Author

Ocean Nightleaf

Browsing

Introduction / Hook

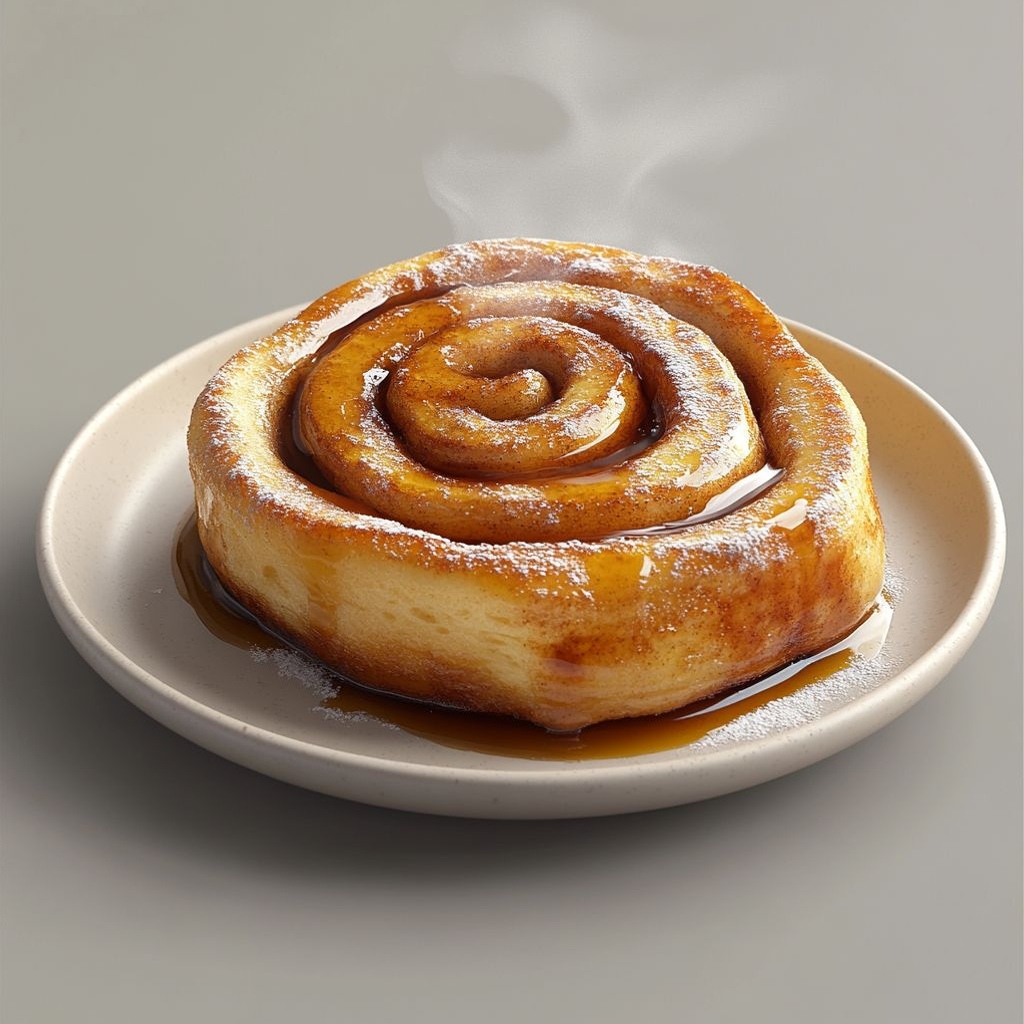
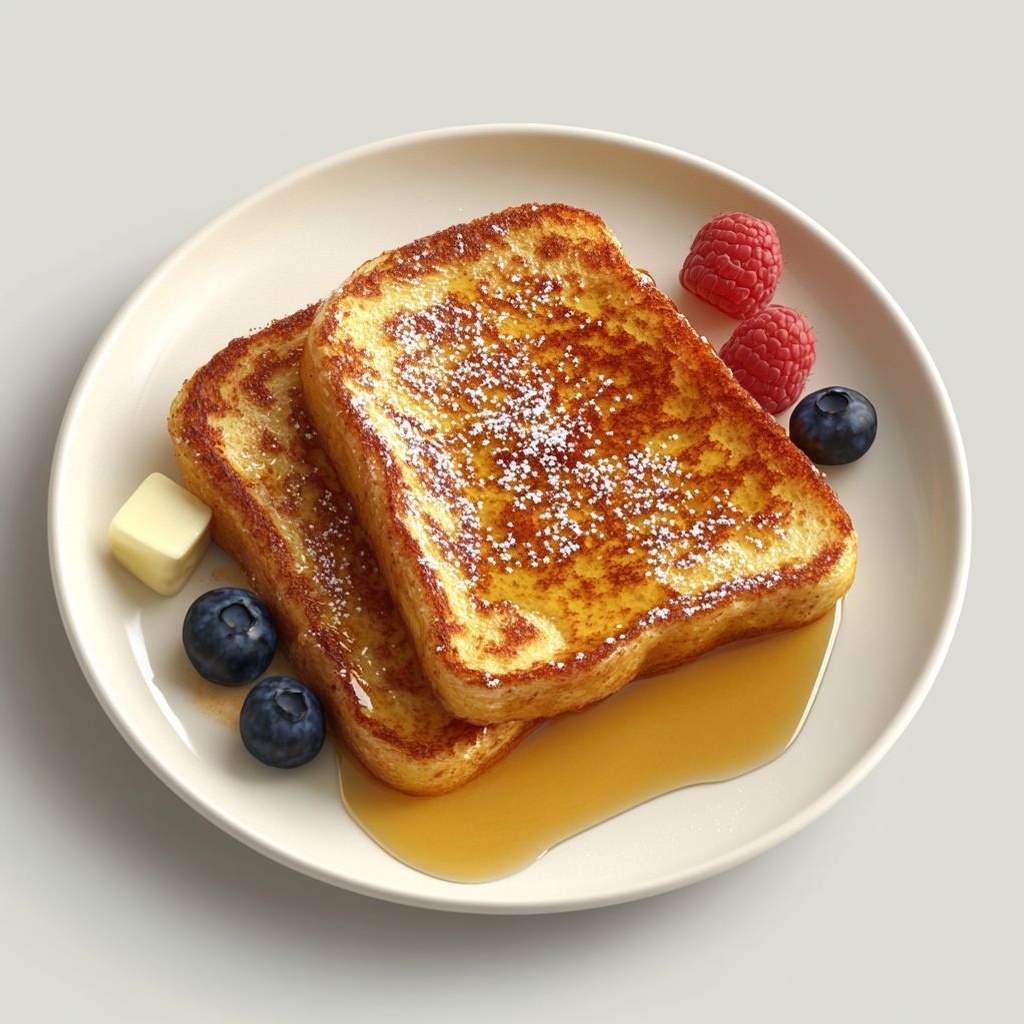
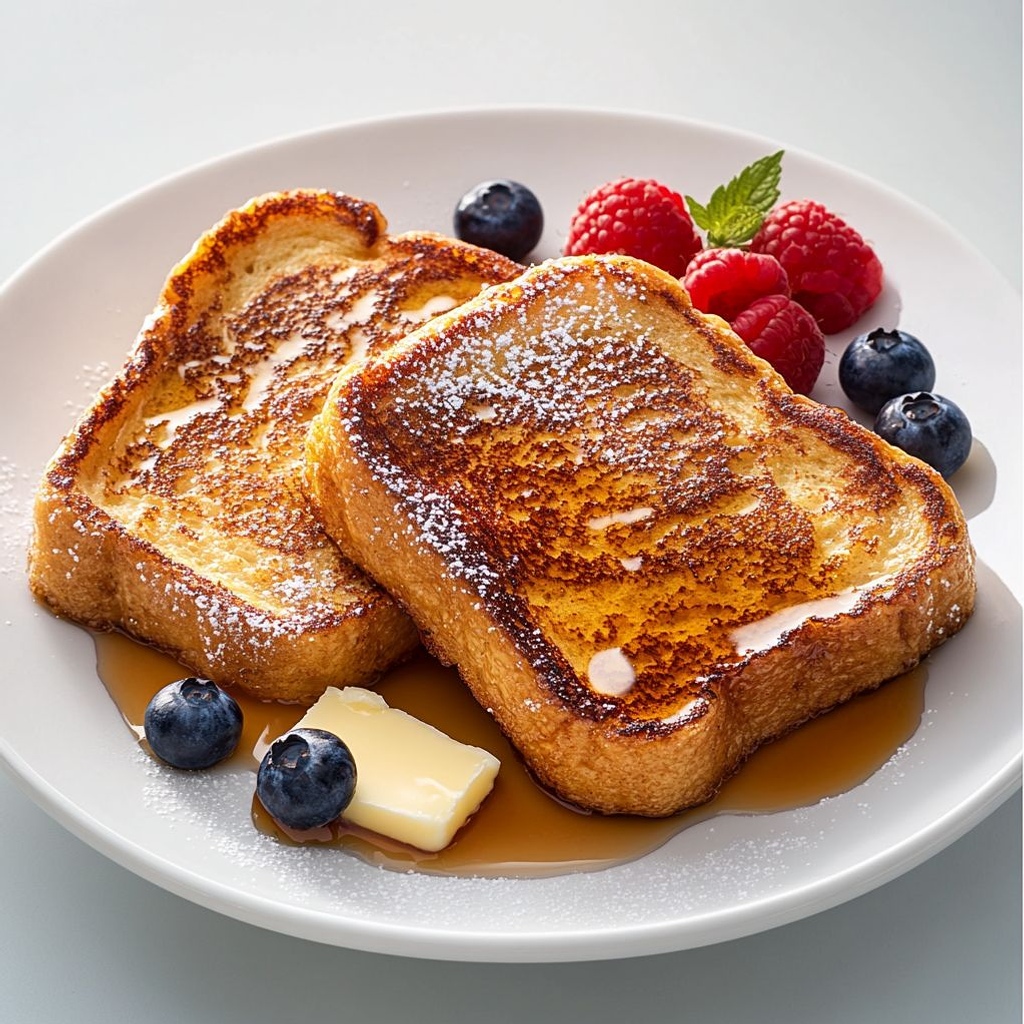
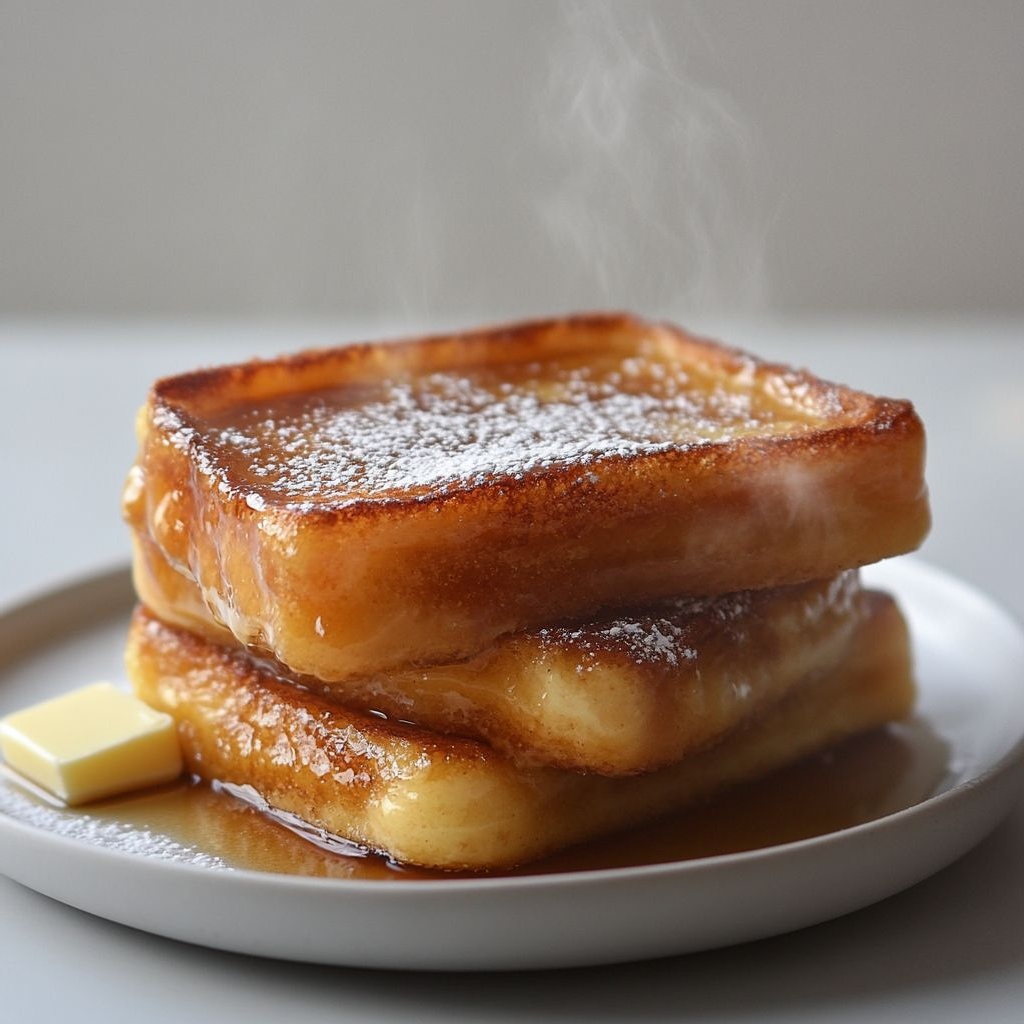
Imagine waking up to the warm, inviting scent of caramelized sugar meeting a creamy, vanilla-scented custard, all wrapped around a slice of perfectly aged bread. French toast crème brûlée is the kind of dish that sounds indulgent enough for a celebratory brunch, yet feels effortless enough for a cozy weekend morning. This recipe is more than a fancy twist on a classic breakfast; it’s a sensorial experience that plays with textures and temperatures, bringing together the familiar comfort of French toast and the decadent crunch of a brûlée top. The contrast alone—silky, custardy interior under a crackling sugar crust—is enough to make even the most devoted skeptics pause, savor, and smile. It’s not merely a dessert dressed up with breakfast vibes; it’s a refined brunch darling that can turn an ordinary table into a small, memorable celebration.

From the first whiff of toasted sugar to the soft sigh of the custard breaking on your tongue, this dish offers an irresistible journey. The aroma alone carries notes of vanilla, a whisper of citrus, and a hint of caramel that lingers long after the last bite. The technique is a playful negotiation between two worlds: the everyday comfort of French toast and the elegant finish of a crème brûlée. The result is a dessert-brunch hybrid that’s both approachable and show-stopping, comforting yet novel, familiar enough to please a crowd and intriguing enough to spark conversation at the table.

The Story Behind the Dish

Every great dish has a story, and this one unfolds at the intersection of brunch culture and classic French technique. French toast is one of those timeless comfort foods that shows up in kitchens worldwide—dressed up for holidays, tinkered with for weekend mornings, and always ready to be coaxed into something special. Crème brûlée, on the other hand, is a symbol of refinement—a custard so smooth it seems to melt on the tongue, crowned with a glassy shell of caramelized sugar that shatters with a satisfying crack. Pair them, and you get a narrative about tradition meeting innovation, a culinary wink to both the decadence of dessert and the approachability of breakfast.

The idea for a fusion like French toast crème brûlée often travels from the tastes and memories we chase in new places: a bustling city brunch where someone dreams up something that looks fancy but tastes comforting; a late-night kitchen improvisation where two textures have a conversation: soft and crisp, warm and cool, sweet and slightly bitter. You can picture a chef, perhaps at a sunlit cafe, letting a thick slice of bread absorb a lush custard before sending it under a hot flame to create that shimmering, crackling top. The dish becomes a celebration of textures: the softness of a well-soaked interior, the crisp resistance of the caramelized crust, and the smooth, almost velvet finish that lingers after the bite. It’s a modern heirloom dish, a reminder that the joy of cooking often lies in pairing the familiar with the unexpected.

Cultural threads weave through this recipe as well. Brûlée techniques originate in a tradition that loves a crisp, caramelized top—a topography of flavor and crunch that mimics the surface of sun-warmed desserts. French toast, a staple across continents, carries with it family memories: Sunday mornings, the sound of the pan, the rush of smoke and steam, the gentle drizzle of sweet syrup. By borrowing the brûlée finish and applying it to the world of French toast, cooks honor both origins while creating something new—an edible bridge between past and present, between nostalgia and novelty. It’s the kind of dish that invites conversation: where did the idea come from? how did it taste the first time you tried it? and why does it feel so indulgent yet so comforting at the same time?

Ultimately, this dish is about celebration—of technique, of ingredients, and of shared meals that linger in memory. It asks for a little patience and a lot of care: a slow soak to allow flavors to mingle, a careful caramelization to form that iconic shell, and a generous portion that invites a second, third, and perhaps a fourth bite. When plated, it tells a story of balance: richness without heaviness, technique without fuss, sophistication without intimidation. It is the kind of dish that makes ordinary brunch feel extraordinary and teaches that sometimes the most delightful surprises come from thoughtful contrasts and precise execution.

Why You’ll Love This Recipe

  • Impressive yet approachable: It looks like a showpiece, but the concept is simple enough for a weekend project or a festive brunch.
  • Contrasting textures: A creamy, custard-like interior with a crisp, glassy caramel shell creates a satisfying bite every time.
  • Aromatics that sing: Vanilla, a hint of warmth from spices, and a subtle citrus note lift the flavors beyond the ordinary.
  • Make-ahead friendly: You can prep components in advance and finish with the brûlée topping just before serving, making it ideal for entertaining.
  • Versatile for many diets and occasions: The base concept can be adapted with substitutions and variations to suit different dietary needs.
  • Comforting and indulgent yet balanced: The dish delivers dessert-like luxury without feeling overwhelming for a late-m morning feast.
  • Pairing potential galore: It pairs beautifully with coffee, sparkling beverages, fresh fruit, or a dollop of whipped cream for added richness.
  • Creative brunch centerpiece: This dish invites conversation, celebration, and a sense of occasion around the table.

Flavor Profile & Texture

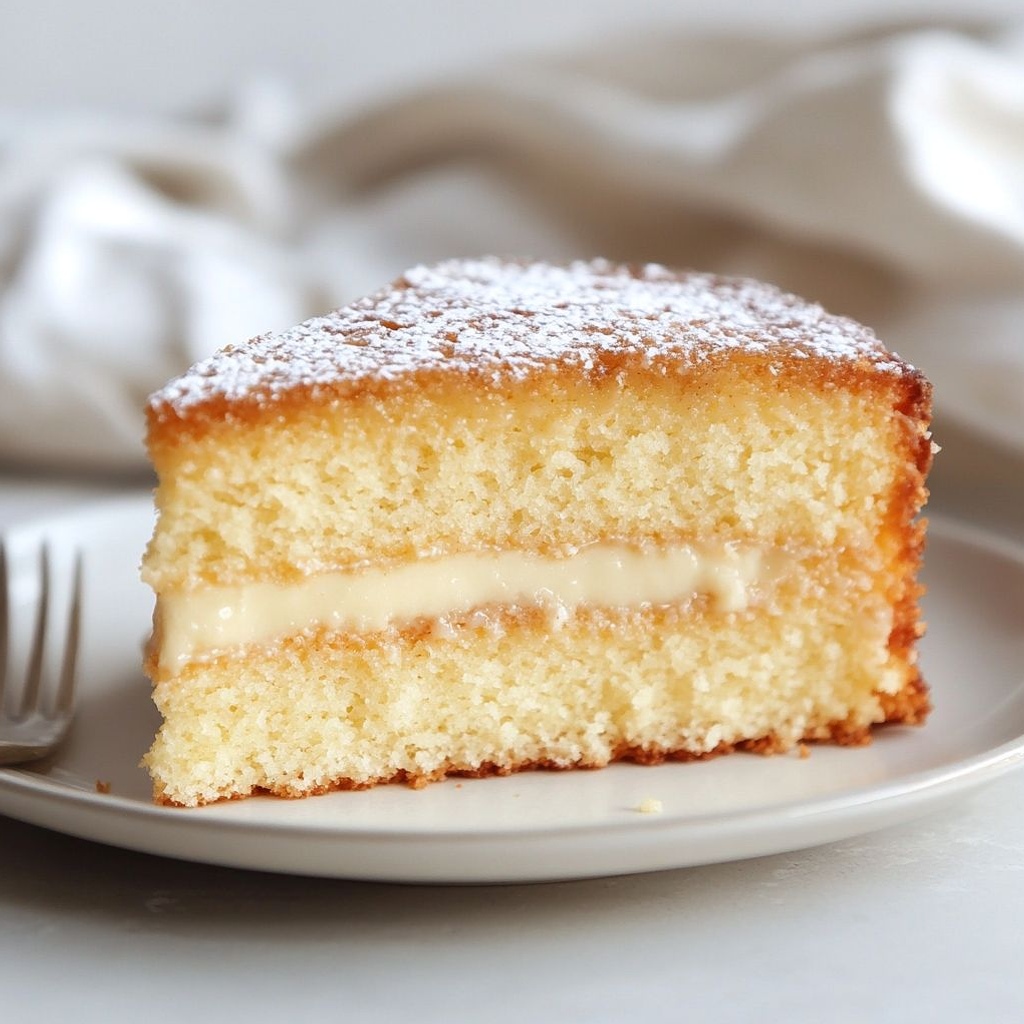
At its core, French toast crème brûlée is a study in contrasts that work together as a cohesive whole. The interior is softly custardy, ethereal in its tenderness, with a gentle depth that often comes from a balanced blend of comforting flavors such as vanilla, a touch of citrus zest, and a hint of warmth from spices. The custard thickness is designed to be spoonable, not heavy—creaminess that glides across the palate and lingers with a subtle sweetness. It’s the kind of texture that invites slow savoring, a moment of quiet indulgence as the mouth cooperates with the senses.

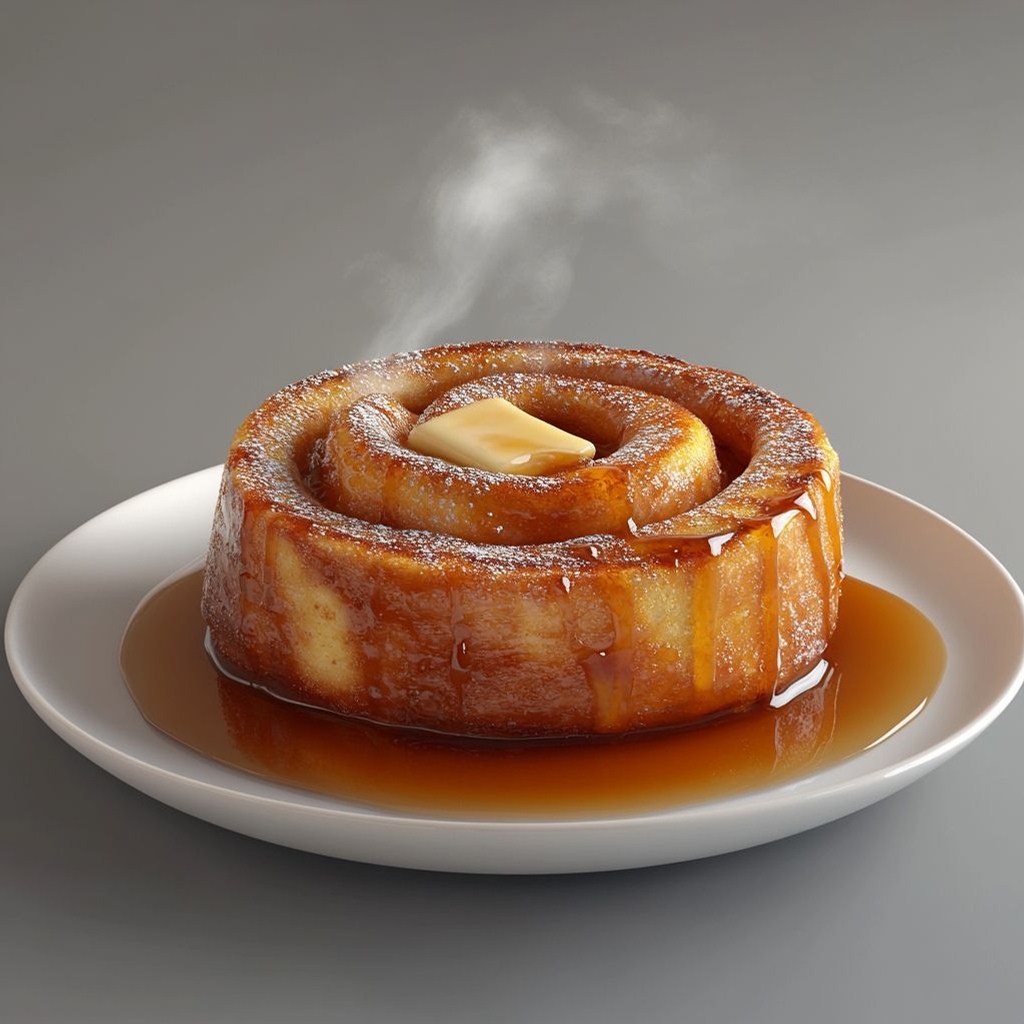
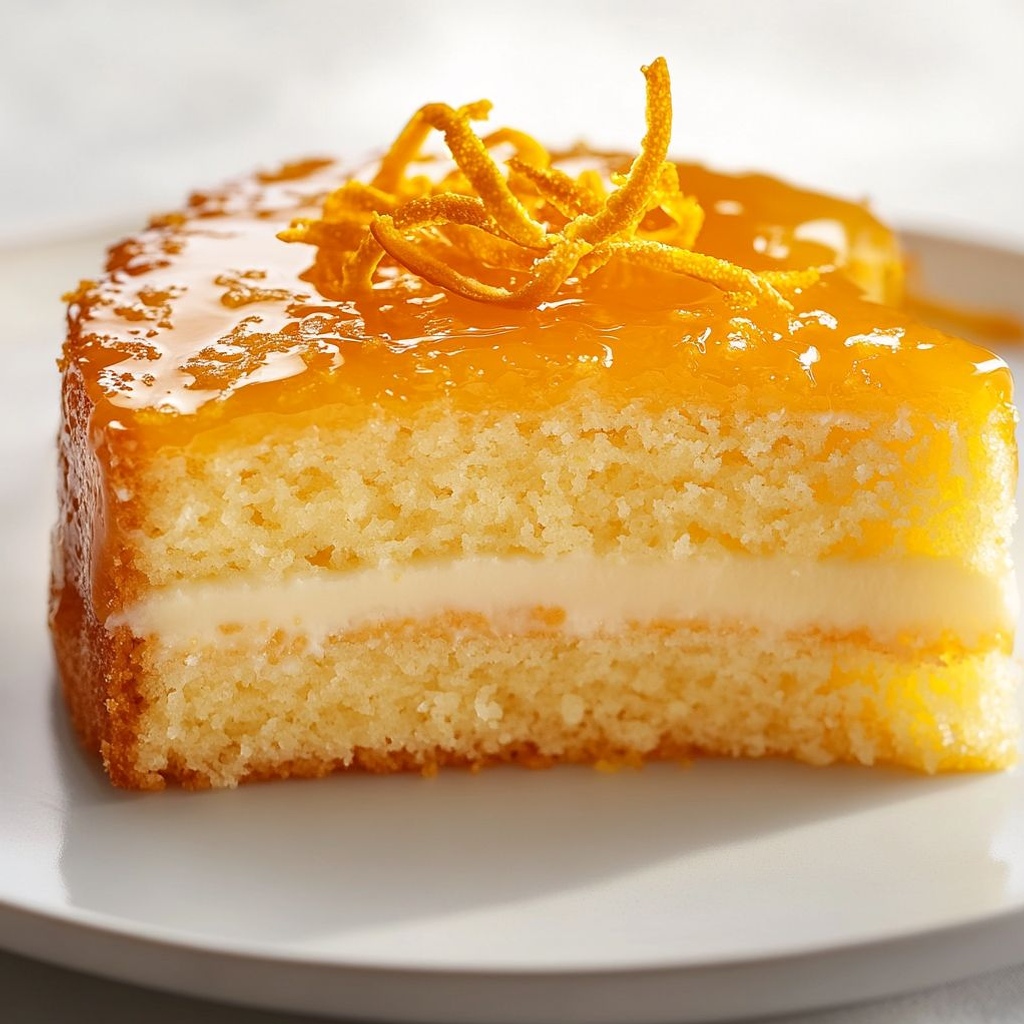
The exterior offers a different kind of magic. Once the dish is assembled and warmed, a caramelized sugar crust forms a resilient, glassy shell that cracks with a satisfying snap when you bite into it. The top surface is glossy and amber, a visual cue that the flavors beneath are both luxurious and deeply comforting. When cracked, the shell reveals the delicate, tender custard beneath—like a pastry’s innards tucked beneath a delicate glaze. The aroma of melted sugar meeting a hot surface is intoxicating: deep caramel notes, a whisper of vanilla, and the faintest edge of citrus zest that brightens the finish.

Flavor-wise, you’ll notice a gentle but distinct sweetness that doesn’t overwhelm; instead, it amplifies the natural carousel of flavors that travel from the bread’s toasty notes to the custard’s smooth richness. The bread itself contributes a nuanced texture—soft and airy in the soak, with a slight sturdiness that holds up to the custard without becoming soggy. Some cooks incorporate a whisper of spice, such as cinnamon or nutmeg, which adds warmth and a hint of old-world café charm. A subtle citrus lift—orange or lemon zest—brightens the profile, helping the dish feel lively rather than dessert-heavy, and it pairs wonderfully with a bitter coffee or a sparkling beverage that cleanses the palate between bites.

The texture journey is the dish’s signature: begin with the crack of the brûléed top, then dip into a silken interior that melts in your mouth, followed by the satisfying chew of the bread’s structure and a lingering sweetness that feels both refined and comforting. It’s a trifecta of sensory experiences—crunch, creaminess, and a warm, toasty aroma—that makes each bite feel like a carefully choreographed moment in a brunch symphony.

Occasions & Pairings

This dish shines in a variety of settings, from intimate mornings to festive gatherings. It’s equally at home on a holiday brunch table as it is on a lazy Sunday breakfast with close friends. Consider these scenarios and pairing ideas for maximum impact:

  • Holiday gatherings: A show-stopping centerpiece for Christmas morning or Easter brunch, paired with a sparkling beverage or a creamy yogurt parfait to balance sweetness.
  • Weekend brunch with friends: Serve alongside seasonal fruit, a light salad, and robust coffee or chai for depth and contrast.
  • Special celebrations: Pair with a dessert wine or a lightly sweetened sparkling cocktail that echoes the caramel notes without overpowering the custard.
  • Family-friendly mornings: Keep portions modest and present a topping bar with fresh berries, nuts, a dollop of whipped cream, and a drizzle of maple or honey for customizable sweetness.

Pairings to consider for a complete table:

  • Side dishes: A citrus-inflected fruit salad, a yogurt or crème fraîche offering, and lightly dressed greens to add brightness.
  • Drinks: A well-roasted coffee, a nutty latte, or a light, effervescent sparkling beverage to balance the richness; for adults, a glass of light sparkling wine or a citrus-forward cocktail can elevate the experience.
  • Desserts that echo the theme: A light berry tart or a simple bowl of seasonal fruit can complement the dish without competing with the brûlée top.

Tips, Variations & Substitutions

Creative ways to customize

  • Flavor twists: Swap in different aromatics such as vanilla bean, orange blossom, or cardamom to shift the scent profile and complement seasonal fruits.
  • Texture shifts: If you crave extra contrast, add a subtle sprinkle of chopped nuts or toasted seeds on the top before caramelizing to introduce a crunchy layer that echoes the brûlée shell.
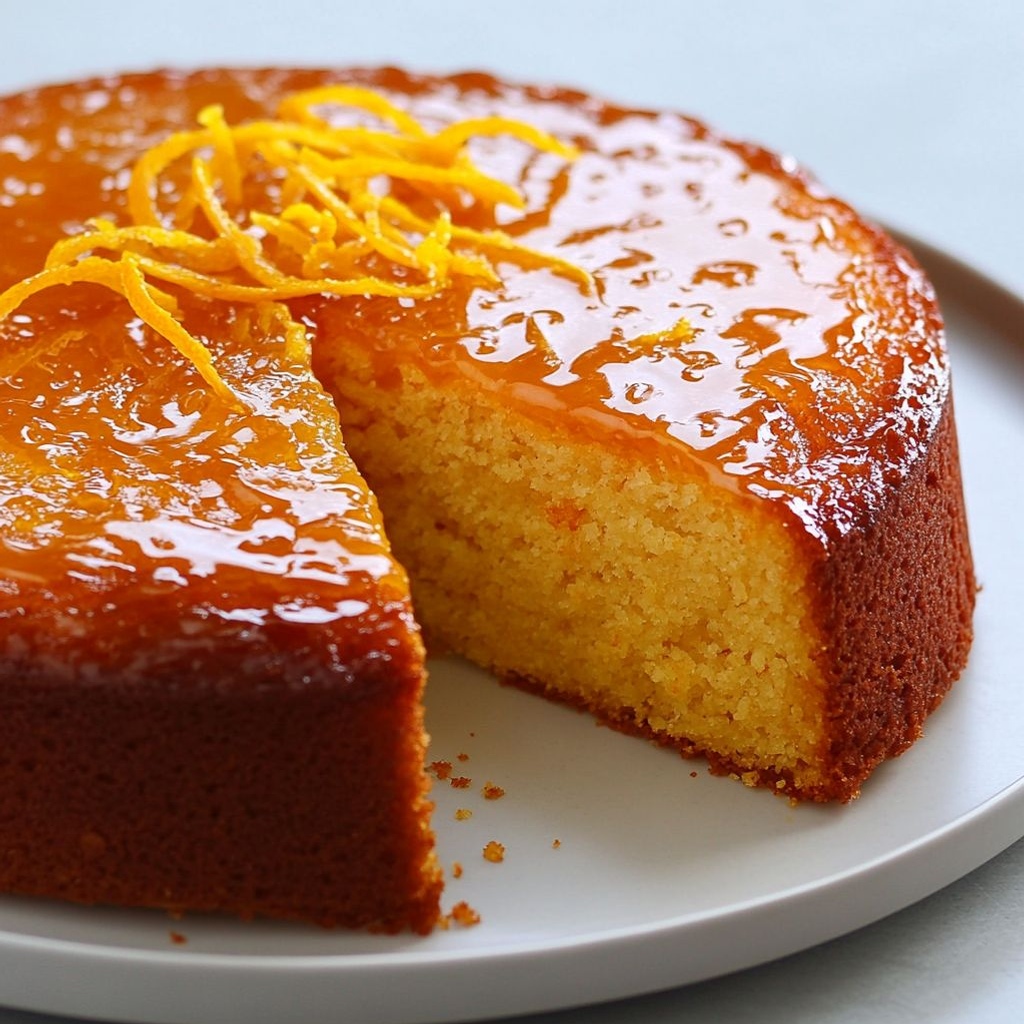
  • Fruit accents: A light fruit compote or fresh citrus segments folded into the custard can add brightness and a splash of color, balancing sweetness with acidity.

Dietary alternatives

  • Vegan option: Use plant-based bread with a custard built from a blend of plant milks and a thickener such as a cornstarch slurry, then finish with a vegan caramelized topping using sugar substitutes that caramelize well. Ensure the bread remains sturdy enough to soak without disintegrating.
  • Gluten-free adaptation: Choose a sturdy gluten-free bread that holds up to soaking. The rest of the technique remains the same, preserving the contrast between a crisp top and tender interior.
  • Lactose-friendly: Use lactose-free dairy or a nut-based milk blend for the custard while keeping the same finish on top to maintain texture and glaze.

Regional twists

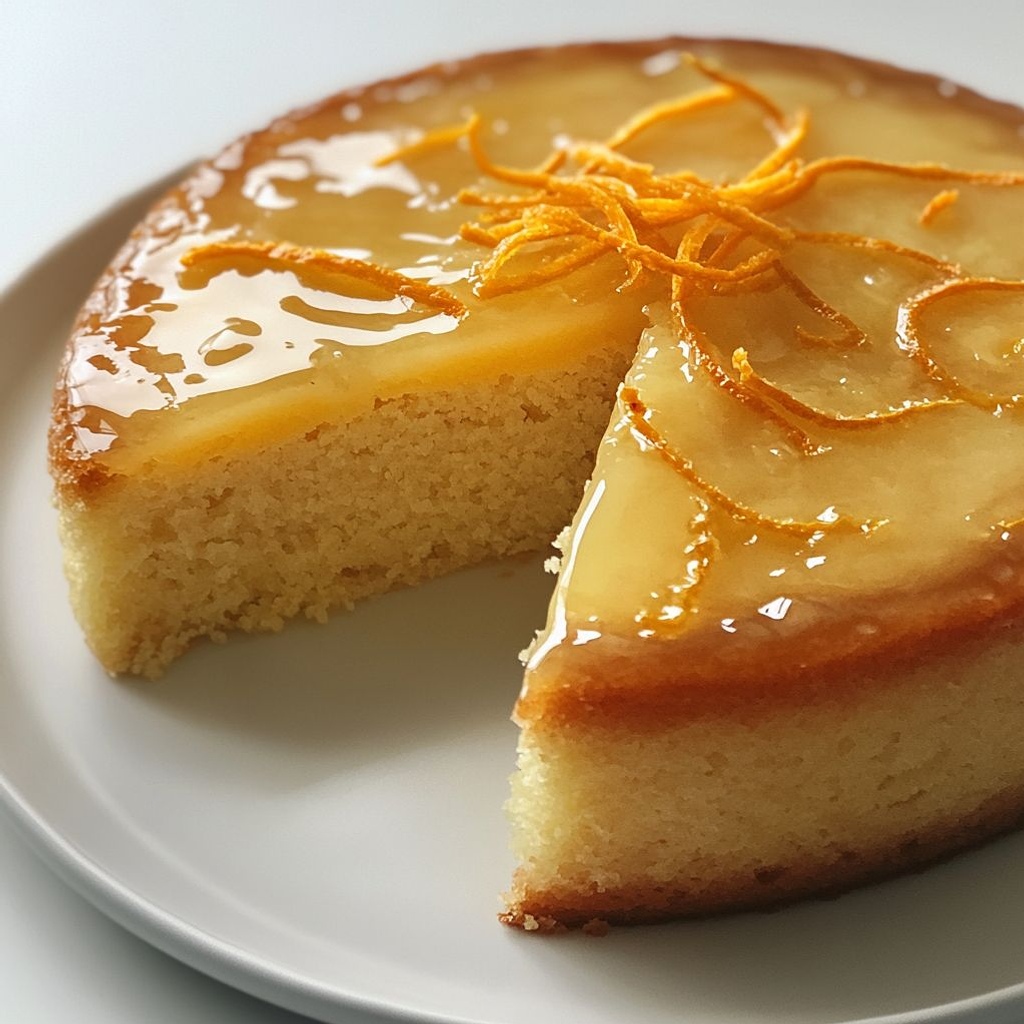
  • Spanish-inspired: Add a hint of cinnamon and citrus zest, and finish with a drizzle of orange-infused syrup to echo classic crema catalana elements.
  • French café nod: Use a subtle espresso powder in the custard and finish with a dark caramel top to echo the flavors of a café au lait nightcap.
  • Middle Eastern warmth: Introduce a touch of saffron or rose water into the custard for a floral note that pairs beautifully with pistachios or berries.

Storage & Make-Ahead Ideas

The beauty of this dish is that you can plan ahead while still delivering a dramatic finish. Here are practical tips to tailor the timing to your schedule:

  • Make-ahead custard: Prepare the custard base and bread soaking mixture a day in advance. Store refrigerated in a covered dish, and rewarm gently the morning you serve. This can shave precious minutes off your brunch routine.
  • Assemble before serving: Soak the bread in the custard in the morning, then refrigerate briefly if you’re pressed for time. When guests arrive, quickly caramelize the top and serve hot, ensuring that crisp top and warm interior are at their peak.
  • Leftovers: Refrigerated leftovers can be gently reheated in a warm oven or toaster oven to refresh the interior. The brûléed top should be recreated with a quick pass under a broiler or a crème brûlée torch to recapture the signature crackle.
  • Avoid sogginess: For best texture, avoid soaking the bread too long if you plan to reheat. A moderate soak yields a sturdy interior that holds up to refrigeration and re-warming without turning mushy.

Fun Facts & Trivia (Optional)

Here are a few tidbits that sprinkle extra flavor onto the tale of this dish:

  • The technique of caramelizing sugar to create a hard, glassy shell is centuries old and spans many cuisines, from desserts to savory sauces. The satisfying crack is not just sensory; it signals a crisp contrast that awakens the palate.
  • Crème brûlée itself has a debated origin, with both French and English-speaking culinary traditions laying claim to similar custards perfected with sugar shells. This dish playfully bridges that history with a familiar breakfast staple.
  • French toast has been known by a variety of names around the world, often reflecting local pantry staples. The idea of soaking bread to absorb flavor and then cooking it until golden is a universal comfort, which makes this crème brûlée version feel both global and personal.
  • Texture science tip: the torch or hot pan used to caramelize the sugar creates a thermo-gel moment where liquid sugar rapidly hardens upon contact with air, forming that iconic crack. Mastery of this moment is what elevates the dish from good to extraordinary.

Ingredients

French toast crème brûlée

French Toast Base

  • 8 slices thick-cut brioche or challah bread, stale or day-old
    → The bread is the vessel that will soak up the custard without collapsing during frying. Thick-cut, rich breads like brioche or challah give a tender, flavorful crumb when soaked. If your bread is very fresh, dry it slightly in a low oven (about 300°F / 150°C) for 5–7 minutes to improve soaking and prevent sogginess. For uniform results, trim crusts if desired.
  • 4 large eggs
    → Eggs provide structure and help bind the custard to the bread. Use room-temperature eggs for easier whisking and even mixing. Lightly whisk to break yolks but avoid overworking to keep a creamy texture.
  • 1 cup whole milk
    → Milk adds moisture to the custard and helps the bread soak evenly. Whole milk keeps the mixture rich without curdling; you can substitute 2% if needed, but dairy richness will be reduced. Warm slightly before soaking to improve absorption.
  • 1/2 cup heavy cream
    → Adds luxurious richness and a smoother mouthfeel to the soaking mixture. Heavy cream helps create a more custardy interior rather than a dry one. If you’re limiting dairy, you can reduce to 1/4 cup, but expect a lighter texture.
  • 2 tablespoons granulated sugar
    → Sweetens the custard base just enough to complement the spices without overpowering the French toast. If you prefer sweeter toast, you can increase by 1–2 tablespoons. Whisk until dissolved to avoid grainy pockets.
  • 1 teaspoon pure vanilla extract
    → Vanilla enhances the custard’s aroma and pairs beautifully with cinnamon. For a deeper vanilla note, use a real vanilla extract or vanilla bean paste; scrape or mix thoroughly into the liquid before combining with eggs.
  • 1 teaspoon ground cinnamon
    → Adds classic warmth and aroma to the custard. For a more pronounced spice, increase to 1½ teaspoons or blend with a pinch of nutmeg. Freshly ground cinnamon provides a sharper flavor than pre-ground.
  • 1/4 teaspoon ground nutmeg (optional)
    → A hint of nutmeg contributes a subtle farewell note that complements cinnamon and vanilla. Omit if you prefer a purer cinnamon profile or if you’re serving with fruit that brings its own spice.
  • 1/4 teaspoon salt
    → Balances sweetness and enhances overall flavor. Salt also strengthens the perception of vanilla and cinnamon. Use fine salt for even distribution.
  • 2 tablespoons unsalted butter, for frying
    → Butter creates a rich, flavorful crust on the French toast and helps prevent sticking. Fry in a skillet over medium heat; cook in batches if needed. If you’re dairy-free, use a neutral oil or dairy-free butter substitute.

Crème Brûlée Custard

  • 2 cups heavy cream
    → The main base for the brûlée custard, delivering silkiness and body. Heat gently to just below simmering to avoid scorching; this creates a smooth, cohesive custard with a delicate set. If you mix with the French toast layer, plan around chilling time for the brûlée shell.
  • 1/2 cup whole milk
    → Adds a touch of lightness to the custard while maintaining richness. If you omit milk, you’ll have a denser cream; adjust sugar accordingly to maintain balance.
  • 4 large egg yolks
    → Provide the creamy, set texture of the crème brûlée. Yolks contribute richness without too much airiness. Temper yolks with warm cream gradually to prevent scrambling, then return to a gentle heat until thickened.
  • 1/3 cup granulated sugar
    → Sweetens the custard and helps form a smooth, glossy surface when properly caramelized. Dissolve sugar well and whisk thoroughly with yolks and cream; a pinch of salt can be added to balance flavors.
  • 1 teaspoon vanilla bean paste or extract
    → Intensifies the vanilla character of the brûlée. Vanilla bean paste adds visible vanilla specks and a deeper flavor; if using extract, add a few extra drops to reach the desired aroma.
  • Pinch of salt
    → Enhances sweetness and depth of flavor in the custard, helping to round out the richness. Do not omit if you prefer a balanced finish.

Caramel Brûlée Topping

  • 1/2 cup granulated sugar (for brûlée topping)
    → This sugar forms the hard, caramelized shell on top of the custard. Evenly sprinkle in a thin, uniform layer to ensure a crisp crack when torched or broiled. If sugar clumps, gently break up lumps with your fingers before caramelizing for a smooth finish.

Optional Garnishes

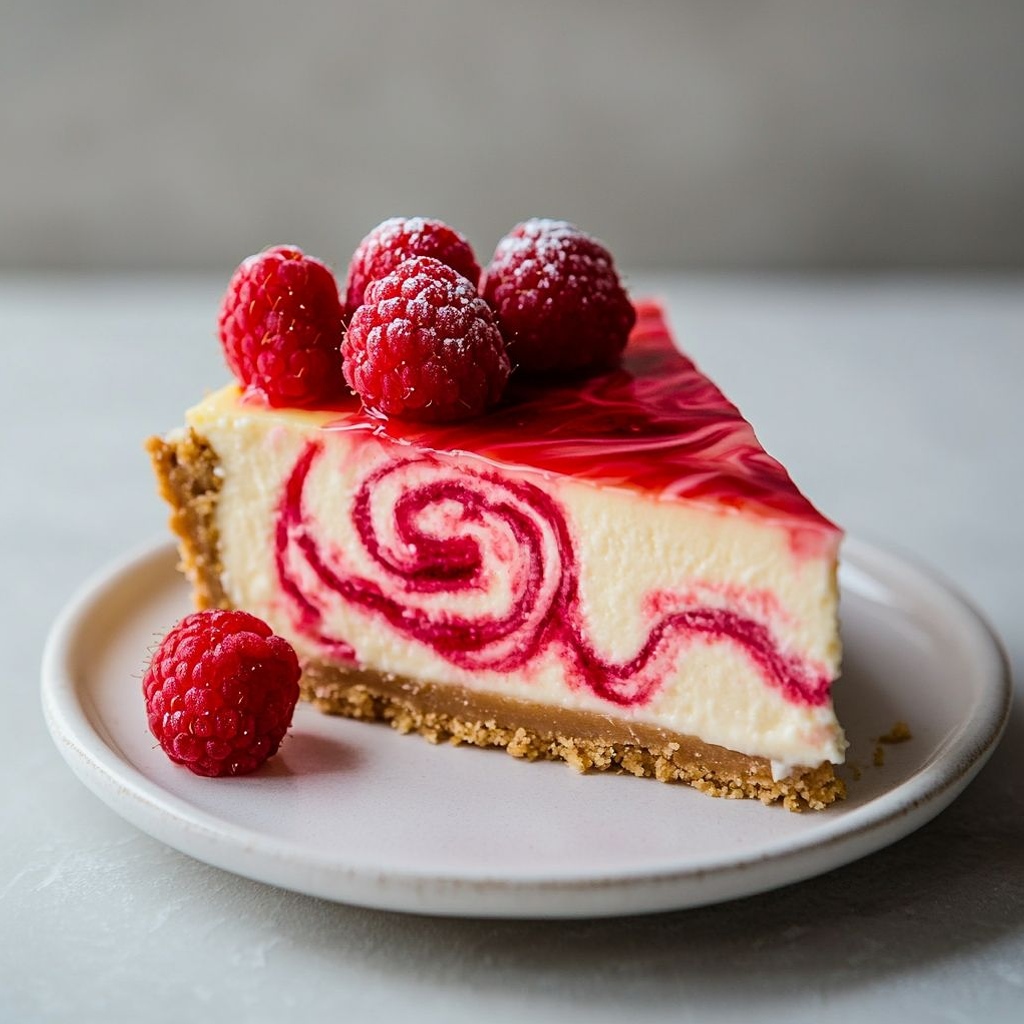
  • Fresh berries or berry compote (optional)
    → Adds bright acidity and vibrant color to balance the rich custard. Choose berries that are in season and rinse just before serving. If using compote, add just a spoonful on top to avoid overwhelming the brûléed crust.
  • Powdered sugar (optional)
    → A light dusting enhances presentation and sweetness. Sift lightly just before serving to avoid clumping.

Instructions

  • Preheat your oven to 325°F (165°C) and place a rack in the middle; set four to six 6-ounce ramekins in a deep baking dish to form a stable water bath; this gentle setup prevents scorching and helps the custard set evenly during baking.
  • → A water bath provides steady, indirect heat that keeps the crème brûlée custard smooth and prevents curdling or cracking at the edges.

  • In a small saucepan combine 2 cups heavy cream, 1/2 cup whole milk, and a pinch of salt; warm over medium heat just until small bubbles form around the edges and the mixture is steaming lightly; remove from heat before it boils; this heats the dairy for even custard and helps dissolve sugar later without scorching.
  • → Heating the dairy before mixing with yolks helps the custard set with a silky texture and reduces risk of scrambled eggs.

  • In a medium bowl whisk 4 large egg yolks with 1/3 cup granulated sugar until the mixture lightens in color and thickens slightly; this builds the custard’s structure and ensures a smooth, glossy texture after cooking.
  • → Properly beaten yolks trap air and create a tender, cohesive custard when gently cooked.

  • Slowly ladle a small amount of the warm cream into the yolks while whisking constantly to temper the yolks; then whisk the tempered yolk mixture back into the saucepan with the remaining hot cream; this prevents scrambling and yields a uniform custard base.
  • → Tempering gradually raises the yolk temperature for a silky custard without curdling.

  • Return the pot to low heat and cook, stirring with a silicone spatula, until the custard thickens enough to coat the back of a spoon and registers about 170°F (77°C); do not let it boil; this creates the proper viscosity for a crème brûlée surface.
  • → Gentle heat ensures a smooth, creamy custard that will set properly in the oven.

  • Strain the custard through a fine-mesh sieve into a clean bowl, then whisk in 1 teaspoon vanilla bean paste or extract; taste and adjust with an extra tiny pinch of salt if needed; this yields a velvety texture and even vanilla distribution.
  • → Straining removes any cooked curds and ensures a pristine, glossy custard surface.

  • Evenly divide the strained custard among the prepared ramekins, leaving about 1/4 inch of headspace; carefully place the ramekins in the water bath and pour hot water into the outer dish until it comes halfway up the sides; this water bath guarantees gentle, uniform cooking and prevents cracking.
  • → The water bath moderates heat transfer, creating a smooth, well-set custard with minimal cracking.

  • Bake the custards for 40–45 minutes until the centers are just set with a slight jiggle; remove from the water bath, cool on a rack, then refrigerate for at least 2 hours or overnight; this chilling firms the surface and enhances the brûlée topping later.
  • → A fully cooled custard yields clean slicing and a crisp caramelized top when brûled.

  • For the French toast base, whisk together 4 large eggs, 1 cup whole milk, 1/2 cup heavy cream, 2 tablespoons granulated sugar, 1 teaspoon vanilla, 1 teaspoon ground cinnamon, 1/4 teaspoon ground nutmeg (optional), and 1/4 teaspoon salt until the mixture is completely smooth and the sugar is dissolved; this forms a rich, evenly seasoned soak that flavors the bread.
  • → Thorough mixing ensures consistent sweetness, aroma, and spice in every slice.

  • If the brioche or challah slices are very fresh, dry them slightly in a round, low oven at 300°F (150°C) for 5–7 minutes to enhance soaking and prevent sogginess; then cut slices 3/4 to 1 inch thick for sturdy soaking and fryability; this controls moisture and yields a tender interior.
  • → Slight drying helps the slices absorb custard without becoming mushy during frying.

  • Trim crusts if desired for uniform thickness, then dip each slice into the prepared French toast soak, allowing 20–40 seconds per side for thorough absorption without tearing the bread; this produces a custardy interior when fried.
  • → Proper soaking weight distributes custard evenly and avoids collapsed slices during frying.

  • Heat a large skillet over medium and add 2 tablespoons unsalted butter; swirl to coat the surface as the butter foams; this creates a flavorful crust and prevents sticking.
  • → Butter adds rich flavor and a crisp, golden crust to the toast while preventing it from sticking to the pan.

  • Fry the soaked bread in the butter until deeply golden and crusty on the outside, about 2–3 minutes per side; adjust heat to maintain a steady sizzle and flip carefully with tongs when the underside is browned; transfer to a warm plate and keep warm in a low oven if needed; this yields a balanced contrast of crisp exterior and custardy interior.
  • → Proper browning develops aroma and texture that define classic French toast.

  • To assemble the crème brûlée topping, evenly sprinkle 1/2 cup granulated sugar over the surface of the chilled crème brûlée custards, distributing it in a thin, uniform layer; this ensures a consistent caramelized shell across the portions.
  • → Even sugar distribution guarantees a smooth, crackable surface when brûléed and prevents thin or thick patches.

  • Caramelize the sugar with a handheld culinary torch held about 2 inches (5 cm) from the surface, moving in small, overlapping circles until the sugar melts, turns amber, and forms a glossy hard crust; if using a broiler, place the ramekins on a rack under a preheated broiler for 1–2 minutes, watching constantly; this creates the signature crisp brûléed top with a satisfying crack when tapped.
  • → A precise, even caramelization yields a crisp shell that contrasts with the creamy custard beneath and provides the dish’s defining texture.

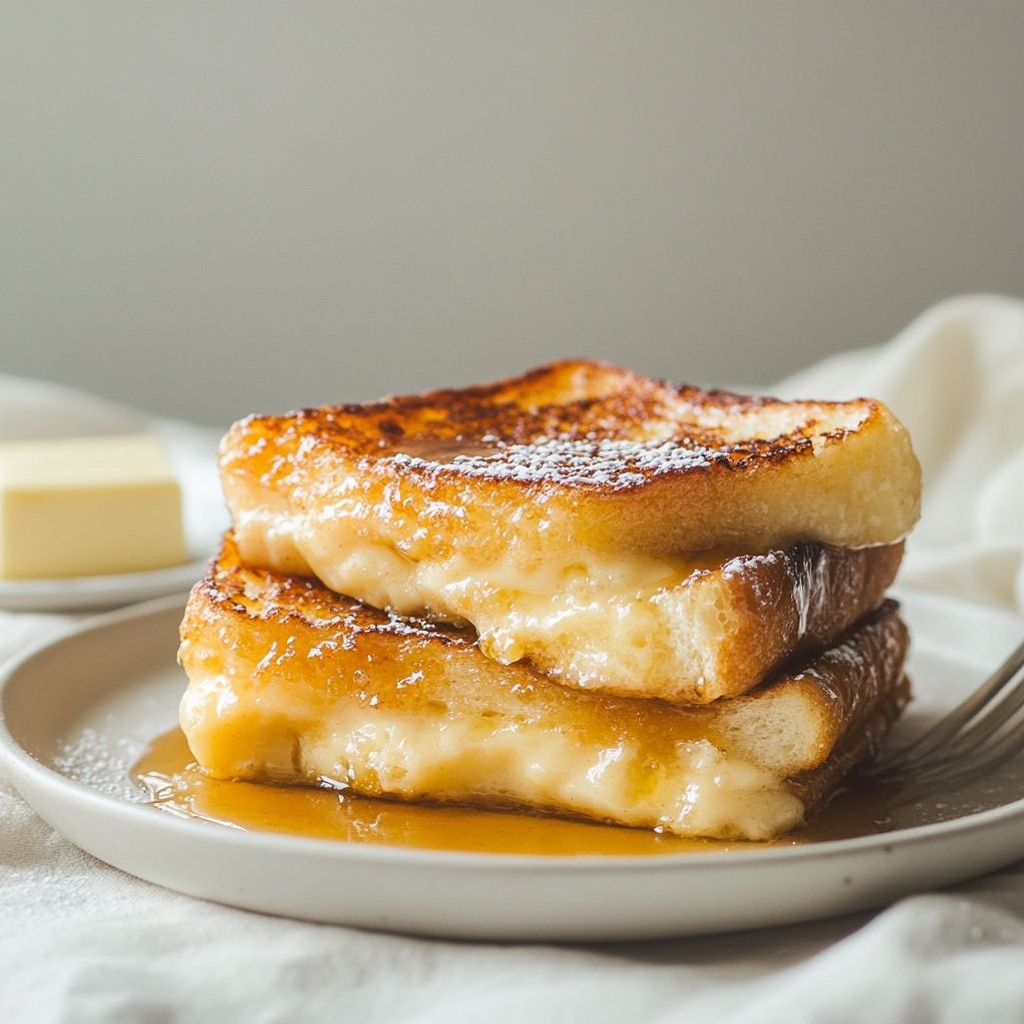
  • To serve, plate a couple of slices of the warm French toast alongside a poised portion of crème brûlée custard or the brûléed custards themselves; if desired, spoon a small quenelle or dollop of custard next to the toast and present the brûlée shell on top; garnish with fresh berries or a light dusting of powdered sugar to brighten the plate; this presentation highlights the contrast of temperatures and textures.
  • → Pairing warm toast with cold custard and a brûné shell creates a dynamic dessert that showcases both components while appealing to multiple senses.

Notes

These French toast crème brûlée bring a luxurious twist to a weekend brunch by marrying the custardy richness of crème brûlée with the comforting heart of French toast. Thick slices of brioche or challah soak up a silky custard, are fried to a golden crust, and finished with a crackling sugar shell for a dessert-like breakfast that feels indulgent yet approachable. Use these notes to guide prep, customization, and timing so every component shines.

  • Bread handling: Use thick-cut brioche or challah, preferably stale or day-old so the slices soak without falling apart. If bread is very fresh, dry it in a low oven (about 300°F / 150°C) for 5–7 minutes to improve absorption and prevent sogginess. Trim crusts if desired for uniform slices.
  • Custard prep for soaking: Warm the milk and cream to just below a simmer to enhance absorption into the bread. Whisk the eggs with the sugar, vanilla, cinnamon, nutmeg, and salt, then gradually whisk in the warm dairy to temper. Return the mixture to a gentle heat and simmer until it thickens slightly, but do not curdle the eggs.
  • Soaking and frying the base: Dip each bread slice briefly in the custard, letting excess drip off. Fry in 2 tablespoons unsalted butter over medium heat until deep golden and crisp around the edges. Cook in batches to avoid crowding the pan, and keep cooked slices warm while you finish the rest.
  • Crème brûlée custard notes: The custard base for the brûlée should be rich and smooth, with yolks providing a creamy set. Temper the yolks with warm cream, then cook until it coats the back of a spoon. Chill until set as needed depending on your assembly plan.
  • Caramelized topping timing: The brûlée sugar topping is added just before serving. After the assembled French toast has cooled slightly, sprinkle a thin, even layer of granulated sugar on top of the custard surface and caramelize with a kitchen torch (preferred) or under a hot broiler until the sugar forms a glossy, crackable shell. Work quickly and evenly to avoid scorching the toast underneath.
  • Make-ahead strategy: You can prepare the crème brûlée custard and the fried toast components separately and assemble just before serving. The custard can be cooled and stored in the fridge for up to 1–2 days; rewarm gently before topping and torching. If desired, the brûlée topping should be applied right before plating for best texture.
  • Serving and garnishes: Pair with fresh berries or a berry compote for brightness, and finish with a light dusting of powdered sugar. A dollop of whipped cream or a spoonful of natural yogurt can add richness and contrast, while a drizzle of maple syrup ties the flavors together.
  • Diet and substitutions: For dairy-free adaptations, substitute dairy with full-fat coconut cream and a plant-based milk, and ensure the sugar and any toppings are dairy-free. If you prefer a lighter version, reduce the heavy cream in the custard by half and compensate with additional milk, but expect a lighter texture. Always check that all components (bread, toppings) are gluten-free if serving to gluten-sensitive guests.

Tips

Choosing and preparing the bread

  • Use the bread specified: thick-cut brioche or challah. Their rich crumb soaks up the custard without collapsing during frying.
  • If your bread is very fresh, dry it slightly in a low oven (about 300°F / 150°C) for 5–7 minutes to improve soaking and prevent sogginess.
  • For uniform results, trim crusts if desired and aim for slices of even thickness to ensure consistent soaking and frying.
  • If you can’t find brioche or challah, a stout sandwich bread can work, but you may need to adjust soak time to avoid soggy centers.

Custard base and soaking tips

  • Use room-temperature eggs for easier whisking and a smoother custard. Lightly whisk to break yolks but avoid overworking.
  • Warm the milk and cream slightly (to just steaming) to improve absorption by the bread without scrambling the eggs.
  • Whisk the sugar into the eggs until dissolved to prevent grainy pockets in the final custard.
  • Season with salt to balance sweetness and enhance vanilla and cinnamon flavors.
  • Allow the bread slices to soak in the custard mixture for a few minutes on each side, then press gently to ensure even saturation without tearing the bread.
  • For deeper spice notes, you can infuse the milk with a small cinnamon stick or a pinch of nutmeg during warming, then strain before mixing with eggs.

Crème brûlée custard tips

  • Heat the heavy cream (and milk) to just below a simmer to create a smooth, cohesive custard when combined with yolks.
  • Temper the egg yolks by gradually whisking in a small amount of hot cream, then slowly whisk in the rest to prevent scrambling.
  • Strain the custard mixture through a fine-mesh sieve to remove any lumps for a silkier texture.
  • Add the vanilla bean paste or extract; if you’re using extract, you may want a touch more to reach the desired aroma.
  • Pour the custard over the soaked bread and chill as needed; if you intend to bake it, a gentle water bath helps prevent cracking and yields even setting.

Caramel brûlée topping tips

  • Evenly sprinkle the 1/2 cup granulated sugar in a thin, uniform layer to form a crisp shell.
  • Use a culinary torch for precise caramelization; keep the torch moving and glaze the surface evenly until it turns a deep amber. If using a broiler, place the dish on the middle rack and monitor closely to avoid burning.
  • Let the caramelized sugar shell rest for 1–2 minutes before serving to ensure it hardens fully; a soft shell will crack less cleanly.
  • If sugar clumps, break apart lumps with clean fingers before caramelizing for a smoother top.
  • Caramelize just before serving for the best contrast between the crisp top and the creamy custard.

Make-ahead, assembly, and serving tips

  • Custard can be prepared in advance and chilled; soak the bread closer to serving if you prefer a softer interior, or toast/fry the bread just before serving for a crispier exterior.
  • Keep the brûlée topping separate until service if you plan to assemble ahead; sprinkle and caramelize right before serving to preserve a crisp shell.
  • When frying the French toast slices, use a stable, medium heat and butter to achieve a rich crust without burning. Fry in batches to maintain even heat.
  • Optional garnishes like fresh berries or berry compote add bright acidity; dust with powdered sugar just before serving for a polished look.
  • For a dairy-free version, substitute dairy with a neutral-tavored plant milk and a dairy-free butter substitute; be aware that texture and flavor will shift slightly.

Troubleshooting and flavor tweaks

  • If the custard is undercooked and wobbly after chilling, bake longer or adjust the water bath and temperature if you’re baking the custard in ramekins.
  • If the custard cracks after chilling, ensure gentle heat during cooking and avoid over-baking; a slight jiggle in the center is ideal.
  • If the brûléed top doesn’t form a crack when tapped, the shell may be too thick or not properly caramelized. Recaramelize a fresh layer a minute or two after the initial torching.
  • Flavor variations: add a pinch of orange zest to the custard, or substitute half the vanilla with almond extract for a different aroma. Cinnamon can be enhanced or balanced with a touch of cardamom or nutmeg according to taste.

Garnish and presentation ideas

  • Top with fresh berries or a berry compote to cut through richness; add just a small spoonful to avoid overpowering the brûléed crust.
  • A light dusting of powdered sugar right before serving adds a refined finish and helps highlight the caramelized top.
  • Serve in warm ramekins or a shallow dish to ensure the caramel shell remains intact when served.

FAQ

What is French toast crème brûlée?

A fusion dish that starts with custard-soaked French toast and finishes with a caramelized sugar crust on top, like crème brûlée. The result is a creamy interior with a crisp, brûléed top.

What ingredients do I need?

For the custard and toast base: 6–8 thick slices brioche or challah, 4 large eggs, 3/4–1 cup milk or cream, 1–2 tsp vanilla extract, 1–2 tbsp sugar for the custard, 1/2 tsp ground cinnamon, pinch of salt, and butter for cooking. For the top: granulated sugar (about 1–2 tsp per slice). Optional toppings: fresh berries, maple syrup, and powdered sugar.

What bread works best for this recipe?

Stale or day-old brioche or challah works best, because it soaks up the custard without falling apart. Use thick slices (about 1 inch) for optimal texture.

How do I soak the bread?

Whisk eggs, milk/cream, vanilla, cinnamon, sugar, and a pinch of salt in a shallow dish. Dip each bread slice to coat both sides, letting it soak 20–40 seconds per side. For extra custard, you can refrigerate the soaked bread for 30–60 minutes or overnight, then blot gently before cooking.

Should I bake or pan-fry?

Both methods work. Pan-fry slices in a little butter over medium heat until lightly golden, then finish in a 350°F (175°C) oven for 8–12 minutes to set the custard. Alternatively, bake the soaked bread in a greased dish at 350°F for about 20–30 minutes until the custard is set and the edges are golden.

How do I create the brûlée topping?

After the French toast is cooked, sprinkle a thin, even layer of granulated sugar over each slice. Use a kitchen torch to caramelize the sugar until deep amber and glossy, about 1–2 minutes per slice. If you don’t have a torch, place under a hot broiler for 1–2 minutes, watching closely to prevent burning.

Can I make this ahead?

Yes. You can prepare the custard-soaked bread and refrigerate overnight. Bake and brûlée just before serving for best texture. Leftovers can be stored in the fridge and re-brûlée briefly to refresh the top.

How should I store leftovers and reheat?

Store refrigerated in an airtight container for up to 2–3 days. Reheat in a toaster oven or 350°F oven for 5–8 minutes until warmed through. Re-brûlée the tops with a torch or under the broiler to refresh the crust.

Can I adapt this recipe for dietary restrictions?

Yes. For dairy-free, use almond, soy, or other non-dairy milk and a dairy-free butter substitute. For gluten-free, use a gluten-free brioche or challah. Texture may vary with substitutions, so you may need to adjust the soaking time or sugar slightly.

What toppings or serving ideas pair well?

Serve with fresh berries, a drizzle of maple syrup or honey, whipped cream, and a dusting of powdered sugar. A touch of cinnamon or citrus zest can brighten the flavors. For extra indulgence, add a dollop of vanilla yogurt or crème fraîche.

Tips for perfect texture and flavor

Use slightly stale bread to improve soaking, avoid over-soaking to prevent sogginess, cook until the custard is set but still moist, and caramelize the top right before serving to keep the interior tender. If you don’t have a torch, a quick broil works, but watch closely to prevent burning.

Introduction / Hook

Picture a stack of warm, pillowy slices that marry two breakfast legends into one irresistible indulgence: French toast and cinnamon rolls. The air is thick with vanilla, butter, and a swirl of cinnamon that seems to drift from the pan into the room, inviting every hungry soul to gather around the table. This French toast cinnamon roll isn’t merely a dish; it’s a comforting, aroma-filled celebration of weekend mornings, a brunch-daydream made edible. The first bite reveals a softly custardy interior that tastes like a kiss of vanilla-laced milk, while the outer edges deliver a caramelized crust that offers just enough resistance before giving way to tender sweetness inside. And then there’s the cinnamon roll essence—the faint, sugary ribbon of cinnamon and brown butter that lingers on the palate, echoing memories of bakery cases warmed by friendly chatter and the glow of morning sunlight. It’s the kind of dish that makes you smile before your fork even meets the plate, because it promises both nostalgia and novelty in one glorious mouthful.

What makes this French toast cinnamon roll so captivating is not just the flavor but the experience. It is a bridge between two beloved breakfast worlds: the quick, cozy convenience of French toast and the indulgent, celebratory nature of a cinnamon roll. It’s adaptable to weekend brunch crowds, intimate mornings with a partner, or a playful make-ahead option for holidays. The scent that fills the kitchen—cinnamon, vanilla, melted butter, a hint of citrus zest—makes a promise: you are about to savor something that tastes like it came from a bakery, yet belongs in your own home kitchen. It invites slow mornings, long conversations, and the rewarding feeling of creating something special without needing a pastry chef’s toolkit. In short, this is the kind of dish that turns ordinary breakfasts into cherished rituals, one slice at a time.

The Story Behind the Dish

French toast, or pain perdu, has been a humble remedy for stale bread across generations, a way to coax sweetness and life back into simple loaves. Cinnamon rolls, on the other hand, trace their roots to European pastry traditions that celebrate yeast, butter, and a swirl of cinnamon-sugar goodness baked into soft, stretchy dough. It feels almost inevitable that these two comforting classics would someday join forces in the quest for a breakfast that feels both familiar and indulgent. The concept of marrying a custardy, eggy toast with the gooey promise of a cinnamon roll is a natural evolution—an idea born from late-night kitchen experiments, a well-timed impulse to “make breakfast feel like a treat,” and the universal desire to replicate that bakery aroma you chase down on weekend mornings.

In many homes, breakfast is a stage for story-telling: the way a grandmother’s stovetop would sing as she prepared a meal that nourished both body and memory, the way a parent might coax the day to start with a sweet, comforting scent. This dish is a kindred spirit to those memories. It borrows the swagger of a cinnamon roll—the warm spice note, the glossy glaze, the soft, pull-apart texture—and condenses it into the morning-friendly form of French toast. The result is a hybrid that honors both traditions: the custard-soaked bread that becomes tenderly custardy when fried, and the cinnamon’s cozy glow that makes the entire kitchen feel like a sunlit bakery. It’s not just about indulgence; it’s about a shared moment—children tracing patterns in the steam, friends swapping stories over forks, and the simple joy of a kitchen that smells like comfort personified.

There’s a narrative undercurrent here as well: a nod to practical brilliance. Cinnamon rolls are often a weekend project—leisurely, patient, and generous in quantities. French toast is the weekday hero, quick and crowd-pleasing. Bringing them together speaks to everyday magic—making something feel special without turning the morning into a marathon. It’s a reminder that great breakfasts don’t have to be complicated to feel extraordinary. They can be beautifully simple and incredibly satisfying, especially when the scent and taste align to evoke warmth, recollection, and a touch of whimsy.

Why You’ll Love This Recipe

  • Impressive yet approachable: It looks like a bakery-worthy dish, but it’s built from everyday pantry staples.
  • Make-ahead friendly: The components can be prepared in stages or assembled the night before for a seamless morning.
  • Luxuriously comforting texture: A custardy interior with a lightly caramelized exterior and a soft, pull-apart crumb that echoes cinnamon rolls.
  • Balanced sweetness: The glaze or icing can be tuned to taste, letting you keep the sweetness in check or go full bakery-sweet for a special occasion.
  • Versatile for dietary tweaks: The base concept adapts to dairy-free, gluten-free, or vegan substitutions without losing its character.
  • Kid-friendly appeal: The familiar flavors of toast, cinnamon, and vanilla make it a perennial favorite for families with varied tastes.
  • Perfect for brunch spread: It pairs beautifully with coffee, fruit, yogurt, and a splash of sparkling cider, elevating a simple morning into a convivial event.
  • Aromatically irresistible: The scent alone is enough to draw people to the table—there’s something almost magical about cinnamon-laced mornings.

Flavor Profile & Texture

The dish rests on a backbone of classic French toast: day-old bread soaked in a velvety custard of eggs, milk, vanilla, and a hint of sugar. But the cinnamon roll influence threads through in a few delicious ways. First, there’s an aromatic warmth from ground cinnamon that permeates every bite, sometimes punctuated with a whisper of nutmeg or citrus zest to mimic the brightness found in many cinnamon roll recipes. The custard itself becomes ribbons of softness, gently binding the slices so they stay cohesive while still offering that characteristic “pull” when you tear into them. The bread’s interior is tender, nearly cloud-like, with just enough stability to hold its shape as you cut through.

The outer crust delivers a satisfying contrast: a light caramelization leaves tiny crisp edges that crackle slightly under your teeth. This crust provides a counterpoint to the interior’s softness, creating a pleasing texture play—from the delicate bite of a perfectly fried slice to the gooey center that tastes like a cinnamon-forward dream. And then there’s the hallmark of cinnamon rolls—the glaze or icing that brings a final, glossy kiss to the plate. Depending on how you choose to finish it, the glaze can be a simple powdered sugar drizzle, a cream-cheese-based frosting, or a lighter glaze with hints of lemon or vanilla. All versions share a unifying sweetness tempered by tangy notes from dairy or citrus, echoing cinnamon roll allure while staying true to French toast’s comforting, breakfast-friendly roots.

In terms of taste, the dish reads as a warm symphony: vanilla-soft dairy, buttery richness, cinnamon’s cozy warmth, a touch of sweetness that lingers pleasantly on the tongue, and a soft, milky finish that invites another bite. There’s enough sweetness to feel like a special treat without tipping into cloying territory, especially if you balance the glaze and the bread’s own sweetness. The result is a layered flavor profile that makes every bite feel like a tiny celebration—one that is complex enough to feel refined, yet familiar enough to be comforting from the first forkful.

Occasions & Pairings

When to Serve

This dish shines in a variety of settings. It’s a standout for weekend brunches when guests linger over coffee and conversation. It also works beautifully as a special upgrade for holidays like Christmas morning, Easter brunch, or Mother’s Day, where the table can be graced with something that feels indulgent but not over-the-top. For weekday mornings, a lighter version or a make-ahead approach can transform a rushed breakfast into something worth waking up for. It also doubles as a dessert-for-breakfast option in a playful sense, perfect for celebrating birthdays or leisurely Sundays after a family pancake-for-two ritual. In short, if you want a dish that reads as both comforting and celebratory, this cinnamon roll-streaked French toast hits the mark.

Pairings

Pair this dish with a range of accompaniments that enhance its flavor without overpowering it. Classic coffee remains the most natural match—the roasted bitterness balancing the sweetness of the bread and glaze. A robust espresso or a creamy latte can elevate the experience, as can a chai or spiced tea for those who enjoy a warm spice chorus with their breakfast. For milder beverages, a glass of cold milk or a small pour of vanilla almond milk complements the dish’s creaminess. Fruit components, such as a warm berry compote, sliced citrus, or tender roasted apples, add brightness and contrast while keeping the meal feeling light. A yogurt or ricotta-based topping can introduce a tangy note that plays well against the cinnamon’s sweetness. For those who prefer a festive beverage, a lightly spiced sparkling cider or a dry sparkling wine can transform this into a brunch-worthy showcase—perfect for holiday gatherings or celebratory weekends.

Tips, Variations & Substitutions

Every family has its own twist on this concept, and the dish invites personalization. Here are ideas to tailor the experience to your kitchen, dietary needs, or mood.

Make-Ahead Tips

Prepare the pan, soak the bread slices, and even whisk the custard up to a day in advance. Cover and refrigerate overnight, then bake in the morning. If you’re pressed for time, you can pre-slice the loaf, arrange the slices in a baking dish, and pour the custard over just before baking. The baking time may be shorter in this case, so keep an eye on the dish as it bakes to achieve the same tender interior and caramelized edges.

Variations

Flavor infusions elevate the dish beyond the original. Try these approaches to create distinct versions:

  • Orange-Cinnamon: Add a teaspoon of orange zest to the custard for a bright, citrusy note that enhances the cinnamon’s warmth.
  • Brown Butter & Maple: Finish the dish with a drizzle of brown butter syrup or a maple glaze to intensify the toffee-like, nutty depth.
  • Cream Cheese Swirl: Layer cream cheese swirls between bread slices before soaking for an extra decadent filling reminiscent of classic cinnamon rolls.
  • Walnut or Pecan Crunch: Sprinkle toasted chopped nuts on top for a caramelized crunch that echoes the textures of a cinnamon roll topping.
  • Fruit-Filled: Insert a thin layer of fruit preserves or sautéed apples between layers to add a fruity contrast that brightens the dish.

Dietary Substitutions

  • Vegan: Use plant-based milk (almond, soy, oat) and a dairy-free butter substitute. Replace eggs with a flaxseed or chia egg mixture, and use a dairy-free cream cheese or glaze made from coconut or cashew cream.
  • Gluten-Free: Choose a gluten-free bread that resembles brioche in texture. Ensure any glaze or icing uses gluten-free ingredients; many store-bought powders are gluten-free, but check labels.
  • Low-Sugar Option: Reduce the sugar in the custard and glaze, or substitute with a sugar-free glaze that uses a splash of lemon juice to counterbalance sweetness.
  • Low-Carb: Opt for almond-flour bread and a sugar-free glaze. The texture will be different, but the cinnamon roll flavor can still shine with a tender, custardy interior.

Storage & Make-Ahead Ideas

Storing and re-serving this dish requires a little strategy to preserve texture and flavor. If you have leftovers, let them cool to room temperature, then transfer to an airtight container. Refrigerate for up to 2 days. Reheating is best done in a low oven or toaster oven to re-crisp the edges while warming the center. A quick re-glaze or a light brush of melted butter can refresh the sheen and add back some moisture after storage. For longer storage, freeze individual portions after fully cooling; reheat gently in a low oven or microwave covered with a damp paper towel to avoid drying out. If you plan to make-ahead, the recommended workflow is to assemble the dish, let it soak, and refrigerate overnight. In the morning, bake until the top is golden and a toothpick inserted into the center comes out clean, with steam rising and the kitchen smelling like a bakery late into brunch hour.

Fun Facts & Trivia (Optional)

Here are a few tidbits that enrich the story of this dish and the broader breakfast heritage it draws from:

  • The term pain perdu translates to “lost bread,” a nod to the dish’s clever resurrection of day-old bread through soaking in a rich custard. This culinary trick multiplies moisture and flavor, turning stale bread into something sumptuous.
  • Cinnamon has a long and storied history, once considered a luxury spice that signified celebration and warmth. Its presence in breakfast classics like this French toast cinnamon roll echoes centuries of spice trade and culinary indulgence.
  • French toast dates back to ancient times, with variations appearing in cuisines across the world. The modern American breakfast toast tradition has many regional twists, from thick-cut brioche to thinner challah, each contributing its own texture and flavor profile to this timeless dish.
  • Cream cheese frosting or glaze has a distinct American bakery influence, often associated with the classic cinnamon roll. Pairing that glaze with French toast’s custard creates a bridge between bakery and breakfast that fans of both treats can appreciate.
  • Many households adopt this hybrid as a “showstopper brunch” recipe, precisely because it looks impressive on the table but is built from familiar, comforting elements that don’t overwhelm the cook on a busy morning.

Ingredients

Cinnamon Roll Dough

  • 3 1/4 cups all-purpose flour (plus more for dusting)
    → This is the base structure for the yeasted dough. The flour provides the gluten network that traps the gas produced by the yeast, giving the rolls their soft yet chewy crumb. Measure by spoon-and-sweep into the bowl to avoid compacted flour; knead on a lightly floured surface until smooth. If you want a slightly richer crumb, you can substitute up to 1/2 cup with bread flour, but all-purpose yields the classic texture.
  • 1/4 cup granulated sugar
    → Supplies sweetness and helps feed the yeast early in fermentation. It also contributes to browning of the crust during baking. Use granulated sugar for reliable dissolution in the dough. If you’re watching sugar, you can reduce slightly, but keep around 3–4 tablespoons to ensure yeast activity.
  • 2 1/4 teaspoons active dry yeast
    → The leavening agent that makes the dough rise into fluffy rolls. Proof in warm liquid (see liquids below) for 5–10 minutes until foamy; if it doesn’t foam, your yeast is dead or the liquid was too hot. Store unopened in a cool, dry place; you can refrigerate or freeze active dry yeast for longer storage.
  • 1/2 teaspoon salt
    → Enhances flavor and tightens the gluten matrix for a better crumb structure. Salt also slows fermentation slightly, helping control flavor development. Add to the dry ingredients before mixing with liquids.
  • 1/2 cup warm milk (about 110°F)
    → Provides the dairy moisture and fat that help yield a tender crumb and rich flavor; warm milk also helps activate the yeast when combined with the yeast and sugar. If dairy-free, use fortified non-dairy milk with 1/2 teaspoon lemon juice or vinegar to mimic acidity; for best results, use whole milk or 2% for fullness.
  • 1/4 cup warm water
    → Additional liquid to achieve the correct dough hydration and to help activate yeast; ensure water is warm but not hot (about 105–110°F). If using milk only, you can skip this, but it helps adjust dough stiffness.
  • 2 tablespoons unsalted butter, melted
    → Adds tenderness and flavor to the dough; fat shortens gluten strands and yields a softer crumb. Let cool slightly before adding to the mixture to avoid cooking the egg. If you want extra richness, you can replace part of the liquid with an additional 1–2 tablespoons melted butter.
  • 1 large egg
    → Binds the dough and enriches the crumb; eggs trap air and help structure during proofing and baking. Use at room temperature for better emulsification and easier mixing.

Filling

  • 1/3 cup unsalted butter, softened
    → The base for the cinnamon-sugar filling; spreadable softness is important to distribute evenly and create a gooey swirl. Soften at room temperature; avoid melting totally to ensure the sugar sticks to the cinnamon layer. You can also use salted butter if you’re not adding much extra salt elsewhere.
  • 3/4 cup light brown sugar, packed
    → Provides moisture and a caramel flavor in the filling; the density helps create a gooey, sticky swirl when rolled. Pack the brown sugar into the measuring cup to ensure consistent amount and avoid gaps in the filling.
  • 2 tablespoons ground cinnamon
    → Delivers classic cinnamon roll aroma and warmth; for a stronger cinnamon presence, use 1.5–3 teaspoons depending on taste; freshly ground cinnamon enhances flavor compared to pre-ground. Sprinkle evenly over the butter to create uniform swirls.

Custard Soak (French Toast Dip)

  • 4 large eggs
    → The protein structure for the custard that coats the cinnamon rolls when dipped or fried. Use eggs at room temperature so they emulsify smoothly with the milk. Beat lightly until just combined; if overbeaten, bubbles may form but they won’t ruin the soak.
  • 1 cup milk (whole milk recommended)
    → Creates a rich, creamy custard base for the French toast soak; whole milk yields the best mouthfeel and flavor. For dairy-free versions, you can use fortified plant milk with a touch of melted butter to mimic fat content; adjust sweetness with sugar if desired.
  • 1 teaspoon vanilla extract
    → Adds warmth and aroma that complements cinnamon and cream cheese glaze. Use real vanilla extract for best flavor; you can also use vanilla bean paste as a substitute.
  • 1/2 teaspoon ground cinnamon
    → Infuses the custard with a hint of cinnamon to marry the flavors between the roll and the French toast soak; you can increase to 1 teaspoon for stronger flavor or omit for a lighter profile.
  • Pinch of salt
    → Enhances the custard’s sweetness and balances flavors; ensure distribution by whisking into the liquid before adding eggs.

Icing / Glaze

  • 4 ounces cream cheese, softened
    → The tangy base for a classic cinnamon-roll glaze; softened cream cheese blends smoothly with butter and sugar to create a creamy frosting that contrasts with the warm rolls. If you’re short on time, soften in a warm spot or microwave briefly (about 10 seconds at a time) to prevent overheating.
  • 2 tablespoons unsalted butter, softened
    → Adds body and helps emulsify the glaze into a satin-smooth texture with the cream cheese; room temperature ensures easy blending without lumps. For dairy-free glazing, substitute with coconut cream softened and mix with a dairy-free cream cheese alternative.
  • 1 cup powdered sugar
    → Provides the sweetness and smooth, pourable texture of the glaze. Sift before using to avoid lumps; adjust thickness by adding more sugar or a splash of milk.
  • 1 teaspoon vanilla extract
    → Enhances sweetness and depth of flavor; use pure vanilla for best aroma. If you prefer a stronger vanilla note, increase to 1.5 teaspoons.

To Serve / Optional toppings

  • 1/2 cup chopped pecans or walnuts (optional)
    → Adds contrasting crunch and nutty flavor to the roll slices; toast nuts briefly in a dry skillet or oven to intensify aroma before chopping and sprinkling. If using salted butter in the dough/filling, adjust salt accordingly to avoid oversalting.
  • 1/4 cup pure maple syrup (for serving)
    → Finishing touch to drizzle over slices; maple pairs beautifully with cinnamon. Use real maple syrup for best flavor; store at room temperature and rewarm slightly before drizzling if desired.

Instructions

  • Bloom the yeast by combining 1/4 cup warm water (105–110°F) with 1 teaspoon granulated sugar, then sprinkling 2 1/4 teaspoons active dry yeast over the surface and letting it sit 5–10 minutes until foamy and fragrant.
    → This activates the yeast so it can leaven the dough; a foamy surface indicates the yeast is alive. If there is no foam, discard and start with fresh yeast and ensure the liquid temperature is correct (not hotter than 120°F).
  • Whisk together the dry ingredients—3 1/4 cups all-purpose flour, the remaining 3–4 tablespoons of sugar (from the recipe’s total sugar), and 1/2 teaspoon salt—in a large bowl to ensure even distribution of salt and sugar before moisture is added.
    → Uniform dry ingredients promote an even crumb and prevent clumps of salt or sugar from directly contacting the yeast; sifting is optional but helpful for a smooth dough.
  • Combine the liquids to form the dough: in a separate bowl, mix the 1/2 cup warm milk (around 110°F), 1/4 cup warm water, 2 tablespoons melted butter (cooled slightly), and 1 large egg until blended, then stir in the foamy yeast mixture.
    → Warm liquids wake the yeast and melt fat, while the egg enriches the dough for a tender crumb; ensure the butter is not hot to avoid cooking the egg.
  • Knead the dough with the dry ingredients and liquids until a smooth, elastic ball forms, about 6–8 minutes by hand or 3–4 minutes in a stand mixer with a dough hook, adding flour sparingly as needed to maintain a soft, non-sticky surface.
    → Proper kneading develops the gluten network that traps gas during fermentation, giving the rolls a soft yet resilient crumb; stop when the dough passes the “windowpane” test (stretching without tearing).
  • First proof: lightly oil a large bowl, place the dough inside, cover with plastic wrap or a damp towel, and let it rise in a warm spot until doubled in size, about 1 to 1 1/2 hours.
    → Allowing the dough to double creates fullness and a light, airy texture in the final rolls; if your kitchen is cool, you can place the bowl in a turned-off oven with the light on or near a warm stove.
  • Prepare the filling by softening 1/3 cup unsalted butter to a spreadable state, then mixing with 3/4 cup light brown sugar (packed) and 2 tablespoons ground cinnamon until smooth and evenly cohesive.
    → A smooth, evenly distributed filling ensures uniform cinnamon swirls and a gooey center; avoid overheating butter so the filling doesn’t run when rolled.
  • Gently deflate the risen dough, transfer to a floured surface, and roll into a rectangle approximately 16×12 inches with even thickness, using a rolling pin to maintain a uniform sheet that facilitates tight rolling.
    → A uniform rectangle ensures consistent roll density and easier, even slicing; keep the edges square for tidy spirals.
  • Spread the cinnamon filling evenly over the dough, leaving a 1/2-inch border along the far edge, then press the filling lightly to adhere and prevent separation during rolling.
    → Even distribution prevents dry pockets and scorching at the edges; press gently so the butter doesn’t squeeze out when rolled.
  • Roll the dough away from you into a tight log, pinch the seam to seal, and trim the ends to even out the roll before cutting into 12 equal portions.
    → A snug seam and evenly cut portions produce uniform spirals that bake evenly; use a sharp knife or dental floss for clean cuts without squashing the dough.
  • Transfer the slices onto a greased 9×13-inch baking dish, spacing them evenly, cover loosely, and let them proof for a second rise until puffy and nearly doubled, about 30–45 minutes.
    → A second rise creates lighter, loftier rolls that bake with a soft crumb; avoid over-proofing, which can cause the dough to collapse in the oven.
  • While the rolls proof, preheat your oven to 350°F (175°C) and position the rack in the center; bake the rolls for 25–30 minutes until the tops are golden brown and the centers are set; rotate the pan halfway through for even browning.
    → Proper oven temperature ensures a golden crust with a tender interior and prevents under- or over-browning; rotating the pan combats hot spots in the oven.
  • Meanwhile, whisk 4 large eggs, 1 cup milk, 1 teaspoon vanilla extract, 1/2 teaspoon ground cinnamon, and a pinch of salt to create a custard for French toast dipping; whisk until fully combined and smooth, then let rest to hydrate the cinnamon.
    → A well-balanced custard coats the rolls evenly and prevents custard from separating during soaking; resting helps the cinnamon flavor melds into the liquid.
  • Prepare the glaze by beating 4 ounces softened cream cheese with 2 tablespoons softened butter until creamy, then gradually whisk in 1 cup powdered sugar and 1 teaspoon vanilla, thinning with a splash of milk if needed to reach a pourable consistency.
    → A smooth glaze adds tang and sweetness, while the dairy fat helps emulsify the frosting; adjust thickness to pour or drizzle as desired.
  • Once the rolls are baked and still warm, cut each roll into 2–3 thick rounds to create individual French toast slices suitable for dipping; set on a rack to cool briefly while you heat a skillet with a little butter over medium heat.
    → Slicing while warm helps maintain a tender interior; a lightly greased skillet ensures crisp, evenly browned exteriors without sticking.
  • Dip each roll round into the prepared custard for 15–20 seconds per side, allowing the surface to absorb the custard without becoming soggy, then transfer to the hot skillet and cook for 2–3 minutes per side until golden brown and the custard is set; repeat with remaining slices.
    → Quick soaking prevents soggy interiors, while pan-frying creates a crisp exterior and a custard-set inside, mimicking classic French toast textures.
  • Dust the finished French toast rolls with a light glaze drizzle and, if desired, scatter 1/2 cup chopped pecans or walnuts that have been toasted briefly for extra crunch and aroma; serve warm with pure maple syrup for additional sweetness and depth.
    → Toasted nuts provide contrast and aroma, while maple syrup enhances the cinnamon profile; serving warm ensures the glaze remains glossy and the textures stay inviting.

Notes

These cinnamon roll French toast rolls are an indulgent breakfast treat: soft yeasted dough spirals around a warm cinnamon-sugar filling and are finished with a creamy cream-cheese glaze. For best results, proof the yeast in warm liquids (about 105–110°F) with a pinch of sugar until the mixture is foamy, 5–10 minutes. Combine the dry ingredients, then whisk in the warm milk, warm water, melted butter and egg; knead until the dough is smooth and elastic, about 6–8 minutes. Let the dough rise in a warm place, covered, until doubled, about 60–75 minutes. Roll the dough into a rectangle, spread the softened butter for the filling, sprinkle brown sugar and cinnamon; roll tightly into a log and slice into 12 equal rolls. Place in a greased pan, proof again until puffy. Meanwhile, whisk together the custard soak: eggs, milk, vanilla, cinnamon and a pinch of salt; this will be used to soak or dip the rolls as French toast before finishing. Bake: preheat to 350°F (175°C). If you prefer, you can fry the rolls in a skillet with a little butter for a crisper edge. Bake the rolls until golden and cooked through, about 25–30 minutes. Make the glaze by beating cream cheese, butter, sifted powdered sugar and vanilla; loosen with a splash of milk to achieve a pourable consistency. Drizzle while warm for a silky finish and a contrast to the warm cinnamon swirl. To serve, drizzle with pure maple syrup and, optionally, scatter toasted nuts for crunch. Storage and make-ahead tips: assemble the rolls a day ahead, refrigerate overnight, then bake until puffed. Leftovers reheat well in a low oven or microwave; keep in a covered container for 2–3 days. Dairy-free options: use fortified plant milk in the soak, and substitute a dairy-free cream cheese or coconut cream for the glaze.

Tips

Tips for Perfect French Toast Cinnamon Roll

  • Yeast health and water temperature: If the yeast doesn’t foam when proofing, the mixture may be too hot, too cold, or the yeast is stale. Use warm (not hot) water around 105–110°F and re-check the yeast before proceeding. Fresh yeast lasts longer when stored in a cool, dry place or sealed in the fridge/freezer.
  • Flour handling: Spoon flour into the measuring cup and sweep off excess to avoid a dense dough. Weighing flour is even more precise. If the dough seems a touch dry, you can add a teaspoon of milk at a time, mixing until you reach a soft, tacky-but-not-sticky dough.
  • Kneading and gluten development: Knead until the dough is smooth and elastic and passes the windowpane test (stretchable enough to become translucent). Under-kneaded dough will be dense; over-kneaded dough can become tough. Take your time with kneading for a tender crumb.
  • Hydration balance: If the dough sticks excessively, rest it for 10–15 minutes to relax the gluten before continuing. A lightly floured surface helps prevent sticking without adding too much flour, which can dry the dough.
  • Filling preparation: Soften the butter but do not melt it completely. A spreadable consistency helps create an even cinnamon-sugar layer and a gooey swirl without seeping unevenly into the dough.
  • Even cinnamon layer: Mix cinnamon thoroughly with the brown sugar so every bite has consistent spice. If the filling seems dry, a tiny pinch of salt can enhance flavor and balance sweetness.
  • Rolling technique: Roll the dough into a tight rectangle to form clean swirls. Pinch the seam shut and seal the ends to prevent filling from leaking out during baking.
  • Cutting the rolls evenly: Use a sharp knife or dental floss (unflavored) to cut uniform slices. Wipe the blade between cuts for neat, even pieces and uniform baking.
  • Second rise (if preferred): Allow shaped rolls to rise briefly in a warm, draft-free spot before baking. This helps achieve a lighter crumb and better height. If you’re short on time, you can bake a bit sooner, but expect a denser outcome.
  • Custard soak temperature and mixing: Eggs should be at room temperature for smooth emulsification. Beat until just combined to avoid incorporating excess air, which can lead to foamy or uneven coating.
  • French toast soak duration: Dip or brush the rolls in the custard for a moment to soak, then let them rest briefly so the flavors penetrate before cooking. Do not oversoak, or the rolls may fall apart or become too soggy when cooking.
  • Glaze texture and application: Soften the cream cheese and butter well for a silky glaze. Sift the powdered sugar to avoid lumps, and whisk in vanilla. If the glaze is too thick, add a teaspoon of milk at a time until you reach a pourable but spreadable consistency. Drizzle over warm rolls so it sets into a glossy finish.
  • Make-ahead and storage: The dough can be prepared a day ahead and refrigerated overnight; bring to room temp and finish shaping before baking. Unbaked rolls freeze well—wrap tightly and thaw before baking. The glaze is best added fresh to avoid glazing that hardens too quickly.
  • Serving and toppings: Toasted nuts add a nice crunch; if using salted nuts or butter, adjust the salt in the dough and filling to avoid oversalting. A light maple syrup drizzle enhances the cinnamon-sugar profile when serving.

FAQ

French toast cinnamon roll – FAQ

What is French toast cinnamon roll?

French toast cinnamon roll is a fusion breakfast dish where pieces or swirls of cinnamon rolls are soaked in a classic French toast custard (eggs, milk, vanilla, and cinnamon) and then baked or pan-fried. It combines the fluffy, cinnamon-spiced flavors of French toast with the richness of cinnamon rolls and is often finished with frosting, glaze, or syrup.

What ingredients do I need?

Common ingredients include:

  • 8–10 traditional cinnamon rolls, or enough rolls to feed your crowd
  • 6 large eggs
  • 1 cup milk or cream
  • 1 teaspoon vanilla extract
  • 1 teaspoon ground cinnamon
  • 2 tablespoons melted butter (plus extra for the baking dish)
  • Optional: cream cheese frosting or powdered sugar for serving
  • Optional toppings: maple syrup, fresh fruit
Can I use store-bought cinnamon rolls?

Yes. Store-bought cinnamon rolls work well. You can cut them into thick slices or separate the rolls and soak them in the custard. If the rolls are heavily glazed, you may wipe off some of the glaze to avoid an overly soggy texture.

How do I assemble and bake it?

Follow these steps:

  1. Preheat oven to 350°F (175°C).
  2. Whisk eggs, milk, vanilla, and cinnamon to make the custard.
  3. Cut cinnamon rolls into 1-inch thick slices or separate the rolls.
  4. Dip slices in the custard, turning to coat, about 30–60 seconds each.
  5. Arrange in a greased 9×13-inch baking dish in a single layer. Spoon any remaining custard over the rolls.
  6. Dot with small pieces of butter; bake 25–35 minutes, until puffed and golden.
  7. Serve warm with cream cheese frosting or maple syrup, if desired.
How long does it take to make?

Prep and dipping take about 15–20 minutes. The bake time is 25–35 minutes. Total time is roughly 1 hour from start to finish. If you prepare it as an overnight casserole, plan for longer bake time in the morning.

Can I make it ahead?

Yes. You can assemble the dish and refrigerate overnight, then bake in the morning. Another option is to refrigerate the cut rolls and custard separately and combine just before baking. You can also freeze baked portions for later reheating.

What size pan should I use?

A standard 9×13-inch (23×33 cm) baking dish works well for 8–10 cinnamon rolls. If you use fewer rolls, an 8×8-inch (or similar) dish is fine, but you may need to shorten the bake time slightly and monitor for doneness.

How should I serve and toppings?

Serve warm. Good options include:

  • Cream cheese frosting or a simple powdered sugar glaze
  • Additional maple syrup
  • Fresh berries or sliced fruit
  • A light dusting of cinnamon
How can I customize the flavor?

Try these variations to suit your taste:

  • Stir in chopped pecans or walnuts for crunch
  • Add diced apples or raisins into the custard or casserole
  • Incorporate citrus zest (orange or lemon) for brightness
  • Use half-and-half or heavy cream for richer custard
  • Drizzle salted caramel or use a cinnamon-sugar glaze
  • Use a cream cheese frosting variation or a maple frosting
How do I store leftovers?

Store refrigerated in an airtight container for up to 3 days. Reheat in a 350°F (175°C) oven for 7–10 minutes or briefly in the microwave (20–30 seconds) until warmed through. You can also freeze individual portions for up to 2 months and reheat from frozen.

Introduction / Hook

In the soft glow of a weekend morning, the kitchen fills with a hum of anticipation. Butter melts with a gentle hiss, the skillet becomes a stage for something playful and cozy, and suddenly breakfast wears a new smile: a pancake sandwich. Imagine two pillowy, sun-warmed rounds of batter standing like friendly sentinels, ready to cradle a swirl of flavors that wake the senses. The aroma is a quiet celebration of comfort—vanilla notes weaving with a hint of toasty sweetness, a whisper of caramelized edges, and the promise of a bite that’s at once familiar and delightfully novel. This isn’t merely a meal; it’s a sunny invitation to slow down, to pause, and to savor textures that contrast—tender pancake softness meeting a savory, melty heart or a bright, glossy topping that glimmers with morning sunshine. The pancake sandwich is breakfast that travels with you, a playful handheld ritual that sparks joy from the first crackle of the pan to the last satisfying chew. It is the softest kind of indulgence, the kind that feels both special and everyday at once, a reminder that a simple idea—two pancakes embracing a filling—can become a moment worth pausing for, a small ceremony of comfort you can carry through your day.

The Story Behind the Dish

The pancake sandwich has a humble, almost nostalgic origin story: a hungry morning, a sizzling skillet, and the timeless appeal of “two things that belong together.” In many kitchens around the world, breakfast is a canvas for improvisation, a place where sweet and savory mingle in comforting harmony. The idea of using pancakes as bread stretches back to the broader tradition of turning everyday staples into portable, handheld meals. In bustling diners, there are riffs on this concept: pancake stacks that enclose a warm, cheese-mlecked center, or a quick fold of fillings inside a tender pancake to create a portable, bite-sized treat. The pancake pancake sandwich taps into that instinct—two soft, forgiving rounds that are sturdy enough to hold a filling without collapsing, yet delicate enough to melt around a heart of goodness. It’s a modern culinary doodle born from childhood mornings when syrup dripped from the plate and the kitchen smelled of vanilla and butter. It’s also a nod to the cross-cultural vitality of breakfast, where the pancake concept has evolved into many forms: crepe-style wrappers, fluffy cloud pancakes, or even crisp-edged versions that offer a textural counterpoint to a cozy filling. The pancake sandwich sits at the intersection of nostalgia and novelty, a dish that invites you to honor tradition while playfully exploring new flavor pairings and textures.

Why You’ll Love This Recipe

  • Versatility at its best: whether you crave something savory, sweet, or a balance of both, the pancake sandwich adapts to your mood and pantry.
  • Quick to assemble conceptually (the actual timing depends on fillings), making it a reliable go-to for busy mornings and leisurely weekends alike.
  • Kid-friendly and crowd-pleasing: the familiar comfort of pancakes reassures little tasters while the sandwich format adds a dash of fun that adults appreciate.
  • Perfect for brunch or on-the-go meals: you can slab, stack, wrap, and bite with one hand, leaving the other free to sip coffee or catch up on the day ahead.
  • Flavor-driven customization: swap fillings, toppings, and fillings to create dozens of distinct experiences without changing the core idea.
  • Texture play that delights: the light, airy pancake exterior contrasts with melty fillings, creamy spreads, or crisp elements for a satisfying mouthfeel.
  • Family-friendly yet elevate-able: a simple breakfast for everyday moments can become a show-stopping weekend treat with small, thoughtful touches.

Flavor Profile & Texture

At its heart, a pancake sandwich delivers a harmony of contrasts. The pancake rounds themselves are soft and cloud-like, with a delicate crumb and a tender bite that melts on the tongue. The edges might shimmer with a light caramelization, offering a faint toasty note that grounds the sweetness. Depending on how you cook them, these pancakes can boast a slightly springy structure or a more pillowy, melt-in-your-mouth texture. The filling is where the narrative truly unfolds: you can lean into savory richness with silky, melted elements and gently seasoned fillings that bring depth without overwhelming the pancake’s mild sweetness. Or you can lean into fruity brightness and creamy spreads that gleam with a glossy sheen, creating a balance that feels light and refreshing despite the indulgence. A well-constructed pancake sandwich offers a playful range of textures—soft, airy pancakes surrounding a warm, creamy center, with occasional crisp edges if you choose a slightly crisper pancake or a lightly toasted filling component. The sensory experience is multi-layered: the first bite releases a chorus of warm batter aroma, followed by a gentle, fruity or savory note, and finally a lingering satisfaction as the filling lingers on the palate. The interplay of vanilla, butter, and gentle sweetness with a savory counterpoint creates a palette that is both comforting and adventurous, inviting you to explore how subtle tweaks can shift the entire mood of the dish.

Occasions & Pairings

  • Weekend brunches: the pancake sandwich shines as a centerpiece that feels special without being fussy. Serve with a vibrant fruit salad and a sparkling beverage to elevate the mood.
  • Weekday mornings on the run: pre-cook thin pancake rounds and assemble a few seconds before departure for a portable, satisfying bite.
  • Family breakfasts: a mix-and-match station where each person builds their own sandwich with preferred fillings and toppings fosters togetherness and creativity.
  • Holiday mornings: dress it up with seasonal flavors and a light dusting of spices to echo festive notes without going overboard.

Pairings elevate the experience without stealing the spotlight from the pancake sandwich. Consider these ideas to complement and contrast the dish:

  • Beverages: a creamy coffee, a bright citrus juice, or a mimosa can balance the subtle sweetness with a refreshing lift.
  • Side dishes: a fresh fruit medley, yogurt with a touch of honey, or light hash browns provide textural variety and a palate-cleansing counterpoint.
  • Dessert-like finishes: a drizzle of a glossy syrup or a fruit compote can echo sweetness while maintaining a balanced profile.

Tips, Variations & Substitutions

The beauty of a pancake sandwich lies in its flexibility. Here are ideas to tailor it to your kitchen, dietary needs, or mood, without getting bogged down in rigid instructions:

  • Make-ahead batter ideas: prepare a batch of pancake batter and chill it briefly; the batter can rest, which often yields a lighter texture when cooked, and you can stockpile hot, fresh rounds for quick assembly.
  • Savory vs. sweet: for savory versions, emphasize fillings and toppings that melt or pair well with a gentle saltiness. For sweet versions, lean into gentle fruit accents and a touch of creaminess to balance the batter’s mild sweetness.
  • Dairy-free and vegan options: use plant-based milks and emulsifiers to craft a tender pancake that remains fluffy; choose fillings that carry moisture to compensate for the absence of dairy richness.
  • Gluten-free approaches: many gluten-free flour blends produce tender, pancake-like textures that still hold up to sandwich-building; consider adding a small amount of starch to improve crumb and bite.
  • Regional twists: experiment by introducing regional pantry flavors—citrus zest, spice blends, or herb accents that resonate with your cooking style.
  • Texture-forward variations: try slightly crisper edges on the pancake by cooking them a touch longer on moderate heat; pair with a contrast component like a creamy spread or a delicate crumble for textural variety.
  • Health-forward spins: you can opt for whole-grain or enriched pancake batters that deliver more fiber and nutrients while keeping the sandwich enjoyable and indulgent.

Storage & Make-Ahead Ideas

Leftovers can be a rare but wonderful thing with a pancake sandwich if you approach storage with intention. Pancake rounds, once cooled, keep well when stored properly, and fillings can be prepared in advance or assembled quickly when you’re ready to eat. Here are practical notes to help you manage ahead and keep flavors fresh:

  • Storing pancakes: refrigerate (in an airtight container) for up to 2–3 days. For longer storage, freeze flat between sheets of parchment, then stack in an airtight bag; rewarm gently to restore softness before assembling.
  • Make-ahead fillings: prepare fillings that can hold well and reheat without losing character; keep them warm or at least near room temperature to ensure the sandwich maintains a pleasing balance when assembled.
  • Reheating tips: reheat pancakes in a warm skillet or toaster oven to revive softness and a hint of toasty texture; avoid microwaving if you want to preserve a better texture, as microwaves can make pancakes denser.
  • Assemble-on-the-spot approach: you can pre-slice or pre-portion components (where appropriate) and assemble the sandwich quickly when you’re ready to eat, preserving the integrity of each element.

Fun Facts & Trivia (Optional)

Delightful little curiosities often accompany comforting foods, and the pancake sandwich is no exception. Here are a few tidbits to nibble on while you plan your next breakfast:

  • The concept of bread-like foods made from batter-to-pancakes has roots in various cultures, where flatbreads and batter-based grilled or fried preparations served as portable sustenance for busy mornings and travelers.
  • In many places, the term “sandwich” evokes a sense of convenience and portability; pairing this idea with the soft, gentle nature of pancakes creates a playful, approachable indulgence that can feel both nostalgic and modern.
  • Seasonal inspiration: pancakes pair beautifully with natural sweetness from seasonal fruits, spices like cinnamon or nutmeg, and floral notes from vanilla or citrus zest, turning breakfast into a sensory celebration.
  • Small touches can transform the experience: a little melted cheese peeking from the edge, a glossy glaze that catches the morning light, or a swath of herbs or greens for freshness can all elevate the simplest sandwich into a memorable bite.

Ingredients

Pancake Base

  • 2 cups all-purpose flour (spooned and leveled)
    → The flour provides the pancake’s structure and body. Sift or whisk with the dry ingredients first to distribute the leaveners evenly, then measure by spooning into the cup and leveling. This helps avoid dense, gummy pancakes. For a lighter result, you can substitute some of the flour with 1/4 cup cornstarch or use a 1:1 gluten-free flour blend if needed, but adjust liquid as necessary.
  • 2 tablespoons granulated sugar
    → Adds sweetness and helps browning during cooking. Use white sugar for a clean flavor; if you prefer a deeper caramel note, substitute half with brown sugar. Reducing or omitting sugar will yield a less sweet pancake, which works well if you plan to fill with banana and peanut butter.
  • 2 teaspoons baking powder
    → Primary leavening that creates light, fluffy pancakes by releasing gas when heated. Ensure it’s fresh for maximum lift. Sift with the flour to distribute evenly, and let the batter rest 5–10 minutes before cooking to activate the leavening.
  • 1/2 teaspoon baking soda
    → Additional leavening that contributes extra tenderness and helps browning when paired with acidic components or buttermilk. If you’re not using an acidic liquid, you can omit this, but in this recipe it adds a bit of lift and softness. Do not overuse, or pancakes may taste soapy.
  • 1/2 teaspoon salt
    → Enhances flavor and balances sweetness. Fine salt distributes more evenly; adjust if using salted butter in the batter.
  • 2 cups milk (dairy) or non-dairy alternative
    → Hydrates dry ingredients and activates leavening. Choose unsweetened varieties to control sweetness. If using a thicker non-dairy milk (like some almond milks), you may add a splash more liquid to reach a pourable batter.
  • 2 large eggs
    → Bind and enrich the batter, adding moisture and structure. Beat lightly with the wet ingredients and fold into the batter just until combined. For a lighter texture, you can whisk the eggs with the milk before mixing into the flour.
  • 3 tablespoons unsalted butter, melted, plus more for cooking
    → Imparts rich flavor and tender crumb; adds ring of fat that helps pancakes crisp slightly around the edges. Let the melted butter cool briefly before mixing into the batter to avoid curdling the eggs. For dairy-free, substitute with neutral oil (e.g., vegetable or canola).
  • 1 teaspoon vanilla extract
    → Adds warmth and depth to the flavor, complementary to peanut butter and banana. Use pure vanilla for best aroma; if you have a vanilla bean, scrape the seeds and add for extra richness.

Filling and Assembly

  • 1/2 cup creamy peanut butter
    → Primary sandwich filling, providing creaminess, protein, and a savory-sweet contrast to the pancakes. Stir until smooth and warm slightly if needed to spread easily between warm pancakes. Natural peanut butter may separate; whisk or rewarm briefly to blend the oil back in for a smooth layer.
  • 1 medium ripe banana, sliced
    → Adds natural sweetness, moisture, and a soft texture between pancake layers. Choose a banana with yellow skin and brown spots for maximum sweetness; slice into even rounds to create neat layers inside the sandwich.

Toppings

  • 2 tablespoons maple syrup (for serving)
    → Classic finishing glaze that adds moisture and a balanced sweetness. Warm slightly to pour smoothly and blend with the pancake crumb. You can substitute honey or a fruit compote if preferred.
  • Butter for cooking and serving (optional)
    → Extra richness when melted on top of the hot pancakes before serving. If you prefer a lighter option, skip this or use a light pat on the finished sandwich.

Optional Add-ins

  • 1/2 cup mini chocolate chips (optional)
    → Fold into the batter for pockets of melted chocolate or sprinkle on pancakes as they cook for bursts of sweetness. If using, fold gently to avoid over-mixing the batter and to keep pancakes light.
  • 1/2 cup blueberries (optional)
    → Fresh or frozen blueberries add brightness and juicy bursts. If using frozen, do not thaw; add directly to the batter to minimize color bleeding. Gently fold to distribute evenly without turning the batter purple.

Instructions

  • Whisk together the dry ingredients: in a large bowl, sift or whisk 2 cups all-purpose flour, 2 tablespoons granulated sugar, 2 teaspoons baking powder, 1/2 teaspoon baking soda, and 1/2 teaspoon salt until evenly combined.

    → This ensures the leaveners are evenly distributed and salt is evenly dispersed, preventing dense pockets and promoting a light, uniform rise in the pancakes.
  • Whisk together the wet ingredients: in a separate bowl, whisk 2 cups milk, 2 large eggs, 3 tablespoons melted unsalted butter cooled, and 1 teaspoon vanilla extract until smooth.

    → Beating the eggs and emulsifying the melted butter with the milk creates a cohesive batter with good moisture and structure, avoiding greasy separations.
  • Gently fold the wet ingredients into the dry ingredients: pour the wet mixture into the dry mixture and stir just until combined, leaving a few small lumps.

    → Overmixing develops gluten and makes pancakes tough; a few lumps keep the crumb tender and light.
  • If using optional add-ins, fold them in now: gently fold in 1/2 cup mini chocolate chips or 1/2 cup blueberries, distributing evenly without overworking the batter.

    → Add-ins provide bursts of flavor, but folding them in gently prevents the batter from becoming dense or discolored and keeps the pancakes tender.
  • Let the batter rest for 5–10 minutes in a warm place to relax the gluten and activate the leavening.

    → Resting allows the gas bubbles to stabilize and the batter to hydrate fully, yielding fluffier pancakes with a softer crumb.
  • Preheat your skillet or griddle to medium heat (about 350°F / 175°C) and grease it lightly with butter or neutral oil.

    → A properly heated, well-greased surface prevents sticking, ensures easy flip timing, and promotes even browning across the pancake surface.
  • Test the pan with a small drop of batter to confirm the temperature; adjust heat if it sizzles too aggressively or remains still.

    → A correctly heated pan will start cooking the batter immediately with a gentle sizzle, producing a sturdy crust without scorching.
  • Pour about 1/4 cup of batter for each pancake onto the hot pan, spacing them so they do not touch, to form neat rounds.

    → Uniform size stacks stack more evenly and cook through without crowding, which helps you maintain consistent thickness and texture.
  • Cook the pancakes until bubbles form on the surface and the edges look set, about 2–3 minutes, then flip in one confident motion and cook the other side until golden and just set.

    → The bubbles indicate the interior is cooking and the underside has formed a sear; a steady flip prevents tearing and yields even browning on both sides.
  • Transfer the cooked pancakes to a warm plate or rack and keep them warm while you finish the remaining batter.

    → Keeping pancakes warm prevents condensation from making the surface soggy and ensures the final sandwich remains cohesive and tender.
  • Warm the peanut butter slightly if needed to a spreadable consistency; whisk or stir briefly to reblend natural oils if separated.

    → A smooth, spreadable filling makes the assembly clean and even, avoiding lumpy patches that interrupt the sandwich texture.
  • Assemble the pancake sandwich: spread a thin, even layer of peanut butter on the first pancake, lay a single layer of banana slices over the peanut butter, then top with the second pancake.

    → Spreading peanut butter first creates a moisture barrier and flavor bridge, while banana adds sweetness and moisture; a single layer prevents oozing and keeps the sandwich neat.
  • Press gently to seal the sandwich and, if desired, slice in half for easier handling and a tidy presentation.

    → Gentle pressure helps the filling stay centered and prevents the layers from sliding apart, especially when cutting.
  • Serve with warm maple syrup on the side or lightly drizzle over the finished sandwich just before eating.

    → Maple syrup provides sweetness and moisture that complements the peanut butter and banana, while serving on the side lets each bite be controlled and balanced.
  • Optional finishing touch: a small pat of butter on top of the hot sandwich as you serve to melt into the pancake for extra richness.

    → A final pat of butter enhances flavor and gloss, but use sparingly to avoid overly greasy layers inside the sandwich.

Notes

These pancake sandwiches are a cozy, crowd-pleasing treat featuring fluffy pancake bases, creamy peanut butter, and sliced banana. They can be customized with extra fillings or toppings, such as mini chocolate chips, blueberries, chopped nuts, or a smear of almond butter for a nuttier twist. They freeze well—assemble the sandwiches, wrap individually, and reheat in a skillet, toaster, or microwave for a quick breakfast or snack. If you prefer dairy-free, swap milk for a plant-based option and use melted coconut oil or a dairy-free butter spread; for gluten-free, substitute with a 1:1 gluten-free flour blend and use gluten-free baking powder. To enhance flavor, rest the batter 5–10 minutes to let the leaveners activate; lightly whisk the wet ingredients with the melted butter before combining with dry ingredients; avoid overmixing to keep pancakes tender. Always ensure your flour and baking powder are certified gluten-free if you have gluten intolerance.

Tips

Tips for a Perfect Pancake Sandwich

General batter and pan tips

  • Let the batter rest 5–10 minutes after mixing. This hydrates the flour (and gluten-free blends) and activates the leavening, helping to produce lighter, fluffier pancakes. If you’re using a gluten-free blend, you may need a touch more liquid—adjust to a pourable consistency.
  • Ensure the baking powder is fresh for maximum lift. If pancakes seem dense, a small extra pinch of baking powder can help, but avoid overdoing it to prevent a soapy taste.
  • Keep the batter at a pourable but thick consistency. If it’s too thick, whisk in a splash more milk; if too thin, add a little flour or a pinch of cornstarch for body.
  • Don’t overmix. Stir just until dry and wet ingredients are combined; a few small lumps are fine and yield tender pancakes.
  • Preheat a nonstick skillet or well-seasoned pan over medium heat and lightly grease with butter or neutral oil. If using butter, add it to the pan first and let it melt before pouring batter to prevent scorching.
  • Pour pancakes with about ¼ cup batter per round for even thickness; adjust if your pan is larger or smaller to keep them uniform.
  • Test the heat with a small drop of batter. When you see bubbles forming on the surface and the edges look set, flip carefully and cook the other side until golden.

Filling and assembly tips

  • Warm the peanut butter slightly so it spreads more easily between pancakes. If using natural peanut butter that separates, whisk or rewarm briefly to emulsify the oil for a smooth layer.
  • Slice the banana just before assembly into even rounds for neat layers and even sweetness distribution.
  • Spread a thin, even layer of peanut butter on the top of one pancake, arrange banana slices in a single layer, then top with the second pancake to close the sandwich. This helps keep the filling from spilling out.
  • If the filling seems thick, drizzle a small amount of maple syrup over the banana to help the layers bind and melt together as you bite.
  • Assemble the sandwich while pancakes are still warm so the peanut butter melts slightly and adheres to the layers for easier slicing.

Flavor tweaks and add-ins

  • Incorporate optional add-ins like ½ cup mini chocolate chips or ½ cup blueberries. Fold them into the batter gently to avoid overmixing; if using blueberries, don’t thaw frozen berries to minimize color bleed.
  • Adjust sweetness: the recipe uses 2 tablespoons granulated sugar with optional brownie-tinted flavor from brown sugar. If you want a deeper caramel note, use more brown sugar or substitute half with brown sugar as indicated.
  • For dairy-free versions, substitute melted neutral oil for the melted butter and use your preferred non-dairy milk. Ensure a pourable batter by adding a splash more liquid if needed.

Make-ahead, storage and reheating

  • Batter can be mixed ahead and refrigerated for up to 24 hours. Bring to room temperature and whisk in a splash of milk before cooking if thick.
  • Cooked pancakes can be cooled, stacked with parchment between layers, wrapped, and refrigerated 1–2 days or frozen for longer storage. Reheat gently in a warm skillet, in the toaster, or in a low oven until just heated through.
  • To keep the sandwich as fresh as possible, assemble just before serving. If you must prep ahead, store peanut butter, banana, and pancake components separately and assemble right before eating.

FAQ

What is a pancake sandwich?

A pancake sandwich is a handheld breakfast or brunch option made by placing a filling between two cooked pancakes, similar to a sandwich. Fillings can be sweet, savory, or a combination.

What ingredients do I need for a basic pancake sandwich?

For the batter: flour, milk, eggs, sugar, baking powder, a pinch of salt, and melted butter or oil. For fillings, choose your favorites such as fruit, jam, yogurt, peanut butter, cream cheese, eggs, cheese, bacon, avocado, or Nut butter.

What fillings pair well with pancake sandwiches?

Sweet ideas: sliced bananas, berries, apples, maple syrup, chocolate spread, whipped cream. Savory ideas: scrambled eggs, cheese, bacon or sausage, avocado, smoked salmon with cream cheese, spinach.

Can I use store-bought pancake mix or should I make batter from scratch?

Both work. Store-bought mix is convenient; follow the package directions. From-scratch batter is simple: 1 cup flour, 1 cup milk, 1 egg, 1–2 tbsp melted butter, 1–2 tsp sugar, 1 tsp baking powder, pinch of salt. Adjust thickness as needed.

How do I cook pancake sandwiches?

Cook pancakes one at a time on a warm non-stick skillet until bubbles form and edges look set, then flip and cook through. Let the pancakes cool slightly, spread your fillings, and stack a second pancake on top. For melty fillings, you can warm the assembled sandwich briefly in a skillet or oven.

How can I make them extra fluffy?

Use fresh baking powder, don’t overmix the batter, rest it 5–10 minutes, and cook on medium heat. If desired, fold in whipped egg whites for extra lift or replace part of the liquid with yogurt or buttermilk for tenderness.

How should I assemble and serve the pancake sandwich?

Place one pancake on a plate, evenly add the filling, then top with the second pancake. Slice if desired and serve immediately with maple syrup, fresh fruit, or a side of yogurt.

How long do pancake sandwiches keep, and how should I store leftovers?

Best enjoyed fresh. Refrigerate fillings like eggs or dairy promptly. Leftover pancakes can be stored in the fridge for 2–3 days or frozen for longer. Reheat gently in a skillet or microwave until warm.

Are there gluten-free or dairy-free options?

Yes. Use gluten-free flour or a prepared gluten-free mix, and plant-based milk with a dairy-free fat (oil or dairy-free butter). For dairy-free fillings, choose options like fruit, dairy-free yogurt, nut butters, and avocado.

Can I make a savory pancake sandwich?

Definitely. Use a less-sweet batter and fillings like eggs, cheese, spinach, avocado, bacon, or sausage to create a hearty savory version.

Introduction / Hook

Imagine a warm, inviting bakery scent wafting through your kitchen the moment you slide a tray into the oven. The air hums with butter, vanilla, and cinnamon—a comforting promise of snuggly sweetness on a busy morning or a cozy weekend treat. A cupcake cinnamon roll takes that irresistible cinnamon-roll magic and folds it into a cake-sized bite-sized joy. It’s a dessert that tastes like a snappy, joyful brunch, a playful breakfast in disguise, and a celebratory sweet all rolled into one. The exterior is softly fluffy, the interior reveals a tender spiral of cinnamon-sugar goodness, and the finish is crowned with cream cheese frosting that tangles perfectly with the sweetness. Each bite is a tiny celebration—pillowy texture meeting the unmistakable warmth of cinnamon, with a whisper of vanilla and a glaze that shines just enough to feel special without being cloying. This is not just a dessert; it’s an invitation to slow down, savor small moments, and enjoy the simple pleasure of a bakery-quality treat made at home.

What makes a cupcake cinnamon roll special is the balance: the bright vanilla note that keeps the cake light, the rich, cinnamon-forward swirl that channels the classic roll, and the creamy frosting that ties everything together with a smooth tang. It’s the best of both worlds—the casual comfort of a cupcake and the nostalgic charm of a cinnamon roll—presented in a format that’s easier to share, easier to portion, and just as delightful to present at a table loaded with weekend coffee or a holiday brunch spread.

The Story Behind the Dish

The cinnamon roll has a storied lineage. Its roots trace through Europe and into Scandinavia, where yeast-leavened doughs meet a generous swirl of brown sugar, butter, and cinnamon. In North America, these rolls became a beloved staple—soft, gooey, and punctuated by the spice that sparked many a sweet morning. The idea of translating that iconic comfort into a cupcake form is a natural evolution—two beloved desserts in one dish. Bakers began pairing the light, airy crumb of a vanilla cupcake with the cinnamon-sugar spiral of a roll, then topping it with a cream cheese frosting that mimics the generous glaze of a fresh-out-of-the-oven cinnamon roll. The result is a portable, visually appealing treat that can be display-worthy for a brunch buffet, yet approachable enough for a weekday bake. It’s a celebration of nostalgia with a modern twist, a nod to tradition while embracing the convenience and charm of cupcakes.

Beyond the kitchen, this hybrid dessert speaks to contemporary dessert culture: the rise of “cupcake-forward” menus that keep classic flavors alive in a format that fits today’s social dining scenes. It’s also a reminder that comfort foods can be reimagined—taking a family favorite and presenting it in a new shape with a refined finish. The cupcake cinnamon roll invites memories, conversations, and that irresistible aroma that signals something special is about to be tasted. It’s a dish that travels well—from a cozy weekend morning at home to a brunch party with friends—without losing its comforting core or its celebratory flair.

Why You’ll Love This Recipe

  • Impossibly soft crumb: a light base that supports the cinnamon swirl without becoming dense or heavy.
  • Perfect harmony of flavors: vanilla sweetness, brown-butter notes in the cinnamon centers, and a tangy cream cheese frosting that brightens every bite.
  • Visual appeal: elegant spirals, a glossy frosting crown, and a dessert that practically begs to be photographed for social feeds or a family album.
  • Make-ahead friendly: portions can be prepared ahead of time and assembled or frosted closer to serving, reducing last-minute stress.
  • Kid-friendly but sophisticated: familiar flavors that appeal to younger tasters while pleasing adults looking for a touch of bakery-style indulgence.
  • Versatile for celebrations or everyday joy: a dessert that fits a holiday table, a weekend brunch, or a simple weeknight treat that lifts the mood.

Flavor Profile & Texture

The cupcake cinnamon roll marries a delicate vanilla cake with a cinnamon-sugar ribbon that reveals itself in every bite. The cake crumb is tender, almost velvet-like, with a subtle crumb that carries the sweetness of a well-developed vanilla batter. Swirled through the center is a cinnamon-spice core—think brown sugar, butter, and a kiss of salt—that gives warmth and depth without turning tooth-achingly sweet. When you bite into the cupcake, you encounter the contrast between the soft cake and the slightly chewy, cinnamon-sugary core, a texture dance that echoes the experience of a classic cinnamon roll but in a more approachable, portion-controlled format. The frosting—cream cheese with a touch of vanilla and a whisper of lemon zest or optional citrus—adds a bright tang that cuts through the pastry’s richness, creating a balanced finish that lingers pleasantly on the palate. The glaze or frosting provides a sheen and a creamy mouthfeel, smoothing the edges of sweetness while amplifying the cinnamon’s aroma as it melts on the tongue.

In aroma, the sweet perfume of vanilla mingles with warm cinnamon; in taste, notes of caramelized sugar, melted butter, and a hint of salt create a comforting, bakery-fresh profile. The texture contrast—airy cake vs. luscious frosting, with a cinnamon swirl that offers a chewy bite—keeps every mouthful interesting and satisfying. This is a dessert that doesn’t rely on gimmicks; it relies on balance, quality ingredients, and technique that yields a cupcake that tastes like a cinnamon roll, only in a form that invites you to grab another bite without committing to a full roll’s worth of pastry.

Occasions & Pairings

This dessert shines in many settings. It’s perfect for weekend brunches, where a beauty shot of a plateful of these cupcakes next to steaming coffee becomes a centerpiece of the table. It’s equally at home at holiday gatherings, where its familiar comfort evokes warmth and togetherness. For birthdays, it offers a playful twist on a classic treat—presented as individual portions that can be decorated with edible glitter or small cinnamon sticks for a festive touch. Its versatility makes it a crowd-pleaser at potlucks and offices alike, a reliable showstopper that requires less hands-on time than a large cinnamon roll but delivers a similar vibe of indulgence.

Suggested pairings include:

  • Drinks: robust coffee, espresso, cinnamon-spiced lattes, chai tea, or a glass of cold milk.
  • Side dishes: fresh berries, citrus segments, or a light yogurt parfait to contrast the sweetness.
  • Desserts: a petite fruit tart or a crisp pastry to echo the cinnamon notes without overwhelming the palate.

Tips, Variations & Substitutions

Here are practical ideas to tailor the cupcake cinnamon roll to your pantry, dietary needs, or flavor preferences:

  • Vegan option: use plant-based milk, vegan butter, and vegan cream cheese for the frosting. Check labels for thickness and tanginess to emulate the classic cream cheese frost.
  • Gluten-free version: substitute with a reliable gluten-free all-purpose flour blend that behaves like wheat flour in quick baking. You may want to increase hydration slightly or add a touch of additional fat to maintain tenderness.
  • Low-sugar or lower-sugar approach: reduce the sugar in the batter and in the cinnamon filling; compensate with a pinch more vanilla and a touch of maple or honey to maintain flavor depth. Use a light glaze instead of a thick frosting if desired.
  • Alternate spices: swap in cardamom, nutmeg, or a pinch of ground cloves for a deeper, more autumnal aroma. A tiny splash of orange zest will brighten the profile beautifully.
  • Texture twist: for a little extra bite, add a sprinkle of finely chopped pecans or walnuts to the cinnamon swirl, but keep the nut amount modest so it doesn’t overwhelm the soft crumb.
  • Flavor variations: you can introduce a punch of brown-butter flavor to the cake batter by browning the butter before using it, which adds a toasty nuance that complements the cinnamon.
  • Frosting options: if you prefer less tang, blend the cream cheese frosting with a touch of buttercream to soften the tang; or add a light whipped cream cheese topping for a lighter feel.
  • Make-ahead frosting: frost the cupcakes the day you plan to serve for the best contrast in texture. If prepping ahead, store unfrosted cupcakes and frost just before serving to maintain softness.
  • Make-ahead swirl: you can prepare the cinnamon-sugar swirl in advance and refrigerate it in a parchment-wrapped log. When ready, slice off rounds to swirl into the cupcakes for a precise, even layer.

Storage & Make-Ahead Ideas

These cupcakes store well and can be a practical asset for meal prep or entertaining. Once baked and cooled, store unfrosted cupcakes in an airtight container at room temperature for up to 2 days. If you need to refrigerate, wrap well to prevent the cake from drying out, and bring to room temperature before frosting for the best texture. Frosted cupcakes will keep in an airtight container in the refrigerator for up to 3 days. If you want to freeze them, freeze unfrosted cupcakes in a single layer on a baking sheet, then transfer to a freezer-safe container. Thaw at room temperature, then finish with frosting for the freshest texture. For a make-ahead approach, you can prepare the cinnamon swirl and batter up to a day in advance, refrigerate the batter (and swirl) separately, and bake fresh the next day to maintain optimal fluff and aroma. If you’re frosting ahead, keep the frosting chilled and re-whip briefly to restore a fluffy texture before applying to the cupcakes.

To keep the presentation pristine for parties or brunch buffets, consider piping the frosting with a decorative swirl or employing small, edible toppers like cinnamon dust, sugar pearls, or a light drizzle of caramel to echo the roll’s glaze. If you’re serving a crowd with a mix of dietary needs, you can provide a few gluten-free or vegan cupcakes alongside the standard version, clearly labeled so guests can choose with confidence.

Fun Facts & Trivia

Did you know that cinnamon, one of the star flavors here, was once valued more highly than gold in ancient times? Its warm, spicy aroma has long been associated with hospitality and comfort, making cinnamon-inspired desserts a natural choice for gatherings. The cinnamon roll itself has deep roots in Northern European baking, particularly in Sweden and Finland, where it’s celebrated as a national treasure during seasonal festivities and weekend indulgences. The concept of turning such a roll into a cupcake form is part of a broader modern trend: reimagining classics in a portable, shareable, and visually appealing format without sacrificing the essence of the original. The cream cheese frosting, a staple in many cinnamon-roll-inspired desserts, owes its tangy brightness to dairy cultures that balance sweetness—an approach that appears across many beloved American pastries. In popular culture, these flavor notes—vanilla, cinnamon, cream cheese—are often associated with comfort, family and gatherings, making the cupcake cinnamon roll a familiar, welcoming choice for many tables.

Historically, cinnamon-related desserts have traveled with merchants and travelers along trade routes, becoming beloved across households as a signal of warmth and care. Today, bakers use those same associations to craft treats that feel luxurious yet approachable, often dazzling with a glossy finish and a scent that signals “special occasion” without requiring a full-on celebration. The cupcake cinnamon roll stands at the intersection of nostalgia and modern convenience, offering a familiar flavor with a new, charming presentation that fits contemporary eating habits and hospitality traditions.

Ingredients

Cupcake Cinnamon Roll
Cupcake Base

  • 2 1/2 cups all-purpose flour, sifted
    → Provides the primary structure and body for the cupcakes, giving a tender yet sturdy crumb that can support the cinnamon swirl. Sifting helps remove lumps and aerate the flour for more even mixing with leaveners, which promotes a lighter rise. Measure accurately and sift with the dry ingredients before combining with the wet ingredients to prevent dense batter; if you prefer an even lighter texture, you can substitute up to 1/2 cup of the flour with cake flour.
  • 1 cup granulated sugar
    → Delivers sweetness and assists with browning of the cupcake tops, contributing to flavor balance alongside the butter and vanilla. When melted butter is used in the batter, the sugar won’t cream in with the fat, so whisk it into the wet ingredients until dissolved enough to avoid grittiness. For a lighter crumb, you can slightly reduce sugar and add a pinch more salt to maintain flavor.
  • 1/2 cup unsalted butter, melted and cooled
    → Adds richness and moisture, helping produce a tender crumb without relying on excessive eggs. Melted butter distributes evenly through the batter, preventing pockets of oil and ensuring a uniform texture. Let the butter cool slightly before adding to the wet ingredients to avoid cooking the eggs; if the batter is very warm, chill it briefly before mixing.
  • 2 large eggs, room temperature
    → Act as binders and contribute to structure and moisture retention. Room-temperature eggs emulsify more smoothly with the fat and liquids, leading to a uniform, tender crumb. If you’ve stored eggs cold, gently warm them in a bowl of warm water for a few minutes to reach room temperature before using.
  • 1 cup whole milk, room temperature
    → Provides moisture and helps dissolve sugars, contributing to a soft, moist crumb. Using room-temperature milk ensures better emulsification with the fats and eggs, yielding a more cohesive batter. If you prefer a dairy-free version, choose a fortified plant milk and consider adding an extra tablespoon of melted vegan butter to mimic richness.
  • 1/2 cup sour cream or Greek yogurt, room temperature
    → Adds tenderness, moisture, and a subtle tang that complements the cinnamon filling. The acidity helps activate the leaveners for a lighter rise and a velvety crumb. Use full-fat for the best texture; if using yogurt, whisk it in with the wet ingredients and ensure it’s well integrated to avoid curdling.
  • 2 teaspoons vanilla extract
    → Enhances sweetness and depth of flavor, especially when paired with cinnamon. Use pure vanilla extract (not imitation) for a richer aroma; for extra depth, you can scrape the seeds from one vanilla bean and add them along with the extract. Add to the wet ingredients and mix until evenly incorporated.
  • 2 teaspoons baking powder
    → Primary leavening agent that provides rise and a light cupcake texture. Whisk with the dry ingredients to distribute evenly and avoid gaps in the batter. Check the expiry date of baking powder and replace it if it’s more than a few months old to ensure proper rising.
  • 1/2 teaspoon baking soda
    → Additional lift and helps with browning and a softer crumb by reacting with the sour cream/yogurt. Use promptly after mixing with acidic components; avoid letting the batter sit too long before portioning into cupcakes to maintain maximum lift.
  • 1/4 teaspoon salt
    → Balances sweetness and enhances overall flavor, helping the cinnamon and vanilla to pop. Dissolve in the dry mix to ensure even distribution. Do not omit, especially in sweeter recipes, as salt heightens flavor perception.

Cinnamon Swirl Filling

  • 1/3 cup light brown sugar, packed
    → Provides a rich, caramel-like sweetness that pairs with the cinnamon to create a classic roll flavor. Packing ensures a consistent level of sweetness throughout the swirl as you bake. For a lighter swirl, substitute with half brown sugar and half granulated sugar; keep the cinnamon ratio the same for flavor balance.
  • 2 tablespoons granulated sugar
    → Adds additional sweetness and helps balance moister elements in the swirl, contributing to a smooth, spreadable texture. Combine with brown sugar to create a uniform filling that won’t clump when spread over the batter. If the swirl becomes too wet, reduce the brown sugar slightly.
  • 2 teaspoons ground cinnamon
    → The defining flavor of the cinnamon roll. Use fresh-ground or well-measured ground cinnamon for consistent aroma and spice intensity. Sift with the sugars to avoid cinnamon clumps; spreading evenly across the batter helps achieve a uniform swirl in every bite.
  • 2 tablespoons unsalted butter, melted
    → Helps the sugar and cinnamon stick together and creates a cohesive, spreadable filling. The butter also adds moisture and a glossy swirl when swirled into the batter. Let it cool slightly if it’s hot to prevent it from liquefying the batter too much when swirled.
  • Optional pinch of salt
    → If your brown sugar is very sweet, a tiny pinch of salt can enhance the overall balance and bring out the cinnamon flavor. Sprinkle lightly and mix into the filling to ensure even distribution.

Cream Cheese Frosting

  • 8 oz cream cheese, softened
    → Forms the tangy, creamy base of the frosting. Softened cream cheese blends smoothly and evenly with butter, yielding a glossy, spreadable finish. If the frosting seems lumpy, beat longer at medium speed until completely smooth and free of lumps.
  • 1/2 cup unsalted butter, softened
    → Provides richness and helps stabilize the frosting; beating with cream cheese creates a lighter, fluffier texture. Ensure butter is at room temperature to achieve a creamy emulsion; refrigerate briefly after icing if you need firmer set for a cake-like finish.
  • 2 to 3 cups powdered sugar, sifted
    → Controls sweetness and thickness, allowing you to tailor a spreadable or pipeable frosting. Start with 2 cups and add more gradually until you reach the desired consistency; sift to avoid gritty grains. If you want a thinner glaze-like frosting, add a splash more milk or cream.
  • 1 teaspoon vanilla extract
    → Adds depth and aroma to the frosting; for the fullest flavor, use pure vanilla and consider scraping a vanilla bean into the frosting for extra fragrance. Mix with the fats before folding in the sugar to ensure even distribution.
  • Pinch of salt
    → Balances sweetness and enhances the tanginess of the cream cheese. A small amount helps to sharpen the flavor; if you’ve used salted butter, offset slightly by reducing the salt on the recipe.
  • 1 to 2 tablespoons milk or heavy cream to loosen if needed
    → Adjusts the frosting to your desired spreading or piping consistency. Add a little at a time and mix until smooth; chill briefly if you want a stiffer frosting for piping without running.

Optional Glaze

  • 1/2 cup powdered sugar
    → Quick, glossy finish that adds a touch more sweetness and a smooth sheen. Sift to prevent lumps and whisk with liquid until smooth. If you want a thicker glaze, use less liquid; for a runnier glaze, add an extra teaspoon of milk.
  • 2 tablespoons milk or heavy cream
    → Provides the liquid needed to reach the desired glaze consistency. Use more or less to achieve a drizzle or a pourable glaze, depending on your preference. Use at room temperature for best blending with the sugar.
  • 1/2 teaspoon vanilla extract
    → Adds aroma and depth to the glaze; use pure vanilla for a richer flavor profile. Mix into the glaze after the sugar is smooth to integrate evenly.
  • Optional pinch of salt
    → Balances sweetness and helps the glaze to set with a more chocolatey or caramelized finish, depending on other ingredients. Use sparingly to avoid making the glaze taste salty.

Toppings

  • 1/2 cup chopped pecans or walnuts, toasted (optional)
    → Adds a contrasting crunch and nutty depth that echoes traditional cinnamon rolls. Toasting enhances flavor and aroma; cool slightly before sprinkling over frosted cupcakes. If you have nut allergies, omit or substitute with toasted coconut or omit entirely for a nut-free version.

Instructions

  • Preheat your oven to 350°F (175°C) and line a 12-cup muffin tin with paper liners or grease it well.
    → This ensures the cupcakes bake evenly, release cleanly, and the cinnamon swirl stays contained without sticking to the pan.
  • Prepare the cinnamon swirl filling by whisking together 1/3 cup light brown sugar, 2 tablespoons granulated sugar, 2 teaspoons ground cinnamon, and a pinch of salt if desired in a small bowl; stir in 2 tablespoons melted unsalted butter until a cohesive, spreadable paste forms.
    → The sugar and cinnamon create a classic cinnamon roll flavor, while the butter helps the filling stay cohesive and spread evenly without clumping during assembly.
  • Whisk together the dry ingredients: 2 1/2 cups sifted all-purpose flour, 1 cup granulated sugar, 2 teaspoons baking powder, 1/2 teaspoon baking soda, and 1/4 teaspoon salt in a large bowl until uniformly dispersed.
    → Sifting and whisking remove lumps and distribute leaveners so the cupcakes rise evenly and have a tender crumb rather than a dense center.
  • In a separate bowl, whisk the wet ingredients: 2 large eggs (room temperature), 1 cup whole milk (room temperature), 1/2 cup sour cream or Greek yogurt (room temperature), 2 teaspoons vanilla extract, and 1/2 cup melted and cooled unsalted butter until smooth and fully integrated.
    → Using room-temperature ingredients ensures smooth emulsification and a cohesive batter; add cooled butter to prevent cooking the eggs and to maintain a silky texture.
  • Pour the wet mixture into the dry ingredients and mix gently with a spatula or wooden spoon just until the batter comes together and there are no streaks of flour; stop as soon as combined.
    → Overmixing develops gluten, making the cupcakes tougher; a few small lumps keep the crumb tender and light.
  • For each liner, spoon batter to fill about one-third full, dollop about 1 teaspoon of the cinnamon swirl in the center, then top with enough batter to fill to about two-thirds full; use a toothpick or small skewer to gently swirl the filling through the batter in a marbled ribbon.
    → Layering the swirl inside the batter creates a cinnamon-roll effect in every bite; swirling distributes the spice without overpowering the batter’s texture, and keeping the swirl away from the very top prevents overflow during baking.
  • Bake in the preheated oven at 350°F (175°C) for 18 to 22 minutes, or until a toothpick inserted into the center comes out with a few moist crumbs and the tops are lightly golden.
    → The toothpick test confirms doneness; rotating the pan halfway through ensures even browning and rising across all cups.
  • Transfer the cupcakes to a wire rack and allow them to cool completely before frosting to prevent the frosting from melting or sliding off.
    → Cooling sets the crumb and stabilizes the surface, giving a smoother foundation for a clean, neat frosting.
  • Beat 8 oz cream cheese (softened) and 1/2 cup unsalted butter (softened) on medium speed until smooth and light, about 2 to 3 minutes.
    → Properly softened fats emulsify into a creamy base, yielding a glossy frosting that pipes smoothly and holds its shape.
  • Beat in 2 to 3 cups sifted powdered sugar, 1 teaspoon vanilla extract, and a pinch of salt; gradually add 1 to 2 tablespoons milk or heavy cream to reach a spreadable, pipeable consistency.
    → Adding sugar gradually prevents graininess; adjusting with dairy controls thickness so you can pipe or spread without tearing the frosting.
  • If the frosting is too soft for piping, refrigerate for 15 to 20 minutes to firm slightly before transferring to a piping bag; otherwise proceed to frosting the cupcakes.
    → A firmer frosting holds its shape on intricate piping and reduces slump in warm kitchens.
  • When cupcakes are cooled and frosting is set, pipe or spread a generous layer of frosting onto each cupcake using an offset spatula or a decorative tip, aiming for an even crown that mirrors a cinnamon-roll topping.
    → A smooth, even frosting enhances flavor perception and provides a luxurious contrast to the spiced swirl.
  • Optional glaze: whisk 1/2 cup powdered sugar with 2 tablespoons milk and 1/2 teaspoon vanilla until smooth; drizzle lightly over the frosted cupcakes for a shiny finish.
    → The glaze adds a touch more sweetness and a polished, bakery-like sheen; adjust thickness if you prefer a drizzle or a pourable glaze.
  • Optional nut topping: toast 1/2 cup chopped pecans or walnuts in a dry skillet over medium heat until fragrant and lightly browned, about 2 to 3 minutes, then cool and sprinkle over the frosting for a textural contrast.
    → Toasting intensifies nut aroma and provides a pleasant crunch that echoes traditional cinnamon rolls; cool completely to prevent smearing the frosting.
  • Serve the cupcakes at room temperature for optimal flavor and texture, and store any leftovers in an airtight container at room temperature for up to 2 days or refrigerate for up to 5 days; bring to room temperature before serving to restore the full softness of the crumb.
    → Proper storage preserves moisture, flavor, and the integrity of the cream cheese frosting, ensuring each bite remains tender and luscious.

Notes

These cupcake cinnamon roll cupcakes are a decadent treat featuring a tender vanilla cupcake swirled with a cinnamon filling and crowned with tangy cream cheese frosting. The warm cinnamon ribbons bake into every bite, delivering classic roll flavors with the lightness of a cupcake. You can customize them by adding chopped pecans or walnuts to the filling, swirling in a bit of orange zest for brightness, or drizzling caramel over the frosting for extra richness. For best texture, bring ingredients to room temperature before mixing and avoid overmixing the batter to keep a soft, delicate crumb. When swirling the cinnamon filling, spread evenly over the batter and use a gentle sweep of the knife to create ribbons without pushing the filling to the edges. Bake at 350°F (175°C) until a toothpick inserted into the center comes out clean, about 18–22 minutes; let cool completely before frosting.

Storage and serving: refrigerate frosted cupcakes and enjoy within 3–4 days; you can freeze unfrosted cupcakes for up to 1 month and frost after thawing. If you frost and freeze, consider piping a fresh layer of frosting after thawing for the best texture. Let any refrigerated cupcakes come to room temperature for 15–20 minutes before serving to maximize flavor and softness.

Gluten-free option: To make gluten-free cinnamon roll cupcakes, substitute a certified gluten-free all-purpose flour blend and a gluten-free baking powder, and ensure all other ingredients are certified gluten-free. If you have gluten intolerance, always verify labels on ingredients like vanilla extract and sour cream for gluten-containing additives.

Tips

Tips for Cupcake Cinnamon Roll

  • Prep and mise en place: Take all ingredients out of the fridge about 30 minutes before you plan to bake to bring dairy and eggs to room temperature. This helps emulsification and a tender crumb.
  • Batter handling: Sift dry ingredients with baking powder, baking soda, and salt to ensure even distribution. Whisk wet ingredients separately, then fold dry ingredients in until just combined. Overmixing develops gluten and can make cupcakes dense.
  • Measuring flour: Scoop and level the flour for accurate measurements; avoid tapping the cup which can pack flour and create a heavy batter.
  • Cupcake portion: Use a 1/4 cup or medium scoop to portion batter into lined muffin cups, filling about 2/3 full for a domed top.
  • Cinnamon swirl: Keep the swirl filling cohesive by mixing the sugars, cinnamon, and melted butter until evenly combined. If it seems too loose, let it rest a few minutes or chill slightly so it swirls cleanly into the batter. Dollop a small amount onto each batter portion and swirl with a toothpick to create a ribbon, not a thick layer.
  • Texture and lift: Baking powder freshness matters—if it’s old, cupcakes may be dense. If you’re unsure, do a quick fizz test with a pinch of dry mixture in hot water to confirm readiness.
  • Masking moisture: Sour cream or yogurt adds tenderness; if you notice cracking top, it’s often from overbaking or overmixing; consider reducing mixing time slightly or baking a minute shorter next time.

Tips for Cream Cheese Frosting

  • Softened dairy: Let cream cheese and butter come fully to room temperature for smooth, lump-free frosting. If lumps form, beat longer at medium speed until smooth.
  • Sweetness and thickness: Start with 2 cups powdered sugar and add more until you reach your desired thickness. Sift the sugar to avoid gritty texture. If the frosting is too thick, beat in a teaspoon at a time of milk or cream.
  • Stability for piping: For a firmer, pipeable frosting, refrigerate the frosting for 15–20 minutes before piping. This helps hold shapes without tearing the cupcakes.
  • Flavor depth: Add vanilla extract and a pinch of salt as listed; you can also fold in a tiny splash of lemon juice or zest for brightness if desired, but keep it minimal to avoid curdling.

Tips for Optional Glaze

  • Consistency control: Mix glaze until smooth; adjust thickness by adding more powdered sugar for a thicker glaze or more milk for a drizzling glaze. For a glossy finish, whisk until very smooth and free of lumps.
  • Application: Drizzle over cooled cupcakes for a light sheen. If you’ve layered frosting, apply glaze after frosting has set slightly for a tidy finish.

Tips for Toppings

  • Toasted nuts: Toast chopped pecans or walnuts on a parchment-lined sheet at 350°F (175°C) for 5–7 minutes, shaking halfway, until fragrant and lightly browned. Cool before sprinkling to avoid soggy frosting.
  • Nut-free option: If you have nut allergies, omit nuts or substitute with toasted coconut or a sprinkle of flaky sea salt for texture contrast.

Baking, Cooling and Storage

  • Oven and timing: Preheat to 350°F (175°C). Bake cupcakes until a toothpick inserted in the center comes out with a few moist crumbs, about 18–22 minutes depending on your oven and size of cups. Do not overbake to avoid a dry crumb.
  • Cooling: Let cupcakes cool in the pan for 5 minutes, then transfer to a wire rack to cool completely before frosting to prevent sliding or melting of icing.
  • Storage: Fresh cupcakes with frosting can be stored in an airtight container at room temperature for 1–2 days or refrigerated for up to 3–4 days. Bring to room temperature before serving for the best texture and flavor.
  • Make-ahead freezing: Freeze unfrosted cupcakes for up to 2–3 months; defrost and frost when ready. Frosted cupcakes can be stored in the fridge for a shorter period, best eaten within 1 month for optimal texture.

FAQ

What is a cupcake cinnamon roll?

A cupcake cinnamon roll is a playful hybrid that bakes a cinnamon-sugar swirl into vanilla cupcakes and tops them with cream cheese frosting. Instead of rolling dough, the cinnamon swirl is folded into the cupcake batter to create ribbons of cinnamon in every bite.

What ingredients do I need for cupcakes cinnamon roll?

You’ll need three parts: the cupcake batter, the cinnamon-sugar swirl, and the cream cheese frosting.

  • For the cupcakes: all-purpose flour, granulated sugar, baking powder, salt, unsalted butter, eggs, vanilla extract, and milk.
  • For the cinnamon swirl: brown sugar, ground cinnamon, and melted butter.
  • For the frosting: cream cheese, unsalted butter, powdered sugar, vanilla extract, and a pinch of salt.
Can I make a dairy-free version?

Yes. Use dairy-free butter or coconut oil in the batter and swirl, and swap in dairy-free cream cheese or a plant-based frosting. Use almond, soy, or oat milk if needed. Check that all mix-ins and frostings are labeled dairy-free.

Can I make a gluten-free version?

Absolutely. Use a gluten-free all-purpose flour blend that includes xanthan gum (or add 1/4 teaspoon xanthan gum per cup of flour if your blend doesn’t include it). The rest of the recipe remains the same, but note that texture may vary slightly.

How do I swirl the cinnamon into the cupcakes?

Prepare the batter and cinnamon-sugar mixture. Line a muffin tin with papers. Fill each liner about 1/3 full with batter, dollop a teaspoon of the cinnamon-sugar swirl, then cover with more batter until 2/3 full. Gently drag a toothpick or skewer through the batter to create a ribbon swirl. Repeat for all cups.

What is the baking temperature and time?

Preheat to 350°F (175°C). Bake for 18–22 minutes, or until a toothpick inserted into the center comes out clean. Ovens vary, so start checking at the 18-minute mark.

What frosting should I use and how do I apply it?

Classic cream cheese frosting works great. Beat together softened cream cheese and butter, then gradually mix in powdered sugar, vanilla, and a pinch of salt until smooth. Once cupcakes are completely cooled, pipe the frosting on top or spread it with a knife. For extra cinnamon, dust with a little ground cinnamon.

How should I store the cupcakes?

Store unfrosted cupcakes in an airtight container at room temperature for up to 2 days. If frosted, refrigerate in an airtight container for up to 4–5 days. Bring to room temperature before serving for best texture and flavor.

Can I freeze these cupcakes?

Yes. Freeze unfrosted cupcakes in an airtight container for up to 1 month. Thaw and then frost. You can also freeze frosted cupcakes for 2–3 weeks; wrap well to prevent freezer burn and thaw in the fridge before serving.

Do you have any tips or common variations?

Tips: – Don’t overfill the liners or the batter may overflow. – Let ingredients come to room temperature for a smoother batter. – Use a light hand with the swirl to avoid dense centers. Variations: swap vanilla for almond extract, add chopped pecans or walnuts to the filling, or drizzle with a maple glaze on top.

Introduction / Hook

Imagine a slice of cake that feels like a warm embrace from a favorite baker, a delicate cloud of softness that melts on your tongue and leaves a whisper of vanilla and milk on the afternoon air. Torta al latte is that comforting, almost-forgotten classic: a milk-forward cake whose crumb is tender as a sigh and whose aroma invites you to slow down, gather loved ones, and share a moment of simple, lingering sweetness. The moment it bakes, the kitchen becomes a small theater of scent—milk, butter, and vanilla dancing together as a pale golden crust forms a gentle balcony above a creamy, cloudlike interior. It’s a cake that doesn’t shout for attention; it invites you to lean in, take a bite, and discover how something so humble can feel so luxurious. Whether you’re savoring it with a cup of coffee, pairing it with fresh berries, or gifting a homemade loaf to a friend, Torta al latte speaks in soft tones and makes ordinary days feel a touch more special.

The Story Behind the Dish

Milk-based desserts have a long, affectionate tradition in many cultures, and Italy is no exception. The concept of a cake built around milk—its gentle sweetness, its ability to tenderize the crumb—has roots in kitchens where ingredients were cherished and scarcity was rarely an enemy of flavor. In Italian homes, desserts often emerged from intelligent simplicity: pantry staples, fresh dairy, the comforting scent of vanilla or lemon zest, and a handful of eggs coming together into something that could carry a family through celebrations and quiet evenings alike. Torta al latte embodies that spirit. It’s the kind of cake that grandparents might have baked for a child returning home from school, a Sunday treat that lingered in tin boxes for the week, or a quick patisserie-style indulgence that felt like a warm hug after a long day.

The name itself is a little poetry—latte means milk in Italian—suggesting a cake where milk isn’t a mere ingredient but the very heartbeat of the batter. Some families remember learning the recipe out of curiosity, asking for the secret to its so-soft crumb, only to discover that the magic lies in patient mixing, proper rest for the batter, and a respectful balance between dairy and sweetness. Across regions, variations appeared—some with a touch of lemon zest brightening the milk, others with a pinch of almond essence that conjured a faint almond breeze. Yet the essence stays consistent: a cake that celebrates milk as a central element, yielding a slice that feels cozy and timeless, as if it had been handed down through generations in the exact same spirit, ever-evolving with each new family to embrace it.

Why You’ll Love This Recipe

  • Ultra-tender crumb: A soft, almost pillowy interior that remains moist and delicate, like a well-kept secret handed from one kitchen to the next.
  • comforting aroma: The lingering fragrance of warm milk, gentle vanilla, and a kiss of butter fills the room, inviting slow savoring rather than hurried bites.
  • Versatile for any moment: Perfect for breakfast with a cup of coffee, a tea-time treat, or a dessert to crown a meal with a quiet sense of sophistication.
  • Everyday luxury: You don’t need a long list of special ingredients or advanced technique—it’s approachable, reliable, and hard to resist.
  • Adaptable to your mood: Subtly customizable with citrus zest, a splash of almond extract, or a dusting of powdered sugar for a quick finish.
  • Ideal for sharing: A cake that travels well in a kitchen-to-table story, whether you’re baking for family, friends, or a cozy potluck gathering.

Flavor Profile & Texture

The flavor of Torta al latte centers on milk’s gentle sweetness, a creamy undertone that carries a whisper of vanilla and a soft, sweet butter note. The finish is clean and comforting, with no overpowering embellishments—just enough sweetness to evoke fond memories and a sense of home. If citrus is added, lemon or orange zest lightly lightens the profile, offering a bright, fragrant lift that doesn’t compete with the milk-forward base. The texture is the real magic: a fine, tender crumb that seems to melt on the tongue, with a subtle crust that provides a gentle contrast—enough structure to hold a slice neatly, yet not so crisp that it jars the delicate interior.

Think of it as a moist sponge cake that has learned the art of embracing moisture rather than drying out; a cake that remains softly springy rather than cakey, and that holds up to a light dusting of powdered sugar or a thin glaze if you choose to finish it in a simple, rustic way. The richness comes from the dairy and small amounts of fat that temper the sweetness, so every bite feels balanced and inviting rather than heavy. The mouthfeel is almost velvet-like, a comforting blanket of crumb that lingers pleasantly as you follow with a sip of coffee or a bite of fruit. This is the kind of cake that makes you pause, smile, and consider how such a straightforward combination can yield something so deeply satisfying.

Occasions & Pairings

Torta al latte feels at home in a wide range of occasions, from everyday indulgence to quiet celebrations. It’s equally content on a cozy weekend brunch table as it is perched at the center of a dessert plate after a weeknight dinner. Consider these moments when you might reach for a slice:

  • Sunday family brunches and relaxed gatherings where something soft and comforting is appreciated as a finale or mid-morning treat.
  • Afternoon tea or coffee breaks, where its tenderness pairs beautifully with a robust espresso, a cappuccino, or a creamy chai.
  • Celebrations that call for a simple, elegant dessert without fuss—think birthdays, anniversaries, or a grateful “thank you” to someone special.
  • Light, bright occasions when you want a cake that doesn’t overwhelm with sweetness; it can be dressed up with a thin glaze, a scattering of citrus zest, or fresh berries for color and contrast.

Pairings to consider for a complete experience:

  • Beverages: strong coffee, latte, cappuccino, Earl Grey tea, or a delicate dessert wine that doesn’t overpower the cake’s milk-forward profile.
  • Fresh accompaniment: a handful of berries (strawberries, blueberries, or raspberries) to add tart brightness that cuts through the cake’s softness; a dollop of lightly sweetened whipped cream or a spoonful of mascarpone can elevate it if you like.
  • Other desserts: a small scoop of vanilla gelato or a light lemon curd on the side to introduce a citrus contrast.

Tips, Variations & Substitutions

While the essence of Torta al latte is elegantly simple, there are many gentle ways to tailor it to your pantry, dietary needs, or mood. Here are ideas to spark your creativity without straying from the cake’s essential soul:

  • Flavor boosters: Add a touch of lemon or orange zest, a splash of vanilla extract, or a hint of almond extract to brighten or deepen the aroma. A pinch of fine sea salt can also enhance the perceived sweetness and balance the flavors.
  • Dairy variations: If you want to experiment with dairy-free or reduced-dairy options, substitute with a neutral plant milk (like almond or oat) and replace butter with a light neutral oil, keeping the fat content balanced to maintain tenderness. Be mindful that the crumb may shift slightly in texture with vegan milks.
  • Gluten-free option: Use a high-quality gluten-free all-purpose flour blend designed for cake baking; you may need to adjust the liquid a touch to keep the batter smooth and evenly hydrated.
  • Sweetness levels: For a less sweet cake, reduce sugar slightly or use a natural sweetener that doesn’t alter texture drastically. Conversely, a glaze or light dusting of powdered sugar can add gentle sweetness and a festive finish.
  • Texture tweaks: If you prefer an even lighter crumb, consider incorporating a small amount of cornstarch into the dry mix (or using a cake flour substitute) to soften the gluten structure and yield a more tender interior.
  • Regional twists: A pinch of ground cinnamon or nutmeg can introduce a warm, comforting note reminiscent of holiday desserts. A drizzle of honey or maple syrup as a finishing touch can also add depth beyond sweetness.
  • Make-ahead flavor development: Preparing the batter a little ahead and letting it rest can allow flavors to mingle; a longer resting period can contribute to a more cohesive crumb, though it should not be over-long to avoid overly thick batter.

Storage & Make-Ahead Ideas

Torta al latte keeps well when stored properly, making it a practical option for busy weeks or gatherings where you want slices ready to go. The cake tends to stay moist and tender for several days when kept in a cool, airtight container or tightly wrapped to preserve moisture. If you want to stretch its life, refrigerating the cake is a reliable option, though it may firm the crumb slightly; allow slices to come to room temperature before serving for the best texture and aroma.

Make-ahead ideas include baking the cake the day before an event and finishing with a light finish—powdered sugar, citrus zest, or a thin glaze—just prior to serving to keep the surface fresh. Because the cake is naturally moist, it travels nicely for picnics or potlucks, especially when transported in a sturdy tin or container that protects the delicate crumb. If you’d like to freeze it, wrap slices individually to protect against freezer burn and reheat gently in a low oven or warm in the microwave with a damp paper towel to restore some of the softness.

Fun Facts & Trivia (Optional)

– The simplicity of milk-forward cakes like Torta al latte reflects a broader culinary ethic: celebrate the quality of basic ingredients and the craft of patient technique. A few wholesome components, treated with care, can yield a result that feels luxurious despite its humble origins.

– Milk-based desserts have inspired countless regional variations around the world—from dense, milky loaf cakes to airy, cloud-like sponges. The universal appeal lies in their ability to soothe and delight with a familiar, comforting flavor profile that transcends borders.

– In some Italian homes, desserts are not just sweet finales but a ritual of togetherness. A slice of Torta al latte can become the centerpiece of a shared moment—a conversation starter, a way to connect, and a reminder that some of the best meals are built on tenderness and time spent with people we love.

Conclusion

Torta al latte is more than a dessert; it’s a gentle celebration of dairy, simplicity, and the everyday magic of baking. Its soft crumb, subtle sweetness, and comforting aroma invite you to slow down, savor the moment, and appreciate how a handful of well-chosen ingredients can become something memorable. Whether you’re baking for a quiet afternoon at home or presenting a sweet, thoughtful dish to friends and family, this cake offers a warm invitation to share joy in its purest form. As the slices disappear and the room fills with the quiet contentment of a job well done, you’ll understand why milk-based cakes endure: they are a reminder that sometimes, the most comforting flavors are also the most timeless.

Ingredients

    Torta al latte

  • – 2 cups all-purpose flour, sifted (about 240 g)
    → For a light, tender crumb; sifting aerates the flour and helps distribute the leavening evenly. If you don’t sift, whisk the flour with the sugar to break up any lumps and ensure smooth batter. If you prefer a slightly lighter texture, you can substitute up to 1/4 cup of the flour with cornstarch, whisking well to incorporate.
  • – 1 cup granulated sugar
    → Provides sweetness and helps with browning and moisture retention during baking. Sugar also aids in tenderizing the crumb by slowing gluten formation. If you want a less sweet cake, reduce to 3/4 cup or replace part with an equal amount of honey or maple syrup for a distinct flavor (note: liquids will slightly alter texture).
  • – 3 large eggs, at room temperature
    → Offer structure, moisture, and stability to the batter. Room-temperature eggs emulsify better with the liquids, creating a smoother batter and a lighter crumb. Beat the eggs with the sugar until pale and slightly thick to incorporate air for better rise.
  • – 1 cup whole milk, warmed to just below body temperature
    → Provides moisture and tenderness; warm milk improves emulsification with the eggs and butter. If using dairy-free milk, choose a fortified option (almond, soy, or oat) and be aware that texture may be slightly different; avoid overheating to prevent curdling.
  • – 1/2 cup unsalted butter, melted and cooled to warm (< 120°F / 49°C)
    → Adds richness and moisture, contributing to a tender, moist crumb. Let the melted butter cool slightly so it won’t cook the eggs when added. Whisk it in gently with the wet ingredients to keep an even emulsion and avoid greasy pockets.
  • – 1 tablespoon vanilla extract
    → Flavor foundation for a classic milk cake; if possible, use real vanilla bean paste or scrape seeds from a vanilla bean for a deeper aroma. For a different profile, you can add a pinch of citrus zest (lemon or orange) to boost brightness.
  • – 2 teaspoons baking powder
    → Leavening that helps the cake rise and develop a light, airy crumb. Ensure your baking powder is fresh and evenly distributed by whisking with the flour. Do not overmix after adding the dry to the wet to prevent toughness.
  • – 1/4 teaspoon fine salt
    → Enhances the overall flavor and helps balance the sweetness; use fine salt so it disperses evenly. If you use salted butter, reduce the added salt accordingly.
  • – Zest of 1 lemon or orange (optional)
    → Adds a fresh citrus aroma that pairs beautifully with the milk-based batter. Use a microplane to grate only the colorful part of the rind, avoiding the bitter white pith. Fold in zest last to preserve its fragrance.
  • Optional Fillings

  • – 1/2 cup pastry cream (crema pasticcera) or mascarpone (optional)
    → For a layered or filled cake, a thick, cooled filling adds richness and creaminess. Pastry cream should be fully chilled and thickened before spreading; mascarpone can be whisked with a little sugar and vanilla for a lighter, creamier alternative.
  • – 1/2 cup fruit jam or preserves (optional)
    → Adds fruity contrast and moisture between layers. Choose a thick jam to minimize sogginess; warm slightly to spread smoothly and avoid lumps. Pair with citrus zest for harmony of flavors.
  • Optional Finish

  • – 1/2 cup powdered sugar (for glaze)
    → Creates a simple glaze or dusting to finish the cake. To make a glaze, whisk with 1–2 tablespoons milk or lemon juice until you reach drizzle-friendly consistency. For a thicker finish, add more powdered sugar; for a thinner glaze, add a touch more liquid.

Instructions

  • Preheat your oven to 350°F (175°C) and prepare a 9-inch round cake pan by greasing it thoroughly and lining the bottom with parchment paper.
    → This ensures the cake releases cleanly and prevents sticking, giving you smooth edges and an intact cake when unmolded.
  • Sift the 2 cups all-purpose flour, 2 teaspoons baking powder, and 1/4 teaspoon fine salt into a medium bowl; whisk to combine and aerate.
    → Sifting aerates the flour, distributes the leavening evenly, and helps create a light, tender crumb.
  • In a large mixing bowl, beat the 3 large eggs and 1 cup granulated sugar with an electric mixer on medium-high until the mixture is pale, thick, and ribbons form when the beaters are lifted, about 3 to 5 minutes.
    → This aerates the batter, enabling a higher rise and a soft, cake-like texture as the sugar helps stabilize the emulsion.
  • Warm the 1 cup whole milk in a small saucepan or microwave until it is just below body temperature (about 110–115°F / 43–46°C), then remove from heat.
    → Warm milk improves emulsification with the eggs and butter for a smoother, more cohesive batter and a moister crumb.
  • Stir the 1/2 cup melted butter into the warm milk until fully emulsified; add 1 tablespoon vanilla extract and, if using, the zest of 1 lemon or orange.
    → Emulsification prevents separation of fat and liquid, while vanilla (and zest) provide depth of aroma; ensure the butter has cooled slightly to avoid cooking the eggs when combined.
  • Add the dry ingredients to the wet ingredients in three additions, whisking or folding gently after each addition just until no dry streaks remain.
    → Overmixing develops gluten and makes the crumb tough; add flour gradually to maintain a tender, delicate texture.
  • Pour the batter into the prepared pan and, if using optional fillings, dollop pastry cream or mascarpone in small spoonfuls over the batter and swirl lightly with a skewer or knife, then cover with the remaining batter.
    → Layering or marbling the filling creates a creamy center or ribbons of richness without overpowering the batter’s moisture.
  • Bake in the center of the oven at 350°F (175°C) for 28–34 minutes, or until the top is golden and a toothpick inserted into the center comes out with a few moist crumbs. Rotate the pan halfway through baking if your oven has hot spots.
    → This range accommodates different pan sizes and oven calibrations; testing with a toothpick confirms doneness without overbaking.
  • Remove the cake from the oven and allow it to cool in the pan for 10–15 minutes, then run a knife around the edge and invert onto a wire rack to cool completely before slicing.
    → Cooling sets the crumb and makes slicing cleanly possible; transferring to a rack prevents the bottom from becoming soggy.
  • If you desire a finish, whisk 1/2 cup powdered sugar with 1–2 tablespoons milk or lemon juice until smooth and drizzle evenly over the cooled cake, or dust a light veil of powdered sugar for a classic finish.
    → The glaze adds sweetness and a polished appearance; adjust thickness by adding more sugar or liquid as needed.
  • Slice and serve; store leftovers in an airtight container at room temperature for up to 2 days or refrigerate for up to 5 days, and let the cake come to room temperature before serving if refrigerated.
    → Proper storage maintains moisture and prevents the cake from drying out; bringing back to room temp enhances aroma and texture.

Notes

This Torta al latte cake is a classic, tender milk cake that relies on warm dairy, melted butter, and a splash of vanilla to build a soft, comforting crumb. You can customize it by adding citrus zest (lemon or orange) for brightness or by layering with a thick pastry cream or mascarpone and fruit jam for a more indulgent dessert. For best texture, sift the flour with the baking powder and salt to ensure even leavening, and whisk the dry ingredients with the sugar before introducing the wet ingredients to help distribute sweetness and air. Avoid overmixing once the dry ingredients meet the wet; mix just until smooth to keep the crumb light and tender. Make sure the eggs are at room temperature and the milk is warmed to just below body temperature to improve emulsification with the butter and milk, producing a smoother batter. Let the melted butter cool to warm before adding to the wet ingredients so it doesn’t seize the eggs or curdle the mixture. If you need a dairy-free version, substitute fortified non-dairy milk and a dairy-free butter alternative; note that texture and flavor may differ slightly but the method remains the same. Fold in the citrus zest at the end to preserve its aroma. For fillings, ensure any pastry cream is fully chilled and thick before spreading; mascarpone can be lightly sweetened with a touch of vanilla for a lighter texture. To finish, whisk together powdered sugar with a little milk or lemon/orange juice to make a glaze, or simply dust the cake with powdered sugar for a quick, elegant touch. The cake stores well for 2–3 days at room temperature in an airtight container or wrapped tightly, and individual slices freeze nicely for a ready-to-serve treat. If you’re baking with gluten-free flour, use a 1:1 gluten-free blend and consider adding 1/4–1/2 teaspoon xanthan gum per cup for better structure. Always preheat the oven and prepare your pan (grease and flour or line with parchment) for an even bake.

Tips

Tips for making Torta al latte

  • Prep mise en place: measure and sift the dry ingredients (flour, baking powder, salt) together to ensure even leavening and a tender crumb.
  • Temperature matters: keep eggs at room temperature and warm the milk to just below body temperature. This helps emulsification and a smoother batter.
  • Aerate the eggs with sugar: beat the eggs and sugar until pale and thick (ribbon stage) to incorporate air for a light, airy crumb.
  • Melted butter handling: let the melted butter cool to a warm temperature before whisking it into the wet ingredients to maintain a smooth emulsion and avoid greasy pockets.
  • Flavor and zest: if using citrus zest, grate only the colorful part and fold in at the end to preserve aroma and brightness.
  • Fresh leavening: check that baking powder is fresh; stale powder yields a dense cake. You can test by mixing a small amount with hot water to see if it foams.
  • Mixing technique: add dry ingredients to wet in batches and mix only until just combined to prevent gluten overdevelopment and a tougher crumb.
  • Pan preparation: grease and line the bottom of the pan with parchment for easy release; for springform pans, run a knife around the edge after baking before removing the ring.
  • Oven setup: bake at 350°F (175°C). If the top browns too quickly, loosely tent with foil and rotate the pan halfway for even browning.
  • Doneness test: use a toothpick or skewer—it should come out with a few moist crumbs, not wet batter. Underbaker yields a gummy center; overbake dries the cake.
  • Cooling and fillings: cool the cake completely before filling. If using pastry cream, ensure it is fully chilled and thick; mascarpone can be sweetened and whipped for a lighter texture.
  • Fruit jam layer: choose a thick jam to minimize sogginess; warm slightly to spread smoothly and pair with a citrus note to complement the milk base.
  • Finish and glaze: for a simple glaze, whisk powdered sugar with a little milk or lemon juice until drizzle-friendly; adjust thickness by adding more sugar or liquid as needed. A light dusting of powdered sugar also gives a classic finish.
  • Storage: cover and store at room temperature for up to 2 days, or refrigerate up to 4 days; the cake freezes well when well wrapped (1–2 months).

FAQ

Cos’è la Torta al latte?

La Torta al latte è un dolce soffice e semplice, realizzato con latte, uova, zucchero, farina, burro fuso e lievito per dolci. È ideale per colazione o merenda e si presta a diverse varianti.

Quali ingredienti servono?

Ingredienti (stampo 24 cm):

  • 250 g di farina 00
  • 150 g di zucchero
  • 3 uova a temperatura ambiente
  • 200 ml di latte intero
  • 100 g di burro fuso (oppure 80 ml di olio di semi)
  • 1 bustina di lievito per dolci (circa 16 g)
  • 1 cucchiaino di estratto di vaniglia (o scorza di limone)
Come si prepara l’impasto?

Procedimento:

  1. Preriscalda il forno a 180°C e fodera una teglia con carta forno.
  2. In una ciotola, monta le uova con lo zucchero fino a ottenere composto chiaro e spumoso.
  3. Aggiungi latte e burro fuso raffreddato, unisci vaniglia.
  4. In un’altra ciotola setaccia farina e lievito.
  5. Unisci gli ingredienti secchi al composto liquido, mescolando delicatamente finché è liscio.
  6. Versa l’impasto nella teglia e livella.
Quali strumenti servono?

Stampo rotondo da 24 cm, carta forno, ciotola capiente, fruste/mixer, spatola, setaccio, cucchiaio dosatore, forno.

Tempo di preparazione e cottura?

Tempo di preparazione: circa 15 minuti. Cottura: 30-35 minuti. Raffreddamento prima di sformare: 10-15 minuti. In totale, contando raffreddamenti, circa 1 ora.

A che temperatura si cuoce?

Cuocere in forno statico preriscaldato a 180°C. Controlla dopo circa 30 minuti: se la superficie è dorata e uno stecchino esce pulito, è pronta. Se necessario, prosegui 5-10 minuti controllando spesso.

Come si conserva?

Lascia raffreddare completamente, poi conserva in contenitore ermetico a temperatura ambiente fino a 2-3 giorni. Per conservarla più a lungo, refrigerala in contenitore ermetico (consuma entro 4-5 giorni). Si congela a fette per 2-3 mesi.

Come si può personalizzare o variare la ricetta?

Varianti:

  • Aggiungere gocce di cioccolato o scorza di limone/arancia
  • Impostare una versione al cacao: sostituire una parte della farina con cacao amaro
  • Farcia con crema al latte o crema chantilly tra due strati
  • Versare una glasse o una spolverata di zucchero a velo prima di servire
  • Versione senza lattosio: utilizzare latte vegetale e burro o olio vegetale
Posso realizzare la Torta al latte senza lattosio o senza burro?

Sì. Per una versione senza lattosio: usa latte vegetale (mandorla, soia, avena) e burro vegetale o olio di semi al posto del burro. Se necessario, aggiungi un pizzico di limone per bilanciare i sapori. Per una versione senza burro, sostituisci con olio di semi o olio di olio di cocco. Verifica che lievito e altri ingredienti non contengano tracce di lattosio se sei estremamente sensibile.

Come si verifica se è cotta?

Infilza uno stecchino al centro: se esce asciutto o con poche molliche attaccate, è cotta. Se esce bagnato, prosegui la cottura di 3-5 minuti e controlla di nuovo. Evita di aprire spesso il forno durante i primi 25-30 minuti.

Consigli per una torta più soffice?

Spesso, la chiave è montare bene le uova con lo zucchero fino a ottenere volume e colore chiaro, incorporare la farina setacciata delicatamente per non smontare l’aria, utilizzare latte a temperatura ambiente e burro ben raffreddato ma non solidificato, e non aprire il forno nelle prime fasi della cottura.

Introduction / Hook

Picture a sunlit Sicilian afternoon: the air is perfumed with sweet citrus, the sea sighs against the rocks, and a cake sits on the table, gleaming with a pale orange glow. Torta siciliana all’arancia is more than a dessert; it is a luminous embrace of the island’s glorious citrus heritage. Each bite carries the brightness of Valencia and Seville-born oranges, the whisper of almond and olive oil, and a tenderness that feels almost shy at first, then increasingly confident as the flavors bloom on your palate. This cake is a memory you can taste—the kind of sweet that lingers in your senses, tugging you back to a warm kitchen, to breezy terraces, to laughter around a table with friends and family. It’s a celebration of simplicity elevated by citrus sunshine, and it invites you to slow down, savor the moment, and let the aroma carry you to a sun-drenched Sicilian afternoon, even if you’re miles away from the island itself.

What makes Torta all’arancia especially magnetic is its balance: a tender crumb that remains moist and ethereal, a crisp edge that crackles softly when cut, and a fragrance that feels almost like a spell of summer. The orange isn’t merely a flavor; it’s a mood. It’s the memory of morning markets stacked with crates of bright fruit, the gentle bitterness that awakens the sweetness, and the way citrus oils cling to the air long after the last crumb has vanished. This cake doesn’t shout its presence; it speaks in warm, sun-kissed whispers. It’s the kind of dessert that pairs beautifully with a cup of coffee in the morning, a glass of dessert wine after dinner, or a stolen slice as the late-afternoon light drapes the room in gold. If you crave a dessert that feels vibrant yet comforting—sophisticated enough for guests, friendly enough for a weeknight—this is your go-to.

Beyond its irresistible taste, the cake embodies a philosophy of Sicilian baking: let the fruit do the talking, rely on high-quality pantry elements, and treat the oven as a trusted ally. There is elegance in restraint here—the citrus provides color and character, the fat source (often olive oil) provides moisture and depth, and every bite leaves a gentle, lingering brightness that invites another slice. The result is not merely a treat but a small ceremony: the moment you slice into the cake, the room fills with a clean citrus fragrance, a quiet cheer that says, “Slow down, enjoy this, and share it.”

The Story Behind the Dish

Sicily has long been a crossroads of cultures, weathered by the interference and influence of many peoples who traversed the Mediterranean. The island’s citrus trees—oranges, lemons, bergamots—have thrived for centuries in the sun-drenched soils, their fragrant oils perfuming the air and coloring the regional desserts with a distinctive brightness. The practice of baking with citrus in Sicily is not merely a culinary gimmick; it is a reflection of a landscape where fruit and sea mingle, where pastry tradition embraces fruit-forward recipes, and where sweetness is often balanced by a touch of tang and a whisper of oiliness that keeps things moist and honest.

The exact origins of Torta all’arancia are as layered as the cake itself. In many Sicilian kitchens, citrus-based desserts emerged as a practical use of seasonal abundance—juiced and zested fruits transformed into cakes, syrups, and delicate pastries during the harvest season and into celebratory offerings during local feasts. Over centuries, the recipe absorbed influences from Arab, Greek, and Spanish culinary currents that crisscrossed the island, each leaving its own nuance: almond textures from the east, citrus-forward brightness from Mediterranean trade routes, and a love for olive oil as a panacea that keeps the crumb tender. The result is a dessert that feels both local and cosmopolitan—a cake that could be served after a simple family dinner or at a grand festa with equal grace.

In the modern kitchen, Torta all’arancia has evolved into a beloved staple that travels well beyond Sicily’s borders. Home bakers around the world discover that a few simple ingredients, treated with respect and patience, can produce a cake that tastes of sunshine, of quiet afternoons, and of shared moments. The citrus’s aromatic oils—released by zest and a gentle squeeze of juice—work in harmony with a smooth, tender crumb that responds beautifully to warm spices, a hint of vanilla, or a nutty accent if you wish to add it on top or within the batter. The dish’s storytelling is less about a fixed, rigid recipe and more about a mood: a citrus-forward, comforting, everyday delight that can be dressed up for a celebration or kept pared back for a cozy family supper. Its history mirrors Sicily itself—a mosaic of land and sea, of tradition and innovation, of the unassuming cake that becomes a memory you want to recreate time after time.

Why You’ll Love This Recipe

  • Bright, uplifting citrus flavor loops through every bite, lifting the palate with natural sweetness and a touch of tartness.
  • The crumb remains exceptionally moist and tender, thanks to the citrus juice and the oil-based batter, which yields a cake that stays fresh for days.
  • Simple, pantry-friendly approach: you don’t need elaborate equipment or hard-to-find ingredients to achieve a bakery-like finish at home.
  • Versatile for multiple occasions—weeknights, special occasions, brunches, and summer picnics—because citrus is universally celebratory and gently sophisticated.
  • Perfect for make-ahead planning: this cake often tastes even better the next day as the flavors settle and deepen.
  • Pairs beautifully with a range of accompaniments, from coffee and tea to light liqueurs or a glass of dessert wine, making it a flexible choice for different menus.
  • Adaptable to various dietary preferences with thoughtful substitutions or variations, without compromising the signature citrus character.
  • A charming introduction to Sicilian baking for curious cooks: it is approachable, comforting, and deeply rooted in a sense of place.

Flavor Profile & Texture

The flavor of Torta all’arancia is a study in citrus brightness tempered by a mellow, comforting backbone. The orange contributes a lively fragrance—think zest that awakens the senses and a gentle sweetness that lingers without cloying. The cake’s crumb is light and springy, yet substantial enough to hold a forkful of joy without collapsing. The fat, often rendered olive oil in traditional preparations, lends a subtle fruity note and a moist, almost velvet-like mouthfeel that sticks with you rather than drying out. Depending on the optional add-ins you might encounter in traditional or modern versions—such as a whisper of vanilla, a touch of almond, or a delicate glaze—the citrus once again takes center stage, while the added elements harmonize rather than overwhelm.

In the mouth, you might notice a delicate balance of sweet and mildly tart flavors. The orange’s natural acidity helps cut through the richness of the cake, creating a round flavor profile that is neither too sharp nor too flat. When a glaze or dusting of sugar is present, it provides a gentle gloss and a final gleam that makes the surface look almost sunlit. The texture often invites a gentle, satisfying chew with a soft crumb that collapses beautifully at the edges, giving way to a moist interior that continues to release citrus oils on the palate with lingering warmth. The finish is clean, with a hint of zest’s bitter notes if zest is used generously, which helps to keep the sweetness bright rather than heavy.

This cake can subtly reflect regional preferences. Some kitchens may invite a whisper of almond, nodding to Sicily’s almond traditions; others may welcome a drop of vanilla to mimic a more familiar Western dessert profile. In all cases, the dominant impression remains the same: a cake that tastes like sun, like a citrus grove after a gentle rain, and like a shared moment that makes a simple slice feel meaningful.

Occasions & Pairings

Where does Torta all’arancia shine best? In many settings, the answer is everywhere. It is equally comfortable as a quiet breakfast companion, a mid-afternoon treat, or a refined finish to a festive dinner. Here are some ideas for presenting this citrus beauty in various atmospheres:

  • Weeknights: serve with a cup of coffee or tea for a comforting end to the day. The citrus lifts the mood without overpowering the senses.
  • Brunches and gatherings: pair with a light yogurt or a dollop of fresh cream, allowing the citrus to tilt the balance toward brightness while the toppings add a touch of indulgence.
  • Holidays and celebrations: layer with a light citrus glaze or dust with powdered sugar and a sprinkle of bright zest to create a festive, glossy finish that photographs beautifully.
  • Outdoor occasions: a slice alongside a chilled sparkling beverage or a crisp white wine can feel effortlessly elegant and refreshing on a warm day.

Suggested pairings vary from the casual to the festive. For beverages, a strong espresso or a bold black tea offers a pleasing counterpoint to the cake’s sweetness. If you want something more indulgent, a small glass of dessert wine or Moscato could heighten the citrus’s perfume and provide a complementary sweetness. For accompaniments beyond drinks, consider a light ricotta or mascarpone dollop, a scatter of chopped pistachios for a crunchy contrast, or a spoonful of tangy fresh fruit to cut through the cake’s richness. You can also balance with a contrasting texture, such as a delicate, creamy topping or a faintly salty finish that makes the citrus sing even louder.

Tips, Variations & Substitutions

Vegan & Dairy-Free Options

You can enjoy this cake with plant-based fats and binders without losing its signature citrus charm. When making a vegan version, consider using a neutral-tavored oil as the base and adjusting the liquid balance to maintain moisture. You can also explore vegan-friendly binders or emulsifiers that preserve tenderness while keeping the texture light.

Gluten-Free & Alternative Flours

Gluten-free bakers can achieve a tender crumb by selecting reputable gluten-free flours or a blend designed for cakes. The key is to maintain moisture and structure without overworking the batter. Some blends incorporate ground nuts or rice flour to mimic the delicate crumb of a wheat-based cake while preserving the aroma of orange and the overall soft texture.

Flavor Variations

  • Almond accents: a subtle almond note can complement the orange beautifully, often achieved by a modest amount of ground almonds or almond extract in compatible recipes.
  • Vanilla or zest combinations: a touch of vanilla can deepen sweetness, while additional citrus zest (like lemon or lime) can broaden the aroma profile and introduce a playful tang.
  • Herbal twists: a hint of fresh thyme or rosemary can surprise the palate with an aromatic counterpoint to the citrus, especially when served with a light drizzle of citrus honey.

Regional Twists

In Sicily and beyond, bakers may tailor the cake with local ingredients or regional techniques. Some versions might finish with a delicate glaze that intensifies the citrus sheen, while others tuck a thin layer of fruit preserves between layers or on top for a glossy fruit note. A light dusting of powdered sugar and a few citrus zest ribbons on the surface can elevate presentation while respecting the cake’s restrained elegance.

Storage & Make-Ahead Ideas

The beauty of this cake lies in its ability to mature gracefully. It often benefits from a repose of a few hours or overnight, during which the citrus oils mingle with the moist crumb, producing an even more pronounced aroma and a richer, cohesive texture. Here are practical tips to keep your Torta all’arancia at its best:

  • Room-temperature freshness: in a cool, dry place or under a light cover, the cake can stay fresh for a couple of days, with flavor deepening as the days pass. Avoid exposing it to heat or direct sunlight, which can dry the crumb or cause the glaze to melt.
  • Refrigeration: if you prefer longer storage, wrap slices or the whole cake tightly and refrigerate. Bring slices back to room temperature for maximum aroma and tenderness before serving.
  • Make-ahead: bake in advance and freeze in airtight containers or wrapped slices. Thaw overnight in the refrigerator or at room temperature, then refresh with a gentle warm-up to revive the citrus scent.
  • Glaze and toppings: if you plan to glaze, consider applying it only when ready to serve, or keep the glaze separate until serving to preserve a glossy finish and a bright, fresh citrus note.

Fun Facts & Trivia (Optional)

– The phrase all’arancia literally translates to “in orange,” a poetic nod to how central the citrus is to the cake’s identity. It’s a reminder that fruits can be the star in a dessert, not just a supplement.

– Sicily’s citrus groves are among the oldest in the Mediterranean, with varieties that have thrived through centuries of trade, conquest, and cultural exchange. The island’s climate, with long, sun-drenched days and mild winters, makes it a natural haven for oranges and lemons, elevating simple baked goods into expressions of terroir.

– Citrus in Italian desserts has a long tradition of balancing sweetness with brightness. The oils released from zest add a perfume that lingers after the last bite, a sensory signature that distinguishes many regional Italian cakes from their counterparts around the world.

– The use of olive oil in cakes is a hallmark of Mediterranean baking. It contributes moisture, a distinctive depth, and a subtle fruitiness that harmonizes particularly well with citrus. This combination—orange and olive oil—is a classic pairing that showcases how modest ingredients can produce extraordinary flavor with patience and care.

– In some Sicilian households, orange blossom water or a tiny pinch of spice may be added to the batter or brushing for an extra layer of aromatic perfume. These delicate touches are a reminder that small nuances can elevate a dessert from good to memorable.

As you prepare to share Torta siciliana all’arancia, you’re inviting more than a dessert—you’re inviting a moment of storytelling, a taste of the Mediterranean climate, and a gentle celebration of sweetness, sunshine, and togetherness. Whether you’re recreating a piece of Sicily at home or simply seeking a citrus-forward cake that feels comforting and refined, this recipe offers a path to warmth, generosity, and a sense of place in every slice.

Closing Thoughts

In the end, Torta siciliana all’arancia invites you to trust the fruit, trust the oven, and trust your senses. The cake’s charm lies not in complexity but in the clarity of its flavors and the grace of its texture. It is the kind of recipe that rewards patient preparation and thoughtful presentation: a slice shared with a friend, a moment of quiet reflection with a cup of coffee, and the possibility of introducing someone to a taste of Sicily they won’t soon forget. When you lift the first forkful to your lips, you’ll understand why citrus-bathed desserts have long held a treasured place in Italian baking—and why this particular Torta, with its sunlit aroma and tender crumb, remains a beloved standard on many Sicilian tables and beyond.

Ingredients

Torta siciliana all’arancia

Torta Base

  • 250 g all-purpose flour (sifted)
    → The flour provides the cake’s structure and bulk. Sifting ensures an even distribution with the baking powder for a light, tender crumb. For a gluten-free version, substitute with a 1:1 gluten-free flour blend and add ¼ teaspoon xanthan gum per 100 g flour to mimic elasticity.
  • 150 g granulated sugar
    → Sugar sweetens the batter and helps with browning and moisture retention. Use standard granulated sugar for a clean sweetness; you can substitute with superfine sugar for quicker dissolution or slightly reduce if you prefer a milder sweetness.
  • 4 large eggs, at room temperature
    → Eggs provide binding, structure, and moisture. Room-temperature eggs emulsify better with oil and fruit juice, giving a smoother batter. Beat the eggs with sugar until pale and thick before combining with wet ingredients for best volume.
  • 100 ml extra-virgin olive oil
    → Olive oil yields a moist, tender crumb and a classic Sicilian flavor. Choose a light, mild EVOO so the citrus shines; a strong-flavored oil can overpower the orange notes. If you must, you can use a neutral oil, but the traditional character may be lost.
  • 200 ml freshly squeezed orange juice
    → The orange juice acts as a citrus-forward liquid to hydrate the batter and contribute bright flavor. Use fresh juice for best aroma; if the juice is very tart, a small additional teaspoon of sugar can balance the acidity.
  • Zest of 2 oranges, finely grated
    → The zest releases essential citrus oils that intensify aroma and flavor. Avoid the white pith, which is bitter, and grate finely with a microplane to distribute evenly through the batter.
  • 1 1/2 tsp baking powder (about 6 g)
    → Leavening agent that helps the cake rise and stay moist. Sift with the flour to ensure even dispersion; use fresh baking powder for reliable lift.
  • 1/4 tsp salt
    → Enhances overall flavor and balances sweetness and citrus. A small amount goes a long way; do not omit if possible.
  • 1 tsp vanilla extract (optional)
    → Adds depth and a touch of warmth to the citrus flavor. If using, add to the wet ingredients with the orange juice; for a more almond-forward profile, substitute with 1/2 tsp almond extract.
  • 2 tbsp plain yogurt or ricotta (optional)
    → Adds extra moisture and tenderness to the crumb; yogurt helps emulsify the batter and keep it soft. If using yogurt, whisk smoothly before folding into the batter; if using ricotta, fold in gently to avoid dense pockets.

Optional Add-ins

  • 60 g chopped almonds (toasted)
    → Introduce a pleasant crunch and a subtle nutty note that complements citrus. Toast almonds in a dry skillet over medium heat until fragrant, then chop roughly for even distribution.
  • 50 g candied orange peel (diced)
    → Provides bursts of sweet, chewy citrus; balance the sweetness by rinsing briefly in warm water to remove excess syrup if very sweet, then pat dry before adding to the batter.
  • 2–3 tbsp orange liqueur (optional)
    → Adds depth and a sophisticated aroma; stir into the wet ingredients or brush a little over the cooled cake. Omit for a non-alcohol version or for serving children.

Glaze (Topping)

  • 100 g powdered sugar
    → Forms a simple glaze that seals in a subtle citrus sweetness. Whisk with orange juice until smooth; adjust the thickness by adding more sugar for a thicker glaze or more juice for a thinner glaze.
  • 2–3 tbsp orange juice
    → Liquid component for the glaze; use freshly squeezed juice from the oranges used in the batter for cohesive flavor. Add gradually to reach desired consistency.
  • Zest of 1/2 orange (for garnish, optional)
    → Finishing touch that adds a bright aroma and a pop of color after glazing. Sprinkle over the glaze once set for extra fragrance.

Instructions

  • Preheat your oven to 350°F (175°C) and grease a 23 cm (9 inch) round cake pan and line the bottom with parchment paper to ensure the cake releases cleanly; this prevents sticking and helps maintain a smooth, even surface for glazing later.
    → A properly preheated oven promotes even rising, and parchment with greasing guarantees the cake can be removed intact without tearing.
  • Zest the oranges with a microplane until you have about 2 teaspoons of zest, taking care to avoid the white pith which can impart bitterness; finely grate so the oils distribute evenly through the batter for pronounced citrus aroma.
    → Finely grated zest releases essential oils that intensify citrus flavor throughout the cake, and avoiding the pith preserves sweetness and balance.
  • Juice the oranges to yield about 200 ml of fresh juice, straining if you prefer a smoother batter; use the freshly squeezed juice to keep the citrus flavor bright and authentic.
    → Fresh juice provides peak acidity and aroma, which helps balance sweetness and supports proper leavening with the baking powder.
  • Sift the 250 g flour, 1 1/2 tsp (about 6 g) baking powder, and 1/4 tsp salt together in a medium bowl to ensure even leavening and a lump-free batter; sifting also aerates the flour for a lighter crumb.
    → Sifting distributes the leavener uniformly and prevents dense pockets that could hamper rise and texture.
  • In a large bowl, beat 4 eggs with 150 g granulated sugar on medium-high speed until the mixture is pale, thick, and ribbons when the whisk is lifted, which typically takes 4–6 minutes; this emulsification creates volume and a tender crumb.
    → Thorough aeration traps air that expands in the oven, giving the cake a light, moist interior when baked.
  • With the mixer on a low speed, slowly drizzle 100 ml extra-virgin olive oil into the egg-sugar emulsion, whisking continuously to form a smooth, glossy emulsion that prevents separation and yields a moist crumb.
    → Emulsifying oil into the eggs preserves structure and moisture, while a slow stream prevents the mixture from breaking.
  • Whisk in 200 ml orange juice and the orange zest, then add 1 tsp vanilla extract (optional) to integrate citrus aroma; mix on low just until combined to avoid deflating the batter.
    → Gentle blending preserves the batter’s air and ensures the citrus flavor is evenly distributed without creating dense pockets.
  • If using yogurt or ricotta, whisk in 2 tbsp plain yogurt or 1–2 tbsp ricotta until smooth and fully incorporated; this adds moisture and tenderness to the crumb.
    → Yogurt emulsifies with the oil and eggs and helps keep the cake soft and moist during storage.
  • Fold the dry ingredients into the wet mixture in 2–3 additions using a spatula or on low speed until just combined; stop as soon as there is no visible streak, avoiding over-mixing which can toughen the crumb.
    → Gentle incorporation preserves the cake’s tenderness and prevents gluten overdevelopment.
  • If using add-ins, fold in 60 g toasted chopped almonds and 50 g diced candied orange peel evenly into the batter to distribute texture and bursts of flavor without sinking. 2–3 tbsp orange liqueur may be stirred in with the wet ingredients if desired.
    → Toasted almonds add crunch and aroma; candied peel adds citrusy sweetness; liqueur deepens aroma without overpowering bright citrus.
  • Scrape the batter into the prepared pan and smooth the surface with a spatula to ensure even height for uniform baking; tap the pan lightly on the counter to release any trapped air.
    → A level surface promotes even rise and consistent baking across the cake.
  • Bake in the center of the oven at 350°F (175°C) for about 35–45 minutes, or until a toothpick inserted into the center comes out with only a few moist crumbs; if the top browns too quickly, tent with foil and continue baking.
    → Proper bake time yields a moist, tender crumb and prevents undercooking in the center while avoiding a dry crust.
  • Remove the cake from the oven and let it rest in the pan for 10–15 minutes on a rack, then invert onto a wire rack to cool completely before glazing; this helps set the structure so it doesn’t crumble when unmolding.
    → Gentle cooling prevents steam from collapsing the cake and ensures a smooth glaze adhesion.
  • Prepare the glaze by whisking 100 g powdered sugar with 2–3 tbsp orange juice until smooth and glossy, adjusting with more sugar for thickness or more juice for a pourable glaze; the glaze should just coat the back of a spoon.
    → A balanced glaze complements the citrus flavors without overpowering the cake, and proper thickness ensures a neat finish.
  • When the cake is completely cool, drizzle or brush the glaze over the top and sides in a slow, even motion, allowing it to set before slicing; garnish with zest of 1/2 orange if desired for extra fragrance and color.
    → Letting the glaze set ensures a clean slice and a polished presentation, while orange zest adds a final aromatic lift.

Notes

These torta siciliana all’arancia is a citrus-forward cake built around fresh orange juice and zest, yielding a moist crumb with fragrant, sunny notes. To achieve volume and a tender texture, beat eggs with sugar until pale and thick, then whisk in orange juice, zest and olive oil before folding in the sifted flour with baking powder and salt. Use the best flavor by choosing a light extra-virgin olive oil and freshly squeezed juice.

You can customize it by adding toasted almonds (60 g), diced candied orange peel (50 g), or a hint of orange liqueur (2–3 tbsp). Toast almonds in a dry skillet until fragrant, then chop roughly for even distribution; if using candied peel, rinse briefly to remove excess syrup and pat dry; add liqueur to the wet ingredients or brush on cooled cake.

Glaze: whisk 100 g powdered sugar with 2–3 tbsp orange juice to form a smooth glaze; adjust thickness by adding more sugar or juice. A final zest of half an orange makes a bright garnish after glazing.

Storage and serving: the cake keeps well covered at room temperature for several days and slices can be frozen wrapped tightly for longer storage. Serve plain, or with a dollop of whipped cream, a spoonful of ricotta, or a light dusting of additional orange zest for extra brightness.

Notes on preparation and substitutions: For a gluten-free version, substitute the 250 g all-purpose flour with a 1:1 gluten-free flour blend and add ¼ teaspoon xanthan gum per 100 g flour to mimic elasticity. Use fresh-brewed orange juice and grate the zest finely to maximize aroma; avoid the white pith; sift dry ingredients to ensure an even rise. If you prefer a milder aroma, you can reduce sugar slightly or omit the optional liqueur. Always make sure your baking powder is fresh for reliable lift.

Tips

Consigli utili per la Torta Siciliana all’Arancia

  • Uova e ingredienti a temperatura ambiente: togli le uova dal frigorifero almeno 30 minuti prima. Per accelerare, immergile in acqua tiepida 5–10 minuti.
  • Farina e lievito: setaccia insieme farina e lievito in polvere per distribuire uniformemente l’agente lievitante e ottenere una mollica leggera. Se prepari una versione senza glutine, sostituisci con una miscela 1:1 e aggiungi ¼ cucchiaino di xantano per 100 g di farina.
  • Olio extravergine d’oliva: usa un EVOO delicato o leggero in modo che l’aroma d’arancia resti al centro. Un olio dal gusto troppo intenso può coprire la nota agrumata.
  • Succhi e scorze d’arancia: spremi succo fresco delle arance e grattugia la scorza con una microplane, evitando la parte bianca (albedo). Per intensificare l’aroma, lascia riposare la scorza grattugiata con un pizzico di zucchero prima di aggiungerla all’impasto.
  • Lievito in polvere: usa 1 1/2 cucchiaini (circa 6 g) e amalgamalo con la farina. Controlla la validità della lievitazione se la confezione è vecchia.
  • Sale: 1/4 cucchiaino, utile per bilanciare la dolcezza e valorizzare l’aroma. Se usi burro salato, riduci o ometti il sale.
  • Vaniglia: opzionale. Se usi l’estratto di vaniglia, aggiungilo al succo d’arancia; in alternativa, per una nota di mandorla, usa 1/2 cucchiaino di estratto di mandorla.
  • Yogurt o ricotta: opzionali. Lo yogurt aggiunge umidità e facilita l’emulsione; se usi ricotta, incorporala delicatamente per evitare grumi. Se la ricotta è molto liquida, scolala leggermente.
  • Aggiunte opzionali: mandorle tostate (60 g) per croccantezza, scorza candita d’arancia (50 g) per esplosioni di aroma, e 2–3 cucchiai di liquore all’arancia per profondità di gusto. Se prepari per bambini, ometti l’alcol o sostituisci con succo d’arancia extra.
  • Glassa: mescola 100 g di zucchero a velo con 2–3 cucchiai di succo d’arancia. Se la glassa risulta troppo densa, aggiungi poco liquido; se troppo liquida, aggiungi zucchero a velo. Stendi sulla torta raffreddata.
  • Finitura: spolvera scorza d’arancia grattugiata (mezzo arancia) per un tocco di colore e profumo extra.
  • Cottura e raffreddamento: preriscalda il forno a 180°C. Cuoci finché la superficie è dorata e uno stecchino inserito al centro esce pulito o con poche briciole. Lascia raffreddare completamente prima di glassare per far rapprendere la glassa.
  • Conservazione: conserva la torta coperta a temperatura ambiente per 2–3 giorni; in frigorifero si mantiene 4–5 giorni. Se è presente la glassa, lasciare a temperatura ambiente prima di servire per 15–20 minuti per risvegliare l’aroma.

FAQ

Che cos’è la Torta siciliana all’arancia?

È un dolce soffice e profumato tipico della Sicilia, realizzato con scorza e succo d’arancia. Può essere glassata o semplice, ideale per colazione o merenda.

Quali ingredienti servono?

Ingredienti base per una teglia da 24 cm: 200 g zucchero, 3 uova, 120 g burro fuso o 120 ml olio neutro, 250 g farina, 1 bustina di lievito per dolci, scorza grattugiata di 2 arance, succo di 1 arancia (circa 120 ml), 50–80 ml latte, pizzico di sale. Opzioni: olio al posto del burro, latte vegetale.

Posso sostituire il burro con olio?

Sì. Usare circa 120 ml di olio neutro o extravergine di oliva leggero al posto del burro. Il sapore cambia leggermente; l’impasto resta morbido e umido.

Come si presenta l’impasto?

In una ciotola si montano le uova con lo zucchero, finché diventano chiare e spumose. Si aggiunge burro fuso o olio, scorza d’arancia, succo, poi farina setacciata con lievito e infine latte q.b. per ottenere una consistenza morbida ma non liquida.

A quale temperatura e quanto tempo si cuoce?

Cuocere in forno statico preriscaldato a 170–180°C per circa 30–40 minuti. Fare la prova stecchino: se esce asciutto, è pronta. Coprire con carta stagnola se la superficie scurisce troppo.

Come si prepara la glassa all’arancia?

Mescolare zucchero a velo con succo d’arancia quanto basta per ottenere una consistenza liscia e fluida. Spennellare sulla torta tiepida o fredda per una finitura lucida.

Come si conserva?

Conservare a temperatura ambiente in un contenitore ermetico per 2–3 giorni. Può durare fino a 4–5 giorni in frigorifero; è consigliabile chiudere bene per evitare che assorba odori. Può anche essere congelata una fetta o una torta intera porzionata.

È possibile rendere la torta senza glutine?

Sì. Sostituire la farina con una miscela per dolci senza glutine e aggiungere una piccola quantità di amido di mais o tapioca per migliorare la consistenza. Controllare che lievito sia senza glutine.

Quali varianti si possono provare?

Varianti comuni: aggiungere gocce di cioccolato all’impasto, incorporare mandorle o nocciole tritate, usare scorza candita, o glassa al limone. Per un tocco ancora più siciliano, si può aggiungere una punta di cannella o di miele all’impasto.

Quali idee di servizio o abbinamenti?

Ottima con una tazza di caffè o tè, accompagnata da una crema di mascarpone o yogurt, o servita con gelato alla vaniglia. Una spolverata leggera di scorza d’arancia fresca completa il piatto.

Quali utensili sono utili per prepararla?

Teglia da 24 cm imburrata e infarinata, ciotola capiente, fruste elettriche, spatola, setaccio per la farina, grattugia per scorza e spremi arance, stuzzicadenti o stecchino per la prova cottura.

Introduction / Hook

Imagine autumn sunlight pouring through a kitchen window and landing in the warm, orange glow of a bubbling pot. Zuppa di zucca con zenzero is the kind of soup that invites you to slow down, take a deep breath, and let the evening melt around you. It’s a bowl that feels both familiar and wonderfully unexpected—the familiar comfort of roasted squash, the bright zing of ginger, and a silky texture that glides across the tongue. This isn’t just a soup; it’s a small celebration of seasonality, where simple ingredients are treated with care and coaxed into something that tastes like a hug from the inside out. The aroma alone can transport you: pumpkin’s sweet earthiness rising with the citrusy warmth of ginger, a whisper of olive oil, and a hint of just-picked herbs that promises a comforting finish. Whether you’re cooking for a quiet weeknight, a cozy family meal, or a small gathering of friends, this dish offers both ease and elegance in every spoonful.

What makes this soup especially enchanting is how it captures contrast in a single bowl. The sweetness of roasted pumpkin balances the peppery brightness of ginger, while the creamy body keeps things luxurious without feeling heavy. It’s the kind of recipe that rewards low-effort techniques—roasting, simmering, blending—yet delivers big personality. As the steam rises, you’ll notice a fragrance that feels timeless yet novel, rustic and refined at the same time. It’s a dish that invites conversation as much as it invites tasting, turning a simple supper into a small ritual of warmth, gratitude, and delicious curiosity about how two ingredients from different corners of the culinary world can harmonize so beautifully.

In many kitchens, soup is a bridge between seasons, a way to coax the last sweetness from summer’s harvest while eagerly anticipating the comfort of winter. This Zuppa di zucca con zenzero embraces that bridge. It celebrates pumpkins as autumn’s gift—soft, fragrant, and endlessly versatile—while welcoming the lively spark of zenzero to remind us that cooking can be a voyage, not a routine. The result is a bowl that looks as inviting as a sunlit squash patch and tastes as memorable as a warm, lingering conversation after a long day. It’s the kind of recipe you’ll reach for again and again, not because it’s complicated, but because it’s reliably comforting and delightfully adaptable to your mood, your pantry, and your guests.

The Story Behind the Dish

The story of Zuppa di zucca con zenzero begins in the quiet rhythm of autumn markets and memory-filled kitchens. Picture a sun-warmed hillside in Italy, where pumpkins spill from crates in shades of tangerine and amber, and the air is perfumed with the scent of roasting squash. It was here that a simple idea took shape: how could a classic Italian pumpkin soup be brightened with a spice that travels far from home? A traveler’s market stall, a jar of fresh ginger, and a patient simmer transformed a humble bowl into something that felt both rooted and adventurous. The ginger wasn’t traditional in every Italian pantry, but in this dish it acts as a spark—an unexpected note that lifts the sweetness of the pumpkin and lends a lively, lingering finish.

There’s a personal thread as well. In a small family kitchen, a grandmother would gently coax flavors from simple ingredients, turning a modest soup into a center of conversation and comfort. Over time, the recipe evolved as households do—little adjustments here and there, a swap of cream for coconut milk to suit dietary needs, a touch more garlic for grounding, a splash of cultural curiosity. The result is a soup that honors tradition while inviting curiosity: a dish that could sit at a Tuscan table one night and at a cosmopolitan dining room the next. The name itself—Zuppa di zucca con zenzero—reads like a passport stamp, telling you that pumpkin is the canvas and ginger is the spark, and together they tell a story of hospitality, memory, and the joy of sharing a well-prepared bowl with people you love.

Food has a way of traveling through families and communities, gathering flavors as it goes. This soup is a small ode to that journey: a culinary hello from autumn to winter, from a rustic kitchen to a modern home, from local markets to distant spices. It’s a reminder that great comfort food doesn’t have to be heavy, and that warmth can be found not only in a pot’s steam but in the stories we tell while we share it. Each pot you make becomes a page in this ongoing tale—a tale of how two ingredients, when treated with patience and a little curiosity, can become something larger than the sum of their parts. That is the heart of this dish: a simple soup that carries memories forward, while inviting fresh experiences at every serving.

Why You’ll Love This Recipe

  • Quick to prepare: hands-on time is short, and the pot does most of the work, making it ideal for busy weeknights.
  • Silky, comforting texture: a velvety puree that feels luxurious without heaviness, perfect for cooling evenings or cozy gatherings.
  • Warm, balanced flavor: pumpkin’s natural sweetness is elevated by the bright bite of ginger, producing a harmonious, multidimensional taste.
  • Versatile for many diets: naturally dairy-free when finished with a splash of olive oil or plant-based milk; easily adapted to vegan, gluten-free, or nut-free needs with simple substitutions.
  • Seasonal celebration: a dish that honors autumn produce and can be customized with seasonal herbs and garnishes for a fresh twist every time.
  • Comforting with elegance: the soup’s simple base makes it suitable for casual family dinners as well as more polished, intimate occasions.
  • Make-ahead friendly: the flavors deepen with a little rest, and it reheats beautifully, making it a superb option for meal prep or entertaining leftovers.

Flavor Profile & Texture

At first glance, Zuppa di zucca con zenzero presents a warm, sunny hue that hints at its comforting nature. When you take a first spoonful, the silky mouthfeel glides smoothly across the palate, like a finely brushed silk scarf wrapping around the senses. The pumpkin provides a gentle sweetness and a rustic earthiness that speaks of harvests and sunsets, yet the ginger slices through with a clean, peppery brightness. This contrast—creamy sweetness tempered by a lively zing—defines the soup’s character and makes each bite feel balanced rather than one-note.

The texture, intentionally smooth, is offset by a soft body that carries a whisper of fiber from the squash, ensuring the soup never feels flat. If you choose to finish with a drizzle of olive oil, a swirl of coconut milk, or a crumb of toasted seeds, you add a second layer of mouthfeel—an opulent sheen, a touch of creaminess, and a satisfying crunch that punctuates the creamy base. Aromatics—perhaps a hint of garlic, a fall-and-herbal note, and a light heat from the ginger—linger on the palate, inviting you to sip again and again. In the aroma department, the soup performs like a warm, inviting kitchen: roasted pumpkin’s caramelized sugars mingling with ginger’s citrusy sharpness and a faint, herbaceous whisper that hints at what’s to come in the next bite.

Texture-wise, expect a comforting quiver of silk with pockets of depth where the squash’s natural oils have concentrated during roasting. The finish is clean and refreshing, with the ginger leaving a friendly glow rather than a harsh bite. It’s the kind of flavor profile that feels timeless, yet it responds beautifully to small adjustments—adding a pinch of cinnamon for a holiday nuance, a squeeze of lemon zest for brightness, or a spoonful of coconut milk for a tropical creaminess. The tasting journey is gentle but expressive, inviting you to reflect on the season’s abundance while savoring a dish that embodies hospitality and a touch of culinary wanderlust.

Occasions & Pairings

This soup shines in many settings, making it a versatile favorite across seasons and occasions. It’s ideal for a casual weeknight supper when you want something nourishing and satisfying with minimal effort. It also has a quietly elegant quality that suits a slow-dawn dinner party or a small autumn gathering where guests linger over conversation and a steaming bowl.

As for pairings, think of textures and contrasts that complement the soup without overpowering it. A crusty loaf or rustic bread for dipping and sopping is a natural partner, as is a simple green salad with a bright vinaigrette to provide a light counterpoint. For drinks, a crisp white wine with gentle fruit notes—such as a Pinot Grigio or Verdicchio—works nicely, as does a light sparkling wine for a celebratory touch. If you prefer non-alcoholic options, a citrusy iced tea or a warm chai-style beverage can echo the spice and lift the flavors.

For holiday menus, this soup acts as a pedestal starter that doesn’t overshadow the main courses. It pairs well with roasted vegetables, a delicate pasta dish, or a roasted poultry centerpiece. If you’re serving it at a casual lunch, consider adding a dollop of yogurt or a swirl of olive oil to introduce a creamy contrast that remains light. In family settings, it’s a crowd-pleaser that can be customized easily according to dietary needs or the preferences of young eaters, without losing its character or heartiness.

Tips, Variations & Substitutions

  • Make it vegan or dairy-free: rely on olive oil and a plant-based milk or coconut milk to achieve a creamy texture without dairy.
  • Spice it up or dial it back: adjust the amount of fresh ginger to control heat; a pinch of cinnamon or nutmeg adds a seasonal warmth, while a splash of lime juice brightens the finish.
  • Regional twists: try a touch of rosemary or sage for an Italian-herbal note, or introduce a Southeast Asian twist with a splash of coconut milk and a squeeze of lime after cooking.
  • Texture variations: leave a portion of the pumpkin slightly chunkier for contrast, then blend the rest to a smoother purée for a two-tone texture.
  • Stock and flavor base: use vegetable stock for a lighter, cleaner soup, or chicken stock for a richer, deeper body. If you’re avoiding gluten, ensure any stock used is labeled gluten-free.
  • Garnishes and finish: finish with a drizzle of high-quality olive oil, a dollop of dairy or plant-based yogurt, toasted seeds, or a pinch of flaky sea salt to intensify flavors right before serving.
  • Make it ahead: the flavors deepen overnight. Reheat gently on the stove or in a microwave, adding a splash of stock or milk if the soup thickens too much.
  • Seasonality note: depending on the sweetness of the pumpkin, you may want to adjust salt or a touch of acid (lemon/lime) to balance the palate.

Storage & Make-Ahead Ideas

Leftovers store beautifully and often taste even better the next day as the flavors have more time to mingle. Refrigerate leftovers in an airtight container for up to 3–4 days. Reheat gently over low to medium heat, stirring occasionally, and adjust the consistency with a small amount of stock, water, or milk if needed to bring back the silky texture. If you’d like to freeze the soup, portion it into freezer-safe containers or bags for up to 2–3 months. Thaw overnight in the refrigerator and reheat slowly, adding liquid as necessary to reach the desired consistency. When freezing, avoid adding delicate dairy toppings until after thawing and reheating to preserve texture and flavor integrity.

For make-ahead planning, consider roasting the pumpkin in advance and storing it in the fridge until you’re ready to simmer. This can shave minutes off the day you plan to serve the soup, making it a friendly option for entertaining or meal-prep Sundays. If you’re entertaining, you can prepare the base ahead, reheat gently, and finish with a fresh finish—oil, herbs, or a quick dairy-free cream—to present a restaurant-quality experience with minimal last-minute effort.

Fun Facts & Trivia (Optional)

• Pumpkins are botanically fruits, though they’re commonly treated like vegetables in the kitchen. They’re a symbol of harvest and autumn in many cultures, and in Italian cooking, zucca appears in both savory and sweet dishes, from soups to tarts. Zuppa di zucca is a staple in many Italian households during the fall and early winter, celebrated for its comforting flavor and versatility.

• Ginger has a long culinary and medicinal history across many traditions, famous for its bright aroma and warming kick. In soups and stews, ginger can brighten the dish without overpowering the other flavors, offering a distinct contrast to the natural sweetness of roasted squash.

• The combination of pumpkin and ginger reflects a broader trend in modern cooking: blending comforting, traditional ingredients with bold, global spices to create layers of aroma and taste. It’s a reminder that great food often arises from curiosity and a willingness to experiment while honoring seasonality and heritage.

• In culinary folklore, a bowl of warm soup is sometimes described as “soul nourishment,” because it’s often shared around the table with friends and family. The simple act of gathering, ladling, and tasting can become a meaningful ritual that transcends the ingredients themselves.

Ingredients

Zuppa di zucca con zenzero

  • 1 tablespoon extra-virgin olive oil
    → The oil starts the flavor base by gently heating to release aroma from the onion, garlic, and ginger and to help soften vegetables without sticking. Use a sturdy pan and medium heat to avoid smoking the oil. If you prefer a lower-fat version, you can sweat the aromatics with a splash of water and skip browning.
  • 1 medium onion, chopped
    → Onion provides natural sweetness and a savory foundation for the soup. Chop roughly so it cooks evenly; sweat in the olive oil until translucent (not browned) to keep the soup bright and silky. For deeper sweetness, cook a little longer until just starting to caramelize.
  • 2 cloves garlic, minced
    → Garlic adds a sharp, aromatic note that lingers in the soup. Mince finely or crush and then finely chop; add after onions have softened to prevent burning, sautéing just until fragrant (about 30–60 seconds).
  • 1 kg pumpkin flesh, peeled and cubed
    → Pumpkin provides the body, sweetness, and natural creaminess of the soup. Peel (or halve the skin if using a very tender variety), remove seeds, and cut into roughly 2–3 cm cubes. For an extra depth of flavor, roast the cubes on a sheet pan at 200°C (400°F) for 15–20 minutes before simmering, then proceed with stock; this intensifies sweetness and color.
  • 1 liter vegetable stock
    → The stock acts as the liquid base that gently cooks the pumpkin and releases flavors into a cohesive soup. Use low-sodium stock to control salt; adjust the thickness by adding more hot water or stock as needed while blending. If you only have water, add a pinch more salt and a dash of miso or soy for umami.
  • 2 cm fresh ginger, grated
    → Ginger adds a warm, peppery zing that complements the pumpkin and brightens the flavor profile with a hint of spice. Grate finely to distribute evenly; add with the onions and spices so the aroma blooms as the soup simmers. Start with 2 cm and increase if you love a stronger bite.
  • 1 small carrot, diced (optional)
    → Carrot adds additional sweetness, color, and body to the soup. Dice small so it cooks through evenly; if you skip it, the pumpkin will still deliver most of the sweetness, and you’ll have a quicker simmer.
  • 1 small potato, peeled and cubed (optional)
    → Potato contributes extra starch, giving the soup a thicker, creamier texture without dairy. Peel and dice evenly; include with the pumpkin so everything cooks at the same pace. If you prefer a looser soup, omit.
  • 1/2 cup coconut milk or heavy cream (optional)
    → Adds richness and a silky mouthfeel; coconut milk makes the soup dairy-free and adds a subtle tropical sweetness that pairs beautifully with ginger. Stir in near the end after puréeing, and warm gently to avoid splitting if using dairy. For a lighter option, omit or use a small splash instead.
  • Salt to taste
    → Salt brings out the pumpkin’s natural sweetness and balances the aromatics. Add gradually during simmering and taste before serving; remember that stock often contains salt, so adjust accordingly.
  • Black pepper to taste
    → Freshly ground black pepper adds a gentle kick that brightens the flavors. Grind just before serving to keep aroma strong, and consider a small pinch of white pepper for a mellower heat if preferred.
  • Pinch ground nutmeg or cinnamon (optional)
    → A small pinch of nutmeg or cinnamon echoes the autumnal spices in pumpkin dishes. Use sparingly (a pinch or less) so it enhances rather than overpowers the soup’s pumpkin sweetness.
  • Juice of 1/2 lime (optional)
    → A squeeze of citrus brightens the soup and counters richness. Add after blending to taste; start with a few drops and adjust incrementally to avoid bitterness.
  • 1/4 teaspoon chili flakes (optional)
    → Chili flakes add a gentle warmth that complements ginger without making the soup spicy. Increase gradually, tasting as you go, to reach your preferred level of heat.

Optional Add-ins

  • 1 tablespoon miso paste (optional)
    → Miso adds a deep umami backbone that enriches the soup without needing extra salt. Dissolve the miso in a little hot stock before whisking it back into the pot; use white miso for a milder, sweeter note or red miso for deeper savoriness.
  • 2 tablespoons chopped fresh cilantro or parsley (optional)
    → Fresh herbs brighten the soup just before serving and add a pop of color. Stir in at the end to preserve flavor and aroma; if you cook them, they’ll lose some brightness.
  • 1/2 cup roasted pumpkin seeds (pepitas) (optional)
    → Roasted pepitas provide a textural contrast and a toasty, nutty flavor. Toast seeds in a dry skillet until popping and fragrant, then sprinkle over bowls for contrast and crunch.

Toppings and finishing touches

  • Drizzle of extra-virgin olive oil (optional)
    → A finishing drizzle adds sheen and a layer of fruity olive oil aroma to the bowl. Use a high-quality oil and drizzle sparingly for best effect.
  • Dollop of yogurt or coconut cream (optional)
    → A cool contrast to the warm soup; swirl a small amount on top for creaminess and tang. Dairy yogurt pairs well; coconut cream keeps the dish dairy-free.

Instructions

  • Roast the pumpkin (optional) to deepen sweetness and color: Preheat your oven to 200°C (400°F). Line a baking sheet with parchment paper and spread the cubed pumpkin in a single layer, without overcrowding. Drizzle with a light coating of extra-virgin olive oil and season with a pinch of salt; roast for 15–20 minutes, turning once, until the edges are caramelized and the flesh is tender when pierced with a fork. This step concentrates natural sugars and yields a richer, velvety texture in the final soup; if you prefer, you can skip roasting and proceed with raw pumpkin in Step 5.
  • Place a heavy-bottom pot over medium heat and warm 1 tablespoon of extra-virgin olive oil until it shimmers lightly: This starts the flavor base gently, releasing aroma from the onion and ginger without burning and helps prevent sticking during the long simmer; maintain a steady, moderate heat to avoid smoking the oil.
  • Add the chopped onion to the pot and sweat it with a pinch of salt until translucent, about 6–8 minutes: Sweating sweetness draws out moisture and softens the onion’s bite, creating a smooth, mellow foundation for the soup; stir occasionally to prevent sticking and ensure even cooking.
  • Stir in the minced garlic and cook for 30–60 seconds until fragrant but not browned: Garlic browns quickly and can turn bitter, so keep the heat moderate and move it around the pot to distribute aroma evenly without scorching.
  • Add the grated fresh ginger to the aromatics and sauté for 1–2 minutes to bloom its spicy aroma: Grating ensures maximum surface area for releasing volatile oils; keep stirring to prevent scorching and to blend with onion and garlic for a unified perfume.
  • Introduce the pumpkin flesh (roasted or raw) along with the optional carrot and potato, stirring to coat with the aromatics: This coating helps the vegetables start to soften and enhances flavor absorption; if you roasted the pumpkin, add it gently to preserve some of its caramelized surface for depth.
  • Pour in 1 liter of vegetable stock and increase the heat to bring the mixture to a gentle boil: The stock provides the simmering liquid that carries flavors into a cohesive purée, while keeping the pumpkin from scalding or sticking to the bottom of the pot; feel free to use low-sodium stock and adjust later with salt.
  • Reduce the heat to a simmer and partially cover the pot; simmer until the pumpkin and any root vegetables are tender, about 20–25 minutes (longer if using raw pumpkin): Gentle simmering allows starches to soften evenly and prevents harsh flavors from concentrating; check occasionally and stir to prevent sticking.
  • Remove the pot from heat and blend the soup until ultra-smooth using an immersion blender right in the pot, or transfer in batches to a countertop blender: Start on a low speed and gradually increase to high, blending in short pulses to avoid splatter; a velvety texture enhances the soup’s comfort and makes it silkier on the palate.
  • Return the blended soup to the pot (if using a countertop blender) and adjust the consistency with additional hot stock or water as needed: A smooth base should coat the ladle with a light cling, not be heavy; add liquid gradually and re-blend if necessary for uniformity.
  • Stir in 1/2 cup coconut milk or heavy cream (if using) and warm over low heat, warming gently without boiling: This adds richness and a creamy mouthfeel; coconut milk keeps the dish dairy-free with a gentle sweetness, while cream yields a silkier finish; heat slowly to prevent curdling or separation.
  • Season the soup with salt to taste and freshly ground black pepper (adjust after adding stock and dairy): Salt brightens pumpkin’s sweetness and balances aromatics; pepper adds a gentle kick; taste as you go to avoid oversalting.
  • Optional aromatic boost: add a pinch of ground nutmeg or cinnamon to echo autumnal notes, stirring in evenly and tasting before serving: Use sparingly so the spices compliment rather than overwhelm the pumpkin’s natural sweetness.
  • Optionally brighten with lime juice: whisk in the juice of 1/2 a lime after blending and tasting, adding in small increments until the acidity lifts the flavors without turning bitter: A touch of citrus counteracts richness and enhances the soup’s freshness.
  • For a gentle warming of heat, sprinkle in 1/4 teaspoon chili flakes (optional) and stir, tasting as you go to reach your preferred level of spice: This enhances the ginger’s bite without making the soup hot, allowing the pumpkin to remain the star.
  • Optional miso umami: dissolve 1 tablespoon miso paste in a small amount of hot stock, then whisk it back into the soup off the heat to preserve its delicate flavors: Miso adds depth and saltiness without needing extra salt; use white miso for a milder sweetness or red miso for deeper savoriness.
  • Finish with fresh herbs: stir in 2 tablespoons chopped cilantro or parsley (optional) right before serving to maintain bright, fresh aroma: Heating herbs can dull their flavor, so add at the end to maximize their perfume and color.
  • Prepare roasted pumpkin seeds (pepitas) as a crunchy garnish: toast 1/2 cup pepitas in a dry skillet over medium heat until popping and fragrant, about 3–5 minutes, then salt lightly: The seeds provide contrast in texture and a toasty note that complements the creamy soup.
  • Serve with finishing toppings: drizzle a small amount of extra-virgin olive oil over the surface and add a dollop of yogurt or coconut cream if desired (optional): The oil adds a sheen and fruity aroma, while the yogurt or coconut cream provides a cool counterpoint to the warmth of the soup.

Notes

These pumpkin-ginger soup bowls are a cozy, nourishing option that marries the natural sweetness of pumpkin with a warming bite of ginger. For extra depth, roast the pumpkin cubes for 15–20 minutes before simmering to intensify color and sweetness, and sauté the onion, garlic, and ginger in olive oil until fragrant but not browned. You can tailor the texture by adding more stock for a looser soup or blending until completely smooth for a velvety finish; dairy or dairy-free options both work, with coconut milk giving a lighter tropical note. Finish with a drizzle of extra-virgin olive oil, a dollop of yogurt or coconut cream, and a scatter of roasted pumpkin seeds for brightness and crunch. Fresh lime juice brightens the flavor near the end, and a pinch of chili flakes adds gentle warmth if you like a hint of heat. This recipe is naturally gluten-free and easily made vegan by using coconut milk and certified gluten-free stock; store leftovers in the fridge for 3–4 days or freeze for up to 2–3 months. Reheat gently on the stove, stirring to re-emulsify the fats, and adjust seasoning with salt and pepper before serving. For extra umami, whisk in miso toward the end after removing from the heat. Always taste and adjust lime, salt, and pepper to balance brightness and savoriness.

Tips

Base di aromi e cottura

  • Scalda l’olio extra-vergine a fuoco medio in una pentola robusta; l’olio deve sfrigolare senza fumare.
  • Sofinisci la cipolla finché diventa trasparente e morbida, non dorata, per mantenere la zuppa luminosa e vellutata.
  • Aggiungi l’aglio soltanto quando la cipolla è morbida: cuoci 30–60 secondi finché è profumato, così non brucia.
  • Gratta finemente lo zenzero e aggiungilo all’inizio per far emergere l’aroma durante la cottura.

Zucca e preparazione

  • Taglia la zucca a cubetti di circa 2–3 cm; elimina scorza e semi per una consistenza omogenea.
  • Per un sapore più profondo, arrostisci i cubetti a 200°C per 15–20 minuti prima di aggiungerli al brodo; otterrai maggiore dolcezza e colore intenso.

Liquidi e densità

  • Usa brodo vegetale a basso contenuto di sodio per controllare il sale; se usi solo acqua, aggiungi un pizzico di sale e un tocco di miso o salsa di soia per l’umami.
  • Regola la consistenza aggiungendo brodo o acqua calda durante o dopo la cottura e prima di frullare, finché non ottieni la vellutata desiderata.

Zenzero e spezie

  • Gratta lo zenzero fresco finemente e aggiungilo all’inizio per farlo sbocciare durante la cottura; se preferisci un sapore meno piccante, riduci la quantità.

Aggiunte opzionali per corpo e sapore

  • Carota e patata aggiungono dolcezza, corpo e una consistenza più cremosa; tagliale in pezzi piccoli per una cottura uniforme.

Latte di cocco o panna

  • Aggiungi 1/2 tazza di latte di cocco o panna vicino al finale, a fuoco basso, per una texture ricca; evita di far bollire se usi latte di cocco per prevenire la separazione.
  • Per una versione leggera, ometti o usa una piccola quantità.

Sale, pepe e spezie

  • Aggiusta il sale gradualmente durante la cottura; ricorda che il brodo può contenere sale già presente.
  • Pepe nero fresco macinato al momento aggiunge freschezza; opzionalmente un pizzico di pepe bianco per una nota più delicata.
  • Una puntina di noce moscata o cannella richiama le spezie autunnali; usala con parsimonia per non sovrastare la zucca.
  • Aggiungi il succo di lime solo a fine cottura; inizia con poche gocce e aumenta lentamente per evitare acidità eccessiva.
  • Fiocchi di peperoncino ¼ di cucchiaino per una leggera nota piccante; aumenta gradualmente a tuo gusto.

Aggiunte opzionali

  • Miso pasto (1 cucchiaio) per un umami profondo: scioglilo in un po’ di brodo caldo prima di unirlo al tegame.
  • Erbe fresche (cilantro o prezzemolo) 2 cucchiai, aggiunte alla fine per aroma e colore; se le cotti, perderanno brillantezza.
  • Semi di zucca tostati (pepitas) 1/2 tazza: aggiungili come croccante finale per contrasto di texture.

Guarnizioni e rifiniture

  • Un filo d’olio extravergine di oliva a fine cottura per lucidità e aroma fruttato.
  • Una cucchiaiata di yogurt o crema di cocco per contrasto cremoso e freschezza; lo yogurt va bene anche in versione greca.

Consigli di servizio e conservazione

  • Per una vellutata omogenea, frulla la zuppa a più riprese e aggiungi brodo o acqua fino a ottenere la consistenza desiderata.
  • Raffredda rapidamente e conserva in frigorifero fino a 3–4 giorni o congela fino a 2–3 mesi; riaccendi lentamente mescolando spesso.

FAQ

Zuppa di zucca con zenzero — Domande frequenti

Quali ingredienti servono per questa zuppa?

Ingredienti base:

  • Zucca a polpa arancione (circa 800 g), tagliata a pezzi
  • Cipolla media
  • Zenzero fresco grattugiato (2–3 cm, o a piacere)
  • Brodo vegetale caldo (circa 750 ml)
  • Olio extravergine d’oliva
  • Sale e pepe

Opzionali (cremosità o varianti):

  • Latte, panna o latte di cocco
  • Spezie come cannella o curcuma
  • Aglio (facoltativo)
Come si prepara la Zuppa di zucca con zenzero?

Procedimento:

  1. Soffriggere cipolla e zenzero nell’olio d’oliva finché morbidi.
  2. Aggiungete la zucca e cuocete per qualche minuto, mescolando.
  3. Versare il brodo vegetale, portare a ebollizione, poi abbassare la fiamma e cuocere finché la zucca è tenera (circa 15–20 minuti).
  4. Frullare con un frullatore a immersione fino a crema liscia; se è troppo densa, aggiungere brodo.
  5. Aggiustare di sale e pepe; se desiderate, aggiungere latte o latte di cocco per cremosità.
  6. Servire calda, eventualmente guarnita.
Posso usare zucca in scatola o solo fresca?

Sì, è possibile. Se usate zucca in scatola, sciacquatela e scolatela bene, quindi aggiungetela al soffritto e abbondate con poco brodo; potrebbe richiedere tempi di cottura leggermente inferiori.

Come regolare la piccantezza o la nota zenzero?

Aggiustate così:

  • Per meno piccantezza: riducete la quantità di zenzero o grattugiatene meno.
  • Per un sapore più intenso: aumentate lo zenzero o aggiungete scorza di limone/lime.
  • Assaggiate a fine cottura e aggiustate di sale/pepe.
La zuppa è adatta a diete particolari (vegano, gluten-free, ecc.)?

Sì:

  • Vegana: sì se si usa brodo vegetale e latte di cocco o crema vegetale.
  • Senza glutine: sì se tutti gli ingredienti sono privi di glutine (verificate brodo e spezie).
  • Senza latticini: sì usando latte di cocco o crema vegetale al posto di latte o panna.
Come si conserva la zuppa avanzata?

Conservazione:

  • In frigorifero: in contenitore ermetico per 3–4 giorni.
  • In freezer: si congela bene fino a 2–3 mesi; scongelare e scaldare a fuoco dolce prima di servire.
Come rendere la zuppa cremosa senza latticini?

Opzioni:

  • Frullare molto bene fino a crema liscia.
  • Aggiungere una patata bollita o ceci cotti per cremosità naturale.
  • Utilizzare latte di cocco, latte di soia o crema di noci al posto di latticini.
Quali guarnizioni consigliate?

Idee per presentare la zuppa:

  • Semi di zucca tostati e un filo d’olio d’oliva
  • Scorza di limone o arancia grattugiata
  • Yogurt vegetale o crema di cocco
  • Erbe fresche come prezzemolo o coriandolo
Quali varianti di sapore posso provare?

Varianti consigliate:

  • Aggiungere cannella, curcuma, cumino o curry per una nota speziata
  • Spremere succo di arancia o aggiungere scorza di limone per acidità fresca
  • Incorporare patate o carrot per una consistenza diversa
Quante porzioni rende e quanto tempo richiede?

Dimensioni tipiche:

  • Porzioni: circa 4–6 porzioni, a seconda delle porzioni servite
  • Tempo totale: circa 30–40 minuti (preparazione 5–10 min, cottura 20–30 min)

Introduction / Hook

Picture this: a sunlit kitchen, a stack of thick brioche slices waiting like glossy invitations, and the sizzle of butter kissing the pan as the air fills with a warm, comforting aroma. French toast Classico is not just a breakfast—it’s a morning invitation to slow down, breathe in sweet vanilla and cinnamon, and savor a moment that tastes like home. This version elevates the timeless comfort of a beloved dish with a touch of elegance, without losing the cozy, homey charm that makes French toast such a cherished weekend ritual. The first bite offers a tender, custardy center wrapped in a whisper of caramelized edges; the second bite reveals a hint of vanilla, a kiss of nutmeg, and a texture that is at once soft and gently chewy. This is breakfast that feels like an indulgence but remains wonderfully simple—an ideal way to celebrate ordinary mornings or special occasions alike.

French toast has a way of turning humble bread into something magical. The magic isn’t in complicated ingredients or complex technique; it’s in the balance—the way the bread soaks up the custard just enough to become richly flavorful, the way the pan’s heat crisps the exterior while keeping the interior velvety. Classico implies a nod to tradition, a respect for the classics, and a confidence in keeping things classic yet modern. In this rendition, you’ll discover a dish that wears its heritage with pride and offers a versatile canvas for your favorite toppings, garnishes, and accompaniments. It’s the kind of breakfast that makes weekends feel like holidays, and weekdays feel like a little celebration of everyday life.

As you read on, you’ll sense the story that surrounds this dish—the way it traveled through time and across oceans, gathering small twists along the way, and how it remains eternally adaptable. The beauty of French toast Classico lies not only in its irresistible flavor but in the memories it invites you to create: the clink of coffee cups, the laughter around a crowded table, the quiet pause as you drizzle maple syrup and hear the sigh of pure satisfaction. Whether you’re feeding a crowd or spoiling a loved one with a quiet breakfast for two, this is a recipe that feels both familiar and delightfully fresh.

The Story Behind the Dish

The idea of transforming stale bread into a comforting, custardy breakfast has ancient roots and a surprisingly global footprint. In many cultures, making use of bread that has begun to dry out is seen as prudent, practical, and delicious. The French called this concept “pain perdu,” literally translating to “lost bread”—a playful nod to bread that would otherwise be discarded. Pain perdu was born out of frugality and ingenuity, a way to coax tenderness and flavor from humble leftovers. The method spread across Europe and beyond, evolving with regional twists, spices, and toppings, until it settled into the universal breakfast favorite we know today as French toast.

In English-speaking countries, the dish found a natural home as a weekend staple and brunch classic. The core idea—thick slices of bread, a custard of eggs and dairy, a touch of sweetness, a high-heat pan or skillet for a quick sear—remains the heartbeat of most interpretations. Over the decades, home cooks and celebrated chefs alike have added their own signature touches: a splash of vanilla or orange blossom water, a whisper of cinnamon or nutmeg, a dusting of powdered sugar, or a fruit compote that brightens the dish with tart and fresh notes. This “Classico” version honors those traditions while inviting you to discover your own preferred balance of sweetness, spice, and richness.

The story isn’t only about technique; it’s about moments shared. Imagine a Sunday morning when the kitchen is alive with the aroma of melted butter, vanilla, and cinnamon. The bread—whether it’s a sturdy brioche, a soft challah, or a rustic loaf—takes on a new life as it bathes in a velvety custard. When it hits the hot pan, the outer crust caramelizes, offering a satisfying crunch that yields to a tender center. The dish invites conversation, connection, and a sense of timeless comfort that transcends trends. In this Classico adaptation, you’ll feel the echo of grandparents’ kitchens and the modern, joyful spontaneity of a well-loved brunch staple, all while enjoying a plate that looks as beautiful as it tastes.

From farm mornings to city brunches, French toast has always thrived at the intersection of simplicity and pleasure. Its enduring appeal lies in its capacity to be both humble and refined—an ironclad promise of warmth and sweetness that never goes out of style. The Classico variant you’re about to savor embodies that very ethos: a dish that feels deeply reassuring yet unexpectedly sophisticated, comfortable enough for a casual weekday morning and elegant enough to shine at a celebratory weekend brunch. It’s a dish with a story, a recipe you can claim as your own, and a ritual that invites generosity, whether you’re feeding one or a tableful of hungry souls.

Why You’ll Love This Recipe

  • Instantly cozy: The aroma alone signals comfort—vanilla, cinnamon, and browned butter mingling in the air.
  • Short, forgiving technique: You don’t need a long list of ingredients or elaborate steps to achieve a luxurious result.
  • Versatile and adaptable: Works beautifully with various breads, milks, and flavor notes to suit your pantry and preferences.
  • Family-friendly and crowd-pleasing: A dish that appeals to kids and adults alike, perfect for weekend gatherings or lazy Sunday mornings.
  • Make-ahead friendly: With thoughtful toppings and staging, you can assemble a momentous brunch without starting from scratch each time.
  • Beautiful presence: Thick-cut slices, a golden crust, and a glossy finish make it photogenic for social moments or intimate celebrations.
  • Customizable for dietary needs: Easily adaptable to vegan, gluten-free, or dairy-free preferences without sacrificing flavor.
  • Pairing-friendly: Complements a wide range of toppings and beverages, from fresh berries and maple syrup to citrus zest and a bubbly brunch drink.

Flavor Profile & Texture

The essence of French toast Classico lies in contrast—the interplay between a softly custard-soaked interior and a crisp, caramelized exterior. When the bread is soaked just enough, the interior becomes indulgently tender, a little custardy and richly infused with the warm notes of vanilla and eggs. The surface, kissed by butter and cooked at a steady heat, develops a delicate crust that delivers a subtle snap before yielding to the creamy heart inside. The spice profile—cinnamon with hints of nutmeg or cardamom—adds warmth and complexity without overpowering the bread’s natural sweetness.

Texture-wise, you’ll experience a satisfying balance: first, a light crack as you cut into the slice; next, a velvety mouthfeel that feels luxurious yet not heavy. The bread choice influences the overall texture—brioche or challah yields an ultra-soft, pillowy interior, while sturdier loaves like sourdough contribute a slightly firmer bite and richer caramelization on the crust. The toppings amplify texture and flavor: a glossy drizzle of pure maple syrup, a kiss of powdered sugar for a delicate sweetness, a dollop of whipped cream for richness, or a spoonful of fresh fruit that provides brightness and contrast. The result is a symphony of taste and texture that plays well with both simple and more elaborate toppings.

Flavor-wise, expect a gentle sweetness enhanced by vanilla and a touch of cinnamon; dairy choices can deepen the richness, while citrus zest or a splash of orange juice can brighten the dish, creating a lively balance between comforting and fresh. The aroma alone—vanilla, browned butter, and spice—can transform an ordinary morning into a little celebration. And because the dish is inherently adaptable, you can tailor the flavor to your mood, season, or dietary needs without sacrificing the essence of what makes French toast so beloved.

Occasions & Pairings

French toast Classico is the perfect companion for a variety of occasions, from intimate weekday mornings to festive weekend gatherings. Here are some ideas to inspire your menu and setting:

  • Weekend brunch with friends or family: A generous platter of golden slices, ready for topping and sharing, sets a welcoming tone.
  • Holiday mornings: Elevate the dish with a few luxe toppings (candied nuts, fig jam, or a lace of dark chocolate) and a sparkling beverage.
  • Special celebrations at home: Pair with a fruit compote or a dollop of mascarpone for decadence and contrast.
  • Late-summer or autumnal breakfasts: Use stone fruit compotes, cinnamon-sugar dusting, and a drizzle of tart cherry reduction for seasonal flair.
  • Weekday comfort with a twist: A quick, satisfying morning option that still feels indulgent.

Pairings to consider:

  • Drinks: A robust coffee, a fresh orange juice, or a light sparkling beverage like a Brut rosé or a mimosa for brunch vibes.
  • Fruit: Berries, sliced apples, peaches, or citrus segments brighten the plate and balance the richness.
  • Toppings: Maple syrup, honey, powdered sugar, whipped cream, yogurt, or a spoonful of fruit compote.
  • Side dishes: Crisp bacon or turkey bacon for a savory note, a spoonful of yogurt or ricotta for tang, or a simple green salad to add freshness.

Tips, Variations & Substitutions

  • Bread choices: Brioche and challah yield the softest, most luxurious texture, while sturdy rustic loaves offer more structure and a deeper crust. For a lighter option, use thick-cut sandwich bread.
  • Milk and dairy: Whole milk provides creaminess; you can use 2% or non-dairy milks (almond, oat, or soy) for a dairy-free variation. A splash of cream or half-and-half can enrich the custard if you’re not avoiding dairy.
  • Flavor boosters: Vanilla is classic, but alternatives like almond extract, orange zest, or a whisper of rum can elevate the aroma. Ground cinnamon, nutmeg, or cardamom add warmth and depth.
  • Sweet-tall options: For a more pronounced sweetness, consider a light dusting of brown sugar or a drizzle of honey along with maple syrup.
  • Vegan variation: Use a plant-based milk, and substitute eggs with a mixture of chickpea flour and water (or a commercial egg replacer) to achieve a custard-like texture. A touch of oil can help with browning and moisture.
  • Gluten-free: Choose thick-cut gluten-free bread slices and ensure any toppings or additions are gluten-free. The cooking method remains the same; you’ll still enjoy the same comforting texture.
  • Regional twists: Add a pinch of lavender or lemon zest for a Provençal twist; drizzle with thick Greek yogurt and honey for a Mediterranean touch; or pair with spiced apple compote for a Fall-inspired option.
  • Texture variation: For extra crispiness, finish the slices in a hot, lightly oiled pan to re-crisp the crust just before serving.
  • Egg-free approach: If avoiding eggs entirely, consider a dairy-free custard base with silken tofu blended with plant milk and a pinch of turmeric or paprika for color, alongside the usual spices for flavor.

Storage & Make-Ahead Ideas

While French toast is best enjoyed fresh, there are practical ways to plan ahead and still capture the dish’s charm. If you’re hosting a brunch or feeding a crowd, you can prepare certain components in advance and assemble or reheat with care for a near-fresh result.

  • Make-ahead toppings: Prepare a fruit compote, sliced fruit, whipped cream, or yogurt toppings ahead of time and store in the refrigerator. When ready to serve, simply plate and add toppings as guests arrive.
  • Leftovers: Stored properly in an airtight container in the refrigerator, leftover French toast slices can be enjoyed for a couple of days. Reheating is best done in a skillet or toaster oven to restore a bit of crispness to the exterior while preserving the soft interior.
  • Freezing: If you anticipate making a large batch, you can freeze individual slices after cooling. Reheat gently in a toaster oven or pan to re-crisp the exterior without drying the interior.
  • Effortless service: For a party-ready presentation, you can set out a toppings bar with a few options, allowing guests to customize their own slices and creating a festive, interactive brunch experience.

Fun Facts & Trivia (Optional)

French toast has inspired stories and playful myths across cultures. Some fun tidbits you may enjoy:

  • The term “French toast” appears in English as far back as the 17th century, but the dish is not exclusive to France. Similar preparations exist in many cultures, each with its own name and twist—from “pain perdu” in France to regional variations across Europe and the Americas.
  • Pain perdu translates to “lost bread,” a nod to reviving stale loaves that might otherwise be discarded—an early example of delicious thrift transformed into a brunch staple.
  • Ancient origins: Some historians trace similar concepts to medieval Europe, where bread was preserved by soaking in milk and eggs, then fried to create a nourishing breakfast in times when dairy and eggs were precious.
  • Influence of bread: The choice of bread dramatically affects texture and flavor. Rich breads like brioche and challah yield an airy, almost custard-like interior, while rustic loaves offer a heartier bite and a deeper caramelization on the crust.
  • Global cousins: Across the world, there are delightful equivalents—think of buchteln with sweet fillings, pan con leche in certain Latin American traditions, or even a simple, savory twist in some regional variants. The concept of reviving bread with eggs, sweeteners, and heat is wonderfully universal.

Closing Thoughts

French toast Classico is more than a recipe; it’s an invitation to slow down, savor, and share in a ritual that has delighted generations. It respects the past while offering room for your present-day favorites: the bread you’ve got on hand, the milk that suits your dietary needs, the spices that whisper memories into your morning. This dish is a canvas—your canvas—to craft a brunch that feels personal, warm, and just right for the moment. So adorn your plate with berries, a drizzle of maple, a sigh of whipped cream, or a generous dusting of powdered sugar. Light a candle, pour a cup of coffee, and let the aroma tell a story of comfort, tradition, and togetherness. In the end, French toast Classico is a celebration of simple ingredients transformed into something extraordinary—an everyday luxury that makes mornings something to look forward to.

Ingredients

  • French Toast Base
  • – 6 large eggs (lightly whisked)
    → Eggs provide protein and structure to the custard that coats the bread. Whisk until fully blended but not foamy, so the custard is smooth and coats the bread evenly. They act as the binding agent that traps moisture during soaking and contribute to a soft, custardy crumb when cooked.
  • – 1 cup whole milk (or dairy-free alternative such as unsweetened almond milk)
    → Milk adds moisture and tenderness to the custard. Use whole milk for a richer texture; if using dairy-free milk, choose unsweetened to avoid extra sweetness. For extra richness, substitute with a splash of cream.
  • – 1 teaspoon vanilla extract
    → Vanilla provides aroma and depth to the custard. Use pure vanilla extract; if you have a vanilla bean, scrape the seeds for extra intense flavor.
  • – 1 teaspoon ground cinnamon
    → Cinnamon adds warm spice that defines classic French toast. Make sure it’s evenly mixed into the custard for consistent flavor; you can adjust to taste.
  • – Pinch of ground nutmeg (optional)
    → Nutmeg provides a subtle, warm finish that complements cinnamon. Use just a pinch to avoid overpowering; grate fresh if possible for a brighter note.
  • – 2 tablespoons granulated sugar (adjust to taste)
    → Sugar sweetens the custard and aids browning during frying. Dissolve completely in the liquid for an even texture; reduce if your bread is sweetened or if you prefer less sweetness.
  • – Pinch of salt
    → Salt enhances the overall flavor, balancing sweetness and enhancing spice. Add to the custard and whisk well.
  • – 6 slices sturdy bread (brioche or challah; day-old recommended)
    → The bread is the main vessel for soaking; thick, sturdy slices hold up to soaking without falling apart. Day-old or lightly dried bread soaks up custard evenly without becoming soggy on the surface.
  • – 2 tablespoons unsalted butter (for frying)
    → Butter provides rich flavor and a golden, crisp crust. Use a nonstick or well-seasoned skillet; melt and swirl to coat the pan, adding more as needed between batches to prevent sticking and burning.
  • Optional Add-ins
  • – 1 tablespoon orange zest (zest of one orange)
    → Adds bright citrus aroma and a hint of tang that pairs beautifully with cinnamon. Zest finely and fold into the custard or sprinkle over cooked toast for a fresh finish.
  • – 1/4 cup raisins or chopped dried apricots (optional)
    → Dried fruits bring pockets of sweetness and chew. If using, soak briefly in warm water or warm milk to plump them up so they don’t draw moisture from the custard; drain before adding.
  • Toppings
  • – Powdered sugar (for dusting; optional)
    → A light dusting adds a delicate sweetness and a polished finish. Sift evenly over the stacked toast just before serving to avoid clumps.
  • – Pure maple syrup (for serving)
    → Classic pairing; pour warm maple syrup over the toast to sweeten and glaze. Adjust sweetness by the amount used, and consider using grade A dark for richer flavor if desired.
  • – Fresh berries or sliced fruit (for serving)
    → Fresh fruit adds brightness and contrast to the rich custard. Choose in-season berries or slices that won’t overpower the toast; wash and pat dry before serving.

Instructions

  • Whisk the six eggs until they are lightly blended but not foamy, then whisk in the 1 cup whole milk, 1 teaspoon vanilla extract, 1 teaspoon ground cinnamon, a pinch of ground nutmeg (optional), 2 tablespoons granulated sugar, and a pinch of salt until the mixture is smooth and uniform.

    → Eggs provide structure and moisture to the custard; blending to a smooth, cohesive base ensures the bread coats evenly and yields a soft, custardy crumb when cooked.
  • If you are using orange zest, fold the zest into the custard now or stir it in with the spices to distribute the citrus aroma evenly throughout the mixture.

    → Orange zest adds bright aromatics that cut through richness; incorporating it at this stage ensures even infusion without streaks.
  • If you are including raisins or chopped dried apricots, soak them in warm water or warm milk for 5–10 minutes to plump, then drain thoroughly before stirring into the custard or scattering onto the bread.

    → Soaking hydrates the fruit so it doesn’t draw moisture from the custard and helps distribute sweetness evenly in every bite.
  • Prepare the bread by laying the 6 slices of sturdy bread (brioche or challah) on a cutting board and allowing them to air-dry for 10–15 minutes if they are fresh, or lightly toast 2–3 minutes per side on a sheet pan to remove excess moisture and strengthen the crust.

    → Drier bread soaks more evenly, resists becoming soggy, and holds its shape during frying; day-old bread is ideal for maximum custard absorption without falling apart.
  • Dip each bread slice into the custard one by one, turning to soak both sides for about 20–40 seconds per side, then lift and let the excess custard drip back into the bowl before placing on a rack or plate.

    → Proper soaking ensures the interior becomes custardy without pooling excess liquid; too long a soak can cause soggy centers, while too short leaves the bread under-saturated.
  • Heat a heavy skillet over medium heat and add 2 tablespoons unsalted butter, swirling to coat the surface completely; let the butter melt until it foams and just begins to brown for a nutty aroma, adjusting heat to avoid burning.

    → Butter enriches flavor and helps form a crisp, golden crust; browning adds depth, but excessive heat will burn the butter and off-flavor the toast.
  • Place the soaked bread slices in the skillet without crowding, and cook until the underside is deeply golden brown and crusty, about 2–3 minutes, then flip carefully with a wide spatula and cook the other side for another 2–3 minutes until evenly browned and the center yields tender resistance when pressed.

    → Moderate heat yields a crisp exterior while the interior remains soft; don’t rush the flip—wait for a sturdy crust to develop to avoid tearing the bread.
  • Transfer the finished French toast to a warm preheated oven (about 200°F/95°C) or to a rack over a baking sheet to keep warm while you finish the remaining slices.

    → Keeping completed slices warm prevents cooling and allows the full batch to be served together with consistent texture and temperature.
  • Serve the French toast stacks with optional toppings: lightly dust with powdered sugar, drizzle warm pure maple syrup to taste, and arrange fresh berries or sliced fruit on the side for color, brightness, and contrast.

    → Powdered sugar adds a delicate finish, maple syrup supplies classic sweetness and moisture, while fresh fruit provides acidity and a fresh balance to the rich custard.

Notes

These French toast classico are a cozy weekend breakfast option that delivers a custardy center with a caramelized exterior. The custard comes from whisked eggs, milk, vanilla, cinnamon, and a touch of sugar, while the bread provides structure to soak up all the goodness. Use brioche or challah for the richest results, ideally day-old so the slices soak evenly without turning mushy.

  • Choose sturdy bread and dry it slightly if it’s fresh: day-old slices or lightly toasted bread will soak up the custard without falling apart.
  • Whisk the custard well: fully blend the eggs with milk, vanilla, cinnamon, nutmeg (if using), sugar, and salt. Dissolving sugar completely prevents grainy texture and ensures even browning.
  • Soaking time: dip each slice in the custard and allow it to soak for about 60–90 seconds per side, depending on thickness. Do not oversoak thick slices or they may become soggy.
  • Cooking technique: cook in a nonstick skillet or well-seasoned pan over medium heat with a knob of unsalted butter. Let the bread brown deeply on each side before flipping, adjusting heat as needed to avoid burning.
  • Variations and add-ins: fold in orange zest for brightness or add raisins, chopped dried apricots, or other dried fruit to the custard for pockets of sweetness. Soak dried fruit briefly in warm water or milk to plump them if desired.
  • Gluten-free option: use a sturdy gluten-free bread; ensure all other ingredients (especially spices and milks) are gluten-free if needed.
  • Serving ideas: dust with powdered sugar, drizzle with pure maple syrup, and top with fresh berries or sliced fruit for contrast and freshness.
  • Make-ahead and storage: you can whisk the custard up to 24 hours ahead and refrigerate. Cooked French toast is best fresh, but leftovers can be reheated gently in a skillet or toaster oven for a quick breakfast, and they freeze well when stored properly.

Tips

Tips for French Toast Classico

  • Bread prep: Use day-old brioche or challah for the best soak. If your bread is very fresh, dry the slices lightly or toast them briefly to help them soak the custard without becoming soggy.
  • Custard soak: Whisk the custard until completely blended and smooth. Dip each slice briefly—about 15–30 seconds per side for thick slices—to ensure the bread absorbs enough custard without turning mushy.
  • Even flavor: Ensure the cinnamon, nutmeg (if using), and salt are evenly distributed in the custard. For a deeper vanilla aroma, you can add a scraped vanilla bean or a small amount of vanilla paste along with the extract.
  • Liquid balance: Whole milk gives a richer, creamier custard. If using dairy-free milk, choose unsweetened varieties. For extra richness, add a splash of cream; for lighter versions, reduce the sugar a touch.
  • Pan prep: Use a nonstick skillet or well-seasoned cast iron. Preheat over medium heat and swirl in butter until it foams and sizzles but doesn’t burn; this prevents sticking and helps a golden crust.
  • Cooking technique: Cook in batches to avoid crowding, which lowers the pan temperature. Let the first side set and develop a deep golden crust before flipping; cook the second side until evenly browned and the custard is set.
  • Butter management: Use 1–2 tablespoons of butter per batch and replenish between batches. If the butter begins to brown too quickly, reduce the heat or add a small amount of neutral oil to finish browning.
  • Texture control: Avoid overcooking the toast, which can make the interior dry. If slices seem thin or fragile, shorten the frying time slightly or lower the heat to allow a gentle cook through.
  • Optional add-ins: Orange zest or dried fruits can be folded into the custard or sprinkled on top after frying. If using dried fruit, soak briefly to plump them so they don’t draw moisture from the custard.
  • Finish and serve: Dust with powdered sugar, drizzle warm maple syrup, and top with fresh berries or sliced fruit for brightness. Keep cooked slices warm in a low oven (around 200°F/95°C) while finishing the rest.
  • Make-ahead and leftovers: The custard can be prepared a few hours ahead and refrigerated. Reheat toast in the oven to restore crisp edges. Best enjoyed fresh, but leftovers can be stored in the fridge for 1–2 days.

FAQ

What is French toast Classico?

A classic breakfast dish where thick slices of bread are dipped in a rich egg-milk custard flavored with vanilla and cinnamon, then fried until golden and slightly crispy on the outside.

What ingredients do I need?

Thick-cut bread (like brioche or white bread), eggs, milk or cream, vanilla extract, ground cinnamon, a pinch of salt, and butter or oil for frying. Optional toppings: maple syrup, powdered sugar, fresh fruit, or whipped cream.

Can I use stale bread?

Yes. Day-old or slightly stale bread soaks up the custard better without falling apart. Avoid very fresh bread that becomes mushy.

Can I make the batter ahead?

Yes. Whisk eggs, milk, vanilla, cinnamon, and salt. You can refrigerate the batter for up to 24 hours; whisk again briefly before dipping the bread.

How long should I soak the bread?

Dip each slice for about 20–60 seconds, depending on thickness. You want the bread to absorb the custard but not become soggy and fall apart.

What heat level and pan should I use?

Cook over medium heat in a nonstick skillet or cast-iron pan. Preheat the pan and add a small amount of butter or oil to prevent sticking and to help browning.

How do I cook it and how long per side?

Place the soaked bread in the pan and cook 2–3 minutes per side, or until golden brown and firm to the touch. Adjust time for thicker slices.

How should I serve French toast Classico?

Serve warm with maple syrup, a dusting of powdered sugar, fresh berries, or whipped cream. A squeeze of lemon zest or a drizzle of honey can add brightness.

Tips for a fluffier, tastier result?

Use slightly stale bread, ensure the custard is well seasoned with vanilla and cinnamon, don’t overcrowd the pan, and let the pan come back to temperature between batches. You can also add a splash of almond or orange zest for variation.

Introduzione / Gancio

Immagina una mattina in cui la casa è pervasa da un profumo avvolgente: uova che sfrigolano delicatamente, salsiccia speziata che rilascia un carattere affumicato, e una crosticina dorata che promette comfort e soddisfazione a ogni morso. Benvenuti nella casseruola uova e salsiccia, un piatto che incarna la convivialità delle tavole di casa e la versatilità della cucina italiana. Questa casseruola è quell’equilibrio felice tra semplicità e gusto, tra la robustezza della salsiccia e la delicatezza vellutata delle uova, tra una configurazione rustica e una presentazione che sembra pensata per una tavola elegante. È un piatto che non pretende di essere complicato: nasce dall’esigenza di nutrire, di riunire le persone intorno al tavolo, di trasformare pochi ingredienti in un’esperienza memorabile. La sua magia risiede nel modo in cui i sapori si intrecciano: la salsiccia sprigiona aromi di finocchio, pepe e agrumi, le uova avvolgono tutto con una morbidezza setosa, e formaggi fusi o una superficie leggermente croccante aggiungono profondità e ricchezza. È una ricetta che parla di mattine lente, di pranzo domenicale e di cene casalinghe che hanno il sapore di casa.

La storia del piatto

La casseruola uova e salsiccia è una celebrazione della tavola italiana in versione comfort-food, un incrocio tra l’eredità contadina e l’arte dell’ospitalità. Le origini di questo stile di piatto si perdono in una tradizione di “torte salate” e di frittate al forno che hanno accompagnato intere generazioni. In molte regioni italiane, la salsiccia è al centro di piatti che si prestano bene alla cottura lenta e uniforme, lasciando che i sapori si fondano senza correre rischi di secchezza. L’uovo, elemento universale, si presta sorprendentemente bene a essere trasformato in una base cremosa o in una nuvola soffice che regge il carattere deciso della salsiccia. In ambito familiare, una casseruola come questa spesso nasce come soluzione pratica: avanzamenti di ingredienti, una teglia da riempire, una festa di sapori pronta da condividere. Nel corso del tempo, si è evoluta in una versione che coniuga tradizione e modernità: una pietanza unica che può essere servita sia a colazione che a pranzo o a cena, adatta a una tavolata di amici, a un brunch domenicale o a una riunione di famiglia durante le festività. Una nota romantica: in molte cucine regionali italiane, la salsiccia è spesso accompagnata da erbe aromatiche, aglio e cipolle che liberano profumi intensi durante la rosolatura. A questa base, l’uovo aggiunge una cornice morbida e avvolgente, capace di legare gli ingredienti in un unico grembo di sapore. Registri di nonne e cuochi casalinghi hanno tramandato l’idea di una “torta” o “casseruola” che si può adattare ai gusti personali, alle stagioni e alle disponibilità della dispensa, offrendo sempre un risultato gustoso e rassicurante.

Perché amerai questa ricetta

  • È un piatto unico nutriente: combina proteine, grassi sani e carboidrati in una porzione sostanziosa che mette a proprio agio la famiglia e gli amici.
  • È semplice da preparare: pochi ingredienti, una sola teglia o padella che passa in forno, e una presentazione che fa la sua figura.
  • Si presta a personalizzazioni senza perdere identità: puoi modulare la quantità di salsiccia, aggiungere verdure di stagione o cambiare formaggi senza compromettere l’equilibrio del piatto.
  • È perfetta per improvvisare brunch, pranzi domenicali o cene informali: si può preparare in anticipo e gustare in tutta tranquillità.
  • Comfort e convivialità: è un richiamo rassicurante di casa, capace di mettere di buon umore chiunque si sieda a tavola.
  • Versatile per diete diverse: con piccoli accorgimenti può diventare vegana (funghi e tofu, con uova sostituite da crema di anacardi), senza glutine o a basso contenuto di carboidrati, mantenendo comunque una spinta di sapore.

Profilo di sapore e consistenza

La casseruola uova e salsiccia è un concerto di sapori che danza tra rusticità e raffinatezza. La salsiccia, soprattutto se artigianale con una nota di finocchio, rilascia aromi che aprono le palpebre del gusto: dolcezze di anice, un pizzico di pepe nero, una leggera affumicatura. La carne brasata rilasciano grassi che si mescolano alle uova, creando una texture vellutata che avvolge il palato. Le uova, se lavorate con dolcezza, offrono una consistenza cremosa e soffice che resta ferma e compatta all’esterno, grazie alla protezione data dalla cottura lenta o dall’interazione con i formaggi. A questi elementi si aggiungono spesso cipolla o scalogno che, rosolati, diventano una base aromatica che sprigiona dolcezza caramellata. I formaggi, quando presenti, fondono e creano una superficie con un leggero croccante o una lucentezza cremosa, a seconda del tipo scelto (parmigiano, provola, fontina o una mozzarella che allunga al taglio). Il risultato finale è un equilibrio di sapori salati, speziati e leggermente lattiginosi, con una consistenza che va dall’alveolatura tenera all’orlo un po’ croccante. Ogni morso racconta una storia di forno, di mescolanze affettuose, di aromi che si intrecciano in modo armonioso. È una ricetta che invita a chiudere gli occhi e assaporare: un abbraccio caldo in una teglia, pronto a scaldare le mani e il cuore.

Occasioni & Abbinamenti

  • Colazione domenicale e brunch: servita con una selezione di pane croccante, olive, pomodori freschi e una spolverata di erbe fresche, è il piatto forte per riunire la famiglia.
  • Pranzo facile: accompagnata da un’insalata verde croccante, potrebbe diventare il protagonista di un pasto sostanzioso ma bilanciato.
  • Cene informali con amici: è perfetta per una tavolata conviviale, dove ciascuno può personalizzarla con contorni a scelta.
  • Occasioni festive: una versione più ricca con formaggi stagionati e verdure colorate può essere presentata come piatto centrale durante le feste.

Abbinamenti consigliati:

  • Pane croccante o baguette per fare la scena aperta, con un filo di olio extravergine di oliva.
  • Contorni di stagione: verdure arrostite, purè morbido di patate o una semplice insalata di rucola e pomodorini.
  • Bevande: un vino rosso di corpo medio (ad es. Chianti o Nero d’Avola) oppure un bianco aromatico se si preferisce una nota più leggera. Per un brunch, spumante o prosecco può aggiungere un tocco festoso; per chi preferisce option analcoliche, una limonata fresca o un agrumato spritz è perfetto.
  • Dolce di accompagnamento: una torta di mele o una crostata al limone può chiudere il pasto con una nota leggera e profumata.

Consigli, Varianti & Sostituzioni

La bellezza di questa casseruola risiede nella sua flessibilità. Ecco una guida pratica per personalizzarla secondo gusti, esigenze alimentari e disponibilità in dispensa:

  • Salsiccia: sostituibile con salamelle o salsicce di maiale piccanti per una versione più vivace; per una versione più delicata, usa salsiccia dolce o meno speziata. Se vuoi ridurre i grassi, scegli una versione magra e aggiungi una punta di olio d’oliva all’ora della rosolatura.
  • Alternative proteiche: per una versione vegetariana, sostituisci la salsiccia con funghi trifolati (shiitake o champignon) e aggiungi cubetti di formaggio cremoso o tofu per mantenere la morbidezza. Puoi anche usare ceci soffici o dadini di pomodori secchi per una nota ricca di umami.
  • Formaggi: una miscela di parmigiano, provola, fontina o mozzarella offre una superficie dorata e filante. Se preferisci una versione più leggera, riduci la quantità di formaggio o scegli versioni a basso contenuto di grassi.
  • Verdure aggiuntive: cipolle, peperoni, spinaci, pomodori, zucchine o funghi possono arricchire la casseruola con colori, texture e sapori diversi. Aggiungili a seconda della stagione e della tua dispensa.
  • Erbe e spezie: finocchietto selvatico, rosmarino, timo o prezzemolo fresco rifiniscono il profilo aromatico. Un pizzico di paprika affumicata può esaltare la profondità della salsiccia.
  • Versione senza glutine: scegli pangrattato senza glutine o evita completamente la crosta croccante in favore di una superficie dessert morbida e setosa, se preferisci una texture più uniforme.
  • Versione a basso contenuto di carboidrati: elimina o riduci le componenti ad alto contenuto di carboidrati come patate o pane, concentrandoti su uova, salsiccia, formaggi e verdure.
  • Make-ahead e praticità: preparare gli ingredienti la sera prima e assemblare al mattino può essere utile per chi ha poco tempo. In alternativa, è possibile preparare un’intera teglia e conservare in frigorifero per un pasto rapido del giorno successivo.

Conservazione & Idee per preparazioni anticipate

Questa casseruola è particolarmente generosa in termini di conservazione e riutilizzo. Ecco alcuni suggerimenti pratici per mantenere intatte la freschezza e il sapore:

  • Conservazione in frigorifero: le porzioni avanzate si conservano bene per 2-3 giorni in contenitori ermetici. Riscaldare lentamente per evitare che le uova si asciughino troppo.
  • Congelamento: a seconda degli ingredienti utilizzati, la casseruola può essere congelata una volta fredda. Per una migliore resa, preferisci porzioni singole da scongelare e riscaldare delicatamente, evitando una cottura eccessiva delle uova.
  • Riscaldare: riscaldare in forno a bassa temperatura o in microonde a potenza moderata, coprendo con un foglio di alluminio per evitare che la superficie si secchi. A temperatura ambiente, lasciare che la casseruola raggiunga di nuovo la temperatura desiderata prima di servire.
  • Make-ahead per brunch: è possibile preparare l’impasto di base senza cottura e conservarlo in frigorifero. Al momento del servizio, aggiungi le uova e avvia la cottura in forno o nella padella, per un brunch al tavolo con meno fretta e più gioia.

Curiosità e trivia (Opzionale)

Prima di spegnere la fornella e lasciarvi con l’assaggio finale, ecco alcune curiosità che accompagnano questo piatto:

  • La combinazione uova-salsiccia è una delle preferite in molte cucine regionali europee, dove la salsiccia conferisce robustezza al piatto e le uova regalano una texture tenera e avvolgente.
  • In alcune tradizioni, la colonna sonora dei pasti domenicali è un crescendo di profumi legati a piatti al forno come questo, che trasformano la semplice preparazione in un rituale di regalità casalinga.
  • La scelta del formaggio, se presente, può cambiare radicalmente la percezione del piatto: formaggi stagionati aggiungono profondità, mentre formaggi freschi regalano una nota cremosa e morbida.
  • La casseruola è anche simbolo di riunione: le ricette di questo tipo hanno una storia di condivisione, dove il cibo diventa pretesto per creare legami e conservare tradizioni culinarie attraverso le generazioni.

Con questa descrizione, hai ora una panoramica completa della casseruola uova e salsiccia: una ricetta che seduce con la sua semplicità, sfida con la sua versatilità e accoglie in tavola chiunque desideri un pezzo di casa, interpretato con una sensibilità contemporanea. Se desideri, posso aiutarti a trasformare questa descrizione in una ricetta completa pronta da seguire, oppure fornire varianti mirate alle tue esigenze alimentari o al tuo palato.

Ingredients

Casseruola uova e salsiccia
Base
  • 1 lb Italian sausage (salsiccia), casings removed and crumbled
    → The sausage provides the main protein and savory depth. Crumble it into small pieces and cook in a skillet until browned and cooked through to render fat. Drain excess fat before combining with eggs and vegetables to avoid a greasy casserole.
  • 8 large eggs
    → Eggs act as the binding agent and help the casserole set into a cohesive slice. Whisk until completely blended before adding other ingredients. Tip: room-temperature eggs mix more evenly than cold eggs.
  • 1 cup whole milk
    → Provides moisture and a creamy custard when baked with the eggs. Prepared at room temperature for even incorporation. Tip: for a lighter version, use 2% milk; for a richer texture, substitute part with cream.
  • 1/2 cup grated Parmesan cheese
    → Adds sharp, salty flavor and helps with binding. Freshly grate for maximum flavor. Tip: reserve 2–3 tablespoons to sprinkle over the top before baking for a golden crust.
  • 1 cup shredded mozzarella cheese
    → Provides melted creaminess and a stretchy texture throughout the casserole. Use whole-milk mozzarella for best melt; for extra depth, mix with a bit of provolone.
  • 2 tablespoons olive oil
    → Used to sauté the sausage and vegetables, creating a flavorful foundation and preventing sticking. Tip: use extra-virgin olive oil for better aroma; heat until shimmering before adding ingredients.
  • 1 small onion, diced
    → Adds sweetness and depth as an aromatic. Sauté with the sausage fat until translucent and lightly caramelized to develop flavor. Tip: avoid burning; lower heat if onions brown too quickly.
  • 2 cloves garlic, minced
    → Delivers savory punch that complements sausage. Add after the onions soften to prevent garlic from burning. Tip: mince finely for even distribution and aroma; optional: crush and rest 5 minutes before mincing to intensify flavor.
  • 1 red bell pepper, diced
    → Contributes color, sweetness, and texture. Sauté with onions until softened. Tip: remove seeds and membranes for a smoother texture; for softer peppers, cook longer.
  • 2 cups diced potatoes (peeled), parboiled 5 minutes or use precooked hash browns
    → Provides bulk and texture to the bake. Parboiling ensures potatoes finish cooking in the oven; if using hash browns, thaw and pat dry to prevent extra moisture. Tip: uniform dice helps even cooking.
  • 1 teaspoon dried oregano or Italian seasoning
    → Delivers classic Italian herb aroma. If using fresh herbs, add toward the end after baking for brightness. Tip: bloom dried herbs briefly in the hot pan with onions to release aroma.
  • Salt and freshly ground black pepper to taste
    → Essential for balancing richness from sausage and cheese. Start with moderate seasoning and adjust after mixing; sausage and Parmesan can be salty, so taste carefully. Tip: add in stages to avoid over-salting.
  • 1 tablespoon chopped fresh parsley (optional garnish)
    → Adds a fresh, grassy note and color when served. Prep by finely chopping fresh flat-leaf parsley; toss into the mixture before baking or sprinkle on plates after cooking for a vibrant finish.
  • 1 tablespoon unsalted butter for greasing the dish
    → Helps prevent sticking and can contribute a slight) buttery finish to the crust. Prep by coating the baking dish evenly; you can also use nonstick spray as an alternative. Tip: parchment lining can further simplify removal.
Optional Add-ins
  • 2 cups fresh spinach, roughly chopped
    → Adds color, nutrients, and a light, leafy texture. Rinse thoroughly, dry, and roughly chop; wilt briefly in a hot pan or fold in raw if you prefer more bite. Tip: squeeze out excess moisture to avoid a watery bake.
  • 1 cup mushrooms, sliced
    → Imparts an earthy flavor and meaty texture. Preparation: sauté in a little oil or butter until browned and moisture evaporates, then fold into the mixture. Tip: avoid overcrowding the pan to get good browning.
  • 1/2 cup sun-dried tomatoes, chopped (oil-packed, drained)
    → Adds tangy sweetness and depth. Preparation: drain oil and chop; fold in for bursts of tomato flavor. Tip: rehydrate very dry sun-dried tomatoes briefly in hot water if needed for plumpness.
  • 1/2 teaspoon red pepper flakes (adjust for heat, optional)
    → Provides a gentle kick to balance richness. Preparation: sprinkle evenly or add to the mixture to distribute heat. Tip: start with 1/4 teaspoon and taste before adding more.
  • 1/2 cup grated Pecorino Romano (additional cheese for topping)
    → Adds a sharper, saltier bite and a crisp top when baked. Preparation: grate fresh and sprinkle over the surface before baking. Tip: Pecorino is saltier than Parmesan, adjust salt accordingly.
  • 1/2 cup breadcrumbs, mixed with 1 tablespoon melted butter (for topping)
    → Creates a crunchy, golden crust on top. Preparation: mix breadcrumbs with melted butter and sprinkle over the casserole before baking. Tip: for extra crunch, use panko; watch closely toward the end to prevent burning.

Instructions

  • Preheat your oven to 350°F (175°C) and grease a 9×13-inch baking dish with unsalted butter or olive oil, or line it with parchment for easy removal.

    → This prepares the baking vessel so the casserole releases cleanly and bakes evenly, preventing sticking and scorching at the edges.
  • In a large skillet, heat 2 tablespoons of olive oil over medium heat and brown the crumbled Italian sausage, breaking it into small pieces with a wooden spoon as it cooks until no pink remains and the fat has rendered.

    → Browning develops savory depth and rendering fat prevents a greasy final bake; drain excess fat thoroughly before mixing with eggs to keep the casserole cohesive.
  • Push the sausage to one side of the skillet and add the diced onion to the rendered fat, cooking until translucent and lightly caramelized, about 5–7 minutes; then add minced garlic and cook for 30–60 seconds until fragrant, taking care not to burn it.

    → The onion develops sweetness; garlic releases aroma when warmed but can become bitter if burned, so timing and low heat matter.
  • Add the diced red bell pepper (and sliced mushrooms if using) to the skillet and sauté until the peppers are softened and any moisture from the mushrooms has evaporated, about 4–6 minutes.

    → This builds texture and sweetness while ensuring vegetables finish cooking in the casserole rather than releasing water during baking.
  • Parboil the diced potatoes in salted water for about 5 minutes until just tender, then drain thoroughly and pat dry to remove surface moisture before adding to the casserole.

    → Parboiling ensures potatoes finish cooking in the oven without remaining hard in the center; drying prevents extra moisture that can make the bake watery.
  • In a large bowl, whisk the 8 eggs until completely blended, then whisk in 1 cup of whole milk and 1/2 cup grated Parmesan until smooth; season with a pinch of salt and a few grinds of black pepper and allow the mixture to come to room temperature if possible for more even binding.

    → A well-emulsified egg custard binds the fillings and yields a cohesive slice; room-temperature ingredients mix more uniformly and prevent clumping.
  • Fold the cooked sausage and vegetables (onion, garlic, pepper, and any mushrooms) into the parboiled potatoes in a large mixing bowl, sprinkling 1 teaspoon dried oregano or Italian seasoning evenly over the mixture and tossing to distribute the seasoning.

    → Even distribution of aromatics ensures every bite carries the Italian-herb warmth; drying oregano briefly in the hot pan releases its aroma.
  • Pour the custard over the sausage-vegetable-potato mixture and stir gently to coat all components without breaking the potatoes; the mixture should look evenly moistened and cohesive but not soupy.

    → The custard must envelop the fillings to set properly as it bakes, so gentle folding prevents breaking apart the structure.
  • Transfer the mixture to the prepared baking dish and spread it into an even layer, pressing down lightly to eliminate air pockets and ensure uniform thickness for even baking.

    → Uniform thickness prevents some areas from overcooking while others remain undercooked; pressing helps the custard to set consistently.
  • Sprinkle 1 cup shredded mozzarella evenly over the top, and reserve 2–3 tablespoons of Parmesan to scatter on the surface; if you prefer a sharper crust, add 1/2 cup grated Pecorino Romano as part of the topping.

    → The cheese on top melts into a golden, glossy crust and adds moisture and bite; Pecorino provides a saltier tang that complements the sausage.
  • Optionally combine 1/2 cup breadcrumbs with 1 tablespoon melted butter and sprinkle over the casserole to create a crunchy topping; or substitute panko for extra crispness and brush lightly with butter.

    → A breadcrumb buttered topping adds a golden, brittle crust that contrasts with the creamy interior; watch closely toward the end to prevent burning.
  • Bake in the preheated oven at 350°F (175°C) for 35–45 minutes, or until the center is set and a knife inserted into the middle comes out clean or with just a few moist crumbs; the top should be golden brown.

    → The custard sets as it bakes; testing the center ensures you do not remove it while undercooked or overdone, and a golden top indicates proper browning.
  • Remove from oven and allow the casserole to rest for 10 minutes before slicing to let the custard firm up and minimize crumbling; the rest period makes clean slices and keeps the filling intact.

    → Resting helps the proteins relax and the juices redistribute, yielding neat portions and better texture when served.
  • Garnish with chopped fresh parsley just before serving to add a bright color and a fresh, herbal note that offsets the richness of the sausage and cheese.

    → Fresh herbs provide contrast and aroma that enhance the overall perception of flavor at the final presentation.
  • Serve slices with a simple green salad or crusty bread for a complete meal, and refrigerate any leftovers promptly to maintain safety and texture.

    → Proper cooling and containment extend the dish’s safe margin and ensure the leftovers reheat well without becoming soggy.

Notes

These Casseruola uova e salsiccia is a hearty Italian‑style egg casserole that comes together with crumbled salsiccia, potatoes, eggs, milk, and cheese for a comforting, savory bake. Brown the sausage in olive oil until well browned and the fat is rendered, then sauté onion, garlic and red pepper in the same pan to develop sweetness and aroma. Parboil the potatoes (or use precooked hash browns) so they finish soft in the oven. Whisk the eggs with milk and half of the Parmesan to make a creamy custard, season with salt and pepper (keeping in mind the salt from the sausage and cheese). Grease a baking dish, layer the sausage and vegetables, fold in any optional add‑ins such as spinach or mushrooms, and top with shredded mozzarella and the remaining Parmesan for a golden, cheesy crust. Bake until the custard is set and the top is bubbling and lightly browned, then rest the casserole for about 10 minutes before slicing for clean cuts. Make‑ahead options: assemble and refrigerate overnight, or freeze before baking and bake from frozen (adding extra 15–20 minutes). For a gluten‑free version, use gluten‑free sausage and dairy/non‑gluten ingredients; skip any breadcrumbs, or use gluten‑free breadcrumbs if you want a crisp top. You can customize with greens, sun‑dried tomatoes, or a pinch of red pepper flakes for heat. Serve with a simple salad or crusty bread on the side and enjoy leftovers reheated.

Tips

Consigli utili per Casseruola uova e salsiccia

Preparazione degli ingredienti principali

  • Salsiccia: rosolala in una padella ampia, spezzettandola con una spatola finché non è ben dorata e cotta. Lascia colare l’eventuale grasso in eccesso prima di mescolarla con le uova e le verdure per evitare una casseruola troppo unta.
  • Uova: utilizza uova a temperatura ambiente e sbattile con una frusta fino a ottenere un composto omogeneo. Evita di montarle troppo a lungo per non incorporare troppa aria.
  • Latte e formaggi: lascia il latte a temperatura ambiente per una migliore incorporazione. Per una versione più leggera usa latte scremato o parzialmente scremato; per una texture più cremosa, sostituisci parte del latte con una piccola quantità di panna.
  • Parmigiano e mozzarella: grattugia il Parmigiano fresco per massima intensità di sapore. Tieni da parte 2–3 cucchiai da spargere sulla superficie prima della cottura per una crosta dorata. Usa mozzarella di latte intero per la migliore fusione; se vuoi, aggiungi un pizzico di provolone per profondità di gusto.
  • Olio e aromi: riscalda eventualmente l’olio extravergine fino a lampeggio luminoso prima di aggiungere salsiccia e verdure per evitare che assorbano troppo olio.
  • Verdure di base: cipolla tagliata a dadini, aglio tritato finemente, peperone rosso a cubetti. Sbriciola la cipolla e cuoci finché non diventa tenera e leggermente caramellata per sviluppare dolcezza e aroma; aggiungi l’aglio verso la fine per evitare che bruci.
  • Patate: se usi patate a cubetti, sbollentale 5 minuti in acqua salata o usa patate già cotte per limitare i tempi di forno. Se usi patate a cubetti precotte, asciugale bene per evitare casseruola annacquata.

Aromi, sale e bilanciamento

  • Origano o condimenti italiani: i condimenti secchi sprigionano aroma rapidamente se “sbollentati” in padella con cipolla calda; se usi erbe fresche, aggiungile verso la fine della cottura o come guarnizione per maggiore brillantezza di sapore.
  • Sale e pepe: il sapore finale va bilanciato dopo aver unito salsiccia e formaggi, poiché possono essere già salati. Aggiungi sale in piccole quantità e assaggia man mano.
  • Prezzemolo fresco: se vuoi un tocco di colore e freschezza, aggiungi prezzemolo tritato all’impasto prima della cottura o cospargi subito prima di servire.
  • Note sull’untuosità: se la casseruola risulta troppo grassa, aggiungi un po’ di pane grattugiato o cuoci la salsiccia su carta assorbente per eliminare l’eccesso di grasso.

Assemblaggio e cottura

  • Burro o carta forno: imburra bene la teglia o rivestila con carta forno per facilitare lo sgrondo e la porzionabilità una volta cotta. Puoi anche utilizzare uno spray antiaderente di buona qualità.
  • Uniformità: assicurati che patate, peperoni e funghi (se usati) siano distribuiti in modo uniforme per una cottura omogenea e una consistenza consistente in ogni fetta.
  • Temperatura e tempo: inforna a circa 180°C (350°F) finché la superficie è dorata e il centro si rassoda, tipicamente 35–45 minuti. Se la superficie si colora troppo in fretta, copri con un foglio di alluminio a metà cottura.
  • Riposare prima di servire: lascia riposare la casseruola 10 minutes dopo la cottura per permettere agli ingredienti di compattersi e facilitare il taglio in fette compatte.

Varianti e topping

  • Add-ins consigliati: 2 tazze di spinaci freschi (lavati e asciugati), 1 tazza di funghi affettati, 1/2 tazza di pomodori secchi sott’olio scolati e tagliuzzati; aggiungili in fase di assemblaggio per un piatto colorato e ricco di sapore.
  • Peperoncino: 1/2 cucchiaino di peperoncino tritato o pepe di Cayenna per un leggero piccante; inizi con metà dose e aggiusta.
  • Copertura croccante: 1/2 tazza di pangrattato mescolato con 1 cucchiaio di burro fuso o burro chiarificato per una crosta dorata croccante; in alternativa usa pangrattato Panko per extra croccantezza.
  • Formaggi extra: spolvera un po’ di Pecorino Romano sopra prima di infornare per una crosta più saporita e salata. Ricorda di aggiustare il sale complessivo.
  • Versione leggera: sostituisci parte del latte con latte scremato o aggiungi poco formaggio per ridurre l’apporto calorico mantenendo comunque una buona texture.

FAQ

Che cos’è questa casseruola uova e salsiccia?

È una casseruola al forno a base di uova sbattute, salsiccia sbriciolata, formaggio fuso e verdure. Viene cotta in forno finché è soda e dorata e si taglia a fette, perfetta per colazione abbondante, pranzo o cena.

Quali ingredienti servono come base?

Ingredienti tipici: salsiccia (circa 600 g), uova (6–8), latte o panna (200–250 ml), formaggio grattugiato (50–100 g di parmigiano o pecorino), cipolla o scalogno, verdure a scelta (peperoni, spinaci, funghi), patate a fette sottili o pane a cubetti per struttura, olio d’oliva, sale, pepe, erbe aromatiche come origano o timo. Opzionale: aglio, peperoncino, erba cipollina.

Come si prepara passo-passo?

1) Preriscalda il forno a circa 180 °C. 2) Cuoci la salsiccia sbriciolata con cipolla (e eventuali funghi) in una padella finché è dorata. 3) Sbatti le uova con latte/panna, sale, pepe e formaggio. 4) Se usi patate o pane, disponili come base nella teglia unta. 5) Mescola la salsiccia cotta con le uova e versa nella teglia. 6) Cuoci in forno 35–45 minuti finché la superficie è dorata e ferma al tatto. Lascia riposare 5–10 minuti prima di tagliare.

Quanta porzione rende e quanto tempo serve?

La ricetta tipica serve 4–6 porzioni, a seconda delle dimensioni delle fette. Il tempo totale è circa 60 minuti: 15–20 minuti di preparazione e 35–45 minuti di cottura.

Posso fare varianti o sostituzioni?

Sì. Varianti comuni: – Versione vegetariana: sostituisci la salsiccia con funghi extra, peperoni e spinaci, o aggiungi ceci. – Versione con formaggio diverso: provola, mozzarella o asiago per una fusione più cremosa. – Versioni senza glutine: usa pane senza glutine raffermentato o patate come base. – Aggiunte di verdure: zucchine, pomodori secchi, spinaci. – Spezie: paprika affumicata, aglio in polvere, pepe di cayenna per un tocco piccante.

Come conservare gli avanzi?

Lascia raffreddare, poi conserva in contenitore chiuso in frigorifero per 2–3 giorni. Puoi riscaldare porzioni singole nel forno a 170 °C per 10–15 minuti o nel microonde. Per migliori risultati, riscalda in forno per evitare che diventi molle.

È possibile congelare la casseruola?

Si, ma potresti valutare di congelare solo gli elementi non cotti o la teglia già cotta tagliata in porzioni. Congelare crudo può cambiare la consistenza delle uova. Per congelare: avvolgi bene o usa contenitori ermetici e congela fino a 2–3 mesi. Scongela in frigorifero prima di riscaldare.

Quali utensili e suggerimenti per una cottura perfetta?

Usa una teglia o una pirofila da forno di medie dimensioni. Ungi bene i bordi. Cuoci fino a doratura e al centro non deve muoversi. Per una superficie più lucida, puoi spennellare con un po’ di latte o panna sui bordi prima di infornare. Se vuoi una crosticina ancora più croccante, negli ultimi 5 minuti attiva modalità grill se il tuo forno lo permette.

Come servirla e accompagnamenti consigliati?

Taglia a fette e serve con una fresca insalata verde o rucola. Puoi abbinare pane croccante, salsa allo yogurt o una salsa al pomodoro. Per una versione completa, accompagna con patate arrosto o una porzione di verdure grigliate.

Posso utilizzare uova intere o soltanto albumi?

La ricetta tradizionale usa uova intere per una consistenza ricca. Se vuoi una versione più leggera, usa un mix di uova e albumi (per esempio 4 uova intere + 2 albumi), ma la consistenza sarà meno cremosa.

Introduzione

Immagina un dessert che sa di festa, di notti estive illuminate dalle luci tremolanti di una cucina accogliente. Una cheesecake cremosa, setosa come una nuvola, con vortici di lamponi che scorrono come piccole sculture di rubino. Ogni fetta rivela un cuore luminoso: una crema vellutata che danza con la dolce acidità della frutta, avvolta da una crosta che offre una prima carezza croccante, un equilibrio di consistenze che soddisfa sia la fame che la voglia di comfort. Questo è Swirl cheesecake ai lamponi: una versione elegante ma sorprendentemente accessibile, capace di trasformare una giornata comune in un piccolo rituale di piacere. È un dessert che invita a rallentare, a assaporare ogni boccone, a condividere momenti con chi si ama: una fetta e, all’improvviso, il tempo sembra farsi dolce, come se la ricetta stessa avesse la chiave per sedersi accanto a te e rendere speciale il pomeriggio o la fine di una cena.

La bellezza di questa torta sta nell’arte dello swirl: striature rosse che corrono attraverso una crema candida, come onde di lampi di colore che raccontano una storia di frutta fresca, vaniglia e limone. Non si tratta solo di gusto; è un’esperienza visiva, un assaggio che inizia con lo sguardo, prosegue con l’olfatto e si conclude con un finale cremoso che rimane sulla lingua. È una ricetta che celebra l’estate e la sua avalanche di lamponi, ma che si adatta facilmente a ogni stagione grazie all’uso di ingredienti universali: formaggi cremosi, succo di limone, una base croccante, e quel tocco di dolcezza che non stanca mai.

Se stai cercando un dessert che sia al contempo raffinato e rassicurante, che possa stupire in una cena tra amici o rendere speciale una serata in famiglia, Swirl cheesecake ai lamponi è la scelta giusta. La magia non risiede soltanto nel sapore finale, ma nel modo in cui questa torta si presenta: liscia e lucida in superficie, con i vermicelli di lamponi che emergono come minuscole opere d’arte, pronta per essere tagliata a fette che sembrano piccole porzioni di felicità. Prepararla è un atto di cura: la crema si rassoda al freddo, la notevole presentazione si ottiene con pazienza, e il risultato è una torta che resta impressa nella memoria, come un piccolo soffio di gioia nella routine quotidiana.

Incorporare lamponi freschi o congelati non è solo una scelta di gusto, ma una dichiarazione di stagione. L’acidità vivace della frutta si intreccia con la dolcezza cremosa, creando una sinfonia di note che ballano sull’assaggio: una punta di vaniglia che consola, una scintilla di limone che illumina, una crema che avvolge senza pesare. E se vuoi alzare ulteriormente l’impatto sensoriale, un’emulsione leggera di scorza di limone grattugiata e una spruzzata di vaniglia introdurranno un profilo aromatico che resta a lungo in bocca, come un ricordo dolce che ci riporta subito a casa.

Un invito all’esplorazione sensoriale

Questo dessert è un invito all’esplorazione: puoi provarlo in versioni tradizionali o osare con varianti che cambiano esteticamente e gustativamente. Forse vuoi una base leggermente più croccante, o una crema meno dolce per lasciare che la frutta brilli di più? Forse desideri sfumature di agrumi più marcate o una crema leggermente più leggera? La bellezza di Swirl cheesecake ai lamponi è che si presta a personalizzazioni senza perdere l’anima fondamentale: equilibrio, eleganza e comfort in ogni morso.

La storia del piatto

La cheesecake, nella sua essenza, è un viaggio attraverso culture e tradizioni culinarie. Dalla classicità newyorkese alle interpretazioni europee, ogni regione ha aggiunto un ingrediente o una tecnica che la rende unica. Swirl cheesecake ai lamponi nasce da un dialogo tra l’irrequietezza creativa dei pasticceri contemporanei e la nostalgia di sapori semplici ma intensi. L’idea di inserire un vortice di lamponi all’interno di una crema è una celebrazione della frutta: non viene semplicemente aggiunta come accompagnamento, ma diventa protagonista “in movimento”, disegnando linee che guidano l’occhio e il palato. Si tratta di un’armoniosa fusione tra la leggerezza della crema e la vivacità della frutta, tra la dolcezza vellutata e la freschezza acida del lampone.

Originariamente, queste striature venivano realizzate con marmellate dense o coulis concentrate, ma l’evoluzione della pasticceria domestica ha portato a una versione più raffinata in cui la crema di formaggio si mescola con delicate note di vaniglia e scorza di limone, offrendo un contrasto aromatico che rende ogni fetta una piccola opera d’arte. La preparazione, seppur semplice, ricorda l’arte della pittura: si aggiungono pigmenti (in questo caso lamponi e crema) con mano lieve, si tiene il delineato equilibrio tra riduzione del retrogusto agrodolce e la lucentezza della superficie, e si aspetta il momento in cui la torta si fissa al freddo per rivelare la sua bellezza definitiva.

In molte tradizioni familiari italiane, i dolci al formaggio hanno avuto un posto speciale nei momenti di festa. Swirl cheesecake ai lamponi risuona con quella memoria: una torta che non teme l’attenzione, ma che però si adatta anche alle occasioni quotidiane. L’uso di lamponi freschi, in stagione, è una scelta che onora la natura, ma la ricetta resta solida anche con lamponi surgelati, permettendo di gustarla tutto l’anno. La storia di questa torta è quindi una storia di incontro: tra cremosità e frutto, tra tradizione e modernità, tra comfort e stile scenico.

Se vuoi allargare l’orizzonte, potresti pensare a una versione “mini” per un buffet o una tavola di dessert: piccoli bicchieri o mini cheesecake che conservano la stessa magia, ma in formato bite-size. In alternativa, una versione gluten-free o dairy-free può prendere forma, mantenendo l’idea di swirl e crema vellutata, offrendo a chi ha esigenze alimentari nuove possibilità di godere di questo incantatore dessert. L’arte di Swirl cheesecake ai lamponi è quindi non solo una ricetta, ma un approccio: una guida al gusto che invita a sperimentare, a personalizzare, a condividere.

Perché You’ll Love This Recipe

  • Equilibrio tra cremosità e freschezza: la crema vellutata si sposa con l’acidità rinfrescante dei lamponi in un continuo gioco di contrasti.
  • Impatto visivo immediato: le swirl rosse su fondo bianco creano una fetta che sembra un’opera d’arte culinaria.
  • Versatilità stagionale: perfetta per l’estate grazie alla frutta, ma altre versioni la rendono irresistibile in ogni stagione.
  • Procedimento pratico: non richiede tecniche complesse o lunghe cotture; è accessibile con strumenti di base e pazienza per il raffreddamento.
  • Confortante senza essere pesante: una quantità ragionata di dolcezza che soddisfa il palato senza appesantire.
  • Adatta a varie occasioni: feste, cene eleganti, merende festive o dessert per una cena romantica.
  • Possibilità di personalizzazioni: puoi modulare la dolcezza, l’intensità degli aromi e l’acidità a seconda dei gusti o delle restrizioni alimentari.

Profilo di sapore e consistenza

La crema di formaggio è l’elemento portante: soffice, liscia, con una nota di vaniglia che avvolge il palato. È una base neutra, perfetta per esaltare la frutta senza sovrastarla. Il lamponi, appena ridotti in coulis o lavorati in purea ruvida, aggiunge una brillantezza rubino e un contrasto acido che taglia la dolcezza. Il sapore complessivo è una sinfonia di dolcezza soffice, acidità vivace e una leggera nota agrumata che rinfresca. La torta ha una texture stratificata: la base, di consistenza croccante o leggermente friabile, sostiene una crema che si scioglie sul palato, e una serie di striature di lamponi che danno una sensazione di freschezza in più ad ogni morso. L’effetto complessivo è di eleganza semplice: non è troppo dolce, né troppo ricco; è bilanciato, bilanciare la cremosità con la frutta, la vaniglia, e una meteora di scorza di limone che illumina i profumi senza sovrastare.

La freschezza dei lamponi fa emergere una leggera nota acidula che pulisce il palato tra una fetta e l’altra, rendendo ogni boccone interessante. L’aroma di vaniglia e scorza di limone crea una cornice profumata, evocando immagini di cucine luminose e piene di profumi di frutta di stagione. La consistenza complessiva è rotonda: la crema si scioglie morbidamente, la base offre una leggera resistenza, e le striature di lamponi si percepiscono al centesimo morso, come piccoli contrasti di colore e sapore che si rincorrono. È una torta che invita al bis, poiché ogni fetta sembra promettere qualcosa di nuovo pur rimanendo fedele all’equilibrio fondamentale tra dolcezza e freschezza.

Occasioni & abbinamenti

Questo dessert si presta a molte occasioni. Le cene eleganti non sembrano complete senza una chiusura dolce che sia contemporanea e sofisticata. È ideale per chiudere una cena estiva all’aperto, magari accompagnata da un calice di vino leggero o uno spumante dolce. È adatto anche a pranzi di famiglia, compleanni, o semplicemente a una merenda in giardino. Puoi presentarne una versione monoporzionata per un effetto “wow” immediato o una grande torta da tagliare a fette generose per un momento condiviso attorno al tavolo.

Abbinamenti consigliati:

  • Bevande: Moscato d’Asti, Prosecco dolce, o uno sparkling rosé leggero. Per chi preferisce il caffè, un espresso breve o un caffè latte bilanciano la dolcezza con l’amaro delicato.
  • Contorni: una leggera glassa di limone o una coulis di lamponi extra per decorare al momento, oppure una leggera spennellata di crema di ricotta per un tocco di cremosità aggiuntiva.
  • Dessert pairing: gelato alla vaniglia o una leggera coulisse di frutti di bosco come accompagnamento, per creare un duo di temperature e consistenze.

Tips, Varianti & Sostituzioni

  • Variazione di base: se vuoi un sapore più intenso, aggiungi una punta di scorza di limone o di arancia nella crema di formaggio durante l’incorporazione. L’aroma agrumato si percepirà come una nota fresca che esalta la frutta.
  • Versione vegana: sostituisci la crema di formaggio tradizionale con una crema a base di anacardi o di anacardi ammollati e frullati con un po’ di latte di mandorle. Puoi usare una gelatina vegetale leggera per tenere la texture, oppure una purea di lamponi per mantenere la coerenza dello swirl.
  • Gluten-free: la base può essere realizzata con cracker o biscotti senza glutine. Mantieni la proporzione tra grassi e biscotti per conservare la croccantezza desiderata.
  • Varianti di frutta: se i lamponi non sono di stagione, puoi usare more, mirtilli o una combinazione di bacche per mantenere la vivacità del swirl. L’importante è una purea che possa essere morbida e facilmente stendibile.
  • Swirl intensi: per un effetto swirl più definito, aggiungi la purea di lamponi a cucchiaiate sull’impasto cremoso già livellato. Usa uno stecchino per tirare delicatamente linee through per creare le striature.
  • Riduzione zuccherina: se vuoi ridurre lo zucchero, riduci leggermente la quantità in base al tuo equilibrio di dolcezza preferito, e aumentare la quantità di lamponi per mantenere la nota acida che contrasta con la crema.
  • Presentazione: servi freddissimo per una consistenza migliore. Puoi decorare con lamponi freschi e una spolverata leggera di scorza di limone o di cacao per un tocco sofisticato.

Conservazione & Make-Ahead Ideas

Questa torta è particolarmente amica delle preparazioni anticipate. Puoi prepararla con almeno 24 ore di anticipo, permettendo ai sapori di fondersi e alla crema di rassodarsi bene in frigorifero. Una volta completamente raffreddata e rassodata, la torta si conserva bene in frigorifero per 2-4 giorni, coperta con pellicola per alimenti o sigillata in contenitore ermetico. Se vuoi congelarla, taglia la torta in porzioni prima di metterla nel congelatore; avvolgi singolarmente ogni fetta in pellicola, quindi riponila in un contenitore che tenga fuori l’umidità. In freezer, le porzioni si conservano fino a 2-3 mesi. Per riscaldarle, lasciale scongelare in frigorifero durante la notte e poi portale a temperatura ambiente un po’ prima di gustarle, oppure riscaldale delicatamente in forno a bassa temperatura per una consistenza più morbida.

Idee make-ahead:

  • Preparare la crema e conservare in frigorifero fino al momento dell’assemblaggio.
  • Preparare la base e raffreddarla, pronta per essere riempita con la crema al momento.
  • Preparare purea di lamponi in anticipo e conservarla in frigorifero; quando è ora di fare il swirl, spennellarla o distribuirla a cucchiaiate sull’impasto.

Se vuoi organizzare una cena di più portate, questa torta può diventare il pezzo forte dell’ultima portata: servila fredda direttamente dal frigorifero per mantenere la perfetta consistenza cremosa e lo swirl luminoso. Puoi accompagnarla con una salsa leggera di lamponi o con una piccola porzione di gelato alla vaniglia per un contrasto tiepido-freddo che esalta ogni sapore.

Fun Facts & Trivia

Sapevi che la parola cheesecake ha origini antiche e si ritrova in culture diverse? In alcune tradizioni, la cheesecake era una torta celebrativa che veniva realizzata con formaggi freschi, miele e aromi naturali, servita durante festival e riunioni comunitarie. L’arte dello swirl, invece, ha radici moderne: è diventata una firma estetica in molti dessert contemporanei, una tecnica che valorizza la presentazione tanto quanto il gusto. Il lampone, con la sua vibrante tonalità rossa, non è solo decorazione: contiene antociani naturali che conferiscono colore e proprietà antiossidanti, offrendo un beneficio aggiunto al piacere del dessert. Combinare lamponi con crema di formaggio è quindi una scelta che unisce bellezza, gusto e una piccola nota salutare, rendendo questo dessert appetitoso anche per chi è attento all’equilibrio.

Infine, una curiosità culinaria: in molte cucine regionali si gioca con i colori e le consistenze dei dessert al formaggio per celebrare la stagione e i frutti disponibili. Swirl cheesecake ai lamponi si inserisce in questa tradizione come una moderna reinterpretazione, capace di rispettare la memoria di una torta classica mentre si allinea con i gusti odierni: una crema che fa sognare, un colore che attira lo sguardo, una consistenza che conquista fin dal primo morso. È un piccolo capitolo di stile gastronomico che puoi portare in tavola con facilità, offrendo a chi assaggia una esperienza complessiva che va oltre il semplice dolce: è un’atmosfera, un momento, una memoria condivisa.

Conclusione: un dessert che racconta una storia

Swirl cheesecake ai lamponi è molto più di una ricetta: è una possibilità di creare atmosfera, di invitare le persone a fermarsi un attimo e a concedersi un momento di piacere. Dalla texture cremosa ai vividi swirl di lamponi, dalla crosta che offre una prima nota croccante a quella fragranza aromatica di vaniglia e scorza di limone che apre i sensi, questa torta è una celebrazione della semplicità ben eseguita. È una ricetta che parla di stagione, di famiglia, di occasionali festeggiamenti e di serate tranquille che si illuminano al primo taglio di una fetta perfetta. Se stai pensando a una chiusura memorabile per un pasto o a una deliziosa coccola per te e i tuoi cari, Swirl cheesecake ai lamponi è la risposta: una promessa di sapore che resta con te molto tempo dopo l’ultimo pezzo sparisce dal piatto.

Ingredients

Crust

    – 1 3/4 cups graham cracker crumbs (or gluten-free graham cracker crumbs), finely crushed
    → These crumbs form the base of the cheesecake crust, providing texture and flavor. If using gluten-free crackers, ensure they are certified gluten-free to prevent cross-contamination. The crumbs are mixed with butter and optional sugar to create a cohesive, pressable crust that bakes into a firm foundation for the filling.
    – 1/4 cup unsalted butter, melted
    → Butter binds the crust together, giving it richness and structure. Melted butter distributes evenly through the crumbs so the crust holds together when pressed into the pan. If you’re dairy-free, substitute with a neutral oil (like coconut oil) and adjust sweetness; note that flavor and texture will shift slightly.
    – 2 tablespoons granulated sugar (optional)
    → A hint of sweetness to the crust, especially if using plain or unsweetened crackers. Omit if crackers are already sweet. Sugar helps with browning and adds a subtle caramel note during baking.

Cheesecake Filling

    – 24 ounces cream cheese, softened to room temperature
    → The main creamy base of the cheesecake, providing structure and a velvety mouthfeel. Softening to room temperature ensures a smooth, lump-free batter. Avoid melting the cheese; only soften it enough to mix evenly for a glossy texture.
    – 1 cup granulated sugar
    → Sweetens the filling and helps create a smooth emulsion with the cream cheese and eggs. Beat until light and fluffy to prevent a grainy texture. Do not overmix after adding eggs to avoid incorporating air that could cause cracks.
    – 3 large eggs, at room temperature
    → Provide structure and moisture to set the cheesecake as it bakes. Add one at a time and mix just until incorporated to keep the batter dense and creamy; overbeating can introduce air leading to cracks or a souffle-like texture.
    – 1/2 cup sour cream or heavy cream, at room temperature
    → Adds moisture, tang, and silkiness. Sour cream yields a traditional tangy note; heavy cream yields a richer, ultra-smooth texture. Using a combination can balance richness and creaminess while helping prevent cracking.
    – 1 teaspoon pure vanilla extract
    → Enhances overall flavor and complements raspberry. Use high-quality vanilla; if possible, opt for real vanilla extract or paste for a deeper aroma. The vanilla helps round the tartness of the berries and cream cheese.
    – 1/2 teaspoon lemon juice or finely grated lemon zest (optional)
    → A touch of acidity to brighten the filling and balance sweetness. Lemon zest adds aroma without adding liquid; lemon juice should be used sparingly to avoid curdling. If using zest, skip the juice to keep the texture stable.
    – Pinch of salt
    → Enhances flavors and counteracts sweetness, helping the raspberry swirl pop. Even if dairy is salted, a small amount intensifies the depth of the filling.

Raspberry Swirl

    – 1 cup raspberries (fresh or thawed from frozen)
    → Provides a vibrant color and fruity contrast. Fresh berries give a more defined swirl; if using frozen, thaw completely and drain excess liquid to prevent a watery swirl. Mash lightly for a chunky swirl or purée for a smoother effect, depending on preference.
    – 2-3 tablespoons granulated sugar (adjust to taste)
    → Sweetens the raspberry mixture to balance tartness. Start with 2 tablespoons and taste; add more if berries are very tart. You can also substitute with honey or maple syrup for a different flavor profile.
    – 1 tablespoon lemon juice (optional)
    → Brightens the raspberry flavor and helps maintain color during baking. Add to the berry mixture after crushing and mixing; adjust acidity to taste to avoid overpowering the raspberry.
    – 1 teaspoon cornstarch (optional, for thickening)
    → Helps stabilize and thicken the swirl so it holds its shape when the cheesecake bakes and cools. If you prefer a looser swirl, you can omit, but the swirl may be more fluid as it bakes.

Toppings (optional)

    – Fresh raspberries for garnish
    → Adds a bright, fresh contrast and enhances visual appeal. Gently wash and pat dry; place a few berries on top after slicing to showcase the swirl. If the swirl is very dominant, place sparingly to preserve the pattern.
    – Powdered sugar for dusting
    → Finishing touch that provides a delicate sweetness and elegant presentation. Sift lightly just before serving to avoid clumps. If you prefer, substitute with a light raspberry coulis for a color pop and extra acidity.

Instructions

  • Preheat your oven to 325°F (165°C) with a rack in the center and prepare a 9-inch (23 cm) springform pan by greasing the interior and lining the bottom with parchment paper.
    → This ensures the crust releases cleanly from the pan after chilling and baking, and parchment prevents sticking along the bottom for easier removal.
  • Sift or finely crush graham cracker crumbs (or gluten-free graham crackers) and transfer to a bowl with the melted unsalted butter and optional sugar; stir until all crumbs are evenly moistened and resemble damp sand.
    → Even moisture distribution allows the crust to compact uniformly when pressed, creating a solid foundation that holds together when sliced.
  • Press the crust mixture into the bottom and slightly up the sides of the prepared springform pan using the flat bottom of a measuring cup or the back of a spoon; apply firm, even pressure to avoid air pockets.
    → A compact, evenly distributed crust bakes into a sturdy base and prevents crumbly slices; pressing up the sides helps anchor the filling.
  • Bake the crust in the preheated oven for 8–10 minutes until the edges are lightly golden and fragrant; remove from oven and cool the crust on a rack before filling.
    → Partial baking sets the crust’s structure and enhances flavor, while cooling prevents the crust from softening when the filling is added.
  • In a stand mixer or with a hand mixer on medium speed, beat the softened cream cheese and granulated sugar together until completely smooth and creamy, about 2–3 minutes; scrape down the bowl midway.
    → Fully smoothing the base prevents lumps in the final cheesecake and yields a glossy, uniform texture; scraping prevents stray cheese from hiding in the batter.
  • With the mixer on low, add the eggs one at a time, mixing just until each is incorporated before adding the next; avoid overmixing to minimize air incorporation that can cause cracks.
    → Gentle, incremental incorporation maintains a dense, creamy texture and reduces crusted cracking during baking.
  • Blend in the sour cream (or heavy cream), vanilla extract, and the optional lemon zest or lemon juice; add a pinch of salt and mix just until the batter is smooth and uniform.
    → Dairy additions contribute moisture and a silky mouthfeel; lemon adds brightness that complements raspberry and cuts sweetness; salt enhances depth of flavor.
  • Prepare the raspberry swirl by combining fresh or thawed raspberries with sugar and lemon juice in a small saucepan; cook gently until the mixture thickens slightly, then cool completely and whisk in the optional cornstarch for a thicker, more stable swirl.
    → Heating concentrates the berry flavor and helps the swirl hold its shape during baking; cooling prevents it from seeping too much into the filling.
  • Pour the cream cheese filling over the cooled crust, smoothing the surface with a spatula; spoon dollops of the raspberry mixture over the filling in a few areas.
    → A smooth surface ensures an even bake, and dollops create distinct pockets for a striking swirl pattern once marbled.
  • Use a thin skewer or knife to gently swirl the raspberry across the surface in a quick, figure-eight or circular motion; avoid excessive swirling to keep visible ribbons rather than a completely pink filling.
    → Controlled swirling yields an attractive marbled look while preserving the creamy base beneath.
  • Wrap the outside of the springform pan tightly with two layers of heavy-duty aluminum foil and place the pan into a larger, deep roasting pan; add hot water to the outer pan until it comes about halfway up the sides of the cheesecake pan.
    → The water bath cushions the cheesecake, promoting an even, gentle bake and reducing the risk of cracks by stabilizing temperature and moisture during baking.
  • Bake the cheesecake in the water bath at 325°F (165°C) for 50–60 minutes, or until the edges are set and the center yields a gentle jiggle when the pan is nudged. Turn off the oven and leave the door ajar; let the cheesecake rest in the oven for 1 hour.
    → The gradual cooling within the oven minimizes thermal shock and cracking, while the center remains creamy and finishes setting as it cools.
  • Remove the cheesecake from the oven and carefully lift the springform pan from the water bath; cool on a rack at room temperature for 1–2 hours before refrigerating.
    → This staged cooling prevents rapid temperature shifts that can cause cracking and ensures the center sets further without drying out.
  • Chill the cheesecake, covered, in the refrigerator for at least 4–6 hours or overnight until completely set and firm to the touch.
    → Chilling solidifies the filling, enhances slicing precision, and allows the flavors to meld with the raspberry notes for a clean, sliceable texture.
  • Release the cheesecake from the springform ring, then transfer to a serving platter; garnish with fresh raspberries and a light dusting of powdered sugar if desired.
    → The final release and presentation showcase a clean edge and vibrant swirl, while the fresh berries add color and a contrasting tart bite just before serving.
  • Slice with a warm, sharp knife wiped clean between cuts; serve chilled for a creamy, indulgent dessert with a bright raspberry contrast.
    → A hot knife yields thinner, neater slices and prevents dragging through the filling, preserving the swirl pattern on each portion.

Notes

These raspberry swirl cheesecake notes offer tips to help you create a luscious dessert with a buttery crust and a velvety filling swirled with bright raspberries. For best results, bring all dairy to room temperature and beat the filling gently: soften the cream cheese fully, beat the sugar until light and fluffy, and add eggs one at a time just until incorporated to avoid cracks. If you need a gluten-free version, use certified gluten-free graham crackers for the crust and check all other ingredients for gluten to prevent cross-contamination. You can customize the crust by adding a pinch of cinnamon or a hint of lemon zest to brighten the base. To prevent cracking, bake slowly in a 325–350°F oven, ideally in a water bath, and let the cheesecake cool gradually in the oven with the door cracked before refrigerating. For the raspberry swirl, mash the berries and balance with sugar and a splash of lemon juice; a small amount of cornstarch can help set the swirl so it holds its shape after baking. Pour the filling over the crust, spoon the raspberry mixture on top, and marbelize with a knife or skewer. Chill for at least 4 hours or overnight until fully set. Serve chilled with fresh raspberries or a light dusting of powdered sugar, and consider a drizzle of raspberry coulis for extra color and acidity. Leftovers freeze well—wrap tightly and thaw in the fridge before serving. Always ensure your dairy products are fresh and properly stored, and if you opt for dairy-free, use a non-dairy cream cheese and sour cream substitute, understanding that texture and flavor will differ slightly.

Tips

Tips for making Swirl cheesecake ai lamponi

  • Bring ingredients to room temperature. Softened cream cheese, sour cream or heavy cream, and eggs mix more evenly, creating a glossy, lump-free batter. Cold ingredients can lead to a lumpy texture.
  • Prepare the crust properly. Use fine crumbs and press the crust evenly into the pan base and a little up the sides. A lightly foamed or compacted crust holds together better after baking. Chill the crust briefly before adding the filling to prevent shrinking away from the pan.
  • Use a water bath to prevent cracking. Wrap the springform pan in heavy-duty foil to seal leaks and place in a larger baking dish filled with hot water. The steam helps the cheesecake set evenly and reduces surface cracks.
  • Protect the crust during baking. Cover the crust with a piece of parchment or foil if the edges start to brown too quickly; you want a pale, golden crust that remains firm after chilling.
  • Raspberry swirl technique. Mash raspberries lightly for a chunky swirl or purée for a smoother effect. If you want a more defined swirl, don’t mix the swirl into the batter too deeply—layer roughly and swirl with a knife.
  • Thickening the swirl (optional). If your raspberries are very juicy, whisk in a small amount of cornstarch (1 teaspoon) to help the swirl hold its shape during baking and cooling.
  • Flavor balance. The lemon zest or juice added to the filling brightens the tang from the cream cheese; if you add zest, avoid adding too much juice to prevent curdling and a runnier batter.
  • Test for doneness carefully. The center should be slightly jiggly but not liquid. It will continue to set as it cools. If the center is still molten, give it a few more minutes and test again.
  • Cooling and setting. Allow the cheesecake to cool gradually in the oven with the door slightly ajar for the first 30–60 minutes, then on the counter before chilling in the fridge for at least 4 hours or overnight for best slicing.
  • Chilling is key. Refrigerate the assembled cheesecake (uncovered for an hour, then covered) to help the filling firm up and the swirl set, making clean slices easier.
  • Crust alternatives. If gluten-free, use certified GF graham crackers or finely ground almonds or oats as a base. For dairy-free, substitute dairy-free cream cheese and a dairy-free butter or neutral oil, keeping in mind the texture and tang may shift slightly.
  • Slicing and plating. Dip the knife in hot water and wipe between cuts for clean slices. A quick pass along the edge of the pan before lifting the slice helps prevent crumbs from sticking to the knife.
  • Storage and leftovers. Store leftovers in the refrigerator for up to 3–4 days or freeze individual slices wrapped tightly for up to 1–2 months. Thaw in the fridge before serving for best texture.
  • Garnish ideas. Fresh raspberries and a light dusting of powdered sugar look gorgeous. For a glossy finish, serve with a thin raspberry coulis on the side or a dollop of whipped cream.

FAQ

Quali sono gli ingredienti principali per Swirl cheesecake ai lamponi?

Base:

  • 200 g di biscotti digestive o graham crackers, sbriciolati
  • 90 g burro fuso

Crema:

  • 600 g di formaggio cremoso
  • 150-180 g di zucchero
  • 2 uova
  • 1 tuorlo
  • 1 cucchiaino di estratto di vaniglia
  • 180 ml di panna fresca

Swirl ai lamponi:

  • 200 g di lamponi (freschi o surgelati)
  • 2-3 cucchiai di zucchero
  • Succo di mezzo limone

A piacere: scorza di limone grattugiata e un pizzico di sale.

Come si prepara la base di biscotti?

Frulla o sbriciola i biscotti fino a polvere finissima. Mescola con il burro fuso finché il composto diventa sabbioso. Pressalo sul fondo dello stampo a cerniera da 20-23 cm, livellando bene. Metti in frigorifero o freezer per 15-20 minuti per compattezza.

Come si prepara la crema al formaggio?

In una ciotola capiente, monta il formaggio cremoso con lo zucchero fino a ottenere una crema liscia. Aggiungi le uova una alla volta, poi il tuorlo, la vaniglia e la panna, mescolando a bassa velocità o con una spatola per evitare bolle d’aria. La crema deve rimanere lucida e omogenea.

Come si fa lo swirl ai lamponi?

Riduci i lamponi in purea con lo zucchero e, se vuoi, passa al setaccio per eliminare i semi. Distribuisci la purea a cucchiaiate sull’impasto cremoso nel guscio, quindi con uno stuzzicadenti o uno stecchino crea movimenti circolari per ottenere l’effetto swirl. Evita di mescolare troppo per non rompere la crema.

Come si cuoce la cheesecake e quali accorgimenti usare?

Cuoci in forno preriscaldato a 160-170°C. Per una cottura uniforme, usa il metodo a bagnomaria: sistema lo stampo in una teglia più grande e aggiungi acqua bollente fino a 1-2 cm di altezza. Cuoci per circa 60-70 minuti, finché i bordi sono solidi e il centro resta leggermente tremolante. Spegni il forno e lascia raffreddare con la porta socchiusa, poi trasferisci in frigorifero per almeno 4 ore o tutta la notte.

Come evitare che la cheesecake si crepi?

Non aprire il forno durante la cottura, preferisci la cottura a bagnomaria e raffredda lentamente. Non lavorare eccessivamente la crema e lascia che il centro sia leggermente tremolante prima di spegnere il forno. Una temperatura uniforme e un raffreddamento lento riducono drasticamente le crepe.

Posso utilizzare lamponi freschi o congelati?

Sia freschi che congelati funzionano. Se usi lamponi congelati, scongelali e scola bene l’acqua in eccesso prima di prepararli. Puoi combinare lamponi freschi per la swirl con lamponi congelati per la decorazione.

Quale stampo utilizzare e come evitare che attacchi?

Preferisci uno stampo a cerniera da 20-23 cm. Imburra leggermente i bordi e, se necessario, rivesti il fondo con carta forno. Per facilitare la detrazione, lascia raffreddare completamente la cheesecake prima di togliere lo stampo. Se usi carta forno, lascia una piccola «maniglia» per sollevarla facilmente.

Come conservare la cheesecake e quanto dura?

Conservala in frigorifero in un contenitore ermetico per 3-5 giorni. Puoi anche congelare porzioni individuali avvolte in pellicola e conservarle fino a 2-3 mesi; scongela in frigorifero durante la notte prima di servire.

Varianti e sostituzioni utili

Per una versione meno dolce, riduci lo zucchero nella crema. Puoi sostituire una parte del formaggio con yogurt greco per una texture diversa. Se vuoi una base gluten-free, usa biscotti senza glutine. Per un sapore più intenso di lampone, aggiungi una spruzzata di limone al purè. Decora con lamponi freschi e scorza di limone a piacere.