Author

Ocean Nightleaf

Browsing

Introduction / Hook

Picture a Sunday kitchen waking up to the comforting scent of warm vanilla, caramelized edges kissing the pan, and a gentle steam that invites you to gather around the table. Casseruola pancake is not just a dish; it’s a hug you bake into a golden assembly that blends the best of breakfast and comfort food. This is the kind of recipe that makes the morning feel special without demanding a full morning’s effort. The batter, the gentle rise, the way the crust develops a delicate crisp while the inside stays tender and custardy—these contrasts create a texture that plays with your senses and lingers on your palate. It’s the kind of dish that works for a big family brunch, a lazy weekend treat, or a party-ready breakfast-for-dinner moment. And because it’s a casserole built to bake, you can assemble it ahead, set your alarm to low and slow, and wake up to something that tastes like it took hours to perfect, even though it came together in a fraction of the time.

Imagine waking up to a scene that feels both rustic and refined: steam curling from the pan, a syrupy drizzle catching the light, a few specks of cinnamon or citrus zest adding warmth, and a chorus of toppings that you can tailor to your mood. Casseruola pancake is that kind of dish—versatile, forgiving, and wonderfully forgiving for cooks of all levels. It’s a celebration of simple ingredients transformed through technique and time into something greater than the sum of its parts. The beauty lies in its ability to be both indulgent and practical: you get that soulful pancake flavor, but you’re rewarded with a more substantial, shareable form that sits confidently at the center of a table.

What makes this pancake casserole truly special is the way it invites customization. You can swirl in fruit for brightness, nest in pockets of creamy custard for richness, or add a crumble topping that delivers a little crunch. It’s equally at home alongside bright berries and a dollop of whipped cream as it is with a rustic maple glaze that glows amber in the morning light. If you’re cooking for kids, you can tune the sweetness and add familiar favorites; if you’re cooking for adults, you can upscale the aroma with vanilla bean, citrus zest, or a whisper of liqueur. The result is a dish that feels personal, achievable, and utterly delicious from the first bite to the last slice.

In short, this is the kind of recipe that makes ordinary mornings feel like an occasion. It’s a one-pan marvel that travels well to potlucks, a brunch hero that can stretch to feed a crowd, and a comforting, homey dish that you’ll crave again and again when the weather turns cool or when the desire for something soft, slightly sweet, and deeply satisfying strikes.

The Story Behind the Dish

Every great dish has a story, and Casseruola pancake wears a few like soft, well-loved layers. At its heart, it’s a culinary love letter to the joy of breakfast transformed into something that feels almost ceremonial. The idea grew from a simple Sunday ritual: a family would gather, a skillet would glow with heat, and plates would be passed with stories about the week that just ended. A grandmother in a sunlit kitchen might whisk together eggs, milk, and a scattering of sugar, then fold in bread and fruit until the batter achieved a rustic, forgiving texture. When baked, the result carried the memory of those mornings—conversations that started with “What’s for breakfast?” and ended with “Let’s do this again next weekend.”

Over time, cooks began to adapt and expand on that familiar comfort, turning the soft pancake batter into a casserole form that could be shared with a larger circle. The term casseruola, borrowed from the Italian word for casserole, evokes Italian warmth and hospitality—the idea that food is a way to bring people together, to slow down, and to celebrate the act of eating as a communal event. The result is a dish that whispers of both homespun breakfasts and convivial Italian meals: a marriage of the plain and the elegant, a muffin-tin memory with the depth of a homemade pie. In some kitchens, you’ll find this recipe given a regional twist—a sprinkle of citrus zest, a dash of cinnamon, or a swirl of seasonal fruit that nods to the harvest. In others, it remains a faithful, unadorned canvas that invites creativity. The throughline is clear: comfort, connection, and the quiet magic that happens when morning food becomes something you want to share with neighbors, friends, and family.

As with any beloved family dish, the exact lineage can blur with time, but the spirit remains consistent: a single, sturdy pan, a patient bake, and a result that feels like home even when you’re miles away from it. The casserole form respects the morning’s pace—no fuss, plenty of flavor, and the satisfaction of presenting something that looks as good as it tastes. It’s the kind of dish that travels well in memory—even when the table is just you and a mug of coffee, the thought of a slice of this pancake casserole can make the morning feel more expansive, more hopeful, and, perhaps, a little more magical.

Why You’ll Love This Recipe

There are many reasons this casserole earns a favorite status in kitchens around the world, and they’re not all about taste. It’s a dish that respects your time, your guests, and your ever-changing cravings. Here’s why it stands out:

  • One-pan convenience: A single dish does most of the work, reducing clean-up and making it easy to serve a crowd.
  • Make-ahead friendly: Assemble, refrigerate overnight, and bake in the morning for a fresh-cooked sensation without the morning rush.
  • Versatile flavor canvas: The basic concept invites a spectrum of flavors—from fruity brightness to warmly spiced, almost “dessert-for-breakfast” indulgence, to a more savory twist with herbs and cheese (if you so desire).
  • Comforting textures: Expect a cloud-whipped interior with tender pockets, contrasted by a lightly crisp crust that adds structure and bite.
  • Seasonal adaptability: It shines with summer berries, autumn apples, winter citrus, or any seasonal fruit you adore, letting you capture the essence of the moment.
  • Kid-friendly and crowd-pleasing: Mild sweetness and familiar textures make it approachable for children while still being refined enough for adults.
  • Just-right sweetness: The dish offers sweetness without overpowering the natural flavors of the eggs, dairy, and fruit, so it remains balanced and comforting rather than overly dessert-like.
  • Forgiving by design: It’s forgiving of small missteps—over-mixing, slight variances in pan size, or a longer bake time won’t derail your results.
  • Storage-friendly: Leftovers store well and reheat beautifully, turning a leisurely morning into a short extension of a good breakfast or brunch.

Flavor Profile & Texture

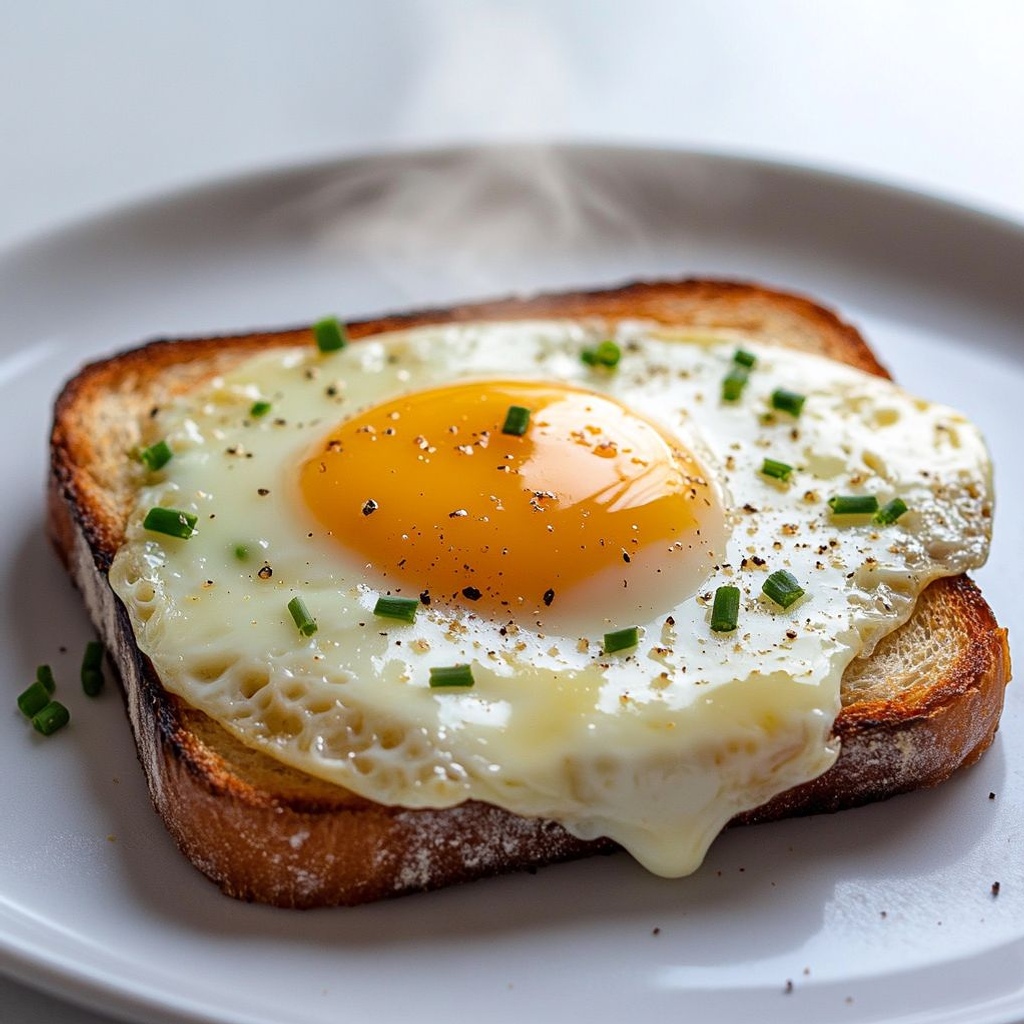
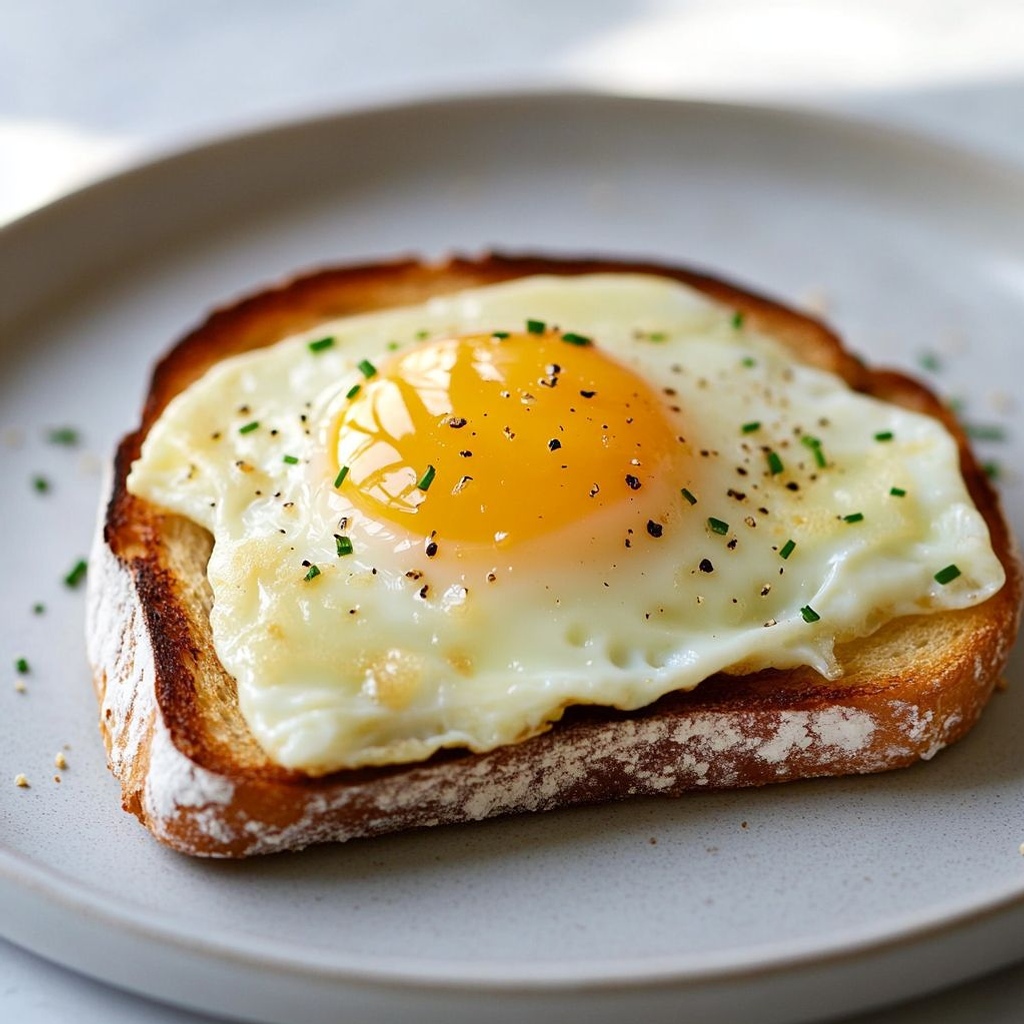
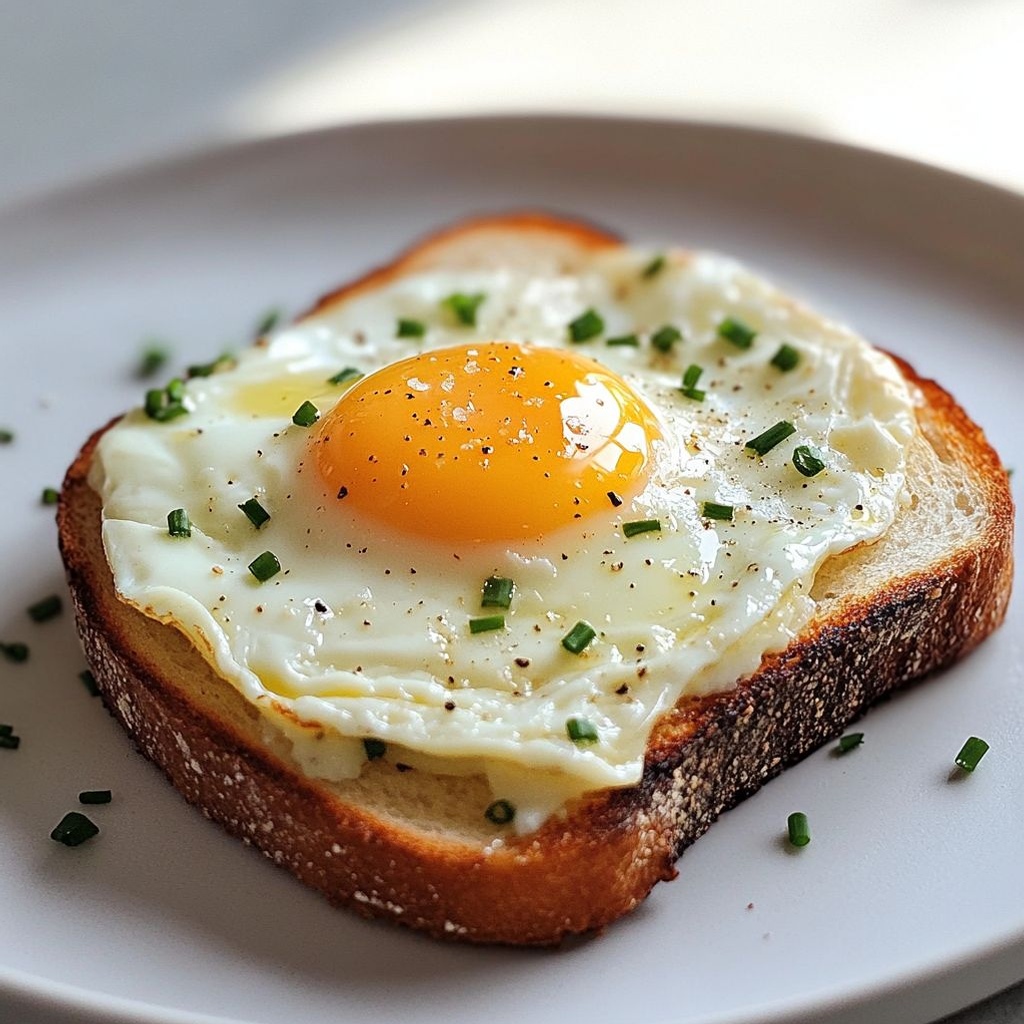
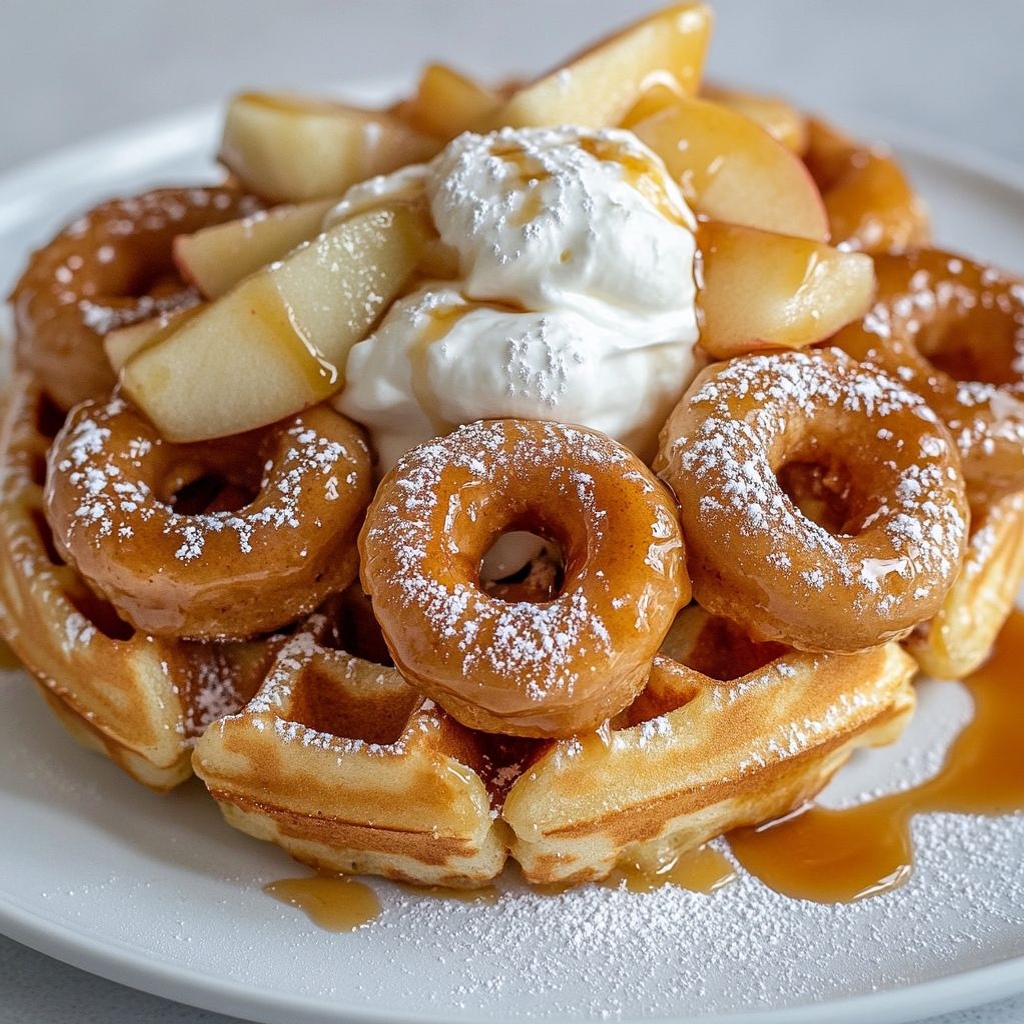
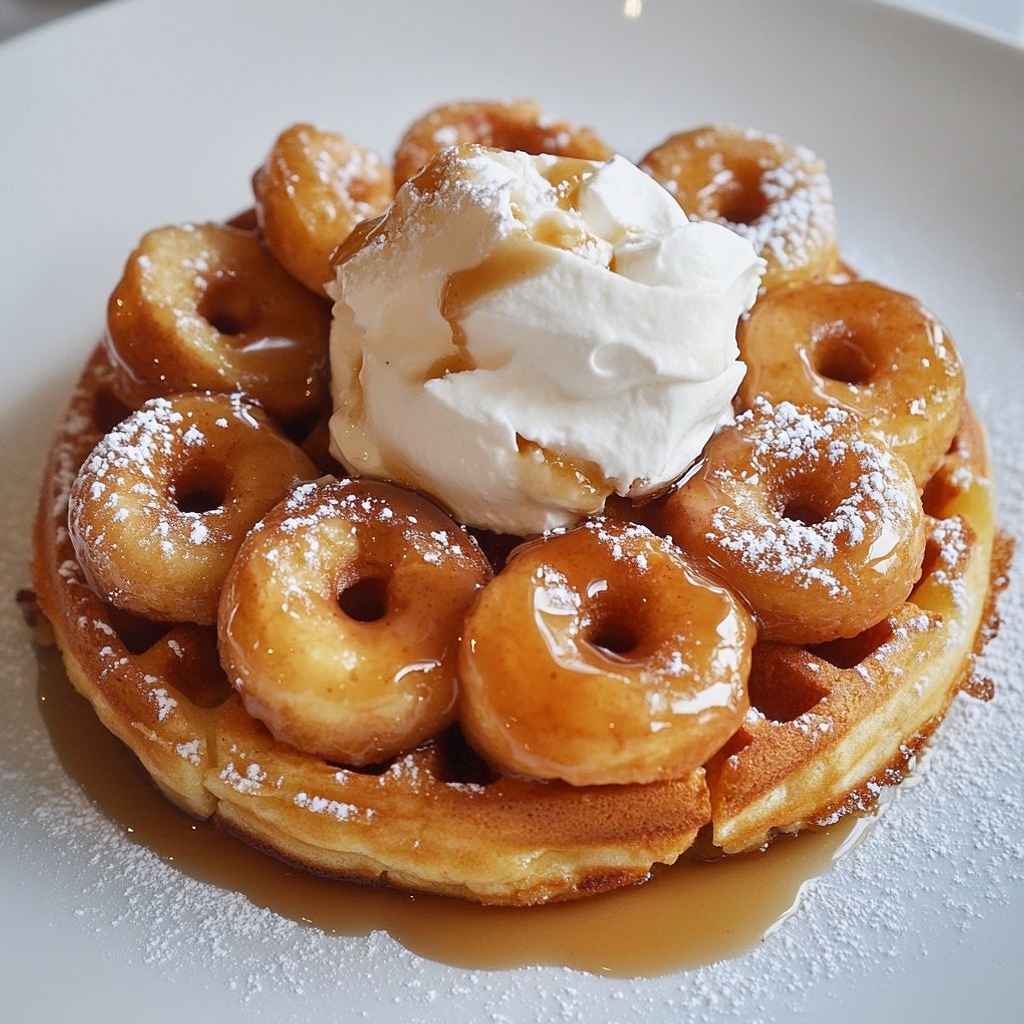
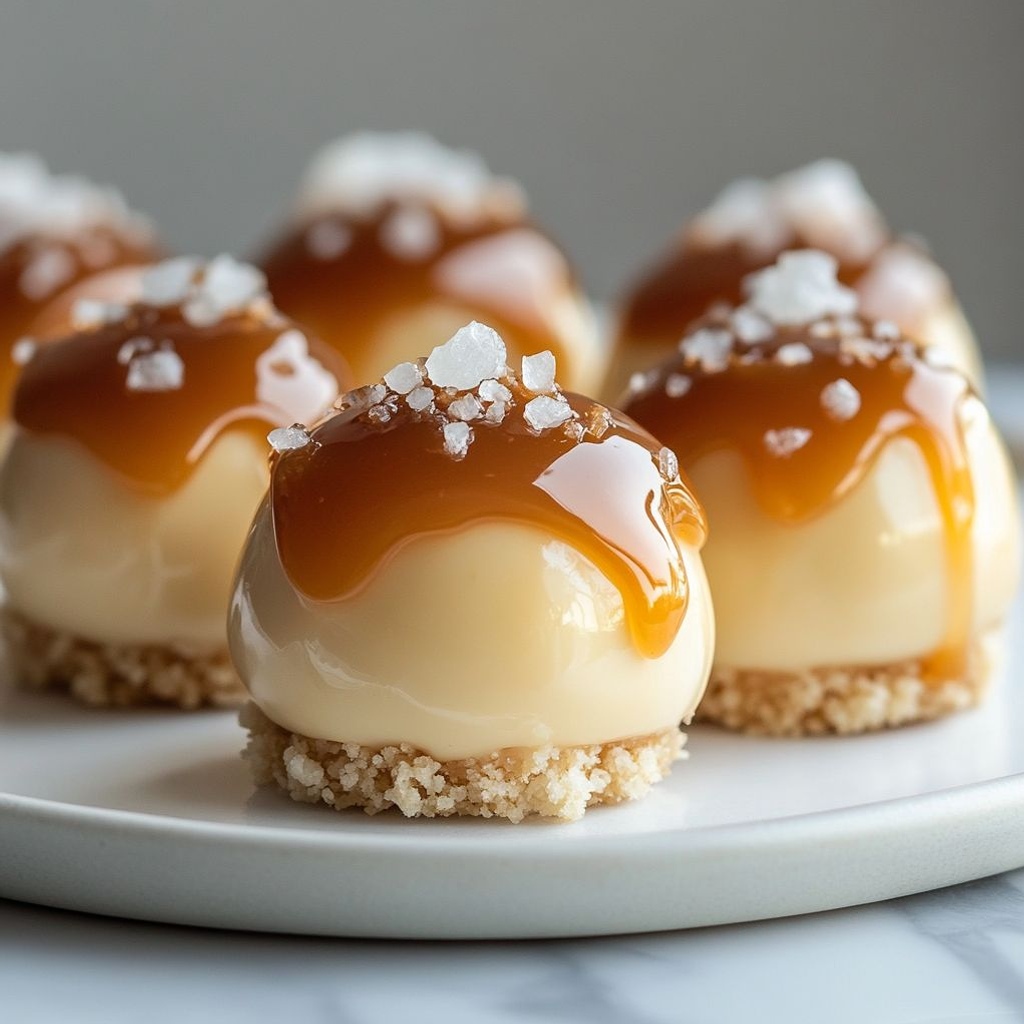
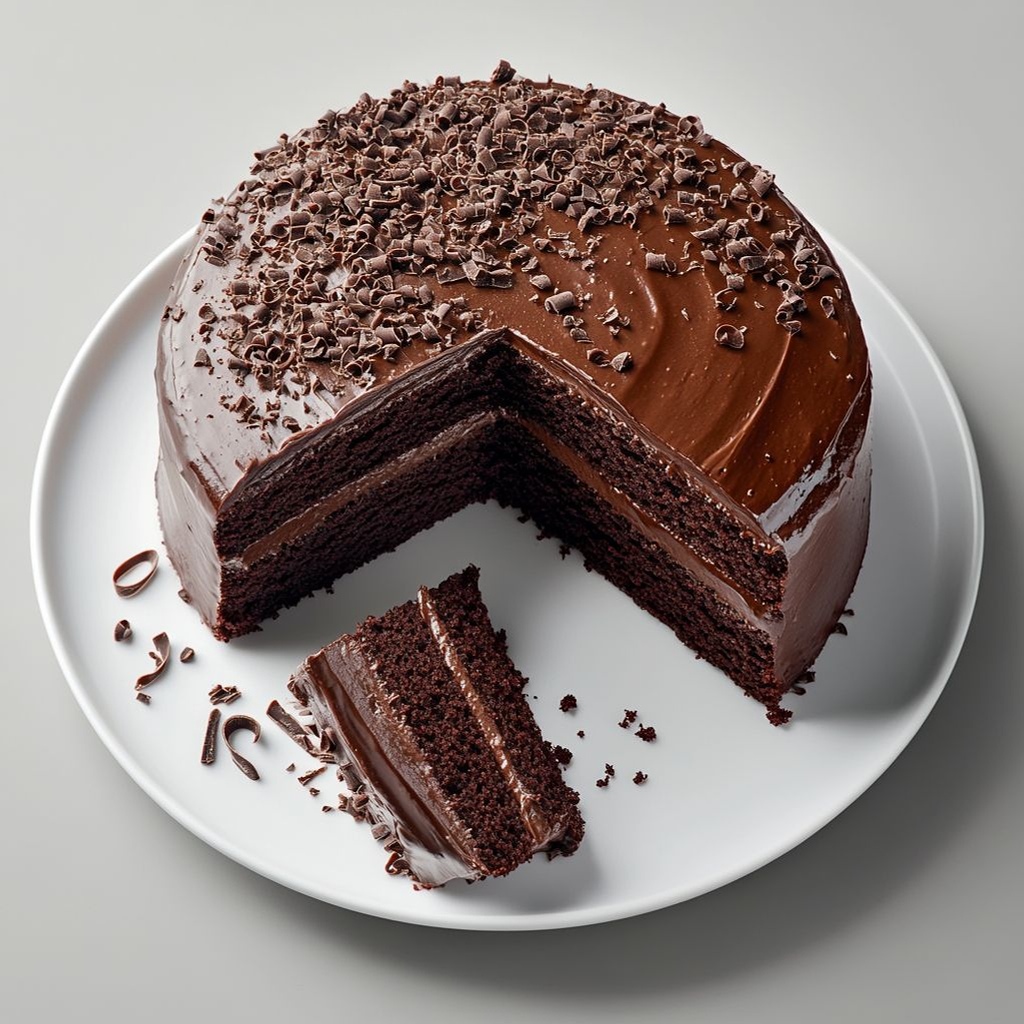
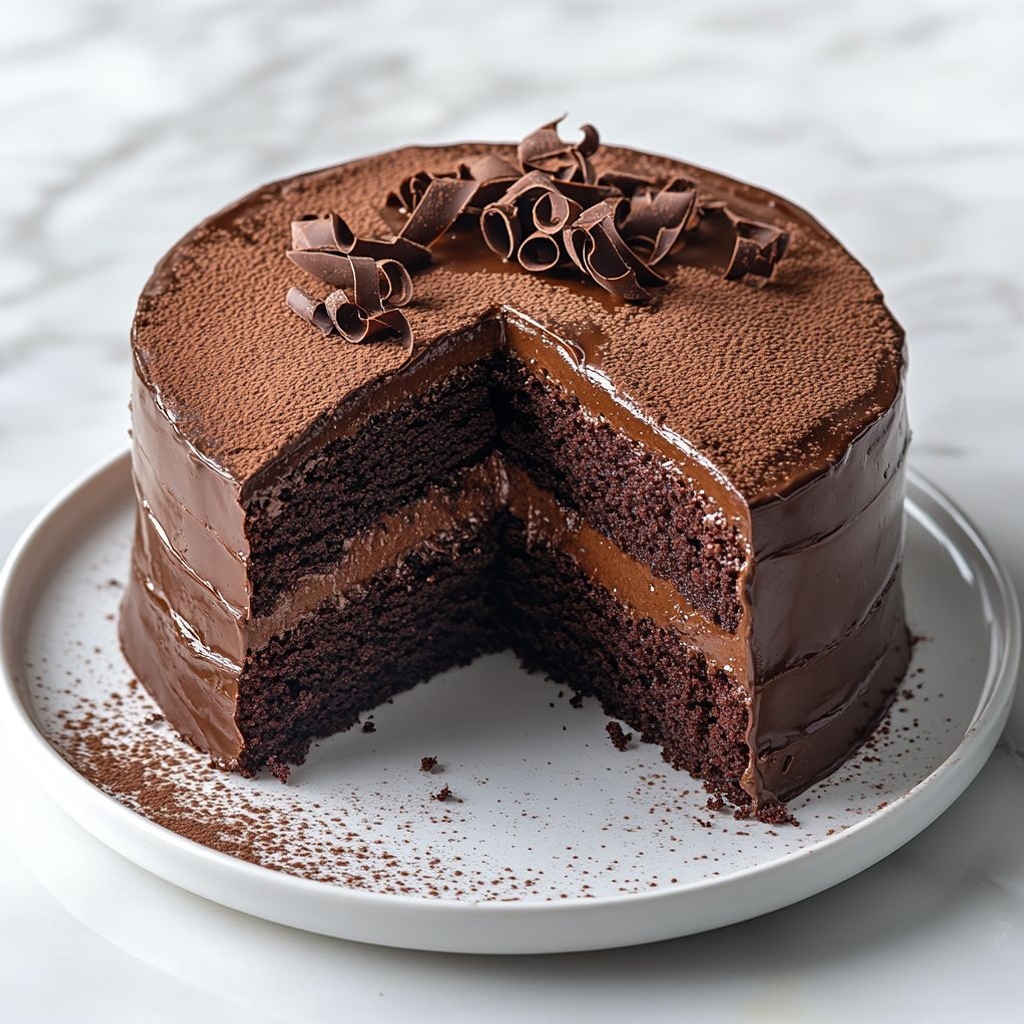
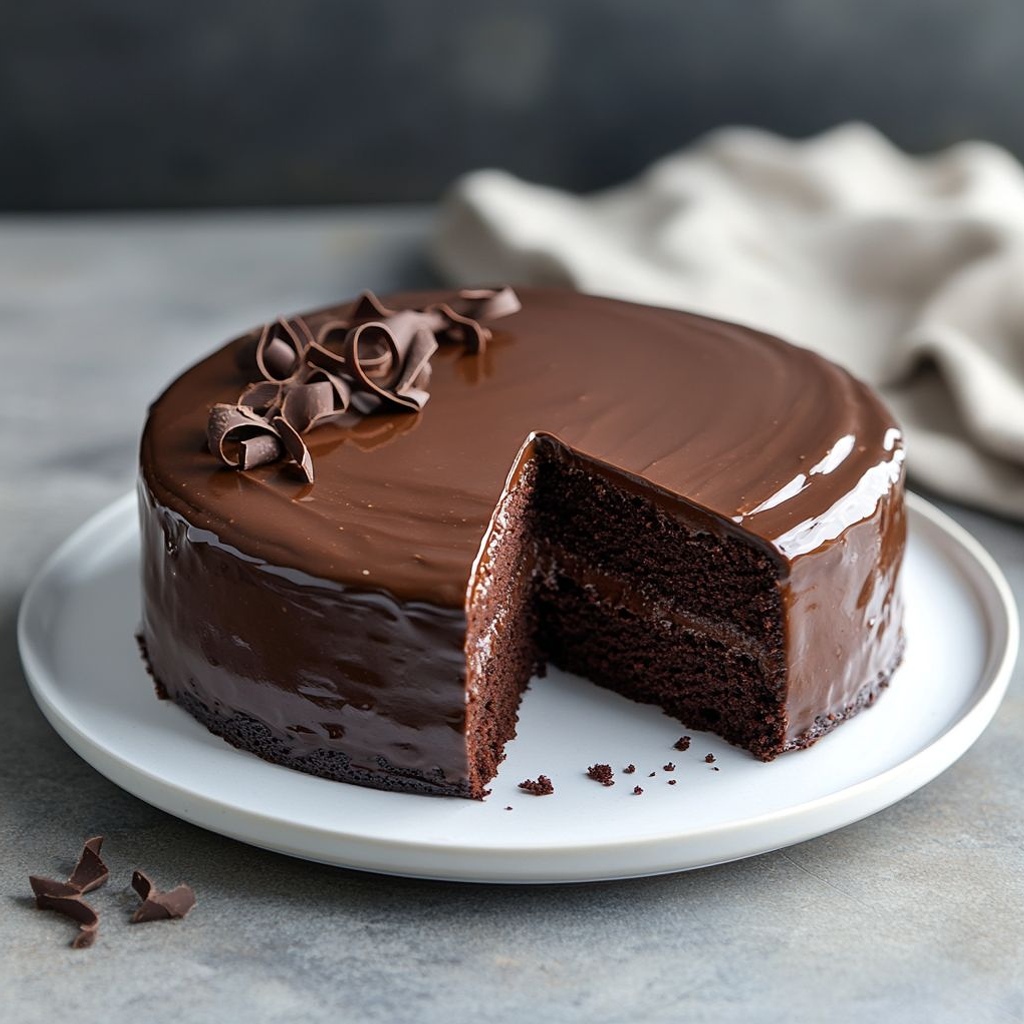
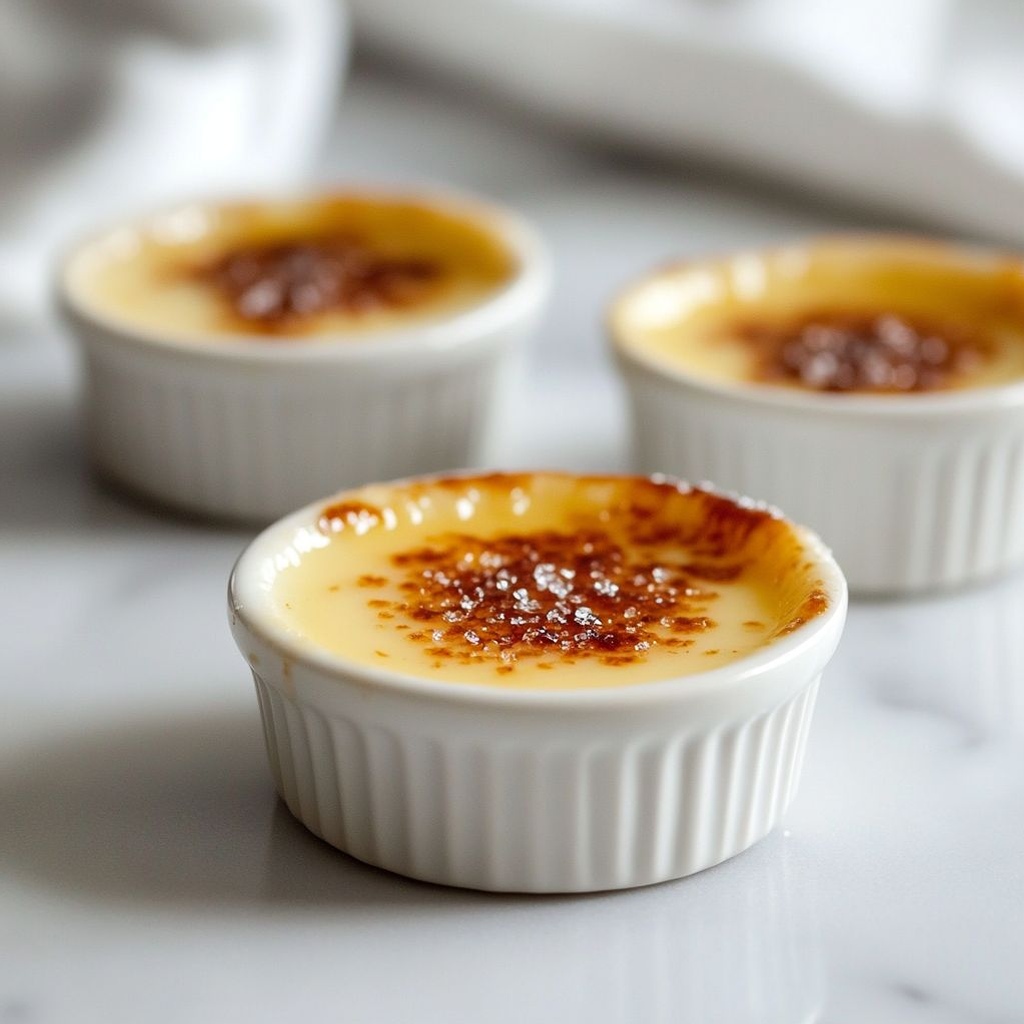
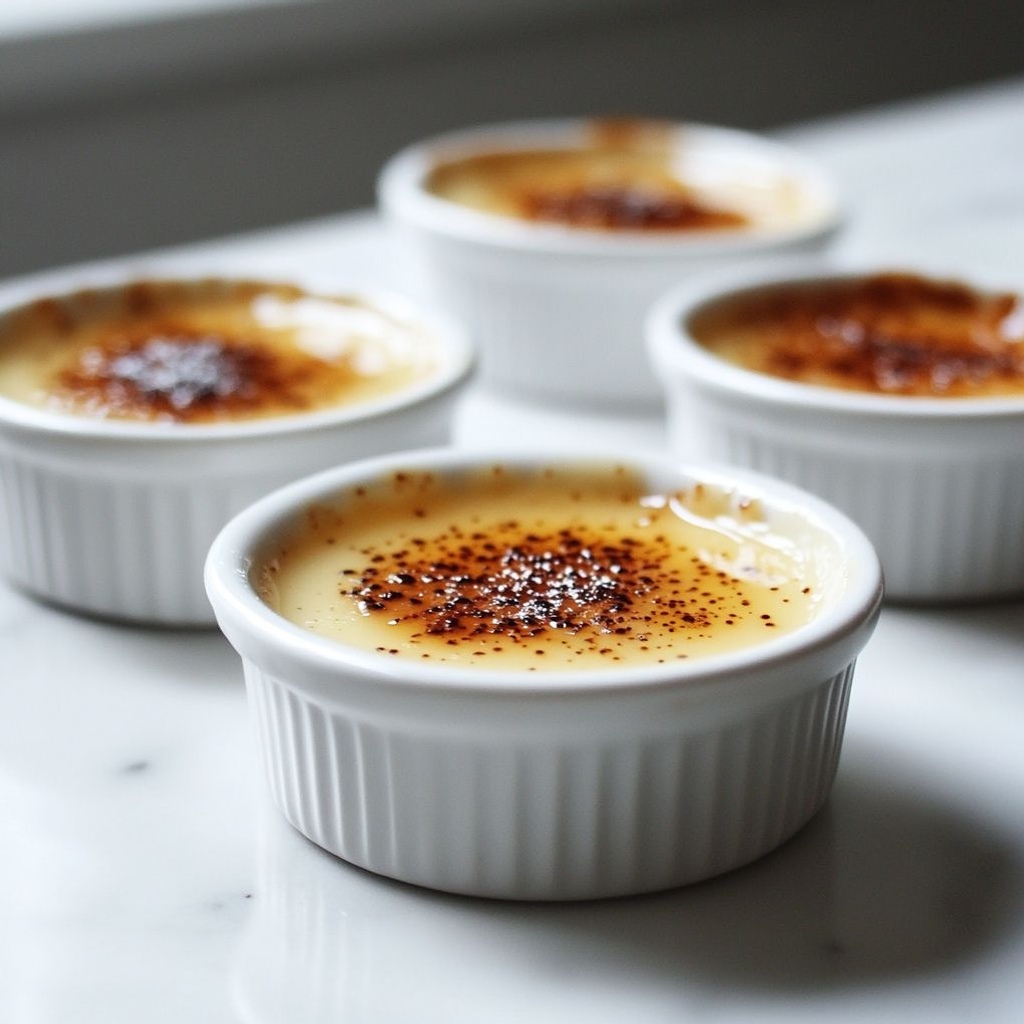
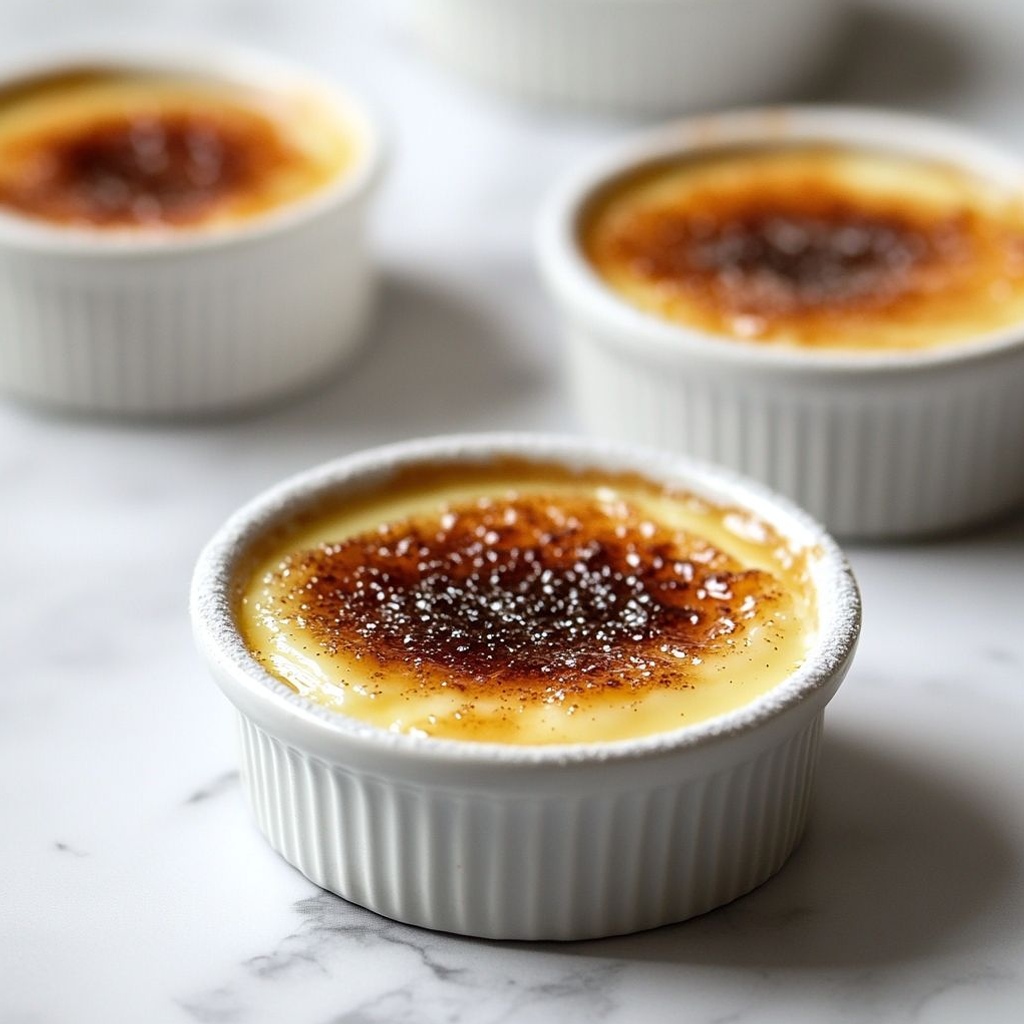
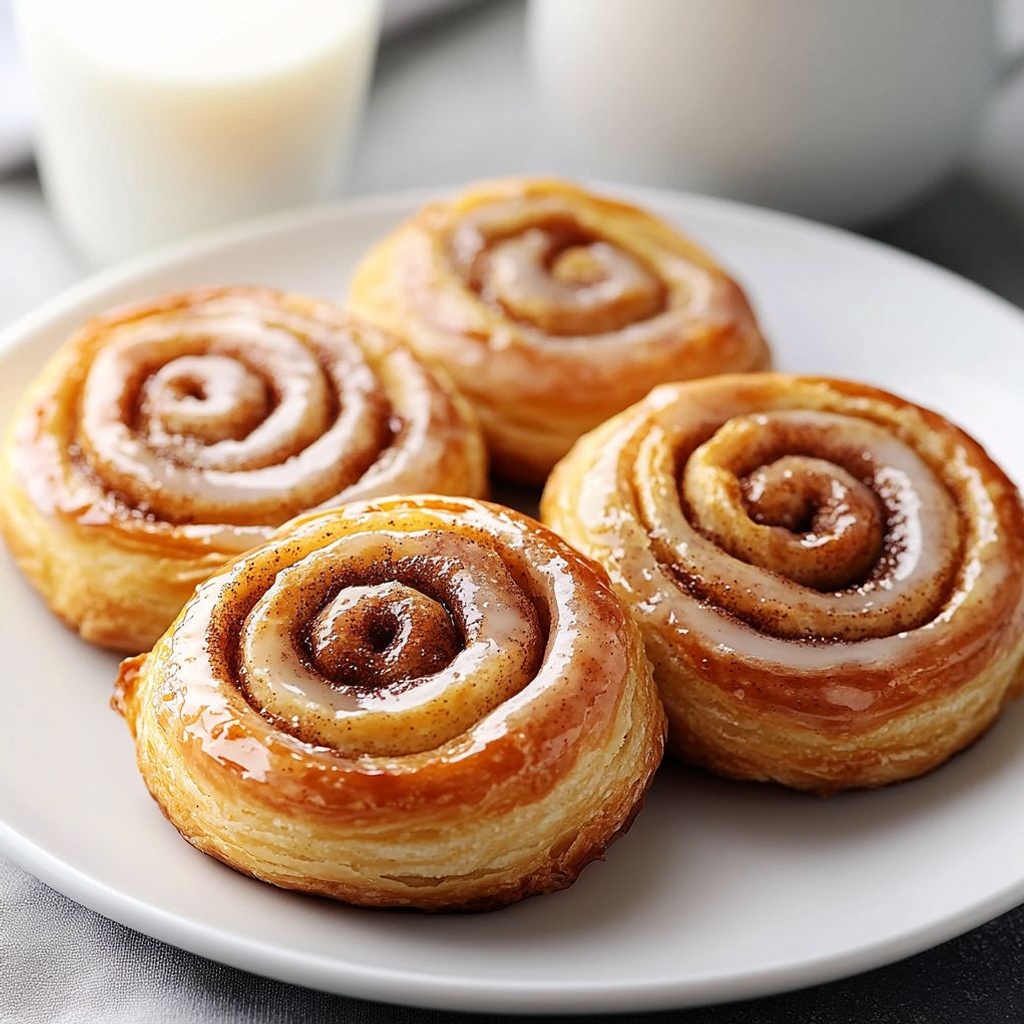
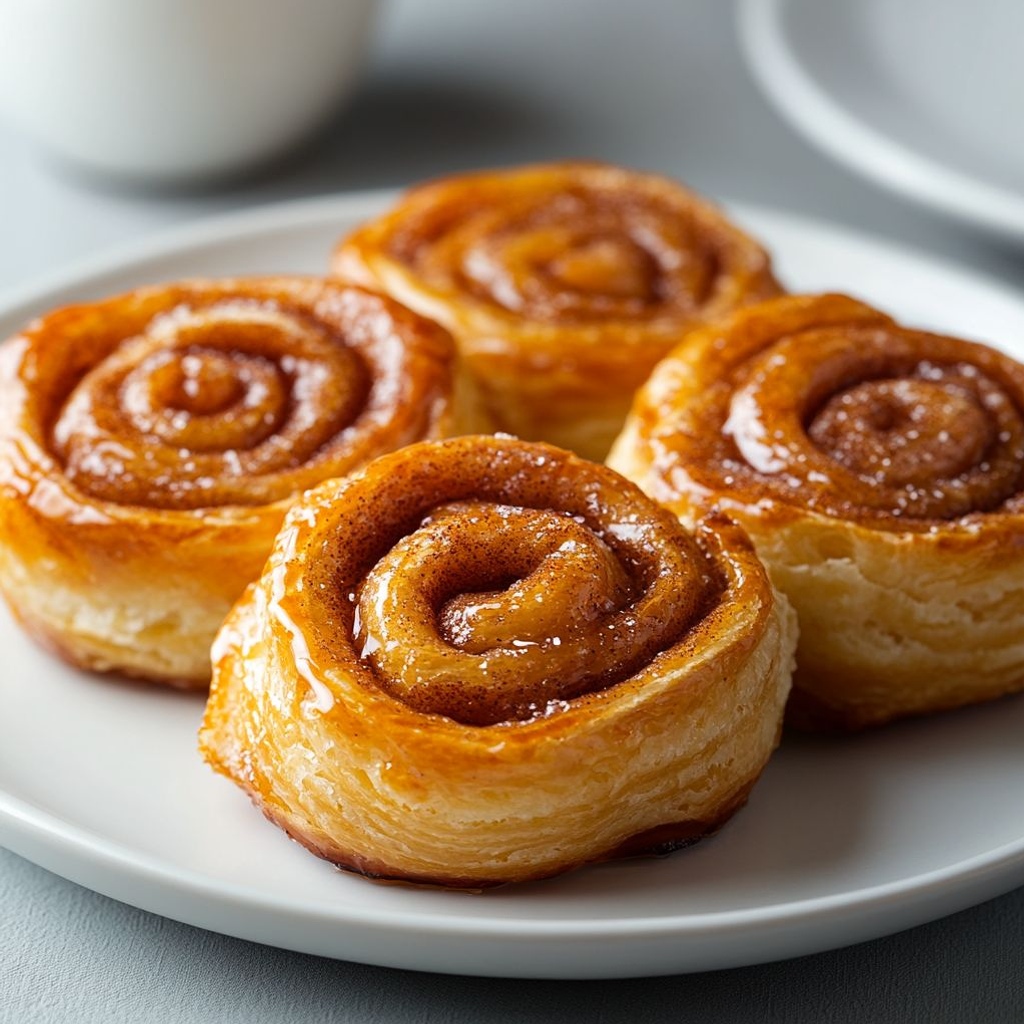
The beauty of Casseruola pancake lies in how it balances sweetness, aroma, and texture. The exterior develops a gentle, irresistible crust—lightly caramelized, with a golden hue that glows when you bring the dish to the table. Inside, the batter behaves like a custard or a soft bread pudding: airy, moist, and tender, with tiny pockets that catch the first drizzle of maple syrup or a spoonful of fresh fruit compote. The flavor is gentle yet captivating: warm vanilla or vanilla bean whispers through every slice, while hints of citrus zest or cinnamon push the aroma toward cozy morning comfort. If you opt for fruit—the bright tang of berries, the mellow tartness of apples, or the orchard sweetness of pears—those notes permeate the layers, ensuring each bite feels fresh and lively rather than uniform or heavy.

Texture-wise, you’ll notice a delightful contrast: the outside edge offers a slight crisp, almost biscuit-like snap, while the center remains luxuriously soft and melt-in-your-mouth tender. This combination is what makes a slice feel substantial enough to stand on its own, yet delicate enough to pair with a dollop of cream, a splash of citrus, or a simple drizzle of good maple syrup. The ensemble of flavors is flexible enough to be bright, comforting, or a touch indulgent, depending on the additions you choose. The aroma—vanilla, a hint of citrus zest, and the gentle sweetness—drives appetite even before the first forkful, turning breakfast into a moment worth savoring. And because it’s baked rather than pan-fried, the texture becomes more uniform and the slices slice cleanly, which is ideal for sharing and for presenting at a table where everyone wants a perfect bite.

Occasions & Pairings

This casserole is a chameleon for various occasions. Here are some ideal moments to bring it to the table, along with suggestions for pairings that enhance every bite:

  • Weekend brunch gatherings: A crowd-pleasing centerpiece that requires minimal hands-on time. Pair with a bright fruit salad, a light yogurt parfait, or a celebration-worthy coffee bar with flavored syrups and whipped cream.
  • Holiday mornings: Elevate with spices like cinnamon, nutmeg, or cardamom and serve with a citrusy glaze or a warm berry compote. It pairs beautifully with roasted coffee or a festive sparkling drink.
  • Breakfast-for-dinner evenings: The heartiness of the casserole makes it a comforting main course. Offer a crisp green salad with a tangy vinaigrette to balance the richness, and perhaps a light herb-scented butter for finishing.
  • Potlucks and gatherings: Slice and transport easily. It maintains its structure well at room temperature for a period, and re-heating brings back that just-out-of-the-oven warmth.
  • Seasonal celebrations: In winter, invite warmth with cinnamon and a drizzle of maple. In summer, fold in fresh berries or stone fruit and serve with a dollop of vanilla cream for a lighter feel.

Flavor partners that consistently harmonize with Casseruola pancake include:

  • Fruit compotes and coulis: Blueberry-basil, strawberry-rhubarb, or apple-cinnamon compotes add brightness and contrast.
  • Whipped cream or yogurt: A touch of richness that lightens the dish, especially when fruit is involved.
  • Maple syrup or honey: A classic pairing that enhances sweetness and brings a glossy finish when poured over slices.
  • Spiced syrups and liqueurs: A whisper of orange liqueur, vanilla bean, or star anise can elevate the aroma for special occasions.
  • Savory twists (optional): A hint of cheese and herbs can convert the casserole into a brunch-friendly, lightly savory dish for those who prefer a less sweet profile.

Tips, Variations & Substitutions

One of the great strengths of this dish is its adaptability. Here are practical ideas to tailor Casseruola pancake to your kitchen, dietary needs, or mood:

  • Gluten-free option: Use a gluten-free bread base or a flour blend appropriate for baking to preserve a light, tender crumb. Ensure the bread is not overly dense so the casserole remains airy.
  • Vegan adaptation: Swap dairy and eggs for plant-based alternatives. Use a flax or chia egg replacement, a non-dairy milk (almond, oat, or soy), and a gentle plant-based butter or oil. The texture will stay soft and custardy with careful balancing of fats.
  • Dairy-free approach: Choose a nut or oat milk and a dairy-free butter substitute. If you still want a touch of richness, a small amount of coconut cream can add body without overpowering the flavor.
  • Fruit-forward variations: Introduce in-season fruit into the layers or on top—ripe peaches, blueberries, raspberries, or pomegranate seeds. The fruit will naturally release juices that weave through the custard and add a burst of color.
  • Nutty crunch: A sprinkle of chopped nuts, such as almonds or pecans, around the edges before baking adds textural contrast and a toasty note.
  • Spice and aroma: Ground cinnamon, a pinch of nutmeg, or even a whisper of cardamom can transform the aroma. A zest of lemon, orange, or even a splash of vanilla bean paste can deepen the fragrance.
  • Savory twist: For a more savory take, skip the sweet toppings and fold in sautéed greens or roasted mushrooms with a touch of cheese and fresh herbs. This can become a comforting brunch main that’s not overly sweet.
  • Texture control: If you prefer a firmer edge, bake a few extra minutes. If you want a softer center, cover partway through with a sheet of foil to prevent over-browning while the center finishes.
  • Make-ahead techniques: Assemble the dish the night before and refrigerate. In the morning, simply bake and serve. Overnight resting can help flavors meld and intensify, especially when fruit juices mingle with custard.
  • Pan and size considerations: Use a shallow, wide baking dish to promote even browning. If you’re feeding a larger crowd, you can double the recipe and adjust the baking time accordingly.

Storage & Make-Ahead Ideas

Carrying leftovers into the next day is part of the charm of baked breakfasts. Here are practical tips to store, reheat, and rehearse this dish for future mornings:

  • Refrigeration: Cool completely, then cover tightly and refrigerate for up to 3–4 days. The flavors will mellow and sometimes taste more cohesive after resting.
  • Freezing: Slice the cooled casserole and freeze individual portions or a complete block for up to 1–2 months. Reheat gently in a microwave in short bursts or in a low oven until warmed through. The texture may be a touch denser after freezing, but it remains satisfying with the proper gentle reheating.
  • Reheating tips: Reheat covered in a moderate oven (around 325–350°F / 165–175°C) until warmed through, or reheat individual slices in the microwave for a quick turnaround. A final minute under the broiler can refresh the crust if it looks pale.
  • Make-ahead strategies: For the one-bake approach, assemble the components the night before and refrigerate. In the morning, simply bake until the top is set and the edges are lightly browned. If you’re feeling particularly organized, pre-slice the dish after cooling to make serving effortless the next day.
  • Storage of toppings: Keep whipped cream, fruit compotes, and other toppings separate until serving to preserve texture and brightness.

Fun Facts & Trivia

Here are a few tidbits that celebrate the playful and cultural side of this dish. They can be fun conversation starters at the table and a reminder that breakfast foods often travel far and wide, gathering influences along the way:

  • Pancake traditions span many cultures, from the thin crepes of France to the thick, fluffy American style. A casserole that uses pancake batter as a base is a creative hybrid that honors that universal love for morning sweetness in a shared format.
  • The term casseruola connects to the broader family of baked, one-dish meals that have sustained households across generations. The casserole method is a nod to practicality—bake once, feed many, and enjoy leftovers with minimal fuss.
  • Breakfast-as-brunch rituals have become a social staple in many cultures, turning a simple meal into a social event. A dish like Casseruola pancake fits perfectly into that ritual, offering a sense of occasion without requiring elaborate preparation.
  • Historically, citrus zest and vanilla have long been celebrated for their aromatic power in morning pastries, dating back centuries in various culinary traditions. Their presence—in any form—in this dish connects it to a lineage of comfort foods designed to evoke warmth and hospitality.
  • Many kitchens have their own version of a baked pancake or bread pudding. The casserole form is a natural evolution—keeping the essence of a pancake while adapting to social dining where sharing and conversation take center stage.

Ingredients

    – Casseruola Pancake Base
    – 2 cups all-purpose flour
    → Provides the structural framework for the pancake batter. For a lighter texture, consider substituting half with a 1:1 gluten-free blend or whole-wheat flour. Sift to remove lumps for a smoother batter and measure by spooning into the cup, not packing the flour.
    – 1 1/2 cups milk
    → Hydrates the flour to form a smooth batter. Whole milk yields a richer crumb; dairy-free milks work too but may affect flavor and browning. If the batter seems thick, add a splash more milk; let it rest 5–10 minutes to hydrate fully.
    – 3 large eggs
    → Bind and enrich the batter, helping the pancake puff and hold together in the casserole. Use room-temperature eggs for better emulsification; whisk thoroughly to incorporate air for a lighter texture.
    – 2 tablespoons granulated sugar
    → Adds gentle sweetness and promotes browning. For a savory version, reduce to 1 tablespoon or omit entirely. If using brown sugar, it will deepen color and flavor slightly.
    – 1/2 teaspoon salt
    → Enhances flavor and helps balance sweetness and cheese. Use fine salt so it dissolves evenly; adjust if using salty fillings like cheese or cured meat.
    – 2 tablespoons unsalted butter, melted
    → Adds richness, moisture, and flavor while aiding browning. Let it cool slightly before mixing to avoid cooking the eggs; substitute with a neutral oil if keeping the dish dairy-free.
    – 1 teaspoon vanilla extract
    → Subtly enhances the batter’s aroma; in a savory casserole you can skip, but it won’t hurt if you prefer a hint of sweetness to balance cheese and potatoes. Use pure vanilla for best flavor.
    – 1/2 teaspoon ground cinnamon
    → A gentle warmth that pairs surprisingly well with potatoes and cheese in baked dishes. Not essential for a strictly savory bake; omit if you prefer a pure savory profile.
    – Pinch of nutmeg
    → Classic accent for potato-based casseroles; freshly grate if possible for a brighter aroma. A little goes a long way, so start with a pinch and adjust to taste.
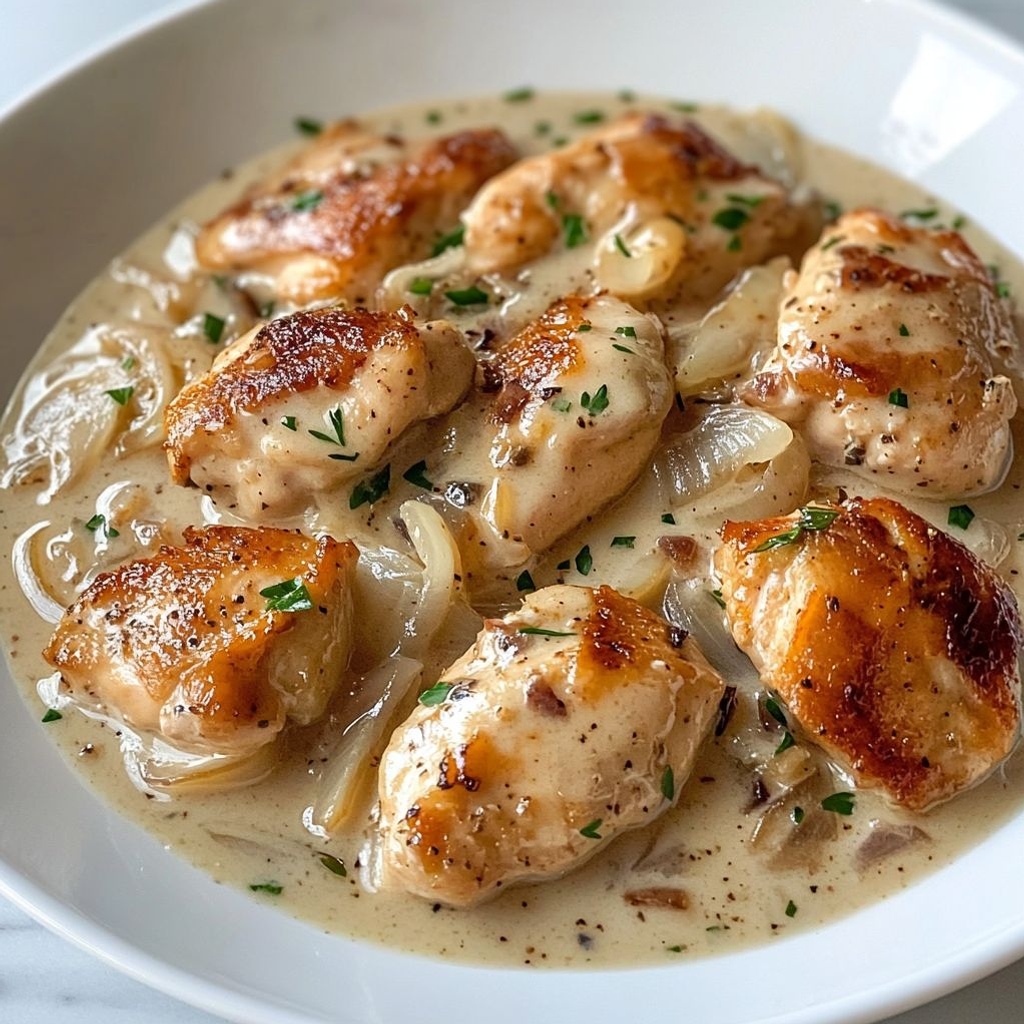
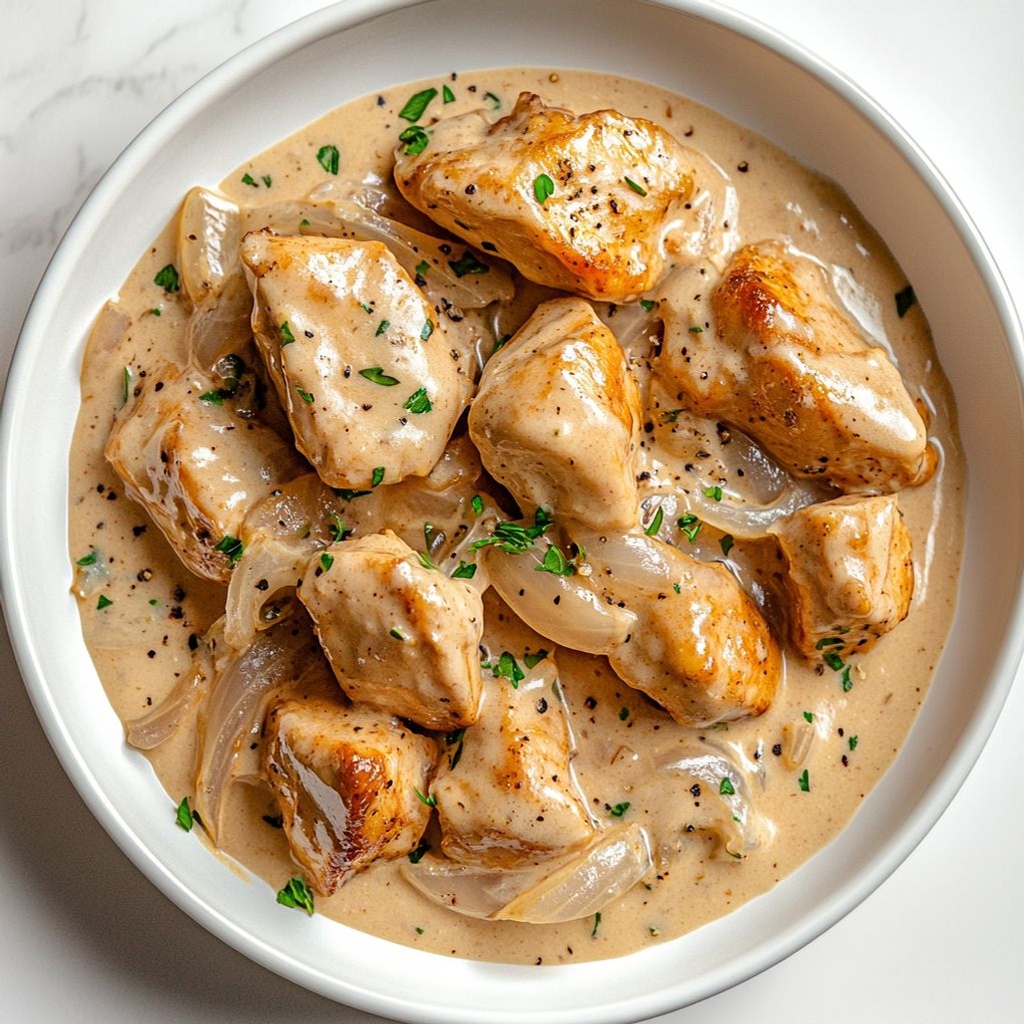
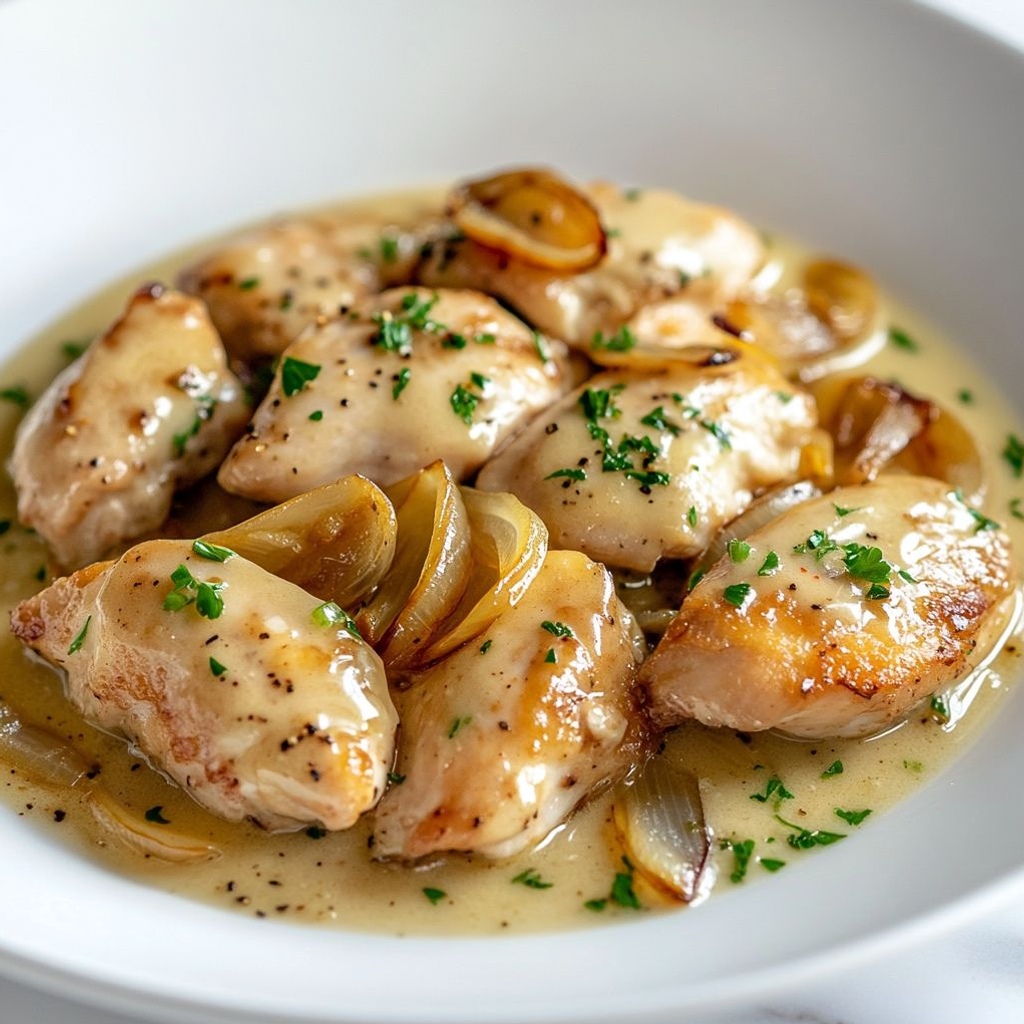
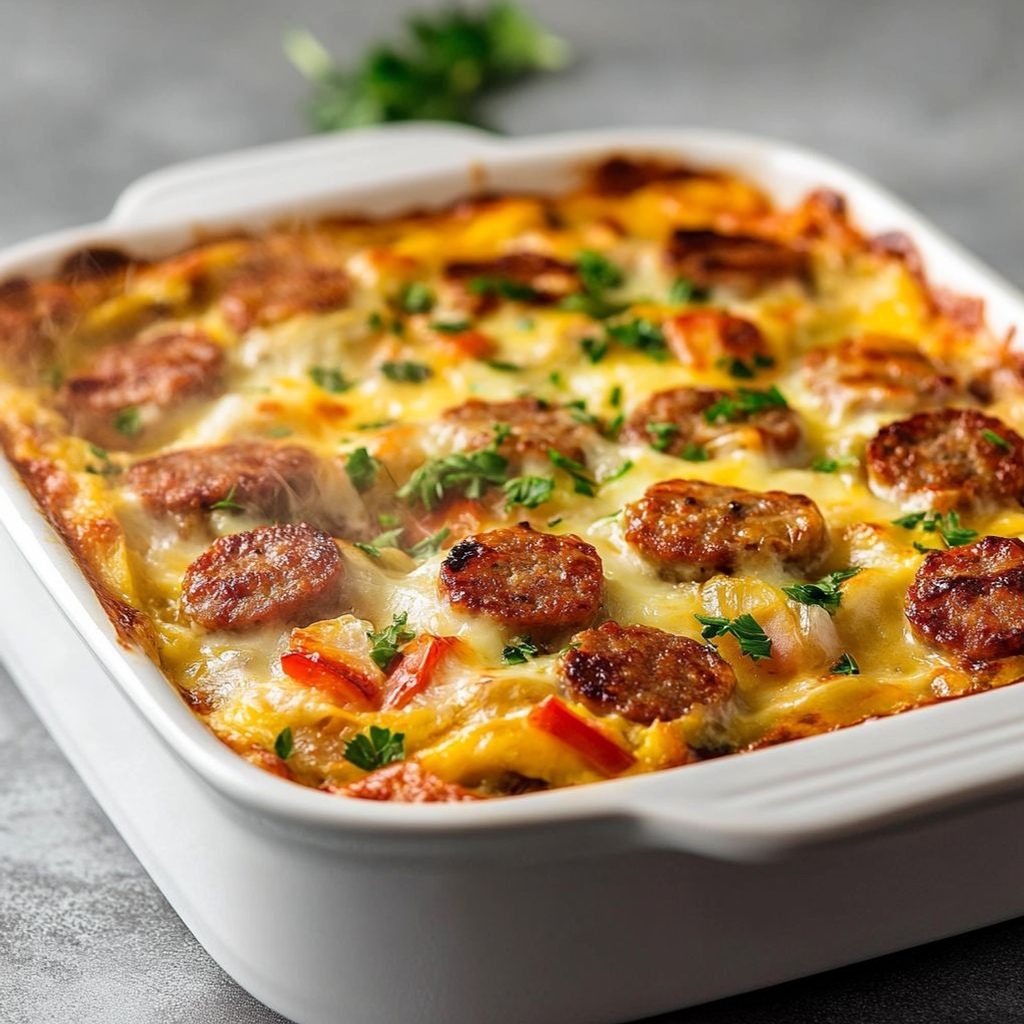
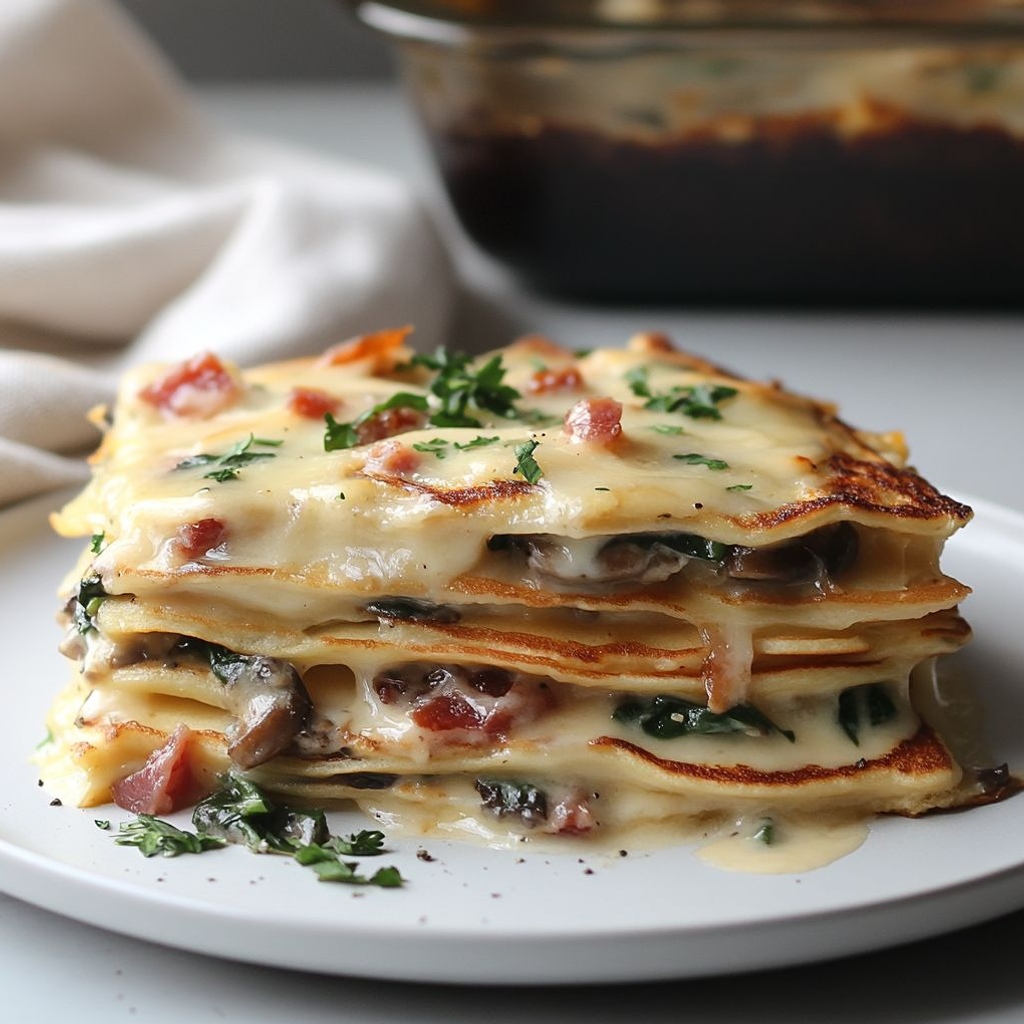
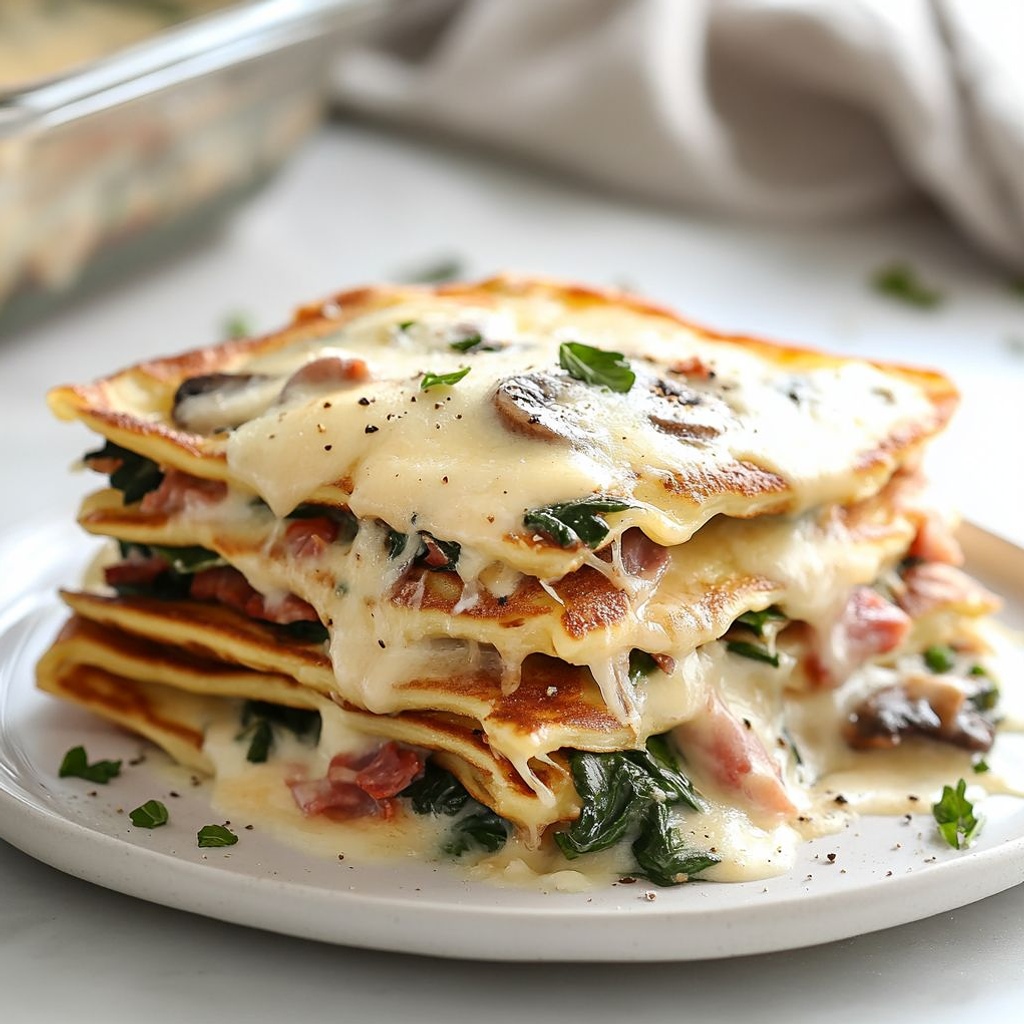
    – Savory Fillings
    – 2 cups grated potatoes, raw
    → The heart of the casserole-like pancake; grate finely and dry thoroughly. Rinse and squeeze out as much moisture as possible to prevent a soggy bake. For crispier edges, pat dry and optionally pre-sauté a minute or two, then drain well.
    – 1 cup onion, finely chopped
    → Adds sweetness and depth; sautéing with a little oil until translucent deepens the flavor and reduces sharpness, ensuring the onion blends well with the other fillings.
    – 1 cup bell pepper, diced
    → Adds color, sweetness, and crunch; sauté briefly to remove raw edge while keeping a bit of bite for texture.
    – 1 cup mushrooms, sliced
    → Contributes umami and earthiness; cook to release moisture and prevent soggy bake. Brown slightly for extra flavor and blot any released liquid before combining with other fillings.
    – 1 cup cooked sausage or bacon, crumbled (optional)
    → Introduces smoky, savory richness; use fully cooked and cooled meat to avoid releasing excess fat. For leaner versions, substitute with turkey sausage or omit entirely.
    – 2 cups shredded cheese (mozzarella and cheddar blend, or fontina)
    → Provides melt, binding, and a creamy texture. Use a mix to balance meltiness with flavor; shredding fresh gives better texture than pre-shredded varieties.
    – 2 cups fresh spinach, roughly chopped
    → Adds color and nutrition; wilt slightly in a pan or microwave with a pinch of salt to reduce moisture, then squeeze out excess liquid to avoid a soggy bake.
    – 2 cloves garlic, minced
    → Delivers aromatic depth; sauté with onions to mellow the bite and infuse the filling with savory notes. If short on time, mince finely and sauté quickly with vegetables.
    – 2 tablespoons olive oil (for sautéing)
    → Used to soften vegetables and coax out sweetness. Choose extra-virgin olive oil for flavor; heat the oil until shimmering before adding aromatics to prevent sticking and burning.
    – 1 teaspoon dried oregano or Italian seasoning
    → Brings classic Italian-herb flavor to the filling; adapt with dried thyme or fresh herbs if desired. Balance with cheese and salt to avoid overpowering the dish.
    – Salt and pepper to taste
    → Essential for flavor balance; cheeses and sausages contribute salt, so adjust after mixing. Taste a small amount of the raw filling before assembling to guide final seasoning.
    – Optional fresh herbs: parsley or chives
    → Add brightness and freshness; chop finely and mix in after cooking or sprinkle on top before serving for a vibrant finish. They also help cut through the richness when plated.

    – Binding and Finishing
    – 1/2 cup milk or cream
    → Adds moisture and helps bind the fillings into a cohesive slice during baking. Use cream for extra richness; or use 2% milk for a lighter version. If omitted, the mixture may be a little firmer.
    – 2 eggs, lightly beaten
    → Provides additional binding and helps create a custard-like top layer as it bakes. Use at room temperature for easier emulsification and even cooking; this is optional if your batter is already rich enough.
    – 1 tablespoon butter, for dotting on top
    → Creates a glossy, golden crust and helps crisp the surface. Dot small pieces across the top before baking for even browning; you can also brush melted butter on the surface.

    – Finish and Bake
    – 1/2 cup grated Parmesan or Pecorino
    → Finishes with a sharp, salty crust that browns beautifully. Freshly grate for maximum flavor; sprinkle evenly so every portion gets a bit of crust.
    – 1 tablespoon olive oil or butter for greasing the pan
    → Ensures easy release and prevents sticking during bake; coat the dish thoroughly before assembling. If dairy-free, use olive oil or a neutral oil instead of butter.
    – Fresh parsley or chives for garnish
    → Adds a fresh, green finish and aroma when sliced into portions. Chop finely and scatter over hot slices to release aroma without wilting.

Instructions

  • Preheat your oven to 350°F (175°C) and grease a 9×13-inch baking dish with butter or oil, ensuring an even coating to prevent sticking and promote uniform browning.
    → A properly heated oven and well-greased pan prevent sticking, collapse, and uneven crust on the casserole pancake.
  • Whisk the pancake batter: in a large bowl, whisk flour, milk, eggs, sugar, salt, melted butter (cool slightly), vanilla, cinnamon, and a pinch of nutmeg until smooth and lump-free, then let the batter rest 5–10 minutes to hydrate the flour for a lighter crumb.
    → Resting allows starch granules to hydrate, reducing toughness and ensuring an even, cohesive texture when baked.
  • Prepare the potatoes: grate 2 cups raw potatoes finely, then transfer to a clean kitchen towel and wring out as much moisture as possible to prevent a soggy bake, which helps the pancake set firmly.
    → Dry potatoes prevent watery pockets that can stop the pancake from lifting and browning evenly.
  • Sauté the aromatics and vegetables: heat 2 tablespoons olive oil in a skillet over medium heat; add 1 cup finely chopped onion and 2 cloves minced garlic, cooking until translucent and fragrant, about 3–4 minutes, then stir in 1 cup diced bell pepper and 1 cup sliced mushrooms and sauté until lightly browned and moisture has evaporated.
    → Sautéing sweetens the onions, concentrates flavor, and removes water from vegetables to avoid a soggy bake, while browning mushrooms adds depth.
  • Wilt the spinach: add 2 cups roughly chopped fresh spinach to the skillet with a pinch of salt and cook just until wilted, then remove from heat and squeeze out excess moisture to keep the casserole from thinning.
    → Removing moisture from greens prevents a watery center and helps the filling hold together during baking.
  • Cook the optional sausage or bacon: crumble and brown 1 cup cooked sausage or bacon in the same skillet until crispy, then drain on paper towels to remove excess fat before adding to the filling.
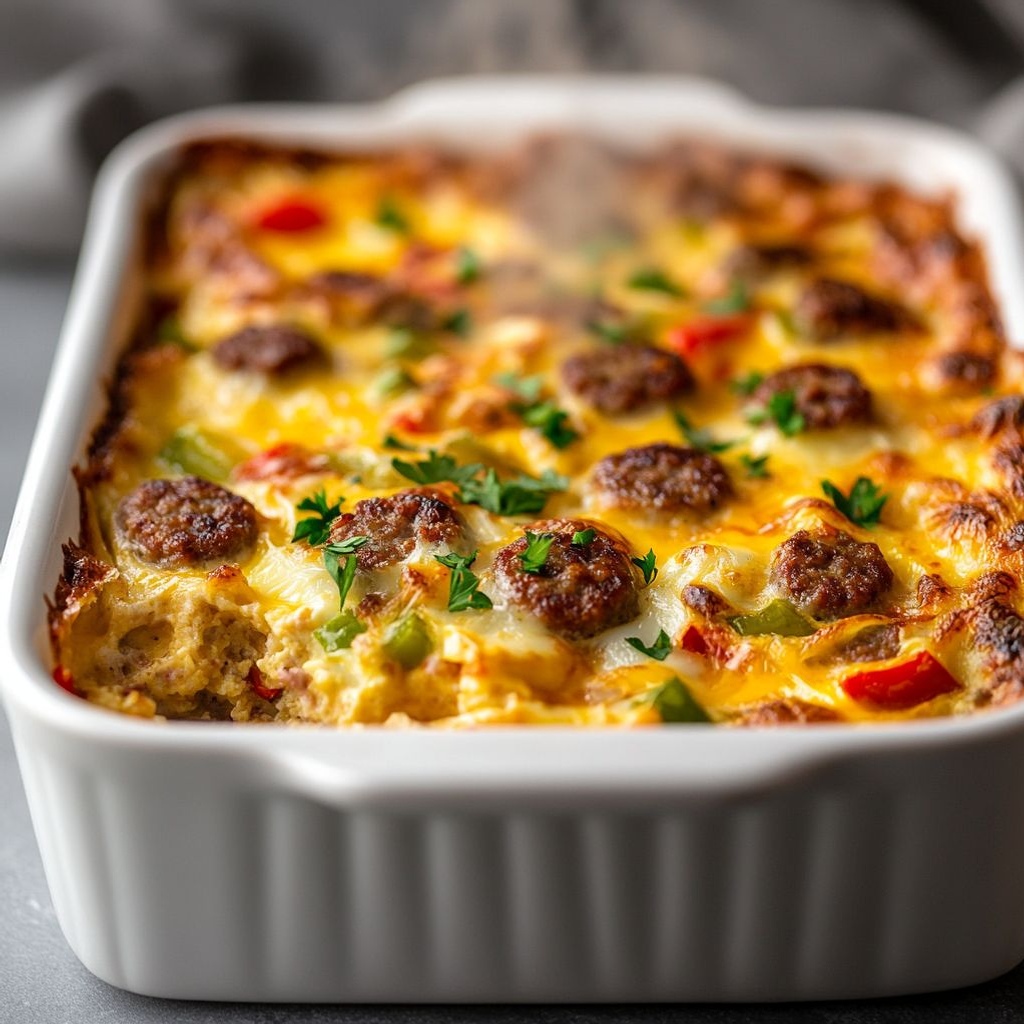
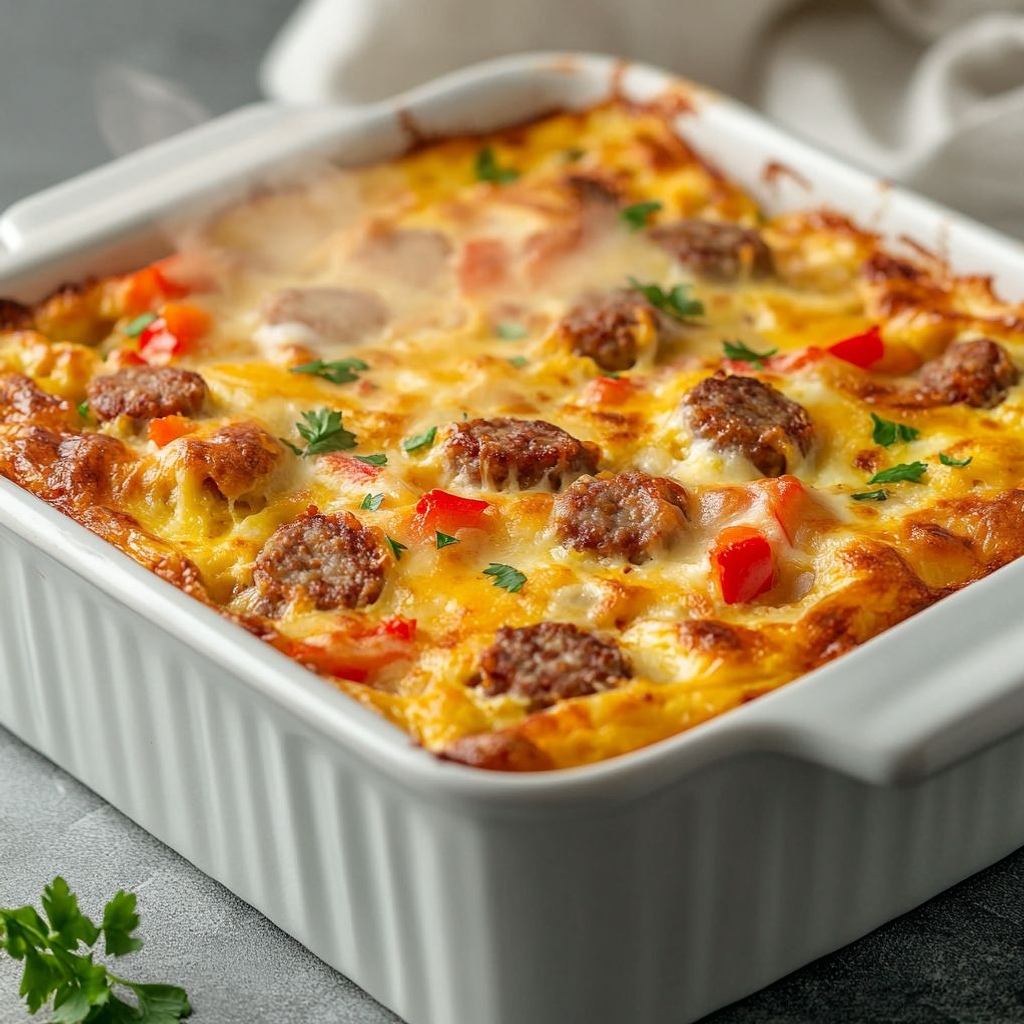
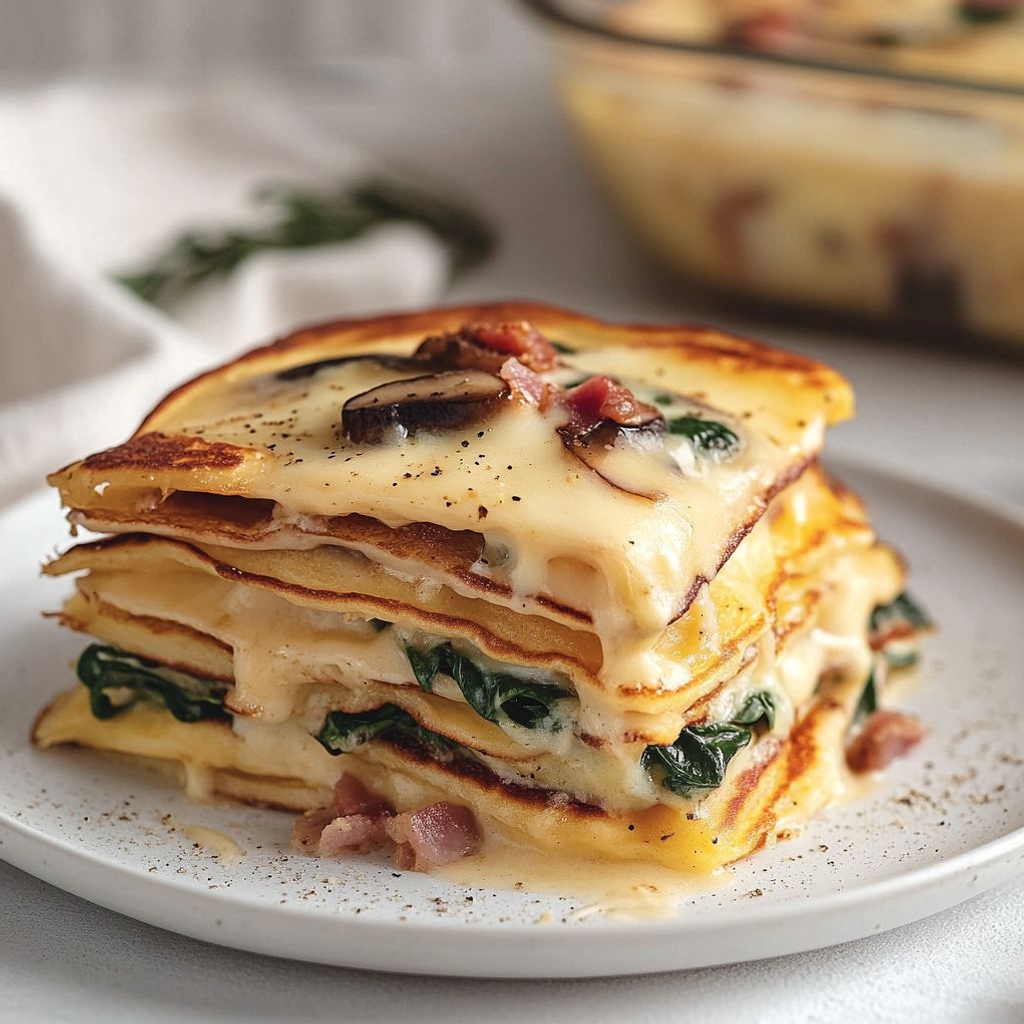
    → Browning develops smoky, savory flavor and draining prevents greasy pockets that can weaken structure.
  • Combine the savory fillings with cheese: in a large bowl, mix the sautéed onions, peppers, mushrooms, spinach, potatoes, and 2 cups shredded cheese, seasoning with salt and pepper to taste, and fold in the crumbled meat if using.
    → Distributing cheese throughout the filling creates gooey pockets and cohesive texture; even seasoning ensures the flavors balance against the mild pancake batter.
  • Bind the filling with a dairy mixture: whisk 1/2 cup milk or cream with 2 eggs in a separate bowl, then pour over the filling and toss gently to moisten without breaking up the vegetables, ensuring the mixture binds evenly.
    → The binding mixture adds custard-like cohesion so the filling stays intact as the pancake bakes and slices cleanly.
  • Assemble the casserole: pour half of the pancake batter into the prepared dish and spread evenly, spoon the filling over the batter in an even layer, then pour the remaining batter on top and gently smooth to cover.
    → Layering helps create distinct but integrated flavors and ensures the filling is enveloped by batter for uniform baking.
  • Finish the top: dot the surface with 1 tablespoon small pieces of butter and sprinkle 1/2 cup grated Parmesan or Pecorino evenly over the top to promote a golden, crisp crust and a sharp, tangy finish.
    → Fat on top melts and bastes the surface for a glossy, bronzed crust; Parmesan adds savory depth and a crisp edge when baked.
  • Bake until set and golden: place the dish in the oven and bake for 35–45 minutes, or until the edges are puffed and pulling away from the sides, the center is just set, and a toothpick inserted into the center comes out with a few moist crumbs.
    → Proper doneness ensures a sliceable interior with a creamy center and a crisp top, not a runny mix.
  • Rest and garnish: remove from the oven and let the casserole pancake rest for 10 minutes to finish setting and to make slicing easier, then scatter fresh parsley or chives over the top for a bright finish.
    → Resting lets structure tighten, making clean slices possible, while fresh herbs add aroma and color to cut portions.
  • Serve and portion: cut into portions with a sharp knife, lift gently with a spatula to preserve the layers, and serve warm as a complete meal with a simple green salad or crusty bread on the side.
    → Slicing with a hot, dry knife prevents dragging and ensures clean, attractive portions for presentation.

Notes

These Casseruola pancakes are a hearty, savory casserole-style bake that layers grated potatoes, sautéed vegetables, and melted cheese into a sliceable, comforting dish. You can customize them by swapping in your favorite fillings—try extra mushrooms, spinach, peppers, or different cheeses, and add cooked sausage or bacon for smoky richness. They freeze well: cool completely, then freeze slices in a single layer before bagging for quick reheats; rewarm in a 350°F (175°C) oven until hot and bubbling. For serving, finish with a dollop of sour cream or yogurt and a sprinkle of chopped parsley or chives. If you need to keep it gluten-free, use a 1:1 gluten-free flour blend and check any processed fillings for gluten; dairy-free options work by using dairy-free cheese and milk alternatives.

Tips

Tips for Casseruola Pancake

  • Batter hydration: After combining the ingredients, let the batter rest 5–10 minutes. This gives the flour time to hydrate, resulting in a smoother, tender pancake base.
  • Flour substitutions: If you’re avoiding gluten, substitute half the all-purpose flour with a 1:1 gluten-free blend. For a heartier texture, use half whole-wheat flour. Always sift to remove lumps for a smoother batter.
  • Egg temperature and mixing: Use room-temperature eggs for better emulsification. Whisk thoroughly to incorporate air, which helps the pancake puff during baking.
  • Milk choices: Whole milk yields a richer crumb; dairy-free milks work too but may affect browning. If the batter is thick, whisk in a splash more milk and let it rest again.
  • Savory vs. sweet balance: For a strictly savory casserole, reduce or omit vanilla, cinnamon, and nutmeg. If using them, keep them modest to avoid clashing with cheese and potatoes.
  • Potato prep: After grating the raw potatoes, rinse and thoroughly squeeze out moisture. Pat dry to prevent a soggy bake; for crisper edges, pre-sauté lightly and drain well.
  • Spinach moisture control: Wilt spinach just until it collapses, then squeeze out as much liquid as possible. Excess moisture can make the bake soggy.
  • Vegetable sautéing: Sweat onions, peppers, and garlic in olive oil until soft and translucent to deepen flavor; avoid browning too much to keep the dish balanced.
  • Moisture management in fillings: Mushrooms release liquid; cook them until the moisture evaporates and blot any remaining liquid before assembling.
  • Meat considerations: If using sausage or bacon, ensure it’s fully cooked and cooled to minimize fat leakage into the bake. For leaner dishes, substitute with turkey sausage or omit meat.
  • Cheese strategy: Use a mix of cheeses for flavor and melt; shred fresh cheeses just before using for better texture than pre-shredded varieties. Reserve a portion to sprinkle on top for a melty crust.
  • Spinach and greens technique: Chop greens finely to distribute evenly and prevent pockets of moisture; wilt and drain thoroughly.
  • Garlic and aromatics: Mince garlic finely and sauté with onions to mellow its bite and distribute flavor evenly.
  • Oil and butter handling: Use hot sauté oil to prevent sticking when cooking vegetables; let melted butter cool slightly before adding to the batter to avoid scrambling eggs.
  • Binding and richness: The binding components (milk/cream and eggs) help the slice hold together; if you want a firmer slice, reduce moisture slightly or add an extra tablespoon of breadcrumbs or cheese.
  • Top crust and finish: Dot the top with butter for a glossy, golden crust; finish with a light drizzle of olive oil or a final sprinkle of Parmesan for extra color and flavor.
  • Baking tips: Bake until the top is set and lightly browned; if the center appears loose, cover loosely with foil and bake a bit longer to avoid over-browning the edges.
  • Serving and resting: Let the casserole pancake rest for 10 minutes after baking to set the layers for clean slicing.
  • Make-ahead and storage: Prepare the filling ahead of time and refrigerate; assemble and bake when ready. Leftovers keep well in the fridge for 3–4 days and can be reheated in the oven or a hot skillet to regain crisp edges.

FAQ

FAQ – Casseruola pancake

What is a Casseruola pancake?

A casserole pancake is a baked version of a pancake batter cooked in a casserole dish until puffy and lightly browned. It combines the comfort of pancake flavors with the ease of a one-pan bake, often with fruit, cream cheese, or other fillings folded into the batter or layered on top.

What ingredients do I need?

Basic batter: eggs, milk (or dairy-free milk), flour (all-purpose or a gluten-free substitute), sugar, vanilla, and a pinch of salt. For richness: melted butter. Fillings or toppings can include sliced fruit (apples, berries), cream cheese or ricotta, cinnamon, or chocolate chips. Optional: baking powder for extra lift.

Can I make it gluten-free or dairy-free?

Yes. For gluten-free, use a 1:1 gluten-free all-purpose flour blend and ensure any added ingredients are gluten-free. For dairy-free, swap milk with almond/oat/c coconut milk and use dairy-free butter or oil. These substitutions keep the batter cohesive and still bake into a fluffy casserole.

Do I need a special dish to bake it?

You can use a medium-sized casserole dish or a greased baking dish (about 8×8 inches / 20×20 cm). A dish with sides helps the batter rise evenly and prevents sticking during baking.

How do I assemble and bake it?

Whisk the batter ingredients until smooth. If using fillings, layer fruit or cheese in the dish, pour the batter over, or fold fillings into the batter. Bake in a preheated oven at about 180°C (350°F) for 25–40 minutes, until the top is lightly golden and a tester comes out clean. Let it rest a few minutes before serving.

What fillings or toppings work well?

Great options include sliced apples with cinnamon, berries with a touch of lemon zest, ricotta or cream cheese swirls, chocolate chips, or a dollop of yogurt on top. Savory variations can use grated cheese, chopped ham, or sautéed vegetables instead of sweet fillings.

How long does it take to bake?

Typically 25–40 minutes depending on the depth of batter and fillings. The center should be set and a slight golden crust formed on top. If the edges brown too quickly, cover loosely with foil and bake a bit longer.

Can I make it ahead or store leftovers?

Yes. You can mix the batter ahead and chill for up to 24 hours, then bake when ready. Leftovers will keep in the refrigerator for 2–3 days. Reheat gently in the oven at 160–170°C (325–340°F) for 8–12 minutes or until warmed through, or reheat slices in the microwave briefly.

Can I freeze a baked casserole pancake?

Yes, it freezes well. Slice and wrap portions tightly, then freeze. Thaw in the fridge overnight and reheat in the oven or microwave until hot. Freezing is best done after fully cooling.

Tips for best results

Use room-temperature eggs and milk for a smoother batter, avoid overmixing, grease the dish well, and let the batter rest for a few minutes before baking. If you want extra height, add a teaspoon of baking powder to the batter. For a lighter texture, whip the egg whites separately and fold them in gently.

Introduction / Hook

Immagina una piccola sinfonia mattutina che si svela nel piatto: una fetta di pane croccante che geme leggermente al morso, uova morbide che sprigionano calore dalla loro cornice cremosa, e una cascata di formaggio che fonde in un abbraccio avvolgente. Il toast uova e formaggio è una proposta semplice, immediata e irresistibile, capace di trasformare una colazione ordinaria in un momento di coccole. È la promessa di una mattina che parte con una scintilla di comfort culinario e una nota di scoperta: ogni morso è una piccola celebrazione della semplicità ben fatta. La magia di questa ricetta sta nella sua capacità di sposare due universi fondamentali della cucina quotidiana: la croccantezza del pane tostato e la morbidezza dei tuorli, insieme al fascino indulgente del formaggio fuso. È una ricetta che parla al cuore e, al contempo, guarda al palato con una raffinatezza sobria. Prepararla è quasi un rituale: si sente il profumo avvolgente che si diffonde in casa, si assapora la promessa di una colazione sostanziosa senza complicazioni, e si assaggia una combinazione di texture che sembra danzare tra contrasto e armonia. In poche parole, questo toast è un inizio di giornata che sa di casa, ma ha anche un tocco di lusso quotidiano.

The Story Behind the Dish

Il toast uova e formaggio nasce dall’incontro tra due pratiche culinarie che da sempre guidano le prime ore del giorno: la semplicità di una fetta di pane tostato e la bontà confortante di uova appena cotte. In molte culture, la colazione è un rituale di recupero energetico, un momento in cui il forno o la padella diventano utensili di cura. In Italia, dove la colazione spesso si esprime con una semplicità suadente, una fetta di pane fragrante accompagnata da un tuorlo cremoso è un modo elegante e accessibile per iniziare la giornata. La versione con formaggio aggiunge una nota di ricchezza che accosta al gusto familiare una sensazione di indulgente piacere. È facile immaginare questa preparazione come un omaggio alle abitudini della nonna: un forno che sfrigola, una padella che gocciola liquido dorato, e una tavola dove si scambiano parole mentre il pane si tinge di colore brunito e profumo invitante. In contesti moderni, il toast uova e formaggio diventa anche un simbolo di comfort senza tempo in una routine frenetica: è rapido, nutre bene e lascia spazio a piccole varianti creative che riflettono personalità e gusto del momento. Per molti, è diventato una tela neutra su cui esercitare l’arte della cucina quotidiana: una tela che accoglie erbe profumate, spezie delicate, o una spolverata di un formaggio più aromatico per trasformarsi in qualcosa di nuovo pur restando familiare. Dietro la semplicità di pochi ingredienti c’è una ricca tradizione di buoni sapori che si raccontano da secoli, una storia di pane che si presta a essere l’abbellimento di una tappa giornaliera, una storia di uova che con la loro leggerezza donano corpo e legame, una storia di formaggio che avvolge e consola. In questa cornice, il toast uova e formaggio diventa un ponte tra l’ordinario e il delizioso, una piccola avventura che inizia ogni giorno e qualche volta si rinnova anche in momenti non convenzionali: una domenica pigra, una colazione post-allenamento, una cena leggera che abbraccia la semplicità. È, in definitiva, una piccola lezione di cucina: con pochi gesti e pochi ingredienti, si può creare qualcosa di memorabile, capace di accompagnare la giornata con una nota di calore e un sorriso soddisfatto.

Why You’ll Love This Recipe

Questo piatto è una piccola scena di comfort che si adatta a molte situazioni e stati d’animo. Ecco perché varrà la pena di provarlo e reinventerlo nel tempo:

  • Rapidità e semplicità: una preparazione che si realizza in pochi minuti, perfetta per mattine frenetiche quando servono energia senza stress.
  • Versatilità: il concept si presta a infinite personalizzazioni, consentendoti di cambiare formaggio, erbe, o contorni in base a ciò che hai in dispensa.
  • Confortevole ma non indulgente: una combinazione che nutre la fame e accende i sensi senza appesantire.
  • Equilibrio di texture: il croccante del pane incontra la crema delle uova e la fusione del formaggio, offrendo una esperienza tattile che rende ogni morso soddisfacente.
  • Adatto a diverse diete: con le giuste varianti, può diventare una base per versioni vegan, vegetariane o gluten-free, mantenendo lo stesso senso di completezza.
  • Ideale per brunch e colazioni lente: è una scelta capace di accompagnare caffè, spremute fresche o un bicchiere di prosecco per un tocco festivo, senza rinunciare alla praticità.
  • Incorpora un senso di casa: la ritualità di prepararlo evoca ricordi affettuosi, rendendolo una proposta accogliente da offrire a familiari e amici.

Flavor Profile & Texture

Il toast uova e formaggio è una danza di sapori e consistenze che si equilibrano con eleganza. La croccantezza del pane tostato è la base solida su cui si innestano due elementi morbidi: le uova, delicate e setose, che offrono una texture soffice e vellutata, e il formaggio fuso, che crea una copertura lucida e cremosa. Dal punto di vista gustativo, si registra un gioco tra salinità e un leggero sentore di dolce del pane, accompagnato da note ricche e aromatiche provenienti dal formaggio fuso. Il profumo è una promessa: una temperatura invitante che avvolge le narici, un odore di tostatura che ricorda colazioni lente ma appassionate. L’uovo, se cotto con cura, rilascia un cuore cremato che si mescola armoniosamente con il collaudo del formaggio fuso, creando una consistenza liscia che si spalma su una base croccante. A seconda delle varianti, possono emergere emozioni diverse: una nota erbacea leggera fornita da erbe fresche, una punta di piccantezza data da pepe o peperoncino, o una delicatezza affumicata se si aggiunge una fetta di formaggio affumicato o una spolverata di scorza d’agrumato. In generale, questa composizione riesce a offrire una soddisfazione immediata, senza rinunciare a una qualità sensoriale che invita al secondo morso. È una combinazione capace di accompagnare la giornata con una sensazione di completezza: non è troppo pesante, ma è sufficientemente ricca da farci sentire sazi e contenti. Se vuoi immaginare la scena a colpo d’occhio: una fetta di pane dorata chiaramente tostato, una nuvola di uova morbide che si intravede al centro, una cascata di formaggio che si scioglie e avvolge la superficie, e magari una spruzzata leggera di olio extravergine d’oliva o una scintilla di erbe fresche spezzate a mano. L’accordo di texture è ciò che rende questa ricetta memorabile: croccante, vellutato, filante, eppure lucente e invitante dall’inizio alla fine.

Occasions & Pairings

Questo piatto è sorprendentemente versatile quando si tratta di occasioni e abbinamenti. Ecco alcuni contesti tipici in cui brilla:

  • Mattine rapide: una colazione sostanziosa ma veloce che ti lascia pieno di energia per iniziare la giornata.
  • Brunch del weekend: un protagonista semplice ma di grande effetto, perfetto per accompagnare una selezione di spremute fresche, caffè e una dolcezza leggera.
  • Colazione post-allenamento: una combinazione di proteine e carboidrati che aiuta a recuperare, senza appesantire.
  • Spuntino sostanzioso: per chi cerca qualcosa di solido ma non complicato, a qualsiasi ora.
  • Cena leggera in stile comfort: una scelta confortante per una serata tranquilla, magari completata da una salsa fresca o un’insalata verde.

Per quanto riguarda gli abbinamenti, le opzioni sono semplici quanto efficaci:

  • Bevande: caffè espresso, cappuccino cremoso, tè nero profumato, o una centrifuga di agrumi per una nota vivace al mattino.
  • Contorni leggeri: pomodori maturi a fette, rucola fresca, o una span di verdure grigliate per aggiungere colore e freschezza.
  • Bevande alcoliche per un brunch festivo: spumante brut o un vino bianco leggero che non sovrasti i sapori delicati del piatto.
  • Dolci di accompagnamento: una piccola porzione di frutta fresca o una mousse leggera per contrastare la ricchezza del formaggio fuso.

Tips, Variations & Substitutions

La bellezza di questo piatto risiede nella sua adattabilità. Ecco alcune idee per personalizzarlo, senza allontanarsi troppo dall’anima originale:

  • Versione vegetariana: mantieni l’essenza cremosa delle uova e del formaggio, magari includendo erbe aromatiche fresche o una crema di avocado per una nota verde vivace.
  • Varianti di pane: scegli un pane integrale rustico, una baguette leggera o una ciabatta croccante. Ogni tipo di pane darà una texture e un sapore leggermente differenti.
  • Rinforzo proteico: potresti aggiungere una leggera spolverata di pepe nero, paprika dolce o pepe di Cayenna per una leggera intensità, o introdurre una salsa a base di yogurt per un tocco di cremosità ancora diversa.
  • Snack vegano o senza latticini: usa una versione vegana di formaggio da cucina fuso e una crema a base di anacardi o soia per ottenere una consistenza simile senza derivati animali.
  • Herbs e aromi: prezzemolo, erba cipollina, basilico fresco o un pizzico di origano possono cambiare notevolmente l’aroma e il profilo finale.
  • Texture alternative: aggiungi una spolverata di noci tostate o semi croccanti per un contrasto extra di croccantezza.
  • Contorni orientati alla tradizione: una fetta sottile di pomodoro arrosto o una salsa verde fresca aggiungono un tocco gourmet senza complicazioni.

Storage & Make-Ahead Ideas

Questo piatto è pensato per essere fresco e semplice, ma con alcune piccole accortezze puoi pensarlo anche come opzione make-ahead per i giorni più frenetici. Ecco alcune dritte pratiche:

  • Avanzi: se avanza una fetta di pane, tienila in un sacchetto ben chiuso e riutilizzala entro 1-2 giorni per una nuova versione di toast, magari rinfrescata con una seconda tostatura leggera.
  • Uova sode avanzate: se hai cucinato uova in anticipo, puoi tagliarle a fettine sottili o a pezzetti e disporle sulla base di pane tostato al momento, insieme al formaggio fuso per un effetto rapido e gustoso.
  • Conservazione delle erbe: se hai erbe fresche in avanzo, puoi conservarle in un contenitore ermetico con un po’ di carta assorbente per prolungarne la freschezza e aggiungerle al tocco finale prima di gustarlo.
  • Riscaldatura: per riscaldare, usa una teglia al forno a bassa temperatura o una padella antiaderente, coprendo leggermente con un coperchio per aiutare a riattivare il formaggio fuso senza bruciare il pane.

Fun Facts & Trivia (Optional)

Sapere qualcosa in più può arricchire l’esperienza di preparazione e condivisione di questo piatto. Ecco alcuni mini-trivias leggeri e interessanti:

  • Pane tostato e uova hanno una lunga storia nelle cucine del mondo: dall’America latina al Centro Europa, dalla tradizione mediterranea a quella asiatica, il pane tostato rappresenta una base universale per creare pasti veloci e confortanti.
  • La combinazione calda di formaggio fuso con proteine morbide crea una sensazione di completezza nel palato che è difficile da battere in una colazione di routine.
  • La cucina casalinga ha una capacità speciale di trasformare semplici gesti in abitudini: un toast con uova e formaggio può diventare un piccolo rito che porta una nota di gioia quotidiana.
  • Questo tipo di piatto è facilmente adattabile alle stagioni: in inverno si possono introdurre spezie calde o toque di affumicatura leggera, in primavera erbe fresche e una punta di limone per un tocco di freschezza.

Ingredients

Toast Base

    – 2 slices sturdy bread (sourdough or whole grain)
    → Base for the toast; choose a bread that can hold up to the egg and cheese without becoming soggy. Slightly stale bread toasts better and preserves structure. If you like extra crispness, toast the slices in a dry skillet before assembling.
    – 1 tablespoon unsalted butter (or 1 teaspoon olive oil, optional)
    → For toasting the bread and cooking the egg. Butter adds rich flavor and helps browning; olive oil provides a lighter, crisper finish. If using oil, keep the heat moderate to prevent smoking and ensure a golden crust.

Eggs

    – 2 large eggs
    → Eggs provide protein and help bind the toppings to the bread. Cook to your preferred doneness: sunny-side up for a runny yolk or gently fried until the whites are set. If you prefer even cooking, let eggs come to room temperature for about 15 minutes before cooking.

Cheese

    – 1/2 cup shredded cheese (cheddar, mozzarella, Gruyère, or a blend)
    → Melting cheese creates a creamy, savory layer that marries with the egg. Shred the cheese just before use for quicker melting; if using pre-shredded, toss with a tiny pinch of flour to prevent clumping. Let cheese come to room temperature before adding so it melts evenly on the hot toast.

Seasoning

    – Salt to taste and freshly ground black pepper to taste
    → Seasoning enhances the flavor of bread, cheese, and eggs. Cheese and butter contribute salt, so add gradually. Pepper adds subtle warmth. Optional: a pinch of smoked paprika or garlic powder for deeper flavor.

Optional Add-ins

    – 1 tablespoon chopped fresh parsley or chives (optional)
    → Fresh herbs add brightness and color. Finely chop and sprinkle on top after assembly to preserve aroma; dried herbs can be used in a pinch but are less vibrant.
    – 1 small tomato, thinly sliced (optional)
    → Adds acidity and freshness; place a thin slice on the bread before topping with cheese or on top after cooking. Pat tomato dry to avoid soggy toast.
    – 1/4 teaspoon red pepper flakes (optional)
    → Provides a gentle kick to balance richness. Adjust to taste, add to the cheese before melting or sprinkle on top after assembly.

Instructions

  • Preheat a heavy skillet over medium heat until a drop of water sizzles on contact.
    → This ensures the bread browns quickly and evenly and reduces the chance of sogginess as the toppings are added later.
  • Add 1 tablespoon unsalted butter to the skillet and swirl to coat; let the butter melt and foam, but stop before it browns.
    → Butter provides rich flavor and helps achieve a golden crust; foaming indicates the pan is hot enough while preventing burnt, bitter notes.
  • Place the 2 slices of sturdy bread in the skillet and toast until golden and crisp on both sides, about 2–3 minutes per side; flip halfway with tongs to ensure uniform browning.
    → Toasting strengthens the bread’s structure so it won’t become soggy under the cheese and eggs, and it enhances flavor through browning (Maillard reaction).
  • Pat dry 1 small tomato and, if using, place one thin slice on each toast; lightly season with a pinch of salt.
    → Dry tomato surface minimizes extra moisture that could soggy the toast, while a touch of salt enhances its brightness and balance with the cheese and eggs.
  • Evenly distribute 1/2 cup shredded cheese over each toast; let the cheese sit for a moment so it begins to melt from the residual heat.
    → Shredded cheese melts quickly and evenly when placed on hot bread; if possible, let cheese come to room temperature for 10–15 minutes beforehand to improve melting uniformity.
  • In a separate nonstick skillet, crack 2 large eggs and cook them to your preferred doneness: sunny-side up with whites set and yolk runny, or gently fried until whites are set and then flipped for over-easy or over-medium.
    → Cooking eggs separately gives you precise control over doneness and prevents overcooking the toast; for sunny-side up, cover lightly to set whites without overcooking the yolk.
  • Gently slide or transfer the fried eggs onto the cheese-topped toasts, aligning them so each slice receives an egg.
    → Placing the egg atop the cheese allows heat from the egg to melt the cheese further and creates a cohesive, flavorful layer without crushing the toast.
  • Season each assembled toast with a light pinch of salt and freshly ground black pepper to taste.
    → Cheese and butter contribute salt, so tasting and adjusting ensures the overall flavor is balanced and not flat.
  • Optional: Sprinkle 1 tablespoon chopped fresh parsley or chives over the finished toasts for brightness and color.
    → Fresh herbs provide a fragrant aroma and a herbaceous contrast to the richness of egg and cheese; cut herbs finely to distribute evenly.
  • Optional: If you like a little heat, sprinkle 1/4 teaspoon red pepper flakes over the eggs or around the toast.
    → The pepper flakes add a gentle kick that cuts through the richness and enhances overall balance; adjust to taste.
  • Serve immediately while the toast is crisp, the cheese is melty, and the yolk is at your preferred doneness.
    → Timely service preserves texture and showcases the contrast between crisp bread, gooey cheese, and runny or set yolk.

Notes

These egg and cheese toast are a quick, satisfying breakfast or brunch option. Use sturdy bread that can hold up to the egg and cheese; slightly stale slices toast better and resist sogginess. For a richer flavor, toast in butter; for a lighter, crisper finish, use olive oil and moderate heat. Cook the eggs to your preference: sunny-side up for a runny yolk or gently fried until whites are set; letting eggs come to room temperature for about 15 minutes before cooking helps even cooking. Shred cheese just before use to speed melting; if using pre-shredded, toss with a pinch of flour to prevent clumping and ensure smooth melt. Optional add-ins: chopped fresh parsley or chives for brightness, a thin tomato slice for acidity, and a pinch of red pepper flakes for a subtle kick. For deeper flavor, a pinch of smoked paprika or garlic powder can be added to the cheese as it melts. Assembly tip: layer a thin spread of butter on the bread, top with cheese to start melting, place the hot egg on top, and finish with a final kiss of cheese so it oozes around. If you prefer a one-pan finish, melt everything in a skillet over low heat with a lid until the cheese is gooey. Storage: these are best fresh, but leftovers can be warmed in a dry skillet or toaster oven for a few minutes. Gluten-free note: Always ensure your bread is gluten-free if you have gluten intolerance. They pair well with a simple side salad or fresh fruit for a balanced meal.

Tips

Tips for Toast uova e formaggio

  • Choose bread that can hold up to the egg and cheese; sourdough or whole grain work well. Slightly stale bread toasts better and keeps structure. If you like extra crispness, toast the slices in a dry skillet before assembling.
  • Butter adds rich flavor and helps browning; olive oil provides a lighter, crisper finish. If using oil, keep the heat moderate to prevent smoking and ensure a golden crust.
  • Bring eggs to room temperature for more even cooking; this helps the whites set uniformly and prevents the yolk from overcooking.
  • Shred cheese just before use for quicker melting; if using pre-shredded, toss with a tiny pinch of flour to prevent clumping. Let cheese come to room temperature before adding so it melts evenly on the hot toast.
  • Sodium awareness: cheese and butter add salt, so season gradually with salt and pepper. Optional: a pinch of smoked paprika or garlic powder for deeper flavor.
  • To avoid soggy toast, melt the cheese on the bread first (or in a skillet with a lid) so it forms a melty layer before adding the egg on top.
  • Egg doneness: sunny-side up for a runny yolk or gently fried until whites are set. If you prefer even cooking, let eggs come to room temperature for about 15 minutes before cooking.
  • Finish with a brief lid cover or a short under-the-broiler blast to melt the cheese evenly without burning the bread.
  • Optional add-ins: sprinkle chopped fresh parsley or chives after assembly for brightness; tomato slices add acidity—pat them dry to avoid sogginess; red pepper flakes provide a gentle kick—adjust to taste.
  • Serve immediately for best texture and melty cheese. If making in advance, keep components separate and assemble just before eating.
  • Storage and reheating: leftovers are best reheated in a toaster oven to regain crispness; avoid microwaving, which can soften the toast and dull the cheese.

FAQ

Cos’è Toast uova e formaggio?

È una fetta di pane tostato farcita con uovo cotto e formaggio fuso, semplice e gustosa, ideale per colazione o pranzo veloce.

Quali ingredienti servono?

Ingredienti base per 1 porzione: 1 fetta di pane, 1 uovo, 1–2 fette di formaggio (es. cheddar, mozzarella o fontina), burro o olio per cuocere, sale e pepe. Opzionali: pomodoro a fette, erbe aromatiche, paprika.

Quale attrezzatura serve?

Padella antiaderente di media grandezza, spatola, tostapane o forno per tostare il pane. Un coltello può aiutare a tagliare ingredienti se necessario.

Come si prepara passo-passo?

1) Tosta leggermente la fetta di pane. 2) Scalda la padella con un po’ di burro o olio. 3) Rompi l’uovo al centro della fetta o cuocilo separatamente e appoggialo sul pane. 4) Disponi il formaggio sopra l’uovo finché non si scioglie. 5) Condisci con sale e pepe e servi subito.

Posso usare formaggi diversi?

Sì. Puoi variare usando mozzarella per scioglievolezza, fontina per sapore ricco, cheddar per nota più intensa o una combinazione di formaggi. Evita formaggi troppo stagionati se vuoi una fusione rapida.

Posso utilizzare pane integrale o senza glutine?

Assolutamente. Usa pane integrale o senza glutine a tua scelta. Potrebbe cambiare leggermente i tempi di cottura o la croccantezza, ma il risultato resta gustoso.

Quante uova servono per porzione?

Generalmente 1 uovo per fetta di pane. Per due porzioni, usa 2 uova. Se preferisci un tuorlo più morbido, cuoci a fuoco medio-basso.

Come ottenere una consistenza perfetta delle uova?

Per un uovo all’occhio di bue, cuoci a fuoco medio-basso finché l’albume è opaco e il tuorlo resta morbido. Se vuoi uova strapazzate, mescola delicatamente negli ultimi minuti. Coprire con formaggio aiuta a fondere bene.

Come conservare e riscaldare gli avanzi?

Conserva in frigorifero entro 2 ore dalla preparazione, in contenitore ermetico, per 1–2 giorni maximum. Per riscaldare, scalda in padella a fuoco basso o in forno finché il formaggio è nuovamente fuso; evita il microonde se vuoi mantenere la croccantezza del pane.

Quali abbinamenti o varianti consigliate?

Abbinamenti: pomodori a fette, rucola o spinaci, avocado a fette. Varianti rapide: aggiungi spezie come paprika, pepe nero o erba cipollina. Per una versione più rustica, aggiungi prosciutto o pancetta se non sei vegetariano.

È possibile rendere la ricetta adatta a diete particolari?

Sì. Per intolleranze: usa formaggio senza lattosio o pane senza lattosio. Per una versione vegana: sostituisci l’uovo con una frittata di ceci o tofu e usa formaggio vegano oppure elimina il formaggio e aggiungi una crema vegetale saporita. Scegli ingredienti alternativi in base alle tue esigenze.

Introduzione / Hook

Immagina una colazione che inizia con la croccantezza dorata di un donut e finisce nella morbidezza soffice di un waffle, il tutto a base di mele profumate alla cannella. Benvenuti nel mondo sorprendente dei Donuts waffle alle mele: una fusione golosa che unisce due classici della tavola mattina in un unico dessert o brunch che fa felici grandi e piccini. Non è solo una ricetta, è un momento di comfort: una cucina che profuma di mercati di campagna, di zuppe calde e di finestre accarezzate dal sole del mattino. Ogni morso è una piccola storia da raccontare, un ricordo che si risveglia e un invito a rallentare per assaporare la semplicità delle cose buone. Le mele, tagliate a piccoli frammenti o a dadini succosi, regalano una dolcezza naturale che si sposa perfettamente con la nota di vaniglia, la dolcezza del burro e la presenza speziata della cannella. Il risultato è una consistenza sorprendente: esternamente crusty e leggermente friabile, internamente soffice e fragrante, come se due icone della colazione avessero deciso di collaborare per creare qualcosa di nuovo, accogliente e irresistibile. Se vuoi stupire i tuoi ospiti con un piatto che sembri complicato ma sia sorprendentemente facile da realizzare, questa è la ricetta perfetta. Promette una presentazione scenografica: una pila di donuti-waffle spolverata di zucchero a velo, magari accompagnata da una crema di mele calda o da una pallina di gelato alla vaniglia. E la cosa migliore è che funziona in qualsiasi momento della giornata: brunch domenicale, merenda tra amici, una dolce coccola dopo cena o una sorpresa per una festa di famiglia. Preparati a innamorarti della fusione tra la croccantezza esterna e la morbidezza interna, tra l’aroma di mele e il profumo inebriante di cannella, tra il comfort food e l’innovazione culinaria. I Donuts waffle alle mele non sono solo una ricetta: sono una piccola celebrazione della cucina casalinga, tradizionale ma audace, capace di trasformare ingredienti semplici in un momento di festa.

La storia del piatto

Le origini di questo piatto sono un viaggio affascinante tra tradizioni diverse che si incontrano in una cucina moderna. Da una parte, i classici donut, nascono come dolcetti fritti che hanno attraversato oceani e cucine per assumere nuove identità: soffici al centro, croccanti all’esterno, con una dolcezza che invita a una seconda that bite. Dall’altra parte, i waffles, con la loro firma distintiva: una griglia a rombi che imprigiona l’aria e crea strutture leggere e friabili. Quando queste due idee culinariamente differenti si intrecciano, nasce una creazione che sembra destinata a restare: un dolce da forno che si comporta come una pancake-sfera, ma con la patina di una cialda e il cuore di un donut. Ma perché mele? Le mele rappresentano la quintessenza della stagione autunnale, quel viaggio tra vendemmie e mercatini di paese che risveglia l’olfatto e la memoria. La cannella, spesso associata a torte di mele e profumi di casa, aggiunge una profondità speziata che tiene compagnia al dolce, senza sovrastarlo. Le piante di vaniglia, burro morbido e zucchero donano una sensualità delicata che invita a chiudere gli occhi per un attimo e lasciarsi trasportare in un viaggio di consistenze. In molte cucine dell’Europa e oltre, esistono versioni di pancake, frittelle o dolci a base di mele e spezie che celebrano l’autunno come stagione di calore e convivialità. Questa versione ibrida è un omaggio a quelle radici culinarie, reinterpretata con una tecnica che mixa l’inaspettato: la cottura in forno tipica dei waffles con la dolcezza soffice e avvolgente di un donut. È una ricetta che parla di famiglia, di weekend lunghi, di colazioni luminose e di brunch che si prendono tutto il tempo per essere assaporati. In sostanza, Donuts waffle alle mele racconta una storia di continuità: la tradizione che incontra l’innovazione, la semplicità che si eleva grazie a una presentazione affascinante e a una texture che sorprende ad ogni morso.

Perché amerai questa ricetta

Questa sezione celebra i motivi per cui questa preparazione diventerà una presenza fissa nel tuo repertorio culinario. Ecco cosa rende unico Donuts waffle alle mele:

  • Facilità d’esecuzione: pur sembrando un piatto da “chef”, è sorprendentemente semplice da realizzare e richiede ingredienti di base che di solito si trovano in cucina. Non serve attrezzatura complicata: una piastra per waffle e una teglia per donut o una griglia si trasformano in strumenti per una grande presentazione.
  • Versatilità: può essere servito come dolce mattutino, come merenda golosa, o come dessert da accompagnare a crema, gelato o una salsa di caramello. Si presta a personalizzazioni infinite in base a stagionalità o preferenze personali.
  • Comfort e convivialità: è un piatto che invita a spegnere la routine e a riunire la famiglia o gli amici a tavola. Il profumo che riempie la cucina è un invito irresistibile a rallentare e godersi il momento.
  • Equilibrio tra dolce e speziato: le mele, la cannella e la vaniglia creano un profilo aromatico caldo e avvolgente, senza mai essere troppo intinto nel dolce. Ogni morso offre una sinfonia di note che si rincorrono tra croccantezza e morbidezza.
  • Testato e approvato: una ricetta che funziona anche quando hai poco tempo o poche idee. È una soluzione salva-viso per colazioni speciali o brunch improvvisati.

Racconti di presentazione

Una piccola nota su come presentarla aggiunge valore: disponi i donuts waffle su un piatto grande, spolvera con zucchero a velo e accompagna con una salsa di mele tiepida o una crema di ricotta delicata. A chi piace il tocco croccante, consiglia di aggiungere una leggera spolverata di noci tostate o mandorle affettate. Alcuni adorano una spinta fresca con una quenelle di yogurt greco o una pallina di gelato alla vaniglia, che si scioglie sull’insieme caldo. Queste scelte di presentazione trasformano la tavola in un piccolo spettacolo sensoriale: l’odore che esce dal forno, la presentazione invitante, la combinazione di colori dorati con il rosso intenso delle mele cotte. Il risultato è un piatto che non solo nutre, ma racconta una storia di sapori ben bilanciati e di momenti condivisi.

Profilo di sapore e consistenza

Questo piatto è una sinfonia di texture e gusti. La croccantezza esterna, ottenuta dal contatto con la griglia del waffle e dalla cottura in forno, contrasta con la morbidezza interna tipica dei donut. Le mele hanno una consistenza leggermente tenace, che trattengono un succo dolce e leggermente acidulo, specialmente se si usano varietà come Granny Smith o Pink Lady. La cannella è presente in modo benefico: non è invadente, ma lascia una scia di calore che si fonde con la dolcezza delle mele. La vaniglia avvolge l’intero profilo aromatico, aggiungendo una nota floreale che rende l’insieme più raffinato. Il burro, se usato con moderazione, inonda la superficie con una dolcezza lattiginosa che amplifica la sensazione di comfort. Infine, la tostatura leggerissima delle superfici aggiunge una leggera nota di caramello, creando una gamma di sapori che si evolves nel tempo, dal primo morso al finale prolungato. In termini di percezione gustativa, è un equilibrio tra dolce e aromi terrosi, che si accompagna perfettamente a una leggera acidità data dalle mele stesse, bilanciando l’intero piatto. L’armonia di testo e gusto si fa sentire non solo al palato ma anche all’immaginazione: la vista di una tavola dorata e profumata, l’udito del leggero scricchiolio delle superfici, l’olfatto che anticipa la dolcezza di mele e cannella, e il gusto che ne resta come un ricordo confortevole.

Occasioni & Pairings

Donuts waffle alle mele è un piatto che si adatta a molte occasioni, trasformando un semplice momento in una piccola festività quotidiana. Ecco alcuni scenari consigliati e abbinamenti che valorizzano il piatto:

  • Brunch domenicale: una tendenza elegante ma facile da realizzare, perfetta per iniziare la giornata con leggerezza e gioia.
  • Colazioni in famiglia: i bambini adorano la parte croccante all’esterno e il cuore morbido all’interno; è un modo divertente per coinvolgere i più piccoli nella cucina.
  • Feste di compleanno o celebrazioni informali: impacchettati in un piatto grande o in cestini alias “donuts waffle party” come decorazione, possono illuminare la tavola con un tocco speciale.
  • Fine pasto: serviti con una pallina di gelato vaniglia o una crema leggera di mascarpone per un dessert rapido ma d’effetto.

Abbinamenti consigliati

  • Bevande calde: caffè lungo, cappuccino, chai latte, tè nero aromatico e infusi speziati si sposano bene con la dolcezza della mela e l’aroma della cannella.
  • Salse e topping: salsa di mele calda, caramello leggero, crema di mascarpone, yogurt greco al limone o una salsa di frutti di bosco per un contrappunto acido.
  • Contorni: una leggera insalata di agrumi, mandorle tostate o noci caramellate completano la dolcezza senza appesantire.
  • Dolci di accompagnamento: una torta di noci e miele o dei biscotti speziati possono costituire un accompagnamento goloso per un piccolo dessert da degustazione.

Consigli, varianti & sostituzioni

Questa sezione è dedicata a chi ama personalizzare la ricetta o adattarla a esigenze dietetiche diverse. Ecco idee pratiche per rendere Donuts waffle alle mele ancora più versatile:

  • Varianti di mele: sperimenta con diverse varietà di mele per modificare il livello di dolcezza e l’acidità. Mele Granny Smith per una nota fresca, Honeycrisp per croccantezza, o Cox’s Orange Pippin per un carattere aromatico robusto.
  • Versione vegan: sostituisci il burro con olio di cocco o margarina vegetale, e usa latte vegetale (riso, mandorla o soia). La consistenza potrebbe variare leggermente ma il sapore resta invitante.
  • Gluten-free: utilizza farine alternative come una miscela di riso, mais e tapioca, oppure un mix specifico per pancake/waffle senza glutine, mantenendo una buona idratazione dell’impasto per evitare risultati troppo compatti.
  • Contro lattei: se preferisci una versione meno grassa, puoi ridurre la quantità di burro o sostituirlo con yogurt greco intero o una purea di mele per una consistenza più leggera.
  • Profumazioni extra: aggiungi una punta di noce moscata o alloro alla miscela per un profilo aromatico diverso. In estate, puoi sostituire una parte di cannella con scorza d’arancia grattugiata per una nota agrumata.
  • Versione al cioccolato: aggiungi un leggero velo di cacao amaro nell’impasto o una salsa al cioccolato fondente per una variante indulgente.
  • Texture supplementare: aggiungi nocciole tostate o pistacchi tritati all’impasto o come topping finale per un tocco croccante extra.

Conservazione & Idee da preparare in anticipo

Per chi ama pianificare o per chi vuole avere una merenda pronta all’ultimo minuto, ecco come gestire correttamente questa delizia:

  • Conservazione a breve termine: una volta raffreddati, i donuts waffle alle mele possono essere conservati in un contenitore ermetico a temperatura ambiente per 1-2 giorni. Rassodano leggermente, ma mantengono una buona parte della loro morbidezza se riscaldati brevemente in forno o tostapane.
  • Riscaldamento: per riportarli al meglio, riscalda in forno a 160-180°C per 5-8 minuti o in forno a microonde per 15-20 secondi ciascuno, a seconda della potenza. Aggiungi una piccola noce di burro o una spruzzata di latte per riacquistare morbidezza.
  • Congelamento: non è la variante più comune, ma è possibile congelare l’impasto non cotto (se si prepara in anticipo) in porzioni singole; scongelare e cuocere come al solito. In alternativa, congelare piccoli pezzi già cotti e scaldarli in forno o fono microonde quando serve.
  • Make-ahead: se vuoi preparare una porzione più grande per una festa, cuoci la quantità desiderata fino a metà cottura, conservane in frigorifero e poi completa la cottura prima di servire. Oppure prepara le mele cotte un giorno prima e scaldale al momento di servire per un risultato ancora più aromatico.

Curiosità & Trivia (Opzionale)

Dietro ai Donuts waffle alle mele si nascondono piccole curiosità che aggiungono fascino e contesto al piatto:

  • Unione di due icone: la fusione tra donut e waffle è una celebrazione della cucina di comfort, nata dall’esigenza di creare piatti pratici ma scenografici per il brunch moderno.
  • Il potere delle mele: molte culture hanno riconosciuto le mele come simbolo di salute, dolcezza e prosperità. Anche in cucina, le mele sono una “scusa” perfetta per introdurre una nota naturale di dolcezza senza ricorrere a zuccheri raffinati.
  • Profumi di casa: la cannella è una spezia che attiva la memoria olfattiva, collegando la preparazione di questo piatto a ricordi di colazioni di famiglia, vacanze autunnali e momenti di calore domestico.
  • Versatilità internazionale: sebbene la ricetta sia influenzata da tradizioni occidentali, l’idea di un dessert a base di griglia e dolce di mele è presente in molte culture, dove viene adattata con spezie locali e metodi di cottura tipici.

Ingredients

Waffle Donut Batter

  • 2 cups all-purpose flour
    → Role: forms the primary structure and body of the waffle-donut batter, giving it a tender crumb when cooked. For a gluten-free version, substitute 2 cups gluten-free all-purpose flour blend and consider adding 1/2 teaspoon xanthan gum per cup if your mix doesn’t already contain it. Preparation tip: sift the flour with the dry ingredients to avoid lumps and measure by spooning into the cup and leveling for accurate texture. Best results come from letting all wet and dry ingredients come to room temperature before mixing to prevent curdling or a dense batter.
  • 2 tablespoons granulated sugar
    → Role: provides subtle sweetness and helps with browning and aroma as the batter cooks. Preparation tip: sift or whisk sugar with the dry ingredients to distribute evenly; you can reduce by up to half if you prefer a less sweet batter, especially when using sweet apples as a filling. Fresh granulated sugar dissolves more readily, giving a smoother texture in the waffle-donut pockets.
  • 2 teaspoons baking powder
    → Role: leavening agent that creates lift and a light, airy crumb in the waffles/donuts. Preparation tip: ensure the baking powder is fresh (bleed test: a small amount should fizz in warm water). Sift it with the flour to distribute evenly and avoid large gaps in the texture. Do not overmix after adding the wet ingredients, or the batter may become tough and dense.
  • 1/2 teaspoon salt
    → Role: enhances sweetness and balances flavors, improving overall taste perception. Preparation tip: mix with dry ingredients for even distribution. If using salted butter, reduce the added salt slightly to prevent the batter from becoming overly salty. A pinch more could improve contrast with the apples if your apples are particularly tart.
  • 1/2 teaspoon ground cinnamon
    → Role: infuses warm spice that complements apples and adds depth to the aroma. Preparation tip: lightly toast the cinnamon in the dry mix for a moment to boost its fragrance, then cool before combining with liquids. If you love stronger spice, you can increase to 1 teaspoon, but start with 1/2 teaspoon and adjust to taste in subsequent batches.
  • 2 large eggs
    → Role: provide structure and moisture, helping to emulsify the batter and contribute to a tender crumb. Preparation tip: beat eggs lightly with the milk to simplify mixing; adding eggs directly to hot melted butter can curdle, so ensure the butter is cooled to lukewarm before combining.
  • 1 cup milk (dairy or plant-based)
    → Role: hydrates the dry ingredients, dissolves sugar and helps activate the leavening agents. Preparation tip: use fresh milk at room temperature for easier emulsification; if using plant-based milk, choose unsweetened options to keep the flavor clean. Adjust quantity slightly if your batter seems too thick or too thin after initial mixing.
  • 1/4 cup unsalted butter, melted and cooled
    → Role: provides moisture, richness, and tenderness; the fat helps create a softer, cake-like crumb in the waffles/donuts. Preparation tip: melt and allow to cool to lukewarm before whisking into wet ingredients to prevent cooking the eggs. If you prefer a lighter version, substitute with an equal amount of neutral oil (like canola or sunflower) instead of butter.
  • 1 teaspoon vanilla extract
    → Role: enhances overall flavor, adding a subtle sweetness with vanilla notes that complement apples. Preparation tip: use high-quality vanilla or paste for a more intense aroma; extract can be replaced with 1/2 teaspoon vanilla bean paste for a richer vanilla speckled batter.

Apple Mix-ins

  • 2 medium apples, peeled and finely diced
    → Role: provide natural sweetness, moisture, and fruit texture; apples also contribute pleasant acidity that can balance the batter. Preparation tip: dice evenly to ensure quick and uniform cooking in the waffle iron; for softer, more integrated sweetness, you can grate the apples finely and fold them into the batter—keep in mind this will increase moisture and slightly change texture. If apples are very tart, you can toss with a teaspoon of lemon juice to brighten flavor before adding to the batter.
  • 1 tablespoon lemon juice (to toss apples)
    → Role: prevents browning and adds a touch of brightness that enhances apple flavor. Preparation tip: toss diced apples with lemon juice just before folding into the batter; pat them dry if they look too wet to avoid sinking and soggy spots in the waffles. If you prefer, substitute with orange juice for a different citrus note.

Glaze

  • 1/2 cup powdered sugar
    → Role: provides a sweet, smooth finish that complements warm waffles/donuts and enhances the apple flavors. Preparation tip: sift the sugar to remove any lumps; mix with a small amount of liquid gradually to reach a pourable glaze consistency. For a thinner glaze, add a touch more milk; for a thicker glaze, use less liquid.
  • 1-2 tablespoons milk (dairy or plant-based)
    → Role: thin glaze to the desired drizzling consistency and help it set on the warm surface. Preparation tip: start with 1 tablespoon and add more as needed; adjust with a drop of vanilla or a pinch of salt if desired for a richer finish. If you plan to decorate, consider adding a pinch of cinnamon to the glaze for a spiced note that ties to the apples.
  • 1/2 teaspoon vanilla extract (optional)
    → Role: deepens the glaze flavor and adds aroma that pairs well with apples. Preparation tip: use pure vanilla extract for best taste; if using vanilla bean paste, you can use a small amount (about 1/4 teaspoon) to intensify the vanilla flavor without adding more liquid.

Optional Add-ins

  • 1/2 cup chopped walnuts (optional)
    → Role: provide pleasant crunch and a toasty, nutty contrast to the soft waffle-donut texture. Preparation tip: toast walnuts briefly in a dry skillet over medium heat for 2-3 minutes until fragrant, then chop finely for even distribution. If you have a nut allergy, omit this ingredient and optionally use toasted shredded coconut for a different texture.
  • 1/4 cup raisins or chopped dried cranberries (optional)
    → Role: introduce chewy pockets of sweetness and a bit of tartness. Preparation tip: soak dried fruit in warm water for 10 minutes if very dry to plump them slightly, then pat dry before folding into the batter to avoid extra moisture that can thin the batter. Use sparingly here to maintain structure and avoid overpowering apple flavor.

Instructions

  • Preheat your waffle iron to 375°F (190°C) and lightly brush or spray the grids with neutral oil or melted butter to prevent sticking.
    → This ensures a clean release and even browning; preheating the iron also seals the surface quickly for a crisp exterior.
  • Sift or whisk together the dry ingredients: 2 cups all-purpose flour, 2 tablespoons granulated sugar, 2 teaspoons baking powder, 1/2 teaspoon salt, and 1/2 teaspoon ground cinnamon.
    → Sifting distributes leavening and spices evenly, prevents lumps, and helps achieve a light, tender crumb in the waffles.
  • Whisk the wet ingredients in a separate bowl: 2 large eggs, 1 cup milk, 1/4 cup melted and cooled unsalted butter, and 1 teaspoon vanilla extract.
    → Beating eggs with the milk before combining helps emulsification, while cooling the butter prevents curdling the eggs and keeps the batter smooth.
  • Combine the wet and dry mixtures by pouring the wet into the center of the dry and stirring just until incorporated; stop as soon as there are no major pockets of flour.
    → Overmixing develops gluten, making the waffles tougher; a few small lumps yield a tender, airy texture once cooked.
  • Prepare the apple mix-ins: toss 2 medium apples, peeled and finely diced, with 1 tablespoon lemon juice; stir to coat evenly and prevent browning.
    → Lemon juice acidulates the fruit, preserving color and adding bright, tangy notes that balance sweetness in the batter.
  • Fold the apples into the batter with a gentle spatula until evenly distributed; do not overwork the batter after adding the apples.
    → Gentle folding prevents crushing the apple pieces and keeps the batter cohesive for even cooking in the waffle iron.
  • Optional: if using 1/2 cup chopped walnuts or 1/4 cup raisins or chopped dried cranberries, fold them in now after apples, or toast walnuts first for extra aroma.
    → Toasting walnuts increases their nuttiness and fragrance; toasting also helps prevent soggy pockets in the batter.
  • Rest the batter for 5–10 minutes at room temperature to hydrate the flour and relax gluten; cover briefly if the environment is drafty.
    → This leads to a more uniform crumb and ensures the batter gains optimal thickness for waffle formation.
  • Make the glaze by whisking 1/2 cup powdered sugar with 1–2 tablespoons milk and 1/2 teaspoon vanilla extract until smooth and pourable; adjust with more milk or sugar to reach the desired consistency.
    → A smooth glaze clings to the warm waffles; adding vanilla deepens the aroma and rounds sweetness.
  • Cook the waffles in batches: spoon roughly 1/2 cup of batter onto the hot iron, spreading gently toward the edges with the back of the spoon, close the lid, and cook 3–5 minutes until the exterior is deeply golden and crisp and the steam dies down.
    → Spreading ensures full contact with the iron for uniform browning, while watching the time prevents under- or overbaking; avoid lifting the lid early to prevent soggy centers.
  • Transfer each waffle to a rack in a warm oven (about 200°F/95°C) to keep them crisp while you finish cooking the rest.
    → The gentle heat keeps the waffles from steaming and softening, maintaining the donut-like crunch on the outside.
  • Once all waffles are cooked, drizzle the warm waffles with the prepared glaze and serve immediately or keep warm briefly while glazing the remaining pieces.
    → The glaze will set as the waffles cool slightly, providing a glossy finish that complements the apple filling.

Notes

These donuts waffle alle mele are a cozy, apple-forward treat with a tender crumb that shines when the batter rests at room temperature and the apples stay juicy yet compact. You can customize them by adding your favorite nuts, seeds, or dried fruits for crunch and complexity. For a gluten-free version, substitute 2 cups gluten-free all-purpose flour blend and consider adding 1/2 teaspoon xanthan gum per cup if your mix doesn’t already contain it. They cook beautifully in a preheated waffle iron or donut molds and freeze well for a quick grab-and-go breakfast or dessert. For an extra boost, drizzle with a light lemon glaze or serve with a dollop of vanilla yogurt. Always ensure your baking powder is fresh and your ingredients are at room temperature for best rise and texture, and toss the apples with a little lemon juice to prevent browning and brighten the apple flavor.

Tips

Tips and Techniques for Donuts Waffle Alle Mele

  • Room temperature matters: Allow all wet ingredients (milk, eggs, melted butter) and dry ingredients to come to room temperature before mixing to prevent curdling and ensure a smooth batter.
  • Whisk dry ingredients first: Sift flour, sugar, baking powder, salt, and cinnamon together to distribute evenly and avoid dense pockets in the batter.
  • Fresh leavening: Check baking powder freshness with a quick bleed test (a pinch fizzing in warm water). Replace if it’s stale to ensure good rise.
  • Don’t overmix: Stir wet and dry just until combined; a few small lumps are fine. Overmixing can develop gluten and lead to a tough texture.
  • Apple prep tips: Toss apples with lemon juice to prevent browning and brighten flavor; pat them dry before folding to avoid soggy spots. For softer bites, dice finely or grate the apples, but expect more moisture.
  • Balance moisture: If the batter seems too thick, whisk in a splash more milk; if too thin, add a little extra flour (or a tablespoon at a time) until it coats the back of a spoon.
  • Flavor boosters: Toast cinnamon briefly in the dry mix to wake its aroma; vanilla paste adds richer specks and flavor without extra liquid.
  • Butter vs. oil: Melted butter adds richness and tenderness; for a lighter or dairy-free version, substitute with an equal amount of neutral oil (or a light oil + dairy-free milk).
  • Prepping the waffle iron: Preheat thoroughly and grease lightly with oil or nonstick spray to prevent sticking and encourage crisp edges.
  • Consistent portions: Use a measuring cup or small scoop to portion batter for uniform donut shapes and even cooking times.
  • Cooking cues: Look for set edges and a lightly dry surface before opening the waffle iron; too early means a soggy center, too late can over-brown.
  • Glaze consistency: Sift powdered sugar and whisk in liquid gradually to reach a pourable glaze; adjust with more milk for thinner glaze or less for a thicker glaze.
  • Glaze flavors: Add a pinch of cinnamon, a dash of vanilla, or a touch of lemon zest to the glaze for a complementary aroma.
  • Optional add-ins: Toast walnuts for 2–3 minutes for extra crunch; if using dried fruit, soak briefly to plump, then pat dry to avoid excess moisture.
  • Make-ahead and storage: Batter can rest in the fridge up to 2 days; stir gently before cooking. Cooked donuts keep in an airtight container for up to 2 days or freeze for longer storage and reheat in a toaster or oven.

FAQ

Quali ingredienti servono per preparare i donuts waffle alle mele?

Ingredienti base:

  • 200 g di farina (00 oppure integrale)
  • 2 cucchiaini di lievito per dolci
  • 60 g di zucchero
  • 2 uova
  • 250 ml di latte (alternativa vegetale come latte di mandorla)
  • 40 g di burro fuso o olio neutro
  • 1 cucchiaino di estratto di vaniglia
  • 1 mela grande, grattugiata o tagliata a cubetti
  • 1 cucchiaino di cannella
  • Scorza di limone (facoltativa) e sale 1 pizzico
Posso preparare l’impasto in anticipo?

Sì. L’impasto può essere preparato in anticipo e conservato in frigorifero per un massimo di 24 ore. Al momento della cottura, mescola brevemente e procedi. Se usi mele grattugiate, aggiungi subito un po’ di succo di limone per evitare l’ossidazione.

Quale tipo di mele è meglio usare?

Preferisci mele a polpa soda come Granny Smith, Honeycrisp o Golden Delicious. Tagliale a cubetti piccoli o grattugiale nell’impasto. Aggiungi un po’ di succo di limone per mantenere la frutta fresca.

Come si cuociono i donuts waffle alle mele?

Cuoci usando un ferro per waffle preriscaldato a fuoco medio-alto. Ungi leggermente la piastra, versa una porzione di impasto e cuoci per circa 3–4 minuti, finché i donuts sono dorati e cotti all’interno. Fai raffreddare su griglia per mantenere la croccantezza esterna.

Posso utilizzare una teglia per ciambelle o cuocerli in forno?

Sì. Per una versione stile donut tradizionale, disponi l’impasto in uno stampo per ciambelle o in stampi da forno individuali e cuoci a 180°C (350°F) per circa 12–15 minuti, o finché uno stecchino esce pulito. Per una versione “waffle donut”, preferisci il ferro per waffle.

Come evitare che i donuts waffle alle mele risultino secchi o gommosi?

Non lavorare troppo l’impasto per non sviluppare il glutine e renderlo elastico. Mantieni una consistenza moka-latte; se l’impasto è troppo denso, aggiungi un po’ di latte. Non cuocerli troppo a lungo: controlla il colore dorato e la cottura interna con uno stecchino.

Posso fare versioni senza glutine o senza latticini?

Sì. Per senza glutine, usa una farina apposita senza glutine con lievito adatto. Per senza latticini, sostituisci il burro con olio neutro o olio di cocco e usa latte vegetale. Puoi usare anche un egg substitute se necessario, oppure 1–2 cucchiai di purè di mele al posto delle uova.

Come conservare e riscaldare i donuts waffle alle mele?

Conserva a temperatura ambiente in un contenitore ermetico fino a 2 giorni. Puoi congelarli una volta cotti; scongelali a temperatura ambiente e riscaldali in forno o in un toaster-oven per 2–3 minuti. Per una versione rapida, riscaldali brevemente nel microonde (10–20 secondi) e richiudi con una leggera doratura.

Quali varianti di sapore si possono provare?

Prova aggiunte come: extra cannella o noce moscata, scorza di limone o arancia, gocce di cioccolato, noci tritate, uvette o crumble di mele. Puoi anche spennellarli con sciroppo d’acero, miele o una crema di ricotta per accompagnarli.

Come presentare al meglio i donuts waffle alle mele?

Servili ancora tiepidi, spolverati con zucchero a velo o farina di cocco. Accompagnali con una pallina di yogurt montato, una salsa di mele o sciroppo d’acero per un tocco finale goloso. Puoi aggiungere un filo di burro aromatizzato alla cannella per una nota extra.

Introduzione / Hook

Immagina una scatola di piccoli tesori dorati, ciascuno compatto come una pepita di dolcezza, pronto a sciogliersi in bocca in un batter d’occhio. Queste Cheesecake balls al caramello salato sono l’equilibrio perfetto tra cremosità seducente e croccantezza irresistibile, tra la dolcezza vellutata del formaggio e la profondità bruciacchiata del caramello, intrisa di un accenno di sale che sembra cantare ad ogni morso. Non si tratta di una torta tradizionale, ma di una versione mossa e giocosa che trasforma la nostra idea di dessert in una versione da party, da snack elegante o da dolce da condividere in un pomeriggio pigro di weekend. Sono perfette da offrire su un vassoio decorato con una pioggia di cioccolato fondente, una spolverata di sale marino e piccoli fiocchi di scorza d’arancia, pronte a conquistare sia i golosi accaniti sia chi cerca qualcosa di delicato ma memorabile. Ogni boccone è una piccola esperienza: crema che si scioglie, crosta che resiste al primo morso, caramello salato che lascia una nota di calda profondità, e quella scintilla di esaltazione che arriva dal contrasto tra dolce e salato. Se vuoi sorprendere senza passare ore in cucina, se ami i dessert che si prestano a essere condivisi e fotografati, se cerchi qualcosa che faccia parlare di te davanti agli ospiti, queste cheesecake balls sono la risposta ideale.

La storia dietro il piatto

La versione “balls” di cheesecake nasce dall’esigenza pratica di ricavare eleganza da ingredienti familiari, trasformando la torta classica in piccole celebrazioni monoporzione. L’ispirazione arriva spesso da una cucina domestica: un pomeriggio in cui rimanevano avanzi di una base croccante, una crema al formaggio cremosa e quel caramello che, una volta aperto, sprigionava tutta la sua intensità. Più che una ricetta codificata, è nata come una filosofia: rendere trasformabili i gusti familiari in esperienze da condividere. In molte culture, il dessert è una forma di ospitalità, un modo per dire “sei il benvenuto” con un piccolo dono dolce e raffinato. E così, una sera, qualcuno ha tirato fuori una ciotola di crema cremosa, ha compreso che i pezzi di crosta avevano una consistenza perfetta per rotolarci dentro, e ha deciso di avvolgerli in una glassa di caramello salato. Da lì è partito un piccolo rito: garantire che ogni pallina avesse lo stesso equilibrio tra morbidezza e croccantezza, tra dolce e intenso, tra comfort e lusso. Nel tempo, la ricetta è diventata un simbolo di convivialità: una merenda che si trasforma in dessert da finire in compagnia, una pila di piccole delizie che si accompagnano bene a un bicchiere di Moscato, di Vin Santo o di un buon espresso. Oggi, questa reinterpretazione è amata in tutto il mondo: non solo per la sua facilità di realizzazione, ma per la sua capacità di evocare ricordi di dolci di casa, di festeggiare piccoli anniversari quotidiani e di trasformare una semplice idea di dessert in una piccola opera d’arte commestibile.

Perché amerai questa ricetta

Velocità e praticità

Non serve una lunga preparazione né una cottura impegnativa. Le cheesecake balls si realizzano con una logica semplice: una base che crea croccantezza, una crema che accarezza il palato, e una copertura che aggiunge lucentezza e sapore. In pochissimo tempo si ottiene un piatto finito che sembra uscito da una pasticceria, ma è assolutamente casalingo e accessibile a chiunque.

Portabilità e condivisione

Perfette per buffet, aperitivi, feste di compleanno o pieghevoli accanto a un tè dopo cena. Le dimensioni ridotte le rendono facili da gustare in un solo morso, facilitando la condivisione tra amici e familiari senza rinunciare all’eleganza.

Equilibrio di sapori

La magia sta nel bilanciamento: cremosità vellutata, dolcezza soffice, e quel pizzico di sale che accende la dolcezza. Non si tratta di un gusto pesante o eccessivo; è un dessert che lascia una traccia di soddisfazione senza appesantire.

Versatilità e personalizzazione

La base di biscotto, la crema e la glassa si prestano a infinite varianti. Puoi giocare con sfumature diverse di vaniglia, aggiungere scorze agrumate, utilizzare cioccolato al latte o fondente, o includere un tocco di liquore per un profilo aromatico unico. È una tela neutra che premia la curiosità e l’estro del momento.

Flessibilità per diete diverse

Con alcune sostituzioni – ad esempio alternative vegane o senza glutine – è possibile mantenere la struttura dolce e cremosa pur adattandola a esigenze alimentari differenti. Questo rende le cheesecake balls non solo deliziose, ma anche inclusive per party e riunioni con ospiti dal palato vario.

Profilo di gusto e texture

Questo dessert si muove tra contrasti ben calibrati. All’esterno, una crosta leggera e croccante che cede al primo tocco, offrendo un’anticipazione di ciò che sta dentro. All’interno, una crema setosa che avvolge il palato con la sua morbidezza lucida e un equilibrio aromatico tra crema di formaggio, vaniglia e una dolcezza caramellata che fa breccia al primo assaggio. Il caramello salato agisce come un contrappunto: una scintilla di sale che solleva la dolcezza, asciuga una traccia di lucentezza, e lascia una nota persistente che ricorda un dessert raffinato ma non troppo intenso. La sensazione è di un dessert che si può gustare in due o tre bocconi, senza mai stancare, con una chiusura di gusto che rimane pulita ma soddisfacente. Si può percepire una leggera nota burrosa, una leggera acidità dovuta al formaggio cremoso, e un aroma che richiama la vaniglia o scorze di agrumi, a seconda dell’aroma scelto per la preparazione. L’insieme è bilanciato: nessun sapore domina, ma tutti si integrano in modo armonioso, offrendo una degustazione che evolve dall’aggiunta di caramello al primo morso fino all’amaro retrogusto che si accompagna al sale finale.

Occasioni & Abbinamenti

Queste cheesecake balls sono adatte a una miriade di momenti conviviali. Possono diventare protagoniste di feste, ma anche un tocco speciale per una serata intima o una merenda elegante. Ecco alcuni contesti ideali e abbinamenti consigliati:

  • Feste di compleanno, anniversari o celebrazioni improvvisate: una presentazione a vassoio fa sempre la sua figura.
  • Aperitivi post lavoro o ricevimenti informali: accompagnate da un bicchiere di vino dolce, un passito, un Moscato o uno Chardonnay dolce per bilanciare l’acidità della crema.
  • Dolce da fine pasto in cene a tema: una piccola nota di dolcezza che chiude il pasto in modo leggero e chic.
  • Colazioni o brunch speciali: servite su un piatto elegante, magari accanto a frutti di bosco freschi e una tazzina di caffè o cappuccino.
  • When to dip into chocolate or fruits: una leggera decorazione di cioccolato fondente o bianco, abbinata a lamelle di mandorla o granella di nocciole, eleva l’esperienza gustativa.

Suggerimenti, Varianti & Sostituzioni

La bellezza di questa idea dolce sta proprio nella facilità di personalizzazione. Ecco alcune strade utili per adattarla ai gusti o alle esigenze alimentari:

  • Versione vegana: sostituisci l’intera crema di formaggio con una crema vegana a base di anacardi o di anacardi ammorbiditi, e utilizza una base di biscotti senza burro animale. La glassa al caramello può rimanere invariata se si usa un caramello vegano, ottenuto con zucchero di canna e una noce di latte vegetale.
  • Versione senza glutine: scegli biscotti o crackers senza glutine per la base; assicurati solo che la texture permetta di formare palline stabili.
  • Aromi alternativi: sostituisci una parte di vaniglia con scorza di limone o arancia grattugiata per una nota agrumata, oppure aggiungi una punta di liquore per un profilo più adulto.
  • Texture differenti: se preferisci una croccantezza extra, aggiungi una piccola quantità di granella di nocciole, pistacchio o biscotto croccante al centro delle palline.
  • Versione light: è possibile alleggerire la crema di formaggio usando formaggi spalmabili a basso contenuto di grassi combinati con una quantità minore di zuccheri, mantenendo però l’equilibrio tra cremosità e dolcezza se accompagnato da una nota di sale nel caramello.
  • Abbinamenti salati: una spolverata di sale Maldon o fior di sale sulla superficie può intensificare quel contrasto dolce-salato molto affascinante.

Storage & Make-Ahead Ideas

La praticità di queste palline dolci sta anche nella flessibilità di conservarle. Seguire alcune semplici linee guida permette di prepararle in anticipo senza perdere consistenza né sapore:

  • Conservazione in frigorifero: le cheesecake balls si mantienenare fresche e compatte per alcuni giorni se riposte in contenitore ermetico. Evita di impilare direttamente una sull’altra per non rovinare la glassa esterna; se possibile, separale con carta forno.
  • Congelamento: è possibile congelarle per un periodo prolungato. Prima di servirle, lasciale scongelare in frigorifero per alcune ore, quindi lasciale raggiungere la temperatura ambiente per qualche minuto prima di gustarle. La glassa al caramello potrebbe apparire più lucida una volta scongelate.
  • Preparazione in anticipo: una valida strategia è realizzare la base e la crema in anticipo e assemblare il tutto poco prima di servire. In questo modo, la fragranza rimane al meglio e la presentazione resta impeccabile.
  • Gemme decorative: se vuoi preservare la forma perfetta, è utile raffreddare le palline prima di rotolarle nuovamente nel caramello o di aggiungere una confezione di guarnizioni decorative come confettini di cioccolato o granella di biscotto.

Curiosità & Trivia

Per chi ama curiosare tra origini e piccoli aneddoti, ecco alcune pillole interessanti che si legano al mondo dei dessert a base di crema e caramello:

  • La combinazione dolce-salata è una tendenza gustativa molto amata in diverse cucine del mondo, spesso associata a profili di cottura che esaltano il contrasto tra sapori intesi e delicatezza dei latticini.
  • Il caramello salato è emerso come icona del dessert contemporaneo in varie correnti culinarie, con innovatori che hanno giocato con il bilanciamento del sale per spezzare la dolcezza e amplificare l’aroma del caramello.
  • La cheesecake classica ha origini antichissime nel mondo della cucina europea, e nel tempo ha assunto numerose interpretazioni regionali. Le versioni moderne in mini porzioni celebrano questa evoluzione, offrendo una forma più giocosa e socializzante.
  • In molte cerimonie e rinfreschi, le porzioni singole hanno una funzione pratica: facilitano la gestione degli spazi, riducono gli sprechi e aumentano la presentazione estetica di un banchetto.
  • La decorazione sui dolci è diventata una forma d’arte a sé stante: i dettagli visivi – come una spruzzata di sale, una leggera lucidatura, o una guarnizione di scorze agrumate – possono trasformare un dessert in una breve esperienza sensoriale.

Ingredients

Cheesecake Balls al Caramello Salato

Cheesecake Base

  • Graham cracker crumbs (or digestive biscuits), finely crushed – 1 1/2 cups (about 150 g)
    → The crust provides the bite-sized base and binding for the cheesecake balls. Using fine crumbs ensures an even texture that sets firmly when chilled. For gluten-free options, use certified gluten-free crackers.
  • Unsalted butter, melted – 4 tablespoons (60 g)
    → Binds the crust together so the mixture holds its shape when rolled into balls. Allow the melted butter to cool slightly before mixing with the crumbs to avoid making the crumbs greasy and slippery.

Cheesecake Filling

  • Cream cheese, softened to room temperature – 8 oz (226 g)
    → The creamy backbone of the filling; softened cream cheese blends smoothly without lumps. If you can’t fully soften it, warm gently in short bursts while stirring until smooth.
  • Powdered sugar, sifted – 1/4 cup (30 g)
    → Provides sweetness with a silky texture ideal for no-bake fillings. Sift to prevent gritty bits and ensure a velvety filling.
  • Pure vanilla extract – 1 teaspoon
    → Adds classic cheesecake aroma and depth. Use high-quality vanilla for the best flavor; avoid imitation vanilla if possible.
  • Lemon juice or lemon zest (optional) – 1 tablespoon juice or 1 teaspoon zest
    → Brightens richness and balances sweetness. Fresh lemon juice yields the best tang; zest offers fragrant citrus notes without extra liquid.
  • Salt – a pinch
    → Enhances overall flavor and helps bring out the sweetness without making the filling taste salty.
  • Heavy cream or milk (optional) – 1-2 tablespoons
    → Adds extra creaminess and helps the filling blend smoothly. Use sparingly to maintain structure when chilling; too much liquid can prevent spheres from setting firmly.

Salted Caramel Core

  • Salted caramel sauce – 1/4 cup (60 ml)
    → Swirl into the filling for ribbons or use as a center to create a gooey caramel surprise inside each ball. If making at home, ensure the sauce thickens enough to hold its shape when cold; runny caramel can leak.

Coating and Finishing

  • Dark or milk chocolate for coating – 8 oz (225 g) chopped or chips
    → Creates a glossy, flavorful shell that contrasts with the creamy interior. Melt gently using a double boiler or microwave in short bursts, stirring between sessions. For a thinner, smoother shell, add 1 teaspoon coconut oil to the chocolate.
  • Coconut oil – 1 teaspoon (optional)
    → Helps thin the chocolate coating and improves shine; omit if you prefer pure chocolate without added fat.
  • Chopped nuts for coating or garnish (optional) – 1/4 cup
    → Adds crunch and a nutty note; toast nuts lightly before using to maximize aroma and prevent sogginess.
  • Sea salt flakes for finishing (optional) – a pinch
    → Finishes the salted concept with a final pop of salt; sprinkle lightly to avoid overpowering the sweetness.
  • Cocoa powder or powdered sugar for dusting (optional) – to taste
    → Provides decorative flair and an extra flavor dimension; dust just before serving for best appearance.

Optional Add-ins

  • Chopped chocolate chips or mini chips (optional) – 2 tablespoons
    → Adds extra pockets of chocolate inside each bite; fold in gently so the filling remains smooth and holds shape.
  • Crushed toasted almonds or pistachios (optional) – 1/4 cup
    → Adds extra texture and a toasty flavor; toast before using to maximize aroma.

Instructions

  • Line a 12-cup muffin tin with paper liners or grease it well.
    → This ensures the crust shells release cleanly after chilling and prevents sticking, preserving the shape of each cheesecake ball.
  • In a small bowl, mix graham cracker crumbs with the melted unsalted butter until the mixture resembles wet sand and holds its shape when pinched.
    → The butter binds the crumbs to form a compact crust that provides structure and a pleasant bite in every bite of the finished ball.
  • Divide the crust evenly among the muffin cups and press firmly with the back of a teaspoon or the flat side of a small measuring cup to form a shallow crust base.
    → A well-pressed crust prevents crumbling when you fill and bite into the balls, and creates consistent thickness across all portions.
  • Chill the crust-lined cups for 15–20 minutes to set the butter and stabilize the shell.
    → Chilled shells are easier to fill and help keep the filling from sliding out when you compose the balls.
  • In a large bowl, beat the softened cream cheese on medium speed until completely smooth and free of lumps, 1–2 minutes.
    → Smoothing the cream cheese ensures a velvety, uniform filling without gritty pockets once chilled and coated in chocolate.
  • Add sifted powdered sugar, pure vanilla extract, and a pinch of salt to the cream cheese and beat until fully integrated and glossy. If using lemon juice or zest, fold in now.
    → Sugar lightens and thickens the filling, while vanilla and citrus brighten the cheesecake flavor; salt enhances balance.
  • Optionally, beat in 1–2 tablespoons of heavy cream or milk to loosen the filling slightly, then beat just until combined.
    → A touch of dairy helps the mixture spread smoothly and reduces density for a supple texture that holds its form when chilled.
  • If using optional add-ins, gently fold in chopped chocolate chips or crushed toasted nuts with a spatula until distributed evenly.
    → Add-ins provide pockets of texture and flavor without undermining the creaminess; fold gently to avoid overworking the filling.
  • Spoon about 1 heaping teaspoon of the filling into each crust, then press lightly to create a shallow well in the center of each cup.
    → Creating a small indentation invites the salted caramel center and ensures even distribution when sealed with more filling.
  • Drop a small amount of salted caramel sauce (about 1/2 to 1 teaspoon, depending on your preference) into the center of each filled cup.
    → The caramel center provides a gooey surprise and contrasting sweetness that complements the cheesecake filling.
  • Cover the caramel with additional filling, ensuring each cup is fully enclosed and the surface is smooth and level.
    → Enclosing the center prevents leaks during chilling and yields a uniform spherical shape once coated in chocolate.
  • Chill the assembled cups in the refrigerator for 2–4 hours, or until the filling is firm enough to handle.
    → Chilling solidifies the filling, making it easier to release from cups and to form a smooth ball without deformation.
  • Carefully unmold the cheesecake balls from the muffin tin by gently pushing from the bottom or lifting with a small offset spatula, then place them on a parchment-lined tray.
    → Gentle release prevents cracking and keeps the spherical shape intact for dipping in chocolate.
  • In a heatproof bowl set over a pan of barely simmering water (double boiler) or in short bursts in the microwave, melt dark or milk chocolate with optional 1 teaspoon coconut oil until smooth and glossy.
    → A smooth, fluid chocolate shell coats evenly; the coconut oil (if used) helps achieve a thinner, shinier glaze that sets nicely.
  • Using a dipping fork or two forks, dip each cheesecake ball into the melted chocolate to coat completely, then lift and let excess chocolate drip back into the bowl before placing on a parchment-lined tray.
    → A full, even coat creates a glossy shell and a satisfying contrast to the creamy filling; excess chocolate ensures a neat finish.
  • Optional: while the coating is still tacky, sprinkle a pinch of sea salt flakes on top, or dust with cocoa powder or powdered sugar for decorative contrast.
    → Finishing touches enhance flavor perception and presentation; apply just before serving to maintain contrast and texture.
  • Chill the chocolate-coated balls for at least 20–30 minutes to set the coating completely.
    → A firm shell prevents smudging when handling and ensures clean, crisp bites.
  • Store the finished Cheesecake Balls al Caramello Salato in the refrigerator in an airtight container for up to 5–7 days, or freeze for longer storage, bringing to room temperature briefly before serving.
    → Refrigeration preserves texture and prevents the filling from becoming overly soft; freezing extends shelf life while preserving flavor and structure.

Notes

These salted caramel cheesecake balls are luscious bite-sized treats with a gooey caramel center that swirls into creamy filling and a glossy chocolate shell. You can customize them by choosing dark or milk chocolate coatings, adding chopped nuts, or folding in mini chocolate chips for pockets of sweetness. For best texture, chill the cheesecake filling briefly before shaping, then refrigerate the balls after forming to help them hold their shape. If you want extra caramel surprise, insert a small quenelle of salted caramel into the center before sealing the ball. They freeze well and make elegant make-ahead desserts for parties or gifts; freeze on a tray, then transfer to an airtight container. To finish, sprinkle a pinch of sea salt on the coating or dust with cocoa for a refined finish. If you have gluten sensitivity, use gluten-free crackers for the crust and ensure the chocolate coating is gluten-free. Always soften the cream cheese fully, sift the powdered sugar to keep the filling velvety, and be mindful of any extra liquid from lemon juice or cream so the centers set firmly when chilled.

Tips

  • Crust readiness: Use ultra-fine graham cracker or digestive crumb for a smooth, cohesive bite. If you switch to gluten-free crackers, process until powder-fine and consider adding a touch more melted butter to help bind.
  • Butter temperature: Let melted butter cool slightly before mixing with crumbs to prevent greasy crumbs that won’t hold together.
  • Cream cheese handling: Soften to room temperature for a lump-free filling. If you’re short on time, warm in short bursts while stirring until completely smooth.
  • Sweetness and texture: Sift powdered sugar to avoid gritty pockets and achieve a silky filling; if you prefer more sweetness, you can adjust by small increments.
  • Brightening flavor: If using lemon, fresh juice yields a brighter tang; lemon zest adds fragrance without adding liquid—choose zest if you want more aroma without thinning the mixture.
  • Balancing flavor: A pinch of salt enhances sweetness and overall depth; don’t skip it unless you’re avoiding saltiness entirely.
  • Creamy boost: If the filling seems too stiff, add 1–2 tablespoons of heavy cream or milk gradually until you reach a scoopable, but not runny, consistency.
  • Caramel center technique: For a gooier center, swirl salted caramel through the filling or place a small caramel dollop in the center of each ball before sealing the filling around it.
  • Setting the spheres: Chill the shaped balls for at least 30 minutes (or freeze 10–15 minutes) before coating to help them hold their shape and prevent leaking caramel.
  • Chocolate coating tips: Melt chocolate gently using a double boiler or microwave in short bursts, stirring often. Add 1 teaspoon coconut oil to the coating if you want a thinner, glossier shell and easier dipping.
  • Coating technique: Dip balls with a fork or dipping tool, let excess drip off, and place on parchment. A second coat yields a thicker shell if you prefer more bite and protection against cracks.
  • Finishing touches: Lightly dust with cocoa powder or powdered sugar just before serving for a decorative touch; a pinch of sea salt flakes on top after coating enhances the salted caramel theme.
  • Nutty or chocolatey variations: If using optional chopped nuts or additional chips, fold them in gently to maintain smooth centers and prevent cracking.
  • Storage and make-ahead: Refrigerate for best texture; these keep 3–5 days in the fridge. For longer storage, freeze the coated balls on a tray first, then transfer to an airtight container.
  • Prep flexibility: If you’re short on time, you can prepare the crust and filling a day ahead and refrigerate; finish with the caramel center and chocolate coating on the same day you plan to serve for optimum texture and shine.

FAQ

Che cosa sono i Cheesecake balls al caramello salato?

Deliziose palline no‑bake che combinano una base cremosa di formaggio spalmabile e vaniglia, avvolte da una croccante base di biscotti, e decorate o farcite con caramello salato. Sono facili da preparare e perfette come snack, antipasto dolce o finger food.

Quali ingredienti servono?
  • 200 g di formaggio spalmabile tipo Philadelphia, ammorbidito
  • 180–200 g di biscotti secchi (digestive o equivalenti), finemente sbriciolati
  • 60 g di burro fuso
  • 50–80 g di zucchero a velo
  • 1 cucchiaino estratto di vaniglia
  • 150 g di caramello salato (fatto in casa o confezionato)
  • 100 g di cioccolato fondente (per la copertura, opzionale)
  • Sale grosso in fiocchi per decorare (opzionale)
Quali strumenti servono?
  • Robot da cucina o frusta per ammorbidire il formaggio
  • Ciotola capiente
  • Spatola
  • Teglia o piatto rivestito con carta da forno
  • Sac à poche o cucchiaio per formare le palline
  • Frigorifero o congelatore per rassodare
  • Ciotola a bagnomaria o microonde per sciogliere cioccolato
Procedura passo-passo
  1. In una ciotola, mescola il formaggio spalmabile con lo zucchero a velo e la vaniglia fino a ottenere una crema liscia.
  2. Aggiungi i biscotti sbriciolati e mescola delicatamente fino a ottenere un impasto compatto.
  3. Raffredda l’impasto in frigorifero per 15–20 minuti.
  4. Con le mani leggermente umide, forma palline di circa 3 cm di diametro e disponile su una teglia rivestita di carta forno.
  5. Raffredda nuovamente in frigorifero per 30–60 minuti per far rassodare.
  6. Se vuoi una versione al cioccolato, sciogli cioccolato a bagnomaria o nel microonde e tienilo da parte.
  7. Decorazione: puoi mescolare un po’ di caramello salato nel cioccolato fuso o utilizzare una ciocca di caramello per golosi fili. In alternativa, farcisci ogni pallina con una piccola goccia di caramello prima di chiuderla e modellarla nuovamente.
  8. Immergi le palline nel cioccolato fuso (opzionale) e lascia solidificare su una griglia o carta forno. Se preferisci, spremi un filo di caramello sopra ogni pallina prima che il cioccolato indurisca.
  9. Riponi in frigorifero finché non sono ben rassodate, circa 30–60 minuti.
Tempo e porzioni

Tempo attivo: circa 25–40 minuti. Tempo di raffreddamento: 1–2 ore in frigorifero. Porzioni: circa 18–24 palline, a seconda della dimensione.

Come conservarli?

Conservarli in frigorifero in contenitore ermetico per 3–4 giorni. In alternativa, possono essere congelati ben chiusi in contenitore per 1–2 mesi; scongelare in frigorifero prima di servire.

Varianti e sostituzioni
  • Versione senza glutine: utilizzare biscotti senza glutine e controllare che il caramello sia certificato senza glutine.
  • Versione vegana/dietetica: usare formaggio spalmabile vegano e cioccolato vegano; per il caramello, optare per una versione vegetariana/senza burro, se disponibile.
  • Coating diverso: al posto del cioccolato fondente, utilizzare cioccolato al latte o bianco; aggiungere nocciole tritate o granella di pistacchio per decorare.
  • Dolcezza modulabile: ridurre o aumentare lo zucchero a velo a seconda delle preferenze.
Decorazione e presentazione

Decorare con una spolverata di sale grosso in fiocchi, granella di cacao, o pistacchi tritati. Servi su un piatto freddo o su babà di carta velina per un aspetto elegante. Per un effetto “cuore al caramello”, inserisci una piccola perlina di caramello al centro prima di chiudere la pallina.

Consigli utili per la riuscita
  • Usa formaggio spalmabile a temperatura ambiente per una consistenza più liscia.
  • Non esagerare con i biscotti: troppi sbriciolanti possono rendere l’impasto troppo secco.
  • Raffreddare tra una fase e l’altra aiuta a mantenere le palline compatte.
  • Se il caramello è troppo denso, scaldalo leggermente per facilitarne l’utilizzo nella decorazione.
Possibili errori comuni e come evitarli
  • Impasto troppo morbido: aggiungi altro biscotto tritato fino a ottenere una consistenza maneggevole.
  • Palline che si sciolgono in bocca: raffreddarle bene in frigorifero o congelarle leggermente prima di rivestirle.
  • Copertura che non aderisce: asciuga bene le palline e, se necessario, tempera il cioccolato o usa un sottile strato di cioccolato come base.

Introduction / Hook

Picture a skillet waking up the senses: the pan sighs as butter melts, onions surrender their crisp bite and soften into a glossy, caramel-honey color, and a chicken breast or thigh glows with a sunlit, bronzed crust. Then, a luxurious bloom of cream swirls in, turning the entire dish into a velvet-soft embrace that coats every bite. Pollo cremoso alla cipolla isn’t just a meal; it’s a warm invitation to gather around the table, to share stories between bites, and to savor the simple magic of few ingredients transformed with patient technique. The aroma alone—green olive oil, garlic softly sautéing, onions caramelizing into sweetness—will coax even the most hectic day into a pause, a smile, and a plate that feels like a hug from a fond memory. This is the kind of dish that makes weeknights feel special and Sundays feel timeless, a testament to how comfort food can be elevated with a few thoughtful steps and a generous handful of heart.

In the kitchen where comfort meets elegance, this creamy onion chicken delivers a symphony of contrasts: the tenderness of succulent meat, the lush thickness of a silky sauce, and the bright lift of aromatics that stay with you long after the last spoonful. It isn’t about chasing trends or chasing perfection; it’s about honoring warmth, patience, and the joy of a dish that makes even ordinary evenings feel worthy of celebration. Each bite holds a whisper of Italian sunshine and rustic farmstead cooking—simple, honest flavors that come together with a confident, almost indulgent creaminess. If you crave something that feels luxurious without fuss, this is your go-to. And if you’re cooking for loved ones, you’ll see it in their eyes—the instant comfort, the satisfied sigh, the lingering smile as the sauce coats the plate like a satin ribbon.

The Story Behind the Dish

Onions have long held a revered place in Italian cooking, anchoring sauces, braises, and pan sauces with their natural sweetness and depth. The term pollo alla cipolla appears in family kitchens across the peninsula, evolving from a humble skillet supper to a dish that can feel both rustic and refined depending on how it’s treated. The beauty of this dish lies in its balance: onions are coaxed to release their sugars without burning, then softened with garlic and a touch of aromatics; chicken is seared to develop a respectful crust, locking in juices. Finally, the cream—the gentle, enveloping stage—binds everything into a single, glossy tapestry. It’s a modern echo of regional preparations that favored braises and pan sauces, a nod to peasant roots that proves simplicity can become something sublime with care and technique. In many Italian homes, onions are a canvas for memory: the way a grandmother’s pan would hiss when the onions hit the heat, the way a sauce thickens with a golden sheen, the way a family gathers at the table long after the plates are cleared. This dish channels that spirit—the everyday transformed by patience, the ordinary elevated by a whisper of cream and a kiss of wine—into a comforting, crowd-pleasing centerpiece.

Beyond its lineage, Pollo cremoso alla cipolla speaks to a universal truth about cooking: the most beloved meals often arise from modest starting points. A few onions, a piece of chicken, a splash of cream and herbaceous warmth can become a dish that tastes like a story you’re telling at the table—one about home, about sharing, about the gentle art of letting flavors shine without shouting. This is a dish that respects tradition while inviting modern cooks to adapt it to their pantry and their people—whether you’re cooking for a weeknight family dinner, a date night at home, or a small gathering that wants to feel special without stepping into something fancy or intimidating.

Why You’ll Love This Recipe

  • Rich and comforting without being heavy, thanks to creamy texture that develops from a gentle reduction and a touch of cream rather than heavy sauces alone.
  • Simple, accessible ingredients that come together with straightforward techniques—perfect for cooks who want soufflé-light sophistication with everyday pantry staples.
  • Versatile and forgiving: use bone-in thighs for extra juiciness, swap dairy for dairy-free options, or switch up aromatics to suit your mood or dietary needs.
  • Adaptable to various occasions—from weeknight dinners to relaxed gatherings—while still feeling indulgent enough for a small celebratory meal.
  • Balances sweet caramelized onions with savory chicken and a silky sauce that clings to each morsel, ensuring every bite is intensely flavorful.
  • Low fuss, high reward: a single pan can deliver a complete, deeply satisfying dish with minimal cleanup—more time for conversation, less for washing up.

Flavor Profile & Texture

The flavor profile of Pollo cremoso alla cipolla is a careful marriage of sweetness, savoriness, and richness. The onions are coaxed slowly, their natural sugars unlocking a gentle caramel that provides a natural sweetness that plays against the savory chicken. Garlic adds a subtle peppery warmth, while a splash of white wine or stock introduces a bright, aromatic acidity that brightens the dish and helps deglaze the fond left in the pan. The cream, when introduced, is not merely a filler; it’s a binder that transforms the pan juices into a silken sauce, lending a luxurious mouthfeel without overwhelming the chicken’s juiciness. The chicken itself—whether you opt for breasts or thighs—develops a savory crust from a quick sear, creating a textural contrast: the outside is lightly crisped and deeply flavored, while the inside remains tender and succulent, soaking up the creamy onion sauce with every bite.

Texture-wise, imagine a velvety, spoonable sauce that clings to each piece of chicken, the onions melted into ribbons that still hold their shape enough to provide a slight bite. The overall mouthfeel is luxe and comforting—think satin and warmth, with a gentle chew from the chicken and a lingering sweetness from the onions. The aroma is equally compelling: the scent of caramelized onions filling the room, the butter lending a toasty note, the cream softening the intensity into a smooth, inviting perfume that makes everyone pause, inhale, and smile before the first bite lands on the tongue.

Occasions & Pairings

This dish shines in a variety of settings, from weeknights to special occasions, because it feels substantial enough to satisfy yet refined enough to serve to guests without fuss.

  • Weeknights: A weeknight hero that pairs beautifully with a simple side like mashed potatoes, soft polenta, or buttered egg noodles soaks up every drop of the creamy sauce.
  • Dates and gatherings: Serve with a bright arugula or cucumber salad to balance the richness and add a refreshing counterpoint.
  • Holidays and casual celebrations: Scale up with extra onions and a touch of fresh herbs to create a pot of comforting joy that feels both homey and earned.

Pairings to consider (drinks, sides, and desserts) include:

  • Wine: A glass of Pinot Grigio, Verdicchio, or a lightly oaked Chardonnay can complement the creamy sauce and onion sweetness nicely.
  • Sides: Creamy mashed potatoes, soft polenta, or a bed of fluffy rice to soak up the sauce; steamed or roasted vegetables like green beans, asparagus, or sautéed spinach add color and balance.
  • Desserts: A light, citrus-forward dessert like a lemon sorbet or an almond-fruit tart cleanses the palate after the richness of the chicken.

Tips, Variations & Substitutions

Here are ideas to tailor Pollo cremoso alla cipolla to your pantry, dietary needs, and taste preferences. These suggestions preserve the essence of the dish while offering creative twists.

Chicken options

  • Boneless, skinless chicken thighs: Juicier and more forgiving in a creamy sauce; they hold moisture beautifully and develop a deeper flavor when seared well.
  • Chicken breasts: A leaner option; consider pounding to even thickness to ensure uniform cooking and avoid dryness.
  • Bone-in cuts: If you prefer the extra flavor from the bone, you can start with bone-in thighs or breasts and finish by shredding or slicing the meat to rest in the sauce.

Dairy and dairy-free variations

  • Use heavy cream or half-and-half for extra richness; for a lighter version, swap in low-fat milk and a small amount of cream cheese to emulsify.
  • Dairy-free option: Replace cream with coconut milk or cashew cream. A small amount of olive oil or dairy-free butter will mimic the silkiness; a touch of cornstarch slurry can help thicken the sauce if needed.

Flavor twists

  • Add fresh herbs: a scattering of chopped thyme, parsley, or tarragon at the end brightens the dish.
  • Spice it up: a pinch of red pepper flakes or paprika can provide a gentle kick without overpowering the onion sweetness.
  • Herbaceous finish: finish with a squeeze of lemon juice to sharpen the rich creaminess and lift the flavors.

Gluten-free and other dietary considerations

The dish is naturally gluten-free if you’re using dairy and stock without gluten-containing additives. If you’re thickening the sauce with flour, substitute with cornstarch or a gluten-free flour blend; ensure all seasonings and broths are gluten-free if you’re cooking for someone with celiac disease or gluten sensitivity.

Regional twists

  • Southern Italian influence: use a splash of white wine and capers for a piquant brightness; finish with a handful of chopped olives for a briny contrast.
  • Northern Italian influence: swap in a touch of Marsala or a dry white wine, and finish with fresh sage to evoke a rustic Alpine pantry memory.
  • Herby countryside version: incorporate rosemary or bay leaf during the simmering phase, then discard before serving for an aromatic, grounded note.

Storage & Make-Ahead Ideas

Like many creamy sauces, Pollo cremoso alla cipolla stores well and often benefits from resting a bit, allowing flavors to meld and the sauce to thicken slightly as it cools. Here are practical tips for planning ahead and keeping leftovers delicious.

  • Storage: Refrigerate leftovers in a covered container for up to 3–4 days. The sauce may look a little separated when cold, but a gentle reheating and a brisk whisk will bring it back to a silky consistency.
  • Make-ahead for gatherings: Prepare the onion base and chicken separately up to the point of finishing the sauce. Reheat the chicken gently, then swirl in the cream and onions to finish just before serving.
  • Freezing: Freezing cooked chicken in a creamy sauce is possible but can alter texture slightly. For best results, freeze chicken and onions separately from the sauce, then combine and reheat with a splash of extra cream or stock to restore silkiness.
  • Reheating tips: Warm slowly over low heat, stirring often to prevent scorching. If the sauce thickens too much, whisk in a little warm stock or water to reach the desired consistency.

Fun Facts & Trivia (Optional)

  • Onions have been cultivated for thousands of years and appear in Italian kitchens in countless forms—caramelized, roasted, sautéed, or raw as a bright contrast to richer elements.
  • The word cipolla comes from Latin cipollus, reflecting a long tradition of onion-centric cooking that spans regions and seasonal harvests.
  • Creamy pan sauces are a hallmark of Italian comfort meals that transform simple proteins into something celebratory without complex techniques, showcasing the elegance of restraint and timing in the kitchen.
  • Wine and onion pairings in Italian cooking often rely on fresh acidity and aromatics to balance creaminess, a principle this dish embraces with a gentle splash of wine or stock to deglaze and brighten the sauce.

Ingredients

  • Pollo Base
  • 4 boneless, skinless chicken breasts (about 1.5 pounds / 680 g)
    → Role: the main protein of the dish; Preparation: if the chicken is very thick, gently pound to an even thickness (about 1/2 inch / 1.25 cm) for uniform searing; Handling: pat dry before cooking to promote a golden crust and prevent extra moisture from stewing the meat. Tip: letting the chicken rest briefly after pounding helps retain juiciness.
  • 2 tablespoons olive oil
    → Role: browning and searing the chicken; Preparation: heat in a heavy skillet over medium-high heat until shimmering before adding chicken; Handling: avoid overcrowding the pan to ensure proper browning rather than steaming. Tip: you can substitute with clarified butter for extra richness, but olive oil keeps the flavor bright.
  • 1/2 teaspoon kosher salt
    → Role: seasoning for the chicken and sauce base; Preparation: sprinkle evenly on all sides; Handling: adjust to taste after the sauce has reduced, as the cream and Parmesan will add saltiness. Tip: season in layers—salt the chicken, then taste the finished sauce and adjust.
  • 1/2 teaspoon freshly ground black pepper
    → Role: seasoning and a touch of heat to balance richness; Preparation: grind fresh over the chicken just before cooking; Handling: pepper intensity can be adjusted after searing. Tip: pepper also helps lift the onion and cream flavors.
  • Cipolla e Salsa Crema
  • 2 large yellow onions, thinly sliced
    → Role: provide natural sweetness, body, and depth to the sauce; Preparation: slice evenly to ensure uniform browning; Handling: cook slowly over medium heat to caramelize without burning; Tip: yellow onions give the best balance of sweetness and savoriness.
  • 3 cloves garlic, minced
    → Role: aromatics that deepen the sauce; Preparation: mince finely to maximize flavor release; Handling: add after onions have softened to prevent rapid browning of garlic; Tip: crush then mince for a quicker, more intense garlic flavor.
  • 2 tablespoons butter
    → Role: base for the sauté and to enrich the sauce; Preparation: melt with a splash of olive oil to prevent butter burning; Handling: let the butter foam and then brown slightly for extra nutty notes; Tip: browned butter adds a luxurious, toasty dimension to the sauce.
  • 1 tablespoon olive oil
    → Role: additional fat to help sauté onions and deglaze; Preparation: use in combination with butter to manage heat; Handling: keep heat moderate to avoid scorching the onions. Tip: this helps prevent the butter from browning too quickly.
  • 1/2 cup dry white wine (or 1/2 cup chicken stock)
    → Role: deglazes the pan, adds acidity and complexity; Preparation: add after onions have softened and scrape up the browned bits; Handling: allow wine to reduce by about half to concentrate flavors; If omitting wine, use more stock and a splash of lemon juice for brightness. Tip: a crisp, dry wine like Sauvignon Blanc or Pinot Grigio works well, or use a high-quality stock for a non-alcohol option.
  • 1 cup heavy cream
    → Role: main creamy component of the sauce; Preparation: stir in after wine reduces; Handling: simmer gently to prevent the cream from curdling or separating; Tip: for a lighter version, substitute with half-and-half or a blend of milk with a little more stock, but expect a thinner sauce.
  • 1/4 cup grated Parmesan cheese (optional)
    → Role: adds salty, umami depth and helps emulsify the sauce; Preparation: finely grate and whisk in toward the end; Handling: keep heat low to prevent cheese from clumping; Tip: skip if dairy-free is required; you can use nutritional yeast as an alternative for a cheesy note.
  • 1 teaspoon dried thyme (or 2 teaspoons fresh thyme leaves)
    → Role: herbaceous brightness that complements onion and cream; Preparation: if using fresh thyme, strip leaves off stems and finely chop; Handling: add early in the sauce to allow the aroma to infuse; Tip: thyme pairs beautifully with chicken and onions; adjust to taste.
  • 1 tablespoon all-purpose flour (or 1 tablespoon cornstarch) for thickening
    → Role: thickens the sauce and helps it cling to the chicken; Preparation: if using flour, whisk into a small amount of cold liquid to form a slurry before adding; if using cornstarch, dissolve in cold water to make a slurry; Handling: cook flour for a minute with the onions to remove raw taste; Tip: stir in gradually and simmer to reach your desired sauce consistency.
  • Finish & Garnish
  • 2 tablespoons chopped fresh parsley
    → Role: provides a bright, fresh contrast and color; Preparation: chop finely; Handling: sprinkle over the finished dish just before serving to preserve color and freshness; Tip: basil or chives can be used as alternatives for different flavor profiles.
  • Salt and pepper to taste
    → Role: final seasoning to balance flavors after reduction; Preparation: taste the sauce after it has simmered and adjusted with cheese and wine/stock; Handling: adjust gradually, since the sauce will concentrate as it cooks; Tip: season in small increments and re-taste.
  • Optional: 1/4 teaspoon red pepper flakes
    → Role: adds a gentle heat to cut through richness; Preparation: sprinkle into the sauce during simmering to meld with the flavors; Handling: start small and increase if you like more heat; Tip: red pepper flakes pair nicely with a touch of lemon zest for a bright finish.

Instructions

  • Pound the chicken breasts to an even thickness of about 1/2 inch (1.25 cm) between two sheets of plastic wrap using a flat meat mallet or the bottom of a heavy pan, then pat dry on all sides with paper towels to remove surface moisture that would inhibit browning.
    → Why: even thickness ensures uniform searing and prevents thinner edges from overcooking before the centers are done; patting dry promotes a crisp, golden crust rather than steaming in moisture.
  • Season the chicken evenly on all sides with 1/2 teaspoon kosher salt and 1/2 teaspoon freshly ground black pepper before cooking.
    → Why: layering salt and pepper builds flavor into the meat itself; dryness before seasoning helps the seasoning adhere and promotes better crust formation during searing.
  • Heat 2 tablespoons olive oil in a large heavy skillet over medium-high heat until shimmering, then add the chicken in batches, avoiding overcrowding the pan.
    → Why: a hot, uncluttered pan creates a rapid crust that locks in juices; overcrowding lowers the pan temperature and leads to steaming rather than browning, which dulls flavor.
  • Sear the chicken for 3–4 minutes per side until deeply golden and the internal temperature reaches 165°F (74°C), then transfer to a plate and tent loosely with foil to rest.
    → Why: proper searing develops caramelized surface flavor; resting helps redistribute juices so the meat stays moist when you finish the sauce.
  • Reduce the heat to medium and add 2 tablespoons butter with 1 tablespoon olive oil to the same pan, allowing the butter to foam and brown slightly for a nutty note.
    → Why: browning the butter adds depth and aroma to the base of the sauce; the accompanying oil helps control butter’s temperature to prevent burning.
  • Add the 2 large yellow onions, thinly sliced, and a pinch of kosher salt; cook slowly, stirring every few minutes, until the onions are deeply caramelized (about 20–25 minutes).
    → Why: slow caramelization builds natural sweetness and savory depth; if onions threaten to scorch, reduce heat or splash in a small amount of water to lift browned bits.
  • Stir in the 3 cloves garlic, minced, and cook for 30–60 seconds until fragrant, taking care not to burn the garlic.
    → Why: minced garlic releases its aroma quickly, but burns easily; this brief cook time preserves sweetness and vivid garlic flavor in the sauce.
  • Whisk in 1 tablespoon all-purpose flour (or prepare 1 tablespoon cornstarch in a cold slurry) to form a light roux and cook for 1–2 minutes to remove raw taste; this helps thicken the sauce.
    → Why: flour thickens with a gentle heat, while cornstarch slurry thickens faster; cooking the roux slightly prevents a raw, starchy taste that would dull the sauce.
  • Deglaze with 1/2 cup dry white wine (or 1/2 cup chicken stock) by pouring it in and scraping up the browned bits from the pan; simmer until reduced by about half.
    → Why: deglazing lifts flavorful fond from the pan and concentrates it; reducing concentrates acidity and sweetness to form a balanced base for the sauce.
  • Stir in 1 cup heavy cream and bring the mixture to a gentle simmer over low heat, cooking until the sauce thickens to a satin coating consistency without boiling.
    → Why: cream provides the luxurious body of the sauce; simmering gently prevents curdling and separation, preserving a smooth texture.
  • Whisk in 1/4 cup grated Parmesan cheese (optional) toward the end of the simmer over low heat until melted and emulsion forms, then taste and adjust salt as needed.
    → Why: Parmesan adds umami and helps emulsify the sauce for a cohesive, glossy finish; heat must stay low to prevent clumping.
  • Stir in 1 teaspoon dried thyme (or 2 teaspoons fresh thyme leaves) to brighten the sauce; allow 1–2 minutes for the herbs to release aroma without becoming bitter.
    → Why: thyme complements onion and cream with a fresh herbal note; adding it early lets the flavor infuse the sauce.
  • Return the seared chicken to the pan, nestling it into the sauce and cooking for another 2–3 minutes to rewarm and coat the chicken with the creamy onion sauce; check that the chicken remains juicy and reaches 165°F (74°C) internally.
    → Why: finishing in the sauce allows the chicken to absorb flavor while the sauce thickens further and adheres to the meat for a cohesive dish.
  • Finish with 2 tablespoons chopped fresh parsley, then taste and adjust salt and pepper as needed; optionally add 1/4 teaspoon red pepper flakes for a gentle heat.
    → Why: parsley provides color and a fresh contrast to the richness; seasoning adjustments ensure the final dish is balanced and vibrant, with heat adjusted to preference.
  • Plate the creamy onion chicken and spoon extra sauce over each piece; serve with cooked pasta, steamed rice, or crusty bread to soak up the sauce.
    → Why: a complementary starch or breadbase highlights the sauce and provides a satisfying, complete meal; the sauce should cling to the protein and spread pleasantly across the plate.

Notes

These Pollo cremoso alla cipolla notes are crafted to guide you through creating a rich, comforting chicken dish finished with a velvety onion cream sauce. Start with 4 boneless, skinless chicken breasts that are pounded to an even thickness, patted dry, and seared in olive oil until deeply golden. The key is to brown the chicken in batches to develop flavor rather than crowding the pan, which can lead to steaming.

The sauce builds from caramelized onions, minced garlic, butter, and a splash of dry white wine (or chicken stock). Let the wine reduce by about half to concentrate the flavors, then add heavy cream and grated Parmesan if desired. A touch of thyme brings herb brightness, while the flour (or cornstarch) helps the sauce cling to the chicken. To prevent curdling, simmer gently and avoid boiling once the cream is added. Brown butter adds a nutty, luxurious dimension—you can substitute with clarified butter if you prefer.

You can customize this dish by sautéing mushrooms or peppers with the onions, finishing with lemon zest for a bright contrast, or finishing with fresh herbs like parsley, chives, or basil instead of thyme. For a dairy-free or lighter version, substitute the cream with half-and-half or a milk-and-stock blend and thicken with a cornstarch slurry in place of flour. If you need a gluten-free version, omit the all-purpose flour and use 1 teaspoon cornstarch dissolved in 1 tablespoon cold water (adjust to desired thickness); ensure wine and stock are gluten-free as well.

Finish with chopped parsley and adjust salt and pepper to taste after the sauce has reduced. This dish pairs beautifully with pasta, rice, or a crusty bread to soak up the sauce. Leftovers refrigerate well for 2–3 days; reheat gently on the stove with a splash of stock if the sauce thickens. The sauce can separate as it cools and reheats, but a gentle whisk will re-emulsify it. For a make-ahead option, you can prep the onion-garlic base in advance and finish with chicken and cream when ready to serve.

Tips

  • Prep for an even sear: Gently pound the chicken to about 1/2 inch (1.25 cm) thick and pat dry thoroughly. Let the meat rest a few minutes after pounding to reabsorb juices, which helps it stay juicy inside and brown evenly on the outside.
  • Use the right pan and space: A large, heavy skillet (preferably cast iron or thick-bottomed stainless) gives a superior crust. Do not overcrowd the pan—cook in batches if needed—so the surface stays hot enough to sear rather than steam the chicken.
  • Season in layers: Salt the chicken lightly before cooking, then taste and adjust the final sauce before serving. Cheese and wine can intensify saltiness, so add salt gradually and adjust at the end.
  • Respect the aromatics timing: For best onion sweetness, cook the onions slowly over medium heat until they are deeply caramelized. Add garlic only after the onions soften to prevent rapid browning or bitterness.
  • Balance fats for the base: Use a combination of butter and olive oil. The oil raises the smoking point while the butter adds flavor; if the butter starts to brown too quickly, lower the heat slightly to keep onions from scorching.
  • Deglaze to capture flavor: After onions have softened, deglaze with white wine or stock and scrape up all the browned bits. Let the liquid reduce by about half to concentrate the savory notes before adding cream.
  • Alcohol substitutions: If you’re skipping wine, use extra stock and a squeeze of lemon juice for brightness. The reduction step remains key to concentrating flavors.
  • Cream handling tips: Add the heavy cream after the wine has reduced. Simmer gently and avoid a vigorous boil to prevent curdling; if your sauce seems too thick, loosen with a splash of stock or water.
  • Cheese decisions: If using Parmesan, whisk it in toward the end over low heat to emulsify the sauce. Keep the heat low to prevent clumping; if dairy-free, skip the cheese and consider nutritional yeast for a cheesy note.
  • Thickening the sauce: Use the flour or cornstarch slurry as directed, adding gradually and simmering enough to cook off the raw starch taste. If you prefer a lighter sauce, reduce the thickeners slightly and let the sauce reduce longer.
  • Herb timing and choice: Add thyme early to let its aroma infuse, but taste and adjust as the sauce thickens. Fresh thyme offers a bright note; dried thyme can work but is more potent—start with a smaller amount and adjust to taste.
  • Finish with brightness: A final sprinkle of chopped parsley (or basil/chives as alternatives) adds color and freshness. A light squeeze of lemon zest at the end can lift the richness nicely.
  • Season carefully at the end: Since the sauce concentrates as it reduces, re-taste after simmering and adjust salt and pepper in small increments. Remember the Parmesan will add saltiness.
  • Textural balance: If you prefer a thinner sauce, add extra stock or a splash of water at the end; for a silkier finish, whisk in a little more cream or a pat of butter off the heat.
  • Finishing touches: Rest the chicken briefly before slicing to keep juices distributed; spoon extra sauce over the meat for serving and pair with pasta, rice, or crusty bread to soak up the creamy sauce.

FAQ

FAQ – Pollo cremoso alla cipolla

Cos’è Pollo cremoso alla cipolla?

È una ricetta confortante italiana in cui pezzi di pollo sono cotti in una salsa cremosa a base di cipolle dolci, panna o besciamella e brodo, con aromi semplici come olio, burro e erbe. Il risultato è un piatto ricco e morbido, ideale per una cena di famiglia.

Quali sono gli ingredienti principali?

Ingredienti tipici: pollo (petto o cosce disossate), cipolle (affettate a julienne), aglio, olio extravergine d’oliva, burro, brodo di pollo, panna da cucina o besciamella, sale, pepe, timo o prezzemolo, vino bianco opzionale e parmigiano grattugiato per mantecare.

Come si preparano le cipolle per la crema?

Affetta le cipolle a julienne. In una padella larga, scald a fuoco medio-basso burro e un filo d’olio, aggiungi le cipolle con un pizzico di sale e cuocile lentamente 20–25 minuti finché diventano morbide, dorate e leggermente caramellate. A fine cottura, sfuma con vino bianco se vuoi.

Quale taglio di pollo è consigliato?

Il petto di pollo è facile da gestire e cuoce rapidamente. Le cosce disossate risultano più saporite e tenere, ma richiedono un tempo di cottura leggermente più lungo. Taglia il pollo a pezzi di dimensione uniforme per una cottura omogenea.

Procedura passo-passo per la ricetta?

1) Rosola il pollo in una padella con olio finché dorato, poi togli e metti da parte. 2) In la stessa padella, cuoci le cipolle fino a dorarle. Aggiungi aglio per 1 minuto. 3) Rimetti il pollo, aggiungi vino bianco (opzionale) e brodo. 4) Aggiungi panna o besciamella e lascia sobbollire fino a quando il pollo è cotto e la salsa si addensa. 5) Controlla di sale e pepe, manteca con un cucchiaio di parmigiano e servi con erbe fresche.

Quanto tempo richiede in totale?

Tempo totale approssimativo: 45–60 minuti. Preparazione e taglio degli ingredienti 10–15 minuti, cottura del pollo 15–25 minuti emere la salsa 5–10 minuti.

Come si conserva e si riscalda gli avanzi?

Conserva gli avanzi in un contenitore chiuso in frigorifero per 2–3 giorni. Per riscaldarlo, fallo piano sul fornello a fiamma bassa o nel microonde a intervalli brevi mescolando spesso. La salsa potrebbe separarsi leggermente al riscaldo; una piccola emulsione con un po’ di latte o panna può aiutare a ristabilirla.

Quali varianti sono consigliate?

Varianti comuni: aggiungere funghi champignon o gambi di funghi misti, pancetta o guanciale per un sapore più ricco, un pizzico di paprika o curry per una nota speziata, o spremuta di limone per una leggera freschezza. Puoi anche prepararlo senza vino sostituendolo con ulteriore brodo.

Spiagazioni per versioni particolari (senza lattosio o vegetariana)

Per una versione senza lattosio sostituisci panna/besciamella con latte di mandorle o latte di soia non zuccherato e utilizza olio al posto del burro. Per una versione vegetariana, sostituisci il pollo con funghi saltati o ceci, e usa una crema vegetale (es. panna di soia) per ottenere la cremosità. Aggiungi aromi come timo e aglio per mantenere il carattere del piatto.

Introduzione / Hook

Immagina una scena accogliente: una cucina calda, luci soffuse, e l’aroma intenso di cioccolato che avvolge l’aria come una coperta confortevole. La Torta dessert al cioccolato è quel tipo di dolce che trasforma una serata ordinaria in un piccolo rituale di puro piacere. È la promessa di una fetta che si scioglie lentamente al contatto della lingua, lasciando una nota di cacao profondo, vellutata e avvolgente, che danza tra dolcezza e una leggera, salutare amarezza tipica del cioccolato di alta qualità. Non è solo una torta: è un’esperienza sensoriale che invita a rallentare, a guardare il tempo che scorre con calma, e a condividere momenti con chi ami. Ogni morso parla di cacao scelto con cura, di una consistenza soffice ma stabile, di una glassa lucida che invita a spegnere la fretta e a lasciarsi coccolare dal gusto intenso. Se stai cercando un dessert che possa essere allo stesso tempo semplice da realizzare e sorprendentemente elegante sulla tavola, questa torta è fatta su misura per te. È versatile, ma soprattutto è una dichiarazione di amore per i cioccolati di qualità: profondo, ricco, ma bilanciato, capace di stupire sia in una cena informale sia in una festa speciale. Preparala per una serata romantica, per una domenica di chiacchiere tra amici, o come premio dolce per una settimana che merita una ricompensa. È una di quelle ricette che, una volta assaporata, resta nel palato e nella memoria, e che spesso diventa un piccolo classico familiare, pronto a essere tramandato con un sorriso.

La storia dietro il dolce

Il cioccolato ha attraversato oceani e culture prima di prendersi una forma dolce che potessimo gustare a casa: dal cacao delle foreste pluviali dell’America Centrale alle corti europee, dove i maestri pasticcieri hanno perfezionato tecniche e ricette, spesso nascoste tra le pagine di un libro antico o lungo le mani callose di una nonna. La torta al cioccolato, in molte tradizioni, nasce come celebrrazione di un alimento che unisce semplicità e lusso: pochi ingredienti base, ma con una potenza gustativa capace di trasformare un semplice impasto in un’emozione. In Italia, la passione per il cacao si è fusa con memorie familiari, con ricette tramandate di generazione in generatione, evolvendosi in una torta che conserva l’anima rustica ma veste di raffinatezza quando serve. Spesso accompagnata da una crema, una glassa lucida o una spolverata di cacao, la Torta dessert al cioccolato richiama ricordi di panni appesi al sole, di cucine affollate durante le feste di fine settimana, e del profumo che doma i pensieri più frenetici. Chiunque, ad un certo punto della propria vita, ha assaggiato una fetta di questa torta ha scoperto che la magia non risiede solo negli ingredienti, ma nel modo in cui un dolce riesce a creare un ponte tra presente e memoria: un odore che fa tornare a casa, una consistenza che ricorda una carezza, un gusto che invita a chiudere gli occhi e sorridere.

Perché amerai questa ricetta

  • Comfort senza complessità: una torta che sembra ricca e decadente, ma è sorprendentemente accessibile da realizzare anche per chi è alle prime armi in cucina.
  • Equilibrio perfetto tra dolcezza e profondità: nota intensa di cacao bilanciata da una dolcezza avvolgente che non sovrasta i sensi.
  • Texture: una crosta lucida e leggermente croccante che cede a un interno morbido, umido e quasi fondente al centro.
  • Versatilità per ogni occasione: perfetta per una cena romantica, per una celebrazione informale, o per un semplice e meritato momento di coccole.
  • Flessibilità nelle varianti: si presta a versioni vegan, senza glutine o a ridotto contenuto di zucchero senza perdere carattere e fascino.
  • Immediata eleganza: la superficie lucida e la ricchezza del sapore fanno sembrare questa torta molto più impegnativa di quel che è in realtà, elevando immediatamente la tavola.

Aromi chiave

Questo dolce racconta di cacao intenso, una punta di vaniglia e un tocco sottile di aromi tostati che emergono senza sopraffare. Ogni fetta svela sfumature che richiamano caffè e mandorle leggermente tostate, offrendo una profondità gustativa che invita a fare una seconda fetta senza alcun rimpianto.

Consistenza e presentazione

La magia di questa torta sta nel contrasto: una crosta esterna che resiste al taglio, una mollica soffice e umida all’interno, e una dolce glassa o una leggera copertura che lucida la superficie. È una torta che si presenta bene su un piatto da dessert, ma è anche enough per un tè pomeridiano con amici: basta una fetta e un bicchiere di liquore dolce o di caffè per completare l’esperienza.

Profilo di sapore e consistenza

Sapori chiave

Il sapore è una sinfonia di cacao: profondo, maturo e avvolgente. Il cacao regala una base intensa che resta a lungo in bocca, mentre altre note, come una lieve vaniglia o un accenno di dolcezza floreale, rendono l’assaggio equilibrato e non stancante. È una torta che non necessita di accompagnamenti complessi per brillare; la sua magnificenza risiede nella purezza del cioccolato bene temperato e nell’armonia tra umidità e struttura dell’impasto.

Texture

La prima impressione è una superficie setosa che cede al coltello con facilità. All’interno, la torta è morbida, umida e quasi burrosa al palato, senza essere pesante. Questo tipo di consistenza nasce dall’equilibrio tra un impasto che assorbe i liquidi e una cottura accurata, che permette all’umidità di rimanere intrappolata. Quando si addenta la torta, si percepisce una leggera densità che avvolge la lingua, ma non appesantisce: è comfort puro, una carezza dolce che lascia una traccia di piacere prolungato.

Occasioni & Abbinamenti

Quando servirla

Questa torta si presta a molte occasioni: una cena fuori programma ma importante, una celebrazione familiare, o un semplice momento di coccole dopo una lunga giornata. Può essere presentata come dessert di chiusura di una serata conviviale, oppure al centro del tavolo in una festa tra amici. È anche una scelta impeccabile per regali casalinghi o per una merenda speciale nel weekend. La sua eleganza sobria la rende adatta sia a un servizio formale che a una tavola informale, offrendo sempre un tocco di classe senza richiedere sforzi eccessivi.

Abbinamenti consigliati

Per completare l’esperienza sensoriale, considera abbinamenti semplici ma raffinati: una tazza di caffè espresso o una bevanda calda aromatizzata, una crema fredda o una pallina di gelato alla vaniglia o alla crema. Frutti di bosco freschi o una coulis di lamponi possono aggiungere una nota acida che bilancia la dolcezza, creando un equilibrio gustativo molto piacevole. Se vuoi un tocco di eleganza, serve una spolverata sottile di cacao amaro o una lama di scorza di arancia per aggiungere freschezza e complessità. Questa torta si presta anche a esaltare una selezione di vini dolci o liquorosi: un passito, un liquore al cioccolato o un caffè corretto con un filo di liquore si armonizzano magnificamente con la ricchezza del cioccolato.

Suggerimenti, Varianti & Sostituzioni

Varianti classiche e moderne

La bellezza di questa torta sta nella sua capacità di adattarsi: puoi optare per una versione extra ricca, sostituendo parte di una componente lucente con una glassa più cicciotta, oppure mantenere un profilo più sobrio scegliendo una finitura leggera. Per una nota di freschezza, è possibile introdurre una cider o una leggera nota di agrumi nelle discussioni di presentazione, senza alterare la base di cacao.

Varianti vegane

Per una versione senza ingredienti di origine animale, si può pensare a sostituzioni mirate: ad esempio, utilizzare oli vegetali al posto del burro e una crema vegetale per la consistenza. Il sapore rimane intenso se si scelgono cacao di alta qualità e aromi naturali. L’importante è mantenere l’equilibrio tra umidità e struttura, evitando di esagerare con sostituzioni che potrebbero rendere la torta secca.

Versione senza glutine

Per rendere la torta adatta a chi segue una dieta senza glutine, si può utilizzare una miscela di farine prive di glutine appositamente bilanciate per torte, oppure optare per una versione a base di nocciole o mandorle macinate finemente. L’obiettivo è mantenere una texture soffice senza compromettere il sapore ricco di cacao.

Dolcezza e riduzione zuccherina

Se desideri una versione meno dolce, puoi ridurre una piccola percentuale di zuccheri o utilizzare un dolcificante alternativo. In ogni caso, è consigliabile mantenere una nota di dolcezza sufficiente per bilanciare l’amaro naturale del cacao, in modo che l’esperienza resti equilibrata e invitante.

Twist regionali

Esistono modi regionali di portare una carta diversa in occasione: una spolverata di pistacchi tostati, una glassa al formaggio cremoso (in piccole quantità) o un tocco di liquore locale per dare una firma caratteristica. Questi piccoli tocchi possono trasformare una torta classica in una versione originale, pronta a raccontare una storia nuova pur restando fedeli alle radici del cioccolato.

Conservazione & Idee per prepararla in anticipo

Questa torta è una compagna fidata anche quando vuoi pianificare in anticipo. Puoi prepararla con qualche margine di sicurezza, in modo da poterla gustare in momenti diverse senza compromettere la qualità. Ecco alcuni suggerimenti pratici per conservarla al meglio e per prepararla in anticipo:

  • Conservazione a temperatura ambiente: una torta ben coperta, in un contenitore ermetico o sotto una campana di vetro, resta fresca per 2-3 giorni in condizioni climatiche moderate. La glassa lucida può perdere parte della sua brillantezza nel tempo, ma mantiene comunque un sapore meraviglioso.
  • Conservazione in frigorifero: se vuoi prolungarne la freschezza, puoi conservarla in frigorifero per up to 5 giorni. Tiaset tagliene una porzione e lasciala a temperatura ambiente per circa 15-20 minuti prima di servirla, in modo che ritrovi la morbidezza originale.
  • Congelamento: questa torta si presta bene al congelamento. Avvolgina accuratamente e riponila nel congelatore per 1-3 mesi. Quando la scongeli, lasciala rasserenare a temperatura ambiente e, se desideri, aggiungi una leggera glassa o una decorazione fresca prima di servire.
  • Se vuoi prepararla in anticipo per una festa, considera la possibilità di congelare la torta già cotta e non glassata. In questo modo, al momento della festa, scongelala e aggiungi la glassa all’ultimo minuto per mantenere la lucentezza.
  • Idee per il servizio: per una presentazione elegante, spolvera una quantità sottile di cacao amaro o di cioccolato fondente grattugiato al momento del taglio. Questo dettaglio crea un effetto visivo accattivante e aggiunge una nota di sapore extra.

Curiosità & Trivia (Optional)

La storia del cioccolato è una storia di viaggi e scoperte. Gli antichi Maya e Aztechi consideravano il cacao una bevanda rituale e preziosa, spesso mescolata con spezie che ne intensificavano il carattere. Quando gli europei introdussero il cacao in Europa, la bevanda si trasformò in una torta, una forma di dessert solida che poteva essere conservata, trasportata e gustata in occasioni speciali. In Italia, la passione per il cioccolato si è intrecciata con la tradizione dolciaria domestica: la torta al cioccolato diventa così una sorta di simbolo di convivialità e di casa, capace di attraversare confini e generazioni. Una curiosità interessante è che molte culture hanno sviluppato varianti di torte al cioccolato utilizzando ingredienti locali: mandorle, nocciole, pistacchi o formaggi cremosi diventano protagonisti accanto al cacao, offrendo esperienze gustative ricche e diverse pur mantenendo la base comune di un dolce al cioccolato. Ogni regione o paese aggiunge una nota personale, trasformando una categoria di dessert in un vero e proprio patrimonio di memoria e sapore condiviso. Parlare di cioccolato è parlare di emozioni: è una delizia che si adatta a tutte le stagioni e a tutti i momenti, in modo semplice o raffinato. E questa torta, in particolare, incarna quel compromesso perfetto tra indulgence e comfort, tra gusto ricco e semplicità di esecuzione, che la rende una compagna fidata per chiunque desideri creare un momento di dolcezza memorabile.

Ingredients

Torta al Cioccolato Base
  • 1 3/4 cups all-purpose flour, sifted
    → Provides the cake’s structure and crumb. Sifting helps distribute leaveners evenly and yields a light, tender crumb. If you need a gluten-free version, substitute with a 1:1 gluten-free flour blend and add 1/2 teaspoon xanthan gum per cup of flour.
  • 3/4 cup unsweetened cocoa powder, Dutch-processed, sifted
    → Rich, smooth chocolate flavor with low acidity. Sift to remove lumps; If you only have natural cocoa, consider increasing the baking powder by 1/4 teaspoon to balance acidity and rise.
  • 1 cup granulated sugar
    → Sweetness that also aids in browning and moisture retention. If you prefer a less sweet cake, reduce by 2-3 tablespoons or substitute half with brown sugar for deeper flavor and moister crumb.
  • 2 teaspoons baking powder
    → Leavening that helps the cake rise and develop a light crumb. Use fresh baking powder for best lift; measured at room temperature.
  • 1/2 teaspoon baking soda
    → Provides additional lift and helps counteract acidity from cocoa and coffee, creating a tender crumb. If you use natural cocoa, keep this; if using only Dutch-processed cocoa, you can reduce to 1/4 teaspoon.
  • 1/2 teaspoon salt
    → Enhances overall flavor and balances sweetness and the slight bitterness of cocoa. Add a pinch more if your cocoa is particularly bitter, but do not exceed 1/2 teaspoon.
  • 2 large eggs, room temperature
    → Bind the batter and contribute to structure. Room-temperature eggs emulsify better with milk and oil, yielding a smoother crumb. If eggs are cold, warm them in a bowl of warm water for 5 minutes before using.
  • 1 cup milk, room temperature
    → Hydrates dry ingredients and adds moisture. Dairy milk yields a richer crumb; for dairy-free, use unsweetened almond, soy, or oat milk. If using plant milk with sweetness, adjust sugar accordingly.
  • 1/2 cup neutral oil (e.g., canola or sunflower)
    → Provides a moist, tender crumb that stays moist after cooling. Oil makes the crumb tender and even; use a neutral-flavored oil to avoid affecting chocolate flavor. If you prefer butter flavor, substitute half with melted unsalted butter, noting a slight change in texture.
  • 2 teaspoons pure vanilla extract
    → Enhances chocolate aroma; vanilla also helps balance bitterness. Use high-quality vanilla extract for best aroma; if available, you can use 1/2 vanilla bean, scraped, in place of the extract.
  • 1/2 cup hot water or hot coffee
    → Hydrates the cocoa and loosens the batter for a moist, glossy crumb. Coffee deepens the chocolate flavor without making the cake taste distinctly of coffee if kept moderate; use hot water if avoiding caffeine.
Optional Add-ins
  • 1/2 cup dark chocolate chips or chopped chocolate (optional)
    → Adds pockets of melted chocolate throughout the cake for extra richness. Toss chips with a teaspoon of the flour from the batter before adding to help distribute evenly and prevent sinking.
  • 1 teaspoon instant espresso powder dissolved in 1 tablespoon hot water (optional)
    → Intensifies the chocolate flavor without imparting a strong coffee taste. Dissolve the powder in hot water first, then fold into the batter just before adding to the pan.
Ganache Glaze (optional)
  • 8 oz (225 g) semisweet or dark chocolate, finely chopped
    → Forms the glossy, rich glaze when melted with cream. Finely chopped chocolate melts quickly and evenly, producing a smooth ganache when combined with heated cream.
  • 3/4 cup (180 ml) heavy cream
    → Provides fat to emulsify with chocolate and create a luxurious, shiny glaze. If you prefer a thinner glaze, increase cream; for thicker glaze, use slightly less.
  • 1 tablespoon unsalted butter, cut into small pieces (optional)
    → Adds extra shine and a silkier finish to the ganache. Add off the heat and stir until glossy. Omit if you want a purer chocolate glaze.
Toppings (optional)
  • Powdered sugar for dusting
    → Finishes the cake with a delicate, elegant touch. Dust using a fine sieve over a completely cooled cake to avoid clumps.
  • Fresh berries (raspberries, strawberries, or blueberries) for serving (optional)
    → Provides a bright contrast to the rich chocolate. Keep berries chilled until serving and arrange just before serving to maintain texture.

Instructions

  • Preheat your oven to 350°F (175°C) and prepare two 9-inch (23 cm) round cake pans by greasing with a neutral oil or butter and lining the bottoms with parchment rounds; this ensures the cake releases cleanly and bakes evenly.
    → Parchment rounds provide a nonstick surface and make lifting the layers later effortless, while greasing prevents the cake edges from tearing.
  • Sift together the dry ingredients: 1 3/4 cups all-purpose flour, 3/4 cup Dutch-processed cocoa powder, 2 teaspoons baking powder, 1/2 teaspoon baking soda, and 1/2 teaspoon salt into a large bowl, then whisk thoroughly to combine; this distributes leaveners and breaks up any cocoa lumps.
    → Uniform dry ingredients yield consistent rising and a smooth crumb without exposed dry pockets.
  • In a separate large bowl, whisk 2 large eggs with 1 cup granulated sugar until the mixture is pale, thick, and forms ribbons when the whisk is lifted, about 2 to 3 minutes; then whisk in 1 cup milk, 1/2 cup neutral oil, and 2 teaspoons vanilla extract until the mixture is smooth and fully emulsified; this builds a stable base for a tender, moist cake.
    → Proper emulsification distributes fat and liquids evenly, creating a cohesive batter that traps air for a light crumb.
  • Stir in 1/2 cup hot water or hot coffee gradually into the wet batter to hydrate the cocoa and loosen the mixture, yielding a glossy, pourable texture that helps the cake stay moist; this step also begins dissolving any cocoa solids for a uniform flavor.
    → Hot liquid activates cocoa and aids in dissolving cocoa solids, contributing to a rich, cohesive crumb.
  • Fold the dry ingredients into the wet batter in three additions, mixing just until no streaks of flour remain and the batter is smooth with a few tiny lumps; avoid overmixing to prevent gluten development and a dense crumb.
    → Gentle folding preserves tenderness and prevents a tough texture, especially in chocolate cakes.
  • If using optional add-ins, toss 1/2 cup dark chocolate chips or chopped chocolate with 1 teaspoon of flour from the dry ingredients to prevent sinking, then fold into the batter; or dissolve 1 teaspoon instant espresso powder in 1 tablespoon hot water and whisk into the batter just before the final fold for a deeper chocolate aroma without a pronounced coffee taste.
    → Coating chips in flour helps distribute them evenly; espresso powder deepens chocolate flavor without overpowering the cake.
  • Divide the batter evenly between the prepared pans and gently tap each pan on the counter to release trapped air; smooth the tops with a clean spatula so the layers bake flat and level for easy stacking.
    → Even distribution and surface leveling promote uniform rise and a professional-looking cake.
  • Bake on the center rack at 350°F (175°C) for 30–35 minutes, rotating the pans halfway through for even browning; test for doneness by inserting a toothpick into the center—the cake should emerge with a few moist crumbs, not wet batter; cool the layers in the pans for 10–15 minutes, then invert onto a wire rack to cool completely.
    → Correct bake time and a cool-down prevent sinking or crumbling, yielding a stable structure for ganache.
  • Ganache glaze: Place 8 oz (225 g) finely chopped semisweet or dark chocolate in a heatproof bowl; in a small saucepan bring 3/4 cup (180 ml) heavy cream just to a simmer, pour over the chocolate, and let stand 2 minutes; whisk gently until smooth and glossy, then whisk in 1 tablespoon unsalted butter off the heat if using; let the ganache cool slightly to a pourable, glaze-like consistency.
    → Heating the cream allows even chocolate liquefaction; resting prevents scorching and yields a satin-smooth glaze that coats the cake beautifully.
  • Level the cooled cake layers with a serrated knife or cake leveler if domed; place the bottom layer on a serving platter and spread a generous, even layer of ganache on top using an offset spatula; place the second layer on top, press gently to set, then pour the remaining ganache over the top and sides, smoothing with the spatula for a glossy finish.
    → Leveling ensures even stacking; the ganache acts as both filling and a protective glaze for a sleek, bakery-style surface.
  • Let the ganache set at room temperature for 20–30 minutes, or refrigerate briefly if you are short on time; before serving, dust with powdered sugar and, if desired, arrange fresh berries on top for contrast and brightness.
    → Allowing the glaze to set yields clean slices and an attractive presentation, while berries provide a fresh counterpoint to the rich chocolate.

Notes

These chocolate torta al cioccolato desserts are rich, fudgy, and irresistibly glossy, with a tender crumb and layers of chocolate flavor that shine when finished with ganache. For a gluten-free version, substitute a 1:1 gluten-free flour blend for the all-purpose flour and add 1/2 teaspoon xanthan gum per cup to help bind the batter. Sift the dry ingredients to ensure even leavening, and dissolve the espresso powder in the hot water or coffee to deepen the chocolate without making the cake taste like coffee. Use room-temperature eggs and milk for better emulsification and a smoother crumb, and whisk the wet and dry ingredients separately before combining to avoid overworking the batter. Prepare the ganache by gently heating the cream and pouring it over the finely chopped chocolate, allowing it to sit for a few minutes before whisking until smooth; stir in the optional butter for extra shine. Let the cake cool completely before glazing and dust with powdered sugar or decorate with fresh berries for contrast. This cake stores well in an airtight container at room temperature for a couple of days, or refrigerates for longer; you can also freeze baked slices wrapped tightly for up to 2–3 months. For a dairy-free version, use plant-based milk in the batter and a coconut- or almond-milk ganache, adjusting the amount of dairy fats accordingly.

Tips

Consigli utili per preparare la Torta al Cioccolato

  • Preparazione degli ingredienti: misura e mette tutto a portata di mano prima di iniziare. Le uova a temperatura ambiente si montano meglio con gli altri ingredienti, quindi se sono fredde, lasciale a temperatura ambiente 30–60 minuti oppure immergile rapidamente in acqua tiepida per 5 minuti.
  • Se vuoi una torta più leggera, assicurati di setacciare farina e cacao insieme e incorporare gli ingredienti secchi in 2–3 volte con attenzione, evitando di lavorare troppo l’impasto per non sviluppare troppo il glutine o far diventare la torta densissima.
  • La cottura: preriscalda il forno e verifica spesso la cottura verso la fine. Per una teglia standard (circa 23 cm), in genere si va a circa 25–35 minuti; fai lo stecchino: deve uscire con alcune briciole umide per una torta al cioccolato molto morbida e umida al centro.
  • Liquidi e cacao: mescola l’acqua calda o il caffè caldi con il cacao per aiutarlo a sciogliersi e attivare il sapore. Il caffè intensifica il sapore del cioccolato senza risultare al gusto di caffè se dosato correttamente.
  • Texture e umidità: l’olio mantiene la torta morbida anche quando è fredda. Se vuoi una nota di burro, puoi sostituire metà dell’olio con burro fuso, ma prepara la torta per una consistenza leggermente diversa.
  • Controllo della lievitazione: utilizzare lievito in polvere fresco significa migliore incremento di volume. Se usi cacao non trattato (natural), potresti dover adattare leggermente la quantità di lievito o bicarbonato a seconda dell’alcalinità del cacao.
  • Aggiunte opzionali: per cioccolato ancora più intenso, aggiungi gocce di cioccolato fondente o cioccolato tritato. Per una nota di espresso senza gusto di caffè, sciogli l’espresso in acqua calda e incorpora subito nell’impasto.

Tips per la ganache e la glassa

  • Ganache lucida: riscalda la panna fin quasi all’ebollizione, versa sul cioccolato tagliato finemente e lascia riposare 3–5 minuti prima di mescolare. Mescola dal centro verso l’esterno finché non ottieni una glassa lucida e setosa.
  • Texture della ganache: se vuoi una glassa più fluida, aumenta la quantità di panna; per una glassa più densa, riduci leggermente la panna. Aggiungi una noce di burro a fuoco spento per aumentare lucentezza e morbidezza.
  • Consistenza senza grumi: se la ganache si indurisce troppo, scalda delicatamente la ciotola a bagnomaria o ripassa al microonde a intervalli molto brevi, mescolando tra un intervento e l’altro.
  • Stesura: versa la ganache sulla torta completamente raffreddata o quasi fredda per una finitura liscia. Per una glassa più liscia, usa una spatola calda e passa delicatamente i bordi.

Consigli di presentazione e conservazione

  • Topping: spolvera con zucchero a velo solo quando la torta è completamente fredda per evitare macchie umide.
  • Dolci di accompagnamento: servi con frutti di bosco freschi per un contrasto di acidità che valorizza il cioccolato.
  • Conservazione: conserva la torta intera o porzioni ben sigillate in contenitore ermetico a temperatura ambiente per 2–3 giorni; può essere conservata in frigorifero se preferisci una torta più soda, ma lasciala acclimatare 20–30 minuti prima di tagliarla.
  • Congelamento: porzioni singole ben sigillate possono essere congelate fino a 2–3 mesi. Scongelale in frigorifero durante la notte e lascia a temperatura ambiente prima di servire.

FAQ

Che tipo di dolce è la Torta dessert al cioccolato?

È una torta al cioccolato morbida e ricca di sapore, ideale come dessert. Può essere gustata così com’è oppure farcita con crema o ganache e accompagnata da gelato, panna o frutti di bosco.

Quali sono gli ingredienti principali?
  • Cioccolato fondente di buona qualità
  • Burro o burro vegetale
  • Zucchero
  • Uova
  • Farina
  • Lievito per dolci
  • Latte o latte vegetale (opzionale)
  • Vaniglia e un pizzico di sale
È possibile prepararla in versioni per diete speciali?

Sì. Ecco alcune varianti comuni:

  • Senza uova: sostituti come purea di banana, yogurt vegetale o una miscela di semi di lino macinati con acqua (1 cucchiaio di semi di lino + 3 cucchiai d’acqua, lascia addensare).
  • Senza lattosio: burro sostituito con margarina o olio, latte con latte vegetale (mandorla, avena, soia).
  • Senza glutine: usa una farina senza glutine o una miscela 1:1 adatta alle torte, senza cambiare troppo i tempi.
  • Vegana: elimina uova e burro, utilizza olio vegetale o burro veg e latte vegetale.
Quanto tempo richiede preparazione e cottura?

Tempo di preparazione: circa 15-20 minuti. Tempo di cottura: 25-35 minuti a 170-180°C, a seconda del forno. Lascia raffreddare completamente prima di tagliare e servire.

Qual è il procedimento passo-passo?

Ecco una versione base:

  • Preriscalda il forno a 170-180°C e unga una teglia (preferibilmente diametro 20-23 cm) o rivestila con carta forno.
  • Fondi il cioccolato e il burro a bagnomaria o a microonde, mescolando fino a ottenere una crema liscia e liscia.
  • In una ciotola, monta lo zucchero con le uova (se usi uova). Aggiungi la crema di cioccolato fusa e mescola.
  • Aggiungi vaniglia e latte (se usato). Incorpora lentamente la farina setacciata con lievito e un pizzico di sale, mescolando fino a ottenere una pastella omogenea.
  • Versa nello stampo e cuoci 25-35 minuti. Verifica con uno stecchino: esci leggermente umido per una torta morbida o asciutto per una torta più asciutta.
  • Lascia intiepidire, poi sforna e lascia raffreddare su una griglia.
Quante porzioni ottengo tipicamente?

Con una teglia da 20-23 cm, si ottengono circa 8-10 porzioni, a seconda dello spessore e della presentazione.

Quali sono i consigli per forno e temperatura?

Preferisci forno statico a 170-180°C. Evita di aprire il forno durante i primi 15-20 minuti per non far scadere lievitazione. Se la superficie tende a scurirsi troppo, copri con un foglio di carta stagnola verso la fine della cottura.

Come conservare la torta e per quanto tempo?

Lascia raffreddare completamente, poi conserva:
– a temperatura ambiente, in una tortiera chiusa o sotto campana di vetro per 2-3 giorni;
– in frigorifero per 4-5 giorni, ben chiusa;
– o congela porzioni individuali up to 1-2 mesi. Per scongelare, lascia a temperatura ambiente o riscalda delicatamente in forno.

Quali varianti di gusto e topping posso usare?

Ecco alcune idee:

  • Ganache al cioccolato fondente da farcitura o glassa (cioccolato + panna).
  • Crema al mascarpone o crema chantilly per la farcitura.
  • Aggiunte all’impasto: gocce di cioccolato, nocciole tritate, cacao extra o caffè espresso per un sapore più intenso.
  • Copertura con glassa al cacao, scaglie di cioccolato o zucchero a velo.
Come presentare una torta al cioccolato al meglio?

Taglia la torta fredda per ottenere fette pulite. Servi con una cucchiaiata di crema, una pallina di gelato alla vaniglia o frutti di bosco. Puoi decorare con cacao in polvere, scaglie di cioccolato o una micro-rasatura di scorza d’arancia per un tocco fresco.

Quali problemi comuni possono verificarsi e come risolverli?

Problemi comuni e soluzioni:

  • Torta troppo secca: aumenta leggermente grassi o liquidi nell’impasto (latte o olio) o prolungare la cottura di pochi minuti poco per volta.
  • Torta cruda all’interno: controlla il tempo di cottura, riduci l’altezza della teglia o copri la superficie per evitare bruciature; se necessario, cuoci qualche minuto in più e controlla con stecchino.
  • Superficie che si rattrappisce: evita mescolamenti eccessivi; incorpora gli ingredienti con movimenti lenti dal basso verso l’alto.
Quali strumenti utili servono per prepararla?

Strumenti consigliati:

  • Stampo rotondo da 20-23 cm o uno stampo a cerniera
  • Bagnomaria o microonde per sciogliere il cioccolato
  • Frusta o planetaria per montare
  • Setaccio per setacciare la farina
  • Spatola per lisciare l’impasto

Introduzione — Il Gancio

Immagina una casseruola che si scalda lentamente nel forno, emanando un profumo avvolgente di uova cremose mescolate con salsiccia succosa, formaggio che tende filante e aromi che si intrecciano come una conversazione tra vecchi amici. Questa è una ricetta che parla di conforto semplice, di mattine illuminate dal sole che filtrano attraverso le tende e di risate che risuonano intorno al tavolo di casa. La casseruola uova e salsiccia non è solo un piatto: è un rituale accogliente, un abbraccio culinario che trasforma una domenica in un ricordo speciale, una colazione che resta aperta per pranzo e una cena improvvisata ma memorabile. È quella cosa che sembra fatta su misura per chi ama i sapori familiari ma desidera una nota di novità: la cremosità delle uova che mette in risalto la robustezza della salsiccia, la dolcezza del formaggio fuso e una leggera croccantezza in superficie. Eppure, non è soltanto ricco: è anche pratico, costruito per chi ha poco tempo ma non vuole rinunciare a qualcosa di gustoso e confortante. In una parola, è la casa che ti accoglie, ovunque tu sia, e ti invita a fermarti un attimo a respirare il profumo della cucina. Se stai cercando una ricetta che trasformi una lista di ingredienti comuni in una scena di tavola calda e felice, questa casseruola è la tua compagna ideale. Preparala una volta e scoprirai che il loro calore non si esaurisce: resta con te, pronta a essere riscaldata per una nuova mattina o una serata che merita un po’ di magia semplice.

La storia dietro il piatto

La casseruola uova e salsiccia nasce dall’humus della cucina familiare, dove i piatti si costruiscono con praticità ma con una dose di creatività e di amore per la tavola condivisa. In molte regioni italiane, le famiglie hanno una tradizione di piatti unti e sostanziosi che si cucinano in teglia: idee nate dall’abbinamento di proteine saporite, uova che tengono tutto insieme e una generosità di formaggi che tutto ammorbidisce. La salsiccia, con le sue note di pepe, finocchio o spezie locali, è spesso una protagonista che regala carattere al piatto, trasformando una semplice combinazione di ingredienti in qualcosa di capace di riunire parenti e amici attorno al tavolo. In passato, molti non avevano uova fresche ogni giorno: le casseruole di uova, cotte al forno, erano un modo ingegnoso per utilizzare avanzi, preservando gusto e proteine in un’unica, pratica soluzione. Nel tempo, questa preparazione ha attraversato confini e tradizioni, adattandosi alle cucine di casa, dai casali alle cucine urbane, assumendo varianti che riflettono territori diversi: erbe aromatiche, peperoni arrosto, formaggi locali o una spolverata di pangrattato sulla superficie per una croccantezza irresistibile. La bellezza di questa ricetta è che porta una storia di sostegno e convivialità in una teglia: un piatto che ricorda le domeniche di nonna, le risate tra fratelli, i pranzi di festa contrassegnati da un forno che canta nel silenzio della cucina. Ogni forchettata è un piccolo viaggio nel tempo e nello spazio, dove la semplicità incontra la ricchezza di sapori e la voglia di stare insieme.

Perché amerai questa ricetta

Questo piatto brilla per una serie di motivi pratici ed emozionali. Ecco perché potrebbe diventare uno dei tuoi go-to nella ricetta di famiglia o nel libro di ricette personale:

  • Praticità e comfort: una sola teglia, poche mosse, poco tempo di preparazione attiva e una cottura che fa tutto da sé. È ideale per brunch, pranzo di metà settimana o una cena in cui vuoi qualcosa di sostanzioso senza stare ai fornelli per ore.
  • Versatilità: resta sorprendentemente neutra nei condimenti e si lascia guidare dalle preferenze. Con salsiccia piccante o dolce, formaggi diversi o erbe aromatiche, ogni versione racconta una storia diversa senza richiedere grandi cambiamenti procedurali.
  • Confortante ma equilibrata: la ricchezza delle uova e del formaggio è bilanciata dalla sapidità della salsiccia, offrendo una sensazione cremosa e avvolgente ma senza pesare troppo sul palato quando viene gustata in porzioni ragionevoli.
  • Adatta a molte occasioni: è perfetta per brunch domenicali, riunioni tra amici, cene in settimana, o come piatto unico per una giornata di freddo. Si presta anche a servirsi con una fresca insalata verde o con una salsa leggera per un contrasto di texture e temperatura.
  • Conservazione di gusto: si presta bene al make-ahead. Puoi prepararla in anticipo e infornarla poco prima di servirla, oppure tagliarne una porzione per un pasto lampo durante la settimana.

Profilo di sapore e consistenza

Immagina una base di uova soffici e ricche che diventano quasi una crema all’interno della casseruola, con bordi dorati che aggiungono una leggera croccantezza. La salsiccia, a seconda della sua tipologia, porta un profilo aromatico che spazia dal dolce al piccante, rilasciando sapidità e umami in ogni morso. Il formaggio, fuso e filante, filtra la ricchezza con una nota di latticino che arricchisce la crema delle uova senza appesantirla eccessivamente. A livello sensoriale, penserai a una morbidezza vellutata al centro, una texture leggermente elastica data dal legame delle uova, e una superficie che, se ben cotta, offre una piacevole croccantezza. L’assaggio è una piacevole armonia di sapori: la robustezza della carne contrasta con la dolcezza delle uova, mentre l’erbaceo delle erbe aromatiche sottili o del pepe nero graffia la lingua con una nota speziata. In bocca, il piatto si muove tra morbidezza e rotondità, lasciando una leggera sapidità che invita a fare il bis. L’equilibrio tra proteine, grassi e una nota croccante sulla superficie rende ogni boccone una piccola esplosione di soddisfazione, capace di alzare l’umore e di scaldare chiunque lo assaggi.

Occasions & Pairings

Questa casseruola è una compagna elegante per vari momenti della giornata e contesti sociali. Ecco alcune idee su quando proporla e con cosa abbinarla per massimizzare gusto e presentazione:

  • Brunch del weekend: accompagnala con una selezione di pane croccante, avocado, pomodori maturi e una spremuta fresca. Una spruzzata di erba cipollina o prezzemolo fresco aggiunge freschezza al piatto.
  • Colazione robusta: è ideale per chi ha bisogno di energia per una giornata attiva: aggiungi una semplice insalata di rucola e una fetta di pane rustico, magari con un filo di olio extravergine.
  • Cena in famiglia: serve a tavola direttamente dalla teglia, con contorni leggeri come verdure al vapore o una insalata verde semplice. Può essere anche l’elemento principale su una tavola dall’atmosfera conviviale.
  • Pranzi per amici: presentala tagliata a fette ordinate in una teglia rotonda, servita con una salsa allo yogurt o una salsa verde leggera per bilanciare la sapidità.
  • Quando hai poco tempo: se hai ospiti improvvisi, questa casseruola ti salva: si riutilizza facilmente, resta gustosa anche il giorno seguente e si può riscaldare senza perdere la sua consistenza cremosa.

Di cosa è fatta la casseruola uova e salsiccia: profilo di sapore

Non è necessario entrare nei dettagli di ogni ingrediente per apprezzarne la magia. In breve, il piatto va oltre la somma dei suoi pezzi: le note di uova e formaggio formano una base cremosa che accoglie la robustezza della salsiccia. Se si utilizza una salsiccia dal profilo speziato, permette al piatto di avere una spinta di gusto decisa; con una salsiccia artigianale delicata, il risultato è più neutro e orientato alla morbidezza. Le erbe aromatiche come il timo, il rosmarino o una spolverata di pepe nero aggiungono una dimensione profonda che risveglia i sensi senza coprire i sapori principali. Il formaggio, fuso e filante, è spesso la chiave che lega tutto insieme: una nota ricca che si scioglie, creando una cremosità vellutata che si spalma come una seconda pelle sulle uova. A seconda della scelta di formaggio, si possono ottenere note più dolci o più pungenti, ma l’armonia resta: una combinazione di cremosità, sapidità e una leggera croccantezza in superficie che invita a tagliare e servire. E se vuoi un tocco di colore, basta aggiungere una manciata di prezzemolo fresco o cipollotto tagliato finemente. L’equilibrio tra morbidezza e struttura è ciò che rende questa casseruola una scelta attraente sia per puristi che per chi cerca una piccola avventura culinaria senza allontanarsi da casa.

Tips, Varianti & Sostituzioni

La bellezza di questa casseruola è la sua adattabilità. Ecco alcune idee per personalizzarla, mantenendo la semplicità e la comodità:

  • Varianti proteiche: se vuoi una versione più leggera, sostituisci una parte della salsiccia con funghi saltati o con tofu sbriciolato speziato. Per una versione ricca, aggiungi pancetta croccante o prosciutto cotto tagliato fine.
  • Opzioni vegetariane: puoi creare una versione completamente vegetariana utilizzando polpette di soia o ceci, oppure funghi Portobello saltati, per una texture carnosa simile alla salsiccia.
  • Formaggi alternativi: provola, fontina, pecorino stagionato o parmigiano grattugiato danno profondità diverse. Per una versione più morbida, scegli formaggi che fondono bene; per una nota più intense, aggiungi una spolverata di pecorino in superficie.
  • Erbe e spezie: timo, rosmarino, dragoncello, pepe nero o peperoncino tritato fine possono cambiare notevolmente l’aroma del piatto. Sperimenta con scorze di limone per un tocco fresco.
  • Aromi in superficie: una leggera spolverata di pangrattato mescolato con olio e parmigiano crea una crosticina ancora più invitante.
  • Aglio e cipolla: aggiungi aglio soffritto o cipolla finemente tritata per un profilo aromatico più marcato, se ti piace.
  • Versioni senza glutine: se usi pangrattato, opta per una versione senza glutine o salta la crosticina croccante per mantenere una consistenza più cremosa.

Conservazione & idee make-ahead

Uno dei grandi vantaggi di questa casseruola è la sua capacità di agevolare i pasti futuri. Ecco alcune strategie utili per conservare gusto e consistenza:

  • Conservazione in frigorifero: una volta raffreddata, puoi coprirla e conservarla in frigorifero per 2–3 giorni. Per riscaldarla, copri la teglia e inforna a bassa temperatura o schizza con un filo di latte per mantenere la crema morbida.
  • Congelamento: la casseruola intera può resistere al congelatore, ma la consistenza delle uova potrebbe cambiare leggermente una volta scongelata. Tagliare in porzioni prima di congelare facilita le defruscite rapide.
  • Make-ahead: puoi preparare la base di uova e salsiccia in anticipo e trasferirla in una teglia. Inforna direttamente quando hai tempo, in modo da avere una cottura uniforme senza fretta.
  • Riscaldamento: per migliorare la texture, riscalda lentamente nel forno con una leggera spruzzata di latte o panna per ridonare morbidezza e cremosità. Evita il microonde per non compromettere la crosticina superficiale se ti piace quella texture.

Curiosità e trivia

Le casseruole simili hanno una ricca storia nelle tradizioni culinarie di molte culture. In alcune regioni italiane, la combinazione uova + carne era una pratica di cucina domestica per utilizzare avanzi in modo creativo durante i mesi freddi, trasformando rimanenze di salsiccia o formaggio in un piatto unico che scaldava corpo e spirito. L’arte di creare piatti in teglia, come questa casseruola, è stata tramandata di generazione in generazione, spesso accompagnata da storie di domeniche serene, tazze di caffè fumante e la gioia di condividere un pasto semplice ma appagante. Un fatto curioso è che, a volte, si aggiungeva una texture croccante sulla superficie con pangrattato o parmigiano, una decisione pratica che offriva contrasto e fascino visivo alla presentazione. Se ti va di portare un tocco storico al tuo piatto, puoi scavare tra le tradizioni locali per trovare piccole varianti di erbe, spezie o formaggio che hanno accompagnato piatti simili nelle cucine regionali italiane per secoli.

Ingredients

Casseruola Base

  • – 500 g Italian sausage, mild or hot, casings removed and crumbled
    → Role: forms the hearty, savory base of the casserole, providing rich flavor and fat for moisture. Preparation: crumble sausage and brown in a skillet until fully cooked; drain excess fat to avoid greasiness. Tip: choose flavorful sausage for depth.
  • – 6 large eggs
    → Role: binding and setting the casserole into a cohesive slice via a custard-like mixture when baked with dairy. Preparation: beat until well combined with the dairy; season lightly. Tip: use room-temperature eggs for smoother custard.
  • – 1 cup whole milk or heavy cream
    → Role: adds moisture and richness to the egg custard. Preparation: whisk into eggs; choose whole milk for lighter texture or cream for extra richness. Tip: for a creamier result, use a mix of milk and cream.
  • – 2 tablespoons extra-virgin olive oil
    → Role: used to sauté aromatics and prevent sticking; flavor base. Preparation: heat oil in skillet and cook onion, garlic, and pepper until softened; optional to brown sausage in the same pan. Tip: use EVOO for best flavor; avoid overheating.
  • – 1 medium onion, diced
    → Role: sweetness and depth; Preparation: sauté until translucent and lightly caramelized. Tip: salt the onion lightly to speed browning.
  • – 2 cloves garlic, minced
    → Role: aromatic backbone; Preparation: add with onions and cook just until fragrant; avoid browning to prevent bitterness. Tip: press or mince finely for even distribution.
  • – 1 red bell pepper, diced
    → Role: color, sweetness, texture; Preparation: sauté until softened. Tip: remove seeds and membranes for cleaner texture.
  • – 1 cup crushed tomatoes or passata
    → Role: provides moisture and a light sauce base. Preparation: stir into the sautéed vegetables or layer with eggs; Season lightly. Tip: for deeper flavor, simmer with aromatics first.
  • – 1 cup stale bread cubes (optional)
    → Role: adds structure and helps absorb custard, yielding a heartier texture. Preparation: use slightly dried bread; toast lightly if time allows; Tip: adjust quantity to desired density.

Aromi e Condimenti

  • – 1 teaspoon Italian seasoning or dried oregano
    → Role: builds a classic Italian herb profile to marry sausage, tomato, and cheese. Preparation: mix into the eggs or sauce. Tip: if using dried herbs, crumble well and let them hydrate in the hot mixture for a fuller flavor.
  • – Salt to taste
    → Role: essential seasoning. Preparation: season gradually; sausage adds salt, so taste before adding more. Tip: season eggs separately for evenness.
  • – Black pepper to taste
    → Role: enhances overall flavor with subtle heat. Preparation: grind fresh just before using. Tip: pair with a touch of red pepper flakes for warmth if desired.
  • – 1/4 teaspoon red pepper flakes (optional)
    → Role: adds gentle heat; Preparation: sprinkle into egg mixture or sauce. Tip: adjust to spice tolerance; omit for milder flavors.

Formaggi

  • – 1/2 cup grated Parmesan cheese
    → Role: delivers salty, nutty depth and helps create a lightly crisp top. Preparation: mix a portion into the egg mixture or reserve for topping. Tip: use real Parmigiano-Reggiano for best flavor.
  • – 1 cup shredded mozzarella cheese
    → Role: melts into a creamy, gooey layer. Preparation: fold some into the egg mixture and sprinkle the rest on top before baking. Tip: reserve a portion for a bubbly, golden crust; shred or cube for even melting.

Optional Add-ins

  • – 1 cup mushrooms, sliced (optional)
    → Role: adds earthy flavor and bite. Preparation: sauté separately until browned to drive off moisture, then fold into the mixture or layer with eggs. Tip: brown well to maximize flavor and avoid soggy texture.
  • – 2 cups fresh spinach, roughly chopped (optional)
    → Role: adds greens and color. Preparation: wilt quickly in a hot pan with a splash of oil, then squeeze out excess moisture before adding. Tip: removing moisture prevents a soggy bake.
  • – 1/2 cup ricotta cheese (optional)
    → Role: adds extra creaminess and lightness to the custard. Preparation: dollop into the mixture or whisk with eggs. Tip: if using ricotta, reduce other dairy slightly to avoid heaviness.

Garnish

  • – Fresh parsley, chopped for garnish (optional)
    → Role: adds bright color and aroma. Preparation: sprinkle on top after baking. Tip: chop finely and sprinkle just before serving for best effect.

Instructions

  • Preheat your oven to 350°F (175°C) and grease a 9×13-inch baking dish or a deep casserole dish with butter or oil.
    → This ensures the casserole bakes evenly and can be removed in clean, intact portions after baking.
  • Crumble the Italian sausage and cook it in a large skillet over medium heat until fully browned and no pink remains, about 6–8 minutes. Drain the rendered fat to prevent greasiness and to let the flavors concentrate.
    → Browning develops Maillard flavor, and draining fat prevents the custard from becoming greasy or heavy.
  • Add 2 tablespoons of extra-virgin olive oil to the same skillet and sauté the diced onion and red bell pepper until they are soft and lightly caramelized, 5–7 minutes. Stir occasionally to prevent sticking and promote even browning.
    → Sautéed aromatics release sweetness and depth; the peppers contribute color and texture to the casserole.
  • Add minced garlic to the pan and cook just until fragrant, about 30 seconds, then remove from direct heat to avoid browning the garlic and imparting bitterness.
    → Garlic burns easily; brief cooking brings aroma without bitterness, integrating into the base.
  • → A short simmer concentrates the sauce base, enriching the custard with subtle tomato sweetness.
  • If you choose to use stale bread cubes, toast them lightly in a dry skillet until they feel dry to the touch and slightly golden, which helps them absorb custard without turning soggy.
    → Toasting improves structure and prevents the bread from turning mushy during baking.
  • In a large mixing bowl, whisk the 6 eggs with 1 cup of whole milk or heavy cream until the mixture is homogeneous and slightly foamy, then season with a pinch of salt, a crack of black pepper, and the optional red pepper flakes for warmth.
    → Fully whisked eggs ensure an even custard; dairy choice affects richness and texture.
  • Stir in 1/2 cup grated Parmesan and fold in 1/2 cup shredded mozzarella into the egg mixture, reserving the remaining mozzarella to sprinkle on top, so the dish finishes with a gooey, golden crust.
    → Cheese in the base enriches the custard; reserving some for the top creates an appealing crust.
  • Pour the egg mixture over the sausage-vegetable base and fold in the bread cubes if using, ensuring all components are evenly coated and distributed throughout the pan.
    → Even distribution prevents dense pockets and guarantees every slice has balanced flavor and texture.
  • If using optional add-ins, wilt the spinach in a hot, lightly oiled pan and squeeze out excess moisture; or sauté mushrooms until browned to deepen flavor, then fold or layer them evenly into the mixture.
    → Removing moisture from spinach prevents sogginess, while browned mushrooms add savory notes and texture.
  • Transfer the mixture to the prepared baking dish, spreading it into an even layer for uniform cooking.
    → A level surface ensures the custard sets evenly from edge to center.
  • Top the casserole with the remaining mozzarella and Parmesan cheese, finishing with a light drizzle of olive oil if desired for a glossy, golden crust.
    → The top cheese creates a bubbly, caramelized crust, while olive oil adds shine and helps browning.
  • Bake in the preheated oven for 35–40 minutes, or until the custard is set in the center and the top is lightly golden and puffed; if the center still trembles slightly, give it a few more minutes but avoid overcooking.
    → A gently set center ensures creamy texture without curdling; the top browning indicates proper moisture evaporation and flavor development.
  • Remove from the oven and let the casserole rest for 5–10 minutes before slicing to allow the custard to finish setting and for cleaner portions.
    → Resting stabilizes the structure, making slices neat and preventing ooze when serving.
  • Garnish with chopped fresh parsley just before serving to add bright aroma and color; portion the casserole into squares or wedges for an appealing presentation.
    → Fresh herbs elevate aroma and presentation, offering a clean contrast to the rich filling.
  • Serve the casserole warm as a hearty breakfast, brunch, or dinner; refrigerate any leftovers and reheat gently to preserve moisture and texture.
    → Proper storage maintains freshness and prevents the custard from drying out during reheating.

Notes

These sausage and egg casserole notes guide you through a hearty Italian-inspired bake of crumbled sausage, eggs, dairy, and cheese. Brown the sausage well and drain excess fat to keep the casserole from greasiness, and sauté onion, garlic, and red pepper until softened for the flavor foundation. Whisk eggs with milk or cream until smooth, then fold in crushed tomatoes and cheese to create a rich custard with a light sauce base. For best texture, use room-temperature eggs and, if desired, a mix of milk and cream for extra richness. Season gradually with Italian seasoning or oregano, salt (sausage will season the mix), and black pepper; add red pepper flakes for a gentle heat if you like. Optional add-ins like mushrooms, spinach, or ricotta can boost creaminess and color; distribute them evenly so every slice gets flavor. The optional bread cubes add structure and soak up custard, but omit or substitute with gluten-free bread if needed. Top with Parmesan and mozzarella to create a gratin-like finish and bake until just set and lightly golden; rest before slicing for clean cuts. This dish stores well in the fridge for several days and freezes well in portions for quick meals; reheat gently to maintain moisture. Serve with a simple green salad or a side of crusty bread (or gluten-free bread) and a sprinkle of fresh parsley.

Tips

Consigli utili per la Casseruola Uova e Salsiccia

  • Rosolare la salsiccia in una padella ampia fino a doratura e cottura completa; lasciare asciugare l’eccesso di grasso per evitare una casseruola troppo grassa. Se vuoi un sapore più intenso, sfuma con un cucchiaio di vino bianco prima di terminare la cottura.
  • Lasciare le uova a temperatura ambiente prima di sbicciarle per ottenere una crema più liscia e uniforme durante la cottura. Sbattere bene le uova fino a ottenere una consistenza omogenea senza bolle d’aria.
  • Per una casseruola più morbida e cremosa, usa una miscela di latte intero e panna (crema) in modo proporzionale; evita di aggiungere troppa crema se preferisci una texture meno ricca.
  • Cuocere cipolla e peperoni in olio extravergine d’oliva finché non sono teneri e leggermente caramellati; questo aggiunge dolcezza e profondità al sapore complessivo.
  • Quando aggiungi l’aglio, fallo soltanto nel finale della rosolatura delle cipolle per evitare l’amaro del sapore bruciato dell’aglio.
  • Rimuovere i semi e le membrane dalla paprika rossa per evitare note troppo amare o ruvidi in bocca; taglio uniforme per una cottura omogenea.
  • Se usi passata di pomodoro, lasciala sobbollire con aromi per 5–10 minuti prima di unirla al mix di uova per intensificare il sapore e ridurre l’acidità.
  • Il pane raffermo serve a dare struttura: tampona con latte leggero se necessario prima di incorporarlo per evitare che assorba troppa umidità dall’uovo.
  • Condimenti secchi come l’origano o una miscela italiana si reidratano meglio se aggiunti direttamente alle uova e mescolati bene; lasciano sprigionare aromi più completi se lasciati in infusione qualche minuto.
  • Poiché la salsiccia può essere già salata, aggiungi il sale gradualmente e assaggia la miscela prima di salare nuovamente per evitare una casseruola troppo salata.
  • Piperina e pepe nero vanno aggiunti al momento dell’assemblaggio per mantenere l’aroma; se gradisci un tocco di piccante, aggiungi fiocchi di peperoncino rosso a piacere.
  • Taglia e distribuisci uniformemente i formaggi: una parte nel mix di uova e una parte sulla superficie permette una doratura croccante e una cuocitura uniforme.
  • Per aggiungere funghi o spinaci, scottali separatamente per far evaporare l’umidità in eccesso; l’eccesso di liquido potrebbe rendere la casseruola liquida.
  • Se preferisci una consistenza più soffice, incorpora piccoli fiocchi di ricotta direttamente nel composto o usane come strato tra i piani di ingrediente.
  • Lasciare riposare la casseruola 10 minuti dopo la cottura facilita il taglio in fette perfette e migliora la tenuta della struttura custard.
  • Per una crosta dorata più invitante, termina la cottura a una breve blast sotto il grill (grill/ventilato) a potenza moderata per 2–4 minuti, controllando attentamente per non bruciare.
  • Preparalo in anticipo: assemblare e conservare in frigorifero fino a 24 ore prima; estrarre dal frigorifero almeno 20–30 minuti prima di infornare per una cottura più uniforme.
  • Conservazione: una casseruola cotta resta buona in frigorifero 3–4 giorni; può essere congelata a porzioni singole se ben raffreddata e sigillata; scongelare in frigorifero e riscaldare delicatamente.
  • Servila con un contorno semplice come rucola o insalata mista per bilanciare la ricchezza; una fetta di pane croccante completa l’esecuzione.

FAQ

Cos’è la casseruola uova e salsiccia?

È un piatto al forno a base di uova, salsiccia, patate e formaggio, cotto finché le uova si rapprendono e la superficie diventa dorata.

Quali sono gli ingredienti base?

Ingredienti base: salsiccia (circa 300–350 g), uova (6), patate (2 medie tagliate a cubetti o sottili), cipolla (1 piccola), aglio (1 spicchio), latte o panna (120–150 ml), formaggio grattugiato (80–100 g), olio o burro per ungere la teglia, sale, pepe, erbe aromatiche a piacere (prezzemolo, timo).

Posso usare salsiccia dolce o piccante?

Sì. Puoi scegliere dolce o piccante a seconda dei tuoi gusti. Per una versione vegetariana, sostituisci con salsiccia vegetale o funghi saltati.

Come si prepara passo-passo?

Procedimento: preriscalda il forno a 180°C. Rosola la salsiccia sbriciolata con cipolla e aglio 5–7 minuti. In una ciotola, sbatti le uova con latte/panna, sale, pepe e formaggio. In una teglia imburrata, alterna strati di patate, salsiccia e cipolla, versa la miscela di uova e completa con formaggio. Cuoci 40–50 minuti finché le uova si rapprendono e la superficie è dorata. lasciare riposare 5–10 minuti prima di servire.

Qual è la temperatura e il tempo di cottura?

Cuoci in forno preriscaldato a 180°C per circa 40–50 minuti, finché la superficie è dorata e le uova sono ferme. Se usi patate molto sottili o precotte, i tempi possono leggermente variare.

Posso prepararla in anticipo?

Sì. Puoi assemblare e conservare in frigorifero fino a 24 ore prima, poi infornarla. In alternativa, cuoci e riscalda al momento di servire. Per riscaldarla, copri e riscalda in forno a bassa temperatura finché ben caldo.

Posso congelarla?

Si può congelare una casseruola cotta in porzioni. Lascia raffreddare, taglia e congela in contenitori ermetici o sacchetti. Per riutilizzare, scongelare in frigorifero e riscaldare fino a 74°C (165°F).

Quali varianti di gusto posso provare?

Aggiungi peperoni, funghi, spinaci o cavolfiore. Puoi variare i formaggi ( cheddar, Gouda, fontina) e usare patate dolci in parte. Una spolverata di paprika affumicata dona un tocco saporito.

Quante porzioni rende?

Con le quantità indicate, ottieni circa 4–6 porzioni, a seconda delle dimensioni della teglia e dell’assunzione dei commensali.

Come servire al meglio?

Lasciare riposare 5–10 minuti, poi tagliare a fette. Servi con contorni leggeri come insalata verde o pane fresco. Puoi aggiungere salsa piccante o una vinaigetta a lato.

Quali accorgimenti per una consistenza cremosa?

Usa una giusta proporzione di uova e latte/panna, non cuocere troppo a lungo per evitare che le uova diventino secche, e lascia riposare prima di servire. Se preferisci, aggiungi un po’ di formaggio extra nell’ultimo minuto di cottura per maggiore cremosità.

Introduzione / Gancio

Immagina una fetta che illumina una tavola: una crema vellutata che scende dal cucchiaio come una nuvola soffice, aromi di limone che danzano con una vibrante freschezza di lamponi, e una crosta che morde leggermente, rivelando una dolce nota di biscotto tostato. Il Cheesecake ai lamponi e limone è quel tipo di dessert che entra in scena con una semplicità elegante: non ha bisogno di complicazioni per conquistare il palato. Ogni morso è una sinfonia di contrasti: la ricchezza cremosa contro l’acidità brillante del limone, la dolcezza dei lamponi maturi contro la leggera acidità dell’aroma agrumato, e una texture che gioca tra setoso, morbido e leggermente croccante. È un viaggio sensoriale che inizia al profumo della scorza di limone grattugiata e termina in una tasting note che persiste sul palato come un ricordo felice di una giornata di sole. Questo dessert è pensato per essere condiviso: una fetta per celebrare un momento speciale, una chiacchiera tra amici, una cena di famiglia, o un momento di dolce pausa che si merita di essere ricordato. Ma c’è molto di più dietro questa torta fredda: una storia di bilanciamento perfetto tra crema e frutta, tra tradizione e piccole innovazioni moderne, tra la semplicità quotidiana e l’eleganza di una presentazione che sembra preparata da una pasticceria, ma che in realtà è relativamente semplice da realizzare a casa. Se stai cercando una torta che si presenti con grande impatto ma che resti accessibile ai fornelli domestici, questo è il dessert che fa per te. Lasciati guidare dall’aroma di limone, dalla brillantezza dei lamponi, dalla cremosità che avvolge il palato e dalla soddisfazione di aver creato qualcosa di sontuoso con ingredienti familiari. Benvenuto nel mondo del cheesecake ai lamponi e limone: una dichiarazione di gusto, colore e gioia in una fetta che merita di essere celebrata ogni volta che vuoi regalare a te e ai tuoi cari un momento di dolcezza autentica.

La storia dietro il piatto

Il cheesecake è una leggendaria protagonista della tavola di molte culture, una torta che ha viaggiato attraverso secoli e continenti, assumendo forme diverse ma restando fedele all’idea di un cuore cremoso incorniciato da una base croccante. Le origini si perdono nell’antichità, quando civiltà mediterranee e bizantine preparavano dessert a base di formaggio dolce e miele, offrendo una prima idea di quel che sarebbe diventato un classico del passato e del presente. Nel corso dei secoli, la torta si è evoluta, prendendo nuove identità a seconda dei luoghi: una versione più leggera e cremosa in alcune tradizioni, una base più friabile e una presentazione più elegante in altre. Il cheesecake ai lamponi e limone, pur rimanendo fedele all’idea di una crema vellutata sostenuta da una base che aggiunge croccantezza, rappresenta un felice incrocio tra la tradizione europea della freschezza agrumata e la modernità di una presentazione che invita al relax e al festeggiamento.

In molte cucine familiari, questa torta fredda è nata come risposta a due elementi: la voglia di un dessert che si possa preparare con anticipo senza rinunciare al richiamo di frutta fresca di stagione, e l’illuminazione di una tavola con colori vivaci e profumi invitanti. È comune sentire racconti di nonne e madri che, nei mesi di primavera e inizio estate, abbinano lamponi freschi a una crema delicata al formaggio, completando con una candida terrazza di scorza di limone grattugiata. In alcuni paesi, la tradizione della torta fredda al formaggio viene celebrata durante le festività e le occasioni speciali, dove un taglio netto rivela la stratificazione perfetta tra la base, la crema e la guarnizione di frutti di bosco. Oggi, con l’abbondanza di lamponi di stagione e la nota rassicurante del limone, questa versione diventa un omaggio contemporaneo a quella storia, capace di raccontare, in una sola fetta, una genealogia di sapori: la dolcezza cremosa, la brillante vivacità agrumata e la freschezza di piccoli frutti che sembrano appena colti.

Proprio come una passeggiata tra un mercato di primavera e una cucina accogliente, questa torta celebra l’arte di mettere insieme ingredienti semplici per creare qualcosa di memorabile. La narrazione del piatto è un invito a scoprire come la cucina possa trasformare ricordi familiari in nuove tradizioni: la stessa ricetta può essere trasmessa come una carezza tra generazioni, con piccoli aggiustamenti che riflettono i gusti del momento, le stagioni e le preferenze personali. Se hai mai assaporato una fetta che esplode di freschezza al primo morso e lascia sul palato una nota cremosa che continua a evolvere, allora sai di cosa parliamo: una cucina che racconta storie, una tavola che unisce persone, un dessert che diventa protagonista senza aver bisogno di ostentazioni.

Perché vorrai amare questa ricetta

  • Equilibrio perfetto tra crema e frutti di bosco: ogni fetta offre una crema setosa che si contrappone alla brillantezza acidula dei lamponi e al profumo luminoso del limone.
  • Fresco ma confortante: l’insieme è leggero anche quando è ricco di sapore, ideale per chi cerca una nota golosa senza appesantirsi.
  • Versatile e adatto a molte occasioni: perfetto per brunch, fine pasto, occasioni speciali o come dolce di domenica da condividere in famiglia.
  • Facile da realizzare in anticipo: la torta fredda può rassodarsi in frigorifero, permettendoti di dedicarci tempo agli ospiti piuttosto che al fornello.
  • Esteticamente irresistibile: la combinazione di crema lucida, lamponi vividi e una leggera scorza di limone crea una presentazione elegante ad ogni tavola.
  • Adatta a molte diete con piccole varianti: è possibile adattarla a versioni senza glutine o vegane senza compromettere troppo sapore e consistenza.
  • Profumo che accende la memoria: l’aroma di limone e lamponi rilascia sensazioni familiari che portano a ricordi di giorni di festa, pranzi di famiglia e momenti di dolcezza condivisa.

Profilo di sapore & texture

La prima cosa che colpisce è l’equilibrio: una base che offre una croccantezza leggera, quasi croccante ma non secca, che sostiene una crema cremosa, liscia e avvolgente. La crema al formaggio è soffice ma strutturata, con una dolcezza subdola che non mette mai in ombra la nota agrumata. Il limone gioca un ruolo chiave: la scorza grattugiata rilascia una fragranza fresca e brillante, e la crema stessa può avere una lieve acidità che equilibra la ricchezza, creando una sinfonia di gusto che si rinnova ad ogni morso. I lamponi, maturi e rossi, aggiungono una punta di acidità naturalmente succosa e una gemma di colore che porta verticalità al piatto. Quando la torta viene tagliata, l’assemblaggio si vede chiaramente: una base che tiene, una crema che accoglie, e una guarnizione di lamponi che luccica come piccoli rubini. Il profumo è una promessa: c’è vaniglia o crema di formaggio che si sprigiona al primo morso, una nota di burro o burro di noce nella base che è percepibile senza essere dominante, e una leggera freschezza di limone che resta a lungo sulla lingua. La texture è modulata: croccantezza iniziale, setosità in bocca, una leggera morbidità legata alle guarnizioni di frutta. È una torta che invita a rallentare, a respirare, a gustare ogni dettaglio di sapore e di presentazione. Ogni ingrediente ricorda che l’arte della pasticceria non è solo nel gusto, ma anche nel modo in cui si percepisce, si guarda e si condivide.

Occasioni & abbinamenti

Cheesecake ai lamponi e limone è una star pronta a brillare in molte occasioni. È perfetta per:

  • Pranzi e cene di primavera: termina il pasto con una nota fresca e leggera.
  • Compleanni e celebrazioni: una torta dall’aspetto raffinato che non richiede decorazioni complicate.
  • Brunch domenicali: un dessert che si adatta bene a una varietà di bevande, dal caffè al tè freddo agli agrumi spruzzi di prosecco.
  • Dolce finale per una serata romantica: una fetta condivisa accompagnata da una bollicina leggera.
  • Dolci pensieri per amici e familiari: facile da trasportare se vuoi portarla a una pranzo fuori casa.

Abbinamenti consigliati:

  • Bevande: Prosecco o Moscato d’Asti per una dolce effervescenza, tè verde freddo con scorza di limone, una limonata fresca o un caffè espresso per chi preferisce intensità scorza-agrume.
  • Contorni: una leggera granita di limone, una spolverata di scorza di limone extra sul piatto, e un piccolo letto di menta fresca per esaltare la freschezza.
  • Contorni dolci: biscotti di mandorla o amaretti leggeri, che aggiungono un croccante complementare senza sovrapporsi al sapore principale.

Tips, Varianti & Sostituzioni

Consigli utili

Per ottenere una presentazione impeccabile e una consistenza stabile, prediligi una crema liscia e una base ben pressata. Evita eccessi di liquido che potrebbero compromettere la compattezza della torta fredda. Se la crema dovesse risultare troppo morbida, una breve passeggiata in frigorifero può fare miracoli per rassodarla senza perdere l’elasticità. Scegli lamponi belli maturi per garantire sia sapore che Jalapeño di colore nella guarnizione, che dà subito un effetto visivo invitante. Inoltre, la scorza di limone fresca è essenziale: non affidarti all’estratto di limone se vuoi un profumo autentico e una nota zingente che non si dissolve durante il raffreddamento.

Varianti creative

  • Versione vegana: crema di formaggio vegetale sostituita da una crema al formaggio a base di anacardi o anacardi ammollati lavorati con latte di mandorla e un pizzico di agar-agar per rassodare, con una guarnizione di lamponi freschi e scorza di limone.
  • Gluten-free: usa una base a base di biscotti senza glutine o una miscela di noci tritate e burro per mantenere la croccantezza senza glutine.
  • Intensità di limone: se ami una nota agrumata più accentuata, aggiungi una piccola quantità di succo di limone extra o una punta di zest nei fini della crema, senza esagerare per non rompere l’equilibrio.
  • Cuore rosso: una decorazione con lamponi freschi in disposizione a fiore o a ventaglio crea un impatto visivo ancora maggiore.
  • Versione all’arancia: sostituisci parte della scorza di limone con scorza d’arancia per un profilo aromatico diverso ma altrettanto vibrante.

Sostituzioni comuni

  • Formaggio cremoso: se desideri una versione meno ricca, usa una parte di formaggio cremoso e una parte di ricotta più magra, mantenendo la consistenza vellutata.
  • Dolcificanti: lo zucchero può essere sostituito con miele leggero o sciroppo d’agave per una nota diversa di dolcezza; ricorda che l’acidità del limone equilibria bene con qualsiasi dolcificante.
  • Frutti alternativi: se non trovi lamponi, puoi usare more, mirtilli o fragole a pezzi, mantenendo l’idea di combinare crema neutra e frutta fresca.

Conservazione & Idee per preparazioni in anticipo

La bellezza di questa torta fredda è la facilità con cui può essere preparata in anticipo. Una volta assemblata, lascia rassodare in frigorifero per almeno 4 ore; per risultati ottimali, preferisci una notte intera. Se hai intenzione di servirla come dessert di una cena, preparala la mattina stessa e lasciala riposare fino al momento di servire: le note di limone si intensificheranno e la crema guadagnerà in compattezza. Puoi anche congelare la torta una volta rassodata: avvolgila bene in pellicola e mettila in un contenitore adatto al congelamento. Per scongelarla, trasferiscila in frigorifero per una notte e lasciala raggiungere la temperatura ambiente per 15-20 minuti prima di gustarla. Sewing tips: evita l’eccesso di liquidi durante la composizione per preservare la texture, soprattutto se hai intenzione di congelare; una base ben pressata e una crema densa faranno la differenza nel mantenere la forma quando è tagliata e servita.

Fatti divertenti & Trivia (Opzionale)

  • Il cheesecake, in molte culture, non è un dessert esclusivo di una stagione: esistono versioni fredde o cotte, con varie basi e ripieni, che raccontano storie di tradizioni familiari in ogni angolo del mondo.
  • La parola “cheesecake” ha origini curioshe: in alcune lingue si riferisce a una torta che miscela formaggio, zucchero e altri ingredienti in una crema leggera, una definizione che si è evoluta nel tempo in diverse culture culinarie.
  • La combinazione di limone e lamponi è una classica in pasticceria: l’acidità del limone bilancia la dolcezza dei lamponi, creando una dinamica di sapori che è molto amata nei dessert estivi e primaverili.

Conclusione

Il Cheesecake ai lamponi e limone è molto più di una torta: è un piccolo viaggio sensoriale che racchiude storia, tradizione e una modernità raffinata. È una ricetta che porta la gioia della stagione fresca in tavola, offrendo un equilibrio di sapori che conquista sia chi cerca una dolcezza indulgente sia chi preferisce una nota di freschezza. Quando prepari questa torta, hai l’opportunità di raccontare una piccola storia di cucina casalinga: quella di una crema che abbraccia il formaggio, di una scorza di limone che brilla come una citazione di allegria, e di lamponi freschi che aggiungono colore e vivacità. Lascia che la tua tavola si trasformi in un luogo di conversazioni, risate e momenti condivisi con un dessert che sembra una presentazione da ristorante ma è, in fondo, la tua creazione calorosa e sincera. E quando una fetta arriva al piatto di chi ami, saprai di aver creato qualcosa che resta: non solo un gusto memorabile, ma anche un ricordo che tornerà a brillare ogni volta che sentirai l’eco di una scorza di limone o il profumo dei lamponi freschi.

Ingredients

Cheesecake ai lamponi e limone

Crust

    – 1 3/4 cups graham cracker crumbs (or digestive biscuits, gluten-free if needed)
    → This crust forms the sweet, crisp base that supports the creamy filling. Use a processor to crush until very fine, or place crackers in a sealable bag and crush with a rolling pin for uniform crumbs. If you’re using gluten-free crackers, choose a brand with a fine texture and minimal added sugar. Mix the crumbs with 2 tablespoons granulated sugar and a pinch of fine salt, then stir in 6 tablespoons melted unsalted butter until the mixture clumps when pressed. Press evenly into the bottom (and a little up the sides) of a 9-inch springform pan. Chill 15–20 minutes before baking, or bake 8–10 minutes at 350°F (175°C) to set the crust for a firmer edge.
    – 2 tablespoons granulated sugar
    → Sweetens the crust and helps balance the tang from the filling. Mix thoroughly with the crumbs so every bite has a pleasant, even sweetness. If your crackers are lightly salted, you can reduce or omit this amount to taste.
    – 6 tablespoons unsalted butter, melted
    → The melted butter binds the crust into a cohesive shell that holds its shape during the bake. Ensure the butter is fully melted and evenly blended with the crumbs; a slightly cooler butter mixture will press more firmly into the pan. If you prefer a lighter crust, you can reduce the butter by a tablespoon or two and add a splash of water.
    – Pinch of fine sea salt (optional)
    → Enhances the flavor balance of the crust, especially if using salted crackers. If your crackers are salted, omit this to prevent over-salting.

Filling

    – 24 oz (680 g) cream cheese, softened to room temperature
    → The creamy, tangy backbone of the cheesecake. Use blocks of full-fat cream cheese (not spreadable tubs) for the best texture. Beat on medium speed until completely smooth and free of lumps, stopping to scrape the bowl as needed. If there are lumps, continue to mix gently; overmixing after eggs are added can incorporate air and lead to cracks as the cake bakes.
    – 1 cup granulated sugar
    → Sweetens the filling and helps achieve a smooth, silky texture when beaten with the cream cheese. Add the sugar gradually, beating steadily to avoid gritty pockets. If you prefer a less sweet cheesecake, you can reduce to 3/4 cup, but do not omit entirely unless you adjust other flavors accordingly.
    – 3 large eggs, room temperature
    → Provide structure and richness. Add eggs one at a time, blending just until incorporated after each addition. Overbeating after the eggs are added can trap air and cause cracks; keep the mixer on a low speed or fold with a spatula to maintain a dense, creamy batter.
    – 1/2 cup sour cream, room temperature
    → Adds tang and extra moisture for a luxuriously creamy texture. Use full-fat sour cream for best results. If you don’t have sour cream, a thick Greek yogurt can be substituted, but stir gently to avoid thinning the batter.
    – 1 tablespoon lemon zest, finely grated
    → Infuses a bright, lemony aroma that complements the raspberry and cream cheese. Avoid grating the white pith by only using the yellow zest. The zest helps balance richness with refreshing citrus notes that linger after baking.
    – 2 tablespoons fresh lemon juice
    → Adds a clean citrus kick that keeps the filling from tasting too heavy. Use freshly squeezed juice and strain out any seeds if possible. The acidity also helps set the filling slightly for a smoother slice.
    – 1 teaspoon vanilla extract
    → Deepens and rounds the flavor of the cheesecake. Use high-quality vanilla; pure vanilla extract gives a warmer, more complex aroma than imitation vanilla.
    – 1/4 cup heavy cream (optional)
    → Optional to loosen the batter slightly and enhance silkiness. If the mixture feels thick, whisk in the cream a little at a time until it flows slowly off a spoon. This can help prevent a dense texture after chilling.

Raspberry swirl

    – 1 cup fresh raspberries
    → The star of the swirl, providing bright color and tart sweetness. Gently crush the berries with a fork to release juice while leaving some larger ruby chunks for texture. This berry ribbon will weave through the cheesecake as it bakes, creating attractive marbling rather than a muddy mix.
    – 2 tablespoons granulated sugar
    → Macerates the raspberries to draw out juice and soften seeds, yielding a glossy, flavorful swirl. Let the raspberries sit with the sugar for about 10 minutes before dolloping into the batter. If berries are very ripe and sweet, you can reduce the sugar slightly.

Optional garnish

    – Fresh raspberries for serving (optional)
    → Add a bright, edible finish to the slice. Arrange a few whole raspberries on top just before serving for color contrast and a fresh aroma. Keep berries dry and gently dried to avoid extra moisture seeping into the surface of the cheesecake.

Instructions

  • Preheat your oven to 350°F (175°C) and prepare a 9-inch springform pan by greasing the sides generously and lining the bottom with parchment for easy release.
    → This ensures the cheesecake releases cleanly and prevents sticking, especially when slicing after chilling.
  • Prepare the crust by crushing 1 3/4 cups graham cracker crumbs until very fine, then whisk in 2 tablespoons granulated sugar and a pinch of fine sea salt; stir in 6 tablespoons melted unsalted butter until the mixture clumps when pressed. Press evenly into the bottom and slightly up the sides of the pan, then chill 15–20 minutes to set; or bake for 8–10 minutes at 350°F (175°C) to pre-set the edge for a firmer crust.
    → A finely crushed crust ensures uniform texture, while chilling or brief par-baking prevents the crust from crumbling once the filling is added.
  • Beat the softened cream cheese (24 oz) on medium speed until completely smooth and free of lumps, scraping the bowl as needed.
    → Smooth cream cheese creates a silky filling; stopping to scrape avoids lumps that can endure into the finished cheesecake.
  • With the mixer running on low, gradually add 1 cup granulated sugar and beat until fully incorporated and light in texture.
    → Gradual incorporation prevents gritty pockets and ensures a uniformly sweet filling without overbeating.
  • Add the eggs one at a time, beating on low speed after each addition until just incorporated; stop as soon as the last egg is blended to avoid overmixing and air incorporation that can cause cracks.
    → Gentle mixing preserves dense, creamy texture and minimizes cracks during baking.
  • Beat in 1/2 cup sour cream, 1 tablespoon lemon zest, 2 tablespoons lemon juice, and 1 teaspoon vanilla extract until the mixture is smooth and uniform.
    → Sour cream adds tang and moisture; lemon zest and juice brighten the flavor, while vanilla deepens aroma; mix just until combined to maintain silkiness.
  • If using, fold in 1/4 cup heavy cream to loosen the batter slightly and enhance silkiness, adding it in small increments until the batter flows slowly off a spatula.
    → The optional cream lightens the texture; add gradually to control thickness and avoid thinning the filling too much.
  • Mash 1 cup fresh raspberries with 2 tablespoons granulated sugar in a small bowl and let macerate for 10 minutes to release juice and soften seeds.
    → Maceration draws out flavor and creates a glossy swirl; some texture remains for visual interest.
  • Pour the cream cheese filling over the prepared crust, then dollop the raspberry mixture in several spoonfuls over the surface and use a skewer or knife to swirl gently to create marbled ribbons.
    → Swirling distributes raspberry flavor throughout the cheesecake and yields an attractive appearance without muddying the batter.
  • Bake the cheesecake in a water bath: place the springform pan in a larger roasting dish, pour hot water around the outside to come halfway up the sides, and bake at 325°F (165°C) for 55–65 minutes, or until the edges are set and the center still gently wobbles.
    → The water bath provides uniform heat and humidity, preventing cracks and helping the center set evenly without overcooking.
  • Cool the cheesecake gradually: remove from the water bath, run a knife around the edge to loosen, and let it come to room temperature on a rack for about 1 hour; then refrigerate uncovered for at least 4 hours or overnight to fully set before slicing.
    → Slow cooling minimizes cracks and ensures the filling firms evenly for clean slices, while overnight chilling gives the best slice quality.
  • To serve, unmold the cheesecake by loosening the sides of the springform pan, slice with a warm knife wiped between cuts for clean edges, and garnish with fresh raspberries if desired.
    → A warmed knife prevents sticking and yields neat slices; fresh raspberries add color, aroma, and a bright contrast to the lemon-raspberry filling.

Notes

“These lemon raspberry cheesecake with a graham cracker crust is rich, creamy, and bright with lemon and raspberry swirls. You can customize it by using gluten-free crackers for the crust or by adding extra lemon zest to intensify the citrus note. The cake can be prepared ahead: bake the crust, blend the filling, swirl in raspberries, and chill until set. It freezes well in individual slices or whole cake portions for easy make-ahead desserts. For best texture and to prevent cracks, bake the cheesecake in a water bath and chill for at least 4 hours or overnight before slicing. Serve with fresh raspberries, a dollop of whipped cream, or a light berry coulis. Always use full-fat cream cheese and sour cream at room temperature to ensure a smooth, lump-free filling, and avoid overmixing once eggs are added. If you want a lighter crust, decrease butter a bit and press firmly; and ensure the crust is fully cooled before filling.”

Tips

Consigli utili per la base (crust)

  • Per una base croccante e uniforme, macina bene i biscotti fino a ottenere briciole fini. Se usi cracker senza glutine, scegli una marca dalla texture fine e con poco zucchero aggiunto.
  • Aggiungi 2 cucchiai di zucchero al mix di briciole, se i crackers sono poco dolci, per equilibrare il sapore della cheesecake.
  • Fondi il burro finché è completamente liquido e mescalo bene con le briciole finché non formano una massa leggermente umida e compatta.
  • Premi la base in modo omogeneo sul fondo e leggermente lungo i bordi del fondo dello stampo a ribes da 9 pollici. Usa il dorso di un cucchiaio o un fondo piatto per compattare bene.
  • Per una base più salda, metti lo stampo in frigo 15–20 minuti prima di infornare. Se preferisci una base ancora più croccante, inforna 8–10 minuti a 175°C (350°F) prima di aggiungere il ripieno.
  • Se vuoi una versione senza glutine, assicurati che i biscotti siano macinati molto fini e che non ci siano grumi di farina grossolana.
  • Tip per una base “no-bake”: aumenta leggermente la quantità di burro e pressa bene la base; raffredda in frigo per almeno 30 minuti prima di aggiungere il ripieno.

Consigli utili per il ripieno

  • Usa formaggio cremoso a temperatura ambiente, tagliato a blocchi, per una crema liscia e senza grumi. Evita di utilizzare formaggi già morbidi in vasetto se non specificatamente consigliato.
  • Aggiungi lo zucchero a poco a poco, lavorando a velocità media, per ottenere una crema vellutata senza grumi. Se la crema risulta leggermente granulosa, raschia i bordi della ciotola e continua a mescolare a bassa velocità.
  • Inserisci le uova una alla volta, amalgamando delicatamente dopo ogni aggiunta. Lavorare a bassa velocità evita di incorporare aria in eccesso che può causare crepe durante la cottura.
  • La panna acida (sour cream) apporta umidità e morbidezza. Se non la hai, puoi sostituire con yogurt greco denso, mescolando con cura per non rendere troppo liquida la crema.
  • La scorza di limone e il succo alzano la freschezza e bilanciano la ricchezza del formaggio. Usane solo la parte gialla (zeste) evitando la parte bianca amara. Filtra il succo per rimuovere eventuali semi.
  • Utilizza una vanilla extract di buona qualità per un aroma più profondo e rotondo. Se usi essenze, pochissime gocce bastano.
  • Se vuoi una consistenza più cremosa, aggiungi 1/4 di tazza di panna fresca o latte intero alternando con il formaggio durante l’impasto. Usa tucca il cucchiaio per controllare la densità.
  • Per evitare il raffreddamento troppo brusco e lesioni alla crema, puoi presentare la cottura in modalità “water bath” (bagno maria). Avvolgi lo stampo in doppie foglie di alluminio per sigillare e traversa una teglia maggiore con acqua calda che arrivi a metà altezza dello stampo.
  • Cuoci finché il centro è appena tremolante al movimento, ma non liquido. Il centro continuerà a rassodarsi mentre si raffredda fuori dal forno.
  • Una volta tolto dal forno, spegni il forno e lascia la torta dentro con lo sportello socchiuso per circa 1 ora per evitare crepe da sbalzo termico, poi trasferisci in frigorifero per almeno 4 ore (meglio tutta la notte).

Consigli utili per la swirl ai lamponi

  • Usa lamponi freschi per un sapore vivace e una colorazione brillante. Se i lamponi sono molto maturi, aggiungi un filo d’acqua per aiutare la macerazione senza rendere liquido troppo.
  • Macerare i lamponi con lo zucchero (10 minuti circa) estrae il succo e ammorbidisce i semini, ottenendo una glassa lucida; lascia riposare qualche minuto e poi scolali leggermente per avere una marmellata non troppo liquida.
  • Per una swirl più definita, versa piccoli fiocchi di lamponi sulla crema già stesa e lascia che la spatola o una punta di coltello creino il motivo a marmorizzazione, evitando di mescolare troppo per non spezzare la base.
  • Se i lamponi sono molto maturi o molto liquidi, asciugali leggermente con carta assorbente prima di aggiungerli al composto, per evitare troppa umidità che possa compromettere la consistenza del ripieno.
  • In alternativa alle lamponi freschi, puoi usare lamponi surgelati ben scongelati e scolati. Risulta utile in tutti i periodi dell’anno e permette una tinta intensa.

Consigli utili per la guarnizione

  • La decorazione con lamponi freschi aggiunge colore e freschezza. Asciuga bene i frutti prima di posizionarli sulle fette per evitare umidità che possa ammorbidirne la superficie.
  • Per un aspetto lucido e appetitoso, puoi preparare una leggera glassa: 1 cucchiaio di succo di limone mescolato con 1 cucchiaino di zucchero a velo; spennella leggermente i lamponi prima di servirli.
  • Conservazione: conserva la cheesecake coperta in frigorifero fino al momento di servire. Si mantiene bene 3–4 giorni. Puoi anche congelarla ben avvolta fino a 1–2 mesi; scongelala in frigorifero durante la notte prima di servire.

FAQ

Qual è la base della Cheesecake ai lamponi e limone?

La base si prepara tipicamente con biscotti digestive sbriciolati mescolati a burro fuso. Puoi sostituire con graham cracker, biscotti al cacao o una base di nocciole tritate per una versione più rustica o gluten-free.

Quali sono gli ingredienti principali?

Per la crema: formaggio cremoso tipo Philadelphia, zucchero, uova, panna acida o yogurt greco, scorza e succo di limone, vaniglia opzionale. Per la salsa o guarnizione: lamponi freschi o congelati e un po’ di zucchero o succo di limone per intensificare il sapore.

Come si prepara la crema al formaggio?

In una ciotola, ammorbidisci il formaggio con lo zucchero fino a crema liscia. Aggiungi le uova una alla volta, mescolando tra un aggiunta e l’altra. Unisci panna acida (o yogurt), scorza e succo di limone e una punta di vaniglia. Evita di montare troppo per non incorporare aria in eccesso.

È necessario cuocerla in forno o si può fare senza forno?

Entrambe le versioni sono possibili. La versione cotta al forno si cuoce in forno con bagno-maria; la versione no-bake si prepara solo con crema fredda e una base di biscotti, poi si raffredda in frigorifero per diverse ore o durante la notte.

Qual è la temperatura e i tempi di cottura se si cuoce al forno?

Cuoci in forno preriscaldato a circa 160–165°C per 50–60 minuti, finché il centro è appena tremolante. Spegni il forno e lascia raffreddare dentro, conporta leggermente socchiusa per evitare crepe. Poi trasferisci in frigorifero per almeno 4 ore o preferibilmente tutta la notte.

Come evitare che il cheesecake si crepi?

Per evitare crepe: usa una base delicata, cuoci a bassa temperatura in bagno-maria, non aprire il forno durante la cottura e raffredda lentamente. Dopo la cottura, spegni il forno e lascia raffreddare con porta chiusa per circa un’ora prima di spostarti in frigorifero.

Come si prepara la salsa o la guarnizione di lamponi?

Cuoci una parte di lamponi con un cucchiaio di zucchero e un filo di succo di limone finché si rompe e rilascia liquido. Passa al colino per una salsa liscia se preferisci, oppure lascia i lamponi interi per una guarnizione rustica. Lascia raffreddare prima di servirla sulla torta.

Come rendere la base senza glutine?

Usa biscotti senza glutine o una base di noci/mandorle tritate mescolate con burro fuso. Pressa bene nello stampo e metti in frigorifero per farlo compattare prima di versare la crema.

Come conservare e quanto dura?

Conserva in frigorifero, coperta, per 3–5 giorni. Puoi anche congelarla: tagliala in porzioni, avvolgi singolarmente e congela. Scongela in frigorifero prima di servire e aggiungi la salsa di lamponi se preparata separatamente.

Quali strumenti servono?

Tortiera a cerchio apribile da circa 23 cm, carta forno, frusta o mixer, ciotola capiente, spatola, teglia per bagno-maria e eventualmente un colino per la salsa di lamponi.

Ci sono varianti o suggerimenti di presentazione?

Guarnisci con lamponi freschi e scorza di limone grattugiata. Puoi variare la salsa di lamponi con un mix di lamponi e fragole o aggiungere una leggera glassa al limone. Per una versione più leggera, sostituisci parte della crema con yogurt greco a ridotto contenuto di grassi e aumenta la quantità di lamponi per la dolcezza naturale.

Introduction / Hook

Imagine a dessert that feels both intimate and indulgent, a single bite shrinking the world to a cozy moment of pure delight. Mini crème brûlée does exactly that: a petite custard that glides across your tongue with creamy richness, crowned by a lacquer of caramel that shatters at the touch of a spoon. The aroma is a soft whisper of vanilla and cream, punctuated by a hint of sugar’s toasty warmth. When you crack that glossy sugar top, a chorus of crackling sweetness erupts, revealing a velvety vanilla heart that is cool, smooth, and luxurious. These little jars of dessert magic are the perfect balance between elegance and comfort—sophisticated enough to grace a special dinner, simple enough to make for a family weeknight treat, and charming enough to steal the spotlight at a party. Mini crème brûlée invites you to slow down, savor, and celebrate the small, luminous moments in life—the kind of dessert that lingers in memory long after the last spoonful has vanished.

In this form, the classic French custard is pared down to its most intimate size, making it approachable for home cooks who crave that restaurant-worthy wow without a complicated process. Each mini portion becomes its own little theater—a glossy caramel top, a pale ivory interior, and a texture that whispers of silky custard contrasted with a crisp, sun-kissed shell. It’s not merely a dessert; it’s an experience you can share—whether you’re treating a loved one to a candlelit end to a meal or inviting friends to gather around a table where conversation is as comforting as the dessert itself.

The Story Behind the Dish

Crème brûlée, literally “burnt cream” in French, is a classic that sits at the intersection of science, luxury, and gastronomy. Its origins spark a friendly debate among food historians. Some trace its lineage to medieval custards and the broader European tradition of custard desserts, while others place its direct antecedent in 17th-century French kitchens. The name crème brûlée appears in recipes dating to the late 1600s and early 1700s, with influential culinary writers such as François Massialot helping to popularize what would become a timeless standard of French patisserie. The ritual of finishing the dessert with a caramelized sugar crust—caramelizing sugar until it glows a deep amber, then chilling the custard beneath—emerged as a signature technique that celebrates contrasts: cool, creamy custard beneath a crackling top, a textural duel that feels almost magical in its simplicity.

Over centuries, crème brûlée traveled beyond French borders, evolving with regional touches and personal interpretations. In many households around the world, the dessert became a canvas for seasonal flavors, citrus notes, coffee, and chocolate, each iteration keeping the essence of the original: a smooth, luscious interior and a glossy, crackly top. The mini version is a modern darling—portioned for easier sharing, quicker chilling, and a more intimate, approachable presentation. It invites you to create a moment of refinement without the formality of a larger custard, making it a favorite for both intimate dinners and festive celebrations alike.

What makes the mini format so compelling is not just its cute size, but how it echoes the philosophy of great French patisserie: ultrasound-smooth texture, balance of sweetness and vanilla depth, and a finish that rewards patience and technique. The story of this dish—whether as a century-old tradition or a contemporary kitchen experiment—speaks to our shared love of texture, aroma, and the sheer joy of cracking something gloriously caramelized with a simple, honest spoonful.

Why You’ll Love This Recipe

  • Portion-controlled elegance: These mini portions feel indulgent without being overwhelming, perfect for intimate dinners or a formal dessert lineup.
  • Silky custard, dreamy texture: The interior is creamy and smooth, with a delicate egg-and-cream richness that melts on the palate.
  • Caramel crackle that sings: The top’s caramelized sugar shell provides a crisp, shimmering contrast that crackles beautifully with every bite.
  • Versatile flavor canvas: Start with classic vanilla and invite citrus, coffee, chocolate, or spice into the custard for effortless variations.
  • Make-ahead-friendly: The custard base can be prepared in advance, chilling quietly in the fridge until you’re ready to finish with the brûléed top.
  • Impressive presentation, everyday ease: The glossy tops and pale interiors look atelier-worthy, yet the technique remains accessible to home cooks.
  • Kid-friendly options, adult twists: If you’re cooking for little ones or grown-up guests, you can tailor sweetness and add-ins to suit your crowd.
  • Comforting, timeless dessert: It pairs beautifully with berries, espresso, and dessert wine, making it a perennial favorite for many menus.

The Flavor Profile & Texture

The essence of mini crème brûlée lies in its dual personality. The custard is a velvet river of creaminess, gently scented with vanilla and kissed by the egg yolk that lends depth and a faint, comforting richness. The flavor is clean, reminiscent of vanilla-flecked custard, with a whisper of caramelized sugar sweetness that lingers on the tongue. If you adorn the custard with a hint of citrus zest—orange or lemon—you invite a citrus glow that brightens the vanilla and adds a lively perfume to each bite.

Contrast is king in this dessert. The outer shell offers a thin, glassy glaze of caramelized sugar that, once cracked, reveals a cool, luscious interior. The shell is crisp and delicate, almost glass-like in its sheen, and it cracks into a clean line with a satisfying snap. Beneath that crackling top lies a custard that can be as silky as satin, a texture that glides across the mouth and coats it with richness. The temperature differential—hot or warm caramelized surface meeting a smoothly chilled center—creates a sensory moment that feels almost cinematic. The experience is enhanced by subtle notes: a faint vanilla orchid aroma, a whisper of sweetness that never tips into cloying, and a creamy finish that feels comforting after a long day.

As you experiment with variations, you can coax new flavors from the same elegant base. A touch of espresso can lend mocha-like depth, a ribbon of citrus zest can brighten the custard into a lively finish, and a dash of cinnamon or cardamom can evoke warmth reminiscent of holiday desserts. Each tweak preserves the essential harmony—the silky custard that dissolves on the palate, the caramel crown that provides the crunch and aroma of vanilla-sugar toffee, and the moment of balance where the two textures meet in perfect accord.

Occasions & Pairings

Mini crème brûlée shines across occasions, from intimate date nights to festive gatherings. Its presence signals refined taste without shouting; it’s a dessert that says you care, whether you’re celebrating an anniversary, a birthday, or simply the joy of a well-made meal. The small size makes it ideal for multi-course dinners where you want a dessert that feels special but won’t overwhelm the palate after a heavy main course.

Pairing suggestions elevate the experience:

  • With berries: fresh raspberries, strawberries, or blackberries add a bright, tart counterpoint to the custard’s sweetness.
  • With sparkling wines or dessert wines: a glass of Sauternes, Moscato, or a late-harvest Riesling complements the caramel notes and lifts the overall sweetness balance.
  • With espresso or strong coffee: a small bite of coffee-infused custard or a shot of espresso helps cut through the richness and adds depth.
  • With a light herb or citrus garnish: a fragrant curl of candied orange zest or a sprig of mint can refresh the palate between bites.
  • With a simple fruit compote: a spoonful of berry compote or a drizzle of seasonal fruit coulis adds brightness and color to the plate.

In terms serving occasions, think of mini crème brûlée as a dessert that suits celebrations of all sizes. For Valentine’s Day, the petite portions feel especially romantic. For Christmas or New Year’s dinners, they offer a refined finish that doesn’t demand heavy seasonal flavors. For a summer dinner party, you can lighten the flavor with citrus zest or a dash of almond extract and pair with a cool vanilla-circling wine. The versatility is part of the charm: you can tailor the flavor to the season, the guest list, and the mood of the moment.

Tips, Variations & Substitutions

Tips for Perfection

To achieve that flawless crème brûlée experience in mini form, keep a few practical ideas in mind. Use high-fat dairy or a combination of cream and milk to ensure the custard remains rich and set, and temper the eggs carefully to prevent curdling. While the classic recipe relies on vanilla, you can explore flavors in a few controlled ways—just avoid overwhelming the custard with too many competing notes. If you’re making multiple mini portions, ensure they’re all uniform in size so they bake evenly and finish with a consistent crack of caramel across each top.

Texture is everything. The interior should be smooth and almost pudding-like in its silkiness, not grainy. If you notice any graininess, that’s a signal to check your custard base and ensure it’s gently handled, and that you’ve given it enough time to set fully. A slow, patient chill helps the custard firm properly and prevents the top from losing its delicate sheen.

Variations

  • Classic vanilla: Keep it simple with a generous vanilla bean or extract to anchor the custard’s profile.
  • Citrus twist: Add a strip of lemon or orange zest to the custard for a bright aroma and a clean finish.
  • Espresso kick: A touch of finely ground coffee or espresso powder creates a mocha-inspired version that pairs beautifully with chocolate accents.
  • Quietly nutty: A whisper of almond extract or a dusting of toasted almond meal in the custard adds warmth.
  • Chocolate lover’s dream: Swirl in a small amount of melted dark chocolate into the custard for a marbled effect and a richer depth.
  • Herbal hint: A delicate rosemary or lavender note (used sparingly) can transform the dessert into a modern, garden-inspired treat.

Substitutions & Dietary Alternatives

  • Dairy-free option: Use full-fat coconut cream or a blend of coconut milk with almond milk for a dairy-free custard. Note that texture and aroma will differ slightly from dairy-based versions.
  • Lower-sugar tweak: You can substitute part of the sugar with a natural sweetener that lends a softer caramel top; keep in mind the top’s ability to caramelize may vary with substitutes.
  • Gluten-free approach: This dessert is naturally gluten-free, so no changes are required for a gluten-free menu—just ensure any add-ins or garnishes are also gluten-free.

Storage & Make-Ahead Ideas

One of the most appealing aspects of mini crème brûlée is its adaptability to a busy schedule. You can prepare the custard ahead of time and store it in the refrigerator until you’re ready to finish with the brûléed tops. The key is to keep the custards covered and well-chilled so they set evenly and retain their smooth texture. When you’re ready to serve, finish with a quick caramelization of the sugar top just before presenting them to your guests.

Leftovers can be stored in the fridge for a day or two, but for the best texture and flavor, it’s ideal to caramelize the tops and serve fresh. If you need to reheat, do so gently and briefly; the goal is to warm the custard without letting it shed its delicate structure, all while preserving that satisfying crack on the surface when you re-torched or re-brûlé the top (if you have a culinary torch handy) or simply replace the top with fresh sugar for a new crisp shell.

Make-ahead strategies include preparing the custard base a day or two in advance, chilling it thoroughly, and arranging the mini ramekins on the serving tray. When guests arrive, a quick caramelization brings the dessert to life, and you’ll have a dessert that feels freshly made without last-minute stress. You can also streamline the serving by lining up a few garnishes—fresh berries, citrus zest, or a light dusting of cocoa—so you can finish each mini crème brûlée with a polished, restaurant-worthy presentation in moments.

Fun Facts & Trivia

  • Despite its strong association with France, crème brûlée has parallel traditions in other European desserts that feature a caramelized sugar topping across different bases and textures.
  • The crack of the caramel top is a sensory ritual as much as a culinary technique; the sound signals the contrast between the crisp top and the creamy center that diners crave.
  • The term brûlée comes from the French word brûler, meaning “to burn,” which captures the moment sugar is caramelized to a deep, glossy amber.
  • Miniature versions of crème brûlée have become a beloved trend in modern patisserie and home culinary experiments, often used to showcase precise technique and elegant plating in a conversation-friendly format.
  • Historically, vanilla was a luxury imported from distant lands; crème brûlée helped popularize vanilla’s aromatic profile in desserts, contributing to the widespread affection for the flavor today.

Ingredients

Custard Base

  • Heavy cream (2 cups)
    → The backbone of crème brûlée. The high fat content yields a rich, velvety custard and helps it set with a silky mouthfeel. Gently heat the cream with the vanilla (if using a bean) until just steaming; do not boil. If you used a vanilla bean, remove the pod and scrape any seeds before pouring. Strain if necessary to remove bean fragments.
  • Egg yolks (4 large)
    → Egg yolks provide structure, creaminess, and the smooth texture that defines crème brûlée. Use yolks only, reserving whites for other uses. Bring yolks to room temperature, whisk lightly, and temper with hot cream to avoid curdling.
  • Granulated sugar (1/3 cup)
    → Sweetness helps the custard set and gives a hint of body to the mixture. Whisk the sugar with the yolks until pale and slightly thickened; dissolving sugar fully helps prevent a gritty texture when heated.
  • Vanilla extract (1 teaspoon)
    → Adds the characteristic warm aroma and depth. Use pure vanilla extract for best flavor. If you prefer vanilla bean, split and scrape one bean and add both seeds and pod to the cream, removing the pod before combining with the yolks.
  • Pinch of salt (to taste)
    → A small amount of salt enhances the sweetness and overall flavor, rounding the custard. Use fine salt or sea salt; a pinch is all that’s needed to avoid a salty aftertaste.

Caramel Topping & Water Bath

  • Granulated sugar (for topping)
    → This sugar forms the iconic caramel crust when torched or briefly broiled. Use about 1–2 teaspoons per ramekin, sprinkled in an even, thin layer. Ensure the custard is fully set and cooled before applying the topping to prevent quick melting. If you use larger ramekins, adjust accordingly.
  • Hot water (for water bath)
    → A shallow hot-water bath ensures gentle, uniform cooking and reduces the risk of cracking or curdling. Place the filled ramekins in a larger baking dish and pour hot water halfway up the sides of the ramekins, then bake. Use hot water to maintain consistent temperature.

Serving (Optional)

  • Fresh berries (optional, for serving)
    → Bright, acidic berries provide a fresh contrast to the rich custard. Pat dry if using thawed frozen berries to avoid water pooling on the surface.
  • Fresh mint leaves (optional, for garnish)
    → A small sprig of mint adds color and a hint of herbaceous aroma, enhancing the dessert’s presentation and balance.

Instructions

  • Preheat your oven to 325°F (165°C) and arrange four to six 4-ounce ramekins in a shallow baking dish or low-sided roasting pan to form a stable water bath.

    → This setup ensures gentle, even heat around each custard and makes it easier to lift the ramekins in and out of the oven without tipping, while the water bath prevents scorching and curdling.
  • Warm the heavy cream with vanilla until just steaming, then remove from heat and let the vanilla steep for a few minutes if using a bean; otherwise, proceed once the cream is hot. Strain if you used vanilla bean to remove seeds and pod fragments.

    → Heating the cream intensifies the vanilla flavor and softens any solids; straining ensures a silky custard without gritty bits.
  • Whisk the egg yolks and granulated sugar together in a medium bowl until the mixture is pale, thick, and well combined, about 45–60 seconds; this builds the custard’s body and helps dissolve sugar for a smooth texture.

    → Properly whisking and whitening the yolks prevents a dense, grainy custard and promotes an even set.
  • Temper the yolk mixture by slowly pouring a thin stream of the hot cream into the yolks while whisking constantly to raise their temperature gradually and prevent curdling.

    → Gradual heating aligns the fat and protein in the yolks with the hot liquid, avoiding scrambled custard and ensuring a creamy final texture.
  • Return the tempered yolk mixture to the saucepan with the remaining cream (if any) or continue whisking in the bowl until fully combined, then stir in the vanilla extract and a pinch of salt; mix just until incorporated.

    → The final infusion of vanilla and a touch of salt enhances sweetness balance and depth of flavor without overpowering the custard.
  • Strain the custard through a fine-mesh sieve into a clean pourable vessel or measuring cup to remove any cooked bits or chalice from the vanilla pod, ensuring a silk-smooth mixture.

    → Straining guarantees an ultra-smooth custard free of lumps that could disrupt the caramel topping later.
  • Divide the strained custard evenly among the prepared ramekins, filling each about two-thirds full to leave room for setting during baking.

    → Filling to two-thirds ensures the centers set without overflowing and provides a uniform surface for the sugar crust later.
  • Carefully slide the filled ramekins into the baking dish and pour hot water into the dish until it comes halfway up the sides of the ramekins to form a proper water bath.

    → The hot water bath delivers gentle, even heat that prevents cracking and curdling, yielding a tender, custard-like texture.
  • Bake in the center of the oven until the custards are just set with a slight jiggle in the center, approximately 25–40 minutes depending on ramekin size; begin checking at 25 minutes and remove when the edges are set but the centers still wobble.

    → A gentle shake test confirms a proper doneness; overbaking results in a dry, rubbery custard, while underbaking leaves a soupy center.
  • Carefully remove the ramekins from the water bath and transfer to a rack to cool for 15–20 minutes; then cover loosely and refrigerate for at least 2 hours or up to overnight to fully set and chill the flavor.

    → Cooling at room temperature and then chilling solidifies the custard and improves texture, making the surface smooth for the sugar crust.
  • Evenly sprinkle 1–2 teaspoons of granulated sugar on top of each chilled custard in a thin, smooth layer to promote an even caramelization when torched or broiled.

    → A uniform sugar layer ensures a flawless, crackly crust and prevents uneven browning or soggy spots.
  • Caramelize the sugar using a culinary torch held about 2–3 inches from the surface, moving methodically in small, overlapping circles until the sugar melts evenly and becomes a deep amber crust; let the sugar harden for 1–2 minutes before serving.

    → Even torching produces a glossy, hard crack that contrasts beautifully with the creamy custard beneath; keep the flame moving to prevent scorching.
  • If you do not have a culinary torch, preheat your broiler and place the ramekins on a rimmed baking sheet, then broil for 1–3 minutes on high, watching constantly until the crust achieves a deep amber color, and remove promptly.

    → Broiling provides an alternative caramelization method, but the intense heat requires vigilant watching to avoid burning the crust.
  • Allow the caramel crust to rest for 1–2 minutes to finish hardening before serving the miniature crème brûlées, ensuring you retain the characteristic crack when tapped.

    → Resting prevents cracking or denting the crust under immediate serving pressure and helps maintain a crisp crack for contrast with the custard.
  • Garnish with fresh berries and mint leaves as desired to provide bright acidity and color contrast that balances the rich custard, serving promptly after the crust has set; pat berries dry if using thawed frozen berries.

    → Fresh accompaniments brighten the dish, add texture, and elevate presentation without overpowering the custard flavor.

Notes

These mini crème brûlée are a silky, classic dessert built on a custard of heavy cream and egg yolks, lightly sweetened and perfumed with vanilla. You can flavor with vanilla bean or pure vanilla extract—if using a bean, split and scrape the seeds and add both pod and seeds to the cream, removing the pod before combining with the yolks. Strain the custard after whisking to remove any curd or bean fragments, then temper the yolks by gradually whisking in hot cream. Divide the mixture among ramekins and bake in a shallow water bath until the centers are just set. Chill the custards thoroughly, at least 2 hours or overnight, so they slice and hold their shape. When ready to serve, sprinkle a thin, even layer of granulated sugar on each custard and caramelize with a culinary torch until the surface is deep amber and glossy; you can also finish under a hot broiler for a few seconds, keeping a close eye to prevent scorching. Let the sugar harden for a minute or two before serving to reveal the characteristic crack. Serve plain for a pure vanilla flavor or add a few fresh berries or a mint leaf for color and balance. Store leftovers in the fridge for up to 2–3 days; do not freeze, as freezing can alter the custard’s texture. For best results, ensure all equipment and surfaces are dry and clean, and use fresh eggs at room temperature for a smoother blend.

Tips

Chef’s Tips for Perfect Mini Crème Brûlée

  1. Gently infuse the cream with vanilla. Heat the cream until just steaming; if using a vanilla bean, add the bean and seeds and let it steep for a few minutes, then remove the pod (and seeds) before combining with the yolks. Strain if needed to remove any fragments for an ultra-smooth custard.
  2. Temperature control is key. Keep the cream around 170–180°F (77–82°C) when heating. Do not boil, as boiling can make the custard tough and cause curdling when it meets the yolks.
  3. Temper the yolks to avoid curdling. Whisk the yolks to loosen them and bring to room temperature. Slowly stream hot cream into the yolks while whisking constantly, then whisk in the tempered mixture until smooth. Strain the mixture to remove any small clumps or foam before pouring into ramekins.
  4. Whisk sugar fully into the yolks. Dissolve the granulated sugar completely with the yolks; this helps avoid a gritty texture and ensures a velvety custard after cooking.
  5. Season thoughtfully. A pinch of salt enhances sweetness and flavor depth without making the custard salty. Use fine salt or sea salt in small amounts.
  6. Prep the custard for a silky finish. Strain the final custard through a fine-mine sieve to remove any air bubbles or chalaza, yielding a smoother set after baking.
  7. Ramekins and water bath setup. Choose ramekins that fit snugly in a baking dish and fill the water bath halfway up the sides of the ramekins. The water bath provides gentle, even heat and prevents cracking or curdling.
  8. Fill to the right level. Pour the custard into ramekins so they’re about three-quarters full. This gives a nice, even surface for the caramel topping once baked and cooled.
  9. Bake with care. Bake at a moderate temperature (around 325°F / 165°C) until the custems are just set with a slight jiggle in the center. If your oven runs hot, start checking a bit earlier to avoid overbaking.
  10. Cool properly before topping. Remove the ramekins from the water bath after baking and cool completely, then refrigerate for at least 2 hours (preferably overnight) to set the custard fully and simplify topping.
  11. Prepare the caramel topping correctly. Just before serving, sprinkle each custard with a thin, even layer of sugar (about 1–2 teaspoons per ramekin). A uniform layer ensures an even crack and crust when torched or broiled.
  12. Torching tips for a pristine crust. For a crisp caramel shell, move the torch in slow, small circles and keep it 2–3 inches from the surface. Don’t linger in one spot to avoid burning. If using broiler, watch closely and rotate the dish for an even crust, usually 1–2 minutes depending on your broiler.
  13. Finish and present stylishly. Let the caramel crust cool for a minute or two, then serve with optional fresh berries or mint. Pat berries dry before placing them on the plate to prevent extra moisture from softening the crust.

FAQ

Mini crème brûlée — Frequently Asked Questions

What is mini crème brûlée?

Mini crème brûlée is a small, single-serving custard dessert made with cream, egg yolks, vanilla, and sugar, topped with a crisp caramelized sugar shell just before serving. Each ramekin yields a creamy center with a crackly top.

What ingredients do I need?

For about 4 mini ramekins (4 oz each):

  • 1 cup heavy cream (240 ml)
  • 4 large egg yolks
  • 1/4 cup granulated sugar (plus extra 2–3 teaspoons for topping)
  • 1 teaspoon pure vanilla extract (or 1/2 vanilla bean, scraped)
  • Pinch of salt

Note: You can scale the recipe for more or fewer portions by keeping the same yolk-to-cream ratio.

Can I make mini crème brûlée ahead of time?

Yes. Bake and chill the custards up to 1 day in advance:

  • After baking, let them cool to room temperature, then refrigerate, loosely covered.
  • Caramelize the sugar topping just before serving to keep it crisp.
What equipment do I need?

Essentials:

  • 4 mini ramekins (about 4 oz each)
  • Shallow baking dish or roasting pan for a water bath
  • Mixing bowl and whisk, or a blender
  • Fine-mesh sieve (optional, for a silky custard)
  • Kettle to heat water
  • Kitchen torch for caramelizing or a broiler/oven
What oven temperature and how do I set up the water bath?

Preheat to 325°F (165°C). Place the ramekins in a shallow baking dish, then carefully pour hot water into the dish until it comes halfway up the sides of the ramekins. Bake until the custards are set around the edges but the centers still jiggle slightly, about 25–30 minutes for mini ramekins. Remove from the water bath and chill for at least 2 hours (or overnight) before serving.

How do I caramelize the top without burning it?

After chilling, evenly sprinkle 1–2 teaspoons of granulated sugar on each custard. Use a kitchen torch to melt and caramelize until amber and shiny. If you don’t have a torch, place the ramekins under a hot broiler for 1–3 minutes, watching closely to prevent burning.

How can I prevent cracks or overcooking?

Cracks or a grainy texture usually come from overbaking or overheating. Bake in a water bath at a gentle temperature (325°F/165°C) until the outer edges are set but centers remain slightly jiggly. Let cool completely in the fridge to finish setting, then top with caramel just before serving.

Can I make dairy-free or low-fat mini crème brûlée?

Yes, with caveats. Dairy-free versions can be made with full-fat canned coconut milk (not light) blended with a dairy-free milk to reach about 1 cup total liquid. Use 4–5 egg yolks to help set the custard, and add vanilla. The texture may differ from dairy cream, but the result can still be delicious. Caramelize the topping with a torch or under a broiler as usual.

What are some serving or flavor variations?

Suggestions:

  • Add a pinch of citrus zest (lemon or orange) to the custard for brightness.
  • Swirl in a teaspoon of espresso for a mocha version.
  • Top with fresh berries or a berry compote for contrast.
How many servings does this yield?

Typically 4 mini crème brûlée portions (4 oz ramekins). You can scale to 6 if using 3 oz ramekins, but keep the custard ratio the same.

What should I do if the custard is still watery in the center?

If the center remains too soft after chilling, re-bake the ramekins for 5–8 more minutes in a 325°F (165°C) water bath, checking every 2 minutes. If cracks appear, remove and chill immediately. For future batches, ensure the water bath is hot and bake time is not too short.

Introduzione

Quando si dice colazione da sogno, a volte basta una teglia che sprigiona vapore e una soffice spirale che invita a sfogliare ogni strato. Le Girelle Colazione sono una promessa: una mattina che inizia con la dolcezza di una pasta soffice, avvolta in una luce dorata, profumata di burro, vaniglia e un accenno di agrumi o cacao. Immagina la cucina che si riempie di un aroma avvolgente, simile a una coccola lenta che si srotola tra le dita. Ogni morso è una piccola cerimonia: una danza tra morbidezza dell’impasto, la cremosità di un ripieno, la leggera croccantezza della superficie che si stacca con un sospiro di miele e zucchero caramellato. È una colazione che non ha fretta, una pausa luminosa che dà il tono al giorno. Eppure, dietro a questa semplicità apparentemente indulgente, c’è una storia di tradizione, di territori che si intrecciano e di gusti che si evolvono per incontrare le esigenze moderne senza perdere la loro anima artigianale.

Le Girelle Colazione non sono solo dolci da forno; sono un modo per celebrare il risveglio. Sono una tela bianca su cui si possono dipingere ricordi: il profumo di una domenica mattina, la tavola condivisa tra famiglia e amici, le chiacchiere che si intrecciano mentre il forno lavora la sua magia. Ogni giro dell’impasto è una promessa di comfort, una promessa che la vita può essere rassicurante e golosa allo stesso tempo. Se hai sete di una colazione che ti coccoli dall’inizio, se vuoi sorprendere i tuoi cari con qualcosa di familiare ma sorprendente, le Girelle Colazione sono fatte per te. Il segreto non è solo nel gusto: è nell’equilibrio tra morbidezza, dolcezza e una nota di freschezza che accende i sensi, senza sovrastare la delicata armonia dei sapori.

Questo piatto celebra la tradizione delle paste lievitate tipiche dell’Europa centrale e mediterranea, reinterpretate per una tavola contemporanea. È una fusione di tecnica, arte dell’uso degli aromi e libertà creativa: una base di pasta soffice, una gamma di ripieni che vanno dal classico al creativo, dalla crema vellutata al cioccolato intenso, passando per la marmellata profumata e una spruzzata di agrumi. Le Girelle Colazione possono essere delicate o più robuste a seconda della stagione e dei gusti: una versione estiva potrebbe giocare con scorze d’arancia candita e crema al limone, una versione invernale potrebbe sposare cioccolato fondente e nocciole tostate. Indipendentemente dall’abbinamento scelto, ciò che resta è la promessa di una degustazione che trasforma la routine in una piccola festa quotidiana.

La storia dietro il piatto

Le girelle, in molte culture, sono una forma di pane dolce o pan Brioche arrotolato che si presta a infinite personalizzazioni. In Italia, dove la colazione è spesso leggera ma in grado di scandire la giornata con ritualità, i dolci da forno al mattino hanno trovato spazio nelle caffetterie e nelle cucine domestiche come simbolo di convivialità e calore familiare. La versione “colazione” di queste girelle si è evoluta naturalmente: impasti morbidi che accolgono ripieni cremosi, talvolta con una punta di agrumi o cannella, altre volte con una nota di cacao o nocciole, per offrire un assaggio che si presta sia a una colazione veloce sia a una pausa più lenta e meditata durante la mattina.

La bellezza delle girelle sta nel loro potenziale narrativo. Ogni famiglia può avere la propria versione, e spesso il segreto del successo risiede nell’equilibrio tra la dolcezza dell’impasto e la ricchezza del ripieno. Nell’italianità di queste sfoglie, si intrecciano influenze di panetterie austere e pasticcerie affascinanti: si parte da una base di pasta lievitata, ben lavorata per ottenere una texture setosa, si aggiungono ripieni che raccontano di primavera (frutta e crema fresca) o di inverno (cioccolato fondente, crema di nocciole), e si conclude con una glassa o una spolverata leggera che mette il tutto in risalto. L’origine può rispondere a pratiche festive o semplici abbellimenti domenicali, ma l’effetto finale resta universale: una coccola che si gusta con lentezza e si condivide senza fretta.

In molte cucine regionali d’Europa, rotoli dolci e brioche ripiene hanno una funzione simile: trasformare ingredienti semplici in un’esperienza sensoriale che solleva lo spirito al risveglio. Le Girelle Colazione si adattano a questa tradizione, ma con un tocco contemporaneo che parla al palato moderno: una lievitazione controllata, una crema vellutata, un equilibrio tra dolcezza e freschezza, e la possibilità di sperimentare con ripieni diversi a seconda delle stagioni e delle preferenze. Scrivere di loro è, in fondo, raccontare una piccola storia di comunità: la cucina come luogo di incontro, dove il profumo di una teglia che cuoce diventa una calla di ritrovo per chiunque entri in casa durante la mattinata.

Perché vorrai amare questa ricetta

  • Comfort immediato: una colazione che coccola, perfetta per chi cerca un inizio di giornata sereno e gustoso.
  • Versatilità: ripieni e aromi che si adattano a ogni stagione, umore e preferenze personali.
  • Equilibrio tra texture: impasto soffice che si scioglie al palato, con una dolcezza che non è mai stucchevole e una leggera nota di croccantezza in superficie.
  • Appetito condiviso: ideali da dividere durante la colazione della famiglia o da offrire agli ospiti al brunch della domenica.
  • Facili da personalizzare: una base neutra che invita all’interpretazione, consentendo di creare versioni gluten-free, vegane o più ricche di proteine a seconda delle esigenze.
  • Immediata soddisfazione visiva: le girelle, una volta sfornate, regalano un tocco di colore e raffinatezza alla tavola mattutina.

Profilo di sapore e consistenza

La magia delle Girelle Colazione è nel bilanciamento di aromi e texture. L’impasto, morbido e leggermente elastico, si scioglie al primo morso, lasciando dietro di sé una nota burrosa e avvolgente. La dolcezza è presente, ma non invadente; è una base neutra che permette al ripieno di brillare. A seconda della scelta del riempimento, puoi percepire:

  • Creme vellutate: una sensazione setosa che avvolge la lingua, con una sfumatura di vaniglia o agrumi che aggiunge freschezza.
  • Cioccolato o cacao: ben legato al dolce dell’impasto, offre una profondità che ricorda le praline, senza diventare pesante.
  • Marmellate o confetture: una nota fruttata che contrasta la morbidezza con una leggera acidità, aggiungendo vivacità.
  • Noce, pistacchio o scorzette: una persistenza croccante e un profumo che rimane a lungo in bocca.

La parte esterna, lucida e dorata, è spesso una leggera glassa o una spolverata di zucchero a velo che si scioglie al contatto del calore del forno. In bocca, la girella offre un tema di contrasti: la forza lenta dell’impasto, la ricchezza del ripieno, una leggera friabilità superficiale e, talvolta, una nota di sale che valorizza ogni sapore. L’insieme è avvolgente e confortante, un equilibrio di dolcezza e aromi che restano vividi senza stancare. Se si aggiunge una nota di agrume, come scorza d’arancia o limone, l’esplosione è fresca, quasi frizzante, e rende la combinazione ideale per alzare la temperatura del risveglio.

Occasioni & Abbinamenti

Le Girelle Colazione si adattano a una varietà di situazioni: una colazione domenicale che riunisce la famiglia, un brunch tra amici, o una pausa golosa durante una giornata di lavoro. Sono perfette per essere presentate su un piatto grande al centro della tavola, dove ognuno può tagliarle e gustarle al proprio ritmo. Ecco alcune idee di accompagnamento:

  • Bevande: caffè latte, cappuccino, espresso cremoso o una tisana profumata agli agrumi per bilanciare la dolcezza.
  • Frutta fresca: agrumi pelati a spicchi, fettine di mela o pere leggermente glassate, che aggiungono freschezza e contrasto di consistenze.
  • Formaggi morbidi: una piccola selezione di formaggi freschi leggeri o ricotti vanigliati può offrire un’interessante alternanza salata-dolce.
  • Dolci di accompagnamento: una leggera glassa al pistacchio o una crema al limone come tocco finale per i più audaci.

Per occasioni speciali, si può trasformare la presentazione in una tavola da brunch: una serie di varianti delle girelle, ciascuna con un ripieno diverso, disposte a raggiera, magari accompagnate da frutta secca e una selezione di succhi freschi. Se si desidera una versione meno dolce, si può scegliere un ripieno a base di crema leggera al mascarpone o yogurt dolcezza, riducendo la quantità di zucchero presente nell’impasto e mantenendo un profilo gustativo equilibrato. In contesti più informali, una versione “colazione da solo” funziona altrettanto bene: una singola girella grande per un momento di piacere solitario, magari accompagnata da una tazza di caffè intenso. Le possibilità sono molte, e la vostra creatività è il limite.

Consigli, Varianti & Sostituzioni

La bellezza di questa ricetta è la sua adattabilità. Qui trovi idee pratiche per personalizzarla, senza rinunciare al carattere unico delle Girelle Colazione.

Varianti di ripieno

  • Ripieno crema e scorza d’arancia: crema pasticcera leggera con scorza grattugiata di arancia per una nota fresca e profumata.
  • Ripieno cioccolato e nocciole: cioccolato fondente fuso mescolato con nocciole tostate tritate grossolanamente per una texture croccante.
  • Ripieno marmellata di albicocche e ceci light: marmellata di albicocca abbinata a una crema leggera di ceci per una dolcezza bilanciata (opzione vegetariana/dietetica).
  • Ripieno crema di limone e vaniglia: crema al limone mossa da una punta di vaniglia, per un sapore brillante e profumato.

Versioni per esigenze dietetiche

  • Vegana: utilizza una parte di latte vegetale nell’impasto e crema di nocciole o crema di anacardi come ripieno; evita burro animale e uova con alternative vegetali. Puoi usare olio di cocco o margarina vegana per la morbidezza dell’impasto.
  • Gluten-free: sostituisci la farina classica con una miscela senza glutine adatta, tenendo presente che l’impasto potrebbe richiedere una piccola variazione della quantità di liquido per ottenere la giusta consistenza.
  • Ridotto contenuto di zuccheri: riduci la quantità di zucchero nell’impasto e nelle creme, scegli ripieni naturalmente dolci come purea di frutta concentrata o yogurt dolce al posto di creme molto ricche.
  • Contro intolleranze: se è necessario evitare latticini, prepara una crema a base di latte di mandorle o di soia e scegli un grasso vegetale leggero per l’impasto.

Twist regionali o gusti ispirati

  • Con cacao e cannella: una versione caraibica o ispanica con cacao amaro nell’impasto e una spolverata di cannella che avvolge i sensi.
  • Con limone e ricotta: ripieno di ricotta leggera e scorza di limone; un tocco luminoso tipico della tradizione italiana.
  • Con pistacchio: pistacchi tritati fini mescolati con crema, per una nota verde e fragrante.

Conservazione & Idee per preparare in anticipo

Una delle grandei virtù delle Girelle Colazione è la loro capacità di essere preparate con anticipo e gustate successivamente senza perdere morbidezza e sapore. Ecco alcuni suggerimenti pratici:

  • Preparazione in anticipo: è possibile preparare l’impasto e lasciarlo lievitare lentamente in frigorifero durante la notte. Al mattino, basta farlo tornare a temperatura ambiente, completare la farcitura e infornare.
  • Conservazione delle girelle già cotte: una volta raffreddate, si possono conservare in contenitore ermetico a temperatura ambiente per 1-2 giorni, oppure congelare singole porzioni ben confezionate per mantenere intatto il sapore. Per riscaldarle, basta qualche secondo nel forno o nel microonde per riacquistare morbidezza.
  • Conservazione dell’impasto non lievitato: è possibile conservare l’impasto crudo in frigorifero per 24-48 ore; al momento di cuocerlo, lascia che si avvicini alla temperatura ambiente e procedi come di consueto.

Per rendere la preparazione ancora più pratica, si può optare per una versione “quasi pronta” durante la notte: stendere l’impasto, aggiungere il ripieno, arrotolare e tagliare, lasciando solo la lievitazione finale al mattino prima di infornare. In questo modo, la profumazione dell’impasto appena sfornato riempie la casa al risveglio, fornendo una pacca di dolcezza che sembra quasi una piccola magia quotidiana.

Curiosità & Trivia

Le dolcezze da forno hanno spesso una storia di scambi tra culture diverse. Le girelle, in alcune tradizioni, hanno avuto vari nomi e vari ripieni a seconda delle regioni, e il concetto di arrotolare l’impasto è una tecnica universale presente in molte cucine del mondo. Una possibile origine potrebbe risalire a secoli fa, quando i fornai iniziarono a sperimentare con strati di pasta lievitata a cui si aggiungevano ripieni dolci o saporiti, sia per scaldare le giornate fredde sia per offrire una presentazione attraente alle famiglie che si riunivano al mattino. Nel tempo, queste spirali si sono evolute in una vera e propria icona della colazione, con varianti localizzate che celebrano ingredienti disponibili stagionalmente e preferenze regionali.

Un aspetto interessante è come la combinazione tra pasta lievitata e ripieno dolce sia riuscita a attraversare confini culinari. La morbidezza dell’impasto, la dolcezza contenuta e la possibilità di aggiungere note aromatiche come vaniglia, scorza d’agrumi o cacao hanno reso le girelle una scelta popolare in molte cucine. Inoltre, la forma a spirale non solo è visivamente accattivante, ma riflette simboli di ciclicità, rinascita e convivialità, temi che accompagnano le tradizioni di molte culture in occasione di festività e riunioni familiari. Se ti trovi in viaggio tra mercati e panetterie di diverse città, potresti riconoscere versioni diverse di questa idea: una testimone della capacità della cucina di adattarsi, pur restando legata a un cuore comune di comfort e piacere.

In chiave contemporanea, la ricetta delle Girelle Colazione è una porticina aperta verso l’interpretazione: permette agli appassionati di sperimentare, di scoprire abbinamenti nuovi e, soprattutto, di condividere momenti di piacere semplice. È una ricetta che parla di casa, di sole mattutino che entra dalle finestre, di mani che imparano, di conversazioni che iniziano con la prima fetta. E, quando si spezza la circonferenza di una girella, si scopre che il segreto non è solo nel gusto ma nel modo in cui una tradizione diventa esperienza quotidiana, capace di trasformare una routine in un rituale. Per chi sta cercando una colazione che avvolga i sensi e accenda il sorriso, le Girelle Colazione restano una scelta affidabile, indulgente ma equilibrata, capace di adattarsi a ogni occasione e a ogni gusto.

Ingredients

Girelle colazione
Pasta per girelle (Dough)

  • – 500 g farina 00 o farina manitoba, setacciata
    → Ruolo: la base dell’impasto che costituirà la struttura delle girelle. L’uso di farina con proteine più alte (manitoba) migliora l’elasticità e l’alveolazione durante la lievitazione. Preparazione/gestione: setacciare per eliminare grumi e incorporare aria; usare a temperatura ambiente gli ingredienti liquidi. Consiglio: se usi solo farina 00, potresti dover regolare la quantità di liquido o lavorare un po’ di più l’impasto per ottenere una consistenza liscia ed elastica.
  • – 250 ml latte intero tiepido
    → Ruolo: idratazione e attivazione del lievito, oltre a conferire morbidezza all’impasto. Preparazione/gestione: scaldare lentamente fino a circa 35–40°C; non deve essere caldo al punto da uccidere il lievito. Note: se preferisci una versione più ricca, puoi sostituire una parte del latte con una piccola quantità di panna.
  • – 70 g burro morbido non salato
    → Ruolo: arricchisce la massa, migliora la morbidezza e la friabilità del prodotto finale. Preparazione/gestione: incorporare a pezzetti nel composto insieme allo zucchero, oppure lavorarlo con lo zucchero fino a ottenere una crema leggera prima di aggiungere la farina. Consiglio: burro morbido a temperatura ambiente evita grumi e favorisce una distribuzione uniforme in tutto l’impasto.
  • – 50 g zucchero semolato
    → Ruolo: dolcifica l’impasto e fornisce energia al lievito, contribuendo a una lievitazione ben visibile. Preparazione/gestione: aggiungere al mix liquido e ammorbidirlo con il burro; se usi lievito attivo secco, lo zucchero aiuta a nutrire il lievito durante l’attivazione. Suggerimento: per un sapore più intenso, usa zucchero di canna chiaro; non incidere sulla consistenza.
  • – 1 uovo grande a temperatura ambiente
    → Ruolo: legante ed emulsificante che dona ricchezza, colore dorato e una mollica più struttura. Preparazione/gestione: aggiungere all’impasto una volta che latte e burro sono amalgamati; accorpa gli ingredienti liquidi con quelli secchi per una massa uniforme. Consiglio: uovo a temperatura ambiente favorisce una migliore emulsione e una lievitazione uniforme.
  • – 7 g lievito di birra secco attivo (o 25 g lievito di birra fresco)
    → Ruolo: agente lievitante che fa crescere l’impasto, rendendolo soffice e spugnoso. Preparazione/gestione: attivarlo in una piccola parte del latte tiepido per 5–10 minuti (se uso lievito secco). Sostituzione: se usi lievito fresco, riduci o regola la quantità come indicato sull’etichetta. Consiglio: non utilizzare latte troppo caldo per non uccidere il lievito.
  • – 1/2 cucchiaino sale fino
    → Ruolo: bilancia il sapore dolce e migliora la struttura dell’impasto. Preparazione/gestione: aggiungere con la farina e mescolare, poi lavorare l’impasto finché diventa liscio ed elastico. Nota: il sale può rallentare lievitazione se usato in eccesso; dosarlo con attenzione per un risultato equilibrato.
  • – 1 cucchiaino estratto di vaniglia puro
    → Ruolo: profumo e profondità di gusto che si armonizzano bene con i ripieni dolci. Preparazione/gestione: aggiungere all’impasto durante la fase di liquidi per una distribuzione uniforme di aroma. Suggerimento: usa vaniglia pura anziché essenze meno naturali per un sapore più rotondo.
  • – Tuorlo d’uovo grande per spennellare, miscelato con 1 cucchiaio di latte
    → Ruolo: doratura lucente e rifinitura estetica delle girelle. Preparazione/gestione: sbattere il tuorlo con il latte e spennellare delicatamente la superficie delle girelle prima della cottura. Consiglio: utilizzare una leggera mano per evitare di far colare il tuo impasto; evita di saturare troppo la superficie per non far aderire troppo la glassa durante la cottura.

Ripieno

  • – Confettura o marmellata a scelta (fragola, albicocca, lamponi o mix)
    → Ruolo: riempitivo dolce che determina la succulenza interna delle girelle. Preparazione/gestione: stendere o lasciare a temperatura ambiente la marmellata per renderla facilmente spalmabile, evitando eccessi che potrebbero far fuoriuscire il ripieno durante la cottura. Suggerimento: una sottile striscia di ripieno crea migliori striature durante la rollatura. Nota: scegli una marmellata senza pezzi troppo grandi per una consistenza liscia.
  • – Crema al cioccolato spalmabile (Nutella o crema gianduia)
    → Ruolo: alternativa golosa al ripieno classico, aggiunge ricchezza di cacao e una morbidezza fondente. Preparazione/gestione: spalmare in strato sottile e uniforme, evitando quantità eccessive che potrebbero rovinare la rollatura. Consiglio: riscaldare leggermente la crema al cioccolato facilita l’estensione e l’adesione al rotolo.
  • – Scorza grattugiata di limone o arancia (opzionale)
    → Ruolo: aggiunge un tocco aromatico fresco che contrasta la dolcezza. Preparazione/gestione: grattugiare solo la parte colorata della scorza per evitare la parte bianca amara; distribuire in modo uniforme sul ripieno per un profumo costante durante la cottura e il raffreddamento.
  • – Burro fuso (opzionale, per spennellare il ripieno)
    → Ruolo: aiuta a mantenere il ripieno morbido e facilita l’adesione durante la rollatura. Preparazione/gestione: spennellare leggermente una sottile lamina di impasto prima di aggiungere il ripieno, se si desidera un finish più ricco. Nota: non esagerare per evitare che il burro sciolto faccia scivolare il ripieno.
  • – Zucchero a velo per spolverare (opzionale)
    → Ruolo: aggiunta finale di dolcezza e presentazione gradevole. Preparazione/gestione: spolverare delicatamente solo prima di servire per mantenere la texture soffice e per non far ammorbidire l’impasto troppo rapidamente. Consiglio: la spolverata è ideale se si utilizza ripieno non troppo dolce.

Glassa e rifiniture

  • – Glassa semplice: 150 g zucchero a velo con 2–3 cucchiai latte (o succo di limone)
    → Ruolo: lucidare e arricchire la superficie, aggiungendo una nota dolce meno invadente. Preparazione/gestione: mescolare zucchero a velo con latte fino a ottenere una consistenza setosa; aggiustare con altro latte o zucchero per raggiungere la densità desiderata. Consiglio: per una glassa più lucida usa latte freddo; se vuoi una nota agrumata, usa succo di limone al posto del latte.
  • – Scorza di limone o arancia grattugiata per la glassa (opzionale)
    → Ruolo: aromatizza la glassa e aggiunge freschezza. Preparazione/gestione: aggiungere una piccola quantità di scorza grattugiata alla glassa finché non raggiungi la tonalità e l’aroma desiderati. Nota: evitare scorze molto grandi che potrebbero rilasciare sapori forti durante il raffreddamento.

Instructions

  • Disponi 500 g di farina 00 o Manitoba setacciata in una ciotola capiente, aggiungi 250 ml di latte tiepido, 70 g di burro morbido tagliato a cubetti, 50 g di zucchero, 1 uovo grande a temperatura ambiente, 7 g di lievito di birra secco (o 25 g di lievito fresco), 1/2 cucchiaino di sale e 1 cucchiaino di estratto di vaniglia; organizzare gli ingredienti in quest’ordine facilita l’incorporazione omogenea e lo sviluppo della rete di glutine durante la lievitazione.
    → L’impasto avrà una struttura elastica e una mollica soffice grazie alla corretta idratazione e all’aroma della vaniglia.
  • Attiva il lievito secco in una piccola ciotola con circa 50 ml di latte tiepido e 1 cucchiaino di zucchero, mescola e lascia riposare 5–10 minuti finché si forma una schiuma leggera; se usi lievito fresco, scioglilo direttamente nel latte tiepido seguendo le istruzioni sulla confezione, senza mescolare con lo zucchero.
    → L’attivazione verifica che il lievito sia vitale e pronto a sviluppare gas durante la lievitazione.
  • In una ciotola a parte lavora 70 g di burro morbido con 50 g di zucchero fino a ottenere una crema liscia e omogenea, quindi integra 1 uovo grande leggermente sbattuto e 1 cucchiaino di estratto di vaniglia, sbattendo brevemente per emulsionare aromi e grassi.
    → Creare una crema di burro e zucchero migliora la distribuzione di grassi nell’impasto e conferisce morbidezza alla mollica.
  • Aggiungi lentamente il latte tiepido rimanente e la miscela di lievito al composto di burro-zucchero-uovo-vaniglia, poi incorpora la farina setacciata e 1/2 cucchiaino di sale in tre riprese, mescolando tra un’aggiunta e l’altra per evitare grumi e ottenere un impasto omogeneo.
    → L’introduzione graduale di liquidi e farina permette una splendida idratazione senza rendere l’impasto appiccicoso.
  • Impasta a mano su una superficie leggermente infarinata per 8–10 minuti (o con impastatrice a gancio a bassa velocità per 5–6 minuti) finché l’impasto è liscio, elastico e si allunga senza strapparsi; esegui il test finestra tirando una piccola porzione: se si allunga in una membrana sottile senza rompersi, è pronto.
    → Il test finestra conferma lo sviluppo del glutine, fondamentale per una mollica soffice e una buona alveolazione durante la cottura.
  • Colloca l’impasto in una ciotola oliata, coprilo con pellicola o un canovaccio umido e lascia lievitare in un luogo caldo finché raddoppia di volume, circa 60–90 minuti a seconda della temperatura ambiente; evita correnti d’aria che potrebbero spezzare la lievitazione.
    → La lievitazione arricchisce l’impasto di gas, migliora la struttura e rende le girelle soffici e soffici a ogni morso.
  • Stendi l’impasto lievitato su una superficie leggermente infarinata in un rettangolo di circa 40 × 30 cm, con spessore di circa 0,5 cm; una base regolare facilita una rollatura uniforme e una cottura uniforme.
    → Un rettangolo ben formato evita spessori irregolari che potrebbero rompere durante l’arrotolamento e la cottura.
  • Distribuisci il ripieno scelto: se usi marmellata, spalma uno strato sottile lasciando 1 cm dai bordi; se usi crema al cioccolato spalmabile, stendi uno strato sottile e uniforme evitando eccessi che ostacolino la rollatura; opzionalmente aggiungi scorza grattugiata di limone o arancia per un profumo fresco; se vuoi, spennella una sottile lamina di burro fuso sul rettangolo prima di aggiungere il ripieno per una consistenza ancora più morbida.
    → Un ripieno sottile evita fuoriuscite durante la cottura e aiuta a definire le striature interne del rotolo.
  • Arrotola saldamente dal lato lungo, comprimendo man mano per sigillare bene il rotolo; chiudi i bordi per impedire fuoriuscite e spostare il ripieno durante la cottura.
    → Un rotolo compatto mantiene la forma e permette una mollica omogenea nelle girelle.
  • Taglia il rotolo in fette di circa 2 cm di spessore e disponile su una teglia rivestita con carta forno, lasciando spazio tra una girella e l’altra per la lievitazione secondaria.
    → La separazione permette l’espansione uniforme senza attaccarsi tra loro.
  • Copri le girelle con un canovaccio pulito e lascia lievitare nuovamente in luogo caldo per 20–40 minuti, finché aumentano di volume ma non superano la teglia; questa seconda lievitazione è essenziale per ottenere una consistenza morbida e una superfice ben dorata.
    → La seconda lievitazione sviluppa ulteriormente la mollica e la struttura interna delle girelle.
  • Preriscalda il forno a 180°C (350°F) e spenna delicatamente la superficie delle girelle con tuorlo d’uovo miscelato con 1 cucchiaio di latte per ottenere una doratura uniforme e lucente; evita di saturare troppo la superficie per non far scorrere il ripieno durante la cottura.
    → La spennellatura aggiunge colore dorato e una finitura professionale.
  • Inforna le girelle per 20–25 minuti, controllando la doratura; se necessario, ruota la teglia a metà cottura per garantire una colorazione uniforme su tutte le girelle.
    → Una cottura completa assicura una mollica morbida all’interno e una superficie ben dorata all’esterno.
  • Sforna e lascia raffreddare le girelle su una griglia per 15–20 minuti prima di glassarle; un raffreddamento breve evita che la glassa si sciolga troppo e comprometta la forma.
    → Il raffreddamento consente di tagliare/servire senza schiacciare la pasta.
  • Prepara la glassa semplice mescolando 150 g di zucchero a velo con 2–3 cucchiai di latte o di succo di limone, mescolando fino a ottenere una consistenza setosa e uniforme; aggiusta la densità con latte o zucchero secondo necessità.
    → Questa glassa dona brillantezza e una dolcezza leggera senza appesantire la mollica.
  • Arricchisci la glassa con scorza grattugiata di limone o arancia, se desideri, aggiungendo piccole quantità finché non ottieni l’aroma e la tonalità desiderati; mescola bene per distribuire uniformemente il profumo.
    → L’aggiunta di scorza aromatizza la glassa e offre un contrasto di freschezza.
  • Spalma la glassa sulle girelle raffreddate e, se vuoi, spolvera con zucchero a velo prima di servire per una presentazione invitante; servile entro poche ore per mantenere la morbidezza della pasta.
    → La glassa completa il piatto con una lucentezza appetitosa e una nota dolce bilanciata.

Notes

These Girelle colazione are soft, buttery breakfast swirls built on an enriched yeast dough enriched with milk, butter and vanilla. They are versatile and shine with a range of fillings—from jam or marmalade to a luscious Nutella or gianduia cream—creating pretty, flavorful spirals that pair perfectly with a morning cup of coffee or tea. For success, keep ingredients at room temperature, activate the yeast correctly, and handle the dough gently to preserve its elasticity and structure during rolling.

To shape, first prepare the dough and let it rise until doubled in a warm, draft-free spot. Roll the dough to about 0.5 cm thickness, spread your chosen filling in an even, thin layer (a light border around the edges helps prevent overflow), then roll tightly from the long side and cut into even slices. Arrange the slices with space to expand on a lined tray or in a baking dish. A second brief rise will puff the swirls before baking, resulting in a soft, airy crumb and beautiful spirals.

Bake at around 180°C until the tops are golden and the rolls sound hollow when tapped, typically 20–25 minutes depending on size. Finish with a glaze or dusting of powdered sugar if desired. For the glaze, whisk 150 g powdered sugar with 2–3 tbsp milk or a splash of lemon juice, adjusting for a glossy, pourable consistency; lemon or orange zest in the glaze adds a fresh citrus note. These can be enjoyed warm from the oven or cooled to room temperature. They freeze well when baked or unbaked; wrap tightly and reheat gently to restore softness. Variations are welcome: use jam, lemon-curd, or chocolate spread in the filling, and add citrus zest or a pinch of cinnamon for extra aroma. If you need a gluten-free version, substitute with a certified gluten-free flour blend and ensure yeast compatibility, adjusting liquids as needed; dairy-free options can be used by replacing milk with a plant-based milk and butter with a dairy-free alternative. Always tailor the filling and glaze to your taste and dietary needs.

Tips

Consigli generali

  • La farina: preferisci Manitoba o una 00 forte e setaccia bene per eliminare grumi e incorporare aria. Una buona elasticità favorisce alveolatura e la tenuta della rollatura.
  • Liquidi a temperatura ambiente: latte tiepido e burro morbido permettono una migliore emulsione e una lievitazione uniforme. Se la cucina è fredda, siedi l’impasto in un ambiente leggermente caldo per favorire la lievitazione.
  • Impasto non appiccicoso: se serve, aggiungi poca farina, ma evita di lavorare troppo per non compromettere la struttura del glutine. Il test del “documento sottile” (windowpane) aiuta a capire quando è pronto.

Impasto e lievitazione

  • Attivazione del lievito: utilizzare il lievito secco attivo attivandolo in una piccola quantità di latte tiepido per 5–10 minuti finché diventa schiumoso. Il lievito fresco va attivato allo stesso modo secondo le dosi indicate.
  • Temperatura: evitare latte troppo caldo per non uccidere il lievito. Se l’ambiente è freddo, aumentare leggermente i tempi di lievitazione o utilizzare una teglia con acqua calda sul fondo per creare umidità.
  • Lievitazione: lasciare l’impasto lievitare fino al raddoppio. Per un sapore più intenso e una texture migliore, è possibile fare una seconda lievitazione in frigorifero durante la notte (riducendo lievito e tempo).

Ripieno e assemblaggio

  • Stendi l’impasto in un rettangolo di circa 40×30 cm con uno spessore di 0,3–0,5 cm: una base liscia facilita la rollatura e una chiusura efficace.
  • Ripieno: evita eccessi di liquido. Marmellata o crema devono essere a temperatura ambiente e distribuiti in uno strato sottile ed uniforme. Per un effetto “striato” migliore, lascia una lieve striscia di ripieno lungo la lunghezza.
  • Se usi crema al cioccolato (Nutella), scaldala leggermente per facilitare la stesura; distribuiscila in modo uniforme senza mettere troppo vicino ai bordi per evitare fuoriuscite.
  • Aromi nel ripieno: aggiungere scorza grattugiata di limone o arancia in piccole quantità per un profumo fresco. Un piccolo velo di burro fuso sul ripieno può aiutare l’adesione.

Glassa e rifiniture

  • Glassa: prepara una glassa semplice con 150 g di zucchero a velo e 2–3 cucchiai di latte (o succo di limone) fino a ottenere una consistenza setosa. Per una glassa più lucida, usa latte freddo.
  • Aromi per la glassa: scorza di limone o arancia grattugiata aggiunge freschezza. Aggiungi piccole quantità per non coprire troppo il gusto del ripieno.
  • Applicazione: spennella la glassa sulle girelle solamente quando sono raffreddate per evitare che si sciolga troppo e alteri la consistenza della pasta.

Tempo, temperatura e cottura

  • Cuoci in forno preriscaldato a 180–190°C in modalità statica. Il tempo di cottura è di circa 20–25 minuti, o finché la superficie è dorata.
  • Spazio tra le girelle sulla teglia: lascia margine sufficiente per permettere la crescita uniforme durante la lievitazione in cottura.
  • Conservazione: una volta raffreddate, richiudi in contenitore ermetico. Puoi anche congelarle crude e cuocerle direttamente dal congelatore, aumentando leggermente il tempo di cottura.

Varianti e suggerimenti extra

  • Aggiungi cannella o scorza di agrumi al ripieno per varianti profumate e golose.
  • Prova ripieni alternativi: crema di nocciole, marmellate diverse o una crema gianduia leggera. Per una versione più leggera, riduci lo zucchero nel ripieno.
  • Per una morbidezza extra, aggiungi un cucchiaio di miele o una piccola quantità di panna nell’impasto per arricchirne il tessuto.

FAQ

Che cosa sono le Girelle colazione?

Le Girelle colazione sono rotoli dolci di pasta lievitata, farciti tipicamente con crema spalmabile, marmellata o Nutella, tagliati a fette e cotti al forno. Sono morbide, profumate e perfette per una colazione golosa o una merenda.

Quali ingredienti servono?

Impasto: 500 g di farina, 250 ml di latte tiepido, 60 g di burro morbido, 70 g di zucchero, 1 uovo, 7 g di lievito di birra secco (o 25 g fresco), 1 pizzico di sale, scorza di limone grattugiata.

Farcitura: Nutella o crema spalmabile, marmellata a scelta, scorza di limone o cannella. Opzionali: granella di zucchero per decorare e zucchero a velo da spolverare prima di servire.

Posso usare lievito secco o fresco?

Entrambi funzionano. Se usi lievito fresco, scioglilo nel latte tiepido e fai riposare 5–10 minuti prima di aggiungerlo agli ingredienti. Se usi lievito secco attivo, scioglilo nello stesso latte e procedi; lascia lievitare finché l’impasto raddoppia di volume. I lieviti chimici istantanei non sono indicati per questa pasta che richiede tempo di lievitazione.

Come si prepara l’impasto passo-passo?
  1. Sciogli il lievito nel latte tiepido con un pizzico di zucchero e lascia agire 5–10 minuti.
  2. In una ciotola capiente, mescola farina, zucchero, scorza di limone e un pizzico di sale.
  3. Aggiungi l’uovo e il latte con lievito, poi lavora fino a ottenere un impasto morbido ed elastico.
  4. Aggiungi il burro morbido a pezzi, continuando a impastare finché sarà completamente incorporato e l’impasto sarà lucido ed elastico (circa 10 minuti).
  5. Copri e lascia lievitare in luogo tiepido finché raddoppia di volume (circa 1 ora).
Come farcire e arrotolare le girelle?
  1. Stendi l’impasto in una sfoglia rettangolare dello spessore di circa 0,5 cm.
  2. Spalma uno strato uniforme di Nutella, crema o marmellata, lasciando un bordo di circa 1 cm.
  3. Aggiungi scorza di limone o cannella se vuoi una nota profumata.
  4. Arrotola dal lato lungo in un cilindro stretto. Sigilla bene i bordi.
  5. Taglia il cilindro in circa 2 cm fette e disponile su una teglia rivestita con carta forno, leggermente distanziate.
Quanto tempo impiega la lievitazione e la preparazione?

Tempo totale indicativo: circa 2 ore e mezza. Preparazione impasto e prima lievitazione circa 1 ora, farcitura e taglio 15–20 minuti, seconda lievitazione 30–60 minuti prima di infornare.

A quale temperatura e quanto tempo si cuociono?

Cuoci in forno preriscaldato a 180°C, in modalità statica, per 18–25 minuti, finché le girelle sono dorate in superficie. Se vuoi una crosticina più croccante, lascia qualche minuto in più, controllando per non bruciarle.

Come si conservano e si riscaldano?

Si conservano morbide per 2–3 giorni in un contenitore ermetico o chiuso. Per riscaldarle, mettile in forno o microonde per pochi secondi; in forno tradizionale, 150°C per 5–8 minuti, spennellando con poco latte se sembrano secche.

Quali varianti gustose posso provare?
  • Farcitura al cioccolato e nocciole o Nutella con aggiunta di gocce di cioccolato.
  • Crema al pistacchio o marmellata ai frutti di bosco.
  • Cannella e zucchero di canna per un sapore simile ai cinnamon rolls.
  • Versione integrale o parzialmente integrale con una parte di farina integrale, magari usando olio al posto del burro per una versione leggermente diversa.
Suggerimenti utili per ottenere girelle perfette
  • Non esagerare con il ripieno per evitare che fuoriesca durante la cottura.
  • Spennella i bordi con latte o uovo sbattuto per una chiusura ben sigillata.
  • Assicurati che l’impasto sia ben lievitato; se non lievita bene, la consistenza risulterà meno soffice.
  • Se non hai forno tradizionale, puoi cuocerle in forno ventilato a 170°C per tempi leggermente ridotti.