Introduction / Hook
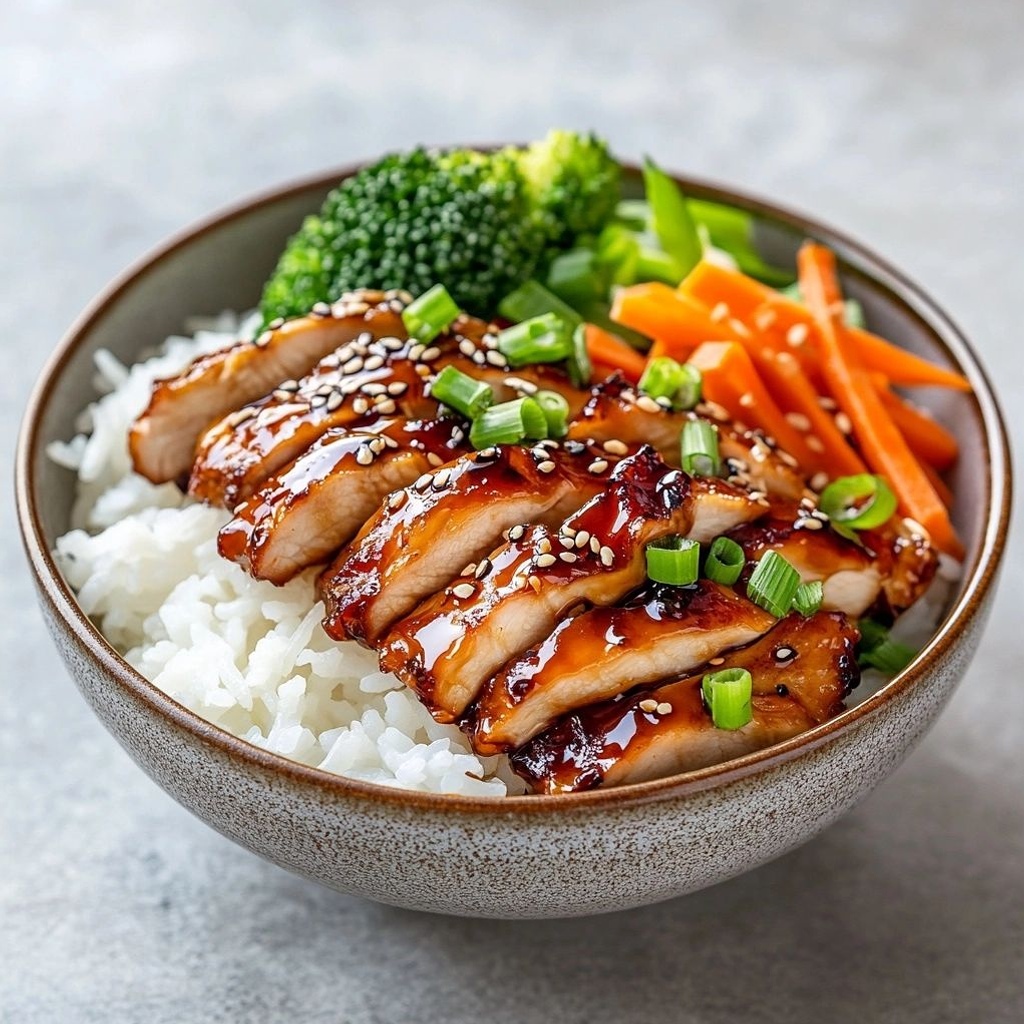
Imagine a warm bowl brimming with glossy, caramelized chicken, glossy with a lacquered glaze that sings with a perfect balance of sweet and savory. The steam rises in soft curls, carrying the inviting scent of ginger, garlic, and toasted sesame. Each bite reveals a tender bite of chicken, a chewy bite of perfectly cooked rice, and a kiss of tangy-sweet teriyaki that clings to every grain like a friendly embrace. The Teriyaki Chicken Rice Bowl is not just a meal; it’s a moment of comfort, a promise of quick weeknight joy, and a little travelogue to the bustling streets of Tokyo or Osaka without ever leaving your kitchen. It’s a dish that feels both familiar and pleasantly exotic, familiar enough to feed a hungry crowd, exotic enough to feel special for date night or a celebratory weeknight treat. In this bowl, you’ll discover how simple ingredients, when treated with a gentle hand and a little patience, transform into something greater than the sum of its parts. The aroma alone can turn a pause into anticipation, and the first bite can transport you to a sunlit izakaya where friends gather to share stories and laughter over a gleaming glaze.
The Story Behind the Dish
Teriyaki, a term that evokes both technique and flavor, originates from Japan and embodies a cooking style that caramelizes sauces onto proteins with a bright, glossy finish. The word itself comes from “teri,” meaning to shine or glow, and “yaki,” meaning to grill or fry. While teriyaki can be applied to a variety of proteins—salmon, beef, tofu—the classic chicken teriyaki remains a beloved staple in homes and eateries alike. The Teriyaki Chicken Rice Bowl is a modern, accessible expression of this tradition: a single, satisfying vessel that brings together a protein ready for the grill or skillet, a bed of starchy rice, and a selection of colorful, textural toppings. In Japan, it often appears in bento boxes as a balanced, visually appealing meal. Across many kitchens worldwide, it’s become a weeknight hero because it can be prepared in a skillet or sheet-pan, requires just a handful of pantry staples, and yields a glossy, family-friendly dish that can be customized to taste and dietary needs. The story of teriyaki in a bowl is the story of how a simple glaze—soy, mirin, sugar—meets a modest piece of chicken and transforms it into something celebratory. It’s the story of comfort that travels well, of the kitchen as a stage where everyday ingredients become memories we carry through the week.
Why You’ll Love This Recipe
- Simple, pantry-friendly ingredients with a restaurant-quality finish.
- Versatile: suitable for weeknights, meal-prep, or a cozy weekend dinner.
- Balanced flavors: savory soy, caramelized sweetness, kiss of ginger and garlic, bright sesame notes.
- Textural harmony: tender chicken, glossy glaze, fluffy or slightly chewy rice, crisp vegetables if you choose to add them.
- Kid-friendly and adaptable: mild to medium savory profile, easy to tune with extra veggie toppings or spice adjustments.
- Glazed finish that clings to every bite, making even leftovers feel special.
Flavor Profile & Texture
The Teriyaki Chicken Rice Bowl dances between sweet and savory with a glossy, almost lacquer-like glaze that coats the chicken and blankets the rice. The chicken itself is lightly charred at the edges, giving a subtle smoky depth that contrasts with the glaze’s brightness. The sauce, typically a blend of soy sauce, mirin or a mirin substitute, sugar or honey, and ginger, offers a multi-layered aroma: a warm, umami-rich savoriness anchored by a gentle sweetness that never veers into cloying territory. Notes of garlic provide a savory backbone, while sesame seeds add a toasty crunch and a nutty finish. When you take a bite, you’ll experience a tender, juicy interior wrapped in a graceful glaze that delivers both moisture and shine. The rice serves as a neutral, slightly chewy counterpoint—perfectly steamed grains that soak up the sauce’s richness without becoming mushy. If you add vegetables, thin ribbons of cucumber, steamed broccoli, or quick-pickled vegetables introduce a crisp, refreshing contrast that brightens the plate. The overall texture is comforting yet dynamic: a glossy surface that yields to a soft, yielding bite, balanced by small pops of texture from any crunchy toppings or vegetables you choose to include.
Occasions & Pairings
This bowl is a crowd-pleaser for many occasions. It shines as a family weeknight dinner because it comes together quickly, reheats well, and can be easily scaled for larger groups. It is equally at home as a casual date-night dish, where a little extra attention to caramelization makes the glaze feel restaurant-worthy. For weekend meals or potlucks, you can double the glaze and let guests customize toppings to their liking. Pair it with:
- Side dishes: pickled cucumbers, steamed edamame, or a light sesame-ginger slaw to cut through the richness.
- Drinks: a crisp cold sake, a light lager, or a dry white wine like Sauvignon Blanc or Pinot Grigio to balance the sweetness.
- Desserts: Citrus-flavored treats, like yuzu sorbet or a lemon-ginger ice cream, that echo the brightness of the glaze.
Tips, Variations & Substitutions
Here are possibilities to tailor the dish to your kitchen, dietary needs, or mood:
- Protein variations: swap chicken for boneless thighs for extra juiciness, or use salmon or tofu for a pescatarian or vegetarian version (cooking times for tofu or salmon will vary).
- Glaze adjustments: simmer the glaze a minute or two longer for a thicker, more clingy coating. If you prefer a lighter glaze, reduce the sugar or use maple syrup for a nuanced sweetness.
- Gluten-free friendly: ensure your soy sauce is gluten-free; use tamari as a gluten-free alternative.
- Low-sugar option: use a sugar substitute that behaves well in sauces, or reduce sugar to taste and compensate with a splash of rice vinegar for balance.
- Veggie boosters: add steamed broccoli florets, sautéed bell peppers, shredded carrot, or quick-pickled cucumbers for color, crunch, and freshness.
- Make-ahead mindset: cook the rice in advance and reheat gently; marinate the chicken in a little of the glaze (not too long if using garlic) to deepen flavor, then cook when ready to serve.
- Spice level: add a pinch of chili flakes into the glaze or a drizzle of chili oil at the end for heat lovers.
- Regional twists: add a squeeze of yuzu juice to brighten the glaze, or finish with furikake for a seaweed-crunchy finish.
Storage & Make-Ahead Ideas
The Teriyaki Chicken Rice Bowl stores well, making it a practical choice for meal prep. Here are tips to keep it tasty and texturally appealing:
- Rice storage: refrigerate cooked rice promptly in an airtight container. Rice keeps 3–4 days in the fridge. Reheat with a splash of water to restore moisture.
- Chicken and glaze: refrigerate leftover glazed chicken separately from the rice to maintain texture. Reheat gently on the stove with a tiny bit of water or stock to loosen the glaze if needed.
- Vegetables: if you’re including vegetables, store them separately to prevent sogginess. Reheat quickly in a skillet with a splash of sauce to re-soften and re-glaze.
- Freezing: this dish doesn’t freeze as well with rice often turning dry; if you must freeze, freeze components separately (glazed chicken, rice, and vegetables) and assemble fresh when reheating, then drizzle with a little extra glaze.
- Make-ahead strategy: prepare the glaze ahead of time and keep it in the refrigerator. Cook chicken and rice fresh, then toss the glaze over the chicken just before serving for maximum shine and flavor.
Fun Facts & Trivia (Optional)
– Teriyaki, when translated, can be thought of as a promise of shine: the glaze is designed to lacquer the surface of the protein, giving it a gleam that’s as visually appealing as it is tasty.
– In Japanese home kitchens, teriyaki is often a practical, quick-cooking method that makes humble ingredients feel special, aligning with the idea that dinner can be both nourishing and celebratory without requiring hours in the kitchen.
– Mirin, a key component of traditional teriyaki, is a sweet rice wine that adds depth and subtle sweetness; if you don’t have mirin, a mixture of rice vinegar and sugar or honey can approximate the balance, though it won’t be an exact replica.
Closing Thoughts
The Teriyaki Chicken Rice Bowl is a celebration of everyday cooking elevated by a glossy glow and a balanced flavor profile that resonates with lovers of Asian-inspired home cooking. It’s a dish that invites personalization, whether you’re a seasoned cook building a pantry of umami or a curious eater who wants something comforting and easy to prepare after a long day. By focusing on a short list of core ingredients and mastering a simple glaze, you unlock a culinary trick that you can apply to countless other dishes: the art of letting a glaze do the heavy lifting, letting minutes of caramelization work their magic, and letting a bed of rice capture the sauce’s sweetness rather than letting it run away. In short, it’s a versatile, deeply satisfying bowl that can be both a reliable weeknight staple and a little culinary adventure depending on how you garnish and what you pair with it. Ready your skillet, warm your rice, and let the glaze perform its glow—your kitchen is about to become a little more inviting, a little more delicious, and a lot more comforting with every glossy spoonful.
Ingredients
- Rice & Base
– 2 cups jasmine rice (rinsed until water runs clear)
→ The rice forms the starchy bed of the bowl. Rinsing removes surface starch to prevent clumping and achieve fluffy, separate grains. Cook according to package instructions, but stop about 5 minutes before full tenderness if you like a bit firmer bite for bowls. - Protein
– 1.5 to 2 pounds boneless skinless chicken thighs (patted dry)
→ Chicken thighs stay juicier and more flavorful than breasts when cooked quickly in a teriyaki glaze. Pat dry to ensure proper sear; trim excess fat if desired. You can marinate briefly (15–30 minutes) to enhance depth, but a quick sear will still yield a tasty result. - Teriyaki Sauce (base glaze)
– 1/2 cup soy sauce (low-sodium preferred)
→ Provides saltiness and umami as the foundation of the glaze. Low-sodium soy helps control saltiness; adjust with a pinch of sugar if needed. Use a light-to-medium color soy to avoid overpowering the dish. - Teriyaki Sauce (sweetener and balance)
– 1/3 cup mirin (or 2 tablespoons sake + 2 teaspoons sugar as substitute)
→ Mirin adds gentle sweetness and depth. If using sake and sugar, simmer briefly to allow the alcohol to burn off and the sugar to dissolve, creating a glossy glaze. Adjust sweetness to taste after simmering. - Teriyaki Sauce (thickener)
– 1 tablespoon cornstarch mixed with 2 tablespoons water (slurry)
→ The slurry thickens the sauce to coat the chicken and rice nicely. Create a smooth slurry to avoid lumps; add gradually while simmering until desired glaze thickness is reached. For a thinner sauce, use 1 teaspoon cornstarch instead. - Aromatics
– 3 cloves garlic (minced)
→ Garlic provides a sharp aroma and depth to the glaze. Mince finely to prevent any large bites and ensure even distribution. You can crush for milder flavor if preferred. - Aromatics
– 1 tablespoon fresh ginger (minced or grated)
→ Ginger adds brightness and warmth that cuts through the savory glaze. Peel and grate finely so it disperses evenly and doesn’t stay fibrous in bites. - Vegetables
– 1 cup broccoli florets (cut into bite-sized pieces)
→ Provides color, texture, and nutrition. Blanch or steam briefly until just tender-crisp to maintain vibrant green and a satisfying bite inside the bowl. - Vegetables
– 1 bell pepper (red or yellow, thinly sliced)
→ Adds sweetness, color, and crunch. Slice evenly to ensure uniform cooking; sauté briefly so it stays crisp-tender and not soggy. - Vegetables
– 1 small carrot (julienned or thinly sliced)
→ Introduces color and a light sweetness. Julienne or shave thinly so it cooks quickly and pairs well with the glaze. - Oil & Finishes
– 1 tablespoon sesame oil (or neutral oil)
→ Adds nutty aroma and helps in searing the chicken. Sesame oil has a strong flavor, so use it for finishing or a light drizzle if using a neutral oil for cooking. - Garnish & Flavor Enhancers
– 2 green onions (scallions, sliced)
→ Brighten the dish with fresh onion flavor and color. Slice thinly on the bias for nicer presentation and quick flavor release. - Toppings
– 1 tablespoon sesame seeds (toasted)
→ Adds crunch and a toasty aroma that complements the glaze. Toast the seeds lightly in a dry pan before using to maximize flavor. - Optional Pineapple
– 1 cup pineapple chunks (fresh or canned, drained)
→ If you enjoy a sweet/tangy contrast, pineapple adds juicy bursts that pair with the salty glaze. If using canned, choose 100% juice without added syrups and drain well to avoid excess moisture. - Seasoning & Balance
– 1/2 teaspoon white or brown sugar (optional, to adjust glaze)
→ A touch more sweetness can help balance saltiness if your soy sauce is particularly salty. Add gradually and taste the glaze as you go.
Instructions
- Rinse the jasmine rice under cold running water until the rinsing water runs clear, then drain thoroughly and transfer to a pot with the recommended cooking liquid or to a rice cooker.
→ Rinsing removes surface starch that causes clumping, ensuring fluffy, separated grains that form a stable bed for the toppings. - Set up your cooking method for the rice: cook it according to the package instructions, but stop about 5 minutes before full tenderness if you prefer a firmer bite for bowls.
→ A slightly firm texture prevents the rice from turning mushy when coated with the glaze and mixed with vegetables. - Pat the chicken thighs completely dry with paper towels and trim any excess fat, then season lightly with salt and pepper or your preferred dry rub.
→ Patting dry improves the sear by promoting better surface contact; seasoning at this stage helps build flavor without drawing out too much moisture. - Heat a large skillet or sauté pan over medium-high heat and add 1 tablespoon of oil, then sear the chicken in a single layer until deeply browned on all sides, about 4 to 6 minutes per side depending on thickness.
→ A good sear creates a flavorful crust and helps lock in juices; avoid crowding the pan to prevent steaming instead of browning. - Remove the chicken from the pan and let it rest on a cutting board for 5 minutes, then slice into bite-sized pieces or strips.
→ Resting redistributes juices, making the meat more succulent; slicing against the grain yields more tender bites in every bowl. - In a separate bowl, whisk together 1/2 cup soy sauce, 1/3 cup mirin, and 1/2 teaspoon sugar (if using) to create the base teriyaki glaze, adjusting saltiness with more soy if needed.
→ This blend provides the salty, sweet, and umami foundation for the glaze; balancing it early makes the final flavor more cohesive. - Stir in 3 minced garlic cloves and 1 tablespoon grated fresh ginger to the sauce, then bring to a simmer in a small saucepan over medium heat for 2 to 3 minutes to awaken aromatics.
→ Garlic and ginger infuse the glaze with brightness and warmth; simmering softens sharp edges and merges flavors before thickening. - Whisk the cornstarch slurry (1 tablespoon cornstarch mixed with 2 tablespoons water) into the simmering sauce and continue to simmer until the glaze thickens to a nappe-like consistency that coats the back of a spoon.
→ The slurry creates the glossy, clingy coating that clads the chicken and vegetables; add gradually and cook until the desired thickness is reached to avoid a gummy texture. - Return the sliced chicken to the pan with the thickened glaze, tossing to coat evenly and heat through, then cook for another 1 to 2 minutes so the coating adheres and glistens.
→ Reintroducing the meat to the glaze ensures even coating and a cohesive glaze on every bite, while residual heat finishes cooking without drying the chicken. - Blanch or steam the broccoli florets in salted water for 1 to 2 minutes until bright green and just tender-crisp, then drain and set aside.
→ Quick cooking preserves vibrant color, crisp texture, and nutrients; stopping at this stage prevents overcooking when assembled in bowls. - Sauté the red or yellow bell pepper slices in a small amount of oil for 2 to 3 minutes until they are tender-crisp, then remove from heat.
→ Brief sauté enhances sweetness and preserves color and crunch, contributing texture contrast within the bowl. - Julienne the carrot into thin matchsticks or shave it to thin ribbons, then lightly toss with a pinch of salt to draw out moisture and soften slightly.
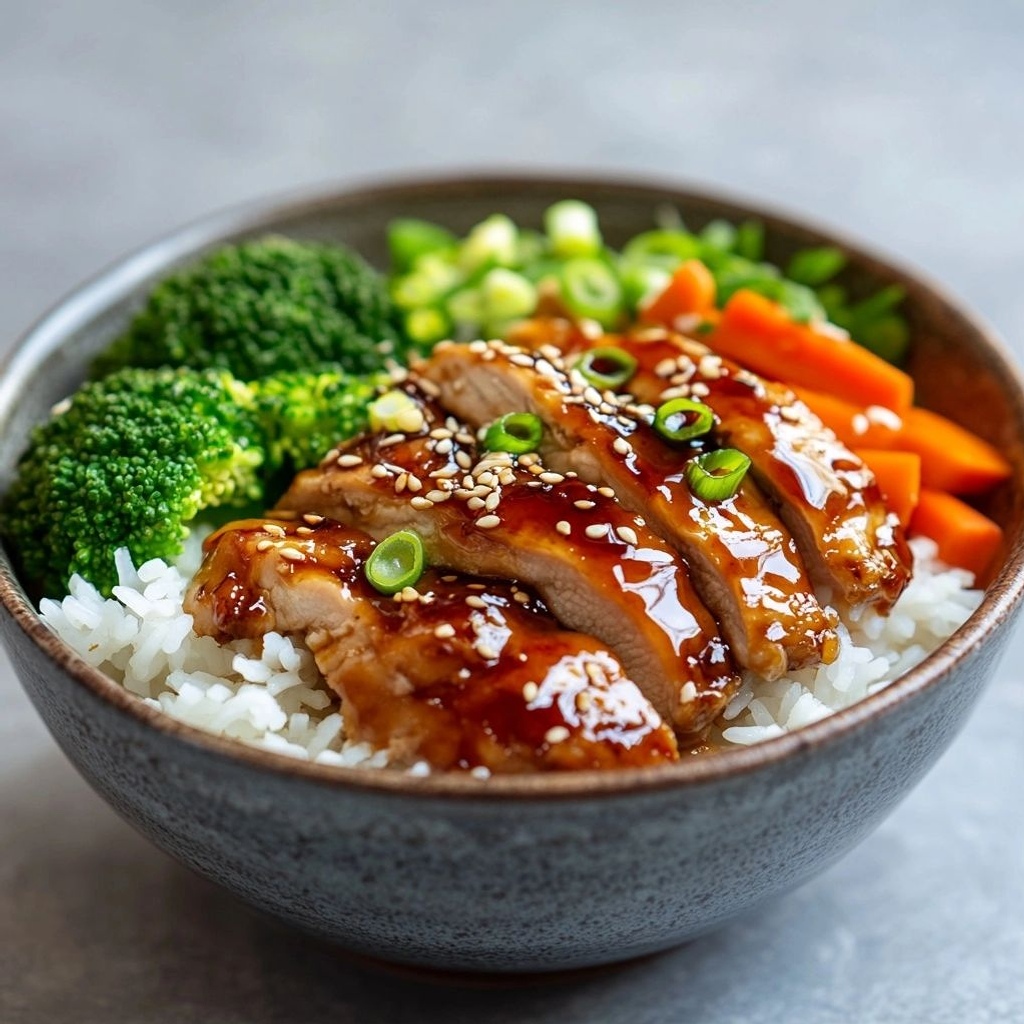
→ Fine cuts ensure quick, even cooking and a delicate texture that complements the glaze without overpowering it. - Assemble each bowl by placing a bed of jasmine rice in the base, followed by the blanched broccoli, sautéed pepper, and carrot, then top with the glazed chicken pieces.
→ Layering creates a balanced dish where each bite includes starch, vegetables, and protein with harmonious glaze; visuals matter, so keep portions even and tidy. - Finish with a drizzle of any remaining glaze over the top, then sprinkle with 1 tablespoon toasted sesame seeds and 2 sliced green onions for aroma and color.
→ Finishing with fresh sesame and scallions adds nutty aroma, brightness, and a crisp finish that complements the glaze’s richness. - Serve immediately while hot, offering extra steamed rice on the side if desired, and provide a small dish of the remaining glaze for those who want a more intense flavor.
→ Serving hot ensures the glaze remains glossy and coats the proteins and vegetables well, while extra rice lets guests adjust balance as they eat.
Notes
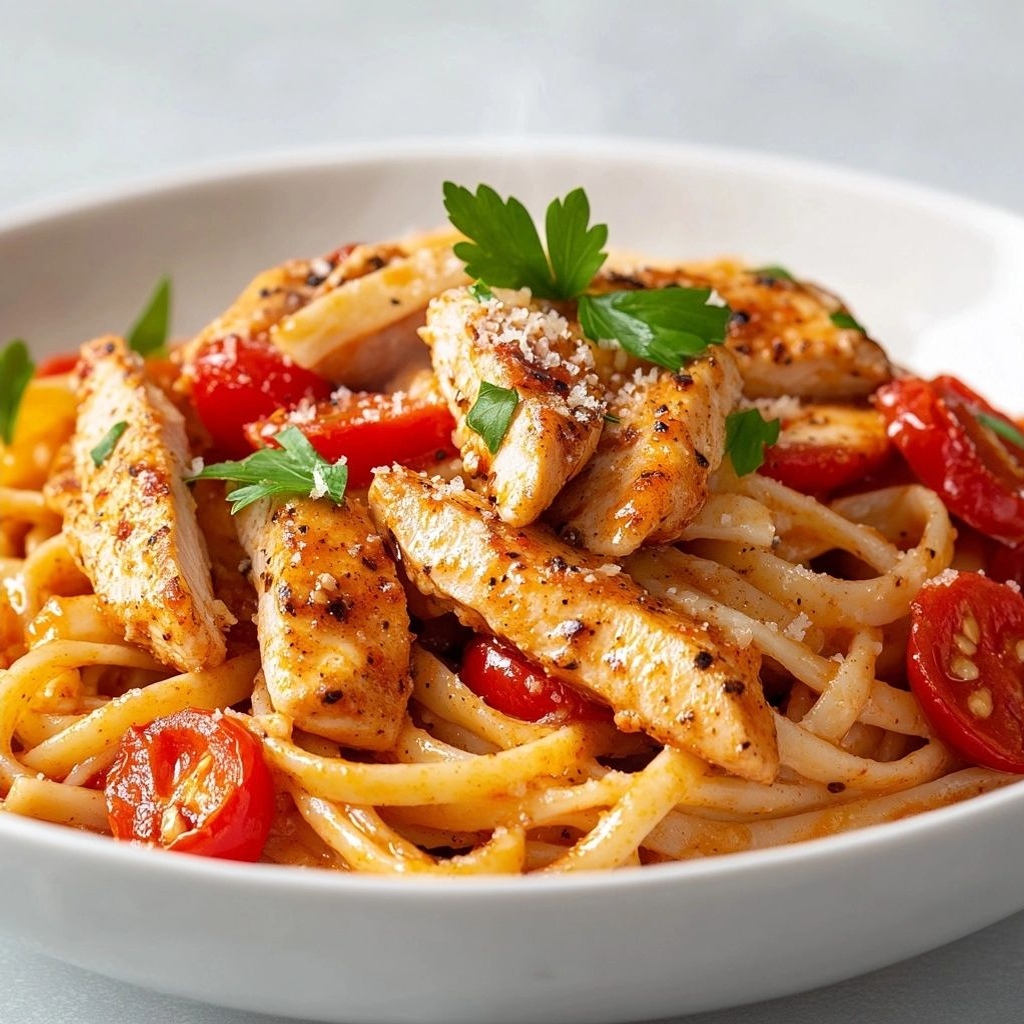
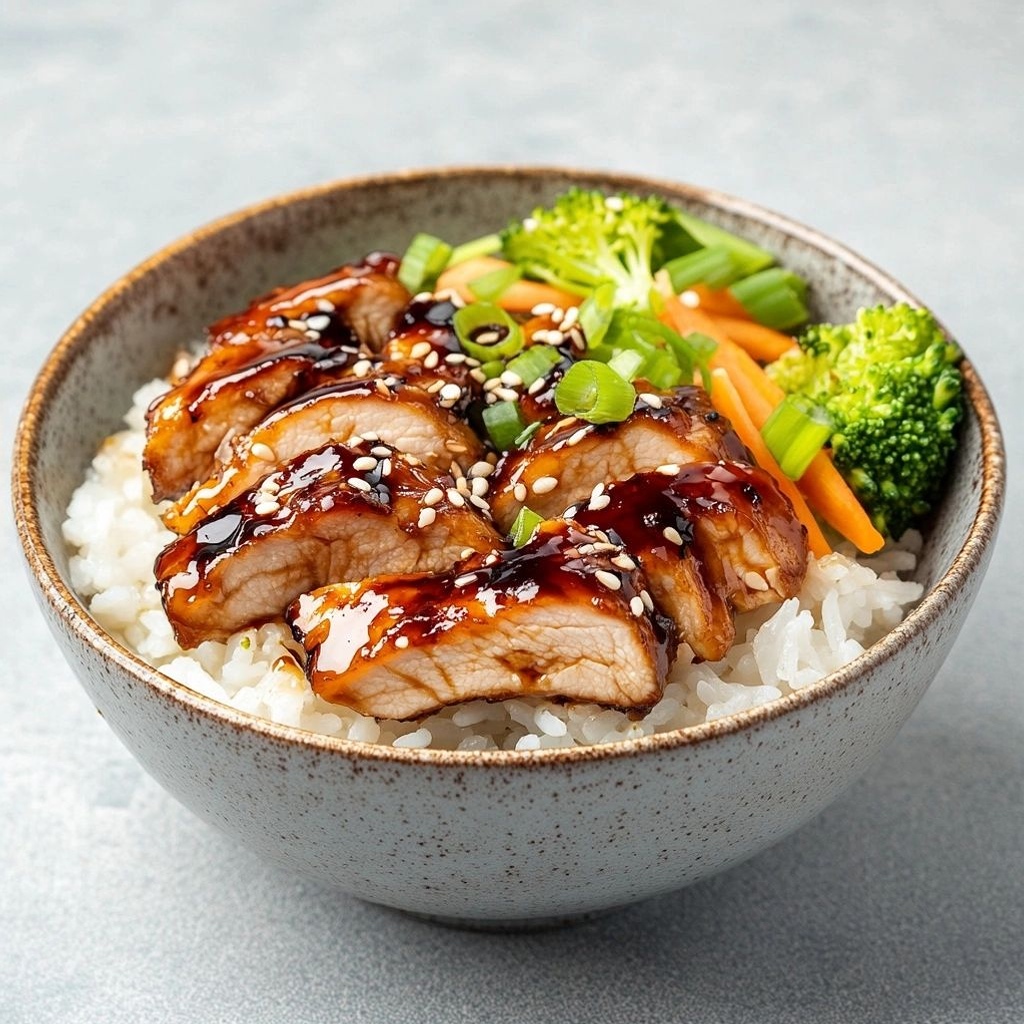
“These Teriyaki Chicken Rice Bowls are a colorful, satisfying meal featuring juicy chicken, glossy homemade teriyaki glaze, crisp vegetables, and a fluffy jasmine rice base. The key is a quick sear for a flavorful crust, then a gentle simmer to coat the chicken with a glossy glaze that sticks nicely to the meat and rice.”
- How to get the best sear: Pat the chicken thighs very dry with paper towels before searing. Use high heat and a touch of oil; resist the urge to move the pieces too soon to allow a flavorful crust to form.
- Glaze technique: Simmer the teriyaki sauce with the cornstarch slurry until it thickens to a glossy coating. If you prefer a lighter glaze, reduce the slurry amount or simmer less time. Taste and adjust with a splash of soy or a pinch of sugar as needed.
- Rice texture tips: Rinse the jasmine rice until the water runs clear to remove excess surface starch. Cook until just tender; if you like a firmer bite for bowls, stop 5 minutes before full tenderness and let the residual steam finish.
- Aromatics and flavor balance: Minced garlic and fresh ginger are essential for depth. If you’re sensitive to heat, add them later in the sauté or reduce their amount by half.
- Vegetable timing: Blanch or steam broccoli briefly until vibrant and tender-crisp. Sauté pepper and carrot just until they’re crisp-tender to preserve color and texture.
- Optional pineapple note: If using pineapple, add the chunks toward the end of cooking for bright, tangy bursts without making the glaze too sweet.
- Serving and plating: Spoon a bed of rice, top with sliced chicken and a generous drizzle of glaze, then scatter green onions and sesame seeds. A light drizzle of sesame oil over the finished bowl adds aroma without overpowering the glaze.
- Make-ahead tips: The sauce can be prepared a day ahead and reheated gently; re-sear the chicken quickly if reheating to refresh the crust. The bowls refrigerate well for 2–3 days; reheat gently to avoid drying the chicken.
- Dietary notes: If you need gluten-free, use certified gluten-free soy sauce and verify all added sauces are GF. You can substitute tamari for a gluten-free option with a slightly different depth.
Tips
- Prep in advance: Have all ingredients measured and ready before you start the stove. This dish comes together quickly once the glaze begins to simmer, so organized mise en place helps prevent overcooking the chicken or vegetables.
- Rice timing: Start the jasmine rice so it finishes just as you’re grilling or searing the chicken. For bowls with a firmer bite, stop the rice 5 minutes shy of full tenderness. Fluff with a quick toss of the fork after resting to keep grains separate.
- Searing the chicken: Pat dry the thighs thoroughly and sear over medium-high heat to develop color without scorching the glaze. Don’t overcrowd the pan; cook in batches if needed to maintain a good sear.
- Glaze technique: Prepare the teriyaki sauce ahead and simmer it to meld flavors before adding the cornstarch slurry. Stir the slurry in gradually and simmer until you reach a glossy, coats-the-spoon consistency. If you prefer a thinner glaze, use less slurry.
- Adjusting sweetness and salt: Taste the glaze after simmering. If it’s too salty, a splash of water or a pinch of sugar can help; if not sweet enough, add a touch more mirin or a tiny amount of sugar, then simmer briefly to dissolve.
- Aromatics: Finely mince garlic and ginger to ensure even distribution. If you’re sensitive to heat, add them later in the cooking to mellow their bite, or use a microplane for ginger to reduce fibrous bits.
- Vegetable texture: Blanch the broccoli until bright green and just tender-crisp. Sauté peppers and carrots quickly on high heat to preserve color and crunch, then toss with the chicken at the end for even heat distribution.
- Heat management: If using a wok or skillet, keep the heat high enough to sear but not so high that the sauce scorches. Add the sauce off the heat briefly if the pan is too hot, then glaze the chicken back on the heat to finish.
- Garnish timing: Slice green onions on the bias just before serving for a fresh look and quicker flavor release. Toast sesame seeds in a dry skillet until fragrant to maximize nuttiness, then sprinkle over the bowl.
- Optional pineapple: If adding pineapple, pat dry well before cooking to prevent soggy bowls. Add pineapple chunks toward the end to warm them without losing their shape and brightness.
- Meal prep approach: This dish scales well. Cook the rice and chicken in larger batches, store separately in airtight containers, and reheat with the glaze whisked in just before serving to revive flavor and texture.
FAQ
What is a Teriyaki Chicken Rice Bowl?
A Teriyaki Chicken Rice Bowl combines juicy, glazed teriyaki chicken with steamed rice and accompanying vegetables. It’s a balanced, flavorful meal that’s quick to make at home.
What are the key ingredients?
Common ingredients include chicken thighs or breasts, teriyaki sauce (soy sauce, mirin or sugar, ginger, garlic), cooked white or brown rice, and vegetables like steamed broccoli, carrots, and sesame seeds for garnish.
How do I make the teriyaki sauce?
Simmer soy sauce, mirin (or honey), and a bit of rice vinegar with grated ginger and garlic until it thickens to a glaze. Optional: cornstarch slurry to reach desired thickness.
Can I use chicken breast instead of thighs?
Yes, but thighs stay juicier. If using breast, avoid overcooking by cooking to 165°F (74°C) internal temperature and consider slicing thinly to stay tender.
Is this dish gluten-free?
Traditional teriyaki sauce often contains soy sauce with gluten. To make it gluten-free, use a certified gluten-free soy sauce or tamari, and ensure other ingredients are gluten-free.
How should I cook the chicken?
Option A: Sauté or pan-sear the chicken in a little oil until golden, then pour the teriyaki glaze over and simmer until coated and cooked through. Option B: Bake chicken, brush with sauce during the last 5 minutes.
What about the rice?
Use plain white or brown rice. Rinse rice if needed, cook according to package instructions, and fluff before serving. For quicker prep, use pre-cooked or microwaveable rice.
How can I add more vegetables?
Steam or stir-fry broccoli, snap peas, bell peppers, carrots, or edamame. You can also top with pickled ginger or sesame seeds for extra flavor and texture.
How do I store leftovers?
Store cooled leftovers in an airtight container for up to 3–4 days in the refrigerator. Reheat gently on the stove or in the microwave and drizzle with a little extra teriyaki sauce if needed.
Tips for meal-prep and freezing
Cook chicken and rice separately, portion into containers, and freeze in sauce-free portions. Thaw overnight in the fridge and reheat with freshly warmed sauce. For best texture, glaze the chicken after reheating rather than freezing with sauce.