Introduction / Hook
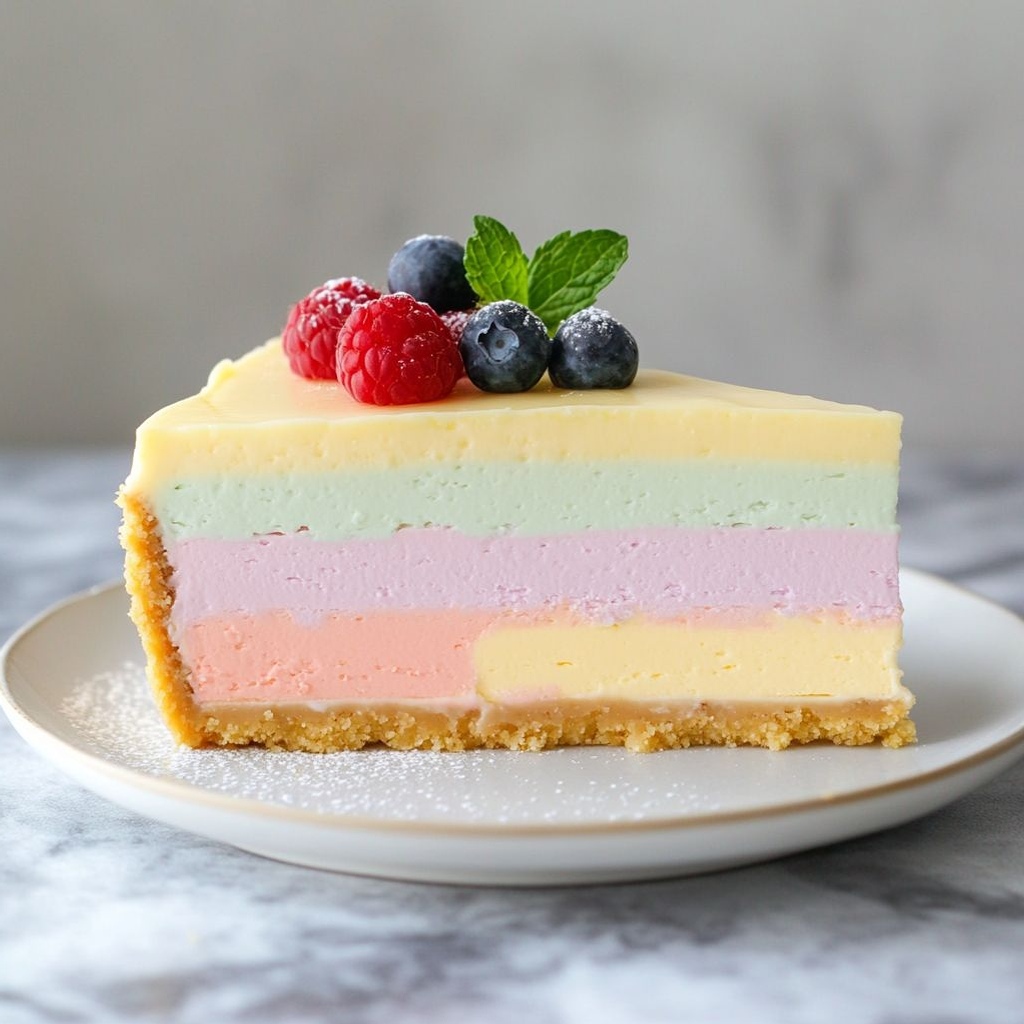
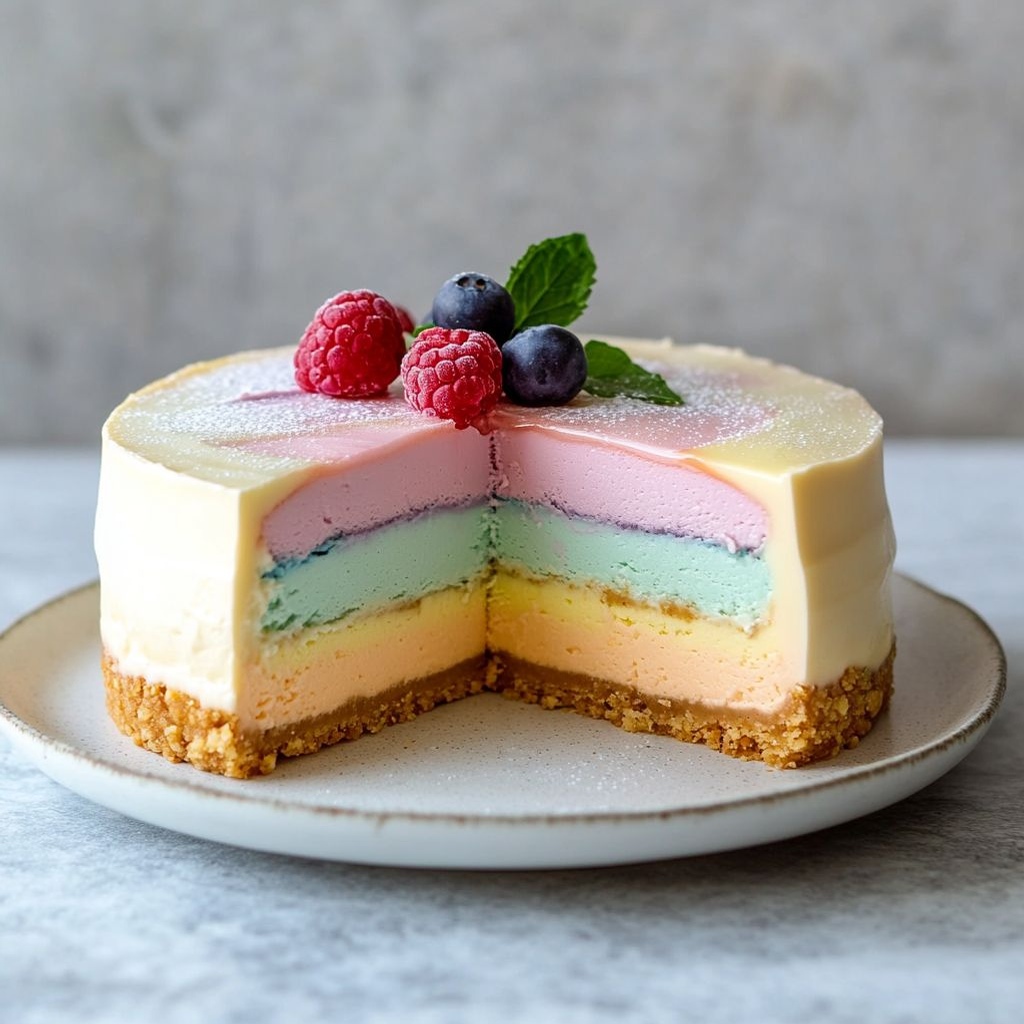
Imagine a dessert that bursts with color as vibrant as a summer rainbow, yet feels like a cool whisper on your tongue. A No-Bake Rainbow Cheesecake is not just a treat; it’s a celebration you can announce with a single slice. Picture layered ribbons of pastel hues—rose pink, lemon yellow, ocean blue, lime green—each as silky and indulgent as a dream, but set firmly in a pale, crumbly crust that crunches happily at the first bite. No oven required, no fuss required—just a little patience in the fridge and a big smile when you pull back the pan to reveal a gleaming, kaleidoscopic centerpiece. This cheesecake is the kind of dessert that earns its place at birthdays, barbecues, celebrations, and those impromptu cravings that demand something dazzling and comforting at once. It’s a dessert that invites you to taste the joy of childhood fairs, the elegance of a formal occasion, and the carefree sweetness of a sunny afternoon—all in one glorious, sliceable canvas.
From the first cool sigh of the cream cheese filling to the last glistening drip of fruit glaze, every element is designed to captivate with texture and aroma. The crust offers a sturdy, toasty foundation that gives way to a filling that’s light as a cloud and shimmeringly smooth as satin. Each color layer brings its own tiny sensory surprise—a citrusy zing, a berry brightness, a touch of vanilla, a whisper of coconut—so your palate meets a parade of flavors, one vivid bite at a time. This no-bake marvel is ideal for warm weather because it relaxes the kitchen while still delivering a show-stopping finish. And because it’s no-bake, you can assemble it in the morning and unveil it at sundown, letting the cooling process do the hard part while you savor the anticipation.
If you’re searching for a dessert that balances familiarity and novelty, comfort and spectacle, this No-Bake Rainbow Cheesecake delivers in spades. It whispers sophistication while shouting joy, making every slice feel like a personal celebration. You don’t need to be a pastry pro to pull this off—just a bit of planning, some cheerful colors, and a willingness to let the fridge do the magic while you enjoy the company around you. The result is not merely cheesecake; it’s a memory you can slice into portions and share with friends, family, and anyone who believes that dessert should feel like a party in your mouth.
The Story Behind the Dish
The idea of a rainbow-inspired dessert taps into a universal whimsy—the wish to capture a spectrum of color, light, and flavor in a single, delightful package. No-Bake Rainbow Cheesecake grew out of a simple kitchen experiment: take the familiar richness of a classic cheesecake and dress it in a façade of playful layers that mirror the joy of a sunny day. The no-bake technique hails from a long line of cool, casual desserts—the kind that center around pantry staples, fridge time, and the art of chilling until the magic happens. Think of those old-fashioned icebox cakes and refrigerated cheesecakes that delighted families before air conditioning was everywhere; this recipe updates that tradition with a modern, vibrant twist.
Culturally, rainbow motifs carry universal symbolism—hope, diversity, inclusivity, and celebration. In many communities, bright, multi-hued desserts have become a language of happiness: a dessert that signals “let’s celebrate” without saying a word. The No-Bake Rainbow Cheesecake fits perfectly into gatherings where people arrive with different tastes and ages in mind. It’s a dessert that invites conversation, as guests discuss their favorite color layer and the memories it evokes. In my own kitchen, a rainbow cheesecake became the centerpiece for a summer birthday, a Pride Month picnic, and a family reunion—each time drawing people together with its striking appearance and comforting, familiar flavors.
The crust tells a quiet story of resilience and texture, a sturdy base that echoes the reliability of a crusted pie while remaining lighter than a baked cheesecake. The filling, smooth and lush, speaks to the indulgence of cream cheese whipped with a touch of vanilla and a splash of lemon for brightness. And the rainbow layers—soft, pastel bands that hold their color while imparting subtle variations in taste—are a playful nod to celebration, to the idea that dessert should be an event, not just something to finish off the meal. The dish’s history is, in essence, a fusion: classic cheesecake technique meeting a modern need for no-bake convenience and a visually stunning presentation.
In sharing this recipe, I’m also sharing a memory of turning a simple kitchen into a studio for color and texture. The way the filling whips to airy fluff, the way the color layers pool and stack, the shimmer of a fruit glaze catching the light—these little moments are the heart of the dish. It’s not just about eating something delicious; it’s about participating in a ritual of build, chill, reveal, and celebrate. And when you cut the first slice and reveal the rainbow inside, you gift your guests a moment of wonder—like seeing the horizon in a single dessert slice.
Why You’ll Love This Recipe
- Effortless, no-bake method: a creamy cheesecake without turning on the oven, perfect for hot days or busy schedules.
- Show-stopping presentation: rainbow layers create an instant wow-factor at parties, potlucks, and holidays.
- Make-ahead friendly: you can assemble, chill, and come back to it later—planning ahead has never tasted so good.
- Customizable flavor palette: swap in different colors, extract flavors, or add fruit purees to tailor the sweetness and brightness.
- Versatile for dietary needs: easy to adapt to gluten-free crusts or dairy-free fillings with thoughtful substitutions.
- Balances textures and tastes: a crunchy crust, a silky, tangy filling, and glossy, fruity toppings that sparkle on the plate.
- Suitable for celebrations of all kinds: birthdays, anniversaries, Pride events, summer gatherings, and family meals alike.
- Kid-friendly appeal: the rainbow layers capture imagination and make a dessert feel like a festive treat without being overly fancy.
- Low-stress dessert planning: fewer movable parts than a layered cake, with clean slices and minimal equipment.
- Great for creativity: nearly endless color and topping combinations allow you to tailor it to any color scheme or theme.
Flavor Profile & Texture
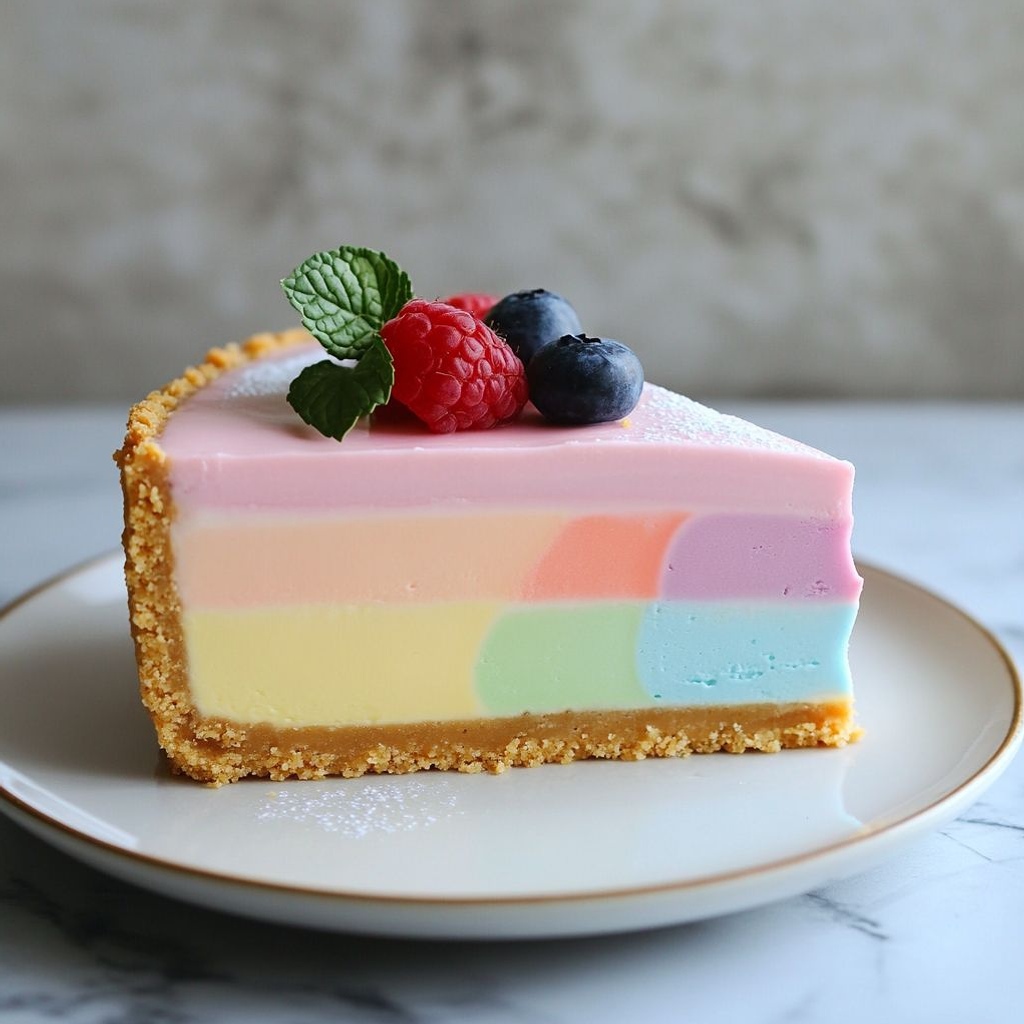
The No-Bake Rainbow Cheesecake is a symphony of contrasts and complements. The crust brings a warm, caramelized bite from the cookies or biscuits you choose, with a subtle butteriness that anchors the sweetness. The filling is where the magic happens: an indulgent, creamy tang from the cream cheese, softened by a touch of vanilla and a bright citrus kiss—often lemon or vanilla bean—so it doesn’t taste flat. The color layers introduce gentle fruit essences or flavor accents that align with the hue. For example, pink might come from a hint of strawberry or raspberry, yellow from vanilla-lemon, blue from blueberry or blue curaçao (in non-alcoholic form, a touch of blue spirulina or butterfly pea flower tea concentrate can achieve a natural tint), green from pistachio or lime, and orange from mango or orange zest. Each layer is subtly distinct but harmonious with the others, creating a mosaic of flavor where no single note overwhelms the palate.
Texture-wise, you’ll experience a pleasant contrast: the crust offers a crisp, crumbly snap, the filling glides smoothly across your tongue with an airy, mousse-like lightness, and the top glaze or fruit topping adds a glossy, slightly chewy, or juicy finish. The no-bake setting helps the filling firm up to a delicate yet stable slice that holds its shape when plated. The sweetness level tends to be balanced—rich enough to feel indulgent without tipping into cloying—while the tang of the cream cheese keeps things lively. When you bite into the rainbow layers, you’ll notice how the flavors evolve from bite to bite: a gentle lemon-bright start, a mid-palate fruit sweetness, and a creamy, comforting finish that lingers softly after each mouthful.
Because the cheesecake is assembled in layers, you can tailor the intensity of each color segment. Lighter colors can be more subtly flavored, while bolder hues can carry a stronger citrus or berry note. The result is a dessert that feels both polished and approachable—an homage to classic cheesecakes but with a festive, modern twist that makes every slice a small celebration of color and texture.
Occasions & Pairings
This No-Bake Rainbow Cheesecake shines at a wide range of occasions, making it a versatile go-to dessert for the year.
- Birthday parties: a playful centerpiece that invites selfies and cake-cutting moments with friends and family.
- Pride celebrations and community events: a colorful, inclusive dessert that celebrates joy and visibility.
- Summer picnics and potlucks: light, refreshing, and easy to transport in a pan or a lined serving dish.
- Holiday gatherings: adapt color/palette to match seasonal schemes (think red/green for Christmas, gold/cream for New Year), while maintaining the no-bake ease.
- Weddings and showers: a whimsical alternative to a traditional wedding cake, especially when draped with edible glitters or metallic spray for a festive look.
Pairings that elevate the experience include:
- Fresh berry compotes and sauces: spoon a warm or cold berry topping over each slice for a burst of juiciness.
- Crème fraîche, whipped cream, or mascarpone dollops: add extra creaminess and a light tang.
- Fruit-based coulis: raspberry, blueberry, passion fruit—these light sauces highlight the fruity layers without overpowering the cheesecake.
- Mint leaves, citrus zest, or edible flowers: for a refined, photogenic finish.
- Bubbly beverages or dessert wines: a glass of sparkling wine, Moscato, or a sweet Riesling can pair beautifully with the dessert’s creaminess.
- Light coffee or tea: a simple, sophisticated pairing that won’t compete with the flavors.
Tips, Variations & Substitutions
These ideas help you tailor the No-Bake Rainbow Cheesecake to your kitchen, dietary needs, and time constraints:
- Layer technique tips: Chill the filling briefly between color additions to prevent colors from bleeding into adjacent layers. If you want perfectly crisp separation, freeze each colored layer for about 15-20 minutes before adding the next. This makes the colors stand out more sharply in the final slice.
- Natural coloring options: For a colorful but natural approach, use fruit purées, beet juice for pink, turmeric for warm orange, spinach or matcha for green, butterfly pea flower tea for blue, and blueberry juice for purple-blue hues. These keep flavors light and additive-free compared to artificial food coloring.
- Gelatin or agar for stability: No-bake cheesecakes benefit from a light setting agent. Gelatin is traditional in dairy-based fillings, but vegan or dairy-free versions may use agar-agar. Follow label instructions for blooming and setting, and remember to gently heat any required ingredients to dissolve the setting agent before mixing with the filling.
- Vegan option: Create the filling with soaked cashews blended with coconut cream, lemon juice, vanilla, and a touch of coconut oil. Use a crumb crust made from crushed cookies or nuts with coconut oil. Gelatin can be replaced with agar-agar or a plant-based setting agent suitable for your diet.
- Gluten-free crust: Use gluten-free graham crackers, or substitute with a mix of almond flour, crushed shortbread (gluten-free), or digestive biscuits that suit your dietary needs. Adjust butter or coconut oil accordingly to achieve the same binding and crunch.
- Low-sugar or sugar-free: Opt for naturally sweet purées and stevia or monk fruit sweetener in moderation. Be mindful that some sweeteners can affect texture, so consider adding a small amount of cream cheese to maintain creaminess.
- Flavor swaps: Keep the base filling classic with vanilla and lemon; for a more pronounced tang, you can add a splash of cream of tartar or a whisper of yogurt. Experiment with complementary flavors like white chocolate, coconut, or almond for a distinct twist.
- Texture tweaks: If you prefer a firmer slice, increase the fat content slightly (more cream cheese or a hint of mascarpone). If you want lighter filling, whip longer to incorporate more air, but avoid over-whipping to prevent pudding-like texture.
- Presentation options: Use a patterned cake ring or a silicone mold with a rainbow insert for a different look. A glossy fruit glaze over the top can give a dramatic finish, or keep it matte for a more elegant, understated presentation.
Storage & Make-Ahead Ideas
One of the real pleasures of a no-bake cheesecake is how well it travels from kitchen to table, and how forgiving it can be with timing.
- Refrigeration: Store in the refrigerator for up to 4-5 days. Keep the cheesecake tightly covered to prevent absorbing fridge odors and to prevent the top from drying out.
- Make-ahead: Because this dessert benefits from chilling time, you can prepare it a day or two in advance. Assemble the crust and filling, layer the colors, and refrigerate. If you’re layering multiple colors, you can complete the assembly a day ahead and finish with toppings just before serving.
- Freezing: This cheesecake freezes beautifully. Wrap the pan tightly, or freeze individual slices wrapped in parchment and stored in an airtight container. Thaw overnight in the fridge for the best texture. Note that the color layers may become slightly less distinct after freezing, but the overall visual effect remains striking when served cold or chilled.
- Make-ahead tips: If you’re preparing for a party, consider making the crust a day early and storing it chilled. The filling can be prepared and colored in advance, then layered and kept chilled until you’re ready to serve. This can dramatically reduce the time needed on party day.
- Transportation: If you’re taking this to a potluck, keep it in the pan with a removable bottom or transfer carefully to a sturdy, travel-safe container. A tight, snug lid or plastic wrap kept close to the surface can help maintain gloss and texture during transport.
Fun Facts & Trivia
- No-bake cheesecakes have roots in early twentieth-century dessert culture, evolving from the era of refrigerator-based confections and icebox desserts. The idea of chilling and shaping cheesecakes rather than baking them aligns with home cooking’s emphasis on convenience and cooling time.
- The term “rainbow” in food often signals celebration and inclusivity, tying the dessert to festive occasions where people come together to share color, joy, and community.
- Color psychology plays a fun role in rainbow desserts: colors like yellow and orange can evoke warmth and happiness, while blue and green are often associated with calm and freshness. A rainbow cheesecake leverages those associations, making it as mood-enhancing as it is visually delightful.
- Texture science: a no-bake cheesecake relies on the fat content and structure of dairy to stabilize the filling, often with a touch of setting agent to prevent crumbling. This makes the reward of each slice both creamy and slice-stable, a rare combination in layered, chilled desserts.
- Creativity in color: many bakers use natural colorings from fruit and vegetables to achieve the rainbow effect, which not only looks beautiful but also adds subtle flavor notes that compliment the filling.
Final Notes
The No-Bake Rainbow Cheesecake is more than a dessert; it’s an invitation—to color, to conversation, to a moment of shared delight. By embracing the no-bake approach, you preserve the creamy, decadent essence of classic cheesecake while embracing a playful, modern presentation that suits today’s gatherings. Whether you’re feeding a crowd or treating a small family to a weekend celebration, this dessert offers a memorable experience with minimal stress and maximal impact. Keep in mind that the joy of this recipe lies not only in the final slice but in the process—the layering, the patience as each color sets, the anticipation of that first reveal when the pan/barrier is lifted and the rainbow appears in all its glory. It’s dessert theater for everyday moments and extraordinary occasions alike.
Notes
Note: The content above is designed to accompany the recipe and should be followed by the traditional Ingredients, Instructions, and Notes sections that detail the specific quantities, steps, and make-ahead recommendations essential to executing the dish. This description aims to inspire and provide context, inspiration, and practical tips for making a No-Bake Rainbow Cheesecake a centerpiece of your table.
Ingredients
No-Bake Rainbow Cheesecake
Crust/Base
– 2 cups graham cracker crumbs (or digestive biscuits)
→ This crust forms the crunchy foundation of the cheesecake. Use fine crumbs for an even, compact crust. If you’re gluten-free, choose gluten-free crackers and crush them to a uniform texture. Mix with sugar and melted butter, then press firmly into a prepared springform pan and chill until set for best structure.
– 1/4 cup granulated sugar
→ Adds a touch of sweetness to balance the richness of the crust. Adjust if your crackers are already sweet. Thoroughly blend with the crumbs so every bite is evenly sweetened.
– 4 tablespoons unsalted butter, melted
→ The binder that holds the crust together. Ensure the butter is fully melted and evenly incorporated with the crumbs, then press evenly across the pan bottom and slightly up the sides for a sturdy base. Chill to firm before filling.
Cream Cheese Filling (White Base)
– 24 oz cream cheese, softened to room temperature
→ The creamy backbone of the cheesecake. Softening prevents lumps and yields a silky texture. Beat until completely smooth, scraping the bowl sides consistently to avoid streaks. Use full-fat cream cheese for best flavor and stability in a no-bake dessert.
– 3/4 cup granulated sugar
→ Sweetens the filling and balances tang. Beat with the cream cheese until fully incorporated and smooth; avoid overmixing after adding air to maintain a creamy, dense texture.
– 1 tsp pure vanilla extract
→ Adds depth and fragrance. Use high-quality vanilla for richer aroma; if using vanilla bean, scrape the seeds for extra nuance.
– 1/2 cup sour cream (optional)
→ Adds tang and extra creaminess to the filling. If omitted, the filling will still set well; when using, fold in gently to preserve smooth texture.
– 1 cup heavy cream, cold
→ Fluffed and folded into the filling to create a light, mousse-like texture that remains sliceable when chilled. Chill the bowl and beaters and whip to soft peaks before folding.
– 2 tablespoons fresh lemon juice
→ Brightens the flavor and helps balance richness. Add gradually and taste; you can omit if you prefer a milder cheesecake, but it helpsSet and flavor balance in a no-bake context.
– 1 envelope unflavored gelatin powder (about 2 1/4 tsp)
→ Helps the layers hold their shape as the cheesecake chills. Bloom in 1/4 cup hot water, stir until completely dissolved, then whisk into a portion of the filling before dividing into color portions. If you skip gelatin, ensure a longer chill time or use a higher ratio of whipped cream to achieve a firmer texture.
Rainbow Color Fillings (to create six layers)
– Red gel food coloring (2–3 drops per 1 cup of filling)
→ Creates a vivid red layer. Start with a small amount and increase gradually, testing on a small portion to reach the desired hue without overpowering the cheesecake flavor. Color portions of the base filling after the gelatin is dissolved for even distribution.
– Orange gel food coloring (2–3 drops per 1 cup of filling)
→ Builds the bright orange layer. Mix in small increments; the color should be bold but not muddy.
– Yellow gel food coloring (2–3 drops per 1 cup of filling)
→ Forms the sunny yellow layer. If you want a softer pastel, use fewer drops; for a more saturated tone, add a bit more.
– Green gel food coloring (2–3 drops per 1 cup of filling)
→ Establishes the green layer. A fresh, leafy green reads nicely against the white base; adjust brightness with the number of drops.
– Blue gel food coloring (2–3 drops per 1 cup of filling)
→ Supplies the blue layer. Blue can appear more purple when mixed with yellow—add color gradually and verify shade before proceeding.
– Purple gel food coloring (2–3 drops per 1 cup of filling)
→ Completes the rainbow with a deep purple layer. Test color intensity in a small sample to prevent over-darkening the filling.
Rainbow Assembly Toppings (colorful fruit arrangement)
– Fresh strawberries, hulled and sliced
→ Represent the red stripe in the rainbow. Slice evenly and arrange festively to keep the pattern intact; their natural juice can bleed slightly, so keep slices neat and dry.
– Ripe mango or papaya, diced
→ Provides the orange stripe with bright sweetness; choose ripe fruit for vibrant color and juicy texture. Dice uniformly for a clean, stacked rainbow look.
– Pineapple chunks
→ Yields the yellow stripe with tropical notes. Use fresh pineapple or well-drained canned chunks; cut into uniform pieces for tidy layers.
– Kiwi slices
→ Forms the green stripe with a zippy tang. Peel and slice thinly so they lay flat and color is even across the surface.
– Blueberries
→ Adds the blue stripe with rich color. Scatter in a neat row or arc to accent the pattern; pat dry the berries to prevent sinking into the filling.
– Purple grapes or blackberries
→ Finishes the purple stripe with deep color and a burst of flavor. If using grapes, cut in half for easier placement; berries provide bold contrast and texture.
Optional Glaze / Finish
– Clear fruit glaze (apricot or neutral glaze) to brush on top
→ Gives a glossy finish and helps the fruit stay in place. Warm gently and brush in a thin, even layer after the cheesecake is fully chilled for a professional look. This is optional but recommended for a polished presentation.
Instructions
- Combine graham cracker crumbs, granulated sugar, and melted unsalted butter in a medium bowl and mix until the texture resembles wet sand and the color is uniform.
→ This ensures an evenly moistened crust that will bind thoroughly and bake into a sturdy foundation for clean slices. - Transfer the crumb mixture into a 9-inch springform pan and press it firmly across the bottom and slightly up the sides using the flat bottom of a measuring cup or a sturdy spatula. Chill for 20–30 minutes until the crust is compact and set.
→ A tight, even press prevents the crust from crumbling and gives the cheesecake structural integrity when sliced. - In a large mixing bowl, beat softened cream cheese with granulated sugar on medium speed until completely smooth and free of lumps, scraping the bowl as needed.
→ Softened cream cheese blends without lumps, ensuring a creamy, uniform base for the filling. - Beat in pure vanilla extract until fully incorporated and fragrant, then fold in sour cream (if using) to add tang and extra creaminess.
→ Vanilla enhances aroma while sour cream adds a subtle tang and silkier texture without adding excessive heaviness. - Whip cold heavy cream to soft peaks in a separate chilled bowl, keeping it airy but stable.
→ Lightened cream gives the filling a mousse-like texture that holds shape when chilled while remaining sliceable. - Gently fold the whipped cream into the cream cheese mixture in two additions, preserving as much volume as possible.
→ Maintaining whipped air ensures a light yet firm filling that won’t be dense or rubbery when set. - Stir in fresh lemon juice gradually, tasting as you go to balance richness with brightness and to help set the filling without overpowering the flavor.
→ The acidity enhances flavor balance and aids the filling’s stability in a no-bake context. - Bloom the gelatin: sprinkle the gelatin powder over 1/4 cup hot water in a small bowl and stir until completely dissolved.
→ Blooming activates the gelatin’s gelling properties for a firm, sliceable cheesecake when chilled. - Whisk the dissolved gelatin into approximately 1 cup of the prepared filling to create a gelatinized portion, then set this portion aside.
→ Incorporating gelatin into a portion of the filling helps the subsequent color layers hold their shape while the dessert chills. - Divide the remaining soft filling evenly into six clean bowls and add 2–3 drops of gel food coloring to each bowl to create red, orange, yellow, green, blue, and purple portions; mix thoroughly until each color is uniform.
→ Even color distribution ensures distinct, vibrant layers with clean boundaries between colors. - Spread a thin, even white base layer of plain filling over the chilled crust to form a neutral foundation for the rainbow layers.
→ The white base anchors the color layers and prevents color bleed into the crust, creating crisp, defined stripes. - Starting with the red portion, gently spoon and spread a color layer over the white base, smoothing with an offset spatula to an even thickness; continue with orange, yellow, green, blue, and purple in order, aiming for roughly equal thickness for each layer. Chill the pan for 10–15 minutes between layers to set each layer and maintain sharp boundaries.
→ Layering one color at a time with brief chilling prevents colors from bleeding into adjacent layers and yields a striking rainbow effect. - Once all six color layers are stacked and lightly set, cover the cheesecake and refrigerate for at least 4 hours or preferably overnight to ensure full firming and clean slicing.
→ Adequate chilling time allows the layers to meld into a cohesive, sliceable dessert with stable edges. - Prepare rainbow assembly toppings by washing and patting dry fresh strawberries, mango or papaya, pineapple chunks, kiwi slices, blueberries, and purple grapes or blackberries; trim and slice as needed for neat presentation.
→ Properly prepped fruits maintain color integrity, avoid bleeding, and reveal a crisp rainbow pattern when arranged. - Arrange the fruit toppings across the top in the order of the rainbow, placing each fruit in a distinct band to mirror the color layers beneath; keep slices dry and pat them if they release moisture to prevent sinking.
→ A careful arrangement preserves the visual rainbow and keeps fruit from sliding into the filling. - If using a clear fruit glaze, warm a thin layer until fluid, then brush a light, even coat over the fruit while the cheesecake is fully chilled; return to refrigerate briefly to set the glaze.
→ The glaze adds a professional shine, helps the fruit stay in place, and protects the surface without altering flavor. - To serve, run a warm knife around the outer edge of the cheesecake, release the springform pan, and slice with a clean, hot blade after wiping between cuts for clean, precise portions.
→ Warming the knife and cleaning it between cuts prevents sticking and yields pristine, restaurant-quality slices. - Store any leftovers refrigerated in an airtight container for up to 3–4 days; for best texture, keep the glaze intact and avoid prolonged exposure to humidity.
→ Proper storage preserves texture and flavor, maintaining the cheesecake’s appearance and sliceability.
Notes
These no-bake rainbow cheesecakes are a dramatic, crowd-pleasing dessert that set in the fridge without an oven. Built on a crisp crumb crust and six vibrant color layers, they combine creamy filling, tang from a touch of sour cream, and a glossy finish with fresh fruit toppings. Because this is a no-bake recipe, thorough chilling is essential to help the layers set and retain their clean, sliceable edges.
For a sturdy crust, blitz the graham crackers (or digestive biscuits) into fine crumbs, whisk in the granulated sugar, then mix with melted butter until evenly moistened. Press firmly into a prepared springform pan, going slightly up the sides, then chill at least 20–30 minutes until set. For gluten-free, substitute with gluten-free crackers and ensure all crumbs are finely ground.
In the filling, softened cream cheese must be completely smooth to avoid lumps; beat with sugar and vanilla until light and creamy. Optional sour cream adds tang and creaminess; fold it gently in if used. Whip the cold heavy cream to soft peaks and fold in to create a light, mousse-like texture that still slices cleanly when chilled. Add lemon juice in small increments to brighten and balance richness. Dissolve the gelatin in hot water (bloom first, then whisk thoroughly) and whisk a portion of the filling with the dissolved gelatin before dividing into color portions.
Divide the remaining filling into six portions and tint each with the prepared gel colors: red, orange, yellow, green, blue, and purple. Add drops gradually and test a small amount to reach vivid but not overpowering hues. You can adjust the intensity by adding more coloring in small increments after the gelatin is dissolved for even distribution.
When layering, pour a thin first layer of white filling (or tinted) onto the crust, then chill briefly to set, and repeat with each color layer, finishing with white or your last color. Work on a clean surface and use a spoon or piping bag to create even, even-thickness layers. Chill between layers for 20–40 minutes (or longer) to prevent colors from blending. Make sure the gelatin is fully dissolved and evenly distributed to help the layers hold their shape when sliced.
Arrange rainbow fruit toppings: strawberries for red, mango or papaya for orange, pineapple for yellow, kiwi for green, blueberries for blue, and purple grapes or blackberries for purple. Pat fruit dry to minimize juice leakage and place in neat stripes or a decorative arc. Optionally brush top with a clear glaze (apricot or neutral) after the cheesecake is fully chilled for a polished finish and extra shine, but avoid glazing berries that may bleed.
Keep the cheesecake refrigerated until ready to serve; slice with a warm blade for clean cuts. This dessert is best enjoyed within 3–4 days; you can freeze individual slices wrapped tightly for longer storage, though fruit colors may fade slightly after thawing. If you omit gelatin, you’ll need a longer chill time or a higher ratio of whipped cream to achieve a firmer set.
For gluten-free diets, use gluten-free crackers and check all dairy products and additives for gluten. For dairy-free or vegan versions, substitute dairy-free cream cheese and coconut or cashew cream, and use a vegan gelatin alternative if desired, noting that texture and setting may differ slightly. Adjust sweetness by reducing sugar if your fruit toppings add sugar or if your cream cheese is already sweetened.
Tips
- Prep and temperature: Bring the cream cheese to room temperature and chill the heavy cream before whipping. Soft, evenly tempered ingredients mix smoothly, giving a silkier filling and better structure for no-bake cheesecake.
- Crust foundation: Use fine graham cracker or digestive crumbs for a compact crust. Press firmly into the pan bottom and slightly up the sides. Line the pan with parchment on the bottom for easy release and a cleaner edge, then chill the crust until set before filling.
- Evenly sweetened crust: Ensure the sugar is well distributed with the crumbs before adding the melted butter. If your crackers are sweet, you can reduce sugar a bit; taste the crust dry-run to keep balance with the filling.
- Butter binding: The melted butter should be fully incorporated and not clumpy. Press evenly with a flat-bottomed cup or the back of a spoon to build a uniform layer that won’t crumble when sliced.
- Cream cheese texture: Beat the softened cream cheese with the sugar until completely smooth, scraping the bowl as needed to avoid lumps or streaks. A glossy, lump-free base yields a creamier final slice.
- Incorporating air: Fold in the whipped heavy cream gently to maintain a light, mousse-like texture. Overmixing after adding air can make the filling feel airy and less sliceable when chilled.
- Gelatin handling: Bloom gelatin in hot water until fully dissolved, then whisk a portion into the filling to help set. Temper by whisking into a small amount of filling before combining, which prevents lumps. If omitting gelatin, plan for longer chilling or adjust the whipped cream ratio for stability.
- Color layering technique: After the gelatin step, divide the filling into six portions for rainbow colors. Color each portion with the respective gel food coloring (2–3 drops per cup). To keep layers distinct, chill each colored portion briefly (15–20 minutes) before layering; pour slowly along the inner edge to minimize mixing.
- Fruit placement and moisture control: Pat fresh fruit dry before placing to reduce moisture that could bleed into layers. Arrange in clean, even rows or a neat arc to maintain the rainbow pattern and prevent fruit from sinking.
- Texture and flavor balance: Lemon juice brightens the filling and helps balance richness, but add gradually and taste as you go. If you prefer milder tang, reduce or omit lemon juice.
- Assembling the rainbow: Build the layers one by one with a gentle touch. After adding each color, lightly tap the pan to level the layer and minimize air pockets, then chill briefly before the next color.
- Final glaze option: If using a clear fruit glaze, brush a thin, even layer over the fruit after the cheesecake is fully chilled. This adds gloss and helps keep fruit in place without dripping into the filling.
- Chill time and serving: No-bake cheesecakes benefit from long chilling. Aim for at least 4–6 hours, preferably overnight, to enhance flavor and ensure clean slicing. For cleaner cuts, run a warmed knife between slices.
- Make-ahead tips: The dessert can be assembled a day ahead. Keep refrigerated, loosely covered, and add fruit and glaze (if using) just before serving for a fresh, vibrant presentation.
- Storage: Refrigerate leftovers in an airtight container or covered pan for up to 3–4 days. The fruit may soften over time, so consider adding the glaze just before serving if keeping for multiple days.
- Diet notes and substitutions: For gluten-free crust, use gluten-free crackers. If you’re dairy-free or need a lighter version, experiment with dairy-free cream cheese and coconut cream, but note texture and flavor will differ and you may need extra setting agents.
FAQ
What is No-Bake Rainbow Cheesecake?
A No-Bake Rainbow Cheesecake is a creamy, layered cheesecake that sets in the refrigerator rather than in an oven. It sits on a crunchy crust and features multiple colored filling layers (usually red, orange, yellow, green, blue, and purple) to create a vibrant rainbow finish. The filling typically includes cream cheese, sugar, vanilla, and whipped cream, with food coloring added to each portion.
What ingredients do I need for the crust and filling?
Common ingredients include:
- Crust: graham crackers or digestive biscuits (crushed), melted butter, optional pinch of sugar
- Filling: soft cream cheese, granulated sugar, vanilla extract, heavy cream or whipped cream
- Coloring: gel food coloring in six rainbow colors (red, orange, yellow, green, blue, purple)
- Optional stabilizer: a small amount of gelatin (dissolved in hot water) if you want a firmer set
Do I need gelatin or other stabilizers?
Gelatin is optional. Without it, the cake will set with chilling time and the whipped cream folded into the filling. Gelatin or agar-agar can help the layers hold their shape more firmly, especially if you plan to transport the cake. If you use gelatin, dissolve it in a little hot water and gently fold into the corresponding filling portion before layering.
How do I create the rainbow layers?
Steps to build the rainbow:
- Prepare your crust and press it into a lined 9-inch springform pan. Chill to set.
- Divide the filling into six portions and tint each with a different color (red, orange, yellow, green, blue, purple).
- Spread the first color evenly over the crust and chill briefly (about 10–20 minutes) to help it set.
- Continue layering each color in order, chilling between layers as needed, until all colors are used.
- Finish with a final light chill to set the entire cake.
Tip: For faster setting, you can allow a short 10–15 minute chill between layers or stack colors in a swirl pattern for a rainbow marbled look.
What pan size should I use and how do I prepare the crust?
Use a 9-inch (about 23 cm) springform pan for a classic cheesecake size. Line the bottom with parchment paper and lightly grease the sides. Crush the crackers finely, mix with melted butter (and a touch of sugar if desired), press firmly into the pan to form a compact crust, and refrigerate for 20–30 minutes to set before adding the filling core.
How long does it take to chill and set?
Plan for at least 4–6 hours of chilling, or preferably overnight, to allow the flavors to meld and the filling to firm up. If you’re using gelatin, follow the package directions for setting times, which may slightly shorten or extend the total chilling time.
How should I store and transport the cheesecake?
Store leftovers covered in the refrigerator for up to 2–3 days (color may fade slightly over time). For transport, keep the cake cold in a snug, sealed carrier or wrap the pan securely. If needed, you can gently chill it a bit longer before transporting to help it hold its shape.
Can I make it ahead of time for a party?
Yes. No-Bake Rainbow Cheesecake is great for make-ahead preparation. Prepare the crust and filling, color the layers, and refrigerate for several hours or overnight. Assemble the layers the day you plan to serve, or keep the fully assembled cake chilled until ready to serve.
Are there dairy-free or gluten-free options?
Absolutely. For dairy-free, use dairy-free cream cheese alternatives and a dairy-free whipped topping or whipped coconut cream. For the crust, choose gluten-free biscuits or crackers and dairy-free butter. For a fully dairy-free version, you can replace the cream cheese with a high-quality dairy-free cream cheese alternative and use agar-agar or a dairy-free gelatin substitute as a stabilizer. Always check labels to ensure ingredients meet your dietary needs.
How can I slice the cake cleanly for serving?
To get clean slices, chill the cake well (overnight if possible). Warm a knife under hot water, wipe dry, and slice in smooth, steady motions. You can wipe the blade between cuts for a neater finish. If the layers resist, return the cake to the fridge for a few minutes before slicing again.
Can I customize the colors or use fewer colors?
Yes. The rainbow effect is flexible. You can use any number of colors (3-6 works well) and choose tones you love. For a pastel look, use lighter shades with less intense coloring. You can also swirl two colors together for a blended rainbow effect rather than strict layered bands.