Introduction / Hook
Imagine a moist, sun-bright cake that captures the scent of early morning citrus groves and the warm, nutty embrace of almonds. The Orange Almond Cake is not just dessert; it’s a sensory passport—one bite releasing a zesty perfume of orange peel, a tender crumb enriched with almond meal, and a gentle sweetness that lingers like a memory of sunny afternoons. Each slice offers a balance of brightness and comfort: the citrus tang wakes up the palate, while the almond undertones ground the sweetness in a nutty, almost marzipan-like depth. This cake invites you to savor the moment—whether shared with friends around a coffee table or enjoyed in a quiet moment of self-indulgence with a cup of tea. Its aroma alone can turn a kitchen into a warm, welcoming lounge, and the first bite invites you to close your eyes and let the flavors unfold slowly, as if a citrus grove had opened its gates just for you.
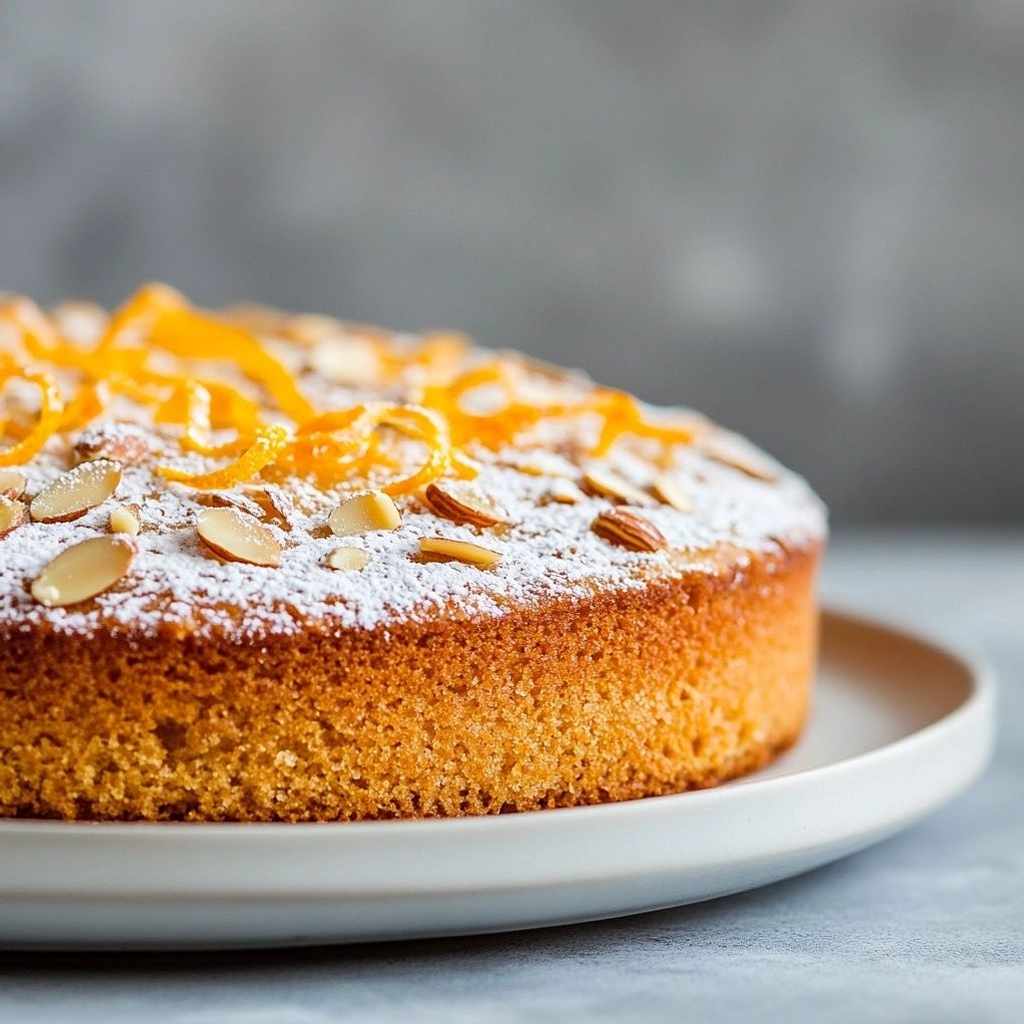
The Orange Almond Cake is that rare bakeable joy: elegant, yet approachable; simple enough for a weeknight treat, yet refined enough to serve to guests. It thrives on contrast—bright citrus versus toasty almond, tender crumb against a gentle crust, and a whisper of sweetness that never overwhelms. The surface often wears a light glaze or a dusting of powdered sugar, catching the light with a glint that makes the cake almost look festive. But the real magic lies in how effortlessly it comes together, how forgiving it is with substitutions, and how it fills the room with a fragrance that feels both nostalgic and fresh.
The Story Behind the Dish
The Orange Almond Cake sits at a crossroads of citrus-forward baking traditions and the timeless appeal of almond flour or ground almonds in many cuisines. Almonds have long been a pantry staple in Mediterranean kitchens, where they add richness without heaviness, and where orange trees share the landscape with almond groves in many sun-kissed regions. The marriage of orange and almond in cake form reflects a broader culinary philosophy: use what’s bright and poised from citrus to lift a more grounded, comforting base like almond meal. In various cultures, orange zest and almond paste or meal appear in desserts that celebrate purity of flavor and a sense of heartiness at the same time.
A modern take on this classic pairing often traces back to home bakers who wanted a cake that could be both everyday and special. The orange’s zest encapsulates the citrus shadow of winterتها, while almonds bring a warmth that makes the cake feel like a hug in edible form. In some families, a dollop of ricotta or a splash of yogurt is folded into the batter to add moisture and a hint of tang; in others, a glaze made with orange juice and sugar glazes the top, echoing the brightness of the fruit and the nuttiness below. The result is a cake that travels well—perfect for a brunch, a teatime ritual, or a casual dessert after a Sunday roast.
If you’ve ever visited a coastal town where citrus trees spill their bright fragrance into the sea air, you’ve likely tasted a cake similar in spirit to this one—something that feels both celebratory and homely, suitable for a crowd yet intimate enough for a quiet afternoon. The Orange Almond Cake embodies that balanced mood: it invites conversation, compliments, and a shared moment of sweetness that feels earned, not extravagant.
Why You’ll Love This Recipe
- Quick to prepare: simple mixing by hand, no electric mixer required, making it ideal for a relaxed weekend bake.
- Versatile base: accommodates almond meal for a denser, more rustic crumb or regular flour for a lighter texture; adaptable to dietary needs with substitutions.
- Bright yet comforting flavor: citrus notes lift the cake while the almonds deliver a cozy, toasty depth.
- Moist and tender crumb: the orange juice and zest, sometimes enriched with yogurt or sour cream, keep the interior soft and luscious.
- Elegant presence with minimal effort: a cake that seems special enough for guests but is easy enough for everyday enjoyment.
- Pairs beautifully with a range of toppings: a simple glaze, powdered sugar dusting, or a crisp sugar crust for added texture.
Flavor Profile & Texture
The flavor profile is a joyful interplay of citrus brightness and nutty earthiness. The orange zest contributes an aromatic oils-rich pop that wakes up the palate, while the orange juice threads a gentle tart-sweet balance throughout the crumb. Almonds, whether used as almond meal or finely chopped, give the cake a delicate, almost honeyed sweetness and a subtle, toasted complexity that lingers after each bite. If you choose to glaze the cake, the glaze often carries a whisper of orange, tying the top layer back to the core flavors.
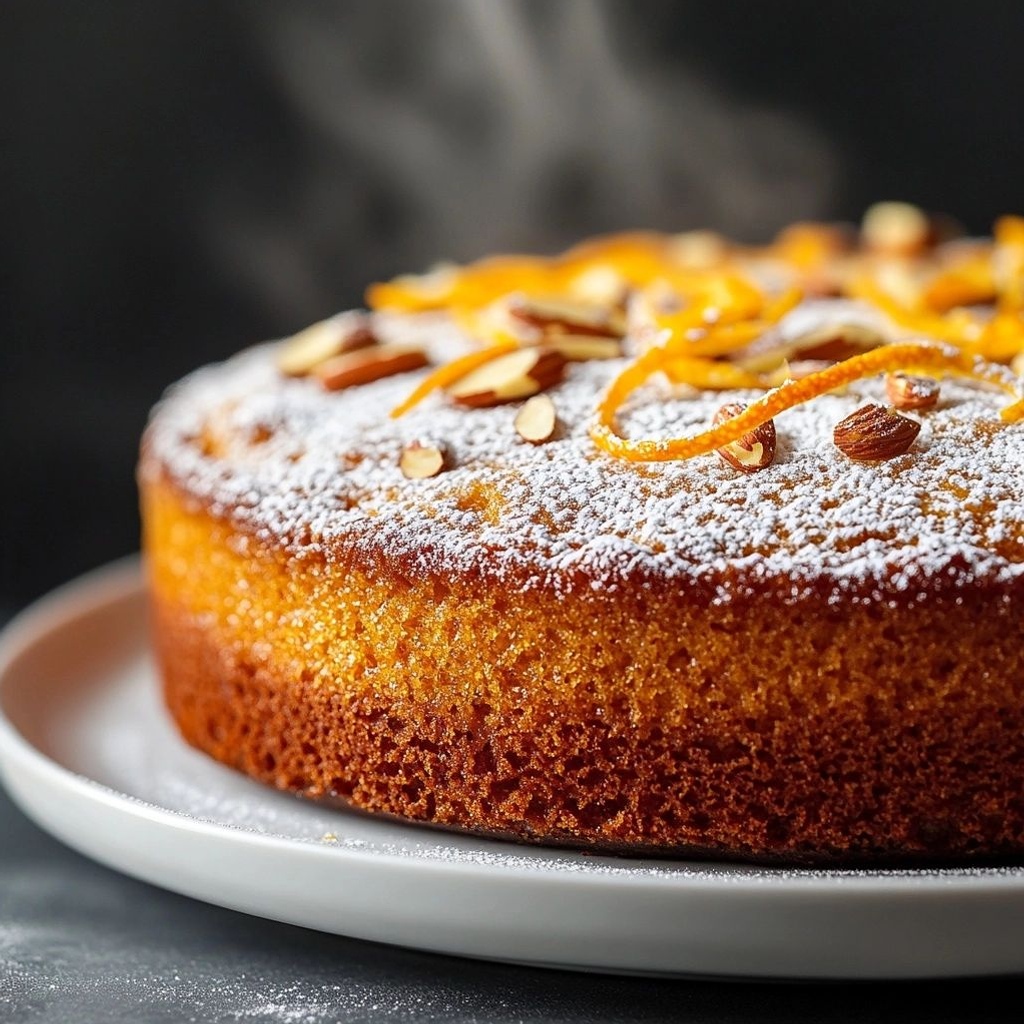
Texture-wise, expect a cake that is tender but substantial. The almond meal adds a slight crumbly texture and a moistness that keeps the slice from drying out in a longer display. When baked carefully, the crust will form a delicate, light crust that provides a pleasant contrast to the moist interior. The finish can range from a minimalist, glossy surface under a glaze to a lightly sugared dusting that catches the light and makes the slices look almost jewel-like. The overall mouthfeel is comforting without heaviness, making it suitable for a post-dinner dessert or a mid-afternoon treat with coffee.
The aroma—oil-laden citrus zest mingling with toasty almond—fills the kitchen moments after the batter hits the pan. It’s a fragrance that evokes sunshine and home-baked rituals, threads of vanilla or almond extract often supporting rather than dominating the primary citrus character. When served warm, the cake feels even more inviting, as the oils released during baking intensify the citrus perfume and soften the crumb’s edges.
Occasions & Pairings
This cake is surprisingly versatile for a range of occasions, from casual gatherings to more formal tea parties. Here are some scenarios where it shines:
- Weekend brunches: serve with a dollop of yogurt or crème fraîche and a drizzle of honey for a bright, comforting start to the day.
- Afternoon tea or coffee: slices pair beautifully with a hot beverage and a small plate of fruit or light cookies.
- Special dinners: cut into generous wedges and presented with citrus-curd accents or a light vanilla bean glaze for an elevated finish.
- Holiday gatherings: the citrus-almond combination feels festive and refined, especially when finished with a delicate glaze or a dusting of powdered sugar and citrus zest.
Pairings to consider:
- Drinks: sparkling tea, light Apéritifs like an orange blossom agua fresca, or a glass of sweet dessert wine that doesn’t overpower the citrus.
- Side dishes: a simple almond biscotti, fresh fruit compote (orange segments or citrus medley), or a light yogurt-based spread to complement the tanginess.
- Desserts: a small scoop of vanilla ice cream or a spoonful of lemon mascarpone can contrast wonderfully with the cake’s warm almond notes.
Tips, Variations & Substitutions
The beauty of the Orange Almond Cake lies in its flexibility. Here are ideas to tailor it to your taste, dietary needs, or what you have on hand:
- Gluten-free option: use almond meal as the primary dry ingredient and replace all-purpose flour with a gluten-free blend that behaves similarly to all-purpose flour in terms of structure.
- Vegan adaptation: swap eggs for flax eggs (1 tablespoon ground flaxseed whisked with 3 tablespoons water per egg) or use unsweetened applesauce as a binder; ensure your chosen fat and liquid balance still yield a moist crumb.
- Moisture boosters: mix in a tablespoon of yogurt or sour cream per cup of dry ingredients to intensify tenderness. A splash of orange juice in the batter can help as well.
- Different citrus: swap oranges for lemons or tangerines for a brighter, sharper zest; a touch of lime zest can add a playful twist.
- Flavor depth: add a pinch of vanilla or almond extract to emphasize the nutty aroma, or a pinch of cardamom for a subtle warm spice note.
- Texture variations: for a denser, cake-like crumb, increase almond meal by a small amount and reduce flour; for a lighter texture, increase flour slightly or incorporate a small amount of baking powder to lift the batter.
- Glaze ideas: a simple glaze made from powdered sugar and orange juice, or a thin glaze of honey and citrus zest; or skip glaze for a cleaner, more rustic surface.
- Top enhancements: toasted sliced almonds on top before baking add a crunchy finish and a visual appeal.
Substitutions should aim to preserve moisture and a balanced citrus-almond profile. If you’re avoiding dairy, choose plant-based yogurt and a dairy-free butter substitute with similar fat content. If sugar is a concern, you can decrease the sugar slightly and rely on the natural sweetness of orange zest and a glaze that is light in sugar.
Storage & Make-Ahead Ideas
The Orange Almond Cake stores well, making it a practical option for meal prepping or entertaining. Here are practical guidelines:
- Room temperature: wrap slices or the whole cake in plastic wrap or store in an airtight container for up to 2 days for best freshness.
- Refrigeration: if you prefer cold cake or live in a warm climate, refrigerate for up to 5 days. Bring to room temperature before serving for an optimal crumb, or warm slightly in a low oven to revitalize the aroma.
- Freezing: freeze baked cake, wrapped tightly, for up to 2–3 months. Thaw overnight in the refrigerator or at room temperature. Glazed variations may need to be added after thawing for best texture.
- Make-ahead tips: prepare the batter in advance and bake the cake fresh the next day for the best aroma and texture. You can also bake the cake and freeze slices for quick, elegant desserts later.
For parties or gatherings, bake a day ahead, so the flavors have time to marry. A sliced cake can be portioned with freshness preserved in mind, ensuring each piece reveals the same bright taste and tender crumb.
Fun Facts & Trivia (Optional)
- Almonds have a long history in Mediterranean cuisine and are considered one of the earliest cultivated nuts, with culinary uses dating back thousands of years.
- Orange zest contains essential oils that are highly aromatic, which is why the zest is such a powerful flavor driver in this cake.
- In some cultures, almond meal is favored in desserts for its ability to create a rich texture without relying heavily on wheat flour.
- Combine orange blossom water with the glaze for a fragrant twist that evokes a Mediterranean afternoon.

Ingredients
-
Almond Flour Cake Base
– 2 cups almond flour (finely ground)
→ Almond flour provides the moist, tender crumb characteristic of gluten-free cakes. It supplies healthy fats and protein, and helps the cake stay moist without gluten. Ensure it is finely ground for a smooth batter; sift if there are clumps. If you prefer a lighter texture, you can mix in 1/2 cup gluten-free all-purpose flour, but this is optional to keep the almond-rich profile. -
Granulated Sugar
– 3/4 cup granulated sugar
→ Sugar sweetens the batter and helps with browning and moisture retention. Cream it with the butter (or beat with eggs if you prefer) to incorporate air for a lighter crumb. If you want a less sweet cake, reduce by 1–2 tablespoons. Use to room temperature ingredients for best incorporation. -
Unsalted Butter, melted (or neutral oil)
– 1/2 cup melted butter (or 1/2 cup neutral oil)
→ Fat provides moisture and tenderness, enriching the crumb and helping the cake stay moist. If using butter, melt and slightly cool before mixing; if using oil, whisk with sugar until smooth to ensure even distribution. For dairy-free variation, use a light olive oil or avocado oil. -
Eggs
– 3 large eggs
→ Eggs bind the batter and contribute structure through coagulation as they bake. They also trap air when whisked, aiding lift. Bring to room temperature before mixing to help emulsify with the fat and sugar for a uniform crumb. For a denser cake, you can reduce to 2 large eggs and add a tablespoon of milk or orange juice. -
Orange Zest
– Zest of 1 large orange (finely grated)
→ Zest provides essential oils and bright citrus aroma that define the dish. Grate only the colored part of the rind; avoid the white pith which can introduce bitterness. Fresh zest offers the most vibrant flavor; zest early and measure before juicing. -
Fresh Orange Juice
– 1/4 cup fresh orange juice
→ Adds natural acidity and moisture, balancing sweetness. Use freshly squeezed juice for the cleanest citrus flavor; if you only have bottled juice, choose 100% orange juice with no added sugars. You can substitute with 1 tablespoon orange juice concentrate diluted with 2 tablespoons water for more intensity. -
Baking Powder
– 1 teaspoon baking powder
→ Provides leavening to help the cake rise and become light. Since almond flour lacks gluten, this powder helps structure. Sift with the almond flour to ensure even distribution and avoid clumps that can create holes in the crumb. If you prefer a denser texture, you can reduce to 1/2 teaspoon. -
Fine Salt
– 1/4 teaspoon fine salt
→ Balances sweetness and enhances the flavor of almond and citrus. Salt also tightens the crumb slightly and improves overall cohesion of the batter. Adjust to taste if you are using salted butter; you may reduce the added salt by 1/8 teaspoon. -
Pure Vanilla Extract
– 1 teaspoon pure vanilla extract
→ Adds warmth and depth to the citrus almond profile, enhancing sweetness perception and aroma. Use high-quality vanilla for best results and consider vanilla bean paste as an alternative for a stronger vanilla note with visible seeds in the batter. If avoiding alcohol, substitute with 1/4 teaspoon almond extract for a complementary nutty nuance. -
Optional Add-ins
– 1/3 cup sliced almonds (toasted)
→ Toasted almonds add a pleasant crunch and a toasty aroma that complements the orange-almond theme. Chop or slice evenly and toast until fragrant and golden. Fold in gently to distribute without overworking the batter. For a subtler crunch, sprinkle on top before baking. -
Orange Glaze (Optional)
– 1 cup powdered sugar
→ The glaze adds a sweet citrus sheen and extra moisture. Powdered sugar dissolves quickly, creating a smooth finish when brushed on slightly warm cake. If you prefer a thicker glaze, use 1 1/4 cups powdered sugar; for a thinner glaze, add more juice a teaspoon at a time. -
Orange Glaze
– 2–3 tablespoons fresh orange juice (adjust to desired glaze consistency)
→ The orange juice loosens the powdered sugar into a glossy glaze that hardens to a soft set. Add juice gradually to reach your preferred thickness. For a stronger orange flavor, replace part of the juice with a teaspoon of zest-infused juice or a splash of orange liqueur if desired (omit if avoiding alcohol).
Instructions
- Preheat your oven to 350°F (175°C) and prepare an 8-inch or 9-inch round cake pan by greasing the sides and lining the bottom with parchment for easy release, then set aside to ensure the cake unmolds cleanly after baking.
→ A warm-up oven ensures even baking, while prepared pan prevents sticking and helps maintain the cake’s shape during cooling. - Sift the almond flour, baking powder, and fine salt together into a medium bowl to ensure even distribution of leavening and remove clumps, which promotes a light, uniform crumb.
→ Sifting prevents pockets of dry flour that can create dense areas and holes in the crumb. - Whisk the granulated sugar and melted butter (or neutral oil) together in a large bowl until the mixture is pale, smooth, and somewhat airy, about 2 to 3 minutes, to incorporate air and begin moisture distribution.
→ Creaming fat with sugar helps tenderize the crumb and aids in emulsification for a finer texture. - Beat in the eggs, one at a time, ensuring each addition is fully incorporated before adding the next, so the batter emulsifies and traps air for lift; continue until the mixture is bright and slightly thick.
→ Room-temperature eggs emulsify better with fat and sugar, yielding a cohesive batter and a tender cake crumb. - Stir in the finely grated orange zest and the 1/4 cup fresh orange juice, mixing until the zest is evenly distributed and the batter has a cohesive citrus aroma, which will flavor the crumb throughout.
→ Zest provides essential oils and a bright aroma; orange juice adds moisture and balanced acidity that helps tenderness. - Gradually fold the dry almond-flour mixture into the wet mixture using a gentle, steady folding motion until just combined, avoiding overmixing to preserve tenderness and prevent a dense texture.
→ Overmixing can develop starches and almond solids, leading to a tougher crumb; use a light folding motion until no streaks of flour remain. - If using optional add-ins, fold in the 1/3 cup toasted sliced almonds evenly, distributing them without heavy mixing to maintain crumb structure and provide evenly spaced crunch.
→ Toasting enhances nutty aroma and flavor; even distribution prevents clumping and ensures consistent texture in every bite. - Pour the batter into the prepared cake pan, smoothing the top with a spatula to ensure an even bake and a level crust.
→ A leveled batter bakes uniformly, preventing domed centers and ensuring clean slicing later. - Bake in the preheated oven for about 25 to 35 minutes, or until the center tests with a clean toothpick and the cake is lightly golden around the edges, rotating the pan halfway if your oven has a hot spot.
→ The toothpick test confirms doneness; rotating helps achieve even browning and rise across the crust. - Allow the cake to cool in the pan for 10 to 15 minutes, then run a knife around the edge and invert onto a cooling rack to cool completely, which prevents steam from overrunning the crumb and helps set the structure.
→ Proper cooling stabilizes the crumb and makes glazing or slicing cleaner and more precise. - Prepare the orange glaze by whisking 1 cup powdered sugar with 2–3 tablespoons fresh orange juice until smooth and glossy, then adjust with additional juice or sugar to reach a pourable but thick consistency.
→ A well-balanced glaze adheres evenly and provides a soft, citrusy finish without soaking the cake. - If not glazing, dust the cooled cake lightly with powdered sugar for a subtle sweetness and a professional finish, or brush with a thin coat of the glaze using a pastry brush for a gentle sheen.
→ A light sugar dust or glaze enhances sweetness, moisture, and visual appeal without overpowering the almond-orange flavor. - Drizzle or brush the orange glaze over the cooled cake in a thin, even layer, allow it to set briefly, and then slice to serve, ensuring each piece has balanced citrus aroma and moist, tender crumb.
→ The glaze sets to a soft finish that seals in moisture and provides a polished look for presentation.
Notes
These gluten-free orange almond cake layers are tender, moist, and bright with fresh orange zest and juice. The almond flour base provides a rich, crumbly texture with natural nutty depth, while the citrus notes lift the richness. You can customize the flavor by adding toasted sliced almonds for crunch or a light dusting of powdered sugar for presentation. For a dairy-free version, use a neutral oil instead of butter. If you prefer a lighter crumb, substitute up to 1/4 cup of the almond flour with gluten-free all-purpose flour, keeping the total dry weight the same. Freshly squeezed orange juice is best for vibrant acidity; bottled juice works in a pinch, but avoid varieties with added sugars. The optional glaze adds a glossy, citrusy finish—adjust the thickness by varying the juice or sugar ratio to suit your preference. This cake freezes well when fully cooled and wrapped; slice before freezing for easy portions. Serve with a dollop of yogurt or a scoop of vanilla ice cream for a dessert that feels bright and indulgent, and enjoy with a cup of coffee or tea. Always ensure your almond flour is finely ground and sifted to avoid a gritty texture, and use fresh oranges for maximum aroma and sweetness.
Tips
Tips for Making Orange Almond Cake
- Finely grind and sift almond flour: If your almond flour has any coarse bits, run it through a sieve or process briefly in a blender to achieve a ultra-fine crumb. This helps create a smooth, tender texture without graininess.
- Cream or combine ingredients for emulsion: For best crumb, beat the sugar with the melted butter (or whisk oil with sugar) until slightly pale and fluffy before adding eggs. This helps trap air and yields a lighter cake.
- Temperature matters: Bring eggs, butter/oil, and orange juice to room temperature. Room-temp ingredients emulsify more evenly and prevent a dense, curdled batter.
- Balance the orange: Fold in orange zest and juice gently to preserve the bright oils and aroma. Avoid over-mixing after adding wet ingredients to keep the crumb tender.
- Measure leavening and salt precisely: Too much baking powder can cause a soapy taste; too little can make the cake dense. Sift powder with almond flour to distribute evenly and avoid clumps that create holes.
- Optional add-ins for texture: If using toasted sliced almonds, fold them in gently at the end or sprinkle on top. They add crunch but can sink if mixed too vigorously.
- Don’t skip room-temperature test: Before pouring batter, ensure the oven is properly preheated (usually 350°F/175°C). A hot oven helps the cake rise quickly and set with a fine crumb.
- Pan preparation: Grease and line the pan with parchment for easy release. For almond flour cakes, a parchment round plus greased sides helps prevent sticking and keeps the shape intact.
- Baking cues and doneness: The cake should be lightly golden and a toothpick inserted into the center should emerge with a few moist crumbs. If the top browns too quickly, tent with foil.
- Glaze technique (if using): For a glossy finish, brush the cake with a warm glaze while it’s still slightly warm. Start with a small amount of glaze and add more as needed to reach desired sheen and moisture without overwhelming the crust.
- Storage tips: Store cooled cake in an airtight container at room temperature up to 2 days, or refrigerate up to 5 days. The flavor deepens with a day of rest. Freeze slices for longer storage and rewarm gently before serving.
FAQ
What is an Orange Almond Cake?
A moist, fragrant cake made with almond flour or ground almonds, fresh orange zest and juice, and a light sweetness that highlights citrus notes and a subtle almond flavor.
What ingredients do I need to make it?
Common ingredients:
- Almond flour or finely ground almonds
- Granulated sugar or alternatives
- Eggs
- Fresh orange zest and juice
- Baking powder
- Oil or melted butter (or neutral oil for dairy-free)
- Optional: pinch of salt, vanilla extract
Can I make this cake gluten-free?
Yes. Using almond flour or finely ground almonds keeps the cake naturally gluten-free. If using a gluten-free baking blend, ensure it complements almond flavor and texture.
Can I make it dairy-free?
Absolutely. Use a neutral oil or melted coconut oil instead of butter, and ensure any added dairy in the recipe is swapped with a plant-based option.
Can I make it vegan?
Yes, with substitutions: replace eggs with flax eggs or applesauce (about 1 tablespoon flaxseed meal plus 3 tablespoons water per egg, or ¼ cup applesauce per egg). You may also adjust baking time slightly since texture changes can occur.
How do I zest and juice the orange?
Use a microplane to zest the bright orange rind, avoiding the white pith. Squeeze the juice from the oranges until you have the desired amount. Strain if you prefer a smoother batter.
How long and at what temperature should I bake it?
Preheat to around 350°F (175°C). Bake for 25–35 minutes, or until a toothpick inserted into the center comes out clean or with a few dry crumbs. Adjust time if using a different pan size.
How should I store leftovers?
Store in an airtight container at room temperature for 1–2 days, or refrigerate for up to 5 days. For longer storage, wrap tightly and freeze for up to 2–3 months. Bring to room temperature before serving.
Can I freeze the baked cake?
Yes. Wrap in plastic wrap and foil to prevent freezer burn. Freeze for up to 2–3 months. Thaw overnight in the fridge or at room temperature, then dust with powdered sugar or drizzle with orange glaze if desired.
What toppings or variations work well?
Suggestions:
- Orange glaze or simple syrup brush
- Dusting of powdered sugar
- Slivered almonds on top
- Creamy yogurt or dairy-free yogurt as a side
- Orange zest or orange segments for garnish