Introduction / Hook
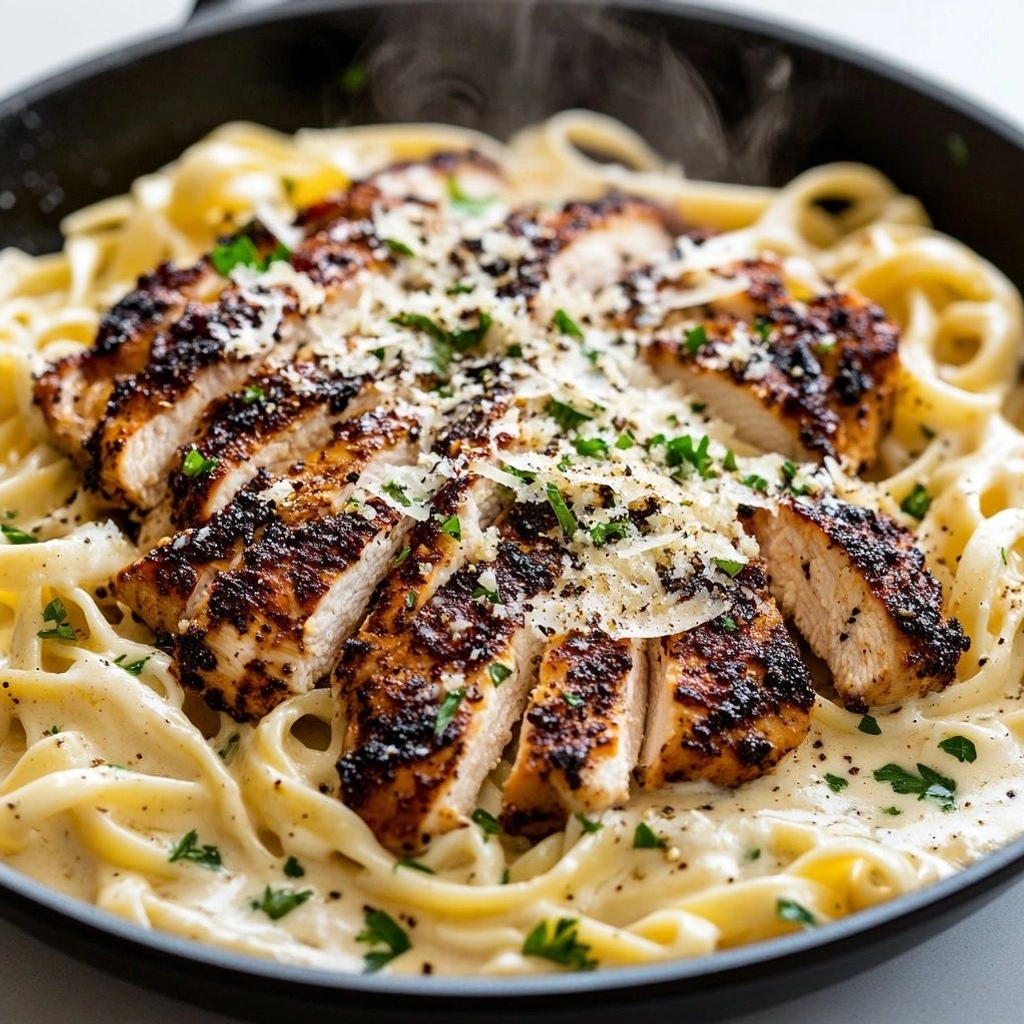
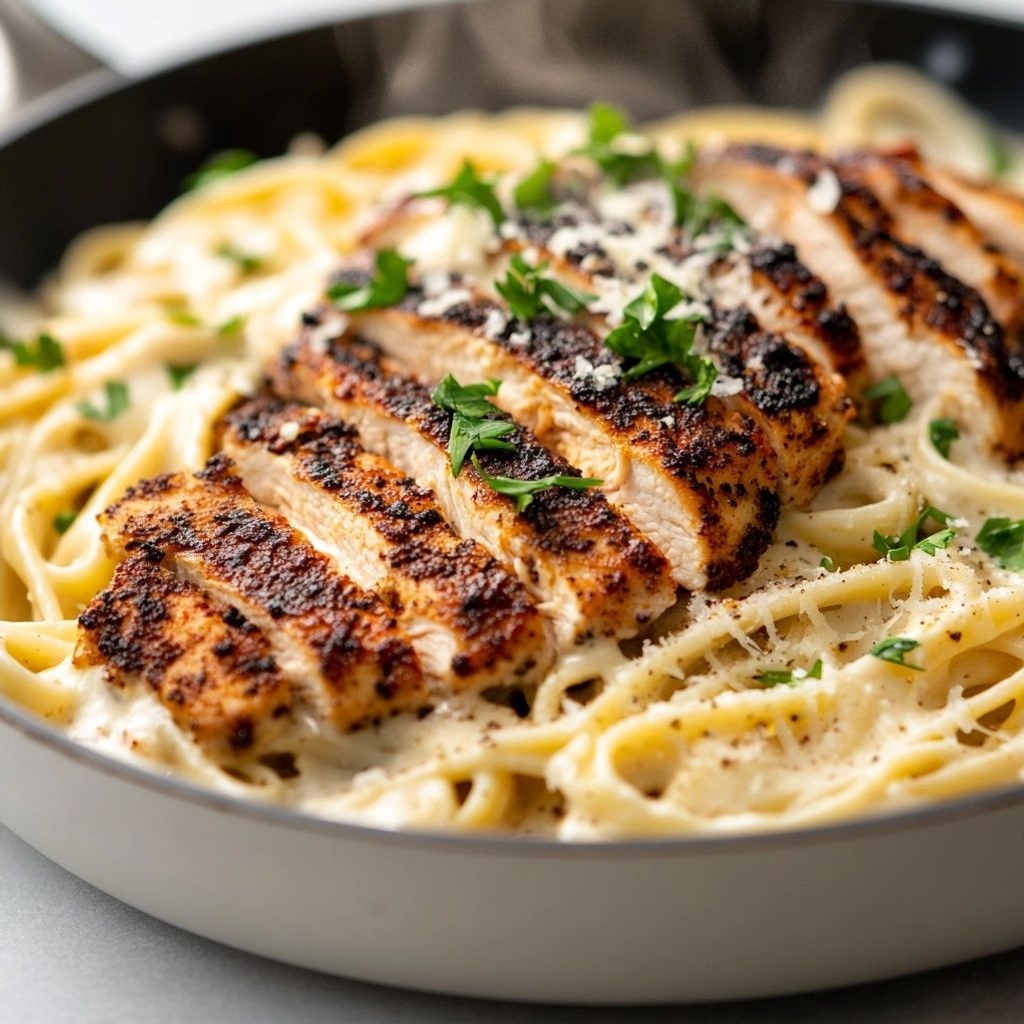
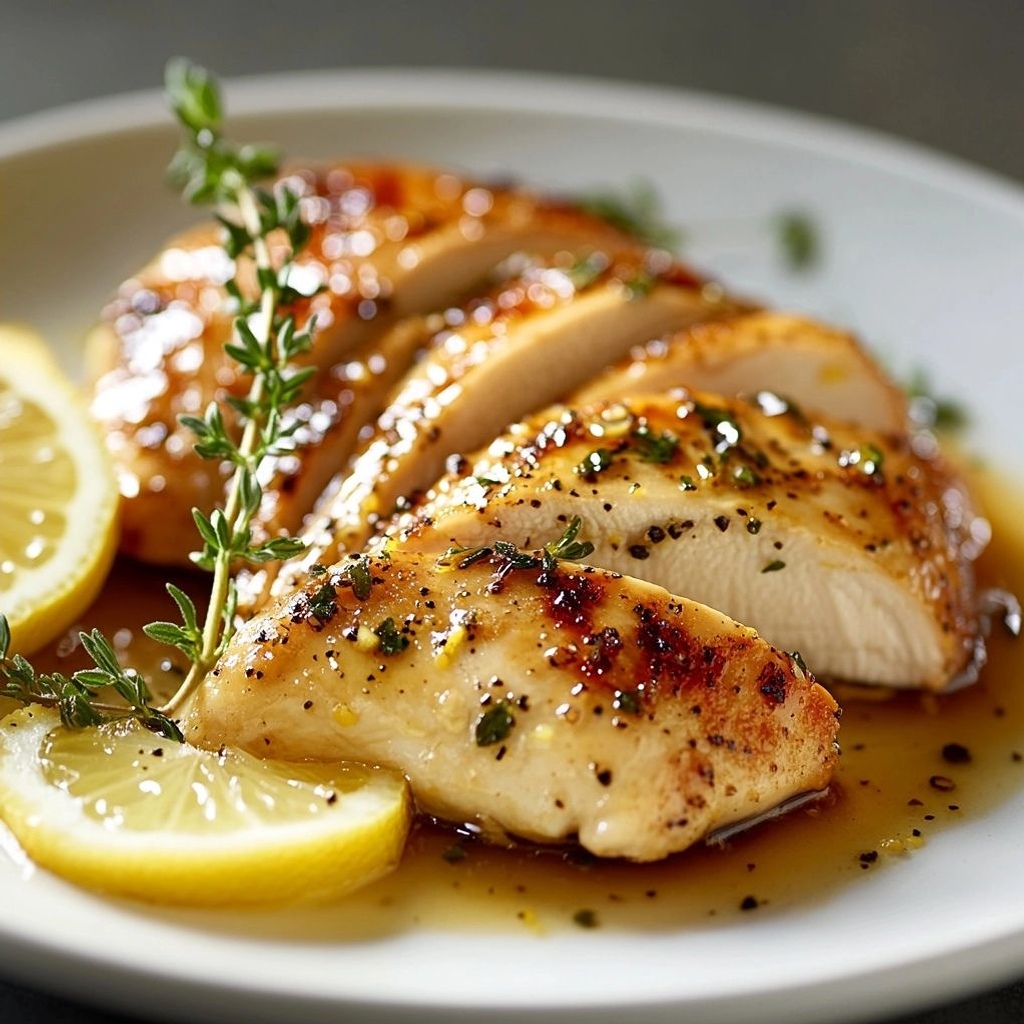
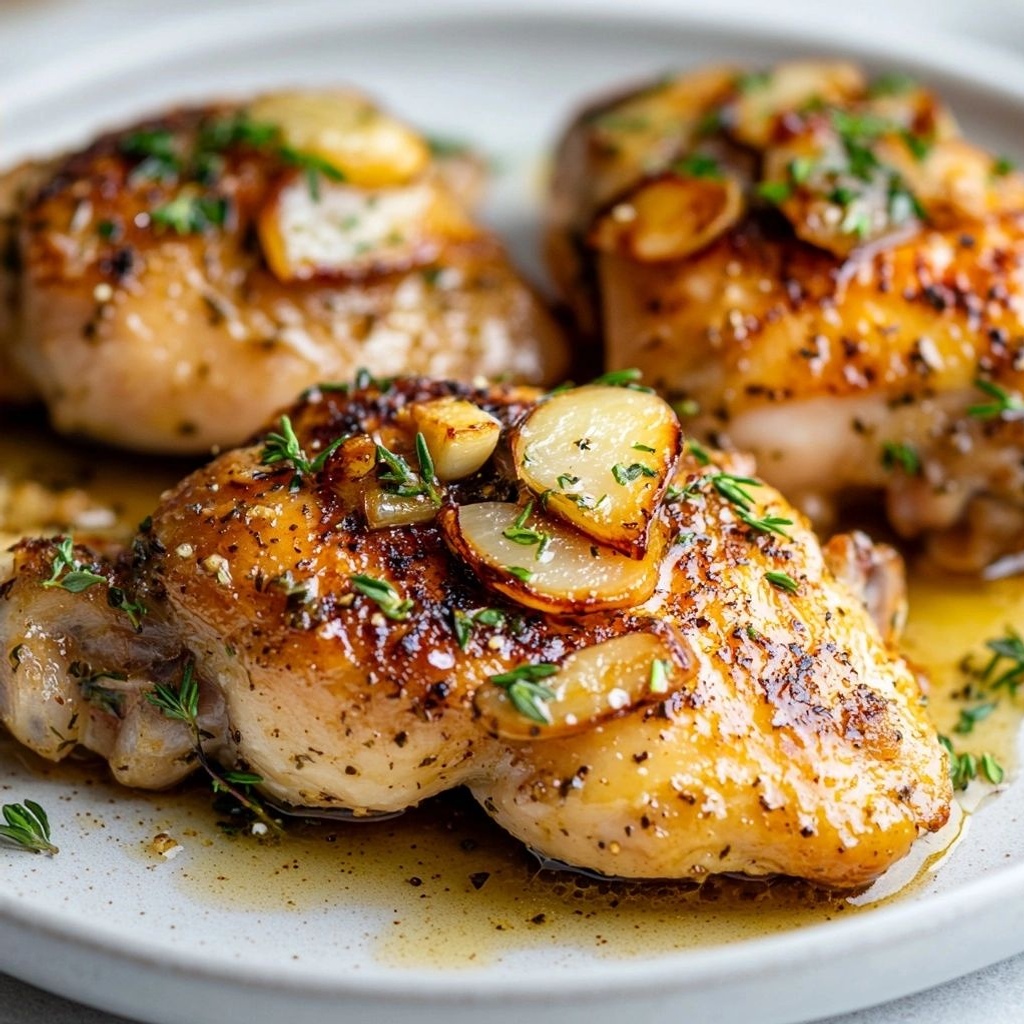
Imagine a skillet lit with the quiet glow of a weeknight dinner, where every bite releases a chorus of creamy, herb-bright flavors that dance on your palate. Creamy Herb Chicken is the kind of dish that feels like a warm hug on a busy evening: tender chicken simmered in a silky, parmesan-tinged sauce, perfumed with garlic, lemon, and fresh herbs. It’s comfort without heaviness, elegance without fuss, and utterly adaptable to whatever you have on hand. The aroma alone—garlic sizzling in butter, a hint of lemon zest mingling with thyme and parsley—creates a sensory invitation that makes the table feel special even on a regular Tuesday. Whether you’re cooking for yourself, a partner, or a family, this dish proves that simplicity can be transformative when your ingredients are treated with care and your pan is heated just right.
The Story Behind the Dish
Creamy herb chicken exists in a culinary space that sits comfortably between classic French-leaning comfort and the accessible home cooking that families rely on. While the recipe card you’ll eventually try may not claim a storied origin in a grand kitchen, its spirit resonates with the tradition of pan-sautéed poultry finished with a lush sauce. Think of it as a modern descendant of dishes where garlic, cream, and fresh herbs are used to coax maximum flavor from humble ingredients. The idea is simple: build flavor in the pan, deglaze to lift every brown-sugar kiss of fond off the bottom, and fold in a dairy element that blankets the chicken in richness without overpowering the aromatic brightness of the herbs.
In different households around the world, variations of this concept appear under names that emphasize the balance between dairy richness and bright aromatics. Some cultures reach for a splash of wine to lift the sauce; others rely on stock and a touch of cream to achieve a velvety finish. The common thread is this: a little butter, a little cream, a handful of garden-fresh herbs, and chicken that’s kissed by heat to create a succulent, fork-tender interior. The dish embodies a shared culinary value—using what’s near at hand, elevating it with technique, and presenting a plate that feels both nourishing and celebratory. If you’ve ever gathered around a stove after a long day and whispered, “Let’s make something comforting,” you’ve already touched the essence of Creamy Herb Chicken.
Why You’ll Love This Recipe
- Quick and reliable: With one skillet, you can have a complete, satisfying meal on the table in under 30 minutes, making it ideal for busy weeknights.
- Creamy without heaviness: The sauce is luxuriously smooth thanks to cream and a touch of cheese, but not overwhelming, so it pairs beautifully with a variety of sides.
- Herb-forward brightness: Fresh herbs bring an aromatic lift that elevates the dish beyond comfort-food status, giving it a fresh, vibrant finish.
- Versatile protein options: While chicken is classic, the technique scales well to turkey cutlets or even firm tofu for a lighter or vegetarian variation.
- One-pan convenience: Easy cleanup and a cohesive, roasty-to-creamy flavor profile that tastes like you spent much longer on it than you did.
- Comfort with a touch of sophistication: It’s the kind of dish that feels special enough for a date night at home or a family dinner, without demanding advanced culinary skills.
Flavor Profile & Texture
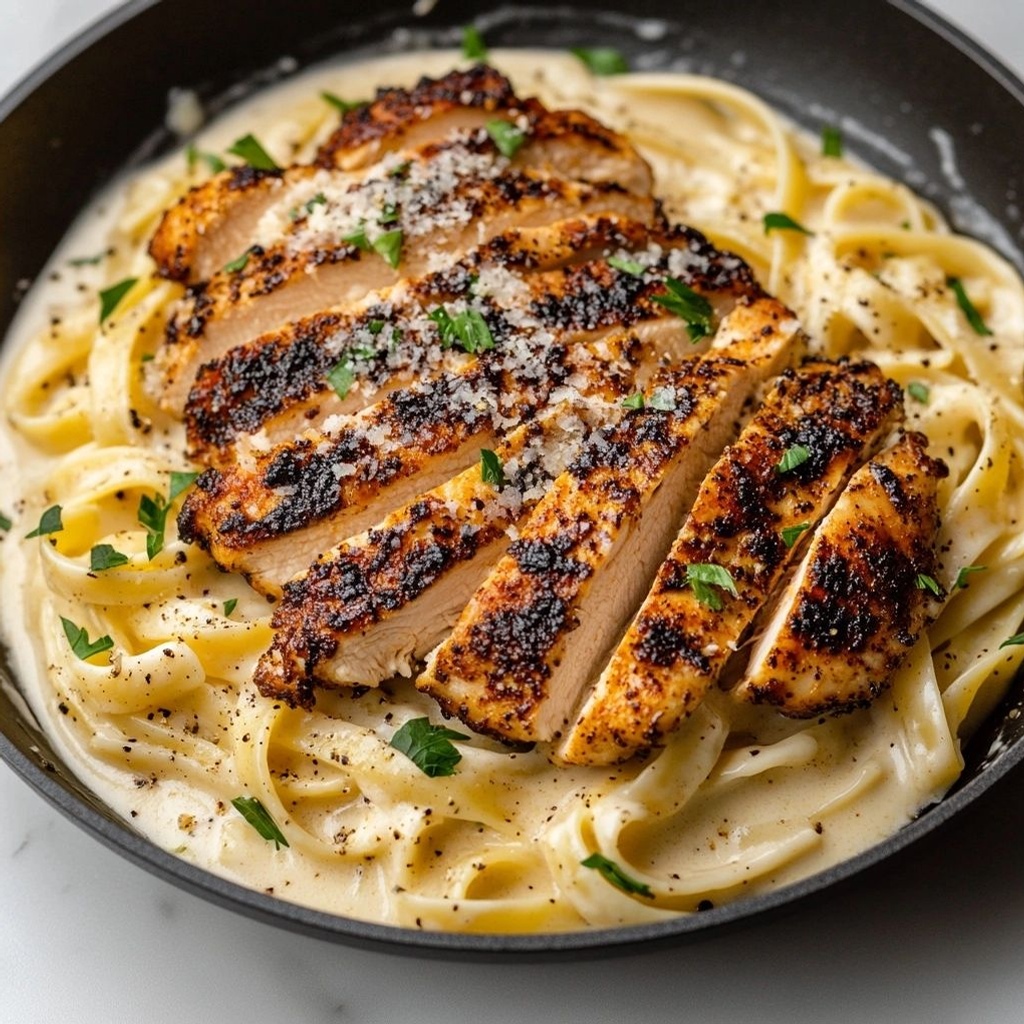
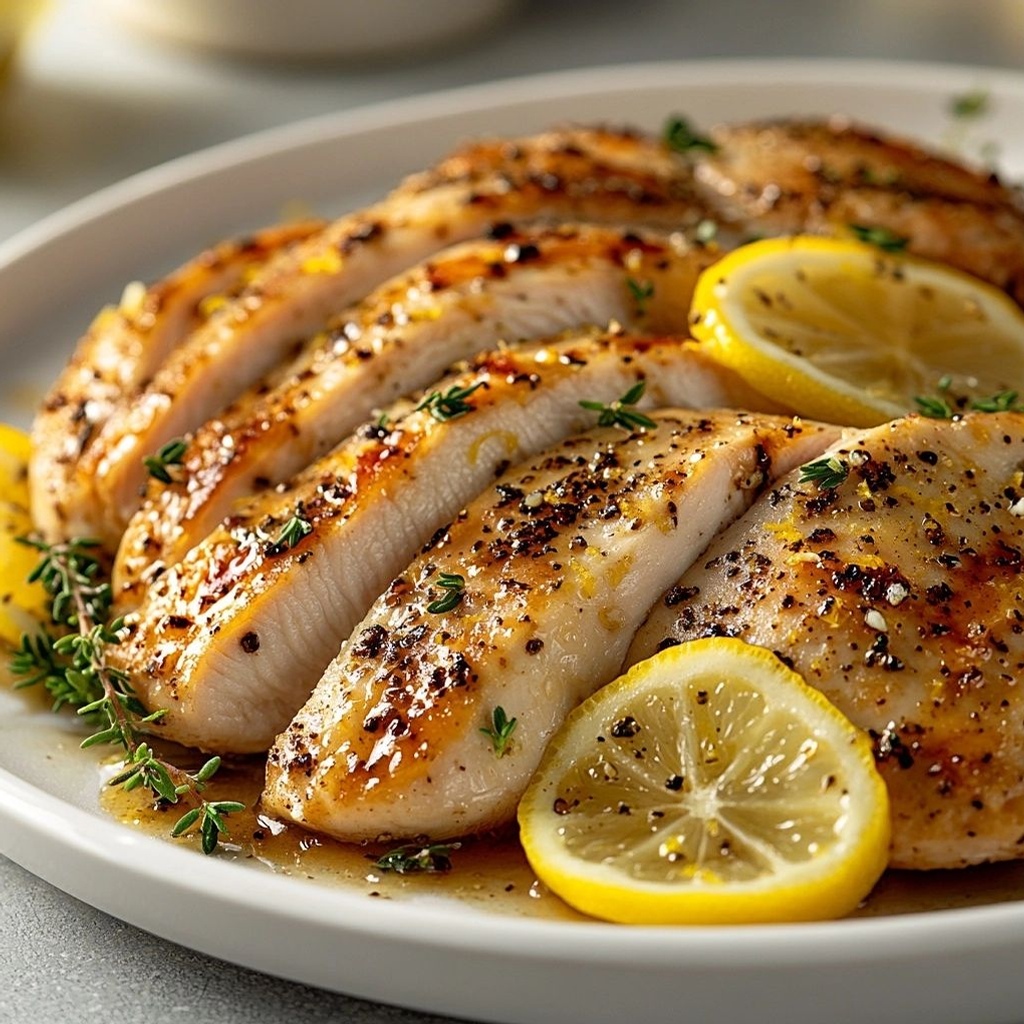
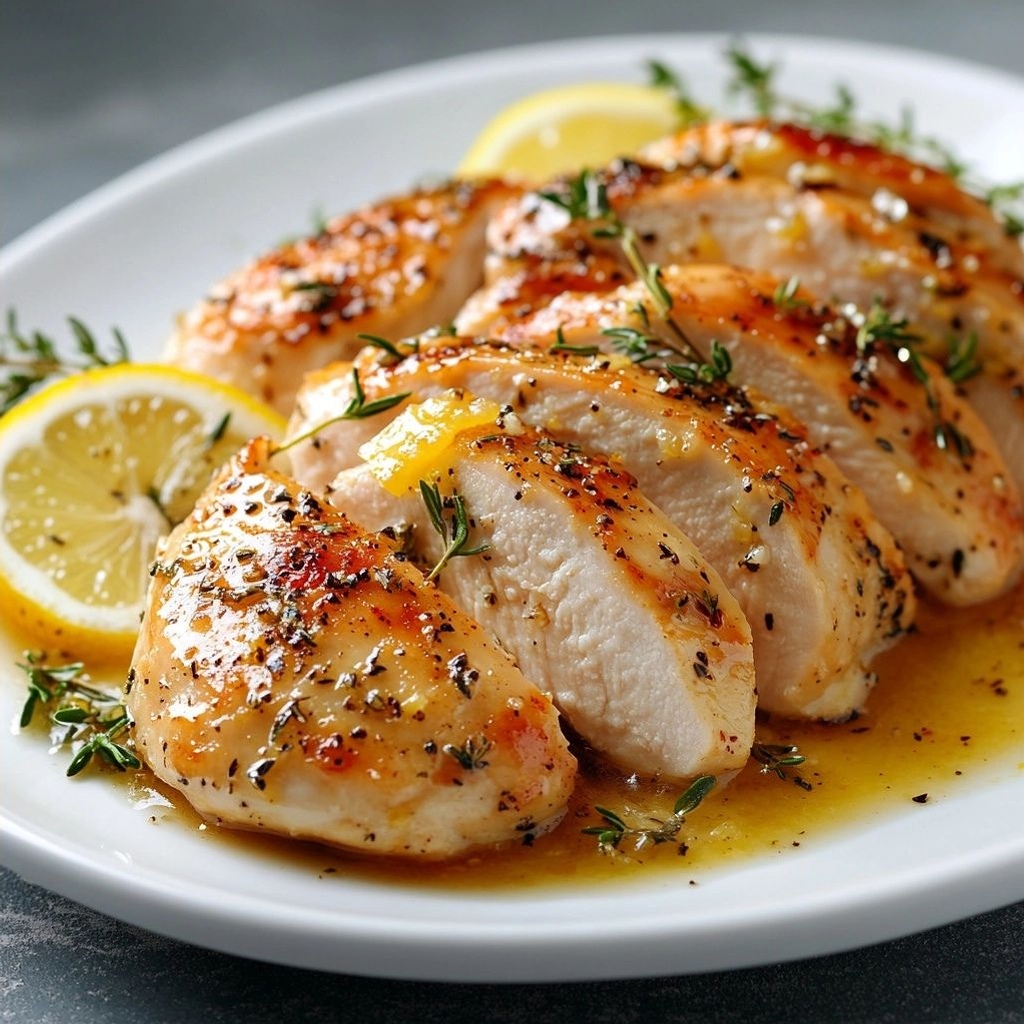
The dish balances a triad of sensory experiences: the silkiness of the sauce, the gentle savor of browned chicken, and the bright lift from herbs and citrus. The chicken develops a light golden crust from searing, which adds a touch of savory complexity and a pleasing bite. Inside, the meat remains tender and juicy, a reward you can count on with proper heat and careful cooking. The sauce is where the magic resides—creamy and luxurious, yet not shy; it coats each slice with a velvety coat that clings to the chicken and clings to the plate, inviting you to scrape every last drop. Parmesan or a sharp, aged cheese introduces a subtle tang that deepens the sweetness of the cream, while garlic provides a warm, aromatic base layer that permeates the entire dish.
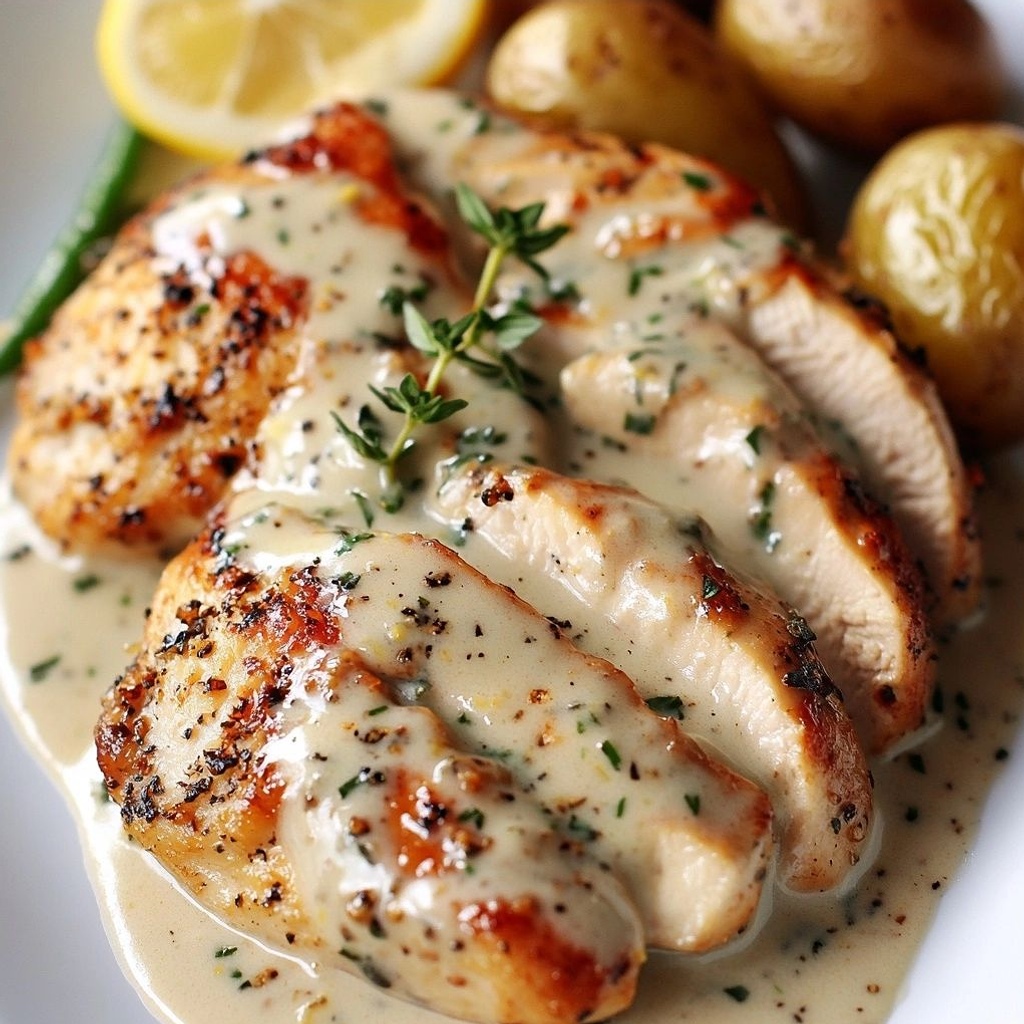
Herbs are the next essential component. Fresh thyme offers a soft, earthy note that harmonizes with lemon zest and parsley for a bright, uplifting finish. The lemon zest, in particular, acts as a high note—an aromatic spark that keeps the richness from tipping into heaviness. Salt and pepper are your quiet partners, enhancing the natural sweetness of the onions or shallots that you might choose to sauté at the start. The texture journey moves from seared, slightly crisp edges on the chicken to the smooth, almost satin-like sauce that envelopes every bite. There’s a comforting creaminess, a whisper of tang from dairy, and a clean finish from the herbs and citrus. Each mouthful offers layers: the initial warmth of the pan, the lushness of the sauce, the tender bite of the chicken, and the lingering scent of fresh herbs that invites you back for more.
Occasions & Pairings
This recipe shines at a variety of occasions, from weeknights when you want something nourishing yet easy, to more leisurely gatherings where you want to serve something comforting and elegant without spending hours in the kitchen. It pairs beautifully with simple staples that allow the chicken and sauce to remain the star.
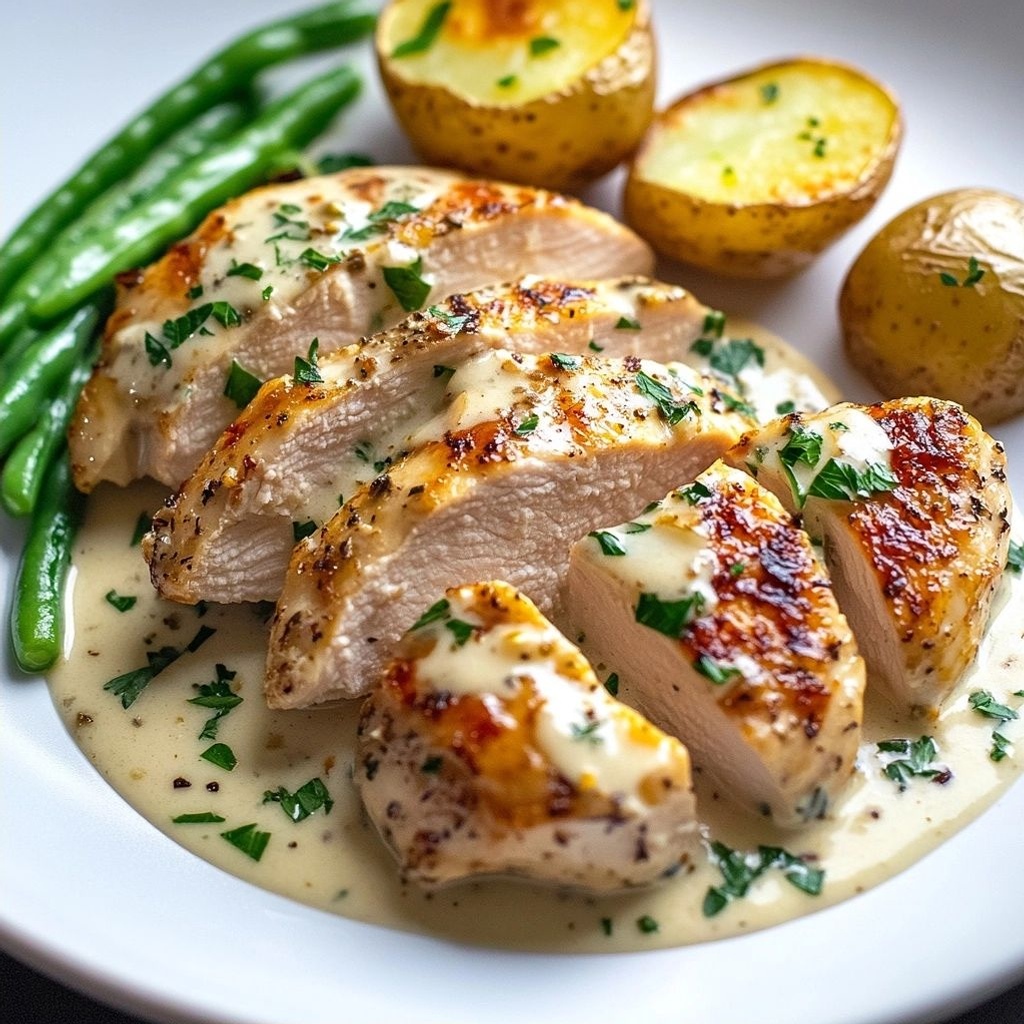
Serve with a simple side of mashed potatoes, buttered noodles, or creamy polenta to soak up the sauce. - Weekends and date nights: Pair with a crisp green salad, roasted asparagus, or sautéed greens to add textural contrast and balance.
- Holiday or special-occasion meals: Introduce a celebratory element with a glass of dry white wine, such as Sauvignon Blanc or Chardonnay, and a side of roasted root vegetables for color and depth.
- Pairings to consider:
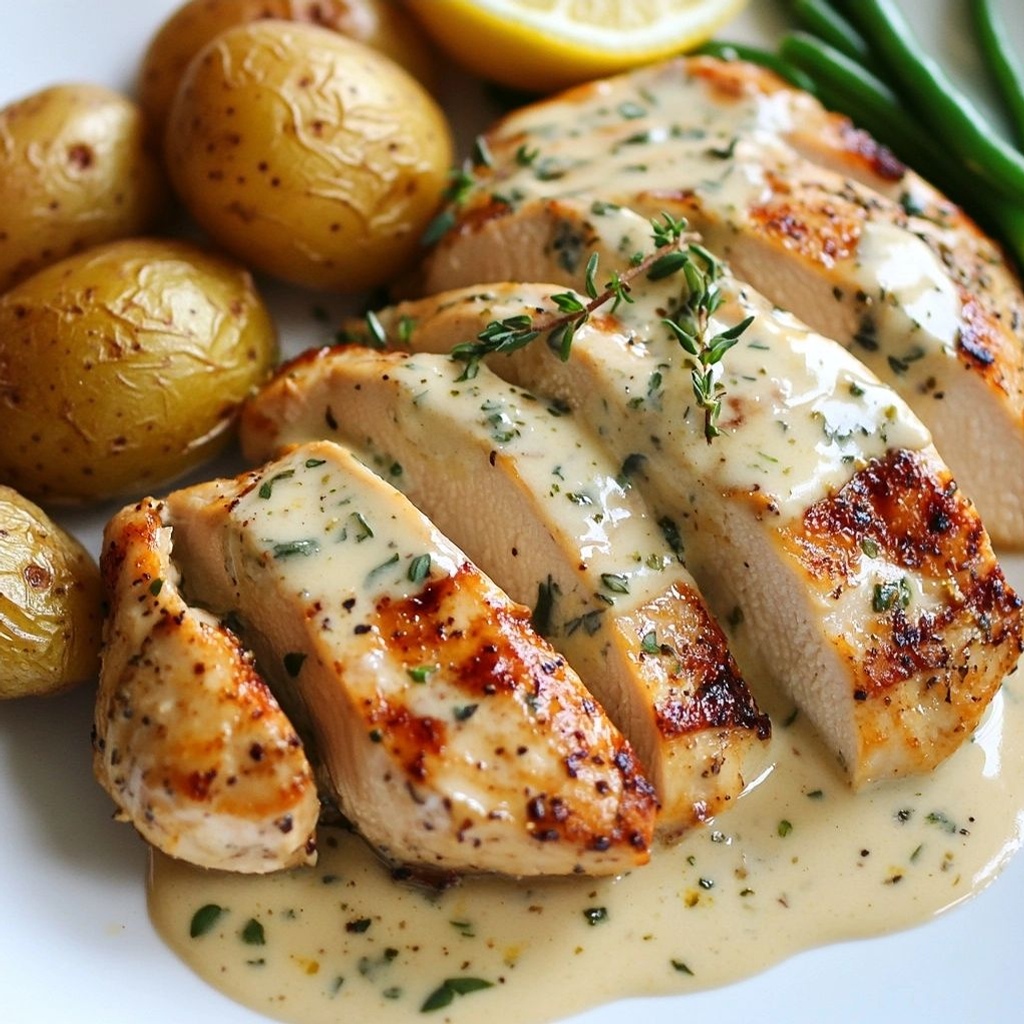
– Starch: mashed potatoes, boiled new potatoes, or soft polenta.
– Vegetables: sautéed green beans, steamed broccoli, or roasted Brussels sprouts.
– Bread: crusty crusts to mop up the luscious sauce.
– Drinks: a bright white wine, sparkling water with a lemon twist, or a light lager for balance. - Meal-prep flexibility: The flavors often taste even better the next day, as the sauce thickens slightly and the chicken reabsorbs some of the aromatics.
Tips, Variations & Substitutions
Here are practical ways to tailor Creamy Herb Chicken to your pantry, dietary preferences, and mood. The core method remains the same: sear, deglaze, simmer the chicken in a luscious sauce with herbs. Small adjustments can yield big differences in flavor and texture.
- Herb variations: Use a blend of thyme, t parsley, and chives for a fresh, garden-like aroma. You can also experiment with tarragon for a subtle anise note or basil for a sweeter, Italian-inspired edge.
- Acid lift: If lemon isn’t available, a splash of white wine vinegar or a teaspoon of Dijon mustard can add brightness without overpowering the dish.
- Cheese options: Parmesan is traditional, but pecorino romano or a grana padano can offer different savory intensity. If dairy-free, use a coconut cream or almond cream with nutritional yeast to achieve a similar body and umami.
- Make it lighter: Substitute half-and-half or whole milk with a lighter dairy alternative, or use a high-quality milk plus extra garlic for a bright note while keeping fat content lower.
- Make it dairy-free: Use olive oil or avocado oil for sautéing, and replace cream with a thick coconut cream or a cornstarch slurry for the sauce body at the end, seasoning to taste with dairy-free cheese substitutes if desired.
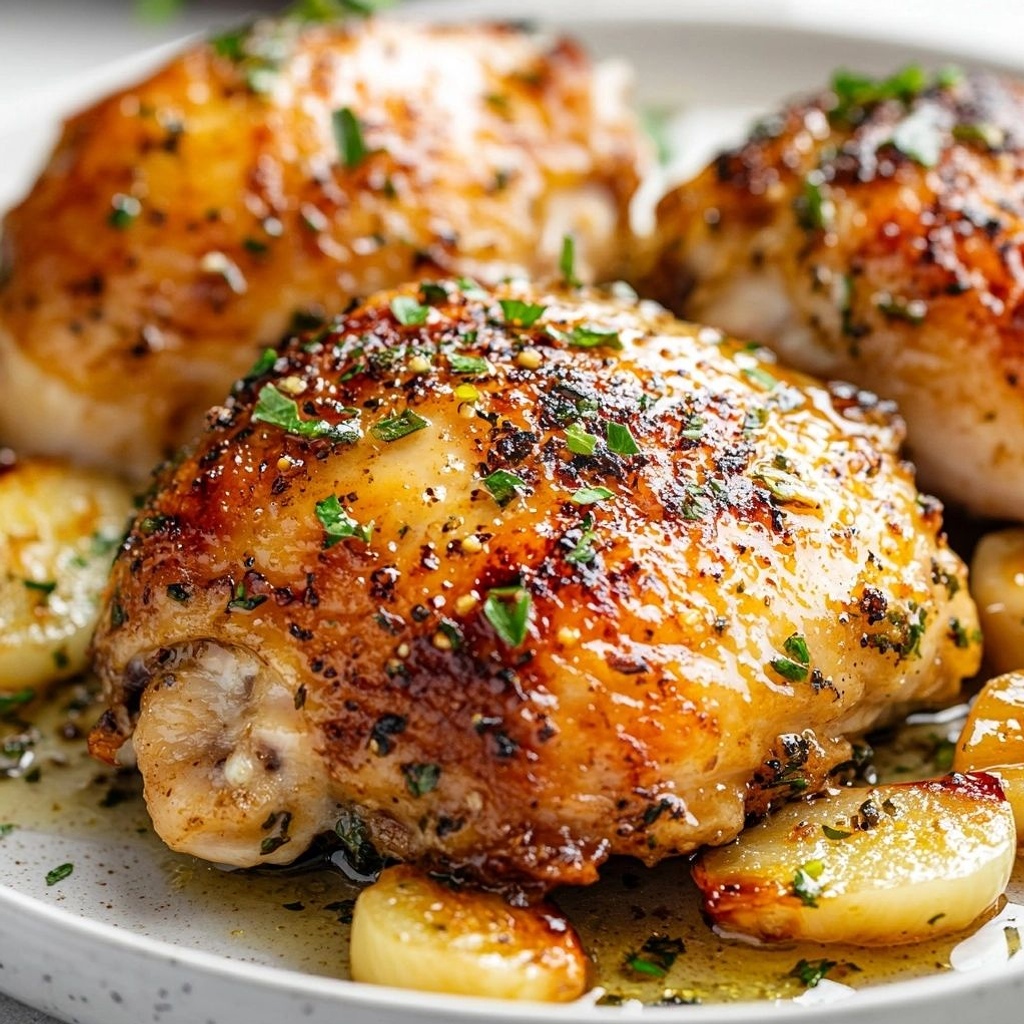
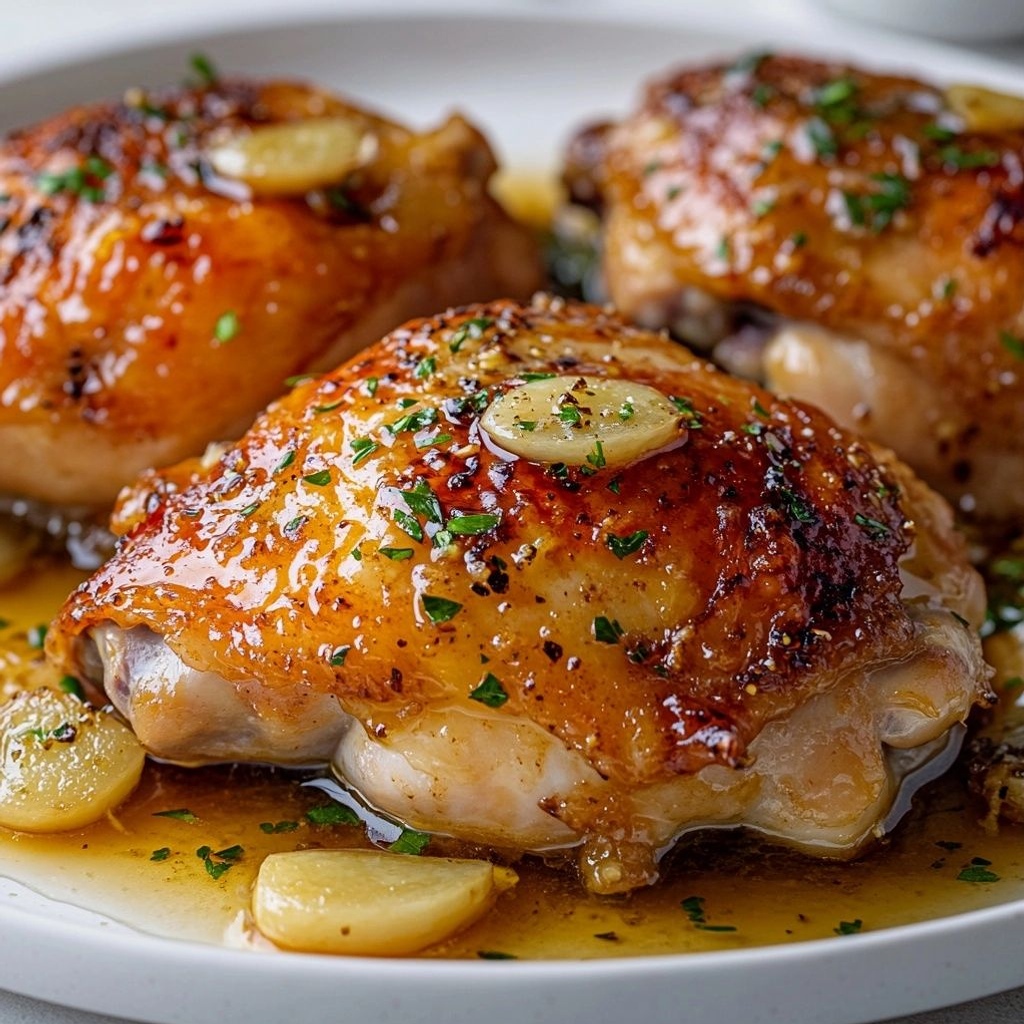
- Protein swaps: Skin-on chicken thighs add richness and tenderness; boneless, skinless chicken breasts yield a leaner result. For a vegetarian variation, lightly pan-sear king mushrooms and finish with the same herb sauce, or use firm tofu slices seared until lightly crisp and then sauced.
- GF and other dietary considerations: Ensure any stock or sauce components are gluten-free if celiac-safe; most dairy and herbs are naturally gluten-free, but always check packaging for cross-contamination in processed ingredients.
- Texture tweaks: If your sauce seems too thick, loosen with a splash of broth or water; for a thicker finish, reduce a bit longer or whisk in a little cornstarch slurry to reach the desired velvetiness.
Storage & Make-Ahead Ideas
The beauty of Creamy Herb Chicken extends beyond the initial dinner. It stores well and lends itself to make-ahead strategies that fit busy life schedules. Proper storage ensures flavor remains robust and texture stays appealing upon reheating.
- Refrigeration: Leftovers will keep in an airtight container for 3–4 days. Reheat gently on the stovetop over low heat, stirring regularly to prevent separation, or in a microwave in short bursts, pausing to stir and restore creaminess with a splash of stock if needed.
- Freezing: The sauce can be frozen with the chicken, but the texture may become slightly softer upon thawing. If freezing, consider freezing the sauce separately from the chicken, then reassemble and reheat together to regain coherence. Use within 1–2 months for best flavor and texture.
- Make-ahead tips: You can season and sear the chicken a day ahead, refrigerate, and finish with the sauce the next day. Or you can prepare the herb cream base in advance and warm with fresh chicken when ready to serve, ensuring the sauce remains glossy and not broken.
- Meal-prep trio: Prepare a large batch of the herb cream sauce and store in the fridge. When needed, quickly sear fresh chicken breasts or thighs, finish with the warmed sauce, and serve with a quick side of greens or grains for a fast, comforting meal.
Fun Facts & Trivia (Optional)
Delving into the cultural texture of creamy poultry with herbs reveals a few delightful tidbits. Dairy-based sauces with herbs have a long, global lineage, appearing in many culinary traditions as a way to transform lean proteins into comforting dishes that feel indulgent yet balanced. The combination of cream and herbs echoes several classic regional preparations—from French sauces that rely on butter and cream to create a glossy finish, to Italian-inspired finishes where citrus and parsley brighten a rich base. The practice of finishing a dish with a touch of lemon zest is a hallmark of bright, modern home cooking—it’s a small trick that elevates flavors without complicating the technique. Some chefs note that the “fond,” the caramelized bits left on the pan after searing meat, is gold for flavor when deglazed with wine or stock; it provides the depth you want in a sauce, and Creamy Herb Chicken capitalizes on that concept by collecting those flavorful bits and turning them into a lush, cohesive sauce. In kitchens around the world, similar techniques are used to coax maximum savor from modest ingredients, turning a simple skillet into a stage for aroma, texture, and color to perform together on the plate.
Ingredients
Creamy Herb Chicken
- 4 boneless skinless chicken breasts (about 1.5–2 lb total)
→ The main protein of the dish. Pounding the breasts to an even thickness helps them cook uniformly and stay juicy. If your breasts vary in size, consider pounding the larger ones to match the smallest for even searing. Season lightly with salt before cooking to enhance flavor without overpowering the creamy sauce. - 2 tablespoons olive oil
→ Used for searing the chicken to develop a rich crust and color. Olive oil has a moderate smoke point and contributes subtle fruitiness. For best results, pat the chicken dry before searing to ensure crisp, golden surfaces rather than steaming in moisture. - 1 tablespoon unsalted butter
→ Adds depth of flavor and helps finish the sauce with a velvety texture. Butter also aids in browning the fond from the chicken, which becomes a flavorful base for the sauce. If you prefer a dairy-free version, replace with additional olive oil or a plant-based butter alternative. - 3 cloves garlic, minced
→ Garlic infuses the sauce with aromatic warmth. Mincing finely ensures it cooks quickly and distributes evenly; you can also grate the garlic for a smoother integration. Be careful not to burn the garlic; add it after the chicken is seared or lower the heat slightly when sautéing. - 1 small onion, finely chopped
→ Onion provides sweetness and a base for the sauce. Finely chopped onion cooks faster and blends into the cream more smoothly, preventing large onion pieces from lingering in the sauce. If you’re short on time, you can substitute with 1/4 cup finely minced shallot for a milder flavor. - 1 cup chicken broth (or stock)
→ Creates the sauce’s initial body and helps deglaze the pan after searing the chicken, lifting the browned fond and adding depth. Use low-sodium broth to better control the salt level. If you prefer a thicker sauce, reduce the broth slightly or whisk in a slurry of 1 teaspoon cornstarch mixed with 1 tablespoon water at the end. - 1 cup heavy cream
→ Provides the creamy, luscious texture characteristic of the dish. Heavy cream adds body without curdling easily when simmered with garlic and onions. For a lighter version, substitute with half-and-half or a 1:1 blend of milk and cream, but expect a looser sauce. - 1/2 cup grated Parmesan cheese
→ Contributes salty, savory richness and helps thicken the sauce with a smooth mouthfeel. Freshly grating Parmesan yields a brighter flavor than pre-grated varieties. Stir in gradually to avoid clumping and to achieve a velvety sauce consistency. - 1 tablespoon lemon juice
→ Brightens the richness of the cream and helps balance the dish’s flavors. Add after the sauce has simmered and reduced slightly, so the acidity doesn’t evaporate away. If you prefer a more pronounced tang, increase to 1.5 tablespoons or add a teaspoon of zest for extra brightness. - 1 teaspoon dried thyme or 1 tablespoon fresh thyme, chopped
→ Creates a classic herbal note that complements chicken and cream. Fresh thyme offers a lighter, brighter aroma, while dried thyme provides a concentrated flavor; if using dried, let it bloom briefly in the hot oil with the onions to release its oils. - 2 tablespoons fresh parsley, chopped
→ Adds color and a fresh, grassy note that lifts the dish. Stir in at the end to preserve the bright green color and crisp-taste of the herb. If you don’t have parsley, a teaspoon of chives or a pinch of dried tarragon can work as alternatives. - Salt and freshly ground black pepper to taste
→ Essential for balancing flavors. Season in stages: lightly salt the chicken before searing, then adjust salt in the sauce after adding cream and cheese to prevent it from becoming overly salty. Freshly cracked pepper adds a subtle, aromatic bite.
Optional Add-ins
- 8 oz cremini or white button mushrooms, sliced
→ Mushrooms contribute a savory, umami backbone and absorb the sauce’s richness. Sauté the mushrooms with the onions and garlic until browned to maximize flavor and prevent sogginess in the final dish. If you’re avoiding mushrooms, you can omit without affecting the core technique. - 1/4 cup dry white wine (or extra chicken broth)
→ Adds acidity and a touch of brightness to the sauce, helping to cut through the richness. If using wine, let it simmer until reduced by about half to concentrate flavors before adding cream. For a non-alcoholic version, substitute with additional broth.
Instructions
- Preheat your oven to 200°F (93°C) and line a baking sheet with a rack; this keeps the chicken warm without steaming it and allows you to finish the sauce separately if desired.
→ A gentle, steady heat maintains juiciness and gives you a buffer to finish any component without rushing the sauce. - Place the four boneless skinless chicken breasts on a cutting board and pound them to an even thickness of about 1/2 inch (1.25 cm) using a flat meat mallet or the bottom of a heavy skillet; this ensures uniform cooking and prevents dry edges.
→ Even thickness promotes consistent searing and prevents overcooked edges while the centers finish cooking, yielding juicy, uniform pieces. - Pat the pounded chicken dry with paper towels and season lightly on both sides with salt and a pinch of black pepper; remove surface moisture to achieve a crisp, golden crust.
→ Dry surfaces sear better, forming fond that enriches the sauce, while light salting enhances flavor without making the dish overly salty. - Heat 2 tablespoons olive oil in a large skillet over medium-high heat until shimmering; add the chicken pieces in a single layer and sear without disturbing for 2 to 3 minutes per side until well browned; transfer to a plate and loosely cover to rest.
→ The high-heat sear creates a flavorful crust and browns the fond, which will deglaze into the sauce for depth of flavor. - Reduce the heat to medium and add 1 tablespoon unsalted butter to the same pan; stir until melted and the butter starts to color slightly, then add 1 small finely chopped onion and sauté for 3 to 4 minutes until translucent and sweet.
→ Butter enriches the base, while the onion builds sweetness and a gentle foundation for the garlic and herbs; cooking onions until softened prevents sharp raw notes in the sauce. - Add 3 minced garlic cloves to the skillet and cook for 30 to 60 seconds until fragrant, stirring constantly to prevent browning; remove from direct heat if the butter begins to brown too quickly.
→ Garlic releases aroma and flavor quickly, but can become acrid if scorched; keeping heat controlled preserves perfume and avoids bitterness. - Deglaze the pan with 1 cup chicken broth, loosening the browned fond from the bottom of the skillet with a wooden spoon; scrape and simmer for 1 to 2 minutes to reduce slightly and concentrate flavor.
→ Deglazing lifts fond into the sauce, building body and a savory base that supports the cream later on. - Stir in 1 cup heavy cream and bring to a gentle simmer; reduce heat if necessary to avoid a boil that could separate the cream, and simmer for 4 to 5 minutes until the sauce thickens to a coatable consistency.
→ The cream provides the luscious texture; gentle simmering prevents curdling and helps the sauce cling to the chicken. - Whisk in 1/2 cup grated Parmesan cheese in small additions, allowing each addition to melt before adding the next; season with salt and pepper to taste during this step.
→ Parmesan enriches the sauce with savoriness and helps it emulsify; adding gradually prevents clumping and ensures a smooth, velvety finish. - Stir in 1 tablespoon lemon juice and 1 teaspoon dried thyme (or 1 tablespoon fresh thyme, chopped); let the sauce simmer for another 1 to 2 minutes to bloom the herbs and brighten the richness.
→ The lemon balances the richness with acidity, while thyme provides a classic herbaceous note that complements chicken and cream. - Return the seared chicken to the skillet, spooning some sauce over the top, and simmer on low heat for 5 to 7 minutes until the chicken reaches an internal temperature of 165°F (74°C); if using fresh thyme, taste and adjust seasoning after simmering.
→ Resting in the sauce helps the chicken reabsorb moisture and finish cooking gently, while the sauce thickens further and coats each piece. - Stir in 2 tablespoons fresh parsley, chopped, off the heat just before serving to preserve color and bright flavor; adjust salt and pepper if needed.
→ Fresh parsley adds a vibrant finish and a hint of crunch; adding off heat preserves its bright green color and aromatic oils. - If using optional mushrooms, add 8 oz sliced cremini or white button mushrooms to the skillet with the onions in step 5 and sauté until browned and their liquid has evaporated; proceed with the rest of the steps to infuse the sauce with mushroom umami.
→ Sautéing mushrooms until brown amplifies their flavor and prevents them from adding moisture or a soggy texture to the final sauce. - For a wine-enhanced variation, substitute 1/4 cup dry white wine for 1/4 cup of the chicken broth in step 6, allowing it to simmer until reduced by half before adding the cream to concentrate acidity and aroma; otherwise, proceed with broth only.
→ Wine adds acidity and depth; reducing concentrates its flavors so the cream can balance without dominating. - Keep the sauce warm on the lowest possible simmer or transfer to a warm oven while you plate; if the sauce thickens too much, whisk in a small splash of broth or water to loosen to a silky consistency.
→ Gentle warmth ensures the sauce stays glossy and cohesive when served, while thinning adjustments prevent a stiff mouthfeel.
Notes
These creamy herb chicken is a rich, comforting dish built on succulent seared chicken breasts crowned with a velvety garlic- and onion-infused cream sauce. For best results, pound the chicken to an even thickness so it cooks uniformly and stays juicy, and pat dry before searing to develop a golden crust. Deglaze the pan with chicken broth (or dry white wine for extra brightness) to lift the fond and deepen the sauce flavor. Add the cream and Parmesan gradually to prevent clumping and to maintain a silky texture, then finish with lemon juice and fresh herbs for a bright, balanced finish. If you’re watching calories or dairy, substitute with a lighter dairy such as half-and-half or a 1:1 blend of milk and cream, or use a dairy-free alternative like coconut cream and olive oil or dairy-free butter. For a thicker sauce, reduce the broth a bit longer or whisk in a cornstarch slurry at the end. Fresh thyme and chopped parsley not only flavor the sauce but also add color; stir in parsley at the end to preserve its vibrancy. Serve this with mashed potatoes, rice, or buttered noodles and a side of steamed vegetables. You can prepare the sauce and finish the dish in stages: sear the chicken, set aside, cook the aromatics, deglaze, simmer the sauce, then return the chicken to finish in the sauce. If making ahead, store the sauce separately from the chicken to reheat gently and prevent overcooking.
Tips
- Prep for even cooking: Pound the chicken breasts to an even thickness so each piece sears uniformly. Pat dry thoroughly before searing to promote a crisp, golden crust rather than steaming in moisture.
- Season smartly: Lightly salt the chicken before browning, then adjust salt in the sauce after cream and cheese are added to avoid oversalting. Freshly cracked black pepper should be added in multiple stages for layered heat.
- Pan searing technique: Pat the chicken dry, heat olive oil until shimmering, then sear without moving the meat for a deep crust. If your pan gets crowded, cook in batches to maintain high heat and proper browning.
- Building the base: Sauté the onions and garlic until translucent and fragrant before adding the chicken broth. This deglazes the fond and builds a flavorful foundation for the creamy sauce.
- Deglaze and reduce: After searing, deglaze with broth (or wine) and simmer to reduce by about half before adding cream. This concentrates flavor and keeps the sauce from masking the chicken.
- Cream and cheese handling: Lower the heat when you add heavy cream and grated Parmesan to prevent curdling and clumping. Add the cheese gradually, stirring to a silky, velvety sauce.
- Herbs and brightness: Stir in thyme and lemon juice toward the end of simmering to preserve their aromatic notes and brighten the sauce. Fresh thyme and parsley should be added off heat if possible to keep their color vibrant.
- Thickness control: If the sauce is too thin, reduce a bit longer or whisk in a slurry of 1 teaspoon cornstarch mixed with 1 tablespoon water at the end. If it’s too thick, loosen with a splash of broth or cream.
- Optional mushrooms: If using mushrooms, sauté them with the onions and garlic until browned to develop their umami and avoid soggy mushrooms in the final dish.
- Wine substitute tips: When using dry white wine, allow it to reduce by about half to concentrate flavors before adding cream. For a non-alcoholic version, replace wine with extra broth and a touch of lemon zest for brightness.
- Final finish: Stir in fresh parsley at the end to preserve color and a fresh, herbal aroma. A final pinch of black pepper right before serving adds a subtle aroma of warmth.
FAQ
What is Creamy Herb Chicken?
Cirmy herb chicken is a skillet-style dish featuring tender chicken breasts cooked in a rich, creamy sauce infused with fresh herbs such as thyme, rosemary, and parsley. It’s cozy, comforting, and pairs well with rice, potatoes, or vegetables.
What ingredients are needed?
Common ingredients include chicken breasts, heavy cream or half-and-half, chicken stock, garlic, onion, fresh or dried herbs (thyme, rosemary, parsley), butter or olive oil, salt, pepper, and optional grated Parmesan for extra flavor. You can add mushrooms, spinach, or sun-dried tomatoes for variation.
Can I use chicken thighs instead of chicken breasts?
Yes. Boneless, skinless chicken thighs work well and stay juicy. They may require a slightly longer cooking time to reach internal doneness.
Is this recipe gluten-free and dairy-free?
Purely dairy-free and gluten-free options exist. Use dairy-free cream alternatives (e.g., coconut cream or almond cream) and ensure stock and any thickeners are gluten-free. If using flour to thicken, consider a gluten-free thickener or reduce and simmer to naturally thicken.
How do I thicken the sauce?
Options include simmering longer to reduce and thicken, whisking in a small amount of cornstarch slurry (1 teaspoon cornstarch + 1 tablespoon water) or using a roux (butter and flour) at the start. For dairy-free, use a starch slurry with dairy-free cream.
What herbs work best?
thyme and rosemary are classic choices. Parsley adds brightness at the end. You can also add a bit of tarragon or sage for a different aroma.
How long does it take to cook?
Prep time is about 10 minutes. Sautéing chicken takes 6–8 minutes per side depending on thickness, and simmering with the sauce adds 5–10 minutes. Total time is typically 25–35 minutes.
What should I serve it with?
Serve with mashed potatoes, steamed or roasted vegetables, rice, or crusty bread to soak up the sauce. A side of green beans or a simple salad also pairs nicely.
How should I store leftovers?
Store in an airtight container in the refrigerator for up to 3–4 days. Reheat gently on the stove or in the microwave, adding a splash of cream or stock to loosen the sauce if needed. It also freezes well for up to 2–3 months.