Introduction / Hook
Imagine a plate that crackles with a satisfying crunch with every bite, giving way to tender, juicy chicken inside. Think of golden edges that glisten with a whisper of garlic, parmesan, and fresh herbs, all wrapped in a light, savory crust that renders beautifully in a skillet or oven. Crispy Italian Chicken Cutlets are the kind of dish that makes weeknights feel like a special occasion and Sunday dinners feel effortless. It’s a recipe that sounds simple on the surface, yet delivers a layer of depth that keeps bringing you back for more: the way the breading clings—yet cracks—revealing a moist interior; the gentle warmth of Italian seasonings mingling with a kiss of lemon; and the aroma that wafts through the house, inviting loved ones to the table. This dish transcends ordinary comfort food by tapping into a timeless, rustic Italian approach to flavor—where simplicity meets passion, and every bite tells a story of family, tradition, and a shared meal that feels like a celebration. Whether you’re cooking for a busy weeknight or entertaining guests, these crispy cutlets deliver a memorable experience with far less effort than you might expect. They pair beautifully with a bright salad, a mound of pasta, or roasted vegetables, and they adapt to your kitchen’s personality—whether you prefer a touch of heat, a hint of tang, or a richer, cheese-forward finish. In short, Crispy Italian Chicken Cutlets are a dish that invites you into a warm kitchen, encourages you to savor the moment, and leaves everyone at the table asking for seconds and the story behind that irresistible crust.
The Story Behind the Dish
Chicken cutlets prepared with a crunchy coating have long been a staple in many kitchens around the Mediterranean and Italian-American neighborhoods, where frugal ingredients meet bold, comforting flavors. The concept is wonderfully simple: a small, boneless chicken breast is sliced or pounded to an even thickness, seasoned, dipped, and fried or baked to achieve a crisp exterior. What elevates Crispy Italian Chicken Cutlets into something special is the marriage of pantry staples—garlic, parmesan, dried oregano, basil, a touch of lemon zest, and a splash of olive oil—with a technique that preserves the integrity of the meat while delivering a satisfying crunch. The Italian influence shines through in the use of Parmesan for that nutty, umami warmth, the oregano and basil that evoke sunlit herb gardens, and the brightness of citrus that cuts through the richness. In many family kitchens, this dish is a late-summer favorite when fresh herbs are abundant, and it’s equally beloved as a versatile base for future meals: slice and serve the cutlets over a bed of warm pasta, tuck them into a sandwich with a spread of provolone and marinara, or layer them atop a crisp salad for a hearty protein boost. The beauty of this recipe lies in its adaptability: you can tailor the seasoning to reflect your regional pantry, your preferred level of crunch, or your dietary needs, all while keeping the soul of the dish intact—crisp, succulent, and quintessentially Italian-American comfort food.
Why You’ll Love This Recipe
- Everything you need is likely already in your pantry—a few staples that transform into something special with a little technique.
- The crust delivers a crackling, satisfying texture while the chicken remains juicy and tender inside.
- Herbaceous brightness with garlic, Parmesan, and lemon keeps the flavors vibrant without being overpowering.
- Versatile: serve with pasta, a crisp green salad, roasted vegetables, or even make-ahead sandwiches for a quick lunch.
- Accessible to cooks of all levels: simple steps, clear results, and room to improvise with your favorite seasonings.
- Comforting yet elevated enough for guests, making it a reliable go-to for weeknights and weekend gatherings alike.
Flavor Profile & Texture
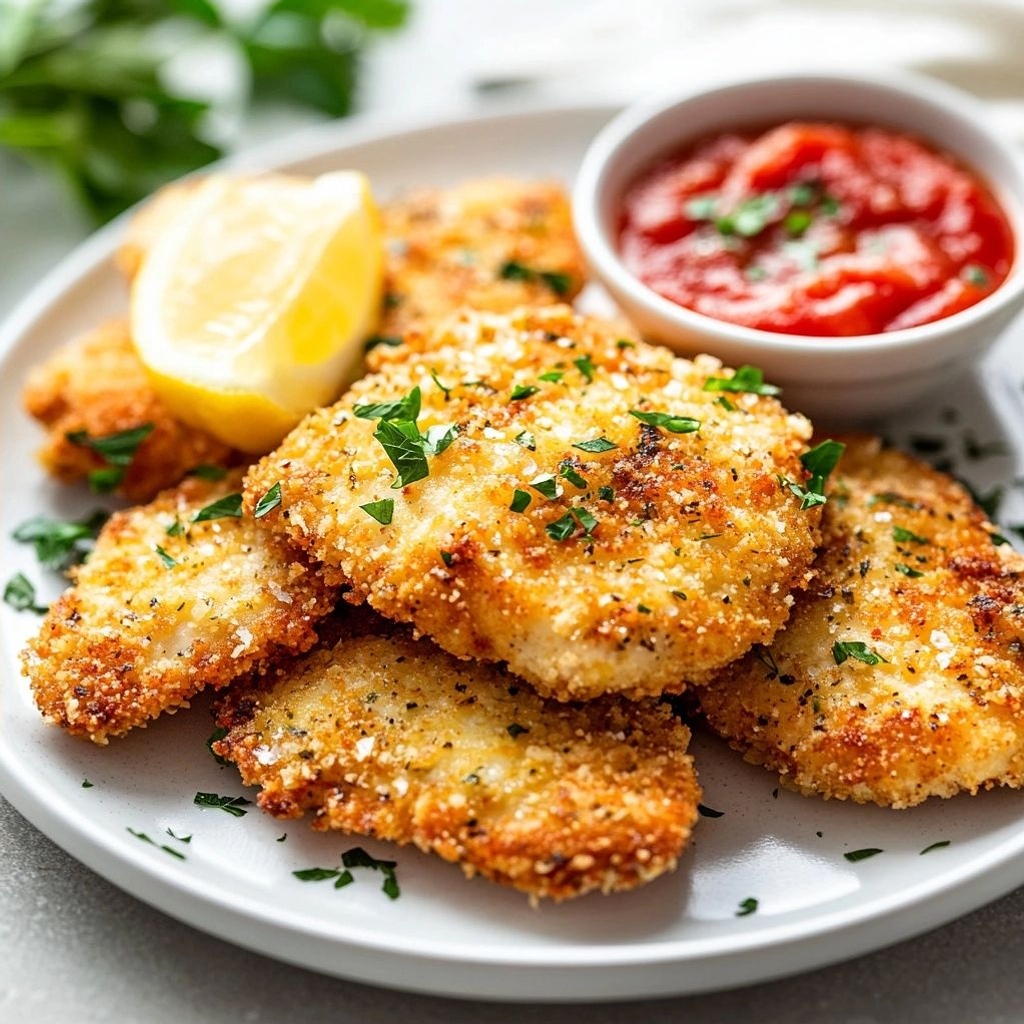
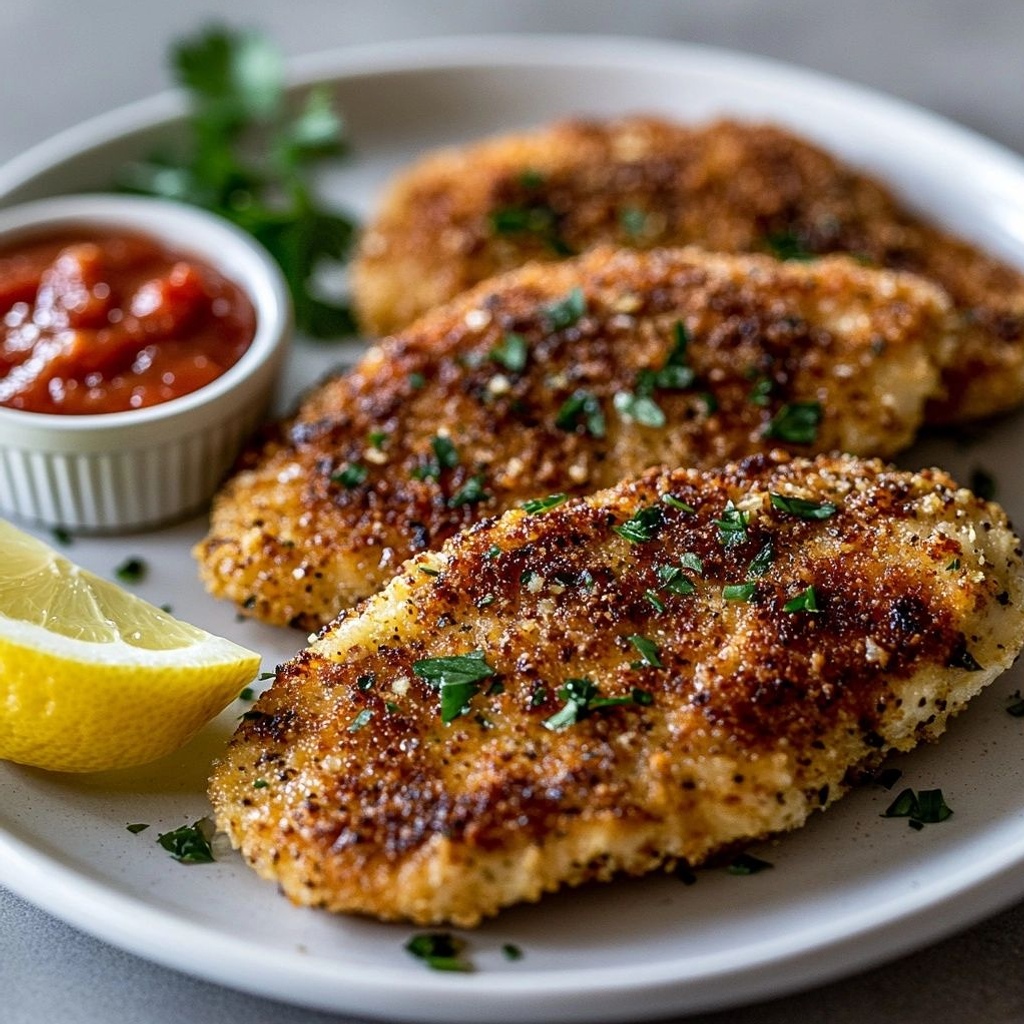
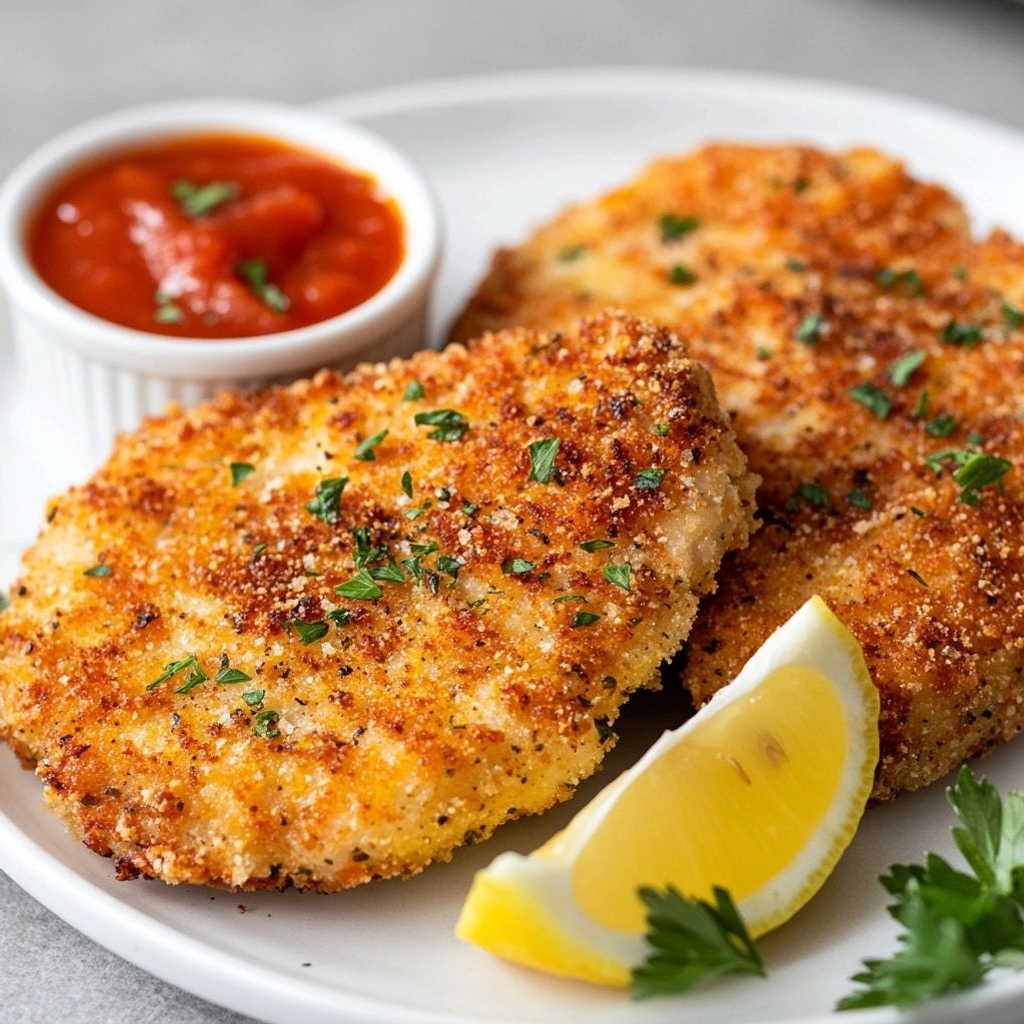
From the first bite, you notice a delicate balance of textures and flavors. The exterior offers a confident, satisfying crunch, thanks to a well-seasoned breading that crisps up beautifully in a hot pan or oven. The crust is aromatic with garlic, a hint of onion, and a gentle warmth from dried oregano and basil, all lifted by Parmesan that adds a toasty, nutty bite. Inside, the chicken remains moist and tender—the sign of proper pounding or slicing to an even thickness and careful cooking. The lemon zest or a squeeze of lemon at the end adds a citrusy brightness that cuts through the richness, while a tiny pinch of red pepper flakes (optional) can introduce a welcome flirtation with heat for those who like a gentle kick. The herbs contribute freshness and lift, whether you’re using fresh basil and parsley or relying on dried equivalents when cooking from the pantry. The overall flavor profile is comforting and warmly familiar, yet refined enough to feel special: savory, cheesy, herbaceous, with a citrusy sparkle and a crisp, satisfying mouthfeel that lingers pleasantly on the palate.
Occasions & Pairings
This dish shines in a variety of settings. It’s ideal for weeknights when you want something you can pull together quickly, without sacrificing flavor. It also adapts to entertaining, as the crisp outer crust travels well and pairs with a wide range of sides. Consider these serving ideas:
- Pair with classic spaghetti aglio e olio or simple marinara for a comforting Italian-inspired meal.
- Serve atop a bed of al dente linguine with a light olive oil–garlic sauce and a shower of chopped parsley.
- Offer with roasted vegetables—brussels sprouts, carrots, and zucchini—or a bright green salad with a lemon vinaigrette to balance the richness.
- Create a panino or sub by layering slices of the cutlets with provolone or fresh mozzarella and a slosh of marinara.
- As an hors d’oeuvre, cut into small pieces and skewer with a dollop of marinara for a party-friendly bite.
Tips, Variations & Substitutions
Here are ideas to tailor Crispy Italian Chicken Cutlets to your preferences, dietary needs, or what you have on hand:
- Gluten-free option: Use gluten-free breadcrumbs or almond flour mixed with grated Parmesan for a crumbly crust that still stays crisp.
- Cheesy crust variation: Add finely grated Pecorino Romano in place of or in addition to Parmesan for a sharper, more tangy bite.
- Herb-forward version: Increase the amount of fresh parsley, basil, and oregano, and finish with a squeeze of lemon juice for a bright, herbal profile.
- Garlic-forward crust: For garlic lovers, add a touch more minced garlic to the coating and finish with a light garlic-lemon glaze after cooking.
- Spice level: Introduce a pinch of red pepper flakes into the breading or a touch of hot Italian seasoning to add heat.
- Oven-finished method: After coating, bake at 425°F (220°C) for 15–20 minutes, flipping once, until crisp and cooked through, for a healthier, hands-off approach.
- Make-ahead tip: Pound and season the chicken the day before, refrigerate on a rack, coat the next day, and fry or bake to finish quickly.
- Parmesan awareness: If you’re dairy-free, substitute a dairy-free Parmesan alternative or skip cheese entirely, relying on herbs and lemon to brighten the crust.
Storage & Make-Ahead Ideas
To maximize freshness and convenience, plan for both leftovers and prep ahead:
- Storage: Refrigerate cooked cutlets in an airtight container for up to 3–4 days. Reheat gently in a skillet or 350°F (175°C) oven to crisp the crust again.
- Freezing: Freeze breaded and partially cooked cutlets on a baking sheet, then transfer to a freezer bag. They’ll keep for up to 1 month. Finish by baking or pan-frying from frozen, adding a few extra minutes for cooking time.
- Make-ahead: Prepare the breading mixture in advance and store it in an airtight container. When ready to cook, coat the chicken and proceed with frying or baking for an evening-ready meal.
- Leftover crust: If you have extra breading or crust mixture, toast it briefly in a dry skillet to revive flavors and create a crunchy topping for salads or soups.
Fun Facts & Trivia (Optional)
– The concept of breaded and fried chicken as a universal comfort food transcends borders, with regional twists that reflect local ingredients and culinary histories. Italian-inspired crusts often emphasize a balance of parmesan and herbs, echoing the country’s love for bold but harmonious flavors.
– Lemon is a frequent companion to Italian dishes, not merely for brightness but because its acidity helps tenderize poultry and pair well with the salty, nutty cheese in the crust.
– Parmesan cheese, when grated finely, contributes a distinctive umami and crispiness to the crust as it toasts in the heat, creating that irresistible crust you crave in crispy chicken dishes.
Make-It-Your-Own Moments
Cooking is a conversation with your pantry and preferences. Here are some prompts to inspire your own version of Crispy Italian Chicken Cutlets:
- What herb would you lean into this season? Basil, oregano, thyme, or a dash of rosemary?
- Do you prefer a touch of citrus brightness with lemon or a more pronounced cheesy profile with extra Parmesan?
- Would you like a gluten-free crust, or is the classic breadcrumbs-and-Parmesan texture more your speed?
Closing Thoughts
Ultimately, Crispy Italian Chicken Cutlets celebrate the art of turning humble ingredients into something memorable. They’re a testament to how technique—properly pounding the chicken to even thickness, seasoning generously, and achieving a perfectly crisp crust—can transform a simple weeknight into a meal worth savoring. The beauty of this recipe lies not only in its immediate satisfaction but also in its versatility: you can serve it right away, pair it with familiar comforting sides, or repurpose the leftovers into creative, new dishes. As you plate these cutlets, take a moment to enjoy the aroma—the warmth of garlic, the nuttiness of Parmesan, and the sun-kissed notes of fresh herbs—before you savor the first bite. In the end, Crispy Italian Chicken Cutlets are about more than flavor; they’re about the joy of cooking, the comfort of a home-cooked meal, and the simple pleasure of a dish that brings people together around a table.
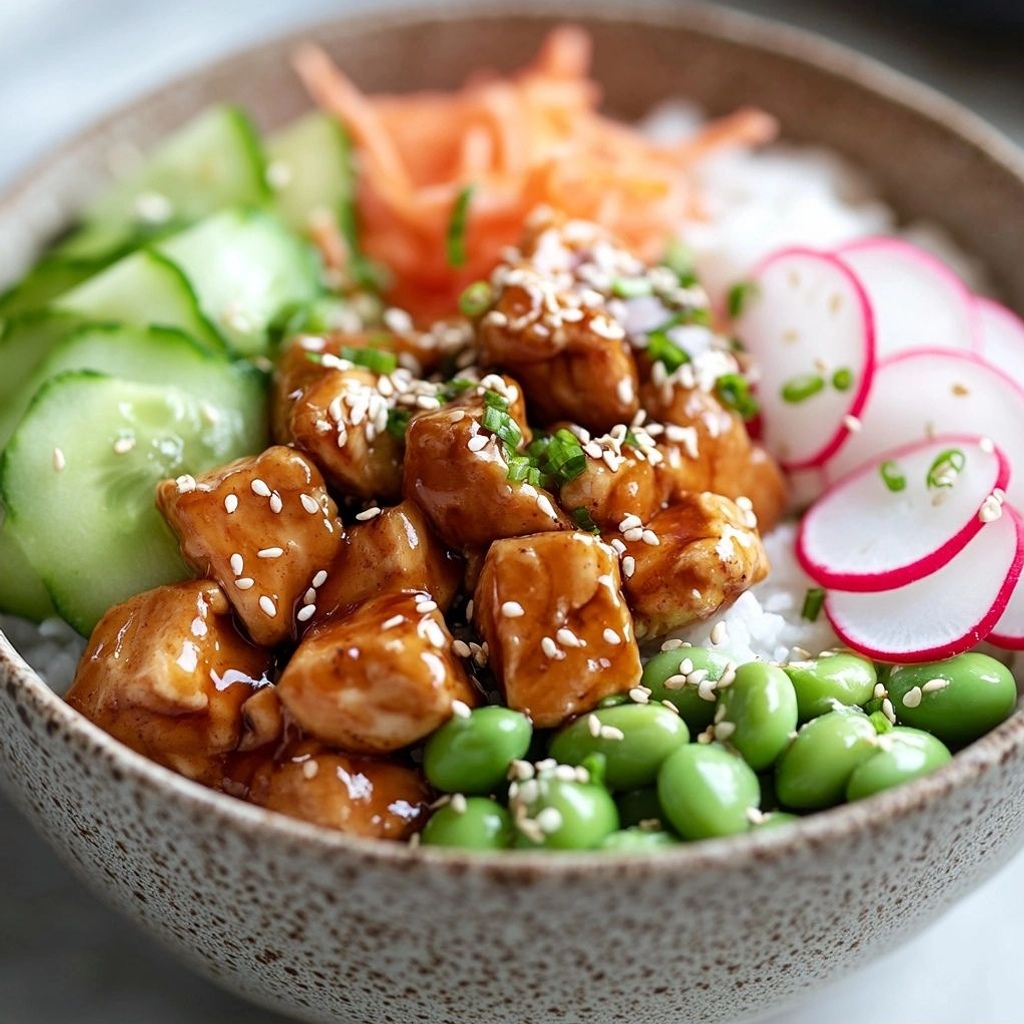
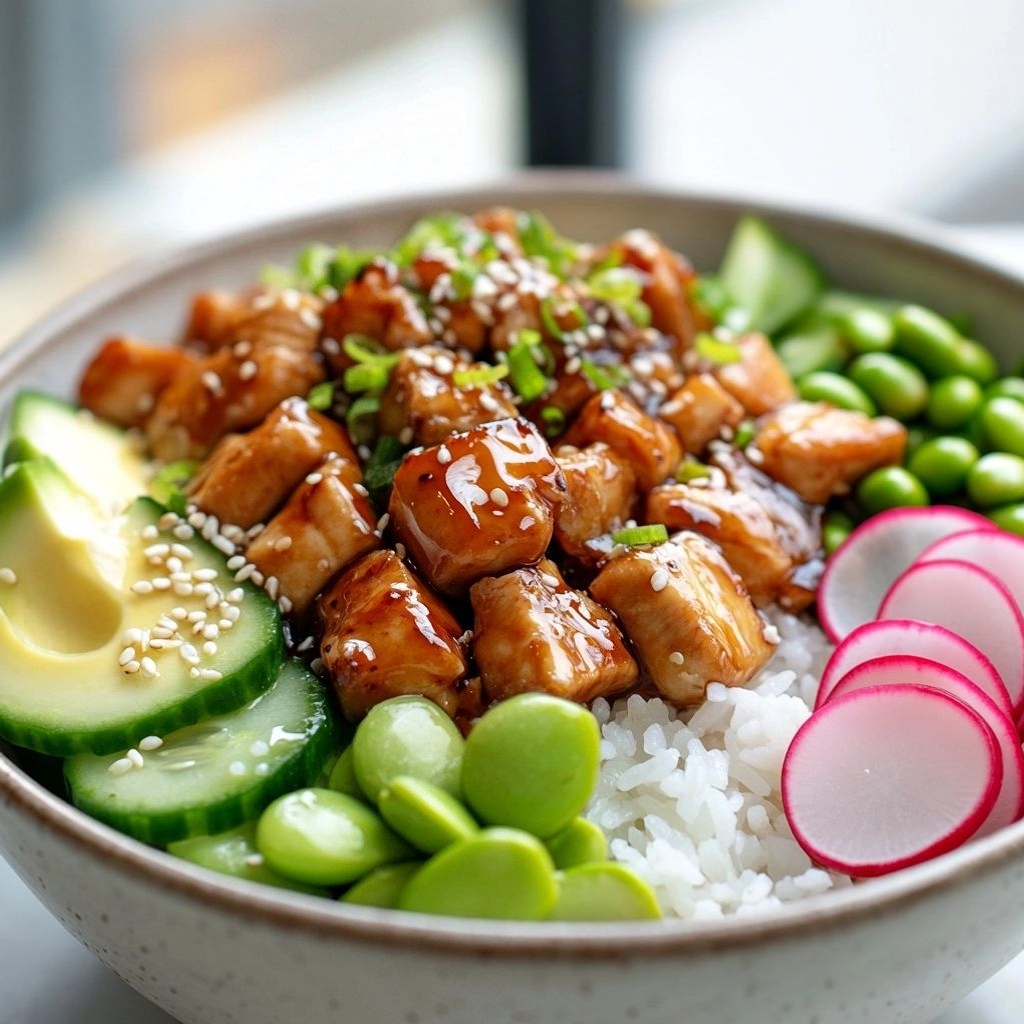
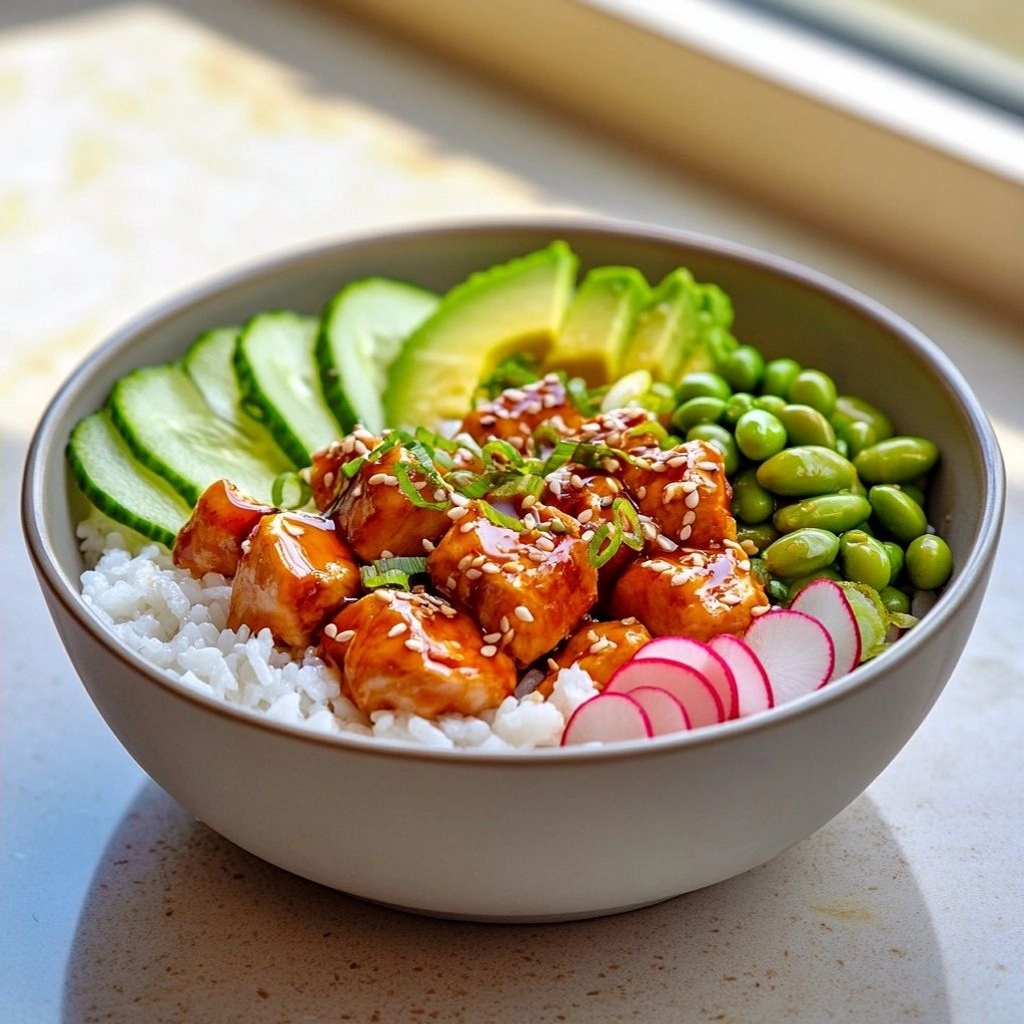
Ingredients
-
Chicken breasts, boneless, skinless (2 large, ~1 lb / 450 g total)
→ The base for the cutlets. Pound to an even 1/4-inch (6 mm) thickness so they cook uniformly and stay tender. Use a sharp knife and gently slice to create uniform pieces; beating with a meat mallet between two sheets of plastic wrap works well to avoid tearing the meat. Avoid over-pounding to prevent dryness. -
Eggs, large (2 large)
→ Act as the binding agent between the dredging stations. Whisk until the yolk and white are fully combined and smooth. Let beaten eggs rest for a minute if foamy, then use immediately to ensure good adhesion of the coating; room-temperature eggs help the coating adhere evenly. -
All-purpose flour (1/3 cup)
→ First dredge layer that creates a dry surface for the egg to cling to, helping the subsequent breadcrumb coating adhere and form a crisp crust. Lightly season the flour with a pinch of salt to enhance flavor; shake off excess before moving to the egg bath to prevent clumping. -
Panko breadcrumbs (1 cup)
→ Provides a light, airy, extra-crispy crust. For a more Italian-crisp finish, mix with finely grated Parmesan. If you prefer gluten-free, substitute with gluten-free panko and gluten-free flour as needed. Toasting the crumbs lightly in a dry pan for 1–2 minutes before use can deepen flavor and crunch. -
Finely grated Parmesan cheese (¼ cup)
→ Adds salty umami and helps form a cohesive crust when mixed with breadcrumbs. Use freshly grated parmesan for the strongest flavor; avoid buying pre-grated varieties that may be drier and have additives. Combine with breadcrumbs for even distribution in the crust. -
Garlic powder (1 teaspoon)
→ Offers a mellow garlic note that blends with the Italian seasoning without risking raw garlic bite. If using fresh garlic, mince finely and sauté briefly in olive oil to mellow before mixing into breadcrumbs for a more pronounced aroma. -
Italian seasoning (1 teaspoon)
→ A convenient blend of dried oregano, basil, thyme, and rosemary to deliver classic Italian flavor. Use a good-quality blend for balanced herbaceous notes. If you grow fresh herbs, you can substitute with 1 teaspoon dried plus 1 tablespoon finely chopped fresh parsley for brightness. -
Fresh parsley, chopped (2 tablespoons)
→ Adds color, freshness, and a hint of brightness to the crust. Sprinkle into the crumb mixture or onto the finished cutlets as a garnish. If you don’t have fresh parsley, substitute with a pinch of dried parsley, understanding it won’t be as vibrant. -
Salt (1 teaspoon, divided)
→ Essential for seasoning without overpowering; use half in the flour dredge and half in the breadcrumb mixture. If the olive oil used for frying is seasoned or the crumbs already salty, adjust accordingly. Always taste a small pinch of the dredge to gauge salt level prior to coating all cutlets. -
Black pepper (½ teaspoon, freshly ground)
→ Adds a subtle kick that complements the Italian flavors. Freshly ground pepper has a brighter, more nuanced aroma than pre-ground varieties. Grind to a medium coarse for bold flavor without biting hard into the crust. -
Olive oil, extra-virgin (2–3 tablespoons for coating pan)
→ Used for pan-frying to achieve a crisp, golden crust and to lightly grease the pan. Choose a high-heat olive oil or a light olive oil that tolerates higher temperatures; avoid olive oils with low smoke points for this application to prevent bitterness. Heat the pan until shimmering before adding cutlets; do not crowd the pan to maintain even crisping. -
Optional: Marinara sauce (1 cup)
→ A tangy, tomato-based sauce for serving with crispy cutlets. Keep warm and spoon over the chicken or dip slices as you eat. If using canned tomatoes, choose a good-quality crushed tomato and simmer briefly with garlic and a touch of sugar for a richer depth of flavor. -
Optional: Fresh mozzarella slices (4–6 slices, about 4 oz / 115 g)
→ For a melty, cheesy Italian twist. Place a slice on each cutlet after frying and briefly cover the pan to melt the cheese, or layer on top of baked cutlets for a bubbly finish. Use low-moisture mozzarella to reduce excess moisture and sogginess. -
Optional: Fresh basil leaves (for garnish)
→ Adds aromatic brightness and color that complements the tomato and cheese pairing. Tear or chiffonade for a vibrant presentation right before serving. If you don’t have fresh basil, a pinch of dried basil can be used, though the aroma will be subtler.
Instructions
- Pound the chicken breasts to an even thickness of 1/4 inch (6 mm) between two sheets of plastic wrap using a flat meat mallet or a heavy skillet, applying steady, even pressure from the center outward. This ensures uniform cooking and tenderness, preventing overcooked edges or underdone centers; keep the wrap tight to avoid tearing the meat and wipe away any juice before proceeding.
- Season the chicken lightly with salt and black pepper on both sides after pounding, letting the salt distribute evenly for seasoning depth and to help retain moisture during frying; if you prefer, rest the seasoned chicken for 10 minutes at room temperature to enhance flavor absorption.
- Whisk together the two eggs in a shallow dish until the yolks and whites are fully combined and smooth, then let the mixture sit for a minute if foamy so the air dissipates and the coating adheres more evenly to the meat; keep the eggs at room temperature for best binding.
- Place all-purpose flour in a separate shallow dish and season with about half of the salt, distributing it evenly; lightly whisk to blend, then sprinkle a touch of black pepper into the flour for a subtle savory baseline that the egg bath can cling to and help crust adhesion.
- In a third shallow dish, combine the panko breadcrumbs, finely grated Parmesan, garlic powder, Italian seasoning, remaining salt, and freshly ground black pepper; stir until the mixture is uniformly seasoned and the Parmesan is evenly distributed to create a cohesive, flavorful crust that browns crispily.
- Dredge each pounded chicken breast first in the seasoned flour, turning to coat all sides and tapping off excess to prevent clumping; this dry layer provides a tacky surface for the egg to cling to and anchors the breadcrumb crust during frying.
- Dip the floured chicken into the beaten eggs, turning to coat completely and allowing any excess egg to drip back into the dish; the egg acts as the binding glue that traps the crumb mixture to the surface for a uniform crust.
- Roll the egg-coated chicken in the seasoned breadcrumb mixture, pressing gently and evenly to adhere the crumbs all over; use your palms to pat the crumbs into place so no bare spots remain and the crust achieves maximum crunch during frying.
- Arrange breaded cutlets on a clean tray or rack in a single layer, leaving space between pieces to prevent sticking and steam buildup; this spacing ensures even browning and crust formation as the moisture escapes rather than steaming the surface.
- Heat a heavy skillet or frying pan over medium heat and add olive oil (2–3 tablespoons) to coat the bottom; swirl to create a thin, shimmering layer and heat until it shimmers but does not smoke, which signals the oil is hot enough to fry and will help achieve a crisp crust without sogginess.
- Gently lay the breaded cutlets into the hot oil, moving away from you to avoid splatter; fry without crowding the pan, flipping once the underside is golden brown and crusted within 2–3 minutes, to ensure even browning and to protect the crust from cracking.
- Cook the second side until it also turns golden and the crust is crisp, about 2–3 minutes more; use tongs to lift and check the color at the edges and the thickness of the crust, ensuring the internal temperature reaches 165°F (74°C) for safe poultry consumption.
- Transfer the fried cutlets to a paper-towel-lined plate to drain excess oil, allowing the crust to set and stay crisp; avoid stacking immediately, which can trap steam and soften the crust.
- Optional: If using marinara and mozzarella, spoon about 1 cup of warm marinara into a skillet, then lay each fried cutlet over the sauce and top with 1–2 slices of fresh mozzarella; cover the pan briefly to melt the cheese and finish the dish with a glossy, bubbling finish.
- Garnish with chopped fresh parsley and, if desired, torn fresh basil just before serving to add color and brightness; the herbs lift the richness of the crust and provide a fresh aroma that enhances the Italian flavors.
- Serve hot with additional marinara on the side for dipping or as a light sauce over the top, and enjoy immediately to preserve maximum crispness and juiciness of the cutlets.
Notes
These Crispy Italian Chicken Cutlets are crafted with a light, parmesan-crisp coating that delivers a golden crust and juicy interior. Start by pounding boneless, skinless chicken breasts to an even 1/4-inch thickness for uniform cooking and tenderness. Set up a two-station dredge: seasoned flour (with a pinch of salt) followed by beaten eggs, then a mixture of panko, finely grated Parmesan, garlic powder, Italian seasoning, and chopped fresh parsley. Toast the breadcrumbs lightly in a dry pan for extra crunch and depth, then mix in the Parmesan and parsley for color and aroma. Dip each cutlet in the flour, shake off excess, coat in the egg, and press into the crumb mixture, ensuring an even, thick crust. Let the coated cutlets rest briefly to help the coating adhere. Pan-fry in extra-virgin olive oil over medium-high heat until the crust is deeply golden and the chicken reaches 165°F (74°C) internally, about 3–4 minutes per side depending on thickness. Avoid crowding the pan; fry in batches and add a little more oil as needed. If you like a melty Italian finish, top with fresh mozzarella and cover the pan briefly to melt the cheese, or keep warm in a low oven (about 200°F/95°C) while you finish the rest. For serving, warm marinara sauce on the side and spoon or dip slices as you eat; a few torn fresh basil leaves add vibrant aroma and color. Tip: For gluten-free needs, substitute gluten-free panko and flour in the dredge and adjust seasoning to taste. You can prepare the coated cutlets a few hours ahead and refrigerate, then fry when ready for crisp crust and maximum tenderness. Always allow the oil to reach shimmering temperature before adding cutlets to ensure crisp, non-greasy results.
Tips
Tips for Crispy Italian Chicken Cutlets
- Even thickness is key: Pound the chicken to a uniform 1/4-inch (6 mm) to ensure all pieces cook at the same rate and stay tender. Avoid over-pounding to prevent dryness.
- Egg binding: Use room-temperature eggs and whisk until fully combined. Let the beaten eggs rest a moment if foamy to improve coating adhesion.
- Flour dredge: Lightly season the flour with salt and shake off excess before dipping into the egg. A dry surface helps the breadcrumb crust adhere better.
- Breadcrumb magic: Toast panko lightly in a dry skillet for 1–2 minutes to deepen flavor and crunch before mixing with Parmesan, garlic powder, and Italian seasoning.
- Cheese integration: Mix finely grated Parmesan into the breadcrumbs for extra crust cohesion and umami. Freshly grated cheese yields the best flavor.
- Seasoning balance: Add half of the salt to the flour dredge and half to the breadcrumb mixture. Taste a small pinch of the dredge first to gauge salt level before coating all cutlets.
- Coating technique: Have a tidy setup—flour, egg, breadcrumb—so you don’t dry the crust or miss coating in one station. Dredge, tap off excess, and set aside on a rack briefly to dry slightly before frying.
- Oil and pan temperature: Use 2–3 tablespoons of extra-virgin olive oil and heat until shimmering. The oil should barely ripple; if it smokes, lower the heat. Fry in batches to avoid crowding, which steals crispness.
- Cooking method: Pan-fry until the crust is deep golden and the internal temperature reaches 165°F (74°C). If using cheese, cover briefly after frying to help melt mozzarella evenly without sogginess.
- Dry-to-wet balance: If your breadcrumbs feel wet from fresh mozzarella or marinara, pat the cutlets dry before dredging to keep the crust crisp.
- Make-ahead notes: The crusting steps can be done up to a day ahead—store coated cutlets on a rack in the fridge. Bring to room temperature for 10–15 minutes before frying for even cooking.
- Variations for gluten-free: Substitute gluten-free panko and flour as needed. Toast gluten-free crumbs lightly to maximize crunch similar to regular breadcrumbs.
- Finishing touches: Garnish with fresh basil and parsley for bright color and aroma. Serve with warm marinara and, if desired, layer on low-moisture mozzarella for a melty finish.
- Serving ideas: Keep marinara warm in a small pot for dipping or spoon over slices just before serving. For a lighter option, serve with a lemony herb aioli instead of cheese.
FAQ
What are Crispy Italian Chicken Cutlets?
Thin chicken cutlets coated in seasoned breadcrumbs and Parmesan, pan-fried until golden and crispy with a flavorful Italian herb kick.
What ingredients do I need?
Chicken cutlets, breadcrumbs, grated Parmesan, egg, milk or water, garlic powder, Italian seasoning, salt, pepper, and neutral oil for frying. Optional: lemon zest, parsley, or mozzarella for extra flavor.
How do I prepare the chicken for coating?
Lightly pound or butterfly the chicken to even thickness (about ¼ inch). Pat dry, then season with salt and pepper before dredging.
What’s the best coating method?
Dredge first in flour (optional), then dip in a whisked egg with a splash of milk, and finally press into a mixture of breadcrumbs, Parmesan, and Italian seasoning for a thick, even crust.
Can I bake the cutlets instead of frying?
Yes. Preheat to 425°F (220°C). Lightly oil a baking sheet or wire rack, coat the cutlets, and bake 12–15 minutes per side or until golden and cooked through. For extra crispiness, broil for 1–2 minutes at the end.
How do I achieve extra crispy results?
Use a two-step coating, ensure the breading is pressed on firmly, and cook in hot oil (about 350–375°F / 175–190°C). Let excess batter drip off before adding to the pan, and avoid overcrowding the pan.
What oil should I use for frying?
Neutral oils with high smoke points work best, such as canola, vegetable, or peanut oil. Avoid olive oil for frying at high heat as it can smoke and alter flavor.
How long should I fry the cutlets?
Fry 2–3 minutes per side until the crust is deeply golden and the chicken reaches 165°F (74°C) inside. Let rest 2–5 minutes before serving.
Can I freeze these cutlets?
Yes. Assemble the cutlets on a baking sheet, freeze individually, then transfer to an airtight bag. Cook from frozen, adding a few extra minutes per side. Do not thaw before frying or baking.
Any recipe variations or substitutions?
Try adding chopped fresh herbs (parsley, basil), using panko for an extra crunch, or mixing in finely grated mozzarella or pecorino. For a lighter option, use whole-wheat breadcrumbs or omit the flour dredge.