Introduction / Hook
Imagine a plate that feels like a warm hug after a long day—a dish that invites you to slow down, breathe in the comforting aromas, and smile at the sight of a glossy finish glimmering under the dining room light. Outback Steakhouse’s Alice Springs Chicken has earned its reputation as a modern classic: a tender, juicy centerpiece crowned with a luxurious melt and finished with a touch of sweetness and tang. This is not just supper; it’s an experience you can recreate at home, a restaurant-inspired moment that transforms a simple weeknight into something a little more special. From the first shimmering scent that wafts toward you to the final bite that lingers with a whisper of caramelized richness, this dish threads together nostalgia, indulgence, and homey satisfaction in a single, unforgettable bite. If you’re seeking a crowd-pleaser that feels both hearty and refined, this is the kind of recipe that earns a few “delicious” accolades around the table and leaves everyone planning the next night’s tasting before the plates are even cleared.
There’s something almost cinematic about the experience—a chorus of textures and flavors that play off each other like a well-staged kitchen scene. The exterior carries a subtle, smoky depth and a gentle crisp that gives way to a creamy, velvety interior. A glaze adds a lacquered shine and a kiss of sweetness that balances the savory richness, while the final presentation invites guests to fork and slice with ease, sharing stories as they pass around the platter. It’s the kind of dish that adapts to moments—from casual weeknights to celebratory dinners—without losing its comforting, familiar soul. And the beauty of it lies in its ability to feel indulgent without being fussy: you can bring that Outback-inspired magic to your table with minimal fuss and maximum warmth.
As you read, you’ll sense the spirit of a dining room where friends and family gather, where conversation flows as easily as the sauce’s sheen, and where every bite echoes the reminders that good food is about connection as much as flavor. This description aims to transport you into that mood, giving you a sense of the dish’s essence—the way it looks, smells, and feels—before you even pick up a knife. By the time you reach the end of this journey, you’ll know why this recipe has a way of becoming a favorite, a “go-to” that you’ll want to share, adapt, and personalize for countless occasions to come.
The Story Behind the Dish
Outback Steakhouse’s Alice Springs Chicken carries with it a sense of travel, comfort, and a touch of Aussie spirit—at least in flavor and naming. The moniker “Alice Springs” evokes the red-dusted landscapes, the sense of bold flavors meeting hearty portions, and a down-to-earth dining experience that has resonated with many food lovers around the world. Though not a traditional Australian dish in the strict sense, it captures a certain roadhouse-inspired energy: generous, satisfying, and crafted to make an impression without requiring you to search far for ingredients or techniques. The dish’s popularity rests on a simple idea—comforting chicken elevated by texture, richness, and a glossy glaze that invites you to dip, slice, and savor with ease—and it has inspired countless home cooks to recreate that same sense of indulgent home dining in their kitchens.
Behind the scene, the concept draws on timeless culinary threads: the appeal of a juicy protein resting beneath a creamy, melty crown; the pull of smoky notes that hint at outdoor cooking even when you’re indoors; and a harmonious balance of savory depth with a touch of sweetness, which makes every bite feel both familiar and exciting. It’s a reminder that a well-executed plate can deliver restaurant-worthy glamour while remaining approachable enough to prepare for a family gathering or a spontaneous weeknight celebration. The dish has traveled through menus, kitchens, and home kitchens alike, collecting variations, stories, and tweaks that reflect the personalities of cooks who love to add their own stamp while preserving the core spirit: a meal that feels like a little escape—comforting, indulgent, and deeply satisfying.
For many home cooks, the journey of this dish begins with a memory: a bite that seemed to melt in the mouth, a glaze that shone with a lacquered sheen, or the satisfying contrast between a crisp exterior and a creamy interior. It’s a recipe that invites conversation as much as it invites appetite, and that’s exactly what makes it enduring. The story isn’t just about technique or flavor—it’s about the shared experience of bringing something special to the table, about the rituals of serving, tasting, and savoring together. The Alice Springs title adds a layer of wanderlust and a wink of playful sophistication, suggesting that a little bit of culinary adventure can be done right at home, with familiar ingredients and a method that rewards attention and care without becoming a heavy-handed process.
Why You’ll Love This Recipe
- Instant crowd-pleaser with broad appeal: comforting, indulgent, and familiar flavors that resonate with both kids and adults.
- Versatile for weeknights and weekend entertaining: elegant enough for guests, simple enough for a family dinner.
- Midweek “restaurant feel” without heavy prep: a dish that looks and tastes special while keeping hands-on time reasonable.
- Balancing act of textures: creamy, velvety interior versus a gently crisp exterior and a glossy glaze that brings it all together.
- Customizable with minor tweaks: adaptable to different dietary needs or flavor preferences without losing the dish’s core spirit.
- Great for make-ahead moments: components can be prepped ahead and finished with minimal effort for a polished finish.
- Perfect for sharing: naturally lends itself to a generous presentation that invites sharing and conversation around the table.
Flavor Profile & Texture
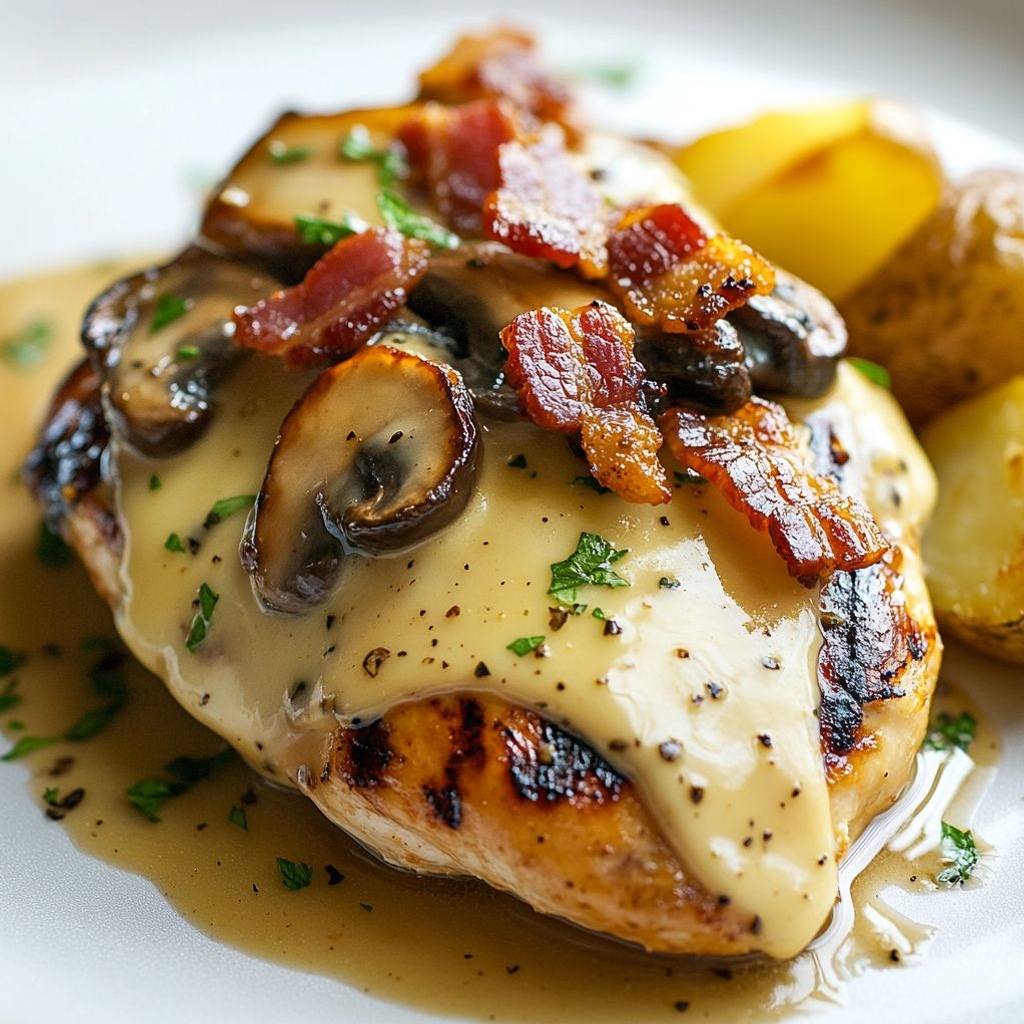
The flavor profile of this dish is a study in balance. Expect a satisfying depth from a well-rounded, savory base that plays well with a glossy finish designed to catch the light and your eye. The interior is typically tender and juicy, with a succulent bite that speaks to careful cooking and proper rest. The exterior carries a gentle, satisfying crisp or caramelized edge—a testament to technique and heat management—that contrasts beautifully with the creamy middle. The finishing glaze or sauce adds a layer of shine and a nuanced sweetness that doesn’t overwhelm but rather smooths the whole plate into harmony.
Texture-wise, you’ll experience a pleasing progression: first the soft, yielding center of the main protein, then a tiny crackle of the outer surface, followed by the silkiness of a luxurious cheese-toasting element that blankets the top and begins to melt into the sauce. The overall mouthfeel is rich without being heavy, with a glossy glaze that delivers a glimmer of acidity and sweetness to brighten the palate. Aromatics—subtle smokiness, a hint of caramel, and the inviting scent of roasted or grilled notes—rise in waves as the dish is taken from stove to table, making the anticipation as enjoyable as the first bite.
While the exact flavor notes can vary depending on how you season, glaze, and finish the dish, the key is cohesion: components that harmonize rather than compete. The result is a dish that feels substantial, satisfying, and celebratory, even when served during a casual weeknight. It’s a recipe that rewards careful pan or grill work, a patient approach to letting flavors meld, and a sense of confidence that comes from knowing you’re delivering something consistently comforting and memorable.
Occasions & Pairings
This dish shines in a variety of settings, from weeknight dinners that deserve a touch of luxury to weekend gatherings where friends and family linger over conversation as the plate empties. It’s particularly well-suited for:
- Weeknights when you want to feel pampered without spending hours in the kitchen.
- Casual dinner parties where a single main course can anchor the meal and still feel effortless.
- Special occasions that call for a showpiece protein with a glossy finish and comforting richness.
- Family gatherings where kids and adults alike appreciate a familiar, hearty flavor profile.
Pairings can elevate the overall experience. Consider these ideas to complete the menu without overshadowing the star:
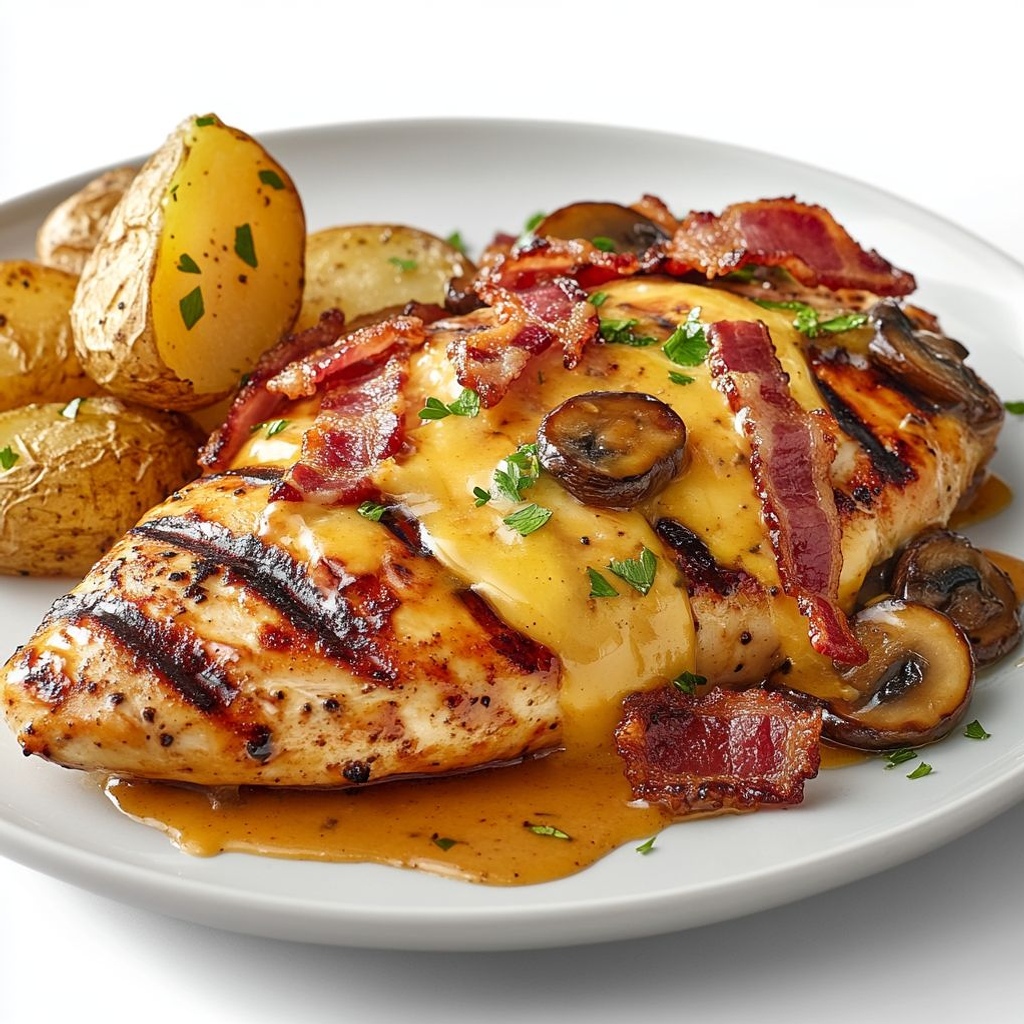
- Sides: creamy mashed potatoes, roasted vegetables, a crisp green salad with a bright vinaigrette, or a light grain like quinoa or barley to balance richness.
- Starches and textures: a warm, crusty bread to mop up any glaze, or a simple rice pilaf to soak up flavors without competing.
- Drinks: a lightly chilled white wine with a touch of acidity, such as a Sauvignon Blanc or a Chardonnay with a gentle oak; a pale ale or a sparkling beverage can also pair nicely depending on the glaze’s sweetness.
- Desserts: something citrusy or a light, creamy finish—think lemon cream tart or vanilla-braised peaches—to cleanse the palate after the richness.
Tips, Variations & Substitutions
- Ingredient flexibility: adapt the dish to your pantry by swapping in different cheese varieties that melt well and offer a creamy texture. If you prefer a milder profile, choose a less assertive cheese; for a bolder finish, opt for a sharper, tangier melt.
- Diet-friendly variations: make a lighter version by choosing lean chicken cuts, using a reduced-fat cheese, and balancing with crisp, roasted vegetables. For a vegetarian take, substitute the protein with roasted tofu or halloumi, and layer in a plant-based melt to replicate the creamy top.
- Glaze alternatives: you can experiment with different subtle sweet-and-tangy glaze notes—honey-mustard is classic, but a maple-sesame or balsamic-glaze twist can reimagine the dish while preserving its essence.
- Allergen-conscious tweaks: if dairy is a concern, choose a high-miber cheesy alternative or a plant-based melt that still delivers a glossy, comforting top layer. For gluten-free needs, ensure that any thickeners or glaze components are gluten-free.
- Regional twists: add a touch of roasted peppers or caramelized onions for depth, or introduce a smoky chipotle note for a zesty balance that still honors the dish’s warmth.
- Texture play: for extra crunch in the finish, finish under a brief broil or high heat to caramelize the top just before serving, watching closely to avoid burning.
Storage & Make-Ahead Ideas
Organization pays off with this dish, especially when entertaining or planning ahead for a busy week. Here are practical tips to keep flavor and texture at their best:
- Make-ahead components: you can prepare the “base” protein portion and the topping separately the day before. Store them in airtight containers and combine just before serving to preserve texture and meltiness.
- Storage for leftovers: refrigerate cooled portions in an airtight container for up to 3-4 days. Reheat gently to maintain juiciness and avoid drying out the protein; a gentle oven warmth or a low-set skillet method works well for this.
- Freeze: while fresh preparations yield the best texture, you can freeze pre-cooked portions for longer storage. Thaw in the fridge overnight and reheat slowly to preserve moisture and creaminess.
- Reheating tips: to preserve the glossy finish and prevent separation, reheat slowly on low heat or in a covered skillet, allowing the sauce to re-emulsify and the cheese to regain its melty texture without scorching.
Fun Facts & Trivia
- The naming of “Alice Springs” carries a playful nod to Australian outback imagery, suggesting bold flavors and a sense of adventure even in the comfort of a familiar restaurant dish.
- Many kitchens adopt their own twists on this dish, emphasizing the universality of comforting, cheesy, creamy chicken with a touch of sweetness and a hint of smoke.
- Texture contrast is a central design principle here: the interplay between a soft interior, a gently crisp exterior, and a glossy top layer is intentionally crafted to deliver a memorable bite every time.
- Versatility is part of the dish’s charm: while it’s rooted in a specific restaurant concept, it adapts effortlessly to different cultures and dietary preferences, illustrating how a single idea can travel and transform across homes and menus.
Final Thoughts
The beauty of the Outback-style Alice Springs Chicken lies in its balance: a hearty, satisfying main that feels indulgent yet approachable; a finish that shines with a lacquered gloss and a hint of sweetness; and a texture profile that invites savoring, dipping, and sharing. It’s a dish that can anchor a dinner with family, elevate a casual gathering with friends, or simply accompany a quiet evening when you crave something comforting and a little glamorous. When you bring this recipe to your table, you’re not just serving a meal—you’re inviting a mood: the warmth of a well-loved home, the magic of a night out, and the simple pleasure of eating something thoughtful, flavorful, and genuinely satisfying. Let the dish be a canvas for your culinary personality: adjust, refine, and make it your own, while savoring the sense of joy that comes from a plate well enjoyed and a moment well spent around the table.

Ingredients
Alice Springs Chicken Base
- 4 boneless, skinless chicken breasts (about 6 oz each; pounded to an even thickness of about 1/2 inch)
→ The main protein for the dish. Pounding to uniform thickness ensures the chicken cooks evenly and stays juicy. Pat dry before cooking and season generously with salt and pepper to help form a flavorful crust when seared. If you prefer, you can butterfly each breast to create a pocket for toppings, but the classic approach keeps the chicken simple and topped after cooking. - 6 slices bacon, cooked until crisp and crumbled
→ Provides smoky, salty notes and a textural contrast to the tender chicken. Cook the bacon until crisp in a skillet, drain on paper towels, then crumble or chop finely so it distributes evenly when added on top. Reserve the rendered fat if you plan to sauté mushrooms in it for extra flavor. - 1 cup mushrooms, sliced (cremini or button)
→ Sautéed mushrooms contribute earthy flavor and moisture, balancing the richness of cheese and bacon. Slice evenly to cook quickly and uniformly; sauté in a hot pan with a little oil or butter until browned and their moisture has evaporated. - 1 cup shredded cheese (a blend of mozzarella and cheddar, or your favorite melting cheese)
→ The cheese melts over the chicken to create a gooey, luscious topping. Shred it yourself for the best melt; pre-grated blends may contain anti-caking agents that affect melting. A mix like mozzarella plus sharp cheddar adds stretch and depth of flavor. - 2 tablespoons olive oil
→ Used to sear the chicken and sauté mushrooms smoothly without sticking. Use a light-flavored, high-smoke point oil. Preheat your pan until hot before adding the chicken so you get a good sear rather than steaming. - 1/2 teaspoon garlic powder (optional)
→ Adds a warm, savory note that complements the bacon and mushrooms. If you prefer fresh garlic, you can replace with 1 clove minced, added during mushroom sauté, but garlic powder provides even flavor distribution if you’re not cooking the mushrooms separately. - 1/2 teaspoon smoked paprika or regular paprika (optional)
→ Gives color and a subtle smoky aroma akin to the restaurant version. Use smoked paprika for a stronger smoky flavor; regular paprika will provide color without the smoky note. - Salt to taste
→ Essential for enhancing the natural flavors of chicken and bacon. Sprinkle evenly, and adjust after cooking as some ingredients like bacon may contribute salt. If using the bacon later, reduce salt slightly to prevent over-salting. - Freshly ground black pepper to taste
→ Adds a sharp bite that complements the richness of the dish. Grind just before using to preserve aroma, and season in layers—season the chicken before searing, and adjust again after topping with cheese and bacon. - Chopped fresh parsley or chives for garnish (optional)
→ A bright, herbal finish that adds color and a hint of freshness to balance richness. Sprinkle after cooking and just before serving for best appearance and aroma.
Honey Mustard Dipping Sauce
- 1/4 cup Dijon mustard
→ Base for the tangy, sharp note in the sauce. Use a quality Dijon for a clean, spicy backbone. Whisk with the other ingredients thoroughly to prevent separation and achieve a smooth sauce. - 1/4 cup honey
→ Adds sweetness that rounds out the tang of the mustard. Choose a smooth honey for a silky texture; warmer honey will mix more easily with the other components. If you prefer a stronger bite, opt for a darker honey. - 1/4 cup mayonnaise or Greek yogurt (for creaminess)
→ Provides body and a creamy mouthfeel. Mayonnaise yields a richer, restaurant-like sauce, while Greek yogurt gives a lighter, tangier finish. Whisk until fully emulsified; add a splash of water or lemon juice if you need to loosen. - 1 teaspoon lemon juice (optional)
→ Brightens the sauce and balances sweetness. Freshly squeezed juice yields the best flavor; add gradually and taste as you go to avoid overpowering the mustard. - Salt to taste
→ Brings the flavors together. Start with a pinch, mix, taste, and adjust as needed. If you used salted mayo or Dijon, adjust accordingly.
Optional Add-ins
- 1/4 cup sun-dried tomatoes, chopped (optional)
→ Adds bursts of concentrated sweetness and a tangy, chewy texture that complements the chicken and cheese. Choose oil-packed sun-dried tomatoes; drain well and pat dry to avoid extra moisture. Dice finely for even distribution. - Chopped fresh parsley or chives for garnish (optional)
→ Fresh herbs provide color and a fresh aroma right before serving. Sprinkle a little over the top to finish the presentation.
Instructions
- Preheat your oven to 350°F (175°C) and line a baking sheet with parchment paper or lightly grease it to prevent sticking; this ensures topping melts evenly and cleanup is easy.
→ A hot, prepared surface prevents cheese from sticking and helps finish-cook the chicken uniformly without burning the coating. - Place the four boneless, skinless chicken breasts between two sheets of plastic wrap and gently pound with a meat mallet or rolling pin to an even thickness of about 1/2 inch; pat dry with paper towels before seasoning.
→ Uniform thickness guarantees consistent cooking time across all pieces and helps retain moisture, while patting dry helps form a savory crust and reduces steaming in the pan. - Season each chicken breast generously with salt and freshly ground black pepper; optionally dust with 1/2 teaspoon garlic powder and 1/2 teaspoon paprika to build depth of flavor.
→ Salt enhances surface browning and flavor; garlic powder and paprika add aroma and color without overpowering the meat. - Cook the bacon in a skillet over medium heat until crisp, then transfer to paper towels to drain and crumble; reserve about 1 to 2 tablespoons of the rendered fat in the pan for the mushrooms.
→ Crisp bacon provides texture and a smoky, salty contrast; saving the fat adds extra savory flavor to the mushrooms without extra butter. - If using sun-dried tomatoes, drain and finely chop them, then set aside with the mushrooms; this allows their concentrated sweetness and tang to distribute evenly if you choose to include them.
→ Chopped tomatoes distribute evenly in the mushroom mixture and avoid large pockets of moisture that can interfere with browning. - In the same skillet, add 1 to 2 tablespoons of olive oil or use the reserved bacon fat, then sauté the sliced mushrooms over medium-high heat until they are deeply browned and their moisture has evaporated, about 4 to 6 minutes; season with a pinch of salt. If using sun-dried tomatoes, add them in during the last minute of sautéing.
→ Browning mushrooms enhances their umami and prevents a soupy texture, while tomatoes add bright sweetness without sogginess. - Heat a separate heavy skillet over medium-high and add 2 tablespoons olive oil; when shimmering, add the pounded chicken breasts and sear undisturbed 2 to 3 minutes per side until a rich golden crust forms.
→ A good sear builds flavor through the Maillard reaction and creates a crust that keeps the chicken juicy inside; avoid moving the meat too soon to prevent sticking. - Reduce the heat if necessary and top each chicken breast with an even layer of the sautéed mushrooms and crumbled bacon; then sprinkle an even handful of shredded cheese over the top of each breast.
→ The toppings melt into a cohesive cap, sealing in moisture, and the cheese adds gooey richness and color. - Transfer the skillet to the preheated oven and bake for 8 to 12 minutes, or until the chicken registers 165°F (74°C) on an instant-read thermometer; this ensures the chicken is fully cooked without drying out.
→ Finishing in the oven lets the cheese melt thoroughly and the toppings warm through while the chicken finishes cooking evenly. - Carefully remove the skillet from the oven and let the chicken rest 5 minutes; this redistribution of juices keeps the meat juicy and prevents the cheese from sliding off when sliced.
→ Resting lets carryover heat finish cooking gently and the juices reabsorb, resulting in a moist bite. - Whisk together the honey mustard dipping sauce by combining Dijon mustard, honey, and mayonnaise or Greek yogurt in a small bowl; whisk until smooth and emulsified, then whisk in lemon juice if using and season with a pinch of salt.
→ The emulsion binds the fat with the acids for a creamy sauce that clings to the chicken; lemon brightens and balances sweetness. - Taste and adjust the dipping sauce to balance tang, sweetness, and creaminess; add a touch more honey for sweetness or a splash of lemon juice for brightness as needed.
→ Tasting and adjusting ensures the sauce complements rather than competes with the rich chicken and cheese. - Garnish the finished chicken with chopped fresh parsley or chives if desired; serve with the honey-mustard sauce on the side for dipping and extra color.
→ Fresh herbs finish the dish with a vibrant aroma and a bright contrast to the creamy cheese and smoky bacon.
Notes
These Alice Springs Chicken notes provide practical guidance for recreating the iconic dish at home. Begin by pounding the chicken to an even thickness of about 1/2 inch to ensure uniform cooking and juiciness; pat dry, season generously with salt and pepper, and sear in olive oil until golden on both sides. Remove and keep warm; sauté the sliced mushrooms in the same pan, using a bit of the rendered bacon fat if you like extra savory richness. Crumble the cooked bacon and combine with the mushrooms, then nestle the chicken back in the pan, top with shredded cheese, and finish under a broiler or in a hot oven until the cheese is melted and bubbly. If you’re using garlic powder and paprika, sprinkle them on the chicken before searing for extra aroma and color. Prepare the honey mustard dipping sauce by whisking Dijon, honey, and mayonnaise or Greek yogurt until smooth; add lemon juice to brighten and season with salt to taste, adjusting the consistency with a splash of water if needed. Optional add-ins like sun-dried tomatoes give a chewy, tangy contrast, while chopped parsley or chives add a note of freshness. For best results, you can assemble and cook the topping components in advance, then simply reheat the chicken and finish with toppings when ready to serve; store leftovers refrigerated for 2–3 days. Pair with a crisp salad or steamed vegetables to balance richness, and consider a squeeze of lemon over the chicken just before serving to brighten flavors.
Tips
Tips for Perfect Alice Springs Chicken
- Prepare chicken evenly: Pound to about 1/2 inch thickness for uniform cooking; pat dry and season generously with salt and pepper to build a flavorful crust.
- Cook with a hot, sturdy pan: Use a heavy skillet (cast iron if possible). Preheat until just shimmering hot, then add oil and sear the chicken without crowding to develop a deep crust.
- Crisp bacon first: Cook bacon until crisp and crumble it. The crisp bits add texture and smoky flavor; reserve the rendered fat to sauté mushrooms for extra savoriness if desired.
- Accent mushrooms properly: Sauté sliced mushrooms in a hot pan until browned and their moisture has evaporated to concentrate their flavor and keep the toppings from becoming soggy.
- Layer toppings thoughtfully: After searing, distribute mushrooms and crumbled bacon evenly over each chicken breast so every bite has flavor, then top with cheese to melt into a gooey layer.
- Choose a good melting cheese: Shred mozzarella and cheddar yourself for the best melt and texture; pre-grated blends can contain anti-caking agents that affect melting.
- Finish cheese melt correctly: If the cheese doesn’t fully melt in the skillet, finish under a hot broiler or in a hot oven for 1–3 minutes, watching closely to prevent excessive browning.
- Season in layers: Taste the dish after adding toppings, as the bacon can contribute salt. Adjust with a light final sprinkle of salt and black pepper as needed.
- Tips for the honey mustard dip: Whisk Dijon, honey, and mayonnaise or yogurt until smooth and emulsified. If it thickens too much, whisk in a little water or lemon juice to loosen.
- Brighten the sauce: A small squeeze of lemon juice (optional) can lift the tang without overpowering the sweetness; add gradually and taste as you go.
- Best with add-ins: If using sun-dried tomatoes, drain well and pat dry to avoid extra moisture; dice finely so they distribute evenly.
- Garnish wisely: A quick sprinkle of chopped parsley or chives adds color and a fresh aroma just before serving.
- Rest before serving: Let the cooked chicken rest 5 minutes before serving to keep it juicy and help the cheese set slightly for clean slicing.
- Make-ahead options: Pre-cook bacon and mushrooms and refrigerate. Reheat and reassemble with cheese melted under the broiler for quick weeknight servings.
- Safety note: If you butterfly the chicken to create pockets, ensure the final thickness is uniform and the internal temperature reaches 165°F for safety.
FAQ
What is Alice Springs Chicken?
A grilled chicken breast topped with crispy bacon, sautéed mushrooms, melted cheese, and a honey mustard glaze. It’s a flavor-inspired dish based on Outback Steakhouse’ Alice Springs Chicken.
What ingredients do I need for a home version?
- 2 boneless, skinless chicken breasts
- 4 slices bacon
- 8 oz mushrooms, sliced
- 1 cup shredded cheddar or Monterey Jack cheese
- 1 small onion, diced (optional)
- 2 cloves garlic, minced
- 2–3 tablespoons honey
- 1–2 tablespoons Dijon or yellow mustard
- 1 tablespoon butter or olive oil
- Salt and pepper to taste
Optional extras: spinach, sun-dried tomatoes, or a splash of cream for a creamier glaze.
How do I cook it step by step?
- Preheat oven to 400°F (200°C) or heat your grill.
- Season the chicken with salt and pepper.
- Cook the bacon until crisp; remove and crumble. Leave a little bacon grease in the pan.
- In the same pan, sauté mushrooms (and onion if using) until browned; add garlic and cook 1 minute more.
- Place the chicken on a baking sheet or oven-safe dish. Top each breast with the mushroom mixture, then sprinkle with cheese.
- Return to the oven (or grill) and bake until the cheese melts and the chicken reaches 165°F (74°C).
- Meanwhile, whisk together honey and mustard to make the glaze. Drizzle over the chicken before serving, or serve on the side.
How do I make the honey mustard glaze?
Mix 2–3 tablespoons honey with 1–2 tablespoons Dijon or yellow mustard. For a creamier glaze, stir in a teaspoon of mayonnaise or a splash of cream. Adjust to taste—more honey for sweetness, more mustard for tang.
Can I prep this in advance?
Yes. You can slice mushrooms, dice onions, crumble bacon, and mix the glaze ahead of time. Store components separately in the fridge. Assemble the chicken, mushroom mixture, and cheese just before baking for best results. The dish is best served soon after baking, but leftovers reheat well.
Is this dish gluten-free?
Typically yes, as long as you use gluten-free bacon and a gluten-free mustard. Check labels on any sauces or seasonings you add. If you’re unsure, substitute with a gluten-free bacon and a mustard labeled gluten-free.
Can I make this dairy-free or vegan?
To make dairy-free, skip the cheese or use a dairy-free cheese alternative. For a vegan version, substitute the chicken with a plant-based protein, use vegan cheese, and replace the bacon with a vegan bacon option. The glaze can remain honey-mustard, but adjust flavors to taste.
What sides pair well with Alice Springs Chicken?
Great options include roasted or steamed vegetables (green beans, asparagus, broccoli), mashed potatoes or roasted potatoes, wild rice, a light salad, or crusty bread to soak up the glaze.
Can I cook it in an air fryer or only in the oven?
Both work well. For air fryer: after assembly, cook at 400°F (200°C) for 10–12 minutes, or until the chicken reaches 165°F (74°C) and the cheese is melted. For oven: bake at 400°F (200°C) for about 18–22 minutes, depending on thickness of the chicken. Use a meat thermometer to verify doneness.
How should I reheat leftovers?
Reheat in an oven or air fryer to keep the cheese melted and the chicken juicy. Preheat to 350°F (175°C) and reheat until internal temperature reaches 165°F (74°C), about 10–15 minutes in the oven or 7–10 minutes in the air fryer. Avoid microwaving if possible to keep the cheese from degrading.
What is a rough nutrition estimate per serving?
Nutrition varies with toppings and portions. A typical serving might range around 600–800 calories, with protein from the chicken, fat from cheese and bacon, and sugars from the honey glaze. For precise counts, tailor to your specific ingredients and portion sizes.
Tip to help replicate Outback flavor?
Use a balance of smoky bacon, sautéed mushrooms, gooey cheese, and a subtly sweet honey-mustard glaze. Don’t overcook the chicken—juicy, tender meat matters. A light touch of cream or a tad of butter can help the glaze cling without making it heavy.