Introduction / Hook
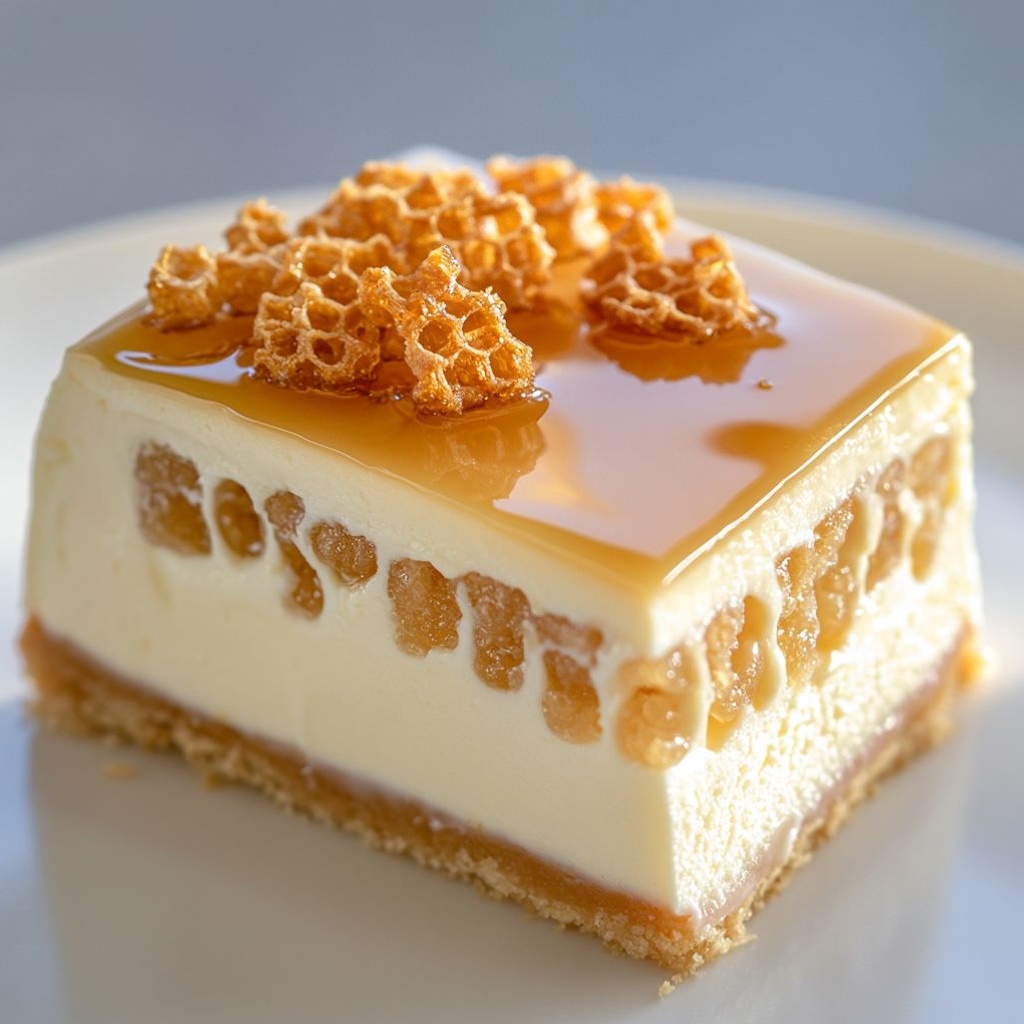
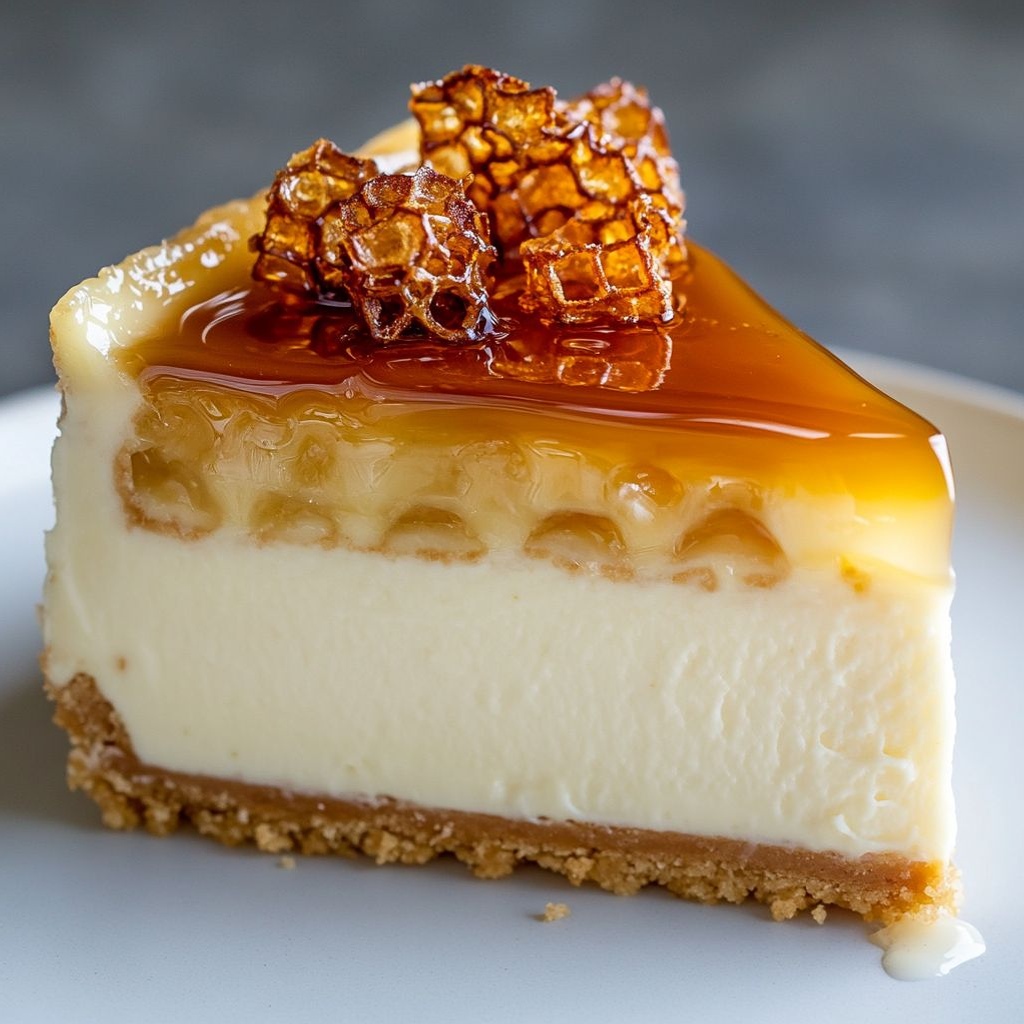
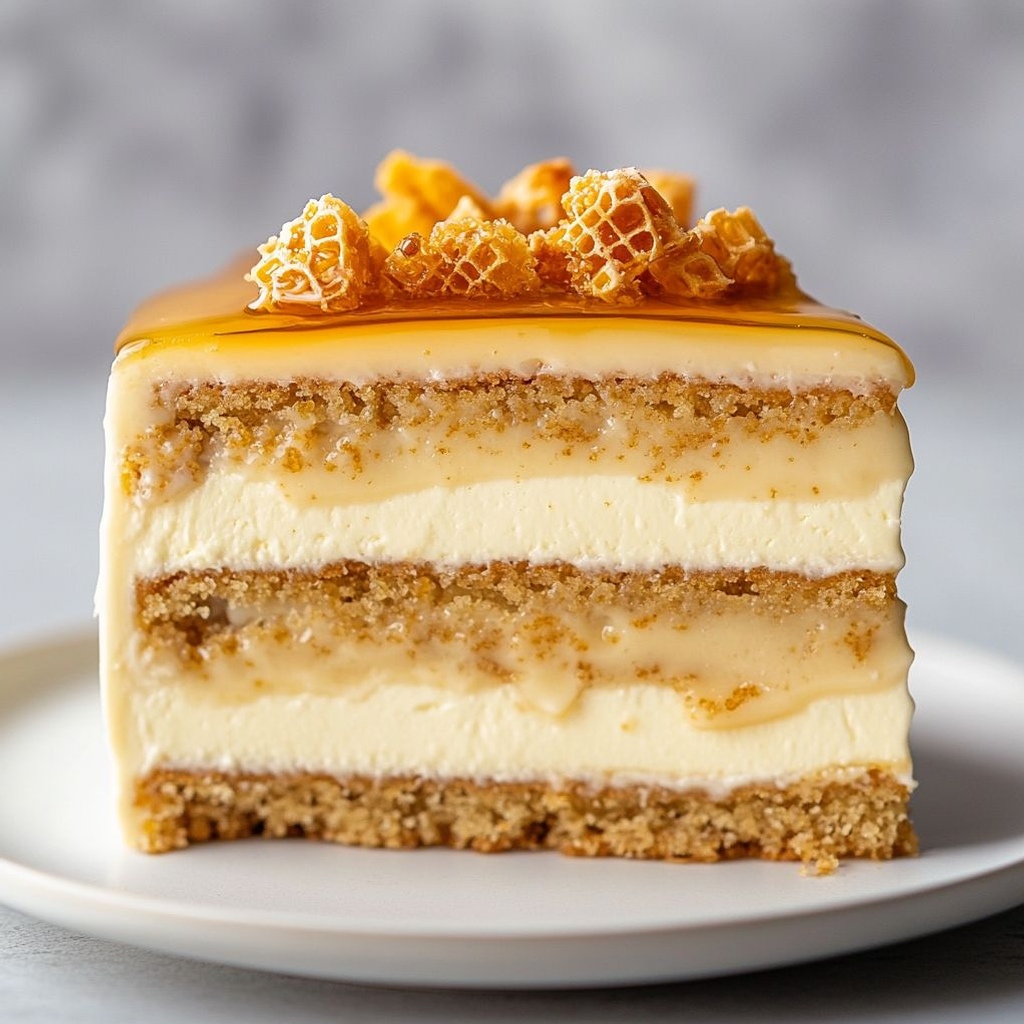
Imagine a dessert that unfolds like a celebration in every bite. A velvet cheesecake layer sinks into a tender, cake-like base, while shards of honeycomb—that crisp, honey-scented candy—provide a surprising crackle with each forkful. The Honeycomb Cheesecake Cake is more than a dessert; it’s an edible tapestry of texture and aroma. When you slice into it, you release a warm, honeyed perfume—vanilla and cream cheese mellowed by a whisper of citrus—and you hear that satisfying, delicate snap of honeycomb that gives way to a silken center. This is dessert theatre: elegant, indulgent, and perfectly suited for birthdays, anniversaries, and holiday feasts. It’s the kind of showpiece that makes guests pause, lean in, and whisper for the story behind it, even as they reach for another slice.
As you move through the kitchen, the air fills with the comforting sweetness of honey and dairy, balanced by tangy notes that keep the richness in check. The texture work is the star here: a dense but creamy cheesecake layer that feels indulgent without heaviness, a light, airy cake beneath that lifts the whole composition, and a crisp honeycomb crust or garnish that adds a surprising crunch. The experience is multi-sensory—visual allure, tactile contrast, and a chorus of flavors that linger pleasantly on the palate. This isn’t just a recipe you follow; it’s a memory in the making, a dessert you’ll talk about long after the last crumb has vanished.
For home bakers and show-stopping hostesses alike, this cake offers a balance of accessibility and spectacle. It invites experimentation with toppings and textures while remaining anchored in classic flavors—the soft tang of cream cheese, the plush warmth of vanilla, and the unmistakable sweetness of honey that elevates every bite. Whether you’re feeding a crowd or gifting a slice of decadence to someone special, the Honeycomb Cheesecake Cake promises a moment of delight that feels luxurious without being intimidating. It’s a testament to how simple ingredients, treated with care and a touch of whimsy, can come together to create something inherently memorable.
The Story Behind the Dish
Honeycomb candy has a long and joyful history in confectionery lore. Its brittle, honey-sweet shards evoke bees buzzing in sunlit meadows and a time-honored craft of candy making that crosses cultures—from classic British to modern American kitchens. The idea of pairing honeycomb with cheesecake wasn’t born overnight; it grew from a desire to fuse two textures that travelers and home cooks alike crave: the smooth, seductively creamy tang of cheesecake and the crackling, candy-like bite of honeycomb. The result is a dessert that feels both nostalgic and contemporary—comforting enough for a quiet family dinner, yet dazzling enough to stand as the centerpiece at a celebratory gathering.
In kitchen folklore, honey is often celebrated as nature’s sweet gift, carrying floral notes from summer blossoms and a warmth that deepens with time. Cheesecake, with its roots in European dairy traditions, has traveled across oceans, mutating into countless regional styles. When you bring these two elements together in a layered cake with a honeycomb accent, you’re tapping into a conversation between two eras of dessert—one that speaks of ritual and refinement, the other of playful confection. The Honeycomb Cheesecake Cake captures that dialogue in three acts: a creamy, tangy core; a cake-like, tender supporting layer; and a dramatic, honey-scented crunch that punctuates every slice.
There’s also a touch of storytelling in the way this cake presents itself. It invites you to assemble in stages: first, the dream of a luxurious cheesecake; then the warmth of a softly baked cake layer; finally, the striking honeycomb shard that makes the moment of cutting feel almost cinematic. The narrative is as important as the recipe itself, turning a dessert into an occasion, a recipe into a ritual, and a simple gathering into an event worthy of photographs and memory-making.
Why You’ll Love This Recipe
- Two beloved textures in one bite: creamy, tangy cheesecake contrasted with a light, cakey base and a crisp honeycomb crunch.
- Elegant enough for special occasions, yet approachable enough for a weekend treat with family and friends.
- Visually stunning and inherently shareable—the kind of dessert that earns compliments and inspires conversations.
- Versatile foundation for customization: swap in different honeys, citrus zests, or garnish ideas to suit the season or your taste.
- Adaptable for gatherings of all sizes: make-ahead friendly with careful chilling and layering that holds up well.
- Balanced sweetness that showcases the tang of cream cheese and the floral sweetness of honey without overpowering the palate.
Flavor Profile & Texture
The flavor profile of the Honeycomb Cheesecake Cake is a delicate symphony of contrasts that harmonize rather than compete. The cheesecake layer delivers a mellow, creamy tang—a classic, comforting tang that’s not too sharp but unmistakably rich. Vanilla notes drift through the cream cheese, rounding edges with a soft, aromatic sweetness. A whisper of citrus, often from zest or a light touch of juice, adds brightness that lifts the richness and keeps the palate alert rather than dulled by sweetness.
The cake component beneath the cheesecake introduces a subtle, tender crumb that behaves almost like a soft sponge—airier than a dense pound cake but sturdier than a delicate genoise. This layer provides a gentle, comforting bite that supports the cheesecake without overpowering it, acting as a bridge between the luxurious center and the showpiece texture on top.
The honeycomb candy threads through the experience with a captivating crunch and a honey-forward taste that echoes the natural sweetness of the bees’ bloom. Each shard or shard-inspired garnish delivers a crackling sound that punctuates the smoothness of the filling, offering a playful sensory moment. The candy’s honey notes can carry a hint of floral nuance, depending on the honey you choose, which adds depth and a whisper of complexity to the overall sweetness.
When all elements come together, what you taste is a balanced dessert where sweet meets tangy, soft meets crisp, and rich meets light. It’s a layered tale in a single slice, with textures that invite you to savor licking, chewing, and sighing in contentment. The combination of a creamy interior, a tender cake layer, and the surprising honeycomb crunch is what makes this cake so memorable—the kind of bite that makes people pause, close their eyes briefly, and simply smile.
Occasions & Pairings
This cake shines at festive gatherings and intimate celebrations alike. Its dramatic presence makes it a natural centerpiece for birthday spreads, anniversary dinners, graduation parties, or holiday feasts. It’s equally at home on a lazy Sunday dessert table, where guests are delighted by its elegance without it feeling fussy. The honeyed aroma invites a pairing mindset—one that pairs well with sparkling beverages and nuanced desserts that echo the cake’s refinement.
Pairing ideas to consider include:
- Light, sparkling wines or a crisp Prosecco that cleanse the palate between rich bites.
- Aromatic tea service—chai or Earl Grey—where the bergamot or spice notes echo the vanilla and honey.
- Fresh berry accompaniments—strawberries, raspberries, or blueberries—to provide a tart counterpoint and a pop of color on the plate.
- Whipped cream or a dollop of crème fraîche for a gentle finish that adds a touch of brightness and creaminess at the end.
- Fragrant citrus zest or a light drizzle of honey to highlight the dessert’s honey theme without overwhelming the core flavors.
For seasonal menus, think springtime with pale flowers in the garnish, summer with bright berries and mint, autumn with toasted nuts sprinkled around the plate, or winter with a dusting of edible gold and warm spice accents. The cake’s versatility makes it a reliable star across holidays and everyday celebrations alike.
Tips, Variations & Substitutions
- Texture variations: If you prefer a more prominent cake layer, adjust the balance of cheesecake to cake by allowing a thicker cake layer beneath the filling, while preserving the honeycomb accent on top for.
- Vegan option: Use a plant-based cream cheese substitute and a vegan sponge or cake layer. Ensure the honeycomb substitute is plant-based if aiming for a vegan finish.
- Gluten-free option: Choose a gluten-free crumb base that mirrors the texture of a traditional cake crust, ensuring it stacks well with the cheesecake.
- Honey variations: Experiment with different honey varieties for nuanced flavors—orange blossom, wildflower, or buckwheat honey can all impart distinctive aromas and sweetness profiles.
- Nut-free version: If you need to avoid nuts, use a crumble or crumbless base that relies on gluten-free cookies or crackers without nuts, and keep the filling classic.
- Flavor twists: Consider adding a layer of citrus curd between the cheesecake and cake layers for a bright tang that intensifies the citrus notes.
- Candy topping options: If you can’t find traditional honeycomb, crush crisp toffee shards or brittle that resemble the crackling texture and still provide that delightful crunch.
- Make-ahead approach: Prepare the cheesecake layer in advance, freeze or refrigerate, and assemble with the cake layer and honeycomb just before serving to preserve the crisp texture of the candy.
Storage & Make-Ahead Ideas
The Honeycomb Cheesecake Cake is forgiving when it comes to make-ahead planning. The flavors mature beautifully after a night or two in the fridge, allowing the layers to meld and the textures to soften in a pleasing way. For best results:
- Chill thoroughly: After assembly, give the cake ample time to chill in the refrigerator to help the layers set and the honeycomb to integrate with the surrounding textures.
- Storage: Cover tightly to prevent absorbing other fridge odors and to protect the honeycomb from becoming soft or sticky.
- Freezing: If you plan to freeze, wrap well and store in an airtight container. Thaw slowly in the refrigerator before serving to preserve texture and flavor.
- Make-ahead assembly: You can prepare the cheesecake layer a day in advance, then assemble the cake with the honeycomb topping or layers just before serving to maintain the crispness of the candy.
Fun Facts & Trivia (Optional)
- Honeycomb candy is sometimes called cinder toffee or hokey pokey in different regions, reflecting its crackly, airy texture and honeyed sweetness.
- Cream cheese was popularized in desserts in the United States in the early 20th century, giving rise to the iconic cheesecake we know today; pairing it with honey draws on long-held dairy-and-sweet flavor traditions.
- Buttercream, a common accompaniment in many cakes, is here replaced in spirit by the lightness of the cake layer and the crispness of honeycomb, showcasing how texture can carry flavor even when ingredients are simple.
- Honey carries a historical resonance; it’s been used in desserts for centuries as a natural sweetener and a flavor enhancer, often associated with warmth, hospitality, and celebration.
- Choosing the right honey can subtly shift the profile of the dessert—from floral and delicate to bold and robust—allowing you to tailor the cake to the season or the guest’s preferences.
Ingredients
Crust
- – 2 cups graham cracker crumbs (or digestive biscuits)
→ Crust base provides structure and a sweet, crumbly foundation for the cheesecake cake. The crumbs should be finely crushed to ensure even binding; mix with melted butter and press firmly into a 9-inch springform pan. For flavor variations, you can add 1–2 tablespoons sugar if your crackers are unsalted; prebake the crust for 8–10 minutes at 350°F (175°C) for extra crispness, then cool before filling. - – 6 tablespoons unsalted butter, melted
→ Binds the crust crumbs into a cohesive base that holds the cheesecake shape. The butter should be evenly distributed through the crumbs; let it cool slightly before mixing so the crumbs don’t melt. If you’re dairy-free, substitute with melted coconut oil; press into the pan and chill briefly before adding filling. - – 2 tablespoons granulated sugar (optional)
→ Adds a touch of sweetness and helps the crust brown slightly. Mix with crumbs before pressing to ensure even sweetness; omit if you’re using sweet crackers or want a less sweet crust; for a nuttier crust, add a pinch of cinnamon or a teaspoon of cocoa powder for chocolate crust.
Cheesecake Filling
- – 4 (8 oz) packages cream cheese, softened to room temperature
→ The creamy, tangy backbone of the cheesecake. Softened cream cheese blends smoothly, reducing lump formation; beat with sugar on low speed at first to minimize air pockets, then gradually increase speed. If any lumps remain, soften slightly longer or cut the cheese into small cubes before beating. - – 1 cup granulated sugar
→ Sweetens and helps achieve a smooth, velvety texture as it dissolves into the cheese; add gradually to prevent gritty sensation; using superfine or caster sugar yields a silkier filling. - – 4 large eggs
→ Contribute structure and stability to the filling. Add one at a time after the cream cheese is smooth; mix on low speed to avoid incorporating excess air that can cause cracks; use at room temperature for best results. - – 1/2 cup sour cream or Greek yogurt
→ Adds moisture and a subtle tang that enhances flavor and tenderness. Use plain, full-fat sour cream or yogurt; if using yogurt, a quick strain to remove excess whey results in a thicker, creamier filling. - – 1/4 cup heavy cream
→ Increases creaminess and helps achieve a silkier mouthfeel. Use at room temperature and mix until just combined to avoid making the batter too runny; it also helps the filling set without shrinking. - – 1 tablespoon freshly squeezed lemon juice
→ Brightens the filling and cuts richness; fresh juice is preferable to bottled. If you prefer a stronger lemon note, you can add zest of half a lemon as well; avoid adding too much liquid to prevent a loose filling. - – 1 teaspoon vanilla extract
→ Classic flavor that rounds out the dairy tang. Use pure vanilla extract (or scrape a vanilla bean for extra depth). If using vanilla bean, add seeds along with the extract. - – 1/4 teaspoon salt
→ Balances sweetness and enhances the cheesecake’s dairy flavors; even a small amount helps unify the flavors.
Honeycomb Candy
- – 1 cup honeycomb candy, crushed (store-bought)
→ Adds distinctive honey flavor and a crunchy textural contrast within the creamy cheesecake layers. Crush to roughly 1/2 inch pieces for even distribution; reserve some larger shards for top decoration if desired. If you prefer making your own, substitute with homemade honeycomb brittle, but size and texture should be chosen to avoid crumbling into powder.
Glaze & Toppings
- – 1/2 cup honey
→ The main glaze and flavor driver; warms easily to release floral notes and helps create a glossy top. Choose a light or floral honey for a delicate profile; gently warm to loosen before drizzling so it coats without running excessively. - – 2 tablespoons water
→ Dilutes the honey to a pourable consistency for a smooth glaze; adjust the amount to achieve your desired thickness. If you want a thicker glaze, use less water or reduce the mixture slightly on the stovetop and cool before using. - – 1 teaspoon lemon juice
→ Brightens the glaze and helps balance the sweetness; use fresh lemon juice for best brightness; if you prefer, omit, but expect a sweeter finish. - – 1 cup heavy cream, cold, for whipping (optional)
→ Creates a softly whipped topping to accompany the cake or to fold into the honey glaze for a lighter finish; whip to soft peaks and keep chilled until serving; if you want a non-dairy option, substitute coconut cream and whip until fluffy.
Garnish / Optional Add-ins
- – Fresh berries (e.g., raspberries, blueberries) for garnish (optional)
→ Adds color contrast and a fresh acidity to cut through the rich cheesecake. Rinse gently and pat dry; if desired, toss berries with a small amount of sugar and a squeeze of lemon before serving to enhance their brightness. - – Extra crushed honeycomb pieces for sprinkling (optional)
→ Provides additional crunch and honey flavor on top just before serving. Scatter evenly for a balanced bite and avoid overloading so the topping remains crisp rather than soggy.
Instructions
- Preheat your oven to 350°F (175°C) and prepare a 9-inch (23 cm) springform pan by greasing the sides well and lining the bottom with parchment; wrap the exterior with two layers of heavy-duty foil if you plan to bake the cake in a water bath to prevent leaks.
→ Proper preparation ensures the crust releases cleanly, prevents sticking, and protects the pan from water leakage during baking. - Crush the graham cracker crumbs (or digestive biscuits) into fine, uniform crumbs using a food processor or by sealing in a bag and pounding with a rolling pin; transfer to a bowl and, if using, whisk in the optional 2 tablespoons of granulated sugar for a sweeter crust.
→ Finely ground crumbs create a smooth, cohesive crust that binds evenly with melted butter, yielding a stable base for the cheesecake cake. - Melt the 6 tablespoons unsalted butter slowly and evenly, then stir it through the crumb mixture until every crumb is MOIST and the mixture holds together when pressed; let it cool slightly before pressing.
→ Melted butter acts as the binder; cooling slightly prevents the crumbs from melting and oozing when you press them into the pan. - Press the crumb mixture firmly into the bottom and slightly up the sides of the prepared pan using the flat bottom of a glass or measuring cup, creating an even, compact crust about 1/4 inch thick; avoid gaps by filling and pressing in small amounts at a time.
→ A tightly packed crust bakes evenly and supports the tall cheesecake without cracking or crumbling. - Prebake the crust for 8–10 minutes at 350°F (175°C) to set the butter and dry the surface; remove from the oven and let cool completely on a rack before filling.
→ Prebaking develops a crisp, resilient crust that resists becoming soggy once the filling is added; cooling prevents steam from creating condensation under the filling. - In a large mixing bowl, beat the 4 (8 oz) packages of cream cheese at low speed until smooth and creamy, scraping the bowl as needed to remove any lumps; this ensures a velvety filling without graininess.
→ Softened cream cheese blends evenly and reduces lump formation, giving a smoother, more professional texture to the cheesecake. - Gradually add the 1 cup granulated sugar while continuing to beat on low speed until fully incorporated and the mixture is light and fluffy, then scrape the bowl again to ensure even sweetness.
→ Slow sugar incorporation prevents a gritty texture and contributes to a silky filling that sets properly during baking and chilling. - With the mixer on low, add the 4 large eggs one at a time, incorporating each before adding the next; keep the batter smooth and avoid beating at high speed to minimize air pockets that can cause cracks.
→ One-at-a-time incorporation builds structure gradually and reduces air entrapment, which helps prevent cracks in the finished cake. - Stir in the 1/2 cup sour cream (or Greek yogurt), 1/4 cup heavy cream, 1 tablespoon lemon juice, 1 teaspoon vanilla extract, and 1/4 teaspoon salt until just combined; do not overmix beyond this point to maintain a creamy texture.
→ The dairy accents (tang and moisture) contribute to a tender, luscious crumb; overmixing can break down the emulsion and cause a dense or cracked cake. - Crush the honeycomb candy into medium-sized pieces (about 1/2 inch) and measure 1 cup; gently fold two-thirds of the crushed candy into the batter with a silicone spatula, distributing evenly without breaking all the pieces.
→ Folding preserves some texture and pockets of crunch while evenly dispersing honeycomb flavor throughout the cheesecake. - Pour one-third of the filling into the cooled crust, spread evenly, then sprinkle one-third of the remaining honeycomb pieces over this layer; repeat with the next third of filling and another third of candy, finishing with the final third of filling; smooth the top and press the reserved honeycomb shards lightly onto the surface for decoration.
→ Layering prevents sinking of candy and ensures visible texture on the top while maintaining a cohesive, uniform bake. - Place the filled pan on a large sheet of high-quality foil and set it into a larger pan; pour hot water into the outer pan halfway up the sides to create a water bath, which yields even cooking and helps prevent cracking. Bake at 325°F (163°C) for 60–75 minutes, or until the edges are set but the center still wobbles slightly when gently shaken.
→ The water bath provides humidity and gentle heat, reducing surface cracking and producing a creamy, evenly set cheesecake interior. - Turn off the oven and crack the door ajar; let the cheesecake rest in the oven for 60 minutes to cool gradually and avoid thermal shock that can cause cracks; then remove the pan from the water bath, discard the foil, and cool on a rack at room temperature before refrigerating.
→ Slow cooling minimizes cracking and stabilizes the structure before chilling, ensuring clean slices later. - Refrigerate the cheesecake, loosely covered, for at least 4 hours or overnight until fully set and the flavors mellow; this resting period is essential for clean slicing and slice-worthy texture.
→ Cold setting firms the proteins and fat, yielding neat portions and a creamy mouthfeel when served. - Prepare the honey glaze by warming 1/2 cup honey with 2 tablespoons water and 1 teaspoon lemon juice in a small saucepan just until smooth and pourable; remove from heat and let cool slightly so it coats without running off the cake.
→ A warm, well-balanced glaze creates a glossy top and mirrors the honeyed flavor without overpowering the filling; cooling prevents melting the filling. - If using whipped cream, whip the 1 cup cold heavy cream to soft peaks and chill; refrigerate until serving and optionally fold a small portion into the glaze for a lighter finish.
→ Whipped cream adds a creamy contrast to the dense cheesecake and can be folded into the glaze for a satin finish if desired. - To finish, drizzle the warm honey glaze evenly over the chilled cake using a back-and-forth motion and rotate the cake to cover all areas; allow the glaze to set for 5–10 minutes before topping with berries and extra honeycomb shards.
→ A thin, even glaze enhances aroma, adds sheen, and reinforces the honey motif; allowing it to set ensures clean slices and prevents runny edges. - Garnish with fresh berries and extra crushed honeycomb pieces around the top edge for color, texture, and brightness; pat berries dry if needed and avoid overcrowding to keep the crust crisp.
→ Fresh fruit introduces acidity to balance richness and adds vibrant color; extra crunch from honeycomb enhances the dessert’s texture profile. - To serve, run a warmed knife (dip briefly in hot water and wipe dry) between slices for clean cuts, wipe the blade between slices, and serve with optional additional whipped cream on the side if desired.
→ A warmed blade yields cleaner slices through the dense filling, while wiping prevents dragging; extra cream on the side offers a luxurious accent to each bite.
Notes
This honeycomb cheesecake cake is a show-stopping, multi-layer dessert featuring a buttery graham cracker crust, a velvety cream cheese filling, crunchy honeycomb candy, and a glossy honey glaze. Start by crushing crackers and mixing with melted butter, optional sugar, then pressing firmly into a 9-inch springform pan and prebaking for 8-10 minutes at 350°F to set the base. Beat softened cream cheese with sugar until smooth, then add eggs one at a time, followed by sour cream or Greek yogurt, heavy cream, lemon juice, vanilla and salt; mix until just combined to avoid air pockets, and fold in most of the crushed honeycomb, reserving some for the top. Bake in a slow, steady oven (a water bath helps prevent cracks) until the center wobbles slightly; cool gradually to room temperature and then refrigerate for at least 6 hours or overnight for clean, sliceable layers. Crush the remaining honeycomb shards for distribution between slices and on top to maximize crunch. For the glaze, warm honey with a little water and lemon juice until pourable, then drizzle evenly; chill briefly so the glaze sets without running. If you’d like extra flair, whip cold heavy cream to soft peaks to serve alongside, or add fresh berries for brightness. To adapt for dietary needs, use gluten-free crackers for the crust and a dairy-free cream cheese and coconut cream alternative; the crust can be rendered nut-based if you prefer, just adjust the butter amount to bind. For make-ahead service, assemble and refrigerate the cake fully, or freeze individual slices for quick desserts; thaw overnight in the fridge before serving. Always use room-temperature ingredients for the smoothest filling and be patient with the chilling times to ensure clean, crisp slices.
Tips
Tips for Honeycomb Cheesecake Cake
Crust preparation and baking
- Press the graham cracker (or digestive biscuit) crumb mixture firmly into a 9-inch springform pan so the crust can support the tall filling. Use the flat bottom of a measuring cup or a small glass to compact evenly, then go slightly up the sides for added stability.
- Prebake the crust for extra crispness: bake 8–10 minutes at 350°F (175°C) and let it cool completely before adding the filling. This helps prevent a soggy bottom.
- If your crackers are unsalted, add 1–2 tablespoons of sugar to the crust for balanced sweetness. For variations, you can tint the crust with a pinch of cinnamon or cocoa powder for a cinnamon or chocolate crust.
- To prevent leaks when baking, wrap the outside of the springform pan with foil if you’re using a water bath during baking.
- Tip for dairy-free options: substitute melted coconut oil for butter in the crust and use a dairy-free cream cheese alternative if desired.
Cheesecake filling technique
- Let the cream cheese soften to room temperature and cut it into chunks if needed. Softened cheese blends more smoothly, reducing lumps. Beat with sugar on low speed at first, then gradually increase to medium until creamy and lump-free.
- Gradually add eggs one at a time on low speed to minimize air pockets that can cause cracks. Have the eggs at room temperature for best incorporation.
- Use sour cream or Greek yogurt to increase moisture and tenderness. If you use yogurt, strain it briefly to remove excess whey for a thicker, creamier filling.
- Add heavy cream at room temperature and mix just until combined to maintain a silky texture. Overmixing can incorporate air and lead to cracks.
- Brighten the filling with lemon juice and, if desired, zest. Fresh juice is preferable to bottled; too much liquid can loosen the filling, so add zest for extra lemon notes without altering consistency.
- Finish with pure vanilla extract and a pinch of salt to balance sweetness and enhance the dairy flavors. If using vanilla bean, scrape seeds into the mixture along with the extract.
Handling the honeycomb candy
- Crush the honeycomb candy to roughly 1/2-inch pieces for even distribution and to protect the filling’s texture. Reserve some larger shards for top decoration if desired.
- If you prefer making your own honeycomb brittle, ensure pieces are sized to avoid crumbling into powder and to maintain crisp texture within the cake.
- Gently fold or sprinkle the candy into the filling to preserve the crunch without breaking the creamy structure.
Glaze and topping assembly
- Warm the honey just enough to loosen it for a glossy glaze. Add water gradually to reach a pourable consistency that coats without running off too quickly. If you want a thicker glaze, use less water or reduce slightly on the stove and cool before use.
- Balance sweetness with a splash of lemon juice in the glaze for brightness; fresh juice yields a livelier finish.
- For a soft topping, whip cold heavy cream to soft peaks and pipe or dollop on the cake just before serving. If you prefer a dairy-free option, use cold coconut cream and whip until fluffy.
Garnish, variations, and serving
- Fresh berries add color and a fresh acidity to cut through richness. Rinse gently and pat dry; for extra brightness, macerate berries with a little sugar and lemon juice before serving.
- Sprinkle extra crushed honeycomb pieces on top for additional honey flavor and crunch. Scatter evenly to keep the topping crisp rather than soggy.
Make-ahead, storage, and serving tips
- Chill the cheesecake for at least 4 hours (ideally overnight) to ensure clean slicing and full-setting of the filling.
- Serve at room temperature or slightly chilled for a creamier mouthfeel. A very warm knife (wiped clean between slices) will yield neat cuts.
- Store leftovers in the refrigerator, tightly wrapped, for up to 4–5 days. For longer storage, you can freeze individual slices for 1–2 months; wrap well to prevent freezer burn.
FAQ
What is Honeycomb Cheesecake Cake?
A honeycomb cheesecake cake is a dessert that combines a creamy cheesecake filling with a crumb-based crust and is often layered like a cake. It is finished with shards of honeycomb candy for a crispy, caramel flavor and a striking honeycomb texture on top or between layers.
What ingredients do I need for the crust, filling, and honeycomb candy?
For the crust: 200 g digestive biscuits or graham crackers, 75 g unsalted butter, melted. For the filling: 600 g cream cheese (softened), 150 g granulated sugar, 3 large eggs + 1 yolk, 1 tsp vanilla extract, 120 ml sour cream or heavy cream, pinch of salt. For the honeycomb candy: 200 g granulated sugar, 60 ml golden syrup or corn syrup, 60 ml water, 1 tsp baking soda. Optional: zest of 1 lemon or orange; garnish such as whipped cream.
How do I make the honeycomb candy to decorate?
In a heavy saucepan, whisk sugar, syrup, and water; bring to a boil without stirring until the temperature reaches 149–155°C (hard crack). Remove from heat, quickly whisk in baking soda (the mixture will foam). Immediately pour onto a parchment-lined sheet and spread thinly. Let cool completely until hard, then break into shards. Store in an airtight container if not using right away.
Should I bake the cheesecake in a water bath?
Yes. Baking the cheesecake in a water bath helps prevent cracks and ensures even cooking. Wrap the springform pan with foil, place in a large roasting pan, and pour hot water halfway up the side of the pan. Bake at 160°C (325°F) for about 60–70 minutes until the edges are set but the center still wobbles slightly. Turn off the oven and leave the cake inside for 1 hour, then refrigerate overnight to chill fully.
Can I make this cake ahead or freeze it?
Yes. You can bake the crust and cheesecake filling a day ahead, cool, and refrigerate overnight. Add honeycomb shards just before serving for best texture. The components can be stored separately: crust up to 3 days, filling refrigerated up to 4 days. To freeze, freeze the fully assembled cake wrapped well for up to 1 month; thaw overnight in the fridge before serving. For best texture, add the honeycomb topping after thawing.
Can I make a dairy-free or gluten-free version?
Yes. For dairy-free: use dairy-free cream cheese, dairy-free sour cream or coconut cream, and dairy-free butter for the crust. For gluten-free: use gluten-free biscuits or cookies ground to crumbs; ensure the butter is dairy-free if using a dairy-free option. Check honeycomb ingredients if avoiding gluten in syrup alternatives; sugar and baking soda are gluten-free. The filling can be dairy-free if using appropriate substitutes.
How do I assemble the cake and decorate?
Spread the cooled crust in a springform pan and press to compact. If you want a sponge layer, place cooled sponge cake on the crust, then pour or pipe the cheesecake filling over. Refrigerate until the filling is set, 6–8 hours or overnight. Top with honeycomb shards, whipped cream, and optional lemon zest or berries. Slice with a warm, dry knife for clean cuts.
How can I prevent cracks or a sinking center?
Use a water bath to reduce temperature shock, avoid overmixing the filling, and bake until the center wobbles slightly. Let the cheesecake cool gradually with the oven off (leave the door slightly ajar for 1 hour). Do not refrigerate too soon; let it come to room temperature before chilling. If cracks appear, you can cover with a thin layer of topping or glaze to hide them.
Can I flavor or customize the cheesecake?
Absolutely. Add 1–2 teaspoons of lemon, orange, or vanilla extract; swirl in raspberry or mango puree; fold in grated citrus zest. For a chocolate twist, add 2–3 tablespoons cocoa powder to the filling or mix in melted chocolate. For the honeycomb topping, you can drizzle additional honey or caramel if you prefer a different topping.
What is the texture like and how should I serve it?
The crust is crunchy, the filling is creamy and tangy, and the honeycomb shards provide a crisp, caramelized bite. Serve cold, straight from the fridge. Slice with a warmed knife and garnish with extra crushed honeycomb or berries. This cake pairs well with espresso or a dessert wine such as Sauternes.