Introduction / Hook
Picture this: a pan or grill blazing with heat, a ribbon of aroma curling through the air—garlic and sesame mingling with a kiss of soy, while caramelized edges glisten under a lacquered glaze. In that moment, you’re transported to a bustling hibachi table, where sizzling soundtracks—the hiss of onions, the crackle of butter meeting the hot surface—promise comfort, excitement, and a little theater. The Hibachi Chicken Rice Bowl is the home chef’s invitation to recreate that irresistibly kinetic dining experience in your own kitchen. It’s more than a meal; it’s a sensory performance: the sizzling serenade, the warm glow of perfectly steamed rice, the brightness of citrus and herbs, and the satisfying bite of tender chicken with a glossy, savory glaze. This bowl captures the magic of restaurant teppanyaki flair while staying friendly to your schedule and pantry. It’s the kind of dish that invites conversation, shareable moments, and those “just one more bite” moments that linger long after the plates are cleared.
When you first lift the lid—or crack open the fridge to grab the next component—you’ll be greeted by a chorus of scent notes: toasty sesame, the nutty aroma of lightly charred vegetables, a whisper of ginger and garlic, and the almost-sweet edge of caramelized chicken. It’s comfort food with a bright, modern edge—the kind that satisfies a craving for something indulgent yet approachable. And the beauty of the Hibachi Chicken Rice Bowl is its versatility: you can keep it simple on a weeknight, or elevate it for a weekend feast with a few thoughtful tweaks. It’s a dish that rewards patience with texture and depth, yet forgives quick improvisation when your day doesn’t go as planned. In short, it’s a bowl that feels like a celebration in every bite.
The Story Behind the Dish
Hibachi and teppanyaki have their roots in Japanese grilling culture, where chefs wield precision, showmanship, and high heat to coax color, aroma, and caramelization from humble ingredients. The term hibachi traditionally refers to a heated vessel—often a small, open flame or a flat cooking surface—used to sear and sear again, yielding a crisp exterior while leaving the interior tender. Teppanyaki, meanwhile, is a broader tradition of cooking on a flat iron griddle, a technique that became a culinary spectacle in modern Japan and, later, in American restaurants that embraced the performative, interactive dining style. The Hibachi Chicken Rice Bowl is a delicious cross-cultural homage: it channels the drama and flavor intensity of hibachi while embracing the comforting, familiar structure of a rice bowl that fits into busy days and casual gatherings.
Across generations and continents, cooks adapted these techniques to whatever tools they had—skillets, cast iron pans, or electric griddles—without losing the soul of the dish: a glossy glaze that clings to the surface, vegetables that crackle with a touch of char, and a bed of fluffy rice that balances richness with light brightness. In many households, this dish has become a go-to way to recreate that “hawker-worthy” or restaurant-worthy experience at home—one where family and friends gather, watch the pan go from quiet to sizzling, and savor a meal that feels celebratory without being intimidating. The story of hibachi-inspired bowls is as much about memory and sharing as it is about technique; it’s about those kitchen moments when a few simple ingredients come together to evoke a sense of place, warmth, and togetherness.
As you embark on making this Hibachi Chicken Rice Bowl, you’re participating in a contemporary culinary tradition: a fusion of technique, nostalgia, and practicality. You’re honoring the ancestral craft of flame and flavor while inviting modern readers to enjoy restaurant-like depth in their own homes. Each component—succulent chicken with a lacquered glaze, tender rice, crisp, bright vegetables, and a final flourish of sesame and citrus—tells a story of balance: sweetness and savoriness in harmony, crunch and silkiness, heat and freshness, all woven into one satisfying bowl.
Why You’ll Love This Recipe
- Quick, weeknight-friendly, yet sure to impress guests with an elevated flavor profile.
- Comforting and satisfying without heaviness—thanks to a well-balanced blend of proteins, starch, and vegetables.
- Versatile and forgiving: adaptable to what you have on hand, with room for creative substitutions.
- Vibrant, restaurant-level flavor using accessible pantry ingredients and a glossy glaze that clings beautifully to the chicken.
- Textural contrast galore: tender chicken with a slight caramelized crust, fluffy rice, crisp vegetables, and a glossy finish.
- Two-in-one meal appeal: a complete bowl that can stand alone or pair nicely with a simple starter or light dessert.
- Family-friendly and crowd-pleasing, making it an ideal choice for picky eaters and spice-adventurers alike (with room to adjust heat).
Flavor Profile & Texture
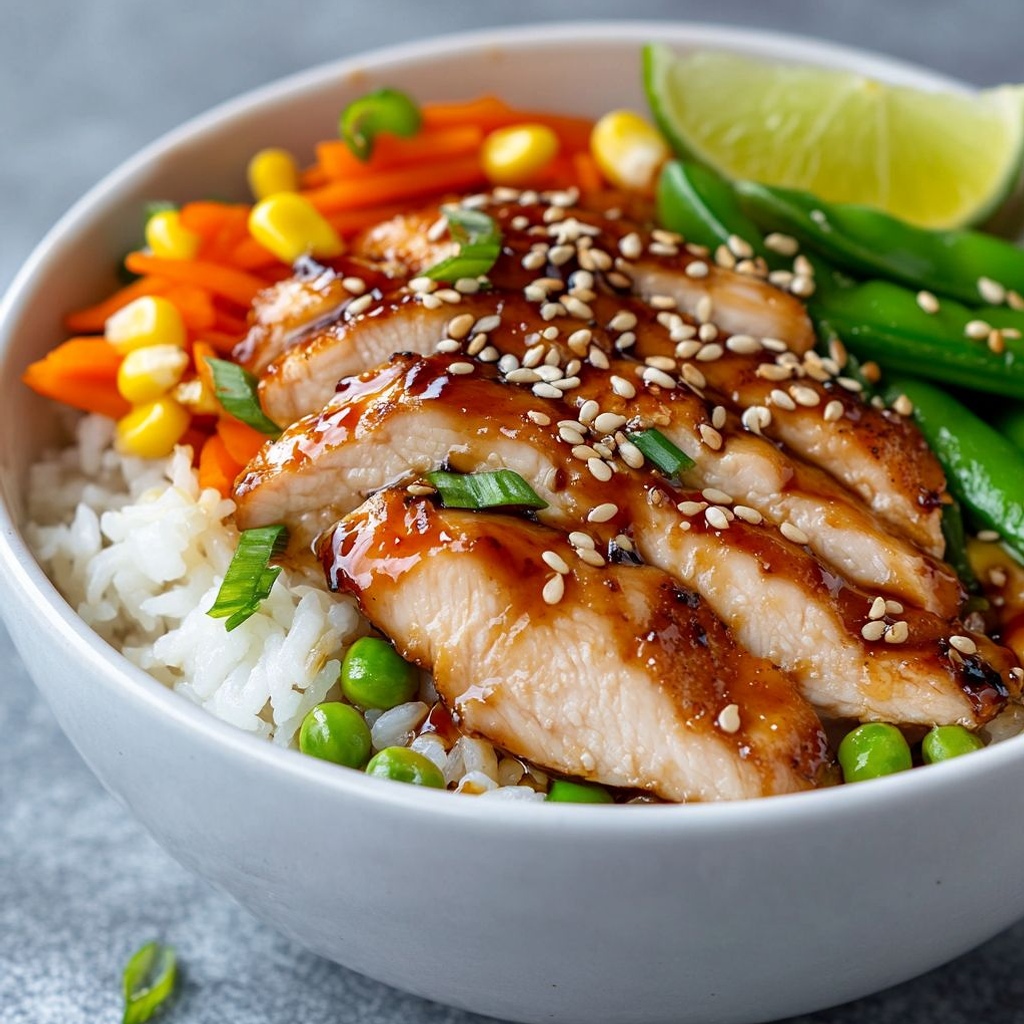
The Hibachi Chicken Rice Bowl is a symphony of taste sensations designed to keep every bite interesting. The chicken offers a caramelized crust with a savory-sweet glaze that whispers of soy, a hint of garlic, and a touch of butter that rounds out the bold flavors. That glaze isn’t cloying; it’s glossy and lacquered, a result of quick, high-heat contact that sears the surface while sealing in juiciness. The rice brings a soft, neutral canvas—a gentle counterpoint to the chicken’s intensity—yet it isn’t merely a backdrop; its subtle sweetness and starchiness help balance the dish, absorbing some of the glaze’s brightness and tying the bowl together.
Vegetables—often a crisp-edged medley of onions, zucchini, and peppers—add brightness, color, and a satisfying crunch. When they hit the heat, they blister at the edges, releasing their own natural sugars and smoky notes. The subtle bitterness of peppers, the gentle sweetness of onions, and the fresh, green snap of scallions (or chives) create a dynamic texture that contrasts beautifully with the tender chicken and soft rice. Sesame seeds sprinkled on top contribute a faint nutty aroma and a delicate crunch, while a dash of citrus—commonly lemon or a light drizzle of a citrusy finish—lifts the dish and keeps the flavors from feeling heavy.
Beyond taste, the dish engages the senses in multiple layers: you’ll hear the hiss of the pan, feel the warmth of a bowl that’s just come off the stove, and smell an inviting fusion of soy, garlic, sesame, and smoky char. The result is a comforting yet bright meal that works well for any season and any palate, from lovers of umami-rich profiles to fans of clean, fresh finishes. It’s a bowl that offers both familiarity and fascination—familiar ingredients executed with a touch of culinary theater, and a texture spectrum that keeps you reaching for just one more bite.
Occasions & Pairings
This Hibachi Chicken Rice Bowl fits a wide range of occasions—whether you’re feeding a busy weeknight crew, hosting a casual dinner with friends, or planning a cozy weekend date night. It’s hearty enough to satisfy a crowd, yet simple enough to be scaled down for two. Here are some ideas to make the most of this dish:
- Weeknights: A one-pan wonder or a minimal-setup meal that comes together quickly after work, with room for a quick grocery run or a well-stocked pantry.
- Casual gatherings: Build a mini hibachi station where guests customize their bowls with extra vegetables, different finishes, or a few spice notes—fun and interactive.
- Comfort weekends: Pair with a light starter such as a miso soup or a crisp cucumber salad, and finish with a simple citrus-forward dessert to brighten the palate.
- Special occasions: Elevate with a few premium garnishes or a side of delicate pickles, roasted mushrooms, or a bright, herbaceous slaw.
Pairings to consider include:
- Green vegetables and sides: Steamed broccoli, blistered asparagus, or sautéed bok choy provide color and contrast.
- Grains and starches: While the bowl centers on rice, a small portion of soba or barley can echo the dish’s textures.
- Beverages: A crisp white wine such as Sauvignon Blanc, a light lager, or chilled green tea for non-alcoholic options.
- Desserts: A zesty citrus sorbet, a matcha‑flavored treat, or a light sesame-focused dessert to mirror the flavors without overpowering the palate.
Tips, Variations & Substitutions
Tips for the best results
To achieve that signature hibachi glow and texture, keep a few practical tips in mind. Pat the chicken dry before you cook; moisture is the enemy of a crisp sear. Use high heat and a well-seasoned pan so the surface browns quickly without steaming. Don’t overcrowd the pan—give each piece room to caramelize. If you’re short on time, you can still pull off a delicious version by prepping components in advance and finishing together just before serving. A light touch of finished butter or a drizzle of sesame oil at the very end can deepen the aroma and contribute a silky finish without making the glaze feel greasy.
Variations
Adaptability is a strength of this dish. Consider these variations to suit your preferences or dietary needs:
- Protein swaps: Replace chicken with shrimp, turkey breast, or firm tofu for a vegetarian option that still nods to hibachi flavors. For a pescatarian version, scallops can be a luscious alternative.
- Glaze experiments: Swap a portion of the soy-based glaze for a hint of honey and ginger for a warmer, spiced profile. A splash of mirin can add subtle sweetness and depth.
- Vegetable riffs: Use a seasonal mix—snap peas, mushrooms, bell peppers, snap peas, or asparagus—to keep the bowl vibrant and varied.
- Rice alternatives: If you prefer a lighter base, go with brown rice, quinoa, or a cauliflower rice option for a lower-carb approach. If you want extra texture, try a mix of white rice with a short-grain brown rice blend.
- Spice level: For a little heat, introduce a mild chili oil drizzle, or add sliced jalapeños or red pepper flakes to the vegetables while sautéing.
Substitutions
Allergies or pantry constraints? Here are gentle substitutions that preserve the dish’s core spirit:
- Soy-free: Use tamari or coconut aminos in place of traditional soy sauce.
- Gluten-free: Ensure the glaze uses gluten-free soy sauce or tamari; check any additional sauces for hidden gluten.
- Nut considerations: Sesame is a common finish; if sesame allergies are a concern, opt for a light drizzle of citrus and a fresh herb garnish instead of seeds.
- Vegetable oil: If you’re avoiding sesame oil for dietary reasons, use a neutral oil with a small amount of toasted sesame oil for aroma only, or skip it entirely and rely on the glaze for flavor.
Storage & Make-Ahead Ideas
The best part of bowls is their flexibility for meal prep. You can assemble elements ahead of time and finish them in minutes the day you plan to serve them, or store the components separately for later use.
- Storing leftovers: Refrigerate cooked chicken, vegetables, and rice in airtight containers for up to 3–4 days. Reheat gently to preserve texture, using a splash of water or broth to rehydrate the rice if it looks dry.
- Make-ahead strategies: If you enjoy planning ahead, prepare the glaze in advance and whisk quickly when ready to serve. You can pre-cut vegetables and store them in an airtight container to speed up weeknight assembly.
- Freezing: Cooked chicken and vegetables can be frozen separately for up to 2–3 months. Rice tends to lose texture after freezing; if you freeze rice, freeze it in individual portions and reheat with a splash of water to restore moisture.
- Reheating tips: Reheat on the stovetop with a wide pan to re-create a bit of a sear on the chicken and encourage a gentle caramelization on the vegetables. Use a lid briefly to trap heat if needed, then uncover to finish.
Fun Facts & Trivia (Optional)
- The name “hibachi” translates to “fire bowl” in Japanese, highlighting the sense of heat and spectacle behind the cooking method.
- Teppanyaki-style cooking gained global popularity in the 20th century, evolving into an entertainment-driven dining experience that emphasizes precision, timing, and showmanship.
- Sesame seeds used as a finishing touch not only add texture and aroma but also bring a nutty, toasty note that complements the savory glaze and helps balance the dish’s richness.
- Rice is more than a base here; it acts as a flavor carrier, soaking up a kiss of glaze and providing a gentle contrast to the crisp, caramelized edges of the chicken.
Ingredients
Hibachi Chicken Rice Bowl
Rice Base
- 2 cups cooked jasmine rice, cooled (preferably day-old)
→ This provides the starchy base for the fried rice portion and helps absorb the savory hibachi flavors without turning mushy. Day-old rice is firmer and separates easily for a classic stir-fry texture. If you only have fresh rice, spread it on a tray to cool and chill for 15–20 minutes, then fluff with a fork to separate the grains. - 1 tablespoon neutral oil (vegetable or canola) for frying
→ Oil helps heat transfer and prevents sticking as you fry the rice and eggs. Use a high smoke point oil and swirl it around the pan before adding the rice. For extra aroma, you can add a few drops of sesame oil at the end, but avoid adding it at the start as it can burn. - 2 large eggs, lightly beaten (optional)
→ Eggs create a traditional fried-rice texture and add protein. Push the rice to the side of the skillet, scramble the eggs in the cleared space until just set, then fold through the rice. If you’re vegan or avoiding eggs, substitute with crumbled firm tofu or omit eggs altogether.
Hibachi Chicken
- 1 lb boneless skinless chicken thighs or breasts, cut into bite-sized pieces
→ Chicken is the star of the dish. Thighs stay juicier and more forgiving, while breasts are leaner. Aim for uniformly sized pieces (about 1 inch) so they cook quickly and evenly. Pat dry before cooking to promote a good sear; if using breast meat, monitor doneness to prevent drying out. - 2 tablespoons soy sauce (for marinating)
→ Provides savory depth and helps season the chicken. Use low-sodium soy if you want tighter control over salt. Marinate for 15–20 minutes for flavor without overpowering the dish; reserve any leftover marinade to flavor the sauce or baste if desired (discard after use if raw chicken was marinated in it). - 1 tablespoon mirin (sweet rice wine)
→ Adds gentle sweetness and a glossy finish to the chicken. If mirin isn’t available, substitute with a teaspoon of sugar dissolved in a tablespoon of white wine or water, but you’ll lose some depth and aroma—adjust sweetness accordingly. - 1 teaspoon grated fresh ginger
→ Provides bright, warming aromatics that cut through the richness. Grate fresh to maximize flavor and avoid biting chunks; if you only have ground ginger, use 1/4 teaspoon and bloom it briefly in the pan with the aromatics. - 1 clove garlic, minced
→ Delivers a savory foundation for the sauce. Mince finely so it distributes evenly and doesn’t burn at high heat; add with the aromatics or alongside the ginger during the initial sear. - 1 teaspoon cornstarch (optional, for light coating and sear)
→ A light dusting of cornstarch helps create a crisp, lacquered surface when the chicken hits the hot pan and can help thicken the glaze slightly. Toss the chicken in cornstarch after marinating for best results; skip if you prefer a lighter crust. - 1 tablespoon vegetable oil (for searing)
→ Use a high-heat, neutral oil to achieve a quick, juicy sear without steaming the meat. Preheat the pan until shimmering, then add the chicken in a single layer without crowding to ensure proper browning.
Vegetables
- 1/2 cup diced onion
→ Onions add sweetness and aromatic depth to the base of the stir-fry. Dice evenly to ensure uniform cooking; you can caramelize lightly for deeper flavor if you have extra time. - 1 cup frozen peas and carrots (or fresh)
→ This classic mix adds color, texture, and subtle sweetness. Frozen mixes are convenient and stay crisp-tender when stirred over high heat; if using fresh, cut into small, even pieces and cook until just tender. - 1 small zucchini, sliced (optional)
→ Adds moisture and a gentle bite. Slice into half-moons or rounds about 1/4 inch thick and add after onions so they cook quickly and retain some bite; omit if you prefer a crunchier texture. - 1 cup broccoli florets (optional)
→ Provides vibrant color and crunch. Steam or blanch briefly if you prefer a very tender texture, or stir-fry directly with the other vegetables for a crisper result; break into small, uniform florets for even cooking.
Hibachi Sauce & Finish
- 1/4 cup soy sauce
→ Builds the salty, umami backbone of the hibachi glaze. Use low-sodium soy if you want more control over saltiness; you can reduce or increase later depending on taste. For a gluten-free version, use tamari instead of soy sauce. - 2 tablespoons mirin
→ Adds sweetness and a gentle acidity that brightens the sauce and helps it cling to the chicken and rice. If unavailable, substitute with a tablespoon of sugar plus a splash of rice vinegar or water; taste and adjust to maintain balance. - 2 tablespoons sake or water
→ Sake deepens flavor and adds a subtle complexity. If you prefer non-alcoholic, use water with an extra pinch of sugar or a splash of rice vinegar; simmer briefly to integrate flavors if using alcohol. - 1 tablespoon sugar or honey
→ Provides the necessary sweetness to balance salty soy and tangy vinegar, creating a glaze-like finish. Add gradually and taste; reduce slightly if your soy sauce is already salty. - 1 teaspoon rice vinegar (optional)
→ A touch of acidity to cut richness and enhance brightness. If you don’t have rice vinegar, a splash of apple cider vinegar or a squeeze of lemon can work in a pinch, but start with less and adjust to taste. - 2 tablespoons unsalted butter (for finishing)
→ The signature silky, glossy finish of hibachi-style sauces. Off-heat swirl the butter into the hot pan or stir into the sauce at the end to emulsify. For dairy-free versions, substitute with a neutral dairy-free butter or a bit of olive oil, noting flavor differences. - 1 teaspoon toasted sesame oil
→ A final kiss of aroma that is quintessential in hibachi dishes. Use sparingly as a finishing touch right before serving to avoid overpowering the other flavors; its nutty fragrance elevates the overall dish.
Garnish
- 2–3 green onions, sliced
→ Fresh green onions add a crisp, oniony brightness and color. Slice diagonally for a nicer presentation and sprinkle over the top just before serving to retain their crunch and aroma. - 1 tablespoon sesame seeds
→ Adds a subtle crunch and nutty flavor. Toast sesame seeds in a dry skillet over medium heat for 1–2 minutes until fragrant to maximize aroma, then sprinkle over the dish for texture and visual appeal. - Lemon wedges (optional)
→ A quick squeeze of lemon brightens the dish, especially the rice. Classic hibachi service often includes citrus to cut richness; offer on the side so guests control acidity level.
Instructions
- Break up and fluff the day-old jasmine rice with a fork to separate grains and prevent clumps; spread it on a wide tray to cool completely if it has been refrigerated, so when it hits the hot pan the grains won’t steam and become mushy.
→ Loose, separate grains fry quickly and evenly, yielding a classic fried-rice texture. - If using eggs, whisk two large eggs with a pinch of salt until smooth and pale; set aside for quick scrambling later so they integrate evenly with the rice.
→ A uniform mixture cooks quickly and distributes evenly through the fried rice for best texture. - Pat dry the chicken pieces thoroughly with paper towels to promote a robust sear; in a small bowl whisk 2 tablespoons soy sauce, 1 tablespoon mirin, 1 teaspoon grated fresh ginger, 1 clove minced garlic, and optional 1 teaspoon cornstarch; toss the chicken pieces in the marinade until evenly coated and let rest 15–20 minutes to deepen flavor and aid browning.
→ Dry surface prevents steaming, while the marinade builds depth and the cornstarch helps create a light lacquer on the sear. - Prepare the vegetables by dicing onion, measuring peas and carrots, and slicing zucchini into 1/4-inch half-moons; cut broccoli into small florets and arrange each component in separate bowls for rapid addition during stir-frying.
→ Uniform pieces ensure even cooking and crisp-tender texture in a hot wok. - In a small bowl whisk together 1/4 cup soy sauce, 2 tablespoons mirin, 2 tablespoons sake or water, 1 tablespoon sugar or honey, and 1 teaspoon rice vinegar (optional) until the sugar dissolves; this forms the hibachi glaze that will glaze the chicken and rice.
→ Balanced sweetness, saltiness, and brightness help the glaze cling and sheen the finished dish. - Preheat a large skillet or wok over high heat until just smoking; add 1 tablespoon neutral oil and swirl to coat the surface, creating a slick that promotes rapid browning without sticking.
→ High-heat sears proteins quickly, forming depth of flavor while keeping meat juicy. - Add the marinated chicken in a single layer and sear without moving for 1–2 minutes until the underside is deeply browned; flip and cook until the pieces are cooked through and no pink remains; transfer to a clean plate and rest to reabsorb juices; reserve any pan juices for the sauce if desired.
→ Proper browning builds flavor; resting prevents juices from running out when you mix back into the dish. - If using eggs, push the chicken to one side of the skillet, add a touch more oil if needed, pour in the beaten eggs, and scramble until just set; fold the eggs into the chicken for even distribution and a cohesive fried-rice texture.
→ Scrambling in the open area yields delicate ribbons of egg that coat the grains without turning rubbery. - Stir-fry the aromatics and vegetables: add onion and cook 1–2 minutes until translucent and fragrant; then add peas and carrots, followed by zucchini and broccoli, and cook 2–3 minutes until crisp-tender and bright in color.
→ Quick, hot motion preserves color, texture, and fresh flavor while integrating aromatics with the base. - Push the vegetables to the side and add the cooled rice to the center; press the rice flat against the hot surface to encourage toasting, and let it sit 1–2 minutes to form a light crust before breaking up any remaining clumps and tossing with the vegetables.
→ Toaste grains develop nutty aroma and texture, preventing soggy, mushy rice. - Return the seared chicken to the pan along with any juices; pour a portion of the hibachi glaze over the mixture and toss vigorously to coat all components; continue to cook until the glaze thickens slightly and coats the ingredients.
→ Even coating ensures consistent flavor and a glossy finish across every bite. - Reduce the heat to medium and simmer 1–2 minutes, stirring constantly, until the glaze tightens and glazes the chicken and rice without burning; adjust with a splash of water if the sauce becomes too thick.
→ Proper reduction binds the sauce and creates a lacquered appearance for a hibachi-style finish. - Off the heat, swirl in 2 tablespoons unsalted butter to emulsify the glaze into a glossy sauce, then whisk in 1 teaspoon toasted sesame oil to impart a nutty aroma; this finishing butter locks in moisture and adds a silky mouthfeel.
→ Butter and sesame oil enrich the sauce and provide authentic hibachi sheen and aroma without overpowering other flavors. - Taste the mixture and adjust seasoning as needed by nudging with a touch more soy sauce for salt or a pinch of sugar to balance acidity; ensure the final balance harmonizes sweet, salty, and savory notes.
→ Final balance is essential for a cohesive flavor profile across the dish. - To serve, spoon a generous bed of fried rice onto each plate or bowl, top with hibachi chicken and vegetables, and drizzle any remaining glaze over the top to unify flavors on every bite.
→ A generous glaze ensures each portion is cohesive and delicious from start to finish. - Garnish with sliced green onions and toasted sesame seeds, and place lemon wedges on the side for optional brightness; sprinkle just before serving to preserve crunch and aroma.
→ Fresh garnishes provide color, aroma, and a final citrus lift that brightens the dish.
Notes
These hibachi chicken rice bowls are a restaurant-style skillet dish built on a glossy, savory glaze and a fluffy bed of jasmine rice. For best texture, use day-old jasmine rice and pat the chicken dry before searing to achieve a crisp, caramelized surface without steaming. You can customize them by swapping in shrimp or firm tofu and by adding extra vegetables such as bell peppers, mushrooms, or broccoli for color and crunch. For a gluten-free version, substitute tamari for soy sauce and opt for a gluten-free mirin if needed. The finishing butter and toasted sesame oil give the signature hibachi shine and aroma; to keep this dairy-free, use a neutral oil or dairy-free butter and skip the butter finish. Leftovers reheat well in a skillet or microwave; loosen reheated rice with a splash of water to restore moisture. Store components separately to preserve texture, and if you’re making ahead, keep the sauce separate and combine just before serving for best gloss and flavor. Always taste and adjust salt with low-sodium soy or tamari, since some ingredients (like mirin and butter) already contribute sweetness and richness.
Tips
Tips to Perfect Hibachi Chicken Rice Bowl
Rice Base tips
- Prefer day-old jasmine rice because it’s drier and grains separate easily for a classic fried-rice texture. If you only have fresh rice, spread it on a tray and cool for 15–20 minutes, then fluff with a fork before frying.
- Use a hot, wide pan or wok and a neutral high-smoke-point oil. Swirl the oil to coat the pan before adding rice to prevent sticking and promote even browning.
- When adding eggs (optional), push the rice to one side, scramble the eggs in the cleared space until just set, then fold through the rice for a traditional fried-rice texture.
- Keep the rice grains distinct; avoid over-stirring at first. If they cling, drizzle a teaspoon of stock or soy to loosen and re-separate the grains.
- Finish with a small amount of sesame oil at the end (not at the start) to impart aroma without risking burnt notes.
Hibachi Chicken tips
- Cut chicken into uniform bite-sized pieces (about 1 inch) for quick, even searing. Thighs stay juicier; breasts are leaner and require closer attention to avoid drying out.
- Marinate for 15–20 minutes to flavor the meat without making it salty. Reserve any leftover marinade for finishing sauce or bastes, discarding after raw-chicken contact if you used it for marinating.
- For a crisp lacquered finish, toss the chicken in a light dusting of cornstarch after marinating. Skip if you prefer a lighter crust.
- Use a hot pan and avoid crowding the chicken. Cook in a single layer to achieve a proper sear; cook in batches if needed.
Vegetables tips
- Dice onions evenly so they cook uniformly and release sweetness. If you have time, a light caramelization adds depth.
- Frozen peas and carrots stay crisp-tender when stirred over high heat; they’re convenient and budget-friendly. If using fresh, cut into small, even pieces and cook until just tender.
- For zucchini, slice 1/4 inch thick and add after onions to preserve bite. If you prefer more texture, omit zucchini.
- Broccoli florets should be small and uniform; steam or blanch briefly for tenderness if you want a softer texture, or stir-fry directly for a crisper result.
Hibachi Sauce & Finish tips
- Balance salty soy with sweetness. Start with the recipe amounts, then adjust with sugar/honey or extra mirin to taste. Gluten-free option: use tamari.
- Simmer sake (or water) with the sauce to meld flavors; if using water, consider a touch more sugar to compensate for the dilution.
- Use 1 teaspoon rice vinegar to brighten acidity if desired. If unavailable, a splash of apple cider vinegar works in a pinch—add gradually to taste.
- Finish the sauce with unsalted butter off heat or just as you remove from heat to create a glossy, silky glaze that clings to chicken and rice.
- A final drizzle of toasted sesame oil adds signature aroma. Add sparingly right before serving to avoid overpowering other flavors.
Garnish & serving tips
- Slice green onions on the bias for color and a crisp bite; sprinkle over the dish just before serving to maintain aroma and texture.
- Toasted sesame seeds add crunch and nuttiness—toast them in a dry skillet for 1–2 minutes until fragrant before sprinkling.
- Lemon wedges on the side brighten the dish; offer for guests to adjust acidity to taste.
Make-ahead and storage tips
- Prepare components in advance: rice, marinated chicken (without marinade contact), and sauce can be made ahead and reheated separately.
- Store components in airtight containers in the fridge for up to 3 days. Reheat rice in a hot pan with a splash of stock or water to rehydrate the grains.
- Reheat chicken and vegetables quickly in a hot pan to maintain sear and texture; reheat sauce gently to avoid separating.
FAQ
What is Hibachi Chicken Rice Bowl?
A Hibachi Chicken Rice Bowl is a breezy, all-in-one dish inspired by hibachi grill cooking: seared chicken served over flavorful fried rice with sautéed vegetables, finished with a garlicky butter sauce. It’s quick to throw together and perfect for a weeknight meal. The components can be cooked separately or together in a single skillet for ease.
What ingredients do I need?
For 2–4 servings, you’ll want:
- 1 lb (450 g) boneless chicken (thighs preferred for tenderness)
- 2 cups cooked white rice (preferably day-old or cooled)
- 2–3 cloves garlic, minced
- 1 tablespoon grated fresh ginger
- 2–3 tablespoons soy sauce (plus extra to taste)
- 1 teaspoon sesame oil
- 1–2 tablespoons butter
- 1 small onion, diced
- Optional vegetables: sliced zucchini or mushrooms, peas, or bell peppers
- 2 eggs (for fried egg or scrambled eggs in the rice)
- Green onions or sesame seeds for garnish
How do I marinate the chicken?
Mix soy sauce, minced garlic, grated ginger, and a splash of sesame oil. Toss the chicken in the marinade and let it sit for 15–30 minutes (or up to 2 hours in the fridge for more flavor). Pat dry before cooking to get a good sear.
How do I cook the chicken?
Heat a skillet over medium-high with a bit of oil. Add the marinated chicken and sear 4–6 minutes per side until cooked through and nicely caramelized. Remove from the pan and let rest for a couple minutes before slicing into strips or bite-sized pieces.
How do I cook the fried rice?
Use cold or day-old rice for best texture. In the same skillet, scramble the eggs and set aside. Add a little butter and sauté onions until translucent, then add the rice and soy sauce. Stir-fry until heated through and a little crispy; fold in the eggs and keep warm.
What veggies work well in this dish?
Good options include sliced zucchini, bell peppers, mushrooms, onions, and peas. Sauté them in a little butter or oil with a pinch of salt until tender-crisp, then set aside to keep their color and texture.
How do I add the hibachi-style butter sauce?
In a small skillet, melt 1–2 tablespoons butter with a minced garlic clove (optional) for 30–60 seconds until fragrant. Stir in a splash of soy sauce and a squeeze of lemon juice if you like. Drizzle lightly over the assembled bowl or toss the chicken in the sauce for extra flavor.
How do I assemble the bowl?
Start with a bed of fried rice, add sliced chicken on top, then pile in the sautéed vegetables. Add the eggs (scrambled or fried) and finish with a drizzle of the garlic butter sauce. Garnish with chopped green onions and sesame seeds.
Can I make this ahead or freeze it?
Cooked chicken and fried rice store well in the fridge for 3–4 days in airtight containers. Reheat in a skillet or microwave, adding a little water or broth if needed to prevent sticking. For best texture, cook the rice fresh if possible; dispose of any leftovers that have been left out for more than 2 hours.
Any substitutions for dietary needs?
You can use brown rice or cauliflower rice for a lower-carb option. For gluten-free, use gluten-free soy sauce. To reduce fat, skip or reduce the butter and use a small amount of olive oil. For a lighter protein, substitute chicken breast; for more flavor, keep the thighs.
What are some tips for the best flavor?
Use day-old rice for crispier fried rice, don’t overcrowd the pan, and let the chicken sear undisturbed to develop a nice crust. Finish with a touch of sesame oil and fresh green onions for aroma and color. Adjust soy sauce to taste—start with 2 tablespoons and add more if needed.