Author

Ocean Nightleaf

Browsing

Introduzione / Hook

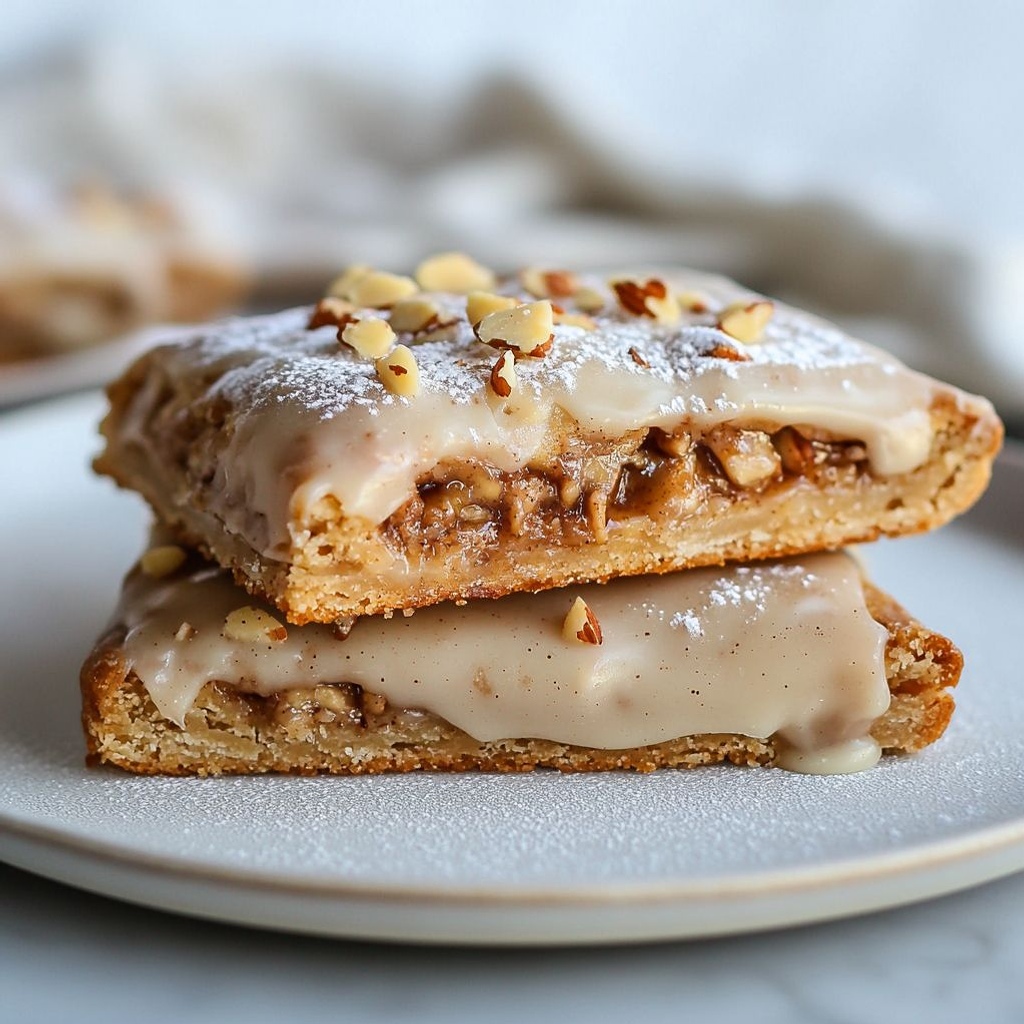
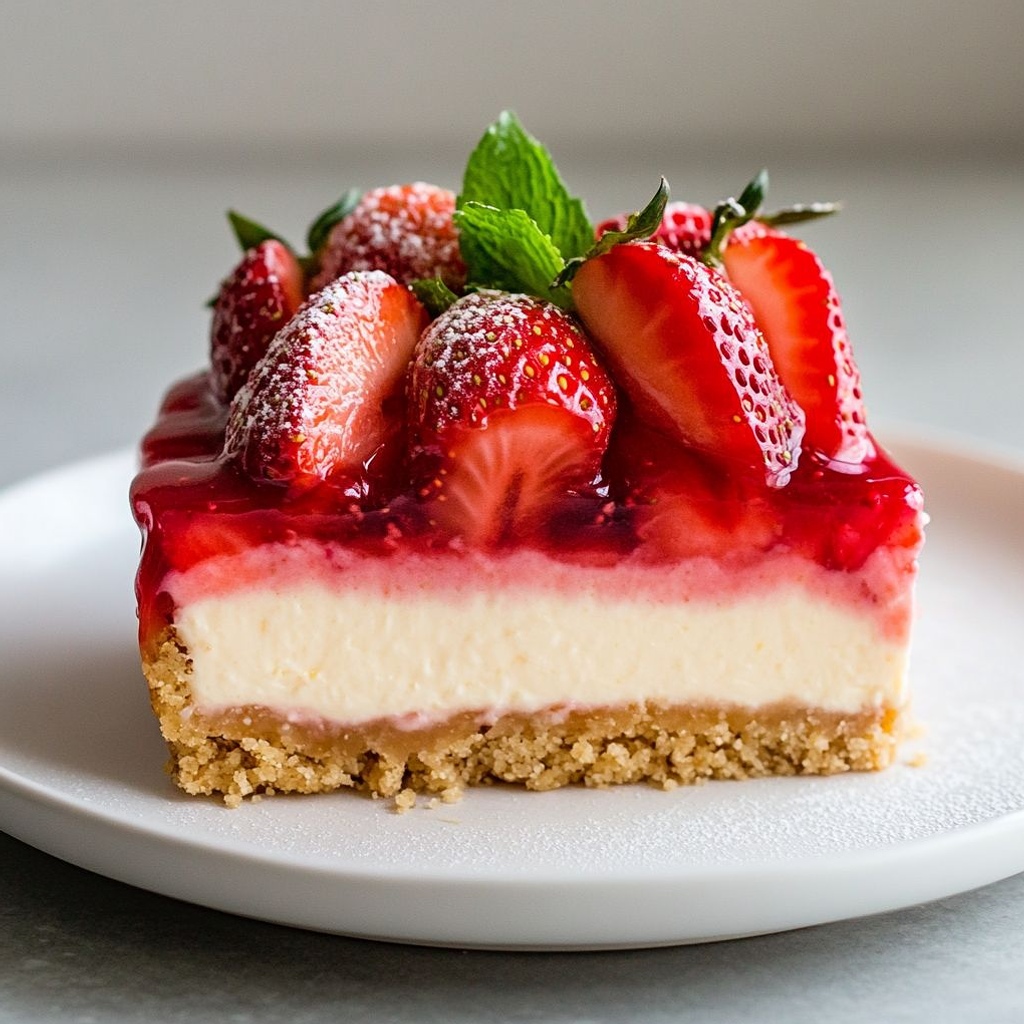
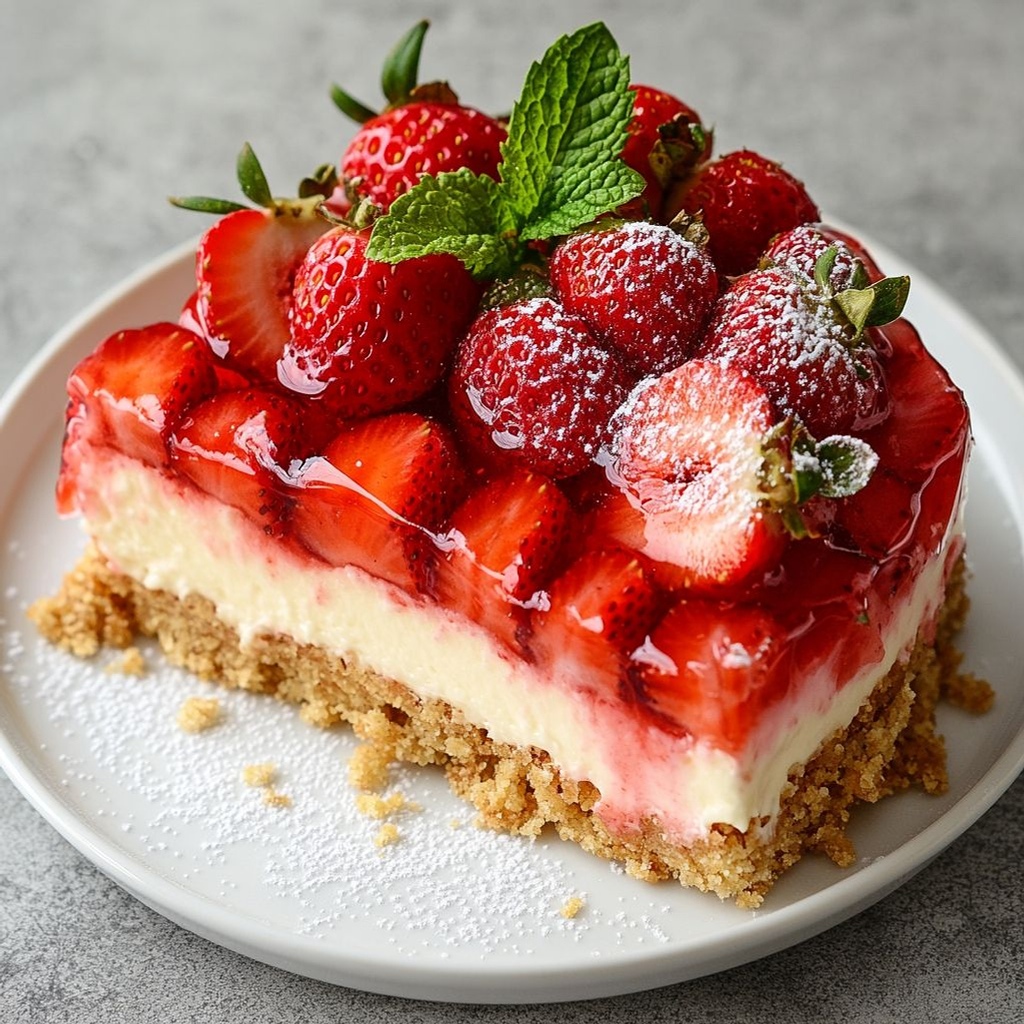
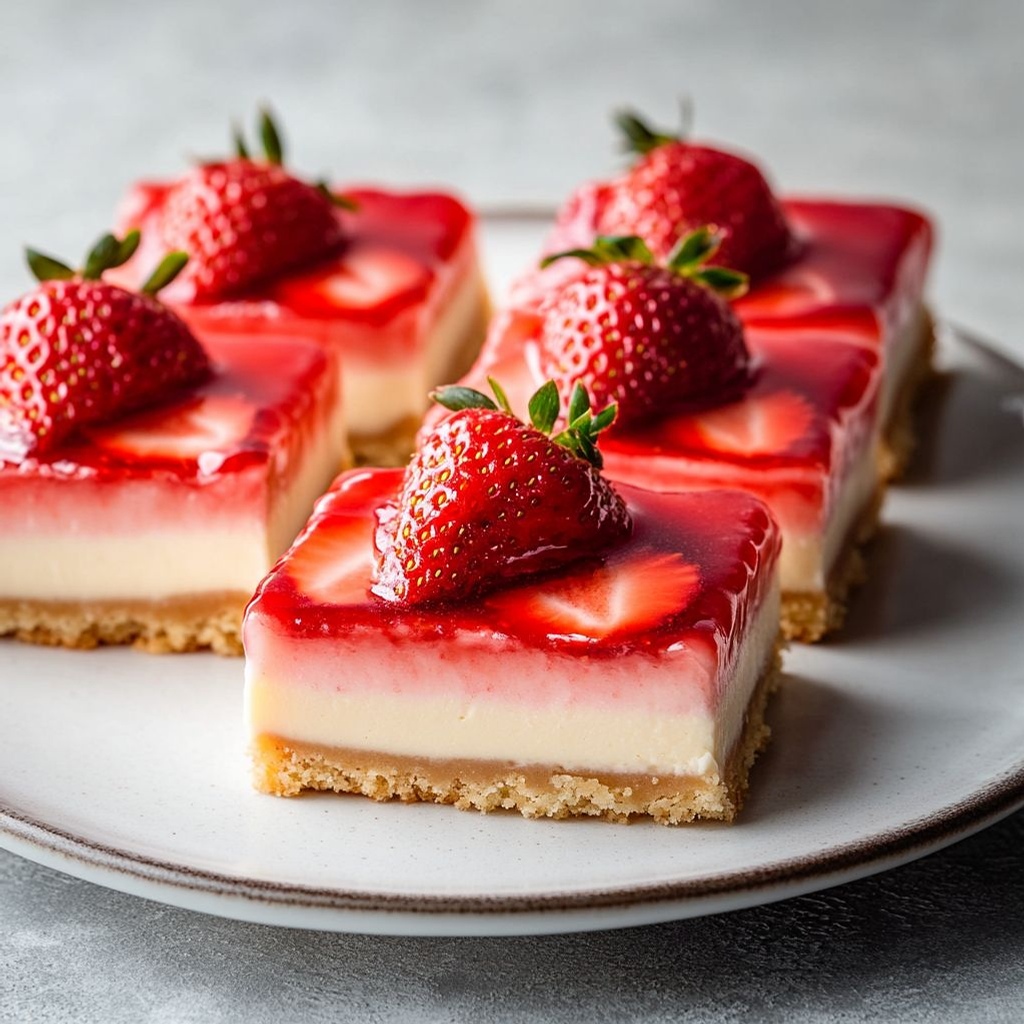
Immagina una tavola estiva dove ogni morso trasporta un soffio di primavera: una base croccante che cede sotto i denti, una crema soffice e vellutata che danza sulla lingua, e una cascata di fragole lucide che esplode in una nota fresca di limone. Benvenuti nel Barrette cheesecake alle fragole, un dessert che unisce la delicatezza della pasticceria italiana con la ricchezza cremosa tipica del cheese­cake, rivelando un equilibrio perfetto tra dolcezza e acidità, morbidezza e struttura. Le barrette, formate da una crosta compatta ma friabile, una crema al formaggio seducente e un ripieno di fragole scintillanti, si presentano come piccoli pezzi di festa: facili da condividere, irresistibilmente fotogenici e incredibilmente versatili. Ogni fetta è un piccolo souvenir di una meravigliosa dolcezza, capace di accendere l’atmosfera di una cena tra amici, una merenda estiva al parco, o un momento di sollievo dopo una giornata intensa. Il profumo che si sprigiona quando si affetta una barretta è una promessa: fragole mature, vaniglia rassicurante, burro che ricorda una crosta di biscotti appena sfornata, e una crema che si scioglie come neve al sole.

Questo dessert è un piccolo viaggio sensoriale: la fragranza iniziale di una crosta al burro, la dolce cremosità del ripieno al formaggio che si insinua con eleganza, la nota fruttata che si intreccia con una leggera acidità della frutta fresca. Non è semplicemente una ricetta: è un modo di riunire le persone intorno a un tavolo, di creare attimi condivisi, di raccontare una storia di tradizioni che si incontrano e si reinventano. La sua eleganza è in realtà in superficie: una semplicità apparentemente ingenua che richiede cura, bilanciamento e attenzione al dettaglio. Progettato per essere preparato in anticipo, può accompagnare una serata estiva sul terrazzo, una festa di compleanno o una dolce conclusione di una cena domenicale in famiglia.

Se hai voglia di qualcosa di raffinato senza rinunciare alla praticità, se desideri un dessert che si adatti a molti gusti e occasioni, e se vuoi stupire senza ostacoli logistici, allora Barrette cheesecake alle fragole è la soluzione ideale. Ogni elemento è pensato per offrire un’esperienza completa: dalla crosta che offre un primo crunch, alla crema al formaggio che avvolge i sensi, fino alla glassa o al gel di fragola che chiude con una nota di lucentezza e freschezza. Preparare queste barrette significa anche celebrare la stagione delle fragole: il loro colore acceso, la loro dolcezza immediata e la loro polpa succosa diventano protagonisti incontrastati, elevati da una base cremosa che esalta la loro naturale vivacità.

La storia dietro il piatto

La cheesecake, nelle sue molteplici incarnazioni, è una storia di scambi culturali e di adattamenti accostati nel tempo. Le origini affondano nell’antichità, con ricette che raccontano di formaggio fresco mescolato a miele e farine, servite su pane o cracker. Nell’Ottocento e nel XX secolo, l’America ha maturato una versione ricca e cremosa, spesso abbracciata da una base di biscotti sbriciolati e burro fuso: nasce così il classico cheesecake statunitense. Quando si parla di cheesecake alle fragole, però, le radici si arricchiscono di colori mediterranei: fragola, limone, vaniglia, burro e una base che ricorda i biscotti friabili utilizzati nella tradizione dolciaria italiana.

Barrette cheesecake alle fragole non è solo una versione affiancata a una torta: è una reinterpretazione elegante che nasce dall’idea di trasformare una torta in una forma pratica da tagliare e condividere. Le barrette hanno una felice semplicità che si presta a contesti informali, ma la loro presentazione li eleva a una guarnizione di classe per pranzi domenicali, coffee break di mezzogiorno o eventi leggeri. In molte cucine italiane, la fragola è una regina di stagione, associata spesso a dolci freddi, sorbetti e torte rivestite di glassa lucida. L’idea di aggiungere una crema al formaggio, avvolta da una crosta burrosa e chiusa da un finish di fragole brillanti, riflette un incrocio tra tradizione europea della creaminess e l’arte americana della praticità in barrette.

L’influenza italiana si nota anche in scelte di equilibrio: una crema che non è mai troppo dolce, ma che lascia respirare una nota agrumata e una leggera acidità fornita dalle fragole fresche o dalla gelatina di frutta. Il risultato è una resa finale che invita a condividere: basta un taglio, una porzione e un sorriso. Per chi ama la cucina casalinga ma non vuole rinunciare a un tocco di raffinatezza, le barrette rappresentano la sintesi perfetta tra estetica e comfort, tra sapore familiare e presentazione curata.

Perché lo amerai questa ricetta

  • Rapida da preparare e adatta a diverse occasioni: una merenda inattesa, una chiusura di pasto o un dessert da condividere durante una festa.
  • Versatilità: la base può essere realizzata con diverse tipi di biscotti, e la crema si presta a varianti di gusto, rendendola facilmente personalizzabile per preferenze e diete diverse.
  • Anticipo piacevole: le barrette si preparano in anticipo e si mantengono bene in frigorifero o in freezer, permettendoti di pianificare la tua mise en place senza fretta.
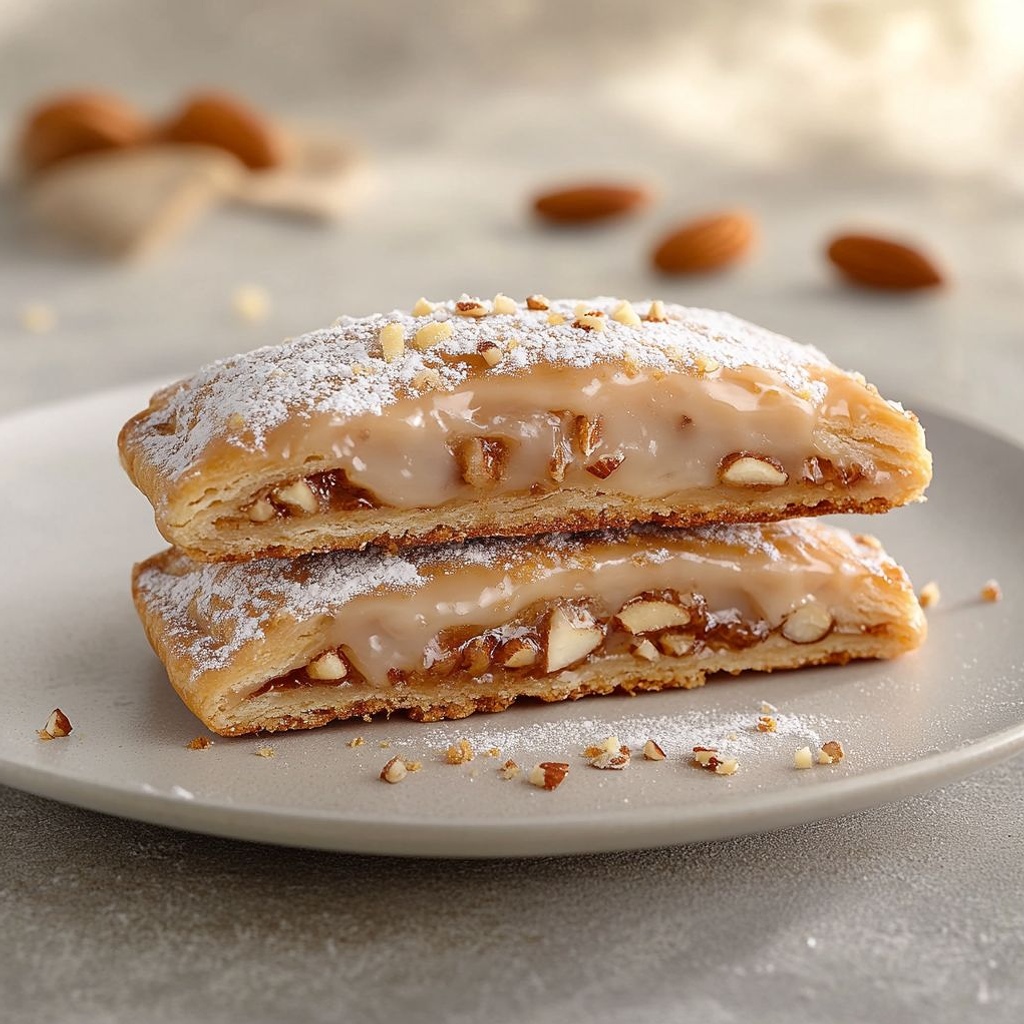
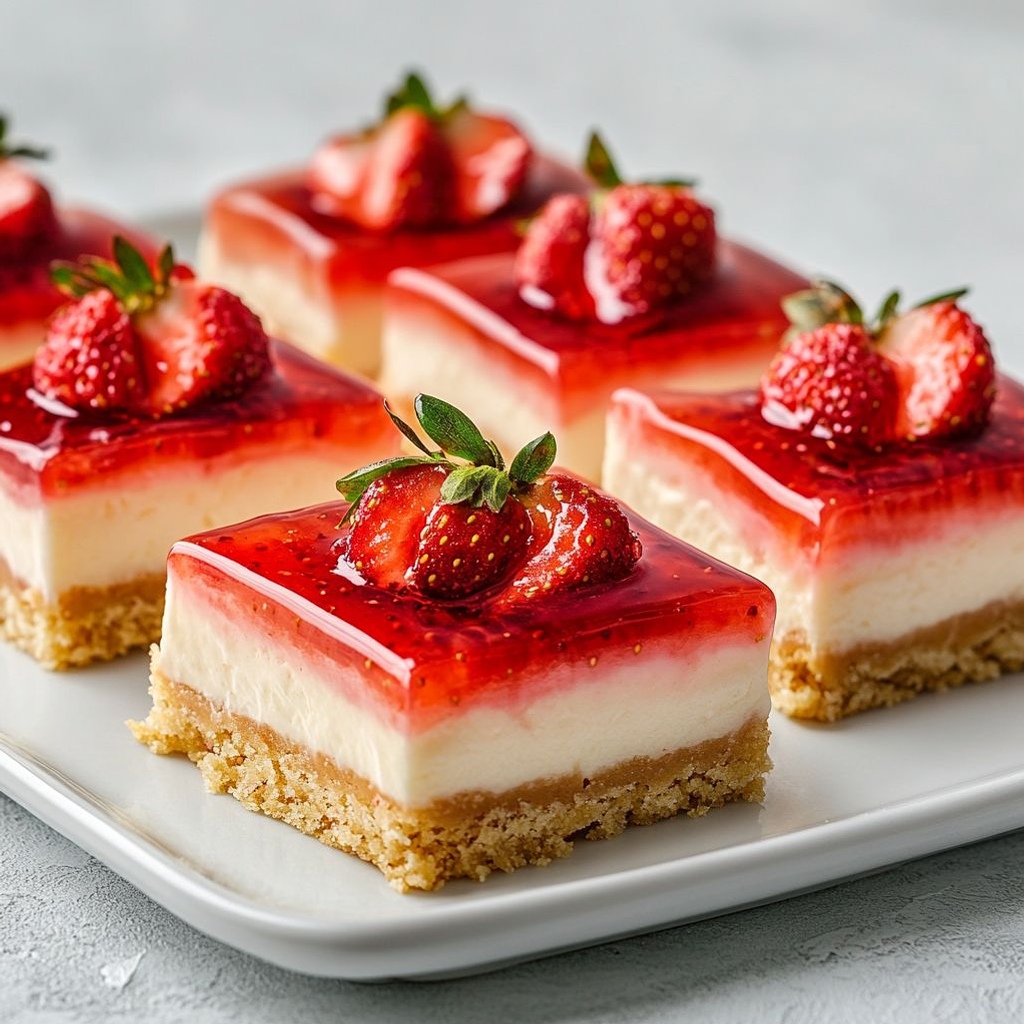
  • Eleganza senza sforzo: una presentazione pulita, lucente e colorata che sorprende per la semplicità. Una mano delicata, una spolverata di fragole fresche e il piatto è completo.
  • Equilibrio di sapori: la cremosità del formaggio bilancia la dolcezza della crosta e l’acidità vivace delle fragole, offrendo una trama complessa ma armoniosa ad ogni morso.
  • Versatilità di abbinamenti: si adatta facilmente a un espresso forte, a un Moscato leggero, a un Prosecco frizzante o a una tazza di tè freddo aromatico, creando abbinamenti che esaltano la fragranza e la freschezza.

Profilo di gusto e consistenza

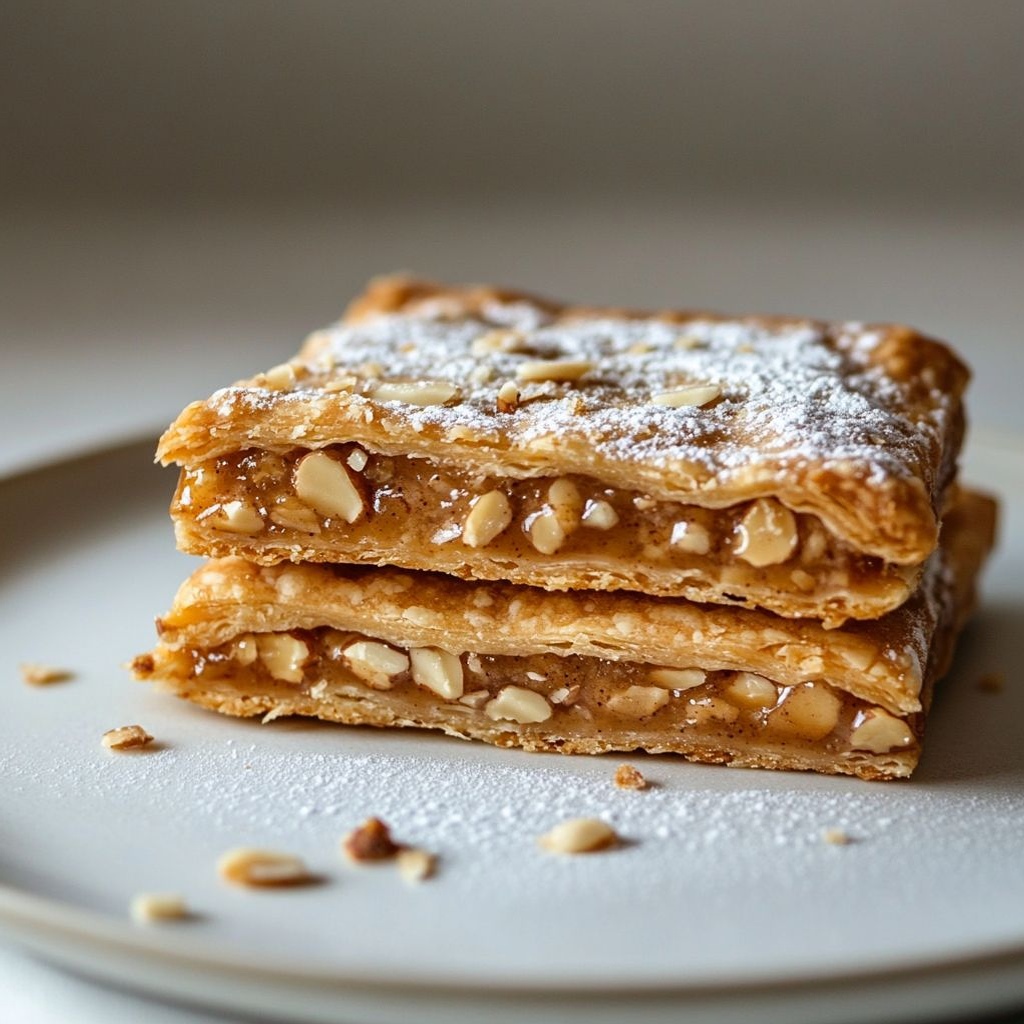
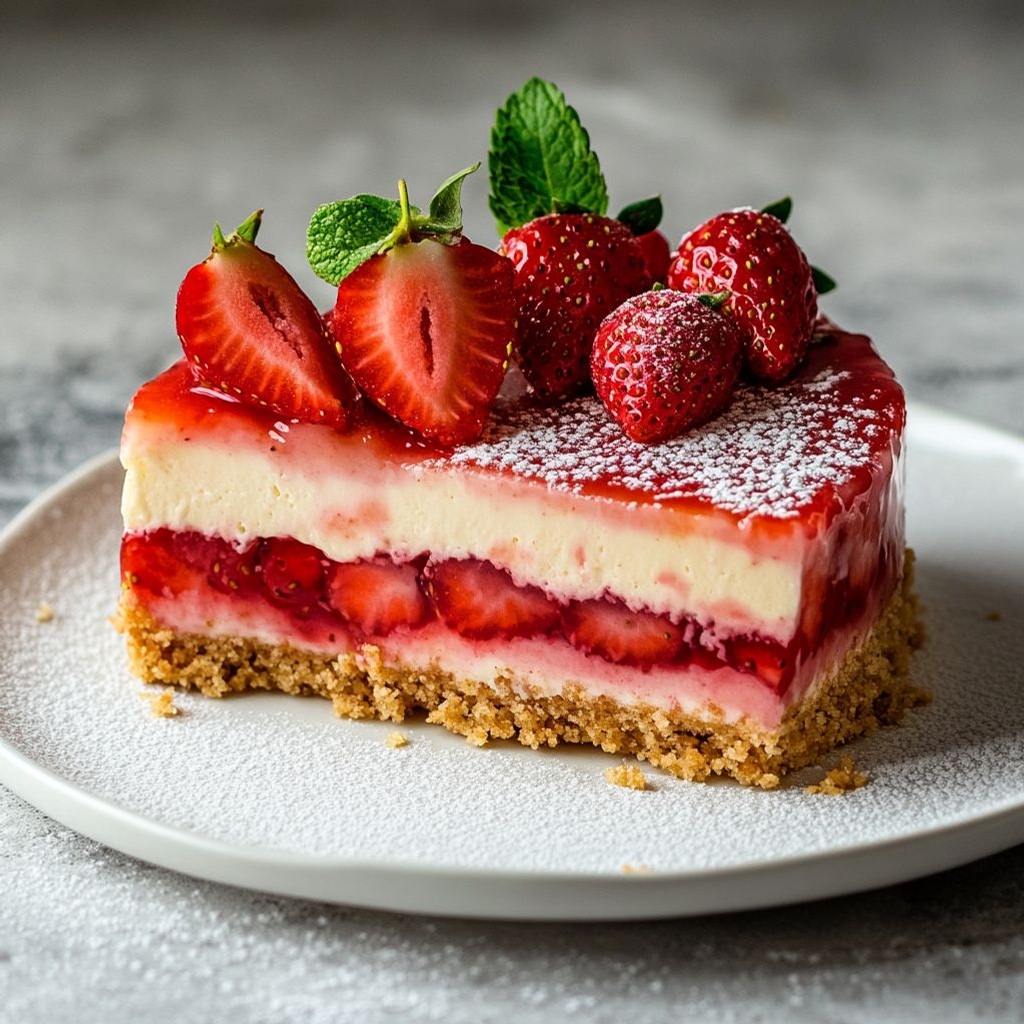
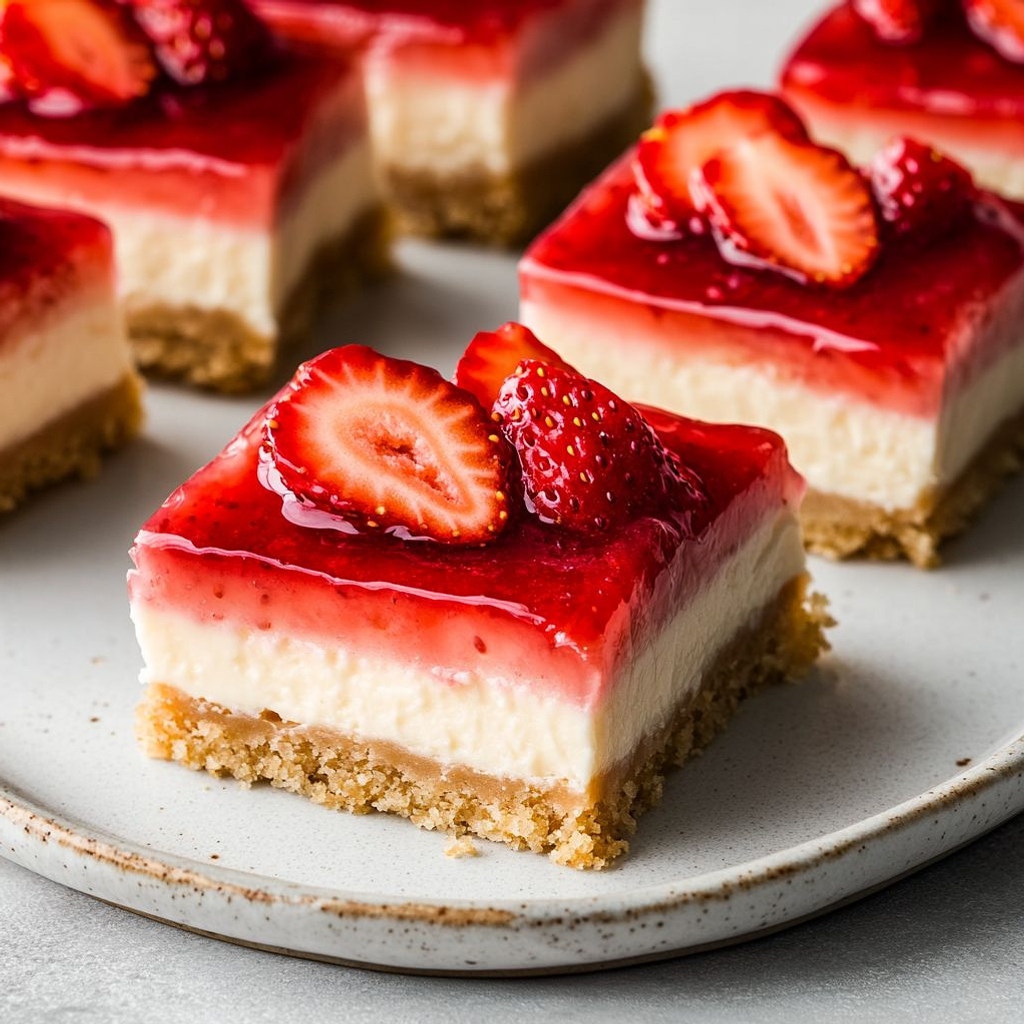
Il Barrette cheesecake alle fragole offre un’alternanza di sensazioni che conquista dall’inizio alla fine. La crosta, generalmente realizzata con biscotti sbriciolati e burro fuso, offre una texture croccante e avvolgente, capace di dare la prima impressione di comfort. Appena si taglia la barretta, la crosta si spezza con un leggero crunch, liberando aroma di burro tostato e vaniglia. Sotto, la crema al formaggio conquista con una consistenza morbida ma strutturata: non è una mousse, non è una torta compatta, ma una fusione setosa che rimane ferma al taglio, senza collassare. L’elemento di fragola può essere integrato in due modi: sia come strato di purea o tagliata a dadini e dispersa nella crema, sia come glassa o gelatina lucida sulla superficie, a seconda di quanto vuoi che la frutta emerga nel gusto e nell’aspetto.

La nota di limone o di scorza può essere aggiunta per dare una freschezza che contrasta la ricchezza cremosa, offrendo una luminosità aromatica che pulisce il palato. A seconda delle preferenze, alcune varianti privilegiano la purezza della fragola senza aggiunte, altri inseriscono un leggero accenno di vaniglia o di pistacchio per un tocco di croccantezza e colore. Il contrasto tra la dolcezza delicata della crema e l’acidità rinfrescante della frutta è la chiave di volta: è ciò che rende ogni morso equilibrato e appagante, senza appesantire. In bocca, si percepisce una progressione: dall’immediata soddisfazione della crosta al morbido abbraccio della crema, fino al finale fruttato che richiama l’estate e l’innocenza di un dessert classico ma sempre nuovo.

Occasioni & abbinamenti

Queste barrette sono perfette per una varietà di occasioni. Sono facili da servire a fette singole, ideali per buffet, buffet di nozze, pic-nic all’aperto o una semplice cena con amici. Possono chiudere un pranzo informale con una nota di classe, oppure essere una dolce tentazione per una merenda domenicale. L’aspetto elegante e pulito le rende adatte anche a incontri più formali, dove si desidera offrire qualcosa di comfort ma di stile.

Per quanto riguarda gli abbinamenti, considera:

  • Bevande: caffè espresso intenso, tè freddo al limone, Prosecco o Moscato leggero per enfatizzare la fragola, o un vino dolce da dessert per chi cerca una nota più ricca.
  • Contorni: un sottile contorno di frutti di bosco freschi, una spolverata di scorza di limone, o una quenelle di panna montata per aggiungere soffice leggerezza.
  • Altri dessert: una fetta di torta al limone o una mousse al cioccolato bianco come contrasto, offrendo una degustazione multi-sensoriale.

  • Varianti di base: per una crosta diversa, puoi utilizzare biscotti digestive integrali, biscotti al cacao o biscotti alle nocciole, a seconda del profilo di gusto che cerchi. La combinazione più classica resta quella con biscotti friabili e burro fuso, ma nulla vieta di sperimentare con fiocchi di avena e noci per una versione più rustica.
  • Versione gluten-free: sostituisci la base di biscotti con biscotti senza glutine o con una base di mandorle tritate finemente mescolate con burro fuso. L’essenziale è mantenere la giusta croccantezza e compattezza.
  • Versione vegan: utilizza un formaggio cremoso vegetale (dove possibile a base di anacardi o soia) e una crema di cocco o mandorla al posto del latticino, insieme a una base di biscotti vegan o di noci triturate. Aggiungi una gelatina vegetale o agar-agar per dare struttura se necessaria.
  • Sostituzioni dolcificanti: se desideri una versione meno dolce, riduci lo zucchero nella crema e scegli fragole molto mature per una dolcezza naturale. Puoi anche utilizzare sciroppo d’acero o miele in piccole quantità a seconda delle tue preferenze.
  • Varianti di gusto: aggiungi scorza di limone o di arancia per una nota agrumata intensa; incorpora una piccola quantità di vaniglia o di pistacchi tritati nella crema per un tocco raffinato. Per un effetto marmellata, inserisci strati sottili di purea di fragole riscaldata tra la crema e la base.
  • Toque regionali: una versione italiana può utilizzare una base di biscotti al burro con un tocco di liquore limoncello o limone, oppure aggiungere una punta di vaniglia bourbon per intensificare l’aroma. Una versione più “mamma italiana” potrebbe integrare una crema di ricotta con un filo di zest di limone, mantenendo però l’idea di barrette.
  • Consiglio di texture: se vuoi una barretta particolarmente cremosa, lavora la crema al formaggio con una spatola fino ad ottenere una consistenza liscia e lucida, senza grumi. Per una presentazione migliore, lascia raffreddare completamente prima di tagliare, in modo da ottenere bordi netti e puliti.

Conservazione & Idee da preparare in anticipo

Una delle grandi forze delle Barrette cheesecake alle fragole è la loro capacità di essere preparate in anticipo senza perdere smalto e freschezza. Ecco alcune linee guida pratiche:

  • Conservazione in frigorifero: una volta assemblate e rassodate, le barrette si mantengono bene coperta da pellicola o in contenitore ermetico nel frigorifero per 3-4 giorni. Se la superficie è glassata, è preferibile conservare senza glassa e aggiungere la copertura subito prima di servire.
  • Congelamento: è possibile congelare le barrette già tagliate, avvolgendole singolarmente in pellicola e poi riponendole in un contenitore. Si mantengono fino a 2-3 mesi. Per riutilizzarle, lasciale scongelare in frigorifero per diverse ore o durante la notte.
  • Preparazione anticipata: puoi preparare sia la base sia la crema fino al momento dell’assemblaggio. Mantieni la crema al formaggio fredda e la base in un contenitore a parte. Quando sei pronto, unisci la crema alla base, aggiungi la frutta o la glassa, e fai raffreddare.
  • Idea make-ahead per eventi: crea una versione “scenografica” per un buffet, tagliando le barrette come mini dolcetti per l’assaggio. Puoi introdurre una decorazione al momento del servizio per mantenere la presentazione fresca e lucente.

Curiosità & Trivia (Opzionale)

  • La fragola, simbolo di amore e prosperità in molte culture, è una delle frutta di bosco più amate al mondo e si integra magnificamente con formaggi cremosi grazie al suo equilibrio di dolcezza e acidità.
  • La cheesecake ha una lunga storia che attraversa popoli e continenti: da dolci antichi basati su formaggi fermentati a versioni molto moderne e cremose, come quella che si presta a barre e porzioni facili da servire.
  • La presentazione in barrette non è una scelta casuale: la porzionabilità rende questo dessert perfetto per ogni tipo di evento, facilitando la condivisione e l’estetica in tavola.
  • La dolcezza della fragola è spesso bilanciata dall’acidità di una scorza di limone o dall’uso di una piccola quantità di succo di agrumi, una tecnica classica per creare un equilibrio di sapori che non appesantisca la crema.

Conclusione

Barrette cheesecake alle fragole è una dichiarazione di dolcezza raffinata ma accessibile. È una celebrazione della semplicità che incontra l’eleganza: una base friabile, una crema ricca, una puntinatura di fragole che brilla come piccole gemme rosse, e un finale che lascia il palato pulito e soddisfatto. È una ricetta pronta a raccontare una storia, a riscaldare una serata, e a diventare uno dei piccoli grandi momenti che rendono la cucina domestica così speciale. Se stai cercando un dessert che incanti, che sia facile da preparare in anticipo e che si adatti a molte situazioni, non cercare oltre: Barrette cheesecake alle fragole è qui per accompagnare i tuoi momenti migliori con un sorriso di dolcezza.

Ingredients

    Crust
    – 200 g digestive biscuits (crushed)
    → Crust base for the bars. Crushed biscuits mixed with melted butter create a compact, cookie-like crust that holds the filling. Grind until fine crumbs for even, dense crust; press firmly into the prepared pan and bake or chill according to the recipe to set properly.
    – 60 g unsalted butter, melted
    → The fat binds the crust crumbs into a cohesive layer. Melt gently until just liquid, then whisk into the crumbs until evenly moistened. Press into the pan with the back of a spoon or a flat-bottomed glass for an even surface; let cool slightly before adding filling to prevent sogginess.
    – 2 tablespoons granulated sugar (optional)
    → Adds a touch of sweetness to the crust, especially if using plain cookies. Include if you prefer a sweeter crust; omit if your biscuits are already sweet enough. Mix into the crumbs before pressing to ensure even distribution.

    Filling
    – 450 g cream cheese, softened
    → The creamy body of the cheesecake. Softening at room temperature ensures a smooth, lump-free filling that blends with sugar and eggs; cold or hard cheese can trap lumps and create a grainy texture. Beat until creamy before adding other ingredients.
    – 1 cup granulated sugar
    → Provides the sweetness to balance the tang of cream cheese and the tart strawberries. Add gradually and beat well to dissolve completely; avoid overmixing after sugar is added to maintain a silky texture and prevent cracks during baking.
    – 2 large eggs
    → Bind and set the filling as it bakes. Lightly whisk eggs before adding to the mixture, then fold in gently; overmixing after eggs are added can incorporate too much air, leading to cracks or a hollow center.
    – 1 teaspoon vanilla extract
    → Adds depth of flavor that rounds out the cheesecake. Use pure vanilla rather than imitation for a richer aroma. If possible, use a pinch of vanilla bean seeds for extra fragrance.
    – 1/2 cup sour cream
    → Adds extra creaminess and helps keep the texture smooth and moist. Use full-fat sour cream and whisk in to avoid curdling; if avoiding dairy, plain Greek yogurt can be a substitute with slight texture and flavor changes.
    – 1/2 cup strawberry puree (strained)
    → Introduces a concentrated strawberry flavor into the filling without adding extra liquid. Blend ripe strawberries, then strain to remove seeds; ensure the puree is smooth and thick enough not to thin the batter.
    – Pinch of salt
    → Enhances overall flavor and balances sweetness. A small amount improves depth; omit only if your ingredients are particularly salty (e.g., salted butter).

    Strawberry Swirl
    – 1 cup fresh strawberries, hulled and chopped
    → Provides vibrant color, texture, and bursts of fruit throughout the cheesecake. Chop evenly for uniform distribution; macerate briefly with a teaspoon of sugar to draw out juice and intensify sweetness before layering or swirling into the batter.
    – 1 tablespoon lemon juice
    → Brightens strawberry flavor and helps preserve color during baking. Freshly squeezed juice is preferred for a clean, crisp acidity that complements the richness of the filling.
    – 1 tablespoon granulated sugar
    → Salted or ripe strawberries can be sweetened to taste; macerating with sugar helps release juice and creates a glossy swirl. Adjust amount based on strawberry sweetness.
    – 1/2 teaspoon cornstarch (optional)
    → Helps thicken the strawberry mixture so it remains defined in the swirl during bake. Dissolve in a small amount of water before adding to avoid lumps and scorching; use if you want a more structured swirl.

    Optional Toppings
    – 1/2 cup strawberry jam or glaze
    → Adds a glossy finish and an extra layer of strawberry flavor when brushed on cooled bars. Warm slightly to loosen if needed, then apply in a thin, even layer to minimize cracking and ensure a smooth look.
    – Fresh strawberries for garnish (optional)
    → For a bright, fresh finish when serving. Slice just before serving to maintain color and texture; arrange attractively to enhance presentation and appeal.

Instructions

  • Preheat your oven to 350°F (175°C) and line an 8×8 inch (20×20 cm) square pan with parchment paper, leaving overhang on the sides for easy lifting of the finished bars.
    → A properly lined pan prevents sticking, allows clean removal, and makes slicing neat bars possible without tearing the crust.
  • Crush the digestive biscuits into fine, uniform crumbs using a food processor or by placing the biscuits in a sealed bag and pounding with a rolling pin until no large pieces remain.
    → Fine crumbs create a smooth, even crust foundation that compacts without gaps, ensuring the bars hold together when cut.
  • Melt the unsalted butter gently until fully liquid and smooth, then whisk in the optional 2 tablespoons of granulated sugar to ensure even sweetness distribution in the crust.
    → The fat from the butter binds the crumbs into a cohesive layer; sugar helps balance flavor if the biscuits are not sweet enough.
  • Combine the crumb mixture with the melted butter (and sugar) until all crumbs are evenly moistened, then transfer to the prepared pan and press firmly into an even, compact layer using the back of a spoon or a flat-bottomed glass.
    → A dense, uniform crust prevents crumbling and sogginess, giving the bars a solid base for the creamy filling.
  • Bake the crust for 8–10 minutes at 350°F (175°C) or chill it until set, then allow it to cool completely before adding the filling.
    → A pre-baked crust sets quickly and provides structure; cooling prevents the filling from sliding and helps maintain a crisp edge.
  • In a large mixing bowl, beat the softened cream cheese until smooth and creamy using an electric mixer on medium speed, ensuring there are no lumps.
    → Softened cream cheese mixes evenly with sugar and eggs for a silky, uniform texture and prevents graininess in the finished cheesecake.
  • Beat in the 1 cup granulated sugar gradually until fully incorporated, then add the eggs one at a time on low speed, followed by the vanilla extract and a pinch of salt.
    → Adding sugar gradually dissolves it for a glossy batter; low-speed egg addition minimizes incorporation of air that could cause cracks during baking.
  • Stir in the 1/2 cup sour cream and the 1/2 cup strained strawberry puree until the filling is smooth and homogenous, but do not overmix once the eggs are added.
    → Sour cream enriches creaminess and moisture; strawberry puree infuses concentrated berry flavor without thinning the batter; overmixing after eggs can introduce air pockets and cracks.
  • Prepare the strawberry swirl by combining 1 cup chopped fresh strawberries, 1 tablespoon lemon juice, and 1 tablespoon granulated sugar in a small bowl, then macerate 10–15 minutes to draw out juice and intensify sweetness; if desired, whisk in 1/2 teaspoon cornstarch dissolved in a splash of water for a thicker swirl.
    → Maceration softens the fruit and creates a vivid, flavorful swirl; cornstarch helps the swirl hold its shape during baking.
  • Pour the filling over the cooled crust, then dollop spoonfuls of the strawberry swirl across the surface and use a thin skewer or knife to gently swirl the berries into the batter without fully mixing.
    → Swirling creates attractive ribbons of fruit and bursts of flavor while keeping a creamy, even texture in the center.
  • Bake the assembled bars at 325°F (165°C) for about 40–50 minutes, or until the edges are set and the center still shows a slight jiggle; if the top over-browns, loosely tent with foil.
    → A gentle bake sets the filling through without drying; a slight jiggle in the center indicates doneness while residual heat finishes cooking as it cools.
  • Cool the bars on a rack for 1 hour, then refrigerate for at least 4 hours or overnight to allow the cheesecake to fully set before cutting.
    → Chilling solidifies the structure, makes slicing clean, and enhances the creamy texture and flavors.
  • If using optional toppings, brush 1/2 cup strawberry jam or glaze in a thin, even layer over the cooled bars and let it set briefly; garnish with fresh strawberry slices just before serving for vibrant color and fresh aroma.
    → The glaze adds shine and extra strawberry intensity; fresh berries provide a bright contrast and inviting presentation.
  • Lift the bars from the pan using the parchment overhang, cut into uniform bars, and serve chilled or at room temperature; store any leftovers covered in the refrigerator for up to 3–4 days.
    → Proper lifting preserves the shape of each bar for clean cuts, and refrigeration helps maintain the creamy texture and prevents sagging.

Notes

These strawberry cheesecake bars are a crowd-pleasing dessert with a buttery biscuit crust, a creamy vanilla cheesecake filling, and a glossy strawberry swirl. The crust is built from crushed digestive biscuits mixed with melted butter and a pinch of sugar to help it compact into a sturdy base.

These steps help you achieve a silky filling: soften the cream cheese and sour cream to room temperature, then beat with granulated sugar until smooth. Add eggs one at a time, followed by vanilla extract and the strawberry puree; fold in gently and avoid overmixing to prevent cracks.

These swirls of strawberry come from fresh strawberries, lemon juice and a touch of sugar; macerate the berries briefly to draw out juice and tint the swirl. If you want a thicker swirl, whisk in a small amount of cornstarch dissolved in water before delaying folding into the batter.

These baking tips help the bars set perfectly: you can bake the base crust separately and chill, then pour in the filling and swirl, or bake the whole thing in a water bath to minimize cracking. After baking, let cool to room temperature and refrigerate for at least 4 hours or overnight for clean, even slices.

These storage and customization tips ensure flexibility: refrigerate leftovers for up to 5 days; freeze for 2-3 months and thaw in the fridge before serving. For gluten-free or dairy-free versions, substitute gluten-free digestive biscuits and dairy-free cream cheese/sour cream, and check that all ingredients are certified gluten-free.

Tips

Consigli utili per Barrette cheesecake alle fragole

Consigli per la base
  • Frulla i biscotti Digestive fino a briciole molto fini: briciole piccole si compattano meglio e producono una base uniforme e resistente.
  • Mescola il burro fuso tiepido alle briciole finché non sono completamente umide. Evita burro troppo caldo o freddo che potrebbe alterare la consistenza.
  • Premi la base nello stampo con il dorso di un cucchiaio o con un tappetino da torta per ottenere una superficie liscia ed elegante; se preferisci una base più croccante, cuoci a 180°C per 8–10 minuti, poi lascia raffreddare completamente prima di aggiungere la crema.
  • Usa carta forno che esce oltre i bordi dello stampo per facilitare l’estrazione delle barrette una volta raffreddate.
Consigli per la crema
  • Lascia il formaggio cremoso a temperatura ambiente: risulterà una crema liscia senza grumi.
  • Aggiungi lo zucchero poco per volta e incorpora bene tra un’aggiunta e l’altra; evita di montare troppo dopo l’aggiunta delle uova per prevenire crepe.
  • Mescola la crema di formaggio, zucchero, uova e vaniglia solo fino a raggiungere una consistenza omogenea; incorporare troppa aria può portare a una torta ruvida o con cavità.
  • Aggiungi la panna acida e la purea di fragole poco prima di versare la crema nello stampo; la panna acida mantiene la crema morbida e cremosa durante la cottura.
  • Passa la purea di fragole al setaccio per rimuovere i semi e ottenere una salsa di fragola liscia che non allenta la consistenza della crema.
  • Il sale aiuta a bilanciare la dolcezza: una leggera puntura migliora la profondità di gusto.
Consigli per il swirl di fragole
  • Macerare le fragole tagliate con un cucchiaino di zucchero e il succo di limone può intensificare sapore e colore; lascia riposare 10–15 minuti prima di usarle.
  • Per uno swirl definito, distribuisci metà della crema nello stampo, aggiungi cucchiaiate di purè di fragola, poi copri con la crema restante e usa uno stecchino o una forchetta per creare motivi decorativi.
  • Se usi cornstarch, scioglilo in una piccola quantità d’acqua fredda e aggiungilo al purè prima di usarlo; cuoci solo qualche secondo per evitare grumi.
Rifiniture e presentazione
  • Per un aspetto lucido e professionale, spennella uno strato sottile di confettura di fragole o glassa sulle barrette raffreddate; scaldala leggermente se necessario per renderla più fluida, poi stendila in uno strato sottile ed uniforme.
  • Decorare con fragole fresche prima di servire aggiunge colore e freschezza; tagliale al momento per mantenere vividi sapore e presentazione.
  • Per slice pulite, usa un coltello ben affilato bagnato e passato rapidamente tra una fetta e l’altra.
Note sulla conservazione
  • Conserva le barrette in frigorifero, coperte, fino a 3–4 giorni; per gustarle al meglio, tagliale e servi freddhe o a temperatura ambiente a piacere.
  • Per un taglio più netto, restringi i tempi di refrigerazione a favore di una crema che si rassodi bene senza scogli di liquido in eccesso.

FAQ

Che cosa sono le Barrette cheesecake alle fragole?

Una versione a barre del classico cheesecake alle fragole: base croccante di biscotti, crema vellutata al formaggio e uno strato di fragole fresche o coulis. Sono facili da tagliare e servire come dessert o snack elegante.

Quali ingredienti servono per la base e la farcitura?

Base: biscotti Digestive o Oreo privati della crema, sbriciolati mescolati con burro fuso. Farcitura: formaggio cremoso (Philadelphia, mascarpone o una miscela), zucchero, vaniglia, succo o scorza di limone, panna fredda o yogurt per rendere la crema soffice. Guarnizione: fragole fresche o composta di fragole. Opzionale: gelatina o agar per far solidificare la versione no-bake.

Posso prepararle senza forno?

Sì. Per una versione no-bake, prepara la base, la crema e aggiungi gelatina (o agar) per rassodare. Lascia raffreddare in frigorifero 4–6 ore o durante la notte prima di servire.

Qual è la procedura passo-passo?

1) Prepara la base: mescola i biscotti sbriciolati con burro fuso e premi nel recipiente. 2) prepara la crema mescolando formaggio cremoso, zucchero, vaniglia e limone; incorpora panna o yogurt. 3) Se usi gelatina, scioglila e aggiungila alla crema. 4) Distribuisci uno strato di crema sulla base e livella. 5) Aggiungi fragole fresche o una coulis come topping. 6) Riponi in frigorifero finché non si rassoda.

Posso usare alternative al formaggio cremoso?

Sì. Puoi combinare mascarpone e crema di formaggio o usare una ricotta ben scolata per una versione più leggera. Le proporzioni consigliate sono 1:1 con il formaggio cremoso.

Come posso rendere la base più croccante?

Utilizza biscotti molto fini, evita eccessi di burro, premi la base con un fondo piatto e utile aiutarsi con un mattarello o un barattolo per compattare bene. Raffreddare completamente prima di aggiungere la crema aiuta a mantenere la croccantezza.

Come conservare le Barrette cheesecake alle fragole?

Conservale in frigorifero in contenitore ermetico per 3–5 giorni. Per prolungarne la durata, puoi congelarle individualmente: avvolgile bene e congelale fino a 1–2 mesi; scongelale in frigorifero prima di servire.

Posso fare una versione senza glutine?

Sì. Sostituisci i biscotti con una versione senza glutine (biscotti GF o una base di mandorle/molino di frutta secca) mantenendo le stesse proporzioni con burro fuso. Verifica che la gelatina sia senza glutine se la usi.

Qualche consiglio di decorazione o variante?

Decora con fragole fresche tagliate, forbici di fragola o una coulis di fragole. Puoi aggiungere scaglie di cioccolato bianco, scorza di limone o menta per un tocco di freschezza. Per una versione più golosa, aggiungi uno strato di crema montata sopra la crema di formaggio prima di togliere in frigo.

Posso usare fragole surgelate?

Sì, ma preferisci fragole fresche per il sapore. Se usi surgelate, lasciale scongelare e asciugale bene per evitare troppa acqua nella crema o nel topping.

Introduction / Hook

Imagine a skillet waking to a gentle sizzle, the air filling with a warm, savory embrace. A pale rain of rice begins to shimmer as it meets a touch of butter and the soft sweetness of slowly caramelized onions. In the center, morsels of tender meat brown to a sun-kissed glaze, their juices seeping into the grains and releasing a bouquet that feels both rustic and refined. This is Riso pollo e cipolla alla francese—a dish that marries the comforting heartiness of Italian home cooking with the graceful, restrained elegance of French technique. It’s not just a meal; it’s a sensorial journey: the way the first forkful tastes like a memory in the making, the way the steam sweeps across the table like a whispered invitation, the way every grain carries a little piece of countryside and a hint of Parisian bistro charm. Whether you’re feeding a hungry weeknight crew or hosting a small, lingering dinner, this dish delivers warmth, familiarity, and a touch of culinary poetry in every bite.

From the first inhale of simmering onion and toasty rice, you feel the kitchen becoming a stage for a quiet celebration: a close-knit circle around the stove, a story unfolding with each stirring motion, and the anticipation of a perfectly cohesive finish. The French influence isn’t loud or ostentatious; it’s a whisper of technique—gentle deglazing here, careful toasting there, a final moment of rest that lets the flavors settle into harmony. Yet at its core, the dish remains unmistakably Italian: homey, generous, and designed to bring people together around a single, shared plate. In that balance—between French refinement and Italian warmth—lie the magic of this recipe.

As you read through, you’ll sense the symphony of textures and aromas: the slight chew of the rice, the yielding succulence of the chicken, the sweet-savory kiss of caramelized onions, and a delicate depth that comes from thoughtful seasoning and careful simmering. This is comfort food with a purpose—food that nourishes the body and steadies the mind, inviting conversation and slowing time at the table. It’s the sort of dish you reach for on a busy weeknight and then reach for again on a lazy Sunday, when you want something both satisfying and a little special without demanding every ounce of your attention. Welcome to a recipe that honors two culinary traditions while crafting a flavor that feels entirely yours.

The Story Behind the Dish

Food travels through kitchens, gathering memories the way a traveler collects postcards. Riso pollo e cipolla alla francese is a dish born from that spirit of exchange—the Italian appetite for comforting, nourishing meals meeting the French knack for technique, balance, and a certain culinary polish. In many Italian households, rice is a canvas—plain or embellished—capable of absorbing the pantry’s most humble treasures. Onions, with their layered sweetness, are a beloved ally, capable of transforming a simple pan into a memory-larping aroma that lingers long after the dish is gone. The “alla francese” designation nods to a style that favors restraint, clarity of flavor, and refined execution: a nod to the French culinary tradition of building flavor in stages, using aromatics to perfume the dish, and letting each component find its moment in the spotlight before uniting them in a final, cohesive chorus.

Long ago, generations of cooks found themselves at a crossroads of cultures—neighbors sharing markets, grandmothers swapping tips over steaming pots, and zucchini, onions, poultry, and grains taking on personalities that reflected the kitchens they entered. This dish embodies that cross-pollination. It’s the kind of plate your grandmother would recognize—nonchalant, generous, and deeply satisfying—yet with a touch of French technique that turns everyday ingredients into something a touch more elegant. It’s not about grand gestures; it’s about the quiet confidence that comes from knowing you can coax flavor from simple things with patience, careful browning, and a respectful simmer. The dish tells a story of home, of shared meals, and of a kitchen that smiles when two culinary languages speak the same language of flavor.

In many families, a recipe like this travels through whispered tweaks: a splash of wine for depth, a handful of herbs for brightness, a pause so the rice can drink in the sauce. The beauty of this dish is its adaptability—it invites you to make it your own while staying faithful to its core identity: rice that glows with savory richness, onions that melt into a velvet sweetness, and a protein that remains juicy and comforting. It’s a story told at the stove, finished at the table, and remembered in the quiet cheer of a dinner shared well past sunset.

Why You’ll Love This Recipe

  • One-pan practicality: a complete, satisfying meal built in one pot or pan, minimizing cleanup and maximizing flavor concentration.
  • Balanced comfort: the earthiness of rice and onions provides a foundation that complements a tender, flavorful protein, all finished with a touch of refinement characteristic of French-inspired technique.
  • Versatile and forgiving: friendly to weeknights, elegant enough for weekend gatherings, and adaptable to what’s in your pantry or fridge.
  • Feel-good factor: a dish that evokes home-cooked meals, hearth-kissed aromas, and the rewarding experience of watching flavors bloom as they simmer together.
  • Texture harmony: a satisfying bite with the gentle bite of al dente rice, the melt-in-your-mouth tenderness of the chicken, and the satin-soft sweetness of caramelized onions—an orchestra of textures in every mouthful.
  • Accessible technique: you’ll gain confidence in building layers of flavor through toasting, gentle browning, and measured simmering—hallmarks of French-inspired culinary thinking—without complicated steps.

Flavor Profile & Texture

The dish thrives on a thoughtful balance of flavors that unfold with each spoonful. At first encounter, you’re greeted by the familiar warmth of caramelized onions, their sugars coaxed into a soft, honeyed sweetness that amplifies the savory depth of the rice. The rice itself carries a toasty undertone, a result of light toasting that enhances its natural nuttiness and helps it stand up to the saucy finish. The chicken—tender, juicy, and browned to a gentle, bronzed edge—offers a comforting protein base that anchors the plate and invites you to savor its naturally savory, almost buttery notes.

Every component talks to its neighbor: the onions release a subtle sweetness that temperates the savory richness of the meat, while the rice drinks up the released juices, swelling and becoming plush with each simmer. Depending on your pantry, you may notice a whisper of wine or a hint of herb that lingers in the background, offering a quiet elegance rather than a loud statement. The overall aroma is warm and inviting—comforting, yet with a poised sophistication that hints at the French sensibility of restraint and refinement. The texture is a dance: the rice offers a gentle bite, the chicken yields slightly under a fork, and the onion ribbons become silky, tying the dish together into a cohesive, mouth-coating finish.

In terms of seasoning, think about a balanced approach: salt and a touch of acid to brighten, with a fat that glides across the palate and helps unify the grains and protein. The result is a plate that feels both grounded and refined, a reminder that comfort and elegance can share the same plate without ever clashing. It’s not a flashy dish; it’s a soulful one—an everyday celebration of two culinary traditions learning from one another and producing something that feels timelessly satisfying.

Occasions & Pairings

This dish shines in many settings, from weeknight family suppers to more leisurely weekend dinners with friends. Its warmth makes it especially comforting in cooler months, but the balance of brightness from onions and the gentle lift from savory stock offers enough freshness to keep it appealing year-round. Consider the following occasions and pairing ideas to elevate the experience:

  • Weeknight comfort with a glass of white wine—something dry and light-bodied that won’t overwhelm the dish but will echo its refined side.
  • Casual dinner parties where guests linger at the table; serve with a crisp green salad dressed with a simple vinaigrette to cutting through the richness.
  • Sunday family meals that invite conversation; this dish pairs nicely with a loaf of crusty bread for mopping up the flavorful sauce.
  • Holiday or festive gatherings where you want a main course that feels special yet approachable.
  • Pairings: a bright herb finish (parsley, chives), a squeeze of lemon to wake the palate, and roasted vegetables or a light, tangy pickled onion to add a zippy contrast.

For drinks, a well-chosen white wine with a touch of mineral character can complement the dish’s silky texture and onion sweetness. If you prefer non-alcoholic options, a sparkling apple cider or a tart iced tea with lemon can provide a refreshing balance to the richness.

Tips, Variations & Substitutions

  • Flavor-building basics: give the aromatics a moment to release their fragrance in a hot pan, then toast the rice briefly to coax out its nutty notes before moisture is introduced.
  • Protein flexibility: while the dish centers on a chicken-driven profile, you can adapt it to other proteins or even a mushroom-forward vegetarian version, using a robust mushroom broth and a mix of hearty mushrooms to mimic the savoriness of poultry.
  • Onion variations: use a combination of onions (yellow for sweetness, red for a touch of sharpness) to play with sweetness and depth. Caramelizing a portion longer will intensify the overall flavor without overpowering the dish.
  • Stock and deglazing: a light splash of wine or a gentle deglazing with stock helps lift the fond from the pan, enriching the sauce and adding a subtle acidity that keeps the dish from feeling heavy.
  • Grain alternatives: if you’d like a different texture or dietary adjustment, consider barley or a small pearl couscous for a different bite while maintaining the comforting, French-influenced technique. For a low-gluten option, explore gluten-free rice varieties or a quinoa base that still allows the onions to shine.
  • Herb finish: a handful of fresh chopped parsley or tarragon at the end adds color and a bright herbal note that lifts the dish without overpowering the core flavors.
  • Spice accents: a pinch of freshly ground black pepper or a hint of thyme can introduce a subtle aromatic complexity that echoes classic French seasoning.

Storage & Make-Ahead Ideas

This dish stores well and often tastes even more developed after a short rest, making it a good candidate for make-ahead meals. Consider these tips to keep it delicious and convenient:

  • Cool and refrigerate: allow the dish to cool to room temperature, then store in an airtight container in the fridge for up to 3–4 days. Reheat gently on the stove with a splash of water or stock to loosen the grains and restore moisture.
  • Freezing: while rice-heavy dishes can sometimes experience textural changes after freezing, you can freeze in individual portions for convenient reheating. Thaw overnight in the fridge before reheating.
  • Make-ahead strategy: prepare components in advance (caramelized onions and browned chicken, separately) and combine with rice and finishing liquid just before serving to preserve the ideal texture and moisture.
  • Reheating tips: rewarm on low heat, stirring occasionally to prevent sticking and to ensure even moisture distribution. A light drizzle of stock or water can help restore the dish’s glossy texture.

Fun Facts & Trivia

Did you know that onions are one of the oldest cultivated crops in human history, with archeological evidence dating back thousands of years? They’ve traveled across cultures and cuisines, often serving as the humble backbone of dishes that require little more than patience and heat to transform. The French approach to “mirepoix” and controlled deglazing is all about coaxing maximum flavor from simple ingredients, a philosophy that resonates with many Italian kitchen traditions as well—where few ingredients are wasted and every browning moment is considered essential. The blend of Italian heartiness and French technique in this dish is a nod to centuries of culinary dialogue between regions, markets, and families who cooked with what they had while imagining what could be earned with a little skill and care. It’s a reminder that great flavor often arises not from extravagance, but from balance, timing, and love at the stove.

In the broader story of European home cooking, onion-centric dishes hold a special place precisely because they teach patience. The simplest elements—onions, a modest grain, a humble piece of meat—can become something comforting, sophisticated, and deeply satisfying when treated with respect. This dish stands as a tribute to that tradition: a modern echo of the pantry-to-table philosophy, designed to bring warmth to your table while inviting you to savor the journey as much as the destination.

Ingredients

Riso Base

  • 1 1/2 cups Arborio rice (risotto rice)
    → The rice is the main structure for this creamy French-style rice dish. Arborio rice releases starch as it cooks, creating a velvety texture; do not rinse if you want maximum creaminess, and toast briefly in butter/oil before gradually adding stock to start the process.
  • 4 cups warm chicken stock or broth (low-sodium)
    → Used to gradually hydrate and flavor the rice; keep stock warm so that the cooking temperature stays steady and the grains cook evenly. For deeper flavor, simmer stock with a carrot, onion, and celery to make a quick mise en place stock.
  • 1/2 cup dry white wine (optional)
    → Used to deglaze the pan after browning the aromatics, adding acidity and brightness that balance the onion sweetness; allow it to reduce by about half before adding stock. If avoiding alcohol, substitute with extra stock or a splash of lemon juice near the end.
  • 2 tablespoons unsalted butter (divided)
    → Adds richness and helps create a creamy emulsified texture as starch releases; melt one tablespoon with the onions at the start and reserve the other to finish the dish, enabling a glossy finish.
  • 1 tablespoon extra-virgin olive oil
    → Provides a higher smoke point fat to sauté aromatics and prevents butter from burning; adds a touch of fruitiness; you can use clarified butter if you prefer.

Pollo e Cipolla

  • 1 1/2 cups diced chicken thighs, boneless and skinless (about 8 oz / 225 g)
    → Chicken is the protein backbone; thighs stay juicy during simmering due to higher fat, while breasts are leaner. Cut into bite-sized pieces so they cook evenly and quickly. Season lightly with salt and pepper prior to searing to help develop a crust.
  • 2 medium onions, thinly sliced
    → Onions are the base of the “alla française” flavor; thin slices caramelize evenly, releasing sweetness that complements the chicken. For quicker caramelization, cook onions slowly over medium heat with some salt until deep golden, about 15-20 minutes.
  • 2 cloves garlic, minced
    → Garlic adds depth to the sauce; mince finely and add after onions have softened to avoid burning, which can produce bitterness. If you love more aroma, you can crush cloves and remove before finishing.
  • 1 teaspoon fresh thyme leaves (or 1/2 teaspoon dried)
    → Thyme gives a classic French herbal note; add early in the onion sauté to release essential oils. If using dried thyme, crush between palms to awaken aroma.
  • 1 bay leaf (optional)
    → Bay leaf provides gentle herbal fragrance during simmering; remove before serving as it is not eaten.
  • Salt to taste; freshly ground black pepper to taste
    → Season progressively; start with a small pinch on the chicken and onions, then adjust after the stock is absorbed. Salt content will depend on your stock; taste as you go.
  • 1 tablespoon unsalted butter (for finishing or browning)
    → Adds richness and helps brown chicken for color; swirl into the pan near the end to enrich the sauce and create a smoother mouthfeel.

Salsa e Rifinitura

  • 1/2 cup heavy cream or crème fraîche (optional)
    → Adds luxurious creaminess and helps emulsify the sauce with the rice; add at the end after removing from heat to prevent curdling; use sparingly to keep the dish balanced.
  • 1/4 cup grated Parmesan cheese (optional)
    → Provides a sharp, savory finish and helps thicken the sauce slightly when melted into the hot mixture; add just before serving and stir until melted.
  • 1 tablespoon chopped fresh parsley (for garnish)
    → Fresh herbs add color and a bright note to the final plate; chop finely and sprinkle on top just before serving to preserve aroma and texture.
  • Salt and white pepper to taste
    → Final season adjustments after the rice has absorbed liquid; white pepper keeps the appearance clean and elegant, especially in a light sauce.

Instructions

  • Warm the chicken stock in a medium saucepan over low heat until just shimmering; keep it at a gentle simmer while you cook the risotto to ensure liquid is always hot and ready to hydrate the rice.
    → Using hot stock prevents a temperature drop that would stall the rice’s cooking and helps maintain a creamy texture.
  • Season the diced chicken thighs lightly with salt and pepper to promote flavorful browning and a better crust during searing; this initial seasoning also helps build depth in the final sauce.
    → A quick dry seasoning encourages Maillard browning and yields richer pan fond for the sauce.
  • Heat a wide, heavy skillet or sauté pan over medium heat and melt 1 tablespoon unsalted butter with 1 tablespoon olive oil; wait until the fat glistens and just begins to shimmer before adding ingredients to prevent scorching.
    → The oil raises the butter’s smoke point and carries delicate flavors without burning the butter, which would impart bitterness.
  • Sear the seasoned chicken in a single layer until well browned on all sides, about 2–3 minutes per side, then transfer to a plate and reserve; avoid crowded pan space to ensure a crisp crust rather than steaming.
    → Browning develops complex flavor through the Maillard reaction, which enriches the sauce when the pan fond is later incorporated.
  • Add the remaining 1 tablespoon butter to the pan and stir in the thinly sliced onions with a pinch of salt; cook over medium-low heat, stirring often, until the onions are deeply caramelized and golden, about 15–20 minutes.
    → Slow caramelization releases natural sugars, creating the sweet-savory backbone of the dish and a rich French onion profile.
  • Stir in the minced garlic and fresh thyme leaves, cooking for 30–60 seconds until fragrant but not browned; this builds aromatics without risking bitterness from burnt garlic.
    → Garlic quickly shifts from fragrant to bitter when overheated; keeping heat moderate preserves sweetness and depth.
  • Deglaze the pan with 1/2 cup dry white wine, scraping up all browned bits from the bottom with a wooden spoon, and simmer until the wine reduces by about half to concentrate its acidity and brightness.
    → The reduced wine lifts the fond and balances fat with a lively edge, enhancing overall harmony.
  • Return the chicken to the pan, letting it rewarm in the aromatics for 1–2 minutes; add the Arborio rice and stir to coat the grains with fat, then toast for 1–2 minutes until the edges become translucent.
    → Toasting the rice lightly seals the starch granules, which helps create a creamy texture as stock is gradually incorporated.
  • Pour in a ladle of hot stock and simmer, stirring constantly, until the liquid is almost fully absorbed and the rice begins to release a creamy core; continue adding stock gradually as the rice absorbs, maintaining a gentle simmer.
    → Constant stirring and gradual liquid addition draw starch from the rice, yielding the characteristic risotto silkiness without overcooking the grains.
  • Continue adding stock in small ladles and stirring for about 18–20 minutes, tasting for al dente texture with a creamy surface; adjust heat to keep a steady simmer and prevent boiling that would break the grains.
    → Proper al dente texture ensures the dish is tender yet structured, with creamy coherence from released starch.
  • When the rice is tender and the chicken is cooked through, remove the pan from the heat and, if used, take out the bay leaf; this stops further softening of the grains and allows for controlled finishing.
    → Eliminates an inedible flavor while preserving the final texture and balance of the dish.
  • Finish the dish by folding in the optional heavy cream or crème fraîche and the grated Parmesan, stirring until the sauce becomes glossy and emulsified; add Parmesan last to avoid stringiness.
    → The cream adds luxurious richness and helps emulsify the starch, while Parmesan provides a sharp, savory finish; adding off the heat prevents curdling.
  • Season to taste with salt and white pepper, then scatter the chopped fresh parsley over the dish just before serving for a bright finish and vibrant color.
    → Fresh herbs brighten the dish’s aroma and appearance; white pepper preserves the sauce’s pale, elegant appearance.

Notes

“These French-style risotto notes provide practical steps to achieve a creamy, balanced Riso pollo e cipolla alla francese: toast Arborio rice in 1 tablespoon of butter with a splash of olive oil for flavor and to start the starch release, do not rinse if you want maximum creaminess, then add warm stock gradually, stirring frequently to coax starch and achieve velvet texture. Keep stock warm and add it in small ladles, waiting for the rice to almost absorb before adding more. If using wine, deglaze after browning the aromatics and let it reduce by about half before adding stock to keep the dish bright. Brown the chicken in batches to develop color and moisture, seasoning lightly with salt and pepper before searing; remove and set aside to avoid overcrowding the pan. Caramelize onions slowly with a pinch of salt until deep golden for natural sweetness that balances the savoriness of the chicken, then add minced garlic and thyme; add the bay leaf during simmering and remove before serving. Finish the dish with a tablespoon of butter for sheen and a silky mouthfeel, and, if you like extra richness, whisk in a splash of heavy cream or crème fraîche and grated Parmesan just before serving; garnish with chopped parsley for color and freshness. Taste and adjust salt and pepper at the end, mindful that stock contributes salt. For a lighter version, skip the cream and rely on proper stock and consistent stirring; the dish can be enriched with vegetables like peas or mushrooms for additional texture and color. Let rest for a minute off the heat before serving to let the flavors meld.”

Tips

Consigli utili per la preparazione

  • Riso Base: per una crema extra vellutata non risciacquate l’Arborio. Tostatelo brevemente nel burro e nell’olio prima di aggiungere il brodo: l’amido si rilascia durante la tostatura e aiuta a ottenere una texture morbida e legante.
  • Usate brodo caldo: mantenere il brodo a temperatura costante evita bruschi cali di cottura e mantiene i chicchi ben cotti in modo uniforme. Se avete tempo, fate un mise en place di brodo aromatizzato (carota, cipolla, sedano) per un sapore più profondo.
  • Deglassare con vino (opzionale): il vino bianco aggiunge acidità e brillantezza. Fate evaporare fino a metà prima di aggiungere il brodo; se non usate alcol, sostituite con un po’ di succo di limone o con più brodo.
  • Burro in due tempi: sciogliete un cucchiaio di burro all’inizio con la cipolla per una base lucida; aggiungete l’altro burro a fine cottura per una finitura liscia e brillante.
  • Olio extra vergine: l’olio aiuta a sorvegliare il punto di fumo e aggiunge una nota fruttata. Se preferite, potete usare burro chiarificato per una base più neutra e alta temperatura.
  • Trattamento della cipolla: affettate sottilmente le cipolle per una doratura uniforme. Cuocetele a fuoco medio-basso con un pizzico di sale finché diventano molto morbide e dorate ( circa 15–20 minuti).
  • Aglio: aggiungete l’aglio minutissimo solo dopo che le cipolle si sono ammorbidite per evitare bruciature che possono impartire amarezza.
  • Erbe aromatiche: thyme fresco va aggiunto presto per liberare gli oli essenziali; se usate timo essiccato, pestatelo tra le mani prima di aggiungerlo per risvegliare l’aroma. Se gradite, il/la bay leaf può restare in cottura durante la fase del brodo e rimuoverlo prima di servire.
  • Cuocere polpette di pollo: asciugate bene i pezzi di pollo prima di rosolarli per ottenere una crosticina. Tagliate in pezzi di dimensione uniforme per una cottura omogenea; saltate leggermente con sale e pepe prima di aggiungere al risotto.
  • Rifinitura cremosa: a fuoco spento, mescolate panna o crème fraîche con una parte del riso per mantenere l’emulsione. Aggiungete parmigiano grattugiato poco prima di servire per una nota sapida che lega il tutto.
  • Regolazioni finali: assaggiate e aggiustate di sale e pepe bianco solo quando il riso ha assorbito parte del liquido. Il pepe bianco mantiene l’aspetto pulito del piatto.

Suggerimenti per varianti e sostituzioni

  • Versione leggera: sostituite la panna con una piccola quantità di latte scremato o elimina la panna del tutto, aumentando la quantità di brodo e un cucchiaio di parmigiano a fine cottura.
  • Versione non alcolica: aumentate leggermente il brodo e aggiungete un cucchiaio di succo di limone al finale per mantenere la brillantezza senza l’acidità del vino.
  • Contorno e presentazione: finite con prezzemolo fresco tritato e una grattugiata di scorza di limone per un tocco aromatico luminoso.
  • Attrezzatura e tecnica: una casseruola a fondo spesso e larga aiuta a distribuire il calore in modo uniforme; mescolate frequentemente durante la prima fase di cottura del riso per rilasciare amido senza rompere i chicchi.
  • Conservazione: se avanzano porzioni, fate raffreddare rapidamente e riponete in frigorifero entro 2 ore. Riscaldate con un po’ di brodo per mantenere la cremosità; se si addensa troppo, allungate con un filo d’acqua o brodo caldo.

FAQ

FAQ – Riso pollo e cipolla alla francese

Che cosa è esattamente questa ricetta?

È una preparazione di ispirazione francese che combina riso, pollo e cipolle dorate, cotta in una salsa profumata di vino bianco e brodo, quindi mantecata con burro e formaggio per una consistenza cremosa. Può ricordare un risotto, ma può essere realizzata anche con riso non da risotto per una versione più rapida.

Quali sono gli ingredienti principali?

Ingredienti tipici includono:

  • riso (preferibilmente Carnaroli o Arborio per cremosità, oppure un riso a chicchi singoli se preferisci una versione più asciutta)
  • pollo tagliato a pezzi
  • cipolle, affettate sottili
  • burro e olio d’oliva
  • vino bianco secco
  • brodo di pollo o vegetale
  • parmigiano o grana grattugiato
  • sale, pepe e erbe aromatiche (timo, alloro)
Quale tipo di riso è meglio utilizzare?

Per una crema simile al risotto, usa riso per risotti come Carnaroli o Arborio. Se vuoi una versione meno cremosa ma più leggera, puoi usare un riso a chicchi singoli. Ricorda che il tempo di cottura varierà a seconda del tipo di riso scelto.

Come si prepara la ricetta passo passo in breve?

Procedimento semplificato:

  1. Rosola le cipolle in una pentola con una noce di burro e olio fino a doratura.
  2. Aggiungi i pezzi di pollo e rosolali su tutti i lati.
  3. Unisci il riso e tostalo per un minuto.
  4. Sfumalo con vino bianco e lascia evaporare l’alcol.
  5. Aggiungi brodo caldo poco per volta, mescolando. Cuoci finché il riso è al dente e la cremina si sviluppa.
  6. Manteca con burro freddo e parmigiano. Aggiusta di sale e pepe e aggiungi erbe a piacere.
Posso rendere la salsa cremosa senza panna?

Sì. Opzioni:

  • Mantacca con burro freddo e formaggio grattugiato (parmigiano o fontina) subito fuori dal fuoco.
  • Aggiungi una piccola quantità di besciamella leggera.
  • Usa una riduzione di brodo ben concentrata con un cucchiaino di amido di mais sciolto in acqua fredda, se necessario, per addensare.
È possibile prepararla in versione vegetariana?

Sì. Sostituisci il pollo con funghi tagliati (champignon o pleurotus) o con ceci. Usa brodo vegetale al posto del brodo di pollo e mantieni le cipolle e il riso senza modifiche. Puoi aggiungere erbe come timo e prezzemolo per un tocco aromatico.

Posso prepararla in anticipo o congelarla?

Puoi prepararla in anticipo e conservarla in frigorifero per 1–2 giorni. Riscaldala a fuoco moderato con aggiunta di brodo o acqua calda per recuperare la cremosità. Congelare è meno consigliato per la consistenza del riso e la texture del pollo; se devi farlo, congela prima della mantecare e manteca al momento del riscaldamento.

Come correggere una consistenza troppo secca o troppo liquida?

– Se è troppo secca: aggiungi brodo caldo poco per volta, mescolando, finché raggiungi la cremosità desiderata.
– Se è troppo liquida: continua la cottura a fuoco medio-basso per far evaporare l’eccesso di liquido oppure aggiungi un po’ di riso in più cotto separatamente e mescola per assorbire l’umidità.

Quali abbinamenti di vino e presentazione consigliate?

Vino bianco secco è ideale. Proposte: Sauvignon Blanc, un Chardonnay non troppo barricato o uno Ribolla/Giulia doc. Per una versione più leggera, scegli un vino bianco fresco e vivace. Presenta il piatto con una spolverata di prezzemolo o timo fresco e una fetta di limone al lato.

Quali varianti o arricchimenti posso provare?

Varianti comuni includono:

  • Aggiungere funghi trifolati o piselli per più colore e sapore.
  • Incorporare una piccola quantità di panna o besciamella per una crema più ricca.
  • Usare zafferano o spice delicate per un aroma francese più marcato.

Introduction / Hook

Imagine bite-sized morsels that glow with the sun-kissed green of pistachios, each piece wrapped in a whisper-thin cloak of melted bocconcini, and a foundation of tender chicken that stays juicy and vibrant. Bocconcini pollo pistacchio is a celebration of contrast—the crackle of a lightly toasted crust against the silken interior, the warm savoriness of poultry elevated by the nutty brightness of pistachios, and cheese that stretches with a comforting pull when you bite in. This dish is not merely dinner; it’s an invitation to an intimate moment at the table, where aroma swirls through the kitchen like a soft Mediterranean breeze and every bite carries a story of sunlit markets, orchard-grown pistachios, and kitchens that cherish both tradition and playful invention. The scent alone—the toasty, caramelized whispers of pistachio and the fresh, milky scent of bocconcini—draws people to the table before a single bite is taken. It’s a dish that feels festive enough for a special occasion, yet approachable enough for a weeknight if you want to treat your family to something a little extraordinary.

In this dish, you’ll encounter a balance of textures and flavors that feels almost cinematic: the crisp outer crust that gives way to an airy, succulent interior, the creamy melt of bocconcini peeking through as you press your fork, and the aromatic perfume of pistachios that lends both sweetness and a gentle, earthy bite. The chicken serves as a tender canvas, soaking up subtle hints of herbs and citrus while letting the pistachio crust provide a nutty chorus that sings with every mouthful. It’s the kind of plate that leaves you reaching for seconds, not out of necessity but out of pure delight—because food, when it’s this thoughtfully assembled, has a language all its own, and this language is deliciously persuasive.

The Story Behind the Dish

The concept of combining delicate bocconcini with pistachios on a tender chicken canvas speaks to a culinary imagination that loves bridging cultures and textures. Bocconcini—those little pearls of mozzarella—are quintessentially Italian, echoing the softness of a sun-warmed hillside and the gentle pull of a fresh cheese melt. Pistachios, meanwhile, carry a distinctly Mediterranean and Middle Eastern sense of depth: their green hue, their rich, slightly sweet oil, and their ability to transform a simple crust into a toast-worthy crust that crackles with presence. When these two elements meet a lightly seasoned chicken, a dish emerges that feels both familiar and exciting—comforting enough to please a Sunday dinner crowd, and refined enough to showcase a cook’s ability to balance flavors with restraint.

Historically, pistachios have traveled the regions around the Mediterranean for centuries, a symbol of hospitality and celebration in many cultures. Bocconcini has long been cherished in rustic Italian kitchens for its delicate texture and versatility; it can be a centerpiece in salads, melted into a sauce, or tucked into a pocket of bread. By threading these two ingredients with a simple, wholesome poultry base, the dish evokes family meals and intimate gatherings—slightly luxurious, yet rooted in everyday pantry staples. Think of it as a small travel itinerary plated on a plate: the bright Italian cheese meeting crunchy pistachio where the sun-drenched flavors of the Levant and the Italian peninsula have left their friendly marks on each other.

In one kitchen legend, a home cook discovered that a pistachio crust not only binds with the chicken but also refracts the molten cheese with a gleam of gold, turning ordinary weeknights into a mini festival. The idea wasn’t to overwhelm the palate but to offer an accessible, elegant version of a dish that can feel special while still being friendly to a weekly menu. And there’s a subtle nod to balance: pistachios bring fragrance and crunch; bocconcini adds indulgent creaminess; chicken provides lean protein and a comforting, almost nostalgic backbone. Put together with a touch of citrus zest, a whisper of garlic, and a handful of fresh herbs, and you have a dish that travels well—from a cozy kitchen to a crowd-pleasing plate at a dinner party.

For cooks who love to tell a story through flavor, bocconcini pollo pistacchio is a canvas for personal touches. Perhaps you’ve watched a guest’s eyes light up as the first bite reveals the cheese’s stretch and the pistachio’s emerald glow. Perhaps you’ve noticed how a simple drizzle of lemony olive oil or a splash of herb-infused oil can carry delicate notes of brightness that lift the dish without overshadowing its core components. The beauty of this recipe is that it invites you to write your own chapter, to incorporate regional twists or family memories into a plate that feels both timeless and modern at once.

Why You’ll Love This Recipe

  • Elegant simplicity: a few high-quality ingredients come together to create a dish that feels special without requiring elaborate technique.
  • Textural contrast: the pistachio crust provides a satisfying crunch that plays against the soft, molten bocconcini and juicy chicken.
  • Cheese-forward appeal: bocconcini adds a creamy, luxurious note that softens the flavor profile while staying light enough to suit warmer seasons or lighter meals.
  • Nutty brightness: pistachios deliver a subtle sweetness and a toasty aroma that brightens every bite.
  • Versatile serving: perfect as a centerpiece for a casual weeknight dinner, a refined party appetizer, or a comforting family meal.
  • Ingredient storytelling: each component brings a sense of place—Italian cheese, Mediterranean nuts, and lean chicken—creating a dish with character and charm.
  • Customize with ease: the flavor canvas invites variations—swap herbs, adjust citrus, or try different nut coatings to suit your mood or dietary needs.

Flavor Profile & Texture

At first glance, the plate offers a gallery of textures: the outer crust carries a delicate, almost piano-key crunch, the chicken inside remains juicy and tender, and the bocconcini melts into silky ribbons that weave through each bite. The pistachios themselves contribute more than crunch; they lend a gentle roasted sweetness and a faint, resinous note that harmonizes with the dairy-friendly, mild tang of mozzarella. If you listen closely, you can imagine a chorus of scents: toasted nuts releasing their warm perfume, a kiss of garlic and herbs, and a citrus nose lifting the dish with a bright spark.

The taste experience is balanced and nuanced. The pistachio crust adds a nutty, slightly sweet depth that counterpoints the savory, milky bocconcini. The chicken anchors the dish with its clean, protein-forward savor, allowing the cheese to shimmer without overshadowing the meat. A subtle citrus zest or a squeeze of lemon can lift the entire profile, while a whisper of fresh herbs—such as parsley, chives, or oregano—provides a green, peppery lift. In the end, every element finds its place in a harmony that is comforting yet sophisticated, making each mouthful feel like a small celebration of texture and aroma.

Occasions & Pairings

This dish shines across a spectrum of occasions. It makes an impression on weeknights when you want something a little extra without being fussy, and it also stands out at casual dinner parties as a conversation-worthy centerpiece. Its elegant simplicity makes it adaptable for intimate gatherings, anniversaries, or holiday menus that call for a refined but approachable entree.

Pairings to consider:

  • Green or grain salads with a bright vinaigrette to cut through the richness and provide counterpoint crunch.
  • Roasted vegetables—such as asparagus, cherry tomatoes, zucchini, or bell peppers—to echo the dish’s color palette and keep the plate vibrant.
  • Herbed yogurt, lemon-garlic yogurt sauce, or a light Mediterranean-style dollop to add a cool counterpoint and a creamy contrast.
  • Accompaniments like crusty bread, warm flatbreads, or a soft polenta to cradle the bites and collect the melted cheese.
  • Wine or beverages: a crisp Pinot Grigio, a bright Vermentino, or a dry sparkling wine can complement the nutty, cheesy notes without overpowering them.

For celebrations, consider presenting the bites on a long platter with a garnish of lemon wedges, chopped fresh herbs, and a light drizzle of herb oil. For a family-friendly weeknight, arrange the pieces alongside a colorful salad and a simple grain or vegetable side to build a complete, nourishing plate that feels festive without requiring a full kitchen marathon.

Tips, Variations & Substitutions

While the core concept remains elegant and simple, there are countless ways to tailor bocconcini pollo pistacchio to your tastes, dietary needs, or available ingredients. Here are some ideas to explore:

  • Nut variants: if pistachios aren’t available, you can experiment with almonds, hazelnuts, or a combination of seeds like sesame or pumpkin seeds for a different crunch and flavor profile. Each nut or seed brings its own aroma and toasty notes, allowing you to customize the dish’s personality.
  • Cheese options: bocconcini provides a gentle melt and creaminess. For dairy-free guests, consider plant-based mozzarella alternatives, ensuring they melt well and have a similar mild flavor. You can also use halloumi for a firmer bite if you prefer a more savory, cheese-forward experience (note that this changes the texture).
  • Herb and citrus play: while lemon is a classic brightness, you can experiment with orange zest for a sweeter, sunnier note, or lime for a sharper bite. Fresh herbs like basil, thyme, oregano, or marjoram offer different aromatics—adjust to your preference.
  • Coating texture: you can pulse pistachios into finer crumbs for a delicate crust or use a coarser grind for a more pronounced crunch. A light pinch of breadcrumbs can introduce a third texture, but keep it minimal to preserve the cheese’s melt and the pistachio’s flavor.
  • Diet-friendly tweaks: for a lower-carb variation, reduce or replace breadcrumbs with almond flour or flax meal. If you’re aiming for gluten-free, ensure any crunchy coating or breadcrumbs are certified gluten-free.
  • Cooking style: the dish can be prepared in several ways. A pan-sear and finish in a warm oven can give a crisp crust with molten cheese; you can also bake the bites on a sheet pan for even caramelization and a consistent crust. An air fryer offers a quicker path to the same crisp exterior with less oil.
  • Make-ahead ideas: you can form the bites ahead of time and refrigerate them, ready to cook when you’re ready to serve. If you’re entertaining, you might even assemble a platter of prepared bites with pistachio crusts and bocconcini filling and finish with a quick bake just before guests arrive.

Storage & Make-Ahead Ideas

Because bocconcini pollo pistacchio combines dairy with poultry and a crunchy nut crust, proper storage matters for texture and flavor. Here are practical guidelines to keep this dish delicious beyond the initial serving:

  • Leftovers: refrigerate in an airtight container for up to 2–3 days. If you’ve already assembled and cooked the bites, store them in a single layer to prevent sticking and maintain the crust’s texture as much as possible.
  • Reheating: to preserve the crust and cheese melt, reheat gently. A low oven or a warm, moderate oven works best, allowing the bites to rewarm through without softening the crust excessively or causing the cheese to separate.
  • Make-ahead strategy: you can prepare a batch of coated bites up to a day in advance and keep them covered in the refrigerator. When ready to serve, finish with a quick bake or pan-sear to re-crisp the crust and ensure the bocconcini remains gooey.
  • Freezer tips: if you want to freeze, form the bites and arrange them on a baking sheet to freeze individually before transferring to a bag. This prevents sticking. Frozen bites can be kept for up to 1–2 months. Thaw before cooking for even results and re-crisping of the crust.

Fun Facts & Trivia (Optional)

Did you know that bocconcini translates to “little mouths” in Italian? The name evokes the soft, bite-sized nature of mozzarella pearls that melt beautifully in the mouth. Pistachios have a storied history in Mediterranean cuisine, often celebrated in festive dishes and sweets; their vibrant green inside speaks of freshness and a touch of indulgence. In many cultures, pistachios symbolize prosperity and vitality, making them a charming addition to a celebratory bite. The combination of creamy cheese, lean poultry, and a nutty crust embodies a modern Italian-inspired approach to cooking—one that honors tradition while inviting a playful, global sensibility to the plate.

Many chefs love this concept because it demonstrates how a few honest ingredients, prepared with care, can transform into something memorable. It’s a reminder that great flavor often comes from texture and balance as much as from intensity. The pistachio’s natural sweetness complements the mozzarella’s mild tang, while the chicken provides a comforting, universal base that invites all palates to join in the feast. This dish, in its humble yet refined presentation, becomes a storytelling plate—one that tells of sunlit markets, convivial gatherings, and the joy of sharing small bites that make a big impression.

Ingredients

Bocconcini pollo pistacchio
Chicken & Pistachio Crust

  • 4 boneless, skinless chicken breasts, pounded to an even 1/2-inch thickness (about 1.25 cm)
    → Uniform thickness ensures even browning and cooking through without drying out the outer edges. Place the breasts between two sheets of plastic wrap and gently pound to an even width.
  • 1 cup pistachios, shelled, lightly toasted and finely chopped to a breadcrumb-like texture
    → Toasting brings out nutty sweetness and aroma; grinding to a crumb helps the crust adhere evenly when pressed with the egg wash and binding mixture. For a coarser crust, pulse less.
  • 1/2 cup breadcrumbs (Italian-style) or gluten-free breadcrumbs
    → Provides structure and crunch to the crust; gluten-free breadcrumbs keep the dish suitable for gluten-sensitive eaters. Combine with pistachios for a textured coating.
  • 1/3 cup grated Parmesan cheese
    → Adds salty, sharp flavor and helps browning; binds slightly with the egg to form a cohesive crust when pressed onto the chicken.
  • 1 large egg, beaten
    → The binding agent that helps the pistachio-breadcrumb mixture stick to the chicken. For a lighter crust, whisk the egg with a teaspoon of water to loosen it.
  • 2 cloves garlic, minced
    → Infuses the crust with savory depth; mince finely so it distributes evenly and doesn’t burn during searing.
  • 1 tablespoon fresh parsley, finely chopped
    → Adds a fresh, herbal note and color; can be mixed into the crust or sprinkled on top after cooking.
  • 1/2 teaspoon salt
    → Enhances all flavors, especially the cheese and nuts. Adjust after tasting, particularly if using salted breadcrumbs or cheese.
  • 1/4 teaspoon freshly ground black pepper
    → Provides a subtle heat that balances richness; adjust to taste depending on the saltiness of other ingredients.
  • 2 tablespoons olive oil (for searing)
    → Helps crisp the crust and prevents sticking in a hot pan; you can brush the chicken lightly with oil after coating if needed.

Sauce & Finish

  • 8 oz bocconcini cheese, torn into bite-sized pieces
    → Bocconcini melts smoothly to create a creamy, luscious sauce around the chicken; tearing into chunks ensures quick, even melting.
  • 2 tablespoons unsalted butter
    → Adds richness and helps form a glossy, velvety sauce when combined with liquids; use high-quality butter for best flavor.
  • 1/2 cup dry white wine (optional)
    → Adds acidity and depth; simmer to reduce before adding stock to concentrate flavors. If omitting wine, substitute with an equal amount of chicken broth.
  • 1/2 cup chicken broth
    → Provides body and moisture for the sauce; use low-sodium broth to control salt level.
  • 1/2 cup heavy cream (optional)
    → Creates a creamy, velvety sauce that envelopes the chicken and cheese; skip for a lighter version or substitute with half-and-half.
  • 1 tablespoon fresh lemon juice
    → Brightens the sauce and cuts richness; taste and adjust acidity to balance the flavors before finishing the dish.
  • 1 teaspoon lemon zest
    → Adds a fragrant citrus aroma that complements pistachio and cheese; grate finely and avoid the bitter white pith.
  • Salt and freshly ground black pepper to taste
    → Essential for balancing flavors; add gradually after tasting the sauce, especially if using salted butter or broth.
  • 2 tablespoons chopped fresh parsley (for finishing)
    → Finishes the dish with color and a fresh herbal note; sprinkle just before serving to preserve brightness.

Garnish

  • 2 tablespoons chopped pistachios, toasted
    → Extra pistachio crunch and color on top; toast briefly to maximize aroma before sprinkling on the plate.
  • Lemon wedges or thin lemon slices
    → A squeeze of lemon at the table brightens the dish and enhances flavors; serve alongside for those who prefer more acidity.
  • Additional fresh parsley leaves
    → Finishing touch that adds vibrancy and a fresh aroma; scatter lightly so the plated dish looks vibrant.

Instructions

  • Preheat your oven to 375°F (190°C) and line a large baking sheet with parchment paper or a silicone mat.

    → This provides a smooth, nonstick surface for finishing the crusted chicken in the oven and makes cleanup easier.
  • Toast the pistachios in a dry skillet over medium heat until fragrant and lightly golden, about 3 to 4 minutes, stirring frequently.

    → Toasting enhances the nutty aroma and flavor; keep the nuts moving so they brown evenly and do not burn.
  • Finely chop the toasted pistachios to a breadcrumb-like texture using a sharp knife or pulse briefly in a processor.

    → Uniform crumbs ensure even crust adhesion and a cohesive bite without large nut pieces detaching during cooking.
  • In a large bowl, mix the pistachios, breadcrumbs, grated Parmesan, minced garlic, chopped parsley, salt, and pepper until evenly combined.

    → The dry mixture provides flavor, texture, and the binding matrix that the egg wash will help attach to the chicken.
  • Place each chicken breast between two sheets of plastic wrap and pound to an even 1/2-inch (about 1.25 cm) thickness, then remove the plastic and pat dry.

    → Uniform thickness ensures the chicken cooks evenly, browns consistently, and remains moist inside rather than drying out at the edges.
  • Beat the egg in a shallow dish until smooth and slightly frothy; if you prefer a lighter crust, whisk in 1 teaspoon of water to loosen it.

    → The egg acts as the binding agent that helps the crust cling to the surface of the chicken; thinning the wash can create a looser, crisper crust if desired.
  • Dip each pounded chicken breast into the beaten egg, allowing excess to drip back into the dish.

    → The egg wash primes the surface so the pistachio-breadcrumb mixture adheres firmly rather than sliding off during searing.
  • Press the egg-coated chicken into the pistachio-breadcrumb mixture, turning to coat all sides and pressing firmly so the crust adheres and won’t detach when turning.

    → Firm pressing ensures an even, intact crust that browns well and does not crumble during cooking.
  • Let the crusted chicken rest on a rack or plate for 5 to 10 minutes to set the crust, which helps prevent slippage during the initial sear.

    → Allowing the crust to set improves adhesion and yields a crispier finish as the crust browns in the pan.
  • Heat a large ovenproof skillet over medium-high heat and add 2 tablespoons olive oil; swirl to coat the bottom and heat until just shimmering.

    → A properly heated pan ensures immediate browning and crust adhesion without sticking; too cool and the crust will sog and fall off.
  • Carefully place the crusted chicken into the hot skillet and sear for 2 to 3 minutes per side, or until the crust is deeply golden and set before turning.

    → Searing creates a flavorful crust, caramelization, and color; use tongs to flip gently to avoid crust flaking.
  • Transfer the skillet to the preheated oven and bake the chicken until it reaches an internal temperature of 165°F (74°C), about 8 to 12 minutes depending on thickness.

    → Finishing in the oven ensures the chicken cooks through without over-browning the crust, producing a juicy, safe-to-eat center.
  • While the chicken bakes, prepare the sauce: in a separate pan or the same skillet after removing the chicken, melt 2 tablespoons unsalted butter over medium heat.

    → Butter provides richness and a silky mouthfeel to the sauce; starting here helps emulsify the subsequent liquids.
  • If using, pour in 1/2 cup dry white wine to deglaze the pan, then simmer until reduced by about half and the browned fond is loosened from the pan.

    → Deglazing lifts flavorful caramelized bits from the pan, concentrating their flavor into the sauce rather than leaving them stuck to the bottom.
  • Pour in 1/2 cup chicken broth, raise the heat to a simmer, and cook until the liquid thickens slightly and reduces by about one-third to concentrate the flavor.

    → Reducing the broth intensifies the stock flavors and provides body for the sauce to coat the chicken nicely.
  • Stir in the torn bocconcini pieces and the butter until the cheese melts smoothly into the sauce, then add 1/2 cup heavy cream (if using) and simmer briefly to create a velvety texture.

    → The melting bocconcini creates a creamy layer that envelops the chicken; cream is optional for a lighter or richer sauce depending on preference.
  • Finish the sauce with 1 tablespoon fresh lemon juice and 1 teaspoon lemon zest, then season to taste with salt and freshly ground black pepper.

    → Lemon brightness cuts richness and aligns with pistachio and cheese flavors; always taste and adjust for balance after simmering.
  • Return the seared chicken to the pan with the sauce to warm through and coat the crust, or simply spoon the sauce over plated chicken for a dramatic presentation.

    → Reuniting the chicken with the sauce ensures the crust stays crisp while absorbing the creamy flavors; avoid overcooking after returning to the sauce.
  • Transfer the finished chicken to a warm platter and spoon any remaining sauce around it; garnish with 2 tablespoons toasted chopped pistachios, lemon wedges, and additional fresh parsley leaves.

    → The pistachio garnish adds extra crunch and color, while lemon and parsley brighten the dish and provide a clean, aromatic contrast to the rich crust and cheese.

Notes

These pistachio-crusted chicken breasts topped with melty bocconcini deliver a dramatic, creamy finish with a nutty crust and bright lemon notes. To keep the dish gluten-free, use gluten-free breadcrumbs or omit breadcrumbs entirely and rely on finely chopped pistachios for texture. Pound the chicken to 1/2 inch for even browning and quicker, juicier cooking; toast the pistachios until golden to deepen their aroma, then mix with the parmesan, garlic, parsley, salt, pepper, and the beaten egg to form the crust. Sear the coated chicken in olive oil over medium-high heat until the crust is golden, which helps seal in juices before finishing the sauce. The sauce combines bocconcini, butter, optional dry white wine, chicken broth, and optional heavy cream for a luxurious finish; finish with lemon juice and zest to brighten the mixture, and scatter fresh parsley for color. Taste and adjust salt after the sauce comes together, as cheese and breadcrumbs can contribute saltiness. For a lighter version, skip the cream or substitute with half-and-half; for a dairy-free alternative, omit bocconcini and use a dairy-free melting cheese if available, though the dish will be lighter. Serve with greens, roasted vegetables, or a simple grain like rice or potatoes. Leftovers refrigerate well for 2–3 days and can be reheated gently with a splash of broth to refresh the sauce. Always check ingredient labels for gluten-free and dairy-free requirements if you have dietary restrictions.

  • Make-ahead crust prep: Toast pistachios and mix with breadcrumbs, Parmesan, garlic, parsley, salt, and pepper; store refrigerated until ready to assemble.
  • Crust attachment: Ensure the egg wash is evenly distributed and press the crust firmly onto the chicken so it adheres well during searing.
  • Cooking method: Sear the crusted chicken until golden, then finish in the pan with the sauce until the chicken reaches a safe internal temperature (165°F / 74°C).
  • Wine substitution: If avoiding wine, increase broth slightly and add a touch more lemon to maintain acidity and depth.
  • Storage: Refrigerate leftovers in an airtight container for up to 2–3 days; reheat gently in a skillet with a splash of broth to loosen the sauce.

Tips

Crust assembly and chicken prep

  • Ensure the chicken breasts are a uniform 1/2-inch thickness for even browning and to prevent dry edges. If needed, gently pound thinner areas to match the thickest part.
  • Toast pistachios until fragrant and lightly golden, then finely chop to a breadcrumb-like texture. A few slightly coarser pieces add pleasant crunch.
  • Mix pistachios with breadcrumbs, grated Parmesan, and minced garlic for a balanced crust. A pinch of fresh parsley stirred in adds color and freshness.
  • Season the chicken lightly with salt before coating; taste the crust mixture as well since cheese and nuts can be salty. If using salted breadcrumbs or cheese, adjust salt accordingly.
  • Dip the pounded chicken in beaten egg (you can whisk with a teaspoon of water for a lighter coat) and press the crust mixture firmly onto all sides. Let it rest a minute to set before cooking to improve adhesion.

Searing and cooking tips

  • Choose a skillet that conducts heat well and preheat with olive oil until shimmering. A hot pan helps crisp the crust without burning the nuts.
  • Place the coated chicken in the pan smooth-side down first and avoid crowding; cook in batches if needed to maintain high heat and even browning.
  • Flip carefully with tongs and press gently to re-seal crust if it loosens. If the crust cracks, pressing back into place helps maintain coverage.
  • For a crisper crust and fully cooked chicken, finish in a 375°F (190°C) oven after searing, until the internal temperature reaches 165°F (74°C).

Sauce and finish tips

  • Tear bocconcini into bite-sized pieces rather than slicing; smaller pieces melt rapidly and create a creamy sauce quickly.
  • After searing, deglaze the pan with dry white wine (or chicken broth) to lift browned bits. Simmer until reduced by half to concentrate flavor before adding stock and cream if using.
  • If omitting wine, substitute with an equal amount of chicken broth to maintain acidity and depth.
  • Add lemon juice gradually and taste often; citrus brightens the sauce but can overpower if overused. Balance with a touch of salt as needed.
  • Heavy cream adds luxurious creaminess; start with a small amount and whisk in, adjusting to your preferred sauce consistency. For a lighter version, use half-and-half or omit the cream.
  • Finish the sauce with chopped fresh parsley for color and fragrance; add just before serving to preserve brightness.

Garnish and serving tips

  • Lightly toast extra chopped pistachios for a crunchy garnish to sprinkle over the plated dish just before serving.
  • Serve with lemon wedges or thin slices for guests to add a bright squeeze at the table.
  • Finish with additional fresh parsley leaves for color and aroma; scatter sparingly to keep the plate vibrant.

FAQ

Cos’è Bocconcini pollo pistacchio?

È un piatto di bocconcini di pollo cotti al forno o in padella, rivestiti da una crosta croccante di pistacchi tritati, parmigiano, pangrattato e aromi. Può essere servito come antipasto, finger food o secondo piatto.

Quali sono gli ingredienti principali?

Ingredienti chiave: bocconcini di pollo, pistacchi non salati, parmigiano/grana, pangrattato (normale o senza glutine), uovo, aglio in polvere o aglio tritato, scorza di limone, erbe aromatiche (origano, timo), olio extravergine d’oliva, sale e pepe.

Come si preparano i bocconcini di pollo pistacchio?

Procedura tipica:

  1. Taglia il pollo a bocconcini di dimensione uniforme.
  2. Trita grossolanamente i pistacchi.
  3. Mischia pistacchi, parmigiano, pangrattato, aglio e scorza di limone con sale e pepe.
  4. Passa i bocconcini nell’uovo sbattuto, poi rotolali nel mix di pistacchi premendo bene per far aderire la crosta.
  5. Cuoci in forno preriscaldato o in padella finché la crosta è dorata e il pollo è cotto.
Si può cuocere in forno e a che temperatura/tempo?

Sì. Preriscalda il forno a circa 200°C (390-400°F). Distribuisci i bocconcini su una teglia rivestita e cuoci per 12-15 minuti, finché risultano dorati e cotti internamente. Per una doratura extra, una breve pausa sotto il grill può essere utile.

Come ottenere una crosta pistacchio davvero croccante?

Consigli:
– usa pistacchi non salati finemente tritati e mescolali con pangrattato e parmigiano.
– premi bene la crosta sui bocconcini, senza spazi vuoti.
– spennella o spruzza leggermente con olio prima di cuocere per favorire la doratura.

Posso sostituire o variare ingredienti?

Sì. Possibili varianti:
– sostituisci i pistacchi con nocciole o mandorle tritate.
– usa formaggio grana o pecorino a seconda dei gusti.
– per una versione gluten-free, usa pangrattato gluten-free o farina di cocco/semola di ceci come coating alternativo.

Posso prepararlo in anticipo?

Sì. Puoi:
– preparare i bocconcini e la crosta in anticipo, conservarli in frigorifero e cuocerli al momento (entro 24 ore).
– o impanare i pezzi e conservarli coperti in frigorifero per 1 giorno prima di cuocerli. Per una maggiore comodità, puoi anche congelare crudo i bocconcini impanati e cuocerli direttamente dal congelatore, aumentando leggermente il tempo di cottura.

Come conservare e riscaldare gli avanzi?

Conserva in frigorifero in contenitore ermetico per 2-3 giorni. Per riscaldare, utilizza forno o forno statico a 180-200°C per 5-8 minuti, o finché la crosta è nuovamente croccante. Evita il microonde se vuoi mantenere la croccantezza.

Quali accompagnamenti consigliate?

Ideale con una fresca insalata, rucola o radicchio, pomodori confit o verdure grigliate. Una spruzzata di limone aggiunge freschezza. Per una bevanda, un vino bianco fresco come Pinot Grigio o Vermentino si abbina bene.

Quali sono le note allergeniche?

Questo piatto contiene pollame, latticini (parmigiano) e frutta secca (pistacchi). Se hai allergie o intolleranze, sostituisci il formaggio con una versione senza lattosio e usa pangrattato o farina senza glutine. Per la versione senza pistacchi, sostituisci con altra noce tritata oseviosamente riso soffiato al posto della crosta.

Introduction / Hook

Imagine a morning bite that feels both nostalgic and novel—a biscotti-inspired crust that crackles softly at the edges, giving way to a tender, jam-kissed center all wrapped in the warm, comforting embrace of brown sugar. This biscotti pop tart zucchero di canna is not just a pastry; it’s a mood. The aroma alone—hint of vanilla, caramel, and a whisper of cinnamon—evokes kitchens filled with Sunday rituals, the kind of scent that lingers long after the oven has cooled. It’s a treat that travels beautifully, whether you’re grabbing a grab-and-go breakfast, packing a lunchbox, or treating a teatime craving with a friend. This isn’t your standard pastry; it’s a celebration of contrast—the crisp, nutty bite of biscotti meeting the soft, gooey sweetness of a thoughtfully layered filling, all crowned with a glaze that glints like morning sun on brown sugar crystals.

In every bite, you’ll hear a satisfying crack, followed by a velvet chew that carries notes of toasted almonds, warm butter, and a kiss of citrus zest. The use of zucchero di canna—the cane sugar that brings deeper molasses warmth—gives the pastry a caramel-rich backbone that lingers on the palate. It’s a playful, indulgent crossover that feels both familiar and exciting, like a familiar song with a fresh remix. If you’ve ever wished your favorite biscotti could wear a more portable, breakfast-friendly outfit, this is your answer: a treat that tastes like a cinematic breakfast scene—cozy, indulgent, and irresistibly shareable.

The Story Behind the Dish

There’s a little kitchen alchemy at work here: the timeless elegance of biscotti, with its twice-baked crunch, meets the playful nostalgia of a Pop-Tart. The inspiration began with a craving for something that could be enjoyed with coffee on a quiet morning, yet still feel special enough for weekend indulgence. The biscotti tradition—thin, crisp slices toasted to perfection—offers texture and toasty flavor, while the Pop-Tart’s core idea—a soft, fruity or sweet filling enveloped by a sturdy crust—promised portability and a familiar, comforting sweetness. Pair those two concepts with the deep, caramel warmth of zucchero di canna, and you have a hybrid that honors both Italian bakehouse sensibilities and American breakfast whimsy.

Historically, biscotti were born out of necessity—longer shelf life, sturdier structure for dunking in coffee, and a texture that could carry through travel. Pop-Tarts, conceived in the mid-20th century, captured the spirit of convenience and crowd-pleasing sweetness. This recipe threads those legacies together into a single pastry that respects tradition while embracing creative boundaries. The name itself—a nod to the core ingredient, zucchero di canna—speaks to the way ingredients tell stories: brown sugar lending depth, warmth, and a chewy gloss to the finished treat. In many kitchens across the world, cinnamon, vanilla, and nutty notes from the biscotti-like crust become a backdrop for experimentation, and this dish invites you to write your own chapter with fillings, glazes, and textures of your choosing.

What makes this dish special is not just its flavor but its personality. It is a pastry that invites conversation—the aroma wafts through a home, urging friends to linger and share a moment over something that feels both a little fancy and warmly familiar. The biscotti pop tart zucchero di canna becomes a platform for creativity: you can adjust sweetness, tweak spice, or swap the filling to suit seasons or gatherings. It’s a celebratory snack that wears everyday practicality as its crown, a reminder that great taste doesn’t have to come with runway-length instructions or elaborate equipment. It’s comfort, it’s curiosity, and it’s a portal to a shared experience: the joy of something crispy at the edges and mellowly lush in the center, all harmonized with the earthy sweetness of cane sugar.

Why You’ll Love This Recipe

  • Versatile breakfast or snack: crisp, biscotti-inspired crust with a soft, comforting center makes it perfect for mornings, tea time, or dessert.
  • Textural contrast: the outer crust delivers a toasty crunch while the interior offers a tender chew and a satisfying, jammy surprise.
  • Make-ahead friendly: you can prepare elements ahead of time, assemble, and bake when convenient for busy weeks or entertaining.
  • Shareable and kid-friendly: naturally portionable and easy to customize, it’s a delightful treat to bring to gatherings or lunch boxes.
  • Brown sugar warmth: zucchero di canna gives a deeper caramel vibe that elevates the pastry beyond ordinary sweetness.
  • Adaptable to dietary preferences: the concept lends itself to gluten-free, dairy-free, or vegan twists with simple substitutions.

Flavor Profile & Texture

This biscotti pop tart unfolds with layers of flavor and texture that work in harmony. The crust—thin, crisp, and gently browned—offers a toasted nutty note, reminding you of biscotti straight from the oven. It carries hints of almond or hazelnut, even if you’re using a simple flour blend, thanks to the toasting of the sugars and fats that melt into a delicate, brittle edge. The core reveals a soft, almost cookie-like center with a subtle sweetness that isn’t cloying, enriched by the warming presence of brown sugar. Spices such as cinnamon or a whisper of nutmeg bring a cozy depth, while vanilla lends a floral softness that keeps the palate seeking more rather than overwhelming it.

The filling, whether imagined as a jammy layer or a gently fruity preserve, sits as a counterpoint to the crust—bright, glossy, and tangy-sweet enough to counterbalance the caramelized notes of zucchero di canna. The balance between crunchy exterior and soft interior creates a satisfying bite that plays across the mouth: first the crack of the edge, then the tenderness of the center, finishing with a lingering caramel-laden finish that evokes roasted sugar and warm dairy. If you decide to glaze the top, a light sheen of sugar and a whisper of citrus can lift the flavors further, adding brightness to the sustained sweetness. This is comfort with character—the kind of flavor that makes you pause, smile, and perhaps share the bite with someone nearby.

Texture-wise, expect a symphony: a crisp snap, a pliant interior, and a gentle, melt-in-the-mouth finish thanks to the browned sugars and butter. The brown sugar in the crust interacts with the fat to form a slightly chewy, glassy glaze along the surface, creating a mouthfeel that’s indulgent without being heavy. The experience is enhanced by careful layering—thin, biscuit-like sheets that hold up against a soft filling, ensuring every bite offers a new combination of crackle, sweetness, and the comforting aroma of toasted sugar. It’s a pastry that rewards slow savoring as much as quick snacking, inviting you to savor the progression from crunchy edge to tender center.

Occasions & Pairings

Where this biscotti pop tart shines is in its versatility. It’s ideal for a leisurely weekend brunch as a show-stopping pastry, yet easy enough to slip into a weekday coffee ritual. Its portability also makes it a wonderful option for picnics, potlucks, or office celebrations—cut into neat rectangles or left whole for sharing. The scent alone signals a moment of indulgence, turning any ordinary morning into a small celebration. For pairing, think classic coffee accompaniments: bold espresso, a creamy latte, or a cappuccino that echoes the pastry’s caramel notes. Tea lovers can opt for robust black tea or an orange-spiced tisane that complements the citrus hints in the glaze or filling. If you’re in the mood for a lighter indulgence, a dollop of vanilla yogurt or a scoop of mascarpone can balance the sweetness in a playful, dessert-meets-breakfast way.

For holiday spread ideas, this pastry can anchor a brunch buffet or serve as an intimate treat for guests who appreciate a pastry with character. It also plays well with a simple fruit compote, a dusting of powdered sugar, or a quick citrus glaze to brighten the flavors for seasonal gatherings. If you’re entertaining children, consider dipping strips in a small pool of melted chocolate or rolling the edges in finely chopped nuts for an extra crunch. Its adaptable nature means you can craft a version that suits autumnal gatherings, springtime teatimes, or cozy winter mornings—each occasion enhanced by the familiar scent of cinnamon, vanilla, and caramelized sugar carried through the kitchen air.

Tips, Variations & Substitutions

  • Flour variations: try a 1:1 gluten-free flour blend with a touch more fat or a mix of almond flour and oats for a nuttier, more crumbly crust.
  • Vegan option: substitute butter with coconut oil or a neutral-tavored plant butter and use a fruit-based filling to maintain moisture.
  • Nutty twist: incorporate finely chopped almonds, hazelnuts, or pistachios into the crust for added crunch and depth.
  • Spice profile: swap cinnamon for cardamom or allspice to tailor the warmth to your preference; a pinch of clove can deepen the autumnal vibe.
  • Filling ideas: use a berry preserves, apricot jam, or a simple lemon-curd for a bright contrast; for a savory-sweet version, a mascarpone cream with a hint of vanilla works beautifully (note: dairy considerations apply).
  • Flavor boosters: a hint of orange zest or lemon zest in the crust or filling can lift the overall brightness and add a fresh note that contrasts with brown sugar.
  • Texture play: if you want a more biscotti-like bite, let the crust dry a little longer after baking before filling; for a softer bite, bake a touch shorter with a gentle cooling time.
  • Make-ahead: bake the crust, cool completely, store in an airtight container; fill and reheat lightly just before serving to revive the crave-worthy contrast.

Storage & Make-Ahead Ideas

The beauty of this pastry lies in its storage flexibility. Once baked and cooled, you can store slices or whole pastries in an airtight container at room temperature for up to 2 days. If you want to keep it longer, wrap tightly and refrigerate for up to a week. For extended preservation, you can freeze baked slices or the unfilled crusts for up to 1 month; thaw at room temperature and rewarm gently in a toaster oven to recapture the crispness of the exterior.

Make-ahead strategies include preparing the biscotti-inspired crust in advance, chilling it adequately to ensure clean slicing, and then assembling with your chosen filling at a later time. If you prefer to bake everything in one go, you can bake, cool, and glaze the pastries on the same day, but allowing the crust to rest a bit after baking helps develop its snap and prevents the filling from making the crust soggy. For a quick weekday option, you can bake a batch, cut into uniform rectangles, and store them flat in a tin; when you’re ready to serve, a quick warm-up in a toaster oven will restore the pop-tart-like crispness and make the center feel freshly prepared.

Fun Facts & Trivia (Optional)

  • Biscotti literally means “twice-baked” in Italian, a method that guarantees a long shelf life and a satisfying crunch that’s ideal for dunking in coffee or dessert wines.
  • Brown sugar, or zucchero di canna, is prized in many Italian-inspired pastries for its deeper caramel notes and its ability to yield a glossy, slightly chewy finish when baked.
  • Pop-Tarts were first introduced by Kellogg’s in 1964 and quickly became a symbol of American convenience pastries—this fusion is a playful nod to both traditions.
  • The concept of crossing cultures with pastries is a growing trend in modern kitchens, where bakers remix classic textures (crisp biscotti) with modern formats (portable pastries) to create comfort with a twist.
  • Texture and flavor experiments like this celebrate the idea that desserts can carry memories—crisp mornings, family gatherings, and the simple joy of sharing something delicious with people you care about.

Ingredients

Biscotti Pop Tart Zucchero di Canna
Biscotti Pop Tart Dough

  • 2 1/2 cups all-purpose flour (315 g)
    → The base crust for the biscotti pop tart. This portion provides structure and tenderness when combined with cold butter and minimal handling. Work quickly to cut the butter into the flour until you have pea-sized pieces, then bind with the egg and a few tablespoons of ice water. Chill the dough for at least 30 minutes to relax the gluten and prevent shrinking during rolling. If you need a gluten-free version, substitute with a 1:1 gluten-free flour blend and add an extra tablespoon or two of ice-cold water as needed to bring the dough together.
  • 1/3 cup light brown sugar (zucchero di canna chiaro)
    → Adds moisture, caramel notes, and a touch of sweetness to the dough, helping create a slightly tender crumb. In the filling, brown sugar also helps bind the biscotti crumbs with butter to form a cohesive layer. When handling, ensure the sugar is evenly dispersed to avoid graininess; sift if needed. Keep the dough slightly cool to maintain the sugar’s moisture.
  • 1/2 teaspoon fine sea salt
    → Enhances the flavors and balances the sweetness in the crust. Salt also tightens the gluten just enough to improve structure. Use fine salt for even distribution; continue to use minimal amounts to avoid an overly salty crust. If using salted butter, reduce to a pinch.
  • 1/2 teaspoon baking powder
    → Optional lift for the crust to prevent it from feeling dense. Adds a hint of airiness and helps the crust crackle slightly when baked. If you omit it, ensure the dough is thoroughly chilled and not overworked.
  • 1 stick (113 g) cold unsalted butter, cut into 1/2-inch cubes
    → The fat creates a tender, flaky crust. Keeping the butter cold and cutting it into small cubes lets it melt in layers during baking, producing a short crust. Do not soften the butter; work quickly with a pastry cutter or two knives, and chill the dough after mixing.
  • 1 large egg, lightly beaten
    → Acts as a binder and enriches the dough, helping it come together without adding too much moisture. For a dairy-free version, substitute with an equal amount of chilled cold-pressed oil and water; note texture will differ. Use the egg in small amount to avoid a tough crust.
  • 2-3 tablespoons ice-cold water or milk
    → Adds just enough moisture to bring the dough together without making it sticky. Start with 2 tablespoons and add more as needed, adding gradually while mixing to keep the dough cohesive but not wet. If you use dairy-free milk, choose a fat-free option to keep crust crisp.
  • 1 teaspoon vanilla extract
    → Provides a subtle sweetness and aroma that complements the almond biscotti and brown sugar flavors. Use pure vanilla extract for the best flavor; avoid artificial vanilla flavor for best results. Add to the dough with the egg for even distribution.

Biscotti Pop Tart Filling

  • 1 cup finely crushed biscotti cookies (almond biscotti preferred)
    → The filling base mimics the biscotti flavor by incorporating crushed cookies directly into the tart filling. Grind biscotti until they resemble coarse breadcrumbs with some small chunks for texture. Do not grind to a powder; some texture enhances bite and flavor. This will be mixed with butter and brown sugar to create a cohesive filling that stays put between the crust layers during baking.
  • 3 tablespoons unsalted butter, melted
    → The butter acts as a binder and helps distribute the sweetness evenly with the biscotti crumbs. Cool the butter slightly before mixing with the warm, crumbly biscotti to prevent hard clumps; stir until the mixture is just combined and holds together when pressed. If dairy-free, substitute with coconut oil or a neutral-tasting oil, though flavor will differ.
  • 1/3 cup light brown sugar
    → Brown sugar contributes moisture and caramel notes that pair with almond biscotti. It also helps bind the crumbs so the filling doesn’t crumble when sliced. If you prefer a less sweet flare, reduce to 2 tablespoons, but keep at least one tablespoon for binding.
  • 1/2 teaspoon ground cinnamon
    → Adds warm spice that complements the almond and vanilla flavors in biscotti. If you’re not a fan of cinnamon, you can omit or substitute with a pinch of nutmeg or cardamom for a different aroma. Ensure the cinnamon is evenly distributed by whisking lightly with the sugar before combining with the biscotti.
  • Pinch of salt
    → Balances sweetness and enhances the biscotti’s nutty notes. A small pinch is enough; too much can dull the flavors. If your butter is salted, adjust or omit; taste the filling before you assemble the pop tarts.
  • 1 teaspoon orange zest (optional)
    → Offers a bright citrus lift that mirrors some biscotti flavors. Zest before grating the orange, avoiding the white pith. Stir in to the filling mixture to release fragrant oils as the tart bakes and rests.

Glaze

  • 1 cup powdered sugar
    → Classic glaze for the pop tart top. Powdered sugar dissolves smoothly to a glossy finish once the tart cools. If you prefer a thicker top, use less liquid; for a thinner glaze, add a splash more milk. Sift the sugar if lumps form to ensure an even coating.
  • 2-3 tablespoons milk or cream
    → Provides the liquid needed to reach a pourable glaze consistency. Use whole milk or cream for richer flavor; dairy-free milk can be used, but the glaze will be thinner and less glossy. Add gradually to achieve the desired thickness.
  • 1/2 teaspoon vanilla extract
    → Enhances sweetness and aroma, complementing almond biscotti tones. Use pure vanilla extract rather than imitation for a richer, more natural flavor. Add to the glaze after whisking the sugar with the liquid to avoid clumping.
  • 1/4 teaspoon almond extract (optional)
    → Intensifies the almond flavor that is central to biscotti-inspired pastries. If you enjoy an almond-forward glaze, add sparingly and taste before finishing. This can be left out if you prefer a more neutral top.

Optional Add-ins

  • 1/4 cup mini chocolate chips (optional)
    → Adds pockets of melty chocolate that pair beautifully with almond biscotti and the brown-sugar crust. Fold them into the filling mixture just before assembling. If you use dark chocolate chips, balance with a touch more orange zest or a pinch of salt.
  • 2 tablespoons finely chopped almonds, toasted (optional)
    → Extra crunch and toasted aroma to echo the biscotti’s almond base. Toast the nuts in a dry skillet until fragrant and lightly browned, then cool before adding. This adds texture but can burn if overdone, so keep an eye on them.
  • 1 tablespoon turbinado sugar (optional)
    → Sprinkles a subtle crunch and a touch of sparkle on the glaze when sprinkled on top before it sets. Turbinado sugar holds its crunchiness better than regular granulated sugar and complements the brown sugar crust.

Instructions

  • Preheat your oven to 350°F (175°C) and line two large baking sheets with parchment paper or a silicone mat.
    → Preheating ensures the dough bakes evenly from the moment it contacts the sheet, and parchment prevents sticking for easy removal and clean edges.
  • Whisk together 2 1/2 cups all-purpose flour, 1/3 cup light brown sugar, 1/2 teaspoon fine sea salt, and 1/2 teaspoon baking powder in a large bowl until evenly distributed.
    → Sifting and whisking distribute dry ingredients uniformly, avoiding pockets of salt or sugar that could affect texture and flavor balance.
  • Add 1 stick (113 g) cold unsalted butter, cut into 1/2-inch cubes, and cut it into the flour using a pastry cutter, two knives, or fingertips until the mixture resembles pea-sized pieces.
    → Keeping the butter cold creates a short, flaky crust as it melts in the oven; avoid warming the butter to maintain tenderness and distinct layers.
  • Beat 1 large egg with 1 teaspoon vanilla extract in a small bowl; drizzle into the flour mixture and mix until just combined. Then add 2-3 tablespoons ice-cold water or milk gradually, mixing until the dough holds together but is not wet.
    → The egg binds and enriches the dough, while cold liquid minimizes gluten development for a tender crust with a crisp bite.
  • Turn dough onto a lightly floured surface and pat into a cohesive disk; do not knead or overwork, as excessive handling toughens the crust.
    → Minimal handling preserves a delicate crumb and helps the crust stay tender after bake.
  • Divide the dough into two equal portions, wrap each in plastic, and refrigerate for at least 30 minutes to relax gluten and solidify fat.
    → Chilling prevents shrinking and makes rolling easier, yielding clean, even edges when cut for pop tart shapes.
  • Roll one portion between parchment sheets to about 1/8 inch (3 mm) thick; slide the parchment with dough onto a sheet pan and chill for 15 minutes.
    → Rolling between parchment prevents sticking and ensures uniform thickness; chilling keeps the butter cold for a crisp crust when baked.
  • Roll the second portion in the same manner and keep refrigerated until ready to assemble; this ensures top and bottom crusts align for a uniform bake.
    → Having both sheets prepared ensures consistent size and helps seal the filling without gaps.
  • Crush biscotti cookies into a coarse crumb (about the texture of breadcrumbs with small bits) using a processor in short pulses or by sealing in a bag and crushing with a rolling pin.
    → Texture in the filling provides bite and flavor; avoid turning them into powder to maintain structure and almond character.
  • Stir 3 tablespoons melted unsalted butter with 1/3 cup light brown sugar and 1/2 teaspoon ground cinnamon until the sugar begins to dissolve and the mixture looks cohesive.
    → Warm butter helps bind the filling and the cinnamon distributes evenly for a warm-spiced note that complements the biscotti.
  • Fold the crushed biscotti into the butter-sugar mixture and mix until just combined; if using, fold in 1 teaspoon orange zest for brightness.
    → Zest releases citrus oils that lift the almond sweetness and enhance aroma as the tart bakes and rests.
  • Place a bottom crust rectangle on a parchment-lined sheet; leave a border about 1/2 inch around edges for sealing.
    → The border provides space to seal the top crust without squeezing out filling during baking.
  • Spoon an even line of filling along the center of the bottom crust, keeping a clean 1/2 inch margin on all sides.
    → Even distribution ensures uniform bake and prevents overflow; margins allow a secure seal for neat edges.
  • Brush the exposed border with a little water or beaten egg to help the top crust adhere to the bottom crust.
    → Moisture around the edge promotes a strong seal and prevents separation during baking.
  • Carefully place the top crust over the filling, align edges, and press together firmly; crimp the perimeter with a fork to seal and create a decorative edge.
    → Proper sealing prevents filling from leaking and the crimped edge yields a bakery-like finish that bakes evenly.
  • Transfer the assembled tart to the refrigerator for 15 minutes to set the seal and firm the filling, reducing spread during baking.
    → Chilling before baking helps maintain shape, prevents sogginess, and yields a crisper crust after bake.
  • Cut the top crust into decorative shapes or vent slits with a small knife to allow steam to escape; place vents to prevent bursting and ensure even cooking.
    → Venting avoids ballooning and helps the filling set properly under the top crust, while decorative edges enhance presentation.
  • Repeat the process to assemble additional tarts, maintaining consistent thickness and seal quality for uniform results.
    → Consistency across pieces ensures even baking and a cohesive presentation when serving.
  • Bake the tarts in the preheated 350°F (175°C) oven for 18-22 minutes, or until the tops are lightly golden and the edges are set; rotate sheets halfway if using multiple pans.
    → Even heat distribution prevents hot spots, yielding uniformly baked crusts and preventing under- or over-browned edges.
  • Remove from oven and cool the tarts on wire racks completely before glazing to ensure the glaze sets smoothly and adheres well.
    → Cooling prevents the glaze from sliding off and gives the surface a crisp base for a glossy finish.
  • In a small bowl, whisk 1 cup powdered sugar with 2-3 tablespoons milk or cream and 1/2 teaspoon vanilla extract until smooth; adjust with more sugar for thickness or more liquid for pourability.
    → A smooth, viscous glaze adheres evenly and sets to a glossy finish; adjusting thickness allows precise coverage without running off.
  • Stir in 1/4 teaspoon almond extract if using and taste; adjust to preference before glazing.
    → Almond extract deepens biscotti flavor; add cautiously to avoid overpowering sweetness.
  • Drizzle the glaze over cooled tarts in a thin, even layer or dip the tops for a glossy finish; while still tacky, sprinkle with 1 tablespoon turbinado sugar for subtle crunch and sparkle.
    → The glaze sets to a smooth, professional shine and the turbinado adds textural contrast that echoes the brown sugar crust.
  • Optionally fold in 1/4 cup mini chocolate chips into the filling for pockets of melt-in-your-mouth chocolate, distributing evenly to avoid tearing the crust.
    → Chocolate adds richness and contrasts with almond biscotti; fold gently to maintain structure.
  • Toast 2 tablespoons finely chopped almonds until fragrant and lightly browned; fold into the filling or sprinkle on top of the glaze after it sets for extra crunch and aroma.
    → Toasting concentrates nut oils, amplifying aroma and delivering a toasty contrast to the sweet filling.
  • Sprinkle 1 tablespoon turbinado sugar on the glaze while it is still tacky for extra crunch and a sparkling finish.
    → Turbinado sugar holds up to moisture and retains crunch, complementing the soft interior with a crisp top.
  • Store any remaining biscotti pop tarts in an airtight container at room temperature for up to 3 days, or freeze for up to 1 month; reheat briefly before serving if desired.
    → Proper storage preserves texture and flavor; freezing and gentle reheating restore crispness without making the crust soggy.

Notes

These biscotti pop tart zucchero di canna are a biscotti-inspired treat with a brown-sugar crust and a fragrant almond breeze from the biscotti and orange zest. To achieve a tender yet sturdy crust, keep your ingredients cold and handle the dough as little as possible—cut the cold butter into the flour until you have pea-sized pieces, then bind with the egg and just enough ice water. Chill the dough for at least 30 minutes to relax the gluten and prevent shrinking during rolling. If you need a gluten-free version, substitute with a 1:1 gluten-free flour blend and add an extra tablespoon or two of ice-cold water as needed to bring the dough together. The filling comes together from finely crushed biscotti, melted butter, and brown sugar for a cohesive layer that stays put between crusts as it bakes.

For best results, roll the dough between parchment until it’s about 1/8 inch thick, then cut into rectangles. Layer with the biscotti filling, seal with the top crust, and crimp the edges. Chill the assembled pop tarts again before baking to maintain clean edges and prevent leakage. Bake until the crust is firm and lightly goldened, then cool completely before glazing to ensure a glossy, set top.

Glaze highlights include a smooth powdered-sugar finish with enough milk or cream to reach a pourable consistency. Vanilla extract heightens the almond notes, and a hint of almond extract is optional for a more pronounced aroma. If you prefer a citrus lift, a touch of orange zest can be stirred into the glaze as well. Adjust the glaze thickness by varying the liquid and sift the sugar if lumps form to ensure an even coating.

Optional add-ins let you customize the texture and flavor: 1/4 cup mini chocolate chips folded into the filling for melty pockets; 2 tablespoons toasted chopped almonds for extra crunch; and 1 tablespoon turbinado sugar sprinkled on top of the glaze before it sets for a subtle sparkle and crunch. You can experiment with more zest, a pinch of cinnamon, or a dash of fleur de sel to balance sweetness.

Storage and serving: baked pop tarts can be stored in an airtight container at room temperature for up to 3 days, or refrigerated for up to 5–7 days. Freeze unbaked assembled pastries for up to 1–2 months and bake from frozen, adding a few extra minutes to the bake time. Freeze baked pastries in a single layer, then transfer to a bag; reheat in a toaster oven or conventional oven until warm and the glaze is glossy again. For serving, enjoy with a cup of coffee or tea; they reheat beautifully and maintain a crisp edge when warmed gently.

Tips

Consigli per l’impasto di base

  • Mantieni tutti gli ingredienti freddi: burro tagliato a cubetti, uovo freddo e acqua fredda. Il freddo aiuta a creare una crosta friabile e a evitare una pasta elastica.
  • Lavora velocemente: taglia il burro nella farina fino a ottenere pezzi grandi quanto una lenticchia (peSize). Questo crea strati friabili una volta in forno.
  • Per una versione senza glutine, sostituisci la farina con una miscela 1:1 per uso forno e aggiungi 1–2 cucchiai di acqua fredda extra se necessario per legare l’impasto.
  • Non lavorare eccessivamente l’impasto: una lavorazione prolungata svilupperebbe troppo glutine e renderebbe la crosta elastica.
  • Stendi l’impasto tra due fogli di carta forno in uno spessore di circa 0,3–0,5 cm e lascialo riposare in frigorifero per almeno 30 minuti prima di tagliare.

Consigli per la farcitura

  • Non macinare i biscotti fino a una polvere: vogliamo una consistenza a granuli per dare corpo al ripieno.
  • Lascia che il burro fuso si raffreddi leggermente prima di mescolarlo con i biscotti tritati per evitare grumi noiosi.
  • La zucchero di canna chiaro aggiunge umidità e caramellizzazione; se vuoi una nota più intensa, usa una quantità leggermente maggiore di zucchero.
  • Se usi scorza d’arancia, assicurati di utilizzare solo la parte colorata della zest (evita la parte bianca amara).
  • Per una versione non ben fresca, prepara la farcitura poco prima di assemblare; troppo tempo a temperatura ambiente può far perdere la coesione al ripieno.

Consigli per la glassa

  • Siftare lo zucchero a velo evita grumi e dona una superficie lucida e uniforme.
  • Aggiungi il liquido poco alla volta per controllare la densità: una glassa troppo densa non spennellerà bene, una troppo liquida colerà.
  • Per una finitura più brillante, aggiungi vaniglia all’impasto della glassa e, facoltativamente, un tocco di estratto di mandorla.

Varianti e abbinamenti

  • Inserisci piccole gocce di cioccolato fondente nella farcitura per un contrasto goloso con la noce/mandorla degli biscotti.
  • Un cucchiaino di scorza di limone o di arancia può sostituire il zest arancia per una fresca nota agrumata.
  • Per una versione più croccante, aggiungi 1–2 cucchiai di granella di mandorle tostate all’impasto o alla farcitura.

Calibrazione e cottura

  • Stendi la pasta in rettangoli uniformi; per evitare deformazioni, raffredda i pezzi tagliati prima di farcirli (15–20 minuti in frigorifero).
  • Cuoci a forno preriscaldato a circa 180–190°C finché i bordi diventano dorati; in genere 18–22 minuti, a seconda dello spessore.
  • Quando si glassa, lascia raffreddare completamente le tart prima di stendere la glassa per evitare che coli o si stacchi.

Conservazione e porzionamento

  • Una volta freddi, conservare in contenitore ermetico a temperatura ambiente per 2–3 giorni; per salvarli più a lungo, congelare sia i biscotti che la glassa separatamente e glassarli al momento di servirli.
  • Per porzionare: taglia i biscotti in rettangoli prima di infornarli; in questo modo otterrai pezzi uguali pronti da glassare e servire.

FAQ

Che cosa significa Biscotti pop tart zucchero di canna?

È una versione dolce ispirata al pop-tart: una pasta frolla aromatizzata allo zucchero di canna che racchiude una crema o confettura, chiusa da un secondo disco di impasto e cotta fino a doratura.

Quali sono gli ingredienti base?

Pasta: 250 g farina 00, 120 g burro freddo a cubetti, 90 g zucchero di canna, 1 uovo, un pizzico di sale, scorza di limone (facoltativa).

Ripieno: confettura o crema a scelta (cioccolato, nocciole, marmellata, ecc.).

Quali utensili servono?

Stendi-pasta tra due fogli di carta forno, mattarello, stampi o coppapasta per dischi, teglia, spatola e un pennello da cucina per spennellare. Forno preriscaldato.

Come si assembla e cuoce?

Stendi la prima metà dell’impasto, ritaglia un disco, farcisci al centro con poco ripieno, copri con la seconda metà e sigilla bene i bordi. Spennella la superficie con uovo sbattuto (o latte vegetale). Cuoci in forno a 180°C per 12–15 minuti, finché dorati.

Posso fare la versione senza glutine?

Sì. Sostituisci la farina con una miscela senza glutine di buona qualità e adatta la quantità di liquidi se necessario. Evita eventualmente l’uso di lievito se non previsto dalla miscela.

È possibile una versione vegana?

Sì. Usa burro vegetale al posto del burro e sostituisci l’uovo con una purea di banana, mele o una miscela di semi di lino tritati con acqua (1 cucchiaio di semi di lino + 3 cucchiai di acqua per ogni uovo).

Come conservare i biscotti?

Una volta raffreddati, conservali in contenitore ermetico a temperatura ambiente per 2–4 giorni. Per prolungarne la durata, puoi congelare sia l’impasto che i biscotti cotti (fino a 2–3 mesi).

Quali varianti di ripieno funzionano bene?

Confettura di albicocca, lamponi, pesca, crema di nocciole, crema al cioccolato o una combinazione marmellata + crema. Aggiungi una spolverata di scorza d’arancia o cannella per un tocco speziato.

Come ottenere una pasta friabile senza romperla?

Tieni il burro molto freddo, lavora poco l’impasto e lascialo riposare in frigorifero 30–60 minuti prima di stenderlo. Evita troppa farina durante il stendere per non rendere la pasta dura.

Perché a volte la farcitura fuoriesce dai bordi?

Assicurati di non riempire troppo, sigilla bene i bordi con una leggera pressione lungo tutto il perimetro e usa una forchetta per chiudere bene la pasta. Se necessario, refrigerare 10–15 minuti prima di infornare per mantenere la chiusura.

Introduzione / Hook

Immagina una teglia che sprigiona un profumo caldo e avvolgente: miele dorato che inizia a caramellare, senape che offre una nota pungente ma equilibrata, e la pelle del pollo che diventa croccante come una piccola crosta di gioia. Pollo al forno con senape e miele è quel tipo di piatto che sembra semplice ma sorprende con una profondità di sapori che sembra provenire da una cucina più articolata. È una ricetta che parla di casa, di comodità, di cene in famiglia e di pranzi condivisi con chi ami. Il segreto non sta nell’ingrediente miracoloso, ma nel bilanciamento perfetto tra dolcezza e piccantezza, tra morbidezza all’interno e una leggera croccantezza all’esterno. Prepararla è un gesto di cura: una marinata che si trasforma in una glassa lucida, una cottura che rende la carne tenera e profumata, e una presentazione che invita a servire subito, con un sorriso soddisfatto sulle labbra. Lasciati guidare da questa combinazione classica ma sempre sorprendente: una sinfonia di miele e senape che trasforma un semplice pezzo di pollo in un piatto che sembra scritto per una tavola festosa, ma resta facile da realizzare anche nelle serate più impegnate.

La storia del piatto

La combinazione di miele e senape è una delle sinfonie culinarie più amate d’Europa, nata dall’incontro tra la dolcezza dei mieli naturali e la pungente complessità della senape. In molte tradizioni, la glassa a base di miele è stata usata per sigillare la carne durante la cottura, creando una salsa lucida che richiama l’abbondanza della tavola di festa. La senape, con le sue sfumature che vanno dal piccante al speziato, è stata a lungo un ingrediente di confine tra la cucina rustica e quella raffinata: una nota pronta a tagliare la dolcezza e a dare carattere al piatto. Se guardiamo oltre l’Italia, vediamo come la combinazione miele-senape sia stata celebrata in regioni come l’Alsazia e la Germania, dove i piatti di carne al forno spesso si vestono di una glassa brillante che cattura i profumi delle erbe e dei mieli locali. In contesti italiani, questa ricetta si è evoluta in una versione confortevole e accessibile: pochi ingredienti semplici, una marinata che si riduce in una glassa fragrante, e una tecnica di cottura che valorizza la carne senza complicarla. È una ricetta che racconta di viaggi, di scoperte culinarie e di come la cucina possa trasformare ingredienti comuni in qualcosa di speciale. È anche un piatto che si adatta a molte tradizioni familiari: la tavola delle domeniche, una serata tra amici o una cena veloce ma piena di carattere. Ogni famiglia ha la sua versione, e questa è una base solida su cui sperimentare, adattando le note a seconda di ciò che avete in dispensa o a seconda dei vostri gusti personali.

Perché amerai questa ricetta

  • Equilibrio perfetto tra dolce e piccante: la dolcezza del miele incontra la punta pungente della senape, creando un sapore completo che non risulta mai stucchevole.
  • Preparazione semplice, risultato da ristorante: pochi passaggi, una teglia unica e una glassa che fa tutto il lavoro per te.
  • Versatile e adatta a molte esigenze: funziona con pollo intero, cosce o petti; si presta a versioni light o più robuste a seconda di come la cucini e dei tempi di glassatura.
  • Cottura a prova di errore: la glassa tende a caramellare in modo uniforme, proteggendo la carne da asciugature e conferendo una croccantezza invitante.
  • Perfetta per pasti in famiglia o cene conviviali: è un piatto che conquista per sapore, ma resta semplice da preparare, così puoi goderti la compagnia senza stress.
  • Adatta a varie diete e preferenze: se usi senape senza glutine o miele monofloreale, o se decidi di mantenere una versione vegana o vegetariana, puoi adattare gli ingredienti facilmente senza compromettere la magia del piatto.

Profilo di sapore e consistenza

Questo piatto racconta una storia di contrasti armoniosi. All’esterno, la pelle del pollo diventa dorata e leggermente croccante grazie alla glassa di miele che si riduce in una lucida patina. Ogni morso rivela una leggera resistenza al primo contatto, seguito da una tenerezza succosa e succedanea. La dolcezza del miele crea una cornice luminosa che mette in risalto l’umami della carne, mentre la senape aggiunge una nota di asprezza sottile e avvolgente, capace di tenere insieme l’insieme senza sovrastare. Se si aggiungono erbe aromatiche come rosmarino o timo, emergono note resinose che rimandano a prati mediterranei, offrendo una profondità ancora maggiore. Alcune varianti con spicchi di aglio rosolato o scorza di limone grattugiata elevano la cipria di gusto, offrendo un profilo aromatico che si modula a seconda delle preferenze. Il gioco tra la superficie lucida e il centro morbido è una parte essenziale dell’esperienza: è come un abbraccio che cambia consistenza ad ogni morso, lasciando dietro di sé un retrogusto delicato di senape che rimane leggermente piccante, ma senza pungire in modo eccessivo. Tutto sommato, si tratta di un piatto bilanciato, capace di passare in poche ore dal comfort food a una proposta che si fa notare, ma senza ostentazione. L’equilibrio tra i sapori è facilitato anche da un accenno di acidità, spesso introdotto con una spruzzata di succo di limone o un po’ di aceto nella marinatura, che aiuta a rendere la salsa brillante e a mantenere la carne tenera durante la cottura.

Occasioni & abbinamenti

Questo piatto si inserisce splendidamente in molte occasioni, rendendolo un classico senza tempo nel repertorio di casa. È ideale per cene in famiglia durante il fine settimana, quando vuoi un piatto che sia gustoso ma non troppo impegnativo da preparare. Può essere la star di una tavolata per le festività, ma resta altrettanto perfetto per una serata tra amici o per una cena romantica a casa. La sua semplicità non nega la capacità di impressionare: una glassa lucida e profumi avvolgenti siedono al centro della tavola, accompagnati da contorni colorati e saporiti. Per quanto riguarda gli abbinamenti, ecco alcune proposte:

  • Contorni: patate arrosto croccanti, purè di patate vellutato, verdure al forno come carote, zucchine e cipolle, o una salsa di-up di cavolo roso per aggiungere una nota croccante.
  • Verdure: insalate fresche con agrumi per bilanciare la dolcezza, o un contorno di spinaci saltati all’aglio per aggiungere sapidità verde.
  • Pangrattato aromatizzato: una spolverata di erbe aromatiche o scorza di limone grattugiata può completare la nota agrumata.
  • Vini abbinati: un bianco fresco e aromatico come Sauvignon Blanc, Soave o un Chardonnay non troppo oak accompagna bene la dolcezza della glassa; se preferisci rosso leggero, pinot nero o un valpolicella giovane possono essere scelte interessanti.
  • Dolci e chiusura: una torta di pere o una crostata al limone per chiudere la cena con una nota leggera di frutta e agrumi.

Varianti, consigli e sostituzioni

Una ricetta così semplice offre ampio spazio alla personalizzazione. Ecco alcune idee pratiche per adattarla a gusti diversi, necessità alimentari o a ciò che avete in dispensa:

  • usa pollo intero o cosce di pollo con pelle, marinando 20-30 minuti o anche più a seconda del tempo a disposizione; cuoci fino a doratura e glassa ben raggrinzita.
  • riduci la quantità di miele e sostituisci parte del liquido con brodo di pollo o succo di mela per una dolcezza più sottile; la pelle resta croccante se si termina la cottura a broil breve per scurire la superficie.
  • aggiungi scorza di limone o arancia grattugiata per un tocco agrumato che taglia la dolcezza e aggiunge freschezza.
  • soffriggi aglio schiacciato e rosmarino o timo nella teglia prima di aggiungere il pollo, in modo che i sapori si fondano durante la cottura.
  • se usi senape a grani, la texture aggiungerà una nota croccante bocca, bilanciando la morbidezza interna del pollo.
  • sostituisci il pollo con pezzi di cavolo o tofu, marinandoli in una miscela di senape, miele (o sciroppo d’acero per una versione completamente vegana) e olio, e falla glassare come indicato; la consistenza e la colorazione saranno diverse, ma i sapori rimangono incisivi.
  • questa ricetta è naturalmente gluten-free se si sceglie una senape senza glutine e un miele non contaminato; assicurati di verificare le etichette degli ingredienti.
  • una spolverata di pepe nero, paprika affumicata o cumino può donare una profondità terrosa al piatto, mentre una manciata di scorza di limone aggiunge una nota brillante finale.

Conservazione e idee per prepararlo in anticipo

Come molte grandi ricette, anche questa si presta bene a essere preparata in anticipo o a essere conservata per future cene. Ecco alcune strategie per mantenere la massima qualità senza rinunciare al sapore:

  • Avanti con anticipo: puoi mescolare la marinata di senape e miele la sera prima e lasciare riposare il pollo in frigorifero in una ciotola chiusa, o in un sacchetto richiudibile. L’aroma si potenzia e la carne assorbe più sapore.
  • Conservazione delle porzioni: una volta cotto, conserva gli avanzi in contenitori ermetici in frigorifero per 3-4 giorni. Riscalda delicatamente in forno o in microonde per un risultato ancora gustoso.
  • Congelazione: è possibile congelare il pollo cotto con la glassa per fino a 2-3 mesi. Scongela lentamente in frigorifero prima di riscaldarlo per evitare la perdita di consistenza.
  • Riscaldamenti e trucchi: per mantenere la glassa lucida, riscalda a temperatura moderata in forno o su fuoco basso, e se necessario aggiungi un piccolo tocco di miele o di olio per riportare la lucentezza.
  • Make-ahead creativo: per un pasto veloce, prepara una versione in teglia più grande e usa porzioni come condimento per panini, insalate calde o piatti di riso; il sapore si presta a molte reinterpretazioni.

Curiosità & Trivia (Opzionale)

Il connubio miele e senape non è solo una combinazione di gusti; è anche una piccola finestra sulla storia gastronomica europea. Il miele era celebrato come dolcificante prezioso in epoche antiche, spesso associato a pane, formaggi e piatti di carne, in quanto offriva una dolcezza intensa senza la pesantezza di zuccheri raffinati. La senape, amata fin dai tempi antichi, era considerata una spezia non solo per il sapore, ma anche per la sua capacità di stimolare l’appetito. In molte cucine regionali, la sinergia tra miele e senape veniva usata per sigillare carne e migliorare la conservazione. Con l’avvento delle tradizioni culinarie più moderne, questa combinazione è diventata una firma di comfort meals che si adatta a cucine di tutto il mondo. Oggi, Pollo al forno con senape e miele è un simbolo di convivialità: una ricetta che, pur nella sua semplicità, racconta storie di tavole piene, di vino condiviso e di mani attente che preparano la cena con cura. Se vuoi ampliare questa esperienza, prova a variare tipi di miele (acacia, millefiori, castagno) o tipi di senape (di Digione, senape in granuli) per scoprire nuove sfumature che invitano a ritornarci per un’altra porzione.

Ingredients

Pollo al forno con senape e miele

    – 4 bone-in, skin-on chicken thighs (about 1.4–1.8 lb / 680–820 g)
    → These thighs provide juicy meat and crisp skin when roasted. Pat them dry with paper towels before seasoning to promote browning, and space them on the baking tray for even heat exposure. If you prefer white meat, you can substitute with boneless skinless chicken breasts, but the glaze adheres best to the thighs.
    – 2 tbsp olive oil (extra-virgin)
    → The oil helps distribute the glaze evenly, aids browning, and prevents sticking. Let the oil come to room temperature before whisking it with mustard and honey to ensure a smooth, cohesive coating.
    – 3 tbsp Dijon mustard
    → Provides bright acidity and tang that cut through the sweetness of the honey and helps emulsify the glaze so it clings to the chicken. For extra texture, you can mix in 1 tbsp whole-grain mustard.
    – 2 tbsp honey
    → Delivers sweetness and a glossy glaze that caramelizes during roasting. Use honey with a mild floral or light flavor to avoid overpowering the chicken; warm honey slightly if it’s very thick to help it blend with the mustard.
    – 2 garlic cloves, minced
    → Adds aromatic depth and a subtle sharpness that complements the honey-mustard glaze. Mince finely to ensure the garlic distributes evenly and doesn’t burn during roasting.
    – 1 tbsp fresh lemon juice
    → Brightens the glaze, balancing sweetness and acidity. Use freshly squeezed juice for best aroma; if lemons are small, you can add a second teaspoon to taste.
    – 1/2 tsp salt
    → Essential for drawing out flavors and enhancing the glaze. Add gradually, especially if your chicken has been brined or if you’re using salted stock; you can adjust after tasting the glaze once.
    – 1/4 tsp ground black pepper
    → Adds gentle heat and aromatic complexity. Freshly ground pepper is preferable for a stronger, more vibrant aroma; scale back if you prefer milder seasoning.

Condimenti e aromi

    – 1/2 tsp smoked paprika (optional)
    → Imparts a subtle smoky note and a bit of color that pairs well with honey and mustard. If you skip it, the dish remains lighter in color and flavor; you can substitute with regular paprika for a milder nuance.
    – 1/2 tsp dried thyme or rosemary, crushed
    → Introduces herbal brightness that complements poultry. Crushing dried herbs between your fingers releases essential oils; use fresh herbs at the end as a garnish if desired.
    – 1–2 tbsp water or chicken stock (to loosen glaze if needed)
    → If the glaze thickens too much during mixing or coating, whisk in a little water or stock to achieve a spoonable consistency that coats the chicken evenly. Start with 1 tablespoon and add more as necessary.
    – Fresh parsley, chopped (optional, for garnish)
    → Brightens the final presentation and adds a fresh note to contrast the rich glaze. Sprinkle after baking to preserve color and aroma; not essential to flavor but visually appealing.

Instructions

  • Preheat your oven to 425°F (220°C) and line a large rimmed baking sheet with parchment paper or foil, then set a wire rack on top if available; this setup promotes even heat circulation and prevents the thighs from sitting in accumulated fat.
    → Higher heat promotes rapid browning and a crisp skin, while the rack ensures air can reach all surfaces for uniform cooking.
  • Pat the bone-in, skin-on chicken thighs dry with paper towels and arrange them skin-side up on the prepared pan; removing surface moisture is essential for achieving a crisp crust.
    → Dryness on the skin helps render fat and promotes Maillard browning rather than steaming.
  • In a small bowl, whisk together 2 tablespoons olive oil, 3 tablespoons Dijon mustard, 2 tablespoons honey, 2 minced garlic cloves, 1 tablespoon fresh lemon juice, 1/2 teaspoon salt, 1/4 teaspoon black pepper, and, if using, 1/2 teaspoon smoked paprika and 1/2 teaspoon dried thyme or crushed rosemary to form a smooth glaze.
    → This emulsified glaze coats the chicken evenly, providing sweetness, acidity, and aromatic depth that balance the rich meat.
  • If the glaze appears too thick to coat evenly, whisk in 1 tablespoon water or chicken stock at a time until you reach a spoonable consistency that will cling to the skin without running off.
    → A balanced, pourable glaze ensures even coverage and prevents pooling that can burn during roasting.
  • Brush half of the glaze over the skin-side surfaces of the thighs, turning them to ensure an even initial coating that adheres to the skin; this base layer begins flavor adhesion and helps the glaze set as the fat renders.
    → A thorough initial coat ensures every bite carries flavor from the glaze and promotes uniform browning.
  • Roast the thighs in the preheated oven for about 20 minutes to start browning and render some fat; this initial stage helps the skin start to crisp while the glaze begins to caramelize.
    → Early browning locks in moisture and creates a texture contrast between crisp skin and tender meat.
  • Remove the tray from the oven, rotate the pan 180 degrees for even heat exposure, and brush the remaining glaze over all surfaces of the thighs; this second application deepens flavor and enhances gloss.
    → Rotating counters oven hot spots and a second glaze layer yields a more uniform color and richer taste.
  • Return the tray to the oven and continue roasting until the chicken reaches an internal temperature of 165°F (74°C) in the thickest part, about 10–15 more minutes, checking with an instant-read thermometer as you approach the end to avoid overbrowning.
    → Safety and juiciness are ensured by proper internal temperature, while still achieving a glossy, caramelized glaze.
  • If the glaze begins to darken too quickly, loosely tent the thighs with foil and reduce the oven temperature by about 25°F (15°C); finish cooking with gentler heat to prevent scorching while the chicken finishes cooking.
    → Tenting preserves color and glaze while allowing the interior to reach doneness without burning the exterior.
  • Remove the pan from the oven and let the thighs rest on the baking sheet for 5–10 minutes; resting redistributes juices and yields a juicier bite with the glaze setting further.
    → Resting stabilizes the juices, making carving and plating easier and preventing runny juices on the plate.
  • Chop fresh parsley and sprinkle over the finished dish for a bright, herbal note and visual contrast; garnish is optional but enhances presentation and aroma.
    → Fresh herbs lift the dish’s aroma and provide a color contrast that complements the glossy glaze.
  • Serve the Pollo al forno con senape e miele with lemon wedges or a light accompaniment such as roasted vegetables or a simple salad to balance the sweetness of the glaze.
    → Acidity from lemon and fresh greens balance the honey-mustard notes, creating a complete, well-rounded meal.

Notes

These honey-mustard roasted chicken thighs deliver juicy meat with a glossy, tangy glaze that caramelizes beautifully as they bake. To get the best browning, pat the thighs dry, leave them skin-side on, and space them evenly on the tray so air can circulate. Whisk the olive oil, Dijon mustard, honey, garlic, lemon juice, salt, and pepper until smooth so the glaze clings and emulsifies easily.

Spread or brush the glaze over the chicken, turning to coat all sides. If the mixture thickens, whisk in 1 tablespoon (or more) of water or chicken stock to reach a spoonable consistency that coats rather than pools. For deeper flavor, sprinkle the optional smoked paprika and crush dried thyme or rosemary into the glaze or sprinkle over the chicken before baking.

Roast in a hot oven (around 200–220°C / 400–425°F) until the internal temperature reaches 74°C / 165°F and the skin is crispy, about 35–45 minutes depending on size. If you like extra caramelization, finish under the broiler for 1–2 minutes watching carefully to avoid burning. You can baste once or twice during roasting for a more even glaze.

Let the dish rest 5–10 minutes after removing from the oven; this helps juices redistribute. Garnish with chopped fresh parsley for color and a bright aroma. Serve with roasted vegetables, potatoes, or a simple green salad to balance the rich glaze. If preparing ahead, you can marinate the chicken in the glaze for up to 2 hours in the fridge before roasting. Leftovers keep refrigerated for 2–3 days and are delicious reheated gently or served cold on salads or sandwiches.

Tips

Consigli utili per Pollo al forno con senape e miele

  • Prima della cottura, asciuga bene ciascun pezzo di pollo con carta da cucina. La pelle asciutta aiuta a ottenere una doratura e una croccantezza migliore durante la rosolatura.
  • Se possibile, lascia il pollo a temperatura ambiente per 20–30 minuti prima di infornare. Questo aiuta una cottura più uniforme e una pelle croccante.
  • Prepara la glassa mescolando olio d’oliva, Dijon, miele, aglio, succo di limone, sale e pepe. Se vuoi un tocco in più di profondità, aggiungi 1 cucchiaino di paprika affumicata o ½ cucchiaino di timo secco (o rosmarino).
  • Per evitare contaminazione incrociata, separa una piccola porzione di glassa prima di mescolarla con il pollo. Usa questa porzione per spennellare durante la cottura e mantieni una glassa fresca per l’ultimo trattamento.
  • Se la glassa risulta troppo densa, allunga con 1 cucchiaio di acqua o brodo di pollo fino a ottenere una consistenza spennellabile.
  • Distribuisci le cosce su una teglia in un solo strato, preferibilmente su una griglia o su carta forno, in modo da permettere una buona circolazione dell’aria e una doratura uniforme.
  • Ruota la teglia a metà cottura per garantire una doratura uniforme su tutti i pezzi. Se vuoi una pelle extra croccante, accendi il grill per 1–2 minuti alla fine, controllando attentamente.
  • Cuoci a 200°C (circa 400°F) per circa 35–45 minuti, o finché la carne non raggiunge 74°C (165°F) al centro. Il tempo può variare a seconda dello spessore delle cosce.
  • Lascia riposare il pollo 5–10 minuti prima di servirlo. Il riposo permette ai succhi di ridistribuirsi e mantiene la carne succosa.
  • Per una presentazione fresca, cospargi prezzemolo tritato al momento e accompagna con spicchi di limone. La nota di limone esalta la salsa senape-miele.
  • Varianti utili: se usi cosce disossate e senza pelle, riduci leggermente i tempi (circa 25–30 minuti) e controlla la cottura con un termometro.
  • Preparazione in anticipo: la glassa si può preparare in anticipo; conserva in frigo e porta a temperatura ambiente prima di usarla. Puoi anche preparare una porzione extra da tenere da parte per spennellare durante la cottura.

FAQ

Cos’è Pollo al forno con senape e miele?

È un secondo piatto di pollo cotto al forno con una glassa dolce-salata a base di senape Dijon e miele. Il sapore è aromatico, leggermente pungente dalla senape e dolce dal miele, con una doratura gustosa e carne tenera.

Quali ingredienti servono per 4 porzioni?
  • 1 kg di pollo (cosce o sovracosce preferite)
  • 3 cucchiai di senape Dijon
  • 2 cucchiai di miele
  • 2 cucchiai di olio extravergine d’oliva
  • 2 spicchi d’aglio, tritati
  • Succo di mezzo limone
  • Sale e pepe q.b.
  • Aromi a piacere: timo o rosmarino, paprika opzionale
Posso usare cosce di pollo o petto di pollo?

Sì. Le cosce tendono a restare più morbide e succose, mentre i petti si cuociono più rapidamente e possono risultare più asciutti. Se usi petto, valuta una marinatura più breve e una cottura leggermente più breve per evitare asciugature.

A che temperatura e per quanto tempo cuocere?

Preriscalda il forno a 200°C (390–400°F). Cuoci circa 35–45 minuti a seconda dei pezzi e dello spessore. Controlla che la temperatura interna del pollo raggiunga almeno 74°C (165°F).

Come preparo la glassa di senape e miele?

In una ciotola, mescola 3 cucchiai di senape Dijon, 2 cucchiai di miele, 2 cucchiai di olio EVO, aglio tritato, succo di mezzo limone, sale e pepe. Spennella la glassa sul pollo prima della cottura e, se vuoi, durante la cottura per una doratura più intensa; aggiungi un’ultima spennellata a fine forno.

Come evitare che la glassa bruci?

Per limitare la bruciatura: copri la teglia con carta stagnola durante la prima metà della cottura, usa una teglia antiaderente o rivestita di carta forno, e aggiungi miele solo negli ultimi 10–15 minuti. Se la glassa tende a scurirsi troppo, abbassa leggermente la temperatura.

Posso marinare il pollo prima della cottura?

Sì. Marinare 2–4 ore in frigorifero intensifica i sapori; puoi anche lasciarlo una notte. Tampona bene il pollo prima di infornarlo per rimuovere l’eccesso di liquido e ottenere una crosta migliore.

Quali contorni si accompagnano bene?

Patate arrosto o patate dolci, verdure al forno (carote, zucchine, cipolle), riso pilaf o una fresca insalata verde. Una salsa al limone o yogurt greco leggero può completare il piatto.

Come conservare gli avanzi e come riscaldarli?

Conserva in frigorifero in contenitore ermetico per 3–4 giorni. Per riscaldare, in forno a 160°C per 10–15 minuti oppure in padella con un po’ di brodo o acqua per evitare di seccare il pollo. Il forno mantiene meglio la croccantezza rispetto al microonde.

Varianti e sostituzioni per gusti diversi

Per una versione più piccante aggiungi pepe di Cayenna o peperoncino. Se vuoi meno dolce, riduci il miele o sostituiscilo con sciroppo d’acero. Puoi sperimentare con senape in grani per una nota più pungente, o usare erbe diverse come origano o basilico. Assicurati che la senape sia gluten-free se necessario.

Introduction / Hook

Close your eyes and picture a sunlit afternoon, the kind where a gentle breeze sways the leaves and the kitchen is perfumed with vanilla, vanilla-sweet cream, and the bright scent of ripe strawberries. In that moment, a dessert arrives on the table that feels both comforting and exciting—a cheesecake with a playful crunch that dances between silky luxury and carefree crunch. This is Cheesecake crunch alle fragole, a celebration of contrasts that somehow harmonize into one unforgettable bite. The creaminess of a classic cheesecake meets the lively snap of a crispy topping, while the strawberries—lusciously vibrant—bring a sun-drenched, summery brightness that makes every mouthful feel like a small taste of la dolce vita. It’s not merely a dessert; it’s a story told in textures, a conversation between richness and zing, a dish that invites you to slow down, savor, and share.

What makes this dessert so compelling is its ability to surprise without straying from familiar comforts. The base exudes a gentle, biscuit-like sweetness, the middle sways between indulgent creaminess and airy lightness, and the crown—an artful strawberry chorus—adds color, perfume, and a touch of tartness that keeps the palate engaged. When you take a bite, you first encounter the satisfying crack of the crunch, followed by the creamy, dreamy interior, and then a striking note of fresh strawberry that lingers like a summer breeze. It’s the kind of dish that begs to be photographed, shared, and—perhaps most importantly—delved into with a fork that’s not shy about taking seconds.

Though the name carries a hint of Italian charm with alle fragole, the spirit of this cheesecake is universal: a celebration of simple ingredients treated with care, transformed into something memorable through texture, balance, and a sense of joy. It’s the kind of recipe you can imagine serving after a family meal, at a festive party, or as a bright weekend finale that leaves guests smiling and asking for the story behind its delightful crunch. And because it invites a little improvisation, it welcomes variations that honor dietary needs and taste preferences without ever losing its signature personality. Let this cheesecake be your invitation to playful dessert-making—an elegant, crowd-pleasing centerpiece that feels like a hug on a plate, a dessert that turns any moment into a small ceremony of sweetness and delight.

The Story Behind the Dish

Cheesecake has a long, winding history that stretches across continents, from ancient civilizations to modern kitchens. The creamy, tangy dream at the heart of this dessert owes lineage to traditional cheesecakes that played with dairy, sugar, and sometimes citrus, evolving with regional flavors and available ingredients. When you add “alle fragole” to the name, you’re inviting a strawberry-forward Italian influence into the narrative—one that nods to sunny Italian summers, seasonal markets bursting with red, jewel-like berries, and the simple pleasure of grown-up sweetness that still feels approachable to cooks at home. The strawberry’s natural acidity brightens the richness of cream cheese, like a warm Mediterranean breeze cutting through a cozy hillside kitchen. In many Italian and Italian-American traditions, fruit and cream come together to celebrate the everyday, turning a modest dessert into something special, something that invites conversation and lingering around the table.

There’s a charming anecdote behind similar combinations: bakers and nonna figures often pair a luscious, velvety filling with a contrasting crunch as a way to honor memory and craft. The crunchy topping can evoke the texture of a biscotto cantucci or a simple biscuit crumble, reminding us that texture is as important as taste. It’s not merely about sugar and dairy; it’s about how a bite unfolds—from the initial crack of crisp sweetness to the creamy center that whispers of vanilla, cream cheese, and a hint of lemon zest, and finally to the bright, aromatic finish of strawberries. In this dish, the strawberry is both garnish and star, a seasonal kiss that elevates the dessert from indulgence to a celebration of fruit’s natural perfume.

Over time, cooks have embraced the idea of combining a luscious interior with a memorable exterior—think of a cheesecake crowned with a crisp, nutty crumble or a gleaming layer of fruit. Cheesecake crunch alle fragole embodies that evolution. It’s a modern homage to the classics, built to travel well to parties, brunches, and picnics, while still feeling refined enough for a special occasion. The story is less about a single origin and more about a culinary dialogue—between tradition and innovation, between texture and tenderness, between the homely and the celebratory. And at its core lies the comforting truth that dessert can be both elegant and approachable, a dish that welcomes curious mouths and invites them to linger a little longer at the table.

Why You’ll Love This Recipe

  • Textural harmony. The delightful contrast between a crisp, crunchy topping and a creamy, lush filling creates a sensory experience that keeps every bite interesting and satisfying.
  • Bright, seasonal flavor. Juicy strawberries and their natural sweetness awaken the palate, balancing the tang of the cream cheese and the mellow sweetness of the base.
  • Versatility for occasions. This dessert works beautifully for weeknight celebrations, weekend gatherings, or holiday feasts, adapting from casual to refined with ease.
  • Visual appeal. The vibrant red of strawberries set against a pale, ivory cheesecake makes for a dessert that photographs beautifully and serves as a stunning centerpiece on the dessert table.
  • Comfort with a twist. It offers the familiar decadence of cheesecake but adds a modern crunch that surprises and delights, turning a classic into something contemporary.
  • Make-ahead potential. The components can be prepared in advance and assembled when ready, making it a practical choice for guests or busy weekends.
  • Inclusive adaptations. With thoughtful substitutions, it can be tailored to dairy-free, gluten-free, or lower-sugar preferences without sacrificing the spirit of the dish.

Flavor Profile & Texture

The flavor journey of Cheesecake crunch alle fragole begins with the first encounter: a crisp, golden crown that crackles gently under the pressure of a fork. The crust—or the crunchy layer that sits atop or around the cheesecake—offers a lightly caramelized sweetness with notes of butter, biscuit, and a whisper of almond or vanilla, depending on the chosen elements. This initial bite is a tease, a quick prelude to the luxurious interior that follows.

Inside, the cheesecake itself is smooth, silk, and deeply creamy, carrying a balanced tang that’s characteristic of properly balanced cream cheese. It’s never cloying; it carries a delicate brightness that may come from a touch of lemon zest or a whisper of vanilla. The texture is where the magic happens: the middle is lush and spoonable, almost cloud-like, yet sturdy enough to hold its shape when plated. It’s a dessert that invites long, slow tasting rather than a quick bite—an occasion to pause, appreciate the technique, and savor the contrast with the topping.

Across the surface, the strawberry component introduces a lively, juicy acidity with aromatic, sun-ripened sweetness. Fresh strawberries release their perfume as they meet the air, filling the palate with a fruity brightness that refreshes the mouth between bites. If the topping includes a light strawberry compote or a compact, glossy glaze, it adds a glossy sheen and a slightly syrupy texture that binds the whole experience without overpowering the creamy core. The overall effect is harmony: the crunch gives way to creaminess, which then yields to fruit-forward brightness, and the cycle begins anew with another forkful.

Texture-wise, the contrast is central. The crispness of the crunch layer provides a satisfying snap, the cheesecake’s interior delivers velvet tenderness, and the tender, succulent strawberries provide a burst of juiciness. The combination feels balanced—neither too rich nor too tart—creating a dessert that is indulgent yet approachable, a crowd-pleaser that still feels special. The aroma is equally inviting: warm dairy notes mingling with vanilla, bright fruit, and a gentle toasty scent from the crunchy topping. It’s a symphony of scent and feel that makes the dining experience immersive and memorable.

Occasions & Pairings

This dessert shines in a variety of settings. For summer gatherings, it’s a standout centerpiece that captures the season’s vitality while delivering the luxury of cheesecake. For casual weeknight dinners, it offers an elevated finish that feels thoughtful without requiring elaborate preparation. It also suits formal occasions when you want something dessert-forward that’s still accessible, a signature dish that guests remember long after the last crumb has vanished.

Pairing ideas to elevate the experience:

  • Drinks: A glass of sparkling Prosecco or Moscato complements the berries and the lightness of the cheesecake. For non-alcoholic options, a well-chilled strawberry-lime cooler or a peach-basil iced tea can echo the fruit and herbal notes beautifully.
  • Side dishes: Fresh berry salads with mint, a dollop of lightly whipped cream or mascarpone, or a citrusy granita can provide refreshing counterpoints that lift the overall meal.
  • Dessert pairings: A delicate almond biscotti, a shortbread finger, or a light lemon tart can offer a cohesive dessert trio, balancing textures and ensuring a satisfying progression of flavors.
  • Occasion ideas: It works wonderfully for Mother’s Day brunches, summer poolside parties, weekend family gatherings, and holiday menus where you want a show-stopping yet approachable dessert.

Tips, Variations & Substitutions

While the essence of Cheesecake crunch alle fragole remains consistent, there are plenty of ways to tailor it to your pantry, dietary needs, or seasonal produce. Here are ideas to consider as you plan or adapt this dessert:

  • Flavor accents: Add a hint of citrus zest (lemon or orange) to brighten the filling, or a splash of vanilla bean paste for a deeper vanilla note. A pinch of ground cardamom can offer an unexpected, subtle warmth that pairs surprisingly well with strawberries.
  • Crunch variations: Swap the base crunch with a hazelnut praline crumble, amaretti biscuits, or a mix of crushed biscuits and toasted almonds for a more pronounced nutty aroma. Gluten-free options can use gluten-free biscuits or toasted oats for texture.
  • Dairy adaptations: Use full-fat cream cheese for a richer, denser filling, or employ a dairy-free cream cheese substitute and coconut milk to maintain creaminess while accommodating dairy-free needs. For a vegan version, consider a plant-based cream cheese alternative and vegan butter in the crunch.
  • Crush and crumble balance: If you prefer a lighter crunch, reduce the amount of topping or substitute with a fine crumble made from gluten-free cookies or granola. For a crisp, macaron-like texture, you can sprinkle toasted almond slices on top just before serving.
  • Fruit variations: While strawberries are front-and-center, you can weave in raspberries or blueberries for a different berry profile, or use a peach-raspberry combination for a late-summer twist. A drizzle of berry coulis can intensify fruitiness without adding heaviness.
  • Make-ahead twists: Prepare the cheesecake filling a day in advance and refrigerate in a sealed container; assemble the crunch topping separately and add just before serving, or keep a baked, cooled crunch ready to layer with the filling when you’re ready to serve.
  • Size and presentation: Turn it into individual portions for easy sharing, or present as a grand, single-ruler cake for a formal table. Individual cups or mini-tarts with a compact crunch layer can be both elegant and practical for events.

Storage & Make-Ahead Ideas

To maintain texture and flavor, thoughtful storage is key. The cream cheese filling benefits from staying cool, so refrigerate any assembled portions promptly. If you’re keeping the dessert for a day or two, cover it tightly to prevent it from absorbing odors from the fridge. The crunch topping is best added just before serving to preserve its crispness, but you can prepare the crunch ahead and store it in an airtight container in a dry place for up to a week, then scatter it over the cheesecake when you’re ready to plate.

Freezing is also an option, though the texture may shift slightly upon thawing. If you plan to freeze, consider freezing the cheesecake portion without the crunch, wrapped well, and adding the crunch topping after thawing for service. When freezing the topping separately, store it in a sealed container and add it to the cheesecake once it’s thawed, just before slicing and serving. Reheating is generally not necessary for a cheesecake, which is best served chilled or at a cool, sliceable temperature, to preserve the creamy interior and the crisp exterior balance.

Make-ahead strategies:

  • Prepare the filling a day or two in advance and keep it well chilled; whip the topping or crumble just before serving for maximum crunch.
  • Assemble in individual portions ahead of time, then refrigerate. This makes for quick, elegant servings at gatherings, with minimal last-minute effort.
  • Set the stage by pre-slicing portions before guests arrive, so you can plate with confidence and present a clean, well-arranged dessert table.

Fun Facts & Trivia (Optional)

Did you know that cheesecake has appeared in many culinary traditions, spanning ancient civilizations where cheese was blended with honey and flour? The modern cheesecake’s soft, creamy texture is a testament to the refinement of dairy processing and the playful experimentation of bakers who discovered that chilling the filling produced a smoother set. The addition of a crunchy topping is a relatively modern delight that plays on the age-old love of combining contrasting textures in a single dish. In Italy, fruit-forward desserts celebrate the land’s abundance, and strawberries, with their bold color and perfume, are a natural fit for a dessert that wants to feel festive and a little theatrical. The combination of a luscious cheesecake with a strawberry-led bright finish embodies a culinary philosophy: simple ingredients, treated well, yield a result that is greater than the sum of its parts. If you listen closely, you might hear the soft crack of the crunch as it yields to the creamy center—a tiny reminder that dessert can be both comforting and exhilarating in the same bite.

Final Thoughts

Cheesecake crunch alle fragole is a tribute to balance—between luxury and approachability, between creamy indulgence and a crisp, gleaming finish, and between the familiar sweetness of cheesecake and the sunny brightness of strawberries. It is a dish designed to sit at the heart of a celebration, inviting friends and family to gather, to savor, and to share stories as they savor spoonfuls of a dessert that feels effortless yet thoughtfully crafted. Whether you’re serving it after a seasonal feast, presenting it as the centerpiece for a summer brunch, or simply treating yourself on a weekend, this cheesecake offers a sensory experience that lingers in memory long after the last bite. Enjoy the journey from first crack to final bite, and let the flavors of fragole transport you to a table where good company, bright fruit, and creamy decadence converge in perfect harmony.

Ingredients

  • Crust & Crunch Base
  • – 1 1/2 cups gluten-free cookie crumbs (e.g., gluten-free graham crackers)

    → The crust forms the base and provides structure. Use gluten-free crumbs so the entire cheesecake remains gluten-free. Mix with melted butter until the texture resembles wet sand, then press firmly into the pan to create an even, compact crust that won’t crumble when sliced. For best results, bake crust lightly (if baked) or chill well if preparing no-bake version.
  • – 5 tablespoons unsalted butter, melted

    → The melted butter binds the cookie crumbs into a cohesive crust. Ensure butter is fully melted and still warm when mixing so the crumbs cling together evenly. If you prefer, you can reduce to 4 tablespoons for a drier crust, but 5 tablespoons yields a sturdier base and richer flavor.
  • – 2 tablespoons granulated sugar (optional)

    → Adds a touch of sweetness to the crust and helps balance the tartness of the cheesecake. If your cookies are already sweet, omit. Use fine granules so they distribute evenly and don’t create gritty texture.
  • Cheesecake Filling
  • – 24 oz cream cheese, softened (680 g)

    → Cream cheese provides the creamy, tangy body of the cheesecake. Let it sit at room temperature so it blends smoothly with other ingredients, avoiding lumps. For a lighter texture, you can combine with a small amount of sour cream.
  • – 1 cup granulated sugar (200 g)

    → Sugar sweetens the filling and affects texture; beating with cream cheese creates a smooth, creamy batter. If you prefer a less sweet cake, reduce to 3/4 cup. For extra silkiness, sift sugar before adding to prevent graininess.
  • – 1/2 cup sour cream (120 ml)

    → Adds moisture and a slight tang, contributing to a creamy, dense texture. Use full-fat sour cream for best flavor; if you want a lighter texture, substitute with Greek yogurt strained to remove whey, but maintain flavor balance.
  • – 2 teaspoons pure vanilla extract

    → Vanilla boosts depth of flavor and rounds the tang from the cream cheese. For best results, use high-quality vanilla and a paste if available. If you have vanilla bean, scrape the seeds for an extra aromatic note.
  • – 1 tablespoon fresh lemon juice (optional)

    → Brightens the filling and helps balance richness. Use fresh lemon juice to preserve vibrant acidity. If you omit, consider a pinch of lemon zest for aroma instead.
  • – 3 large eggs

    → Eggs provide structure and help the filling set as it bakes. Add eggs one at a time on low speed to avoid overmixing, which can incorporate too much air and lead to cracks. Room temperature eggs mix in more smoothly for a silkier batter.
  • Strawberry Layer / Fresh Strawberries
  • – 2 cups fresh strawberries, hulled and sliced

    → Strawberries bring color and juicy sweetness that complements the creamy filling. Slice just before assembly to prevent color bleed, and arrange in an even layer or fold a few pieces into the batter for pockets of berry sweetness. For sweeter berries, maceration with a teaspoon of sugar can intensify the flavor.
  • – 2 tablespoons granulated sugar

    → Used to macerate the strawberries, drawing out juices and creating a glossy sauce-like release that blends with the cheesecake. Let sit for 15-20 minutes at room temperature to soften and sweeten; drain slightly if you want less juice in the final presentation.
  • – 1 tablespoon lemon juice

    → Adds brightness and counteracts the berry sweetness. Freshly squeezed lemon juice helps preserve the red color and enhances tartness that pairs with the creamy filling. If you omit, consider a pinch of zest for aroma.
  • Crunch Topping (Cornflake Crunch)
  • – 2 cups gluten-free cornflakes, lightly crushed

    → The cornflake crunch adds a crisp, sweet, crunchy contrast to the creamy cheesecake. Crush them lightly to large chunks; too fine will lose texture. If you cannot find gluten-free cornflakes, substitute with puffed rice cereal or crushed gluten-free cookies for a similar effect.
  • – 3 tablespoons granulated sugar

    → Coats the cornflakes to help them caramelize slightly during assembly, creating a crisp, sweet topping. You can reduce if your cornflakes are sugary or if you want a subtler crunch. Use gentle stirring to avoid turning the topping into a syrupy mass.
  • – 2 tablespoons unsalted butter, melted

    → Binds the cornflake crumble together and helps it crisp up when spooned or sprinkled on top. Ensure the butter is warm enough to coat evenly; mix until the cereal looks glossy and evenly coated.
  • – 1/2 teaspoon ground cinnamon (optional)

    → Adds warmth and complements the strawberry flavor, especially if using plain cornflakes. If not a fan, omit; a pinch of nutmeg or cardamom can offer a different aroma.

Instructions

  • Preheat your oven to 325°F (163°C) and prepare a 9-inch (23 cm) springform pan by lining the bottom with a round of parchment paper and greasing the sides; this ensures the cheesecake releases cleanly and the crust boundaries stay intact during baking.
    → A parchment circle prevents the crust from sticking to the pan bottom, while greasing the sides aids in smooth, even release when the cake cools.
  • Combine gluten-free cookie crumbs and the optional granulated sugar with the melted butter in a medium bowl; mix until the texture resembles wet sand so the crumbs bind evenly when pressed. Press the mixture firmly into the bottom and up about 1/2 inch on the sides of the pan to form a compact, uniform crust that will not crumble when sliced.
    → Proper binding and even distribution prevent crust gaps and provide a stable base for the creamy filling.
  • Bake the crust for 8–10 minutes at 325°F (163°C) until it just sets and smells toasty, then remove from the oven and let cool completely on a rack; if you prefer a no-bake approach, chill the crust for 20–30 minutes before filling.
    → A brief bake firms the crust for structure; chilling prevents slumping when the filling is added, especially in no-bake versions.
  • Mac­erate the strawberries by combining the 2 cups of sliced strawberries with 2 tablespoons granulated sugar and 1 tablespoon lemon juice in a bowl; let rest 15–20 minutes at room temperature to draw out juices and intensify sweetness while preserving bright color. Drain slightly if you want less juice in the final cheesecake.
    → Maceration concentrates strawberry flavor and creates a glossy juice that can be incorporated or controlled in the batter for balance.
  • In a large mixer bowl, beat the softened cream cheese on medium speed until creamy and smooth, about 2–3 minutes, stopping to scrape the bowl as needed to ensure a lump-free base. Add 1 cup granulated sugar and continue beating until fully integrated and silky.
    → Thorough creaming dissolves sugar for a uniform custard-like texture and prevents graininess in the final slice.
  • Beat in the sour cream and vanilla extract until the mixture is glossy and homogeneous; if using lemon juice, add it now and beat just until incorporated.
    → Sour cream contributes moisture and tang; vanilla rounds sweetness; lemon juice brightens the overall flavor without overpowering the filling.
  • With the mixer on low speed, add eggs one at a time, mixing just until each is incorporated before adding the next; avoid overmixing to prevent introducing air that can cause cracks.
    → Gentle incorporation preserves a dense, creamy texture and reduces cracks on the surface during baking.
  • Pour half of the filling into the cooled crust in an even layer; spoon half of the macerated strawberry mixture over this layer and drizzle a small amount of its juice; use a small offset spatula to distribute evenly. Then pour the remaining filling over the top to form a smooth surface.
    → Layering creates pockets of strawberry flavor and a visually appealing contrast while maintaining a stable structure for slicing.
  • Spread the remaining fresh strawberry slices over the top of the first filling layer or fold some into the remaining batter for pockets of fruit; gently swirl with a knife to create ribbons if desired for a marbled appearance.
    → Fresh strawberries add color, aroma, and bursts of sweetness without sinking into the filling when layered properly.
  • Wrap the outside of the sprung pan with a double layer of heavy-duty foil and place the pan in a larger baking dish; pour hot water into the outer dish until it reaches halfway up the sides of the springform to create a water bath that yields a creamy, even-set interior.
    → The water bath moderates heat, preventing cracks and producing a smoother cheesecake center.
  • Bake in the preheated oven at 325°F (163°C) for about 55–65 minutes, or until the center jiggles slightly and the edges are set; when finished, turn off the oven, crack the door open, and let the cheesecake rest inside for 60 minutes to gradually cool and minimize cracking.
    → Slow cooling prevents abrupt temperature changes that can cause fissures and helps the center set without curdling.
  • Carefully remove the cheesecake from the water bath, discard the foil, and refrigerate the cake, loosely covered, for at least 4 hours or overnight until fully chilled and firm.
    → A cold, firm cheesecake slices cleanly and maintains the creamy texture that defines the dessert.
  • Make the cornflake crunch by combining gluten-free cornflakes, 3 tablespoons granulated sugar, and 1/2 teaspoon ground cinnamon in a bowl; drizzle with 2 tablespoons melted butter and toss until every flake is lightly coated.
    → The sugar and cinnamon caramelize slightly during cooking, creating a crisp, flavorful topping that pairs with berries.
  • Spread the coated cornflakes on a parchment-lined baking sheet and bake at 350°F (175°C) for 6–8 minutes, shaking the pan halfway, until they are crisp and lightly golden; cool completely before using.
    → Toasting intensifies flavor and guarantees the topping remains crunchy after chilling on the cheesecake.
  • Just before serving, scatter the cooled cornflake crunch evenly over the chilled cheesecake and gently press to adhere without sinking into the filling; garnish with extra strawberry slices if desired and slice to serve.
    → The final crunch provides textural contrast and an appealing presentation that complements the strawberry filling.

Notes

This gluten-free strawberry cheesecake crunch is a decadent yet approachable dessert featuring a sturdy gluten-free crust, a creamy vanilla-flecked filling, a crisp cornflake crunch topping, and a bright strawberry layer. For best results, ensure all dairy ingredients are at room temperature before mixing to avoid lumps, and beat the cream cheese with sugar until silky. You can customize by swapping strawberries for raspberries, blueberries, or peaches, or by adding a few fresh lemon zest shavings to the filling for extra brightness. If you prefer a lighter texture, substitute part or all of the cream cheese with a light cream cheese blend and a touch of Greek yogurt. To make it dairy-free, use dairy-free cream cheese and coconut or almond yogurt. No-bake versions work well; chill the assembled cheesecake for at least 4 hours (preferably overnight) so the filling sets perfectly and the flavors meld. The crust can be prebaked for extra firmness or simply pressed and chilled for a no-bake option; in either case, use gluten-free crumbs. The cornflake topping provides a sweet, crunchy contrast; if you can’t find gluten-free cornflakes, substitute with crushed gluten-free cookies or chopped nuts. Serve chilled, perhaps with a dollop of whipped cream or a light dusting of powdered sugar, and enjoy as a striking celebration dessert. Always check that every ingredient is certified gluten-free if you have gluten intolerance.

Tips

Tips for Cheesecake crunch alle fragole

Crust & Crunch Base

  • Use gluten-free cookie crumbs and mix with melted butter until the texture resembles wet sand, then press firmly into the pan to create an even, compact crust that won’t crumble when sliced. For best results, bake the crust lightly if you’re using a baked version or chill well if you’re making a no-bake version.
  • Ensure the butter is fully melted and still warm when mixing so the crumbs cling together evenly. The 5 tablespoons of butter yield a sturdier base and richer flavor; you can reduce to 4 tablespoons for a drier crust, but 5 tablespoons is preferred for structure.
  • If your cookies are very sweet, you can omit the optional 2 tablespoons of sugar in the crust. Use fine granules so they distribute evenly and don’t create a gritty texture.
  • After pressing the crust into the pan, chill it for at least 20–30 minutes before filling to set the structure and prevent it from shifting during assembly.

Cheesecake Filling

  • Let the cream cheese soften to room temperature and beat with the sugar until the mixture is smooth and creamy, scraping the bowl as needed to avoid lumps.
  • Beat in the sour cream to add moisture and a gentle tang. Use full-fat sour cream for best flavor and creaminess; you can substitute Greek yogurt strained to remove whey if you want a lighter result, but keep the flavor balance.
  • Add the vanilla extract and, if using, the fresh lemon juice to brighten the filling. Fresh, high-quality vanilla (or vanilla paste) yields the best depth of flavor.
  • When adding the eggs, do so one at a time on low speed to avoid overmixing, which can incorporate air and cause cracks. Let each egg incorporate fully before adding the next one. Room-temperature eggs mix in more smoothly for a silkier batter.
  • If you want extra silkiness, you can sift the sugar before adding it to the filling to prevent graininess and ensure a ultra-smooth texture.

Strawberry Layer / Fresh Strawberries

  • Macerate the sliced strawberries with the 2 tablespoons of sugar for 15–20 minutes at room temperature to draw out juices and create a glossy, sauce-like release. Drain slightly if you want less juice in the final presentation.
  • Add the 1 tablespoon of lemon juice to brighten the berry layer and help preserve color. If you prefer, you can skip the lemon juice and just use a touch of lemon zest for aroma instead.
  • Slice strawberries just before assembly to prevent color bleed into the filling, and arrange them in an even layer or fold a few pieces into the batter for pockets of berry sweetness.

Crunch Topping (Cornflake Crunch)

  • Lightly crush the gluten-free cornflakes to create large, crunchy chunks rather than a fine crumb. Too fine a crumble will lose texture in the finished cake.
  • Coat them with the 3 tablespoons of sugar and 2 tablespoons of melted butter to help them caramelize slightly and stay crisp. Use gentle stirring to avoid turning the topping into a syrupy mass.
  • Scatter the topping evenly over the strawberry layer or the surface of the cheesecake; the topping will crisp further as the cake bakes and cools.
  • Optional 1/2 teaspoon ground cinnamon adds warmth and complements the strawberry flavor. If you’re not a fan, omit the spice or try a pinch of nutmeg or cardamom for a different aroma.
  • If gluten-free integrity is a concern, ensure the cornflakes are certified gluten-free or substitute with puffed rice cereal or crushed gluten-free cookies for a similar crunch.

FAQ

Che cos’è Cheesecake crunch alle fragole?

È un dolce al formaggio cremosa con una base croccante di biscotti, uno spesso strato di crema cheesecake e un topping di fragole fresche. La “crunch” arriva dal crumble di biscotti sulla superficie e da eventuali briciolature extra sulla base.

Quali sono gli ingredienti principali?

Base croccante: biscotti sbriciolati (digestive, Oreo o alternative senza glutine) mescolati con burro fuso. Crema cheesecake: formaggio cremoso, zucchero, uova, vaniglia e panna. Topping fragole: fragole fresche o una coulis di fragole. Crumble per la crunch: frammenti di biscotti o noci leggermente tostati con burro e zucchero.

Posso usare biscotti senza glutine?

Sì. Scegli biscotti senza glutine certificati. Mantieni la stessa quantità di burro fuso per ottenere una base compatta.

Come preparo la base croccante?

Frantuma i biscotti fino a ottenere una sabbia fine. Mescola con burro fuso finché è umida. Premi sul fondo di una teglia foderata con carta forno, livellando bene. Cuoci in forno preriscaldato a 175°C per 8-10 minuti finché è dorata. Lascia raffreddare completamente prima di aggiungere la crema.

Come preparo la crema di cheesecake?

In una ciotola, monta il formaggio cremoso con lo zucchero finché è liscio. Aggiungi uova una per volta, poi vaniglia e panna. Mescola delicatamente fino a ottenere una crema vellutata (evita mescolare troppo per non incorporare aria). Versa sulla base raffreddata.

Come preparo la topping alle fragole?

Taglia le fragole a fettine. Puoi usarle fresche o preparare una coulis: scalda una tazza di fragole con un cucchiaio di zucchero e un po’ d’acqua finché si addensano; passa al setaccio se vuoi una salsa liscia. Lascia raffreddare prima di usarla sul dolce.

Come si assemblano il dolce e la crunch?

Versa la crema sulla base raffreddata, livella. Distribuisci le fragole o la coulis sopra. Aggiungi crumble di biscotti o pezzi croccanti sulla superficie per la crunch. Raffredda in frigorifero per almeno 4-6 ore o tutta la notte.

Come si conserva?

Conserva in frigorifero, coperto, per 2-3 giorni. Puoi anche congelare, ma le fragole fresche potrebbero rilasciare liquido; se congeli, aggiungi le fragole fresche al momento di servire.

È possibile una versione senza latticini/dairy-free?

Sì. Usa formaggio cremoso vegetale (es. a base di soia o anacardi) e panna vegetale al posto di latticini. Sostituisci il burro con margarina vegetale o olio di cocco. Assicurati che i biscotti siano senza burro animale.

Posso prepararlo in anticipo per una festa?

Certo. Puoi preparare la cheesecake fino al passaggio di raffreddamento e conservarla in frigorifero. Aggiungi fragole fresche e crumble poco prima di servire per mantenere la croccantezza.

Qualche consiglio extra per una crunch perfetta?

Tosta leggermente il crumble di biscotti prima di aggiungerlo in superficie. Usa biscotti con buona percentuale di grasso per una croccantezza migliore. Raffredda completamente la crema prima di mettere la superficie croccante e non aggiungere troppa umidità sulla base.

Qual è la porzione tipica e il tempo totale di preparazione?

Porzione: circa 8-10 fette. Tempo totale approssimativo: preparazione base 15-20 minuti, cottura base 8-10 minuti, crema 15-20 minuti, raffreddamento in frigorifero 4-6 ore (preferibilmente tutta la notte).

Introduction / Hook

Imagine a warm dish bubbling at the edge of a wooden table, the kitchen lit by the soft glow of late-afternoon sun. The scent is immediate and irresistible: sun-ripened peaches releasing their honeyed sweetness, mingling with a light, buttery warmth that perfumes the room. A crust—golden, slightly craggy, a little breezy around the edges—presents itself like a gentle invitation to indulge. When you break into the cobbler, a fragrant steam rises, carrying notes that feel both nostalgic and fresh, as if summer decided to linger a little longer. This is Peaches Cobbler Classico—a timeless, true-to-its-roots dessert that bridges generations with every scoop, bite, and sigh of contentment. It’s the kind of dish that gathers people, not just plates, around one table, turning a simple night into a memory you’ll revisit long after the summer peaches have faded from the trees. The magic lies in its balance: a fruit filling that sings with bright, sun-warmed fruit, and a topping that is at once tender and slightly toothsome, offering a comforting contrast that makes every mouthful feel like a hug from the kitchen itself. This is more than dessert; it’s a ritual—one that says you care enough to make something that tastes like sunshine, even when the weather outside isn’t cooperative. Let this classic peach cobbler become a go-to, a reassuring favorite that never goes out of style, and a gentle reminder that the best flavors are often the simplest ones, crafted with patience, a touch of curiosity, and a whole lot of heart.

The Story Behind the Dish

The peach cobbler has roots that wander across continents and settle, almost inevitably, in the warm kitchens of the American South. Its story is one of adaptation—of making do with what’s on hand and turning it into something comforting and celebratory. The term “cobbler” itself hints at a rustic, improvised dessert: a dish with a “cobbly” top, not a precise, refined crust, baked until the edges crack and the fruit beneath sighs with juice. Some culinary historians trace the cobbler’s lineage to British puddings, where fruit was baked under a blanket of dough or batter. As it crossed the ocean, the dish evolved, absorbing local influences and pantry possibilities. In many Southern homes, peaches—bold, fragrant, and deeply summery—took center stage. Juicy fruit simmered to release its gold-tinged syrup, while a simple topping browned to a tender, crackly finish. The result is a dessert that feels both rustic and intimate, the kind of dish that seems to have always existed, like a familiar song you hear as you walk into a familiar kitchen. Throughout the decades, the peach cobbler has traveled with families from harvest fairs to community dinners, from formal occasions to spontaneous weekend gatherings, always presenting a sense of welcome. Its essence is not about grandeur but about making something lovely with what you have, about sharing sweetness in good company, and about letting a single, soulful bite transport you to a sunlit orchard or a grandmother’s cozy, well-loved stove.

In many places, people breathed life into the dish by adding a splash of vanilla, a pinch of spice, or a crumble of oats for texture. Others settled for a more biscuit-like topping—light, fluffy, and sliced with a knife—while still others embraced a denser, crumbly top. The versatility is part of the charm: the core remains the same—seasonal fruit crowned with a comforting top—yet every family, every region, and every cook offers a personal twist. “Classico” in the name isn’t about rigidity; it’s a nod to a tradition that honors time-tested methods while inviting gentle personal touches. The beauty of this dish lies in its memory-making power: the moment you lift the first spoonful, you’re not only tasting peaches but also the lasting impression of shared stories, of hands that have peeled, cut, and stirred with patience, and of a kitchen that welcomes all who enter with the promise of something good, something warm, something that feels like home.

Why You’ll Love This Recipe

  • Comfort in every bite: a harmonious balance between a juicy, fragrant fruit filling and a soft, inviting topping that yields to the spoon with ease.
  • Versatility at its best: adaptable to many seasons and occasions, from weeknight desserts to holiday gatherings, and flexible for dietary preferences with thoughtful substitutions.
  • Effort that feels effortless: you’ll experience the satisfaction of a dessert that comes together with simple steps and minimal fuss, yet delivers maximum appeal.
  • Deep sensory appeal: the aroma of ripe fruit, warm spices, and toasty crust creates an irresistible mood that lingers long after the last bite.
  • Classic repertoire with a personal touch: a beloved dish that invites you to weave in your own memories, flavors, and traditions while honoring a timeless method.

Flavor Profile & Texture

The dish starts with the fruit’s natural sweetness, which is amplified by gentle heat and a hint of aromatic undertones. The peaches release a sunny, sun-kissed juice that glistens as it caramelizes ever so slightly at the edges, giving a subtle kiss of depth without overwhelming the fruit’s intrinsic brightness. This filling carries a soft tang—a reminder of orchard freshness—balanced by a whisper of sweetness that feels balanced rather than sweet-to-a-fault. The topping offers a counterpoint of texture: when a spoon glides through, you’ll encounter a gentle resistance that resolves into a tender, almost melt-in-your-mouth crumb. The crust-to-fruit ratio is designed to deliver a satisfying bite that stays crisp around the perimeters while remaining pleasantly soft at the center. The topping’s color, a warm, inviting gold with faint toffee-tinted edges, signals the presence of toasty notes and a touch of caramelization that brings depth without heaviness. In aroma, expect a comforting bouquet: the fruit’s perfume, the veil of baked dough, and the subtle, comforting warmth that only a well-made cobbler can present. The overall sensation is one of balance—fruit brightness and earthy sweetness, soft crumble and crisp edges, a dessert that is both exuberant and soothing, suitable for sharing with friends and family or savoring as a personal moment of indulgence.

Occasions & Pairings

This classic is at its best during moments that call for warmth and togetherness. Serve it after a meal as a comforting finale, or present it as a centerpiece at casual gatherings where conversation flows as freely as the laughter. It shines in late-summer celebrations when peaches are at their peak, yet its appeal carries through the year when you crave a reminder of sunshine and casual decadence. Pairing ideas enhance its charm without stealing focus from the star: a simple swirl of light, airy dairy or a scoop of a creamy, neutral ice cream adds cool contrast to the warm, fruit-filled dish. A dollop of whipped cream brings a delicate richness, while a dusting of a complementary spice can nudge the aroma into a new, inviting direction. For beverages, consider a brisk iced tea or a sparkling, lightly fruit-forward drink that mirrors the cobbler’s brightness, or a softly effervescent wine that complements the dessert’s elegance without overpowering its fruit-forward character. This dessert also makes a worthy finish for family-style dinners, potlucks, or weekend gatherings where the shared space is about unhurried enjoyment and connection as much as flavor.

Tips, Variations & Substitutions

Because the essence of this dish is simple ingredients transformed with care, there are plenty of ways to personalize it while keeping the familiar, comforting core. Here are ideas to tailor the cobbler to your preferences or dietary needs:

  • Vegan-friendly approach: swap in plant-based fats and dairy-free toppings to maintain a luscious texture without animal products, while preserving the comforting mouthfeel and aromatic depth.
  • Gluten-free option: use a gluten-free batter or topping mix that delivers a similar crumb and tenderness, preserving the delicate balance between fruit and crust.
  • Fruit variations: while peaches are the traditional star, you can fold in complementary stone fruits like nectarines or apricots, or blend berries for a berry-peach hybrid with a vibrant hue and lively acidity.
  • Texture twists: for a crisper top, bake a little longer at a moderate temperature to encourage browning and a satisfying snap; for a softer, biscuit-like topping, aim for a gentler bake with a shorter duration.
  • Flavor depth without a recipe: add subtle enhancements such as citrus zest to lift the fruit’s brightness, or a touch of spice to evoke warm memories without overpowering the fruit’s natural aroma.
  • Make-ahead options: you can assemble the filling and topping separately or assemble the entire dessert and refrigerate briefly before baking to fit into a busy schedule; the flavors often become more pronounced after resting.
  • Small-batch approach: scale down the proportions for a modest dessert that still delivers a satisfying experience, perfect for intimate dinners or quiet nights in.

Storage & Make-Ahead Ideas

Leftovers, if any, can be treated with the same tenderness you’d extend to the original crust and fruit. Once completely cooled, transfer the cobbler to a covered container and refrigerate for several days. Reheating is best done gently to preserve the texture of both the topping and the fruit; a brief warm-up in a moderate oven or a few minutes in a toaster oven can revive that just-baked warmth and aroma. If you prefer to freeze, consider freezing the fully baked cobbler; wrap well to prevent freezer burn and reheat slowly to avoid drying out the topping. For make-ahead options, you can prepare the fruit filling in advance and refrigerate until ready to bake, then top with a fresh, light-dusting of topping before the final bake to retain that rustic, cobbled texture. When planning ahead for gatherings, assembling a large cobbler the day before and baking it just before serving can yield a fragrance-filled moment that fills the room the moment the dessert emerges from the oven. The key is to maintain a balance between the fruit’s juiciness and the topping’s crispness, ensuring neither component dominates the other and that every serving remains as inviting as the first.

Fun Facts & Trivia (Optional)

Peach cobbler carries a playful sense of culinary history that invites curiosity. Here are a few tidbits that add flavor to the lore:

  • The term “cobbler” is thought to derive from the irregular, “cobbly” surface of the topping, which resembles a cobblestone street. The imperfect, rustic top is part of the charm and a badge of tradition rather than a flaw.
  • In the American South, cobblers have long been a symbol of hospitality, a dessert that welcomes guests with warmth and generosity after a long day of work in the fields or in the kitchen.
  • While peaches are iconic, many regions embraced regional fruit varieties that reflected local harvests, which contributed to a diverse family of cobblers—from apple and berry combinations to stone-fruit medleys—each with its own character and memory attached.
  • Some cooks prefer to bake cobblers in a cast-iron skillet, a vessel that conducts even heat and adds a subtle, nostalgic sear to the topping, reminiscent of campfire storytelling and late-night chats around a shared table.

Ingredients

Peach Cobbler Classico

Peach Filling

  • 6 cups peeled and sliced fresh peaches (about 4-5 medium peaches)
    → The peaches are the star of the cobbler. Slicing ensures even cooking and juicy pockets; use ripe-but-firm peaches for best balance of sweetness and texture. If using canned peaches, drain well and pat dry to remove excess syrup and prevent a watery filling.
  • 3/4 cup granulated sugar
    → Adds sweetness to balance the natural tartness of peaches. The amount depends on peach ripeness and sweetness; adjust accordingly. If peaches are very ripe, you can reduce to 1/2 cup. For a more pronounced peach flavor, you can add a pinch of salt to help balance the sweetness.
  • 2 tablespoons cornstarch
    → Thickens the peach juices as the cobbler bakes so the filling becomes a cohesive sauce rather than runny juice. If you don’t have cornstarch, you can use 3 tablespoons all-purpose flour instead; whisk well to avoid lumps.
  • 1 tablespoon fresh lemon juice
    → Brightens the peach flavor and helps balance sweetness; use fresh lemon juice for best aroma. If you only have bottled juice, reduce to 1 teaspoon to avoid overpowering citrus.
  • 1/4 teaspoon fine salt
    → Enhances peach sweetness and helps the flavors come together; do not skip, especially if fruit is unsweetened or if using canned peaches with added syrup.
  • 1/2 teaspoon vanilla extract (optional)
    → Subtly enhances fruit flavor and adds warmth; add to peaches as they macerate with sugar to evenly distribute vanilla.

Cobbler Topping

  • 1 cup all-purpose flour
    → Provides the structure for the biscuit-like topping; gluten forms the framework that holds the topping together as it bakes. For a gluten-free version, substitute with 1 cup gluten-free all-purpose blend plus 1/4 teaspoon xanthan gum if your blend doesn’t include it.
  • 1/3 cup granulated sugar
    → Sweetens the topping and aids browning; you can adjust to taste; if you prefer a less sweet crust, reduce to 2 tablespoons or omit entirely and let peaches carry sweetness.
  • 1 tablespoon baking powder
    → Leavening that gives the topping a light, airy texture; ensure baking powder is fresh for proper rise; sift with dry ingredients to prevent lumps.
  • 1/2 teaspoon fine salt
    → Depth of flavor and helps balance sweetness; essential even in sweet recipes; if using salted butter, you may reduce slightly.
  • 1/2 cup cold unsalted butter, diced
    → In cold, small pieces, the butter is cut into the dry ingredients to create a flaky, crumbly topping as it bakes. Do not overwork; you want pea-sized butter pockets that melt into steam during baking.
  • 3/4 cup milk (or 1/2 cup milk + 2 tablespoons heavy cream)
    → Hydrates the dough to form a tender biscuit batter; using cold milk helps keep the fat cold for flakier results. For dairy-free, use a fortified almond or soy milk with a splash of lemon juice to mimic tang.
  • 1 teaspoon vanilla extract (optional)
    → Adds aroma and depth to the topping; optional but recommended if you’re not including vanilla in the filling.
  • 1 tablespoon melted butter, optional for brushing on top before baking
    → Gives a glossy finish and extra richness; brushing the surface with melted butter or a light sprinkle of sugar before baking yields a crisper, more golden crust.

Optional Add-ins

  • 1/2 teaspoon ground cinnamon (optional)
    → Adds warm spice that pairs beautifully with peaches. Mix into filling or dust over topping to taste; use sparingly if you prefer the pure peach flavor.
  • 1/4 cup chopped pecans or almonds (optional)
    → Adds crunchy texture and nutty flavor; toast the nuts lightly to deepen flavor before adding; chop coarsely for even distribution.
  • Zest of 1/2 lemon or orange (optional)
    → Brightens the dish with citrus notes; zest before juicing the fruit to avoid bitterness; distribute through filling for aroma.
  • 1/4 cup dried fruit (raisins or chopped dates) (optional)
    → Provides chewy pockets of sweetness; soak in warm water for 10 minutes to plump before mixing to ensure even distribution and prevent dryness.
  • Powdered sugar or cinnamon sugar, for finishing (optional)
    → A light dusting adds visual appeal and subtle sweetness when serving; add just before serving to preserve texture.

Instructions

  • Preheat your oven to 350°F (175°C) and lightly grease a 9×13-inch baking dish or a similar 2-quart casserole dish with unsalted butter or nonstick spray.
    → Starting with a hot, properly prepared pan prevents sticking and makes portioning easier after baking; a 9×13 dish provides ample space for the peach filling and a generous layer of topping.
  • Peel and slice 6 cups peaches (about 4–5 medium peaches) into uniform pieces about 1/4 to 1/2 inch thick, ensuring you measure accurately so the filling cooks evenly. If you prefer skin on, you may leave the skin on, but peeling yields a smoother filling.
    → Uniform slices bake evenly, release consistent juices, and blend smoothly with the thickening agents; if peaches are very ripe, adjust by reducing sugar slightly to avoid oversweetness.
  • In a large bowl, whisk together 3/4 cup granulated sugar, 2 tablespoons cornstarch, 1 tablespoon fresh lemon juice, 1/4 teaspoon fine salt, and 1/2 teaspoon vanilla extract (optional); add the sliced peaches and toss gently to coat completely, then let macerate for 10–15 minutes.
    → This coats the fruit evenly, begins the thickening process, and brightens the peach flavor with lemon while vanilla adds warmth.
  • Spread the peach mixture in the prepared dish in an even layer, scraping in any accumulated juices to form a uniform base for the topping.
    → An even base ensures consistent baking and prevents dry pockets where filling wouldn’t thicken properly.
  • In a separate bowl, whisk 1 cup all-purpose flour, 1/3 cup granulated sugar, 1 tablespoon baking powder, and 1/2 teaspoon fine salt; add 1/2 cup cold unsalted butter, cut into cubes, and use a pastry blender or two forks to cut the butter into the dry ingredients until the mixture resembles coarse crumbs with pea-sized pieces.
    → The cold butter creates the characteristic flaky, biscuit-like topping as it melts during baking; handle minimally to keep the butter pockets intact.
  • Stir in 3/4 cup milk (or 1/2 cup milk plus 2 tablespoons heavy cream) and 1 teaspoon vanilla extract (optional) just until a thick, shaggy batter forms; do not overmix, as a few lumps will yield a tender topping.
    → Cold milk helps keep fat cold for a flakier crust; mixing only until combined prevents gluten overdevelopment which would make the topping tough.
  • Spoon or dollop the topping over the peach filling in large irregular chunks, spacing them to allow some peach surface to show through; avoid spreading into a single sheet to maintain a rustic texture.
    → The rustic topping yields tender pockets of biscuit with crisp edges when baked, and the gaps let juices bubble up naturally.
  • Optional: If you want extra browning and richness, brush the exposed topping with 1–2 tablespoons melted butter or lightly sprinkle with a tablespoon of sugar; this front-loads fat and sugar for a glossier, crisper finish.
    → Butter brushing helps achieve a golden crust and adds a hint of richness that complements the fruit filling.
  • Optional add-ins: If using ground cinnamon, whisk 1/2 teaspoon into the peach filling before macerating to add warmth; if using citrus zest, fold zest of 1/2 lemon or orange into the peaches for aroma; if using dried fruit, soak 1/4 cup in warm water 10 minutes, drain, and fold in with peaches; if using nuts, toast 1/4 cup chopped pecans or almonds and sprinkle over the topping.
    → These additions enhance depth and texture; adjust quantities to taste so the fruit remains the star.
  • Bake the assembled cobbler in the preheated oven for 40–45 minutes, or until the peaches are bubbling around the edges and the topping is golden brown; if the topping browns too quickly, tent loosely with foil for the remaining bake time.
    → Bubbling indicates thickening of juices, while golden topping signals proper Maillard browning and flavor development; rotating the pan halfway promotes even browning.
  • Remove from the oven and allow the cobbler to rest for 15–20 minutes before serving; this rest time helps the filling thicken slightly and makes portions easier to scoop.
    → Resting prevents a hot, runny filling and improves flavor concentration; serve warm with vanilla ice cream or whipped cream for a classic contrast.
  • Optional finishing: just before serving, dust with powdered sugar or cinnamon sugar for a final touch of sweetness and visual appeal; this should be done after resting to preserve topping texture.
    → A light finish adds elegance and a subtle sweetness that enhances the peach aroma.

Notes

These Peach Cobbler Classico notes guide you to a comforting, fruit-forward dessert featuring a juicy peach filling and a flaky biscuit topping. You can customize it by adjusting the peach filling sweetness, adding 1/2 teaspoon ground cinnamon and/or citrus zest, or folding in chopped nuts for texture. It is best served warm with vanilla ice cream or whipped cream, and leftovers reheat well for quick desserts. For make-ahead prep, you can prepare the peach filling in advance and chill, then bake the topping separately or together when ready. For gluten-free or dairy-free versions, substitute a gluten-free all-purpose flour blend (with xanthan gum if your blend lacks it) and certified gluten-free baking powder, and use plant-based milk and cold dairy-free butter or coconut oil in the topping. Always choose ripe-but-firm peaches, whisk the cornstarch thoroughly into the filling to avoid lumps, and measure ingredients accurately to ensure the topping bakes up light and tender.

Tips

Tips for Peach Cobbler Classico

  • Choosing peaches: Look for peaches with a fragrant aroma and a little give when pressed. They should be ripe but still firm enough to hold their shape when sliced. If using canned peaches, drain well and pat dry to remove excess syrup; for frozen peaches, thaw completely and drain the excess moisture.
  • Peach preparation: Peel if you prefer a smoother filling, using a quick blanch (30–60 seconds in boiling water) or a peeler. Slice evenly (about ¼–½ inch) so the filling cooks uniformly.

Filling flavor and thickening

  • Maceration and balance: Toss peaches with sugar, lemon juice, salt, and vanilla. Let sit 15–20 minutes to draw out juices and start dissolving sugar. If peaches are very ripe and sweet, you can reduce sugar by 1–4 tablespoons.
  • Thickening the filling: Dissolve cornstarch in a small amount of cold water before adding to the peaches to avoid lumps. If you don’t have cornstarch, you can substitute with 3 tablespoons all-purpose flour and whisk well to avoid specks.
  • Bright juice, not overpowering: Fresh lemon juice brightens the peach flavor; don’t overdo it. If using bottled juice, reduce to 1 teaspoon to keep citrus from dominating.
  • Salt and vanilla: The pinch of salt enhances sweetness; vanilla in the filling deepens aroma. If you’re using vanilla only in the topping, you can omit it from the filling.

Topping technique

  • Butter and dough texture: Keep the butter very cold and cut it into small pieces. In the dry ingredient mix, the cold butter should form pea-sized pockets that melt into steam as the cobbler bakes, creating a flaky, biscuit-like topping. Avoid overworking the dough.
  • Dry ingredients preparation: Sift the flour, sugar, baking powder, and salt together to ensure even distribution and to prevent lumps.
  • Dairy choice: Cold milk is recommended to keep fat cold for flakier results. For a richer crust, use 1/2 cup milk plus 2 tablespoons heavy cream. For dairy-free, use fortified plant milk with a splash of lemon juice to mimic tang.
  • Vanilla and optional finishes: Vanilla in the topping adds aroma; if you already have vanilla in the filling, you can skip it in the topping. Brushing melted butter on top or a light sprinkle of sugar near the end will yield a glossy, crisper crust.

Flavor boosters and add-ins

  • Cinnamon and spice: 1/2 teaspoon ground cinnamon is an optional warm note. Add to filling or dust over the topping to taste; use sparingly if you want the pure peach flavor to shine.
  • Nuts and zest: Toast 1/4 cup chopped pecans or almonds for texture and depth; add to the filling or sprinkle on top. Zest of 1/2 lemon or orange adds a bright citrus scent; distribute through the filling for aroma.
  • Dried fruit: 1/4 cup raisins or chopped dates give chewy pockets of sweetness; soak briefly to plump before mixing to prevent dryness.
  • Finish options: A light dusting of powdered sugar or cinnamon sugar right before serving adds visual appeal and a touch more sweetness.

Baking, serving, and storage

  • Bake moment: Preheat to 350–375°F (175–190°C). Bake until the top is golden and the filling is bubbling, typically 35–45 minutes. If the topping browns too quickly, tent with foil.
  • Rest time: Let the cobbler rest 10–15 minutes after baking to thicken the filling and make serving easier.
  • Serving ideas: Serve warm with vanilla ice cream or whipped cream for contrast with the hot filling. A dollop of fresh whipped cream also works well.
  • Make-ahead and storage: Filling can be prepared in advance and refrigerated for up to 24 hours. Assemble and bake just before serving. Refrigerate leftovers up to 3 days; reheat gently in the oven or in a covered dish in the microwave. Baked cobbler can be frozen for up to 2 months; thaw and reheat before serving.

FAQ

Peach cobbler classico

What makes a Peach Cobbler Classico?

A classic peach cobbler features juicy peaches baked under a light, biscuit-like topping. It’s simple to make, relies on pantry ingredients, and highlights summer peaches with warm spices and a touch of vanilla.

What ingredients do I need for the peach filling?
  • 6 cups sliced ripe peaches (about 4–5 large peaches)
  • 1/2 cup granulated sugar (adjust to sweetness of peaches)
  • 1 tablespoon lemon juice
  • 1 tablespoon cornstarch (or arrowroot) to thicken
  • 1/2 teaspoon ground cinnamon
  • Pinch of salt
What ingredients are used for the cobbler topping?
  • 1 cup all-purpose flour (or gluten-free blend)
  • 1/3 cup granulated sugar
  • 1 teaspoon baking powder
  • 1/4 teaspoon salt
  • 1/2 cup cold unsalted butter, cut into cubes (or dairy-free butter)
  • 2/3 cup milk (dairy or plant-based)
  • 1 teaspoon vanilla extract (optional)
Can I use fresh, frozen, or canned peaches?

Use fresh peaches when available for the best flavor. Frozen peaches (thawed and drained) work well, and canned peaches can be used if drained and patted dry. Avoid overly wet fruit, which can make the filling runny.

Should I peel the peaches?

Peaches can be peeled or unpeeled. Peeling yields a smoother filling, while leaving the skins on adds color and texture. If you want a silky filling, peel; if you like a rustic look, leave skins on.

Do I need to pre-cook the filling or bake it with the topping?

There’s no pre-cooking required. Toss the sliced peaches with sugar, lemon juice, and cornstarch, then spread in a baking dish and top with the batter. The filling cooks and thickens as the cobbler bakes.

What oven temperature and bake time should I use?

Preheat to 350°F (175°C). Bake for about 40–45 minutes, until the filling is bubbling at the edges and the topping is golden brown.

How do I know when the cobbler is done?

The edges should be bubbling and the topping should be a golden-brown, tender crust. A toothpick inserted into the topping should come out clean or with a few crumbs.

How should I store leftovers?

Let the cobbler cool completely, then cover and refrigerate. It will keep for 3–4 days. To reheat, warm in a 325–350°F (165–175°C) oven for 10–15 minutes, or briefly in the microwave.

Can I make this dairy-free or gluten-free?

Yes. For dairy-free, substitute dairy-free butter and plant-based milk. For gluten-free, use a gluten-free flour blend in place of all-purpose flour. Ensure your baking powder is gluten-free if needed.

Can I freeze peach cobbler?

Yes. You can freeze assembled unbaked cobbler for up to 2 months, or freeze baked cobbler (cool first) and reheat in a 350°F oven. Wrap tightly to prevent freezer burn for unbaked versions.

What should I serve with peach cobbler?

Classic pairings include vanilla ice cream or a dollop of whipped cream. A drizzle of caramel or a sprinkle of cinnamon sugar also works well.

Introduzione / Hook

Immagina bocconcini dorati che si dissolvono in bocca, lasciando dietro di sé una nuvola di morbidezza cremosa e una croccantezza irresistibile. Questi Bocconcini croccanti di cottage sono l’emblema dello snack raffinato ma semplice, capace di trasformare un aperitivo qualunque in un momento di festa. L’intenso profumo di formaggio morbido incontra una crosta fragrante, sprigionando un equilibrio di sapori che è sia confortante sia sorprendentemente fresco. La magia sta nella contrapposizione: all’esterno, una scenografia croccante che scintilla sotto la luce, all’interno, un cuore setoso e leggermente acidulo che rilascia una delicatezza cremosa con ogni morso. Sono perfetti per chi cerca una stuzzicheria elegante ma senza troppi fronzoli, per chi ama la cucina casalinga che sa di casa, famiglia, e ricordi di aperitivi condivisi con amici. Se vuoi conquistare al primo assaggio, questa ricetta ti offre una scorciatoia sicura: pochi ingredienti, una preparazione che sembra quasi magie, e un risultato che fa dire a chi assaggia: “Questo sì che è comfort food, ma con stile.” In una parola, una piccola esplosione di sapori che accende l’appetito e invita a servire subito qualcosa di delizioso da condividere.

La storia dietro il piatto

Dietro a ogni antipasto che brilla c’è una storia di viaggi culinari, incontri tra tradizioni e tocchi di innovazione. I Bocconcini croccanti di cottage nascono dall’idea di reinventare due classici intramontabili: la morbidezza cremosa del cottage cheese e la croccantezza invitante di una panatura ben construita. L’ispirazione arriva spesso dalle cucine italiane di mezzogiorno, dove antipasti di formaggio, olive, e sfiziosità croccanti accompagnano affetto e conversazioni. Ma la vera anima di questa ricetta è la sua capacità di attraversare confini: un cuore delicato, una crosta croccante, e aromi che richiamano erbe mediterranee e scorza di limone, elementi universali che parlano a ogni tavola. In molte famiglie, il formaggio fresco è da sempre un simbolo di condivisione: un modo semplice per dare vita a piccoli pezzi di felicità compatti e veloci da preparare. Con questa ricetta, la tradizione si fa gioco, ritmo, e qualche sorpresa. Potrebbe essere apprezzata in una serata estiva sul balcone, in una cena tra amici, o come antipasto rituale durante le festività. E se vuoi aggiungere una nota personale, alcuni sostituiscono o arricchiscono la panatura con spezie, erbe aromatiche o un tocco di scorza di limone grattugiata per dare al piatto una firma unica. È la bellezza di una ricetta che si presta a essere raccontata: ogni boccone è una pagina, ogni crosta una cornice, e ogni tavolo una piccola celebrazione della convivialità.

Perché amerai questa ricetta

  • Praticità e velocità: preparazione rapida che non compromette l’eleganza, ideale sia per cene improvvisate sia per aperitivi pianificati.
  • Versatilità: si presta a molte varianti, dalle erbe classiche agli aromi audaci, senza mai perdere la sua identità.
  • Qualità senza complicazioni: un piatto che mette in risalto la texture, con un cuore morbido e una crosta croccante che soddisfa ogni palato.
  • Vegetariano e personalizzabile: perfetto per chi preferisce opzioni senza carne; è facile adattarlo a diete diverse (senza lattosio, gluten-free, ecc.).
  • Convivialità immediata: piccoli bocconi da offrire in un buffet o come parte di un aperitivo, stimolano la conversazione e l’interazione tra ospiti.
  • Assorbimento di sapori senza rinunciare al comfort: la dolce acidità del formaggio si sposa magnificamente con una crosta aromatica e una spruzzata di limone, offrendo una nota rinfrescante che pulisce il palato.
  • Adatta a diverse occasioni: dal brunch domenicale al party serale, dai picnic estivi alle cene su tavoli all’aperto, è sempre una scelta vincente.

Profilo di gusto e Texture

Questo piatto è una sinfonia di contrasti: all’esterno, la crosta croccante è dorata e leggera, grazie a una panatura che grazie a un equilibrio di ingredienti crea una superficie quasi cioccolatata per quanto è lucida sotto la luce. All’interno, il cuore di cottage cheese è cremoso, fresco, leggermente agrumato e pieno di una delicatezza lattiginosa che avvolge il palato. L’intesa tra acidità e dolcezza è bilanciata dai profumi delle erbe aromatiche e dalla scorza di limone, che aggiungono vivacità e freschezza. La texture gioca su tieri: il primo morso è una promessa di croccantezza, seguito da una rivelazione morbida che cede lentamente, lasciando un retrogusto leggermente sapido e limpido. A seconda degli aromi scelti, puoi accompagnare la seconda fase del morso con note di parmigiano o di aglio. In bocca, la composizione è equilibrata: non è pesante, ma è piena di carattere. Il profumo è invitante: zeste di limone che sprigionano una fragranza agrumata, erbe fresche che danno una pennellata di verde, e una nota di burro o olio che rende tutto più avvolgente. È una ricetta che celebra le texture, ma anche l’equilibrio tra consistenze contrastanti: cremosa, croccante, vellutata, leggera e profumata. Ogni boccone offre una nuova sfumatura: a volte una punta di pepe nero che pizzica, altre volte un accenno di aglio arrostito che dona profondità, sempre mantenendo la dolcezza del cottage come timoniere.

Occasioni e Abbinamenti

Questi bocconcini si prestano a una varietà di contesti. Sono perfetti come antipasto sofisticato in una cena tra amici, come aperitivo prima di una serata in cui vuoi sorprendere senza complicarti la vita, o come snack elegante per un picnic o una giornata di festa all’aperto. Puoi proporli su un tagliere con olive, pomodorini e una salsa leggera di yogurt alle erbe, oppure accompagnarli con una salsa rossa al pomodoro leggermente speziata o una maionese aromatizzata al limone. Per creare un effetto “wow” al tavolo, posizionali su un piatto grande, decora con scorze di limone e rametti di rosmarino, e presenta una piccola ciotola di glassa di aceto balsamico o una crema di yogurt all’aglio come dipping sauce. Abbinamenti ideali: spumanti leggeri o bianchi freschi come Prosecco, Pinot Grigio o Vermentino, che accompagnano bene la crema senza sovrastarla; un bianco aromatico può riprodurre l’armonia tra acidità e dolcezza. Se vuoi offrire qualcosa di caldo e confortante, abbinali a una salsa di pomodoro profumata all’origano o a una salsa al basilico. Per un tocco di novità, prova a servire con una chutney di fichi o una glassa agrodolce a base di agrumi. In contesti informali, funzionano anche come finger food per brunch o aperitivi domenicali, dove la gente può gustarli tra una chiacchiera e l’altra. Se vuoi renderli ancora più golosi, puoi combinarli con piccoli formaggi stagionati, prosciutto crudo tagliato a striscioline sottili o pomodori secchi, creando un piccolo mosaico di sapori che stupisce per complessità nonostante la semplicità della preparazione.

Consigli, Varianti & Sostituzioni

La bellezza di questa ricetta risiede nella sua adattabilità. Ecco alcune idee per personalizzarla o per accogliere esigenze dietetiche diverse senza rinunciare al carattere del piatto:

  • Versione leggera: utilizza una panatura leggera e controlla la quantità di olio durante la cottura; opta per una cottura al forno o all’aria per un risultato croccante senza fritto eccessivo.
  • Varianti aromatiche: aggiungi erbe diverse come prezzemolo, timo, o dragoncello per cambiare l’identità olfattiva del piatto. Una spolverata di paprika affumicata dona una nota affumicata molto intrigante.
  • Gusto agrumato: arricchisci con scorza di limone o arancia grattugiata per una freschezza vibrante che esalta la dolcezza del cottage.
  • Sostituzioni vegetariane: se vuoi evitare latticini, puoi utilizzare una crema di tofu setoso mescolato con una leggera quantità di lievito alimentare per un tocco sapido e “formaggioso” senza lattosio. Per una versione completamente vegetariana, impiega una base di formaggio vegetale a scelta e una panatura croccante.
  • Versione gluten-free: scegli pangrattato senza glutine o una miscela di semi triturati (mandorle, sesamo) per creare una crosta croccante senza glutine.
  • Intensità di sapore: aggiungi pepe bianco o pepe di sichuan per una nota speziata delicata; per un tocco piccante, inserisci una punta di peperoncino finissimo nella panatura.
  • Abbinamenti internazionali: una spolverata di curry dolce o di paprika affumicata può trasportare questi bocconcini in una scena fusion, rendendoli perfetti per una cena a tema etnico.

Conservazione & Idee per Preparare in Anticipo

Per un risultato sempre perfetto, puoi organizzare la preparazione in due fasi. Prima, forma i bocconcini e lasciali rassodare in frigorifero su un vassoio foderato con carta forno. Una volta che sono ben freddi e compatti, copri e conserva fino a 24 ore. Quando sei pronto per cuocerli, procedi con la panatura e la cottura come indicato, ma con una breve tempistica di cottura se i pezzi sono particolarmente freddi, in modo che la crosta diventi ancora più dorata e uniforme. Se vuoi consolidare i sapori prima di servirli, puoi preparare una piccola salsa di accompagnamento da tenere al fresco; una salsa leggera a base di yogurt, erbe e scorza di limone è una scelta classica che non sovrasta il gusto del formaggio. Realizzare una versione da congelare è possibile: impiatta i bocconcini formandoli, ma non cuocerli. Congelali su una teglia in una sola fila, poi trasferisci i pezzi in un contenitore ermetico. Quando vuoi gustarli, basta passare dal congelato direttamente in forno a una temperatura moderata finché la crosta non diventa croccante e l’interno si riscalda uniformemente. Per quanto riguarda il riscaldamento, evita microonde se vuoi mantenere la croccantezza: preferisci un forno tradizionale o una padella antiaderente leggermente unta per ripristinare la texture esterna.

Curiosità & Trivia (Opzionale)

Sapevi che il termine bocconcini in italiano implica bocconi di piccole dimensioni, perfetti da mordere in un sol morso? È una definizione che si presta bene a una vasta gamma di stuzzichini, ma qui si ottiene una personalità unica: una crosta croccante che scoppietta quando si morde, accompagnata da un cuore morbido che rilascia una nota lattiginosa delicata. Il cottage cheese, spesso apprezzato per la sua leggerezza proteica, è stato a lungo un alleato di diete moderne e tradizioni casalinghe, offrendo una base neutra su cui costruire aromi e texture. In molte cucine regionali, l’arte di creare piccoli bocconi croccanti è una celebrazione della convivialità: piccoli piatti che riuniscono, stimolano conversazioni e permettono a chiunque di assaggiare qualcosa di gustoso senza impegnarsi in preparazioni lunghe. Una curiosità interessante è come la crosta croccante possa agire come veicolo di sapore: i sapori delle erbe, del limone e delle spezie si fissano nella crosta, offrendo una prima impressione aromaticamente intensa, mentre l’interno mantiene la sua morbidezza cremosa. In definitiva, è un esempio felice di come la semplicità possa generare un effetto gourmet: pochi elementi di base trasformati in una piccola esperienza sensoriale che resta impressa sulla lingua e nell’anima della convivialità.

Ingredients

Cottage Cheese Bites

    – 2 cups full-fat cottage cheese, well drained
    → The star ingredient; cottage cheese provides a creamy, tender interior when baked or fried. To achieve a cohesive bite, drain thoroughly to remove as much whey as possible. Press the cheese through a fine sieve or wrap in a clean kitchen towel and squeeze gently to extract moisture. The drier the cheese, the better the bites will hold their shape; for very wet cottage cheese, you may blot with paper towels before measuring.

    – 1 cup breadcrumbs (panko or gluten-free, depending on dietary needs)
    → Breadcrumbs supply structure and a crispy exterior. Panko yields the crispiest crust, while gluten-free breadcrumbs keep the recipe suitable for gluten-intolerant diets. If mixture seems dry, you can moisten with a teaspoon of water or milk; if too wet, add a few more crumbs until the mixture holds together.

    – 1/2 cup grated parmesan cheese
    → Parmesan adds a sharp, savory bite and assists with binding when combined with the egg. Use freshly grated for the best aroma and texture; pre-grated varieties can be drier and less flavorful. For a milder cheese note, substitute part with Pecorino Romano.

    – 1 large egg, lightly beaten
    → Acts as the primary binder to keep the bites intact during cooking. Use at room temperature for easier mixing and even binding. If you need a vegan alternative, substitute with 1 tablespoon ground flaxseed mixed with 2.5 tablespoons water (let rest 5 minutes) to create a flax “egg,” though expect a different texture.

    – 2 cloves garlic, minced
    → Adds depth and savory aroma; ensure garlic is finely minced to distribute evenly. For a subtler garlic presence, briefly sauté the minced garlic in a teaspoon of olive oil until just fragrant, then cool before adding to the mix to mellow sharp notes.

    – 1 teaspoon dried Italian seasoning (or 1/2 teaspoon oregano + 1/2 teaspoon basil)
    → Delivers classic Italian herb character throughout the bites. If using fresh herbs instead, use about 1 tablespoon of minced parsley plus a pinch of oregano and basil and reduce the moisture slightly to maintain texture.

    – 1/2 teaspoon salt
    → Seasoning anchor; cheeses and breadcrumbs can vary in saltiness, so adjust after mixing. If using very salty parmesan, begin with 1/4 teaspoon and taste before shaping. Remember that optional dips or sauces may also contribute saltiness to the final dish.

    – 1/4 teaspoon black pepper
    → Provides a subtle backdrop that enhances cheese flavor. Freshly ground pepper yields a brighter aroma; adjust to taste and consider a pinch of white pepper if you prefer a milder appearance.

    – 1 tablespoon olive oil
    → Adds moisture and helps the mixture bind while lending a tender crumb and better browning. Mix into the batter to improve cohesion; if it looks too dry, add a teaspoon more until the dough just comes together. This oil also aids in crisping the exterior during baking or frying.

    – 1 teaspoon lemon zest (optional)
    → Provides a bright citrus lift that counterbalances richness. Use a microplane to finely zest the lemon, avoiding the white pith. If you prefer lemon juice instead, add only a few drops and reduce added liquids elsewhere to maintain proper texture.

    – 1–2 tablespoons cornstarch or all-purpose flour (optional, for binding)
    → Helps absorb excess moisture and improve the bites’ ability to hold shape. Start with 1 tablespoon and add more if the mixture seems too loose; cornstarch is a good gluten-free option that lightens the texture slightly.

    – 2 tablespoons finely chopped fresh parsley (optional)
    → Adds color and a fresh herbal note; distribute evenly through the mix for a uniform flavor. If using dried parsley instead, reduce to 1/2 teaspoon and consider increasing other herbs to compensate for its milder, dried flavor.

Coating and Finishing

    – 1/2 cup additional breadcrumbs for coating (optional)
    → An extra crumb coat creates a thicker, crunchier crust when baked or fried. Use gluten-free crumbs if needed. Pat formed bites gently to help the coating adhere, then roll or press bites in the crumbs to ensure an even crust before cooking.

    – 2 tablespoons grated parmesan for coating (optional)
    → Adds extra cheesiness to the exterior crust. Mix with the additional breadcrumbs in a shallow dish for rolling the bites. Freshly grated parmesan yields more aroma and a crisper crust than pre-grated varieties.

    – Oil spray or 1–2 teaspoons olive oil for brushing (optional)
    → Helps promote browning and a crisp finish on the baked bites. Lightly spray or brush the tops just before baking; avoid over-oiling to prevent soggy surfaces. If frying, use enough oil to shallow-fry the bites until golden and crisp, then drain on paper towels.

    – Marinara sauce or garlic aioli for dipping (optional)
    → Provides a complementary dipping sauce that enhances the presentation and flavor. If using marinara, choose a simple, not overly sweet variety; for aioli, a light garlic note works well without overpowering the cheese. Keep sauces separate for dipping and stability of the crust.

Optional Add-ins

    – 1/4 teaspoon red pepper flakes
    → Adds a gentle kick and warmth without overpowering the cheese. Adjust to taste; omit entirely if you prefer a mild bite. For a more even distribution of heat, whisk into the egg before mixing with the other ingredients.

    – 2 tablespoons chopped fresh basil
    → Bright, aromatic herb that pairs beautifully with cheese. Tear or mince leaves finely to release essential oils; fold into the mixture for an even herbal note. If using dried basil, reduce to 1/2 teaspoon and rehydrate briefly in a splash of water to reintroduce flavor.

    – 2 tablespoons finely chopped chives
    → Adds a mild onion-like freshness and color. The green flecks look appealing in the final bites. If you don’t have chives, substitute with a tablespoon of finely minced green onions.

    – 2 tablespoons finely chopped sun-dried tomatoes (packed in oil, drained)
    → Imparts a rich, tangy tomato flavor with a chewy texture that contrasts nicely with the soft center. Pat dry to remove excess oil before chopping; adjust other liquids slightly to compensate for added moisture from the tomatoes.

Instructions

  • Preheat your oven to 350°F (175°C) and line a baking sheet with parchment paper or lightly grease it; this ensures the bites brown evenly, release easily, and do not stick to the pan during baking.
    → A properly heated surface promotes even browning and a crisp exterior, while parchment or light greasing prevents tearing when lifting the bites.
  • Thoroughly drain the cottage cheese to remove as much whey as possible; place the 2 cups in a fine-mesh sieve over a bowl and press with the back of a spoon, or wrap in a clean kitchen towel and squeeze gently; drying the cheese prevents a loose mixture that would spread or fall apart.
    → Excess moisture weakens binding and results in soft, crumbly bites; drying yields a firmer, cohesive interior that holds its shape when baked or fried.
  • Transfer the drained cottage cheese to a large mixing bowl and whisk in the lightly beaten egg until the mixture is smooth and evenly combined; breaking up any remaining curds ensures uniform texture throughout the bites.
    → The egg acts as the primary binder, trapping fat and starch to create a cohesive dough that resists crumbling during cooking.
  • Stir in the minced garlic, 1 teaspoon dried Italian seasoning (or 1/2 teaspoon oregano plus 1/2 teaspoon basil), salt, and black pepper; mix until the seasonings are evenly distributed so every bite tastes uniformly savory.
    → Even distribution prevents pockets of salt or spice that can overpower the cheese and ensures a balanced crust and interior flavor.
  • Fold in 1 cup breadcrumbs (panko or gluten-free if needed) and 1/2 cup freshly grated parmesan cheese until the mixture begins to hold together; the breadcrumbs provide structure and the parmesan adds savoriness that helps with binding.
    → The combination creates a tender interior with a sturdy matrix that browns nicely and resists crumbling.
  • Drizzle in 1 tablespoon olive oil and add the lemon zest, then mix thoroughly to incorporate moisture and brightness; the oil improves cohesion and promotes browning while the zest offers a contrasting citrus note.
    → Fat from the oil helps bind the mixture and yields a tender crumb; zest provides a fresh aroma that cuts richness.
  • If the mixture seems too loose, sprinkle in 1 tablespoon cornstarch or all-purpose flour and fold it in; continue adding a little at a time until the dough holds its shape when gently pressed.
    → A small amount of starch absorbs excess moisture and stabilizes the bites for a crisper crust and firmer interior.
  • Optionally fold in 2 tablespoons finely chopped fresh parsley to add color and a subtle herbal note, distributing it evenly through the mixture; if using dried parsley, reduce to 1/2 teaspoon and rehydrate briefly in a splash of water.
    → Fresh herbs contribute vibrant aroma and flavor; even distribution prevents concentrated spots of herb intensity.
  • If you are using optional add-ins, incorporate 1/4 teaspoon red pepper flakes for a gentle kick, and fold in 2 tablespoons chopped fresh basil or 2 tablespoons finely chopped chives, or 2 tablespoons finely chopped sun-dried tomatoes (drained); these enhancements personalize the flavor while maintaining texture.
    → Adds brightness, heat, or a tangy tomato note that harmonizes with the cheese without overpowering the bite.
  • Chill the mixture covered in the bowl for 15–30 minutes to let the fats set slightly and improve workability when shaping; cold dough holds its shape better during rolling and coating.
    → Chilling firms the mixture, making it easier to form uniform bites and reduces sticking when rolling in crumbs.
  • In a shallow dish, combine the additional 1/2 cup breadcrumbs with 2 tablespoons grated parmesan for the coating; this extra crumb layer yields a thicker, crunchier crust that contrasts with the creamy interior.
    → A robust crust forms a desirable outer texture and enhances browning during baking or frying.
  • Scoop or pinch portions of the chilled mixture and roll them into bite-sized balls or ovals about 1 inch in diameter; place them on the prepared sheet about 1 inch apart to prevent sticking as they expand.
    → Uniform sizing ensures even cooking and consistent texture across all bites.
  • Roll or press each bite in the crumb-parmesan coating until fully coated and the crust adheres; press gently to help the crumbs cling, then return to the baking sheet with the seam side down.
    → A secure crust prevents cracking and yields a crisp exterior that seals in the interior moisture.
  • Lightly brush or spray the tops with oil to promote even browning and a crisp finish; avoid over-oiling, which can make the crust soggy, especially if you plan to bake for a long time.
    → A touch of oil encourages deeper, uniform browning and a crackly crust while preventing dryness.
  • Bake in the preheated oven for 15–18 minutes, turning the bites halfway through, until the exterior is deeply golden and crisp and the centers are set; smaller bites brown more quickly, larger ones may need extra minutes.
    → Turning ensures even exposure to heat and uniform coloration on all sides, while checking for a firm, not jiggly center confirms doneness.
  • Remove from the oven and let the Bocconcini croccanti di cottage rest on the sheet for 2–3 minutes to finish firming and to prevent steam from softening the crust immediately after baking; this also makes handling easier.
    → Resting allows moisture to redistribute and the crust to set, ensuring a crisp after-sizzle when plated.
  • Serve warm with marinara sauce or garlic aioli for dipping, keeping the sauce separate to maintain crust integrity and ease of dipping; the contrasting acidity or garlic note enhances the cheese’s richness.
    → A separate dipping sauce elevates presentation and provides a complementary flavor balance without soggying the crust.
  • If making ahead, refrigerate cooled bites in an airtight container for up to 3 days or freeze unbaked bites on a tray and transfer to a bag once frozen; reheat from frozen at 350°F (175°C) for 12–15 minutes until heated through and crisp.
    → Proper storage preserves texture and flavor, and reheating restores the desired crunch and tenderness.

Notes

“These crispy Bocconcini cottage cheese bites are savory, protein-rich snacks that can be made gluten-free by using gluten-free breadcrumbs and ensuring the crust stays light and crisp.”

Tips and cooking notes:

  • Drain cottage cheese thoroughly to remove whey; press through a fine sieve or wrap in a clean kitchen towel and squeeze. The drier the cheese, the better the bites hold their shape; blot with paper towels if very wet.
  • Breadcrumbs provide structure and a crisp crust. If using gluten-free crumbs, ensure they are finely processed for even binding. If mixture seems dry, moisten with a teaspoon of water or milk; if too wet, add more crumbs until it holds together.
  • Freshly grated Parmesan yields stronger aroma and helps binding. For a milder cheese character, substitute part with Pecorino Romano.
  • Bind with one large egg, at room temperature for easy mixing. For vegan, substitute with 1 tablespoon ground flaxseed + 2.5 tablespoons water (let rest 5 minutes).
  • Garlic should be finely minced to distribute evenly; for subtler flavor, sauté the garlic briefly in olive oil until fragrant and cool before adding.
  • Herbs: dried Italian seasoning or a mix of oregano and basil add classic character. Fresh herbs will impart more brightness—1 tablespoon minced parsley plus a pinch of oregano and basil; reduce moisture slightly.
  • Salt and pepper: start with 1/2 teaspoon salt and 1/4 teaspoon pepper, then adjust after mixing to suit the saltiness of the cheeses and breadcrumbs.
  • Olive oil 1 tablespoon adds moisture and helps binding; the mixture should just come together. If too dry, add a touch more oil; if too wet, add a bit more breadcrumbs or cornstarch.
  • Lemon zest (optional) adds brightness; zest with a microplane, avoiding the white pith. If using lemon juice instead, add only a few drops and reduce liquids elsewhere.
  • Cornstarch or all-purpose flour (1 tablespoon to start) helps absorb moisture and improves binding; gluten-free option is cornstarch.
  • Fresh parsley (optional): 2 tablespoons chopped for color and fresh note; dried parsley can be used in smaller amounts (1/2 teaspoon) if needed.
  • Coating and finishing: For a thicker, crunchier crust, roll formed bites in 1/2 cup additional breadcrumbs and 2 tablespoons grated Parmesan. Lightly press to adhere.
  • Oil spray or brushing with 1–2 teaspoons olive oil helps browning and crispness; avoid oversaturation which can soften surfaces.
  • Cooking methods: Bake at 200°C (about 400°F) for 15–18 minutes, turning halfway, until golden and crisp. For extra crispness, finish under the broiler for 1–2 minutes, watching closely. If frying, shallow-fry until golden and drain on paper towels.
  • Dipping options: Serve with marinara sauce or garlic aioli on the side; keep sauces separate to maintain crust integrity.
  • Optional add-ins: 1/4 teaspoon red pepper flakes for gentle heat; 2 tablespoons chopped fresh basil for brightness; 2 tablespoons finely chopped chives for color and onion-like nuance; 2 tablespoons chopped sun-dried tomatoes (drained) for tangy depth. Pat tomatoes dry to prevent excess moisture.

Make-ahead and storage: You can form the bites and refrigerate up to 24 hours before cooking. They can be frozen before cooking; freeze on a tray, then transfer to a bag and bake from frozen, adding a couple minutes. Reheat leftovers in a moderate oven until warm.

Dietary notes: Use gluten-free breadcrumbs if you need a gluten-free version. For dairy-free or vegan variations, skip Parmesan and use a vegan binder; note texture may change. If cheese content is a concern, consider using aged dairy-free alternatives that melt well.

Tips

Tips for perfect Bocconcini croccanti di cottage

  • Drain and dry the cottage cheese thoroughly. The drier the curds, the better the bites hold their shape. Press through a fine sieve or wrap in a clean towel and squeeze to remove as much whey as possible; blot with paper towels if needed.
  • Chill the mixture briefly if it feels too soft or sticky. Cold dough is easier to shape and helps the bites stay compact during cooking.
  • Choose your breadcrumbs wisely. Panko yields the cristiest crust; gluten-free breadcrumbs keep the dish suitable for gluten-free diets. If the mixture seems dry, moisten with a teaspoon of water or milk; if too wet, add a few more crumbs until itJust comes together.
  • Grate parmesan freshly when possible. Freshly grated cheese melts with a richer aroma and helps with binding. If using pre-grated, you may need a touch more egg or binding to compensate.
  • Use a large egg at room temperature for even binding. For a vegan option, substitute with a flax egg (1 Tbsp ground flaxseed + 2.5 Tbsp water, rested 5 minutes) but expect a different texture.
  • Minced garlic should be evenly incorporated. For a milder garlic note, sauté the mince in a teaspoon of olive oil until just fragrant, cool, then mix in.
  • Herbs add cohesion. If using dried Italian seasoning, it’s fine; with fresh herbs, reduce moisture slightly to maintain texture. Fresh parsley works well as a bright note.
  • Season gradually. Start with 1/2 teaspoon salt and adjust after mixing, considering the saltiness of parmesan and any dips you plan to serve.
  • Freshly ground black pepper enhances the cheese flavor. Use to taste and consider white pepper for a milder appearance.
  • Olive oil in the mix improves moisture and browning. If the dough seems dry, add a little more oil; too much oil can make the bites greasy.
  • Optional lemon zest brightens the richness. Zest finely to avoid pith; if using lemon juice instead, add only a few drops to prevent thinning the dough.
  • Cornstarch or flour helps with binding. Start with 1 tablespoon and add more if needed to help the bites hold shape without becoming dense.
  • Parsley or other greens should be chopped finely and folded evenly for color and flavor distribution. If using dried herbs, use smaller amounts and adjust moisture accordingly.
  • For an extra-crunch coating, add a second crumb layer: 1/2 cup additional breadcrumbs plus 2 Tbsp grated parmesan. Pat bites gently so the coating adheres well.
  • Oil for coating: a light spray or brushing helps browning in the oven. If frying, use enough oil for shallow frying and drain on paper towels afterward.
  • Cooking method: bake at about 425°F (220°C) until golden and set (roughly 12–15 minutes, depending on size). For frying, heat oil to 350°F (175°C) and fry in batches until crisp, then drain.
  • Dip wisely. Keep marinara or garlic aioli separate to preserve crust crispness. If using aioli, keep it light so it doesn’t overpower the cheese.
  • Make-ahead tips: you can form bites and refrigerate up to 2 hours before cooking. For longer storage, freeze on a tray, then transfer to a bag; reheat from frozen and add a minute or two to the bake time for crispness.

FAQ

Cos’è Bocconcini croccanti di cottage?

Sono piccole palline di formaggio cottage impanate e cotte fino a diventare croccanti all’esterno e morbide all’interno. Perfette come antipasto o stuzzichino sfizioso.

Quali ingredienti servono?

Ingredienti tipici: formaggio cottage, pangrattato (opzionale pangrattato senza glutine), parmigiano grattugiato, uovo, erbe aromatiche (prezzemolo o origano), sale, pepe, olio per friggere o olio extravergine d’oliva per forno. Opzionali: scorza di limone, aglio in polvere, paprika, peperoncino.

Posso usare formaggio diverso se non ho cottage cheese?

Sì. Puoi sostituire con ricotta molto ben scolata mescolata con un po’ di yogurt per legare, o con formaggio spalmabile ben asciutto. Se usi ricotta, aggiungi un po’ di parmigiano per dare sapore e consistenza.

Posso prepararlo in anticipo?

Sì. Puoi preparare le palline, passarle nell’impanatura e conservarle crude in frigorifero per fino a 24 ore. Puoi anche precuocerle al forno o in padella e conservarle cotte in frigorifero per 1-2 giorni, da riscaldare rapidamente.

Come ottenere la croccantezza perfetta?

Per una croccantezza uniforme: scolora bene il cottage cheese, asciuga bene l’impasto, e usa una panatura ben aderente. Cuoci in forno a circa 190°C per 15-20 minuti o friggi in olio caldo fino a doratura. Girali a metà cottura per doratura uniforme.

Quanto tempo ci vuole per prepararli?

Tempo totale approssimativo: 25-35 minuti. Preparazione (modellare e impanare) circa 15 minuti, cottura 10-20 minuti a seconda del metodo (forno o padella).

Quali varianti di sapore posso fare?

Aggiungi erbe come prezzemolo, origano o basilico, e spezie come aglio in polvere, paprika, pepe di Cayenna. Puoi anche aggiungere scorza di limone grattugiata o parmigiano extra all’impanatura per un sapore più intenso.

Posso renderli senza glutine?

Sì. Usa pangrattato senza glutine o impanatura di mais/polenta per una croccantezza diversa. Controlla sempre le etichette per assicurarti che tutti gli ingredienti siano privi di glutine.

Come conservarli e come riscaldarli?

Conservali in frigorifero in un contenitore chiuso per 2-3 giorni. Per riscaldarli, usa forno preriscaldato a 180°C per 5-7 minuti o una padella antiaderente a fuoco medio-basso finché sono caldi e croccanti.

Come servirli?

Servili caldi con una salsa a piacere: salsa allo yogurt, maionese all’aglio, marinara leggera o una salsa al miele e senape. Sono ottimi anche come antipasto accompagnati da insalata fresca o verdure croccanti.

Introduzione / Hook

Immagina una mattina luminosa, il profumo invitante della pancetta che sfrigola dolcemente, le uova che si costruiscono in una crema indulgente e una montagna di hash browns dorati che scintillano come piccoli cuscini croccanti. Questo piatto, Uova e bacon con hash brown, è una promessa di comfort immediato: una colazione che sa di casa, di weekend rubati al calendario, di brunch pigri con amici che si perdono tra risate e chiacchiere. Ogni morso è una sinfonia di contrasti: la croccantezza delle patatine fritte, la morbidezza vellutata delle uova, il sapore affumicato della pancetta che si fonde con una leggera lucentezza di burro o olio. È un rituale semplice, ma straordinariamente magnifico, capace di trasformare una routine mattutina in un momento di piacere condiviso. In poche parole, è la colazione che accende il resto della giornata.

La storia dietro il piatto

Questo piatto nasce dall’unione di due grandi classici della cucina contemporanea: le uova al piatto o strapazzate, e il bacon croccante che fa sfrigolare il cuore di ogni buongustaio. Aggiungi la hash browns, quelle morbide e dorate patatine di patata grattugiata o a dadini, e ottieni una combinazione che ha radici nella tradizione della colazione all’americana ma si presta a interpretazioni globali. Nel corso degli anni, molte culture hanno adottato format simili per iniziare la giornata con energia: pane tostato che si costruisce con una pioggia di uova, formaggi fusi, erbe aromatiche, oppure verdure che aggiungono freschezza e colore. In questo piatto, la semplicità è la vera protagonista. Non serve una cucina da chef stellato per renderlo memorabile: serve solo una padella ben calda, ingredienti di qualità e un pizzico di pazienza per permettere a ogni elemento di brillare nel suo tempo. La storia è una storia di comfort, di sabati mattina in cui la casa sembra riunirsi attorno a una tavola fumante, di profumi che aprono porte e cuori, di ricordi che si ricaricano grazie a una colazione che sa di casa ma è pronta in fretta per chi ha fretta o per chi vuole concedersi un momento di puro piacere.

Perché lo amerai

  • Comfort immediato: è una coccola mattutina che mette subito di buon umore, con sapori familiari che risvegliano la memoria affettiva.
  • Equilibrio di consistenze: hash browns croccanti all’esterno con un interno morbido, uova cremose e pancetta croccante che aggiunge una nota affumicata intensa.
  • Versatilità: può essere gustato a colazione, brunch, o anche come pranzo veloce quando si desidera qualcosa di davvero soddisfacente.
  • Rapido da preparare: non richiede strumenti particolari o tecniche complesse; è accessibile anche a chi cucina al mattino tra una tazza di caffè e l’altra.
  • Possibilità di personalizzazione: si presta a varie interpretazioni, dall’uso di pancetta affumicata di qualità a versioni più leggere o plant-based per chi evita la carne.
  • Delicato ma pieno di sapore: l’uovo lega gli elementi, mentre la pancetta introduce una profondità gustativa che resta in bocca a lungo dopo l’ultimo boccone.

Profilo di sapore e consistenza

Questo piatto è una-camera di armonia tra sapori e texture. Le hash browns offrono una base croccante e dorata, con una doratura uniforme che sprigiona note leggermente dolciastre di patata caramellata quando la superficie si incontra con la padella. Le uova, a seconda di come le cuci, possono essere morbide e vellutate o leggermente più compatte, ma sempre saporite grazie a una leggera emulsione di burro o olio che le scorre. La pancetta, se scelta con cura, porta una nota affumicata intensa e un tocco salato che fa risaltare gli altri componenti. L’insieme è arricchito da eventuali erbe aromatiche come pepe nero fresco, prezzemolo tritato o una spolverata di paprika affumicata per un grado extra di profondità. In bocca, si crea una sinfonia di contrasti: la croccantezza che spezza la morbidezza, la sapidità pungente della pancetta che bilancia la dolcezza delle patate, e la ricchezza cremosa delle uova che tiene tutto insieme. Ogni boccone è un equilibrio di calore, comfort e una sensazione di casa, resa ancora più avvolgente dal profumo invitante che avvolge la cucina durante la preparazione.

Occasioni & Abbinamenti

Uova e bacon con hash browns è perfetto per diverse occasioni. Ecco alcuni contesti e suggerimenti di abbinamento:

  • Colazione domenicale irrinunciabile: accompagnalo con una tazza di caffè aromatico, una spremuta d’arancia fresca o un cappuccino vellutato per un inizio di giornata rilassato e appagante.
  • Brunch tra amici: servilo come piatto principale in stile buffet, lasciando che ogni ospite si scelga la quantità di uova, bacon e hash browns secondo l’appetito del momento.
  • Weekend rilassato: è una soluzione veloce per una colazione abbondante che non rinuncia al gusto, perfetta per chi si concede un pranzo tardivo o una cena leggera a base di uova.
  • Abbinamenti consigliati: pane tostato croccante, avocado a fettine, pomodori confit o una fresca insalata verde per aggiungere leggerezza. Bevi a fianco succhi di frutta, una spremuta di pompelmo o, per chi preferisce un accento più deciso, una birra chiara stile pale ale per un tocco brunch-al-fun.

Consigli, Varianti & Sostituzioni

Questo piatto è una tela su cui è facile dipingere. Ecco idee per personalizzarlo a seconda dei gusti, delle esigenze dietetiche o delle stagioni:

  • Sostituzioni proteiche: se vuoi ridurre le proteine animali, usa pancetta di tacchino o pancetta di manzo magra; per una versione vegetariana, sostituisci la pancetta con funghi saltati o pancetta vegetale, oppure elimina completamente la componente proteica animale e arricchisci il piatto con würstel vegetali o tofu saltato.
  • Hash browns alternative: se non hai hash browns pronti, puoi ottenere una croccantezza simile usando patate grattugiate rimesse ad asciugare e poi pressate in una padella ben oliata fino a doratura. Aggiungi cipolla finemente tritata per un sapore extra.
  • Uova in stile diverso: uova strapazzate morbide per un effetto cremoso, o uova all’occhio di lupo con il tuorlo che resta liquido per un gioco di consistenze ancora più marcato.
  • Versione light: lessa le patate e falla dorare leggermente in padella con olio a spray; usa una pancetta affumicata magra o sostituisci con prosciutto cotto a basso contenuto di grassi. Opta per uova intere o solo albumi se vuoi ridurre le calorie.
  • Varianti regionali: aggiungi un tocco di paprika affumicata, pepe di cayenna o una spolverata di parmigiano grattugiato per un profilo più intenso. In alcune regioni italiane si aggiunge una grattugiata di scorza di limone per un accento fresco che contrasta con la ricchezza dell’uovo e della pancetta.
  • Salse e finishing touches: una punta di salsa verde, una crema di yogurt con erbe o una goccia di olio al tartufo possono trasformare il piatto in una versione gourmet senza troppo impegno.

Conservazione & Idee per preparazione in anticipo

Se vuoi avere questo piatto pronto quasi all’istante, ecco alcune strategie pratiche:

  • Hash browns in anticipo: puoi preparare le hash browns e conservarle in frigorifero una notte; scaldale in padella con un po’ d’olio prima di aggiungere le uova e la pancetta per un rapido assemblaggio al momento. Assicurati di asciugare bene eventuali umidità residue per mantenere la croccantezza.
  • Uova pronte all’occorrenza: se preferisci, sbatti le uova con sale e pepe e conservatele in frigorifero in un contenitore chiuso per massimo 24 ore; quando sei pronto, scalda leggermente e versale in padella per una cottura rapida.
  • Pancetta: la pancetta può essere cotta in anticipo e conservata in frigorifero, da scaldare rapidamente prima di assemblare il piatto. In alternativa, risparmia tempo e gusto utilizzando pancetta a fette sottili che si cuociono in pochi minuti.
  • Riscaldamento: per mantenere la croccantezza delle hash browns, evita di riscaldare troppo a lungo. Una breve rigenerazione in padella a fuoco medio è ideale per ritrovare la texture originale.

Curiosità & Trivia

La combinazione uova, bacon e hash browns incarna una cucina di comodo che ha attraversato oceani e culture. Le hash browns hanno radici nella cucina americana, nate come un modo pratico per utilizzare patate rimanenti e trasformarle in una deliziosa croccantezza. Le uova, con la loro magia universale, sono state presenti in colazioni di tutto il mondo, ma è in questo set up che assumono una notorietà quasi quotidiana: una tela perfetta per esprimere personalità culinarie diverse. Infine, il bacon, con il suo profumo inconfondibile, aggiunge una nota respiro di campagna e di festa. Insieme rappresentano un linguaggio universale della colazione: qualcosa di semplice che può trasformarsi in qualcosa di speciale, a seconda di come lo cucini e con cosa lo accompagni. È curioso pensare a come un piatto così semplice possa evocare ricordi, tradizioni familiari e momenti di condivisione che rimangono impressi nella memoria. Forse è proprio questa la magia della cucina quotidiana: trasformare ingredienti accessibili in un piccolo momento di gioia, capace di scaldare non solo lo stomaco ma anche lo spirito.

Ingredients

Hash Browns Base

  • 2 medium russet potatoes, peeled and grated
    → The potatoes serve as the starch-rich base for crispy hash browns. Grating them increases surface area for browning, while peeling removes skins unless you prefer texture. After grating, rinse and squeeze out as much moisture as possible using a clean towel to avoid soggy hash browns. Dry potatoes brown better and stay crisp; optionally pat dry with paper towels after squeezing. If you want extra crispness, you can toss with 1 teaspoon cornstarch to help with browning and deters moisture.
  • 1-2 tablespoons neutral oil (such as canola or sunflower) for frying
    → Oil is needed to fry the hash browns and prevent sticking; use enough to lightly coat the pan. Neutral oils have high smoke points and won’t overpower the potatoes’ flavor. You can adjust quantity by pan size; if you use bacon fat, you can substitute some or all oil for added flavor. Heat the oil until shimmering before adding the potatoes to ensure crisp browns.
  • 1/2 teaspoon salt, or to taste
    → Salt heightens flavor and helps draw out moisture from potatoes; add to the potatoes before binding and cooking. If using salted bacon, reduce additional salt. Always taste hash browns before finishing and adjust to preference. Salt also affects crispness—excess moisture can hinder browning.
  • 1/4 teaspoon ground black pepper
    → Pepper adds a gentle heat and aroma; freshly ground is best, adjust to taste. You can also add a pinch of paprika for color or a subtle smoky note.
  • 1/4 small onion, finely grated (optional)
    → Onion adds sweetness and aroma to the hash browns. If grated, it blends with the potatoes and reduces moisture; omit if you prefer a purer potato bite. Sauté the onion briefly with the potatoes or mix raw, depending on your texture preference.

Eggs

  • 2 large eggs
    → Eggs provide protein and richness to the dish, complementing the hash browns and bacon. For best results, bring eggs to room temperature before cooking to ensure even coagulation and to help maintain a soft, creamy yolk if you cook them sunny side up. If you want firmer eggs, scramble or flip-fry accordingly.

Bacon

  • 4 slices bacon, cut into 1-inch pieces
    → Bacon adds salty, smoky flavor and a crisp texture that contrasts with the soft hash browns and eggs. Slice into bite-sized pieces so they render evenly. Cook until crispy but not burnt; drain on paper towels and reserve the rendered fat for cooking the hash browns if desired to add extra flavor.

Optional Add-ins

  • 1/2 cup shredded cheddar cheese (optional)
    → Cheese melts over the hot hash browns and eggs, adding creaminess and depth. Shred cheese just before use to prevent clumping, and sprinkle on top near the end of cooking so it melts without browning too much. You can substitute with Monterey Jack or cheddar blend for different flavors.
  • 2 tablespoons chopped fresh parsley (optional)
    → Parsley adds color and a fresh note that brightens the dish. Finely chop and sprinkle over just before serving for a vibrant finish. If parsley isn’t available, substitute with chives or green onions for a similar effect.

Toppings

  • Ketchup or hot sauce to serve (optional)
    → A light dip to balance richness. Use sparingly; avoid overpowering the dish. If serving with eggs, some people prefer a touch of hot sauce on the yolk. This can be omitted for a cleaner plate.

Instructions

  • Preparare la base degli hash browns: Grattugiare le 2 patate russet con una grattugia a fori medi per aumentare la superficie di doratura.
    → L’aumento della superficie favorisce una crosta croccante durante la frittura; dopo aver grattugiato, sciacquare brevemente in acqua fredda per rimuovere l’amido in eccesso e strizzare bene in un canovaccio pulito finché non lascia più gocce di liquido; asciugare ulteriormente con carta assorbente se necessario. Se vuoi extra croccantezza, aggiungi 1 cucchiaino di amido di mais per trattenere l’umidità.
  • Condire la base hash browns: Mescolare 1/2 cucchiaino di sale e 1/4 cucchiaino di pepe con le patate grattugiate e, se usi cipolla, aggiungere 1/4 di cipolla piccola finemente grattugiata; mescolare bene con le mani o una spatola per distribuire uniformemente i condimenti.
    → Il sale estrae umidità e intensifica il sapore, mentre la cipolla grattugiata aggiunge dolcezza e aroma senza creare liquidi in eccesso se ben incorporata.
  • Riscaldare una grande padella antiaderente con olio neutro: Scaldare 1-2 cucchiai di olio (canola o girasole) a fuoco medio-alto finché ottiene un leggero scintillio e brilla, senza fumare.
    → Un olio caldo ma non fumante permette una doratura rapida e una crosta stabile, evitando che le patate si attacchino o diventino mollicce.
  • Cuocere gli hash browns formando strati sottili: Distribuire un terzo della composta di patate in padella, comprimendola con una spatola per creare uno strato uniforme e compatto; cuocere 4-5 minuti finché i bordi iniziano a dorarsi e la base si stacca agevolmente.
    → Lo strato sottile e compatti favorisce una doratura uniforme e evita che le patate si sfaldino durante la cottura.
  • Rivoltare e dorare l’altro lato: Girare con una spatola grande, premere di nuovo per compattare e continuare la cottura altri 3-4 minuti finché la seconda faccia è dorata e croccante; se necessario regolare il fuoco per evitare bruciature.
    → Una cottura uniforme su entrambi i lati garantisce una base croccante che regge bene con le uova e il bacon.
  • Cuocere il bacon in parallelo o in una padella separata: Tagliare 4 fette di bacon in pezzi da 1 pollice e cuocerle a fuoco medio finché diventano croccanti ma non bruciate, circa 6-8 minuti; scolarle su carta assorbente e conservare il grasso reso per arricchire ulteriormente la base degli hash browns se desiderato.
    → Il bacon rilascia grasso che aggiunge sapore e aiuta a ottenere croste ancora più appetitose; il grasso renderà le patate più sapide se usato per cucinarle.
  • Cuocere le uova: Nella stessa padella o in una piccola padella, scaldare un filo di grasso o olio e cuocere 2 uova; per uova all’occhio di bue, lasciarle cagliare finché il bianco è opaco e il tuorlo resta liquido, 2-3 minuti; per tuorli più compatti, coprire e cuocere 30-60 secondi in più.
    → Le uova devono essere cotte a una temperatura giusta: un bianco ben rassodato ma un tuorlo ancora fluido offre contrasto con la croccantezza degli hash browns e la texture del bacon.
  • Assemblare il piatto: Disporre gli hash browns dorati come base sul piatto, distribuire i pezzi di bacon sopra e adagiarvi delicatamente le uova cotte; se desideri, spolverare 1/2 tazza di cheddar grattugiato sopra e lasciare che si sciolga con il calore residuo.
    → L’assemblaggio in sequenza crea contrasti di texture: croccante base, bacon sapido e uova cremose; l’aggiunta di formaggio solo agli ultimi istanti permette una fusione morbida senza bruciature.
  • Aggiungere finishing touches: Cospargere 2 cucchiai di prezzemolo fresco tritato per colore e freschezza, quindi aggiustare di sale e pepe a gusto.
    → Il prezzemolo dona brillantezza visiva e un tocco aromatico finale; un piccolo aggiustamento di sale e pepe bilancia il piatto prima di servire.
  • Servire con condimenti a lato: Offrire ketchup o salsa piccante a parte per chi desidera un accento dolce, aspro o piccante; servire subito per mantenere la croccantezza degli hash browns.
    → Le salse a lato permettono agli ospiti di controllare l’intensità di sapore e di bilanciare la ricchezza del piatto.

Notes

These eggs with hash browns and bacon are a classic breakfast combo featuring crispy hash browns, smoky bacon, and eggs cooked to your liking. You can customize them by adding shredded cheddar, fresh parsley, or sautéed mushrooms for extra depth. For crisp, non-soggy hash browns, dry the grated potatoes thoroughly—squeeze out as much moisture as possible and pat dry with paper towels; a light toss with 1 teaspoon cornstarch can help with browning if you like extra crust. Use enough neutral oil to lightly coat the pan and heat it until shimmering before adding the potatoes. Cook the bacon first in a large skillet over medium heat until crisp, then remove and reserve the rendered fat; using this fat to fry the hash browns adds depth and flavor. Cook the hash browns in a thin, even layer without overcrowding, pressing them down so they crisp, then flip and brown the other side. For the eggs, use 2 large eggs per serving; cook sunny-side up if you want a runny yolk, or scramble or fry them until set depending on your preference. If you’re adding cheese, sprinkle it on near the end so it melts but doesn’t burn. Finish with chopped parsley and a splash of hot sauce or a tomato salsa for freshness. These dishes can be gluten-free as long as you use gluten-free bacon and avoid any flour or gluten-containing thickeners; store leftovers in the fridge for up to 2 days and reheat in a skillet to restore crispness. Always season to taste, keeping in mind the saltiness of the bacon, and adjust pepper accordingly; for a lighter version, trim the bacon or use turkey bacon and skip the cheese.

Tips

  • Potato prep and moisture management: After grating, rinse to remove excess starch and wring out as much moisture as possible using a clean cloth or paper towels. Dry potatoes brown better and stay crisp. If you want extra crispness, dust with 1 teaspoon cornstarch to help browning and reduce moisture.
  • Oil and pan temperature: Use enough neutral oil (canola or sunflower) to lightly coat the pan. Heat until shimmering before adding potatoes to ensure a good sear. If you’re using bacon fat, you can substitute part of the oil for a richer flavor, but monitor the heat so it doesn’t smoke.
  • Shaping and cooking hash browns: Press the grated potatoes into an even thin layer, and avoid overcrowding the pan. Let the bottom crust form before flipping; use a wide spatula and flip in one piece if possible. If browning unevenly, adjust the heat and rearrange pieces for even contact with the pan.
  • Seasoning caution: Salt the potatoes before cooking, but remember bacon adds salt too. Taste and adjust at the end. Freshly ground black pepper is great; a pinch of paprika can add color and a subtle smoky note.
  • Bacon handling: Dice bacon into 1-inch pieces for even rendering. Cook until crispy but not burnt; drain on paper towels. Reserve the rendered fat to cook the hash browns for extra flavor, but use sparingly to avoid overpowering the potatoes.
  • Eggs and doneness: Bring eggs to room temperature for even coagulation. For runny yolks, cook eggs sunny-side up or over-easy after the hash browns are nearly finished. If you prefer firmer eggs, scramble or flip-fry briefly.
  • Cheese and herbs (optional): Shred cheese just before use and sprinkle near the end so it melts without browning too much. Add chopped fresh parsley or chives at the very end for color and brightness.
  • Serving tips: Serve immediately for the best texture. A light dip of ketchup or hot sauce is optional—use sparingly to balance richness without overpowering the dish.

FAQ

Che cos’è questa ricetta?

Uova e bacon con hash browns è una colazione sostanziosa che combina uova cotte a tuo piacimento, bacon croccante e hash browns dorati, spesso preparati in una sola padella per un pasto rapido.

Quali ingredienti servono per 2 porzioni?

Ingredienti base:

  • Uova: 2-4
  • Bacon: 4-6 fette
  • Hash browns: 2 porzioni (circa 300 g di patate grattugiate)
  • Olio o burro per la cottura
  • Sale e pepe

Opzionali: formaggio grattugiato, cipolla, prezzemolo, salsa piccante.

Posso sostituire il bacon?

Sì. Puoi usare pancetta, salsiccia a cubetti cotta, prosciutto oppure una versione vegetariana con funghi e peperoni se preferisci una versione senza carne.

Come preparare gli hash browns croccanti?

Procedura tipica: lavare e grattugiare le patate, asciugarle bene con un panno per rimuovere l’acqua. Scaldare olio in una padella, stendere uno strato sottile di patate, cuocere a fuoco medio-alto senza muoverle per 4-5 minuti finché dorate, poi girarle e cuocerne altri 4-5 minuti.

Qual è il modo migliore per cuocere uova, bacon e hash browns insieme?

Cuoci il bacon in padella a fuoco medio finché è croccante, rimuovilo e tienilo da parte. Nella stessa padella, cuoci gli hash browns finché dorati. Poco prima di terminare, aggiungi le uova (strapazzate o all’occhio di bue a tuo gusto) e cuocile finché i tuorli si solidificano. Aggiusta di sale e pepe.

Quali sono i tempi di cottura approssimativi?

Bacon: 6-8 minuti totali. Hash browns: 6-8 minuti. Uova: 3-4 minuti per strapazzate, 2-3 minuti per uovo all’occhio. I tempi possono variare in base allo spessore delle fette di bacon e alla fame di croccantezza delle patate.

Come servire e condire?

Servi subito caldo. Puoi aggiungere pepe nero macinato, prezzemolo o erbe fresche. Per un tocco in più, accompagnalo con salsa hot, ketchup o una crema all’avocado. Una fetta di pane tostato completa il piatto.

Come conservare e riscaldare gli avanzi?

Conserva gli eventuali avanzi in contenitore ermetico in frigorifero per 1-2 giorni. Per riscaldare, usa una padella antiaderente a fuoco medio-basso o il forno per mantenere la croccantezza delle hash browns. Riscalda finché tutto è ben caldo.

È adatta a diete particolari?

Questo piatto è ricco di proteine e carboidrati: non è ideale per diete chetogeniche o molto low-carb a causa delle hash browns. Puoi renderlo più leggero riducendo le porzioni di patate o sostituendole con alternative a basso contenuto di carboidrati, come zucchine grattugiate.

Qualche variante o suggerimento di personalizzazione?

Varianti popolari: aggiungere formaggio fuso sopra le uova, cipolla rossa caramellata, peperoni, funghi o pomodori. Per una versione piccante, aggiungi pepe di Cayenna o peperoncino. Puoi anche utilizzare pane integrale o una tortilla per una versione avvolta.

Introduzione e gancio

Immagina una colazione che sa di città fredda e strade di Canada, ma con un tocco tutto italiano che rende i giorni lenti un po’ più dolci e molto più saporiti. Poutine colazione è la versione mattutina di un classico amato in tutto il mondo: croccanti patatine fritte, fiocchi di formaggio che scintillano al sole e una cascata di gravy cremosa che avvolge ogni morso. Ma questa non è una poutine qualsiasi: è una promessa di comfort immediato, una colazione che si fa in 20 minuti e che sa di casa, di domenica mattina, di brunch tra amici. Provala quando hai voglia di un risveglio pieno di energia, ma senza rinunciare al calore avvolgente del formaggio che si scioglie e del sugo profumato.

La magia sta nella dinamica tra croccante e morbido, tra salato e leggermente dolce, tra la spinta del caffè e la dolcezza rassicurante delle uova o del bacon—a seconda di come vuoi iniziare la giornata. Poutine colazione è una dichiarazione: la colazione può essere audace, può essere confortante, può essere divertente, tutto in un solo piatto. È la risposta perfetta per chi cerca una cena orientata al mattino che sorprende, ma che resta familiare. È una ricetta che invita a improvvisare: puoi personalizzare i toppings, modulare i sapori, giocare con le consistenze. E la cosa migliore? è una ricetta che accoglie sia i puristi sia gli spiriti avventurosi, offrendo una piattaforma creativa per la tua tavola del risveglio.

La storia del piatto

La poutine nasce nelle province canadese del Quebec negli anni ’50, come reinterpretazione semplice e robusta di un piatto da strada: patatine fritte, formaggio fuso e salsa di gravy. Le origini sono avvolte da leggende: in una versione celebre, un ristoratore avrebbe lanciato in fretta patatine e formaggio nel piatto di un cliente, chiedendo che venisse aggiunta una salsa calda per tenere tutto insieme. Da quel momento la poutine è diventata un simbolo di comfort rustic e di convivialità, una sorta di incontro tra la cucina di strada e la purità del formaggio che si fonde. Nel corso degli anni, le varianti hanno preso il sopravvento: si può aggiungere carne, funghi, erbe, spezie e persino versioni gourmet con formaggi invecchiati e gravies arricchite. Eppure, al cuore della tradizione c’è quell’intrigo semplice tra patatine, formaggio e salsa calda che fa vibrare le papille gustative. La versione “colazione” di questa pietanza non è una forzatura: è un’evoluzione naturale, una risposta creativa alle mattine pigre o ai week-end pieni di attività, dove la fame si mescola con la voglia di qualcosa di saporito e soddisfacente fin dal primo morso. In molte culture, la colazione è un rituale regolare, ma in poche cucine si è riusciti a farla diventare un’esperienza d’incontro tra tradizione canadese e freschezza mediterranea. Ecco perché Poutine colazione ha conquistato cucine e cuori in tutto il mondo: è una celebrazione di contrasts, una mossa audace che si sente familiare.

Questo piatto è anche una finestra aperta su modi diversi di iniziare la giornata: può includere uova, pancetta o salsiccia per un tocco ricco, oppure versioni vegetariane o vegane che mantengono la struttura croccante e la cremosità del formaggio fuso. La bellezza della preparazione risiede nella sua adattabilità: puoi utilizzare patatine fritte già pronte per risparmiare tempo, oppure optare per patate fresche tagliate a bastoncini e fritte in casa per una croccantezza ancora più pronunciata. Puoi giocare con il tipo di formaggio—formaggio a pasta semidura che fonde bene è l’ideale, ma anche formaggio cheddar in cubetti o formaggio a scaglie può funzionare se hai poco tempo. E naturalmente, la salsa gravy è l’anima del piatto: una salsa cremosa e saporita che avvolge ogni strato, legando tutto in un abbraccio caldo e confortante.

Perché amerai questa ricetta

  • Rapida e semplice: una colazione sostanziosa che si prepara in poco tempo, perfetta per i giorni impegnativi o per un brunch domenicale.
  • Confortante e soddisfacente: la combinazione di croccante, morbido e cremoso crea un’esperienza multisensoriale che scalda corpo e spirito.
  • Versatile: puoi personalizzare la poutine colazione per soddisfare diete diverse (vegetariane, vegane, senza glutine) senza perdere la sua identità di piatto pieno.
  • Perfetta per la convivialità: serve come piatto di condivisione, ideale per riunire famiglia e amici attorno al tavolo del brunch.
  • Rende speciale una mattina ordinaria: basta un tocco di creatività per trasformare una colazione semplice in un momento memorabile.

Profilo di sapore e consistenza

La prima impressione è la croccantezza delle patatine, che resiste sorprendentemente bene incontrando la salsa calda. Le patatine possono essere sottili e dorate o più spesse, a seconda della tua preferenza, ma l’importante è che mantengano una risposta croccante anche una volta accanto al gravy. Il formaggio, quando è di buona qualità e tagliato a cubetti o a scaglie, si scioglie al contatto con la salsa calda e con il calore delle patatine, offrendo una crema vellutata che contrasta con la texture fibrosa delle patatine. La gravy, ricca e avvolgente, aggiunge profondità di sapore: un buon equilibrio tra sale, pepe, erbe aromatiche e una nota di rosolatura che ricorda il soffritto e la carne. Se aggiungi uova, bacon o salsiccia, il profilo nuttoso e-friendly si amplia con note di burro, tuorlo cremoso e una leggera speziatura. Il risultato finale è un piatto dal carattere robusto, ma capace di trovare leggerezza in tocchi freschi come prezzemolo tritato o cipollotto crudo. Per chi preferisce una versione più leggera, la versione con patate al forno molto croccanti e una salsa gravy a base di brodo vegetale è altrettanto invitante, offrendo una colazione che resta soddisfacente senza appesantire troppo.

In termini di equilibrio tra sapori, la chiave è l’armonia tra sale e acidità. Una salsa gravy ben bilanciata ha una leggera acidità che evita che il piatto diventi troppo pesante, mentre una quantità moderata di formaggio evita che la cremosità sovrasti il resto. Le erbe fresche fanno la differenza: una spruzzata di pepe nero, una spolverata di timo o erba cipollina possono accentuare la profondità del piatto senza renderlo troppo complesso. La temperatura gioca un ruolo importante: servire subito, appena assemblato, garantisce la giusta frivola coccola di formaggio fuso e salsa calda, ma una versione leggermente più rustica che si scalda nuovamente non perde appeal. L’insieme è una sinfonia di contrasti che si suppone in ogni boccone, una celebrazione dei sapori fondamentali: sale, grassi buoni, cremosità e un tocco di aromaticità che invita a una seconda porzione.

Occasioni & Abbinamenti

Poutine colazione è perfetta per una varietà di occasioni:

  • Brunch della domenica: una scelta scenografica che crea atmosfera e consente a tutti di iniziare la giornata con allegria.
  • Colazione post-allenamento: il mix proteico (uova e formaggio) insieme alle patatine fornisce energia immediata per recuperare.
  • Giornate di freddo o pioggia: riscalda e conforta, trasformando la cucina in un rifugio accogliente.
  • Feste informali o game night: un piatto che stimola conversazioni e condivisione, facile da partizionare in porzioni per ospiti.
  • Anteprime culinarie o momenti di cucina condivisa: soddisfa sia chi cerca gusto sia chi vuole sperimentare nuove combinazioni.

Abbinamenti consigliati:

  • Bevande: caffè intenso o espresso, latte caldo, o una spremuta fresca per bilanciare il sapore ricco. Per un tocco di brio, una Bloody Mary leggera o un mimosa può essere un accompagnamento divertente per i brunch.
  • Contorni: una semplice insalata verde con vinaigrette leggera per bilanciare l’intensità, oppure salsa di pomodoro fresco come nota di contrasto.
  • Contorno proteico: uova in stile pochè o strapazzate a fuoco dolce per aggiungere leggerezza e completezza al piatto.
  • Alternative croccanti: verdure grigliate o cavolini di bruxelles saltati per introdurre una texture diversa e un tocco di colore.

Suggerimenti, Varianti & Sostituzioni

  • Versione classica that si adatta al mattino: usa patatine sottili, formaggio cheddar a cubetti e gravy classico. Aggiungi un uovo all’occhio o strapazzato sopra per una nutrizione extra e una presentazione invitante.
  • Varianti vegane: sostituisci il formaggio tradizionale con formaggio vegano che fonde bene e prepara una gravy a base di funghi o di lievito alimentare. Le patatine restano croccanti, e puoi aggiungere una “uovo vegano” fatta con crema di ceci spolverata dietro per consistenza e sapore.
  • Gluten-free: fai attenzione alla gravy; usa una versione gluten-free di brodo e addensante (farina di riso o amido di mais) per garantire che sia senza glutine. Le patatine industriali o fatte in casa di solito sono prive di glutine, ma controlla sempre le etichette.
  • Patatine fitness o patate dolci: per una versione più leggera, opta per patate dolci tagliate a bastoncini e cotte in forno fino a renderle croccanti. Il sapore dolce aggiunge una nuova dimensione al profilo generale.
  • Cheese curds alternativi: se non trovi formaggio a pasta filante, puoi usare formaggio cheddar tagliato a cubetti che fonde bene, oppure una miscela di formaggi che si sciolgono facilmente. Un pop di formaggio cremoso al centro resta desiderabile.
  • Erbe e spezie: pepe nero macinato al momento, paprika affumicata, aglio in polvere e una spruzzata di salsa di soia leggera possono intensificare il sapore della gravy senza appesantire.
  • Versione gourmet: aggiungi funghi trifolati, pancetta croccante o salsiccia dolce sbriciolata per un fattore “mini-breakfast” da ristorante. Una spolverata di pepe tartufo può regalare eleganza senza esagerare.

Conservazione & Idee da preparare in anticipo

Per una colazione impeccabile, è utile pensare a come conservare gli elementi separatamente fino al momento di servire. Ecco alcuni consigli pratici:

  • Gravy in anticipo: la gravy può essere preparata con qualche giorno di anticipo e conservata in frigorifero. Riportala a leggera ebollizione prima di usarla. Se congeli, la potresti dover addensare leggermente nuovamente una volta scongelata.
  • Patatine: per la croccantezza, è meglio prepararle al momento. Se devi prepararle in anticipo, lasciale raffreddare completamente e riaccendile in forno o in air fryer per 5–7 minuti prima di servire.
  • Formaggio: taglia formaggio a cubetti o scaglie e conservalo in frigorifero in un contenitore ermetico. Non è necessario scioglierlo prima della preparazione; si scioglierà naturalmente quando la salsa calda gli arriva.
  • Uova o proteine: se usi uova, possono essere cucinate al momento per evitare che si rapprendano troppo. Se preferisci, puoi utilizzare uova sode tagliate o altre proteine pre-cotte per un tocco di praticità.
  • Make-ahead brunch: prepara una base di patatine e gravy, tenendoli separati; al momento di pranzo, riscalda la gravy e aggiungi le patatine e il formaggio. In pochi minuti avrai una poutine colazione pronta da gustare.

Curiosità e Trivia

La poutine ha una storia affascinante, con origini contestate e una crescente popolarità internazionale. Ecco alcune curiosità interessanti:

  • Esistono numerose teorie sull’origine del termine “poutine”. Alcune riferiscono una radice francese legata al termine per una grande quantità di cibo; altre ipotesi lo associano a un termine che descriveva una mistura di ingredienti fatta “a poutine” o “ripiene”.
  • La popolarità della poutine è esplosa in molti Paesi dopo che chef e appassionati hanno inizato a creare varianti gourmet con formaggi selezionati, salse raffinate e ingredienti di alta cucina. Oggi è comune trovare versioni che includono funghi, tartufo, pane croccante e persino versioni speziate.
  • La colazione poutine è un’interpretazione recente ma rapida: mostra come un classico di strada possa essere reinterpretato per i pasti della giornata, offrendo comfort e soddisfazione sia a chi ama la tradizione sia a chi desidera una novità audace a tavola.
  • In alcune cucine regionali, la poutine è associata a festività e celebrazioni. La versione colazione si inserisce naturalmente in idee di brunch festivi o riunioni familiari dove la tavola diventa un luogo di scambio gastronomico e divertimento.

Conclusione

Poutine colazione è più di una combinazione di ingredienti: è una filosofia di comfort senza tempo, capace di trasformare una mattina qualsiasi in un momento speciale. È una tela bianca dove ognuno può dipingere la propria versione, aggiungendo un tocco personale, un ingrediente preferito o una salsa particolare. È una promessa di energia per affrontare la giornata con serenità, un invito a riunirsi attorno al tavolo per condividere risate, conversazioni e sapori che riscaldano dal primo morso all’ultimo. Se cerchi una colazione che sia sia robusta sia versatile, se vuoi stupire senza rinunciare alla semplicità, se vuoi celebrare la convivialità in una forma gustosa e accessibile: benvenuto nel mondo di Poutine colazione. La cucina è un racconto, e questa ricetta ne è un capitolo luminoso, profumato di patatine fragranti, formaggio che si scioglie e una salsa stuzzicante che unisce tutto in un abbraccio perfetto per iniziare al meglio la giornata.

Ingredients

Poutine colazione
Base

  • – 4 medium russet potatoes, peeled and grated into thin matchsticks or coarse shreds for hash browns, then thoroughly dried to remove moisture
    → The base provides the crispy potato layer that soaks up hot gravy. Grating and drying the potatoes yields crisper results. If you want ultra crisp, shred and refrigerate for 20 minutes before cooking, and squeeze out as much moisture as possible.
  • – 2 tablespoons neutral cooking oil (canola, grapeseed) for frying
    → Oil helps achieve a golden, crisp exterior. Heat until shimmering, then cook in batches to avoid overcrowding and to maintain surface contact for even browning.
  • – 1/2 teaspoon kosher salt
    → Enhances potato flavor and helps balance the dish when paired with the gravy. Adjust after tasting the finished poutine since gravy and cheese can add saltiness.
  • – 1/4 teaspoon freshly ground black pepper
    → Adds subtle heat and depth to the potatoes. Freshly ground pepper gives a brighter aroma than pre-ground.
  • – 1/2 teaspoon smoked paprika (optional)
    → Imparts a gentle smoky note that pairs nicely with the gravy. Use if you enjoy a hint of smokiness; sprinkle evenly over the potatoes during cooking.

Gravy

  • – 2 cups hot beef gravy (store-bought or homemade) or 2 cups hot mushroom gravy for a vegetarian option
    → The pourable sauce that unites the dish. It should be hot and smooth; if using store-bought gravy, whisk well to remove lumps and reheat gently before serving. For mushroom gravy, sauté mushrooms in a little oil, deglaze with stock, and thicken as needed.
  • – 1 teaspoon Worcestershire sauce (optional)
    → Adds depth and savory umami to the gravy. Skip if you prefer a gluten-free version or have dietary restrictions; choose gluten-free Worcestershire if needed.

Cheese

  • – 2 cups cheese curds (fresh, squeaky) or substitute with 1 1/2 cups shredded mozzarella or mild cheddar if cheese curds are unavailable
    → Cheese curds deliver the classic poutine texture, staying distinct and slightly squeaky when hot. If using shredded cheese, expect a fully melted, gooey layer that blends with the gravy; mozzarella yields stretch, cheddar offers a sharper bite.

Eggs

  • – 4 large eggs, freshly laid if possible, for topping
    → Eggs add richness and a creamy yolk that mingles with the gravy. Poach the eggs or fry sunny-side up just before serving to ensure yolks remain runny and vibrant. Room-temperature eggs will poach or fry more evenly than cold eggs.

Toppings and finishing

  • – 2 tablespoons finely chopped green onions (scallions) for garnish
    → Adds bright, fresh flavor and color. Slice thinly on the bias for best presentation; scatter over the top just before serving.
  • – Optional: 1/2 cup crispy bacon bits or pancetta
    → Extra crunch and savory depth. If cooking separately, drain well on paper towels to keep the base from becoming soggy.
  • – Optional: hot sauce or pickled jalapeños to taste
    → A touch of heat can balance the richness of the gravy and cheese. Add gradually and adjust to your preferred spice level.

Instructions

  • Peel the potatoes and grate them into thin matchsticks or coarse hash browns to create a uniform base for the dish.
  • → The base provides the crispy potato layer that soaks up hot gravy. Grating and drying the potatoes yields crisper results. If you want ultra crisp, shred and refrigerate for 20 minutes before cooking, and squeeze out as much moisture as possible.

  • Spread the grated potatoes onto a clean kitchen towel, fold the towel over, and press firmly to remove as much moisture as possible, then unroll and transfer the dry shreds to a separate bowl ready for frying.
  • → Removing moisture prevents steaming during frying and helps achieve a crisp exterior rather than a soggy interior, which is essential for a classic poutine texture.

  • If you prefer extra crispness, refrigerate the dried potato shreds for 20 minutes, then pat them dry again to remove any surface moisture before cooking.
  • → Chilling helps stabilize the starches and yields an even crisper fry, giving you a superior crunch when plated with hot gravy.

  • Heat 2 tablespoons neutral cooking oil in a large, heavy skillet over medium-high heat until shimmering, then add the potatoes in batches, spreading them in a single layer to maximize contact and even browning.
  • → Frying in batches prevents overcrowding, which would steam the potatoes and prevent browning; even surface contact develops a uniform, golden crust.

  • Cook each batch until the underside is deeply golden and crisp, about 4–6 minutes, then flip with tongs and cook the other side until equally crisp, transferring finished batch to a rack or paper towels to drain briefly.
  • → Proper flipping and even browning create a sturdy base that holds up to gravy and cheese without becoming greasy, while draining removes excess fat that can soggy the base.

  • Season the hot potatoes with kosher salt, freshly ground black pepper, and optional smoked paprika, tossing gently to distribute the seasonings evenly while the fries are still hot.
  • → Salt enhances potato flavor and balances the richness of the gravy and cheese; paprika adds a subtle smoky aroma that complements the gravy.

  • Keep the fried potatoes warm in a low oven (about 200°F / 95°C) as you finish the remaining batches, so the base stays hot and crisp when you assemble the dish.
  • → Warm potatoes stay crisp and ready to mingle with the hot gravy and cheese, preventing a cold, limp base at serving time.

  • In a small saucepan, heat 2 cups of hot beef gravy or hot mushroom gravy until steaming, whisking to smooth out lumps if using store-bought gravy, then keep the gravy hot and ready for assembly.
  • → A smooth, hot gravy coats the potatoes evenly and carries flavor into every bite; heating ensures immediate melding with the cheese and eggs when plated.

  • If using Worcestershire sauce, whisk in 1 teaspoon to deepen the savory notes of the gravy, then simmer for a minute to meld the flavors; set aside off the heat but still hot.
  • → Worcestershire brings umami and a slight tang that balances richness; adding it off the heat preserves its bright, sharp character.

  • Arrange the hot, crisp potatoes on a warmed serving platter or deep dish, forming an even layer as the foundation for the poutine stack.
  • → A consistent layer ensures all portions receive the same distribution of base, gravy, cheese, and eggs for uniform texture and flavor.

  • Scatter 2 cups cheese curds (fresh, squeaky) over the hot potatoes, or if using shredded mozzarella or mild cheddar, sprinkle 1½ cups over the surface in an even layer so they begin to melt with the heat from the potatoes.
  • → Cheese curds retain distinct texture and squeak when hot, while shredded cheese melts into a gooey blanket; both deliver the signature poutine experience.

  • Pour the hot gravy evenly over the potatoes and cheese, allowing it to surround the curds so they begin to soften and emit a creamy edge without becoming pool-like.
  • → The gravy should permeate the layer without washing out all texture; a balanced amount ensures the dish remains cohesive and saucy rather than soggy.

  • Prepare 4 large eggs to top the poutine just before serving by either poaching in gently simmering water with a splash of vinegar (3–4 minutes until whites set and yolks remain runny) or frying sunny-side up in a light coating of oil until the whites are set and the yolk stays liquid.
  • → Eggs add richness and a creamy yolk that mingles with the gravy; runny yolks create a luscious, silky sauce when broken onto the hot potatoes.

  • Carefully place the poached or fried eggs over the hot poutine, one atop each portion, ensuring the yolks remain intact and visible for a dramatic, appetizing presentation.
  • → The yolk acts as a natural emulsifier, enriching the gravy as it breaks into the dish, while the sunny-side yolk visually signals the dish’s breakfast-inspired twist.

  • Finish with 2 tablespoons finely chopped green onions, scatter optional crispy bacon bits or pancetta, and offer hot sauce or pickled jalapeños on the side to taste for spice and extra crunch.
  • → Green onions provide bright contrast and fresh aroma; bacon adds a savory crunch, while hot sauce or jalapeños let each eater tailor the heat level to balance the richness of the poutine.

  • Serve immediately to preserve the crisp texture of the potatoes, the fuzz-free melt of the cheese, and the runny yolk of the eggs for an indulgent, breakfast-forward poutine experience.
  • → Piping hot, freshly assembled poutine delivers the best texture and flavor; delays allow the components to over-wilt or stiffen, diminishing the intended contrast of textures.

Notes

This Poutine Colazione delivers a crispy potato base, hot savory gravy, and melty cheese with a rich yolk on top—an indulgent breakfast twist on a classic. For the base, grate the potatoes into thin matchsticks or coarse shreds and thoroughly dry them to remove moisture; this helps achieve a crisp surface. Fry in hot neutral oil in small batches until deeply golden, seasoning with 1/2 teaspoon salt and 1/4 teaspoon black pepper; for extra crunch, refrigerate the shredded potatoes for 15-20 minutes and squeeze out any remaining moisture before frying, and consider a light dusting of smoked paprika if you enjoy a hint of smokiness. Keep the gravy hot and smooth; whisk out lumps if using store-bought gravy and reheat gently before serving, or make a quick mushroom gravy for a vegetarian option. If using cheese curds, scatter them over the hot base so they begin to soften but still hold their squeak; or use 1 1/2 cups shredded mozzarella or mild cheddar for a fully melted layer with different texture. Top with four freshly fried or poached eggs so the yolks mingle with gravy and cheese; finish with finely chopped green onions for brightness and color. Optional: add crispy bacon bits or pancetta for extra crunch, and offer hot sauce or pickled jalapeños to taste. Serve immediately to enjoy maximum crispness and a decadent runny yolk; leftovers tend to soften the potatoes, but you can reheat in a hot oven to regain some texture. For gluten-free considerations, ensure the gravy and Worcestershire sauce are gluten-free, or make your own gluten-free gravy to guarantee a safe, delicious result.

Tips

Consigli utili per preparare Poutine Colazione

Base di patate: croccantezza ottimale

  • Assicurati che le patate siano ben asciugate dopo averle grattugiate: tampona con un panno pulito o carta da cucina per eliminare quanta più umidità possibile. L’umidità è nemica della croccantezza.
  • Se vuoi extra croccantezza, segui la tecnica del “due passaggi”: friggi prima a temperatura moderata per cuocere interiormente, poi aumentala per dorare fuori.
  • Non sovrapporre le patate in pentola: friggi in lotti in modo da mantenere contatto con l’olio e ottenere una doratura uniforme.
  • Per una crosta uniforme, asciuga ulteriormente le patate anche dopo averle mescolate con olio e sale; una superficie asciutta si scurisce meglio.
  • Se vuoi un effetto ultra croccante, puoi refrigerare le patate grattugiate per circa 20 minuti prima di friggere e poi strizzarle di nuovo per togliere eventuale umidità residua.

Gravy: consistenza e sapore

  • Riscalda la salsa fino a sfiorare l’ebollizione, mescolando spesso per mantenere una consistenza liscia e senza grumi.
  • Se usi salsa pronta, sbatti bene per eliminare grumi e, se necessario, addensa con una piccola slurry di amido di mais (amido mescolato ad acqua fredda) prima di servire.
  • Il Worcestershire aggiunge profondità; se preferisci una versione senza carne o gluten-free, omettilo o sostituiscilo con una salsa umami senza glutine.
  • Per una versione cremosa ma non troppo densa, togli dal fuoco poco prima che raggiunga la consistenza finale e riscalda al momento dell’assemblaggio.
  • Se prepari una salsa a base di funghi (opzione vegetariana), cuoci funghi tagliati finemente in poco olio, sfuma con brodo e addensa come necessario prima di unire al soffritto di base.

Formaggio: curds vs formaggi fusi

  • I cheese curds originali offrono una texture “sgrinzolante”; servili subito mentre sono caldi per mantenere la caratteristica consistenza.
  • Se usi formaggio mozzarellа o cheddar, attendi che sia caldo ma non bollente per permettere una fusione morbida ma controllata nella salsa.
  • Distribuisci i formaggi in modo uniforme: i curds dovrebbero mantenere le loro pepite, mentre i formaggi fusi dovrebbero creare uno strato cremoso ma non eccessivamente filante.
  • Se hai una combinazione, considera di aggiungere una piccola quantità di formaggio a metà doratura per una texture ibrida (curds dall’alto e formaggio fuso sotto).

Uova: cottura perfetta per il tuorlo

  • Uova freschissime regalano tuorli più cremosi. Tienile a temperatura ambiente circa 15–20 minuti prima della cottura per una cottura uniforme.
  • Per uova al tegamino: scotta poche minuti finché il bianco è formato ma il tuorlo resta liquido. Per poaching, aggiungi un filo di aceto all’acqua e cuoci 2–4 minuti a seconda dello spessore del tuorlo.
  • Se preferisci, prepara le uova in anticipo e tienile in forno caldo (non troppo) per mantenere la consistenza mentre monti la poutine.

Toppings e rifiniture

  • Taglia i cipollotti finemente e in diagonale per una presentazione migliore e per rilasciare aromi più rapidamente.
  • Il bacon o pancetta croccante aggiunge crunch e sapidità: cuoci e asciuga bene su carta da forno per non appesantire la base.
  • Se vuoi un tocco piccante, aggiungi salsa piccante o jalapeños sottaceto a tavola, così ciascun commensale può regolare il livello di piccantezza.
  • Servi subito: la base tende a diventare meno croccante con il calore del gravy e degli elementi morbidi; montala su un piatto caldo e aggiungi gli ingredienti in sequenza per mantenere texture diverse.

FAQ

Cos’è la Poutine colazione?

È una versione mattutina della poutine tradizionale: patatine croccanti, formaggio a pezzetti o curds, salsa gravy calda e spesso guarnizioni come uova o pancetta. Il risultato è un piatto salato e confortante, ideale per una colazione sostanziosa.

Quali ingredienti base servono per questa ricetta?

Patatine fritte o patatine al forno, formaggio a pasta filata o curds (o formaggio vegano), salsa gravy calda. Opzionali: uova, pancetta o salsiccia, sciroppo d’acero per un tocco dolce-salato.

Come si prepara la salsa gravy per colazione?

Soffriggi cipolla e aglio in poco olio, aggiungi brodo (vegetale o di carne) e una spruzzata di salsa di soia. In una ciotola, mescola amido di mais con un po’ di brodo freddo, aggiungilo al sugo e lascia addensare a fuoco medio finché non avrà consistenza cremosa.

Come ottenere patatine croccanti come base?

Taglia patate a bastoncini, asciugale bene. Puoi friggerle in olio a 170–180°C fino a doratura o cuocerle al forno a 220°C per 25–30 minuti, girandole a metà cottura. Condisci subito con sale.

È possibile rendere questa ricetta vegetariana o vegana?

Sì. Per la versione vegetariana/vegana usa gravy vegetariano o vegano e formaggio vegano a scaglie o una crema di anacardi per simulare la cremosità. Le patatine restano uguali; aggiungi guarnizioni come funghi saltati o tofu croccante se vuoi.

Posso aggiungere uova o pancetta?

Certo. Puoi aggiungere uova fritte o in camicia direttamente sopra la poutine. Per una versione salata extra, aggiungi pancetta croccante o salsiccia sbriciolata come topping.

Quanto tempo ci vuole per prepararla dall’inizio alla fine?

Circa 40–50 minuti se prepari le patatine da zero (friggendo o cuocendo al forno) e la salsa gravy. Se usi patatine pronte o congelate, il tempo si riduce a circa 25–35 minuti.

Come presentare la Poutine colazione in tavola?

Disponi le patatine in una ciotola o su un piatto singolo, versa abbondante salsa gravy calda, spargi formaggio a pezzetti, quindi aggiungi uova o pancetta come topping. Guarnisci con erba cipollina tritata o pepe fresco e, se lo vuoi, una leggera cascata di sciroppo d’acero.

È possibile una versione senza glutine?

Sì. Usa patatine certificate senza glutine e una gravy senza glutine. Controlla che eventuali condimenti o salse non contengano glutine nascosto.

Quali varianti posso provare per rendere la ricetta diversa?

Prova funghi saltati, peperoni, jalapeños, o salse speziate. Puoi anche sostituire la carne con tacchino, prosciutto, o salse di pomodoro speziate per un tocco diverso. Per una versione dolce-salata, una nota di sciroppo d’acero o agave può essere interessante.