Introduction / Hook
Imagine waking up to a breakfast that tastes like dessert but fuels your day with protein, fiber, and wholesome goodness. These High-Protein Baked Protein Pancake Bowls are not your typical morning fare: they’re a comforting, cozy dish that delivers a satisfying, plate-licking finish without derailing your nutrition goals. The aroma swirls from the oven as gentle vanilla and cinnamon notes drift through the kitchen, hinting at a treat that’s both indulgent and smart. Each bite bursts with a fluffy interior and a slightly crisp edge, a texture that feels like a personal breakfast casserole and a pancake at the same time. And because they’re baked in bowls, you get perfectly portioned servings that are easy to portion, grab, and go. If you’ve ever wished for a protein-packed breakfast that doesn’t taste like a supplement, you’ve found your new weekend ritual—a balance of comfort food nostalgia and modern wellness in every spoonful.
The Story Behind the Dish
Protein pancakes have a long and winding history in the quest for a breakfast that satisfies morning hunger while supporting active lifestyles. The idea of “baked” pancake varieties has roots in simple, homestyle recipes that transform a familiar batter into a warm, custardy dish with a hint of golden crust. In many kitchens, the concept of turning traditional pancakes into individual portions has been a practical solution for family breakfasts, crowd-pleasing brunches, and meal-prep routines. The baked pancake bowl format adds a modern twist: it borrows the convenience of a baked dish—easy to scale, easy to portion, easy to reheat—while preserving the comforting charm of a pancake. This version embraces a high-protein approach by integrating quality protein powder or dairy and egg-based richness, without sacrificing the light, pillow-soft texture that makes pancakes beloved. The result is a dish that feels like a weekend treat but behaves like a smart weekday staple, bridging indulgence and nourishment in a single, satisfying bowl.
Why You’ll Love This Recipe
- High protein, balanced macros: crafted to support active mornings, post-workout recovery, or a satisfying breakfast-for-dinner treat.
- One-bowl simplicity, multiple portions: mix once, bake in individual bowls, and enjoy for several mornings with minimal effort.
- Soft, custardy center with a delicate edge: a texture profile that surprises and delights, never dry or heavy.
- Versatile flavor canvas: vanilla, cinnamon, and subtle sweetness pair with a rainbow of toppings or add-ins you already love.
- Kid-friendly and family-friendly: a nutritious, appealing option that satisfies a range of taste preferences.
- Customizable for dietary needs: easily adaptable to dairy-free, gluten-free, or lower-sugar versions without losing the essential pancake charm.
Flavor Profile & Texture
The flavor profile centers on comforting, familiar notes—vanilla, a whisper of cinnamon, and a touch of sweetness that echoes maple without overwhelming the palate. The base batter carries a gentle richness from eggs and milk (or dairy-free alternatives) that swells into a tender, almost custard-like center as it bakes. Outside, a delicate crust forms, providing a faint caramelization that adds depth and a pleasantly chewy contrast to the soft interior. Protein powders or yogurt contribute a subtle tang or neutral amplifications of sweetness, depending on the brand and choice, while keeping the sauce of moisture intact. Toppings become a crucial extension of flavor and texture: tart berries pop against the creamy interior, nuts add a crunchy counterpoint, and a drizzle of nut butter or maple syrup weaves a glossy finish that ties the bowl together. The overall sensation is a harmonious blend of cozy pancake nostalgia and modern nutrition—soft, airy bites that linger with warmth and a nod to wellness.
Occasions & Pairings
These High-Protein Baked Pancake Bowls are incredibly versatile and shine in several scenarios:
- Weekend brunch centerpiece: a colorful spread with fresh fruit, a dollop of yogurt, and a splash of espresso or light juice.
- Post-workout recovery: a nourishing plate that replenishes protein and carbohydrates after a gym session.
- Weekday make-ahead breakfasts: portioned bowls that reheat quickly for busy mornings.
- Family breakfasts: kid-friendly and easily customizable with different toppings to suit each eater.
- Brunch-to-dinner option: served warm with savory accents like smoked salmon, avocado, or a sprinkle of seeds for a more robust meal.
Pairing ideas to elevate the experience include:
- Fruit compotes or fresh berries: strawberries, blueberries, raspberries, or sliced peaches add brightness and contrast.
- Yogurt or kefir dollops: tangy creaminess that complements the gentle sweetness.
- Nut butters or seeds: almond, peanut, or sunflower butter for indulgent richness; chia or flax seeds for a light crunch.
- Savory twists: a small drizzle of olive oil or yogurt-based herb sauce to balance the sweetness on non-traditional days.
- Warm spices: a pinch of nutmeg or cardamom can transform the aroma and depth.
Tips, Variations & Substitutions
These bowls are wonderfully forgiving and can be tailored to your pantry and preferences. Here are a few ideas to customize while preserving the high-protein, breakfast-forward spirit:
- Protein sources: use a whey or plant-based protein powder that blends smoothly. If you skip powder, you can add extra eggs or Greek yogurt to maintain moisture and protein content.
- Flour options: a small amount of almond flour or oat flour can add structure and a slightly nutty flavor, but keep it minimal to avoid dense texture.
- Sweetness level: adjust with a sugar alternative like maple-flavored syrup, stevia, or mashed banana to suit your taste.
- Dairy-free version: substitute dairy milk with almond, soy, or oat milk; use a dairy-free yogurt for moisture and tang if your recipe relies on dairy.
- Gluten-free approach: use certified gluten-free oats or oat flour and ensure any add-ins are gluten-free.
- Flavor boosters: add lemon zest for brightness, orange zest for a citrus twist, or a small amount of cocoa powder for a chocolatey variant.
- Texture variations: for a lighter interior, reduce the baking time slightly; for a creamier center, consider a touch more yogurt or milk and a lower oven temperature to bake more slowly.
- Savory twist: omit sweeteners and fold in chopped herbs, black pepper, and shredded cheese to create a breakfast bake with a pancake-inspired aroma.
Storage & Make-Ahead Ideas
One of the most practical strengths of pancake bowls is their suitability for meal prep. Here are strategies to maximize freshness and ease of use:
- Make-ahead: prepare the batter or mixture up to the stage just before baking, refrigerate in sealed bowls, and bake fresh in the morning for a just-baked aroma.
- Storage: refrigerate baked bowls in airtight containers for up to 3–4 days. Reheat gently in the oven or microwave, adding a splash of milk to restore moisture as needed.
- Freezing: freeze baked bowls individually wrapped; thaw in the refrigerator overnight and reheat in the oven to restore texture. Fresh toppings should be added after reheating.
- Tips for reheating: for best texture, reheat in a 350°F (175°C) oven for 8–12 minutes, or microwave in short 20–30 second bursts if you’re pressed for time.
Fun Facts & Trivia (Optional)
Delighting tidbits to savor while you cook or plan your toppings:
- High-protein breakfasts have roots in athletic training routines from the mid-20th century, evolving into popular options for busy mornings and lifestyle diets.
- The concept of individual bowls is influenced by the rise of “bake-and-serve” breakfasts found in brunch cafes, where portion control and aesthetics meet convenience.
- Protein powders vary widely in texture and flavor; choosing the right one for baking can dramatically affect the final texture and sweetness of the dish.
- Texture plays a major role in perceived sweetness. A slightly crisp exterior with a tender interior can make a dish taste sweeter with less sugar because of the contrast.
- Eggs are among the most versatile breakfast proteins, contributing not only to texture but also to emulsification and moisture, making them essential to this baked pancake approach.
Conclusion / Final Thoughts
High-Protein Baked Protein Pancake Bowls are more than a breakfast option; they are an invitation to begin your day with intention, warmth, and a sense of indulgence that doesn’t compromise your goals. They bridge the gap between comfort food and performance nutrition, offering a flexible canvas that invites experimentation with flavors, textures, and toppings. Whether you’re an early riser seeking a quick, protein-rich meal after a morning workout, a parent trying to feed the family with something nourishing and appealing, or a foodie who relishes a comforting breakfast that travels well to weekend adventures, these pancake bowls deliver. Bake them once, taste them, and you’ll understand why this idea has resonated with home cooks and fitness enthusiasts alike—the gift of a sunlit, cozy morning, ready to be shared or savored in quiet, solo moments.
Note on Aesthetic & Presentation
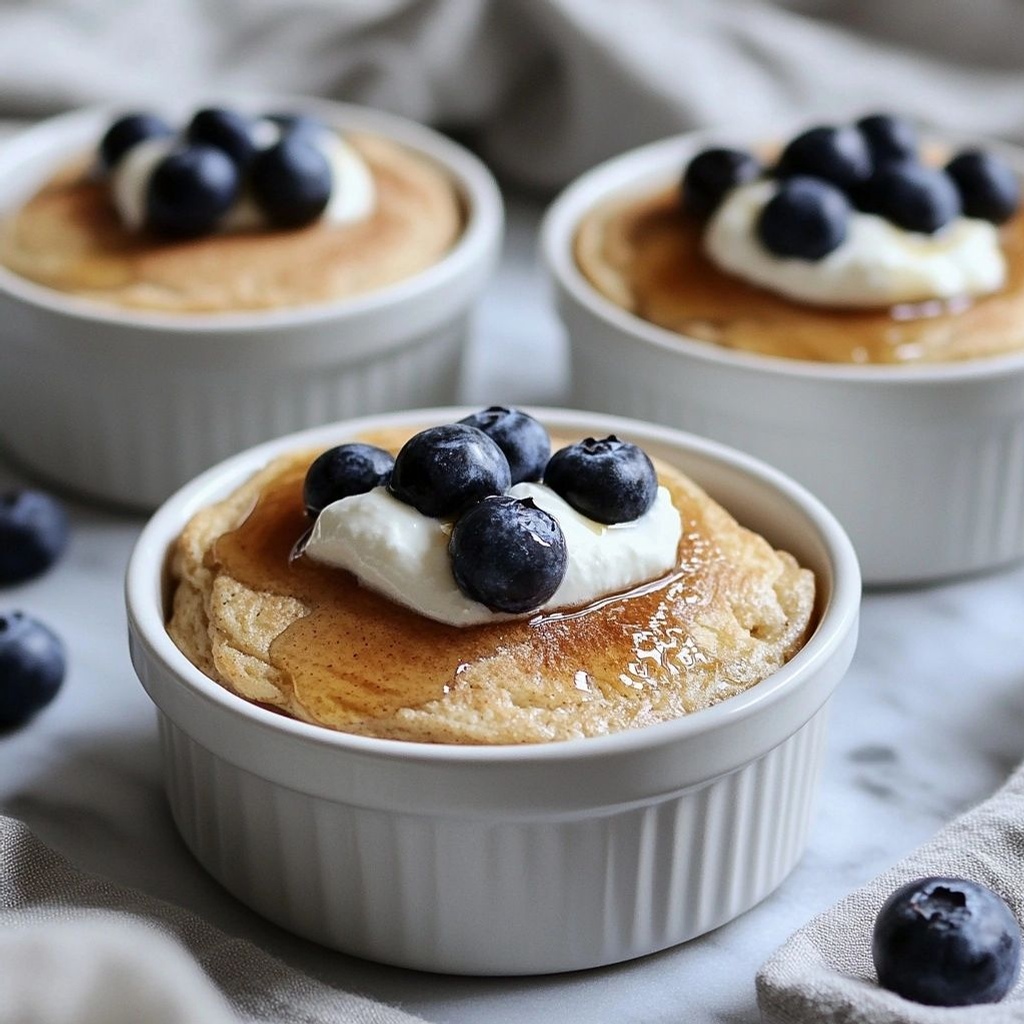
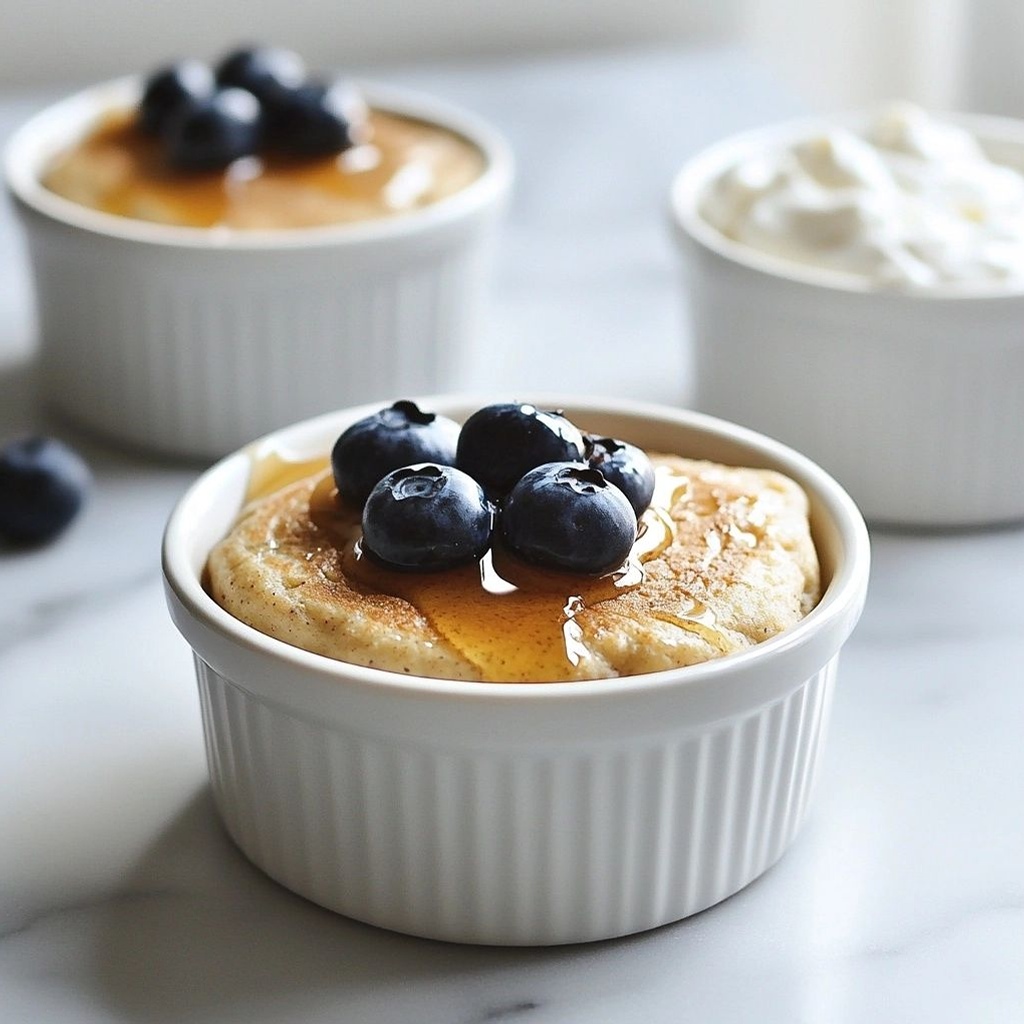
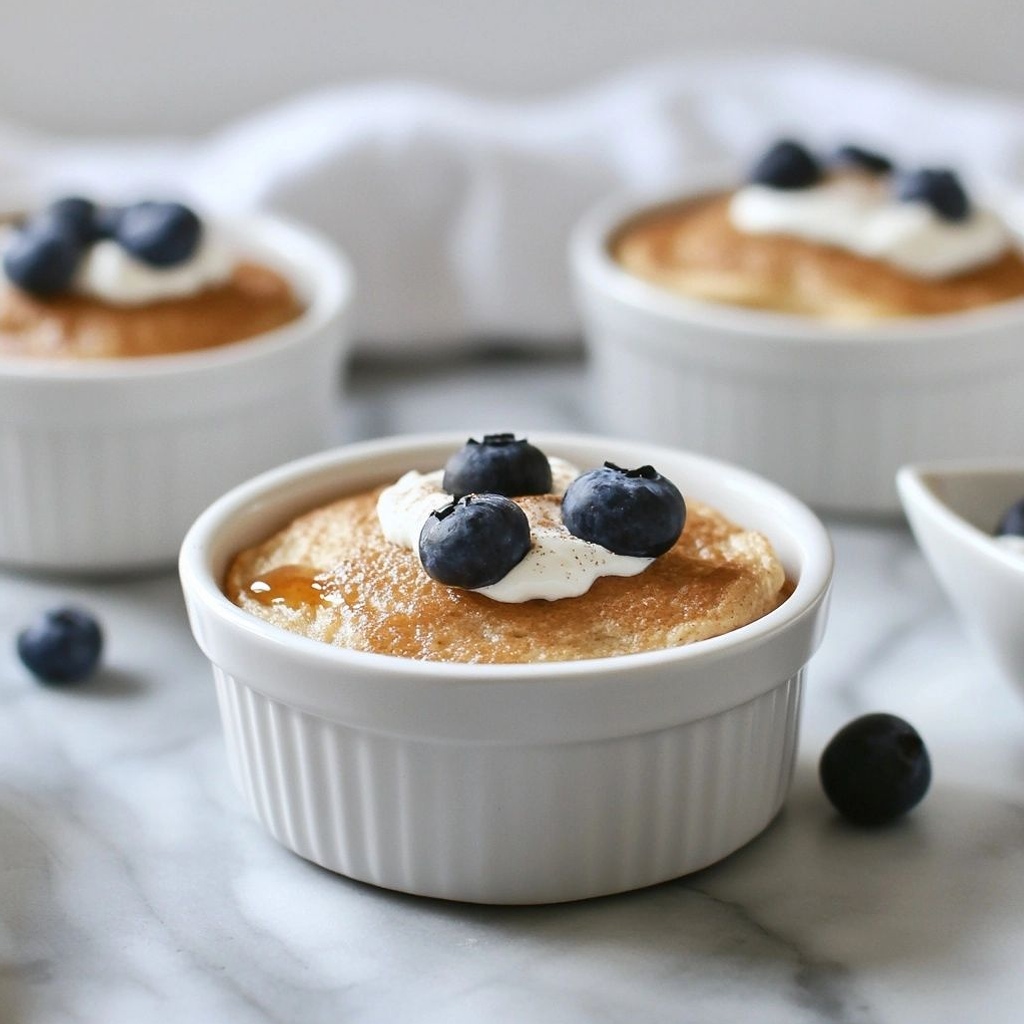
While the health benefits and flavor are the stars, the visual appeal matters too. Serving these pancake bowls in small, oven-proof ramekins creates a little culinary theater: the rising, golden top peeking above a creamy interior invites curiosity and satisfaction. Top with a mosaic of colors—bright berries, a drizzle of yogurt, a scatter of seeds—to transform each bowl into a miniature, eye-catching breakfast parfait that’s as pleasing to the eye as it is to the palate.
Ingredients
Pancake Bowl Base
-
– 2 cups old-fashioned rolled oats (certified gluten-free)
→ These oats form the coating and texture after blending into a flour-like base. If you need a finer flour, blend until very powdery; using certified gluten-free oats ensures the dish stays gluten-free for sensitive eaters. For a smoother batter, grind longer to a fine consistency before mixing with liquids.
– 1 scoop vanilla whey protein powder (or plant-based protein powder)
→ Boosts the protein content to make the bowls more filling and satisfy hunger longer. Choose a blend that dissolves smoothly; if you don’t want to use protein powder, substitute with an extra 1/2 cup Greek yogurt and slightly more milk to reach the same consistency.
– 1 cup unsweetened almond milk (or milk of choice)
→ Hydrates the dry ingredients to form a thick, pourable batter. Use unsweetened to control sweetness and calories; adjust by adding a little more milk if the batter is too thick.
– 2 large eggs
→ Act as a binder and help the batter set into cohesive portions during baking. Bring eggs to room temperature for easier incorporation; whisk lightly before adding to the bowl to ensure even distribution.
– 1/2 cup Greek yogurt (unsweetened)
→ Adds moisture, tenderness, and extra protein. If you are dairy-free, substitute with an equal amount of dairy-free yogurt or coconut yogurt, noting it may slight alter flavor and texture.
– 1 teaspoon baking powder (gluten-free if needed)
→ Provides lightness and puff to the baked bowls, creating a soft interior. Do not overmix after adding baking powder to avoid dense texture; fold just until combined.
– 1/2 teaspoon ground cinnamon
→ Adds warmth and depth to the batter, pairing well with berries and maple syrup. If you prefer, substitute with 1/4 teaspoon cardamom for a spiced aroma shift.
– Pinch of salt
→ Enhances overall flavor and balances the sweetness; even a tiny amount makes a noticeable difference in finish. Use a fine pinch so it distributes evenly.
– 1 tablespoon melted coconut oil or neutral oil (e.g., canola)
→ Improves moisture and crumb, helping the bowls bake without sticking and stay tender. Whisk into the wet ingredients so it emulsifies evenly; if you skip fat, batter may be drier and crumblier.
– Optional addition: 1-2 tablespoons maple syrup or honey (adjust to taste)
→ Adds a touch of sweetness and helps create a slightly glossy batter. If using sweetened protein powder, reduce this amount to avoid overly sweet bowls.
Optional Add-ins
-
– 1/2 cup fresh berries (blueberries, raspberries) or sliced banana
→ Provide natural sweetness, moisture, and vibrant color. Fold in gently to avoid crushing berries; if using frozen berries, toss with a teaspoon of flour to prevent color bleed and ensure even distribution.
– 1/4 cup chopped dark chocolate or cacao nibs
→ Introduce rich pockets of chocolate and a subtle crunch. Chocolate chips will melt slightly during baking; cacao nibs stay crisp and intensify chocolate flavor. Adjust sweetness if using sweet chips.
– 2 tablespoons ground flaxseed (optional)
→ Adds extra fiber and a nutty note; can aid binding when using less egg. Allow batter to rest a few minutes after adding flax to hydrate; increase liquid slightly if batter thickens.
– 2 tablespoons chia seeds (optional)
→ Contribute texture, omega-3 fats, and a slight gel-like body as they hydrate in the batter. If you prefer a smoother texture, grind chia seeds first or omit; soak in a teaspoon of milk for a smoother dispersion if desired.
Instructions
- Preheat your oven to 350°F (175°C) and line a 12-cup muffin tin with paper liners or grease it well to prevent sticking and ensure easy removal after baking.
→ A consistent oven temperature activates leavening and sets the structure of the pancake bowls evenly, while proper lining prevents the final product from tearing or crumbling. - Grind the oats in a high-speed blender or food processor until they resemble a light flour; measure 2 cups of the oat flour and transfer to a medium bowl.
→ Grinding creates a cohesive batter with a smooth texture, allowing the pancakes to bake into compact, sliceable bowls rather than crumbly mounds. - Whisk together the dry ingredients: 2 cups oat flour, 1 scoop protein powder, 1 teaspoon baking powder, 1/2 teaspoon ground cinnamon, and a pinch of salt until evenly combined.
→ Sifting or whisking ensures the leavening and spices are distributed uniformly, which prevents pockets of baking powder or cinnamon that could cause uneven rise or flavor. - In a separate large bowl, whisk 1 cup unsweetened almond milk, 2 large eggs (room temperature), 1/2 cup Greek yogurt, and 1 tablespoon melted coconut oil until the mixture is smooth and homogenous.
→ Room-temperature eggs blend more easily and evenly into dairy components, while the yogurt provides moisture and tenderness; whisking emulsifies the fat and liquids for a cohesive batter. - Pour the wet ingredients into the dry ingredients and stir gently with a spatula just until combined; avoid overmixing to prevent a dense, gummy texture.
→ Gentle folding preserves air pockets created by the baking powder, yielding light, tender bowls rather than tough ones. - If using optional maple syrup or honey, stream in 1 to 2 tablespoons during the final stir, ensuring even distribution without over-sweetening the batter.
→ Sweetener at this stage helps the batter reach a balanced flavor profile and can slightly affect browning; adding it gradually allows control over sweetness. - Let the batter rest for 5 minutes at room temperature to allow the oats to hydrate and the chia or flax, if added, to begin thickening the mixture.
→ Resting lets the batter achieve a cohesive consistency, improving scoopability and the final texture of the baked bowls. - If adding fresh berries, sliced banana, dark chocolate, or cacao nibs, fold them in now with a light hand to distribute evenly without bruising fruit.
→ Gentle incorporation prevents color bleed from berries and ensures each bowl has a balanced amount of add-ins without compromising bake time. - Spoon approximately 1/3 cup of batter into each muffin cup, filling about two-thirds full to allow rise without overflow; use a lightly oiled spoon or spatula to level the tops.
→ Proper portioning guarantees uniform baking, predictable texture across all bowls, and prevents dome-shaped tops from touching the muffin tin edges. - Bake in the preheated oven for 18 to 22 minutes, or until the tops are lightly golden and a toothpick inserted into the center comes out with a few moist crumbs.
→ The bake time ensures a tender interior with a delicate crumb; testing with a toothpick confirms doneness without overbaking, which would dry the bowls. - Remove the muffin tin from the oven and let the bowls rest in the pan for 5 minutes, then transfer to a wire rack to cool completely before serving or storing.
→ Resting in the pan helps set the structure and makes removal easier, while cooling prevents condensation from making the tops sticky. - Store any leftovers in an airtight container in the refrigerator for up to 4 days or refrigerate/freeze portions for longer storage; reheat gently in a toaster oven or microwave until warmed through.
→ Proper cold storage preserves moisture and texture; reheating restores softness and helps the bowls regain their comforting, fluffy mouthfeel. - To serve, optionally top with additional yogurt, a drizzle of maple syrup, fresh berries, or a dusting of cinnamon for a polished finish.
→ Finishing touches enhance flavor and provide a visually appealing contrast while adding moisture or brightness to each bite.
Notes
These high-protein baked pancake bowls are naturally gluten-free when using certified gluten-free oats and gluten-free baking powder. They’re designed to boost satiety with a protein scoop while remaining tender and meal-prep friendly. You can swap vanilla whey with any plant-based protein powder that dissolves smoothly, or increase the Greek yogurt for extra moisture and creaminess without losing structure.
For best results, allow the batter to rest briefly after adding flax or chia as optional add-ins to let the seeds hydrate and thicken the mixture. If you’re watching your sugar, skip optional maple syrup or honey, or reduce the amount to taste, since the protein powder can affect sweetness. These bowls freeze well—reheat in the microwave or the oven for a quick, nourishing breakfast or post-workout meal. Serve with a dollop of yogurt, extra berries, or a drizzle of nut butter to elevate the texture and flavor. Always choose certified gluten-free oats, protein powder, and baking powder if you have gluten intolerance.
Tips
Tips for Perfect High-Protein Baked Pancake Bowls
- Grinding oats to a very fine consistency yields a smoother batter. If you prefer a heartier texture, blend until just lightly powdery.
- Use room-temperature eggs so they whisk evenly into the batter and prevent curdling when mixed with yogurt and milk.
- Whisk the wet ingredients (eggs, yogurt, milk, melted oil) thoroughly before combining with the dry mix to ensure a uniform batter without lumps.
- When adding baking powder, fold gently to keep the mixture airy. Overmixing after this step can deflate the batter and result in denser bowls.
- For a dairy-free version, substitute yogurt with an identical amount of plant-based yogurt and check consistency; you may need a splash more milk.
- Control sweetness by tasting the batter before baking, especially if using maple syrup, honey, or a sweetened protein powder. Adjust with a touch of extra milk if needed.
- Fresh berries should be folded in gently to avoid mashing them and staining the batter. If using frozen berries, toss with a teaspoon of flour to prevent color bleed and clumping.
- Chocolate additions: cacao nibs stay crisper than chocolate chips; if using chips, expect some melting and a sweeter bite.
- Optional flaxseed or chia seeds help with texture and fiber. Hydrate flaxseed for best binding by letting the batter rest a few minutes after adding it.
- If the batter looks thick, loosen with a splash of milk a tablespoon at a time. If too thin, add a little more oats or a spoon of yogurt to regain body.
- To prevent sticking, lightly grease the pan or use parchment cups if baking in muffin tins; a touch of coconut oil helps maintain tender crumb.
- Storage tip: these bowls refrigerate well for up to 2–3 days. Reheat baked bowls in the microwave in 20–30 second bursts or warm in a 300°F (150°C) oven until heated through.
- Make-ahead option: portion the batter into individual cups, cover, and refrigerate up to 24 hours. Bake directly from the fridge, adding a minute or two to the bake time.
- Flavor boosters: a pinch more cinnamon or a dash of vanilla extract can elevate aroma without adding sugar; consider a pinch of nutmeg for warmth.
FAQ
What are High-protein Baked Protein Pancake Bowls?
A batch of pancake bowls baked in a muffin or ramekin form, packed with extra protein from ingredients like Greek yogurt, protein powder, or egg whites for a filling, breakfast-friendly meal.
What ingredients are typically used?
Common ingredients include protein powder, rolled oats or oat flour, eggs or egg whites, Greek yogurt, milk (dairy or non-dairy), mashed banana or sweetness (honey/maple syrup), a leavening agent (baking powder), and optional mix-ins like berries, nuts, or chocolate chips.
How long do they take to bake?
The baking time is usually around 18–25 minutes at 350°F (175°C), or until a toothpick inserted in the center comes out clean. Adjust if using different pan sizes.
What pan sizes work best?
Muffin tins or ramekins are ideal. Each cup creates a single “pancake bowl.” You can also bake the batter in a small loaf pan for a larger, sliceable cake-like item.
How do I boost protein content?
Add an extra scoop of your favorite protein powder, use 1–2 extra eggs, or incorporate Greek yogurt or cottage cheese. Substituting milk with a higher-protein option (like soy milk) also helps.
Are these gluten-free or dairy-free options possible?
Yes. For gluten-free, use certified gluten-free oats or oat flour. For dairy-free, use dairy-free yogurt and milk, and choose a dairy-free protein powder. Ensure baking powder is also dairy-free if needed.
How can I customize flavors and add-ins?
Mix-ins like blueberries, sliced strawberries, chopped nuts, dark chocolate chips, or a pinch of cinnamon work well. For flavor variety, swap vanilla extract for almond or maple, or add cocoa powder for chocolatey bowls.
How should I store leftovers?
Store cooled bowls in an airtight container in the fridge for up to 4–5 days. Reheat in the microwave in 20–40 seconds or in a 350°F (175°C) oven for a few minutes.
Can these be frozen?
Yes. Freeze baked pancake bowls in a single layer, then transfer to a freezer-safe bag or container. Reheat from frozen in the microwave or oven until warm.
What equipment do I need?
You’ll need a mixing bowl, whisk, measuring cups/spoons, and either a muffin tin or small ramekins. Optional: a blender for smoother batter, and a piping bag or spoon for neat portioning.