Introduction / Hook
Imagine shelves lined with jars of thick, creamy sweetness that turns every dessert, beverage, and snack into a silky, indulgent moment. Welcome to the world of a homemade milkmaid—condensed milk made in minutes, with a fraction of the fuss and a depth of flavor that store-bought versions struggle to rival. In just a few quick minutes, you can conjure a luxuriously smooth, velvety sweetness that behaves like a culinary chameleon: happily jazzing up coffee, weaving through caramel sauces, and lending a decadent gloss to puddings, fudges, and frozen treats. The magic isn’t just in the end result; it’s in the process—the way humble milk and a touch of patience transform into something that feels like a tiny, edible luxury. This description invites you into a world where kitchen confidence meets pantry creativity, where a simple pantry staple becomes a versatile, time-saving ally in your cooking and baking adventures.
The Story Behind the Dish
Condensed milk has a storied lineage that traces its roots through dairy-rich regions and the practical ingenuity of home cooks who sought to preserve milk when fresh supplies weren’t always available. The concept rests on two time-tested traditions: slow-simmered sweetness and the art of reduction. Early dairy stewards discovered that gently heating milk with sugar could thickly concentrate both the liquid and the flavor, producing a syrupy elixir that could stand up to heat, cold, and long shelf life. Over the decades, industrial methods refined this idea into the familiar canned condensed milk found on supermarket shelves around the world. Yet in the hands of a home cook, condensed milk becomes something even more personal—a quick craft that mirrors grandmotherly wisdom and modern convenience in one unassuming jar.
The term “milkmaid” evokes a pastoral romance—images of rustic kitchens, copper pots, the song of a kettle, and the comforting aroma of sweet milk slowly transforming into a lush, creamy treasure. A homemade milkmaid in minutes is a nod to that timeless charm, a bridge between traditional techniques and contemporary speed. It’s not merely about achieving thickness; it’s about balancing sweetness, texture, and flavor so that every spoonful carries warmth, nostalgia, and versatility. Sharing this skill honors both the romance of slow cooking and the practicality of today’s busy life, where you deserve desserts and treats that taste like they took more time than they did to create.
Why You’ll Love This Recipe
- Speed without compromise: Achieve a rich, silky condensed milk in a fraction of the time it typically takes, perfect for last-minute desserts or spontaneous coffee moments.
- Versatility galore: This homemade condensed milk is a dream base for caramel sauces, baked goods, fudge, ice creams, and beverages, giving you a consistent, pure sweetness you can trust.
- Control over sweetness and texture: You decide the level of sweetness and thickness, tailoring the dairy-sweet balance to your palate and to the specific recipe you’re about to embark on.
- Fewer additives, more flavor: By making it at home, you skip additives and stabilizers often found in commercial versions, enjoying a cleaner, more natural taste.
- Kid-friendly and comforting: A familiar, comforting flavor that can be adapted to kid-approved treats, from creamy hot beverages to fudgey delights.
- Economical and resourceful: A small amount of raw materials can yield a larger, lasting shelf-friendly sweetener that reduces waste and enhances your pantry planning.
- Great for sharing: It’s a thoughtful homemade gift—presented in a pretty jar with a simple label, it says, “I made this for you with care.”
Flavor Profile & Texture
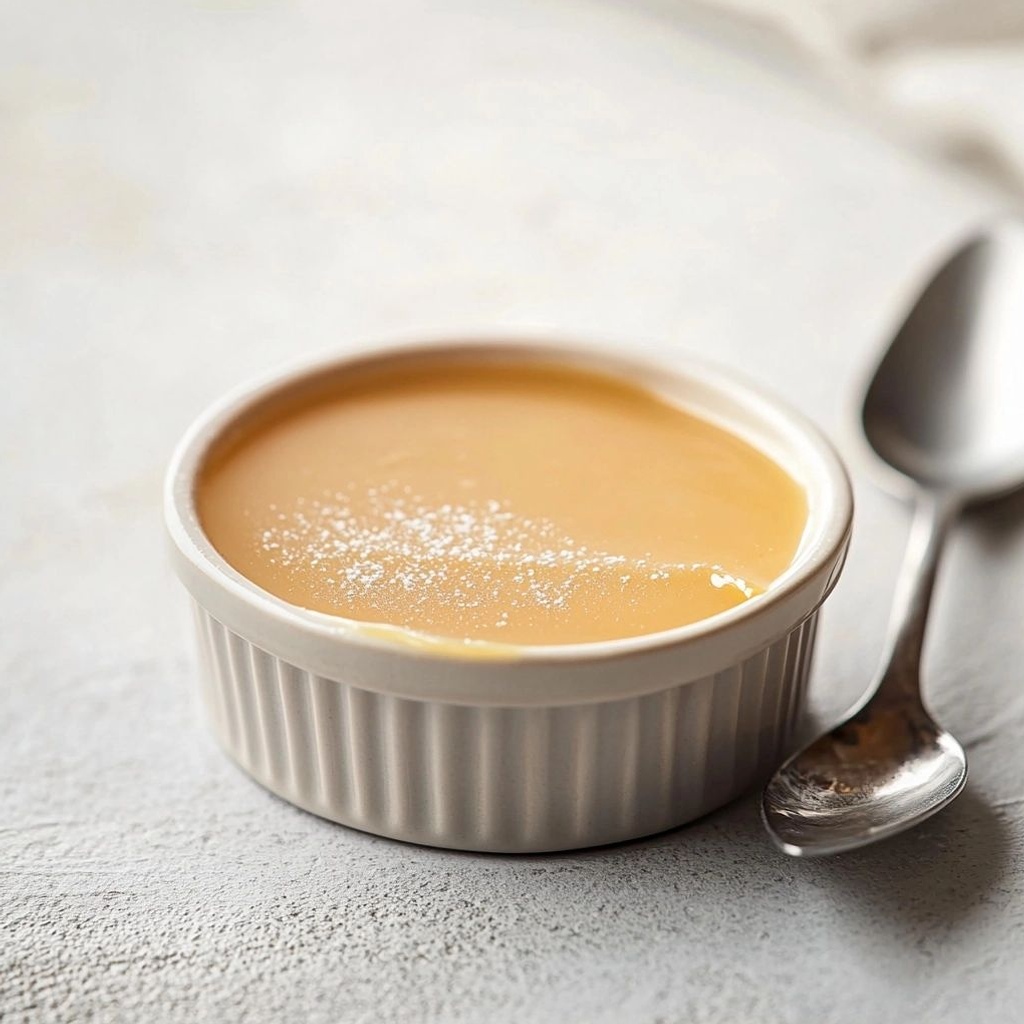
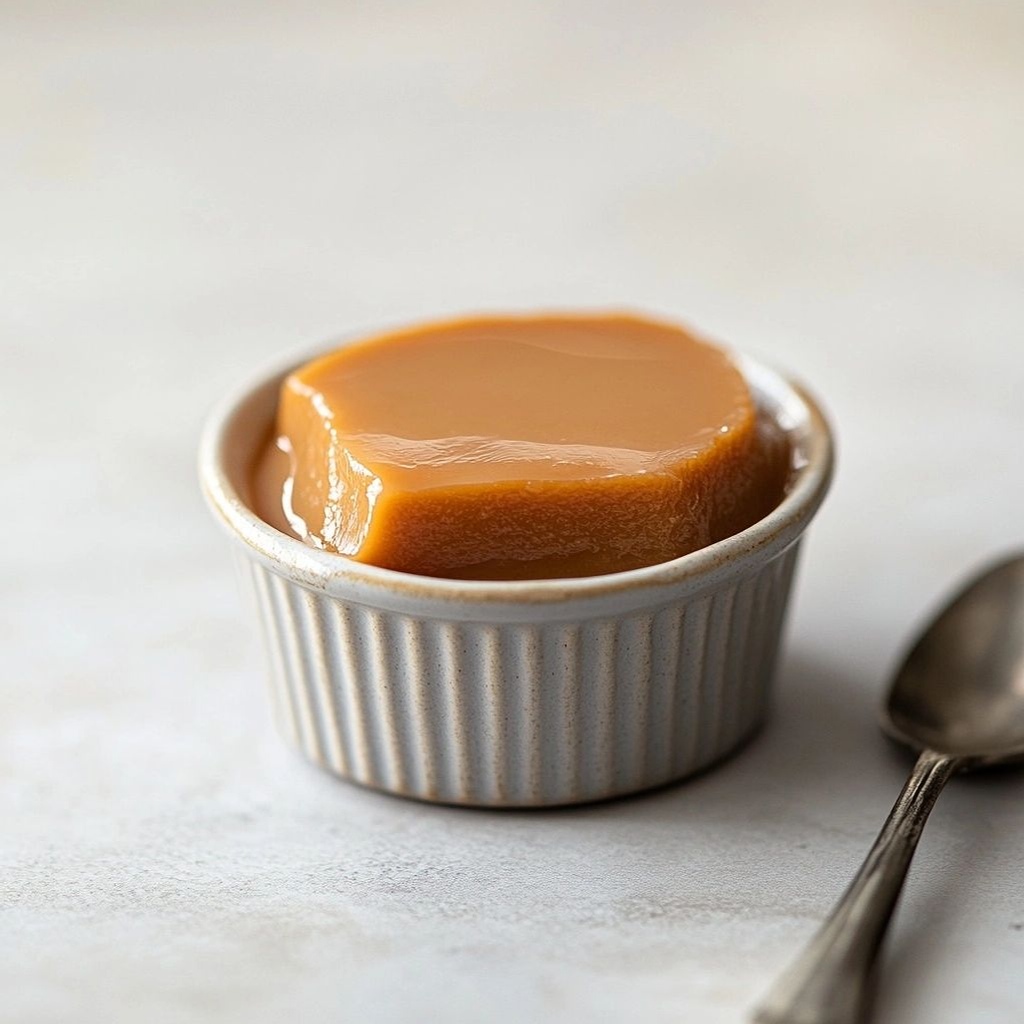
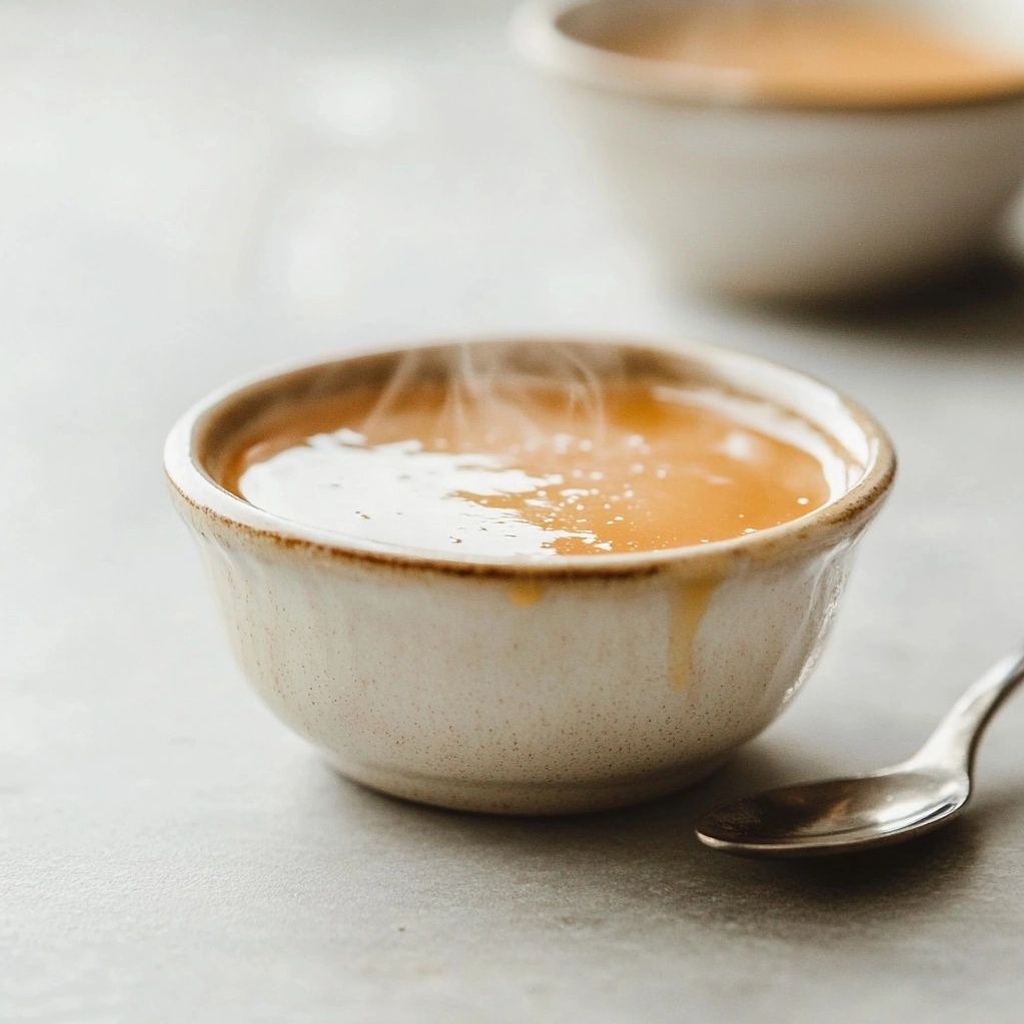
The essence of a homemade condensed milk is a marvel of balance. It begins with the soft, comforting aroma of caramelized milk—notes of toasted sugar and creamy dairy blending into a luminous sweetness. When you taste it, you encounter a velvet-smooth mouthfeel that coats the palate with a luxurious, buttery richness. The sweetness is mellow, not cloying, allowing the milk’s innate dairy notes to shine through while a gentle caramel undertone lingers on the tongue. The texture should be satin-like, not grainy or stiff, with enough viscosity to cling to spoons and ribbons of sauce, yet light enough to be whipped into dreamlike folds for dessert sauces and fillings.
In a homemade version, you can modulate the intensity of caramel depth through the cooking time and the ratio of milk to sugar. A shorter simmer yields a lighter, milkier sweetness with more immediate dairy brightness, ideal for drizzling over warm coffee or dolloping into flans. Extending the process fosters a deeper caramelized flavor with a robust body, perfect for thick ganache-like fillings or a spoonful in fudgy squares. The color shift—from pale ivory to a warm, golden-amber—tells the story of its transformation and serves as a visual cue for achieving the desired consistency. The finish is glossy and smooth, with a lingering sweetness that invites another taste, another drizzle, or another swirl in your favorite dessert creation.
Occasions & Pairings
This homemade milkmaid is a versatile companion for many culinary moments. Here are some ideal occasions and pairing ideas to inspire your menu planning:
- Weeknight desserts: A quick drizzle over warm breads, steamed puddings, or fresh fruit becomes a comforting finale without much effort.
- Breakfast enhancements: Stirred into coffee or chai, it lends a café-like indulgence with minimal fuss, and a creamy texture that foams beautifully.
- Holiday treats: It acts as a perfect base for holiday fudge, dulce de leche-inspired pies, and festive ice creams with caramel notes.
- Ice creams and frozen desserts: Use as a supple mix-in or base to create smooth, decadent homemade ice cream with less churn time.
- Baking and fillings: A key ingredient for creamy fillings in roulades, sandwich cookies, and layered cakes, bringing cohesion and moisture.
- Pairings: Goes well with dark chocolate, espresso, vanilla, coconut, cinnamon, and a pinch of sea salt; it also harmonizes with tropical fruits like mango or banana for tropical-inspired desserts.
- Drink pairings: A splash in milkshakes, iced coffees, lattes, or warm milk for soothing evenings.
Tips, Variations & Substitutions
Every home cook loves a few knobs to tweak. Here are practical tips and creative twists to customize your milkmaid experience:
- Vary the fat content: For a lighter version, use a portion of skim milk and whisk in a tiny amount of butter or coconut cream at the end for gloss and richness. For a richer result, use whole milk or add a splash of heavy cream toward the end of cooking.
- Sugar adjustments: If you prefer less sweetness, cut the sugar by a third and compensate with a touch of vanilla to preserve depth of flavor. For dairy-free versions, substitute with full-fat coconut milk and a neutral sugar like maple syrup or agave, keeping an eye on the viscosity.
- Flavors and infusions: Add a vanilla bean scrape, a cinnamon stick, or a touch of cardamom during cooking for a fragrant, dessert-ready note. For a coffee-infused twist, steep a small amount of ground coffee in the milk for a subtle mocha undertone.
- Regional twists: A hint of lime zest for a Caribbean brightness, or a pinch of toasted sesame for a sesame-sweet fusion—these accents can create signature variations that feel local and personal.
- Vegan and dairy-free: Use full-fat coconut milk or almond milk with a plant-based fat (catsup of coconut cream works well) to mimic the richness; you may need to adjust cooking times to achieve the desired thickness.
- Gluten-free compatibility: Condensed milk, being dairy-based, is naturally gluten-free; still, ensure no gluten-containing flavorings are added if you’re using it as a base in a gluten-free dessert.
- Make-ahead twists: A quick addition of a teaspoon of butter at the end can create a beautifully glossy finish and improved spreadability, especially for baked fillings.
Storage & Make-Ahead Ideas
Proper storage can extend the life of your homemade milkmaid and keep its texture and flavor at their best. Here are guidelines and ideas for making this component fit into busy weeks:
- Refrigeration: Transfer to a clean, airtight jar or container and refrigerate. It will keep for up to 2 weeks, maintaining a smooth, pourable consistency.
- Freezing: For longer storage, freeze in a portioned container or small silicone molds. Thaw overnight in the refrigerator, then lightly re-warm to restore scoopable texture. If it separates, whisk vigorously to reincorporate.
- Make-ahead uses: Prepare a double batch to have a ready-to-use base for the week’s desserts, coffee enhancements, or quick caramel sauces. Pre-portion into small jars labeled with dates to track freshness.
- Reheating tips: Gentle reheating is key. Warm slowly on the stove over low heat or in a microwave in short bursts, stirring in between, to avoid scorching and to return the glossy, cohesive texture.
Fun Facts & Trivia (Optional)
Condensed milk, with its rich, creamy profile, has influenced countless desserts across cultures. In some traditions, it’s used to create dulce de leche, a caramel-like sauce beloved in Latin American desserts. The technique of slowly heating milk with sugar to reduce volume echoes in many kitchen cultures where sweetness and preservation intersect. The playful moniker “milkmaid” evokes a time when dairy work was done by hand, with families gathering around warm kitchens as the day’s labor and love were transformed into something sweet and shareable. Modern kitchens may streamline the process, but the essence remains a celebration of transformation: humble ingredients evolving into something luscious, comforting, and endlessly usable. And if you’ve ever wondered how to capture that luxury with minimal effort, you’ve just discovered a secret weapon that elevates everyday cooking into something a little more special.
Conclusion
Crafting a milkmaid at home—condensed milk in minutes—offers more than a convenient ingredient. It presents a philosophy of cooking that blends tradition with speed, comfort with creativity, and simplicity with sophistication. It invites you to experiment, customize, and enjoy the process as much as the product. Whether you’re a beginner looking for a reliable base to empower your desserts or a seasoned cook seeking a pure, controllable sweetness for a signature recipe, this homemade condensed milk provides a flexible, satisfying foundation. And because it’s ready in mere minutes, it becomes your ally for spontaneous sweetness, turning ordinary moments into small celebrations. So, set a kettle to warm, gather milk and sugar, and begin a quick journey toward a silky, shimmering milkmaid that unlocks a world of delicious possibilities in your kitchen.
Ingredients
- Milkmaid Base
– 1 cup whole milk
→ This is the main liquid component that will be sweetened and reduced to resemble condensed milk. Use fresh, full-fat milk for richer body and to help the mixture thicken as it cooks. If you prefer a dairy-free version, you can substitute with full-fat coconut milk and adjust sweetness to taste, though the flavor will be coconut-forward.
– 1 cup granulated sugar
→ Sugar is the primary sweetener that also helps preserve the thick, syrupy texture of condensed milk. For best results, use fine granulated sugar so it dissolves quickly and evenly during heating. If you want a lighter sweetness, you can start with 3/4 cup and adjust after thickening.
– 1 tablespoon unsalted butter (melted)
→ Butter adds richness, a touch of gloss, and helps mimic the mouthfeel of traditional condensed milk. Add it at the same time as the sugar so it can emulsify smoothly as the mixture heats. If dairy-free, substitute with 1 tablespoon coconut oil.
– 1/2 teaspoon vanilla extract (optional)
→ Vanilla deepens the sweetness and rounds the flavor, making the condensed milk taste more like the canned version. Use pure vanilla extract rather than imitation for a richer aroma. Do not skip if you want a classic milkmaid flavor.
– Pinch of salt (optional)
→ A small salt pinch enhances sweetness perception and balances richness, especially if you are using unsalted butter. Stir in at the end to avoid oversalting; adjust to taste. - Optional Flavor Add-ins
– 1/2 teaspoon almond extract (optional)
→ For a hint of almond aroma that complements dairy sweetness, especially in baking. Use sparingly, as it can overpower the milk flavor. If using, start with a tiny amount and increase to taste after thickening.
– Zest of 1/2 lemon (optional)
→ Fresh citrus zest adds brightness to the condensed milk, making it more versatile for desserts with a zing. Add zest during heating and remove before thickening to keep the flavor clean.
Instructions
- Combine the milk and sugar in a heavy-bottom saucepan and set over medium-low heat to dissolve evenly while warming, ensuring the mixture does not scorch by stirring frequently with a wooden spoon or silicone spatula.
- Add the melted butter to the milk-and-sugar mixture and stir continuously until the butter is fully emulsified, which contributes to a glossy texture and creamy mouthfeel similar to traditional condensed milk.
- Optionally stir in the vanilla extract (and salt if using) now so the flavors have time to blend as the mixture reduces, enhancing sweetness and balance without overpowering dairy sweetness.
- If using lemon zest or almond extract, add them at this stage in small quantities to infuse aroma without overwhelming the base flavor, adding little by little and tasting as you go.
- Maintain a gentle simmer, not a vigorous boil, and stir every few minutes to prevent sticking and scorching, watching for a slow reduction that thickens the liquid into a pourable, syrupy consistency.
- Continue simmering and stirring until the mixture thickens to a coating consistency on the back of a spoon, which typically takes 8–15 minutes depending on heat and pan width; do not rush this step.
- Test the thickness by dipping a cold spoon into the mixture and wiping the edge; if it clings and coats the spoon smoothly without being runny, it is ready to cool.
- Remove the pan from heat and strain if you used zest or any solids, allowing the liquid to settle into a smooth, uniform syrup; then let it cool slightly before transfer.
- Pour the warm condensed milk into a sterilized jar or airtight container and let it cool completely at room temperature before refrigerating; once chilled, it will thicken and set to a shelf-stable, syrupy consistency.
- Label the container with date and batch, and store in the refrigerator for up to 2 weeks, or freeze in a suitable freezer-safe container for longer storage; thaw thoroughly before using if frozen.
→ Slow, steady heat helps the sugar dissolve completely and prevents scorching, which would impart a burnt flavor and gritty texture.
→ Emulsification distributes fat evenly, preventing separation as the mixture thickens and helping mimic the rich body of store-bought milkmaid.
→ Heating with vanilla allows the aroma to bloom; salt tightens perceived sweetness and rounds flavors when added in small amounts.
→ Gentle addition of aromatics prevents overpowering the milk and lets you tailor the profile to desserts you plan to pair with it.
→ A controlled simmer concentrates the flavors and thickens the mixture evenly; vigorous boiling can scorch the bottom and create a grainy texture.
→ The “nappe” test—drawing a line with your finger on the coated spoon—helps you judge when it’s ready; longer reduction yields a thicker, curd-free condensed milk.
→ The cooling stage will firm the texture further; heat at this stage can continue to thicken slightly as the mixture rests.
→ Straining prevents citrus zest or other bits from lingering in the final product, giving a clean, versatile condensed milk.
→ Proper cooling and sealing preserve texture and flavor, and refrigerating extends the storage life of your homemade milkmaid.
→ Clear labeling avoids confusion in future baking, and proper storage maintains consistency and prevents spoilage.
Notes
“These quick milkmaid condensed milk notes provide a fast, pantry-friendly way to mimic classic sweetened condensed milk in minutes. Use fresh full-fat milk for richer body, and dissolve the sugar fully to avoid graininess; for dairy-free, substitute with full-fat coconut milk and adjust sweetness to taste, noting the coconut flavor will come through. Add melted butter at the same time as the sugar to achieve a glossy, dairy-like mouthfeel; if dairy-free, swap in coconut oil. Vanilla extract deepens the sweetness and rounds flavors—don’t skip for a classic milkmaid profile. A tiny pinch of salt enhances sweetness and balance; add at the end and taste. Optional almond extract and lemon zest bring a delightful aroma and brightness; start with small amounts and adjust after thickening to preserve the milk flavor. This base, once cooled, thickens further and can be stored in a clean jar in the refrigerator for up to a week or frozen for longer storage. Use it in coffee, desserts, or as a spread for pastries; reheat gently with a splash of water or milk to loosen if needed. Always use fresh milk and clean utensils, and if you’re avoiding dairy, ensure your coconut milk is full-fat and unsweetened for the best texture. For a lighter sweetness, start with 3/4 cup sugar and adjust after thickening.”
Tips
Pro Tips for Making Homemade Milkmaid in 3 Minutes
- Choose a heavy-bottom, wide pan to promote even heat distribution and quicker reduction. A wide surface area helps the liquid evaporate faster, shortening your cook time.
- Warm the milk gently before adding sugar. Starting with warm milk reduces the time needed to reach a thick, syrupy consistency and helps prevent scorching.
- Stir continuously as the mixture heats. Use a silicone spatula or wooden spoon to scrape the sides and bottom to prevent sticking and achieve a smooth, uniform texture.
- Keep the heat medium-low to medium. High heat can cause scorching and a grainy texture; slow reduction yields a creamier condensed milk.
- Fully dissolve the sugar before the mixture thickens. If sugar granules remain, continue stirring until completely dissolved for a glossy final texture.
- Add butter and vanilla at the same time as the sugar. The butter emulsifies with the reduced milk, giving a richer mouthfeel and a classic gloss.
- Rest the milk briefly after stirring in the fat. A short off-heat rest helps the liquid thicken slightly as it cools, improving cling and consistency.
- Taste and adjust sweetness carefully. If the mixture tastes under-sweet while hot, it will be noticeably sweeter when cooled—start with a touch less sugar if you’ll be using it later in recipes.
- For a dairy-free version, substitute with full-fat coconut milk and consider using coconut sugar to maintain color and sweetness. Expect a coconut-forward aroma and flavor.
- If using optional almond extract, add a tiny amount (a drop or two) near the end of cooking and adjust after thickening to avoid overpowering the dairy notes.
- For a bright lemon note, add zest during heating and remove before thickening so the flavor remains clean and doesn’t become bitter with longer cooking.
- Store properly: transfer cooled milkmaid to a clean, sterilized jar and refrigerate. It will keep for up to 2 weeks; the mixture will thicken slightly more when chilled.
FAQ
What is milkmaid or condensed milk, and how is it used in recipes?
Milkmaid, or sweetened condensed milk, is cow’s milk with most of the water removed and sugar added. It provides rich sweetness and creamy texture, commonly used in desserts, candies, beverages, and baked goods.
Can I make milkmaid at home in about 3 minutes?
Yes, with a quick microwave or blender method using dry milk powder or powdered milk and sugar. It won’t be exactly the same as canned condensed milk, but it can work for fast desserts. For a closer taste and texture, a traditional simmer on the stove takes longer but yields authentic results.
What are the basic ingredients for a quick homemade version?
Common quick method (microwave): powdered milk, sugar, hot water, and a pinch of salt. Optional butter or vanilla for richer flavor. Proportions vary, but a typical quick mix is about 1 cup powdered milk, 1/3 to 1/2 cup sugar, and 1/2 cup hot water.
What equipment do I need?
Microwave-safe bowl or mug, spoon for stirring, measuring cups, and optionally a whisk. If using stove method, a small saucepan and whisk are helpful.
What are step-by-step quick methods (microwave and stove) for making a milkmaid-like mixture?
Microwave method: Combine powdered milk and sugar in a bowl. Add hot water gradually while stirring until smooth and creamy. Microwave in short bursts (15–30 seconds), stirring between, until it thickens to a milkmaid-like consistency. Stove method: Simmer milk powder, sugar, and water over low heat, whisking continuously until it thickens slightly. Cool before using.
How do I store homemade milkmaid and how long does it last?
Store in an airtight container in the refrigerator. Use within 1–2 weeks for best flavor and texture. For longer storage, you can freeze small portions and thaw as needed, though freezing may slightly change texture.
Can I make dairy-free or vegan milkmaid using substitutes?
Yes, you can attempt a vegan version using coconut milk, cashew milk, or almond milk with a sugar substitute and thickener like cornstarch. The texture and flavor will differ from traditional condensed milk. Commercial vegan condensed milk is available and tends to perform better in recipes.
What recipes can I use the homemade milkmaid in?
Popular uses include tres leches cake, fudge, banoffee pie, chai-flavored beverages, coconut laddoos, fudge bars, puddings, and as a coffee or tea sweetener. It’s a versatile base for many desserts.
What are common mistakes to avoid when making quick milkmaid at home?
Avoid overheating, which can scorch the sugar and cause a burnt taste. Don’t add too much water at once, which can make the mixture too runny. Stir continuously to prevent lumps, and adjust sugar for your sweetness preference. Let it cool slightly before using in recipes that require thickened texture.