Introduction / Hook
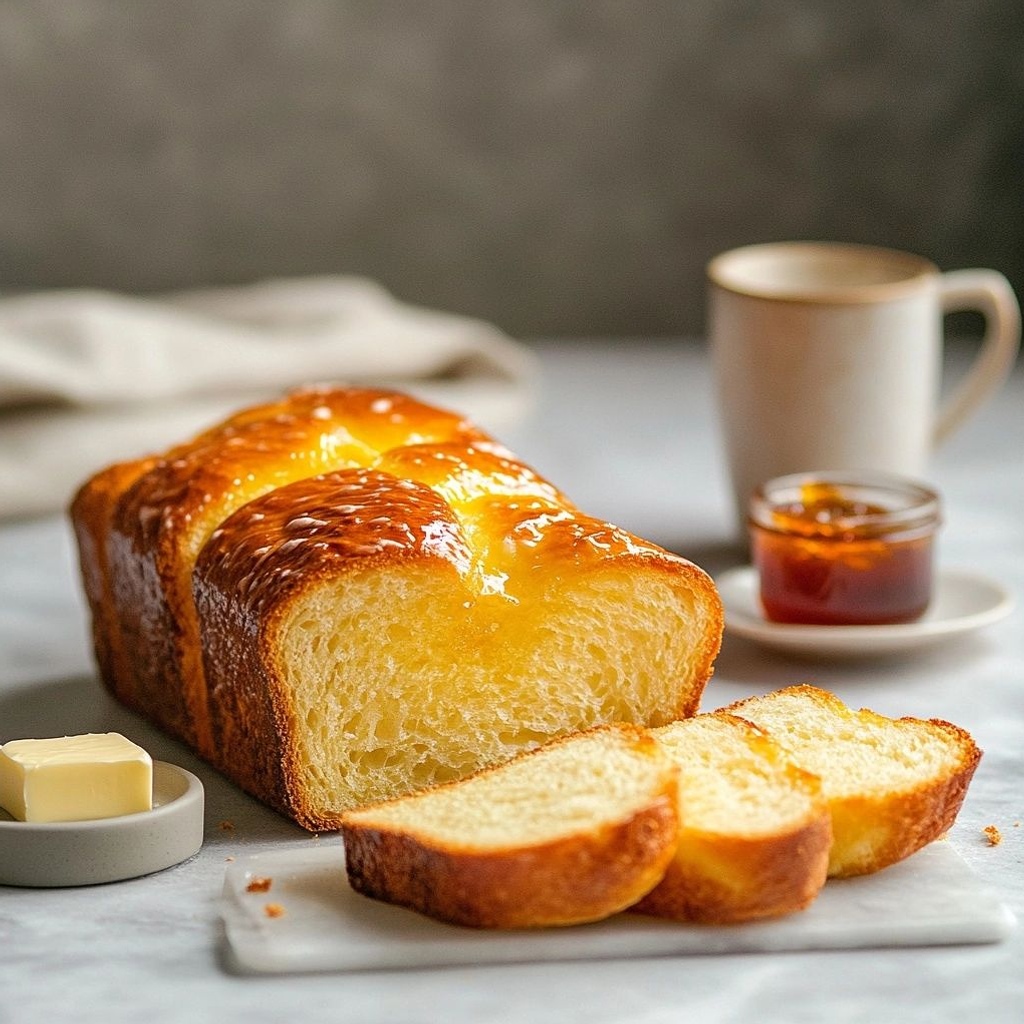
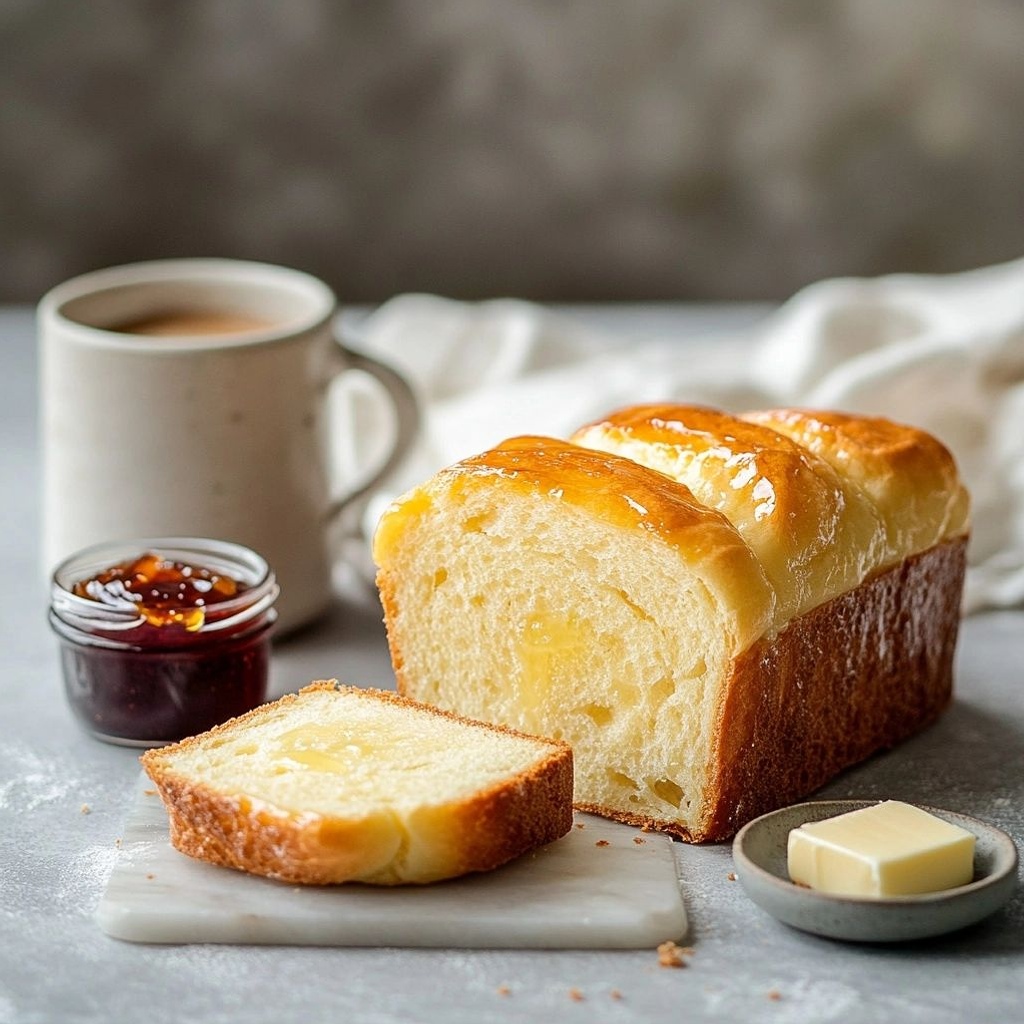
There’s something undeniably luxurious about a weekend morning that unfolds at a leisurely pace, when the scent of butter and warm bread drifts through the house like an invitation to slow down and savor. Buttery brioche bread for weekend brunch isn’t merely a recipe—it’s a sensory experience, a ritual that turns an ordinary morning into a celebration. Each slice carries a delicate balance of richness and tenderness, a whisper of eggs and cream that melts into a soft, cloud-like crumb. The crust glints with a caramel-gold sheen, and as you slice into a warm loaf, steam rises in forgiving spirals, carrying the faint sweetness of vanilla and a pocket of butter that sighs with every bite. This bread is not just food; it’s a small luxury you can share with friends and family, a centerpiece for laughter, conversation, and lingering moments around a sunlit kitchen table.
Imagine pulling apart a freshly baked slice and hearing a soft, almost sighing crackle as the crust yields. The aroma is intoxicating—rich, toasty, and comforting, with a buttery perfume that makes mouths water from across the room. The interior is beachy-soft, almost pillow-like, with a tender crumb that stays moist long after it’s been sliced. It’s the kind of bread that makes brunch feel special without dipping into complexity. Whether topped with jam, a generous spread of lemon yogurt, or simply enjoyed with a hot cup of coffee, this brioche elevates the moment and invites a longer, more relaxed conversation. It’s weekend luxury without the fuss, a bread that embodies crisp edges, melt-in-your-mouth interior, and a sweetness that is gently enhanced by a touch of vanilla and a whisper of sugar. And because it’s brioche, there’s a subtle density that holds its own whether you serve it warm or at room temperature, making it ideal for early morning gatherings or late-morning indulgences.
The Story Behind the Dish
Brioche has a storied past, tracing its roots to the boulevards and bakeries of France, where rich doughs were crafted with eggs, butter, and a generous helping of time. The result is a bread that exudes luxury while remaining surprisingly approachable—proof that indulgence doesn’t have to be complicated. The name itself hints at a sense of regal assurance; in many regions, brioche has long been the bread of celebrations, the centerpiece of Sunday breakfasts, festive families, and communal meals. The technique involves beating the dough until it becomes silky and airy, then allowing it to proof slowly to develop its signature tenderness. The butter in brioche is not merely an ingredient—it’s the heartbeat of the loaf, essential for that tender crumb and the luxurious mouthfeel that lingers after every bite.
In many kitchens around the world, brioche has traveled beyond its French origins, adapting to different palates and occasions. Some traditions add a touch of orange blossom or rum, other times a hint of almond paste tucked inside for a surprise note. The result is a bread that feels both familiar and adventurous, a comforting staple that invites creative pairings—savory spreads for a brunch crowd, or simply warm with a smear of jam for a sweet-tinish pleasure. Weekend brunches, in particular, have embraced brioche as a canvas—a soft, forgiving loaf that accepts toppings with grace and invites guests to linger longer than their coffee cups might suggest. This version honors that legacy while leaning into the practical joy of a loaf you can pull together with confidence, knowing that the end result will be worthy of celebration and shared stories alike.
Why You’ll Love This Recipe
- Velvety texture: Expect a crumb that’s rich, tender, and almost pillow-like—perfect for generous slices that hold up to toppings or simply butter.
- Homemade luxury with minimal fuss: The dough rewards patience with a deeply flavorful loaf, yet the process remains approachable for weekend bakers of all levels.
- Versatility for toppings: From fruit compotes to lemon yogurt, butter, honey, or a savory herb butter, brioche pairs beautifully with a range of flavors that suit sweet or savory brunches.
- Fragrant and comforting: The aroma of vanilla, warm dairy, and toasty crust elevates the mood of the table, turning a simple meal into an intimate moment.
- Make-ahead friendly: While best enjoyed fresh, the dough (and baked bread) can be planned in advance, making Sunday mornings easier without sacrificing quality.
- Crowd-pleasing comfort: It’s a bread that appeals to both kids and adults, a universal favorite that naturally invites sharing and conversation.
- Room-temperature resilience: The loaf slices well when cooled, allowing you to prepare ahead for a brunch that moves at a relaxed pace.
Flavor Profile & Texture
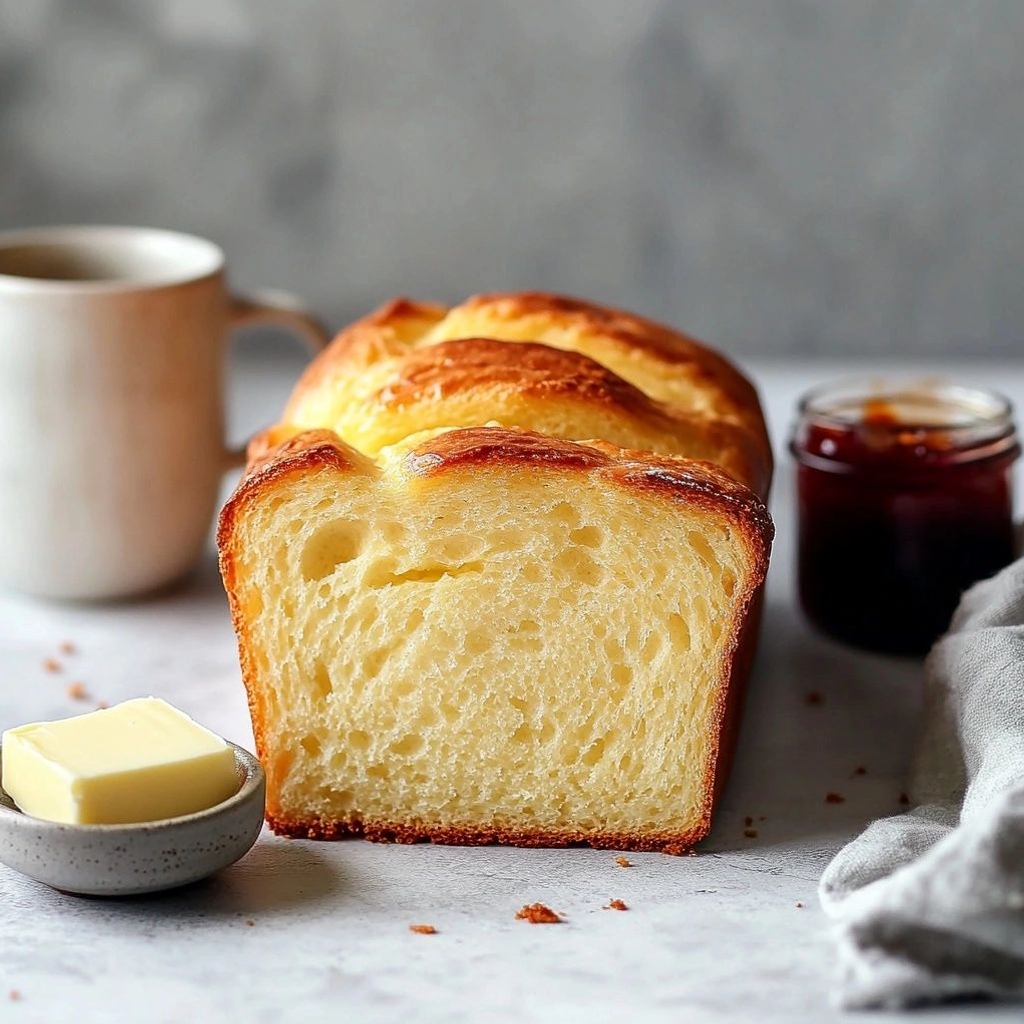
The flavor of brioche is a delicate embrace of sweet and rich. You’ll notice a mellow sweetness, often enhanced by a subtle vanilla note, that doesn’t overpower the bread but rather reveals itself as you continue to chew. The eggs contribute a gentle depth, giving the crumb its characteristic silkiness. Butter plays a starring role, lending a glossy tenderness and a slightly toasty, caramel-like finish as the crust forms. The crust itself is a study in balance—thin, crisp, and deeply tinged with golden-brown color, offering a satisfying crackle when you cut through it. Inside, the crumb hums with soft, airy pockets; each bite feels lush and cushiony, yet substantial enough to carry a generous spread without collapsing.
Texture-wise, imagine a bread that is at once delicate and resilient. The dough is enriched enough to feel indulgent, but not so heavy that it sits heavily in the stomach. The crumb is finely grained, with a slight tenderness that yields to light pressure. This balance enables a wide range of experiences: a warm slice on its own is luxurious; a sliver of honey butter melts into the surface; a layer of jam brings bright fruitiness that plays off the rich backdrop; or a savory topping—creamy mushroom or garlic butter—offers a surprising and delightful contrast. The aroma, meanwhile, is a warm perfume of butter, vanilla, and toasty crust, inviting you to take a first bite before you even reach for the knife.
Pairing ideas emphasize balance: light, bright toppings to counter the richness; crisp textures for contrast; and warm beverages that echo the bread’s comforting mood. Brunch guests often pause just long enough to inhale the scent, exchange smiles, and then dive into that first slice with childlike anticipation. Brioche holds up to a variety of accompaniments—syrups and compotes for a bright sweetness, citrus curds for a zing, or a soft cheese spread for a more adult, savory iteration. This is bread that invites creativity, while still delivering the classic, timeless pleasure of a well-made loaf.
Occasions & Pairings
This buttery brioche shines at a spectrum of weekend moments and celebrations. It makes a strong impression as the centerpiece of a leisurely brunch, a gift to share with neighbors after a long week, or a comforting addition to a family gathering that deserves a little extra warmth. Consider these occasions and pairings as you plan your table:
- Weekend brunch with friends: Serve warm slices with a trio of toppings—strawberry jam, lemon yogurt, and a savory herb butter. Offer mimosas or a pot of coffee to complete the scene.
- Holiday breakfast: Use brioche as the base for a bake-ahead bread pudding or a French toast-style platter with vanilla cream and citrus zest for brightness.
- Casual family morning: Pair with a simple fruit salad, crisp bacon or smoked salmon, and a dollop of crème fraîche for a balanced option that feels indulgent without being heavy.
- Tea time or dessert course: A slice with dark chocolate spread or almond paste creates a luxurious, dessert-like experience worthy of relaxed celebration.
Suggested Pairings
- Sweet: fruit compotes (apricot, fig, berry), lemon curd, honey, lightly salted butter
- Savory: whipped herb butter, garlic mushroom sauté, smoked salmon with crème fraîche, aged cheese slices
- Beverages: coffee, cappuccino, light-mrotinated teas, sparkling wine or champagne for a festive brunch
Tips, Variations & Substitutions
Every kitchen has its own rhythm, and brioche is wonderfully adaptable. Here are ideas to tailor the recipe to your tastes, dietary needs, or pantry constraints:
- Flavor boosters: Add a teaspoon of vanilla bean paste or orange zest to deepen aroma. A splash of rum or amaretto in the dough can introduce a playful, festive note.
- Gluten-free option: Use a high-quality gluten-free brioche mix or a blend designed for enriched yeasted breads. Expect a slightly denser crumb, but still wonderfully indulgent with the right fat content and moisture.
- Vegan adaptation: Substitute plant-based butter and a flaxseed or chia egg replacement. Use a dairy-free milk to maintain moisture, and consider a touch of aquafaba to mimic the lift of eggs.
- Low-sugar twist: Reduce sweetener slightly and pair with unsalted butter and savory toppings for a brunch with a less pronounced sweetness.
- Herb and cheese variation: Fold in finely chopped fresh herbs (thyme, chives) and grated cheese (Parmesan, Gruyère) for a savory brioche that travels well into brunch mains or sides.
- Regional twists: For a Nordic touch, add a hint of cardamom and a splash of pear juice to the dough, then finish with a light sugar glaze that complements cold-smoked toppings.
Storage & Make-Ahead Ideas
Smart planning makes brioche even more enjoyable. Here are practical tips to maximize freshness and enjoyment:
- Short-term storage: Wrap cooled brioche tightly in plastic wrap or a sealable bag. It will stay fresh for up to 2 days at room temperature.
- Refrigeration: If you need to store longer, you can refrigerate sliced brioche for up to 3 days; bring slices to room temperature before serving for the best texture.
- Freezing: Freeze the whole loaf or individual slices wrapped securely. It will keep for up to 2–3 months. Thaw at room temperature and rewarm gently in a warm oven or toaster for an almost-fresh result.
- Make-ahead: Consider shaping the dough the night before and letting it rise slowly in the fridge. In the morning, give it a final rise at room temperature, then bake for a brunch-ready loaf with minimal last-minute effort.
- Reheating tips: Rewarm slices in a low oven (300-325°F / 150-160°C) for 8-10 minutes to restore crust crispness and interior softness; or toast lightly to revive crunch on the crust.
Fun Facts & Trivia (Optional)
Delightful little tidbits that connect this beloved bread to broader culinary lore:
- Brioche is often described as “the bread of kings” or “the bread that makes a celebration.” Its richness and airy crumb feel ceremonial, which is why it’s a staple at festive breakfasts and special occasions.
- The dough’s enrichment (eggs and butter) is what sets brioche apart from many other breads, contributing to its distinctive sheen and tender crumb.
- In certain regions, bakers brush the surface with a light egg wash and sprinkle with pearl sugar or sugar crystals to create a delicate, sparkling glaze that catches the morning sun.
- Bringing brioche to the table can become a tradition in itself—some families toast slices for a “brioche hour” where conversations stretch and new memories are formed around a warm loaf.
- There are variations that lean into sweet pastry territory, including versions with a filling swirled through the loaf or shaped into braids and loaves that display intricate patterns—yet all share the same core of luxurious, ethereal crumb.
Closing Thoughts
Preparing buttery brioche for weekend brunch is more than making bread; it’s about creating an atmosphere of warmth, generosity, and shared pleasure. As the dough comes together, you’re engaging in a slow, mindful process that culminates in a loaf capable of turning an ordinary morning into a cherished ritual. The loaf’s tenderness and aroma invite people to linger, to converse, to savor and reflect. It’s a bread that rewards patience with a deeply satisfying bite and a memory that remains with you long after the last crumb has vanished. So gather your ingredients, allow the dough to rise with patience, and let the kitchen fill with a fragrance that promises comfort, celebration, and a touch of luxury that feels just right for a weekend well spent.
Ingredients
Brioche Dough
-
– 3 1/2 cups all-purpose flour (or bread flour for extra structure)
→ This enriched flour provides the base structure for the brioche. Using bread flour will yield a slightly chewier crumb, while all-purpose keeps it tender. Sift lightly to distribute evenly before mixing.
– 1/2 cup granulated sugar
→ Sugar feeds the yeast for a gentle rise and contributes to the buttery, caramelized crust. It also helps nourish the lactose in dairy components, improving browning and flavor balance. If you prefer a milder sweetness, reduce by up to 2 tablespoons.
– 2 1/4 teaspoons active dry yeast (1 standard packet)
→ Yeast powers the dough rise. Activate if using active dry by dissolving in the warm milk with a pinch of sugar for 5–10 minutes until foamy; if using instant yeast, it can be mixed directly with the flour.
– 1 teaspoon fine sea salt
→ Salt controls yeast activity, enhances gluten development, and sharpens the overall flavor. Don’t skip it, but avoid oversalting unless you’re adjusting other salted ingredients.
– 4 large eggs plus 1 extra large egg yolk (for richness and emulsion)
→ Eggs provide structure, tenderness, and color. The yolk adds richness and helps emulsify the dough with the butter. Room-temperature eggs blend more smoothly and prevent a cold dough from seizing when butter is added.
– 1/2 cup warm whole milk (about 110°F/43°C) or water
→ Warm liquid activates yeast and helps the dough come together. Use whole milk for richer flavor and tenderness; if dairy-free is required, use a high-quality dairy-free milk plus a teaspoon of lemon juice to mimic fat and richness.
– 1 tablespoon honey or light corn syrup (optional)
→ A touch of sweetness furthers browning and depth of flavor. If omitting, you may still achieve a good crust with the butter and egg wash, but the color may be lighter.
– 1 cup (225 g) unsalted butter, softened and cut into pieces (plus extra for greasing)
→ Butter is the key to brioche’s signature richness and velvet crumb. Incorporate gradually through a proper kneading or mixer method to achieve a glossy, airy dough. The butter should be softened (not melted) to ensure smooth emulsification without breaking the dough.
Finishing and Dough Handling
-
– 1 large egg for egg wash (optional: 1 tablespoon milk for the wash)
→ The egg wash gives brioche its glossy, golden crust and helps the loaf develop a professional finish. Whisk well and brush lightly just before baking; avoid pooling on the surface to prevent a soggy crust.
Optional Flavor Enhancers
-
– 1 teaspoon pure vanilla extract
→ Vanilla deepens the dough’s aroma and rounds out the richness of the butter. Add to the dough or the liquid mixture for a comforting, bakery-like profile. If using vanilla bean, scrape the seeds for extra flavor.
– Zest of 1 lemon or orange (zest)
→ Citrus zest adds a bright contrast to the buttery base, balancing sweetness with a clean, aromatic note. Avoid the white pith, which is bitter, and zest just before mixing to preserve volatile oils.
Toppings and Finish (Optional)
-
– Sea salt flakes for finishing (a light pinch)
→ A tiny sprinkle of flaky salt enhances the sweetness and the perception of butter, giving a more complex flavor. Use sparingly to avoid overpowering the brioche’s delicate taste.
Instructions
- Preheat your oven to 350°F (175°C) and prepare a 9×5-inch loaf pan by greasing it thoroughly and lining with parchment, ensuring easy release after baking to maintain a clean crust and even slice texture.
- Beat the eggs and warm milk (about 110°F/43°C) with the optional honey or light corn syrup until the sugar dissolves and the mixture looks glossy, because warm liquid activates the yeast and promotes a smooth emulsion with the fat from the eggs.
- Sift the flour with salt into a large bowl to distribute salt evenly and remove any stray lumps, which ensures consistent gluten development and a tender crumb; reserve the dried mix for the next step.
- Mix 2 1/4 teaspoons active dry yeast (or instant yeast) with the warm liquid, letting it sit for 5 minutes if using active dry to bloom and become foamy, which signals that the yeast is active and ready to leaven the dough.
- Combine the flour mixture with the yeast liquid, 1/2 cup sugar, 1 teaspoon fine sea salt, and 4 large eggs plus 1 extra yolk, stirring until a shaggy mass forms and all ingredients are hydrated, which sets up the initial gluten development without overworking the dough.
- Knead the dough on a lightly floured surface or in a stand mixer with a dough hook on low speed for 8–10 minutes until cohesive and only slightly tacky, stopping to scrape the bowl as needed, which builds gluten strength and a pliable base for butter incorporation.
- With the mixer or by hand, gradually incorporate the softened butter piece by piece, allowing each addition to fully emulsify before adding the next, until the dough is smooth, shiny, and passes the windowpane test when stretched, which distributes the fat evenly for a velvety crumb.
- Perform a first rise by placing the dough in a lightly oiled bowl, cover tightly, and let it ferment in a warm spot until doubled in size, about 1.5 to 2 hours, which activates yeast and develops flavor while the dough becomes airy and supple.
- Punch the dough down gently to release gases, reshape into a log, and place it into the prepared loaf pan, smoothing the top with a damp spatula to encourage an even rise, which ensures a uniform loaf that slices cleanly.
- Proof the dough in the pan at warm room temperature until it crest slightly above the rim, about 45 minutes to 1 hour, or until the dough holds a soft jiggle when nudged, which indicates the second rise and maximum airiness before baking.
- Whisk the optional egg wash (one large egg with 1 tablespoon milk) and brush lightly over the surface of the loaf, avoiding pools, to create a glossy, bakery-quality crust that browns evenly during baking, which enhances appearance and flavor.
- Bake the loaf in the preheated oven for 35–45 minutes, rotating halfway if your oven bakes unevenly, until the crust is deeply golden and a skewer inserted into the center comes out clean or with a few moist crumbs, indicating doneness without drying the interior.
- Let the brioche cool in the pan for 10 minutes, then transfer to a wire rack to cool completely before slicing, which prevents a gummy center by allowing residual steam to escape gradually and firms the crumb for clean slicing.
- Optionally drizzle a light vanilla-infused butter or dust with a faint sprinkle of flaky salt just before serving, which enhances the aroma and creates a subtle contrast with the sweet, rich bread, best enjoyed within a day or two for peak softness.
→ Properly greased and lined pan prevents sticking and enables clean, intact slices without tearing the delicate crumb of brioche.
→ This creates an even temperature throughout the dough and helps the butter incorporate smoothly later.
→ Sifting aerates the flour and prevents dense pockets, giving Brioche its soft, open interior.
→ Blooming confirms yeast vitality and ensures reliable rise; skipping this step can lead to a dense loaf.
→ The eggs add richness and structure; starting with a cohesive mass makes subsequent kneading easier and more controlled.
→ Proper kneading develops the gluten network that gives brioche its characteristic chewy tenderness while preventing a crumbly final texture.
→ Slow, staged incorporation prevents the butter from breaking the emulsion and ensures a uniform, airy crumb.
→ A proper rise builds volume and a tender, airy interior; under-proofing yields a dense loaf, while over-proofing can collapse in the oven.
→ Gentle deflation re-aligns the gluten matrix and helps the dough rise evenly outward rather than bulging unpredictably.
→ The second rise determines the final loaf height and crumb structure; under-proofing yields a dense loaf, over-proofing causes a pale crust and a collapsed center.
→ The wash aids browning and sheen; too much can yield a soggy surface, so apply in a single light coat.
→ Proper bake time and rotation ensure an evenly baked interior and a richly caramelized crust that defines brioche.
→ Cooling stabilizes the crumb and preserves the delicate tenderness; slicing too early yields a crumb that squashes and clumps.
→ Finishing touches elevate aroma and flavor while reminding guests of the brioche’s bakery-level finesse.
Notes
These buttery brioche for weekend brunch are a decadent yet approachable treat that reward patient bakers with a rich, velvety crumb and a glossy, chocolate-gold crust. You’ll achieve bakery-worthy results by letting the dough rest and proof slowly, which allows the butter to emulsify into the flour for that signature tender texture. For the best aroma and depth of flavor, use fresh eggs and softened unsalted butter, and ensure the liquids are warm but not hot to activate the yeast without killing it. If you’re short on time, you can start with a quick dough using instant yeast and a kitchen mixer, but traditional yeast activation (for active dry yeast) will yield a more developed crumb. The dough is enriched and delicate, so avoid overworking once the butter is added to maintain a light, airy structure. Before shaping, chill the dough slightly if it feels too soft; this makes it easier to handle and helps you form tight loaves or rolls. For an extra-flavorful finish, brush with an egg wash and a pinch of sea salt flakes right before baking to enhance the buttery crust. If dairy-free is required, substitute with high-fat coconut or almond milk and a plant-based butter alternative, recognizing that the crumb may be slightly different. You can prepare the dough up to the first rise a day ahead, refrigerate, and bake fresh the next day for a weekend brunch; simply allow extra time for the second rise after shaping. For serving, pair brioche with fruit preserves, lemon curd, or a dollop of rich yogurt; a light dusting of powdered sugar or a thin honey drizzle also beautifully complements the bread’s rich flavor. Always let the brioche rest briefly after baking so the internal steam settles and the crumb firms up for clean slices. If you have leftovers, brioche freezes well when cooled completely and wrapped tightly; thaw at room temperature and refresh in a quick 350°F (175°C) oven for just a few minutes to revive softness.
Tips
Buttery Brioche Bread: Practical Tips for Perfect Results
- Temperature matters: Use ingredients at room temperature for the best emulsification. Cold butter can hole-punch and break the dough; warm liquids help the yeast activate smoothly.
- Yeast handling: If you’re using active dry yeast, activate it in the warm milk with a pinch of sugar until foamy (5–10 minutes). Instant yeast can be mixed directly with the dry ingredients without proofing.
- Butter incorporation: Soften the butter to the point where it’s pliable but not melted. Add it in small pieces and mix gradually on low speed until the dough is glossy and smooth to prevent it from splitting or tearing.
- Texture balance: Choosing flour affects crumb. Bread flour yields a chewier bite; all-purpose keeps it tender. For extra richness, a portion of the liquid can be replaced with heavy cream.
- Avoid overworking: Brioche dough is enriched and delicate. Mix until just combined, then add the butter in stages. Over-kneading can cause tough crumb and tough butter emulsification.
- First rise and flavor development: Let the dough rise in a warm, draft-free spot until doubled (about 1–2 hours depending on room temperature). For deeper flavor, refrigerate the dough after the first rise for 4–12 hours and proceed when ready.
- Hydration and stickiness: Brioche dough is naturally soft and sticky. Lightly flour your work surface and hands as needed, and use a light touch to prevent tearing the dough during shaping.
- Egg wash technique: Use a thick, even coat of egg wash to encourage a glossy, golden crust. Brush just before baking and avoid pooling to prevent soggy spots.
- Flavor boosters: Vanilla and citrus zest brighten the brioche. Zest can be added with the dry ingredients or the liquid; scrape vanilla bean seeds for a more pronounced aroma.
- Shaping options: For a pull-apart loaf, braid or form into a ring; for a classic loaf, place the dough in a well-greased loaf pan. Scoring lightly on top can help control expansion during baking.
- Baking doneness: Brioche is done when the internal temperature reaches about 190–200°F (88–93°C) and the crust is deep golden. If the crust browns too quickly, tent with foil.
- Cooling: Let the loaf cool completely on a wire rack to set the crumb and prevent soggy centers. Brioche continues to cook slightly as it rests after removing from the oven.
- Storing and freezing: Wrap cooled brioche tightly in plastic and refrigerate for up to 2 days. For longer storage, freeze wrapped loaves up to 1–2 months; thaw at room temperature and rewarm gently if desired.
FAQ
What makes brioche different from other bread for weekend brunch?
Brioche is a rich, tender bread made with a high amount of butter and eggs, which gives it a soft crumb, golden color, and slight sweetness—perfect for indulgent weekend brunches.
What ingredients do I need for buttery brioche?
Basic brioche ingredients: all-purpose or bread flour, warm milk, active dry yeast or instant yeast, sugar, salt, eggs, and a generous amount of unsalted butter. Optional: a little vanilla or lemon zest for aroma.
Can I make this brioche if I don’t have a mixer?
Yes. You can mix by hand. Combine ingredients, knead on a floured surface for 10–15 minutes until smooth, then incorporate softened butter in small pieces, kneading until fully absorbed. It’s a sticky but achievable process with patience.
How long does it take to rise the dough?
First rise: about 1 to 2 hours at room temperature until doubled. Chill (overnight) helps develop flavor and makes shaping easier. If using the cold-rise method, you’ll need 8–12 hours in the fridge.
What equipment helps with shaping brioche?
A loaf pan or brioche mold for a classic pull-apart loaf, a stand mixer with a paddle and dough hook, or a silicone mold. A pastry brush helps glaze with egg wash for a glossy finish.
How do I know when the brioche is fully baked?
The loaf should be deeply golden on top, and a skewer inserted into the center should come out clean or with a few moist crumbs. The internal temperature should be around 190–200°F (88–93°C).
What should I pair brioche with for brunch?
Top with butter and jams, layer into French toast, serve as a base for eggs Benedict variations, or slice and toast to enjoy with smoked salmon, avocado, or ham. A light dusting of powdered sugar is optional for a touch of sweetness.
Can I make brioche ahead of time?
Yes. Do a full rise in the fridge (8–12 hours) after shaping, then bake the next day. You can also freeze baked brioche slices or a full loaf, then rewarm gently in a warm oven.
What are common issues and how can I fix them?
Common issues: dense crumb (not enough kneading or insufficient butter incorporation) and dry texture (too much flour or overbaking). Fixes: knead longer, ensure butter is fully incorporated, weigh ingredients, and bake until just golden. If dough is too sticky, refrigerate briefly to firm up.


")