Introduction / Hook
Imagine bite-sized pieces of nostalgia, each one a little sun-kissed rectangle of comfort that crackles with a delicate fried crust the moment you bite into it. Fried Toast Bites are what happens when breakfast meets snacktime and decides to throw a playful brunch party in your kitchen. The moment the pan heats and butter meets bread, your senses are invited on a mini-vacation: a warm scent of caramelizing sugar and toasty grain, a whisper of vanilla, and a faint, inviting sizzle that promises something irresistible on the tongue. These bites transform humble, everyday bread into a sunshiny, shareable treat that feels both fancy and impossible to resist. They’re perfect for lounging on a weekend morning, for bustling gatherings where you want something crowd-pleasing that’s quick to whip up, or for a spontaneous late-night raid of the pantry that somehow turns into a small celebration. The beauty of Fried Toast Bites is in their contrasts: a crisp outer edge that yields to a soft, almost custardy interior; a warmth that settles in your chest like a hug; and a sweetness or savoriness that can swing with your mood and the moment. Whether you drizzle a glossy maple glaze, dust them with cinnamon sugar, dunk in a tangy yogurt dip, or top with a savory shave of cheese and herbs, these bites invite experimentation and delight. They’re also wonderfully forgiving: you can use stale bread to rescue it, you can scale up for a crowd, and you can tailor toppings to suit kids, guests with dietary needs, or your own craving for something comforting and new.
The Story Behind the Dish
Fried Toast Bites sit at a crossroads of culinary history and personal memory. The concept of turning bread into a luxurious, dessert-like treat through frying has deep roots across many cultures. In Spain and Portugal, there are torrijas and rabanadas, where thick slices of bread are soaked in wine or milk, seasoned with warm spices, then fried to a caramelized, custardy finish. France gives us pain perdu, a clever way to rescue stale bread, transform it with eggy batter, and fry it until it glows with golden color. In Italy, pane fritto and other fried bread preparations celebrate the same impulse: give bread a new life by crisping the exterior while preserving softness inside, then inviting it to mingle with honey, citrus, or even a sprinkle of sugar. Our modern, bite-sized version is a playful nod to these traditions, reimagined as a snackable, shareable treat that fits seamlessly into today’s fast-paced, crave-friendly culinary landscape.
There’s a personal layer, too. My earliest memories of this dish are not a formal recipe but a kitchen moment: stale bread rescued from the back corner of the loaf, sliced into little triangles, brushed with a whisper of butter, and dropped into a hot pan until the edges blistered and the centers stayed tender and slightly chewy. The kitchen filled with the aroma of toasty sweetness, a scent that felt like a friendly invitation to slow down, gather around the table, and savor something comforting. Over time, I learned to play with the concept—dusting the bites with cinnamon, dusting with powdered sugar, drizzling with honey, or serving them with a bright fruit jam. Each variation carried a tiny story of its own, a reminder that food can be both simple and deeply satisfying. Fried Toast Bites aren’t about mastering a complex technique; they’re about embracing a satisfying method that turns everyday leftovers or pantry staples into something you’ll reach for again and again, the type of dish you want to share with friends, family, or even a silent, solitary afternoon where you just need a win.
Why You’ll Love This Recipe
- Quick and forgiving: A handful of ingredients, a short fry, and you have a platter of irresistible bites ready in minutes.
- Versatile for sweet or savory cravings: The base is neutral, but toppings and dips can swing from maple-drenched sweetness to herb-cheesy savoriness with ease.
- Perfect for crowds: Easy to scale up for brunch gatherings, game nights, or parties without losing that homemade comfort vibe.
- Resourceful and budget-friendly: Uses stale or day-old bread, extending its life and turning it into something exciting instead of waste.
- Portable and snackable: Ideal for picnics, potlucks, or a playful after-school treat that kids and adults alike will grab by the handful.
- Textural delight: A satisfying crackle on the outside against a soft, tender center, with warm flavors that linger pleasantly on the palate.
- Kid-friendly and adaptable: Gentle flavors with room for a few bold toppings, making it easy to please picky eaters while still offering adults a fun twist.
- Make-ahead friendly (to an extent): You can prep the bread bites before frying and finish them off when guests arrive or when the craving strikes.
Flavor Profile & Texture
Fried Toast Bites offer a symphony of textures and flavors that work in harmony. The exterior is a sun-bronzed crust, crisp and lightly caramelized from the hot oil and the contact with butter or oil in the pan. That crackle is your first signal that something special is happening—the crisp bite gives way to a soft, almost pillowy interior that tastes faintly of toasted bread and the gentle sweetness of the frying. The flavor is warm and welcoming: toasty bread enriched with a hint of butter, a whisper of vanilla or a caramel-like nuance, and a touch of sugar that encourages a delicate sheen and a lingering sweetness on the finish.
What makes the dish truly versatile is how you treat the interior and exterior with toppings and accompaniments. A lightly seasoned crust might lead you toward a more restrained, simple bite—just enough sweetness and fat to stock the flavor. Add a cinnamon-tinged dusting and a drizzle of syrup for a breakfasty afternoon treat. Or switch gears with savory toppings—parmesan, garlic powder, fresh herbs, or grated fontina that melts into the warm bread to create a comforting, fragrant bite. The texture then becomes a dialogue: the crisp edge provides bite, while the inner crumb remains tender enough to absorb a dollop of yogurt or a tangy fruit compote. The balance of sweet and tangy, salty and sweet, crunchy and soft makes these bites addictive in the best way: you’re always looking for the next one, even as the plate starts to disappear.
In terms of flavor mapping, imagine the familiar warmth of toasted bread enhanced by a toasty caramel note and a faint hint of vanilla or cinnamon. The surface blushes with a kiss of sugar or cheese, depending on the route you choose, and the inside keeps a gentle, comforting moisture that stops short of being gummy. This is comfort food that doesn’t overwhelm the palate; it instead invites you to explore variations and adornments, almost as if you’re painting a tiny edible canvas with your favorite toppings. The overall impression is cozy, crowd-pleasing, and unmistakably nostalgic—a small bite that carries big memories and even bigger smiles.
Occasions & Pairings
Fried Toast Bites adapt to almost any setting, from casual weeknights to festive celebrations. Here are some ideal occasions and pairing ideas to consider as you plan when and how to serve them:
- Brunch staples: A platter of golden bites alongside fresh fruit, a pot of coffee, and a light yogurt dip. They pair wonderfully with a glass of sparkling juice or a mimosa for a no-fuss, crowd-pleasing spread.
- Playful party bites: Serve with a trio of dips—citrus yogurt, a maple-honey glaze, and a tangy tomato-herb sauce—to offer a range of flavor contrasts that guests can mix and match.
- Kids’ snacks and celebrations: The flexible format makes them perfect for kids’ parties or after-school snacks. Offer a “dipping bar” with yogurt, jam, and a mild honey glaze for simple, kid-friendly creativity.
- Holiday mornings: Elevate a lazy holiday morning with a batch that feels special but is still cozy and comforting. Add a dusting of powdered sugar and a side of berry compote for color and brightness.
- Picnics or casual gatherings: They transport well when cooled slightly and can be enjoyed at room temperature with a few fresh dips or a savory herbed cream cheese spread.
Pairing ideas to bring the experience full circle:
- Drinks: robust coffee, hot chocolate, or a light sparkling tea; for a savory twist, try a cold-brew coffee with a hint of cinnamon.
- Sweet toppings: maple syrup, honey, berry compote, citrus glaze, or a simple dusting of cinnamon sugar.
- Savory toppings: grated cheese with herbs, a light drizzle of olive oil and a pinch of flaky salt, or a dollop of herbed yogurt or sour cream for dipping.
- Side bites: fresh fruit slices, a small green salad, or a bright citrus yogurt to cut through the richness.
Tips, Variations & Substitutions
General Tips
To maximize flavor and texture, keep a few practical ideas in mind. Use bread that’s sturdy enough to hold its shape when fried; day-old or slightly stale bread can work beautifully because it soaks up just enough moisture without becoming soggy. Ensure your pan is well heated before the bread hits the surface so you get that immediate sizzle and the outer crust forms quickly. Don’t crowd the pan; fry in small batches to keep the temperature steady and to maintain the crispy exterior. If you’re aiming for a particular look—uniform rounds or uniform triangles—pre-cut your bread into consistent shapes so they fry evenly. And while the beauty of these bites lies in their simplicity, a light touch of patience while the first batch crisp holds true: risen hunger plus a hot pan equals quick results, but rushing the process can lead to uneven browning or a softer texture than you want.
Sweet Variations
- Classic cinnamon sugar: dust the hot bites with a sweet, fragrant blend of cinnamon and sugar for a familiar, comforting finish.
- Maple-glazed sparkle: drizzle a glossy maple glaze over the warm bites for a glossy sheen and a deep, cozy sweetness.
- Vanilla cream dip: pair with a light vanilla yogurt or custard-like dip to add a creamy contrast that enhances the toast’s softness.
Savory Twists
- Garlic-herb crunch: add a sprinkle of garlic powder and a pinch of dried herbs to the exterior for a savory, enticing aroma that stands up to dips.
- Cheesy melt: top with a light dusting of grated cheese or a small shaved cheese that melts into the warm surface, creating a toasty, cheesy crust.
- Herb butter finish: finish with a dab of herbed butter or olive oil and lemon zest for a bright, fresh lift.
Dietary-Friendly Variations
- Gluten-free option: use sturdy gluten-free bread slices cut into bites; the technique remains the same, but ensure the oil is hot enough to crisp the coating without steaming.
- Vegan adaptation: substitute with plant-based butter or oil for frying, and use a plant-based milk in any batter or coating you decide to conceptually use elsewhere; finish with a dairy-free yogurt dip if desired.
- Low-sugar approach: keep toppings simple—light dusting of sugar or a sugar-free maple-flavor drizzle with natural sweeteners—while focusing on herb and cheese accents for savory balance.
Regional Twists
- Allspice-and-orange zest twist inspired by certain festive breads: add a faint note of citrus with a pinch of allspice for an aromatic edge.
- Lemon poppy variation: a quick citrus finish and a light crunch on the coating adds brightness that pairs well with tangy yogurts.
Storage & Make-Ahead Ideas
While these bites are ideally enjoyed fresh for maximum crispness, there are practical ways to plan ahead and still deliver warmth and crunch when the moment arrives. If you’re making ahead, consider frying the bread bites in advance and keeping them on a rack in a warm oven to conserve crispness, then giving them a few minutes in a hot pan or brief oven blast to re-crisp just before serving. If you anticipate leftovers, store cooled bites in an airtight container for a short window in the refrigerator; reheat in a 350°F (175°C) oven or toaster oven until the exterior is again crisp and the interior remains tender. Freezing is possible, but the texture may shift slightly after thawing and reheating, so plan to re-crisp thoroughly in a hot oven to reclaim some of that initial crunch.
For make-ahead flavor, you can pre-cut the bread into bites and arrange them on a parchment-lined tray, then freeze the tray until solid. Once frozen, transfer to an airtight container or bag. When you’re ready to fry, drop a handful into hot oil or butter and cook until crisp and golden. This method makes it easy to serve a platter of ready-to-go bites even on busy mornings or when guests arrive unexpectedly. If you prefer to bake instead of fry for a lighter approach, you can finish the bites in a hot oven or a quick skillet toast after a light brush of butter to obtain a crackly surface while keeping the interior tender.
Fun Facts & Trivia (Optional)
Crust, crunch, and the comfort of bread have been a universal language across cultures for centuries. A few tidbits you might enjoy sharing around the table:
- The concept of turning stale bread into a delicious dish by soaking, frying, or baking traces back to ancient times, with variations appearing in virtually every cuisine that valued using up leftovers with care and creativity.
- In some cultural traditions, the process of frying bread is tied to celebrations or seasonal feasts, where the warm, enriched crust represents abundance and hospitality.
- Small, bite-sized treats, such as these Fried Toast Bites, are particularly effective at social gatherings because they invite people to mingle, sample, and compare toppings without the commitment of a full plate.
Ingredients
Fried Toast Bites
- – 6 slices day-old bread (white or brioche) cut into 1-inch cubes
→ Bread should be day-old or slightly stale so the cubes can soak up the custard without becoming mushy. Uniform 1-inch cubes ensure even soaking and frying. If you prefer extra crunch, keep the crusts on; for a softer bite, trim the crusts entirely. - – 4 large eggs
→ The eggs create the custard that coats the bread for a cohesive bite. For best results, use eggs at room temperature so they whisk smoothly into the milk and sugar. Beat until completely combined to avoid streaks in the mixture. - – 1 cup whole milk
→ Milk provides moisture and helps the custard cling to the bread; whole milk yields a richer texture. If you use a dairy-free alternative, consider a splash of neutral oil to improve binding and mouthfeel. - – 1 teaspoon vanilla extract
→ Vanilla adds warmth and aroma to the custard; use pure vanilla for best flavor. For an extra depth, infuse a split vanilla bean in warm milk, then remove before mixing with the eggs. - – 1/2 teaspoon ground cinnamon
→ Provides subtle spice that pairs beautifully with the sweet batter. Freshly ground cinnamon offers stronger aroma; adjust to taste and consider a pinch of nutmeg for a classic fall note. - – 2 tablespoons granulated sugar
→ Adds gentle sweetness and helps with browning during frying. Reduce to 1 tablespoon if you plan to serve with a very sweet topping, or omit if you prefer a savory edge with a fruit compote. - – 1/4 teaspoon salt
→ Enhances overall flavor and balances the sweetness. If using salted butter in finishing, you may want to reduce the salt slightly in the batter.
Optional Add-ins
- – 1/2 cup mini chocolate chips (optional)
→ Chocolate chips tucked into the bread provide pockets of melted sweetness. Fold chips gently into the bread cubes before dipping so they distribute evenly; choose small chips to prevent tearing the bread during frying.
Frying & Finish
- – 2 cups neutral oil (vegetable or canola) for frying
→ Use enough oil to shallow-fry the bites with about 1/2 inch of oil in a skillet. Maintain the oil temperature around 350°F (175°C) for crisp, evenly browned edges. Do not crowd the pan to avoid soggy, uneven frying. - – 1-2 tablespoons unsalted butter, optional
→ A little butter adds a toasty, rich aroma and helps with browning when used with oil. Add towards the end of frying or after frying a batch for a glossy finish, but monitor heat to prevent burning.
Toppings / Serve
- – Powdered sugar for dusting
→ A light dusting gives a classic finish and a touch of sweetness. Use a fine sieve for an even coating. If serving with syrup, you can skip the dusting to avoid sogginess. - – Maple syrup or honey for serving (optional)
→ A warm drizzle of maple syrup or honey complements the cinnamon-egg batter nicely. Warm the syrup slightly for easier pouring and a smoother texture; omit if you prefer a drier bite.
Instructions
- Preheat your neutral oil to 350°F (175°C) in a wide, heavy-bottomed skillet and arrange a rack or layer of paper towels nearby; keep the pan large enough to cook in batches without crowding.
→ Maintaining the temperature prevents the custard from seeping out and yields a crisp, evenly browned crust; overcrowding chills the oil and makes the bites soggy. - Whisk together 4 large eggs, 1 cup whole milk, 2 tablespoons granulated sugar, 1/4 teaspoon salt, 1 teaspoon vanilla extract, and 1/2 teaspoon ground cinnamon in a large bowl until completely combined and smooth; let no streaks remain.
→ Room-temperature eggs whisk more easily and evenly into the milk, ensuring a cohesive custard coating for every cube. - Cut 6 slices day-old bread into uniform 1-inch cubes and discard larger crumbs; if you prefer extra crunch, keep the crusts on, or trim them for a softer bite; spread the cubes in a single layer on a sheet pan to prevent them from sticking together.
→ Uniform cubes ensure even soaking and browning, and drying slightly helps the bread soak up the custard without becoming mushy. - If using optional mini chocolate chips, fold 1/2 cup chips gently into the bread cubes in a large bowl or on a sheet pan to distribute evenly without tearing the bread.
→ Gentle folding avoids breaking the bread and creates pockets of melted chocolate in every bite. - Pour the prepared custard into a wide, shallow dish and set the bread cubes nearby; this creates a fast, efficient dipping station so each cube spends just enough time soaking; avoid oversoaking to prevent a soggy interior.
→ A shallow dish allows quick, even immersion and helps control how much custard remains on the bread before frying. - Dip each bread cube into the custard for about 15 seconds, turning once to coat all sides, then lift and let excess custard drain back into the dish for a moment; place coated cubes on a clean tray or parchment to rest briefly, which helps the surface set and reduces splatter during frying.
→ Short soaking prevents the bread from turning into mushy custard spheres while still delivering a rich, cohesive interior. - Fry the coated cubes in the hot oil in batches, cooking 2–3 minutes per batch, turning once halfway, until they are golden brown and crisp on all sides; maintain oil temperature and adjust heat as needed to keep a steady sizzle.
→ Turning ensures even browning; staying near 350°F prevents pale centers or overly dark exteriors. - Using a slotted spoon or tongs, transfer the fried bites to the rack or paper towels to drain; optionally melt 1–2 tablespoons unsalted butter in the still-hot pan and swirl to coat the next batch lightly for a glossy finish without burning.
→ Butter adds a toasty aroma and extra sheen when used judiciously; avoid butter pooling to prevent soggy crusts. - Keep the finished fried toast bites warm in a low oven (around 200°F / 95°C) while you fry remaining batches to ensure even serving temperature.
→ A gentle oven keeps all pieces warm without continuing to fry, preserving crispness and preventing soft interiors as more batches finish. - Dust the hot bites with powdered sugar using a fine-mesh sieve just before serving; arrange on a platter to highlight the golden crust and prevent clumping; if desired, provide warm maple syrup or honey on the side for dipping.
→ The sugar balances sweetness and enhances aroma; warmed syrup provides a silky texture that complements the custard coating.
Notes
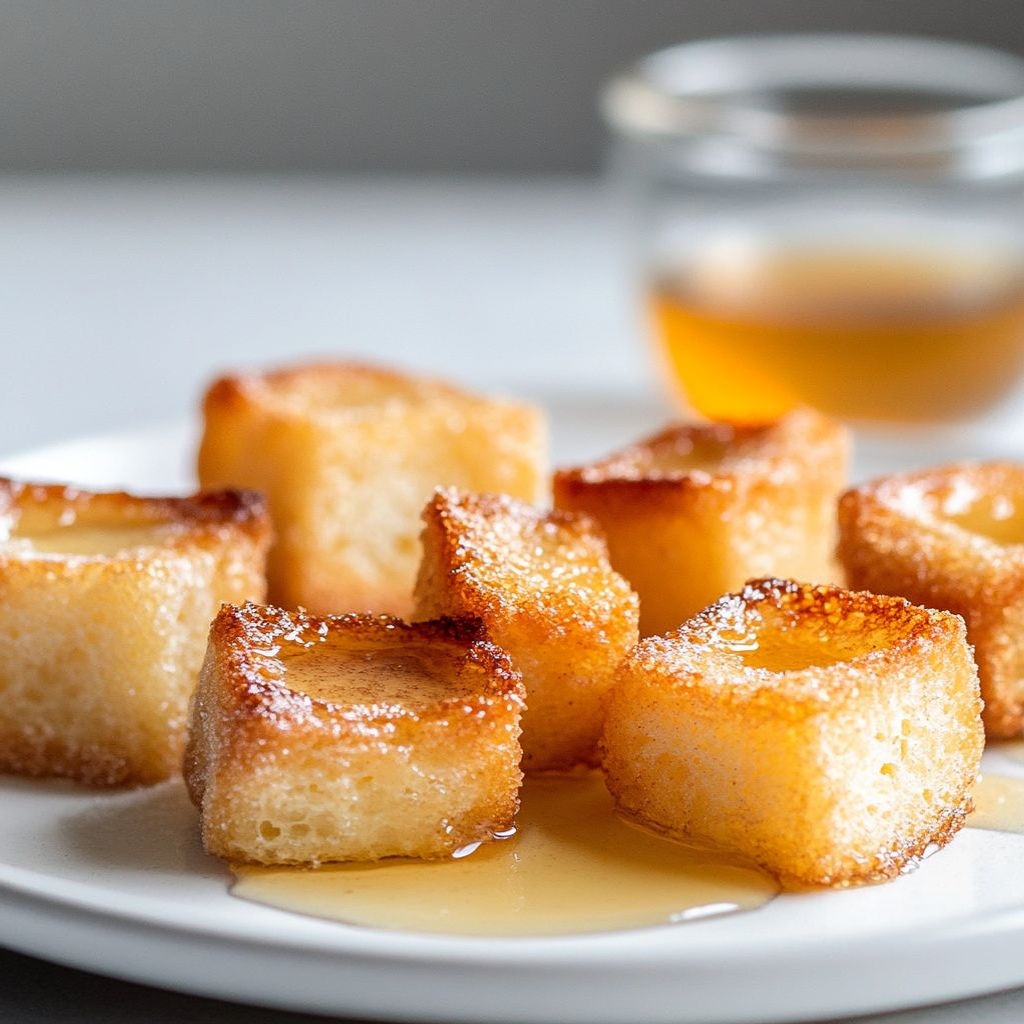
These fried toast bites are a comforting, crowd-pleasing snack: cubes of day-old bread soaked in a cinnamon-vanilla custard, then shallow-fried until crisp and golden with a custardy center. For best results, use uniform 1-inch cubes so the pieces soak evenly without becoming mushy, whisk eggs with milk, vanilla, cinnamon, sugar and salt until completely combined, and let the bread soak briefly before frying; keep the oil at about 350°F (175°C) and fry in batches to avoid overcrowding. Drain on paper towels and finish with a light dusting of powdered sugar; serve warm with maple syrup or honey for a luxurious touch. You can customize them by folding in mini chocolate chips or chopped nuts into the bread cubes before soaking, trimming the crusts for a softer bite or leaving them on for extra crunch, and if desired, a small pat of butter added to the pan at the end will help with browning and aroma. They reheat well in a 350°F oven for a few minutes, making them suitable for make-ahead breakfasts or brunch. For dairy-free or gluten-free needs, use dairy-free milk and gluten-free bread, and ensure your toppings are gluten-free.
Tips
Tips for Fried Toast Bites
- Bread prep: Use day-old bread cut into uniform 1-inch cubes. If you want a crunchier bite, keep the crusts on; for a softer bite, trim the crusts.
- Custard preparation: Use eggs at room temperature and whisk the custard thoroughly with milk, sugar, vanilla, cinnamon, and salt until completely combined to prevent streaks.
- Seasoning balance: Freshly ground cinnamon has stronger aroma—adjust to taste. A pinch of nutmeg can add a classic fall note if desired.
- Add-ins: If using mini chocolate chips, fold them into the bread cubes before dipping to distribute evenly and prevent tearing during frying.
- Soaking strategy: Dip each bread cube briefly to let it soak up custard without becoming mushy. Typically 15–30 seconds per side is enough for day-old bread.
- Resting after dipping: Let dipped cubes rest on a rack for a few minutes to help the custard cling and reduce surface drips before frying.
- Frying oil: Use about 1/2 inch of neutral oil in a heavy skillet and maintain around 350°F (175°C). Fry in batches to avoid crowding, which lowers the oil temperature and sogges the bites.
- Finish with butter: A small amount of unsalted butter added toward the end of frying (or after a batch) enhances browning and aroma, but keep heat moderate to avoid burning the butter.
- Drain and crisp: Transfer fried bites to a wire rack set over a sheet pan to drain excess oil. Paper towels can trap moisture and soften crusts.
- Serving tactics: Dust with powdered sugar just before serving for a classic look and sweetness. If serving with syrup, warm it and drizzle—this can lessen sogginess if you plan a generous pour.
- Reheating and storage: For leftovers, rewarm in a 200°F (93°C) oven or toaster oven to regain crispiness. Refrigerate leftovers up to 1–2 days; re-crisp before serving.
- Flavor variations: For a citrus twist, add a little orange or lemon zest to the custard. For a savory contrast, reduce the sugar and serve with a fruit compote or savory spread.
FAQ
What are Fried Toast Bites?
Fried Toast Bites are small, crispy-on-the-edges pieces of bread that are dipped in a creamy egg mixture and fried until golden. They make a quick, kid-friendly snack or breakfast option.
What ingredients do I need?
You’ll need a few pantry staples:
- 4 slices of bread (day-old works great)
- 2 eggs
- 1/4 cup milk (or dairy-free alternative)
- 1/2 teaspoon vanilla extract (optional)
- 1/2 teaspoon ground cinnamon (optional)
- Pinch of salt
- Butter or oil for frying (or a mix of both)
- Optional toppings: powdered sugar, cinnamon sugar, maple syrup, fruit, chocolate sauce
Can I use different types of bread?
Yes. You can use white, whole wheat, brioche, challah, or gluten-free bread. Slightly stale bread tends to fry up crisper, but fresh bread works too.
How do I prepare the bread for frying?
Trim crusts if you prefer, then cut each slice into 4–6 bite-sized pieces. Keep shapes uniform for even cooking.
What’s the dipping mixture like and how do I coat the bread?
Whisk together the eggs, milk, vanilla (if using), cinnamon (if using), and a pinch of salt. Dip each bread piece in the mixture, letting excess drip off before frying.
What oil or fat should I use for frying?
Use a combination of butter for flavor and a neutral oil (like canola or vegetable) to raise the smoke point. If you prefer, you can fry in clarified butter or just oil, but butter adds a nice richness.
How long do Fried Toast Bites take to cook?
Pan-fry over medium heat about 1–2 minutes per side, until golden and crisp. Total time is roughly 6–10 minutes depending on batch size and heat.
How should I serve Fried Toast Bites?
Serve warm with your favorite toppings or dips. Good options include:
- Maple syrup or honey
- Powdered sugar or cinnamon sugar
- Fruit compote or fresh berries
- Chocolate sauce or yogurt
How do I store and reheat leftovers?
Store cooled bites in an airtight container in the fridge for 2–3 days. Reheat in a skillet over medium heat for 1–2 minutes per side or in a 350°F (175°C) oven for 5–7 minutes until crisp. Microwaving can make them soft.
Can I customize these to be sweet or savory?
Absolutely. For sweeter bites, add cinnamon and a sugar dusting, and serve with syrup. For savory versions, skip the sugar, add grated cheese to the bread before dipping, or serve with a savory dipping sauce such as cheese dip or marinara.
What are common tips to avoid soggy or greasy bites?
Use slightly stale bread, don’t oversoak, and fry over medium heat to prevent burning. Don’t crowd the pan, and let excess egg mixture drip off before placing in the pan. Use a light coating of fat to avoid greasiness.
Can I make a dairy-free or gluten-free version?
Yes. Use dairy-free milk (almond, soy, oat) and a dairy-free butter substitute or oil. For gluten-free, use gluten-free bread and ensure any added toppings or sauces are gluten-free.