Crispy Fried Chicken
Introduction / Hook
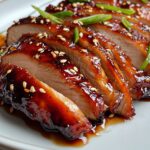
There is something almost ceremonial about that first bite—the crackle of a perfectly formed crust giving way to a tender, juicy interior, steam curling up like morning fog, and a warmth that seems to travel straight to the heart. Crispy fried chicken is not merely a dish; it’s a ritual of comfort, a sensory invitation that tugs at memories of family kitchens and weekend dinners. Imagine the skillet singing with fat and spice, a chorus of savory aromas weaving through the air: savory, nutty, a touch of sweetness, a whisper of pepper, all culminating in that signature golden crust that gleams as if it’s wearing a tiny robe of sunshine. Each piece is a little celebration—crunchy on the outside, succulent on the inside, with a dusting of seasonings that hints at the kitchen’s love and patience. It’s the kind of dish that makes you slow down, plate by plate, savoring the moment rather than rushing to the next bite. In this version, the chicken is treated with reverence, but the technique is approachable for home cooks, reviving a timeless comfort that has fed generations and sparked joyful gatherings from casual weeknights to festive dinners. The magic begins with a crust that shatters with a satisfying crack, revealing meat that is unexpectedly tender and juicy, even on the busiest of days. It’s the sound, the aroma, and the glow of a kitchen that says: you deserve something special, and today is as good a day as any to make it.
Beyond the surface crunch, the soul of Crispy Fried Chicken lies in balance. The exterior carries a toasty, slightly nutty note from the frying process, a crust that celebrates both texture and aroma. Inside, the meat remains moist and flavorful, an important counterpoint to the shell that encases it. This dish invites improvisation—the chance to tailor the spice profile to your mood, to play with heat, to introduce subtle sweetness, and to pair it with a universe of sides and condiments. The result is not just a meal but an experience: the first bite that lingers on your palate, the second bite that announces that this is a recipe you’ll return to again and again, the third bite that brings a quiet kind of contentment—the kind that settles into the shoulders and invites conversation around the table. Whether you’re feeding a bustling crowd or enjoying a quiet night in, Crispy Fried Chicken has a way of turning ordinary moments into cherished memories. And in today’s kitchen, we’ll honor that tradition by focusing on technique that yields a consistently crisp crust, juicy centers, and a finish that remains satisfying from the first bite to the last crumb.
The Story Behind the Dish
The story of crispy fried chicken is as layered as its crust. It’s a dish that has traveled across continents and through generations, gathering influences and evolving with every cook who kept the skillet hot. In the American South, fried chicken became a beloved staple, thriving in homes and at gatherings where family recipes grew richer with each telling. It’s a dish born of practical ingenuity—chicken pieces chosen for even cooking, a coating that could stand up to lengthy fry times, and a hot, steady flame that encouraged a perfect crackling skin. As African American communities and other immigrant groups brought their own spice blends, brines, and techniques to the table, fried chicken transformed. The result is a mosaic of regional varieties: some opting for a dry, herb-laden crust; others embracing a tangier, more pepper-forward bite; still others experimenting with double frying for an extra layer of crunch. Across the globe, similar ideas appear in different guises—crispy skins and juicy interiors that celebrate texture and savor in equal measure.
In many homes, the kitchen becomes a sanctuary where tradition and memory mingle. A grandmother’s advice, a favorite spice mix whispered in a moment of love, and the quiet ritual of letting seasoned chicken rest before it meets the hot fat—all these threads weave into the tapestry of Crispy Fried Chicken. Food historians note the cross-cultural exchange that shaped these techniques: coastal traders, home cooks, and neighborhood eateries all contributed to a method that could be adapted with local ingredients while preserving a universal joy—the moment when a crackling crust yields to tender meat and you realize you’re tasting something timeless and deeply satisfying. Today, cooks upgrade the experience with modern tools—air fryers and small countertop fryers—without losing the essence: a crisp exterior, a juicy interior, and a balance of flavors that make the dish comforting, festive, and universally appealing. The story is not just about a method; it’s about how food connects people—across generations, across kitchens, and across cultures—through the shared delight of a perfect bite.
Why You’ll Love This Recipe
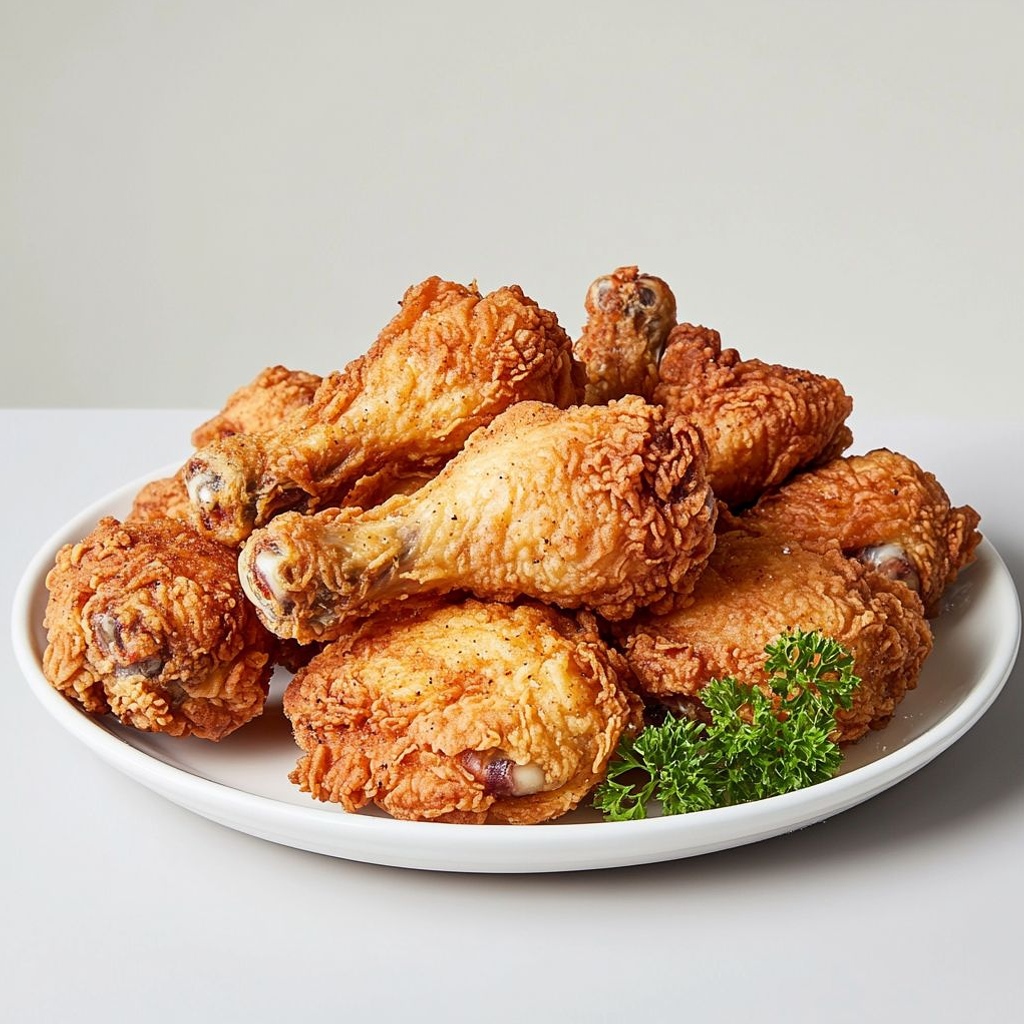
- Consistent, restaurant-like crispiness with a juicy interior that stays tender even after resting.
- A versatile flavor base that can be easily customized to milder or bolder spice levels.
- Simple techniques that rely on common kitchen tools, making it accessible to home cooks.
- Comfort food that feels special enough for gatherings yet easy enough for weeknights.
- Great for a crowd: you can scale up without losing quality or texture.
- Pairs beautifully with a wide range of sides, from creamy potatoes to bright slaws and crunchy pickles.
- A kitchen confidence booster: you’ll master texture control, timing, and temperature balance with practice.
Flavor Profile & Texture
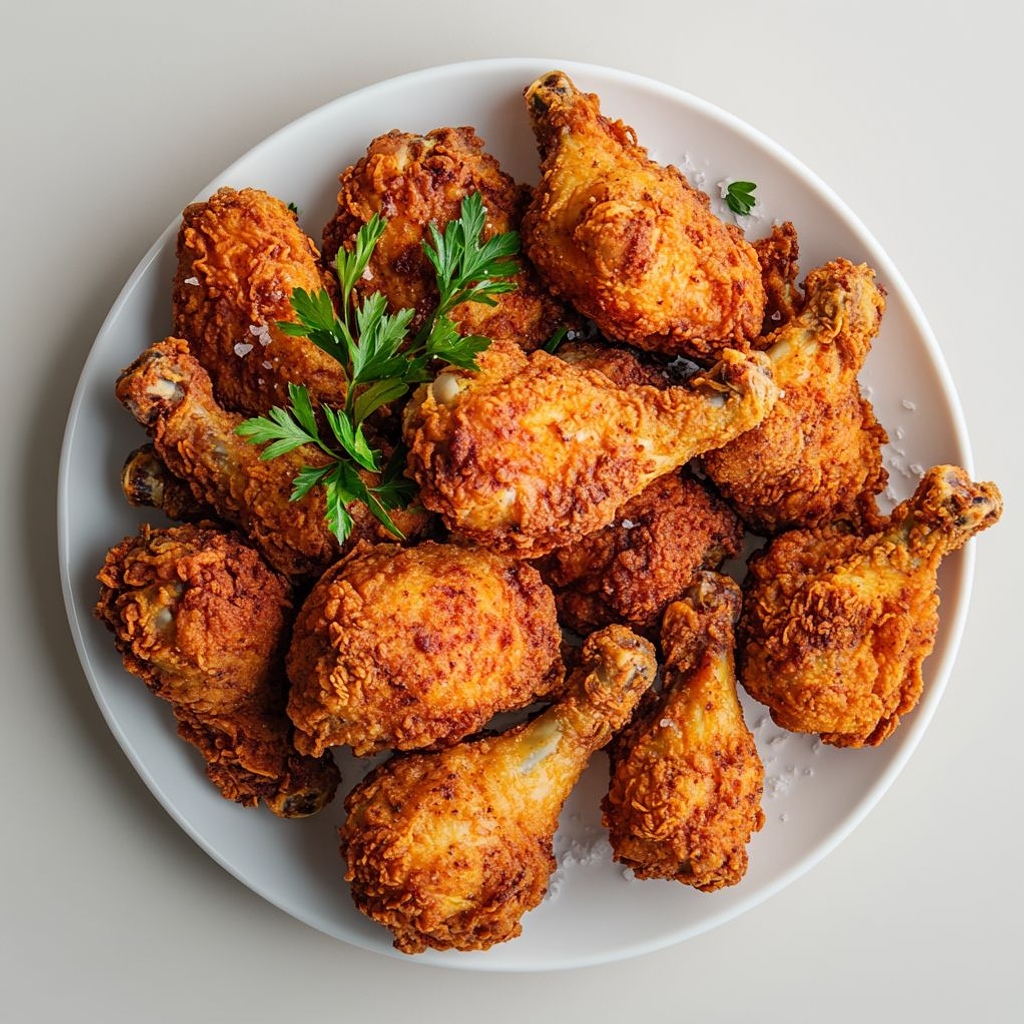
The flavor profile of Crispy Fried Chicken is a harmony of savory, slightly toasty, and deeply satisfying notes. The exterior crust carries a toasty depth with hints of corn-like sweetness and a gentle kiss of spice, depending on the blend you favor. There’s a nutty character from the browning process, often enhanced by toasting flour or starches that contribute a subtle earthiness. The interior is where the dish shines in its most comforting form: succulent, juicy meat that tears easily with a fork and releases a gentle steam when you bite in. Juices mingle with the crust in a mouthful that feels indulgent yet balanced, never overwhelmed by salt or heat. The texture contrast is the star—crunchy, crackly crust giving way to moist, tender meat, followed by the soft, yielding bite of the flesh as you chew. If there’s a complementary note, it’s a modest sweetness that can come from the crust’s natural browning, serving as a counterpoint to the savory depth inside.
The spices and aromatics create a layered fragrance that hits first with a toasty aroma, then with a mild peppery warmth that lingers on the palate. The crust’s light crunch gives way to the meat’s sigh of juiciness, a sensation that satisfies both the tongue and the imagination. When served with cooling accompaniments like tangy pickles or a crisp salad, the dish finds balance: a crackly counterpart that cuts the richness and a bright counterpart that refreshes the senses. The texture and flavor work together to deliver a complete, satisfying eating experience that resonates with comfort and a touch of nostalgia, while still feeling fresh and relevant in modern home cooking.
Occasions & Pairings
- Weeknights made special: a comforting centerpiece that feels indulgent without being overwhelming.
- Weekend family dinners or casual gatherings where everyone can customize their plate with favorite sides.
- Holiday spreads and potlucks, where the crunch and fragrance draw people to the serving area.
- Picnics and outdoor meals, where a portable, shareable main can shine with crispiness that travels well.
- Pairings: creamy mashed potatoes or grits, coleslaw for a refreshing contrast, cornbread or biscuits, and pickles or pickled vegetables for brightness.
- Drinks: a sparkling citrus soda, iced tea, light beer, or a dry cider can complement the richness without overpowering it.
Tips, Variations & Substitutions
Elevate and customize Crispy Fried Chicken with these practical ideas that honor the technique while letting you tailor the dish to your pantry and preferences.
- Spice level: adjust heat by choosing milder or hotter spice blends, or add a touch of dried chili flakes for a subtle kick. A hint of paprika or smoked paprika can add gentle smoky notes without overpowering the meat.
- Double fry for extra crispiness: a second fry at a slightly lower temperature helps the crust set and re-crisp after resting. This technique enhances texture without increasing sogginess.
- Coating variations: experiment with a blend of flours and starches to achieve different textures—cornstarch for extra crunch, rice flour for lightness, or a small amount of fine breadcrumbs for a crisper shell.
- Gluten-free options: use a gluten-free flour mix or a corn-starch-based coating to maintain crunch while accommodating dietary needs.
- Vegan or plant-based version: substitute with a hearty plant-based protein and use a similar coating approach with plant-based binders for texture and flavor, ensuring a satisfying bite.
- Dairy-free adaptation: choose a dairy-free binding and seasoning approach that delivers similar crust adhesion and browning, using neutral oils and a robust spice mix.
- Herbal and citrus accents: brighten the crust with finely chopped fresh herbs or a touch of citrus zest to add a fresh, modern twist without compromising crunch.
- Regional twists: incorporate regional spice blends—herbal notes for a Southern twist, garlic-forward profiles for Mediterranean influences, or five-spice-inspired rubs for an Asian-inspired take.
- Oven or air-fryer alternatives: while frying delivers classic texture, you can achieve a very good crust with a convection oven or an air fryer by mimicking the hot, crisp environment and giving the coating enough room to brown evenly.
Storage & Make-Ahead Ideas
Leftovers can be a treasure when stored and reheated properly. Crispy Fried Chicken can maintain its appeal with careful handling, preserving its texture and flavor for the next day or later in the week.
- Storage: refrigerate any cooled fried chicken within two hours of cooking. Keep pieces in a loose container or wrap loosely to prevent moisture from building up and softening the crust.
- Reheating for best texture: reheat in an oven or dedicated appliance to restore crispiness. A preheated oven or air fryer at a moderate temperature helps the crust re-crisp while the meat remains juicy. Avoid microwaving, which can soften the crust and dry out the interior.
- Make-ahead ideas: you can prepare the coating and the spices in advance and keep them ready for a quick, weeknight fry. If you’re planning ahead, you can portion out pieces of chicken and do a light dry-brine or seasoning ahead of time to intensify flavor, then coat and fry when ready.
- Freezing: freezing cooked fried chicken is possible but can diminish crispness. If you must freeze, freeze unfried pieces after seasoning, then finish with fresh cooking and frying when you’re ready to serve. For already fried chicken, freezing is not optimal for texture; plan to refrigerate and reheat.
Fun Facts & Trivia (Optional)
Fried chicken has inspired countless culinary stories and playful myths. While its exact origins are debated, many credit a blend of influences that traveled across oceans and cultures. The technique of frying meat in fat is ancient and widespread, but fried chicken as a dish with a distinct identity likely emerged from a convergence of traditional Southern American cooking, Scots-Irish settlers, and African culinary traditions. The result was a dish with a crust that could hold up during longer cooking times and a meat interior that remained moist and flavorful. In modern times, fried chicken has become a global canvas for creativity—Korean fried chicken popularized a double-fry for an extra-crisp shell and a glossy, lacquered finish, while Japanese karaage offers a lighter, punchier bite with careful marination. The playful variations you see today—from spicy-glazed wings to herb-forward crusts—showcase how a simple concept can evolve into a spectrum of textures and flavors, all rooted in the same core desire: a satisfying, memorable bite. If you listen closely in a busy kitchen, you can almost hear the clatter of pans and the murmurs of cooks excited to share something as comforting and celebratory as crispy fried chicken with friends and family.
Ingredients
Crispy Fried Chicken
Marinade / Soak
- 8 bone-in, skin-on chicken pieces (about 3–4 lb)
→ For juicier meat and a crispier final crust, keep the skin on during marination and soaking. Pat dry after removing from the buttermilk to help the coating adhere, and for best results let them rest uncovered in the fridge for 15–30 minutes before breading. - 2 cups buttermilk (or 2 cups milk + 2 tablespoons lemon juice, curdled)
→ Buttermilk provides tang and acid to tenderize the meat while adding moisture; if using the substitute, let the milk and lemon juice sit for 5 minutes to thicken, then marinade the chicken for 4–12 hours in the fridge. Remove from the fridge 30–60 minutes before frying to reduce chill. - 2 cloves garlic, minced
→ Adds aromatic depth; distribute evenly in the soak to season the meat throughout. For stronger garlic presence, crush or press the garlic first to release oils. - 1 teaspoon kosher salt
→ Essential seasoning that penetrates the meat during soaking; be mindful of the salt level in the marinade and crust, adjust to taste. - 1/2 teaspoon black pepper
→ Subtle heat and aroma; distribute by whisking into the buttermilk so it is not concentrated in one spot. - 1 teaspoon smoked paprika (or sweet paprika)
→ Adds color and a gentle smoky nuance; paprika helps color the meat subtly and complements the crust. - 1/2 teaspoon cayenne pepper (optional)
→ Brings heat; adjust to taste depending on tolerance. If you like extra heat, increase to 1 full teaspoon. - 1 tablespoon hot sauce (optional)
→ Brightens flavor and adds a bit of tang; mix into the marinade if you enjoy a more pronounced zing.
Coating / Dredge
- 2 cups all-purpose flour
→ The foundation of the crust; provides structure and a surface for the spices and starch to cling. For lighter crusts, substitute up to 1/2 cup with corn starch and ensure even mixing. - 1/2 cup cornstarch or rice flour
→ Extra crispness and a lighter texture; cornstarch helps the crust crisp up quickly in hot oil, while rice flour yields a delicate, crackly bite. Fold evenly into the flour. - 1 teaspoon baking powder
→ Creates tiny gas bubbles in the coating during frying, resulting in a puffier, crisper crust. Distribute evenly to avoid clumping. - 1 teaspoon garlic powder
→ Adds warm, savory notes; ensure even distribution within the dry mix. For a stronger garlic aroma, gently toast the flour mix before dredging the chicken. - 1 teaspoon onion powder
→ Provides a savory backbone that enhances overall flavor without overpowering the chicken. - 1 teaspoon paprika (regular or smoked)
→ Contributes color and a subtle warmth; mix thoroughly so every piece picks up the color evenly. - 1 teaspoon kosher salt
→ Salt the crust so flavor is balanced; keep in mind the marinade has salt as well, so adjust accordingly for your preference. - 1/2 teaspoon black pepper
→ Adds a hint of bite; freshly ground pepper is best for aroma. - 1/2 teaspoon cayenne pepper (optional)
→ If you enjoy heat in the crust, this ensures consistent spiciness across bites; tweak to your tolerance.
Frying
- 6 cups peanut oil (or other high-smoke-point oil)
→ Peanut oil is ideal for frying due to its high smoke point and neutral flavor; it allows the crust to crisp without imparting strong taste. Use a deep pan and a thermometer; maintain oil temperature around 325–350°F (165–175°C) and fry in batches to avoid crowding, which lowers temperature and makes the crust soggy.
Instructions
- Marinate the chicken in buttermilk and aromatics: In a large nonreactive bowl, whisk together 2 cups buttermilk (or 2 cups milk + 2 tablespoons lemon juice, curdled), 2 cloves garlic (minced), 1 teaspoon kosher salt, 1/2 teaspoon black pepper, 1 teaspoon smoked paprika, 1/2 teaspoon cayenne pepper (optional), and 1 tablespoon hot sauce (optional). Add the 8 bone-in, skin-on chicken pieces, ensuring they are completely submerged. Cover and refrigerate for 4–12 hours to tenderize the meat and infuse the flavors; if you used the milk-lemon substitute, allow the mixture to thicken first. Remove the chicken from the marinade 30–60 minutes before breading to reduce chilling and pat dry with paper towels to remove surface moisture so the crust adheres; let the pieces rest uncovered in the fridge for 15–30 minutes before breading.
→ The dairy and acid tenderize and flavor the meat, while keeping the skin on helps retain moisture and yields a crisper crust once dry surface is achieved. - Prepare the dry coating (dredge): In a large mixing bowl, combine 2 cups all-purpose flour, 1/2 cup cornstarch or rice flour, 1 teaspoon baking powder, 1 teaspoon garlic powder, 1 teaspoon onion powder, 1 teaspoon paprika, 1 teaspoon kosher salt, 1/2 teaspoon black pepper, and 1/2 teaspoon cayenne pepper (optional). Whisk vigorously until the spices and starch are evenly distributed; breaking up any lumps ensures uniform color and crisp texture on every piece. For extra evenness, sift the mixture once and then whisk again.
→ Even distribution of dry components ensures every bite is uniformly seasoned and crisp, with the baking powder creating tiny gas bubbles for a lighter crust. - Pat the chicken dry after marinating: Remove the chicken from the marinade and pat each piece thoroughly with paper towels, including under the skin where possible, until the surface feels dry to the touch. Place the pieces on a rack and let them rest uncovered in the refrigerator for 15–30 minutes to complete surface drying.
→ A dry surface is essential for the coating to cling and to achieve a crackly crust when fried. - Dredge the chicken in the seasoned flour: One piece at a time, press the skin side into the seasoned flour and rotate to coat all surfaces, then shake off excess and place on a wire rack. After all pieces are coated, let them rest 10–15 minutes to allow the crust to set for better adhesion during frying.
→ Resting helps the coating adhere firmly and reduces flaking when the chicken hits the hot oil. - Heat the oil to frying temperature: In a heavy, high-sided pot or Dutch oven, pour 6 cups peanut oil and attach a deep-fry thermometer. Heat over medium-high heat until the oil reaches 325–350°F (165–175°C), then maintain that temperature range throughout frying.
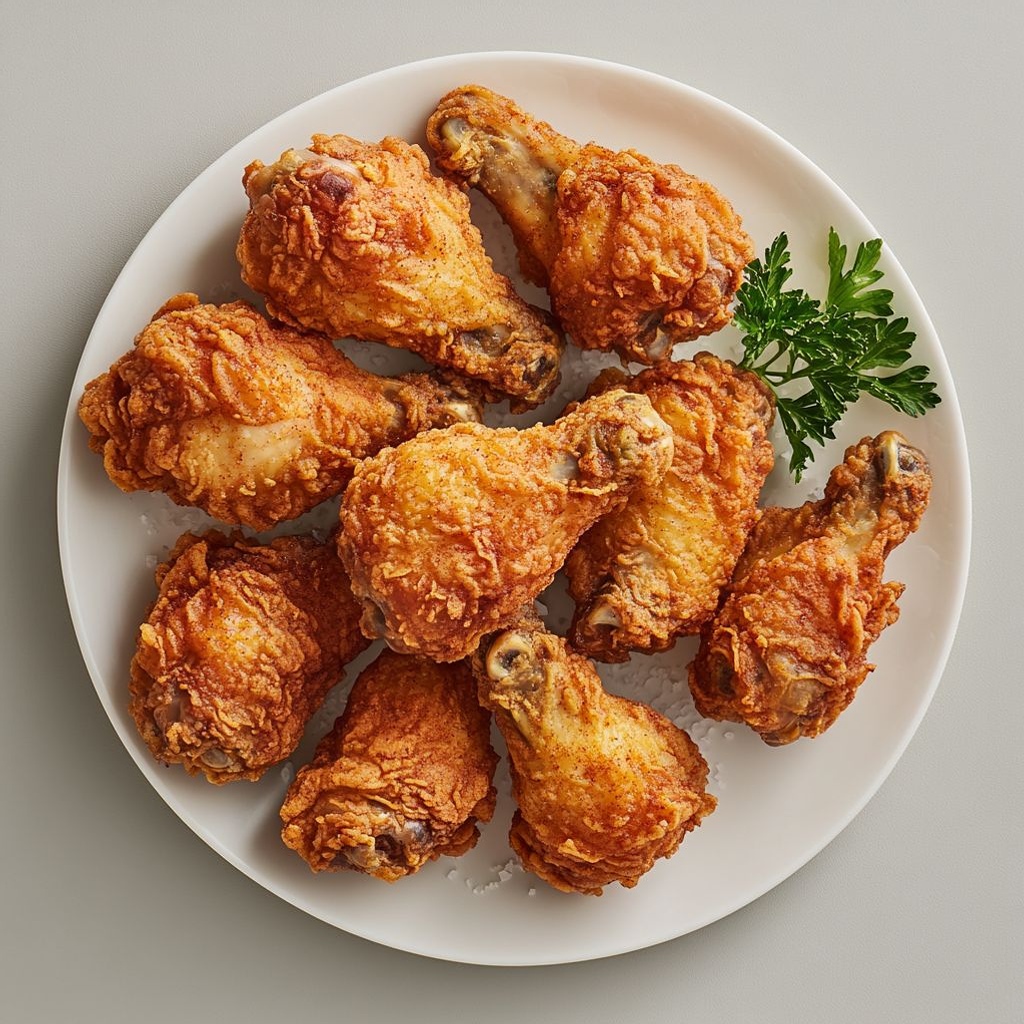
→ A stable, high smoking point and precise temperature promote a crisp crust and juicy interior; too hot will burn the crust before the meat cooks, too cool will yield greasy skin. - Fry the chicken in batches: Gently lower coated pieces into the hot oil one by one using tongs, avoiding crowding to maintain oil temperature. Fry for 12–15 minutes, turning once or twice, until the crust is deeply golden and the internal temperature reaches 165°F (74°C). If the crust browns too quickly, adjust the heat downward; if the chicken seems underdone, shorten or lengthen the fry time as needed.
→ Frying in batches prevents temperature drop and ensures a crackly crust with a juicy interior. - Drain and rest the fried chicken: Use tongs to remove each piece and transfer to a wire rack set over a parchment-lined sheet. Let the chicken rest for 5–10 minutes to drain excess oil and allow carryover cooking to finish without steaming the crust.
→ Resting removes surface oil that would otherwise soften the crust and helps retained juices stay evenly distributed. - Keep finished pieces warm and crisp if needed: If frying in multiple batches, place completed chicken on a rack in a warm oven at about 200°F (93°C) to keep them hot and crisp while the remaining pieces finish.
→ A low, dry heat keeps the crust from softening and prevents chilling the interior. - Serve immediately and adjust seasoning: Transfer the fried chicken to a platter, sprinkle with an extra pinch of kosher salt if desired while hot, and serve hot with dipping sauces or sides as preferred.
→ Hot service preserves the contrast between the crackly crust and juicy meat; salt at the end enhances flavor without oversalting the crust.
Notes
These crispy fried chicken pieces are juicy on the inside with a crackly, flavorful crust achieved by a buttermilk soak and a well-balanced dredge.
To maximize juiciness and ensure even browning, keep the skin on during marination and soaking, pat dry after removing from the buttermilk, and let the pieces rest uncovered in the fridge for 15–30 minutes before breading.
They can be customized by adjusting the heat level—add more cayenne or hot sauce, or mix in different paprika varieties for color and nuance; for a lighter crust, substitute up to 1/2 cup of flour with cornstarch or rice flour and mix evenly.
They freeze well after cooling and reheat in a hot oven to regain crispness; fry in batches at 325–350°F (165–175°C) in a high-smoke-point oil like peanut oil, keeping the oil temperature steady and not overcrowding the pan. Always ensure your oil is at the right temperature for best results.
Tips
Tips for Crispy Fried Chicken
Marinating and prepping the chicken
- For juicier meat and a crispier final crust, keep the skin on during marination and soaking. Pat dry with paper towels after removing from the buttermilk, then let the pieces rest uncovered in the fridge for 15–30 minutes before breading to dry the surface.
- Buttermilk tenderizes and adds moisture. If using a milk + lemon juice substitute, let it thicken for about 5 minutes, then marinate the chicken for 4–12 hours in the fridge. Remove from the fridge 30–60 minutes before frying to reduce chill and promote even cooking.
- Distribute minced garlic evenly in the soak to season the meat all the way through. For a stronger garlic presence, crush or press the garlic first to release oils.
- Season the marinade with salt and pepper; the salt helps penetrate during soaking. Be mindful of the crust salt as well—taste and adjust to avoid over-salting.
Flavor, color, and building the crust
- Paprika adds color and a gentle smoky nuance; paprika helps color the meat subtly and complements the crust. If you prefer more warmth, use smoked paprika.
- The optional cayenne pepper provides heat. Adjust to taste; for more heat, increase gradually.
- A bit of hot sauce in the marinade brightens flavor with a tang; omit if you prefer a milder profile.
- When coating, whisk all dry ingredients well so spices are evenly distributed. Press the dredged chicken gently to help the coating cling and shake off excess flour so it doesn’t shed in the oil.
- To increase crispiness, substitute up to 1/2 cup of flour with cornstarch or rice flour. Cornstarch yields a very crisp crust; rice flour gives a delicate, crackly bite. You can also try a double-dredge (coat, rest 10 minutes, then coat again) for extra crust.
- 1 teaspoon baking powder creates tiny air pockets in the crust for a puffier, crisper bite. Ensure even distribution to avoid clumps.
Frying technique and finishing touches
- Use a high-smoke-point oil like peanut oil (or canola/vegetable). Maintain the oil temperature at 325–350°F (165–175°C). Fry in batches to avoid crowding, which drops the oil temperature and makes the crust soggy.
- Fry in a deep, sturdy pan and monitor with a thermometer to keep heat steady. Dry surfaces and proper oil depth help maintain crust integrity.
- Drain fried pieces on a wire rack set over a sheet pan rather than on paper towels alone. This prevents steam from softening the crust.
- Check internal doneness with a thermometer: 165°F (74°C) in the thickest part. If you don’t have a thermometer, cut into the meat to ensure juices are clear and the inside is opaque.
- For extra crispness and to keep crust crisp after frying, finish in a hot oven (about 200–225°F) for 5–10 minutes, or re-crisp in a 400–425°F oven for 5–8 minutes. This also helps the crust set while the meat stays juicy inside.
- Let the chicken rest a few minutes before serving to redistribute juices and allow the crust to finish setting.
- Moisture on the surface can lead to dangerous oil splatters. Pat the chicken dry thoroughly before coating and avoid adding water to hot oil.
- Keep a rack ready for draining; avoid stacking hot pieces as it traps steam and softens the crust.
- Leftovers store in the fridge for 3–4 days. Reheat in a hot oven to restore crispness rather than microwaving.
- If peanut oil isn’t available, use other high-smoke-point oils (canola, vegetable, or refined avocado) but avoid oils with strong flavors that can compete with the seasoning.
- Gluten-free option: use a gluten-free flour blend and/or increase the ratio of cornstarch or rice flour to maintain the crisp texture.
FAQ
What cut of chicken should I use for Crispy Fried Chicken?
Bone-in pieces with skin (thighs, drumsticks, or a mix) are ideal for juiciness and a sturdy crust. Boneless pieces fry faster but may be drier; if using breasts, consider pounding to an even thickness for even cooking.
Should I marinate or brine the chicken before frying?
Yes. A simple buttermilk brine (about 2 cups buttermilk, 1–2 tsp salt, pepper, and optional hot sauce) for 4–8 hours yields juicy meat and adds flavor. You can add spices like paprika, garlic powder, or thyme for extra depth.
What oil should I use and what temperature is best for frying?
Use a high-smoke-point oil such as peanut, canola, vegetable, or sunflower. Maintain the oil around 325–350°F (165–175°C) for the first fry. If double-frying, you can raise to 375°F (190°C) for the final fry to crisp the crust.
How do I prepare the coating for maximum crispiness?
Pat the chicken dry, then dredge in a seasoned flour mix. A great combo is all-purpose flour with salt, pepper, paprika, garlic powder, onion powder, and optional cayenne. For extra crunch, mix in 1–2 tbsp cornstarch or baking powder per cup of flour.
How long should I fry different cuts of chicken?
Frying times vary by cut and temperature. Rough guidelines: thighs/drumsticks 12–15 minutes, wings 9–12 minutes, breasts 12–15 minutes. The internal temperature should reach 165°F (74°C).
How can I tell when the chicken is done without cutting into it?
Use a meat thermometer to check that the thickest part reads 165°F (74°C). The juices should run clear, and the crust should be golden and firm, not pale or soggy.
How do I keep Crispy Fried Chicken crispy after frying?
Let the chicken rest on a wire rack set over a baking sheet to drain excess oil. Keep it warm in a 200°F (90°C) oven for up to 20–30 minutes if needed. Avoid stacking; air exposure helps retain crispness.
Can I reheat fried chicken without losing its crunch?
Yes. Reheat in a 400°F (200°C) oven for 10–15 minutes, or until heated through and the crust is crisp again. Avoid microwaving, which makes the crust soggy.
Is there a baked or air-fryer alternative for Crispy Fried Chicken?
Yes. For an oven finish, coat as usual, place on a rack, and bake at 425°F (220°C) for 20–25 minutes, flipping once. For air-frying, cook at 360–400°F (180–205°C) for 15–20 minutes, shaking halfway, until golden and cooked through.
What are common pitfalls and how can I avoid them?
Pitfalls include overcrowding the pan (dropping oil temperature), using cold chicken, and thinning the batter with too much liquid. To fix, dry the chicken well, fry in batches, keep oil temp steady, and ensure your coating is dry and well-seasoned.