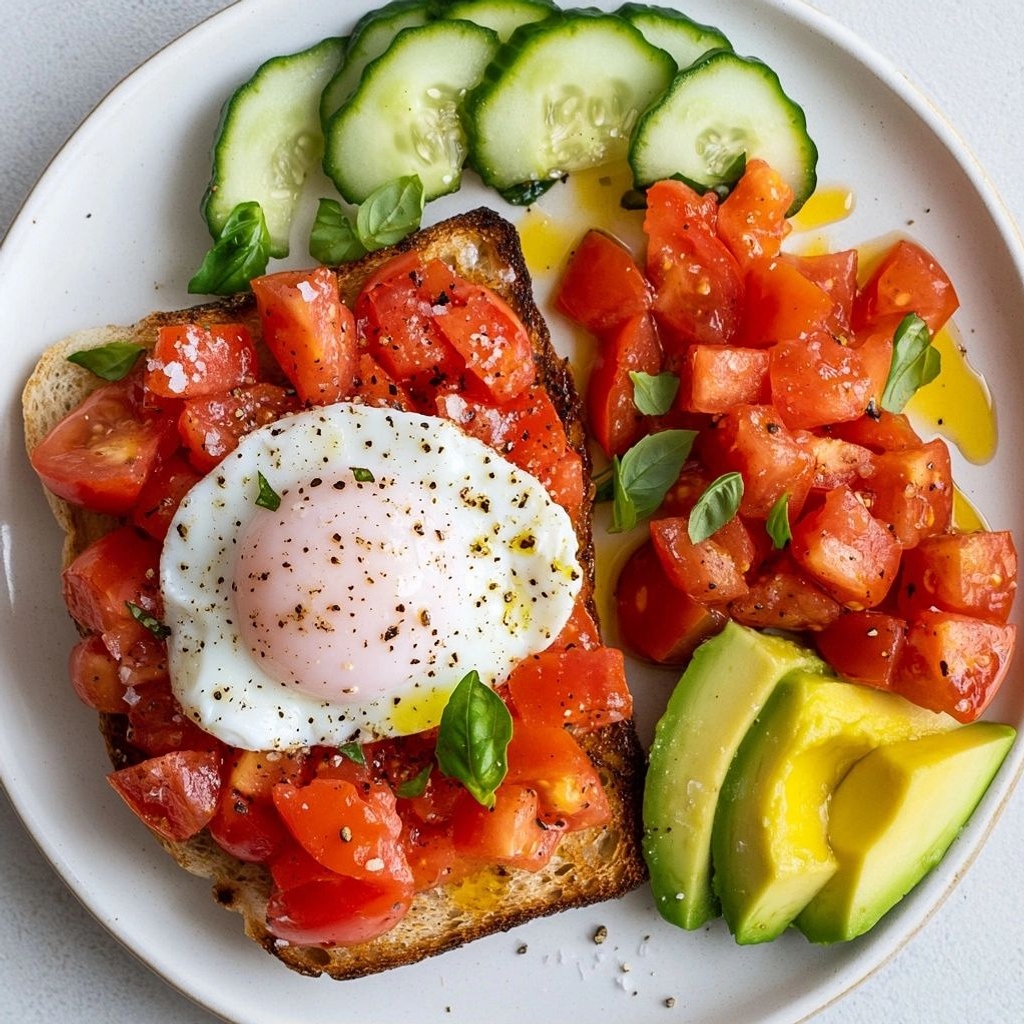
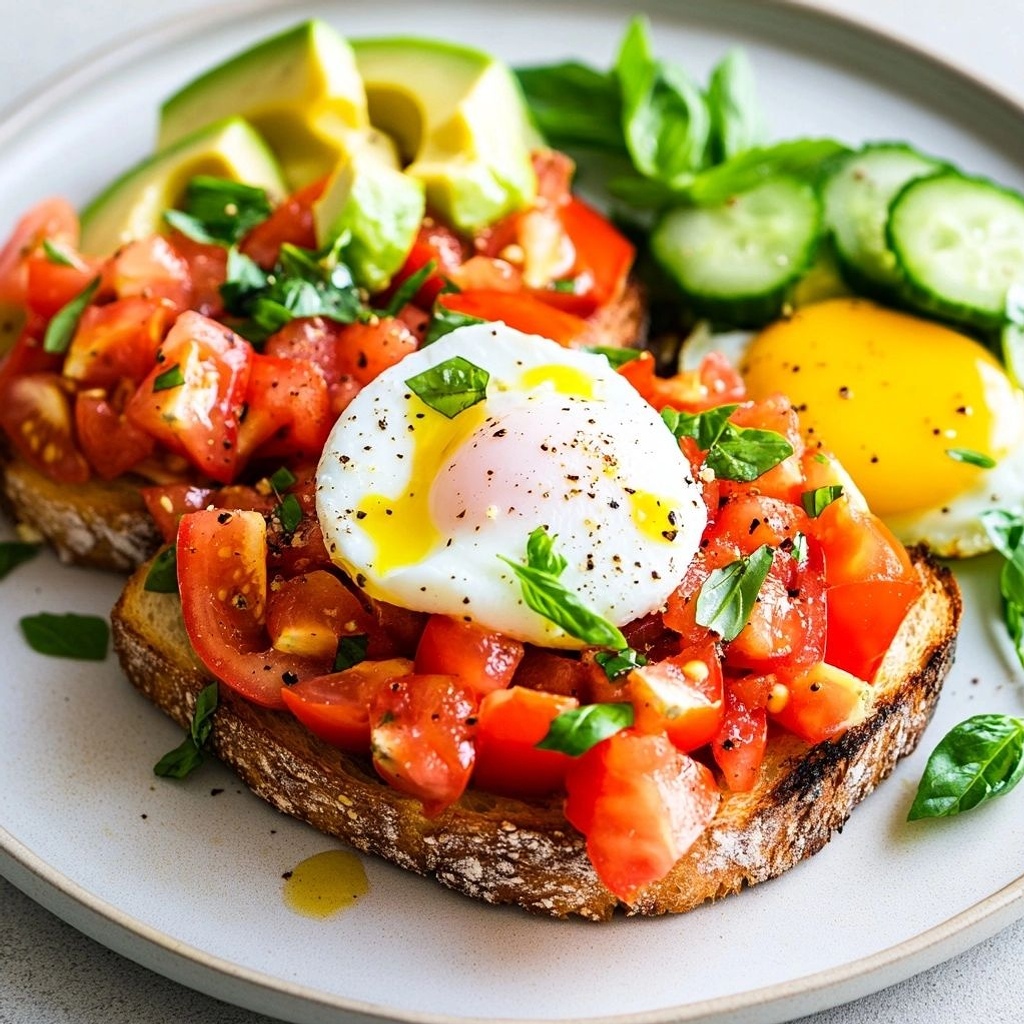
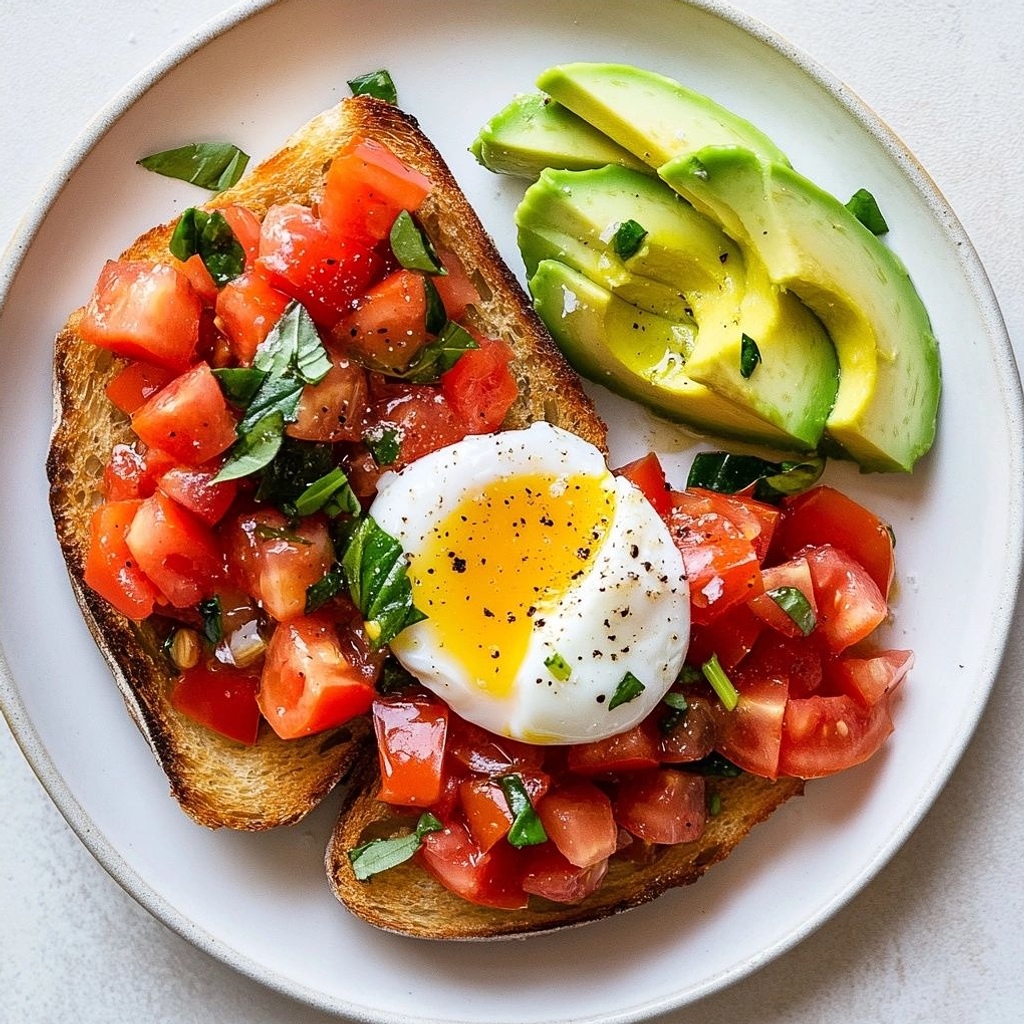
Author

Ocean Nightleaf

Browsing

Introduzione / Hook

Immagina una scena accogliente: una cucina calda, luci soffuse, e l’aroma intenso di cioccolato che avvolge l’aria come una coperta confortevole. La Torta dessert al cioccolato è quel tipo di dolce che trasforma una serata ordinaria in un piccolo rituale di puro piacere. È la promessa di una fetta che si scioglie lentamente al contatto della lingua, lasciando una nota di cacao profondo, vellutata e avvolgente, che danza tra dolcezza e una leggera, salutare amarezza tipica del cioccolato di alta qualità. Non è solo una torta: è un’esperienza sensoriale che invita a rallentare, a guardare il tempo che scorre con calma, e a condividere momenti con chi ami. Ogni morso parla di cacao scelto con cura, di una consistenza soffice ma stabile, di una glassa lucida che invita a spegnere la fretta e a lasciarsi coccolare dal gusto intenso. Se stai cercando un dessert che possa essere allo stesso tempo semplice da realizzare e sorprendentemente elegante sulla tavola, questa torta è fatta su misura per te. È versatile, ma soprattutto è una dichiarazione di amore per i cioccolati di qualità: profondo, ricco, ma bilanciato, capace di stupire sia in una cena informale sia in una festa speciale. Preparala per una serata romantica, per una domenica di chiacchiere tra amici, o come premio dolce per una settimana che merita una ricompensa. È una di quelle ricette che, una volta assaporata, resta nel palato e nella memoria, e che spesso diventa un piccolo classico familiare, pronto a essere tramandato con un sorriso.

La storia dietro il dolce

Il cioccolato ha attraversato oceani e culture prima di prendersi una forma dolce che potessimo gustare a casa: dal cacao delle foreste pluviali dell’America Centrale alle corti europee, dove i maestri pasticcieri hanno perfezionato tecniche e ricette, spesso nascoste tra le pagine di un libro antico o lungo le mani callose di una nonna. La torta al cioccolato, in molte tradizioni, nasce come celebrrazione di un alimento che unisce semplicità e lusso: pochi ingredienti base, ma con una potenza gustativa capace di trasformare un semplice impasto in un’emozione. In Italia, la passione per il cacao si è fusa con memorie familiari, con ricette tramandate di generazione in generatione, evolvendosi in una torta che conserva l’anima rustica ma veste di raffinatezza quando serve. Spesso accompagnata da una crema, una glassa lucida o una spolverata di cacao, la Torta dessert al cioccolato richiama ricordi di panni appesi al sole, di cucine affollate durante le feste di fine settimana, e del profumo che doma i pensieri più frenetici. Chiunque, ad un certo punto della propria vita, ha assaggiato una fetta di questa torta ha scoperto che la magia non risiede solo negli ingredienti, ma nel modo in cui un dolce riesce a creare un ponte tra presente e memoria: un odore che fa tornare a casa, una consistenza che ricorda una carezza, un gusto che invita a chiudere gli occhi e sorridere.

Perché amerai questa ricetta

  • Comfort senza complessità: una torta che sembra ricca e decadente, ma è sorprendentemente accessibile da realizzare anche per chi è alle prime armi in cucina.
  • Equilibrio perfetto tra dolcezza e profondità: nota intensa di cacao bilanciata da una dolcezza avvolgente che non sovrasta i sensi.
  • Texture: una crosta lucida e leggermente croccante che cede a un interno morbido, umido e quasi fondente al centro.
  • Versatilità per ogni occasione: perfetta per una cena romantica, per una celebrazione informale, o per un semplice e meritato momento di coccole.
  • Flessibilità nelle varianti: si presta a versioni vegan, senza glutine o a ridotto contenuto di zucchero senza perdere carattere e fascino.
  • Immediata eleganza: la superficie lucida e la ricchezza del sapore fanno sembrare questa torta molto più impegnativa di quel che è in realtà, elevando immediatamente la tavola.

Aromi chiave

Questo dolce racconta di cacao intenso, una punta di vaniglia e un tocco sottile di aromi tostati che emergono senza sopraffare. Ogni fetta svela sfumature che richiamano caffè e mandorle leggermente tostate, offrendo una profondità gustativa che invita a fare una seconda fetta senza alcun rimpianto.

Consistenza e presentazione

La magia di questa torta sta nel contrasto: una crosta esterna che resiste al taglio, una mollica soffice e umida all’interno, e una dolce glassa o una leggera copertura che lucida la superficie. È una torta che si presenta bene su un piatto da dessert, ma è anche enough per un tè pomeridiano con amici: basta una fetta e un bicchiere di liquore dolce o di caffè per completare l’esperienza.

Profilo di sapore e consistenza

Sapori chiave

Il sapore è una sinfonia di cacao: profondo, maturo e avvolgente. Il cacao regala una base intensa che resta a lungo in bocca, mentre altre note, come una lieve vaniglia o un accenno di dolcezza floreale, rendono l’assaggio equilibrato e non stancante. È una torta che non necessita di accompagnamenti complessi per brillare; la sua magnificenza risiede nella purezza del cioccolato bene temperato e nell’armonia tra umidità e struttura dell’impasto.

Texture

La prima impressione è una superficie setosa che cede al coltello con facilità. All’interno, la torta è morbida, umida e quasi burrosa al palato, senza essere pesante. Questo tipo di consistenza nasce dall’equilibrio tra un impasto che assorbe i liquidi e una cottura accurata, che permette all’umidità di rimanere intrappolata. Quando si addenta la torta, si percepisce una leggera densità che avvolge la lingua, ma non appesantisce: è comfort puro, una carezza dolce che lascia una traccia di piacere prolungato.

Occasioni & Abbinamenti

Quando servirla

Questa torta si presta a molte occasioni: una cena fuori programma ma importante, una celebrazione familiare, o un semplice momento di coccole dopo una lunga giornata. Può essere presentata come dessert di chiusura di una serata conviviale, oppure al centro del tavolo in una festa tra amici. È anche una scelta impeccabile per regali casalinghi o per una merenda speciale nel weekend. La sua eleganza sobria la rende adatta sia a un servizio formale che a una tavola informale, offrendo sempre un tocco di classe senza richiedere sforzi eccessivi.

Abbinamenti consigliati

Per completare l’esperienza sensoriale, considera abbinamenti semplici ma raffinati: una tazza di caffè espresso o una bevanda calda aromatizzata, una crema fredda o una pallina di gelato alla vaniglia o alla crema. Frutti di bosco freschi o una coulis di lamponi possono aggiungere una nota acida che bilancia la dolcezza, creando un equilibrio gustativo molto piacevole. Se vuoi un tocco di eleganza, serve una spolverata sottile di cacao amaro o una lama di scorza di arancia per aggiungere freschezza e complessità. Questa torta si presta anche a esaltare una selezione di vini dolci o liquorosi: un passito, un liquore al cioccolato o un caffè corretto con un filo di liquore si armonizzano magnificamente con la ricchezza del cioccolato.

Suggerimenti, Varianti & Sostituzioni

Varianti classiche e moderne

La bellezza di questa torta sta nella sua capacità di adattarsi: puoi optare per una versione extra ricca, sostituendo parte di una componente lucente con una glassa più cicciotta, oppure mantenere un profilo più sobrio scegliendo una finitura leggera. Per una nota di freschezza, è possibile introdurre una cider o una leggera nota di agrumi nelle discussioni di presentazione, senza alterare la base di cacao.

Varianti vegane

Per una versione senza ingredienti di origine animale, si può pensare a sostituzioni mirate: ad esempio, utilizzare oli vegetali al posto del burro e una crema vegetale per la consistenza. Il sapore rimane intenso se si scelgono cacao di alta qualità e aromi naturali. L’importante è mantenere l’equilibrio tra umidità e struttura, evitando di esagerare con sostituzioni che potrebbero rendere la torta secca.

Versione senza glutine

Per rendere la torta adatta a chi segue una dieta senza glutine, si può utilizzare una miscela di farine prive di glutine appositamente bilanciate per torte, oppure optare per una versione a base di nocciole o mandorle macinate finemente. L’obiettivo è mantenere una texture soffice senza compromettere il sapore ricco di cacao.

Dolcezza e riduzione zuccherina

Se desideri una versione meno dolce, puoi ridurre una piccola percentuale di zuccheri o utilizzare un dolcificante alternativo. In ogni caso, è consigliabile mantenere una nota di dolcezza sufficiente per bilanciare l’amaro naturale del cacao, in modo che l’esperienza resti equilibrata e invitante.

Twist regionali

Esistono modi regionali di portare una carta diversa in occasione: una spolverata di pistacchi tostati, una glassa al formaggio cremoso (in piccole quantità) o un tocco di liquore locale per dare una firma caratteristica. Questi piccoli tocchi possono trasformare una torta classica in una versione originale, pronta a raccontare una storia nuova pur restando fedeli alle radici del cioccolato.

Conservazione & Idee per prepararla in anticipo

Questa torta è una compagna fidata anche quando vuoi pianificare in anticipo. Puoi prepararla con qualche margine di sicurezza, in modo da poterla gustare in momenti diverse senza compromettere la qualità. Ecco alcuni suggerimenti pratici per conservarla al meglio e per prepararla in anticipo:

  • Conservazione a temperatura ambiente: una torta ben coperta, in un contenitore ermetico o sotto una campana di vetro, resta fresca per 2-3 giorni in condizioni climatiche moderate. La glassa lucida può perdere parte della sua brillantezza nel tempo, ma mantiene comunque un sapore meraviglioso.
  • Conservazione in frigorifero: se vuoi prolungarne la freschezza, puoi conservarla in frigorifero per up to 5 giorni. Tiaset tagliene una porzione e lasciala a temperatura ambiente per circa 15-20 minuti prima di servirla, in modo che ritrovi la morbidezza originale.
  • Congelamento: questa torta si presta bene al congelamento. Avvolgina accuratamente e riponila nel congelatore per 1-3 mesi. Quando la scongeli, lasciala rasserenare a temperatura ambiente e, se desideri, aggiungi una leggera glassa o una decorazione fresca prima di servire.
  • Se vuoi prepararla in anticipo per una festa, considera la possibilità di congelare la torta già cotta e non glassata. In questo modo, al momento della festa, scongelala e aggiungi la glassa all’ultimo minuto per mantenere la lucentezza.
  • Idee per il servizio: per una presentazione elegante, spolvera una quantità sottile di cacao amaro o di cioccolato fondente grattugiato al momento del taglio. Questo dettaglio crea un effetto visivo accattivante e aggiunge una nota di sapore extra.

Curiosità & Trivia (Optional)

La storia del cioccolato è una storia di viaggi e scoperte. Gli antichi Maya e Aztechi consideravano il cacao una bevanda rituale e preziosa, spesso mescolata con spezie che ne intensificavano il carattere. Quando gli europei introdussero il cacao in Europa, la bevanda si trasformò in una torta, una forma di dessert solida che poteva essere conservata, trasportata e gustata in occasioni speciali. In Italia, la passione per il cioccolato si è intrecciata con la tradizione dolciaria domestica: la torta al cioccolato diventa così una sorta di simbolo di convivialità e di casa, capace di attraversare confini e generazioni. Una curiosità interessante è che molte culture hanno sviluppato varianti di torte al cioccolato utilizzando ingredienti locali: mandorle, nocciole, pistacchi o formaggi cremosi diventano protagonisti accanto al cacao, offrendo esperienze gustative ricche e diverse pur mantenendo la base comune di un dolce al cioccolato. Ogni regione o paese aggiunge una nota personale, trasformando una categoria di dessert in un vero e proprio patrimonio di memoria e sapore condiviso. Parlare di cioccolato è parlare di emozioni: è una delizia che si adatta a tutte le stagioni e a tutti i momenti, in modo semplice o raffinato. E questa torta, in particolare, incarna quel compromesso perfetto tra indulgence e comfort, tra gusto ricco e semplicità di esecuzione, che la rende una compagna fidata per chiunque desideri creare un momento di dolcezza memorabile.

Ingredients

Torta al Cioccolato Base
  • 1 3/4 cups all-purpose flour, sifted
    → Provides the cake’s structure and crumb. Sifting helps distribute leaveners evenly and yields a light, tender crumb. If you need a gluten-free version, substitute with a 1:1 gluten-free flour blend and add 1/2 teaspoon xanthan gum per cup of flour.
  • 3/4 cup unsweetened cocoa powder, Dutch-processed, sifted
    → Rich, smooth chocolate flavor with low acidity. Sift to remove lumps; If you only have natural cocoa, consider increasing the baking powder by 1/4 teaspoon to balance acidity and rise.
  • 1 cup granulated sugar
    → Sweetness that also aids in browning and moisture retention. If you prefer a less sweet cake, reduce by 2-3 tablespoons or substitute half with brown sugar for deeper flavor and moister crumb.
  • 2 teaspoons baking powder
    → Leavening that helps the cake rise and develop a light crumb. Use fresh baking powder for best lift; measured at room temperature.
  • 1/2 teaspoon baking soda
    → Provides additional lift and helps counteract acidity from cocoa and coffee, creating a tender crumb. If you use natural cocoa, keep this; if using only Dutch-processed cocoa, you can reduce to 1/4 teaspoon.
  • 1/2 teaspoon salt
    → Enhances overall flavor and balances sweetness and the slight bitterness of cocoa. Add a pinch more if your cocoa is particularly bitter, but do not exceed 1/2 teaspoon.
  • 2 large eggs, room temperature
    → Bind the batter and contribute to structure. Room-temperature eggs emulsify better with milk and oil, yielding a smoother crumb. If eggs are cold, warm them in a bowl of warm water for 5 minutes before using.
  • 1 cup milk, room temperature
    → Hydrates dry ingredients and adds moisture. Dairy milk yields a richer crumb; for dairy-free, use unsweetened almond, soy, or oat milk. If using plant milk with sweetness, adjust sugar accordingly.
  • 1/2 cup neutral oil (e.g., canola or sunflower)
    → Provides a moist, tender crumb that stays moist after cooling. Oil makes the crumb tender and even; use a neutral-flavored oil to avoid affecting chocolate flavor. If you prefer butter flavor, substitute half with melted unsalted butter, noting a slight change in texture.
  • 2 teaspoons pure vanilla extract
    → Enhances chocolate aroma; vanilla also helps balance bitterness. Use high-quality vanilla extract for best aroma; if available, you can use 1/2 vanilla bean, scraped, in place of the extract.
  • 1/2 cup hot water or hot coffee
    → Hydrates the cocoa and loosens the batter for a moist, glossy crumb. Coffee deepens the chocolate flavor without making the cake taste distinctly of coffee if kept moderate; use hot water if avoiding caffeine.
Optional Add-ins
  • 1/2 cup dark chocolate chips or chopped chocolate (optional)
    → Adds pockets of melted chocolate throughout the cake for extra richness. Toss chips with a teaspoon of the flour from the batter before adding to help distribute evenly and prevent sinking.
  • 1 teaspoon instant espresso powder dissolved in 1 tablespoon hot water (optional)
    → Intensifies the chocolate flavor without imparting a strong coffee taste. Dissolve the powder in hot water first, then fold into the batter just before adding to the pan.
Ganache Glaze (optional)
  • 8 oz (225 g) semisweet or dark chocolate, finely chopped
    → Forms the glossy, rich glaze when melted with cream. Finely chopped chocolate melts quickly and evenly, producing a smooth ganache when combined with heated cream.
  • 3/4 cup (180 ml) heavy cream
    → Provides fat to emulsify with chocolate and create a luxurious, shiny glaze. If you prefer a thinner glaze, increase cream; for thicker glaze, use slightly less.
  • 1 tablespoon unsalted butter, cut into small pieces (optional)
    → Adds extra shine and a silkier finish to the ganache. Add off the heat and stir until glossy. Omit if you want a purer chocolate glaze.
Toppings (optional)
  • Powdered sugar for dusting
    → Finishes the cake with a delicate, elegant touch. Dust using a fine sieve over a completely cooled cake to avoid clumps.
  • Fresh berries (raspberries, strawberries, or blueberries) for serving (optional)
    → Provides a bright contrast to the rich chocolate. Keep berries chilled until serving and arrange just before serving to maintain texture.

Instructions

  • Preheat your oven to 350°F (175°C) and prepare two 9-inch (23 cm) round cake pans by greasing with a neutral oil or butter and lining the bottoms with parchment rounds; this ensures the cake releases cleanly and bakes evenly.
    → Parchment rounds provide a nonstick surface and make lifting the layers later effortless, while greasing prevents the cake edges from tearing.
  • Sift together the dry ingredients: 1 3/4 cups all-purpose flour, 3/4 cup Dutch-processed cocoa powder, 2 teaspoons baking powder, 1/2 teaspoon baking soda, and 1/2 teaspoon salt into a large bowl, then whisk thoroughly to combine; this distributes leaveners and breaks up any cocoa lumps.
    → Uniform dry ingredients yield consistent rising and a smooth crumb without exposed dry pockets.
  • In a separate large bowl, whisk 2 large eggs with 1 cup granulated sugar until the mixture is pale, thick, and forms ribbons when the whisk is lifted, about 2 to 3 minutes; then whisk in 1 cup milk, 1/2 cup neutral oil, and 2 teaspoons vanilla extract until the mixture is smooth and fully emulsified; this builds a stable base for a tender, moist cake.
    → Proper emulsification distributes fat and liquids evenly, creating a cohesive batter that traps air for a light crumb.
  • Stir in 1/2 cup hot water or hot coffee gradually into the wet batter to hydrate the cocoa and loosen the mixture, yielding a glossy, pourable texture that helps the cake stay moist; this step also begins dissolving any cocoa solids for a uniform flavor.
    → Hot liquid activates cocoa and aids in dissolving cocoa solids, contributing to a rich, cohesive crumb.
  • Fold the dry ingredients into the wet batter in three additions, mixing just until no streaks of flour remain and the batter is smooth with a few tiny lumps; avoid overmixing to prevent gluten development and a dense crumb.
    → Gentle folding preserves tenderness and prevents a tough texture, especially in chocolate cakes.
  • If using optional add-ins, toss 1/2 cup dark chocolate chips or chopped chocolate with 1 teaspoon of flour from the dry ingredients to prevent sinking, then fold into the batter; or dissolve 1 teaspoon instant espresso powder in 1 tablespoon hot water and whisk into the batter just before the final fold for a deeper chocolate aroma without a pronounced coffee taste.
    → Coating chips in flour helps distribute them evenly; espresso powder deepens chocolate flavor without overpowering the cake.
  • Divide the batter evenly between the prepared pans and gently tap each pan on the counter to release trapped air; smooth the tops with a clean spatula so the layers bake flat and level for easy stacking.
    → Even distribution and surface leveling promote uniform rise and a professional-looking cake.
  • Bake on the center rack at 350°F (175°C) for 30–35 minutes, rotating the pans halfway through for even browning; test for doneness by inserting a toothpick into the center—the cake should emerge with a few moist crumbs, not wet batter; cool the layers in the pans for 10–15 minutes, then invert onto a wire rack to cool completely.
    → Correct bake time and a cool-down prevent sinking or crumbling, yielding a stable structure for ganache.
  • Ganache glaze: Place 8 oz (225 g) finely chopped semisweet or dark chocolate in a heatproof bowl; in a small saucepan bring 3/4 cup (180 ml) heavy cream just to a simmer, pour over the chocolate, and let stand 2 minutes; whisk gently until smooth and glossy, then whisk in 1 tablespoon unsalted butter off the heat if using; let the ganache cool slightly to a pourable, glaze-like consistency.
    → Heating the cream allows even chocolate liquefaction; resting prevents scorching and yields a satin-smooth glaze that coats the cake beautifully.
  • Level the cooled cake layers with a serrated knife or cake leveler if domed; place the bottom layer on a serving platter and spread a generous, even layer of ganache on top using an offset spatula; place the second layer on top, press gently to set, then pour the remaining ganache over the top and sides, smoothing with the spatula for a glossy finish.
    → Leveling ensures even stacking; the ganache acts as both filling and a protective glaze for a sleek, bakery-style surface.
  • Let the ganache set at room temperature for 20–30 minutes, or refrigerate briefly if you are short on time; before serving, dust with powdered sugar and, if desired, arrange fresh berries on top for contrast and brightness.
    → Allowing the glaze to set yields clean slices and an attractive presentation, while berries provide a fresh counterpoint to the rich chocolate.

Notes

These chocolate torta al cioccolato desserts are rich, fudgy, and irresistibly glossy, with a tender crumb and layers of chocolate flavor that shine when finished with ganache. For a gluten-free version, substitute a 1:1 gluten-free flour blend for the all-purpose flour and add 1/2 teaspoon xanthan gum per cup to help bind the batter. Sift the dry ingredients to ensure even leavening, and dissolve the espresso powder in the hot water or coffee to deepen the chocolate without making the cake taste like coffee. Use room-temperature eggs and milk for better emulsification and a smoother crumb, and whisk the wet and dry ingredients separately before combining to avoid overworking the batter. Prepare the ganache by gently heating the cream and pouring it over the finely chopped chocolate, allowing it to sit for a few minutes before whisking until smooth; stir in the optional butter for extra shine. Let the cake cool completely before glazing and dust with powdered sugar or decorate with fresh berries for contrast. This cake stores well in an airtight container at room temperature for a couple of days, or refrigerates for longer; you can also freeze baked slices wrapped tightly for up to 2–3 months. For a dairy-free version, use plant-based milk in the batter and a coconut- or almond-milk ganache, adjusting the amount of dairy fats accordingly.

Tips

Consigli utili per preparare la Torta al Cioccolato

  • Preparazione degli ingredienti: misura e mette tutto a portata di mano prima di iniziare. Le uova a temperatura ambiente si montano meglio con gli altri ingredienti, quindi se sono fredde, lasciale a temperatura ambiente 30–60 minuti oppure immergile rapidamente in acqua tiepida per 5 minuti.
  • Se vuoi una torta più leggera, assicurati di setacciare farina e cacao insieme e incorporare gli ingredienti secchi in 2–3 volte con attenzione, evitando di lavorare troppo l’impasto per non sviluppare troppo il glutine o far diventare la torta densissima.
  • La cottura: preriscalda il forno e verifica spesso la cottura verso la fine. Per una teglia standard (circa 23 cm), in genere si va a circa 25–35 minuti; fai lo stecchino: deve uscire con alcune briciole umide per una torta al cioccolato molto morbida e umida al centro.
  • Liquidi e cacao: mescola l’acqua calda o il caffè caldi con il cacao per aiutarlo a sciogliersi e attivare il sapore. Il caffè intensifica il sapore del cioccolato senza risultare al gusto di caffè se dosato correttamente.
  • Texture e umidità: l’olio mantiene la torta morbida anche quando è fredda. Se vuoi una nota di burro, puoi sostituire metà dell’olio con burro fuso, ma prepara la torta per una consistenza leggermente diversa.
  • Controllo della lievitazione: utilizzare lievito in polvere fresco significa migliore incremento di volume. Se usi cacao non trattato (natural), potresti dover adattare leggermente la quantità di lievito o bicarbonato a seconda dell’alcalinità del cacao.
  • Aggiunte opzionali: per cioccolato ancora più intenso, aggiungi gocce di cioccolato fondente o cioccolato tritato. Per una nota di espresso senza gusto di caffè, sciogli l’espresso in acqua calda e incorpora subito nell’impasto.

Tips per la ganache e la glassa

  • Ganache lucida: riscalda la panna fin quasi all’ebollizione, versa sul cioccolato tagliato finemente e lascia riposare 3–5 minuti prima di mescolare. Mescola dal centro verso l’esterno finché non ottieni una glassa lucida e setosa.
  • Texture della ganache: se vuoi una glassa più fluida, aumenta la quantità di panna; per una glassa più densa, riduci leggermente la panna. Aggiungi una noce di burro a fuoco spento per aumentare lucentezza e morbidezza.
  • Consistenza senza grumi: se la ganache si indurisce troppo, scalda delicatamente la ciotola a bagnomaria o ripassa al microonde a intervalli molto brevi, mescolando tra un intervento e l’altro.
  • Stesura: versa la ganache sulla torta completamente raffreddata o quasi fredda per una finitura liscia. Per una glassa più liscia, usa una spatola calda e passa delicatamente i bordi.

Consigli di presentazione e conservazione

  • Topping: spolvera con zucchero a velo solo quando la torta è completamente fredda per evitare macchie umide.
  • Dolci di accompagnamento: servi con frutti di bosco freschi per un contrasto di acidità che valorizza il cioccolato.
  • Conservazione: conserva la torta intera o porzioni ben sigillate in contenitore ermetico a temperatura ambiente per 2–3 giorni; può essere conservata in frigorifero se preferisci una torta più soda, ma lasciala acclimatare 20–30 minuti prima di tagliarla.
  • Congelamento: porzioni singole ben sigillate possono essere congelate fino a 2–3 mesi. Scongelale in frigorifero durante la notte e lascia a temperatura ambiente prima di servire.

FAQ

Che tipo di dolce è la Torta dessert al cioccolato?

È una torta al cioccolato morbida e ricca di sapore, ideale come dessert. Può essere gustata così com’è oppure farcita con crema o ganache e accompagnata da gelato, panna o frutti di bosco.

Quali sono gli ingredienti principali?
  • Cioccolato fondente di buona qualità
  • Burro o burro vegetale
  • Zucchero
  • Uova
  • Farina
  • Lievito per dolci
  • Latte o latte vegetale (opzionale)
  • Vaniglia e un pizzico di sale
È possibile prepararla in versioni per diete speciali?

Sì. Ecco alcune varianti comuni:

  • Senza uova: sostituti come purea di banana, yogurt vegetale o una miscela di semi di lino macinati con acqua (1 cucchiaio di semi di lino + 3 cucchiai d’acqua, lascia addensare).
  • Senza lattosio: burro sostituito con margarina o olio, latte con latte vegetale (mandorla, avena, soia).
  • Senza glutine: usa una farina senza glutine o una miscela 1:1 adatta alle torte, senza cambiare troppo i tempi.
  • Vegana: elimina uova e burro, utilizza olio vegetale o burro veg e latte vegetale.
Quanto tempo richiede preparazione e cottura?

Tempo di preparazione: circa 15-20 minuti. Tempo di cottura: 25-35 minuti a 170-180°C, a seconda del forno. Lascia raffreddare completamente prima di tagliare e servire.

Qual è il procedimento passo-passo?

Ecco una versione base:

  • Preriscalda il forno a 170-180°C e unga una teglia (preferibilmente diametro 20-23 cm) o rivestila con carta forno.
  • Fondi il cioccolato e il burro a bagnomaria o a microonde, mescolando fino a ottenere una crema liscia e liscia.
  • In una ciotola, monta lo zucchero con le uova (se usi uova). Aggiungi la crema di cioccolato fusa e mescola.
  • Aggiungi vaniglia e latte (se usato). Incorpora lentamente la farina setacciata con lievito e un pizzico di sale, mescolando fino a ottenere una pastella omogenea.
  • Versa nello stampo e cuoci 25-35 minuti. Verifica con uno stecchino: esci leggermente umido per una torta morbida o asciutto per una torta più asciutta.
  • Lascia intiepidire, poi sforna e lascia raffreddare su una griglia.
Quante porzioni ottengo tipicamente?

Con una teglia da 20-23 cm, si ottengono circa 8-10 porzioni, a seconda dello spessore e della presentazione.

Quali sono i consigli per forno e temperatura?

Preferisci forno statico a 170-180°C. Evita di aprire il forno durante i primi 15-20 minuti per non far scadere lievitazione. Se la superficie tende a scurirsi troppo, copri con un foglio di carta stagnola verso la fine della cottura.

Come conservare la torta e per quanto tempo?

Lascia raffreddare completamente, poi conserva:
– a temperatura ambiente, in una tortiera chiusa o sotto campana di vetro per 2-3 giorni;
– in frigorifero per 4-5 giorni, ben chiusa;
– o congela porzioni individuali up to 1-2 mesi. Per scongelare, lascia a temperatura ambiente o riscalda delicatamente in forno.

Quali varianti di gusto e topping posso usare?

Ecco alcune idee:

  • Ganache al cioccolato fondente da farcitura o glassa (cioccolato + panna).
  • Crema al mascarpone o crema chantilly per la farcitura.
  • Aggiunte all’impasto: gocce di cioccolato, nocciole tritate, cacao extra o caffè espresso per un sapore più intenso.
  • Copertura con glassa al cacao, scaglie di cioccolato o zucchero a velo.
Come presentare una torta al cioccolato al meglio?

Taglia la torta fredda per ottenere fette pulite. Servi con una cucchiaiata di crema, una pallina di gelato alla vaniglia o frutti di bosco. Puoi decorare con cacao in polvere, scaglie di cioccolato o una micro-rasatura di scorza d’arancia per un tocco fresco.

Quali problemi comuni possono verificarsi e come risolverli?

Problemi comuni e soluzioni:

  • Torta troppo secca: aumenta leggermente grassi o liquidi nell’impasto (latte o olio) o prolungare la cottura di pochi minuti poco per volta.
  • Torta cruda all’interno: controlla il tempo di cottura, riduci l’altezza della teglia o copri la superficie per evitare bruciature; se necessario, cuoci qualche minuto in più e controlla con stecchino.
  • Superficie che si rattrappisce: evita mescolamenti eccessivi; incorpora gli ingredienti con movimenti lenti dal basso verso l’alto.
Quali strumenti utili servono per prepararla?

Strumenti consigliati:

  • Stampo rotondo da 20-23 cm o uno stampo a cerniera
  • Bagnomaria o microonde per sciogliere il cioccolato
  • Frusta o planetaria per montare
  • Setaccio per setacciare la farina
  • Spatola per lisciare l’impasto

Introduzione — Il Gancio

Immagina una casseruola che si scalda lentamente nel forno, emanando un profumo avvolgente di uova cremose mescolate con salsiccia succosa, formaggio che tende filante e aromi che si intrecciano come una conversazione tra vecchi amici. Questa è una ricetta che parla di conforto semplice, di mattine illuminate dal sole che filtrano attraverso le tende e di risate che risuonano intorno al tavolo di casa. La casseruola uova e salsiccia non è solo un piatto: è un rituale accogliente, un abbraccio culinario che trasforma una domenica in un ricordo speciale, una colazione che resta aperta per pranzo e una cena improvvisata ma memorabile. È quella cosa che sembra fatta su misura per chi ama i sapori familiari ma desidera una nota di novità: la cremosità delle uova che mette in risalto la robustezza della salsiccia, la dolcezza del formaggio fuso e una leggera croccantezza in superficie. Eppure, non è soltanto ricco: è anche pratico, costruito per chi ha poco tempo ma non vuole rinunciare a qualcosa di gustoso e confortante. In una parola, è la casa che ti accoglie, ovunque tu sia, e ti invita a fermarti un attimo a respirare il profumo della cucina. Se stai cercando una ricetta che trasformi una lista di ingredienti comuni in una scena di tavola calda e felice, questa casseruola è la tua compagna ideale. Preparala una volta e scoprirai che il loro calore non si esaurisce: resta con te, pronta a essere riscaldata per una nuova mattina o una serata che merita un po’ di magia semplice.

La storia dietro il piatto

La casseruola uova e salsiccia nasce dall’humus della cucina familiare, dove i piatti si costruiscono con praticità ma con una dose di creatività e di amore per la tavola condivisa. In molte regioni italiane, le famiglie hanno una tradizione di piatti unti e sostanziosi che si cucinano in teglia: idee nate dall’abbinamento di proteine saporite, uova che tengono tutto insieme e una generosità di formaggi che tutto ammorbidisce. La salsiccia, con le sue note di pepe, finocchio o spezie locali, è spesso una protagonista che regala carattere al piatto, trasformando una semplice combinazione di ingredienti in qualcosa di capace di riunire parenti e amici attorno al tavolo. In passato, molti non avevano uova fresche ogni giorno: le casseruole di uova, cotte al forno, erano un modo ingegnoso per utilizzare avanzi, preservando gusto e proteine in un’unica, pratica soluzione. Nel tempo, questa preparazione ha attraversato confini e tradizioni, adattandosi alle cucine di casa, dai casali alle cucine urbane, assumendo varianti che riflettono territori diversi: erbe aromatiche, peperoni arrosto, formaggi locali o una spolverata di pangrattato sulla superficie per una croccantezza irresistibile. La bellezza di questa ricetta è che porta una storia di sostegno e convivialità in una teglia: un piatto che ricorda le domeniche di nonna, le risate tra fratelli, i pranzi di festa contrassegnati da un forno che canta nel silenzio della cucina. Ogni forchettata è un piccolo viaggio nel tempo e nello spazio, dove la semplicità incontra la ricchezza di sapori e la voglia di stare insieme.

Perché amerai questa ricetta

Questo piatto brilla per una serie di motivi pratici ed emozionali. Ecco perché potrebbe diventare uno dei tuoi go-to nella ricetta di famiglia o nel libro di ricette personale:

  • Praticità e comfort: una sola teglia, poche mosse, poco tempo di preparazione attiva e una cottura che fa tutto da sé. È ideale per brunch, pranzo di metà settimana o una cena in cui vuoi qualcosa di sostanzioso senza stare ai fornelli per ore.
  • Versatilità: resta sorprendentemente neutra nei condimenti e si lascia guidare dalle preferenze. Con salsiccia piccante o dolce, formaggi diversi o erbe aromatiche, ogni versione racconta una storia diversa senza richiedere grandi cambiamenti procedurali.
  • Confortante ma equilibrata: la ricchezza delle uova e del formaggio è bilanciata dalla sapidità della salsiccia, offrendo una sensazione cremosa e avvolgente ma senza pesare troppo sul palato quando viene gustata in porzioni ragionevoli.
  • Adatta a molte occasioni: è perfetta per brunch domenicali, riunioni tra amici, cene in settimana, o come piatto unico per una giornata di freddo. Si presta anche a servirsi con una fresca insalata verde o con una salsa leggera per un contrasto di texture e temperatura.
  • Conservazione di gusto: si presta bene al make-ahead. Puoi prepararla in anticipo e infornarla poco prima di servirla, oppure tagliarne una porzione per un pasto lampo durante la settimana.

Profilo di sapore e consistenza

Immagina una base di uova soffici e ricche che diventano quasi una crema all’interno della casseruola, con bordi dorati che aggiungono una leggera croccantezza. La salsiccia, a seconda della sua tipologia, porta un profilo aromatico che spazia dal dolce al piccante, rilasciando sapidità e umami in ogni morso. Il formaggio, fuso e filante, filtra la ricchezza con una nota di latticino che arricchisce la crema delle uova senza appesantirla eccessivamente. A livello sensoriale, penserai a una morbidezza vellutata al centro, una texture leggermente elastica data dal legame delle uova, e una superficie che, se ben cotta, offre una piacevole croccantezza. L’assaggio è una piacevole armonia di sapori: la robustezza della carne contrasta con la dolcezza delle uova, mentre l’erbaceo delle erbe aromatiche sottili o del pepe nero graffia la lingua con una nota speziata. In bocca, il piatto si muove tra morbidezza e rotondità, lasciando una leggera sapidità che invita a fare il bis. L’equilibrio tra proteine, grassi e una nota croccante sulla superficie rende ogni boccone una piccola esplosione di soddisfazione, capace di alzare l’umore e di scaldare chiunque lo assaggi.

Occasions & Pairings

Questa casseruola è una compagna elegante per vari momenti della giornata e contesti sociali. Ecco alcune idee su quando proporla e con cosa abbinarla per massimizzare gusto e presentazione:

  • Brunch del weekend: accompagnala con una selezione di pane croccante, avocado, pomodori maturi e una spremuta fresca. Una spruzzata di erba cipollina o prezzemolo fresco aggiunge freschezza al piatto.
  • Colazione robusta: è ideale per chi ha bisogno di energia per una giornata attiva: aggiungi una semplice insalata di rucola e una fetta di pane rustico, magari con un filo di olio extravergine.
  • Cena in famiglia: serve a tavola direttamente dalla teglia, con contorni leggeri come verdure al vapore o una insalata verde semplice. Può essere anche l’elemento principale su una tavola dall’atmosfera conviviale.
  • Pranzi per amici: presentala tagliata a fette ordinate in una teglia rotonda, servita con una salsa allo yogurt o una salsa verde leggera per bilanciare la sapidità.
  • Quando hai poco tempo: se hai ospiti improvvisi, questa casseruola ti salva: si riutilizza facilmente, resta gustosa anche il giorno seguente e si può riscaldare senza perdere la sua consistenza cremosa.

Di cosa è fatta la casseruola uova e salsiccia: profilo di sapore

Non è necessario entrare nei dettagli di ogni ingrediente per apprezzarne la magia. In breve, il piatto va oltre la somma dei suoi pezzi: le note di uova e formaggio formano una base cremosa che accoglie la robustezza della salsiccia. Se si utilizza una salsiccia dal profilo speziato, permette al piatto di avere una spinta di gusto decisa; con una salsiccia artigianale delicata, il risultato è più neutro e orientato alla morbidezza. Le erbe aromatiche come il timo, il rosmarino o una spolverata di pepe nero aggiungono una dimensione profonda che risveglia i sensi senza coprire i sapori principali. Il formaggio, fuso e filante, è spesso la chiave che lega tutto insieme: una nota ricca che si scioglie, creando una cremosità vellutata che si spalma come una seconda pelle sulle uova. A seconda della scelta di formaggio, si possono ottenere note più dolci o più pungenti, ma l’armonia resta: una combinazione di cremosità, sapidità e una leggera croccantezza in superficie che invita a tagliare e servire. E se vuoi un tocco di colore, basta aggiungere una manciata di prezzemolo fresco o cipollotto tagliato finemente. L’equilibrio tra morbidezza e struttura è ciò che rende questa casseruola una scelta attraente sia per puristi che per chi cerca una piccola avventura culinaria senza allontanarsi da casa.

Tips, Varianti & Sostituzioni

La bellezza di questa casseruola è la sua adattabilità. Ecco alcune idee per personalizzarla, mantenendo la semplicità e la comodità:

  • Varianti proteiche: se vuoi una versione più leggera, sostituisci una parte della salsiccia con funghi saltati o con tofu sbriciolato speziato. Per una versione ricca, aggiungi pancetta croccante o prosciutto cotto tagliato fine.
  • Opzioni vegetariane: puoi creare una versione completamente vegetariana utilizzando polpette di soia o ceci, oppure funghi Portobello saltati, per una texture carnosa simile alla salsiccia.
  • Formaggi alternativi: provola, fontina, pecorino stagionato o parmigiano grattugiato danno profondità diverse. Per una versione più morbida, scegli formaggi che fondono bene; per una nota più intense, aggiungi una spolverata di pecorino in superficie.
  • Erbe e spezie: timo, rosmarino, dragoncello, pepe nero o peperoncino tritato fine possono cambiare notevolmente l’aroma del piatto. Sperimenta con scorze di limone per un tocco fresco.
  • Aromi in superficie: una leggera spolverata di pangrattato mescolato con olio e parmigiano crea una crosticina ancora più invitante.
  • Aglio e cipolla: aggiungi aglio soffritto o cipolla finemente tritata per un profilo aromatico più marcato, se ti piace.
  • Versioni senza glutine: se usi pangrattato, opta per una versione senza glutine o salta la crosticina croccante per mantenere una consistenza più cremosa.

Conservazione & idee make-ahead

Uno dei grandi vantaggi di questa casseruola è la sua capacità di agevolare i pasti futuri. Ecco alcune strategie utili per conservare gusto e consistenza:

  • Conservazione in frigorifero: una volta raffreddata, puoi coprirla e conservarla in frigorifero per 2–3 giorni. Per riscaldarla, copri la teglia e inforna a bassa temperatura o schizza con un filo di latte per mantenere la crema morbida.
  • Congelamento: la casseruola intera può resistere al congelatore, ma la consistenza delle uova potrebbe cambiare leggermente una volta scongelata. Tagliare in porzioni prima di congelare facilita le defruscite rapide.
  • Make-ahead: puoi preparare la base di uova e salsiccia in anticipo e trasferirla in una teglia. Inforna direttamente quando hai tempo, in modo da avere una cottura uniforme senza fretta.
  • Riscaldamento: per migliorare la texture, riscalda lentamente nel forno con una leggera spruzzata di latte o panna per ridonare morbidezza e cremosità. Evita il microonde per non compromettere la crosticina superficiale se ti piace quella texture.

Curiosità e trivia

Le casseruole simili hanno una ricca storia nelle tradizioni culinarie di molte culture. In alcune regioni italiane, la combinazione uova + carne era una pratica di cucina domestica per utilizzare avanzi in modo creativo durante i mesi freddi, trasformando rimanenze di salsiccia o formaggio in un piatto unico che scaldava corpo e spirito. L’arte di creare piatti in teglia, come questa casseruola, è stata tramandata di generazione in generazione, spesso accompagnata da storie di domeniche serene, tazze di caffè fumante e la gioia di condividere un pasto semplice ma appagante. Un fatto curioso è che, a volte, si aggiungeva una texture croccante sulla superficie con pangrattato o parmigiano, una decisione pratica che offriva contrasto e fascino visivo alla presentazione. Se ti va di portare un tocco storico al tuo piatto, puoi scavare tra le tradizioni locali per trovare piccole varianti di erbe, spezie o formaggio che hanno accompagnato piatti simili nelle cucine regionali italiane per secoli.

Ingredients

Casseruola Base

  • – 500 g Italian sausage, mild or hot, casings removed and crumbled
    → Role: forms the hearty, savory base of the casserole, providing rich flavor and fat for moisture. Preparation: crumble sausage and brown in a skillet until fully cooked; drain excess fat to avoid greasiness. Tip: choose flavorful sausage for depth.
  • – 6 large eggs
    → Role: binding and setting the casserole into a cohesive slice via a custard-like mixture when baked with dairy. Preparation: beat until well combined with the dairy; season lightly. Tip: use room-temperature eggs for smoother custard.
  • – 1 cup whole milk or heavy cream
    → Role: adds moisture and richness to the egg custard. Preparation: whisk into eggs; choose whole milk for lighter texture or cream for extra richness. Tip: for a creamier result, use a mix of milk and cream.
  • – 2 tablespoons extra-virgin olive oil
    → Role: used to sauté aromatics and prevent sticking; flavor base. Preparation: heat oil in skillet and cook onion, garlic, and pepper until softened; optional to brown sausage in the same pan. Tip: use EVOO for best flavor; avoid overheating.
  • – 1 medium onion, diced
    → Role: sweetness and depth; Preparation: sauté until translucent and lightly caramelized. Tip: salt the onion lightly to speed browning.
  • – 2 cloves garlic, minced
    → Role: aromatic backbone; Preparation: add with onions and cook just until fragrant; avoid browning to prevent bitterness. Tip: press or mince finely for even distribution.
  • – 1 red bell pepper, diced
    → Role: color, sweetness, texture; Preparation: sauté until softened. Tip: remove seeds and membranes for cleaner texture.
  • – 1 cup crushed tomatoes or passata
    → Role: provides moisture and a light sauce base. Preparation: stir into the sautéed vegetables or layer with eggs; Season lightly. Tip: for deeper flavor, simmer with aromatics first.
  • – 1 cup stale bread cubes (optional)
    → Role: adds structure and helps absorb custard, yielding a heartier texture. Preparation: use slightly dried bread; toast lightly if time allows; Tip: adjust quantity to desired density.

Aromi e Condimenti

  • – 1 teaspoon Italian seasoning or dried oregano
    → Role: builds a classic Italian herb profile to marry sausage, tomato, and cheese. Preparation: mix into the eggs or sauce. Tip: if using dried herbs, crumble well and let them hydrate in the hot mixture for a fuller flavor.
  • – Salt to taste
    → Role: essential seasoning. Preparation: season gradually; sausage adds salt, so taste before adding more. Tip: season eggs separately for evenness.
  • – Black pepper to taste
    → Role: enhances overall flavor with subtle heat. Preparation: grind fresh just before using. Tip: pair with a touch of red pepper flakes for warmth if desired.
  • – 1/4 teaspoon red pepper flakes (optional)
    → Role: adds gentle heat; Preparation: sprinkle into egg mixture or sauce. Tip: adjust to spice tolerance; omit for milder flavors.

Formaggi

  • – 1/2 cup grated Parmesan cheese
    → Role: delivers salty, nutty depth and helps create a lightly crisp top. Preparation: mix a portion into the egg mixture or reserve for topping. Tip: use real Parmigiano-Reggiano for best flavor.
  • – 1 cup shredded mozzarella cheese
    → Role: melts into a creamy, gooey layer. Preparation: fold some into the egg mixture and sprinkle the rest on top before baking. Tip: reserve a portion for a bubbly, golden crust; shred or cube for even melting.

Optional Add-ins

  • – 1 cup mushrooms, sliced (optional)
    → Role: adds earthy flavor and bite. Preparation: sauté separately until browned to drive off moisture, then fold into the mixture or layer with eggs. Tip: brown well to maximize flavor and avoid soggy texture.
  • – 2 cups fresh spinach, roughly chopped (optional)
    → Role: adds greens and color. Preparation: wilt quickly in a hot pan with a splash of oil, then squeeze out excess moisture before adding. Tip: removing moisture prevents a soggy bake.
  • – 1/2 cup ricotta cheese (optional)
    → Role: adds extra creaminess and lightness to the custard. Preparation: dollop into the mixture or whisk with eggs. Tip: if using ricotta, reduce other dairy slightly to avoid heaviness.

Garnish

  • – Fresh parsley, chopped for garnish (optional)
    → Role: adds bright color and aroma. Preparation: sprinkle on top after baking. Tip: chop finely and sprinkle just before serving for best effect.

Instructions

  • Preheat your oven to 350°F (175°C) and grease a 9×13-inch baking dish or a deep casserole dish with butter or oil.
    → This ensures the casserole bakes evenly and can be removed in clean, intact portions after baking.
  • Crumble the Italian sausage and cook it in a large skillet over medium heat until fully browned and no pink remains, about 6–8 minutes. Drain the rendered fat to prevent greasiness and to let the flavors concentrate.
    → Browning develops Maillard flavor, and draining fat prevents the custard from becoming greasy or heavy.
  • Add 2 tablespoons of extra-virgin olive oil to the same skillet and sauté the diced onion and red bell pepper until they are soft and lightly caramelized, 5–7 minutes. Stir occasionally to prevent sticking and promote even browning.
    → Sautéed aromatics release sweetness and depth; the peppers contribute color and texture to the casserole.
  • Add minced garlic to the pan and cook just until fragrant, about 30 seconds, then remove from direct heat to avoid browning the garlic and imparting bitterness.
    → Garlic burns easily; brief cooking brings aroma without bitterness, integrating into the base.
  • → A short simmer concentrates the sauce base, enriching the custard with subtle tomato sweetness.
  • If you choose to use stale bread cubes, toast them lightly in a dry skillet until they feel dry to the touch and slightly golden, which helps them absorb custard without turning soggy.
    → Toasting improves structure and prevents the bread from turning mushy during baking.
  • In a large mixing bowl, whisk the 6 eggs with 1 cup of whole milk or heavy cream until the mixture is homogeneous and slightly foamy, then season with a pinch of salt, a crack of black pepper, and the optional red pepper flakes for warmth.
    → Fully whisked eggs ensure an even custard; dairy choice affects richness and texture.
  • Stir in 1/2 cup grated Parmesan and fold in 1/2 cup shredded mozzarella into the egg mixture, reserving the remaining mozzarella to sprinkle on top, so the dish finishes with a gooey, golden crust.
    → Cheese in the base enriches the custard; reserving some for the top creates an appealing crust.
  • Pour the egg mixture over the sausage-vegetable base and fold in the bread cubes if using, ensuring all components are evenly coated and distributed throughout the pan.
    → Even distribution prevents dense pockets and guarantees every slice has balanced flavor and texture.
  • If using optional add-ins, wilt the spinach in a hot, lightly oiled pan and squeeze out excess moisture; or sauté mushrooms until browned to deepen flavor, then fold or layer them evenly into the mixture.
    → Removing moisture from spinach prevents sogginess, while browned mushrooms add savory notes and texture.
  • Transfer the mixture to the prepared baking dish, spreading it into an even layer for uniform cooking.
    → A level surface ensures the custard sets evenly from edge to center.
  • Top the casserole with the remaining mozzarella and Parmesan cheese, finishing with a light drizzle of olive oil if desired for a glossy, golden crust.
    → The top cheese creates a bubbly, caramelized crust, while olive oil adds shine and helps browning.
  • Bake in the preheated oven for 35–40 minutes, or until the custard is set in the center and the top is lightly golden and puffed; if the center still trembles slightly, give it a few more minutes but avoid overcooking.
    → A gently set center ensures creamy texture without curdling; the top browning indicates proper moisture evaporation and flavor development.
  • Remove from the oven and let the casserole rest for 5–10 minutes before slicing to allow the custard to finish setting and for cleaner portions.
    → Resting stabilizes the structure, making slices neat and preventing ooze when serving.
  • Garnish with chopped fresh parsley just before serving to add bright aroma and color; portion the casserole into squares or wedges for an appealing presentation.
    → Fresh herbs elevate aroma and presentation, offering a clean contrast to the rich filling.
  • Serve the casserole warm as a hearty breakfast, brunch, or dinner; refrigerate any leftovers and reheat gently to preserve moisture and texture.
    → Proper storage maintains freshness and prevents the custard from drying out during reheating.

Notes

These sausage and egg casserole notes guide you through a hearty Italian-inspired bake of crumbled sausage, eggs, dairy, and cheese. Brown the sausage well and drain excess fat to keep the casserole from greasiness, and sauté onion, garlic, and red pepper until softened for the flavor foundation. Whisk eggs with milk or cream until smooth, then fold in crushed tomatoes and cheese to create a rich custard with a light sauce base. For best texture, use room-temperature eggs and, if desired, a mix of milk and cream for extra richness. Season gradually with Italian seasoning or oregano, salt (sausage will season the mix), and black pepper; add red pepper flakes for a gentle heat if you like. Optional add-ins like mushrooms, spinach, or ricotta can boost creaminess and color; distribute them evenly so every slice gets flavor. The optional bread cubes add structure and soak up custard, but omit or substitute with gluten-free bread if needed. Top with Parmesan and mozzarella to create a gratin-like finish and bake until just set and lightly golden; rest before slicing for clean cuts. This dish stores well in the fridge for several days and freezes well in portions for quick meals; reheat gently to maintain moisture. Serve with a simple green salad or a side of crusty bread (or gluten-free bread) and a sprinkle of fresh parsley.

Tips

Consigli utili per la Casseruola Uova e Salsiccia

  • Rosolare la salsiccia in una padella ampia fino a doratura e cottura completa; lasciare asciugare l’eccesso di grasso per evitare una casseruola troppo grassa. Se vuoi un sapore più intenso, sfuma con un cucchiaio di vino bianco prima di terminare la cottura.
  • Lasciare le uova a temperatura ambiente prima di sbicciarle per ottenere una crema più liscia e uniforme durante la cottura. Sbattere bene le uova fino a ottenere una consistenza omogenea senza bolle d’aria.
  • Per una casseruola più morbida e cremosa, usa una miscela di latte intero e panna (crema) in modo proporzionale; evita di aggiungere troppa crema se preferisci una texture meno ricca.
  • Cuocere cipolla e peperoni in olio extravergine d’oliva finché non sono teneri e leggermente caramellati; questo aggiunge dolcezza e profondità al sapore complessivo.
  • Quando aggiungi l’aglio, fallo soltanto nel finale della rosolatura delle cipolle per evitare l’amaro del sapore bruciato dell’aglio.
  • Rimuovere i semi e le membrane dalla paprika rossa per evitare note troppo amare o ruvidi in bocca; taglio uniforme per una cottura omogenea.
  • Se usi passata di pomodoro, lasciala sobbollire con aromi per 5–10 minuti prima di unirla al mix di uova per intensificare il sapore e ridurre l’acidità.
  • Il pane raffermo serve a dare struttura: tampona con latte leggero se necessario prima di incorporarlo per evitare che assorba troppa umidità dall’uovo.
  • Condimenti secchi come l’origano o una miscela italiana si reidratano meglio se aggiunti direttamente alle uova e mescolati bene; lasciano sprigionare aromi più completi se lasciati in infusione qualche minuto.
  • Poiché la salsiccia può essere già salata, aggiungi il sale gradualmente e assaggia la miscela prima di salare nuovamente per evitare una casseruola troppo salata.
  • Piperina e pepe nero vanno aggiunti al momento dell’assemblaggio per mantenere l’aroma; se gradisci un tocco di piccante, aggiungi fiocchi di peperoncino rosso a piacere.
  • Taglia e distribuisci uniformemente i formaggi: una parte nel mix di uova e una parte sulla superficie permette una doratura croccante e una cuocitura uniforme.
  • Per aggiungere funghi o spinaci, scottali separatamente per far evaporare l’umidità in eccesso; l’eccesso di liquido potrebbe rendere la casseruola liquida.
  • Se preferisci una consistenza più soffice, incorpora piccoli fiocchi di ricotta direttamente nel composto o usane come strato tra i piani di ingrediente.
  • Lasciare riposare la casseruola 10 minuti dopo la cottura facilita il taglio in fette perfette e migliora la tenuta della struttura custard.
  • Per una crosta dorata più invitante, termina la cottura a una breve blast sotto il grill (grill/ventilato) a potenza moderata per 2–4 minuti, controllando attentamente per non bruciare.
  • Preparalo in anticipo: assemblare e conservare in frigorifero fino a 24 ore prima; estrarre dal frigorifero almeno 20–30 minuti prima di infornare per una cottura più uniforme.
  • Conservazione: una casseruola cotta resta buona in frigorifero 3–4 giorni; può essere congelata a porzioni singole se ben raffreddata e sigillata; scongelare in frigorifero e riscaldare delicatamente.
  • Servila con un contorno semplice come rucola o insalata mista per bilanciare la ricchezza; una fetta di pane croccante completa l’esecuzione.

FAQ

Cos’è la casseruola uova e salsiccia?

È un piatto al forno a base di uova, salsiccia, patate e formaggio, cotto finché le uova si rapprendono e la superficie diventa dorata.

Quali sono gli ingredienti base?

Ingredienti base: salsiccia (circa 300–350 g), uova (6), patate (2 medie tagliate a cubetti o sottili), cipolla (1 piccola), aglio (1 spicchio), latte o panna (120–150 ml), formaggio grattugiato (80–100 g), olio o burro per ungere la teglia, sale, pepe, erbe aromatiche a piacere (prezzemolo, timo).

Posso usare salsiccia dolce o piccante?

Sì. Puoi scegliere dolce o piccante a seconda dei tuoi gusti. Per una versione vegetariana, sostituisci con salsiccia vegetale o funghi saltati.

Come si prepara passo-passo?

Procedimento: preriscalda il forno a 180°C. Rosola la salsiccia sbriciolata con cipolla e aglio 5–7 minuti. In una ciotola, sbatti le uova con latte/panna, sale, pepe e formaggio. In una teglia imburrata, alterna strati di patate, salsiccia e cipolla, versa la miscela di uova e completa con formaggio. Cuoci 40–50 minuti finché le uova si rapprendono e la superficie è dorata. lasciare riposare 5–10 minuti prima di servire.

Qual è la temperatura e il tempo di cottura?

Cuoci in forno preriscaldato a 180°C per circa 40–50 minuti, finché la superficie è dorata e le uova sono ferme. Se usi patate molto sottili o precotte, i tempi possono leggermente variare.

Posso prepararla in anticipo?

Sì. Puoi assemblare e conservare in frigorifero fino a 24 ore prima, poi infornarla. In alternativa, cuoci e riscalda al momento di servire. Per riscaldarla, copri e riscalda in forno a bassa temperatura finché ben caldo.

Posso congelarla?

Si può congelare una casseruola cotta in porzioni. Lascia raffreddare, taglia e congela in contenitori ermetici o sacchetti. Per riutilizzare, scongelare in frigorifero e riscaldare fino a 74°C (165°F).

Quali varianti di gusto posso provare?

Aggiungi peperoni, funghi, spinaci o cavolfiore. Puoi variare i formaggi ( cheddar, Gouda, fontina) e usare patate dolci in parte. Una spolverata di paprika affumicata dona un tocco saporito.

Quante porzioni rende?

Con le quantità indicate, ottieni circa 4–6 porzioni, a seconda delle dimensioni della teglia e dell’assunzione dei commensali.

Come servire al meglio?

Lasciare riposare 5–10 minuti, poi tagliare a fette. Servi con contorni leggeri come insalata verde o pane fresco. Puoi aggiungere salsa piccante o una vinaigetta a lato.

Quali accorgimenti per una consistenza cremosa?

Usa una giusta proporzione di uova e latte/panna, non cuocere troppo a lungo per evitare che le uova diventino secche, e lascia riposare prima di servire. Se preferisci, aggiungi un po’ di formaggio extra nell’ultimo minuto di cottura per maggiore cremosità.

Introduzione / Gancio

Immagina una fetta che illumina una tavola: una crema vellutata che scende dal cucchiaio come una nuvola soffice, aromi di limone che danzano con una vibrante freschezza di lamponi, e una crosta che morde leggermente, rivelando una dolce nota di biscotto tostato. Il Cheesecake ai lamponi e limone è quel tipo di dessert che entra in scena con una semplicità elegante: non ha bisogno di complicazioni per conquistare il palato. Ogni morso è una sinfonia di contrasti: la ricchezza cremosa contro l’acidità brillante del limone, la dolcezza dei lamponi maturi contro la leggera acidità dell’aroma agrumato, e una texture che gioca tra setoso, morbido e leggermente croccante. È un viaggio sensoriale che inizia al profumo della scorza di limone grattugiata e termina in una tasting note che persiste sul palato come un ricordo felice di una giornata di sole. Questo dessert è pensato per essere condiviso: una fetta per celebrare un momento speciale, una chiacchiera tra amici, una cena di famiglia, o un momento di dolce pausa che si merita di essere ricordato. Ma c’è molto di più dietro questa torta fredda: una storia di bilanciamento perfetto tra crema e frutta, tra tradizione e piccole innovazioni moderne, tra la semplicità quotidiana e l’eleganza di una presentazione che sembra preparata da una pasticceria, ma che in realtà è relativamente semplice da realizzare a casa. Se stai cercando una torta che si presenti con grande impatto ma che resti accessibile ai fornelli domestici, questo è il dessert che fa per te. Lasciati guidare dall’aroma di limone, dalla brillantezza dei lamponi, dalla cremosità che avvolge il palato e dalla soddisfazione di aver creato qualcosa di sontuoso con ingredienti familiari. Benvenuto nel mondo del cheesecake ai lamponi e limone: una dichiarazione di gusto, colore e gioia in una fetta che merita di essere celebrata ogni volta che vuoi regalare a te e ai tuoi cari un momento di dolcezza autentica.

La storia dietro il piatto

Il cheesecake è una leggendaria protagonista della tavola di molte culture, una torta che ha viaggiato attraverso secoli e continenti, assumendo forme diverse ma restando fedele all’idea di un cuore cremoso incorniciato da una base croccante. Le origini si perdono nell’antichità, quando civiltà mediterranee e bizantine preparavano dessert a base di formaggio dolce e miele, offrendo una prima idea di quel che sarebbe diventato un classico del passato e del presente. Nel corso dei secoli, la torta si è evoluta, prendendo nuove identità a seconda dei luoghi: una versione più leggera e cremosa in alcune tradizioni, una base più friabile e una presentazione più elegante in altre. Il cheesecake ai lamponi e limone, pur rimanendo fedele all’idea di una crema vellutata sostenuta da una base che aggiunge croccantezza, rappresenta un felice incrocio tra la tradizione europea della freschezza agrumata e la modernità di una presentazione che invita al relax e al festeggiamento.

In molte cucine familiari, questa torta fredda è nata come risposta a due elementi: la voglia di un dessert che si possa preparare con anticipo senza rinunciare al richiamo di frutta fresca di stagione, e l’illuminazione di una tavola con colori vivaci e profumi invitanti. È comune sentire racconti di nonne e madri che, nei mesi di primavera e inizio estate, abbinano lamponi freschi a una crema delicata al formaggio, completando con una candida terrazza di scorza di limone grattugiata. In alcuni paesi, la tradizione della torta fredda al formaggio viene celebrata durante le festività e le occasioni speciali, dove un taglio netto rivela la stratificazione perfetta tra la base, la crema e la guarnizione di frutti di bosco. Oggi, con l’abbondanza di lamponi di stagione e la nota rassicurante del limone, questa versione diventa un omaggio contemporaneo a quella storia, capace di raccontare, in una sola fetta, una genealogia di sapori: la dolcezza cremosa, la brillante vivacità agrumata e la freschezza di piccoli frutti che sembrano appena colti.

Proprio come una passeggiata tra un mercato di primavera e una cucina accogliente, questa torta celebra l’arte di mettere insieme ingredienti semplici per creare qualcosa di memorabile. La narrazione del piatto è un invito a scoprire come la cucina possa trasformare ricordi familiari in nuove tradizioni: la stessa ricetta può essere trasmessa come una carezza tra generazioni, con piccoli aggiustamenti che riflettono i gusti del momento, le stagioni e le preferenze personali. Se hai mai assaporato una fetta che esplode di freschezza al primo morso e lascia sul palato una nota cremosa che continua a evolvere, allora sai di cosa parliamo: una cucina che racconta storie, una tavola che unisce persone, un dessert che diventa protagonista senza aver bisogno di ostentazioni.

Perché vorrai amare questa ricetta

  • Equilibrio perfetto tra crema e frutti di bosco: ogni fetta offre una crema setosa che si contrappone alla brillantezza acidula dei lamponi e al profumo luminoso del limone.
  • Fresco ma confortante: l’insieme è leggero anche quando è ricco di sapore, ideale per chi cerca una nota golosa senza appesantirsi.
  • Versatile e adatto a molte occasioni: perfetto per brunch, fine pasto, occasioni speciali o come dolce di domenica da condividere in famiglia.
  • Facile da realizzare in anticipo: la torta fredda può rassodarsi in frigorifero, permettendoti di dedicarci tempo agli ospiti piuttosto che al fornello.
  • Esteticamente irresistibile: la combinazione di crema lucida, lamponi vividi e una leggera scorza di limone crea una presentazione elegante ad ogni tavola.
  • Adatta a molte diete con piccole varianti: è possibile adattarla a versioni senza glutine o vegane senza compromettere troppo sapore e consistenza.
  • Profumo che accende la memoria: l’aroma di limone e lamponi rilascia sensazioni familiari che portano a ricordi di giorni di festa, pranzi di famiglia e momenti di dolcezza condivisa.

Profilo di sapore & texture

La prima cosa che colpisce è l’equilibrio: una base che offre una croccantezza leggera, quasi croccante ma non secca, che sostiene una crema cremosa, liscia e avvolgente. La crema al formaggio è soffice ma strutturata, con una dolcezza subdola che non mette mai in ombra la nota agrumata. Il limone gioca un ruolo chiave: la scorza grattugiata rilascia una fragranza fresca e brillante, e la crema stessa può avere una lieve acidità che equilibra la ricchezza, creando una sinfonia di gusto che si rinnova ad ogni morso. I lamponi, maturi e rossi, aggiungono una punta di acidità naturalmente succosa e una gemma di colore che porta verticalità al piatto. Quando la torta viene tagliata, l’assemblaggio si vede chiaramente: una base che tiene, una crema che accoglie, e una guarnizione di lamponi che luccica come piccoli rubini. Il profumo è una promessa: c’è vaniglia o crema di formaggio che si sprigiona al primo morso, una nota di burro o burro di noce nella base che è percepibile senza essere dominante, e una leggera freschezza di limone che resta a lungo sulla lingua. La texture è modulata: croccantezza iniziale, setosità in bocca, una leggera morbidità legata alle guarnizioni di frutta. È una torta che invita a rallentare, a respirare, a gustare ogni dettaglio di sapore e di presentazione. Ogni ingrediente ricorda che l’arte della pasticceria non è solo nel gusto, ma anche nel modo in cui si percepisce, si guarda e si condivide.

Occasioni & abbinamenti

Cheesecake ai lamponi e limone è una star pronta a brillare in molte occasioni. È perfetta per:

  • Pranzi e cene di primavera: termina il pasto con una nota fresca e leggera.
  • Compleanni e celebrazioni: una torta dall’aspetto raffinato che non richiede decorazioni complicate.
  • Brunch domenicali: un dessert che si adatta bene a una varietà di bevande, dal caffè al tè freddo agli agrumi spruzzi di prosecco.
  • Dolce finale per una serata romantica: una fetta condivisa accompagnata da una bollicina leggera.
  • Dolci pensieri per amici e familiari: facile da trasportare se vuoi portarla a una pranzo fuori casa.

Abbinamenti consigliati:

  • Bevande: Prosecco o Moscato d’Asti per una dolce effervescenza, tè verde freddo con scorza di limone, una limonata fresca o un caffè espresso per chi preferisce intensità scorza-agrume.
  • Contorni: una leggera granita di limone, una spolverata di scorza di limone extra sul piatto, e un piccolo letto di menta fresca per esaltare la freschezza.
  • Contorni dolci: biscotti di mandorla o amaretti leggeri, che aggiungono un croccante complementare senza sovrapporsi al sapore principale.

Tips, Varianti & Sostituzioni

Consigli utili

Per ottenere una presentazione impeccabile e una consistenza stabile, prediligi una crema liscia e una base ben pressata. Evita eccessi di liquido che potrebbero compromettere la compattezza della torta fredda. Se la crema dovesse risultare troppo morbida, una breve passeggiata in frigorifero può fare miracoli per rassodarla senza perdere l’elasticità. Scegli lamponi belli maturi per garantire sia sapore che Jalapeño di colore nella guarnizione, che dà subito un effetto visivo invitante. Inoltre, la scorza di limone fresca è essenziale: non affidarti all’estratto di limone se vuoi un profumo autentico e una nota zingente che non si dissolve durante il raffreddamento.

Varianti creative

  • Versione vegana: crema di formaggio vegetale sostituita da una crema al formaggio a base di anacardi o anacardi ammollati lavorati con latte di mandorla e un pizzico di agar-agar per rassodare, con una guarnizione di lamponi freschi e scorza di limone.
  • Gluten-free: usa una base a base di biscotti senza glutine o una miscela di noci tritate e burro per mantenere la croccantezza senza glutine.
  • Intensità di limone: se ami una nota agrumata più accentuata, aggiungi una piccola quantità di succo di limone extra o una punta di zest nei fini della crema, senza esagerare per non rompere l’equilibrio.
  • Cuore rosso: una decorazione con lamponi freschi in disposizione a fiore o a ventaglio crea un impatto visivo ancora maggiore.
  • Versione all’arancia: sostituisci parte della scorza di limone con scorza d’arancia per un profilo aromatico diverso ma altrettanto vibrante.

Sostituzioni comuni

  • Formaggio cremoso: se desideri una versione meno ricca, usa una parte di formaggio cremoso e una parte di ricotta più magra, mantenendo la consistenza vellutata.
  • Dolcificanti: lo zucchero può essere sostituito con miele leggero o sciroppo d’agave per una nota diversa di dolcezza; ricorda che l’acidità del limone equilibria bene con qualsiasi dolcificante.
  • Frutti alternativi: se non trovi lamponi, puoi usare more, mirtilli o fragole a pezzi, mantenendo l’idea di combinare crema neutra e frutta fresca.

Conservazione & Idee per preparazioni in anticipo

La bellezza di questa torta fredda è la facilità con cui può essere preparata in anticipo. Una volta assemblata, lascia rassodare in frigorifero per almeno 4 ore; per risultati ottimali, preferisci una notte intera. Se hai intenzione di servirla come dessert di una cena, preparala la mattina stessa e lasciala riposare fino al momento di servire: le note di limone si intensificheranno e la crema guadagnerà in compattezza. Puoi anche congelare la torta una volta rassodata: avvolgila bene in pellicola e mettila in un contenitore adatto al congelamento. Per scongelarla, trasferiscila in frigorifero per una notte e lasciala raggiungere la temperatura ambiente per 15-20 minuti prima di gustarla. Sewing tips: evita l’eccesso di liquidi durante la composizione per preservare la texture, soprattutto se hai intenzione di congelare; una base ben pressata e una crema densa faranno la differenza nel mantenere la forma quando è tagliata e servita.

Fatti divertenti & Trivia (Opzionale)

  • Il cheesecake, in molte culture, non è un dessert esclusivo di una stagione: esistono versioni fredde o cotte, con varie basi e ripieni, che raccontano storie di tradizioni familiari in ogni angolo del mondo.
  • La parola “cheesecake” ha origini curioshe: in alcune lingue si riferisce a una torta che miscela formaggio, zucchero e altri ingredienti in una crema leggera, una definizione che si è evoluta nel tempo in diverse culture culinarie.
  • La combinazione di limone e lamponi è una classica in pasticceria: l’acidità del limone bilancia la dolcezza dei lamponi, creando una dinamica di sapori che è molto amata nei dessert estivi e primaverili.

Conclusione

Il Cheesecake ai lamponi e limone è molto più di una torta: è un piccolo viaggio sensoriale che racchiude storia, tradizione e una modernità raffinata. È una ricetta che porta la gioia della stagione fresca in tavola, offrendo un equilibrio di sapori che conquista sia chi cerca una dolcezza indulgente sia chi preferisce una nota di freschezza. Quando prepari questa torta, hai l’opportunità di raccontare una piccola storia di cucina casalinga: quella di una crema che abbraccia il formaggio, di una scorza di limone che brilla come una citazione di allegria, e di lamponi freschi che aggiungono colore e vivacità. Lascia che la tua tavola si trasformi in un luogo di conversazioni, risate e momenti condivisi con un dessert che sembra una presentazione da ristorante ma è, in fondo, la tua creazione calorosa e sincera. E quando una fetta arriva al piatto di chi ami, saprai di aver creato qualcosa che resta: non solo un gusto memorabile, ma anche un ricordo che tornerà a brillare ogni volta che sentirai l’eco di una scorza di limone o il profumo dei lamponi freschi.

Ingredients

Cheesecake ai lamponi e limone

Crust

    – 1 3/4 cups graham cracker crumbs (or digestive biscuits, gluten-free if needed)
    → This crust forms the sweet, crisp base that supports the creamy filling. Use a processor to crush until very fine, or place crackers in a sealable bag and crush with a rolling pin for uniform crumbs. If you’re using gluten-free crackers, choose a brand with a fine texture and minimal added sugar. Mix the crumbs with 2 tablespoons granulated sugar and a pinch of fine salt, then stir in 6 tablespoons melted unsalted butter until the mixture clumps when pressed. Press evenly into the bottom (and a little up the sides) of a 9-inch springform pan. Chill 15–20 minutes before baking, or bake 8–10 minutes at 350°F (175°C) to set the crust for a firmer edge.
    – 2 tablespoons granulated sugar
    → Sweetens the crust and helps balance the tang from the filling. Mix thoroughly with the crumbs so every bite has a pleasant, even sweetness. If your crackers are lightly salted, you can reduce or omit this amount to taste.
    – 6 tablespoons unsalted butter, melted
    → The melted butter binds the crust into a cohesive shell that holds its shape during the bake. Ensure the butter is fully melted and evenly blended with the crumbs; a slightly cooler butter mixture will press more firmly into the pan. If you prefer a lighter crust, you can reduce the butter by a tablespoon or two and add a splash of water.
    – Pinch of fine sea salt (optional)
    → Enhances the flavor balance of the crust, especially if using salted crackers. If your crackers are salted, omit this to prevent over-salting.

Filling

    – 24 oz (680 g) cream cheese, softened to room temperature
    → The creamy, tangy backbone of the cheesecake. Use blocks of full-fat cream cheese (not spreadable tubs) for the best texture. Beat on medium speed until completely smooth and free of lumps, stopping to scrape the bowl as needed. If there are lumps, continue to mix gently; overmixing after eggs are added can incorporate air and lead to cracks as the cake bakes.
    – 1 cup granulated sugar
    → Sweetens the filling and helps achieve a smooth, silky texture when beaten with the cream cheese. Add the sugar gradually, beating steadily to avoid gritty pockets. If you prefer a less sweet cheesecake, you can reduce to 3/4 cup, but do not omit entirely unless you adjust other flavors accordingly.
    – 3 large eggs, room temperature
    → Provide structure and richness. Add eggs one at a time, blending just until incorporated after each addition. Overbeating after the eggs are added can trap air and cause cracks; keep the mixer on a low speed or fold with a spatula to maintain a dense, creamy batter.
    – 1/2 cup sour cream, room temperature
    → Adds tang and extra moisture for a luxuriously creamy texture. Use full-fat sour cream for best results. If you don’t have sour cream, a thick Greek yogurt can be substituted, but stir gently to avoid thinning the batter.
    – 1 tablespoon lemon zest, finely grated
    → Infuses a bright, lemony aroma that complements the raspberry and cream cheese. Avoid grating the white pith by only using the yellow zest. The zest helps balance richness with refreshing citrus notes that linger after baking.
    – 2 tablespoons fresh lemon juice
    → Adds a clean citrus kick that keeps the filling from tasting too heavy. Use freshly squeezed juice and strain out any seeds if possible. The acidity also helps set the filling slightly for a smoother slice.
    – 1 teaspoon vanilla extract
    → Deepens and rounds the flavor of the cheesecake. Use high-quality vanilla; pure vanilla extract gives a warmer, more complex aroma than imitation vanilla.
    – 1/4 cup heavy cream (optional)
    → Optional to loosen the batter slightly and enhance silkiness. If the mixture feels thick, whisk in the cream a little at a time until it flows slowly off a spoon. This can help prevent a dense texture after chilling.

Raspberry swirl

    – 1 cup fresh raspberries
    → The star of the swirl, providing bright color and tart sweetness. Gently crush the berries with a fork to release juice while leaving some larger ruby chunks for texture. This berry ribbon will weave through the cheesecake as it bakes, creating attractive marbling rather than a muddy mix.
    – 2 tablespoons granulated sugar
    → Macerates the raspberries to draw out juice and soften seeds, yielding a glossy, flavorful swirl. Let the raspberries sit with the sugar for about 10 minutes before dolloping into the batter. If berries are very ripe and sweet, you can reduce the sugar slightly.

Optional garnish

    – Fresh raspberries for serving (optional)
    → Add a bright, edible finish to the slice. Arrange a few whole raspberries on top just before serving for color contrast and a fresh aroma. Keep berries dry and gently dried to avoid extra moisture seeping into the surface of the cheesecake.

Instructions

  • Preheat your oven to 350°F (175°C) and prepare a 9-inch springform pan by greasing the sides generously and lining the bottom with parchment for easy release.
    → This ensures the cheesecake releases cleanly and prevents sticking, especially when slicing after chilling.
  • Prepare the crust by crushing 1 3/4 cups graham cracker crumbs until very fine, then whisk in 2 tablespoons granulated sugar and a pinch of fine sea salt; stir in 6 tablespoons melted unsalted butter until the mixture clumps when pressed. Press evenly into the bottom and slightly up the sides of the pan, then chill 15–20 minutes to set; or bake for 8–10 minutes at 350°F (175°C) to pre-set the edge for a firmer crust.
    → A finely crushed crust ensures uniform texture, while chilling or brief par-baking prevents the crust from crumbling once the filling is added.
  • Beat the softened cream cheese (24 oz) on medium speed until completely smooth and free of lumps, scraping the bowl as needed.
    → Smooth cream cheese creates a silky filling; stopping to scrape avoids lumps that can endure into the finished cheesecake.
  • With the mixer running on low, gradually add 1 cup granulated sugar and beat until fully incorporated and light in texture.
    → Gradual incorporation prevents gritty pockets and ensures a uniformly sweet filling without overbeating.
  • Add the eggs one at a time, beating on low speed after each addition until just incorporated; stop as soon as the last egg is blended to avoid overmixing and air incorporation that can cause cracks.
    → Gentle mixing preserves dense, creamy texture and minimizes cracks during baking.
  • Beat in 1/2 cup sour cream, 1 tablespoon lemon zest, 2 tablespoons lemon juice, and 1 teaspoon vanilla extract until the mixture is smooth and uniform.
    → Sour cream adds tang and moisture; lemon zest and juice brighten the flavor, while vanilla deepens aroma; mix just until combined to maintain silkiness.
  • If using, fold in 1/4 cup heavy cream to loosen the batter slightly and enhance silkiness, adding it in small increments until the batter flows slowly off a spatula.
    → The optional cream lightens the texture; add gradually to control thickness and avoid thinning the filling too much.
  • Mash 1 cup fresh raspberries with 2 tablespoons granulated sugar in a small bowl and let macerate for 10 minutes to release juice and soften seeds.
    → Maceration draws out flavor and creates a glossy swirl; some texture remains for visual interest.
  • Pour the cream cheese filling over the prepared crust, then dollop the raspberry mixture in several spoonfuls over the surface and use a skewer or knife to swirl gently to create marbled ribbons.
    → Swirling distributes raspberry flavor throughout the cheesecake and yields an attractive appearance without muddying the batter.
  • Bake the cheesecake in a water bath: place the springform pan in a larger roasting dish, pour hot water around the outside to come halfway up the sides, and bake at 325°F (165°C) for 55–65 minutes, or until the edges are set and the center still gently wobbles.
    → The water bath provides uniform heat and humidity, preventing cracks and helping the center set evenly without overcooking.
  • Cool the cheesecake gradually: remove from the water bath, run a knife around the edge to loosen, and let it come to room temperature on a rack for about 1 hour; then refrigerate uncovered for at least 4 hours or overnight to fully set before slicing.
    → Slow cooling minimizes cracks and ensures the filling firms evenly for clean slices, while overnight chilling gives the best slice quality.
  • To serve, unmold the cheesecake by loosening the sides of the springform pan, slice with a warm knife wiped between cuts for clean edges, and garnish with fresh raspberries if desired.
    → A warmed knife prevents sticking and yields neat slices; fresh raspberries add color, aroma, and a bright contrast to the lemon-raspberry filling.

Notes

“These lemon raspberry cheesecake with a graham cracker crust is rich, creamy, and bright with lemon and raspberry swirls. You can customize it by using gluten-free crackers for the crust or by adding extra lemon zest to intensify the citrus note. The cake can be prepared ahead: bake the crust, blend the filling, swirl in raspberries, and chill until set. It freezes well in individual slices or whole cake portions for easy make-ahead desserts. For best texture and to prevent cracks, bake the cheesecake in a water bath and chill for at least 4 hours or overnight before slicing. Serve with fresh raspberries, a dollop of whipped cream, or a light berry coulis. Always use full-fat cream cheese and sour cream at room temperature to ensure a smooth, lump-free filling, and avoid overmixing once eggs are added. If you want a lighter crust, decrease butter a bit and press firmly; and ensure the crust is fully cooled before filling.”

Tips

Consigli utili per la base (crust)

  • Per una base croccante e uniforme, macina bene i biscotti fino a ottenere briciole fini. Se usi cracker senza glutine, scegli una marca dalla texture fine e con poco zucchero aggiunto.
  • Aggiungi 2 cucchiai di zucchero al mix di briciole, se i crackers sono poco dolci, per equilibrare il sapore della cheesecake.
  • Fondi il burro finché è completamente liquido e mescalo bene con le briciole finché non formano una massa leggermente umida e compatta.
  • Premi la base in modo omogeneo sul fondo e leggermente lungo i bordi del fondo dello stampo a ribes da 9 pollici. Usa il dorso di un cucchiaio o un fondo piatto per compattare bene.
  • Per una base più salda, metti lo stampo in frigo 15–20 minuti prima di infornare. Se preferisci una base ancora più croccante, inforna 8–10 minuti a 175°C (350°F) prima di aggiungere il ripieno.
  • Se vuoi una versione senza glutine, assicurati che i biscotti siano macinati molto fini e che non ci siano grumi di farina grossolana.
  • Tip per una base “no-bake”: aumenta leggermente la quantità di burro e pressa bene la base; raffredda in frigo per almeno 30 minuti prima di aggiungere il ripieno.

Consigli utili per il ripieno

  • Usa formaggio cremoso a temperatura ambiente, tagliato a blocchi, per una crema liscia e senza grumi. Evita di utilizzare formaggi già morbidi in vasetto se non specificatamente consigliato.
  • Aggiungi lo zucchero a poco a poco, lavorando a velocità media, per ottenere una crema vellutata senza grumi. Se la crema risulta leggermente granulosa, raschia i bordi della ciotola e continua a mescolare a bassa velocità.
  • Inserisci le uova una alla volta, amalgamando delicatamente dopo ogni aggiunta. Lavorare a bassa velocità evita di incorporare aria in eccesso che può causare crepe durante la cottura.
  • La panna acida (sour cream) apporta umidità e morbidezza. Se non la hai, puoi sostituire con yogurt greco denso, mescolando con cura per non rendere troppo liquida la crema.
  • La scorza di limone e il succo alzano la freschezza e bilanciano la ricchezza del formaggio. Usane solo la parte gialla (zeste) evitando la parte bianca amara. Filtra il succo per rimuovere eventuali semi.
  • Utilizza una vanilla extract di buona qualità per un aroma più profondo e rotondo. Se usi essenze, pochissime gocce bastano.
  • Se vuoi una consistenza più cremosa, aggiungi 1/4 di tazza di panna fresca o latte intero alternando con il formaggio durante l’impasto. Usa tucca il cucchiaio per controllare la densità.
  • Per evitare il raffreddamento troppo brusco e lesioni alla crema, puoi presentare la cottura in modalità “water bath” (bagno maria). Avvolgi lo stampo in doppie foglie di alluminio per sigillare e traversa una teglia maggiore con acqua calda che arrivi a metà altezza dello stampo.
  • Cuoci finché il centro è appena tremolante al movimento, ma non liquido. Il centro continuerà a rassodarsi mentre si raffredda fuori dal forno.
  • Una volta tolto dal forno, spegni il forno e lascia la torta dentro con lo sportello socchiuso per circa 1 ora per evitare crepe da sbalzo termico, poi trasferisci in frigorifero per almeno 4 ore (meglio tutta la notte).

Consigli utili per la swirl ai lamponi

  • Usa lamponi freschi per un sapore vivace e una colorazione brillante. Se i lamponi sono molto maturi, aggiungi un filo d’acqua per aiutare la macerazione senza rendere liquido troppo.
  • Macerare i lamponi con lo zucchero (10 minuti circa) estrae il succo e ammorbidisce i semini, ottenendo una glassa lucida; lascia riposare qualche minuto e poi scolali leggermente per avere una marmellata non troppo liquida.
  • Per una swirl più definita, versa piccoli fiocchi di lamponi sulla crema già stesa e lascia che la spatola o una punta di coltello creino il motivo a marmorizzazione, evitando di mescolare troppo per non spezzare la base.
  • Se i lamponi sono molto maturi o molto liquidi, asciugali leggermente con carta assorbente prima di aggiungerli al composto, per evitare troppa umidità che possa compromettere la consistenza del ripieno.
  • In alternativa alle lamponi freschi, puoi usare lamponi surgelati ben scongelati e scolati. Risulta utile in tutti i periodi dell’anno e permette una tinta intensa.

Consigli utili per la guarnizione

  • La decorazione con lamponi freschi aggiunge colore e freschezza. Asciuga bene i frutti prima di posizionarli sulle fette per evitare umidità che possa ammorbidirne la superficie.
  • Per un aspetto lucido e appetitoso, puoi preparare una leggera glassa: 1 cucchiaio di succo di limone mescolato con 1 cucchiaino di zucchero a velo; spennella leggermente i lamponi prima di servirli.
  • Conservazione: conserva la cheesecake coperta in frigorifero fino al momento di servire. Si mantiene bene 3–4 giorni. Puoi anche congelarla ben avvolta fino a 1–2 mesi; scongelala in frigorifero durante la notte prima di servire.

FAQ

Qual è la base della Cheesecake ai lamponi e limone?

La base si prepara tipicamente con biscotti digestive sbriciolati mescolati a burro fuso. Puoi sostituire con graham cracker, biscotti al cacao o una base di nocciole tritate per una versione più rustica o gluten-free.

Quali sono gli ingredienti principali?

Per la crema: formaggio cremoso tipo Philadelphia, zucchero, uova, panna acida o yogurt greco, scorza e succo di limone, vaniglia opzionale. Per la salsa o guarnizione: lamponi freschi o congelati e un po’ di zucchero o succo di limone per intensificare il sapore.

Come si prepara la crema al formaggio?

In una ciotola, ammorbidisci il formaggio con lo zucchero fino a crema liscia. Aggiungi le uova una alla volta, mescolando tra un aggiunta e l’altra. Unisci panna acida (o yogurt), scorza e succo di limone e una punta di vaniglia. Evita di montare troppo per non incorporare aria in eccesso.

È necessario cuocerla in forno o si può fare senza forno?

Entrambe le versioni sono possibili. La versione cotta al forno si cuoce in forno con bagno-maria; la versione no-bake si prepara solo con crema fredda e una base di biscotti, poi si raffredda in frigorifero per diverse ore o durante la notte.

Qual è la temperatura e i tempi di cottura se si cuoce al forno?

Cuoci in forno preriscaldato a circa 160–165°C per 50–60 minuti, finché il centro è appena tremolante. Spegni il forno e lascia raffreddare dentro, conporta leggermente socchiusa per evitare crepe. Poi trasferisci in frigorifero per almeno 4 ore o preferibilmente tutta la notte.

Come evitare che il cheesecake si crepi?

Per evitare crepe: usa una base delicata, cuoci a bassa temperatura in bagno-maria, non aprire il forno durante la cottura e raffredda lentamente. Dopo la cottura, spegni il forno e lascia raffreddare con porta chiusa per circa un’ora prima di spostarti in frigorifero.

Come si prepara la salsa o la guarnizione di lamponi?

Cuoci una parte di lamponi con un cucchiaio di zucchero e un filo di succo di limone finché si rompe e rilascia liquido. Passa al colino per una salsa liscia se preferisci, oppure lascia i lamponi interi per una guarnizione rustica. Lascia raffreddare prima di servirla sulla torta.

Come rendere la base senza glutine?

Usa biscotti senza glutine o una base di noci/mandorle tritate mescolate con burro fuso. Pressa bene nello stampo e metti in frigorifero per farlo compattare prima di versare la crema.

Come conservare e quanto dura?

Conserva in frigorifero, coperta, per 3–5 giorni. Puoi anche congelarla: tagliala in porzioni, avvolgi singolarmente e congela. Scongela in frigorifero prima di servire e aggiungi la salsa di lamponi se preparata separatamente.

Quali strumenti servono?

Tortiera a cerchio apribile da circa 23 cm, carta forno, frusta o mixer, ciotola capiente, spatola, teglia per bagno-maria e eventualmente un colino per la salsa di lamponi.

Ci sono varianti o suggerimenti di presentazione?

Guarnisci con lamponi freschi e scorza di limone grattugiata. Puoi variare la salsa di lamponi con un mix di lamponi e fragole o aggiungere una leggera glassa al limone. Per una versione più leggera, sostituisci parte della crema con yogurt greco a ridotto contenuto di grassi e aumenta la quantità di lamponi per la dolcezza naturale.

Introduction / Hook

Imagine a dessert that feels both intimate and indulgent, a single bite shrinking the world to a cozy moment of pure delight. Mini crème brûlée does exactly that: a petite custard that glides across your tongue with creamy richness, crowned by a lacquer of caramel that shatters at the touch of a spoon. The aroma is a soft whisper of vanilla and cream, punctuated by a hint of sugar’s toasty warmth. When you crack that glossy sugar top, a chorus of crackling sweetness erupts, revealing a velvety vanilla heart that is cool, smooth, and luxurious. These little jars of dessert magic are the perfect balance between elegance and comfort—sophisticated enough to grace a special dinner, simple enough to make for a family weeknight treat, and charming enough to steal the spotlight at a party. Mini crème brûlée invites you to slow down, savor, and celebrate the small, luminous moments in life—the kind of dessert that lingers in memory long after the last spoonful has vanished.

In this form, the classic French custard is pared down to its most intimate size, making it approachable for home cooks who crave that restaurant-worthy wow without a complicated process. Each mini portion becomes its own little theater—a glossy caramel top, a pale ivory interior, and a texture that whispers of silky custard contrasted with a crisp, sun-kissed shell. It’s not merely a dessert; it’s an experience you can share—whether you’re treating a loved one to a candlelit end to a meal or inviting friends to gather around a table where conversation is as comforting as the dessert itself.

The Story Behind the Dish

Crème brûlée, literally “burnt cream” in French, is a classic that sits at the intersection of science, luxury, and gastronomy. Its origins spark a friendly debate among food historians. Some trace its lineage to medieval custards and the broader European tradition of custard desserts, while others place its direct antecedent in 17th-century French kitchens. The name crème brûlée appears in recipes dating to the late 1600s and early 1700s, with influential culinary writers such as François Massialot helping to popularize what would become a timeless standard of French patisserie. The ritual of finishing the dessert with a caramelized sugar crust—caramelizing sugar until it glows a deep amber, then chilling the custard beneath—emerged as a signature technique that celebrates contrasts: cool, creamy custard beneath a crackling top, a textural duel that feels almost magical in its simplicity.

Over centuries, crème brûlée traveled beyond French borders, evolving with regional touches and personal interpretations. In many households around the world, the dessert became a canvas for seasonal flavors, citrus notes, coffee, and chocolate, each iteration keeping the essence of the original: a smooth, luscious interior and a glossy, crackly top. The mini version is a modern darling—portioned for easier sharing, quicker chilling, and a more intimate, approachable presentation. It invites you to create a moment of refinement without the formality of a larger custard, making it a favorite for both intimate dinners and festive celebrations alike.

What makes the mini format so compelling is not just its cute size, but how it echoes the philosophy of great French patisserie: ultrasound-smooth texture, balance of sweetness and vanilla depth, and a finish that rewards patience and technique. The story of this dish—whether as a century-old tradition or a contemporary kitchen experiment—speaks to our shared love of texture, aroma, and the sheer joy of cracking something gloriously caramelized with a simple, honest spoonful.

Why You’ll Love This Recipe

  • Portion-controlled elegance: These mini portions feel indulgent without being overwhelming, perfect for intimate dinners or a formal dessert lineup.
  • Silky custard, dreamy texture: The interior is creamy and smooth, with a delicate egg-and-cream richness that melts on the palate.
  • Caramel crackle that sings: The top’s caramelized sugar shell provides a crisp, shimmering contrast that crackles beautifully with every bite.
  • Versatile flavor canvas: Start with classic vanilla and invite citrus, coffee, chocolate, or spice into the custard for effortless variations.
  • Make-ahead-friendly: The custard base can be prepared in advance, chilling quietly in the fridge until you’re ready to finish with the brûléed top.
  • Impressive presentation, everyday ease: The glossy tops and pale interiors look atelier-worthy, yet the technique remains accessible to home cooks.
  • Kid-friendly options, adult twists: If you’re cooking for little ones or grown-up guests, you can tailor sweetness and add-ins to suit your crowd.
  • Comforting, timeless dessert: It pairs beautifully with berries, espresso, and dessert wine, making it a perennial favorite for many menus.

The Flavor Profile & Texture

The essence of mini crème brûlée lies in its dual personality. The custard is a velvet river of creaminess, gently scented with vanilla and kissed by the egg yolk that lends depth and a faint, comforting richness. The flavor is clean, reminiscent of vanilla-flecked custard, with a whisper of caramelized sugar sweetness that lingers on the tongue. If you adorn the custard with a hint of citrus zest—orange or lemon—you invite a citrus glow that brightens the vanilla and adds a lively perfume to each bite.

Contrast is king in this dessert. The outer shell offers a thin, glassy glaze of caramelized sugar that, once cracked, reveals a cool, luscious interior. The shell is crisp and delicate, almost glass-like in its sheen, and it cracks into a clean line with a satisfying snap. Beneath that crackling top lies a custard that can be as silky as satin, a texture that glides across the mouth and coats it with richness. The temperature differential—hot or warm caramelized surface meeting a smoothly chilled center—creates a sensory moment that feels almost cinematic. The experience is enhanced by subtle notes: a faint vanilla orchid aroma, a whisper of sweetness that never tips into cloying, and a creamy finish that feels comforting after a long day.

As you experiment with variations, you can coax new flavors from the same elegant base. A touch of espresso can lend mocha-like depth, a ribbon of citrus zest can brighten the custard into a lively finish, and a dash of cinnamon or cardamom can evoke warmth reminiscent of holiday desserts. Each tweak preserves the essential harmony—the silky custard that dissolves on the palate, the caramel crown that provides the crunch and aroma of vanilla-sugar toffee, and the moment of balance where the two textures meet in perfect accord.

Occasions & Pairings

Mini crème brûlée shines across occasions, from intimate date nights to festive gatherings. Its presence signals refined taste without shouting; it’s a dessert that says you care, whether you’re celebrating an anniversary, a birthday, or simply the joy of a well-made meal. The small size makes it ideal for multi-course dinners where you want a dessert that feels special but won’t overwhelm the palate after a heavy main course.

Pairing suggestions elevate the experience:

  • With berries: fresh raspberries, strawberries, or blackberries add a bright, tart counterpoint to the custard’s sweetness.
  • With sparkling wines or dessert wines: a glass of Sauternes, Moscato, or a late-harvest Riesling complements the caramel notes and lifts the overall sweetness balance.
  • With espresso or strong coffee: a small bite of coffee-infused custard or a shot of espresso helps cut through the richness and adds depth.
  • With a light herb or citrus garnish: a fragrant curl of candied orange zest or a sprig of mint can refresh the palate between bites.
  • With a simple fruit compote: a spoonful of berry compote or a drizzle of seasonal fruit coulis adds brightness and color to the plate.

In terms serving occasions, think of mini crème brûlée as a dessert that suits celebrations of all sizes. For Valentine’s Day, the petite portions feel especially romantic. For Christmas or New Year’s dinners, they offer a refined finish that doesn’t demand heavy seasonal flavors. For a summer dinner party, you can lighten the flavor with citrus zest or a dash of almond extract and pair with a cool vanilla-circling wine. The versatility is part of the charm: you can tailor the flavor to the season, the guest list, and the mood of the moment.

Tips, Variations & Substitutions

Tips for Perfection

To achieve that flawless crème brûlée experience in mini form, keep a few practical ideas in mind. Use high-fat dairy or a combination of cream and milk to ensure the custard remains rich and set, and temper the eggs carefully to prevent curdling. While the classic recipe relies on vanilla, you can explore flavors in a few controlled ways—just avoid overwhelming the custard with too many competing notes. If you’re making multiple mini portions, ensure they’re all uniform in size so they bake evenly and finish with a consistent crack of caramel across each top.

Texture is everything. The interior should be smooth and almost pudding-like in its silkiness, not grainy. If you notice any graininess, that’s a signal to check your custard base and ensure it’s gently handled, and that you’ve given it enough time to set fully. A slow, patient chill helps the custard firm properly and prevents the top from losing its delicate sheen.

Variations

  • Classic vanilla: Keep it simple with a generous vanilla bean or extract to anchor the custard’s profile.
  • Citrus twist: Add a strip of lemon or orange zest to the custard for a bright aroma and a clean finish.
  • Espresso kick: A touch of finely ground coffee or espresso powder creates a mocha-inspired version that pairs beautifully with chocolate accents.
  • Quietly nutty: A whisper of almond extract or a dusting of toasted almond meal in the custard adds warmth.
  • Chocolate lover’s dream: Swirl in a small amount of melted dark chocolate into the custard for a marbled effect and a richer depth.
  • Herbal hint: A delicate rosemary or lavender note (used sparingly) can transform the dessert into a modern, garden-inspired treat.

Substitutions & Dietary Alternatives

  • Dairy-free option: Use full-fat coconut cream or a blend of coconut milk with almond milk for a dairy-free custard. Note that texture and aroma will differ slightly from dairy-based versions.
  • Lower-sugar tweak: You can substitute part of the sugar with a natural sweetener that lends a softer caramel top; keep in mind the top’s ability to caramelize may vary with substitutes.
  • Gluten-free approach: This dessert is naturally gluten-free, so no changes are required for a gluten-free menu—just ensure any add-ins or garnishes are also gluten-free.

Storage & Make-Ahead Ideas

One of the most appealing aspects of mini crème brûlée is its adaptability to a busy schedule. You can prepare the custard ahead of time and store it in the refrigerator until you’re ready to finish with the brûléed tops. The key is to keep the custards covered and well-chilled so they set evenly and retain their smooth texture. When you’re ready to serve, finish with a quick caramelization of the sugar top just before presenting them to your guests.

Leftovers can be stored in the fridge for a day or two, but for the best texture and flavor, it’s ideal to caramelize the tops and serve fresh. If you need to reheat, do so gently and briefly; the goal is to warm the custard without letting it shed its delicate structure, all while preserving that satisfying crack on the surface when you re-torched or re-brûlé the top (if you have a culinary torch handy) or simply replace the top with fresh sugar for a new crisp shell.

Make-ahead strategies include preparing the custard base a day or two in advance, chilling it thoroughly, and arranging the mini ramekins on the serving tray. When guests arrive, a quick caramelization brings the dessert to life, and you’ll have a dessert that feels freshly made without last-minute stress. You can also streamline the serving by lining up a few garnishes—fresh berries, citrus zest, or a light dusting of cocoa—so you can finish each mini crème brûlée with a polished, restaurant-worthy presentation in moments.

Fun Facts & Trivia

  • Despite its strong association with France, crème brûlée has parallel traditions in other European desserts that feature a caramelized sugar topping across different bases and textures.
  • The crack of the caramel top is a sensory ritual as much as a culinary technique; the sound signals the contrast between the crisp top and the creamy center that diners crave.
  • The term brûlée comes from the French word brûler, meaning “to burn,” which captures the moment sugar is caramelized to a deep, glossy amber.
  • Miniature versions of crème brûlée have become a beloved trend in modern patisserie and home culinary experiments, often used to showcase precise technique and elegant plating in a conversation-friendly format.
  • Historically, vanilla was a luxury imported from distant lands; crème brûlée helped popularize vanilla’s aromatic profile in desserts, contributing to the widespread affection for the flavor today.

Ingredients

Custard Base

  • Heavy cream (2 cups)
    → The backbone of crème brûlée. The high fat content yields a rich, velvety custard and helps it set with a silky mouthfeel. Gently heat the cream with the vanilla (if using a bean) until just steaming; do not boil. If you used a vanilla bean, remove the pod and scrape any seeds before pouring. Strain if necessary to remove bean fragments.
  • Egg yolks (4 large)
    → Egg yolks provide structure, creaminess, and the smooth texture that defines crème brûlée. Use yolks only, reserving whites for other uses. Bring yolks to room temperature, whisk lightly, and temper with hot cream to avoid curdling.
  • Granulated sugar (1/3 cup)
    → Sweetness helps the custard set and gives a hint of body to the mixture. Whisk the sugar with the yolks until pale and slightly thickened; dissolving sugar fully helps prevent a gritty texture when heated.
  • Vanilla extract (1 teaspoon)
    → Adds the characteristic warm aroma and depth. Use pure vanilla extract for best flavor. If you prefer vanilla bean, split and scrape one bean and add both seeds and pod to the cream, removing the pod before combining with the yolks.
  • Pinch of salt (to taste)
    → A small amount of salt enhances the sweetness and overall flavor, rounding the custard. Use fine salt or sea salt; a pinch is all that’s needed to avoid a salty aftertaste.

Caramel Topping & Water Bath

  • Granulated sugar (for topping)
    → This sugar forms the iconic caramel crust when torched or briefly broiled. Use about 1–2 teaspoons per ramekin, sprinkled in an even, thin layer. Ensure the custard is fully set and cooled before applying the topping to prevent quick melting. If you use larger ramekins, adjust accordingly.
  • Hot water (for water bath)
    → A shallow hot-water bath ensures gentle, uniform cooking and reduces the risk of cracking or curdling. Place the filled ramekins in a larger baking dish and pour hot water halfway up the sides of the ramekins, then bake. Use hot water to maintain consistent temperature.

Serving (Optional)

  • Fresh berries (optional, for serving)
    → Bright, acidic berries provide a fresh contrast to the rich custard. Pat dry if using thawed frozen berries to avoid water pooling on the surface.
  • Fresh mint leaves (optional, for garnish)
    → A small sprig of mint adds color and a hint of herbaceous aroma, enhancing the dessert’s presentation and balance.

Instructions

  • Preheat your oven to 325°F (165°C) and arrange four to six 4-ounce ramekins in a shallow baking dish or low-sided roasting pan to form a stable water bath.

    → This setup ensures gentle, even heat around each custard and makes it easier to lift the ramekins in and out of the oven without tipping, while the water bath prevents scorching and curdling.
  • Warm the heavy cream with vanilla until just steaming, then remove from heat and let the vanilla steep for a few minutes if using a bean; otherwise, proceed once the cream is hot. Strain if you used vanilla bean to remove seeds and pod fragments.

    → Heating the cream intensifies the vanilla flavor and softens any solids; straining ensures a silky custard without gritty bits.
  • Whisk the egg yolks and granulated sugar together in a medium bowl until the mixture is pale, thick, and well combined, about 45–60 seconds; this builds the custard’s body and helps dissolve sugar for a smooth texture.

    → Properly whisking and whitening the yolks prevents a dense, grainy custard and promotes an even set.
  • Temper the yolk mixture by slowly pouring a thin stream of the hot cream into the yolks while whisking constantly to raise their temperature gradually and prevent curdling.

    → Gradual heating aligns the fat and protein in the yolks with the hot liquid, avoiding scrambled custard and ensuring a creamy final texture.
  • Return the tempered yolk mixture to the saucepan with the remaining cream (if any) or continue whisking in the bowl until fully combined, then stir in the vanilla extract and a pinch of salt; mix just until incorporated.

    → The final infusion of vanilla and a touch of salt enhances sweetness balance and depth of flavor without overpowering the custard.
  • Strain the custard through a fine-mesh sieve into a clean pourable vessel or measuring cup to remove any cooked bits or chalice from the vanilla pod, ensuring a silk-smooth mixture.

    → Straining guarantees an ultra-smooth custard free of lumps that could disrupt the caramel topping later.
  • Divide the strained custard evenly among the prepared ramekins, filling each about two-thirds full to leave room for setting during baking.

    → Filling to two-thirds ensures the centers set without overflowing and provides a uniform surface for the sugar crust later.
  • Carefully slide the filled ramekins into the baking dish and pour hot water into the dish until it comes halfway up the sides of the ramekins to form a proper water bath.

    → The hot water bath delivers gentle, even heat that prevents cracking and curdling, yielding a tender, custard-like texture.
  • Bake in the center of the oven until the custards are just set with a slight jiggle in the center, approximately 25–40 minutes depending on ramekin size; begin checking at 25 minutes and remove when the edges are set but the centers still wobble.

    → A gentle shake test confirms a proper doneness; overbaking results in a dry, rubbery custard, while underbaking leaves a soupy center.
  • Carefully remove the ramekins from the water bath and transfer to a rack to cool for 15–20 minutes; then cover loosely and refrigerate for at least 2 hours or up to overnight to fully set and chill the flavor.

    → Cooling at room temperature and then chilling solidifies the custard and improves texture, making the surface smooth for the sugar crust.
  • Evenly sprinkle 1–2 teaspoons of granulated sugar on top of each chilled custard in a thin, smooth layer to promote an even caramelization when torched or broiled.

    → A uniform sugar layer ensures a flawless, crackly crust and prevents uneven browning or soggy spots.
  • Caramelize the sugar using a culinary torch held about 2–3 inches from the surface, moving methodically in small, overlapping circles until the sugar melts evenly and becomes a deep amber crust; let the sugar harden for 1–2 minutes before serving.

    → Even torching produces a glossy, hard crack that contrasts beautifully with the creamy custard beneath; keep the flame moving to prevent scorching.
  • If you do not have a culinary torch, preheat your broiler and place the ramekins on a rimmed baking sheet, then broil for 1–3 minutes on high, watching constantly until the crust achieves a deep amber color, and remove promptly.

    → Broiling provides an alternative caramelization method, but the intense heat requires vigilant watching to avoid burning the crust.
  • Allow the caramel crust to rest for 1–2 minutes to finish hardening before serving the miniature crème brûlées, ensuring you retain the characteristic crack when tapped.

    → Resting prevents cracking or denting the crust under immediate serving pressure and helps maintain a crisp crack for contrast with the custard.
  • Garnish with fresh berries and mint leaves as desired to provide bright acidity and color contrast that balances the rich custard, serving promptly after the crust has set; pat berries dry if using thawed frozen berries.

    → Fresh accompaniments brighten the dish, add texture, and elevate presentation without overpowering the custard flavor.

Notes

These mini crème brûlée are a silky, classic dessert built on a custard of heavy cream and egg yolks, lightly sweetened and perfumed with vanilla. You can flavor with vanilla bean or pure vanilla extract—if using a bean, split and scrape the seeds and add both pod and seeds to the cream, removing the pod before combining with the yolks. Strain the custard after whisking to remove any curd or bean fragments, then temper the yolks by gradually whisking in hot cream. Divide the mixture among ramekins and bake in a shallow water bath until the centers are just set. Chill the custards thoroughly, at least 2 hours or overnight, so they slice and hold their shape. When ready to serve, sprinkle a thin, even layer of granulated sugar on each custard and caramelize with a culinary torch until the surface is deep amber and glossy; you can also finish under a hot broiler for a few seconds, keeping a close eye to prevent scorching. Let the sugar harden for a minute or two before serving to reveal the characteristic crack. Serve plain for a pure vanilla flavor or add a few fresh berries or a mint leaf for color and balance. Store leftovers in the fridge for up to 2–3 days; do not freeze, as freezing can alter the custard’s texture. For best results, ensure all equipment and surfaces are dry and clean, and use fresh eggs at room temperature for a smoother blend.

Tips

Chef’s Tips for Perfect Mini Crème Brûlée

  1. Gently infuse the cream with vanilla. Heat the cream until just steaming; if using a vanilla bean, add the bean and seeds and let it steep for a few minutes, then remove the pod (and seeds) before combining with the yolks. Strain if needed to remove any fragments for an ultra-smooth custard.
  2. Temperature control is key. Keep the cream around 170–180°F (77–82°C) when heating. Do not boil, as boiling can make the custard tough and cause curdling when it meets the yolks.
  3. Temper the yolks to avoid curdling. Whisk the yolks to loosen them and bring to room temperature. Slowly stream hot cream into the yolks while whisking constantly, then whisk in the tempered mixture until smooth. Strain the mixture to remove any small clumps or foam before pouring into ramekins.
  4. Whisk sugar fully into the yolks. Dissolve the granulated sugar completely with the yolks; this helps avoid a gritty texture and ensures a velvety custard after cooking.
  5. Season thoughtfully. A pinch of salt enhances sweetness and flavor depth without making the custard salty. Use fine salt or sea salt in small amounts.
  6. Prep the custard for a silky finish. Strain the final custard through a fine-mine sieve to remove any air bubbles or chalaza, yielding a smoother set after baking.
  7. Ramekins and water bath setup. Choose ramekins that fit snugly in a baking dish and fill the water bath halfway up the sides of the ramekins. The water bath provides gentle, even heat and prevents cracking or curdling.
  8. Fill to the right level. Pour the custard into ramekins so they’re about three-quarters full. This gives a nice, even surface for the caramel topping once baked and cooled.
  9. Bake with care. Bake at a moderate temperature (around 325°F / 165°C) until the custems are just set with a slight jiggle in the center. If your oven runs hot, start checking a bit earlier to avoid overbaking.
  10. Cool properly before topping. Remove the ramekins from the water bath after baking and cool completely, then refrigerate for at least 2 hours (preferably overnight) to set the custard fully and simplify topping.
  11. Prepare the caramel topping correctly. Just before serving, sprinkle each custard with a thin, even layer of sugar (about 1–2 teaspoons per ramekin). A uniform layer ensures an even crack and crust when torched or broiled.
  12. Torching tips for a pristine crust. For a crisp caramel shell, move the torch in slow, small circles and keep it 2–3 inches from the surface. Don’t linger in one spot to avoid burning. If using broiler, watch closely and rotate the dish for an even crust, usually 1–2 minutes depending on your broiler.
  13. Finish and present stylishly. Let the caramel crust cool for a minute or two, then serve with optional fresh berries or mint. Pat berries dry before placing them on the plate to prevent extra moisture from softening the crust.

FAQ

Mini crème brûlée — Frequently Asked Questions

What is mini crème brûlée?

Mini crème brûlée is a small, single-serving custard dessert made with cream, egg yolks, vanilla, and sugar, topped with a crisp caramelized sugar shell just before serving. Each ramekin yields a creamy center with a crackly top.

What ingredients do I need?

For about 4 mini ramekins (4 oz each):

  • 1 cup heavy cream (240 ml)
  • 4 large egg yolks
  • 1/4 cup granulated sugar (plus extra 2–3 teaspoons for topping)
  • 1 teaspoon pure vanilla extract (or 1/2 vanilla bean, scraped)
  • Pinch of salt

Note: You can scale the recipe for more or fewer portions by keeping the same yolk-to-cream ratio.

Can I make mini crème brûlée ahead of time?

Yes. Bake and chill the custards up to 1 day in advance:

  • After baking, let them cool to room temperature, then refrigerate, loosely covered.
  • Caramelize the sugar topping just before serving to keep it crisp.
What equipment do I need?

Essentials:

  • 4 mini ramekins (about 4 oz each)
  • Shallow baking dish or roasting pan for a water bath
  • Mixing bowl and whisk, or a blender
  • Fine-mesh sieve (optional, for a silky custard)
  • Kettle to heat water
  • Kitchen torch for caramelizing or a broiler/oven
What oven temperature and how do I set up the water bath?

Preheat to 325°F (165°C). Place the ramekins in a shallow baking dish, then carefully pour hot water into the dish until it comes halfway up the sides of the ramekins. Bake until the custards are set around the edges but the centers still jiggle slightly, about 25–30 minutes for mini ramekins. Remove from the water bath and chill for at least 2 hours (or overnight) before serving.

How do I caramelize the top without burning it?

After chilling, evenly sprinkle 1–2 teaspoons of granulated sugar on each custard. Use a kitchen torch to melt and caramelize until amber and shiny. If you don’t have a torch, place the ramekins under a hot broiler for 1–3 minutes, watching closely to prevent burning.

How can I prevent cracks or overcooking?

Cracks or a grainy texture usually come from overbaking or overheating. Bake in a water bath at a gentle temperature (325°F/165°C) until the outer edges are set but centers remain slightly jiggly. Let cool completely in the fridge to finish setting, then top with caramel just before serving.

Can I make dairy-free or low-fat mini crème brûlée?

Yes, with caveats. Dairy-free versions can be made with full-fat canned coconut milk (not light) blended with a dairy-free milk to reach about 1 cup total liquid. Use 4–5 egg yolks to help set the custard, and add vanilla. The texture may differ from dairy cream, but the result can still be delicious. Caramelize the topping with a torch or under a broiler as usual.

What are some serving or flavor variations?

Suggestions:

  • Add a pinch of citrus zest (lemon or orange) to the custard for brightness.
  • Swirl in a teaspoon of espresso for a mocha version.
  • Top with fresh berries or a berry compote for contrast.
How many servings does this yield?

Typically 4 mini crème brûlée portions (4 oz ramekins). You can scale to 6 if using 3 oz ramekins, but keep the custard ratio the same.

What should I do if the custard is still watery in the center?

If the center remains too soft after chilling, re-bake the ramekins for 5–8 more minutes in a 325°F (165°C) water bath, checking every 2 minutes. If cracks appear, remove and chill immediately. For future batches, ensure the water bath is hot and bake time is not too short.

Introduzione

Quando si dice colazione da sogno, a volte basta una teglia che sprigiona vapore e una soffice spirale che invita a sfogliare ogni strato. Le Girelle Colazione sono una promessa: una mattina che inizia con la dolcezza di una pasta soffice, avvolta in una luce dorata, profumata di burro, vaniglia e un accenno di agrumi o cacao. Immagina la cucina che si riempie di un aroma avvolgente, simile a una coccola lenta che si srotola tra le dita. Ogni morso è una piccola cerimonia: una danza tra morbidezza dell’impasto, la cremosità di un ripieno, la leggera croccantezza della superficie che si stacca con un sospiro di miele e zucchero caramellato. È una colazione che non ha fretta, una pausa luminosa che dà il tono al giorno. Eppure, dietro a questa semplicità apparentemente indulgente, c’è una storia di tradizione, di territori che si intrecciano e di gusti che si evolvono per incontrare le esigenze moderne senza perdere la loro anima artigianale.

Le Girelle Colazione non sono solo dolci da forno; sono un modo per celebrare il risveglio. Sono una tela bianca su cui si possono dipingere ricordi: il profumo di una domenica mattina, la tavola condivisa tra famiglia e amici, le chiacchiere che si intrecciano mentre il forno lavora la sua magia. Ogni giro dell’impasto è una promessa di comfort, una promessa che la vita può essere rassicurante e golosa allo stesso tempo. Se hai sete di una colazione che ti coccoli dall’inizio, se vuoi sorprendere i tuoi cari con qualcosa di familiare ma sorprendente, le Girelle Colazione sono fatte per te. Il segreto non è solo nel gusto: è nell’equilibrio tra morbidezza, dolcezza e una nota di freschezza che accende i sensi, senza sovrastare la delicata armonia dei sapori.

Questo piatto celebra la tradizione delle paste lievitate tipiche dell’Europa centrale e mediterranea, reinterpretate per una tavola contemporanea. È una fusione di tecnica, arte dell’uso degli aromi e libertà creativa: una base di pasta soffice, una gamma di ripieni che vanno dal classico al creativo, dalla crema vellutata al cioccolato intenso, passando per la marmellata profumata e una spruzzata di agrumi. Le Girelle Colazione possono essere delicate o più robuste a seconda della stagione e dei gusti: una versione estiva potrebbe giocare con scorze d’arancia candita e crema al limone, una versione invernale potrebbe sposare cioccolato fondente e nocciole tostate. Indipendentemente dall’abbinamento scelto, ciò che resta è la promessa di una degustazione che trasforma la routine in una piccola festa quotidiana.

La storia dietro il piatto

Le girelle, in molte culture, sono una forma di pane dolce o pan Brioche arrotolato che si presta a infinite personalizzazioni. In Italia, dove la colazione è spesso leggera ma in grado di scandire la giornata con ritualità, i dolci da forno al mattino hanno trovato spazio nelle caffetterie e nelle cucine domestiche come simbolo di convivialità e calore familiare. La versione “colazione” di queste girelle si è evoluta naturalmente: impasti morbidi che accolgono ripieni cremosi, talvolta con una punta di agrumi o cannella, altre volte con una nota di cacao o nocciole, per offrire un assaggio che si presta sia a una colazione veloce sia a una pausa più lenta e meditata durante la mattina.

La bellezza delle girelle sta nel loro potenziale narrativo. Ogni famiglia può avere la propria versione, e spesso il segreto del successo risiede nell’equilibrio tra la dolcezza dell’impasto e la ricchezza del ripieno. Nell’italianità di queste sfoglie, si intrecciano influenze di panetterie austere e pasticcerie affascinanti: si parte da una base di pasta lievitata, ben lavorata per ottenere una texture setosa, si aggiungono ripieni che raccontano di primavera (frutta e crema fresca) o di inverno (cioccolato fondente, crema di nocciole), e si conclude con una glassa o una spolverata leggera che mette il tutto in risalto. L’origine può rispondere a pratiche festive o semplici abbellimenti domenicali, ma l’effetto finale resta universale: una coccola che si gusta con lentezza e si condivide senza fretta.

In molte cucine regionali d’Europa, rotoli dolci e brioche ripiene hanno una funzione simile: trasformare ingredienti semplici in un’esperienza sensoriale che solleva lo spirito al risveglio. Le Girelle Colazione si adattano a questa tradizione, ma con un tocco contemporaneo che parla al palato moderno: una lievitazione controllata, una crema vellutata, un equilibrio tra dolcezza e freschezza, e la possibilità di sperimentare con ripieni diversi a seconda delle stagioni e delle preferenze. Scrivere di loro è, in fondo, raccontare una piccola storia di comunità: la cucina come luogo di incontro, dove il profumo di una teglia che cuoce diventa una calla di ritrovo per chiunque entri in casa durante la mattinata.

Perché vorrai amare questa ricetta

  • Comfort immediato: una colazione che coccola, perfetta per chi cerca un inizio di giornata sereno e gustoso.
  • Versatilità: ripieni e aromi che si adattano a ogni stagione, umore e preferenze personali.
  • Equilibrio tra texture: impasto soffice che si scioglie al palato, con una dolcezza che non è mai stucchevole e una leggera nota di croccantezza in superficie.
  • Appetito condiviso: ideali da dividere durante la colazione della famiglia o da offrire agli ospiti al brunch della domenica.
  • Facili da personalizzare: una base neutra che invita all’interpretazione, consentendo di creare versioni gluten-free, vegane o più ricche di proteine a seconda delle esigenze.
  • Immediata soddisfazione visiva: le girelle, una volta sfornate, regalano un tocco di colore e raffinatezza alla tavola mattutina.

Profilo di sapore e consistenza

La magia delle Girelle Colazione è nel bilanciamento di aromi e texture. L’impasto, morbido e leggermente elastico, si scioglie al primo morso, lasciando dietro di sé una nota burrosa e avvolgente. La dolcezza è presente, ma non invadente; è una base neutra che permette al ripieno di brillare. A seconda della scelta del riempimento, puoi percepire:

  • Creme vellutate: una sensazione setosa che avvolge la lingua, con una sfumatura di vaniglia o agrumi che aggiunge freschezza.
  • Cioccolato o cacao: ben legato al dolce dell’impasto, offre una profondità che ricorda le praline, senza diventare pesante.
  • Marmellate o confetture: una nota fruttata che contrasta la morbidezza con una leggera acidità, aggiungendo vivacità.
  • Noce, pistacchio o scorzette: una persistenza croccante e un profumo che rimane a lungo in bocca.

La parte esterna, lucida e dorata, è spesso una leggera glassa o una spolverata di zucchero a velo che si scioglie al contatto del calore del forno. In bocca, la girella offre un tema di contrasti: la forza lenta dell’impasto, la ricchezza del ripieno, una leggera friabilità superficiale e, talvolta, una nota di sale che valorizza ogni sapore. L’insieme è avvolgente e confortante, un equilibrio di dolcezza e aromi che restano vividi senza stancare. Se si aggiunge una nota di agrume, come scorza d’arancia o limone, l’esplosione è fresca, quasi frizzante, e rende la combinazione ideale per alzare la temperatura del risveglio.

Occasioni & Abbinamenti

Le Girelle Colazione si adattano a una varietà di situazioni: una colazione domenicale che riunisce la famiglia, un brunch tra amici, o una pausa golosa durante una giornata di lavoro. Sono perfette per essere presentate su un piatto grande al centro della tavola, dove ognuno può tagliarle e gustarle al proprio ritmo. Ecco alcune idee di accompagnamento:

  • Bevande: caffè latte, cappuccino, espresso cremoso o una tisana profumata agli agrumi per bilanciare la dolcezza.
  • Frutta fresca: agrumi pelati a spicchi, fettine di mela o pere leggermente glassate, che aggiungono freschezza e contrasto di consistenze.
  • Formaggi morbidi: una piccola selezione di formaggi freschi leggeri o ricotti vanigliati può offrire un’interessante alternanza salata-dolce.
  • Dolci di accompagnamento: una leggera glassa al pistacchio o una crema al limone come tocco finale per i più audaci.

Per occasioni speciali, si può trasformare la presentazione in una tavola da brunch: una serie di varianti delle girelle, ciascuna con un ripieno diverso, disposte a raggiera, magari accompagnate da frutta secca e una selezione di succhi freschi. Se si desidera una versione meno dolce, si può scegliere un ripieno a base di crema leggera al mascarpone o yogurt dolcezza, riducendo la quantità di zucchero presente nell’impasto e mantenendo un profilo gustativo equilibrato. In contesti più informali, una versione “colazione da solo” funziona altrettanto bene: una singola girella grande per un momento di piacere solitario, magari accompagnata da una tazza di caffè intenso. Le possibilità sono molte, e la vostra creatività è il limite.

Consigli, Varianti & Sostituzioni

La bellezza di questa ricetta è la sua adattabilità. Qui trovi idee pratiche per personalizzarla, senza rinunciare al carattere unico delle Girelle Colazione.

Varianti di ripieno

  • Ripieno crema e scorza d’arancia: crema pasticcera leggera con scorza grattugiata di arancia per una nota fresca e profumata.
  • Ripieno cioccolato e nocciole: cioccolato fondente fuso mescolato con nocciole tostate tritate grossolanamente per una texture croccante.
  • Ripieno marmellata di albicocche e ceci light: marmellata di albicocca abbinata a una crema leggera di ceci per una dolcezza bilanciata (opzione vegetariana/dietetica).
  • Ripieno crema di limone e vaniglia: crema al limone mossa da una punta di vaniglia, per un sapore brillante e profumato.

Versioni per esigenze dietetiche

  • Vegana: utilizza una parte di latte vegetale nell’impasto e crema di nocciole o crema di anacardi come ripieno; evita burro animale e uova con alternative vegetali. Puoi usare olio di cocco o margarina vegana per la morbidezza dell’impasto.
  • Gluten-free: sostituisci la farina classica con una miscela senza glutine adatta, tenendo presente che l’impasto potrebbe richiedere una piccola variazione della quantità di liquido per ottenere la giusta consistenza.
  • Ridotto contenuto di zuccheri: riduci la quantità di zucchero nell’impasto e nelle creme, scegli ripieni naturalmente dolci come purea di frutta concentrata o yogurt dolce al posto di creme molto ricche.
  • Contro intolleranze: se è necessario evitare latticini, prepara una crema a base di latte di mandorle o di soia e scegli un grasso vegetale leggero per l’impasto.

Twist regionali o gusti ispirati

  • Con cacao e cannella: una versione caraibica o ispanica con cacao amaro nell’impasto e una spolverata di cannella che avvolge i sensi.
  • Con limone e ricotta: ripieno di ricotta leggera e scorza di limone; un tocco luminoso tipico della tradizione italiana.
  • Con pistacchio: pistacchi tritati fini mescolati con crema, per una nota verde e fragrante.

Conservazione & Idee per preparare in anticipo

Una delle grandei virtù delle Girelle Colazione è la loro capacità di essere preparate con anticipo e gustate successivamente senza perdere morbidezza e sapore. Ecco alcuni suggerimenti pratici:

  • Preparazione in anticipo: è possibile preparare l’impasto e lasciarlo lievitare lentamente in frigorifero durante la notte. Al mattino, basta farlo tornare a temperatura ambiente, completare la farcitura e infornare.
  • Conservazione delle girelle già cotte: una volta raffreddate, si possono conservare in contenitore ermetico a temperatura ambiente per 1-2 giorni, oppure congelare singole porzioni ben confezionate per mantenere intatto il sapore. Per riscaldarle, basta qualche secondo nel forno o nel microonde per riacquistare morbidezza.
  • Conservazione dell’impasto non lievitato: è possibile conservare l’impasto crudo in frigorifero per 24-48 ore; al momento di cuocerlo, lascia che si avvicini alla temperatura ambiente e procedi come di consueto.

Per rendere la preparazione ancora più pratica, si può optare per una versione “quasi pronta” durante la notte: stendere l’impasto, aggiungere il ripieno, arrotolare e tagliare, lasciando solo la lievitazione finale al mattino prima di infornare. In questo modo, la profumazione dell’impasto appena sfornato riempie la casa al risveglio, fornendo una pacca di dolcezza che sembra quasi una piccola magia quotidiana.

Curiosità & Trivia

Le dolcezze da forno hanno spesso una storia di scambi tra culture diverse. Le girelle, in alcune tradizioni, hanno avuto vari nomi e vari ripieni a seconda delle regioni, e il concetto di arrotolare l’impasto è una tecnica universale presente in molte cucine del mondo. Una possibile origine potrebbe risalire a secoli fa, quando i fornai iniziarono a sperimentare con strati di pasta lievitata a cui si aggiungevano ripieni dolci o saporiti, sia per scaldare le giornate fredde sia per offrire una presentazione attraente alle famiglie che si riunivano al mattino. Nel tempo, queste spirali si sono evolute in una vera e propria icona della colazione, con varianti localizzate che celebrano ingredienti disponibili stagionalmente e preferenze regionali.

Un aspetto interessante è come la combinazione tra pasta lievitata e ripieno dolce sia riuscita a attraversare confini culinari. La morbidezza dell’impasto, la dolcezza contenuta e la possibilità di aggiungere note aromatiche come vaniglia, scorza d’agrumi o cacao hanno reso le girelle una scelta popolare in molte cucine. Inoltre, la forma a spirale non solo è visivamente accattivante, ma riflette simboli di ciclicità, rinascita e convivialità, temi che accompagnano le tradizioni di molte culture in occasione di festività e riunioni familiari. Se ti trovi in viaggio tra mercati e panetterie di diverse città, potresti riconoscere versioni diverse di questa idea: una testimone della capacità della cucina di adattarsi, pur restando legata a un cuore comune di comfort e piacere.

In chiave contemporanea, la ricetta delle Girelle Colazione è una porticina aperta verso l’interpretazione: permette agli appassionati di sperimentare, di scoprire abbinamenti nuovi e, soprattutto, di condividere momenti di piacere semplice. È una ricetta che parla di casa, di sole mattutino che entra dalle finestre, di mani che imparano, di conversazioni che iniziano con la prima fetta. E, quando si spezza la circonferenza di una girella, si scopre che il segreto non è solo nel gusto ma nel modo in cui una tradizione diventa esperienza quotidiana, capace di trasformare una routine in un rituale. Per chi sta cercando una colazione che avvolga i sensi e accenda il sorriso, le Girelle Colazione restano una scelta affidabile, indulgente ma equilibrata, capace di adattarsi a ogni occasione e a ogni gusto.

Ingredients

Girelle colazione
Pasta per girelle (Dough)

  • – 500 g farina 00 o farina manitoba, setacciata
    → Ruolo: la base dell’impasto che costituirà la struttura delle girelle. L’uso di farina con proteine più alte (manitoba) migliora l’elasticità e l’alveolazione durante la lievitazione. Preparazione/gestione: setacciare per eliminare grumi e incorporare aria; usare a temperatura ambiente gli ingredienti liquidi. Consiglio: se usi solo farina 00, potresti dover regolare la quantità di liquido o lavorare un po’ di più l’impasto per ottenere una consistenza liscia ed elastica.
  • – 250 ml latte intero tiepido
    → Ruolo: idratazione e attivazione del lievito, oltre a conferire morbidezza all’impasto. Preparazione/gestione: scaldare lentamente fino a circa 35–40°C; non deve essere caldo al punto da uccidere il lievito. Note: se preferisci una versione più ricca, puoi sostituire una parte del latte con una piccola quantità di panna.
  • – 70 g burro morbido non salato
    → Ruolo: arricchisce la massa, migliora la morbidezza e la friabilità del prodotto finale. Preparazione/gestione: incorporare a pezzetti nel composto insieme allo zucchero, oppure lavorarlo con lo zucchero fino a ottenere una crema leggera prima di aggiungere la farina. Consiglio: burro morbido a temperatura ambiente evita grumi e favorisce una distribuzione uniforme in tutto l’impasto.
  • – 50 g zucchero semolato
    → Ruolo: dolcifica l’impasto e fornisce energia al lievito, contribuendo a una lievitazione ben visibile. Preparazione/gestione: aggiungere al mix liquido e ammorbidirlo con il burro; se usi lievito attivo secco, lo zucchero aiuta a nutrire il lievito durante l’attivazione. Suggerimento: per un sapore più intenso, usa zucchero di canna chiaro; non incidere sulla consistenza.
  • – 1 uovo grande a temperatura ambiente
    → Ruolo: legante ed emulsificante che dona ricchezza, colore dorato e una mollica più struttura. Preparazione/gestione: aggiungere all’impasto una volta che latte e burro sono amalgamati; accorpa gli ingredienti liquidi con quelli secchi per una massa uniforme. Consiglio: uovo a temperatura ambiente favorisce una migliore emulsione e una lievitazione uniforme.
  • – 7 g lievito di birra secco attivo (o 25 g lievito di birra fresco)
    → Ruolo: agente lievitante che fa crescere l’impasto, rendendolo soffice e spugnoso. Preparazione/gestione: attivarlo in una piccola parte del latte tiepido per 5–10 minuti (se uso lievito secco). Sostituzione: se usi lievito fresco, riduci o regola la quantità come indicato sull’etichetta. Consiglio: non utilizzare latte troppo caldo per non uccidere il lievito.
  • – 1/2 cucchiaino sale fino
    → Ruolo: bilancia il sapore dolce e migliora la struttura dell’impasto. Preparazione/gestione: aggiungere con la farina e mescolare, poi lavorare l’impasto finché diventa liscio ed elastico. Nota: il sale può rallentare lievitazione se usato in eccesso; dosarlo con attenzione per un risultato equilibrato.
  • – 1 cucchiaino estratto di vaniglia puro
    → Ruolo: profumo e profondità di gusto che si armonizzano bene con i ripieni dolci. Preparazione/gestione: aggiungere all’impasto durante la fase di liquidi per una distribuzione uniforme di aroma. Suggerimento: usa vaniglia pura anziché essenze meno naturali per un sapore più rotondo.
  • – Tuorlo d’uovo grande per spennellare, miscelato con 1 cucchiaio di latte
    → Ruolo: doratura lucente e rifinitura estetica delle girelle. Preparazione/gestione: sbattere il tuorlo con il latte e spennellare delicatamente la superficie delle girelle prima della cottura. Consiglio: utilizzare una leggera mano per evitare di far colare il tuo impasto; evita di saturare troppo la superficie per non far aderire troppo la glassa durante la cottura.

Ripieno

  • – Confettura o marmellata a scelta (fragola, albicocca, lamponi o mix)
    → Ruolo: riempitivo dolce che determina la succulenza interna delle girelle. Preparazione/gestione: stendere o lasciare a temperatura ambiente la marmellata per renderla facilmente spalmabile, evitando eccessi che potrebbero far fuoriuscire il ripieno durante la cottura. Suggerimento: una sottile striscia di ripieno crea migliori striature durante la rollatura. Nota: scegli una marmellata senza pezzi troppo grandi per una consistenza liscia.
  • – Crema al cioccolato spalmabile (Nutella o crema gianduia)
    → Ruolo: alternativa golosa al ripieno classico, aggiunge ricchezza di cacao e una morbidezza fondente. Preparazione/gestione: spalmare in strato sottile e uniforme, evitando quantità eccessive che potrebbero rovinare la rollatura. Consiglio: riscaldare leggermente la crema al cioccolato facilita l’estensione e l’adesione al rotolo.
  • – Scorza grattugiata di limone o arancia (opzionale)
    → Ruolo: aggiunge un tocco aromatico fresco che contrasta la dolcezza. Preparazione/gestione: grattugiare solo la parte colorata della scorza per evitare la parte bianca amara; distribuire in modo uniforme sul ripieno per un profumo costante durante la cottura e il raffreddamento.
  • – Burro fuso (opzionale, per spennellare il ripieno)
    → Ruolo: aiuta a mantenere il ripieno morbido e facilita l’adesione durante la rollatura. Preparazione/gestione: spennellare leggermente una sottile lamina di impasto prima di aggiungere il ripieno, se si desidera un finish più ricco. Nota: non esagerare per evitare che il burro sciolto faccia scivolare il ripieno.
  • – Zucchero a velo per spolverare (opzionale)
    → Ruolo: aggiunta finale di dolcezza e presentazione gradevole. Preparazione/gestione: spolverare delicatamente solo prima di servire per mantenere la texture soffice e per non far ammorbidire l’impasto troppo rapidamente. Consiglio: la spolverata è ideale se si utilizza ripieno non troppo dolce.

Glassa e rifiniture

  • – Glassa semplice: 150 g zucchero a velo con 2–3 cucchiai latte (o succo di limone)
    → Ruolo: lucidare e arricchire la superficie, aggiungendo una nota dolce meno invadente. Preparazione/gestione: mescolare zucchero a velo con latte fino a ottenere una consistenza setosa; aggiustare con altro latte o zucchero per raggiungere la densità desiderata. Consiglio: per una glassa più lucida usa latte freddo; se vuoi una nota agrumata, usa succo di limone al posto del latte.
  • – Scorza di limone o arancia grattugiata per la glassa (opzionale)
    → Ruolo: aromatizza la glassa e aggiunge freschezza. Preparazione/gestione: aggiungere una piccola quantità di scorza grattugiata alla glassa finché non raggiungi la tonalità e l’aroma desiderati. Nota: evitare scorze molto grandi che potrebbero rilasciare sapori forti durante il raffreddamento.

Instructions

  • Disponi 500 g di farina 00 o Manitoba setacciata in una ciotola capiente, aggiungi 250 ml di latte tiepido, 70 g di burro morbido tagliato a cubetti, 50 g di zucchero, 1 uovo grande a temperatura ambiente, 7 g di lievito di birra secco (o 25 g di lievito fresco), 1/2 cucchiaino di sale e 1 cucchiaino di estratto di vaniglia; organizzare gli ingredienti in quest’ordine facilita l’incorporazione omogenea e lo sviluppo della rete di glutine durante la lievitazione.
    → L’impasto avrà una struttura elastica e una mollica soffice grazie alla corretta idratazione e all’aroma della vaniglia.
  • Attiva il lievito secco in una piccola ciotola con circa 50 ml di latte tiepido e 1 cucchiaino di zucchero, mescola e lascia riposare 5–10 minuti finché si forma una schiuma leggera; se usi lievito fresco, scioglilo direttamente nel latte tiepido seguendo le istruzioni sulla confezione, senza mescolare con lo zucchero.
    → L’attivazione verifica che il lievito sia vitale e pronto a sviluppare gas durante la lievitazione.
  • In una ciotola a parte lavora 70 g di burro morbido con 50 g di zucchero fino a ottenere una crema liscia e omogenea, quindi integra 1 uovo grande leggermente sbattuto e 1 cucchiaino di estratto di vaniglia, sbattendo brevemente per emulsionare aromi e grassi.
    → Creare una crema di burro e zucchero migliora la distribuzione di grassi nell’impasto e conferisce morbidezza alla mollica.
  • Aggiungi lentamente il latte tiepido rimanente e la miscela di lievito al composto di burro-zucchero-uovo-vaniglia, poi incorpora la farina setacciata e 1/2 cucchiaino di sale in tre riprese, mescolando tra un’aggiunta e l’altra per evitare grumi e ottenere un impasto omogeneo.
    → L’introduzione graduale di liquidi e farina permette una splendida idratazione senza rendere l’impasto appiccicoso.
  • Impasta a mano su una superficie leggermente infarinata per 8–10 minuti (o con impastatrice a gancio a bassa velocità per 5–6 minuti) finché l’impasto è liscio, elastico e si allunga senza strapparsi; esegui il test finestra tirando una piccola porzione: se si allunga in una membrana sottile senza rompersi, è pronto.
    → Il test finestra conferma lo sviluppo del glutine, fondamentale per una mollica soffice e una buona alveolazione durante la cottura.
  • Colloca l’impasto in una ciotola oliata, coprilo con pellicola o un canovaccio umido e lascia lievitare in un luogo caldo finché raddoppia di volume, circa 60–90 minuti a seconda della temperatura ambiente; evita correnti d’aria che potrebbero spezzare la lievitazione.
    → La lievitazione arricchisce l’impasto di gas, migliora la struttura e rende le girelle soffici e soffici a ogni morso.
  • Stendi l’impasto lievitato su una superficie leggermente infarinata in un rettangolo di circa 40 × 30 cm, con spessore di circa 0,5 cm; una base regolare facilita una rollatura uniforme e una cottura uniforme.
    → Un rettangolo ben formato evita spessori irregolari che potrebbero rompere durante l’arrotolamento e la cottura.
  • Distribuisci il ripieno scelto: se usi marmellata, spalma uno strato sottile lasciando 1 cm dai bordi; se usi crema al cioccolato spalmabile, stendi uno strato sottile e uniforme evitando eccessi che ostacolino la rollatura; opzionalmente aggiungi scorza grattugiata di limone o arancia per un profumo fresco; se vuoi, spennella una sottile lamina di burro fuso sul rettangolo prima di aggiungere il ripieno per una consistenza ancora più morbida.
    → Un ripieno sottile evita fuoriuscite durante la cottura e aiuta a definire le striature interne del rotolo.
  • Arrotola saldamente dal lato lungo, comprimendo man mano per sigillare bene il rotolo; chiudi i bordi per impedire fuoriuscite e spostare il ripieno durante la cottura.
    → Un rotolo compatto mantiene la forma e permette una mollica omogenea nelle girelle.
  • Taglia il rotolo in fette di circa 2 cm di spessore e disponile su una teglia rivestita con carta forno, lasciando spazio tra una girella e l’altra per la lievitazione secondaria.
    → La separazione permette l’espansione uniforme senza attaccarsi tra loro.
  • Copri le girelle con un canovaccio pulito e lascia lievitare nuovamente in luogo caldo per 20–40 minuti, finché aumentano di volume ma non superano la teglia; questa seconda lievitazione è essenziale per ottenere una consistenza morbida e una superfice ben dorata.
    → La seconda lievitazione sviluppa ulteriormente la mollica e la struttura interna delle girelle.
  • Preriscalda il forno a 180°C (350°F) e spenna delicatamente la superficie delle girelle con tuorlo d’uovo miscelato con 1 cucchiaio di latte per ottenere una doratura uniforme e lucente; evita di saturare troppo la superficie per non far scorrere il ripieno durante la cottura.
    → La spennellatura aggiunge colore dorato e una finitura professionale.
  • Inforna le girelle per 20–25 minuti, controllando la doratura; se necessario, ruota la teglia a metà cottura per garantire una colorazione uniforme su tutte le girelle.
    → Una cottura completa assicura una mollica morbida all’interno e una superficie ben dorata all’esterno.
  • Sforna e lascia raffreddare le girelle su una griglia per 15–20 minuti prima di glassarle; un raffreddamento breve evita che la glassa si sciolga troppo e comprometta la forma.
    → Il raffreddamento consente di tagliare/servire senza schiacciare la pasta.
  • Prepara la glassa semplice mescolando 150 g di zucchero a velo con 2–3 cucchiai di latte o di succo di limone, mescolando fino a ottenere una consistenza setosa e uniforme; aggiusta la densità con latte o zucchero secondo necessità.
    → Questa glassa dona brillantezza e una dolcezza leggera senza appesantire la mollica.
  • Arricchisci la glassa con scorza grattugiata di limone o arancia, se desideri, aggiungendo piccole quantità finché non ottieni l’aroma e la tonalità desiderati; mescola bene per distribuire uniformemente il profumo.
    → L’aggiunta di scorza aromatizza la glassa e offre un contrasto di freschezza.
  • Spalma la glassa sulle girelle raffreddate e, se vuoi, spolvera con zucchero a velo prima di servire per una presentazione invitante; servile entro poche ore per mantenere la morbidezza della pasta.
    → La glassa completa il piatto con una lucentezza appetitosa e una nota dolce bilanciata.

Notes

These Girelle colazione are soft, buttery breakfast swirls built on an enriched yeast dough enriched with milk, butter and vanilla. They are versatile and shine with a range of fillings—from jam or marmalade to a luscious Nutella or gianduia cream—creating pretty, flavorful spirals that pair perfectly with a morning cup of coffee or tea. For success, keep ingredients at room temperature, activate the yeast correctly, and handle the dough gently to preserve its elasticity and structure during rolling.

To shape, first prepare the dough and let it rise until doubled in a warm, draft-free spot. Roll the dough to about 0.5 cm thickness, spread your chosen filling in an even, thin layer (a light border around the edges helps prevent overflow), then roll tightly from the long side and cut into even slices. Arrange the slices with space to expand on a lined tray or in a baking dish. A second brief rise will puff the swirls before baking, resulting in a soft, airy crumb and beautiful spirals.

Bake at around 180°C until the tops are golden and the rolls sound hollow when tapped, typically 20–25 minutes depending on size. Finish with a glaze or dusting of powdered sugar if desired. For the glaze, whisk 150 g powdered sugar with 2–3 tbsp milk or a splash of lemon juice, adjusting for a glossy, pourable consistency; lemon or orange zest in the glaze adds a fresh citrus note. These can be enjoyed warm from the oven or cooled to room temperature. They freeze well when baked or unbaked; wrap tightly and reheat gently to restore softness. Variations are welcome: use jam, lemon-curd, or chocolate spread in the filling, and add citrus zest or a pinch of cinnamon for extra aroma. If you need a gluten-free version, substitute with a certified gluten-free flour blend and ensure yeast compatibility, adjusting liquids as needed; dairy-free options can be used by replacing milk with a plant-based milk and butter with a dairy-free alternative. Always tailor the filling and glaze to your taste and dietary needs.

Tips

Consigli generali

  • La farina: preferisci Manitoba o una 00 forte e setaccia bene per eliminare grumi e incorporare aria. Una buona elasticità favorisce alveolatura e la tenuta della rollatura.
  • Liquidi a temperatura ambiente: latte tiepido e burro morbido permettono una migliore emulsione e una lievitazione uniforme. Se la cucina è fredda, siedi l’impasto in un ambiente leggermente caldo per favorire la lievitazione.
  • Impasto non appiccicoso: se serve, aggiungi poca farina, ma evita di lavorare troppo per non compromettere la struttura del glutine. Il test del “documento sottile” (windowpane) aiuta a capire quando è pronto.

Impasto e lievitazione

  • Attivazione del lievito: utilizzare il lievito secco attivo attivandolo in una piccola quantità di latte tiepido per 5–10 minuti finché diventa schiumoso. Il lievito fresco va attivato allo stesso modo secondo le dosi indicate.
  • Temperatura: evitare latte troppo caldo per non uccidere il lievito. Se l’ambiente è freddo, aumentare leggermente i tempi di lievitazione o utilizzare una teglia con acqua calda sul fondo per creare umidità.
  • Lievitazione: lasciare l’impasto lievitare fino al raddoppio. Per un sapore più intenso e una texture migliore, è possibile fare una seconda lievitazione in frigorifero durante la notte (riducendo lievito e tempo).

Ripieno e assemblaggio

  • Stendi l’impasto in un rettangolo di circa 40×30 cm con uno spessore di 0,3–0,5 cm: una base liscia facilita la rollatura e una chiusura efficace.
  • Ripieno: evita eccessi di liquido. Marmellata o crema devono essere a temperatura ambiente e distribuiti in uno strato sottile ed uniforme. Per un effetto “striato” migliore, lascia una lieve striscia di ripieno lungo la lunghezza.
  • Se usi crema al cioccolato (Nutella), scaldala leggermente per facilitare la stesura; distribuiscila in modo uniforme senza mettere troppo vicino ai bordi per evitare fuoriuscite.
  • Aromi nel ripieno: aggiungere scorza grattugiata di limone o arancia in piccole quantità per un profumo fresco. Un piccolo velo di burro fuso sul ripieno può aiutare l’adesione.

Glassa e rifiniture

  • Glassa: prepara una glassa semplice con 150 g di zucchero a velo e 2–3 cucchiai di latte (o succo di limone) fino a ottenere una consistenza setosa. Per una glassa più lucida, usa latte freddo.
  • Aromi per la glassa: scorza di limone o arancia grattugiata aggiunge freschezza. Aggiungi piccole quantità per non coprire troppo il gusto del ripieno.
  • Applicazione: spennella la glassa sulle girelle solamente quando sono raffreddate per evitare che si sciolga troppo e alteri la consistenza della pasta.

Tempo, temperatura e cottura

  • Cuoci in forno preriscaldato a 180–190°C in modalità statica. Il tempo di cottura è di circa 20–25 minuti, o finché la superficie è dorata.
  • Spazio tra le girelle sulla teglia: lascia margine sufficiente per permettere la crescita uniforme durante la lievitazione in cottura.
  • Conservazione: una volta raffreddate, richiudi in contenitore ermetico. Puoi anche congelarle crude e cuocerle direttamente dal congelatore, aumentando leggermente il tempo di cottura.

Varianti e suggerimenti extra

  • Aggiungi cannella o scorza di agrumi al ripieno per varianti profumate e golose.
  • Prova ripieni alternativi: crema di nocciole, marmellate diverse o una crema gianduia leggera. Per una versione più leggera, riduci lo zucchero nel ripieno.
  • Per una morbidezza extra, aggiungi un cucchiaio di miele o una piccola quantità di panna nell’impasto per arricchirne il tessuto.

FAQ

Che cosa sono le Girelle colazione?

Le Girelle colazione sono rotoli dolci di pasta lievitata, farciti tipicamente con crema spalmabile, marmellata o Nutella, tagliati a fette e cotti al forno. Sono morbide, profumate e perfette per una colazione golosa o una merenda.

Quali ingredienti servono?

Impasto: 500 g di farina, 250 ml di latte tiepido, 60 g di burro morbido, 70 g di zucchero, 1 uovo, 7 g di lievito di birra secco (o 25 g fresco), 1 pizzico di sale, scorza di limone grattugiata.

Farcitura: Nutella o crema spalmabile, marmellata a scelta, scorza di limone o cannella. Opzionali: granella di zucchero per decorare e zucchero a velo da spolverare prima di servire.

Posso usare lievito secco o fresco?

Entrambi funzionano. Se usi lievito fresco, scioglilo nel latte tiepido e fai riposare 5–10 minuti prima di aggiungerlo agli ingredienti. Se usi lievito secco attivo, scioglilo nello stesso latte e procedi; lascia lievitare finché l’impasto raddoppia di volume. I lieviti chimici istantanei non sono indicati per questa pasta che richiede tempo di lievitazione.

Come si prepara l’impasto passo-passo?
  1. Sciogli il lievito nel latte tiepido con un pizzico di zucchero e lascia agire 5–10 minuti.
  2. In una ciotola capiente, mescola farina, zucchero, scorza di limone e un pizzico di sale.
  3. Aggiungi l’uovo e il latte con lievito, poi lavora fino a ottenere un impasto morbido ed elastico.
  4. Aggiungi il burro morbido a pezzi, continuando a impastare finché sarà completamente incorporato e l’impasto sarà lucido ed elastico (circa 10 minuti).
  5. Copri e lascia lievitare in luogo tiepido finché raddoppia di volume (circa 1 ora).
Come farcire e arrotolare le girelle?
  1. Stendi l’impasto in una sfoglia rettangolare dello spessore di circa 0,5 cm.
  2. Spalma uno strato uniforme di Nutella, crema o marmellata, lasciando un bordo di circa 1 cm.
  3. Aggiungi scorza di limone o cannella se vuoi una nota profumata.
  4. Arrotola dal lato lungo in un cilindro stretto. Sigilla bene i bordi.
  5. Taglia il cilindro in circa 2 cm fette e disponile su una teglia rivestita con carta forno, leggermente distanziate.
Quanto tempo impiega la lievitazione e la preparazione?

Tempo totale indicativo: circa 2 ore e mezza. Preparazione impasto e prima lievitazione circa 1 ora, farcitura e taglio 15–20 minuti, seconda lievitazione 30–60 minuti prima di infornare.

A quale temperatura e quanto tempo si cuociono?

Cuoci in forno preriscaldato a 180°C, in modalità statica, per 18–25 minuti, finché le girelle sono dorate in superficie. Se vuoi una crosticina più croccante, lascia qualche minuto in più, controllando per non bruciarle.

Come si conservano e si riscaldano?

Si conservano morbide per 2–3 giorni in un contenitore ermetico o chiuso. Per riscaldarle, mettile in forno o microonde per pochi secondi; in forno tradizionale, 150°C per 5–8 minuti, spennellando con poco latte se sembrano secche.

Quali varianti gustose posso provare?
  • Farcitura al cioccolato e nocciole o Nutella con aggiunta di gocce di cioccolato.
  • Crema al pistacchio o marmellata ai frutti di bosco.
  • Cannella e zucchero di canna per un sapore simile ai cinnamon rolls.
  • Versione integrale o parzialmente integrale con una parte di farina integrale, magari usando olio al posto del burro per una versione leggermente diversa.
Suggerimenti utili per ottenere girelle perfette
  • Non esagerare con il ripieno per evitare che fuoriesca durante la cottura.
  • Spennella i bordi con latte o uovo sbattuto per una chiusura ben sigillata.
  • Assicurati che l’impasto sia ben lievitato; se non lievita bene, la consistenza risulterà meno soffice.
  • Se non hai forno tradizionale, puoi cuocerle in forno ventilato a 170°C per tempi leggermente ridotti.

Introduction / Hook

Imagine waking up to the warm, inviting scent of caramelized sugar meeting a creamy, vanilla-scented custard, all wrapped around a slice of perfectly aged bread. French toast crème brûlée is the kind of dish that sounds indulgent enough for a celebratory brunch, yet feels effortless enough for a cozy weekend morning. This recipe is more than a fancy twist on a classic breakfast; it’s a sensorial experience that plays with textures and temperatures, bringing together the familiar comfort of French toast and the decadent crunch of a brûlée top. The contrast alone—silky, custardy interior under a crackling sugar crust—is enough to make even the most devoted skeptics pause, savor, and smile. It’s not merely a dessert dressed up with breakfast vibes; it’s a refined brunch darling that can turn an ordinary table into a small, memorable celebration.

From the first whiff of toasted sugar to the soft sigh of the custard breaking on your tongue, this dish offers an irresistible journey. The aroma alone carries notes of vanilla, a whisper of citrus, and a hint of caramel that lingers long after the last bite. The technique is a playful negotiation between two worlds: the everyday comfort of French toast and the elegant finish of a crème brûlée. The result is a dessert-brunch hybrid that’s both approachable and show-stopping, comforting yet novel, familiar enough to please a crowd and intriguing enough to spark conversation at the table.

The Story Behind the Dish

Every great dish has a story, and this one unfolds at the intersection of brunch culture and classic French technique. French toast is one of those timeless comfort foods that shows up in kitchens worldwide—dressed up for holidays, tinkered with for weekend mornings, and always ready to be coaxed into something special. Crème brûlée, on the other hand, is a symbol of refinement—a custard so smooth it seems to melt on the tongue, crowned with a glassy shell of caramelized sugar that shatters with a satisfying crack. Pair them, and you get a narrative about tradition meeting innovation, a culinary wink to both the decadence of dessert and the approachability of breakfast.

The idea for a fusion like French toast crème brûlée often travels from the tastes and memories we chase in new places: a bustling city brunch where someone dreams up something that looks fancy but tastes comforting; a late-night kitchen improvisation where two textures have a conversation: soft and crisp, warm and cool, sweet and slightly bitter. You can picture a chef, perhaps at a sunlit cafe, letting a thick slice of bread absorb a lush custard before sending it under a hot flame to create that shimmering, crackling top. The dish becomes a celebration of textures: the softness of a well-soaked interior, the crisp resistance of the caramelized crust, and the smooth, almost velvet finish that lingers after the bite. It’s a modern heirloom dish, a reminder that the joy of cooking often lies in pairing the familiar with the unexpected.

Cultural threads weave through this recipe as well. Brûlée techniques originate in a tradition that loves a crisp, caramelized top—a topography of flavor and crunch that mimics the surface of sun-warmed desserts. French toast, a staple across continents, carries with it family memories: Sunday mornings, the sound of the pan, the rush of smoke and steam, the gentle drizzle of sweet syrup. By borrowing the brûlée finish and applying it to the world of French toast, cooks honor both origins while creating something new—an edible bridge between past and present, between nostalgia and novelty. It’s the kind of dish that invites conversation: where did the idea come from? how did it taste the first time you tried it? and why does it feel so indulgent yet so comforting at the same time?

Ultimately, this dish is about celebration—of technique, of ingredients, and of shared meals that linger in memory. It asks for a little patience and a lot of care: a slow soak to allow flavors to mingle, a careful caramelization to form that iconic shell, and a generous portion that invites a second, third, and perhaps a fourth bite. When plated, it tells a story of balance: richness without heaviness, technique without fuss, sophistication without intimidation. It is the kind of dish that makes ordinary brunch feel extraordinary and teaches that sometimes the most delightful surprises come from thoughtful contrasts and precise execution.

Why You’ll Love This Recipe

  • Impressive yet approachable: It looks like a showpiece, but the concept is simple enough for a weekend project or a festive brunch.
  • Contrasting textures: A creamy, custard-like interior with a crisp, glassy caramel shell creates a satisfying bite every time.
  • Aromatics that sing: Vanilla, a hint of warmth from spices, and a subtle citrus note lift the flavors beyond the ordinary.
  • Make-ahead friendly: You can prep components in advance and finish with the brûlée topping just before serving, making it ideal for entertaining.
  • Versatile for many diets and occasions: The base concept can be adapted with substitutions and variations to suit different dietary needs.
  • Comforting and indulgent yet balanced: The dish delivers dessert-like luxury without feeling overwhelming for a late-m morning feast.
  • Pairing potential galore: It pairs beautifully with coffee, sparkling beverages, fresh fruit, or a dollop of whipped cream for added richness.
  • Creative brunch centerpiece: This dish invites conversation, celebration, and a sense of occasion around the table.

Flavor Profile & Texture

At its core, French toast crème brûlée is a study in contrasts that work together as a cohesive whole. The interior is softly custardy, ethereal in its tenderness, with a gentle depth that often comes from a balanced blend of comforting flavors such as vanilla, a touch of citrus zest, and a hint of warmth from spices. The custard thickness is designed to be spoonable, not heavy—creaminess that glides across the palate and lingers with a subtle sweetness. It’s the kind of texture that invites slow savoring, a moment of quiet indulgence as the mouth cooperates with the senses.

The exterior offers a different kind of magic. Once the dish is assembled and warmed, a caramelized sugar crust forms a resilient, glassy shell that cracks with a satisfying snap when you bite into it. The top surface is glossy and amber, a visual cue that the flavors beneath are both luxurious and deeply comforting. When cracked, the shell reveals the delicate, tender custard beneath—like a pastry’s innards tucked beneath a delicate glaze. The aroma of melted sugar meeting a hot surface is intoxicating: deep caramel notes, a whisper of vanilla, and the faintest edge of citrus zest that brightens the finish.

Flavor-wise, you’ll notice a gentle but distinct sweetness that doesn’t overwhelm; instead, it amplifies the natural carousel of flavors that travel from the bread’s toasty notes to the custard’s smooth richness. The bread itself contributes a nuanced texture—soft and airy in the soak, with a slight sturdiness that holds up to the custard without becoming soggy. Some cooks incorporate a whisper of spice, such as cinnamon or nutmeg, which adds warmth and a hint of old-world café charm. A subtle citrus lift—orange or lemon zest—brightens the profile, helping the dish feel lively rather than dessert-heavy, and it pairs wonderfully with a bitter coffee or a sparkling beverage that cleanses the palate between bites.

The texture journey is the dish’s signature: begin with the crack of the brûléed top, then dip into a silken interior that melts in your mouth, followed by the satisfying chew of the bread’s structure and a lingering sweetness that feels both refined and comforting. It’s a trifecta of sensory experiences—crunch, creaminess, and a warm, toasty aroma—that makes each bite feel like a carefully choreographed moment in a brunch symphony.

Occasions & Pairings

This dish shines in a variety of settings, from intimate mornings to festive gatherings. It’s equally at home on a holiday brunch table as it is on a lazy Sunday breakfast with close friends. Consider these scenarios and pairing ideas for maximum impact:

  • Holiday gatherings: A show-stopping centerpiece for Christmas morning or Easter brunch, paired with a sparkling beverage or a creamy yogurt parfait to balance sweetness.
  • Weekend brunch with friends: Serve alongside seasonal fruit, a light salad, and robust coffee or chai for depth and contrast.
  • Special celebrations: Pair with a dessert wine or a lightly sweetened sparkling cocktail that echoes the caramel notes without overpowering the custard.
  • Family-friendly mornings: Keep portions modest and present a topping bar with fresh berries, nuts, a dollop of whipped cream, and a drizzle of maple or honey for customizable sweetness.

Pairings to consider for a complete table:

  • Side dishes: A citrus-inflected fruit salad, a yogurt or crème fraîche offering, and lightly dressed greens to add brightness.
  • Drinks: A well-roasted coffee, a nutty latte, or a light, effervescent sparkling beverage to balance the richness; for adults, a glass of light sparkling wine or a citrus-forward cocktail can elevate the experience.
  • Desserts that echo the theme: A light berry tart or a simple bowl of seasonal fruit can complement the dish without competing with the brûlée top.

Tips, Variations & Substitutions

Creative ways to customize

  • Flavor twists: Swap in different aromatics such as vanilla bean, orange blossom, or cardamom to shift the scent profile and complement seasonal fruits.
  • Texture shifts: If you crave extra contrast, add a subtle sprinkle of chopped nuts or toasted seeds on the top before caramelizing to introduce a crunchy layer that echoes the brûlée shell.
  • Fruit accents: A light fruit compote or fresh citrus segments folded into the custard can add brightness and a splash of color, balancing sweetness with acidity.

Dietary alternatives

  • Vegan option: Use plant-based bread with a custard built from a blend of plant milks and a thickener such as a cornstarch slurry, then finish with a vegan caramelized topping using sugar substitutes that caramelize well. Ensure the bread remains sturdy enough to soak without disintegrating.
  • Gluten-free adaptation: Choose a sturdy gluten-free bread that holds up to soaking. The rest of the technique remains the same, preserving the contrast between a crisp top and tender interior.
  • Lactose-friendly: Use lactose-free dairy or a nut-based milk blend for the custard while keeping the same finish on top to maintain texture and glaze.

Regional twists

  • Spanish-inspired: Add a hint of cinnamon and citrus zest, and finish with a drizzle of orange-infused syrup to echo classic crema catalana elements.
  • French café nod: Use a subtle espresso powder in the custard and finish with a dark caramel top to echo the flavors of a café au lait nightcap.
  • Middle Eastern warmth: Introduce a touch of saffron or rose water into the custard for a floral note that pairs beautifully with pistachios or berries.

Storage & Make-Ahead Ideas

The beauty of this dish is that you can plan ahead while still delivering a dramatic finish. Here are practical tips to tailor the timing to your schedule:

  • Make-ahead custard: Prepare the custard base and bread soaking mixture a day in advance. Store refrigerated in a covered dish, and rewarm gently the morning you serve. This can shave precious minutes off your brunch routine.
  • Assemble before serving: Soak the bread in the custard in the morning, then refrigerate briefly if you’re pressed for time. When guests arrive, quickly caramelize the top and serve hot, ensuring that crisp top and warm interior are at their peak.
  • Leftovers: Refrigerated leftovers can be gently reheated in a warm oven or toaster oven to refresh the interior. The brûléed top should be recreated with a quick pass under a broiler or a crème brûlée torch to recapture the signature crackle.
  • Avoid sogginess: For best texture, avoid soaking the bread too long if you plan to reheat. A moderate soak yields a sturdy interior that holds up to refrigeration and re-warming without turning mushy.

Fun Facts & Trivia (Optional)

Here are a few tidbits that sprinkle extra flavor onto the tale of this dish:

  • The technique of caramelizing sugar to create a hard, glassy shell is centuries old and spans many cuisines, from desserts to savory sauces. The satisfying crack is not just sensory; it signals a crisp contrast that awakens the palate.
  • Crème brûlée itself has a debated origin, with both French and English-speaking culinary traditions laying claim to similar custards perfected with sugar shells. This dish playfully bridges that history with a familiar breakfast staple.
  • French toast has been known by a variety of names around the world, often reflecting local pantry staples. The idea of soaking bread to absorb flavor and then cooking it until golden is a universal comfort, which makes this crème brûlée version feel both global and personal.
  • Texture science tip: the torch or hot pan used to caramelize the sugar creates a thermo-gel moment where liquid sugar rapidly hardens upon contact with air, forming that iconic crack. Mastery of this moment is what elevates the dish from good to extraordinary.

Ingredients

French toast crème brûlée

French Toast Base

  • 8 slices thick-cut brioche or challah bread, stale or day-old
    → The bread is the vessel that will soak up the custard without collapsing during frying. Thick-cut, rich breads like brioche or challah give a tender, flavorful crumb when soaked. If your bread is very fresh, dry it slightly in a low oven (about 300°F / 150°C) for 5–7 minutes to improve soaking and prevent sogginess. For uniform results, trim crusts if desired.
  • 4 large eggs
    → Eggs provide structure and help bind the custard to the bread. Use room-temperature eggs for easier whisking and even mixing. Lightly whisk to break yolks but avoid overworking to keep a creamy texture.
  • 1 cup whole milk
    → Milk adds moisture to the custard and helps the bread soak evenly. Whole milk keeps the mixture rich without curdling; you can substitute 2% if needed, but dairy richness will be reduced. Warm slightly before soaking to improve absorption.
  • 1/2 cup heavy cream
    → Adds luxurious richness and a smoother mouthfeel to the soaking mixture. Heavy cream helps create a more custardy interior rather than a dry one. If you’re limiting dairy, you can reduce to 1/4 cup, but expect a lighter texture.
  • 2 tablespoons granulated sugar
    → Sweetens the custard base just enough to complement the spices without overpowering the French toast. If you prefer sweeter toast, you can increase by 1–2 tablespoons. Whisk until dissolved to avoid grainy pockets.
  • 1 teaspoon pure vanilla extract
    → Vanilla enhances the custard’s aroma and pairs beautifully with cinnamon. For a deeper vanilla note, use a real vanilla extract or vanilla bean paste; scrape or mix thoroughly into the liquid before combining with eggs.
  • 1 teaspoon ground cinnamon
    → Adds classic warmth and aroma to the custard. For a more pronounced spice, increase to 1½ teaspoons or blend with a pinch of nutmeg. Freshly ground cinnamon provides a sharper flavor than pre-ground.
  • 1/4 teaspoon ground nutmeg (optional)
    → A hint of nutmeg contributes a subtle farewell note that complements cinnamon and vanilla. Omit if you prefer a purer cinnamon profile or if you’re serving with fruit that brings its own spice.
  • 1/4 teaspoon salt
    → Balances sweetness and enhances overall flavor. Salt also strengthens the perception of vanilla and cinnamon. Use fine salt for even distribution.
  • 2 tablespoons unsalted butter, for frying
    → Butter creates a rich, flavorful crust on the French toast and helps prevent sticking. Fry in a skillet over medium heat; cook in batches if needed. If you’re dairy-free, use a neutral oil or dairy-free butter substitute.

Crème Brûlée Custard

  • 2 cups heavy cream
    → The main base for the brûlée custard, delivering silkiness and body. Heat gently to just below simmering to avoid scorching; this creates a smooth, cohesive custard with a delicate set. If you mix with the French toast layer, plan around chilling time for the brûlée shell.
  • 1/2 cup whole milk
    → Adds a touch of lightness to the custard while maintaining richness. If you omit milk, you’ll have a denser cream; adjust sugar accordingly to maintain balance.
  • 4 large egg yolks
    → Provide the creamy, set texture of the crème brûlée. Yolks contribute richness without too much airiness. Temper yolks with warm cream gradually to prevent scrambling, then return to a gentle heat until thickened.
  • 1/3 cup granulated sugar
    → Sweetens the custard and helps form a smooth, glossy surface when properly caramelized. Dissolve sugar well and whisk thoroughly with yolks and cream; a pinch of salt can be added to balance flavors.
  • 1 teaspoon vanilla bean paste or extract
    → Intensifies the vanilla character of the brûlée. Vanilla bean paste adds visible vanilla specks and a deeper flavor; if using extract, add a few extra drops to reach the desired aroma.
  • Pinch of salt
    → Enhances sweetness and depth of flavor in the custard, helping to round out the richness. Do not omit if you prefer a balanced finish.

Caramel Brûlée Topping

  • 1/2 cup granulated sugar (for brûlée topping)
    → This sugar forms the hard, caramelized shell on top of the custard. Evenly sprinkle in a thin, uniform layer to ensure a crisp crack when torched or broiled. If sugar clumps, gently break up lumps with your fingers before caramelizing for a smooth finish.

Optional Garnishes

  • Fresh berries or berry compote (optional)
    → Adds bright acidity and vibrant color to balance the rich custard. Choose berries that are in season and rinse just before serving. If using compote, add just a spoonful on top to avoid overwhelming the brûléed crust.
  • Powdered sugar (optional)
    → A light dusting enhances presentation and sweetness. Sift lightly just before serving to avoid clumping.

Instructions

  • Preheat your oven to 325°F (165°C) and place a rack in the middle; set four to six 6-ounce ramekins in a deep baking dish to form a stable water bath; this gentle setup prevents scorching and helps the custard set evenly during baking.
  • → A water bath provides steady, indirect heat that keeps the crème brûlée custard smooth and prevents curdling or cracking at the edges.

  • In a small saucepan combine 2 cups heavy cream, 1/2 cup whole milk, and a pinch of salt; warm over medium heat just until small bubbles form around the edges and the mixture is steaming lightly; remove from heat before it boils; this heats the dairy for even custard and helps dissolve sugar later without scorching.
  • → Heating the dairy before mixing with yolks helps the custard set with a silky texture and reduces risk of scrambled eggs.

  • In a medium bowl whisk 4 large egg yolks with 1/3 cup granulated sugar until the mixture lightens in color and thickens slightly; this builds the custard’s structure and ensures a smooth, glossy texture after cooking.
  • → Properly beaten yolks trap air and create a tender, cohesive custard when gently cooked.

  • Slowly ladle a small amount of the warm cream into the yolks while whisking constantly to temper the yolks; then whisk the tempered yolk mixture back into the saucepan with the remaining hot cream; this prevents scrambling and yields a uniform custard base.
  • → Tempering gradually raises the yolk temperature for a silky custard without curdling.

  • Return the pot to low heat and cook, stirring with a silicone spatula, until the custard thickens enough to coat the back of a spoon and registers about 170°F (77°C); do not let it boil; this creates the proper viscosity for a crème brûlée surface.
  • → Gentle heat ensures a smooth, creamy custard that will set properly in the oven.

  • Strain the custard through a fine-mesh sieve into a clean bowl, then whisk in 1 teaspoon vanilla bean paste or extract; taste and adjust with an extra tiny pinch of salt if needed; this yields a velvety texture and even vanilla distribution.
  • → Straining removes any cooked curds and ensures a pristine, glossy custard surface.

  • Evenly divide the strained custard among the prepared ramekins, leaving about 1/4 inch of headspace; carefully place the ramekins in the water bath and pour hot water into the outer dish until it comes halfway up the sides; this water bath guarantees gentle, uniform cooking and prevents cracking.
  • → The water bath moderates heat transfer, creating a smooth, well-set custard with minimal cracking.

  • Bake the custards for 40–45 minutes until the centers are just set with a slight jiggle; remove from the water bath, cool on a rack, then refrigerate for at least 2 hours or overnight; this chilling firms the surface and enhances the brûlée topping later.
  • → A fully cooled custard yields clean slicing and a crisp caramelized top when brûled.

  • For the French toast base, whisk together 4 large eggs, 1 cup whole milk, 1/2 cup heavy cream, 2 tablespoons granulated sugar, 1 teaspoon vanilla, 1 teaspoon ground cinnamon, 1/4 teaspoon ground nutmeg (optional), and 1/4 teaspoon salt until the mixture is completely smooth and the sugar is dissolved; this forms a rich, evenly seasoned soak that flavors the bread.
  • → Thorough mixing ensures consistent sweetness, aroma, and spice in every slice.

  • If the brioche or challah slices are very fresh, dry them slightly in a round, low oven at 300°F (150°C) for 5–7 minutes to enhance soaking and prevent sogginess; then cut slices 3/4 to 1 inch thick for sturdy soaking and fryability; this controls moisture and yields a tender interior.
  • → Slight drying helps the slices absorb custard without becoming mushy during frying.

  • Trim crusts if desired for uniform thickness, then dip each slice into the prepared French toast soak, allowing 20–40 seconds per side for thorough absorption without tearing the bread; this produces a custardy interior when fried.
  • → Proper soaking weight distributes custard evenly and avoids collapsed slices during frying.

  • Heat a large skillet over medium and add 2 tablespoons unsalted butter; swirl to coat the surface as the butter foams; this creates a flavorful crust and prevents sticking.
  • → Butter adds rich flavor and a crisp, golden crust to the toast while preventing it from sticking to the pan.

  • Fry the soaked bread in the butter until deeply golden and crusty on the outside, about 2–3 minutes per side; adjust heat to maintain a steady sizzle and flip carefully with tongs when the underside is browned; transfer to a warm plate and keep warm in a low oven if needed; this yields a balanced contrast of crisp exterior and custardy interior.
  • → Proper browning develops aroma and texture that define classic French toast.

  • To assemble the crème brûlée topping, evenly sprinkle 1/2 cup granulated sugar over the surface of the chilled crème brûlée custards, distributing it in a thin, uniform layer; this ensures a consistent caramelized shell across the portions.
  • → Even sugar distribution guarantees a smooth, crackable surface when brûléed and prevents thin or thick patches.

  • Caramelize the sugar with a handheld culinary torch held about 2 inches (5 cm) from the surface, moving in small, overlapping circles until the sugar melts, turns amber, and forms a glossy hard crust; if using a broiler, place the ramekins on a rack under a preheated broiler for 1–2 minutes, watching constantly; this creates the signature crisp brûléed top with a satisfying crack when tapped.
  • → A precise, even caramelization yields a crisp shell that contrasts with the creamy custard beneath and provides the dish’s defining texture.

  • To serve, plate a couple of slices of the warm French toast alongside a poised portion of crème brûlée custard or the brûléed custards themselves; if desired, spoon a small quenelle or dollop of custard next to the toast and present the brûlée shell on top; garnish with fresh berries or a light dusting of powdered sugar to brighten the plate; this presentation highlights the contrast of temperatures and textures.
  • → Pairing warm toast with cold custard and a brûné shell creates a dynamic dessert that showcases both components while appealing to multiple senses.

Notes

These French toast crème brûlée bring a luxurious twist to a weekend brunch by marrying the custardy richness of crème brûlée with the comforting heart of French toast. Thick slices of brioche or challah soak up a silky custard, are fried to a golden crust, and finished with a crackling sugar shell for a dessert-like breakfast that feels indulgent yet approachable. Use these notes to guide prep, customization, and timing so every component shines.

  • Bread handling: Use thick-cut brioche or challah, preferably stale or day-old so the slices soak without falling apart. If bread is very fresh, dry it in a low oven (about 300°F / 150°C) for 5–7 minutes to improve absorption and prevent sogginess. Trim crusts if desired for uniform slices.
  • Custard prep for soaking: Warm the milk and cream to just below a simmer to enhance absorption into the bread. Whisk the eggs with the sugar, vanilla, cinnamon, nutmeg, and salt, then gradually whisk in the warm dairy to temper. Return the mixture to a gentle heat and simmer until it thickens slightly, but do not curdle the eggs.
  • Soaking and frying the base: Dip each bread slice briefly in the custard, letting excess drip off. Fry in 2 tablespoons unsalted butter over medium heat until deep golden and crisp around the edges. Cook in batches to avoid crowding the pan, and keep cooked slices warm while you finish the rest.
  • Crème brûlée custard notes: The custard base for the brûlée should be rich and smooth, with yolks providing a creamy set. Temper the yolks with warm cream, then cook until it coats the back of a spoon. Chill until set as needed depending on your assembly plan.
  • Caramelized topping timing: The brûlée sugar topping is added just before serving. After the assembled French toast has cooled slightly, sprinkle a thin, even layer of granulated sugar on top of the custard surface and caramelize with a kitchen torch (preferred) or under a hot broiler until the sugar forms a glossy, crackable shell. Work quickly and evenly to avoid scorching the toast underneath.
  • Make-ahead strategy: You can prepare the crème brûlée custard and the fried toast components separately and assemble just before serving. The custard can be cooled and stored in the fridge for up to 1–2 days; rewarm gently before topping and torching. If desired, the brûlée topping should be applied right before plating for best texture.
  • Serving and garnishes: Pair with fresh berries or a berry compote for brightness, and finish with a light dusting of powdered sugar. A dollop of whipped cream or a spoonful of natural yogurt can add richness and contrast, while a drizzle of maple syrup ties the flavors together.
  • Diet and substitutions: For dairy-free adaptations, substitute dairy with full-fat coconut cream and a plant-based milk, and ensure the sugar and any toppings are dairy-free. If you prefer a lighter version, reduce the heavy cream in the custard by half and compensate with additional milk, but expect a lighter texture. Always check that all components (bread, toppings) are gluten-free if serving to gluten-sensitive guests.

Tips

Choosing and preparing the bread

  • Use the bread specified: thick-cut brioche or challah. Their rich crumb soaks up the custard without collapsing during frying.
  • If your bread is very fresh, dry it slightly in a low oven (about 300°F / 150°C) for 5–7 minutes to improve soaking and prevent sogginess.
  • For uniform results, trim crusts if desired and aim for slices of even thickness to ensure consistent soaking and frying.
  • If you can’t find brioche or challah, a stout sandwich bread can work, but you may need to adjust soak time to avoid soggy centers.

Custard base and soaking tips

  • Use room-temperature eggs for easier whisking and a smoother custard. Lightly whisk to break yolks but avoid overworking.
  • Warm the milk and cream slightly (to just steaming) to improve absorption by the bread without scrambling the eggs.
  • Whisk the sugar into the eggs until dissolved to prevent grainy pockets in the final custard.
  • Season with salt to balance sweetness and enhance vanilla and cinnamon flavors.
  • Allow the bread slices to soak in the custard mixture for a few minutes on each side, then press gently to ensure even saturation without tearing the bread.
  • For deeper spice notes, you can infuse the milk with a small cinnamon stick or a pinch of nutmeg during warming, then strain before mixing with eggs.

Crème brûlée custard tips

  • Heat the heavy cream (and milk) to just below a simmer to create a smooth, cohesive custard when combined with yolks.
  • Temper the egg yolks by gradually whisking in a small amount of hot cream, then slowly whisk in the rest to prevent scrambling.
  • Strain the custard mixture through a fine-mesh sieve to remove any lumps for a silkier texture.
  • Add the vanilla bean paste or extract; if you’re using extract, you may want a touch more to reach the desired aroma.
  • Pour the custard over the soaked bread and chill as needed; if you intend to bake it, a gentle water bath helps prevent cracking and yields even setting.

Caramel brûlée topping tips

  • Evenly sprinkle the 1/2 cup granulated sugar in a thin, uniform layer to form a crisp shell.
  • Use a culinary torch for precise caramelization; keep the torch moving and glaze the surface evenly until it turns a deep amber. If using a broiler, place the dish on the middle rack and monitor closely to avoid burning.
  • Let the caramelized sugar shell rest for 1–2 minutes before serving to ensure it hardens fully; a soft shell will crack less cleanly.
  • If sugar clumps, break apart lumps with clean fingers before caramelizing for a smoother top.
  • Caramelize just before serving for the best contrast between the crisp top and the creamy custard.

Make-ahead, assembly, and serving tips

  • Custard can be prepared in advance and chilled; soak the bread closer to serving if you prefer a softer interior, or toast/fry the bread just before serving for a crispier exterior.
  • Keep the brûlée topping separate until service if you plan to assemble ahead; sprinkle and caramelize right before serving to preserve a crisp shell.
  • When frying the French toast slices, use a stable, medium heat and butter to achieve a rich crust without burning. Fry in batches to maintain even heat.
  • Optional garnishes like fresh berries or berry compote add bright acidity; dust with powdered sugar just before serving for a polished look.
  • For a dairy-free version, substitute dairy with a neutral-tavored plant milk and a dairy-free butter substitute; be aware that texture and flavor will shift slightly.

Troubleshooting and flavor tweaks

  • If the custard is undercooked and wobbly after chilling, bake longer or adjust the water bath and temperature if you’re baking the custard in ramekins.
  • If the custard cracks after chilling, ensure gentle heat during cooking and avoid over-baking; a slight jiggle in the center is ideal.
  • If the brûléed top doesn’t form a crack when tapped, the shell may be too thick or not properly caramelized. Recaramelize a fresh layer a minute or two after the initial torching.
  • Flavor variations: add a pinch of orange zest to the custard, or substitute half the vanilla with almond extract for a different aroma. Cinnamon can be enhanced or balanced with a touch of cardamom or nutmeg according to taste.

Garnish and presentation ideas

  • Top with fresh berries or a berry compote to cut through richness; add just a small spoonful to avoid overpowering the brûléed crust.
  • A light dusting of powdered sugar right before serving adds a refined finish and helps highlight the caramelized top.
  • Serve in warm ramekins or a shallow dish to ensure the caramel shell remains intact when served.

FAQ

What is French toast crème brûlée?

A fusion dish that starts with custard-soaked French toast and finishes with a caramelized sugar crust on top, like crème brûlée. The result is a creamy interior with a crisp, brûléed top.

What ingredients do I need?

For the custard and toast base: 6–8 thick slices brioche or challah, 4 large eggs, 3/4–1 cup milk or cream, 1–2 tsp vanilla extract, 1–2 tbsp sugar for the custard, 1/2 tsp ground cinnamon, pinch of salt, and butter for cooking. For the top: granulated sugar (about 1–2 tsp per slice). Optional toppings: fresh berries, maple syrup, and powdered sugar.

What bread works best for this recipe?

Stale or day-old brioche or challah works best, because it soaks up the custard without falling apart. Use thick slices (about 1 inch) for optimal texture.

How do I soak the bread?

Whisk eggs, milk/cream, vanilla, cinnamon, sugar, and a pinch of salt in a shallow dish. Dip each bread slice to coat both sides, letting it soak 20–40 seconds per side. For extra custard, you can refrigerate the soaked bread for 30–60 minutes or overnight, then blot gently before cooking.

Should I bake or pan-fry?

Both methods work. Pan-fry slices in a little butter over medium heat until lightly golden, then finish in a 350°F (175°C) oven for 8–12 minutes to set the custard. Alternatively, bake the soaked bread in a greased dish at 350°F for about 20–30 minutes until the custard is set and the edges are golden.

How do I create the brûlée topping?

After the French toast is cooked, sprinkle a thin, even layer of granulated sugar over each slice. Use a kitchen torch to caramelize the sugar until deep amber and glossy, about 1–2 minutes per slice. If you don’t have a torch, place under a hot broiler for 1–2 minutes, watching closely to prevent burning.

Can I make this ahead?

Yes. You can prepare the custard-soaked bread and refrigerate overnight. Bake and brûlée just before serving for best texture. Leftovers can be stored in the fridge and re-brûlée briefly to refresh the top.

How should I store leftovers and reheat?

Store refrigerated in an airtight container for up to 2–3 days. Reheat in a toaster oven or 350°F oven for 5–8 minutes until warmed through. Re-brûlée the tops with a torch or under the broiler to refresh the crust.

Can I adapt this recipe for dietary restrictions?

Yes. For dairy-free, use almond, soy, or other non-dairy milk and a dairy-free butter substitute. For gluten-free, use a gluten-free brioche or challah. Texture may vary with substitutions, so you may need to adjust the soaking time or sugar slightly.

What toppings or serving ideas pair well?

Serve with fresh berries, a drizzle of maple syrup or honey, whipped cream, and a dusting of powdered sugar. A touch of cinnamon or citrus zest can brighten the flavors. For extra indulgence, add a dollop of vanilla yogurt or crème fraîche.

Tips for perfect texture and flavor

Use slightly stale bread to improve soaking, avoid over-soaking to prevent sogginess, cook until the custard is set but still moist, and caramelize the top right before serving to keep the interior tender. If you don’t have a torch, a quick broil works, but watch closely to prevent burning.

Introduction / Hook

Picture a stack of warm, pillowy slices that marry two breakfast legends into one irresistible indulgence: French toast and cinnamon rolls. The air is thick with vanilla, butter, and a swirl of cinnamon that seems to drift from the pan into the room, inviting every hungry soul to gather around the table. This French toast cinnamon roll isn’t merely a dish; it’s a comforting, aroma-filled celebration of weekend mornings, a brunch-daydream made edible. The first bite reveals a softly custardy interior that tastes like a kiss of vanilla-laced milk, while the outer edges deliver a caramelized crust that offers just enough resistance before giving way to tender sweetness inside. And then there’s the cinnamon roll essence—the faint, sugary ribbon of cinnamon and brown butter that lingers on the palate, echoing memories of bakery cases warmed by friendly chatter and the glow of morning sunlight. It’s the kind of dish that makes you smile before your fork even meets the plate, because it promises both nostalgia and novelty in one glorious mouthful.

What makes this French toast cinnamon roll so captivating is not just the flavor but the experience. It is a bridge between two beloved breakfast worlds: the quick, cozy convenience of French toast and the indulgent, celebratory nature of a cinnamon roll. It’s adaptable to weekend brunch crowds, intimate mornings with a partner, or a playful make-ahead option for holidays. The scent that fills the kitchen—cinnamon, vanilla, melted butter, a hint of citrus zest—makes a promise: you are about to savor something that tastes like it came from a bakery, yet belongs in your own home kitchen. It invites slow mornings, long conversations, and the rewarding feeling of creating something special without needing a pastry chef’s toolkit. In short, this is the kind of dish that turns ordinary breakfasts into cherished rituals, one slice at a time.

The Story Behind the Dish

French toast, or pain perdu, has been a humble remedy for stale bread across generations, a way to coax sweetness and life back into simple loaves. Cinnamon rolls, on the other hand, trace their roots to European pastry traditions that celebrate yeast, butter, and a swirl of cinnamon-sugar goodness baked into soft, stretchy dough. It feels almost inevitable that these two comforting classics would someday join forces in the quest for a breakfast that feels both familiar and indulgent. The concept of marrying a custardy, eggy toast with the gooey promise of a cinnamon roll is a natural evolution—an idea born from late-night kitchen experiments, a well-timed impulse to “make breakfast feel like a treat,” and the universal desire to replicate that bakery aroma you chase down on weekend mornings.

In many homes, breakfast is a stage for story-telling: the way a grandmother’s stovetop would sing as she prepared a meal that nourished both body and memory, the way a parent might coax the day to start with a sweet, comforting scent. This dish is a kindred spirit to those memories. It borrows the swagger of a cinnamon roll—the warm spice note, the glossy glaze, the soft, pull-apart texture—and condenses it into the morning-friendly form of French toast. The result is a hybrid that honors both traditions: the custard-soaked bread that becomes tenderly custardy when fried, and the cinnamon’s cozy glow that makes the entire kitchen feel like a sunlit bakery. It’s not just about indulgence; it’s about a shared moment—children tracing patterns in the steam, friends swapping stories over forks, and the simple joy of a kitchen that smells like comfort personified.

There’s a narrative undercurrent here as well: a nod to practical brilliance. Cinnamon rolls are often a weekend project—leisurely, patient, and generous in quantities. French toast is the weekday hero, quick and crowd-pleasing. Bringing them together speaks to everyday magic—making something feel special without turning the morning into a marathon. It’s a reminder that great breakfasts don’t have to be complicated to feel extraordinary. They can be beautifully simple and incredibly satisfying, especially when the scent and taste align to evoke warmth, recollection, and a touch of whimsy.

Why You’ll Love This Recipe

  • Impressive yet approachable: It looks like a bakery-worthy dish, but it’s built from everyday pantry staples.
  • Make-ahead friendly: The components can be prepared in stages or assembled the night before for a seamless morning.
  • Luxuriously comforting texture: A custardy interior with a lightly caramelized exterior and a soft, pull-apart crumb that echoes cinnamon rolls.
  • Balanced sweetness: The glaze or icing can be tuned to taste, letting you keep the sweetness in check or go full bakery-sweet for a special occasion.
  • Versatile for dietary tweaks: The base concept adapts to dairy-free, gluten-free, or vegan substitutions without losing its character.
  • Kid-friendly appeal: The familiar flavors of toast, cinnamon, and vanilla make it a perennial favorite for families with varied tastes.
  • Perfect for brunch spread: It pairs beautifully with coffee, fruit, yogurt, and a splash of sparkling cider, elevating a simple morning into a convivial event.
  • Aromatically irresistible: The scent alone is enough to draw people to the table—there’s something almost magical about cinnamon-laced mornings.

Flavor Profile & Texture

The dish rests on a backbone of classic French toast: day-old bread soaked in a velvety custard of eggs, milk, vanilla, and a hint of sugar. But the cinnamon roll influence threads through in a few delicious ways. First, there’s an aromatic warmth from ground cinnamon that permeates every bite, sometimes punctuated with a whisper of nutmeg or citrus zest to mimic the brightness found in many cinnamon roll recipes. The custard itself becomes ribbons of softness, gently binding the slices so they stay cohesive while still offering that characteristic “pull” when you tear into them. The bread’s interior is tender, nearly cloud-like, with just enough stability to hold its shape as you cut through.

The outer crust delivers a satisfying contrast: a light caramelization leaves tiny crisp edges that crackle slightly under your teeth. This crust provides a counterpoint to the interior’s softness, creating a pleasing texture play—from the delicate bite of a perfectly fried slice to the gooey center that tastes like a cinnamon-forward dream. And then there’s the hallmark of cinnamon rolls—the glaze or icing that brings a final, glossy kiss to the plate. Depending on how you choose to finish it, the glaze can be a simple powdered sugar drizzle, a cream-cheese-based frosting, or a lighter glaze with hints of lemon or vanilla. All versions share a unifying sweetness tempered by tangy notes from dairy or citrus, echoing cinnamon roll allure while staying true to French toast’s comforting, breakfast-friendly roots.

In terms of taste, the dish reads as a warm symphony: vanilla-soft dairy, buttery richness, cinnamon’s cozy warmth, a touch of sweetness that lingers pleasantly on the tongue, and a soft, milky finish that invites another bite. There’s enough sweetness to feel like a special treat without tipping into cloying territory, especially if you balance the glaze and the bread’s own sweetness. The result is a layered flavor profile that makes every bite feel like a tiny celebration—one that is complex enough to feel refined, yet familiar enough to be comforting from the first forkful.

Occasions & Pairings

When to Serve

This dish shines in a variety of settings. It’s a standout for weekend brunches when guests linger over coffee and conversation. It also works beautifully as a special upgrade for holidays like Christmas morning, Easter brunch, or Mother’s Day, where the table can be graced with something that feels indulgent but not over-the-top. For weekday mornings, a lighter version or a make-ahead approach can transform a rushed breakfast into something worth waking up for. It also doubles as a dessert-for-breakfast option in a playful sense, perfect for celebrating birthdays or leisurely Sundays after a family pancake-for-two ritual. In short, if you want a dish that reads as both comforting and celebratory, this cinnamon roll-streaked French toast hits the mark.

Pairings

Pair this dish with a range of accompaniments that enhance its flavor without overpowering it. Classic coffee remains the most natural match—the roasted bitterness balancing the sweetness of the bread and glaze. A robust espresso or a creamy latte can elevate the experience, as can a chai or spiced tea for those who enjoy a warm spice chorus with their breakfast. For milder beverages, a glass of cold milk or a small pour of vanilla almond milk complements the dish’s creaminess. Fruit components, such as a warm berry compote, sliced citrus, or tender roasted apples, add brightness and contrast while keeping the meal feeling light. A yogurt or ricotta-based topping can introduce a tangy note that plays well against the cinnamon’s sweetness. For those who prefer a festive beverage, a lightly spiced sparkling cider or a dry sparkling wine can transform this into a brunch-worthy showcase—perfect for holiday gatherings or celebratory weekends.

Tips, Variations & Substitutions

Every family has its own twist on this concept, and the dish invites personalization. Here are ideas to tailor the experience to your kitchen, dietary needs, or mood.

Make-Ahead Tips

Prepare the pan, soak the bread slices, and even whisk the custard up to a day in advance. Cover and refrigerate overnight, then bake in the morning. If you’re pressed for time, you can pre-slice the loaf, arrange the slices in a baking dish, and pour the custard over just before baking. The baking time may be shorter in this case, so keep an eye on the dish as it bakes to achieve the same tender interior and caramelized edges.

Variations

Flavor infusions elevate the dish beyond the original. Try these approaches to create distinct versions:

  • Orange-Cinnamon: Add a teaspoon of orange zest to the custard for a bright, citrusy note that enhances the cinnamon’s warmth.
  • Brown Butter & Maple: Finish the dish with a drizzle of brown butter syrup or a maple glaze to intensify the toffee-like, nutty depth.
  • Cream Cheese Swirl: Layer cream cheese swirls between bread slices before soaking for an extra decadent filling reminiscent of classic cinnamon rolls.
  • Walnut or Pecan Crunch: Sprinkle toasted chopped nuts on top for a caramelized crunch that echoes the textures of a cinnamon roll topping.
  • Fruit-Filled: Insert a thin layer of fruit preserves or sautéed apples between layers to add a fruity contrast that brightens the dish.

Dietary Substitutions

  • Vegan: Use plant-based milk (almond, soy, oat) and a dairy-free butter substitute. Replace eggs with a flaxseed or chia egg mixture, and use a dairy-free cream cheese or glaze made from coconut or cashew cream.
  • Gluten-Free: Choose a gluten-free bread that resembles brioche in texture. Ensure any glaze or icing uses gluten-free ingredients; many store-bought powders are gluten-free, but check labels.
  • Low-Sugar Option: Reduce the sugar in the custard and glaze, or substitute with a sugar-free glaze that uses a splash of lemon juice to counterbalance sweetness.
  • Low-Carb: Opt for almond-flour bread and a sugar-free glaze. The texture will be different, but the cinnamon roll flavor can still shine with a tender, custardy interior.

Storage & Make-Ahead Ideas

Storing and re-serving this dish requires a little strategy to preserve texture and flavor. If you have leftovers, let them cool to room temperature, then transfer to an airtight container. Refrigerate for up to 2 days. Reheating is best done in a low oven or toaster oven to re-crisp the edges while warming the center. A quick re-glaze or a light brush of melted butter can refresh the sheen and add back some moisture after storage. For longer storage, freeze individual portions after fully cooling; reheat gently in a low oven or microwave covered with a damp paper towel to avoid drying out. If you plan to make-ahead, the recommended workflow is to assemble the dish, let it soak, and refrigerate overnight. In the morning, bake until the top is golden and a toothpick inserted into the center comes out clean, with steam rising and the kitchen smelling like a bakery late into brunch hour.

Fun Facts & Trivia (Optional)

Here are a few tidbits that enrich the story of this dish and the broader breakfast heritage it draws from:

  • The term pain perdu translates to “lost bread,” a nod to the dish’s clever resurrection of day-old bread through soaking in a rich custard. This culinary trick multiplies moisture and flavor, turning stale bread into something sumptuous.
  • Cinnamon has a long and storied history, once considered a luxury spice that signified celebration and warmth. Its presence in breakfast classics like this French toast cinnamon roll echoes centuries of spice trade and culinary indulgence.
  • French toast dates back to ancient times, with variations appearing in cuisines across the world. The modern American breakfast toast tradition has many regional twists, from thick-cut brioche to thinner challah, each contributing its own texture and flavor profile to this timeless dish.
  • Cream cheese frosting or glaze has a distinct American bakery influence, often associated with the classic cinnamon roll. Pairing that glaze with French toast’s custard creates a bridge between bakery and breakfast that fans of both treats can appreciate.
  • Many households adopt this hybrid as a “showstopper brunch” recipe, precisely because it looks impressive on the table but is built from familiar, comforting elements that don’t overwhelm the cook on a busy morning.

Ingredients

Cinnamon Roll Dough

  • 3 1/4 cups all-purpose flour (plus more for dusting)
    → This is the base structure for the yeasted dough. The flour provides the gluten network that traps the gas produced by the yeast, giving the rolls their soft yet chewy crumb. Measure by spoon-and-sweep into the bowl to avoid compacted flour; knead on a lightly floured surface until smooth. If you want a slightly richer crumb, you can substitute up to 1/2 cup with bread flour, but all-purpose yields the classic texture.
  • 1/4 cup granulated sugar
    → Supplies sweetness and helps feed the yeast early in fermentation. It also contributes to browning of the crust during baking. Use granulated sugar for reliable dissolution in the dough. If you’re watching sugar, you can reduce slightly, but keep around 3–4 tablespoons to ensure yeast activity.
  • 2 1/4 teaspoons active dry yeast
    → The leavening agent that makes the dough rise into fluffy rolls. Proof in warm liquid (see liquids below) for 5–10 minutes until foamy; if it doesn’t foam, your yeast is dead or the liquid was too hot. Store unopened in a cool, dry place; you can refrigerate or freeze active dry yeast for longer storage.
  • 1/2 teaspoon salt
    → Enhances flavor and tightens the gluten matrix for a better crumb structure. Salt also slows fermentation slightly, helping control flavor development. Add to the dry ingredients before mixing with liquids.
  • 1/2 cup warm milk (about 110°F)
    → Provides the dairy moisture and fat that help yield a tender crumb and rich flavor; warm milk also helps activate the yeast when combined with the yeast and sugar. If dairy-free, use fortified non-dairy milk with 1/2 teaspoon lemon juice or vinegar to mimic acidity; for best results, use whole milk or 2% for fullness.
  • 1/4 cup warm water
    → Additional liquid to achieve the correct dough hydration and to help activate yeast; ensure water is warm but not hot (about 105–110°F). If using milk only, you can skip this, but it helps adjust dough stiffness.
  • 2 tablespoons unsalted butter, melted
    → Adds tenderness and flavor to the dough; fat shortens gluten strands and yields a softer crumb. Let cool slightly before adding to the mixture to avoid cooking the egg. If you want extra richness, you can replace part of the liquid with an additional 1–2 tablespoons melted butter.
  • 1 large egg
    → Binds the dough and enriches the crumb; eggs trap air and help structure during proofing and baking. Use at room temperature for better emulsification and easier mixing.

Filling

  • 1/3 cup unsalted butter, softened
    → The base for the cinnamon-sugar filling; spreadable softness is important to distribute evenly and create a gooey swirl. Soften at room temperature; avoid melting totally to ensure the sugar sticks to the cinnamon layer. You can also use salted butter if you’re not adding much extra salt elsewhere.
  • 3/4 cup light brown sugar, packed
    → Provides moisture and a caramel flavor in the filling; the density helps create a gooey, sticky swirl when rolled. Pack the brown sugar into the measuring cup to ensure consistent amount and avoid gaps in the filling.
  • 2 tablespoons ground cinnamon
    → Delivers classic cinnamon roll aroma and warmth; for a stronger cinnamon presence, use 1.5–3 teaspoons depending on taste; freshly ground cinnamon enhances flavor compared to pre-ground. Sprinkle evenly over the butter to create uniform swirls.

Custard Soak (French Toast Dip)

  • 4 large eggs
    → The protein structure for the custard that coats the cinnamon rolls when dipped or fried. Use eggs at room temperature so they emulsify smoothly with the milk. Beat lightly until just combined; if overbeaten, bubbles may form but they won’t ruin the soak.
  • 1 cup milk (whole milk recommended)
    → Creates a rich, creamy custard base for the French toast soak; whole milk yields the best mouthfeel and flavor. For dairy-free versions, you can use fortified plant milk with a touch of melted butter to mimic fat content; adjust sweetness with sugar if desired.
  • 1 teaspoon vanilla extract
    → Adds warmth and aroma that complements cinnamon and cream cheese glaze. Use real vanilla extract for best flavor; you can also use vanilla bean paste as a substitute.
  • 1/2 teaspoon ground cinnamon
    → Infuses the custard with a hint of cinnamon to marry the flavors between the roll and the French toast soak; you can increase to 1 teaspoon for stronger flavor or omit for a lighter profile.
  • Pinch of salt
    → Enhances the custard’s sweetness and balances flavors; ensure distribution by whisking into the liquid before adding eggs.

Icing / Glaze

  • 4 ounces cream cheese, softened
    → The tangy base for a classic cinnamon-roll glaze; softened cream cheese blends smoothly with butter and sugar to create a creamy frosting that contrasts with the warm rolls. If you’re short on time, soften in a warm spot or microwave briefly (about 10 seconds at a time) to prevent overheating.
  • 2 tablespoons unsalted butter, softened
    → Adds body and helps emulsify the glaze into a satin-smooth texture with the cream cheese; room temperature ensures easy blending without lumps. For dairy-free glazing, substitute with coconut cream softened and mix with a dairy-free cream cheese alternative.
  • 1 cup powdered sugar
    → Provides the sweetness and smooth, pourable texture of the glaze. Sift before using to avoid lumps; adjust thickness by adding more sugar or a splash of milk.
  • 1 teaspoon vanilla extract
    → Enhances sweetness and depth of flavor; use pure vanilla for best aroma. If you prefer a stronger vanilla note, increase to 1.5 teaspoons.

To Serve / Optional toppings

  • 1/2 cup chopped pecans or walnuts (optional)
    → Adds contrasting crunch and nutty flavor to the roll slices; toast nuts briefly in a dry skillet or oven to intensify aroma before chopping and sprinkling. If using salted butter in the dough/filling, adjust salt accordingly to avoid oversalting.
  • 1/4 cup pure maple syrup (for serving)
    → Finishing touch to drizzle over slices; maple pairs beautifully with cinnamon. Use real maple syrup for best flavor; store at room temperature and rewarm slightly before drizzling if desired.

Instructions

  • Bloom the yeast by combining 1/4 cup warm water (105–110°F) with 1 teaspoon granulated sugar, then sprinkling 2 1/4 teaspoons active dry yeast over the surface and letting it sit 5–10 minutes until foamy and fragrant.
    → This activates the yeast so it can leaven the dough; a foamy surface indicates the yeast is alive. If there is no foam, discard and start with fresh yeast and ensure the liquid temperature is correct (not hotter than 120°F).
  • Whisk together the dry ingredients—3 1/4 cups all-purpose flour, the remaining 3–4 tablespoons of sugar (from the recipe’s total sugar), and 1/2 teaspoon salt—in a large bowl to ensure even distribution of salt and sugar before moisture is added.
    → Uniform dry ingredients promote an even crumb and prevent clumps of salt or sugar from directly contacting the yeast; sifting is optional but helpful for a smooth dough.
  • Combine the liquids to form the dough: in a separate bowl, mix the 1/2 cup warm milk (around 110°F), 1/4 cup warm water, 2 tablespoons melted butter (cooled slightly), and 1 large egg until blended, then stir in the foamy yeast mixture.
    → Warm liquids wake the yeast and melt fat, while the egg enriches the dough for a tender crumb; ensure the butter is not hot to avoid cooking the egg.
  • Knead the dough with the dry ingredients and liquids until a smooth, elastic ball forms, about 6–8 minutes by hand or 3–4 minutes in a stand mixer with a dough hook, adding flour sparingly as needed to maintain a soft, non-sticky surface.
    → Proper kneading develops the gluten network that traps gas during fermentation, giving the rolls a soft yet resilient crumb; stop when the dough passes the “windowpane” test (stretching without tearing).
  • First proof: lightly oil a large bowl, place the dough inside, cover with plastic wrap or a damp towel, and let it rise in a warm spot until doubled in size, about 1 to 1 1/2 hours.
    → Allowing the dough to double creates fullness and a light, airy texture in the final rolls; if your kitchen is cool, you can place the bowl in a turned-off oven with the light on or near a warm stove.
  • Prepare the filling by softening 1/3 cup unsalted butter to a spreadable state, then mixing with 3/4 cup light brown sugar (packed) and 2 tablespoons ground cinnamon until smooth and evenly cohesive.
    → A smooth, evenly distributed filling ensures uniform cinnamon swirls and a gooey center; avoid overheating butter so the filling doesn’t run when rolled.
  • Gently deflate the risen dough, transfer to a floured surface, and roll into a rectangle approximately 16×12 inches with even thickness, using a rolling pin to maintain a uniform sheet that facilitates tight rolling.
    → A uniform rectangle ensures consistent roll density and easier, even slicing; keep the edges square for tidy spirals.
  • Spread the cinnamon filling evenly over the dough, leaving a 1/2-inch border along the far edge, then press the filling lightly to adhere and prevent separation during rolling.
    → Even distribution prevents dry pockets and scorching at the edges; press gently so the butter doesn’t squeeze out when rolled.
  • Roll the dough away from you into a tight log, pinch the seam to seal, and trim the ends to even out the roll before cutting into 12 equal portions.
    → A snug seam and evenly cut portions produce uniform spirals that bake evenly; use a sharp knife or dental floss for clean cuts without squashing the dough.
  • Transfer the slices onto a greased 9×13-inch baking dish, spacing them evenly, cover loosely, and let them proof for a second rise until puffy and nearly doubled, about 30–45 minutes.
    → A second rise creates lighter, loftier rolls that bake with a soft crumb; avoid over-proofing, which can cause the dough to collapse in the oven.
  • While the rolls proof, preheat your oven to 350°F (175°C) and position the rack in the center; bake the rolls for 25–30 minutes until the tops are golden brown and the centers are set; rotate the pan halfway through for even browning.
    → Proper oven temperature ensures a golden crust with a tender interior and prevents under- or over-browning; rotating the pan combats hot spots in the oven.
  • Meanwhile, whisk 4 large eggs, 1 cup milk, 1 teaspoon vanilla extract, 1/2 teaspoon ground cinnamon, and a pinch of salt to create a custard for French toast dipping; whisk until fully combined and smooth, then let rest to hydrate the cinnamon.
    → A well-balanced custard coats the rolls evenly and prevents custard from separating during soaking; resting helps the cinnamon flavor melds into the liquid.
  • Prepare the glaze by beating 4 ounces softened cream cheese with 2 tablespoons softened butter until creamy, then gradually whisk in 1 cup powdered sugar and 1 teaspoon vanilla, thinning with a splash of milk if needed to reach a pourable consistency.
    → A smooth glaze adds tang and sweetness, while the dairy fat helps emulsify the frosting; adjust thickness to pour or drizzle as desired.
  • Once the rolls are baked and still warm, cut each roll into 2–3 thick rounds to create individual French toast slices suitable for dipping; set on a rack to cool briefly while you heat a skillet with a little butter over medium heat.
    → Slicing while warm helps maintain a tender interior; a lightly greased skillet ensures crisp, evenly browned exteriors without sticking.
  • Dip each roll round into the prepared custard for 15–20 seconds per side, allowing the surface to absorb the custard without becoming soggy, then transfer to the hot skillet and cook for 2–3 minutes per side until golden brown and the custard is set; repeat with remaining slices.
    → Quick soaking prevents soggy interiors, while pan-frying creates a crisp exterior and a custard-set inside, mimicking classic French toast textures.
  • Dust the finished French toast rolls with a light glaze drizzle and, if desired, scatter 1/2 cup chopped pecans or walnuts that have been toasted briefly for extra crunch and aroma; serve warm with pure maple syrup for additional sweetness and depth.
    → Toasted nuts provide contrast and aroma, while maple syrup enhances the cinnamon profile; serving warm ensures the glaze remains glossy and the textures stay inviting.

Notes

These cinnamon roll French toast rolls are an indulgent breakfast treat: soft yeasted dough spirals around a warm cinnamon-sugar filling and are finished with a creamy cream-cheese glaze. For best results, proof the yeast in warm liquids (about 105–110°F) with a pinch of sugar until the mixture is foamy, 5–10 minutes. Combine the dry ingredients, then whisk in the warm milk, warm water, melted butter and egg; knead until the dough is smooth and elastic, about 6–8 minutes. Let the dough rise in a warm place, covered, until doubled, about 60–75 minutes. Roll the dough into a rectangle, spread the softened butter for the filling, sprinkle brown sugar and cinnamon; roll tightly into a log and slice into 12 equal rolls. Place in a greased pan, proof again until puffy. Meanwhile, whisk together the custard soak: eggs, milk, vanilla, cinnamon and a pinch of salt; this will be used to soak or dip the rolls as French toast before finishing. Bake: preheat to 350°F (175°C). If you prefer, you can fry the rolls in a skillet with a little butter for a crisper edge. Bake the rolls until golden and cooked through, about 25–30 minutes. Make the glaze by beating cream cheese, butter, sifted powdered sugar and vanilla; loosen with a splash of milk to achieve a pourable consistency. Drizzle while warm for a silky finish and a contrast to the warm cinnamon swirl. To serve, drizzle with pure maple syrup and, optionally, scatter toasted nuts for crunch. Storage and make-ahead tips: assemble the rolls a day ahead, refrigerate overnight, then bake until puffed. Leftovers reheat well in a low oven or microwave; keep in a covered container for 2–3 days. Dairy-free options: use fortified plant milk in the soak, and substitute a dairy-free cream cheese or coconut cream for the glaze.

Tips

Tips for Perfect French Toast Cinnamon Roll

  • Yeast health and water temperature: If the yeast doesn’t foam when proofing, the mixture may be too hot, too cold, or the yeast is stale. Use warm (not hot) water around 105–110°F and re-check the yeast before proceeding. Fresh yeast lasts longer when stored in a cool, dry place or sealed in the fridge/freezer.
  • Flour handling: Spoon flour into the measuring cup and sweep off excess to avoid a dense dough. Weighing flour is even more precise. If the dough seems a touch dry, you can add a teaspoon of milk at a time, mixing until you reach a soft, tacky-but-not-sticky dough.
  • Kneading and gluten development: Knead until the dough is smooth and elastic and passes the windowpane test (stretchable enough to become translucent). Under-kneaded dough will be dense; over-kneaded dough can become tough. Take your time with kneading for a tender crumb.
  • Hydration balance: If the dough sticks excessively, rest it for 10–15 minutes to relax the gluten before continuing. A lightly floured surface helps prevent sticking without adding too much flour, which can dry the dough.
  • Filling preparation: Soften the butter but do not melt it completely. A spreadable consistency helps create an even cinnamon-sugar layer and a gooey swirl without seeping unevenly into the dough.
  • Even cinnamon layer: Mix cinnamon thoroughly with the brown sugar so every bite has consistent spice. If the filling seems dry, a tiny pinch of salt can enhance flavor and balance sweetness.
  • Rolling technique: Roll the dough into a tight rectangle to form clean swirls. Pinch the seam shut and seal the ends to prevent filling from leaking out during baking.
  • Cutting the rolls evenly: Use a sharp knife or dental floss (unflavored) to cut uniform slices. Wipe the blade between cuts for neat, even pieces and uniform baking.
  • Second rise (if preferred): Allow shaped rolls to rise briefly in a warm, draft-free spot before baking. This helps achieve a lighter crumb and better height. If you’re short on time, you can bake a bit sooner, but expect a denser outcome.
  • Custard soak temperature and mixing: Eggs should be at room temperature for smooth emulsification. Beat until just combined to avoid incorporating excess air, which can lead to foamy or uneven coating.
  • French toast soak duration: Dip or brush the rolls in the custard for a moment to soak, then let them rest briefly so the flavors penetrate before cooking. Do not oversoak, or the rolls may fall apart or become too soggy when cooking.
  • Glaze texture and application: Soften the cream cheese and butter well for a silky glaze. Sift the powdered sugar to avoid lumps, and whisk in vanilla. If the glaze is too thick, add a teaspoon of milk at a time until you reach a pourable but spreadable consistency. Drizzle over warm rolls so it sets into a glossy finish.
  • Make-ahead and storage: The dough can be prepared a day ahead and refrigerated overnight; bring to room temp and finish shaping before baking. Unbaked rolls freeze well—wrap tightly and thaw before baking. The glaze is best added fresh to avoid glazing that hardens too quickly.
  • Serving and toppings: Toasted nuts add a nice crunch; if using salted nuts or butter, adjust the salt in the dough and filling to avoid oversalting. A light maple syrup drizzle enhances the cinnamon-sugar profile when serving.

FAQ

French toast cinnamon roll – FAQ

What is French toast cinnamon roll?

French toast cinnamon roll is a fusion breakfast dish where pieces or swirls of cinnamon rolls are soaked in a classic French toast custard (eggs, milk, vanilla, and cinnamon) and then baked or pan-fried. It combines the fluffy, cinnamon-spiced flavors of French toast with the richness of cinnamon rolls and is often finished with frosting, glaze, or syrup.

What ingredients do I need?

Common ingredients include:

  • 8–10 traditional cinnamon rolls, or enough rolls to feed your crowd
  • 6 large eggs
  • 1 cup milk or cream
  • 1 teaspoon vanilla extract
  • 1 teaspoon ground cinnamon
  • 2 tablespoons melted butter (plus extra for the baking dish)
  • Optional: cream cheese frosting or powdered sugar for serving
  • Optional toppings: maple syrup, fresh fruit
Can I use store-bought cinnamon rolls?

Yes. Store-bought cinnamon rolls work well. You can cut them into thick slices or separate the rolls and soak them in the custard. If the rolls are heavily glazed, you may wipe off some of the glaze to avoid an overly soggy texture.

How do I assemble and bake it?

Follow these steps:

  1. Preheat oven to 350°F (175°C).
  2. Whisk eggs, milk, vanilla, and cinnamon to make the custard.
  3. Cut cinnamon rolls into 1-inch thick slices or separate the rolls.
  4. Dip slices in the custard, turning to coat, about 30–60 seconds each.
  5. Arrange in a greased 9×13-inch baking dish in a single layer. Spoon any remaining custard over the rolls.
  6. Dot with small pieces of butter; bake 25–35 minutes, until puffed and golden.
  7. Serve warm with cream cheese frosting or maple syrup, if desired.
How long does it take to make?

Prep and dipping take about 15–20 minutes. The bake time is 25–35 minutes. Total time is roughly 1 hour from start to finish. If you prepare it as an overnight casserole, plan for longer bake time in the morning.

Can I make it ahead?

Yes. You can assemble the dish and refrigerate overnight, then bake in the morning. Another option is to refrigerate the cut rolls and custard separately and combine just before baking. You can also freeze baked portions for later reheating.

What size pan should I use?

A standard 9×13-inch (23×33 cm) baking dish works well for 8–10 cinnamon rolls. If you use fewer rolls, an 8×8-inch (or similar) dish is fine, but you may need to shorten the bake time slightly and monitor for doneness.

How should I serve and toppings?

Serve warm. Good options include:

  • Cream cheese frosting or a simple powdered sugar glaze
  • Additional maple syrup
  • Fresh berries or sliced fruit
  • A light dusting of cinnamon
How can I customize the flavor?

Try these variations to suit your taste:

  • Stir in chopped pecans or walnuts for crunch
  • Add diced apples or raisins into the custard or casserole
  • Incorporate citrus zest (orange or lemon) for brightness
  • Use half-and-half or heavy cream for richer custard
  • Drizzle salted caramel or use a cinnamon-sugar glaze
  • Use a cream cheese frosting variation or a maple frosting
How do I store leftovers?

Store refrigerated in an airtight container for up to 3 days. Reheat in a 350°F (175°C) oven for 7–10 minutes or briefly in the microwave (20–30 seconds) until warmed through. You can also freeze individual portions for up to 2 months and reheat from frozen.

Introduction / Hook

In the soft glow of a weekend morning, the kitchen fills with a hum of anticipation. Butter melts with a gentle hiss, the skillet becomes a stage for something playful and cozy, and suddenly breakfast wears a new smile: a pancake sandwich. Imagine two pillowy, sun-warmed rounds of batter standing like friendly sentinels, ready to cradle a swirl of flavors that wake the senses. The aroma is a quiet celebration of comfort—vanilla notes weaving with a hint of toasty sweetness, a whisper of caramelized edges, and the promise of a bite that’s at once familiar and delightfully novel. This isn’t merely a meal; it’s a sunny invitation to slow down, to pause, and to savor textures that contrast—tender pancake softness meeting a savory, melty heart or a bright, glossy topping that glimmers with morning sunshine. The pancake sandwich is breakfast that travels with you, a playful handheld ritual that sparks joy from the first crackle of the pan to the last satisfying chew. It is the softest kind of indulgence, the kind that feels both special and everyday at once, a reminder that a simple idea—two pancakes embracing a filling—can become a moment worth pausing for, a small ceremony of comfort you can carry through your day.

The Story Behind the Dish

The pancake sandwich has a humble, almost nostalgic origin story: a hungry morning, a sizzling skillet, and the timeless appeal of “two things that belong together.” In many kitchens around the world, breakfast is a canvas for improvisation, a place where sweet and savory mingle in comforting harmony. The idea of using pancakes as bread stretches back to the broader tradition of turning everyday staples into portable, handheld meals. In bustling diners, there are riffs on this concept: pancake stacks that enclose a warm, cheese-mlecked center, or a quick fold of fillings inside a tender pancake to create a portable, bite-sized treat. The pancake pancake sandwich taps into that instinct—two soft, forgiving rounds that are sturdy enough to hold a filling without collapsing, yet delicate enough to melt around a heart of goodness. It’s a modern culinary doodle born from childhood mornings when syrup dripped from the plate and the kitchen smelled of vanilla and butter. It’s also a nod to the cross-cultural vitality of breakfast, where the pancake concept has evolved into many forms: crepe-style wrappers, fluffy cloud pancakes, or even crisp-edged versions that offer a textural counterpoint to a cozy filling. The pancake sandwich sits at the intersection of nostalgia and novelty, a dish that invites you to honor tradition while playfully exploring new flavor pairings and textures.

Why You’ll Love This Recipe

  • Versatility at its best: whether you crave something savory, sweet, or a balance of both, the pancake sandwich adapts to your mood and pantry.
  • Quick to assemble conceptually (the actual timing depends on fillings), making it a reliable go-to for busy mornings and leisurely weekends alike.
  • Kid-friendly and crowd-pleasing: the familiar comfort of pancakes reassures little tasters while the sandwich format adds a dash of fun that adults appreciate.
  • Perfect for brunch or on-the-go meals: you can slab, stack, wrap, and bite with one hand, leaving the other free to sip coffee or catch up on the day ahead.
  • Flavor-driven customization: swap fillings, toppings, and fillings to create dozens of distinct experiences without changing the core idea.
  • Texture play that delights: the light, airy pancake exterior contrasts with melty fillings, creamy spreads, or crisp elements for a satisfying mouthfeel.
  • Family-friendly yet elevate-able: a simple breakfast for everyday moments can become a show-stopping weekend treat with small, thoughtful touches.

Flavor Profile & Texture

At its heart, a pancake sandwich delivers a harmony of contrasts. The pancake rounds themselves are soft and cloud-like, with a delicate crumb and a tender bite that melts on the tongue. The edges might shimmer with a light caramelization, offering a faint toasty note that grounds the sweetness. Depending on how you cook them, these pancakes can boast a slightly springy structure or a more pillowy, melt-in-your-mouth texture. The filling is where the narrative truly unfolds: you can lean into savory richness with silky, melted elements and gently seasoned fillings that bring depth without overwhelming the pancake’s mild sweetness. Or you can lean into fruity brightness and creamy spreads that gleam with a glossy sheen, creating a balance that feels light and refreshing despite the indulgence. A well-constructed pancake sandwich offers a playful range of textures—soft, airy pancakes surrounding a warm, creamy center, with occasional crisp edges if you choose a slightly crisper pancake or a lightly toasted filling component. The sensory experience is multi-layered: the first bite releases a chorus of warm batter aroma, followed by a gentle, fruity or savory note, and finally a lingering satisfaction as the filling lingers on the palate. The interplay of vanilla, butter, and gentle sweetness with a savory counterpoint creates a palette that is both comforting and adventurous, inviting you to explore how subtle tweaks can shift the entire mood of the dish.

Occasions & Pairings

  • Weekend brunches: the pancake sandwich shines as a centerpiece that feels special without being fussy. Serve with a vibrant fruit salad and a sparkling beverage to elevate the mood.
  • Weekday mornings on the run: pre-cook thin pancake rounds and assemble a few seconds before departure for a portable, satisfying bite.
  • Family breakfasts: a mix-and-match station where each person builds their own sandwich with preferred fillings and toppings fosters togetherness and creativity.
  • Holiday mornings: dress it up with seasonal flavors and a light dusting of spices to echo festive notes without going overboard.

Pairings elevate the experience without stealing the spotlight from the pancake sandwich. Consider these ideas to complement and contrast the dish:

  • Beverages: a creamy coffee, a bright citrus juice, or a mimosa can balance the subtle sweetness with a refreshing lift.
  • Side dishes: a fresh fruit medley, yogurt with a touch of honey, or light hash browns provide textural variety and a palate-cleansing counterpoint.
  • Dessert-like finishes: a drizzle of a glossy syrup or a fruit compote can echo sweetness while maintaining a balanced profile.

Tips, Variations & Substitutions

The beauty of a pancake sandwich lies in its flexibility. Here are ideas to tailor it to your kitchen, dietary needs, or mood, without getting bogged down in rigid instructions:

  • Make-ahead batter ideas: prepare a batch of pancake batter and chill it briefly; the batter can rest, which often yields a lighter texture when cooked, and you can stockpile hot, fresh rounds for quick assembly.
  • Savory vs. sweet: for savory versions, emphasize fillings and toppings that melt or pair well with a gentle saltiness. For sweet versions, lean into gentle fruit accents and a touch of creaminess to balance the batter’s mild sweetness.
  • Dairy-free and vegan options: use plant-based milks and emulsifiers to craft a tender pancake that remains fluffy; choose fillings that carry moisture to compensate for the absence of dairy richness.
  • Gluten-free approaches: many gluten-free flour blends produce tender, pancake-like textures that still hold up to sandwich-building; consider adding a small amount of starch to improve crumb and bite.
  • Regional twists: experiment by introducing regional pantry flavors—citrus zest, spice blends, or herb accents that resonate with your cooking style.
  • Texture-forward variations: try slightly crisper edges on the pancake by cooking them a touch longer on moderate heat; pair with a contrast component like a creamy spread or a delicate crumble for textural variety.
  • Health-forward spins: you can opt for whole-grain or enriched pancake batters that deliver more fiber and nutrients while keeping the sandwich enjoyable and indulgent.

Storage & Make-Ahead Ideas

Leftovers can be a rare but wonderful thing with a pancake sandwich if you approach storage with intention. Pancake rounds, once cooled, keep well when stored properly, and fillings can be prepared in advance or assembled quickly when you’re ready to eat. Here are practical notes to help you manage ahead and keep flavors fresh:

  • Storing pancakes: refrigerate (in an airtight container) for up to 2–3 days. For longer storage, freeze flat between sheets of parchment, then stack in an airtight bag; rewarm gently to restore softness before assembling.
  • Make-ahead fillings: prepare fillings that can hold well and reheat without losing character; keep them warm or at least near room temperature to ensure the sandwich maintains a pleasing balance when assembled.
  • Reheating tips: reheat pancakes in a warm skillet or toaster oven to revive softness and a hint of toasty texture; avoid microwaving if you want to preserve a better texture, as microwaves can make pancakes denser.
  • Assemble-on-the-spot approach: you can pre-slice or pre-portion components (where appropriate) and assemble the sandwich quickly when you’re ready to eat, preserving the integrity of each element.

Fun Facts & Trivia (Optional)

Delightful little curiosities often accompany comforting foods, and the pancake sandwich is no exception. Here are a few tidbits to nibble on while you plan your next breakfast:

  • The concept of bread-like foods made from batter-to-pancakes has roots in various cultures, where flatbreads and batter-based grilled or fried preparations served as portable sustenance for busy mornings and travelers.
  • In many places, the term “sandwich” evokes a sense of convenience and portability; pairing this idea with the soft, gentle nature of pancakes creates a playful, approachable indulgence that can feel both nostalgic and modern.
  • Seasonal inspiration: pancakes pair beautifully with natural sweetness from seasonal fruits, spices like cinnamon or nutmeg, and floral notes from vanilla or citrus zest, turning breakfast into a sensory celebration.
  • Small touches can transform the experience: a little melted cheese peeking from the edge, a glossy glaze that catches the morning light, or a swath of herbs or greens for freshness can all elevate the simplest sandwich into a memorable bite.

Ingredients

Pancake Base

  • 2 cups all-purpose flour (spooned and leveled)
    → The flour provides the pancake’s structure and body. Sift or whisk with the dry ingredients first to distribute the leaveners evenly, then measure by spooning into the cup and leveling. This helps avoid dense, gummy pancakes. For a lighter result, you can substitute some of the flour with 1/4 cup cornstarch or use a 1:1 gluten-free flour blend if needed, but adjust liquid as necessary.
  • 2 tablespoons granulated sugar
    → Adds sweetness and helps browning during cooking. Use white sugar for a clean flavor; if you prefer a deeper caramel note, substitute half with brown sugar. Reducing or omitting sugar will yield a less sweet pancake, which works well if you plan to fill with banana and peanut butter.
  • 2 teaspoons baking powder
    → Primary leavening that creates light, fluffy pancakes by releasing gas when heated. Ensure it’s fresh for maximum lift. Sift with the flour to distribute evenly, and let the batter rest 5–10 minutes before cooking to activate the leavening.
  • 1/2 teaspoon baking soda
    → Additional leavening that contributes extra tenderness and helps browning when paired with acidic components or buttermilk. If you’re not using an acidic liquid, you can omit this, but in this recipe it adds a bit of lift and softness. Do not overuse, or pancakes may taste soapy.
  • 1/2 teaspoon salt
    → Enhances flavor and balances sweetness. Fine salt distributes more evenly; adjust if using salted butter in the batter.
  • 2 cups milk (dairy) or non-dairy alternative
    → Hydrates dry ingredients and activates leavening. Choose unsweetened varieties to control sweetness. If using a thicker non-dairy milk (like some almond milks), you may add a splash more liquid to reach a pourable batter.
  • 2 large eggs
    → Bind and enrich the batter, adding moisture and structure. Beat lightly with the wet ingredients and fold into the batter just until combined. For a lighter texture, you can whisk the eggs with the milk before mixing into the flour.
  • 3 tablespoons unsalted butter, melted, plus more for cooking
    → Imparts rich flavor and tender crumb; adds ring of fat that helps pancakes crisp slightly around the edges. Let the melted butter cool briefly before mixing into the batter to avoid curdling the eggs. For dairy-free, substitute with neutral oil (e.g., vegetable or canola).
  • 1 teaspoon vanilla extract
    → Adds warmth and depth to the flavor, complementary to peanut butter and banana. Use pure vanilla for best aroma; if you have a vanilla bean, scrape the seeds and add for extra richness.

Filling and Assembly

  • 1/2 cup creamy peanut butter
    → Primary sandwich filling, providing creaminess, protein, and a savory-sweet contrast to the pancakes. Stir until smooth and warm slightly if needed to spread easily between warm pancakes. Natural peanut butter may separate; whisk or rewarm briefly to blend the oil back in for a smooth layer.
  • 1 medium ripe banana, sliced
    → Adds natural sweetness, moisture, and a soft texture between pancake layers. Choose a banana with yellow skin and brown spots for maximum sweetness; slice into even rounds to create neat layers inside the sandwich.

Toppings

  • 2 tablespoons maple syrup (for serving)
    → Classic finishing glaze that adds moisture and a balanced sweetness. Warm slightly to pour smoothly and blend with the pancake crumb. You can substitute honey or a fruit compote if preferred.
  • Butter for cooking and serving (optional)
    → Extra richness when melted on top of the hot pancakes before serving. If you prefer a lighter option, skip this or use a light pat on the finished sandwich.

Optional Add-ins

  • 1/2 cup mini chocolate chips (optional)
    → Fold into the batter for pockets of melted chocolate or sprinkle on pancakes as they cook for bursts of sweetness. If using, fold gently to avoid over-mixing the batter and to keep pancakes light.
  • 1/2 cup blueberries (optional)
    → Fresh or frozen blueberries add brightness and juicy bursts. If using frozen, do not thaw; add directly to the batter to minimize color bleeding. Gently fold to distribute evenly without turning the batter purple.

Instructions

  • Whisk together the dry ingredients: in a large bowl, sift or whisk 2 cups all-purpose flour, 2 tablespoons granulated sugar, 2 teaspoons baking powder, 1/2 teaspoon baking soda, and 1/2 teaspoon salt until evenly combined.

    → This ensures the leaveners are evenly distributed and salt is evenly dispersed, preventing dense pockets and promoting a light, uniform rise in the pancakes.
  • Whisk together the wet ingredients: in a separate bowl, whisk 2 cups milk, 2 large eggs, 3 tablespoons melted unsalted butter cooled, and 1 teaspoon vanilla extract until smooth.

    → Beating the eggs and emulsifying the melted butter with the milk creates a cohesive batter with good moisture and structure, avoiding greasy separations.
  • Gently fold the wet ingredients into the dry ingredients: pour the wet mixture into the dry mixture and stir just until combined, leaving a few small lumps.

    → Overmixing develops gluten and makes pancakes tough; a few lumps keep the crumb tender and light.
  • If using optional add-ins, fold them in now: gently fold in 1/2 cup mini chocolate chips or 1/2 cup blueberries, distributing evenly without overworking the batter.

    → Add-ins provide bursts of flavor, but folding them in gently prevents the batter from becoming dense or discolored and keeps the pancakes tender.
  • Let the batter rest for 5–10 minutes in a warm place to relax the gluten and activate the leavening.

    → Resting allows the gas bubbles to stabilize and the batter to hydrate fully, yielding fluffier pancakes with a softer crumb.
  • Preheat your skillet or griddle to medium heat (about 350°F / 175°C) and grease it lightly with butter or neutral oil.

    → A properly heated, well-greased surface prevents sticking, ensures easy flip timing, and promotes even browning across the pancake surface.
  • Test the pan with a small drop of batter to confirm the temperature; adjust heat if it sizzles too aggressively or remains still.

    → A correctly heated pan will start cooking the batter immediately with a gentle sizzle, producing a sturdy crust without scorching.
  • Pour about 1/4 cup of batter for each pancake onto the hot pan, spacing them so they do not touch, to form neat rounds.

    → Uniform size stacks stack more evenly and cook through without crowding, which helps you maintain consistent thickness and texture.
  • Cook the pancakes until bubbles form on the surface and the edges look set, about 2–3 minutes, then flip in one confident motion and cook the other side until golden and just set.

    → The bubbles indicate the interior is cooking and the underside has formed a sear; a steady flip prevents tearing and yields even browning on both sides.
  • Transfer the cooked pancakes to a warm plate or rack and keep them warm while you finish the remaining batter.

    → Keeping pancakes warm prevents condensation from making the surface soggy and ensures the final sandwich remains cohesive and tender.
  • Warm the peanut butter slightly if needed to a spreadable consistency; whisk or stir briefly to reblend natural oils if separated.

    → A smooth, spreadable filling makes the assembly clean and even, avoiding lumpy patches that interrupt the sandwich texture.
  • Assemble the pancake sandwich: spread a thin, even layer of peanut butter on the first pancake, lay a single layer of banana slices over the peanut butter, then top with the second pancake.

    → Spreading peanut butter first creates a moisture barrier and flavor bridge, while banana adds sweetness and moisture; a single layer prevents oozing and keeps the sandwich neat.
  • Press gently to seal the sandwich and, if desired, slice in half for easier handling and a tidy presentation.

    → Gentle pressure helps the filling stay centered and prevents the layers from sliding apart, especially when cutting.
  • Serve with warm maple syrup on the side or lightly drizzle over the finished sandwich just before eating.

    → Maple syrup provides sweetness and moisture that complements the peanut butter and banana, while serving on the side lets each bite be controlled and balanced.
  • Optional finishing touch: a small pat of butter on top of the hot sandwich as you serve to melt into the pancake for extra richness.

    → A final pat of butter enhances flavor and gloss, but use sparingly to avoid overly greasy layers inside the sandwich.

Notes

These pancake sandwiches are a cozy, crowd-pleasing treat featuring fluffy pancake bases, creamy peanut butter, and sliced banana. They can be customized with extra fillings or toppings, such as mini chocolate chips, blueberries, chopped nuts, or a smear of almond butter for a nuttier twist. They freeze well—assemble the sandwiches, wrap individually, and reheat in a skillet, toaster, or microwave for a quick breakfast or snack. If you prefer dairy-free, swap milk for a plant-based option and use melted coconut oil or a dairy-free butter spread; for gluten-free, substitute with a 1:1 gluten-free flour blend and use gluten-free baking powder. To enhance flavor, rest the batter 5–10 minutes to let the leaveners activate; lightly whisk the wet ingredients with the melted butter before combining with dry ingredients; avoid overmixing to keep pancakes tender. Always ensure your flour and baking powder are certified gluten-free if you have gluten intolerance.

Tips

Tips for a Perfect Pancake Sandwich

General batter and pan tips

  • Let the batter rest 5–10 minutes after mixing. This hydrates the flour (and gluten-free blends) and activates the leavening, helping to produce lighter, fluffier pancakes. If you’re using a gluten-free blend, you may need a touch more liquid—adjust to a pourable consistency.
  • Ensure the baking powder is fresh for maximum lift. If pancakes seem dense, a small extra pinch of baking powder can help, but avoid overdoing it to prevent a soapy taste.
  • Keep the batter at a pourable but thick consistency. If it’s too thick, whisk in a splash more milk; if too thin, add a little flour or a pinch of cornstarch for body.
  • Don’t overmix. Stir just until dry and wet ingredients are combined; a few small lumps are fine and yield tender pancakes.
  • Preheat a nonstick skillet or well-seasoned pan over medium heat and lightly grease with butter or neutral oil. If using butter, add it to the pan first and let it melt before pouring batter to prevent scorching.
  • Pour pancakes with about ¼ cup batter per round for even thickness; adjust if your pan is larger or smaller to keep them uniform.
  • Test the heat with a small drop of batter. When you see bubbles forming on the surface and the edges look set, flip carefully and cook the other side until golden.

Filling and assembly tips

  • Warm the peanut butter slightly so it spreads more easily between pancakes. If using natural peanut butter that separates, whisk or rewarm briefly to emulsify the oil for a smooth layer.
  • Slice the banana just before assembly into even rounds for neat layers and even sweetness distribution.
  • Spread a thin, even layer of peanut butter on the top of one pancake, arrange banana slices in a single layer, then top with the second pancake to close the sandwich. This helps keep the filling from spilling out.
  • If the filling seems thick, drizzle a small amount of maple syrup over the banana to help the layers bind and melt together as you bite.
  • Assemble the sandwich while pancakes are still warm so the peanut butter melts slightly and adheres to the layers for easier slicing.

Flavor tweaks and add-ins

  • Incorporate optional add-ins like ½ cup mini chocolate chips or ½ cup blueberries. Fold them into the batter gently to avoid overmixing; if using blueberries, don’t thaw frozen berries to minimize color bleed.
  • Adjust sweetness: the recipe uses 2 tablespoons granulated sugar with optional brownie-tinted flavor from brown sugar. If you want a deeper caramel note, use more brown sugar or substitute half with brown sugar as indicated.
  • For dairy-free versions, substitute melted neutral oil for the melted butter and use your preferred non-dairy milk. Ensure a pourable batter by adding a splash more liquid if needed.

Make-ahead, storage and reheating

  • Batter can be mixed ahead and refrigerated for up to 24 hours. Bring to room temperature and whisk in a splash of milk before cooking if thick.
  • Cooked pancakes can be cooled, stacked with parchment between layers, wrapped, and refrigerated 1–2 days or frozen for longer storage. Reheat gently in a warm skillet, in the toaster, or in a low oven until just heated through.
  • To keep the sandwich as fresh as possible, assemble just before serving. If you must prep ahead, store peanut butter, banana, and pancake components separately and assemble right before eating.

FAQ

What is a pancake sandwich?

A pancake sandwich is a handheld breakfast or brunch option made by placing a filling between two cooked pancakes, similar to a sandwich. Fillings can be sweet, savory, or a combination.

What ingredients do I need for a basic pancake sandwich?

For the batter: flour, milk, eggs, sugar, baking powder, a pinch of salt, and melted butter or oil. For fillings, choose your favorites such as fruit, jam, yogurt, peanut butter, cream cheese, eggs, cheese, bacon, avocado, or Nut butter.

What fillings pair well with pancake sandwiches?

Sweet ideas: sliced bananas, berries, apples, maple syrup, chocolate spread, whipped cream. Savory ideas: scrambled eggs, cheese, bacon or sausage, avocado, smoked salmon with cream cheese, spinach.

Can I use store-bought pancake mix or should I make batter from scratch?

Both work. Store-bought mix is convenient; follow the package directions. From-scratch batter is simple: 1 cup flour, 1 cup milk, 1 egg, 1–2 tbsp melted butter, 1–2 tsp sugar, 1 tsp baking powder, pinch of salt. Adjust thickness as needed.

How do I cook pancake sandwiches?

Cook pancakes one at a time on a warm non-stick skillet until bubbles form and edges look set, then flip and cook through. Let the pancakes cool slightly, spread your fillings, and stack a second pancake on top. For melty fillings, you can warm the assembled sandwich briefly in a skillet or oven.

How can I make them extra fluffy?

Use fresh baking powder, don’t overmix the batter, rest it 5–10 minutes, and cook on medium heat. If desired, fold in whipped egg whites for extra lift or replace part of the liquid with yogurt or buttermilk for tenderness.

How should I assemble and serve the pancake sandwich?

Place one pancake on a plate, evenly add the filling, then top with the second pancake. Slice if desired and serve immediately with maple syrup, fresh fruit, or a side of yogurt.

How long do pancake sandwiches keep, and how should I store leftovers?

Best enjoyed fresh. Refrigerate fillings like eggs or dairy promptly. Leftover pancakes can be stored in the fridge for 2–3 days or frozen for longer. Reheat gently in a skillet or microwave until warm.

Are there gluten-free or dairy-free options?

Yes. Use gluten-free flour or a prepared gluten-free mix, and plant-based milk with a dairy-free fat (oil or dairy-free butter). For dairy-free fillings, choose options like fruit, dairy-free yogurt, nut butters, and avocado.

Can I make a savory pancake sandwich?

Definitely. Use a less-sweet batter and fillings like eggs, cheese, spinach, avocado, bacon, or sausage to create a hearty savory version.

Introduction / Hook

Imagine a warm, inviting bakery scent wafting through your kitchen the moment you slide a tray into the oven. The air hums with butter, vanilla, and cinnamon—a comforting promise of snuggly sweetness on a busy morning or a cozy weekend treat. A cupcake cinnamon roll takes that irresistible cinnamon-roll magic and folds it into a cake-sized bite-sized joy. It’s a dessert that tastes like a snappy, joyful brunch, a playful breakfast in disguise, and a celebratory sweet all rolled into one. The exterior is softly fluffy, the interior reveals a tender spiral of cinnamon-sugar goodness, and the finish is crowned with cream cheese frosting that tangles perfectly with the sweetness. Each bite is a tiny celebration—pillowy texture meeting the unmistakable warmth of cinnamon, with a whisper of vanilla and a glaze that shines just enough to feel special without being cloying. This is not just a dessert; it’s an invitation to slow down, savor small moments, and enjoy the simple pleasure of a bakery-quality treat made at home.

What makes a cupcake cinnamon roll special is the balance: the bright vanilla note that keeps the cake light, the rich, cinnamon-forward swirl that channels the classic roll, and the creamy frosting that ties everything together with a smooth tang. It’s the best of both worlds—the casual comfort of a cupcake and the nostalgic charm of a cinnamon roll—presented in a format that’s easier to share, easier to portion, and just as delightful to present at a table loaded with weekend coffee or a holiday brunch spread.

The Story Behind the Dish

The cinnamon roll has a storied lineage. Its roots trace through Europe and into Scandinavia, where yeast-leavened doughs meet a generous swirl of brown sugar, butter, and cinnamon. In North America, these rolls became a beloved staple—soft, gooey, and punctuated by the spice that sparked many a sweet morning. The idea of translating that iconic comfort into a cupcake form is a natural evolution—two beloved desserts in one dish. Bakers began pairing the light, airy crumb of a vanilla cupcake with the cinnamon-sugar spiral of a roll, then topping it with a cream cheese frosting that mimics the generous glaze of a fresh-out-of-the-oven cinnamon roll. The result is a portable, visually appealing treat that can be display-worthy for a brunch buffet, yet approachable enough for a weekday bake. It’s a celebration of nostalgia with a modern twist, a nod to tradition while embracing the convenience and charm of cupcakes.

Beyond the kitchen, this hybrid dessert speaks to contemporary dessert culture: the rise of “cupcake-forward” menus that keep classic flavors alive in a format that fits today’s social dining scenes. It’s also a reminder that comfort foods can be reimagined—taking a family favorite and presenting it in a new shape with a refined finish. The cupcake cinnamon roll invites memories, conversations, and that irresistible aroma that signals something special is about to be tasted. It’s a dish that travels well—from a cozy weekend morning at home to a brunch party with friends—without losing its comforting core or its celebratory flair.

Why You’ll Love This Recipe

  • Impossibly soft crumb: a light base that supports the cinnamon swirl without becoming dense or heavy.
  • Perfect harmony of flavors: vanilla sweetness, brown-butter notes in the cinnamon centers, and a tangy cream cheese frosting that brightens every bite.
  • Visual appeal: elegant spirals, a glossy frosting crown, and a dessert that practically begs to be photographed for social feeds or a family album.
  • Make-ahead friendly: portions can be prepared ahead of time and assembled or frosted closer to serving, reducing last-minute stress.
  • Kid-friendly but sophisticated: familiar flavors that appeal to younger tasters while pleasing adults looking for a touch of bakery-style indulgence.
  • Versatile for celebrations or everyday joy: a dessert that fits a holiday table, a weekend brunch, or a simple weeknight treat that lifts the mood.

Flavor Profile & Texture

The cupcake cinnamon roll marries a delicate vanilla cake with a cinnamon-sugar ribbon that reveals itself in every bite. The cake crumb is tender, almost velvet-like, with a subtle crumb that carries the sweetness of a well-developed vanilla batter. Swirled through the center is a cinnamon-spice core—think brown sugar, butter, and a kiss of salt—that gives warmth and depth without turning tooth-achingly sweet. When you bite into the cupcake, you encounter the contrast between the soft cake and the slightly chewy, cinnamon-sugary core, a texture dance that echoes the experience of a classic cinnamon roll but in a more approachable, portion-controlled format. The frosting—cream cheese with a touch of vanilla and a whisper of lemon zest or optional citrus—adds a bright tang that cuts through the pastry’s richness, creating a balanced finish that lingers pleasantly on the palate. The glaze or frosting provides a sheen and a creamy mouthfeel, smoothing the edges of sweetness while amplifying the cinnamon’s aroma as it melts on the tongue.

In aroma, the sweet perfume of vanilla mingles with warm cinnamon; in taste, notes of caramelized sugar, melted butter, and a hint of salt create a comforting, bakery-fresh profile. The texture contrast—airy cake vs. luscious frosting, with a cinnamon swirl that offers a chewy bite—keeps every mouthful interesting and satisfying. This is a dessert that doesn’t rely on gimmicks; it relies on balance, quality ingredients, and technique that yields a cupcake that tastes like a cinnamon roll, only in a form that invites you to grab another bite without committing to a full roll’s worth of pastry.

Occasions & Pairings

This dessert shines in many settings. It’s perfect for weekend brunches, where a beauty shot of a plateful of these cupcakes next to steaming coffee becomes a centerpiece of the table. It’s equally at home at holiday gatherings, where its familiar comfort evokes warmth and togetherness. For birthdays, it offers a playful twist on a classic treat—presented as individual portions that can be decorated with edible glitter or small cinnamon sticks for a festive touch. Its versatility makes it a crowd-pleaser at potlucks and offices alike, a reliable showstopper that requires less hands-on time than a large cinnamon roll but delivers a similar vibe of indulgence.

Suggested pairings include:

  • Drinks: robust coffee, espresso, cinnamon-spiced lattes, chai tea, or a glass of cold milk.
  • Side dishes: fresh berries, citrus segments, or a light yogurt parfait to contrast the sweetness.
  • Desserts: a petite fruit tart or a crisp pastry to echo the cinnamon notes without overwhelming the palate.

Tips, Variations & Substitutions

Here are practical ideas to tailor the cupcake cinnamon roll to your pantry, dietary needs, or flavor preferences:

  • Vegan option: use plant-based milk, vegan butter, and vegan cream cheese for the frosting. Check labels for thickness and tanginess to emulate the classic cream cheese frost.
  • Gluten-free version: substitute with a reliable gluten-free all-purpose flour blend that behaves like wheat flour in quick baking. You may want to increase hydration slightly or add a touch of additional fat to maintain tenderness.
  • Low-sugar or lower-sugar approach: reduce the sugar in the batter and in the cinnamon filling; compensate with a pinch more vanilla and a touch of maple or honey to maintain flavor depth. Use a light glaze instead of a thick frosting if desired.
  • Alternate spices: swap in cardamom, nutmeg, or a pinch of ground cloves for a deeper, more autumnal aroma. A tiny splash of orange zest will brighten the profile beautifully.
  • Texture twist: for a little extra bite, add a sprinkle of finely chopped pecans or walnuts to the cinnamon swirl, but keep the nut amount modest so it doesn’t overwhelm the soft crumb.
  • Flavor variations: you can introduce a punch of brown-butter flavor to the cake batter by browning the butter before using it, which adds a toasty nuance that complements the cinnamon.
  • Frosting options: if you prefer less tang, blend the cream cheese frosting with a touch of buttercream to soften the tang; or add a light whipped cream cheese topping for a lighter feel.
  • Make-ahead frosting: frost the cupcakes the day you plan to serve for the best contrast in texture. If prepping ahead, store unfrosted cupcakes and frost just before serving to maintain softness.
  • Make-ahead swirl: you can prepare the cinnamon-sugar swirl in advance and refrigerate it in a parchment-wrapped log. When ready, slice off rounds to swirl into the cupcakes for a precise, even layer.

Storage & Make-Ahead Ideas

These cupcakes store well and can be a practical asset for meal prep or entertaining. Once baked and cooled, store unfrosted cupcakes in an airtight container at room temperature for up to 2 days. If you need to refrigerate, wrap well to prevent the cake from drying out, and bring to room temperature before frosting for the best texture. Frosted cupcakes will keep in an airtight container in the refrigerator for up to 3 days. If you want to freeze them, freeze unfrosted cupcakes in a single layer on a baking sheet, then transfer to a freezer-safe container. Thaw at room temperature, then finish with frosting for the freshest texture. For a make-ahead approach, you can prepare the cinnamon swirl and batter up to a day in advance, refrigerate the batter (and swirl) separately, and bake fresh the next day to maintain optimal fluff and aroma. If you’re frosting ahead, keep the frosting chilled and re-whip briefly to restore a fluffy texture before applying to the cupcakes.

To keep the presentation pristine for parties or brunch buffets, consider piping the frosting with a decorative swirl or employing small, edible toppers like cinnamon dust, sugar pearls, or a light drizzle of caramel to echo the roll’s glaze. If you’re serving a crowd with a mix of dietary needs, you can provide a few gluten-free or vegan cupcakes alongside the standard version, clearly labeled so guests can choose with confidence.

Fun Facts & Trivia

Did you know that cinnamon, one of the star flavors here, was once valued more highly than gold in ancient times? Its warm, spicy aroma has long been associated with hospitality and comfort, making cinnamon-inspired desserts a natural choice for gatherings. The cinnamon roll itself has deep roots in Northern European baking, particularly in Sweden and Finland, where it’s celebrated as a national treasure during seasonal festivities and weekend indulgences. The concept of turning such a roll into a cupcake form is part of a broader modern trend: reimagining classics in a portable, shareable, and visually appealing format without sacrificing the essence of the original. The cream cheese frosting, a staple in many cinnamon-roll-inspired desserts, owes its tangy brightness to dairy cultures that balance sweetness—an approach that appears across many beloved American pastries. In popular culture, these flavor notes—vanilla, cinnamon, cream cheese—are often associated with comfort, family and gatherings, making the cupcake cinnamon roll a familiar, welcoming choice for many tables.

Historically, cinnamon-related desserts have traveled with merchants and travelers along trade routes, becoming beloved across households as a signal of warmth and care. Today, bakers use those same associations to craft treats that feel luxurious yet approachable, often dazzling with a glossy finish and a scent that signals “special occasion” without requiring a full-on celebration. The cupcake cinnamon roll stands at the intersection of nostalgia and modern convenience, offering a familiar flavor with a new, charming presentation that fits contemporary eating habits and hospitality traditions.

Ingredients

Cupcake Cinnamon Roll
Cupcake Base

  • 2 1/2 cups all-purpose flour, sifted
    → Provides the primary structure and body for the cupcakes, giving a tender yet sturdy crumb that can support the cinnamon swirl. Sifting helps remove lumps and aerate the flour for more even mixing with leaveners, which promotes a lighter rise. Measure accurately and sift with the dry ingredients before combining with the wet ingredients to prevent dense batter; if you prefer an even lighter texture, you can substitute up to 1/2 cup of the flour with cake flour.
  • 1 cup granulated sugar
    → Delivers sweetness and assists with browning of the cupcake tops, contributing to flavor balance alongside the butter and vanilla. When melted butter is used in the batter, the sugar won’t cream in with the fat, so whisk it into the wet ingredients until dissolved enough to avoid grittiness. For a lighter crumb, you can slightly reduce sugar and add a pinch more salt to maintain flavor.
  • 1/2 cup unsalted butter, melted and cooled
    → Adds richness and moisture, helping produce a tender crumb without relying on excessive eggs. Melted butter distributes evenly through the batter, preventing pockets of oil and ensuring a uniform texture. Let the butter cool slightly before adding to the wet ingredients to avoid cooking the eggs; if the batter is very warm, chill it briefly before mixing.
  • 2 large eggs, room temperature
    → Act as binders and contribute to structure and moisture retention. Room-temperature eggs emulsify more smoothly with the fat and liquids, leading to a uniform, tender crumb. If you’ve stored eggs cold, gently warm them in a bowl of warm water for a few minutes to reach room temperature before using.
  • 1 cup whole milk, room temperature
    → Provides moisture and helps dissolve sugars, contributing to a soft, moist crumb. Using room-temperature milk ensures better emulsification with the fats and eggs, yielding a more cohesive batter. If you prefer a dairy-free version, choose a fortified plant milk and consider adding an extra tablespoon of melted vegan butter to mimic richness.
  • 1/2 cup sour cream or Greek yogurt, room temperature
    → Adds tenderness, moisture, and a subtle tang that complements the cinnamon filling. The acidity helps activate the leaveners for a lighter rise and a velvety crumb. Use full-fat for the best texture; if using yogurt, whisk it in with the wet ingredients and ensure it’s well integrated to avoid curdling.
  • 2 teaspoons vanilla extract
    → Enhances sweetness and depth of flavor, especially when paired with cinnamon. Use pure vanilla extract (not imitation) for a richer aroma; for extra depth, you can scrape the seeds from one vanilla bean and add them along with the extract. Add to the wet ingredients and mix until evenly incorporated.
  • 2 teaspoons baking powder
    → Primary leavening agent that provides rise and a light cupcake texture. Whisk with the dry ingredients to distribute evenly and avoid gaps in the batter. Check the expiry date of baking powder and replace it if it’s more than a few months old to ensure proper rising.
  • 1/2 teaspoon baking soda
    → Additional lift and helps with browning and a softer crumb by reacting with the sour cream/yogurt. Use promptly after mixing with acidic components; avoid letting the batter sit too long before portioning into cupcakes to maintain maximum lift.
  • 1/4 teaspoon salt
    → Balances sweetness and enhances overall flavor, helping the cinnamon and vanilla to pop. Dissolve in the dry mix to ensure even distribution. Do not omit, especially in sweeter recipes, as salt heightens flavor perception.

Cinnamon Swirl Filling

  • 1/3 cup light brown sugar, packed
    → Provides a rich, caramel-like sweetness that pairs with the cinnamon to create a classic roll flavor. Packing ensures a consistent level of sweetness throughout the swirl as you bake. For a lighter swirl, substitute with half brown sugar and half granulated sugar; keep the cinnamon ratio the same for flavor balance.
  • 2 tablespoons granulated sugar
    → Adds additional sweetness and helps balance moister elements in the swirl, contributing to a smooth, spreadable texture. Combine with brown sugar to create a uniform filling that won’t clump when spread over the batter. If the swirl becomes too wet, reduce the brown sugar slightly.
  • 2 teaspoons ground cinnamon
    → The defining flavor of the cinnamon roll. Use fresh-ground or well-measured ground cinnamon for consistent aroma and spice intensity. Sift with the sugars to avoid cinnamon clumps; spreading evenly across the batter helps achieve a uniform swirl in every bite.
  • 2 tablespoons unsalted butter, melted
    → Helps the sugar and cinnamon stick together and creates a cohesive, spreadable filling. The butter also adds moisture and a glossy swirl when swirled into the batter. Let it cool slightly if it’s hot to prevent it from liquefying the batter too much when swirled.
  • Optional pinch of salt
    → If your brown sugar is very sweet, a tiny pinch of salt can enhance the overall balance and bring out the cinnamon flavor. Sprinkle lightly and mix into the filling to ensure even distribution.

Cream Cheese Frosting

  • 8 oz cream cheese, softened
    → Forms the tangy, creamy base of the frosting. Softened cream cheese blends smoothly and evenly with butter, yielding a glossy, spreadable finish. If the frosting seems lumpy, beat longer at medium speed until completely smooth and free of lumps.
  • 1/2 cup unsalted butter, softened
    → Provides richness and helps stabilize the frosting; beating with cream cheese creates a lighter, fluffier texture. Ensure butter is at room temperature to achieve a creamy emulsion; refrigerate briefly after icing if you need firmer set for a cake-like finish.
  • 2 to 3 cups powdered sugar, sifted
    → Controls sweetness and thickness, allowing you to tailor a spreadable or pipeable frosting. Start with 2 cups and add more gradually until you reach the desired consistency; sift to avoid gritty grains. If you want a thinner glaze-like frosting, add a splash more milk or cream.
  • 1 teaspoon vanilla extract
    → Adds depth and aroma to the frosting; for the fullest flavor, use pure vanilla and consider scraping a vanilla bean into the frosting for extra fragrance. Mix with the fats before folding in the sugar to ensure even distribution.
  • Pinch of salt
    → Balances sweetness and enhances the tanginess of the cream cheese. A small amount helps to sharpen the flavor; if you’ve used salted butter, offset slightly by reducing the salt on the recipe.
  • 1 to 2 tablespoons milk or heavy cream to loosen if needed
    → Adjusts the frosting to your desired spreading or piping consistency. Add a little at a time and mix until smooth; chill briefly if you want a stiffer frosting for piping without running.

Optional Glaze

  • 1/2 cup powdered sugar
    → Quick, glossy finish that adds a touch more sweetness and a smooth sheen. Sift to prevent lumps and whisk with liquid until smooth. If you want a thicker glaze, use less liquid; for a runnier glaze, add an extra teaspoon of milk.
  • 2 tablespoons milk or heavy cream
    → Provides the liquid needed to reach the desired glaze consistency. Use more or less to achieve a drizzle or a pourable glaze, depending on your preference. Use at room temperature for best blending with the sugar.
  • 1/2 teaspoon vanilla extract
    → Adds aroma and depth to the glaze; use pure vanilla for a richer flavor profile. Mix into the glaze after the sugar is smooth to integrate evenly.
  • Optional pinch of salt
    → Balances sweetness and helps the glaze to set with a more chocolatey or caramelized finish, depending on other ingredients. Use sparingly to avoid making the glaze taste salty.

Toppings

  • 1/2 cup chopped pecans or walnuts, toasted (optional)
    → Adds a contrasting crunch and nutty depth that echoes traditional cinnamon rolls. Toasting enhances flavor and aroma; cool slightly before sprinkling over frosted cupcakes. If you have nut allergies, omit or substitute with toasted coconut or omit entirely for a nut-free version.

Instructions

  • Preheat your oven to 350°F (175°C) and line a 12-cup muffin tin with paper liners or grease it well.
    → This ensures the cupcakes bake evenly, release cleanly, and the cinnamon swirl stays contained without sticking to the pan.
  • Prepare the cinnamon swirl filling by whisking together 1/3 cup light brown sugar, 2 tablespoons granulated sugar, 2 teaspoons ground cinnamon, and a pinch of salt if desired in a small bowl; stir in 2 tablespoons melted unsalted butter until a cohesive, spreadable paste forms.
    → The sugar and cinnamon create a classic cinnamon roll flavor, while the butter helps the filling stay cohesive and spread evenly without clumping during assembly.
  • Whisk together the dry ingredients: 2 1/2 cups sifted all-purpose flour, 1 cup granulated sugar, 2 teaspoons baking powder, 1/2 teaspoon baking soda, and 1/4 teaspoon salt in a large bowl until uniformly dispersed.
    → Sifting and whisking remove lumps and distribute leaveners so the cupcakes rise evenly and have a tender crumb rather than a dense center.
  • In a separate bowl, whisk the wet ingredients: 2 large eggs (room temperature), 1 cup whole milk (room temperature), 1/2 cup sour cream or Greek yogurt (room temperature), 2 teaspoons vanilla extract, and 1/2 cup melted and cooled unsalted butter until smooth and fully integrated.
    → Using room-temperature ingredients ensures smooth emulsification and a cohesive batter; add cooled butter to prevent cooking the eggs and to maintain a silky texture.
  • Pour the wet mixture into the dry ingredients and mix gently with a spatula or wooden spoon just until the batter comes together and there are no streaks of flour; stop as soon as combined.
    → Overmixing develops gluten, making the cupcakes tougher; a few small lumps keep the crumb tender and light.
  • For each liner, spoon batter to fill about one-third full, dollop about 1 teaspoon of the cinnamon swirl in the center, then top with enough batter to fill to about two-thirds full; use a toothpick or small skewer to gently swirl the filling through the batter in a marbled ribbon.
    → Layering the swirl inside the batter creates a cinnamon-roll effect in every bite; swirling distributes the spice without overpowering the batter’s texture, and keeping the swirl away from the very top prevents overflow during baking.
  • Bake in the preheated oven at 350°F (175°C) for 18 to 22 minutes, or until a toothpick inserted into the center comes out with a few moist crumbs and the tops are lightly golden.
    → The toothpick test confirms doneness; rotating the pan halfway through ensures even browning and rising across all cups.
  • Transfer the cupcakes to a wire rack and allow them to cool completely before frosting to prevent the frosting from melting or sliding off.
    → Cooling sets the crumb and stabilizes the surface, giving a smoother foundation for a clean, neat frosting.
  • Beat 8 oz cream cheese (softened) and 1/2 cup unsalted butter (softened) on medium speed until smooth and light, about 2 to 3 minutes.
    → Properly softened fats emulsify into a creamy base, yielding a glossy frosting that pipes smoothly and holds its shape.
  • Beat in 2 to 3 cups sifted powdered sugar, 1 teaspoon vanilla extract, and a pinch of salt; gradually add 1 to 2 tablespoons milk or heavy cream to reach a spreadable, pipeable consistency.
    → Adding sugar gradually prevents graininess; adjusting with dairy controls thickness so you can pipe or spread without tearing the frosting.
  • If the frosting is too soft for piping, refrigerate for 15 to 20 minutes to firm slightly before transferring to a piping bag; otherwise proceed to frosting the cupcakes.
    → A firmer frosting holds its shape on intricate piping and reduces slump in warm kitchens.
  • When cupcakes are cooled and frosting is set, pipe or spread a generous layer of frosting onto each cupcake using an offset spatula or a decorative tip, aiming for an even crown that mirrors a cinnamon-roll topping.
    → A smooth, even frosting enhances flavor perception and provides a luxurious contrast to the spiced swirl.
  • Optional glaze: whisk 1/2 cup powdered sugar with 2 tablespoons milk and 1/2 teaspoon vanilla until smooth; drizzle lightly over the frosted cupcakes for a shiny finish.
    → The glaze adds a touch more sweetness and a polished, bakery-like sheen; adjust thickness if you prefer a drizzle or a pourable glaze.
  • Optional nut topping: toast 1/2 cup chopped pecans or walnuts in a dry skillet over medium heat until fragrant and lightly browned, about 2 to 3 minutes, then cool and sprinkle over the frosting for a textural contrast.
    → Toasting intensifies nut aroma and provides a pleasant crunch that echoes traditional cinnamon rolls; cool completely to prevent smearing the frosting.
  • Serve the cupcakes at room temperature for optimal flavor and texture, and store any leftovers in an airtight container at room temperature for up to 2 days or refrigerate for up to 5 days; bring to room temperature before serving to restore the full softness of the crumb.
    → Proper storage preserves moisture, flavor, and the integrity of the cream cheese frosting, ensuring each bite remains tender and luscious.

Notes

These cupcake cinnamon roll cupcakes are a decadent treat featuring a tender vanilla cupcake swirled with a cinnamon filling and crowned with tangy cream cheese frosting. The warm cinnamon ribbons bake into every bite, delivering classic roll flavors with the lightness of a cupcake. You can customize them by adding chopped pecans or walnuts to the filling, swirling in a bit of orange zest for brightness, or drizzling caramel over the frosting for extra richness. For best texture, bring ingredients to room temperature before mixing and avoid overmixing the batter to keep a soft, delicate crumb. When swirling the cinnamon filling, spread evenly over the batter and use a gentle sweep of the knife to create ribbons without pushing the filling to the edges. Bake at 350°F (175°C) until a toothpick inserted into the center comes out clean, about 18–22 minutes; let cool completely before frosting.

Storage and serving: refrigerate frosted cupcakes and enjoy within 3–4 days; you can freeze unfrosted cupcakes for up to 1 month and frost after thawing. If you frost and freeze, consider piping a fresh layer of frosting after thawing for the best texture. Let any refrigerated cupcakes come to room temperature for 15–20 minutes before serving to maximize flavor and softness.

Gluten-free option: To make gluten-free cinnamon roll cupcakes, substitute a certified gluten-free all-purpose flour blend and a gluten-free baking powder, and ensure all other ingredients are certified gluten-free. If you have gluten intolerance, always verify labels on ingredients like vanilla extract and sour cream for gluten-containing additives.

Tips

Tips for Cupcake Cinnamon Roll

  • Prep and mise en place: Take all ingredients out of the fridge about 30 minutes before you plan to bake to bring dairy and eggs to room temperature. This helps emulsification and a tender crumb.
  • Batter handling: Sift dry ingredients with baking powder, baking soda, and salt to ensure even distribution. Whisk wet ingredients separately, then fold dry ingredients in until just combined. Overmixing develops gluten and can make cupcakes dense.
  • Measuring flour: Scoop and level the flour for accurate measurements; avoid tapping the cup which can pack flour and create a heavy batter.
  • Cupcake portion: Use a 1/4 cup or medium scoop to portion batter into lined muffin cups, filling about 2/3 full for a domed top.
  • Cinnamon swirl: Keep the swirl filling cohesive by mixing the sugars, cinnamon, and melted butter until evenly combined. If it seems too loose, let it rest a few minutes or chill slightly so it swirls cleanly into the batter. Dollop a small amount onto each batter portion and swirl with a toothpick to create a ribbon, not a thick layer.
  • Texture and lift: Baking powder freshness matters—if it’s old, cupcakes may be dense. If you’re unsure, do a quick fizz test with a pinch of dry mixture in hot water to confirm readiness.
  • Masking moisture: Sour cream or yogurt adds tenderness; if you notice cracking top, it’s often from overbaking or overmixing; consider reducing mixing time slightly or baking a minute shorter next time.

Tips for Cream Cheese Frosting

  • Softened dairy: Let cream cheese and butter come fully to room temperature for smooth, lump-free frosting. If lumps form, beat longer at medium speed until smooth.
  • Sweetness and thickness: Start with 2 cups powdered sugar and add more until you reach your desired thickness. Sift the sugar to avoid gritty texture. If the frosting is too thick, beat in a teaspoon at a time of milk or cream.
  • Stability for piping: For a firmer, pipeable frosting, refrigerate the frosting for 15–20 minutes before piping. This helps hold shapes without tearing the cupcakes.
  • Flavor depth: Add vanilla extract and a pinch of salt as listed; you can also fold in a tiny splash of lemon juice or zest for brightness if desired, but keep it minimal to avoid curdling.

Tips for Optional Glaze

  • Consistency control: Mix glaze until smooth; adjust thickness by adding more powdered sugar for a thicker glaze or more milk for a drizzling glaze. For a glossy finish, whisk until very smooth and free of lumps.
  • Application: Drizzle over cooled cupcakes for a light sheen. If you’ve layered frosting, apply glaze after frosting has set slightly for a tidy finish.

Tips for Toppings

  • Toasted nuts: Toast chopped pecans or walnuts on a parchment-lined sheet at 350°F (175°C) for 5–7 minutes, shaking halfway, until fragrant and lightly browned. Cool before sprinkling to avoid soggy frosting.
  • Nut-free option: If you have nut allergies, omit nuts or substitute with toasted coconut or a sprinkle of flaky sea salt for texture contrast.

Baking, Cooling and Storage

  • Oven and timing: Preheat to 350°F (175°C). Bake cupcakes until a toothpick inserted in the center comes out with a few moist crumbs, about 18–22 minutes depending on your oven and size of cups. Do not overbake to avoid a dry crumb.
  • Cooling: Let cupcakes cool in the pan for 5 minutes, then transfer to a wire rack to cool completely before frosting to prevent sliding or melting of icing.
  • Storage: Fresh cupcakes with frosting can be stored in an airtight container at room temperature for 1–2 days or refrigerated for up to 3–4 days. Bring to room temperature before serving for the best texture and flavor.
  • Make-ahead freezing: Freeze unfrosted cupcakes for up to 2–3 months; defrost and frost when ready. Frosted cupcakes can be stored in the fridge for a shorter period, best eaten within 1 month for optimal texture.

FAQ

What is a cupcake cinnamon roll?

A cupcake cinnamon roll is a playful hybrid that bakes a cinnamon-sugar swirl into vanilla cupcakes and tops them with cream cheese frosting. Instead of rolling dough, the cinnamon swirl is folded into the cupcake batter to create ribbons of cinnamon in every bite.

What ingredients do I need for cupcakes cinnamon roll?

You’ll need three parts: the cupcake batter, the cinnamon-sugar swirl, and the cream cheese frosting.

  • For the cupcakes: all-purpose flour, granulated sugar, baking powder, salt, unsalted butter, eggs, vanilla extract, and milk.
  • For the cinnamon swirl: brown sugar, ground cinnamon, and melted butter.
  • For the frosting: cream cheese, unsalted butter, powdered sugar, vanilla extract, and a pinch of salt.
Can I make a dairy-free version?

Yes. Use dairy-free butter or coconut oil in the batter and swirl, and swap in dairy-free cream cheese or a plant-based frosting. Use almond, soy, or oat milk if needed. Check that all mix-ins and frostings are labeled dairy-free.

Can I make a gluten-free version?

Absolutely. Use a gluten-free all-purpose flour blend that includes xanthan gum (or add 1/4 teaspoon xanthan gum per cup of flour if your blend doesn’t include it). The rest of the recipe remains the same, but note that texture may vary slightly.

How do I swirl the cinnamon into the cupcakes?

Prepare the batter and cinnamon-sugar mixture. Line a muffin tin with papers. Fill each liner about 1/3 full with batter, dollop a teaspoon of the cinnamon-sugar swirl, then cover with more batter until 2/3 full. Gently drag a toothpick or skewer through the batter to create a ribbon swirl. Repeat for all cups.

What is the baking temperature and time?

Preheat to 350°F (175°C). Bake for 18–22 minutes, or until a toothpick inserted into the center comes out clean. Ovens vary, so start checking at the 18-minute mark.

What frosting should I use and how do I apply it?

Classic cream cheese frosting works great. Beat together softened cream cheese and butter, then gradually mix in powdered sugar, vanilla, and a pinch of salt until smooth. Once cupcakes are completely cooled, pipe the frosting on top or spread it with a knife. For extra cinnamon, dust with a little ground cinnamon.

How should I store the cupcakes?

Store unfrosted cupcakes in an airtight container at room temperature for up to 2 days. If frosted, refrigerate in an airtight container for up to 4–5 days. Bring to room temperature before serving for best texture and flavor.

Can I freeze these cupcakes?

Yes. Freeze unfrosted cupcakes in an airtight container for up to 1 month. Thaw and then frost. You can also freeze frosted cupcakes for 2–3 weeks; wrap well to prevent freezer burn and thaw in the fridge before serving.

Do you have any tips or common variations?

Tips: – Don’t overfill the liners or the batter may overflow. – Let ingredients come to room temperature for a smoother batter. – Use a light hand with the swirl to avoid dense centers. Variations: swap vanilla for almond extract, add chopped pecans or walnuts to the filling, or drizzle with a maple glaze on top.

Introduction / Hook

Imagine a slice of cake that feels like a warm embrace from a favorite baker, a delicate cloud of softness that melts on your tongue and leaves a whisper of vanilla and milk on the afternoon air. Torta al latte is that comforting, almost-forgotten classic: a milk-forward cake whose crumb is tender as a sigh and whose aroma invites you to slow down, gather loved ones, and share a moment of simple, lingering sweetness. The moment it bakes, the kitchen becomes a small theater of scent—milk, butter, and vanilla dancing together as a pale golden crust forms a gentle balcony above a creamy, cloudlike interior. It’s a cake that doesn’t shout for attention; it invites you to lean in, take a bite, and discover how something so humble can feel so luxurious. Whether you’re savoring it with a cup of coffee, pairing it with fresh berries, or gifting a homemade loaf to a friend, Torta al latte speaks in soft tones and makes ordinary days feel a touch more special.

The Story Behind the Dish

Milk-based desserts have a long, affectionate tradition in many cultures, and Italy is no exception. The concept of a cake built around milk—its gentle sweetness, its ability to tenderize the crumb—has roots in kitchens where ingredients were cherished and scarcity was rarely an enemy of flavor. In Italian homes, desserts often emerged from intelligent simplicity: pantry staples, fresh dairy, the comforting scent of vanilla or lemon zest, and a handful of eggs coming together into something that could carry a family through celebrations and quiet evenings alike. Torta al latte embodies that spirit. It’s the kind of cake that grandparents might have baked for a child returning home from school, a Sunday treat that lingered in tin boxes for the week, or a quick patisserie-style indulgence that felt like a warm hug after a long day.

The name itself is a little poetry—latte means milk in Italian—suggesting a cake where milk isn’t a mere ingredient but the very heartbeat of the batter. Some families remember learning the recipe out of curiosity, asking for the secret to its so-soft crumb, only to discover that the magic lies in patient mixing, proper rest for the batter, and a respectful balance between dairy and sweetness. Across regions, variations appeared—some with a touch of lemon zest brightening the milk, others with a pinch of almond essence that conjured a faint almond breeze. Yet the essence stays consistent: a cake that celebrates milk as a central element, yielding a slice that feels cozy and timeless, as if it had been handed down through generations in the exact same spirit, ever-evolving with each new family to embrace it.

Why You’ll Love This Recipe

  • Ultra-tender crumb: A soft, almost pillowy interior that remains moist and delicate, like a well-kept secret handed from one kitchen to the next.
  • comforting aroma: The lingering fragrance of warm milk, gentle vanilla, and a kiss of butter fills the room, inviting slow savoring rather than hurried bites.
  • Versatile for any moment: Perfect for breakfast with a cup of coffee, a tea-time treat, or a dessert to crown a meal with a quiet sense of sophistication.
  • Everyday luxury: You don’t need a long list of special ingredients or advanced technique—it’s approachable, reliable, and hard to resist.
  • Adaptable to your mood: Subtly customizable with citrus zest, a splash of almond extract, or a dusting of powdered sugar for a quick finish.
  • Ideal for sharing: A cake that travels well in a kitchen-to-table story, whether you’re baking for family, friends, or a cozy potluck gathering.

Flavor Profile & Texture

The flavor of Torta al latte centers on milk’s gentle sweetness, a creamy undertone that carries a whisper of vanilla and a soft, sweet butter note. The finish is clean and comforting, with no overpowering embellishments—just enough sweetness to evoke fond memories and a sense of home. If citrus is added, lemon or orange zest lightly lightens the profile, offering a bright, fragrant lift that doesn’t compete with the milk-forward base. The texture is the real magic: a fine, tender crumb that seems to melt on the tongue, with a subtle crust that provides a gentle contrast—enough structure to hold a slice neatly, yet not so crisp that it jars the delicate interior.

Think of it as a moist sponge cake that has learned the art of embracing moisture rather than drying out; a cake that remains softly springy rather than cakey, and that holds up to a light dusting of powdered sugar or a thin glaze if you choose to finish it in a simple, rustic way. The richness comes from the dairy and small amounts of fat that temper the sweetness, so every bite feels balanced and inviting rather than heavy. The mouthfeel is almost velvet-like, a comforting blanket of crumb that lingers pleasantly as you follow with a sip of coffee or a bite of fruit. This is the kind of cake that makes you pause, smile, and consider how such a straightforward combination can yield something so deeply satisfying.

Occasions & Pairings

Torta al latte feels at home in a wide range of occasions, from everyday indulgence to quiet celebrations. It’s equally content on a cozy weekend brunch table as it is perched at the center of a dessert plate after a weeknight dinner. Consider these moments when you might reach for a slice:

  • Sunday family brunches and relaxed gatherings where something soft and comforting is appreciated as a finale or mid-morning treat.
  • Afternoon tea or coffee breaks, where its tenderness pairs beautifully with a robust espresso, a cappuccino, or a creamy chai.
  • Celebrations that call for a simple, elegant dessert without fuss—think birthdays, anniversaries, or a grateful “thank you” to someone special.
  • Light, bright occasions when you want a cake that doesn’t overwhelm with sweetness; it can be dressed up with a thin glaze, a scattering of citrus zest, or fresh berries for color and contrast.

Pairings to consider for a complete experience:

  • Beverages: strong coffee, latte, cappuccino, Earl Grey tea, or a delicate dessert wine that doesn’t overpower the cake’s milk-forward profile.
  • Fresh accompaniment: a handful of berries (strawberries, blueberries, or raspberries) to add tart brightness that cuts through the cake’s softness; a dollop of lightly sweetened whipped cream or a spoonful of mascarpone can elevate it if you like.
  • Other desserts: a small scoop of vanilla gelato or a light lemon curd on the side to introduce a citrus contrast.

Tips, Variations & Substitutions

While the essence of Torta al latte is elegantly simple, there are many gentle ways to tailor it to your pantry, dietary needs, or mood. Here are ideas to spark your creativity without straying from the cake’s essential soul:

  • Flavor boosters: Add a touch of lemon or orange zest, a splash of vanilla extract, or a hint of almond extract to brighten or deepen the aroma. A pinch of fine sea salt can also enhance the perceived sweetness and balance the flavors.
  • Dairy variations: If you want to experiment with dairy-free or reduced-dairy options, substitute with a neutral plant milk (like almond or oat) and replace butter with a light neutral oil, keeping the fat content balanced to maintain tenderness. Be mindful that the crumb may shift slightly in texture with vegan milks.
  • Gluten-free option: Use a high-quality gluten-free all-purpose flour blend designed for cake baking; you may need to adjust the liquid a touch to keep the batter smooth and evenly hydrated.
  • Sweetness levels: For a less sweet cake, reduce sugar slightly or use a natural sweetener that doesn’t alter texture drastically. Conversely, a glaze or light dusting of powdered sugar can add gentle sweetness and a festive finish.
  • Texture tweaks: If you prefer an even lighter crumb, consider incorporating a small amount of cornstarch into the dry mix (or using a cake flour substitute) to soften the gluten structure and yield a more tender interior.
  • Regional twists: A pinch of ground cinnamon or nutmeg can introduce a warm, comforting note reminiscent of holiday desserts. A drizzle of honey or maple syrup as a finishing touch can also add depth beyond sweetness.
  • Make-ahead flavor development: Preparing the batter a little ahead and letting it rest can allow flavors to mingle; a longer resting period can contribute to a more cohesive crumb, though it should not be over-long to avoid overly thick batter.

Storage & Make-Ahead Ideas

Torta al latte keeps well when stored properly, making it a practical option for busy weeks or gatherings where you want slices ready to go. The cake tends to stay moist and tender for several days when kept in a cool, airtight container or tightly wrapped to preserve moisture. If you want to stretch its life, refrigerating the cake is a reliable option, though it may firm the crumb slightly; allow slices to come to room temperature before serving for the best texture and aroma.

Make-ahead ideas include baking the cake the day before an event and finishing with a light finish—powdered sugar, citrus zest, or a thin glaze—just prior to serving to keep the surface fresh. Because the cake is naturally moist, it travels nicely for picnics or potlucks, especially when transported in a sturdy tin or container that protects the delicate crumb. If you’d like to freeze it, wrap slices individually to protect against freezer burn and reheat gently in a low oven or warm in the microwave with a damp paper towel to restore some of the softness.

Fun Facts & Trivia (Optional)

– The simplicity of milk-forward cakes like Torta al latte reflects a broader culinary ethic: celebrate the quality of basic ingredients and the craft of patient technique. A few wholesome components, treated with care, can yield a result that feels luxurious despite its humble origins.

– Milk-based desserts have inspired countless regional variations around the world—from dense, milky loaf cakes to airy, cloud-like sponges. The universal appeal lies in their ability to soothe and delight with a familiar, comforting flavor profile that transcends borders.

– In some Italian homes, desserts are not just sweet finales but a ritual of togetherness. A slice of Torta al latte can become the centerpiece of a shared moment—a conversation starter, a way to connect, and a reminder that some of the best meals are built on tenderness and time spent with people we love.

Conclusion

Torta al latte is more than a dessert; it’s a gentle celebration of dairy, simplicity, and the everyday magic of baking. Its soft crumb, subtle sweetness, and comforting aroma invite you to slow down, savor the moment, and appreciate how a handful of well-chosen ingredients can become something memorable. Whether you’re baking for a quiet afternoon at home or presenting a sweet, thoughtful dish to friends and family, this cake offers a warm invitation to share joy in its purest form. As the slices disappear and the room fills with the quiet contentment of a job well done, you’ll understand why milk-based cakes endure: they are a reminder that sometimes, the most comforting flavors are also the most timeless.

Ingredients

    Torta al latte

  • – 2 cups all-purpose flour, sifted (about 240 g)
    → For a light, tender crumb; sifting aerates the flour and helps distribute the leavening evenly. If you don’t sift, whisk the flour with the sugar to break up any lumps and ensure smooth batter. If you prefer a slightly lighter texture, you can substitute up to 1/4 cup of the flour with cornstarch, whisking well to incorporate.
  • – 1 cup granulated sugar
    → Provides sweetness and helps with browning and moisture retention during baking. Sugar also aids in tenderizing the crumb by slowing gluten formation. If you want a less sweet cake, reduce to 3/4 cup or replace part with an equal amount of honey or maple syrup for a distinct flavor (note: liquids will slightly alter texture).
  • – 3 large eggs, at room temperature
    → Offer structure, moisture, and stability to the batter. Room-temperature eggs emulsify better with the liquids, creating a smoother batter and a lighter crumb. Beat the eggs with the sugar until pale and slightly thick to incorporate air for better rise.
  • – 1 cup whole milk, warmed to just below body temperature
    → Provides moisture and tenderness; warm milk improves emulsification with the eggs and butter. If using dairy-free milk, choose a fortified option (almond, soy, or oat) and be aware that texture may be slightly different; avoid overheating to prevent curdling.
  • – 1/2 cup unsalted butter, melted and cooled to warm (< 120°F / 49°C)
    → Adds richness and moisture, contributing to a tender, moist crumb. Let the melted butter cool slightly so it won’t cook the eggs when added. Whisk it in gently with the wet ingredients to keep an even emulsion and avoid greasy pockets.
  • – 1 tablespoon vanilla extract
    → Flavor foundation for a classic milk cake; if possible, use real vanilla bean paste or scrape seeds from a vanilla bean for a deeper aroma. For a different profile, you can add a pinch of citrus zest (lemon or orange) to boost brightness.
  • – 2 teaspoons baking powder
    → Leavening that helps the cake rise and develop a light, airy crumb. Ensure your baking powder is fresh and evenly distributed by whisking with the flour. Do not overmix after adding the dry to the wet to prevent toughness.
  • – 1/4 teaspoon fine salt
    → Enhances the overall flavor and helps balance the sweetness; use fine salt so it disperses evenly. If you use salted butter, reduce the added salt accordingly.
  • – Zest of 1 lemon or orange (optional)
    → Adds a fresh citrus aroma that pairs beautifully with the milk-based batter. Use a microplane to grate only the colorful part of the rind, avoiding the bitter white pith. Fold in zest last to preserve its fragrance.
  • Optional Fillings

  • – 1/2 cup pastry cream (crema pasticcera) or mascarpone (optional)
    → For a layered or filled cake, a thick, cooled filling adds richness and creaminess. Pastry cream should be fully chilled and thickened before spreading; mascarpone can be whisked with a little sugar and vanilla for a lighter, creamier alternative.
  • – 1/2 cup fruit jam or preserves (optional)
    → Adds fruity contrast and moisture between layers. Choose a thick jam to minimize sogginess; warm slightly to spread smoothly and avoid lumps. Pair with citrus zest for harmony of flavors.
  • Optional Finish

  • – 1/2 cup powdered sugar (for glaze)
    → Creates a simple glaze or dusting to finish the cake. To make a glaze, whisk with 1–2 tablespoons milk or lemon juice until you reach drizzle-friendly consistency. For a thicker finish, add more powdered sugar; for a thinner glaze, add a touch more liquid.

Instructions

  • Preheat your oven to 350°F (175°C) and prepare a 9-inch round cake pan by greasing it thoroughly and lining the bottom with parchment paper.
    → This ensures the cake releases cleanly and prevents sticking, giving you smooth edges and an intact cake when unmolded.
  • Sift the 2 cups all-purpose flour, 2 teaspoons baking powder, and 1/4 teaspoon fine salt into a medium bowl; whisk to combine and aerate.
    → Sifting aerates the flour, distributes the leavening evenly, and helps create a light, tender crumb.
  • In a large mixing bowl, beat the 3 large eggs and 1 cup granulated sugar with an electric mixer on medium-high until the mixture is pale, thick, and ribbons form when the beaters are lifted, about 3 to 5 minutes.
    → This aerates the batter, enabling a higher rise and a soft, cake-like texture as the sugar helps stabilize the emulsion.
  • Warm the 1 cup whole milk in a small saucepan or microwave until it is just below body temperature (about 110–115°F / 43–46°C), then remove from heat.
    → Warm milk improves emulsification with the eggs and butter for a smoother, more cohesive batter and a moister crumb.
  • Stir the 1/2 cup melted butter into the warm milk until fully emulsified; add 1 tablespoon vanilla extract and, if using, the zest of 1 lemon or orange.
    → Emulsification prevents separation of fat and liquid, while vanilla (and zest) provide depth of aroma; ensure the butter has cooled slightly to avoid cooking the eggs when combined.
  • Add the dry ingredients to the wet ingredients in three additions, whisking or folding gently after each addition just until no dry streaks remain.
    → Overmixing develops gluten and makes the crumb tough; add flour gradually to maintain a tender, delicate texture.
  • Pour the batter into the prepared pan and, if using optional fillings, dollop pastry cream or mascarpone in small spoonfuls over the batter and swirl lightly with a skewer or knife, then cover with the remaining batter.
    → Layering or marbling the filling creates a creamy center or ribbons of richness without overpowering the batter’s moisture.
  • Bake in the center of the oven at 350°F (175°C) for 28–34 minutes, or until the top is golden and a toothpick inserted into the center comes out with a few moist crumbs. Rotate the pan halfway through baking if your oven has hot spots.
    → This range accommodates different pan sizes and oven calibrations; testing with a toothpick confirms doneness without overbaking.
  • Remove the cake from the oven and allow it to cool in the pan for 10–15 minutes, then run a knife around the edge and invert onto a wire rack to cool completely before slicing.
    → Cooling sets the crumb and makes slicing cleanly possible; transferring to a rack prevents the bottom from becoming soggy.
  • If you desire a finish, whisk 1/2 cup powdered sugar with 1–2 tablespoons milk or lemon juice until smooth and drizzle evenly over the cooled cake, or dust a light veil of powdered sugar for a classic finish.
    → The glaze adds sweetness and a polished appearance; adjust thickness by adding more sugar or liquid as needed.
  • Slice and serve; store leftovers in an airtight container at room temperature for up to 2 days or refrigerate for up to 5 days, and let the cake come to room temperature before serving if refrigerated.
    → Proper storage maintains moisture and prevents the cake from drying out; bringing back to room temp enhances aroma and texture.

Notes

This Torta al latte cake is a classic, tender milk cake that relies on warm dairy, melted butter, and a splash of vanilla to build a soft, comforting crumb. You can customize it by adding citrus zest (lemon or orange) for brightness or by layering with a thick pastry cream or mascarpone and fruit jam for a more indulgent dessert. For best texture, sift the flour with the baking powder and salt to ensure even leavening, and whisk the dry ingredients with the sugar before introducing the wet ingredients to help distribute sweetness and air. Avoid overmixing once the dry ingredients meet the wet; mix just until smooth to keep the crumb light and tender. Make sure the eggs are at room temperature and the milk is warmed to just below body temperature to improve emulsification with the butter and milk, producing a smoother batter. Let the melted butter cool to warm before adding to the wet ingredients so it doesn’t seize the eggs or curdle the mixture. If you need a dairy-free version, substitute fortified non-dairy milk and a dairy-free butter alternative; note that texture and flavor may differ slightly but the method remains the same. Fold in the citrus zest at the end to preserve its aroma. For fillings, ensure any pastry cream is fully chilled and thick before spreading; mascarpone can be lightly sweetened with a touch of vanilla for a lighter texture. To finish, whisk together powdered sugar with a little milk or lemon/orange juice to make a glaze, or simply dust the cake with powdered sugar for a quick, elegant touch. The cake stores well for 2–3 days at room temperature in an airtight container or wrapped tightly, and individual slices freeze nicely for a ready-to-serve treat. If you’re baking with gluten-free flour, use a 1:1 gluten-free blend and consider adding 1/4–1/2 teaspoon xanthan gum per cup for better structure. Always preheat the oven and prepare your pan (grease and flour or line with parchment) for an even bake.

Tips

Tips for making Torta al latte

  • Prep mise en place: measure and sift the dry ingredients (flour, baking powder, salt) together to ensure even leavening and a tender crumb.
  • Temperature matters: keep eggs at room temperature and warm the milk to just below body temperature. This helps emulsification and a smoother batter.
  • Aerate the eggs with sugar: beat the eggs and sugar until pale and thick (ribbon stage) to incorporate air for a light, airy crumb.
  • Melted butter handling: let the melted butter cool to a warm temperature before whisking it into the wet ingredients to maintain a smooth emulsion and avoid greasy pockets.
  • Flavor and zest: if using citrus zest, grate only the colorful part and fold in at the end to preserve aroma and brightness.
  • Fresh leavening: check that baking powder is fresh; stale powder yields a dense cake. You can test by mixing a small amount with hot water to see if it foams.
  • Mixing technique: add dry ingredients to wet in batches and mix only until just combined to prevent gluten overdevelopment and a tougher crumb.
  • Pan preparation: grease and line the bottom of the pan with parchment for easy release; for springform pans, run a knife around the edge after baking before removing the ring.
  • Oven setup: bake at 350°F (175°C). If the top browns too quickly, loosely tent with foil and rotate the pan halfway for even browning.
  • Doneness test: use a toothpick or skewer—it should come out with a few moist crumbs, not wet batter. Underbaker yields a gummy center; overbake dries the cake.
  • Cooling and fillings: cool the cake completely before filling. If using pastry cream, ensure it is fully chilled and thick; mascarpone can be sweetened and whipped for a lighter texture.
  • Fruit jam layer: choose a thick jam to minimize sogginess; warm slightly to spread smoothly and pair with a citrus note to complement the milk base.
  • Finish and glaze: for a simple glaze, whisk powdered sugar with a little milk or lemon juice until drizzle-friendly; adjust thickness by adding more sugar or liquid as needed. A light dusting of powdered sugar also gives a classic finish.
  • Storage: cover and store at room temperature for up to 2 days, or refrigerate up to 4 days; the cake freezes well when well wrapped (1–2 months).

FAQ

Cos’è la Torta al latte?

La Torta al latte è un dolce soffice e semplice, realizzato con latte, uova, zucchero, farina, burro fuso e lievito per dolci. È ideale per colazione o merenda e si presta a diverse varianti.

Quali ingredienti servono?

Ingredienti (stampo 24 cm):

  • 250 g di farina 00
  • 150 g di zucchero
  • 3 uova a temperatura ambiente
  • 200 ml di latte intero
  • 100 g di burro fuso (oppure 80 ml di olio di semi)
  • 1 bustina di lievito per dolci (circa 16 g)
  • 1 cucchiaino di estratto di vaniglia (o scorza di limone)
Come si prepara l’impasto?

Procedimento:

  1. Preriscalda il forno a 180°C e fodera una teglia con carta forno.
  2. In una ciotola, monta le uova con lo zucchero fino a ottenere composto chiaro e spumoso.
  3. Aggiungi latte e burro fuso raffreddato, unisci vaniglia.
  4. In un’altra ciotola setaccia farina e lievito.
  5. Unisci gli ingredienti secchi al composto liquido, mescolando delicatamente finché è liscio.
  6. Versa l’impasto nella teglia e livella.
Quali strumenti servono?

Stampo rotondo da 24 cm, carta forno, ciotola capiente, fruste/mixer, spatola, setaccio, cucchiaio dosatore, forno.

Tempo di preparazione e cottura?

Tempo di preparazione: circa 15 minuti. Cottura: 30-35 minuti. Raffreddamento prima di sformare: 10-15 minuti. In totale, contando raffreddamenti, circa 1 ora.

A che temperatura si cuoce?

Cuocere in forno statico preriscaldato a 180°C. Controlla dopo circa 30 minuti: se la superficie è dorata e uno stecchino esce pulito, è pronta. Se necessario, prosegui 5-10 minuti controllando spesso.

Come si conserva?

Lascia raffreddare completamente, poi conserva in contenitore ermetico a temperatura ambiente fino a 2-3 giorni. Per conservarla più a lungo, refrigerala in contenitore ermetico (consuma entro 4-5 giorni). Si congela a fette per 2-3 mesi.

Come si può personalizzare o variare la ricetta?

Varianti:

  • Aggiungere gocce di cioccolato o scorza di limone/arancia
  • Impostare una versione al cacao: sostituire una parte della farina con cacao amaro
  • Farcia con crema al latte o crema chantilly tra due strati
  • Versare una glasse o una spolverata di zucchero a velo prima di servire
  • Versione senza lattosio: utilizzare latte vegetale e burro o olio vegetale
Posso realizzare la Torta al latte senza lattosio o senza burro?

Sì. Per una versione senza lattosio: usa latte vegetale (mandorla, soia, avena) e burro vegetale o olio di semi al posto del burro. Se necessario, aggiungi un pizzico di limone per bilanciare i sapori. Per una versione senza burro, sostituisci con olio di semi o olio di olio di cocco. Verifica che lievito e altri ingredienti non contengano tracce di lattosio se sei estremamente sensibile.

Come si verifica se è cotta?

Infilza uno stecchino al centro: se esce asciutto o con poche molliche attaccate, è cotta. Se esce bagnato, prosegui la cottura di 3-5 minuti e controlla di nuovo. Evita di aprire spesso il forno durante i primi 25-30 minuti.

Consigli per una torta più soffice?

Spesso, la chiave è montare bene le uova con lo zucchero fino a ottenere volume e colore chiaro, incorporare la farina setacciata delicatamente per non smontare l’aria, utilizzare latte a temperatura ambiente e burro ben raffreddato ma non solidificato, e non aprire il forno nelle prime fasi della cottura.