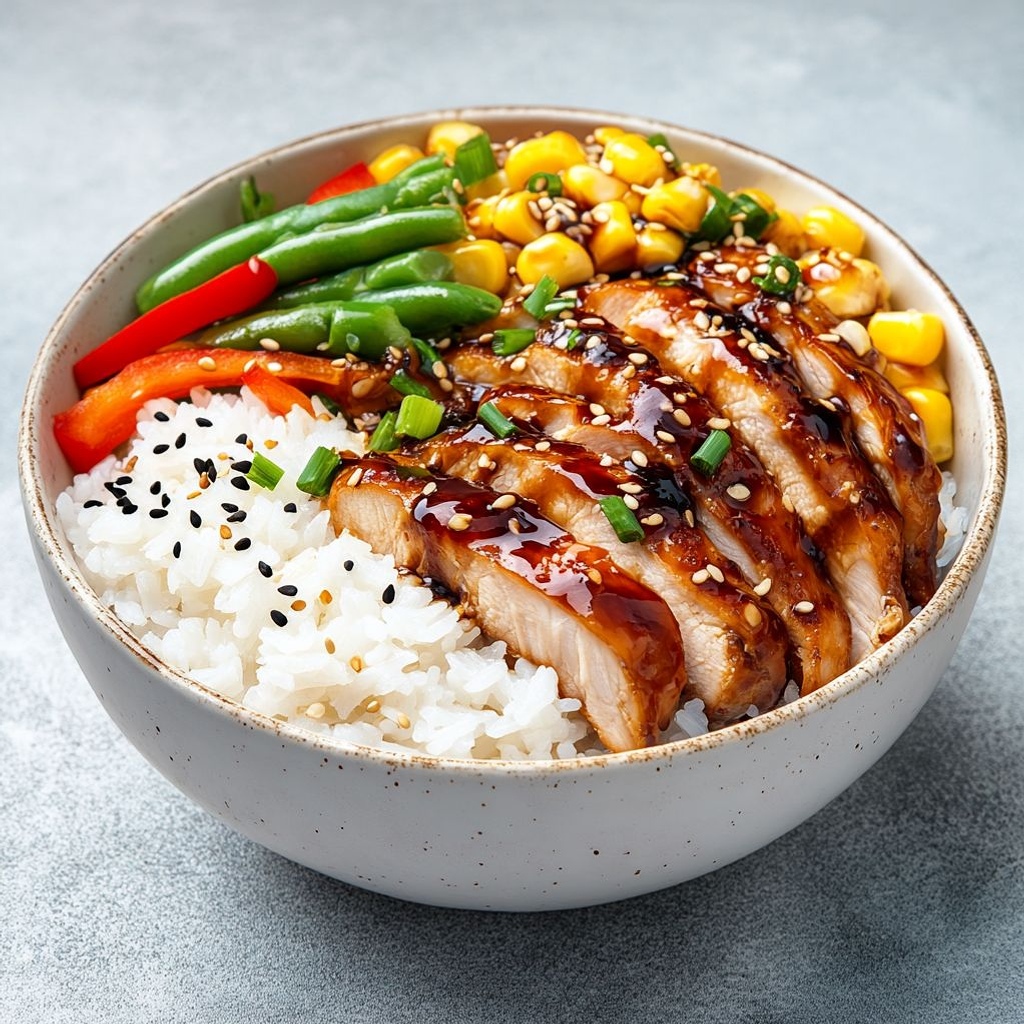
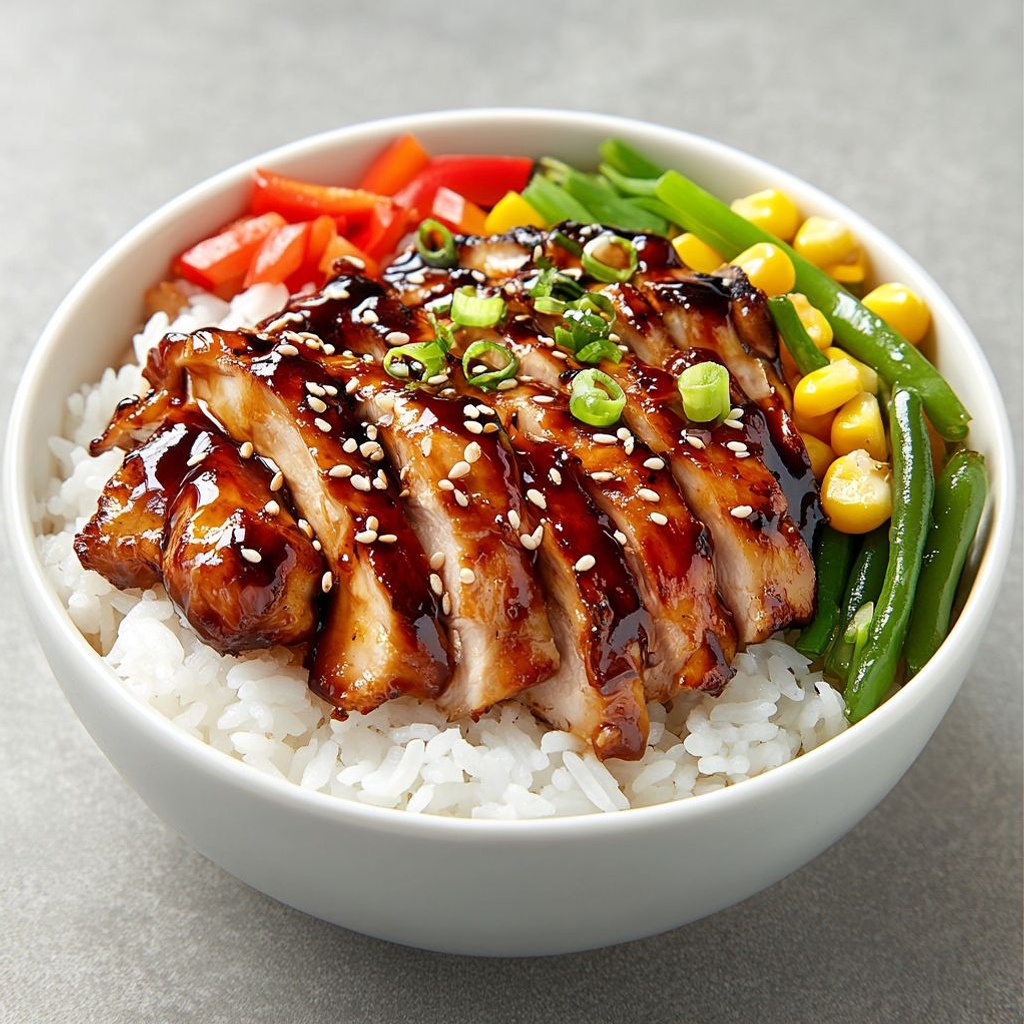
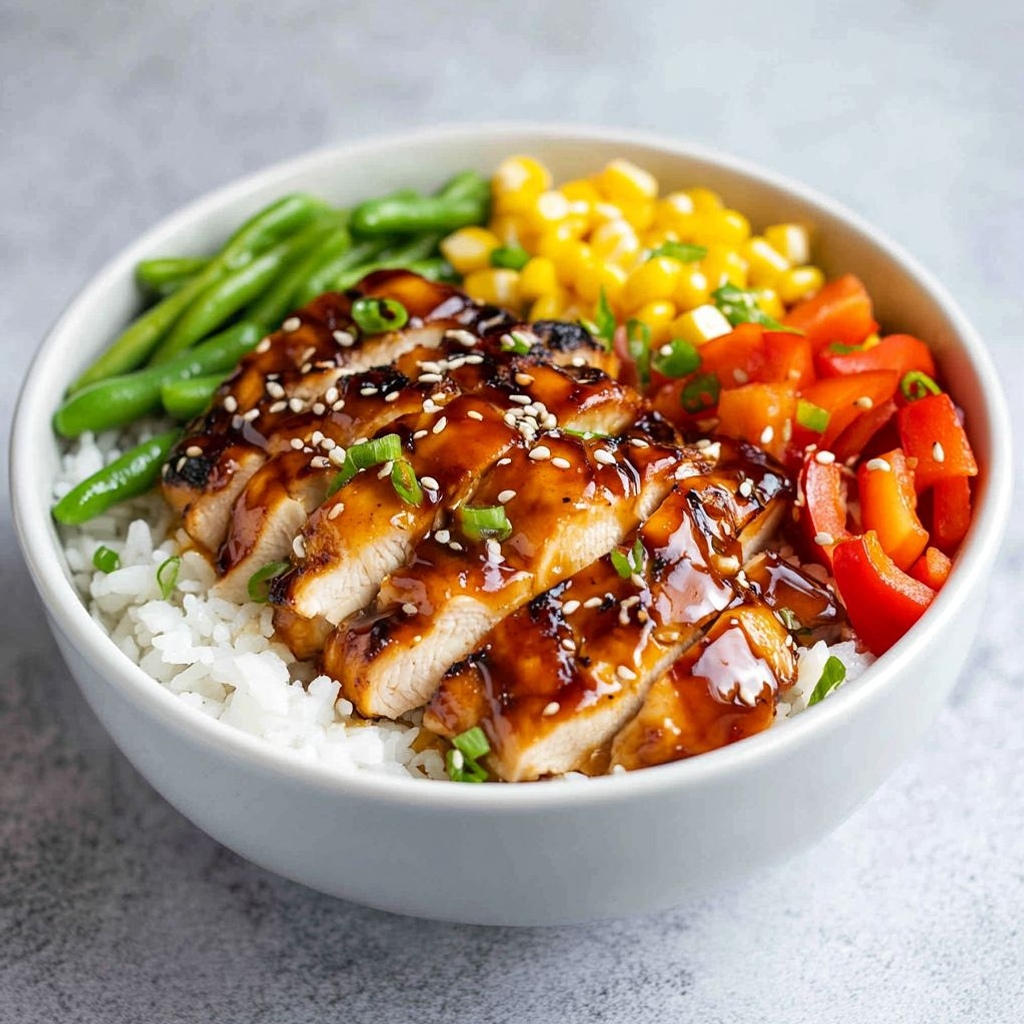
Author

Ocean Nightleaf

Browsing

Introduction / Hook

There is something magical about a breakfast that feels both cozy and clever at the same time. The Breakfast Muffin Frittata is designed to be your morning ally: a warm, handheld delight that tastes like a brunch party in a single bite. It’s the kind of dish that makes dawn feel friendlier, inviting you to savor the first light with a plate that promises comfort without sacrificing speed. Picture a muffin cup that holds the soul of a classic frittata—soft, custardy on the inside, with just a kiss of caramelized edges around the rim—ready to travel with you from kitchen counter to commuting car, from crowd-filled brunch to a quiet weekend picnic. The experience begins the moment you lift the warm, steam-laden top and take that first inhale of eggy aroma, melted cheese whispering hello, and the gentle crunch of vegetables offering a bright counterpoint. It’s not just breakfast; it’s a small, joyful ritual that turns a busy morning into something you look forward to for the rest of the day.

What makes this recipe truly special is its balance between familiarity and novelty. It borrows the comforting, savory depth of a traditional frittata—the way eggs set into a tender, cohesive mass—while presenting it in a format that’s perfectly portioned, portable, and quick to assemble. This isn’t a dish you need to slave over; it’s a streamlined, make-ahead marvel that grants you flexibility. You can bake a batch on a Sunday and have a week’s worth of easy grab-and-go breakfasts, or you can set a pan to glow in the oven as guests arrive for a lazy weekend brunch. The texture is a revelation: the center remains pillowy and delicate, a gentle custard that yields to a lightly crisp exterior, while pockets of melted cheese and tangy notes play across the bite. It’s comfort food with an upgraded, modern twist, ideal for anyone who loves the ritual of a warm, savory breakfast that fits into a busy life.

Beyond the taste and texture, this dish invites experimentation. Its form invites you to play with colors, temperatures, and textures—soft greens from herbs, ribbons of pepper or zucchini for a light sweetness, a hint of onion for depth, and a cheese that strings just enough to feel indulgent without overwhelming the palate. There’s a confidence baked into the idea: you don’t need to be a professional chef to create something stunning, something that looks as good as it tastes, and something that makes those first meals of the day feel special. Whether you’re feeding a family, entertaining friends, or simply treating yourself, the Breakfast Muffin Frittata is ready to adapt, to welcome, and to satisfy with warmth and sincerity.

As you read on, allow the imagery to anchor you in the sensory world of the dish—steam curling through the air, the gentle sizzle of a pan, the aroma that hints at nutty cheese and garden-fresh vegetables, and the comforting sight of golden muffin cups rising like tiny morning suns. This description is your invitation to slow down just a touch, to imagine the first bite, and to feel a sense of nourishment blooming from a simple, practical idea—elevating breakfast into an occasion worth savoring every day.

The Story Behind the Dish

The concept of a muffin-sized frittata grew from a love of two breakfast classics that never fail to put a smile on a tired morning: the hearty, savory appeal of a frittata and the convenience and portability of muffins. The idea traveled through kitchens of many believers in “grab-and-go” mornings, where time often wins over elaborate cooking yet flavor and satisfaction remain nonnegotiable. In a sense, this dish is a culinary bridge between Sunday brunch and weekday hustle—a hybrid born from necessity and creativity. It’s the kind of recipe that family cooks share across generations, each tweak a small footprint of memory: the addition of a pepper here to brighten the color, a dash of herbs there to lift the aroma, a note of warmth from a mild spice that makes the dish feel personal and welcoming.

There’s a tiny anecdote tucked into the origin story of this recipe: in a sunlit kitchen crowded with early-morning chatter, someone forgot to start the coffee nearly in time, but the oven was already preheating for a different project. A quick brainstorm led to a playful experiment—pouring an eggs-and-dairy-based batter into muffin cups, stirring in whatever vegetables and cheese were available, and letting the oven do the heavy lifting. When the timer rang, the kitchen smelled like a celebration: nutty cheese, herbs awakening the air, and vegetables lending color and brightness. The result was not only delicious feed for the morning crowd but also a clever technique—an elegant, simplified approach to feeding many mouths with minimal fuss. Since then, many kitchens have adopted this method, keeping the spirit of that impromptu experiment alive: embrace simplicity, celebrate flavor, and trust that a well-made dish can feel special without being complicated.

Today, the Breakfast Muffin Frittata carries that same spirit. It’s a testament to the idea that great mornings come from thoughtful, efficient cooking—where a handful of pantry-friendly ingredients, a trusty muffin tin, and a little trust in technique can create something that tastes both comforting and exciting. The dish has traveled through households with a shared understanding: breakfast can be nourishing, quick, and stylish all at once. It’s a small emblem of hospitality—the kind that says, “I prepared this for you with care,” even when time is tight. And while the story is rooted in tradition, the real charm lies in its versatility: a simple canvas that invites you to paint with seasonal produce, herbs, and regional flair, turning every batch into a story of its own.

Why You’ll Love This Recipe

  • Fast and forgiving: Batter comes together quickly, and the muffin-tin format bakes evenly, producing consistent results with minimal hands-on time.
  • Make-ahead mastery: Bake a batch on the weekend, refrigerate or freeze portions, and reheat for a quick, protein-rich breakfast during busy weekdays.
  • Portability and portion control: Individual muffin cups make it easy to grab-and-go, perfect for busy mornings, office breakfasts, or school lunchboxes.
  • Comfort meets versatility: The dish embodies the cozy, savory warmth of a frittata while welcoming a spectrum of add-ins and flavors to suit any season or preference.
  • Kid-friendly and crowd-pleasing: The familiar, gentle flavors appeal to picky eaters while still offering a satisfying, grown-up depth for adults.
  • One-pan convenience with endless customization: Bake in muffin cups for easy cleanup or in a larger pan for a dramatic brunch centerpiece, then tailor each cup to different dietary needs.

Flavor Profile & Texture

The Breakfast Muffin Frittata delivers a symphony of textures and flavors that compliment one another in every bite. The exterior presents a delicate, almost pastry-like crust that develops a gentle, pleasing crisp—enough to provide a subtle crackle when you bite into it. Inside, the center is luxuriously tender, with a custard-like mouthfeel that melts slowly on the tongue. This contrast between a slightly crisp edge and a silkier interior creates a dynamic eating experience that keeps the palate engaged from the first bite to the last crumb.

Flavors are balanced and soulful. A sunny, egg-based base offers mouthfeel and richness without heaviness, while a kiss of melted cheese threads through the cups, lending a creamy, savory backdrop. Mild herbs add brightness and aroma, cutting through the richness with a fresh lift. If the recipe includes vegetables, you’ll encounter a gentle sweetness and crisp-tender texture that adds color and vitality to each bite. The overall flavor profile is comforting and familiar, yet elevated—like a favorite morning hymn sung with a modern, accessible arrangement. The dish harmonizes with a touch of salt for seasoning, a hint of pepper for warmth, and a whisper of dairy that rounds everything out without ever tipping into heaviness. The result is a breakfast that feels indulgent without being indulgent in spirit—a nourishing, flavorful start to the day that satisfies, while also inviting you to experiment and personalize with your own preferred accents.

Occasions & Pairings

This versatile dish suits a wide range of occasions, from hurried weekday breakfasts to leisurely weekend gatherings. It travels well, making it a fantastic option for potlucks, brunches, camping trips, or a family breakfast that stretches across a longer morning. Its compact, individual portions also make it ideal for school lunches or quick post-workout meals when you want something savory and satisfying without fuss.

Pairings enhance the experience without overshadowing the stars of the dish. Consider these ideas to complete the meal:

  • Bright fruit sides: citrus segments, berries, or a small bowl of melon offer a refreshing contrast to the savory cups.
  • Creamy dairy accents: a dollop of yogurt or a light drizzle of sour cream can add tang and creaminess to a plate.
  • Fresh greens: a simple arugula or spinach salad dressed with lemon can balance the richness with a crisp, peppery bite.
  • Morning beverages: a smooth cup of coffee, a lightly roasted tea, or a glass of cold-pressed juice pairs beautifully with the savory bite.
  • Why not celebration drinks: a splash of sparkling water with a twist of citrus or a lightbellini-style mocktail can elevate a brunch gathering?

Tips, Variations & Substitutions

Make-Ahead & Storage Tips

One of the biggest strengths of this dish is its adaptability for advance planning. Bake a batch on Sunday, then refrigerate or freeze portions for the week. To reheat, simply warm in a microwave in short intervals or finish with a quick reheat in a 350°F (175°C) oven until warmed through and the edges regain a touch of crisp. If freezing, allow the cups to cool completely, then place them in an airtight container or freezer-safe bag. They will keep well for up to one month. Reheat straight from the freezer for a fast breakfast, or thaw overnight for more even reheating. For best results, avoid overcooking during the initial bake; you want a tender center that doesn’t become dense when reheated.

Want to streamline mornings even more? Prepare a batch of components ahead of time: pre-chop vegetables, grate cheese, and whisk the egg mixture the night before (or even keep a pre-mixed batter pouch ready). In the morning, you’ll simply combine the components and bake, turning a potential time crunch into a seamless routine.

Dietary Swaps

The beauty of this concept is that dietary needs can be accommodated without sacrificing flavor. For gluten-free preferences, ensure the batter uses a gluten-free mix or naturally gluten-free ingredients. For dairy-free or vegan variations, substitute with a plant-based egg substitute where appropriate and use dairy-free cheese or nutritional yeast to achieve a savory, cheesy note. You can also experiment with almond flour or a gluten-free blend in the base to change texture slightly—keeping the eggs as the binding agent helps maintain the fudgy, custard-like interior in most versions. For a lower-carb twist, you can include more vegetables and a smaller amount of dairy in the batter, or use a cauliflower-based crust alternative as a frame—though that would edge away from the classic frittata texture. Always consider texture and binding, ensuring the substitution still creates a cohesive bite rather than a crumbly result.

Flavor Twists

Herbs lift the aroma and taste without adding heaviness. Try fresh chives for a mild onion note, dill for brightness, or parsley for a classic green whisper. For a bolder flavor, swap in roasted peppers, caramelized onions, or mushrooms to introduce earthy or sweet notes. A touch of smoked paprika or a pinch of garlic powder can lend a subtle depth, while a sprinkle of nutmeg or black pepper at the finish can elevate the savory profile. If you want a Mediterranean vibe, incorporate olives, sun-dried tomatoes, and feta cheese—keeping in mind the overall salt balance. For a more breakfast-brunch hybrid, a light drizzle of olive oil on top just before serving adds a finishing gloss and aroma that complements the baked cups beautifully.

Storage & Make-Ahead Ideas

Beyond basic refrigeration and freezing, consider setting up a mini routine: bake, cool, wrap, and stack. The individual cups refrigerate neatly and reheat without drying out, which makes them an excellent vehicle for weekly breakfasts. If you’re entertaining guests, you can bake a full dozen cups and arrange them on a platter for a visually appealing “muffin bar” that invites guests to select their preferred flavors. For a handful of extras, you can keep a tray of the batter chilled in the fridge for up to 24 hours and bake portions as needed—this approach gives you the best of both worlds: almost-instant servings without sacrificing the joy of fresh-baked scent.

When storing, aim to use an airtight container to protect the delicate exterior from absorbing aromas in the fridge. Reheating in a moderate oven (not too hot) preserves the texture more effectively than microwaving, which can make the surface less crispy and the interior less tender. If you must reheat in the microwave, do so in short intervals, flitting between 50-60 seconds at a time, to maintain moisture and avoid rubbery textures. These cups are forgiving and resilient, returning to their comforting self with a brief warm-up and a quick re-crisp if you desire.

Fun Facts & Trivia (Optional)

  • The concept of combining the egg-based baked texture of a frittata with the convenience of muffins is a modern culinary hybrid that has gained popularity with meal-prep trends and busy schedules.
  • Mini muffins have long been a casual, shareable format for gatherings, but their savory cousins—like this frittata-inspired version—offer a playful, heartier alternative for breakfast and brunch.
  • Cheese, in its melted form, acts as a flavor conveyor, carrying umami notes through the dish while also helping to keep the interior tender and cohesive.
  • Herbs can dramatically shift the perception of the dish, transforming it from a simple morning meal into a signature dish of a kitchen—one that reflects seasonal produce and personal taste.
  • Leftover cups can be repurposed in creative ways, such as crumbling and adding to a breakfast bowl with grains, greens, and a drizzle of sauce or hot sauce for a satisfying make-ahead meal prep.

Ingredients

Muffin Base

  • 8 large eggs
    → The eggs provide the primary binding and structure for the muffin-style frittata. They set the texture and hold the chopped vegetables and proteins together as the dish bakes. Use room-temperature eggs for even mixing, whisking until completely combined with the milk and cheese. If you prefer a firmer slice, you can add a touch more eggs; if you want a lighter, softer texture, back off to 6–7 eggs and add a little extra milk. This base is versatile and can be scaled to fit your muffin tin size or desired serving count.
  • 1/2 cup whole milk (or 2% or dairy-free alternative)
    → Milk provides moisture and helps create a smooth, cohesive batter with the eggs. It also helps carry the dissolved salt and spices so every bite is seasoned evenly. You can substitute a dairy-free milk such as almond or oat milk; if using a non-dairy option, consider a slightly thicker milk (or add an extra tablespoon of cheese) to maintain creaminess. For richer flavor, use half-and-half or a splash of cream instead of milk.
  • 1 cup shredded cheddar cheese (or cheese blend)
    → Cheese adds melt, richness, and aroma, binding the batter with its fats as it liquefies during baking. Use a sharp or medium cheddar for a bold bite, or mix with mozzarella for extra stretch. For dairy-free versions, substitute with a meltable vegan cheese and adjust salt to taste. Grate the cheese just before mixing to maximize melt and flavor.
  • 2 tablespoons all-purpose flour (or 2 tablespoons almond flour for gluten-free)
  • → The flour helps provide structure and binding so the batter sets into compact, muffin-sized pieces rather than remaining overly loose. If you skip flour, the texture will be looser and the frittatas may not hold their shape as well, especially with a lot of vegetables. For gluten-free versions, almond flour or a gluten-free blend works well and preserves tenderness. If dairy-free, you can omit flour and rely on extra eggs and cheese, though texture may be looser.

  • 1/2 teaspoon fine sea salt
    → Salt is essential to balance the richness of the eggs and cheese and to enhance the flavors of vegetables and meat. Taste the batter after mixing; if your add-ins are particularly salty (like browned bacon or ham), you may reduce this slightly. If using salted butter, decrease salt accordingly.
  • 1/4 teaspoon black pepper
    → Black pepper adds a gentle heat that complements eggs and cheese. For more depth, you can add a pinch of paprika or a tiny splash of hot sauce to the batter. Freshly ground pepper is recommended for aroma and flavor.
  • 1/2 teaspoon garlic powder (optional)
    → Garlic powder gives a quick, even garlic note throughout the batter without needing minced garlic. If you prefer a more pronounced garlic flavor, sauté a minced garlic clove with the vegetables and fold the cooled mixture into the eggs to avoid raw bite.
  • 1 tablespoon olive oil or melted butter (for greasing muffin cups or thinning the batter slightly)
  • → A little fat helps prevent sticking in the muffin cups and keeps the frittatas moist. Grease the pan well or line with silicone liners, and you can whisk the butter into the egg mixture for extra richness if desired. If you skip oil, ensure accurate greasing to avoid tearing when removing baked portions.

Vegetables & Aromatics

  • 1/2 cup onion, finely diced
    → Onion adds sweetness and depth to the base. Sauté the diced onion with a bit of oil until translucent and lightly caramelized to maximize flavor, then fold into the batter. Raw onion can add sharpness and extra moisture; cooking it first balances flavor and helps soften other vegetables later.
  • 1 cup bell pepper, diced (red, yellow, or mixed)
    → Bell peppers contribute color, crunch, and a subtle sweetness. Sauté briefly until just tender to reduce raw crunch and moisture, which helps the muffins set evenly. Chop small enough to distribute in each bite for even flavor.
  • 1 cup mushrooms, sliced
    → Mushrooms add earthiness and moisture. Cook them until their moisture evaporates and they brown lightly; this concentrates their flavor and prevents soggy muffins. Slice evenly for uniform cooking and fold in after sautéing.
  • 2 cups fresh spinach, roughly chopped
    → Spinach adds green color and nutrition without overpowering the batter. Sauté briefly to wilt and remove excess moisture, or finely chop and fold raw if you prefer a sturdier texture. Ensure the leaves are well drained before mixing.
  • 1 garlic clove, minced (optional)
    → Garlic enhances aroma and depth. Mince finely and add to the vegetable sauté, cooking just until fragrant. If you’d rather skip the sauté step, you can fold minced garlic directly into the egg mixture, but it may be less evenly distributed and can burn if sautéed too long.
  • 1/2 cup cherry tomatoes, halved (optional)
    → Tomatoes provide bright bursts of acidity and sweetness. Halve the tomatoes to distribute flavor and reduce excess moisture; pat lightly with paper towel if they seem juicy. Add them after the batter is mixed to prevent soggy pockets in the muffins.

Protein (Optional)

  • 6 slices bacon, cooked and crumbled
    → Bacon adds smoky, savory notes and extra crunch. Cook until very crisp, drain on paper towels to remove excess fat, and crumble finely. If you prefer a leaner option, substitute with cooked turkey bacon or use ham pieces instead. Fold into the batter or sprinkle on top before baking for visible pieces in each muffin.
  • 1 cup fully cooked sausage, crumbled
    → Sausage brings additional heartiness and seasoning. Choose mild or seasoned breakfast sausage and crumble after cooking. Cook to render fat and develop flavor, then drain before mixing into the batter to avoid greasiness. For a spicy kick, use chorizo or breakfast sausage with herbs.
  • 1/2 cup diced ham
    → Ham contributes a savory, salty bite and works well with eggs. Use fully cooked, diced ham; pat dry any excess moisture before mixing to keep the batter from becoming watery. Ham pairs nicely with cheddar and spinach for a classic breakfast combo.

Herbs & Finishes

  • 2 tablespoons chopped fresh parsley or chives
    → Fresh herbs brighten the dish and add a fresh contrast to the rich eggs and cheese. Fold them into the batter or sprinkle on top after baking as a vibrant garnish. For the most aroma, add just before serving; you can also mix in dill or basil for different flavor profiles.
  • 1/4 cup extra shredded cheese for topping (optional)
    → A final sprinkle of cheese on top creates a golden crust and extra melty top. Add just before the last few minutes of bake to get a nice bubbled layer, or sprinkle after baking for visual contrast. If you’re avoiding extra dairy, skip this step.

Optional Add-ins

  • 1/4 cup sun-dried tomatoes, chopped
    → Sun-dried tomatoes contribute intense sweetness and a chewy texture. Rehydrate briefly if using oil-packed versions by patting them dry before chopping; they pair well with spinach and feta for a Mediterranean twist.
  • 1/4 cup black olives, sliced
    → Olives introduce a briny, savory bite that offsets the richness of the eggs and cheese. Pit and slice evenly to ensure consistent flavor in every bite. Consider red or Kalamata olives for stronger flavor; drain well to avoid excess moisture.
  • 1/4 cup feta cheese, crumbled (optional)
    → Feta adds tang and creaminess with a lighter texture than cheddar. Crumble, then fold gently into the batter or place on top for a tangy finish. If using, reduce the salt slightly in the base to prevent it from becoming too salty.

Instructions

  • Preheat your oven to 350°F (175°C) and line a 12-c cup muffin tin with paper liners or grease it well with oil or melted butter to prevent sticking and ensure easy release after baking.
    → A properly greased or lined tin prevents the frittata muffins from tearing or sticking to the cups, making removal clean and intact.
  • Bring the eggs to room temperature if they are cold, then crack them into a large mixing bowl and whisk vigorously until completely homogeneous and slightly frothy, about 20–30 seconds; whisk in the 1/2 cup of milk until fully incorporated and smooth. Add 2 tablespoons of flour and whisk just until no lumps remain, then fold in 1 cup shredded cheddar cheese and 1/2 teaspoon fine sea salt and 1/4 teaspoon black pepper; finish with 1/2 teaspoon garlic powder if using.
    → Room-temperature eggs emulsify more evenly with the milk, while whisking with flour builds a gentle structure that helps the muffins set; fully incorporated cheese distributes melt and flavor throughout the batter for uniform texture in every bite.
  • If you are using olive oil or melted butter, whisk in 1 tablespoon into the batter now to add richness and help create a tender crumb that still holds together when baked.
    → A small amount of fat in the batter improves moisture, improves binding with the flour, and aids in releasing the muffins from the cups after baking.
  • Prepare the vegetables: finely dice the onion, dice the bell pepper, and slice the mushrooms; then mince the optional garlic clove. Sauté the onion and pepper in 1 teaspoon oil over medium heat until translucent and just starting to caramelize, about 4–5 minutes; add the mushrooms and cook until their moisture evaporates and they brown lightly, 4–6 minutes; finally add the spinach and garlic, cooking just until the spinach wilts and any excess moisture cooks away, 1–2 minutes; remove from heat and let cool slightly.
    → Sautéing releases sweetness, concentrates flavor, and reduces moisture that could soggy the muffins; cooling stops carryover heat from cooking the eggs when you mix everything together.
  • If using optional proteins, cook any raw components: crisp 6 slices bacon until very crisp and crumble, or crumble fully cooked sausage or diced ham; pat dry with paper towels to remove excess fat and prevent greasiness in the batter; set aside.
    → Fully cooked proteins render fats and develop flavor; patting dry prevents excess moisture from diluting the egg mixture and keeps muffins cohesive.
  • Fold the cooled vegetables and proteins into the batter along with any optional add-ins such as sun-dried tomatoes, black olives, or feta cheese; fold gently until distributed, then stir in 2 tablespoons chopped fresh parsley or chives for a bright herbaceous note. Reserve 1/2 cup of cheddar to sprinkle on top if you desire a more golden crust.
    → Gentle folding distributes add-ins without deflating air bubbles, ensuring even texture and flavor in each muffin; herbs brighten the dish and the reserved cheese creates a delicious crust on top.
  • Spoon the batter into the prepared muffin cups, filling each about three-quarters full to allow room for expansion as the eggs set; if desired, sprinkle the reserved cheddar over the tops for a bubbly, golden crust.
    → Filling cups to three-quarters prevents overflow and ensures even baking; a final cheese topping promotes a crisp, appealing crust when baked.
  • Bake in the preheated oven for 18–22 minutes, or until the edges are set and the centers no longer wobble; test doneness by inserting a toothpick into the center of a muffin— it should come out with just a few moist crumbs, not wet batter.
    → Proper bake time ensures a firm center with a tender crumb; the toothpick test confirms internal doneness without overbaking, which can dry the muffins.
  • Remove the muffin tin from the oven and let the frittata muffins rest in the pan for 5 minutes; then transfer to a wire rack to cool slightly before removing and serving to prevent breakage and to finish setting by residual heat.
    → Resting allows the structure to stabilize so the muffins slice cleanly and hold together when lifted from the cups.
  • Serve warm or at room temperature with a squeeze of fresh herb garnish if desired; store leftovers tightly covered in the refrigerator for up to 4 days or freeze for longer storage, reheating in a 350°F (175°C) oven or a quick 30–40 second microwave burst per muffin.
    → Storing properly maintains moisture and flavor, while reheating preserves the soft interior and the melty cheese top for a satisfying bite.

Notes

These breakfast muffin frittatas are a protein-packed, portable way to start the day, built on a fluffy egg-based base with cheese and sautéed vegetables, and you can fold in optional meats for extra savor. You can customize them by swapping in your favorite vegetables (onions, peppers, mushrooms, spinach, tomatoes), swapping or adding proteins (bacon, sausage, ham), and finishing with fresh herbs for brightness. They refrigerate well and freeze beautifully—cool completely, store in airtight containers or bags, and reheat in a microwave or oven until just set and the cheese is melted. For even portions, bake in a muffin tin or bake in a larger pan and cut into squares. To keep the dish gluten-free, use almond flour or a certified gluten-free all-purpose blend in place of all-purpose flour, and choose gluten-free meat options if needed; dairy-free variations can be made by omitting cheese and using a dairy-free milk and a meltable vegan cheese. If you like extra richness, whisk a splash of cream into the egg mixture or use half-and-half, and consider adding a pinch more salt or pepper to balance flavors after you’ve chosen add-ins. Always grease muffin cups well or line with silicone liners and let the baked frittatas rest briefly before removing to maintain clean, neat portions.

Tips

General tips for best results

  • Use eggs at room temperature for easier emulsification with the milk and cheese. If starting from cold eggs, let them sit at room temp for 15–20 minutes or warm briefly in warm water.
  • Whisk the eggs with the milk until completely combined and smooth. This helps create a cohesive batter that sets cleanly in muffins.
  • Grate cheddar or cheese blends just before mixing to maximize melt and flavor and avoid clumps.
  • Prepare all add-ins (vegetables, meats, herbs) ahead of time so the batter remains smooth and the bake time stays consistent.

Batter structure, texture and substitutions

  • The flour provides structure. If you skip flour, the muffins may be looser; for gluten-free versions, use almond flour or a gluten-free blend and expect a slightly different texture.
  • For dairy-free versions, use a thicker plant-based milk (like oat or almond) and consider a dairy-free cheese substitute to help maintain creaminess and binding.
  • Seasoning can be adjusted after mixing in add-ins—taste the batter and compensate for salty meats like bacon or ham by reducing salt slightly.

Vegetables, aromatics and moisture control

  • Sauté onions until translucent and lightly caramelized to deepen sweetness and depth of flavor.
  • Cook peppers and mushrooms until just tender and their moisture has evaporated to prevent soggy muffins.
  • Spinach should be wilted and well drained; squeeze or pat dry to remove excess moisture before mixing.
  • Tomatoes (if using) should be halved and patted dry to reduce moisture and prevent soggy spots; add after batter is mixed.

Meats and optional proteins

  • Bacon should be cooked until very crisp and crumbled; drain well to avoid greasiness in muffins.
  • Sausage should be fully cooked and crumbled; drain fat before mixing to keep the batter from becoming greasy.
  • Ham should be fully cooked and thoroughly patted dry before folding into the batter for best texture.

Herbs, finishes and toppings

  • Fresh parsley or chives add brightness. Fold them into the batter or sprinkle on top after baking for a pop of color and aroma; add near serving time for maximum aroma.
  • A final sprinkle of extra cheese on top creates a golden, bubbly crust; add during the last few minutes of baking for best results. If avoiding dairy, skip this step.

Baking tips and doneness

  • Grease muffin cups well or use silicone liners; a light brush of olive oil or melted butter helps with easy release.
  • Fill cups about 3/4 full to leave room for the batter to rise without overflow.
  • Bake until set and lightly golden; center should be just firm to the touch. If using a standard muffin tin, consider 350°F (180°C) as a reference and start checking around 20–25 minutes, adjusting based on muffin size.
  • Allow baked muffins to rest in the pan for 5 minutes before transferring to a rack to prevent breaking.

Makes ahead, storage and reheating

  • Store baked muffins in the refrigerator for up to 4 days; reheat gently in a microwave or toaster oven to restore moisture and warmth.
  • Freeze baked muffins individually for longer storage (2–3 months); reheat in the oven or toaster oven to keep the crust crisp.
  • Ahead tip: you can sauté vegetables and crumble proteins in advance, then mix with the eggs and cheese when you’re ready to bake.

Flavor variations to try

  • Spinach, feta, and sun-dried tomatoes for a Mediterranean twist; reduce salt if using feta.
  • Basil or dill with cherry tomatoes for a fresh, herb-forward version—use dairy-free cheese if needed.
  • Bacon, mushroom, and cheddar with chopped chives for a classic, robust breakfast bite.

FAQ

What is Breakfast Muffin Frittata?

Breakfast Muffin Frittata is a portable, egg-based bake made in a muffin tin. Whisk eggs with a splash of milk, mix in cheese and your favorite vegetables and optional protein, then bake until set. Each muffin is a convenient, grab-and-go breakfast bite.

What equipment do I need?

You’ll need a standard 12‑cup muffin tin, nonstick spray or paper/foil liners, a mixing bowl, and a whisk or fork. A spatula helps for scooping fillings into the cups.

What temperature and bake time should I use?

Preheat to 350°F (175°C). Fill muffin cups about 3/4 full and bake for 18–22 minutes, until the centers are set and the tops are lightly golden. Let them rest for a few minutes before removing.

What ingredients are in the basic recipe?

Basic components: eggs (8–10), a splash of milk or cream (2–4 tablespoons), shredded cheese (1/2–1 cup), chopped vegetables (e.g., bell peppers, spinach, onions, mushrooms), and optional cooked meat (ham, bacon, sausage). Season with salt, pepper, and your favorite herbs.

Can I make this dairy-free or vegetarian?

Yes. For dairy-free, omit the cheese or use a dairy-free cheese alternative and a dairy-free milk. For a vegetarian version, simply keep the cheese or use a plant-based cheese substitute. You can also add extra vegetables for color and flavor.

Can I make them ahead of time?

Yes. You can whisk the eggs and refrigerate the mixture up to 24 hours before baking. If you want an even quicker morning, you can prep the fillings in advance and mix with eggs just before baking.

How should I store and reheat leftovers?

Store refrigerated in an airtight container for 3–4 days. For longer storage, freeze the baked muffins (up to 2–3 months) and reheat directly from frozen. Reheat in the microwave (30–45 seconds per muffin) or in a 350°F (175°C) oven for 5–10 minutes until warm.

How many muffins does this yield?

Typically yields 12 standard-size muffins, depending on how full you fill each cup. You can reduce or increase the batch by adjusting the egg-to-fillings ratio, but keep an eye on bake time if you adjust the quantity.

What are some tasty filling ideas for variations?

Try combinations like spinach, feta, and sun-dried tomatoes; peppers, onions, and cheddar; turkey and mushroom; or broccoli with cheddar. Herbs such as chives, parsley, or thyme pairs well. Not a fan of meat? add extra veggies for a heartier veggie muffin.

Are there allergen considerations to note?

These muffins contain eggs and dairy (unless you adapt). If you have gluten or other allergies, use a gluten-free cheese and ensure any add-ins are gluten-free. Always check ingredient labels for hidden allergens.

How can I customize the texture and flavor?

For a firmer texture, reduce the milk slightly and bake a bit longer. For a lighter texture, whisk the eggs a bit longer and add a bit more milk. Mix-ins adjust flavor—try robust herbs, hot sauce, or a pinch of smoked paprika for depth.

Introduction / Hook

Imagine a cozy Sunday morning where the scent of warm butter, vanilla, and sun-warmed blueberries fills the air, turning a simple breakfast into a celebration. Blueberry pancake casserole is the kind of dish that greets you with the comfort of a hug and the excitement of something just a little bit special. It’s not a daily scramble of pans and scrambling eggs; it’s a forgiving bake that glows with the promise of lazy weekend mornings, late family brunches, and spontaneous gatherings with friends who pop in just as the coffee machine starts to hiss. The beauty of this dish lies in its dual nature: the soul of a pancake, the heartiness of a bake, and the ease of a one-pan moment that can feed a crowd without demanding your full attention for hours in the kitchen. The blueberries glisten like little pockets of sunshine beneath a softly bronzed crust, while the aroma hints at cinnamon, vanilla, and a whisper of citrus zest—an irresistible invitation to gather around the table and let the conversation flow as freely as the maple syrup you pour alongside it.

What makes this Blueberry pancake casserole truly special is its ability to transform a beloved breakfast staple into a shareable, sliceable experience. It takes the joy of flipping pancakes—watching them puff, bubble, and turn a glorious shade of gold—and elevates it into an oven-baked moment where every bite offers a chorus of textures: a custardy, marshmallow-soft interior with a gently crisp edge, swirled with tart-sweet blueberries that pop with every mouthful. It’s the kind of dish that tastes like weekend freedom, comforting yet bright, familiar yet capable of surprising you with a new nuance of flavor each time you bake it. And if you’re feeding a crew—whether that crew is your family, roommates, or close-knit friends—this casserole makes mornings feel celebratory without requiring you to be chained to the stove. It’s a solution that respects your time, your taste buds, and your love of a good story shared over a plate of something irresistible.

Beyond the indulgent sensory appeal, this blueberry pancake casserole has a practical charm. It’s easily assembled the night before and baked in the morning, or it can be reimagined with pantry staples when you’re short on something particular but long on craving. It’s friendly to a range of dietary preferences with creative tweaks, and it invites personalization: a drizzle of lemon zest that wakes up the blueberries, a sprinkle of cinnamon that deepens warmth, or a crack of sea salt that makes the sweetness sing. It’s comfort food that invites conversation, nostalgia, and a little playful experimentation—an anchor recipe you’ll return to because it makes life feel a little sweeter, a little brighter, and a little more delicious with minimal fuss.

The Story Behind the Dish

The origin of pancake casseroles draws from the memory of weekend breakfasts where the plan is simple but the reward is grand. Think of summer mornings when farmers’ markets overflow with blueberries—the tiny, blue gems that burst with a tart-sweet brightness when kissed by heat. Bakers and home cooks began translating the familiar pancake experience into a bakeable format, a technique that honors the tenderness of pancakes while embracing the convenience of a cast-iron skillet pushed into the oven or a dutch oven filled with batter-like goodness. The result is a dish that preserves the spirit of a fresh batch of blueberry pancakes—soft centers, gentle chew, and a toasty surface—yet delivers it in a single dish that can be portioned, shared, and enjoyed with less hands-on time.

Cultural threads from different breakfast traditions weave through this recipe. It nods to the classic American pancake—thin, fluffy, and comforting—while borrowing from the rustic, custardy desserts found in brunch cultures around the world. In many homes, blueberries symbolize late-spring and summer abundance, a reminder of sunlit orchards, clear skies, and the joy of gathering people around a table to savor something produced by the simple labor of farmers and the patient watchfulness of a kitchen. The casserole form also echoes the family favorite of baked breakfasts—dishes that are prepared ahead of time and baked to the moment of shared delight—turning a crowd into a chorus rather than a chorus into a chorus of “Are we there yet?” It’s a dish that feels timeless and modern at once: timeless in its homage to comforting mornings, modern in its easy, one-pan practicality and the generous hands-off ease it affords busy cooks.

If you’ve ever watched a kitchen full of chatter quiet to listen to the gentle crackle of the crust forming and the blueberries releasing their purple-blue juices as they heat, you’ve felt the essence of this dish. It’s a recipe that travels well—great for potlucks, brunches, and holiday mornings—yet it remains intimate enough to serve as a comforting weekend indulgence for two when leftovers are thoughtfully portioned and shared the next day. The story of this dish is really a story about togetherness: about turning simple, everyday ingredients into something that nourishes conversation, signals a pause from the rush of daily life, and invites everyone to linger a little longer at the table.

Why You’ll Love This Recipe

  • Crowd-pleasing and shareable: A single casserole can feed a crowd, making it perfect for brunch celebrations, family gatherings, or weekend-off breakfasts with friends.
  • Hands-off convenience: Assemble ahead and bake when ready, or bake first thing in the morning for a warm, ready-to-serve dish without standing over the stove.
  • Customizable sweetness and tang: Blueberries offer vibrant pockets of tartness that balance the pancake batter’s sweetness, with optional zest or spice to tailor the experience.
  • Flexible textures: The baked nature creates a custardy interior with a gentle, toothsome bite and a lightly crisp edge—an irresistible contrast that feels both indulgent and comforting.
  • Family-friendly and beginner-friendly: It’s a forgiving dish that doesn’t demand precise, delicate technique; it welcomes improvisation and imagination and is great for cooks of all levels.
  • Make-ahead-friendly: Perfect for meal prep or weekend planning—set it up the night before and pop it into the oven in the morning, or bake and reheat for later portions.
  • Diet-friendly twists: With simple substitutions, you can adapt the dish to vegan, gluten-free, or dairy-free needs without sacrificing flavor or texture.

Flavor Profile & Texture

This blueberry pancake casserole harmonizes multiple sensory experiences into a single, satisfying bite. The core is a pancake-like batter that bakes into a soft, airy, almost custardy center—think soufflé-light with a comforting, bread-pudding body. The exterior gains a delicate caramelized crust, a result of the natural browning that occurs when batter meets heat for an extended period. The blueberries provide surprising bursts of juicy sweetness and a tart counterpoint, releasing their juices as they heat and mingle with the batter’s vanilla and subtle spices. If you add citrus zest, you’ll notice a bright lift that keeps the dish from veering toward cloying sweetness, a reminder of the fruit’s inherent brightness and the uplifting aroma of sun-warmed berries.

Key flavor notes include:
– Vanilla and a hint of cinnamon or cardamom that adds warmth, rounding out the berries’ sharpness.
– A delicate citrus kiss (lemon or orange zest) that brightens the profile and enhances blueberry flavor.
– A touch of melted butter that enriches the batter, infusing each bite with a gentle, milk-fat sweetness.
– A delicate salt balance that makes the sweetness feel polished and prevents it from becoming overpowering.
In terms of texture, expect a pleasant contrast: a lightly crisp edge and a soft, pillowy interior with juicy pockets of blueberry welcome scent that linger on the palate. The experience is comforting and homey but elevated enough to feel like a treat. This is the kind of dish that makes you linger at the table, savoring the last bites and trading stories while the aroma slowly dissipates in the room.

Occasions & Pairings

Blueberry pancake casserole shines in a variety of settings, from the most casual weekday brunch to more festive weekend gatherings. Consider these occasions when you’re planning a menu or deciding what to bake for a crowd:

  • Weekend brunch with family and friends: A centerpiece that balances indulgence with practicality, allowing everyone to serve themselves at their own pace.
  • Holiday mornings (Thanksgiving, Christmas, Easter): A comforting, nostalgic dish that evokes the warmth of family breakfasts and pairs nicely with maple-glazed ham, sausages, or roasted vegetables.
  • Special-occasion breakfasts: Mother’s Day, Father’s Day, or birthdays where the goal is to celebrate with something a little sweeter than the everyday.
  • Potlucks and gatherings: A versatile, easy-to-transport dish that can be served warm or at room temperature, still tasting delicious and comforting.
  • Weeknight comfort with leftovers: Bake once and enjoy for a couple of nights; reheat slices with a quick drizzle of syrup or a dollop of yogurt for a fresh lift.

Pairing ideas to complement the casserole vary by mood and season. Classic maple syrup or a honey-butter drizzle is a timeless choice that echoes the pancake roots. A dollop of whipped cream or a spoonful of Greek yogurt offers a creamy contrast that lightens the richness. For a fruit-forward contrast, serve with crispy bacon, sausage, or a light fruit salad. A side of citrusy yogurt or a small glass of cold milk can balance the sweetness. For beverages, a strong cup of coffee or a lightly sweetened chai can pair beautifully with the warm spices and fruity notes. If you’re feeling festive, a sparkling citrus spritz or a glass of chilled prosecco can elevate the brunch into something a little more celebratory without overpowering the flavors of the dish.

Tips, Variations & Substitutions

One of the joys of this recipe is how quickly you can tailor it to fit your pantry, dietary needs, or mood. Here are practical ideas to customize and upgrade the dish, without stepping outside its core identity as a comforting blueberry pancake bake:

  • Make-ahead beats: Assemble the batter base and blueberry mixture the night before; refrigerate, then bake in the morning for a hands-off start to your day. If the batter needs to rest, let it sit for 15-30 minutes after combining to relax the starches and improve texture.
  • Gluten-free option: Swap in a gluten-free pancake mix or a blend of gluten-free flours with a binding agent like xanthan gum. The goal is a batter that still flows like a pancake batter but bakes into a cohesive casserole.
  • Vegan/dairy-free version: Use plant-based milk (almond, oat, or coconut) and a neutral oil or vegan butter substitute. Replace eggs with a flax egg or commercially available vegan egg replacer—these substitutions will let the custard set while maintaining the light texture.
  • Streusel topping (optional): For an extra crunch and a mix of textures, sprinkle a simple streusel over the top before baking. A combination of flour, brown sugar, butter, and a pinch of salt yields a golden, crumbly crown.
  • Fruit variations: While blueberries are classic, you can mix in other berries or stone fruits. Strawberries, raspberries, peaches, or a combination can create delightful new layers of flavor. If using particularly juicy fruit, consider tossing with a touch of cornstarch to help thicken the bake.
  • Flavor boosters: Add a small amount of lemon or orange zest to brighten the dish, or stir in a pinch of cinnamon, nutmeg, or cardamom for warmth and depth. A splash of vanilla extract can intensify the overall aroma and sweetness without making the dish overly sweet.
  • Nutty crunch: Fold in sliced almonds, pecans, or walnuts for a contrasting texture and extra richness (if nut boundaries allow).
  • Portion control: Bake in a shallow casserole dish to encourage quicker bake times and easier serving. For individual portions, bake in ramekins or small cast-iron skillets for a charming presentation.

Storage & Make-Ahead Ideas

Proper storage helps you maximize the joy of this dish beyond the initial serving. Here are practical tips to keep the flavors fresh and the texture enjoyable:

  • In the refrigerator: Leftovers can be stored in an airtight container for 3-4 days. Reheat individual slices in the microwave (short bursts) or in a low oven to regain a bit of that crispy edge.
  • Freezing: While the texture is best fresh, you can freeze slices for up to 2-3 months. Reheat gently in the oven covered with foil to prevent drying. A splash of lemon juice or a drizzle of maple syrup during reheating can revive brightness.
  • Make-ahead strategy: For busy mornings, prepare the components the night before and assemble in the morning for baking. If you prefer, you can bake it the night before, refrigerate, and reheat slices in the morning; the flavors will deepen slightly as they sit.
  • Storage tips: If you choose to refrigerate before baking, cover the batter and blueberries to prevent them from absorbing fridge odors. If you’ve added a streusel on top, keep it separate and add it just before baking to maintain crunch.

Fun Facts & Trivia (Optional)

Blueberries aren’t just a pretty fruit; they’re packed with history and science. Here are a few bite-sized tidbits that pair nicely with your casserole adventures:

  • Blueberries are one of the few fruits native to North America, with deep roots in Indigenous and early American culinary traditions. They’re celebrated for their vibrant color, sweetness, and the delicate tang that pairs perfectly with dairy and grains.
  • The name “blueberry” is a simplified description of the fruit’s rich, blue skin—a color that often appears in nature’s most cherished edible treasures. The berry’s pigment comes from anthocyanins, compounds associated with health benefits and a stunning hue.
  • Blueberry pancakes are a quintessential brunch staple in many households, and baking them into a casserole is a natural evolution—allowing the joy of pancakes to be shared with even more people at once and with less individual flipping.
  • Traditionally, pancakes are a symbol of hospitality and warmth in many cultures, and turning them into a bake sustains that spirit while elevating the ease of serving a larger group without compromising flavor.

Ingredients

Pancake Batter

  • 2 1/2 cups all-purpose flour
    → Provides structure and body to the pancake casserole. Flour forms the gluten network that traps air and moisture as the bake cooks, yielding a sliceable, tender crumb. For best results, whisk this with the dry ingredients and measure by lightly spooning into a measuring cup and leveling to avoid a dense batter. If you prefer a gluten-free version, substitute with a certified gluten-free 1-to-1 baking mix and adjust liquids slightly if the batter seems too thick after resting.
  • 3 tablespoons granulated sugar
    → Adds gentle sweetness and helps browning on the top of the casserole. It also contributes to a slightly tender bite. Dissolve in the wet ingredients for even distribution or mix with dry ingredients before combining. If you want a less sweet version, reduce to 2 tablespoons. For deeper caramel flavor, you can substitute with light brown sugar, noting it may slightly alter moisture.
  • 2 1/2 teaspoons baking powder
    → The primary leavening agent for the batter, creating a light, fluffy texture as the casserole bakes. Ensure it’s fresh and evenly distributed by whisking with the dry ingredients. Avoid overmixing once liquid is added to prevent a dense crumb. If your powder is old, you may not get full rise; fresh powder yields the best lift.
  • 1/2 teaspoon baking soda
    → Provides additional lift and helps with browning when paired with acidic components. In this recipe, acidity comes from dairy and any optional citrus zest. If you omit citrus, the soda can still contribute a touch of lift and a crisper edge; use sparingly to avoid a metallic taste.
  • 1/2 teaspoon fine sea salt
    → Balances sweetness and enhances overall flavor while supporting browning during baking. Use fine salt for even distribution. If you use salted butter, reduce the added salt to 1/4 teaspoon to prevent over-salting.
  • 2 large eggs
    → Bind the batter and contribute structure, moisture, and tenderness. They help trap air during mixing for a lighter crumb. For best results, bring eggs to room temperature before mixing to improve emulsification. Vegan option: replace with 2 flax eggs (2 tablespoons ground flaxseed + 6 tablespoons water, mix and let sit 5 minutes).
  • 2 cups milk (dairy) or unsweetened plant-based milk
    → Liquidity that hydrates the flour and forms the pancake batter. Dairy milk yields a richer crumb, while plant-based milks keep the dish dairy-free with a slightly lighter texture. Use unsweetened varieties to avoid additional sweetness. If using cold milk, the batter may chill; room-temperature milk helps emulsification and even mixing.
  • 1/4 cup unsalted butter, melted, plus extra for greasing the pan
    → Adds rich flavor and tenderness, and aids browning of the casserole edges. Allow melted butter to cool slightly before whisking into the wet ingredients to avoid scrambling the eggs. Brush the baking dish with melted butter or oil to prevent sticking and help achieve crisp edges. Substitute with melted coconut oil or a neutral oil if dairy-free is required; adjust flavor slightly.
  • 1 teaspoon pure vanilla extract
    → Adds a warm aromatic sweetness that deepens the flavor of the batter. Use high-quality pure vanilla for best aroma; if desired, you can scrape in the seeds of half a vanilla bean or use vanilla bean paste for a more intense vanilla note. If avoiding vanilla, you can omit, but the depth will be reduced.

Berry Layer

  • 2 cups fresh blueberries (or 1 1/2 cups frozen blueberries, thawed and drained)
    → The star flavor and color accents of the casserole. Fresh berries hold together better during baking, while frozen berries release more juice. To minimize sinking and uneven coloring, toss the berries with 1 tablespoon all-purpose flour and 1 teaspoon sugar before layering or folding into batter. If using frozen berries, thaw completely and pat dry to reduce excess moisture; drain any released liquid before assembling. If berries are particularly tart, a touch more sugar can be added to the top layer to balance flavor.
  • Zest of 1 lemon (optional)
    → Brightens the blueberry flavor with a clean, citrusy note that cuts sweetness and adds aroma. Use a microplane to grate only the yellow zest, avoiding the white pith, which can be bitter. You can add the zest to the dry ingredients or whisk it into the wet mix for even distribution. If you prefer a milder citrus influence, skip.

Optional Add-ins

  • 1/2 teaspoon ground cinnamon (optional)
    → Adds warm, inviting spice that complements blueberry. Stir into the dry ingredients to distribute evenly. Freshly ground cinnamon has the strongest aroma; store cinnamon sealed away from heat to preserve potency. If you want a more complex flavor, you can swap with pumpkin pie spice for a seasonal twist.

Toppings

  • Powdered sugar, for dusting (optional)
    → Finishes the casserole with a delicate sweet dusting and an appealing appearance. Dust lightly after the casserole has cooled slightly to avoid dissolving into the top. Adjust the amount to taste or omit if you prefer a less sweet finish.
  • Maple syrup or preferred serving syrup
    → Classic accompaniment that adds moisture and a rich sweetness to each slice. Warm the syrup before serving and drizzle to taste; you can provide it on the side for guests to add as desired. If avoiding added sugar, you can serve with a fruit compote instead or a small amount of honey or agave.

Instructions

  • Preheat your oven to 350°F (175°C) and generously grease a 9×13-inch baking dish with melted butter or a neutral oil, ensuring an even coating on the bottom and sides to prevent sticking as the casserole bakes.
    → A hot, well-greased surface promotes even browning and clean release when slicing the finished casserole.
  • Whisk together the pancake batter dry ingredients in a large bowl: 2 1/2 cups all-purpose flour, 3 tablespoons granulated sugar, 2 1/2 teaspoons baking powder, 1/2 teaspoon baking soda, and 1/2 teaspoon fine sea salt (plus optional 1/2 teaspoon ground cinnamon if using).
    → Sifting or whisking these components ensures the leaveners and salt are evenly distributed, preventing uneven rise and salt hotspots in the finished dish.
  • In a separate bowl, whisk 2 large eggs, 2 cups milk, 1/4 cup melted unsalted butter (cooled slightly), and 1 teaspoon pure vanilla extract until smooth and fully emulsified.
    → Fully combined wet ingredients promote a uniform crumb and prevent the butter from pooling or separating, which can lead to a greasy texture.
  • Pour the wet mixture into the dry ingredients and whisk just until combined, stopping as soon as you see most of the dry flour hydrated and the batter is lightly lumpy.
    → Overmixing develops gluten and can yield a dense, rubbery slice; a few small lumps will steam into a tender, pancake-like crumb during baking.
  • Let the batter rest at room temperature for 5 to 10 minutes to hydrate the flour and relax the gluten, which improves tenderness and helps the batter achieve an even bake.
    → Resting gives the flour time to fully absorb moisture, resulting in a cohesive batter that firms nicely as it bakes.
  • In a medium bowl, toss 2 cups fresh blueberries with 1 tablespoon all-purpose flour and 1 teaspoon granulated sugar; if using lemon zest, add the zest to the berry mixture.
    → Coating the berries with flour helps absorb excess juices during baking and prevents sinking, while sugar balances tartness and lemon zest brightens the overall flavor.
  • Spread a thin, even layer of batter in the prepared dish to form a base, using a spatula to push the batter to the edges and avoid pockets.
    → An even base ensures uniform thickness across the casserole, so every bite has the same texture and moisture level.
  • Scatter half of the coated blueberries over the batter in an even layer, distributing them to create pockets of berry sweetness throughout the slice.
    → This initial berry layer gives bursts of color and flavor that permeate the early part of each slice.
  • Pour the remaining batter over the berries and gently smooth the surface with a spatula to achieve an even top and prevent large hollows.
    → A level surface promotes uniform baking and prevents overcooked edges while the center remains creamy and set.
  • Top the batter with the remaining blueberries in an even distribution to ensure each bite includes berry brightness and color.
    → Evenly scattered berries maximize presentation and ensure consistent flavor throughout the dish.
  • If using optional cinnamon, sprinkle 1/2 teaspoon of ground cinnamon over the top now, or incorporate it into the dry ingredients at step 2 for a more integrated warmth.
    → Cinnamon enhances the blueberry profile with a cozy spice note that complements the vanilla and fruit.
  • Bake in the preheated oven for 40 to 50 minutes, rotating the dish halfway if your oven runs unevenly, until the edges are golden and a toothpick inserted into the center emerges with a few moist crumbs.
    → Proper doneness ensures a custardy, pancake-like interior that holds together when sliced, with a lightly browned, inviting crust.
  • Remove from the oven and let the casserole rest 10 to 15 minutes before slicing to allow the structure to set, which yields clean, evenly portioned slices.
    → Resting helps the starches and proteins reconfigure, making the casserole easier to lift and serving neater results.
  • Dust with powdered sugar if desired and serve warm with warm maple syrup on the side, or offer an additional fruit compote for a lighter finish.
    → Finishing touches add visual appeal and a final layer of sweetness or acidity to balance the rich pancake base.

Notes

These blueberry pancake casserole slices are a cozy brunch option, featuring a fluffy pancake base layered with a juicy blueberry filling and baked until the edges are lightly crisp and the center is tender. You can customize them by adding lemon zest, a pinch of ground cinnamon, chopped nuts, or a dollop of yogurt or whipped cream when serving. They pair beautifully with maple syrup and an extra handful of fresh berries for color. For make-ahead prep, mix the batter and toss the berries with a tablespoon of flour and a teaspoon of sugar to help prevent sinking, then cover and refrigerate for up to 12 hours before baking. Bake in a preheated 350°F (175°C) oven in a greased 9×13-inch dish until the center is set and a toothpick comes out with a few moist crumbs, about 25–35 minutes; if your pan is larger or deeper, start checking at 20 minutes and adjust as needed. Leftovers store in the fridge for up to 3 days and reheat well in the oven or microwave. To make dairy-free, use unsweetened plant-based milk and melted dairy-free butter or oil; for gluten-free, substitute with a certified gluten-free 1-to-1 flour blend and ensure the baking powder is gluten-free. For vegan options, replace eggs with flax eggs (2 tablespoons ground flaxseed + 6 tablespoons water per egg) and let the mixture rest briefly before combining. If you want to freeze, freeze baked slices airtight for up to 2 months or assemble and freeze unbaked; thaw overnight in the fridge and reheat. Always taste the batter and berries as you go, since sweetness can vary with fruit ripeness and personal preference.

Tips

Tips for Blueberry Pancake Casserole

  • Let ingredients come to room temperature before mixing. This helps fats melt evenly and makes the batter smoother and more cohesive.
  • Whisk the dry ingredients (flour, sugar, baking powder, baking soda, salt) thoroughly before adding wet ingredients. This ensures even rise and prevents dense pockets.
  • Avoid overmixing once the wet ingredients are added. Mix just until you see no dry streaks to keep the crumb tender and airy.
  • Rest the batter for 10–15 minutes after mixing. The flour will hydrate and the batter will thicken slightly, which improves texture and height in the bake.
  • For a gluten-free version, substitute a certified gluten-free 1-to-1 baking mix for the all-purpose flour. You may need a little extra liquid if the batter seems too thick after resting.
  • To keep a dairy-free option, use plant-based milk and substitute melted dairy-free butter or a neutral oil. The flavor will be slightly lighter, but the texture remains tender.
  • When using fresh blueberries, toss them with 1 tablespoon all-purpose flour and 1 teaspoon sugar before adding to the batter. This helps prevent sinking and creates a nicer presentation and color distribution.
  • If you use frozen blueberries, thaw completely, drain excess liquid, and pat them dry. Tossing with a little flour also helps prevent color bleed and soggy pockets in the casserole.
  • Optional lemon zest in the berry layer brightens flavor. If you prefer, whisk the zest into the wet ingredients for even distribution.
  • Ground cinnamon (or pumpkin pie spice) adds warmth. If you’re not fans of cinnamon, simply omit or try a light sprinkle of spice in the batter.
  • Grease the baking dish thoroughly and consider a light brush of melted butter along the sides for crisp, golden edges that release cleanly when sliced.
  • Check doneness with a gentle toothpick test in the center; it should come out with a few moist crumbs but not wet batter. The edges should be lightly browned.
  • Let the casserole rest for 10 minutes after baking before slicing. This helps set the structure and makes clean slices easier to serve.
  • Make-ahead option: assemble the casserole, cover, and refrigerate overnight. Bake directly from the fridge the next day, adding a few extra minutes if needed.
  • Storage and reheating: refrigerate leftovers up to 3 days or freeze individual slices for up to 2 months. Reheat in the oven or toaster oven until warm and the edges are crisp again.
  • Serving ideas: dust with powdered sugar, drizzle with warm maple syrup, and offer a dollop of yogurt or a scoop of vanilla ice cream for extra richness. Fresh lemon zest or a mint garnish can brighten the plate beautifully.

FAQ

What is Blueberry pancake casserole?

Blueberry pancake casserole is a comforting breakfast baked dish where pancake batter is swirled with juicy blueberries and baked in a casserole dish until puffed and golden. It’s like a baked pancake or a crowd-friendly brunch option that you can slice into squares.

How do you make blueberry pancake casserole?

Typical steps: preheat the oven to 350°F (175°C). Grease a 9×13-inch baking dish. Whisk together the dry ingredients and separately whisk the wet ingredients, then combine to form a pancake batter. Fold in blueberries. Pour into the dish, optionally top with a streusel or crumble, and bake for 35–45 minutes until the center is set and the edges are golden. Let rest a few minutes before slicing.

What ingredients do I need to make it?

A typical lineup includes: 2 cups all-purpose flour, 2 tablespoons sugar, 2 teaspoons baking powder, 1/2 teaspoon salt, 1 1/2 cups milk, 2 eggs, 4 tablespoons melted butter (or oil), 1 teaspoon vanilla extract, 1 cup blueberries (fresh or frozen). Optional: lemon zest (1 teaspoon) and 1/2 teaspoon cinnamon. For a crumb topping: 1/2 cup flour, 1/3 cup brown sugar, 3 tablespoons cold butter.

Can I use frozen blueberries?

Yes. You can use frozen blueberries. Do not thaw completely; fold them in still-frozen or lightly thawed. Tossing them with a teaspoon of flour helps prevent excessive sinking and color bleed.

Can I make this ahead of time?

Yes. You can mix the batter and fold in the blueberries, then cover and refrigerate for up to 24 hours before baking. If you bake it right away after mixing, it’s ready in 35–45 minutes. If chilled, you may need a few extra minutes to reach full set.

How do I know when it’s done baking?

Bake at 350°F (175°C) for 35–45 minutes. The casserole should be puffed, the edges lightly browned, and a toothpick inserted into the center should come out with a few moist crumbs (not raw batter). If the top browns too quickly, tent it with foil and continue baking.

How should I store leftovers and reheat?

Store cooled leftovers in an airtight container in the refrigerator for 3–4 days. Reheat individual portions in the microwave for 30–60 seconds or reheat the whole pan, covered, in a 325–350°F (165–175°C) oven for about 10–15 minutes until warm.

Can I make this gluten-free or dairy-free?

Yes. For gluten-free, use a 1-to-1 gluten-free flour blend in place of all-purpose flour, and ensure your baking powder is gluten-free. For dairy-free, use a plant-based milk (almond, soy, oat) and dairy-free butter or neutral oil. You can also swap in coconut oil for fat if desired.

How many servings does it yield and what size dish should I use?

A standard 9×13-inch casserole yields about 8–12 servings, depending on portion size. If you need fewer servings, you can bake it in an 8×8-inch dish for a thicker, shorter bake (adjust bake time as needed).

What toppings or add-ins work well with this casserole?

Helpful options include a light dusting of powdered sugar, warm maple syrup, or a dollop of whipped cream. For extra texture, add a crumble topping (flour, sugar, butter) before baking. You can also stir in a pinch of cinnamon, lemon zest for brightness, or chopped nuts like almonds or pecans for crunch.

Introduction / Hook

Imagine a velvet-smooth sauce that clings to each piece of chicken like a warm embrace, a glow of orange-red that hints at sunlit spices and comforting indulgence. Creamy Butter Chicken is one of those dishes that turns an ordinary weeknight into a festival of aroma and satisfaction. From the first swirl of the spoon, you’ll hear the soft hiss of butter meeting hot pan, the garlic and ginger releasing their perfume, and the gentle clink of cream coating the surface in a glossy sheen. It’s a dish that feels luxurious without demanding days of prep, and each bite delivers a balance of tangy tomato, rich dairy, and a whisper of warm spices that lingers pleasantly on the palate. If you’ve ever wished for a curry that feels cozy enough to curl up with on the couch, yet elegant enough to serve to guests, Creamy Butter Chicken delivers that dream in a single, shimmering bowl.

What makes this dish truly special is how it marries depth and brightness. The sauce carries the sweetness of tomatoes and the mild sweetness of butter, tempered by garlic, ginger, garam masala, and fenugreek. It’s indulgent, yes, but not cloying; it’s creamy without being heavy, and it harmonizes with a handful of simple accompaniments to create a complete, satisfying meal. Beyond the taste, there’s the memory of sharing a plate with loved ones—hands reaching for a warm naan, steam rising, conversations unfolding—as if the kitchen itself had become a stage for comfort and celebration. Creamy Butter Chicken invites you to slow down a little, savor the moment, and savor each bite with a smile.

In this description, you’ll discover not just how to recreate the dish but why it has captured the hearts of home cooks and restaurant menus around the world. You’ll explore the story of its origins, the textures that make the sauce cling and caress, and the simple tweaks that let you tailor the dish to your own spice tolerance, dietary preferences, and mood. Whether you’re cooking for a busy family weeknight or planning a dinner that feels like a warm hug after a long day, this creamy, savory celebration of chicken and butter will become a staple in your kitchen repertoire. Read on to explore the layers of flavor, the thoughtful techniques, and the ways to adapt this dish for your table—no matter your culinary style.

The Story Behind the Dish

Murgh Makhani, better known in many households as Creamy Butter Chicken, has a history as rich as its sauce. The dish is widely believed to have originated in Delhi, at the legendary Moti Mahal restaurant, in the mid-20th century. According to popular lore, it was born somewhat out of kitchen improvisation: tandoori chicken—roasted in a blazing clay oven and deeply smoky—was transformed into a luxurious curry when chefs tossed the meat into a celestial, velvety tomato-based sauce enriched with butter and cream. The result was a dish that balanced charred, smoky notes with a lush, dairy-forward finish, creating something utterly new and endlessly comforting.

The creators of this iconic dish embraced contrast: the heat of the spices tempered by the cool, creamy sauce; the brightness of tomatoes softened by fat and dairy; the smoky undertones of tandoori chicken mingling with the sweetness of onion and garlic. Over time, Butter Chicken traveled far beyond Delhi, adapting to regional tastes and the global palate. In many places, cooks perfected the balance by adjusting the tomato base, the level of dairy richness, and the spice blend, all while keeping the essence intact: a dish that feels luxurious yet approachable, and deeply satisfying with every bite.

What often captivates home cooks is the sense that Butter Chicken is both a doorway into Indian cooking and a confident, stand-alone classic. It’s a dish that invites generosity—creaminess that doesn’t overwhelm, butter that lends gloss and depth, and spices that illuminate rather than scorch. Because the dish centers on gently simmered sauce and tender chicken, it also becomes a convenient canvas for personal touches: a touch of heat for those who crave it, a whisper of acidity to sharpen the palate, or a vegan-friendly adaptation that preserves the saucy, comforting character. In many homes around the world, Butter Chicken has become a symbol of hospitality, a dish you pull out for celebrations or when you simply crave a little culinary luxury.

Today, Creamy Butter Chicken sits at a delicious crossroads: it remains faithful to its Indian roots while inviting global flavors and modern dietary preferences. The technique is approachable, the results spectacular, and the experience—sharing a spoonful with someone you care about—unmistakably universal. The story behind the dish is as much about people and kitchens as it is about tomatoes and cream: a legacy of improvisation, hospitality, and a willingness to dream big with familiar ingredients.

Why You’ll Love This Recipe

  • Comfort in a bowl: a luxurious, silky sauce that feels indulgent without being heavy, perfect for cozy evenings or special occasions.
  • Versatile and forgiving: a forgiving base that adapts to your pantry, spice tolerance, and dietary needs without losing its soul.
  • Family-friendly flavor: balanced spices with creamy richness that appeals to both kids and adults, encouraging everyone to try something new.
  • Fast enough for weeknights: with smart prep and simple pantry staples, you can have a restaurant-worthy dinner on the table in a fraction of the time.
  • Make-ahead potential: sauce can be prepared in advance and finished quickly, which makes it ideal for meal planning and entertaining.
  • Great for entertaining: a dramatic, crowd-pleasing centerpiece that pairs beautifully with a variety of sides and drinks.

Flavor Profile & Texture

The defining characteristic of Creamy Butter Chicken is its sauce: a glossy, lacquered finish that clings to every piece of chicken. The flavor profile is a harmonious blend of sweet, tangy, and savory notes. Tomatoes provide a natural brightness and a gentle acidity that cuts through the richness of butter and cream. The dairy component—whether butter, cream, or a combination—adds a velvety mouthfeel and a subtle sweetness that rounds out the spices rather than overpowers them.

Within the spice blend, garam masala introduces warmth with hints of nutmeg, cinnamon, and cardamom; cumin adds earthiness; and paprika or Kashmiri chili offer color and a mild to moderate heat that builds gradually. Ginger and garlic contribute a sharp, aromatic backbone that wakes the palate, while fenugreek leaves (kasuri methi) impart a delicate, almost herbaceous finish that lingers on the tongue. The texture is a study in contrasts: the tender, juicy chicken absorbs the sauce while remaining succulent, and the sauce itself—silky, smooth, and rich—provides a counterpoint to the slight bite of the aromatics and the softness of the starch you choose to accompany it.

When you plate Creamy Butter Chicken, you’ll notice a vibrant hue—bright enough to be inviting but not so bold as to feel artificial. The surface sheen is glossy and inviting, hinting at the luxurious mouthfeel to come. A final sprinkle of fresh cilantro and a swirl of cream or yogurt on top can elevate the dish with a touch of brightness and a contrasting cool note that refreshes the palate after each richly flavored mouthful.

Occasions & Pairings

This dish shines in many settings. On weeknights, it’s a comforting dinner that feels special without requiring hours in the kitchen. For weekends or gatherings, it becomes a centerpiece that invites conversation and shared enjoyment. It also adapts gracefully to celebrations or intimate dinners, where its universal appeal can be enjoyed by guests with varied spice preferences.

Suggested pairings to complete the experience:

  • Starches: basmati rice (plain or saffron), steamed jeera rice, or warm, fluffy naan and roti to soak up the sauce.
  • Cool accompaniments: cucumber raita or a tangy onion-yogurt salad to balance the richness.
  • Vegetable sides: roasted cauliflower, sautéed spinach, or a simple guild of peas and carrots to add color and texture.
  • Drinks: a crisp lager, a softly fruity white wine like Sauvignon Blanc, or a lassi (sweet or salted) for a traditional touch.
  • Desserts: a light, citrusy dessert such as kulfi, mango sorbet, or a yogurt-based cheesecake to round out the meal.

Tips, Variations & Substitutions

Whether you’re dairy-free, vegetarian, or chasing a spicier version, there are many ways to tailor Creamy Butter Chicken to your needs without losing its essence.

Dairy-friendly and vegan-friendly options

  • Make it dairy-light: substitute a portion of the cream with full-fat coconut milk or almond milk, and use a dairy-free butter or neutral oil for cooking. The sauce will be lighter but still luscious.
  • Vegan variation: use paneer or chickpeas as the protein, and replace dairy with cashew cream (soaked cashews blended with water) to achieve a similar luxurious texture.
  • Butter alternative: olive oil or ghee can be used, with ghee giving a deeper, more traditional aroma if you’re not avoiding dairy.

Protein and texture tweaks

  • Protein swaps: chicken thighs stay juicier and more forgiving than breasts; you can also use turkey or paneer for a different texture.
  • To keep chicken extra tender, consider marinating briefly in yogurt and a pinch of salt before cooking (the description here preserves the idea of tender meat without detailing long steps).
  • For a lighter version, simmer the sauce with less cream and a touch of yogurt added at the end for brightness.

Flavor variations

  • Spice level: adjust with Kashmiri chili for color and mild heat, or increase with green chilies or crushed red pepper for more punch.
  • Herbal lift: finish with a scatter of kasuri methi crushed in the palm for a fragrant, slightly bitter finish that enhances the dairy richness.
  • Smoky notes: a small amount of smoked paprika or a dash of charred tomato can add depth for those who love a deeper, rustic flavor.
  • Herby brightness: a squeeze of lemon or a splash of amchoor (dried mango powder) at the end can brighten the dish and add a subtle tang.

Regional twists

  • Mumbai-style butter chicken: a touch sweeter and more velvety, with a hint of tamarind or pomegranate molasses offering a gentle tang.
  • Punjabi influence: a bit more garlic and a touch of onion powder in the base can echo the heartier, rural-restaurant versions.
  • South Asian fusion: pair with spiced lentil dal or chickpea curries to create a colorful, multi-constituent platter.

Storage & Make-Ahead Ideas

Creamy Butter Chicken is as friendly to the planner as it is to the spontaneous cook. With a few smart steps, you can have leftovers that taste as vibrant as the day you made them.

  • Make-ahead: prepare the sauce up to the point of finishing the dish and refrigerate for 1–2 days. Reheat gently and add a splash of water or stock to restore the sauce’s looseness before finishing with a final swirl of dairy.
  • Make-ahead proteins: cook the chicken and store it separately from the sauce. When ready to serve, rewarm the chicken in the sauce to reabsorb flavors and glaze the pieces with the glossy finish.
  • Storage: keep leftovers in an airtight container in the refrigerator for up to 3–4 days. For longer storage, freeze the sauce (without adding dairy), and store the cooked chicken separately. Thaw and reheat slowly, then combine with sauce and finish with a touch of cream or butter if desired.
  • Reheating tips: reheat gently on the stovetop over low heat, stirring often to prevent separation. If the sauce thickens too much, whisk in a little water or stock to reach the desired consistency.

Fun Facts & Trivia (Optional)

– The word makhani translates to “buttered” or “buttery,” a perfect descriptor for the dish’s silky texture and luxurious finish.

– Butter Chicken occupies a special place in global Indian cuisine: it is a bridge dish—recognizable to many who have never traveled to India, yet deeply rooted in Indian culinary traditions.

– The dish is often cited as a celebrated example of fusion within Indian cooking, where tandoor authenticity meets the comfort of a creamy sauce and a plump, juicy chicken piece.

– In many Indian restaurants around the world, Butter Chicken is a gateway dish that introduces diners to the flavors of garam masala, fenugreek, and the balance of tomato and dairy that defines much of North Indian curries.

– Variations exist across regions, but the core idea remains the same: a luxurious, creamy, tomato-based sauce enveloping tender chicken, with a gentle spice kick and a glossy finish that makes every bite feel festive.

Ingredients

Creamy Butter Chicken
Marinade
  • – 1.5 pounds boneless skinless chicken thighs, cut into 1-inch pieces
    → Purpose: The chicken provides protein and becomes tender when marinated; Preparation: Cut into uniform pieces for even browning and sauce coating; marinate with yogurt and spices to impart flavor and moisture. Tips: Thighs stay juicy; for a leaner option use chicken breast but monitor cooking time; marinate 30 minutes to 4 hours for best results; ensure the chicken is dry before searing to get a good crust.
  • – 1 cup plain yogurt (full-fat)
    → Purpose: Tenderizes and adds tang; Preparation: Whisk into the marinade with lemon juice; If yogurt is very runny, strain or label as thick; Tips: Use thick yogurt for better cling; avoid adding watery yogurt to marinade as it can make sauce thin.
  • – 1 tablespoon lemon juice
    → Purpose: Acidity to brighten; Preparation: Freshly squeeze; Add to marinade; Tips: Balance with sugar if needed; adjust salt later; fresh juice is best.
  • – 4 cloves garlic, minced
    → Purpose: Aromatics to flavor the marinade; Preparation: Mince finely; mix into marinade. Tips: Crushing and resting garlic for 5–10 minutes increases aroma.
  • – 1 tablespoon grated fresh ginger
    → Purpose: Aromatics; Preparation: Peel and finely grate; mix into marinade. Tips: Fresh ginger gives best flavor; avoid using dried ground ginger at this stage.
  • – 1 teaspoon ground cumin
    → Purpose: Earthy warmth; Preparation: Use ground cumin; bloom in oil for deeper aroma if desired. Tips: Freshly ground offers stronger fragrance; toast briefly if you like.
  • – 1 teaspoon ground coriander
    → Purpose: Citrus-like brightness; Preparation: Use ground coriander; mix evenly in marinade. Tips: If using whole seeds, crush before grinding.
  • – 1/2 teaspoon turmeric
    → Purpose: Color and earthy note; Preparation: Stir into marinade; Tips: Use sparingly to avoid bitterness; color will intensify in sauce.
  • – 1/2 teaspoon Kashmiri chili powder or paprika
    → Purpose: Color and mild heat; Preparation: Add to marinade to impart color; Tips: For more heat, adjust with an additional pinch of red chili powder.
  • – 2 teaspoons garam masala, divided (1 teaspoon for marinade; 1 teaspoon for finishing sauce)
    → Purpose: Classic spice blend unifies flavors; Preparation: Mix 1 teaspoon into marinade and reserve 1 teaspoon to stir into sauce near the end. Tips: Freshly toasted garam masala has more aroma; store airtight.
  • – 1/2 teaspoon salt
    → Purpose: Seasoning base for marinade; Preparation: Stir into marinade and taste before cooking; Tips: Yogurt and tomatoes add salt so adjust later.
  • – 1 tablespoon vegetable oil (neutral) or ghee for marinade and cooking
    → Purpose: Fat to carry spices and help sear; Preparation: Mix into marinade and use to sear chicken pieces. Tips: Ghee adds richer flavor; oil helps prevent dairy from separating.
Sauce
  • – 1 large onion, finely chopped
    → Purpose: Base for the sauce; Preparation: Sweat in butter/oil until translucent and lightly golden to develop sweetness. Tips: Slow cooking yields deeper caramelization; adjust salt later to balance.
  • – 2 tablespoons butter
    → Purpose: Adds richness and helps create a creamy emulsified sauce; Preparation: Melt with onion before adding other ingredients; Tips: Do not brown too deeply to avoid burnt flavor; use unsalted butter for controlled salt.
  • – 1 can crushed tomatoes (14 oz / 400 g) or 1.5 cups tomato puree
    → Purpose: Tomato base for acidity and body; Preparation: Simmer to reduce and concentrate; if you prefer a smooth sauce, blend after simmering. Tips: Canned crushed tomatoes provide texture; passata yields a smoother texture.
  • – 1 cup heavy cream
    → Purpose: Creates silky, rich sauce; Preparation: Add toward the end and simmer briefly to thicken; Tips: For lighter version, substitute with half-and-half or coconut cream; avoid boiling after adding cream to prevent separation.
  • – 1/2 cup water or chicken stock
    → Purpose: Adjusts thickness; Preparation: Add gradually until sauce reaches desired consistency; Tips: Stock adds savoriness; water keeps the dish lighter.
  • – 1 teaspoon kasuri methi (fenugreek leaves), crushed between fingers
    → Purpose: Signature aroma; Preparation: Crush leaves between fingers to release oils; sprinkle toward the end of cooking. Tips: If unavailable, omit or substitute with a pinch of dried oregano for a different aroma.
  • – 1 teaspoon sugar or honey (optional)
    → Purpose: Balances acidity from tomatoes; Preparation: Stir in little by little, tasting as you go. Tips: Start with 1 teaspoon; adjust to preferred sweetness; skip if tomatoes are already sweet.
  • – 1/2 teaspoon salt
    → Purpose: Seasoning for sauce; Preparation: Season gradually during simmer and taste before serving. Tips: Use kosher salt for even distribution; adjust after adding cream.
  • – 1 tablespoon tomato paste (optional)
    → Purpose: Deepens tomato flavor and adds body; Preparation: Stir in after onions soften to bloom; Tips: Optional but adds depth if you want a richer sauce.
Finish and Garnish
  • – 1 tablespoon chopped fresh cilantro leaves (for garnish)
    → Purpose: Fresh, bright finishing aroma and color; Preparation: Roughly chop and sprinkle over the dish just before serving. Tips: If you dislike cilantro, substitute with parsley or skip garnish.
  • – 2 tablespoons extra butter or ghee for finishing (optional)
    → Purpose: Finishes the sauce with a glossy, luxurious finish; Preparation: Remove from heat and whisk in off the heat to emulsify; Tips: Use unsalted to control salt and adjust at the end; avoid adding while boiling to prevent separation.

Instructions

  • Marinate the chicken: In a large bowl, whisk together 1 cup plain yogurt (thick if possible), 1 tablespoon lemon juice, 4 cloves garlic minced, 1 tablespoon grated fresh ginger, 1 teaspoon ground cumin, 1 teaspoon ground coriander, 1/2 teaspoon turmeric, 1/2 teaspoon Kashmiri chili powder or paprika, 1 teaspoon garam masala, 1/2 teaspoon salt, and 1 tablespoon vegetable oil; add the 1.5 pounds boneless skinless chicken thighs cut into 1-inch pieces and toss to coat evenly; cover and refrigerate for 30 minutes to 4 hours to allow the yogurt to penetrate and tenderize while flavoring every piece.
    → This step infuses the chicken with aromatics, tenderizes the meat, and ensures an even coating for the sear and the sauce; use thick yogurt for better adhesion and pat the chicken dry before cooking to promote browning.
  • Pat dry the marinated chicken: Remove the chicken from the marinade and pat each piece dry with paper towels to remove excess surface liquid; drying prevents steaming and helps achieve a crisp, browned crust during searing.
    → Excess marinade moisture can inhibit browning and dilute the sauce; drying ensures a proper sear that locks in juices and develops flavor through Maillard reactions.
  • Prepare the sauce base: In a wide, heavy skillet, melt 2 tablespoons butter over medium heat; add the finely chopped onion and sweat slowly until translucent and lightly golden, about 8–10 minutes, stirring occasionally to prevent scorching and to develop sweetness.
    → Slow sautéing draws out natural sugars in the onion, building a rich foundation for the sauce and balancing the acidity of tomatoes.
  • Bloom spices and introduce the tomato component: If using tomato paste, add it to the onions and cook for 1 minute to bloom their flavor in the fat; then stir in 1 can crushed tomatoes (14 oz) or 1.5 cups tomato puree and bring to a gentle simmer to concentrate their flavor, 8–12 minutes.
    → Blooming the paste and reducing the tomatoes thickens the sauce and deepens the tomato-forward tang that underpins butter chicken.
  • Season the sauce and balance acidity: Stir in 1 teaspoon garam masala (reserve the remaining 1 teaspoon for finishing later), 1/2 teaspoon salt, and 1 teaspoon sugar or honey if the tomatoes taste sharp; simmer a few minutes so the flavors meld and the salt integrates without oversalting.
    → Salt and a touch of sweetness balance tangy tomatoes; adding garam masala now layers warmth into the base before the chicken finishes cooking.
  • Cook the chicken in batches to brown: In a separate heavy skillet, heat 1 tablespoon oil or ghee over medium-high heat; add the marinated chicken in batches without crowding and sear until browned on all sides, about 2–3 minutes per side; do not cook through completely, then transfer to a plate.
    → Browning in a hot, dry pan builds flavor and color that intensifies the final sauce; crowding cools the pan and prevents proper sear, so work in batches.
  • Combine the chicken with the sauce and simmer: Return the browned chicken (and any juices) to the tomato-onion base; simmer uncovered over medium-low heat until the chicken is cooked through (internal temperature 165°F / 74°C) and the sauce thickens to coat the pieces, about 8–12 minutes; stir occasionally to ensure even cooking and prevent sticking.
    → Gentle simmering allows the yogurt-based marinade to meld with the cream and tomatoes, finishing the chicken without turning it dry.
  • Finish the sauce with cream and remaining spice: Stir in the remaining 1 teaspoon garam masala and pour in 1 cup heavy cream; simmer gently 3–5 minutes to emulsify the sauce and achieve a luxurious texture; gradually add up to 1/2 cup water or chicken stock to reach your desired consistency, avoiding a thin sauce.
    → Cream heightens richness and creates the signature buttery, smooth sauce; avoid a hard boil after cream addition to prevent separation.
  • Finish and glaze for gloss: Remove from heat and whisk in 2 tablespoons extra butter or ghee (optional) to melt through the sauce; this step tightens the emulsion for a glossy finish and silken mouthfeel; sprinkle with 1 tablespoon chopped fresh cilantro just before serving.
    → Finishing with butter adds a satin sheen and rounds the fat-soluble flavors; cilantro provides a fresh contrast and aroma that brightens the dish.
  • Taste and adjust final seasoning: After the sauce has legged a moment, test for salt and acidity; if needed, add a splash more lemon juice or a pinch more salt in small increments and mix well; keep warm until ready to plate.
    → Balancing salt and brightness at the end ensures the dish tastes cohesive with the richness of cream and yogurt.
  • Plate and serve: Spoon the creamy butter chicken over steamed basmati rice or alongside warm naan; garnish with a final scatter of cilantro and a pat of butter if desired; serve immediately to enjoy the sauce at its freshest.
    → The dish shines when served hot, with the rice or bread soaking up the luscious sauce and carrying the spices to every bite.

Notes

These gluten-free creamy butter chicken notes describe a rich, yogurt-tenderized chicken simmered in a silky tomato-cream sauce with warming spices. Marinating the chicken in plain yogurt, lemon juice, and spices helps tenderize the meat and infuse depth of flavor, while browning the pieces in a hot pan adds color and complexity before they simmer in the sauce.

  • Marinate the chicken thighs (boneless, skinless, 1.5 pounds) with plain yogurt, lemon juice, minced garlic, grated ginger, cumin, coriander, turmeric, Kashmiri chili powder or paprika, a portion of garam masala (1 teaspoon for marinade), salt, and oil for 30 minutes to 4 hours for best tenderness and flavor.
  • Pat the chicken dry before searing to ensure a good crust; sear in batches on medium-high heat with a little oil or ghee, then set aside.
  • In the same pan, sweat the onion in butter until translucent and lightly golden to develop sweetness; this creates the flavor base for the sauce.
  • Bloom remaining spices (cumin, coriander, and garam masala) in the fat for 30–60 seconds to awaken their aromas, being careful not to burn them.
  • Add crushed tomatoes or tomato puree and simmer to reduce and concentrate their acidity and body; blend if you prefer a smoother sauce.
  • Pour in heavy cream toward the end and simmer briefly to thicken; keep the heat gentle to prevent curdling, and consider tempering the cream by adding a splash of the hot sauce before fully incorporating it.
  • Finish with kasuri methi crushed between fingers for aroma, and stir in the remaining teaspoon of garam masala off the heat for a cohesive finish.
  • If the sauce tastes too acidic, balance with a touch of sugar or honey added gradually; adjust salt after adding cream.
  • Garnish with chopped cilantro and a final pat of butter or ghee if desired for a glossy, luxurious finish.

Make-ahead, storage, and substitutions: The marinated chicken can be prepared up to 4 hours ahead, and the sauce can be made a day in advance and gently reheated, adding cream at the end. Refrigerate leftovers in an airtight container for 3–4 days or freeze portions for 2–3 months. This dish is gluten-free as written; verify that spice blends, tomato paste, and stock are certified gluten-free if you have gluten intolerance, and serve with gluten-free rice or bread. For dairy-free or lighter versions, substitute coconut cream and dairy-free yogurt, and omit the butter; the texture will be creamier with careful reheating on low heat.

Serving notes: Pair with basmati rice or gluten-free naan, and adjust salt to taste before serving. For extra richness, finish with an additional knob of butter off the heat and let it emulsify into the sauce. If you prefer milder heat, reduce the Kashmiri chili powder or paprika; for more heat, add a pinch of red chili powder to taste.

Tips

Tips for Creamy Butter Chicken

Marinade and chicken prep

Searing and building flavor

Sauce construction and texture

Finishing and optional tweaks

  • Serve with basmati rice or warm naan to soak up the sauce; a squeeze of lemon at plating brightens the dish just before serving.

Storage, reheating and troubleshooting

  • If the sauce splits, whisk in a little warm water or cream off the heat to re-emulsify; a small amount of tomato paste can help restore body.
  • The sauce and chicken freeze well; thaw in the fridge overnight and reheat slowly, adding a touch of stock to adjust thickness.

FAQ

Creamy Butter Chicken – FAQ

What is Creamy Butter Chicken?

Creamy Butter Chicken is a mild, tomato-based curry featuring tender chicken simmered in a rich, velvety sauce made with butter and cream. It’s inspired by North Indian flavors and is typically less spicy, with a luxurious, silky texture.

What ingredients do I need?

Common ingredients include:

  • Boneless, skinless chicken thighs (or breasts), cut into bite-sized pieces
  • Plain yogurt for marinating
  • Lemon juice and garlic-ginger paste
  • Spices: garam masala, ground cumin, coriander, paprika, chili powder
  • Tomato puree or crushed tomatoes
  • Butter and cream (or dairy-free alternatives)
  • Salt and pepper
  • Optional: kasuri methi (den.) or fenugreek leaves, fresh cilantro for garnish
Can I make it ahead or freeze it?

Yes. You can marinate the chicken up to 1 day in advance. Sauce can be prepared and cooled, then stored in the fridge for up to 2–3 days. For freezing, freeze the sauce (without cream) for up to 2–3 months. Thaw in the fridge and reheat gently, adding cream or dairy-free milk at the end to restore creaminess.

How do I adjust the spice level?

To tone it down, reduce chili powder or skip fresh chilies. To increase heat, add a pinch of red pepper flakes or chopped green chilies. You can also control spiciness by balancing with a touch of sugar or yogurt in the marinade, and serving with mild sides like rice or naan.

Is this recipe gluten-free?

Yes, the core recipe is gluten-free if you use gluten-free spices and avoid any tomato paste or sauces containing gluten. Check labels on garam masala and tomato products, and use gluten-free stock if included in the recipe.

Can I make a dairy-free or vegan version?

Absolutely. Use coconut cream or almond cream instead of dairy cream, and dairy-free butter or oil. For protein, use paneer alternatives or chickpeas if you prefer a vegetarian option. Some people also blend coconut yogurt for tanginess, but adjust sweetness and acidity accordingly.

How do I reheat leftovers without breaking the sauce?

Reheat gently over low heat, stirring often. If the sauce thickens, loosen with a splash of water or a little more cream/coconut milk. Avoid boiling, which can separate dairy-based sauces.

What should I serve Creamy Butter Chicken with?

Popular accompaniments include basmati rice, naan, or roti. A side of cucumber raita or a simple salad adds freshness, while chopped cilantro and a squeeze of lemon brighten the dish.

Common mistakes to avoid?

Tips to prevent issues:

  • Overcooking the chicken—cook just until sealed and tender, then simmer in sauce.
  • Adding too much tomato or not balancing acidity—taste and adjust with a little sugar or cream.
  • Letting the sauce boil after adding dairy—keep heat gentle to preserve creaminess.
  • Not marinating long enough—marination helps tenderize chicken and deepen flavor.
How long does it take to cook?

Total time is typically 40–50 minutes, including marinating (optional) and cooking. Active cooking usually takes 25–35 minutes: marinate if you like, sauté aromatics, add tomato and spices, simmer until chicken is cooked through, then finish with butter and cream.

Introduction / Hook

There’s a simple, almost magical alchemy in garlic bread: a humble loaf transformed into a warm, fragrant embrace that makes any meal feel like a celebration. Imagine slices of crusty bread bronzed to a whisper-crisp along the edges, the scent of butter and garlic wafting through the room, a speckled crown of fresh herbs catching the light as cheese (if you choose) melts into silky pools. It’s the kind of dish that invites you to slow down, to break bread with friends and family, and to savor every bite as if savoring a memory in the making. Garlic bread is more than a side—it’s a mood, a comfort, and a universal crowd-pleaser that turns ordinary dinners into cozy gatherings.

The Story Behind the Dish

Garlic bread has a nuanced history that travels far beyond a single kitchen. Its roots are often traced to Europe—where bread, butter, and garlicky seasoning are humble staples—yet the modern, cheese-laden versions most of us love today owe much of their fame to Italian-American eateries and pizza parlors of the mid-20th century. In many Italian households, bread and butter with garlic is a pantry staple—an everyday treat that stretches a simple loaf into something comforting and satisfying. As Italian immigration blended with American dining trends, garlic butter on toasted bread became a signature starter in pizza joints and family-run trattorias alike. The result is a dish that feels both timeless and universally accessible: a shared bite that evokes warmth, hospitality, and the pleasure of good company.

What makes garlic bread particularly charming is its adaptability. Across continents, cooks have riffed on the theme—some prefer a crackly, bare-bones crust with a whisper of garlic, others smear the bread with a rich, herb-laden butter and finish with a scatter of cheese. In some regions, olive oil replaces butter, rendering a lighter, crisper bite. In others, a touch of parmesan, parsley, or chili flakes adds sparks of brightness and heat. The story of garlic bread is, in essence, a testament to how a simple idea—bread plus garlic butter—can be endlessly reimagined to fit culture, taste, and occasion.

Why You’ll Love This Recipe

  • Quick and versatile: comes together in minutes with pantry staples, making it an ideal weeknight starter or a make-ahead party bite.
  • Comforting and indulgent: the warm, buttery aroma elevates any table, inviting conversation and shared smiles.
  • Adaptable to all diets and preferences: you can keep it dairy-free, vegan, gluten-free, or extra cheesy—whatever suits your crowd.
  • Perfectly forgiving: you can use leftover bread, stale crusts, or a fresh baguette; the result remains deliciously satisfying.
  • Pairing powerhouse: pairs beautifully with pasta, soups, salads, grilled vegetables, or even simple antipasti for a.table-ready starter.

Flavor Profile & Texture

At its core, garlic bread is a study in balance. The garlic should perfume the air without turning harsh or bitter; the butter or olive oil should carry the loaf to a golden, crackly edge while keeping the interior soft and inviting. The scent is where the magic begins—garlic’s sharpness mellowed by fat, herbs releasing their bright, leafy scent, and a whisper of salt tying everything together. If you choose to add cheese, expect a second wave of richness: the cheese melts into the bread, creating a creamy, cohesive bite that contrasts beautifully with the crisp crust.

Texture plays a starring role. A good garlic bread offers a satisfying crunch on the first bite, followed by a tender, almost pillowy crumb inside. The contrast between the crisp exterior and the soft interior makes it irresistibly munchable. The optional herbs—parsley, chives, or oregano—introduce a pop of color and a fresh, grassy note that lightens the dish, preventing the richness from feeling cloying. A touch of lemon zest or a pinch of red pepper flakes can brighten the finish, balancing the fat and garlic with a hint of tang or heat. In every bite, you’ll notice the interplay between heat, salinity, and aromatic brightness—a trifecta that is hard to resist.

Occasions & Pairings

Garlic bread shines in nearly any setting, from casual weeknights to festive gatherings. Here are some ways to think about when and how to serve it:

  • Weeknight dinners: a comforting starter alongside a bowl of soup or a hearty pasta dish.
  • Family gatherings and potlucks: a crowd-pleasing bite that travels well and reheats nicely.
  • Pizza night or Italian-inspired menus: a natural companion to margherita, arrabbiata, or mushroom risotto.
  • Holiday feasts: a warm, aromatic accompaniment that fills the kitchen with irresistible aromas.
  • Casual entertaining: serve the garlic bread warm with a dipping olive oil, balsamic, or a bright herby oil for added flair.

Pairing ideas to elevate the experience:

  • Pastas: spaghetti carbonara, fettuccine alfredo, or a tomato-basil linguine.
  • Soups: roasted tomato soup, minestrone, creamy mushroom soup, or a winter squash bisque.
  • Salads: a crisp Caesar, an arugula salad with lemony vinaigrette, or a roasted beet and goat cheese salad.
  • Proteins: roasted chicken, grilled shrimp, or a hearty meat ragù.
  • Drinks and dips: a sparkly lager, a light white wine like Pinot Grigio, or a bright herbaceous olive oil dip for dipping.

Tips, Variations & Substitutions

Garlic bread is a playground for flavor and texture. Here are creative ways to customize it while keeping the essence intact:

Herb and Seasoning Variations

  • Classic herb blend: finely chopped parsley and a touch of oregano or thyme for a familiar, comforting aroma.
  • Herb-forward: add chives or basil for a fresh, grassy note that pairs beautifully with summer tomatoes.
  • Spicy kick: sprinkle red pepper flakes or finely minced jalapeño into the butter for a gentle heat.
  • Smoked finish: a pinch of smoked paprika or a few drops of liquid smoke for a subtle campfire essence.

Cheesy vs. Non-Cheesy

  • Cheesy: sprinkle grated mozzarella, provolone, or parmesan over the buttered bread, then broil until bubbling and golden.
  • Non-cheesy: rely on a buttery-garlic-herb coating for a lighter, crispier bite with a focus on aroma and crunch.
  • Combination: a light dusting of parmesan plus a handful of torn mozzarella can create a luxe, melty top without overpowering the bread.

Diet-Friendly Versions

  • Vegan: use dairy-free butter or olive oil as the fat base, and skip cheese or substitute with a vegan cheese that melts well.
  • Gluten-free: choose a sturdy gluten-free bread that toasts well and holds up to the garlic butter without becoming soggy.
  • Low-fat: use a light butter or olive oil with a modest amount of garlic and herbs, focusing on flavor intensity rather than quantity.
  • Low-carb: serve the garlic butter over toasted almond flour bread or serve the garlic butter on crisp cucumber rounds for a refreshing alternative.

Regional Twists

  • Mediterranean touch: add lemon zest, chopped olives, and a splash of olive oil for a bright, sun-kissed flavor.
  • Italian-American classic: finish with grated Parmigiano-Reggiano and chopped flat-leaf parsley for a bright finish.
  • Garlic and anchovy: a whisper of anchovy minced into the butter can deepen the savoriness for true umami lovers.

Storage & Make-Ahead Ideas

Garlic bread adapts well to prep-ahead planning, making it ideal for entertaining or busy weeks. Consider these approaches to maximize convenience without compromising flavor:

  • Make-ahead basics: prepare the garlic butter mixture, herbs, and optional cheese ahead of time, then store in the fridge until ready to bake. This reduces assembly time when guests arrive or dinnertime hits.
  • Storing baked garlic bread: store cooled slices in an airtight container or wrap tightly in foil. Reheat in a hot oven or toaster oven until the crust re-crisps and the interior heats through. Avoid microwaving, which can soften the crust and dull the aroma.
  • Freezing options: freeze the ready-to-bake garlic bread on a baking sheet, then transfer to a freezer bag. Bake directly from frozen; add a few extra minutes if needed. Freezing works especially well for the non-cheesy version that preserves crispness.
  • Batch testing: for large gatherings, bake in small batches to ensure an even, golden crust and to keep the bread from drying out.

Fun Facts & Trivia (Optional)

Did you know that garlic has a long history of culinary and medicinal uses across many cultures? Beyond its unmistakable aroma, garlic has been revered for centuries for its potential heart-health benefits and its potent flavor profile. Garlic bread, in many ways, is a celebration of the humble garlic clove—transformed with fat and heat into something comforting and irresistible. The bread’s versatility mirrors the hospitality that many cultures associate with sharing a meal, turning a simple loaf into a conversation starter, a memory-maker, and a small ritual of everyday joy.

Ingredients

Garlic Bread Base

    – 1 loaf crusty Italian or French bread (about 12 inches / 30 cm), cut in half lengthwise

    → This forms the sturdy, chewy base that will soak up the garlic butter without falling apart. A fresh, crusty loaf yields the best texture; if your loaf is very soft, toast lightly before applying the butter to avoid sogginess.

    – 1/2 cup unsalted butter, softened to room temperature

    → Softened butter provides a smooth, even spread that coats the bread surface and carries the garlic flavor deeply. It also helps create a rich, golden crust as it bakes. If dairy-free, substitute with olive oil or a dairy-free butter substitute, but note that flavor and fat composition will change slightly.

    – 3-4 cloves garlic, finely minced or pressed

    → Garlic is the primary flavor for garlic bread. Mince or press to release maximum aroma and distribute evenly across the bread. For a milder profile, you can sauté the minced garlic in a tiny bit of butter for 1–2 minutes to mellow sharpness, then whisk into the rest of the butter.

    – 2 tablespoons fresh flat-leaf parsley, finely chopped

    → Parsley adds a fresh, bright note and a pop of green to contrast the rich butter. Use fresh parsley for best fragrance; if using dried, substitute 1 teaspoon and crumble it into the butter to release its flavor. Avoid over-chopping to prevent browning too quickly.

    – 1/4 teaspoon fine sea salt, or to taste

    → Salt balances the richness of the butter and garlic, and enhances overall flavor. If your bread is salted, start with less and adjust after mixing the butter and garlic. Always taste a small smear on the bread before baking to ensure seasonings are correct.

    – 1/8 teaspoon freshly ground black pepper (optional)

    → A whisper of pepper adds subtle warmth that complements garlic. This is optional and can be omitted if you prefer a milder taste, especially for children.

    – 1 tablespoon extra-virgin olive oil (optional, for extra moisture and crispness)

    → Olive oil helps achieve a lighter, crisper edge on the loaf and can improve spreadability if your butter is very soft or slightly skiffy. Use in addition to butter, not as a replacement.

Optional Add-ins

    – 1/4 cup grated Parmesan cheese (Parmigiano-Reggiano) or Pecorino Romano

    → Adds a sharp, salty, nutty note and a golden, crisp top when baked. Use high-quality aged cheese for the best depth of flavor. Sprinkle on before the final bake or mix into the butter for a more integrated flavor.

    – 1/2 cup shredded mozzarella cheese

    → Creates a classic cheesy garlic bread with a gooey, melty layer. Choose low-moisture mozzarella to prevent sogginess; you can sprinkle on top or tuck some into the butter mixture for a more even melt.

    – 1/2 teaspoon dried oregano or Italian seasoning

    → Provides a fragrant herbaceous note that pairs well with garlic and cheese. If using dried oregano, crush it between fingers to release the aroma; for a fresher taste, add a few chopped fresh basil leaves after baking as a finish.

    – Optional garnish: extra chopped fresh parsley for finish

    → Finishing with a fresh parsley sprinkle brightens the dish and enhances presentation. It also echoes the herbiness inside the butter and adds a fragrant scent just as the bread comes hot from the oven.

Instructions

  • Preheat your oven to 350°F (175°C) and line a large baking sheet with parchment paper or a silicone mat to prevent sticking and facilitate easy cleanup; this temperature creates a crisp, golden crust without scorching the butter or bread.
    → This ensures even baking and prevents the butter from scorching while the bread toasts.
  • In a medium bowl, whisk together the softened butter, finely minced garlic, 2 tablespoons chopped fresh parsley, 1/4 teaspoon salt, 1/8 teaspoon black pepper, and 1 tablespoon extra-virgin olive oil (if using) until the mixture is smooth and uniform; this forms a cohesive garlic butter that distributes flavor evenly across the bread.
    → Whisking emulsifies the fats and aromatics so they spread smoothly and bake into the crust, avoiding grease pockets.
  • Using a serrated knife, cut the loaf in half lengthwise, keeping the halves connected at the bottom; this creates a spacious surface for even butter distribution and preserves structural integrity during baking.
    → A clean, saw-like cut prevents ragged edges and ensures the butter can cover every crumb evenly.
  • If the bread feels very fresh or is slightly soft, lightly toast the cut halves on the prepared sheet in the preheated oven for 2–3 minutes to firm the crumb and reduce sogginess; this pre-drying step helps the butter stay on the surface rather than soaking into the bread.
    → A brief bake firms the crust; a drier surface accepts butter more evenly and yields crisper edges later.
  • Brush or scoop the garlic butter mixture evenly over the cut surfaces of both bread halves, using a spatula to press the butter into any grooves or indentations until the surface looks evenly glossy and fully coated; this ensures every bite carries garlic and fat for flavor and moisture.
    → Even coverage prevents dry patches and guarantees a consistent texture across the loaf.
  • If you are using Parmesan cheese, sprinkle 1/4 cup evenly over the buttered surfaces or whisk it into the butter before spreading for a more integrated cheesy note; the cheese will melt and form a golden crust as the bread bakes. If you prefer mozzarella on top, reserve 1/2 cup shredded mozzarella to scatter after the initial cheese layer melts.
    → Parmesan adds sharp, nutty depth and helps color the top; mozzarella provides classic gooey pull without overwhelming the garlic butter.
  • If using dried oregano or Italian seasoning, dust 1/2 teaspoon over the buttered surfaces along with a light pinch more salt if desired; crushing dried oregano between your fingers releases essential oils for more aroma. Alternatively, you can sprinkle fresh chopped basil after baking for a bright finish.
    → Herbs balance garlic richness and contribute aromatic notes that lift the overall flavor profile.
  • For a cheesy finish, scatter the remaining mozzarella cheese over the buttered loaf halves after applying the parmesan (if using) and let the cheese melt into the butter as the bread bakes; this yields a classic, bubbly cheese crust.
    → The cheese melts into the warm butter and bread, creating an irresistible pull and golden top.
  • Transfer the prepared bread halves to the oven-centered rack on the sheet and bake at 350°F (175°C) for 10–15 minutes, or until the edges are deeply golden and the butter is bubbling; if you want a crisper top, extend to 3–5 minutes more or broil 1–2 minutes at the end.
    → The high heat activates the butter’s fat and sugar, browning the crust and locking in moisture while melting cheese evenly.
  • Remove from the oven and let rest for 2–3 minutes to set the butter and cut surfaces and avoid steam scalding when slicing; resting also makes it easier to cut and helps the flavors meld.
    → A brief rest allows the butter to reabsorb slightly and prevents scorching hot steam from escaping and splattering.
  • Slice the loaf into even strips or soldiers across the grain, taking care not to tear the crust, and return any sliced pieces to the sheet for 1–2 minutes if you want extra crispness on the cut edges.
    → Slicing while warm yields cleaner cuts and maintains a uniform texture; extra crisping adds bite to the edges.
  • Transfer to a serving platter, sprinkle the remaining chopped fresh parsley on top as a finish, and serve immediately while hot and fragrant; the parsley adds color contrast and a fresh aroma that brightens the rich garlic butter.
    → Fresh parsley accents the dish visually and aromatically, completing the presentation and cutting the richness with brightness.

Notes

These garlic bread notes help you achieve a perfectly crisp, golden-edged loaf with a deeply garlicky butter finish. A crusty Italian or French loaf yields the best texture, and you can tailor the level of garlic and herbs to suit your crowd. To make dairy-free versions, substitute the butter with olive oil or a dairy-free butter substitute without sacrificing too much flavor.

  • Use softened unsalted butter for easy spreading and even flavor distribution across the exposed bread surface. If you want a lighter crumb or crisper crust, whisk in a little olive oil with the butter mixture.
  • Finely minced garlic should be evenly dispersed. For a milder profile, sauté the garlic in a small amount of butter for 1–2 minutes to mellow sharpness before mixing into the rest of the butter.
  • Fresh parsley adds color and freshness; dried parsley works but is less vibrant. If using dried herbs, use smaller amounts and crumble to release aroma for best flavor.
  • Season with salt to taste after mixing the butter and garlic. Remember the bread itself may have salt; start with a small amount and adjust after testing a smear on a slice.
  • Optional cheeses like grated Parmesan or shredded mozzarella create a classic cheesy garlic bread. For extra bite, sprinkle cheese on top after spreading butter and/or bake until melted and golden.
  • Oregano or Italian seasoning adds depth; crush dried oregano between fingers to release aroma. Finish with a few chopped fresh basil leaves after baking if desired.

Oven technique: preheat to 350°F (175°C). Bake on a parchment-lined sheet until the edges are golden and the butter is bubbling, about 10–12 minutes. If you love a crisper crust and bubbly cheese, finish under the broiler for 1–2 minutes. For extra moisture and crisper edges, drizzle a little olive oil into the butter before mixing.

Make-ahead and storage: you can mix the garlic butter up to 2 days ahead and refrigerate, then spread on cut bread just before baking. Unbaked buttered bread can be wrapped tightly and frozen for up to 1 month; bake from frozen, adding a few extra minutes. Leftovers can be reheated quickly in a hot oven or toaster oven to refresh the crust.

Gluten-free option: if you need gluten-free, use a crusty gluten-free baguette and ensure all added ingredients (cheeses, seasonings) are gluten-free. Gluten-free breads can vary in texture, so you may need to bake a bit longer or use a brief broil to recrisp the exterior.

Tips

  • Bread choice and prep: Use a crusty loaf (Italian or French) for sturdy texture that won’t crumble. If your loaf is very soft, toast lightly before butter to help prevent sogginess, and consider crisping the cut surfaces slightly under the broiler for extra bite.
  • Butter temperature and mixing: Let butter soften to room temperature so it spreads evenly. Beat or whisk it with garlic and parsley until smooth for uniform flavor distribution. If you want a dairy-free version, substitute with olive oil but expect a lighter mouthfeel and different aroma.
  • Garlic prep for maximum aroma: Mince or press the garlic finely. For a milder profile, you can sauté the minced garlic in a small amount of butter for 1–2 minutes to mellow sharpness, then whisk into the rest of the butter.
  • Parsley handling: Use fresh flat-leaf parsley for bright flavor and color. If using dried parsley, crumble it into the butter (about 1 teaspoon) and let it hydrate briefly to release its scent. Don’t over-chop fresh parsley to avoid browning.
  • Salt and seasoning: Start with 1/4 teaspoon salt and adjust after mixing. Remember, the bread may already be salted, so taste a small smear on the bread before baking. The optional pepper adds a subtle warmth; omit if you prefer a milder taste.
  • Olive oil option: Adding 1 tablespoon of extra-virgin olive oil can improve spreadability and create a crisper edge. Use in addition to butter, not as a complete replacement, to maintain rich flavor.
  • Cheese integration: For a cheesy garlic bread, mix 1/4 cup grated Parmesan or Pecorino into the butter or sprinkle on top before baking. If using mozzarella, choose low-moisture varieties to reduce sogginess and spread some into the butter or on top for a gooier melt.
  • Herb layering: Dried oregano or Italian seasoning adds aroma; if using dried oregano, crush between your fingers to release flavor. For a fresher finish, add chopped fresh basil after baking as a bright note.
  • Garnish and finish: Optional garnish of extra chopped fresh parsley brightens presentation and aroma. Scatter after baking to preserve vibrant color and scent.
  • Spreading technique: Spread the garlic butter evenly over the cut sides of the bread using a spatula or the back of a spoon. Aim for a thin, uniform layer that covers every inch to avoid dry edges and soggy centers.
  • Baking tips: Place the buttered loaf on a baking sheet. Bake until the edges are golden and the butter is bubbling; for a crisper top, finish under a hot broiler for 1–2 minutes, watching closely to prevent burning.
  • Make-ahead and storage: The garlic butter mixture can be made in advance and kept in the fridge for up to 1 day. Bring to room temperature before spreading. Leftovers can be reheated briefly in a hot oven to regain crispness.
  • Serving suggestions: Slice after a brief rest (5 minutes) to let flavors meld. Serve immediately while hot for the best gooey texture and aroma.
  • Allergen note and substitutions: For dairy-free versions, use olive oil in place of butter or a dairy-free margarine, but note the flavor and texture will differ. If dairy is not an issue, full-fat butter gives the richest flavor and crispest crust.

FAQ

Garlic Bread – FAQ

What is garlic bread?

Garlic bread is slices of bread brushed with a garlic-infused butter or oil and toasted or baked until the exterior is crisp and flavorful. It’s a popular side dish for pasta and soups and can be made plain or with added herbs and cheese.

What ingredients do I need for classic garlic bread?

For a simple version: crusty bread (like a baguette or Italian loaf), softened butter, minced garlic, chopped parsley, and a pinch of salt. Optional additions include grated Parmesan or mozzarella, olive oil, and crushed red pepper flakes for a bit of heat.

Can I make garlic bread with store-bought bread?

Yes. Store-bought or bakery bread works great. Slightly stale bread can actually soak up more of the garlic butter. Slice, spread, and bake as usual for best results.

How do I make garlic butter from scratch?

Whip softened butter with minced garlic, chopped parsley, and a pinch of salt until well combined. For extra aroma, you can whisk in a little olive oil or a squeeze of lemon zest. Let it rest for 10–15 minutes to let flavors meld.

Is garlic bread vegan?

Traditional garlic bread uses dairy butter, so it isn’t vegan. To make a vegan version, use plant-based butter or olive oil, and skip dairy cheese unless you’re using a vegan cheese alternative.

How long and at what temperature should I bake garlic bread?

Preheat your oven to 350–400°F (175–200°C). Bake for about 8–12 minutes, until the bread is toasted and the edges are golden. For a crisper top, you can broil for 1–2 minutes at the end, watching closely.

How can I make garlic bread extra crispy?

Use crusty bread and spread the garlic butter on the cut sides. Bake on a parchment-lined sheet in a hot oven until the edges become deeply golden. For extra crunch, toast the bread on a lower rack or finish under the broiler for a minute or two.

Can I make garlic bread ahead of time or freeze it?

You can assemble the bread with the butter mixture and refrigerate up to 24 hours before baking. For longer storage, you can freeze the sliced bread with the butter mix (wrapped well). Bake from frozen, adding a few extra minutes to the bake time.

How should I store leftovers and reheat?

Store leftovers in an airtight container in the fridge for 2–3 days. Reheat in a toaster oven or conventional oven at 350°F (175°C) for 5–7 minutes until hot and crispy. Avoid microwaving if you want to keep the crust crisp.

What variations can I try?

Popular twists include:

  • Cheesy garlic bread: add mozzarella or Parmesan on top before baking.
  • Herb garlic bread: mix in oregano, thyme, or chopped basil.
  • Roasted garlic garlic bread: blend roasted garlic paste with the butter for a mellow, sweet garlic flavor.
  • Spicy garlic bread: sprinkle red pepper flakes into the butter or drizzle with a chili oil.

Introduction / Hook

In a sunlit kitchen, bell peppers glow like tiny harvest lanterns, their glossy skins catching the light and their edges lightly charred from the oven’s kiss. When you crack the first pepper open, a sigh of steam rises, carrying a symphony of garlic, herbs, and roasted sweetness that makes the room feel warm with memories. This isn’t just a dish; it’s an invitation to slower Sunday afternoons, to the comfort of a home-cooked meal that feeds the body and lifts the spirit. Stuffed peppers are the kind of timeless classic that fits on every table—stunning in its simplicity, generous in heart, and endlessly adaptable to your mood, your pantry, and your crowd. Each pepper becomes a little edible bowl, cradling a savory reunion of textures and flavors that unfold with every bite: a crisp-sweet crack of the pepper giving way to a tender, richly seasoned interior, all bathed in a gentle kiss of herbs and sunlight. If you’ve ever wanted a dish that looks impressive yet feels homey, that delivers warmth without fuss, and that makes a weeknight feel like a celebration, you’ve found it in stuffed peppers.

As the peppers roast and soften, their aroma drifts through the kitchen like a welcome breeze from a Mediterranean clime—garlic, onions, and a whisper of herbs mingling with a comforting, hearty filling. The experience is multisensory: the vibrant colors that brighten the plate, the sizzling crackle as the peppers blister at the edges, the way the filling yields steam and steam carries a faint kiss of citrus or tomato, depending on the season. It’s a dish built for sharing, whether you’re cooking for a family gathering, a weeknight dinner that earns applause, or a casual meal with friends who come for the conversation as much as the food. And because it’s incredibly forgiving, it invites experimentation—swap in grains for a lighter bite, switch meats for a vegetarian feast, or weave in regional flavors that tell your own culinary story.

The Story Behind the Dish

Origins and global echoes

Stuffed peppers arrive at the table with a passport full of destinations. Across the Balkans, the Eastern Mediterranean, and the Middle East, variations of this dish appear under many names and with different fillings, all sharing a core idea: hollowed peppers embraced by a savory interior. In Turkey, you’ll hear stories of dolma and stuffed peppers that honor seasonal vegetables and pantry staples alike. In Greece, gemista is a beloved spring and summer ritual, where peppers and tomatoes cradle a fragrant mixture that often features rice, herbs, and sometimes meat. In Spain, pimientos rellenos take on bold, peppery personalities, sometimes with seafood or meat-based fillings that celebrate regional ingredients. In the Caucasus, in the former Ottoman lands, or in the Levant, the concept morphs into tiny, delicate dolmaki or larger, heartier renditions, each telling a family’s history in its spices and textures.

Whether you’re drawn to the comforting familiarity of a home kitchen or the playful thrill of a global pantry, stuffed peppers offer a bridge between cultures. They remind us that a simple mound of rice or grains, legumes, and herbs can be turned into a celebratory dish when wrapped inside a pepper—the edible bowl becoming a vessel for memory, tradition, and shared meals. In many households, this dish has traveled through generations, with grandmothers tweaking fillings to honor what’s fresh at the market or what’s left in the fridge. The result is a culinary tapestry that respects local produce while inviting personal twists—a recipe that is at once universal and personal.

Why You’ll Love This Recipe

  • Versatility: The filling can be tailored to your preferences—meat, poultry, seafood, grains, or a fully plant-based version—and still deliver a satisfying, cohesive dish.
  • Color and presentation: The peppers’ vibrant hues—green, red, yellow, orange—make a striking, balanced plate that instantly elevates weeknight dinners and special occasions alike.
  • Make-ahead friendliness: You can prepare stuffed peppers in advance, refrigerate them, and finish them off when you’re ready to serve, making weeknights easier without sacrificing flavor.
  • One-dish comfort with breadth: A single dish that delivers the comfort of a complete meal—protein, starch, and vegetables—without needing extensive sides.
  • Adaptable for dietary needs: Whether you’re seeking gluten-free, dairy-free, vegetarian, or low-carb options, the concept accommodates a wide range of dietary preferences without losing its soul.
  • Economical and resourceful: Peppers are often affordable, especially when in season, and the filling can be built from pantry staples, reducing waste and maximizing flavor.

Flavor Profile & Texture

What makes stuffed peppers so irresistibly satisfying is how the flavors and textures interplay from bite to bite. The pepper itself provides a crisp-to-tender bite that remains pleasantly structured even after baking, lending a refreshing counterpoint to the softer interior. When roasted, peppers intensify in sweetness, lifting the filling with a natural, almost caramelized depth. The interior is where the magic happens: grains or legumes absorb aromatic fats, herbs, and minerals, becoming tender but substantial—almost dreamy in their cohesion. Depending on the chosen filling, you might encounter the warm savor of cooked onions and garlic melting into the grains, the fennel-like lift of dried herbs, or a smoky, savory richness from a browned surface on any meat component. If cheese is involved, it can add a gilded, creamy layer that binds the filling and bubbles lightly against the pepper’s rim, adding a gentle, melt-in-your-mouth finish. The overall flavor profile tends toward comforting yet bright: the natural sweetness of the peppers balanced by earthier notes from grains or legumes, a savory seasoning backbone, and a finishing whisper of citrus, herbs like parsley or dill, and a touch of acidity to keep the palate lively. Texture-wise, imagine a tender bite with a slight chew from the grains, followed by a soft, yielding interior, all wrapped in a velvet-soft pepper that carries its own subtle snap when cut. It’s a harmony of contrasts—the crisp edge of a blistered skin, the yielding interior, the aromatic lift of herbs, and the satisfying, comforting finish that lingers after the last bite.

Occasions & Pairings

Stuffed peppers shine in a variety of moments, from everyday weeknights to celebratory gatherings. They are equally at home as a centerpiece for a family dinner, a cheerful dish at casual potlucks, or a vibrant starter to a more elaborate menu. Their colorful appearance instantly signals a special touch, even when the preparation is simple. For weeknights, they offer a one-dish solution that feels like a treat—protein, grains, and vegetables all in one elegant package. For weekend gatherings, they lend themselves to a shared, serve-from-the-pan presentation that invites guests to cut and serve at the table, creating a sense of communal warmth.

Pairing ideas to consider:

  • Drinks: A light, crisp white wine (such as Sauvignon Blanc or Pinot Grigio) complements the brightness of peppers; for a heartier meal, a medium-bodied red with gentle acidity can pair nicely. Non-alcoholic options like sparkling lemonade or a cucumber-mint mocktail echo the fresh, herbaceous notes of the dish.
  • Sides: A bright green salad with tangy vinaigrette, garlicky sautéed greens, or a simple, citrusy yogurt sauce can lift the richness of the filling. Crusty bread or warm flatbreads are perfect for scooping up any leftover stuffing.
  • Desserts: A light fruit-based dessert, such as citrus sorbet or baked peaches with a touch of honey, provides a refreshing counterpoint to the savory dish.
  • Seasonal twists: In warmer months, incorporate fresh herbs and lighter grains; in autumn and winter, add heartier elements like mushrooms, toasted nuts, or a touch of smoked paprika for depth.

Flavor Profile & Texture (Continued)

The interplay of textures is key to that lasting impression after the meal is over. A well-made stuffed pepper offers a continuum: the upfront tactile snap of the pepper’s skin, the tender, almost creamy interior holding the grains or legumes, and the occasional bite of a piece of softened vegetable or a melted cheese layer that glistens under the oven light. Aromatics—garlic, onion, fresh herbs—permeate the dish with warm, inviting scents that waft from the serving dish to the dining area, establishing mood and appetite before the first bite is even taken. The finishing touches, whether a squeeze of lemon, a sprinkle of chopped parsley, or a dusting of pepper flakes, can introduce a bright brightness or a whisper of heat that lingers pleasantly on the palate. In short, stuffed peppers deliver a balanced, satisfying mouthfeel: crisp-tender peppers surrounding a plush, savory core that delights with every mouthful and leaves room for conversation, laughter, and lingering at the table.

Tips, Variations & Substitutions

Flexibility is the heartbeat of stuffed peppers. Here are ideas to customize, adapt, and reinvent this dish while keeping its soul intact:

  • Make it meatless: Use a mixture of cooked lentils, quinoa, brown rice, or bulgur as the base, then fold in finely chopped vegetables and herbs for texture and depth.
  • Protein options: Ground beef, turkey, chicken, lamb, or a mixture can be used. For seafood lovers, consider a stuffing with chopped shrimp or crab integrated into a light tomato-herb sauce.
  • Grain alternatives: Try barley, farro, or freekeh to add a chewy bite and nutty flavor that beautifully complements the peppers.
  • Vegetarian-friendly cheeses: If you want a dairy-free version, skip cheese entirely or use a dairy-free melt that browns nicely on top.
  • Herb and spice notes: Fresh parsley, dill, mint, cilantro, or a pinch of dried oregano, marjoram, or smoked paprika can steer the dish toward different cultural flavors. A touch of lemon zest brightens the filling; a teaspoon of tomato paste intensifies the savory depth.
  • Regional twists: Add roasted eggplant cubes for a baba ghanoush-like dimension, or fold in crumbled feta for a Greek-inspired finish. For a Mexican-inspired version, incorporate corn, black beans, cumin, and cilantro, and top with a light cheese.
  • Gluten-free considerations: Ensure any grains used are naturally gluten-free (like quinoa or rice) or gluten-free certified products if needed.
  • Spice level: Adjust heat with fresh or dried chilies, red pepper flakes, or a splash of harissa for a North African flair.

Storage & Make-Ahead Ideas

Stuffed peppers store beautifully, which makes them perfect for meal planning. Here are practical tips to keep the dish at its best when you’re ready to enjoy it again:

  • Refrigeration: Refrigerate unbaked or baked stuffed peppers in an airtight container for up to 3-4 days. If you plan to bake later, you can assemble them in a dish, cover tightly, and refrigerate until you’re ready to bake.
  • Freezing: For longer storage, freeze baked or unbaked stuffed peppers. If freezing after assembly, consider placing them in a single layer on a tray to pre-freeze, then transfer to a freezer-safe container. They’ll keep for up to 2-3 months. Note: if freezing before baking, you may want to reduce baking time slightly when reheating, as the peppers will be starting from frozen.
  • Reheating: Reheat gently in a covered pan over low heat or in a moderate oven (around 325°F / 165°C) until heated through. If you’ve added cheese, you can give a quick broil at the end to re-melt and re-brown the top for a fresh look.
  • Make-ahead ideas: Prepare the filling and the peppers separately, then stuff and bake when ready. Alternatively, bake the stuffed peppers, then reheat when needed; the flavors often deepen with a little time in the fridge.

Fun Facts & Trivia (Optional)

Did you know that stuffed peppers are a name that travels across languages and kitchens, from dolma in Turkey and Armenia to gemista in Greece and pimientos rellenos in Spain? The idea of using a hollow vegetable or fruit as a vessel has ancient roots in Mediterranean and Middle Eastern cuisines, where seasonal produce was celebrated and preserved in creative ways. The word dolma itself means “to be filled” or “stuffed” in Turkish, reflecting a practical culinary tradition: make use of what’s on hand, combine flavors, and transform simple ingredients into a dish that feels festive. Stuffed peppers, in all their regional incarnations, illustrate a universal truth about cooking: turning humble ingredients into a comforting, shareable treasure is one of the most enduring pleasures of the kitchen. In many households, the ritual of preparing stuffed peppers becomes a seasonal memory—peppers lined up on a cutting board, the aroma drifting through the house, grandchildren watching as the peppers go into the oven, and the resounding chorus of “Delicious!” at the table. The dish’s adaptability is a small culinary rebellion against rigid recipes: it invites you to trust your senses, to test a combination, to appreciate the color and aroma, and to savor the moment of eating something that feels both nourishing and joyful.

Ingredients

Stuffed Peppers

  • 4 large bell peppers (red, yellow, or green) with tops cut off and seeds removed, membranes scraped clean; these peppers act as natural vessels for the filling and contribute color and crunch to the dish. Choose peppers that are firm, evenly sized, and free of bruises; if they don’t stand upright, trim a tiny bit from the bottom to level them (being careful not to create a hole) and pat the insides dry before stuffing.
    → The peppers serve as vessels for the filling, providing sweetness and texture. To prep, wash and dry, remove tops and seeds, and scrub away any remaining membranes. Level the bottoms if needed so they stand steady on the baking dish. For a softer bite, you can pre-roast the peppers for 5–7 minutes before filling.
  • 1 tablespoon olive oil for cooking the filling (plus optional light brushing of pepper skins)
    → Olive oil carries and enhances the aroma of sautéed aromatics like onion and garlic, adding moisture to the filling and helping it come together. Use extra-virgin olive oil for best flavor. Brush the insides of the peppers lightly with oil before stuffing to prevent sticking and to promote even roasting.
  • 1 small onion, finely chopped
    → Onion provides foundational sweetness and moisture to the filling, acting as a bulk ingredient that helps bind the meat with the rice. Chop finely so it cooks evenly and blends into the filling rather than sinking to the bottom. Sauté in the olive oil until translucent and just starting to caramelize for deeper flavor.
  • 2 cloves garlic, minced
    → Garlic adds sharp, bright aroma and depth of flavor to the filling. Mince finely to distribute evenly and add after the onions begin to soften to prevent burning; this ensures a smooth, cohesive filling rather than a garlicky aftertaste.
  • 1 pound ground beef, turkey, or plant-based crumbles (choose one)
    → This is the primary source of protein and texture in the dish. Lean varieties keep the filling lighter; if using plant-based crumbles, cook according to package directions and crumble finely so the texture melds with rice and vegetables. Drain any excess fat or moisture after cooking to prevent a watery filling.
  • 1 cup cooked long-grain white rice (or cooked quinoa for a gluten-free, higher-protein option)
    → Rice or quinoa provides bulk, texture, and helps bind the filling together. Make sure whatever you use is fully cooked and cooled slightly to prevent mush. If you prefer more bite, use half rice and half quinoa.
  • 1 cup canned crushed tomatoes
    → Crushed tomatoes contribute moisture, acidity, and a cohesive sauce that helps meld the filling. Choose low-sodium varieties if possible to better control the overall salt level. Simmer the tomatoes briefly with the tomato paste before mixing with the filling to deepen the flavor.
  • 2 tablespoons tomato paste
    → Tomato paste intensifies tomato flavor and helps thicken the filling so it clings to the rice and meat. Stir it into the onion-garlic mixture for even distribution, then add crushed tomatoes. Once opened, store refrigerated for up to a week.
  • 1 teaspoon dried oregano
    → Oregano adds classic Italian-herb brightness and pairs perfectly with tomatoes and peppers. If using fresh oregano, use 1 tablespoon chopped and add toward the end of cooking to preserve its aroma. Blooming dried oregano with the onion and garlic helps release its oils for a more pronounced flavor.
  • 1/2 teaspoon ground cumin (optional)
    → Cumin adds warm, earthy notes that complement the savory filling and pair nicely with any beans or corn you might add. Omit if you prefer a purer, simpler tomato flavor.
  • 1/2 teaspoon smoked paprika (optional)
    → Smoked paprika introduces a gentle smokiness that elevates the dish without needing a grill. If you don’t have smoked paprika, regular paprika plus a pinch of chili powder works well.
  • Salt and black pepper to taste
    → Essential for balancing sweetness of the peppers and tomatoes. Salt gradually, tasting the filling before stuffing; remember that the cheese topping will add saltiness, so adjust accordingly. Freshly ground pepper is preferred for the best aroma.
  • 1/2 cup shredded cheese (mozzarella, cheddar, or a plant-based alternative)
    → Cheese provides a creamy, gooey topping that melts beautifully over the peppers. If using dairy-free cheese, choose a meltable variety and sprinkle evenly. Reserve a portion for the final 5–10 minutes of baking to avoid over-melting.
  • 1/2 cup tomato sauce (to drizzle in the baking dish or mix into the filling)
    → Tomato sauce adds extra moisture and helps prevent the filling from drying out during baking. Pour a thin layer on the bottom of the baking dish to prevent sticking and to create a saucy base for serving.

Optional Add-ins

  • 1/2 cup corn kernels
    → Adds sweet crunch and color; if using frozen corn, thaw and pat dry to remove excess moisture before adding to the filling.
  • 1/2 cup black beans, rinsed and drained
    → Boosts protein and fiber while adding a creamy texture when slightly mashed. Rinse well to reduce sodium; you can mash half of them for cohesion or leave whole for bite.
  • 1/2 cup chopped mushrooms
    → Mushrooms contribute umami and moisture, helping to make the filling feel meatier. Sauté them with the onion to release moisture and lightly brown for extra depth.
  • 1 jalapeño pepper, finely diced (optional)
    → Adds a bright, fresh heat. Remove seeds and membranes to tame the heat, or leave them for a spicier kick. Adjust to taste.
  • 2 tablespoons chopped fresh parsley or cilantro (optional)
    → Fresh herbs brighten the dish just before serving and add a pop of color. Stir into the filling after cooking or sprinkle on top as a garnish.

Instructions

  • Preheat your oven to 375°F (190°C) and lightly grease a baking dish with olive oil or line it with a thin layer of tomato sauce. This ensures the peppers cook evenly, the filling remains moist, and the peppers do not stick to the dish during baking.

    → Starting with a hot oven and a well-greased or sauced dish promotes even heat transfer and prevents the filling from sticking, which makes spooning it out later much easier.
  • Prepare the peppers by washing, removing the tops, and scraping out seeds and membranes; pat the insides dry and trim a tiny bit from the bottoms if needed so they stand upright without creating a hollow hole. This creates stable vessels for the filling and prevents wobbly peppers during baking.

    → Clearing seeds and membranes reduces bitterness and excess moisture, while drying prevents soggy filling and helps the peppers roast evenly.
  • Lightly brush the inside of each pepper with 1 teaspoon of olive oil and season the insides with a pinch of salt; this protects the flesh from drying out and helps the skins bronse and flavor char slightly during roasting.

    → Oil conducts heat evenly inside the pepper and adds a glossy surface that browns nicely, enhancing texture and aroma.
  • Cook the 1 cup of long-grain white rice (or quinoa for a gluten-free option) until just tender, then spread it on a plate to cool slightly so it firms up and holds shape when mixed with the filling. This provides structure and bulk to the stuffing without becoming mushy.

    → Cool rice or quinoa prevents the filling from becoming paste-like and helps it bind with the meat and vegetables during baking.
  • Heat 1 tablespoon olive oil in a large skillet over medium heat; add the finely chopped onion and sauté until translucent and just beginning to caramelize, about 5–7 minutes, to develop sweetness and depth.

    → Proper sautéing builds flavor foundations; stirring occasionally prevents scorching and ensures even browning.
  • Add the minced garlic to the onions and sauté 30–60 seconds until fragrant, then season with a pinch of salt; this ensures garlic releases its aroma without burning, avoiding bitter notes in the filling.

    → Garlic cooks quickly and can burn; adding it after the onion reduces the risk and distributes flavor evenly.
  • Push the onion and garlic to the side, add the ground meat (beef, turkey, or plant-based crumble) to the skillet, and cook until fully browned with crumbles separate; drain excess fat to keep the filling from becoming greasy.

    → Browning meat develops Maillard flavor and a cohesive texture; draining fat prevents a greasy filling and helps the sauce cling better to the ingredients.
  • Stir 1 tablespoon tomato paste into the meat and onions, letting it cook for 1–2 minutes to bloom its flavor before adding crushed tomatoes; this intensifies tomato flavor and thickens the mixture.

    → Blooming tomato paste releases concentrated umami and integrates deeply with the meat for a richer filling.
  • Pour in 1 cup crushed tomatoes and 1/2 cup tomato sauce; simmer briefly to meld flavors, then season with 1 teaspoon dried oregano, 1/2 teaspoon ground cumin (optional), 1/2 teaspoon smoked paprika (optional), and salt and black pepper to taste. This creates a cohesive, savory base for the filling.

    → Simmering concentrates acidity and sweetness, while the spices balance the filling and echo the peppers’ sweetness.
  • Fold the cooled rice (or quinoa) into the meat mixture until evenly distributed; check seasoning and adjust salt if needed, recognizing that cheese on top will add some saltiness later.

    → Proper mixing ensures every bite contains a balanced ratio of grain, meat, and sauce, and prevents separate pockets of filling from forming.
  • If using optional add-ins (corn, black beans, mushrooms, jalapeño, and herbs), fold them in now or sauté mushrooms with onions beforehand for extra depth; ensure any canned beans are rinsed and drained to remove excess sodium.

    → Optional ingredients boost texture, color, and nutrition, while proper preparation (rinsing beans, browning mushrooms) prevents watery or mushy results.
  • Spoon the filling into each prepared pepper, packing it gently so it holds its shape without tearing the flesh; leave a small headspace at the top to accommodate expansion during baking.

    → Gentle packing helps the filling stay intact when the peppers are moved and ensures even baking without squeezing out filling.
  • Place the stuffed peppers upright in the prepared baking dish; spoon a thin layer of tomato sauce over the bottom of the dish to create a saucy base that prevents sticking and adds moisture. Then divide the remaining 1/2 cup of cheese among the tops of the peppers.

    → A saucy base reduces risk of scorching and enhances juiciness, while cheese on top provides a melty, golden crust that binds flavors together.
  • Cover the dish tightly with aluminum foil and bake in the preheated oven for 30–40 minutes, or until the peppers are tender and the filling is heated through; this gentle steaming method preserves texture and prevents drying.

    → Covered baking traps steam and heat, cooking the peppers evenly and letting flavors meld without drying out the interior.
  • Remove the foil, continue baking for an additional 5–10 minutes to melt and lightly brown the cheese topping; watch closely to prevent scorching and remove when cheese is fully melted and bubbling.

    → Finishing with uncovered baking creates a glossy, appetizing crust of cheese and ensures the filling reaches a cohesive, cohesive finish.
  • Let the peppers rest for 5–10 minutes before serving to allow the filling to set slightly, making them easier to slice and helping flavors settle; garnish with chopped fresh parsley or cilantro if desired.

    → Resting helps the filling reabsorb juices and hold its shape when plated, while herbs provide a fresh aromatic lift just before serving.

Notes

These stuffed peppers are a colorful, satisfying dish that can be made gluten-free by using rice or quinoa instead of any breadcrumbs and choosing gluten-free tomato products. You can customize the filling by choosing ground beef, turkey, or plant-based crumbles, and by adding optional add-ins like corn, black beans, mushrooms, or jalapeño for extra texture, color, and heat. For best flavor, sauté onion and garlic in olive oil until translucent and golden, brown the meat if using, then stir in cooked rice or quinoa, crushed tomatoes, tomato paste, oregano, and any spices; taste and adjust salt and pepper before filling. To bake, stand the peppers upright in a shallow baking dish with a thin layer of tomato sauce on the bottom to prevent sticking, fill with the mixture, top with cheese, and bake covered for 30–35 minutes, then uncover for 5–10 minutes to melt the cheese and finish cooking. If you prefer softer skins or deeper sweetness, pre-roast the peppers for 5–7 minutes before stuffing. This dish freezes well; assemble and freeze unbaked peppers, then bake from frozen, adding extra 20 minutes. Serve with fresh herbs like parsley or cilantro and a dollop of yogurt or sour cream for brightness. Always taste the filling and adjust salt, pepper, and acidity (from the crushed tomatoes) before stuffing, since cheese will add saltiness; and if using canned ingredients, ensure they are gluten-free if needed.

Tips

Tips for Perfect Stuffed Peppers

  • Choosing and prepping peppers: Pick peppers that are firm, evenly sized, and free of bruises. If peppers don’t stand upright, trim a tiny bit from the bottom to level them—careful not to create a hole. Pat the insides dry before stuffing to prevent soggy filling.
  • Improve roasting and prevent sticking: Lightly brush the insides (and optionally the skins) of the peppers with olive oil before filling. This helps them roast evenly, reduces sticking, and enhances flavor.
  • Build flavor in the filling: Sauté onions in olive oil until translucent, then add garlic. This sequence prevents garlic from burning and ensures a smooth, aromatic base for the filling.
  • Cook meat properly and drain: Brown the meat (or plant-based crumble) until it develops good color and flavor, then drain excess fat or moisture to keep the filling from becoming watery.
  • Make sure ingredients stay cohesive: Use fully cooked and cooled rice (or quinoa) so the filling doesn’t become mushy. A cooler grain blends better with meat and veggies and holds its shape when stuffed.
  • Deepen tomato flavor: Briefly simmer crushed tomatoes with tomato paste to concentrate their sweetness and acidity. This reduces blandness and helps the filling cling to the grains.
  • Season with balance: Taste and adjust salt after you’ve combined the filling, keeping in mind that cheese and canned tomatoes can add salt. Freshly ground pepper boosts aroma; bloom dried oregano in the fat for a brighter, more integrated herb note.
  • Cheese strategy: Use a meltable cheese and reserve a portion to sprinkle on top during the last 5–10 minutes of baking. This ensures a gooey topping without over-melting.
  • Keep the filling moist without sogginess: Include some tomato sauce in the filling or drizzle a thin layer of sauce in the baking dish. This helps create a cohesive, saucy bite and prevents the filling from drying out.
  • Assembly and baking technique: Place stuffed peppers upright in a baking dish with a light sauce or tomato layer on the bottom. Fill each pepper to the top, then drizzle a little sauce over the filling. Cover with foil to trap steam, and uncover toward the end to melt the cheese and lightly brown the tops.
  • Make-ahead options: Filling can be prepared ahead and refrigerated up to 1–2 days. Assemble peppers unfilled and refrigerate, then bake when ready. If starting from cold, add 10–15 minutes to the baking time.
  • Variations and add-ins: Corn, beans, mushrooms, or jalapeño can boost texture and heat. If using mushrooms, sauté with the onion to release moisture and deepen flavor. For a fresher finish, stir chopped parsley or cilantro into the filling after cooking or sprinkle on top before serving.
  • Storage and reheating: Leftovers keep well in the fridge for 3–4 days or in the freezer for up to 2 months. Reheat gently covered to avoid drying out, and add a splash of sauce if needed to refresh the moisture.

FAQ

What peppers are best for stuffed peppers?

Choose firm bell peppers in any color—green, red, yellow, or orange. They should be medium to large with sturdy walls and intact stems. For a milder taste, green peppers work well; for sweeter filling, red or yellow peppers are great. Cut the tops off and remove seeds and membranes. If needed, trim a tiny bit from the bottom so they sit flat, but be careful not to create a hole.

Do I need to precook the rice?

Yes. Use partially cooked (par-cooked) rice or boil the rice for 5–8 minutes and drain well. This ensures the rice finishes cooking inside the peppers as they bake. You can also substitute with quinoa or couscous, but adjust liquids and cooking time accordingly.

What can I put in the filling?

Classic filling includes browned ground meat (beef, turkey, or chicken), onion, garlic, tomato sauce or canned tomatoes, cooked rice or quinoa, and herbs (parsley, oregano, thyme). For variety or lighter dishes, try plant-based crumbles, sautéed mushrooms, corn, black beans, spinach, or shredded cheese. Use your preferred cheeses (mozzarella, cheddar, Parmesan) or dairy-free cheese if desired.

Is stuffed peppers gluten-free?

Generally yes. Peppers, rice, meat, tomato sauce, and most herbs are gluten-free. Just check any added sauces, sauces, or seasonings for hidden gluten and opt for gluten-free tomato products if needed.

How long and at what temperature should I bake them?

Preheat to 375°F (190°C). Bake for about 40–50 minutes until the peppers are tender and the filling is hot and cooked through. If using raw rice or a thicker filling, bake up to 60 minutes. For cheese-topped peppers, add the cheese in the last 5–7 minutes to melt.

How do I prevent soggy peppers or undercooked filling?

Par-roast or blanch the peppers for 6–12 minutes before filling to soften the walls. Drain any excess moisture from canned tomatoes or fillings, and avoid overly watery sauces. Let the filling cool slightly before stuffing, pack it firmly, and bake on a rack to promote even heat circulation.

Can I freeze stuffed peppers?

Yes. You can freeze them before baking or after cooking. For best texture, assemble and fill the peppers, then freeze on a sheet until solid and wrap individually. To bake from frozen, cook at 350°F (180°C) for 60–75 minutes (plus additional time if filling contains raw rice). Alternatively, freeze fully baked peppers and reheat covered at 350°F (180°C) for 20–30 minutes until heated through.

How do I reheat leftovers?

Refrigerate leftovers within 2 hours and use within 3–4 days. Reheat in the microwave for 2–4 minutes per pepper, or bake at 350°F (180°C) for 15–25 minutes until hot. If you like melted cheese, add a topping and return to the oven for a few minutes to re-melt.

Can I make this dairy-free or vegan?

Absolutely. Omit cheese or use a dairy-free cheese substitute. You can also skip meat and use a plant-based crumble or lentils as the main protein. Ensure any sauce or seasoning is dairy-free, and you can add extra veggies to boost flavor and texture.

What are good side dishes or toppings?

Serve with a fresh green salad, crusty bread, or roasted vegetables. Garnish with chopped parsley or cilantro. Optional toppings include a dollop of sour cream or a dairy-free yogurt, avocado crema, or a squeeze of lime for brightness. A light sprinkle of chili flakes adds a nice kick if you like heat.

Introduction / Hook

Imagine a bright afternoon pour of sunlight captured in a dessert you can hold in two hands. The first bite crackles with a kiss of sweetness and tang, as if spring itself decided to announce its arrival with a citrusy cheer. Blueberry and lemon bars bring that exact moment to your kitchen: a buttery, delicate base that melts on the tongue, a lemon brightness that wakes every sense, and blueberry jewels that burst with juicy, jammy notes. It’s the kind of treat that feels celebratory enough for a party but simple enough for a weeknight craving, a pocket-sized celebration you can share with someone you love or stash away for your own quiet moments of joy. Threads of lemon cut through the berry, balancing the garden-fresh aroma of summer fruit with the comforting familiarity of a bake-sale classic. Each square promises a little drama—zesty zing, berry perfume, and a tender crumb that holds everything together like a warm hug. This is more than a dessert; it’s memory in bite-sized form, the kind of dish that invites you to slow down, inhale deeply, and savor the moment as if time itself has softened just for you.

Blueberry and lemon bars are a sunlit hybrid of two timeless favorites: the bright, citrusy glow of lemon and the lush, velvety sweetness of blueberries. The contrast is part of the appeal—the tart lemon cutting through the fruit’s sweetness, the berries lending a glossy, almost jewel-like finish that glimmers under a gentle dusting of sweetness. It’s a dessert that wears spring and summer on its sleeve, yet it feels totally at home in any season. When you slice into one, you’re greeted by a layered harmony: a tender, cake-like base that yields under slight pressure, a lemon layer that glints with a citrusy glow, and a blueberry top that gleams like a twilight sky. The aroma alone can turn a kitchen into a gathering place, drawing people to the table without a word spoken. It’s a recipe that begs to be shared, admired, and tasted with a smile—an edible postcard from nature’s bounty that doubles as a comforting indulgence.

What makes this particular pairing so enduring is its versatility. It is equally at home on a brunch table as it is on a dessert tray at a summer party. It travels well, ships well, and holds its shape when cut into neat, confident bars. It can be dressed up with a simple dusting of powdered sugar, a dollop of whipped cream, or a splash of vanilla for a deeper, creamier finish. But even on its simplest form, the combination of lemon’s bright citrus and blueberries’ syrupy depth remains irresistibly compelling, like a well-composed melody that lingers in your memory long after the last bite.

The Story Behind the Dish

The idea behind blueberry and lemon bars is a tale of two beloved flavors meeting in a sunny kitchen. Lemon desserts have long enjoyed a place at gatherings when you want something vibrant and uplifting, a palate-awakening squeeze of brightness that pairs beautifully with tea, coffee, or a sparkling drink. Blueberries, meanwhile, carry a sense of carefree delight—the fruit of midsummer days, bursting with juice and a whisper of floral notes. When these two flavors come together in a single handheld treat, they tell a story of balance: tartness tempered by sweetness, orchard sunshine meeting a forest of berries, and a crust that invites you to linger at the edge of the plate.

The culinary lineage of bars themselves traces back to the practical charm of turning a few ingredients into something portable and shareable. A sturdy crust serves as a comforting foundation, a lemony layer provides tang and brightness, and a blueberry glaze or swirl crowns the creation with color and depth. In many homes, the tradition of baking bars is tied to bake sales, school fundraisers, weekend cooks-and-crew sessions, and the simple joy of a recipe that travels well and pleases many palates. Blueberries are a summertime favorite that flourish in many regions, while lemons add a universal brightness that can lift even the dullest day. When fused together in bar form, they become a small, edible celebration—easy to portion, perfect for sharing, and loaded with the nostalgia of family gatherings and sunny afternoons.

This particular rendition emerged from a desire to capture the essence of both fruits in a single cut that feels indulgent yet approachable. It’s the kind of dish that invites conversations about berries you’ve picked, lemon trees you’ve smelled in late-winter markets, and the small rituals of baking—greasing the pan, dusting with sugar, waiting for the oven to sigh with warmth. The result is a dessert that feels timeless, yet modern in its balance and presentation—something you could serve at a refined afternoon tea or at a casual barbecue, with equal grace and a quiet sense of celebration.

Why You’ll Love This Recipe

  • Bright, balanced flavor: tart citrus notes from the lemon beautifully counterpoint the natural sweetness and depth of blueberries for a harmonious bite.
  • Textural harmony: a buttery, tender base that gives way to a silky lemon layer and a glossy, berry-flecked top—each bite offering a new sensation.
  • Make-ahead friendly: bars bake into portions that can be prepared ahead of time, chilled, and enjoyed later, making them ideal for gatherings and busy weeks.
  • Portable and crowd-pleasing: easy to slice into uniform squares, perfect for picnics, potlucks, bake sales, or school lunches.
  • Versatile serving options: drizzle with a touch of glaze, dust with powdered sugar, or serve simply as-is to highlight the fruit and citrus brightness.
  • Customizable for dietary needs: the concept translates well into gluten-free or dairy-free versions without losing the core charm of the dessert.

Flavor Profile & Texture

At first glance, you’re met with a sunlit glow—a pale, inviting base that hints at butter and warmth. When you bite in, the base yields softly, like a shortbread-inspired foundation that holds its shape without being crumbly to the point of distraction. The lemon layer arrives next with a clean, refreshing tang that enlivens the senses: it carries a delicate acidity that sparkles without overpowering. If you listen closely, you can almost hear the citrus notes singing in harmony with a slightly sweet, floral backdrop. Then comes the blueberry layer, a jewel-toned crown that adds depth and a touch of jammy sweetness. The berries release their juices in a gentle, glossy swirl, creating specks of purple and blue across the surface. The combination is a dance of bright citrus and deep fruit, anchored by a comforting crust that makes the entire slice feel like a secure, edible hug.

Texture-wise, the contrast is essential. The base provides a sturdy yet tender mouthfeel, giving you enough bite to hold the bar together while still dissolving gracefully. The lemon layer should feel smooth and almost custardy in some bites, with a satin-like finish that lingers on the tongue. The blueberry top adds a slight chew and a juicy burst that punctuates the experience. Visually, the bars are a celebration: pale lemon against midnight-blue confetti, a presentation that’s as pleasing to the eye as the taste is to the palate. The aromas collaborate too—from the zesty lemon fragrance that fills the room to the ripe, fruity perfume that hints at summer fruit stands and sun-drenched orchards. It’s a sensory voyage that makes you want to savor not just the first bite but every moment leading up to it.

Occasions & Pairings

This dessert shines in a variety of settings, and you can tailor it to the moment. For a leisurely weekend brunch, pair with a light vanilla bean yogurt, a cup of tea with a lemon twist, or a glass of sparkling rosé for a touch of celebration. At a backyard gathering or picnic, it travels well and cuts cleanly into neat squares that are easy to share. It’s equally at home as a dessert after a casual weeknight dinner or plated with a dollop of whipped cream and a scatter of fresh berries for a more formal presentation.

Suggested pairings to elevate the experience:

  • Brews and beverages: black tea with a slice of lemon, mint-infused iced tea, or a sparkling citrus soda to echo the lemon brightness.
  • Dessert companions: a light vanilla ice cream, a dollop of whipped cream, or a delicate mascarpone cream to add richness without overpowering the citrus and berry flavors.
  • Side accents: a scattering of fresh berries on the plate for color and extra juiciness, a light dusting of powdered sugar for a subtle sweetness, or a tiny zest peel curl for citrus aroma.
  • Occasion vibes: a spring or summer tea party, a baby shower dessert table, a bake sale item, or a casual family weeknight treat after dinner.

Tips, Variations & Substitutions

Small adjustments can transform the dessert while preserving its essential charm. Here are ideas to customize, accommodate dietary needs, or explore regional twists.

Vegan & Dairy-Free

Use a dairy-free butter substitute in the base and lemon layer. A vegan butter or coconut oil blend can provide a similar crumb structure while maintaining moisture. To maintain a sturdy texture, consider adding a touch of plant-based yogurt or a gentle aquafaba-based binder if needed to mimic richness without dairy.

Gluten-Free

Replace all-purpose flour with a gluten-free blend designed for pastries. To keep the base tender, a mix of almond flour and a gluten-free cup-for-cup blend can help achieve a delicate, crumbly base with enough strength to support the layers above.

Fruit Variations

Blueberries aren’t the only star here. Swap or mix in other berries like raspberries, blackberries, or sliced strawberries for bursts of color and different tartness levels. For a deeper citrus profile, add a touch of orange zest along with lemon to intensify brightness and complexity.

Sweetness & Acidity Adjustments

If you prefer a tarter finish, reduce the sugar slightly or introduce a whisper of lime zest for a sharper finish. For a sweeter bite, a gentle glaze or a dusting of powdered sugar can soften the lemon’s tart edge and add a polished look.

Regional Twists

In some regions, a pinch of vanilla bean or a dash of cardamom can bring warmth and aroma that complements the fruit notes. A light crumble topping—made from a mix of flour, sugar, and butter—could add a textural contrast if you’re in the mood for a more rustic take on the classic bars.

Storage & Make-Ahead Ideas

Planning ahead makes this dessert even more appealing. The bars hold well and can be prepared in advance of gatherings, which is always a bonus when you’re hosting or contributing to a potluck.

  • Storage: refrigerate cut bars in an airtight container to keep them fresh. They’ll stay tender and flavorful for several days.
  • Make-ahead: you can assemble the base and lemon layer ahead of time, then complete with the blueberry topping closer to serving time for a fresher fruit note. Alternatively, bake the entire dessert, cool completely, and always cut just before serving to preserve clean edges.
  • Freezing: once cooled and cut, bars can be wrapped individually or stored in a single layer in an airtight container and frozen. Thaw in the refrigerator or at room temperature for a quick, ready-to-serve treat.
  • Reheating: if you enjoy a slightly warm, comforting bite, a short nudge in a low oven or a quick micro-heat can revive the crumb and brighten the citrus aroma.

Fun Facts & Trivia (Optional)

Did you know that blueberries, with their deep indigo hue, are technically not blue at all on the inside? Their flesh ranges from deep purple to blue-red, revealing a spectrum of colors as you bite into them. Lemons, meanwhile, are among the oldest cultivated fruit crops, and their bright acidity has traveled the world, turning ordinary desserts into something uplifting and universally appealing. When combined, these two fruits celebrate the best of two worlds: the sun-drenched sweetness of berries and the crisp, refreshing tang of citrus. The color contrast alone—golden lemon against sapphire-blue berries—creates a visually stunning slice that looks almost as vibrant as its flavor promises. And because bars are inherently portable, they have long served as a bridge between gatherings, a way to carry a little sunshine from kitchen to picnic table to dessert tray, one neat square at a time.

Historically, bar-style desserts emerged as a practical solution for sharing and transporting sweets. The concept of layering flavors in a pan, then slicing into uniform portions, is a technique celebrated in many culinary traditions. The combination of citrus and berries is a timeless pairing because it balances brightness with depth, making it a favorite across continents and generations. Blueberries themselves are celebrated not only for their flavor but also for their antioxidants and versatility in both sweet and savory dishes. Lemon’s culinary magic lies in its ability to elevate other ingredients, brightening flavors and providing a clean finish that cleanses the palate. Together, they form a pairing that’s as nostalgic as it is contemporary, inviting stories of summer memories and always leaving room for new ones to begin around a plate of bars.

Ingredients

Crust (Shortbread Base)

  • 1 cup (226 g) unsalted butter, melted

    → The fat-rich base that becomes the tender, cookie-like crust. Melting the butter creates an easy, even coating of fat with the flour, which helps the crust press together and bake into a firm bottom layer. Let the melted butter cool slightly before mixing with the dry ingredients to avoid cooking the flour. If you prefer a crisper crust, you can chill the pressed dough briefly before baking.
  • 1/2 cup (100 g) granulated sugar

    → Provides sweetness and a slightly sandy texture to the crust. Use fine-grain sugar for a smoother crust; too much sugar can soften the crust, so balance with the flour. If you like a more buttery flavor, you can reduce sugar to 1/3 cup.
  • 2 cups (240 g) all-purpose flour

    → Builds the structure of the crust. Handle the dough just until it holds together to avoid a tough texture; overworking can develop gluten and make the crust dense. You can substitute a portion with almond flour for a nutty note, but this will change the texture slightly.
  • 1/4 teaspoon fine sea salt

    → Enhances overall flavor by balancing sweetness and bringing out the butter’s savoriness. If using salted butter, reduce to 1/8 teaspoon to prevent the crust from tasting overly salty.

Lemon Filling

  • 3 large eggs

    → Act as the binding and structure for the lemon layer, giving it a custardy texture when set. Bring eggs to room temperature for smoother mixing and to avoid curdling when whisking with the acidic lemon juice.
  • 1 cup granulated sugar

    → Sweetens the tart lemon filling and helps with setting. You can adjust downward to 3/4 cup if you prefer a tarter bar; note that reducing sugar will also affect the final texture slightly.
  • 1/4 cup (32 g) all-purpose flour

    → Thickens the filling so it holds together after baking. This is essential to prevent the lemon layer from being too runny. Sift if possible to avoid lumps and ensure a smooth custard-like texture.
  • 1/2 cup fresh lemon juice (approximately 2–3 lemons)

    → The defining bright, tangy flavor of these bars. Fresh juice yields the best aroma and acidity. Strain to remove seeds and pulp for a silky filling; consider zesting first, then juicing to maximize lemon flavor without bitterness.
  • 2 tablespoons lemon zest

    → Intensifies lemon aroma and boost of citrus flavor. Use only the yellow zest; avoid the white pith which is bitter. Grate finely for even distribution and mixing into the batter.
  • 4 tablespoons unsalted butter, melted and cooled

    → Adds richness and a smooth, velvety mouthfeel to the filling. Make sure the butter is cooled before whisking into the hot filling to prevent scrambling the eggs; temper by whisking in a small amount of the hot filling first.

Blueberry Layer

  • 1 cup fresh blueberries

    → Provides a juicy, fruity layer and natural sweetness that contrasts with the lemon. Choose ripe berries for best flavor. If using frozen berries, thaw and drain well to minimize excess moisture that could affect the crust’s texture.
  • 2 tablespoons granulated sugar

    → Helps draw out berry juices and contributes to a glossy, cohesive layer. Adjust to taste based on the sweetness of the berries; reduce if your berries are very sweet.
  • 1 teaspoon fresh lemon juice

    → Brightens the blueberry layer and harmonizes with the lemon filling. Use fresh juice when possible; bottled lemon juice can be less vibrant.
  • 1 tablespoon cornstarch

    → Thickens the blueberry layer so it sets nicely without running. Mix cornstarch with a small amount of water to make a slurry before adding to the blueberries to avoid lumps.

Lemon Glaze (Optional)

  • 1/2 cup powdered sugar

    → Creates a glossy, tart-sweet finish that enhances the lemon flavor. Sift to remove lumps for a smooth glaze that drizzles evenly over cooled bars.
  • 1–2 tablespoons fresh lemon juice

    → Adjusts the glaze consistency from a light drizzle to a thicker coating. Start with 1 tablespoon and add more if you prefer a stronger lemon bite or a thicker glaze.

Instructions

  • Preheat your oven to 350°F (175°C) and line a shallow baking pan with parchment paper, allowing the parchment to overhang the sides for easy removal.
    → This creates a nonstick surface and makes lifting the finished bars out of the pan cleanly possible.
  • Whisk together 2 cups all-purpose flour, 1/2 cup granulated sugar, and 1/4 teaspoon fine sea salt in a large bowl until evenly combined.
    → Sifting or whisking dry ingredients ensures the crust will bake with a uniform texture and prevents clumps of sugar or salt from creating hotspots.
  • Stir in 1/4 cup (60 g) melted unsalted butter and mix just until the dough comes together in a cohesive, slightly crumbly mass; let the butter cool slightly so it does not cook the flour.
    → Adequate cooling preserves the dough’s structure and yields a tender, shortbreadlike crust rather than a greasy, dense one.
  • Turn the dough into the prepared pan and press it firmly into an even layer using the flat bottom of a measuring cup or a small, straight-edged tool; aim for about 1/4 inch thickness and create a slight edge around the perimeter.
    → Even pressure prevents gaps and uneven baking, while a slight edge helps contain the filling and contributes to clean slices later.
  • Chill the pressed crust in the refrigerator for 15 minutes to set the fat and reduce shrinking during baking.
    → Chilling helps maintain a stable, tender crust that holds together when the lemon filling is added.
  • Bake the crust in the preheated oven until it is light golden around the edges and set in the center, about 18–22 minutes; remove and let cool completely on a rack before filling.
    → A cooled crust provides a stable foundation and prevents the lemon custard from seeping into a warm crust.
  • Whisk 3 large eggs, 1 cup granulated sugar, and 1/4 cup all-purpose flour in a heavy bowl until smooth and free of lumps; this forms the base of the lemon filling.
    → A smooth emulsion ensures a custardy texture rather than a curdled mixture once baked, and the flour helps the filling set properly.
  • Whisk in 1/2 cup fresh lemon juice and 2 tablespoons lemon zest, then gradually whisk in 4 tablespoons melted and cooled unsalted butter to create a glossy, rich filling; temper by whisking a small amount of the hot filling into the eggs before combining fully.
    → Tempering prevents the eggs from scrambling and the butter adds a velvety mouthfeel and depth of flavor.
  • Pour the lemon filling over the cooled crust, spreading it into an even layer with a small offset spatula; bake until the filling is set at the edges but still slightly wobbly in the center, about 16–20 minutes.
    → The residual heat will continue to set the center as it cools, giving a custardy yet sliceable texture.
  • Meanwhile, prepare the blueberry layer by tossing 1 cup fresh blueberries with 2 tablespoons granulated sugar and 1 teaspoon fresh lemon juice in a bowl; in a separate cup, stir 1 tablespoon cornstarch with 1–2 tablespoons cold water to form a slurry.
    → Sugar helps draw out juices and create a cohesive layer, while the cornstarch slurry prevents runny fruit and yields a glossy, set topping.
  • Sprinkle or spoon the blueberry mixture evenly over the lemon-filled pan, then drizzle the cornstarch slurry over the blueberries and gently swirl to distribute; this will help the layer set without sliding.
    → An even distribution prevents browned patches and ensures a uniform bite in every bar.
  • Bake the assembled bars until the blueberry layer is glossy and just set, about 12–15 minutes; remove from the oven and allow to cool completely on a rack.
    → Cooling stabilizes the layers and makes the bars easier to cut into clean, neat portions.
  • Prepare the optional lemon glaze by whisking 1/2 cup powdered sugar with 1–2 tablespoons fresh lemon juice until smooth and pourable; adjust with more sugar or lemon juice to reach your desired consistency.
    → A glossy glaze enhances brightness and provides a pleasant tart-sweet finish that complements the lemon and blueberry layers.
  • Drizzle the glaze in a thin, even stream over the completely cooled bars, then let the glaze set for about 15 minutes before slicing; refrigerate briefly if you are in a hurry.
    → A set, glossy glaze ensures clean, attractive plating and prevents smearing when cutting the bars.
  • Lift the bars from the pan using the parchment overhang, slice into even portions with a sharp knife, and serve at room temperature or slightly chilled for a refreshing contrast of textures.
    → Proper lifting and clean cuts reveal distinct layers and make serving effortless, while temperature affects texture—you can chose the best option for your preference.

Notes

These blueberry and lemon bars are a tangy-sweet dessert with a buttery shortbread crust, a bright lemon filling, and a juicy blueberry layer. They pair a crisp base with a silky center and a fruity top, making them ideal for dessert, tea time, or potlucks. You can customize them by adding a pinch of vanilla, swapping lemon zest for orange zest, or sprinkling chopped almonds or pistachios on the top for extra texture. They keep well in the fridge for several days and freeze well for make-ahead treats. For an extra finish, drizzle with a light lemon glaze or serve with vanilla yogurt. If you have gluten intolerance, you can make a gluten-free version by using a 1:1 gluten-free all-purpose flour blend for the crust and filling; ensure your lemon juice, cornstarch, and baking powder are gluten-free.

Crust and lemon filling tips: Use melted butter cooled slightly before mixing with sugar and flour so the flour doesn’t scramble. Press dough evenly into the pan and prebake until the edges are just starting to color for a crisper bottom. For the lemon filling, whisk eggs with sugar and flour until smooth, then whisk in lemon juice and zest and finally temper in a little of the hot filling before combining with the rest, to prevent scrambling the eggs. The result should be a custard-like layer that sets firmly as it bakes.

Blueberry layer tips: Toss the blueberries with sugar, a splash of lemon juice, and a cornstarch slurry (cornstarch mixed with a small amount of water) to help the layer set and prevent runny fruit. If using frozen berries, thaw completely and drain well to minimize extra moisture that can soften the crust. Gently spoon or dollop the blueberry mixture over the lemon layer for an even finish before baking.

Glaze and serving: The optional lemon glaze is simply powdered sugar whisked with fresh lemon juice to a drizzleable consistency. Drizzle once bars are fully cooled for a glossy finish and balanced tartness. Serve slices chilled or at room temperature with a dollop of vanilla yogurt or a scoop of vanilla ice cream for extra indulgence.

Storage and make-ahead: Store baked bars in the fridge for up to 4 days, or freeze uncut bars for up to 2-3 months. To serve, cut cold bars for clean edges or warm gently in the oven or microwave to soften in the center before serving.

Tips

Tips for Blueberry and Lemon Bars

Crust (Shortbread Base) tips

  • Let melted butter cool slightly before mixing with the dry ingredients to prevent cooking the flour and to keep the crust tender.
  • To ensure a smooth, even crust, mix just until the dough comes together. Overworking can develop gluten and make the crust tougher.
  • If the dough feels dry or crumbly, add 1–2 teaspoons of ice water, a little at a time, until it holds together without becoming sticky.
  • Line the pan with parchment paper and press the dough evenly into a compact layer. The parchment helps you lift the bars out cleanly after baking.
  • For a crisper crust, chill the pressed dough briefly (about 15–20 minutes) before baking, or bake a touch longer until the edges are lightly golden.
  • Bake the crust until the edges are just starting to turn golden. It will continue to set as it cools once the filling is added.

Lemon Filling tips

  • Bring eggs to room temperature to promote smoother mixing and to avoid curdling when whisked with the lemon juice.
  • Room-temperature ingredients mix more evenly. If the filling looks a little too thick, warm the lemon juice slightly to loosen it before adding.
  • Whisk sugar with the eggs first, then gradually whisk in the flour to prevent lumps. Finally, whisk in lemon juice and zest for a bright, uniform custard.
  • Sift the flour to avoid lumps and to ensure a silky, custard-like texture.
  • Strain the lemon juice to remove seeds and pulp for a smoother filling. Zest the lemons first, then juice to maximize flavor without bitterness.
  • Temper the eggs: whisk a small amount of the hot filling into the eggs before combining fully to prevent scrambling.
  • Add a pinch of salt to balance sweetness and enhance lemon brightness. A little vanilla can be optional for depth, but keep it subtle.
  • If the filling looks too loose, you can whisk in a little extra flour (a teaspoon at a time) and test for thickness before baking.

Blueberry Layer tips

  • Thaw frozen berries completely and drain well to minimize excess moisture that could make the crust soggy.
  • Toss fresh berries with the sugar and lemon juice just before assembly. For sweeter berries, reduce added sugar in the filling.
  • Mix the cornstarch with a small amount of water to make a smooth slurry before adding to the blueberries. This helps prevent lumps and gives the layer a cohesive set.
  • Use ripe, flavorful blueberries for best color and sweetness. If berries are tart, you may want to keep the added sugar on the higher side.
  • A light layering means some berries stay whole for bursts of color and texture; avoid over-mashing to keep a nice fruit texture in the layer.

Lemon Glaze (Optional) tips

  • Sift the powdered sugar to remove lumps for a glossy, smooth glaze that drizzles evenly.
  • Adjust glaze thickness by varying lemon juice: start with 1 tablespoon and add more if you prefer a thicker glaze, or add a teaspoon of water if it’s too stiff.
  • Apply the glaze only after the bars have cooled completely; otherwise, the glaze can run or sink into the filling.
  • If you want a stronger lemon bite, mix in a touch more zest to the glaze, but keep it light so it doesn’t overshadow the bars.

  • Let the bars cool completely in the pan before slicing to ensure clean, neat edges. A quick chill in the refrigerator helps the layers set firmly for easier cutting.
  • Use a sharp, warm knife (wipe between cuts) to get clean slices through the crust and fruit layers.
  • If you prefer a fully baked glaze, you can give the glazed bars a light 5–8 minute finish in a low oven (about 350°F / 175°C) after glazing, then cool completely.
  • Store leftovers in an airtight container in the fridge for up to 5 days; for longer storage, freeze bars in a single layer and wrap well, then stack after thawing.

FAQ

What are Blueberry and Lemon Bars?

Blueberry and Lemon Bars are a bright, citrusy dessert with a buttery shortbread crust, a tangy lemon layer, and a topping of blueberries baked into or atop the lemon filling for a colorful, fresh flavor.

What ingredients do I need for the crust?

Common crust ingredients: 1 1/2 cups (190 g) all-purpose flour, 1/2 cup (115 g) unsalted butter, melted, 1/4 cup (30 g) powdered sugar, and a pinch of salt. Optional: 1–2 teaspoons lemon zest for a subtle citrus note in the crust.

What ingredients are in the lemon filling?

Typical lemon filling: 3 large eggs, 2/3 cup (135 g) granulated sugar, 1/2 cup (120 ml) fresh lemon juice, 1 tablespoon lemon zest, 2 tablespoons cornstarch, and a pinch of salt. Optional: 1–2 tablespoons heavy cream for a silkier texture.

Can I make this gluten-free?

Yes. Use a 1:1 gluten-free all-purpose flour blend for the crust, and ensure any toppings or thickeners (like cornstarch) are gluten-free. Some blends perform best with a touch less liquid, so adjust as needed.

How do I prevent soggy bars?

Par-bake the crust: bake the crust alone for about 12–15 minutes until just starting to color. Let it cool completely before adding the lemon filling to keep the crust crispy.

How do I know when the bars are done?

The lemon filling should be set around the edges and just barely jiggle in the center. The edges will be lightly golden. A knife inserted near the center should come out clean or with a few moist crumbs; avoid overbaking to prevent a rubbery texture.

How should I store the bars and how long do they last?

Let cool completely, then store in an airtight container. Refrigerate for up to 5 days. For longer storage, freeze baked bars for up to 2–3 months; thaw in the refrigerator before serving and enjoy.

Can I use frozen blueberries?

Yes, you can use frozen blueberries. Do not thaw them completely before using if you want them to hold their shape; fold them in gently or sprinkle on top before baking. If using frozen berries, you may want to add an extra tablespoon of sugar to balance sweetness.

Can I adjust the sweetness or lemon flavor?

Yes. To make them sweeter, add 1–2 tablespoons more sugar or use sweeter lemon varieties. For more lemon intensity, increase lemon juice and zest by small amounts (e.g., +1 teaspoon zest, +1–2 tablespoons juice), then compensate with a little extra cornstarch if the filling seems runny.

Are there easy variations or toppings I can try?

Try adding a crumb topping: mix 1/2 cup flour, 1/4 cup granulated sugar, 2 tablespoons melted butter, and sprinkle over the lemon layer before baking. For a different twist, substitute half of the lemon juice with orange juice or add a teaspoon of vanilla extract to the crust for warmth.

Introduction / Hook

There’s something irresistibly comforting about a plate of caramel cookies waiting on the countertop, steam faintly rising from warm edges, and a ribbon of glossy caramel peeking through every bite. Imagine the first crack of a golden exterior giving way to a chewy, tender heart that glows with melted sweetness and a whisper of salt that somehow makes the sweetness seem brighter and more alive. Caramel cookies are not just dessert; they are a small ritual—an invitation to slow down, to sip a mug of coffee or milk, and to share a moment of deliriously cozy indulgence with family or friends. The aroma alone can transform a ordinary afternoon into a memory: toffee-like notes that carry through the kitchen, the satisfying snap as you bite into the edge, and the way the caramel lingers on the tongue, warm and luxurious. This is a cookie that welcomes you with a familiar hug, then keeps you coming back for another tale in a single, luminous bite. Whether you’re baking for a weekend treat, a gift, or a last-minute dessert for guests, caramel cookies deliver a timeless pleasure: simple ingredients, a little patience, and a lot of heart. In the pages that follow, you’ll discover a method that yields bakery-worthy cookies with caramel in every corner—soft centers, delicate crisp edges, and pockets of molten caramel that make each bite feel special. If you’ve ever wished for a cookie that feels both nostalgic and wonderfully modern, you’ve found it. Let this be your new cookie for comfort, your go-to for celebrations, and your favorite way to end a long day on a sweet and serene note.

The Story Behind the Dish

Caramel, as a flavor and technique, travels a long and delicious road—from the simple sugar syrups that caramelize into rich amber tones to the modern, indulgent riffs that turn dessert into an experience. The idea of a caramel cookie sits at the intersection of two beloved culinary traditions: the universal charm of a butter-based biscuit and the irresistible allure of caramel, a flavor that has fascinated cooks for centuries. The origin of caramel itself is humble and a touch mysterious, born from the simple act of heating sugar until it melts into a glossy, amber elixir. From there, chefs and home bakers discovered how to pair that liquid gold with everything from chocolate to sea salt to give dessert a new depth and a touch of drama.

In many households, cookies have always carried a story—a ritual of cooling on a rack, of sharing warm halves with a neighbor, of a favorite pair of glass of milk waiting nearby. Caramel cookies echo that tradition while inviting modern techniques: a dough that rests to develop flavor, a quick swirl of caramel or caramel chips folded in to ensure pockets of sweetness, and a finishing kiss of salt to highlight the caramel’s toasty notes. The salted caramel trend, which rose to global fame in the early 21st century, helped to launch countless delicious riffs, including caramel cookies that feel both luxurious and accessible. They are a testament to how a simple confection can carry nostalgia while remaining wonderfully current—an everyday treat that can feel like a small celebration in your own kitchen.

For many, the story of caramel cookies is also about shared moments. A grandmother’s recipe reimagined for modern ovens; a bake sale favorite that children adore; a thoughtful gift jar with a note that says, “these are the kind of cookies you share.” The cookies you’re about to explore carry that history in their crumb: a dough with a certain sturdiness that bakes into golden rims and a soft center; caramel that melts into the crumb; and through it all, a reminder that sweets can be comforting without being fussy. The dish has traveled across kitchens, drawn new lines of flavor, and proved that a well-executed caramel cookie can become a classic—one that remains relevant as tastes shift toward richer, more nuanced treats that still feel familiar and kind to the soul.

Why You’ll Love This Recipe

  • Comforting, crowd-pleasing flavor that resonates with both kids and adults.
  • Balanced texture: crisp edges with a chewy, fudgy center that hides pockets of caramel in every bite.
  • Versatile and forgiving: adaptable to different flours, sugars, and add-ins without losing structure.
  • Short on time but big on impact—gjittering with a minimal, approachable technique that yields bakery-worthy results.
  • Potential for customization: play with caramel styles, salt levels, and complementary mix-ins to create your signature version.
  • Makes an elegant gift or party treat that travels well when cooled properly and stored correctly.
  • Pairs beautifully with a hot beverage or a scoop of vanilla ice cream for an indulgent dessert.

Flavor Profile & Texture

Caramel cookies balance a quartet of sensations that come together to create a memorable bite. The aroma is warm and inviting, a fusion of toasty butter, vanilla, and caramelized sugar that fills the room with a gentle sweetness. On tasting, you encounter a layered flavor: first the familiar richness of a buttery cookie, then the lush, almost toffee-like caramel that melts into the crumb, followed by a soft salt kiss that brightens and elevates the sweetness. The salt is not a mere afterthought; it is a crucial conductor that makes the caramel sing rather than disappear into the dough.

In terms of texture, you’ll experience a contrast that makes these cookies addictive. The outer rim achieves a delicate crispness, a light snap when you break through the edge. Inside, the cookie remains tender and chewy, so you get a satisfying resistance before the melt of caramel reveals itself. Caramel bits or ribbons create little pockets of ooey-gooey goo, which are especially delightful as they stretch slightly with the first bite. The overall mouthfeel is luxurious but balanced: not too heavy, with enough structure to hold shape but a soft center that invites careful savoring. The flavor lingers long enough to invite another bite without becoming cloying, a sign of well-integrated sweet and savory notes—the classic salt-caramel harmony people crave in modern desserts.

Occasions & Pairings

Caramel cookies shine across many settings, from everyday indulgence to festive occasions. Here are some ideas to make the most of them:

  • Weeknight treat: bake a small batch to accompany a quiet evening, perhaps with a glass of cold milk or a robust cup of coffee.
  • Gift idea: wrap cooled cookies in tissue paper and tuck into a decorative box or jar as a thoughtful, artisanal-present for birthdays or holidays.
  • Potlucks and parties: these cookies travel well when cooled completely and stored in an airtight container; their universal appeal makes them a safe choice for mixed crowds.
  • Dessert course: pair with vanilla ice cream, a quick chocolate sauce, or a warm caramel sauce drizzled atop for an indulgent finale.
  • Tea party or brunch: these cookies offer a refined sweetness that complements afternoon tea and light pastries.

For beverage pairings, consider a rich cup of espresso, a smoky dark roast, or even a glass of dessert wine or aged sherry for a more celebratory pairing. If you want a dairy-free or vegan version, pair with almond milk or oat milk coffee for a complementary, balanced tasting experience.

Tips, Variations & Substitutions

Here are practical ideas to tailor this caramel cookie experience to your pantry, dietary needs, or flavor imagination. These are meant to inspire and guide rather than prescribe a rigid recipe.

  • Caramel variations: use different caramel forms—soft caramel bits for gooey pockets, or a swirl of caramel sauce into the dough to create ribbons of sweetness that caramelize as the cookies bake. A light sprinkle of flaky sea salt just before baking enhances the caramel’s depth.
  • Texture tweaks: if you crave more chew, underbake by a minute or two and let the cookies rest on the sheet after removal from the oven. For crisper edges, bake a touch longer and cool on a rack rather than on the sheet.
  • Flour and gluten considerations: for gluten-friendly cookies, use a standard all-purpose flour. For gluten-free adaptations, choose a blend with xanthan gum and add a touch more moisture (like a splash of dairy or dairy-free milk) to maintain tenderness. The base concept remains the same—caramel sweetness tied to a buttery crumb.
  • Vegan option: substitute plant-based butter and ensure your caramel is dairy-free. Use a vegan-friendly sugar and a dairy-free milk if you’re following a vegan approach.
  • Brown sugar vs white sugar: using brown sugar deepens the caramel flavors and adds a hint of molasses, creating a richer cookie. White sugar yields a brighter sweetness and crisper edges.
  • Flavor twists: incorporate a pinch of sea salt in the dough for a bolder contrast, or add a whisper of vanilla bean powder for a floral, bakery-like aroma. You could also fold in finely chopped toasted nuts for texture and a nutty complement to caramel.
  • Regional twists: a touch of cinnamon or cardamom introduces warmth and spice that pairs beautifully with caramel. For a coastal twist, swap in dark chocolate chips or chunks for a chocolate-caramel medley.

Make-Ahead Variations

If you like to plan ahead, you can shape the dough into disks and refrigerate for up to 3 days, or freeze portions for longer storage. Bake directly from cold if you prefer a slightly thicker, chewier center. If you freeze the dough, portion it first and freeze flat on a tray before transferring to a bag; bake from frozen, adding a minute or two to the bake time. This makes it easy to stock up for gatherings or to keep a ready-to-bake treat on hand.

Storage & Make-Ahead Ideas

Proper storage keeps caramel cookies at their best for as long as possible. Once cooled completely, store in an airtight container away from heat or moisture. They will stay fresh for several days if kept in a cool, dry place. For longer-term freshness, you can freeze baked cookies: layer them between sheets of parchment in an airtight container, and rewarm in a low oven until warmed through. If you prefer, freeze unbaked portions shaped into disks; bake from frozen, just add a minute or two to the usual bake time. Properly stored and handled, these cookies retain their texture and aroma, so you can enjoy that bakery-worthy bite even days after you first baked them. A well-sealed jar in the pantry can turn into a staple gift or a quick dessert stockpile whenever life gets busy.

Fun Facts & Trivia (Optional)

Caramel has a history as rich as its flavor. Here are a few tidbits you might enjoy sharing with fellow bakers:

  • Caramelization begins when sugar hits around 320°F (160°C). At this temperature, sugar molecules break down and recombine to form new, deeper flavors and a classic amber color.
  • Salted caramel became a global sensation after chefs in France and later the United States started pairing the sweet richness with a crack of sea salt, creating a dramatic balance that highlighted the caramel’s nuances.
  • Some of the most beloved caramel cookies owe their irresistibility to the contrast between a crisp edge and a soft, chewy center—achieved by a combination of butter, sugar, and a precise bake time that allows moisture to retreat slowly toward the crumb’s interior.
  • The sound of a cookie cooling on a rack is almost a soundtrack to comfort: the slight crackling as the steam escapes signals a cookie that will stay tender and flavorful without becoming crumbly.
  • Caramel itself has cultural variations across the globe—from the soft, buttery caramels of Europe to the chewy, toffee-like treats found in other regions—yet the caramel-cookie concept unites these flavors into a universally cherished treat.
  • In many dessert menus, a caramel element signals a premium moment: it’s a small, accessible luxury that feels indulgent without being over-the-top.
  • Beyond sweetness, salt in caramel is a culinary technique that activates taste receptors differently, heightening sweetness and giving the caramel a longer, linger-worthy finish.

With these sections, you’ve uncovered not just a recipe concept but a story of comfort, balance, and shared moments. Caramel cookies, in their elegant simplicity, offer a pathway to cozy afternoons, cheerful gatherings, and the small luxury of a treat that’s as timeless as it is modern. Whether you’re baking for a quiet night in or a lively gathering, these cookies promise a memorable bite—soft, soulful, and perfectly caramel-forward.

Ingredients

Cookie Dough Base

    – 1 cup unsalted butter, softened
    → Butter provides tenderness, moisture, and a rich mouthfeel to the cookies. Creaming the softened butter with sugars traps air and helps form chewy edges with a softer center. Use unsalted butter and let it come to room temperature (about 65–70°F / 18–21°C) for even incorporation; melted or overly soft butter can cause excessive spreading. If measuring by weight, 1 cup is about 227 g. For best flavor, choose high-quality butter.
    – 1 cup packed light brown sugar
    → Brown sugar contributes moisture and a chewy texture due to its molasses content, plus a deeper caramel note. Pack the sugar firmly into the measuring cup to ensure an accurate amount. Light brown sugar yields a milder caramel flavor, while dark brown sugar intensifies it and darkens the cookie color. If dough seems too dry, you can add a teaspoon of milk or water during mixing to reach the right consistency.
    – 1/2 cup granulated sugar
    → Granulated sugar adds sweetness, aids browning, and helps create a crisp edge around the chewy center. It also assists in spreading the dough slightly during baking when creamed with butter. Keep it as part of the mix to maintain structure and even spread; replacing it with another sugar can alter texture and color.
    – 2 large eggs, room temperature
    → Eggs provide moisture, structure, and binding, helping the cookies hold together and set properly as they bake. Room temperature eggs emulsify more evenly with the fat, yielding a smoother dough and uniform crumb. Allow eggs to come to room temperature (about 20 minutes) or warm gently in warm water before adding to the mixture to avoid a lumpy, separated dough.
    – 2 tsp vanilla extract
    → Vanillin depth enhances the overall flavor profile of the cookies, balancing sweetness with a warm aroma. Use pure vanilla extract for the best flavor; imitation vanilla can taste flat in rich cookie dough. If possible, opt for a vanilla bean paste for more pronounced vanilla flavor and visible specks. Store in a cool, dark place to preserve aroma.
    – 2 1/4 cups all-purpose flour
    → Provides the structure and body of the cookies. Measuring accurately is crucial: spoon the flour into the measuring cup and level off, rather than scooping. Too much flour yields cakier, drier cookies; too little can cause excessive spreading. For a softer crumb, you can replace a portion with cake flour, but this is optional. Mix flour with leaveners and salt before adding to the wet ingredients to ensure even distribution.
    – 1 tsp baking soda
    → Primary leavening and a contributor to the cookies’ spread and chewy texture. Fresh baking soda ensures proper rise and browning. Sift with the dry ingredients to distribute evenly and help the dough rise evenly as it bakes.
    – 1/2 tsp baking powder
    → Additional leavening that supports a bit more lift and a slightly lighter crumb. Helps cookies maintain a gentle puff rather than spreading too thin. Sift with dry ingredients for even distribution.
    – 1/2 tsp kosher salt
    → Enhances flavor by balancing sweetness and sharpening the taste of caramel and chocolate. Distribute evenly by mixing with the dry ingredients. If using table salt, reduce to a pinch (about 1/4 teaspoon) due to finer grains.

Caramel Center (Optional)

    – 12-16 soft caramel candies, unwrapped
    → Caramel centers create gooey pockets of melt-in-your-mouth caramel as the cookies bake. Choose soft, chewy caramels so they remain molten inside the cookie rather than seizing up. If using caramel bits instead of full candies, ensure they are small enough to fit inside the dough without breaking the dough apart. Unwrap all candies and, if needed, press one inside each dough ball before baking; chilling the dough slightly can help keep the centers intact during shaping.

Optional Add-ins

    – 1/2 cup semisweet chocolate chips
    → Adds chocolate melt and a complementary contrast to the caramel. To keep chips evenly distributed and prevent sinking to the bottom, you can toss them with a tablespoon of flour before adding to the dough. Use high-quality chips for the best flavor; dark or bittersweet chocolate can provide a richer note.
    – 1/2 cup chopped toasted nuts (pecans or walnuts)
    → Provides a toasty crunch and nutty depth that pairs well with caramel. Toast the nuts first to intensify flavor, then cool and chop to roughly uniform pieces so they distribute evenly. If you have a nut allergy, omit or substitute with toasted oats for texture.

Toppings

    – 1/2 tsp flaky sea salt
    → Finishes with a bright salt bite that enhances caramel and chocolate flavors. Sprinkle a light pinch on top of the cookies just after shaping or while they are still warm from the oven to help the salt adhere. Use a high-quality flaky salt (like Maldon) for best texture and distribution; avoid oversalting to keep the cookie balanced.

Instructions

  • Preheat your oven to 350°F (175°C) and line two baking sheets with parchment paper or silicone baking mats.
    → This ensures even heat distribution, prevents sticking, and makes transferring hot cookies to a rack safe and easy.
  • If you are using caramel centers, unwrap 12–16 soft caramel candies and set them on a small plate for easy access during shaping.
    → Having ready centers reduces handling and helps keep the centers intact as cookies bake.
  • In a large mixing bowl, cream the unsalted butter and both sugars on medium-high speed until the mixture is pale, fluffy, and free of obvious lumps, about 3–4 minutes.
    → Creaming traps air and yields a tender, chewy edge with a soft interior; scraping the bowl halfway ensures even incorporation.
  • Beat in the eggs one at a time, allowing each to fully incorporate before adding the next, then beat in the vanilla extract.
    → Eggs emulsify with fat to create a smoother dough and a uniform crumb; room-temperature eggs mix more evenly than cold ones.
  • Whisk together the all-purpose flour, baking soda, baking powder, and kosher salt in a separate bowl until evenly distributed.
    → Even distribution of leaveners and salt prevents uneven rise and concentrates flavor throughout the dough.
  • With the mixer on low speed, add the dry ingredients to the wet in three additions, mixing just until no streaks of flour remain and the dough comes together.
    → Do not overmix; overworking gluten creates tough cookies and reduces tenderness and chewiness.
  • Fold in the optional add-ins—1/2 cup semisweet chocolate chips and/or 1/2 cup chopped toasted nuts—using a spatula until evenly distributed without overworking the dough.
    → Even distribution prevents clumps and ensures consistent bite; keep chips from sinking by folding gently.
  • If you are using caramel centers, portion the dough into approximately 1.5–2 tablespoon mounds, flatten slightly, place one caramel in the center, fold the dough around to enclose completely, and roll into a smooth ball; chill the dough 15–30 minutes to help retain the center during baking.
    → Chilling (and enclosing the center) firms the fats and helps keep the caramel centered and molten; sealing the caramel prevents leakage during baking.
  • If you are not using caramel centers, scoop dough into rounded tablespoons (about 1.5 tablespoons per cookie) and space the dough balls on the prepared sheets at least 2 inches apart to allow spreading.
    → Adequate spacing ensures even spreading and uniform shape as cookies bake.
  • Bake the cookies in the preheated oven for 9–11 minutes, rotating the sheets halfway through, until the edges are lightly golden and the centers look just set but a touch soft.
    → This timing yields a chewy center with a delicate crisp edge; ovens vary, so start checking at 9 minutes.
  • Remove the cookies from the oven and, while they are still warm, sprinkle flaky sea salt over the tops if using; the salt will adhere and enhance the caramel and chocolate flavors.
    → Salting warm cookies intensifies caramel notes and balances sweetness; use a light touch to avoid overpowering the cookies.
  • Let the cookies rest on the baking sheets for 5 minutes to finish setting, then transfer to a wire rack to cool completely; this prevents breakage and helps maintain a glossy surface.
    → Cooling on a rack prevents trapped steam from softening the bottoms and allows even cooling for optimal texture.
  • Store the cooled cookies in an airtight container at room temperature for up to 5 days, or freeze for longer storage; re-warm briefly in a low oven if you desire a warmer, softer center.
    → Proper storage preserves chewiness and caramel while preventing staling; warming revives softness.

Notes

These caramel cookies are rich, chewy, and have pockets of molten caramel when baked properly. They pair a buttery dough with a deep caramel sweetness and a hint of vanilla, finished with a delicate salt kiss. You can customize them by adding chopped toasted nuts or extra chocolate chips, and for a more intense caramel note, sprinkle a tiny pinch of flaky salt on top before baking. They freeze well and reheat beautifully, making them a great make-ahead treat. For an extra treat, sandwich two cookies with a swirl of caramel or serve warm with a scoop of vanilla ice cream. Always measure the flour accurately, keep the butter soft but not melted, and chill the dough briefly to help the centers stay gooey rather than runny during baking.

Tips

Tips for perfect Caramel Cookies

  • Measure flour accurately. Spooning into the cup and leveling off yields a softer, more reliable cookie texture than scooping directly from the bag, which can pack the flour and make the dough dry or crumbly.
  • Use softened, not melted, butter. Butter at 65–70°F (18–21°C) helps you cream with sugars to trap air for chewy edges and a tender center. If your kitchen is warm, chill the dough briefly between steps to control spreading.
  • Cream butter and sugars properly. Beat on medium-high for 2–3 minutes until pale and fluffy, scraping the bowl a few times for even incorporation. This aeration helps with rise and texture.
  • Balance the sugars. Brown sugar adds moisture and chew, while granulated sugar contributes browning and a crisp edge. If the dough looks very dry, add a teaspoon of milk or water to bring it together without loosening the structure.
  • Eggs at room temperature mix more evenly. If you’re short on time, warm the eggs in warm water for a few minutes or leave them out to take the chill off before beating into the dough.
  • Chill the dough for best shape. A short chill (30–60 minutes) helps prevent over-spreading and makes it easier to insert caramel centers later. For even stronger flavor and structural integrity, refrigerate overnight.
  • Caramel centers: choose soft caramels so they melt into gooey pockets. Unwrap and press one into the center of each dough ball. If you’re using caramel bits, ensure they’re small enough to stay enclosed without tearing the dough.
  • Keep centers intact. If the centers start to melt out during shaping, chill the dough slightly before baking or indent the dough after placing the centers to keep them centered.
  • Distribute add-ins evenly. Coat chocolate chips in a little flour to prevent sinking, and toast nuts before chopping to maximize flavor. Cool nuts completely before mixing them in.
  • Salt timing matters. A light sprinkle of flaky sea salt on warm cookies enhances caramel and chocolate. You can salt before or after baking, but do not overdo it—a light dust is enough.
  • Portion and space properly. Use a cookie scoop for uniform sizing and space dough balls about 2 inches apart on a parchment-lined sheet to allow even spreading and even caramel distribution.
  • Oven dynamics. Rotate sheets halfway through baking for even browning. If your oven runs hot or cold, consider using an oven thermometer to calibrate temperature for consistent results.
  • Know doneness. Edges should be set and lightly browned; centers may look just shy of done. They will continue to firm as they cool on the baking sheet.
  • Cooling matters. Let cookies rest on the sheet 5 minutes before transferring to a rack to finish setting. This prevents breakage and ensures a chewy center with a molten caramel core.
  • Make-ahead and storage. Dough can be wrapped and chilled up to 3 days or frozen for longer storage. Bake from chilled or frozen, adding an extra minute or two to the bake time. Store baked cookies in an airtight container for up to 3–4 days; freeze for longer storage.
  • Troubleshooting quick fixes. If cookies spread too much, chill the dough longer or check that your butter wasn’t too warm. If centers aren’t melting, slightly increase the bake time or gently rewarm the cookies for 10–15 seconds in a warm oven or microwave before tasting.
  • Flavor variations. For a richer contrast, use dark brown sugar, a pinch more salt, or a mix of milk and dark chocolate chips. You can also add a touch of espresso powder to intensify the caramel and chocolate notes.

FAQ

What are caramel cookies?

Caramel cookies are soft, chewy cookies that incorporate melted caramel or caramel bits into the dough. They often have a buttery flavor with pockets of gooey caramel, sometimes finished with a pinch of sea salt for balance.

What ingredients do I need?

Typical ingredients (about 24 cookies):

  • All-purpose flour
  • Baking soda
  • Salt
  • Unsalted butter (softened or browned for extra flavor)
  • Granulated sugar
  • Light brown sugar
  • Eggs and vanilla extract
  • Caramel bits or soft caramels cut into small pieces (or dulce de leche for swirls)
  • Optional: sea salt for topping

Note: You can swap in gluten-free or dairy-free options as needed.

Do I need to chill the dough?

Chilling is highly recommended. Resting the dough for 1–2 hours (or overnight) helps develop flavor, keeps cookies from spreading too much, and yields thicker, chewier cookies with better caramel pockets.

How do I bake them for chewy centers?

For chewier cookies: use a higher ratio of brown sugar, melt some butter or use room-temperature butter plus extra egg yolk, chill the dough, and bake at 350°F (175°C) for about 9–11 minutes. Edges should be set while the centers remain soft. Let them rest on the sheet for a couple minutes before transferring to a rack.

How do I get a gooey caramel center?

You can achieve a gooey center by one of these methods:
– Wrap a small caramel piece inside each dough scoop, encasing it completely before shaping.
– Make a shallow indentation in the dough, place a small caramel, then cover with dough and seal.
– Alternatively, swirl in a ribbon of dulce de leche or caramel sauce in the center of the dough before baking.
Bake just until the edges are set and the centers look slightly underdone for a gooier result.

How should I store baked cookies?

Store cooled cookies in an airtight container at room temperature. They stay best for 3–5 days. If you want longer storage, freeze them (see below) or refrigerate for up to 1 week, though refrigeration can soften texture.

Can I freeze the dough or baked cookies?

Yes. For dough, portion into balls, place on a baking sheet to freeze, then transfer to a freezer bag. Bake from frozen, adding 1–2 minutes to the bake time. For baked cookies, layer with parchment in a container and freeze for up to 2–3 months. Thaw at room temperature or rewarm in a low oven before serving for best texture.

Are there dairy-free or vegan options?

Yes, with substitutions: use vegan butter or coconut oil instead of dairy butter, and choose dairy-free caramel or caramels. If using eggs, you can substitute with flax eggs or other vegan binders, and ensure any chocolate or caramel you add is vegan. Caramel flavor may come from dairy in some products, so read labels carefully.

Can I make them gluten-free?

Yes. Use a 1:1 gluten-free flour blend that contains xanthan gum or guar gum, and consider adding an extra tablespoon of moisture (e.g., a little more butter or an extra egg) if the dough feels dry. Caramel pieces are typically gluten-free, but check packaging just in case.

What toppings or flavor variations can I try?

Try these variations for different twists:

  • Finish with flaky sea salt for a sweet-salty balance
  • Add chocolate chips or chunks (semi-sweet or dark)
  • Swap caramel bits for crushed pretzels for texture
  • Mix in toasted nuts (pecans or walnuts) for crunch
  • Use a swirl of dulce de leche in the center for extra caramel flavor

Introduction / Hook

In a kitchen perfumed with vanilla, warm-toasted oats, and the bright kiss of blueberry, these Blueberry Oatmeal Cookies feel like a friendly hug you can bake into existence. The moment the dough comes together, you’ll notice how the oats lend a hearty chew—almost like a mini, wholesome loaf in a cookie form—while the blueberries burst with tiny pockets of sweetness and tang, lucky enough to remind you of summer’s late-season bounty even as the weather cools. There’s something extraordinarily comforting about a cookie that looks unassuming but carries a chorus of flavors in every bite: the nutty aroma of oats, the cozy warmth of cinnamon and brown sugar, and the gentle acidity from the berries that keeps the sweetness honest. These cookies aren’t flashy; they don’t demand your full attention with extravagant toppings or complicated steps. They invite you to slow down, press your palms against the warm sheet, and take that first bite that signals the day’s small triumphs—breakfast treated as a celebration, an afternoon moment paused with tea, or a bedtime snack that doesn’t derail your routine but sweetens it.

What makes this recipe special is how approachable it is without compromising depth. It’s a cookie that thrives on simple pantry staples: oats for texture and protein, a bit of butter for richness, a touch of honey or maple for a natural sweetness that doesn’t overshadow the fruit, and a handful of fresh or frozen blueberries that maintain their brightness even after baking. The result is a cookie that’s gently sweet, lightly chewy, and wonderfully fragrant, with a blueberry-speckled crumb that turns ordinary afternoons into comforting rituals. If you’ve ever baked cookies that felt like a warm conversation with a friend—reliable, unfussy, and totally satisfying—you’re about to meet your new favorite crowd-pleaser. And because the batter forgives improvisation, you can tailor it to your mood: add lemon zest for a citrusy zing, fold in chopped nuts for extra crunch, or swap in dried fruit for a chewy, pantry-friendly variation. This recipe is less of a rigid instruction and more of a friendly invitation to bake with heart.

As you read on, you’ll discover that these cookies aren’t just delicious; they’re adaptable, nourishing, and incredibly versatile. They work for busy weekday mornings where a quick, wholesome bite is all you need to energize the day, as a comforting after-school treat for kids, or as a simple dessert that honors seasonal fruit without feeling indulgent. The blueberry’s color—deep indigo flecked with morning-light—paints the cookie with a sense of place, conjuring images of sunlit berry patches, dew-kissed fields, and the easy pleasure of a well-loved family recipe passed down and gently modernized. Get ready to bake something that tastes like home but feels like a reminder that flavor can be both wholesome and truly delicious.

The Story Behind the Dish

Oats have long carried the reputation of being the humble workhorse of the pantry—modest, sturdy, and incredibly versatile. Historically, oats were a staple for many cultures seeking a durable, energy-dense food that could sustain long days of labor or travel. When people think of cookies, they often picture butter-rich confections with a glossy finish; but oat-based cookies tell a different story—one of texture, earthiness, and a gentle sweetness that doesn’t shout but speaks softly to the senses. The concept of the oat cookie has roots in European baking, where rolled oats were used to create chewy, hearty treats that could be enjoyed with a cup of tea or coffee. Over time, cooks embraced the idea of pairing oats with fruit, nuts, and spices to balance their natural sturdiness with sunshine-bright flavors that feel both comforting and celebratory.

Blueberries, meanwhile, bring a distinct twist to this classic duo. Berry season is a reminder of sun-warmed mornings and gardens brimming with color, and blueberries in baked goods are a way to preserve those sunny notes long after harvest. Blueberries offer a delicate balance of sweetness and tang, a vibrant pigment that makes baked goods look irresistibly inviting, and a texture that holds up well under heat while still bursting with juice when bitten. The pairing of blueberries with oats feels almost inevitable—earthy, wholesome oats meet the bright, cheerful bite of berries in a cookie that’s equal parts pantry staple and seasonal treat. This particular recipe is a modern nod to time-honored baking wisdom: keep things simple, treat the fruit with care, and let the ingredients speak for themselves.

As a personal note, many bakers love this combination because it is forgiving and forgiving results are delicious. It’s the sort of recipe that invites stories—of substitutions that became favorites, of rushed mornings when a dozen cookies must be baked in a pinch, or of quiet afternoons when a tray of these cookies cools on the rack, waiting to be shared with neighbors, coworkers, or family. The story behind this dish is as much about the people who bake it as it is about the ingredients themselves: those who measure with habit, who taste as they go, and who believe that a well-made cookie can carry a bit of the day’s warmth to each bite.

Why You’ll Love This Recipe

  • Wholesome base with oats for texture and staying power, making cookies that feel substantial yet not heavy.
  • Bright blueberry pockets that burst with flavor and keep the cookie surprisingly moist and flavorful.
  • Balanced sweetness from natural sugars and a touch of honey or maple, avoiding cloying aftertaste.
  • Short ingredient list and straightforward method—great for weeknights or last-minute baking sessions.
  • Customizable to suit dietary needs and preferences (gluten-free, dairy-free, vegan options with substitutions).
  • Flexible flavor tweaks: citrus zest, brown butter, toasted nuts, or a sprinkle of cinnamon create new personalities without breaking the cookie’s core charm.
  • Workable with fresh or frozen blueberries, making it practical year-round regardless of season.
  • Perfect for a welcoming plate of dessert that doesn’t overwhelm; ideal for sharing with friends and neighbors.
  • Kid-friendly without dumbing down: tender texture, natural sweetness, and colorful berries appeal to younger palates while satisfying adults too.
  • Great as a breakfast-on-the-go option if you like a little fruit in the morning with your coffee or yogurt.

Flavor Profile & Texture

The flavor profile of Blueberry Oatmeal Cookies dances between comforting and fresh. The oats contribute a toasty, slightly nutty backbone that anchors the cookie in a satisfying chew. The brown sugar provides a caramel-rich depth, while a hint of vanilla oil or extract adds a warm, creamy note that lingers. Blueberries introduce bursts of juicy sweetness with a tangy edge, counterbalanced by a whisper of citrus zest (if you choose to add it) that lifts the palate and prevents the cookie from tasting flat. Cinnamon or a touch of nutmeg can be included to evoke cozy baked goods without overwhelming the blueberry personality.

Texture-wise, these cookies strike a balance between a soft center and a lightly chewy exterior. The oats keep each bite substantial and hearty, so even when the cookies are a little underbaked, they remain indulgent rather than crumbly. The berries, whether fresh or gently thawed from frozen, offer visible flecks of purple or blue and release a tiny, fruity juice that keeps the interior moist. The cookies set into a perfect middle ground between cakey and chewy—richer than a standard drop cookie but lighter than a full-fledged shortbread. The result is a crowd-pleasing experience: easy to eat with one hand, delightful to share, and satisfying enough to stand up to a tall glass of milk, a mug of tea, or a robust coffee. Each cookie invites you to savor the interplay of toasty oats, sweet-tresh berry sweetness, and a fragrant, comforting aroma that makes the kitchen feel like a little bakery in your home.

Occasions & Pairings

Blueberry Oatmeal Cookies shine in a wide range of occasions, from everyday comforts to special gatherings. Here are some ideas for serving and pairing:

  • Weekday breakfast companion: grab-and-go with a mug of tea or coffee for a balanced, satisfying start to the day.
  • Afternoon tea or coffee break: delicate enough to accompany a hot beverage, yet hearty enough to stave off mid-afternoon slump.
  • Lunchbox-friendly treat: a small, thoughtful dessert that travels well and remains fresh for several days when stored properly.
  • Picnic or potluck favorite: easy to portion, share, and spread with a light cream cheese or yogurt dip if desired.
  • Family movie night: a comforting, indulgent treat that doesn’t feel too heavy after a big bowl of popcorn.

Suggested pairings:

  • Drinks: a lightly caffeinated coffee, a fragrant black tea, or a glass of cold milk. For a more grown-up pairing, a vanilla latte or a cinnamon-spiced chai complements the cookies beautifully.
  • Side treats: a small dollop of yogurt with a drizzle of honey, lemon curd for a tangy contrast, or a simple mascarpone cream for a richer finish.
  • Occasion-driven twists: serve with a scoop of vanilla or blueberry-swirl ice cream for a dessert that feels festive; crumble over a bowl of Greek yogurt for a satisfying breakfast option.

Tips, Variations & Substitutions

Here are ideas to customize and optimize the cookies to fit your pantry, dietary needs, or flavor goals:

  • Gluten-free option: use certified gluten-free rolled oats and substitute all-purpose flour with a gluten-free blend that works well for cookies (or omit if you’re making a gluten-free oat-focused cookie that relies on oats and fruit for structure).
  • Dairy-free alternative: swap butter for a neutral-flavored plant-based butter or coconut oil; ensure the chosen fat doesn’t overpower the blueberry note.
  • Vegan version: use flax eggs or chia eggs as binding, combined with dairy-free butter and a touch of maple syrup to maintain moisture.
  • Sweetness adjustments: reduce sugar by up to 1/3 if you prefer a less sweet cookie, or add a touch more honey or maple for moisture and depth.
  • Texture tweaks: for chewier centers, slightly underbake and store cookies in an airtight container; for crisper edges, bake a minute longer and cool on a rack completely.
  • Flavor boosters: add lemon or orange zest to brighten the berries; fold in crushed almonds, pecans, or walnuts for extra crunch and nuttiness.
  • Fruit variations: swap blueberries with diced strawberries, raspberries, or cherries; if using frozen fruit, do not thaw completely to minimize the color bleed and maintain texture.
  • Spice profile: a pinch of ground ginger, cardamom, or nutmeg can elevate the profile and pair nicely with the berry tang.
  • Make-ahead tip: chill the dough for 30–60 minutes before baking to help cookies hold their shape and intensify flavors; you can freeze shaped dough balls on a sheet and transfer to a bag for later baking.

Storage & Make-Ahead Ideas

These cookies keep beautifully when stored properly, and they’re forgiving enough to be prepared in advance for gatherings or holiday gifting. Here are reliable strategies:

  • Room temperature storage: store in an airtight container for up to 4–5 days; place parchment between layers to prevent sticking if you’re stacking them.
  • Refrigeration: for extended freshness, refrigerate the baked cookies in an airtight container for up to 1 week; bring them back to room temperature before serving for optimal texture and aroma.
  • Freezing baked cookies: layer cookies with parchment in an airtight container or freezer bag; freeze for up to 3 months. Thaw at room temperature or warm them gently in a low oven to revive their softness.
  • Make-ahead dough: chill the dough for 1–2 days before baking for enhanced flavor development; you can portion into balls and freeze the dough, then bake from frozen with a minute or two of extra time.
  • Stale-to-crisp trick: if cookies lose their freshness, re-bake them for 2–3 minutes to re-crisp the edges while maintaining a soft center.

Fun Facts & Trivia (Optional)

Did you know that oats, though often used in breakfast dishes like porridge, have a long, storied role in baked goods that dates back centuries? They’re naturally gluten-free, though cross-contamination can occur in processing facilities, which is why certified gluten-free oats matter for sensitive eaters. Blueberries are among the few fruits native to North America that found a beloved home in cookies and desserts across many cultures, celebrated for their distinctive hue and juicy, tangy-sweet flavor. The combination of oats and blueberries in baking taps into two threads of culinary memory: the rustic, homestyle cookie that evokes Sunday baking and the bright, modern fruit-forward desserts that celebrate seasonal produce. This recipe honors both threads, offering a comforting bite that still feels fresh and lively—proof that simple ingredients, treated with care, can create something memorable and deeply satisfying.

Ingredients

Cookie Dough Base

  • 1/2 cup unsalted butter, softened to room temperature
    → Butter provides the fat that carries flavor and contributes to the cookie’s tender, chewy texture. Softened to room temperature allows it to cream smoothly with sugars, creating air pockets that help with spread and structure. If the butter is melted or too soft, the dough may spread too quickly; chilling briefly before baking helps maintain shape and texture.
  • 1/2 cup granulated sugar
    → Granulated sugar sweetens and helps with browning and spread. It creates a crisp edge while coordinating with brown sugar to yield a chewy center. Use fresh sugar for consistent texture and flavor.
  • 1/2 cup packed light brown sugar
    → Brown sugar adds moisture and a subtle caramel note from the molasses it contains, increasing chewiness and tenderness. The moisture helps keep cookies soft in the center after baking. Pack the sugar firmly for accuracy.
  • 1 large egg, at room temperature
    → Eggs bind the dough and contribute to structure and moisture. Room-temperature eggs blend more evenly with butter and sugars, promoting a smooth dough and uniform rise during baking.
  • 1 teaspoon vanilla extract
    → Vanilla enhances overall flavor and depth. Use high-quality vanilla extract for a pronounced aroma that complements blueberries and oats without overpowering them.
  • 1 cup all-purpose flour
    → Flour provides the framework that lets the cookies hold shape while still staying tender. All-purpose flour is standard, but you can substitute with half whole-wheat flour for a nuttier flavor and denser crumb, adjusting moisture if needed.
  • 1 1/2 cups old-fashioned rolled oats
    → Oats give chew and heartiness to the cookies. Use old-fashioned oats for the best texture; quick oats will create a softer, crumblier cookie. For extra chew, you can lightly toast the oats before mixing.
  • 1/2 teaspoon baking soda
    → Baking soda helps with browning and slight spreading by reacting with acids in the dough. It also contributes to a chewy bite. Measure level to avoid metallic aftertaste from excess.
  • 1/4 teaspoon salt
    → Salt heightens sweetness and balances flavors, especially with blueberries and oats. If using salted butter, reduce this amount accordingly to prevent oversalting.
  • 1/2 teaspoon ground cinnamon
    → Cinnamon adds warmth and pairs beautifully with blueberries and oats, enhancing aroma and flavor. It can be omitted if you prefer a simpler profile, but it helps tie the dough together.

Fruit & Flavor

  • 1 cup fresh blueberries (washed and gently patted dry) or 3/4 cup frozen blueberries (do not thaw)
    → Blueberries provide bursts of fruity sweetness and juiciness. Fresh berries stay firmer and hold their shape; frozen berries work well if thawed and thoroughly patted dry to minimize extra moisture. To prevent berries from bleeding into the dough and staining cookies, lightly toss them with 1 tablespoon of flour before folding them in, or fold them in very gently at the end.
  • Zest of 1 lemon (optional)
    → Lemon zest adds a bright citrus note that complements blueberries and oats, cutting sweetness and adding aroma. Use only the yellow zest; avoid the bitter white pith. If using lemon juice as well, consider reducing the milk slightly to maintain dough consistency.

Moisture & Texture (Optional)

  • 2 tablespoons milk or plain yogurt (optional, add if dough seems dry)
    → A touch of extra liquid can help achieve a tender, moist crumb, especially with a higher oat content. If using yogurt, it adds a slight tang and extra moisture; if using milk, it lightens the dough a bit. Start with 1 tablespoon and add as needed to reach a soft, scoopable dough.

Optional Add-ins

  • 1/2 cup chopped walnuts or pecans (optional)
    → Nuts add a contrasting crunch and a toasty, nutty depth. Toast the nuts lightly to deepen flavor, then chop evenly to distribute through the dough. If you have nut allergies, omit.
  • 1/2 cup white chocolate chips (optional)
    → White chocolate adds creamy sweetness and melts into soft pockets that pair nicely with blueberries. If using frozen berries, fold in chips after incorporating the berries to avoid overmixing and ensure chips stay intact.
  • 1/4 cup shredded coconut (optional)
    → Coconut brings a subtle tropical aroma and additional texture. Use sweetened or unsweetened coconut depending on desired sweetness; omit if you prefer a pure blueberry-oat profile or if coconut allergies are present.

Instructions

  • Preheat your oven to 350°F (175°C) and line two baking sheets with parchment paper or silicone baking mats to prevent sticking and promote even browning.
    → This ensures the cookies release cleanly and bake evenly, preventing sticking and helping edges achieve a uniform golden color.
  • In a large mixing bowl, cream the 1/2 cup unsalted butter that is softened to room temperature together with 1/2 cup granulated sugar and 1/2 cup packed light brown sugar on medium speed until the mixture is pale, light, and fluffy, about 2 to 3 minutes.
    → Creaming incorporates air into the dough, which creates tender structure and helps the cookies spread more evenly during baking.
  • Beat in 1 large egg (at room temperature) and 1 teaspoon vanilla extract until the mixture is smooth and fully incorporated, about 30 to 45 seconds.
    → Adding egg and vanilla at this stage hydrates the fat and sugar, forming a stable emulsion that contributes to moisture, aroma, and even distribution of flavor.
  • In a separate medium bowl, whisk together 1 cup all-purpose flour, 1 1/2 cups old-fashioned rolled oats, 1/2 teaspoon baking soda, 1/4 teaspoon salt, and 1/2 teaspoon ground cinnamon until evenly combined.
    → Sifting or whisking the dry ingredients ensures even leavening, temperature distribution, and that the oats, spice, and salt are dispersed evenly for consistent flavor and texture.
  • With the mixer on low speed or using a wooden spoon, gradually add the dry ingredients to the creamed mixture in two or three additions, mixing only until just combined after each addition to avoid overworking the dough.
    → Overmixing develops gluten, which can make cookies tough; mixing in stages helps maintain a tender crumb while ensuring all components are evenly incorporated.
  • Stir in the zest of 1 lemon (optional) using a gentle folding motion to distribute the bright citrus evenly without bruising the zest or removing too much essential oil.
    → Lemon zest adds a fresh aroma and balanced acidity that enhances blueberries and oats without overpowering them; omit if you prefer a pure oat-berry profile.
  • Gently toss 1 cup fresh blueberries (washed and gently patted dry) or 3/4 cup frozen blueberries (do not thaw) with 1 tablespoon all-purpose flour to coat berries and prevent color bleed, then fold them into the dough with a wide spatula just until evenly distributed.
    → Coating berries minimizes staining and moisture release during baking, helping cookies keep their shape and color; fold carefully to avoid crushing berries.
  • If the dough seems dry, incorporate 2 tablespoons milk or plain yogurt, adding 1 tablespoon at a time and mixing until the dough is soft and scoopable but not slack.
    → A small amount of extra moisture helps the oats hydrate and yields a tender, cohesive dough that holds shape when baked.
  • Fold in optional add-ins such as 1/2 cup chopped walnuts or pecans (toasted and cooled) or 1/2 cup white chocolate chips or 1/4 cup shredded coconut, distributing them evenly without overworking the dough.
    → Nuts add crunch and toasty flavor, white chocolate chips provide creamy pockets, and coconut introduces subtle texture; toast nuts for deeper flavor and chop evenly for consistent distribution.
  • Wrap the dough and chill it in the refrigerator for at least 30 minutes (and up to 2 hours) to firm the dough, enhance flavor, and reduce spreading during baking.
    → Chilling helps the cookies hold their shape, creates thicker, chewier centers, and concentrates flavors for a more defined texture.
  • Scoop rounded tablespoons of dough (or use a 1.5-tablespoon cookie scoop) onto the prepared baking sheets, spacing them about 2 inches apart to allow for spreading.
    → Proper spacing prevents cookies from melding into one another and ensures even baking across each cookie’s surface.
  • Bake the cookies in the preheated oven for about 12 to 15 minutes, or until the edges are lightly golden and the centers look just set; rotate the baking sheets halfway through baking for even browning.
    → The timing yields a chewy center with crisp edges; rotating ensures uniform heat exposure and consistent texture across all cookies.
  • Remove the baking sheets from the oven and let the cookies rest on the sheets for 5 minutes before transferring them to a wire rack to cool completely.
    → Cooling on the sheet allows the cookies to finish setting and prevents them from cracking or crumbling when moved, while the rack cools them evenly to room temperature.

Notes

These blueberry oatmeal cookies are a wholesome treat featuring juicy blueberries folded into chewy oat cookies. You can customize them by adding your favorite nuts, seeds, or dried fruits. They freeze well and make a great grab-and-go snack. For an extra boost, serve with a dollop of yogurt or a drizzle of honey. Always ensure your oats are certified gluten-free if you have gluten intolerance; if needed, substitute with a gluten-free flour blend to keep the cookies gluten-free.

Tips

Tips for Blueberry Oatmeal Cookies

Dough consistency and shaping

  • Make sure the butter is truly softened to room temperature. If it’s too hard, it won’t cream smoothly with sugars; if it’s melted, the dough may spread too much. If in doubt, chill the dough briefly before shaping.
  • Cream the butter with the granulated and brown sugars until the mixture is light and fluffy. This creates air pockets that help with lift and a chewy center.
  • When adding the egg and vanilla, mix until the dough looks cohesive and smooth. Overbeating after adding eggs can incorporate too much air and affect texture.
  • Dry dough can be loosened with 1 tablespoon of milk or yogurt at a time, until you reach a soft, scoopable consistency. Do this in small increments to avoid a runny dough.

Oats and mix-ins

  • Use old-fashioned rolled oats for the best chewy texture; quick oats will yield a softer, crumblier cookie.
  • For deeper toasty flavor, lightly toast the oats in a dry skillet over medium heat for a few minutes until fragrant, then cool before mixing.
  • Lightly toss fresh blueberries with 1 tablespoon of flour before folding them into the dough to help prevent them from bleeding color into the dough. For frozen berries, pat very dry after thawing and fold in gently at the end.
  • If you’re adding white chocolate chips, fold them in after the berries to help keep the chips intact during baking.

Flavor balance

  • Use lemon zest to add brightness that complements blueberries and oats. Avoid the white pith, which can be bitter. If you use lemon juice, reduce any extra liquid to keep the dough from getting too wet.
  • Quality vanilla extract makes a noticeable difference; opt for pure vanilla for a richer aroma.
  • Salt helps balance sweetness; if you use salted butter, consider reducing the added salt slightly to prevent oversalting.

Baking and texture

  • Chill the dough for 30–60 minutes (or longer) to prevent excessive spreading and to enhance a thick, chewy center. Longer chilling yields thicker cookies.
  • Space dough mounds about 2 inches apart on a parchment-lined sheet. For a more uniform look, gently flatten the tops before baking.
  • Bake at about 350°F (177°C) until the edges are golden and the centers look just set. Cookies will continue to firm as they cool, so err on the side of a touch underbaked for chewier centers.
  • If you’re using a convection oven, reduce the temperature by about 25°F and start checking a minute or two earlier, since convection browns faster.

Make-ahead, storage, and variations

  • The dough can be chilled overnight or frozen in portions. Bake straight from the fridge or thaw briefly; dough chills deepen flavor and improve texture.
  • Store baked cookies in an airtight container at room temperature for 3–5 days; freeze dough balls for longer storage and bake as needed.
  • Variations: add 1/2 cup chopped walnuts or pecans for extra crunch; substitute white chocolate chips for a different sweetness profile; or add 1/4 cup shredded coconut for texture (omit if you prefer a pure blueberry-oat flavor).

FAQ

What are Blueberry Oatmeal Cookies?

They are chewy cookies made with rolled oats and juicy blueberries folded into a lightly sweet batter, typically with butter or oil, brown sugar, and vanilla for a comforting, wholesome treat.

Fresh vs. frozen blueberries: which should I use?

Both work well. Fresh blueberries give brighter pockets of fruit, while frozen berries are convenient and hold up in baking. If using frozen, keep them frozen until folding to minimize color bleed; you may need to bake 1–2 minutes longer.

Are these cookies gluten-free?

You can make them gluten-free by using certified gluten-free rolled oats and a 1:1 gluten-free flour blend (or omit the flour entirely and rely on oats for structure). Be mindful of cross-contamination if you have a gluten sensitivity.

Can I make these cookies vegan?

Yes. Substitute plant-based butter or coconut oil for the butter, and replace eggs with a flax egg or chia egg (1 tablespoon ground flaxseed or chia meal mixed with 3 tablespoons water per egg).

How should I store Blueberry Oatmeal Cookies?

Cool completely and store in an airtight container at room temperature for 3–4 days. For longer storage, refrigerate for up to a week or freeze for 2–3 months. Layer with parchment to prevent sticking.

How do I bake them for chewy vs. soft centers?

Bake at about 350°F (175°C). For softer centers, bake until edges are set and centers still look slightly underdone (about 10–12 minutes). For chewier cookies, you can chill the dough before baking and bake a touch longer if needed.

What flavor variations can I try?

Add a splash of vanilla, a pinch of cinnamon, or a teaspoon of lemon zest for brightness. You can also fold in chopped nuts (like walnuts) or use half oats, half whole-wheat flour for a nuttier flavor.

How can I prevent the cookies from spreading too much?

Chill the dough for 30–60 minutes before scooping, use parchment or a silicone mat, and space dough evenly on the sheet. Using cold butter and not overmixing helps maintain shape.

Can I freeze the dough or baked cookies?

Yes. Scoop the dough onto a tray and freeze until solid, then transfer to a bag for long-term storage. Bake directly from frozen, adding 1–2 minutes to the bake time. You can also freeze baked cookies for up to a month.

Introduction / Hook

Imagine a skillet that releases a chorus of sizzling sounds as honey-gold sauce clings to each piece of chicken, turning every bite into a glossy, sticky kiss of savory-sweet delight. Healthy Sticky Chicken isn’t just a weeknight rescue mission; it’s a celebration of simple ingredients transformed into something truly crave-worthy. The aroma alone—garlic and ginger dancing with sesame, a whisper of citrus and soy—has a way of pulling you to the stove, promising comfort without guilt. This isn’t heavy takeout flavor repackaged; it’s a thoughtfully balanced glaze that delivers depth, brightness, and that satisfying lacquered finish that makes you want to lick the plate (okay, maybe just the spoon). The beauty of this dish lies in its accessibility: pantry staples, one pan, a quick reduction that turns ordinary chicken into something that feels both indulgent and wholesome. You’ll taste the harmony of salty umami, gentle sweetness, tangy brightness, and a touch of heat that can be dialed up or down to your liking. And because we’ve tuned this version to be healthier, you can enjoy it more often without sacrificing flavor—perfect for families, busy professionals, or anyone who appreciates a cozy dinner with a modern, light twist.

The Story Behind the Dish

The term “sticky” in cooking evokes those lacquered glazes that cling to meat with a glossy, almost candy-like sheen. While the technique draws inspiration from traditional Chinese glazes—where soy, sugar, and aromatics are coaxed into a thick, bronzed coating—the modern interpretation of Healthy Sticky Chicken emphasizes balance and accessibility. In many homes, kitchen memories are built around garlic sizzling in oil, a drizzle of honey or maple syrup, and a handful of pantry gems that turn a simple chicken breast or thigh into a centerpiece. This dish is a culinary nod to those everyday moments: the first sizzle of garlic meeting hot oil, the way the caramelization happens as the sauce reduces, the comforting scent of sesame sesame seeds toasting on a pan. The “healthy” label isn’t about stripping flavor; it’s about preserving the pleasure of a sticky glaze while choosing lean proteins, mindful sweetness, and brighter acidity to keep the profile lively. It’s a dish that travels well in memory and in the kitchen: from mom’s stovetop to your own table, from a hurried weeknight to a relaxed weekend dinner with friends, every iteration carries a touch of home and a sense of nourishment.

Why You’ll Love This Recipe

  • One-pan wonder: minimal cleanup and maximum flavor align for a stress-free dinner.
  • Lean protein that satisfies: chicken provides high-quality protein with the option to use thighs or breasts depending on preference.
  • Balanced sweetness: the glaze leans toward a gentle caramel glaze rather than a cloying sugar base, resulting in a refined, restaurant-like finish.
  • Kid-friendly and adaptable: the flavor profile is approachable, with room to tweak sweetness, salt, and heat to suit younger palates or adventurous adults.
  • Versatile for meal prep: the glaze stores beautifully and re-heats well, making it ideal for lunches or make-ahead dinners.
  • Gluten-free by default (with a simple swap): tamari or gluten-free soy sauce keeps the glaze friendly to gluten-free diets.
  • Textural interest: a contrast of tender chicken with a slightly crisp, lacquered finish creates a satisfying bite every time.
  • Flavor-forward without heaviness: you get depth from aromatics, brightness from acidity, and a lingering finish that isn’t heavy on the palate.

Flavor Profile & Texture

Healthy Sticky Chicken is a study in texture and balance. The first impression is the aroma: garlic and ginger releasing their sharp, warming notes, followed by sesame and a hint of citrus. The glaze itself offers a glossy sheen that clings to the surface of the chicken, giving you that characteristic slow, sticky pull as you bite through. The sweetness is present, but it’s not cloying; think a carefully measured honey or maple that plays with soy or tamari to create a savory undercurrent. There’s a tang—often from a splash of rice vinegar or a touch of citrus—that brightens the dish and keeps it from feeling heavy. The umami depth comes from the soy or tamari, which rounds out the sweetness and reveals a savory backbone that lingers on the palate.

As for texture, you’ll notice two dynamic contrasts. On the outside, the chicken develops a delicate caramelized crust from the glaze, giving a light crispness and a satisfying bite. Inside, the meat remains juicy and tender, a result of quick sears that lock in moisture. When the glaze thickens, it becomes almost syrupy, allowing each bite to deliver a harmonious union of sweet, salty, and tangy notes. The sesame seeds add a tiny crunch and a nutty aroma, while the green onions (if you choose to garnish) deliver a fresh, peppery lift that cleanses the palate between bites. The overall sensory experience is warm and comforting, yet lively enough to feel fresh—like a kitchen’s best kept secret that you’re eager to share with friends and family.

Occasions & Pairings

Where does Healthy Sticky Chicken shine? In every setting where comfort meets simplicity. It’s ideal for weeknights when you want something satisfying yet quick, and perfect for casual gatherings when you want a dish that feels elevated but easy to prepare in larger quantities. This recipe is friendly to meal-preppers, as the glaze can be prepared in advance and the chicken portioned for later reheating. It’s also a forgiving canvas for pairings, allowing you to tailor the plate to your mood or season.

Pairing ideas to consider:

  • Starchy bases: brown rice, quinoa, or cauliflower rice for a lower-carb option that soaks up the sauce beautifully.
  • Greens and vegetables: sautéed spinach, bok choy, steamed broccoli, or sautéed snap peas provide a crisp counterpoint and color contrast.
  • Garnishes: a scattering of toasted sesame seeds, finely sliced scallions, and a squeeze of lime or lemon to add brightness.
  • Drink suggestions: a light, crisp white wine like Sauvignon Blanc, a cold lager, or a sparkling water with a twist of citrus for a refreshing balance.
  • Occasion vibes: weeknight family dinners, casual date nights, potluck-friendly mains, or savory bowls for lunch prep.

Tips, Variations & Substitutions

  • Protein options: while chicken is classic, you can adapt this glaze to turkey cutlets, pork tenderloin, tofu, or tempeh for vegetarian/vegan options. For tofu, press well to remove moisture and sear to build a crust before glazing.
  • Chicken cuts: skin-on thighs deliver juicy, flavorful meat; skinless thighs or breasts work beautifully too. If you’re using breasts, watch the cooking time to avoid drying out the meat.
  • Glaze base: use tamari or gluten-free soy sauce to keep it gluten-free. If you’re not gluten-sensitive, traditional soy sauce is perfectly fine. For a deeper complexity, try a splash of miso paste whisked into the glaze.
  • Sweetness dial: adjust honey, maple syrup, or brown sugar to taste. For a lighter version, reduce the sweetener slightly and rely on a touch more vinegar to maintain balance.
  • Acidity and brightness: rice vinegar gives a gentle tang; you can substitute a mild apple cider vinegar if needed or add a squeeze of fresh citrus (lime or lemon) at the end for a zesty lift.
  • Spice level: chili flakes or gochugaru add heat without overwhelming the glaze. For a milder version, omit the heat entirely; for a hotter version, add a little minced fresh chili.
  • Flavor twists: add a teaspoon of grated fresh ginger at the glaze stage for an extra zing, or finish with a few drops of toasted sesame oil for a nutty aroma.
  • Regional riffs: a Korean-inspired version might incorporate gochujang into the glaze for depth and spice; a Thai-inspired glaze could include a splash of fish sauce and lime juice for a bright, savory-sour finish.
  • Make-ahead options: prepare the glaze ahead of time and refrigerate. Searing the chicken just before serving will preserve the lacquered finish; otherwise, you can glaze and finish completely in one go for maximum stickiness.
  • Low-carb approach: pair with cauliflower rice or steamed vegetables instead of grains to keep carbohydrates lower while preserving a satisfying plate.
  • Vegan glaze variations: use maple or agave with a splash of tamari, and finish with toasted sesame seeds to mimic the savory-sweet balance.

Storage & Make-Ahead Ideas

Leftovers are a gift when you’re organized. The sauce tightens and intensifies in flavor after resting, but you’ll still want to reheat with care to preserve moisture and glaze texture.

  • Refrigeration: store cooked Healthy Sticky Chicken in an airtight container for up to 3–4 days. Reheat gently on the stove over medium-low heat, or in the oven at a low temperature to preserve moisture and prevent the glaze from breaking.
  • Make-ahead glaze: you can prepare the glaze up to a week in advance and keep it refrigerated; warm gently to bring it back to a glossy consistency before tossing with freshly seared chicken. If you have leftovers, re-glaze during reheating for the best lacquered finish.
  • Freezing: freeze fully cooked chicken in the glaze for up to 2–3 months. Thaw overnight in the refrigerator, then re-warm slowly to reestablish the gloss and tenderness. Note that the texture of the glaze may slightly vary after freezing, so you might re-apply a touch of fresh glaze during reheating.
  • Make-ahead meal prep: portion the chicken into meal containers with a side of grain and vegetables. The glaze will keep its shine if kept separate and re-tossed with the chicken just before serving.

Fun Facts & Trivia (Optional)

– The hallmark of a great glaze is not just sweetness; it’s the balance of fat, acid, and salt that creates a lacquered finish that clings without dripping. When reduced properly, the sauce thickens into a glossy coating that makes every bite feel luxurious.

– Glazes like this have roots in many culinary traditions around the world, from Chinese and Southeast Asian kitchens to Mediterranean and Latin American techniques that rely on reduced sauces to intensify flavors without relying on heavy fats. The concept of “sticky” cooking showcases how a handful of pantry staples—soy or tamari, honey or maple, vinegar or citrus, ginger, garlic, and a little heat—can transform simple protein into something memorable.

– Sesame seeds are more than garnish: they bring a gentle nutty aroma when toasted, adding depth to the dish. A quick toast in a dry pan will unlock their full aromatic potential and enhance the overall flavor profile.

– If you’re plating this for a crowd, think color and texture. A bright green garnish, a lemon or lime wedge, and a scattering of sesame seeds create visual appeal that makes the dish feel special even on a weeknight.

Ingredients

Healthy Sticky Chicken

Main Protein

  • – 1.5 pounds boneless skinless chicken thighs, cut into bite-sized pieces
    → The chicken thighs provide juicier, more forgiving meat that soaks up the sticky glaze beautifully. Cutting into uniform pieces ensures even cooking and glaze coating. Pat the pieces dry before cooking to promote browning rather than steaming in moisture. For a leaner option, you can substitute chicken breasts, but monitor to avoid drying out; cook until the internal temperature reaches 165°F (74°C) for safety.

Sauce & Glaze

  • – 3 tablespoons low-sodium soy sauce or tamari (gluten-free)
    → This creates the salty, savory base of the glaze and helps season the chicken evenly. Low-sodium versions prevent the dish from becoming overly salty, especially important if you’re serving with salted sides like rice. For gluten-free needs, tamari is a direct substitute with a similar profile. Let the chicken coat well with the sauce for even flavor.
  • – 2 tablespoons hoisin sauce
    → Hoisin adds sweet, tangy depth and a glossy finish to the glaze, giving that classic sticky texture. It also helps thicken the sauce a bit due to its sugar content. If you’re avoiding hoisin, substitute with an extra teaspoon of honey plus a splash of soy/tamari, or omit and rely on a thicker honey-ginger base.
  • – 2 tablespoons honey or maple syrup
    → Provides natural sweetness and helps create the sticky glaze. Honey yields stronger stickiness, while maple syrup offers a lighter sweetness. Adjust to taste and balance with the salty soy and tangy vinegar; use slightly less if you’re sensitive to sugar.
  • – 1 tablespoon rice vinegar
    → Adds brightness to balance sweetness and salt, preventing the glaze from tasting cloying. Use plain rice vinegar for a clean, mild acidity; if not available, a splash of lime juice can work, but adjust to avoid overpowering the glaze.
  • – 1 teaspoon toasted sesame oil
    → Provides a nutty aroma and depth to the glaze. Sesame oil is potent, so drizzle and mix the sauce off the heat to preserve its fragrance. Omit if you prefer a neutral profile, but a touch enhances the finished dish.
  • – 3 cloves garlic, minced
    → Garlic builds the savory backbone of the glaze. Mince finely so the flavor distributes evenly and doesn’t burn during searing. If you’re garlic-sensitive, start with 2 cloves and adjust to taste.
  • – 1 tablespoon grated fresh ginger
    → Ginger adds warmth and a zing that complements the sweet-savory glaze. Fresh ginger releases more flavor than dried; if you must substitute, use 1/4 teaspoon ground ginger and increase slightly, but fresh is highly recommended.
  • – 1-2 tablespoons water or chicken broth to loosen glaze as needed
    → A small amount of liquid helps achieve a coating consistency that clings to the chicken without glopping. Start with 1 tablespoon and add more gradually; broth adds depth, especially if you’ve reduced the sauce for a thicker finish.
  • – 1 teaspoon cornstarch, mixed with 2 tablespoons water to create a slurry for thickening
    → The cornstarch slurry thickens the glaze to a glossy, clingy finish. Whisk until completely smooth, then whisk into the simmering sauce off the heat to prevent lumps. If you’re avoiding gluten, ensure cornstarch is certified gluten-free.
  • – 1/4 teaspoon red pepper flakes (optional)
    → A touch of heat brightens the glaze and adds dimension without masking the other flavors. Adjust to taste or omit entirely for a milder version. Add near the end of cooking to preserve color and aroma.

Cooking Fat & Aromatics

  • – 1 tablespoon neutral oil (e.g., avocado oil) for searing
    → A high-heat oil ensures the chicken browns nicely rather than steaming. Heat the pan until shimmering, then add the chicken in a single layer without overcrowding. Searing in batches prevents soggy pieces and builds flavor; adjust oil as needed.

Serving & Sides

  • – 2 cups cooked brown rice (from about 1 cup dry)
    → The rice provides a neutral base to soak up the sticky glaze and adds fiber with the brown variety. If you prefer white rice, you can use it, but brown rice is the healthier option. Fluff the rice with a fork before serving to keep grains separate and light.
  • – Steamed broccoli florets (optional)
    → Adds color, texture, and nutrients for a balanced plate. Steam until just tender for a crisp-tied bite that contrasts nicely with the sticky chicken. If you like, toss with a squeeze of lemon for brightness.
  • – 1 tablespoon sesame seeds, toasted (garnish)
    → Toasted sesame seeds give a nutty aroma and a subtle crunch that echoes the glaze’s sesame note. Toast in a dry skillet over medium heat, stirring frequently, until lightly browned and fragrant—watch closely to prevent burning.
  • – 2 green onions (scallions), thinly sliced (garnish)
    → Green onions add fresh color and a mild onion bite that pairs well with the glaze. Slice thinly on the bias for a nice presentation and sprinkle just before serving to retain their brightness.

Optional Add-ins

  • – 1/2 cup chopped fresh cilantro (optional)
    → Adds a bright herbal note that complements the sesame-ginger flavor profile. Chop roughly and sprinkle over the dish before serving to preserve color. If cilantro isn’t preferred, substitute with parsley or omit entirely.
  • – Extra chili flakes or sriracha (optional)
    → For those who love heat, a little extra chili can be blended into the glaze or sprinkled on top at the end. Start with a small amount and taste, then adjust to your preferred level of spiciness.

Instructions

  • Pat dry 1.5 pounds boneless skinless chicken thighs and cut into bite-sized pieces about 1 inch each to ensure even cooking and glaze adhesion.

    → Drying prevents steaming in the pan and promotes browning; uniform pieces cook evenly and hold the glaze better.
  • In a small bowl, whisk together 3 tablespoons low-sodium soy sauce or tamari, 2 tablespoons hoisin sauce, 2 tablespoons honey, 1 tablespoon rice vinegar, 1 teaspoon toasted sesame oil, 3 cloves garlic (minced), and 1 tablespoon grated fresh ginger until the sugars dissolve and the mixture is smooth.

    → This forms the glossy, balanced glaze that provides salt, sweetness, and brightness; whisking ensures even distribution of flavors for a cohesive coating.
  • If you want a thicker glaze, whisk 1 teaspoon cornstarch with 2 tablespoons cold water in a separate small bowl to create a smooth slurry.

    → The slurry thickens the glaze to cling to the chicken; using cold water prevents premature clumping when added to hot sauce.
  • If using red pepper flakes, stir 1/4 teaspoon into the glaze base and let it sit while you prepare the chicken so the heat melds with the other flavors.

    → A subtle kick brightens the glaze; adding early allows heat to distribute evenly, but you can adjust later to taste.
  • Heat 1 tablespoon neutral oil in a large skillet over medium-high heat until shimmering, then add the chicken in a single layer and sear without moving for 2-3 minutes until the underside is deeply golden.

    → Searing creates Maillard browning that adds depth of flavor; avoid overcrowding to prevent steaming and ensure crisp edges.
  • Turn the chicken pieces and brown on the opposite side for another 2-3 minutes, cooking until the internal temperature reaches 165°F (74°C) and the pieces are firm to the touch.

    → Safe temperature ensures all harmful bacteria are eliminated; use an instant-read thermometer for precision rather than relying solely on time.
  • Transfer browned chicken to a clean plate and set aside, leaving the browned fond in the pan to enrich the glaze.

    → The fond concentrates flavor; it will emulsify into the glaze and deepen the overall sauce.
  • Pour the prepared glaze into the skillet with the fond and bring to a simmer over medium heat, reducing for 1-2 minutes to concentrate the flavors.

    → Reducing thickens the sauce and intensifies sweetness and savoriness; keep the heat steady to avoid scorching the sugars.
  • Turn off the heat and whisk the cornstarch slurry into the simmering glaze off the heat, then whisk vigorously until the glaze is glossy and coats the back of a spoon.

    → Adding the slurry off the heat minimizes lumping; if the glaze is too thick, whisk in a teaspoon of water or broth until you reach the desired cling.
  • Return the chicken to the pan and toss to coat thoroughly with the thickened glaze, simmering for 1-2 minutes to reheat the chicken and ensure an even coating.

    → Reintroducing the chicken to the glaze builds a uniform lacquered surface; do not overcook the chicken at this stage to keep it moist.
  • Turn off the heat, drizzle 1 teaspoon more toasted sesame oil over the chicken, and stir to distribute; this finish adds aroma without overpowering the glaze.

    → Sesame oil is potent; adding off the heat preserves its fragrance and prevents it from evaporating during high-heat cooking.
  • In a separate dry skillet, toast 1 tablespoon sesame seeds over medium heat, shaking frequently until lightly browned and fragrant, then remove from heat.

    → Toasting deepens the nutty aroma and echoes the sesame note in the glaze; watch closely as seeds can burn quickly.
  • Steam broccoli florets until just tender, about 3-5 minutes, then season lightly with salt and a squeeze of lemon if desired for brightness.

    → Crisp-tender broccoli provides color and texture contrast to the sticky chicken and glaze; avoid overcooking to maintain vibrant color and bite.
  • Fluff 2 cups cooked brown rice (from about 1 cup dry) and keep warm to serve as a neutral base that soaks up the glaze and adds fiber.

    → Brown rice provides a hearty, earthy contrast to the sweet-savory glaze; fluffing prevents clumping and ensures light grains on the plate.
  • To plate, spoon a portion of brown rice onto each plate, top with the sticky chicken and its glaze, and arrange broccoli on the side; sprinkle the toasted sesame seeds and sliced green onions over the top for color and aroma.

    → Proper plating showcases the glossy glaze and provides an appealing balance of texture; fresh greens add brightness and a pop of color.
  • If using optional cilantro, chop 1/2 cup fresh cilantro and sprinkle over the finished dish just before serving; alternatively substitute parsley or omit.

    → Cilantro adds a fresh herbal note that complements sesame-ginger flavors; omit if you’re not a fan or if cilantro doesn’t suit your palate.
  • For extra heat, offer additional chili flakes or a small drizzle of sriracha on the side for guests to adjust to taste.

    → Heat should be customizable; adding at the table preserves the glaze’s balance while allowing guests to tailor the spice level.

Notes

These Healthy Sticky Chicken bites are a weeknight-friendly dish featuring juicy boneless thighs lacquered in a glossy, savory-sweet glaze that clings to the meat. For gluten-free diets, use tamari instead of soy sauce and ensure the cornstarch is certified gluten-free. You can customize the glaze by adjusting honey or maple syrup for sweetness, adding a splash of rice vinegar for brightness, or stirring in a pinch of red pepper flakes for heat. For an extra layer of depth, finish the glaze with 1 teaspoon toasted sesame oil off the heat and stir well.

  • Brown the chicken in batches to ensure a good sear and avoid steaming.
  • Whisk the cornstarch slurry separately and whisk into the sauce off the heat to prevent lumps; simmer briefly until glossy, then coat the chicken.
  • Use 1 tablespoon water or chicken broth to loosen the glaze if it thickens too much as it reduces.
  • Serve with cooked brown rice and steamed broccoli for a balanced meal; garnish with sesame seeds and sliced green onions for color and crunch.
  • leftovers store in an airtight container in the fridge for up to 3 days; reheat gently on the stovetop to regain glossiness.
  • For extra heat, add extra chili flakes or a drizzle of sriracha at the end.

Tips

Tips for Perfect Healthy Sticky Chicken

  • Prep and cutting: pat the chicken pieces dry and cut into uniform bite-sized pieces so they sear evenly and the glaze coats smoothly. If using chicken breasts, monitor cooking time to avoid drying out and ensure an internal temperature of 165°F (74°C).
  • Searing technique: use 1 tablespoon neutral oil and heat until shimmering. Sear in a single layer without crowding, in batches if needed, to develop a rich brown crust that adds flavor to the glaze.
  • Glaze preparation: mix soy or tamari, hoisin, honey, and rice vinegar to form the base. Simmer briefly to meld flavors, then keep warm. Add minced garlic and grated ginger so they bloom without burning.
  • Thickening the glaze: whisk a cornstarch slurry (1 teaspoon cornstarch to 2 tablespoons water) and whisk into the simmering glaze off the heat to prevent lumps. If avoiding gluten, use certified gluten-free cornstarch.
  • Flavor balance: brighten the glaze with rice vinegar and a splash of sesame oil. If you like heat, add red pepper flakes toward the end so the color and aroma stay vibrant.
  • Glaze coating technique: for a glossy, clingy finish, reduce the glaze to a nap-like consistency and toss the seared chicken in the pan until evenly coated. A brief final simmer helps the glaze adhere.
  • Adjusting thickness: if the glaze is too thick, loosen with 1 tablespoon at a time of water or chicken broth. If too thin, simmer a bit longer or add a touch more slurry.
  • Garlic and ginger handling: mince garlic finely to distribute flavor evenly and prevent burning. Fresh ginger provides the best warmth; if using ground ginger, reduce to 1/4 teaspoon and increase slightly to taste.
  • Side pairing tips: serve with 2 cups cooked brown rice (fiber). Steam broccoli to provide color and crunch, and garnish with toasted sesame seeds and sliced green onions just before serving for contrast and aroma.
  • Storage and reheating: refrigerate leftovers within 2 hours and store in an airtight container for up to 3–4 days. Reheat gently and re-thicken the glaze if it separates or thickens on rewarming.
  • Optional add-ins and finish: garnish with chopped fresh cilantro or parsley if desired, and offer extra chili flakes or a drizzle of sriracha for those who like more heat.

FAQ

What is Healthy Sticky Chicken?

Healthy Sticky Chicken is a lighter take on a classic sticky-glazed dish. It uses lean chicken, a glossy glaze with less refined sugar, and quick cooking methods so you can enjoy flavorful chicken without overdoing calories. The sauce typically combines soy or tamari, a touch of honey or maple syrup, vinegar, garlic, and ginger, thickened with a small amount of cornstarch or arrowroot.

What ingredients do I need?

For about 4 servings, you’ll need:

  • Boneless, skinless chicken thighs (preferred) or breasts
  • Honey or maple syrup
  • Low-sodium soy sauce or tamari (gluten-free option)
  • Rice vinegar or apple cider vinegar
  • Garlic (minced)
  • Fresh ginger (grated)
  • Water
  • Cornstarch or arrowroot (to thicken)
  • Sesame oil (optional, for marinade or finish)
  • Sesame seeds and chopped green onions for garnish
  • Optional chili flakes or hot sauce for a kick
Is Healthy Sticky Chicken gluten-free?

Yes, you can make it gluten-free by using tamari or another gluten-free soy sauce. Always check labels on sauces and vinegars to ensure there are no hidden gluten ingredients.

How can I make the sauce less sugary while keeping it tasty?

Use a smaller amount of honey or maple syrup and balance with extra vinegar or a splash of citrus. Thickening with a cornstarch or arrowroot slurry helps achieve a glossy coating with less sugar, and you can finish with a little water if the mixture is too thick.

What cut of chicken should I use?

Boneless, skinless chicken thighs are best for juiciness and flavor. Chicken breasts work too but can dry out; if using breasts, consider slightly shorter cooking times or slicing thinner pieces to stay moist.

How do I cook it on the stovetop?

Lightly oil a skillet and sear the chicken until browned. Remove, then whisk a slurry of cornstarch and water into the glaze (soy, honey, vinegar, garlic, ginger). Simmer until glossy, return the chicken to the pan, and coat in the sauce until cooked through (165°F/74°C internally, about 8–12 minutes depending on thickness).

How do I bake it in the oven?

Preheat to 400°F (200°C). Arrange chicken on a lined baking sheet, brush with part of the glaze, and bake for 18–22 minutes. Brush with more glaze halfway through and bake until the chicken reaches 165°F. Finish under the broiler for a few minutes if you want extra caramelization.

Can I cook this in an air fryer?

Yes. Preheat to 400°F (200°C). Cook the chicken pieces for about 10–12 minutes, flipping halfway. Toss or brush with the glaze in the last 2–3 minutes of cook time to create a sticky coating.

How should I store and reheat leftovers?

Cool leftovers and store in an airtight container in the refrigerator for up to 3–4 days. Reheat gently on the stovetop or in the microwave, adding a splash of water or glaze to refresh the sauce. Do not freeze after dairy-based sauces; the texture may change, but the dish itself can be frozen if you’re using a simple honey-soy glaze without dairy.

What should I serve Healthy Sticky Chicken with?

Pair with brown rice, quinoa, or steamed vegetables like broccoli or bok choy. A side of sesame-steamed greens also works well. Garnish with sesame seeds and chopped green onions for extra flavor and color.

Can I make this spicier or milder?

For more heat, add chili flakes, sriracha, or a splash of gochujang to the glaze. To keep it mild or kid-friendly, omit the heat and increase the honey or maple syrup slightly for a sweeter glaze.

Introduction / Hook

Imagine a dessert that feels both familiar and new—like a hug you can eat with your eyes. The Strawberry Cheesecake Roll is that comforting paradox: a light, cloud-soft sponge cake that unfurls to reveal a luxurious ribbon of tangy cream cheese and bright, sun-kissed strawberries. As you slice, the layers peel apart with a gentle sigh, releasing a fragrance of warm vanilla, fresh berries, and a whisper of lemon that brightens every bite. The first mouthful is at once creamy and airy, the sweetness balanced by a tart kiss of fruit, and the finish lingers with a creamy-smooth finish that invites another slice. It’s a dessert that feels special enough for celebrations, but approachable enough for a weeknight treat. The moment this roll arrives at the table, it becomes a story you tell with your fork.

The Story Behind the Dish

The idea of rolling delicate cake with a creamy filling has its roots in classic Swiss roll and roulade traditions, where bakers learned to coax light textures into elegant, portable desserts. Cheesecake, with its velvety filling, has long been a symbol of celebration and indulgence, often associated with family gatherings and festive occasions. The Strawberry Cheesecake Roll marries these two beloved concepts into a contemporary favorite that feels both nostalgic and fresh. In many homes, the ritual of slicing a prepared roll becomes a shared moment—photos snapped, forks poised, a chorus of delighted “mmm”s as the bright strawberry aroma wafts through the room. The dish is a nod to seasonal fruit, a celebration of simple pantry staples, and a reminder that a few well-chosen ingredients can deliver a result that looks as spectacular as it tastes. The name alone evokes summer gardens, outdoor parties, and the satisfying spectacle of a roll that holds its own on a dessert table. For bakers, it’s a dish that invites variation: swap in blueberries at the height of berry season, swap lemon for orange zest, or tuck a touch of almond extract into the filling for a nutty sotto voce note.

Why You’ll Love This Recipe

  • Effortless elegance: A roll presentation that looks impressive without requiring intricate piping or stacking.
  • Balanced texture: A tender, airy sponge enveloping a creamy, luscious filling with bursts of strawberry brightness.
  • Make-ahead friendly: The roll can be assembled in advance and chilled, making entertaining easier and stress-free.
  • Versatile for seasons: Use fresh berries when in season, or a glossy jam to capture that same fruity glow year-round.
  • Comforting yet light: It delivers the comforting sensation of cheesecake with the lightness of a sponge cake, ideal for dessert menus and family dinners alike.
  • Idea-friendly for customization: The filling can be tweaked with citrus zest, a splash of vanilla, or a hint of liqueur to tailor the flavor portrait.

Flavor Profile & Texture

The Strawberry Cheesecake Roll is a symphony of contrasts that come together in every bite. The sponge cake forms a pale, pale-gold blanket—soft, springy, and delicate, with a whisper of vanilla and a touch of lemon zest that brightens the palate. Inside, the cream cheese filling is luxuriously smooth and lightly sweetened, a refined tang that cuts through the sweetness with a clean, almost creamy edge. The strawberries—whether fresh or jammed—provide a fruity, sun-ripened sweetness that shines through, their juices weaving through the filling as you bite. When the roll is sliced, you encounter a visual cross-section: a pale roll crowned with a pink kiss of berry, the cream cheese swirled in generous ribbons that catch the light. The textures contrast harmoniously: the sponge yields to a creamy center, while the fruit notes carry a lively acidity that refreshes the mouth. The overall flavor profile is bright, comforting, and celebratory, with a lingering finish that hints at vanilla and a delicate tartness from the berries. This dessert strikes a balance between indulgence and restraint, making it suitable for a wide range of menus—from casual family dinners to special occasions.

Occasions & Pairings

The Strawberry Cheesecake Roll shines in many settings. Its portable, sliceable nature makes it ideal for gatherings, picnics, and potlucks, where guests can easily serve themselves without needing heavy utensils or plating. It also fits beautifully on weekend brunch menus as a dessert option that pairs surprisingly well with coffee or a sparkling beverage. For holiday tables, a dusting of powdered sugar and a few edible flowers can elevate its presentation without complicating the preparation. Pairing suggestions to enhance the experience:

  • Pair with a light dessert wine or a glass of rosé to echo the berry theme without overpowering the delicate flavors.
  • Serve alongside a simple fruit compote or a dollop of whipped cream for extra creaminess.
  • Pair with a citrusy note—orange zest or a splash of Grand Marnier in the filling can lift the flavors beautifully.
  • For brunch or afternoon tea, add a side of fresh berries and a sprig of mint for a refreshing contrast.
  • In warmer weather, serve slightly chilled to emphasize the cake’s delicate, airy character.

Ideal Occasions

Mother’s Day breakfasts, bridal or baby showers, summer garden parties, weekend family dinners, Valentine’s Day celebrations, and any time you want a dessert that feels special without being overly heavy.

Tips, Variations & Substitutions

  • Make it lighter: Use a sponge base made with whipped egg whites folded into batter to yield an even lighter texture. You can also substitute part of the filling with whipped cream to introduce a lighter airiness.
  • Dairy-free option: Swap in dairy-free cream cheese and a non-dairy butter substitute for the filling. Use a coconut cream-based mix for extra richness if desired, keeping the tang with a dairy-free cream cheese alternative.
  • Gluten-free version: Choose a gluten-free sponge mix or a genoise adapted with almond or rice flour. Ensure the roll remains tender by balancing moisture with a touch more liquid in the batter, if needed.
  • Fruit variations: Blueberries, raspberries, or a mix of berries can replace strawberries. For a seasonal twist, orange zest or lime zest can brighten the filling and complement the fruit’s acidity.
  • Nutty accents: Finely ground pistachios or sliced almonds folded into the filling or sprinkled on top add texture and a subtle nutty note.
  • Flavor boosters: A splash of vanilla extract, a pinch of almond extract, or a whisk of lemon zest can elevate the taste without complicating the recipe.
  • Make-ahead variations: Assemble up to the rolling stage and refrigerate the sponge wrapped tightly. Fill and roll just before serving for a crisp, fresh texture, or assemble fully and chill to set the filling for cleaner slices.

Storage & Make-Ahead Ideas

The beauty of a roll lies in its adaptability to make-ahead planning. After assembling and chilling, the Strawberry Cheesecake Roll will typically hold its structure well for a day or two when kept tightly wrapped or stored in an airtight container in the refrigerator. If you prefer warmer flavors, you can slice portions and quickly reheat individual pieces in a gentle manner, just until the sponge is slightly warmed and the filling reaches a luxurious, soft state—though be mindful not to overheat, which can soften the roll too much. For longer storage, you may freeze slices, individually wrapped, for a quick dessert option on busy days. Thaw at room temperature or in the refrigerator for a few hours before serving to regain their soft, creamy center. If you freeze, consider adding a fresh strawberry garnish after thawing to refresh the visual appeal and brightness of the fruit flavor. Spare tips: keep the roll away from strong-smelling foods in the fridge, as the cream cheese can absorb odors, and serve within a few days for the best texture and flavor.

Fun Facts & Trivia (Optional)

  • The concept of rolling sponges with fillings goes back centuries in European patisserie, where bakers used flat sheets of cake to encase creams and fruit, turning humble desserts into elegant showpieces.
  • Strawberries are among the earliest fruit picked in many cultures’ growing seasons, symbolizing sweetness, abundance, and celebration—making them a natural partner for cheesecake in celebratory desserts.
  • Cheesecake itself has a universal appeal that spans centuries and continents; this roll version highlights how a traditional idea can be transformed into something playful, portable, and modern.
  • In some cuisines, citrus zest is used to cut through richness; in this dessert, a touch of lemon or orange zest acts like a refreshing bright note that awakens the palate between bites.
  • Roll cakes can be a practice in restraint and precision; achieving a clean cut reveals the icing-silk swirl inside, a moment of culinary theater that delights both eyes and taste buds.

Ingredients

Strawberry Cheesecake Roll
– Vanilla Sponge Cake Layer

  • 4 large eggs, room temperature
    → Eggs provide the primary structure and moisture for the sponge roll. Room-temperature eggs whip to a higher volume, creating a lighter, tender crust that rolls without cracking. Let the eggs sit out about 30 minutes before mixing and avoid overmixing once the dry ingredients are added to preserve the batter’s airy texture.
  • 3/4 cup granulated sugar
    → Sugar acts as the main aerator when beaten with the eggs, helping to leaven the cake and create a soft crumb. Add gradually and whip until the mixture is pale, thick, and forms ribbons when lifted. For an even lighter crumb, use superfine sugar if available.
  • 1 teaspoon vanilla extract
    → Adds depth and aroma to the delicate sponge. Use pure vanilla for the best flavor; add with the eggs before incorporating the dry ingredients to ensure even distribution throughout the batter.
  • 1 cup all-purpose flour, spooned and leveled
    → Provides the structure of the sponge. Sift the flour with the other dry ingredients to remove lumps and fold gently into the egg mixture to keep the batter airy. Overmixing after adding flour can deflate the batter.
  • 1 1/2 teaspoons baking powder
    → Leavening that helps the sponge rise during baking, producing a light, rollable sheet. Ensure the powder is fresh for optimum lift and distribution by whisking it with the dry ingredients before combining with the wet mix.
  • 1/4 teaspoon salt
    → Enhances overall flavor and balances sweetness; distribute evenly in the dry mix to ensure a uniform bite and taste throughout the sponge.
  • 2 tablespoons unsalted butter, melted and cooled
    → Adds richness and tenderness to the crumb. Fold the cooled melted butter into the batter after the dry ingredients are incorporated if you want a slightly richer roll. If avoiding dairy, substitute with a neutral oil and adjust moisture slightly.

– Cream Cheese Filling

  • 12 oz cream cheese, softened
    → The tangy, creamy core of the filling. Soften at room temperature until completely smooth (about 1–2 hours, or 20–30 minutes in a warm spot) to avoid lumps. Beat until silky, then fold in the whipped cream for lightness.
  • 1/2 cup powdered sugar
    → Sweetens the filling and helps it set without becoming runny. Sift to remove clumps and whisk into the cream cheese until smooth before incorporating whipped cream to maintain a glossy texture.
  • 1 teaspoon vanilla extract
    → Enhances the cream cheese flavor; use pure vanilla for best aroma. Add to the cream cheese before folding in the whipped cream to ensure even distribution.
  • 1 cup heavy cream, cold
    → Whips into light, airy texture to fold into the cream cheese for a cheesecake-like filling. Chill the bowl and beaters, whip to soft peaks, then fold carefully to maintain volume without splitting.

– Strawberry Components

  • 2 cups fresh strawberries, hulled and sliced
    → Provide vivid flavor, color, and texture. Slice evenly so they distribute well when rolling. For a more intense strawberry taste, macerate the slices with 1–2 tablespoons granulated sugar for 10–15 minutes and drain excess juice to avoid soggy sponge.
  • 1–2 tablespoons granulated sugar, for macerating (optional)
    → Draws out berry juices and sweetens slightly, intensifying strawberry flavor. Drain the excess liquid after maceration to prevent sogginess in the roll.

– Finish and Finish-Within (Assembly)

  • 1/4 cup strawberry jam or preserves (optional)
    → Adds an extra layer of strawberry flavor and moisture. If using, spread a thin, even layer on the cooled sponge before rolling to improve adhesion and prevent cracking. Warm jam slightly to loosen, then strain seeds if a smoother finish is desired.
  • Confectioners’ sugar for dusting
    → Finishes the roll with a light, decorative coating. Dust lightly after slicing to enhance presentation and help prevent surface sticking.
  • Fresh strawberries for garnish (optional)
    → Extra berries improve the visual appeal when serving. Choose firm, bright berries and refrigerate until ready to plate for the best appearance and texture.

Instructions

  • Preheat your oven to 350°F (175°C) and line a 15×10-inch jelly roll pan with parchment paper, then lightly grease the parchment to prevent sticking.
    → A prepared pan ensures a uniform cake sheet that rolls smoothly without tearing, and parchment gives an easy, clean release.
  • Bring eggs to room temperature by leaving them out for about 30 minutes, then measure 4 large eggs and plan to whisk them with the sugar.
    → Room-temperature eggs whip to a higher volume, creating a lighter, more stable sponge that rolls without cracking.
  • Sift together 1 cup all-purpose flour, 1 1/2 teaspoons baking powder, and 1/4 teaspoon salt in a medium bowl, then set aside.
    → Sifting evenly distributes leavening and salt, prevents lumps, and helps the sponge rise uniformly for a tender crumb.
  • In a large mixing bowl, whisk 4 eggs with 3/4 cup granulated sugar on high speed until the mixture is pale, thick, and forms glossy ribbons, then beat in 1 teaspoon vanilla extract.
    → Whipping the eggs with sugar builds air for volume; vanilla enhances aroma and depth of flavor distributed evenly through the batter.
  • Gently fold the dry ingredients into the egg mixture in three additions, using a spatula with a light hand to maintain air and prevent overmixing.
    → Folding preserves the delicate foam and yields a soft, tender sponge that can be rolled without tearing.
  • If using melted butter, gradually drizzle 2 tablespoons of cooled melted butter into the batter while folding, mixing just until you see the fat incorporated.
    → The fat adds richness and moisture; cool the butter first to avoid cooking the eggs and deflating the batter.
  • Spread the batter evenly in the prepared pan with a small offset spatula, smoothing to a uniform thickness across the entire surface.
    → An even layer ensures consistent bake and prevents thin edges that crack when rolling.
  • Bake the sponge for 10–12 minutes, or until the surface springs back when gently touched and the edges pull away from the parchment.
    → Proper doneness yields a pliable sheet that rolls around the filling without cracking.
  • Meanwhile, prepare a clean kitchen towel and dust a generous layer with confectioners’ sugar, laying it flat on the counter to ready for rolling the warm sponge.
    → The sugared towel prevents sticking and creates a smooth surface for a neat roll once the cake is baked.
  • When the cake is done, carefully lift the pan from the oven and loosen the edges, then invert the cake onto the sugared towel, gently peeling away the parchment.
    → Inverting onto the towel immediately helps shape the roll and keeps it from sticking, while removing parchment ensures a clean surface for rolling.
  • While the sponge is still warm, roll it up inside the towel from the short side to form a tight cylinder, then set aside to cool completely on a rack.
    → Rolling while warm helps set the shape and prevents cracking later; cooling completely keeps the roll stable during filling.
  • Prepare the cream cheese filling by beating 12 oz cream cheese with 1/2 cup powdered sugar and 1 teaspoon vanilla extract until smooth and creamy, then fold in 1 cup cold heavy cream that has been whipped to soft peaks.
    → This creates a light, cheesecake-like filling with the right consistency to spread evenly without sliding, while keeping a glossy texture.
  • Chill the filling briefly for easier spreading, at least 15 minutes, to help it hold its shape during assembly.
    → Chilling firms the texture so the filling stays put and doesn’t bleed into the sponge when rolled.
  • Macération 2 cups fresh strawberries by huling and slicing them, then optional: toss with 1–2 tablespoons granulated sugar and let sit for 10–15 minutes to intensify flavor; drain any excess juice before use.
    → Maceration intensifies strawberry flavor and the drained juice prevents soggy layers in the roll.
  • If you choose to use strawberry jam, warm 1/4 cup gently to loosen and strain seeds if you prefer a smoother finish; otherwise proceed with the fresh strawberry filling.
    → A thin jam layer adds moisture and additional strawberry perfume without overwhelming the filling.
  • Unroll the cooled sponge carefully and remove the towel, then place the cake on a clean work surface with the long edge facing you.
    → Unrolling without tearing preserves the cake’s integrity for a clean roll and even filling distribution.
  • Spread a thin, even layer of jam (if using) or skip to spread the prepared cream cheese filling across the sponge in an even rectangle, leaving about 1 inch at the far edge to seal.
    → A uniform spread prevents gaps and ensures a smooth, cohesive roll with a visible seam.
  • Distribute the cream cheese filling over the surface in an even layer, then scatter the macerated strawberries across the filling in a single, uniform layer.
    → Even distribution of filling and fruit ensures balanced bite and color in every slice.
  • Re-roll the sponge tightly from the near edge into a log, using the towel if needed to help shape, and seal the seam by pinching gently. Chill the assembled roll for at least 1–2 hours to set.
    → Chilling solidifies the filling and makes slicing cleanly easier, while the roll holds its cylindrical form.
  • Just before serving, dust the roll lightly with confectioners’ sugar and garnish with fresh strawberries as desired for a polished presentation.
    → The sugar adds a decorative finish and a brief sweet counterpoint to the creamy filling, while fresh berries enhance color and aroma.

Notes

These Strawberry Cheesecake Roll notes guide you to a show-stopping dessert with a tender vanilla sponge wrapped around a creamy strawberry cheesecake filling. For best results, start with room-temperature eggs so the batter whips up light and smooth; beat eggs with sugar until pale, thick, and ribbons form when you lift the beaters. Sift the flour with baking powder and salt, then gently fold it into the egg mixture along with vanilla and cooled melted butter to keep the crumb soft. Bake on a parchment-lined sheet until set, then while still warm, carefully roll the sponge in a clean kitchen towel or parchment to form a tight cylinder, which helps prevent cracking as it cools. Let the sponge cool completely before filling.

Filling: In a mixer, beat softened cream cheese with powdered sugar and vanilla until silky; whip cold heavy cream to soft peaks and fold gently into the cream cheese mixture to create a light, cheesecake-like filling that holds its shape when rolled. Chill the filling briefly if needed to keep it firm enough to spread.

Strawberry components: Use 2 cups fresh strawberries, hulled and sliced evenly; for deeper strawberry flavor, macerate with 1–2 tablespoons granulated sugar for 10–15 minutes and drain any excess juice so the roll doesn’t become soggy. You may optionally warm the strawberry jam briefly to loosen, then strain seeds for a smoother layer if using jam as a filling or finish.

Assembly and finish: Once the sponge is completely cool, spread a thin layer of optional jam on the surface, then spread the filling evenly, leaving a small border. Arrange the sliced strawberries along the filling, then roll the sponge tightly using the towel or parchment as a guide; pinch the seam and refrigerate the roll for at least 1–2 hours to set. Dust with confectioners’ sugar and garnish with extra fresh berries before serving. To adapt for gluten-free or dairy-free diets, substitute the flour with a gluten-free blend and use a dairy-free cream cheese and whipped topping alternative.

Tips

General tips for best results

  • Prepare and measure everything in advance. Having the eggs at room temperature, measured flour sifted, and butter cooled but not hard will help the batter mix smoothly and bake evenly.
  • Line your baking pan well. Use a rimmed sheet pan with parchment, and lightly grease the parchment to prevent the sponge from sticking and tearing when you roll it.
  • Keep a light touch. When folding in dry ingredients or whipped cream, use gentle, deliberate motions to preserve air and prevent a dense roll.

Sponge cake tips (Vanilla Sponge Layer)

  • Whip eggs and sugar until the mixture is pale, thick, and falls in ribbons when you lift the batter. This aeration is key to a tender, rollable sponge.
  • Sift the flour with the baking powder and salt; add in two or three additions, folding just until combined to keep the batter airy.
  • Gently fold in the cooled melted butter (if using) at the very end to add richness without deflating the batter. If you skip the butter, you can substitute with a neutral oil and adjust moisture slightly.
  • Avoid overbaking. Check for a slight spring back in the center and rotate the pan halfway through to ensure even browning. Overbaking makes the sponge prone to cracking when rolled.
  • For easier rolling, bake on a sheet pan and, while warm, roll the sponge in a clean kitchen towel dusted with powdered sugar. Let it cool completely in the towel to set the shape.

Cream cheese filling tips

  • Softened cream cheese blends smoothly to a lump-free base. Soften at room temperature for 1–2 hours or 20–30 minutes in a warm spot, then beat until silky.
  • Gradually add powdered sugar and vanilla, beating until glossy and smooth before folding in whipped cream. This prevents a grainy texture and helps the filling set nicely.
  • Whip the heavy cream to soft peaks and fold it in gently to keep the filling light and cheesecake-like. Do not overbeat, or the cream may separate.
  • Chill the filling briefly if it’s too soft before spreading on the cake to prevent sliding or ooze when rolling.

Strawberry components tips

  • Prepare the strawberries evenly sliced for uniform distribution inside the roll. If you macerate them with sugar, let them sit 10–15 minutes and drain excess juice to avoid soggy sponge.
  • If you want a more intense strawberry flavor, macerate with a bit more sugar and optionally a splash of lemon juice, but drain well before use.
  • Reserve some fresh slices to distribute with the filling for texture and color contrast.

Assembly, rolling and finishing tips

  • Spread a thin, even layer of strawberry jam on the cooled sponge before adding the filling to improve adhesion and moisture distribution. Warm jam slightly to loosen, and strain seeds if a smoother finish is desired.
  • Spread the cream cheese filling evenly over the sponge, leaving a small margin at the edges to prevent overflow when rolling.
  • Roll tightly using the parchment or towel to guide the roll. A tight roll yields cleaner slices and reduces the chance of cracks.
  • Chill the rolled cake for at least 1–2 hours to set the filling and make slicing easier. Wipe the knife between cuts for clean, neat slices.
  • Finish with a light dusting of confectioners’ sugar and garnish with fresh strawberries for a polished presentation.

Make-ahead, storage and serving tips

  • Store the rolled cake wrapped tightly in plastic or in an airtight container in the refrigerator. It’s best consumed within 2–3 days for optimal texture and flavor.
  • If freezing, wrap well and thaw in the refrigerator overnight; the texture may be slightly softer but still delicious.
  • For clean slicing, use a sharp, warmed knife (dip in hot water and wipe dry between cuts) to minimize sticking and tearing.

FAQ

What ingredients do I need to make a Strawberry Cheesecake Roll?
  • For the cake (genoise-style sponge): 4 large eggs, 2/3 cup granulated sugar, 1 teaspoon vanilla extract, 1/2 cup all-purpose flour, 1 tablespoon cornstarch, pinch of salt.
  • For the cream cheese filling: 8 oz (225 g) cream cheese, 1/3 cup powdered sugar, 1 teaspoon vanilla extract, 1 cup heavy whipping cream.
  • For the strawberry filling: 1 cup fresh strawberries, 2 tablespoons granulated sugar, 1 teaspoon lemon juice (optional), 1 tablespoon cornstarch (optional, to thicken).
  • To finish: extra strawberries for garnish or a light dusting of powdered sugar.
Can I use store-bought cake instead of baking a sponge?

Yes. You can use a store-bought sponge cake, sheet cake, or a pre-made Swiss roll. If using a rolled cake, unroll it gently, trim to a rectangle, and proceed. If using a sheet cake, place it on parchment and trim to a suitable size (around 9×13 inches) before filling and rolling.

How do I roll the cake without cracking?

Roll the warm cake around a clean kitchen towel or parchment paper to shape. Let it cool completely in the rolled form. This helps set the structure. When unmolding to fill, handle gently and avoid lifting with a hard roll.

How do I make the cream cheese filling?

Beat the cream cheese with powdered sugar and vanilla until smooth. In a separate bowl, whip the heavy cream to soft peaks, then fold it into the cream cheese mixture until evenly blended. Chill the filling until ready to use.

How do I prepare the strawberry filling?

In a small saucepan, simmer the sliced strawberries with sugar and lemon juice until they release juices and soften. If you want a glaze-like filling, whisk a slurry of 1 teaspoon cornstarch with 1 tablespoon water and stir in; simmer until thickened. Let the mixture cool completely before filling.

How do I assemble and chill the roll?

Unroll the cooled cake. Spread an even layer of the cream cheese filling, leaving about a 1/2-inch border. Top with the cooled strawberry filling. Re-roll tightly using the parchment or towel. Wrap and refrigerate for 1–2 hours (or overnight) to set. Slice to serve.

How long does it take to make this recipe?

Active time is about 30–40 minutes (baking and filling). Chilling time is 1–2 hours (or longer if desired). Total time including chilling is typically 2–3 hours, depending on how long you chill.

How should I store leftovers?

Store leftovers refrigerated in an airtight container or wrapped slice by slice. Best within 2–3 days. For longer storage, freeze individual slices and thaw in the fridge before serving.

Can I adapt this recipe for gluten-free or dairy-free diets?

Yes. For gluten-free, use a 1:1 gluten-free flour blend in place of all-purpose flour. For dairy-free, substitute dairy-free cream cheese and a dairy-free whipped cream (or coconut cream). Ensure the strawberry filling uses a dairy-free sweetener. Texture may differ slightly.

Any tips or common mistakes to avoid?

Tips: avoid overbaking the sponge; ensure the cake is completely cooled before filling; spread fillings evenly and keep within borders to prevent leakage; roll tightly but not crush; if cracks occur, patch with a little filling and dust with powdered sugar to disguise.