Introduction / Hook
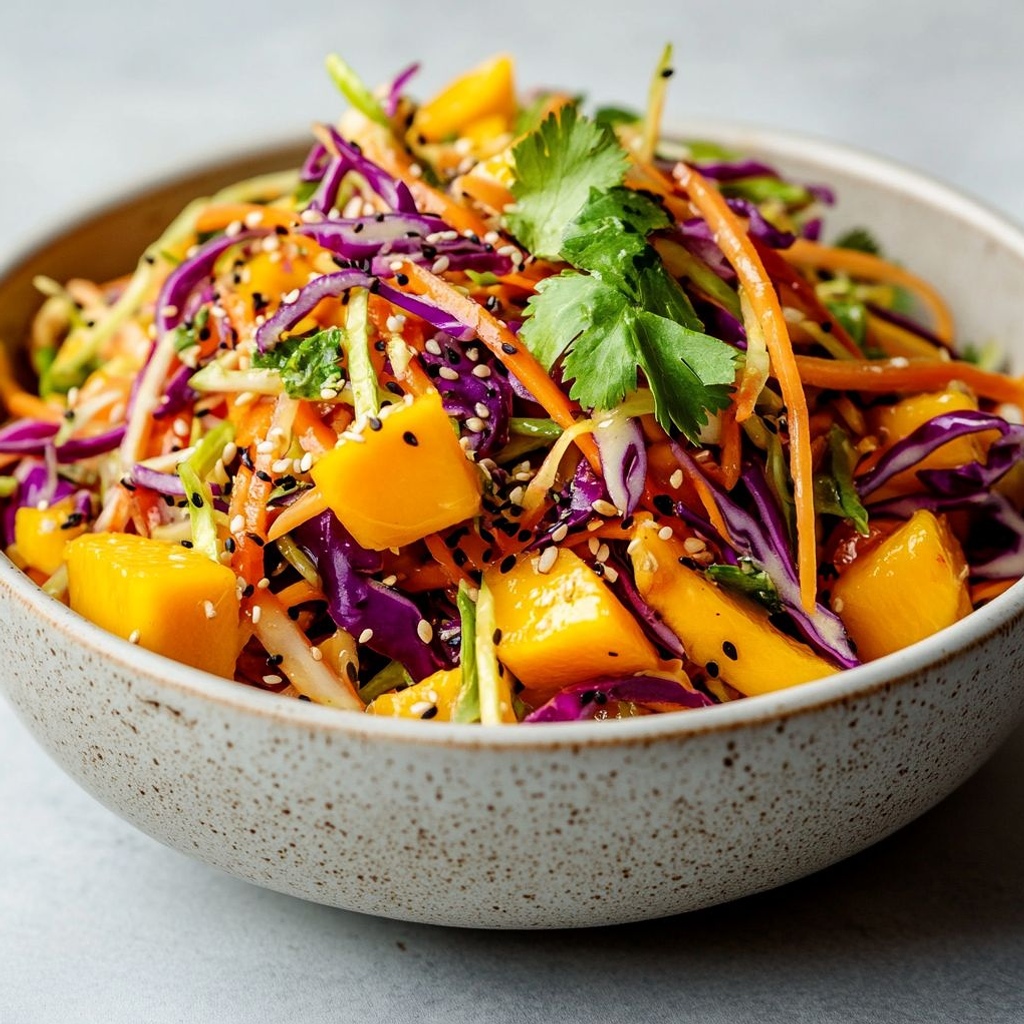
Sun-kissed and soul-warming, this vibrant Mango Slaw is the kind of dish that makes a summer afternoon feel immediately brighter. Imagine a bowl that captures the brightness of a tropical breeze: a burst of sunshine-orange sweetness mingling with crisp, cool greens, all awakened by a zippy, citrusy kiss and a whisper of heat. It’s the kind of side dish that looks almost too good to eat, then vanishes in a matter of minutes because its irresistible textures and flavors demand to be tasted again and again. This isn’t merely a slaw; it’s a celebration in a bowl, a quick concerto of contrasts that transforms ordinary weeknights into small holidays. The beauty of Mango Slaw lies in its versatility, its ability to adapt to whatever main you’re serving, and its power to elevate a simple plate into something memorable. It invites you to take a bite and close your eyes, imagining sun-warmed produce, the scent of fresh herbs, and the sound of a light crunch with every mouthful. You’ll notice how the dish changes with the day: when the air is humid, it feels refreshing and crisp; when the breeze turns cooler, its tangy brightness lingers, like a memory of summer that’s still fresh on the palate. And the best part: it comes together quickly, with a sense of fun and play that makes you feel like you’re tapping into a shared secret of radiant, seasonal eating.
The Story Behind the Dish
Food stories are rarely linear, and Mango Slaw is no exception. It grew from the timeless kitchen truth that fruit can brighten almost any outcome, that a handful of crisp vegetables can be elevated by a kiss of brightness and a hint of heat, and that textures and colors—softness, crunch, tang, and sweetness—play with the senses the way a good song plays with memories. The fondness for tropical fruit in slaws has long roots in coastal and market cultures around the world, where stalls spill over with color and aroma, inviting cooks to improvise. In many regions, cooks learned to pair the sweetness of ripe fruit with the sharp bite of citrus and the earthiness of greens, creating a balance that feels both comforting and playful. Mango, with its sunny brightness and buttery richness, became a natural star in these riffs. Its versatility invites cooks to experiment: a slaw that can dress up a bowl of grilled fish, a taco night, or a simple weeknight chicken platter; a dish that can be prepared in minutes yet carries the impression of something crafted with care and intention.
In this version, the idea is to honor that tradition while giving you a modern, approachable take. The dish leans into bright acidity, satisfying crunch, and a bouquet of fresh herbs, all of which echo the spirit of street-food markets and family gatherings where everyone gathers around a shared plate and swaps stories as they pass the spoon. It’s the kind of recipe that travels well: it fits into a picnic basket, a lunchbox, or a casual supper, and its charm lies not in perfection but in personality—the little singsong of flavors that makes you smile and reach for seconds without hesitation. If you’ve ever wanted a dish that feels festive yet effortless, this Mango Slaw offers both: it looks dazzling on the table, and its flavors are instantly familiar, inviting you to lean in and savor the moment.
Why You’ll Love This Recipe
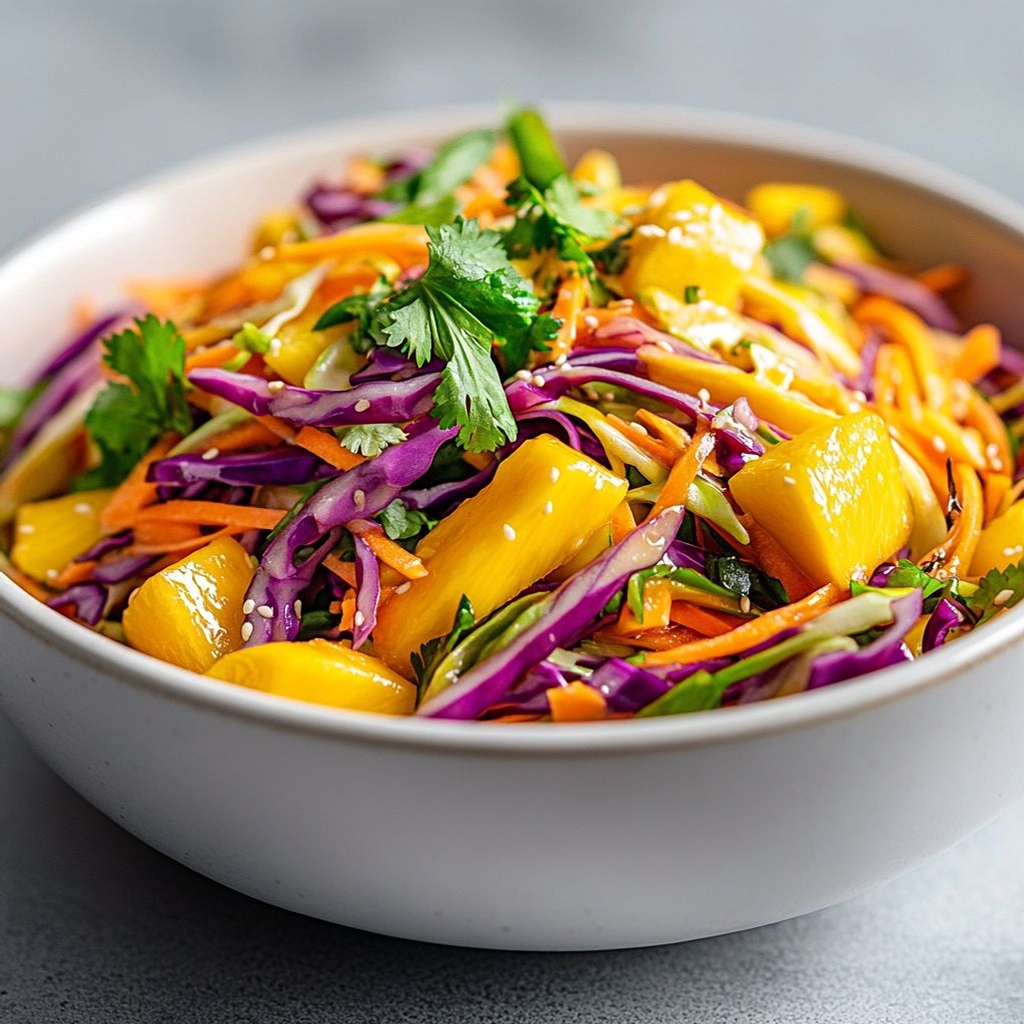
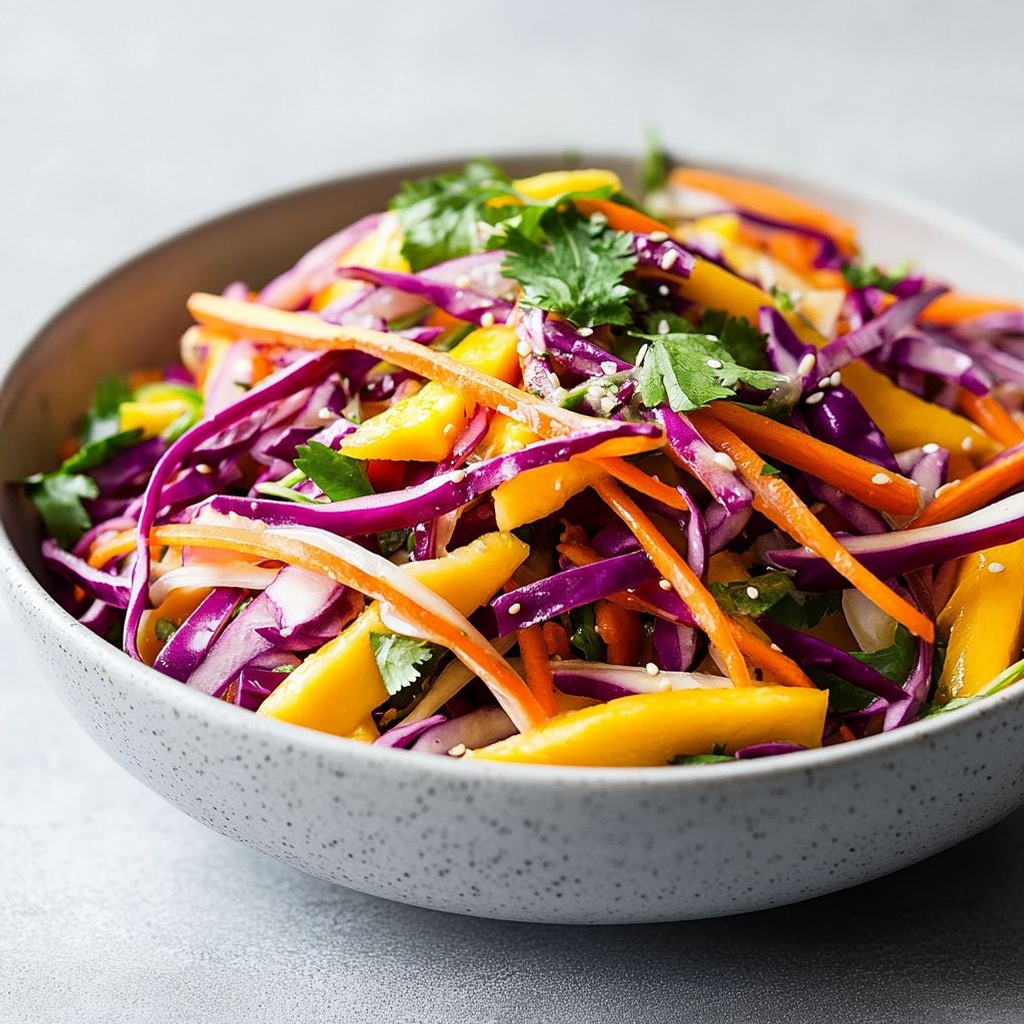
- Bright, eye-catching color that instantly elevates any plate and photography-worthy for sharing.
- Fast to assemble, making it ideal for busy weeknights, potlucks, and last-minute gatherings.
- Versatile pairing that complements a wide range of proteins and dishes without overpowering them.
- Light yet satisfying, offering a refreshing contrast to heavier mains like fried items or rich meats.
- Customizable to suit dietary needs or flavor preferences, from milder to spicier, and from vegan to gluten-free profiles.
- Excellent for meal-prep: the flavors meld beautifully as it rests, keeping a crisp edge when dressed lightly and stored properly.
- Seasonal-friendly—made for mango season but adaptable to other fruits when mango isn’t in peak, ensuring year-round appeal.
Flavor Profile & Texture
Think of Mango Slaw as a carefully orchestrated balance of contrasts. The first impression is a tropical sweetness—soft, fragrant, and lush—that dances with a bright acidity that wakes up the palate. This citrusy lift acts like a spark, cutting through the sweetness and giving the dish a clean, refreshing edge. The texture is where the magic happens: the greens and crisp vegetables provide a satisfying crunch that makes every bite lively, while the fruit offers a tender, juicy contrast that feels almost indulgent in its smoothness. There’s a whisper of heat or a mild kick depending on the chosen level of spice, which adds depth without overwhelming the fruit’s natural brightness. Herbaceous notes—freshness from greens and aromatic elements—bring a fragrant lift that lingers on the tongue, inviting another mouthful. The overall experience is bright, crisp, and uplifting, a little sweet, a little tangy, with a savory-salty undertone that makes you return for more.
To imagine the flavor without naming ingredients, picture a bowl that begins with a sunny sweetness, then introduces a tart, almost citrus-like brightness that makes your lips pucker in a pleasant way. A crisp, cool crunch immediately follows, like a freshly laundered textile dancing in a light breeze. A subtle warmth peeks through, reminiscent of a gentle heat that does not shout but speaks softly to the appetite. Finally, there’s a fresh orchard-like aroma from herbs that makes the dish feel alive and present rather than passive. The result is a modern side dish that pairs beautifully with many flavors, whether it’s a smoky grilled main, a delicate seafood platter, or a hearty weeknight staple seeking a lift. It’s not merely a side; it’s a bright, textural celebration that knows how to play well with others on the plate.
Occasions & Pairings
This Mango Slaw shines in social settings and everyday meals alike. It’s a surefire crowd-pleaser for warm-weather occasions and works beautifully as a bright counterpoint to richer dishes. Use it as a cooling side for spicy mains, a refreshing counterpoint to fried or crispy items, or a vibrant topping to add a crisp, tangy element to sandwiches and bowls. It also makes a friendly, make-ahead option for gatherings where you want to offer something vibrant without a lot of last-minute effort. Here are ideas to inspire your menu planning:
- Summer barbecues and cookouts, where its refreshing bite contrasts with smoky grilled proteins.
- Taco nights or fish tacos, where its brightness complements citrusy, zesty fillings and adds texture to each bite.
- Picnics and potlucks, thanks to its sturdy crunch and ability to transport well in a sealed container.
- Weeknight dinners that benefit from a quick, colorful side to balance a weeknight main.
- Brunch accompaniments, offering a lively option that stands up to creamy or savory dishes on the table.
Pairings can elevate the dish further. Consider serving alongside grilled or roasted proteins—particularly light fish, shellfish, or poultry. It also pairs well with grain bowls, roasted vegetables, or fresh, dairy-friendly spreads that echo its brightness. For drinks, light and refreshing beverages like citrusy sparkling waters, iced herbal teas, or a crisp white wine can mirror the dish’s lift without competing with its flavors. If you’re leaning into a cultural fusion theme, this slaw can bridge flavors from different cuisines: a squeeze of citrus and a handful of fresh herbs can unify the plate and celebrate global inspirations in one simple bite.
Tips, Variations & Substitutions
Every cook loves a few flexible levers to tailor a dish to the moment. Here are ideas to customize Mango Slaw while preserving its bright essence and crunchy charm. These suggestions are designed to be practical, quick, and friendly to different dietary needs or pantry situations.
Tips for Success
- Choose fruit that gives a gentle yield to pressure but isn’t mushy. The right ripeness ensures sweetness without overwhelming juiciness that can water down the dressing or texture.
- Maintain the crunch by adding the greens and any root vegetables last if you’re preparing ahead. This helps keep the slaw crisp even after a brief rest.
- If you want a more pronounced dressing flavor, consider a slightly longer rest before serving to allow the tang to permeate the crunchy components—but don’t let it sit too long if you’re aiming for maximum crunch.
Make It Spicy, or Keep It Gentle
- For a milder version, minimize or omit any heat elements. The dish remains vibrant and refreshing without the kick.
- For a bolder profile, introduce a bit more heat using a sliced chili, or a pinch of chili flakes. The heat should feel integrated, not overpowering, so start small and adjust to taste.
Dietary Variations
- Vegan and vegetarian-friendly by default; ensure any dressing components are plant-based if you’re swapping for other dressings or flavor enhancers.
- Gluten-free options are natural if you use gluten-free flavor boosters or simply rely on citrus and herbs for brightness.
- Low-sugar or lower-sugar adaptations can be achieved by balancing sweetness with acidity and keeping portions moderate in terms of fruit presence for those watching sugar intake.
Regional Twists & Flavor Twists
- Latin-inspired notes: a dash of a tangy, fruit-forward dressing with a hint of coriander seeds or similar spices can echo regional flavors without changing the core concept.
- Asian-inspired riff: a touch of sesame oil and a light splash of vinegar can introduce an umami-savory depth that pairs well with grilled proteins.
- Caribbean vibe: a light, fragrant blend of herbs with a pinch of salt and a citrus zest can brighten the dish and connect with coastal cooking traditions.
Storage & Make-Ahead Ideas
Proper storage helps preserve the texture and brightness that define this dish. Here are practical guidelines to keep Mango Slaw at its best when you’re preparing ahead or planning for leftovers.
- Make-ahead: When you’re preparing a batch for a gathering or meal-prep, consider keeping the greens and fruit components separate from the dressing until serving time. Toss just before serving to preserve crunch and color.
- Storage: Store in an airtight container in the refrigerator. For best results, consume within 1–2 days. The longer it sits, the more the texture may soften and the color may shift slightly, but many people still enjoy it beyond the first day due to the lively flavors.
- Separation: If the mixture begins to separate, a quick toss or whisk can re-emulsify the dressing and bring back the cohesive, glossy appearance the dish benefits from.
- Freezing: Not recommended for this dish as the texture may become soggy and the vibrant crunch may be compromised once thawed.
Fun Facts & Trivia (Optional)
Delightful snippets that may inspire conversation around your table or in your kitchen space:
- The fruit at the heart of this dish is celebrated worldwide for its versatility and is often called the “king of fruits” in some cultures due to its widespread appeal and cultural significance.
- Historically, slaws have been a global culinary technique—shredded vegetables dressed in simple, bright dressings that honor the fresh produce of the season and highlight textures on the palate.
- Color theory on the plate matters: the bright hues of this dish not only taste vibrant but also visually signal freshness and seasonality, making it a popular choice for photography, social sharing, and table appeal.
- Texture matters as much as flavor: the crispness of the base and the juicy, almost melting fruit create a multi-sensory experience that keeps guests reaching for more, encouraging conversation and connection around the table.
Ingredients
Mango Slaw
Slaw Base
- 4 cups shredded green cabbage
→ Cabbage provides the crisp, crunchy backbone of the slaw. Shred finely or medium-thin so it mixes evenly with the dressing. Remove the tough core; rinse and dry well if needed. For best texture, use a sharp knife or a mandoline to achieve uniform pieces. - 2 cups shredded red cabbage
→ Red cabbage adds color, a slightly peppery note, and extra crunch. Prepare as with the green cabbage: remove the core and shred to a consistent thickness so it tosses evenly with the other ingredients. Store leftovers in a sealed container to keep color. - 1 large carrot, julienned or shredded
→ Carrot brings sweetness and vibrant color; choose a uniform thickness for even mixing. Julienne for classic slaw texture or shred for a softer crumble. Peel if desired and pat dry after shredding to avoid extra moisture. - 1 ripe mango, diced
→ Mango adds tropical sweetness and a creamy contrast to the crunch. Choose mangoes that yield to gentle pressure but aren’t mushy; dice into roughly 1/2-inch cubes for even distribution. Toss gently to avoid mashing the fruit. - 1/2 small red onion, thinly sliced
→ Red onion provides brightness and bite. Slice very thin to distribute flavor in every bite; to mellow its edge, soak the slices in cold water for 5–10 minutes and drain well before mixing. - 1/4 cup fresh cilantro leaves, chopped
→ Cilantro adds fresh, citrusy brightness that lifts the entire slaw. Chop leaves and tender stems to release flavor; if you’re sensitive to cilantro, substitute with flat-leaf parsley for a milder herb note or omit entirely.
Dressing
- 3 tablespoons fresh lime juice
→ Lime juice provides the acidity to balance the natural sweetness of mango and the crunch of cabbage. Use freshly squeezed juice for a bright, clean tang and strain to remove seeds or pulp if desired. Adjust to taste depending on the juiciness of the limes and the ripeness of the mango. - 2 tablespoons extra-virgin olive oil
→ The oil helps emulsify the dressing and coat the vegetables for a glossy, cohesive slaw. Use high-quality extra-virgin olive oil for richer flavor; whisk well (or shake in a jar) to prevent separation. If you prefer a lighter dressing, substitute a neutral oil. - 1 tablespoon honey or agave (optional)
→ Adds gentle sweetness to balance acidity and highlight mango; adjust to taste. Use honey for a richer, more rounded flavor or agave for a vegan option. If the mango is very ripe and sweet, you can reduce or omit this. - 1 teaspoon Dijon mustard (optional)
→ Dijon acts as a subtle emulsifier and adds a touch of tang without overpowering the fruit flavors. Whisk into the dressing to help it bind with lime juice and oil. For a milder profile, skip or reduce. - 1/2 teaspoon fine salt
→ Salt enhances all the flavors and helps draw out moisture from the cabbage for a crisper slaw. Start with this amount and adjust after tasting; if using salted mango or nuts, reduce accordingly. - 1/4 teaspoon ground black pepper
→ Black pepper adds a gentle warmth and aroma that complements the sweetness of mango. Freshly grind for best flavor and adjust after tossing the vegetables with the dressing. - 1/4 teaspoon chili powder or pinch of cayenne (optional)
→ A hint of heat can brighten the dish and pair nicely with mango. Add gradually, taste, and increase only if you enjoy a spicier slaw; omit if serving to heat-sensitive guests.
Optional Add-ins
- 1/4 cup roasted pepitas (pumpkin seeds)
→ Pepitas provide a satisfying crunch and a toasty, nutty note that contrasts with the tender cabbage and mango. Toast them lightly in a dry skillet before adding for deeper flavor; store leftovers in an airtight container to maintain crunch. - 1/4 cup chopped roasted peanuts or cashews
→ Adds extra texture and a savory depth. Choose unsalted varieties to control overall salt, and chop to bite-size pieces so they distribute evenly throughout the slaw. If you have a nut allergy, skip or substitute with additional seeds. - 1/2 jalapeño, finely minced, seeds removed (optional)
→ Introduces a fresh, moderate heat that complements the sweetness of mango. Remove seeds for milder heat; mince finely so it disperses evenly. For more heat, include some seeds or swap with a hotter pepper. - 1/4 cup toasted coconut flakes (optional)
→ Adds a tropical aroma and a subtle crunch that pairs beautifully with mango. Lightly toast before adding to deepen flavor; store in an airtight container away from moisture to keep crunch.
Instructions
- Prepare the vegetables by rinsing both green and red cabbage thoroughly, remove the tough cores, and pat dry. Then trim the cabbages and shred to a uniform thickness using a sharp knife or a mandoline to ensure even absorption of dressing and a consistent crunch in every bite.
→ Uniform shredding prevents dense pockets of cabbage from weighing down the dressing and helps the slaw stay crisp rather than drooping as it sits. - Shred or julienne the carrot to a uniform thickness that matches the cabbage pieces, and pat dry to remove surface moisture that could dilute the dressing.
→ Consistent carrot size ensures even texture and helps the final dish look cohesive on the plate. - Dice the ripe mango into roughly 1/2-inch pieces, choosing fruit that yields gently to pressure but isn’t mushy, and handle pieces delicately to avoid mashing the flesh.
→ Even mango cubes provide bursts of tropical sweetness without turning to a puree when the slaw is mixed or stored. - Thinly slice the red onion into very fine rings or half-m moons, then soak the slices in cold water for 5 to 10 minutes to mellow sharpness, followed by draining well and patting dry.
→ Soaking reduces bite while preserving brightness; thorough drying prevents extra moisture from thinning the dressing. - Coarsely chop the fresh cilantro leaves and tender stems until you have about 1/4 cup, discarding thick stems if they feel woody, and set aside to fold through the slaw for bright herbaceous lift.
→ Evenly chopped cilantro releases essential oils that perfume the dish; small stems contribute a subtle depth if tender. - In a small bowl, whisk together lime juice, extra-virgin olive oil, honey or agave (if using), Dijon mustard (if using), fine salt, and black pepper until the mixture just comes together and looks glossy and cohesive.
→ A well-emulsified dressing clings to the cabbage fibers, delivering consistent flavor and a glossy appearance without separating. - If using chili powder or cayenne, whisk it into the dressing now and taste, adjusting heat level gradually to balance sweetness and acidity without overpowering the mango’s fruitiness.
→ Controlled heat enhances complexity; adding gradually prevents masking the mango and citrus notes. - Reserve about two-thirds of the dressing and drizzle it over the chopped vegetables in a large mixing bowl, then toss with tongs or a wide spatula to begin coating without mashing the mango pieces.
→ Starting with less dressing gives you control to achieve an even coat and prevents sogginess; mango can bruise if over-handled early. - Add the mango, onion, cabbage, and cilantro to the dressed greens in the bowl, and toss gently while rotating the bowl to distribute dressing evenly, lifting from the bottom to avoid crushing fruit.
→ Gentle tossing preserves mango texture and ensures every bite contains a balanced mix of components and flavors. - Taste the slaw and adjust seasoning with a pinch more salt or lime juice if needed, noting that the flavors will mellow slightly after resting; if necessary, whisk in a touch more dressing to reach desired moisture.
→ Final adjustments ensure bright acidity and savory balance just before serving. - Cover and refrigerate the slaw for 15 to 30 minutes to let the flavors meld while the cabbage softens slightly and the dressing thickens on the vegetables.
→ Resting time helps the dressing emulsify further and allows the flavors to harmonize without losing crunch. - Just before serving, fold in optional add-ins such as roasted pepitas or toasted nuts, chopped jalapeño, or toasted coconut flakes to retain maximum crunch and aroma after chilling.
→ Toasted elements provide contrasting texture and aroma; add them at the end to prevent sogginess and to preserve their distinct flavors.
Notes
These mango slaw notes highlight a bright, crisp side dish that’s naturally gluten-free and versatile enough to pair with everything from grilled meats to tacos. Customize with roasted pepitas for crunch, chopped peanuts or cashews for a savory bite, a small amount of minced jalapeño for gentle heat, or toasted coconut for tropical aroma. The lime-dressing balance comes from fresh lime juice, a drizzle of extra-virgin olive oil, and a touch of honey or agave; whisk well and adjust salt to taste. For best texture, fold the mango and red onion in just before serving or refrigerate the dressing separately if making ahead. It keeps well in the fridge for up to 2–3 days in an airtight container; to maintain color and crunch, add mango closer to serving. Serve alongside grilled chicken, fish, or shrimp, or spoon over tacos and bowls for a fresh, juicy contrast. Always taste the slaw before serving and adjust acidity and seasoning to your preference.
Tips
Tips for Mango Slaw
Prep and texture
- Pat cabbage dry after washing to keep the dressing from thinning and the slaw from becoming soggy.
- Use a sharp knife or a mandoline to achieve uniform shreds; consistent pieces help the dressing coat evenly and the flavors distribute nicely.
- Dice mango into roughly 1/2-inch cubes for even distribution and to avoid mushy bites when tossing with the dressing.
Choosing and handling mango
- Choose mangoes that yield slightly to gentle pressure but aren’t mushy; this gives the best texture and sweetness for the slaw.
- Cut around the pit and dice the flesh into uniform cubes to maximize the mango-to-vegetable ratio in every bite.
- Toss mango gently with the slaw to prevent mashing the fruit and losing its bright color.
Dressing and emulsification
- Whisk or shake lime juice with a pinch of salt first to help start the emulsion with the oil.
- Add the oil in a slow, steady stream while whisking vigorously to form a glossy, cohesive dressing that clings to the slaw.
- Taste and adjust: depending on lime juiciness and mango ripeness, you may want a touch more honey or a touch less dressing overall.
- Optional Dijon mustard supports emulsification and adds a subtle tang without overpowering fruit flavors.
Balance and flavor
- Balance sweetness, acidity, and salt. Start with the specified amounts, then adjust after tasting—especially if your mangoes are very ripe or tart.
- Thinly sliced red onion adds brightness; if you’re sensitive to its bite, soak the slices in cold water for 5–10 minutes and drain well before mixing.
- Fresh cilantro brightens the slaw; if you dislike cilantro, substitute with flat-leaf parsley for a milder herb note.
Make-ahead and storage
- Best dressed just before serving, but you can prep components (cabbage, carrot, mango, onion, cilantro) several hours ahead and mix with dressing moments before serving to maintain crunch.
- Store leftovers in an airtight container in the refrigerator for up to 1–2 days. The mango may darken slightly; toss gently and re-taste before serving.
Optional add-ins
- Toast pepitas (pumpkin seeds) in a dry skillet until fragrant for extra crunch and nuttiness; add just before serving to preserve crunch.
- Use unsalted roasted peanuts or cashews for a savory contrast; chop to bite-size pieces so they distribute evenly.
- For mild heat, use 1/2 jalapeño finely minced with seeds removed; wear gloves when handling peppers and adjust to taste.
- Lightly toast coconut flakes for a tropical aroma; add near the end to maintain texture and avoid sogginess.
Serving tips
- This slaw pairs beautifully with grilled chicken, shrimp, or fish, and also works well as a bright topping for fish tacos or pulled pork.
- Serve with lime wedges on the side for extra brightness; a quick squeeze right before serving can elevate the flavors.
- For extra freshness, toss the slaw with a fork rather than a spoon to avoid crushing the mango and cabbage.
FAQ
What is Mango Slaw?
Mango slaw is a fresh, crunchy salad made with ripe mangoes, shredded cabbage, and a tangy dressing. It pairs sweet tropical fruit with crisp veggies for a bright, versatile dish.
What ingredients do I need to make Mango Slaw?
Core ingredients typically include:
- Ripe mangoes, peeled and diced
- Shredded green or red cabbage
- Red onion or scallions
- Cilantro (optional)
- Lime juice and zest
- Olive oil or neutral oil
- Honey or maple syrup
- Salt and pepper
Optional add-ins: shredded carrot, jalapeño or serrano for heat, bell pepper, avocado, nuts or seeds.
How do I prep Mango Slaw?
Steps:
– Shred the cabbage
– Dice the mango
– Slice the red onion thinly
– Whisk dressing (lime juice, oil, honey/maple, salt, pepper)
– Toss everything together and chill for 15–30 minutes for best flavor
How long does Mango Slaw last in the fridge?
About 2–3 days in a sealed container. Mango can brown slightly, so you can toss with a bit of lime juice and store dressing separately for longer freshness.
Can I customize or variations of Mango Slaw?
Yes. Try red cabbage for color, add shredded carrot for sweetness, or include jalapeño for heat. For a creamy version, mix in a dollop of yogurt or avocado. Use maple syrup or honey to adjust sweetness.
What should I serve Mango Slaw with?
Great as a taco topping, alongside grilled chicken or fish, pulled pork, or as a refreshing side for barbecue. It also works well on top of burritos or salads.
Can I make Mango Slaw ahead of time?
Yes, but mango browning can occur. Prep the veggies ahead and mix in the dressing just before serving, or keep the dressing separate and combine before eating.
How can I control the spice level?
Jalapeño adds heat. Use half a pepper, remove the seeds, or omit entirely for milder slaw. You can also add a pinch of red pepper flakes if you like extra warmth.
Is Mango Slaw dairy-free or vegan?
Yes. The basic recipe is dairy-free and vegan. If you add yogurt or mayo, choose dairy-free options to keep it vegan.
How do I store fresh mango to prevent browning in the slaw?
Toss mango with a little lime juice to slow browning, and add it just before serving if possible. If prepping ahead, you can store mango separately and combine at the last moment.