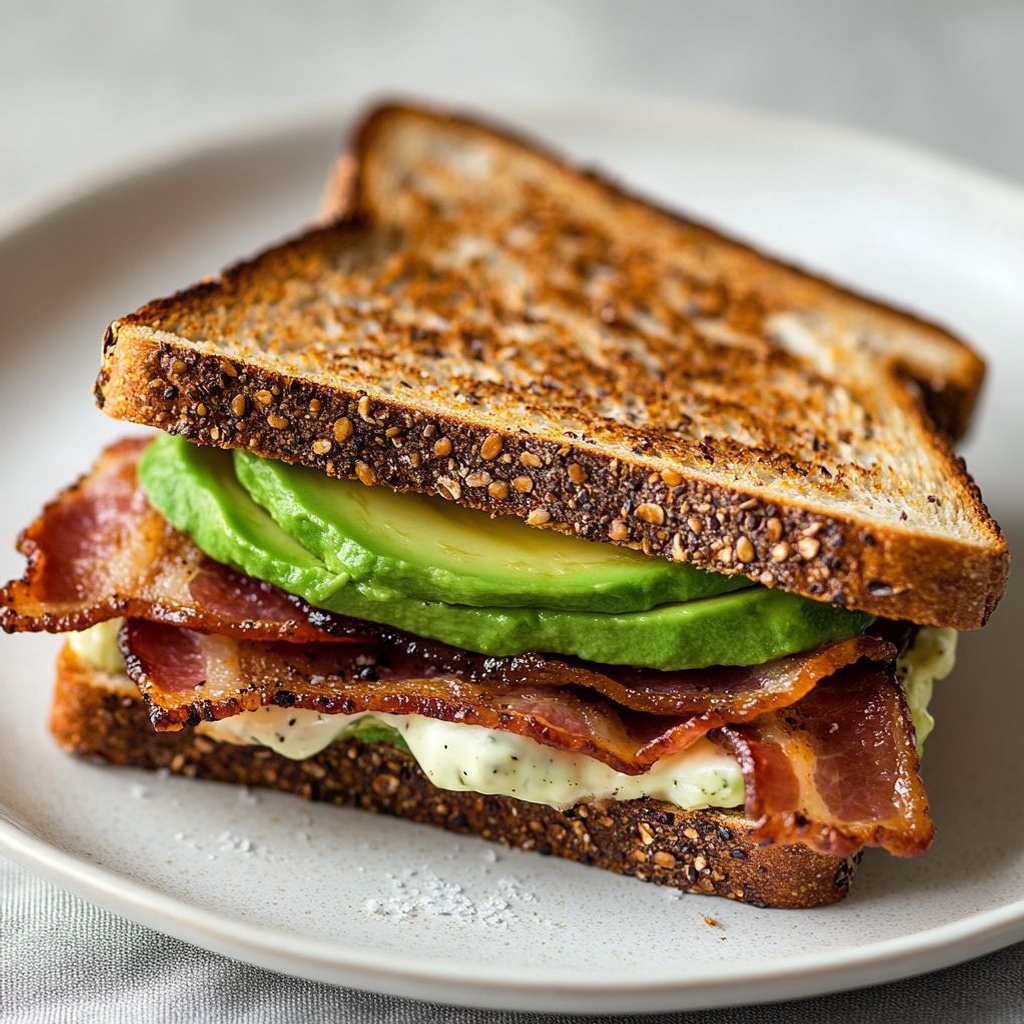
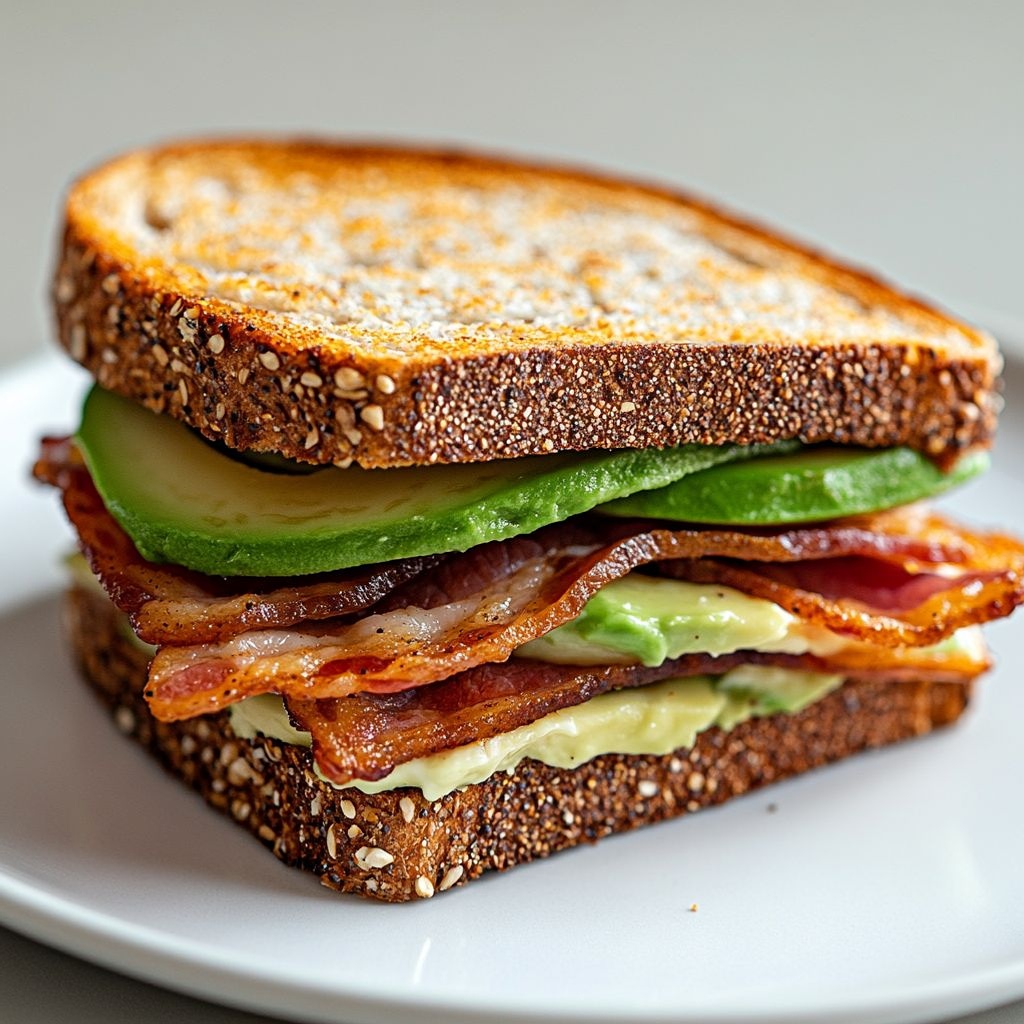
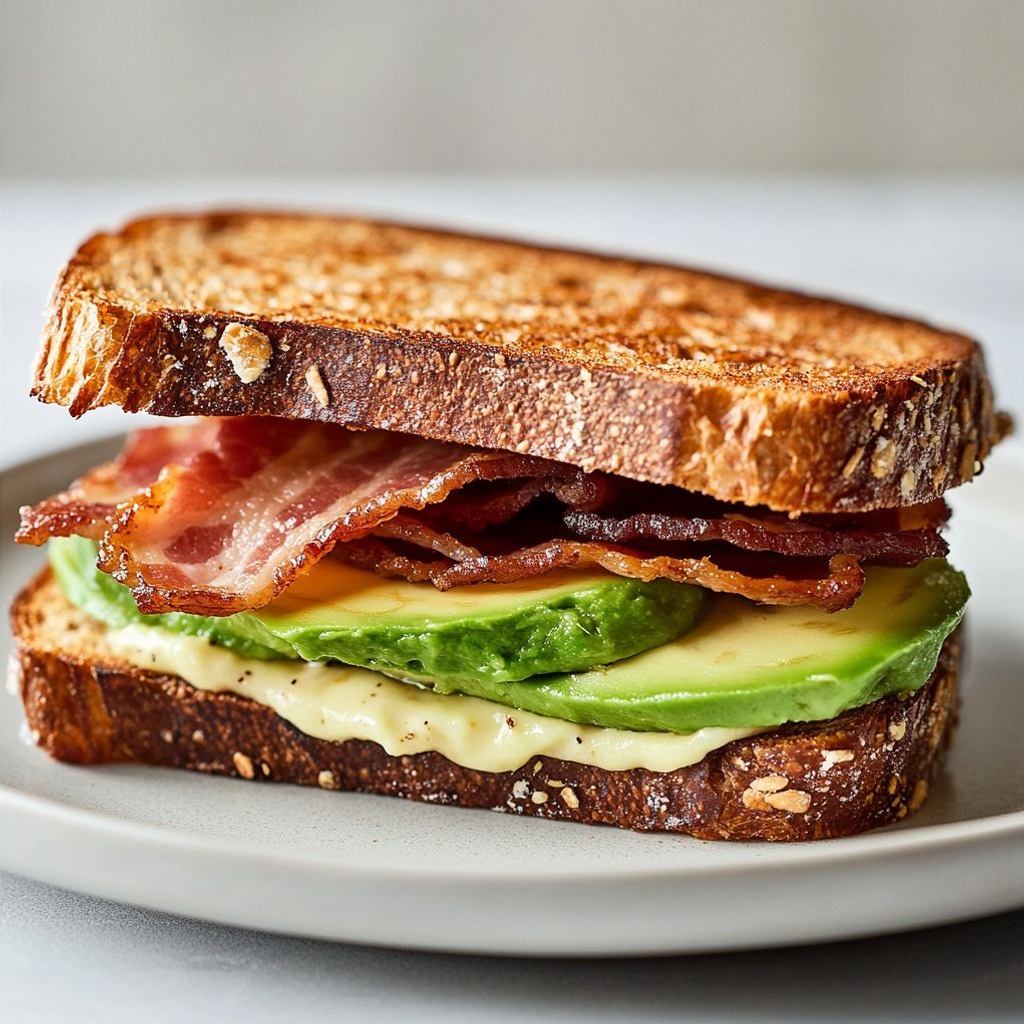
Author

Ocean Nightleaf

Browsing

Introduction / Hook

Immagina una dolce tentazione che si scioglie lentamente in bocca, dove la croccantezza scura dell’Oreo incontra la lucentezza cremosa di una cheesecake vellutata, e dove una vibrante freschezza di fragole danza all’aria aperta di un’estate italiana. Barrette cheesecake Oreo alle fragole è quel tipo di dessert che conquista subito: una presentazione elegante a barre che si tagliano facilmente, perfette per rinfrescare le serate, allietare i pranzi di festa o accompagnare un caffè al pomeriggio. Ogni morso è un viaggio sensoriale. La base, robusta e leggermente croccante, si presenta come una fonduta di cacao che mette in risalto la dolcezza lattiginosa del ripieno. Le fragole, fresche o ridotte in una salsa leggera, regalano un tocco fruttato che contrasta con la crema al formaggio, creando un equilibrio irresistibile tra comfort e sorpresa. Questo dessert è una dichiarazione di semplicità ed eleganza: non servono presentazioni elaborate, basta una teglia ben preparata, una finitura lucida e una nota di freschezza che rimane impressa nella memoria di chi assaggia.

Barrette cheesecake Oreo alle fragole non è solo una ricetta: è un piccolo momento di pura gioia condivisa. È un modo per celebrare la stagione delle fragole senza complicazioni, ma con una cura artigianale che fa sentire chi cucina come se stesse offrendo un abbraccio. La magia sta nella sincerità dei sapori: cioccolato e crema che si fondono, fragole che brillano, e una consistenza che convince anche i palati più esigenti. Se vuoi sorprendere amici e familiari con qualcosa di classico ma contemporaneo, questa è la scelta giusta. È una ricetta che parla di convivialità, di tavolate che si allungano, di risate che riempiono la casa, e di momenti in cui un dessert diventa ricordo. Quando prepari questa barretta, stai narrando una piccola storia di comfort food aggiornata per il presente, una storia che si racconta senza parlare troppo: basta assaggiarla.

The Story Behind the Dish

La combinazione di Oreo e fragole nasce dall’incontro tra due universi golosi: l’iconica dolcezza al cacao degli Oreo, amata in tutto il mondo, e la freschezza pungente delle fragole, simbolo di stagione e di convivialità nei paesi mediterranei. In molte cucine, i biscotti al cacao diventano la base di crostate, cheesecake e barre dessert che viaggiano tra tradizione e innovazione. L’idea di trasformare questa combinazione in “barrette” nasce dalla voglia di creare qualcosa di pratico da tagliare e servire in ogni occasione: una piccola porzione di torta, ma realizzata in formato da condividere, più comodo da trasportare e da gustare in movimento. Le barrette hanno una storia di viaggio: portano con sé la praticità delle merende fatte in casa ma con un tocco di eleganza, come se ogni fetta contenesse un piccolo segreto di festa.

In molte culture, la cheesecake è diventata un simbolo di hospitalità. Il formaggio morbido, la vaniglia, lo zucchero e una leggera nota di limone creano una crema che si abbina perfettamente a una base solida. Quando si aggiungono le fragole, si accende una memoria sensoriale: il profumo fruttato che invade la cucina, la luce rossa delle fragole tagliate e quel gusto aspro-dolce che equilibria la dolcezza della crema. Trasformare questo mix in barre rende il tutto ancora più accessibile: è possibile prepararlo in anticipo, conservarlo in frigo, e servire porzioni perfette che mantengono la loro forma e consistenza. È una storia di audacia moderata: non servono troppe stranezze culinarie, ma una chiara idea di sapore e texture che si completano a vicenda, giorno dopo giorno.

Nella tradizione italiana, i dessert spesso si raccontano come momenti di condivisione: una tavola imbandita, una famiglia riunita, una risata che nasce intorno a una fetta da gustare. Questa ricetta incarna quel sentimento, offrendo una versione moderna e accessibile di un classico americano. Non è una ricetta “alla lettera”: è un invito a personalizzare, a giocare con le fragole di stagione, a scegliere creme più o meno dense, a sperimentare con piccole varianti che regalano nuove sfumature. Così nasce Barrette cheesecake Oreo alle fragole: una piccola storia di gusto, pronta a essere scritta dal tuo palato, con la tua firma.

Why You’ll Love This Recipe

  • Preparazione pratica: una base di Oreo croccante, una crema setosa e un soffio di fragola che completa il quadro, tutto in barre facilmente tagliabili.
  • Versatilità: si presta a versioni no-bake o leggermente cotte, a seconda del tempo e della preferenza per la texture. Puoi adattarla alle stagioni e agli ingredienti disponibili.
  • Bilancio di sapori: l’amaro-delicato del cacao delle Biscotti Oreo si confronta con la dolcezza cremosa del formaggio e la brillante acidità delle fragole, creando un equilibrio che soddisfa sia chi ama i profumi intensi sia chi cerca leggerezza.
  • Texture coinvolgente: croccantezza iniziale, crema vellutata e un tocco di succo di fragola che rende ogni morso curioso e stimolante.
  • Condivisione facilitata: le barre si preparano in anticipo, si conservano facilmente e si tagliano in porzioni uniformi, perfette per feste, pic-nic e merende da portare a scuola o in ufficio.
  • Estetica invitante: la striatura di fragole e la lucentezza del rivestimento creano un dessert che è quasi troppo bello per essere mangiato, ma troppo buono per resistere.
  • Adattabilità dietetica: è possibile realizzare versioni vegetariane o vegane con alternative al formaggio cremoso e al rivestimento, mantenendo sempre la sensazione di una barretta indulgente.

Flavor Profile & Texture

Il sapore di Barrette cheesecake Oreo alle fragole è una sinfonia ben bilanciata. La base di Oreo, con il suo sapore di cioccolato e burro, offre una nota di cacao ricca ma non troppo amara, che funge da fondazione stabile per tutto il resto. La crema al formaggio aggiunge una dolcezza morbida e una leggera acidità che pulisce il palato ad ogni morso, impedendo che la dolcezza diventi stucchevole. Le fragole, a seconda della stagione, possono essere sul campo o presentarsi come una delicata coulis: entrambe le varianti introducono una brillante freschezza, una leggera nota acida che equilibra la crema e lascia una sensazione di pulizia dopo ogni pezzo. Testurali giocose: la prima crunchera dell’Oreo, la seducente creaminess della crema e il succo delle fragole che si scioglie in bocca, creando un finale morbido ma mai svanito. Nel retrogusto, una lieve vaniglia e una traccia di limone donano una luminosità che invita al prossimo morso.

In termini di consistenze, la barretta offre una progressione: la crosta si rompe facilmente sotto la lama, rilasciando un profumo invitante; poi la crema si aggiusta, dando una densità vellutata che resta stabile una volta tagliata; infine, le fragole o la loro salsa lasciano una nota fresca e leggermente aspra che allontana la sonnolenza zuccherina tipica di dessert molto dolci.

Occasions & Pairings

Queste barrette sono perfette in molte occasioni. Una tavola di dessert per feste estive, un post pranzo domenicale in famiglia, una merenda elegante da servire a un tea party, o un dolce di fine cena per una cena tra amici. La loro forma a barre le rende facili da afferrare tra una chiacchiera e l’altra, senza dover utilizzare piatti e posate elaborate. Inoltre, si sposano con una serie di abbinamenti che valorizzano il profilo di sapore:

  • Bevande: Moscato d’Asti leggero, spumante brut, rosé fruttato o un tè freddo al limone con una spruzzata di menta fresca.
  • Contorni: una pallina di gelato alla vaniglia o alla crema, fragole fresche a fettine, una leggera spolverata di scorza di limone.
  • Altri dessert: una nuvola di panna montata leggera o una quenelle di yogurt greco dolcificato leggermente per un contrasto fresco.
  • Occasioni speciali: matrimoni, anniversari, o cene a tema estivo che richiedono un dessert che sia al tempo stesso chic e pratico.

Tips, Variations & Substitutions

La bellezza di Barrette cheesecake Oreo alle fragole risiede anche nella possibilità di personalizzazione. Ecco alcune idee utili per adattarla ai gusti, alle esigenze alimentari e alle occasioni:

Tips per la preparazione

  • Premi la base di Oreo in modo uniforme sul fondo della teglia: una pressione costante aiuterà a ottenere una barretta che si taglia facilmente e resta compatta.
  • Lascia raffreddare completamente la crema prima di versarla sulla base: una crema troppo calda può sciogliere la base e compromettere la consistenza finale.
  • Per una finitura lucida, puoi preparare una gelatina di fragola da stendere sottilmente sulla superficie una volta rassata, creando un aspetto professionale e un ulteriore tocco di brillantezza.

Varianti senza glutine, vegane o light

  • Gluten-free: usa Oreo senza glutine o altre marche di biscotti al cacao senza glutine per la base. Assicurati che la crema contenga burro o olio certificato senza glutine.
  • Vegane: sostituisci il formaggio cremoso con una crema di anacardi o di caviale di cocco, e usa una versione vegana degli Oreo o un’alternativa di biscotti vegani. Per la dolcezza, scegli sciroppo d’agave o zucchero di canna non raffinato.
  • Leggero: scegli una crema con una percentuale di grassi ridotta o sostituisci parte del formaggio con yogurt greco scremato, ottenendo una consistenza meno densa senza rinunciare al gusto.

Twist internazionali e regionali

  • Twist agrumato: aggiungi scorza di limone o arancia all’impasto della crema per una nota agrumata fresca.
  • Twist cacao: integra una piccola quantità di cioccolato fondente fuso nella crema per aumentare la profondità del sapore.
  • Frutti di bosco: sostituisci parzialmente le fragole con lamponi o more per una variazione di colore e acidità.

Storage & Make-Ahead Ideas

Una delle grandi virtù delle barrette cheesecake è la loro praticità di conservazione. Preparale con anticipo e conserva correttamente per massimizzare gusto e consistenza:

  • Conservazione: copri bene la teglia o taglia le barre e riponile in contenitori ermetici. Mantengono la loro consistenza per 3-5 giorni in frigorifero.
  • Congelamento: puoi congelare le barre già tagliate, avvolgendole singolarmente in carta stagnola o pellicola, per 1-2 mesi. Per gustarle, lascia scongelare in frigorifero per diverse ore o durante la notte.
  • Make-ahead: la preparazione può essere fatta 1 giorno prima. Se prepari la versione no-bake, lascia rassodare in frigorifero per almeno 4-6 ore o durante la notte per una consistenza più ferma. Se opti per una leggera cottura, lascia raffreddare completamente prima di tagliare e conservare in frigorifero.

Fun Facts & Trivia (Optional)

Una veloce curiosità per aggiungere un tocco di teatro al tuo piatto:

  • Gli Oreo sono stati creati nel 1912 da Sam prone e put: l’uso del biscotto doppio con crema all’interno è diventato un classico globale, protagonista di ricette infinite, dalle torte ai milkshake, fino alle barrette come questa versione alle fragole.
  • La fragola è uno dei simboli della estate e della convivialità: la sua forma, il profumo e la vivacità del colore la rendono un ingrediente perfetto per dessert che vogliono celebrare la stagione.
  • Le barrette come formato “da portare” sono nate dall’esigenza di creare dessert facili da condividere, ma soprattutto facili da trasportare in picnic, pranzi all’aperto e cene tra amici.
  • Questo tipo di dessert dimostra come una base semplice possa sostenere una crema cremosa e una nota di frutta in modo equilibrato, trasformando un piatto familiare in un’esperienza estetica e gustativa gratificante.

In conclusione, Barrette cheesecake Oreo alle fragole è una ricetta che celebra la semplicità raffinata: pochi ingredienti amati, lavorazione gentile e una presentazione che invita a tagliare, condividere e tornare per un altro pezzo. È la prova che la cucina non deve essere complicata per essere memorabile: a volte basta un biscotto al cacao, una crema vellutata, e la freschezza di fragole perfette per creare qualcosa di speciale, capace di trasformare una semplice merenda in un piccolo rituale di gioia quotidiana. Se stai cercando un dessert che sia al contempo confortante e moderno, familiare e sorprendente, questa barretta potrebbe diventare il tuo nuovo cavallo di battaglia, pronto a ripetersi nelle stagioni e a evolversi con i tuoi gusti, anno dopo anno.

Ingredients

  • Barrette Cheesecake Oreo alle Fragole
  • 24 Oreo cookies, crushed (filling removed) to about 2 cups
    → The cookies form a rich, chocolatey crust. Removing the cream filling prevents extra moisture and a soggy crust. Crush until fine, then mix with melted butter to create a cohesive, pressable base. Use a food processor for even texture or place cookies in a sealed bag and roll with a rolling pin.
  • 6 tablespoons unsalted butter, melted
    → Binds the crust together. Ensure the butter is fully melted and slightly cooled before mixing with the crumbs to avoid greasy lumps. Press the mixture firmly into the pan and bake for a few minutes or chill until set, depending on your recipe approach.
  • Filling
  • 2 (8-ounce) blocks cream cheese, softened to room temperature (total 16 oz / 450 g)
    → The creamy base of the cheesecake layer. Softening is essential to achieve a smooth, lump-free mixture when beaten with sugar and eggs. If lumps remain, beat longer at medium speed and scrape the bowl.
  • 1 cup granulated sugar
    → Sweetens the filling and helps achieve a creamier texture when beaten with the cream cheese. If you prefer a less sweet version, reduce by 2–3 tablespoons, but note this can slightly affect the final texture and color.
  • 2 large eggs
    → Eggs help set the cheesecake during baking and contribute to a smooth, custard-like interior. Add one at a time to avoid curdling; mix until just combined to maintain a creamy texture without overwhipping which can cause cracks.
  • 1/2 cup sour cream
    → Adds moisture, tenderness, and a subtle tang that complements the creamy cheese and contrasts with the Oreo crust. For a lighter version, substitute plain Greek yogurt, but expect a slightly different mouthfeel and tang.
  • 1 teaspoon pure vanilla extract
    → Enhances the overall flavor with warm vanilla notes. Use high-quality vanilla extract for depth. If you have vanilla bean paste or seeds, you can add 1/2 teaspoon for extra aroma and specks.
  • 1 teaspoon fresh lemon juice or lemon zest
    → Provides brightness that cuts richness and pairs well with strawberry. Use juice sparingly to avoid overpowering the cheesecake; if using zest, grate finely and avoid the white pith.
  • Pinch of salt
    → Heightens sweetness and flavors, balancing the richness of cream cheese. A tiny pinch goes a long way; adjust to taste based on sweetener and fruit swirl.
  • Strawberry Swirl
  • 1/2 cup strawberry puree
    → Adds a fruity pink swirl and strawberry aroma to the filling. Purée fresh strawberries until smooth, then strain if you prefer a seed-free texture. Gently swirl into the batter before baking to create attractive marbling.
  • 1 tablespoon granulated sugar (optional)
    → If your strawberries are not very ripe, a touch more sugar helps the puree taste fruity and vibrant. Taste the puree before adding sweetness and adjust accordingly.
  • 1 teaspoon lemon juice (optional)
    → A hint of lemon brightens the strawberry flavor and helps balance sweetness. Use sparingly to avoid overpowering the strawberry profile.
  • Fresh Strawberry Topping
  • 1 cup fresh strawberries, hulled and diced
    → Provides a bright, juicy finish and color contrast when the bars are chilled and served. Dice evenly for a neat appearance; if desired, toss with a teaspoon of sugar and a squeeze of lemon juice to release juices before serving.
  • Optional Add-ins
  • 1/4 cup mini chocolate chips (optional)
    → Small chocolate chips add pockets of sweetness and textural contrast. Fold into the batter at the end of mixing, being careful not to overmix; keep chips evenly distributed by lightly coating them in a teaspoon of flour before adding.
  • 1/4 cup chopped almonds or pistachios (optional)
    → Adds crunch and nuttiness to contrast the creamy layer. Toast the nuts briefly to intensify flavor, then sprinkle on top or fold gently into batter; use finely chopped pieces for even distribution.
  • Optional Garnish
  • Powdered sugar, for dusting
    → Finishing touch that adds a delicate sweetness and professional look. Dust lightly just before serving to avoid clumping; you can also dust with a strawberry-themed edible shimmer for presentation.
  • Fresh mint leaves or lemon zest, for garnish
    → Adds a fresh aroma and color contrast to the plate. Mint pairs nicely with strawberry notes; a touch of zest brightens the dish when served.

Instructions

  • Preheat your oven to 350°F (175°C) and line a 9×13-inch baking pan with parchment paper, leaving an overhang on the sides to lift the bars when finished.
    → This ensures even heat distribution, prevents sticking, and allows you to lift the entire cheesecake cleanly for neat slices.
  • Prepare the Oreo crust by crushing the cookies (filling removed) to about 2 cups and melting the butter until smooth; whisk the butter into the crumbs until evenly moistened. Press the mixture firmly across the bottom of the prepared pan in a uniform, compact layer.
    → A tight, cohesive crust provides structure and prevents crumbling when cutting, while the butter adds richness and helps the crust set.
  • Bake the crust for about 8 minutes at 350°F (175°C) or chill until set, then cool completely before filling.
    → Briefly baking sets the crust, minimizes sogginess from the filling, and cooling prevents warping or shifting under the batter.
  • In a large mixer bowl, beat the softened cream cheese and granulated sugar on medium speed until completely smooth, light, and free of lumps, usually 2–3 minutes; scrape the bowl halfway to ensure even texture.
    → Softened cream cheese blends smoothly with sugar to form a creamy, stable base for the cheesecake; scraping prevents stubborn lumps from remaining.
  • With the mixer on low, add the eggs one at a time, beating after each addition only until incorporated; avoid overmixing to prevent incorporate too much air and potential cracks.
    → Gentle incorporation preserves a velvety interior and minimizes cracking during baking and cooling.
  • Beat in the sour cream, vanilla extract, fresh lemon juice, and a pinch of salt on low speed until just combined; stop as soon as the mixture comes together.
    → Sour cream adds moisture and tenderness, vanilla enhances depth, lemon brightens the flavor, and salt balances sweetness.
  • Prepare the strawberry swirl by puréeing 1/2 cup fresh strawberries until smooth; if you prefer a silkier texture, strain the purée to remove seeds, then whisk in optional 1 teaspoon lemon juice and up to 1 tablespoon sugar, setting aside.
    → Strawberry purée provides color, aroma, and a fruity ribbon through the cheesecake; straining yields a smoother swirl.
  • If using optional add-ins, toss 1/4 cup mini chocolate chips or 1/4 cup chopped almonds/pistachios with 1 teaspoon all-purpose flour to coat lightly, then fold into the filling at the end to distribute evenly without sinking.
    → Coating prevents sinking and promotes even distribution of additions for texture and flavor balance.
  • Pour the cheesecake filling over the cooled crust in an even layer; drop spoonfuls of the strawberry purée onto the surface and gently swirl with a knife or skewer to create a marbled pattern without blending completely.
    → Marbling visual appeal and a balanced strawberry aroma; avoid over-swirl to keep distinct pink ribbons.
  • Bake the assembled cheesecake at 350°F (175°C) until the center is slightly jiggly and the edges are set, typically 45–55 minutes; if the top browns too quickly, tent loosely with foil to prevent scorching.
    → A gently set center yields a creamy interior after chilling; tenting preserves color and texture without drying the top.
  • Cool the cheesecake in the pan on a wire rack for 1 hour, then refrigerate for at least 4 hours or overnight until fully chilled and firm for clean slicing.
    → Chilling allows the proteins to fully resettle, enhances flavor, and makes cutting into neat bars easy.
  • Prepare the fresh strawberry topping by dicing 1 cup strawberries into uniform pieces and, if desired, tossing with 1 teaspoon sugar and a squeeze of lemon juice; let macerate for 10–15 minutes to release juices.
    → Maceration softens fruit and intensifies sweetness and brightness for a glossy topping.
  • Just before serving, dust the bars lightly with powdered sugar and garnish with fresh mint leaves or a hint of lemon zest for color and aroma; slice into neat bars using a warmed knife for clean edges.
    → Finishing touches elevate presentation and provide a fresh aroma that complements the strawberry cheesecake flavor.

Notes

These Barrette Cheesecake Oreo alle Fragole bars are a decadent dessert that layers a chocolate Oreo crust with a velvety strawberry cheesecake filling and a bright fresh-strawberry topping. For best results, bring ingredients to room temperature and beat the filling at low speed until smooth, adding eggs one at a time to avoid curdling. Gentle handling prevents cracks and airy pockets in the cheesecake.

Crust tips: Crush the Oreo cookies to about 2 cups (filling removed) and mix with 6 tablespoons melted butter until the mixture resembles wet sand. Press firmly into the prepared pan to create a dense, even crust. Bake for 8–10 minutes to set, or chill the crust until firm if you plan a no-bake finish.

Filling: In a bowl, beat 2 (8-ounce) blocks of cream cheese with 1 cup granulated sugar until smooth and fluffy. Add 2 large eggs, one at a time, mixing on low until just combined. Stir in 1/2 cup sour cream, 1 teaspoon vanilla extract, 1 teaspoon fresh lemon juice or zest, and a pinch of salt until the batter is glossy. Strawberry swirl: purée 1/2 cup strawberries until smooth, then swirl into the filling by dolloping and using a knife to create marbling. If you like, add 1 teaspoon lemon juice to the puree to brighten the flavor.

Assemble and bake: Pour the filling over the crust, then dollop the strawberry puree and swirl with a knife to create marbling. If using optional add-ins like mini chocolate chips or chopped almonds/pistachios, fold them in or sprinkle on top after halfway mixing to keep distribution even.

Fresh strawberry topping: Scatter 1 cup diced fresh strawberries on top of the filling after baking for a bright finish. If desired, macerate the berries with a teaspoon of sugar and a squeeze of lemon juice to release juices before serving.

Chill and serve: Bake at 325°F (163°C) until the center is just set and the edges are slightly puffed, about 40–50 minutes. Cool completely on a rack, then refrigerate at least 4 hours or overnight to let the bars firm up and flavors meld. Slice with a clean knife for neat portions and serve chilled.

Storage and variations: These bars keep well in the refrigerator for up to 5 days and freeze for 2–3 months—wrap individually or freeze as a whole. Gluten-free option: to make gluten-free Barrette bars, use gluten-free chocolate cookies for the crust (and verify any added ingredients are gluten-free). For a lighter version, you can substitute part of the cream cheese with Greek yogurt, though this may soften the texture and reduce tang.

Tips

  • Crust tips: Crush Oreo cookies with the cream removed until fine for a dense, chocolatey base. Melted butter should be fully incorporated and slightly cooled before mixing with the crumbs to avoid greasy clumps. Press the crust firmly into the pan using the bottom of a glass or measuring cup for an even, compact layer. For a quicker setting, chill the crust in the fridge for 15–20 minutes; if you prefer a firmer bake-set, bake briefly before filling. Line the pan with parchment for easy removal if needed.
  • Filling consistency tips: Let the cream cheese soften to room temperature to prevent lumps. Beat with sugar until smooth and creamy, then add eggs one at a time on medium speed to avoid curdling. Mix just until combined after the eggs; overmixing can introduce too much air and cause cracks. Stir in sour cream, vanilla, lemon juice or zest, and a pinch of salt until everything is evenly incorporated. If the batter looks a bit lumpy, a quick scrape of the bowl and a few more seconds of mixing will help achieve a silky texture.
  • Strawberry swirl technique: Purée fresh strawberries until smooth and strain if you want a seed-free swirl. Taste the puree and add optional sugar only if needed. Gently dollop the swirl onto the batter and use a knife or skewer to create pretty marbling—don’t over-swirl, or the colors may blend too much and look muddy.
  • Fresh strawberry topping tips: Dice strawberries into uniform pieces for a neat appearance. To deepen flavor, toss with a teaspoon of sugar and a squeeze of lemon juice and let stand briefly to draw out juices. Drain excess liquid before spooning over set bars to prevent a soggy topping; scatter just before serving for best texture.
  • Optional add-ins: If using mini chocolate chips, toss them in a teaspoon of flour to help distribute evenly and prevent sinking. Toast chopped almonds or pistachios for a crunchier texture, then fold lightly into the batter or sprinkle on top. Keep add-ins to small amounts so they don’t overwhelm the creamy filling.
  • Optional garnish tips: A light dusting of powdered sugar gives a professional finish; garnish with fresh mint leaves or a touch of lemon zest for color and aroma. For a festive look, consider a strawberry-themed edible shimmer or a few whole berries on the side when serving chilled.
  • Make-ahead and storage tips: Chill the bars in the refrigerator for at least 4 hours (or overnight) to ensure clean cuts. Store leftovers covered in the fridge for up to 3–4 days. If freezing, wrap slices individually and freeze for up to 2–3 months; thaw in the refrigerator before serving to maintain texture.

FAQ

Che cosa sono le Barrette cheesecake Oreo alle fragole?

Sono barre dessert a base di biscotti Oreo croccanti e una crema di formaggio cremosa con fragole, tagliate a porzioni rettangolari perfette da offrire come dessert freddo o snack estivo.

Quali ingredienti servono?

Per circa 12–16 barrette:

  • 200 g di Oreo
  • 60 g di burro fuso
  • 400 g di formaggio spalmabile tipo Philadelphia
  • 100 g di zucchero a velo
  • 200 ml di panna fresca da montare
  • 180–200 g di fragole fresche (più alcune per guarnire)
  • 1 cucchiaino di estratto di vaniglia
  • un pizzico di sale
  • facoltativo: 2 fogli di gelatina o agar-agar per una migliore presa
Quante porzioni rende?

Con una teglia rettangolare di circa 23 x 33 cm, otterrai circa 12–16 barrette, a seconda delle dimensioni con cui taglierai.

Come preparo la base delle barrette?

Procedura:

  1. Sminuzza finemente gli Oreo (con o senza crema) in una ciotola.
  2. Mescola i biscotti sbriciolati con il burro fuso finché il composto è umido e compatto.
  3. Stendi l’impasto sul fondo di una teglia rivestita con carta forno, premendo bene per ottenere uno strato uniforme di circa 1 cm di spessore.
  4. Metti in frigorifero per circa 15–20 minuti per rapprendere.
Come preparo la crema al formaggio e fragole?

Procedura:

  1. Frulla 180–200 g di fragole per ottenere una purea; passa al setaccio se vuoi una crema più liscia.
  2. In una ciotola, monta la panna fredda fino a renderla soffice.
  3. In un’altra ciotola, lavora il formaggio spalmabile con lo zucchero a velo, l’estratto di vaniglia e il pizzico di sale fino a ottenere una crema liscia.
  4. Incorpora delicatamente la panna montata alla crema di formaggio, poi aggiungi la purea di fragole. Se vuoi una consistenza più ferma, aggiungi 2 fogli di gelatina precedentemente ammollati e sciolti (opzionale).
  5. Aggiungi pezzetti di fragola fresca per una nota croccante, se preferisci.
Come si assembla e si raffredda?

Procedura:

  1. Versa la crema alle fragole sulla base di Oreo già rassodata, livellando la superficie.
  2. Copri con un foglio di carta forno, senza sigillare troppo, e metti in frigorifero per almeno 4–6 ore (meglio tutta la notte) per far prendere consistenza.
  3. Una volta rassodata, taglia in barre rettangolari della dimensione desiderata e decora con fragole fresche tagliate.
Come conservare le barrette?

Conservazione:

  • In frigorifero, ben coperte, per 3–5 giorni.
  • Si possono anche congelare per 1–2 mesi ben sigillate; lascia scongelare in frigo prima di servire e, se possibile, aggiungi una fetta di fragola fresca al momento di servire.
Quali varianti posso provare?

Idee e sostituzioni:

  • Sostituisci le fragole con lamponi, pesche o mango per versioni diverse.
  • Aggiungi scaglie di cioccolato fondente o bianco nell’impasto per un tocco extra di dolcezza.
  • Per una versione senza lattosio, usa formaggio cremoso senza lattosio e panna vegetale.
  • Per una base diversa, utilizza Oreo al cioccolato bianco o altre varianti di biscotti al cioccolato.
Posso prepararlo senza gelatina?

Sì. Se vuoi evitare la gelatina, lavora la crema con panna montata ferma e lascia raffreddare in frigorifero per ottenere una buona presa. Per una maggiore stabilità senza gelatina, puoi utilizzare 2 fogli di gelatina ammollati come descritto nella crema, oppure agar-agar seguendo le istruzioni sulla confezione.

Consigli utili per una presentazione perfetta?

Consigli:

  • Usa una teglia con bordo lungo e rivestita con carta forno per facilitare lo stacco delle barrette.
  • Raffreddare bene prima di tagliare per ottenere barre nette e facili da maneggiare.
  • Guarnisci con fettine di fragola fresca o con piccoli ciuffi di panna montata per un tocco elegante.

Introduzione / Hook

Immagina una cheesecake che non è solo dolce, ma una carezza leggera come una nuvola d’agosto. Immagina un ripieno soffice, spumoso, quasi turbato al punto giusto, che si scioglie in bocca rivelando una freschezza di fragole appena colte. Benvenuto nella Cheesecake Turbinata alle Fragole: un dessert che conquista con la sua eleganza semplice e la sua anima vivace. Qui la tradizione incontra l’aria: il ripieno è lavorato finemente per essere incredibilmente morbido e setoso, ma la magia sta nella turbinata—una tecnica che mette in moto una vorticosa leggerezza, come se una brezza di panna e formaggio avesse deciso di ballare con le fragole. Il risultato è una torta fredda che profuma di estate, in cui la crosticina croccante sul fondo contrasta con la cremosità vellutata e la salsa di fragola che sembra scivolare in strati di colore e gusto. Ogni fetta è una piccola esperienza sensoriale: l’olfatto viene accolto da note burrose e zuccherine, l’occhio è catturato dalla lucentezza del topping cremisi, e il palato riceve un equilibrio tra dolcezza, acido fruttato e una leggera acidità lattica. Questa non è una torta qualunque: è una celebrazione della semplicità ben fatta, un dessert che alleva e gioca con le consistenze, senza pesare, pronto per essere condiviso in momenti speciali o semplicemente in un pomeriggio di weekend.

Ciò che rende questa versione davvero speciale è la sua versatilità. Puoi gustarla come chiusura elegante di una cena informale con amici, o trasformarla in un dessert di festa per celebrare una ricorrenza. La fragola, in tutto il suo splendore rosso rubino, dona freschezza e brillantezza, ma è accompagnata da una base ferma e croccante che dà sostanza. L’elemento turbinato non è solo un vezzo: è la chiave che rende la texture soave e quasi spumosa, un aspetto che rende ogni boccone una piccola sorpresa. Non servono trucchi complicati: è un dessert che si presta a essere realizzato con ingredienti semplici, selezionati con cura, e che premia chi lo gusta con una ricompensa di conforto e raffinatezza allo stesso tempo.

La storia dietro il piatto

La Cheesecake Turbinata alle Fragole nasce dall’incontro tra due mondi apparentemente diversi: la tradizione delle torte fredde italiane e la tecnica contemporanea che privilegia leggerezza e aerazione. In molte regioni italiane, la cultura dolciaria ha una forte memoria di dessert freddi o al cucchiaio, pensati per le calde estati o per celebrazioni familiari. Le fragole, invece, hanno un posto di rilievo nel calendario gastronomico italiano ed europeo: protagoniste di mercati contadini, di dessert domestici e di ricette che esaltano la loro dolcezza profonda con un tocco di acidità tipico della stagione estiva. Abbinare fragola e crema è una scommessa di equilibrio che la tradizione ha sostenuto con paste biscottate, formaggi freschi e aromi delicati. In questo piatto, la parola chiave è turbinare: un gesto di cucina che richiama la rapidità del mixer, l’aria che si prende dal latte e dal formaggio, e la volontà di ottenere una consistenza leggera ma ricca di gusto.
Con una pennellata di creatività, la ricetta racconta una storia di cucine familiari che si rinnovano: una nonna che insegnava a mescolare con pazienza, un giovane chef che ha portato la tecnica della turbina in una versione dolce a base di fragole, e una casa che respira di profumi di burro, vaniglia e frutti di bosco. In questa narrazione, il piatto diventa un simbolo di condivisione: una torta che invita a sedersi insieme, a conversare tra un cucchiaio e l’altro, a fermare il tempo per assaporare un momento di dolcezza semplice ma accurata.

La storia dietro la cheesecake turbinata è anche una storia di stagioni: la fragola, ideale in primavera ed estate, rappresenta rinascita e gioia, mentre la crema di formaggio ricorda la ricchezza di una tradizione che celebra la convivialità. Il connubio è riuscito perché unisce la rusticità di una base croccante, la leggiadria di un ripieno montato, e la vivacità di una salsa di fragola che accende il piatto. Ogni tradizione locale può offrire una piccola variazione: un tocco di limone, una vaniglia più marcata, o una nota di alcol aromatizzato per dare profondità al sapore. In Italia, come altrove, i dessert non sono solo una chiusura: sono un gesto d’amore e di attenzione verso chi osserva e assapora.

Perché amerai questa ricetta

  • Texture incredibilmente leggera: grazie al processo di turbinazione, il ripieno risulta setoso e soffice, senza risultare pesante.
  • Freschezza estiva: le fragole aggiungono un carattere fruttato brillante e una vivacità che bilancia la dolcezza della crema.
  • Versatilità: perfetta per occasioni casuali o per dessert di festa, facilmente adattabile a diverse diete e preferenze.
  • Preparazione non troppo complicata: si parte da una base croccante, un ripieno soffice e una salsa di accompagnamento, ma senza tecnicismi proibitivi.
  • Equilibrio di sapori: dolcezza morbida, acidità leggera della frutta, e una leggera nota di vaniglia o agrumi che ne elevano il profilo aromatico.
  • Potenziale di personalizzazione: puoi giocare con la consistenza della crema, intensificare la fragola con un coulis extra, o introdurre varianti di ricco contrasto come cioccolato bianco o scorza di limone.
  • Ideale per la condivisione: una fetta di cheesecake turbinata è un invito al dialogo, una scusa per riunirsi, una dolce parentesi in una giornata piena.

Profilo di sapore e texture

Questo dessert racconta una storia di contrasti controllati. Il fondo croccante è come un piccolo decoro di terra che sostiene una nuvola di crema: una base che contrasta la morbidezza con una nota di burro fragrante e una leggera salinità che rende la dolcezza ancora più definita. Il ripieno turbinato è la star: una crema liscia, aerata e soffice, che scivola delicatamente lungo la lingua, lasciando una traccia cremosa ma non pesante. La fragola, presente sia come elemento fresco sia come salsa lucida, taglia la dolcezza con una vibrante acidità fruttata, equilibrando il tutto in un’armonia di gusto che si percepisce ad ogni boccone. Le fragole non sono solo decorazione: la loro brillantezza e il loro sapore pepato di primavera aprono il palato, mentre la vaniglia, la scorza di agrumi o un pizzico di sale marino in minime quantità possono accendere o modulare l’aroma complessivo. Se si desidera una texture ancora più leggera, è possibile aumentare l’aria del ripieno con una leggera montatura o inserire una piccola quantità di crema di latte montata per creare un contrasto tra densità e leggerezza. Il risultato è una torta che brinda alla stagione: una esperienza sensoriale completa che incontra la dolcezza classica del cheesecake con una freschezza di fragola che resta sul palato, invitando a una seconda fetta senza alcuna remora.

In termini di ricchezza aromatica, ci sono note burrose e lattiche che sostengono la fragranza del croccante e la compostezza della crema. L’equilibrio tra crema e frutta è essenziale: la crema deve restare morbida e setosa, ma non troppo delicata da non reggere la salsa; la salsa di fragola deve essere visibile, brillante e profumata, ma non dominare il sapore del formaggio. L’effetto turbina è ciò che dà al dessert la sua identità: una crema che sembra chiudersi su se stessa in un soffio, pronta a riaprirsi al contatto con una nuova cucchiaiata. In conclusione, la Cheesecake Turbinata alle Fragole è una danza di texture: croccante, cremosa, vellutata, lucida e fruttata—un’esperienza che cambia leggermente ad ogni boccone e invita all’eco di un sorriso soddisfatto.

Occasioni & Abbinamenti

Questo dessert è una compagna versatile per numerose occasioni. Puoi servirlo durante una cena estiva tra amici, accompagnato da una bottiglia di spumante leggero o di Moscato d’Asti per esaltare la frizzantezza del drink e la dolcezza della fragola. Per una festa di compleanno o per un brunch domenicale, è perfetto come chiusura elegante ma non troppo formale. E se vuoi trasformarlo in una tentazione da tavola delle feste, aggiungi una decorazione di fragole fresche, foglie di menta e una spolverata molto leggera di scorza di limone per una nota aromatica rinfrescante. In abbinamento, oltre al vino spumante, puoi pregustare opzioni come un Prosecco DOC, un vino passito leggero o persino un dessert wine non troppo dolce. Per chi preferisce una bevanda calda, un espresso intenso o un caffè moka può bilanciare la dolcezza con un tocco di amaro. Se vuoi proporre una versione non alcolica, una limonata fresca con una punta di vaniglia può rinfrescare il palato tra una fetta e l’altra. Allo stesso tempo, la cheesecake si sposa bene con dessert leggeri come un sorbetto al limone o una coulis di frutti di bosco che amplifica la freschezza fruttata senza competere con la crema.

Ideale anche per occasioni speciali: matrimoni all’aperto, anniversari, cene di festa o semplicemente un pomeriggio di lago o montagna. Il ritmo scenografico della presentazione—una fetta porzionata su un piatto elegante, la salsa che decora l’anello del bordo, un ciuffetto di panna o una fogliolina di menta—crea un momento memorabile senza richiedere una presentazione troppo elaborata. In contesti dove la cucina è discussa quanto la tavola, questa torta diventa un simbolo di cura e di attenzione, una piccola opera che racconta una storia di gusto e di convivialità.

Consigli, Varianti & Sostituzioni

  • Vegan o dairy-free: sostituisci la crema di formaggio con una base di anacardi ammollati e frullati, un po’ di latte di mandorla e una leggera quantità di olio di cocco per rendere la crema sufficiently vellutata. Per la base, usa burro vegetale o olio di cocco insieme a una miscela di biscotti vegani tritati.
  • Gluten-free: scegli biscotti senza glutine per la base o prepara una base di noci tritate e datteri per una versione ancora più rustica.
  • Varianti di frutta: se non trovi fragole fresche, puoi usare lamponi, mirtilli o una miscela di frutti di bosco per la salsa e una variante di ripieno che richiami quel gusto fruttato.
  • Scorza e aromi: l’aggiunta di scorza di limone o di arancia può ravvivare le note agrumate e offrire una leggera freschezza che bilancia la dolcezza
  • Intensità di dolcezza: se preferisci una versione meno dolce, usa un dolcificante alternativo come miele d’acacia o sciroppo d’acero in piccole quantità, oppure riduci una parte dello zucchero nella crema.
  • Texture extra leggera: se vuoi una consistenza ancora più ariosa, incorpora una piccola quantità di tuorlo montato o una leggera montatura di panna in equivalente proporzione per ottenere una crema più soffice.
  • Later adaptations: per una versione al cucchiaio, puoi presentare la crema in bicchierini con la salsa di fragola sul fondo e una decorazione singola di fragole per un dessert dall’effetto bistrot.

Storage & Make-Ahead Ideas

La cheesecake turbinata è fatta per essere preparata in anticipo, il che la rende perfetta per eventi o cene in cui vuoi liberarti dallo stress dell’ultimo minuto. Conservata in frigorifero, la torta si mantiene fresca per alcuni giorni, purché sia coperta in modo da evitare assorbire odori e umidità indesiderati. Se hai intenzione di congelarla, è preferibile congelare solo la parte di crema pure e assemblare la salsa al momento del servizio, oppure congelare porzioni singole con una base già solida e il ripieno leggermente più compatto. Per scongelarla, lasciala riposare in frigorifero lentamente durante la notte e poi portala a temperatura ambiente giusto prima di servire per riscoprire l’elasticità della crema turbinata. Se vuoi preparare un abbellimento a tempo, puoi tranquillamente preparare la salsa di fragole in anticipo e conservarla in frigorifero in un contenitore a chiusura ermetica: quando sarai pronto per servire, distribuisci un filo di salsa sul bordo della fetta per creare un effetto “anello rosso” molto elegante. Ciò che resta della base e della crema può essere riutilizzato in altre preparazioni creative: una versione a cucchiaio per cocktail dessert, o una base per una torta fredda ancora più ricca con l’aggiunta di piccoli tocchetti di frutta.

Make-ahead tips: se hai poco tempo, prepara la base e la crema in anticipo e lascia che la turbinata si stabilizzi in frigorifero. L’assemblaggio finale, con la salsa e la decorazione, è la parte che rende la presentazione spettacolare, ma l’illusione di leggerezza è già data dal ripieno e dalla qualità degli ingredienti scelti. In breve, questa cheesecake è una promessa di comfort fatto in casa, pronta a essere realizzata quando la voglia di stupire incontra la voglia di gustare qualcosa di semplice ma sorprendente.

Curiosità & Aneddoti (Opzionale)

La cultura del cheesecake ha molte radici nel mondo, da ricette europee a varianti americane, ciascuna con la sua identità. In molte tradizioni italiane, i dolci freddi a base di formaggio rappresentano una semplicità raffinata, spesso accompagnata da una salsa di frutta o da una spruzzata di agrumi che ne esalta la freschezza. L’uso della frutta fresca come fragola per accompagnare una crema ricca è un richiamo diretto a pratiche culinarie che celebrano la stagione e la spontaneità della preparazione casalinga. Un tratto affascinante di questa ricetta è la fusione di tecniche moderne—come la turbinatura per aerare la crema—with l’essenza rustica delle fragole e della base croccante. È un esempio di come la cucina contemporanea possa rendere omaggio alle tradizioni senza rinunciare all’innovazione.

Un piccolo trucco storico: le fragole hanno avuto ruoli simbolici in molte culture, rappresentando purezza, rinnovamento e piacere. Nella gastronomia europea, la fragola è stata sin dal XVIII secolo un ingrediente preferito per dessert vivaci e colorati, spesso accoppiata con formaggi freschi o creme delicate. Abbinare fragola a crema di formaggio in una versione turbata è una how-to modernista che rispetta la tradizione pur offrendo una presentazione visiva di grande impatto. Se ti piace esplorare, potresti provare una reinterpretazione di questa torta con una base di biscotti integrali e una crema leggermente meno dolce, per scoprire nuove profondità di gusto—ma senza rinunciare al fascino di quel vortice di fragole che rende subito riconoscibile la cheesecake turbinata.

Ingredients

Crust

  • 1 1/2 cups graham cracker crumbs (or gluten-free graham crackers, finely crushed)
    → Provides the base and flavor for the cheesecake. Crumble the cookies into a fine, even texture using a processor or by crushing in a bag with a rolling pin, then mix with 1/4 cup granulated sugar and 5 tablespoons melted unsalted butter. Press firmly into the bottom (and a little up the sides) of a 9-inch springform pan. Pre-bake for 8–10 minutes to set the crust and help prevent sogginess; cool before filling.
  • 1/4 cup granulated sugar
    → Adds gentle sweetness to the crust and helps bind the crumbs with the butter. Mix this sugar into the crumb mixture before pressing into the pan; adjust amount if your crackers are already sweet. Evenly distribute so the crust bakes uniformly.
  • 5 tablespoons unsalted butter, melted
    → Acts as the binder that holds the crust together and contributes richness. Let the melted butter cool slightly before mixing with the crumbs to prevent soft, greasy dough; press mixture evenly into the pan and chill briefly before adding the filling to ensure clean edges and a neat slice.

Filling

  • 24 oz (3 cups) cream cheese, softened to room temperature
    → The creamy backbone of the cheesecake, providing structure and silken texture. Use block cream cheese (not whipped) and ensure it is fully softened to avoid lumps; beat with sugar until smooth and creamy, then proceed with adding eggs one by one at low speed to maintain a luscious batter.
  • 1 cup granulated sugar
    → Sweetens the filling and helps achieve a smooth, airy texture. Add gradually in stages to avoid gritty pockets; do not overbeat after eggs are introduced to minimize cracks in the final bake.
  • 3 large eggs
    → Provide structure and lift to the cheesecake as it bakes. Add eggs one at a time on low speed to minimize air incorporation; overmixing after adding eggs can create cracks, so mix just until combined.
  • 1/2 cup sour cream
    → Contributes tanginess, moisture, and a velvety finish. Use full-fat sour cream, and whisk it with the cream cheese to keep the batter smooth; bring to room temperature to prevent curdling during mixing.
  • 1/2 cup heavy cream
    → Adds richness and helps create a silky, creamy mouthfeel. Incorporate with the other liquids at the appropriate stage; for a lighter texture, you can whisk lightly before folding in, but avoid overmixing to maintain tenderness.
  • 1 teaspoon pure vanilla extract
    → Enhances depth of flavor and complements the strawberry swirl. Use high-quality vanilla extract (preferably real vanilla) for a more pronounced aroma; add with the dairy liquids for even distribution.
  • 1 tablespoon lemon juice or lemon zest (optional)
    → Brightens the filling and balances sweetness with a citrusy note. Zest provides fragrance, while juice adds acidity that can help with set; if using juice, add with other liquids and avoid too much acidity which could curdle the mixture.
  • 1 tablespoon all-purpose flour or cornstarch (to stabilize)
    → Helps the filling set and reduces cracking, especially if using very soft cream cheese. Use cornstarch for gluten-free versions; whisk thoroughly to dissolve and avoid lumps before adding to the batter.
  • 1/4 teaspoon salt
    → Elevates and balances the flavors, counteracting sweetness and brightening the overall profile. Distribute evenly into the filling to prevent concentrated salty spots.

Swirl

  • 1 cup fresh strawberries, hulled and chopped
    → The star of the swirl, providing vibrant color and fruity flavor. Hull and chop strawberries into small pieces; macerate with a little sugar and lemon juice to release juices and soften so they swirl smoothly through the batter. If berries are very ripe, adjust sugar accordingly.
  • 2 tablespoons granulated sugar
    → Draws out juice from the berries to create a glossy, flavorful swirl. Toss the chopped berries with sugar and let sit 10–15 minutes to macerate; drain any excess liquid if you prefer a thicker swirl.
  • 1 teaspoon fresh lemon juice
    → Brightens the strawberry flavor and helps prevent color loss during baking. Combine with berries during maceration; use freshly squeezed juice for best flavor and stability.
  • 1 teaspoon cornstarch or arrowroot powder (optional)
    → Thicken the strawberry juices into a defined ribbon rather than a thin sauce. Dissolve in a small amount of water and stir into the macerated berries just before layering; adjust thickness by the amount used; omit if you prefer a looser swirl.

Toppings

  • 1/2 cup fresh strawberries, sliced (optional)
    → Extra berry flavor and a decorative touch. Slice evenly and arrange on top or around the edge after baking for visual appeal; wash and pat dry to keep the surface free of moisture that could affect the crust.
  • 1 cup whipped cream (optional)
    → A light, creamy finish that pairs beautifully with the dense cheesecake. Whip cold heavy cream with a pinch of sugar and a splash of vanilla to soft peaks; dollop or pipe around the slice just before serving. Keep whipped cream chilled until serving to retain structure.

Instructions

  • Preheat your oven to 350°F (175°C) and line a 9-inch springform pan with parchment or grease the bottom and sides well.
    → This ensures the crust releases cleanly and prevents sticking that could ruin slices.
  • Combine graham cracker crumbs with 1/4 cup granulated sugar and 5 tablespoons melted unsalted butter until the mixture resembles wet sand.
    → The sugar aids binding and the melted butter coats the crumbs, creating a cohesive crust that bakes evenly.
  • Press the crust firmly into the bottom and 1/4 inch up the sides of the pan using the flat bottom of a glass or measuring cup to create an even, compact layer.
    → A snug press prevents gaps and ensures a stable base for clean slicing.
  • Bake the crust in the preheated oven for 8–10 minutes to set the structure, then remove and cool completely before filling.
    → Partial baking reduces sogginess and helps the crust hold together once filled.
  • In a large bowl, beat softened cream cheese with 1 cup sugar on medium-low speed until completely smooth and creamy, stopping to scrape the bowl as needed.
    → Fully softened cheese mixes without lumps, producing a velvet texture; avoid higher speed to prevent air pockets.
  • With the mixer on low, add eggs one at a time, mixing until each is just incorporated before adding the next; do not overbeat after eggs are added.
    → Low-speed incorporation minimizes air bubbles that can cause cracks and keeps the batter silky.
  • Beat in 1/2 cup sour cream until fully smooth, ensuring even distribution for moisture and tang.
    → Sour cream adds moisture and a gentle tang that balances sweetness when evenly integrated.
  • Pour in 1/2 cup heavy cream and 1 teaspoon pure vanilla extract, mixing on low until just combined.
    → Liquids hydrate the batter and enrich flavor; combine gently to maintain a creamy texture.
  • Stir in 1 tablespoon lemon juice or zest (optional) and 1 tablespoon all-purpose flour or cornstarch plus 1/4 teaspoon salt; mix on low until just incorporated.
    → Lemon adds brightness; starch stabilizes the batter and salt sharpens overall flavor.
  • Prepare the strawberry swirl by tossing 1 cup fresh strawberries, hulled and chopped, with 2 tablespoons granulated sugar and 1 teaspoon fresh lemon juice; let macerate 10–15 minutes.
    → Maceration softens fruit, releases juice, and creates glossy ribbons in the bake.
  • If a thicker swirl is desired, dissolve 1 teaspoon cornstarch or arrowroot powder in 1 teaspoon water and stir into the macerated berries just before use.
    → The starch helps set the juices into defined ribbons rather than a thin syrup.
  • Pour the prepared filling over the cooled crust in the pan, then spoon dollops of the strawberry mixture on top in several generous spots.
    → This distributes berry flavor and color for a Turbinata pattern once swirled.
  • Gently swirl the strawberry dollops through the batter using a thin knife or skewer in broad, figure-eight motions to create a turbinata design; avoid over-swirl to preserve the creamy texture.
    → Controlled swirling yields a striking pattern without deflating the filling.
  • Wrap the exterior of the springform pan tightly with 2–3 layers of heavy-duty foil to prevent water intrusion during baking.
    → A secure foil barrier protects the cheesecake and keeps the crust dry in a water bath.
  • Place the wrapped pan in a larger roasting pan and pour hot water into the outer pan until it reaches halfway up the sides of the springform pan.
    → The water bath creates gentle, uniform heat that reduces cracking and produces a smoother surface.
  • Bake in the center of the oven until the center barely jiggles when nudged, about 60–70 minutes; the edges should be set and the center slightly wobbly.
    → The gentle jiggle indicates proper set without overbaking, which can cause cracks and dryness.
  • Turn off the oven and crack the door; let the cheesecake cool in the oven for 1 hour to gradually reduce heat and minimize surface cracking.
    → Slow cooling prevents sudden temperature changes that cause fissures in the filling.
  • Remove the cake from the water bath, discard the foil, and refrigerate for at least 6 hours or overnight until completely chilled and set.
    → Cold set enhances sliceability and flavor development as the filling firms.
  • Before serving, optionally top with 1/2 cup sliced fresh strawberries and/or pipe or dollop 1 cup whipped cream around the edges for a bright, decorative finish.
    → Fresh toppings add contrast and lift; keep whipped cream cold until serving to maintain structure.
  • Slice with a warm, clean knife, wiping it between cuts to achieve neat portions and prevent smearing of the creamy filling.
    → A hot knife cleanly cuts through dense cheesecake, producing tidy, elegant slices.

Notes

These Cheesecake Turbinata alle Fragole are creamy and tangy, with a buttery crust and a bright strawberry swirl that makes each slice feel special. For the best texture, use room-temperature dairy and slowly integrate the eggs to avoid cracks. For a gluten-free version, substitute gluten-free graham crackers for the crust (or crushed nuts with a touch of sugar and melted butter) and ensure all other ingredients are gluten-free. This dessert benefits from gentle mixing, a controlled bake, and a water bath to prevent cracking. You can customize the swirl by adjusting the strawberry amount or adding a splash of lemon juice for extra brightness.

  • Crust tips: Pre-bake the crust for 8–10 minutes to set the base and prevent sogginess; press the crumb mixture firmly into the pan and chill briefly before adding the filling. If using gluten-free crackers, grind to a fine, even texture and mix with sugar and melted butter as directed.
  • Filling tips: Beat the softened cream cheese with sugar until smooth and creamy, then add eggs one at a time on low speed. Do not overmix after the eggs go in, or you risk cracks. Whisk sour cream and heavy cream in gently with the vanilla (and optional lemon zest) until just combined.
  • Swirl tips: Macerate the chopped strawberries with a pinch of sugar and lemon juice to release juice; drain excess liquid if making a dense swirl, and optionally thicken a portion of the juices with a small amount of cornstarch before layering.
  • Baking and chilling tips: Bake the cheesecake in a shallow water bath (wrap the pan in foil to seal and place in a larger pan with hot water). Bake until the center is just set, then let cool gradually at room temperature and refrigerate for at least 4 hours or overnight for clean slicing.
  • Serving and storage tips: Add fresh strawberries or whipped cream just before serving for a fresh finish. The cheesecake can be frozen: wrap tightly and freeze; thaw in the fridge overnight before serving.
  • Gluten-free note: If you have gluten intolerance, ensure your crust and all ingredients are certified gluten-free; use gluten-free crackers or alternative crust options and check labels on dairy products for gluten-containing additives.

Tips

Tips for the crust

Tips for the filling

Tips for the strawberry swirl

Tips for toppings and serving

FAQ

Che cos’è Cheesecake turbinata alle fragole?

È una cheesecake cremosa con un effetto turbinata creato dal swirl di purea di fragole sulla superficie. Ha una base croccante di biscotti, una crema ricca di formaggio e panna, e una dolce fusione di fragole che la rende visivamente accattivante e gustosa.

Quali sono gli ingredienti principali e le porzioni indicative?

Per circa 8 porzioni:

Base: 200 g di biscotti digestive (o biscotti secchi simili), 80 g di burro fuso. Crema: 600 g di formaggio cremoso (tipo philadelphia), 150 g di zucchero, 3 uova, 200 ml di panna fresca, 1 cucchiaino di estratto di vaniglia. Purea di fragole: 250 g di fragole frullate con 40 g di zucchero. Opzionale: scorza grattugiata di limone per un leggero aroma.

Quali strumenti servono per prepararla?

Stampo a cerniera da 24–26 cm, carta forno, mixer o frullatore, ciotole, frusta o spatola, cucchiaio per distribuire la base, stuzzicadenti o bastoncino per creare il turbinio, spatola per livellare, forno con funzione statica e opzionalmente una teglia alta per bagno-maria.

Come si prepara la base di biscotti?

Trita i biscotti fino a ottenere una granella fine. Mescola con burro fuso fino ad avere un composto umido e compatto. Versa nel fondo dello stampo rivestito di carta forno e premi con il dorso di un cucchiaio per ottenere una base uniforme. Raffredda in fridge per almeno 15–20 minuti prima di aggiungere la crema.

Come si prepara la crema al formaggio?

In una ciotola, monta il formaggio cremoso con lo zucchero fino a ottenere una crema liscia. Aggiungi le uova, una per volta, mescolando delicatamente per non incorporare aria. Unisci la panna fresca e la vaniglia, mescolando fino a renderla omogenea. Versa sulla base fredda e livella.

Come si ottiene l’effetto turbinata delle fragole?

Prepara la purea di fragole: frulla fragole con un po’ di zucchero. Versa delicatamente la purea sulla crema a cucchiaiate sparse, poi con uno stuzzicadenti o una forchetta fai dei movimenti circolari dalla superficie verso l’interno per creare l’effetto swirl tipo turbina. Non mescolare troppo; resta una quantità di purea a vortice. Puoi anche lasciare alcune gocce di purea al centro per un effetto visivo più accentuato.

Qual è la procedura di cottura e raffreddamento?

Cuoci in forno preriscaldato a 160°C, preferibilmente su forno statico, per circa 50–60 minuti. Se utilizzi bagno-maria, metti lo stampo in una teglia più grande con acqua bollente. Dopo la cottura, spegni il forno e lascia raffreddare nel forno socchiuso per circa 1 ora per evitare crepe. Poi trasferisci in frigorifero minimo 4 ore, meglio tutta la notte, prima di servire.

Come si conserva e per quanto tempo?

Conserva la Cheesecake turbinata alle fragole in frigorifero, coperta con pellicola o in contenitore ermetico, fino a 3–4 giorni. Puoi anche congelarla porzionata; toglila dal freezer la sera prima per gustarla al meglio (lo swirl può apparire meno definito una volta scongelata).

Quali varianti o sostituzioni sono possibili?

Varianti e sostituzioni utili:

– Senza glutine: usa biscotti senza glutine per la base e burro. – Senza lattosio: utilizza formaggio cremoso senza lattosio e panna senza lattosio. – Versione leggera: riduci lo zucchero nella crema e nella purea di fragole; aggiungi un po’ di succo di limone per equilibrare. – Per una cheesecake vegana: sostituisci formaggio cremoso con crema di anacardi, aggiungi agar-agar o gelatinante vegetale e usa una base di biscotti vegani. – Altri frutti: sostituisci le fragole con lamponi o more per una variante di sapore e colore diversi. – Decorazione: decora con fragole fresche a fette, scorzette di limone o una spolverata di pistacchi tritati.

Introduction / Hook

Imagine a bite-size treasure that instantly conjures cozy evenings, laughter around a sunlit table, and the irresistible aroma of garlic dancing in melted cheese. Crocchette aglio e formaggio are small, golden orbs that promise a symphony of warmth with every crunch. The exterior shimmers with a light, crisp coating that gives way to a velvety interior—a creamy, savory center perfumed with garlic and enriched by rich cheese. It’s the kind of dish that makes a simple gathering feel festive, the kind of snack you crave when the day has been long and your senses deserve a treat. The scent alone can coax smiles from a roomful of hungry people, and the first bite is a revelation: a crisp outer shell giving way to a soft, indulgent core that clings to your memory long after the plate is emptied.

This is more than a snack; it’s a small celebration of comforting flavors performed with confidence and a touch of street-food charm. The garlic isn’t sharp or overpowering; it’s mellowed by the gentleness of the cheese and the tenderness of the interior, creating a balanced, inviting warmth. The cheese adds a lush, indulgent pull, a way to feel pampered without fuss. And the crust—golden, lightly salted, and crackling sotto punta—provides that satisfying snap that makes croquettes so addictive. Whether served with a simple dipping sauce, a bright herb aioli, or a tangy tomato glaze, these crocchette become a crowd-pleaser that looks elegant on a platter and disappears faster than you’d expect.

In a world of quick bites and fast-food shortcuts, these crocchette feel like a small triumph of technique: a delicate balance between a soft, creamy center and a crisp, aromatic crust. They’re forgiving enough for a weeknight treat, yet special enough to star at a party, a tapas night, or a family gathering. The beauty lies in how approachable they are: you can coax the base to a creamy harmony, roll them gently into a coat of breadcrumbs, and watch them transform into little golden crescents of happiness. It’s a dish that invites sharing, conversation, and the comfort of a kitchen well-loved—garlic-scented joy that warms both hands and hearts.

Ready to embark on a little culinary joy ride? This recipe is designed to feel approachable, yet offer an experience that feels luxurious. You’ll notice how the simple combination of garlic and cheese, wrapped in a delicate crust, can turn an ordinary moment into something memorable. The technique is versatile, the flavors versatile, and the result universally appealing—crisp, creamy, and utterly satisfying from the very first bite to the last crumb on the plate.

The Story Behind the Dish

Crocchette, in their various regional guises, have long held a place at the heart of Italian comfort food. These small, fried delights borrow from the country’s love affair with potatoes, breading, and the gentle magic of slow flavor development. The term “crocchette” itself speaks to that signature crunch—the word evoking the satisfying crackle you hear the moment a croquette meets heat and air. While many regions have their own spin, the core idea remains the same: a tender, flavorful interior encased in a crisp exterior that delivers a multisensory experience with every bite.

The version centered on garlic and cheese taps into a timeless culinary impulse: pairing a fragrant aromatic with a luscious, melty cheese to create something both indulgent and deeply comforting. Garlic has long been a workhorse in Italian kitchens, its aroma weaving through sauces, roasted vegetables, and bread as a message from the pan that something wonderful is about to unfold. When garlic meets cheese—whether it’s a nuance of parmesan, pecorino, or a smooth, melting variety—the flavors become creamy, savory, and almost nostalgic, inviting you to slow down and savor the moment. The crocchette become a portable, shareable form of that magic: little golden pillows that travel well from pan to plate, perfect for dipping and pairing with something bright and fresh to cut through the richness.

In many households, crocchette emerge from a simple, almost ritual kitchen practice: mash a starchy base, fold in aromatics and cheese, shape with care, and roll in breadcrumbs before a quick, precise fry. The ritual is less about complexity and more about concentration—the kind of cooking where patience and attention transform humble ingredients into something memorable. It’s a dish that has traveled and evolved: a reminder that great flavors often hide in small, perfect bites—tiny moments of joy that can turn a meal into a celebration. Whether you first tasted them at a bustling street corner, in a family kitchen, or as part of an intimate gathering, crocchette aglio e formaggio carry with them the spirit of sharing, warmth, and the quiet happiness of something savory, crisp, and incredibly satisfying.

While the seeds of this dish can be traced to broader Italian comfort-food traditions, the beauty of crocchette is how adaptable they are. You can tailor the texture with different coatings, experiment with cheese varieties to suit your pantry, or pair them with sauces that reflect your mood or occasion. They bridge rustic, homey flavors with a touch of refined indulgence, and that balance is what keeps them timeless. Today, they stand as a testament to how a few well-chosen ingredients—garlic’s perfume, cheese’s melt, and a crust that crackles—can become a signature bite that’s both familiar and exciting.

Why You’ll Love This Recipe

  • Quick to make, impressive to serve: These crocchette come together with ease, yet their appearance and aroma feel special enough for guests or a weekend treat.
  • Comforting and indulgent: A creamy interior enriched with melted cheese contrasts with a crisp, golden crust for a satisfying texture experience.
  • Versatile pairing: They pair beautifully with bright dips, zesty sauces, and fresh greens, making them suitable for antipasto platters or a light weeknight bite.
  • Aromatics that sing: The scent of garlic, just warmed and mellowed, infuses the entire dish, making it irresistible even before the first bite.
  • Crowd-pleasing and shareable: Perfect as an appetizer at parties, a tapas-style spread, or a cozy family snack that invites dipping and conversation.
  • Evidence of technique, not fuss: Achieve a crisp outer crust without overworking the interior; a few precise steps create a texture that feels luxurious without being precious.
  • Adaptable to dietary needs: With the right cheese choices and crust options, you can craft versions that suit vegan or gluten-free preferences while keeping the spirit of the dish intact.

Flavor Profile & Texture

The flavor profile is a balanced love letter to comfort foods. The garlic introduces a warm, fragrant note that doesn’t overwhelm; it’s the perfume that lingers in the air as the crocchette fry to a golden finish. The interior retains a gentle creaminess, reminiscent of a soft, well-panned mashed potate-like center, enriched by melted cheese that lends a luxurious, silky mouthfeel. The cheese contributes not only richness but a savory depth that harmonizes with the garlic rather than competing with it. Some cheese varieties offer a sharp tang, others a mellow, creamy stretch; the result is a flexible flavor canvas that can be tailored to your pantry and preference.

The crust provides the all-important texture contrast. A light, airy breadcrumb coating—possibly with a hint of herbs or parmesan for extra savoriness—crisp to a delicate crackle. This outer shell acts as a boundary that locks in the interior’s tenderness while offering a satisfying resistance with each bite. The overall sensation is a dance between heat, scent, and texture: the crunch first, then the creamy interior, finished with a gentle, lingering savor from the cheese and garlic.

In aroma terms, think of an inviting mélange: toasty breadcrumbs, warm garlic, and a hint of melted, aromatic cheese escaping into the air as they fry. The palate experiences layers—initial crispness, a gentle umami from the cheese, and a lingering mellow garlic that leaves you wanting another bite. The balance is essential; too much garlic can dominate, so achieving a soft, rounded garlic presence is key to capturing the dish’s comforting charm. The result is a harmonious, crowd-pleasing bite that feels indulgent without being heavy, elegant without being fussy, and always inviting another round.

Occasions & Pairings

These crocchette are incredibly versatile, making them an ideal choice across a spectrum of occasions. They shine as a bright antipasto at a holiday gathering, a tempting tapas addition for a casual evening with friends, or a comforting starter before a Sunday family meal. Their compact size makes them perfect for potlucks, birthday parties, or any occasion where guests relish shareable bites they can scoop up with ease. They also work beautifully as a quick weeknight treat when you crave something a touch more special than everyday snacks.

Pairing ideas to elevate the experience:

  • Dips and sauces: A bright tomato-garlic sauce, a peppery aioli, a lemony herb yogurt dip, or a simple marinara can provide a tangy counterpoint to the richness. The contrast enhances the aromatic garlicky notes while offering a fresh brightness.
  • Green salads and vegetables: A crisp arugula salad with lemon vinaigrette or a lightly dressed cucumber and fennel salad adds a verdant balance and refreshing bite to cut through the richness.
  • Wine and beverages: A chilled white with good acidity, such as a Pinot Grigio or Sauvignon Blanc, harmonizes with the garlic and cheese. For those who prefer beer, a light, hoppy pale ale or a pilsner can be a fantastic match. For a non-alcoholic option, a sparkling mineral water with a twist of lemon or a citrusy iced tea works very well.
  • Side dishes: A simple caprese-inspired platter, roasted vegetables, or a light antipasti assortment provides a well-rounded spread that complements the crocchette without competing for attention.

Tips, Variations & Substitutions

Core technique tips

To achieve that perfect balance of crisp exterior and creamy interior, keep these practical tips in mind. Maintain consistent shaping so each piece cooks evenly. If you’re pan-frying, use a moderate heat and a shallow layer of oil to encourage even browning without scorching. When baking or air-frying, give space between pieces to avoid steaming them together, which can soften the coating. For the interior, aim for a cooperative texture—soft, smooth, and cohesive rather than crumbly—so it binds well when formed into croquettes. If you’re reworking a soft base, a touch of light binding agent can help maintain shape without turning the center heavy.

Variations

  • Cheese varieties: For a mellower profile, use a creamy white cheese; for a bolder bite, mix in a sharper aged cheese. You can also blend cheeses for depth—parmesan or pecorino with a milder mozzarella or fontina creates a pleasing contrast.
  • Herbs and aromatics: Add chopped parsley, chives, or thyme to lift the flavors. A hint of black pepper or red pepper flakes can introduce a subtle warmth that pairs nicely with garlic.
  • Coatings: Experiment with panko for an extra-crisp finish, or a seasoned flour mix for a more robust crust. A light dusting of grated parmesan on the crust can enhance savoriness and aroma.
  • Diet-friendly options: Vegan version: use a plant-based meltable cheese and a dairy-free base, ensuring the texture remains creamy. Gluten-free option: use gluten-free breadcrumbs or almond flour-based crust for crunch without gluten. Low-carb approach: shape croquettes with riced cauliflower or a potato substitute and use a crispy nut or seed crumb coating.
  • Regional twists: Add a pinch of smoked paprika or a dash of Italian seasoning to evoke different regional profiles. A squeeze of lemon zest just before serving brightens the dish and foregrounds the garlic and cheese.

Make-ahead ideas

Shape the croquettes and refrigerate on a parchment-lined tray for up to 24 hours before frying or baking. If you want to freeze them, lightly pre-freeze on a tray, then transfer to an airtight container. They can be baked or air-fried directly from the freezer, but you’ll want to add a few extra minutes to the cooking time. When reheating, a short fry or a hot oven return will help regain the crust’s crispiness after storage.

Storage & Make-Ahead Ideas

Leftovers, if any, deserve a place in your fridge rather than the back of the kitchen cabinet. Store cooked crocchette in an airtight container in the refrigerator for up to 2 days. When reheating, aim for a method that preserves crispness. A quick fry in a shallow pan, or a high-heat finish in the oven or air fryer, can bring back the crunch that might soften after resting. If you’ve prepared a batch ahead of time, consider cradling the crocchette on a wire rack over a sheet pan while reheating to avoid soggy bottoms. For longer-term planning, freezing before or after coating is a reliable way to extend their life. If frozen before cooking, simply place on a parchment-lined tray to flash-freeze, then transfer to a freezer bag; cook directly from frozen, adding extra minutes as needed. If frozen after coating, bake or fry from frozen, but allow a few additional minutes for the interior to heat through evenly.

Make-ahead ideas can also extend to dipping sauces or accompaniments. A bright, zesty dip can be prepared in advance and stored in the refrigerator for a couple of days, ready to re-emerge alongside a hot plate of crocchette. The combination of a make-ahead plan with a quick finish just before serving is a smart way to provide a restaurant-like experience at home without turning the kitchen into a last-minute rush.

Fun Facts & Trivia (Optional)

Did you know crocchette as a concept exist in many culinary traditions around the world? While the Italian crocchette celebrate a harmonious blend of aromatic garlic and cheese, other cultures have their own beloved bite-sized fried treats that share the same spirit of comfort and portability. The technique—creating a cohesive interior that stays tender while the outside becomes crisp—has universal appeal and has inspired countless regional adaptations. The name itself, with its emphasis on “crunch” and “crocc” in several Romance languages, hints at the universal love for a satisfying crackle that signals a well-executed fry. Garlic, a staple across cuisines, has a storied history of bringing warmth and depth to dishes, and its pairing with cheese is a timeless classic that appears in many regional specialties. The story of crocchette is a reminder that the simplest combinations—humble ingredients treated with care—can deliver moments of culinary delight that feel both familiar and novel.

In some kitchens, crocchette are more than food; they’re a memory-making ritual. They appear at family gatherings, festive celebrations, and casual evenings alike, always inviting hands to gather and noses to follow the irresistible scent to the platter. The crispy shell and warm center create a sensory moment that lingers, a tiny celebration you can share again and again. And while today’s version features garlic and cheese, the heart of the dish remains the same: a commitment to texture, balance, and a moment of pure, delicious comfort.

Ingredients

Crocchette Base

  • 4 medium russet potatoes, peeled and cut into chunks
    → Boil or steam until fork-tender. Mashing hot potatoes yields a smooth, cohesive base; russet potatoes provide a light, fluffy interior with enough starch to bind without becoming gummy. Peel to avoid a muddy texture; drain well and return to heat briefly to dry out excess moisture before mashing.
  • 2 tablespoons unsalted butter, melted
    → Adds richness and helps create a silky, cohesive mash when stirred into the hot potatoes. Melt and whisk in so it emulsifies with the potato starch; use unsalted to control the salt level. For dairy-free, substitute with a neutral oil, though flavor will shift.
  • 1/4 cup milk
    → Adds creaminess and helps achieve a light, fluffy texture. Warm the milk slightly before mixing to prevent cooling the potatoes; adjust quantity to reach a batch that holds its shape but isn’t too wet. If you prefer dairy-free, use a lightly seasoned plant-based milk alternative.
  • 1 teaspoon fine sea salt
    → Essential for flavor; potatoes taste bland if under-seasoned. Taste the mash before adding cheese and herbs and adjust accordingly. If you plan to add salty cheese, you may reduce this a touch.
  • 1/4 teaspoon white pepper (or black pepper)
    → Provides a subtle kick and aroma. White pepper yields a cleaner appearance in the mash, while black pepper adds a bit more bite. Freshly grind just before using for maximum aroma.

Garlic & Cheese

  • 1 tablespoon extra-virgin olive oil
    → Used to gently sauté the garlic to release its aroma without burning; olive oil adds a fruity note that complements the potatoes and cheese. Heat gently and add the minced garlic until just fragrant, then remove from heat and let cool slightly before mixing to avoid cooking the eggs.
  • 2 garlic cloves, minced
    → Garlic provides the signature aroma. Mince finely so it distributes evenly throughout the mash. Sauté in the olive oil until fragrant (about 30–60 seconds) and avoid browning to prevent bitterness; incorporate into the warm potato base so its flavor infuses evenly.
  • 100 g grated Parmigiano-Reggiano
    → Delivers sharp, savory umami and helps with binding while enriching the overall flavor. Use freshly grated cheese for the best aroma and texture; fold into the warm mash so it melts smoothly and disperses evenly through the mixture.
  • 150 g shredded mozzarella (optional)
    → Adds a creamy, melty center when fried. Choose a mozzarella with good melt; drain excess whey or moisture before mixing to avoid soggy croquettes. If you prefer firmer croquettes, reduce or omit this cheese.
  • 2 large eggs, beaten and divided
    → 1 egg is used in the potato-cheese mixture as a binder to help the croquettes hold their shape; the remaining egg is reserved for dredging the formed croquettes so the breadcrumbs adhere well. If the mixture feels too wet, chill it 15–20 minutes to firm up for easier shaping.

Coating & Finish

  • 1.5 cups breadcrumbs (Italian-style or panko)
    → Creates the crisp outer crust. For extra flavor, mix in 1 tablespoon grated Parmigiano-Reggiano or a pinch of salt and black pepper. Press the crumbs onto each croquette firmly to ensure even coverage and a uniform crust.
  • 2 tablespoons finely chopped fresh parsley (optional)
    → Adds color and a fresh herbal note. You can mix parsley into the mash for even distribution or press additional parsley into the breadcrumb coating for a brighter finish. If using dried parsley, use 1 teaspoon as a substitute.

Frying

  • Neutral oil for frying (vegetable or canola), about 1 liter (4 cups)
    → Use a high-smoke-point oil suitable for frying. Heat to approximately 180°C (350°F) and maintain temperature between batches. Fry croquettes in batches to avoid crowding, which can lower the oil temperature and result in greasy crusts. Drain on paper towels after frying and serve hot for best texture and flavor.

Instructions

  • Rinse and peel the potatoes, then cut them into evenly sized chunks for uniform cooking.
    → Uniform pieces cook at the same rate, yielding a smoother mash without overcooked edges.
  • Place the potato chunks in a large pot and cover with cold water; bring to a boil over medium-high heat and simmer until fork-tender, about 15–20 minutes.
    → Starting in cold water ensures gradual, even heat penetration and prevents mealy outsides with undercooked centers.
  • Drain the potatoes thoroughly in a colander and return them to the warm pot; set over low heat for 1–2 minutes to dry surface moisture.
    → Removing excess moisture helps the mash bind properly and prevents a soggy croquette interior.
  • Mash the potatoes using a ricer or masher until completely smooth with no lumps.
    → A smooth base binds with the cheese and eggs to form cohesive croquettes that hold their shape during frying.
  • Stir in the melted unsalted butter into the hot mash until fully emulsified and integrated.
    → Butter adds richness and helps loosen the starch, creating a creamy, cohesive base that folds easily with cheese.
  • Warm the 1/4 cup of milk briefly (do not scald) and gradually fold it into the mash, mixing until the mixture is creamy and holds its shape but is not overly wet.
    → Warm liquid integrates smoothly with hot potatoes, preventing a cool, tacky mash that would hinder binding.
  • Season the mash with 1 teaspoon fine sea salt and 1/4 teaspoon white pepper; taste and adjust so the base is seasoned before adding cheese and herbs.
    → Potatoes need salt to shine; remember cheese will contribute additional saltiness, so balance carefully.
  • In a small skillet, heat 1 tablespoon extra-virgin olive oil over gentle heat and add the minced garlic; sauté just until fragrant, 30–60 seconds, then remove from heat and allow to cool slightly.
    → Gentle heating releases aroma without browning or bitterness, ensuring a clean garlic flavor in the final mash.
  • Stir the cooled garlic and its oil into the warm potato mixture along with the grated Parmigiano-Reggiano; mix until evenly distributed.
    → The cheese melts into the warmth of the mash, imparting umami and helping the mixture bind together.
  • If using mozzarella, fold in the shredded mozzarella and distribute evenly throughout the mash.
    → Mozzarella creates a creamy, molten center; distribute evenly to prevent pockets of moisture that can weaken binding.
  • Beat one large egg and fold it into the potato–cheese mixture as a binder; the mixture should become cohesive and easier to shape; if it feels too soft, chill for 15–20 minutes.
    → The egg acts as a glue that helps croquettes keep their form during frying; chilling firms the texture for easier handling.
  • Cover and refrigerate the mixture for 15–20 minutes if it feels too wet or sticky, allowing the starch to hydrate and the fats to settle for easier shaping.
    → Chilling firms the texture so croquettes hold their shape when formed and breaded.
  • Stir in 2 tablespoons finely chopped fresh parsley into the potato–cheese mixture for a bright, herbal note (optional); alternatively, reserve parsley to press into the breadcrumb coating.
    → Parsley adds color and fresh aroma; distributing it in the mash ensures even flavor throughout each croquette.
  • Shape the croquettes: using a spoon or small ice-cream scoop, portion the mixture and roll into evenly sized cylinders or ovals; place them on a parchment-lined tray.
    → Even sizing ensures uniform frying time and a consistent crust per piece.
  • Beat the remaining egg in a shallow dish; dip each shaped croquette into the egg to lightly coat, then roll in the 1.5 cups breadcrumbs (Italian-style or panko) until fully coated; press the crumbs firmly to adhere.
    → The egg wash helps breadcrumbs cling, while pressing ensures a thick, even crust that crisps nicely in hot oil.
  • If desired, mix 1 tablespoon grated Parmigiano-Reggiano into the breadcrumbs or sprinkle with salt and pepper for extra crust flavor; press again to set the coating.
    → A flavorful crust adds contrast to the tender interior and enhances aroma on frying.
  • Optionally chill the breaded croquettes for 10–15 minutes to firm the coating and reduce crumbs shedding during frying.
    → A settled crust fries more evenly and stays intact when submerged in hot oil.
  • Pour neutral oil (vegetable or canola) into a deep pot to a depth of about 4 inches (1 liter) and heat to 180°C (350°F); monitor with a thermometer to maintain steady temperature.
    → Maintaining the correct frying temperature yields a crisp crust without excessive greasiness or undercooked centers.
  • Fry the croquettes in batches for 2–3 minutes, turning as needed, until evenly golden brown and the cheese inside is melted; do not overcrowd the pan to avoid temperature drop.
    → Frying in batches preserves oil temperature, ensuring a crisp crust and a molten interior.
  • Transfer fried croquettes to paper towels to drain, then keep warm in a low oven if not serving immediately.
    → Draining prevents sogginess and resting briefly helps set the crust; a low oven keeps them hot without continuing to cook the interior.
  • Serve crocchette aglio e formaggio hot, optionally sprinkled with extra chopped parsley for color and a fresh aroma.
    → Crisp exterior, creamy cheesy interior, and bright herb notes make the dish balanced and inviting straight from the fryer.

Notes

These garlic and cheese croquettes are a comforting savory bite with a crisp outer crust and a creamy, cheesy interior. The potatoes provide the binding, while Parmigiano-Reggiano and mozzarella add depth and melt for a luscious center. For best texture, fold the cheese into the warm mashed potatoes so it dissolves evenly, then shape into uniform cylinders or ovals so they fry consistently. You can customize them by swapping Parmigiano-Reggiano with Pecorino Romano or Asiago, adding finely chopped fresh parsley, chives, or oregano, or a pinch of red pepper flakes for a subtle kick. To keep the dish gluten-free, use gluten-free breadcrumbs (or crushed gluten-free cornmeal) and ensure all other ingredients are certified gluten-free; press the crumbs firmly onto each croquette to form a thick, even crust. If dairy-free is preferred, omit or replace the cheese with a plant-based alternative and use a dairy-free butter substitute, understanding that melt and flavor will differ. If the mash seems too wet, chill it 15–20 minutes to firm up for easier shaping; if it’s too stiff, warm briefly and rehydrate with a splash of milk. Fry in neutral oil heated to about 180°C (350°F), in batches to maintain temperature and prevent soggy crusts; drain on paper towels and serve immediately for the best texture. For a lighter approach, bake on a parchment-lined tray at 200°C (400°F) for 12–15 minutes, turning once for even color. You can freeze shaped croquettes on a tray, then transfer to a bag for up to 1 month; cook from frozen, adding 1–2 minutes to frying or baking time. Serve with marinara, aioli, or a garlicky yogurt dip and a simple green salad for balance.

Tips

Tips for Crocchette aglio e formaggio

  • Potato base: Use russet potatoes for a light, fluffy interior. After boiling or steaming until fork-tender, drain thoroughly and return to the pot on low heat for 1–2 minutes to evaporate excess moisture before mashing. For an ultra-smooth texture, pass the hot potatoes through a ricer.
  • Mash and binding: Mash while very hot and whisk in the melted butter first, then gradually mix in warm milk. This helps emulsify the fat with the potato starch for a silkier base. Avoid over-mixing, which can make the texture gummy.
  • Seasoning: Salt the mash before adding cheese and herbs; taste and adjust. If you plan to use very salty cheese, you may reduce the initial salt a touch.
  • Garlic handling: Sauté minced garlic gently in olive oil until just fragrant—do not let it brown, which can introduce bitterness. Cool slightly before mixing to prevent cooking the eggs.
  • Olive oil note: Use extra-virgin olive oil for a fruity, aromad note. Warm the oil and garlic briefly, then remove from heat to prevent overheating the mixture.
  • Cheese strategy: Fold in freshly grated Parmigiano-Reggiano into the warm mash for sharp flavor and binding. If using mozzarella, drain excess moisture and fold in small portions so it melts evenly without making the mixture soggy.
  • Eggs as binders: Use 1 beaten egg in the potato-cheese base to help the croquettes hold together; reserve the remaining egg for dredging. If the mixture feels too wet, chill 15–20 minutes to firm up for easier shaping.
  • Coating texture: For a crisp crust, use 1.5 cups breadcrumbs (Italian-style or panko). Mix in a little Parmigiano-Reggiano or a pinch of salt and pepper for extra flavor, then press crumbs firmly onto each croquette to ensure even coverage.
  • Herbs and color: Fresh parsley adds color and brightness; mix some into the mash or press into the breadcrumb coating. If using dried parsley, substitute 1 teaspoon.
  • Shaping and chilling: Keep the potato mixture cool while shaping to help it hold form. If the dough is too soft, refrigerate 15–20 minutes before coating and frying.
  • Frying technique: Fry in neutral oil (vegetable or canola) heated to about 180°C (350°F). Do not crowd the pan; fry in batches to maintain oil temperature for a crispy crust. Drain on paper towels and serve immediately while hot and crisp.
  • Cooking from frozen: For make-ahead croquettes, freeze shaped croquettes on a baking sheet, then transfer to a bag. Fry or bake from frozen—add a minute or two to the frying or baking time.
  • Healthier option: If you prefer to bake, preheat to 200°C (400°F). Lightly oil a baking sheet, place croquettes, brush or spray with a little oil, and bake about 15–20 minutes, flipping halfway, until golden and crisp.
  • Dairy-free adaptation: Substitute dairy with a neutral oil in the mash and use a dairy-free cheese substitute. Keep in mind the flavor and melt will differ from the dairy version.

FAQ

Che cosa sono le Crocchette aglio e formaggio?

Sono bocconcini croccanti preparati con purè di patate arricchito con aglio e formaggi, panati e cotti al forno o fritti. Sono ideali come antipasto, stuzzichino o contorno.

Quali sono gli ingredienti base?

Patate lesse schiacciate, aglio (facoltativo o soffritto), formaggi grattugiati (parmigiano o pecorino) e formaggio filante (mozzarella o fontina), uovo, pangrattato, prezzemolo, sale e pepe. Opzionale: latte o panna per rendere l’impasto più morbido.

Posso cuocerle al forno invece di friggerle?

Sì. Preriscalda il forno a 200°C (con forno statico; 180°C se ventilato). Disponi le crocchette su una teglia rivestita di carta forno, spennella leggermente con olio e cuoci 20–25 minuti, girandole a metà cottura per dorarle in modo uniforme.

Come si prepara l’impasto?

Lessa le patate, falle intiepidire e schiacciale. Mescola con aglio soffritto, formaggi tagliati o grattugiati, l’uovo, prezzemolo, sale e pepe. Se l’impasto risulta troppo morbido, aggiungi un po’ di pangrattato. Forma delle crocchette o bastoncini e passale nel pangrattato (mescolato con parmigiano, se vuoi).

Qual è la temperatura e i tempi di cottura?

In olio: 170–180°C, circa 2–3 minuti per lato finché dorate. In forno: 200°C per 20–25 minuti, girandole a metà cottura per una doratura uniforme.

Posso prepararle in anticipo?

Sì. Si possono formare e conservare in frigorifero fino a 24 ore prima della cottura. Per una conservazione più lunga, surgelale: impanate e sistemate su vassoi, poi trasferitele in sacchetti. Da congelate, friggi o cuoci in forno aggiungendo qualche minuto al tempo normale.

Come conservarle e come congelarle?

Conservazione: in frigorifero si mantengono 1–2 giorni. Congelamento: si possono congelare crude o cotte. Per congelarle crude, disponile su un vassoio e congela; poi trasferiscile in sacchetti. Da congelate, friggi 3–4 minuti o cuoci in forno a 200°C per 25–30 minuti. Se sono già cotte, riscalale in forno a 180–190°C per 8–12 minuti.

Quali alternative per allergie/intolleranze?

Glutine: utilizza pangrattato senza glutine o una panatura di mais. Lattosio: scegli formaggi stagionati o formaggi senza lattosio. Vegane: sostituisci i formaggi con formaggi vegetali e legante vegetale (ad es. purè di patate arricchito con olio) e usa un sostituto dell’uovo (una miscela di acqua e amido di mais o purea di ceci) per legare. Puoi anche omettere l’aglio se preferisci una versione meno pungente.

Quali formaggi consigliate e come variare il sapore?

Consigli comuni: parmigiano reggiano e/o pecorino per sapidità, mozzarella o fontina per cremosità. Per un gusto più deciso, aggiungi cheddar o gorgonzola piccante in piccole quantità, oppure arricchisci con erbe come prezzemolo, origano o scorza di limone. Puoi anche alternare i formaggi a tuo gusto per diverse versioni.

Come ottenere una croccantezza extra?

Usa pangrattato regolato con parmigiano o pangrattato panko per una crosta più leggera e croccante. Impana bene le crocchette e asciugale leggermente prima di passarle nel pangrattato. Se le friggi, mantieni la temperatura dell’olio costante (170–180°C) e lavora poche pezzi alla volta per evitare che si abbassino la temperatura. Se le cuoci al forno, spennella con olio prima di infornarle e, se vuoi, usa una grata o una teglia che permetta una migliore circolazione dell’aria.

Introduzione / Hook

Immagina una nuvola dorata che danza leggera sulla tavola, una nuvola che sembra sfiorare il cielo con la sua delicatezza. Lo senti il soffio sottile di una promessa di dolcezza? Il soufflé giapponese soffice è esattamente questo: una meraviglia di leggerezza, un equilibrio tra umami gentile e dolcezza soffice che si scioglie al primo assaggio. Non è solo un dessert; è un viaggio sensoriale che mette insieme precisione tecnica e poesia culinaria. Ogni boccone racconta una storia di cura, di pazienza e di equilibrio tra aria e crema, tra cremosità vellutata e sofficità che sembra custodire un piccolo segreto all’interno. Prepararlo significa concedersi un momento di calma, come se la cucina diventasse una piccola universo in cui la gestualità conta quanto la ricetta stessa. Se hai mai desiderato un dessert che sorprenda senza essere eccessivo, che renda una semplice cena un’occasione speciale, allora questo soufflé è la chiave: una porta sottile tra l’ingegno della cucina giapponese e la tradizione francese del soufflé, reinterpretata con delicatezza, raffinatezza e una particolare attenzione al respiro dell’impasto.

La bellezza di questo piatto sta nella sua semplicità apparente. Non servono ingredienti pomposi o tecniche arditamente complesse: è la maestria nel mantenere l’aria, la luce e l’umidità giuste che fa la differenza. Eppure non è una ricetta da improvvisare in una fretta: richiede un po’ di organizzazione, una mente calma e una sensibilità per capire quando la crema ha raggiunto la giusta consistenza, quanto è pronta la montata d’albume, o quando la piastra o lo stampo hanno raggiunto la temperatura ideale. È un dessert che invita alla mindfulness, a una respirazione lenta tra una preparazione e l’altra, trasformando l’atto di cucinare in un rituale di piacere puro. Se vuoi stupire con qualcosa di diverso senza rinunciare all’eleganza, al gusto e a una presentazione che cattura l’occhio, questo soufflé giapponese soffice sarà la tua compagna ideale.

La storia dietro il piatto

Il soufflé è, per definizione, una creazione europea nata dall’incontro tra tradizioni culinarie francesi e l’arte di lavorare gli albumi a neve. Nel tempo, diverse culture hanno reinterpretato questa idea, giocando con pesi, protrezioni di sapori e tecniche di incorporazione dell’aria. Il soufflé giapponese soffice rappresenta una fusione affascinante tra l’estetica estremamente pulita e la sensibilità all’umidità tipica della cucina nipponica, unita a una tecnica che privilegia l’areazione delicata. In Giappone, spesso i dolci fanno leva sull’equilibrio tra dolcezza e leggerezza, tra sapori che non sovrastano il palato ma lo invitano a scoprire nuove sfumature. In questa versione, la leggerezza non è un semplice obiettivo tessuto dall’aria, ma una filosofia: c’è una grande attenzione al controllo della temperatura, al bilanciamento tra crema e aria, e a una presentazione minimale ma estremamente raffinata.

Molti appassionati hanno raccontato di come, quando provano questo dessert, la casa si riempie di un profumo caldo e avvolgente: una fragranza lattiginosa, leggermente vanigliata o agrumata a seconda delle varianti, che anticipa la morbidezza che seguirà. È come se la cucina si trasformasse in un piccolo teatro in cui la scena principale è la consistenza: una massa soffice che si mantiene compatta ma che, al contatto con il cucchiaio o con la lingua, evapora, rilasciando una sensazione di leggerezza che non è vana, ma strutturata e ricercata. La versione giapponese di questa delizia spesso porta con sé un tocco di delicatezza in più: potrebbe includere una nota di yuzu, matcha o una punta di latte condensato, creando un profilo aromatico che è allo stesso tempo familiare e sorprendente.

Perché lo adorerai

  • Leggerezza senza pesi: la struttura interna è morbida, ma stabile, un perfetto equilibrio tra celebre sofficezza e sostanza necessaria per non crollare subito a tavola.
  • Esperienza multisensoriale: profumo invitante, texture che si disintegra al primo morso, sapore delicato ma presente, con note che possono variare dal dolce al leggermente agrumato o vanigliato.
  • Eleganza e semplicità: una presentazione pulita che si presta a una tavola raffinata o a una cena informale ma curate in ogni dettaglio.
  • Versatilità aromatica: si presta a piccole variazioni tra latte, vaniglia, agrumi o crema, offrendo la possibilità di personalizzarlo a seconda della stagione o del tema della serata.
  • Esperienza educativa in cucina: per chi ama imparare tecniche di montatura, controllo della temperatura e gestione dell’aria, questa ricetta offre una lezione pratica e gratificante senza essere intimidatoria.
  • Porta a tavola una sensazione di comfort: nella sua morbidezza c’è una sensazione di coccole che ricorda un abbraccio dolce, perfetta per chiudere una cena o per celebrare un momento speciale.

Profilo di sapore e consistenza

Questo soufflé si distingue per una leggerezza volutamente controllata: l’aria incorporata è parte integrante della struttura, non un semplice tocco finale. La base cremosa fornisce una ricchezza delicata che sostiene la nuvola soffice. In termini di gusto, si può immaginare una dolcezza equilibrata, capace di accogliere note di vaniglia, limone o yuzu, a seconda degli aromi scelti. La texture è una sinfonia di morbidezza: quando si taglia una fetta o si serve un cucchiaio, la crema interna resta soffice e umida, mentre la superficie, leggermente dorata, forma una crosticina sottile che aggiunge una lieve croccantezza. È una danza di contrasti che non sfiora mai l’eccesso: la delicatezza è la protagonista, la potenza resta sottile, pronta a emergere solo al contatto con la lingua.

La sensazione in bocca è a metà strada tra una meringa soffice e una crema leggera. Il sapore è spesso composto e neutro all’inizio, ma subito si aprono sottili note aromatiche che ricordano la vaniglia o i profumi citrus. Se si aggiunge un tocco di yuzu o di scorza di limone, si ottiene una presentazione fresca e vibrante che rompe la dolcezza senza sovrastarla. Alcune versioni includono una punta di latte o ricotta leggera per una cremosità extra, mantenendo comunque la leggerezza dall’interno; altre preferiscono una base di crema pasticcera molto fine, che funge da rete di sostegno per la spatola di aria. Qualunque sia la strada scelta, l’equilibrio tra dolcezza, acidità e aromaticità è la chiave: un assaggio dopo l’altro, l’elemento sorpresa risiede proprio nelle sfumature di sapore che si sviluppano man mano che la temperatura del dessert cambia con il contatto della lingua.

Occasioni & Abbinamenti

Questo dessert eleva qualsiasi occasione, dal pasto quotidiano a una serata speciale. Ecco alcune idee su quando e come proporlo:

  • Fine pasto raffinato: servito con una leggera spolverata di zucchero a velo o una goccia di sciroppo di agrumi, per chiudere la cena con una nota delicata e memorabile.
  • Dolce per celebrare: perfetto per anniversari, compleanni o momenti di festa, soprattutto se accompagnato da un vino dolce o da uno spumante brut che pulisce il palato tra un boccone e l’altro.
  • Dolce da tè pomeridiano: una versione più leggera, ideale da gustare con tè verde o tè all’angolo, per un momento di coccole in contemplazione.
  • Serate intime: una piccola porzione presentata in tazze o bicchierini trasparenti, per una tavola minimale ma estremamente chic.

Abbinamenti ideali:

  • Bevande: tè verde delicato, sake dolce leggero, o un vino passito che non sovrasti la leggerezza del soufflé.
  • Contorni: una piccola insalata di agrumi o una salsa di frutta leggera può fornire una nota fresca che contrasta con la dolcezza soffice.
  • Dessert complementari: frutta fresca a pezzi, come fragole o mango, per un accento di acidità e colore.

Consigli, Varianti & Sostituzioni

La bellezza del soufflé giapponese soffice è la sua flessibilità e la possibilità di personalizzarne la ricetta senza compromettere la sua identità. Ecco alcune idee pratiche per adattarlo a gusti diversi, necessità dietetiche o stagioni:

  • Varianti aromatiche: aggiungi una punta di scorza di agrumi (limone, yuzu), una goccia di estratto di vaniglia o di mandorla, oppure una leggera nota di matcha in polvere per un retrogusto erbaceo e originale.
  • Versione vegana: sostituisci le uova con una combinazione di aquafaba (l’acqua di ceci) montata a neve ferma e una base cremosa vegetale (latte di mandorla o di soia) arricchita con amidi per addensare. Esalta la stabilità dell’impasto con una piccola quantità di crema di riso o di tapioca.
  • Gluten-free: la ricetta originale non è una ricetta di gluten, ma è bene utilizzare stampi ben puliti e una base cremosa ben bilanciata per evitare che l’impasto si disgreghi. L’uso di amidi come maizena aiuta a mantenere compattezza senza appesantire.
  • Aromi stagionali: in primavera si può aggiungere scorza di limone o arancia e una nota di fragole schiacciate, in autunno una leggera punta di cannella o noce moscata e una purea di zucca light può dare una tonalità autunnale interessante.
  • Versione al cioccolato: potresti incorporare una piccola quantità di cioccolato fondente fuso nella crema base per un tocco di cacao che si sposa bene con note di vaniglia.

Stoccaggio & Idee per preparare in anticipo

Una delle sfide di un dessert così delicato è la gestione della freschezza. La consistenza soffice non è destinata a resistere come una torta compatta, ma con le giuste precauzioni puoi organizzarti per gustarlo al meglio anche in seguito:

  • Preparazione anticipata: la crema base (senza montare l’albume) può essere preparata in anticipo e conservata in frigorifero per 24 ore. Montare gli albumi all’ultimo momento e unirli all’impasto solo prima della cottura per mantenere l’aria integrale.
  • Conservazione delle porzioni: se restano porzioni, coprirle con un foglio di carta fornito di umidità o in un contenitore ermetico dopo la freddatura e conservare in frigorifero per 1 giorno al massimo. Riscaldare delicatamente a bagnomaria o nel forno a bassa temperatura per ristabilire una parte della nuvolosità.
  • Congelazione: in genere non è consigliata per mantenere la texture originale, poiché l’aria incorporata perde la sua leggerezza una volta scongelata. Se decidi di congelare, fai una piccola prova con una porzione singola per valutare la resa al nuovo riscaldamento.
  • Riscaldamento & servizio: il soffice è meglio se servito immediatamente dopo la cottura. Se devi rifare una porzione, riscaldala delicatamente in forno per pochi minuti, fino a che la superficie non ritrovi una lieve doratura e una consistenza morbida.

Fatti curiosi e trivia (opzionali)

Curiosità che rendono ancora più affascinante questo dessert:

  • Il termine “soufflé” deriva dal francese “souffler”, che significa sprigionare aria, soffiare. È una promessa che la ricetta mantiene: aria, leggerezza e delicatezza sono le sue parole chiave.
  • La versione giapponese di questa soffice dolce ha spesso una presentazione minimalista, ma non per questo meno golosa: la semplicità è un’arte in sé, e la pulizia del piatto contrasta magnificamente con la complessità della texture interna.
  • La temperature giusta è la vera arma segreta: una volta in forno, l’aria si espande, ma è la velocità di cottura e il controllo termico che impediscono il crollo improvviso, donando all’esterno una leggera crosticina mentre l’interno resta soffice e umido.
  • Molti chef giapponesi adorano includere un accenno di agrume nelle loro preparazioni dolci: una nota di yuzu o di pompelmo rosa non è solo una scelta di aromatizzazione, ma una dichiarazione di freschezza e modernità.

Conclusione

In conclusione, il soufflé giapponese soffice è molto più di un dessert: è una dichiarazione di grazia culinaria, un modo di celebrare la leggerezza senza rinunciare al gusto, una piccola opera d’arte che richiede pazienza, calma e attenzione ai dettagli. Se cerchi un’esperienza che sorprenda in modo sottile ma memorabile, se vuoi regalarti un momento di puro piacere, o se vuoi offrire una coppia di momenti di gioia ai tuoi ospiti, questa ricetta è la candidata ideale. Con la sua leggerezza, la sua eleganza e le sue sfumature di sapore, ti invita a prendere fiato, a sorridere e a godere del modo in cui la cucina può trasformarsi in poesia commestibile. Prepararlo significa anche accendere una piccola lampada di curiosità in cucina: ogni step è una scoperta, ogni boccone una nuova sensazione, ogni presentazione una promessa di gioia che lascia il segno nella memoria gustativa. Se sei pronto a lasciare che la tua cucina diventi un luogo dove l’aria conta quanto la sostanza, dove la tecnica incontra l’emozione, allora togli il grembiule, accendi il forno e lascia che questo soufflé giapponese soffice prenda vita davanti ai tuoi occhi. Buon viaggio culinario.

Ingredients

  • Base
    • 2 large eggs, separated
      → The yolks provide the rich, silky foundation of the soufflé base, while the whites will be whipped separately to create the airy lift. Separate eggs when cold for clean separation; bring the whites to room temperature before whipping for maximum volume.
    • 1/2 cup (120 ml) whole milk
      → Use fresh whole milk for a creamy, delicate texture. Warm the milk just until it’s warm to the touch, then gently whisk with the yolks to avoid curdling. Do not boil.
    • 2 tablespoons granulated sugar (for the yolk base)
      → Adds gentle sweetness and helps create a tender custard; whisk until the yolks are pale and smooth so the sugar dissolves completely.
    • 1 tablespoon all-purpose flour
      → Acts as a light thickener to give the custard body without weighing it down; whisk with a little milk to make a smooth slurry before stirring into the yolk mixture.
    • 1 tablespoon unsalted butter, melted
      → Adds richness and a glossy texture to the base. Let it cool slightly before whisking into the yolk mixture to avoid cooking the eggs.
    • 1/2 teaspoon vanilla extract
      → Provides a warm, aromatic note that complements the delicate egg flavor. Use pure vanilla for best aroma rather than artificial flavorings.
    • Pinch of salt
      → Enhances overall flavor; balances sweetness; incorporate into the yolk mixture.
  • Meringue
    • 2 large egg whites
      → The whites are whipped into a light foam that will inflate the soufflé. Bring whites to room temperature for best volume; ensure bowls and utensils are impeccably clean and free of fat or yolk.
    • 2 tablespoons granulated sugar
      → Added gradually while whipping to create a strong, glossy meringue that holds air and stabilizes the lift. Prefer superfine sugar for faster dissolution.
    • Pinch cream of tartar (optional)
      → Stabilizes the foam, helping it to hold stiff peaks during folding and baking; omit if not available, but it improves volume and stability.
  • Ramekins and Assembly
    • Butter for greasing ramekins
      → A light coat prevents sticking and helps the soufflé rise evenly. For extra release, you can dust the inside with a thin layer of granulated sugar after buttering.
    • 1 teaspoon granulated sugar per ramekin for coating
      → After buttering, sprinkle and rotate to create a uniform sugared lining; this not only aids release but also adds a touch of sweetness to the outer crust.
  • Optional Toppings
    • Powdered sugar for dusting
      → Finishing touch that adds a delicate sweetness and a pretty presentation when serving. Dust just before serving for the best effect.
    • Fresh berries or fruit coulis
      → A tart counterpoint to the sweet, airy soufflé; add upon serving to balance richness and provide color and brightness.
    • Whipped cream (optional)
      → Lightly sweetened whipped cream adds extra creaminess and helps anchor the soufflé’s delicate texture if desired.

Instructions

  • Preheat your oven to 350°F (175°C) and prepare the ramekins: line a baking sheet with parchment, then lightly grease four 1/2-cup ramekins with unsalted butter and dust the insides with granulated sugar.
    → The parchment protects from sticking and makes transport easy, while the butter-sugar coating ensures a clean release and a delicate crust as the soufflé rises.
  • Separate the eggs while they are cold, placing the yolks in a small bowl and the whites in a large, clean mixing bowl, then let the whites come to room temperature before whipping.
    → Clean separation prevents yolk contamination, and room-temperature whites whip to greater volume, giving the soufflé the lift it needs.
  • Gently warm the 1/2 cup milk in a small saucepan over low heat until it is warm to the touch (approximately 110–120°F / 43–49°C), then remove from heat.
    → Warm milk blends smoothly with the yolk base and helps create a silky custard without curdling the eggs.
  • Whisk the egg yolks with 2 tablespoons granulated sugar in a medium bowl until the mixture is pale, thick, and ribbons form when the whisk is lifted.
    → This aeration dissolves the sugar and lightens the yolk mixture, forming a creamy foundation for the soufflé.
  • Stir 1 tablespoon all-purpose flour with a splash of the warmed milk to make a smooth slurry, then whisk the slurry into the yolk mixture until completely incorporated and lump-free.
    → The slurry prevents flour lumps and ensures the custard thickens evenly for a stable base.
  • Gradually whisk the warm milk into the yolk mixture in a thin, steady stream to temper the yolks, then whisk in 1 tablespoon melted unsalted butter (cooled to just warm), 1/2 teaspoon vanilla, and a pinch of salt until the mixture is glossy and uniform.
    → Tempering prevents scrambling the eggs, while the butter enriches texture and the vanilla adds aromatic depth.
  • In a separate clean bowl, beat the egg whites with a pinch of cream of tartar (if using) until foamy, then gradually add 2 tablespoons granulated sugar and continue beating to stiff, glossy peaks.
    → A stable, glossy meringue traps air for lift; ensure no yolk or fat contaminates the whites for maximum volume.
  • Fold a spoonful of the meringue into the yolk base to lighten the mixture, then fold in the remaining meringue in two or three gentle additions using a sweeping motion from the bottom of the bowl to the top, until just incorporated and no white streaks remain.
    → Gentle folding preserves the air in the meringue, which is essential for a lofty soufflé; avoid overmixing which deflates the batter.
  • Divide the batter evenly among the prepared ramekins, filling about three-quarters full, then wipe any batter from the inner rim with a clean fingertip or paper towel to ensure a clean seal and even rise; lightly tap the ramekins on the counter to settle the batter.
    → Proper filling gives room for expansion; a clean edge helps the batter climb the sides without sticking and deflating.
  • Bake the soufflés in the center of the preheated oven for 12–14 minutes, until puffed and just set in the center; avoid opening the oven door during the first 8–10 minutes to prevent sudden temperature drop and collapse.
    → Quick, even heat sets the outer shell while the interior remains creamy and airy; sudden cold air can cause deflation.
  • Remove from the oven and immediately finish with optional toppings: a light dusting of powdered sugar or a dollop of whipped cream, and serve with fresh berries or a fruit coulis if desired.
    → Soufflés begin to deflate as they cool, so presenting and serving promptly preserves the dramatic lift and delicate texture for the best experience.

Notes

These airy Japanese soufflés are delicate, cloud-light treats built on a silky yolk custard and a generous lift from whipped egg whites. For best results, bring the whites and milk to room temperature, whip the whites in a clean, fat-free bowl until they form glossy stiff peaks, and fold them into the yolk mixture in thirds to preserve volume. The base comes together with warm milk, sugar, flour, melted butter, and vanilla, with a pinch of salt to balance sweetness. Butter and a light dusting of sugar inside the ramekins help the soufflés rise evenly and release cleanly. Fill the ramekins about three-quarters full and bake in a hot oven without opening the door early, so the soufflé can puff to its full height. Serve immediately for the most delicate texture; finish with a light dusting of powdered sugar and optional fresh berries or a simple fruit coulis to cut the richness. For flavor variations, add a touch of vanilla, lemon zest, or matcha to give a Japanese twist. If you need a gluten-free version, substitute the all-purpose flour with a gluten-free all-purpose blend or cornstarch; expect a slightly different texture but still a refined lift. They are best enjoyed fresh, but a gentle reheat in a warm oven can revive a leftover soufflé. Always use high-quality butter and pure vanilla extract for depth of flavor, and ensure all equipment is impeccably clean to maximize volume.

Tips

Consigli pratici per un Soufflé giapponese soffice

  • Separazione e temperatura: porta le uova a temperatura ambiente e separa tuorli e albumi in ciotole pulite e asciutte. Anche una minima traccia di tuorlo o grasso impedirà agli albumi di montare bene. Usa una frusta e una spatola pulite per evitare residui di olio.
  • Base cremosa: scalda il latte solo fino a quando è tiepido e incorporatelo poco per volta ai tuorli mescolando costantemente per evitare la cottura. Una massa liscia e lucida aiuta a dare ricchezza senza grumi.
  • Farina e burro: sciogli la farina con un po’ di latte per creare una pastella liscia, quindi aggiungi burro fuso raffreddato e vaniglia. Lascia raffreddare leggermente prima di unire ai tuorli per evitare la cottura immediata delle uova.
  • Zucco di zucchero: lo zucchero nei tuorli aiuta a ottenere una base leggermente dolce e morbida; assicurati che si sciolga completamente durante la lavorazione.
  • Meringa ferma: per una meringa consistente monta albumi a temperatura ambiente con lo zucchero aggiunto in 2–3 volte. Un pizzico di cremor tartaro aiuta a stabilizzare i picchi; verifica che il recipiente sia completamente pulito e privo di tracce di grasso.
  • Incorporare la meringa: aggiungi la meringa alla base in più volte, mescolando dal basso verso l’alto con una spatola per mantenere l’aria. Evita movimenti circolari troppo energici che sgonfierebbero l’impasto.
  • Ramekins pronti: spennella i bordi interni con burro e, se vuoi, spolvera con zucchero per favorire l’assoluta liberazione e creare una crosticina piacevole. Riempi i stampi per circa 3/4 della loro altezza per permettere la crescita.
  • Cuocere senza aprire lo sportello: inforna in forno già caldo a circa 190°C e cuoci per 12–15 minuti, finché il soufflé è ben gonfio e dorato sui bordi. Evita di aprire lo sportello durante i primi minuti per non far collassare l’aria.
  • Servire subito: i soufflé giapponesi sono migliori appena sfornati; servili immediatamente per apprezzarne la delicatezza. Spolvera con zucchero a velo e accompagna con frutti freschi o coulis se ti piace un contrasto agrumato o acidulo.
  • Varianti facili: se vuoi cambiare aromi, aggiungi una punta di scorza di limone o arancia al composto di tuorli, oppure sostituisci una parte di latte con una cucchiaiata di panna per una maggiore ricchezza. Per una nota giapponese, puoi sperimentare con una piccola quantità di matcha in polvere sciolta in latte prima di unirlo al tuorlo.
  • Soluzioni ai problemi comuni: se l’impasto non gonfia, controlla che non ci sia traccia di tuorlo nell’albume, che la meringa sia ben ferma, e che tu stia operando con movimenti delicati durante l’incorporazione. Se si affloscia dopo la cottura, assicurati di non aver aperto lo sportello troppo presto e di aver riempito gli stampi correttamente (troppo pieno può impedire la crescita).

FAQ

Che cosa è il Soufflé giapponese soffice?

È una versione leggera e spumosa del soufflé tradizionale, ispirata allo stile giapponese: una base cremosa arricchita da albumi montati che le conferiscono una texture morbida e vellutata. Viene cotto in stampi singoli e va gustato subito per apprezzarne la leggerezza.

Quali ingredienti servono per 4 porzioni?

Ingredienti principali:

  • 4 uova grandi (4 tuorli e 4 albumi separati)
  • Burro: 30 g (più un filo per ungere gli stampi)
  • Farina: 25 g
  • Latte intero: 250 ml
  • Zucchero: 40 g (20 g per la base, 20 g per gli albumi)
  • Sale: un pizzico
  • Scorza di limone o estratto di vaniglia: a piacere
  • Varianti facoltative: cacao amaro in polvere (1-2 cucchiai) per versione al cacao; matcha in polvere (1 cucchiaino) per una versione verde
Quali strumenti sono necessari?

Strumenti utili:

  • Stampi da soufflé o ramequins di almeno 7–8 cm di diametro, ben imburrati e leggermente zuccherati
  • Sbattitore elettrico o frusta a mano
  • Ciotole capienti e spatola in silicone
  • Pentolino per la base (roux)
  • Forno preriscaldato
  • Teglia poco profonda per contenere gli stampi in forno (opzionale, facilita la cottura uniforme)
Come si prepara la base del soufflé (roux)?

Procedura:

  • In un pentolino, sciogli il burro a fuoco medio.
  • Aggiungi la farina e mescola bene per 1–2 minuti per eliminare il gusto crudo della farina.
  • Versa lentamente il latte, mescolando continuamente fino a ottenere una crema liscia e leggermente spessa (bechamel leggera).
  • Spegnì il fuoco, aggiungi zucchero, pizzico di sale e la scorza di limone o l’estratto di vaniglia. Lascia intiepidire o raffreddare leggermente.
Come si montano gli albumi?

Procedura:

  • In una ciotola pulita, monta gli albumi con un pizzico di sale a neve ferma.
  • Quando iniziano a formarsi i picchi, aggiungi gradualmente 20 g di zucchero (a pioggia) e continua a montare fino a ottenere picchi lucidi e stabili.
Come si uniscono la base e gli albumi senza smontare l’impasto?

Procedura:

  • Aggiungi i tuorli al roux raffreddato e mescola fino a incorporarli bene.
  • Prendi un terzo degli albumi e incorporalo delicatamente per rendere l’impasto più morbido.
  • Unisci poi gli albumi rimanenti con movimenti delicati dal basso verso l’alto (fold) per non smontare l’aria.
Qual è la temperatura e il tempo di cottura?

Si consiglia:

  • forno preriscaldato a 180°C
  • cottura di circa 12–15 minuti, a seconda delle dimensioni degli stampi
  • non aprire lo sportello del forno durante la cottura per evitare che l’aria esca e il soufflé crolli
Come evitare che il soufflé crolli subito?

Consigli pratici:

  • Usa stampi alti e imburrati, eventualmente passati nello zucchero per una crosta esterna leggera
  • Accendi il forno in anticipo e mantienilo stabile durante tutta la cottura
  • Non mescolare troppo una volta uniti tuboli e albumi; mantieni le pieghe delicate
  • Servi subito appena sfornato: il guscio si gonfia, ma tende a rivelarsi subito una volta raffreddato
Quali varianti posso provare (al cacao, limone, matcha)?

Varianti popolari:

  • Versione al cacao: aggiungi 1–2 cucchiai di cacao amaro setacciato al roux e, se vuoi, un pizzico di zucchero in più per bilanciare l’acidità
  • Versione al limone: aggiungi scorza grattugiata di limone e qualche goccia di succo di limone per una nota fresca
  • Versione matcha: incorpora 1 cucchiaino di matcha in polvere al roux e riduci leggermente il latte se necessario
Come servire al meglio il Soufflé giapponese soffice?

Servizio consigliato:

  • Servi immediatamente, magari con una crema leggera o una salsa di frutti di bosco
  • Accompagna con panna montata, salsa al cioccolato bianco o sciroppo di yuzu per un tocco giapponese
  • Una spolverata leggera di zucchero a velo può completare la presentazione
Posso prepararlo in anticipo o conservarlo?

Note sulla conservazione:

  • Il soufflé perde subito la sua consistenza soffice se tenuto troppo tempo; è ideale gustarlo appena sfornato
  • È possibile preparare in anticipo la base (roux) e raffreddarla in frigorifero; montare gli albumi all’ultimo momento e unire, poi cuocere
  • Non si congela bene: la struttura potrebbe degradarsi dopo scongelamento

Introduzione / Gancio

Immagina una nuvola cremosa di formaggio che si sgrana dolcemente al primo morso, avvolta in una base croccante di biscotti burrosi. Poi arriva un soffio di fragole fresche, lucide e profumate, che esplodono di sapore al contatto con una leggera dolcezza vanigliata. Questo è Cheesecake dump alle fragole: un dessert che unisce la ricchezza vellutata della cheesecake a una magia di fragole estive, in una presentazione semplice, pratica e quasi ‘duttile’ come una ricetta di famiglia. Non serve essere una pastry chef per avere successo: si prepara in pochi gesti, si serve freddo o leggermente intiepidito, e conquista chiunque con la sua eleganza sobria e il gusto irresistibile. Se stai cercando un dolce che sia un vero colpo di scena senza complicazioni, questo è il tuo biglietto da visita: una duchessa delicata di crema, una pioggia di fragole lucenti e un cuore croccante che resta insolito, ma familiare al tempo stesso.

La storia dietro il piatto

Cheesecake dump alle fragole è una creazione che sembra nascere da due mondi: la tradizione americana della cheesecake, ricca di crema al formaggio e vaniglia, e la freschezza mediterranea delle fragole di stagione. L’idea di un “dump cake” è nata come risposta pratica alle vite frenetiche: si mette tutto in una teglia e si lascia che gli ingredienti si assorbano a contatto, senza lunghe lavorazioni. Nel nostro contesto, la versione alle fragole si è evoluta grazie alla disponibilità di fragole succose e profumate: una frutta che sa di giardino, di risveglio primaverile e di estati in riva al mare. Nel racconto di molte cucine casalinghe, questo dolce è diventato un simbolo di convivialità: le fragole vengono lavate rapidamente, il formaggio cremoso viene aromatizzato con scorza di limone o di arancia per un tocco di freschezza, e il tutto trova la sua casa tra una base di biscotti sbriciolati e una rifinitura di crema montata o yogurt dolce. In molte famiglie, questa torta è associata a piccoli momenti di festa: una merenda del pomeriggio, un dessert dopo una cena informale o una sorpresa per amici durante una calda serata estiva. La bellezza di questa ricetta sta proprio nel suo essere versatile: può essere ironica e leggera o ricca e sorprendente, a seconda di come la si personalizza e di quali fragole si scelgono.

Perché ti innamorerai di questa ricetta

  • Facilità d’esecuzione: poco tempo, pochi passaggi e una lavorazione che non richiede abilità da pasticcere.
  • Preparazione versatile: può essere realizzata in versione classica o adattata a esigenze alimentari diverse (senza lattosio, vegetariana, con alternative vegan, ecc.).
  • Profilo di gusto bilanciato: la cremosità del formaggio si sposa con la succosità delle fragole, mentre la base croccante aggiunge una nota di anti-ricotta che rende ogni morso completo.
  • Incredibilmente rinfrescante: servita fredda, è un dessert che si gusta anche come dolce di fine pasto in una calda giornata estiva.
  • Adatta a molte occasioni: feste, brunch, dessert per cena romantica o riunioni familiari.
  • Trasparenza di ingredienti: si sente la qualità delle fragole e l’aroma di vaniglia; non c’è bisogno di tutto quel fronzolo per ottenere un grande effetto.

Profilo di gusto e texture

La cheesecake dump alle fragole è una sinfonia di texture contrastanti che lavora come una coreografia sensoriale. All’assaggio si vive prima un leggero croccante della base, evocato da biscotti sbriciolati mischiati con burro fuso, che si rifugiano sul fondo creando una fondina solida ma friabile. Sopra, la crema al formaggio arriva setosa, morbida e vellutata: una nuvola che si scioglie quasi sul palato, grazie a una leggera montatura o a una mousse a base di formaggio cremoso e zucchero. L’elemento profondo è la fragola: fragole fresche o una salsa/gelatina di fragole a seconda della versione, che introduce una dolcezza vivace, una brillante acidità e una vigorosa saturazione di aroma estivo. Il mix tra la dolcezza delicata e la nota agrumata della scorza di limone o di arancia, se presente, crea un equilibrio che evita la pesantezza tipica di alcuni dessert al formaggio. Il finale è spesso un retrogusto di fragola fresca o una leggera nota vanigliata che resta a lungo sul palato, invitando a un altro boccone. La texture è cremosa senza essere pesante, con una base croccante che offre una piccola resistenza al morso e una parte finale morbida che invita all’assaggio successivo. È un dessert che celebra la semplicità, ma con una seduzione sensoriale che lo rende memorabile.

Occasioni & Abbinamenti

Questo dolce è una compagna perfetta per una varietà di momenti:

  • Estate e barbecue: fresco, fresco e facile da preparare in anticipo.
  • Brunch domenicale: un dessert leggero che non appesantisce la tavola.
  • Feste e portate condivise: la struttura “dump” permette di realizzarlo in grandi quantità con poco sforzo.
  • Dolce di fine pasto elegante: una chiusura raffinata ma non troppo formale.

Abbinamenti consigliati:

  • Bevande: un bicchiere di Moscato, un Prosecco leggero, o un rosé frizzante per enfatizzare la freschezza della frutta.
  • Contorni: una pallina di gelato alla vaniglia o uno yogurt naturale per bilanciare la dolcezza; frutti di bosco freschi come guarnizione per intensificare la nota fruttata.
  • Dolci complementari: una salsa di fragole ridotta al cucchiaio, una leggera crema al mascarpone sul lato o una spolverata di scorza di limone grattugiata per un tocco agrumato.

Suggerimenti & Varianti

Per rendere questa cheesecake dump alle fragole ancora più interessante o adatta a diverse esigenze, prova alcune di queste varianti e idee:

  • Versione vegan: usa crema vegana a base di anacardi o formaggi cremosi vegetali, e una base di biscotti vegan. Sostituisci il latte con latte di mandorla o di soia e usa un dolcificante a piacere.
  • Base senza glutine: opta per biscotti gluten-free o una base di noci macinate finemente mescolate con olio di cocco per legare.
  • Versione light: riduci lo zucchero, utilizza yogurt greco naturale al posto di parte del formaggio cremoso e aggiungi purea di fragole senza zuccheri aggiunti.
  • Frutti di bosco misti: aggiungi lamponi o more per una profondità di gusto e un colore ancora più vivace.
  • Glassa o topping: una glassa leggera di fragole triturate e succo di limone, oppure una leggera salsa di fragola per conferire brillantezza al topping.
  • Texture alternate: se vuoi una versione più “crunch”, aggiungi uno strato di croccante di mandorle o nocciole tostate sul fondo o tra gli strati.
  • Profumo di agrumi: aggiungi scorza di limone o arancia nella crema per una nota fresca e aromatica.

Conservazione & Idee per preparare in anticipo

La bellezza di una cheesecake dump alle fragole è la sua comodità anche per la pianificazione del menù. Ecco alcuni consigli pratici per rendere il dessert perfetto al momento di servirlo:

  • Raffreddamento: lascia raffreddare completamente la cheesecake in frigorifero per almeno 4 ore, idealmente tutta la notte, affinché gli strati si compattino e i sapori si armonizzino.
  • Conservazione: copri bene la teglia o trasferisci la cheesecake in un contenitore ermeticamente chiuso; si conserva bene in frigorifero fino a 3-4 giorni.
  • Congelamento: può essere congelata una volta pronta; parti in porzioni e avvolgi ciascuna porzione in pellicola. Si conserva fino a 2-3 mesi. Per servire, scongelare in frigorifero durante la notte e, se necessario, lucidare con una leggera salsa di fragole prima di servire.
  • Preparazione in anticipo: per un evento, puoi preparare la base e la crema un giorno prima, conservandole separatamente; al momento di servire, assembla velocemente e aggiungi le fragole e la decorazione finale.

Curiosità & trivia (Opzionale)

La cheesecake, nella sua forma moderna, affonda le radici nell’antica Grecia, dove veniva celebrata come un dolce semplice fatto di formaggio fresco, miele e farina. L’idea di un dolce freddo e setoso ha viaggiato attraverso continenti, trasformandosi in una gamma di varianti che includono basi di biscotti, crema al formaggio arricchita con vaniglia e gelatine di frutta. Il termine “dump” in pastecceria è un richiamo alla tecnica semplice di “scuotere” o “sbattere” gli ingredienti insieme e versarli direttamente in una teglia, senza impasti complessi o tecniche elaborate. La versione alle fragole celebra la stagione estiva di questa frutta, quando le fragole sono al loro massimo sapore: dolci ma con una leggera acidità, rosse come piccoli soli, profumate e capaci di dare a qualsiasi dessert una scintilla di freschezza.

Conclusione

Cheesecake dump alle fragole è più di un dessert: è un invito a riunirsi, a condividere momenti pieni di gusto e semplicità, a trasformare una piccola idea in un grande sorriso. È la promessa di una serata in cui tutto ciò che serve è una teglia, una frigorifera, fragole fresche e una voglia di dolcezza pulita. In un mondo che corre, questa ricetta ci ricorda che la cucina di casa può essere una splendida espressione di cura e creatività, senza bisogno di complicazioni. Se vuoi sorprendere i tuoi commensali con qualcosa di elegante ma immediato, se desideri un dessert che possa adattarsi a molte occasioni, se vuoi una dolce meraviglia che sia al tempo stesso confortante e fresca, allora Cheesecake dump alle fragole è la scelta giusta. Preparala, lasciala riposare, e assapora l’equilibrio perfetto tra la creaminess del formaggio, la brillantezza delle fragole e la croccantezza della base: un piccolo capolavoro di semplicità che conquista al primo morso e resta impresso nella memoria.

Ingredients

Crust

  • 1 1/2 cups graham cracker crumbs (about 150 g)
    → These crumbs form the base crust; crush crackers until fine, then mix with sugar and melted butter. The goal is a cohesive, crisp crust that presses evenly into the pan. Bake briefly if you like a firmer crust, then cool before filling.
  • 1/4 cup granulated sugar
    → Adds subtle sweetness to the crust; helps with moisture distribution and flavor balance. Mix with the crumbs and melted butter before pressing into the pan to ensure an even texture.
  • 6 tablespoons unsalted butter, melted
    → Binds the crust and adds richness; the butter should be warm but not hot when mixing with crumbs. Press firmly into the bottom and a touch up the sides for a sturdy base.
  • 1/4 teaspoon fine sea salt (optional)
    → Enhances overall flavor and counteracts sweetness; omit if using salted crackers or if you prefer a sweeter crust. Sprinkle into the crust mix and combine thoroughly before pressing.

Cheesecake Filling

  • 24 oz (680 g) cream cheese, softened to room temperature
    → The creamy foundation of the cheesecake; softening prevents lumps and ensures a smooth batter. Cut into chunks and let sit at room temperature 30–60 minutes, then beat until completely smooth.
  • 1 cup granulated sugar
    → Provides sweetness and helps balance the tang of the cream cheese. Beat with the cream cheese until light and airy and fully dissolved for a silky filling.
  • 3 large eggs
    → Add structure and richness; add one at a time to avoid curdling. Keep eggs at room temperature to help the mixture emulsify; avoid overmixing after adding eggs to prevent cracks.
  • 1/2 cup sour cream
    → Adds moisture, tenderness, and a slight tang; use full-fat for best texture. Fold in gently after the main batter is smooth to maintain a creamy consistency.
  • 1 teaspoon vanilla extract
    → Depth of flavor; vanilla enhances the overall aroma of the cheesecake. Use pure vanilla for best results; vanilla bean paste can be used for a more intense flavor.
  • 1 tablespoon lemon juice (optional)
    → Brightens the filling and helps balance richness; use freshly squeezed lemon juice. Add sparingly to avoid tipping the batter toward curdling.
  • 1 tablespoon all-purpose flour (optional)
    → Stabilizes the batter and helps prevent cracking in baked cheesecake. If avoiding gluten, substitute with 1 teaspoon cornstarch or 1 teaspoon potato starch. Whisk into the filling with the other ingredients for a smoother finish.

Strawberry Topping

  • 2 cups fresh strawberries, hulled and sliced (about 300 g)
    → The star topping providing bright color and natural sweetness. Slice evenly so they cook uniformly; reserve a few larger pieces for texture, or fold some in after cooking for added bits of fruit.
  • 1/4 cup granulated sugar
    → Helps draw out juices and creates a glossy strawberry sauce. Adjust to taste based on the sweetness of the berries and desired sauce thickness.
  • 1 tablespoon lemon juice
    → Brightens the sauce and helps preserve color; use fresh juice for best aroma. Taste and adjust sweetness after simmering.
  • 1 teaspoon cornstarch (optional)
    → Thickens the strawberry sauce to a glaze-like consistency; mix with 1 tablespoon cold water to form a slurry before adding to the berries. Simmer until thickened and glossy.

Optional Toppings

  • 1 cup heavy whipping cream, chilled
    → For a luscious whipped topping to dollop on each slice. Chill the bowl and beaters, whip to soft or stiff peaks as desired, then sweeten with powdered sugar and a touch of vanilla. Keep refrigerated until serving and re-whip if needed just before serving.
  • 2–3 tablespoons powdered sugar (to taste)
    → Sweetens the whipped cream; sift to avoid lumps and adjust to your preferred sweetness. Start with two tablespoons and add more as desired.
  • 1/2 teaspoon vanilla extract (optional)
    → Adds a warm vanilla note to the whipped cream; use vanilla bean paste for extra aroma if available.
  • Fresh strawberries for garnish (optional)
    → Extra color and freshness when serving; rinse and pat dry just before slicing and arrange around the edge or on top for a polished look.

Instructions

  • Preheat your oven to 325°F (165°C) and wrap the outside of a 9-inch (23 cm) springform pan with two layers of heavy-duty foil; place the pan on a rimmed baking sheet to catch any spills.
    → The foil keeps water from seeping in during baking and makes cleanup easier, while the sheet catches any leaks from the water bath.
  • Crush the graham crackers to a fine, uniform crumb using a food processor or by sealing the crackers in a zip-top bag and pounding with a rolling pin until there are no large shards.
    → Uniform crumbs bake evenly and form a cohesive crust that holds together when sliced.
  • In a medium bowl, whisk together the graham cracker crumbs, granulated sugar, and fine sea salt (if using) until evenly distributed.
    → Even distribution guarantees consistent sweetness and flavor across the crust without pockets of salt or sugar.
  • Stir in the melted unsalted butter until every crumb is moistened and resembles damp sand that clumps together when pressed.
    → Proper moisture ensures the crust binds firmly and bakes into a sturdy, sliceable base rather than a crumbly mess.
  • Press the crust firmly into the bottom and slightly up the sides of the prepared pan using the flat bottom of a measuring cup or a small glass to achieve an even, compact layer.
    → A dense, evenly distributed crust prevents sogginess and helps support the filling during baking.
  • Chill the crust in the freezer for about 15 minutes or until firm to set its shape before filling.
    → A cold crust resists shifting when the hot filling is added, reducing the chance of cracks and uneven edges.
  • Bake the crust for 8–10 minutes at 350°F (175°C), then remove from the oven and let it cool completely on a rack before filling.
    → A brief bake sets the crust’s structure; cooling fully prevents it from crumbling or warping when the hot batter is poured in.
  • In a large mixer bowl, beat the softened cream cheese and granulated sugar on medium speed until the mixture is smooth, creamy, and free of lumps, about 2–3 minutes; stop to scrape the bowl halfway through.
    → Fully smoothing the base eliminates lumps that would mar texture and appearance later.
  • With the mixer on low, add the eggs one at a time, mixing after each addition just until incorporated and stopping before the batter looks glossy or overmixed.
    → Adding eggs gradually and on low prevents curdling and a tough, dense cheesecake; overmixing introduces too much air that can cause cracks.
  • Beat in the sour cream, vanilla extract, and lemon juice (if using) until just combined; if you include flour, whisk it in now on low speed until evenly integrated.
    → Sour cream adds moisture and tenderness; vanilla enhances aroma; lemon brightens the rich filling; flour helps stabilize the batter to reduce cracking.
  • Pour the filling over the cooled crust and smooth the surface with an offset spatula to ensure an even top for uniform baking.
    → A level surface promotes even heat distribution, preventing a domed top and facilitating clean slicing.
  • Set the filled pan in a larger baking dish and pour hot water into the dish until it reaches halfway up the sides of the springform pan to create a gentle water bath; bake at 325°F (165°C) for about 55–70 minutes, or until the edges are set and the center yields a slight wobble.
    → The water bath provides humidity and slow, even cooking, which minimizes cracking and yields a custard-like center.
  • Turn off the oven, crack the door slightly, and let the cheesecake cool in the oven for 1 hour to gradually reduce the temperature without shocking the batter.
    → Slow cooling prevents surface cracking and helps the center settle evenly.
  • Remove the cheesecake from the water bath, take off the foil, and refrigerate, wrapped, for at least 6 hours or overnight to finish setting and chill completely before topping.
    → Thorough chilling firms the filling and enhances flavor and texture; overnight chilling yields the best sliceability.
  • Prepare the strawberry topping by combining sliced fresh strawberries, granulated sugar, and lemon juice in a saucepan and simmering over medium heat until the berries release juice and the mixture thickens to a gloss; stir gently and occasionally to avoid breaking all the fruit.
    → Gentle simmer concentrates sweetness and creates a vibrant, pourable sauce that clings to the cheesecake without becoming syrupy.
  • If you desire a thicker sauce, whisk in a slurry of cornstarch mixed with 1 tablespoon cold water and simmer a few minutes until glossy and thickened; remove from heat and cool to room temperature before serving.
    → The cornstarch slurry quickly thickens the sauce without scorching, creating a stable glaze that coats the cake beautifully.
  • Meanwhile, for optional whipped cream, chill a mixing bowl and beaters, then whip heavy cream with powdered sugar and vanilla to soft or stiff peaks as desired; refrigerate until ready to serve and re-whip briefly if needed just before serving.
    → Properly chilled equipment and controlled whipping yield a light, stable whipped cream that complements the cheesecake without melting too quickly.
  • When ready to serve, unmold the cheesecake by running a warm knife around the inner edge, release the springform, and slice; top each piece with strawberry sauce and a dollop of whipped cream if desired.
    → A clean release and neatly cut slices present the dessert attractively and ensure each portion holds together for serving.
  • Garnish with extra fresh strawberries if desired and refrigerate any leftovers promptly to maintain texture and safety.
    → Fresh garnish elevates presentation; prompt refrigeration preserves flavor and prevents spoilage.

Notes

These cheesecake dump alle fragole are a crowd-pleasing classic featuring a crisp, buttery graham cracker crust, a creamy tangy filling, and a glossy strawberry topping. For gluten-free versions, substitute gluten-free graham crackers (or cookies) for the crust and replace the optional 1 tablespoon all-purpose flour in the filling with 1 teaspoon cornstarch or potato starch; confirm all other ingredients are gluten-free. Useful prep tips: ensure the cream cheese is fully softened to room temperature and beat with the sugar until completely smooth and light; add eggs one at a time, beating briefly after each until just incorporated to avoid curdling or overmixing; fold in sour cream and vanilla gently, and add lemon juice gradually if using to brighten without tipping to curdle. If using flour, whisk it in with the other dry ingredients to help stabilization. Bake in a moderate oven; for best crack-free results you can bake the cheesecake in a water bath and let it cool gradually in the oven with the door slightly ajar. Chill the finished cake for at least 4 hours or overnight so it slices cleanly. For the topping, simmer sliced strawberries with sugar and lemon juice until the juices release and the mixture thickens to a glossy sauce; thicken with a quick cornstarch slurry if you prefer a glaze. To serve, top with a dollop of whipped cream and extra fresh berries if desired. Store leftovers refrigerated for 3–4 days; the cheesecake can also be frozen in slices for longer storage.

Tips

Consigli pratici per Cheesecake dump alle fragole

  • Preparazione della crosta: per una base uniforme, usa una teglia a cerchio apribile da 23 cm. Fodera il fondo con carta forno e spennella appena i bordi con burro per facilitare la rimozione. Dopo aver mescolato i biscotti con zucchero e burro fuso, premi bene con il dorso di un cucchiaio o con un fondo piatto per ottenere uno strato compatto e livellato. Se vuoi una crosta più solida, fai una breve cottura di 8–10 minuti e lascia raffreddare completamente prima di riempire.
  • Burro e temperatura: assicurati che il burro sia caldo ma non bollente quando lo incorpori ai biscotti. Un burro troppo caldo può rendere la crosta troppo lucida o friabile; al contrario, burro freddo non si amalgama bene.
  • Massima lisciatura del formaggio: lascia il formaggio cremoso a temperatura ambiente 30–60 minuti e taglialo a pezzi piccoli. Sbatti fino a renderlo completamente liscio prima di aggiungere lo zucchero, in modo da evitare grumi nel ripieno.
  • Incorporazione dello zucchero: aggiungi lo zucchero al formaggio e lavora fino a ottenere una crema chiara e spumosa. Raschia i bordi della ciotola durante la lavorazione per una consistenza uniforme.
  • Uova: aggiungi le uova una per volta a velocità moderata. Evita di mescolare troppo una volta unite le uova, altrimenti potresti incorrere in una consistenza elastica o crepe.
  • Sour cream e aroma: incorpora delicatamente la panna acida e la vaniglia fino a ottenere una crema lucida. Se usi estratto di vaniglia, opta per quello puro; l’aroma resta più intenso e morbido.
  • Limone e farina (opzionali): se vuoi una nota di freschezza, aggiungi limone fresco a piccole dosi. Se usi la farina (o amido di mais come alternativa), scioglila bene nel composto per aiutare a ridurre le crepe, ma non esagerare per non appesantire la texture.
  • Prevenire crepe durante la cottura: cuoci la torta in forno preriscaldato a circa 165–170°C (325–350°F). Per una superficie più uniforme e meno crepe, cuoci a bagnomaria proteggendo la teglia con un doppio strato di carta stagnola per evitare infiltrazioni d’acqua. Il bordo dovrebbe essere rassodato e al centro leggermente tremolante.
  • Raffreddamento e stabilizzazione: una volta cotta, spegni il forno, lascia la torta nel forno con lo sportello leggermente socchiuso per 1 ora per evitare contraccolpi termici, quindi trasferiscila in frigorifero minimo 4 ore o meglio durante la notte. Non sformarla subito; la gelificazione richiede tempo.
  • Riferimenti della teglia: se usi una teglia a foro removibile, proteggi l’esterno con foglio di alluminio per evitare infiltrazioni d’acqua se fai la cottura a bagnomaria. Una base ben sigillata facilita la rimozione senza rovinare la crosta.
  • Preparazione della salsa di fragole: per una salsa lucida, lascia macerare le fragole affettate con zucchero e succo di limone per 20–30 minuti. Se vuoi una salsa più spessa, sciogli un cucchiaino di amido di mais in un cucchiaio d’acqua fredda e aggiungilo alla salsa, quindi riscalda finché non vela il cucchiaio. lascia raffreddare prima di usarla come topping.
  • Stoccaggio e servizio: copri la torta e conservala in frigorifero per 3–4 giorni. Per porzioni ideale, taglia le fette freddandole leggermente in salotto; una volta tagliate, la torta tende a scaldarsi rapidamente. Puoi anche congelare porzioni coperte per un paio di mesi, ma la consistenza della crema potrebbe cambiare leggermente.
  • Montare la panna opzionale: per una nuvola di panna, monta 1 tazza di panna fredda con 2–3 cucchiai di zucchero a velo e una punta di vaniglia fino a raggiungere i picchi desiderati. Mantieni in frigorifero e aggiungi poco prima di servire. Se vuoi una stabilità maggiore, includi un pizzico di crema di tartaro o una bustina di pectina per creme.
  • Decorazione finale: guarnisci con fragole fresche e un filo di salsa di fragole appena prima di servire per un effetto lucente e invitante. Evita l’eccesso di liquido sulla superficie per non ammorbidire la crema.

FAQ

Domanda 1: Che cos’è Cheesecake dump alle fragole?

È una cheesecake fredda, a strati, senza cottura in forno. Si parte da una base di biscotti, si aggiunge una crema al formaggio e panna, e si conclude con fragole fresche o una salsa di fragole. Si lascia rassodare in frigorifero per diverse ore prima di servire.

Domanda 2: Quali ingredienti servono?

Base: biscotti digestive o graham (circa 180 g) e burro fuso (70 g). Crema: formaggio cremoso tipo Philadelphia o mascarpone (600 g), zucchero a velo (100 g), vaniglia, panna fresca montata (200 ml). Gelatina o colla di pesce (6 g, opzionale per maggiore stabilità). Fragole fresche per topping o per salsa. Un pizzico di scorza di limone e qualche goccia di succo di limone.

Domanda 3: Che tipo di formaggio è migliore?

Preferisci formaggio cremoso non acidulo: Philadelphia o mascarpone. Per una versione più leggera puoi usare una crema a base di formaggio spalmabile mischiato con mascarpone in percentuale equilibrata. Se vuoi un sapore più intenso, aggiungi un cucchiaio di mascarpone extra.

Domanda 4: Come preparo la base?

Sbriciola i biscotti fino a polvere fine. Mescola con burro fuso e distribuisci sul fondo di una teglia a cerchio apribile rivestita con carta forno. Premi bene per creare una base compatta e metti in frigorifero per 15–20 minuti per farla rassodare.

Domanda 5: Come preparo la crema al formaggio?

In una ciotola lavora il formaggio con lo zucchero, la vaniglia e la scorza di limone finché è liscio. In un’altra ciotola monta la panna e incorpora delicatamente al composto di formaggio. Se vuoi una crema più ferma, sciogli la gelatina in pochissima acqua calda e aggiungila al mix prima di unire la panna. Versa sulla base e livella. Riponi in frigorifero per 4–6 ore o tutta la notte.

Domanda 6: Come si aggiungono le fragole?

Taglia le fragole a fettine e disponile sulla crema in modo ordinato, oppure prepara una salsa di fragole scaldando fragole con un cucchiaio di zucchero e qualche goccia di limone, e versa a filo sopra la cheesecake. Lascia che la salsa si raffreddi prima di servire se l’hai preparata.

Domanda 7: Devo cuocere la cheesecake?

No. Si tratta di una versione senza forno. La struttura si ottiene mediante raffreddamento in frigorifero (o in parte in freezer) fino a rassodare.

Domanda 8: Quanto tempo serve e quante porzioni ottengo?

Tempo di preparazione circa 30–40 minuti. Raffreddamento consigliato: 4–6 ore, meglio tutta la notte. In una teglia da 20–22 cm si ottengono circa 8–10 fette, a seconda dello spessore.

Domanda 9: Come posso conservarla e posso congelarla?

Conserva in frigorifero, coperta, fino a 3–4 giorni. Puoi congelare fette singole, ben avvolte, per 1–2 mesi; scongelale in frigorifero prima di servire. Se hai usato fragole fresche, è preferibile aggiungere le fragole fresche al momento di servire per mantenere la consistenza e il sapore.

Domanda 10: Quali varianti o consigli extra posso provare?

Varianti: versione senza glutine usando biscotti senza glutine; versione vegana usando formaggio cremoso vegano, panna vegetale e agar-agar al posto della gelatina. Per una nota di sapore diversa, aggiungi scorza di limone extra o sciroppo di fragola nella crema. Decora con foglie di menta o pezzi di fragola per un tocco finale.

Introduction / Hook

Imagine a dessert that sits lovingly at the intersection of tradition and indulgence: a custard-soft center lit from within by the warm glow of vanilla, lemon, and a whisper of cream, all cradled in a buttery crust that gives way to a sigh of creamy richness with every slice. This is Cheesecake al forno—the classic Italian baked cheesecake that turns a simple gathering into a gentle celebration. The moment it bakes, the kitchen fills with a fragrance that feels almost ceremonial: creamy cheese balancing tang from citrus, a hint of vanilla, and a crust that carries the sweet memory of butter and patience. When you cut into it, the surface might boast a delicate crack or a smooth, glossy sheen, both heralds of a proper bake. The texture is what truly captures the heart: velvety, luscious, and luxuriously silky, with a light, almost cloud-like finish that lingers on the palate. It’s the kind of dessert that invites quiet admiration and no small amount of gratitude—the kind of treat you’ll want to share, season after season, year after year.

What makes Cheesecake al forno so appealing is not merely its decadence, but its sense of place. It carries with it a sense of Italian convivio—a gathering where food becomes a language of warmth, conversation, and slow, savoring bites. This cheesecake is not a rushed finish; it is a confection that asks to be savored, to be admired for its balance between richness and restraint, and to be enjoyed with friends, family, or a moment of solitary indulgence when the house is quiet and the candles are lit.

In the end, this dish is as much about the experience as the flavor: the hush of the oven, the gentle crackle of the crust as it cools, the first forkful that dissolves on the tongue, and the lingering aroma that lingers long after the last bite has vanished. It is a dessert that grows more fragrant and more layered as it rests, a testament to the idea that sometimes the best cooking is the patient, unhurried kind that rewards you with depth, nuance, and a lasting impression.

The Story Behind the Dish

cheesecake al forno is a bridge between ancient techniques and modern palate, a creamy celebration that has traveled through cultures and kitchens to become a beloved staple in many households. The lineage of cheesecake stretches far beyond a single country or era. The earliest recipes, scribbled in ancient times, speak of a simple mixture of cheese, eggs, and sweetening agents that were pressed into a crust or set into a pan and baked. These early explorations were less about a precise formula and more about the shared joy of turning curds and sweetness into something more than the sum of its parts. As centuries rolled forward, this humble concept traveled with merchants, travelers, and home cooks who adapted it to local ingredients, creating a tapestry of regional variations that would bloom into the many cheesecake traditions we recognize today.

In Italy, the baked cheesecake evolved with a distinctive character. Rather than relying exclusively on one single type of cheese, Italian bakers embraced ricotta, mascarpone, and other fresh cheeses to achieve a light, airy, almost soufflé-like interior. The use of fresh cheese gives the cake a gentle tang—enough to keep the sweetness honest, but mellow enough that it feels comforting rather than overpowering. The crust, often made from crushed biscuits or a more rustic mix of sweetened crumbs, provides a warm, buttery counterpoint that anchors the delicate filling. The baked method itself is a nod to the traditional philosophy of cooking: the slow, steady application of heat allows the flavors to meld, the texture to set with quiet poise, and the surface to gleam with a subtle glaze that hints at the indulgence beneath.

There are stories from Italian kitchens about families gathering around a cooling pan, the scent swirling through hallways as stories and laughter rise with the steam. Some regions favor a touch of lemon zest or vanilla to brighten the dairy richness, while others appreciate a whisper of citrus or a hint of almond that echoes the country’s love affair with bright, floral notes. Across generations, bakers learned to treat the cake with care: a gentle bake with a cautious hand during the final minutes, a cool rest that allows the interior to set completely, and a reverence for the moment when a knife glides through the crust with ease. The result is a cheesecake that feels both rustic and refined—a dessert that belongs at the center of the table, yet is sophisticated enough to share with guests as the evening deepens.

Beyond Italy, this cheesecake shares a kinship with other warm, comforting desserts that have helped defined holiday tables and weekend celebrations around the world. The technique—seeded with a base of dairy, eggs, and sugar, coaxed into a creamy center by slow, patient baking—connects diverse culinary traditions. It’s a dish that demonstrates how a simple idea, when executed with care, can become a timeless favorite, capable of being personalized with family stories, seasonal fruit, or a drizzle of chocolate, coffee, or berry compote. The “al forno” approach is a celebration of that patient craft: a method that respects texture, temperature, and time as the essential ingredients that elevate comfort food into something memorable and meaningful.

The Evolution of Flavor and Form

In the modern era, cheesecakes come in many forms—glossy, smooth, crackled, or jewel-toned with fruity swirls. Yet the baked Italian style keeps a faithful honor to the idea of restraint: a filling that is rich but never cloying, a crust that offers gentle support rather than a heavy distraction, and a finish that glows with a subtle, natural sweetness. The oven does much of the storytelling here: it lightly husks the filling to a silky finish, creates a delicate surface sheen, and sets the interior to a perfect harmony of creaminess and structure. As you read about this dish, you are reading about a philosophy of dessert-making that respects the ingredients, the rhythm of the kitchen, and the shared experience of enjoying something crafted with quiet devotion.

Why You’ll Love This Recipe

  • Simple elegance: It combines a few classic ingredients into a refined, crowd-pleasing dessert that looks as impressive as it tastes.
  • Comforting creaminess: The interior is luxuriously soft, almost cloud-like, with a gentle tang that keeps the sweetness honest.
  • Versatile flavor notes: Vanilla and citrus accents pair beautifully with the dairy richness, while optional add-ins let you tailor the cake to your mood or season.
  • Make-ahead friendly: The cake can set overnight or for several hours in the fridge, making it ideal for parties, holidays, or relaxed weekend gatherings.
  • Show-stopping yet approachable: It looks sophisticated on a dessert platter, but requires no fancy equipment or techniques beyond patient baking and careful cooling.
  • Pairing paradise: Its understated flavor makes it a natural partner for a range of sauces, berries, chocolate, or a splash of dessert wine, letting you customize the finale to your menu.

Flavor Profile & Texture

The essence of Cheesecake al forno is a dialogue between richness and brightness. The filling carries a creamy, airy mouthfeel that seems to melt on contact, thanks to the delicate balance of dairy—often a combination of soft cheeses—eggs, and a touch of sugar. The dairy base offers a gentle tang, which can come from ricotta, mascarpone, or a mild cream cheese blend. This tang is never sharp; it is rounded by the sweetness and tempered by citrus zest, vanilla, or a hint of almond, depending on the regional or personal touch used in the bake.

The texture is the star. The inside is supremely smooth, with a silk-like glide that remains stable without being heavy. When properly baked, the center should feel set and supple, not jiggly, producing that familiar cheesecake slice that holds its shape but yields with elegance. The crust adds a contrasting bite: a delicate crunch or chew that anchors the slice, providing a satisfying counterpoint to the insubstantial, creamy center. The flavor profile is cream-forward, with a gentle caramel undertone from the crust and a whisper of vanilla or citrus that brightens the overall experience. If you serve it slightly chilled, you’ll experience a firmer, cooler texture that still carries that unmistakable creaminess; if you allow it to come closer to room temperature, the flavors become more pronounced, and the filling releases a richer aroma as the fats soften and bloom.

Texture and flavor are nearly inseparable here: soft, airy filling; crisp or crumbly crust; a light glaze on top if you choose to finish with a glaze or dusting. The result is a dessert that feels indulgent yet balanced—a testament to the art of patient baking and to the quiet magic of well-chosen ingredients. It’s not a dessert that hurries to the finish line; it invites you to slow down, to savor the moment, and to notice how the flavors evolve from bite to bite. The sensory journey—from the first inhale of vanilla and citrus to the last lingering note of dairy sweetness after a spoonful—rewards the effort of preparation with a lasting sense of satisfaction.

Occasions & Pairings

This cheesecake is a versatile guest at many occasions. It shines on holiday dessert tables, where its refined silhouette and comforting flavor offer a crowd-pleasing finale without demanding intense labor. It also makes a comforting weekend dessert after a long week, a centerpiece for a family birthday, or a sophisticated finish to a dinner party with friends. Its elegance is matched by its adaptability: it can be dressed simply with fresh berries and a dusting of powdered sugar, or enhanced with a glossy fruit coulis, a chocolate drizzle, or a light berry compote that adds a pop of color and a complementary acidity to cut through the richness.

Pairing ideas elevate the experience. Consider these options to complement and balance the dish:

  • Drinks: a glass of dessert wine or a late-harvest wine, a cup of strong espresso, or an airy Italian sparkling Moscato can be ideal companions depending on your mood and dessert philosophy for the night.
  • Fruit accents: fresh berries, lightly macerated strawberries, or a spoonful of bright berry coulis provide a counterpoint to the creaminess and add a vibrant visual element.
  • Sauces and toppings: a chocolate ganache, a lemon or orange glaze, or a tart cherry sauce can transform the cake into a new experience while preserving its essence.
  • Contrastive elements: a light, barely sweetened whipped cream or a dollop of mascarpone can add a layer of richness and heighten the cake’s luxurious texture.

When to serve it? Any time you want to mark a moment—family meals, anniversaries, or a simple Sunday supper—the Cheesecake al forno fits. Its restrained sweetness makes it suitable after a savory meal, while its richness ensures it holds its own among other dessert courses. The cake’s lingering aroma also lends itself nicely to a dessert course that wraps up with a sense of comfort and satisfaction, leaving guests with a warm memory and the wish for another slice (or perhaps two).

Tips, Variations & Substitutions

Tips for the best bake

To honor the traditional spirit of the baked cheesecake while allowing for home kitchen realities, consider these guiding ideas. A gentle bake, a careful cooling, and a patient set are the trifecta of success. Bake at a moderate temperature to encourage an even set without over-drying the edges. If you notice the top developing a deep golden hue too quickly, shield it with a sheet of parchment or a light tent of foil to prevent over-browning. Allow the cake to cool gradually in the turned-off oven or on a rack to avoid sudden temperature changes that could cause cracking. Once cooled, refrigerate for several hours or overnight; this resting period lets the filling firm and the flavors meld. When slicing, use a clean, sharp knife warmed slightly in hot water and wiped dry for the neatest cuts. A gentle wipe between slices helps maintain those pristine lines that make the dessert look as refined as it tastes.

Texture and moisture are intimately connected in a baked cheesecake, so moisture management matters. If the filling seems too loose before baking, you can opt for a slightly firmer base by masking moisture with gentle eggs and avoiding over-mixing, which can introduce air pockets that cause cracks. If you’re aiming for a lighter sensation, you can blend in a touch more ricotta or a smoother cheese mixture to achieve a silkier interior while preserving the cake’s structural integrity.

Variations to suit taste and dietary needs

  • Ricotta-based variation: Emphasize the Italian roots by using ricotta as a primary filling. The texture remains creamy, with a slightly grainy charm that some find quintessentially rustic.
  • Mascarpone cream: Integrate mascarpone for a richer, silkier mouthfeel and a more pronounced dairy depth. This version feels especially indulgent and luxurious.
  • Lemon or citrus-forward: Intensify the bright notes with zest and a touch of citrus juice to create a lively counterpoint to the creamy base.
  • Chocolate swirl: A ribbon of melted dark or white chocolate swirled into the batter before baking adds a sophisticated twist.
  • No-bake adaptation: For days when the oven must stay quiet, a no-bake version uses a crumb crust and a chilled, mousse-like filling; however, note that the texture will differ from the traditional baked version.
  • Gluten-free crust: Use gluten-free biscuits or almond flour-based crusts to accommodate gluten intolerance without sacrificing flavor or crumb texture.
  • Vegan option: A vegan baked cheesecake can be crafted using soaked cashews, coconut cream, and a plant-based cheese substitute, set with agar or cornstarch, and baked gently to replicate the creamy interior.
  • Regional twists: Consider a pinch of toasted almond meal in the crust for a nutty aroma, or a hint of cinnamon to evoke a comforting, spiced finish in cooler months.

Substitutions and pantry-friendly tweaks

If you’re working with what’s in the pantry, you can balance flavor and texture by adjusting the ratio of cheeses to eggs, or by pairing a milder cheese with a touch more cream cheese for a smoother set. A splash of vanilla extract can be replaced with vanilla bean seeds for a more pronounced aroma, and a few teaspoons of lemon juice can brighten the overall profile if citrus zest isn’t available. When choosing dairy options, fresh, high-quality products will always shine, so consider premium ricotta, mascarpone, or cream cheese as the anchors of your filling. The right balance is what makes the cake sing, so taste as you go to achieve a harmonious blend rather than a single dominant note.

Storage & Make-Ahead Ideas

Cheesecake al forno is especially friendly to advance planning. The flavors deepen with time, making it an ideal make-ahead dessert for parties or holiday meals. Here are practical tips to maximize flavor and texture after the bake:

  • Refrigeration: Once fully cooled, cover the cake and refrigerate. It will keep well for several days, often tasting best after a gentle chill and a few hours to come closer to room temperature before serving.
  • Make-ahead: You can bake the cheesecake up to a day in advance. If you plan to serve it cold, simply refrigerate once cooled. If you prefer slightly softer texture, pull it 30–60 minutes before serving to allow the filling to loosen a touch at room temperature.
  • Freezing: Slices freeze well individually wrapped. Thaw overnight in the refrigerator and bring to room temperature before serving for the best texture. Note that the crust may soften a bit upon freezing and thawing, but the creamy center remains luxurious.
  • Storing toppings separate: If you anticipate toppings (berries, chocolate, or sauces), hold them in separate containers and add just before serving for a fresh, bright finish.

Fun Facts & Trivia (Optional)

Cheesecake is a dish with a storied past. The concept of a cheese-based dessert stretches back to ancient civilizations, with various cultures adopting and adapting the idea to fit local tastes and available ingredients. The term “cheesecake” in English appears in print as early as the 19th century, but variations of this dessert existed long before. In many Italian kitchens, the baked cheesecake became a canvas for seasonal flavors and regional cheese varieties, transforming into a dish that could be as simple or as refined as the occasion required.

One delightful piece of trivia: the balance between tenderness and sturdiness in a baked cheesecake often hinges on the method—gentle heat, slow cooling, and patient rest are almost as important as the ingredients themselves. The practice of letting the cake settle in a cool environment after baking resembles the temperament of many traditional desserts from around the world, where the act of waiting quietly is part of the flavor development. In modern culinary culture, cheesecake has earned countless riffs—some light and airy, others deeply rich and decadent—but the baked Italian style retains a sense of timelessness that connects home ovens with trattorias across generations.

For dessert lovers, there is a fun ritual associated with cheesecakes: the first slice is often shared with a guest as a sign of hospitality, a small ceremonial moment that echoes the cake’s social roots. The joy of giving a slice, watching the creamy interior glisten in the light, and hearing the smile that follows is part of what makes Cheesecake al forno a beloved staple for celebrations and everyday indulgence alike.

Conclusion: A Dessert with Soul

Cheesecake al forno is more than a dessert; it is a narrative of patience, craft, and affection. It speaks of kitchens where the oven is a friend, where ingredients are treated with respect, and where a few thoughtful touches can elevate a simple recipe into a memory. Whether you choose a classic, citrus-kissed version or a more adventurous variant with a chocolate swirl or almond crust, this baked cheesecake invites you to slow down, to celebrate the everyday, and to share something that feels both timeless and deeply comforting. So preheat your imagination, gather a few select ingredients (in their best form), and let the oven work its quiet magic. In its smooth center and tender crust, you’ll find a small, perfect moment—a reminder that the simplest pleasures, when prepared with care, can become the ones you reach for again and again. Enjoy the process as much as the result, and let Cheesecake al forno become a beloved chapter in your own culinary story.

Ingredients

Cheesecake Crust

    – 1 1/2 cups graham cracker crumbs (about 150 g)
    → The crust provides the crunchy foundation and structural support for the cheesecake. Crush the crackers into fine, even crumbs (or pulse in a processor) and mix with sugar and salt. Stir in the melted butter until the mixture resembles wet sand. Press firmly into the bottom and slightly up the sides of a prepared springform pan. For a gluten-free version, use gluten-free crackers and ensure they’re finely ground. If you prefer a crisper crust, lightly bake the crust before filling as a blind bake.
    – 1/4 cup granulated sugar (optional)
    → Adds gentle sweetness to the crust and helps with binding when mixed with the butter. If your crackers are already sweetened, you can omit. Combine with the crumbs before binding; for a crisper crust, bake the pressed crust for 8–10 minutes at 350°F (175°C) before filling.
    – 5 tablespoons unsalted butter, melted
    → Binds the crust together and provides rich flavor. Ensure the butter is fully melted and slightly cooled before mixing with the crumbs so the crust doesn’t become greasy. Press evenly into the pan and chill briefly or bake as part of a blind bake to set the crust.
    – Pinch of fine sea salt
    → Enhances the intrinsic flavors of the crust and balances sweetness. Mix into the crumb mixture before binding to keep the crust cohesive and flavorful.

Cheesecake Filling

    – 4 x 8-ounce blocks cream cheese, softened to room temperature (about 900 g)
    → The creamy base that defines the cheesecake texture and tang. Softened cream cheese blends smoothly with sugar and dairy, avoiding lumps. Beat until very smooth and airy, then add eggs one at a time on low speed. Avoid overbeating after adding eggs to minimize air incorporation, which can cause cracks. Room temperature ingredients emulsify better for a glossy filling.
    – 1 cup granulated sugar (200 g)
    → Provides balanced sweetness to counter the tang of the dairy. Add gradually to the cream cheese while beating to ensure full dissolution and a silky batter. Using sugar crystals that dissolve easily helps prevent a gritty texture in the cake.
    – 3 large eggs
    → Contribute moisture, structure, and setting. Add one at a time on low speed after the cream cheese has become smooth. Keep eggs at room temperature to promote even incorporation and minimize temperature shock that could lead to cracks.
    – 1/2 cup sour cream (120 g)
    → Adds moisture, tenderness, and a subtle tang that enhances overall flavor. Whisk or fold into the filling until just combined; using full-fat sour cream gives a richer, creamier texture without thinning the batter.
    – 1/2 cup heavy cream (120 ml)
    → Adds extra richness and a silky, smooth mouthfeel. Incorporate gradually to maintain a stable emulsion; room-temperature cream blends more evenly and helps prevent separation during baking.
    – 2 teaspoons vanilla extract
    → Deepens flavor and aroma. Use pure vanilla extract for best results; you can also add vanilla bean seeds for extra fragrance. Add with the liquids to ensure even distribution throughout the batter.
    – 1 tablespoon lemon zest (optional)
    → Brightens the filling with citrus notes that cut through richness. Zest, not juice, to avoid thinning the batter; if using lemon juice instead, start with 1 tablespoon and adjust to taste to avoid overly wet batter. The zest’s essential oils provide aroma without adding liquid.
    – 1/4 teaspoon fine salt
    → Enhances overall flavor and helps balance sweetness. Even if using salted cream cheese, a small pinch can help unify the batter and prevent it from tasting flat.

Optional Toppings

    – Fresh berries (strawberries, blueberries, raspberries) for serving
    → Adds color, freshness, and a contrasting tart sweetness. Rinse gently and pat dry; add just before serving to keep the crust crisp and the topping from becoming soggy.
    – Berry compote or sauce
    → A luscious, fruity accompaniment. Simmer berries with a touch of sugar and a squeeze of lemon juice until thickened; cool completely before serving. This can be made ahead and stored in the fridge.
    – Powdered sugar for dusting
    → Finishing touch that lightly sweetens and beautifies slices. Sift over cooled cheesecake to avoid clumps and create an elegant presentation.
    – Caramel sauce
    → Rich, glossy topping that pairs beautifully with vanilla cheesecake. Warm slightly to drizzle; drizzle in thin streams across slices to avoid overpowering the filling. Use sparingly to maintain a balance between topping and cake.

Instructions

  • Preheat your oven to 350°F (175°C) and generously grease a 9-inch (23 cm) springform pan, then wrap the exterior with heavy-duty foil to guard against water leakage during the bake.
    → Wrapping prevents water from seeping into the crust and helps the pan maintain its integrity in a water bath; greasing the interior ensures the crust releases cleanly once chilled and sliced.
  • In a medium bowl, combine the graham cracker crumbs, granulated sugar (optional), and fine sea salt; whisk until evenly distributed to ensure consistent flavor and texture in every bite.
    → Even distribution of dry ingredients ensures the crust binds with butter uniformly, and salt enhances sweetness while balancing the flavor.
  • Stir in the melted butter with the crumb mixture until the texture resembles wet sand and the crumbs hold together when squeezed.
    → Properly buttered crumbs will compact into a cohesive crust that remains intact when sliced and served.
  • Transfer the crumb mixture to the prepared pan and press firmly into the bottom and up the sides with the flat bottom of a measuring cup or a small glass, aiming for an even, compact layer.
    → Uniform pressure prevents thin or uneven areas that could crumble and ensures the filling sits on a stable base.
  • Blind bake the crust (optional) by baking for 8–10 minutes at 350°F (175°C) until the edges look set and the crust is fragrant, then cool on a rack before filling.
    → A brief bake dries the crust, creating a barrier against moisture from the filling and yielding a crisper texture.
  • Cool the crust completely on a rack before proceeding with the filling to avoid trapped steam that could soggify the crust.
    → A cooled crust provides a solid base that supports the dense filling and prevents cracking from heat differentials.
  • In a large mixer bowl, beat the softened cream cheese on low speed until completely smooth and airy, scraping the bowl as needed to remove lumps.
    → Smooth, room-temperature cream cheese emulsifies better with sugar and dairy, yielding a glossy, lump-free filling with good structure.
  • With the mixer on medium-low, gradually add the granulated sugar and beat until the mixture is fully incorporated and silky, ensuring there are no gritty sugar granules.
    → Full dissolution of sugar prevents a grainy texture and helps the filling set evenly during baking.
  • Add the eggs one at a time on low speed, beating just until each is incorporated before adding the next; avoid overmixing after eggs are added to minimize air pockets and cracks.
    → Gentle incorporation preserves a smooth batter and reduces the likelihood of surface cracking during cooling.
  • Beat in the sour cream and heavy cream on low speed until just combined and the mixture is uniform and glossy.
    → The dairy adds tenderness and moisture, while staying smooth prevents separation in the hot oven.
  • Stir in the vanilla extract and the lemon zest (if using) along with the fine salt; mix on low until evenly distributed throughout the batter.
    → Vanilla and lemon zest enrich aroma and brightness, while salt enhances overall flavor harmony.
  • Pour the filling over the cooled crust in an even layer and gently tap the pan on the counter to release any trapped air bubbles; smooth the top with an offset spatula for a flawless finish.
    → Even surface and free of air pockets ensure uniform bake and a clean slice.
  • Wrap the bottom of the springform pan with two layers of heavy-duty foil and set the pan into a larger, deep baking dish; pour hot water into the outer dish until it reaches halfway up the sides of the cheesecake to establish a water bath.
    → A water bath provides gentle, uniform heat that minimizes cracking and yields a velvety texture.
  • Bake the cheesecake in a preheated oven at 325°F (165°C) for about 60–70 minutes, or until the edges are set and the center still wobbles slightly when nudged.
    → The gentle bake with a bath keeps the center creamy while the edges firm; timing may vary with pan and oven, so monitor instead of strictly timing.
  • If the top browns too quickly, tent loosely with foil after 30 minutes of baking and continue to bake; this shields the surface while the interior firms.
    → Foil prevents excessive browning and ensures an even color and texture across the surface.
  • Turn off the oven, crack the door, and let the cheesecake rest in the oven for 1 hour to gradually cool and reduce the risk of cracking from abrupt temperature change.
    → Slow cooling minimizes cracks and helps set the filling evenly before chilling.
  • Carefully remove the cheesecake from the water bath, lift out of the outer dish, and cool completely on a rack; then refrigerate for at least 4 hours or overnight to finish setting and develop flavor.
    → Chilling hardens the texture and ensures clean, tidy slices with a glossy finish.
  • Just before serving, run a thin knife around the edge, release the springform, and transfer the cheesecake to a platter for presentation.
    → This guarantees a clean release and a neat, professional slice when plated.
  • Serve with your chosen toppings—fresh berries, berry compote, a light dusting of powdered sugar, or a drizzle of caramel—to complement the cheesecake’s vanilla and tang; display and portion with care for an elegant finish.
    → Toppings add color, brightness, and contrast in texture, enhancing the overall dessert experience.

Notes

“These classic baked cheesecake slices are rich and creamy with a crisp crust and a subtle tang from the cream cheese. To ensure a smooth filling, beat the cream cheese with sugar until completely silky, then add eggs one at a time on low speed to minimize air pockets that can cause cracks. For a gluten-free crust, substitute graham crackers with finely ground gluten-free crackers or digestive biscuits and add a little extra pinch of salt to balance sweetness. Let all dairy come to room temperature before mixing to promote even emulsification. A water bath helps regulate moisture and prevents cracking; bake the cheesecake in a larger pan filled with hot water and check for a just-set center that slightly jiggles. After baking, cool gradually in the oven with the door ajar, then chill for several hours or overnight for clean, sliceable results. Toppings can include fresh berries, berry compote, or a dusting of powdered sugar. If you want a lighter texture, you can reduce the sour cream and heavy cream by a few tablespoons, but this will affect moistness and tang. Always ensure any flavorings and vanilla are gluten-free if needed, and check labels for cross-contamination.”

Tips

Tips for Cheesecake al forno

Crust tips

  • Crush graham crackers to fine, even crumbs. For a gluten-free version, use gluten-free crackers and grind very finely. Mix with the optional sugar and a pinch of salt, then stir in the melted butter until the mixture resembles wet sand.
  • Press the crust firmly into the bottom and slightly up the sides of a prepared springform pan. For a crisper crust, blind bake the crust at 350°F (175°C) for 8–10 minutes before filling, then cool completely before adding the filling.
  • If your crackers are sweetened, you can omit the added sugar. The salt helps balance sweetness.
  • Chill the crust briefly after pressing to set it before filling, which reduces crumbling and helps the filling release cleanly.

Filling tips

  • Beat the softened cream cheese until very smooth and airy to create a glossy, lump-free filling. Add sugar gradually to ensure full dissolution.
  • Add eggs one at a time on low speed after the cream cheese is smooth; keep eggs at room temperature to promote even incorporation and minimize temperature shock that can cause cracks.
  • Whisk or fold in sour cream and heavy cream gradually until just combined for a tender, moist texture. Use full-fat dairy for richness.
  • Mix in vanilla extract with the liquids. If using lemon zest, add it for brightness; if using lemon juice instead, start with 1 tablespoon and adjust to taste to avoid thinning the batter.
  • Finish with a pinch of fine salt to enhance flavor and balance sweetness, even if using salted cream cheese.
  • Ensure all ingredients are at room temperature to promote emulsification and a smoother batter, which helps prevent cracks and uneven texture.

Baking and handling tips

  • Bake in a low oven and monitor for doneness; edges should be set while the center remains slightly jiggy. Do not overbake to avoid a dry texture.
  • To minimize cracks, consider baking the cheesecake in a water bath. Wrap the pan tightly in foil and place in a larger pan with hot water, then bake. If not using a water bath, reduce mixing and bake time to avoid overcooking.
  • Allow the cheesecake to cool gradually in the oven with the door slightly open for about an hour, then transfer to a rack at room temperature before refrigerating overnight for best texture.

Toppings and serving tips

  • Fresh berries add color and a tart contrast; rinse gently and pat dry. Add just before serving to keep the crust crisp.
  • Berry compote or sauce can be prepared ahead; cool completely before serving.
  • Dust with powdered sugar for a refined finish; sift to avoid clumps.
  • Drizzle caramel sauce in thin streams over slices to complement the vanilla flavor; warm slightly before serving and use sparingly to maintain balance.

FAQ

Cheesecake al forno: cos’è?

È un dolce cremoso a base di formaggio cremoso, zucchero e uova, cotto al forno. Di solito ha una base di biscotti sbriciolati con burro, ed è spesso cotto in bagno-maria per mantenere una consistenza morbida e uniforme.

Qual è la differenza tra cheesecake al forno e quella senza forno?

La cheesecake al forno viene cotta, risultando cremosa e compatta con una leggera crosticina in superficie. Le versioni senza forno si solidificano con gelatina o panna acida e non richiedono cottura, ma hanno una consistenza diversa e una preparazione leggermente diversa.

Quali ingredienti servono per la base e la crema?

Base: biscotti sbriciolati (es. digestive) mescolati con burro fuso. Crema: formaggio cremoso, zucchero, uova, panna o panna fresca, vaniglia, scorza di limone (opzionale). Opzionali: un pizzico di sale e succo di limone per bilanciare la dolcezza.

Come si prepara la base croccante?

Sbriciola i biscotti, mescolali con burro fuso finché tutto è ben umido. Versa il composto nello stampo a cerniera rivestito di carta forno, e premi bene con il dorso di un cucchiaio o con un fondo piatto. In alternativa, scotta 5-8 minuti a 180°C per stabilizzare la crosta prima di aggiungere la crema.

Come evitare crepe o sformamenti in superficie?

Cuoci a temperatura moderata, evita mescolamenti eccessivi della crema, e usa ingredienti a temperatura ambiente. Per una cottura più dolce, utilizza un bagno-maria: avvolgi lo stampo con più strati di carta stagnola e ponilo in una teglia più grande piena di acqua calda durante la cottura.

A che temperatura e per quanto tempo si cuoce?

Cuoci tipicamente a 160–165°C (325–330°F) per circa 50–70 minuti. Il centro dovrebbe cedere leggermente al tatto. Spegni il forno e lascia la cheesecake dentro con lo sportello socchiuso per circa 1 ora, poi rimuovi e lascia raffreddare a temperatura ambiente prima di refrigerare.

Come raffreddare e rassodare prima di servirla?

Lascia raffreddare completamente a temperatura ambiente, quindi trasferisci in frigorifero e lascia rassodare per almeno 4–6 ore, meglio una notte. Evita di togliere lo stampo troppo presto: aiuta a mantenere la consistenza cremosa.

Come conservarla e per quanto tempo?

Conserva in frigorifero, coperta o in un contenitore ermetico, per 3–5 giorni. Puoi congelare la cheesecake a fette ben sigillate per 1–2 mesi; scongelala in frigorifero prima di gustarla.

È possibile fare la cheesecake al forno senza glutine o senza lattosio?

Sì. Per una versione senza glutine, usa biscotti gluten-free per la base o un mix di biscotti senza glutine; evita contaminazioni. Per una versione senza lattosio, usa formaggio cremoso senza lattosio e panna senza lattosio (oppure latte di soia/mandorla per la crema, regolando zucchero e consistenza). Assicurati che anche burro o alternative siano prive di lattosio se necessario.

Quali varianti gustose si possono fare?

Varianti popolari includono cheesecake al limone (con scorza e succo di limone), al cioccolato (includendo cioccolato fondente fuso nella crema), al caffè, o con topping di frutti di bosco, coulis di frutti rossi o caramello. Puoi anche aggiungere una striscia di ganache al cioccolato sopra o incorporare frutta secca o scorza d’arancia nell’impasto.

Introduzione / Hook

Immagina una teglia che esala profumi di mandorla tostata, scorza di limone luminoso e una dolce nota di bacche selvatiche che si aprono come piccoli gioielli. I Biscotti ai mirtilli sono una danza tra tradizione italiana e un tocco di freschezza nordica: due volte cotti per una croccantezza che si scioglie in bocca, una texture che salta tra croccante e friabile, e una memoria aromatica che accompagna ogni morso. Questi biscotti non sono solo dolcetti; sono un rituale di pausa, una carezza per le mattine fredde e una chiusura perfetta di una cena estiva al tramonto. Ogni fetta, croccante come una scocca di cioccolato finemente temperato, rivela un cuore morbido e profumato, dove la dolcezza naturale dei mirtilli incontra la delicatezza leggermente agrumata della scorza e la ricchezza di noci o mandorle tostate. L’aroma denso e avvolgente invita prima l’olfatto, poi il palato, e infonde una sensazione di casa che rende questi biscotti familiari anche quando li prepari per la prima volta. Se cerchi una ricetta che trasformi in un momento speciale una semplice pausa caffè, questa è la scelta giusta: un classico reinventato, capace di stupire i tuoi sensi e conquistare il palato degli ospiti con una croccantezza che resta impressa nella memoria.

La storia dietro il piatto

I biscotti, in Italia, hanno una lunga littorina di tradizioni. Da Prato arriva la versione più famosa, i cantucci, biscotti secchi e duri che nascono per accompagnare il Vin Santo, una pratica secolare di inzuppare il dolce in un vino dolce dopo i pasti. La parola “biscotti” stessa racconta la doppia cottura: l’impasto viene formato, cotto una prima volta, raffreddato, tagliato e cotto di nuovo per ottenere quella consistenza croccante tanto amata. I biscotti ai mirtilli, come molte varianti moderne, nascono dall’idea di portare la frutta fresca o essiccata in una tradizione consolidata, aggiungendo una freschezza che ricorda l’estate, ma con la solidità e la praticità che contraddistinguono i biscotti italiani. L’origine precisa di una versione ai mirtilli può variare da regione a regione, ma l’idea rimane: un guscio croccante che custodisce un cuore profumato, capace di accompagnare conversazioni lente, letture pomeridiane o una tazza di caffè fumante. In molte cucine casalinghe, i mirtilli rappresentano l’abbinamento perfetto con mandorle, scorza di limone e una lieve nota di vaniglia, elementi che si intrecciano come fili sottili per creare una sinfonia di aromi sempre fresca, anche dopo settimane di conservazione. Da un punto di vista storico, l’uso della frutta in biscotti dolci è una pratica diffusa in molte tradizioni regionali: i mirtilli, con la loro profondità di sapore e la loro vivacità cromatica, portano un tocco di stagione e colore, rendendo ogni forno aperto una finestra su campi pieni di bacche profumate e arie estive. Questa versione con mirtilli, quindi, è un ponte tra l’antica tecnica della cantucci e l’energia contemporanea della frutta fresca, capace di regalare una dolcezza equilibrata che non sovrasta la nota secca della pasta biscotto.

Perché amerai questa ricetta

  • Quick and comforting: una preparazione che nasce per essere semplice ma sorprendente, ideale per chi cerca qualcosa di tradizionale ma con un twist di freschezza.
  • Texture irresistibile: croccante all’esterno, leggermente friabile all’interno, perfetto per essere accompagnato da una tazza di caffè, tè o vino dolce.
  • Equilibrio di sapori: la dolcezza delicata dei mirtilli si fonde con la ricchezza delle mandorle o delle noci, con una nota agrumata che illumina il palato.
  • Versatilità unica: si prestano a diverse varianti stagionali e a personalizzazioni con ingredienti alternativi, mantenendo sempre una base croccante e soddisfacente.
  • Conservazione efficace: la cottura doppia li rende duraturi, perfetti da preparare in anticipo per settimane di degustazione lenta.
  • Perfetti per regali fatti in casa: una confezione elegante e profumata racconta cura, attenzione ai dettagli e una passione per la cucina.

Profilo di sapore & texture

Al primo morso, la croccantezza esterna si rompe con una scissione sottile che rivela un interiore morbido, dove la dolcezza dei mirtilli crea una nota fruttata che ricorda una macedonia di bosco essiccato. L’aroma di mandorla tostata è una base calda e confortante, quasi avvolgente, che sostiene senza sovrastare i mirtilli. Un accenno di vaniglia o scorza di limone leggera agita le papille gustative con una freschezza che sembra quasi sollevarsi sopra la base di pasta. La consistenza resta compatta ma non seca, grazie a una giusta percentuale di zuccheri che bilancia l’umidità naturale della frutta. Le note di forno tostato, lievemente burrose, si armonizzano con un retrogusto leggermente acidulo dei mirtilli, una combinazione che invita a un secondo morso senza esitare. Nella versione ideale, ogni fetta esprime una sinergia tra croccantezza e morbidezza, un equilibrio che si ripete lentamente dopo ogni pausa. Il profumo che invade la cucina è una promessa: che non importa se il tempo è grigio o assolato, questo biscotto sa trasformare un momento ordinario in un piccolo festival di sensazioni. Se si aggiungono spezie leggere come una punta di cannella o un pizzico di zenzero, la gamma aromatica guadagna profondità e una timbrica leggermente esotica, mantenendo però la delicatezza che rende i mirtilli così protagonisti.

Occasioni & abbinamenti

Questi biscotti si prestano a molteplici contesti: una colazione lenta al mattino con caffè o latte freddo, una merenda domenicale al parco, o una chiusura di pasto più elaborata durante le festività. Sono perfetti anche per accompagnare dessert cremosi, come una crema al mascarpone o uno yogurt dolce, dove la croccantezza offre una contrapposizione molto gradevole al velluto del dolce. Per un abbinamento classico, servili con Vin Santo o un Moscato dolce: il contrasto tra liquore dolce e biscotto secco crea un abbraccio gustativo che rimane a lungo in bocca. Se vuoi un twist moderno, prova a spalmarli con una crema di formaggio dolce o di ricotta, aggiungendo una leggera nota salata che esalta la frutta. Durante le feste o i regali, una confezione di biscotti ai mirtilli può diventare un piccolo dono di prossembranza elegante: impacchettati singolarmente, emanano profumo di casa e di premura. In un brunch, abbinali a un succo di agrumi fresco o a una zuppa di frutti rossi come antipasto dolce per spezzare la dolcezza e rinfrescare il palato. In estate, servili freddi o appena tiepidi, perché i mirtilli freschi rilasciano un accento vivace quando la temperatura è elevata, offrendo una sensazione rinfrescante. In inverno, accompagnali con una tazza di cioccolato caldo o una tisana profumata che richiama i frutti di bosco: la combinazione è confortante, avvolgente e ideale per momenti di coccole domestiche.

Consigli, Varianti & Sostituzioni

La bellezza di questa ricetta sta nella versatilità. Ecco alcune idee per personalizzarla a seconda dei gusti o delle esigenze alimentari:

  • Varianti di frutta: oltre ai mirtilli, puoi usare more, lamponi secchi, pezzi di prugna disidratata o ciliegie candite per un sapore diverso ma altrettanto affascinante.
  • Noci e semi: le mandorle restano classiche, ma pistacchi, nocciole o pinoli tostati offrono texture diverse e aromi complementari.
  • Variazioni di scorza: limone è classico, ma arancia o lime aggiungono una freschezza brillante; una punta di vaniglia può aumentare la morbidezza aromatica.
  • Versione vegana: sostituisci uova con legumi liquidi o purè di banane/datteri per legare l’impasto; la consistenza resta croccante se si regola la quantità di grasso.
  • Gluten-free: utilizza una miscela di farine senza glutine equilibrata con una piccola quantità di amido di mais o di tapioca per mantenere la struttura.
  • Spezie opzionali: cannella, zenzero in polvere, o una leggera nota di cardamomo per una complessità aromatica senza togliere protagonista ai mirtilli.
  • Metodo alternativo: se preferisci una forma diversa, puoi lavorare l’impasto per creare piccole barrette, che verranno cotte una sola volta e tagliate a fette finemente prima di una breve seconda cottura.

Conservazione & Idee per preparare in anticipo

I biscotti ai mirtilli, una volta cotti due volte, si conservano incredibilmente bene. Per il massimo della croccantezza, conservali in un contenitore ermetico in un luogo fresco e asciutto. Se vuoi prepararne in anticipo una fornitura per settimane, procedi con la cottura completa, lascia raffreddare completamente, poi riponi in contenitori ermetici. Sul piano di lavoro, una scatola di latta o una teca singola li manterrà croccanti per circa 2-3 settimane, mentre in frigorifero la freschezza può durare anche qualche settimana extra, purché siano ben sigillati per evitare l’assorbimento di odori. Per una presentazione al tavolo, scalda leggermente al forno per circa 5-7 minuti prima di servire: l’aroma si riattiva e la consistenza diventa nuovamente fragrante. Se vuoi congelarli, avvolgi singolarmente le porzioni in carta pergamena e metti in una busta: il freddo li conserva bene per 2-3 mesi. Per riattivarli, basta scongelare a temperatura ambiente e, se necessario, farli rinfornare per qualche minuto in forno a bassa temperatura per ritrovare la croccantezza originale.

Fatti divertenti & Trivia (Opzionale)

– Il termine “biscotto” deriva dal latino “bis coquus”, che significa “double-cotture”, una pratica antica che garantisce una conservazione sicura senza rinunciare al gusto.

– I cantucci di Prato sono spesso serviti con Vin Santo, un incontro tra vino e biscotto che è diventato una tradizione di fine pasto in molte famiglie italiane, specialmente nel Nord e Centro Italia.

– L’estate italiana spesso ispira versioni di biscotti leggeri, ricchi di frutta fresca o secca, capaci di celebrare la stagione senza appesantire, ma offrendo una croccantezza duratura per accompagnare le lunghe ore di sole.

– La scialba colorazione dei mirtilli dorati e la brillantezza della scorza di limone creano una presentazione visiva molto attraente, rendendo questi biscotti una scelta popolare sia per la tavola di casa sia per regali gastronomici fatti a mano.

Chiusura: un invito a creare e condividere

Lascia che questi Biscotti ai Mirtilli diventino parte della tua routine culinaria e delle piccole celebrazioni quotidiane. Non sono semplici dolcetti: sono un contenitore di ricordi, di profumi che evocano paesaggi bergamaschi, colline toscane o boschi mediterranei a seconda della tua immaginazione. Sono anche un invito a sperimentare: aggiungi una nota di agrumi, una punta di spezie, una varietà di frutta secca, e lascia che la tua cucina diventi un laboratorio dove l’ingrediente principale rimane la passione. Ogni fetta racconta una storia diversa, ma tutte convergono in una conclusione semplice ma potente: il gusto autentico, quando è ben bilanciato e ben presentato, ha la forza di un abbraccio caldo in una giornata fredda, o di una dolce chiusura dopo un pasto memorabile. Prepara, gusta, condividi, e lascia che questi biscotti diventino una piccola ma fedele compagna delle tue pause, dei tuoi momenti di riflessione, dei tuoi incontri con amici e familiari. Il profumo che si diffonde dalla teglia non è solo un invito al gusto: è una promessa di comfort, di semplicità elevata e di piacere che dura nel tempo.

Ingredients

Biscotti ai mirtilli

Biscotti Base

  • – 2 1/2 cups all-purpose flour
    → This is the main structure for the biscotti dough, giving it the firm, chewy-crisp texture after twice-baking. For gluten-free versions, use a 1:1 gluten-free flour blend with 1–2 tablespoons added cornstarch and a pinch of xanthan gum; sift the mix to distribute evenly before combining with the wet ingredients.
  • – 3/4 cup granulated sugar
    → Adds sweetness and contributes to the cookie’s dry, crisp crust. It also helps with browning during the first bake. If you prefer less sweetness, you can reduce by 1–2 tablespoons, but expect a slightly softer final texture.
  • – 1 teaspoon baking powder
    → Provides light leavening to keep the dough’s structure from becoming too dense and to help the biscotti slice cleanly after the first bake. Do not skip; omit only if you want a denser biscotto.
  • – 1/4 teaspoon salt
    → Enhances overall flavor and balances sweetness; distribute evenly by whisking with the dry ingredients to ensure even taste in every bite.
  • – 1 tablespoon lemon zest
    → Fresh lemon zest delivers fragrant essential oils that brighten the blue- berry flavors and contrast nicely with the biscuit’s richness. Use a microplane and avoid the white pith, which can add bitterness.
  • – 2 large eggs
    → Eggs bind the dough and provide moisture; they also contribute to the structure when baked twice. For a richer bite, you can substitute 1 whole egg plus 1 yolk. Bring eggs to room temperature before mixing to improve emulsion with sugar and butter.
  • – 1/3 cup unsalted butter, melted and cooled
    → Butter adds richness and a tender crumb; melting ensures even distribution and helps create the biscuit’s crisp exterior after the second bake. Let the melted butter cool slightly before mixing to avoid scrambling the eggs.
  • – 1 teaspoon vanilla extract
    → Pure vanilla enhances the overall aroma and depth of the dough, pairing with lemon and blueberries for a balanced flavor. If using imitation vanilla, expect a lighter, less complex profile.
  • – 1/2 teaspoon almond extract (optional)
    → A classic pairing with berries and citrus, almond extract adds a delicate nutty note that complements the almonds in the add-ins. Use sparingly (start with 1/4 teaspoon) to avoid overpowering the blueberry flavor.

Add-ins

  • – 1 cup dried blueberries or freeze-dried blueberries
    → Dried or freeze-dried blueberries provide concentrated blueberry flavor without adding excess moisture that could compromise the biscotti’s texture. If using dried berries, you may wish to rehydrate briefly in warm water (5–10 minutes) then drain; if freeze-dried, you can add them as-is. Lightly toss the berries in a tablespoon of the flour to help distribute evenly and prevent clumping or sinking to the bottom.
  • – 1 cup toasted almonds, chopped
    → Almonds give a pleasant crunch and a toasty, nutty contrast to the blueberries. Toast the almonds until fragrant (about 6–8 minutes at 350°F / 180°C), then cool completely and chop to even pieces. Dust with a little flour if needed to keep them from sinking in the dough.

Optional Glaze (Finish)

  • – 1/2 cup powdered sugar
    → This forms the base for a simple lemon glaze or a light dusting to finish the biscotti. For a glaze, whisk powdered sugar with enough lemon juice to reach a pourable consistency; brush or drizzle over cooled biscotti and let set. If you prefer a dry finish, skip the glaze or dust only with powdered sugar.
  • – 1-2 tablespoons fresh lemon juice
    → Adjusts the glaze to the desired thickness and adds a bright tang that complements the blueberries. Start with a little and whisk in gradually; add more juice for a thinner glaze or more sugar for a thicker one. For a simple dusting, omit the juice and dust with powdered sugar instead.

Optional Garnish

  • – Additional lemon zest for garnish
    → A light sprinkle of zest right before serving enhances aroma and makes the tart lemon note pop. Use a fine zest to avoid large shreds that can be visually heavy.

Instructions

  • Preheat your oven to 350°F (175°C) and line two rimmed baking sheets with parchment paper or silicone mats to prevent sticking during both the initial bake and the second bake that will dry the biscotti.
    → Proper heat and nonstick surfaces ensure even browning and clean slices later, avoiding the biscotti from adhering when you reduce moisture in the second bake.
  • Whisk together the dry ingredients: 2 1/2 cups all-purpose flour, 3/4 cup granulated sugar, 1 teaspoon baking powder, 1/4 teaspoon salt, and the lemon zest until evenly distributed.
    → Sifting or whisking distributes leavening and salt uniformly, preventing pockets of sweetness or saltiness and ensuring a consistent crust on each bite.
  • In a separate bowl, whisk together 2 large eggs, 1/3 cup melted and cooled unsalted butter, 1 teaspoon vanilla extract, and optional 1/2 teaspoon almond extract until the mixture is smooth and the fat emulsifies with the eggs.
    → Room-temperature eggs emulsify better with sugar and fat, creating a cohesive dough that slices cleanly after the first bake.
  • Add the wet mixture to the dry ingredients and mix with a wooden spoon or spatula just until a rough, cohesive dough forms; avoid overmixing to prevent toughness in the final biscotti.
    → Biscotti benefit from a short mix to maintain slight tenderness inside while the second bake dries the exterior for crispness.
  • Fold in the add-ins: 1 cup dried blueberries or freeze-dried blueberries and 1 cup toasted almonds, chopped, using gentle motions to distribute evenly without breaking the berries or overworking the dough. Lightly toss the berries in a tablespoon of flour before adding so they don’t sink; toast almonds until fragrant and cool completely before chopping.
    → Dry berries and toasted nuts provide concentrated flavor and crunch; coating berries with flour helps them suspend rather than clump or settle during baking.
  • Turn the dough out onto a lightly floured work surface and divide it in half; shape each half into a log about 10-12 inches long and 2 inches wide, pressing firmly to compact the dough without gaps.
    → Shape determines the final biscotti size and the ease of slicing; a tight log yields uniform diagonal cookies after the second bake.
  • Transfer the logs to the prepared sheets and bake for 25-30 minutes until the exterior is set and lightly golden; this first bake cooks the interior and creates a firm crust that will hold shape when sliced.
    → The biscotti should feel firm to the touch and a blade should come out clean; underbaking will cause crumbling when sliced.
  • Cool the logs on the sheets for 15-20 minutes, then reduce the oven temperature to 325°F (165°C) to prepare for the second bake.
    → Cooling stabilizes the structure and the temperature reduction begins the drying process without overcooking the inside.
  • Place the logs on a cutting board and slice diagonally into 1/2-3/4 inch (1.25-2 cm) wide biscotti; arrange slices cut-side down on the same sheets.
    → Diagonal slices maximize surface area for crisping during the second bake and give the classic biscotti appearance; a sharp serrated knife and a gentle sawing motion reduce crumble.
  • Bake the biscotti slices for 8-12 minutes, then turn them over and bake another 8-12 minutes until the exterior is dry and crisp; this second bake removes remaining moisture and creates the signature crunch.
    → The twice-baked method dehydrates the cookies; watch closely toward the end to avoid over-drying or scorching.
  • If you are using the optional glaze, whisk 1/2 cup powdered sugar with 1-2 tablespoons fresh lemon juice to a pourable consistency, then brush or drizzle over the cooled biscotti and allow the glaze to set.
    → The glaze adds a tangy sweetness and a glossy finish; adjust thickness by adding more sugar or juice as needed.
  • Finish with a light sprinkle of additional lemon zest just before serving to amplify the citrus aroma and brighten the berry flavor.
    → Fresh zest releases essential oils that perfume the biscotti and improve perceived freshness; use a fine grater and avoid shredding large pieces.
  • Store the biscotti in an airtight container at room temperature for up to two weeks, or freeze for longer storage; this keeps them crisp and prevents moisture from softening the crunch.
    → Proper storage maintains the biscotti’s dryness and prevents staleness; keep away from humidity and strong odors.

Notes

These biscotti ai mirtilli are lemon-scented and studded with blueberries and toasted almonds, baked twice to achieve the classic firm, crisp texture that’s perfect for dunking in coffee or dessert wine. You can customize them by swapping the almonds for pistachios or pecans, or by folding in a few white chocolate chips for a sweeter version. They store well in an airtight container for up to two weeks and freeze beautifully for longer keeping; slice the baked logs and return them to the oven for a second bake until dry and crisp. For gluten-free versions, use a 1:1 gluten-free flour blend with 1–2 tablespoons added cornstarch and a pinch of xanthan gum, and sift the dry ingredients before mixing with the wet to ensure an even texture. Bring eggs to room temperature and let the melted butter cool slightly before combining to promote a smooth emulsion; avoid overworking the dough so it stays tender yet sliceable after the first bake. If you like extra brightness, dust lightly with powdered sugar and a touch of lemon zest just before serving. Always ensure your flour, baking powder, and any add-ins are gluten-free if you have gluten intolerance.

Tips

Consigli utili per Biscotti ai Mirtilli

FAQ

Cos’è Biscotti ai mirtilli?

I Biscotti ai mirtilli sono una versione italiana di biscotti cotti due volte (doubling bake). Si preparano con una base di pasta frolla leggera e si arricchiscono di mirtilli freschi o secchi, con scorza di limone per un tocco fresco. Il risultato è un biscotto croccante all’esterno e leggermente morbido all’interno.

Quali ingredienti servono per i Biscotti ai mirtilli?

Indicazioni generali (quantità possono variare a seconda della ricetta):

  • Farina 00 (o tipo 0) – circa 260 g
  • Zucchero – circa 120 g
  • Burro non salato, morbido – circa 100 g
  • Uova grandi – 2
  • Lievito per dolci – 1 cucchiaino
  • Pizzico di sale
  • Scorza grattugiata di 1 limone
  • Mirtilli freschi o secchi – circa 150 g
  • Essenza o estratto di vaniglia (opzionale)
Posso fare una versione senza glutine?

Sì. Usa una miscela di farine senza glutine 1:1. Se la miscela non contiene xantano, aggiungi circa 1/2 cucchiaino di gomma xantana. Potrebbe essere necessario aggiungere un po’ di latte o acqua per ottenere un impasto lavorabile. Cuoci come indicato e controlla la consistenza durante la lavorazione.

Posso utilizzare mirtilli freschi o secchi?

Scegli in base all’effetto desiderato. I mirtilli freschi daranno una nota succosa ma possono rendere l’impasto più umido; i mirtilli secchi mantengono meglio la forma. Se usi freschi, asciugali leggermente e, se necessario, aggiungi un cucchiaio di farina in più per controllarne l’umidità.

Come si cuociono i Biscotti ai mirtilli?

Procedura tipica: forma due log (i cilindri di impasto) e posizionali su una teglia. Cuoci in forno preriscaldato a 180°C per 25-30 minuti, finché i bordi iniziano a dorarsi. Lascia raffreddare leggermente, taglia a fette di circa 1 cm e rimetti in forno per la seconda passata, a 170°C, per 8-12 minuti per lato, finché diventano croccanti.

Come si conservano i biscotti ai mirtelli?

Conservali in un contenitore ermetico a temperatura ambiente, in luogo fresco e asciutto. Si mantengono bene per 1-2 settimane. Puoi anche congelarli: sia l’impasto crudo che i biscotti cotti si conservano bene nel tempo. Per l’impasto, avvolgi i log singolarmente e congela; per i biscotti già tagliati, congela su una teglia prima di riporli in sacchetto.

Posso congelare l’impasto o i biscotti?

Sì. Congela l’impasto formato in log o i biscotti già cotti. Per l’impasto, avvolgi i log in pellicola e congela fino a 1-2 mesi; per i biscotti cotti, congela in un contenitore ermetico separati da fogli di carta forno per evitare che si attacchino. Quando servono, lascia scongelare a temperatura ambiente.

Posso personalizzarli con aromi o ingredienti extra?

Sì. Alcuni abbinamenti comuni includono:

  • Scorza di limone o arancia per un piacevole profumo agrumato
  • Vaniglia o una punta di cannella per profondità di gusto
  • Mandorle tritate o nocciole per una nota croccante
  • Gocce di cioccolato bianco o fondente (con moderazione)
È possibile fare una versione vegana?

Sì. Sostituisci:

  • Burro con olio vegetale o burro vegano (1:1)
  • Uova con un sostituto vegetale: ad es. 1 cucchiaio di semi di lino macinati mescolati con 3 cucchiai d’acqua per “uovo” oppure purè di banane o yogurt vegetale a seconda della ricetta
  • Latte animale con latte vegetale (mandorla, soia, avena)

Potrebbe essere necessario regolare leggermente la consistenza dell’impasto durante l’esecuzione.

Quali errori comuni dovrei evitare?

Ecco alcuni consigli utili:

  • Non lavorare eccessivamente l’impasto; altrimenti i biscotti potrebbero diventare duri
  • Non aggiungere troppa farina durante la lavorazione
  • Non far raffreddare i log completamente prima di tagliarli: un po’ di calore facilita il taglio
  • Assicurarsi che i mirtilli non rilascino troppa umidità, soprattutto se si usano freschi
  • Controllare bene la seconda cottura per evitare bruciature

Introduzione

Immagina un dessert che danza tra eleganza e semplicità: un rotolo di pan di Spagna soffice, spalmato con una crema al formaggio vellutata e arricchito da un fermento di mirtilli appena cotti. Ogni fetta rivela un colore brillante, come una piccola finestra su un giardino estivo, dove i profumi di vaniglia, scorza di limone e burro appena tostato si mescolano in un abbraccio irresistibile. Il Rotolo cheesecake ai mirtilli è una promessa: un dessert che si presenta come un piccolo capolavoro scenico, ma che si prepara con gesti familiari e pizze di gusto che fanno cantare il palato. Non è solo una dolcezza; è un momento da vivere con la famiglia, da condividere ai pasti festivi o da portare in tavola durante una serata tra amici. Il profumo che riempie la cucina mentre il rotolo prende forma è una forma di accoglienza: una richiesta gentile per sedersi, assaggiare e lasciarsi trasportare in un viaggio di consistenze che si svelano al primo morso. Il contrasto tra la morbidezza leggera del pandispan e la cremosità dell’interno, la dolcezza mirtillosa che si sposa con una nota leggermente agrumata, crea un equilibrio che non stanca mai. Se c’è un dessert che sa trasformare una semplice conclusione di pasto in un piccolo rito, questo Rotolo cheesecake ai mirtilli lo sa fare con grazia.

La storia dietro il piatto

Il Rotolo cheesecake ai mirtilli nasce dall’unione di due tradizioni dolciarie molto amate: la morbidezza del pan di Spagna arrotolato tipico dei rotoli dolci italiani e la cremosità della cheesecake, amata in molte culture come simbolo di comfort e convivialità. L’idea è semplice: creare un dolce che possa essere presentato con la stessa raffinatezza di una torta, ma senza imporsi con una fetta pesante o una decorazione troppo impegnativa. In molte cucine di casa italiani, il rotolo rappresenta un invito a sedersi, a condividere storie e a gustare una merenda o un dessert con la consapevolezza che la semplicità, se ben eseguita, può raggiungere vette sorprendenti. I mirtilli, simbolo di estate e freschezza, offrono una nota aromatica che richiama i mercati di frutta, le colline baciate dal sole e le mattine serene. L’unione di questi elementi racconta una storia di stagionalità, di cuidado nel processo e della gioia di offrire qualcosa di bello e buono senza complicazioni eccessive. In alcune versioni regionali, si esplorano lievi varianti di aromatizzazione e di texture, ma l’anima resta quella di un dolce che avvolge il palato come una carezza: delicato, invitante, memorabile.

Perché questa ricetta farà breccia nel tuo cuore

  • Facilità di preparazione: scenico quanto basta per impressionare, ma realizzabile con tecniche di base e ingredienti comuni.
  • Versatilità: si presta a personalizzazioni stagionali, colori diversi e gusti complementari, pur restando bilanciato tra dolcezza e acidità.
  • Contenuto di comfort e leggerezza: la crema al formaggio offre una cremosità cremosa senza appesantire, mentre il rotolo di pan di Spagna fornisce una consistenza ariosa.
  • Piacevole per tutta la famiglia: una proposta elegante ma non eccessivamente complessa, adatta a celebrazioni, ma anche a una coccola domenicale.
  • Perfetto per la stagione estiva e oltre: i mirtilli danno freschezza e colore, ma si adatta a qualsiasi periodo dell’anno, basta sostituire i frutti o cambiare agrumi nell’impasto.
  • Ideale per la presentazione: una fetta appena tagliata rivela strati colorati e una crema lucida, pronta per essere fotografata e condivisa.

Profilo di sapore e consistenza

Il profilo aromatico è un intreccio tra dolcezza bilanciata e una leggera nota agrumata. Il pan di Spagna, leggero e soffice, funge da contenitore perfetto: lo stesso tessuto che si scioglie al primo morso, rivelando al suo interno una crema al formaggio morbida ma non pesante. La crema, vellutata e leggermente tangy, trae la sua grazia dalle note delicate del formaggio assortite a un tocco di vaniglia e scorza di limone. I mirtilli, sia in salsa che come guarnizione, aggiungono un’esplosione di succosità e una leggera acidità che bilancia la dolcezza della crema, offrendo una dimensione fruttata che richiama l’estate. Quando il rotolo è tagliato, si osserva una danza cromatica: strati di bianco crema, punteggiature di blu intenso dei mirtilli, e un guscio dorato di pandispan che invita al primo morso. La texture è un’armonia tra morbidezza, cremosità e una leggera consistenza elastica del rotolo: ogni pezzo è una piccola sinfonia di gusti, dove l’aroma si espande nel finale, lasciando una nota di burro leggero e vaniglia che resta sulla lingua.

Occasioni & abbinamenti

Questo Rotolo cheesecake ai mirtilli è un compagno ideale per molte occasioni:

  • Desert facile da servire durante i pranzi domenicali, in buffet di compleanno o celebrazioni intimate.
  • Perfetto come chiusura di una cena estiva all’aperto, accompagnato da un sorbetto al limone o una gelatina di agrumi.
  • Ideale per piccole festività o momenti speciali: l’eleganza della presentazione rende ogni fetta una piccola celebrazione.
  • Abbinamenti consigliati: un passito o un moscato freddo per chiudere in dolcezza, oppure un caffè espresso lungo per bilanciare la cremosità.
  • Servito con una punta di glassa leggera di mirtilli o una salsa di frutti di bosco per aumentare il contrasto visivo e gustativo.

Consigli, varianti & sostituzioni

La bellezza di questa ricetta sta nella sua flessibilità. Ecco alcune idee per personalizzarla senza allontanarsi dall’identità del piatto:

  • Sostituzioni di base: se preferisci una versione più leggera, prova una crema al formaggio a base di yogurt greco scremato mescolato con formaggio cremoso, riducendo così la quantità di burro e creando una texture ancora più fresca.
  • Versione vegana: utilizza un rotolo di pandispan vegano e una crema al formaggio a base di anacardi, ammorbiditi e miscelati con succo di limone e vaniglia, e una gelatina vegetale a base di agar-agar per l’addensamento.
  • Gluten-free: scegli una base di pandispan senza glutine o una versione di pan di spagna realizzata con farina di riso e maizena per una consistenza leggera e alveolata.
  • Variante agrumata: sostituisci la scorza di limone con scorza di arancia o di bergamotto per cambiare l’aroma e offrire una nuova esperienza olfattiva.
  • Dimensioni e presentazione: puoi realizzare una versione mini in vassoietti o una grande torta arrotolata per occasioni speciali, mantenendo sempre l’equilibrio tra crema e frutta.
  • Frutta di stagione: se i mirtilli non sono disponibili, puoi optare per more, lamponi o fragole, mantenendo la proporzione tra dolcezza e acidità e adeguando la quantità di succo o purea.

Stoccaggio e idee per preparare in anticipo

Questo rotolo è una soluzione pratica sia per chi vuole preparare in anticipo sia per chi cerca una presentazione impeccabile al momento. Ecco cosa considerare:

  • Conservazione in frigorifero: una volta pronto, avvolgi il rotolo in pellicola trasparente e conserva in frigorifero per 1-2 giorni. La crema al formaggio mantiene la sua morbidezza, mentre il pandispan resta soffice se avvolto adeguatamente.
  • Congelamento: è possibile congelare una versione già arrotolata, purché sia ben sigillata e senza perdita di umidità. Per riutilizzarla, lasciala scongelare lentamente in frigorifero e poi tagliala al momento di servire. La consistenza potrebbe leggermente cambiare, ma il sapore resta delizioso.
  • Preparazione in anticipo: puoi preparare la crema al formaggio e il pandispan separatamente con un giorno di anticipo, quindi assemblare il rotolo il giorno successivo. Questo rende il processo di presentazione estremamente fluido.
  • Taglio e presentazione: per un effetto visivo impeccabile, taglia le fette con un coltello affilato e asciuga delicatamente la lama tra una fetta e l’altra. Servi subito per mantenere la crema fresca e lucida.

Curiosità e trivia

Lo chiamano rotolo cheesecake ai mirtilli non solo per la forma, ma anche per la promessa di una combinazione di texture che ricorda la tradizione della torta di formaggio: la crema è morbida, la base leggera, e i mirtilli offrono un tocco rinfrescante che anima il palato. La glassa o la salsa di accompagnamento, quando presente, è spesso interpretata come una piccola scena—un accenno lucente che fa risaltare i colori naturali dei frutti. In molte culture dolciarie europee, i rotoli offrono una soluzione pratica per servire dolci scenografici durante i pasti o i momenti conviviali, senza rinunciare a una presentazione raffinata. Un piatto come questo diventa, quindi, un piccolo patrimonio di famiglia: una ricetta che si tramanda, si adatta, si migliora con ogni generazione e resta piacevolmente al centro della tavola per celebrare la semplicità e la gioia di condividere.

Ingredients

    – Base (Sponge Roll)
    – 4 large eggs, separated
    → For a light, tender sponge roll, separate the eggs while they’re cold, keeping whites and yolks in clean, dry bowls. Whip the whites with a pinch of salt (and optional cream of tartar) to stiff peaks, then beat the yolks with sugar until pale and thick. Fold the yolk mixture into the whites, then sifted flour and vanilla into the batter. Gentle folding helps preserve air; bake on a parchment-lined sheet until just set. When done, invert onto a clean towel dusted with powdered sugar and roll while warm, then cool completely to form the roulade.
    – 120 g granulated sugar
    → Sugar balances sweetness, aids moisture, and helps stabilize the foamy batter in a genoise-style roll. Add to yolks while beating until pale and thick; ensure it dissolves to avoid gritty texture. If you prefer a lighter crumb, substitute up to 20 g with powdered sugar but beware it can make the batter softer and less stable.
    – 1 tsp vanilla extract
    → Adds warm aroma that complements blueberries; use pure vanilla extract for best flavor; if you have vanilla bean paste, use it for a richer, speckled look. You may reduce slightly if you want the blueberry flavor to shine.
    – 110 g all-purpose flour, sifted
    → Provides structure for the sponge. Sift to aerate and remove lumps; fold in gently to preserve air. If you want an even lighter roll, you can replace up to 1–2 tablespoons with additional cornstarch (3:1 ratio with flour) to tenderize crumb.
    – pinch salt
    → Enhances overall flavor and helps balance sweetness; a tiny amount is all you need for a delicate bake. If using salted butter in this recipe later, adjust salt accordingly.
    – 1/2 tsp cream of tartar (optional)
    → Stabilizes beaten egg whites, helping them hold volume during rolling and baking. If you skip it, your whites may be a touch less stable, but the roll will still work; ensure whites are beaten to stiff peaks for best lift.
    – 1 sheet parchment paper (for lining)
    → Keeps the sponge from sticking to the pan and simplifies rolling. Use a sheet that fits your baking tray; you can dust the paper lightly with sugar or a thin layer of flaked almond meal to prevent sticking. After baking, the parchment helps you lift and roll the cake without tearing.

    – Cheesecake filling
    – 250 g cream cheese, softened
    → The creamy, tangy core of the roulade. Soften at room temperature for 1–2 hours or microwave briefly in 5-second bursts to avoid melting. Beat until smooth to prevent lumps, then incorporate other filling ingredients for a mousse-like texture.
    – 80 g powdered sugar
    → Adds sweetness and lightness to the filling. Sift to remove lumps for a smooth mouthfeel; adjust to taste depending on the vanilla and blueberry sweetness. If you prefer a tarter filling, reduce sugar a bit or add extra lemon zest.
    – 1 tsp lemon zest
    → Fragrant citrus note that brightens the dense cheese filling and complements blueberries. Zest before juicing the lemon to avoid squeezing bitter pith; use a microplane for fine, even shavings.
    – 1 tsp vanilla extract
    → Adds warmth and depth to the filling; if using vanilla bean paste, you may adjust to taste; this helps balance the tart from the cheese and blueberries. You can omit if you want a purer cheese flavor.
    – 150 ml heavy cream, cold
    → Whipped cream folded into the cheese to create a light, airy texture that rolls without cracking. Whip to soft or medium peaks and fold gently to maintain volume; keep the cream cold until folding to prevent runny texture.
    – 1 tbsp lemon juice
    → Adds brightness and helps cut richness; add gradually and taste, since too much lemon can make the filling runny. If your cream cheese is tangier, you may skip or reduce this.

    – Blueberry component
    – 250 g fresh blueberries
    → Use ripe, firm berries for vibrant color and balanced sweetness. Rinse gently and pat dry; you can macerate with a little sugar before folding into filling or heat to make a quick compote. If using frozen, thaw completely and drain excess liquid to avoid soggy filling.
    – 40 g granulated sugar
    → Macerates the berries, drawing out flavorful juices and balancing tartness. Adjust sweetness to taste; if making a compote, simmer longer for a thicker sauce.
    – 1 tbsp lemon juice
    → Brightens the blueberry flavor and helps maceration; taste and adjust, since lemon can intensify sour notes. Combine with sugar and let berries rest for 10–15 minutes to release juices.
    – 1 tsp cornstarch (optional)
    → A small amount helps thicken any blueberry sauce or compote so it doesn’t seep into the roll. Dissolve in a little cold water or juice, then stir into the simmering berries until glossy and thickened. Do not overcook to avoid a gummy texture.

    – Finishing and assembly
    – Powdered sugar for dusting
    → Finishes the roulade with a delicate, snowy look. Lightly dust after the roulade has cooled to set; avoid heavy layers that may cake; dust just before serving for best appearance and ease of slicing.

    – Optional garnish
    – Extra fresh blueberries for garnish
    → Provide a fresh, vibrant finish when sliced; arrange along the cut edge or scatter on top. Choose berries of similar size for a tidy presentation and avoid overhandling to prevent bruising.

Instructions

  • Preheat your oven to 350°F (175°C) and line a large rimmed baking sheet (about 33 × 23 cm) with parchment paper, allowing the edges to hang slightly for easy rolling later.
    → Preheating ensures even, quick baking and parchment prevents sticking; the parchment overhang helps you lift and roll the hot sponge without tearing.
  • Separate the 4 large eggs while they are cold, placing whites in one clean, dry bowl and yolks in another to maximize volume and prevent grease or yolk contamination from weakening the meringue.
    → Clean, dry bowls and cold eggs help whites whip to full volume, which provides the sponge’s light, airy structure necessary for a tender roulade.
  • Whip the egg whites with a pinch of salt and optional 1/2 tsp cream of tartar to stiff peaks, ensuring no yolk leaks into white, and avoid overbeating to prevent graininess.
    → Stiff peaks stabilize the meringue that anchors the light genoise texture and helps the sponge hold its shape when rolled.
  • Beat the egg yolks with 120 g granulated sugar until pale, thick, and ribbon-like, then beat in 1 tsp vanilla extract to develop depth of flavor.
    → The sugar lightens and stabilizes the yolk mixture, while vanilla adds warmth that pairs with blueberries and cream cheese; proper aeration yields a tender crumb.
  • Gently fold about a third of the whipped whites into the yolk mixture to lighten it, then fold in the remaining whites with a light, sweeping motion to preserve air.
    → Folding preserves the air you’ve created, which drives the sponge’s lift and soft texture essential for a roulade that stays tender when rolled.
  • Sift 110 g all-purpose flour with a pinch of salt and, if using, 1/2 tsp vanilla into the batter, then fold in just until the mixture is smooth and no flour pockets remain.
    → Sifting aerates the flour and prevents lumps; gentle folding avoids deflating the batter and ensures the roll remains light and even in color.
  • Spread the batter evenly on the parchment-lined sheet and bake in the center of the oven until just set and lightly springy to the touch, about 8–12 minutes, until the edges look slightly pale and a tester comes out clean.
    → A brief bake prevents the sponge from browning too much and keeps it flexible for rolling; overbaking will make it crack when rolled.
  • Invert the hot sponge onto a clean kitchen towel generously dusted with powdered sugar, peel away the parchment, and let the cake rest for a minute or two to stop steaming.
    → Inverting while warm creates a pliable surface that can be rolled without cracking; the towel aids in forming a tight roll and the sugar prevents sticking.
  • Roll the sponge with the towel into a tight log, twisting gently, and let it cool completely at room temperature to set the shape.
    → Rolling while still warm helps maintain the roll’s form; cooling fixes the shape so the filling sits evenly inside when unrolled later.
  • Beat 250 g cream cheese, softened to room temperature, until completely smooth and free of lumps, using a spatula or electric mixer, to create a creamy base for the filling.
    → Softened cheese blends more evenly; lumps would create uneven texture in the roulade and interfere with a silky filling.
  • Add 80 g powdered sugar, 1 tsp lemon zest, and 1 tsp vanilla extract to the cream cheese and beat until light and airy, ensuring the sugar is fully integrated for a balanced sweet-tangy flavor.
    → Powdered sugar dissolves completely for a smooth filling; lemon zest provides brightness that pairs with blueberries, while vanilla adds warmth.
  • Whip 150 ml heavy cream to soft or medium peaks and fold it gently into the cream cheese mixture with 1 tbsp lemon juice, preserving volume for a mousse-like filling that won’t collapse in the roll.
    → Cold cream kept separate and folded in preserves loft and creaminess; folding rather than beating ensures the filling stays airy and spreadable.
  • Macerate 250 g fresh blueberries with 40 g granulated sugar and 1 tbsp lemon juice for 10–15 minutes, allowing the berries to release juice and sweeten evenly.
    → Maceration enhances blueberry flavor, creates a juicy filling, and ensures the fruit distributes evenly without needing additional syrup.
  • If you desire a thicker accent, whisk 1 tsp cornstarch with a splash of cold water, then stir it into the macerated blueberries and simmer briefly until glossy and slightly thickened, then cool completely.
    → The cornstarch thickens the berry component so it doesn’t pool or seep too much when rolled, giving a cleaner slice.
  • Unroll the cooled sponge carefully and spread the cream-cheese filling evenly over the surface, leaving about 1 cm of margin at the far edge to seal, and then spoon or dot the remaining blueberries over the filling.
    → An even, thin layer prevents gaps and cracking; the margin helps seal the roll when you finish, while the blueberries provide bursts of fruit and color.
  • Roll the sponge tightly away from you using the towel as a guide to form a neat roulade, then remove the towel and wrap the roll tightly in plastic wrap, chilling it in the refrigerator for at least 4 hours or overnight to set.
    → A long chill firmed the filling and helped the roll hold shape for clean slicing; the exterior will look glossy and the interior will be sliceable.
  • Just before serving, dust the roulade with powdered sugar and garnish with extra fresh blueberries for a bright, elegant finish.
    → Powdered sugar adds a delicate, snowy touch while fresh berries add color contrast and a fresh aroma; dusting right before serving prevents melting or bleeding into the filling.

Notes

“These Rotolo cheesecake ai mirtilli are a show-stopping dessert that pairs a light sponge roll with a creamy lemon-vanilla cheesecake filling and a vibrant blueberry component. To ensure a tender, airy roulade, whip the egg whites with a pinch of salt (and optional cream of tartar) to stiff peaks, beat the yolks with sugar until pale and thick, then fold in the yolk mixture with sifted flour and vanilla, taking care to fold gently so you preserve the air; bake on a parchment-lined sheet until just set, invert onto a clean towel dusted with powdered sugar, and roll while warm to form the roulade, then cool completely. For the filling, soften the cream cheese and beat with powdered sugar, lemon zest, vanilla, and lemon juice, then fold in cold whipped cream until smooth and mousse-like. The blueberry component can be macerated with sugar and lemon juice, or cooked briefly with a cornstarch slurry to make a glossy sauce that won’t leak when rolled. Assemble by unrolling the cooled sponge, spreading or stacking filling evenly, and rolling tightly using the towel, then refrigerate for at least 2–4 hours so the roll holds its shape. This dessert is best made a day ahead and keeps well refrigerated; dust with powdered sugar and garnish with extra blueberries before slicing. If you need a gluten-free version, substitute the all-purpose flour with a certified gluten-free blend (plus a little cornstarch or xanthan gum as directed) and note that texture may vary slightly. Store leftovers in the fridge for up to 3 days or freeze individual slices for longer storage.”

Tips

Consigli utili per Rotolo cheesecake ai mirtilli

  • Preparazione degli albumi: separa gli albumi dai tuorli quando le uova sono ancora fredde, in ciotole pulite e senza tracce di grasso. Aggiungi un pizzico di sale e, se hai a disposizione, cremor tartaro per stabilizzare la schiuma. Monta gli albumi a picchi fermi prima di unirli ai tuorli.
  • Base soffice (genoise): per una rollabilità perfetta evita di lavorare troppo l’impasto una volta aggiunte le farine. Setaccia la farina e la vaniglia, quindi incorpora delicatamente con movimenti dal basso verso l’alto per preservare l’aria. Cuoci finché la superficie è impostata e non troppo dorata; meno è meglio per una rollatura morbida.
  • Rullo subito dopo la cottura: rivolta il nostro biscotto su un canovaccio pulito spolverato con zucchero a velo o zucchero a velo leggero, e arrotola rapidamente mentre è ancora caldo. Raffredda completamente nel canovaccio per mantenere la forma.
  • Ripieno al formaggio: ammorbidisci il formaggio crema a temperatura ambiente per 1–2 ore (oppure scaldalo brevemente a intervalli di 5 secondi al microonde). Sbatti fino a ottenere una crema liscia, poi incorpora lo zucchero a velo setacciato, la scorza di limone e la vaniglia. Mantieni la crema fredda e incorpora la panna montata a mousse morbida, in modo da avere volume senza spezzare la struttura.
  • Panna montata: raffredda bene la ciotola e la frusta, monta la panna a neve morbida o media e aggiungila al formaggio con movimenti delicati, per evitare di smontarla prima di riempire la base.
  • Limone e aroma: aggiungi la scorza di limone all’impasto al formaggio per un tocco aromatico che contrasti la dolcezza dei mirtilli. Se preferisci un sapore più pulito, riduci la scorza o ometti la vaniglia.
  • Preparazione dei mirtilli: lava i mirtilli freschi e asciugali delicatamente. Puoi macerarli con zucchero per un sapore intenso, oppure cuocerli rapidamente in modo da ottenere una salsa brillante. Se usi moretti congelati, scongelali e scola bene per non allungare troppo il ripieno.
  • Salsa di mirtilli: per una salsa lucida, aggiungi una cucchiaino di succo di limone e, se necessario, un cucchiaino di amido di mais sciolto in poca acqua fredda. Cuoci finché la salsa è leggermente addensata, poi lascia raffreddare prima di incorporarla al ripieno o come strato opzionale.
  • Consistenza del ripieno: se vuoi una salsa di mirtilli intercalata nel ripieno, mescola i mirtilli macerati freddi con una piccola quantità di ripieno al formaggio. Evita di aggiungere troppa umidità per non sfaldare il rotolo.
  • Assemblaggio e riposo: stendi il ripieno sulla base fredda in modo uniforme, lasciando un bordino di circa 1–2 cm. Arrotola con cautela usando il canovaccio e pressa leggermente per chiudere. Lascia riposare in frigorifero per almeno 2 ore (ideale una notte) per far rassodare e amalgamare i sapori.
  • Presentazione: prima di servire, spolverizza con zucchero a velo e aggiungi alcune more fresche per un tocco di colore. Per una presentazione più ordinata, affetta con un coltello ben affilato e pulito dopo aver raffreddato bene.
  • Conservazione e varianti: conservare in frigorifero 2–3 giorni. Puoi preparare i componenti in anticipo: base cotta e ripieno pronti, poi assemblare al momento. Varianti consigliate includono scorza d’arancia al posto del limone o l’aggiunta di un leggero liquore al ripieno per una nota aromatico-ospite.

FAQ

Rotolo cheesecake ai mirtilli

Cos’è il Rotolo cheesecake ai mirtilli?

È un dolce freddo a forma di rotolo composto da una base (di biscotti o di pan di Spagna) arrotolata intorno a una crema al formaggio e mirtilli, raffreddata in frigorifero e tagliata a fette. Il risultato è una combinazione cremosa e fresca con un tocco di dolcezza fruttata.

Quali ingredienti servono e quali sostituzioni sono possibili?

Base: biscotti digestive o biscotti senza glutine, burro fuso. Versione vegana: burro vegetale e biscotti vegani. Crema: formaggio fresco tipo Philadelphia, mascarpone opzionale, zucchero a velo, vaniglia, scorza di limone, panna fresca montata. Sostituzioni: crema di formaggio vegana o yogurt greco al posto di parte del formaggio, panna vegetale. Mirtilli: freschi o congelati; zucchero e succo di limone per la salsa.

Come si prepara la base della rotolo?

Procedimento no-bake: trita i biscotti fino a ottenere una granella fine, unisci burro fuso e mescola finché è tutto umido. Riparti la massa in una teglia rettangolare foderata con carta forno, premi bene per compattare e metti in frigo per 30–60 minuti. Variante cotta: usa pan di Spagna o savoiardi leggermente inumiditi e stendili come base, poi fai raffreddare e farcisci.

Come si ottiene la crema al formaggio?

In una ciotola, lavora il formaggio con lo zucchero a velo, la vaniglia e la scorza di limone fino a ottenere una crema liscia. A parte monta la panna e, delicatamente, incorporala al composto con movimenti dal basso verso l’alto per non smontarla. Conserva in frigorifero fino all’uso.

Come preparare i mirtilli o la salsa?

Per la salsa: cuoci i mirtilli con un cucchiaio di zucchero e qualche goccia di succo di limone finché si ammorbidiscono e rilasciano una salsa leggera. Puoi usarli anche interi come ripieno o decorazione. Se vuoi una salsa lucida, passa i mirtilli al setaccio per ottenere un coulis e riportalo sul fuoco fino a leggera addensazione.

Come assemblare e arrotolare senza spezzarsi?

Stendi uniformemente la crema sulla base, lasciando liberi 2–3 cm ai bordi. Distribuisci i mirtilli, quindi arrotola delicatamente usando la carta forno o un canovaccio come supporto. Sigilla le estremità e metti in frigorifero per almeno 4 ore (meglio tutta la notte) per farlo rassodare e facilitarne il taglio.

Si può cuocere? Versione no-bake vs cotta?

La versione tradizionale è no-bake (base di biscotti e crema fredda). Se preferisci una versione cotta, prepara una base di pan di Spagna, farciscila con crema al formaggio e arrotola; dopo la farcitura lascia rassodare in frigorifero. La differenza principale è la consistenza: cremosa e fredda nel no-bake, spugnosa e compatta nel cotto.

Come conservare e quanto dura?

Conserva in frigorifero, ben chiuso, per 3–4 giorni. Può essere congelato per 1–2 mesi se ben avvolto. Alla riutilizzazione, lascialo scongelare in frigorifero e consumalo entro 24 ore per mantenere la migliore consistenza.

Suggerimenti per servire e varianti di gusto?

Taglia fette spesse e servi con mirtilli freschi o una salsa di mirtilli a lato. Decora con foglie di menta e una spolverata di zucchero a velo. Varianti: sostituisci i mirtilli con lamponi o more; aggiungi scorza di limone o arancia all’impasto per un aroma agrumato diverso; versione senza lattosio: utilizza formaggio senza lattosio e panna non contenente lattosio.

Introduction / Hook

Immagina una sera di autunno, quando le foglie sembrano incendiare il paesaggio con i loro riflessi dorati. L’aria sa di terra bagnata, di castagne arrosto e di pane caldo. In quell’atmosfera accogliente, una zuppa si accende come un piccolo, luminoso abbraccio: una zuppa di zucca cremosa che scivola sulle labbra con una vellutata finesse, lascia una scia dolce-salata e avvolge i sensi con una nota delicatamente speziata. È una ricetta che trasforma ingredienti semplici in un rituale di conforto: una ciotola fumante che invita a rallentare, a respirare, a sorridere. Ecco perché questa zuppa è diventata una presenza fidata sulle tavole di casa, pronta a riscaldare il cuore prima ancora che il palato. Ogni cucchiaio è una piccola celebrazione dell’autunno, una passeggiata tra coltivi e mercati, una memoria gustativa che si rinnova a ogni stagione. Preparala, e renderai ogni pasto un momento di rifugio gustoso, elegante nella sua semplicità, eppure sorprendente nella sua profondità di sapore.

The Story Behind the Dish

La zuppa di zucca cremosa nasce nel cuore della cucina italiana come una risposta semplice ma raffinata all’abbondanza dell’autunno. Le zucche, regine di questa stagione, hanno sempre avuto un posto speciale sulle nostre tavole: non solo per la loro dolcezza naturale, ma anche per la versatilità che permetteva alle famiglie di trasformarle in piatti capaci di raccontare storie diverse a seconda della regione e della tradizione. In molte zone del nord Italia, la zucca è stata the ingrediente della casa: una base confortante che diventa crema quando incontrano aromi di cipolla, aglio, erbe fresche e una carezza di grasso morbido. Nelle cucine contadine, la zuppa nasceva come una food for the soul: un piatto unico che nutriva i figli e i nonni dopo una giornata di lavoro nei campi, una tavola condivisa che invitava a conversare, a ridere, a ritrovare calore e sicurezza. Con gli anni, la pratica si è evoluta in una versione cremosa e più raffinata, dove la purea di zucca diventa seta, dove il soffritto si fa dolce e rotondo, e dove una piccola abbondanza di grasso morbido—crema, latte o una spruzzata di olio d’oliva—arricchisce la consistenza senza nascondere la dolce profondità del prodotto principale. Questa è la storia di una zuppa che guarda al passato con gratitudine, e al futuro con una promessa di conforto che non delude mai.

Oltre la tradizione italiana, la zuppa di zucca cremosa incontra influenze culinarie di montagne e pianure, di mercati di paese e di cucine urbane, dove la zucca diventa una tela su cui dipingere note di noce moscata, chiodi di garofano, pepe nero e una sottile traccia di rosmarino o salvia. È una storia di stagioni: la resa dolce delle zucche coltivate al sole, la fragranza di spezie che accendono lentamente, e la magia di una crema che, pur essendo semplice, sembra nobilitare ogni ingrediente con una lucentezza vellutata. Fare questa zuppa è come aprire un libro di racconti culinari: ogni angolo della ricetta svela una nuance, ogni cucchiaio richiama una memoria di casa, e ogni presentazione racconta una piccola favola di convivialità.

Why You’ll Love This Recipe

  • Semplicità senza rinunciare al tocco gourmet: pochi ingredienti, una tecnica pulita e una presentazione elegante che fa sentire il piatto speciale senza sforzo.
  • Comfort puro: una crema vellutata che avvolge il palato, offrendo una sensazione di calore e protezione, ideale per serate rilassanti o cene famigliare.
  • Versatilità per diete diverse: una base neutra e ricca che si adatta a versioni vegetariane, vegane o con latticini a seconda delle preferenze; è facile sostituire la componente cremosa con alternative non casearie o con una crema di cocco per un tocco esotico.
  • Equilibrio di sapori: la dolcezza naturale della zucca si armonizza con una leggera stimolazione di spezie, contrapposta da una nota salina se si aggiunge un filo di olio extravergine o una spolverata di formaggio grattugiato.
  • Presentazione accattivante: una crema lucida, servita con un tocco finale croccante o un filo di olio colorato, che la rende irresistibile anche visivamente.
  • Tempo utile all’aroma: i profumi di atrio e forno che si diffondono mentre la zucca viene arrostita o soffritta costruiscono un preludio di gusto che non tradisce la preparazione finale.
  • Facilità di personalizzazione: è una tela neutra su cui aggiungere agrumi, spezie invernali, erbe fresche o condimenti croccanti per rendere ogni versione unica.

Flavor Profile & Texture

La zuppa cremosa è una sinfonia di texture e sapori. La base è una purea di zucca che diventa setosa al contatto della lingua, come una nuvola calda che attraversa il palato. La dolcezza delicata della zucca è bilanciata da una leggera rusticità proveniente dalla cipolla o dall’aglio, che aggiungono profondità senza mai sovrastare la dolcezza principale. Le spezie, spesso una punta di noce moscata e una spolverata di cannella o chiodi di garofano, agiscono come un balsamo aromatico: ricordano il comfort dell’infanzia e aprono una porta verso aromi autunnali ricchi ma raffinati. L’elemento cremoso—sia una crema delicata, sia una goccia di latte o una versione vegetale—conferisce una consistenza lucida e avvolgente, capace di legarsi con il retrogusto leggermente rotondo della zucca. Quando la zuppa arriva al piatto, un filo di olio extravergine di oliva o una grana fresca rasata sopra può aggiungere una nota fruttata o piccante, offrendo un piccolo contrasto che esalta il profilo gustativo complessivo. In bocca, la crema scivola lentamente, lasciando una sensazione di calore che sembra allontanare il freddo esterno. Il retrogusto resta pulito, con una delicata persistenza di spezie che invita a prendere un altro cucchiaio e a continuare l’esperienza sensoriale.

Dal punto di vista tattile, la zuppa offre una texture liscia ma non una senza carattere: una crema soffice ma non acquosa, capace di sostenere l’aggiunta di croccantezza in superficie. Alcune varianti presentano topping di semi di zucca tostati, gocce di crema fresca o una nuvola di latte di cocco che aggiungono una dimensione ricca e leggermente esotica. Altre versioni giocano con un tocco di scorza di limone o arancia grattugiata per una nota agrumata che taglia la dolcezza e rinnova l’armonia. In ogni caso, la consistenza finale è un invito costante: una crema satinata che scende meravigliosamente sullo stomaco, accompagnata da una leggera spinta di sapidità che rinfresca il palato ad ogni sorso.

Occasions & Pairings

Questa zuppa cremosa si presta ad una varietà di occasioni, dall’amichevole cena di weekend alle serate intime in famiglia, fino a una versione elegante da servire come primo piatto in una cena formale. È perfetta per i mesi più freddi, quando il bisogno di conforto è reale, ma brilla anche come antipasto accattivante durante una cena autunnale o invernale. Può essere preparata come piatto unico semplice per una serata in cui vuoi coccolarti, oppure come preludio a un pasto più elaborato, accompagnata da crostini croccanti, pane casereccio o una selezione di formaggi morbidi. Se vuoi proporla in un’occasione più speciale, presentala in ciotole porzionate con una spolverata di semi di zucca tostati e un filo d’olio frizzante, per un tocco di raffinatezza visiva e di croccantezza aromatiche.

Abbinamenti consigliati:

  • Pane croccante o crostini all’olio al basilico per una nota erbacea che rompe la morbidezza della crema.
  • Una spolverata di formaggio grana o parmigiano grattugiato per una leggera piccantezza salina che esalta la dolcezza della zucca.
  • Una manciata di semi di zucca tostati o pistacchi per un contrasto croccante e una dimensione visiva interessante.
  • Birre chiare o vini bianchi leggeri come Pinot Grigio, Verdicchio o Soave, capaci di accompagnare senza sovrastare la delicatezza della zuppa.
  • Una fresca ciotola di insalata di arance o di mela verde come contorno per una nota agrumata che pulisce il palato.

Tips, Variations & Substitutions

  • usa una crema leggera o latte vegetale per ottenere una consistenza soffice e lucida.
  • sostituisci la crema con latte di mandorla o latte di cocco leggero; aggiungi un filo d’olio extra vergine per la ricchezza.
  • oltre noce moscata, prova una piccola quantità di cannella, chiodi di garofano o un pizzico di cumino per una nota inusuale ma accattivante.
  • una punta di arancia o scorza di limone grattugiata può bilanciare la dolcezza della zucca con una freschezza vibrante.
  • aggiungi crostini di pane al forno, semi di zucca tostati, o una quenelle di crema di formaggio per un tocco ricco e cremoso in superficie.
  • una lieve nota di rosmarino, salvia o peperoncino fresco può dare personalità, senza dominare il piatto.
  • se vuoi renderla ancora più italiana, prova una piccola quantità di formaggio di capra morbido sciolto sulla superficie per una nota tartufata leggermente pungente.
  • raffredda leggermente la zuppa e servi come zuppa fredda, aggiungendo una spruzzata di limone e una quenelle di yogurt per una variazione rinfrescante.
  • è possibile ottimizzare i tempi rosolando la zucca o la base aromatica in anticipo e conservando in frigorifero; il riscaldamento finale si farà in pochi minuti.

Storage & Make-Ahead Ideas

Questa zuppa si presta molto bene a preparazioni anticipate. Puoi prepararne una grande quantità in anticipo, conservarla in contenitori ermetici in frigorifero per 3-4 giorni, e riscaldarla lentamente al momento di servirla per mantenere la sua consistenza cremosa. Se vuoi congelarla, la zuppa si conserva bene per circa 2-3 mesi; per mantenere la velatura cremosa una volta scongelata, potresti dover riemulsionare con un piccolo aggiunta di liquido (acqua o brodo) e mescolare energicamente. Consigli pratici per il make-ahead: rosola appena le basi aromatiche, lascia raffreddare, poi congela in porzioni singole; al momento dell’uso, scongela in frigorifero durante la notte e riscalda piano piano aggiungendo liquidi se necessario per ritrovare la cremosità originale. Se preferisci una versione ancora più comoda, prepara solo la purea di zucca in anticipo (arrostita o cotta al vapore) e conservala al fresco in contenitori chiusi: al momento della preparazione basta unirla con il liquido caldo e rifinire con crema o olio per la texture desiderata.

Prenota spazio per una presentazione impeccabile: una zuppa cremosa è spesso migliore quando è appena riscaldata, ma una piccola attenzione come una guarnizione di olio aromatizzato e una manciata di semi tostati può rinnovarne completamente l’aspetto e l’impatto sensoriale anche dopo averla conservata.

Fun Facts & Trivia (Optional)

– Il termine “zuppa” in italiano richiama l’idea di qualcosa di liquido e comfortante, ma la parola ha origini latine che descrivono una consistenza simile a una pappetta soffice, un floppy denso che avvolge i sensi. Nel caso della zuppa di zucca, questa tradizione è un esempio perfetto di cucina povera trasformata in piatto raffinato grazie all’uso sapiente di tecniche di cottura e aromi.

– In molte regioni italiane la zucca è associata alle celebrazioni autunnali, come mercati di quartiere e festival di stagione. La sua presenza in cucina racconta storie di raccolto, di famiglie riunite e di tavole condivise, dove la semplicità degli ingredienti diventa un grande abbraccio di sapori.

– La zuppa cremosa è un piatto estremamente versatile: può essere arricchita da identità regionali, come una spolverata di formaggi locali, erbe aromatiche tipiche o una nota di olio profumato che richiama la zona di provenienza degli ingredienti. Questa flessibilità la rende uno dei capisaldi della cucina domestica, in grado di adattarsi a gusti e disponibilità diverse senza perdere la sua anima avvolgente.

Ingredients

Soup Base

  • 2 cups pumpkin puree (unsweetened)
    → Pumpkin puree is the creamy foundation of the soup, delivering natural sweetness and body without chunks. Use unsweetened puree; if using canned, verify it contains only pumpkin. If starting from fresh pumpkin, roast peeled chunks until very tender, then blend until smooth before adding to the pot. For the smoothest texture, blend the soup with an immersion blender after simmering until velvety, and strain through a fine sieve for extra silkiness. Season with a small pinch of salt to balance sweetness and enhance pumpkin flavor.
  • 1 tablespoon extra-virgin olive oil
    → Olive oil is used to sauté the onion and garlic, building flavor and helping to soften vegetables. Use good-quality extra-virgin olive oil for a fruity, robust aroma. Heat in a heavy pot over medium heat, then add onion and garlic; cook until translucent and fragrant, not deeply browned, to avoid bitterness.
  • 1 medium onion, finely chopped
    → Onion provides the base sweetness and aromatic backbone. Chop finely so it cooks evenly and dissolves into the soup, adding body without large chunks. Sauté with the olive oil until soft and translucent, then proceed with garlic.
  • 2 cloves garlic, minced
    → Garlic adds warmth and savory depth. Mince finely to maximize diffusion of flavor; add after the onion has softened to prevent scorching. Cook until fragrant, about 30–60 seconds, then continue with the recipe. If you prefer a milder garlic flavor, sauté it a little longer at a lower heat.
  • 4 cups vegetable stock (unsalted)
    → The stock provides the liquid backbone and carries pumpkin flavor. Use unsalted stock so you can control salt later; warm the stock before adding to the pot to avoid shocking the sautéed aromatics and to help everything come together quickly. Simmer until flavors meld and the pumpkin softens.

Creaminess & Seasoning

  • 1/2 cup heavy cream
    → Heavy cream adds richness and helps create a velvety, emulsified texture. Stir in toward the end of cooking to prevent separation or curdling; if you want a dairy-free version, substitute with coconut cream or a non-dairy milk-thickened base. Keep the cream off heat briefly after adding and whisk gently to incorporate.
  • 1 teaspoon kosher salt (adjust to taste)
    → Salt balances sweetness and enhances overall flavor. Start with less, then taste the finished soup before adding more, especially if your stock is salted. Dissolve salt evenly by whisking vigorously after adding, and recheck seasoning after cooling slightly as flavors mellow when cooled.
  • 1/4 teaspoon freshly ground black pepper
    → Pepper adds a subtle bite and depth to contrast the pumpkin’s sweetness. Grind freshly for the most vibrant aroma; if making this for children, you can reduce or omit the pepper and adjust later with a dash of nutmeg.
  • 1/4 teaspoon ground nutmeg
    → Nutmeg provides warm, cozy spice notes that complement pumpkin beautifully. It’s potent, so measure carefully; start with a pinch and increase after tasting. If your nutmeg is very fragrant, you can even hold back a bit and adjust at end.
  • 1 bay leaf (optional)
    → A bay leaf perfumes the simmer with subtle herbal aroma without overpowering the pumpkin. Add during simmering and remove before blending to avoid gritty textures; if you don’t have bay leaf, you can skip and instead add a small pinch of thyme for a similar herbal echo.
  • 1/2 teaspoon dried thyme (optional)
    → Thyme adds a woodland, savory note that complements pumpkin; if using fresh thyme, use a small sprig and remove before blending if desired. This is optional but beneficial for deeper aroma; remove from the pot if you don’t want the herbaceous texture in the final soup.

Garnishes (optional)

  • 1/4 cup toasted pumpkin seeds (pepitas)
    → Toasted pepitas provide crunch and an extra pumpkin flavor on top. Toast in a dry skillet over medium heat until they pop and become fragrant; season lightly with salt if desired after toasting. Scatter over each serving just before serving to preserve crunch.
  • Fresh parsley, chopped (for garnish)
    → Parsley adds a fresh, bright note and visual contrast. Chop finely and sprinkle a small amount over each bowl for color and aroma.
  • Croutons (store-bought or homemade) (for garnish)
    → Croutons add a satisfying crunch and contrast to the creamy soup. If making homemade, toss bread cubes with a little olive oil and salt, then bake until crisp; add on top just before serving to maintain texture.
  • A swirl of cream or extra-virgin olive oil for serving (optional)
    → A final swirl provides a glossy, restaurant-style presentation and extra richness. Drizzle a thin line across the surface of the soup just before serving, and consider pairing with a light olive oil drizzle for aroma.

Instructions

  • Warm the vegetable stock in a small saucepan over medium-low heat until it is steaming but not boiling; keep it hot and ready to ladle into the pot as you build the base.
    → Keeping the stock hot prevents shocking the sautéed aromatics and helps maintain an even simmer, which yields a smoother, more cohesive soup texture.
  • In a heavy-bottomed pot, add 1 tablespoon extra-virgin olive oil and set over medium heat until the oil shimmers and lightly coats the surface.
    → A hot fat base is essential for imparting flavor to the aromatics and ensuring the onion and garlic cook evenly without sticking or burning.
  • Add the finely chopped onion to the pot and sauté until it turns translucent and soft, about 5 to 7 minutes, stirring occasionally to prevent scorching.
    → Sautéing releases the onion’s natural sweetness and creates a smooth foundation; avoid browning to prevent bitterness in the soup.
  • Introduce the minced garlic and cook for 30 to 60 seconds until fragrant, keeping the heat medium to prevent browning and bitter notes.
    → Garlic releases its aroma quickly; excessive heat can turn it sharp, so brief heating preserves a mellow, integrated flavor.
  • Stir in the pumpkin puree and cook for 2 to 3 minutes, moving it around the pot with a wooden spoon to evenly coat the aromatics and wake the pumpkin’s sweetness.
    → This step helps marry the pumpkin with the onion and garlic, producing a silkier, more cohesive base before adding liquid.
  • Pour the warmed vegetable stock into the pot, whisking as you go to blend the puree smoothly into the liquid, then bring the mixture to a gentle simmer.
    → Whisking helps prevent lumps and creates a uniform texture; a gentle simmer prevents scorching and maintains bright pumpkin flavor.
  • If using optional bay leaf and dried thyme, add 1 bay leaf and 1/2 teaspoon dried thyme to the pot and simmer for 10 to 15 minutes to let the herbal notes infuse the soup.
    → The bay leaf and thyme add subtle earthy depth; simmering allows these flavors to permeate the pumpkin without overpowering it.
  • Remove the bay leaf (and thyme stems if used) from the pot to avoid gritty texture or overly herbal notes before blending.
    → Removing these aromatics prevents them from contributing bitterness or a muddy texture to the finished soup.
  • Blend the soup until velvety using an immersion blender directly in the pot, moving it in slow, steady vertical and circular motions; alternatively, transfer in batches to a countertop blender, venting steam carefully.
    → A smooth, emulsified texture is characteristic of creamy zuppa di zucca; immersion blending minimizes contamination and makes clean work of hot liquids.
  • For extra silkiness, optionally strain the blended soup through a fine-mesh sieve back into the pot, using a spatula to press on solids and extract as much liquid as possible; discard the solids.
    → Straining removes any remaining fibrous bits for an ultra-smooth finish that clings beautifully to the spoon.
  • Stir in 1/2 cup heavy cream, warming the soup gently while whisking to emulsify and prevent separation; do not boil after adding the cream.
    → Cream creates a luxuriously silky mouthfeel and a glossy surface; overheating can cause curdling, so keep the heat gentle.
  • Season the soup with 1 teaspoon kosher salt (adjust to taste), 1/4 teaspoon freshly ground black pepper, and 1/4 teaspoon ground nutmeg, then taste and adjust the seasoning as the flavors meld.
    → Proper salting balances the inherent sweetness of the pumpkin; nutmeg adds a warm note that complements the autumnal character of the dish.
  • Meanwhile, prepare the garnish of toasted pepitas by heating a dry skillet over medium heat and cooking 1/4 cup pumpkin seeds until they pop and become fragrant, about 3 to 4 minutes; shake the pan to prevent burning.
    → Toasting intensifies the pumpkin seed flavor and gives a contrasting crunch that enhances the soup’s texture and aroma.
  • Chop fresh parsley for garnish, about 1 to 2 tablespoons, and set aside ready to scatter over each bowl for color and brightness.
    → Parsley provides a herbal lift and visual contrast that elevates the presentation and aroma just before serving.
  • If making croutons, preheat the oven to 375°F (190°C), toss bread cubes with a little olive oil and salt, spread on a baking sheet, and bake 10 to 12 minutes until crisp and golden.
    → Crunchy croutons add textural contrast to the creamy soup; keep an eye on them so they don’t burn and become bitter.
  • To plate, ladle the hot zuppa di zucca into warmed bowls, finish with a delicate swirl of cream or extra-virgin olive oil on the surface, and scatter toasted pepitas along with parsley and a handful of croutons for texture.
    → A careful presentation with a glossy sheen, bright herbs, and crunch on top makes the dish look as inviting as it tastes and helps keep textures distinct until the last bite.

Notes

These gluten-free banana oat muffins are naturally sweetened with ripe bananas and contain no added sugar, making them a wholesome and guilt-free breakfast option. For Zuppa di zucca cremosa, start with a smooth pumpkin base. Use 2 cups pumpkin puree (unsweetened) as the creamy foundation of the soup, delivering natural sweetness and body without chunks. If using canned puree, verify it contains only pumpkin; if starting from fresh pumpkin, roast peeled chunks until very tender, then blend until smooth before adding to the pot. For the smoothest texture, blend the soup with an immersion blender after simmering until velvety, and strain through a fine sieve for extra silkiness. Season with a small pinch of salt to balance sweetness and enhance pumpkin flavor. Cook aromatics in 1 tablespoon extra-virgin olive oil: 1 medium onion, finely chopped, and 2 cloves garlic, minced; sauté until translucent and fragrant, not deeply browned. Add 4 cups vegetable stock (unsalted) and bring to a gentle simmer, then whisk in the pumpkin puree and simmer until flavors meld and the pumpkin softens. Creaminess & seasoning: 1/2 cup heavy cream, stirred in toward the end of cooking to emulsify and enrich the soup; adjust salt (1 teaspoon kosher salt, or to taste) and 1/4 teaspoon freshly ground black pepper; add 1/4 teaspoon ground nutmeg for warmth. Optional: add a bay leaf during simmer (remove before blending) and/or 1/2 teaspoon dried thyme for deeper aroma, removing the herb if you don’t want pieces in the final texture. Garnishes (optional) include 1/4 cup toasted pumpkin seeds (pepitas) for crunch, fresh parsley for bright color, croutons for extra texture, and a final swirl of cream or a drizzle of extra-virgin olive oil for presentation. These gluten-free notes also apply here: ensure all ingredients (stock, cream, and flavorings) are certified gluten-free and avoid cross-contamination; this soup keeps well in the fridge for several days and can be frozen for longer storage; reheat gently and whisk if needed to re-emulsify. Always taste and adjust seasoning after reheating, as flavors intensify with time.

Tips

Tips for preparing Zuppa di zucca cremosa

  • Preparation first: Have all mis en place ready—finely chopped onion, minced garlic, and measured pumpkin puree and stock—so the cooking flow is smooth and uninterrupted.
  • Fresh pumpkin from scratch: If you’re starting with chunks of fresh pumpkin, roast them until very tender (around 200°C / 400°F) to concentrate sweetness, then blend until smooth before adding to the pot.
  • For the smoothest base: After the soup has simmered, blend with an immersion blender directly in the pot until velvety. For extra silkiness, pass the soup through a fine-mesh sieve after blending.
  • Keep aromatics gentle: Sauté onion in olive oil over medium heat until translucent, then add garlic and cook briefly just until fragrant. Avoid browning garlic too deeply to prevent bitterness.
  • Warm your liquids: Warm the vegetable stock before adding to the pot to prevent a temperature shock that can dull the aromas and slow down simmering.
  • Balance from the start: Since you’re using unsalted stock, season gradually with kosher salt. Add a little at a time, taste, then adjust—flavors intensify as the soup rests a moment.
  • Cream addition timing: Stir in heavy cream toward the end of cooking and off the heat to maintain a lush, emulsified texture. If you want dairy-free, use coconut cream or a thickened non-dairy milk and whisk well.
  • Prevent curdling: If you’re adding dairy, temper a small amount of hot soup into the cream before returning it to the pot, then rewarm gently without boiling.
  • Season in layers: Start with a small pinch of salt and a dash of pepper, then adjust after the soup has simmered and cooled slightly—flavors mellow as the soup rests.
  • Nutmeg and herbs: Nutmeg adds warmth; use sparingly and taste after adding. If using bay leaf or thyme, remove and discard before blending to avoid grassy or gritty textures.
  • Herb alternatives: If you don’t have bay leaf, a small pinch of thyme (dried or fresh) can still contribute a nice woodland note without overpowering the pumpkin.
  • Texture control: If you prefer a chunkier texture, reserve a small portion of roasted pumpkin and stir in at the end. For a ultra-smooth soup, blend longer and add a splash of stock if needed.
  • Garnish for contrast: Toasted pumpkin seeds add crunch and a direct pumpkin note; sprinkle on just before serving to preserve texture.
  • Fresh color and aroma: A little chopped parsley on top gives brightness and color; keep garnish light so it doesn’t wilt before tasting.
  • Croutons: If making croutons, bake cubes tossed with olive oil and salt until crisp, and add them to bowls at the last moment to maintain crunch.
  • Serving flourish: A thin swirl of cream or a drizzle of extra-virgin olive oil on the surface just before serving elevates presentation and aroma.
  • Storage and reheating: Refrigerate leftovers in an airtight container for 3–4 days; reheat gently on the stove or in a microwave, adding a splash of stock or water if it thickens too much.
  • Make-ahead plan: This soup benefits from resting a bit after simmering—the flavors meld, so consider making it a little ahead and reheating before serving.
  • Equipment note: A sturdy, heavy-bottomed pot helps prevent scorching during simmering, and an immersion blender makes silky textures quick and easy.

FAQ

What is Zuppa di zucca cremosa?

La Zuppa di zucca cremosa è una zuppa vellutata italiana realizzata con purè di zucca, cipolla e aglio, brodo e una nota di crema o latte vegetale per la ricchezza. Spesso con pepe moscato o cannella per un tocco aromatico, servita calda con condimenti come semi di zucca tostati o un filo di panna.

What ingredients do I need?

Per circa 4 porzioni, potrebbero servire:

  • 1 zucca media (circa 900 g) oppure 3–4 tazze di purè di zucca
  • 1 cipolla, tritata
  • 2 spicchi d’aglio, tritati
  • 1 carota, opzionale
  • 2 tazze di brodo vegetale (o brodo di pollo)
  • 0,5 tazza di panna fresca o latte di cocco per una versione vegana
  • 1–2 cucchiai di olio d’oliva
  • Sale e pepe
  • Un pizzico di noce moscata (opzionale) e cannella (opzionale)
  • Condimenti opzionali: filetto di panna, semi di zucca tostati, crostini, prezzemolo
Can I make it vegan/vegetarian?

Sì. Utilizza brodo vegetale e latte di cocco o latte vegetale al posto della panna. Evita burro e, se vuoi, usa olio d’oliva come grasso di cottura.

How do I get it ultra-creamy without dairy?

Per una consistenza molto cremosa senza latticini:

  • Frulla bene la zucca con un minipimer ad immersione fino a ottenere una crema liscia.
  • Aggiungi latte di cocco o panna vegetale a piacere.
  • Per corpo extra, includi una piccola patata pelata tagliata a cubetti e cuocere insieme, poi frulla.
  • Arrotonra i sapori tostandola zucca prima di purè per un gusto più profondo.
How to adjust thickness?

Per ottenere la consistenza desiderata:

  • Se è troppo densa, aggiungi brodo o acqua poco alla volta e mescola fino a raggiungere la consistenza voluta.
  • Se è troppo liquida, lascia sobbollire a fuoco basso per qualche minuto per ridurre e addensare, oppure aggiungi una piccola patata tagliata e frulla di nuovo.
Can I use other types of squash?

Assolutamente. Funziona bene con zucche come zucca-butternut, acorn, hubbard o kabocha. Ogni varietà ha una dolcezza e una consistenza leggermente diverse, ma il risultato rimane cremoso. Se la zucca è molto dolce, potresti bilanciare con un pizzico di sale e pepe o una punta di cannella.

Is this gluten-free?

Sì, è naturalmente priva di glutine. Controlla che il brodo e le guarnizioni/topping siano gluten-free (in particolare i crostini o la salsa se presenti).

How to store and reheat leftovers?

Conservazione:

  • In frigorifero: conserva in contenitore ermetico per 3–4 giorni.
  • In freezer: oppure congela porzioni singole per 2–3 mesi.

Riscaldo: riscalda a fuoco medio-basso sul fornello, mescolando spesso, oppure nel microonde a intervalli brevi mescolando tra un intervallo e l’altro. Aggiungi un po’ di brodo o latte se necessario per riacquistare la cremosità.

What toppings go well?

I topping aggiungono colore e sapore:

  • Semi di zucca tostati o semi di girasole
  • Un filo di panna o olio extravergine d’oliva
  • Crostone croccanti
  • Prezzemolo o coriandolo fresco
  • Pepe nero o peperoncino in flake
Can I freeze it?

Sì. Una volta raffreddata, separa in porzioni e congela in contenitori adatti al freezer per 2–3 mesi. All’occorrenza scioglila in frigorifero durante la notte, poi riscaldala delicatamente sul fuoco o nel microonde. Potrebbe cambiare leggermente la texture, ma resta molto gustosa.

Introduction / Hook

There’s a dessert that feels like a warm embrace from a friend who loves chocolate just as much as you do. Chocolate heaven cake isn’t just a dessert; it’s a celebration of cacao in its most indulgent form. Picture this: a deeply glossy, almost velvet-dark crumb that gives way to a tender, melt-in-your-mouth softness with every slice. The aroma alone—where bitter cocoa tang meets sweet vanilla warmth and a hint of butter—is enough to coax a small sigh of happiness from anyone within smelling distance. When you cut into it, you reveal layers that throw back a sigh of chocolatey steam, a scent that seems to wrap around you like a cozy blanket on a cool evening. This isn’t merely cake; it’s an experience you want to share, from the first forkful to the final crumb. It’s the kind of dessert that becomes a ritual—one you’ll return to for birthdays, anniversaries, or simply when the mood calls for something truly decadent. If you’re a chocolate lover, you’ve found your new favorite indulgence, a recipe that turns a simple bake into a memory-in-the-making.

What makes Chocolate heaven cake special is its balance: a richness that never overwhelms, a texture that remains light enough to keep the slice graceful, and a finish that glistens with a luxurious sheen. It’s not merely sweet; it’s the kind of chocolate experience that feels opulent without being fussy. The cake carries a chorus of cocoa, a whisper of espresso or coffee, and a creamy, velvety filling that binds the layers with a finish that lingers. Each bite is a reminder that chocolate, when treated with care, can be both comforting and dazzling, a dessert that satisfies the deepest cravings while inviting yet more moments of delight. In short, Chocolate heaven cake invites you to slow down, savor the moment, and savor the flavor—one dreamy forkful at a time.

The Story Behind the Dish

Chocolate heaven cake grew from a kitchen’s memory of late-night dessert talks, where friends would trade stories and slice after slice of something rich and comforting. It’s the kind of recipe that starts with a craving and ends up as a tradition, a cake that carries the warmth of family gatherings, birthday celebrations, and the quiet joy of sharing something utterly irresistible. The genesis was simple: a desire to bottle the glow that comes from a perfectly made chocolate cake and to do so in a way that felt both timeless and modern. The result is a layered confection that nods to classic European chocolate cakes—dense and lush, yet buoyed by a cloudlike frosting and a sinfully glossy ganache glaze that makes the finish feel like a jewel-touched curtain. There’s a whisper of nostalgia in every bite, as if the cake holds stories of kitchens long gone but not forgotten, of grandmothers and aunts who stirred with the rhythm of a home’s heartbeat, and of friends gathering around a plate to celebrate the simple, beloved ritual of dessert shared with laughter and love.

As the cake traveled from its original test kitchen to family tables, it collected little touches that made it feel personal—vanilla bean flecks here, a dash of sea salt there, and a deliberate choice to keep the cake’s interior moist with a touch of moisture-locking ingredients rather than a heavy syrup. It’s a recipe that invites curiosity: what happens if you swap a dark chocolate with a milkier blend, or if you fold in a surprise crunch of toasted nuts or a layer of fruit compote? The story behind Chocolate heaven cake is a living one, evolving with kitchens, occasions, and the people who lift the first forkful to their lips. It’s a cake that holds memory, and in doing so, invites you to add your own chapters to its ongoing narrative.

Why You’ll Love This Recipe

  • Deep, multi-layer chocolate flavor that feels indulgent without being cloying.
  • Moist, tender crumb that stays luscious for days thanks to thoughtful moisture balance.
  • Silky-smooth frosting and a glossy ganache that make the cake look as dreamy as it tastes.
  • Adaptable to different dietary preferences with easy substitutions (vegetarian, gluten-lite, vegan options).
  • Perfect for celebrations, intimate gatherings, or an elegant weeknight dessert when you deserve a treat.
  • Impressive-looking yet surprisingly approachable—great for bakers of all levels who want a showstopper.
  • Scales beautifully from a personal cake to a showpiece layered cake for larger crowds.

Flavor Profile & Texture

Chocolate heaven cake delivers a symphony of flavors that harmonize in the most satisfying way. The core is a rich, dark chocolate character that carries notes of roast and bitterness balanced by a touch of sweetness that never dominates. There’s a faint smokiness that lingers on the palate, like a cozy campfire after a day of snow. The cake’s crumb is exceptionally tender, almost crumbly in the most comforting sense, which makes it feel ultra-light despite its luxurious richness. As you cut through the layers, you’ll notice a moist interior that remains soft and springy, a testament to smart moisture management—enough fat, a whisper of acidity to keep it bright, and the perfect balance of cocoa to flour. The frosting brings everything together with a silken, almost creamy finish that melts on the tongue and yields to a second, more chocolate-saturated bite. The ganache glaze on top adds a sheen that glimmers like tempered chocolate in the light, giving the cake a restaurant-worthy finish that will have guests reaching for seconds before the first slice has even cooled. If you ever crave the feeling of luxury without a fuss, this is the profile you’re chasing: intense cocoa, a velvet texture, and a finish that glints with decadence while remaining approachable and cozy.

The flavor story is often elevated by subtle accent notes. A hint of espresso deepens the chocolate’s soul without tasting like coffee, while a touch of vanilla rounds the edges and adds warmth. A tiny pinch of salt can elevate the sweet, making the chocolate taste more vivid and balanced. Some bakers like to incorporate a delicate citrus zest to brighten the chocolate’s complexion briefly, while others lean into smoky or roasted-nut hints that add complexity without stealing the show from the chocolate itself. The frosting—usually a luscious buttercream or whipped ganache—plays a crucial role, providing a creamy contrast to the cake’s denser interior. It’s all about a balance: chocolate in its most satisfying form, with textures and accents that dance together to create a dessert that is virtuous in its richness but never oppressive to the palate.

Occasions & Pairings

This cake shines in many settings. It’s a natural for birthdays and anniversaries, where a dramatic, crowd-pleasing dessert elevates the celebration. It also works beautifully as a weekend treat to cap off a dinner party or a coffee-and-cchat afternoon with friends. Its elegance makes it suitable for more formal occasions, such as a bridal shower or holiday gathering, yet its comfort-food charm ensures it remains welcoming for casual family meals. The decadence invites luxurious pairings without requiring elaborate accompaniments. For beverages, consider a strong espresso or a glass of red wine with good berry or plum notes—both can complement the cake’s chocolatey depth. For a non-alcoholic route, a robust cold brew or a chai latte can echo the spice and caffeine notes that help highlight the flavor profile.

When it comes to sides, you can pair this cake with simple additions that enhance the experience without overshadowing the star. Fresh berries or a berry compote provide a bright contrast that cuts through chocolate’s richness. A scoop of vanilla bean ice cream or a dollop of lightly sweetened whipped cream creates a classic duo that never fails. For texture play, offer a light almond praline or chopped toasted hazelnuts to sprinkle on the side or between layers for a gentle crunch. If you’re serving a crowd, consider adding a few color accents—shaved chocolate curls, edible gold dust, or a few raspberries—to make the presentation feel as celebratory as the flavor promises. In sum, this cake pairs beautifully with simple, high-quality accompaniments that amplify its chocolate charisma without stealing the spotlight.

Tips, Variations & Substitutions

  • Espresso or coffee amp: A splash of brewed espresso in a chocolate batter enhances depth without making the cake taste like coffee. If you’re avoiding caffeine, use a robust decaf and start with a small amount, tasting as you go.
  • Gluten-friendly option: Swap conventional flour for a gluten-free blend that’s designed for baking. You’ll still want to keep an eye on moisture and crumb structure, as gluten-free flours behave differently, but the result can be wonderfully tender.
  • Vegan/dairy-free version: Use vegan butter and a dairy-free milk in the batter, plus a dairy-free ganache or frosting. Ensure your cocoa is dairy-free as well for a clean vegan outcome.
  • Nut-free flexibility: If you want to keep it nut-free, avoid added nut pastes or crushed nuts in fillings and use nut-free toppings like burnt sugar brittle or chocolate shavings.
  • Flavor twists: Introduce a pinch of chili powder for a subtle heat, or orange zest for a bright citrus lift. A pinch of sea salt on top of the ganache intensifies the chocolate’s sweetness.
  • Layer variations: For a more dramatic presentation, make three thinner layers with a lighter filling between them. Or keep it as a two-layer cake with a generous frosting layer for extra richness.
  • Moisture management: Use buttermilk or a yogurt substitute in the batter to boost tenderness and keep the crumb moist longer. If you’re dairy-free, consider a plant-based yogurt with a similar fat content.
  • Make-ahead ease: Bake the cake layers in advance and freeze them. Freeze unfrosted layers tightly wrapped, then thaw and frost when ready. This is a lifesaver for holiday hosting or big parties.
  • Frosting options: If you prefer a lighter finish, opt for a whipped ganache or a mousselike chocolate frosting. For a more classic, buttercream finish, a rich buttercream with high-quality cocoa works beautifully.
  • Texture accents: Add a layer of crushed toffee, cacao nibs, or toasted nuts between layers for a delightful crunch that contrasts with the soft cake.
  • Presentation tips: A mirror glaze can turn this cake into a modern centerpiece, or keep it rustic with a dusting of cocoa powder and chocolate curls for a more homey look.

Storage & Make-Ahead Ideas

Chocolate heaven cake is remarkably forgiving when it comes to storage, which makes it a dependable choice for busy schedules. If you’re serving within a few days, wrap the cooled cake tightly in plastic wrap and keep it at room temperature in a cool, dry place. If your kitchen tends to be warm or humid, refrigerating the cake is a better option; just be sure to bring it to room temperature before slicing to regain that soft, melt-in-your-mouth texture. For longer storage, you can freeze the baked layers (well-wrapped) for up to two to three months. Thaw overnight in the refrigerator or at room temperature, then reassemble and frost as desired. The frosting itself stores well in the refrigerator for several days; let it come to room temperature and rewhip briefly to restore its creamy, spreadable texture. If you’ve got leftovers, store them in an airtight container in the fridge for up to five days, and bring slices back to room temperature before serving to maximize flavor and texture. If you freeze leftovers, you can reheat slices gently in the microwave or oven to awaken the chocolatey aromas and soften the crumb a touch, though you’ll ideally want to enjoy them cold or at room temperature as a contrast to the frosting’s chill or warmth.

Fun Facts & Trivia (Optional)

Chocolate has a long and luxurious history that mirrors the cake’s own story. The cacao bean, originally cultivated by ancient Mesoamerican civilizations, was once reserved for royalty and ceremonial use. It wasn’t until the 19th century that chocolate transformed into the sweet, versatile ingredient we know today, moving from a bitter drink to the versatile dessert base that can be baked into luscious cakes like this one. The term “ganache” hails from the French language and refers to a glossy chocolate cream that’s the perfect partner for a cake’s outer layer. The science behind a great chocolate cake lies in balance: fat tenderizes the crumb, acid (from yogurt, buttermilk, or sour cream) helps activate baking soda for lift, and sugar caramelizes during baking to deepen flavor and give a slight crust that yields to a soft interior. Sensory details aside, there’s a cultural memory baked into every slice—a shared moment of indulgence that makes chocolate heaven cake feel more than a dessert; it feels like a little celebration you can carry into your day, over and over again. As a fun culinary tidbit, many bakers like to finish the cake with a soft, barely warm glaze that makes the surface look satin-smooth and invites that first glorious forkful to melt into the mouth, an effect that has been perfected by generations of bakers who chase the perfect chocolate experience.

Ingredients

Chocolate Heaven Cake
Cake Base

  • – 2 cups all-purpose flour (or 2 cups 1:1 gluten-free flour blend)
    → The flour provides the cake’s structure by forming a gluten network (or acting as the base of a gluten-free batter). If using a gluten-free blend, choose one designed for baking and consider adding 1/4 teaspoon xanthan gum per cup to mimic elasticity. Sift with the cocoa to ensure even distribution and measure by spoon-and-level to avoid overly dense results. Do not overmix once the wet ingredients are added to keep the crumb tender; resting the batter for 5–10 minutes helps hydrate the flour.
  • – 1 3/4 cups granulated sugar
    → Sugar tenderizes the crumb, contributes to browning, and helps retain moisture. It also influences the cake’s mouthfeel and sweetness. Measure by scooping into the cup and leveling with a knife for accuracy. If you want a moister, more deeply caramelized crust, you can substitute half of the sugar with light brown sugar for a touch of molasses flavor.
  • – 3/4 cup unsweetened cocoa powder (Dutch-processed or natural)
    → Cocoa provides the core chocolate flavor and color. Dutch-processed cocoa yields a smoother, milder chocolate, while natural cocoa is more acidic and can slightly aid leavening when paired with baking soda. Sift with the flour to break up lumps and distribute evenly. If using natural cocoa, ensure the leavening balance remains appropriate to achieve a good rise.
  • – 2 teaspoons baking powder
    → Acts as the primary chemical leavener, producing carbon dioxide bubbles that lift the batter for a light, airy crumb. Sift with dry ingredients to distribute evenly. If you use natural cocoa (acidic), the extra acidity helps with lift; otherwise, the baking powder keeps the crumb tender and risen.
  • – 1/2 teaspoon baking soda
    → Additional leavening helps create a balanced rise and a tender crumb. Reacts with acidic components in the batter to generate extra lift. It also softens the crumb; ensure it’s evenly dispersed and not lumped by whisking with the dry ingredients. If you use buttermilk or yogurt, this helps balance the acidity for better rise.
  • – 1/2 teaspoon salt
    → Enhances overall flavor and rounds out the sweetness, sharpening the chocolate profile. Salt also slightly strengthens gluten structure and helps suppress bitterness from cocoa. Use fine sea salt or kosher salt and distribute evenly by whisking into the dry mix.
  • – 2 large eggs, room temperature
    → Eggs provide moisture, structure, and emulsification. Room-temperature eggs blend more smoothly with the other liquids, producing a finer, more uniform crumb. If eggs are cold, they can seize with cocoa; warm them in warm water for 5–10 minutes or whisk separately to ensure even incorporation.
  • – 1 cup whole milk (or dairy-free milk with 1 tablespoon white vinegar)
    → Adds moisture and tenderness; fats in milk help create a soft crumb. Using room-temperature milk aids emulsification. For dairy-free, use a fortified milk and, if desired, add a splash of vinegar to mimic acidity. Combine milk with the hot coffee later to ensure even temperature in the batter.
  • – 1/2 cup neutral oil (such as canola or sunflower)
    → Provides rich moisture and a tender crumb that stays soft longer than butter at room temperature. Oils remain liquid, helping fat distribute evenly. If you prefer butter flavor, substitute half the oil with melted, cooled butter; avoid strongly flavored oils that may compete with chocolate.
  • – 2 teaspoons vanilla extract
    → Adds depth and warmth to the cake’s aroma. Use pure vanilla extract for best flavor; for extra intensity, add a small amount of vanilla bean paste or scraped vanilla bean seeds and whisk evenly into the liquids.
  • – 1 cup hot coffee or strong brewed coffee
    → Intensifies chocolate flavor and deepens color, helping balance sweetness. The hot liquid also helps dissolve sugars and hydrate dry ingredients quickly, yielding a smoother batter. If you prefer not to use coffee, substitute with hot water or decaf coffee; avoid boiling water that could scramble eggs.
  • – Optional: 1/4 cup melted dark chocolate (70% cacao or higher)
    → Extra depth of chocolate in the crumb and a richer overall flavor. Gently fold cooled, melted chocolate into the wet ingredients after the eggs to avoid re-cooking them. This is optional but enhances the cake’s decadence.

Frosting (Ganache)

  • – 8 oz dark chocolate, finely chopped
    → The ganache base that coats the cake; chopped chocolate melts more evenly for a glossy, smooth finish. Use good-quality chocolate with at least 60% cacao for a rich, balanced chocolate flavor. Finely chopping helps it melt quickly and uniformly when hot cream is added.
  • – 1 cup heavy cream
    → The liquid portion of the ganache; heat just to a simmer to melt the chocolate into a silky glaze. The cream-to-chocolate ratio determines thickness: more cream yields a pourable glaze, less yields a thicker frost. For a stiffer frosting, slightly reduce the cream or add more chocolate.
  • – 2 tablespoons unsalted butter (optional)
    → Adds extra sheen and silkiness to the finished ganache; helps create a bakery-worthy gloss and smoother mouthfeel. Add after the ganache has melted and is homogeneous; do not overheat. This is optional but yields a more luxurious texture.
  • – Pinch of salt (optional)
    → Deepens chocolate flavor and balances sweetness. A tiny pinch mixed into the ganache enhances complexity; if using salted chocolate, adjust accordingly.
  • – 1 teaspoon vanilla extract (optional)
    → Adds aromatic warmth to the ganache. If using, stir in with the hot ganache just before pouring to distribute evenly; otherwise, skip for a purer chocolate finish.

Toppings

  • – 1–2 tablespoons unsweetened cocoa powder for dusting (optional)
    → Finishes the cake with a delicate chocolate aroma and a matte surface. Lightly sift over the cooled cake using a fine-mesh sieve to avoid clumps and create an elegant, even finish.
  • – Chocolate curls or shavings (optional)
    → Adds decorative texture and extra chocolatey bites. Use a vegetable peeler on a block of good-quality chocolate and refrigerate the block briefly if it’s soft to keep curls intact. Arrange just before serving for best appearance.
  • – Sea salt flakes (optional)
    → A subtle salinity enhances sweetness and intensifies chocolate flavor. Sprinkle a few flakes over the finished cake or ganache for a quick, sophisticated contrast.

Instructions

  • Preheat your oven to 350°F (175°C) and prepare two 9-inch round cake pans by greasing them with neutral oil and lining the bottoms with parchment circles; this ensures the cake releases evenly and minimizes sticking.
    → This setup prevents the batter from sticking and helps you remove the cakes cleanly for a smooth, even finish.
  • Whisk together the dry ingredients: 2 cups all-purpose flour (or 2 cups gluten-free flour blend with xanthan gum if using GF), 1 3/4 cups granulated sugar, 3/4 cup unsweetened cocoa powder, 2 teaspoons baking powder, 1/2 teaspoon baking soda, and 1/2 teaspoon salt in a large bowl until evenly distributed; lightly sift or whisk to break up lumps.
    → Uniform dry ingredients ensure even rise, consistent color, and a tender crumb by preventing pockets of flour or cocoa from forming.
  • Whisk the wet ingredients: 2 large eggs (room temperature), 1 cup whole milk (or dairy-free milk with 1 tablespoon white vinegar), 1/2 cup neutral oil, and 2 teaspoons vanilla extract in a separate bowl; add 1 cup hot coffee or strong brewed coffee last to intensify chocolate flavor and help dissolve sugars; ensure liquids are emulsified and smooth.
    → Room-temperature eggs emulsify better with liquids for a smoother batter, and hot coffee deepens the chocolate flavor and contributes to a moist crumb.
  • Make a well in the center of the dry mixture and pour in the wet mixture; stir gently with a spatula or wooden spoon until just combined and no large streaks of dry flour remain; avoid overmixing to keep a tender crumb, and let the batter rest for 5–10 minutes to hydrate the flour.
    → Resting relaxes the gluten (or hydrates gluten-free blends) for a finer crumb and more even rise in the oven.
  • If using the optional 1/4 cup melted dark chocolate, fold it in now with a light, figure-eight motion until evenly distributed but not overworked; use cooled melted chocolate to prevent re-cooking the eggs and to maintain a smooth, glossy batter.
    → The extra chocolate depth enriches the flavor and the smooth distribution prevents streaks in the baked crumb.
  • Divide the batter evenly between the prepared pans, tapping the pans lightly on the counter to release trapped air and level the surface; this promotes an even rise and flat tops for neat assembly.
    → Even distribution and gentle tapping minimize air pockets that can cause domed or uneven layers during baking.
  • Bake in the preheated oven at 350°F (175°C) for about 28–34 minutes, or until a toothpick inserted into the center comes out with a few moist crumbs; rotate the pans halfway through baking for even heat distribution.
    → The crumb should be set and springs back slightly; toothpicks with a few crumbs indicate doneness without overbaking.
  • Allow the cakes to cool in the pans for 10–15 minutes, then run a knife around the edges and invert onto a wire rack to cool completely before assembly; this prevents steam from condensing and making the layers soggy.
    → Proper cooling preserves structure for clean slicing and stable stacking with ganache.
  • Chop 8 oz dark chocolate finely and place into a heatproof bowl; finely chopped chocolate melts more quickly and evenly for a glossy ganache because the surface area is increased, ensuring a smoother finish.
    → Uniform size pieces melt evenly when hot cream is added, avoiding lumps or graininess in the ganache.
  • Heat 1 cup heavy cream in a small saucepan over medium heat until it just begins to simmer; do not let it boil vigorously; pour the hot cream over the chopped chocolate and let it sit for 3–5 minutes to melt; then whisk until the ganache is smooth and glossy.
    → Allowing the chocolate to melt gradually with the hot cream yields a seamless, silk-like ganache without separation.
  • If using optional butter, add 2 tablespoons unsalted butter (cut into small pieces) and, optionally, a pinch of salt and 1 teaspoon vanilla extract after the ganache has melted; whisk gently until fully incorporated and glossy.
    → Butter enriches the mouthfeel and shine; salt and vanilla deepen and balance the chocolate flavor when emulsified into the warm ganache.
  • Let the ganache cool at room temperature until it reaches a pourable but thickened consistency; if it becomes too thick, warm it briefly over low heat or in short bursts in the microwave until smooth but not runny.
    → Temperature control ensures a glaze that flows smoothly over the cake without sliding off or setting too quickly.
  • Level the cooled cake layers with a long serrated knife or cake leveler to create flat, even surfaces; this facilitates even ganache coverage and stable layering.
    → An even top prevents gaps and uneven thickness when stacking, giving a professional finish.
  • Place the first cake layer on a serving plate and spread a generous, even layer of ganache over the top to form a middle filling; place the second layer atop and press gently to set; this creates a stable structure and balanced flavor between layers.
    → A defined filling anchors the layers and ensures clean slicing with a cohesive crumb.
  • Pour the remaining ganache over the top, using an offset spatula to spread it evenly over the surface and down the sides for a smooth, glossy finish; allow the ganache to cascade naturally for a bakery-worthy look.
    → Even coating yields a sleek appearance and seals in moisture for a luscious bite from edge to center.
  • Let the ganache set at room temperature, or refrigerate briefly if you prefer a firmer finish; if refrigerated, allow the cake to come back to room temperature before slicing to maintain a clean cut and avoid cracking.
    → Proper setting prevents cracking and ensures tidy slices with a polished presentation.
  • Dust the cooled cake lightly with 1–2 tablespoons unsweetened cocoa powder using a fine-mesh sieve for a delicate aroma and matte finish; avoid clumps for an even, refined surface.
    → A subtle dusting enhances aroma and provides a sophisticated border against the glossy ganache.
  • Make chocolate curls or shavings by running a vegetable peeler along a block of good-quality chocolate; refrigerate the block briefly if it softens to help curls hold their shape, and arrange curls on top or along the sides just before serving for texture and visual interest.
    → Curls add contrast and a dynamic, appetizing finish, enhancing the chocolate-forward theme.
  • Finish with sea salt flakes sprinkled sparingly over the ganache to heighten sweetness and intensify chocolate flavor; consider a light touch to avoid overpowering the final bite.
    → A touch of salt sharpens flavor and deepens chocolate intensity, creating a more sophisticated finish.

Notes

These chocolate heaven cake slices are rich, moist, and deeply chocolatey, and they can be baked with either all-purpose flour or a 1:1 gluten-free flour blend for a gluten-free option.

If you’re using a gluten-free blend, sift the dry ingredients with the cocoa and add 1/4 teaspoon xanthan gum per cup to mimic elasticity. Measure by spoon-and-level to avoid dense results and avoid overmixing once the wet ingredients are added to keep the crumb tender.

You can customize the batter by folding in extra chopped dark chocolate or chocolate chips, and for a deeper flavor, a pinch of espresso powder can be whisked into the liquids. The optional 1/4 cup melted dark chocolate folded into the wet ingredients adds a fudgier, more decadent crumb.

The ganache topping creates a glossy, luxurious finish. For a dairy-free version, replace the heavy cream with coconut cream or a fortified plant-based cream and use dairy-free chocolate; whisk until smooth and pour over the cooled cake for a sleek glaze.

Tips

Tips for Chocolate Heaven Cake

  • Dry ingredient readiness: Sift the flour with the cocoa and leaveners (baking powder and baking soda) to break up lumps and ensure even distribution. If using a gluten-free blend, add 1/4 teaspoon xanthan gum per cup of flour to mimic gluten structure and hydration.
  • Temperature matters: Bring eggs and milk to room temperature to improve emulsification and crumb structure. If using cold eggs with hot coffee, briefly whisk the eggs separately or temper them to avoid streaks or curdling.
  • Measuring liquids: Use hot coffee to bloom the chocolate flavor and help dissolve sugars for a smoother batter. If you skip coffee, use hot water or decaf, but avoid boiling water that could affect eggs.
  • Mixing technique: Combine wet ingredients with dry just until incorporated to keep the crumb tender. Do not overmix. If you fold in optional melted chocolate, add it after the eggs to prevent cooking them.
  • Oil vs butter: Neutral oil yields a very moist crumb that stays soft. If you crave a butter-forward note, substitute up to half the oil with melted, cooled butter, but avoid strong-flavored oils that may compete with chocolate.
  • Even batter: Scrape the bowl and whisk briefly after adding wet to ensure no dry pockets remain. Rest the batter 5–10 minutes to hydrate flour and improve crumb texture.
  • Pans and prep: Line pans with parchment rounds and grease the sides well to prevent sticking. Filling each pan to about 2/3 ensures a domed rise without overflow; rotating pans halfway through baking can help with even coloring.
  • Baking doneness: Begin checking for doneness 5–10 minutes before the minimum time. Use a toothpick inserted in the center; it should come out with a few moist crumbs, not wet batter. If using GF flour, bake a minute or two longer if needed.
  • Ganache tips: For a silky ganache, heat the cream just to a simmer and pour over finely chopped chocolate; let sit 5 minutes, then whisk until smooth. If you want extra gloss, stir in 1 teaspoon vanilla and/or 2 tablespoons unsalted butter after the ganache is smooth. If ganache seizes, rewarm gently over low heat or a warm water bath and whisk.
  • Texture and shine: A thinner ganache yields a glossy glaze; for a thicker frosting, reduce cream slightly or increase chocolate. Chill briefly after pouring to set quickly for clean edges.
  • Decorating options: Dust with 1–2 tablespoons cocoa powder just before serving for a cocoa aroma; add chocolate curls or shavings for texture. A few sea salt flakes can heighten the chocolate’s sweetness when used sparingly.
  • Storage and plan ahead: Store the cake loosely covered at room temperature for 1–2 days or refrigerate up to 4–5 days. Bring to room temperature before serving for the best crumb and ganache gloss. If refrigerating, you may want to rewarm the cake slightly or gently reheat slices for a softer crumb.
  • Gluten-free considerations: If using a gluten-free flour, scoop-and-level the flour rather than scoop-from-bag to avoid dense results; resting the batter helps hydration. The basic technique remains the same for a moist, tender cake.

FAQ

What is Chocolate Heaven Cake?

Chocolate Heaven Cake is a rich, moist chocolate cake layered with a luscious chocolate frosting. It’s deeply chocolatey, slightly fudgy, and perfect for celebrations or a dessert indulgence any time.

What ingredients do I need to make it?

Basic dry ingredients: flour, cocoa powder, baking powder, baking soda, salt, and sugar. Wet ingredients: eggs, milk (or dairy-free alternative), vegetable oil, vanilla extract. Then: boiling water or hot coffee to intensify the chocolate flavor. Optional: chocolate chips for extra fudginess. Frosting typically uses butter, powdered sugar, cocoa powder, milk, and vanilla.

What equipment will I need?

Typically you’ll need: two 9-inch round cake pans, parchment paper, a mixing bowl, a whisk or electric mixer, a rubber spatula, a cooling rack, a serrated knife for leveling, and a spatula for frosting. Optional: a parchment-lined pan for easier removal and a cake stand for serving.

How do I bake Chocolate Heaven Cake?

Preheat oven to 350°F (175°C). Grease and line the cake pans. Mix dry ingredients in one bowl; whisk wet ingredients in another. Combine wet and dry until just blended, then fold in boiling water or hot coffee until smooth. Pour into pans and bake for about 30–35 minutes, or until a toothpick inserted in the center comes out clean. Cool in pans for 10 minutes, then transfer to a rack to cool completely before frosting.

How long does it take from start to finish?

Approximately 1 hour for mixing and baking, plus about 1–2 hours for cooling and frosting. If you’re making a two-layer cake, factor in extra time for leveling and assembling.

How should I frost and decorate it?

A classic chocolate buttercream works beautifully: softened butter, powdered sugar, cocoa powder, a touch of milk, and vanilla. Beat until light and fluffy, then layer between the cooled cake layers and frost the outside. Garnish with chocolate shavings, cocoa powder dusting, or fresh berries for contrast. You can also pour a glossy ganache for a luxurious finish.

Can I make this cake vegan or dairy-free?

Yes. Use plant-based milk (almond, soy, oat, etc.), use a neutral oil or dairy-free butter substitute, and replace eggs with a flax egg, chia egg, or commercial egg replacer. For frosting, use a vegan butter or coconut oil-based frosting and dairy-free milk. Ensure cocoa powder is dairy-free if needed.

Is it gluten-free or can I substitute gluten-free flour?

You can adapt it to gluten-free by using a 1-to-1 gluten-free flour blend. Some blends require adjustments in liquid, so start with the same measurements and add a little more liquid if the batter seems too thick.

How should I store leftovers?

Store tightly covered at room temperature for 1–2 days, or refrigerate for up to 4–5 days. If frost is involved, keep refrigerated. For longer storage, wrap slices or the whole cake in plastic wrap and refrigerate or freeze.

Can I freeze Chocolate Heaven Cake?

Yes. Freeze unfrosted cake layers wrapped well in plastic wrap and aluminum foil for up to 2–3 months. Thaw overnight in the fridge, then frost. You can also freeze frosted cake, but it’s best to decorate after thawing to maintain the frosting’s texture.

What are common troubleshooting tips?

Tips:
– If the cake sinks in the middle, avoid opening the oven door during the first 20–25 minutes and make sure your baking powder/soda are fresh.
– If the crust cracks, it could be due to overly hot oven or overmixing; mix just until combined.
– If the cake is dry, check the baking time, add a bit more fat to the batter, or increase the fat or liquid slightly in your next batch.
– If frosting is too thick, add milk a teaspoon at a time until you reach the desired spreadable consistency.