Introduction / Hook
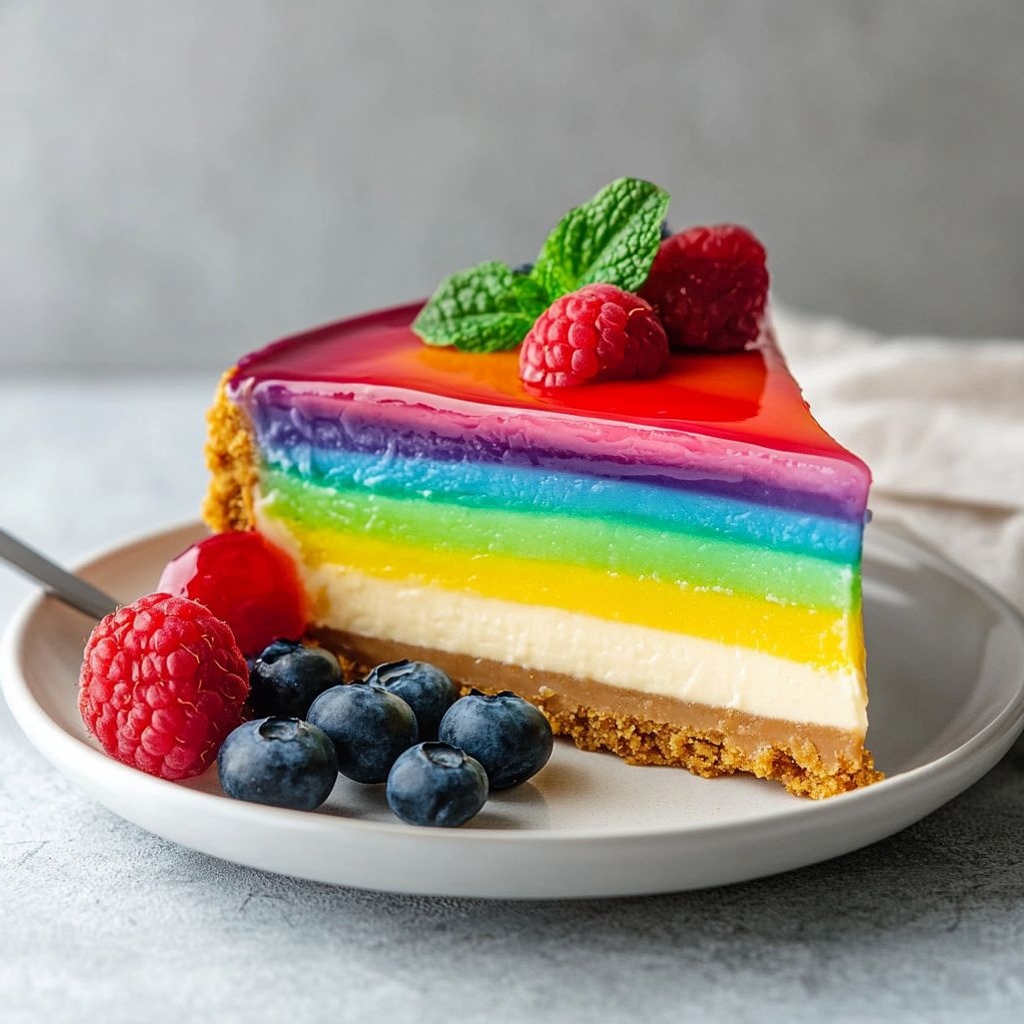
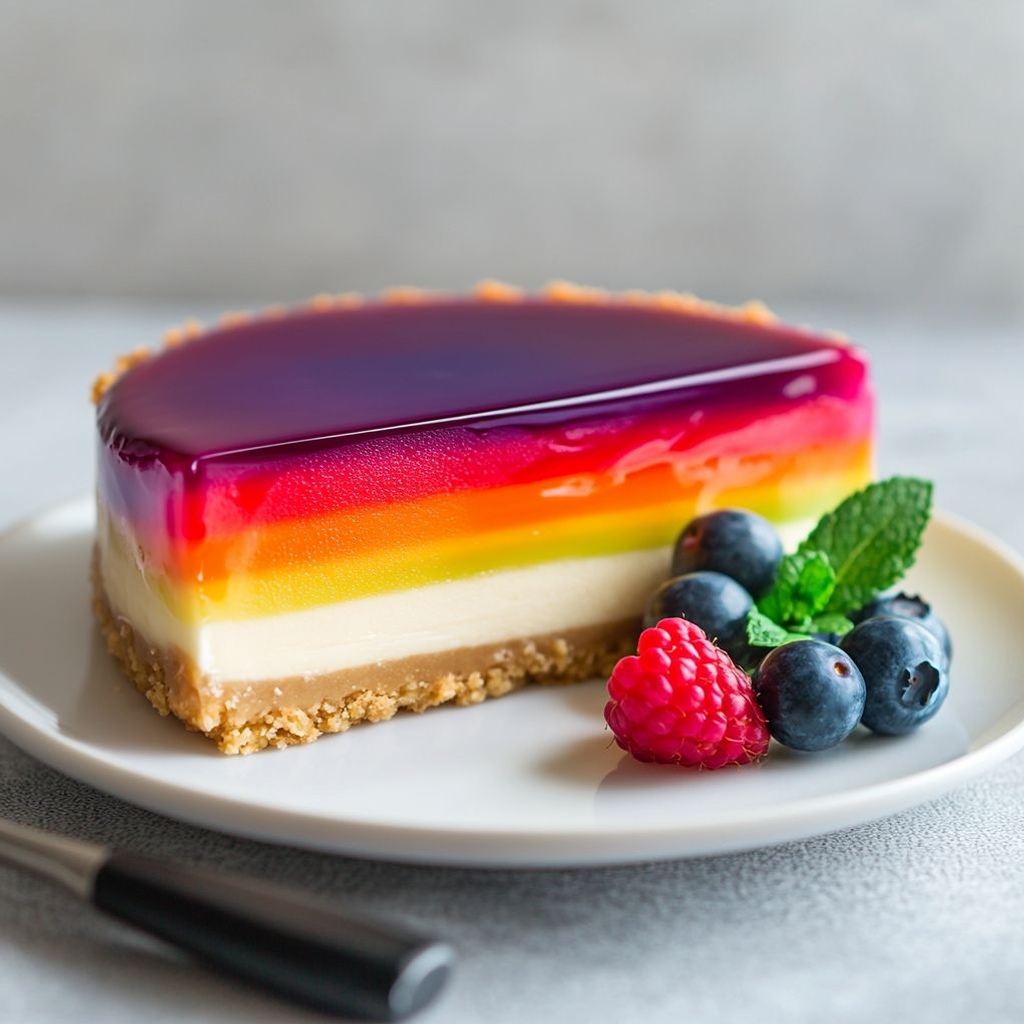
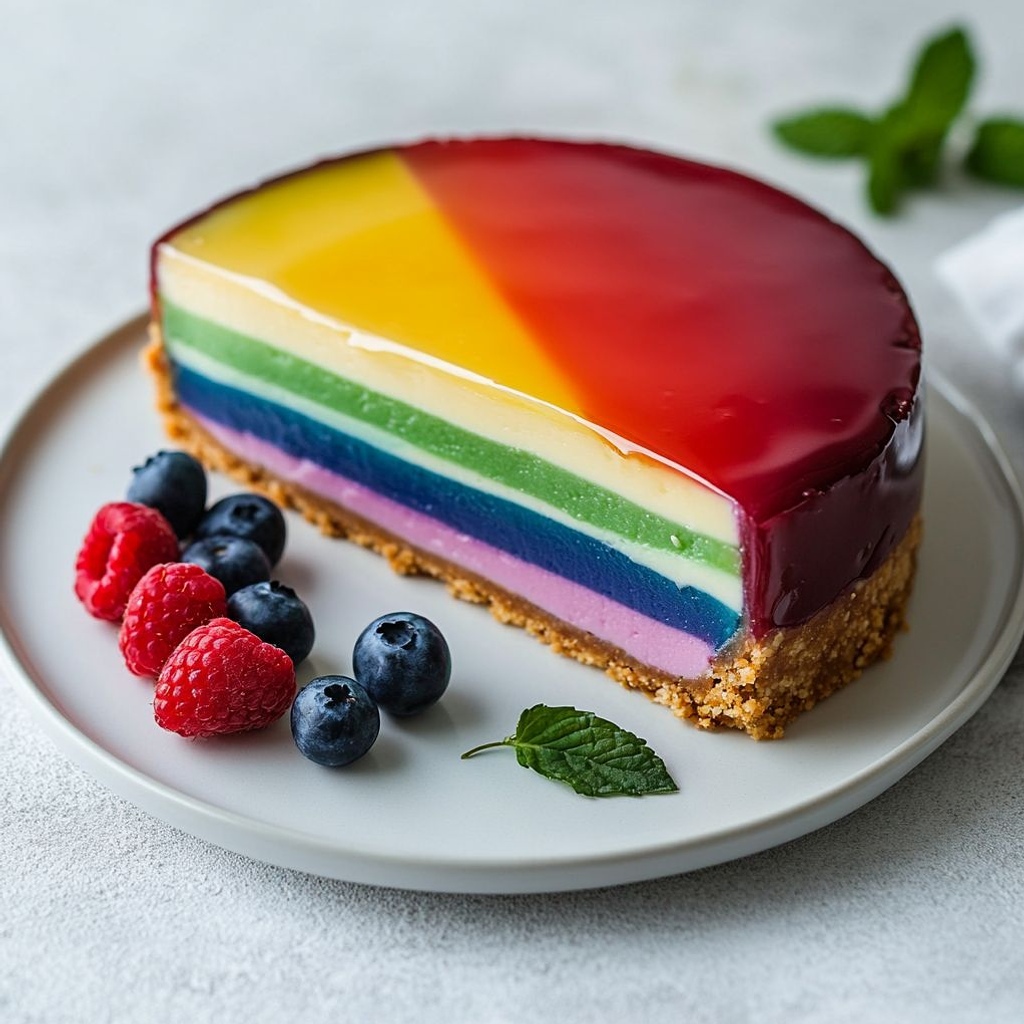
Imagine a dessert that bursts with color the moment you slice into it, a sparkling spectrum perched atop a smooth, cloud-soft cheesecake filling. No-Bake Rainbow Cheesecake isn’t just a treat for the eyes; it’s a celebration in a pan. Each bite delivers a whisper of tangy cream cheese, a hint of vanilla, and a whisper-thin kiss of sweetness that melts on the tongue. The crust delivers a satisfying crunch that gives way to a delicate, velvety filling, while the rainbow layers bring a playful lift to any table—whether you’re hosting a summer barbecue, a kid’s birthday, or a lingering Sunday gathering. When you lift the lid and reveal the multicolored slice, you’re not just serving dessert; you’re serving a memory in color—packs of joy, nostalgia, and a little bit of whimsy all at once.
What makes this no-bake rainbow cheesecake feel so special is not just its vibrant exterior but the way it pulls people together. It’s a dessert that invites oohs and aahs before a single bite is taken, and then invites seconds as the soft filling yields to the crisp crust and the bright layers leave a lasting impression. The aroma is both familiar and exciting—the gentle scent of cream cheese and vanilla mingling with a touch of citrus zest, while the crust offers smoky, toasty notes that ground the entire experience. It’s the kind of dish that makes ordinary evenings feel like a celebration and ordinary ingredients feel like a stage for something joyful and bright.
As you stand at the counter garnished with fresh fruit, you’ll notice how the rainbow stripes glow under the kitchen light, their colors a reminder of sunny days and festive moments. Yet the beauty is not just in the eye—it’s in the way the flavors balance, how the layers cooperate to create a chorus of taste rather than a solo. Each layer can whisper a different fruit-inspired note, while the overall profile remains creamy, luscious, and comforting. It’s a dessert that welcomes all ages and all occasions, from family dinners to festive gatherings, with an easygoing charm that says: you deserve something wonderful, and it doesn’t have to be complicated to feel spectacular.
In short, No-Bake Rainbow Cheesecake is a modern classic that respects tradition while inviting playful experimentation. It honors the timeless love for cheesecake—a dessert with roots in simple dairy and crumbly crusts—then dresses it in color like a confetti parade. The no-bake nature means you can prepare it ahead, letting the flavors mingle and the colors settle while you tend to other party prep. It is both a showstopper and a reliable crowd-pleaser, a recipe you’ll return to when you want to conjure a sense of magic without turning on the oven. If you’re looking for a dessert that sings, shines, and satisfies with every bite, you’ve found it in this cheerful rainbow cheesecake.
The Story Behind the Dish
Rainbow desserts have long carried a sense of joy, celebration, and inclusivity. A plate dressed in color mirrors the emotional color of gatherings: laughter, shared stories, and the feeling that anything is possible when friends and family come together. The No-Bake Rainbow Cheesecake embraces that spirit by combining two timeless ideas: the beloved cheesecake and the playful rainbow motif. The idea of a no-bake cake emerged from practical kitchen creativity—home cooks seeking a luscious dessert without heating the house on hot days or when the appliances were busy with other tasks. The no-bake technique relies on chilled, set fillings that can emulsify into a silky texture with the help of whipped cream and light gelling agents, resulting in a cheesecake that is soft, airy, and just as indulgent as its baked counterparts.
The rainbow aspect, meanwhile, taps into a long tradition of color-coded desserts—the idea that color can tell a story and evoke mood. In party menus and celebratory tables, a rainbow cake or layered dessert signals “party time” and “special moment,” inviting guests to pause, admire, and indulge. The combination of no-bake technique with rainbow layers feels like a natural evolution: it’s approachable enough for home cooks, quick enough for busy weeknights, and dazzling enough for holidays and milestones.
Personally, this dish often carries memories of summer afternoons in kitchens and porches where the sun streamed in and colored the countertop with light. It’s a dessert that invites hands-on participation—kids helping to spread layers, adults layering with a flourish, and everyone taking a seat to admire the final reveal. The no-bake method encourages planning ahead: you can prepare the crust and filling in advance, chill them, then come together to assemble the rainbow, present it on a pretty platter, and watch as guests gather around, drawn by the twinkling colors and the promise of something truly special.
Beyond the kitchen, the story touches on shared rituals—birthday celebrations, summer gatherings, and the universal appeal of a dessert that’s both beautiful and comforting. The rainbow banner over this cheesecake isn’t just decoration; it’s a reminder that meals are opportunities to connect, celebrate, and create new memories that taste as bright as they look.
Why You’ll Love This Recipe
- Very little active cooking required: no oven, no fuss, just chilling and layering for a stunning result.
- The presentation is a guaranteed crowd-pleaser. A slice reveals a rainbow of colors that makes mouths water before the first bite.
- Feel-good flavors with a creamy, tangy filling that’s light yet rich, balanced by a crisp, buttery crust.
- Make-ahead friendly: you can prepare components in advance and assemble closer to serving time, which is perfect for parties, holidays, or impromptu gatherings.
- Highly adaptable: color layers can be tinted with natural fruit juices or extracts to suit seasons and dietary preferences.
- Versatile for all ages: sweet but not cloying, gentle enough for children and indulgent enough for adults.
- Perfect for celebrations that call for color and delight, from birthdays to graduations, showers to picnics, and everything in between.
- Less heat in the kitchen means your home stays comfortable during warmer months, while still delivering a dessert that looks and tastes like a special event.
Flavor Profile & Texture
The No-Bake Rainbow Cheesecake delivers a multi-layered experience that balances brightness and creaminess. At the core is a silk-smooth cheesecake filling that melds tangy cream cheese with a whisper of vanilla and a light sweetness that never overwhelms. The texture is plush and airy, yet substantial enough to hold its shape when sliced—thanks to the gentle set from chilling and a touch of stabilizing agents that keep it luxuriously creamy without becoming heavy.
The rainbow layers introduce subtle variations in flavor without straying far from the familiar cheesecake personality. Each colored tier can be tinted or infused to offer a distinct accent, such as a citrus note from lemon or orange, a berry whisper from raspberry or blueberry, or a tropical hint from passion fruit or mango. The result is a symphony of soft fruit-driven hints that complement the tang of the center filling rather than competing with it. The crust offers a warm, toasty counterpoint: a crunchy, slightly crumbly base that adds texture and structure, providing a satisfying bite that contrasts with the creamy interior.
Color is not just cosmetic—it acts as a flavor cue, guiding the palate through the layers. The topmost layer tends to be the most vibrant visually, often a pristine white or pale cream to highlight the rainbow beneath. As your fork traverses deeper, you encounter ribbons of color that glow with brightness, each slice revealing a clean separation between stripes, yet savoring the same rich cheesecake essence throughout. When you finish a bite, the lingering finish is creamy and smooth, with a whisper of sweetness and a hint of vanilla that lingers on the tongue, inviting the next bite with anticipation.
The texture interplay—crunchy crust, custard-like filling, and the distinct yet cohesive rainbow layers—creates a dimensional mouthfeel that keeps the palate engaged from first bite to last. It’s a dessert that feels refined enough for a dinner party but approachable enough for a casual family gathering. The no-bake technique contributes a velvety, melt-in-your-mouth sensation that is simply irresistible, particularly when the cheesecake has been properly chilled to set and the layers have had a chance to settle into their individual flavors and hues.
Occasions & Pairings
No-Bake Rainbow Cheesecake is versatile enough to shine at a wide range of occasions. Its celebratory color palette makes it an obvious choice for birthdays, anniversaries, and holiday gatherings, but it’s also ideal for casual summer barbecues, potlucks, and weekend dessert splurges. The visual impact makes it a star at dessert tables, while its forgiving, make-ahead nature keeps hosting stress-free.
Pairing ideas to enhance the experience:
- Fresh fruit toppings: sliced strawberries, blueberries, kiwi, or tropical fruits add natural brightness and a juicy contrast to the creamy filling.
- Light citrus glazes or drizzles: a thin lemon or passion fruit glaze can provide a gentle zing that brightens every bite.
- Whipped cream or a dollop of vanilla yogurt: a light topping adds volume and a cloud-like finish.
- Herbal accents: a whisper of mint, lemon balm, or basil can introduce an unexpected, refreshing note that pairs well with fruit layers.
- Beveiage pairings: a glass of chilled sparkling wine, a fruity rosé, or a light dessert wine complements the cheesecake’s sweetness without overpowering it.
- Seasonal variations: in summer, lean into citrus and berry flavors; in spring, you can accent with rhubarb or strawberry; in autumn, consider pumpkin spices or apple-cider hints for subtle warmth.
When planning a menu, this cheesecake serves as a focal point that coordinates with both light and indulgent sides. Think a simple green salad with citrus vinaigrette to balance the richness, or a light fruit pie and a crisp cookie platter to echo the layers’ color and texture without duplicating flavors. For celebrations, a platter of mixed berries and edible flowers can complement the rainbow aesthetic, turning dessert into an edible centerpiece that invites guests to gather, admire, and share.
Tips, Variations & Substitutions
- Make it vegan: use a dairy-free cream cheese and whipped coconut cream or a plant-based cream cheese substitute. Use a dairy-free butter alternative for the crust, and ensure any coloring agents are vegan if needed.
- Gluten-free option: substitute traditional graham crackers with gluten-free crackers or finely crushed gluten-free cookies for the crust. Check labels to ensure all ingredients are certified gluten-free if necessary.
- Color alignment: for a bold rainbow, use six colors (red, orange, yellow, green, blue, purple). If you prefer a softer look, reduce the palette to four or five pastel shades.
- Natural color sources: to avoid artificial colors, tint layers with natural fruit juices or purées (beet for pink/red, beet-raspberry blend for a ruby shade, mango for yellow, spinach or matcha for green, blueberry for blue, purple cabbage for purple).
- Flavor accents: each colored layer can be subtly flavored with a touch of citrus zest or fruit essence to add dimension without overpowering the cheesecake base.
- Texture tweaks: if you like a firmer slice, add a small amount of dissolved gelatin or a vegetarian gelatin substitute to the filling, keeping the mixture airy and pale in color.
- Alcohol-free option: skip any liqueur or heavy flavorings to keep the dessert accessible to all ages; a splash of vanilla and a hint of citrus suffices for depth.
- Layering technique tips: ensure each layer is spread evenly and smooth before adding the next one. Chill the cake briefly between layers to help set the color bands cleanly and prevent bleeding.
- Seasonal twists: for a fall-forward look, use warm-toned hues (pumpkin, cinnamon, caramel) and infuse the filling with a gentle spice blend; for spring, go bright with lemon, lime, and berry accents.
- Portion control: for a party, pre-slice the cake into portions before presentation to make serving easy and elegant.
Storage & Make-Ahead Ideas
One of the greatest strengths of this dessert is its make-ahead friendliness. The components can be prepared earlier in the day or even a day or two in advance, allowing the flavors to meld and the colors to settle into their clean stripes. Proper storage helps preserve texture and flavor, ensuring that your rainbow remains vibrant when you finally serve it.
Storage tips:
- Refrigeration: once fully assembled, cover the cheesecake tightly with plastic wrap or slide it into an airtight container. Store in the refrigerator for up to 3–4 days. The filling will stay creamy, though the colors may soften slightly as it sits.
- Make-ahead strategy: you can prepare the crust and filling a day ahead. In many cases, the filling can be spooned into the pan and leveled, then refrigerated overnight. In the morning, top with the rainbow layers and chill again until ready to serve.
- Freezing: for longer storage, freeze the assembled cheesecake. Wrap well in plastic wrap and then in foil. It will keep for up to 1–2 months. Thaw overnight in the refrigerator before serving; a gentle re-chill will help the layers settle back into place.
- Texture considerations when freezing: frost-free freezers can slightly dull the color intensity; if you’re planning to freeze, consider a slightly thicker color layer at the time of assembly to maintain visible stripes after thawing.
- Reheating not required: cheesecake is best served cold. Avoid warming to preserve the creamy texture and crisp crust, which are the two defining traits of this no-bake dessert.
Fun Facts & Trivia (Optional)
- Color symbolism: rainbow desserts are often associated with celebrations of diversity and inclusion, echoing the vibrant spectrum that brings people together to share joy.
- No-bake traditions: the popularity of no-bake cheesecakes rose with the advent of easy-to-use whipping creams and stabilizers that allow a cheesecake to set without oven heat.
- Texture science: the creamy filling relies on air incorporation from whipped cream and gentle setting agents to achieve its signature lightness—without sacrificing the depth of flavor that comes from cream cheese.
- Presentation as an art: the rainbow layers not only please the palate but also transform the plate into a canvas—a reminder that dessert can be as visually uplifting as it is delicious.
- Color as memory cue: researchers note that color in food can influence perception of taste and anticipation; a rainbow is a built-in cue that something special is ahead, enhancing the dining experience even before the first bite.
- Adaptability across cultures: while this recipe uses classic Western cheesecake elements, the concept easily translates to other culinary traditions by swapping flavor accents (e.g., matcha green for an Asian twist, mango for a tropical edge, or lavender for a floral note).
Ingredients
-
– 2 cups graham cracker crumbs (or digestive biscuits), finely crushed
→ Crust provides the crunchy, flavorful base that supports the creamy filling. Crushing crackers to a fine, even texture ensures a smooth edge and prevents crumbly bites. If you’re gluten-free, use certified gluten-free crackers and consider adding a pinch of salt for balance.
– 1/4 cup granulated sugar
→ Adds a touch of sweetness to the crust. If your crackers are already sweetened, you can reduce or omit this. Mixing well with the melted butter ensures an even, cohesive crust that holds its shape when sliced.
– 6 tablespoons unsalted butter, melted
→ Binds the crumbs into a solid crust that doesn’t crumble under the soft filling. Make sure the butter is fully incorporated and the mixture resembles wet sand. Press firmly into the pan and chill for 15–20 minutes before filling to set the base.
-
– 24 oz cream cheese, softened to room temperature
→ The creamy heart of the cheesecake; softened cream cheese blends smoothly, avoiding lumps. Beat until velvety, then gradually add sugar to build a light, stable base. For best results, use full-fat cream cheese.
– 3/4 cup granulated sugar
→ Sweetens the filling to balance tang from the dairy. You can adjust up or down by a few tablespoons to taste. Add gradually and beat until completely dissolved for a silky texture.
– 1 cup sour cream, at room temperature
→ Adds tang and moisture, yielding a creamy, luscious mouthfeel. Room temperature helps it blend evenly; you can substitute Greek yogurt for a thicker, tangier variation if preferred.
– 1 teaspoon pure vanilla extract
→ Enhances the creamy flavors; use high-quality vanilla for the most aroma. If you have a vanilla bean, using the seeds provides extra depth.
– 1/8 teaspoon fine salt
→ A tiny amount cuts sweetness and heightens dairy flavors. Too much salt will be noticeable, so measure carefully.
– 1 cup heavy whipping cream, cold
→ Whipped and folded into the cheese mixture to add lightness and a stable structure without gelatin. Chill the bowl and beaters for maximum volume; whip to soft peaks for folding, or to stiff peaks if you want a firmer set.
– 2 tablespoons powdered sugar (for whipping cream)
→ Lightens and sweetens the whipped cream used in the filling. Adjust to taste; if you prefer less sweetness, you can reduce or omit, relying on the sour cream and cream cheese for balance.
-
– 1 cup fresh strawberries, hulled and sliced
→ Provides vibrant red color and juicy sweetness. Slice evenly to create neat color blocks and arrange around the edge or in a rainbow arc for visual impact. To prevent browning, prepare close to serving time.
– 1 cup diced mango
→ Delivers bright orange hue and tropical sweetness; cut into uniform cubes for clean layers and a cohesive rainbow presentation. If using frozen mango, thaw and pat dry to avoid extra moisture.
– 1 cup pineapple chunks
→ Adds sunny yellow color and a tangy balance; use fresh pineapple for crisp texture or well-drained canned pineapple if needed.
– 1 cup kiwi slices
→ Gives vivid green color and a tart-sweet note; slice thinly for easy layering and to keep the topping from overpowering the filling. Pat dry any excess moisture before arranging.
– 1 cup blueberries
→ Rich blue hue and bursts of juice; scatter whole berries for pops of color and texture. If using frozen berries, thaw and pat dry to minimize excess moisture.
– 1 cup blackberries
→ Adds purple depth and juicy flavor; choose ripe berries for best color and taste. Rinse gently and pat dry; cut larger berries in half if needed for uniformity.
– 1/4 cup apricot jam (optional glaze) + 1–2 tablespoons water
→ A light glaze to give fruit a glossy finish and help colors pop. Warm gently and brush lightly over the fruit just before serving. If avoiding sugar, you can skip the glaze.
-
– Fresh mint leaves
→ Adds a final pop of green and a refreshing aroma. Tuck a few leaves between slices or along the edge for a restaurant-quality finish. Keep mint dry until serving to maintain color.
Instructions
- Step 1: Prepare the pan and crust base by lining a 9-inch springform pan with a parchment round on the bottom and lightly greasing the interior sides.
→ This ensures the crust and set cheesecake release cleanly, preventing sticking and preserving a neat edge when sliced. - Step 2: Crush graham crackers into fine, even crumbs totaling 2 cups, using a plastic bag and rolling pin or a processor until no large pieces remain. Add 1/4 cup granulated sugar and toss to combine.
→ Fine crumbs provide a uniform, cohesive crust that grips the butter and forms a sturdy base without crumble pockets. - Step 3: Stir in 6 tablespoons melted unsalted butter until the mixture resembles wet sand and holds together when pressed. Avoid leaving dry pockets of crumb by mixing thoroughly with a fork or spatula.
→ Properly moistened crust binds cohesively, allowing it to hold its shape when the filling is added. - Step 4: Transfer the crust mixture into the prepared pan and press evenly across the bottom and up the sides to about 1/2 inch. Use the flat-bottomed of a measuring cup or a small glass to compact and create a level surface.
→ A compact, even crust prevents crumbling and ensures uniform support for the creamy filling. - Step 5: Chill the crust in the freezer or refrigerator for 15–20 minutes to set the butter and firm the base before adding the filling.
→ A chilled crust resists softening once the filling is applied, maintaining structure during slicing. - Step 6: Soften 24 oz cream cheese to room temperature by letting it sit uncovered for about 60–90 minutes, or cut into chunks and microwave in 10–15 second bursts until pliable. Beat until completely smooth with no lumps.
→ Softened cheese blends into a velvety filling without lumpiness, creating a seamless texture throughout the cheesecake. - Step 7: Add 3/4 cup granulated sugar to the cream cheese and beat on medium-high until light and fluffy, scraping the bowl halfway through to incorporate all the sugar.
→ Sugar dissolves and aerates the filling, contributing to a stable, creamy body that sets well without grit. - Step 8: Blend in 1 cup sour cream, 1 teaspoon pure vanilla extract, and 1/8 teaspoon fine salt on low speed until just combined and smooth.
→ Sour cream adds tang and moisture; vanilla enhances aroma; salt balances the sweetness for depth of flavor. - Step 9: In a separate bowl, whip 1 cup cold heavy whipping cream with 2 tablespoons powdered sugar to soft peaks. Chill the bowl and beaters first for maximum volume.
→ A stable, light whipped cream folds into the filling to give structure and a luxurious mouthfeel without relying on gelatin. - Step 10: Fold the whipped cream into the cream cheese mixture in three additions, using a gentle spatula as you rotate the bowl. Stop as soon as the mixture is homogeneous with no visible white streaks.
→ Gentle folding preserves volume and prevents overworking, which could cause a dense texture. - Step 11: Pour the filling over the chilled crust and smooth the top with a spatula, running the blade around the edge to remove excess; tap the pan lightly to release any air pockets.
→ A level, air-free surface ensures even set and clean slices when served. - Step 12: Refrigerate the assembled cheesecake for 4–6 hours, or preferably overnight, until the filling is fully set and holds its shape when sliced.
→ A long, cool set develops structure and prevents the filling from oozing or cracking when cut. - Step 13: While the cheesecake chills, prepare rainbow toppings by washing and pat-drying all fruit: hull and slice strawberries, dice mango, cut pineapple into chunks, slice kiwis thinly, and keep blueberries and blackberries whole.
→ Clean, uniform pieces ensure neat, colorful sections and prevent excess moisture from pooling on the surface. - Step 14: Arrange the fruit in a rainbow arc or concentric rings around the top once set, starting with red strawberries, then orange mango, yellow pineapple, green kiwi, blue blueberries, and purple-blackberries; place slices and chunks with even spacing for visual balance.
→ A deliberate layout creates the signature rainbow effect and a dramatic, restaurant-quality appearance when served. - Step 15: If using apricot glaze, warm 1/4 cup apricot jam with 1–2 tablespoons water until loosened, then brush a light, even coat over the fruit just before serving to give shine and color pop.
→ The glaze enhances fruit color, adds a gentle gloss, and helps keep fruit looking fresh on display. - Step 16: Just before serving, loosen the cheesecake from the pan by running a thin knife or offset spatula around the inner edge of the springform; release the buckle and slide the cake onto a serving plate.
→ Releasing the ring cleanly preserves the crisp edge and makes presentation neat for slicing. - Step 17: Garnish with fresh mint leaves along the edge or between slices for a pop of bright green and a fresh aroma; keep mint dry until serving to prevent color loss.
→ Mint adds a final contrast in color and a refreshing scent that elevates the dessert’s presentation and aroma. - Step 18: Use a warm, sharp knife to slice the cheesecake; wipe the blade between cuts for clean, precise pieces and a professional-looking finish.
→ A warmed blade reduces crumb resistance, yielding smooth, intact slices that reveal the rainbow topping inside.
Notes
These no-bake rainbow cheesecake slices are a dramatic, crowd-pleasing dessert that comes together without turning on the oven. A crunchy crust supports a silky filling, while vibrant fruit toppings create a striking rainbow effect. For gluten intolerance, choose certified gluten-free crackers in the crust and check all packaged ingredients for gluten-free labels. Keep all dairy products at room temperature before whipping to ensure the filling is ultra-smooth, and chill the assembled cake long enough to set fully for clean slices.
Crust preparation
- 2 cups graham cracker crumbs (or digestive biscuits), finely crushed — Crust provides the crunchy base that supports the creamy filling. If you’re gluten-free, use certified gluten-free crackers and consider adding a pinch of salt to balance sweetness.
- 1/4 cup granulated sugar — Adds a touch of sweetness to the crust. If your crackers are already sweetened, you can reduce or omit this. Mix well with the melted butter so the crust holds together when pressed.
- 6 tablespoons unsalted butter, melted — Binds the crumbs into a cohesive crust. The mixture should resemble wet sand. Press firmly into the bottom (and up the sides, if desired) of a 9-inch springform pan. Chill 15–20 minutes before filling to set the base.
Filling
- 24 oz cream cheese, softened to room temperature — The creamy heart of the cheesecake; softened cream cheese blends smoothly without lumps. Beat until velvety, then gradually add sugar to build a light, stable base. Use full-fat cream cheese for best texture.
- 3/4 cup granulated sugar — Sweetens the filling to balance tang from the dairy. Add gradually and beat until completely dissolved for a silky texture.
- 1 cup sour cream, at room temperature — Adds tang and moisture; room temperature helps it blend evenly. Substitute Greek yogurt for a thicker, tangier variation if preferred.
- 1 teaspoon pure vanilla extract — Enhances the creamy flavors; quality vanilla matters. If you have a vanilla bean, scrape the seeds for extra depth.
- 1/8 teaspoon fine salt — A tiny amount balances sweetness and boosts dairy flavors. Measure carefully, as too much salt will stand out.
- 1 cup heavy whipping cream, cold — Whipped and folded into the cheese mixture to add lightness and stability. Chill the bowl and beaters for maximum volume; whip to soft peaks for folding, or to stiff peaks if you want a firmer set.
- 2 tablespoons powdered sugar (for whipping cream) — Lightens and sweetens the whipped cream used in the filling. Adjust to taste; you can reduce or omit if you prefer a less sweet filling.
Rainbow toppings
- 1 cup fresh strawberries, hulled and sliced — Provides vibrant red color and juicy sweetness. Slice evenly for neat color blocks and arrange around the edge or in a rainbow arc. Prepare close to serving time to prevent browning.
- 1 cup diced mango — Delivers bright orange hue and tropical sweetness; cut into uniform cubes for clean layers and a cohesive rainbow.
- 1 cup pineapple chunks — Adds sunny yellow color and a tangy balance; use fresh pineapple for crisp texture or well-drained canned pineapple if needed.
- 1 cup kiwi slices — Gives vivid green color and a tart-sweet note; slice thinly for easy layering and to keep the topping from overpowering the filling. Pat dry any excess moisture before arranging.
- 1 cup blueberries — Rich blue hue and bursts of juice; scatter whole berries for pops of color and texture. Thaw frozen berries and pat dry if using them.
- 1 cup blackberries — Adds purple depth and juicy flavor; choose ripe berries and pat dry; halve larger berries for uniformity if needed.
- 1/4 cup apricot jam (optional glaze) + 1–2 tablespoons water — A light glaze to give fruit a glossy finish and help colors pop. Warm gently and brush lightly over the fruit just before serving. If avoiding sugar, you can skip the glaze.
Garnish (optional)
- Fresh mint leaves — Adds a final pop of green and a refreshing aroma. Tuck a few leaves between slices or along the edge for a restaurant-quality finish. Keep mint dry until serving to maintain color.
Tips for best results
- Keep ingredients cold. Work quickly when mixing the filling to maintain a smooth texture and prevent the cream cheese from getting too soft.
- A parchment collar around the pan helps release slices cleanly. Lightly grease the pan and line with parchment for easy removal.
- For evenly colored color blocks, divide the filling into separate portions before folding in any color tint or avoid tinting and let the toppings provide the rainbow effect.
- Chill time is essential. Refrigerate at least 4 hours, preferably overnight, to allow the filling to set completely. If you’re short on time, you can freeze slices for 1–2 hours to firm up, then slice and thaw slightly before serving.
- Storage: Keep refrigerated for up to 3–4 days. For longer storage, freeze slices wrapped tightly for up to 1–2 months; thaw in the fridge or at room temperature before serving.
Dietary notes and substitutions
- Gluten-free option: Use certified gluten-free graham crackers or biscuits for the crust and ensure any mix-ins are gluten-free. Cross-contamination can be an issue with some brands, so check labels carefully if you have celiac disease or gluten intolerance.
- Dairy-free option: Replace cream cheese with a dairy-free alternative (e.g., dairy-free cream cheese) and use coconut cream or a dairy-free yogurt in place of sour cream. Whip coconut cream separately and fold gently to avoid deflation; color and toppings can remain the same.
- Low-sugar option: Reduce the crust sugar or substitute with a sugar alternative. For the filling, gradually reduce sugar and taste as you go; consider adding natural sweetness from fruit toppings rather than relying on sugar.
Tips
Tips for No-Bake Rainbow Cheesecake
Crust tips
- Crush graham crackers or digestive biscuits to a uniform, fine crumb for a smooth edge and a cohesive crust. If your crumbs are uneven, pulse a bit longer.
- If using gluten-free crackers, choose certified gluten-free options and consider adding a pinch of salt to balance sweetness.
- Mix the crumbs with sugar and melted butter until the texture resembles wet sand. Don’t skip chilling; press firmly into the pan and chill 15–20 minutes to set before filling for a sturdier base.
Filling tips
- Let all dairy ingredients come to room temperature before mixing. Softened cream cheese blends smoother with no lumps; beat until velvety.
- Gradually add sugar and fully dissolve it for a silky texture. Sprinkle in salt to heighten dairy flavors without making the filling taste salty.
- Whip the heavy cream separately to soft peaks and fold in gently. For extra lift, whip to stiff peaks and fold in to maintain structure, but be careful not to overwork the mixture.
- Use full-fat dairy for a richer, creamier cheesecake. If you like tang, sour cream adds moisture and depth; Greek yogurt can be swapped for a thicker texture, adjusting sugar as needed.
Rainbow layers and color tips
- Plan color placement before filling. You can portion the filling and tint each portion with gel food coloring for vibrant, distinct stripes, or create a rainbow swirl for a blended look.
- To keep colors clean, avoid excessive mixing after adding color. Let each colored layer set slightly before adding the next to reduce bleeding.
- If your topping layer will sit on the filling, ensure the filling is fairly firm to prevent colors from mixing when slicing.
Fruit toppings and glaze tips
- Fresh fruit adds brightness but releases moisture. Pat fruit dry before arranging and avoid piling wet fruit directly on the filling to prevent sogginess.
- For a glossy finish, glaze fruit with a warmed apricot jam mixture (jam thinned with a little water). Brush lightly just before serving. If you prefer not to use sugar, skip the glaze or use a light fruit syrup.
Chilling, setting, and assembly tips
- Chill the assembled cheesecake for at least 4 hours, preferably overnight, to achieve clean edges when sliced.
- If short on time, you can freeze the cake briefly to firm up, then refrigerate to finish setting, but note texture may be slightly different.
- To slice cleanly, wipe the knife between cuts with a warm, damp towel or run it under hot water, then dry before slicing.
Garnish and serving ideas
- Fresh mint adds a bright aroma and color contrast. Keep mint dry until serving to prevent wilting.
- Serve slices with extra fruit or a light dusting of finely grated lemon zest for a pop of aroma.
Make-ahead, storage, and substitutions
- Leftovers keep in the refrigerator for 3–4 days. For longer storage, freeze individual slices wrapped well and thaw in the fridge before serving.
- Substitute crushed gluten-free crackers for a gluten-free crust; you may want to adjust sugar slightly based on the crackers’ sweetness.
- For a lighter version, you can use half-fat cream cheese and Greek yogurt, but expect a softer set and slightly different mouthfeel.
FAQ
No-Bake Rainbow Cheesecake – FAQs
What is a No-Bake Rainbow Cheesecake?
A no-bake rainbow cheesecake is a chilled dessert with a crumb crust and a creamy filling that’s divided into several colored layers to create a rainbow effect. The filling is typically made with cream cheese and whipped cream, set in the fridge rather than baked. A small amount of gelatin or agar-agar is often used to help it hold its shape.
What crust options work best?
A classic choice is a butter-cracker crust (graham crackers or digestive biscuits) mixed with melted butter and a touch of sugar, then pressed into the pan. You can also use gluten-free cookies, a nut-based crust, or a simple crushed biscuit crust with a dairy-free butter substitute if needed.
What ingredients are in the filling?
The traditional filling typically includes cream cheese, sugar, vanilla, and whipped cream or a stabilized whipped cream. A pinch of salt and a little lemon juice or zest for brightness are common additions. If you’re using gelatin/agar to set, follow the package directions for how much to use.
How do you create the rainbow layers?
Divide the filling into several bowls, tint each with a different gel or paste food coloring, and layer them in the crust one color at a time. You can pour each color carefully to keep the layers distinct, or create a gentle swirl for a soft blended look. Chill briefly between layers if you want crisper separation.
Is this recipe suitable for vegetarians or dairy-free diets?
Regular versions may use gelatin (not vegetarian). For a vegetarian-set, use agar-agar or a vegetarian gel stabilizer according to its instructions. For dairy-free options, substitute dairy-free cream cheese and whipped topping, and use a dairy-free crust. Always check product labels for gelatin and dairy ingredients.
How long does it take to set in the fridge?
Chilling time is typically at least 4–6 hours, with overnight chilling often yielding the best texture. If using a stronger setting agent like gelatin/agar, follow its recommended setting time and temperature for best results.
Can I make it ahead or freeze it?
Yes. You can prepare the crust and filling a day ahead, assemble the layers, and refrigerate until ready to serve. For longer storage, you can freeze the assembled cheesecake (best without toppings) and thaw in the fridge overnight before serving. Note that color and texture may shift slightly after freezing.
How do I unmold and serve the cheesecake?
If using a springform pan, run a warm knife around the edge and loosen the sides before removing the band. Slice with a clean, hot knife for neat pieces. Top with whipped cream, fresh fruit, or colorful sprinkles for a festive finish.
What are common trouble spots and how can I fix them?
Common issues include a crust that crumbles, a filling that won’t set, or colors that bleed. Fixes: press and chill the crust firmly; ensure your setting agent is prepared and used in the correct amount; chill between color layers, and avoid overfilling with wet toppings that can cause colors to run. For clean layers, pour slowly and avoid stirring colors together after they’re layered.
What substitutions can I try for dietary restrictions or flavor tweaks?
Try lactose-free cream cheese and dairy-free whipped topping for dairy-free versions, or use gluten-free cookies for the crust. Swap vanilla with other flavorings (like almond) or add lemon zest for brightness. You can also experiment with different fruit colors and toppings to customize the rainbow.