Author

Ocean Nightleaf

Browsing

Introduction / Hook

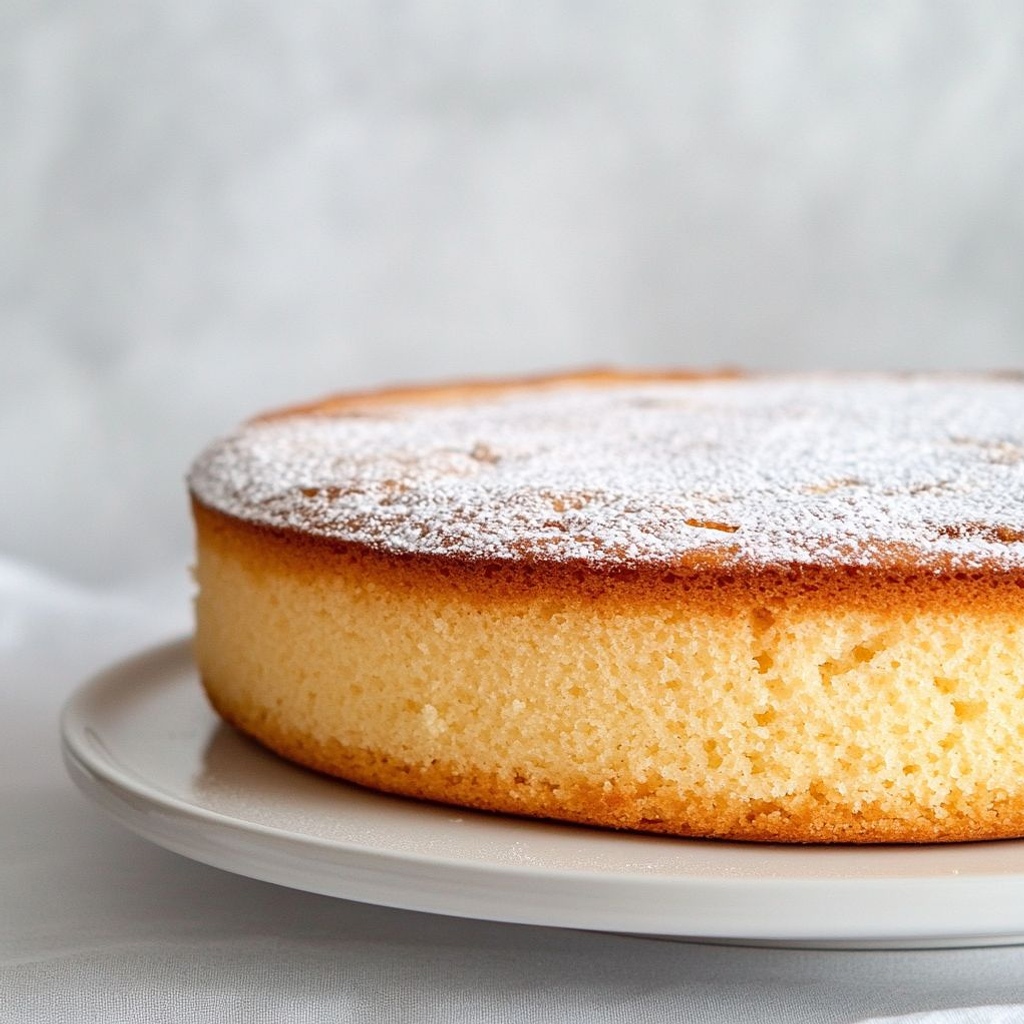
Imagine a warm slice of Torta soffice classica, its pale golden crust catching the morning light as steam rises in delicate rings. The crumb is feather-soft, like a cloud, yet sturdy enough to cradle a dollop of whipped cream or a spoonful of jam without crumbling away. The aroma fills the kitchen with a comforting blend of vanilla, butter, and citrus, inviting you to slow down, take a deep breath, and savor every bite. This is not a flashy dessert meant to steal the show; it is a timeless Italian classic, born of humble ingredients and patient technique. The Torta soffice classica embodies the heart of homemade baking: simple, honest, and deeply satisfying. It invites you to gather around the table, share stories, and watch as a batter transformed by warmth becomes a cake that feels like a hug. In every slice, you’ll taste memories of Sunday mornings, family kitchens, and the quiet pleasure of a well-made crumb that lingers long after the last bite disappears.

The Story Behind the Dish

In Italian homes, “torta soffice” translates to a soft cake—a kind of everyday indulgence that feels like a gentle hug at the end of a long day. While the exact lineage of this particular classic varies from region to region, the essence is universal: a cake that relies on the tenderness of eggs, the richness of butter or oil, and the bright lift of sugar to create a crumb that’s airy yet substantial. This is the kind of cake that grandmother and mother alike would bake when company was coming, when a rainy afternoon called for warmth, or when a child came home hungry after school and needed something comforting to sustain them through homework and play. The technique is deceptively simple: whisk air into a pale, pale batter, fold with care, and bake until the exterior whispers with a gentle crack while the inside remains lush and moist. The result is a cake that holds its own against fruit compotes, creamy fillings, or a simple dusting of powdered sugar. The ritual—measuring, whisking, smelling, and waiting—connects generations, turning a handful of pantry staples into a shared experience that transcends trends.

Why You’ll Love This Recipe

  • Easy, approachable bake: a tranquil project that yields a stunning result with straightforward, pantry-friendly ingredients.
  • Versatile flavor profile: vanilla and citrus notes provide a bright, comforting backbone that pairs with many toppings and accompaniments.
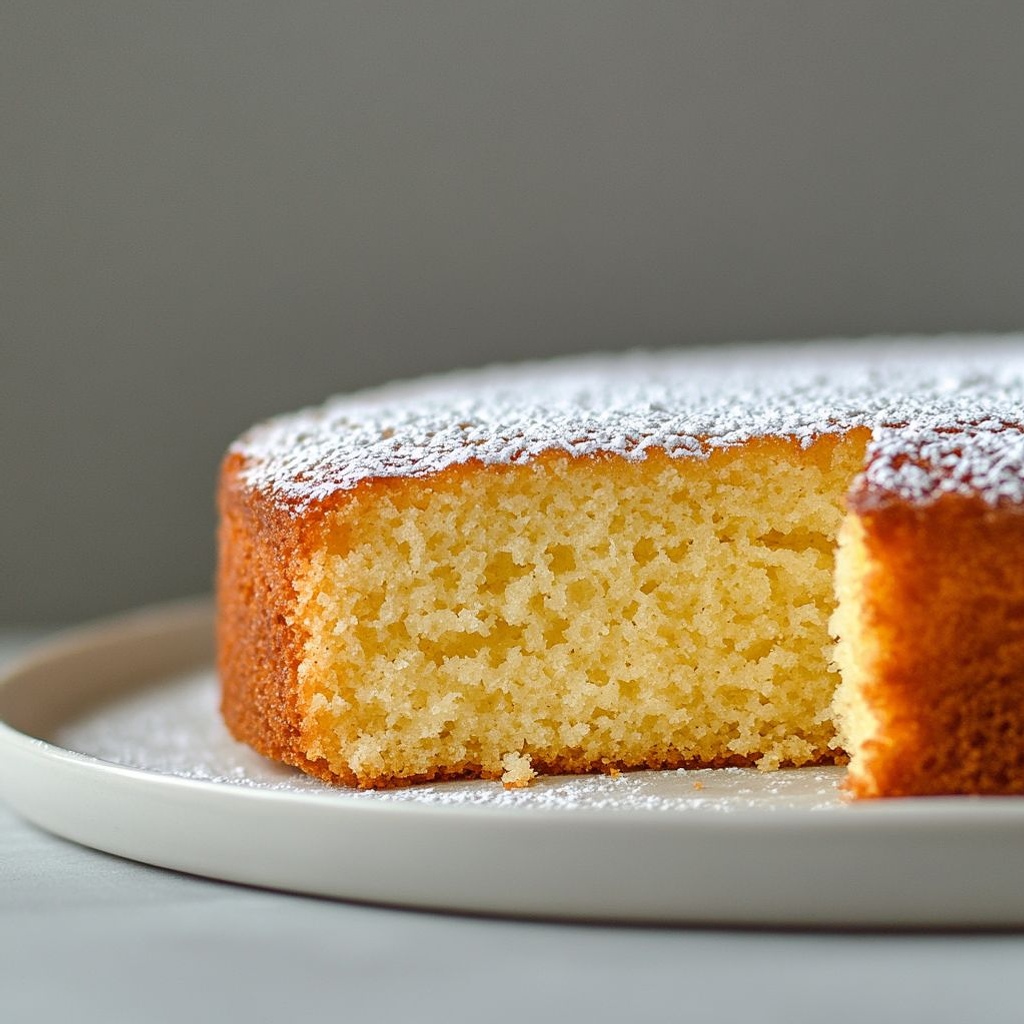
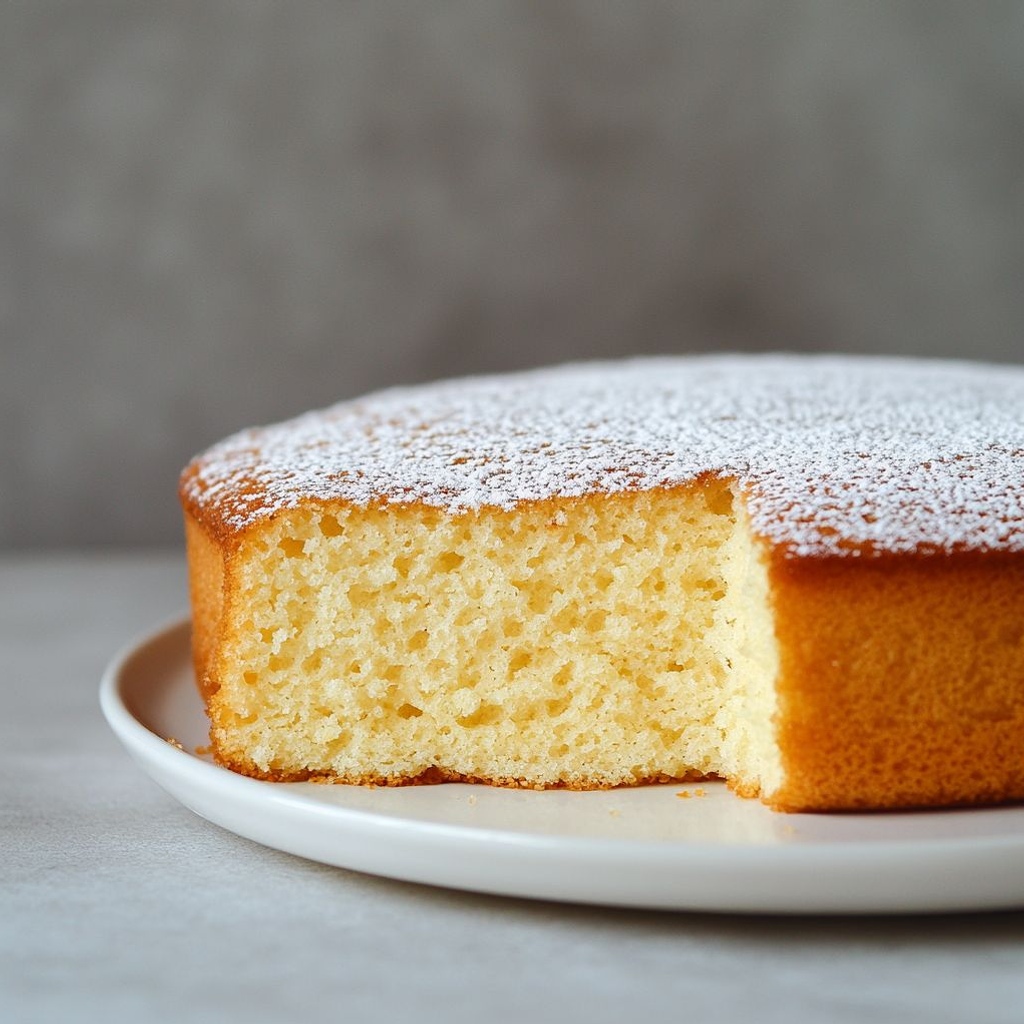
  • Perfect texture: a delicate yet sturdy crumb with a tender interior and a light, slightly crisp crust.
  • Ideal for any occasion: breakfast, tea time, dessert after a meal, or a bring-a-slice-to-a-friend moment.
  • Comforting but refined:; simple enough for weeknights, yet elegant enough to serve to guests without ceremony.
  • Adaptable for different diets: easy to veganize, gluten-free, or dairy-free with thoughtful substitutions (see Variations).

Flavor Profile & Texture

The flavor of the Torta soffice classica is gently sweet, with a soft vanilla lift that carries a whisper of citrus—often lemon or orange zest—zest lending brightness without sharpness. But beyond the taste, it is the texture that makes this cake so memorable. The interior is incredibly tender, almost cloud-like, with a fine, even crumb that melts on the tongue. The outer crust turns a pale golden hue, offering a subtle nutty aroma and a tiny, satisfying crack when sliced. The balance of fat and sugar yields a luxurious mouthfeel, while a hint of salt backstage helps the flavors sing rather than feel sugary. Depending on the bake, you may notice a slightly springy bite near the center, a sign of careful whisking and proper oven temperature. When served simply, with a cup of coffee or a dollop of yogurt, the cake shines in its own right. When paired with fresh berries, a jam, or a cloud of lightly whipped cream, it becomes a more indulgent dessert without ever tipping into heaviness. The aroma—hot butter mingling with citrus oils—invites you to pause, breathe, and prepare your cut with care, because the first bite sets the tone for the entire slice.

Occasions & Pairings

This classic cake is a versatile companion for many moments. Here are some ideas to make the most of it:

  • Weekday mornings: a slice with a mug of strong espresso or a glass of milk to start the day with comfort.
  • Brunch gatherings: layer with mascarpone or lemon curd between two thin rounds, or serve alongside a fruit salad for a bright, light dessert.
  • Afternoon tea or coffee time: pair with a selection of jams, clotted cream, or a spoonful of ricotta for a creamy contrast.
  • Family celebrations: dust with powdered sugar, drizzle with a simple glaze, or serve with seasonal berries for a pop of color.
  • Kids’ parties: cut into small squares and present with a yogurt-dipped fruit skewer for a playful touch.

Pairings to consider include:

  • Drinks: strong espresso, cappuccino, or a light white tea.
  • Frills: fresh berries, a dollop of lightly sweetened whipped cream, or a spoonful of lemon curd.
  • Accompaniments: vanilla or lemon-flavored yogurt, mascarpone, or a simple citrus glaze to add a glossy finish.

Tips, Variations & Substitutions

Here are practical ideas to adapt this classic to different preferences or occasions, without losing the essence of its soft, comforting character.

Vegan Version

To make a vegan Torta soffice classica, replace eggs with a combination of aquafaba or flaxseed meal (1 tablespoon ground flaxseed mixed with 3 tablespoons water per egg is a common binder). Use plant-based butter or a neutral oil (like avocado oil) in place of dairy butter. Opt for a dairy-free milk such as almond, oat, or soy. You’ll still get a tender crumb, especially if you whisk the aquafaba until stiff peaks form and fold it gently into the batter, preserving airiness.

Gluten-Free Version

For a gluten-free approach, use a high-quality gluten-free all-purpose flour blend that already contains xanthan or guar gum, or mix almond flour with a gluten-free starch to mimic structure. Be mindful that gluten-free batters can be denser; you may need to incorporate a touch more air by whisking the eggs well and folding gently. A teaspoon of baking powder should be included to ensure lift, but adjust according to your flour blend’s guidelines.

Flavor Twists

  • Citrus variation: use orange zest with a splash of orange juice for a brighter, sunnier cake.
  • Almond or Amaretto: swap a portion of the vanilla with almond extract or a teaspoon of amaretto for a nutty, inviting aroma.
  • Vanilla-Only Classic: omit citrus to emphasize the vanilla profile for a purer, woolly crumb.

Regional Twists

In some Italian traditions, a small amount of grated lemon zest or orange zest is folded into the batter for fragrance, while others favor a light dusting of almond flour on the top or a delicate glaze. In coastal regions, a touch of limoncello may be brushed onto the cooled cake for a gentle boozy brightness. In the north, you might see a whisper of aromatic vanilla paired with a lemon honey glaze. These regional touches highlight how a single formula can morph into distinctly local flavors while preserving the same tender crumb.

Make-Ahead Flavor Boosts

If you want to plan ahead, prepare the batter (without baking) and refrigerate it for up to 24 hours; bring to room temperature before baking to ensure proper lift. Alternatively, bake the cake, then frost or glaze the next day—the flavors deepen with a little resting time, and the texture can become even more cohesive after a night covered in a light cloth.

Storage & Make-Ahead Ideas

The Torta soffice classica stores well and adapts to make-ahead strategies that suit busy schedules. Here are practical guidelines to keep the cake tasting as fresh as possible:

  • Room temperature: Store covered at room temperature for up to 2–3 days. Keep it in a sealed container or wrapped tightly to prevent drying out.
  • Refrigeration: For longer storage, refrigerate for up to 5 days. Bring slices to room temperature before serving to regain tenderness.
  • Freezing: Freeze individual slices or the whole cake wrapped tightly in plastic wrap and foil. It will keep for up to 2–3 months. Thaw at room temperature and, if desired, warm gently in the oven to refresh the crumb.
  • Make-ahead methods: You can prepare the batter a day in advance and bake it fresh the next day, or bake the cake in advance and reheat slices gently before serving to rejuvenate moisture and aroma.

To maximize moisture and flavor over time, consider pairing leftovers with a lightly sweetened whipped cream, or a fragrant layer of fresh fruit and a drizzle of honey or lemon syrup. If you’re making a lemon or vanilla glaze, brush it over the cooled cake to seal in moisture and add a subtle gloss that makes the surface tempting to cut into.

Fun Facts & Trivia

Did you know that the term “soffice” in Italian desserts broadly describes a texture that melts in the mouth? It’s a word that captures the essence of light, airy cake batters that are gently leavened and baked at a moderate temperature to preserve tenderness. The idea of a simple, comforting cake that can be dressed up or down is deeply ingrained in Italian home baking. Culturally, these cakes often accompany the ritual of a morning espresso, an afternoon tea, or a pastry plate that marks a small celebration—no need for grand occasions to deserve a slice. The Torta soffice classica, with its humble ingredients and generous spirit, embodies the Italian philosophy of making something memorable out of something ordinary. It’s a reminder that baking is not about showy technique alone, but about patience, balance, and the joy of sharing. A single loaf of softly risen cake has the power to turn a quiet moment into a memory and a simple dessert into a conversation starter among friends and family.

Ingredients

Torta soffice classica

    – 4 large eggs, room temperature
    → Eggs act as the main structure and moisture backbone of the batter. In a classic torta soffice, you’ll typically beat the whole eggs with sugar until the mixture is pale and ribbons fall from the whisk, incorporating air for a light, airy crumb. Keep the eggs at room temperature (approx. 20-22°C) for maximum volume; if they’re cold, warm them in a bowl of warm water for a few minutes. After the sugar and eggs are airy, sift and fold in the dry ingredients gently to preserve air you’ve created. Do not overbeat after adding flour, or the cake may become dense.
    – 140 g granulated sugar
    → Sugar tenderizes and sweetens, and it helps create the light texture by aerating with the eggs. Use standard granulated sugar; if you only have superfine sugar, you can use that to dissolve faster, but granulated works fine. Dissolve sugar into the eggs gradually as you whisk; for best results, whisk until the mixture is pale and thick, about 5-7 minutes by hand or 3-4 minutes with an electric mixer. Avoid lumps of sugar; if needed, rub sugar between fingers or sift.
    – 200 g all-purpose flour (or 00 flour)
    → Flour provides the structure of the cake. Sift with the baking powder to evenly distribute leavening and remove lumps. Use all-purpose for a sturdy but tender crumb; 00 flour will yield a softer, finer crumb. Measure by scooping into the bowl and leveling with a knife, or weigh for accuracy. Do not overmix once flour is added; just fold until you no longer see dry streaks, to keep the batter light.
    – 120 ml milk, warmed to lukewarm
    → Milk adds moisture and helps dissolve sugar while activating the fat and gluten in a controlled way. Warm the milk to about 35-40°C (lukewarm) so it blends smoothly with the batter and helps emulsify the butter. If using dairy-free milk, select unsweetened varieties; you may need a touch more or less depending on the brand. Add gradually to maintain batter consistency; stop when it pours slowly off a spoon.
    – 60 g unsalted butter, melted and cooled
    → Butter provides richness, tenderness, and flavor; melted and cooled ensures it blends evenly without splitting the eggs. Add the cooled melted butter gradually after combining the wet and dry ingredients to avoid curdling; if you prefer dairy-free, substitute with a neutral oil like sunflower or canola in the same quantity. For extra tenderness, you can skip the butter for a lighter cake and replace with an equal amount of extra milk, but the texture will change.
    – 1 teaspoon baking powder
    → Baking powder acts as a leavening agent to lift the batter and create that signature airy crumb. Sift with the flour so it’s evenly distributed; do not add too early to the eggs, as you want the air to stay intact. After adding, fold gently to avoid knocking out the air. Do not overuse; too much can cause a soapy taste and collapse.
    – 1 teaspoon vanilla extract
    → Vanilla provides aroma and rounds out sweetness; use pure vanilla and avoid imitation if possible for best flavor. Add to the wet ingredients after beating eggs and sugar, ensuring even distribution. If you like a citrus note, you can substitute with a small amount of lemon zest or orange zest instead of vanilla. For stronger aroma, you can let the batter rest for 10-15 minutes before baking to allow flavors to meld.
    – 1 tablespoon lemon zest (optional)
    → Lemon zest adds bright fragrance and acidity to balance sweetness, enhancing the cake’s aroma and soft crumb. Use only the outer colored layer, avoiding the bitter white pith. Grate it finely and fold into the batter or blend with sugar for faster release of oils. If not using lemon zest, you can substitute with orange zest or omit entirely.
    – 1 pinch salt
    → Salt enhances overall flavor and helps balance sweetness; add a pinch to the egg-sugar mixture or to the dry ingredients. If using salted butter, adjust or omit this pinch accordingly. It also helps strengthen the crumb and make flavors pop.

Optional Add-ins

    – Powdered sugar for dusting
    → Dusting the cooled cake with a light veil of powdered sugar provides a simple, elegant finish and a touch of sweetness without affecting texture. Dust just before serving to prevent caking; keep remaining sugar in an airtight container to avoid moisture clumping.
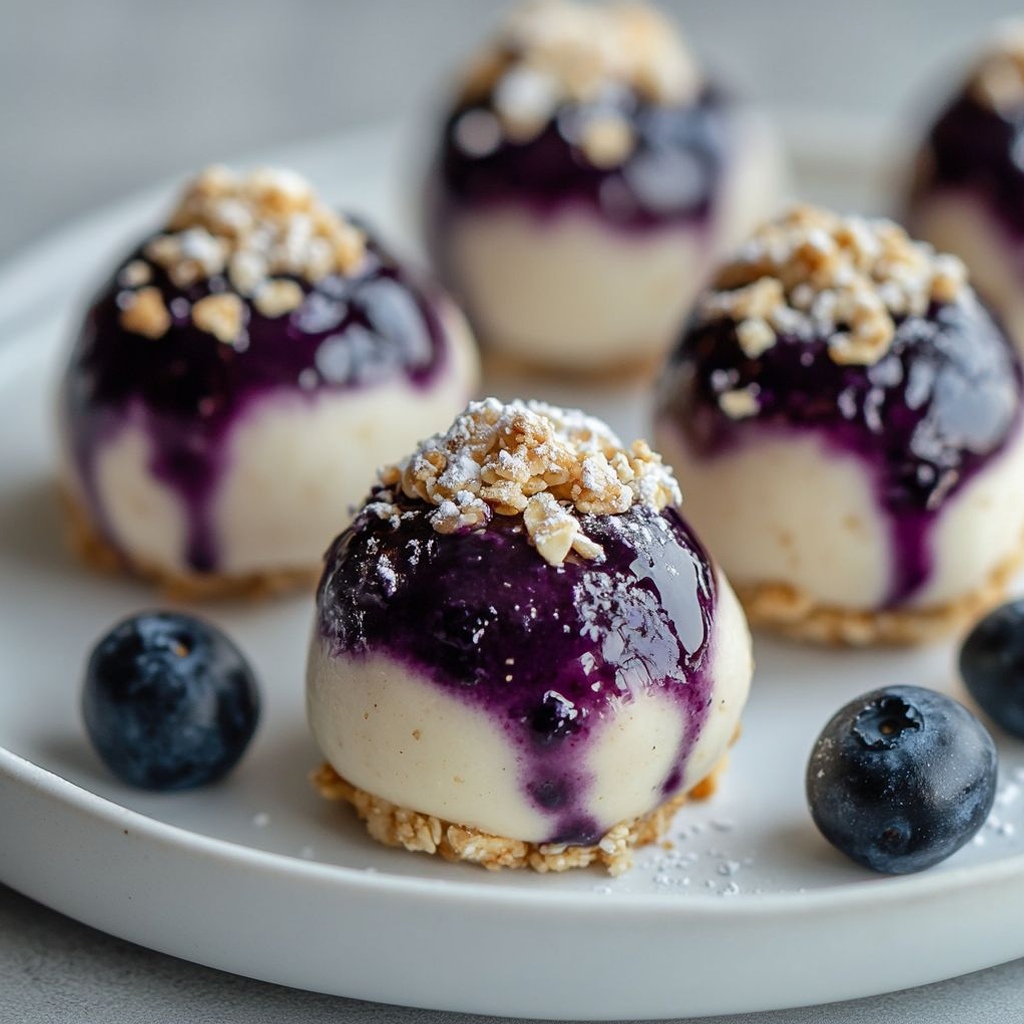
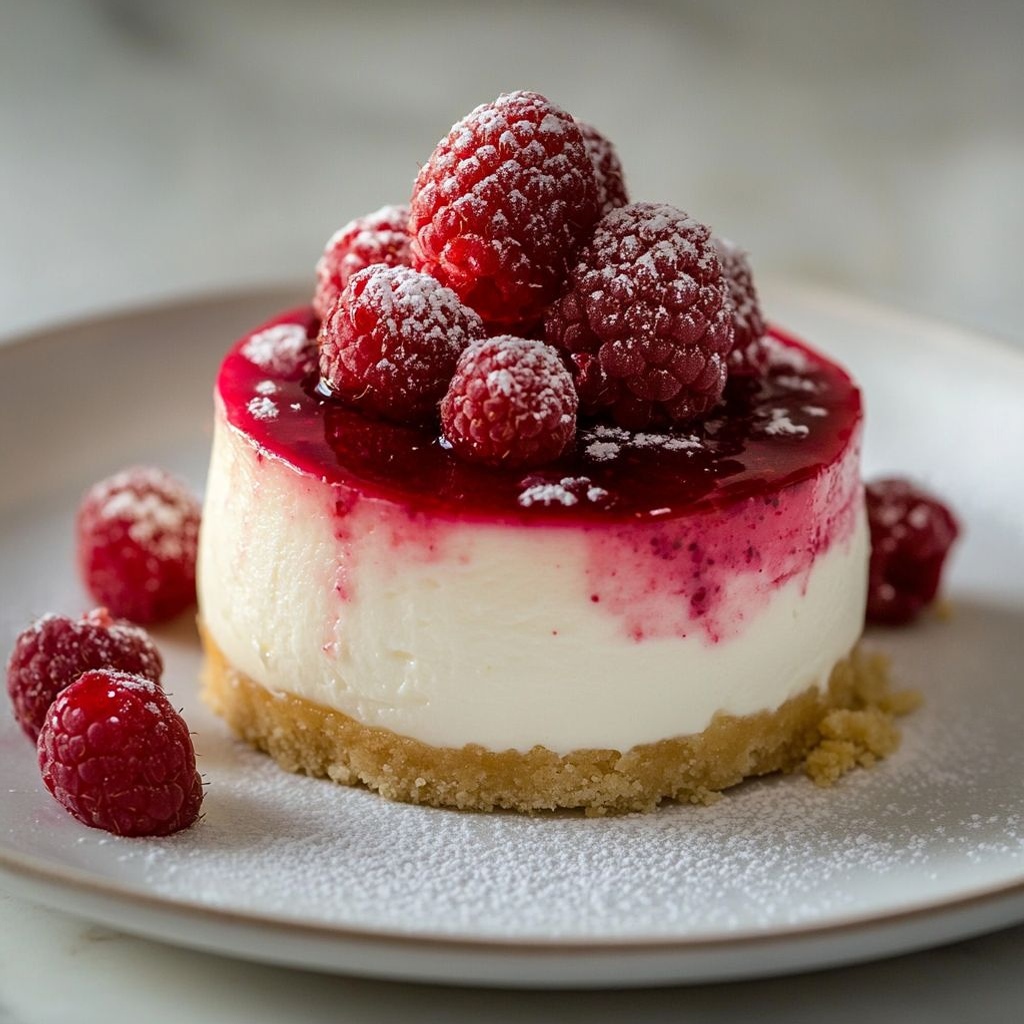
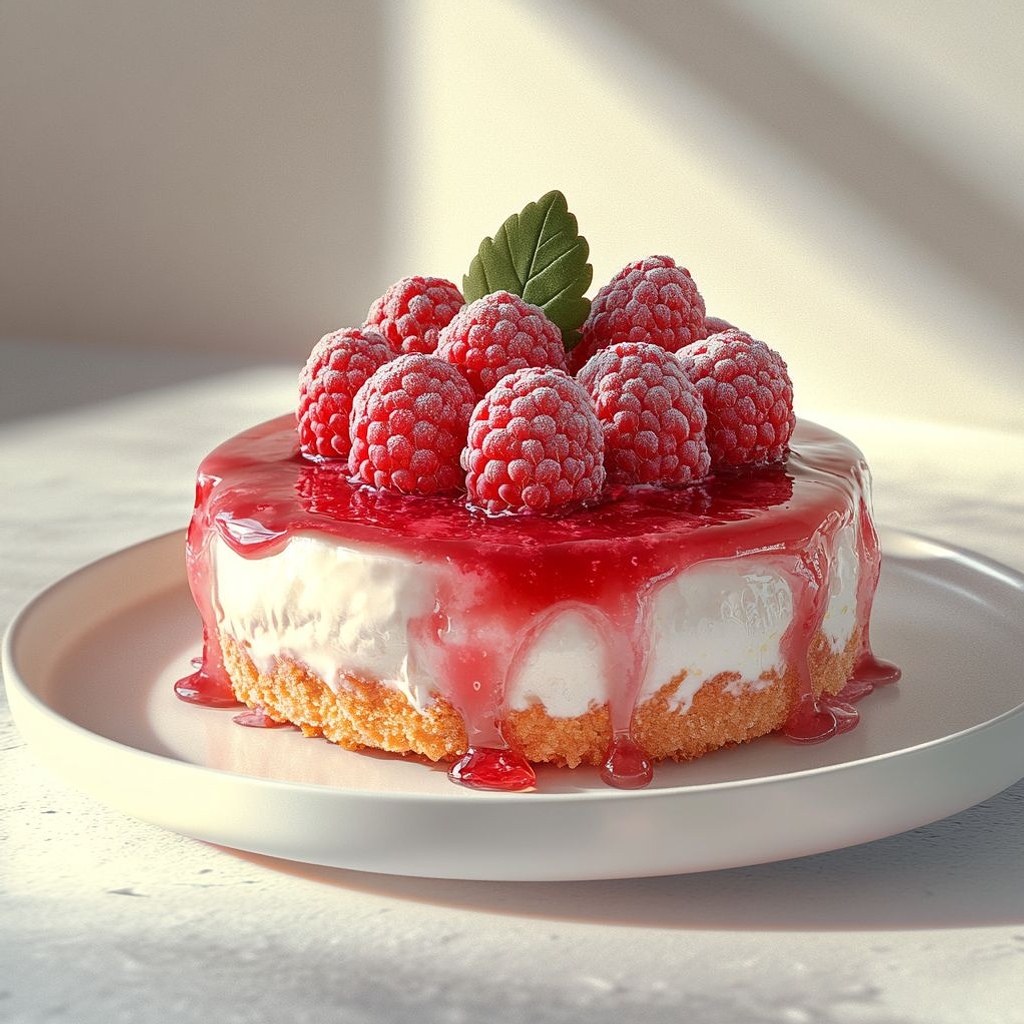
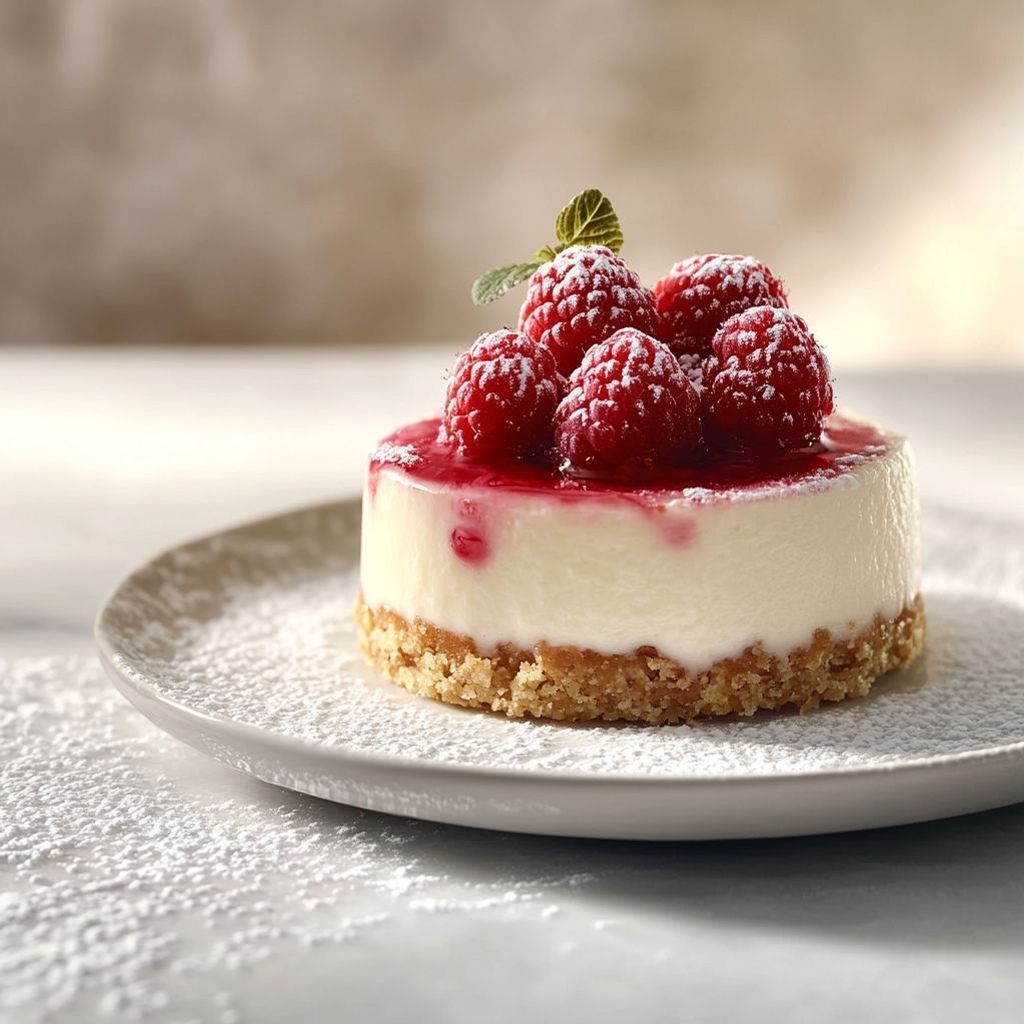
    – Fresh berries for serving (optional)
    → Fresh berries add brightness, acidity, and color contrast that complements the soft crumb of the torta soffice. Rinse gently and pat dry; cut larger berries as needed and serve on the side or scattered over slices for a vibrant presentation.
    – Chocolate chips (optional)
    → Chocolate chips introduce pockets of melted chocolate and a comforting contrast to the light crumb. Fold them in gently at the end so they distribute evenly without sinking too much; use good quality chips (semi-sweet or dark) so they don’t overpower the delicate vanilla aroma.

Instructions

  • Preheat your oven to 350°F (175°C) and grease an 8-inch (20 cm) round cake pan; line the bottom with a circle of parchment and lightly flour the sides, or dust with flour for extra security.
    → This preparation ensures the delicate torta soffice releases cleanly and bakes evenly without sticking, yielding a smooth exterior for clean slicing.
  • In a large mixing bowl, beat the 4 large eggs and 140 g granulated sugar on high speed until the mixture is pale, thick, and falls from the whisk in glossy ribbons (about 5–7 minutes by hand or 3–4 minutes with an electric mixer).
    → The volume and structure come from aerating the eggs and sugar, which creates the light, airy crumb characteristic of this cake; avoid overbeating after adding flour to preserve that air.
  • Sift 200 g all-purpose flour (or 00 flour), 1 teaspoon baking powder, and 1 pinch salt together into a separate bowl; set aside.
    → Sifting distributes leavening evenly and breaks up any lumps, ensuring a tender, uniform crumb without dense pockets.
  • Warm 120 ml milk to lukewarm (about 35–40°C) and reserve; avoid overheating to prevent curdling and to keep a smooth emulsion with the other ingredients.
    → Lukewarm milk blends smoothly with the eggs and fat, helping to maintain the batter’s structure and prevent shock to the eggs.
  • Stir 1 teaspoon vanilla extract into the eggs-sugar mixture and, if using, fold in 1 tablespoon lemon zest to perfume the batter; whisk gently for about 15 seconds to distribute evenly.
    → Vanilla provides aroma and rounds sweetness; lemon zest adds brightness and a subtle acidity that complements the sponge.
  • Pour in the cooled melted 60 g unsalted butter in a slow, steady stream while whisking to emulsify and prevent the fat from separating.
    → Emulsification traps fat and air together for a smooth batter with a tender, rich crumb; add butter gradually to avoid curdling the mixture.
  • With the mixer on low or using a spatula, fold the dry ingredients into the wet in 2–3 additions, alternating with portions of the lukewarm milk, starting and ending with the flour, until the batter is just combined.
    → Gentle folding preserves the air previously incorporated and prevents toughness; stop as soon as no dry streaks remain for a light texture.
  • If you are using chocolate chips (optional), fold in 60 g to distribute pockets of melted chocolate without sinking; alternatively, for berries, fold in 50–80 g of fresh berries after the batter is just combined.
    → Add-ins provide flavor and texture; folding them in at the end minimizes disruption to the delicate structure and prevents uneven distribution.
  • Pour the batter into the prepared pan and smooth the top with a spatula; gently tap the pan on the counter once or twice to release any trapped air bubbles and ensure an even surface.
    → Leveling and degassing the batter helps the cake rise evenly and slice cleanly later.
  • Bake in the preheated oven for 25–30 minutes, or until the surface is pale golden and a toothpick inserted into the center comes out with a few moist crumbs.
    → The toothpick test confirms doneness without overbaking; avoid opening the oven door early to keep the batter from deflating.
  • Remove the pan from the oven and let it rest on a wire rack for 10–15 minutes; then run a knife around the edge and invert onto the rack to cool completely.
    → Gentle cooling prevents cracking and helps the crumb set so that the cake slices neatly.
  • Dust the cooled torta soffice with a light veil of powdered sugar just before serving, if desired.
    → Powdered sugar adds a touch of sweetness and a polished finish without altering the delicate texture.

Notes

“This classic Torta soffice classica is a tender, airy Italian sponge cake built with whisked whole eggs and sugar, yielding a light crumb and gentle sweetness. You can customize the flavor by adding lemon zest and vanilla, or swap in orange zest for a brighter note. Use room-temperature ingredients and fold the dry ingredients gently to preserve air; do not overmix after adding the flour. The batter should be smooth and pour slowly off a spoon; if it’s too stiff, loosen with a splash of milk. Bake in a preheated oven at about 175°C (350°F) for 25-35 minutes, or until a skewer inserted into the center comes out clean. Let the cake cool in the pan for about 10 minutes, then transfer to a wire rack to finish cooling. Dust with powdered sugar or serve with fresh berries for a simple finish. For a dairy-free version, substitute the melted butter with an equal amount of neutral oil and use dairy-free milk. If you need a gluten-free version, use a 1:1 gluten-free flour blend with 1/4 teaspoon xanthan gum per cup of flour and ensure all ingredients are certified gluten-free. To enhance aroma, add 1 teaspoon vanilla extract or a tablespoon of lemon zest to the batter. Always ensure your ingredients are fresh and measured precisely to achieve the classic light crumb.”

Tips

Consigli utili per Torta soffice classica

  • Uova a temperatura ambiente: porta le uova a circa 20-22°C prima di iniziare. Se sono fredde, immergile per 5-10 minuti in acqua tiepida, poi asciugale bene. Uova a temperatura ambiente favoriscono una montata più volumosa e una mollica leggera.
  • Tecnica di montatura: lavora le uova con lo zucchero fino a ottenere un composto chiaro, spumoso e che forma fili che cadono dalla frusta (la prova a vela). Questo passaggio crea l’aria necessaria per una torta soffice. Evita di montare troppo dopo aver aggiunto la farina.
  • Incorporare le polveri: setaccia insieme farina e lievito e aggiungili al composto a cucchiaiate, piegando delicatamente dall’alto verso il basso per mantenere l’aria intrappolata nel batters.
  • Latte e burro: scalda il latte a 35-40°C e fai raffreddare il burro fuso. Avere liquidi tiepidi e burro raffreddato aiuta a creare un’emulsione stabile e impedisce curdling o separazioni.
  • Aggiunta del burro: aggiungi il burro fuso a filo, mescolando o versando a filo mentre la miscela è in movimento. Un’emulsione ben fatta conferisce una mollica morbida e uniforme.
  • Scelta della farina: usa farina 00 per una torta più soffice o farina 00/all-purpose se preferisci una struttura leggermente più robusta. Misura con bilancia per precisione e evita di lavorare troppo una volta aggiunta la farina.
  • Aromi e scorze: la vaniglia è classica, ma puoi utilizzare scorza di limone (o arancia) per un freschezza extra. Grattugia la scorza finemente e incorporala all’inizio con lo zucchero; se usi scorza, lascia riposare 10-15 minuti per esaltarne gli oli aromatici.
  • Sale: una presa di sale valorizza i sapori e bilancia la dolcezza. Se usi burro salato, diminuisci o ometti il sale.
  • Preparazione della teglia: oliata e infarinata o foderata con carta forno, preferibilmente stampo rotondo da 20-22 cm. Assicurati che i bordi siano ben presenti per una stratificazione uniforme dell’impasto.
  • Cottura: usa il forno statico, posiziona lo stampo al centro e preriscaldalo. Evita di aprire lo sportello nelle prime fasi per non far collassare l’impasto; se la superficie si scurisce troppo, copri con un foglio di alluminio. Verifica la cottura con uno stecchino: deve uscire pulito o con briciole asciutte.
  • Raffreddamento e conservazione: lascia intiepidire nello stampo per 10-15 minuti, poi sforma e raffredda su una griglia. Conserva la torta in contenitore ermetico a temperatura ambiente per 2-3 giorni, o refrigerala per 4-5 giorni. Puoi anche congelare le fette ben sigillate.
  • Varianti e arricchimenti: aggiungi gocce di cioccolato, frutti di bosco o scorza di limone all’ultimo terzo dell’impasto per varietà di gusto. Per una presentazione diversa, spolvera con zucchero a velo prima di servire o accompagna con una salsa di frutti di bosco.
  • Sostituzioni per diete: per una versione senza lattosio, usa latte di mandorla o avena non zuccherato e burro vegetale o olio neutro al posto del burro. La texture cambierà leggermente, ma il risultato sarà comunque soffice.

FAQ

Che cosa è la Torta soffice classica?

È un dolce semplice e morbido, con una mollica soffice e umida. È la base perfetta per varianti al limone, al cacao o farcite con crema. Si prepara con pochi ingredienti comuni come uova, zucchero, farina, latte e burro (o olio).

Quali ingredienti servono per la Torta soffice classica?

Ingredienti base (per una tortiera di circa 22–24 cm):

  • 4 uova grandi
  • 150 g di zucchero
  • 120 g di farina 00 (o farina debole)
  • 60 g di burro fuso raffreddato (o olio neutro)
  • 60 ml di latte
  • 1 cucchiaino di lievito per dolci
  • Un pizzico di sale e un aroma a piacere (vaniglia, scorza di limone)
Qual è la base di dosi tipiche?

Una base comune è: uova 4, zucchero 150 g, farina 120 g, burro fuso 60 g, latte 60 ml, lievito per dolci 1 cucchiaino, sale e aroma. Queste proporzioni producono una torta soffice senza essere troppo compatta.

Posso fare senza burro? Quali alternative usare?

Sì. Puoi sostituire il burro con olio neutro (girellando 1:1) o con yogurt/olio di cocco per una versione più leggera. Se usi olio, la torta potrebbe risultare leggermente più umida.

Posso prepararla in anticipo? Conservazione?

Sì. Si conserva bene a temperatura ambiente, coperta, per 2–3 giorni. In frigorifero dura 4–5 giorni. Per conservarla più a lungo, avvolgila bene e congelala tagliata a porzioni; scongelala a temperatura ambiente.

Quali utensili servono?

Stampo rotondo da 22–24 cm, carta forno, ciotola capiente, fruste elettriche o a mano, setaccio, spatola, mestolo per mescolare, e eventualmente una griglia per far raffreddare.

Come si prepara l’impasto? Passaggi base

Procedimento tipico:

  • Preriscalda il forno a 170–180°C (statico).
  • Imburra e infarina una tortiera o rivestila con carta forno.
  • In una ciotola, monta le uova con lo zucchero finché diventano chiare e spumose.
  • Aggiungi miele/trucco di aroma (vaniglia) e mescola. Incorpora la farina setacciata con il lievito, alternando con il latte e il burro fuso raffreddato.
  • Unisci delicatamente dal basso verso l’alto fino ad avere un impasto omogeneo.
  • Versa nello stampo e cuoci per circa 25–35 minuti, controllando con uno stecchino.
  • Lascia raffreddare nello stampo 10 minuti, poi trasferisci su una griglia.
Perché la torta potrebbe non lievitare bene? Problemi comuni

Cause frequenti: lievito non attivo o scaduto, forno troppo basso, mescolamento eccessivo dopo l’aggiunta della farina, uova troppo fredde, stampo troppo grande o troppo piccolo, o mancanza di aria durante la montatura. Assicurati che il lievito sia fresco, mescola delicatamente e non aprire il forno durante i primi 20 minuti.

Posso variare aromi o aggiunte?

Certo. Alcune varianti popolari includono:

  • Scorza e succo di limone o arancia
  • Aroma di vaniglia o rum
  • Cacao in polvere per una versione al cioccolato
  • Gocce di cioccolato o scorze di agrumi
  • Frutta secca o crema al centro per farcire

Introduction / Hook

Imagine stepping into a sunlit kitchen where the breeze carries the scent of citrus, oregano, and warm olive oil. Ciambelle pollo greco unfolds on the stove like a small festival of sound and color: rings of golden crust, a delicate crackle as the dough meets heat, and the soft, savory center releasing a rush of juicy chicken aromatics. This dish is a celebration of two culinary worlds colliding in a single, joyful bite: the rustic charm of Italian ciambelle—those comforting ring-shaped breads and pastries—meets the sun-drenched, herb-laden flavors of the Greek table. It’s not just a recipe; it’s a memory made edible. As you bite through the crisp exterior, you hear the sigh of dough yielding to a succulent interior, scented with garlic, oregano, lemon, and a whisper of feta. The aroma invites everyone to gather: a casual weeknight supper that feels like a festive gathering, a weekend treat that tastes like a holiday. The first bite carries a balance of brightness and warmth, a little crunch followed by a tender, almost pillowy bite, and the lingering kiss of Mediterranean herbs that makes you smile from the inside out.

The idea behind Ciambelle pollo greco is to capture the essence of a Greek tzatziki-friendly, herb-forward chicken preparation and present it in the playful, approachable form of a ring-shaped pastry or bread. The crust is baked or fried to a delicate, honey-gold finish that holds its structure while giving way to a juicy interior studded with olive oils, citrus zest, and a chorus of aromatics. It’s a dish that invites conversations—about family memories, travel stories, and the joy of bright, balanced flavors. Whether you’re gathering friends for a casual night in, feeding a hungry family after a long day, or planning a memorable centerpiece for a tapas-style spread, Ciambelle pollo greco delivers not just sustenance but an experience.

In every bite, you’ll sense the marriage of two Mediterranean traditions: the Italian love affair with dough rings, which provide a comforting, forgiving canvas, and the Greek palette, which embraces bold herbs, citrus lift, and the tang of local dairy. The result is a dish that feels both familiar and adventurous—the best of both worlds wrapped into a single, shareable bite. It’s as much about memory-making as it is about flavor: the sizzle of hot oil, the glint of a lemon on a plate, the soft hum of a room full of people who are delighted to pause, nibble, and swap stories.

As you prepare to make Ciambelle pollo greco, you’ll notice how it invites creativity without overwhelming your kitchen. The concept is flexible—you can adjust herbs, citrus, and dairy accents to suit your pantry or dietary preferences, all while maintaining that core Greek-Italian fusion that makes the dish sing. The result is a versatile centerpiece that works beautifully as an appetizer for a crowd, a comforting main in a casual weeknight dinner, or a show-stopping plate for a small, joyful celebration.

The Story Behind the Dish

The tale of Ciambelle pollo greco begins in the sunlit lanes where Italian bakery traditions mingle with Greek tavern culture. Imagine a family traveling along the coast of the Ionian Sea, stopping at a bustling market where the scent of orange blossoms, garlic, and fresh herbs fills the air. A grandmother, renowned for her soft, forgiving ciambelle dough, crosses paths with a chef who honors the Greek table with oregano, lemon, dill, and feta—the flavors that define the region’s comfort foods. They trade stories and techniques: how to coax tenderness from dough, how to balance bright acidity with a creamy, salty note, and how to present a dish that feels both familiar and exciting.

In this culinary crossroads, they co-create a dish that breathes life into a classic Italian shape—the ciambella, a ring-shaped form that evokes celebration and togetherness—while embedding the soul of Greek cuisine. The dough becomes a versatile vessel that can cradle a savory filling or become a light, airy crust that yields to a juicy interior. The filling is inspired by Greek flavors: a chorus of garlic, oregano, lemon zest, olive oil, and crumbly feta that hints at the sea air and hillside vineyards. It’s a dish that speaks of shared meals, of tavern tables and kitchen counters where cousins laugh, where recipes travel as easily as stories, and where the ring shape serves as a playful reminder to come back to the table again and again.

Over time, Ciambelle pollo greco found a home in the idea that cooking is a dialogue between places. A dish can carry the memory of a summer in Santorini and the comfort of a grandmother’s Sunday bake. It can be adapted to reflect what’s fresh in the market or what a family loves to eat any night of the week. The ring, after all, is symbolic: unity, continuity, and the idea that a good meal should always bring people together in a circle of conversation, laughter, and shared bites.

Why You’ll Love This Recipe

  • Brings together two Mediterranean classics: the comforting form of ciambelle and the bright, herb-forward flavors of Greek cuisine.
  • Versatile and crowd-pleasing — perfect as an appetizer, a weeknight main, or a party finger food.
  • Layered flavors that are accessible and doable with pantry staples—no exotic ingredients required.
  • Textural contrast that excites the senses: a crisp exterior with a juicy, flavorful interior.
  • Adaptable to dietary preferences (lighter, dairy-friendly, gluten-conscious options) without sacrificing flavor.
  • Audibly impressive presentation: the ring shape catches the eye and invites dipping and sharing.

This dish isn’t just about eating well; it’s about savoring the experience of cooking that feels both comforting and adventurous. It rewards you with a satisfying, well-rounded bite and leaves room for curiosity—about how changing a single herb or dairy accent can tilt the flavor profile toward brighter citrus notes or deeper, cheesier richness. It’s a recipe that invites improvisation and personal touch, making it as much your story as it is the story of the dish.

Flavor Profile & Texture

The flavor profile of Ciambelle pollo greco is a chorus of brightness, salt, and warmth. The crust offers a gentle crunch and a toasty aroma, a result of dough meeting hot oil or oven heat until it develops a honey-gold sheen. Inside, the chicken delivers succulence—tender, juicy, and infused with aromatic notes. The presence of feta adds a creamy, tangy saltiness that balances the lemon zest and garlic, while oregano and dill weave herbal, almost meadow-like perfume throughout. A hint of olive oil ties everything together, glistening the surface and carrying the herbs through every bite.

Citrus brightness—primarily lemon—brightens the dish without dominating, providing a clean contrast to the savory depth of the meat and dairy. Garlic lends a familiar warmth, while oregano contributes a Mediterranean sweetness that doesn’t overwhelm the palate. If you choose to add a yogurt component, it can introduce a creamy tang that echoes tzatziki, but the core remains: a savory, aromatic, and satisfying bite that feels both rustic and refined.

Texture-wise, Ciambelle pollo greco moves from crisp to tender with ease. The exterior crackles slightly as you bite, giving way to a moist interior where the chicken’s juices mingle with herbs and a whisper of feta. When done well, each ring feels light on the bite, with enough structure to hold its shape for sharing, yet soft enough to yield to a fork or to the muted pressure of teeth. The interplay between crust and center, along with the herbal-sour-salty balance, creates a multi-sensory experience that makes this dish memorable beyond the plate.

Occasions & Pairings

Ciambelle pollo greco shines in a range of occasions, from casual weeknight dinners to festive gatherings. It’s a playful centerpiece for a Mediterranean-inspired buffet, a tapas spread, or a shared table with friends and family. Its ring shape makes it naturally shareable and visually appealing on a communal platter. Because the flavor profile is bright and accessible, it pairs beautifully with a variety of sides and drinks.

  • Pairings: a crisp Greek salad with cucumbers, tomatoes, olives, and feta; roasted vegetables; lemony rice or herbed quinoa; and a simple cucumber-dill yogurt sauce or tzatziki for dipping.
  • Drinks: a chilled white wine such as Assyrtiko or Pinot Grigio, a light rosé, or a citrus-forward sparkling water with a splash of lemon or orange for non-alcoholic options.
  • Desserts: a light lemony baklava-inspired bite or a honeyed yogurt dessert to echo the dairy and citrus notes.

For holiday tables, this dish can be plated as a finger-food centerpiece with lemon wedges and olive oil drizzle. For weeknights, pair with a simple cucumber salad and a yogurt-lemon sauce to keep the flavors bright without adding complexity. It also works well as a brunch or late-afternoon snack—imagine a sunlit table, friends chatting, and rings of golden goodness making the rounds.

Tips, Variations & Substitutions

The beauty of Ciambelle pollo greco lies in its adaptability. Here are ideas to tailor the dish to your kitchen, dietary needs, and taste preferences:

  • Herb and citrus swaps: If you don’t have oregano, try marjoram or thyme. For a brighter note, increase lemon zest or add a touch of orange zest for sweetness.
  • Dairy variations: Use feta crumbles for a salty bite, or substitute a milder cheese like ricotta folded with a bit of yogurt to create a creamy interior element.
  • Make it vegan or vegetarian: Substitute finely shredded mushrooms or chopped artichokes with a plant-based protein or a chickpea-based “meat” crumble to mimic the texture and savoriness. Use a dairy-free feta alternative or sun-dried tomato and herb filling for color and depth.
  • Gluten-free adaptation: Use a gluten-free flour blend or almond flour in the dough ring to preserve the light, airy texture while accommodating gluten sensitivities.
  • Spice it up: A pinch of red pepper flakes or Aleppo pepper can add a gentle heat that complements the lemon and feta without overpowering the dish.
  • Herb-forward twist: Add chopped parsley and dill to brighten the filling and echo Greek flavors even more distinctly.
  • Make-ahead: Shape the rings and refrigerate them on parchment-lined trays for up to a day. Bring to room temperature before cooking for best texture.

If you’re preparing for a crowd, consider making a few different fillings—one more lemony and herb-forward, another with a feta-olive riff, and perhaps a dairy-free version. The rings will still present beautifully and allow guests to choose their preferred profile.

Storage & Make-Ahead Ideas

Leftovers, if you’re lucky enough to have them, benefit from proper storage and gentle reheating. For best results:

  • Storage: Once cooled, store Ciambelle pollo greco in an airtight container in the refrigerator for up to 3 days. If possible, keep the rings separated to maintain their crispness on reheat.
  • Freezing: Freeze cooked rings on a parchment-lined tray, then transfer to a freezer-safe bag for up to 1 month. Reheat in a 350°F (175°C) oven until warmed through and crust is re-crisped.
  • Reheating tips: Recrisp in the oven or an air fryer rather than microwaving, which can soften the crust. If using the microwave, finish with a quick hot-sesh in a hot skillet to recapture some texture.
  • Make-ahead strategy: Prepare the dough or the filling in advance and keep refrigerated. Assemble and finish cooking before serving to ensure the most appealing texture and aroma.

Fun Facts & Trivia (Optional)

– The ciambelle shape has long symbolized unity and continuity in Italian culinary culture, often associated with festive occasions and family gatherings. Rings are inclusive by design, inviting everyone to the table.

– Greek flavor elements—oregano, dill, lemon, olive oil, and feta—are reflected in countless coastal dishes across the Mediterranean. This fusion recipe is a celebration of how regional ingredients can travel and transform when placed into a beloved structure from another cuisine.

– If you’re curious about similar rings in other cultures, think of savory doughnuts or bread rings found in Middle Eastern and Balkan cuisines, where herbs and dairy often play a central role in the flavor profile. Ciambelle pollo greco sits at the intersection of these culinary conversations, offering a familiar comfort with an adventurous twist.

Ingredients

Dough/Base

  • – 3 cups all-purpose flour (bread flour works for a chewier crumb)
    → Purpose: provides the framework and gluten structure for the ciambelle, giving elasticity and shape. Preparation: whisk with salt to distribute evenly, then gradually combine with the yeast mixture to form a soft dough. Tips: if you’re aiming for a lighter crumb, you can substitute up to 1 cup of flour with a gluten-free 1:1 blend, but the texture will differ; avoid overworking the dough to prevent toughness.
  • – 1 packet active dry yeast (2 1/4 tsp)
    → Purpose: leavening agent that makes the dough rise, creating a light, airy interior suitable for ring-shaped breads. Preparation: bloom in warm water (about 110°F/43°C) with a pinch of sugar until foamy (5–10 minutes). Tips: if it doesn’t foam, the yeast may be dead; use fresh yeast and confirm water isn’t too hot, which can kill the yeast.
  • – 1 cup warm water (110°F / 43°C)
    → Purpose: hydrates the dough and activates the yeast; helps develop a supple, workable dough. Preparation: warm to a comfortable touch; do not use boiling-hot water. Tips: adjust by adding small amounts of water if the dough feels dry, or a little flour if it’s too sticky during mixing.
  • – 2 tablespoons extra-virgin olive oil
    → Purpose: adds moisture, tenderness, and Mediterranean flavor; aids in dough handling. Preparation: whisk into the wet ingredients and incorporate during kneading. Tips: use a good-quality EVOO for richer flavor; oil helps keep the dough from sticking and improves crumb texture.
  • – 1 tablespoon sugar
    → Purpose: feeds the yeast for a good rise and promotes browning; mild sweetness pairs nicely with feta. Preparation: dissolve in the warm water with the yeast. Tips: brown sugar will impart a deeper color and slight molasses note; adjust to taste.
  • – 1 teaspoon fine salt
    → Purpose: enhances flavor and strengthens gluten structure; balances the filling. Preparation: add with the flour before hydrating. Tips: distribute evenly to avoid direct contact with yeast; salt can slow fermentation if not mixed well.
  • – 1/4 cup Greek yogurt (full-fat)
    → Purpose: adds moisture, tenderness, and a subtle tang that complements feta and olives. Preparation: whisk into the wet ingredients or blend with water before mixing with flour. Tips: use full-fat yogurt for richer crumb; dairy-free yogurt can be substituted but may change texture slightly.

Filling

  • – 2 cups cooked chicken, finely chopped
    → Purpose: main protein filling that provides savoriness and texture to the ciambelle. Preparation: use cooled, cooked chicken; chop into small, uniform pieces. Tips: for the best bite, avoid over-processing; you can pulse briefly for a finer texture if desired.
  • – 1/2 cup feta cheese, crumbled
    → Purpose: salty, tangy Greek cheese that adds creaminess and crumbly texture. Preparation: crumble from block rather than precrumbled to better control saltiness. Tips: adjust overall salt by reducing added salt if feta is very salty.
  • – 1/4 cup Kalamata olives, pitted and chopped
    → Purpose: briny, fruity Mediterranean note that complements the chicken and cheese. Preparation: pit and finely chop. Tips: rinse briefly if very salty; substitute green olives if Kalamata aren’t available.
  • – 1 small red onion, finely minced
    → Purpose: adds sweetness, aroma, and moisture to the filling. Preparation: mince finely; optional to soak in ice water for a few minutes to mellow sharpness. Tips: drain well before mixing to avoid soggy dough rings.
  • – 2 cloves garlic, minced
    → Purpose: aromatic depth and savory backbone. Preparation: mince finely; for milder garlic, sauté briefly in olive oil with the onion before mixing. Tips: fresh garlic has the strongest flavor; adjust according to taste.
  • – 1 teaspoon dried oregano
    → Purpose: classic Greek herb that delivers the signature flavor. Preparation: stir into the filling. Tips: if you have fresh oregano, you can use 1 tablespoon chopped instead of dried for a brighter aroma.
  • – 1/2 teaspoon dried dill
    → Purpose: herbal note that complements yogurt and lemon; adds brightness. Preparation: mix into filling. Tips: fresh dill may be used as a substitute; use about 1–2 tablespoons chopped if fresh is preferred.
  • – 1 tablespoon lemon juice
    → Purpose: acidity to balance richness and bring a fresh, zesty note. Preparation: squeeze fresh; seeds removed. Tips: a touch of lemon zest can boost fragrance if desired but keep to 1 teaspoon to avoid overpowering the filling.
  • – 1 tablespoon olive oil
    → Purpose: moisture and helps blend the filling into a cohesive mixture. Preparation: drizzle over filling ingredients and mix well. Tips: extra-virgin olive oil enriches flavor; use a neutral oil if you want a milder taste.
  • – Fresh pepper to taste
    → Purpose: rounds out the seasoning with a touch of heat and aroma. Preparation: freshly grind over the mixture. Tips: consider the saltiness of feta and olives; start with a small amount and adjust.

Coating & Finish

  • – 2 tablespoons sesame seeds
    → Purpose: optional exterior coating to provide a subtle crunch and appealing appearance. Preparation: lightly press seeds onto the formed rings before baking. Tips: toasted sesame seeds offer more pronounced flavor; ensure even coverage for a uniform crust.
  • – 1 beaten egg (for brushing, optional)
    → Purpose: acts as an egg wash to seal seams and give a glossy, golden finish during baking. Preparation: whisk until smooth; brush lightly on the exterior of each ring. Tips: avoid pooling wash in the inner ring to prevent soggy centers; for a vegan version, brush with olive oil instead.
  • – 1 teaspoon lemon zest (optional)
    → Purpose: bright citrus aroma that enhances the Greek profile at the finish. Preparation: zest over the rings just before baking using a microplane. Tips: avoid the white pith for a clean lemon note; use sparingly if you’re sensitive to citrus.

Instructions

  • Bloom the yeast in warm water: in a small bowl, combine 1/4 cup warm water (110°F/43°C) with 2 1/4 teaspoons active dry yeast and 1 tablespoon sugar; stir to dissolve and let stand 5–10 minutes until the mixture is foamy.
    → Foaming indicates active yeast and readiness to leaven the dough; if no foam forms within 10 minutes, discard and start with fresh yeast and ensure the water is not hotter than 115°F/46°C, which can kill the yeast.
  • Whisk the flour and salt together: in a large bowl, sift or whisk 3 cups all-purpose flour with 1 teaspoon fine salt until evenly distributed.
    → Even distribution of salt with flour ensures gluten development proceeds smoothly and flavor is balanced throughout the dough.
  • Prepare the wet base: in a separate bowl, whisk together the remaining 3/4 cup warm water, 1/4 cup Greek yogurt, and 2 tablespoons extra-virgin olive oil until smooth.
    → This wet base hydrates the flour, contributes tenderness from the yogurt, and the oil improves dough handling and crumb softness.
  • Combine wet and dry components to form a soft dough: pour the foamy yeast mixture into the wet base, then gradually fold in the flour mixture to form a soft, cohesive dough; use a spatula to bring in flour from the sides as needed.
    → Gradual incorporation prevents dry pockets and ensures even hydration; aim for a smooth, slightly tacky dough that passes the windowpane test when stretched.
  • Knead until smooth and elastic: turn the dough onto a lightly floured surface and knead for 8–10 minutes, adding only small amounts of flour if necessary to prevent sticking; you should be able to stretch a thin edge without tearing.
    → Gluten development from kneading gives the ciambelle structure and chew; the dough should spring back slightly when pressed.
  • Ferment the dough: place the dough in a lightly oiled bowl, cover with plastic wrap or a damp towel, and let rise in a warm, draft-free place until doubled in size, about 60–90 minutes.
    → Proper fermentation builds gas pockets that create a light crumb and enhances flavor; avoid overproofing which can weaken the dough’s structure.
  • Prepare the filling: while the dough ferments, in a large bowl combine 2 cups cooked chicken (finely chopped), 1/2 cup feta cheese (crumbled), 1/4 cup Kalamata olives (pitted and chopped), 1 small red onion (finely minced), 2 cloves garlic (minced), 1 teaspoon dried oregano, 1/2 teaspoon dried dill, 1 tablespoon lemon juice, 1 tablespoon olive oil, and fresh pepper to taste; mix until evenly distributed.
    → Chilling or resting the filling briefly helps meld flavors; ensure chicken is cooled so it won’t melt or make the dough soggy when filling.
  • Divide and pre-shape the dough: punch down the risen dough to release gas, then divide it into 12 equal portions and shape each into a smooth ball; keep the dough balls covered to prevent surface drying.
    → Even portions ensure uniform ring size and baking; covering preserves moisture on the surface for easier shaping.
  • Roll and fill the rings: for each dough portion, roll into an 8–10 inch long strip, lay a line of filling down the center, fold the sides over to enclose the filling, pinch and seal the edges well, and gently join the ends to form a circular ring; space rings on a parchment-lined baking sheet.
    → Rolling creates a stable pocket for the filling, proper sealing prevents leakage, and forming a ring yields the classic ciambelle silhouette suitable for Greek-inspired stuffing.
  • Finish with glaze and seeds: brush the formed rings with beaten egg and press sesame seeds onto the outer surface; if desired, grate a little lemon zest over the tops just before baking.
    → The egg wash gives a glossy, golden finish and helps sesame adhere; zest adds a bright citrus note that complements the feta and olives.
  • Proof the shaped rings: preheat the oven to 375°F (190°C) and let the rings proof on the sheet for 20–40 minutes in a warm place until noticeably puffed.
    → Final proof ensures a light, airy interior after baking; avoid over-proofing which can cause a collapsed center in the hot oven.
  • Bake until golden and cooked through: bake on the middle rack for 22–28 minutes, rotating the sheet halfway for even browning; test doneness by a deep golden crust and an internal temperature around 190°F (88°C).
    → Even browning signals thorough cooking; a thermometer confirms that the filling and dough are fully cooked without being underdone or dry.
  • Cool and rest before serving: remove the ciambelle from the oven, transfer to a wire rack, and let cool 10–15 minutes before serving; this allows the steam to escape and the crumb to set.
    → Resting prevents a gummy interior and makes slicing or biting into the rings easier while preserving structure.

Notes

These Ciambelle pollo greco are a savory, Mediterranean-inspired ring loaf filled with lemony feta, olives, and tender chicken. The yogurt in the dough adds moisture and tenderness, while the feta and olives give a bright, briny character that pairs beautifully with oregano and dill in the filling. For best results, ensure the yeast is active and the dough rises until doubled; handle it gently to keep the crumb light and airy, and seal the seams well when shaping to prevent filling from leaking during baking.

  • Make-ahead: prepare the dough through the first rise, then refrigerate the dough and filling separately. Bring to room temperature before shaping and baking for the best rise and texture.
  • Yeast readiness: proof the yeast in warm water (about 110°F/43°C) with a pinch of sugar until foamy (5–10 minutes). If it doesn’t foam, start with fresh yeast and re-check the water temperature to avoid killing the yeast.
  • Dough handling: if the dough feels too sticky, lightly flour your hands and work surface, but avoid over-flouring which can lead to a denser crumb. Add flour gradually as needed to maintain a soft, tacky dough.
  • Filling prep: cool the chicken and finely chop, then mix with feta, olives, onion, garlic, oregano, dill, lemon juice, olive oil, and pepper. Taste and adjust salt carefully, considering the saltiness of feta and olives.
  • Shaping: divide the dough, roll into portions, fill with a portion of the filling, and seal to form rings. Pinch the seams firmly to prevent the filling from seeping out during baking. Optionally brush with a beaten egg for a glossy finish and sprinkle sesame seeds for extra crunch.
  • Finish and aroma: a little lemon zest brushed on top just before baking adds a fresh citrus aroma that enhances the Greek profile.
  • Baking guidance: bake until the rings are golden and the crust is set and crisp at the edges. If using an egg wash, avoid pooling inside the inner ring to prevent soggy centers.
  • Make-ahead and freezing: cooled rings can be stored in an airtight container for 2–3 days. Freeze unbaked rings on a tray, then transfer to a bag; bake from frozen, adding a few extra minutes. You can also freeze baked rings and reheat gently to preserve moisture.
  • Variations: swap Kalamata olives for green olives if preferred, or add roasted peppers, spinach, or sun-dried tomatoes to the filling. For a lighter version, substitute part of the feta with a lower-fat cheese, understanding it may alter texture.
  • Serving ideas: serve warm with a dollop of Greek yogurt or tzatziki and a squeeze of lemon; pair with a simple cucumber-tenned salad and a crisp white wine for a complete Greek-inspired meal.

Tips

Tips for Ciambelle Pollo Greco

  • Dough handling: The dough should be soft and tacky but not sticky. If it sticks to your hands, sprinkling a little flour or oil on your palms helps. If it’s too dry, add water a teaspoon at a time until it comes together; if too sticky, rest for 5–10 minutes and knead again with lightly oiled hands.
  • Yeast activation: Bloom the yeast in warm water (not hot) with a pinch of sugar until foamy. If it doesn’t foam after 10 minutes, discard and start with fresh yeast—the dough won’t rise properly otherwise.
  • Gluten development: Knead until the dough is smooth and elastic. Perform a windowpane test by stretching a small piece between your fingers; you should be able to thin it without it tearing. If it tears easily, give it a few more minutes of kneading and resting.
  • Flavor integration: The yogurt adds tenderness and tang; ensure it’s fully incorporated into the wet mix before adding flour. Use whole-fat yogurt for a richer crumb; dairy-free yogurt can be used but may alter texture slightly.
  • Filling prep: Let the chicken cool completely before mixing with feta, olives, and onions to prevent the dough from getting soggy. Drain excess moisture from onions; pat olives dry to avoid releasing too much brine into the filling.
  • Salt balance: Feta and olives are salty; taste the filling before adding extra salt. If feta is very salty, reduce added salt in the dough or filling to prevent over-seasoning.
  • Herb and citrus tuning: Dried oregano and dill bring classic Greek notes. If you have fresh oregano, use about 1 tablespoon chopped and 1–2 teaspoons fresh dill for a brighter aroma. A small amount of lemon zest can elevate scent without overpowering the filling.
  • Shaping technique: Roll the dough into a long rope, then cut into uniform pieces. Shape each piece into a ring by joining the ends with a touch of water and pinching to seal. For even cooking, flatten slightly to maintain uniform thickness and create a stable ring shape.
  • Sealing and moisture: Lightly brush the seams with water or a little olive oil to help seals hold during baking. If you’re using an egg wash, apply sparingly to avoid pooling inside the ring which can make the center soggy.
  • Coating and finish: Sesame seeds provide a pleasant crunch and look. If you prefer a vegan option, brush with olive oil instead of egg wash and skip the seeds or use chia seeds for texture. Toast seeds briefly for deeper flavor before pressing onto dough.
  • Baking and browning: Position rings on a parchment-lined tray for easy handling and even browning. Bake until the exterior is golden and the filling is heated through; if the tops brown too quickly, loosely tent with foil to prevent burning.
  • Make-ahead and storage: The dough can be fermented in the fridge overnight to deepen flavor. Assemble and fill the rings, then refrigerate; bake them from cold for a slower, more developed rise. Leftovers refrigerate well for a couple of days; reheat gently to preserve tenderness.
  • Variations and substitutions: If gluten isn’t available, you can try a gluten-free 1:1 blend, but expect a different crumb and texture. You can also swap Kalamata olives for green olives if preferred, or add a handful of chopped fresh parsley for color and brightness.
  • Serving ideas: Serve warm with a light dollop of yogurt or tzatziki on the side and lemon wedges for squeezing. A simple Greek salad complements the filling without overpowering the flavors.

FAQ

Cos’è Ciambelle pollo greco?

Una ricetta salata che propone ciambelle (anelli di impasto) riempite o farcite con un ripieno di pollo condito in stile greco: pollo cotto con cipolla, aglio, origano, scorza e succo di limone, feta e magari olive, racchiuse in ciambelle soffici da cuocere al forno o fritte. Perfette come antipasto o piatto principale.

Quali ingredienti servono?
  • Impasto: 300 g farina 00, 1 cucchiaio zucchero, 1 cucchiaino lievito di birra secco, 180 ml acqua tiepida, 2 cucchiai olio extravergine d’oliva, ½ cucchiaino sale
  • Ripieno pollo greco: 300 g pollo (petto), 1 cipolla piccola, 1 spicchio d’aglio, 1 cucchiaino origano secco, scorza e succo di 1 limone, 100 g feta, olive nere (facoltativo), olio d’oliva, sale e pepe
  • Per rifinire: olio per friggere o per spennellare, semi di sesamo o papavero (facoltativi)
Quante porzioni rende e tempi di preparazione?

Con queste quantità si ottengono circa 12 ciambelle. Tempo di preparazione totale: circa 60–90 minuti (lievitazione inclusa). Tempo di cottura: 12–15 minuti se fritte; 18–22 minuti se cotte al forno a 190°C.

Come si prepara l’impasto e la farcitura?

Procedimento generale:
– Impasto: sciogli il lievito in acqua tiepida con un pizzico di zucchero, unisci la farina, l’olio e il sale. Impasta finché è liscio ed elastico. Lascia lievitare finché raddoppia di volume.
– Ripieno: rosola cipolla e aglio in un filo d’olio, aggiungi pollo tagliato a pezzi e cuoci finché è ben cotto. Aggiungi origano, scorza e succo di limone, sale e pepe. Spezzetta la feta e, se vuoi, unisci olive tritate.

Posso fare delle varianti per diete particolari?

Sì. Varianti comuni includono:
– Senza glutine: usa una miscela di farine senza glutine con lievito adeguato.
– Senza latticini: ometti la feta o sostituiscila con formaggio vegano o una crema di mandorle.
– Versione leggera: riduci la quantità di olio e preferisci la cottura al forno.

Si possono cuocere al forno o fritti?

Entrambe le modalità funzionano. Per croccantezza superiore, friggi in olio caldo (170–180°C) per 3–4 minuti e lascia asciugare su carta assorbente. Per una versione più leggera, cuoci al forno su teglia leggermente unta a 190°C per 18–22 minuti, girando a metà cottura.

Come conservare gli avanzi e come riscaldarli?

Conserva in frigorifero, coperti, fino a 2 giorni. Per riscaldarli: in forno a 180°C per 6–8 minuti o in microonde per 30–60 secondi. Evita di lasciare a temperatura ambiente per più di 2 ore.

Quali errori comuni evitare?

Possibili errori: impasto troppo compatto o troppo idratato (non lievita bene); farcia troppo bagnata che fa fuoriuscire il ripieno durante la cottura; chiusura non sigillata bene che provoca perdite di ripieno; cuocere troppo a lungo la farcia o le ciambelle diventano secche o, al contrario, crude al centro.

Quali abbinamenti o varianti di gusto consigli?

Abbinamenti classici: tzatziki, insalata greca, limone a spicchi, olive nere. Varianti di sapore: aggiungere menta o aneto, sostituire feta con formaggio di capra, oppure includere peperoncino per una versione piccante. Puoi anche aggiungere pomodori secchi tritati o spinaci al ripieno.

Introducción: un bocado que despierta los sentidos

Imagina una mesa soleada, risas en el aire y el irresistible crujir de una corteza caramelizada que cede al primer mordisco. Este Pollo BBQ con patate arrosto es una invitación a una experiencia culinaria que parece sencilla y audaz a la vez: una pieza de pollo jugosa y ahumada cubierta por una capa de sabores profundos, acompañada de patatas doradas que estallan en cada bocado con notas de hierbas y aceites que liberan su dulzura natural. La magia está en el equilibrio entre lo tierno y lo crujiente: una piel que cruje al morder, un interior que se deshilacha con suavidad, y patatas que, por dentro, conservan su cremosidad, mientras por fuera se vuelven irresistiblemente crujientes. Este plato no necesita una elaboración rebuscada para brillar; es la clase de comida que convierte una cena cualquiera en una celebración. Sus aromas, que combinan humo suave, ajo tostado, mimbres de limón y un toque ahumado de la parrilla, te llaman desde la cocina sin pedir permiso. Si buscas una cena que combine confort y un ligero aire de festividad, este Pollo BBQ con patate arrosto es la respuesta. Es, al fin y al cabo, comida que se come con los ojos antes de entrar por la garganta: colores cálidos, brillos dorados y una presencia que invita a sentarse y disfrutar sin prisas. Prepárate para una experiencia que recuerda a las barbacoas de verano, a los asaderos de domingo y a los desayunos tardíos que se convierten en comidas compartidas. Cada bocado promete una memoria de sabor que quedará grabada en la mesa de tu casa, lista para repetirse cuando quieras envolver a tu familia y a tus amigos en un abrazo culinario que se siente como casa.

The Story Behind the Dish

Este plato nace en la encrucijada de tradiciones: la cocina de asados que se disfruta al aire libre y la sencillez reconfortante de una buena cena familiar. En muchas culturas —desde los patios soleados de América Latina hasta las trattorias de la cuenca del Mediterráneo— el pollo se transforma en una estrella cuando se le agrega humo y una capa de glaseado. La idea de reunir pollo y patatas en una misma bandeja es, de hecho, una celebración de la simplicidad y la abundancia; dos ingredientes que pueden brillar por sí solos, pero que, cuando se juntan, se elevan mutuamente. A nivel histórico, el asado de aves con acompañamientos aromáticos tiene raíces profundas en tradiciones de reunión comunitaria: cada familia aporta su toque, cada región imprime su carácter con hierbas, especias y métodos de cocción, y el resultado es una sinfonía de aromas que convoca a la memoria y al deseo de compartir. El uso del término “patate arrosto” añade un toque de herencia mediterránea a la experiencia: una alusión a las patatas asadas que, enteras o troceadas, se doran con el aceite de oliva, el ajo y las hierbas, absorbiendo el calor del horno o de la parrilla hasta volverse deliciosamente crujientes por fuera y tiernas por dentro. Este plato, por tanto, viaja entre continentes y tradiciones, tomando lo mejor de cada una para presentar una comida que se siente como un viaje corto sin salir de casa. Es el tipo de receta que se cuenta con un vaso de vino o una cerveza fría a un costado, mientras el aroma invita a detenerse, respirar hondo y dejar que el cuerpo se rinda ante el placer sencillo de una comida bien hecha.

Por qué te encantará esta receta

  • Comodidad y sabor en una sola bandeja: pollo tierno y patatas crujientes que se cocinan juntos, reduciendo tiempos y lavando menos utensilios.
  • Versatilidad de cocción: ideal para horno o parrilla, lo que te permite adaptar la receta a lo que tengas a mano o a la temporada.
  • Equilibrio perfecto entre dulce y salado: notas ahumadas, toques de ajo y hierbas que se funden con la riqueza del pollo y la suavidad de las patatas.
  • Apto para reuniones y noches en familia: una cena que se disfruta en comunidad, con una presentación bonita y colores que invitan a compartir.
  • Fácil de personalizar: admite variaciones de sabor, desde un toque cítrico y herbáceo hasta una versión más picante o dulce, para adaptarse a distintos paladares.
  • Con ingredientes familiares y accesibles: no necesitas técnicas complicadas ni ingredientes raros; el resultado es reconfortante y memorable.

Perfil de sabor y textura

La experiencia sensorial de este Pollo BBQ con patate arrosto es un juego de contrastes que se conjugan para crear un sabor complejo sin esfuerzo. La piel del pollo, cuando se cocina con una capa de glaseado o especias, desarrolla una corteza dorada que cruje al primer mordisco. Justo debajo, el interior permanece jugoso y tierno, gracias a una cocción cuidadosa que evita el reseco. El humo suave aporta una nota terrosa y ligeramente dulce, que se equilibra con la acidez suave si hay un toque de limón o vinagre en la salsa o adobo. En las patatas arrosto, la superficie recibe el calor directo hasta formar una capa crujiente y dorada—un exterior dorado y fragante que oculta un corazón jugoso y cremoso. El aceite o la grasa que se usa para asarlas ayuda a que cada trozo desarrolle una capa de sabor caramizada, mientras que las hierbas aportan frescura y una fragancia que recuerda a la cocina casera de verano. En conjunto, obtienes un plato donde cada mordisco ofrece un abanico de sensaciones: el calor ahumado del pollo, la fragancia aromática de las hierbas, el acento punzante del ajo tostado y la suavidad reconfortante de las patatas recién horneadas. Es una experiencia que se siente a la vista, se escucha en el crujido y se saborea con una cadencia que invita a la conversación, la risa y la repetición de la primera porción.

Ocasiones & Maridajes

Este plato brilla en una variedad de escenarios. Es perfecto para una cena de semana en casa cuando quieres algo que sea delicioso pero sin complicaciones, y se adapta muy bien a reuniones informales donde nadie quiere pasar horas en la cocina. También funciona para barbacoas de fin de semana, desayunos tardíos que se convierten en almuerzos o cenas, o para cuando recibes a amigos que llegan con hambre después de un día de excursión. En cuanto a maridajes, piensa en bebidas que complementen el carácter ahumado y el perfil clásico de la comida reconfortante: una cerveza rubia o una lager fresca para equilibrar la grasa y realzar la crocancia, o un vino tinto ligero o un rosado seco que no opaque la sutileza de las patatas y la jugosidad del pollo. Si prefieres algo sin alcohol, una limonada casera con un toque de menta o una aguas con toques de cítricos pueden ser aliados refrescantes. Para completar la mesa, acompaña con una ensalada verde crujiente, pan artesanal para recoger los jugos de la bandeja y quizá una salsa de yogur con hierbas para aportar una nota cremosa y fresca. Este plato, en definitiva, invita a una experiencia social cálida y relajada, donde la comida sirve como hilo conductor para la conversación, la risa y la conexión entre personas.

Consejos, Variaciones & Sustituciones

Consejos prácticos

  • Para lograr patatas arrosto más crujientes, seca bien las patatas tras cortarlas y asegúrate de distribuirlas en una sola capa para que el calor circule uniformemente.
  • Si el pollo parece dorarse demasiado rápido, cubre ligeramente con papel de aluminio durante la cocción para evitar que se queme la piel mientras el interior se cocina a su ritmo.
  • Un toque de acidez, como jugo de limón o un chorrito de vinagre suave, puede realzar los sabores sin abrumarlos.

Variaciones de sabor

  • Toque dulce: añade una pizca de miel o jarabe de arce al glaseado para una capa glaseada con destellos de melaza y caramelo.
  • Con textura más picante: incorpora chiles secos o pimienta de cayena a la mezcla de especias para un golpecito cálido y reconfortante.
  • Herbáceo y cítrico: añade romero o tomillo fresco con ralladura de limón para un perfil más fresco y aromático.

Sustituciones y opciones para diversas dietas

  • Versión vegana/vegetariana: sustituye el pollo por tofu firme o garbanzos asados y añade una capa de aceite aromático y especias para obtener un sabor similar con textura satisfactoria.
  • Sin gluten: la receta base ya es adecuada, pero evita utilizar salsas o adobos con gluten oculto; elige opciones etiquetadas sin gluten.
  • Colesterol reducido: utiliza pechuga de pollo sin piel para reducir la grasa saturada, y controla la cantidad de aceite utilizado para las patatas arrosto.

Storage & Make-Ahead Ideas

Este plato se presta a preparaciones con antelación y a una buena vida en la nevera. Si quieres planificar con anticipación, puedes marinar el pollo con anticipación y almacenar la mezcla en el refrigerador para que los sabores se concentren; sin embargo, evita marinar demasiado temprano para no perder la textura de la piel durante la cocción. Una vez cocido, el pollo y las patatas se mantienen bien en un recipiente hermético en el refrigerador durante 3–4 días. Para recalentar, puedes hacerlo con calor suave en el horno o en una sartén a fuego medio para que la piel recupere algo de su crujido. Si tienes que congelar, es mejor hacerlo en porciones separadas una vez cocidos; descongélalos en el refrigerador durante la noche y vuelve a calentarlos en horno o microondas con cuidado para conservar la jugosidad sin resecar. Un consejo práctico: conserva los jugos de cocción y úsalos como base para una salsa ligera que puedas verter sobre las porciones re calentadas, añadiendo un toque de acidez para equilibrar.

Datos curiosos & Trivia

El término barbacoa tiene raíces que se remontan a prácticas culinarias antiguas que se extendieron por varias culturas. En algunas regiones, la idea de cocinar lentamente una pieza de carne sobre brasas o humo se convirtió en una forma de celebrar, de reunir a la familia y de compartir historias. En el corazón de muchas cocinas, pollo y patatas han sido protagonistas de mesas festivas precisamente por su disponibilidad y por la capacidad de absorber sabores. Las patatas arrosto, con su nombre suave y evocador, son un recordatorio de las técnicas simples que pueden transformar ingredientes humildes en una experiencia gastronómica especial. Este plato, que fusiona el cariño del asado con la comodidad de una guarnición clásica, es un reflejo moderno de esa tradición: una receta que celebra tanto la rusticidad como la sofisticación de los sabores que se vuelven memorables gracias a su equilibrio y ejecución. También es un ejemplo de cómo una idea aparentemente simple puede convertirse en un lienzo para la creatividad: cada cocinero puede añadir su toque personal, y cada mesa puede convertir la receta en una historia propia para contar en cada cena.

Ingredients

Pollo BBQ

  • 4 muslos de pollo con piel (aprox. 1.2 kg)
    → El muslo con piel ofrece jugosidad y una capa crujiente al hornearse o asarse. Secar ligeramente la piel con papel de cocina antes de marinar ayuda a que la salsa se adhiera mejor y a lograr un dorado uniforme durante la cocción.
  • 1 taza de salsa BBQ (240 ml)
    → Base de sabor y formación de glaseado. Elige una salsa de BBQ con equilibrio entre tomate, humo y dulzor; si la usas casera, ajusta el contenido de sal y azúcar para evitar que quede demasiado salada o dulce. Marinar con parte de la salsa realza el sabor y la cohesión de la capa externa.
  • 2 cucharadas de miel
    → Aporta brillo y un toque de dulzor al glaseado, ayudando a caramelizar la superficie. Mantén la cocción a temperatura moderada para evitar que se queme; aplica en las últimas etapas de cocción para obtener un acabado brillante.
  • 2 dientes de ajo picados
    → Aportan aroma y profundidad al marinado. Pueden ser triturados o rallados para liberar más sabor; para un sabor más suave, sofríelos ligeramente en el aceite antes de mezclar con la salsa.
  • 1 cucharada de aceite de oliva
    → Ayuda a distribuir el marinado de manera uniforme y facilita que la piel quede crujiente durante el horneado o asado. Usa aceite de oliva extra virgen para un sabor más intenso.
  • 1 cucharadita de pimentón dulce
    → Aporta color y un ligero toque ahumado sin picante. Si prefieres más humo, usa pimentón ahumado en lugar del dulce, ajustando la cantidad para evitar un sabor demasiado marcado.
  • 1/2 cucharadita de comino molido
    → Añade notas cálidas y terrosas que complementan la salsa BBQ. Combínalo con el pimentón para un perfil de sabor más completo; úsalo con moderación para que no opaque el sabor de la salsa.
  • Sal y pimienta negra al gusto
    → Realzan el sabor de todo el conjunto. Ten en cuenta que la salsa BBQ ya puede contener sal; ajusta la sal adicional después de mezclar con la salsa para evitar salinidad excesiva.

Patatas asadas

  • 1.5–2 kg de patatas medianas, cortadas en cuartos o gajos uniformes
    → Trozos de tamaño similar aseguran una cocción pareja y dorado uniforme. Las patatas Yukon Gold o rojas funcionan bien por su buena textura al asarse.
  • 3 cucharadas de aceite de oliva
    → Cierra y crujiente la superficie de las patatas; concentra el sabor y ayuda a distribuir los condimentos de manera homogénea. Usa aceite de oliva de buena calidad para obtener un mejor aroma y color.
  • 2 dientes de ajo picados
    → Aporta sabor aromático a las patatas. Puedes mezclar con las patatas en la bandeja para una distribución uniforme o triturarlos y frotarlos con las patatas antes de hornear para un sabor más intenso.
  • 1 cucharadita de romero seco (o 2 ramitas de romero fresco)
    → Proporciona un aroma campestre y elegante. Si usas romero fresco, retíralo antes de servir para evitar fibras largas entre los dientes; si es seco, espolvoréalo uniformemente para una cocción homogénea.
  • 1/2 cucharadita de tomillo seco
    → Complemento herbáceo suave que realza el sabor terroso de las patatas. Combina bien con el romero y el ajo, sin dominar el plato.
  • Sal y pimienta negra al gusto
    → Condimenta las patatas para realzar su sabor natural. Agrega sal al gusto tras mezclar con aceite y hierbas para distribuir igualitariamente.

Guarnición y acabado

  • Perejil fresco picado para espolvorear (opcional)
    → Añade color y un toque de frescura al plato al servir. Picar justo antes de servir para conservar sabor y aroma.
  • Limón en rodajas para servir (opcional)
    → Un toque ácido que equilibra la grasa del pollo y aporta frescura. Sirve a un lado para quien quiera añadir un poco de acidez según su gusto.

Instructions

  • Precalienta el horno a 200°C (390–400°F) y forra una bandeja amplia con papel de hornear o engrásala ligeramente para que la piel del pollo se dore uniformemente sin pegarse.
    → Este paso crea una superficie antiadherente y una base de calor constante para un dorado parejo tanto del pollo como de las patatas.
  • Mezcla la marinada de forma homogénea: en un tazón grande combina 1 taza de salsa BBQ, 2 cucharadas de miel, 2 dientes de ajo picados, 1 cucharada de aceite de oliva, 1 cucharadita de pimentón dulce y 1/2 cucharadita de comino molido; añade sal y pimienta al gusto y bate hasta crear una salsa brillante y uniforme.
    → Esta emulsión aporta sabor, brillo y cohesión para un glaseado que se adherirá durante la cocción sin perder sus notas aromáticas.
  • Separa la marinada en dos porciones iguales y reserva una parte para glasear durante la cocción; marina el pollo con la otra mitad golpeando ligeramente la piel para que la salsa se adhiera mejor.
    → Compartir la marinada de esta forma evita que tengas que manipular el pollo con la salsa caliente y garantiza que el interior absorba sabor sin perder la textura de la piel.
  • Seca los muslos de pollo con papel de cocina para eliminar humedad superficial y así favorecer un dorado crujiente; unta la piel con la porción reservada de marinada para crear una capa inicial de sabor y color.
    → La piel seca evita que la grasa genere vapor excesivo, permitiendo que se caramelice mejor y se forme una capa glaseada atractiva.
  • Lava y corta las patatas en cuartos o gajos uniformes para garantizar cocción homogénea; repartir trozos similares evita que some se cocinen demasiado rápido o queden crujientes por fuera y crudos por dentro.
    → Trozos de tamaño uniforme facilitan un dorado parejo y una textura tierna por dentro.
  • En un bol grande, mezcla las patatas cortadas con 3 cucharadas de aceite de oliva, 2 dientes de ajo picados, 1 cucharadita de romero seco (o 2 ramitas de romero fresco), 1/2 cucharadita de tomillo seco y sal y pimienta al gusto; removér para que cada pieza quede cubierta de grasa y hierbas.
    → El aceite actúa como conductor de calor y las hierbas liberan aromas que impregnan las patatas durante la cocción.
  • Extiende las patatas sazonadas en una bandeja grande en una única capa para lograr contacto directo con el calor y obtener dorado y crujiente por igual.
    → Una distribución plana evita que los trozos se amontonen, lo que provoca vapor en lugar de dorado.
  • Coloca los muslos de pollo con la piel hacia arriba sobre las patatas en la bandeja; vierte el resto de la marinada sobre el pollo para que se adhiera y desarrolle un glaseado durante la cocción.
    → El contacto directo entre pollo y salsa permite que el azúcar de la miel caramelice y se forme una capa brillante.
  • Hornea a 200°C (400°F) durante 35–40 minutos sin abrir el horno con frecuencia para mantener una temperatura constante que favorezca un dorado uniforme.
    → Mantener el calor estable evita cocción desigual y ayuda a que la piel se torne crujiente y la carne se cocine de forma segura.
  • A mitad de la cocción, voltea las piezas de pollo y remueve ligeramente las patatas para asegurar que todos los lados reciban calor y se doran de forma homogénea.
    → Girar evita que una cara quede poco dorada y promueve un color uniforme en toda la bandeja.
  • Con aproximadamente 15–20 minutos restantes, cepilla la piel del pollo con la porción restante de marinada para reforzar el glaseado y fomentar un acabado brillante; repite la aplicación si es necesario para una capa más gruesa.
    → Glasear en los últimos minutos intensifica el sabor, añade brillo y crea una capa caramelizada que mejora la textura.
  • Verifica la cocción interna del pollo usando un termómetro; la temperatura debe alcanzar al menos 74°C (165°F) en la parte más gruesa del muslo y las patatas deben estar tiernas al pincharlas.
    → Alcanzar la temperatura segura garantiza que el pollo sea comestible y jugoso, mientras la patata esté cocida sin ser blanda.
  • Retira la bandeja del horno y deja reposar el pollo y las patatas 5–10 minutos antes de cortar para que los jugos se redistribuyan y el sabor se asiente.
    → El reposo es crucial para evitar jugos escapando al cortar y para obtener una textura más jugosa y consistente.
  • Espolvorea perejil fresco picado y sirve con rodajas de limón al lado para un toque de frescura y acidez que contrarresta la riqueza del plato.
    → El perejil añade color y aroma, mientras el limón aporta un contraste ácido que realza los sabores del pollo BBQ y las patatas.

Notes

Estos muslos de pollo BBQ con patatas asadas ofrecen jugosidad gracias a la piel y un glaseado brillante que se carameliza al hornearse. Marina el pollo con la salsa BBQ, miel y ajo picado, más una cucharada de aceite de oliva, al menos 30 minutos (idealmente 2-4 horas) para que la carne absorba sabor y la piel se adhiera mejor al glaseado. Para las patatas, corta en cuartos o gajos uniformes, mézclalos con el aceite de oliva, ajo, romero y tomillo, y espolvoréalos con sal y pimienta; reparte en una bandeja amplia para que se doren por igual. Hornea todo a temperatura alta (190-220°C) hasta que el pollo alcance una temperatura interna de 74°C y la piel esté dorada y crujiente; durante la cocción, baña el pollo con la salsa para formar una capa glaseada y, en los últimos 5-10 minutos, pincela con miel para un acabado brillante. Sirve con limón en rodajas y perejil picado para un toque de frescura; si necesitas que el plato sea libre de gluten, utiliza una salsa BBQ certificada sin gluten y revisa que el resto de ingredientes lo sean.

Tips

Selección y preparación del pollo

  • Seca bien la piel de los muslos con papel de cocina antes de marinar. Una piel seca se dorará y crujirá mejor durante la cocción.
  • Para un sabor más intenso, deja marinar el pollo en la nevera al menos 1–2 horas y, si puedes, toda la noche. Si tienes poco tiempo, una hora ya mejora mucho el sabor y la adherencia de la salsa.
  • Si al marinar te parece que falta cohesión en la capa externa, mezcla la salsa BBQ con la miel y el ajo picado para crear un glaseado uniforme que se adhiera mejor al pollo.

Glaseado, sabor y equilibrado

  • Antes de hornear, reserva un poco de salsa BBQ para pincelar durante la cocción y lograr un brillo uniforme sin que se queme la miel.
  • Para un gloss más intenso y equilibrado, añade un toque de ácido: unas gotas de limón o una pequeña cantidad de vinagre de manzana al glaseado.
  • Si la salsa BBQ casera es muy salada, reduce la sal en la marinada y prueba el sabor después de mezclar con la miel; ajusta con una pizca de azúcar si falta balance entre dulce y ácido.

Cocción y dorado

  • Precalienta el horno a temperatura moderada (aprox. 190–200°C) para favorecer dorado sin quemar la salsa. Hornear a una temperatura estable ayuda a que el glaseado se caramelice de forma uniforme.
  • Coloca las patatas y el pollo en una bandeja amplia para permitir una buena circulación de aire. Evita amontonar para obtener un dorado crujiente tanto de la piel como de las patatas.
  • Durante la cocción, gira las piezas de pollo a la mitad para un dorado homogéneo. A los últimos 5–10 minutos, pincela el pollo con el glaseado de miel para obtener brillo sin que se despegue.

Patatas asadas

  • Asegúrate de cortar las patatas en tamaños uniformes y secarlas ligeramente si están mojadas; esto favorece un dorado más parejo.
  • Extiéndelas en una sola capa sobre la bandeja y no las muevas de vez en cuando; voltea a mitad de cocción para alcanzar un dorado uniforme de todos los lados.
  • Si quieres más sabor, añade media cebolla cortada en gajos o una pizca extra de romero fresco al repartirlas en la bandeja.

Aromas y hierbas

  • El romero fresco aporta notas elegantes, pero retíralo antes de servir para evitar fibras difíciles; si usas romero seco, espolvoréalo uniformemente para una cocción homogénea.
  • El ajo en las patatas puede ser picado y mezclado con el aceite para distribuir mejor el aroma; para un sabor más suave, sofríe ligeramente el ajo en el aceite caliente antes de mezclar con las patatas.

Sal, seguridad y servicio

  • Ajusta la sal tras mezclar la salsa BBQ con el pollo para evitar que quede salado; recuerda que la salsa ya aporta sal.
  • Deja reposar el pollo 5–10 minutos tras salir del horno antes de cortar; esto ayuda a reabsorber jugos y facilita el corte limpio.
  • Guarda las sobras en un recipiente hermético en la nevera y consúmelas en 2–3 días. Recalienta lentamente para evitar resecar la carne.

Variaciones y sustituciones

  • Si no tienes miel, usa jarabe de arce o sirope de gran cantidad en menor intensidad; ajusta la acidez con un chorrito de limón.
  • Para un toque picante opcional, añade una pizca de pimentón picante o unas gotas de salsa picante al glaseado, teniendo en cuenta el equilibrio general de sabor.

FAQ

Quali sono gli ingredienti principali?

Ingredienti base per Pollo BBQ con patate arrosto:

  • Cosce di pollo con osso e pelle (o sovracosce)
  • Salsa BBQ (fatta in casa o confezionata)
  • Patate (preferibilmente rosse o Yukon Gold)
  • Olio d’oliva
  • Aglio
  • Rosmarino fresco o secco
  • Sale e pepe
  • Paprika dolce (opzionale paprika affumicata)
  • Cipolla in polvere e pepe nero
Quanto tempo richiede la preparazione?

Tempo stimato:

  • Preparazione: circa 15-20 minuti
  • Marinatura: 2-4 ore (opzionale ma consigliata)
  • Cottura: circa 35-45 minuti sul BBQ a calore moderato oppure in forno a 220°C, girando a metà
  • Riposo: 5-10 minuti prima di servire
Qual è la temperatura interna consigliata per il pollo?

La temperatura interna deve raggiungere circa 74-75°C (165°F) nel pezzo più spesso. Verifica con un termometro per carne vicino all’osso senza toccarlo per non ottenere letture fuorvianti.

Posso utilizzare un forno se non ho una griglia BBQ?

Sì. Preriscalda il forno a 220°C. Disponi pollo e patate su una teglia grande, spennella con la salsa BBQ e cuoci per 35-45 minuti, girando a metà cottura. Per una finitura lucida e croccante, attiva la funzione grill o passa gli ultimi 2-3 minuti sotto il grill del forno.

Come si preparano le patate arrosto?

Procedimento consigliato:

  • Taglia le patate a pezzi di circa 3-4 cm.
  • Opzionale: sbollentale 5-7 minuti per renderle morbide dentro.
  • Asciugale bene, poi mescola con olio d’oliva, sale, pepe, aglio tritato e rosmarino.
  • Distribuiscile su una teglia in uno strato unico (non sovraffollare).
  • Cuoci finché sono dorate e croccanti, girando a metà cottura.
Come posso variare la salsa BBQ?

Varianti suggerite:

  • Classica: ketchup o passata, aceto, zucchero di canna, senape, salsa Worcestershire
  • Piccante: aggiungi pepe di cayenna o peperoncino in polvere
  • Dolce: usa miele o sciroppo d’acero
  • Affumicata: paprika affumicata o qualche goccia di essenza affumicata
  • Leggera: dimezza la quantità di zucchero e diluisci con un po’ di succo di pomodoro
Quali strumenti sono utili per questa ricetta?

Strumenti consigliati:

  • Griglia BBQ o forno con funzione grill
  • Teglia da forno o placca alta
  • Pinze da cucina
  • Pennello per spennellare la salsa
  • Termometro per carne
  • Tagliere e coltello
Come ottenere patate croccanti e pollo saporito?

Consigli pratici:

  • Non sovraffollare la teglia: spazio sufficiente aiuta la doratura
  • Assicurati che patate e pollo siano asciutti prima di oliare
  • Rimuovi l’umidità in eccesso dalle patate, poi usa ampio olio
  • Cuoci in forno preriscaldato su teglia calda o in forno con calore alto
  • Spennella la salsa BBQ verso la fine della cottura per una glassa lucida
Come conservare gli avanzi?

Avanzi: conservare in frigorifero in contenitore chiuso per 3-4 giorni. Riscaldare in forno a 180°C finché sono ben caldi; la patata potrebbe perdere un po’ di croccantezza, ma resta gustosa. Evita di lasciare a temperatura ambiente troppo a lungo.

Posso preparare in anticipo o congelare?

Sì:

  • Marinare la carne in anticipo e conservarla in frigorifero, oppure congelare porzioni di pollo crudo marinate per 1-2 mesi (scongelare in frigorifero prima della cottura).
  • Le patate cotte non congelano bene: è meglio prepararle fresche al momento.
  • Se vuoi, congela solo la salsa BBQ fatta in casa per un paio di mesi.

Introduction / Hook

Imagine a bite-sized treat that tastes like a sun-drenched slice of blueberry cheesecake, but fits in your palm and travels with you wherever you go. Energy balls cheesecake ai mirtilli are not just a snack; they are a small, decadent moment of dessert-level joy without the fuss. In one glossy bite, you’ll feel the creamy tang of cheesecake meeting the bright lift of blueberries, all bound together by a satisfying chew and a delicate crumb that melts on the tongue. It’s a symphony of flavors and textures—cool, creamy, and subtly tart—wrapped in a portable form that whispers, “grab one more, it’s healthier than it looks—and gloriously indulgent.” As the aroma of blueberry wanders from the kitchen to the sunlit balcony, you’ll sense that you’re about to indulge without derailing the day. This is comfort, convenience, and a touch of nostalgia in a modern, no-bake package.

The Story Behind the Dish

No-bake treats have long traveled the globe as a practical solution for busy lives and spontaneous cravings. The energy ball, in particular, emerged from the desire to combine nutrition, portability, and pleasure in a single, grab-and-go bite. It’s a craft that grew as snack culture evolved—from pantry staples turned inventive, to tiny indulgences that could power a hike, a study session, or a busy afternoon. The cheesecake ai mirtilli variation draws on affectionate memories of summertime desserts: the first blueberries of the season, the cool, creamy tang of a classic cheesecake, and the simple joy of a handheld treat that doesn’t require utensils. This dish isn’t trying to impersonate a full cheesecake; it’s capturing its essence—the smooth, slightly tangy center and the fruity brightness—into an energy-dense, convenient format. The blueberry is more than a flavor note here; it’s a nod to the fruit’s long association with celebrations, harvests, and weekend baskets, lending a summery, vibrant color and a refreshing bite that cuts through richness with a crisp finish. As you bite in, you may recall picnics, kitchen counters dusted with flour from family baking sessions, and the comforting sense that a simple, well-balanced snack can still feel special.

Why You’ll Love This Recipe

  • Fast and no-bake: A delightful treat that comes together without turning on the oven, perfect for warm days or when you want a quick sweet fix.
  • Portability and portion control: The bite-sized form is ideal for lunchboxes, gym bags, purse pockets, or a desk drawer—no crumbs, no mess, just a ready-to-enjoy reward.
  • Balanced indulgence: A satisfying blend of creamy richness with fruity brightness, designed to satisfy cravings without tipping the scales.
  • Kid-friendly and family-friendly: Simple flavors that appeal to little taste buds while still feeling indulgent for adults.
  • Customizable for various diets: Easily adaptable to vegan, gluten-free, or dairy-free preferences with thoughtful ingredient swaps and substitutions.
  • Longer-lasting nutrition: A compact snack that can provide a quick energy lift when you need it—protein, fiber, and healthy fats come together for sustained satisfaction.

Flavor Profile & Texture

This blueberry cheesecake-inspired energy bite is a study in contrasts that harmonize beautifully. The exterior typically offers a light, slightly chewy crust-like texture—think a gentle bite with a subtle crumb that gives way to a creamy, velvety center. The creaminess evokes the classic cheesecake flavor, but the sweetness is balanced by a gentle tartness that mirrors the natural acidity of blueberries. The blueberry notes range from fresh and floral to subtly jammy, delivering a bright, fruity perfume that lingers on the palate. You may notice a whisper of vanilla and a hint of tang, which together create that quintessential cheesecake aura without veering into cake territory. The overall mouthfeel is luxurious yet approachable: a comforting, ever-so-slightly sticky finish that you’re happy to lick from your fingers (or wipe gently on a napkin) after every bite. The textures work in concert: a soft interior with a faintly crisp, delicate exterior that makes each bite feel like a mini dessert experience rather than a simple snack. The balance of richness and fruitiness makes this treat versatile—enjoyable as an afternoon lift, a post-workout reward, or a sweet ending to a light meal.

Occasions & Pairings

Energy balls cheesecake ai mirtilli shine in moments that call for something polished yet effortless. They are equally at home on a casual family snack board as they are at a more refined brunch table. Consider these occasions and pairing ideas:

  • Weeknight treat: A quick finish after dinner or a mid-evening pick-me-up that won’t derail your routine.
  • Picnics and on-the-go moments: A sturdy, handheld dessert that won’t crumble mid-journey and won’t require utensils.
  • Lunchbox-friendly indulgence: A small, satisfying end to a midday meal, helping to curb sweet cravings until dinner.
  • Special occasions with a casual vibe: A simple, elegant addition to dessert tables or party trays that feels thoughtful yet approachable.
  • Pairings:
    • Hot beverages: A bold espresso or a creamy latte can deepen the cheesecake flavors and contrast the brightness of the blueberries.
    • Cold drinks: A glass of sparkling water with a twist of lemon, or a light, fruit-forward white wine or a delicate dessert wine.
    • Accompaniments: A small dollop of yogurt or a spoonful of whipped cream on the side can echo the cheesecake vibe without adding heaviness.

Tips, Variations & Substitutions

The beauty of energy bites lies in their forgiving nature. While you won’t find a precise ingredient list here, you can imagine a few thoughtful directions to tailor the concept to your pantry, dietary needs, or flavor whims. Use these ideas to customize your blueberry cheesecake energy bites while preserving their core appeal.

  • Vegan and dairy-free: Seek dairy-free cream-cheese alternatives and use plant-based binding agents that mimic the creaminess. The resulting flavor remains indulgent and comparable to the classic cheesecake experience.
  • Gluten-free and grain-free options: If you’re avoiding gluten or grains, lean into alternatives that provide structure and chew without gluten. The texture can stay soft and satisfying, with the blueberry brightness shining through.
  • Nut-free or seed-based for allergies: Swap typical nuts or seeds with safe, allergy-friendly bases that still give you a satisfying bite and energy pull.
  • Flavor twists: While blueberries are central, you can explore other berry notes or citrus zest to vary brightness. A hint of lemon or orange zest can elevate the cheesecake impression without complicating the balance too much.
  • Sweetness control: Depending on your preferred level of sweetness, pick compatible natural sweeteners that align with your dietary goals. The key is to retain a gentle tang that echoes cheesecake without becoming overpowering.
  • Texture play: If you desire a crisper exterior, a brief chill after shaping or a light rolling in a fine, fragrant dusting (like a neutral-tiber or a zest) can add a delicate finish.
  • Make-ahead strategies: These bites generally keep well in the refrigerator for several days and freeze securely for longer storage. Consider freezing individual portions for truly grab-and-go convenience later.

Storage & Make-Ahead Ideas

Smart storage is part of the appeal of no-bake bites. To keep their texture and flavor at their best, consider these practical strategies:

  • Refrigeration: Store in an airtight container in the refrigerator. The chill helps the center stay luxuriously firm while maintaining a creamy feel when bitten into.
  • Separation for freshness: If you’re layering on a tray or stacking in a container, use parchment or a thin separator to prevent sticking. This keeps each bite pristine for a longer time.
  • Make-ahead planning: Assemble a batch in advance and portion it into convenient serving sizes. This is especially handy for busy weeks, workout days, or when you anticipate guests.
  • Freezing: Freeze individual bites on a tray before transferring to a freezer-safe bag or container. Frozen bites are handy for stocking up; thaw briefly at room temperature to regain their ideal texture.
  • Portion control: Pre-portioning helps with mindful eating and ensures consistent texture and sweetness across servings.

Fun Facts & Trivia (Optional)

Delightful little bites often carry little tidbits that add to their charm. Here are a few fun notes you might enjoy:

  • No-bake desserts became especially popular during summers and on hot days when turning on the oven was impractical, turning kitchens into creative laboratories of texture and flavor with minimal heat.
  • Blueberries are celebrated not only for their taste but also for their color, which can brighten any dessert and evoke a sense of freshness and vitality. They pair particularly well with creamy, tangy flavors that mimic the experience of cheesecake.
  • The idea of “energy” in energy bites comes from the combination of fats, proteins, and fibrous carbohydrates designed to provide a quick, satisfying lift. While not a meal replacement, they can be a thoughtful part of a balanced day when enjoyed in moderation.
  • Food culture often blends traditional flavors with modern convenience. Turning a classic cheesecake concept into a portable bite is a nod to that fusion—honoring beloved flavors while embracing on-the-go living.

Conclusion

Energy balls cheesecake ai mirtilli offer a delicious bridge between dessert indulgence and everyday practicality. They invite you to savor the nostalgic charm of cheesecake—without the fuss, and with the flexibility to fit your lifestyle. This is a treat that celebrates the best parts of fruit, creaminess, and a gentle, satisfying chew, all wrapped in a neat, portable package. Whether you’re planning a casual gathering, packing a lunchbox, or simply craving a moment of sweet happiness, these bites deliver with finesse. Remember, the magic is in the balance: the tang of blueberries meeting the creamy undertone, the sturdy bite that gives way to a creamy center, and the sense that a little indulgence can be both delightful and smart. Enjoy experimenting with textures, flavors, and twists, and let these little energy bites become a reliable favorite that you reach for again and again, season after season.

Ingredients

Energy Ball Base

  • 1 cup pitted Medjool dates, chopped
    → These dates act as the primary natural sweetener and binding agent, helping to hold the balls together without added sugar. For best texture, use soft, sticky Medjool dates. If your dates are a bit dry, soak them in warm water for 5–10 minutes, then drain well before measuring. Chopping before blending ensures a smooth, cohesive dough rather than a crumbly mix.
  • 1 cup raw cashews, soaked 2-4 hours, drained
    → Soaking softens the cashews to create a creamy, cheesecake-like base when blended. They provide a rich, dairy-free creaminess and help with binding. Drain thoroughly after soaking; pat dry if needed to prevent excess moisture. For a quicker option, you can use 1 cup store-bought cashew cream, but whole soaked cashews give more control over texture.
  • 1/2 cup gluten-free rolled oats
    → Oats add structure and a subtle chew to the energy balls, helping them hold together while adding fiber. If you want a smoother texture, pulse the oats in a blender to a coarse meal before mixing. Make sure they are certified gluten-free if gluten sensitivity is a concern.
  • 2 tablespoons coconut oil, melted
    → Coconut oil adds moisture and helps bind the mixture, giving the balls a glossy finish and a light richness reminiscent of cheesecake crust. Use melted liquid oil for even distribution; if you prefer a neutral fat, you can substitute refined almond oil or light tasting vegetable oil, though coconut oil also contributes a faint coconut note that complements the blueberry flavor.
  • 1 teaspoon pure vanilla extract
    → Vanilla enhances the overall sweetness and depth, tying together the date, cashew, and oat flavors. Use high-quality pure vanilla extract rather than imitation for best aroma. If you desire extra vanilla, you can add a pinch of vanilla bean powder for intensified flavor without added liquid.
  • Pinch of sea salt
    → Salt balances sweetness, heightens flavors, and improves the perception of blueberry and cheesecake notes. It also helps with the texture by tightening the dough slightly. For a more pronounced contrast, use coarse sea salt flakes and sprinkle lightly on the dough before rolling.

Blueberry Cheesecake Swirl

  • 1/2 cup raw cashews, soaked 2-4 hours, drained
    → Additional cashews in the swirl create a smooth, tangy cheesecake-like center when blended with lemon and a touch of lemon zest. Soak until soft so they blend completely; drain thoroughly. This layer adds authentic tang and creamy contrast to the oat-date base.
  • 2 tablespoons lemon juice (fresh)
    → Fresh lemon juice introduces a bright tang that mimics classic cheesecake. It also helps balance the sweetness from dates and blueberries. If you prefer a milder tang, reduce to 1 tablespoon. Avoid bottled juice if possible, as fresh preserves more nuanced citrus flavors.
  • 1 tablespoon maple syrup or honey
    → Provides gentle sweetness to the swirl; choose maple syrup for a vegan option or honey for a more mellow sweetness. Adjust to taste after blending; the aim is tangy creaminess, not overly sweet.
  • 1/2 cup blueberries, fresh or frozen
    → Blueberries supply the characteristic blueberry cheesecake flavor and color. If using frozen, thaw and drain well to prevent adding extra moisture to the mix. For a more intense color, you can blend half the berries into a puree and stir through the swirl while reserving the other half for chunks or design.

Optional Add-ins

  • 1/4 cup chopped nuts (e.g., almonds, walnuts, pecans)
    → Adds crunch and varying texture; choose a mix for more interest or stick to one nut for a clearer flavor. Chop finely so they distribute evenly and don’t overpower the dough. If toasting prior to mixing, do so lightly to bring out aroma but cool completely before folding in.
  • 2 tablespoons chia seeds or ground flax
    → Introduces a little extra binding and nutrition, helping the dough hold together and providing omega-3 fats and fiber. If using whole chia seeds, you may notice a bit of texture; ground flax will blend more smoothly. Increase liquid slightly if the mixture feels dry.
  • 1/4 cup unsweetened shredded coconut
    → Adds a light, tropical note and pleasant texture; toasting coconut lightly before folding in yields more pronounced aroma. If you want a smoother bite, pulse the coconut to a finer size or mix it with the oats instead of adding raw for more even distribution.
  • 1/4 cup mini dark chocolate chips (optional)
    → Creates little bursts of chocolate that pair well with blueberry cheesecake flavors. Use dairy-free chips if you need a vegan option. Fold in gently to prevent crushing the chips and to maintain a uniform dough; you can also sprinkle on top after rolling for a decorative finish.

Instructions

  • Soak the raw cashews for 2–4 hours in plenty of water, then drain thoroughly and pat dry; this softens the nuts to create a creamy, cheesecake-like base when blended.
    → Soaked cashews hydrate and become silky, essential for a smooth, dairy-free filling and cohesive texture in the energy balls.
  • If your Medjool dates are a bit dry, soak them in warm water for 5–10 minutes, then drain well before chopping; this plumps the fruit and improves binding so the dough comes together without crumbling.
    → Soft, plump dates blend smoothly and provide natural sweetness without added sugar.
  • Chop the pitted Medjool dates finely by hand or pulse briefly in a processor until they form a thick paste; this creates a uniform binding mass that distributes sweetness evenly.
    → Finely chopped dates minimize dry pockets and help the dough come together smoothly.
  • Measure the gluten-free rolled oats and, if you prefer a smoother texture, pulse them briefly in a blender to a coarse meal before mixing; this helps the dough bind and gives a gentle chew.
    → Oats add structure and chew; pulsing them adjusts texture to your preference.
  • Melt the coconut oil until fully liquid and smooth, either in a small saucepan over low heat or in 15–20 second bursts in the microwave; this ensures even distribution in the dough.
    → Liquid coconut oil blends evenly with the other ingredients, aiding binding and creating a glossy finish.
  • In a high-powered blender or food processor, blend the dates, soaked cashews, oats, melted coconut oil, vanilla extract, and a pinch of sea salt on high until the mixture forms a cohesive, sticky dough with no large crumbs.
    → Proper blending builds a smooth, uniform base that holds together when rolled into balls.
  • If the dough seems too dry to come together, add a teaspoon of water or a few drops of coconut oil at a time and blend briefly; continue until the dough forms a cohesive mass.
    → A small amount of liquid prevents cracking and ensures easy shaping without making the dough greasy.
  • Transfer the base dough to a bowl and fold in optional add-ins such as chopped nuts, chia seeds or flax, shredded coconut, or dairy-free chocolate chips; distribute evenly without overmixing to preserve texture.
    → Add-ins provide texture and nutrition; gentle folding avoids breaking down the dough’s cohesion.
  • In a separate blender, prepare the blueberry cheesecake swirl by blending 1/2 cup soaked cashews, 2 tablespoons fresh lemon juice, 1 tablespoon maple syrup (or honey), and 1/2 cup blueberries until creamy; for a smoother swirl, blend until very smooth, or leave a few small berry bits for texture.
    → This mixture gives the tangy cheesecake note and blueberry flavor that contrasts with the oat-based base.
  • Reserve a portion of the blueberries if you want extra visible specks in the swirl, and keep the rest ready for folding into the swirl or for decoration.
    → Reserved berries add pops of color and texture in the final appearance.
  • Gently portion the base dough and roll into round balls about 1 inch (2.5 cm) in diameter on a parchment-lined tray; keep your palms slightly damp to prevent sticking and maintain smooth spheres.
    → Uniform spheres ensure even chilling and a professional finish.
  • Create a small indentation in the center of each ball with your fingertip, spoon a small amount of the blueberry cheesecake swirl into the impression, then pinch the dough around to enclose the filling and roll back into a smooth ball.
    → Encasing the swirl yields a marbled center effect and prevents leakage during chilling.
  • Place the filled balls back on the parchment-lined tray and refrigerate for 1–2 hours, or until firm; chilling solidifies the fats (coconut oil and cashews) so the balls hold their shape.
    → Chill sets the structure, making the bites easy to handle and preventing squashing the swirl.
  • Optional: after chilling, roll the finished balls in extra shredded coconut, chopped nuts, or additional blueberries for decoration and added texture; press lightly to help adherence.
    → A decorative coating enhances texture and presentation while adding a complementary flavor note.
  • Store the blueberry cheesecake energy balls in an airtight container in the refrigerator for up to 1 week, or freeze for up to 1 month; thaw briefly in the fridge before serving.
    → Cold storage maintains firmness and freshness, preserving flavor and texture over time.

Notes

These gluten-free energy balls with blueberry cheesecake swirl are naturally sweetened with Medjool dates and creamy cashews, delivering a dairy-free cheesecake-like bite with no added sugar. For best texture, soak the cashews for 2–4 hours and drain well, and soften the dates in warm water if needed before blending. If you prefer a smoother base, pulse the gluten-free oats to a coarse meal. The lemony swirl comes from cashews blended with fresh lemon juice and a touch of maple syrup or honey to balance tartness; you can adjust the sweetness and tang to taste. Customize with chopped nuts, chia or flax, shredded coconut, and dairy-free chocolate chips for extra crunch and flavor. The bites freeze well—store them in an airtight container in the freezer for 1–3 months and thaw briefly before eating; refrigerate leftovers for up to a week. If gluten sensitivity is a concern, ensure all ingredients (especially oats) are certified gluten-free, and keep the blueberries either fresh or thawed well to avoid extra moisture in the swirl.

Tips

  • Soaking and texture: Ensure cashews are well softened (2–4 hours). If time is tight, soak in hot water for 15–20 minutes and drain completely before blending.
  • Dates quality: Use soft Medjool dates. If they’re a bit dry, soak 5–10 minutes, then drain well and pat dry to avoid a crumbly base.
  • Chopping vs blending: Chop dates before blending to achieve a smooth, cohesive dough rather than a crumbly mix. Scrape the sides of the blender frequently for an even texture.
  • Oats and gluten: Use certified gluten-free rolled oats to keep the recipe gluten-free. If you want a smoother bite, pulse oats briefly to a coarse meal before mixing.
  • Fat and binding: Melted coconut oil helps with moisture and shine. If you prefer a neutral fat, substitute refined almond oil or light-tasting vegetable oil, but note coconut aroma pairs well with blueberry.
  • Flavor depth: Use high-quality vanilla and a pinch of sea salt to intensify sweetness and balance acidity from the lemon and blueberries.
  • Blueberry swirl tang: Fresh lemon juice provides brightness; if you prefer milder tang, start with 1 tablespoon and adjust after blending. Don’t skip the lemon zest if you have it for extra zing.
  • Texture balancing: If the swirl is too thick, add a tiny splash of lemon juice or water. If it’s too loose, blend in a little more soaked cashews or chill the filling before swirling.
  • Blueberry handling: Thaw frozen blueberries completely and drain well to avoid excess moisture bleeding into the dough. Reserve some berries for chunky texture in the swirl.
  • Binding boosters: If the dough feels crumbly, add 1–2 teaspoons of cashew cream or a little extra date paste. For a firmer bite, refrigerate the rolled balls 20–30 minutes before serving.
  • Optional add-ins: Toast nuts lightly before folding in to enhance aroma; chopped dark chocolate chips should be folded gently to keep small chocolate pockets intact.
  • Nut-free option: If avoiding nuts, substitute with roasted seeds (pumpkin or sunflower) and add a touch more oats and dates to maintain binding.
  • Storage and freshness: Store in an airtight container in the fridge for up to 1 week, or freeze for up to 3 months. Thaw in the fridge or at room temperature for 15–20 minutes before eating.
  • Serving ideas: For extra flair, dust with cacao powder, drizzle with a little blueberry jam, or roll in crushed freeze-dried blueberries for color and extra blueberry punch.

FAQ

Che cosa sono le energy balls cheesecake ai mirtilli?

Sono palline dolci, no-bake, dal gusto cheesecake ai mirtilli. Si preparano con una base di datteri, noci/mandorle e fiocchi d’avena, arricchita da una crema al formaggio o crema vegetale al sapore di mirtilli, poi modellate e raffreddate in frigorifero.

Quali sono gli ingredienti principali?

Ingredienti tipici: datteri, noci o mandorle, fiocchi d’avena, crema di formaggio spalmabile (o crema vegana a base di anacardi), yogurt greco o yogurt vegetale, mirtilli, scorza di limone, vaniglia, dolcificante (miele o sciroppo d’acero) e un pizzico di sale.

È necessario cucinare qualcosa per questa ricetta?

No. Le energy balls cheesecake ai mirtilli si preparano a freddo e si fanno rassodare in frigorifero.

Come si preparano passo-passo?

Procedimento indicativo:

  • Frulla datteri e noci fino a ottenere una pasta appiccicosa.
  • Aggiungi fiocchi d’avena, scorza di limone, vaniglia e un pizzico di sale; mescola finché l’impasto è omogeneo.
  • Mescola la crema di formaggio (o crema vegetale) con dolcificante e un po’ di vaniglia in una ciotola.
  • Forma piccole palline con l’impasto di base; appiattiscile leggermente e aggiungi al centro una piccola quantità di crema al formaggio e qualche mirtillo; richiudi formando una pallina.
  • Riponi in frigorifero almeno 30–60 minuti prima di servire.
Quante palline si ottengono e quanto durano?

Dipende dalle dimensioni, in genere 12–16 palline da circa 20–25 g ciascuna. Conservazione: in frigorifero 3–5 giorni oppure congelate fino a 1–2 mesi.

Posso rendere la ricetta vegana o senza latticini?

Sì. Sostituisci la crema di formaggio con crema di anacardi o yogurt vegetale spalmabile, e usa miele o sciroppo d’acero come dolcificante. Puoi omettere anche il latte animale se presente nella crema.

Posso usare altri tipi di frutti di bosco al posto dei mirtilli?

Certamente. Fragole, lamponi o more funzionano bene e mantengono il sapore cheesecake-fruttato. Puoi anche aggiungere una combinazione di bacche.

Come ottenere la giusta consistenza dell’impasto?

Se l’impasto risulta secco, aggiungi poco latte vegetale o acqua fine: poche gocce alla volta. Se è troppo appiccicoso, metti l’impasto in frigorifero per 15–20 minuti o aggiungi un po’ di fiocchi d’avena per assorbire l’umidità.

È possibile una versione senza zuccheri aggiunti?

Sì. Usa datteri ben maturi come dolcificante principale e, se necessario, riduci o ometti il miele/sciroppo d’acero. Per una nota dolce naturale, puoi aumentare leggermente la quantità di mirtilli o aggiungere un pizzico di stevia naturale equivalente al tuo gusto.

Quali utensili servono?

Robot da cucina o frullatore per tritare gli ingredienti, ciotole, spatola, carta forno e un cucchiaio per modellare le palline. Per una presentazione finale, una griglia o un piatto da dessert.

Come posso presentarle al meglio?

Disponile su un piatto o in coppette singole; guarnisci con una scorza di limone grattugiata, qualche mirtillo fresco e una spolverata leggera di cacao o cocco grattugiato per un tocco decorativo.

Introduction / Hook

Close your eyes and imagine a spoon gliding through velvet. This is more than dessert; it’s a moment suspended between warmth and delight. Dessert cremoso invites you into a world where dairy sings softly, where sweetness is a graceful companion rather than a loud shout, and where texture becomes a language all its own. The first touch on the tongue is a whisper—silky, tender, and faintly glossy—like satin melting on a quiet afternoon. As it unfolds, you sense a nuanced balance: richness that acknowledges luxury, yet restraint that keeps the experience approachable for a weeknight treat or a celebratory finale. This dessert asks for nothing dramatic to shine, only the quiet confidence of cream, a touch of sweetness, and a canvas for your favorite flavor accents. It is the kind of dessert that transforms an ordinary moment into something memorable, a sensory pause that lingers long after the last spoonful. In its simplest form, dessert cremoso becomes a ritual of indulgence—soft enough to spoon with ease, substantial enough to feel satisfying, and endlessly adaptable to your mood, season, or pantry. The name itself—”dessert cremoso”—hints at a mood: creamy, comforting, and irresistibly smooth. Welcome to a dessert that invites you to slow down, to savor, and to discover new depth in what seems like a familiar, beloved texture.

The Story Behind the Dish

Every culture carries a version of the creamy finale that crowns a meal, and dessert cremoso is a celebration of those shared pleasures. Think of the Italian panna cotta with its glassy shimmer, the Spanish crema catalana with its delicate crust, the French crème légère that feels like whipped clouds, and the Latin American flan that glides wobbly and rich across the palate. This dish is a quiet synthesis of those traditions, a modern homage to the universal love of a dessert that glides, not sticks, on the tongue. The origin story is as comforting as the dish itself: in a sunlit kitchen perched on a hill, a home cook—perhaps a grandmother, perhaps a neighbor, perhaps you—grants milk and cream permission to mingle with vanilla, citrus zest, or a whisper of cocoa. A gentle thickener joins the party, not to overpower, but to hold the dream together. Over time, the recipe is passed along, adapted to different climates, royal to casual tables, and always inviting a little improvisation. A squeeze of lemon brightens the night, a dusting of cocoa deepens the memory, and a few berries offer a lively counterpoint. In this lineage, dessert cremoso becomes more than a dessert; it becomes a tradition you can customize, a canvas for celebration, and a comforting routine when life feels hurried. The story is not fixed; it evolves with the cook who revives it, the pantry at hand, and the flavor you crave in the moment.

Why You’ll Love This Recipe

  • Versatility that rewards improvisation: start with a creamy base and finish with your preferred flavor accents, whether vanilla, citrus, coffee, chocolate, or fruit.
  • Long finish, short effort: the dessert feels indulgent and luxurious, yet the hands-on time is approachable and forgiving, making it ideal for both weeknights and special occasions.
  • Make-ahead friendliness: this dessert can set in advance, allowing you to prepare a stunning finale without last-minute rush.
  • Silky texture that adapts to your mood: firm enough to hold a delicate slice or spoonable enough for dessert cups, it delivers a consistently creamy mouthfeel.
  • Customizable sweetness: you can dial in sweetness to suit any audience—from those who crave a gentle sweetness to those who love a more pronounced dessert profile.
  • Comforting nostalgia with a modern twist: while reminiscent of classic custards and creams, it embraces contemporary techniques and flavor pairings for a fresh take.
  • Kid-friendly, adult-approved: its gentle flavor profile makes it accessible to younger palates while evolving with bolder toppings for grown-ups.
  • Elegant presentation opportunities: the smooth surface and glassy sheen lend themselves to beautiful serving ideas—layered in透明 cups, topped with fruit, or finished with a glossy chocolate glaze.

Flavor Profile & Texture

At its heart, dessert cremoso is a study in contrast and harmony. The base offers a whisper of dairy richness—a blend of milk and cream that feels light on the tongue yet substantial enough to evoke indulgence. If vanilla plays the lead, you’ll notice a gentle orchestration of its warm, comforting perfume—a reminder of creamy custards and old-fashioned desserts enjoyed on cozy evenings. Introduce citrus zest for a lift: lemon or orange brings a bright, sunny acidity that keeps the sweetness from feeling cloying and adds a refreshing edge that cleanses the palate between bites.

When chocolate or coffee enters the scene, the texture remains impossibly smooth, but the flavor takes on a deeper, more intimate character. Dark chocolate lends a velvet, slightly bitter echo that pairs beautifully with a hint of vanilla, while coffee or espresso notes add a caramelized, roasted nuance that can be both comforting and sophisticated. If you opt for a fruit-forward approach, the creamy base becomes a stage for berries, stone fruits, or tropical treasures—each bite releasing a burst of acidity or sweetness that lifts the entire dish.

Texture-wise, dessert cremoso sits between a panna cotta’s gentle jiggle and a custard’s stable, spoon-friendly body. It’s a soft-set dream that holds its shape just enough to be elegant in presentation, yet yields easily to a spoon with a sigh. The mouthfeel is silky and luxurious, with a velvety coating that lingers. The finish can be long and satin-smooth, sometimes with a whisper of sweetness that feels like a fond memory returning. The technique behind the creaminess matters: a delicate balance of dairy, a patient set, and a light touch with thickeners to avoid a rubbery or chalky aftertaste. The result is a dessert that feels creamy, airy, and luxurious—an experience you’ll want to repeat again and again, adjusting the flavors to suit the season or the company you keep.

Occasions & Pairings

This dessert is the perfect closer for a wide range of gatherings. It shines as a finale to a casual dinner with friends, a refined end to a formal meal, or a comforting year-end treat when the weather turns cool. Its versatility makes it equally at home at weeknight dinners and weekend celebrations. For a dinner party, present individual servings in elegant coupe glasses or ramekins for a polished, shareable look. For a family meal, larger dishes or a shallow dish that’s easy to scoop from can create a warm, rustic vibe.

Pairings enrich the experience without overpowering the creamy base. Consider these ideas:
– Fresh berries or citrus segments to provide brightness and a contrasting texture.
– A light fruit coulis (raspberry, passion fruit, mango) drizzled over the top for color and acidity.
– A sprinkle of toasted nuts (walnuts, almonds, pistachios) for a gentle crunch and earthy aroma.
– A dusting of cocoa powder, espresso powder, or cinnamon to accentuate chocolate or spice notes.
– A crisp cookie or tuile on the side, offering a contrasting texture that complements the softness of the dessert.
– A sparkling dessert wine, Moscato, Prosecco, or a lightly brewed coffee to round out the sensory experience, depending on the chosen flavor profile.
For holidays or special occasions, you can elevate the presentation with decorative edible flowers, gold leaf accents, or a glossy fruit mirror that adds color and sophistication while enhancing the creamy base’s appeal.

Tips, Variations & Substitutions

  • Vegan and dairy-free version: swap dairy milk with almond, oat, or coconut milk and replace cream with a plant-based cream or coconut cream. Use a thickener like agar-agar or arrowroot to achieve a stable set while maintaining a creamy mouthfeel. You can also blend silken tofu with a splash of plant milk for a silkier texture if you want to keep the dessert airy and entirely plant-based.
  • Gluten-free considerations: this dish typically doesn’t rely on gluten-containing ingredients, but always check thickeners and flavorings. Cornstarch, arrowroot, or tapioca starch are gluten-free options for a smooth set.
  • Flavor variations: classic vanilla-citrus is timeless, but you can experiment with almond extract, miso-caramel for a savory-sweet intrigue, or a hint of espresso for a coffee-forward version. For a chocolatey twist, fold in finely melted dark chocolate or cocoa powder into the warm base before chilling.
  • Fruit-forward twists: swirl in a fruit puree (strawberry, raspberry, mango) before chilling, creating a marbled effect and a bright flavor note that pairs beautifully with the creamy base.
  • Lightened texture: to maintain creaminess while reducing fat, use a higher proportion of milk and a gentle thickener, ensuring you do not overcook the mixture, which can break the emulsion.
  • Texture play with toppings: a crisp tuile, brittle shards, or roasted nuts add a contrasting bite to the smoothness for an elevated finish.
  • Gelatin vs. agar-agar: gelatin yields a richer, more classic custard-like set, while agar-agar provides a firmer, vegan-friendly set that still feels luxurious. Use the appropriate amount and follow the recommended blooming or simmering steps for best results.
  • Make-ahead guidance: prepare the base and chill in individual serving glasses or molds up to 1 day ahead. If you’re layering flavors, assemble just before serving to keep distinct textures and colors.

Storage & Make-Ahead Ideas

Love a dessert you can prepare ahead? This creamy creation shines with that approach. After chilling until fully set, store it in the refrigerator, covered, for up to 3–4 days. Individual servings in clear glasses not only look elegant but also help you manage portions and keep surfaces pristine. If you plan to layer or glaze the dessert, it’s best to assemble the base a day ahead and add any toppings, sauces, or decorations right before serving to preserve texture and visual appeal.

Freezing a true custard-style crema can be tricky; some versions do freeze well if stabilized with the right amount of thickener, but the texture may change slightly after thawing. If you want to freeze, consider freezing in individual portions, then thaw slowly in the refrigerator and re-whip lightly or whisk to restore creaminess. For vegan or dairy-free versions using coconut cream or nut milks, freezing tends to alter texture more noticeably, so plan to serve fresh or refrigerate only for best results.

Make-ahead strategies by flavor: you can prepare a vanilla base ahead of time, then reserve flavor additions (citrus zest, espresso, fruit purée) separately and add just before serving. This keeps the dessert vibrant and ensures you always have a ready-made canvas for different menus or dietary needs.

Fun Facts & Trivia (Optional)

– The concept of creamy desserts spans cultures and culinary traditions—from the Italian panna cotta to the Spanish crema catalana and the French crème légère—each with its own approach to achieving that silky texture.

– The word crema in many Romance languages evokes creaminess and richness, a reminder that the appeal of a creamy finish is a shared human affection across continents.

– In pastry and dessert lore, the gentle art of thickening without breaking the cream is considered a mark of finesse. The science behind a smooth set—careful heat control, proper tempering, and mindful thickening—turns simple ingredients into a luxurious mouthfeel.

– Creamy desserts often rely on small amounts of stabilizers or thickeners to achieve that glossy, custard-like set. The choice of thickener—gelatin, agar-agar, cornstarch, or arrowroot—shapes not only texture but also dietary suitability and mouthfeel.

– A well-chilled dessert cremoso can feel almost weightless, yet its impact on the palate is lasting, which is why it pairs so beautifully with bright fruit, bitter chocolate, or a robust coffee.

Ingredients

Dessert cremoso

  • 2 cups whole milk

    → The base of the custard and the primary source of moisture and body. Use whole milk for a creamy texture; heat gently with the cream and chocolate, but do not boil to prevent scorching or curdling. For a lighter version, you can substitute part of the milk with a low-fat option, but the result will be less rich.
  • 1 cup heavy cream

    → Adds richness and silkiness to the custard, helping to create a smooth, spoonable texture. Warm with the milk (and chocolate) but avoid a full boil. If you prefer a lighter feel, you can reduce the amount slightly, but the cream is key for that velvety finish.
  • 150 g dark chocolate (70% cacao), finely chopped

    → Provides the dominant chocolate flavor and depth. Finely chop so it melts quickly and evenly when whisked into the warm milk-cream. Use high-quality chocolate for a pronounced aroma and glossy finish; add after removing from heat to prevent scorching, then whisk until completely smooth.
  • 3 large egg yolks

    → Thickens and enriches the custard, giving a luxurious, creamy mouthfeel. Whisk yolks with the sugar to create a pale, airy mixture, then temper with hot milk gradually to avoid scrambling. This step is crucial for a smooth, stable dessert.
  • 1/4 cup granulated sugar

    → Balances the bitterness of the chocolate and helps create a luscious custard when combined with the yolks. Whisk in with the yolks to dissolve fully; if you prefer less sweetness, you can decrease to 2–3 tablespoons, but this will affect overall balance.
  • 2 tablespoons cornstarch

    → Thickening agent that aids in setting the custard to a luscious, spoonable consistency. Make a smooth slurry with a little cold milk before whisking into the hot mixture to prevent lumps. If you want a firmer texture, you can increase to 3 tablespoons, but test in small batches.
  • 1 teaspoon pure vanilla extract

    → Adds warmth and rounds out the chocolate flavor. Use vanilla extract for a bright, aromatic note; add with the hot liquids or off the heat after thickening for maximum fragrance. If available, a vanilla bean split and scraped seeds can be infused into the milk for a deeper flavor.
  • 1/4 teaspoon salt

    → Enhances sweetness and intensifies the chocolate while balancing richness. A small pinch is sufficient; it helps suppress any bitter aftertaste from the chocolate. Add to the milk along with the sugar.

Optional Add-ins

  • 1 tablespoon instant espresso powder (optional)

    → Deepens and intensifies the chocolate flavor with a mocha nuance. Dissolve directly in the warm milk/cream mixture and whisk until fully incorporated. Start with 1 teaspoon if you’re unsure about coffee notes; adjust to taste to avoid overpowering the chocolate.
  • 1 tablespoon orange zest (optional)

    → Imparts a bright citrus contrast that pairs beautifully with dark chocolate. Zest only the colored part of the peel, avoiding the white pith. Add to the milk as it heats to infuse aroma, or fold in after cooking for a milder hint. If you like a stronger citrus note, you can steep the zest briefly and strain before finishing the custard.
  • 2 tablespoons chopped toasted hazelnuts or almonds (optional)

    → Adds a pleasant crunch and a toasty, nutty aroma. Toast nuts until fragrant, cool, then finely chop. Fold into the custard off heat for texture, or sprinkle on top just before serving to preserve crunch. For nut-free versions, omit.

Toppings

  • Whipped cream or chantilly cream (to serve)

    → Provides a light, airy contrast to the dense, creamy base. Whip cold heavy cream with a touch of sugar and a splash of vanilla until soft to medium peaks, then pipe or spoon over the dessert just before serving for an elegant finish.
  • Cocoa powder or shaved dark chocolate (to garnish)

    → Finely dust with unsweetened cocoa powder or scatter curls/shavings for a polished surface and an extra chocolate aroma. Garnish right before serving to keep the texture and appearance pristine.
  • Fresh berries (optional)

    → Adds a bright, tart counterpoint to the rich custard. Choose berries like raspberries, strawberries, or blueberries; serve a few alongside or on top for color and balance. If using frozen berries, thaw and drain well to avoid extra moisture.

Instructions

  • Gather your ingredients and equipment: 2 cups whole milk, 1 cup heavy cream, 150 g dark chocolate, 3 large egg yolks, 1/4 cup granulated sugar, 2 tablespoons cornstarch, 1 teaspoon vanilla extract, 1/4 teaspoon salt, and optional add-ins such as espresso powder, orange zest, or chopped toasted nuts; also prepare a medium saucepan, a whisk, a heatproof bowl, a fine-mesh sieve, ramekins or a shallow serving dish, plastic wrap, and a spatula.

    → This ensures you have everything in reach and prevents interruptions that could cause uneven heating or curdling.
  • Whisk the egg yolks with granulated sugar until the mixture turns pale and slightly thickened, creating a smooth base for the custard; this stage helps to incorporate air and dissolve sugar for a silkier finish.

    → A pale, airy yolk-sugar base ensures the custard thickens evenly without graininess when heated.
  • Make a smooth cornstarch slurry by whisking 2 tablespoons of cornstarch with a few tablespoons of cold milk until completely lump-free; set aside for later incorporation to help the custard set firmly without curdling.

    → The slurry prevents lumps and provides a controlled thickening that yields a spoonable texture.
  • In a medium saucepan, combine 2 cups whole milk, 1 cup heavy cream, and 1/4 teaspoon salt; heat gently over medium-low, whisking occasionally, until the mixture is just steaming with tiny bubbles at the edge—do not boil; if using espresso powder, whisk it in now to dissolve completely; if using orange zest, add to infuse aroma.

    → Gentle heating extracts the chocolate flavor and prepares the dairy for emulsification; avoid boiling to prevent scorching and curdling.
  • Remove the warm dairy from heat, then whisk in the finely chopped dark chocolate until completely melted and the mixture looks glossy and uniform; this prevents chocolate scorching and ensures a smooth, velvety base.

    → Off-heat addition minimizes scorching risk and promotes a glossy, even melt for a rich chocolate aroma.
  • Slowly ladle a small amount of the hot dairy into the yolk-sugar mixture, whisking constantly to temper and gradually raise the yolk temperature; then whisk the tempered yolks back into the saucepan with the remaining hot dairy.

    → Tempering prevents the yolks from scrambling and creates a cohesive custard once thickened.
  • Whisk the prepared cornstarch slurry into the custard and continue to cook over low heat, stirring constantly with a spatula until the mixture thickens enough to coat the back of a spoon; this should take 2–4 minutes and requires patience to avoid lumps.

    → Proper thickening yields a luscious, spoonable texture and helps the custard hold its shape when chilled.
  • Remove the custard from heat and stir in the vanilla extract; if you infused orange zest and strained it, the zest has already imparted aroma, so whisk until smooth; taste and adjust a pinch more salt if needed.

    → Vanilla brightens the chocolate and balances the richness; a touch of salt enhances depth and counteracts sweetness.
  • If using optional add-ins like chopped toasted nuts, fold 2 tablespoons of them into the warm custard off the heat so they retain some crunch without becoming soggy.

    → Folding in nuts off the heat preserves texture and aroma, adding pleasant contrast to the creamy base.
  • Strain the custard through a fine-mesh sieve into a clean bowl to remove any lumps or bits of zest, ensuring a perfectly smooth final texture for a refined dessert.

    → Straining guarantees a glassy, uniform custard and removes any curdled remnants for a silky finish.
  • Divide the smooth custard evenly among ramekins or a shallow serving dish; smooth the tops with a spatula and lightly tap to release any trapped air bubbles; cover the surface directly with plastic wrap to prevent a skin from forming.

    → Portioning evenly aids even chilling and presentation, while plastic wrap minimizes the formation of a skin on the custard.
  • Chill the custard in the refrigerator for at least 4 hours, or overnight, until set and spoonable; the cold environment firms the texture and enhances the chocolate flavor.

    → Slow chilling prevents cracking and ensures the custard maintains its creamy, smooth mouthfeel when served.
  • Prepare toppings: whip cold heavy cream with a touch of sugar and a splash of vanilla until soft to medium peaks, then refrigerate until ready to serve; this yields a light, billowy contrast to the dense custard.

    → Chantilly or lightly whipped cream adds a luxurious, airy balance to the rich chocolate base when spooned on top.
  • Just before serving, dust the surface with unsweetened cocoa powder or scatter shaved dark chocolate curls; if desired, cap with fresh berries to add brightness and color; garnish right before serving to maintain texture and visual appeal.

    → Garnishes heighten aroma, provide visual appeal, and offer a refreshing counterpoint to the velvety chocolate custard.
  • To serve, spoon or pipe a portion of the chilled dessert into individual glasses or on plates, crown with whipped cream, and present immediately to enjoy the contrast between the cool, creamy center and the crisp garnish.

    → Immediate serving preserves the intended texture contrast and ensures the dessert looks and tastes its best.

Notes

These dessert cremoso is a silky, chocolate-forward custard that comes together by gently warming whole milk and heavy cream with finely chopped dark chocolate, then thickening it with egg yolks, sugar, and a touch of cornstarch for a spoonable set. For best results, heat the dairy gently and never let it boil; melt the chocolate off the heat and whisk in until glossy, then temper the yolks with the hot milk to avoid scrambling. Use high-quality chocolate (70% cacao) to maximize depth, and season with a pinch of salt to balance sweetness. If you want a deeper mocha note, dissolve 1 tablespoon instant espresso powder in the warm milk/cream; for a citrus contrast, fold in 1 tablespoon orange zest. Optional toasted nuts (hazelnuts or almonds) add crunch; fold in off heat or sprinkle on top just before serving. Serve with whipped cream and a light dusting of cocoa or shaved chocolate, and pair with fresh berries for brightness. Chill the custard to set; it will thicken as it cools, and refrigerating for at least 2–4 hours helps develop flavor. Troubleshooting tips: if lumps form, whisk vigorously or strain; if you prefer a firmer set, increase cornstarch to 3 tablespoons and test in small batches. Storage: keep in the fridge for up to 3–4 days; reheat gently over low heat, stirring, and avoid boiling. Always handle eggs safely and consider using pasteurized yolks if desired.

Tips

Consejos prácticos para Dessert cremoso

  • Control de temperatura: calienta la leche y la crema a fuego medio-bajo y evita que hiervan. El objetivo es que la mezcla esté tibia y lista para mezclar con el chocolate, no un hervor rápido que puede curdlear los huevos.
  • Tempering de las yemas: bate las yemas con el azúcar hasta que blanqueen, luego añade poco a poco una cantidad de la leche caliente mientras sigues batiendo. De este modo las yemas se aclimatan y no se cuajan al incorporarlas al resto de la crema.
  • Disolución de la maicena: disuelve la maicena en un poco de leche fría hasta obtener una solución suave sin grumos antes de mezclarla con la mezcla caliente. Esto evitará grumos en el custard.
  • Uso del chocolate: añade el chocolate finamente picado justo después de retirar del calor para que se funda con el calor residual. Remueve con energía hasta lograr una mezcla lisa y brillante. Si ves pequeños grumos, pasa la crema por un colador.
  • Textura sedosa: evita hervir la mezcla una vez que espese; cuando alcance el punto deseado, retira del fuego y deja que el calor residual termine de crear la textura cremosa.
  • Aromas y sal: la vainilla y la sal realzan el sabor del chocolate. Añádelas al final o fuera del fuego para mantener el aroma. Si usas una vaina de vainilla, infusiona la leche caliente y luego cuela antes de mezclar.
  • Colado final: para una crema extremadamente lisa, cuela la mezcla caliente a través de un colador fino antes de enfriar. Esto elimina posibles grumos de las yemas o del cacao.

Consejos sobre chocolate y sabores

  • Elige chocolate de buena calidad (70% cacao recomendado) para un sabor profundo y un brillo suave. Los chocolates de baja calidad pueden dejar un sabor a recalentado o aceitoso.
  • Si deseas intensificar el sabor a chocolate, añade una pizca adicional de cacao en polvo tamizado a la mezcla caliente junto con la maicena, pero prueba para no desequilibrar la textura.
  • Para toques mochas, incorpora el espresso en polvo como se indica en la sección opcional, disuelto en la leche caliente y ajusta al gusto para evitar que domine el chocolate.

Variaciones y añadidos opcionales

  • Orilla cítrica: la ralladura de naranja aporta un contraste brillante. Añade la ralladura a la leche durante el calentamiento para infusionar aroma, o espolvorea una pequeña cantidad al final para un aroma más suave.
  • Frutos secos: los 2 cucharadas de frutos secos tostados añaden crujiente y aroma. Tuéstalos ligeramente y pícalos finamente; agrégalos fuera del fuego para conservar la textura.
  • Notas de cacao extra: si te gusta más intenso, añade una pizca de cacao en polvo sin azúcar al paso de la maicena y mezcla bien.

Consejos de enfriado, almacenamiento y servicio

  • Una vez lista la crema, pásala por un colador fino y cúbrela con film (toque de contacto) para evitar formación de película superficial. Deja atemperar a temperatura ambiente y luego refrigera al menos 2–4 horas, o toda la noche, para una textura más firme.
  • Para servir, puedes acompañar con nata montada fría y una lluvia ligera de cacao o virutas de chocolate para un acabado profesional.
  • Si sobran porciones, guarda en recipientes herméticos en el refrigerador hasta 2–3 días. Para recalentar, hazlo a fuego muy suave o en microondas en intervalos cortos, removiendo entre them para evitar cuartear.

FAQ

¿Qué es exactamente un “dessert cremoso”?

Es un postre suave y sedoso, con textura parecida a una crema, mousse o pudín. Se obtiene combinando una base cremosa (leche, crema, yogur o leche vegetal) con un espesante (yemas, maicena, gelatina o agar) y saborizantes. Se sirve frío y su cuerpo debe mantenerse estable sin descomponerse.

¿Qué ingredientes son típicos en un dessert cremoso?

Base cremosa: leche o crema (o leche vegetal para versiones sin lácteos). Endulzante: azúcar, miel o estevia. Enriquecedores: huevos o yemas (en versiones cocidas), chocolate, vainilla, cacao, café o fruta. Espesantes: maicena, harina de maíz, fécula de patata, o gelatina/agar. Toques: sal y ralladura de cítricos. Opcional: galletas trituradas o fruta para textura y presentación.

¿Se puede hacer sin lactosa o en versión vegana?

Sí. Usa leche vegetal (soya, avena, almendra o coco) y crema vegana. Para espesar, emplea agar-agar o gelatina vegetal y, si quieres cremosidad sin huevo, añade puré de tofu sedoso o yogur vegetal. Evita la mantequilla y utiliza una pequeña cantidad de aceite neutro si es necesario.

¿Necesita cocción o se puede hacer sin horno?

Depende de la receta. Muchos dessert cremosos requieren cocción suave (crema pastelera o pudín). También existen versiones sin horno que se fijan con gelatina/agar o se montan como mousse con batido de crema. Elige según la consistencia deseada y los ingredientes disponibles.

¿Cómo lograr una textura cremosa sin grumos?

Tips prácticos: tamiza el espesante; calienta la base sin llegar a hervir; añade el espesante caliente poco a poco a la base caliente, batiendo constantemente; si usas yemas, tempúrarlas antes para evitar grumos; luego cuela para eliminar grumos; usa batidora o blender para una textura aún más suave.

¿Cuánto tiempo hay que enfriar o refrigerar?

En general, 2-4 horas para mousse o rellenos ligeros; 4-6 horas para cremas más densas; y preferible toda la noche para que cuaje y tome cuerpo. Mantén siempre en refrigeración a 4°C y cubre para evitar absorción de olores.

¿Cómo variar sabores y recetas de crema?

Prueba combinaciones como vainilla con chocolate, coco con mango, limón con merengue, café con chocolate, frutos rojos, o cacao y plátano. Añade puré de fruta, ralladura de cítricos, especias (canela, cardamomo) o toppings como frutos secos, galletas trituradas o salsa de caramelo para distintos perfiles.

¿Qué sustitutos usar para alérgicos o dietas especiales?

Para gluten-free: usa espesantes sin gluten (la maicena es una opción común). Para sin lactosa o vegano: leche vegetal y crema vegetal; gelatina vegetal (agar-agar) en lugar de gelatina animal. Evita huevo o utiliza sustitutos como tofu sedoso o puré de plátano para cremosidad. Usa chispas o chocolate sin leche si es necesario.

¿Cómo almacenar y cuánto dura?

Guárdalo en un recipiente hermético en el refrigerador a 4°C. Dura típicamente 2-4 días para cremosos lácteos; 3-5 días para versiones veganas. Evita dejarlo fuera del refrigerador más de 2 horas. Congelar no suele ser recomendable para mousses cremosos; pueden separarse al descongelarse.

¿Cómo servir y decorar un dessert cremoso?

Sirve frío en copas o cuencos. Decora con nata batida, frutas frescas, trocitos de chocolate, ralladura de cacao, hojas de menta o trocitos crujientes. También puedes añadir una salsa de frutas, caramelo o chocolate para realzar el sabor.

¿Qué errores comunes ocurren y cómo solucionarlos?

Errores típicos: 1) textura líquida: puede deberse a cocinar demasiado o a poco espesante; solución: recalentar con más espesante o gelatina adequada. 2) Grumos: colar o usar licuadora/blender. 3) Separación de capas: mezclar bien al preparar y enfriar gradualmente; asegurarse de que la base no esté demasiado fría al añadirla. 4) Falta de sabor: ajustar con más vainilla, cacao, ralladura, o un toque de sal.

Introducción y Gancho

Imagínate un plato que te abraza desde el primer momento: Pollo cremoso con riso, una sinfonía de suavidad y calidez que se desliza sin esfuerzo por la boca. El aroma invade la cocina como un susurro de cocina casera: pollo tiernizado hasta la perfección, una salsa sedosa que parece susurrar promesas de consuelo, y el arroz, suelto pero abrazado por la crema, listo para absorber cada nota de sabor. Entra en escena una combinación tan reconfortante que parece hecha a medida para días nublados, celebraciones íntimas o simples momentos en los que necesitas un abrazo de comida que se sienta como un mimo para el alma. Este plato no es sólo una comida; es una experiencia sensorial que transforma la rutina en algo especial. Cada bocado ofrece una textura cremosa que se deshace con facilidad, una ebriedad suave de sabor que no compite con el dulzor natural del pollo, y una armonía de fondo que revela que la simplicidad bien ejecutada puede ser verdaderamente extraordinaria. Si alguna vez te has preguntado qué hay detrás de un plato de comfort que logra mezclar lo suave con lo sabroso, este es el momento en que la respuesta aparece en tu mesa: un polvorín de aromas que te invita a sentarte, respirar hondo y dejar que cada cucharada te cuente su historia.

Este cremoso plato de pollo y arroz está diseñado para ser cotidiano y especial a la vez. Es posible que parezca humilde, pero en su interior alberga capas de sabor que hablan de tradición, de creatividad en la cocina de casa y de la alegría de compartir una comida que ha pasado de generación en generación, adaptándose a los gustos y recursos de cada familia. La magia está en el equilibrio: una salsa rica lo suficiente para envolver el arroz sin convertirlo en una crema pesada, una cocción lenta que mantiene la jugosidad de la carne, y un arroz que mantiene su carácter sin desbordarse en la textura. Criaturas de sabor simples elevadas con técnicas simples: ese es el secreto detrás de este Pollo cremoso con riso, un plato que no necesita adornos innecesarios para brillar, sino paciencia, buena temperatura y una buena conversación alrededor de la mesa mientras la cocina se llena de un perfume que promete recuerdos memorables.

En cada cocción, este platillo te invita a hacer una pausa: a escuchar el chisporroteo suave, a contemplar el brillo de la salsa que parece derretir la noche, a sonreír ante la vista de los granos de arroz que quedan sueltos y disponibles para recoger toda la cremosidad. Es una promesa de sabor inmediato y de satisfacción duradera: la clase de comida que se disfruta en silencio mientras el plato termina de formarse, corazón de la casa y alma de la reunión.

La historia detrás del plato

El Pollo cremoso con riso se enmarca en una tradición de platos que hacen de la simplicidad un arte. En muchas cocinas familiares de la región iberoamericana, el arroz y el pollo han sido compañeros inseparables, desde arroces tan populares como el arroz con pollo hasta versiones que juegan con salsas cremosas y una cocción que suaviza la proteína sin perder su carácter. Este plato toma esa herencia y la reinterpret a con una salsa cremosa que abraza cada grano de arroz y cada pedazo de pollo, creando una experiencia que recuerda a las comidas de la abuela sin renunciar a una chispa de modernidad. Es una celebración de la cocina hogareña: ingredientes humildes, técnicas accesibles y un resultado que se siente especial gracias al cuidado con el que se trata cada paso de la cocción.

La historia de este plato también es una historia de convivialidad. En muchas casas, la cocina se convierte en un escenario de conversación, risas y recuerdos mientras el pollo se cocina y la salsa se espesa. La libertad de adaptar las especias, el nivel de cremosidad y la proporción de arroz a la personalidad de la mesa es parte de la magia: cada familia puede hacer suyo este platillo, introduciendo pequeñas variaciones que cuentan su historia. Aunque no exista un único origen geográfico para esta versión cremosa, su esencia es la de un plato de confort que encarna la idea de que cocinar puede ser un gesto de amor cotidiano, una forma de demostrar que la comida puede unir, alimentar y emocionar a la vez.

A veces, las recetas que parecen simples esconden un mundo de técnica. Pulverizar el dorado del pollo, lograr una salsa que emulsione sin grumos, hallar el punto justo en el que el arroz suelta su almidón sin pasarse: todo eso forma parte de una pequeña danza culinaria que transforma lo cotidiano en una experiencia memorable. Este plato es un homenaje a esa danza: paciencia, atención a los detalles y un poco de intuición son más que suficientes para obtener un resultado que impresiona sin pretensiones.

Por qué te encantará esta receta

  • Confort inmediato: una sensación de calidez y bienestar que llega en cada cucharada, perfecta para días de lluvia o cuando necesitas una cena que sienta bien.
  • Versatilidad: adaptable a lo que tengas a mano, permitiendo cambios en proteínas, lácteos y acompañamientos sin perder la esencia cremosa.
  • Comida en una olla: la conveniencia de una preparación que minimiza la limpieza y maximiza el sabor, ideal para semanas ocupadas.
  • Texturas y sabores equilibrados: pollo jugoso, una salsa sedosa y arroz suelto, con notas suaves que se vuelven más profundas con un toque de acidez o una pizca de especias.
  • Familia y hogar: es un plato que invita a compartir, a sentarse alrededor de la mesa y a dejar que la conversación fluya entre cada bocado.
  • Optimizable para dietas: la receta base ofrece rutas simples hacia versiones veganas, sin gluten o bajas en lactosa sin perder la experiencia sensorial.

Perfil de sabor y textura

La experiencia aromática de este Pollo cremoso con riso se construye sobre una base de sabores suaves y reconfortantes que se elevan mediante técnicas que realzan la jugosidad y la cremosidad. En primer plano, la suavidad del pollo, cocido de forma que retenga su humedad, ofrece una mordida tierna y satisfactoria. La salsa, sedosa y envolvente, aporta una riqueza que no se siente pesada, gracias a la emulsión entre el fondo aromático y la base cremosa. Esta crema puede obtener su cuerpo a partir de leche, crema o sustitutivos vegetales, siempre con la intención de mantener una coherencia entre la salsa y el arroz que la acompaña. El arroz, por su parte, aporta textura y equilibrio: cuando está en su punto, cada grano suelta algo de almidón, permitiendo que la salsa se adhiera sin desaparecer, y que cada bocado combine la suavidad de la crema con la ligera resistencia del grano cocido.

En cuanto a notas de sabor, se espera un perfil que combina la dulzura natural del pollo y la cebolla o ajo caramelizado con la ligereza de una salsa cremosa y un ligero toque de ácido para cortar la riqueza. Este contraste crea una experiencia bien integrada: la crema suaviza las notas saladas y ligeramente dulces de la carne, mientras que la base de arroz ofrece una neutralidad que permite que la salsa brille sin dominar. Algunas versiones pueden incorporar toques de pimienta blanca, hierbas frescas o un chorrito de vino para aportar complejidad sin desviar la atención de la textura cremosamente elegante. En cualquier caso, la clave está en la textura: ni demasiado espesa ni demasiado líquida, sino un state de equilibrio que hace que cada bocado se sienta suave y reconfortante al mismo tiempo.

Ocasiones y pairings

Este plato se adapta a una amplia gama de momentos y escenarios. Es ideal para cenas familiares entre semana, cuando se quiere algo que se sienta especial sin requerir horas en la cocina. También funciona muy bien para cenas de fin de semana cuando quieres impresionar con una preparación que parece más elaborada de lo que es en realidad. Su naturaleza suave y acogedora lo convierte en una excelente opción para días lluviosos, para darle calor a la mesa durante el otoño o para celebrar el inicio de un proyecto nuevo con una comida que transmita orgullo y ternura.

En cuanto a acompañamientos, las opciones son amplias y pueden ir desde lo más ligero hasta lo más festivo. Algunas ideas incluyen:

  • Ensaladas verdes frescas con vinagreta ligera para aportar contraste y acidez que equilibre la cremosidad.
  • Verduras al vapor o salteadas ligeramente para añadir color y textura crujiente.
  • Una porción de plátano frito o maduros para un toque dulce que casa sorprendentemente bien con la cremosidad del plato.
  • Pan crujiente o una baguette para recoger la salsa sedosa y disfrutar de una experiencia completa.
  • Un vino blanco ligero o un rosado fresco, o incluso una limonada casera o agua con hierbas para mantener todo equilibrado.

Para los más aventureros, se puede jugar con “pairings” regionales: un toque de limón confitado, aceitunas picadas para una pizca de sal marina, o hierbas como el perejil o el cilantro para un perfil más fresco y aromático. Cada elemento puede realzar una faceta distinta del plato, ya sea resaltando la cremosidad, destacando la jugosidad del pollo o aportando una explosión de color y aroma a la mesa.

Consejos, variaciones y sustituciones

Aquí tienes una colección de ideas para adaptar el Pollo cremoso con riso a diferentes gustos, necesidades dietéticas o recursos disponibles, sin perder la esencia de la experiencia.

  • Versión vegana o sin lactosa: sustituye el pollo por un mix de setas o tofu firme, y usa una crema vegetal (por ejemplo, crema de coco o una leche vegetal cremosa) junto con caldo vegetal para mantener la textura sedosa. El arroz puede seguir siendo el protagonista, absorbiendo la salsa vegetal sin perder su carácter cremoso.
  • Sin gluten: la salsa cremosa puede espesar con maicena o harina sin gluten. Asegúrate de que cualquier componente líquido o espesante no contenga gluten, y el plato mantendrá su cohesión sin sacrificar la riqueza de la salsa.
  • Versión baja en grasa o más ligera: reduce la cantidad de crema o leche y añade un poco de yogur natural o yogur griego para aportar cremosidad con menos grasa. Mantén la base de arroz para que el plato siga siendo equilibrado y satisfactorio.
  • Aromas y toques regionales: incorpora pimentón ahumado, cúrcuma o comino para una nota más cálida y especiada. Un chorrito de vino blanco al inicio de la cocción puede aportar una base aromática más compleja.
  • Variaciones con mariscos: para una versión mar y tierra, añade camarones o una mezcla de mariscos en la última etapa de cocción para un contraste de texturas y sabores entre la carne y el marisco.
  • Texturas contrastantes: si te gusta un poco más de mordiente, mezcla el arroz con una pequeña cantidad de granos de maíz cocidos o guisantes para introducir un toque crocante o jugoso según la textura que prefieras.

Conservación y ideas para preparar con anticipación

Este plato se presta para preparaciones con antelación, siempre que se maneje con cuidado para preservar la textura cremosa y evitar que el arroz absorba demasiado líquido y se vuelva gomoso. Algunas pautas útiles:

  • Almacenamiento: guarda las sobras en un recipiente hermético en el refrigerador durante 3-4 días. Enfriar rápidamente y mantener a una temperatura estable ayuda a preservar la crema y la jugosidad de la carne.
  • Recalentamiento: para recalentar, hazlo a fuego medio-bajo con una pizca de líquido adicional (caldo, leche o una alternativa vegetal) para devolver la cremosidad sin que se corte. Remueve con suavidad para que el arroz no se desorganice.
  • Congelar: la versión con pollo y crema podría no congelarse tan bien como una salsa más ligera, ya que la textura puede cambiar tras descongelar. Si necesitas congelar, separa la salsa y el arroz y vuelve a unir durante el recalentamiento con un poco de líquido para recuperar la cremosidad.
  • Make-ahead: para ahorrar tiempo, puedes preparar el arroz con antelación y conservarlo en frío; cuando estés listo para comer, saltea ligeramente el pollo y mezcla con la salsa cremosa caliente para un acabado rápido y suave.

Datos curiosos y trivia (opcional)

El arroz con pollo es un plato querido en muchísimas culturas hispanohablantes y ha dado lugar a miles de versiones regionales. En algunas comunidades, el secreto está en el uso de un fondo muy aromático que impregna el arroz y el pollo; en otras, se valora la creación de una crema que se funde con el grano para crear una experiencia lisa y envolvente. La variedad de nombres y pequeñas adaptaciones de este plato refleja la riqueza de la tradición culinaria —y la universalidad de la idea: que una cena cálida y sencilla puede convertirse en un momento especial cuando se comparte entre amigos y familia. Algunas anécdotas gastronómicas señalan que ciertas variantes de arroz con pollo utilizan azafrán, pimentón dulce o hierbas frescas en un intento de capturar imágenes de atardeceres mediterráneos en la mesa. Este Pollo cremoso con riso, con su versión contemporánea y adaptable, continúa esa tradición: una receta que se reinventa sin perder su alma, lista para convertirse en un clásico en tu casa.

Ingredients

Pollo

  • 1 1/2 pounds boneless, skinless chicken breasts, cut into bite-sized pieces
    → Provides the main protein and body of the dish. Cutting into bite-sized pieces ensures even cooking and a tender texture; pat dry and season lightly before searing to develop color.
  • 1 tablespoon olive oil
    → Used to sear the chicken and sauté aromatics; use a high-smoke-point oil and heat until shimmering before adding the chicken to get a golden-brown crust and flavorful fond.

Arroz

  • 1 1/2 cups long-grain white rice, rinsed until water runs clear
    → The base starch; rinsing removes surface starch for fluffy grains. Cook the rice in hot broth to infuse flavor and keep grains separate.
  • 3 cups low-sodium chicken broth, hot
    → Liquid for cooking the rice; hot broth helps maintain cooking temperature and enhances rice flavor. Use low-sodium to control salt.

Salsa cremosa

  • 1 cup heavy cream
    → Forms the creamy base of the sauce that coats the chicken and rice. For lighter sauce, substitute with half-and-half or 3/4 cup milk, but dairy cream gives the richest texture.
  • 1/2 cup whole milk
    → Balances richness and prevents the sauce from becoming too thick. Use whole milk for best mouthfeel; skim milk will thin the sauce.
  • 2 tablespoons cream cheese (optional)
    → Adds extra silkiness and a slight tang; whisk into the simmering sauce until smooth. Omit if avoiding dairy.
  • 1/2 cup grated Parmesan cheese
    → Provides savory depth and helps thicken the sauce as it melts; add gradually to avoid clumping.
  • 2 tablespoons unsalted butter
    → Finishes the sauce with gloss and richness; swirl in at the end or melt into the sauce during simmering to enrich mouthfeel.
  • 1 tablespoon all-purpose flour or 1 tablespoon cornstarch (for thickening)
    → Thickening agent to achieve a cohesive, clingy sauce. If using flour, whisk with a splash of the hot sauce to form a slurry; if using cornstarch, mix with cold water to create a slurry before adding to the simmering sauce to prevent lumps.
  • 1/2 teaspoon smoked paprika (optional)
    → Adds a warm, smoky note and color that complements chicken; adjust or omit based on preference.
  • 1/2 teaspoon lemon juice (optional)
    → A bright finish that counters the richness; add at the end and taste before serving.

Aromáticos y verduras

  • 1 small onion, finely chopped
    → Builds the flavor base for the sauce; sauté until translucent and lightly golden to release sweetness. Yellow onion is preferred for balanced sweetness.
  • 2 cloves garlic, minced
    → Aromatic foundation; add after onion to prevent burning and to maximize aroma as it flavors the sauce and chicken.
  • 1 cup mushrooms, sliced (optional)
    → Add earthiness and texture; sauté until browned to remove moisture and avoid soggy mushrooms; they release moisture so cook until tannish brown.
  • 1/2 cup frozen peas, thawed
    → Provides color, sweetness, and a pop of freshness; add toward the end to preserve bright green color.

Condimentos

  • 1 teaspoon kosher salt, plus more to taste
    → Seasoning backbone for both the sauce and rice; add gradually and taste as you go since salt levels depend on broth and parmesan.
  • 1/2 teaspoon freshly ground black pepper
    → Adds depth and warmth; adjust to your preference.
  • 1/2 teaspoon dried thyme or oregano (optional)
    → Subtle herbal note that complements chicken; use sparingly so it doesn’t overpower the creamy sauce.

Toppings y toques finales

  • 2 tablespoons chopped fresh parsley for garnish
    → Brightens the dish with color and fresh aroma; stir a little into the sauce at the end and reserve some for garnish.
  • 1/4 cup extra grated Parmesan cheese for serving
    → Finishing cheese that intensifies the creaminess; sprinkle just before serving for extra savor.
  • 1 lemon, cut into wedges
    → A bright squeeze of lemon over the dish provides contrast to the richness and enhances overall balance; serve a wedge on the side.

Instructions

  • Sanea las piezas de pollo con papel de cocina y córtalas en trozos del tamaño de un bocado; sazónalas ligeramente con sal y pimienta para intensificar el sabor y favorecer una costra uniforme al dorarse.
    → La sequedad superficial evita que el vapor ablande la carne y garantiza un dorado rápido y sabroso.
  • Calienta una sartén grande a fuego medio-alto y añade 1 cucharada de aceite de oliva, esperando a que esté caliente y brillante; coloca el pollo en una sola capa para sellarlo sin amontonar y deja dorar 2–3 minutos por cada lado hasta obtener una corteza dorada; retíralo y reserva.
    → Dorar primero crea un sabor profundo gracias a la reacción de Maillard y sella los jugos para que el pollo no quede seco.
  • En la misma sartén, reduce el fuego a medio y añade la cebolla picada; sofríe hasta que esté translúcida y ligeramente dorada (5–7 minutos) para extraer su dulzor y construir una base de sabor; remueve con frecuencia para evitar que se queme.
    → La caramelización suave de la cebolla aporta dulzor y complejidad al fondo de la salsa.
  • Añade el ajo picado a los últimos 30 segundos para evitar que se queme y para perfumar la base con su aroma; remueve para distribuir uniformemente.
    → El ajo liberará su aroma sin quemarse, evitando amargor en la salsa.
  • Si usas champiñones, incorpóralos y saltéalos hasta que estén dorados y hayan evaporado su humedad, aproximadamente 4–5 minutos; si no, continúa con la siguiente etapa.
    → El dorado de los champiñones añade profundidad terrosa y evita que su jugo aguade la salsa.
  • Desglasa la sartén con un chorrito de caldo o agua para levantar el fond dorado; raspa con una espátula para incorporar ese sabor intenso a la base de la salsa.
    → El fond contiene sabores de Maillard que enriquecen la salsa y ayudan a unir los elementos líquidos y cremosos.
  • En una olla aparte, lleva el caldo de pollo a ebullición suave; añade el arroz lavado y escurrido; reduce el fuego a bajo, tapa y cocina 15–18 minutos hasta que el arroz esté tierno y haya absorbido el líquido; retira del fuego y deja reposar tapado 5 minutos.
    → Usar caldo caliente mantiene la cocción uniforme y añade sabor al arroz; el reposo evita que el grano se vuelva pegajoso.
  • Vierte la crema espesa y la leche en la sartén con la base de aromáticos; mezcla hasta incorporar y, si lo deseas, añade el queso crema en trozos para mayor cremosidad, removiendo hasta que se funda.
    → La crema aporta suavidad y riqueza; la leche equilibra la textura para lograr una salsa sedosa.
  • Incorpora 1/2 taza de parmesano rallado poco a poco, batiendo para que se funda sin formarse grumos; continúa hasta que la salsa esté suave y ligeramente espesa.
    → El parmesano añade profundidad salina y ayuda a espesar la salsa al derretirse.
  • Si prefieres una salsa más espesa, prepara una dilución con 1 cucharada de harina y un poco de caldo caliente para formar una pasta suave, o disuelve 1 cucharada de maicena en 2 cucharadas de agua fría y añade poco a poco a la salsa caliente, batiendo para evitar grumos.
    → Usar el método correcto evita grumos y garantiza una textura uniforme en la crema.
  • Agrega 2 cucharadas de mantequilla y mezcla hasta que se derrita, aportando brillo y una suavidad adicional; evita hervir la salsa una vez añadida la mantequilla para no separar la grasa.
    → La mantequilla al final aporta gloss y una sensación sedosa en boca.
  • Vuelve a incorporar el pollo dorado a la salsa junto con 1/2 taza de guisantes descongelados; cocina a fuego suave 3–5 minutos hasta que el pollo esté cocido y los guisantes conserven su color verde brillante.
    → El pollo termina de cocinarse en la salsa cremosa y los guisantes aportan color y frescura.
  • Ajusta la sazón con sal y pimienta al gusto; si usaste tomillo u oregano, añade una pizca para realzar el perfil aromático sin opacar la cremosidad.
    → Prueba y corrige la sazón porque el parmesano y el caldo aportan salinidad, y las hierbas deben ser sutiles.
  • Sirve una porción de arroz en cada plato, cubre con el pollo y la crema; espolvorea con perejil fresco picado y parmesano adicional; acompaña con una cuña de limón para aportar un toque ácido que contrarreste la riqueza.
    → El arroz funciona como base neutra que equilibra la crema; el limón realza sabores y añade contraste.

Notes

These Pollo cremoso con arroz notes describe a comforting, one-pan-style dish with juicy seared chicken, fluffy rice cooked in hot broth, and a silky cream sauce enriched with Parmesan. For best results, pat the chicken dry and season lightly before searing to develop color, then rest while you finish the sauce; rinse the rice until the water runs clear to remove surface starch and cook it in hot broth to infuse flavor and keep the grains separate. In the crema, combine heavy cream, whole milk, and Parmesan, and thicken with a little all‑purpose flour or cornstarch—if using flour whisk it with a splash of hot sauce to form a slurry, or use a cold-water cornstarch slurry to prevent lumps; optional cream cheese adds extra silkiness, and a kiss of smoked paprika provides warmth and color. Finish with a bright lemon juice on the end to counterbalance richness. Sauté aromatics—onion first, then garlic—to build depth, and if you like earthiness, add mushrooms and thawed peas toward the end to preserve texture and color. Season thoughtfully with kosher salt and black pepper, and if you want a subtle herbal note, a pinch of dried thyme or oregano works best sparingly so it doesn’t overwhelm the creamy sauce. Finish with butter for gloss, scatter fresh parsley and extra Parmesan just before serving, and offer lemon wedges on the side for a fresh finish. For gluten-free preparation, use cornstarch or gluten-free all-purpose flour as the thickener and ensure the broth is gluten-free; leftovers refrigerate well for a few days and reheat gently with a splash of broth or milk to loosen the sauce.

Tips

Consejos prácticos para Pollo cremoso con arroz

Pollo

  • Pat dry las pechugas y córtalas en trozos uniformes para una cocción pareja. Sazona ligeramente para realzar el sabor sin resecar.
  • Calienta la sartén a medio-alto y sella el pollo en una sola capa para obtener una buena coloración; evita amontonar para que el dorado sea uniforme.
  • Después de dorar, deja reposar la carne un minuto antes de integrarla en la salsa para que los jugos se redistribuyan.
  • Si haces en tandas, mantén el calor entre las tandas para evitar que el pollo se cocine al vapor y pierda jugos.

Arroz

  • Enjuaga el arroz bajo agua fría hasta que salga clara para eliminar el exceso de almidón y obtener granos sueltos.
  • Utiliza caldo caliente para mantener la temperatura y realzar el sabor; añade el arroz cuando el caldo esté casi hirviendo.
  • Opcional: tuesta ligeramente el arroz en la olla con una cucharadita de aceite durante 1–2 minutos para aportar aroma a nuez; luego añade el caldo caliente.
  • Después de cocer, deja reposar 5 minutos tapado y luego esponja con un tenedor para separar los granos.

Salsa cremosa

  • Calienta la crema y la leche a fuego medio-bajo y evita hervir vigorosamente para que no se corte.
  • Si usas queso crema, añádelo al inicio de la emulsión y mezcla hasta que quede suave; si no, añade solo el parmesano al final para que funda bien.
  • Disuélve la harina (o la maicena) previamente en un poco de líquido caliente para formar una slurry y añade poco a poco, removiendo constantemente para evitar grumos.
  • Ajusta el espesor gradualmente; si queda demasiado espesa, alígala con un poco de caldo caliente o leche.
  • Un toque de limón al final aporta acidez que equilibra la riqueza; prueba y ajusta.
  • Ajusta la sal al final, ya que el parmesano y el caldo aportan salinidad.

Aromáticos y verduras

  • Sofríe la cebolla hasta que esté translúcida y ligeramente dorada para liberar su dulzor natural.
  • Agrega el ajo después de la cebolla para evitar que se queme y desarrolle un amargor.
  • Si usas champiñones, cocínalos hasta dorarse para eliminar humedad y evitar una textura gomosa.
  • Las arvejas deben añadirse al final para conservar su color verde brillante y su textura fresca.
  • Desglasa la sartén con un chorrito de caldo (o vino) para recoger el fond y enriquecer la salsa.

Condimentos

  • Ajusta la sal y la pimienta al gusto; recuerda que el caldo y el parmesano ya aportan salinidad.
  • Si deseas un toque herbal, añade tomillo o orégano en pequeñas cantidades para no sobrecargar la crema.

Toppings y toques finales

  • Pelares perejil fresco picado para color y aroma; reserva un poco para decorar al servir.
  • Ralla o espolvorea parmesano adicional justo antes de servir para intensificar la cremosidad.
  • Sirve con cuñas de limón para un toque de acidez que contrasta con la crema.

FAQ

¿Qué ingredientes necesito para Pollo cremoso con arroz?

Para 4 porciones, necesitarás:

  • 500 g de pechuga de pollo (o muslos deshuesados), cortados en trozos
  • 1 taza de arroz blanco de grano medio o largo
  • 2 tazas de caldo (pollo o vegetal)
  • 1/2 taza de crema de leche o nata para cocinar
  • 1/4 taza de queso parmesano rallado (opcional)
  • 1 cebolla pequeña, picada
  • 2 dientes de ajo, picados
  • 2 cucharadas de mantequilla o aceite
  • Sal y pimienta al gusto
  • Especias opcionales: paprika, tomillo o albahaca
  • Opcional: 1/2 taza de leche extra si prefieres más cremosidad
¿Qué tipo de arroz es mejor para este plato?

El arroz de grano medio o largo que absorbe bien el líquido funciona mejor. Evita arroces precocidos. Si buscas una textura más cremosa tipo risotto, puedes usar arroz arborio, pero el tiempo de cocción cambiará y la consistencia será más espesa.

¿Cómo hago la salsa cremosa?

Después de dorar el pollo y el sofrito, añade la crema de leche y el queso parmesano (si usas). Cocina a fuego medio hasta que la salsa espese ligeramente. Si está muy espesa, agrega caldo caliente poco a poco. Para una versión más ligera, usa leche entera o mezcla crema con leche y espesa con 1 cucharadita de harina disuelta en 2 cucharadas de agua.

¿Cuánto tiempo toma la preparación y cocción?

Tiempo total aproximado: 35–45 minutos. Preparación: 10–15 minutos para cortar el pollo y sofreír; cocción del pollo: 8–12 minutos; cocción del arroz en 15–20 minutos; mezcla final y reposo: 5 minutos.

¿Cómo evitar que el arroz quede pegajoso o duro?

Consejos prácticos:
– Enjuaga el arroz bajo agua fría para quitar el exceso de almidón.
– Usa la proporción adecuada de líquido (aproximadamente 2 tazas de líquido por cada taza de arroz para método tradicional).
– No remuevas demasiado durante la cocción para evitar que libere más almidón.
– Deja reposar el arroz tapado 5 minutos al final para que termine de absorber el líquido.

¿Se pueden hacer sustituciones o variaciones?

Sí. Variaciones y sustituciones:

  • Versión más ligera: usa leche o crema vegetal y menos queso.
  • Con verduras: añade champiñones, pimiento, guisantes o espinacas durante el sofrito.
  • Versión sin gluten: usa caldo sin gluten y harina sin gluten para espesar, si la salsa lo requiere.
  • Versión vegetariana: sustituye el pollo por tofu firme o garbanzos, y usa caldo vegetal.
¿Puedo preparar este plato con anticipación o para llevar?

Sí. Se puede preparar con antelación y guardar en refrigeración hasta 2 días. Recalienta lentamente en sartén a fuego medio o en microondas, añadiendo un poco de caldo o leche si la salsa se espesa demasiado. El arroz puede absorber más líquido al reposar, por lo que podría necesitar un poco de líquido extra al recalentar.

¿Qué acompañamientos van bien con Pollo cremoso con arroz?

Buenas opciones para complementar:

  • Ensalada fresca o pepino para contrastar
  • Verduras al vapor (brócoli, zanahoria, guisantes)
  • Pan crujiente o pan de ajo
  • Una salsa ligera de limón o un toque de rúcula
¿Cómo conservar sobrantes y cómo recalentarlos?

Enfría a temperatura ambiente y guarda en un recipiente hermético en el refrigerador. Duración: 3–4 días. Recalienta en sartén a fuego medio o en microondas, cubriendo para evitar que se seque. Si está muy espeso, añade un poco de caldo o leche al recalentarlo.

¿Qué hago si la salsa no espesa?

Soluciones rápidas:
– Añade un poco más de crema o queso y cocina unos minutos más.
– Si aún está líquida, añade una mezcla de 1 cucharadita de harina disuelta en 2 cucharadas de agua fría y remueve hasta espesar. Cocina un par de minutos más para eliminar el sabor a harina cruda.

Introduzione / Gancio

Immagina una piccola gioia lacustre di primavera, pronta a conquistarti al primo morso: bocconcini soffici, lucidi come perle, che scoprono una crema vellutata al cuore e una leggera nota agrumata di lampone. Bocconcini cheesecake ai lamponi è una danza di contrasti fertilissimi per il palato: la croccantezza delicata della base, la dolcezza cremosa che si scioglie subito, l’acidità frizzante dei lamponi che tira su il sapore e la freschezza di una scorza di limone zestata. È un dessert da gustare in qualsiasi stagione, ma particolarmente irresistibile nelle serate estive, quando vuoi offrire qualcosa di raffinato ma semplice da realizzare. Non è un dolce da forno pesante, ma una coccola leggera che si presenta come un piccolo gioiello: perfetto per un brunch elegante, una festa tra amici o una cena romantica a due, dove l’attenzione ai dettagli conta quanto il sapore. I bocconcini si tendono a una perfezione compiuta: freddi, setosi e profumati, pronti a conquistare il palato senza appesantire il pasto. Se stai cercando un dessert che unisca estetica e gusto, che possa essere preparato in anticipo e servito a tavola con un tocco di magia, questo è il piatto giusto.

La storia dietro il piatto

La ricetta dei bocconcini cheesecake ai lamponi nasce dall’idea di trasformare un classico dolce di crema in una versione mini, pronta da mordere in una sola mano, come piccoli diamanti da offrire agli ospiti. In molte cucine italiane, i dessert freddi e leggeri hanno una tradizione molto sentita: parfaits, cheesecake no-bake e dolci di formaggio serviti in porzioni individuali sono spesso presenti nelle tavolate delle feste, perché permettono di accontentare gusti diversi senza rinunciare all’eleganza. Il termine “bocconcini” richiama proprio l’idea di piccole porzioni da degustare con la stessa gioia di una prelibatezza servita in una degustazione. A questa ricetta si abbinano storie di estati trascorse in giardino, mani sporche di zucchero a velo e risate che riecheggiano tra le pareti di una casa accogliente. L’uso dei lamponi, frutti numerosi nelle campagne italiane, aggiunge un tocco romantico: rosso vivo, profumo intenso e una nota leggermente acidula che si sposa con la ricotta o il mascarpone tipico della crema. È una celebrazione della semplicità, della convivialità e dell’arte di trasformare pochi ingredienti in qualcosa di meraviglioso. Se stai pensando a una storia da raccontare mentre serviamo i bocconcini, potresti ricordare una merenda d’infanzia, quando la cucina profumava di vaniglia e limone e ogni boccone era una piccola scoperta sensoriale.

Perché adorerai questa ricetta

  • Facile da realizzare: non serve una lunga mise en place né tempi di cottura estesi; è una ricetta no-bake che si presta a essere preparata in anticipo.
  • Porzioni singole e impeccabili: le presentazioni in stile boccone regalano eleganza a ogni tavola, facilitando la condivisione tra gli ospiti.
  • Versatilità: si adatta a diversi regimi alimentari con semplici sostituzioni, mantenendo sempre una qualità sorprendente.
  • Equilibrio di sapori: la crema cremosa incontra la freschezza dei lamponi, la nota agrumata dello zest di limone e una base croccante che aggiunge struttura.
  • Allineato con la stagione: i lamponi maturi regalano una nota fruttata vivace che si esalta quando accostata a formaggi dolci e al profumo di vaniglia.
  • Ideale per l’anteprima di una cena: perfetto per aperitivi o fine pasto, aggiunge colore e raffinatezza senza appesantire.
  • Adatto a una varietà di gusti: dalla versione classica a quella con varianti cioccolatose o fruttate, offre infinite possibilità creative.

Profilo di sapore e consistenza

Questo dolce è una sinfonia di texture e contrasti. La base, spesso composta da biscotti sbriciolati mescolati con burro fuso, offre una croccantezza delicata che funge da fondale stabile per la crema. La crema di formaggio, vellutata e setosa, è una nuvola leggera che si scioglie in bocca, avvolgendo i sensi con note lattiche morbide e una leggera dolcezza. L’acidità dei lamponi, sia in purea sia come guarnizione fresca, stimola l’anima e rinforza il carattere del dessert senza sovrastarlo. Lo zest di limone, finemente grattugiato, aggiunge zing e luminosità, come un soffio di aria fresca in una giornata afosa. L’equilibrio tra dolcezza e acidità crea una scia aromatica che resta in memoria: una combinazione che invita a chiudere gli occhi e respirare profondamente il profumo della frutta rossa maturata al sole. Quando mordi, la crema si avvolge intorno al crumble, offrendo una texture complessa: prima una lieve friabilità della base, poi la crema liscia che scende morbida e avvolgente, infine la lucentezza brillante del lampone fresco che aggiunge una nota fresca e leggermente pungente. È un dessert in cui ogni boccone racconta una piccola storia di armonia: il calore della vaniglia, la freschezza del lampone, la cremosità del formaggio, e la possibile puntura citrus che rinforza l’esperienza sensoriale.

Occasioni & Abbinamenti

Questo dolce si presta a numerose situazioni. È ideale per:

  • Pranzi estivi all’aperto, dove un dessert freddo e non pesante è preferibile;
  • Feste di compleanno, che richiedono una presentazione chic ma praticabile;
  • Brunch domenicali, dove un tocco goloso e fresco rompe la routine mattutina;
  • Cene romantiche o anniversari, accompagnati da un bicchiere di Prosecco, Moscato d’Asti o un passito leggero;
  • Degustazioni tra amici, come finger dessert che stimolano la conversazione senza appesantire la sera.

Per quanto riguarda gli abbinamenti, pensa a bevande frizzanti che non sovrastino la crema: uno spumante secco, un vino dolce leggero o una limonata al basilico per una nota erbacea. In accompagnamento, piccole sculture di cioccolato bianco o scaglie di cioccolato fondente possono offrire un contrappunto goloso senza oscurare la fragranza principale dei lamponi. Puoi anche optare per un tocco di erbe: una fogliolina di menta o di basilico al momento di servire aggiunge una freschezza insolita che eleva l’intera esperienza sensoriale. Se vuoi variare la base, una versione al cacao leggero o una base alle mandorle può dare profondità diversa senza togliere equilibrio al piatto.

Consigli, Varianti & Sostituzioni

  • Sostituzioni per diete vegane o senza latticini: sostituisci la crema di formaggio con una crema a base di anacardi o anacardi ammollati lavorati con latte di mandorla e un pizzico di succo di limone. Per la base, usa burro di cacao o olio di cocco al posto del burro tradizionale. Aggiungi agar-agar o agar per solidificare la crema; lavora con dosi leggere per mantenere una consistenza cremosa.
  • Versione senza glutine: scegli biscotti privi di glutine per la base e controlla l’etichetta degli ingredienti per evitare contaminazioni. Puoi usare noci macinate e cacao per una base diversa ma altrettanto croccante.
  • Varianti di sapore: sostituisci i lamponi con fragole, mirtilli o frutti di bosco misti. Aggiungi una piccola purea di frutti di bosco all’interno della crema per un effetto marmorizzato. Puoi anche mixare scorza di lime per una nota più agrumata o un filo di puro sciroppo di vaniglia per una dolcezza più intensa.
  • Versione al cioccolato: aggiungi un sottile strato di ganache al cioccolato bianco tra la base e la crema, oppure incorpora cacao amaro nella base per un profilo al cioccolato leggero. In superficie, cospargi con scaglie di cioccolato fondente per contrasto.
  • Varianti regionali: apporta un tocco di liquore all’amaretto o limoncello per un aroma speziato e fine, tipico delle tradizioni dolci italiane. Oppure utilizza miele di sambuco per una scorza dolce e floreale che rende il dessert ancora più aromatico.
  • Preparazione in anticipo: i bocconcini si prestano a essere preparati con 1–2 giorni di anticipo. Conserva in frigorifero, ben coperti, fino al momento di servire. Se vuoi accelerare la presentazione, crea le basi in anticipo e aggiungi la crema al momento di assemblare.

Conservazione & Idee per preparare in anticipo

Per conservare al meglio i bocconcini cheesecake ai lamponi, disponili in un contenitore ermetico e riponili in frigorifero. La crema a base di formaggio tende a mantenere una consistenza liscia per 2–3 giorni, ma è consigliabile consumare entro 48–72 ore per preservare la freschezza dei lamponi e la brillantezza della base. Se vuoi congelarli, rimuovi eventuali decorazioni fresche (lamponi interi) e congela senza sovrapposizioni che possano far attaccare tra loro. Per risvegliare la cremosità dopo la congelazione, lasciali scongelare lentamente in frigorifero per diverse ore o durante la notte. Se hai intenzione di servire a una festa, prepara la base con largo anticipo, congela, e al momento di servirla adagia la crema e i lamponi freschi per una presentazione impeccabile.

Un’altra strategia utile è fare una prestazione in due fasi: prima prepara la base e la crema, quindi congela la crema in piccole porzioni all’interno di stampi o cilindri individuali. Quando è ora di servirli, spalma o versa la crema sui gusci di base e aggiungi lamponi freschi. In questo modo si risparmia tempo e puoi replicare la ricetta per un grande numero di ospiti senza perdere di vista la consistenza perfetta.

Curiosità & Trivia (Opzionale)

Lo yogurt di lamponi e la cucina italiana hanno una storia intrecciata con i dessert freddi. I lamponi, appartenenti alla famiglia delle Rosaceae, hanno una storia antica che risale all’Europa del Nord, ma hanno trovato una casa perfetta nel Mediterraneo dove la dolce acidità dei frutti rossi si sposa magnificamente con formaggi cremosi e aromi agrumati. Il termine “bocconcini” richiama l’idea del boccone prezioso: in cucina italiana è usato per indicare piccole porzioni di formaggi, stuzzichini o dolcetti, ideali come presentazione elegante ma informale. In molte cucine regionali, i dessert di formaggio freddi hanno origini monastiche o contadine: l’arte di trasformare latte, formaggio cremoso e dolcificanti naturali in una dolce esperienza da condividere è stata una parte vitale della convivialità familiare. Un altro aneddoto divertente è che, per alcuni, i bocconcini cheesecake ai lamponi sembrano un’immagine di estate eterna: la dolcezza soffice dentro, la brillantezza rossa dei lamponi all’esterno, e l’idea di una piccola fortuna da gustare in un sol boccone possono ricordare la gioia semplice di una tavola piena di colori e risate.

Ingredients

Crust
  • – 200 g digestive biscuits or graham crackers, finely crushed
    → Crust base provides structure and flavor. Crush the cookies to a consistent, fine crumb for an even press into the pan. Mix with melted butter until evenly moistened, then press firmly into the base and slightly up the sides. Chill briefly to set before filling for a clean separation between crust and filling.
  • – 80 g unsalted butter, melted
    → Binds the crust together and gives a crisp, pastry-like texture when baked. Ensure the butter is fully melted and smooth before mixing with crumbs; pour into the crumbs and mix until uniform; press into the pan and chill to set.
Filling
  • – 250 g bocconcini (bocconcini mozzarella), well drained and softened to room temperature before blending
    → Adds a velvety, ultra-creamy texture with a mild, milky flavor that pairs beautifully with raspberries. To avoid a watery filling, blot the bocconcini thoroughly to remove excess whey and blend until completely smooth. If the mixture seems grainy, pass through a fine sieve after blending or blend with a small amount of cream cheese to improve texture.
  • – 450 g cream cheese, softened to room temperature
    → Provides body, tang, and stability to the cheesecake. Soften thoroughly to prevent lumps; beat on medium speed until completely smooth and airy, scraping down the bowl a few times. This base allows the flavors to emulsify with bocconcini for a luxurious filling.
  • – 180 g ricotta cheese, well drained (optional for extra creaminess)
    → Lightens the filling and adds moisture without making it feel heavy. Drain well to minimize extra moisture; whisk until smooth before folding into the main mixture to maintain a silky texture.
  • – 150 g granulated sugar
    → Balances the tang of dairy and enhances the creamy mouthfeel. If you prefer a less sweet cheesecake, reduce to 120 g. For a deeper caramel note, a small amount of light brown sugar can be used, but this will alter flavor.
  • – 3 large eggs, at room temperature
    → Provide structure and help the filling set during baking. Add one at a time on low speed to avoid incorporating excess air, which can cause cracks. If you bake at a lower temperature, you may reduce cracking further.
  • – 1 large egg yolk, at room temperature
    → Adds richness and glossy texture to the cheesecake, helping to create a smoother finish.
  • – 1 tsp vanilla extract
    → Enhances overall flavor; use pure vanilla for best aroma. If using vanilla bean, scrape the seeds and add them with the vanilla extract for intensified fragrance.
  • – Zest of 1 lemon
    → Lifts the filling with a bright citrus note that complements raspberries. Use finely grated zest, avoiding the white pith, which can introduce bitterness.
  • – 1–2 tbsp fresh lemon juice
    → Adds acidity to balance sweetness and helps activate the setting of the filling; taste and adjust to your preference.
  • – 2 tbsp cornstarch
    → Acts as a thickener and helps stabilize the filling during baking for a smooth, crack-free surface. Whisk with a splash of the milk or cream to create a lump-free slurry before adding. If you prefer a creamier texture, you may reduce to 1 tbsp.
  • – 60 ml heavy cream (optional) or milk
    → Adds extra creaminess and a softer crumb; use heavy cream for a richer mouthfeel, or milk for a lighter result. Add gradually to reach the desired consistency of the batter.
  • – 1/4 tsp salt
    → Enhances the dairy flavors and balances sweetness; especially important when using sweetened dairy products.
Raspberry Layer and Swirl
  • – 300 g fresh raspberries (reserve some for topping)
    → The star ingredient; provides tartness to contrast the creamy filling. If using frozen raspberries, thaw and drain thoroughly to minimize excess moisture; pat dry before use to avoid a soggy cheesecake base.
  • – 40–60 g granulated sugar (adjust to taste)
    → Sweetens the raspberries; macerating with a pinch of salt can enhance depth. Adjust amount depending on raspberry sweetness.
  • – 1 tablespoon fresh lemon juice
    → Brightens the raspberry flavor and helps maintain vibrant color. Add gradually and taste; lemon juice also helps prevent browning of the fruit.
  • – 1 teaspoon cornstarch (optional)
    → Thickens the raspberry swirl for a glossy ribbon effect. Mix with a teaspoon of water to form a slurry if you cook a quick raspberry coulis, or skip if you prefer a fresh, uncooked swirl.
Garnish and Finish
  • – Fresh raspberries for topping
    → Adds color, texture, and a fresh-taceted contrast. Place gently on top after chilling to prevent squashing the filling.
  • – Fresh mint leaves (optional)
    → Provides a pop of color and an aromatic finish; gently tear leaves or leave whole as a delicate garnish.
  • – Icing sugar for dusting (optional)
    → Finishes the surface with a subtle sweetness and a professional look. Dust lightly just before serving to avoid soaking into the filling.

Instructions

  • Preheat your oven to 325°F (165°C) and prepare a 9-inch (23 cm) springform pan: grease the sides with melted butter and line the bottom with parchment if you like; wrap the exterior of the pan with two layers of foil if you plan a water bath.
    → This setup prevents sticking, protects the crust from sogginess, and helps the cheesecake bake evenly without leaks.
  • Process the digestive biscuits or graham crackers until they become fine crumbs using a food processor, or place them in a sealed bag and crush with a rolling pin; transfer to a bowl and whisk in the melted butter until the crumbs are evenly moistened and hold together when pressed.
    → Achieve an even texture for uniform pressing and a cohesive crust that holds its shape during baking.
  • Press the crumb mixture into the bottom of the prepared pan and gently up the sides to form a compact, even crust about 1–2 cm high; use the flat bottom of a glass or a small offset spatula to press firmly and evenly.
    → A dense, even press prevents the crust from crumbling and ensures clean edges when sliced.
  • Chill the crust in the freezer or refrigerator for 15–20 minutes to set the butter and firm the crust before filling.
    → Chilled crust holds its shape during baking and makes sealing the filling easier without sliding.
  • Bake the crust briefly in the preheated oven at 325°F (165°C) for 8–10 minutes until it looks just set and fragrant; remove and let cool completely on a rack before filling.
    → Lightly baking the crust sets the butter and dries the crumb, creating a better barrier against moisture from the filling.
  • Meanwhile, drain the bocconcini thoroughly and blot with paper towels to remove excess whey, then allow them to come to room temperature so they blend smoothly without creating lumps.
    → Room temperature ingredients emulsify more readily, yielding a silkier, ultra-creamy filling without watery pockets.
  • Place the drained bocconcini in a high-powered blender or food processor and blend until completely smooth and velvety, scraping the bowl as needed to incorporate stray pieces.
    → A perfectly smooth base prevents graininess and ensures the distinctive bocconcini creaminess shines through the cheesecake.
  • In a large mixing bowl, beat the softened cream cheese on medium speed until it is completely smooth and fluffy, scraping the bowl down several times to avoid lumps.
    → Air-free, smooth cream cheese creates a stable, creamy matrix that supports the delicate texture of the filling.
  • If using the optional ricotta, whisk the well-drained ricotta until smooth before folding it into the main mixture; this step helps prevent clumps and creates an even creaminess.
    → Properly whisked ricotta integrates with the bocconcini and cream cheese for a lighter mouthfeel without stringiness.
  • Beat in the granulated sugar until fully incorporated and the mixture is light and creamy, about 2–3 minutes; this helps dissolve sugars and prevents a gritty texture.
    → Properly aerated, sweet filling supports a balanced flavor with the tang of dairy and the brightness of lemon.
  • With the mixer on low speed, add the eggs one at a time, allowing each to fully incorporate before adding the next; this minimizes the development of large air pockets that can cause cracks.
    → Gentle addition prevents overbeating and keeps a smooth, crack-free surface after baking.
  • Blend in the large egg yolk to enrich the batter and give a glossy finish, beating just until combined.
    → The yolk adds richness and helps create a silkier cheesecake structure.
  • Stir in the vanilla extract and the lemon zest using a spatula, distributing the bright aroma evenly without overworking the batter.
    → Pure vanilla and fresh zest amplify fragrance and balance the richness with citrus lift.
  • Add the lemon juice in small amounts, tasting as you go to reach the desired acidity that balances sweetness without curdling; whisk just to combine.
    → The acidity helps set the filling and heightens flavor without making the mixture too loose.
  • Whisk the cornstarch with a splash of the milk or cream to form a smooth slurry, then whisk it into the filling to help stabilize and prevent cracking during baking.
    → The starch thickens slightly, producing a smoother surface and reducing seepage of moisture from the dairy.
  • Stir in the heavy cream (or milk) gradually, aiming for a pourable but thick batter; add just enough to achieve a silky, spoonable consistency without thinning too much.
    → The dairy ratio affects the texture: heavy cream yields richer mouthfeel; milk yields lighter texture.
  • Beat in the pinch of salt to enhance the dairy flavors and balance sweetness; distribute evenly by scraping the bowl and mixing briefly.
    → Salt sharpens flavors and prevents the filling from tasting flat, especially with sweet raspberries.
  • Pour the smooth bocconcini–cream cheese filling into the cooled crust, smoothing the top with a spatula to a uniform level, and tap the pan gently on the counter to release any trapped air.
    → A level, bubble-free filling bakes evenly and yields a clean edge for slicing.
  • Prepare the raspberry layer by rinsing and patting the raspberries dry; reserve a handful for topping and place the rest in a bowl with the sugar and lemon juice; macerate for 10–15 minutes to release juices.
    → Maceration softens the fruit, concentrates flavor, and creates a vibrant swirl with the creamy filling.
  • If you prefer a cooked raspberry swirl, simmer the macerated raspberries with a pinch of salt until slightly thickened, then whisk in a slurry of cornstarch and water; cook 1–2 minutes until glossy, then cool completely before swirling. If you prefer raw swirl, skip cooking and proceed to assembly.
    → Cooking creates a glossy, stable swirl that holds its shape; raw fruit yields a fresh, tart ribbon within the cheesecake.
  • Pour the cheesecake filling over the crust, then spoon the prepared raspberry mixture in dollops over the surface; using a thin skewer or knife, swirl the raspberry into the batter with gentle figure-eight motions to create a marbled pattern.
    → The swirl adds tart brightness and visual contrast without compromising the structural integrity of the filling.
  • Bake the assembled cheesecake in the center of a preheated oven at 325°F (165°C) for 50–60 minutes, or until the edges are set and the center wobbles slightly when the pan is gently nudged; avoid overbaking to prevent cracking.
    → A gentle bake sets the filling while preserving a creamy center; a slight jiggle indicates proper set as it cools.
  • Turn off the oven, crack the door open, and let the cheesecake rest in the warm oven for 60 minutes to gradually reduce temperature and minimize cracking from a sudden temperature shift. Then transfer to a rack to cool completely at room temperature.
    → Slow cooling minimizes surface cracks and helps the center set with a smooth finish.
  • Chill the cheesecake in the refrigerator for at least 4 hours, or overnight, to fully set the flavors and stabilise the structure before slicing.
    → Chilling firms the filling so each slice holds its shape and the flavors meld for an indulgent bite.
  • Once chilled, run a thin knife around the inner edge of the pan before releasing the springform; remove the ring carefully to avoid damaging the crust.
    → This prevents fragments from pulling away and ensures clean slices and a neat presentation.
  • Garnish with the reserved fresh raspberries and optional mint leaves just before serving, and dust lightly with icing sugar if desired for a professional, photogenic finish.
    → Fresh berries provide a bright contrast in color and flavor; light sugar dusting adds a polished look without saturating the filling.

Notes

These bocconcini cheesecake ai lamponi are a creamy, luxurious dessert with a crisp biscuit crust and a bright raspberry swirl. For the smoothest filling, drain the bocconcini thoroughly and blend them with the softened cream cheese until completely silky; if the mixture feels grainy, pass it through a fine sieve and fold in the ricotta if using. Chill the crust briefly before adding the filling to help it cut cleanly. When mixing the eggs, add them one at a time on low speed to avoid incorporating air that can cause cracks. Finish the batter with lemon zest and juice to lift the flavors and help setting; 1–2 tablespoons of lemon juice can be adjusted to taste. The cornstarch helps stabilize the bake and keep the surface crack-free; whisk it with a little milk or cream to make a smooth slurry before adding. For the raspberry layer, macerate berries with granulated sugar and lemon juice to draw out juices; if you want a glossy swirl, cook a quick coulis with optional cornstarch, otherwise fold in the fresh raspberries as is. Bake gently, ideally in a water bath, and wrap the pan with foil to prevent water seepage; cool completely then refrigerate for several hours or overnight to allow the cheesecake to set. Garnish with fresh raspberries, mint leaves, and a light dusting of icing sugar just before serving. These notes assume you are using standard gluten-containing digestive biscuits; if you are gluten-sensitive, choose gluten-free biscuits and verify that all other ingredients are gluten-free. Always use room-temperature dairy ingredients for a smoother batter and chill the finished cheesecake well before slicing.

Tips

Consigli utili per la preparazione

  • Porta formaggi e uova a temperatura ambiente prima di iniziare: renderà la crema molto più liscia e facile da lavorare senza grumi.
  • Asciuga bene i bocconcini di mozzarella (bocconcini) con carta assorbente prima di frullarli: troppa umidità renderà la crema meno stabile.
  • Frulla i bocconcini e il formaggio cremoso in ordine: lavora prima i formaggi fino a cremosità, poi aggiungi zucchero e aromi poco per volta per evitare grumi.
  • Per evitare crepe, aggiungi le uova una alla volta a velocità bassa e non sbattere troppo; incorpora solo quanto basta per amalgamare gli ingredienti.
  • Utilizza solo la scorza gialla del limone e, se possibile, aggiungi il succo gradualmente: assaggia per bilanciare l’acidità senza coprire gli altri sapori.
  • La cornstarch aiuta a rassodare la crema. Se ti sembra troppo spessa, riduci da 2 a 1 cucchiaio; se vuoi una texture ancora più vellutata, prosciuga l’amido con una piccola quantità di latte o crema prima di aggiungerlo.
  • Assicura la base ben pressata: premi la base in modo uniforme e alzala leggermente sui bordi per una separazione pulita tra crosta e ripieno. Raffredda la crosta prima di aggiungere la crema.
  • Per una salsa di lamponi lucida e aromatica, macera i lamponi con zucchero e succo di limone; se vuoi una salsa più spessa, aggiungi un cucchiaino di amido di mais sciolto in poca acqua e scalda brevemente.
  • Lamponi freschi sono ideali per topping. Se usi lamponi congelati, scongelali e tampona l’umidità in eccesso per evitare una base molle.
  • Cuocere in forno a bassa temperatura aiuta a evitare crepe: se possibile, usa un bagno di acqua (water bath) posizionando lo stampo in una teglia più grande con acqua calda; chiudi la porta del forno e spegni quando è quasi pronta, poi lascia raffreddare lentamente.
  • Lascia raffreddare completamente il cheesecake a temperatura ambiente prima di trasferirlo in frigorifero; quindi riponi in frigo minimo 4 ore, meglio tutta la notte, per una consistenza ferma e liscia.
  • Per una fetta pulita, usa un coltello molto affilato e scotta la lama tra una fetta e l’altra. Puliscilo tra una porzione e l’altra per evitare sbavature.
  • Conservazione: il dolce si mantiene in frigorifero 3–4 giorni; per congelarlo, avvolgilo bene e consumalo entro 1 mese. Scongelalo in frigorifero durante la notte prima di servirlo.
  • Varianti: se vuoi una versione meno ricca, riduci il formaggio morbido o sostituiscilo parzialmente con morella di ricotta leggera; per un sapore più intenso di limone, aumenta leggermente la scorza o il succo.

FAQ

Che cosa sono i Bocconcini cheesecake ai lamponi?

Sono piccoli dessert freddi a base di una base croccante di biscotti, crema cremosa al formaggio e lamponi freschi in cima. Vengono realizzati in formine da muffin o in bicchierini, ideali per dessert da buffet o per accompagnare una tazza di caffè.

Quali ingredienti servono (per circa 12-14 bocconcini)?

Base:
– 200 g biscotti digestive (o altri biscotti secchi)
– 80 g burro fuso
Crema:
– 300 g formaggio spalmabile (tipo philadelphia)
– 150 g mascarpone
– 100 g zucchero a velo
– 1 cucchiaino estratto di vaniglia
– scorza grattugiata di 1 limone
– 200 ml panna fresca da montare
Guarnizione:
– lamponi freschi
– foglie di menta (facoltali)

Quali strumenti sono utili per prepararli?

– stampi per muffin o pirottini in carta/riutilizzabili
– frullatore o sacchetto per tritare i biscotti
– una ciotola capiente e una frusta o mixer
– spatola da cucina per livellare
– frigorifero o frigo per far rassodare

Come preparo la base dei bocconcini?

1) Tritare finemente i biscotti. 2) Mescolarli con burro fuso fino a ottenere un composto lavorabile. 3) Distribuire il composto nelle cavità degli stampi, premendo bene per formare una base compatta. 4) Mettere in frigo per almeno 15-30 minuti per far rassodare.

Come preparo la crema di formaggio?

1) In una ciotola, mescolare formaggio spalmabile, mascarpone e zucchero a velo fino a ottenere una crema liscia. 2) Aggiungere vaniglia, scorza di limone e mescolare bene. 3) Montare la panna e incorporarla delicatamente alla crema con una spatola, in modo da non smontarla.

Come si assemblano i bocconcini?

1) Estrarre le basi dal frigo. 2) Versare o adagiare la crema sopra ciascuna base, livellando con una spatola. 3) Decorare con un lamponi su ogni bocconcino e, se desiderato, una fogliolina di menta. 4) Rimettere in frigo per rassodare, per almeno 3-4 ore (meglio tutta la notte).

Quanto tempo richiede l’intero procedimento?

Tempo attivo: circa 30-40 minuti. Temperatura e riposo: almeno 3-4 ore in frigorifero (preferibilmente overnight) per una consistenza ben soda.

Posso preparare i Bocconcini in anticipo?

Sì. Sono ideali da preparare in anticipo. Si conservano in frigorifero, coperti, fino a 2-3 giorni. Più a lungo restano, più i lamponi sulla superficie rischiano di rilasciare liquido; è consigliabile decorarli solo poco prima di servirli.

Posso variare la frutta o rendere il dolce più green/leggero?

Certo. Puoi sostituire i lamponi con fragole, lamponi gialli, mirtilli o frutti di bosco misti. Per una versione più leggera, riduci la quantità di zucchero a velo e usa una crema di formaggio meno dolce; puoi anche aggiungere una spruzzata di succo di limone per bilanciare la dolcezza.

Come conservare e quali sono le alternative di decorazione?

Conservazione: in frigorifero, coperti, per 2-3 giorni. Per decorare, oltre ai lamponi, puoi usare scorza di limone, foglioline di menta, scaglie di cioccolato bianco o una leggera polvere di zucchero a velo. Evita decorazioni che ossidano o marciscono rapidamente.

Posso rendere la ricetta senza lattosio o vegana?

Per una versione senza lattosio, usa formaggio spalmabile e mascarpone senza lattosio e panna senza lattosio. Per una versione vegana, occorrono alternative plant-based: crema di anacardi o altro formaggio cremoso vegano, biscotti senza burro animale e panna vegetale. Le proporzioni andranno adattate per ottenere una crema stabile e gustosa.

Introduction / Hook

Imagine a dessert that begins with a whisper of coffee and almond, then unfolds into a cheesecake cloud studded with jewel-toned berries. Biscotti cheesecake ai mirtilli is the kind of slice that makes a room pause: a creamy, vanilla-tinged filling swirls softly around a base that crackles with the unmistakable snap of biscotti. The blueberry pockets burst with bright tartness, like little midnight stars scattered through a silky custard. In every bite, you taste an affectionate conversation between two beloved Italian classics—the sturdy, comforting crunch of biscotti and the elegant, lingering richness of cheesecake. The aroma invites you to linger in the kitchen a moment longer: a hint of citrus zest here, a pinch of warm spice there, and the soft glow of vanilla that tells you you’re about to experience something both familiar and wonderfully new. This isn’t just a dessert; it’s a memory in the making—an edible invitation to slow down, to savor, and to share with the people who make ordinary moments feel special.

The Story Behind the Dish

Food, like language, evolves when cultures meet over a table. Biscotti cheesecake ai mirtilli is a modern Italian-American fusion that speaks to the romance of two signatures in one elegant bite. The biscotti, those twice-baked Italian cookies that travel far beyond their homeland’s borders, bring a sturdy, toasty backbone to the crust-like base. They carry whispers of almond, vanilla, and coffee that have charmed generations, from sunlit Tuscan mornings to bustling city kitchens in New York and beyond. Cheesecake, meanwhile, is a universal comfort: a smooth, velvety canvas—its custard richness balancing sweetness with tang. In this recipe, the two worlds kiss at the center, producing a dessert that is both grounded in traditional flavors and liberated by creative boldness. The blueberries—native to many regions of Europe and the Americas—introduce a seasonal brightness that turns the dish into a celebration of fresh fruit, a reminder that sometimes the simplest ingredients, treated with care, yield the most mesmerizing results.

Beyond the flavors, there’s a tale of hospitality. In Italian culture, dessert is often a shared ritual rather than a finale. The biscotti’s sturdy character makes it ideal for party gatherings, accompanying a strong espresso or a glass of wine as guests linger over conversations. Layer a tangy blueberry finish over a creamy cheesecake, and you create a dessert that invites storytelling—a dish that says: sit down, relax, and enjoy the moment. For me, this combination also carries personal nostalgia: the crisp bite of biscotti dipping into a creamy slice mirrors afternoons spent in sunlit kitchens, watching a grandmother craft something that would become a favorite family memory. The legend of this dessert is not carved in stone but chiseled by experience—small rituals like dusting the plate with powdered sugar, slicing the cheesecake with a gentle sawing motion, and letting the blueberries fracture on the surface to reveal their purple-blue innocence. It’s a dessert that respects tradition while inviting experimentation, a bridge between the comforting familiarity of Italian cookies and the indulgent, crowd-pleasing allure of cheesecake.

Why You’ll Love This Recipe

  • Indulgent yet approachable: a sophisticated dessert that feels special without being intimidating.
  • Harmonious flavor balance: the earthy almond notes from biscotti, the tangy creaminess of cheesecake, and the bright, juicy blueberries create a multi-layered taste profile.
  • Textural contrast: a biscotti-crisp base or crust-like layer provides a satisfying snap against the lush, creamy cheesecake filling, finished with a glossy berry sheen on top.
  • Versatile for occasions: perfect for dinner parties, festive holidays, weekend family gatherings, or a refined weekend treat with coffee after dinner.
  • Make-ahead friendly: this dessert can be prepared in advance and served chilled, allowing flavors to meld and the texture to set beautifully.
  • Visually captivating: the purple-blue blueberries punctuating a pale, velvety canvas make for a stunning dessert that photographs beautifully and garnishes well with citrus zest or mint.
  • Adaptable for dietary preferences: with easy substitutions, you can craft a gluten-free or dairy-free version without sacrificing the spirit of the dish.

Flavor Profile & Texture

The flavor journey begins with the biscotti component: a warm, toasty almond aroma that hints at coffee grounds and subtle vanilla. This base adds a crunchy, brittle texture that remains pleasantly chewy in places, especially where the biscotti has softened just enough against the creamy filling. The cheesecake itself is delicately sweet, with a gentle tang that acts as a counterpoint to the sweetness of the blueberries. The cheese layer—creamy, smooth, and luxuriously rich—carries a whisper of vanilla and a touch of citrus zest, creating brightness without acidity hijacking the palate. The blueberries introduce a fruity acidity and a floral note that brighten the entire slice, while their fresh, juicy pop provides a delightful contrast to the silkiness of the cheese.

Texture-wise, you encounter a three-act experience: the initial crisp snap of the biscotti, the indulgent silken mouthfeel of the cheesecake, and the burst of juicy blueberry that lingers after swallowing. The crust, or the baked biscuit base, offers a rustic bite that evolves as the filling warms slightly in the mouth, releasing extra aromas of almond and citrus. There’s a subtle, almost imperceptible layer of lemon zest or orange peel mingling with the filling, yanking the flavors upward with a citrusy lift that makes the dessert feel lighter and more refreshed, even as it remains deeply indulgent. The overall effect is a harmonious blend of textures and tastes—crunchy, creamy, tart, and sweet all at once, with a flavor arc that invites you to take another forkful, then another, until the plate is nearly empty and the memory of the last bite lingers in the jaw and the heart.

Occasions & Pairings

This blueberry biscotti cheesecake shines in a variety of settings, from intimate weeknight desserts to show-stopping party desserts. Consider serving it after a Mediterranean-inspired dinner with a light salad and a glass of sparkling wine. It also fits naturally into holiday spreads, where its rich yet approachable profile can please guests of all ages. For brunch gatherings, it complements coffee and a citrusy mimosa, offering a decadent option that still feels special but not heavy. The presentation alone lends itself to a celebratory moment: a clean, neat slice on a cool plate, a dusting of powdered sugar, a few fresh blueberries or a delicate mint leaf as a garnish, and perhaps a thin citrus zest curl to add a pop of color.

Pairings to consider:
– Beverages: a glass of Moscato d’Asti, Prosecco, a late-harvest Riesling, or a rich espresso. For non-alcoholic options, a chilled black tea with a splash of lemon or a shimmering blueberry cordial can be delightful.
– Sides and accompaniments: a light citrus salad with a mint vinaigrette, a dollop of herb-scented whipped cream, or a scoop of vanilla-flavored Greek yogurt folded with a hint of lemon zest for a tangy contrast.
– Desserts to follow: a simple berry tart, almond biscotti on the side, or a small square of dark chocolate to extend the chocolate-berry-nut theme in a balanced way.

This dessert also adapts beautifully to seasonal menus. In late summer and early fall, you can swap in other stone fruits—peach or plum—alongside blueberries for a seasonal twist, keeping the almond-biscotti base and cheesecake foundation intact. The result remains a crowd-pleasing option that travels well to potlucks, picnics, or intimate family dinners, becoming a signature dish that friends and family begin to request by name.

Tips, Variations & Substitutions

  • Make-ahead tricks: bake the cheesecake portion, allow it to set fully in the refrigerator, and then top with a blueberry compote just before serving for a fresh, glossy finish. The base can be prepared a day ahead and kept in an airtight container to maintain crispness until assembly.
  • Crust alternatives: if you prefer a traditional crust, crush biscotti and mix with a little melted butter to press into a shallow dish or springform base. For a gluten-free version, use gluten-free biscotti or crushed gluten-free cookies with a small amount of almond flour to mimic texture.
  • Dairy-free option: opt for a plant-based cream cheese alternative and a dairy-free cream cheese substitute with a splash of lemon juice or apple cider to mimic tang. Use a non-dairy yogurt or coconut cream to achieve the filling’s creaminess, and keep the blueberries as they are for a burst of color and flavor.
  • Flavor twists: add a touch of lemon or orange zest to the filling to brighten the cheesecake. A pinch of cinnamon or cardamom can offer warmth and complexity that pairs beautifully with the almond notes.
  • Blueberry substitution: if blueberries aren’t available, swap with blackberries, raspberries, or a mixed berry compote. Each berry produces a slightly different balance of sweetness and tartness, but the overall effect remains delightful.
  • Texture variations: instead of a fully creamy filling, you can bake a lighter cheesecake with a mousse-like texture by folding in whipped cream toward the end of mixing. This reduces density while preserving creaminess and adding a refreshing lightness.
  • Presentation ideas: serve chilled slices on a plate with a small dollop of lemon curd or a light whipped cream, and finish with a few whole berries, a sprinkle of powdered sugar, and a micro-thin lemon twist for color and aroma.

Storage & Make-Ahead Ideas

Storage and make-ahead approaches help you plan ahead for holidays, gatherings, or simply a week of indulgence without last-minute stress. If you’ve prepared the cheesecake part in advance, you can keep it tightly wrapped in plastic wrap or a resealable container in the refrigerator for up to 3–4 days before topping with blueberries or serving. The biscotti crust can also be prepared early and kept in an airtight container for up to a week; reassemble once you’re ready to serve, letting the cheesecake come to a comfortable serving temperature from the fridge for about 20–30 minutes.

For longer storage, freeze slices after they’re fully set. Wrap each piece tightly in plastic wrap and place in a freezer-safe container or bag. Frozen cheesecake slices can be kept for up to 2–3 months. Thaw overnight in the refrigerator and bring to room temperature for optimal texture and flavor. If the biscotti layer has softened a bit due to freezing, a quick refreshment under a low oven for a few minutes can restore the pleasant snap just before serving.

Make-ahead party plan: assemble the base and the filling on separate days. Bake the biscotti base, allow to cool completely, and store sealed. Prepare and chill the cheesecake filling, then pour over the base and refrigerate until ready to serve. Just before serving, top with a fresh blueberry compote or scatter whole berries for a vibrant finish. This approach not only simplifies hosting but also ensures you bring a freshly composed, restaurant-quality moment to the table with minimal last-minute effort.

Fun Facts & Trivia (Optional)

Did you know that the term biscotto literally translates to “twice baked” in Italian? The biscotti’s double-bake method dates back centuries and was originally used to preserve bread for longer journeys, including long flights of trade and sea travel. The crisp texture made biscotti ideal for dunking in a hot beverage, which is a beloved tradition in Italian culture—coffee and tea become part of the flavor experience rather than mere accompaniments. Cheesecake itself has ancient roots, with early variations traced to ancient Greece; the modern velvety rendition flourished in New York and beyond, where cream cheese found its perfect partner in a dense, smooth filling. Marrying these two classics becomes a playful reminder that culinary innovation often arises from the simplest desire—to make something familiar feel new again.

Blueberries, of course, have their own storied pasts. In addition to their culinary versatility, they’re celebrated for their vibrant hue and antioxidant properties, making a dessert like this not just delicious but an instant mood-lifter. In many Mediterranean regions, citrus zest is a timeless flourish that brightens rich dairy and nutty flavors; a hint of lemon or orange in desserts is more than aroma—it’s a nudge that lifts the dessert from indulgence to refined pleasure. And in the end, this biscotti cheesecake ai mirtilli is a small celebration of memory and discovery: a dessert that respects tradition, welcomes modern twists, and invites you to gather, savor, and share without a rush.

Ingredients

Crust

  • 1 ¾ cups finely crushed biscotti cookies (about 14–16 cookies)
    → The biscotti crumbs form the crust: they provide a crisp, nutty base that contrasts nicely with the creamy filling. Crush the cookies very finely for even texture; if very hard, pulse in a processor or seal in a bag and crush with a rolling pin. Measuring crumbs after crushing ensures the correct crust density.
  • 3 tablespoons unsalted butter, melted
    → The melted butter binds the crust together so it holds when pressed into the pan. Let the butter cool slightly before mixing to avoid making the crumbs greasy; mix until the mixture resembles wet sand and press firmly into the pan. For best results, chill briefly before baking to set the crust.
  • 1 tablespoon granulated sugar (optional)
    → Adds a touch of sweetness to the crust and helps with browning. If your biscotti are already sweet, you can omit this; otherwise it helps balance flavors and yields a pleasantly crisp edge.

Cheesecake Filling

  • 24 oz (680 g) cream cheese, softened
    → The creamy base of the cheesecake; soften to room temperature to avoid lumps and ensure a silky batter. Beat on low speed until smooth, then proceed with the rest of the batter. Avoid over-mixing after eggs are added to prevent air pockets that can cause cracking.
  • 3/4 cup granulated sugar
    → Provides the primary sweetness and contributes to a creamy, smooth texture when beaten with the cream cheese. Add gradually and taste; this helps prevent graininess and ensures a balanced flavor.
  • 3 large eggs, room temperature
    → Structure and richness for the cheesecake. Add eggs one at a time, mixing just until incorporated to keep batter smooth and to reduce air incorporation that can lead to cracks during baking.
  • 1/2 cup sour cream, room temperature
    → Adds tang, moisture, and a luxuriously creamy mouthfeel. Whisk until smooth before folding into the batter to prevent lumps and ensure an even texture.
  • 1 teaspoon vanilla extract
    → Deepens overall flavor; use pure vanilla for best aroma. If possible, scrape a vanilla bean or use bean paste for a more intense vanilla note.
  • 1 tablespoon lemon zest
    → Provides a bright citrus note that pairs beautifully with blueberries and balances richness. Use a fine grater and avoid the white pith, which can impart bitterness.
  • 1 tablespoon lemon juice
    → Adds slight acidity to balance sweetness and enhances overall brightness. Use freshly squeezed juice and add gradually, especially if using very sweet berries in the swirl.
  • 1/4 cup all-purpose flour
    → Helps the cheesecake set and reduces cracking. If you’re avoiding gluten, substitute with 1–2 tablespoons cornstarch or potato starch and adjust the batter consistency accordingly.
  • 1/4 teaspoon kosher salt
    → Sharpen flavors and balance sweetness; salt is essential for a well-rounded cheesecake flavor.

Blueberry Swirl

  • 1 cup fresh blueberries
    → Adds vibrant color and fruity flavor to the swirl. Rinse, pat dry, and remove stems. If using frozen berries, thaw and drain well to avoid excess liquid; lightly crush some berries to release color while preserving some whole berries for texture.
  • 2 tablespoons granulated sugar
    → Macerates the berries, drawing out juices to create a vivid swirl. Adjust to your sweetness preference and the natural sweetness of the berries.
  • 1 tablespoon lemon juice
    → Brightens the blueberry flavor and helps balance richness. Use fresh juice for best flavor; add gradually and taste as you go.
  • 1 teaspoon cornstarch (optional)
    → Helps thicken the blueberry mixture so the swirl holds its shape inside the batter. Mix with a tiny amount of water to make a slurry before incorporating into the berries.

Optional Toppings

  • 1/2 cup fresh blueberries for topping
    → Scatter on top after the cheesecake has cooled for extra color and bursts of fruit. Rinse and pat dry; you can arrange in a decorative pattern or scatter randomly for a rustic look.
  • 1 teaspoon lemon zest, for finishing
    → A final zing of citrus aroma sprinkled over the chilled cheesecake enhances the blueberry theme.

Instructions

  • Preheat your oven to 325°F (165°C) and prepare a 9-inch (23 cm) springform pan by greasing the interior and lining the bottom with a parchment circle, then wrap the exterior with heavy-duty foil to protect against water bath leakage if you choose to bake the cheesecake in a pan of water.
    → A stable, non-stick pan and proper insulation prevent sticking, ensure even heat distribution, and help maintain a smooth edge around the crust.
  • Crush the biscotti cookies into very fine crumbs, aiming for a consistent texture that will form a compact crust; pulse in a processor or place in a sealed bag and crush with a rolling pin until there are no large lumps.
    → Fine crumbs bind more evenly with the butter, creating a cohesive crust that stays intact when sliced.
  • Combine the 1 ¾ cups biscotti crumbs with the 3 tablespoons melted unsalted butter and the 1 tablespoon granulated sugar (if using) in a bowl, then mix until the mixture resembles wet sand and holds together when pressed.
    → The butter provides fat to bind the crust, while sugar can help with browning and flavor balance; ensuring even moisture prevents a crumbly crust.
  • Transfer the crust mixture to the prepared pan and press it firmly into an even layer on the bottom and about 1/4 inch (6 mm) up the sides using the flat side of a measuring cup or the back of a spoon.
    → A compact, evenly distributed crust prevents gaps and cracking, and the raised edges contain the filling for a cleaner slice.
  • Chill the crust in the freezer or refrigerator for 15–20 minutes so it firms up before baking.
    → Chilled crust holds its shape, prevents sliding when the hot filling is added, and yields a crisper final texture after baking.
  • Bake the crust for 10 minutes until it just begins to color and set, then remove from the oven and let it cool on a rack while you prepare the filling.
    → A brief prebake sets the crust, enhances flavor through toasting, and prevents a soggy bottom once the filling is added.
  • In a stand mixer or large bowl, beat the 24 oz (680 g) cream cheese on low speed until smooth and free of lumps, about 1–2 minutes, then scrape the bowl.
    → Softened cream cheese merges more easily, producing a silky filling without gritty spots; scraping ensures even mixing and prevents overdeveloping air pockets.
  • Gradually add the 3/4 cup granulated sugar to the cream cheese and beat on low speed until fully incorporated and lightened in color, approximately 2–3 minutes.
    → Slow addition prevents graininess from undissolved sugar and yields a creamy, glossy filling.
  • Introduce the eggs one at a time, beating on low speed and scraping the bowl after each addition to maintain a smooth batter and minimize air pockets that can cause cracks.
    → Adding eggs individually reduces turbulence in the batter, helping it set evenly without cracking as it bakes.
  • Beat in the 1/2 cup sour cream, then add the 1 teaspoon vanilla extract, 1 tablespoon lemon zest, and 1 tablespoon lemon juice, mixing just until combined and smooth.
    → Sour cream adds moisture and tang; lemon zest and juice brighten the filling and balance richness without thinning the batter.
  • Stir in the 1/4 cup all-purpose flour and the 1/4 teaspoon kosher salt until just incorporated, taking care not to over-mix.
    → Flour helps stabilize the cheesecake, reduce cracking, and contribute to a creamy, sliceable texture when the filling sets.
  • Prepare the blueberry swirl by combining 1 cup fresh blueberries, 2 tablespoons granulated sugar, and 1 tablespoon lemon juice in a small bowl; lightly mash a portion of the berries to release color while leaving some whole berries for texture. If desired, whisk 1 teaspoon cornstarch with a splash of water into a slurry and gently fold it in.
    → Macerating the berries concentrates flavor and creates a vibrant swirl; cornstarch helps the swirl hold its shape during baking.
  • Pour one-third of the filling over the cooled crust, then spoon several dollops of the blueberry mixture on top and use a knife to swirl it through the batter in gentle, broad strokes.
    → Layering and swirling distributes color and fruity notes without overwhelming the cheesecake’s structure, creating a marbled appearance.
  • Pour the remaining filling over the blueberry layer, ensuring the surface is smooth and level, then give the pan a few gentle taps on the counter to release any air pockets.
    → A smooth, level surface ensures even baking and a professional-looking finish; tapping removes trapped air that could cause cracks.
  • Set the springform pan in a larger roasting pan and pour hot water into the outside pan until it reaches about halfway up the sides, creating a water bath; then bake at 325°F (165°C) for 60–70 minutes until the center jiggles only slightly when the pan is nudged.
    → The water bath provides gentle, uniform heat that minimizes cracking and helps the cheesecake set with a creamy, uniform texture.
  • Turn off the oven, leave the cheesecake inside with the door ajar for 1 hour to cool gradually, which reduces thermal shock and prevents cracks from forming as it cools.
    → A controlled cooling process minimizes surface cracking and preserves a smooth, even surface throughout the cake.
  • Remove the cheesecake from the water bath, discard the foil, and chill the cheesecake in the refrigerator for at least 4 hours or preferably overnight for optimum flavor and a clean slice.
    → Chilling firms the filling, enhances flavor concentration, and makes slicing neat and effortless.
  • Before serving, optional: top with 1/2 cup fresh blueberries and finish with 1 teaspoon lemon zest scattered over the surface to brighten the presentation and aroma.
    → Fresh toppings add color, contrast, and a fresh citrus aroma that complements the blueberry swirl and biscotti crust.
  • To slice cleanly, run a knife warmed under hot water around the edge of the cake, wipe the blade, and slice with long, smooth strokes; wipe between cuts for the sharpest edges.
    → A warmed, clean knife minimizes tearing and yields perfectly neat portions that show the swirl and crust clearly.

Notes

These biscotti cheesecake ai mirtilli offer a crisp biscotti crust, a creamy lemon-kissed filling, and a vibrant blueberry swirl. For best results, prepare the crust and filling ahead and bake the cheesecake in a water bath to minimize cracking. The recipe is adaptable for gluten-free diets by using gluten-free biscotti and, if desired, a cornstarch-based substitute for the all-purpose flour in the filling.

  • Finely crush the biscotti cookies so the crust binds evenly. Mix the crumbs with the melted butter until the texture resembles wet sand, then press firmly into a 9-inch springform pan. If the crumbs feel dry, add a touch more melted butter. Chill briefly before baking to help set the crust.
  • Soften the cream cheese to room temperature to avoid lumps. Beat with the sugar on low speed until smooth, then add eggs one at a time, mixing just until incorporated to keep the batter creamy and crack-free. Whisk in sour cream, vanilla, lemon zest, and lemon juice. Add the flour (or substitute with 1–2 tablespoons cornstarch or potato starch for gluten-free) and salt, mixing until just combined. Do not over-mix after the eggs are added.
  • Combine blueberries with sugar and lemon juice. If using frozen berries, thaw and drain well. Optional: add 1 teaspoon cornstarch to thicken the mixture. Spoon several dollops of the blueberry mixture onto the filled batter and use a knife or skewer to swirl in a marbled pattern for a bright, fruity ribbon.
  • Wrap the springform pan in heavy-duty foil and place it in a larger pan with hot water to create a shallow water bath. Bake until the center is just set and the edges are lightly puffed (center should jiggle slightly). After baking, run a thin knife around the edge to release it from the pan and let it cool gradually before refrigerating. Chill for at least 4 hours, preferably overnight, to achieve clean slices.
  • Slice chilled cheesecake and garnish with fresh blueberries and a light dusting of lemon zest for extra brightness. A dollop of whipped cream or a drizzle of lemon glaze can be added if desired.
  • Covered tightly, the cheesecake keeps well in the refrigerator for up to 4–5 days. It also freezes well; wrap slices individually and freeze for up to 2–3 months. Thaw overnight in the refrigerator before serving.
  • To make gluten-free, use gluten-free biscotti for the crust and replace all-purpose flour with cornstarch or potato starch in the filling (1–2 tablespoons, adjusting for batter thickness). Ensure all other ingredients are labeled gluten-free if serving to those with gluten intolerance.

Tips

Consigli utili per la crosta

  • Macina i biscotti finemente: briciole piccole e uniformi garantiscono una crosta liscia e compatta.
  • Misura le briciole dopo averle ridotte in polvere: una densità calibrata evita una crosta troppo secca o troppo morbida.
  • Se i biscotti sono molto duri, pulse in un processore o chiudi in un sacchetto e passa con un mattarello: evita grumi grandi.
  • Lascia raffreddare leggermente il burro fuso prima di mescolarlo con le briciole: così la crosta non risulta unta o oleosa.
  • Premi la crosta in modo uniforme sul fondo e sui lati della teglia; usa un fondo piatto (es. un bicchiere o una spatola) per livellare bene.
  • Raffredda brevemente la crosta prima di infornare: aiuta a mantenere la forma durante la cottura.
  • Se usi una teglia a cerniera, rivesti fondo e lati con carta forno o imburrala bene: una crosta ben aderente facilita la rimozione.
  • Se i biscotti sono già dolci, puoi omettere lo zucchero; altrimenti, uno spuntino di 1 cucchiaio aiuta a bilanciare i sapori e a dare una leggera croccantezza in superficie.

Consigli per la crema al formaggio

  • Lascia ammorbidire il formaggio cremoso a temperatura ambiente per evitare grumi e ottenere una crema liscia.
  • Mescola il formaggio con lo zucchero a bassa velocità fino a ottenere una texture soffice; evita di lavorare troppo una volta aggiunti gli aromi.
  • Aggiungi le uova una per volta, mescolando solo fino all’incorporazione per mantenere una crema vellutata e ridurre le crepe in cottura.
  • La panna acida va incorporata liscia; se è fredda, riscaldala leggermente o lascia che torni a temperatura ambiente per facilitarne l’emulsione.
  • La scorza e il succo di limone donano vivacità: usa solo la parte gialla della scorza e spremi succo fresco, aggiungendolo poco per volta e assaggiando.
  • La farina aiuta a stabilizzare la crema; se preferisci una versione senza glutine, sostituiscila con 1–2 cucchiai di amido di mais o di patate e regola la densità dell’impasto.
  • Un pizzico di sale enfatizza i sapori; non esagerare per non contrastare la dolcezza.

Consigli per la swirl ai mirtilli

  • Preferisci mirtilli freschi per colore intenso e sapore brillante; se usi quelli congelati, scongelali e scola bene per evitare liquidi in eccesso.
  • Macerali con lo zucchero per estrarne i succhi e ottenere una salsa vivace; aggiungi succo di limone per un tocco di acidità.
  • Per una swirl più densa, sciogli 1 cucchiaino di amido di mais in poca acqua fredda e aggiungilo al composto di mirtilli prima di inserirlo nell’impasto.
  • Distribuisci la swirl a cucchiaiate sulla crema livellata e usa un coltello o uno stecchino per creare motivi a vortice o serpentine senza mescolare troppo.

Consigli per la finitura e il servizio

  • Per una cottura uniforme, valuta la cottura a bagnomaria: avvolgi la teglia con carta stagnola e posizionala in una teglia più grande riempita di acqua calda a metà altezza.
  • Cotta la cheesecake finché il centro è appena tremolante; i bordi devono essere fermi e definiti mentre il centro resta setoso.
  • Lascia raffreddare lentamente nel forno con lo sportello leggermente aperto per evitare crepe causate da cambiamenti drastici di temperatura.
  • Una volta a temperatura ambiente, trasferisci in frigorifero per almeno 4 ore o preferibilmente tutta la notte: il freddo aiuta a tagliare fette pulite e a consolidare la crema.
  • Per fette nette, scalda rapidamente il coltello tra una fetta e l’altra (acqua calda e asciugato) per una separazione precisa.

Preparazione in anticipo e conservazione

  • La base può essere preparata in anticipo e conservata in frigorifero fino al momento di aggiungere la crema.
  • La cheesecake cotta si conserva in frigorifero per 3–4 giorni; per la conservazione a lungo termine, può essere congelata (fette singole) e scongelata in frigorifero.
  • Per un sapore ancora più intenso, lascia riposare la torta aromatizzando leggermente i mirtilli con il tempo in frigorifero prima di servire.

FAQ

Cos’è Biscotti cheesecake ai mirtilli?

È un dolce freddo a base di una crosta di biscotti burrosi, una crema vellutata al formaggio e mirtilli freschi o in salsa, raffreddata in frigorifero fino a solidificazione.

Quali sono gli ingredienti principali?

Per la base: biscotti tipo digestive o graham, burro fuso. Per la crema: formaggio cremoso (tipo Philadelphia o mascarpone), zucchero, vaniglia, panna fresca o yogurt greco. Per la guarnizione: mirtilli freschi e succo di limone. Puoi usare gelatina o agar-agar per rassodare se preferisci.

Come si prepara la crosta di biscotti?

Frantuma i biscotti, mescola con burro fuso e premi sul fondo di una teglia a cerniera. Lascia rassodare in frigorifero per 20–30 minuti prima di aggiungere la crema.

Come si prepara la crema al formaggio?

Montare il formaggio cremoso con zucchero e vaniglia, poi aggiungere panna o yogurt fino a ottenere una crema liscia. Versa sulla base e livella.

Come si combina con i mirtilli?

Aggiungi mirtilli freschi interi o una salsa di mirtilli sulla crema. In alternativa, mescola una piccola quantità di mirtilli frullati nella crema o usa gelatina per creare una salsa gelatinata sopra la torta.

Qual è il tempo di preparazione e la difficoltà?

Tempo attivo circa 30–40 minuti. Raffreddamento in frigorifero consigliato 4–6 ore o durante tutta la notte. Difficoltà: facile.

Come conservare e servire?

Conservare in frigorifero, coperta, per 3–4 giorni. Per servire, togli dal frigorifero 10–15 minuti prima e tagliare a fette; guarnire con mirtilli freschi o scorza di limone.

Posso prepararlo in anticipo?

Sì, è ideale da preparare il giorno prima o anche 1–2 giorni in anticipo per permettere ai sapori di fondersi e facilitare la tagliatura al momento di servire.

Versioni alternative: senza glutine o vegane?

Versione senza glutine: usa biscotti senza glutine. Versione vegana: sostituisci il formaggio cremoso con una crema vegana (es. formaggio cremoso vegetale o anacardi) e usa panna vegetale; sostituisci la gelatina con agar-agar o pectina secondo le istruzioni.

Posso congelare questa cheesecake?

Sì. Puoi congelarla intera o a fette. Avvolgila bene e conserva in freezer fino a 1–2 mesi. Scongela in frigo e, se vuoi, aggiungi una salsa di mirtilli fresca prima di servire.

Quali varianti di gusto si sposano bene con i mirtilli?

Fragole, lamponi o more si accompagnano bene ai mirtilli. Aggiungi una punta di scorza di limone o arancia per un tocco agrumato, oppure una leggera marmellata di mirtilli tra la base e la crema per intensificare il sapore.

Introduction / Hook

Imagine a bakery’s morning perfume wafting through your kitchen: vanilla-scented batter rising into soft, delicate domes; a silken vanilla custard waiting to embrace every bite; and a glossy, midnight-chocolate glaze that crowns each bite with a kiss of cocoa richness. Cupcake Boston cream is not just a dessert; it’s a celebration of contrast—airy cake, creamy filling, and a lacquered chocolate top that gleams like a window full of promises. This is the kind of treat that makes weekends feel special, invites smiles around the table, and somehow turns simple sweetness into a little ceremony you’ll want to recreate again and again. The bite is light yet indulgent, the fragrance nostalgic yet fresh, and the texture playfully dynamic: a tender crumb that yields to a cool, custardy center, finished with a crackling glaze that shatters into tiny, satisfying shards as you press your fork in. If you’ve ever adored the classic Boston cream pie but craved the portability of a cupcake, you’ve just found your new favorite crowd-pleaser. With each cupcake, you’re serving comfort, whimsy, and a decadent nod to a beloved American dessert—presented in a form that’s perfect for sharing, gifting, or simply savoring solo on a quiet afternoon.

What makes Cupcake Boston cream especially enchanting is how it distills the essence of a historical favorite into a portable, kid-friendly, and party-ready bite. The light vanilla cake acts as a friendly canvas that doesn’t shout, allowing the custard center to shine as the star. The chocolate glaze, glossy and smooth, provides a final, luxurious finish—like a petite, edible piece of chocolate art perched atop a cloud. It’s a dessert that feels special without being fussy; approachable enough for a weeknight but polished enough to impress guests. Whether you’re hosting a brunch, celebrating a birthday, or simply craving a comforting treat that feels like a warm hug, Cupcake Boston cream offers a perfect balance of sophistication and homey charm. And because cupcakes are inherently shareable, this recipe invites conversation, crumb-laden laughter, and the kind of memories that linger long after the last bite.

The Story Behind the Dish

The Boston cream pie has a storied place in American pastry lore, often cited as one of the country’s earliest beloved custard-filled desserts. Its origins trace back to the late 19th or early 20th century in the kitchens of bustling Boston eateries and hotels, where chefs began layering a velvety vanilla custard between sheets of tender cake and sealing it with a lacquer of rich chocolate glaze. Over the years, the pie earned a reputation for elegant simplicity—the sort of dessert that feels grand without being formal. The cupcake version takes that narrative and translates it into individual portions, preserving the spirit of the original while adapting to modern tastes and rituals.

This particular adaptation—Cupcake Boston cream—imagines the classic as bite-sized indulgence. The concept remains faithful: a soft, airy cake that yields to a creamy filling, crowned with a glossy chocolate glaze that delivers a dramatic, glossy finish with every bite. In transforming the pie into cupcakes, you gain portability, portion control, and the delightful thrill of a little cupcake “moment” that can be enjoyed as a standalone treat or dressed up for celebrations. The materials of the original—vanilla, custard, and chocolate—are kept intentionally pure, allowing each element to sing. The result is not simply a cupcake version of a pie; it’s a reimagining that respects tradition while embracing the playful, social nature of cupcakes.

Beyond the kitchen, the story speaks to a broader American culinary culture: a willingness to reinterpret classic flavors in new formats, the love of custard-filled desserts, and the artistry of tempering a glaze to a mirror-like sheen. It’s a reminder that good desserts aren’t about complexity for its own sake; they’re about balance, texture, and the way certain flavors travel from the nose to the taste buds in a single elegant arc. Cupcake Boston cream captures this essence—nostalgic, comforting, and irresistibly modern all at once.

Why You’ll Love This Recipe

  • Classic flavors, reimagined: vanilla cake with a creamy center and a glossy chocolate top, delivering all the familiar Boston cream vibes in a more festive, portable format.
  • Perfect for gatherings: individual portions are easy to serve, pass around, and eat without fuss, making them ideal for parties, potlucks, and brunches.
  • Make-ahead friendly: you can bake the cupcakes, fill them, and glaze them in stages, giving you flexibility when planning events or busy weekends.
  • Customizable to fit dietary needs: dairy-free or gluten-free adaptations can be explored without sacrificing the fundamentals of flavor and structure.
  • Kid- and adult-friendly: familiar flavors, bright textures, and a little bit of chocolate drama on top make these appealing to a wide range of palates.
  • Visually impressive: the dark, glossy top contrasts with the pale cake and creamy center, making them photogenic for social media, gift boxes, or festive platters.
  • Versatile pairing opportunities: they pair beautifully with coffee, tea, vanilla ice cream, or fresh fruit compote, making them a flexible option for many menus.

Flavor Profile & Texture

The beauty of Cupcake Boston cream lies in the harmony between three core components. The cake is a delicate, vanilla-forward crumb—soft, tender, and lightly buttery. It provides a gentle, cushioned base that supports the custard center without overpowering it. The custard or cream filling is smooth, velvety, and luxuriously rich. It’s the kind of filling that glides across the palate, leaving a whisper of vanilla and a faint dairy sweetness that lingers in the mouth. The final layer—a chocolate glaze or ganache—brings depth and sophistication. The glaze should feel silky and glossy, just set enough to crack slightly on the first bite. When you combine all three, you get a textural trifecta: the tender crumble of the cake, the cool silk of the filling, and the crisp snap of the chocolate shell.

Flavor-wise, the dish balances vanilla’s soft sweetness with the custard’s warm, eggy depth and the chocolate’s bittersweet finish. If you close your eyes, you can sense each component’s origin: the bakery’s vanilla bean, the custard’s buttery vanilla perfume, and the chocolate’s refined bitterness softened by a touch of cream. Aromas rise in waves—the vanilla’s familiar scent mingling with the faint aroma of cocoa, while the chocolate glaze gleams like a polished surface on a still lake. The overall sensation is comforting and celebratory at once: a dessert that feels like a hug but also a high-five in edible form.

Texture-wise, you’ll notice the contrast that makes this dessert so addictive. The cupcake’s crumb is light and airy, with just enough structure to hold a voluptuous filling. The filling itself—silky and cool—defies the expectation of “just sweet” by offering a subtle richness and a touch of vanilla that echoes through the bite. The chocolate glaze provides a slightly firmer outer shell that yields with a satisfying crack before giving way to the tender interior. It’s a progression that keeps the palate excited and the experience memorable, making each cupcake feel like a little celebration rather than a dessert alone.

Occasions & Pairings

Cupcake Boston cream shines in a variety of settings and occasions. Here are some ideal moments to showcase this treat:

  • Holidays and celebrations: birthdays, anniversaries, and family gatherings benefit from the elegant yet approachable nature of these cupcakes.
  • Brunch and tea hours: their refined flavor profile pairs beautifully with coffee drinks, hot chocolate, or a light tea service.
  • Weekend baking projects: a fun, interactive dessert to bake with friends or family, turning the kitchen into a shared creative space.
  • Giftable treats: packaged in pretty boxes, these cupcakes become charming edible gifts for teachers, coworkers, or neighbors.
  • Potlucks and office parties: their portable size and crowd-pleasing taste make them a reliable crowd favorite.

Pairing ideas to elevate the experience:

  • Drinks: a bold espresso, a lightly sweetened cappuccino, or a cold brew brings out the chocolate and vanilla notes beautifully.
  • With fruit: fresh berries, especially strawberries or raspberries, provide a bright counterpoint to the custard’s richness.
  • Texture contrasts: a dollop of lightly whipped cream or a small scoop of vanilla ice cream alongside a cupcake can create a delightful dessert ensemble.
  • Other desserts: serve alongside a lemon tart or a delicate almond biscuit to explore complementary citrus and nut flavors.

Tips, Variations & Substitutions

While the core concept remains the same, there are many ways to tailor Cupcake Boston cream to your preferences, dietary needs, or available ingredients. Here are ideas to inspire you:

  • Use real vanilla bean seeds for a more intense aroma, or substitute high-quality vanilla extract if you’re short on beans. A touch of almond extract can add a subtle, complementary note if you enjoy it.
  • Traditional vanilla pastry cream is classic, but you can experiment with flavors: a hint of espresso for a mocha twist, a whisper of citrus zest for brightness, or a pinch of cinnamon for warmth.
  • The traditional approach is a glossy chocolate glaze, but you can explore a semi-sweet ganache, dark chocolate with a splash of cream for a richer feel, or a white chocolate glaze for a lighter, dessert-table-friendly look.
  • Craft the cake with dairy-free milk and a plant-based butter substitute; fill with a dairy-free pastry cream made from almond, oat, or coconut milk; glaze with a dairy-free chocolate that has a glossy, stable finish.
  • Prepare a gluten-free vanilla base using a well-balanced gluten-free flour blend to maintain a tender crumb and good rise, ensuring the filling and glaze pair well.
  • Bake the cakes a day ahead, store them in an airtight container, and fill/glaze closer to serving time for the freshest texture and appearance.
  • For a New-England twist, incorporate a pinch of maple syrup into the custard for a subtle woodland sweetness; for a Mediterranean touch, add orange zest to the filling and a touch of coffee liness to the glaze.

Storage & Make-Ahead Ideas

One of the practical delights of cupcakes is the ease of storage and planning. Here are strategies to keep Cupcake Boston cream fresh, delicious, and ready when you need them:

  • Storing freshly made cupcakes: Keep unfilled cupcakes stored in an airtight container at room temperature for up to 2 days. If your filling contains dairy, refrigeration is recommended after assembly.
  • Filling and assembly timing: Bake the cakes a day ahead if possible, cool completely, and store in an airtight container. When you’re ready to serve, fill and glaze close to serving time to maintain the best texture of the cake and the gloss of the chocolate.
  • Make-ahead assembly: You can prepare the vanilla cake cups, refrigerate them, and then fill and glaze on holiday mornings or party days for a polished finish without last-minute rush.
  • Freezing options: Cupcakes without glaze can be frozen for up to one month. Thaw gently at room temperature, then fill and glaze just before serving to preserve the best texture and appearance.
  • Glaze stability: If you’re in a warm climate, keep the glaze slightly cooler so it sets with a crisp gleam when added to the cupcakes, ensuring a durable finish that won’t melt too quickly.

Fun Facts & Trivia (Optional)

Delightful little tidbits can add charm to your serving platter. Here are a few to consider sharing with guests:

  • The term “Boston cream pie” is widely treated as a cake in many parts of the United States, and some menus proudly label it as a pie; the distinction often comes down to the culinary tradition in a given region—and how one defines a custard-filled dessert with a glossy chocolate top.
  • Custard-based desserts have a long, storied lineage across many cultures, and the vanilla custard central to this treat is a cornerstone of patisserie that brings a smooth, lusciously creamy note to desserts of all kinds.
  • The visual drama of a glossy chocolate top has made this dessert a popular subject for food photography, with the reflection of light on the glaze creating a dramatic, almost jewel-like surface that invites a closer look.

Final Thoughts

Cupcake Boston cream is more than a reinterpretation of a classic American favorite; it’s a bridging dessert that unites nostalgia with modern convenience. It invites you to slow down and enjoy the ritual of baking—measuring, whisking, tasting, and adjusting—while delivering a finished treat that feels both timeless and contemporary. The interplay of light cake, airy custard, and glossy chocolate is more than a flavor combination; it’s a memorable sensory journey that invites conversation, compliments, and—the best kind of indulgence—shared smiles. Whether you’re a seasoned baker or a home cook experimenting with refined flavors, these cupcakes offer an accessible gateway to a celebratory dessert that feels special yet warm, elegant yet approachable. Ready to bake your own Boston cream moment? Embrace the tradition, savor the texture, and relish the way a single bite can conjure a memory and spark a new favorite tradition in your kitchen.

Ingredients

  • Cupcake Base
    • 2 cups all-purpose flour (sifted)
      → Provides the structure and crumb for the cupcakes. Sifting the flour before measuring helps ensure the batter rises evenly and prevents dense texture. For a lighter crumb, you may substitute a portion with cake flour, but keep some all-purpose for structure.
    • 1 1/2 cups granulated sugar
      → Adds sweetness and, when creamed with softened butter, helps trap air for a light, tender crumb. Measure level; if you want a deeper caramel flavor, you can substitute part of the granulated sugar with light brown sugar for extra moisture.
    • 1/2 cup unsalted butter, softened
      → Provides richness, moisture, and tenderness. Cream this with the sugar until light and fluffy to incorporate air for a loftier batter. Keep the butter at soft room temperature; if it’s too soft, chill slightly before mixing.
    • 2 large eggs, at room temperature
      → Contribute structure, moisture, and emulsification. Room-temperature eggs mix more evenly with butter and sugar, helping the batter hold together during baking. If eggs are cold, briefly whisk them to loosen before adding.
    • 3/4 cup whole milk
      → Provides moisture and tenderness; whole milk yields a richer crumb. Use at room temperature to improve emulsification and rise; for a lighter texture, you can substitute part with buttermilk or yogurt, though this will affect flavor and acidity.
    • 2 teaspoons vanilla extract (pure)
      → Adds depth of flavor that complements the chocolate and custard. Pure vanilla is preferred for its aroma; if you use vanilla paste, you’ll get a stronger vanilla note and visible specks.
    • 2 teaspoons baking powder
      → Leavening agent that lifts the cupcakes during baking. Distribute evenly by whisking with the dry ingredients; avoid over-mixing once wet and dry ingredients combine to prevent tunneling and dense crumbs. If you scale the recipe, adjust slightly to maintain rise.
    • 1/4 teaspoon salt
      → Enhances overall flavor and tightens the crumb slightly, helping balance sweetness. Dissolve into the dry ingredients for even distribution.
  • Boston Cream Filling
    • 2 cups whole milk
      → The base liquid for the vanilla pastry cream; heating the milk helps integrate with the eggs and cornstarch to create a smooth custard. Whole milk yields a richer texture; you can use a lower-fat milk, but texture will be less luxurious.
    • 1/2 cup granulated sugar
      → Sweetens the pastry cream; balance with a pinch of salt to prevent cloying sweetness. Taste and adjust after thickening; for a stronger vanilla note, add a dash more vanilla at the end.
    • 1/4 cup cornstarch
      → Thickening agent that gives the signature smooth, velvety custard texture. Sift to remove lumps and whisk with a splash of cold milk to dissolve fully before adding to hot milk. Cook until it reaches a glossy, nappe-like consistency, then remove from heat to prevent over-thickening.
    • 4 large egg yolks
      → Primary thickener and enrichers; temper yolks with hot milk to prevent scrambling, then whisk until the mixture thickens. Room-temperature yolks mix more evenly and yield a smoother pastry cream. Save the whites for another use if desired.
    • 2 tablespoons unsalted butter
      → Adds gloss, richness, and helps stabilize the pastry cream after cooking. Whisk in off the heat so the butter melts smoothly and the cream becomes silky. Do not boil after adding the butter to avoid breaking the emulsion.
    • 1 teaspoon vanilla extract (pure)
      → Depth of vanilla flavor that shines in the pastry cream; use pure vanilla for best aroma. If desired, you can stir in a small amount of vanilla bean paste for extra strength and tiny vanilla seeds.
    • Pinch of salt
      → Balances sweetness and enhances the custard’s flavor; a small amount helps the vanilla pop without overwhelming the mixture.
  • Chocolate Glaze
    • 6 ounces semisweet chocolate, finely chopped
      → Forms the rich, glossy glaze that coats the cupcakes and complements the creamy filling. Finely chopping allows rapid, even melting; use high-quality chocolate for a smooth, shiny finish. If you prefer a darker glaze, adjust with darker chocolate while maintaining weight.
    • 1/2 cup heavy cream
      → Creates a luxurious ganache that melts smoothly over the cupcakes, giving a rich mouthfeel and a glossy surface. Heat the cream until just steaming (do not boil) before pouring over the chocolate to ensure a silky emulsion. For a thicker glaze, reduce the cream slightly.
    • 1 tablespoon unsalted butter
      → Adds extra shine and a smooth, velvet finish to the glaze. Whisk in off the heat after the ganache is smooth to achieve a mirror-like gloss. If dairy-free, substitute with a neutral-t colored vegan butter or coconut cream, noting that the flavor will change.
  • Optional Toppings
    • 1/4 cup mini chocolate chips (optional)
      → Provides an extra chocolate texture and burst of flavor on top. Sprinkle after the glaze has begun to set so they adhere well; avoid adding too early, which can cause them to sink.
    • Rainbow sprinkles (optional)
      → Decorative and festive; add once the glaze is set to prevent color bleeding into the glaze. Choose non-bleeding sprinkles for a cleaner finish.

Instructions

  • Preheat your oven to 350°F (175°C) and line a 12-cup muffin tin with paper liners or grease it well.
    → This ensures the cupcakes bake evenly, release cleanly, and have a tender crumb without sticking.
  • Sift together the dry ingredients: all-purpose flour, baking powder, and salt into a medium bowl, then whisk to distribute evenly.
    → Sifting aerates the flour, removes lumps, and ensures even leavening for a light, uniform crumb.
  • Cream the softened butter and granulated sugar on medium-high speed until the mixture is pale, airy, and ribbon-stage.
    → Beating until light incorporates air that will leaven the batter while keeping fat evenly distributed for tenderness. If your butter is too warm, chill briefly before mixing to avoid abrupt melting.
  • Beat in the eggs one at a time on medium speed, ensuring each egg is fully incorporated before adding the next, then mix in the vanilla extract.
    → Room-temperature eggs emulsify better with sugar and butter, creating a stable emulsion that prevents curdling and leads to a smooth batter.
  • Alternate adding the dry ingredients and the milk, beginning and ending with the dry ingredients, and mix on low just until each addition is incorporated.
    → This technique prevents overdeveloping gluten, yields a tender crumb, and ensures the batter remains smooth without lumps or tunnels.
  • Divide the batter evenly among the lined cups, filling each about two-thirds full, then tap the pan to settle the batter and remove air pockets.
    → Proper portioning ensures uniform bake times and level tops; tapping helps collapse large air bubbles for even rise.
  • Bake the cupcakes in the center rack until a toothpick inserted into the center comes out with only a few moist crumbs (about 18–22 minutes, depending on your oven). Rotate the pan halfway through baking for even color.
    → A tester with a few crumbs indicates doneness without drying the crumb; rotating avoids hot spots that cause uneven browning.
  • Cool the cupcakes in the pan for 5 minutes, then transfer to a wire rack to cool completely before filling.
    → Cooling here prevents the pastry cream from melting and helps the surface set so the filling and glaze apply cleanly.
  • Make the vanilla pastry cream by combining the milk, sugar, and a pinch of salt in a heavy saucepan and heating just to steaming.
    → Gentle heating helps the starch hydrate and the fats emulsify for a smooth custard; overheating can scorch milk and impart off-flavors.
  • In a separate bowl, whisk the egg yolks with the remaining sugar and cornstarch until smooth and pale, ensuring there are no lumps.
    → Thorough whisking disperses the cornstarch and sugar so the custard thickens evenly without specks.
  • Temper the yolks by gradually whisking in a ladleful of the hot milk, then pour the tempered yolk mixture back into the saucepan with the remaining milk.
    → Tempering prevents scrambling and yields a glossy, smooth pastry cream; whisk continuously during this transfer to maintain an even texture.
  • Cook over medium heat, whisking constantly until the mixture thickens to a nappe-like consistency, then remove from heat and whisk in the butter and vanilla, followed by a pinch of salt.
    → The butter adds shine and silkiness; keeping the heat from boiling preserves the emulsion and prevents a skin from forming.
  • Sieve the pastry cream into a clean bowl to remove any lumps, then press a piece of plastic wrap directly onto the surface and refrigerate until fully chilled and thickened.
    → Chilling stabilizes the filling for easy piping and prevents it from sliding out of the cupcakes.
  • Once the pastry cream is cold, cut a small cone or hollow out the centers of each cooled cupcake using a small paring knife or a round piping tip, creating a cavity for the filling.
    → This creates a defined space for the cream so the filling sits neatly and the outer shell remains intact during eating.
  • Fill a piping bag fitted with a small round tip (or use a teaspoon) with the pastry cream and pipe into the cavities until slightly domed, then let the filling settle.
    → Piping ensures a clean, controlled distribution and prevents air pockets; fill just to the surface to avoid overstuffing and leaking.
  • Prepare the chocolate glaze by placing the chopped chocolate in a heatproof bowl and heating the heavy cream in a small saucepan until it just begins to steam, then pour over the chocolate and let sit for a minute before whisking to a smooth ganache.
    → Hot cream melts the chocolate evenly and creates a glossy, stable glaze; resting before whisking prevents scorching and encourages a silky emulsion.
  • Whisk in the butter off the heat until the glaze is smooth and shiny, then let it cool to a pourable but thick consistency.
    → Off-heat butter helps to tighten and give a reflective gloss; too-hot glaze can melt the filling or run, while too cool glaze will not adhere.
  • Finish each cupcake by spooning or dipping the top into the chocolate glaze, allowing excess to drip back into the bowl, and let the glaze set at room temperature.
    → A thin, even coating hides the filling and creates the classic Boston Cream appearance; a shallow dip minimizes mess and ensures a smooth finish.
  • Optionally sprinkle a few mini chocolate chips over the glaze or decorate with rainbow sprinkles after the glaze has set, to add texture and festive color.
    → Toppings provide contrast in flavor and texture, and choosing non-bleeding sprinkles preserves the glaze’s sheen.

Notes

These Boston Cream Cupcakes are a timeless treat featuring a soft vanilla cupcake, a silky vanilla pastry cream filling, and a glossy chocolate glaze. You can customize them by adding a splash of espresso to the pastry cream for a mocha twist, or fold in vanilla bean seeds for extra aroma. They freeze well: bake and cool the cupcakes, then freeze unfrosted or filled and glazed cupcakes; thaw and finish as desired. For an extra touch, serve with a dollop of whipped cream or a light dusting of cocoa powder. Always ensure your flour is certified gluten-free if you have gluten intolerance, and if you need a dairy-free option, substitute accordingly with careful tweaks to texture.

Tips

Tips for Cupcake Boston Cream

  • Prepare ingredients to room temperature: Let butter, eggs, and milk sit out for about 30-60 minutes before mixing. This helps the batter emulsify properly, lift evenly, and yields a lighter crumb.
  • Sift and measure correctly: Sift the flour and baking powder with the salt to distribute leavening evenly. Spoon the flour into the cup and level off; this prevents a dense, heavy crumb.
  • Cream butter and sugar thoroughly: Beat the butter and sugar until pale, light, and fluffy (about 3-4 minutes). This traps air and helps the cupcakes rise during baking.
  • Avoid over-mixing after wet and dry combine: Mix just until the ingredients are incorporated to keep the crumb tender and to prevent tunnel holes in the cupcakes.
  • Fill liners appropriately: Fill each cupcake liner about 2/3 full to allow room for expansion and to prevent the tops from doming or overflowing.
  • Make smooth pastry cream: For the Boston Cream filling, temper the egg yolks with hot milk gradually to prevent scrambling. Cook until the mixture thickens to a glossy nappe, then whisk in butter and vanilla off the heat. Strain if necessary for extra silkiness and refrigerate until cold.
  • Keep pastry cream cold and protected: Cover the surface with plastic wrap touching the filling to prevent a skin from forming while it cools.
  • Fill with care: Once the cupcakes are completely cooled, create a small pocket or cut a tiny cone from the top and pipe pastry cream inside until it just bulges. Avoid overfilling to prevent leakage.
  • Make a smooth chocolate glaze: Heat the heavy cream just to steaming and pour over the finely chopped chocolate. Let sit a minute, then whisk until smooth. Whisk in the butter off the heat for a shiny, velvety finish. If the glaze is too thick, warm it slightly; if too thin, add a bit more chopped chocolate.
  • Set the glaze wisely: Let the glazed cupcakes sit at room temperature until the glaze is glossy and set before adding toppings or storing.
  • Top and decorate mindfully: Add mini chocolate chips or rainbow sprinkles after the glaze has set to prevent bleeding or sinking. For a cleaner finish, use non-bleeding sprinkles.
  • Storage and make-ahead tips: Pastry cream can be made a day ahead and kept refrigerated. Cupcakes can be baked a day ahead and stored in an airtight container; assemble and glaze just before serving for best texture. Refrigerate filled cupcakes if not serving soon, and bring to room temperature before enjoying.

FAQ

What are the main components of Cupcake Boston Cream?

Vanilla cupcakes, a rich pastry cream filling, and a smooth chocolate ganache or glaze on top. Optional decorations include crushed cookies, sprinkles, or fresh fruit.

How do I make the pastry cream filling for the cupcakes?

Whisk together egg yolks and sugar, then temper with hot milk. Return to the stove and cook over medium heat until it thickens to a custard-like consistency. Stir in vanilla and a little butter for shine, then chill until firm enough to pipe.

What temperature and how long should the cupcakes bake?

Bake at 350°F (175°C). Cupcakes typically take 18–22 minutes, or until a toothpick inserted into the center comes out clean. Let them cool completely before filling and glazing.

How do I fill the cupcakes with the pastry cream without making a mess?

Use a small sharp knife to cut a shallow cone-shaped hole in the center of each cupcake or insert a piping tip into a pastry bag filled with pastry cream. Inject a generous amount, then replace the cap you removed or cover with a small piece of cupcake.

Can I make the pastry cream ahead of time?

Yes. Pastry cream can be made 1–2 days in advance. Cover tightly with plastic wrap pressed to the surface to prevent a skin from forming, and refrigerate. Stir gently before using.

Are there dairy-free or gluten-free options for this recipe?

Yes. For dairy-free, use almond or oat milk and dairy-free butter alternatives; use a dairy-free chocolate for the glaze. For gluten-free cupcakes, use a certified gluten-free flour blend and follow the same mixing and baking times. The pastry cream can be made with dairy-free milk and cornstarch as a thickener if needed.

How should I store Boston Cream Cupcakes?

Store refrigerated. Keep them in an airtight container for up to 2–3 days. If you need to keep them longer, freeze unfrosted cupcakes or the filled cupcakes without glaze, then reassemble and glaze after thawing.

Can I freeze Boston Cream Cupcakes?

You can freeze unfrosted cupcakes for up to 2–3 months wrapped well. Pastry cream can be frozen for up to 1 month. Thaw overnight in the fridge, rewarm gently if needed, then fill and glaze before serving.

How do I make a smooth chocolate ganache glaze?

Heat cream until steaming (not boiling), then pour over chopped chocolate or use dark chocolate chips. Let sit briefly, then whisk until glossy and smooth. Allow to cool slightly before pouring over the cupcakes in a thin, even layer.

What are common issues and how can I troubleshoot them?

If the tops sink, bake a bit longer or avoid overmixing the batter. If the pastry cream is runny, add a touch more cornstarch slurry and cook a bit longer. If the glaze beads or won’t set, let it cool a bit more or adjust with a touch of corn syrup for shine. For a smooth finish, chill the filled cupcakes before glazing.

Introduction / Hook

Imagine a cozy morning where sunlight drapes a rustic kitchen in gold, and the scent of olive oil, garlic, and herbs threads softly through the air. In the heart of this scene sits a humble dish that feels both everyday and extraordinary: Uova al forno, eggs baked to silky perfection in a warm, welcoming cocotte. This is comfort food that slips into your memory as easily as it melts on your tongue. The edges become gently crisp, the yolks stay luxuriously runny, and every bite carries a whisper of the Italian countryside—tomatoes sun-kissed in the heat, herbs gathered from a sunny windowsill, cheese that lends a creamy, indulgent note, and a kiss of peppery green garnish. It’s breakfast with character, lunch that feels like a hug, and a dinner starter that somehow tastes like Sunday morning all week long. Whether you’re cooking for one or sharing with family, Uova al forno offers a moment of warmth, elegance, and approachable sophistication that turns a simple pantry into a feast for the senses.

The Story Behind the Dish

Uova al forno is a dish born from the Italian kitchen’s instinct to improvise with what’s at hand. In many Italian homes, the pantry is a mosaic of seasonal vegetables, a few cheeses, and a dependable reserve of eggs—the kind of ingredients that speak of late breakfasts and leisurely Saturdays. The concept of baking eggs in small, individual vessels—often called cocotte-style in modern kitchens—hails from a broader tradition of cucina povera: making the most of humble staples to create something comforting and satisfying. This is not a flashy, fast-food moment; it’s a slow, soul-nourishing practice that invites you to pause, savor, and coax flavors from simple ingredients. As ovens warmed homes across the peninsula for generations, cooks learned to layer texture and aroma: the tenderness of a slowly set egg, the brightness of a tomato-rich sauce or a few roasted vegetables, the fragrant lift of fresh herbs, and the savory embrace of cheeses that melt into creamy ribbons. The dish embodies the Italian belief that great meals emerge from restraint and imagination, from the quiet ceremony of putting a few things together with care and letting the oven do the rest. In today’s kitchens, Uova al forno is a bridge between rustic tradition and contemporary comfort—a nod to childhood memories and a nod to the present moment, where a quick bake can become a memorable centerpiece for a relaxed brunch or a casual weeknight supper.

Why You’ll Love This Recipe

  • Effortless elegance: A single, simple preparation yields a dish that feels special enough for company but is easy enough for a weeknight.
  • Versatility by design: The dish adapts to what you have—tomatoes, greens, mushrooms, cheese—each ingredient adds its own personality.
  • Texture play: The contrast between a gently set yolk and a velvety interior, with a lightly crisped edge, creates a memorable bite every time.
  • Brunch-friendly: Perfect for a leisurely weekend spread, paired with crusty bread, a bright green salad, and a sparkling drink or strong coffee.
  • Comforting and nourishing: Rich, satisfying, and deeply satisfying, this dish nourishes the body and steadies the mood.
  • Make-ahead potential: A smart choice for entertaining or meal-prep Sundays; you can prep components ahead and finish them in the oven when guests arrive.
  • Kid-friendly and crowd-pleasing: Gentle flavors, appealing textures, and a familiar, comforting profile that appeals to all ages.

Flavor Profile & Texture

Uova al forno is a study in harmony. The base is a soft, comforting canvas of eggs that gently set in the warmth of the oven, offering a silky, custard-like yolk that mirrors a mellow richness without heaviness. Surrounding this indulgent core, there is often a fragrant, simmered embrace of vegetables or a light tomato sauce that provides brightness, a touch of acidity, and a gentle sweetness. The cheese—whether it’s a delicate mozzarella that melts into creamy ribbons or a sharper pecorino or parmesan that adds a savory bite—helps to form a delicate crust along the top and yields a creamy finish when you cut into the dish. Herbs—basil, parsley, a hint of thyme—contribute a fresh, aromatic lift, while a drizzle of high-quality olive oil lends a fruity, peppery echo that ties all the elements together. Texture-wise, you encounter a pleasing sandwich of contrasts: the exterior may have a slight crispness from browning, while the interior remains luxuriously soft and custardy, almost indulgently glossy around the yolk. The finish is airy, savory, and comforting, with a gentle saltiness that lingers without overpowering the palate. When you combine the warmth of the baked eggs with the vibrancy of tomatoes or greens, you create a flavor spectrum that feels both rustic and refined—the kind of dish that makes you slow down, breathe, and savor the moment.

Occasions & Pairings

Uova al forno shines in a handful of moments and settings. It’s ideally suited for a relaxed weekend breakfast or a leisurely brunch when friends and family linger over coffee, juice, and conversation. It also works beautifully as a light, satisfying lunch—paired with a crisp salad and perhaps a shard of rustic bread to scoop up the yolk-rich goodness. For a simple dinner, it can stand on its own as a comforting main course, especially when it’s accompanied by a zesty green salad or a steamed vegetable medley. If you’re entertaining, this dish offers a sophisticated touch without demanding elaborate timing or multiple pans; the individual portions bake in the oven, making for an elegant table presentation.

Pairings to consider:
– Bread and/or crostini: a crackly crust to dipped into the yolk, perfect for soaking up every last bit.
– A bright green salad: arugula with lemon, or a simple peppery mix to balance the richness.
– Beverages: a dry white wine such as Verdicchio or a light Prosecco; for non-alcohol options, a sparkling water with citrus, or a subtle coffee to finish the meal.
– Side dishes: roasted peppers, sautéed mushrooms, or a few slices of roasted eggplant for a Mediterranean touch.
– Dessert: something light and simple, like citrus-scented yogurt or a fruit compote, to end on a fresh note.

Tips, Variations & Substitutions

Uova al forno invites a garden of variations. Here are ideas to tailor the dish to your tastes, dietary needs, or the seasons:

  • Herb and cheese variations: Use a mix of shredded mozzarella for a melty top, or fold in soft goat cheese for tang. Finish with grated Parmesan or Pecorino for a sharp, nutty finish.
  • Vegetable riffs: Layer in thinly sliced zucchini, sautéed mushrooms, roasted peppers, spinach, or tomatoes. A handful of leeks or shallots can add a delicate sweetness and aroma.
  • Tomato-forward version: Create a shallow tomato base by gently simmering crushed tomatoes with garlic and a pinch of sugar; spoon a spoonful into the bottom of each ramekin before adding the eggs for a vibrant, saucy foundation.
  • Protein boosts: Add a touch of Italian-style cured meat or smoked ham for a savory depth; ensure any meat is lightly pre-cooked to the desired tenderness.
  • Vegan version: Use firm tofu or chickpea flour “eggs” and dairy-free cheese; a tomato-based sauce and olive oil provide rich flavor without animal products.
  • Gluten-free and lighter options: Serve with gluten-free bread or skip bread entirely in favor of a vegetable-forward platter to keep portion sizes satisfying while staying gluten-free.
  • Regional twists: North Italian touches might include a dusting of aged Parmesan with a few ribbons of speck or prosciutto; southern accents could bring roasted peppers, olives, and a drizzle of olive oil from a local olive grove.
  • Make-ahead and storage-wise: Some components can be prepped ahead: chop vegetables, shred cheese, and whisk eggs in advance, then assemble in ramekins just before baking for speed on busy mornings.
  • Flavor boosters: A pinch of chili flakes for warmth, a squeeze of lemon zest for brightness, or a splash of aged balsamic to finish can elevate the dish with little effort.

Storage & Make-Ahead Ideas

Leftovers, if you’re fortunate enough to have any, can be a pleasant improvement on the next day’s plate. Store baked portions in an airtight container in the refrigerator for up to two days. To reheat, warm gently in a low oven or delicate microwave cycle to preserve the delicate texture and prevent overcooking the yolk. If you prepared a tomato-based base or a vegetable layer separately, you can reheat those components gently and combine with fresh eggs at serving time to refresh the dish’s brightness. For those who like to plan ahead, you can assemble the components in ramekins, cover tightly, and refrigerate; when ready to bake, simply remove the cover and place in a moderate oven to rewarm and finish achieving a light browning on top. Freezing baked eggs is generally not recommended because the texture can change after thawing; instead, consider freezing only the base vegetables or sauce and assembling fresh eggs when you’re ready to cook.

Fun Facts & Trivia (Optional)

Eggs have long held a place of comfort and versatility in kitchens around the world, and Italy is no exception. The term “uova al forno” translates simply to “eggs in the oven,” but the idea appears in countless regional variations across the peninsula. In Italy, eggs are often celebrated for their ability to bring richness without heaviness, especially when joined with tomatoes, greens, and cheese—a triad that resonates with the colors and flavors of the Mediterranean. The ramekin or small terrine used in baked egg preparations evokes a simple, almost rustic elegance—proof that great flavor does not require elaborate equipment. In some Italian households, these dishes are a Sunday morning ritual, a “brunch” before the day’s activities begin, while others enjoy them as a comforting weeknight supper after a long day. The fusion of technique—soft-set yolk, lightly browned edges, a fragrant herb finish—echoes a culinary philosophy that values balance and restraint: heat is embraced gently, ingredients are allowed to speak for themselves, and a handful of pantry staples can become a dish that feels celebratory. A tiny bite of Uova al forno can transport you from a quiet kitchen to a sunlit Italian hillside, reminding us that simplicity can carry depth, and a small oven can create a moment of universal warmth.

Ingredients

Uova al forno Base

  • 4 large eggs (room temperature)

    → Core of the dish: the baked eggs provide the primary protein and set the structure of the finished dish. Handling: for best results, let eggs sit at room temperature for about 15–20 minutes before cracking into ramekins to ensure even cooking. If you prefer a richer, creamier center, lightly whisk the eggs with a splash of dairy before pouring into the ramekins, then bake until the whites are set but the yolks remain slightly runny. Tip: for multiple servings, crack one egg per ramekin or bake all in a single shallow tray for faster, even heat distribution.
  • 1/4 cup heavy cream or whole milk

    → Adds moisture and a creamy, custard-like texture to the bake. Preparation: whisk into the eggs or whisk separately and fold in; heavy cream yields silkier, more luxurious results, while whole milk keeps things lighter. Tip: adjust quantity to desired richness; if using milk, consider increasing the cheese slightly to maintain depth of flavor, and avoid ultra-pasteurized dairy which can alter texture.
  • 1/2 cup shredded mozzarella or fontina cheese (or a mix)

    → Provides melt and a gooey, cohesive layer that helps bind the eggs together. Preparation: distribute evenly in the ramekins and/or fold a portion into the egg mixture; reserve some to sprinkle on top for a golden finish. Tip: choose a low-moisture mozzarella to reduce excess liquid; fontina adds a buttery, creamy note that complements tomato and herbs.
  • 1/4 cup grated Parmigiano-Reggiano or Pecorino Romano

    → Adds sharp, nutty umami and a finishing salty kick. Preparation: grate finely just before use for maximum aroma; you can mix some into the egg mixture or sprinkle on top before baking. Tip: taste the overall salt level, especially if other ingredients (like olives or cured meat) are included.
  • 1/2 cup crushed tomatoes or tomato passata (optional base)

    → Creates a gentle sauce under the eggs and helps prevent sticking to the ramekins while enhancing tomato brightness. Preparation: if using, simmer briefly with a little onion and garlic in olive oil to bloom flavors before spooning into ramekins. Tip: drain excess liquid if very watery to avoid diluting the eggs; this base works well with fresh basil after baking.
  • 1 small onion, finely chopped (optional)

    → Adds sweetness and depth to the base. Preparation: sauté in olive oil until translucent and lightly caramelized to develop flavor; incorporate into the tomato base or spoon into the bottom of the ramekins. Tip: cook until moisture evaporates to avoid soggy layers; this ingredient pairs nicely with garlic and tomato.
  • 2 garlic cloves, minced

    → Aromatic backbone that enhances overall savoriness. Preparation: mince finely and sauté with the onion until fragrant without browning too aggressively. Tip: crush garlic with the side of a knife before mincing to release more oils for a richer aroma.
  • 1 tablespoon extra-virgin olive oil

    → Used to sauté vegetables and lightly grease the ramekins; contributes a fruity base flavor. Preparation: heat and use to soften onion and garlic; brush a thin film onto ramekins to prevent sticking. Tip: choose a high-quality EVOO for better depth of flavor; avoid over-heating to prevent bitterness.
  • Salt to taste

    → Essential for extracting flavors from cheese, tomatoes, and meats; calibrate after considering cheese and any cured ingredients. Preparation: add a small amount at a time and taste before serving. Tip: cheese can be salty, so you may need less additional salt.
  • Freshly ground black pepper to taste

    → Adds a gentle bite that lifts the dish; enhances the aromatics of garlic and herbs. Preparation: grind just before use for strongest aroma. Tip: white pepper is an option if you prefer a milder appearance.
  • Pinch of red pepper flakes (optional)

    → Subtle heat to balance richness and tomatoes. Preparation: sprinkle into the tomato base or egg mixture according to heat tolerance. Tip: increase for more heat, or omit for a milder, family-friendly bake.
  • Fresh herbs (basil, parsley or chives), chopped

    → Fresh aromatics brighten the finished dish; adds color and freshness. Preparation: wash, dry, and finely chop; fold into the eggs or sprinkle on top after baking. Tip: basil pairs particularly well with tomato-based flavors, while parsley or chives offer a crisp, green finish.
  • Butter or softened butter or nonstick spray to grease ramekins

    → Ensures easy release and prevents sticking; contributes a hint of richness. Preparation: grease evenly with a light film, then wipe away any excess for a smooth surface. Tip: using parchment lids or ramekins with removable lids can simplify serving and cleanup.

Optional Add-ins

  • Spinach leaves, torn or chopped (about 1/2 cup)

    → Adds color, nutrients, and a gentle earthiness. Preparation: wilt briefly in a hot skillet to remove moisture before adding; squeeze out excess liquid to prevent sogginess. Tip: drain well; a small amount of spinach goes a long way in flavor and color.
  • Mushrooms, sliced (about 1/2 cup)

    → Introduces umami and texture. Preparation: sauté in a little oil until browned and moisture has evaporated; pat dry before mixing to reduce moisture in the bake. Tip: allow mushrooms to cool slightly before adding to prevent steam from making the eggs watery.
  • Cherry tomatoes, halved (about 1/2 cup)

    → Fresh sweetness and a hint of acidity to balance richness. Preparation: pat dry to limit added moisture; you can roast briefly to intensify sweetness before adding. Tip: remove seeds if very juicy to minimize liquid in the final bake.
  • Prosciutto, pancetta or cooked ham, diced (about 1/4 cup)

    → Adds savory depth and a meaty bite. Preparation: lightly sauté to render fat and remove excess oil; crumble into the mixture or place on top for distribution. Tip: reduces need for additional salt; use lean cuts to avoid greasiness.
  • Olives, sliced (about 2–3 tablespoons)

    → Briny, salty notes that complement cheese and tomato. Preparation: pit if needed and slice evenly; distribute in the dish for a balanced bite. Tip: choose milder olives if you’re concerned about overpowering the egg flavor.
  • Artichoke hearts, quartered or chopped (about 1/4 cup)

    → Adds an earthy tang and a pleasant texture. Preparation: drain well and pat dry; chop into small pieces for even distribution. Tip: marinated artichokes can introduce extra salt, so adjust salt in the recipe accordingly or rinse lightly.

Instructions

  • Let the eggs sit at room temperature for 15 to 20 minutes before cracking them into the ramekins to ensure even cooking and a uniform set.

    → Room-temperature eggs emulsify more evenly with dairy and bake more predictably, preventing dense centers or undercooked yolks.
  • Preheat your oven to 350°F (175°C) and lightly grease six 4-ounce ramekins with butter or a neutral oil, then set them on a rimmed baking sheet for easy transport.

    → Greasing prevents sticking and elevates the ramekins to catch heat more evenly, while the baking sheet makes it simple to move the dishes in and out of the oven without spills.
  • Heat the olive oil in a small skillet over medium heat and sauté the finely chopped onion until translucent and just beginning to caramelize, then add minced garlic and cook until fragrant without browning.

    → Softly sweating the onion builds sweetness and depth; adding garlic at the end prevents bitterness from overcooking the garlic.
  • Add the crushed tomatoes to the skillet with the onions and garlic, simmer briefly to bloom the flavors, and season with salt, pepper, and a pinch of red pepper flakes.

    → Brief simmer concentrates tomato flavor and helps the sauce marry with the eggs, while pepper flakes add a gentle heat that balances richness.
  • Spoon about 1–2 tablespoons of the tomato base into the bottom of each ramekin to prevent sticking and to form a flavorful foundation.

    → A thin layer of base ensures the eggs release cleanly and provides a savory bed for the bake.
  • In a medium bowl, whisk the eggs with the heavy cream or whole milk until the mixture is smooth and evenly pale; this creates a silky custard texture when baked.

    → Whisking thoroughly incorporates air and emulsifies dairy with eggs, which yields a tender, cohesive bake rather than a dense one.
  • Stir 1/2 cup shredded mozzarella or fontina into the egg mixture until evenly distributed, then fold in 1/4 cup grated Parmigiano-Reggiano for sharp, nutty notes.

    → Melted cheese provides meltability and body; the Parmigiano adds depth and a finishing savory kick.
  • Evenly distribute your chosen add-ins across the ramekins: spinach, mushrooms (sautéed until moisture evaporates), olives, cherry tomatoes, artichokes, or prosciutto.

    → Uniform distribution prevents pockets of moisture or overly salty bites and ensures each bite has balanced flavor and texture.
  • Pour the egg-cheese mixture into each ramekin over the base and add-ins, filling to about three-quarters full to leave room for the eggs to puff and set.

    → Filling to this level avoids overflow and allows a light rise without spilling over the sides during baking.
  • Sprinkle the remaining cheese atop each filled ramekin for a golden, bubbly crust at the finish.

    → The top layer of cheese melts into the custard, creating an appealing crust and a more cohesive slice when served.
  • Bake the ramekins in the center of the preheated oven until the whites are set and the yolks are still slightly runny in the center, about 12–16 minutes; start checking at 12 minutes for desired doneness.

    → The goal is a tender custard with yolks that remain glossy; overbaking yields a dull, solid center, while underbaking risks a loose, liquid center.
  • Remove the ramekins from the oven and let them rest for 2–3 minutes before serving to allow the residual heat to finish cooking the yolks and to set the structure for easy unmolding.

    → Resting stabilizes the texture and prevents the eggs from sliding apart when plated, making slicing neat and clean.
  • Finish with a scattering of fresh herbs (basil, parsley, or chives) and serve immediately, optionally with a light drizzle of extra-virgin olive oil for extra aroma and shine.

    → Fresh herbs brighten the dish’s aroma and color; a final drizzle of olive oil adds gloss and a touch of fruity richness that complements the tomato base.

Notes

These baked eggs al forno are a comforting, protein-rich dish with softly set yolks resting on a fragrant tomato, onion and garlic base, all crowned with melted cheese. For best results, bring the eggs to room temperature for about 15–20 minutes before cracking into ramekins to ensure even cooking; if you prefer a richer center, lightly whisk the eggs with a splash of cream before pouring. Use 1/4 cup heavy cream or whole milk to adjust moisture; heavier dairy yields silkier texture while milk keeps it lighter, and you can compensate with a little extra cheese. Grease ramekins well with butter, olive oil, or nonstick spray; a light film helps prevent sticking. Sauté finely chopped onion and minced garlic in extra-virgin olive oil until translucent and fragrant, then simmer crushed tomatoes or passata briefly to bloom flavors. Season with salt and freshly ground pepper, and a pinch of red pepper flakes if you like a hint of heat. Layer in shredded mozzarella or fontina and finish with grated Parmigiano-Reggiano or Pecorino Romano for a savory crust. Bake until the whites are set and the yolks reach your preferred doneness; cooking time will vary with ramekin size and oven, so check at 12–15 minutes and then adjust. Finish with fresh chopped basil, parsley, or chives for brightness. This dish is naturally gluten-free, and you can customize with optional add-ins such as spinach, mushrooms, cherry tomatoes, olives, artichokes, prosciutto or pancetta; add these after sautéing to prevent soggy layers and taste for salt as salty add-ins will heighten saltiness. Leftovers reheat well in the oven or a skillet, and serve alongside crusty bread or a light salad for a complete meal.

Tips

Tips for Uova al forno

  • Egg temperature and texture: Let the eggs come to room temperature (about 15–20 minutes) before cracking into the ramekins. This promotes even cooking and a smoother texture. If you want a richer, creamier center, lightly whisk the eggs with a splash of dairy before baking, then bake until the whites are set but the yolks remain slightly runny.
  • Ramekins and preparation: Grease the ramekins evenly with a thin film of extra-virgin olive oil or butter, then wipe away any excess for a smooth surface. For extra ease of release, you can line the bottom with a small circle of parchment.
  • Managing the tomato base: If you’re using crushed tomatoes, passata, or tomato sauce, simmer briefly with a little onion and garlic in olive oil to bloom the flavors and reduce excess moisture. Drain or cook off liquid if very watery to avoid diluting the eggs.
  • Sautéed aromatics: Sauté the onion until translucent and lightly caramelized, then add garlic just until fragrant. Over-browning can lend bitterness; keep the heat moderate so flavors bloom without scorching.
  • Cheese strategy: Distribute the shredded mozzarella or fontina evenly to create a cohesive melt, and reserve a portion to sprinkle on top for a golden finish. Grate the Parmigiano-Reggiano or Pecorino Romano finely just before use to maximize aroma and saltiness.
  • Salt and seasoning balance: Remember that cheeses and cured meats contribute salt. Start with a modest amount of salt, then taste and adjust after layering the ingredients. You can always add but can’t remove salt once baked.
  • Heat and chilies: The optional red pepper flakes add warmth to balance richness. Start with a pinch and increase if you like more heat; omit for a family-friendly version.
  • Fresh herbs: Fold chopped basil, parsley, or chives into the egg mixture or sprinkle on top after baking for bright, fresh notes. Basil pairs beautifully with tomato, while parsley or chives add a crisp finish.
  • Layering technique: Consider a thin base layer of tomato or sautéed vegetables at the bottom of each ramekin to create a core that flavors the eggs without overwhelming them. Avoid a thick layer that may prevent even heat distribution.
  • Optional add-ins – spinach: If using spinach, briefly wilt or sauté until completely dry, then squeeze out excess moisture before adding. This prevents soggy layers and preserves color.
  • Optional add-ins – mushrooms: Sauté mushrooms until browned and all moisture has evaporated; pat them dry before mixing to reduce extra liquid in the bake and avoid watery eggs.
  • Optional add-ins – cherry tomatoes: Pat dry and, if desired, roast briefly to concentrate sweetness before adding. Remove seeds if very juicy to minimize liquid in the final bake.
  • Optional add-ins – meats and briney accents: Diced prosciutto, pancetta, or cooked ham should be lightly sautéed to render fat and reduce greasiness; crumble into the mixture or arrange on top for even distribution. They add savory depth and can reduce the need for extra salt.
  • Other briny elements: Olives (sliced) and artichoke hearts introduce savory, salty notes. Pit olives if needed and trim artichokes into small pieces for even distribution. If using marinated artichokes, adjust salt accordingly or rinse lightly to reduce extra saltiness.
  • Baking time and temperature: A common baseline is around 180°C (350°F). Bake until the egg whites are set and the yolk reaches your preferred doneness: about 12–14 minutes for a soft yolk, 15–20 minutes for a firmer yolk in standard ramekins. Check early and adjust for your oven and ramekin size.
  • Rest and serving: Let the dish rest for 2–3 minutes after removing from the oven to let the eggs finish settling. Garnish with fresh herbs and a light drizzle of good olive oil. Serve with crusty bread or a simple green salad for a complete brunch or light meal.
  • Make-ahead and reheating: You can prep the base and toppings ahead of time and fill the ramekins shortly before baking. Baked Uova al forno reheat well; warm gently in a low oven if leftovers are desired, but avoid overcooking to keep the yolks from firming up too much.
  • Variations and dietary tweaks: For a lighter version, use less cheese or swap some dairy for a splash of milk with a touch of yogurt. To make it vegetarian, omit meat and increase vegetables or greens. This dish is naturally gluten-free when served with bread on the side.

FAQ

Che cosa sono le Uova al forno?

Le Uova al forno sono un piatto semplice e versatile in cui le uova vengono cotte al forno, spesso arricchite con latte o panna, formaggi, verdure o altri ingredienti, fino a ottenere una crema morbida all’interno e una leggera crosticina all’esterno.

Quali ingredienti di base servono?

Ingredienti essenziali: uova, un liquido per legare (latte, panna o crema), sale e pepe, e una base grassa per ungere la teglia (burro o olio). Opzionali: formaggi, verdure, erbe aromatiche e altri condimenti a piacere.

Come si preparano in forno? Passaggi base

Preriscalda il forno a 180–200°C. Ungi una teglia o stampini singoli, sbatti le uova con latte/panna, aggiungi sale/pepe e gli ingredienti scelti, versa nelle teglie e cuoci finché le uova si rapprendono e la superficie è dorata, circa 12–20 minuti a seconda della quantità.

Quanta temperatura e tempo di cottura sono consigliati?

Per una consistenza cremosa: 180–190°C per 12–15 minuti. Se aggiungi ingredienti molto cremosi o formaggi, cuoci 15–20 minuti. Controlla la deliziosa crosticina e la fermezza al centro per evitare che diventino secchi.

Quante uova servire per una porzione?

In una porzione singola in una pirofila da forno: 2 uova con una piccola quantità di liquido. Per una porzione più ricca o da condividere, 3–4 uova. In teglie grandi, è possibile usare 4–6 uova per una porzione familiae.

Si possono aggiungere ingredienti extra? quali e come?

Sì. Verdure precotte o soffritte (spinaci, pomodori, funghi), prosciutto, formaggi (parmigiano, cheddar, fontina), erbe aromatiche e spezie. Aggiungi gli ingredienti in strati o mescolali con le uova prima di versare nelle teglie per una cottura uniforme.

Latte o panna: quale scegliere?

Latte rende il preparato più leggero; la panna o crema di latte lo rende più ricco e cremoso. Puoi mescolare entrambe le opzioni o utilizzare latte vegetale se vuoi una versione senza lattosio. Le consistenze variano a seconda della quantità di liquido utilizzata.

Si può preparare in anticipo o conservare?

Si può preparare in anticipo e scaldare delicatamente prima di servire. Conserva in frigorifero per 1–2 giorni in contenitore chiuso. Non è consigliabile congelare le uova cotte, poiché la texture può deteriorarsi una volta scongelate.

Come servire e quali abbinamenti consigli?

Servi subito caldo, accompagnando con pane tostato, una semplice insalata o contorno di pomodori. Abbinamenti classici: pane croccante, salsa di pomodoro fresco, erbe verdi fresche, o una spolverata di parmigiano. Puoi anche aggiungere una salsa leggera a base di pomodoro o peperoncino per dare vivacità.

Quali sono gli errori comuni da evitare?

Non cuocere troppo a lungo, altrimenti le uova diventano secche e gommosi. Non usare teglie troppo piccole che impediscono una cottura uniforme. Assicurati di ungere bene le teglie e di tagliare gli ingredienti a pezzi di dimensione simile per una cottura omogenea.