Author

Ocean Nightleaf

Browsing

Introduction / Hook

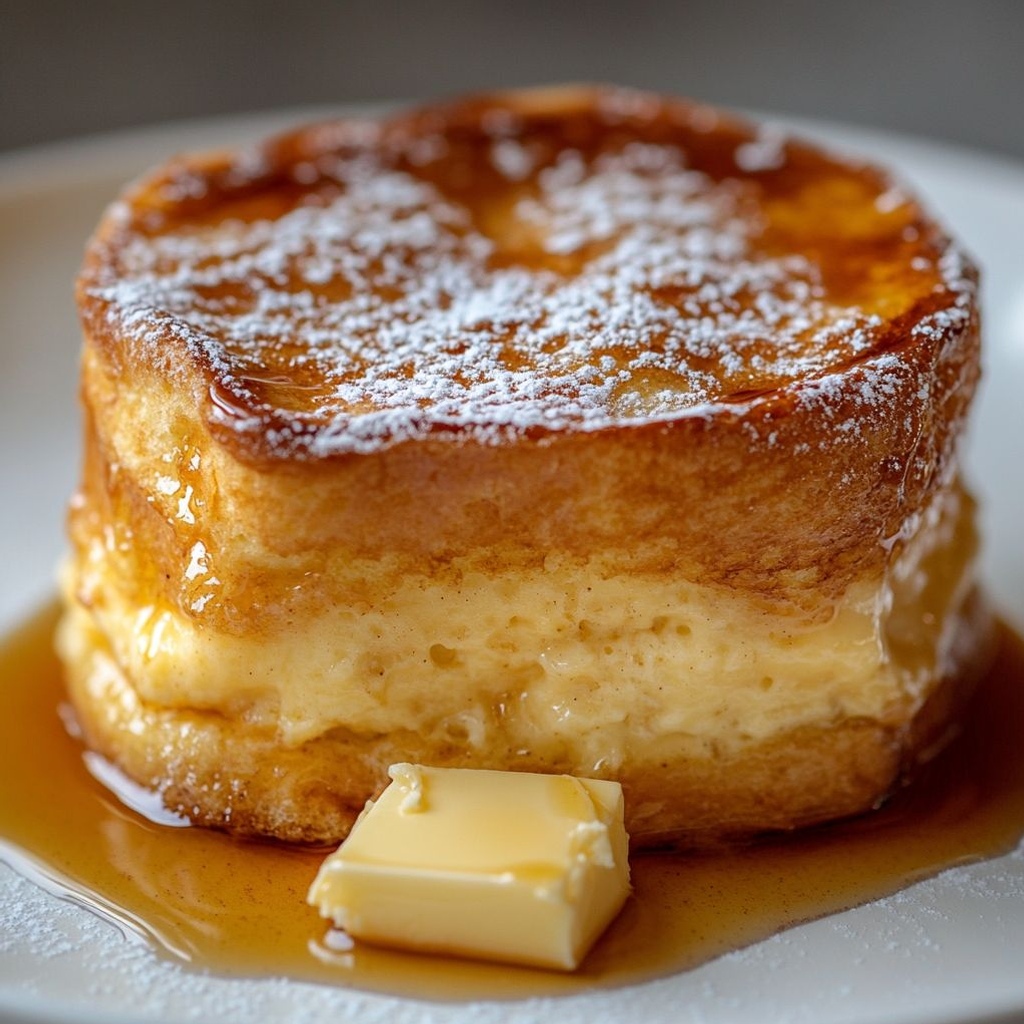
Imagine a quiet morning where steam curls from a warm skillet and the fragrance of vanilla, tangy yogurt, and orchard-fresh apples fills the air. This is not a dream breakfast but the welcoming reality of Pancake allo yogurt e mele. A humble stack that feels like a handwritten note from a grandmother, a recipe that travels with you from weekend brunches to weekday breakfasts with a little extra sunshine. The beauty of this pancake lies in its balance: the softness and subtle tang of yogurt mingle with the natural sweetness and crisp bite of apples, all wrapped in a fluffy, golden exterior. Each bite offers a gentle bounce, a whisper of cinnamon, and a comforting aroma that says you’ve made something both familiar and new—something you could savor slowly, savoring the morning as it unfolds. The texture is tender on the inside, just shy of custardy, while the edges offer a delicate, caramelized edge that provides a satisfying contrast. And because yogurt brings moisture without heaviness, these pancakes glide across the tongue with a lightness that invites seconds, not heaviness. Whether you’re fueling a big family breakfast, catching up with a friend over coffee, or treating yourself to a quiet Sunday ritual, Pancake allo yogurt e mele delivers warmth, nourishment, and a touch of Italian-inspired charm to every bite.

What makes this dish particularly inviting is its simplicity and versatility. You don’t need a long list of ingredients or a complicated technique to coax flavor and moisture from the batter. The yogurt acts like a gentle leavener in disguise, adding tang and tenderness, while the apples lend sweetness, a slight tartness, and a crisp bite that stays interesting from first pancake to last. The result is a breakfast that feels indulgent without being indulgent—comforting and wholesome in equal measure. It’s the kind of recipe that suggests conversation, laughter, and slow mornings, even when life outside is moving fast. And because it’s built on a pantry-friendly foundation, you can tailor it to what you have on hand, turning a simple idea into a signature dish with the flick of a wrist and a sprinkle of imagination.

The Story Behind the Dish

Pancake allo yogurt e mele sits at a crossroads of cultures, blending the comforting sensibilities of a classic American pancake with the bright, tangy creaminess found in Mediterranean and Middle Eastern yogurt-dominated breakfasts. The base idea—soft, cake-like pancakes infused with yogurt—grew in kitchens where morning meals were meant to be both nourishing and inviting. In Italian households, apples have long held a place of honor in desserts and breakfast fare, prized for their natural sweetness, versatility, and comforting aroma when warmed with gentle spices. The combination of yogurt and apples evokes memories of early autumn mornings when markets overflow with fragrant apples and warm cinnamon, and family kitchens buzz with the simple rituals of preparation and sharing.

Origins of pancake traditions vary around the world, but one common thread remains: a love for something quick, comforting, and crowd-pleasing. The yogurt adds a touch of tang that brightens the flavor and keeps the pancake from feeling heavy, while the apples bring a familiar sweetness that pairs beautifully with a drizzle of maple, a dollop of yogurt, or a sprinkle of toasted nuts. It’s a dish that can be traced to village breakfasts and modern brunch spreads alike, a reminder that the best recipes often live at the intersection of comfort and simplicity. If you’ve ever watched a child delight in the first bite of a warm pancake, you know the heart of this dish: a small, joyful moment that sets the tone for the day.

Throughout generations, families have adapted this concept to their local ingredients and tastes. In some versions, yogurt is stirred with lemon zest for a bright zing; in others, a pinch of cardamom or nutmeg adds an aromatic glow. The apples themselves tell a story of harvests and markets, of choosing the firm variety that holds up in heat and the sweetness thatteases the palate just enough to balance the tangy yogurt. Pancake allo yogurt e mele is, in many ways, a tribute to those everyday rituals—a reminder that the best breakfasts aren’t about perfection but about heart, warmth, and the pleasure of sharing something delicious with people you love.

Why You’ll Love This Recipe

  • Quick to bring together: a comforting, satisfying breakfast without a long list of ingredients or complicated steps.
  • Moist and tender: yogurt adds moisture, while apples provide texture and natural sweetness for a balanced bite.
  • Versatile flavor canvas: a gentle cinnamon/vanilla note invites customization with zest, spices, or a splash of citrus.
  • Family-friendly: gentle flavors that appeal to both kids and adults, with room for grown-up toppings or kid-friendly syrups.
  • Make-ahead friendly: batter and cooked pancakes can be stored or reheated with minimal fuss for busy mornings.
  • Fits multiple dietary ideas: adaptable with dairy-free yogurt or gluten-free flour blends, without losing the pancake’s charm.

Flavor Profile & Texture

The fundamental flavor is a harmonious duet: mild tang from yogurt and a natural sweetness from apples. The tang is not sharp; it’s creamy and soft, providing a gentle lift that keeps the pancake from tasting flat. The apples contribute tart-sweet pockets of juiciness that pop with every bite, especially when warmed with a touch of cinnamon and vanilla. The batter, when cooked, yields a pancake that is pillowy in the center and lightly crisped along the edges. The aroma alone—vanilla, apple, and cinnamon seeping from the skillet—is enough to draw people to the table with a hopeful grin. Texture-wise, you get a pleasing contrast: tender interior contrasted with subtle caramelization at the rim, offering a satisfying bite that luses you to continue eating. The yogurt also helps the pancake stay moist even as it cools, making it just as enjoyable a few minutes later as it is fresh off the griddle. Depending on toppings, the flavor can swing from comforting and cozy to bright and lively; a drizzle of honey or maple syrup introduces warmth, while a scoop of yogurt and a few shards of toasted nuts can bring a creamy and crunchy dimension that elevates the experience.

Occasions & Pairings

Because Pancake allo yogurt e mele is inherently light, flexible, and delicious, it suits a range of occasions:

  • Weekend brunches with family and friends, where everyone can customize toppings to their liking.
  • Weekday breakfasts that feel special without demanding extra time in the kitchen.
  • Children’s meals or celebrations, offering a kid-friendly shape and flavor that still feels a touch refined.
  • Seasonal mornings, especially when apples are in peak season, making the dish feel vibrant and timely.

Pairing ideas to enhance the experience:

  • Drizzle with real maple syrup, a touch of honey, or a dollop of creamy yogurt for extra richness.
  • Top with sliced fresh apples, toasted walnuts or almonds, and a pinch of cinnamon for a dessert-like twist in the morning.
  • Serve alongside fresh fruit cups (e.g., berries, kiwi, orange segments) to add brightness and color.
  • Pair with a warm beverage: a latte, a cup of strong espresso, or cinnamon tea to accent the spice notes.

Tips, Variations & Substitutions

  • Vegan version: use dairy-free yogurt (almond, coconut, or soy) and a plant-based milk in the batter; ensure any sweetener or vanilla is vegan-friendly.
  • Gluten-friendly version: swap in a gluten-free flour blend that behaves similarly to all-purpose flour; you may need a splash more liquid if the batter seems thick.
  • Apple variety: choose crisp apples like Honeycrisp, Fuji, or Pink Lady to hold up during cooking and provide a tangy-sweet bite; you can mix in other fruits like pears for a different flavor profile.
  • Spice and zest: add a pinch of ground cardamom, nutmeg, or a touch of lemon or orange zest to brighten the batter with citrusy brightness.
  • Texture variations: fold in a handful of rolled oats or a tablespoon of ground almonds for extra body and subtle crunch.
  • Sweetness balance: adjust sweetness by using unsweetened yogurt and a modest amount of honey or maple—taste and tailor before cooking.
  • Herbal and savory twists: a pinch of finely chopped fresh rosemary or lemon zest can transform the dish into a brunch-savvy savory-sweet option, especially when paired with a creamy yogurt drizzle.

Storage & Make-Ahead Ideas

These pancakes flourish in advance planning and practical storage. If you want to prep ahead, consider a few simple routes that preserve texture and flavor without turning breakfast into a rush:

  • Batter advance: you can mix the batter early and refrigerate it for a short period; give it a gentle stir before cooking to re-emulsify any ingredients that may have settled.
  • Cooked pancakes: store cooled pancakes in an airtight container in the refrigerator for a couple of days, layering with parchment to prevent sticking. Reheat gently in a skillet or toaster oven until warmed through and just crisp at the edges.
  • Freezer-friendly: freeze individually cooked pancakes with parchment between each layer; reheat directly from the freezer in a skillet or toaster. They’ll thaw and regain their tender interior with minimal effort.
  • Make-ahead serving: if you’re hosting a brunch, you can keep a batch of warm pancakes in a low oven for a short period, then reheat briefly as guests arrive.

Tips for reheating to maintain texture: a light skillet heat or a warm oven helps re-crisp the edges and revive the gentle, airy interior. Avoid microwaving if you want to preserve the delicate structure; microwaving can soften the edges and dull the pancake’s surface.

Fun Facts & Trivia (Optional)

Here are a few small delights to enrich your cooking story while you prep:

  • Yogurt in pancake batters isn’t just about flavor; the acid and proteins in yogurt can help tenderize gluten, producing a lighter crumb than standard milk-based batters in some contexts.
  • Apples have a natural pectin that helps the batter stay cohesive as it cooks, contributing to the pancake’s gentle structure—perfect for a soft, melt-in-the-mouth bite.
  • The cinnamon note in apple-based dishes is a carryover from culinary traditions around the world where warm spices evoke comfort and nostalgia during harvest seasons.
  • In Italy, “pancake” often evokes a brunch-friendly, simple, delicious staple rather than a dessert treat, making this recipe a bridge between everyday meals and special occasions.

As you can see, Pancake allo yogurt e mele is more than a recipe. It’s a comforting ritual translated into a stack of sunny, fluffy rounds that invite you to slow down, savor the morning, and share a moment of warmth with those at your table. Whether you’re whisking with a cup of coffee, coaxing a smile from a sleepy head, or simply treating yourself to a moment of culinary joy, these pancakes offer a dependable, endearing embrace every time you cook them. The combination of yogurt and apples creates a timeless harmony that feels both familiar and refreshing, a gentle reminder that the simplest ingredients can yield the most memorable breakfasts. So, set the skillet on a warm flame, listen for the sizzle, and let the aroma carry you toward a bright, flavorful morning. Your kitchen cravings have found a charming companion in Pancake allo yogurt e mele, ready to turn an ordinary day into something a little more delicious, a little more joyful, and a lot more nourishing. Buon appetito, and may your mornings be as inviting as the first bite of this cozy pancake tradition.

Ingredients

Pancake Base

    – 1 cup all-purpose flour
    → Provides the structure and body of the pancake; gluten forms as the batter hits heat, giving lift and a tender crumb. For best results, measure accurately (scoop and level) and whisk with the dry ingredients to distribute the leaveners evenly. If you prefer a lighter texture, you can substitute up to half of the flour with whole-wheat flour, but the batter may be a touch denser; avoid overmixing to keep it tender.
    – 1 tsp baking powder
    → Leavening agent that helps pancakes rise and become fluffy; distribute evenly in the dry ingredients to ensure even lifting. Use fresh baking powder for best results; once mixed with wet ingredients, avoid overmixing to preserve air bubbles.
    – 1/4 tsp baking soda
    → Reacts with the yogurt’s acidity to produce extra lift and a softer crumb. Use sparingly—too much can give a metallic taste. If your yogurt is very tart or your batter sits before cooking, you may shave a bit more; rest the batter briefly after mixing to allow bubbles to settle.
    – 1/4 tsp salt
    → Heightens flavor and balances sweetness. Added to the dry mix to evenly distribute salty flavor throughout the batter. If using salted butter in the recipe, reduce salt accordingly.
    – 2 tbsp granulated sugar
    → Provides gentle sweetness and helps with browning and Maillard reactions for a golden exterior. If your apples are very sweet, you can reduce sugar or omit; taste the batter and adjust accordingly.
    – 1/2 tsp ground cinnamon
    → Adds warmth and pairs beautifully with apples; can be added to the batter or sprinkled with apple pieces. If you dislike cinnamon, skip or reduce to 1/4 tsp.
    – 1/2 cup plain yogurt
    → Adds moisture and tenderness; the yogurt’s acidity helps activate the leavening and yields a soft crumb. Use plain yogurt (Greek or regular). If you use very thick Greek yogurt, you may thin the batter with a splash of milk to reach a pourable consistency.
    – 1/2 cup milk
    → Adjusts batter consistency and provides moisture; dairy milk yields a slightly lighter texture, while plant-based milks work well too. Start with 1/2 cup and add more if the batter seems too thick; you want a pourable, not runny, batter.
    – 1 large egg
    → Binds the batter and helps with structure; adds richness. Beat the egg lightly before mixing with wet ingredients to ensure even distribution and prevent lumps.
    – 1 tsp vanilla extract
    → Adds depth and aroma to the pancake; vanilla complements the apple and yogurt flavors. For a stronger apple note, you can use vanilla bean paste instead of extract.
    – 1 tbsp melted unsalted butter or neutral oil
    → Provides moisture and helps with browning and release from the pan. Butter adds flavor, while a neutral oil keeps the batter lighter. Whisk into the wet ingredients while it’s still warm to prevent solidifying. If you skip fat entirely, pancakes may be drier.

Apple Add-ins

    – 1 medium apple, peeled and diced small
    → Brings natural sweetness, moisture, and apple flavor to the batter. Dice evenly so they cook through with the pancake; you can sauté these pieces in a touch of butter with a pinch of cinnamon and sugar before folding for softer, caramelized apples, or fold raw for more bite.
    – 1 tsp lemon juice
    → Prevents browning of the apple pieces and brightens their flavor; toss diced apples with lemon juice immediately after peeling to keep them fresh. If you don’t want lemon, a splash of orange juice can work as a substitute.
    – 1/2 tsp ground cinnamon
    → Enhances the apple flavor and adds warmth; use with the apples to create a cohesive apple pancake. If your batter already has cinnamon, you can reduce to 1/4 tsp in the apple mix to avoid over-spicing.
    – 1-2 tbsp brown sugar or maple syrup
    → Provides caramel sweetness that pairs with apples during cooking; adjust to taste. If sautéing apples, sugar helps caramelize; skip if you prefer a less sweet pancake.

Optional Add-ins

    – 1/4 cup chopped walnuts or pecans
    → Adds crunchy texture and nutty depth; toast nuts in a dry skillet for 2–3 minutes until fragrant to maximize flavor, then chop into small, even pieces so they distribute evenly through the batter. If you’re avoiding nuts, omit or substitute with toasted coconut for a different crunch.
    – 2 tbsp raisins or chopped dates
    → Provides bursts of sweetness and chewy texture; chop dates finely and soak raisins in warm water for 5–10 minutes if very dry to plump them before mixing. Drain well and pat dry before adding to batter to prevent soggy pancakes.

Instructions

  • Preheat your skillet over medium heat and lightly grease with a thin film of butter or neutral oil to prevent sticking and promote even browning.
    → This ensures the pancakes release cleanly and form a uniform, golden crust without tearing when you flip them.
  • In a large bowl, whisk together the dry ingredients: 1 cup all-purpose flour, 1 tsp baking powder, 1/4 tsp baking soda, 1/4 tsp salt, 2 tbsp granulated sugar, and 1/2 tsp ground cinnamon until the mixture is evenly distributed.
    → Even distribution prevents clumps of leavening or salt, which can cause uneven rise and salty spots in the batter.
  • In a separate bowl, whisk the wet ingredients: 1/2 cup plain yogurt, 1/2 cup milk, 1 large egg, 1 tsp vanilla extract, and 1 tbsp melted unsalted butter until smooth and fully integrated.
    → The yogurt adds moisture and tenderness, while the melted butter emulsifies into the batter for a richer crumb; whisking ensures the fat and liquids emulsify without separating.
  • Prepare the apples by dicing 1 medium apple into small, even pieces and toss with 1 tsp lemon juice to prevent browning and brighten flavor; add 1/2 tsp ground cinnamon and 1–2 tbsp brown sugar or maple syrup for a balanced sweetness.
    → The lemon juice preserves color, the cinnamon echoes the batter’s warmth, and the sugar begins caramelization during cooking for depth of flavor.
  • Pour the wet ingredients into the bowl of dry ingredients and stir gently with a spatula just until combined; leave the batter slightly lumpy instead of stirring to a smooth consistency.
    → A few lumps indicate minimal gluten development, which yields a lighter pancake; overmixing makes the crumb tougher and denser.
  • Fold the diced apples (and any optional add-ins such as 1/4 cup chopped walnuts or 2 tbsp raisins) into the batter with a gentle motion to distribute them evenly without deflating the batter.
    → Folding preserves the batter’s airiness while ensuring each pancake has apple bites in every bite; avoid overworking to maintain tenderness.
  • Let the batter rest for 5–10 minutes on the counter to hydrate the flour and allow the leavening agents to begin working; during this time, the batter will thicken slightly.
    → Resting promotes a lighter texture and more even rise in the pan; do not skip this step if you have time.
  • Reduce the heat slightly if the pan is too hot, then ladle about 1/4 cup of batter per pancake onto the skillet; lightly press to spread if needed and ensure even thickness.
    → Controlled heat prevents scorching before the centers cook through and ensures uniform diameter for easier flipping.
  • Cook until bubbles form on the surface and the edges look set, about 2–3 minutes; then slide a wide spatula under the pancake and flip gently, cooking on the second side for another 1–2 minutes until golden and cooked through.
    → The bubble stage signals that the interior is puffing and setting; flipping at the right time yields a tender crumb with a crisp edge.
  • Transfer the finished pancakes to a warm plate and repeat with the remaining batter, maintaining a steady gentle heat and adding a touch more butter or oil as needed between batches.
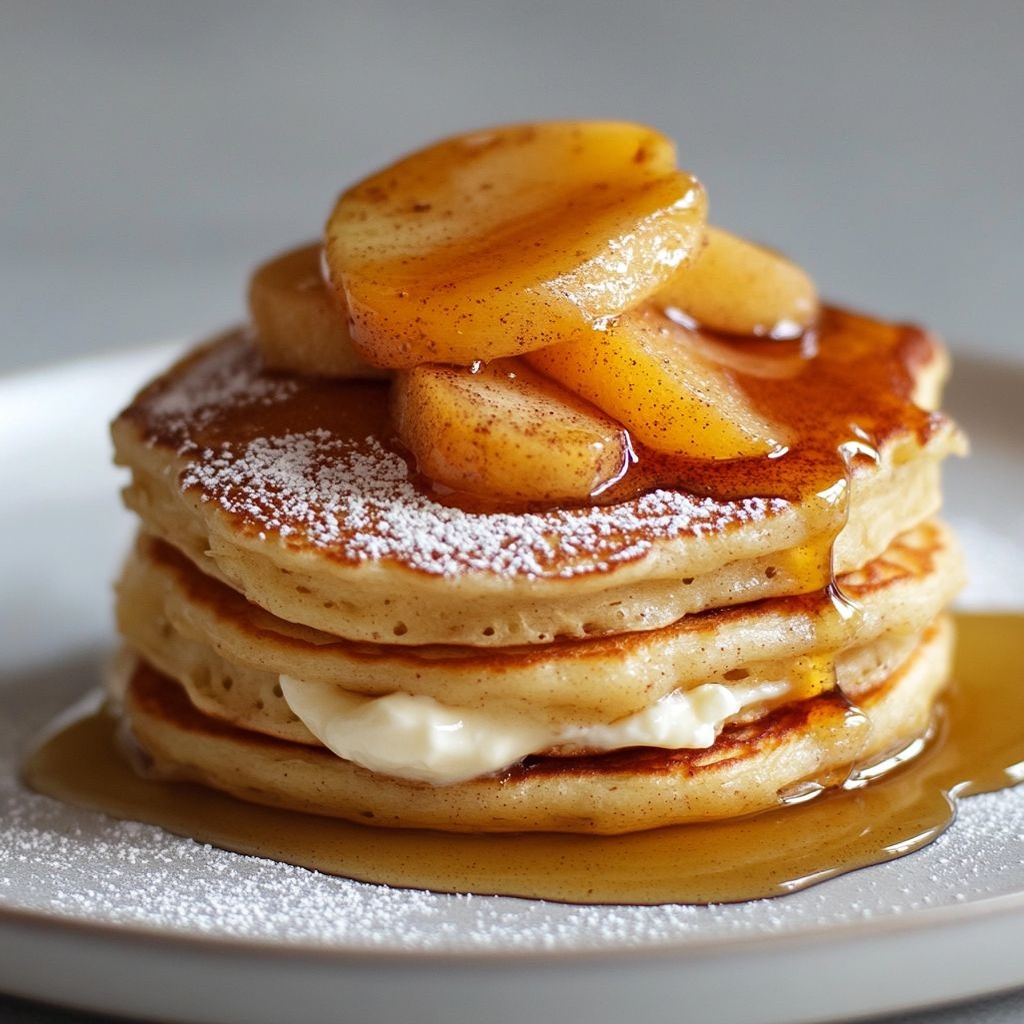
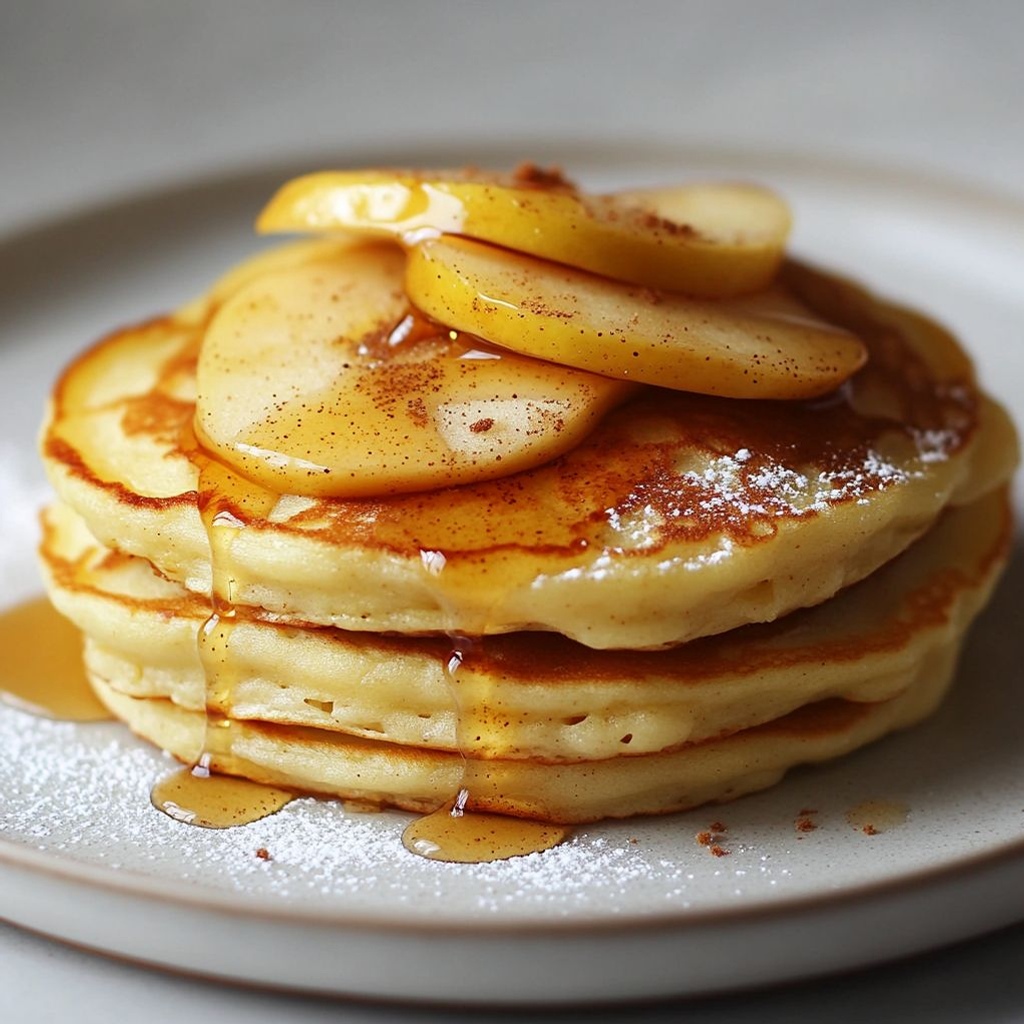
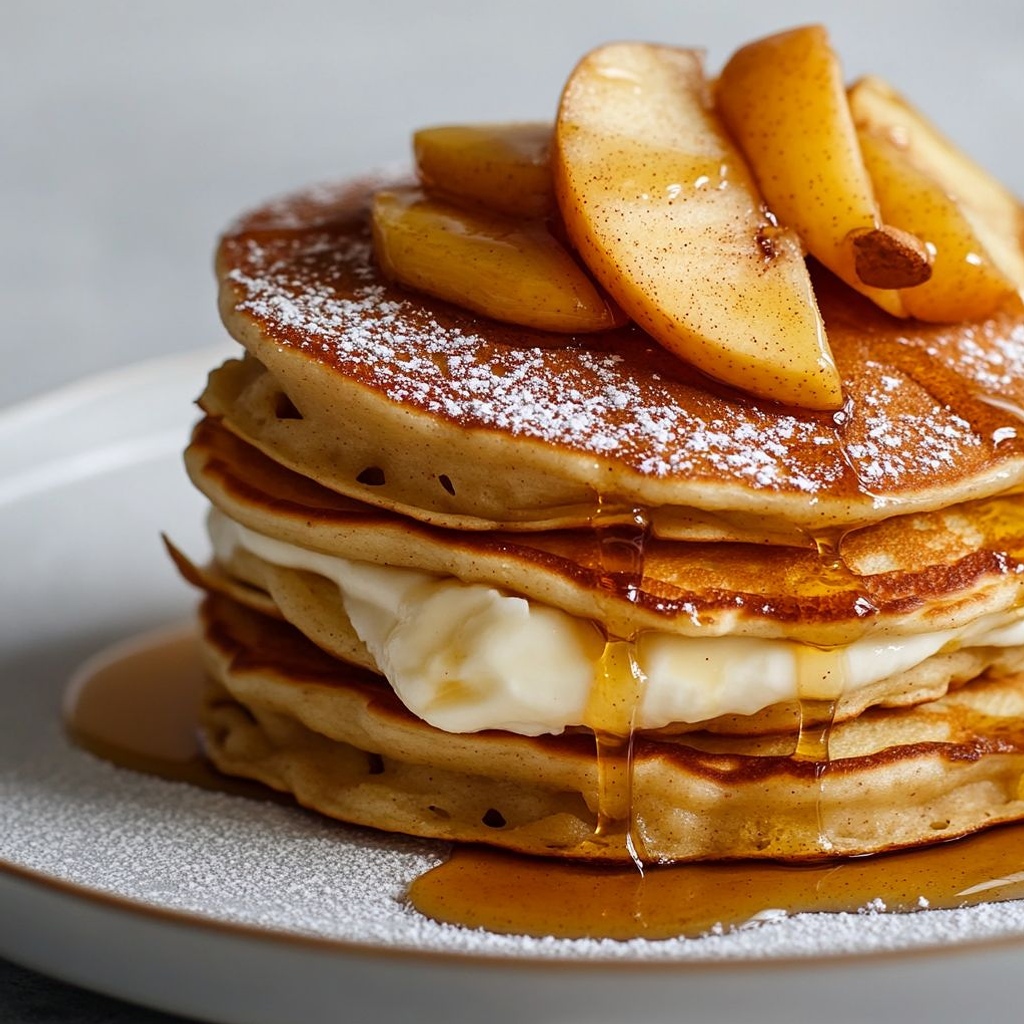
    → Keeping pancakes warm without stacking too tightly prevents them from steaming and losing crispness; re-oil the pan if the surface starts sticking.
  • Serve the Pancake allo yogurt e mele with a dollop of yogurt, a drizzle of maple syrup if desired, and extra chopped apples or nuts for texture; garnish briefly for visual appeal and add contrast.
    → The yogurt echoes the batter’s foundation, while maple syrup and apples amplify the dish’s tart-sweet profile and provide complementary textures.

Notes

These yogurt and apple pancakes are fluffy, moist, and lightly tangy from the yogurt, with juicy apple pieces throughout. For best results, whisk the dry ingredients thoroughly and fold in the wet ingredients just until combined to keep the batter light. Let the batter rest 5–10 minutes to allow the baking powder to activate and the flavors to meld. Toss apple pieces with a little lemon juice to prevent browning and consider sautéing them with a touch of butter, cinnamon, and brown sugar for softer, caramelized bites before adding them to the batter. You can customize with optional add-ins like toasted walnuts or raisins for extra texture and sweetness.

  • Tip: Use room-temperature ingredients and adjust the milk to reach a pourable, not runny, batter. If the batter is too thick, whisk in a splash more milk.
  • Flavor: Add 1/4 cup chopped walnuts or 2 tablespoons raisins for texture; toast nuts before adding for deeper flavor.
  • Make ahead: The batter can be refrigerated for up to 24 hours; stir gently before cooking.
  • Serving: Serve with maple syrup, extra yogurt, or a dollop of whipped cream; a light dusting of cinnamon works well.
  • Diet notes: To make dairy-free, use plant-based yogurt and milk; consider a flax egg or one regular egg depending on the texture you desire.

Tips

Consigli utili per la preparazione

  • Preparare l’impasto: setacciare la farina con il lievito e il sale per distribuire bene gli elementi secchi. In una ciotola a parte mescolare yogurt, latte, uovo, essenza di vaniglia e burro fuso. Unire i liquidi agli ingredienti secchi mescolando il minimo necessario: piccoli grumi sono normali e contribuiscono a una texture soffice.
  • Riposo della pastella: lasciare riposare l’impasto 5–10 minuti prima della cottura permette agli amidi di idratarsi e al lievito di rilasciare aria, ottenendo pancake più leggeri.
  • Controllo consistenza: se la pastella risulta troppo densa, aggiungere latte poco alla volta fino a ottenere una consistenza simile a una crema pesante che cada lentamente dal mestolo.
  • Gestione del bicarbonato: il bicarbonato reagisce con l’acidità dello yogurt per dare maggiore volume. Se hai yogurt molto acido o se la pastella rimane a riposo, puoi aumentare leggermente la quantità di liquidi per mantenere una buona fluidità.

Gestione delle mele

  • Preparazione delle mele: taglia a cubetti piccoli in modo uniforme per garantire una cottura omogenea. Per prevenire l’ossidazione, aggiungi subito succo di limone e mescola velocemente.
  • Caramellizzazione opzionale: se vuoi un sapore più intenso, fai saltare le mele in una noce di burro con cannella e 1–2 cucchiaini di zucchero finché non dorano leggermente.
  • Versione alternativa: se preferisci mele più croccanti, aggiungile all’impasto crude; per una texture più morbida, aggiungere le mele saltate all’impasto prima di cucinare i pancake.

Cottura e presentazione

  • Padella e grassi: usa una padella antiaderente ben calda e unta leggermente con burro o olio. Mantieni fuoco medio-basso per evitare bruciature e garantire una cottura interna uniforme.
  • Quando girare: osserva bolle in superficie e bordi che iniziano ad asciugarsi; è il momento di girare delicatamente con una spatola larga. Cuoci l’altro lato per 1–2 minuti o finché dorato.
  • Composizione: impila 2–3 pancake e aggiungi le mele caramellate come strato intermedio o sopra; termina con una cucchiaiata di yogurt e una spruzzata di cannella o sciroppo d’acero.

Varianti e sostituzioni

  • Versione senza latticini: sostituisci yogurt con yogurt vegetale e latte animale con latte di mandorla, soia o avena. Per il grasso, usa olio neutro o olio di cocco leggero.
  • Farine alternative: puoi sostituire fino a metà della farina con farina integrale per una versione più rustica; se vuoi una versione senza glutine, usa una miscela di farine senza glutine e aggiungi una piccola quantità di gomma xantana per la struttura.
  • Dolcificanti: se le mele sono molto dolci, riduci lo zucchero nell’impasto o omettilo; puoi aumentare leggermente lo sciroppo d’acero solo al momento della presentazione.

Conservazione e riscaldamento

  • Avanzi: conservare gli ultimi pancake in un contenitore ermetico in frigorifero per 1–2 giorni. Per riscaldarli, scaldarli brevemente in padella o nel microonde a bassa potenza per mantenere morbidezza.
  • Congelamento: è possibile congelare le porzioni singole tra fogli di carta forno; scongelare e riscaldare in padella prima di servire per una consistenza simile al fresco.

FAQ

Cos’è Pancake allo yogurt e mele?

È una variante di pancake morbidi e leggeri che incorporano yogurt nell’impasto per una texture umida e sapore delicato. Le mele, tagliate a cubetti o grattugiate, aggiungono dolcezza naturale e una nota fruttata a ogni morso. Ideali per una colazione nutritiva o una merenda sostanziosa.

Quali ingredienti servono per preparare Pancake allo yogurt e mele?

Ecco una versione per circa 2 porzioni:

  • 120 g di farina (tipo 00 o integrale)
  • 150 g di yogurt bianco o al gusto neutro
  • 1 uovo
  • 100 ml di latte (più o meno, a seconda della consistenza)
  • 1 cucchiaio di zucchero (facoltativo)
  • 1 cucchiaino di lievito istantaneo per dolci
  • Una presa di sale
  • 1 mela piccola, tagliata a cubetti o grattugiata
  • Succo di limone (facoltativo, per non ossidare la mela)
  • Olio o burro per ungere la padella
Come si prepara l’impasto dei pancake?

Seguire questi passaggi:

  1. In una ciotola, mescola farina, lievito, zucchero e sale.
  2. In un’altra ciotola sbatti lo yogurt con il latte e l’uovo.
  3. Aggiungi gli ingredienti liquidi agli ingredienti secchi, mescolando fino a ottenere un impasto omogeneo (lievito non deve formare grumi). Se l’impasto è troppo denso, aggiungi un po’ di latte.
  4. Aggiungi le mele a cubetti o grattugiate e mescola delicatamente.
  5. Lascia riposare l’impasto 5–10 minuti prima di cuocerlo.
Come si cuociono i pancake allo yogurt e mele?

Procedura consigliata:

  1. Scalda una padella antiaderente a fuoco medio e ungila leggermente con olio o burro.
  2. Versa una piccola quantità di impasto per ogni pancake, formando cerchi della dimensione desiderata.
  3. Cuoci finché compaiono bollicine in superficie e i bordi sembrano asciutti, circa 2–3 minuti.
  4. Gira e cuoci dall’altro lato per altri 1–2 minuti, finché dorati.
Posso sostituire lo yogurt con alternative vegetali?

Sì. Puoi utilizzare yogurt vegetale (soia, mandorla, avena) in rapporto 1:1. Per un sapore più neutro, scegli yogurt naturale non zuccherato. Tieni presente che alcune varianti vegetali possono rendere l’impasto leggermente meno cremoso, ma la consistenza resta morbida.

Si può preparare l’impasto in anticipo?

È possibile prepararlo e conservarlo in frigorifero per al massimo 24 ore. Copri bene la ciotola o trasferisci l’impasto in un contenitore ermetico. Se l’impasto si separa, mescola bene prima di cucinare.

Quali varianti con mele posso provare?

Varianti e idee:

  • Aggiungere cannella o vaniglia all’impasto per un aroma più intenso.
  • Usare mele diverse (granny smith per acidità o golden per dolcezza).
  • Aggiungere una manciata di uvetta o noci tritate per crunchy.
  • Caramellare rapidamente le mele in padella con un filo di burro e zucchero prima di aggiungerle all’impasto.
Come conservare gli avanzi?

Se avanzano pancake cotti, conservarli in un contenitore ermetico in frigorifero per 1–2 giorni. Per riscaldarli, riscaldali in padella a fuoco medio o nel microonde a breve intervallo. Puoi anche congelarli, separandoli con carta forno; scongelali e riscaldali prima di gustarli.

Come servire e idee di topping?

Idee di servizio:

  • Miele o sciroppo d’acero
  • Una generosa cucchiaiata di yogurt
  • Fette di mela fresche e una spolverata di cannella
  • Burro chiarificato per un tocco ricco
  • Noci tostate o granola per croccantezza
Quali sono gli errori comuni e come evitarli?

Ecco alcuni trucchi utili:

  • Impasto troppo liquido: aggiungi poco per volta farina. Impasto troppo spesso: aggiungi latte un cucchiaio alla volta.
  • Padella troppo calda: riduci leggermente la fiamma per evitare pancake bruciati esternamente crudi all’interno.
  • Amele non aromatizzate: aggiungi cannella, scorza di limone o una punta di vaniglia per esaltare il sapore.
  • Non riposa l’impasto: lascia riposare 5–10 minuti per permettere alla farina di assorbire liquidi e al lievito di attivarsi.

Introduction / Hook

Imagine a tray of bite-sized morning jewels, each one a golden morsel that crackles softly as you bite into it. The air is perfumed with the warm, comforting aroma of cinnamon—a scent that instantly hugs the room and signals that a cozy, joyful breakfast moment is about to unfold. French toast bites alla cannella are not just a dish; they are an invitation to linger at the table a little longer, to dip into conversation, to savor the sweet-to-savoury contrast that makes mornings feel brighter. They’re the kind of food that turns ordinary weekends into small celebrations, turning a simple idea—toast cut into charming little cubes—into a lavish, crowd-pleasing experience. And because they’re in bite-sized form, they’re perfect for sharing, for playful brunches, for kids’ parties, and for those mornings when you want something refined yet approachable. The cinnamon kiss on the crust, the tender interior, the way each piece glows with a hint of vanilla and warm spice, all combine to create a sensation that’s familiar and new at the same time. These bites don’t demand a grand kitchen; they invite you to create something memorable with a few simple ingredients, a little patience, and a lot of heart.

The Story Behind the Dish

French toast is one of those timeless breakfast classics with a story that travels across borders and centuries. Its lineage can be traced back to kitchens in ancient civilizations where stale bread was revived with milk or eggs to rescue it from the realm of the day-old. In France, the dish is known as pain perdu, literally “lost bread,” a name that nods to its humble origins and its purpose: to rescue bread that would otherwise be wasted. The genius of this humble concept is in its simplicity and its transformative power—when bread is given a brief soak and heat, it becomes tender, custard-like on the inside with a caramelized, crisp exterior that delivers a satisfying bite every time.

As the dish traveled across Europe and into other culinary scenes, cooks began to experiment with spices, sweeteners, and textures. Cinnamon emerged as a natural partner, a fragrant spice that has traveled with traders and travelers for millennia. It’s a spice that instantly evokes warmth, comfort, and a touch of festive charm. The version you’re seeing here—the “alla cannella” homage—speaks to both Italian culinary sensibilities and the global love for cinnamon-laced treats. The idea of turning these once-humble slices into delightful little bites is a modern twist, a playful presentation that appeals to gatherings both intimate and lively. It’s a reminder that tradition can meet creativity in delicious harmony, and that a simple tweak—a change in shape—can reframe a familiar dish into something fresh, shareable, and unmistakably comforting.

Why You’ll Love This Recipe

  • Shareable and kid-friendly: Bite-sized portions make these perfect for family brunches, birthday mornings, or a casual party spread where guests can pick up a piece and go.
  • Instant brunch elevate: The aroma alone elevates your kitchen into a cozy cafe—no flash in the pan required, just a little mindful cooking and a lot of warmth.
  • Customizable and approachable: The concept invites adaptations—swap textures, adjust sweetness, or layer in seasonal twists without needing a full culinary overhaul.
  • Comforting, with a spark of spice: Cinnamon brings a familiar, comforting note, while the bite-sized format keeps the experience light, playful, and easy to share.
  • A crowd pleaser for any occasion: From weekdays to weekends, holiday mornings to weekend brunches, it fits in with almost any menu and mood.

Flavor Profile & Texture

These bites are a study in contrast and balance. The exterior carries a delicate caramelization—the kind of toasty crust that gives a soft resistance when you press your fork into it. That crisp-edged surface gives way to a tender, almost custard-like interior that stays moist and fluffy, a texture that remains inviting from the first bite to the last. The cinnamon note is fragrant and pervasive, not dull or overbearing; it’s a gentle warmth that mingles with a whisper of sweetness and a hint of vanilla or dairy richness, depending on how you imagine the fold. The flavor profile dances between breakfast-cheer and dessert-siren, delivering comfort with a playful twist.

In aroma terms, you’ll notice an enveloping spice perfume that fills the room—an invitation to slow down, sip something warm, and savor the moment. The bites are versatile in flavor pairing: the natural sweetness carries well with a glossy syrup, a dollop of whipped cream, or a simple dusting of extra cinnamon for a more intense aromatic punch. In texture, think of each piece as a tiny, tender pillow that delivers a soft, yielding center you can enjoy without crumbly mess. The crust offers that satisfying bite, a satisfying counterpoint to the softness within, creating a memory of texture you’ll be chasing with every other bite you take.

Occasions & Pairings

Where do these cinnamon-kissed bites shine? Everywhere you want a little celebration around breakfast or a mid-moments snack that feels special. They’re ideal for:

  • Weekend brunches with friends and family, when you want a shareable centerpiece that still feels cozy and approachable.
  • Holiday mornings, where the aroma of cinnamon can evoke memories of festive gatherings without demanding heavy preparation.
  • Brunch-to-desk days at the office, where coworkers can grab a bite and move on with their morning, only lightly delaying the rush of the day.
  • Kids’ parties or school events, because their bite-sized form is perfect for little hands and big smiles.

Pairing ideas to complement the bites without overshadowing them include simple, timeless options: a hot beverage selection with varied sweetness (dark roast coffee, a creamy latte, or a comforting cocoa), fresh fruit slices to cut through the richness, and a drizzle of maple or a lightly sweet fruit compote to add a bright, fruity contrast. If you’re after a more indulgent pairing, consider a dollop of whipped cream or a light yogurt-based cream to add tang and richness in balance with the cinnamon notes. For a festive touch, a handful of toasted nuts or a subtle citrus zest can introduce a new layer of aroma and texture without overpowering the cinnamon-forward flavor.

Tips, Variations & Substitutions

Here are some ideas to adapt and enrich the concept of French toast bites alla cannella while keeping the spirit intact. Each option is designed to be friendly to cooks of all levels and to accommodate different dietary preferences without compromising the essence of the dish.

Variations

  • Seasonal twists: Introduce seasonal elements such as pumpkin, apple, or cranberry to complement the cinnamon’s warmth. The effect is cozy and autumnal, perfect for fall gatherings.
  • Flavor accents: A subtle hint of citrus zest, such as orange or lemon, can brighten the profile and add a refreshing counterpoint to the spice.
  • Texture plays: Try coating the bites with a light crumb topping for extra crunch or finish with a delicate dusting of powdered sugar for a soft, snowy look.
  • Nutty notes: Add a light crunch with toasted seeds or finely chopped nuts to bring in a toasty, nutty nuance that complements the cinnamon.
  • Chocolate whisper: A drizzle of melted chocolate on the plate or a tiny chocolate shard tucked beneath a bite can create a pleasing dessert-like contrast for chocolate lovers.

Substitutions

  • Allergen-friendly: For dairy-free or vegan adaptations, imagine a non-dairy, plant-based milk alternative and a suitable binder to maintain tenderness, while preserving the cinnamon aroma. The concept remains the same: a gentle soak that yields a soft interior and a crisp exterior.
  • Gluten considerations: If gluten-free needs arise, explore gluten-free bread options that still offer a satisfying texture when warmed and lightly toasted.

Regional Twists

  • Inspiration from Sicilian or Tyrolean traditions can guide you to pair cinnamon with hints of almond or vanilla for a nutty, fragrant profile that nods to regional sweets.
  • Latin American influences can bring a touch of dulce de leche-style richness or a citrus-laden glaze that accentuates the spice beautifully.

Storage & Make-Ahead Ideas

The beauty of these bites is their flexibility when it comes to planning. They can be prepared ahead in several practical ways, then finished with a quick heat to revive their fragrance and texture just before serving.

  • Make-ahead: Assemble the bread pieces a day ahead and refrigerate them in a covered container. When ready to serve, complete the cooking process so they come out crisp and warm. This approach is ideal for brunch gatherings where timing can be tricky.
  • Storage: If you have leftovers, store cooled bites in an airtight container in the refrigerator for up to 2–3 days. Reheat gently in a low oven or toaster oven to restore the crisp edge without losing the tender interior.
  • Freezing: For longer-term make-ahead, freeze the completed bites in a single layer on a parchment-lined tray, then transfer to a freezer bag. Reheat in a moderate oven until heated through and the exterior regains some crispness.

Tips for reheating without losing tenderness include using moderate heat and giving the pieces a bit of time to re-crisp—rushing the process can render them dry or dense. If you’re topping with any glaze, syrup, or sauce, apply just before serving to preserve the ideal texture and mouthfeel.

Fun Facts & Trivia

Delving into the lighter, curious side of this dish brings a few delightful tidbits to the surface. French toast, in its many forms, has been a breakfast staple around the world for centuries, proof that a clever rescue of stale bread can be a universal joy. The term pain perdu (lost bread) evokes a practical memory of how households historically saved ingredients, turning potential waste into nourishment. Cinnamon, the star spice in this rendition, has a long and storied history that crosses continents—ancient trade routes, caravans, and kitchens that welcomed its sweet, woody warmth. In some cultures, cinnamon is paired with citrus and vanilla as a celebration of aroma and balance, showing how this spice can harmonize flavors in sweet and comforting dishes alike.

Anecdotally, the idea of serving bite-sized versions of classic dishes is a modern culinary trend that aligns with the social dining movement—easier sharing, more approachable plating, and the delight of sampling multiple flavors in one sitting. The bite format invites a sense of play and discovery: guests can pick several pieces, compare textures, and choose their preferred dippers or syrups. In essence, these bites carry the romance of a classic French technique reimagined for contemporary gatherings, where tradition and whimsy meet at the table.

Ingredients

French toast bites alla cannella

Bread & Batter

  • 6 cups cubed day-old brioche or challah bread, cut into 1-inch cubes
    → The bread forms the base of the bites. Day-old brioche or challah soaks up the custard without turning mushy; uniform 1-inch cubes ensure even soaking and a consistent fry for a balanced texture of soft interior and crisp exterior.
  • 4 large eggs
    → Eggs provide the custard that binds and sets the bites during frying, giving structure and richness. Whisk until completely smooth to avoid streaks and ensure even coating on every cube.
  • 1 cup whole milk
    → Milk adds moisture and creaminess to the custard; whole milk yields a silky texture, while dairy-free options can work with unsweetened plant milk plus a splash of cream or coconut milk for body. Adjust the ratio if using non-dairy milk to maintain custard consistency.
  • 1 teaspoon ground cinnamon
    → Cinnamon is the signature warmth of this dish, blending into the custard for flavor throughout each bite. If you love spice, you can add a pinch of nutmeg or cardamom for extra depth.
  • 2 tablespoons granulated sugar
    → Sugar sweetens the custard lightly and assists with browning during frying. You can reduce to 1 tablespoon for a less sweet version or substitute with brown sugar for a deeper caramel note.
  • 1 teaspoon pure vanilla extract
    → Vanilla enhances the overall sweetness and aroma, enriching the custard’s flavor. Use high-quality pure vanilla for best fragrance; avoid imitations for a cleaner taste.
  • 1/4 teaspoon fine sea salt
    → A small amount of salt balances sweetness, sharpens flavors, and helps the cinnamon come alive. If you use salted butter, reduce the salt slightly.
  • 2 tablespoons unsalted butter, for frying
    → Butter adds flavor and helps create a golden crust while keeping the interior tender. Use a nonstick skillet or well-seasoned pan and cook over medium heat to prevent burning; add more butter as needed between batches for even browning.

Cinnamon-Sugar Coating

  • 1/2 cup granulated sugar
    → After frying, toss the warm bites in this coating to form a light, sweet crust that echoes the cinnamon flavor. Use a shallow dish to roll the pieces gently so they remain intact and evenly coated.
  • 2 teaspoons ground cinnamon
    → Combine with the sugar to create a fragrant coating that enhances the exterior. Mix thoroughly so every bite gets cinnamon contact; you can increase to 1 tablespoon total if you want a stronger crust.

Optional Add-ins

  • 1/2 cup mini chocolate chips (optional)
    → Chocolate chips introduce pockets of melt-in-the-mouth richness. Fold them into the bread cubes before soaking or sprinkle a few into the pan after a partial fry, ensuring even distribution and preventing clumps. Use mini chips to avoid sinking to the bottom.
  • 1/2 cup raisins or chopped dates (optional)
    → Adds chew and natural sweetness. If very dry, rinse or soak in warm water for 5–10 minutes to plump, then drain and mix with the bread before soaking to integrate evenly.

Serving & Toppings

  • Powdered sugar (confectioners’ sugar) for dusting
    → A light dusting at serving adds a delicate sweetness and a pretty finish. Sift just before plating to avoid clumps and ensure an even veil over the bites.
  • Pure maple syrup, for serving
    → Classic pairing with cinnamon; warm the syrup slightly for a smoother pour and to intensify maple notes that complement the cinnamon. Taste and adjust quantity to your preference.
  • Fresh berries or sliced fruit, for serving
    → Fresh fruit provides brightness and acidity to balance the richness. Choose seasonal berries or fruits like strawberries, blueberries, or bananas; add a squeeze of lemon juice if desired to heighten freshness.

Instructions

  • Prepare the cinnamon-sugar coating by combining 1/2 cup granulated sugar with 2 teaspoons ground cinnamon in a shallow dish and whisk until evenly blended.

    → This ensures the coating adheres evenly to the warm bites and provides a balanced cinnamon flavor in every piece.
  • Whisk the custard mixture thoroughly in a large bowl: 4 large eggs, 1 cup whole milk, 1 teaspoon pure vanilla extract, 1/4 teaspoon fine sea salt, 1/4 teaspoon ground cinnamon, and 2 tablespoons granulated sugar until completely smooth and homogenous.

    → Whisking until there are no streaks guarantees uniform texture and prevents uneven flavor distribution on the bread.
  • If using optional add-ins, fold in 1/2 cup mini chocolate chips or 1/2 cup raisins or chopped dates into the cubed bread now, distributing them gently to avoid tearing the bread.

    → Even distribution prevents clumps that could cause uneven cooking or hot pockets and preserves the integrity of each cube.
  • Spread 6 cups cubed day-old brioche or challah on a baking sheet in a single layer and let them dry out slightly for 10–15 minutes if they feel very soft, to prevent mushy coating during soaking.

    → Day-old or lightly dried bread soaks up custard without collapsing, yielding a soft interior with a crisp exterior after frying.
  • Transfer the bread cubes to a large shallow dish or rimmed tray, pour the prepared custard over them, and use a wide spatula to gently flip and stir so every surface is coated; let the cubes soak for 5–10 minutes, turning halfway for even absorption.

    → Soaking time allows the bread to absorb custard without disintegrating, creating a cohesive bite with internal softness.
  • Preheat a large nonstick skillet or cast-iron pan over medium heat and melt 2 tablespoons unsalted butter, swirling to coat the surface; wait until the butter foams and just begins to color for a nutty aroma.

    → Medium heat yields a golden crust without burning, and butter adds flavor and browning since it aids even browning and prevents sticking.
  • Fry the soaked bread cubes in batches: lift each piece with tongs to allow excess custard to drip back, place in the hot pan in a single layer without crowding, and cook 2–3 minutes per side until deeply golden and crisp on the exterior and fully set inside; adjust heat as needed to avoid scorching.

    → Proper browning signals Maillard reaction for rich flavor; avoiding overcrowding ensures even heat transfer and uniform texture.
  • Keep finished bites warm on a rack over a sheet pan or in a 200°F (90°C) oven while you fry remaining batches to maintain crispness and prevent soggy results.

    → Warming between batches keeps the exterior crisp and prevents the first batch from cooling and softening before coating.
  • While bites are still warm, roll or toss them in the prepared cinnamon-sugar coating: place the warm pieces in a shallow dish of the mixture and rotate gently to coat all sides; the warmth helps sugar adhere and forms a fragrant crust.

    → Coating while warm ensures immediate adhesion and a balanced cinnamon-sugar crust that enhances texture and aroma.
  • Serve immediately with a light dusting of powdered sugar, warm pure maple syrup, and a side of fresh berries or sliced fruit; if desired, warm the maple syrup slightly to improve pourability and intensify maple notes.

    → Fresh fruit provides brightness to offset richness, while warm syrup and a delicate sugar veil tie together the cinnamon profile for a classic finish.

Notes

These cinnamon French toast bites are a cozy, crowd-pleasing breakfast or brunch treat, made with day-old brioche or challah soaked in a fragrant cinnamon-vanilla custard and fried to a golden, crisp exterior. You can customize them by adding chopped nuts (pecans or walnuts), seeds, or dried fruits (raisins, cranberries) to the mixture or on top. They freeze well and reheat beautifully in a 350°F (175°C) oven for 8–12 minutes or in a toaster oven for a quick serve. For an extra boost, serve with warm maple syrup, a dollop of yogurt or a light cream-cheese glaze, and fresh berries if desired. Always ensure your bread and any add-ins are gluten-free if you have gluten intolerance.

Tips

Tips for Perfect French Toast Bites alla Cannella

Bread prep and soaking readiness

  • Use day-old brioche or challah; their sturdy crumb soaks up the custard without becoming overly soft. If you only have fresh bread, dry slices in a 300°F (150°C) oven for 5–7 minutes to mimic day-old texture.
  • Cut bread into uniform 1-inch cubes to ensure even soaking and consistent fry time. If some pieces are smaller, adjust frying time accordingly.
  • Toast or air-dry bread slightly if it feels very fresh or crumb-heavy; this helps the cubes hold their shape when fried.

Custard preparation

  • Whisk 4 large eggs until completely smooth to avoid streaks; this ensures a uniform custard coating on every cube.
  • Warm 1 cup of whole milk to about 100–110°F (38–43°C), then whisk in 1 teaspoon pure vanilla extract, 1/4 teaspoon fine sea salt, 1/4–1/2 teaspoon ground cinnamon, and 2 tablespoons granulated sugar. This creates a fragrant custard that browns evenly.
  • Dip bread cubes briefly—about 20–40 seconds per batch—allowing them to absorb without becoming soggy. If the custard seems too thin, let it rest a few minutes and whisk again; you can dissolve a pinch of cornstarch in a little milk to help set during frying (optional).
  • For dairy-free options, use unsweetened plant milk with a splash of coconut cream or light oil to maintain richness; keep the total liquid similar to the recipe so the crust browns properly.

Frying technique

  • Heat a heavy skillet or cast-iron pan over medium heat and add 1–2 tablespoons unsalted butter. When sizzling gently, add the coated bread cubes in a single layer—do not crowd the pan (work in batches).
  • Cook until the underside is deep golden brown and crisp, about 2–3 minutes per side. Flip carefully with a spatula; if the butter starts to burn, reduce the heat slightly.
  • Keep finished bites warm on a rack in a low oven (about 200°F / 93°C) while finishing the rest to preserve crisp exterior rather than stacking on paper towels that trap steam.

Cinnamon-sugar coating

  • Immediately toss hot bites with a coating of 1/2 cup granulated sugar and 2 teaspoons ground cinnamon in a shallow dish. Roll gently so the coating adheres without breaking the bites.
  • For a stronger crust, increase cinnamon to 1 tablespoon total (sugar remains 1/2 cup). Re-coat while still warm to maximize adhesion.
  • To keep the coating from clumping, whisk the mixture well and swirl the warm bites in the sugar-cinnamon mix rather than dipping; a light toss is enough to coat.

Add-ins and texture

  • If using optional mini chocolate chips, fold them into the bread cubes before soaking or scatter through the pan after partial fry to prevent sinking and clumping. Use mini chips to distribute evenly.
  • Raisins or chopped dates add chew; soak them in warm water for 5–10 minutes to plump, then drain well and mix with the bread before soaking to distribute sweetness and texture.

Serving and presentation

  • Dust with powdered sugar just before serving for a delicate finish. Sift in small batches to avoid clumps.
  • Warm pure maple syrup slightly to create a smooth pour and amplify maple notes that pair with cinnamon. Serve with fresh berries or sliced fruit for brightness; a squeeze of lemon on the fruit adds zing that balances richness.
  • For an extra-crispy finish, re-crisp leftovers in a 350°F (175°C) oven for 5–8 minutes before serving.

Make-ahead and storage

  • Custard can be prepared a few hours ahead; keep refrigerated until ready to soak. Bread cubes can be pre-cut and stored in a bag at room temperature for a few hours, then soaked and fried as you go.
  • Leftovers can be frozen after frying—freeze on a sheet pan, then transfer to a bag. Reheat in a 350°F (175°C) oven for 8–10 minutes or until heated through and crisp.

FAQ

Che cosa sono i French toast bites alla cannella?

Sono cubetti di pane raffermo immersi in una pastella profumata alla cannella, fritti o cotti al forno fino a doratura. Sono una versione mini della French toast, perfetti come snack o colazione dolce.

Quali ingredienti servono per preparare i French toast bites alla cannella?

Per circa 4 porzioni:

  • Pane raffermo tagliato a cubetti di circa 2 cm (6-8 fette)
  • 2-3 uova
  • 120-150 ml di latte (latte intero o latte vegetale)
  • 1-2 cucchiai di zucchero
  • 1-2 cucchiaini di cannella in polvere
  • 1/2 cucchiaino di estratto di vaniglia
  • Un pizzico di sale
  • Burro o olio per la padella
  • Opzionali: zucchero a velo, sciroppo d’acero, frutta fresca
Posso prepararla senza latticini o senza uova?

Sì. Puoi rendere la ricetta adatta a chi evita latticini o uova:

  • Usa latte vegetale (mandorla, soia, avena) al posto del latte normale
  • Usa burro veg o olio al posto del burro tradizionale
  • Se vuoi evitare le uova, puoi usare una miscela a base di latte vegetale + una piccola quantità di amido di mais o lievito per preparazioni dessert, oppure un egg replacer commerciale
Come tagliare il pane per ottenere cubetti uniformi?

Utilizza pane raffermo e taglialo in cubetti di circa 2 cm. Pane troppo fresco assorbe poco la pastella, mentre pane secco eccessivamente duro potrebbe sbriciolarsi; i cubetti di media consistenza funzionano meglio.

Come preparo la pastella per i French toast bites?

In una ciotola sbatti le uova con latte, zucchero, cannella, vaniglia e un pizzico di sale fino a ottenere un composto omogeneo. Se vuoi una pastella più corposa, aggiungi un cucchiaio in più di latte.

Come si cuociono i cubetti dopo averli immersi nella pastella?

Scalda una padella antiaderente a fuoco medio e sciogli una noce di burro (o usa olio). Immergi i cubetti nella pastella per circa 10-20 secondi per lato, poi cuocili 2-3 minuti per lato finché sono dorati e croccanti esternamente e morbidi all’interno.

È possibile cuocerli al forno invece di friggerli?

Sì. Preriscalda il forno a 200°C. Immergi i cubetti nella pastella, scolali leggermente e disponili su una teglia foderata con carta da forno. Spennella con un po’ di burro fuso e cospargi di cannella. Cuoci per 10-12 minuti, poi gira e cuoci altri 5-7 minuti finché dorati.

Come si servono questi French toast bites?

Servili caldi con sciroppo d’acero, zucchero a velo, miele o yogurt. Aggiungi frutta fresca come mirtilli o banane a fette per una presentazione completa. Una spolverata extra di cannella è sempre gradita.

Come si conservano e si riscaldano gli avanzi?

Conserva gli avanzi in frigorifero in un contenitore ermetico per 2-3 giorni. Per riutilizzarli, riscaldali in padella a fuoco medio con una noce di burro o in forno a 180°C per 5-7 minuti fino a farli tornare croccanti.

Quali varianti o trucchi utili per personalizzarli?

Prova queste varianti:

  • Aggiungi scorza di limone o arancia per una nota agrumata
  • Usa pane brioche o pan carrè per una versione più ricca
  • Intensifica la dolcezza con sciroppo di agave o miele al posto dello zucchero
  • Inserisci una punta di noce moscata o cardamomo per un aroma diverso
  • Rendi gluten-free utilizzando pane senza glutine

Introduzione / Gancio

Immagina una dessert che combina la morbidezza vellutata di una cheesecake con la brillante freschezza delle fragole e un irresistibile croccante che arriva a ogni morso come un piccolo applauso: questo è Cheesecake crunch alle fragole. È un dessert che sembra una dichiarazione d’amore per la primavera, ma che funziona in ogni stagione, capace di trasformare una cena ordinaria in un momento di festa. Appena apri il frigorifero, il profumo agrumato della scorza di limone e la dolcezza lattiginosa di una crema al formaggio si mescolano con l’aroma delle fragole mature. Nel primo morso, la crema seducente si fonde con un cuore fruttato e una croccantezza sorprendente che fa scattare una sorta di soddisfazione istantanea. Non è solo una torta; è un viaggio sensoriale che invita a rallentare, a respirare profondamente e a godere di ogni istante della degustazione. Se cerchi un dessert capace di incantare senza sforzo, questa cheesecake con crunch alle fragole è la scelta giusta: elegante quanto semplice, sofisticata quanto familiare, pronta a raccontare una storia di condivisione e di gusto autentico.

La storia del piatto

Cheesecake crunch alle fragole nasce dall’incontro di due mondi dolci: la tradizione della cheesecake, nata ben prima dell’era dei forni moderne, e l’improvvisazione creativa tipica delle cucine contemporanee. In molte culture, la cheesecake è stata reinterpretata per esaltare ingredienti locali e stagionali. Qui, le fragole non sono una semplice decorazione: diventano la protagonista luminosa, in grado di rilasciare il loro profumo inconfondibile, rinforzando la cremosità tipica della crema al formaggio con una nota rinfrescante e leggermente acida che bilancia la dolcezza. La componente crunchy, spesso ispirata a crumble di biscotti, granella di noci o zuccherini caramellati, aggiunge un elemento di sorpresa che ricorda le ricette di famiglia dove il rispetto per la tradizione incontra l’audacia del tocco personale. In alcune versioni, la croccantezza nasce da strati sottili di biscotti croccanti o da una granella di cioccolato bianco e pistacchi, che ricordano i giochi di contrasti presenti in molte tavole italiane: semplicità, eleganza, e una punta di teatralità. La ricetta racconta anche una storia di convivialità: le fragole, facilmente reperibili durante la stagione, hanno da sempre un ruolo centrale nelle grandi tavolate estive italiane, dove si condividono dolci, gelati e sorbetti. In questo piatto, ogni elemento è pensato per restituire quel senso di calore domestico e di festa semplice, dove la tecnica incontra la gioia di cucinare insieme.

Perché amerai questa ricetta

  • Equilibrio di consistenze: crema soffice e vellutata, cuore morbido di fragole, e una croccantezza che invita a mordere nuovamente.
  • Profilo di sapore luminoso: la dolcezza delicata della crema al formaggio si apre al profumo agrumato e alla freschezza delle fragole, bilanciate da una nota leggermente burrosa della base croccante.
  • Versatilità stagionale: perfetta per cene in famiglia, ma anche per occasioni più formali o celebrazioni, grazie all’estetica pulita e al sapore universale.
  • Facilità di presentazione: può essere preparata con anticipo e servita in fette ordinate, offrendo un impatto visivo notevole senza richiedere decorazioni complesse.
  • Adatta a diverse diete: con piccole varianti, può diventare vegan o gluten-free senza perdere l’anima del dessert.
  • Convivialità e condivisione: un dessert che invita a spezzare il pane e a discutere dei ricordi legati al cibo e ai momenti di festa.

Profilo di sapore e consistenze

Questo cheesecake è una sinfonia di contrasti piacevoli. La crema al formaggio, che qui si presenta leggera e setosa, offre una base cremosa che avvolge il palato come una nuvola profumata di vaniglia. A contrasto, la parte fruttata delle fragole tenta con note vivaci: dolcezza succosa, un accenno di asprozza tipico della fragola matura, e una leggera freschezza che elimina la sensazione di pesantezza tipica di molti dolci a base di formaggio. La base croccante, che funge da fondale, aggiunge una texture solida e friabile che si rompe al primo morso, rivelando un cuore di fragranza burrosa. Per completare il quadro, una nota di scorza di limone o di arancia apre il profilo aroma, accendendo la dolcezza con una scintilla di agrumi che allontana la pesantezza e rende ogni fetta pulita e rinfrescante. Il tocco finale di crunch può essere paragonato a un sentore di biscotti leggermente caramellati o di granella di nocciole tostate: una spinta croccante che esplode in bocca, offrendo un occhiolino a chi ama la gamma di sapori classici italiani. In termini di equilibrio globale, la dolcezza moderata della crema è sostenuta dall’acidità lieve delle fragole e dalla brillantezza degli aromi agrumati, creando una degustazione armoniosa che rimane leggera e invitante dall’inizio alla fine.

Occasioni & Abbinamenti

Cheesecake crunch alle fragole è una soluzione perfetta per diverse occasioni. È elegante a una cena di gruppo o a una celebrazione, ma sufficiente per chiudere una serata romantica senza essere troppo formale. Può diventare il protagonista di una domenica pomeriggio tra amici, accompagnata da una tazza di caffè o da un bicchiere di vino spumante o Moscato d’Asti per esaltare la freschezza della frutta. Per un abbinamento non alcolico, una tisana fredda al limone o un decoro di foglie di menta fresca completano il quadro senza sovrastare i sapori delicati. In contesti più estivi, si sposa bene con dessert di frutta fresca o con una leggera gelatina di agrumi come chiusura di una cena a tema mediterraneo. Se vuoi renderla ancora più scenografica, servi la torta in porzioni individuali con una sola fragola fresca al centro, adagiata su un velo di coulis di fragola o di lamponi, creando un effetto visivo accattivante e un profumo irresistibile al taglio. Per i momenti di festa, considera l’equilibrio tra dolcezza e freschezza: una spolverata di scorza d’arancia candita o una spruzzata leggera di zucchero a velo può dare un tocco di eleganza finale senza sacrificare la leggerezza del piatto.

Consigli, Varianti & Sostituzioni

La bellezza di Cheesecake crunch alle fragole è la sua versatilità. Ecco come personalizzarla per diverse esigenze e gusti:

Varianti gustative

  • Versione al cioccolato: aggiungi una punta di cacao amaro alla crema per un abbinamento classico con fragole, creando un contrasto tra dolcezza cremosa e cacao intenso.
  • Crunch di noci e caramello: sostituisci o aggiungi granella di nocciole o mandorle tostate con un leggero sottile strato di caramello per un effetto croccante più marcato.
  • Cuore di limone: incorpora una lieve nota di limone nella crema per un tocco di acidità che leviga la dolcezza e illumina il profilo aromatico.
  • Versione estiva senza latticini: utilizza una crema a base di latte di mandorla o di soia e una base a base di burro Vegetale per una cheesecake vegana, mantenendo però la texture cremosa tipica del piatto.

Opzioni per diete speciali

  • Gluten-free: scegli una base di biscotti senza glutine o utilizza fiocchi di crusca d’avena certificati senza glutine per una croccantezza leggera.
  • Vegan: impiega formaggio cremoso a base di piante e una crema di anacardi o anacardi frullati con latte vegetale, cui può essere aggiunto un poco di agar-agar per stabilizzare.
  • Zuccheri ridotti: riduci la quantità di zucchero e aggiungi una dolcezza naturale proveniente dalla frutta, equilibrando con un po’ di vaniglia e scorza di agrumi per mantenere la percezione di dolcezza.

Twist regionali o tradizionali

Per una versione italiana con un tocco locale, aggiungi una punta di liquore di fragola o di limoncello al composto prima di raffreddarlo, oppure sostituisci la frutta con lamponi o more selvatiche tipiche delle nostre campagne estive. Un accenno di scorza di limone grattugiata e una spolverata di pistacchi spezzati danno una nota mediterranea in grado di sorprendere anche i palati più tradizionalisti.

Conservazione e Preparazione in anticipo

Una delle grandi virtù di questo dolce è la sua praticità quando si tratta di tempo e organizzazione. Puoi prepararlo con anticipo e servirlo freddo, mantenendo intatta la temperatura e la consistenza. Ecco alcuni consigli utili:

  • Raffreddamento: una volta montata e raffreddata, lasciare in frigorifero per diverse ore o durante la notte permette ai sapori di amalgamarsi profondamente e alla crema di stabilizzarsi.
  • Porzionamento: taglia porzioni individuali prima di raffreddarli completamente per facilitare la presentazione e l’uso successivo. In alternativa, conserva l’intera torta e taglia al momento di servire.
  • Conservazione: copri bene con pellicola o chiudi in contenitore ermetico. Puoi conservare in frigorifero per 2-3 giorni; oltre quel periodo, la consistenza della base potrebbe cominciare a perdere croccantezza.
  • Congelamento: se vuoi conservare a lungo, puoi congelare porzioni singole già tagliate. Scongelale lentamente in frigorifero prima di servirle: la crema potrebbe diventare leggermente meno densa, ma la freschezza delle fragole resta molto presente.
  • Make-ahead: se prevedi una tavola di festa, realizza la crema e la base separatamente il giorno prima e unisci solo prima di servire per conservare al meglio la croccantezza.

Fun Facts & Trivia (Opzionale)

– Le fragole, famose per la loro dolcezza rinfrescante, sono naturali drappeggi di gioia aromatica: contengono composti che esaltano la percezione del gusto e l’aroma, rendendo ogni boccone più intenso.

– La cheesecake è una torta che, pur avendo molte variazioni in tutto il mondo, trova una versione particolarmente amata nelle cucine mediterranee, dove si uniscono cremosità e frutta in un equilibrio delicato.

– Il Crunch finale può essere interpretato come un omaggio alle tradizioni locali che prediligono texture diverse: in molte regioni italiane, l’uso di croccante, nocciole, mandorle e biscotti spezzati è un modo per rendere ogni dolce qualcosa di unico e memorabile.

– Per chi ama la storia degli alimenti, questa ricetta è una celebrazione di come un dessert internazionale possa trasformarsi in un piatto profondamente radicato nel carattere e nel gusto di casa, in grado di raccontare storie di stagioni, di mercati e di tavole condivise.

In conclusione, Cheesecake crunch alle fragole è molto più di un dessert: è un racconto di sapori, di texture, di ricordi e di convivialità. Ogni fetta porta con sé la freschezza della fragola, la morbidezza seducente della crema e la soddisfazione sonora del croccante. È la promessa di un momento speciale, pronto a trasformare una semplice chiacchierata tra amici in una piccola cerimonia di gusto. Preparala con gioia, servila con un sorriso, e lascia che la tua tavola diventi un luogo dove fragranze, profumi e sorrisi si intrecciano in un unico, indimenticabile morso.

Ingredients

Cheesecake Crust

  • 1 1/2 cups graham cracker crumbs (or gluten-free graham crackers, finely crushed)
    → For the crust, finely ground crumbs create an even base that bakes into a tender, crisp layer. If using gluten-free crackers, ensure they are gluten-free certified. Mix with melted butter and sugar until the mixture resembles wet sand, then press firmly into the pan; chilling or pre-baking helps the crust maintain shape during filling.
  • 4 tablespoons unsalted butter, melted
    → The melted butter binds the crust crumbs into a cohesive, sliceable base. Allow the crust to cool slightly before filling; if the crust is too warm, the filling may not set properly. For a crisper crust, bake the crust for 8–10 minutes at 350°F (175°C) and let cool completely before adding the filling.
  • 2 tablespoons granulated sugar
    → Optional depending on the sweetness of your crackers; sugar enhances the crust’s flavor and helps give a light caramelization when baked. If crackers are already sweet, reduce or omit. Sprinkle into the crust mixture evenly to achieve uniform sweetness across slices.

Cream Cheese Filling

  • 16 oz (450 g) cream cheese, softened to room temperature
    → The filling’s body and tang come from cream cheese. Softening prevents lumps and yields a smooth, creamy texture when beaten with sugar. Use high-fat cream cheese (not “low-fat”) for best texture; avoid overbeating which can incorporate excess air and cause cracks.
  • 3/4 cup granulated sugar
    → Sugar balances the tang of the cream cheese and helps the filling set properly. Add gradually and beat until smooth and glossy, but stop short of overmixing to keep the texture tender.
  • 2 large eggs
    → Eggs provide structure and help the filling set as it bakes. Add eggs one at a time on low speed to prevent overmixing; scrape down the bowl between additions for even texture.
  • 1/2 cup sour cream
    → Adds moisture, silkiness, and a subtle tang that enhances creaminess without making the filling heavy. Use full-fat sour cream; whisk in gently at the end to avoid curdling.
  • 1 teaspoon vanilla extract
    → Vanilla deepens the cheesecake flavor, warming the tang. Use pure vanilla extract for best aroma; if you have vanilla bean paste, you can substitute with a half the amount for an intensified flavor.
  • 1 teaspoon lemon juice or zest (optional)
    → A touch of lemon brightens the filling and balances richness. Add zest for fragrance or a small squeeze of juice; taste and adjust to avoid overpowering the cream cheese.

Strawberry Layer

  • 2 cups fresh strawberries, hulled and sliced
    → These strawberries provide the fruity center of the dessert. Slice evenly for a uniform layer; if you prefer, macerate with a tablespoon sugar for 10–15 minutes to release juices and create a glossy, saucy layer. If using frozen berries, thaw completely and drain excess liquid.
  • 2 tablespoons granulated sugar (for macerating)
    → Maceration draws out juice and softens the berries, resulting in a luscious strawberry layer that pairs with creamy cheesecake. Stir gently to avoid breaking berries into mush; adjust amount to taste based on berry sweetness.
  • 1 teaspoon lemon juice (optional)
    → Brightens the berry layer and helps balance sweetness. Use freshly squeezed lemon juice and add gradually; stop when you reach the desired tartness without compromising the pink color.

Crunch Topping

  • 1 cup cornflakes, lightly crushed
    → The crunchy cornflake topping provides a contrasting texture to the creamy filling. Crush to coarse bits rather than powder to retain crunch in every bite. For gluten-free needs, use certified gluten-free cornflakes.
  • 2 tablespoons unsalted butter, melted
    → Binds the crushed cornflakes into a cohesive, crisp crumble that browns nicely in the oven. Ensure the butter is evenly distributed to prevent clumps; bake until light golden and fragrant.
  • 2 tablespoons granulated sugar
    → Adds a touch of sweetness and helps caramelization of the topping as it bakes. If your cornflakes are pre-sweetened, you may reduce this; taste the mixture before baking and adjust accordingly.

Garnish and Serving

  • Fresh strawberries, hulled and halved or sliced (for topping)
    → Extra fresh berries on top create a vibrant finish and reinforce the strawberry theme. Slice right before serving to preserve shape and avoid juice pooling; arrange decoratively for an appealing presentation.
  • Fresh mint leaves (optional)
    → A hint of mint adds color and aroma that complements strawberry. Use whole leaves or small sprigs as a final flourish; store unwashed in the fridge and add just before serving to retain freshness.

Instructions

  • Preheat your oven to 350°F (175°C) and grease a 9-inch springform pan, then line the bottom with parchment and lightly grease the sides to ensure the crust releases cleanly.
    → A properly prepared pan prevents sticking and ensures clean, even slicing after chilling.
  • In a bowl, combine 1 1/2 cups graham cracker crumbs, 2 tablespoons granulated sugar, and 4 tablespoons melted unsalted butter until the mixture resembles wet sand; press firmly into the pan with a flat-bottomed glass or measuring cup to form an even, compact crust.
    → A cohesive crust bases the cheesecake and prevents crumbling when sliced; pressing evenly avoids thin or soft spots.
  • Bake the crust for 8–10 minutes at 350°F (175°C), then remove and cool completely on a rack before filling.
    → Briefly baking sets the crust and keeps it crisp under the moist filling, while cooling prevents the filling from sliding off a warm crust.
  • While the crust cools, macerate the 2 cups of fresh strawberries by tossing them with 2 tablespoons granulated sugar and optional lemon juice; let them sit 10–15 minutes until juices are released and the berries become glossy.
    → Maceration softens the fruit, draws out juice for a vibrant layer, and balances sweetness with acidity.
  • In a large mixer bowl, beat 16 oz (450 g) cream cheese on medium speed until smooth and free of lumps; this builds a creamy, stable foundation for the filling.
    → Softened cream cheese ensures a silky texture and prevents gritty lumps in the final cheesecake.
  • Add 3/4 cup granulated sugar to the cream cheese and beat until the mixture is light, silky, and glossy, scraping the bowl as needed to ensure even sweetness.
    → Gradual addition prevents graininess and helps the filling set properly without dulling the texture.
  • With the mixer on low, add 2 large eggs one at a time, beating just until incorporated after each addition and scraping the bowl between additions for even texture.
    → Adding eggs slowly builds structure and reduces the risk of incorporating excess air that can cause cracks.
  • Beat in 1/2 cup sour cream and 1 teaspoon vanilla extract until just combined; if using, whisk in 1 teaspoon lemon juice or zest for brightness; do not overmix.
    → Sour cream adds moisture and silkiness, while vanilla enhances flavor; lemon balances richness without overpowering the tang.
  • Pour one-third of the filling onto the cooled crust and spread evenly to create a stable base layer for the strawberry filling.
    → A partial base layer anchors the fruit without sinking into the bottom, giving a distinct strawberry layer.
  • Spoon the macerated strawberry mixture over the first filling layer, spreading it into an even circle and leaving a small margin at the edges to prevent overflow during baking.
    → Even distribution prevents concentrated pockets and ensures a balanced bite with strawberry flavor in every slice.
  • Pour the remaining cheesecake filling over the strawberry layer, smoothing the top with a spatula and tapping the pan lightly to release any air bubbles.
    → A smooth top ensures uniform bake and an attractive finish once sliced.
  • Prepare the crunch topping by mixing 1 cup lightly crushed cornflakes, 2 tablespoons melted butter, and 2 tablespoons granulated sugar until the cornflakes are evenly coated; sprinkle this topping in an even layer over the filled cheesecake.
    → The butter-impregnated crumbs crisp as they bake, providing a contrasting texture to the creamy center.
  • Bake the assembled cheesecake in a water bath: place the springform pan in a larger roasting pan, pour hot water into the outer pan halfway up the sides, and bake at 325°F (165°C) for 50–60 minutes until the edges are set and the center still has a slight jiggle.
    → The water bath stabilizes heat and moisture, preventing cracks and yielding a creamy, custard-like center.
  • Turn off the oven and let the cheesecake sit in the warm oven with the door ajar for 60 minutes, then transfer to a rack to cool completely before refrigerating for at least 4 hours or overnight.
    → Slow cooling reduces stress cracks and helps the layers set evenly, improving texture and slicing clarity.
  • Before serving, remove the pan sides and garnish with fresh strawberries and optional mint leaves; serve chilled for best firmness and brightness of strawberry flavors.
    → Fresh garnish enhances color and aroma; chilling ensures clean slices and a refreshing contrast to the creamy filling.

Notes

These strawberry cheesecake crunch alle fragole are a show-stopping dessert that pairs a silky, tangy cream cheese filling with a bright strawberry layer and a crunchy cornflake topping. For a gluten-free version, use certified gluten-free graham crackers (or gluten-free cookies) for the crust and ensure the cornflakes are labeled gluten-free; this keeps the dessert accessible to those with gluten intolerance. Make sure the cream cheese is softened to room temperature and use full-fat cream cheese to achieve a smooth, glossy filling; beat until just blended and avoid overmixing to prevent cracks. A quick pre-bake or a good chill of the crust helps it hold shape when the filling is added; if you prefer an extra crisp crust, bake the crust for 8–10 minutes at 350°F (175°C) and cool completely. The strawberry layer benefits from maceration: toss sliced berries with a tablespoon of sugar and a teaspoon of lemon juice, let stand 10–15 minutes for juices to release and a glossy finish; if using fresh berries, slice evenly; if using frozen, thaw completely and drain well. For the crunch topping, lightly crush cornflakes with butter and sugar until crumbly but still chunky, then bake until golden for a crisp, caramelized finish that contrasts the creamy filling. To serve, chill the assembled cheesecake for several hours or overnight, then garnish with extra fresh strawberries and a few mint leaves for color and aroma. Store leftovers in the refrigerator for 3–4 days; for longer storage, freeze individual slices wrapped tightly, and thaw in the fridge before serving.

Tips

Tips for the Cheesecake Crust

  • Grind crackers to a fine, even crumb so the crust bakes into a smooth, cohesive base. If using gluten-free crackers, ensure they are certified gluten-free.
  • Mix the crumbs with melted butter and sugar until the texture resembles wet sand. This helps the crust press together and bake into a tender, sliceable layer.
  • Press the crust firmly into the pan using the flat bottom of a measuring cup or the back of a spoon to avoid air pockets and to achieve an even thickness around the edges.
  • Chill the crust before filling, or prebake for 8–10 minutes at 350°F (175°C) for extra firmness. Let it cool completely before adding the filling to prevent slipping.
  • If you’re skipping baking entirely, chill the crust well to help it set before filling.

Tips for the Cream Cheese Filling

  • Let the cream cheese, eggs, and sour cream come to room temperature before mixing to avoid lumps and ensure a silky texture.
  • Beat the cream cheese with sugar until smooth and glossy, then add eggs one at a time on low speed. Scrape down the bowl between additions for even texture.
  • Avoid overmixing after adding eggs; too much air can cause cracks as the cheesecake bakes and cools.
  • Stir in sour cream gently at the end to add moisture and a subtle tang without curdling. Use full-fat ingredients for best stability and richness.
  • To reduce cracking, bake in a water bath (double-wrap the pan in foil and place it in a larger pan filled with hot water) and let the cheesecake cool gradually in the oven with the door ajar.
  • If you want a hint of brightness, you can fold in a small amount of lemon zest or a teaspoon of lemon juice, but taste to avoid overpowering the cheesecake.

Tips for the Strawberry Layer

  • Slice strawberries evenly for a uniform fruit layer. For a juicier center, macerate with a tablespoon of sugar for 10–15 minutes to release juices.
  • If you macerate, drain excess juice before layering to prevent a soggy crust; reserve the juice for brushing or a light glaze if desired.
  • A splash of lemon juice brightens the berry layer; add gradually and taste to keep balance with sweetness.
  • If using frozen berries, thaw completely and pat dry to minimize extra moisture in the filling.

Tips for the Crunch Topping

  • Crush cornflakes to coarse bits rather than a fine powder so they stay crisp after baking.
  • Mix in melted butter evenly to avoid clumps; distribute the topping in an even layer for uniform browning.
  • Sprinkle sugar to help with caramelization; if your cornflakes are sweetened, reduce sugar accordingly.
  • For a gluten-free version, ensure the cornflakes are certified gluten-free and process in a way that avoids cross-contamination.

Tips for Garnish and Serving

  • Decorate with fresh strawberries just before serving for a vibrant finish; slice right before plating to prevent juice pooling.
  • Add fresh mint leaves as a subtle aroma and color pop. Store mint dry and crisp; add them just before serving.
  • Chill the assembled cheesecake for several hours or overnight to let flavors meld and the filling set fully. Run a thin knife around the edge before slicing for clean cuts.
  • Store leftovers covered in the refrigerator; you can freeze individual slices for longer storage—wrap well and reassemble gently after thawing in the fridge.

FAQ

Cheesecake crunch alle fragole – FAQ

Che cos’è Cheesecake crunch alle fragole?

Una cheesecake cremosa con una base croccante, rifinita con una salsa di fragole e una “crunch” di biscotti o granella. Può essere preparata al forno o come versione no-bake, ed è perfetta come dessert rinfrescante.

Quali sono gli ingredienti principali?

Base: biscotti (digestive o tipo shortbread) saranno sbriciolati e mescolati con burro fuso. Crema: formaggio cremoso (tipo Philadelphia), zucchero, uova, vaniglia e panna. Fragole: fresche per la salsa o composte. Opzionale per la crunch: granella di biscotti o cereali croccanti. Per la salsa: fragole fresche, zucchero e succo di limone.

Posso fare la versione senza glutine?

Sì. Usa biscotti senza glutine per la base e controlla che il burro e gli altri ingredienti non contengano tracce di glutine. Puoi anche usare una base di noci macinate mescolate a burro fuso.

È meglio una versione al forno o no-bake?

Entrambe le versioni sono valide. Al forno, la crema si rassoda con la cottura e di solito richiede una cottura di circa 45–60 minuti a temperatura contenuta; no-bake si setta in frigorifero per almeno 4 ore o durante una notte. Scegli in base al tempo a disposizione e al risultato desiderato.

Come si prepara la base croccante?

Sbriciola i biscotti e mescolali con burro fuso finché il composto è umido ma sbriciolabile. Premi sul fondo di una teglia a cerniera per formare una base compatta. Per un extra crunch, aggiungi una manciata di granella di biscotti o cereali sulla base prima di farfallare la crema o di cuocere, se necessario.

Come preparo la crema al formaggio?

In una ciotola, ammorbidisci il formaggio cremoso con lo zucchero e la vaniglia fino a ottenere una crema liscia. Aggiungi le uova una alla volta, mescolando delicatamente. Se usi panna, incorporala a poco a poco per una consistenza più vellutata. Cuoci al forno in bagno-maria se si tratta di una versione al forno.

Come si prepara la salsa di fragole?

Taglia le fragole e cuocile dolcemente con un dosso di zucchero e un po’ di succo di limone finché non si addensa leggermente. Puoi passarla al setaccio per una salsa liscia o lasciarla con pezzi per una texture più rusticata. Lascia raffreddare prima di aggiungerla al dolce.

Come si evita che la cheesecake si crepi o rimanga troppo morbida?

Mescola delicatamente gli ingredienti per non incorporare aria. Se fai una versione al forno, usa un bagno-maria, cuoci a bassa temperatura, spegni il forno e lascia raffreddare nel forno con lo sportello leggermente aperto per evitare contrazioni rapide. Assicurati che la crema sia a temperatura ambiente prima di infornare e non cuocere oltre il necessario.

Come conservare gli avanzi?

Raffredda completamente, quindi conserva in frigorifero, coperta o in contenitore ermetico, per 3–4 giorni. Per una conservazione più lunga, congela affettata (senza salsa) avvolta bene in pellicola; lascia scongelare in frigorifero prima di gustarla.

Posso variare la ricetta con altri frutti o gusti?

Assolutamente. Puoi sostituire le fragole con lamponi, mirtilli o frutti di bosco, oppure aggiungere scorza di limone o arancia nella crema per una nota agrumata. Per una versione al cioccolato, aggiungi cacao o cioccolato fondente fuso all’impasto di crema e cambia la salsa di fragole con una salsa al cioccolato.

Introduction / Hook

Imagine a tray of tiny, glossy pearls glinting in the afternoon light, each one promising a moment of bright, comforting pleasure. Bocconcini cottage ai mirtilli air fryer takes the familiar comfort of cottage cheese and transforms it into a playful, elegant bite that feels both rustic and refined. The air fryer’s magic turns a simple mixture into a crisp, delicate shell that yields to a creamy, mild center—an irresistible contrast that wakes the senses with a whisper of lemon zest, vanilla, and the jewel-like sweetness of blueberries. This is the kind of snack that invites conversation, brunch grazing, and spontaneous smiles, all without turning your kitchen into a game of tag with pots and pans. It’s a recipe that celebrates simplicity, redefines bite-sized luxury, and makes you feel like a culinary magician for a moment—without the fuss.

In its essence, this dish is a joyful fusion: the concept of tiny, tender bocconcini-like bites meets the light, tangy charm of cottage cheese, folded with blueberries for pockets of burst sweetness. The air fryer does the heavy lifting, delivering a streamlined, low-oil method to achieve a golden exterior that’s satisfyingly crisp while preserving the soft, cushiony interior. It’s the kind of snack that glides from plate to mouth with minimal effort and maximum delight, perfect as a pre-dinner nibble, a weekend brunch addition, or a playful sight-and-sense moment for kids and adults alike. And because the flavors are bright but balanced, you can enjoy them warm, at room temperature, or reheated with the same cheerful charm.

What makes this recipe especially appealing is its versatility. It can be a light breakfast treat, a colorful party bite, or a comforting midafternoon pick-me-up. The combination of cottage cheese with blueberries brings a gentle tang and a natural sweetness that feels wholesome and approachable. The subtle citrus notes—zest or a squeeze of lemon—lift the flavors and keep the bites from feeling heavy, while a touch of vanilla ties the dairy and fruit into a cozy, dessert-ready profile. The result is a bite-sized marvel that is as comforting as a warm pastry and as fresh as a summer berry picnic.

The Story Behind the Dish

The name Bocconcini cottage ai mirtilli air fryer is a playful homage to two culinary ideas from different corners of the table. “Bocconcini” evokes those little mozzarella treasures—tiny, round, and meltable—conjuring images of a cheese-filled bite that’s soft, creamy, and indulgent. In this recipe, the word becomes a mood board, a cue to create small, lovable morsels with a similar “bitesized bliss” vibe, but using cottage cheese as the creamy heart instead of stretched mozzarella. Cottage cheese is a pantry staple that often lives in the shadows—underrated, underappreciated, but incredibly versatile. It brings a gentle tang and a light, airy texture that plays beautifully with fruit and a touch of sweetness.

Blueberries have a long history in many European and North American kitchens, celebrated for their bright aroma, pop of color, and balanced sweetness. In many cultures, blueberries symbolize abundance and seasonal joy, turning even the simplest treat into something celebratory. When you combine cottage cheese with blueberries, you’re pairing two everyday ingredients that together feel like a little celebration. The air fryer—an invention that has transformed home cooking by delivering crisp textures with less oil—provides a modern stage for this classic meets contemporary moment. The result is a dish that feels both timeless and new, a bridge between comforting dairy-confections of the past and crisp, modern snacks of today.

Historically, “bite-sized” tables—antipasti, tapas, meze—have always been about sharing, conversation, and the art of packing flavor into tiny, portable portions. This recipe follows that spirit: it’s designed to be generous in spirit but gentle on time, easy to scale for a crowd, and forgiving enough to adapt to what you have on hand. The story here isn’t about a grand, ancient tradition; it’s about a modern approach to snackable, crave-worthy bites that honor the best of two dairy-friendly worlds while embracing a bright fruit note that makes them practically irresistible. It’s a tale of how a little creativity and a helpful kitchen gadget can turn simple ingredients into something that feels special, whether you’re cooking for family, friends, or a moment of quiet personal indulgence.

Why You’ll Love This Recipe

  • Quick and effortless: mix, shape, and air-fry for a snack or starter that comes together in a flash.
  • Healthy-ish indulgence: cottage cheese provides protein and creaminess with comparatively lower fat than many richer cheeses, while blueberries add antioxidants and natural sweetness.
  • Versatile for many diets: naturally gluten-free and adaptable for vegetarian diets; with substitutions, it can lean vegan or dairy-free.
  • Flavor-forward without being overpowering: a delicate balance of dairy tang, blueberry brightness, lemon zest, and vanilla tucked into a crispy shell.
  • Textural contrast that delights: a crisp outer bite yields a soft, pillowy center—every bite feels special.
  • Great for entertaining or everyday snacking: elegant enough for guests, approachable enough for weeknights.
  • Make-ahead capable: the bites can be prepared in advance and finished in the air fryer when ready to serve.
  • Kid-friendly without sacrificing sophistication: familiar flavors presented in fun, bite-sized form that kids and grownups alike enjoy.
  • Low-odds of leftovers, high-odds of smiles: a snack that disappears quickly, encouraging a little social nibbling and conversation.

Flavor Profile & Texture

This dish is a study in contrast and harmony. The exterior offers a gentle crispness, achieved through careful air frying, which seals in moisture while developing a light, golden crust. The crust doesn’t rely on heavy breading; it comes from a delicate balance of the cottage cheese mixture and binding elements that encourage shaping and browning without turning chewy or dense. The interior remains pleasingly soft and creamy, with the cottage cheese providing a mild tang that cleanly cuts through the natural sweetness of the blueberries.

The blueberries contribute bursts of fruity brightness—tiny pockets of tart-sweet juice that burst on the palate with each bite. Their color adds visual appeal, making the bites look like little jewels on the plate. Lemon zest or a touch of lemon juice brings a citrus lift that freshens the dairy-forward profile, preventing it from feeling stodgy or heavy. A hint of vanilla rounds the flavors into a cozy, almost dessert-like finish that’s still perfectly suited to a savory or brunch setting. The balance is important: a bite with too much sweetness can feel cloying, while too little fruit can make the bites feel dull. With the right ratio, you get a melody of tastes—creamy, tangy, bright, and lightly sweet—where each element complements the others rather than competing for attention.

Texture-wise, the contrast is key. The outer shell should deliver a gentle crunch without being hard, almost like a panned pastry edge that gives way to a pillowy interior. The cottage cheese inside should feel soft and slightly grainy in a pleasant, dairy-savory way, never runny or off-putting. The blueberries add a juicy, almost jam-like sensation when heated, which keeps the bite lively and exciting. Overall, the mouthfeel is comforting yet lively, a reminder that small things can hold big, satisfying experiences.

Occasions & Pairings

This dish shines in a variety of settings and occasions. Here are some ideas to spark your planning:

  • Brunch centerpiece: pair with a light sparkling beverage, citrusy sips, and a spread of fruit, yoghurt, and light pastries for a delightful late-morning spread.
  • Happy hour nibble: serve alongside a selection of nuts, olives, and a crisp white wine or sparkling rosé to elevate conversation and discovery.
  • Weeknight snack: a quick, satisfying bite that won’t derail a busy evening but still feels special enough to celebrate small wins.
  • Kids’ party treat: colorful and approachable, these bites are easy to share and fun to pop into mouths between games or activities.
  • Bringing seasonal flair: blueberry season? Use fresh berries at peak and consider a drizzle of honey or a dusting of powdered sugar for a touch of elegance.

Suggested pairings to enhance the experience include a light, citrus-forward sparkling water or a dry Prosecco for a celebratory feel. For non-alcoholic options, a hibiscus tea or blackberry spritzer can echo the berry note beautifully. If you want a savory contrast, a tiny dollop of honey-orange whipped ricotta on the side provides a playful double-dip option. For a complete pairing, consider a simple salad of greens with citrus vinaigrette, which can cleanse the palate between bites without overpowering the delicate flavors of the bocconcini cottage ai mirtilli bites.

Tips, Variations & Substitutions

Here are practical ideas to tailor the concept to your pantry, dietary needs, or mood:

  • Vegan option: replace cottage cheese with a firm, dairy-free alternative such as high-protein almond yogurt or blended cashew cream, and use a flaxseed or aquafaba binder to mimic bite. Use a plant-based cheese substitute for a similar texture, if available, and keep the blueberries for brightness.
  • Gluten-free approach: this concept is naturally gluten-free as long as you avoid any gluten-containing binders. If you want a more “crisp” shell, you can add a small amount of finely ground gluten-free grain or almond flour, ensuring the mixture remains cohesive without becoming crumbly.
  • Low-sugar or sugar-free variant: use blueberries that are naturally sweet and skip extra sugar or sweeteners. A pinch of vanilla and citrus zest will still carry a lot of flavor without added sugar.
  • Regional twists: swap blueberries for other berries like raspberries or blackberries for different tart notes. For a more stone-fruit tilt, a hint of peach or apricot preserves stirred into the cheese can create a luxurious, dessert-like bite.
  • Nutty crunch: fold in a tablespoon or two of finely chopped almonds or pistachios for texture and a hint of toasty flavor, then roll the formed bites in a light dusting of crushed nuts before air frying.
  • Herbal lift: a small amount of chopped mint, thyme, or basil can bring an unexpected herbaceous note that pairs surprisingly well with citrus and berries.
  • Make-ahead binder tricks: if you’re assembling in advance, chill the mixture before shaping so it holds form better. This also helps the air fryer crisp evenly once heated.

Storage & Make-Ahead Ideas

Smart planning makes this dish even more appealing. Here are practical ways to store and maximize fresh flavor:

  • Assemble and refrigerate: Shape the bites and refrigerate on a parchment-lined tray for up to 24 hours before cooking. When ready, air fry directly from the fridge, allowing a minute or two longer cooking time if needed.
  • Make-ahead and reheat: Prepare the bites up to a day in advance, refrigerate, and reheat in the air fryer for a short burst to restore the crisp exterior while keeping the center soft.
  • Storage after cooking: Store any leftovers in an airtight container in the refrigerator for up to 2 days. Reheat gently in the air fryer to re-crisp the exterior, or briefly in a hot oven if you don’t have the air fryer handy.
  • Freezing tips: If you want to freeze, form the bites and freeze on a tray first, then transfer to an airtight bag. Bake from frozen, adding a bit more time to ensure the centers heat through evenly.

Fun Facts & Trivia (Optional)

Here are a few tidbits that add a little extra flavor to the story of these bites:

  • The term bocconcini means “small mouthfuls” in Italian, perfectly describing the tiny, delightful bites in this recipe. It’s a playful nod to the idea that great flavors can come in petite, shareable packages.
  • Blueberries are among the few citrus-friendly fruits that hold up beautifully when heated, making them ideal for quick sears and crisp finishes without turning mushy.
  • Air frying is a relatively modern kitchen technique that mimics deep-frying textures with significantly less oil. It’s perfect for creating a crispy exterior on delicate fillings like cottage cheese without compromising the soft interior.
  • The combination of dairy (cottage cheese) and fruit (blueberries) is a timeless pairing in many culinary traditions, where the tanginess of dairy meets the natural sweetness of fruit to create balanced, satisfying bites.

Make-Ahead Inspiration & Serving Suggestions

If you’re planning a gathering or simply want a weekend project, consider these ideas to maximize flavor and presentation:

  • Serve on a cute platter with fresh mint leaves and a light drizzle of citrus glaze for a party-ready appearance.
  • Offer dipping options: a dollop of lemon yogurt, a touch of honey, or a small spoon of blueberry compote can elevate the experience as a dip for the bites.
  • Create a tasting board: pair your bites with other small plates—savory, sweet, and tangy—to showcase how versatile the concept can be when you mix textures and flavors.

Closing Thoughts

In the end, Bocconcini cottage ai mirtilli air fryer is a tiny celebration of everyday ingredients, elevated through thoughtful combination and a modern cooking method. It invites you to slow down just enough to appreciate a bite that feels both comforting and novel, a perfect reminder that delightful food doesn’t require grand gestures, only a little curiosity, a handful of good ingredients, and a smart gadget that does the heavy lifting. Whether you’re feeding a family, entertaining friends, or savoring a quiet moment alone, these bites offer a memorable, tasty pause—bright, creamy, crisp, and utterly irresistible. Welcome to a little world of bite-sized wonder where cottage cheese meets blueberry sunshine, all courtesy of the air fryer’s gentle magic.

Ingredients

Bocconcini Cottage ai Mirtilli Air Fryer

  • 1 cup cottage cheese, well-drained (full-fat or 2%)
    → The cottage cheese provides moisture, tenderness, and a mild tang that keeps the bites juicy. To prevent soggy results, drain the whey thoroughly and press the curds between paper towels for a few minutes. For a smoother texture, mash or pulse briefly in a blender until you reach a uniform consistency, then fold lightly to keep some texture.
  • 1 large egg, at room temperature, lightly beaten
    → The egg acts as a binder to help the mixture set and hold its shape during air frying. Room temperature eggs emulsify more evenly, giving a cohesive batter. Whisk just until combined to avoid overworking the mixture and making it dense.
  • 1/4 cup almond flour
    → Almond flour provides gluten-free structure and helps bind the mixture without a crumbly texture. It also aids in browning for a crisp exterior. If you only have almond meal, sift it first and you may need a touch more flour to achieve a batter that holds together without being too wet.
  • 1 tablespoon honey or maple syrup
    → Serves as a mild sweetener and contributes to browning under heat. Choose honey for a deeper flavor or maple for a lighter, fruity note. If you skip sweetener, you may need a pinch more almond flour to maintain texture.
  • 1/2 teaspoon vanilla extract
    → Adds warmth and depth that complements the blueberries and cottage cheese. Use real vanilla extract for a richer aroma; avoid imitation varieties if possible for a more natural flavor profile.
  • Pinch of salt
    → Enhances sweetness and helps balance the richness of the cottage cheese. Even a small amount can noticeably sharpen flavor; adjust if your cottage cheese is salted or if you’re using salted toppings elsewhere in the recipe.
  • 1/2 teaspoon lemon zest (optional)
    → Brightens the batter with a citrus note that pairs beautifully with blueberries and cuts through the richness of cottage cheese. Zest only the colorful outer peel, avoiding the bitter white pith, and add it just before mixing to preserve its aroma.
  • 1/4 teaspoon ground cinnamon (optional)
    → A subtle warmth that complements the blueberry flavor. If you prefer a purer vanilla-cake-like profile, omit the cinnamon. Freshly ground cinnamon provides stronger aroma; mix evenly to prevent clumping.

Blueberries

  • 1/2 cup blueberries, fresh (washed and patted dry) or frozen blueberries (do not thaw)
    → Blueberries provide bursts of sweetness and vibrant color. If using frozen berries, they can bleed color, so handle gently and consider tossing them with a teaspoon of almond flour to limit bleeding and help them distribute evenly. Fold carefully into the batter to maintain whole berries where possible, or press a few onto the tops before air frying for a pretty finish.

Air Fryer Prep

  • Cooking spray or neutral oil for greasing the air fryer basket
    → A light coating prevents sticking and promotes even browning. Apply a thin, even layer to the basket or use a pastry brush to coat the bites lightly after shaping. Avoid heavy oiling, which can create soggy bottoms; a little goes a long way for crisp exterior.

Instructions

  • Preheat your air fryer to 350°F (175°C) and lightly grease the air fryer basket with neutral oil or spray.

    → Preheating ensures the bites start cooking immediately and develop a crisp, even exterior; a light oil prevents sticking without making the bottoms soggy.
  • Drain your cottage cheese thoroughly: place 1 cup cottage cheese in a fine-mesh sieve over a bowl, press with paper towels to remove whey for 3–5 minutes, and let the curds drain completely. For a smoother texture, mash briefly or pulse in a blender until uniform, then fold lightly to keep some texture.

    → Removing excess moisture prevents sogginess and helps the bites hold their shape during air frying; mashing slightly creates a smoother batter that still has some body.
  • Whisk 1 large egg at room temperature until just combined and smooth; use a light hand to avoid overworking the egg, which can make the batter dense.

    → Room-temperature eggs emulsify more evenly and help the batter bind without creating dense pockets; whisk until barely combined to keep a tender crumb.
  • In a medium bowl, whisk together the dry ingredients and flavorings: 1/4 cup almond flour, 1 tablespoon honey or maple syrup, 1/2 teaspoon vanilla extract, a pinch of salt, and optional 1/2 teaspoon lemon zest and 1/4 teaspoon ground cinnamon. Then fold in the drained cottage cheese and the lightly beaten egg, mixing just until the components come together into a cohesive batter.

    → Almond flour provides gluten-free structure and aids browning; the sweetener helps browning and moisture retention; vanilla and lemon zest brighten the mix; salt enhances flavor and cinnamon adds warmth; avoid overmixing to keep the batter light.
  • Prepare the blueberries by ensuring 1/2 cup are ready: if using frozen blueberries, do not thaw; toss them with a teaspoon of almond flour to reduce color bleed and help distribute evenly, and if using fresh blueberries, pat them dry to minimize extra moisture.

    → Frozen berries bleed more juice; coating with a little almond flour helps them stay intact and distribute evenly through the batter.
  • Gently fold 1/2 cup blueberries into the batter with a spatula, being careful not to crush the berries; fold until evenly distributed, leaving some pockets of batter visible to ensure a juicy bite.

    → Gentle folding preserves the integrity of the berries and prevents purple staining of the entire batter while distributing sweet-tart bursts throughout the bites.
  • Scoop and shape the batter into bites: using a tablespoon or small cookie scoop, portion the batter into 12 equal pieces, gently roll each into a compact ball or oval about 1 inch in diameter, and place on a parchment-lined surface or directly in the greased air fryer basket, leaving about 1 inch of space between pieces for air circulation.

    → Uniform portions ensure even cooking; keeping them compact helps them hold together during air frying, and space allows hot air to circulate for crisp exterior.
  • Transfer the formed bites to the preheated air fryer basket in a single layer, making sure they do not touch; if your air fryer basket is small, cook in batches.

    → Single-layer placement ensures consistent heat exposure; crowding causes steaming and uneven browning.
  • Air fry at 360°F (182°C) for 6–9 minutes, flipping the bites halfway through for even browning; start checking at 6 minutes for doneness.

    → The high, quick heat sets the exterior into a light crisp while the interior remains tender; flipping halfway ensures both sides crisp evenly.
  • Test for doneness by inspecting the color and texture: the exterior should be golden brown and the center should be set; if needed, continue cooking in 1-minute increments up to 2 additional minutes.

    → A properly set center indicates fully cooked cottage cheese texture and prevents a runny interior; avoid overcooking to prevent a tough crumb.
  • Carefully remove the bites from the air fryer and let them cool on a wire rack for 5 minutes before serving; this rest period helps finish setting and makes them easier to bite.

    → Resting redistributes moisture and stabilizes the structure, producing a crisper exterior and a tender interior when warm.

Notes

These cottage cheese and blueberry air-fryer bites are protein-packed, light, and naturally bright from the blueberries. To ensure tender results, drain the cottage cheese well and press the curds between paper towels to remove excess moisture; mashing or briefly pulsing in a blender will yield a smoother base while keeping some texture. You can customize them by adding lemon zest and vanilla for brightness, or a pinch of cinnamon for warmth; fold in chopped nuts for crunch if you like. They freeze well and reheat beautifully in the air fryer for a quick grab-and-go snack or breakfast. For serving, pair with a dollop of yogurt or a drizzle of honey or maple, and press a few whole berries on top before air frying for a pretty finish. Always ensure your cottage cheese is well-drained and the almond flour is certified gluten-free if you have gluten intolerance.

Tips

Tips for Bocconcini Cottage ai Mirtilli Air Fryer

Preparing the cottage cheese batter

  • Drain whey thoroughly and press the curds between paper towels for several minutes. For a smoother texture, briefly pulse the drained cottage cheese in a processor or blender, then fold just enough to keep some bite and moisture.
  • Use a room-temperature egg and whisk only until combined. Overmixing can make the mixture dense and tough to bite.
  • If the batter feels too wet, whisk in an extra teaspoon or two of almond flour at a time until it holds together without being crumbly.
  • Honey gives browning and a gentle sweetness; maple syrup yields a lighter sweetness. If you skip the sweetener, lightly bump the almond flour to help binding.
  • Real vanilla extract adds depth. If you’re using imitation vanilla, consider using a tiny amount or skip it for a purer flavor.
  • Pinch of salt helps balance the richness of cottage cheese; adjust to taste if your cheese is already salted.
  • Optional lemon zest adds brightness. Zest finely and fold in right before mixing to preserve aroma.
  • Ground cinnamon adds warmth. If you’re after a purer vanilla-cake note, omit the cinnamon.

Handling blueberries

  • Fresh blueberries should be washed and thoroughly dried. If using frozen berries, do not thaw; they bleed color, so toss them lightly with 1 teaspoon almond flour to help distribute evenly and reduce color bleed.
  • Fold berries gently to keep as many whole as possible; press a few onto the tops before air frying for a pretty finish.

Air fryer setup and shaping

  • Lightly grease the air fryer basket with cooking spray or a neutral oil. Avoid heavy oiling, which can create soggy bottoms; a thin, even coating is ideal.
  • Portion evenly using a small scoop or spoon, then roll into compact bites. Slightly flatten the tops so they cook evenly and brown nicely.
  • Arrange in a single layer with space between each piece. Do not overcrowd the basket; cook in batches if needed for a uniform crust.
  • For crisper exteriors, spray or brush the formed bites lightly with oil just before cooking and shake the basket halfway through to promote even browning.

Cooking and finish

  • Preheat the air fryer to about 360–380°F (180–193°C) depending on your model. Preheating helps achieve a crisper crust.
  • Cook the bites for roughly 8–10 minutes, checking for a light golden color and set edges. If needed, cook a bit longer in short increments to prevent over-browning.
  • Remove promptly and let rest 2–3 minutes; this helps them firm up and stay juicy inside.
  • Texture should be light and tender with a gentle crisp on the outside. If they seem too soft, a quick additional minute in the air fryer can help.

Make-ahead, storage, and reheating

  • Formed bites can be stored in the refrigerator for up to 24 hours before cooking. Keep them on a tray and cover loosely.
  • To reheat leftovers, air fry at 320°F (160°C) for 3–4 minutes until warmed through and crisped.
  • For freezing, lay shaped portions on a parchment-lined tray, freeze solid, then transfer to a sealed bag. Cook from frozen, adding 2–3 minutes to the total time.

FAQ

Che cosa è Bocconcini cottage ai mirtilli air fryer?

È uno spuntino o antipasto bite-size che combina bocconcini di mozzarella con cottage cheese e mirtilli, leggermente riscaldati nell’air fryer per sciogliere leggermente il formaggio e far esplodere i mirtilli. Puoi completare con un filo di miele o sciroppo d’acero e foglie di menta per un tocco fresco.

Quali ingredienti servono?
  • 200 g di bocconcini di mozzarella piccoli (perle o cubetti)
  • 120 g di cottage cheese
  • 100 g di mirtilli freschi (lavati e asciugati)
  • 1 cucchiaio di miele o sciroppo d’acero
  • Scorza di mezzo limone (facoltativa)
  • Olio d’oliva o spray da cucina
  • Sale e pepe q.b.
  • Foglie di menta o basilico per guarnire
Posso usare mirtilli congelati?

Sì. Usa mirtilli congelati, ma scongelali leggermente e asciugali bene prima di usarli. I mirtilli possono rilasciare liquido in cottura, quindi asciugarli aiuta a evitare eccesso di umidità.

È possibile prepararlo in anticipo?

È meglio prepararlo fresco. Puoi conservare cottage cheese e mirtilli separatamente in frigorifero e assemblare prima della cottura. Una volta cotti, mangialo entro 1 giorno per gusto e consistenza migliori.

Qual è la temperatura e il tempo di cottura nell’air fryer?

Cuoci a 180–190°C (350–375°F) per circa 6–8 minuti. Controlla a metà cottura: i bocconcini dovrebbero essere leggermente dorati e i mirtilli dovrebbero scoppiettare, senza seccarsi troppo.

Devo preriscaldare l’air fryer?

Sì, preriscalda l’air fryer per 3–5 minuti prima di posare i bocconcini. Questo aiuta a ottenere una leggera crosticina uniforme.

Come assemblare i bocconcini con cottage e mirtilli?

Disponi i bocconcini su un vassoio. Aggiungi una piccola quantità di cottage cheese su ciascun bocconcino e fissa 1-2 mirtilli su ogni pezzo. Puoi spruzzare leggermente di olio e aggiungere miele prima di infornare. Se vuoi, aggiungi una goccia di scorza di limone per un tocco aromatico.

Come gustarlo e con cosa abbinarlo?

Servilo subito mentre è tiepido. Puoi abbinarlo a crostini, prosciutto crudo o a un tagliere di antipasti. Guarnisci con foglie di menta o basilico per un tocco fresco.

È possibile rendere questa ricetta senza latticini?

Sì. Sostituisci mozzarella e cottage cheese con alternative non latticine, come mozzarella vegana a base di latte di soia e crema di anacardi o yogurt di soia. Aggiungi mirtilli e miele come accompagnamento per mantenere il sapore dolce e fruttato.

Posso sostituire bocconcini con mozzarella di bufala o altri formaggi?

Puoi usare mozzarella di bufala o altre mozzarella pigmentate, ma tieni presente che la consistenza e il sapore cambieranno leggermente. Se usi formaggi molto salati o più acquosi, potresti dover regolare il sale.

Come conservare gli avanzi?

Conserva gli avanzi separati: bocconcini cotti e cottage/ mirtilli in frigorifero per 1 giorno. Riscaldali brevemente in air fryer a bassa potenza (circa 2–3 minuti) prima di servire. Alcuni liquidi potrebbero separarsi se riscaldati a lungo.

Qual è il profilo nutrizionale approssimativo?

Una porzione (circa 4–5 bocconcini) fornisce approssimativamente 180–230 kcal, 12–14 g proteine, 9–12 g grassi e 8–12 g carboidrati, variando in base alle quantità e ai condimenti. Puoi adattare gli ingredienti per ridurre calorie o latticini.

Introduzione / Hook

Immagina una piccola festa di sapori racchiusa in una singola bocca: una croccante scorza d’oro che si rompe al primo morso, rivelando un cuore cremoso al formaggio dolce, profumato di vaniglia e scorza di limone, avvolto da una cascata di mirtilli che sprigionano tartine di colore e tepore estivo. Gli egg rolls cheesecake ai mirtilli sono una meraviglia di contrasti: esterno croccante, interno setoso, dolce e un pizzico di aspro dal frutto rosso-violaceo che li rende irresistibilmente freschi. Non si tratta solo di una ricetta; è un piccolo momento di magia culinaria che trasforma una tecnica tradizionale di fritto in una dolce oasi di comfort. Questo dessert, così semplice da realizzare ma sorprendente negli abbinamenti, unisce l’eredità asiatica degli involtini con la delicatezza cremosa della cheesecake e la brillante nota estiva dei mirtilli. È ideale per chi cerca qualcosa di originale ma familiare, per chi ama i contrasti tra croccante e vellutato, e per chi desidera offrire agli ospiti una presentazione che illumini la tavola. E non è solo una dolce delizia da fine pasto: è una proposta di convivialità, perfetta per buffet, feste di compleanno, pranzi domenicali o evenienze improvvisate con amici. Prepararli è un atto di cura: si sente immediatamente che ogni singolo pezzo è pensato per offrire una piccola esplosione di gioia sensoriale dall’ingresso in bocca all’ultimo morso.

La storia dietro il piatto

Il dessert che porta il nome di “egg rolls cheesecake ai mirtilli” racconta una storia di incroci culinari. Da un lato, gli egg rolls – involtini fritti tipici della cucina asiatica, noti per la loro croccantezza e la possibilità di riempirli con una vasta gamma di ingredienti. Dall’altro lato, la cheesecake, un classico intramontabile di tradizioni occidentali, con base di biscotto e cuore cremoso a base di formaggio. L’unione di questi due mondi non è solo una curiosità gastronomica: è una celebrazione della modernità in cucina, dove i confini regionali si dissolvono per dare vita a esperienze nuove e memorabili. I mirtilli, colorati e profumati, aggiungono un tocco mediterraneo e autunnale al contesto, ricordando terreni baciati dal sole, raccolti al culmine della loro dolcezza estiva. Questo piatto nasce da una voglia di creare piccoli dessert che siano facili da condividere, ma che offrano anche una narrazione di sapori: la cremosità del formaggio si unisce all’acidità delicata dei mirtilli, mentre la croccantezza esterna invita a una seconda o terza fetta, come in una conversazione tra amici. La storia di questa ricetta è una di quelle che dimostrano come la cucina possa trasformare un modo di cucinare in una nuova identità di gusto, in cui tradizione e innovazione si abbracciano senza sforzo.

In termini pratici, la combinazione di texture – l’esterno croccante, l’interno morbido e la salsa di mirtilli fresca – richiama la gioia delle degustazioni da street food, ma con un tocco di eleganza e raffinatezza tipico delle cucine casalinghe moderne. È l’esempio perfetto di come una tecnica semplice possa essere reinventata in chiave dessert, offrendo un’esperienza non solo gustativa ma anche visiva: i colori vividi dei mirtilli, il dorato degli involtini fritti e la lucentezza della glassa o dello zucchero a velo rendono ogni pezzo una piccola opera d’arte commestibile.

Perché amerai questa ricetta

  • Facilità di esecuzione: non servono strumenti complicati né tecniche da chef stellato. Con pochi ingredienti base, si ottiene un dessert che fa scena.
  • Contenuto di comfort con un tocco di eleganza: la crema di formaggio è morbida e vellutata, ma l’involucro croccante aggiunge una soddisfazione crunchy che va oltre la tipica cheesecake.
  • Versatilità: si presta a varianti stagionali (fragole, lamponi, mango) o a versioni più legate al gusto classico del cheesecake con diversi aromi (limone, vaniglia, zenzero).
  • Condivisione facilitata: perfetti da servire in piccoli pezzi, ideali per buffet, aperitivi golosi o dessert al taglio in feste e celebrazioni.
  • Equilibrio tra dolcezza e acidità: la dolcezza cremosa incontra l’acidità vivace dei mirtilli, creando un equilibrio che non stanca il palato.
  • Textural play: la crosta croccante sull’esterno contrasta con l’interno morbido, offrendo un’esperienza texturale appagante ad ogni morso.
  • Possibilità di personalizzazione: si adattano benissimo varianti senza glutine o vegane (usando wrapper gluten-free o alternative a base di tofu/soia e formaggi vegani) senza perdere la carica di gusto.

Profilo di gusto e texture

Il profilo gustativo di questi egg rolls cheesecake ai mirtilli è una sinfonia di contrasti che si bilanciano in ogni morso. L’esterno, dorato e leggermente salato, nasce dalla friggitoria o dalla cottura in forno ad alta temperatura, creando una crosta che fa scintillare la vista e stuzzica l’olfatto con una nota aromatica quasi di burro e olio che richiama il comfort della cucina casalinga. All’interno, il ripieno è una crema setosa di formaggio (tradizionalmente cremoso e leggermente dolce), arricchita da una punta di vaniglia, una grattugiata di scorza di limone per un tocco agrumato e una dolce eleganza che si allinea con le note delicate dei mirtilli freschi o in purea. I mirtilli, quando si aprono su una fetta, offrono una leggera acidità che equilibra la dolcezza della crema, con una brillante succosità che ravviva il palato e invita al prossimo morso. A volte, una salsa di mirtilli o una riduzione leggera può accompagnare gli involtini, aggiungendo una cascata di colore e un ulteriore strato di gusto: l’acidità del frutto si sposa perfettamente con la morbidezza cremosa, e la freschezza dei mirtilli interrompe la dozzinalità del dolce puro, offrendo un finale pulito ma soddisfacente. Le note di limone o di scorza conferiscono una marcata ma delicata aromaticità, evitando che la crema diventi troppo pesante. Insieme, questi elementi creano una esperienza di degustazione equilibrata: croccante all’esterno, cremosa all’interno, fresca e fruttata al centro, con una chiusura leggera e profumata che invita a tornare indietro per un altro morso.

Occasioni & abbinamenti

Questi egg rolls cheesecake ai mirtilli brillano in contesti sociali e familiari. Sono perfetti come dessert di fine pasto in cene intime, ma anche come finger food raffinato per brunch, buffet o feste di compleanno. Grazie alle loro dimensioni ridotte, si prestano a una presentazione elegante: impilati su un piatto luminoso con una leggera spolverata di zucchero a velo o con una salsa di mirtilli a lato per decorare, diventano la protagonista di ogni tavola. Abbinamenti consigliati:

  • Bevande: spumante brut, Prosecco, un Moscato leggero o una limonata agli agrumi per una nota fresca che riequilibra la dolcezza del ripieno.
  • Contorni: una leggera insalata di agrumi o di lamponi per continuare il tema fruttato; oppure una crema leggera al limone o un sorbetto ai mirtilli per pulire il palato tra un morso e l’altro.
  • Dolci di accompagnamento: una piccola coppetta di gelato alla vaniglia o al limone per ampliare la gamma di texture e temperature.

Occasioni speciali includono matrimoni informali, merende tra amici, o cene di primavera/estate in cui si desidera offrire qualcosa di unico senza appesantire i fornelli. Sono anche ideali come alternativa al tradizionale tiramisù o al cheesecake classico quando si vuole proporre qualcosa di meno pesante ma altrettanto goloso. Per una presentazione stagionale, si può utilizzare una salsa di mirtilli ridotta con zest di limone e un filo di miele per mettere in risalto l’aroma estivo, oppure optare per una salsa di more o di frutti di bosco per una nuance diversa ma altrettanto affascinante.

Suggerimenti, varianti e sostituzioni

La bellezza di questa ricetta è la sua versatilità. Ecco idee pratiche per adattarla a gusti diversi, necessità alimentari o occasioni specifiche:

  • Varianti di farcitura: oltre al classico ripieno di crema al formaggio, si può inserire una crema al mascarpone per una texture ancora più vellutata, oppure aggiungere una piccola quantità di crema di ricotta per una nota lattiginosa più delicata. Per una versione light, si può utilizzare formaggio quark o yogurt greco ben scolato, senza rinunciare alla cremosità.
  • Gusti e aromi: la scorza di limone è un complemento classico, ma si può sperimentare con scorza d’arancia, vaniglia, cannella o una punta di zenzero grattugiato per un profilo più speziato. Per un tocco erbaceo, aggiungere una piccola quantità di scorza di limone e foglie di menta tritate finemente.
  • Versione vegana: utilizzare wrapper vegani (senza carne) o fogli di carta di riso frittabili e una crema a base di formaggio vegano o tofu cremoso, addolcito con sciroppo d’acero o agave. Per i mirtilli, utilizzare una purea di mirtilli e un po’ di amido di mais per addensare la salsa.
  • Gluten-free: assicurarsi che i wrapper siano privi di glutine o sostituirli con fogli di riso fritti in olio bollente fino a doratura (frittura in olio o cottura al forno come alternativa).
  • Versione al forno: se preferisci una versione meno oleosa, spennella i wrapper con un po’ d’olio e cuoci in forno a 190-200°C, girando a metà cottura, fino a doratura. Otterrai una consistenza croccante simile a quella fritta ma con meno grassi.
  • Dimensioni personalizzate: per presentazioni da finger food, riduci le dimensioni degli involtini e crea mini porzioni monoporzione; per una versione “piatto principale” raddoppia la quantità di ripieno e aggungi una base di biscotto sbriciolato per una crosta ancora più strutturata.
  • Abbinamenti di texture: se vuoi esaltare ulteriormente la croccantezza, aggiungi una spruzzata di granella di pistacchio o nocciole tostate sulla superficie degli involtini appena prima di servire.

Conservazione e idee per preparazione in anticipo

La gestione del tempo è spesso la chiave di una degustazione riuscita. Ecco come preservare al meglio la freschezza e la consistenza di questi dessert:

  • Preparazione anticipata: è possibile preparare il ripieno in anticipo e conservarlo in frigorifero per 1-2 giorni. Assemblare e friggere solo poco prima di servire per mantenere la croccantezza ottimale.
  • Conservazione delle porzioni cotte: una volta fritti o cotti al forno, lasciarli raffreddare completamente e conservarli in contenitori ermetici a temperatura ambiente per 1 giorno; in frigorifero, massimo 2 giorni, con attenzione a non farli ammuffire o imbevire di umidità.
  • Riscaldamento: riscaldare in forno a 180-190°C per 5-7 minuti fino a tornare croccanti; se sono stati serviti con salsa, scaldare la salsa separatamente per accompagnare al momento di servire.
  • Make-ahead per eventi: preparare la crema e i mirtilli in anticipo, conservare in contenitori refrigerati, e preparare l’involtino all’ultimo minuto per mantenere croccantezza e temperatura.

Curiosità & trivia (Opzionale)

Sapete che i mirtilli sono tra i frutti di bosco più antichi e apprezzati nelle tradizioni culinarie europee? Questo piccolo frutto, con la sua tonalità blu-violacea, non è solo bello da vedere ma anche ricco di antocianine, composti naturali che possono avere benefici benefici per la salute. L’uso della scorza di agrumi per profumare i formaggi cremosi è una tecnica classica in molte cucine del mondo: quel tocco di freschezza può davvero trasformare una base dolce in qualcosa che resta più a lungo sul palato. Per quanto riguarda gli involucri, gli egg rolls hanno origini cinesi, ma oggi si trovano in versioni creative in molte cucine, impegnate a dimostrare che la cucina è il posto dove la tradizione incontra l’innovazione. La fusione di cheesecake e involtini fritti è un piccolo esempio di come le idee creative possano nascere dall’incontro tra mondi diversi, dando vita a nuove icone culinarie che non smettono di stupire.

Conclusione

Egg rolls cheesecake ai mirtilli è una ricetta che invita a giocare con la cucina: una base di dolcezza cremosa avvolta da una croccante carezza dorata, con l’esplosione finale di mirtilli freschi o in salsa. È una portata conviviale, non troppo impegnativa da realizzare, ma sorprendentemente generosa nel gusto e nell’impatto visivo. Se stai cercando un dessert che parli di casa, di estate e di momenti condivisi, questa idea ti offre tutto questo e molto di più: una piccola gioia croccante che rende ogni occasione più speciale. Provala e scopri quanto poco servano per creare una grande impressione: bastano pochi gesti semplici, qualche ingrediente di qualità e una dose di fantasia per trasformare una cena ordinaria in una memoria gustativa memorabile.

Ingredients

Egg Rolls cheesecake ai mirtilli

Wrapping & Filling

  • Egg roll wrappers (12 sheets, wheat-based)
    → Outer shell that forms the crisp, golden exterior when fried. Preparation: Keep wrappers covered with a damp towel to prevent drying; Place filling near one corner and roll tightly, folding in the sides as you go; Seal the edge with a touch of water to help keep the roll closed during frying. Tips: If a wrapper tears, patch with a small amount of water and press to seal; For baked versions, brush with a thin layer of oil and bake on a parchment-lined sheet until crisp.
  • Cream cheese, softened (8 oz / 225 g)
    → Core of the filling, providing the creamy cheesecake texture. Preparation: Let cream cheese soften at room temperature, then beat with sugar and vanilla until smooth and lump-free. Tips: Avoid overbeating after adding sugar to prevent air pockets; For extra silkiness, incorporate a tablespoon of sour cream, but keep the texture sturdy for frying.
  • Granulated sugar (2 tablespoons)
    → Sweetens the filling and balances the tang of the cream cheese. Preparation: Add to the cream cheese mixture and beat until fully incorporated. Tips: If you prefer milder sweetness, start with 1 tablespoon and adjust; Use fine granulated sugar to dissolve quickly and mix evenly.
  • Vanilla extract (1 teaspoon)
    → Enhances the cheesecake flavor profile. Preparation: Stir into the cream cheese mixture with the sugar. Tips: Use pure vanilla extract for best aroma; If you have vanilla bean, scrape seeds for extra depth.
  • Lemon zest (1 teaspoon)
    → Provides a bright citrus note that complements blueberries. Preparation: Zest lemon with a microplane, avoiding the white pith. Tips: Zesting before juicing maximizes aroma; If you don’t have zest, a small amount of lemon juice can substitute, but aroma will be reduced.
  • Blueberries, fresh or thawed frozen (1 cup)
    → Core fruit that gives color, sweetness, and tang to the filling. Preparation: Rinse fresh berries; If using frozen, thaw completely and drain well; Optional: macerate with a teaspoon of sugar for 10–15 minutes to intensify flavor and reduce moisture. Tips: Choose ripe, deeply colored berries for best flavor and appearance.
  • Cornstarch (1 tablespoon)
    → Thickening agent for the blueberry portion to minimize leakage during frying. Preparation: Mix with a small amount of cold water to form a slurry before adding to the blueberries and heating until the mixture thickens. Tips: If you want a firmer filling, you can increase to 1.5 tablespoons, but avoid making it chalky.
  • Fine salt (pinch)
    → Enhances overall flavor and prevents sweetness from tasting flat. Preparation: Add a tiny pinch to the cream cheese mixture. Tips: Use just a pinch to avoid oversalting; adjust other sweet elements accordingly.

Assembly & Frying

  • Egg wash (1 large egg + 1 tablespoon water)
    → Used to seal wrapper edges and promote browning. Preparation: Beat egg with water until smooth; Apply along the wrapper edge with a pastry brush to seal after rolling. Tips: Keep the wrapper edges slightly damp for a secure seal; If you prefer not to use egg, you can seal with a touch of water, but the seal may be less secure during frying.
  • Neutral oil for frying (2–3 cups, or enough for deep frying)
    → Creates the crisp, golden crust that characterizes fried egg rolls. Preparation: Heat oil to about 350°F (175°C) in a deep, heavy pot; Maintain temperature while frying; Tips: Do not overcrowd the pan; Fry until evenly golden and crisp, then drain on paper towels; For a lighter version, bake at 400°F (200°C) on a parchment-lined sheet until crisp but this will alter texture.

Serving & Finish

  • Powdered sugar for dusting (optional, 1–2 tablespoons)
    → Finishing touch that adds a delicate sweetness and decorative appeal. Preparation: Lightly dust the hot rolls just before serving. Tips: Use a fine-mesh sieve for even coverage; Store leftovers in an airtight container to prevent moisture from dissolving the dusting.
  • Blueberry sauce for serving (optional)
    → A complementary dipping sauce that enhances the blueberry cheesecake theme. Ingredients (for quick sauce): blueberries (1/2 cup), sugar (1 tablespoon), lemon juice (1 teaspoon), water (1 tablespoon), cornstarch (1/2 teaspoon, mixed with a splash of water). Preparation: Simmer blueberries with sugar and lemon juice until the fruit releases juice; Stir in the cornstarch slurry and cook until thickened; Tips: Let sauce cool slightly before serving; This sauce can be stored in the fridge for up to 3 days and reheated gently.

Instructions

  • Soften the cream cheese to room temperature for 30–60 minutes, then transfer to a medium bowl and beat with a mixer on medium speed until the mixture is completely smooth and lump-free.
    → Softening allows the sugars and vanilla to blend evenly, preventing grainy pockets and ensuring a silky cheesecake texture in every bite.
  • Beat in granulated sugar (2 tablespoons), vanilla extract (1 teaspoon), and a fine pinch of salt until fully incorporated and glossy.
    → Properly sweetening and seasoning the base creates a balanced filling that showcases the blueberry more clearly without masking the cream cheese flavor.
  • Zest the lemon with a microplane until you have about 1 teaspoon of bright, aromatic zest, then fold it into the cream cheese mixture.
    → The lemon zest adds citrus perfume that complements the blueberries and wakes up the cheesecake undertones without adding liquid.
  • Rinse the blueberries if using fresh, or thaw frozen berries completely and drain well, then place them in a small saucepan with 1 tablespoon granulated sugar and 1 teaspoon lemon juice.
    → Gentle heating releases fruity juices and concentrates blueberry flavor; draining prevents extra moisture from loosening the filling later.
  • Matter the berry preparation by whisking 1 tablespoon cornstarch with 1–2 teaspoons cold water to form a smooth slurry, then stir the slurry into the blueberries in the saucepan and bring to a gentle simmer until the mixture thickens to a jam-like consistency. Remove from heat and let cool to room temperature.
    → The cornstarch thickener sets the blueberry portion so it remains intact inside the rolls during frying, reducing leakage.
  • Fold the cooled blueberry mixture into the cream cheese until well distributed, using a spatula to create streaks of blue through the cream cheese for a marbled effect; do not overmix to avoid turning the filling gray.
    → Folding gently preserves color and texture, giving you pockets of blueberry flavor without breaking the filling apart.
  • Chill the filling in the refrigerator for 15–20 minutes to firm slightly, making it easier to portion and seal inside the wrappers.
    → A cooler filling reduces oozing and helps the wrappers seal more reliably during frying.
  • Prepare the egg wash by beating 1 large egg with 1 tablespoon water until completely combined and smooth.
    → The gentle liquid helps glue the wrapper edges without creating a thick layer that can cause blistering; a uniform wash yields a smooth, golden seal.
  • Arrange the egg roll wrappers with parchment or a clean, dry surface nearby, keeping them covered with a damp towel to prevent drying and cracking.
    → Keeping wrappers moist prevents tearing and makes them easier to roll tightly without cracks that could leak filling during frying.
  • Position each wrapper with a corner facing you, place about 2–3 tablespoons of filling near that corner, and lightly brush the edges with the egg wash.
    → This setup ensures a secure seal and a neat, compact roll that bakes and fries evenly.
  • Roll the wrapper away from you toward the opposite corner, folding in the two long edges as you go, then seal the final edge with a thin line of egg wash and press gently to secure.
    → A tight roll prevents gaps that would allow filling to escape and promotes uniform browning all around.
  • Transfer the sealed egg rolls to a parchment-lined tray, seam-side down, and cover loosely with a damp towel while you finish assembling the rest.
    → Stacking or drying the shells causes cracks and makes sealing difficult during frying; spacing prevents sticking.
  • Set a deep, heavy pot over medium-high heat and pour neutral oil to a depth of about 2–3 inches; heat the oil to 350°F (175°C) using a thermometer for accuracy.
    → A stable 350°F ensures a crisp, golden crust without undercooking the filling or absorbing excess oil.
  • Fry the egg rolls in batches, turning occasionally, for 3–5 minutes total, until all sides are evenly golden and crisp; adjust heat to maintain the target temperature during frying.
    → Frying in batches prevents crowding, which lowers oil temperature and yields soggy rolls rather than crisp shells.
  • Lift the rolls from the oil with tongs, drain on paper towels, and let them rest for 1–2 minutes before serving to avoid immediate burning or breaking the delicate filling.
    → Resting helps the filling set slightly and prevents steam burns when biting into the roll.
  • If you prefer a lighter texture or a non-fried version, preheat the oven to 400°F (200°C), brush the rolls lightly with oil, place on a parchment-lined sheet, and bake 12–15 minutes, turning once, until the shells are crisp.
    → Baking yields a crisper shell with less fat, but it will have a different mouthfeel than deep-fried rolls; keep an eye on color to avoid overbrowning.
  • Dust the hot rolls with powdered sugar (about 1–2 tablespoons) just before serving, using a fine-mesh sieve for an even, delicate coating.
    → A light dusting adds a touch of sweetness and visual contrast without overwhelming the filling.
  • Prepare a quick blueberry sauce for serving by simmering 1/2 cup additional blueberries with 1 tablespoon sugar and 1 teaspoon lemon juice in a small saucepan, then stirring in 1/2 teaspoon cornstarch dissolved in 1 teaspoon water to thicken; cook until glossy and thickened, then remove from heat and cool slightly.
    → The sauce enhances the blueberry cheesecake theme, providing a complementary tart-sweet note and a glossy presentation.
  • Serve the fried blueberry cheesecake egg rolls warm with a spoonful of the blueberry sauce on the side or drizzled over the rolls for a vivid blueberry perfume and extra moisture.
    → Serving warm ensures the cream cheese filling remains soft and creamy, while the sauce adds moisture and contrast with the crisp shell.
  • Store any leftovers in an airtight container at room temperature for up to 2 hours or refrigerate for up to 2 days; reheat gently in a 350°F (175°C) oven for a few minutes to restore crispness.
    → Proper storage prevents the filling from drying out and helps maintain the desirable texture when reheated.

Notes

These blueberry cheesecake egg rolls are a playful fusion of crisp, golden wrappers and a creamy blueberry cheesecake filling.

You can customize them by adding lemon zest, vanilla seeds, or a pinch of cinnamon to the cream cheese mixture, and by folding in extra blueberries or white chocolate chips.

For a lighter version, bake instead of fry: preheat to 400°F (200°C), brush the rolls lightly with oil, place on a parchment-lined sheet, and bake for about 12–15 minutes or until crisp and golden, turning once for even browning.

To help the filling stay put and prevent leakage during frying, chill the cream cheese filling and thicken the blueberry portion with a cornstarch slurry before heating.

Make-ahead and storage: assemble the rolls and refrigerate for up to 2 hours before frying. For longer storage, freeze assembled rolls on a parchment-lined tray until solid, then transfer to a freezer bag; fry or bake from frozen, adding 1–2 minutes to the cooking time.

Serving suggestions: dust warm rolls with powdered sugar, and serve with a blueberry sauce or a dollop of whipped cream or vanilla yogurt for extra richness.

Gluten-free option: for a gluten-free version, use certified gluten-free egg roll wrappers or rice paper and adjust sealing and frying times as needed; note that texture may differ from wheat-based wrappers.

Tips

Consigli utili per la preparazione

  • Gestione delle wrapper: conservare gli involucri coperti da un panno umido mentre si lavora per evitare che si secchino. Se si strappano, lucidare i bordi con un po’ d’acqua e sigillare premendo. Per una versione al forno, spennellare leggermente con olio e cuocere su una teglia foderata con carta forno finché risultano croccanti.
  • Crema di formaggio morbida: lasciare il formaggio a temperatura ambiente finché diventa morbido, poi montarlo con lo zucchero e la vaniglia fino a ottenere una crema liscia e senza grumi. Evitare di montare troppo dopo l’aggiunta dello zucchero per non creare microbolle; per maggiore setosità, incorporare un cucchiaio di panna acida, ma mantenere una consistenza stabile per la frittura.
  • Zucchero: aggiungere fino a completa incorporazione. Se preferisci una dolcezza più lieve, inizia con 1 cucchiaio e aggiusta. Usa zucchero fine per dissoluzione rapida e buona dispersione nella crema.
  • Vaniglia: preferire estratto puro per aroma intenso; se hai bacello di vaniglia, puoi raschiarne i semini e aggiungerli per profondità extra.
  • Scorza di limone: grattugiare con una microplane evitando la parte bianca (dà amaro). Preparare la scorza prima di spremere il limone per preservare l’aroma. Se non hai scorza, un pizzico di succo di limone può sostituire parte dell’aroma, ma l’esalazione sarà minore.
  • Mirtilli: scegliere mirtilli maturi e intensi di colore. Se usi quelli congelati, scongelarli e scolarli bene. Per un sapore più intenso, macerare i mirtilli con 1 cucchiaino di zucchero per 10–15 minuti prima di unirli al composto; asciugare bene per evitare liquidi in eccesso nella crema.
  • Addensante (amido di mais): utilizzare 1 cucchiaio sciogliendolo in una piccola quantità d’acqua fredda per formare una slurry prima di unirlo al composto di mirtilli. Cuocere finché la salsa si addensa. Se vuoi una consistenza più ferma, puoi aumentare fino a 1,5 cucchiai, ma evita di rendere la salsa troppo opaca o gessosa.
  • Sale: un pizzico di sale aiuta a bilanciare la dolcezza. Aggiungi poco per volta e aggiusta in base al gusto complessivo.
  • Uovo per la doratura e sigillatura: sbattere l’uovo con l’acqua per creare una consistenza omogenea da spennellare sui bordi della wrapper e sigillare bene. Se preferisci non usare l’uovo, puoi sigillare con un po’ d’acqua, ma la tenuta durante la frittura potrebbe risultare meno sicura.
  • Olio neutro per frittura: mantenere la temperatura intorno ai 175°C. Scaldare in una pentola profonda e non sovraffollare il contenitore per evitare sbalzi di temperatura. Friggere fino a doratura uniforme, scolare su carta assorbente. Per una versione più leggera, è possibile cuocere al forno a 200°C su teglia foderata, ma la consistenza cambia rispetto alla frittura.
  • Zucchero a velo per la finitura: utilizzare un setaccio fine per una doratura leggera e uniforme. Conservare i rotolini cotti in contenitore ermetico per mantenere la croccantezza. Se avanzano, riscaldarli poco prima di servire per ritrovare la croccantezza.
  • Salsa di mirtilli (facoltativa): per una salsa rapida, unire mirtilli, zucchero, succo di limone e un po’ d’acqua, far sobbollire finché i frutti rilasciano succo. Aggiungere una slurry di amido di mais e cuocere finché si addensa. Lasciare raffreddare leggermente prima di servire. Conservare in frigo per 3 giorni; si può riscaldare delicatamente prima di accompagnare i rotoli.
  • Preparazione anticipata: puoi preparare crema e salsa in anticipo e conservare in frigorifero. Assemblare i rotoli poco prima di friggere per mantenere la croccantezza. I rotoli non fritti possono essere congelati su un vassoio, poi sigillati in sacchetti e conservati; friggerli direttamente dal congelatore senza scongelarli per una doratura uniforme.

FAQ

Domande frequenti – Egg rolls cheesecake ai mirtilli

Che cosa sono gli egg rolls cheesecake ai mirtilli?

Sono involtini croccanti ripieni di una crema al formaggio dolce e mirtilli, avvolti in wrapper per egg rolls e cotti al forno o fritti. Sono una versione finger-food del cheesecake, perfetti come dessert o snack e da servire con una coulis di mirtilli o gelato alla vaniglia.

Quali ingredienti servono per preparare la ricetta?

Ripieno: crema di formaggio morbido (circa 225 g), zucchero a velo (circa 50 g), estratto di vaniglia (1 cucchiaino), scorza grattugiata di 1/2 limone, succo di limone (1 cucchiaio), amido di mais (2 cucchiai), mirtilli freschi o congelati (circa 150 g), cannella in polvere (opzionale).

Involtini: fogli di wrapper per egg rolls (20-24 pezzi), olio per friggere o olio per spennellare, acqua per sigillare.

Come si prepara il ripieno?

In una ciotola, mescola crema di formaggio morbido, zucchero a velo, vaniglia, scorza e succo di limone. Aggiungi l’amido di mais e mescola finché la crema è liscia e leggermente addensata. Incorpora delicatamente i mirtilli. Copri e lascia riposare in frigorifero per circa 15-20 minuti.

Come si avvolgono correttamente gli egg rolls?

Metti circa un cucchiaio pieno di ripieno al centro di ogni wrapper. Ripiega i lati e arrotola serrando bene. Sigilla l’estremità con una goccia di acqua lungo il bordo per impedire che si aprano durante la cottura.

Qual è il metodo di cottura consigliato?

Scalda l’olio a 175-180°C e friggi 2-3 minuti finché sono dorati. Sgrena su carta assorbente. Opzione 2: forno preriscalda a 190-200°C e cuoci per 15-20 minuti, spennellando i wrapper con poco olio per renderli croccanti.

Come evitare che il ripieno fuoriesca durante la cottura?

Non riempire troppo, sigilla bene i bordi con acqua o uovo sbattuto, lascia raffreddare leggermente il ripieno prima di riempire e utilizza amido di mais per addensare; se i mirtilli sono molto succosi, mescola con un po’ di amido in modo da trattenere i liquidi.

Si possono preparare in anticipo o congelare?

Sì. Il ripieno può essere preparato in anticipo e conservato in frigorifero per 1-2 giorni. Gli involtini non cotti possono essere congelati su una teglia, poi trasferiti in sacchetti: cuocere direttamente dal congelato, aggiustando i tempi di cottura.

Come si serve e quali accompagnamenti scegliere?

Servili tiepidi o freddi. Spolvera con zucchero a velo e accompagna con una coulis di mirtilli o sciroppo, oppure con una pallina di gelato alla vaniglia per un dessert completo.

Posso variare la ricetta con alternative o abbinamenti?

Sì. Puoi usare crema di formaggio a ridotto contenuto di grassi, yogurt greco denso o ricotta come alternativa. Prova con mirtilli freschi o altri frutti di bosco (lamponi, more). Aggiungi scorza di limone o arancia, cannella o zenzero per una nota diversa. Per una versione extra croccante, aggiungi una piccola quantità di crumble di noci al ripieno prima di chiudere gli involtini.

Introduction / Hook

Imagine a dessert that feels both familiar and exhilarating at once: a delicate, cloud-soft cheesecake that arrives on the palate like a whisper, yet bursts into a chorus of sun-warmed strawberries with every bite. Bocconcini cheesecake alle fragole is that intriguing paradox—a dessert that whispers of Italian summers while inviting you to savor a modern, playful twist on a classic. In this creation, tiny morsels of soft, milky cheese mingle with the brightness of ripe strawberries,creating a texture that is at once lush and light. The aroma alone is enough to transport you to a sun-dappled piazza where laughter drifts through the air, where family and friends gather around a gleaming dessert platter, and where every slice promises a moment of simple, joyful indulgence. The balance between creamy, creamy, and fresh fruit is what makes this cheesecake so irresistible: it offers a comforting familiarity while presenting a fresh, almost celebratory finish that makes even ordinary evenings feel special. This is not merely a dessert; it’s a sensorial experience, a small ritual of sweetness that invites conversation, lingering glances, and a handful of memories in the making.

What makes bocconcini cheesecakes alle fragole particularly enchanting is the way the dish can feel rustic yet refined at the same time. The bocconcini—those petite, tender cheese curds whose name literally translates to “little morsels”—introduce a soft, creamy undercurrent without overpowering the bright, crystalline notes of strawberry. When the berries meet this gentle dairy embrace, they release a perfume of orchard sunlight—lemon zest, vanilla, and a hint of mint or basil if you’re feeling particularly Mediterranean—that lingers on the tongue and in the air long after the last bite. It’s a dessert you can share with the table, confident in its elegance yet unpretentious enough to accompany a casual weeknight supper. And because it’s versatile in texture and form, it adapts to the rhythms of your life: a show-stopping dessert for guests, a comforting treat for a quiet evening at home, or a playful conclusion to a celebratory meal.

The Story Behind the Dish

Every great dish carries a story, and bocconcini cheesecake alle fragole is no exception. The concept grew out of an affectionate blend of two Italian culinary loves: the soft, curd-like charm of fresh cheeses and the pure, sun-kissed sweetness of strawberries that mark the start of summer. In many Italian regions, dinners are more than meals—they are moments of storytelling, where recipes travel from kitchen to courtyard, gathering small variations with each new cook who adds a personal touch. The bocconcini, those little pearls of mozzarella, have long been celebrated for their approachable, melt-in-your-mouth texture. They offer a gentle saltiness and a pristine dairy note that can act as a counterpoint to fruit in surprising, delightful ways. This cheesecake plays with that dynamic, treating bocconcini not as a bold, savory ingredient but as a soft foundation that lets the strawberries sing.

In the imagined lineage of this dessert, a family in a Ligurian hillside village begins with a familiar cheesecake base, but then folds in crushed bocconcini or a cream made with bocconcini to create a lighter, silkier filling. The result is a balance you might not expect: the richness of dairy without heaviness, the brightness of fruit without cloying sweetness, and a texture that feels at once sophisticated and cozy. The origin story isn’t about a single chef or a single kitchen; it’s about a shared memory—the kind of memory that people pour into a slice of cake when they have gathered around a table with good company and a bottle of something sparkling. The dish becomes a modern homage to tradition, a gentle nod to regional flavors, and a playful invitation to experiment with textures and flavors that feel both timeless and contemporary.

Why You’ll Love This Recipe

  • Elegant yet approachable: It looks impressive on a platter, but the concept is straightforward enough for a confident home cook to reproduce and enjoy.
  • Silky texture with a bright fruit finish: The bocconcini provide a velvet backdrop that lets the strawberry brightness take the stage, creating a harmonious contrast that’s both comforting and refreshing.
  • Versatile for occasions: Perfect for summer gatherings, family Sunday desserts, or a refined finale for a dinner party.
  • Make-ahead friendly: The dessert can be prepared in advance and refrigerated, allowing flavors to meld and intensify while you prep other courses or set the table.
  • Diet-friendly adaptations: The concept adapts well to vegan, gluten-free, or dairy-free versions, offering flexibility without sacrificing the essence of the dish.
  • Sensory storytelling: Each bite tells a story—creamy, fruity, a touch of vanilla, and a whisper of citrus—creating a multi-sensory experience that lingers in memory.

Flavor Profile & Texture

The flavor journey begins with a gentle tang and creaminess that comes from the bocconcini and the dairy-inspired components. The bocconcini impart a soft, milky note with a whisper of salinity that keeps the palate energized rather than weighed down. When strawberry is introduced, the fruit’s natural sweetness and high notes of berry acidity cut through the dairy, creating a balanced, lively finish. The mid-palate is rounded by a subtle vanilla or citrus zest—often lemon or orange—adding citrus lift that brightens the cheesecake without veering into sharpness. A hint of mint, basil, or even a trace of balsamic can be incorporated to accentuate the fruit’s aroma and to echo the Italian herb garden’s scent.

The texture is where the magic truly happens. The goal is a cheesecake that feels light, almost ethereal, yet satisfies with a creamy, lush mouthfeel. The bocconcini component helps achieve that dream by providing a delicate, melt-in-your-mouth experience that pairs beautifully with a smooth, soft, and slightly airy filling. The strawberry element contributes a juicy bite and a tart-sweet punch that brightens every mouthful. The overall effect is a dessert that glides across the tongue, leaving a clean, satisfying finish rather than a heavy aftertaste. The crust or base—whether crumbly and buttery, or a delicate biscuit layer—offers a contrasting crunch that elevates the overall texture, making the first bite a multi-layer sensation: first the crisp edge, then the creamy core, and finally the juicy brightness of fruit as you reach the center.

For those who love aroma, this dessert’s scent is an essential part of its appeal. Fresh strawberries release their perfume as they macerate, sending notes of orchard fruit and summertime warmth through the room. A light dusting of citrus zest releases a fragrant citrus note that mingles with the dairy, while a sprig of herb, if used, adds a green, herbal whisper that reinforces the dish’s Italian character. It’s not just a taste; it’s an atmosphere you can feel as you bring the dish to the table and slice with a gentle twist of the knife, revealing a creamy, pale interior studded with little pearls of bocconcini and specks of ruby red strawberry. This is the kind of dessert that invites slow savoring—the better you taste, the more you notice: the way the dairy creaminess dissolves into the fruit’s brightness, the soft texture that allows a single bite to deliver a chorus of flavors in a single moment.

Occasions & Pairings

This strawberry cheesecake with bocconcini is ideal for a summer soirée, a weekend family dinner, or a romantic end to a date night. It’s equally at home on a casual brunch table as it is on a plated dessert course in a more formal menu. The dish thrives in settings where guests enjoy light, balanced sweetness and a touch of Italian charm. Consider serving it alongside a sparkling wine, such as Prosecco or a light Asti, to echo the dish’s celebratory spirit and help cleanse the palate between bites. For non-alcoholic pairings, a sparkling water with a squeeze of citrus or a lightly aromatic herbal tea can complement the dessert beautifully, enhancing the fruit’s brightness without overpowering the delicate dairy notes.

Pairing ideas beyond drinks include fresh fruit salads that echo the strawberry theme, almond biscotti for a crunchy contrast, or a delicate shortbread cookie that provides a complementary texture. A soft, vanilla-scented custard or light gelato can also accompany the cheesecake for a more indulgent dessert trio. For a more rustic presentation, you can plate slices with a fresh strawberry compote and a few mint leaves, letting the colors—crystal white, ruby red, and fresh green—shine on the platter. If you’re entertaining, consider making mini individual portions: bite-sized servings that are perfect for a cocktail party or an elegant buffet, allowing guests to sample and mingle as they chat and smile at the sight of a gleaming, glassy dessert centerpiece.

Tips, Variations & Substitutions

Here are ideas to tailor bocconcini cheesecake alle fragole to your taste, dietary needs, or ingredient availability, all while preserving its essence:

  • Texture tweaks: If you prefer a more pronounced cake-like texture, adjust by increasing the density of the filling slightly with a smoother base and a firmer set. For a lighter, mousse-like feel, introduce more air by folding in whipped elements that harmonize with the bocconcini’s creaminess.
  • Flavor twists: Introduce complementary berries such as raspberries or blueberries for a more complex fruit profile. A touch of citrus zest (lemon or orange) enhances the fruit’s brightness and keeps the dish feeling fresh.
  • Herbal accents: A hint of fresh mint, basil, or thyme echoes the Italian garden and elevates the strawberry aroma. Use sparingly—one small leaf or a chiffonade goes a long way.
  • Vegan or dairy-free adaptations: Swap dairy-based bocconcini and cream elements for plant-based alternatives made from almonds, cashews, or coconut. A cashew-based cream can provide a similarly silky mouthfeel when blended with other plant ingredients, and a neutral-flavor base helps the strawberry notes shine.
  • Gluten-free or allergen-friendly base: If you’re serving guests with gluten sensitivities, choose a gluten-free crust option or omit the crust entirely for a pavé-style presentation with a soft interior and a crisp exterior from a light topping or a pressed nut crust.
  • Make-ahead variations: Prepare components a day ahead and assemble just before serving to preserve texture and prevent sogginess. Chilled, the flavors deepen; at room temperature, they become more aromatic but may lose a touch of cohesion.
  • Serving styles: Slice and plate with a drizzle of strawberry sauce or reduction, and garnish with a strawberry half and a small herb for color and fragrance. For a party, consider mini versions—single-bite bites that are both convenient and visually appealing.
  • Regional twists: In coastal regions, a subtle marine saline note on the bocconcini can pair with a lightly scented berry garnish to evoke sea breeze and sun-drenched cliffs, while inland versions might emphasize vanilla and almond flavors for a comforting, kitchen-table feel.

Storage & Make-Ahead Ideas

Like many cheesecakes, this dessert benefits from a comfortable chilling period to allow flavors to meld and textures to settle. Here are practical tips to ensure your bocconcini cheesecake alle fragole remains at its best:

  • Refrigeration: Store leftovers covered in the refrigerator for up to 2–3 days. The texture will soften slightly with time, but the flavor remains bright and inviting.
  • Make-ahead: Prepare the filling mixture one day in advance and refrigerate until ready to assemble. The fruit topping can be prepared ahead as well and kept refrigerated until assembly. This approach allows you to serve an elegant dessert with minimal last-minute effort.
  • Freezing: Freezing is feasible if you wish to preserve for a longer period; however, the texture may change slightly due to the bocconcini’s dairy properties. If freezing, wrap tightly to prevent freezer burn and thaw slowly in the fridge before serving. A light freshening of the fruit topping after thawing can help restore brightness.
  • Serving temperature: This dessert is most enjoyable when it’s nicely chilled but not ice-cold; a brief 10–15 minutes at room temperature before serving helps the flavors open up and the textures soften beautifully.

Fun Facts & Trivia (Optional)

  • Origin of bocconcini: The word bocconcini translates to “little mouthfuls” or “small bites,” a perfect description of these tiny, tender cheese pearls that melt smoothly on the tongue.
  • Strawberry symbolism: Strawberries have long been associated with love and friendship in Italian culture, often sprinkled across tables during festive occasions and shared with family to symbolize warmth and hospitality.
  • Cheesecake across Italy: While the classic American cheesecake is ubiquitous, Italian adaptations often feature ricotta, mascarpone, or fresh cheeses. A bocconcini-based approach nods to regional dairy traditions while embracing a contemporary twist on texture and balance.
  • Texture harmony: The combination of the creamy interior and a slightly crisp crust echoes the Italian culinary principle of achieving balance through contrasting textures, turning every bite into an evolving sensory experience.
  • Variations around the world: Similar concepts appear in different culinary cultures where fresh cheeses are paired with fruit-based desserts, illustrating how universal the idea of delicate dairy meets bright fruit can be—an invitation to explore your own regional flavors.

Ingredients

  • Cheesecake Base
  • Cr crushed digestive biscuits, finely ground (1 1/2 cups / 150 g)
    → The crust provides the base and texture contrast to the creamy filling. Crush the biscuits into fine crumbs, then mix with a pinch of salt (if using) and the melted butter until evenly moistened. Press firmly into the bottom of a lined springform pan and chill for 10–15 minutes to set before filling.
  • Unsalted butter, melted (4 tablespoons / 60 g)
    → Binds the crust crumbs into a cohesive layer that holds together when sliced. Use melted butter that is still warm but not hot to avoid soggy crust; mix thoroughly with the crumbs and press into the pan, then refrigerate briefly to set.
  • Pinch of salt (optional)
    → Enhances the sweetness and flavor of the crust. Use if your biscuits are unsalted; omit if you used salted biscuits or prefer a milder crust.
  • Filling
  • Bocconcini (fresh mozzarella), drained and softened, roughly chopped (200 g)
    → Adds a creamy, milky body to the filling. Drain well to remove excess whey, pat dry, and blend until smooth with the other cheeses so the texture becomes silkier. Because bocconcini contains more moisture than cream cheese alone, ensure thorough blending for a ultra-smooth filling.
  • Cream cheese, softened to room temperature (450 g)
    → The primary structure and tang of the cheesecake. Soften to room temperature for easy blending; beat with sugar until smooth and light, then fold in other ingredients carefully to avoid tough texture. Avoid overbeating after adding gelatin to maintain a creamy, uniform texture.
  • Granulated sugar (1/2 cup / 100 g)
    → Sweetness to balance the tang; dissolve fully during beating. You can adjust to taste, and if desired, substitute part with powdered sugar for a silkier mouthfeel.
  • Lemon zest (from 1 lemon)
    → Bright citrus aroma and a hint of tartness that complements the dairy. Zest before juicing the lemon, and grate finely to avoid large bits; do not include the white pith.
  • Lemon juice (2 tablespoons)
    → Adds acidity to balance sweetness and enhances freshness. Use fresh lemon juice for best flavor; start with 2 tablespoons and adjust to taste after tasting the blended filling. If very tart, slightly reduce the sugar.
  • Vanilla extract (1 teaspoon)
    → Deepens and rounds the flavor of the filling. Use pure vanilla extract rather than imitation for superior aroma. If you have vanilla bean, scrape seeds into the filling for extra depth.
  • Heavy cream (1 cup / 240 ml)
    → Whips into a light, airy texture and helps create a luscious, mousse-like filling. Chill the cream and bowl before whipping to maximize volume; fold gently to avoid deflation. If you prefer a firmer set, you can heat the whisking step slightly or incorporate gelatin to stabilize.
  • Unflavored gelatin (1 teaspoon)
    → Provides structure to a no-bake cheesecake. Bloom in cold water (see next item) until set, then gently warm to dissolve before mixing into the filling to help it set cleanly without lumps.
  • Cold water (2 tablespoons)
    → Used to bloom the gelatin before dissolving. Ensure the water is cold to properly hydrate the gelatin; add the bloomed gelatin to the warm liquid (not boiling) to avoid damaging its gelling power.
  • Strawberry Layer
  • Fresh strawberries, hulled and sliced (2 cups)
    → Provides bright, fruity flavor and a natural sweetness. Hull and slice evenly to ensure uniform layering; you can macerate a portion with sugar to release juices for a glossy layer or sauce.
  • Granulated sugar (2 tablespoons)
    → Helps macerate the strawberries and draw out juices, creating a glossy, flavorful layer. Toss berries with sugar and let sit 15–20 minutes at room temperature or refrigerate for stronger flavor. Stir once or twice to distribute evenly.
  • Lemon juice (1 tablespoon)
    → Adds brightness and helps balance sweetness; use fresh juice and adjust to taste. A touch of acid can also help preserve the bright red color of the berries.
  • Toppings
  • Fresh strawberries, for topping (as needed)
    → Finishing touch that adds color and extra fresh fruit flavor. Arrange whole or halved berries on top just before serving to keep them vibrant and juicy; wash gently and pat dry to remove any excess moisture.
  • Mint leaves, optional
    → A touch of green and a fresh aroma that pairs nicely with strawberry. Garnish sparingly; avoid overpowering the delicate cheese with too much mint.

Instructions

  • Line a springform pan with a round of parchment paper on the bottom and lightly grease the sides to prevent sticking.
    → This creates a nonstick surface and ensures the crust and filling release cleanly for neat slices.
  • Place the Cr crushed digestive biscuits, finely ground (1 1/2 cups / 150 g) in a bowl and add a pinch of salt, if using; pour in the melted unsalted butter (4 tablespoons / 60 g) and mix with a fork until the crumbs are evenly moistened.
    → The butter binds the crumbs into a cohesive crust that holds together when chilled and sliced.
  • Transfer the crumb mixture into the prepared pan and press firmly into an even layer across the bottom using the flat bottom of a glass or a small spatula; chill for 10–15 minutes to set before filling.
    → Chilling solidifies the fat and helps the crust hold its shape when the filling is added.
  • Drain the Bocconcini (200 g), pat dry to remove excess moisture, and roughly chop; place into a blender or processor to begin smoothing with the cream cheese.
    → Thoroughly blending the bocconcini with the cream cheese creates a silky, ultra-smooth filling without stringy texture.
  • Add the Cream cheese, softened to room temperature (450 g), to the bocconcini and blend until the mixture is completely smooth and lump-free.
    → A lump-free base ensures even texture throughout the cheesecake and aids in light, even folding of the whipped cream later.
  • Add Granulated sugar (1/2 cup / 100 g), Lemon zest from 1 lemon, Lemon juice (2 tablespoons), and Vanilla extract (1 teaspoon) to the filling; blend until fully incorporated and fragrant.
    → Sugar sweetens and balances acidity; zest and juice provide brightness; avoid overmixing once sugar is added to prevent a dense texture.
  • Whip Heavy cream (1 cup / 240 ml) in a chilled bowl to soft peaks; refrigerate until needed.
    → The whipped cream lightens the filling, giving a mousse-like texture; keeping it cold helps maintain volume during folding.
  • Bloom Unflavored gelatin (1 teaspoon) in Cold water (2 tablespoons) for 5–10 minutes until the surface looks set and the gelatin is fully hydrated.
    → Blooming hydrates the gelatin so it dissolves smoothly and provides structure without lumps.
  • Gently warm the bloomed gelatin just until dissolved completely, then whisk it into the filling mixture to distribute the structure evenly; do not boil.
    → Dissolving gelatin before adding prevents graininess and ensures a clean set for the cheesecake.
  • Fold the Whipped cream into the cheese-gelatin mixture in two additions, using a light, folding motion until just combined and no white streaks remain.
    → Folding preserves the air and prevents deflation, yielding a light, airy filling.
  • Pour the filling over the chilled crust and smooth the surface with an offset spatula; tap the pan on the counter to remove any air bubbles. Refrigerate for at least 4 hours or overnight until completely set.
    → Proper chilling firms the filling so slices cut cleanly and the strawberry layer can be added evenly later.
  • In a bowl, toss Fresh strawberries, hulled and sliced (2 cups), with Granulated sugar (2 tablespoons) and Lemon juice (1 tablespoon); macerate for 15–20 minutes to draw out juices and intensify flavor.
    → Maceration softens the fruit, creates a glossy juice, and balances sweetness with acidity for a vibrant topping.
  • Spread the Macerated strawberry mixture and its juices over the set cheesecake surface to form the strawberry layer; distribute evenly and reserve excess juice if needed.
    → The strawberry layer provides color, brightness, and a fresh fruit contrast to the rich filling, with juices helping to bind and sheen the top.
  • Top with Fresh strawberries for garnish and, if desired, Mint leaves; arrange just before serving to maintain vibrant color and aroma.
    → Fresh garnish adds final brightness and a pleasant fragrance; wash gently and pat dry to maintain shine.
  • To serve, release the springform ring and slice with a warm knife, wiping the blade between cuts for pristine portions.
    → Warming the knife reduces sticking and results in clean, professional-looking slices.

Notes

These Bocconcini strawberry cheesecake alle fragole are a creamy, indulgent dessert with a soft lemon-kissed filling and a crisp biscuit crust. The bocconcini adds a silky texture that blends with cream cheese for a rich, mousse-like center. You can customize them by adding extra lemon zest, vanilla, or a ripple of strawberry puree. They refrigerate well and make a great make-ahead dessert; serve chilled with fresh berries or a dollop of whipped cream for extra brightness. For an easier setup, you can prepare the crust and filling a day ahead and assemble the strawberry layer just before serving. If you have gluten intolerance, ensure your digestive biscuits are certified gluten-free, or substitute with a gluten-free biscuit; and use dairy-free options if needed.

Tips

Tips for Bocconcini cheesecake alle fragole

Base / Crust tips
Filling tips
Strawberry layer tips
Assembling and chilling
Decoration and serving
Make-ahead and storage

FAQ

Che cos’è Bocconcini cheesecake alle fragole?

È una versione monoporzione di cheesecake cremosa, realizzata in piccoli bocconcini facili da prendere. Ha una base di biscotti croccanti, una crema di formaggio morbido e una guarnizione di fragole fresche, perfetta come dessert estivo o finger food.

Quali ingredienti servono?

Base:

  • 200 g biscotti digestive o wafer, sbriciolati
  • 80 g burro fuso

Crema:

  • 400 g formaggio cremoso tipo Philadelphia
  • 100–150 g zucchero (a seconda della dolcezza desiderata)
  • 200 ml panna fresca (opzionale per una crema più leggera)
  • 1 cucchiaino estratto di vaniglia
  • 1 cucchiaio succo di limone
  • 1 pizzico sale

Guarnizione:

  • 200 g fragole fresche, tagliate
  • 1–2 cucchiaini gelatina in fogli (opzionale, per una maggiore compattezza)

Nota: se non trovi bocconcini specifici, usa formaggio cremoso in panetti tagliati a cubetti o aggiungi una piccola quantità di latte per ammorbidire la crema.

Come si prepara la base?

Mescola i biscotti sbriciolati con burro fuso fino a ottenere un composto umido. Distribuiscilo sul fondo degli stampini monoporzione o dei pirottini da muffin, premendo bene per compattare. Metti in frigorifero per almeno 15–20 minuti per far solidificare.

Come si prepara la crema al formaggio?

In una ciotola, lavora il formaggio cremoso con lo zucchero fino a ottenere una crema liscia. Aggiungi vaniglia, succo di limone e un pizzico di sale, poi incorpora la panna se vuoi una consistenza più morbida. Se usi gelatina, scioglila in poca acqua calda e aggiungila alla crema raffreddata. Riponi in frigorifero per rassodare leggermente.

Come assemblare i bocconcini?

Versa un cucchiaio abbondante di crema sulle basi previamente raffreddate, livellando la superficie. Aggiungi una metà o un cubetto di fragola al centro, poi copri con un altro po’ di crema fino a formare un bicchiere/formina. Metti nuovamente in frigorifero per almeno 2–4 ore (o una notte) per far solidificare bene.

Posso fare questa ricetta senza gelatina?

Sì. La gelatina aiuta a dare stabilità, ma è facoltativa. Se vuoi evitarla, rinuncia alla gelatina e raffredda le capsule più a lungo (circa 4–6 ore) finché la crema non si rassoda naturalmente. Per una consistenza ancora più stabile, puoi sostituire una parte della panna con yogurt greco denso.

Posso variare la ricetta con altri gusti o frutta?

Certo. Puoi sostituire le fragole con frutti di bosco, pesche a cubetti, mango o kiwi. Aggiungi scorza di limone o arancia per una nota agrumata, oppure incorpora un cucchiaino di cacao o nutella nella crema per una versione chocolate-strawberry.

Come si conserva il dolce?

Conserva i bocconcini in frigorifero, in un contenitore chiuso, per 2–3 giorni. Se vuoi conservarli più a lungo, puoi congelarli già porzionati (senza fragole fresche in cima) e scongelarli in frigorifero prima di servirli. Nota: le fragole fresche possono rilasciare liquido durante la conservazione; aggiungile fresche al momento di servire.

Quali suggerimenti di decorazione ci sono?

Decorali con fragole fresche a fette, foglioline di menta o basilico, e una leggera spruzzata di sciroppo di fragola o coulis. Puoi anche spolverare scorza di limone grattugiata o glassare con una piccola quantità di gelatina colorata per una lucentezza extra.

Quali errori comuni evitare?

Non inzuppare troppo i biscotti nel burro; rischiano di diventare molli. Assicurati che la crema sia ben fredda prima di riempire gli stampi. Se usi gelatina, scioglila completamente e non aggiungerla calda alla crema fredda. Infine, lascia raffreddare sufficientemente prima di servire per una migliore compattezza.

Introduction / Hook

Imagine a brunch where the aroma of vanilla and cinnamon swirls through the room, and the surface of your plate glows with a caramelized crust that gives way to a cloud-soft, custard-centered center. French toast soufflé is not just a dish; it’s a celebration of morning magic. It takes the familiar finesse of classic French toast—bread kissed by fat, eggs, and sweetness—and elevates it with a delicate lift that rises like a gentle sunrise. Each bite offers a creamy, airy interior and a perfectly crisp exterior, a contrast that crackles with every forkful. The best part? It looks utterly show-stopping on the table, yet it’s surprisingly forgiving to make, turning a weekend breakfast into a memorable occasion without demanding hours in the kitchen.

From the moment the batter is poured and the mix of eggs, cream, and spices comes to life, you’ll hear the soft sizzle in the pan and feel that familiar cozy warmth spreading through the kitchen. It’s the kind of dish that makes you pause, inhale deeply, and smile at the prospect of sharing something thoughtful with people you love. The soufflé lift brings a light, almost ethereal texture that feels celebratory—like a dessert you can enjoy before noon without guilt. And because it’s built on the humble, comforting backbone of French toast, it remains approachable for cooks of all levels, inviting experimentation while staying grounded in a timeless flavor profile.

In this format, you’re not just cooking; you’re performing a tiny piece of brunch theatre—dramatic, comforting, and a little indulgent. The scent alone can trigger a cascade of memories: weekend family mornings, sleepy conversations over coffee, the first bite of summer berries against a warm, custardy kiss. And when the plate returns to the table, glistening with syrup or crowned with fresh fruit, you’ll notice the room brighten a notch. This is not just a recipe to follow; it’s an invitation to slow down, savor the moment, and start your day with a dish that feels both luxurious and deeply comforting at the same time.

The Story Behind the Dish

French toast itself has a long, winding history that goes far beyond the breakfast plate. Known in many places as pain perdu, “lost bread,” the dish originated as a practical solution to transform stale bread into something delicious, keeping waste to a minimum while delivering comforting richness. The simple combination of eggs, milk, sugar, and a bit of spice was a clever way to coax life back into day-old loaves, and it spread across Europe with regional twists—vanilla in one version, orange zest in another, a dusting of cinnamon here, a touch of rum there. Pain perdu traveled with explorers and travelers alike, adapting to local tastes, baking techniques, and available ingredients, all while retaining its humble genius: transform the ordinary into something unforgettable with a few pantry staples.

Soufflé, on the other hand, is a product of French culinary artistry that rose to prominence in the 18th and 19th centuries, celebrated for its airy lift and delicate texture achieved by beating egg whites to stiff peaks and folding them into a rich base. The soufflé is the epitome of technique—light, velvety, and capable of turning simple ingredients into something ethereal. When cooks sought to give French toast an extra dimension—height, airiness, and a more elegant structure—the idea of pairing the concept with a soufflé-style technique emerged. French toast soufflé is a harmonious fusion: the comforting, nostalgic essence of traditional French toast meets the culinary drama of a soufflé, resulting in a brunch darling that feels both familiar and astonishingly refined.

In this dish, the bread becomes a vessel for a custard that breathes with life as it bakes. The result is a gentle rise that turns crusty edges into crisp caramel and a center that stays tender and slightly wobbly, like a wisp of vanilla cloud. The history behind it is a reminder that great food often comes from two impulses: the desire to treasure something overlooked (stale bread, leftovers, pantry odds and ends) and the urge to elevate it into something celebratory. That tension—humble beginnings meeting culinary ingenuity—gives French toast soufflé its enduring appeal and its irresistible charm at a weekend table or a special brunch gathering.

Why You’ll Love This Recipe

  • Impressive yet approachable. It looks spectacular on the table, but the concept is simple enough for a weekend cook to master without fancy equipment.
  • A perfect balance of textures. The top forms a delicate, crisp crust while the interior remains airy, creamy, and soft—a contrast that keeps every bite interesting.
  • Comforting flavors with a touch of elegance. Vanilla, warm spices, and a hint of sweetness come together with the richness of dairy and eggs to create a soothing, indulgent taste.
  • Highly adaptable. The base flavor profile accepts a wide range of add-ins and toppings, from citrus zest to berries, nuts to chocolate, or a whisper of liqueur for adults.
  • Brunch-friendly and forgiving. It’s forgiving in preparation and forgiving in timing, letting you pause to enjoy the moment with guests instead of hustling in the kitchen.
  • Ideal for special occasions and holidays. Elevates a simple Sunday morning into a celebratory meal, making birthdays, anniversaries, and holiday weekends extra special.

Flavor Profile & Texture

The flavor profile of a French toast soufflé is warm, comforting, and gently elevated by a kiss of aroma. The custard base—egg, cream or milk, a touch of sugar, and vanilla—provides a smooth, silky backdrop that carries the aromatic spices. Think cinnamon and nutmeg with a hint of citrus zest, such as orange or lemon, which brightens the richness and keeps the dish from feeling heavy. If you choose to add a splash of orange liqueur or a whisper of almond extract, you’ll introduce a layer of nuance that makes the dish feel festive without straying from its homey roots.

The crown jewel of this dish is its texture. The center stays intentionally soft and almost custardy, thanks to the deliberate gentleness of the bake and the air introduced by whipping some egg whites into the base (a common soufflé trick). The outer crust forms a light, caramelized shell—a delicate snap gives way to the tender interior with every forkful. The contrast between the crisp edge and the plush middle is where the magic happens. When finished, the soufflé should rise slightly and hold its height for a moment, inviting you to capture that moment just as the steam carries off the memories of childhood breakfasts and the promise of a brand-new day. Pair the dish with a drizzle of pure maple syrup, a spoonful of whipped cream, or a bright berry compote to amplify the brightness and bring a balanced sweetness to contrast the creamy interior.

Occasions & Pairings

This dish shines at a variety of occasions, from intimate weekend breakfasts to festive brunch spreads. It’s particularly charming for:

  • Brunch gatherings with friends and family, where you want a centerpiece that’s both indulgent and shareable.
  • Holiday mornings, such as Christmas or Easter, when a touch of elegance elevates the anticipation around the table.
  • Slow Saturday mornings when you want to savor time with loved ones and stagger chores around a delicious, impressive dish.
  • Romantic breakfasts or anniversaries, where a dish that feels special but not fussy sets the mood for a cozy celebration.

Pairings that complement French toast soufflé include:

  • Maple syrup, a classic accompaniment that enhances the toasty notes of the crust.
  • Fresh berries (strawberries, blueberries, raspberries) or a warm berry compote for brightness and color.
  • Whipped cream or a dollop of vanilla yogurt for extra creaminess.
  • A light dusting of powdered sugar or a citrus zest twist to lift the flavors.
  • A morning coffee or a glass of sparkling wine (Mimosa) to elevate the brunch experience without overpowering the dish.
  • Savory contrasts optional toppings, such as crispy bacon or a delicate herb-framed ricotta, if you want a playful balance between sweet and savory.

Tips, Variations & Substitutions

Make-Ahead & Storage Ideas

One of the most delightful aspects of this dish is how well it can be planned in advance. You can assemble the batter and soak the bread a few hours ahead, or even overnight in the refrigerator, then bake fresh in the morning. The bread will soak up the custard slowly, and you’ll wake to a batter that has begun its gentle transformation into a fluffy, risen delight. If assembling ahead, cover the dish securely and refrigerate, then bake as you would on the day of serving, allowing a few extra minutes for chilling and heat distribution.

Leftovers, if any, can be stored in the refrigerator for a day or two. Reheating works best in the oven or a toaster oven to recapture crisp edges while keeping the interior soft. Avoid microwave reheating, which can make the texture feel dense or rubbery. If you freeze portions, thaw overnight in the fridge and rewarm gently in the oven. While the texture may be slightly altered after freezing, a well-prepared soufflé can still offer a satisfying experience when you’re craving a comforting breakfast on another morning.

Dietary Variations & Substitutions

  • Dairy-free: Use a full-fat coconut milk or almond milk as the base and replace cream with a plant-based alternative. A neutral-tavored yogurt or silken tofu can add creaminess while keeping the custard cohesive. You may need a touch more starch or a small amount of a dairy-free thickener to help the texture stay light.
  • Gluten-free: Choose your favorite gluten-free bread with a sturdy texture (gluten-free brioche or challah works beautifully). The custard base remains the same, so the soufflé lift and interior tenderness should still shine.
  • Vegan twist: Replace eggs with aquafaba (the liquid from canned chickpeas) whipped to stiff peaks and folded into a plant-based custard. Use a vegan milk and plant-based butter to mimic the richness. Expect a slightly different lift, but the result remains delightfully airy.
  • Low-sugar or sugar-free: Reduce sugar or use a natural sweetener that bakes well. Pair with naturally sweet toppings like ripe berries or a sugar-free syrup if desired, and rely on vanilla and cinnamon for depth of flavor.
  • Flavor twists: Swap or add citrus zest (orange, lemon, or lime) for brightness; a splash of orange liqueur or almond extract can introduce a new dimension without overpowering the core flavors.
  • Savory rendition: For a brunch-savvy savory version, omit the sugar and incorporate grated cheese, chopped herbs, and a pinch of black pepper. The result becomes a fluffy cheese-and-herb soufflé-inspired toast that pairs beautifully with sautéed mushrooms or smoky paprika toppings.

Regional Twists & Flavor Variations

  • French toast with orange blossom and cinnamon for a Middle Eastern-inspired brunch memory.
  • Brown-butter and maple cognac notes for a grown-up, dessert-like morning treat.
  • Chocolate-studded version with a hint of espresso for a brunch-dessert crossover that still feels morning-appropriate.
  • Cardamom and pistachio for a nutty, fragrant profile that nods to Mediterranean pastry traditions.

Storage & Make-Ahead Ideas

If you’re planning a larger brunch or a weekend gathering, consider these practical strategies to maximize flavor and minimize stress:

  • Prepare the custard base ahead of time and keep it refrigerated; soak the bread slices in the mixture just before baking for optimal texture and rise.
  • Assemble the dish in a baking dish the night before and refrigerate. In the morning, let it sit at room temperature for about 15-20 minutes to take the chill off, then bake as directed.
  • Store any leftovers in an airtight container in the fridge. Reheat in a moderate oven to restore the crust’s crisp exterior and warm the center through, avoiding the microwave for the best texture.
  • To freeze, bake a portion fully, cool completely, and freeze in a single layer before packing. Reheat from frozen in a low oven until warmed through and the crust has re-crisped.

Fun Facts & Trivia (Optional)

  • The term pain perdu translates to “lost bread,” highlighting the dish’s roots in turning stale bread into something extraordinary.
  • Soufflés became a symbol of French culinary finesse, often associated with higher-end patisseries and bistro menus. Combining soufflé technique with French toast is a playful nod to both traditions.
  • Brunch culture as we know it—combining late breakfast and early lunch—has roots in New York and other American cities, but the elegance of this dish makes it a natural fit for modern brunch menus around the world.
  • In some regions, cooks add a splash of orange liqueur or Grand Marnier to evoke a slight citrus-alcohol glow that pairs beautifully with vanilla and cinnamon.
  • There’s something universally comforting about a dish that celebrates leftovers with a sense of decadence. The idea that dessert-like magic can appear at breakfast is a delight people have cherished across generations.

Ingredients

French Toast Soufflé Batter

    – 6 cups cubed brioche or challah bread (stale)
    → The base bread should be day-old or lightly dried to absorb custard without becoming mushy. Cut into 1-inch cubes to maximize surface area and ensure slices soak evenly. Brioche or challah yields a rich, tender texture due to higher fat and egg content. If you only have sandwich bread, toast lightly and trim crusts to approximate crumb, but a richer bread gives better soufflé height and flavor.
    – 4 large eggs
    → The eggs provide structure, lift, and protein to the custard. They should be at room temperature to blend smoothly with dairy and prevent curdling. Beat the eggs lightly to combine with the milk and cream before soaking the bread.
    – 1 1/2 cups whole milk
    → Milk contributes moisture and helps hydrate the bread; whole milk adds body and richness. If you prefer lighter, you can substitute 2% milk; the texture will be lighter. Warm slightly before mixing to help dissolve sugar and spices.
    – 1 cup heavy cream
    → Cream adds luxurious richness and helps create a custardy, soufflé-like center as it bakes. Use room temperature; emulsify with eggs. For lighter version, replace half with extra milk.
    – 1/3 cup granulated sugar
    → Sugar balances sweetness and aids browning and custard texture. Dissolve well in the mixture; if you like more sweetness, increase slightly. For a lower-sugar version, reduce by 1-2 tablespoons.
    – 1 teaspoon vanilla extract
    → Vanilla enhances the custard; real vanilla extract or paste yields deeper aroma. If using a vanilla bean, scrape seeds and steep with the milk and cream for more flavor; otherwise it’s fine to use extract.
    – 1/2 teaspoon ground cinnamon
    → Cinnamon provides warmth; use freshly ground if possible. You can adjust to taste.
    – 1/4 teaspoon ground nutmeg
    → Nutmeg adds subtle spice; too much can dominate; fresh grate if possible; optional.
    – 1/4 teaspoon salt
    → Salt enhances flavors and helps set the custard by strengthening proteins; adjust to taste; use fine salt to dissolve evenly.
    – 2 tablespoons unsalted butter, melted
    → Butter enriches the custard and helps grease the dish, preventing sticking; you can fold a portion into batter and brush the pan with remaining; for dairy-free skip, use oil.

Optional Add-ins

    – 1 tablespoon orange zest (optional)
    → Fresh citrus zest brightens the custard; zest provides aroma without adding liquid. Use microplane; avoid pith. If unavailable, skip.
    – 1/4 cup raisins or chopped dates (optional)
    → Soak in warm water or orange juice for 10 minutes to plump; drain before adding to mixture to avoid soggy pockets. Provides chewy sweetness.
    – 1/4 cup chocolate chips (optional)
    → Fold in evenly; avoid too many to prevent sinking; choose small chips for distribution. They add pockets of melted chocolate.
    – 1/2 cup diced apples or berries (optional)
    → Adds fruitiness and texture; apples should be diced small; toss with a teaspoon of lemon juice to prevent browning; fold into mixture or scatter on top before baking.

Toppings & Serving

    – Powdered sugar for dusting
    → Lightly dust just before serving for presentation and to balance the richness; use fine icing sugar; good for photos; avoid clumping in humid climates.
    – Maple syrup or honey for serving
    → Classic pairing; serve warm with syrup; drizzle gently to avoid soggy crust; you can warm the syrup to thin it slightly for even distribution.
    – Fresh berries or sliced fruit for serving
    → Adds brightness and contrast; choose seasonal berries or stone fruit; wash and pat dry; cut into bite-sized pieces; a squeeze of lemon can brighten berries if desired.

Instructions

  • Preheat your oven to 350°F (175°C) and grease a 9×13-inch baking dish with melted unsalted butter, ensuring every interior surface is coated; this prevents sticking and helps the soufflé rise evenly as it bakes.
    → Buttering the dish creates a slick surface for the batter to cling to as it puffs, and the even coating promotes uniform browning around the edges.
  • Cube the brioche or challah into approximately 1-inch pieces, ensuring the bread is day-old or lightly dried; spread the cubes in a single, even layer in the prepared dish to maximize surface area and ensure even soaking.
    → Day-old or lightly dried bread absorbs custard without becoming mushy; 1-inch cubes promote even soaking and a tender, soufflé-like interior.
  • In a large bowl, whisk the 4 eggs until yolks and whites are just blended; this creates a cohesive base that emulsifies with dairy during soaking.
    → Lightly beating ensures the proteins set uniformly when baked and helps prevent gaps in texture.
  • In a medium saucepan, whisk together 1 1/2 cups whole milk and 1 cup heavy cream with 1/3 cup granulated sugar, 1 teaspoon vanilla, 1/2 teaspoon ground cinnamon, 1/4 teaspoon ground nutmeg, and 1/4 teaspoon salt; warm the mixture over medium heat until it is steaming and the sugar dissolves, but do not let it boil.
    → Warm custard allows smoother integration with eggs and bread, and dissolving sugar ensures even sweetness and texture throughout the dish.
  • Gradually temper the eggs by slowly whisking a ladleful of the warm milk mixture into the beaten eggs, then whisk the tempered eggs back into the saucepan with the remaining warm dairy; continue to whisk until the mixture is homogenous and just begins to thicken; remove from heat.
    → Tempering prevents the eggs from curdling, and a thickened custard helps create a richer, cohesive soufflé filling as it bakes.
  • Whisk the 2 tablespoons melted unsalted butter into the warm custard once it has cooled slightly to body temperature, ensuring the butter is fully emulsified and not hot enough to scramble the eggs; this adds richness and lubricates the custard for smooth soaking.
    → Butter enhances moisture and flavor; emulsification reduces fat separation for a velvety custard.
  • Pour the warm custard over the bread cubes in the dish, then press gently with a spatula to submerge and evenly coat all pieces; let the mixture rest at room temperature for 20 to 30 minutes, occasionally pressing to ensure the bread absorbs custard and swells uniformly.
    → Resting lets the bread soak and swell, creating a cohesive interior rather than dry pockets and helping the soufflé rise evenly during baking.
  • If using optional add-ins such as orange zest, raisins, chocolate chips, or diced apples/berries, fold them gently into the soaked bread and custard now or scatter them evenly over the top before baking to ensure even distribution and to avoid sinking.
    → Add-ins provide texture and contrast; citrus zest or fruit adds brightness, while chocolate adds indulgence; fold carefully to preserve bread structure.
  • Scrape the soaked mixture into the prepared dish in an even layer; if you used a larger dish, gently level the surface with a spatula to promote uniform rising and browning.
    → A flat, level top ensures uniform bake and allows the soufflé to puff consistently rather than bowing in the middle.
  • Place the baking dish on the middle rack of the preheated oven and bake at 350°F (175°C) for 40 to 50 minutes, or until the edges are puffed and deeply golden and the center is just set with a slight wobble; a knife or skewer inserted near the center should come out clean or with a trace of custard.
    → Proper bake time yields a light, airy interior with a saturated custard interior; avoid overbaking which can dry the center.
  • Remove the soufflé from the oven and let it rest for 8 to 10 minutes before serving; this rest allows the interior to finish setting and the steam to distribute, resulting in cleaner slices.
    → Resting helps stabilize the structure so the soufflé won’t collapse immediately and makes serving easier.
  • Dust with powdered sugar just before serving and offer maple syrup or honey and fresh berries or sliced fruit on the side for contrast; warm the syrup slightly for easy drizzle and to keep toppings from cooling the dish.
    → The sugar adds a delicate finish that balances richness, while fruit and syrup provide brightness and complementary textures.
  • Store any leftovers in an airtight container in the refrigerator for up to 2 days; reheat gently in a 350°F (175°C) oven for 8 to 10 minutes or in short bursts in the microwave until warmed through to preserve the soufflé-like texture.
    → Gentle reheating restores moisture and prevents the custard from turning rubbery, keeping flavors fresh for a second serving.

Notes

These French toast soufflés are a rich, brunch-friendly dish built on day-old brioche or challah that bake into a light, custardy center with a golden, airy top. For best texture, cube the bread into 1-inch pieces and let it stale slightly so it absorbs the custard without turning mushy; the melted butter helps prevent sticking and contributes a crisp edge. The custard is a simple blend of eggs, whole milk, heavy cream, sugar, vanilla and warm spices, which you can tailor to taste. Optional add-ins like orange zest, raisins or chopped dates, chocolate chips, or diced apples or berries add texture and brightness; toss fruits with a pinch of lemon juice to prevent browning. Bake until puffed and lightly browned, then dust with powdered sugar and serve with maple syrup and fresh fruit for contrast. Leftovers reheat well in a low oven, and you can assemble the dish a day ahead and refrigerate; bake time may be slightly longer if starting from cold. Always grease the dish well to prevent sticking and ensure the batter is evenly soaked for uniform rise.

Tips

Tips for Perfect French Toast Soufflé

  • Bread selection and prep: Use day-old brioche or challah cut into 1-inch cubes. A drier bread soaks up the custard without turning mushy. If you only have sandwich bread, toast lightly and trim crusts to mimic the crumb; richer bread yields better height and flavor.
  • Eggs and dairy: Use eggs at room temperature to help them blend smoothly with the dairy and prevent curdling. Warm the milk slightly to dissolve sugar and spices and to promote even mixing. Whole milk and heavy cream give a richer custard; for lighter version, substitute some or all with lighter dairy, understanding the texture may be less custardy.
  • Sweetness and flavor balance: Dissolve the sugar completely in the custard. Taste and adjust vanilla or cinnamon if needed. A small amount of orange zest can brighten the custard without adding liquid; zest should be added to the milk/cream mixture before combining with eggs.
  • Lifting the soufflé: For extra height, consider folding in softly whipped egg whites into the custard after whisking (optional). This will create a lighter, more soufflé-like texture but changes the batter balance slightly.
  • Soaking time: Soak bread cubes in the custard for about 10–20 minutes, turning halfway to ensure even absorption. For make-ahead, refrigerate the soaked bread and custard overnight; bring to room temperature for 30 minutes before baking.
  • Pan preparation: Grease the baking dish well with melted butter and, if desired, brush a little more on the top of the bread to promote browning. If avoiding dairy, use a neutral oil or dairy-free butter substitute.
  • Spices and add-ins: Distribute optional add-ins (orange zest, raisins, chocolate chips, or fruit) evenly and gently. Toss dried fruit with a teaspoon of flour to prevent sinking and floods of liquid; fold add-ins just before baking to maintain texture.
  • Temperature and bake: Preheat fully and bake until the top is puffed, golden, and the center is set. In convection ovens, reduce the temperature by about 25°F (15°C) and monitor closely. Do not open the oven door during the first 20 minutes to preserve lift.
  • Finish and serving: Let the soufflé rest 5–10 minutes after removing from the oven to set the custard for cleaner slices. Dust with powdered sugar and serve with warm maple syrup or fresh fruit for contrast.
  • Make-ahead options: Assemble and soak the bread ahead of time; refrigerate and bake the next day for a quick brunch. Leftovers can be refrigerated for 2–3 days and reheated in a 350°F (175°C) oven for 10–15 minutes or toasted slices for a crisper edge.
  • Avoid soggy edges: Use bread that is not too wet with custard, keep the bread-to-custard ratio balanced (not overly saturated), and bake in a deep, roomy pan to allow the soufflé to rise without collapsing too quickly.
  • Optional browning finish: If you like a deeper gold top, finish with a brief high-heat broil (1–2 minutes) at the end, watching closely to prevent burning.

FAQ

French toast soufflé – Frequently Asked Questions

What is French toast soufflé?

A light, airy baked version of French toast. Bread is soaked in a rich custard, then the mixture is folded with whipped egg whites to lift it, and baked until puffed and golden.

How is it different from classic French toast?

Classic French toast is typically pan-fried and denser. French toast soufflé is baked, using whipped egg whites for lift to create a tall, soufflé-like texture that serves a crowd.

What ingredients do I need?

Core ingredients (serves 6–8): bread (8 slices, preferably day-old brioche or challah), eggs (4), milk (1 cup) plus optional cream (1/2 cup), sugar (1/4 cup), vanilla extract (1 tsp), ground cinnamon (1/2 tsp), pinch of salt, and butter for greasing the dish. Optional add-ins: nutmeg, lemon zest, berries for serving.

What bread works best?

Sturdy, slightly stale bread works best—brioche, challah, or thick-cut Texas toast. Slices around 1 to 1.5 cm thick soak evenly. If using gluten-free bread, choose a sturdy GF loaf and allow it to dry out lightly.

Can I make this ahead?

Yes. You can soak the bread in the custard and refrigerate up to 12–24 hours, then bake. Or assemble in the baking dish, cover, and refrigerate overnight; bring to room temperature before baking. Bake at 350°F (175°C) for 25–35 minutes, or until puffed and golden.

How long and at what temperature should I bake it?

Preheat to 350°F (175°C). Bake for about 25–35 minutes, until the top is puffed and golden and the center is set. If your dish is very large, bake a few minutes longer and check for doneness.

How do I prevent it from deflating after baking?

Fold the whipped egg whites gently into the custard to keep as much air as possible. Do not over-mix. Bake immediately after combining and avoid opening the oven door during the early stages of baking. Let it rest briefly after removing from the oven; it will stay fluffy for a short while.

What toppings pair well?

Serve with real maple syrup, dusting of powdered sugar, fresh berries or sliced fruit, a dollop of whipped cream, or a drizzle of honey. A touch of cinnamon or lemon zest can add brightness.

Can I make dairy-free or gluten-free versions?

Yes. Use dairy-free milk (almond, soy, or oat) and dairy-free butter or oil. For texture, consider a gluten-free bread that absorbs custard well. Note that gluten-free bread can be denser, so adjust soak time and bake until fully puffed.

How should I store and reheat leftovers?

Store leftovers in the refrigerator for up to 2–3 days in an airtight container. Reheat slices in a 350°F (175°C) oven or toaster oven for 8–12 minutes until warmed and lightly crisped at the edges. Microwave reheats are quicker but may make the dish softer.

What should I do if the center is undercooked?

If the center seems a bit runny, return the dish to the oven for 5–8 more minutes and check again. Ensure your oven is fully preheated and that you’re using a deep, wide dish to promote even cooking. Avoid cutting into it too soon, as it can deflate quickly.

Introduzione / Hook

Immagina una griglia che sfrigola dolcemente, una nuvola di vapore che si sprigiona e una superficie dorata che pulsa di calore. All’interno, una sorpresa succosa: salsiccia dal carattere deciso, uova cremose e una croccantezza leggera tipica di un waffle perfetto. Benvenuto nel mondo dei Waffle salati con salsiccia e uova, un piatto che intreccia la comfort food più amata con una grinta da brunch contemporaneo. Ogni morso è una sinfonia di contrasti: la rosetta croccantezza esterna si apre su un cuore morbido e sapido, condito da una leggera nota burrosa che avvolge il palato. L’aroma avvolgente di salsiccia dorata, leggermente speziata, si amalgama con la dolcezza degli ingredienti all’uovo, creando una base irresistibile per una tavola piena di allegria. È una ricetta che sembra elegante ma è sorprendentemente facile da preparare, capace di trasformare una semplice colazione o un brunch domenicale in un momento speciale. Il profumo che invade la cucina, la vista delle superfici a ghiera e la combinazione di sapori decisi e confortanti vi invitano a servirlo subito, magari con un cesto di pane caldo, una fresca insalata di stagione o una spruzzata di salsa piccante per chi ama un tocco di fuoco. In poche parole, è la colazione che non conosce orari: un piatto che brilla per gusto, velocità e carattere, pronto a rubare la scena a ogni tavola.

La storia dietro il piatto

La nascita di questa ricetta è una storia di convivenza tra tradizioni. Da una parte, la waffle è una celebrazione europea della croccantezza dorata, unisce tecniche e forme nate nei vagoni del tempo — dal Belgio alle cucine di corte — trasformandosi in una base versatile per molte varianti. Dall’altra, la cucina italiana ha una predisposizione innata a trasformare i piatti di ogni giorno in esperienze condivisibili: un morso diventa un racconto, una scena di famiglia. In tempi moderni, la tendenza brunch ha spinto i cuochi casalinghi a cercare piatti che concilino comfort e novità, portando al centro della scena quel sapiente mix di consistenze: la rottura croccante della superficie del waffle incontra la ricchezza proteica della salsiccia e l’“omaggio” vellutato delle uova. Così nasce questa ricetta: un inno alla convivialità, in cui la semplicità degli ingredienti – ben gestiti – si trasforma in qualcosa di più grande. Si racconta di colazioni passate in cui una padella riscaldata era il cuore di una cucina semplice, ma anche di momenti di festa: brunch tra amici, domeniche lente, sabati di famiglia, dove il tempo sembra rallentare e il gusto diventa un rituale. L’idea è stata quella di conservare l’onestà di un piatto rustico, ma di presentarlo in una veste moderna e accattivante: una serie di waffles salati che sostituiscono il tradizionale accompagnamento con un vero piatto principale, ricco di proteine e sapore, ma facile da condividere. In questa storia culinaria, ogni aggiunta ha una funzione: la salsiccia porta carattere e ricchezza, l’uovo offre morbidezza e legame, e la waffle dona la base ariosa e croccante che tiene tutto insieme. È una fusione che parla di tempi moderni senza tradire l’anima delle cucine di casa: una ricetta che si adatta a ogni stagione, a ogni casa e a ogni tavolo.

Perché amerai questa ricetta

  • Equilibrio tra croccantezza esterna e morbidezza interna: la superficie del waffle offre una texture avvolgente che incontra la succosità della salsiccia e la cremosità delle uova.
  • Versatilità per brunch e pasti singoli: è una soluzione ideale per un pasto completo che non necessita di molte preparazioni separate.
  • Potente profilo di sapore con pochi ingredienti: la combinazione di sapore ricco della carne, nota di uovo e aromi delicati crea un piatto soddisfacente senza sovraccaricare la lingua.
  • Rapida da realizzare: una ricetta che risponde al desiderio di qualcosa di speciale ma senza impegnare ore in cucina, perfetta per serate in cui il tempo è limitato.
  • Confortante e invitante: una cucina domestica che ricorda pasti di famiglia, ideale per ricreare quel senso di calore e accoglienza a casa.

Profilo di sapore e consistenza

Nel gusto emerge una sinfonia di sapori che si equilibrano a vicenda. Il primo impatto è una leggera dolcezza di base proveniente dalla griglia, seguita da una nota affumicata e speziata della salsiccia. L’elemento salato della carne si fonde con la ricchezza cremosa delle uova, creando una consistenza vellutata che scivola delicatamente in bocca. Il waffle serve da cornice: una crosticina esterna che si rompe facilmente sotto i denti, rivelando un interno soffice e arioso che sostiene senza appesantire. Le erbe e gli aromi, se presenti, offrono una freschezza aromatica che pulisce il palato tra un morso e l’altro. L’equilibrio tra grasso e umami rende ogni boccone memorabile, ma non pesante: è una robustezza che invita a continuare a mangiare, senza mai sentirsi saturo troppo presto. A livello di texture, l’insieme gioca con contrasti: la crosta del waffle è friabile ma stabile, la salsiccia resta tenera e succosa, e l’uovo aggiunge una morbidezza cremosa che lega il tutto. Quando si aggiunge magari una punta di salsa piccante o un soffio di formaggio fuso, il profilo sensoriale si amplia con una piacevole nota pungente o leggermente lattiginosa, a seconda delle preferenze. In sintesi, è una danza di sapori robusti e comfort, con una delicatezza che permette a chiunque di sentirsi a casa anche al di fuori di una tradizionale colazione domenicale.

Occasioni & abbinamenti

Questo piatto è la soluzione perfetta per una serie di momenti sociali e personali. È ideale per brunch domenicali in famiglia, per una mattina di vacanza quando si vuole coccolare se stessi e gli altri, o per una serata tra amici in cui si condivide cibo saporito senza sobbalzare sulla tavola. Può essere servito come piatto principale o come punto centrale di una tavolata dove si alternano piccole portate, creando un mosaico di sapori e consistenze. Per quanto riguarda gli abbinamenti, pochissimi accompagnamenti sono necessari, ma possono elevare l’esperienza: una fresca insalata di rucola e pomodorini per aggiungere una nota verde e acida che pulisce il palato; una guarnitura di formaggio stagionato grattugiato o scaglie di parmigiano che si sciolgono sul caldo del piatto; una salsa leggera a base di pomodoro o una riduzione di aceto balsamico per un tocco agrodolce; e magari una spolverata di pepe nero o paprika per intensificare il finale. Per le bevande, optare per un caffè robusto, un cappuccino cremoso o un bicchiere di Prosecco freddo per una svolta festiva è perfetto. Se si cerca un tocco ancora più brunch, accompagnare con una centrifuga di agrumi o una limonata al basilico offre una nota fresca che luccica accanto al piatto. E non dimenticare una porzione di frutta fresca per bilanciare la ricchezza: una manciata di uva, fette di pera o melone dona una dolcezza leggera e un contrasto rinfrescante.

Tips, Varianti & Sostituzioni

Questa ricetta è una tela bianca pronta a essere personalizzata. Ecco idee per renderla ancora più interessante o adattarla alle proprie esigenze dietetiche:

  • Varianti proteiche: sostituisci la salsiccia con spezzatini di vitello speziato, carne di pollo affumicata o funghi trifolati per una versione vegetariana ricca di sapore. In alternativa, usa salsiccia di manzo o di maiale a seconda della disponibilità e dei gusti.
  • Versione vegetariana o vegana: per una versione vegetariana, utilizza funghi grandi saltati e aggiungi un tofu strapazzato speziato. Per una versione vegana, impiega waffle senza uova e un mix di proteine vegetali, come ceci o tofu, e completa con una salsa cremosa a base di anacardi o latte vegetale spesso.
  • Glutine-free: scegli waffle preparati con una miscela senza glutine di tua preferenza. Il resto resta invariato: salsiccia e uova oppure le alternative preferite.
  • Aromi e spezie: prova a incorporare una nota di rosmarino, timo o peperoncino tritato per un tocco aromatico che si sposa bene con la salsiccia. Una leggera spolverata di scorza di limone grattugiata può dare freschezza e brillantezza al piatto.
  • Trasformazioni regionali: aggiungi un tocco di formaggio stagionato grattugiato e una salsa di pomodoro leggero per evocare sapori mediterranei; oppure una riduzione di aceto balsamico per un profilo dolce-acido che contrasta la sapidità.
  • Salse di accompagnamento: una salsa cremosa leggera o una salsa di pomodoro fresca possono completare il piatto senza sovrastarne la semplicità. Sperimenta con una punta di limone o una crema all’aglio per intensificare la profondità del gusto.

Conservazione & Idee per preparare in anticipo

Questo piatto può essere pianificato con un po’ di anticipo per rendere le mattine ancora più fluide. Una strategia è preparare separatamente i componenti principali: la salsiccia può essere rosolata in anticipo e tenuta al caldo, le uova possono essere cotte al momento o preparate come strapazzate morbide da unire al waffle caldo, e i waffles possono essere cotti in anticipo e conservati in frigorifero o congelati per un uso successivo. Per la conservazione, tenere separati i componenti e riscaldare delicatamente per evitare che si asciughino: il waffle può essere riscaldato brevemente in forno o in una tostapane per ristabilirne la croccantezza, mentre la salsiccia e le uova vanno riscaldate lentamente per mantenere la morbidezza senza diventare fibrose o secche. Se si vuole preparare in anticipo una porzione per un brunch successivo, si può affidare la gestione delle uova a una preparazione tipo “uova strapazzate già pronte” che si scalda rapidamente, e utilizzare waffles freschi o conservati. Una seduta di 20-30 minuti al mattino, con qualche minuto di rigenerazione del waffle in forno caldo, può trasformare questa ricetta in una routine accattivante con tempi di preparazione contenuti. Per chi pianifica in anticipo, la planificazione della quantità di ingredienti e una gestione attenta delle porzioni sono chiavi: si può aumentare o diminuire la quantità di salsiccia in base al numero di commensali, per garantire che ogni porzione sia equilibrata e soddisfacente.

Curiosità & Trivia

Lo sguardo curioso sulle origini delle waffle è ricco di aneddoti. Il termine waffle deriva dal fiammingo “waffle” o dall’olandese “wafel”, che in passato indicava una misura di pane cucinato tra due placche incise. In Belgio, le gaufres hanno una lunga tradizione di presentarsi in varianti regionali, con caratteri di pasta diversa e cornici particolari, spesso cucinate in dolci feste di mercato e celebrazioni locali. In tempi antichi, le cucine casalinghe e le fiere erano luoghi di sperimentazione: i cuochi adattavano le tecniche per ottenere non solo una struttura croccante, ma anche una superficie che potesse condurre condimenti o ripieni. Per quanto riguarda la salsiccia, è una presenza antica nelle cucine europee, con una ricca varietà di sapori che riflettono le tradizioni di un territorio: spezie, erbe e metodi di conservazione hanno modellato una carne che si presta a essere abbracciata da una superficie calda e croccante. Le uova, più di ogni altra cosa, hanno accompagnato l’evoluzione di innumerevoli ricette, offrendo una texture cremosa e una fonte proteica versatile. In questo piatto, si celebra quella fusione di storia e modernità: un piatto che appare semplice ma contiene un animo di viaggio, capace di portare su una tavola tutta la memoria di luoghi diversi eppure vicini. Se vi affascinano le curiosità gastronomiche, scoprirete come l’uso creativo della waffle sia diventato un linguaggio culinario universale, capace di trasformare una colazione in un’esperienza condivisa e memorabile.

Ingredients

Waffle Base

    – 2 cups all-purpose flour
    → The flour provides structure and body for the waffle batter. For a gluten-free version, substitute with a 1:1 gluten-free all-purpose blend and add an extra 1/4 teaspoon xanthan gum if your blend lacks it. Avoid overmixing after adding liquids to keep waffles tender.
    – 2 teaspoons baking powder
    → Leavening agent that creates air pockets and lightness in the waffles. Sift with the flour to ensure even distribution; avoid adding it after mixing the wet and dry ingredients to prevent quick loss of lift.
    – 1/2 teaspoon salt
    → Enhances overall flavor by balancing richness and sweetness. Use fine sea salt; adjust if using salted butter.
    – 2 large eggs
    → Bind the batter, add moisture and richness. Bring eggs to room temperature for smoother emulsification, and whisk with the milk before combining with the dry ingredients to prevent curdling.
    – 1 1/2 cups whole milk
    → Provides moisture and helps activate the leavening. Substitute with plant-based milk if needed; warm slightly if ingredients are cold to help blend with melted butter.
    – 4 tablespoons melted butter
    → Adds rich flavor and tenderness while aiding browning. Let cooled butter mingle with the eggs and milk to avoid splitting; you can substitute with a neutral oil if you prefer.
    – 1/2 cup grated Parmesan cheese
    → Imparts savory, umami depth that pairs perfectly with sausage. Use finely grated cheese for even distribution and better browning; enhances flavor without making the batter heavy.
    – 1/4 teaspoon ground black pepper
    → Optional kick of savory warmth to complement sausage. Adjust to taste; pairs well with garlic and herbs in optional add-ins.
    – 1 teaspoon butter or neutral oil for greasing the waffle iron
    → Prevents sticking and helps achieve crisp edges. Lightly brush the preheated iron; wipe away any excess to avoid soggy batter.

Optional Add-ins

    – 1/2 cup shredded cheddar cheese (optional)
    → Adds extra melt and savory notes. Fold into the batter evenly or sprinkle in layers for pockets of cheddar; let it come to room temperature for smoother incorporation.
    – 2 tablespoons chopped fresh chives or green onions (optional)
    → Fresh herbal brightness that complements sausage. Fold into the batter just before cooking or sprinkle on top. For a stronger flavor, bloom chopped herbs in a teaspoon of hot butter for 30 seconds before adding.
    – 1/4 teaspoon dried oregano or thyme (optional)
    → Deepens the savory profile. Crush between fingers to release aroma before mixing with dry ingredients to ensure even distribution.

Sausage and Aromatics

    – 250 g pork sausage, casings removed, crumbled
    → Primary savory filling and protein. Sauté until browned and cooked through to render fat and develop flavor; break into small, even pieces so they distribute evenly in each bite.
    – 1 tablespoon olive oil
    → Used to sauté the sausage and aromatics without sticking. Choose good extra-virgin olive oil for flavor; if the sausage releases enough fat, you can skip additional oil.
    – 1 small onion, finely chopped
    → Adds sweetness and depth of aroma. Sauté with the sausage until softened and lightly caramelized to balance richness; drain excess fat if needed.
    – 1 clove garlic, minced
    → Aromatic base that enhances savory notes. Add toward the end of sautéing to prevent burning; minced garlic infuses the sausage mixture with brightness.

Serving Eggs

    – 4 large eggs, for serving (fried or poached on top)
    → Finishes the dish with extra protein and a glossy yolk that enriches the overall flavor. Cook to your preferred doneness (runny yolk pairs beautifully with the waffles); keep warm while the waffles finish cooking.

Instructions

  • Preheat your waffle iron to a medium-high heat (about 190°C / 375°F) and lightly grease the plates with the remaining melted butter or a neutral oil to prevent sticking and promote crisp edges.
    → A properly heated, greased iron ensures the batter begins cooking immediately, forming a uniform crust and avoiding tearing when you lift the waffles.
  • Heat a skillet over medium heat and sauté the crumbled pork sausage in 1 tablespoon olive oil until browned and cooked through, breaking it into small pieces as it cooks for even distribution.
    → Browning develops savory Maillard flavors and renders fat, which concentrates flavor and helps the sausage integrate smoothly into the waffle batter.
  • Add the finely chopped onion to the sausage and cook until soft and lightly caramelized, about 4–6 minutes, stirring occasionally to promote even browning; then add the minced garlic and cook for 30 seconds more until fragrant, being careful not to burn.
    → Caramelized onions contribute sweetness and depth, while garlic delivers a bright aromatic punch without bitterness if kept brief.
  • Transfer the sausage-onion-garlic mixture to a plate and let it cool for 5–10 minutes before folding into the batter to prevent scrambling the eggs and to maintain a smooth emulsion.
    → Resting reduces heat, which helps keep the eggs from cooking prematurely and ensures even distribution throughout the batter.
  • In a large mixing bowl, whisk 2 large eggs and 1 1/2 cups whole milk together until smooth and homogeneous, then in a separate bowl whisk 2 cups all-purpose flour, 2 teaspoons baking powder, and 1/2 teaspoon salt to evenly distribute leavening.
    → Proper separation and whisking ensure uniform hydration of the dry ingredients and even lift, yielding lighter waffles with a tender crumb.
  • Whisk in the 4 tablespoons melted butter into the egg-milk mixture once it has cooled slightly, then fold in 1/2 cup grated Parmesan cheese until fully incorporated for a savory, cohesive batter.
    → The melted butter adds tenderness and richness; cooling prevents breaking the emulsion and helps the cheese distribute evenly for uniform flavor.
  • Fold the dry ingredients into the wet mixture just until combined, stopping as soon as there is no visible streak of flour to avoid overworking the batter and making the waffles tough.
    → Overmixing develops gluten, leading to dense waffles; a few small lumps are acceptable and yield a lighter texture.
  • If using optional add-ins (1/2 cup shredded cheddar, 2 tablespoons chopped chives or green onions, or 1/4 teaspoon dried oregano or thyme), fold them in now with a gentle hand to distribute evenly without deflating the batter.
    → Even distribution ensures pockets of cheese or herb flavor in every bite and prevents clumping or sinking to the bottom.
  • Gently fold the cooled sausage mixture into the batter until just incorporated, then rest the batter for 5–10 minutes to hydrate the flour and allow flavors to meld.
    → A short rest relaxes the gluten and produces a more cohesive batter that yields a tender yet sturdy waffle that holds the sausage filling.
  • Scoop about 1/3 cup of batter per waffle onto the preheated, greased iron, close the lid, and cook until the waffles are deeply golden brown and crisp around the edges, about 4–6 minutes depending on your iron; rotate if your iron cooks unevenly.
    → Uniform portions ensure even cooking, while color and aroma indicate optimal browning and crispness without undercooking the interior.
  • While the waffles cook, prepare four large eggs to your preferred doneness for serving, such as sunny-side-up or gently fried, in a lightly oiled nonstick skillet, keeping them warm until the waffles finish.
    → The eggs add richness and a glossy yolk that enriches the overall dish; keeping them warm prevents them from cooling and dampening the waffles.
  • As soon as the waffles are ready, transfer them to warm plates, top each with a portion of the sausage mixture if desired, and crown with a fried or poached egg on top; finish with a light crack of black pepper and a sprinkle of chopped chives or oregano for brightness.
    → Assembly while hot ensures the yolk mingles with the sausage and Parmesan, while herbs and pepper lift the savory profile for a balanced bite.
  • Serve immediately while the waffles remain crisp and the eggs are at peak richness, offering additional grated Parmesan at the table if desired for extra umami.
    → Immediate serving preserves texture and flavor, and extra Parmesan offers a personalized boost of savoriness without overpowering the dish.

Notes

These savory waffles with sausage and eggs are a hearty, brunch-ready option that marry a parmesan-scented waffle base with browned sausage, onion and garlic, finished with a glossy egg on top for richness. For a gluten-free version, substitute the all-purpose flour with a 1:1 gluten-free flour blend and add an extra 1/4 teaspoon xanthan gum if your blend lacks it; avoid overmixing after adding liquids to keep waffles tender and light. You can customize them by adding 1/2 cup shredded cheddar for melty pockets, 2 tablespoons chopped fresh chives or green onions for brightness, and a pinch of dried oregano or thyme to deepen the savory profile. Brown the sausage in a tablespoon of olive oil with the finely chopped onion until deeply caramelized and the fat is rendered; drain any excess fat if needed. The sausage mixture should be cooled slightly before folding into the waffle batter, and you can reserve a portion to crumble on top for extra texture. Bring the eggs to room temperature and whisk with the milk before combining with the dry ingredients to prevent curdling and to produce a smoother batter that browns evenly. Preheat and grease the waffle iron with a light coat of butter or neutral oil to prevent sticking and to achieve crisp edges. To serve, top each waffle with sausage and a fried or poached egg; the runny yolk acts as a natural sauce and adds silkiness to each bite. Leftovers can be stored in the refrigerator for 2-3 days or frozen and reheated in a toaster oven or skillet to restore crunch. Always choose good-quality sausage and Parmesan for the best flavor, and adjust salt, pepper, and garlic according to your sausages’ saltiness.

Tips

Consigli utili per preparare Waffle salati con salsiccia e uova

  • Pastella: per waffles soffici ma ben strutturati evita di lavorare troppo l’impasto una volta aggiunti i liquidi. Mescola solo finché gli ingredienti si amalgamano; se la pastella risulta troppo densa, aggiungi un po’ di latte, poco alla volta.
  • Temperatura degli ingredienti: porta le uova a temperatura ambiente e riscalda bene la piastra. Un burro fuso raffreddato si incorpora meglio agli ingredienti liquidi e aiuta l’emulsione.
  • Versione senza glutine: per una versione gluten-free usa una miscela 1:1 e, se la miscela non contiene xanthan gum, aggiungi 1/4 cucchiaino per mantenere la struttura. Evita mescolare eccessivamente per non rendere i waffles gommosi.
  • Salsiccia: rosola la salsiccia sbriciolata in olio d’oliva finché è dorata e cotta. Spezzetta la carne in pezzi piccoli e uniformi affinché si distribuisca bene in ogni morso.
  • Aromi: soffri cipolla finemente tritata finché morbida e leggermente caramellata; aggiungi l’aglio verso la fine per evitare bruciature e perdita di aroma.
  • Formaggio: parmigiano grattugiato finemente facilita la fusione e aggiunge umami; se usi cheddar, lascialo a temperatura ambiente per una fusione più uniforme.
  • Add-ins: se usi formaggi extra o erbe, incorporali al momento dell’impasto o poco prima di cucinare per una distribuzione uniforme e una cottura omogenea.
  • Ungere la piastra: ungere leggermente la piastra con burro o olio garantirà una croccantezza esterna; asciuga eventuali tracce in eccesso per evitare waffles molli al centro.
  • Distribuzione: versa una quantità adeguata di impasto e distribuiscilo in modo uniforme; evita di riempire troppo la piastra per prevenire fuoriuscite e cotture non uniformi.
  • Abbinamenti di sapore: se vuoi un tocco piccante, aggiungi pepe nero fresco o peperoncino al ripieno di salsiccia; per una nota cremosa, aggiungi una cucchiaiata leggera di panna all’impasto.
  • Uova come topping: scegli tra uova fritte o in camicia da adagiare sui waffles caldi. Le uova con tuorlo ancora morbido arricchiscono la croccantezza e la sapidità del piatto.
  • Servizio: mantieni i waffles caldi in forno a bassa temperatura mentre prepari le uova; servi subito per godere della croccantezza e del contrasto di temperatura.
  • Avanzi e conservazione: gli avanzi si conservano in frigorifero fino a 2 giorni; per ri-scaldarli, usa forno o tostapane per recuperare croccantezza senza seccare.

FAQ

Quali sono gli ingredienti necessari?

Per circa 4 waffle salati con salsiccia e uova, servono:

  • 200 g farina 00
  • 1 cucchiaino di lievito per dolci
  • 1/2 cucchiaino di sale
  • 300 ml latte
  • 2 uova
  • 40 g burro fuso
  • 200 g salsiccia, privata della pelle e sbriciolata
  • 100 g formaggio grattugiato o cubetti di formaggio (es. mozzarella o parmigiano)
  • olio o burro per ungere la piastra
  • pepe, erbe aromatiche a piacere (rosmarino, pepe nero, origano)
Come si prepara l’impasto dei waffle?

In una ciotola mescola farina, lievito e sale. In un’altra ciotola sbatti latte, uova e burro fuso. Unisci gli ingredienti liquidi a quelli secchi, mescolando fino a ottenere un impasto liscio e senza grumi. Lascia riposare 5-10 minuti prima di cuocere.

Come si cuoce la salsiccia?

Rosola la salsiccia in una padella antiaderente con un filo d’olio, spezzettandola con una spatola. Cuoci finché è ben dorata e profumata, circa 5-7 minuti. Scolala su carta assorbente prima di usarla.

Come si preparano le uova per completare il piatto?

Hai due opzioni: puoi preparare uova strapazzate morbide oppure cuocere uova all’occhio di bue. In entrambi i casi, cuocile appena prima di assemblare i waffle in modo che siano fresche e morbide.

Come si assemblano i waffle salati con salsiccia e uova?

Cuoci i waffle e tienili al caldo. Disponi un po’ di salsiccia sui waffle, aggiungi le uova e, se vuoi, una spolverata di formaggio. Copri con un altro waffle o servi come base e guarnisci con erbe aromatiche. Servi subito.

Si può preparare in anticipo o congelare?

Sì. Puoi preparare l’impasto in anticipo e conservarlo in frigo fino a 1 giorno. La salsiccia cotta può essere conservata in frigo per 1-2 giorni. I waffle cotti possono essere raffreddati e congelati; riscaldali nel forno o in tostapane finché tornano croccanti e caldi, quindi aggiungi salsiccia e uova riscaldate.

È possibile fare varianti per diete particolari?

Certamente. Per una versione senza glutine usa farina senza glutine specifica. Per una versione vegetariana ometti la salsiccia o sostituiscila con salsiccia vegetale. Per una variante più leggera, riduci la quantità di burro e usa latte scremato. Puoi anche aggiungere verdure saltate per aumentare la porzione di ortaggi.

Quali trucchi rendono i waffle croccanti?

Assicurati che la piastra sia ben preriscaldata e leggermente unta. L’impasto non deve essere troppo liquido; se necessario aggiusta con poco latte. Crea una superficie ben dorata cuocendo i waffle finché risultano croccanti all’esterno e morbidi all’interno. Evita di aprire la macchina troppo spesso durante la cottura.

Quali abbinamenti o condimenti consigliate?

Prova con una salsa allo yogurt al pizzico di limone, ketchup piccante, maionese aromatizzata, o una salsa di pomodoro leggera. Puoi aggiungere avocado a fette, pomodorini confit o una spolverata di peperoncino per un tocco extra. Si abbina bene anche a una insalata verde semplice come contorno.

Quante porzioni si ottengono e quanto tempo ci vuole?

Con questa ricetta puoi ottenere circa 4 waffle salati. Tempo totale: circa 40-50 minuti, inclusi preparazione dell’impasto (10-15 min), cottura dei waffle (15-20 min) e preparazione di salsiccia e uova (5-10 min).

Introduzione / Hook

Immagina una fetta luminosa che sembra catturare la luce in mille riflessi di rubino: una torta che nasce dall’incontro tra la delicatezza di una mousse soffice e la freschezza pungente dei lamponi maturi. La Torta mousse ai lamponi è un viaggio sensoriale, una piccola fuga estiva che si avvolge di crema vellutata, di note agrumate e di una base che risuona di croccantezza sottile. Ogni morso è un equilibrio perfetto tra morbidezza e vivacità: la mousse si scioglie al contatto della lingua, lasciando una scia di profumo di frutti di bosco, mentre la base—leggera, friabile, quasi spumosa—ora ricorda una dolce memoria di biscotto, ora un abbraccio croccante. Se stai cercando qualcosa di capace di rendere speciale una merenda, una cena informale o un dessert di festa, questa torta è la risposta: raffinata quanto basta per impressionare, ma accogliente come una chiacchierata tra amici. E non è solo un dolce: è un racconto di contrasti che si completano, una piccola sinfonia di colori, aromi e consistenze che trasformano ogni boccone in un momento di gioia condivisa. Lasciati guidare dall’assaggio, e scopri perché questa torta mousse ai lamponi è diventata una presenza fissa sulle tavole estive, sulle occasioni speciali e sulle serate in cui vuoi offrire qualcosa di memorabile senza complicarti la vita in cucina.

La magia di questa torta inizia con gli occhi: una doratura leggera o una superficie lucida, a seconda della versione, e una tavolozza di rosso rubino che invita a prendere una fetta. Ma la vera gioia è nel profumo che sale dal tavolo: lamponi freschi o in parte purè che sprigionano un’energia vivace, accompagnati da note gentili di vaniglia, limone o scorza d’arancia, a seconda di come preferisci personalizzare il profilo aromatico. Il cucchiaio scivola senza fatica, e la consistenza è un invito al comfort: una mousse che sembra una nuvola, ma con una struttura sufficientemente ferma da tenere la forma, e una base che offre sostegno senza rubare la scena. È il dessert per chi ama la freschezza dei frutti rossi ma senza l’acidità pungente, per chi desidera una dolcezza elegante ma non stucchevole, per chi cerca l’equilibrio tra leggerezza e presenza. In breve: una torta che ha il potere di trasformare una semplice occasione in una memoria gustativa duratura.

La storia del piatto

Le mousse hanno origini che attraversano i confini tra cucine e culture: nate in ambienti di pasticceria raffinata, hanno saputo trasformarsi in piatti moderni che celebrano la leggerezza e la velocità. In Italia, la passione per il dolce al cucchiaio ha trovato espressioni eleganti, dove la mousse diventa spesso la cornice di una base delicatamente croccante o di una torta soffice, capace di accogliere frutti freschi o composte brillanti. La torta mousse ai lamponi incarna questa tradizione in chiave contemporanea: la frutta rossa, simbolo di freschezza, si sposa con una crema a base di panna o alternative vegetali, addolcita da una punta di vaniglia, dal succo di limone o da una leggera nota di liquore. Oltre all’eleganza, c’è la praticità: questa torta permette di preparare in anticipo un dessert di grande effetto, che resta stabile in frigorifero per ore, pronto a essere servito all’ultimo minuto con una presentazione impeccabile. In molte culture, i lamponi simboleggiano la gioia e la preservazione delle estati; quando li trasformi in una mousse e li compatti in una torta, tutto questo si traduce in una celebrazione di sapori che è contemporaneamente semplice e sofisticata. Per chi ama storie culinarie, questa torta racconta una fusione di tradizione italiana e freschezza internazionale: una celebrazione della frutta di stagione, trattata con maestria per offrire un dessert che sembra nato per l’occasione giusta, ma che è davvero adatto a ogni giorno.

Se ti piace l’idea di una torta che racconta una storia, questa è la tua scelta. Non si tratta solo di gusto: è una piccola esperienza sensoriale, un rituale di piacere che coinvolge vista, olfatto, gusto e persino la memoria. E se hai accanto persone care che amano i lamponi, la crema leggera e la croccantezza delicata, vedrai che questa torta diventa un punto di incontro, una scusa dolce per riunire chi vuoi bene intorno al tavolo. In fondo, la cucina è una forma di narrazione, e questa torta è una pagina scritta con fragranze, colori e consistenze che rimangono impresse come una citazione gustativa nel libro delle tue ricette di famiglia.

Perché amerai questa ricetta

  • Freschezza assicurata: la combinazione di lamponi e crema leggera regala una sensazione di pulito al palato, perfetta anche dopo pasti ricchi.
  • Versatilità: si adatta a diverse occasioni, dalle cene tra amici alle festività, senza perdere eleganza.
  • Preparazione anticipata: grazie alla mousse e alla possibilità di raffreddare in frigorifero, puoi pianificare in anticipo senza rinunciare al gusto.
  • Textural balance: la morbidezza della mousse contrasta con la croccantezza della base o della glassa leggera, creando una sinfonia di consistenze.
  • Estetica irresistibile: la tonalità rosso lamponi è visivamente accattivante, rendendo la fetta perfetta per foto social e presentazioni.
  • Adattabilità: è facile personalizzare aromi e intensità, con opzioni di latte o panna alternative per versioni vegan o allergen-free.
  • Dolcezza controllata: si mette in risalto la frutta fresca senza essere dominata da zuccheri eccessivi, grazie all’equilibrio con crema e basi neutre.

Profilo di sapore e texture

La Torta mousse ai lamponi è una sinfonia di contrasti armoniosi. All’assaggio, si apre con una nota dorata di vaniglia e una leggera freschezza agrumata che taglia la dolcezza, preparando il palato a una cascata di mousse morbida. Questa crema è leggerissima, quasi una nuvola che si scioglie al contatto con la lingua, e porta con sé l’essenza dei lamponi: una fragranza fruttata, intensa ma equilibrata, che non pretende la scena ma la concede all’insieme. Le qualità acide dei lamponi, bilanciate da un tocco di dolcezza e dalla cremosità avvolgente, offrono una sensazione vellutata ma vivace. A completare la degustazione, la base—che può essere una frolla friabile, un biscuit delicato o una nutty crust—fornisce una struttura leggera, mai pesante, capace di sostenere la mousse senza sovrastarla. La nota finale è quella di una leggera freschezza mentolata o di una leggera acidità di frutta rossa, a seconda delle varianti scelte, che richiama a sè il finale pulito tipico dei dessert estivi. Il risultato è un equilibrio di texture: croccantezza sottile contro spuma silenziosa, freschezza del frutto contro la cremosità indulgente, dolcezza avvolgente contro una leggera asprezza che fa risaltare ogni lamponcino. L’insieme è delicato ma presente, raffinato ma accogliente, capace di soddisfare sia chi desidera un dessert elegante sia chi cerca una dolce tentazione che non appesantisca.

Ogni elemento è pensato per rivelarsi gradualmente. La mousse si scioglie lentamente, rilasciando aromi di lamponi, vaniglia e, a volte, una punta di scorza di limone che taglia la dolcezza e rinfresca. La base, se scelta, dà una prima texturazione secca, quasi biscuitata, per poi cedere al morbido della crema. L’insieme è estremamente bilanciato: nessun ingrediente pretende di essere protagonista assoluto; si parla piuttosto di un dialogo dolce tra sfumature diverse, dove la morbidezza della mousse invita a un secondo assaggio, e la componente di base—quando presente—presta sostegno e carattere. In una parola: armonia. E proprio questa armonia rende la torta adatta anche a fine pasto con un espresso corto o un caffè filtrato, che ne esaltano la pulizia in bocca senza oscurarne la delicatezza.

Occasioni & abbinamenti

La bellezza di questa torta è la sua duttilità. Può essere presentata come dessert principale per una cena romantica, come chiusura di una cena familiare domenicale, o come protagonista di un buffet estivo. Nelle festività, aggiunge un tocco di giovinezza e raffinatezza senza richiedere decorazioni complesse. Per pranzi all’aperto, è ideale perché si mantiene fresca e non diventa pesante, offrendo un tocco di eleganza anche su tavole rustiche. Per quanto riguarda gli abbinamenti, pensa a:

  • Bevande: prosecco brut, Moscato d’Asti, oppure un vino dolce leggero per un abbinamento dessert-wine che elevi la frutta rossa. Anche un tè nero agrumato o una tisana delicata si sposano bene.
  • Contorni: un’insalata di agrumi, fettine di kiwi, o una mousse di yogurt per un contrasto di temperatura e consistenza. Se vuoi un tocco croccante, servi con una spolverata di granella di mandorle tostate.
  • Decorazioni: una leggera glassa brillante a base di gelatina neutra o una coulis di lamponi leggermente ridotta può esaltare il rosso vivo e aggiungere un tocco di lucentezza. Foglie di menta o scorze sottili di limone regalano freschezza visiva e olfattiva.
  • Occasioni speciali: per un matrimonio informale, una decorazione semplice ma curata con lamponi freschi e una spolverata di zucchero a velo rende la presentazione da fotografia.

Se vuoi pensare a versioni alternative, potresti adattare la torta a gusti diversi: una base al cacao per un contrasto ancora più marcato, una mousse al mango o al passion fruit per una versione tropicale, o una versione vegana sostituendo la panna con panna di cocco montata e utilizzando agar-agar per la solidificazione della mousse. Le possibilità sono molte, e la tua creatività è il miglior ingrediente di abbinamento.

Consigli, varianti e sostituzioni

Qui trovi una serie di suggerimenti pratici per personalizzare la Torta mousse ai lamponi, senza perdere l’eleganza e la leggerezza che la contraddistinguono.

  • Versione vegana: sostituisci la panna con una crema a base di latte di mandorle o cocco montato, aggiungendo agar-agar o agar per far rapprendere la mousse. Usa una base senza burro o con una margarina vegetale resistente al freddo.
  • Versione senza glutine: opta per una base di biscotti senza glutine o una base di noci frullate con un poco di olio di cocco per legare. Verifica che tutti gli ingredienti siano certificati senza glutine.
  • Intensità di lamponi: se preferisci una mousse più intensa, aggiungi una piccola quantità di purè di lamponi o di concentrato di frutta; se vuoi una nuance più delicata, riduci la quantità e aggiungi una nota di vaniglia o di scorza di limone per accompagnare.
  • Aromi alternativi: una punta di menta fresca o basilico può offrire una sorpresa rinfrescante. Una lieve nota di acqua di rose o di gelsomino può portare un tocco floreale interessante.
  • Dolcezza: se vuoi ridurre zuccheri, scegli lamponi molto maturi, che hanno una dolcezza naturale maggiore, e bilancia con una crema meno dolce o yogurt greco non dolcificato.
  • Varianti di base: puoi creare una base di biscotti tradizionali, una base di savoiardi per un effetto tiramisù-style, o una base di wafer sottili per una croccantezza leggera.

Conservazione & idee per preparare in anticipo

Una delle grandi virtù di una mousse ben bilanciata è la capacità di resistere al tempo. Se vuoi pianificare in anticipo, ecco alcune linee guida pratiche per ottenere risultati perfetti:

  • Frigorifero: una volta assemblata, conserva la torta coperta in frigorifero per almeno 2-4 ore prima di servire, in modo che la mousse rassodi adecuatamente e le consistenze si amalgamino. Per dessert di festa, puoi prepararla il giorno prima e conservarla ben chiusa.
  • Eventuale congelamento: se la mousse è vegana o se hai verificato che la versione scelta si congeli bene, puoi congelare la torta a blocchi o porzionata. Scongelala lentamente in frigorifero per preservarne la consistenza; evita scongelamenti rapidi che potrebbero alterare la texture.
  • Decorazioni: aggiungi decorazioni fresche poco prima di servire per mantenere colore e sapore vividi. Le lamponi freschi, la scorza di agrumi o una spolverata di cacao leggero possono essere aggiunte al momento della presentazione.
  • Trasporto: se porti la torta a un evento, porta una copertura o una scatola rigida per proteggerne la superficie durante il trasporto. Una breve raffreddatura in ghiaccio secco non è consigliata se non hai esperienza, per evitare sbalzi di temperatura che possano compromettere la mousse.

Aneddoti e curiosità

Curiosità affascinanti sul mondo delle mousse e dei lamponi: i lamponi sono stati celebrati fin dall’antichità per la loro intensità aromatica e per il colore che stimola l’appetito. In molte culture, i lamponi significano freschezza, passione e promesse di estate. Le mousse, nate come dessert di fantasia nelle cucine più raffinate, hanno poi trovato una diffusione capillare grazie alla loro facilità di preparazione e alla loro versatilità. Una mousse ben fatta è un’arte: temprare la consistenza, bilanciare i sapori e mantenere la leggerezza senza far perdere struttura. L’unione di una mousse ai lamponi con una base leggermente croccante è una combinazione molto amata perché permette di giocare con le temperature: un morso freddo, una crema morbida che si scioglie, una notevole freschezza che resta a lungo sul palato. Alcune culture hanno persino attribuito alle mousse funzioni conviviali: servire una mousse fredda è, in molte tradizioni, un modo per invitare a fermarsi, a gustare, a condividere un momento di dolcezza tra amici e familiari. Collaborazioni tra tradizione e innovazione hanno portato a versioni con cioccolato fondente, con basi di biscotto integrali o con topping di frutta secca: tutte scelte valide che arricchiscono il panorama di questo dessert. Ecco perché questa Torta mousse ai lamponi trova posto in molte ricette moderne: è elegante, ma non fredda; è ricca di carattere, ma sempre rassicurante; è un piatto che invita a tornare indietro, a raccontare una storia e a offrirne una seconda, ancora da scrivere.

Ingredients

Base (Crust)

    – 200 g digestive biscuits, finely crushed to crumbs (about 2 cups)
    → The biscuit base provides the structure and flavor for the tart. Use plain, sweet biscuits; crushing to fine crumbs helps them bind with melted butter and press into a smooth, even layer. For a gluten-free version, substitute with gluten-free biscuits and ensure they are ground finely. Press the mixture firmly into a lined springform pan and refrigerate until set for a crisp, clean edge.
    – 90 g unsalted butter, melted and cooled slightly
    → The melted butter binds the biscuit crumbs into a cohesive crust and adds richness. Let the butter cool just a bit so the crumbs stay dry enough to press; a warm mixture can cause the crust to become greasy. Spread and press evenly along the bottom of the pan, then chill to firm the base before filling.
    – 1–2 tablespoons granulated sugar (optional)
    → Adds a touch of sweetness to the crust if your biscuits aren’t sweet enough. Omit if using very sweet biscuits. Mix the sugar with the crumbs before combining with butter, press evenly, and chill to maintain a neat, compact crust.

Raspberry Mousse

    – 300 g fresh raspberries, plus extra for garnish (reserve a few for topping)
    → This is the primary flavor of the mousse. Purée and strain for a smooth texture; you may leave a few seeds for texture if you prefer. Reserve some whole berries for decoration after the mousse sets. If using frozen raspberries, thaw completely and drain excess liquid to avoid a watery mousse.
    – 60–80 g granulated sugar (adjust to taste)
    → Sweetens the raspberry puree to balance tartness. Start with 60 g and increase if needed after tasting. Dissolve sugar completely in the raspberry puree to prevent graininess, and avoid scorching the mixture while heating if you warm it for gelatin activation.
    – 2 tsp lemon juice (optional)
    → Brightens flavor and complements raspberries. Fresh lemon juice is best; avoid bottled juice if possible. Add to the puree during blending to enhance aroma and cut through fruit richness.
    – 300 ml heavy cream, very cold
    → Whipped cream lightens the mousse and provides a creamy, airy texture. Chill the cream thoroughly and whip to soft peaks; fold gently to preserve volume. Do not overwhip, or the mousse may become grainy or butter-like.
    – 3 leaves gelatin (gelatin sheets) totaling about 9 g, bloomed in cold water then melted
    → Gelatin sets the mousse so it holds its sliceable shape after chilling. Soak leaves in cold water for 5–10 minutes until softened, then squeeze out excess water and melt in a small amount of warm raspberry puree before whisking into the rest of the mixture. If avoiding gelatin, use 1–2 teaspoons agar-agar powder dissolved in hot liquid and allow extra setting time.
    – 1 teaspoon vanilla extract (optional)
    → Adds depth and warmth to the raspberry flavor. Use pure vanilla for best aroma; add with the whipped cream during folding for even distribution without overworking the mixture.
    – Pinch of salt (optional)
    → A tiny pinch balances sweetness and enhances fruit flavor. Add to the raspberry puree before folding into whipped cream or into the creme itself to subtly intensify taste.

Finish/Decoration

    – 150 g fresh raspberries (for topping)
    → Create a visually appealing mosaic on top and add contrast to the pale mousse. Wash gently and pat dry; arrange in a decorative pattern after the mousse has set to a flawless finish. If possible, reserve berries from the set for an even distribution of color and texture.
    – 4–6 fresh mint leaves (optional)
    → A touch of green and a refreshing aroma that complements the raspberry flavor. Rinse and pat dry; tuck leaves between berries or at the edge of the cake for a polished look without overpowering sweetness.
    – 1–2 tablespoons powdered sugar for dusting (optional)
    → Adds a delicate, snowy finish and helps highlight the contrast between mousse and fruit. Sift lightly just before serving to avoid clumps; use sparingly to keep the mousse flavor prominent.

Instructions

  • Line a 23 cm (9 inch) springform pan with a round parchment disc on the bottom and lightly grease the sides to ensure clean release.
    → This prevents the crust from sticking to the pan and yields a neat, professional edge when unmolding the tart after chilling.
  • If you have a food processor, process 200 g digestive biscuits until you have fine crumbs; or place them in a resealable bag and crush with a rolling pin until powdery, with no large chunks.
    → A fine crumb forms an even, cohesive crust that binds with butter without crumbly pockets.
  • Transfer the crumbs to a bowl and add 1–2 tablespoons granulated sugar if your biscuits are not quite sweet; whisk to distribute evenly.
    → Even sweetness ensures the crust complements the tart raspberry filling and prevents dull edges.
  • Pour in 90 g melted and cooled slightly unsalted butter; mix with a fork until the crumbs resemble wet sand and begin to clump.
    → Butter binds the crumbs into a cohesive crust that holds its shape when you cut the tart; cooling the butter prevents the crust from turning greasy.
  • Press the crumb mixture firmly into the prepared pan, spreading it evenly from the center to the edges with the flat bottom of a glass or measuring cup.
    → A compact, level crust creates clean edges and prevents gaps or air pockets that would crack or crumble during slicing.
  • Chill the crust in the refrigerator for at least 30 minutes, or until set and hard to the touch.
    → Chilling firms the fat and bonds the crust, making it stable to hold the mousse without sliding.
  • Purée 300 g fresh raspberries in a blender until smooth, then push the purée through a fine-mesh sieve to remove most seeds, pressing with a spatula to extract as much liquid as possible, and reserve a handful of whole berries for topping.
    → A silky mousse base without gritty seeds ensures a luxurious texture and a vibrant color that sets evenly.
  • In a bowl, combine the strained purée with 60–80 g granulated sugar and 2 tsp lemon juice if using, then stir until the sugar is fully dissolved.
    → Sweetens and brightens the fruit flavor; warming slightly helps the sugar dissolve, but keep the heat gentle to avoid cooking the puree.
  • Bloom 3 leaves gelatin (9 g) in cold water for 5–10 minutes until soft and pliable.
    → Blooming hydrates the sheets so they dissolve evenly, preventing lumps in the mousse.
  • Squeeze excess water from the gelatin and melt it with a small amount (about 2–3 tablespoons) of warm raspberry purée in a small saucepan until completely dissolved, then whisk the melted gelatin back into the rest of the raspberry purée.
    → Dissolving gelatin evenly ensures the mousse sets uniformly without sagging or gelatin pockets.
  • Whip 300 ml cold heavy cream to soft peaks in a chilled bowl using clean beaters, adding 1 teaspoon vanilla extract and a pinch of salt if desired, then set aside.
    → Properly whipped cream provides the mousse with lift and a creamy texture; do not overbeat to avoid graininess or butteriness.
  • Gently fold one-third of the whipped cream into the raspberry purée to loosen the mixture, then fold in the remaining whipped cream with a spatula until fully incorporated and uniform, being careful not to deflate the volume.
    → Gentle folding preserves airiness and keeps the mousse light and sliceable; stop as soon as the color is uniform.
  • Pour the raspberry mousse over the chilled crust and smooth the top with an offset spatula; gently tap the pan on the counter to release any trapped air, then refrigerate for at least 4 hours or until the mousse is fully set.
    → Sufficient chilling allows the gelatin to set the mousse into a firm, sliceable dessert and ensures clean edges when cut.
  • Arrange the 150 g fresh raspberries on top in a decorative pattern and scatter 4–6 mint leaves if using; dust lightly with powdered sugar just before serving for contrast.
    → The berries and mint provide color, aroma, and a fresh finish that enhances presentation and balance.
  • To serve, run a warm knife around the edge of the pan, release the springform ring, and slice with clean, even strokes; wipe the blade between cuts for pristine pieces.
    → Warmed blade helps the mousse cut smoothly without dragging, yielding professional-looking slices.

Notes

These raspberry mousse tart slices are a show-stopping dessert featuring a crisp biscuit crust and a light, airy raspberry mousse that chills into clean, sliceable portions. You can customize them by adding a splash of lemon juice to the raspberry puree or folding in a little vanilla or citrus zest for extra aroma. They can be made a day ahead; keep the assembled tart in the fridge for several hours or overnight to allow the mousse to set fully. For a gluten-free version, substitute the digestive biscuits with gluten-free biscuits and ensure all other ingredients (biscuits, gelatin or agar-agar, and cream) are certified gluten-free. If you prefer a lighter finish, replace part of the heavy cream with mascarpone or plain yogurt and reduce the sugar in the raspberry puree, tasting as you go. They decorate beautifully with extra raspberries and mint leaves, and a light dusting of powdered sugar just before serving. Leftovers can be covered and kept in the fridge for up to 2–3 days; the mousse holds its shape well, but the crust may soften slightly over time.

Tips

  • Base crust handling: Grind the digestive biscuits to very fine crumbs for a smooth crust. If your biscuits aren’t very sweet, the optional sugar in the crust helps balance the flavor. Press the crumb mixture firmly into a lined springform pan using the back of a spoon or a flat glass to create an even surface. Chill until set before adding the mousse to prevent the crust from crumbling.
  • Butter temperature matters: Melted butter should be warm but not hot. Let it cool slightly before mixing with the crumbs; too-hot butter can make the crust greasy and slick.
  • Gluten-free option: For a gluten-free version, substitute with gluten-free digestive biscuits and grind to a fine crumb. Ensure the pressed crust is even and compact just as with regular biscuits.
  • Raspberry puree texture: Purée the raspberries and strain if you want a silky mousse. Leaving a few seeds for texture is fine if you prefer a bit of bite. If using frozen raspberries, thaw completely and drain excess liquid to avoid a watery mousse.
  • Sweetness and brightness: Start with 60 g of sugar and taste the raspberry puree before folding in the whipped cream. Add more sugar if needed. A small amount of lemon juice (1–2 tsp) brightens the flavor and helps balance tartness from the berries.
  • Gelatin technique: Bloom the gelatin in cold water for 5–10 minutes, then squeeze out excess water and melt it gently in a small amount of warm raspberry puree before whisking into the rest of the mixture. Do not boil the gelatin. If you prefer a vegetarian setting agent, use 1–2 tsp agar-agar powder dissolved in hot liquid and allow extra setting time.
  • Whipping the cream: Chill the heavy cream and the bowl well, whip to soft peaks, and fold gently to preserve volume. Overwhipping can make the texture grainy or butter-like, so stop at soft peaks and fold promptly.
  • Folding technique: Fold the melted gelatin cocktail (raspberry puree with gelatin) into the whipped cream in two additions. Start with a light fold to combine, then finish with a broader fold to maintain airiness.
  • Assembly and chilling: Spread the mousse evenly over the crust and tap the pan on the counter to release any trapped air. Refrigerate for at least 4 hours, preferably overnight, until the mousse is firm and sliceable. If possible, chill the unmolded cake briefly in the freezer for 10–15 minutes to help neat edges when slicing.
  • Decoration tips: Reserve some whole raspberries for placing on top after the mousse has set. Add mint leaves just before serving for a fresh aroma and color contrast. Dust lightly with powdered sugar right before serving for a delicate finish, avoiding clumps that can overwhelm the mousse.
  • Make-ahead and storage: This tart is best made 1 day ahead and kept refrigerated, loosely covered to prevent odors from seeping in. It will hold well for 2–3 days, but the texture and color of the raspberries may slowly change the longer it sits.
  • Variations to try: For a citrus twist, add a teaspoon of zest (lemon or lime) to the raspberry puree. Swirl a thin layer of white chocolate into the mousse for a contrasting flavor, or top with shaved dark chocolate for a refined look. If dairy-free is needed, replace the whipped cream with whipped coconut cream and use a plant-based setting agent (agar-agar) with proper setting time.
  • Knife and serving tip: Dip a knife in hot water and wipe clean between slices for clean divisions. Keep the knife warm for each cut to prevent tearing the mousse.

FAQ

Domande frequenti – Torta mousse ai lamponi

Quali ingredienti servono per la torta mousse ai lamponi?

Base: biscotti digestive tritati (circa 200 g) e burro fuso (80–100 g). Mousse: lamponi frullati (350–400 g), panna fresca montata (300 ml), zucchero (60–100 g a seconda della dolcezza), gelatina in fogli (6 g) ammollata. Decorazione: lamponi freschi. Opzionali: scorza di limone o vaniglia.

Come preparo la base di biscotti?

Sminuzza i biscotti fino a ottenere una granella fine, mescolala con burro fuso tiepido finché è omogenea. Premi il composto sul fondo di uno stampo a cerniera da 22–24 cm rivestito di carta forno, livellando con il dorso di un cucchiaio. Metti in frigorifero per 15–30 minuti a rassodare.

Come si monta la mousse ai lamponi?

Frulla i lamponi e, se vuoi, passa al setaccio per eliminare i semi. Monta la panna fresca. In una piccola quantità di purea riscaldata sciogli la gelatina ammollata, quindi aggiungi la gelatina sciolta al resto della purea. Lascia intiepidire, poi incorpora delicatamente la panna montata, mescolando dal basso verso l’alto. Versa la mousse sulla base, livella e lascia rassodare in frigorifero per almeno 4–6 ore (meglio una notte).

Serve gelatina? Come usarla?

Sì, serve per dare struttura alla mousse. Fogli: ammorbidisci 6 g di gelatina in acqua fredda per 5–10 minuti, strizza e sciogli a bagnomaria o al microonde, quindi aggiungi alla purea calda e prosegui come descritto. In alternativa, per una versione senza gelatina animale puoi usare agar-agar seguendo le dosi indicate sull’imballaggio (solitamente 2–3 g per 250 ml di purè) e far bollire per attivarlo.

Posso preparare la torta in anticipo?

Sì. Puoi preparare base e mousse in anticipo e assemblare poco prima di servire. La torta si conserva in frigorifero coperta per 2–3 giorni. Se vuoi, puoi anche mantenere la base pronta e montare la mousse il giorno stesso.

Quanto tempo va in frigorifero per rassodare?

Almeno 4–6 ore; preferibilmente tutta la notte per una consistenza più ferma e uniforme.

È possibile fare una versione senza lattosio o vegana?

Sì. Versione senza lattosio: usa biscotti senza burro o con burro senza lattosio, panna da montare senza lattosio e, se desideri, gelatina normale. Versione vegana: sostituisci la panna con panna vegetale montata e usa agar-agar per rassodare la mousse (seguendo le istruzioni del prodotto). Puoi anche utilizzare una base di biscotti senza lattosio e un fondo vegano.

Quale stampo è consigliato e che formato ottengo?

Uno stampo a cerniera rotondo da 22–24 cm è ideale; per una torta più alta usa uno stampo da 20 cm. Imburra leggermente e rivesti con carta forno. Se non hai lo stampo a cerniera, puoi usare una teglia rotonda, ma potrebbe essere più difficile rimuoverla intera.

Come decorare al momento di servire?

Decorala con lamponi freschi sparsi sulla superficie, scorza di limone grattugiata, foglioline di menta o cioccolato bianco in scaglie. Per un tocco di colore, qualche cucchiaio di coulis di lamponi può essere spennellato sulla superficie.

Come conservare la torta dopo averla tagliata?

Copri bene con pellicola alimentare e conserva in frigorifero. Consumala entro 2–3 giorni. Evita di lasciare a temperatura ambiente per troppo tempo per non perdere la textures della mousse.

Introduction / Hook

Imagine a sunny kitchen in Naples, the scent of ripe tomatoes warming the air, and a skillet that holds a simple, beautiful promise: eggs that gleam like little suns, nestled in a pool of glossy red sauce. Uova napoletane al forno are not just a dish; they are a comforting ritual, a breakfast thoughtfulness that travels well beyond the morning hour, and a family-friendly crowd-pleaser that can morph from a humble weeknight supper into a festive centerpiece. The beauty of this recipe lies in its balance—tomatoes bright with sunshine and a whisper of garlic, melted cheese that tucks the eggs into a velvet embrace, and a crackling edge of crusty edges where the sauce and cheese caramelize into something deeply soulful. Every bite offers a chorus of textures: the soft, just-set yolk that oozes into the tomato bath, the tender egg white that has learned patience in the oven, and the cheese that brings a gentle, creamy tang. If you crave comfort food with character, this dish rewards slow anticipation and quick service alike, a rare combination that makes it perfect for both intimate dinners and lively gatherings.

The Story Behind the Dish

Uova napoletane al forno are rooted in the culinary heartbeat of Naples, a city that knows how to coax maximum flavor from simple ingredients. Naples has long celebrated the tomato as a star player, turning garden-fresh harvests into sauces that sing with brightness, depth, and a touch of sweetness. The technique of baking eggs in a tomato-scented sauce likely grew out of necessity and ingenuity—home cooks wanting to stretch a single pot of sauce into a nourishing, all-in-one meal. In Neapolitan kitchens, the oven is a trusted ally, transforming the surface of the dish into a sun-kissed crust while the interior remains luxuriously tender. The dish embodies a culinary philosophy that values harmony over hype: each component supports the others, never outshouting, always collaborating to deliver a comforting and satisfying bite. Over time, regional tweaks and family secrets—whether a pinch of oregano here, a splash of white wine there, or a final shower of pecorino—have layered this dish with personal memory and cultural nostalgic. Today, it stands proudly as a bridge between rustic street food and homey Sunday suppers, inviting you to write your own chapter in a long, delicious lineage.

Why You’ll Love This Recipe

  • One-pot comfort: A single pan delivers a complete meal with protein, vegetables, and dairy, minimizing cleanup and maximizing flavor.
  • Family-friendly versatility: Gentle enough for kids, yet flavorful enough to satisfy adults, making it ideal for mixed age groups.
  • Breakfast to dinner: Works beautifully for brunch, lunch, or a cozy dinner, adapting to your schedule and appetite.
  • Make-ahead potential: The sauce can be prepared ahead of time, and eggs can be added just before baking for a quick weeknight meal.
  • Wine-friendly and crowd-pleasing: The acidity of tomatoes and the creamy cheese balance well with a light white wine or a glass of something simple and refreshing.
  • Vegetarian-friendly by design: A comforting plant-forward option that can be easily adapted to include optional meat additions if desired.

Flavor Profile & Texture

The essence of Uova napoletane al forno lies in the tango between tomato brightness and the mellow richness of dairy, punctuated by a hint of herbaceous lift. The tomato sauce is typically tomato-forward—simmered until it glows with a natural sweetness and a whisper of garlic, onion, and olive oil. There’s a gentle tang that comes from ripe fruit tomatoes, balanced by a soft sweetness that intensifies as the sauce thickens. When the eggs are nestled into this warm bath and the dish bakes, the whites become tender, the yolks remain luxuriously runny or softly set depending on timing, and the cheese on top creates a sunlit crust that is at once silky and slightly chewy. The result is a multi-layered mouthfeel: the initial scoop offers a creamy, rich interior with a bright, almost entrancing tomato bite; the edges introduce a faint caramelization and a touch of savoriness from the cheese and olive oil. Fresh herbs—basil or parsley—offer a green, peppery finish that lingers on the palate, like a final, fragrant whisper that invites another bite.

Texture-wise, the dish balances creamily smooth elements with contrasting textures: the egg whites provide a soft, yielding bite; the yolk, depending on cooking time, can run like molten gold or be perfectly custardy; the sauce stays thick and spoonable without being heavy; the cheese forms a delicate, lightly crisped crust that adds a gratifying chew. The overall sensation is comforting and sunny, a reminder of home and of meals shared around a table where every guest feels both welcomed and pampered.

Occasions & Pairings

This dish shines in a variety of settings. It’s ideal for a make-ahead weekend brunch that gracefully converts into a weeknight dinner, a cheerful lunch in a sunlit kitchen, or a relaxed supper for guests who appreciate a dish with soul and simplicity. It also makes a fantastic centerpiece for casual gatherings, where the family-style presentation invites conversation as much as appetite.

Pairing suggestions to elevate the experience:

  • Side dishes: A simple crusty loaf or garlic bread to scoop up every last drop of sauce; a light arugula or fennel salad to provide a crisp, peppery contrast; steamed green vegetables like broccolini or green beans for color and crunch.
  • Drinks: A dry white such as Soave, Verdicchio, or a crisp Pinot Grigio; a sparkling water with a twist of lemon for brightness; or a light red like a Chianti for those who prefer red with tomato-based dishes.
  • Desserts: A delicate citrus dessert, such as lemon panna cotta or orange-blossom–infused panacotta, to finish on a fresh, bright note that complements the dish without overwhelming it.

Tips, Variations & Substitutions

  • Herb variations: While basil is classic and aromatic, you can experiment with oregano, thyme, or a mix of Italian herbs to tailor the aroma to your taste. A pinch of crushed red pepper can introduce a welcome warmth if you like a touch of heat.
  • Cheese options: Traditional Neapolitan preparations often use mozzarella, sometimes mixed with a sharper cheese like pecorino or a sprinkling of Parmigiano-Reggiano. If you’re dairy-free, opt for a high-quality almond or cashew cheese that melts well, or skip the cheese altogether and finish with a drizzle of extra virgin olive oil and a squeeze of lemon.
  • Vegetarian and vegan twists: Keep the dish vegetarian by avoiding any meat additions; for a vegan version, use plant-based cheese that melts smoothly and base the sauce on high-quality canned tomatoes or fresh tomatoes simmered with olive oil, garlic, and onion.
  • Protein add-ins: Some cooks like to add crumbled sausage, pancetta, or chorizo into the sauce for a heartier bite. If you choose to add meat, ensure it is cooked through before the eggs are added to the dish.
  • Tomato texture: For a rustic finish, chop tomatoes by hand and let them simmer down, or use crushed tomatoes for a smoother, more uniform sauce. Fresh tomatoes can be used in peak season, but canned tomatoes often provide a richer depth of flavor in year-round cooking.
  • Egg doneness: If you prefer a completely set yolk, bake the dish a few minutes longer; for a runnier center, remove when the whites are just firm and the yolks still gleaming with liquid gold.
  • Herb finish: Finish with a handful of fresh basil leaves torn over the top just before serving to preserve bright, aromatic oils and color.

Storage & Make-Ahead Ideas

One of the practical joys of this dish is its adaptability for planning ahead. The tomato sauce often tastes even better the next day as flavors meld. You can prepare the sauce in advance and refrigerate it for up to 2 days. When ready to serve, reheat gently and add fresh eggs to bake. If you prefer to bake everything in one go, you can assemble the sauce and portion it into individual ramekins or a baking dish, then refrigerate. When you’re ready to eat, crack the eggs into the warmed sauce and bake as directed. Leftovers can be stored in the refrigerator for up to 2 days. Reheat gently in the oven or on the stove, and add a splash of water or broth if the sauce thickens too much. Freeze is an option for the sauce alone, up to 3 months; thaw in the refrigerator overnight and reheat before proceeding with the eggs when you’re ready to cook.

Make-ahead strategies to simplify weeknights:

  • Prep the base sauce in big batches: onions, garlic, tomatoes, and olive oil can be simmered and cooled, then stored. When you’re ready to bake, reheat the sauce, portion into dishes, crack in eggs, and bake.
  • Set up a “meal kit” station: keep eggs, cheese, and herbs on hand, ready to be added to reheated sauce for a last-minute, cozy meal.
  • Meal customization: consider adding vegetables like spinach, roasted peppers, or artichoke hearts during the sauce preparation for extra color and nutrients.

Fun Facts & Trivia (Optional)

Neapolitan cuisine is deeply regional, and many dishes reflect the city’s history as a bustling port where ingredients from the sea, land, and markets converge. The humble tomato, once considered a exotic novelty in Europe, became a cornerstone of Southern Italian cooking in the 18th and 19th centuries, fueling dishes that celebrate vibrant color and robust flavor. In Naples, the oven has always been a magical equalizer, turning simple pantry staples into comforting, soul-satisfying meals. A small dish like Uova napoletane al forno embodies the spirit of Italian home cooking: straightforward, soulful, and designed to bring people together around a shared meal. Fun fact: in some households, a pinch of fennel pollen or a drizzle of black pepper on top is believed to evoke the scent of a seaside breeze, reminding diners of the region’s coastlines even when they’re far from the sea.

As you explore this recipe, you may discover your own regional or familial twists—an opportunity to keep a timeless tradition alive while making it uniquely yours. The sauce’s versatility means you can adapt the dish to reflect what you have in your pantry, your dietary preferences, or the season’s freshest produce. The result is not merely a plate of baked eggs; it’s a story you tell with color, aroma, and texture, a small celebration of life, warmth, and everyday joy.

Ingredients

Uova Napoletane al Forno

  • 2 tablespoons extra-virgin olive oil
    → Use good-quality olive oil as the flavor base for the sauce. Warm it over medium heat until shimmering, then sauté aromatics to develop a rich foundation for the baked eggs. Avoid overheating to prevent burning the oil.
  • 1 small onion, finely chopped
    → The onion provides natural sweetness and body to the tomato sauce. Finely chop so it moshes into the sauce rather than remaining chunky, and sauté until translucent and soft for a smooth texture.
  • 2 garlic cloves, minced
    → Garlic adds aromatic depth to the sauce. Mince finely and add after the onion begins to soften to prevent scorching; you want a gentle aroma rather than a bitter, burnt note.
  • 1 can crushed tomatoes (28 oz / 796 g)
    → This forms the sauce base that absorbs the eggs’ flavors. Choose high-quality crushed tomatoes for a balanced, slightly sweet-tresh tomato flavor. If you only have whole tomatoes, crush them by hand or with a spoon before simmering.
  • 1 tablespoon tomato paste
    → Intensifies tomato flavor and helps the sauce cling to the eggs. Stir it in with the onion and garlic so it blooms and thickens the sauce slightly.
  • 1/2 teaspoon fine sea salt
    → Essential for balancing and enhancing all other flavors. Start with this amount and adjust to taste after simmering the sauce; remember that cheeses will add salt too.
  • 1/4 teaspoon freshly ground black pepper
    → Adds a subtle warmth and depth. Freshly ground pepper is preferred for a brighter, more pronounced flavor.
  • Pinch red pepper flakes (optional)
    → If you enjoy a gentle kick, this will add subtle heat without overpowering the tomato base. Adjust to your preferred heat level.
  • 1 teaspoon granulated sugar (optional)
    → Helps balance the natural acidity of the tomatoes. Add gradually and taste; omit if your tomatoes are naturally sweet or if you prefer a more tart sauce.
  • 6 fresh basil leaves, torn
    → Fresh basil brightens the sauce with herbal notes. Tear the leaves to release essential oils and fold into the sauce toward the end of simmering for aroma, or reserve a few whole leaves for garnish.

Eggs and Cheese

  • 4 large eggs
    → The star of the dish. Crack each egg gently on top of the simmering sauce in a baking dish so the whites set around the yolks. Bake until the whites are just set and the yolks reach your preferred doneness (usually soft to medium for Neapolitan style).
  • 1/2 cup shredded mozzarella cheese (or 150 g fresh mozzarella, torn)
    → Provides a creamy, melty layer over the eggs. If using fresh mozzarella, tear into uneven chunks so it distributes and melts more evenly; shredded low-moisture mozzarella yields a more uniform melt.
  • 1/4 cup grated Parmesan cheese
    → Adds a sharp, salty finish and helps develop a slightly crusty top. Mix a portion into the sauce for deeper flavor and reserve a little to sprinkle over the eggs before baking for a tasty finish.
  • 1/4 cup grated Pecorino Romano (optional)
    → An optional tangier, saltier cheese that complements the sweetness of the tomatoes. If used, reduce the salt in the sauce slightly to avoid oversalting.

Optional Add-ins

  • 1/4 cup pitted black olives, sliced
    → Briny bits add depth and a Mediterranean contrast to the creamy cheese and tomato base. Slice evenly so they distribute nicely in each bite.
  • 1 tablespoon capers, drained
    → Capers bring a sharp, lemony brininess that brightens the sauce. Rinse and pat dry to remove excess salt before adding.
  • 4-6 fresh basil leaves, torn (for garnish)
    → Additional fresh basil on top provides a vibrant aroma and a final basil lift just before serving.
  • Pinch chili flakes (additional heat)
    → If you crave more heat, a small pinch of chili flakes can be sprinkled over the finished dish or stirred into the sauce before baking.

Instructions

  • Preheat your oven to 350°F (175°C) and lightly grease a shallow baking dish or arrange six 6-ounce ramekins; this ensures even heat distribution and prevents the eggs from sticking to the surface.
    → Greasing or lining creates a smooth surface for the sauce and eggs, and makes unmolding the finished dish effortless.
  • Warm the extra-virgin olive oil in a medium skillet over medium heat until it shimmers, then add the finely chopped onion and sauté until translucent and soft, about 5 to 7 minutes; this builds a sweet, savory base that carries the tomato and cheese.
    → Sautéing the onion melts its sugars and reduces raw sharpness, creating a silkier sauce.
  • Add the minced garlic and cook for 30 to 60 seconds, stirring constantly, until fragrant but not browned; this preserves delicate garlic aroma and avoids bitter notes.
    → Garlic burns quickly; cooking briefly with the onions ensures a gentle aroma and integrated flavor.
  • Stir in the tomato paste and cook for 1 minute to bloom its flavor and help the sauce cling to the eggs, then mix it evenly with the onions and garlic.
    → Blooming tomato paste concentrates its sweetness and deepens the overall sauce, preventing a flat tomato taste.
  • Pour in the crushed tomatoes and season with fine sea salt, freshly ground black pepper, and optional sugar; bring the mixture to a gentle simmer over medium-low heat, then reduce to a simmer to thicken slightly without scorching.
    → A gentle simmer prevents scorching and helps the tomato flavor concentrate for a richer sauce base.
  • Simmer the sauce for 15 to 20 minutes, stirring occasionally, then tear in the fresh basil leaves toward the end and adjust seasoning; this concentrates the tomato sweetness and infuses herbal brightness.
    → Fresh basil released at the end provides vibrant aroma without cooking out its delicate oils.
  • If using optional add-ins, fold in sliced black olives and drained capers during the last 4 to 5 minutes of simmering; this preserves their texture and integrates their briny notes without overpowering the sauce.
    → Evenly distributed add-ins create little bursts of flavor in every bite rather than salty hotspots.
  • Spread the sauce evenly in the prepared baking dish and, with the back of a spoon, create four shallow wells across the surface to cradle the eggs; this ensures each egg cooks evenly and sits nicely above the sauce.
    → The wells guide the eggs into uniform positions so they bake consistently and present well.
  • Crack four large eggs, one into each well, being careful not to break the yolks; if using ramekins, crack an egg into each dish after spooning sauce into each portion; this keeps the whites from spreading too much and ensures yolks stay centered.
    → Gentle hands prevent yolk rupture, which would leak whites and affect cooking time.
  • Sprinkle shredded mozzarella evenly over the eggs and sauce, or scatter torn fresh mozzarella, followed by grated Parmesan and Pecorino Romano if using, distributing in a thin layer to promote melt and create a slightly bubbly top.
    → Cheese distributes heat, melts into the sauce, and forms a delicious cheesy crust that locks in moisture.
  • Bake in the preheated oven until the egg whites are just set and the yolks reach your preferred doneness, typically 10 to 15 minutes in a shallow dish; start checking at 10 minutes to prevent overcooking the yolks; the surface should be gently bubbling and the cheese should be lightly golden.
    → Timing depends on dish depth and yolk firmness; watching early prevents overcooking and preserves runny yolks.
  • Remove the dish from the oven with oven mitts and let rest 2 to 3 minutes before serving; this resting allows carryover cooking to finish the eggs and gives the sauce a chance to thicken slightly for easy spooning.
    → A short rest prevents scorching the tongue and helps the sauce cling to the eggs for a cohesive bite.
  • Garnish with torn additional fresh basil leaves and, if desired, a pinch of extra chili flakes; serve immediately with crusty bread or toasted crostini to soak up the sauce.
    → Fresh herbs at the end lift the aroma and the bread provides textural contrast to the silky eggs and sauce.

Notes

These Neapolitan baked eggs are naturally gluten-free and feature a rich tomato-based sauce enriched with onion, garlic, and fresh basil, then crowned with mozzarella and Parmesan for a creamy, bubbly finish. You can customize them by stirring in or topping with olives, capers, extra torn basil, and, if you like a gentle kick, a pinch of red pepper flakes. Bake in a shallow, wide dish so the eggs nestle into the sauce and whites set around the yolks while the tops stay silky; bake time is about 8–12 minutes, depending on how runny you like the yolks. For a sharper edge, fold a little Pecorino Romano into the sauce and reserve some to scatter over the eggs before baking. They reheat well for leftovers—cover and warm gently in a moderate oven. Serve with warm gluten-free bread or a crisp green salad; a drizzle of extra-virgin olive oil just before serving can brighten the flavors. Always ensure canned tomatoes and cheeses are gluten-free if you have gluten intolerance.

Tips

Tips pratici per Uova napoletane al forno

  • Scegli olio extra-vergine di buona qualità: scalda l’olio a fuoco medio finché scintilla, poi aggiungi gli aromi. Evita di fumare l’olio per non rischiare sapori amari.
  • Per una base di salsa soffice e dolce, lascia stufare la cipolla finché non è trasparente e morbida prima di aggiungere l’aglio. L’aglio va inserito dopo che la cipolla inizia ad ammorbidire per evitare che bruci.
  • Usa pomodori schiacciati di buona qualità e, se usi pomodori interi, spezzali con il cucchiaio prima della cottura. Il sapore deve restare equilibrato, non troppo acido.
  • Incorporated il concentrato di pomodoro: aggiungilo con la cipolla e l’aglio per farlo sbianchire e addensare leggermente la salsa, così le uova si mantengono ben legate al sugo durante la cottura.
  • Regola il sale gradualmente: in genere 1/2 cucchiaino è un buon punto di partenza, ma ricordati che i formaggi aggiungeranno sale. Aggiusta solo verso fine cottura.
  • Il pepe fresco aggiunge profondità: macinalo al momento per un aroma più brillante.
  • Se desideri un tocco di piccantezza, aggiungi una punta di peperoncino in fiocchi nella salsa o come finishing touch.
  • La dolcezza bilancia l’acidità: lo zucchero è opzionale; aggiungilo poco per volta e assaggia. Omettilo se i pomodori sono già dolci o preferisci una salsa più acida.
  • Freschezza del basilico: spezzetta le foglie di basilico all’ultimo momento e incorporale verso la fine della cottura per mantenere l’aroma intenso. Riserva alcune foglie per guarnire.
  • Metti le uova direttamente sulla salsa già sobbollente: rompi ogni uovo con delicatezza per evitare di rompere i tuorli. L’albume si rapprende attorno al tuorlo senza renderlo troppo cotto.
  • Formaggio in strati: mescola una parte di parmigiano nella salsa per una nota sapida e crea uno strato superiore con mozzarella (se possibile, spezzetta la mozzarella fresca in pezzi irregolari per una melting uniforme) o usa mozzarella a basso contenuto di umidità per un topo di fusione.
  • Cuoci al forno a temperatura moderata: preriscalda il forno a circa 180°C (350°F). Cuoci finché gli albumi sono setti e i tuorli restano morbidi (tipicamente 12–15 minuti). Se preferisci tuorli più cotti, prolungare leggermente la cottura.
  • Controllo durante la cottura: se vuoi verificare la cottura, muovi leggermente la teglia: i tuorli dovrebbero muoversi solo leggermente se vuoi un centro morbido.
  • Forme e contenitore: usa una teglia o una pirofila resistente al forno ben imburrata o oliata per evitare che il sugo si attacchi e per facilitare la pulizia.
  • Guarnizioni e presentazione: termina con un filo d’olio extravergine a crudo e basilico fresco. Servi con pane casereccio croccante per fare la scarpetta nel sugo.
  • Preparazione anticipata: puoi preparare la salsa in anticipo e conservarla in frigorifero. Quando è ora di cuocere, aggiungi le uova sopra la salsa fredda e poi inforna. Le uova si cuoceranno in modo uniforme grazie al calore già presente nel piatto.
  • Varianti e sostituzioni: se vuoi una versione più leggera, riduci la quantità di formaggio o sostituisci la mozzarella con una mozzarella light, mantenendo però la cremosità con un tocco di crema o ricotta salata a piccole dosi.

FAQ

Che cosa sono le Uova napoletane al forno?

Un piatto della cucina napoletana in cui le uova vengono cotte al forno su uno strato di salsa di pomodoro speziata, spesso arricchite con formaggi fusi e una nota croccante data dal pangrattato. Viene servito caldo come piatto unico o accompagnamento.

Quali ingredienti servono per 4 porzioni?

Base: 4 uova, 400 g di passata o pomodori pelati schiacciati, 2 cucchiai di olio extravergine d’oliva, 1 spicchio d’aglio, cipolla facoltativa, peperoncino a piacere, sale, pepe, basilico fresco. Per la gratinatura: 150 g circa di mozzarella o scamorza tagliata a cubetti e 40–60 g di parmigiano o pecorino grattugiato. Opzionale: pangrattato per una crosticina extra.

Come si prepara la salsa di pomodoro per la base?

Soffriggi leggermente aglio (e cipolla, se vuoi) in olio d’oliva. Aggiungi la passata o i pomodori pelati schiacciati, sale, pepe e peperoncino. Lascia sobbollire 8–12 minuti finché la salsa si addensa e i sapori si amalgamano. Aggiungi basilico spezzettato alla fine.

Qual è la procedura passo-passo?

1) Preriscalda il forno a 180–200°C. 2) Ungi leggermente una teglia o una pirofila. 3) Stendi uno strato sottile di salsa di pomodoro sul fondo. 4) Rompi delicatamente le uova sulla salsa, mantenendo spazio tra loro. 5) Copri con pepe, sale, formaggio grattugiato e cubetti di mozzarella/scamorza. 6) Se desideri, spolvera pangrattato per una crosticina croccante. 7) Inforna 10–15 minuti finché le uova raggiungono la cottura desiderata (tuorli morbidi o più sodi). 8) Guarnisci con basilico fresco prima di servire.

Qual è la temperatura e il tempo di cottura indicativi?

Cuoci in forno preriscaldato a 180–200°C per circa 10–15 minuti. Se vuoi tuorli molto morbidi, riduci leggermente i tempi; per tuorli più sodi prosegui per altri 2–3 minuti. Controlla visivamente.

È possibile prepararle in anticipo?

È consigliabile preparare la salsa in anticipo e assemblare le uova poco prima di infornarle. Puoi preparare la salsa e conservarla in frigo fino a 1–2 giorni. L’assemblaggio con uova va fatto poco prima della cottura per evitare che l’albume si cuocia troppo.

Posso personalizzare con formaggi o ingredienti extra?

Sì. Prova mozzarella, scamorza o fiordilatte per una fusione cremosa. Puoi aggiungere olive nere, capperi, acciughe leggermente tritate, o una spolverata di pepe di Cayenna per una versione piccante. Per una versione leggera, limita i formaggi o usa parmigiano al posto di mozzarella.

Come si serve e quali accompagnamenti abbinare?

Servile calde, magari accompagnate da fette di pane casereccio o bruschette. Un contorno di rucola o insalata fresca si abbina bene. Un filo di olio extravergine d’oliva a crudo e una spolverata di basilico donano freschezza al piatto.

Quali sono i consigli per una cottura perfetta?

Non cuocere troppo le uova altrimenti diventano dure. Distribuisci bene la salsa sul fondo per evitare punti troppo liquidi, usa una teglia non troppo grande per mantenere le uova vicine e cuocere in modo uniforme. Se vuoi una crosticina, aggiungi pangrattato e un po’ di formaggio in superficie.

Quali sono gli errori comuni e come evitarli?

Uova cotte troppo a lungo: riduci il tempo di forno. Salsa troppo liquida: lascia sobbollire più a lungo o aggiungi un po’ di concentrato di pomodoro. Uova che si rompono al momento di romperle: rompi le uova con una leggera pressione in modo da non creare schizzi, oppure aggiungi prima la salsa e poi versa delicatamente l’uovo vicino al bordo.

È possibile utilizzare alternative per diete specifiche?

Si: per una versione vegetariana, evita carne o prosciutto e preferisci formaggi magri. Per una versione a basso contenuto calorico, usa meno olio e meno formaggio, e aggiungi solo un tuorlo per porzione o opta per albume extra. Puoi sostituire la mozzarella con formaggio a basso contenuto di grassi o con una piccola quantità di ricotta salata per aggiungere cremosità.