Author

Ocean Nightleaf

Browsing

Introduction / Hook

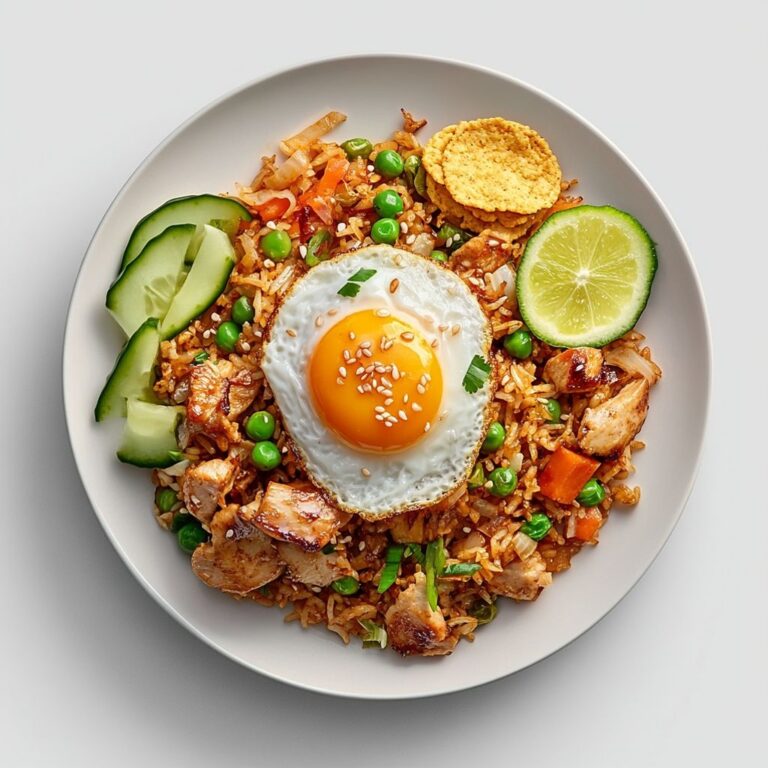
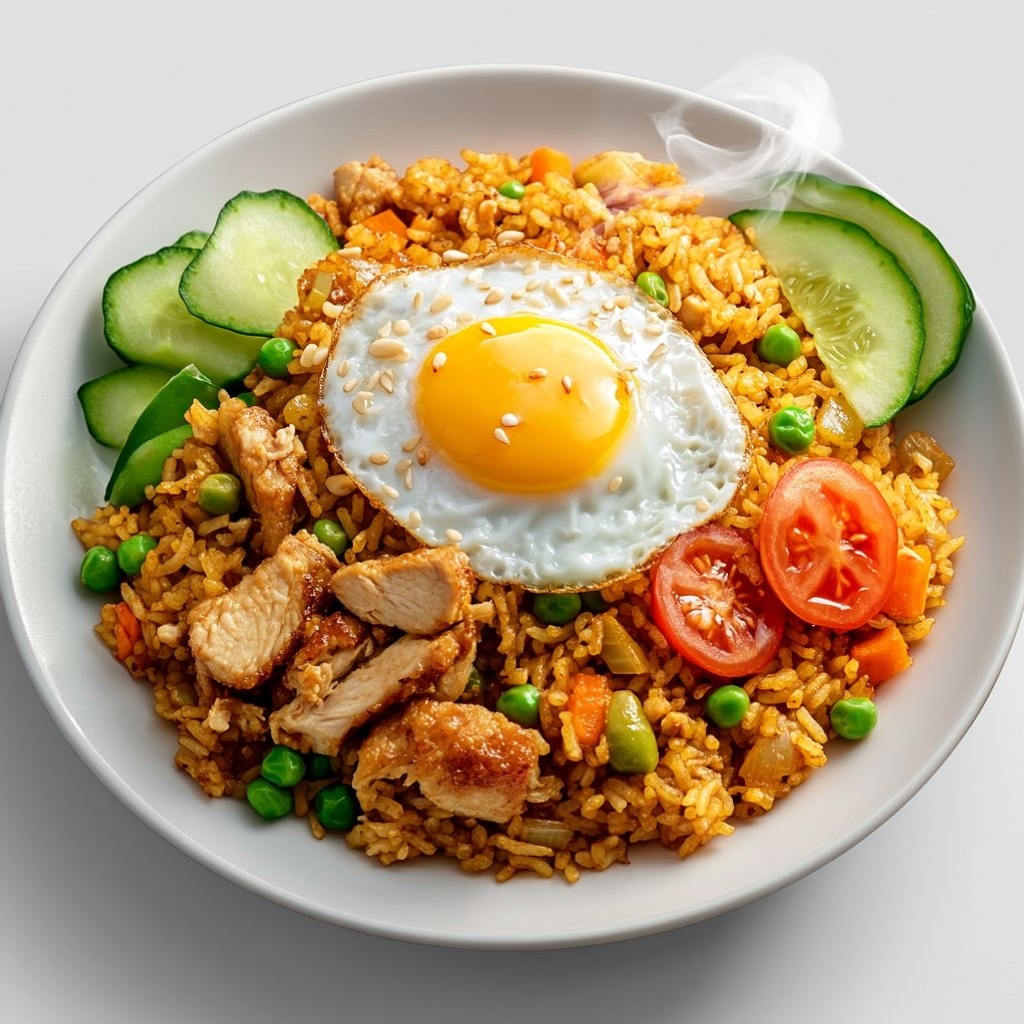
The moment the wok hits the flame, a gust of garlic, shallots, and caramel-scented sweetness rises like a warm hug around the kitchen. Nasi Goreng Indonesian Chicken is not just a dish; it’s a vibrant ceremony of flavor and texture that invites you to slow down, savor, and smile. Imagine ruby-orange flecks of fried rice glistening with kecap manis, the faint heat of chiles dancing with smoky wok hei, and tender chicken mingling with little crisp-edged grains that crackle with every bite. It’s comfort food with character—the kind of meal that tastes like a memory in the making. When you bring this plate to the table, you’re serving more than nourishment; you’re sharing a story of Indonesian street corners, of bustling markets, of families gathered around a steaming skillet, and of a world where simple ingredients become something that feels special, even celebratory. Welcome to a dish that makes weeknights feel like a festival, and leftovers feel like a new beginning.

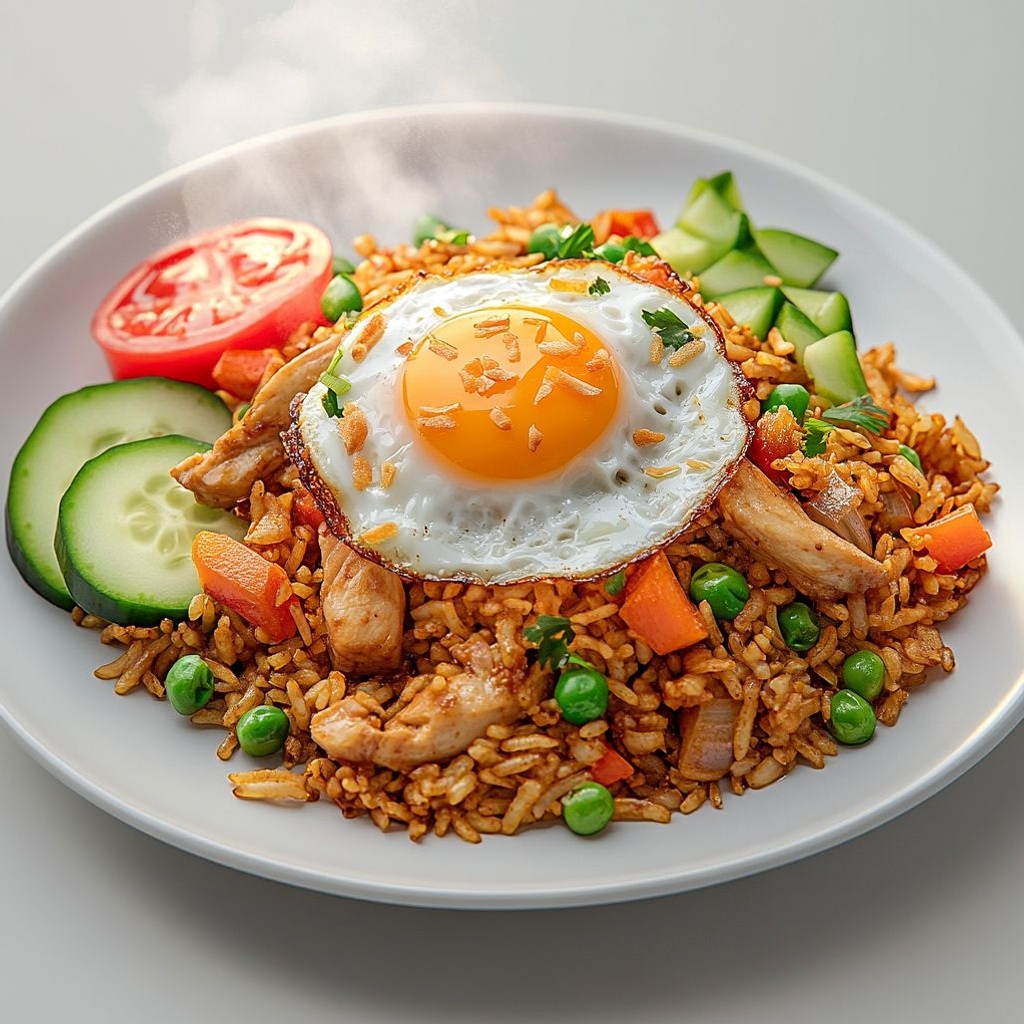
In its essence, nasi goreng is a culinary postcard from Indonesia—where the rice is fried to a golden, fragrant finish, where sweet soy glaze coats every grain, and where a sunnyside-up egg crowns the hill of rice like a sunrise over a busy, joyful street. The chicken adds a comforting heartiness, lending protein and a savory depth that balances the kiss of heat and the sweetness of the soy. The result is a colorful, satisfying one-dish meal that satisfies both quick-weeknight hunger and the deeper cravings for flavor exploration. This is more than food; it’s a passport stamp you can savor in your own kitchen.

The Story Behind the Dish

Nasi goreng translates simply to fried rice in Indonesian, but its origins tell a richer, more layered tale. It is a dish born from the necessity and ingenuity of home cooks and street vendors alike—rice, a faithful staple, meeting the day’s leftovers, a handful of aromatics, and a splash of something distinctly Southeast Asian: soy sauce with a touch of sweetness, say the beloved kecap manis. Over time, nasi goreng became a symbol of Indonesian comfort cooking, a dish that could adapt to whatever was on hand while still delivering a big, satisfying flavor punch.

Historical notes weave a tapestry of cultural exchange. Indonesian nasi goreng bears the imprint of vast trade routes, Chinese culinary influence, and local Indonesian pantry staples. The result is a fusion in spirit if not in name: a beloved street-food staple that feels both familiar and exotic. The version with chicken is a classic for family dinners and casual gatherings—protein, color, and a balance of savory, smoky, and slightly sweet sensations that feel universal in appeal yet distinctly Indonesian in personality.

Traditionally, nasi goreng is served with an assortment of accompaniments that elevate the plate into a complete meal. Think crisp cucumber or acar (pickled vegetables), a bright wedge of lime, a fried egg perched atop the rice, and a handful of crackers like kerupuk for an extra pop of texture. In many households, it’s a dish that stretches across generations: a way to repurpose leftover rice into something exciting, a way to welcome friends for a quick meal that feels special without requiring a lot of fuss. If you’ve ever wondered how to transform simple staples into something that tastes both nostalgic and contemporary, nasi goreng with chicken is a perfect ambassador for that culinary magic.

Beyond the plate, this dish carries the energy of markets where garlicky aromas mingle with smoky air, where a wok’s sizzle writes its own poetry, and where families gather to share stories as the clock ticks toward dinnertime. The Indonesian kitchen teaches you to respect balance: the chorus of sweet, salty, savory, and a whisper of heat; the textural contrast of fluffy, caramelized grains with crisp edges; and the way a single fried egg—golden, glossy, and unbroken—can crown the entire creation like a small sun. That is the spirit you bring to your own kitchen when you make nasi goreng chicken: a dish that honors tradition while inviting your own personal touch.

Why You’ll Love This Recipe

  • Fast and forgiving: a one-pan wonder that comes together quickly, using pantry staples and leftovers you likely already have.
  • Comforting yet exciting: the sweetness of kecap manis, the warmth of garlic and shallots, and a gentle kick from chiles—an inviting balance that satisfies both cozy nights in and crowd-pleasing meals.
  • Versatile and adaptable: swap chicken for shrimp, tofu, or mushrooms; adjust heat; experiment with different vegetables; make it gluten-free or vegan with simple substitutions.
  • Texturally satisfying: each grain is coated with a glossy glaze, with pockets of crisped edges that deliver a pleasant crunch alongside tender morsels of chicken.
  • Naturally crowd-pleasing: a colorful, nourishing one-dish meal that works for weeknights, lazy Sundays, or casual entertaining.
  • Leftover-friendly: a great way to reinvent leftover rice and protein into something that feels new and exciting.
  • Globally inspired, locally prepared: a taste of Indonesia that can be made authentically in your own kitchen with accessible ingredients.

Flavor Profile & Texture

At first inhale, nasi goreng greets you with a savory, slightly sweet aroma. The kecap manis—an Indonesian sweet soy sauce—drapes the rice in a deep caramel color that’s both glossy and inviting. The sweetness is restrained enough to allow the natural fragrance of garlic and shallots to shine through, while a touch of chili contributes warmth without overpowering the palate. The chicken, once kissed by heat, becomes beautifully browned and juicy, developing a gentle crust that adds a toasty savor to every bite. The fried rice itself offers a textural journey: each grain is distinct, yet some grains adopt a light, almost caramelized edge where the pan’s heat bites gently, creating little bits of crispiness that crackle when you scoop them up with your fork.

A fried egg, when included, introduces a creamy, sunny counterpoint. The runny yolk, when broken, mingles with the rice, turning it into a silken sauce that coats each grain and softens the bite. If you add accompaniments like cucumber slices or acar (pickled vegetables), you introduce citrusy brightness and a crisp bite that cuts through the richness. The overall flavor is a harmonious chorus: salty-sweet depth from the soy, aromatic sweetness from caramelized onions and garlic, a subtle heat that lingers on the tongue, and a smoky hint from the high-heat wok that whispers of street-food stalls and cooks expertly managing the flame.

Texture-wise, the dish plays with contrasts in a delightful way. The tender chicken pieces meet the tender, fluffy rice, while the occasional seared grain provides a light crunch. The egg adds a runny, luxurious layer that binds with the rice as you take a mouthful. If you include crisp crackers or fresh vegetables, you amplify the variety of textures—soft, chewy, crisp, and velvety all in a single, satisfying forkful. The balance among sweet, salty, and savory notes means the dish remains approachable for a broad range of palates, while still offering the kind of depth that invites you to savor a second helping and perhaps even a third.

Occasions & Pairings

Nasi goreng chicken is incredibly versatile, making it a fantastic choice for a number of occasions:

  • Weeknight dinners: a speedy, comforting option that still feels like a treat.
  • Casual gatherings: easy to scale up for a small crowd, as it’s just as satisfying for a group as it is for one.
  • Weekend brunch or late-night suppers: the richness pairs wonderfully with a light, refreshing drink to balance the flavors.
  • Celebrations and potlucks: a crowd-pleasing dish that travels well when kept warm in a covered skillet.

Pairing ideas to elevate the experience include:

  • Cool counterpoints: cucumber slices, sliced tomatoes, or tangy acar (pickled vegetables) add brightness and crunch.
  • Accompaniments: a simple lime wedge to brighten the dish; prawn crackers or krupuk for an extra texture pop; a light, crisp salad to contrast the richness.
  • Drinks: a chilled jasmine tea or a lime-ginger cooler to cleanse the palate; a light lager or pilsner also works nicely with the savory-sweet notes.
  • Desert options: a fresh fruit platter with tropical notes (mango, pineapple) or a light coconut milk-based dessert to echo the dish’s tropical undertones.

Tips, Variations & Substitutions

Here are practical ideas to tailor nasi goreng chicken to your kitchen, dietary needs, or mood for the day:

  • Rice considerations: use day-old cooked rice for the best texture. Freshly cooked rice tends to be softer and clumpier; if you must use fresh rice, spread it out to cool and dry slightly before frying.
  • Protein options: chicken is classic, but you can experiment with shrimp, thinly sliced beef, tofu, tempeh, or mushrooms for a vegetarian or pescatarian version. If substituting tofu or tempeh, consider a quick sear or pan-fry to add texture.
  • Vegetable variations: bell peppers, peas, shredded carrots, or bean sprouts can be stirred in for color and freshness. Keep vegetables cut to a similar bite size for even cooking.
  • Vegan & gluten-free options: swap regular soy sauce with tamari or gluten-free soy sauce; use a vegan-friendly kecap manis if available or a homemade blend of tamari with a touch of maple syrup or palm sugar.
  • Heat level: adjust the amount of fresh chilies or chili sauce to suit your spice tolerance. For a milder version, remove seeds and membranes from chiles; for a bolder kick, leave them in or add a small amount of sambal oelek.
  • Depth of flavor: a small splash of sesame oil at the end can add a toasty finish; a pinch of ground white pepper can brighten the aroma.
  • Smoke and wok hei: for a more authentic char, use a hot, well-seasoned wok or skillet and avoid overcrowding the pan. Fry in batches if needed to maintain a high heat flow and the signature smoky aroma.
  • Egg preparation: a sunny-side-up egg on top is traditional, but you can scramble the eggs into the rice if you prefer a different texture or if you’re cooking for a crowd where a single egg per serving isn’t desired.
  • Flavor boosters: a tiny dot of palm sugar or brown sugar can deepen sweetness if your kecap manis is lighter; balancing with a squeeze of lime juice after plating adds a bright finish.
  • Regional twists: add a touch of terasi (shrimp paste) for a more pronounced Indonesian profile, if you enjoy deeper umami notes. Alternatively, use a chili-garlic paste for a modern, punchy take.

Storage & Make-Ahead Ideas

Like many fried-rice dishes, nasi goreng is well-suited to make-ahead cooking and efficient leftovers. Here are practical storage tips to keep flavors vibrant and textures appealing:

  • Storage: refrigerate leftovers in an airtight container for up to 3 days. Reheat gently in a hot pan, stirring frequently to revive the grains and prevent sogginess. A splash of water or a tiny drizzle of oil can help restore moisture as needed.
  • Freezing: fried rice generally freezes well if kept in a freezer-safe container. Thaw overnight in the refrigerator before reheating, and re-fry on medium-high to regain some of the original texture.
  • Make-ahead strategy: cook the rice and chicken separately ahead of time, then assemble and finish the dish quickly when you’re ready to eat. This approach is ideal for busy weeknights or meal-prep Sundays.
  • Batch cooking tips: if you enjoy variety, you can prepare a base of seasoned fried rice and portion it into bowls with different toppings (egg, extra vegetables, or greens) so each meal feels distinct.

Fun Facts & Trivia (Optional)

– Nasi goreng is often celebrated as a national Indonesian dish by many locals, though Indonesia does not officially declare a single national dish. The dish’s versatility and presence across countless households make it a true cultural touchstone.

– The name itself, nasi goreng, literally means “fried rice” in Indonesian, with “nasi” meaning rice and “goreng” meaning fried. It’s a simple phrase that belies the complexity of flavors you can achieve with one skillet and a well-balanced pantry.

– A key hallmark of a great nasi goreng is “wok hei” — the smoky aroma and slightly charred flavor that comes from cooking quickly over very high heat. Achieving this in a home kitchen requires a hot pan and proper rice texture, but the result is well worth the effort.

– Sweet soy sauce, kecap manis, is a pantry staple in Indonesian cooking. Its caramel-like sweetness is what gives nasi goreng its characteristic glossy, amber hue and a distinctively indulgent finish that pairs beautifully with savory chicken and crisp-edged rice.

– Serving rituals matter: many households finish nasi goreng with a fried egg, a wedge of lime, cucumber slices, and a handful of crunchy crackers. These accompaniments aren’t afterthoughts—they’re carefully chosen for a mix of brightness, crunch, and balance that elevates the dish to a complete experience.

Closing Thoughts

With nasi goreng Indonesian Chicken, you’re inviting a world of flavor to your table without complicated steps or rare ingredients. It’s a dish that respects tradition while encouraging personal expression—the kind of recipe that becomes a favorite because it’s such a confident, comforting, and adaptable one-pan meal. Whether you’re cooking for a weeknight family dinner, a casual dinner with friends, or a quiet moment of culinary exploration, this fried rice with chicken offers warmth, aroma, and satisfaction in every bite. Let the kitchen fill with the scent of garlic and caramel, watch the rice glisten with a glossy sheen, and savor the sense of connection that comes from cooking something soulful and universally enjoyable. This is more than food; it’s an invitation to share a story of flavors, cultures, and memories around your own table.
Ingredients

  • Nasi Goreng Base
  • – 3 cups cooked jasmine rice (preferably day-old and cooled)
    → The base grain for fried rice. Day-old jasmine rice is ideal because it is drier and each grain stays separate when fried, giving a light, fluffy texture. If you only have freshly cooked rice, spread it on a tray to cool completely and refrigerate for at least 30 minutes to dry out excess moisture. Before frying, break up any clumps with a fork or spatula to ensure the grains separate.
  • – 1 tablespoon neutral oil (vegetable or canola)
    → Oil creates the initial sear for aromatics and helps fry the rice without sticking. Use a neutral oil so it doesn’t compete with the dish’s flavors. If you like a toasty note, you can add a small drizzle of sesame oil at the end, but keep the initial heat high enough to crisp the rice.
  • – 1 small onion, finely chopped
    → Onion provides sweetness and depth to the base. Finely chopping ensures quick, even cooking so the onion melds into the dish rather than remaining in visible chunks. Sauté until translucent and just starting to caramelize for added complexity.
  • – 2 cloves garlic, minced
    → Garlic adds pungent aroma and depth. Mince finely or crush to release oils, and add after the onions begin to soften to prevent burning. Avoid overcooking garlic as burned garlic can impart a bitter flavor.
  • – 1 teaspoon fresh ginger, grated (optional)
    → Ginger introduces a warm, bright note typical of Indonesian flavors. Grate finely so it distributes evenly. If you don’t have fresh ginger, you can omit it or substitute with a pinch of ground ginger, keeping in mind it won’t be as sharp.
  • – 200 g chicken thighs, cut into bite-sized pieces
    → Chicken provides protein and savory flavor. Thighs stay moist and tender when stir-fried; cut into uniform pieces (about 1 inch) for even cooking. You can marinate briefly with a pinch of salt and pepper or a splash of soy sauce if you like extra depth; if using chicken breast, monitor cooking time to avoid dryness.
  • – 2 large eggs, lightly whisked
    → Eggs create ribbons of protein-rich texture that bind with the rice. Scramble them quickly in the hot wok with the rice, or push them aside to set and then fold the rice through to form little egg-strands within the fried grains.
  • – 1/2 cup peas and carrots (frozen or fresh)
    → Color, texture, and subtle sweetness. Add toward the middle of cooking so they heat through but stay crisp. If using frozen, thaw briefly or rinse under cold water to remove frost and ensure even cooking.
  • – Salt, to taste
    → Essential for balancing soy sauces and natural flavors. Since sauces contribute salt, start with a light pinch and taste as you go to avoid over-salting the dish.
  • – Freshly ground black pepper, to taste
    → Adds a touch of mild heat and depth. Pepper is best adjusted at the end after the other flavors have mingled. Grind just before serving for maximum aroma.
  • Sauce & Flavorings
  • – 2 tablespoons kecap manis (sweet soy sauce)
    → This thick, syrupy soy sauce provides caramel color and a fruity-sweet note that defines nasi goreng. Use as a primary seasoning alongside salt; if you prefer less sweetness, start with 1 tablespoon and adjust to taste. Stir in during frying so the grains become evenly coated.
  • – 1 tablespoon light soy sauce
    → Adds salt and umami without darkening the dish too much. Pair with kecap manis to achieve a balanced, savory glaze on the rice. Start with 1 tablespoon and add more only if needed after tasting.
  • – 1 teaspoon fish sauce (optional)
    → A boost of deep umami reminiscent of Southeast Asian street foods. Use sparingly, as it is potent; if avoiding fish sauce, substitute with a touch more soy sauce or a pinch of mushroom seasoning to maintain depth.
  • – 1-2 teaspoons sambal oelek (to taste)
    → Provides heat and bright chili flavor. Add gradually and taste as you go; if you like more kick, increase the amount, or whisk in fresh chopped chilies for extra texture.
  • – 1/2 teaspoon sugar (optional)
    → A small amount helps balance the heat and acidity from the sambal and enhances caramelization from the soy sauces. Use only if you want a touch more sweetness; otherwise, skip.
  • – 1/2 teaspoon sesame oil (optional)
    → Finishing oil that adds a toasty aroma. Drizzle a few drops at the very end after removing the pan from heat to preserve its fragrance. Avoid cooking with sesame oil at high heat as it can become bitter.
  • Optional Add-ins
  • – 1/2 cup fried shallots or crispy onions
    → Adds a satisfyingly crunchy onion note with extra savor. Fry shallots slowly in oil until golden and crisp, or use store-bought crispy onions. Scatter on top just before serving so they stay crisp.
  • – 1/2 cucumber, thinly sliced
    → Provides refreshing crunch and light contrast to the saucy rice. Serve on the side or fold in lightly at the end for a fresh bite. Keep chilled until serving to retain crispness.
  • – 1 medium tomato, cut into wedges
    → Adds brightness and a slight acidity that complements the savory rice. Choose ripe but firm fruit; add as a fresh garnish on the side or mix in lightly for color and juiciness.
  • – 1/2 cup prawn crackers (krupuk)
    → Classic crispy topping that stays crunchy when served with nasi goreng. Deep-fry just before serving or bake according to package directions. Serve on the side to maintain crispness.
  • – 2 tablespoons chopped cilantro or scallions (green onions)
    → Fresh herbs provide a bright finish and aromatic lift. Chop just before serving and sprinkle over the dish to preserve their fragrance.
  • – Lime wedges, for serving
    → A squeeze of lime adds a fresh acidity that brightens the dish and balances the sweetness of kecap manis. Serve on the side and encourage guests to customize their tanginess.
  • – 2 tablespoons chopped roasted peanuts (optional)
    → Adds a nutty crunch and extra texture. Lightly toast peanuts in a dry pan to deepen flavor, then scatter over the top right before serving.
  • – 1-2 red chilies, sliced (optional)
    → For extra heat and color. Remove seeds for milder heat, or leave seeds for a stronger bite. Add to finish to preserve vibrant color and crunch.

Instructions

  • Prepare the rice base by ensuring you have 3 cups cooked jasmine rice that is preferably day-old and cooled; if you only have freshly cooked rice, spread it on a tray to cool completely and refrigerate for at least 30 minutes, then break up any clumps with a fork or spatula before frying.
    → The base grain for fried rice. Day-old jasmine rice is ideal because it is drier and each grain stays separate when fried, giving a light, fluffy texture. Breaking up clumps ensures even coating and prevents sticky clumps in the wok.
  • Set up your mise en place and prepare the sauce components by measuring 2 tablespoons kecap manis, 1 tablespoon light soy sauce, optional 1 teaspoon fish sauce, 1-2 teaspoons sambal oelek, and 1/2 teaspoon sugar in a small bowl; whisk briefly so the flavors are ready to bloom during frying.
    → Having sauces measured and ready ensures a smooth stir-fry where the rice is evenly glazed instead of chasing sauces mid-cook.
  • Preheat a large wok or heavy skillet over high heat until it begins to shimmer, then add 1 tablespoon neutral oil and swirl to coat the surface; maintaining high heat is crucial to achieve a crisp sear on aromatics without steaming the rice.
    → A hot pan drives rapid browning and prevents sticking, forming the aromatic foundation for the dish.
  • Add the finely chopped onion to the hot oil and sauté, stirring frequently, until the onion is translucent and just starting to caramelize, about 2-3 minutes; this builds sweetness and depth into the base.
    → Proper browning of the onion adds natural sweetness and enhances the overall savoury profile without overpowering other flavors.
  • Add the minced garlic and grated fresh ginger (if using) to the onions; cook briefly for 30 seconds to 1 minute, stirring constantly to release their fragrance without letting them burn, which would impart bitterness.
    → Garlic and ginger provide the foundational aromatics; adding after the onions soften prevents scorching and bitterness.
  • Increase heat if needed and add the chicken thighs cut into bite-sized pieces; spread them in a single layer and sear until browned on edges and cooked through, about 4-6 minutes, turning pieces to ensure even contact with the hot surface.
    → Searing adds depth of flavour and ensures the chicken remains juicy; uniform pieces ensure even cooking.
  • Push the chicken and aromatics to one side of the wok and pour in the beaten eggs on the cleared area; stir or scramble until they are just-set, then fold them through the chicken and onion mixture so you form delicate ribbons of egg within the fried rice.
    → Scrambled eggs distribute protein and create textural contrast, while folding prevents overcooking and helps bind the mixture.
  • Add the peas and carrots, allowing them to cook for 2-3 minutes until heated through but still vibrant and crisp; if using frozen, thaw or rinse briefly to promote even cooking.
    → Quick cooking preserves color and bite, providing contrast to the soft rice and tender chicken.
  • Add the cooled jasmine rice to the wok; break up any remaining clumps with a spatula and toss vigorously to separate the grains while you toast them slightly to develop some crisp edges.
    → The goal is separate grains that fry evenly; pressing and tossing helps achieve the characteristic airy texture of nasi goreng.
  • Stir the contents to combine evenly, using fast, continuous motion across the wok’s surface to avoid scorching; keep the pan hot to promote quick searing of the rice and vegetables.
    → Consistent motion prevents sticking and evenly distributes heat for uniform fried rice.
  • Pour the prepared sauce mixture over the rice (kecap manis, light soy, optional fish sauce, sambal oelek, and sugar) and toss or stir-fry until the grains are evenly coated with a glossy, caramelized glaze; adjust with salt if necessary.
    → The sauce provides sweetness, salt, and umami while giving the characteristic deep color and lacquered finish to nasi goreng.
  • Taste and season with a light pinch of salt and freshly ground black pepper; adjust the balance if the dish tastes flat or overly sweet, remembering that the sauces contribute salt and umami.
    → Finishing seasoning ensures the dish shines; pepper should be added at the end for maximum aroma.
  • Remove the wok from heat and drizzle 1/2 teaspoon sesame oil over the nasi goreng; toss once or twice to distribute aroma without breaking the grains, then serve promptly to preserve the fragrance.
    → Sesame oil adds a toasty note and aroma; adding off heat avoids burning and bitterness while maintaining fragrance.
  • Finish with optional add-ins by scattering the optional fried shallots or crispy onions over the hot nasi goreng just before serving to retain their crunch and savor; this adds texture and a deep oniony note.
    → Crispy shallots provide a contrasting crunch and richness that elevates the dish’s final bite.
  • Serve alongside thin cucumber slices and tomato wedges to provide refreshing contrast; keep cucumber cool and crisp until serving to preserve texture.
    → Fresh vegetables balance the rich fried rice and give a pleasant, bright bite with each scoop.
  • Offer prawn crackers on the side and fry or bake them according to package directions, serving them separately to stay crisp rather than soggy in the heat of the rice.
    → Prawn crackers deliver a classic, light crunch that complements the dish without overwhelming the flavors.
  • Sprinkle chopped cilantro or scallions over the dish just before serving to add a fresh herbal lift and aroma; slice scallions thinly for best presentation and even distribution.
    → Fresh herbs brighten the dish and provide a pop of color and fragrance that contrasts with the warm rice.
  • Place lime wedges on the side so guests can squeeze fresh citrus to their taste, brightening the dish with acidity that balances the sweetness of kecap manis; offer an optional squeeze at the table.
    → A touch of lime elevates the flavors and helps cut through richness.
  • If desired, scatter chopped roasted peanuts over the top for a nutty crunch; lightly toast the peanuts in a dry skillet to deepen their flavor before scattering.
    → Roasted peanuts add texture and a subtle toasty note that complements the dish’s savoriness.
  • If you like extra heat and color, garnish with sliced red chilies, added at the end to preserve their vibrant color and crunch; adjust quantity to taste.
    → Fresh chilies deliver contrasting heat and color that livens the plate without softening the rice.
Notes

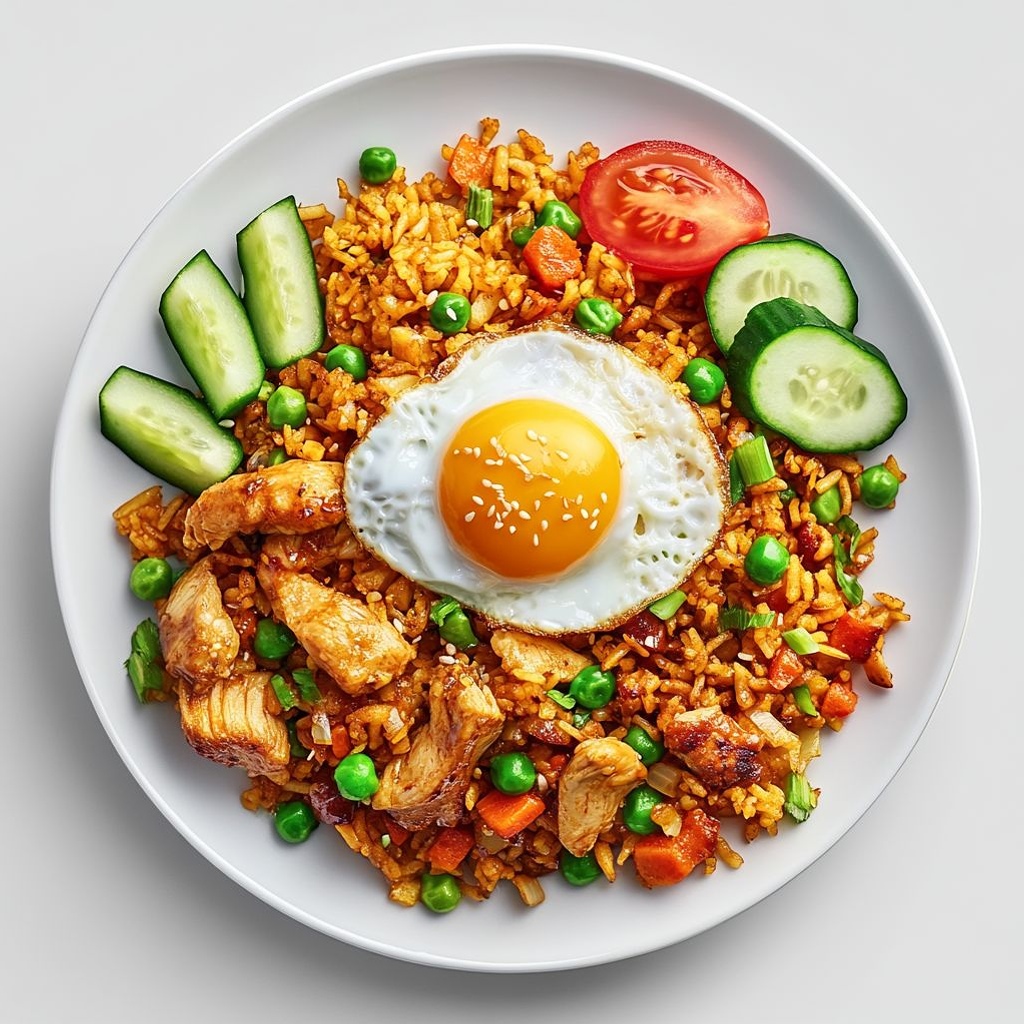
“These Nasi Goreng Indonesian Chicken notes explain how to achieve restaurant-quality fried rice at home. Start with day-old jasmine rice that is cooled and dry, as it fries to separate grains rather than clumping. Sauté onion, garlic, and optional ginger in neutral oil until fragrant, then sear the chicken thighs until browned and cooked through. Push the mixture aside and scramble the eggs in the pan, then combine with the rice. Stir in kecap manis and light soy sauce for color and depth, with fish sauce if using, and fold in peas and carrots until heated through. Finish with a drizzle of sesame oil and taste for salt, adjusting with a pinch of salt or more soy as needed. Top with fried shallots, cucumber, tomato, cilantro or scallions, lime wedges, roasted peanuts, prawn crackers, and sliced chilies as desired. Leftovers keep in the fridge for up to 2 days and reheat in a hot wok or skillet, adding a splash of water or soy to refresh the grains. To make a vegetarian version, omit chicken and increase vegetables or use tofu and mushroom sauce; adjust sambal for heat.”
Tips

Tips for Perfect Nasi Goreng Indonesian Chicken

  • Use day-old jasmine rice when possible. It’s drier and grains stay separate better during frying. If you only have fresh rice, spread it on a tray to cool completely and refrigerate for at least 30 minutes to remove excess moisture, then break up any clumps before cooking.
  • Preheat your wok or skillet until it’s hot and slightly smoking. A hot pan helps sear aromatics and fry the rice without sticking, giving a fluffy texture with nicely caramelized edges.
  • Keep the aromatics moving. Start with onion, then add garlic after the onion begins to soften to prevent burning. Stir-frying quickly at high heat enhances aroma without turning them bitter.
  • Cook the chicken in a single layer for even browning. Cut thighs into uniform pieces (about 1 inch) and don’t overcrowd the pan. Sear quickly to develop color and keep the meat juicy; finish cooking after the rice is added if needed.
  • Scramble the eggs separately or push them aside in the pan to set before folding into the rice. This prevents overcooking and creates delicate egg ribbons that bind with the grains.
  • Add the peas and carrots midway through cooking so they heat through but stay crisp. If using frozen, thaw briefly or rinse to remove frost for even cooking.
  • Taste and balance when adding sauces. Start with the recommended amounts of kecap manis and light soy sauce, then adjust saltiness with salt and, if desired, fish sauce. Remember that kecap manis adds sweetness and color, so taste as you go.
  • Season gradually. Since sauces contribute salt, avoid over-salting early. You can always add a touch more soy or salt toward the end after tasting the dish.
  • Consider optional aromatics and finishing touches. A small drizzle of sesame oil at the end adds a toasty aroma, while a pinch of sugar can help balance heat and enhance caramelization if you like a touch more sweetness.
  • Control the heat level of the dish. Sambal oelek provides heat and brightness; add 1–2 teaspoons to taste, then increase slowly if you want more kick. Remove seeds for milder heat or keep them for stronger bite.
  • Maintain texture with proper timing. Don’t overcook the rice; stir-fry until the grains are heated through and slightly crisp on the edges for that classic nasi goreng texture.
  • Texture-forward add-ins elevate the dish. Crispy fried shallots, cucumber slices, tomato wedges, and prawn crackers should be added just before serving to preserve crunch and color.
  • Herbs and freshness matter. Scatter chopped cilantro or green onions over the finished dish for a bright finish and aromatic lift right before serving.
  • Fresh acidity brightens the flavors. Serve with lime wedges on the side and invite guests to squeeze to taste, balancing the sweetness of kecap manis with a citrusy zing.
  • Plating and serving. Nasi goreng is best served immediately after cooking to keep the rice fluffy and toppings crisp. Keep toppings separate if you’re serving to a crowd and assemble at the table.
  • Make-ahead and variations. You can marinate the chicken briefly, or prep toppings like cucumber, tomato, and shallots ahead of time. For a lighter version, substitute tempeh or extra vegetables and use a gluten-free kecap manis or tamari if needed.
  • Food safety and leftovers. Refrigerate leftovers promptly within two hours of cooking and reheat in a hot wok or skillet to restore texture. Discard any rice that has been left out at room temperature for too long.

FAQ

Nasi Goreng Indonesian Chicken

What is Nasi Goreng?

Nasi Goreng is a classic Indonesian fried rice dish. It typically uses day-old rice stir-fried in a hot wok with aromatics (garlic and shallots), kecap manis (sweet soy sauce), and protein such as chicken. It is often finished with a fried egg on top and served with cucumber, tomato, and krupuk (crackers).

What ingredients do I need to make Nasi Goreng with chicken?
  • Cooked rice (preferably day-old, 1–2 cups per serving)
  • Chicken breast or thigh, thinly sliced
  • Garlic (minced) and shallots (finely chopped)
  • Fresh chili or red chili, optional for heat
  • Kecap Manis (sweet soy sauce)
  • Soy sauce (light)
  • Eggs
  • Vegetable oil or peanut oil
  • Vegetables of choice (peas, carrots, scallions, green beans)
  • Salt and pepper to taste
  • Optional toppings: fried shallots, sliced cucumber and tomato, krupuk (prawn crackers)
Can I use leftovers or day-old rice?

Yes. Day-old rice is ideal because it is drier and separates easily, giving the best texture. If you only have fresh rice, spread it on a tray to cool and dry a bit, or use less sauce to prevent sogginess.

How do I cook Nasi Goreng with chicken?
  1. Prep all ingredients: cook rice ahead, slice chicken, mince garlic and shallots, chop vegetables.
  2. Heat a wok or large skillet over high heat and add oil.
  3. Sauté garlic, shallots, and chilies until fragrant (about 30–60 seconds).
  4. Add chicken; cook until browned and cooked through.
  5. Push chicken to the side, pour in beaten eggs and scramble until just set.
  6. Add rice and toss to combine with aromatics and chicken.
  7. Stir in kecap manis and light soy sauce; adjust sweetness and saltiness to taste.
  8. Fold in vegetables and cook until heated through but still crisp.
  9. Remove from heat; garnish with green onions, fried shallots, and serve with cucumber, tomato, and crackers if desired.
What makes Nasi Goreng authentic?

Authenticity comes from key flavor components: kecap manis for sweetness and depth, garlic and shallots for aroma, and often a touch of shrimp paste (terasi) for a savory kick. A hot wok and day-old rice are also hallmarks. Finishing with a fried egg on top is a common traditional touch.

Can I make Nasi Goreng spicy?

Yes. Add more fresh chilies, sambal oelek, or chili paste for heat. For milder spice, reduce or omit the chilies and sambal; you can also serve extra chili sauce on the side.

Can I customize with other proteins or make it vegetarian?

Yes. You can use shrimp, beef, or tofu for protein. For a vegetarian version, omit the chicken and use mushrooms or tofu, and replace chicken stock with water or vegetable stock if your recipe calls for it. Aromatics and kecap manis will still provide the familiar flavor.

What should I serve with Nasi Goreng?

Common accompaniments include sliced cucumber and tomato, fried shallots, and krupuk (prawn crackers). A side of sambal on the side is popular for those who want extra heat. A fried egg on top is a classic finish.

How should I store leftovers?

Cool the fried rice, then store it in an airtight container in the refrigerator. It will keep for 2–3 days. Reheat in a skillet over medium heat or in the microwave, stirring until steaming hot. Do not reheat more than once.

Common mistakes to avoid?
  • Using freshly cooked rice, which clumps and becomes mushy.
  • Overloading with soy sauce, making the dish overly salty or sweet.
  • Not drying the rice or using a pan that’s not hot enough, resulting in soggy texture.
  • Overcooking the eggs or scrambling them too early.
  • Not achieving a good sear on the chicken due to pan temperature.
Introduction / Hook

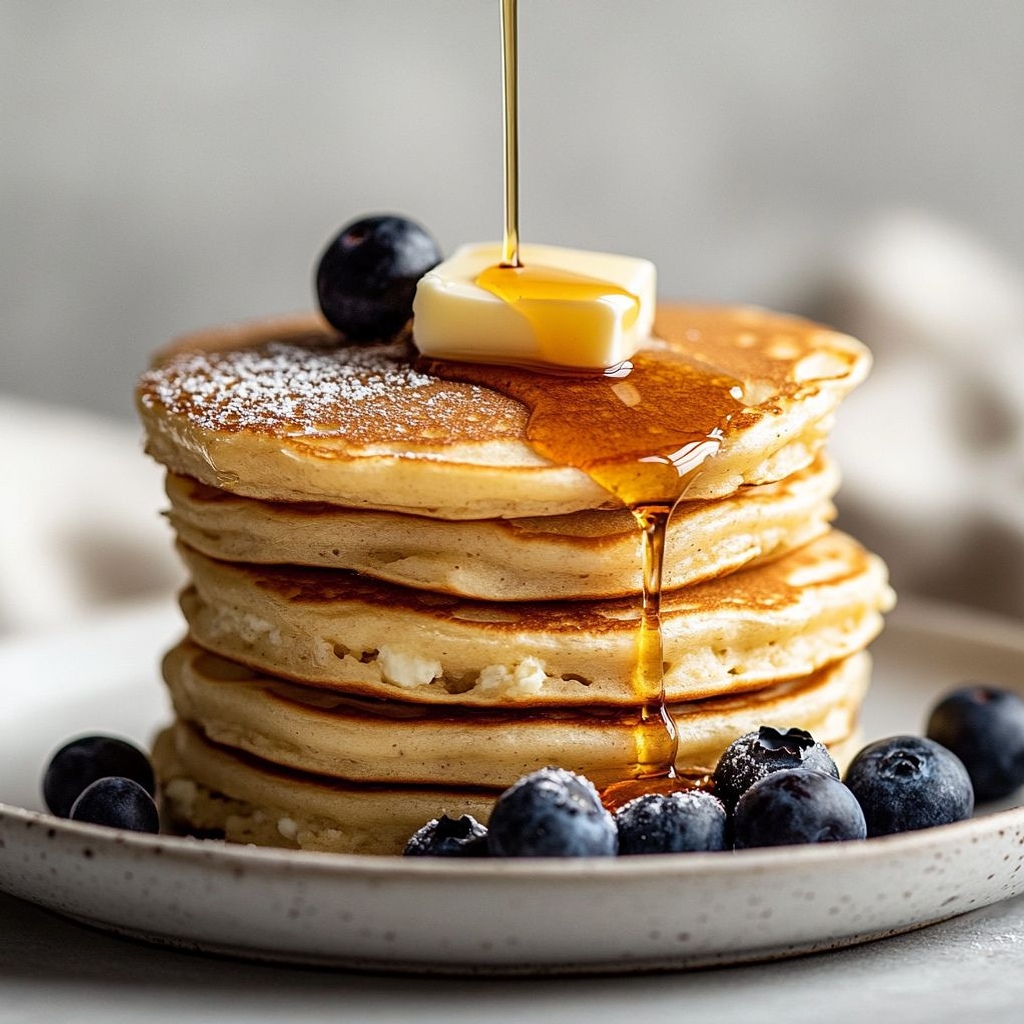
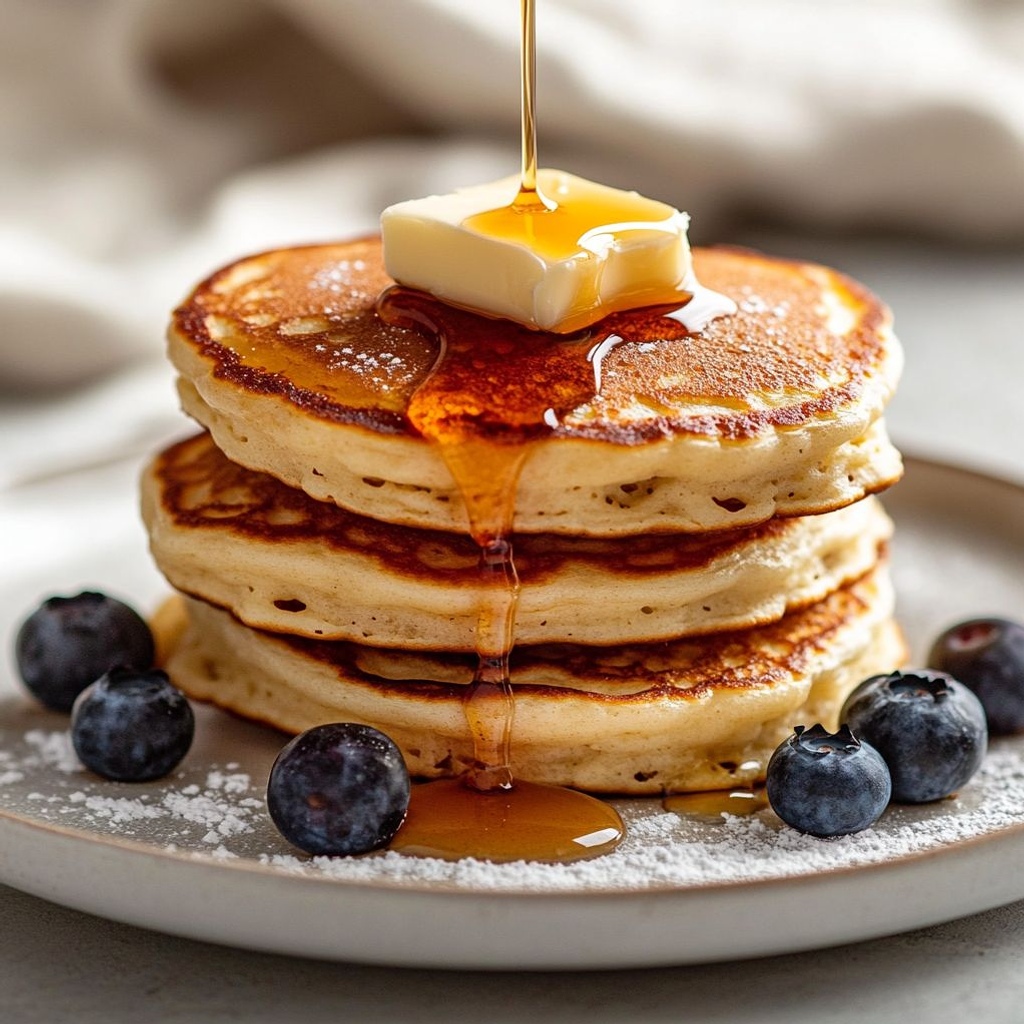
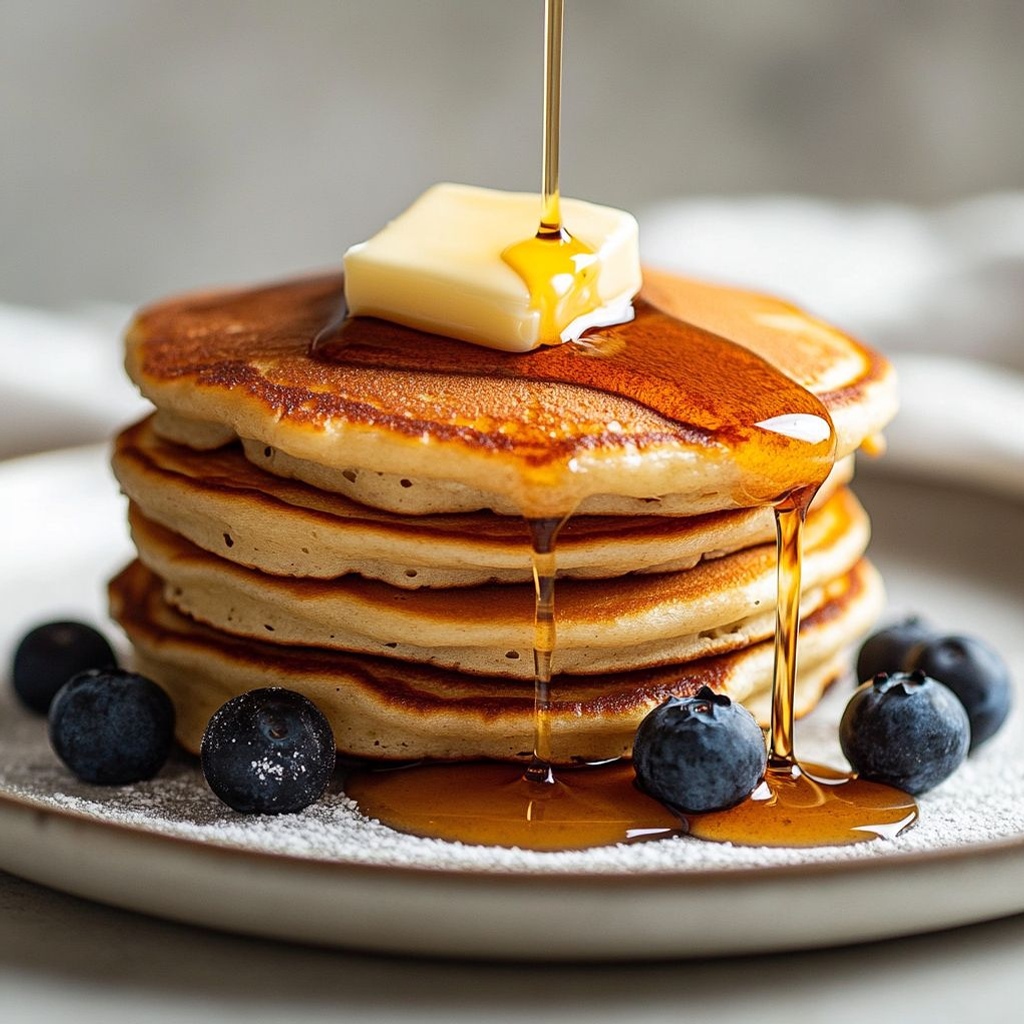
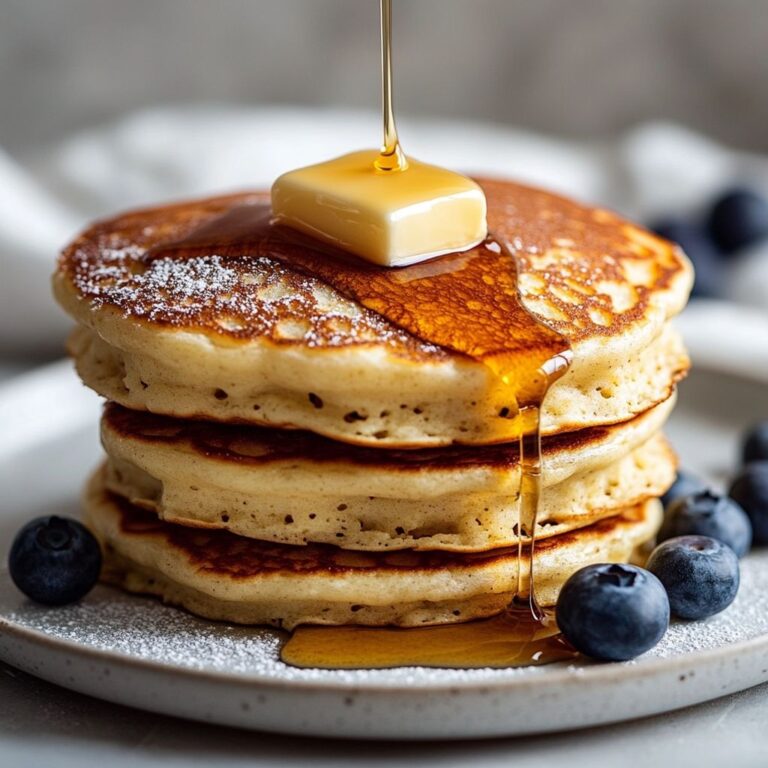
Imagine a breakfast that tastes like a warm Sunday and feels light enough to wear a spring breeze—yet comes together in about half an hour. 30-Minute Cottage Cheese Pancakes are the kind of family-friendly treat that turns a rushed weekday morning into a tiny celebration. They’re tender and airy, with a whisper of tang from the cottage cheese that keeps each bite exciting rather than heavy. The batter comes together with minimal fuss, and before you know it, your skillet is singing with sizzling circles that puff into soft, cloudlike discs. Drizzle them with maple, crown with fruit, or simply spread a smear of creamy butter, and you’ve got a breakfast that feels indulgent without being indulgent in time or effort. The magic lies in the science of moisture and air: tiny curds of cottage cheese punctuate the batter, locking in moisture, while gentle whisking creates enough structure to stand up to a touch of heat without becoming stiff. It’s breakfast that respects your morning routine while still delivering a comforting, nostalgic hug in every bite.

The Story Behind the Dish

Cottage cheese has a humble, almost unassuming reputation—a pantry staple that travels quietly from fridge to plate. Yet its role in breakfast is a quiet revolution. Historically, cottage cheese was valued by households for its protein-packed goodness and its ability to stretch a few ingredients into something satisfying. In rural kitchens and early-morning farmhouses, cooks learned to fold soft curds into batters to add moisture and lift without relying on heavy dairy or lots of fat. The idea of turning cottage cheese into a pancake batter feels both familiar and refreshingly modern: you get the tenderness and tenderness without the density, a pancake that’s as comforting as a classic but with a contemporary, light-as-air texture. Over the years, bakers and home cooks have embraced cottage cheese as a secret weapon for fluffy cakes, baked goods, and yes—pancakes that breakfast table dreams are made of. The recipe you’re reading today is a celebration of that lineage: a practical, weeknight-friendly method that honors the cottage cheese’s natural tang and dairy brightness, while leveraging simple pantry staples to achieve a pancake that’s quick to come together but generous in character.

In many households, breakfast is the most democratic meal of the day—the one where everyone’s appetite is different, yet all want something that feels special. The 30-Minute Cottage Cheese Pancakes strike that balance perfectly: they’re sturdy enough to hold up to fruit and syrup, yet delicate enough to melt on the tongue. The story of this dish echoes a larger story about modern home cooking: taking a few core ingredients, treating them with respect, and letting technique do the heavy lifting. A little lemon zest or vanilla adds a note of brightness that feels like a nod to grandmother’s kitchen, while the cottage cheese keeps the batter moist and lively. It’s a recipe that invites memories to mingle with new morning routines, turning a simple plate into an occasion you’ll look forward to all week.

Why You’ll Love This Recipe

  • Fast and dependable: ready to plate in about 30 minutes, from pantry to table.
  • Protein-forward breakfast that feels indulgent without being heavy, thanks to cottage cheese’s moisture and structure.
  • Light, fluffy texture with a delicate tang—perfect for topping with fruit, yogurt, or a drizzle of maple syrup.
  • Versatile base: adaptable to sweet or lightly savory toppings, and easily customized for dietary preferences.
  • Kid-friendly and crowd-pleasing, making it an ideal Saturday-brunch staple or a quick weekday treat.
  • Minimal equipment and simple ingredients, so you can whip up a batch even on busy mornings.

Flavor Profile & Texture

These pancakes offer a harmonious balance between lightness and richness. The cottage cheese contributes small, creamy curds that punctuate the batter with soft pockets of moisture. The result is a pancake that stays tender well beyond the first bite, resisting the dryness that can plague thinner batters. A touch of vanilla lends warmth, while optional lemon zest introduces a whisper of brightness that lifts the flavors without turning the pancakes tart. When cooked in a well-oiled skillet, the edges crisp ever so slightly, creating a subtle contrast to the fluffy, almost soufflé-like center. If you’re in the mood for something a touch more decadent, a light brushing of melted butter against a warm pancake and a generous shower of real maple syrup creates a glossy sweetness that glazes the surface without overpowering the gentle tang inside.

The texture is a study in contrasts: you bite into a pancake that is soft and cushiony, then encounter a tiny, pleasing tang from the cottage cheese that reminds you this isn’t a sugary airiness but a balanced, satisfying bite. The crumb is finer than traditional wheat-only batters, yet it isn’t dense, thanks to the extra moisture and the air you whip into the batter. The result is a pancake that feels almost like a cross between a classic pancake and a souffle, with the ease of a quick breakfast and the elegance of a well-made batters-based treat. As toppings, you might pair fresh berries and a dollop of yogurt for a light, fruity-lactic contrast, or go for caramelized apples and cinnamon for a warm, comforting moment—the pancake is a perfect stage for a broad range of accompaniments.

Occasions & Pairings

This pancake recipe shines in a variety of settings, from intimate mornings to casual weekend gatherings. Here are some ideas to help you plan the perfect plate.

  • Weekday mornings: a fast, comforting breakfast when time is tight and appetite is honest. Pair with a glass of milk or a quick smoothie for a balanced start to the day.
  • Brunch with friends or family: stack a few pancakes high, offer a trio of toppings (berries, yogurt, maple syrup), and let guests build their own perfect bite.
  • Celebratory weekend breakfast: transform the plate with a fruit compote, a yogurt skir unf, or a dusting of powdered sugar and citrus zest for a festive feel.
  • Kids’ morning favorite: creamy, mild flavors that appeal to young palates, with fun toppings like sliced bananas, chocolate chips, or fruit slices.
  • Late-night comfort: a quick, cozy option when you crave something warm and satisfying but don’t want a heavy dessert.

Pairings that complement the pancake experience include a light, acidic beverage to cut through the sweetness (orange juice with a splash of sparkling water, a citrusy tea, or a mild latte). Savory accompaniments are also delightful: a side of crisp bacon or a few slices of ham, some softly scrambled eggs, or a dollop of herbed yogurt can create a balanced breakfast plate that keeps you full without weighing you down. For a more decadent brunch, try maple-salted butter, a spoonful of ricotta, or a fruit compote that adds brightness and color to the plate.

Tips, Variations & Substitutions

The beauty of this recipe is in its flexibility. Below are ideas to customize, adapt, and reinvent the pancakes to suit your pantry, dietary needs, or mood.

Make it lighter or fluffier

  • Whisk the batter briefly but thoroughly to introduce air, then let it rest for a few minutes to hydrate the flour and soften the curds.
  • A pinch of baking powder or a tiny amount of baking soda can help with extra lift if your cottage cheese is particularly dense, but use sparingly to avoid an airy, cake-like texture.
  • Separate and whip the egg whites (if using eggs in the batter). Fold them into the batter at the end for an even lighter, soufflé-like pancake.

Vegan or dairy-free variations

  • Use a dairy-free cottage cheese alternative or a soft silken tofu blended until smooth to replace the dairy component. You may need a splash of non-dairy milk to reach the right batter consistency.
  • Choose almond or oat milk in place of dairy milk, and ensure your other toppings and additions align with vegan requirements.
  • Replace eggs with a flax or chia seed slurry (1 tablespoon flaxseed meal or chia seeds whisked with 2.5 tablespoons water per egg) to maintain structure.

Gluten-free and grain-friendly options

  • Swap all-purpose flour for a gluten-free blend that contains xanthan gum (or add 1/4 teaspoon xanthan gum per cup of flour) to maintain binding and tenderness.
  • Try a naturally gluten-free base like finely milled oats (gluten-free oats) or a mix of almond flour with a small amount of tapioca starch for structure.

Flavor twists

  • Add citrus notes with lemon or orange zest for a brighter flavor that pairs beautifully with berries.
  • Swirl in a spoonful of ricotta or cream cheese to intensify creaminess, or fold in a few handfuls of fresh blueberries for bursts of fruity sweetness.
  • Sprinkle cinnamon, nutmeg, or pumpkin spice into the batter for a warm, cozy variation in autumn and winter.

Regional twists

  • Fold in finely chopped apples or pears and a pinch of cinnamon for a North American-country breakfast vibe.
  • In a Mediterranean-inspired twist, top with Greek yogurt, honey, and crushed pistachios for a creamy, nutty finish.
  • Use olive oil or browned butter in the pan to impart a subtle savory depth that complements fruit toppings beautifully.

Storage & Make-Ahead Ideas

These pancakes shine not only when freshly made but also when you plan ahead. Here are practical tips to keep you cooking with confidence, even on the busiest mornings.

  • Leftovers: store cooled pancakes in an airtight container in the refrigerator for up to 2–3 days. Reheat briefly in a skillet, toaster, or oven to regain a little of their initial crispness.
  • Freezing: layer cooled pancakes with parchment or waxed paper to prevent sticking, then freeze in a resealable bag for up to 1 month. Reheat directly from frozen in a skillet or toaster oven until warmed through and lightly crisped on the edges.
  • Make-ahead batter: you can mix a batch of batter ahead of time and refrigerate for up to 24 hours. Give it a gentle stir before cooking to recombine any separated ingredients. If the batter thickens, whisk in a splash of milk to reach the desired consistency.
  • Storage tips for toppings: keep fresh berries and yogurt separate and add them just before serving to maintain texture and brightness.

Fun Facts & Trivia (Optional)

Did you know that cottage cheese has been a pantry staple for centuries, admired for its versatility and privacy in the kitchen? Here are a few tidbits that add flavor to your pancake-making story:

  • Cottage cheese owes its soft texture to curd formation, where casein proteins link into curds that trap moisture, giving a unique creaminess even when the cheese is lean.
  • In many cultures, soft-curd cheeses are a breakfast staple because they pair so well with fruit, honey, and bread—embracing a philosophy of balancing sweetness and acidity from the start of the day.
  • The pancake format is one of the most forgiving canvases in a home kitchen. When you introduce cottage cheese, you’re bringing in extra moisture and tenderness, which can transform a simple batter into pancake perfection with minimal effort.
  • Maple syrup, a quintessential pancake companion, has a history intertwined with North American forests and Indigenous culinary traditions. Pairing it with a tangy, protein-rich pancake creates a bright, satisfying breakfast that’s both comforting and adventurous.

Ingredients

Pancake Batter Base

  • 1 cup cottage cheese, blended until smooth
    → Cottage cheese provides a high-protein, tender base that keeps pancakes moist without needing heavy fats. Blending until silky ensures the batter pours smoothly and cooks evenly, yielding a light, fluffy texture. For best results, use small-curd cottage cheese and blend until completely uniform; if you prefer a chunkier texture, pulse the cottage cheese briefly instead of fully blending.
  • 3 large eggs
    → Eggs act as binders and help structure the pancakes while contributing to the lift and moisture. Use eggs at room temperature to promote better emulsification with the cottage cheese, which yields a smoother batter. If you’re avoiding yolk-heavy richness, you can separate the whites and whisk them to soft peaks, then fold in for extra fluff, but this is optional.
  • 3/4 cup all-purpose flour (or gluten-free all-purpose flour)
    → Flour provides the primary structure for the pancakes. If you’re gluten-free, substitute with a 1:1 GF all-purpose blend and add 1/4 teaspoon xanthan gum if your blend lacks it. Sift the flour to remove lumps and whisk gently to avoid overworking the batter, which can make the pancakes tougher.
  • 1/2 cup milk (any kind)
    → Milk adds moisture and helps achieve a pourable batter. Adjust the thickness by adding more milk if the batter seems too thick; dairy or non-dairy options work. For thicker pancakes, a touch less milk works well; for lighter, thinner pancakes, add an extra tablespoon or two.
  • 1 teaspoon baking powder
    → Baking powder provides gentle lift, helping the pancakes stay soft and fluffy. Use fresh baking powder for consistent leavening; distribute it evenly by whisking with the flour before combining with the wet ingredients to prevent uneven rising.
  • 1/4 teaspoon baking soda
    → A small amount of baking soda can aid browning and lift when paired with the acidity of cottage cheese. This is optional; if you omit it, you may still achieve good texture with the baking powder alone. If used, ensure even distribution by whisking with the dry ingredients.
  • 2 tablespoons granulated sugar
    → Provides a light sweetness and helps with browning on the griddle. You can reduce or swap for an equal amount of honey or maple syrup in the batter if you prefer a less refined sweetness. Taste the batter and adjust if you like a sweeter pancake.
  • 1/4 teaspoon salt
    → Enhances overall flavor and balances sweetness. A pinch more can intensify the pancake’s flavor, but keep it moderate to avoid tasting salty; salt also helps with browning during cooking.
  • 1 teaspoon pure vanilla extract
    → Adds warmth and depth to the batter. Use high-quality vanilla for a noticeable difference; if you’re using vanilla bean, scrape the seeds for a stronger, more aromatic flavor. Avoid artificial vanilla if possible for best taste.
  • 1 tablespoon melted butter or neutral oil
    → Helps keep the pancakes tender and adds a subtle richness to the crumb. If you prefer a dairy-free option, use a neutral oil like canola or light olive oil. Do not overmix; whisk until just combined to maintain a light texture.
  • 1 teaspoon lemon or orange zest (optional)
    → Rind zest adds a bright citrus note that complements the cottage cheese’s tang and the vanilla. Zest is optional but brightens the flavor; avoid zesting too deeply to prevent bitterness.

Optional Add-ins

  • 1/2 cup fresh blueberries
    → Blueberries bring bursts of sweetness and color. Gently fold them into the batter to avoid breaking them; if using frozen berries, thaw and pat dry, then toss with a teaspoon of flour to prevent color bleed and sinking. Fresh berries cook quickly and pair beautifully with the cottage cheese crumb.
  • 1/4 cup mini chocolate chips
    → Chocolate chips add indulgence without overpowering the cheesy flavor. Toss chips with a tablespoon of flour before folding to help distribute evenly and reduce sinking to the bottom of the pancake while cooking. Use dairy-free chips if needed.

Toppings

  • Butter for cooking and serving
    → A small pat of butter melted on the griddle or on hot cakes adds flavor and helps create a crisp edge. If dairy-free, substitute with a light neutral oil or dairy-free butter alternative for cooking and serving.
  • Maple syrup for serving
    → Real maple syrup provides a classic pairing with cottage cheese pancakes. Warm the syrup slightly for a smoother pour and better distribution over the pancake surface.
  • Fresh fruit for serving (e.g., berries, sliced peaches)
    → Fresh fruit adds brightness and acidity that balance the richness of the cheese and pancakes. Rinse berries and slice stone fruits just before serving to maintain texture and color.

Instructions

  • Blend the cottage cheese until smooth using a blender, food processor, or vigorous whisking to create a silky base that emulsifies with the other ingredients.
    → A smooth cottage cheese base creates an even batter that yields tender, uniform pancakes and prevents the crumb from feeling grainy or dense.
  • Whisk the eggs into the smooth cottage cheese until fully emulsified and homogeneous.
    → Room-temperature eggs emulsify more easily with the dairy, improving lift and texture; whisk thoroughly to avoid streaks and ensure a cohesive batter.
  • Whisk together the dry ingredients in a separate bowl: all-purpose flour, baking powder, baking soda, sugar, and salt.
    → Distributing leavening and seasonings evenly prevents uneven rises and ensures balanced sweetness across every pancake.
  • If using citrus zest, stir in lemon or orange zest with the dry ingredients to distribute the bright aroma evenly.
    → Zest releases essential oils that perfume the batter; mixing with dry ingredients prevents uneven pockets of zest.
  • Whisk the milk, vanilla extract, and melted butter (or neutral oil) in a small bowl until combined.
    → This wet mixture integrates fat and flavor into the batter and helps with tenderness; melted fat also improves the crumb’s softness.
  • Pour the wet ingredients into the dry ingredients and whisk just until combined, stopping as soon as the batter comes together.
    → Gentle incorporation prevents overdeveloped gluten or dense pancakes; a few small lumps are acceptable and will cook out during heat application.
  • If using fresh blueberries, fold them in gently with a spatula, distributing them without crushing.
    → Gentle folding preserves berry integrity and avoids turning the batter purple or creating uneven pockets of moisture.
  • If using mini chocolate chips, toss them with a tablespoon of flour to coat, then fold into the batter evenly.
    → Coating chips helps prevent sinking to the bottom and ensures even distribution in each pancake.
  • Let the batter rest for 5 to 10 minutes at room temperature to hydrate the flour and activate the baking agents.
    → Resting enhances batter viscosity and improves rise and tenderness during cooking without requiring extra leavening time.
  • Preheat a large nonstick skillet or griddle over medium heat until hot, then add a thin coat of butter or neutral oil and swirl to coat the surface.
    → A properly heated, lightly oiled surface prevents sticking and promotes an even golden crust on each pancake.
  • Test the pan with a small drop of batter; adjust the heat so the batter sizzles gently without scorching.
    → This confirms the pan is at the right temperature for consistent browning and cooked centers.
  • Pour about 1/4 cup of batter per pancake onto the skillet, spacing them evenly to allow room for spreading.
    → A measured portion yields uniform pancakes that cook through without merging together.
  • Cook the pancakes until the edges look set and bubbles form on the surface, about 2 to 3 minutes, then glide a wide spatula under and flip.
    → Waiting for structure before flipping prevents tearing; the bubbles indicate the interior is setting and cooking evenly.
  • Cook for another 1 to 2 minutes on the second side until golden brown and cooked through, adjusting the heat as needed to avoid burning.
    → Proper browning and internal doneness ensure a flavorful crust with a tender crumb inside.
  • Transfer the finished pancakes to a warm plate or keep them in a 200°F (90°C) oven to hold while finishing the remaining batter.
    → Keeping pancakes warm prevents sogginess and lets you serve a stack at the optimal temperature.
  • Serve the cottage cheese pancakes with butter and maple syrup, and add fresh fruit if desired for brightness and contrast.
    → Fat and syrup enhance the flavor balance, while fruit provides acidity and freshness that lift the overall dish.

Notes

These 30-minute cottage cheese pancakes are a protein-packed, quick breakfast option. They start with cottage cheese blended until silky for a tender, moist base and are lightly lifted by eggs, a touch of baking powder, and a pinch of baking soda. For a gluten-free version, substitute 3/4 cup all-purpose flour with a 1:1 gluten-free flour blend and add 1/4 teaspoon xanthan gum if your blend lacks it. Use eggs at room temperature to promote silky emulsification; if you want extra fluff, separate the whites and fold in softly beaten whites. The batter includes 2 tablespoons granulated sugar, 1 teaspoon vanilla, 1 tablespoon melted butter or neutral oil, 1/4 teaspoon salt, and optional citrus zest to brighten the flavor. Whisk the dry ingredients (flour, baking powder, baking soda, salt) separately and whisk them into the wet ingredients just until combined; avoid overmixing to keep the pancakes tender. If the batter seems too thick, whisk in a splash of milk; for thinner pancakes, add another tablespoon or two. Let the batter rest 5-10 minutes to hydrate the flour and relax the gluten (or give structure to GF blends). Cook on a lightly oiled nonstick skillet over medium heat, flipping when bubbles form and edges look set; cook until golden and cooked through. Fold in berries (1/2 cup fresh blueberries) or mini chocolate chips if desired, tossing chips with a teaspoon of flour to prevent sinking. Toppings include butter, maple syrup, and fresh fruit. These pancakes refrigerate well for 2-3 days and can be frozen for longer storage; reheat in a skillet or toaster oven until warmed through. Always use fresh ingredients and measure carefully for consistent results, and adjust the batter with milk or flour as needed to reach your preferred thickness.

Tips

Tips for Perfect 30-Minute Cottage Cheese Pancakes

  • Blend cottage cheese until completely smooth and uniform. If you prefer a bit more texture, pulse briefly rather than blending all the way to smooth.
  • Use room-temperature eggs. They emulsify more easily with the cottage cheese, yielding a smoother batter and lighter pancakes.
  • Whisk dry ingredients (flour, baking powder, baking soda, salt) together first and sift if possible. This helps distribute leavening evenly and prevents lumps that can toughen the texture.
  • Let the batter rest for 5–10 minutes after mixing. This hydrates the flour and relaxes the starch, resulting in tender pancakes.
  • Adjust batter thickness by fluidly adding milk. If the batter seems too thick, add milk a tablespoon at a time until it pours but still coats the back of a spoon.
  • Keep your baking powder fresh for reliable lift. If you’re unsure, test with a tiny amount of batter to ensure it bubbles promptly on the pan.
  • Preheat your skillet to medium and lightly grease with butter or a neutral oil. Too hot and the pancakes will brown too quickly; too cool and they may be pale and dense.
  • For evenly sized discs, use a 1/4 cup (60 ml) measure per pancake and gently spread to a uniform circle. This helps them cook through without thick centers.
  • Flip when the edges look set and bubbles form on the surface. A gentle flip preserves the tender crumb; over-flipping can yield tougher results.
  • Aim for a light golden-brown color. If browning too quickly, lower the heat slightly; if they’re pale, give them a little more time or raise the heat a touch for a quick finish.
  • Fold in add-ins like blueberries or chocolate chips carefully. Toss berries or chips with a teaspoon of flour before folding to prevent sinking and uneven distribution.
  • Make ahead and storage: batter can be refrigerated for up to 24 hours. Cooked pancakes reheat well in a skillet or toaster; freeze individually on a tray and transfer to a bag for longer storage.
  • If making dairy-free or gluten-free, substitute with 1:1 gluten-free flour and a dairy-free milk. Add a pinch of xanthan gum if your GF blend isn’t pre-gummed, and choose dairy-free butter or oil for cooking.
  • Top with warm maple syrup, fresh fruit, or a dollop of yogurt for contrast. A squeeze of lemon or orange zest can brighten the flavors further if you enjoy citrus notes.

FAQ

30-Minute Cottage Cheese Pancakes – Frequently Asked Questions

What ingredients do I need to make these pancakes?

Common ingredients (adjust for dietary needs):
– 1 cup cottage cheese (drained)
– 2 large eggs
– 1/2 cup all-purpose flour (or gluten-free flour blend)
– 1–2 tablespoons sugar (to taste)
– 1/2 teaspoon baking powder
– 1/4 teaspoon salt
– 1/2 teaspoon vanilla extract
– 2–4 tablespoons milk (optional, to thin batter)
– Butter or oil for cooking

Tip: For gluten-free, use a 1:1 gluten-free flour blend and ensure baking powder is gluten-free.

How long does it take to make these pancakes?

From start to finish, about 20–25 minutes. This includes mixing, resting the batter briefly, and cooking 2–3 minutes per batch. It yields roughly 8–10 medium pancakes depending on size.

Can I use low-fat cottage cheese?

Yes. Low-fat cottage cheese works fine, though it may yield a slightly lighter, airier texture. If the batter seems too thick, add a splash of milk to adjust.

How many pancakes does this recipe yield?

Approximately 8–10 medium pancakes (about 3 inches in diameter). The exact number depends on how large you make each pancake.

What should I do if the batter is too thick or too runny?

If too thick: whisk in a little more milk (1 tablespoon at a time) until you reach a pourable consistency. If too runny: whisk in a bit more flour (1 tablespoon at a time) or add a touch more cottage cheese. Let the batter rest about 5 minutes to hydrate.

Can I customize the batter with add-ins?

Absolutely. You can fold in:
– 1/2 cup blueberries or sliced bananas
– 1–2 tablespoon chocolate chips
– 1/4 teaspoon cinnamon for extra warmth
Add them after mixing wet and dry ingredients and before cooking.

Are there gluten-free or dairy-free options?

Gluten-free: Use a 1:1 gluten-free flour blend and ensure your baking powder is gluten-free. You may want to add 1/8 teaspoon xanthan gum if your blend doesn’t include it.

Dairy-free: The recipe relies on cottage cheese, which is dairy. To make it dairy-free, you could try a cottage-cheese substitute suitable for dairy-free diets or blend silken tofu with a splash of non-dairy milk to mimic the texture, then proceed with the rest of the ingredients. Results may vary in texture and flavor.

How should I store and reheat leftovers?

Store cooked pancakes in an airtight container in the refrigerator for 3–4 days. Reheat in a skillet over medium heat with a little butter or oil, or warm in a toaster/ microwave until heated through. They reheat best when warmed evenly to avoid drying out.

Can I freeze batter or cooked pancakes?

Cooked pancakes freeze well: place them on a tray to flash-freeze, then transfer to a freezer bag for up to 1 month. Reheat in a toaster or skillet until warm. Freezing the batter is less ideal, but you can refrigerate dry ingredients mixed together for up to 24 hours before cooking.

What toppings pair well with these pancakes?

Great options include maple syrup, fresh berries, sliced bananas, yogurt, nut butter, chopped nuts, and a dusting of powdered sugar. A dollop of yogurt or a drizzle of honey also works nicely.

How do I keep the pancakes from sticking to the pan?

Use a well-seasoned nonstick skillet or griddle, and brush or melt a small amount of butter or oil before cooking each batch. Preheat the pan to a medium heat before adding batter for even cooking.

Introduction / Hook

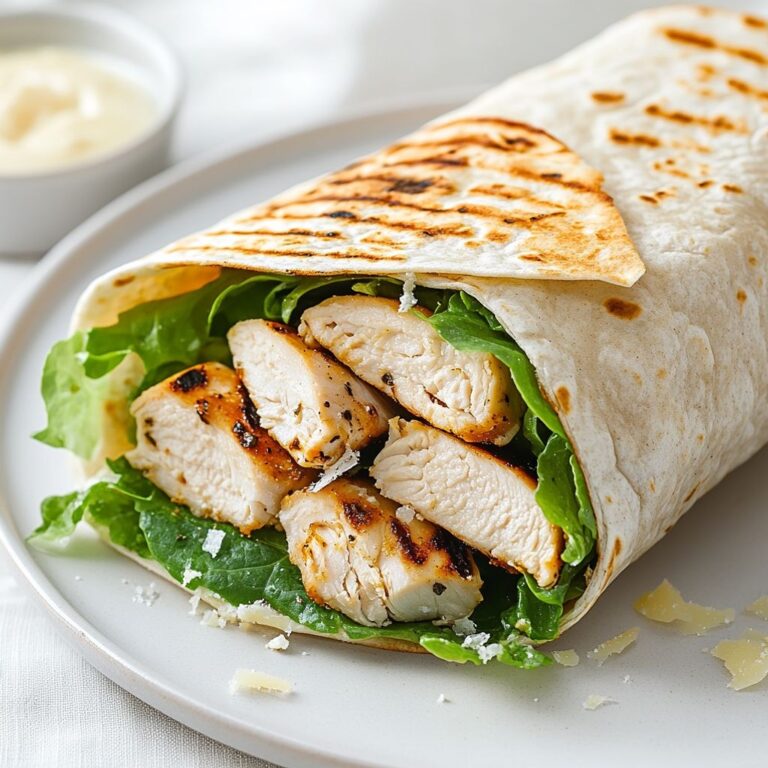
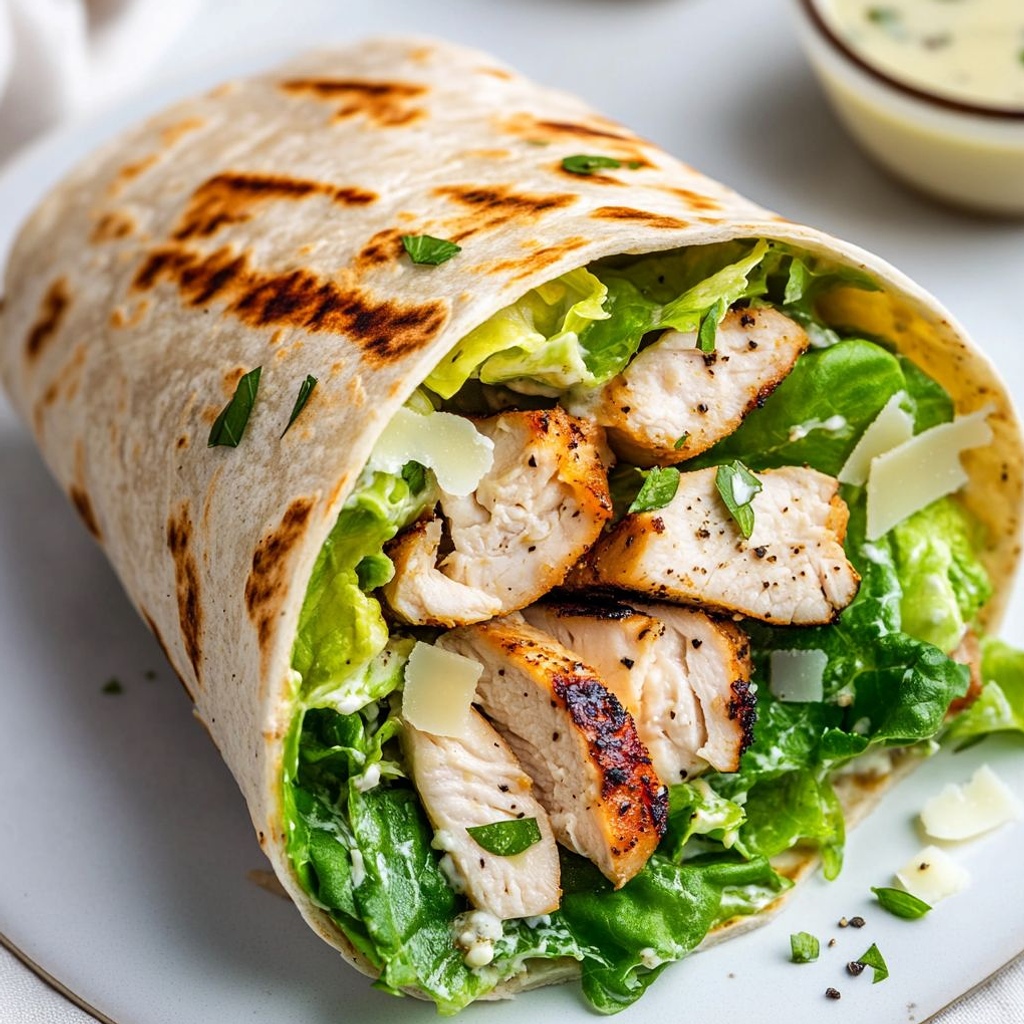
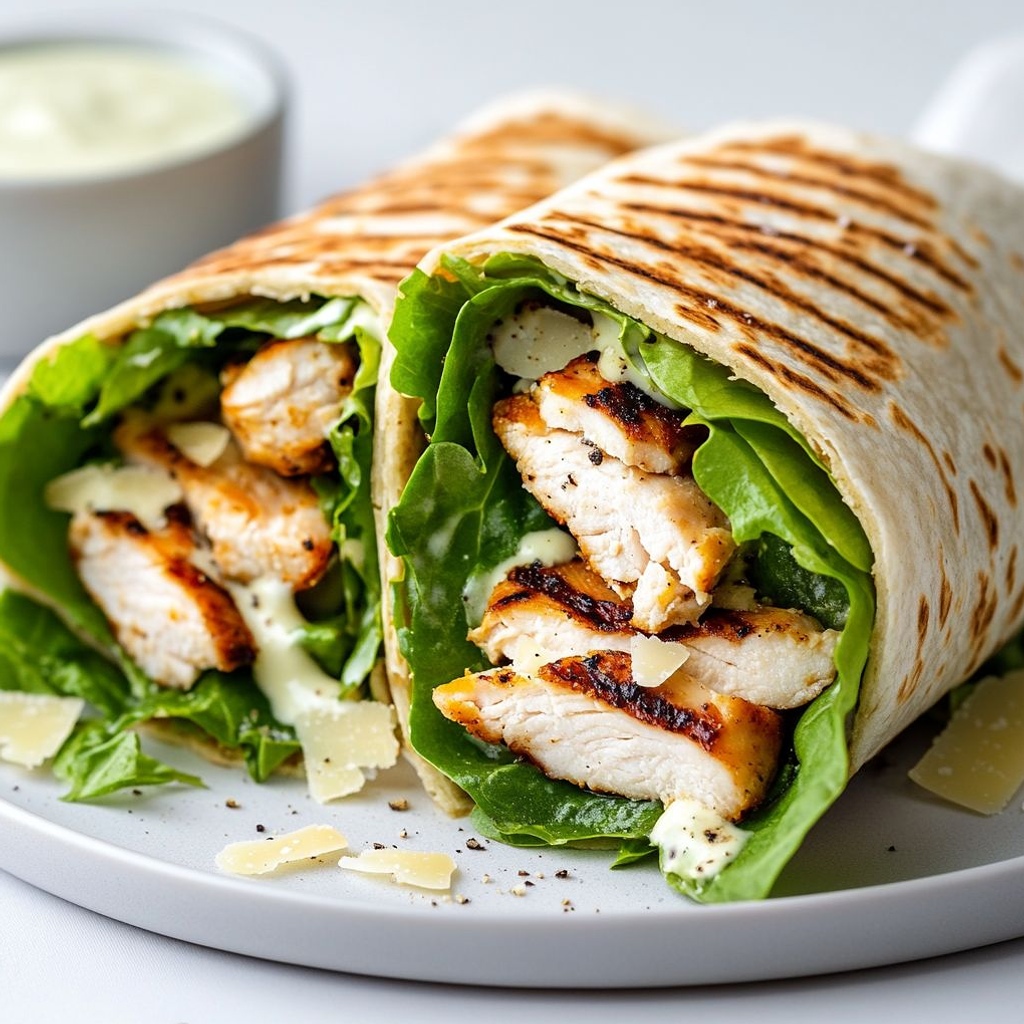
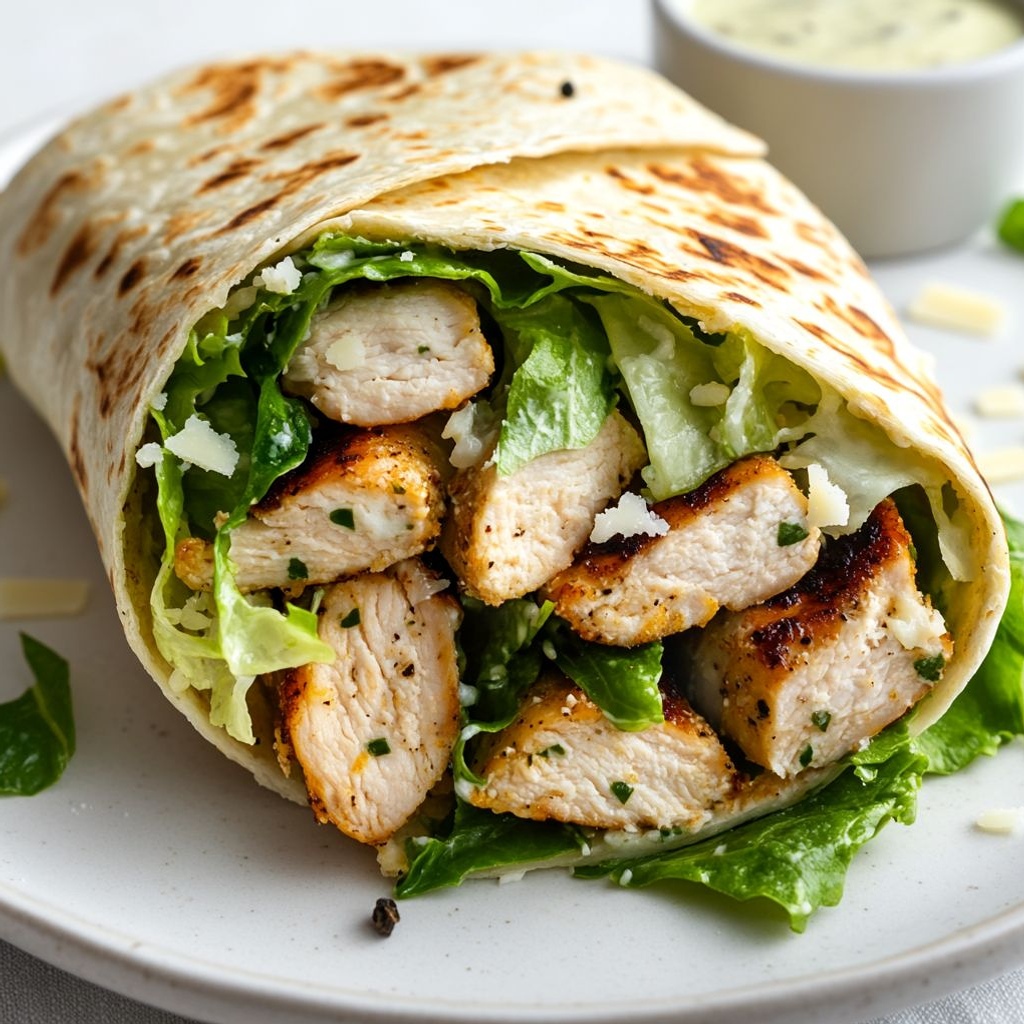
Imagine a lunch that tastes like a sunlit picnic on a breezy afternoon, portable enough to fit in a lunchbox, and satisfying enough to become your weeknight comfort food. Chicken Caesar Wraps blend the familiar, beloved notes of a classic Caesar salad with the easy, handheld charm of a tortilla roll, so you get the best of both worlds: the crisp bite of romaine, the silky, umami-rich tang of Caesar dressing, and succulent slices of chicken all tucked into a soft, flexible wrap. The first bite delivers a chorus of textures and flavors: the freshness of leafy greens, the creamy haze of dressing coating every leaf, the salty kiss of parmesan, and a subtle garlicky warmth that lingers on the palate. It’s a meal that feels indulgent without being heavy, chic enough for a date-night picnic and simple enough for a busy weekday lunch. You’ll notice how the wrap holds everything together—no mess, no fuss—so you can savor each mouthful as the flavors unfold. In a world of quick fixes, this dish offers a small celebration: a balanced, satisfying bite that tastes like it took more effort than it actually did.

The Story Behind the Dish

The chicken Caesar wrap is a modern fabrication born at the intersection of two timeless inspirations: the Caesar salad and the idea of a portable, hand-held meal. The Caesar salad itself is a storied creation with a dash of mystery and a lot of romance. Legend points to Caesar Cardini, an Italian immigrant who ran a bustling restaurant in Tijuana, Mexico, in the 1920s. According to lore (and a healthy dose of restaurant folklore), a rushed afternoon, a few pantry improvisations, and a sprightly sense of improvisation produced a luminous salad that would become an icon: romaine leaves bathed in a tangy, garlicky dressing, crowned with parmesan, and punctuated by crispy croutons. What you taste in a classic Caesar—bright lemon, sharp parmesan, the creamy, egg-and-oil emulsion, and a whisper of anchovy umami—came to symbolize elegance in simplicity. Over the decades, cooks around the world reimagined it in countless ways: with different proteins, with assorted greens, with toasted seeds or nuts, and with dressings both faithful to the original and whimsically modern.

The leap to a wrap is a natural evolution. A tortilla offers a canvas for the salad’s flavors while transforming the dish into something you can hold, travel with, and enjoy anywhere—from a park bench to a cramped office desk. Chicken brings substance and protein, turning a plate-sized salad into a filling meal that resonates with busy people who still crave comfort and care in their food. The chicken Caesar wrap also marks a culinary moment that embraces flexibility. You can cook the chicken in a skillet, on the grill, or even use leftover roast chicken. You can swap greens, introduce crunchy add-ins, or mellow the dressing with yogurt or avocado. The wrap is a celebration of contrast: the cool, crisp leaves against the warm, savory chicken; the velvety dressing binding everything together and then giving way to a bright lemony finish as you bite through the final layer. It’s not merely a recipe—it’s an idea: that a classic can travel, adapt, and still feel intimately familiar. As you read on, you’ll discover how this approachable dish honors the Caesar’s spirit while embracing the modern appetite for convenience and versatility.

Why You’ll Love This Recipe

  • Quick and practical: Cooks can have dinner on the table in under 30 minutes, using pantry staples and leftovers.
  • Perfect for meal-prep: Assemble components ahead of time, then roll up when you’re ready to eat.
  • Balanced, satisfying protein: Tender chicken provides a nourishing foundation that will keep you full, without weighing you down.
  • Make-ahead and adaptable: The dressing, greens, and chicken can be prepared separately and combined later, which preserves texture and flavor.
  • Kid-friendly yet sophisticated: The familiar flavors appeal to younger palates while offering depth that adults appreciate.
  • Customizable for dietary needs: Gluten-free wraps, dairy-free dressings, or lighter versions with yogurt still deliver the iconic Caesar profile.
  • Travel-friendly: A wrap travels well, making it ideal for picnics, office lunches, school lunches, or weekend adventures.

Flavor Profile & Texture

The Chicken Caesar Wrap is a symphony of textures and flavors designed to deliver immediate appeal and linger pleasantly after the bite. The chicken, pan-seared or grilled, bears a gentle char that adds a touch of smokiness and a satisfying chew. When sliced, its juices mingle with the dressing’s fat, creating a nuanced richness that coats every leaf. The Romaine lettuce offers crisp, almost lacquered freshness—the kind of crunch that crackles a little before giving way to a tender bite. The dressing—classic Caesar in spirit—brings a creamy, slightly tangy, garlicky heartbeat to the wrap. Anchovy undertones provide depth and a savory backbeat that anchors the dish; if you’re wary of anchovies, you can use a high-quality vegetarian anchovy substitute or a robust, umami-rich plain yogurt to mimic the silkiness while dialing down intensity. Parmesan shavings add a gentle, salty bite and a mineral brightness that echoes the sharpness of the dressing, creating a bridge between salty tang and dairy creaminess.

Texture-wise, you’ll notice the harmony of soft ribbons of chicken with the crisp greens, punctuated by the occasional crunch from crouton bits, if you choose to include them. The wrap itself offers a pliable, forgiving shell that holds the salad together without turning soggy, letting the flavors stay vibrant from first bite to last. The finish is bright and clean: lemon zest or juice lifts the richness, cutting through the richness and delivering a memory of a crisp, fresh salad even as you savor the warm, comforting warmth of a well-seasoned chicken filling. In every bite, the dish reveals a careful balance: the tang of parmesan and dressing, the mellow sweetness of roasted garlic, the lemon’s sunlit acidity, and the chicken’s savory warmth. It’s not merely a combination; it’s a refined everyday meal designed to feel like a little celebration every time you wrap it up.

Occasions & Pairings

This dish is remarkably versatile and shines under a variety of circumstances, from casual weeknight dinners to weekend gatherings. The wrap’s portability makes it ideal for brown-bag lunches, picnics, or a relaxed brunch with friends. It also adapts beautifully for more formal occasions when you want something elegant yet unfussy: serve as part of a rustic, salad-forward menu where guests can assemble their own wraps at the table. The comforting familiarity of Caesar-inspired flavors invites pairing with bright, refreshing beverages and simple sides that don’t overwhelm the palate.

When to Serve

  • Weeknights when you want a satisfying, fast dinner without sacrificing flavor.
  • Lunches for picnics, beach days, or office lunches that don’t require reheating.
  • Casual entertaining, such as a family gathering or a relaxed potluck.
  • Outdoor grilling days when you want a crowd-pleaser that travels well.

Suggested Pairings

  • Side dishes: a light citrus salad, tomato and cucumber salad, or roasted vegetables to echo the Caesar dressing’s brightness.
  • Drinks: sparkling water with lemon, a chilled Pinot Grigio, or a crisp Sauvignon Blanc; for non-alcoholic options, iced tea with a squeeze of lemon or a citrusy mocktail.
  • Desserts: a light berry shortcake, lemon sorbet, or yogurt-based parfaits to keep the meal feeling fresh and balanced.
  • Additional textures: a handful of toasted croutons or crispy chickpeas sprinkled inside the wrap add a delightful crunch that complements the greens.

Tips, Variations & Substitutions

Here are practical ideas to tailor Chicken Caesar Wraps to your pantry, your dietary needs, or your mood. Each variation preserves the core Caesar essence while inviting creativity.

Classic and Quick Variations

  • Extra creamy: Use a dressing made with a higher ratio of yogurt to mayo to intensify creaminess while lightening the heaviness.
  • Crunchy twist: Add homemade or store-bought croutons or roasted chickpeas for an extra crisp bite.
  • Herb lift: Mix in chopped fresh herbs like parsley, chives, or dill to brighten the dressing and add color.

Dietary-Friendly Options

  • Gluten-free: Use gluten-free wraps or large lettuce leaves for a wrap-without-flour option.
  • Dairy-free or lighter: Swap the dressing for a dairy-free version based on olive oil and lemon with a touch of tahini, or Greek yogurt as the base for silkiness without heavy fat.
  • Vegan or vegetarian: Replace chicken with marinated chickpeas or roasted mushrooms that mimic a meaty bite, keeping the Caesar-like dressing robust with capers or miso for depth.

Regional Twists

  • Southwest Cali: Add avocado slices, a sprinkle of chili-lime seasoning, and a corn or black bean variation of the salad, wrapped in a whole-grain tortilla.
  • Mediterranean influence: Incorporate roasted red peppers and a sprinkle of feta instead of parmesan for a tangy, sunny Mediterranean vibe.
  • Smoked poultry: Use smoked chicken or turkey to amplify the depth of the dish, especially when paired with a slightly smoky dressing.

Make-Ahead & Assembly Tips

  • Storing components separately: Keep chicken, dressing, greens, and wraps separate for maximum texture. Assemble just before serving to maintain crunch and freshness.
  • Flavor development: If you have a bit more time, marinate the chicken briefly in a lemon-garlic mixture before cooking to deepen the citrus and garlic notes.
  • Wrap integrity: If you fear sogginess, line the wrap with a thin layer of greens or a light smear of dressing on the outside to create a moisture barrier and extend the wrap’s life for travel.

Storage & Make-Ahead Ideas

The beauty of Chicken Caesar Wraps lies in their adaptability for batch cooking and meal prep. You can prepare several components in advance, then assemble when you’re ready to eat. Here are practical guidelines to keep everything fresh and flavorful.

  • Chicken: Store cooked chicken in an airtight container in the refrigerator for up to 4 days. For longer storage, dice and freeze in small portions, then thaw before use.
  • Dressing: Caesar-inspired dressings can be made 2–3 days ahead and kept refrigerated in a sealed container. If freezing, note that dairy-based emulsions may separate; whisk vigorously after thawing to re-emulsify.
  • Greens: Wash, dry thoroughly, and refrigerate romaine or other greens in a vented bag or container. Dry greens resist wilting longer, ensuring a crisp bite at serving time.
  • Wraps: If you’re making several wraps ahead for a party, consider keeping the tortilla shells separate and warming them briefly before assembly to maintain flexibility and prevent tearing.
  • Make-ahead assembly: For a quick meal, toss the greens with a small amount of dressing to lightly coat them, slice the chicken, and keep everything in separate containers. When ready, lay the greens on the wrap, add chicken, finish with a drizzle of dressing, and roll.

Fun Facts & Trivia (Optional)

Delighting in little-known tidbits can deepen your appreciation for a dish. Here are a few that relate to the flavors and history behind Chicken Caesar Wraps:

  • The original Caesar salad is believed to have used raw eggs in its dressing to achieve a creamy texture, a characteristic that has inspired many modern dressings, including lighter yogurt-based versions for today’s health-conscious kitchens.
  • Anchovies, often cited as the “secret” umami in Caesar dressing, supply a deep savoriness without overpowering other flavors. If you’re new to anchovies, you’re not alone—there are many ways to achieve that dense, savory backbone with substitutes or milder ingredients.
  • Wraps as a concept gained enormous popularity in the late 20th century, offering a portable, adaptable format that could be filled with nearly anything—from breakfast fillings to plant-based mains—while remaining easy to eat on the go.
  • Parmesan cheese, a hallmark of Caesar flavor, carries a distinct protein-rich, nutty saltiness that is both aromatic and versatile, pairing well with citrus and garlic in a way that brightens the overall dish.
  • Flavor layering—the technique of building a dish from ingredients that carry contrasting but complementary notes (creamy dressing, crisp greens, savory chicken, bright lemon)—is a hallmark of many classic American adaptations of European-inspired dishes.

Ingredients

Chicken Caesar Wraps
Wraps

  • 4 large flour tortillas (10-12 inches)
    → The wrap shells hold all the fillings together and determine portion size. Use large burrito-sized tortillas for easy folding. Warm them briefly in a dry skillet or microwave to make them pliable, which prevents tearing when wrapping. If using gluten-free wraps, heat slightly longer and handle gently to prevent cracking.

Chicken Filling

  • 2 cups cooked chicken breast, shredded or diced
    → The primary protein and bulk of the filling. Shredded or finely diced chicken distributes evenly and makes each bite cohesive. Use cooked chicken that has cooled to room temperature to avoid extra heat spoiling the balance with the dressing. If you’re using leftovers or rotisserie chicken, pull the meat into small pieces and pat away any excess moisture before mixing with dressing to prevent soggy wraps.

Greens

  • 3 cups chopped romaine lettuce, rinsed and thoroughly dried
    → Adds crisp, refreshing contrast to the creamy Caesar dressing. Dry greens well to prevent soggy wraps; pat dry with a clean towel or use a salad spinner. Chop into bite-sized pieces so each wrap gets a balanced amount of greens with every bite.

Caesar Dressing

  • 1/2 cup mayonnaise
    → Creamy base that binds the chicken and greens together while carrying the tang from lemon and garlic. For a lighter option, substitute half with Greek yogurt, but full-fat mayo yields a richer texture. Whisk until smooth to avoid lumps and ensure an even coating on the filling.
  • 1 tablespoon fresh lemon juice
    → Brightens the dressing and cuts through richness. Use freshly squeezed juice for maximum brightness; adjust to taste. If the lemon is very tart, dilute with a touch of water or a bit more mayo to balance.
  • 1 clove garlic, minced
    → Delivers the characteristic Caesar bite. Freshly minced garlic distributes evenly and avoids a raw, chunky texture. For a milder profile, use half a clove or rub the minced garlic into the bowl before adding other ingredients.
  • 1 teaspoon Dijon mustard
    → Adds subtle tang and helps emulsify the dressing for a smooth, cohesive coat on the salad. Whisk in early to ensure it blends evenly with the mayo and lemon before adding cheese.
  • 1 teaspoon Worcestershire sauce
    → Contributes depth and a touch of sweetness that complements garlic and lemon. Use sparingly to avoid overpowering the dressing; omit if you prefer a purer, simpler Caesar flavor.
  • 1-2 anchovy fillets minced (optional)
    → Traditional Caesar flavor brings umami without a fishy aftertaste when emulsified. Omit for a vegetarian option. If using, mince finely or mash to a paste to distribute evenly throughout the dressing.
  • 1/4 cup finely grated Parmesan cheese
    → Provides the signature sharp, nutty Caesar character and helps thicken the dressing slightly. Freshly grate for best flavor and smooth texture. Reserve a small amount to sprinkle on the wraps just before serving for extra aroma.
  • Salt and black pepper to taste
    → Essential for balancing the dressing’s acidity and the cheese’s saltiness. Add gradually, tasting as you go because Parmesan, anchovies, and mustard push the seasoning. Finish with a final adjustments after all components are combined.
  • 1-2 teaspoons water to thin to desired consistency
    → Dressing should lightly coat the greens, not be oily puddles. If too thick, whisk in water a little at a time until you reach a smooth, pourable texture. If it becomes too thin, whisk in a touch more mayo or cheese to regain body.

Crunch and Toppings

  • 3/4 cup garlic croutons, roughly crushed (optional)
    → Adds a satisfying crunch and toasty flavor that contrasts with the creamy dressing. Choose sturdy, crisp croutons; crush lightly so pieces distribute evenly without tearing the tortilla. If making croutons at home, toss bread cubes with olive oil, minced garlic, and a pinch of salt, then toast until golden and crunchy.

Finishers (Optional)

  • Extra shaved Parmesan cheese for finishing (optional)
    → Finishes with a fragrant, salty note that echoes the dressing. Use very thin shavings with a microplane for delicate texture; a light dusting just before serving elevates the overall Caesar theme without adding bulk.
  • Freshly ground black pepper to taste (optional)
    → Adds a final aromatic kick to the wrap. Grind right before serving to preserve aroma and brightness. A few twists are usually enough; taste and adjust as needed.
  • Cherry tomatoes halved (optional)
    → Optional brightness and juiciness to contrast the creamy filling. Halve and pat dry to remove excess moisture that could soggy the wrap. Use small, firm tomatoes to maintain bite without over-sauce.

Instructions

  • Warm the flour tortillas until pliable by briefly heating each in a dry skillet for 10-15 seconds per side or microwaving for 15-20 seconds wrapped in a damp paper towel.

    → Making the tortillas pliable prevents tearing and helps them roll tightly without cracking, ensuring an even, easy wrap.
  • Pat the romaine thoroughly dry after washing, using a salad spinner or by patting with a clean towel.

    → Removing excess moisture keeps the wrap from becoming soggy and maintains a crisp, refreshing bite in every bite.
  • In a medium bowl, whisk together mayonnaise, lemon juice, minced garlic, Dijon mustard, and Worcestershire sauce until the mixture is smooth and emulsified.

    → Emulsification creates a cohesive dressing that clings to the chicken and greens rather than separating, giving you even flavor distribution.
  • If using anchovy fillets, stir in the finely minced anchovies or mash to paste to distribute umami; then fold in the finely grated Parmesan and season with salt and pepper.

    → Anchovies add depth and a classic Caesar tang; Parmesan enriches the dressing and helps with texture, while salt and pepper balance acidity.
  • Stir in 1-2 teaspoons water, added a little at a time, to achieve a light, coat-the-salad consistency without pooling.

    → A thinner dressing coats the fillings evenly without making them soggy, while too much thickness can clump and overwhelm flavors.
  • In a large mixing bowl, combine the cooked chicken with just enough dressing to lightly coat the pieces; reserve any remaining dressing for finishing or optional extra sauce.

    → This prevents the filling from becoming oily while ensuring every bite carries sufficient Caesar flavor.
  • Add the chopped romaine to the dressed chicken and toss gently to distribute evenly, aiming to coat greens lightly while preserving their crisp texture.

    → Thorough but gentle tossing keeps the greens vibrant and prevents them from turning mushy under heavy dressing.
  • If using garlic croutons, crush them into coarse crumbs and fold into the filling just before assembling the wraps to retain their crunch.

    → Crouton crunch provides a satisfying contrast to the creamy dressing and soft chicken, elevating texture in the wrap.
  • Prepare optional finishers by shaving extra Parmesan, finishing with freshly ground black pepper, and halving cherry tomatoes; have them ready to add as a bright garnish.

    → Parmesan shavings and pepper enhance aroma and savory notes, while tomatoes add acidity and freshness that cut through richness.
  • Lay a tortilla on a clean surface, spread a thin line of dressing in the center (not reaching the edges), and spoon a generous mound of the chicken–romaine mixture onto the tortilla.

    → A restrained dressing layer prevents soggy edges and gives you a clean seam when rolling; the filling should look compact, not overflowing.
  • Fold the bottom edge up over the filling, tuck in the sides, and roll the tortilla tightly from bottom to top to form a secure wrap.

    → Rolling tightly keeps the filling contained and reduces leakage; if the tortilla resists, warm it slightly again for flexibility.
  • Slice each wrap in half on a sharp diagonal, wipe the blade between cuts to maintain clean edges, and arrange on plates with optional finishing touches like Parmesan shavings or tomato halves.

    → A diagonal cut showcases the colorful filling, while a clean blade prevents smear; finishing touches heighten presentation and aroma.
  • Serve immediately for best texture, or refrigerate assembled wraps (wrapped in parchment or plastic) for up to 2 hours; bring to room temperature briefly before serving if chilled.

    → Freshly prepared wraps taste best, but they can be made ahead with proper wrapping to maintain moisture balance and prevent drying.

Notes

These Chicken Caesar Wraps are a satisfying handheld meal that pair tender seasoned chicken, crisp romaine, and a creamy Caesar dressing wrapped in warm tortillas. For best results, warm the wraps briefly to make them pliable; this helps them roll without tearing, especially if you are using gluten-free wraps which can crack if handled cold.

Dry greens well after washing and use bite-sized pieces so every bite gets a balance of greens and filling. If you are using leftovers, shred the chicken and pat away any excess moisture to prevent soggy wraps when you add the dressing.

The dressing is a creamy emulsion built from mayonnaise, lemon juice, garlic, Dijon mustard, Worcestershire, and Parmesan. If you prefer a lighter version, substitute half the mayo with Greek yogurt; whisk in the rest until smooth and adjust salt, pepper, and water to reach a light coating that clings to the filling without pooling.

Anchor the dressing with a touch of anchovy (optional) for authentic Caesar depth; mince finely so the flavor disperses through the mixture rather than clustering in a bite.

Crunch is optional but delicious: add crushed garlic croutons or omit for a softer texture; if making croutons at home, toast sturdy bread cubes with olive oil and garlic until golden and crunchy. Finish with extra shaved Parmesan and freshly ground pepper to taste.

Make-ahead and storage tips: you can prepare the chicken, greens, and dressing separately and assemble the wraps just before serving to maintain texture. Refrigerate components in sealed containers; assembled wraps are best eaten the same day but can be kept for up to 24 hours if kept cold and wrapped tightly. If you anticipate sogginess, hold back some dressing to drizzle lightly on the tortilla after wrapping.

Tips

Best tortilla prep for sturdy wraps

  • Warm the tortillas until they are pliable to prevent tearing during folding. A quick 15–20 second warm in a dry skillet per side works well; if using a microwave, cover with a damp paper towel to keep them soft and prevent cracking.
  • For gluten-free wraps, heat a bit longer and handle them gently to avoid cracking. If a wrap cracks, transfer the filling to a new wrap and finish rolling quickly to minimize breakage.

Chicken filling: moisture, texture, and even distribution

  • Use cooled cooked chicken to avoid extra heat breaking the dressing’s emulsion. Fork or shred the meat into even pieces so every bite has consistent texture.
  • If using leftovers or rotisserie chicken, pat away any excess surface moisture with a clean towel before mixing with dressing to prevent soggy wraps.

Greens: crunch without sogginess

  • Dry romaine thoroughly after washing; moisture is the enemy of a clean wrap. Use a salad spinner or pat dry with towels.
  • Chop into bite-sized pieces to ensure each wrap distributes greens evenly and every bite has a balanced crunch and freshness.

Caesar dressing: emulsification and balance

  • Whisk mayo with lemon juice, garlic, Dijon mustard, and Worcestershire first to build a cohesive base. This helps the dressing emulsify and coat the filling smoothly.
  • If using anchovies, mince finely or mash to a paste so the umami is evenly distributed and not perceived as chunks.
  • Stir in finely grated Parmesan gradually; it thickens the dressing and adds the signature bite. Reserve a little for finishing.
  • Season gradually with salt and pepper. The Parmesan and anchovies add saltiness, so taste as you go and adjust at the end.
  • Thin the dressing to the right consistency with 1–2 teaspoons of water if it’s too thick, aiming for a light coat rather than pools at the bottom of the wrap.

Cheese, umami, and texture boosters

  • Use freshly grated Parmesan for the sharp, nutty flavor and smoother texture. Pre-grated cheese can be dry and less flavorful.
  • Consider finishing with a small amount of extra shaved Parmesan just before serving for aroma and a delicate snowy finish.

Crunch and toppings: balancing textures

  • Croutons add a pleasant crunch, but crush them lightly so they distribute without tearing the tortilla. For best results, use sturdy, crisp croutons or homemade ones that are well toasted.

Finishers: aroma and brightness

  • Freshly ground black pepper brightens the final bite; grind just before serving.
  • Cherry tomatoes add brightness and juiciness; halve and pat dry to prevent extra moisture from soggying the wrap.

Assembly and rolling technique

  • Spread a light, even layer of dressing on the tortilla. Too much dressing can make the wrap soggy; a thin coat that reaches the edges is ideal.
  • Layer greens first, then chicken, and finish with a pinch of croutons and any optional toppings. This order helps fill the wrap evenly and keeps the interior cohesive.
  • Fold the sides in, then roll tightly from one end to the other. If the tortilla seems prone to unrolling, you can wrap it in parchment or foil to hold its shape until eaten.

Make-ahead, storage, and serving tips

  • Dress the greens and chicken ahead of time if you’re meal-prepping, but keep the dressing refrigerated separately until you’re ready to assemble to avoid soggy wraps.
  • Assembled wraps are best enjoyed same day. If needed, wrap individually in parchment and refrigerate up to 1 day. Let them come to room temperature for a few minutes before serving for better flavor and texture.
  • Keep greens completely dry and pat out any moisture from tomatoes or other toppings to minimize sogginess.

Variations and optional tweaks

  • For a lighter version, substitute half of the mayonnaise with Greek yogurt. The texture will be slightly lighter while preserving tang.
  • Use lettuce blends or baby romaine for varied texture and color.
  • Feel free to add avocado slices or a little extra lemon zest for brightness if desired.

FAQ

What are Chicken Caesar Wraps?

Chicken Caesar Wraps are a handheld meal that combines seasoned cooked chicken, crisp romaine lettuce, creamy Caesar dressing, grated Parmesan, and crunchy croutons all rolled up in a tortilla. They’re perfect for lunch on the go or a quick dinner.

What ingredients do I need?

Typical ingredients include:

  • Cooked chicken (grilled, roasted, or rotisserie), shredded or sliced
  • Romaine lettuce, chopped
  • Caesar dressing
  • Grated Parmesan cheese
  • Croutons
  • Large flour tortillas or wraps

Optional additions: cherry tomatoes, avocado slices, crispy bacon, lemon wedges, or black pepper.

Can I use chicken leftovers or rotisserie chicken?

Yes. Both work great. Shred or chop the chicken and pat it dry to prevent sogginess in the wrap.

How do I make Caesar dressing from scratch?

To make a simple Caesar dressing: whisk together 1/2 cup mayonnaise, 1/4 cup grated Parmesan, 1–2 minced garlic cloves, juice of 1 lemon, 1 teaspoon Dijon mustard, 1 teaspoon Worcestershire sauce, and optional anchovy paste to taste. Season with salt and pepper. For a lighter version, substitute part or all of the mayo with plain yogurt.

How should I assemble the wraps so they don’t get soggy?

Lightly spread the dressing on the tortilla, layer chicken and romaine, and add cheese and croutons. If you want extra crunch, add croutons just before serving. Roll tightly and wrap in parchment or foil to keep moisture out.

What tortillas or wraps work best?

Use large flour tortillas or burrito wraps for easy folding. Spinach or whole-wheat wraps also work well. For gluten-free dishes, pick certified gluten-free wraps.

How can I make a lighter version?

Use less dressing or mix the dressing with plain yogurt or light mayo. Add more crunchy veggies (like cucumbers or bell peppers) and lean chicken to keep it filling without extra heaviness.

How should I store leftovers and how long do they keep?

Store assembled wraps or their components in an airtight container in the refrigerator. For best quality, eat within 1–2 days. If possible, keep dressing separate and assemble just before eating to avoid sogginess.

Can I customize with extra veggies or add-ins?

Absolutely. Try adding cherry tomatoes, cucumber, red onion, avocado, or even crispy bacon. You can also swap in arugula or add a squeeze of lemon for brightness.

Can I freeze wraps or make them ahead?

Fresh wraps are best enjoyed soon after assembly. You can prep the chicken and vegetables ahead of time, then assemble right before serving. Freezing assembled wraps is not recommended as texture and moisture can suffer; you can freeze cooked chicken separately for later use.

Introduction / Hook

Imagine waking up to the warm, cinnamon-scented air of a sleepy kitchen, where the sun’s first rays spill across a pan bubbling with a dawn-inspired dessert that doubles as brunch. Apple Pie French Toast Bake is the kind of dish that makes weekend mornings feel like a celebration and a cozy hug all at once. It’s a harmony of two beloved classics—apple pie and French toast—transformed into a single, hands-off bake that delivers nostalgia in every bite. The edges caramelize into a delicate crust that gives way to a custardy, luscious center, while ribbons of sweet-tart apples soften and surrender their shape to the heat. As you cut into the pan, you’ll hear that familiar sizzle and feel the aroma wafting through the room like a memory you didn’t know you were missing. This dish isn’t just food; it’s an invitation—an invitation to linger over breakfast, to gather friends and family, to savor the slow, comforting joy of a dessert-for-brunch that tastes like fall in full bloom. Whether you’re feeding a crowd on a lazy Sunday, planning a holiday brunch, or simply craving something indulgent yet approachable, this bake delivers. It’s forgiving, adaptable, and irresistibly shareable—the kind of recipe that earns “oh wow” reactions without requiring you to stand at the stove stirring for hours. Let the oven do the work while you lean into the moment: the crackle of sugar, the perfume of vanilla and cinnamon, the soft steam that promises comfort in every forkful. Welcome to a dish that marries the homey nostalgia of apple pie with the cozy, custardy richness of French toast—without sacrificing ease or flavor.

The Story Behind the Dish

Apple Pie French Toast Bake is a modern homage to two enduring American favorites—apple pie and French toast—woven together to tell a story of celebration and family. The concept arose in kitchens where Sunday brunches and holiday mornings become small, ritualistic rituals: a sweet payoff after a week of routines, a dish that can be prepared in advance and baked to golden perfection just as guests arrive. Think of it as the brunch version of a comforting bedtime story—a recipe that travels well between households, a dish that tastes both familiar and slightly magical because it fuses memories of weekend feasts with the practical joy of a one-pan, bake-and-go solution. The apple piece of the equation brings a whisper of autumn—crisp, tart-sweet slices that soften into tender morsels under warm spices—while the French toast element adds a custardy, vanilla-scented richness that makes each slice feel like a little celebration. In culinary lore, French toast has always been a clever way to transform stale bread into something luxurious; plating it with apple pie accents feels like a nod to thrift and abundance at once. The combination is a testament to how comforting classics can evolve when they meet in the right pan with the right timing. There’s a playful lineage here: a dish born from the desire to do more with leftovers, a family cooking instinct that says, “If you can bake it, you can savor it with company.” This bake is more than a recipe—it’s a bridge between seasons, a hospitality-forward centerpiece, and a reminder that the most memorable meals often come from simple, heartwarming ideas that grew into something unexpectedly radiant over time.

Why You’ll Love This Recipe

  • Effortless crowd-pleaser: Assemble once, bake once, and serve to a hungry group with minimal hands-on time.
  • Comforting and versatile: The mix of apples, cinnamon, vanilla, and a custard base offers familiar flavors with a touch of indulgence.
  • Make-ahead friendly: It can be prepared the night before and baked in the morning, or even portioned for a quick brunch.
  • Flexible for dietary needs: Uses pantry-friendly ingredients, with easy substitutions for dairy-free or gluten-free versions.
  • Show-stopping presentation: The baked casserole style makes a dramatic, tempting centerpiece that looks as good as it tastes.
  • Economical and practical: Lets you repurpose day-old bread with a sweet, pie-inspired twist, reducing waste while maximizing flavor.
  • Slow-spread aroma: The scent of apples, caramelized sugar, and warm spices fills the house, turning breakfast into an event.

Flavor Profile & Texture

What you’ll taste in every bite is a thoughtful duet of flavors and textures. The apples bring a gentle tang and a soft, yielding bite as they surrender to the warmth of the bake. They are perfumed with cinnamon, vanilla, and a whisper of nutmeg, which gives the dish that classic pie-like warmth without veering into cloying sweetness. The bread acts as the vehicle for the custard—supple on the inside, with a delicate crust that forms along the edges and top as it bronzes in the oven. The custard, rich with eggs and a touch of milk or dairy-free milk alternatives, binds the bake into a cohesive slice that slices cleanly but remains soft and luscious in the center. A hint of brown sugar adds a subtle caramel undertone, while a splash of vanilla intensifies the overall sweetness without overshadowing the fruit. Salt plays a quiet counterpoint, heightening the flavors and preventing the mixture from tasting flat. The result is a harmonious balance: the brightness of fresh apples, the comforting warmth of cinnamon and vanilla, the gentle sturdiness of bread, and the luxurious, pudding-like interior that makes each mouthful feel like dessert that happens to be breakfast. The top, when perfectly baked, offers a light crackle with a soft interior—an indulgent contrast that makes the dish feel special yet approachable. It’s a texture tapestry you can truly savor: the crisp edges giving way to a creamy, custardy center, the apples still holding a delicate bite that keeps the dish from becoming too mushy, and the overall sweetness staying within an inviting, breakfast-appropriate range.

Occasions & Pairings

  • Weekday-worthy weekend brunches: A no-fuss centerpiece that feeds a crowd with minimal prep and maximum impact.
  • Holiday morning specials: Elevate your Christmas, Easter, or Thanksgiving morning with a dish that feels festive and comforting.
  • Potlucks and family gatherings: A shareable, easily transported bake that travels well in a covered dish.
  • Casual breakfast-for-din-dins: A playful option for a brunch-for-dinner night when you want comfort with a twist.

Pairings to consider include a generous drizzle of real maple syrup or a dollop of whipped cream for those who want extra richness. A side of crisp bacon or sausage adds a savory counterpoint that brightens the plate and balances the sweetness. For a lighter option, serve with a dollop of vanilla yogurt or a spoonful of tart cranberry sauce to cut through the custard’s richness. Fresh fruit, such as sliced pears or pomegranate seeds, can provide a pop of color and a fresh bite that complements the warm spices. To drink, tap into seasonal vibes with hot chai, rich coffee, or a sparkling apple cider—drinks that echo the dish’s apple-pie homage while keeping the meal feeling brunch-appropriate. If you’re entertaining vegetarian or vegan guests, consider plant-based milks and a vegan egg substitute to maintain the custard’s cohesion without dairy. For gluten-free guests, opt for sturdy gluten-free bread with a good heartiness, ensuring the bake holds together while still delivering the familiar custard texture. If you want to kick it up a notch, a crumble topping or a sprinkle of streusel baked on top can introduce a contrasting texture and an extra layer of sweetness that enhances the apple pie vibe.

Tips, Variations & Substitutions

  • Bread choices: Use sturdy bread that can soak up the custard without becoming soggy. Brioche, challah, or thick-cut rustic loaf all work beautifully; day-old bread tends to soak up flavors more readily.
  • Apple varieties: A mix of tart and sweet apples—Granny Smith, Honeycrisp, or Fuji—adds depth and prevents the bake from tasting one-note. Peel or don’t peel depending on texture preference; the peels add color and fiber.
  • Spice profile: In addition to cinnamon, consider nutmeg, allspice, or a pinch of cardamom for a nuanced flavor. A splash of lemon zest can brighten the apples and balance sweetness.
  • Sweetness control: Adjust sugar with your taste and fruit sweetness. For a lighter finish, reduce the sugar and rely more on the natural sweetness of apples and the vanilla.
  • Make-ahead options: Assemble the dish the night before, refrigerate overnight, and bake in the morning. You can also bake and refrigerate slices for quick reheating.
  • Vegan or dairy-free version: Use plant-based milk (almond, oat, or soy) with a neutral oil or vegan butter in the custard. Ensure the bread is dairy-free as well. A flax egg or mashed banana can help mimic the binding effect if needed.
  • Gluten-free adaptation: Choose gluten-free bread with a good structure. The custard base remains the same, but bread texture may be slightly different; allow a few extra minutes in the oven if needed.
  • Additional texture: For a crunchy top, sprinkle a light layer of crumble mixture or toasted pecans before baking. A streusel topping can add a delightful contrast to the soft interior.
  • Flavor twists: Swap apples for pears or a mix of stone fruits in late summer. A splash of bourbon or vanilla extract can enrich the depth, if you like a more adult-friendly profile.

Storage & Make-Ahead Ideas

This Apple Pie French Toast Bake is designed with make-ahead practicality in mind. If you’re preparing for a crowd, you can assemble the dish the night before, cover tightly, and refrigerate. In the morning, simply pop it into a preheated oven and bake until the top is golden and the center is set. If you’ve already baked it, allow the dish to cool to room temperature, then refrigerate in an airtight container. Reheat individual portions in the microwave or gentle oven (low heat) to preserve the custard’s creaminess and the crust’s crisp edge. The bake freezes well when cooled fully; slice into portions before freezing for easier later reheating. Wrap each slice tightly in plastic wrap and place in a freezer-safe container. When ready to enjoy, reheat from frozen in a moderate oven until warmed through and the top is just crisp again. For best texture, avoid over-reheating, which can dry out the center. If you anticipate serving leftovers at room temperature, consider offering a light warm-up option for guests who appreciate fresh, just-baked warmth. A correctly stored, properly reheated slice retains the comfort of the original bake, with the same pleasing balance of apple, spice, and custard lingering in every bite.

Fun Facts & Trivia

  • French toast has ancient origins and is often described as “the bread of the dead” in some cultures, because stale bread becomes something delightfully new when dipped in a fragrant eggy mixture and fried or baked to golden perfection.
  • Apple pie is a symbol of home and harvest in American culture, with roots that stretch back to early European settlers; combining it with French toast is a tribute to how generations reuse and reinvent comfort foods.
  • The phrase “apple pie” evokes not only a dessert but also a sense of warmth and togetherness, which is precisely what this bake aims to deliver at any brunch table.
  • Many families have a “brunch dish” that signals weekend gatherings; this bake has a modern memory-making edge because it can be prepped the night before and served with little ceremony, yet feels special enough for holidays.
  • Texture science tip: the contrast between a lightly crisped top and a creamy interior is achieved by balancing the fat in the custard and the moisture in the apples; using slightly stale bread helps the custard soak in more evenly, creating that ideal custard-soaked interior without turning soggy.

Ingredients

French Toast Bake Base

  • 1 loaf thick-cut bread (brioche or challah), cut into 1-inch cubes (about 10-12 cups)

    → The bread is the foundation of the bake. Choose a sturdy, mildly sweet loaf like brioche or challah so it soaks up the custard without becoming soggy. Cut into approximately 1-inch cubes to ensure even absorption and a cohesive, layered texture in the final bake. If your bread is very fresh, you can dry it out in a 250°F (120°C) oven for 8-10 minutes to mimic day-old bread and improve custard uptake.
  • 6 large eggs

    → Eggs provide the structure and binding for the custard as the dish bakes, helping the slices hold together when cut. Use eggs at room temperature for better emulsification and a smoother, silkier custard; whisk until fully combined with no stray yolk pockets.
  • 2 cups whole milk

    → This is the primary liquid for the custard, giving body without overwhelming flavor. For richer depth, you can substitute part with heavy cream (see next ingredient) or use all milk for a lighter result. Whisk with the eggs to create a smooth, cohesive custard.
  • 1/2 cup heavy cream

    → Adds luxurious richness and a creamier mouthfeel to the baked custard. If you prefer a lighter bake, you can omit this or reduce to 1/4 cup; note that texture will be less indulgent but still delicious.
  • 1/4 cup granulated sugar

    → Sweetens the custard and helps balance the tang of apples. Dissolve well by whisking with the eggs and milk. You can adjust to taste, especially if your apples are very sweet or you plan a sugary topping.
  • 1 teaspoon vanilla extract

    → Adds warm, aromatic sweetness that enhances the custard and pairs beautifully with apple flavors. Use pure vanilla extract for best aroma; add to the custard and, if desired, drizzle a touch into the apple filling for extra fragrance.
  • 1/2 teaspoon ground cinnamon

    → Provides cozy warmth that harmonizes with the apple theme. Integrate into the custard for even spice distribution, and you can dust a pinch on the apples as they layer for a stronger aroma.
  • 1/4 teaspoon ground nutmeg

    → Subtle warmth that complements cinnamon and apple flavors. Use sparingly to avoid overpowering the other spices; grate fresh if possible for the most vibrant aroma.
  • 1/4 teaspoon salt

    → Enhances sweetness and deepens flavors, helping the custard taste more rounded. If your butter used later is salted, you may adjust by reducing this slightly to avoid excessive saltiness.
  • 2 tablespoons unsalted butter, melted

    → Used to grease the baking dish to prevent sticking and contributes a subtle buttery sheen to the finished edges. The melted butter also helps carry flavor into the bread as it soaks and bakes.

Apple Filling

  • 4 cups apples, peeled and sliced 1/4-inch thick (about 3-4 medium apples)

    → The star of the dish; peeled apples cut into thin 1/4-inch slices cook evenly and distribute sweetness throughout the bake. Varieties like Granny Smith or Honeycrisp hold their shape well and provide a pleasing balance of tartness and sweetness. If using very ripe apples, slice slightly thinner to help them soften without turning mushy.
  • 2 tablespoons lemon juice

    → Brightens the apple flavor and prevents browning after slicing. Freshly squeezed is best; the acidity also helps balance the sweetness of the filling. If you’re avoiding lemon, a splash of orange juice can work as a substitute.
  • 1/3 cup granulated sugar

    → Sweetens the apples and helps draw out juices during baking. You can adjust this amount to taste, especially if your apples are very sweet or if you prefer a less sugary filling. Combine with spices to ensure even distribution.
  • 2 tablespoons cornstarch

    → Thickens the apple filling as it heats, preventing a runny result once the dish is baked. Mix into the apples with the lemon juice and a tiny splash of water or juice to create a smooth slurry, then fold evenly through the filling to avoid lumps.
  • 1 teaspoon ground cinnamon

    → Reinforces the apple pie flavor and ties the filling to the spice profile of the custard. You can adjust slightly depending on your cinnamon preference, but avoid over-spicing to keep the apples tasting fresh.
  • 1/4 teaspoon ground nutmeg

    → Adds warmth and depth to the filling. Use sparingly—nutmeg can quickly dominate if used in excess, so a light pinch is usually enough when combined with cinnamon.
  • Pinch of salt

    → Amplifies sweetness and helps balance the flavors in the filling. A small amount goes a long way in enhancing the apple taste.
  • 1 tablespoon unsalted butter

    → Dotting the apples with butter as they cook in the pan (or melted into the filling before layering) adds richness and helps create a glossy, lightly caramelized surface on the apples during baking.

Streusel Topping (Optional)

  • 1/4 cup all-purpose flour

    → Forms the structural base of the crumb topping, helping it hold together while baking. The flour interacts with sugar and butter to create the crumbly, flaky texture that contrasts with the custard.
  • 1/4 cup old-fashioned oats

    → Adds a pleasing chew and extra crunch to the topping. Rolled oats perform best here; if you only have quick oats, you can use them but the texture will be finer and less rustic.
  • 1/4 cup light brown sugar

    → Provides moisture and a caramel-like sweetness that browns nicely in the oven. Packing the sugar into the topping helps create a golden, crisp crust; you can substitute a portion with granulated sugar if you prefer a lighter crumble.
  • 3 tablespoons cold unsalted butter, cubed

    → The key to a flaky streusel. Cold butter creates small pockets that melt during baking, resulting in a tender, crumbly top rather than a dense layer. Keep butter cold until mixing, and incorporate with fingers or a pastry cutter until the mixture resembles coarse crumbs.
  • 1/2 teaspoon ground cinnamon

    → Adds spice that complements the apple filling and custard. Use a moderate amount so the topping remains fragrant rather than overpowering.

Optional Add-ins

  • 1/2 cup raisins or chopped dates (optional)

    → Introduce bursts of sweetness and chewy contrast within the apple layers. If very dry, soak them in warm water or a splash of apple juice for 10 minutes to plump before mixing into the filling or topping.
  • 1/2 cup chopped walnuts or pecans (optional)

    → Add crunchy, nutty depth to the bake. Chop finely to distribute evenly; toasting the nuts briefly in a dry skillet before adding enhances their aroma and flavor.

Serving and Garnish

  • Powdered sugar for dusting

    → Finishing touch that creates a delicate contrast against the warm bake. Dust lightly after slicing for an attractive presentation and extra sweetness without overpowering the flavors.
  • Maple syrup or caramel sauce for serving (optional)

    → A warm drizzle can elevate the dish, pairing nicely with the apple custard. Choose maple for a classic breakfast twist or caramel for a richer finish; serve warm for best consistency.

Instructions

  • Preheat your oven to 350°F (175°C) and generously grease a 9×13-inch baking dish with the 2 tablespoons of melted unsalted butter, ensuring every surface is slick so the bake releases cleanly.

    → A well-greased dish prevents the custard-soaked bread from sticking and helps achieve evenly browned edges for a professional-looking bake.
  • If the bread is very fresh, dry it slightly by placing the thick-cut brioche or challah cubes on a sheet pan in a 250°F (120°C) oven for 8–10 minutes, then remove and cool before cubing into 1-inch pieces.

    → Drying the bread creates better custard absorption without turning the loaf to mush, and helps the final bake hold its structure.
  • Whisk together the eggs, whole milk, heavy cream, granulated sugar, vanilla extract, ground cinnamon, ground nutmeg, and the pinch of salt until the mixture is smooth and fully emulsified, with no visible pockets of yolk.

    → A thorough whisking ensures a uniform custard that coats the bread evenly and sets into a silky texture as it bakes.
  • Pour the custard over the bread cubes in a large bowl or the prepared dish, then toss gently to coat every piece and evenly distribute the spices. Let the mixture stand for 15–20 minutes, flipping once or twice to ensure even absorption.

    → Allowing time for the bread to soak ensures the custard penetrates deeply, creating a cohesive bake rather than a dry center.
  • Meanwhile, in a large bowl, combine the apple filling: apples, lemon juice, granulated sugar, cornstarch, ground cinnamon, ground nutmeg, and a pinch of salt, then toss to coat all pieces evenly.

    → The lemon juice brightens apple flavor and the cornstarch thickens juices during baking for a glossy, pie-like filling that holds its shape.
  • In a skillet over medium heat, melt 1 tablespoon unsalted butter and add the apple mixture, cooking for 4–6 minutes until the apples begin to soften and release some juices; stir occasionally and keep the heat moderate to prevent browning.

    → Briefly cooking the apples softens them so they texture-harmonize with the custard and prevents a firm, undercooked center in the final bake.
  • Set aside the apple filling until ready to layer, ensuring the juices remain integrated rather than evaporating completely; this keeps the filling moist and richly flavored.

    → Reserved juices contribute to the overall moisture and glaze in the bake, enhancing the apple character once baked.
  • Spread half of the soaked bread in an even layer in the prepared baking dish, pressing gently to form a compact base.

    → A uniform base ensures consistent cooking and allows the custard to set evenly through the dish.
  • Top the bread layer with all the apples and their juices in an even, cohesive layer, distributing them to cover the bread without crowding.

    → An even apple layer creates distinct pockets of fruit and prevents soggy patches while baking.
  • Spread the remaining soaked bread over the apples, pressing lightly to compact and incorporate the layers, then drizzle any remaining custard over the top if you have it.

    → This seals the layers and ensures the top browns evenly while the interior gently steams and sets.
  • If you are using the Streusel Topping, whisk together flour, oats, light brown sugar, ground cinnamon, and a pinch of salt; cut in the cold cubed butter with a pastry cutter or your fingertips until the mixture forms coarse crumbs. Chill briefly if desired.

    → Cold butter in the topping creates distinct flakey crumbs that contrast with the creamy custard, and chilling helps keep the butter from melting too quickly during assembly.
  • Evenly sprinkle the streusel over the top layer (or omit if you prefer a simpler bake), ensuring a light, even coverage to promote a crisp, golden crust.

    → A uniform top browns more predictably and provides a satisfying textural contrast to the soft custard beneath.
  • Place the pan in the preheated oven and bake, covered loosely with foil for the first 25 minutes to prevent excessive browning, then uncover and bake an additional 20–30 minutes until the custard is set in the center and the top is golden and crisp.

    → Covering early helps the interior cook without burning the exterior; uncovering later allows the streusel to crisp and the custard to finish setting.
  • Remove from the oven and let the Apple Pie French Toast Bake rest for 10–15 minutes before slicing; this resting period allows the custard to firm up, making clean cuts and easier portioning.

    → Resting lets proteins coagulate and starches thicken, resulting in slices that hold their shape and a more elegant presentation.
  • Just before serving, dust with powdered sugar and, if desired, drizzle with maple syrup or caramel sauce for a warm, glossy finish; serve in generous portions with the sweet fruit and creamy custard balanced by the toasty crust.

    → The finishing sugar and sauce amplify sweetness, while serving warm enhances the aroma of vanilla and cinnamon and complements the apple filling.

Notes

These Apple Pie French Toast Bake is a cozy, make-ahead breakfast that delivers the warm, nostalgic flavors of apple pie in a creamy, custard-soaked bread bake. For the best texture, use a sturdy loaf like brioche or challah and, if very fresh, dry the cubes in a 250°F (120°C) oven for 8–10 minutes to mimic day-old bread so the custard absorbs evenly without becoming soggy. Whisk the eggs, whole milk, heavy cream, granulated sugar, vanilla, ground cinnamon, nutmeg, and salt until completely smooth and glossy, then pour over the bread cubes and fold gently to ensure every piece gets soaked without breaking apart. Prepare the apple filling by tossing peeled, 1/4-inch-thick slices with lemon juice, sugar, cornstarch, cinnamon, nutmeg, and a pinch of salt, then dot with 1 tablespoon butter; layer this mixture with the soaking bread so the juices release into the custard as it bakes, creating a glossy, caramelized apple layer. If you’re making the optional streusel topping, combine all-purpose flour, oats, light brown sugar, cold cubed butter, and cinnamon and work quickly with your fingers or a pastry cutter until the mixture resembles coarse crumbs; sprinkle over the assembled bake for a toasted, crumbly crown. The dish can be assembled a day ahead: cover tightly and refrigerate, then bake when ready, increasing the bake time slightly if it’s been refrigerated longer to ensure the center sets and the top turns golden. To serve, dust with powdered sugar and finish with a warm drizzle of maple syrup or caramel for extra sweetness and shine. If you need a gluten-free version, substitute the streusel with a gluten-free flour blend and certified gluten-free oats or omit the streusel altogether; always choose ingredients labeled gluten-free if you’re cooking for gluten intolerance. For customization, swap in your favorite apples or add a handful of chopped nuts or raisins to the filling or topping for extra texture; tasting the filling before baking will help you balance sweetness with the tartness of the apples. Finally, let slices rest a few minutes after baking to help the custard set fully and cut cleanly.

Tips

Tips for Apple Pie French Toast Bake

  • Bread selection and soaking: Choose a sturdy, mildly sweet loaf (brioche or challah) cut into 1-inch cubes to ensure even absorption. If the bread is very fresh, dry it in a 250°F (120°C) oven for 8–10 minutes to mimic day-old bread and improve custard uptake. Let the bread cool slightly before mixing with the custard.
  • Custard preparation: Use eggs at room temperature for better emulsification and a silkier custard. Whisk eggs with milk, cream, sugar, vanilla, and spices until fully combined and smooth; avoid overbeating to prevent bubbles. For an ultra-smooth texture, strain the custard before pouring over the bread.
  • Apple filling prep and thickening: Slice apples 1/4-inch thick and toss with lemon juice to prevent browning and brighten flavor. Mix in sugar, cinnamon, nutmeg, salt, and cornstarch with a tiny splash of water or juice to make a slurry, then fold through the apples. The cornstarch will set the juices as it bakes, creating a luscious filling.
  • Balancing sweetness and spice: Start with the recipe’s amounts, then adjust cinnamon, nutmeg, and sugar to taste after tasting the filling raw. If your apples are very tart, you may want a touch more sugar; if sweet, scale back slightly.
  • Streusel topping tips (if using): Keep butter cold and cut into the dry ingredients until the mixture resembles coarse crumbs. This creates a flaky, crumbly top that stays crisp. Do not overwork; larger clumps bake into a rustic crumble.
  • Layering and assembly: Grease the baking dish with melted butter to prevent sticking and to help the edges brown nicely. Layer the bread evenly and distribute apple filling between layers for even pockets of flavor.
  • Baking and doneness: Bake until the custard is set in the center and the top is golden. If the top browns too quickly, tent loosely with foil for the last 15–20 minutes. A gentle jiggle in the center or a knife inserted should come out with a few moist crumbs, not uncooked batter.
  • Make-ahead and storage: The assembled bake can be refrigerated overnight before baking, which allows the custard to thoroughly soak the bread. Leftovers refrigerate well for 2–3 days; reheat individual portions in the microwave or a low oven until warm.
  • Serving ideas: Dust with powdered sugar and serve warm with maple syrup or caramel sauce for a cozy brunch. A dollop of whipped cream or a scoop of vanilla ice cream also complements the apple flavors beautifully.
  • Variations and add-ins: Add 1/2 cup raisins or chopped dates for chewy pockets or 1/2 cup chopped walnuts or pecans for crunch. Toast nuts briefly before adding to amplify aroma. For gluten-free options, ensure bread and topping use gluten-free ingredients.

FAQ

What is Apple Pie French Toast Bake?

A comforting breakfast casserole that layers cubed day-old bread with a cinnamon-vanilla custard and apple pieces, then bakes until puffed and set. It often gets a crumb or streusel topping to mimic apple pie flavors.

What ingredients do I need?

For the bake, you’ll typically need:

  • 6–8 cups cubed day-old bread (brioche or challah recommended)
  • 4 large eggs
  • 1 1/2 cups milk
  • 1/2 cup heavy cream or more milk
  • 1/2 cup granulated sugar (adjust to taste)
  • 1 teaspoon vanilla extract
  • 1 teaspoon ground cinnamon
  • Pinch of nutmeg
  • 2–3 apples, peeled and diced (Granny Smith or Honeycrisp work well)
  • 2 tablespoons melted butter

Optional toppings/fixes:

  • Brown sugar for the apple mixture
  • Crumb topping: 1/2 cup flour, 1/3 cup brown sugar, 4 tablespoons cold butter
  • Powdered sugar for serving
Can I make this ahead of time?

Yes. You can assemble the bake the night before. Whisk the custard, toss the apples, and layer the bread and apples in the baking dish. Cover tightly and refrigerate. In the morning, bake at 350°F (175°C) for 50–60 minutes (or until puffed and set). If you’ve already added the custard, you may need a few extra minutes to bake through fully.

How long and at what temperature should I bake it?

Bake at 350°F (175°C) for about 45–60 minutes, or until the center is set and the edges are golden. If the top browns too quickly, loosely tent with foil during the last 10–15 minutes.

Can I make this gluten-free?

Yes. Use gluten-free bread (sturdy slices, not too soft). If you want a crumb topping, use a gluten-free flour blend or almond flour for the topping. Ensure any added mix-ins or toppings are also gluten-free.

Is there a dairy-free or vegan version?

Absolutely. For dairy-free/vegan options, make the following substitutions:

  • Milk: use unsweetened almond, soy, or oat milk (or a blend).
  • Butter: use a dairy-free butter substitute or coconut oil.
  • Eggs: replace each egg with 1 tablespoon ground flaxseed mixed with 3 tablespoons water (let sit 5 minutes) or use a commercial egg replacer. For 4 eggs, use 2 flax eggs (or adjust as needed).

Note: Some creaminess comes from the plant-based milk; texture may be slightly different but still delicious.

How should I store leftovers?

Let the bake cool completely, then cover and refrigerate. Leftovers are best within 3–4 days. Reheat in the oven at 350°F (175°C) for 10–15 minutes or in the microwave in short bursts until warmed through. You can also freeze slices for longer storage.

Can I freeze the bake?

Yes. You can freeze before baking or after baking.

  • Unbaked: Assemble in a dish, tightly wrap, and freeze up to 2–3 months. Thaw overnight in the fridge, then bake as directed (you may need to add a few extra minutes).
  • Baked: Freeze individual slices wrapped well for up to 1–2 months. Reheat in the oven at 350°F (175°C) for 10–15 minutes, or until warmed through.
Can I customize the fruit or add other flavors?

Definitely. Apples are classic, but you can mix in pears, blueberries, cranberries, or even diced peaches. If using very juicy fruit, consider a light toss with a teaspoon of lemon juice to brighten flavor and help reduce excess moisture. You can also add a pinch more cinnamon or a splash of vanilla to suit your taste.

What type of bread works best?

Sturdy, day-old bread yields the best texture. Brioche or challah are ideal due to their rich, absorbent crumb. Avoid very soft fresh bread that can become mushy. If you only have fresh bread, dry it out in the oven for a few minutes before cubing.

How should I serve and garnish?

Serve warm, with toppings such as maple syrup, whipped cream, vanilla yogurt, or a dusting of powdered sugar. A scoop of vanilla ice cream or a caramel drizzle can turn it into a breakfast-dessert treat. Garnish with chopped toasted pecans or walnuts for crunch.

Introduction / Hook

Picture a sun-drenched bowl that feels like a vacation you can plate on a weeknight. The Hawaiian Chicken Bowl is a luminous fusion of tropical sweetness, smoky savoriness, and comforting heartiness, all tucked into one vibrant dish. The moment you lift the lid, you’re greeted by a chorus of aromas: caramelized edges of glossy chicken, the bright lift of pineapple caramel, sesame and ginger dancing in the steam, and a bed of warm rice soaking in every drop of ambrosial sauce. It’s the kind of meal that makes your kitchen feel like a beach cabana, where the air is perfumed with citrus, salt, and a whisper of coconut. This bowl isn’t just dinner; it’s a sensory experience—sunny, satisfying, and instantly shareable. Whether you’re feeding a busy family, a bunch of friends, or simply treating yourself to a little exotic warmth, this dish delivers kindness in every bite. The flavors are approachable and deeply comforting, while still feeling celebratory enough to mark a special night. It’s a recipe you’ll reach for again and again because it checks all the boxes: quick to pull together, adaptable to what you have on hand, and irresistibly delicious from first bite to last lick of the spoon or fork. Welcome to the bright, breezy world of the Hawaiian Chicken Bowl—a bowlful of sunshine that brings the island to your table without leaving your kitchen.

The Story Behind the Dish

Hawaiian cuisine has always been a delicious mosaic of influences, a testament to the islands as a crossroads of cultures. The archipelago’s plate lunch—a simple, satisfying meal that often features a protein, two scoops of rice, and a crisp salad or pickles—emerged from a practical history. Workers and travelers in the early 20th century needed something hearty, portable, and flavorful. Out of this practicality grew a tradition of bold, balanced flavors and smart, efficient preparation. The Hawaiian Chicken Bowl borrows the spirit of this tradition: a singable harmony of sweet and savory, the kind of dish that tastes like it’s been kissed by the sun and the sea.

Central to the flavor profile is teriyaki-inspired technique—the glaze that clings to the meat with a glossy finish—paired with tropical fruit that feels like a vacation in itself. The pineapple is not an afterthought; it’s a co-star that brings brightness, acidity, and a caramelized char that echoes the island’s love of smoky, outdoor cooking. Yet this bowl also nods to the island’s more rustic influences—the warming comfort of rice, the crunch of fresh vegetables, and the gentle warmth of ginger, garlic, and sesame. It’s a modern reinterpretation of traditional flavors, a dish born from island hospitality and the desire to share a generous, satisfying meal with friends and family.

If you peek behind the scenes, you’ll find a practical philosophy: lean proteins, colorful vegetables, a kiss of sweetness, and a sauce that ties everything together without overpowering the ingredients’ natural character. The Hawaiian Chicken Bowl feels both timeless and contemporary—a dish you could imagine served at a casual luau or plated with care for a weeknight dinner. It’s not just about eating; it’s about storytelling through textures and tastes, about inviting guests to linger at the table a little longer as the fragrances linger in the air and in your memory.

Why You’ll Love This Recipe

  • Fast and convenient: a weeknight-friendly option that comes together quickly without sacrificing depth of flavor.
  • Balanced and satisfying: protein, carbohydrates, and vegetables all in one colorful, crave-worthy bowl.
  • Versatile and forgiving: adaptable to your pantry, dietary needs, and personal preferences.
  • Bright and comforting: a perfect blend of tropical sweetness, savory glaze, and fresh crunch.
  • Make-ahead friendly: elements can be prepped in advance to speed up weeknight assembly.
  • Impressive without fuss: a restaurant-worthy presentation that still feels approachable and homey.
  • Kid-friendly appeal: flavors that are recognizable and comforting for younger palates while still exciting for adults.
  • Great for leftovers: scales up easily for meal prep or next-day lunches with minimal reheating effort.

Flavor Profile & Texture

The essence of the Hawaiian Chicken Bowl lies in its multi-dimensional flavor and the interplay of textures. The chicken—tender and juicy—carries a glaze that is glossy, slightly sticky, and deeply savory with a touch of sweetness. Think soy or tamari-based gloss with a whisper of brown sugar, mirroring the classic teriyaki shine but tuned to be bright rather than heavy. As the sauce caramelizes on contact with heat, it forms a lacquered coating that gives each bite a satisfying bite and a linger of sweetness at the finish. Pineapple adds a tropical brightness that cuts through the richness, offering both acidity and a caramelized fruitiness when grilled or pan-seared. The natural tang from the pineapple helps keep the glaze balanced, so the dish remains appetizingly fresh rather than cloying.

Around this stellar center, vegetables contribute texture, color, and crunch. Crisp cucumbers or red onions, tender-snap bell peppers, and the gentle bite of greens or shredded cabbage offer contrast to the soft rice and glossy chicken. Sesame seeds bring a nutty note and tiny crunch, while a dusting of fresh herbs like scallions or cilantro adds a green lift that makes the bowl feel alive and vibrant. Optional avocado can lend a creamy counterpoint, smoothing the brightness in a way that’s incredibly satisfying.

Texture-wise, you’ll experience a delightful spectrum: the glossy, slightly tacky coating on the chicken; the sticky, caramelized edges that deliver a hint of edge and char; the bite of crispy vegetables; the plush, fluffy rice soaking up the sauce; and the juicy pop of pineapple in each mouthful. It’s a harmonious orchestra of textures—soft and succulent, crisp and fresh, glossy and comforting—all working in concert to evoke the feeling of a seaside afternoon on a plate. The flavor profile is equally dynamic: sweet meets savory, tart meets mellow, and the finish lingers with a gentle ember of warmth, akin to a sunset glow that refuses to fade quickly.

Occasions & Pairings

This bowl shines in a variety of settings, from casual weeknights to weekend gatherings. It’s ideal for:

  • Weeknight dinners when you want something comforting yet vibrant.
  • Family-friendly meals that please a crowd with familiar, agreeable flavors.
  • Outdoor gatherings, potlucks, or picnics where a single, shareable dish makes a statement.
  • Meal prep sessions, because you can portion it into individual bowls for the week.
  • Celebrations with a tropical or island-inspired theme, where the dish acts as a bright centerpiece.

Pairing ideas to elevate the experience:

  • Side dishes: a crisp cucumber salad or pickled vegetables to refresh the palate; a light seaweed salad for oceanic echoes; or a simple lime-wedges-for-dunking ritual to brighten the acidity.
  • Desserts: a light, citrus-forward dessert such as mango sorbet or a coconut-lime cheesecake to echo the tropical notes.
  • Drinks: a chilled sparkling water with lime, a tropical fruit mocktail, or a crisp white wine such as Sauvignon Blanc or a Grüner Veltliner to mirror the brightness of the dish.
  • Garnishes: sesame seeds, chopped scallions, fresh cilantro, and a squeeze of lime juice raise the aromatic profile and add a final flourish.

Tips, Variations & Substitutions

One of the joys of a bowl like this is how forgiving and customizable it can be. Here are ideas to tailor it to your pantry, preferences, or dietary needs.

  • Protein options: while chicken thighs offer extra flavor and juiciness, you can use chicken breasts if you prefer a leaner option. For a seafood variation, salmon or shrimp work beautifully in the same glaze. For a plant-based version, try extra-firm tofu or tempeh marinated and seared to develop a crust, or use chickpeas for heartiness.
  • Glaze and sauce: you can adjust the balance of sweet and salty by swapping in a touch more pineapple juice or a splash of rice vinegar. If you need gluten-free, use tamari or coconut aminos instead of traditional soy sauce. A pinch of chili flakes or a drizzle of sriracha adds a gentle kick for those who like a bit of heat.
  • Vegetable variations: swap in what’s fresh in your crisper—bell peppers, snap peas, shredded cabbage, julienned carrots, or pineapple rings. Grilling or searing pineapple first adds a deeper caramelization that amplifies the flavor.
  • Carb options: while white rice is classic, you can use brown rice, jasmine, or basmati for a different aroma and texture. For a lower-carb option, serve the bowl over cauliflower rice or a quinoa blend.
  • Make-ahead ideas: you can pre-make the glaze and marinate the chicken in a pinch, then sear and toss with the glaze just before serving. Rice can be cooked in advance and warmed gently with a splash of broth or water to keep it fluffy. Cut vegetables ahead of time and keep them crisp by storing separately from the sauce until assembly.
  • Regional twists: add a touch of island-inspired flavor by incorporating lime zest, toasted macadamia nuts for crunch, or a scatter of furikake for a Japanese-tea-house twist. A hint of coconut milk in the sauce can lend a creamy tropical note if you like.
  • Spice level: customize the heat by adding fresh ginger, garlic, or a pinch of chili paste to the glaze, or offer chili oil and hot sauce at the table for those who want extra warmth.

Storage & Make-Ahead Ideas

These bowls are highly adaptable for meal prep and leftovers, with simple guidelines to preserve texture and flavor. Cooked chicken with glaze and vegetables can be kept in an airtight container in the refrigerator for up to 3–4 days. When storing, keep rice, proteins, and vegetables in separate containers if possible to prevent sogginess; you can reheat the components separately and assemble just before serving to retain texture. For longer storage, you can freeze the cooked chicken with glaze (minus any delicate greens or fresh herbs). Freeze in portions and thaw in the fridge overnight before reheating in a skillet or microwave at a gentle medium heat to regain moisture. Rice freezes less well in terms of texture, but you can cook a bigger batch, cool it quickly, and reheat with a splash of water or broth to freshen it up. If you plan to freeze pineapples or vegetables, note that their texture may become softer after freezing and thawing; plan to add them during reheating to maintain a crisp bite if possible.

Make-ahead strategies to streamline serving:

  • Marinate the chicken ahead of time to deepen flavor, then store covered in the fridge until you’re ready to cook.
  • Prepare a large batch of rice or grain in advance and portion into containers for easy assembly throughout the week.
  • Pre-chop vegetables and store in airtight containers; assemble bowls quickly when you’re ready to eat.
  • Prepare a batch of the glaze and keep it in the fridge; reheat gently and toss with freshly cooked protein for the final glaze.

Fun Facts & Trivia (Optional)

Here are a few bite-sized tidbits that celebrate the whimsy and history behind this kind of dish:

  • The term teriyaki comes from the Japanese words teri, meaning “gloss” or “luster,” and yaki, meaning “grill” or “roast.” The technique of glazing meat to a shiny finish is a hallmark of many Japanese-inspired dishes that traveled across the Pacific.
  • Pineapple in Hawaii is more than a flavor booster—it’s a symbol of hospitality and sweetness. The fruit was introduced to the Hawaiian Islands in the early 19th century and quickly became associated with tropical abundance and festive meals.
  • The plate lunch, a staple in Hawaii, was popularized as a convenient, filling meal for workers. Its enduring appeal lies in its simple structure and ability to balance protein, starch, and vegetables in one satisfying plate or bowl—an idea that translates perfectly into the bowl format today.
  • Sesame seeds aren’t just decorative; they add a gentle nutty aroma and a tiny crunch that complements the soft textures of chicken and rice, making every bite more dynamic.
  • Islands-inspired bowls have exploded in popularity in homes around the world because they embody a concept: a balanced, customizable meal that feels both comforting and celebratory, with the comforting familiarity of familiar flavors enhanced by a touch of island magic.

Ingredients

Hawaiian Chicken Bowl
Marinade & Glaze

  • 1.5 pounds boneless, skinless chicken thighs, trimmed and cut into bite-sized pieces
    → The primary protein component. Chicken thighs stay moist and flavorful when cooked quickly in a skillet. Trim excess fat and cut into even pieces to ensure uniform cooking. For less juiciness, you can use chicken breasts, but thighs are preferred for real bowl texture. After cutting, toss with a portion of the marinade to begin flavor absorption.
  • 1/3 cup low-sodium soy sauce (or tamari for gluten-free)
    → Builds the savory, umami backbone of the glaze and marinade. If you avoid soy, substitute with coconut aminos, keeping in mind the flavor will be slightly different and saltiness may vary.
  • 1/4 cup pineapple juice
    → Adds sweetness and acidity to balance the saltiness of the soy. Use juice from canned pineapple or freshly squeezed to control sweetness. It also helps create a glossy glaze when simmered with the cornstarch.
  • 2 tablespoons light brown sugar (packed)
    → Contributes caramel sweetness that intensifies as the glaze reduces, helping it cling to the chicken. If you like it sweeter, you can add a touch more, but balance with acidity from vinegar or lime.
  • 2 cloves garlic, minced
    → Provides aromatic depth and sharp bite. Mince finely so it distributes evenly and doesn’t burn during quick sautéing.
  • 1 tablespoon fresh ginger, grated
    → Gives bright, warm spice that pairs with pineapple. Peel and grate finely to avoid fibrous bits; fresh ginger provides more vibrant flavor than ground.
  • 1 tablespoon rice vinegar
    → Introduces crisp acidity that brightens the glaze and keeps the sauce from tasting flat. If you only have apple cider vinegar, use a small amount and taste before adding more.
  • 1 teaspoon toasted sesame oil
    → Adds a nutty aroma and depth; a little goes a long way. Use toasted sesame oil rather than plain sesame oil for richer flavor. If unavailable, omit with only a minor flavor change.
  • 1 tablespoon cornstarch
    → Used to thicken the glaze into a glossy coating. Mix with 2 tablespoons cold water to create a slurry before adding to the pan; this helps prevent lumps and gives a clingy sauce that coats the chicken nicely.
  • 2 tablespoons cold water
    → Used to create a smooth cornstarch slurry for thickening the glaze without clumps. Add gradually and simmer until the sauce coats the back of a spoon.
  • Salt to taste
    → Season the marinade and glaze to your preference. Start with a small amount and adjust after tasting the glaze as it reduces, since soy sauce is salty by itself.
  • Black pepper to taste
    → Adds a subtle bite to contrast the sweetness. Freshly ground black pepper will give a brighter flavor than pre-ground.

Produce & Veggies

  • 1 cup pineapple chunks (fresh or canned, drained)
    → Adds juicy tropical sweetness and textural contrast. If using canned pineapple, drain well to avoid extra liquid in the pan. For best flavor, use ripe pineapple; cut into ~1-inch pieces for even cooking.
  • 1 red bell pepper, thinly sliced
    → Provides color, crunch, and a mild sweetness that complements the glaze. Slice evenly to ensure uniform cooking; you can sauté with the chicken until just tender.
  • 1/2 red onion, thinly sliced
    → Adds sharpness and aroma, balancing the sweetness of pineapple. If you prefer milder onion flavor, you can rinse sliced onions briefly in cold water or marinate them in a splash of lime juice for 5–10 minutes.
  • 1 tablespoon neutral oil (for cooking)
    → Helps achieve a crisp sear on the chicken and prevents vegetables from sticking. Choose a high smoke-point oil like canola, grapeseed, or neutral vegetable oil.

Base

  • 2 cups cooked jasmine rice
    → The soft, fragrant base that soaks up glaze and sauce from the chicken. Prepare the rice ahead of time for best texture; reheat with a splash of water to restore fluffiness. If you prefer brown rice for more fiber, substitute 2 cups cooked brown rice.

Garnish & Finish

  • 2 green onions, sliced
    → Adds fresh oniony brightness and color. Use both the white and green parts for a balanced aroma; slice on the diagonal for a cleaner look in the bowl.
  • 1 tablespoon sesame seeds
    → Tiny crunch and a nutty finish. Toasting the seeds quickly in a dry skillet before using intensifies their aroma; if you skip toasting, they’ll still add a nice finish.
  • Fresh cilantro leaves (optional)
    → Provides a bright, herbal note that pairs nicely with pineapple and lime. Omit if you dislike cilantro or prefer a milder finish.
  • Lime wedges (optional)
    → A quick squeeze of lime brightens the glaze and balances sweetness. Serve wedges on the side so each eater can adjust acidity to taste.

Instructions

  • Pat the chicken thighs dry with paper towels and trim any excess fat, then cut into bite-sized, evenly sized pieces to ensure uniform browning and marinading.

    → Dry surfaces promote a crisp sear by eliminating moisture that would steam the meat, and evenly sized pieces cook at the same rate for consistent texture.
  • Whisk together 1/3 cup low-sodium soy sauce, pineapple juice, 2 tablespoons light brown sugar, minced garlic, grated fresh ginger, 1 tablespoon rice vinegar, and 1 teaspoon toasted sesame oil in a medium bowl until the sugar dissolves and the mixture is cohesive.

    → This creates a balanced umami-sweet base that flavors the chicken and forms the glossy glaze when reduced; whisking helps dissolve sugar for an even coating.
  • Set aside 1/3 cup of the prepared marinade as a dedicated glaze and refrigerate it separately so you can finish the dish with a concentrated, glossy coating later.

    → Keeping a portion separate prevents over-salting the chicken and allows precise glaze finishing during simmering.
  • Toss the remaining marinade with the chicken pieces to coat them evenly, then cover and refrigerate for 30 to 60 minutes to begin flavor absorption and keep the chicken moist during cooking.

    → A short marinade time tenderizes slightly and pre-seasones the meat without overpowering the fresh chicken flavor; longer marinades can start to alter texture.
  • Whisk 1 tablespoon cornstarch with 2 tablespoons cold water in a small bowl to form a smooth slurry and set aside to use as a thickener for the glaze.

    → The slurry prevents lumps and yields a satin-smooth glaze that clings to the chicken and vegetables when heated.
  • Preheat a large skillet over medium-high heat and add 1 tablespoon neutral oil, swishing to coat; heating the pan properly ensures fast browning and a flavorful crust.

    → A hot, lightly oiled pan promotes Maillard browning, which adds depth of flavor and texture to the finished bowl.
  • Sear the chicken in batches without crowding the pan until deeply browned on all sides and just cooked through, about 4 to 6 minutes per batch; transfer to a plate and rest, leaving the fond in the skillet.

    → Searing in batches prevents steaming and allows even contact with the hot surface; resting helps juices rediscover their center for juicy bite-sized pieces.
  • Pour the reserved glaze into the skillet with the fond and bring to a simmer, reducing for 2 to 3 minutes to concentrate the flavors.

    → Gentle simmering unlocks sweetness and tang while the fond enriches the glaze with complex savory notes; do not boil aggressively to avoid scorching.
  • Whisk in the cornstarch slurry gradually, continuing to simmer and stirring until the glaze thickens to a glossy consistency that coats the back of a spoon, then remove from heat.

    → The slurry thickens the sauce to clinginess rather than runny; adjust thickness by simmering a bit longer or thinning with a splash of water if needed.
  • Return the marinated chicken to the skillet with the thickened glaze, add the pineapple chunks, red bell pepper, and red onion, and cook until the vegetables are crisp-tender and the pineapple is heated through, about 2 to 4 minutes.

    → Reintroducing the chicken allows it to pick up even more glaze while the vegetables provide color, sweetness, and texture; keep the heat moderate to avoid overcooking.
  • Prepare the jasmine rice according to package directions or reheat 2 cups of cooked rice with a splash of water to restore fluffiness, keeping grains separate and light.

    → Fluffy, individual grains act as a neutral bed that soaks up sauce without becoming mushy, improving texture in the bowl.
  • Toast 1 tablespoon sesame seeds in a dry skillet over medium heat just until fragrant, about 1 to 2 minutes, then cool; this deepens their nuttiness and aroma.

    → Toasting enhances the sesame’s flavor and provides a contrasting texture and color when finished in the bowl.
  • Slice 2 green onions on the diagonal and chop fresh cilantro leaves (if using) for a bright herbal Garnish, and cut lime into wedges for optional acidity.

    → Green onions add fresh bite and color, cilantro contributes a citrusy herb note, and lime offers a tart contrast to the sweet glaze, letting guests tailor acidity to taste.
  • Assemble the Hawaiian Chicken Bowls by dividing the warm jasmine rice among bowls, topping with the glazed chicken, pepper, onion, and pineapple, then drizzling any remaining glaze over the top; finish with toasted sesame seeds and sliced green onions, plus cilantro and lime wedges on the side.

    → Proper assembly distributes heat and sauce evenly, ensuring every bite includes a balance of sweet, savory, and bright acidity while the garnishes add aroma, texture, and color for an appealing presentation.

Notes

These Hawaiian Chicken Bowls are a bright, crowd-pleasing balance of savory glazed chicken, tropical pineapple, and colorful vegetables served over fluffy jasmine rice. The chicken thighs stay moist and develop a glossy glaze when simmered with garlic, fresh ginger, pineapple juice, and a touch of brown sugar, creating a sweet-sour-salty profile that shines in every bite.

You can customize them by swapping in chicken breast for a lighter texture, adding extra vegetables such as snap peas, broccoli, or sliced bell peppers, or adjusting the sweetness with more pineapple juice or a splash of rice vinegar. Sear the chicken pieces in a hot pan to caramelize the edges, then simmer with the glaze until it coats the chicken and vegetables. These bowls store well for meal prep and reheat beautifully; divide into portions and rewarm with a splash of water or broth to restore moisture. For a bright finish, serve with a squeeze of lime, chopped cilantro, sliced green onions, and a sprinkle of sesame seeds.

To keep this dish gluten-free, use gluten-free soy sauce such as tamari or coconut aminos, and ensure any starches or packaged ingredients are certified gluten-free. The result is a vibrant, weeknight-friendly meal that can be scaled up for family dinners or batch-cooked for the week ahead.

Tips

Tips for Hawaiian Chicken Bowl

Marinade and glaze balance

  • Reserve a portion of the marinade before tossing the chicken to avoid cross-contamination. Use the reserved portion as part of the glaze, or boil it for 1–2 minutes before brushing onto the cooked chicken to kill any bacteria from raw meat.
  • Taste the glaze before cooking. If it tastes overly salty from the soy, add a splash more pineapple juice or a tiny bit of lime juice to brighten it. If it’s too sweet, a touch more rice vinegar can help balance it.
  • For gluten-free recipes, use tamari or coconut aminos in place of soy. Keep in mind the flavor will shift slightly and saltiness may vary, so adjust accordingly.
  • Patience matters: a good glaze thickens as it simmers. If it seems thin, simmer a bit longer and keep an eye on it so it won’t burn due to sugar content.

Chicken preparation and searing

  • Pat the chicken thighs dry after trimming. A dry surface sears better and yields a crisper crust, which helps the glaze cling.
  • Do not overcrowd the pan. Cook in batches if needed to maintain a hot skillet; otherwise the chicken will steam rather than brown.
  • Cook time will depend on the size of pieces. Bite-sized pieces usually take 6–8 minutes total over medium-high heat, turning once for even browning. Aim for an internal temperature of 165°F (74°C).
  • Finish searing the chicken just before you’re ready to glaze to preserve moisture. If you glaze while the heat is very high, sugar in the glaze can burn; keep heat moderate when applying the glaze.

Glaze technique

  • Make a proper slurry: mix the cornstarch with cold water before adding to the pan. This prevents lumps and gives the glaze a glossy, clingy finish.
  • Add the slurry gradually and simmer for 1–2 minutes, stirring constantly, until the glaze coats the back of a spoon. If it’s too thick, add a splash of water or pineapple juice to loosen.
  • Brush glaze toward the end of cooking rather than at the start to avoid burning the sugars. A light glaze at the end gives a shiny finish without hiding the chicken’s crust.

Fruit, vegetables, and texture

  • Drain canned pineapple well or pat fresh pineapple dry to avoid extra liquid that can prevent browning on the chicken.
  • Slice vegetables evenly to ensure uniform cooking. If you prefer crisper peppers and onions, add them later in the cooking process or sauté them briefly after the chicken is seared.
  • For a more vibrant contrast, sauté the red bell pepper and red onion until they are just tender and still retain some bite. This helps the bowl stay crunchy and colorful.
  • If you like a stronger onion bite, keep the onion slices slightly thicker and add them a minute or two earlier so they soften but don’t dissolve.

Base and assembly

  • Cook jasmine rice ahead of time and fluff with a fork just before serving. Reheat leftovers with a splash of water to restore fluffiness and prevent mushiness.
  • Warm the bowls or plates slightly before adding hot components to keep everything at a good serving temperature.
  • Consider serving lime wedges on the side. A quick squeeze brightens the glaze and freshens the dish to taste.

Adaptations and make-ahead tips

  • For meal-prep: marinate and refrigerate the chicken up to 4 hours. Cook the chicken and glaze the day you plan to serve. Store cooked chicken and leftover glaze separately, then reheat and toss with warmed glaze just before serving.
  • To make this bowl more substantial, add a fried egg on top or serve with an extra scoop of rice. You can also swap jasmine rice for brown rice for more fiber.
  • If you’re avoiding sesame, you can skip the sesame oil and seeds or substitute with a small drizzle of olive oil for a gentler aroma. The glaze will still be delicious.

Storage and safety

  • Store leftovers in an airtight container in the refrigerator for up to 3–4 days. Reheat gently in a skillet with a splash of water or microwave until hot, then toss with any remaining glaze.
  • Boiled marinade (the portion used for the raw chicken) can be kept separate and used as a glaze after boiling; never reuse raw marinade without cooking it first.

FAQ

What is a Hawaiian Chicken Bowl?

A Hawaiian Chicken Bowl is a quick, colorful dish with sautéed or grilled chicken, pineapple, bell peppers, and onions tossed in a sweet–savory pineapple-teriyaki glaze, served over rice.

What are the main ingredients?

Core ingredients include:

  • Chicken (breast or thigh)
  • Pineapple chunks (fresh or canned)
  • Bell peppers (any color)
  • Onion
  • Rice (white, brown, or jasmine)
  • Pineapple-teriyaki glaze (soy sauce or tamari, honey or maple, garlic, ginger, rice vinegar)
  • Optional garnishes: sesame seeds, green onions
How do I make it?

Steps:

  1. Cook rice according to package instructions.
  2. Season and cook chicken until browned and cooked through.
  3. Stir-fry peppers and onions until crisp-tender.
  4. Add pineapple and glaze; simmer until sauce thickens.
  5. Serve over rice and garnish with sesame seeds or green onions.
Can I make it gluten-free?

Yes. Use tamari or coconut aminos instead of standard soy sauce, and ensure your glaze is gluten-free. If using store-bought teriyaki sauce, check the label for gluten.

Can I use frozen chicken or pre-cooked rice?

Yes. Thaw chicken fully and pat dry before cooking. Pre-cooked or microwaveable rice saves time—reheat according to package directions, and reheat the bowl with the chicken at the end if needed.

How long does it take to cook?

About 25–30 minutes total. 10–15 minutes active cooking, plus 5–10 minutes for rice if making it from scratch.

How should I store leftovers?

Cool leftovers and store in airtight containers in the refrigerator for up to 3–4 days. Reheat in a skillet or microwave. If the sauce separates, give it a quick simmer to re-emulsify.

Can I make a vegetarian or vegan version?

Yes. Replace chicken with tofu, tempeh, or chickpeas. Use cauliflower rice or regular rice and add extra vegetables if desired. For a vegan glaze, use maple syrup instead of honey.

What is the approximate nutrition per serving?

Approximate values per serving: 420–520 calories, 28–32 g protein, 60–70 g carbohydrates, 14–22 g sugar (from pineapple and glaze), 8–12 g fat, and 600–850 mg sodium. Values vary with ingredients and portion sizes.

What should I serve it with or how can I garnish?

Serve over fluffy rice and garnish with sesame seeds and sliced green onions. For extra color and crunch, add steamed broccoli, snap peas, or a side salad.

Any tips for best flavor and texture?

Tips: (1) If you have time, marinate the chicken for extra flavor. (2) Sear the chicken well for browning, then deglaze the pan with a splash of rice vinegar before adding the glaze. (3) Cook vegetables to crisp-tender, not mushy. (4) Simmer the glaze briefly to thicken before tossing with chicken and pineapple for a glossy finish.

Introduction / Hook

There’s something quietly luxurious about a slice of warm, perfectly toasted bread crowned with cottage cheese. It sounds simple—almost everyday—but this humble combination unfolds into a symphony of texture and brightness with every bite. The toasty crust provides a golden, nutty foundation that contrasts with the soft, cloud-like curds of cottage cheese, which brings a gentle tang, a velvet creaminess, and a surprising creaminess that lingers on the tongue. When you add a drizzle of honey or olive oil, a squeeze of lemon, or a scatter of herbs and seeds, the dish transcends its pantry roots and becomes a little moment of celebration for breakfast, lunch, or a lazy afternoon snack. It’s the kind of recipe that feels both comforting and exciting—like a familiar tune reinterpreted with fresh, zesty harmony.

Picture a kitchen filled with the welcoming aroma of toasted bread—the crackle as you lift a slice from the toaster, the warm steam that fogs the window, and the inviting scent of toasty grains mingling with the delicate perfume of dairy. The cottage cheese offers a cool counterpoint to the warmth, its milky notes brightened by a hint of citrus, a dash of salt, or a kiss of pepper. It’s a dish that invites improvisation: a canvas ready for your favorite flavors, from savory to sweet, from quick weekday bites to leisurely weekend brunches. The beauty of cottage cheese toast lies in its versatility, its speed, and its ability to feel indulgent even when it’s made with pantry staples. This is more than a snack; it’s a tiny ritual of nourishment that respects your time and your palate.

If you’re ever tempted to skip breakfast or reach for a processed quick-fix, consider this elegant, approachable toast instead. It’s the kind of recipe that travels well—from a busy apartment counter to a picnic blanket, from a hostel kitchen to a grandmother’s table. Its charm grows with the toppings you choose: the brightness of lemon zest; the softness of the cheese; the crispness of a well-toasted slice; the powdery kiss of sea salt; and the whisper of olive oil that glides across the surface. As you bite into it, you’ll notice how the simple elements come together in an almost alchemy-like way—the ordinary becomes extraordinary with the right balance of textures, temperatures, and contrasts. Cottage cheese toast is not just food; it’s a mood, a moment of clarity in a bustling day, and a tiny celebration of everyday ingredients doing something wonderfully special together.

The Story Behind the Dish

Cottage cheese has stood as a staple in many kitchens around the world for generations, valued for its mild flavor, high protein content, and adaptable texture. Its history is the story of farmhouse pantries and modern lifestyles colliding in a delightful, practical way. Long before trendy health foods existed, families discovered the simple magic of curdled milk strained to reveal soft, crumbly curds that could stretch to meet a meal or stand alone as a quick bite. Cottage cheese found its home in breakfast bowls, savory toppers, and even dessert plates in various cultures, each era leaving its mark with a unique twist.

The idea of bread with a cheese topping has deep roots too. Toasted bread has served as a warm stage for toppings since ancient times, when toasting gave food a longer shelf life and a more inviting aroma. It’s easy to imagine a bustling kitchen, perhaps in a small town or a sunlit cottage, where a grandmother or mother would spread cottage cheese across a slice just as the bread finished its transformation from soft crumb to crisp edge. In some places, cottage cheese met herbs, cucumbers, or tomatoes for a refreshing breakfast; in others, a drizzle of honey or a shower of cinnamon offered a sweeter variation that still kept things light and refreshing. What makes cottage cheese toast feel timeless is precisely this flexibility—the way it can carry a pinch of the familiar while inviting you to experiment with the new.

Over time, as culinary cultures intersected and kitchen pantries evolved, cottage cheese toast became a beacon of quick, nourishing meals that don’t compromise on flavor. It became popular with busy families, students, athletes, and anyone who appreciated a food that could be both comforting and energizing without demanding complex preparation. The dish reflects a broader trend toward simple, freezer-to-table or pantry-to-plate cooking—a reminder that good food doesn’t have to be fussy to be memorable. When you sprinkle on herbs or a squeeze of citrus, you’re tapping into a centuries-old instinct: that brightness and herbaceous freshness can turn a modest starter into something that feels celebratory. The result is a dish that feels familiar yet has the freedom to become something personal and unique with each topping choice.

Why You’ll Love This Recipe

  • Quick and versatile: Ready in minutes, perfect for rushed mornings or post-work hunger, with endless topping possibilities to suit your mood.
  • Protein-packed and satisfying: Cottage cheese adds a boost of protein to keep you full longer, making this toast more than a snack.
  • Balanced texture: The contrast between crisp, golden toast and creamy, cool cheese creates a delightful mouthfeel.
  • Customizable for all diets: Easily adaptable to vegetarian, gluten-free (by choosing gluten-free bread), and even lower-sodium preferences with the right toppings.
  • Budget-friendly: A simple, economical way to create a nourishing meal without breaking the bank.
  • Kid-friendly and universally appealing: Mild flavor with a playful topping palette makes it a crowd-pleaser for picky eaters and adults alike.
  • Great for meal planning: Works as a breakfast, a light lunch, or a hearty snack, and can be scaled up for a make-ahead brunch.

Flavor Profile & Texture

The flavor profile of cottage cheese toast sits at the intersection of brightness and creaminess. The toast offers a nutty, toasty backbone with a satisfying crunch, while the cottage cheese provides a cool, milky canvas with a subtle tang. Depending on your toppings, the overall taste can range from gently savory to lightly sweet, with citrusy zing, herbal brightness, or a whisper of sweetness from honey or fruit. The saltiness of the cheese—especially when lightly salted—helps bring out the savory notes in herbs, olive oil, and pepper, while citrus or vinegar can lift the richness and keep the bite lively. The texture is the star of the show: a crisp exterior yielding to a soft, fluffy interior of cheese, punctuated by crunchy seeds, juicy tomato, or translucent cucumber slices, all dancing together on your palate.

Texture combinations are where this dish truly shines. There’s the contrast between hot toast and cooler cheese; the gentle melt of the curds against a crisp crust; a burst of juicy tomato or cucumber that adds moisture without weighing down the topping. If you add seeds or nuts, you introduce a surprise crunch that makes each bite feel dynamic. Herbs add aromatics that wake up the senses long before you take your first bite, while a delicate drizzle of olive oil or a squeeze of lemon zests brings a bright, finishing note. For those who prefer a sweeter angle, a light honey glaze along with a sprinkle of cinnamon or a handful of fresh berries can transform the dish into a breakfast or snack with a touch of indulgence without losing its light character. This versatility is what makes cottage cheese toast so irresistibly adaptable to your daily flavor cravings.

Occasions & Pairings

These toasty little beauties are perfect for a wide range of occasions. They shine as a quick weekday breakfast that still feels special, a nourishing post-workout snack, a graceful addition to a weekend brunch, or a light lunch on days when you want something comforting yet not heavy. They’re also ideal for entertaining guests who favor simple, elegant bites that don’t require a lot of kitchen time. The options for toppings are almost endless, so you can tailor them to the occasion and to your guests’ preferences—saving you from last-minute recipe stress while delivering guaranteed satisfaction.

Pairing ideas to elevate cottage cheese toast:

  • Savory: Diced tomatoes, cucumber slices, fresh dill or chives, cracked black pepper, a drizzle of extra-virgin olive oil, and a pinch of sea salt.
  • Herbal brightness: Lemon zest, lemon juice, parsley, and a light sprinkle of chili flakes for a gentle kick.
  • Umami kick: Slices of avocado, a few capers, a touch of smoky paprika, and a drizzle of balsamic glaze.
  • Fresh and crisp: Thinly sliced radishes, microgreens, a splash of lime juice, and sesame seeds.
  • Sweet twist: A spoonful of honey or fig jam, sliced almonds, and a few fresh berries for a breakfast or dessert-inspired toast.
  • Protein-forward: Smoked salmon or tuna, a swirl of Dijon mustard, and dill for a heartier, lunch-worthy option.
  • Global vibe: Sliced olives, sun-dried tomatoes, and a drizzle of olive oil, or a sprinkle of za’atar for a Middle Eastern twist.

Tips, Variations & Substitutions

  • Bread choices: Any sturdy bread works—baguette slices, whole-grain sourdough, country bread, or gluten-free options. For extra crunch, toast until deeply golden on the edges.
  • Cottage cheese varieties: Choose full-fat for a richer mouthfeel, low-fat for lighter fare, or flavored varieties to add a base note without heavy toppings. If you’re dairy-free, try a plant-based cottage cheese alternative or a thick almond yogurt as a base, though the texture will differ slightly.
  • Sweet vs. savory: Keep it sweet with honey and fruit; go savory with herbs, olive oil, and pepper. Don’t be afraid to mix and match to suit your mood.
  • Herbs and aromatics: Dill, chives, parsley, basil, mint—these brighten the cheese and cut through the richness. A whisper of lemon or orange zest lifts the flavors beautifully.
  • Texture boosters: Add crunch with toasted seeds (pumpkin, sunflower, sesame), chopped nuts, or crisped chickpeas. A sprinkle of pomegranate seeds can add a tasty pop of sweetness and color.
  • Sea salt and pepper: A light shower of flaky sea salt and a crack of black pepper or smoked paprika enhances the flavor without overpowering the cheese.
  • Make-ahead ideas: Prep cheese and toppings separately the night before. Toast slices fresh in the morning, then assemble. For brunch buffets, set out bowls of toppings and let guests build their own toasts.
  • Diet-friendly twists: Use gluten-free bread for a gluten-free version; select low-sodium cottage cheese or pair with salt-reduced toppings to keep the sodium in check; opt for vegan cheese alternatives where appropriate.
  • Regional twists: A Mediterranean spin could feature feta (or a tangy plant-based substitute), cucumber, tomato, olives, and oregano; a Scandinavian twist might include smoked salmon, dill, lemon, and capers.

Storage & Make-Ahead Ideas

Because the beauty of cottage cheese toast lies in its quick assembly, storage mostly concerns the individual components. Keep toasted bread in a cool, dry place or a resealable bag for up to a day or two, depending on freshness. If you plan to assemble ahead, store cottage cheese in a sealed container in the refrigerator and keep toppings separately in small bowls. This ensures the toast remains crisp and the cheese stays creamy rather than watery. When you’re ready to serve, simply toast the bread to your preferred level of crunch, then spoon on the cottage cheese and finish with your chosen toppings. If you have leftovers, you can keep unassembled toppings in the fridge for up to 2-3 days; the toast, once prepared, is best enjoyed fresh for the best texture and taste.

Make-ahead tips:

  • Pre-toast slices and store in a breathable container to maintain crustiness; re-crisp briefly in a warm oven or toaster oven before serving.
  • Whip up a small topping bar for gatherings: fresh herbs, sliced veggies, fruit preserves, nuts, and seeds arranged for guests to assemble their own custom toasts.
  • For meal-prep, portion cottage cheese into small containers with a squeeze of citrus or a pinch of salt to pre-season, then pair with a separate container of toppings for quick assembly in the morning.

Fun Facts & Trivia (Optional)

Cottage cheese is not just a staple; it’s a cultural chameleon. From Eastern European kitchens where it’s often blended with dill and chives to Mediterranean tables where it mingles with olive oil and herbs, this simple curd has inspired countless regional toppings. The texture you enjoy—soft curds that melt into a creamy, slightly tangy bite—comes from a careful balance of milk, rennet or acid, and time. Some people like to culture their cottage cheese to introduce a tangier, more complex flavor, while others prefer the straightforward, clean dairy taste that makes it a perfect base for any topping. And because it’s partial to contrast, cottage cheese toast pairs especially well with both crisp, toasted bread and vibrant, fresh ingredients—making it a tiny window into how versatile one humble ingredient can be when you approach it with curiosity and a playful palate.

Ingredients

Toast Base

  • 2 slices whole-grain bread (or your preferred sturdy bread)
    → The bread forms the toast’s foundation. Toast until the crust is golden and crisp so it can support the cottage cheese without becoming soggy. If using gluten-free bread, choose a dense option and toast longer to mimic the structure of a traditional loaf. Store bread in a cool, dry place or toast immediately before assembling for best texture.

Cottage Cheese Filling

  • 1 cup plain cottage cheese (drained if very watery)
    → The cottage cheese provides the creamy, protein-rich spread that forms the base of the filling. For a smoother texture, drain excess whey in a fine-mesh sieve and gently press with a spoon. If you prefer a silkier finish, whisk briefly or blend with a splash of milk until creamy before mixing with other flavorings.
  • 1 tablespoon fresh lemon juice
    → Brightens the mild dairy flavor and adds a clean citrus note that cuts richness. Stir into the cottage cheese until evenly distributed; use freshly squeezed juice for the best aroma. If you’re sensitive to lemon, 1 teaspoon of zest can be used in place of some juice for aroma without extra acidity.
  • 1/4 teaspoon fine sea salt
    → Enhances the spread’s flavor and helps balance the tang of the cottage cheese. Add to the filling and taste before assembling; if using salted cottage cheese or toppings with salt, reduce accordingly. For a milder profile, start with 1/8 teaspoon and adjust up slowly.
  • 1/8 teaspoon freshly ground black pepper
    → Adds a subtle warmth and depth to the filling, helping the flavors pop against the bread and toppings. Grind just before mixing to maximize aroma; omit if you prefer a milder taste.

Optional Add-ins

  • 1 tablespoon chopped fresh dill or chives (optional)
    → Fresh herbs brighten the filling with fragrant, green notes. Finely chop to distribute evenly; if using dried herbs, crush between fingers and use about 1/4 teaspoon to approximate fresh flavor. This also adds a pleasing color contrast.
  • 1 tablespoon minced shallot or red onion (optional)
    → Introduces a gentle bite and aroma. For milder onion flavor, soak minced onion in cold water for 5 minutes, then drain well before mixing to reduce sharpness and extra moisture.
  • 2 tablespoons cucumber, finely diced (optional)
    → Adds refreshing crunch and moisture; dice small so it blends smoothly with the cottage cheese. Pat dry if cucumber is very juicy to prevent soggy toast.
  • 1 tablespoon capers, drained (optional)
    → Briny pops of flavor that pair wonderfully with dairy-based spreads. Rinse briefly to remove excess brine and chop finely to distribute evenly. Consider reducing additional salt elsewhere in the recipe when using capers.

Toppings

  • Cherry tomatoes, halved or thinly sliced (optional)
    → Provide juicy sweetness and color; scatter on top for freshness. Let tomatoes come to room temperature for best flavor, and season lightly with a pinch of salt if desired. If not in season, thin cucumber slices or roasted peppers can be good substitutes.
  • Avocado, sliced (optional)
    → Adds creamy richness and a second texture layer. Slice thinly to cover evenly and prevent overpowering the cottage cheese. If prepping ahead, drizzle with a little lemon juice to prevent browning.
  • Sliced smoked salmon (optional)
    → A luxurious, protein-rich topping that pairs beautifully with the dairy filling. Place on top just before serving to maintain texture; keep salmon cold until use and use thin slices for even distribution.
  • Microgreens or fresh herbs (optional)
    → A final herby or leafy top adds aroma and color. Gently tear or snip to avoid bruising and sprinkle sparingly so they don’t overwhelm the filling.
  • Drizzle of extra-virgin olive oil (optional)
    → Adds a note of fruity fat and shine. Use a light drizzle to enhance flavor without making the toast soggy; a teaspoon or two is usually sufficient for 2 slices.
  • Red pepper flakes or cracked black pepper, to taste (optional)
    → For a touch of heat and a contrasting finish. Start with a pinch and adjust after tasting to control intensity.

Instructions

  • Toast the slices of whole-grain bread in a toaster or on a dry skillet until the crust is golden and crisp, allowing a sturdy base that will support the filling without becoming soggy.

    → A crisp toast provides structure and contrasts with the creamy cottage cheese, while also creating surface area for even spreading. If using dense gluten-free bread, extend toasting time slightly for a sturdier foundation.
  • Drain the cottage cheese thoroughly in a fine-mesh sieve and press gently to remove excess whey, then transfer to a bowl for mixing.

    → Removing excess moisture prevents a watery filling that can make the toast soggy and helps the flavors bind more smoothly. If very watery, let drain for 5–10 minutes and pat dry with paper towels.
  • Whisk or fold the drained cottage cheese with 1 tablespoon fresh lemon juice, 1/4 teaspoon fine sea salt, and 1/8 teaspoon freshly ground black pepper until the mixture is evenly seasoned and light in texture.

    → The lemon juice brightens the dairy’s mild flavor, while salt and pepper balance acidity and add depth; aim for a cohesive spread that holds its shape on the toast.
  • Stir in 1 tablespoon chopped fresh dill or chives if you are using them, ensuring even distribution and a bright herbal note.

    → Fresh herbs lift the filling with fragrance and color; finely chop to help them distribute evenly without clumping.
  • If using shallot or red onion, fold in 1 tablespoon minced shallot or red onion and, to mellow sharpness, soak the onion in cold water for 5 minutes before draining well.

    → Soaking reduces raw bite and excess moisture while preserving aroma; pat dry before mixing to avoid adding extra water to the filling.
  • Fold in 2 tablespoons finely diced cucumber if desired, ensuring the pieces are small enough to blend with the cottage cheese and pat dry if they release moisture.

    → Diced cucumber adds refreshing crunch and moisture, but excessive moisture can make the filling runny; dabbing or patting dry helps maintain texture.
  • Stir in 1 tablespoon drained capers, chopped finely, to introduce briny pops that complement the dairy filling.

    → Capers provide a savory contrast; rinse briefly to remove excess brine and chop finely so flavors distribute evenly without overpowering the spread. Consider reducing salt elsewhere if using capers.
  • Spread a thick, even layer of the cottage cheese mixture onto each toasted slice, using a flat-edged knife and gentle pressure to avoid tearing the bread.

    → Even distribution creates a uniform base for toppings and ensures each bite has balanced dairy flavor; avoid overworking to keep a light, creamy texture.
  • Top each toast with halved or thinly sliced cherry tomatoes, arranging them to cover the surface for consistent sweetness and moisture.

    → Room-temperature tomatoes deliver the best aroma and flavor; a light pinch of salt can enhance their sweetness if desired.
  • Add thin slices of avocado over the cottage cheese layer, fanning them so they cover the surface without stacking thickly.

    → Avocado adds creaminess and richness; slice thinly to avoid overpowering the dairy and ensure even mouthfeel across bites.
  • Place slices of smoked salmon on top of the avocado if using, arranging them in an even layer and keeping them cold until serving.

    → Salmon adds a luxurious, protein-rich contrast; use thin slices to maintain balance and prevent heavy stacking.
  • Gently scatter microgreens or fresh herbs over the tops to finish, tearing or snipping as needed to avoid bruising and to maintain delicate flavor.

    → The greens provide aroma and color; a light sprinkle keeps the focus on the creamy filling while adding a fresh finish.
  • Finish with a light drizzle of extra-virgin olive oil, applying a small amount to the surface without saturating the bread.

    → A touch of fruity fat enhances richness and sheen while carrying brightness from the lemon; keep drizzle minimal to preserve toast integrity.
  • Season with a pinch of red pepper flakes or cracked black pepper to taste, then lightly re-taste the toast to balance flavors.

    → A hint of heat or pepper adds contrast and lifts the creamy filling; adjust carefully to avoid overpowering the delicate dairy notes.
  • Serve the cottage cheese toasts immediately while the bread remains crisp and the toppings retain their texture.

    → Freshness matters for texture and flavor; if making ahead, keep components separate and assemble just before serving to maintain crunch.
  • Alternatively, compose the toast components on a platter with all toppings in bowls so guests can customize each slice to their preference.

    → This method ensures even distribution of toppings and allows guests to adjust textures and flavors according to taste.

Notes

These cottage cheese toasts are a quick, protein-rich option for breakfast or a light lunch. To ensure a creamy but not watery filling, drain the cottage cheese well and mix with fresh lemon juice, salt, and pepper before spreading on toasted bread. Customize with chopped fresh dill or chives, minced shallot, cucumber, and capers for brightness and texture. Top with cherry tomatoes, avocado, or slices of smoked salmon for extra color and flavor. Finish with microgreens or herbs, a light drizzle of extra-virgin olive oil, and a touch of red pepper flakes or cracked black pepper to taste. They reheat or meal-prep well if you assemble the toppings just before serving to keep the toast crisp. If you are avoiding gluten, choose a dense gluten-free bread and toast longer to mimic traditional toast structure. For a smoother spread, blend the cottage cheese briefly with a splash of milk; you can also use a whisk for a silkier finish before adding flavorings. Always start with plain, low-sodium cottage cheese or drain well and adjust salt when using salted toppings.

Tips

Tips for Perfect Cottage Cheese Toasts

  • Toasting the bread: Choose sturdy whole-grain slices and toast until the crust is deeply golden and crisp, giving the toast enough structure to hold the cottage cheese without becoming soggy. For gluten-free bread, pick a dense option and extend toasting time if needed. Store bread in a cool, dry place or toast immediately before assembling for best texture.
  • Preparing the cottage cheese filling: Drain any excess whey from the cottage cheese and press gently to remove moisture. For a silkier texture, whisk briefly or blend with a splash of milk before mixing with other flavorings.
  • Brightening with lemon: Add freshly squeezed lemon juice to the cottage cheese for a fresh citrus lift. If you’re sensitive to acidity, start with a smaller amount and adjust. You can substitute some of the juice with a pinch of lemon zest for aroma without extra liquid.
  • Seasoning balance: Start with a small amount of fine sea salt and taste, especially if your cottage cheese is salted or if toppings will add salt. Remember you can add more, but you can’t remove it easily.
  • Pepper for depth: Freshly ground black pepper adds subtle warmth; grind just before mixing to preserve aroma. Omit if you prefer a milder filling.
  • Herbs and aromatics: Add chopped fresh dill or chives to brighten the filling. If using dried herbs, crush between your fingers and use about 1/4 teaspoon to approximate fresh flavor and color.
  • Onion notes: For a gentle bite, mix in minced shallot or red onion. To soften sharpness, soak the minced onion in cold water for 5 minutes, then drain well before mixing.
  • Cruncy freshness: Include finely diced cucumber for moisture and texture. Pat dry if cucumber is very juicy to prevent soggy toast.
  • Briny accents: If using capers, drain, rinse, and chop finely to distribute evenly. Consider reducing additional salt elsewhere in the recipe when using capers.
  • Topping strategy: Let toppings like cherry tomatoes come to room temperature for maximum sweetness. If out of season, substitute with thin cucumber slices or roasted peppers for color and moisture balance.
  • Creamy layers with avocado: If using avocado, slice thinly and place evenly to avoid overpowering the cottage cheese. A light lemon juice drizzle on avocado can prevent browning if prepping ahead.
  • Smoked salmon: Add thin slices of smoked salmon on top just before serving to preserve texture; keep the salmon chilled until use for best taste and quality.
  • Herb finish: Tear or snip microgreens or fresh herbs gently to keep their aroma intact; sprinkle sparingly so they complement rather than overwhelm the filling.
  • Oil for shine: A light drizzle of extra-virgin olive oil adds a fruity note and shine. Use about 1 teaspoon per 2 slices to avoid sogginess.
  • Heat and spice: If you like a hint of heat, finish with a small pinch of red pepper flakes or cracked black pepper; taste and adjust after initial bites.
  • Assembly tips to avoid sogginess: Assemble toppings in a way that avoids soaking the bread—place moisture-rich items on top or just before serving, and consider layering the filling lightly to preserve crunch in the toast.
  • Make-ahead tips: Prepare the cottage cheese filling in advance and refrigerate up to 24 hours; keep bread toasted fresh and toppings separate until serving to maintain texture.

FAQ

Cottage Cheese Toasts FAQ

What are cottage cheese toasts?

They’re simple open-faced toasts topped with cottage cheese. A creamy base with endless topping possibilities, making a protein‑packed, versatile snack or light meal.

How do I make cottage cheese toast?

Toast your bread to your preferred level of doneness. Spread a generous layer of cottage cheese, season lightly with salt and pepper, and add toppings such as vegetables, herbs, fruits, or a drizzle of olive oil or honey. Enjoy fresh.

What bread works best for cottage cheese toast?

Choose sturdy breads that can hold toppings, such as whole‑grain, sourdough, rye, or thicker white bread. Toast until crisp to prevent sogginess and to hold up the toppings.

What toppings pair well with cottage cheese toast?

Savory ideas: sliced tomatoes, cucumber, avocado, olives, herbs (dill, chives, parsley), pepper, chili flakes, a splash of olive oil. Sweet ideas: berries, sliced banana, honey, jam, a pinch of cinnamon. A squeeze of lemon or lime can brighten flavors.

Can I make this ahead of time?

Best enjoyed fresh, but you can prep components in advance. Toast the bread, keep cottage cheese, fruits, and vegetables chopped in the fridge, and assemble just before serving. If you must pre-assemble, keep toppings modest and add a freshness boost (herbs, lemon juice) right before serving to prevent sogginess.

Are cottage cheese toasts healthy?

Yes, they can be. Cottage cheese provides protein and calcium. Choose low‑sodium varieties, and pair with fiber‑rich bread. watching portion sizes and toppings helps keep it balanced.

Can I make this vegan or dairy-free?

Yes. Use a plant‑based cottage cheese substitute (many brands offer vegan cottage cheese or cultured cashew products), or swap with vegan ricotta, mashed avocado, or cashew cream as a creamy base. Pair with vegan-friendly toppings.

How can I tailor cottage cheese toast for kids?

Keep toppings simple and mild. Use familiar flavors like fruit slices, a drizzle of honey, or a light sprinkle of cinnamon. Cut into kid-friendly shapes or bite-sized pieces, and avoid strong spices.

How should I store leftovers?

Toast is best eaten fresh. If you have leftovers, refrigerate any unused cottage cheese and toppings separately in airtight containers. Reassemble on fresh toast when you’re ready to eat. Pre‑toasted bread can be kept for a day or two in a bag, but the texture may soften with toppings left on.

Introduction / Hook

Picture a sunlit kitchen where the air carries the bright scent of ripe strawberries, vanilla, and a whisper of lemon zest. You reach for a plate of delicate rolls that look almost like little gifts: soft, pale ribbons of pastry hugging a pale pink whirl of creamy filling, each one gleaming with a glossy glaze or a dusting of sugar. The first bite releases a symphony of textures—a tender, melt-in-your-mouth shell gives way to a velvety cheesecake center, its tang balancing the fruit’s natural sweetness. The strawberry notes are fresh and vibrant, dancing with a hint of citrus and a whisper of vanilla. These are Strawberry Cheesecake Rolls—a charming, bite-sized dessert that feels fancy enough for a special occasion, but accessible enough for a weeknight treat. They’re the kind of dessert you want to reach for when you crave something comforting, elegant, and a little bit playful all at once. They’re not just a dessert; they’re a petite celebration in every bite, a portable moment of dessert joy that you can share with friends, family, or anyone who appreciates a little luxury wrapped in a simple, approachable form.

What makes these rolls so appealing is how they balance elegance with practicality. They can be prepared ahead of time, assembled in layers, and served with minimal fuss. The flavor is familiar and comforting—the classic tang of cream cheese meets the bright, sun-kissed sweetness of strawberries—yet the presentation feels modern and irresistible. Whether you’re planning a brunch, a summer picnic, or a cozy dessert after a weeknight dinner, these Strawberry Cheesecake Rolls fit the moment with their soft textures, glossy finish, and irresistible strawberry glow. They invite you to slow down, slice a roll, and savor that first, unmistakable bite—the moment when the creamy filling meets the juicy fruit and a whisper of citrus lingers on the palate. And because bites are small, you can indulge a little without feeling heavy-handed, making them perfect for sharing or for treating yourself after a long day.

The Story Behind the Dish

Every good dessert carries a story, and these Strawberry Cheesecake Rolls began as a kitchen experiment born from a summer afternoon sprinting through the garden, picking baskets of strawberries while the sun dipped low. The idea was simple: create a dessert that combined the classic indulgence of cheesecake with the lightness of a rolled pastry, something you could tuck into a lunchbox, a picnic basket, or a party platter without feeling overdone. A family member who loves both baking and travel remembered a street vendor in a sun-drenched market who wrapped creamy fillings in thin pastry and dusted them with powdered sugar. The traveler’s tale sparked a memory—the dream of a bite-sized cheesecake that could be rolled, sliced, and shared. The result was a delicate harmony: a soft pastry shell, a luxuriously smooth filling, and bright strawberry notes that echo the season’s harvest. This dish became a bridge between nostalgia and novelty, a modern take on classic flavors that respects the tradition of cheesecake while embracing the playful, roll-up form that makes dessert feel like a little parade on a plate.

In this version, the rolls are assembled with careful layers, letting the pastry do its job as a gentle envelope for a creamy center. The process is as much about texture as taste: you want a light, tender exterior that yields to a rich, luscious interior. The strawberries, either fresh or lightly macerated, provide a natural sweetness and a vibrant color that makes the finished rolls irresistible to the eye. The story behind the dish celebrates a love of simple ingredients transformed through technique—cream cheese softened to ease blending, a touch of lemon to brighten, and a pinch of vanilla to tie together the fruit and dairy in a way that feels both familiar and new. It’s a recipe that invites you to create a moment of sweetness in your own kitchen, to share a comforting dessert that feels like a small, thoughtful gift to those around you.

Why You’ll Love This Recipe

  • Accessible and approachable: no heavy equipment or intimidating techniques required, making it perfect for bakers at any level.
  • Versatile flavor profile: balances creamy tang with bright strawberry sweetness and a hint of citrus for depth.
  • Make-ahead friendly: can be prepared in stages, refrigerated, and assembled when ready to serve for stress-free entertaining.
  • Kid-friendly and crowd-pleasing: visually appealing and naturally sweet, great for birthdays, showers, picnics, and potlucks.
  • Lightly indulgent without being overly rich: the roll format gives you portion-controlled bites that feel special without weighing you down.
  • Customizable: adapt to dairy-free, gluten-free, or vegan preferences with thoughtful substitutions (see Tips & Variations).
  • Beautiful presentation: a glossy finish, rosy interiors, and clean slices make this dessert look as delightful as it tastes.

Flavor Profile & Texture

The flavor journey begins with a gentle sweetness that never overwhelms. The filling offers the unmistakable tang of cream cheese, softened to silkiness, mingling with a touch of vanilla and a whisper of lemon to brighten the dairy richness. The strawberry presence is both fragrant and fresh—either in small diced pieces or a faint strawberry swirl—so you get punctuations of fruit in every bite rather than a dominant jammy flavor. The pastry or outer wrapper provides a delicate contrast: a tender, almost melt-in-your-mouth bite with a hint of pastry sweetness and a subtle crumb or crisp edge, depending on the exact method used to create the shell. This creates a pleasing tension between the creamy center and the soft, pastry-wrapped exterior, an enchanting balance that makes each bite a dance between smooth, cool cheesecake and the light, airy shell around it. If you choose to glaze or dust with sugar, you’ll enjoy a final glossy kiss that enhances the color and adds a whisper of sweetness without dulling the bright fruit notes.

Texture-wise, think of a velvety center that coats the tongue with cheesecake’s classic creaminess, followed by a gentle bite from the outer shell. The strawberry pieces provide occasional pops of fruit texture, adding freshness and a tiny tang that keeps the sweetness in check. A light glaze or powdered sugar finish can add a satin sheen and a hint of sweetness that lingers on the palate. The overall mouthfeel is luxurious but not heavy—a dessert that feels indulgent in presentation but keeps the essence of a simple, honest treat. The balance of flavors—cream cheese, vanilla, lemon, and strawberries—remains harmonious, ensuring that no single component overwhelms the others and that the sweetness comes from fruit and a touch of sugar rather than from cloying richness. It’s a profile that invites you to savor slowly, to discover new nuances with each bite, and to appreciate how a few well-chosen ingredients can deliver a memorable dessert experience.

Occasions & Pairings

Strawberry Cheesecake Rolls are at-home-friendly yet impressive enough for special occasions. They shine at family brunches, bridal or baby showers, and outdoor summer gatherings, where their bite-sized nature makes them easy to share. They also work beautifully as a refined finish to a light dinner party menu, offering a dessert that feels indulgent without sitting heavy after the main course. For holiday entertaining, these rolls provide a charming twist on cheesecake that fits into a multi-dessert spread without demanding too much time. Their elegant presentation makes them ideal for celebrating milestones or simply turning an ordinary weeknight into something a bit more elevated.

Pairing ideas to elevate the experience:

  • Drinks: a lightly sparkling beverage such as sparkling rosé, a dry prosecco, or a citrus-forward iced tea to mirror the citrus notes in the filling.
  • Side dishes: a fresh berry salad, lemon-yogurt parfaits, or a small plate of lightly salted nuts to complement the sweetness and texture.
  • Dessert companions: a light citrus curd tart, a panna cotta with berry compote, or almond biscotti that adds a contrasting crunch.
  • Garnishes: fresh mint leaves, thin strawberry slices, or a light dusting of powdered sugar to finish the rolls with a delicate, celebratory touch.

Tips, Variations & Substitutions

Here are practical ideas to customize the recipe while keeping the essence of Strawberry Cheesecake Rolls intact. Use these as starting points to tailor the dessert to your pantry, dietary needs, or mood for the day.

  • Pastry shell variations: depending on your preference, you can use puff pastry sheets, prepared phyllo pastry brushed with butter, or a delicate sponge-like wafer to wrap the filling. Each option offers a distinct texture, from crisp to tender to almost melt-in-your-mouth.
  • Cheesecake filling alternatives: for a lighter version, substitute part of the cream cheese with a whipped topping or a mascarpone blend. For a tangier note, increase the cream cheese ratio slightly and add a touch more lemon juice.
  • Vegan option: replace dairy with vegan cream cheese and a plant-based butter alternative. Use a dairy-free yogurt or cashew cream to mimic the tang and creaminess, and choose gluten-free pastry sheets if needed.
  • Gluten-free version: select gluten-free pastry sheets or gluten-free crepes as the outer layer. Ensure the cream cheese and any additives are gluten-free; many jams are naturally gluten-free but check the label.
  • Fruit variations: swap strawberries for raspberries, blueberries, or a mix of berries for a different color and flavor profile. You can also swirl some berry puree into the filling for a marbled effect.
  • Sweetness control: if you prefer less sugar, reduce the amount of sugar in both the filling and any glaze. You can use a sugar substitute that measures like sugar if you’re baking for someone watching sugar intake.
  • Texture twists: add a little lemon zest to the filling for extra brightness, or fold in a teaspoon of finely minced crystallized ginger for a subtle zing that pairs beautifully with berries.
  • Decoration ideas: drizzle with a light white chocolate glaze or a berry coulis to add color and extra flavor without overpowering the cake-like filling.
  • Make-ahead technique: prepare the filling and the outer wrappers in advance, refrigerate separately, and assemble shortly before serving to maintain the desired texture of the shell.

Storage & Make-Ahead Ideas

These Rolls lend themselves to careful planning, making them ideal for entertaining or meal-prep scenarios. Proper storage helps maintain their delicate texture and fresh flavor, so you can enjoy them over a few days without sacrificing quality.

Storage tips:

  • Refrigeration: store assembled rolls in an airtight container in the refrigerator for up to 2-3 days. If you prefer them to stay firmer, refrigerate the shell separately from the filling and assemble just before serving.
  • Freezing: you can freeze rolled, unglazed pastries after assembly. Wrap each roll tightly in plastic wrap and place in an airtight container or freezer bag. Thaw overnight in the refrigerator and reassemble or glaze just before serving.
  • Make-ahead strategy: for a party, prepare the pastry wrapper and the filling a day ahead. Assemble the rolls on the day of serving, and refrigerate until ready to slice and plate.
  • Reheating and serving: if the pastry shell is flaky and wants a bit of warmth, you can give the rolls a quick, gentle warm in a low oven (about 325°F / 165°C) for a few minutes, then allow to cool slightly before serving. This refreshes the aroma without compromising the filling’s texture.

Fun Facts & Trivia (Optional)

Did you know that cheesecake, in its many forms, has a history that stretches back thousands of years? The concept of a creamy cheese filling with a hint of sweetness appears in ancient Greek recipes, and the modern, creamy version we recognize today evolved through centuries of adaptation and regional flavors. Strawberries, meanwhile, have captivated people for centuries with their bright color and sweet-tresh scent, often used in desserts to evoke the feeling of warm summer days. The combination of a creamy cheesecake element with bright strawberry notes is a timeless pairing that feels both nostalgic and fresh, making it a favorite across generations. The roll format adds a modern twist to a classic flavor profile, showing how traditional ingredients can be reimagined into contemporary, crowd-pleasing confections. This dessert is a reminder that some classics never go out of style—they just need a new shape to keep them exciting.

Extra tidbits: rolling techniques for soft fillings can be traced to bakeries that popularized rolled pastries across Europe and America. The concept of rolling a filling inside a thin layer of pastry creates a neat, presentable dessert that’s easy to portion and share. The strawberry flavor is often enhanced by a small splash of citrus, a trick that enhances aromatic oils and brightens the overall flavor without adding heaviness. So, when you bite into a Strawberry Cheesecake Roll, you’re enjoying a modern confection with roots in centuries of dessert craft, a tribute to the timeless appeal of creamy, fruity, and light-as-air textures all wrapped into a single elegant bite.

Ingredients

    Puff Pastry / Crescent Roll Dough
    – 1 sheet puff pastry, thawed

    → Outer wrapper used to encase the cheesecake filling. Keep the puff pastry cold until ready to roll to prevent butter from melting and to help it puff correctly in the oven. If you’re using crescent roll dough instead, roll out the sheets into a single rectangle, removing perforations so the filling can be rolled evenly. Chill the sheet briefly after filling to maintain clean, tight rolls before slicing.

    Cream Cheese Filling
    – 8 oz cream cheese, softened

    → The creamy core of the cheesecake rolls. Soften to room temperature so it blends smoothly with the sugar and vanilla, avoiding lumps. Beat until light and fluffy for a silky texture that will hold the filling together inside the pastry. Keep refrigerated until ready to use.
    – 1/4 cup granulated sugar

    → Provides sweetness to the filling and helps achieve a smooth texture when beaten with the cream cheese. If you prefer a milder cheesecake sweetness, you can adjust to 2–3 tablespoons, but be careful not to overbeat which could introduce air and make the filling too loose.
    – 1/2 tsp vanilla extract

    → Classic cheesecake flavor; use pure vanilla for best aroma. If you have vanilla bean paste, you can substitute with 1/2 teaspoon plus a pinch of vanilla bean seeds for extra depth. Beat into the cream cheese mixture until fully incorporated.
    – pinch salt

    → A small amount of salt enhances the sweetness and balances the richness of the cream cheese. If using salted butter in the dough, be mindful of overall salt in the recipe.

    Strawberry Filling
    – 1 cup fresh strawberries, diced

    → The fruity core within each roll. Hull the berries and dice evenly so they distribute well. For a juicier filling, macerate with a little sugar (see next item) and drain slightly before using to avoid soggy pastry.
    – 1 tablespoon granulated sugar

    → Maceration sugar draws out strawberry juices, concentrating flavor and preventing the strawberries from releasing too much moisture during baking. Let sit 10–15 minutes, then drain excess juice if you want crisper rolls.
    – 1/2 teaspoon lemon juice (optional)

    → Brightens the strawberry flavor and helps preserve berry color. If you prefer a milder note, you can omit; the berries will still taste delicious.

    Optional Glaze/Finish
    – 2 tablespoons strawberry jam

    → Adds a glossy glaze that can be brushed onto rolls after baking for a strawberry sheen. Warm jam slightly to loosen before brushing; strain if desired to reduce seeds for a smoother appearance.
    – 1 tablespoon water

    → Used to thin jam into a light glaze consistency. Add gradually to reach the desired thickness; too much water will make the glaze runny.

    Dusting Finish
    – Powdered sugar, for dusting (optional)

    → A light dusting gives a pretty, snowy finish. Sift lightly over warm rolls just after they come out of the oven so the sugar clings to the steam and adds a delicate sweetness. If you prefer, you can skip this step.

Instructions

  • Preheat your oven to 375°F (190°C) and line a baking sheet with parchment paper to promote even browning and prevent sticking.
    → This ensures the rolls release cleanly from the pan and bake evenly without tearing the pastry.
  • Prepare the dough: If using puff pastry, keep it cold, unfold on a lightly floured surface, and roll to a rectangle about 12 by 8 inches; if using crescent roll dough, roll the sheets into a single rectangle and pinch perforations so the filling stays intact; chill briefly before filling to maintain a clean edge.
    → Cold, evenly rolled dough puffs properly in the oven and avoids thin, uneven spots that can burst.
  • Beat the cream cheese filling: In a medium bowl, beat 8 oz softened cream cheese with 1/4 cup granulated sugar, 1/2 teaspoon vanilla extract, and a pinch of salt on medium speed until completely smooth and fluffy.
    → Softened cream cheese blends with sugar and vanilla to create a silky, cohesive filling that holds the roll together during baking.
  • Prepare the strawberry filling: In a small bowl, combine 1 cup diced strawberries with 1 tablespoon granulated sugar and, if desired, 1/2 teaspoon lemon juice; let macerate for 10–15 minutes to intensify flavor and release juice, then drain any excess liquid to prevent soggy pastry.
    → Maceration concentrates strawberry flavor and ensures moisture is controlled for crisp pastry edges.
  • Assemble the filling on the dough: Roll the dough into a rectangle and spread an even layer of cream cheese filling over the surface, leaving a 1/2 inch border; distribute the strawberry filling in an even layer over the cream cheese.
    → An even layer prevents pockets of filling and ensures uniform slices with balanced filling in every bite.
  • Roll the dough tightly from a long edge into a log, using steady, even pressure; pinch the seam closed with a light dab of water and place seam-side down; chill the log for 10–15 minutes to firm the shape for clean slicing.
    → Chilling solidifies the fats, making the rolls hold their shape when cut and baked.
  • Slice the log into evenly sized rounds about 3/4 to 1 inch thick using a sharp serrated knife, wiping the blade between cuts to prevent dragging the filling.
    → Consistent thickness ensures uniform baking and a neat appearance in every roll.
  • Arrange the slices on the prepared sheet with about 1 inch of space between them to allow for expansion; gently press any exposed seam edges to help them stay sealed during baking.
    → Adequate spacing prevents sticking and promotes even browning and puffing.
  • Bake in the preheated oven at 375°F (190°C) for 15–18 minutes, rotating the pan halfway through for even browning; bake until the pastry is puffed, golden, and the filling is set.
    → Rotation prevents hot spots that cause uneven color and ensures all rolls cook through evenly.
  • Glaze the rolls (optional): Warm 2 tablespoons strawberry jam with 1 tablespoon water until smooth and pourable; brush a thin glaze over the hot rolls and, if desired, strain to remove seeds for a smoother finish.
    → The glaze adds shine and an extra strawberry flavor that complements the creamy filling.
  • Finish with a light dusting of powdered sugar (optional): Dust the rolls while still warm or just cooled to add a delicate sweetness and an appealing contrast; avoid heavy dusting that could mush the surface.
    → The sugar creates a pretty, snowy finish that enhances presentation and sweetness perception.
  • Serve promptly or store properly: Serve the rolls warm for best texture and flavor, or cool completely and store in an airtight container in the refrigerator for up to 2 days, reheating briefly before serving to restore puff.
    → Freshness matters for pastry texture; gentle reheating revives crispness and aroma without drying the filling.

Notes

These Strawberry Cheesecake Rolls are a playful, indulgent treat that pair a creamy, vanilla-sweetened cheesecake filling with juicy strawberries wrapped in flaky puff pastry. Keep the pastry cold until you’re ready to roll to help it puff and prevent butter from melting; if you’re using crescent roll dough instead, roll the sheets into one rectangle and remove perforations so the filling seals neatly, then chill briefly after filling to maintain clean edges. For the filling, soften the cream cheese to room temperature and beat it with granulated sugar, vanilla extract, and a pinch of salt until light and fluffy. The texture should hold the filling together inside the pastry without cracking. For the strawberry filling, dice fresh strawberries and macerate with a tablespoon of sugar for 10–15 minutes to draw out flavor; drain excess juice to avoid soggy pastry. If you like a brighter note, add a half teaspoon of lemon juice. When assembling, lay a line of filling and strawberries along the pastry, roll tightly, and seal the seam with a light egg wash (optional). Chill the wrapped rolls briefly before slicing to keep them tight and even. Bake until the pastry is golden and puffed, typically around 375–400°F (190–205°C) for 14–18 minutes, monitoring closely as oven temperatures vary. If you’d like a glossy finish, brush warm strawberry jam thinned with a teaspoon or so of water onto the rolls after they come out of the oven and let the jam glaze set; strain the jam if you want fewer seeds. A light dusting of powdered sugar adds a pretty finish if you like. Serve warm or at room temperature with a dollop of yogurt or a drizzle of yogurt for extra richness, and refrigerate leftovers in an airtight container for up to 2–3 days. To freeze, bake fully or freeze unbaked rolls on a tray, then transfer to a bag; reheat in a 350°F oven for 8–10 minutes. Always keep dairy items chilled and use within recommended timelines for best flavor.

Tips

Tips for Strawberry Cheesecake Rolls

  • Keep the puff pastry cold until you’re ready to roll. Cold butter helps the pastry puff and stay crisp. If it warms too much, chill the sheet for 10–15 minutes before continuing.
  • Let the cream cheese soften to room temperature so it blends smoothly with the sugar and vanilla, preventing lumps in the filling. Beat until light and fluffy for a silky texture that stays put inside the pastry.
  • Beat in the sugar gradually and don’t overbeat once the vanilla and salt are added. Overbeating can introduce air and make the filling looser than you want.
  • For the strawberry filling, dice berries evenly so every bite has fruit. Macerate with the sugar if you like deeper strawberry flavor, but drain the juices before filling to avoid soggy pastry.
  • If using the optional lemon juice, add just a tiny amount to brighten the berries without making them watery.
  • Spread the filling (cream cheese) in an even layer inside the pastry, keeping a clean 1–2 cm border to seal the roll well.
  • Roll the pastry tightly but not too tightly to avoid squeezing out the filling. Pinch the seam with a damp fingertip (or a touch of water) to seal securely.
  • When using crescent roll dough, roll it into a single rectangle and remove perforations so the filling rolls evenly. Chill the sheet briefly after filling to maintain clean, tight rolls before slicing.
  • Chill the assembled roll (before slicing) for about 15–20 minutes. This helps the pastry hold its shape and makes clean slices easier.
  • Use a sharp knife or slicer to cut even portions. Wipe the blade between cuts for neater rolls and to prevent dragging the filling.
  • Line your baking sheet with parchment and space rolls well to allow even baking and puffing. If you want extra lift, you can brush the top lightly with a little water before baking.
  • Bake until the pastry is puffed and golden. Times vary by oven, so look for a deep golden color and fully puffed sides rather than a strict time.
  • For a glossy finish, heat the strawberry jam until liquid and brush it on the warm rolls after they come out of the oven. Strain out seeds if you prefer a smoother glaze.
  • Dust with powdered sugar while the rolls are still warm for best adhesion, then serve once they’re cooled to a comfortable temperature. You can rewarm individual rolls gently in a 350°F (175°C) oven for a few minutes if desired.
  • Store leftovers in the refrigerator in an airtight container. Reheat in a 350°F (175°C) oven for 5–7 minutes to refresh the pastry. Baked rolls can be frozen for longer storage and reheated from frozen.
  • Want to customize? A pinch of lemon zest in the filling or a splash of almond extract can add a nice background note—start small and taste as you go.

FAQ

What are Strawberry Cheesecake Rolls?

A no‑bake dessert where a creamy strawberry cheesecake filling is rolled up in thin wrappers (like flour tortillas or crepes) and then chilled until set.

What ingredients do I need to make Strawberry Cheesecake Rolls?

Typical ingredients include: softened cream cheese, powdered sugar, vanilla extract, fresh strawberries or strawberry puree, whipped cream or heavy cream, and thin wrappers such as flour tortillas or crepes. Optional additions are lemon zest, a pinch of salt, and garnishes like extra strawberries or graham cracker crumbs.

Are these rolls baked or no-bake?

They are no-bake. The filling sets as it chills, and the wrappers stay soft when kept refrigerated.

How do I roll them without tearing the wrappers?

Tips: use softened filling that spreads easily, leave a small margin around the edges, and lay the wrapper flat. Spread the filling in a thin, even line, add a few strawberry pieces if desired, then roll tightly from one edge to the opposite. Seal the seam and refrigerate to help them hold their shape.

How long should I chill the rolls?

Chill for 2–4 hours for best texture, or overnight. Chilling helps the filling set and makes slicing easier.

How should I store leftovers?

Store in an airtight container in the refrigerator. Consume within 2–3 days for best texture and flavor.

Can I make these gluten-free or dairy-free?

Yes. For gluten-free, use gluten-free wrappers (such as certified gluten-free tortillas or crepes). For dairy-free, use dairy-free cream cheese and a dairy-free whipped topping or whipped coconut cream. Ensure any wrapper you choose is also gluten-free if needed.

Can I freeze Strawberry Cheesecake Rolls?

Freezing is not ideal, as the texture of the filling and wrappers may change. If you must, freeze unrolled filling separately and prepare fresh rolls later. Best results are achieved fresh or within a couple of days.

Can I customize the flavors or use other fruits?

Absolutely. Swap strawberries for raspberries, blueberries, or mango. Add a hint of lemon or orange zest, or mix in finely chopped fresh fruit for a varied texture. You can also add a chocolate drizzle or crushed graham crackers for extra crunch.

What are some serving ideas or toppings?

Serve chilled with a light dusting of powdered sugar, extra strawberry slices, a drizzle of strawberry sauce, or a few mint leaves. You can also plate with whipped cream or a dollop of extra filling on the side for dipping.

Introduction / Hook

Close your eyes and imagine a dessert that caresses the senses from the very first bite. A cheesecake so luxuriously creamy it glides across the palate with the quiet confidence of velvet, yet underneath lies a foundation of caramel-spiced crunch—a crust built from the famous Biscoff cookies that whispers of cozy afternoons and European cafés. Each mouthful harmonizes the warmth of vanilla and cream cheese with the unmistakable, caramelized sweetness of lotus-baked cookies. The aroma alone is enough to summon memories of bustling markets, of long conversations over steaming cups of coffee, of holiday gatherings where friends and family crowd the kitchen counter to share stories as much as slices. This Biscoff Cookie Cheesecake isn’t just a dessert; it’s an experience—the kind of treat that makes ordinary evenings feel like a celebration and ordinary cravings feel suddenly indulge-worthy. It’s a recipe designed to impress without demanding every hour of your life in the kitchen, to be cherished as a centerpiece for special occasions and a reliable comfort for quiet Sundays alike.

As you approach this cheesecake, you’ll notice how the first impression is all about texture. The crust offers a satisfying snap that yields to a deeply creamy interior, a juxtaposition that makes every slice feel like a small, luxurious ritual. The Biscoff cookies, with their spice-kissed, caramel-laden profile, bring a distinctive warmth that distinguishes this dessert from its more conventional cousins. There is a gentle, almost irresistible sweetness, balanced by a hint of tanginess from the cream cheese and a whisper of salt that brightens the whole composition. And if you drizzle, swirl, or garnish with a touch of melted chocolate, a caramel ribbon, or roasted nuts, you’ll discover even more layers hiding within—surprises that reveal themselves as the cheesecake rests and the flavors mingle overnight.

This description isn’t just about what you’ll taste; it’s about what you’ll feel. There’s something comforting about biting into something familiar yet elevated, something nostalgic that’s been tuned to contemporary technique and presentation. It’s a recipe that travels well—from weeknight treat to holiday centerpiece—yet remains approachable enough for a confident home baker to pull off with confidence. In short, the Biscoff Cookie Cheesecake is the epitome of comfort-forward decadence: familiar flavors elevated by a refined texture, a balanced sweetness, and a storytelling aroma that invites seconds, and perhaps even thirds.

The Story Behind the Dish

Every bite of Biscoff Cookie Cheesecake carries a thread of history. The star cookies—the Biscoff, known for their deep, caramelized flavor and delicate spice—trace their roots to a tradition of speculoos biscuits that originated in Belgium and the Netherlands. Lotus, the brand most of us recognize, transformed a regional favorite into a global sensation with a simple, almost magical idea: bake cookies until they caramelize and take on a toasty, honeyed sweetness that dissolves merrily on the tongue. The cookies’ fragrance—cinnamon, clove, nutmeg, ginger—creates an olfactory map that instantly evokes winter markets, warm kitchens, and the soft glow of candlelight. They are not merely cookies; they are cultural memory in edible form, a ritual of dipping, pairing with coffee, and savoring the moment before dessert continues the celebration of the day.

In the tradition of many beloved cheesecakes, this particular rendition borrows a touch of European sweetness and folds it into a quintessential American dessert. The result is a harmonious marriage: a crust fashioned from finely ground Biscoff cookies bound with a little gentle fat, and a filling that respects the cookies’ signature flavor while letting the cream cheese, vanilla, and perhaps a whisper of citrus sing. The origins of the idea are humble—grandparents’ kitchens, neighborhood bakeries testing flavors, a best friend who swore that “cookie cheesecake” could be both comforting and impressive. Over time, bakers began sharing this version as a go-to party dessert: it travels beautifully, holds its shape well, and gains a certain elegance as it chills, slicing into perfect wedges that resemble a jewel-toned mosaic of heavenly textures. The story, then, is really about the joy of giving people something that tastes like home, but with a modern polish that makes it feel special enough for celebrations.

Historically, cheesecakes have always thrived on contrast—soft and firm, tangy and sweet, airy and dense. The Biscoff Cookie Cheesecake leans into this tradition with a modern twist: a crust that is not merely crunchy but deeply flavorful, and a filling that remains supremely creamy without feeling heavy. It’s a dessert that invites you to slow down, to breathe in the scent of warm spices, and to savor the moment of discovery with each slice. The cultural backdrop—coffee traditions, European patisserie, and the universal love of caramelized cookies—gives this cheesecake its soul. It’s not just a recipe; it’s a story about how simple ingredients, treated with care and respect, can become something memorable that travelers tell stories about long after the last bite has disappeared.

Why You’ll Love This Recipe

  • Impressive yet approachable: A show-stopping dessert that looks like a bakery-finished treat but comes together with accessible techniques.
  • Irresistibly creamy center: The filling achieves a lush, silky texture that melts on the tongue and leaves a lasting impression of richness without heaviness.
  • Distinctive crust: The Biscoff cookie crust provides a crisp, buttery foundation with a caramel-spiced depth that’s instantly recognizable and deeply satisfying.
  • Balanced flavor profile: Vanilla, cream cheese, and a hint of citrus balance the cookies’ caramel sweetness, while a light touch of salt keeps everything vibrant.
  • Versatile for occasions: Works equally well as a weeknight treat, a family celebration, or a holiday dessert that people remember long after the feast ends.
  • Make-ahead friendly: This cheesecake benefits from resting, giving flavors time to mingle and develop, while still delivering a spoonful of joy when served.
  • Customizable: Easily adaptable to dietary needs or flavor preferences with thoughtful substitutions and tasteful tweaks without losing its essence.
  • Pairing potential: Pairs beautifully with coffee, dessert wines, dark chocolate, or a bright berry compote, making the experience complete and cohesive.

Flavor Profile & Texture

Texture is the soul of this cheesecake. The crust starts with a foundation of finely crushed Biscoff cookies, mingled with a small amount of melted fat to create a biscuit that is delightfully crumbly yet sturdy enough to hold its shape. As you bite through, the crust provides a gentle resistance, a satisfying snap that yields to the creamy interior. The filling is where the magic happens: it is luxuriously smooth, with a velvety mouthfeel that glides across the palate as if it’s velvet silk. The tang of cream cheese is tempered by a touch of sweetness that comes from the cookies themselves, and a whisper of vanilla adds warmth and depth rather than glaring sweetness.

Layering on top, you might imagine subtle notes of citrus zest or vanilla bean—a faint brightness that lifts the profile without overpowering the cookie’s caramel-spiced essence. The Biscoff cookies themselves offer a caramelized, spiced flavor—think brown sugar with a hint of cinnamon and nutmeg—that harmonizes perfectly with the cream of the filling. Some bakers enjoy finishing with a delicate drizzle of caramel or a sea-salt finish to highlight the contrast between sweet and salty. The overall experience is one of balance: a crust that anchors the bite, a filling that glides, and occasional accents that surprise and delight, revealing new nuances with each mouthful.

In sensory terms, you’ll notice the aroma first—warm, comforting, almost toasty. As the cheesecake sits, the fragrance of baked cookies and vanilla intensifies, inviting you to linger at the counter or at the table a little longer before serving. When you finally cut into it, the texture contrast becomes immediately apparent: a crisp, crumbly edge gives way to a luxurious, almost cloud-like center. The finish is smooth and slightly lingering, with memories of caramelized sugar and spices echoing on the palate. It’s a flavor profile that feels both familiar and elevated—a nostalgic treat that speaks to the child within while satisfying the palate of an adult dessert connoisseur.

Occasions & Pairings

This Biscoff Cookie Cheesecake shines in settings where comfort meets celebration. It’s a dessert that adapts to many moments, from casual weeknight dinners to more formal gatherings. Here are some ideas on when and how to serve it, along with practical pairings that elevate the experience.

  • Weeknight indulgence: A simple but indulgent finish to a cozy dinner, paired with a hot cup of coffee or a cappuccino.
  • Holiday centerpiece: An elegant choice for Thanksgiving, Christmas, Easter, or birthdays when you want something that feels festive yet familiar.
  • Hosting staple: A reliable dessert that travels well for potlucks or dinner parties and still looks inviting on a dessert table.
  • Career milestone or special occasion: A refined treat that delivers warmth and a sense of ceremony without requiring hours in the kitchen.

Pairing ideas to consider:

  • Beverages: Dark-roast coffee, espresso, or a glass of dessert wine such as late-harvest Riesling or Sauternes can enhance the toasty notes of the cookies.
  • Complementary desserts: A small portion of chocolate-dusted berries, a spoonful of vanilla bean crème anglaise, or a simple espresso chocolate sauce can echo the flavors without overpowering them.
  • Side dishes: A light berry compote or a handful of candied citrus peels can provide a bright contrast that refreshes the palate between bites.

Tips, Variations & Substitutions

Adaptability is one of the pleasures of this recipe. Here are thoughtful ways to customize the Biscoff Cookie Cheesecake to suit different tastes, dietary needs, or occasions, while preserving the beloved core of the dessert.

  • Vegan option: Use plant-based cream cheese and a vegan butter for the crust. Some brands of coconut cream or almond-milk cheese alternatives can provide a similar texture, though you may notice a slight difference in tanginess and mouthfeel.
  • Gluten-free crust: Replace the standard Biscoff cookies with gluten-free speculoos cookies or a gluten-free biscuit that matches the caramel-spice profile. Ensure the butter or fat used to bind remains suitable for gluten-free diets.
  • Less sweet: If you prefer a less sweet cheesecake, adjust the filling by using a tangier cream cheese and a touch less sugar or sweetener. Pairing with a tart berry sauce can balance milder sweetness beautifully.
  • Extra spice notes: Introduce a pinch of cinnamon, cardamom, or nutmeg into the crust or the filling to deepen the spice profile and echo the cookies’ inherent flavors.
  • Flavor twists: Swap some Biscoff cookies for a portion of vanilla wafers or chocolate-coated Speculoos pieces to create a subtle variation in texture and taste.
  • Texture play: For a more pronounced crust, you can blend some finely chopped roasted nuts into the cookie crust or press a thin nut layer on top before chilling for added crunch.
  • Make-ahead tweaks: If you’re preparing this in advance, consider a light dusting of cocoa powder or a surface of shaved chocolate for an eye-catching finish that also enhances flavor depth.
  • Regional twists: In regions where citrus is beloved, a hint of lemon or orange zest can brighten the filling, creating a more lively contrast against the cookie’s caramel notes.

Storage & Make-Ahead Ideas

An important part of planning for this cheesecake is understanding how it behaves after it’s assembled. Cheesecakes often benefit from a rest period in the fridge, which allows flavors to mingle and set into that unmistakable sliceable texture. Here are practical tips to make sure your cheesecake remains as delicious as the day you made it.

  • Refrigeration: After the cake has set, store it covered in the refrigerator. Properly stored, it will stay fresh and flavorful for several days, allowing you to spread out serving across a few days if desired.
  • Make-ahead: This dessert benefits from a little time in the fridge to truly meld the flavors. Consider preparing it a day or two in advance for best results, especially if you’re serving to guests who appreciate a well-rounded, cohesive flavor profile.
  • Freezing: If you want to extend its life further, you can freeze slices. Wrap individual slices tightly to protect against freezer burn. Thaw overnight in the refrigerator for best texture and flavor retention.
  • Reheating and serving: If you prefer a slightly warmer bite, you can gently warm a slice in a microwave or a low oven for a few minutes, though the classic cold or chilled serve is often preferred for cheesecake textures.
  • Garnish timing: Add any fresh garnishes—berries, whipped cream, or caramel drizzle—just before serving to preserve their texture and brightness.

Fun Facts & Trivia (Optional)

Delightful tidbits can enhance the experience and give you something fun to share while you serve the dessert. Here are a few morsels of trivia to sprinkle into conversation as guests admire the presentation or as they await the next slice.

  • The Biscoff cookies are marketed as “the condiment of the moment” for coffee lovers because their flavor complements coffee so well, but their versatility extends far beyond dipping. They’re a natural pairing for desserts, yogurts, and even some savory sauces that crave a hint of caramel spice.
  • Speculoos flavor traces its roots to spice trade routes and North Sea traditions, where warm, spiced biscuits were a cherished winter treat. The modern Biscoff cookie captures that timeless flavor in a convenient, mass-produced form that travels well and stores beautifully.
  • Cheesecake, in its many forms, has always invited personal interpretation. The addition of cookies as a crust is a relatively modern flourish that elevates texture and flavor—turning a standard cheesecake into a cross-cultural dessert that respects both classic technique and contemporary tastes.
  • Many cooks find that allowing a cheesecake to rest for several hours or overnight in the fridge actually improves its sliceability and flavor integration, turning a good cake into a great one as the filling firms and the flavors mingle.
  • In some kitchens, chefs garnish with a touch of sea salt or a hint of espresso powder to intensify the chocolate and caramel notes—the tiny salt crystals or the bitter edge of coffee heighten the sweetness just enough to keep the finish balanced and intriguing.

Conclusion: A Dessert That Tells a Story

In its essence, the Biscoff Cookie Cheesecake is more than a dessert; it’s a narrative in a slice. It speaks of spice-laced traditions and the modern genius of turning a beloved cookie into a refined, creamy canvas. It invites reminiscence—of late-night conversations at a kitchen table, of holidays where laughter rings in the air and the clink of forks against plates punctuates the end of a meal. It promises comfort with sophistication, richness without heaviness, and a texture that lingers in memory long after the last bite has disappeared. Whether you’re feeding a crowd or treating a few cherished people to something special, this cheesecake offers both reliability and a touch of extravagance, a way to celebrate the ordinary and the extraordinary in one elegant, irresistible dessert.

Ingredients

Crust
    – 2 cups finely crushed Biscoff cookies (Speculoos cookies)
    → Role: forms the crisp, flavorful crust that supports the cheesecake; Preparation: crush cookies into very fine crumbs (a food processor works best) and measure the crumbs after crushing; mix with melted butter to bind. Tips: press the crust firmly into a greased springform pan and chill for at least 15–20 minutes before filling, or prebake for 8–10 minutes for a crisper base.
    – 5 tablespoons unsalted butter, melted
    → Role: binds the cookie crumbs into a cohesive crust; Preparation: melt until smooth and slightly cooled before mixing with crumbs; Tips: use unsalted butter to control salt level; if the mixture seems dry, add a teaspoon of ice-cold water or a touch more butter and press until it holds together; press evenly across the pan bottom and optionally up the sides.
Filling
    – 4 (8 oz) packages cream cheese, softened to room temperature
    → Role: main structure and creamy body of the cheesecake; Preparation: ensure cheese is fully softened (about 1 hour at room temperature) and beat with sugar until smooth, scraping sides as needed; Tips: avoid overmixing after eggs are added to prevent air pockets and cracking; if baking in a water bath, wrap the pan tightly in foil to prevent leaks.
    – 1 cup granulated sugar
    → Role: sweetening agent that blends with the cream cheese for a balanced filling; Preparation: add gradually to the cream cheese while mixing on low speed; Tips: use superfine sugar if available for quicker dissolution; fully dissolving sugar yields a silkier texture.
    – 1/2 cup sour cream
    → Role: adds tang and moisture, yielding a creamier, lighter texture; Preparation: whisk sour cream until smooth and fold into the filling; Tips: use full-fat sour cream at room temperature to blend evenly; substitutes like Greek yogurt can work but will alter tang and texture slightly.
    – 1/4 teaspoon salt
    → Role: balances sweetness and enhances flavors; Preparation: measure and add with the other dry ingredients; Tips: if using salted butter, reduce or omit this salt; it helps tighten the filling as it bakes.
    – 3 large eggs
    → Role: provide structure and richness; Preparation: add one egg at a time, mixing on low just until incorporated; Tips: ensure eggs are at room temperature to prevent curdling and to help the batter emulsify evenly; avoid overmixing after eggs are added to minimize cracks.
    – 1/2 cup Biscoff cookie butter (Speculoos spread) for the filling
    → Role: imparts the signature spiced cookie flavor and a creamy ribbon through the cheesecake; Preparation: loosen slightly at room temperature and whisk into a portion of batter until smooth; Tips: for a marbled look, gently swirl into the batter after pouring into the crust; if too thick, warm slightly to emulsify.
    – 1/4 cup extra Biscoff cookie butter for swirling (optional)
    → Role: creates decorative ribbons and intensified flavor; Preparation: keep at room temperature for easy dolloping; Tips: dollop small amounts on the surface and swirl with a knife or skewer to achieve a marbled pattern without mixing fully into the base batter.
    – 1 teaspoon vanilla extract
    → Role: enhances overall flavor; Preparation: use pure vanilla for best aroma; Tips: for extra depth, scrape in seeds from a vanilla bean or use vanilla paste.
    – 1 tablespoon all-purpose flour (or 2 teaspoons cornstarch) (optional)
    → Role: helps set the filling and reduces cracking; Preparation: whisk into the filling with the dry ingredients; Tips: use sparingly to keep the filling creamy—omit if you prefer a silkier texture.
    – 1 tablespoon lemon juice or zest (optional)
    → Role: brightness and balance to the rich filling; Preparation: zest before juicing; Tips: lemon zest adds aroma without thinning the batter; keep juice limited to avoid curdling; add only if desired to preserve creamy texture.
Toppings
    – 1 cup heavy whipping cream, chilled
    → Role: topping to add light richness; Preparation: whip to soft or stiff peaks as desired, with the addition of sugar and vanilla; Tips: chill the mixing bowl and beaters, start on low, then increase speed; add powdered sugar and vanilla near the end to stabilize and flavor the whipped cream.
    – 2-3 tablespoons powdered sugar
    → Role: sweetens and stabilizes the whipped cream; Preparation: sift before using to avoid lumps; Tips: adjust to taste depending on sweetness of the filling; use to lightly sweeten the topping without overpowering the cheesecake.
    – 1 teaspoon vanilla extract
    → Role: flavoring for whipped cream; Preparation: add with the cream during whipping; Tips: pure vanilla provides a cleaner, sweeter aroma than imitation.
    – 1/2 cup Biscoff cookie crumbs for garnish
    → Role: visual garnish and extra crunch; Preparation: crush additional cookies to fine crumbs; Tips: dust over the top just before serving for contrast; store leftovers in an airtight container to maintain crunch.

Instructions

  • Preheat your oven to 350°F (175°C) and prepare a 9-inch (23 cm) Springform pan by greasing the sides and lining the bottom with parchment.
    → This ensures the crust and filling release smoothly and prevents sticking, while parchment protects the bottom for clean removal.
  • Process 2 cups finely crushed Biscoff cookies into uniform crumbs using a food processor or by placing the cookies in a resealable bag and pounding with a rolling pin until no large chunks remain.
    → Uniform crumbs bind evenly with the butter to form a cohesive, even crust that holds its shape when sliced.
  • Melt 5 tablespoons unsalted butter until completely liquid and smooth, then let it cool slightly so it won’t scald the crumbs when combined.
    → Warm butter coats the crumbs for binding without melting them into a loose, crumbly mass; cooling prevents softening the filling later.
  • In a bowl, combine the cookie crumbs with the melted butter and stir until all crumbs are evenly moistened and the texture resembles damp sand.
    → Even moisture ensures a compact crust that won’t crumble; press more firmly where the pan is thinner to distribute weight evenly.
  • Press the crumb mixture firmly into the bottom of the prepared Springform pan and, if desired, lightly up the sides to create a shallow collar. Chill the crust for 15–20 minutes or bake for 8–10 minutes at 350°F (175°C) for a crisper base.
    → A well-pressed crust prevents puffing and cracking; chilling helps it set before adding the filling, while prebaking adds extra texture for a stable base.
  • In a large mixer bowl, beat 4 (8 oz) packages cream cheese, softened to room temperature, with 1 cup granulated sugar on medium-low speed until the mixture is smooth and free of lumps.
    → Softened cheese blends evenly with sugar to form a creamy base; high speed introduces air, so keep it gentle to minimize cracks in the final cheesecake.
  • Add 1/2 cup sour cream and 1/4 teaspoon salt to the cream cheese mixture and beat on low speed just until combined and silky.
    → Sour cream adds moisture and tang without thinning the batter; salt balances sweetness and enhances flavor as it bakes.
  • With the mixer on low, add 3 large eggs one at a time, waiting until each egg is fully incorporated before adding the next.
    → Adding eggs gradually and at room temperature helps emulsify the batter and reduces the risk of cracks from sudden moisture or temperature changes.
  • Stir in 1 teaspoon vanilla extract to round out the flavor, and if using, whisk in 1 tablespoon all-purpose flour (or 2 teaspoons cornstarch) to help set the filling.
    → Vanilla enhances depth, while a small amount of flour or cornstarch tightens the texture to minimize cracking without making the filling heavy.
  • Loosen 1/2 cup Biscoff cookie butter at room temperature and whisk it into a portion of the batter until smooth, then fold that mixture back into the main batter to create ribbons of flavor.
    → The cookie butter provides the characteristic spice-forward taste; loosening ensures it integrates evenly and doesn’t seize when mixed with the chill-chilled cream cheese.
  • Pour the full cheesecake batter into the prepared crust, spreading it into an even layer across the pan.
    → An even surface ensures uniform baking and a consistent texture from edge to center.
  • Dollop the remaining 1/4 cup of Biscoff cookie butter over the surface in several small spoons, then use a knife or skewer to gently swirl the batter to create a marbled effect without fully mixing it in.
    → Marbling adds visual appeal and concentrated Biscoff flavor in every bite, while preserving the creamy cheesecake base.
  • Place the filled pan in a larger baking dish and pour hot water into the outer dish until it reaches halfway up the sides of the springform pan to create a water bath.
    → The water bath provides gentle, even heat and minimizes cracking by stabilizing the temperature and keeping moisture in the environment around the cheesecake.
  • Bake the cheesecake in the prepared water bath at 325–350°F (165–175°C) for about 55–70 minutes, or until the edges are set and the center still has a slight wobble when gently shaken.
    → The center should be creamy and not fully set to finish firming as it cools; overbaking can cause a dry texture and cracks.
  • Turn off the oven, crack the door open, and let the cheesecake cool gradually in the oven for about 1 hour to minimize rapid temperature shifts that cause cracking.
    → Slow cooling helps the filling set evenly and reduces the risk of surface cracks, preserving a smooth finish.
  • Carefully remove the cheesecake from the water bath, discard the outer foil, and refrigerate the cake, still in its pan, for at least 4 hours or preferably overnight.
    → Chilling solidifies the filling for clean slicing and enhances flavor; a night of rest allows flavors to meld and the texture to firm up.
  • Just before serving, whip 1 cup heavy cream to soft or stiff peaks with 2–3 tablespoons powdered sugar and 1 teaspoon vanilla, then spread over the chilled cheesecake or pipe decorative rosettes.
    → Whipped cream adds light richness and a contrasting texture; chilling the bowl and beaters helps stabilize the whip for clean, holds-them shape toppings.
  • Sprinkle 1/2 cup Biscoff cookie crumbs over the whipped cream as a garnish for visual contrast and extra crunch.
    → The crumb topping reinforces the cookie-forward theme and provides a satisfying snap with each bite; store any leftover crumbs airtight to maintain crunch.
  • Slice with a warmed knife (wipe between cuts) to reveal clean edges, then serve promptly to enjoy the full creaminess of the cheesecake and the spiced cookie flavors.
    → Warming the knife reduces sticking and yields neater slices; serving soon after cutting preserves the best texture and mouthfeel.

Notes

This Biscoff Cookie Cheesecake features a crisp, spiced crust and a luxuriously creamy filling that carries the signature caramelized notes of Speculoos cookies. The crust is the foundation of this dessert, providing structure and a delicious contrast to the smooth center. The filling relies on soft cream cheese, a touch of tang from sour cream, and the warm hug of Biscoff cookie butter for a recognizable, cozy flavor.

Crust tips: start with 2 cups of finely crushed Biscoff cookies and 5 tablespoons of melted unsalted butter. Aim for ultra-fine crumbs so the mixture binds evenly when pressed into a greased 9-inch springform pan. Press the crust firmly across the bottom and optionally up the sides; this helps prevent cracking and ensures clean slices. Chill the crust for 15–20 minutes before filling, or prebake for 8–10 minutes for an extra-crisp base.

Filling notes: ensure the four blocks of cream cheese (32 ounces total) are softened to room temperature before beating with the sugar. Beat on low until smooth, then add sour cream, salt, and vanilla, scraping the sides as needed. Add eggs one at a time on low speed to minimize air pockets; overmixing after eggs are added can lead to cracks. Fold in 1/2 cup of Biscoff cookie butter to infuse the filling with the cookies’ characteristic spice and creaminess. For a marbled look, reserve 1/4 cup extra cookie butter to swirl into the batter after pouring into the crust, keeping some texture and visual interest. Optional additions like 1 tablespoon flour (or 1 tablespoon cornstarch) and a splash of lemon juice or zest can help set and brighten the filling—use if you like a firmer texture and a touch of brightness.

To bake with confidence, wrap the pan tightly in foil to seal out water if you opt for a water bath, which helps prevent cracks. Pour the filling over the crust, drizzle in the extra cookie butter, and swirl gently with a knife or skewer for a restrained marbled effect. Bake until the center is just set (it should have a slight jiggle) and the edges are lightly puffed; then remove from the oven and cool gradually on a rack before chilling. Chilling is essential—refrigerate for at least 4 hours, preferably overnight, to let the flavors meld and the texture to firm up.

Toppings and finishing: whip 1 cup of heavy cream with 2–3 tablespoons powdered sugar and 1 teaspoon vanilla to soft or stiff peaks, depending on your preference. Spread or pipe the whipped cream over the chilled cheesecake and garnish with 1/2 cup extra Biscoff cookie crumbs for a crisp top layer and decorative appeal. For serving, slice with a hot knife (wipe between cuts) and dust with a little more cookie crumbs if desired. The assembled cheesecake keeps best when chilled and covered; it can be stored in the fridge for up to 4–5 days, or frozen (without the whipped cream topping) for longer storage.

Serving tips and troubleshooting: if you notice cracks, they’re often due to temperature shocks or overbaking—a water bath and gentle handling during mixing help prevent this. If you prefer a firmer center, you can increase the optional flour/cornstarch slightly, but be mindful of losing some of the cheesecake’s creaminess. For a lighter finish, you can reduce the sour cream by a few tablespoons or swap in some Greek yogurt, understanding this will alter tang and texture slightly. For guests who love extra contrast, offer a dollop of whipped cream alongside a wedge and a sprinkling of cookie crumbs for texture with every bite.

Tips

Tips for Perfect Biscoff Cookie Cheesecake
  • Crust texture: Grind the Biscoff cookies into very fine crumbs and measure after grinding to ensure the right crust density. Finer crumbs bind better with butter and bake into a sturdier crust.
  • Butter temperature: Use melted unsalted butter and let it cool slightly before mixing with the crumbs so the crust doesn’t melt too fast when pressed into the pan.
  • Even binding: If the crust seems dry or crumbly, stir in a teaspoon of ice-cold water or a touch more melted butter and press until the mixture holds together.
  • Pan preparation: Grease the springform pan well and press the crust evenly across the bottom (and up the sides if you like). A flat-bottomed cup or a glass helps compact the crust evenly.
  • Chill or prebake: Chill the crust for 15–20 minutes before filling or prebake for 8–10 minutes for a crisper base. Don’t skip chilling if you want clean slices.
  • Room-temperature ingredients: Ensure cream cheese and sour cream are fully softened (about 1 hour at room temperature) to avoid lumps and ensure a smooth filling.
  • Gentle filling mixing: Beat the cream cheese and sugar until smooth, scraping the sides often. Add eggs one at a time on low speed and mix just until incorporated to prevent air pockets and cracks.
  • Water bath notes: If baking in a water bath, wrap the pan tightly in foil to prevent leaks and place the springform pan in a larger pan with hot water for gentle, even cooking.
  • Flavor balance: Use pure vanilla extract for the best aroma; lemon zest (optional) adds brightness without thinning the batter. If using lemon juice, add sparingly to avoid curdling.
  • Binding aids: The optional 1 tablespoon flour (or 2 teaspoons cornstarch) helps set the filling and minimizes cracking; use sparingly to keep the cheesecake creamy.
  • Swirls and marbling: For a marbled effect, swirl in some loosened Biscoff cookie butter after pouring the filling into the crust. Keep a portion to dollop and swirl lightly for a decorative pattern.
  • Topping prep: Chill the heavy cream and equipment before whipping; whip to soft or stiff peaks as desired, adding powdered sugar and vanilla near the end to stabilize and flavor the whipped cream.
  • Texture and serving: Let the cheesecake rest at room temperature for 15–20 minutes before slicing for cleaner cuts; refrigerate leftovers in an airtight container for up to 4–5 days.
  • Make-ahead and storage: The cheesecake can be baked and chilled overnight; it also freezes well—wrap tightly and freeze up to 1–2 months; thaw overnight in the fridge before serving.
  • Safety and handling: Use a sturdy, well-fitted springform pan; handle hot pans with care; ensure the pan is well-sealed if using a water bath to prevent leaks and steam burns.

FAQ

What is Biscoff Cookie Cheesecake?

A rich, creamy cheesecake with a crust made from crushed Biscoff cookies and a filling that includes Biscoff spread or crumbled cookies for a warm, spiced caramel flavor.

What ingredients do I need for the crust?

Crushed Biscoff cookies mixed with melted butter (and a touch of sugar if you like). The mixture is pressed into the pan to form a firm crust.

What ingredients do I need for the filling?

Typically cream cheese, granulated sugar, eggs, vanilla extract, heavy cream, and either Biscoff spread or finely chopped Biscoff cookies folded into the batter for extra flavor.

Can I make this cheesecake without baking it (no-bake version)?

Yes. For a no-bake version, prepare the crust as usual, then beat cream cheese with sugar and vanilla, fold in whipped cream and Biscoff spread, and chill the filling until it firms up. A small amount of gelatin can help set the filling if you prefer a firmer texture.

What is the best method to bake the cheesecake?

Bake at around 325°F (165°C). Use a water bath to help prevent cracks and bake until the center is just set. After baking, cool slowly in the oven with the door ajar, then refrigerate to finish setting.

How long should the cheesecake chill before serving?

Chill for at least 4–6 hours, and ideally refrigerate overnight for the best texture and flavor integration.

How can I prevent cracks in the cheesecake?

Pre-bake or use a water bath, avoid overmixing the batter, let the cheesecake cool gradually in the oven, and run a knife around the edge after baking to release air and prevent cracking.

Can I customize the flavor or toppings?

Absolutely. Try extra Biscoff swirl on top, crumble more cookies as a topping, drizzle with caramel sauce or melted Biscoff spread, or add a layer of whipped cream between slices for presentation.

Can I substitute regular cookies for Biscoff?

You can, but the flavor will be different. If using other spiced cookies, adjust sweetness accordingly. Biscoff cookies give the characteristic caramel-spice note that defines this cheesecake.

How should I store leftovers?

Store refrigerated in an airtight container for 3–4 days. For longer storage, you can freeze slices wrapped well and thaw in the fridge overnight.

Introduction / Hook

Imagine a bright weekend morning, the kitchen waking up with the soft glow of sunlight slipping over the counter. The air is perfumed with the comforting warmth of toasted sweetness, a hint of vanilla drifting through the room, and the tiny bursts of blueberry juice popping like little jewels with every bite. Blueberry French Toast Cups are the kind of breakfast that feels like a celebration—each little cup a perfect, portable treasure that brings the magic of a Sunday brunch to your weekday routine. They’re not just a dish; they’re an invitation to slow down, savor, and share. The scent alone is enough to coax even the sleepiest household member out of bed, while the sight of golden-nutty edges peeking from muffin tins promises texture as joyful as the flavor itself. The beauty of these cups is in their individuality: you can grab one on the go or enjoy a cozy tray among friends and family, all without sacrificing any of the indulgence you crave from a classic French toast. And because they’re built to be assembled before the morning hustle—or even the night before—they’re perhaps the most delightful way to make a comforting breakfast feel effortless, elegant, and wonderfully accessible.

As you take your first bite, you’ll notice the way the outside remains delicately crisp while the interior stays soft and custardy, a gentle contrast that is the hallmark of a well-made French toast. The blueberries provide a bright, fruity burst that cuts through the warmth with a little tang and a lot of personality. There’s a whisper of a glaze-like sweetness, a subtle kiss of spice, and a comforting chew that makes this dish linger in your memory long after the plate is cleared. It’s breakfast and dessert rolled into one, a cheerful celebration of simple ingredients transformed into something a little magical. The cups are small enough to feel special, big enough to feel satisfying, and flexible enough to adapt to your mood—whether you’re craving a hearty brunch to feed a crowd or a quick, comforting solo breakfast that still feels like a treat.

The Story Behind the Dish

At their core, French toast and blueberries share a long, affectionate history that makes this modern cup version feel both timeless and refreshingly new. French toast, known in many cultures as pain perdu or day-old bread revived, has always been the dish that honors leftovers and turns humble ingredients into something comforting and luxurious. The concept is simple: old bread is coaxed back to life with a luscious, eggy, custard-like soak, then kissed with heat until it develops a caramelized edge and a tender center. It’s a technique that celebrates transformation—bread that could have been wasted becomes a small plate of warmth, memory, and joy. Blueberries, meanwhile, have a storied presence in North American kitchens and gardens, a summertime burst of color and brightness that seems almost magical against the pale, custardy base. When these two worlds meet—the cozy nostalgia of French toast and the sunny brightness of blueberries—the result is a breakfast that speaks to comfort and celebration in equal measure.

The idea for Blueberry French Toast Cups grew from a desire to make that comforting, nostalgic flavor more approachable for today’s busy mornings and casual gatherings. The classic French toast can be a bit fussy: large slices to soak, pans to watch, and a need for perfect timing to avoid sogginess or dryness. Reimagining it as individual cups in a muffin pan preserves all the goodness—moist interior, lightly crunchy edges, and that irresistible vanilla-spiced aroma—while adding convenience and a playful, almost dessert-like presentation. It’s a nod to family brunch memories and a wink to modern meal-prep sensibilities. In many homes, the weekend breakfast table becomes a stage for conversation, laughter, and a sense of togetherness. These cups lean into that spirit, offering a dish that is as delightful to prepare as it is to eat, and as forgiving as it is festive. The blueberries bring a touch of sunshine that makes the dish feel celebratory without feeling over-the-top, a reminder that even the simplest pleasures—coffee, warm bread, and fruit—can create extraordinary moments when practiced with care.

In cultural terms, this recipe embodies a bridge between generations: the classic technique passed down through cooks who know the comforting glow of a kitchen filled with the hum of a stovetop, and a contemporary love for individualized servings, effortless prep, and vibrant seasonal fruit. It’s a small culinary story that travels well—serve them at a weekend family brunch, a cozy holiday morning, or a casual gathering with friends who appreciate a bright, satisfying start to the day. The cups invite storytelling as much as they invite tasting: about a grandmother’s kitchen, about the way a kitchen can smell like home, about the joy of waking up to something that seems indulgent yet feels like a warm hug in edible form. This is the kind of dish that earns a place in both memory and routine, a bright center of attention without demanding the spotlight. And because they’re easily adaptable, they invite your own memories to write the next chapter—a new twist, a new berry, a new topping, a new reason to celebrate morning together.

Why You’ll Love This Recipe

  • Convenience without compromise: individual cups are perfect for portion control and easy serving, whether you’re feeding one or a crowd.
  • Make-ahead magic: assemble and refrigerate overnight, then bake in the morning for a just-off-the-press experience that still tastes freshly made.
  • A crowd-pleasing balance: the soft, custardy interior contrasted with a lightly crisp edge delivers a satisfying texture that appeals to both kids and adults.
  • Bright, seasonal flavor: blueberries add a sweet-tresh zing and a pop of color that makes the dish look as lively as it tastes.
  • Versatile brunch anchor: pairs beautifully with a spectrum of accompaniments—from yogurt and citrus to smoky bacon or plant-based options—without clashing flavors.
  • Kid-friendly yet sophisticated: the presentation feels special, making it a fun treat for little hands and grown-up palettes alike.
  • Diet-friendly possibilities: the concept can be adapted to gluten-free or dairy-free preferences with subtle substitutions, keeping the spirit intact.
  • Comfort with a touch of elegance: this dish delivers familiar, nostalgic flavors in a refined, modern format, ideal for celebrations or everyday mornings.

Flavor Profile & Texture

The essence of Blueberry French Toast Cups is a symphony of contrasts harmonized into a single bite. The exterior offers a delicate, golden crisp that gives way to a soft, almost custard-like interior. Think of a gentle, egg-infused cloud that has soaked up warmth and personality, yet remains tender enough to yield to a fork with ease. The blueberries contribute bright bursts of fruity brightness—tiny pockets of tart-sweet freshness that pop as you chew, creating little moments of surprise that keep your palate engaged from the first bite to the last. There is a whisper of aromatic warmth—subtle hints of vanilla or a gentle spice—imparting sweetness and depth without overwhelming the fruit. The result is a layered experience: a warm, comforting base with a zing of fruit and a touch of caramelization around the edges, all perched on a texture that feels indulgent but approachable.

If you close your eyes and breathe in, you’ll notice a fragrance that feels like a memory: toasted bread, vanilla warmth, and a fruity brightness that promises a cheerful lift to the morning. The balance between the soft interior and the lightly crisp edges is the sensory heart of the dish, inviting you to experience the contrast in each mouthful. The cups aren’t cloying in sweetness; they’re gently sweet, with the blueberries providing natural acidity that keeps the flavor dynamic rather than flat. The overall mouthfeel is rounded and comforting, yet there’s a playful lightness that comes from the portion size and the way the flavors are layered. It’s the kind of bite that lingers—warming the imagination as much as the palate—and leaves you eager for the next cup, the next bite, the next shared moment around the table.

Occasions & Pairings

Blueberry French Toast Cups shine in a variety of settings, from intimate weekday mornings to festive weekend gatherings. Their individual portions make them ideal for a brunch buffet, a baby shower, or a potluck where you want something that’s easy to serve but special enough to impress. They are also a fantastic option for a Mother’s Day or Father’s Day morning, where a little extra sweetness sets a tone of gratitude and joy. If you’re hosting outdoors, they travel well in a warm oven, staying comforting while the rest of your menu feels summery and breezy. Their portability means you can bring a platter to the table or pass cups around the room during conversation, turning breakfast into a shared, interactive experience rather than a solitary routine.

Pairing-wise, think about balance and contrast. A dollop of tangy yogurt or a light crèmelike topping can brighten the dish and add a refreshing creaminess that complements the custard and fruit. A side of crisp bacon or smoky sausage provides a savory counterpoint, while a simple greens salad with citrus vinaigrette can offer a crisp, refreshing counterpoint to the comforting sweetness. For drinks, consider a crisp sparkling beverage, a lightly sweetened coffee, or a mimosa that keeps the mood festive without stealing focus from the star: the cups themselves. If you’re aiming for a more sophisticated brunch, you can serve them with a small glass of chilled fruit-infused water or a lightly spiced chai that brings warmth to the table without overpowering the delicate flavors below.

In festive settings, you can dress the cups up with a light drizzle of maple or a whisper of a citrus glaze (if you’re comfortable with a tiny touch of extra sweetness). For a more rustic or wintery vibe, pair with a maple-browning note or a cinnamon-scented syrup. The versatility of this dish makes it a reliable anchor for many themes: country-chic brunch, modern breakfast bar, or a simple, comforting morning that feels like a celebration in itself. The cups also scale well for gatherings: bake a larger batch in multiple muffin pans, then move them to a warmed platter for easy serving. Their charming appearance invites conversation and shared tasting, turning breakfast into a memory-making moment rather than just a routine meal.

Tips, Variations & Substitutions

  • Texture tweaks: experiment with a light dusting of fine sugar on top before baking for a delicate crust. For a crunchier edge, finish with a quick broil for a minute or two, watching closely so they don’t burn.
  • Fruit variations: swap or mix in other berries or stone fruits in season—strawberries, raspberries, or peaches can be delightful, shifting the brightness without losing the comforting base.
  • Bread base considerations: use stale or day-old bread for best texture, as it soaks up the custard more evenly and yields a richer bite. For a lighter texture, choose a softer bread with a bit more air.
  • Make-ahead upgrades: the cups can be assembled ahead of time and stored, then baked in the morning for a just-out-of-the-oven experience. Keep in mind that chilling them may slightly alter the texture, so give them a gentle reheat time if needed.
  • Diet-friendly adaptations: for dairy-free or vegan versions, substitute with plant-based milks and egg alternatives that mimic the binding and moisture. Gluten-free bread options can be used without sacrificing flavor, though texture may vary slightly depending on the blend.
  • Flavor accents: add a hint of citrus zest or a subtle spice to awaken the profile. A touch of almond extract or a dash of ground cardamom can bring a new dimension without overpowering the blueberries.
  • Serving aesthetics: a light drizzle of a maple-leaning glaze or a dollop of yogurt can elevate the presentation and add a touch of tang that complements the fruit sweetness.

Storage & Make-Ahead Ideas

One of the greatest strengths of Blueberry French Toast Cups is their ease of storage and make-ahead versatility. If you’re planning ahead, you can assemble the cups in advance and refrigerate them before baking. This approach lets you wake up to a ready-to-go breakfast that only needs a brief bake time, ensuring maximum savor with minimal morning effort. After baking, store any leftovers in an airtight container in the refrigerator for up to a few days. Reheat gently in a warm oven or toaster oven to restore a just-baked texture, or stir lightly in a skillet to restore a little crispiness around the edges. If you want to freeze them, consider freezing the baked cups in a single layer on a parchment-lined tray first, then transferring them to a freezer bag for longer storage. When you’re ready to enjoy, reheat them directly from frozen, adding a few minutes to the bake time to ensure the interior is heated through and the edges remain pleasantly crisp.

To maximize flavor and texture when reheating, you can place the cups on a baking sheet and warm them in a moderate oven, or use a convection setting for quicker, even results. If you prefer the idea of fresh flavors day-of, you can prepare a light fruit compote or a simple citrus cream to accompany the cups, adding brightness without turning the dish into a different recipe. The key is to preserve that balance between the soft interior and the gently crisp exterior so the experience remains consistent, whether you’re serving a dozen hungry guests or enjoying a quiet solo morning. The philosophy behind make-ahead breakfasts like these is simple: give yourself back time in the morning without compromising taste or texture, and preserve the sense that breakfast can feel like a small weekend celebration that you can duplicate on busy days.

Fun Facts & Trivia (Optional)

  • Blueberries are one of the few naturally blue foods in the plant world, earning their vibrant hue from pigments called anthocyanins, which also contribute to their antioxidant properties.
  • The term pain perdu translates to “lost bread,” a nod to the dish’s origin as a way to rescue stale bread and transform it into something irresistible.
  • French toast is a global comfort food with countless regional twists—from sweet to savory—demonstrating how a single technique can travel and adapt across cultures.
  • Individual servings, such as these cups, have become a popular brunch trend because they simplify distribution and presentation while maintaining an element of indulgence.
  • Blueberries have earned a place in many traditional breakfasts due to their portability, long shelf-life, and versatility in both sweet and savory preparations.
  • There is a small but charming culinary etiquette in some homes: presenting each guest with a neatly baked cup as a personal welcome to the table, reinforcing a sense of care and hospitality.
  • In kitchen folklore, the scent of cinnamon and vanilla together is often associated with comfort and home, evoking memories of family gatherings and holiday mornings.

Ingredients

  • French Toast Cup Base
  • – 6 cups day-old brioche or challah bread, cut into 1-inch cubes
    → The bread should be slightly stale to maximize custard absorption without turning mushy. If your bread is fresh, dry it lightly in a 300°F (150°C) oven for 5-7 minutes, then cube.
  • – 4 large eggs
    → Eggs bind the custard and give structure to the cups as they bake. Whisk until evenly blended with no visible streaks.
  • – 1 1/2 cups milk (whole or 2%) or dairy-free alternative (such as almond or oat milk)
    → The liquid forms the custard that soaks into the bread. For richer flavor, use whole milk or a mix with a little cream; for dairy-free, choose a fortified milk.
  • – 1/2 cup half-and-half or heavy cream (optional)
    → Adds extra creaminess and helps set a silkier custard. Omit or substitute with additional milk if you prefer a lighter result or dairy-free version.
  • – 1/4 cup granulated sugar
    → Sweetens the custard to balance the blueberries’ tartness. If your bread contains sweeteners, adjust accordingly.
  • – 2 teaspoons vanilla extract
    → Provides warm, fragrant vanilla notes that enhance the custard. Use pure vanilla extract for best flavor; vanilla paste is a good substitute.
  • – 1/2 teaspoon ground cinnamon
    → Classic spice that complements blueberries and French toast. If you prefer stronger warmth, increase to 3/4 teaspoon.
  • – 1/4 teaspoon ground nutmeg
    → Adds a nutty, aromatic hint that pairs nicely with cinnamon. Optional; you can omit if you dislike nutmeg.
  • – 1/4 teaspoon kosher salt
    → Heightens sweetness and enhances overall flavor; if using table salt, reduce to 1/8 teaspoon.
  • – 1 tablespoon unsalted butter, melted
    → Used to brush muffin cups for non-stick release and to add a touch of richness to the cups. You can also whisk a small amount into the custard if desired; kept separate is perfectly fine.
  • Blueberries
  • – 1 cup fresh blueberries, rinsed and patted dry
    → Fresh berries give bright color and juicy pockets. If berries are large, you can halve them so they distribute evenly and avoid bursting during baking.
  • Toppings and Serving
  • – Maple syrup for serving
    → A classic companion to French toast cups. Warm the syrup slightly for easier pouring and a smoother texture. If desired, add a pinch of lemon zest to brighten the syrup.
  • – Powdered sugar for dusting (optional)
    → Lightly dusts the tops for a pretty finish and a touch more sweetness without overpowering the flavors. Sift over warm cups just before serving.

Instructions

  • Preheat your oven to 350°F (175°C) and line a 12-c cup muffin tin with paper liners or grease it well.
    → This prepares a non-stick, easy-release surface so the cups maintain their shape and the custard does not cling to the pan.
  • Slice and cube the day-old brioche or challah into even 1-inch pieces to measure about 6 cups total.
    → Slightly stale bread absorbs custard more evenly, preventing soggy centers; if bread is fresh, dry it lightly in a 300°F (150°C) oven for 5-7 minutes before cubing.
  • Whisk 4 large eggs in a large bowl until completely blended with no visible streaks.
    → Full emulsification creates a uniform custard that sets evenly as it bakes, avoiding a scrambled-egg texture.
  • In a separate bowl, whisk together 1 1/2 cups milk, 1/2 cup half-and-half or heavy cream (optional), 1/4 cup granulated sugar, 2 teaspoons vanilla extract, 1/2 teaspoon ground cinnamon, 1/4 teaspoon ground nutmeg, and 1/4 teaspoon kosher salt.
    → Whisking with a steady motion ensures the sugar dissolves and the spices are evenly dispersed, preventing gritty pockets and uneven flavor.
  • Whisk the wet ingredients into the eggs until the mixture is smooth and homogeneous.
    → The custard must be uniform to soak evenly into the bread; whisk until no lumps remain for a silky texture.
  • Brush the muffin cups with 1 tablespoon melted unsalted butter, coating the sides and bottoms evenly.
    → Butter adds flavor and creates a natural non-stick barrier; brushing ensures each cup releases cleanly after baking.
  • Divide the cubed bread evenly among the twelve muffin cups, distributing roughly 6 cups worth, then press the bread lightly to create a shallow bed for custard.
    → Even distribution prevents some cups from being overloaded while others are underfilled; pressing helps the bread hold its custard and form a stable cup.
  • Pour the custard over the bread in each cup, filling to just below the rim, and let the cups rest 5-10 minutes to allow the bread to soak and swell.
    → Resting time ensures the bread absorbs the custard, resulting in a custardy center rather than a dry, under-filled cup.
  • Evenly scatter 1 cup fresh blueberries over the top of the custard-filled cups, pressing a few berries gently into the surface of each cup.
    → Blueberries release juices that tint the custard and create pockets of tart sweetness; pressing them helps prevent sinking during baking and ensures visible berry distribution.
  • Bake in the preheated oven for 18-22 minutes, or until the centers are set and the edges are light golden brown; rotate the pan halfway for even baking.
    → The custard should be just set with a slight jiggle in the center; overbaking yields a dry texture, underbaking leaves a custardy, undercooked center.
  • Remove the pan from the oven and let the cups cool in the tin for 5-7 minutes before transferring to a wire rack to finish cooling.
    → Cooling stabilizes the structure so the cups hold their shape when lifted and prevents a steam-condensation sogginess on the crusts.
  • Serve warm with maple syrup on the side and, if desired, a light dusting of powdered sugar; keep maple syrup warm for smooth pouring.
    → Maple syrup complements the cinnamon and vanilla notes; warming makes it easier to pour and enhances the aroma as you serve.

Notes

These Blueberry French Toast Cups are a cozy brunch treat featuring a silky vanilla custard baked with blueberries and warm cinnamon. For best texture, use day-old brioche or challah cut into 1-inch cubes so the cubes soak up the custard without turning mushy; if your bread is fresh, dry it lightly in a 300°F (150°C) oven for 5-7 minutes before cubing. The custard comes together with eggs and milk (plus optional half-and-half or cream) and should be whisked until completely homogeneous. You can customize this recipe by using dairy-free milk (such as almond or oat) and skipping the dairy to suit dietary needs; you can also add a pinch more cinnamon or a splash of vanilla for deeper flavor. These cups can be assembled the night before and kept covered in the fridge, then baked in the morning for a quick brunch. Rewarm leftovers by gently reheating in a 350°F (175°C) oven until warm and custard is set; they also freeze well—cool completely, wrap individually, and reheat directly from frozen. Serve with warm maple syrup, a light dusting of powdered sugar, and an extra handful of blueberries if desired; for a bright note, stir a tiny amount of lemon zest into the syrup. Always ensure the bread is sturdy enough to hold its shape and that the eggs and dairy are well balanced to avoid a soggy center.

Tips

Tips for Blueberry French Toast Cups

  • Bread quality matters: use day-old brioche or challah, cut into 1-inch cubes to maximize custard absorption. If the bread is fresh, dry it lightly in a 300°F (150°C) oven for 5–7 minutes before cubing.
  • Custard technique: whisk the eggs until completely blended with no visible streaks. Scramble-free custard yields a firmer, sliceable cup after baking.
  • Soaking strategy: use the milk/cream mixture to soak the bread; allow the bread to soak for at least 15–30 minutes, or refrigerate overnight to intensify flavor and texture. If soaking overnight, give the cups a quick stir before baking to ensure even coverage.
  • Berry handling: rinse and pat blueberries dry for bright color and fresh bursts of fruit. If berries are large, halve them to distribute evenly and prevent bursting during baking; for frozen berries, thaw and dry thoroughly and consider tossing with a tablespoon of flour to keep them suspended in the custard.
  • Pan prep: brush muffin cups with melted butter for non-stick release and added richness; you can also use nonstick spray or line cups with parchment liners for easy removal and clean presentation.
  • Richness options: the recipe includes 1/2 cup half-and-half or heavy cream—use it for a silkier custard; omit for a lighter result or if making dairy-free, substitute with fortified plant milk and a touch of coconut milk or oil to mimic richness.
  • Flavor boosters: pure vanilla extract provides warm aroma; if using vanilla paste, you can add it directly to the custard for intensified vanilla notes. Cinnamon adds classic warmth; nutmeg adds subtle depth—adjust to taste.
  • Sweetness balance: 1/4 cup granulated sugar is a baseline; if your bread is particularly sweet or you plan to drizzle maple syrup generously, consider reducing sugar slightly to avoid excess sweetness.
  • Bake test: bake until the custard is set with a slight jiggle in the center and the tops are golden. A knife inserted near the center should come out clean or with a few moist crumbs; if edges brown too quickly, tent with foil and finish baking.
  • Cooling and serving: let the cups rest 5–10 minutes in the pan before removing to help them set and hold their shape. Serve warm with warmed maple syrup, and dust with powdered sugar just before serving for a pretty finish.
  • Make-ahead and storage: assembled cups can be covered and refrigerated for up to 1 day before baking. Leftovers should be refrigerated and reheated in a 350°F (175°C) oven for 8–10 minutes or briefly in the microwave. Store any extra berries separately to keep them fresh for topping.
  • Dietary tweaks: for dairy-free versions, use fortified almond, oat, or other plant milks; skip dairy-based butter in the pan or use a dairy-free butter substitute. Ensure your toppings are dairy-free if needed.

FAQ

What are Blueberry French Toast Cups?

Blueberry French Toast Cups are a baked breakfast treat made by soaking cubed bread in a custardy mixture of eggs, milk, vanilla, and cinnamon, then folding in blueberries and baking the mixture in a greased muffin tin until the cups are set and golden.

What ingredients do I need?

Common ingredients include day-old or sturdy bread cubes, eggs, milk (dairy or non-dairy), sugar, vanilla extract, ground cinnamon, blueberries (fresh or frozen), and butter for greasing the pan. Optional add-ins: cream cheese swirls, a pinch of salt, and maple syrup for serving.

How do I assemble and bake them?

Whisk eggs, milk, sugar, vanilla, cinnamon (and salt if using). Gently mix in blueberries. Toss bread cubes in a little bit of the custard, then spoon into a greased muffin tin. Pour remaining custard over the cups and dot with melted butter if desired. Bake at 350°F (175°C) for about 18–22 minutes, until set and lightly golden. Let cool a couple of minutes before serving.

Can I make them ahead or overnight?

Yes. You can either soak the bread in the custard and refrigerate overnight, or assemble the cups in the muffin tin, cover, and refrigerate. If baking the next day, add a few extra minutes to the bake time and check for doneness.

How long do they keep and how should I store leftovers?

Store leftovers in an airtight container in the refrigerator for up to 3 days. Reheat individual cups in the microwave for 20–40 seconds or in a 350°F (175°C) oven for 6–10 minutes. They can also be frozen for longer storage; reheat straight from frozen.

Can I freeze them or adapt for dairy-free/vegan diets?

Yes, you can freeze baked cups; reheat from frozen in the oven. For dairy-free or vegan options, use non-dairy milk (almond, soy, oat), a vegan egg replacer (or flax egg), and vegan butter or oil. You can also skip butter and rely on the oil used to grease the pan, but the texture may be a bit different.

How can I customize or vary the flavor?

Try adding lemon or orange zest for brightness, swap blueberries for strawberries or raspberries, swirl in cream cheese before baking, sprinkle with a streusel topping, or add chopped nuts (like pecans or almonds) for crunch. A splash of almond extract can also complement the berries nicely.

What size muffin tin should I use and how many cups does it yield?

A standard 12-cup muffin tin is perfect and usually yields 12 cups. If you use a mini muffin tin, you’ll get more cups but will need to bake 8–12 minutes shorter. Adjust the bake time accordingly and check for a set center.

What if the centers are soggy or the edges are dry?

Use slightly stale or day-old bread for better absorption. Don’t over-soak the bread; just lightly coat the cubes. Ensure the cups are not overcrowded and that the bake time is sufficient for the centers to set. If the tops brown too quickly, tent with foil and continue baking.

What are some serving suggestions?

Serve warm with a drizzle of maple syrup, a dusting of powdered sugar, and extra fresh berries. A dollop of yogurt or whipped cream also pairs nicely. For a brunch twist, pair with bacon or sausage on the side.

How can I reheat leftovers for best texture?

Reheat individual cups in the microwave for 20–40 seconds or bake at 350°F (175°C) for 8–12 minutes until warmed through. Reheating in the oven helps maintain a crisper top and avoid sogginess.

Introduction / Hook

Imagine a bite-sized masterpiece that delivers the thrill of a cheeseburger with the comforting embrace of garlic-buttered parmesan. Garlic Parmesan Cheeseburger Bombs are not just a snack or a meal; they’re an experience. Picture a blistered, golden crust crackling as you bite through to a juicy, sizzling center, where melted cheddar or mozzarella swirls with seasoned beef, garlic, and a kiss of parmesan. The aroma swirls through the kitchen like a warm invitation, summoning everyone to the table with a single, irresistible scent. These bombs are the kind of dish that makes weeknights feel like a celebration and game days feel like a reunion with old friends. They’re hearty, indulgent, and surprisingly versatile, offering the satisfying heft of a classic cheeseburger in a playful, shareable form. The first bite is a caramelized edge that gives way to a savory, beefy middle, while the inside remains tender and juicy, with molten cheese that stretches just enough to feel indulgent without tipping into chaos. This is the kind of recipe that pairs comfort with a dash of showmanship—the kind of dish you’ll want to cook again and again, tweaking with your own favorite cheeses and seasonings to make it truly yours.

The Story Behind the Dish

Garlic Parmesan Cheeseburger Bombs grew out of a playful kitchen experiment: taking two crowd-pleasers—the cheeseburger and the crisp, garlic-kissed flavors of a parmesan crust—and marrying them in a single, portable bite. The idea came to life in a bustling family kitchen, where a dozen different sauces were perched on the counter, and the air was thick with the scent of garlic, butter, and sizzling beef. It’s a dish born from casual gatherings, where friends swap stories while hands work quickly, shaping little dough-wrapped parcels that promise comfort, nostalgia, and a touch of decadence. Parmesan, with its sharp, nutty bite, complemented garlic’s pungent warmth, while a soft, melt-in-your-mouth interior kept the surface crisp and caramelized from the hot pan or oven. The result is a modern takeaway-meets-diner favorite, reimagined for home cooks who crave something comforting yet dramatic enough to impress guests. In many households, the cheeseburger is a symbol of simple pleasure; in these bombs, that pleasure is elevated by the addition of parmesan crispiness and a garlicky punch that lingers long after the last bite. The story of these little treats is really a story about sharing: gathering around a table to pass around a tray of golden, cheese-streaked bombs, dipping sauces at the ready, and the inevitable chorus of “when can we have more?” That chorus is the heartbeat of the dish, reminding us that good food is less about complexity and more about balance—meat, cheese, garlic, and parmesan, held together by a comforting, doughy hug that stands up to bold flavors and big appetites alike.

Why You’ll Love This Recipe

  • Shareable, finger-friendly bites that work beautifully for game day, parties, potlucks, or a cozy family dinner.
  • Rich, comforting flavors with a bright garlic-parmesan snap that elevates a familiar cheeseburger profile.
  • Texture contrast: crisp, seared exteriors give way to juicy, cheese-stretched centers for a satisfying bite every time.
  • Versatile and forgiving—easy to customize with your favorite cheeses, seasonings, or fillings.
  • Make-ahead friendly: you can assemble and refrigerate or freeze them before baking for quick weeknight meals.
  • When you want a showstopper without a lot of fuss, these bombs deliver elegance and indulgence in one neat package.

Flavor Profile & Texture

At the core of Garlic Parmesan Cheeseburger Bombs is a beefy, savory heart that’s seasoned with a careful balance of salt, pepper, and aromatic garlic. The garlic note is not loud or aggressive; it’s the warm, almost nutty perfume you notice as soon as the bombs bake. Parmesan adds a distinctive sharp, slightly nutty edge that mingles with the beefy base, giving the filling a depth that lifts the entire dish above the ordinary cheeseburger experience. If you choose to incorporate cheese into the center, you’ll enjoy a luscious, molten core that melts into the warm beef, creating pockets of gooey goodness that pull into long, satisfying strings with each bite.

The exterior is where the magic truly happens. A delicate glide of dough or pastry (depending on how you style your bombs) crisps to a light amber, its surface speckled with flecks of garlic and parmesan that toast to a savory crust. The crust crackles just enough to provide contrast against the tender interior, while still staying pliable enough to bite through without resistance. When pulled apart, you’ll notice a gentle steam escaping, carrying the scent of garlic butter and molten cheese, a sensory reminder that comfort food can also feel luxurious. The overall balance—savory beef, garlicky brightness, parmesan bite, and a subtle buttery finish—creates a multi-layered flavor profile that satisfies both hunger and nostalgia. These bombs are not just a quick snack; they’re an experience of texture and aroma, a chorus of satisfying contrasts that make you want to go back for one more bite, and then another, until the tray is empty and the kitchen smells like a small celebration.

Occasions & Pairings

These Garlic Parmesan Cheeseburger Bombs shine in a wide range of settings. They’re ideal for game nights, backyard barbecues, holiday gatherings, and potlucks where you want something that feels festive but is easy to share. They also work beautifully as a weeknight dinner when you want something a little more special than ordinary burgers yet still straightforward enough to throw together after a busy day. Because they’re self-contained and handheld, they travel well for picnics or lunch-box friendly meals, making them a versatile addition to your recipe repertoire.

Pairing suggestions to elevate the experience:

  • Fries or potato wedges: classic, crisp, and the perfect vehicles for dipping sauces.
  • Coleslaw or a bright, crunchy cucumber salad: the contrast of cool, crisp vegetables with the warm, cheesy bombs is delightful.
  • A simple green salad with lemony vinaigrette to balance richness.
  • Picking sauces: a tangy aioli, smokey barbecue sauce, or a creamy ranch can complement the garlicky, parmesan notes nicely.
  • Drinks: a cold beer (lager or amber) or a sparkling citrus soda pairs exceptionally well with the savory, garlicky profile.
  • Dessert: something light and refreshing, like a citrus sorbet, can cleanse the palate after a savory, cheesy meal.

Tips, Variations & Substitutions

  • Beef choices: use ground chuck for extra juiciness or a blend of chuck and brisket for a deeper beefy bite. For a lighter option, ground turkey can be used, but you may want to adjust seasoning to keep the taste robust.
  • Cheese options: mozzarella provides gooey pull, cheddar adds a sharp bite, and pepper jack introduces a gentle kick. Mixing cheeses is allowed for a more complex center.
  • Garlic variations: roasted garlic can deepen the sweetness, while a touch of garlic powder adds a consistent background note—adjust to your garlic tolerance and preference.
  • Herb accents: a pinch of dried oregano or a sprinkle of fresh chopped parsley can brighten the flavor profile without overpowering the garlic-parmesan base.
  • Dough and crust options: you can wrap the filling in puff pastry for a flakier, more indulgent crust, or use a soft biscuit or sandwich dough for a tender bite. If you’re avoiding gluten, look for a gluten-free puff pastry or wrap designed for baking.
  • Spice level: add crushed red pepper flakes or a dash of hot sauce to the beef mixture for a subtle heat that complements parmesan.
  • Make-ahead ideas: assemble the bombs and refrigerate up to 24 hours before baking, or freeze unbaked bombs on a tray, then transfer to a bag for longer storage. Bake straight from the freezer, adding a few extra minutes to the bake time.
  • Vegan or dairy-free version: use plant-based beef crumbles, vegan cheese, and a dairy-free butter substitute. The garlic-parmesan flavor can be recreated with nutritional yeast and a dairy-free parmesan substitute for a similar savory profile.
  • Regional twists: for an Italian-inspired version, fold in a small amount of finely chopped sun-dried tomatoes and mozzarella; for a Mexican twist, swap in pepper jack and add a pinch of cumin and paprika, then serve with a light chipotle mayo.

Storage & Make-Ahead Ideas

One of the most appealing aspects of these bombs is their flexibility when it comes to planning. You can prep ahead in several convenient ways. If you’re entertaining, you can assemble a tray of raw or partially baked bombs early in the day and refrigerate until you’re ready to bake. This makes hosting simpler and keeps the kitchen from becoming chaotic at the last minute. If you prefer to prep on a weekend for weeknights, assemble and freeze the bombs unbaked. When you’re ready to cook, place them on a lined baking sheet and bake from frozen, adding a few extra minutes to the total bake time. The results remain juicy, flavorful, and perfectly crispy on the outside.

Leftovers store well in an airtight container in the refrigerator for up to 3 days. Reheat gently in the oven or air fryer to preserve the crispy exterior and prevent drying out. If you’ve cut the bombs open or there’s melted cheese leaking, reheat in a shallow baking dish to catch any drips while warming through. For freezing cooked bombs, wrap them tightly to prevent freezer burn and keep them for up to 2 months; reheat in the oven until heated through and the crust regains its crispness. If you’re freezing raw, lay the formed bombs on a parchment-lined tray and freeze until solid, then transfer to a sealed bag. When you’re ready to bake, add a few minutes to the bake time and monitor for a perfectly crisp crust and a juicy interior.

Fun Facts & Trivia (Optional)

Here are a few tidbits that might add a little extra sparkle to your cooking session. The concept of a “bomb” in cooking—small, stuffed, often puffed foods—has roots in a tradition of creating shareable, visually appealing bites that look as good as they taste. Parmesan cheese, originating from Italy’s Emilia-Romagna region, has a long history as a staple in both cooking and finishing touches, celebrated for its nutty, savory profile that enhances almost any savory dish. Garlic has been used in kitchens around the world for centuries, praised not only for flavor but also for its purported warming properties and comforting aroma—an ingredient that’s hard to resist in a dish designed to evoke coziness. The cheeseburger, meanwhile, is an emblem of American culinary culture, with debates over its exact origin long a subject of playful folklore. Combining these elements into a compact, handheld form is a testament to how global flavors can converge in delightful, practical ways. If you’ve ever watched a tray of bubbling, garlic-dotted, cheese-streaked bombs emerge from the oven and felt your mouth water in anticipation, you’re participating in a modern culinary tradition: taking familiar comfort foods and reimagining them into something that feels both nostalgic and novel at the same time.

Ingredients

Ground Beef Mixture

  • 1 1/2 pounds ground beef (80/20)
    → This ground beef provides juiciness and flavor due to its 20% fat content. It forms the base protein for the bombs and will be seasoned and bound with breadcrumbs, egg, and seasonings to hold together while baking. Handle the mixture gently but thoroughly to distribute seasonings without overworking, which can make the burgers dense and tough.
  • 1/2 cup breadcrumbs
    → Breadcrumbs act as a binder and help retain moisture, improving the texture of the bombs. For best results, use fine or panko breadcrumbs so the mixture holds together without becoming dense. You can swap with gluten-free breadcrumbs if needed.
  • 1 large egg
    → The egg binds the mixture, helping it hold shape during baking. Use at room temperature for better emulsification; whisk briefly before adding to the beef to ensure even distribution and to avoid a dense crumb.
  • 2 cloves garlic, minced
    → Garlic adds savory depth and aroma, blending into the meat to create a burger-like flavor. Mince finely to distribute evenly; if you prefer a stronger garlic punch, grate or press the cloves for faster release of oils.
  • 1 teaspoon onion powder
    → Onion powder provides a quick, even onion flavor without extra moisture. It enhances savory depth and pairs well with garlic; it’s best mixed into the meat early to perfume throughout the bombs.
  • 1 teaspoon kosher salt
    → Salt amplifies beef flavor and helps with seasoning balance; sprinkle evenly and taste the mixture raw if safe to do so, then adjust as needed. If using table salt, reduce to about 3/4 teaspoon to avoid over-salting.
  • 1/2 teaspoon freshly ground black pepper
    → Black pepper adds heat and aroma; distribute evenly by whisking into the beef mix to ensure consistent flavor in every bite. Freshly ground is preferred for brighter flavor than pre-ground.
  • 1 tablespoon Worcestershire sauce
    → Worcestershire sauce adds umami, a slight tang, and depth reminiscent of grilled burgers. Stir it into the beef mix for a more robust, savory base; it also helps with moisture distribution. If you want a milder version, use 1 teaspoon.
  • 1/4 cup grated Parmesan cheese
    → The Parmesan provides a sharp, savory boost that echoes the garlic-parmesan theme and helps with binding and texture. Grate finely and mix evenly into the meat mixture to prevent clumps; avoid overly moist parmesan to prevent sogginess.

Cheese Core

  • 8 small mozzarella cubes (about 1/2 inch each)
    → The mozzarella cubes create a molten center that stays gooey when baked; keep them refrigerated until assembly to prevent melting too early. If you can’t find cubes, use 1/2-inch chunks cut from mozzarella blocks and pat dry to remove excess moisture.

Pastry Wrapper

  • 1 sheet puff pastry, thawed, cut into 8 squares (about 4×4 inches)
    → Puff pastry provides a crisp, flaky outer shell that seals in juices and cheese; ensure the pastry is fully thawed and cut evenly into eight equal squares for uniform wrapping. Lightly flour the surface to prevent sticking and seal edges well to keep filling intact during bake.

Garlic Butter & Finish

  • 4 tablespoons unsalted butter, melted
    → Butter is the flavor vehicle for the garlic finish; melted butter creates a glossy, golden crust when brushed on before baking. Do not overheat to avoid browning too quickly; brush on toward the end of baking if needed to prevent over-browning.
  • 2 cloves garlic, minced
    → Garlic in the butter deepens aroma; use finely minced garlic to distribute evenly and create a smoother garlic butter. If you want extra garlic intensity, sauté the minced garlic briefly in the butter before combining with other finish ingredients.
  • 1 tablespoon grated Parmesan cheese
    → Parmesan in the butter enhances the cheesy flavor and helps with browning; mix it into the melted butter or sprinkle on top after baking for extra savory notes. Freshly grated yields the best aroma and texture compared to pre-grated.
  • 1 tablespoon finely chopped fresh parsley
    → Parsley adds a fresh, bright note to cut through richness and to provide color garnish. Chop finely for even distribution; sprinkle into butter or brush along before or after baking as preferred.
  • 1/4 teaspoon salt
    → A pinch of salt in the garlic butter helps balance the butter’s richness and the cheese; avoid over-salting since the pastry and cheese carry salt. Adjust to taste after the bombs come out of the oven.

Dipping Sauce

  • 1/2 cup marinara sauce or tomato sauce for dipping
    → Marinara provides a classic burger-bite contrast with acidity and tomato sweetness; slightly warm for smooth dipping. If you prefer a cheesier profile, mix with a touch of garlic butter or add a pinch of oregano for herbal notes.

Instructions

  • Preheat your oven to 400°F (200°C) and line a large rimmed baking sheet with parchment paper or a silicone baking mat.
    → This ensures even heat transfer, prevents sticking, and makes cleanup easier after the bombs bake.
  • Chill the mozzarella cubes and prepare them for assembly by keeping 8 small cubes refrigerated until use, then pat them dry if needed.
    → Cold, dry cheese stays centered and melts into a gooey core without leaking through the pastry during baking.
  • Combine the beef mixture: In a large bowl, gently mix together the ground beef, breadcrumbs, egg, minced garlic, onion powder, kosher salt, freshly ground black pepper, Worcestershire sauce, and grated Parmesan until just combined.
    → Use a light folding motion to distribute seasonings evenly without overworking the meat, which can make the bombs dense and tough.
  • Portion and flatten the beef mixture into eight equal portions and pat each into a flat disk about 2.5–3 inches in diameter.
    → A uniform base allows even surrounding of the cheese core and predictable wrapping inside the pastry.
  • Create the cheese center and encase: press a shallow indentation in the center of each beef disk, place one mozzarella cube in the indentation, then fold the beef around the cheese to form a compact ball with no visible filling.
    → This centers the cheese, prevents it from shifting during wrapping, and reduces the risk of cheese bursting through seams.
  • Prepare puff pastry squares: Thaw the puff pastry completely, then cut the sheet into eight equal squares (about 4×4 inches) and keep them cold until ready to wrap.
    → Fully thawed pastry bakes evenly and seals well around the filling; a cold surface helps maintain crisp texture.
  • Wrap each beef-cheese ball in puff pastry: Center a beef-cheese ball on a puff pastry square, brush the pastry edges with a thin layer of water or beaten egg to help sealing, then fold the pastry corners up and over the filling, pinching to seal all edges and placing the seam-side down on the prepared sheet.
    → Proper sealing traps juices inside and prevents the pastry from opening during bake, yielding a neat, enclosed bomb.
  • Chill the assembled bombs on the sheet for 10–15 minutes to firm the fat and help the pastry hold its shape.
    → A brief chill aids in clean seams and more defined, puffed pastry during baking.
  • Make the garlic butter finish: In a small bowl, whisk together 4 tablespoons melted unsalted butter, 2 cloves minced garlic, 1 tablespoon grated Parmesan, 1 tablespoon finely chopped fresh parsley, and 1/4 teaspoon salt.
    → This infused butter provides flavor, helps with browning, and gives the pastry a glossy, appealing finish.
  • Brush the bombs with the garlic butter finish: Use a pastry brush to coat all exposed pastry surfaces generously, making sure to reach seams; reserve any remaining butter for later brushing.
    → A thorough coating ensures even flavor distribution and a uniform golden crust as the bombs bake.
  • Bake the bombs for 25–30 minutes, rotating the pan halfway through for even browning, until the pastry is deeply golden and puffed and the beef center reaches 160°F (71°C) on an instant-read thermometer.
    → Temperature confirms doneness and safe eating; rotation prevents hot spots and ensures uniform color.
  • If the pastry begins to brown too quickly, tent the bombs loosely with foil and continue baking to prevent over-browning while the interior finishes.
    → Foil shielding slows browning while the core continues to cook, preserving a crispy crust without burning.
  • During the last 5 minutes of baking, brush with a little more garlic butter if desired to intensify color and aroma.
    → A final glaze adds shine, extra garlic aroma, and richer flavor to the finished crust.
  • Rest the bombs for 5–7 minutes on the baking sheet before serving to allow the juices to redistribute and the cheese to set slightly.
    → Resting prevents cheese from oozing when you bite in and helps keep the pastry crisp.
  • Warm the marinara sauce in a small saucepan or microwave until heated through and pour into a serving dish for dipping.
    → A warm, acidic tomato sauce provides a bright counterpoint to the rich beef and cheese and enhances each bite.
  • Serve the Garlic Parmesan Cheeseburger Bombs hot with the marinara on the side, dividing eight portions, and garnish with a light sprinkle of parsley if desired.
    → Proper portioning and fresh garnish complete the presentation and balance flavors and textures on the plate.

Notes

These garlic parmesan cheeseburger bombs are a fun, indulgent party snack that combines a juicy seasoned ground beef center with a molten mozzarella core, all wrapped in flaky puff pastry and finished with garlicky parmesan butter.

To ensure tender filling and a crisp, golden crust, handle the beef mixture gently just until the seasonings are evenly distributed; avoid overmixing. Chill the mozzarella cubes until assembly to help them stay intact as you wrap, and make sure the puff pastry is fully thawed and cut into eight equal squares, sealing edges well so juices stay trapped inside.

Gluten-free option: substitute gluten-free breadcrumbs (if used) and gluten-free puff pastry to keep this dish GF-friendly. If you can’t find GF puff pastry, you can wrap the filling with a sturdy cheese crust or use a GF dough alternative, understanding the texture will differ. Feel free to swap mozzarella for provolone or cheddar for a different melt and flavor profile.

Make-ahead and freezing: assemble the bombs up to 1 day ahead and refrigerate uncovered; bake from chilled. For freezing, freeze assembled bombs unbaked on a sheet, then transfer to a bag; bake from frozen, adding about 8–12 minutes to the bake time. You can also freeze baked bombs and reheat in a 350°F oven until hot and bubbling.

Finish and serving: brush with the garlic butter during the last 5–7 minutes of baking for a glossy, flavorful crust, or melt a little extra garlic butter and brush after baking. Serve with warm marinara or a garlic-parmesan dipping sauce. Ensure the beef reaches an internal temperature of 160°F (71°C) and let the bombs rest a few minutes before serving for easier slicing and juicier bites.

Tips

Tips for Garlic Parmesan Cheeseburger Bombs

Ground Beef Mixture tips

  • Handle the mixture gently. Mix just until the seasonings, breadcrumbs, and moisture are evenly distributed to keep the burgers juicy and tender. Overworking can make the bombs dense and tough.
  • Keep ingredients cold while mixing. Cold beef and a just-chilled egg help with emulsification and binding, resulting in a more cohesive bomb core.
  • Binders help moisture retention. The breadcrumbs and egg bind the mixture; if you prefer a juicier result, you can use fine or panko breadcrumbs and avoid adding extra liquids.
  • Taste for seasoning with a test patty. Form a small patty, cook it quickly, and adjust salt and Worcestershire as needed before shaping the full bombs.
  • Season evenly. Sprinkle salt in small increments and mix in stages to avoid under- or over-salting. Freshly ground pepper should be added with the rest of the spices for uniform flavor.
  • Worcestershire boosts umami. Stir it in thoroughly to distribute its tang and depth throughout the mixture; if you want a milder note, reduce slightly.
  • Parmesan should be well-distributed. Grate finely and mix evenly so you don’t get clumps that could affect texture.
  • Chill the mixture before shaping (optional but helpful). A short chill helps the bombs hold their shape during wrapping and baking.

Cheese Core tips

  • Keep mozzarella cubes cold until assembly. This helps them stay intact inside the beef shell and prevents early melting.
  • Seal the cheese completely. Create a tight pocket of beef around each cube and pinch seams to prevent cheese from leaking during baking.
  • If you can’t find cubes, use small chunks cut from a block of mozzarella and pat dry to remove excess moisture.
  • Expect some cheese leakage; if it happens, bake seam-side down to minimize spillage and have parchment ready to catch drips.

Pastry Wrapper tips

  • Thaw puff pastry fully and keep it cold. Work quickly to maintain layers and prevent soggy wrappers.
  • Cut eight equal squares. Use a sharp knife or a ruler to ensure consistent wrapping and even baking times.
  • Lightly flour your surface to prevent sticking, then seal edges well with a touch of water or a light egg wash to keep the filling inside.
  • Place wrapped bombs seam-side down on parchment-lined sheet pans. This helps them bake evenly and reduces filling leakage.
  • Chill after wrapping. A 15–20 minute chill helps the pastry hold its shape and makes for crisper outer crust after baking.

Garlic Butter & Finish tips

  • Use melted butter at a moderate temperature. Too-hot butter can brown too quickly; keep it warm and brush on toward the last 5–7 minutes of bake for a glossy finish.
  • Distribute garlic evenly. Minced garlic in the butter should be finely minced for even aroma; you can briefly sauté it in the butter for a deeper aroma, then brush on.
  • Parmesan and parsley boost color and flavor. Mix the Parmesan into the butter base for a cheesy crust and sprinkle chopped parsley for a fresh finish after baking.
  • Season butter lightly. A pinch of salt in the garlic butter balances richness; taste after baking and adjust if needed for your preferences.

Dipping Sauce tips

  • Warm the sauce before serving for smooth dipping. Marinara or tomato sauce should be gently heated to release flavor and improve dipping consistency.
  • Herb and garlic notes. If you like, add a tiny pinch of oregano or a swirl of garlic butter into the sauce for a richer profile (optional).
  • Keep sauce on the side. Serve warm in a small bowl to provide a classic burger-dip experience and prevent pastry from becoming soggy.

  • Assemble and chill for best results. After wrapping, refrigerate bombs for 15–20 minutes to help maintain shape during baking.
  • Baking confidence. Bake at 400°F (200°C) for about 22–26 minutes, or until pastry is golden and the internal temperature of the beef reaches 160°F (71°C). Adjust time if using a different oven.
  • Let them rest briefly. Allow baked bombs to rest 5 minutes before serving to let juices re-distribute.
  • Make ahead and freezing. Assemble (without baking) and refrigerate up to 8 hours, or freeze unbaked bombs on a tray, then transfer to an airtight container. Bake from cold or frozen, adding a few extra minutes as needed.
  • Storage and reheat. Refrigerate leftovers in airtight containers for 2–3 days. Reheat in the oven or toaster oven to maintain the pastry crispness.

FAQ

What are Garlic Parmesan Cheeseburger Bombs?

Garlic Parmesan Cheeseburger Bombs are bite‑sized, burger‑filled pastry pockets. They’re made with seasoned ground beef and cheese, wrapped in dough, then baked with a garlicky parmesan glaze for a savory, crowd‑pleasing appetizer or main dish.

What ingredients do I need to make them?

Typical ingredients include:

  • Ground beef or turkey, seasoned with salt, pepper, garlic powder, and onion powder
  • Minced garlic (or chopped fresh garlic)
  • Cheese options such as cheddar, mozzarella, or cream cheese
  • Dough for wrapping (refrigerated biscuit dough, croissant dough, or puff pastry)
  • Parmesan cheese (for the coating or inside the filling)
  • Butter, garlic (for garlic parmesan glaze), and optional herbs
Should I cook the filling before wrapping it?

Yes. Brown the seasoned ground beef with garlic until no pink remains. Drain excess fat, then mix in cheese (or leave cheese to melt inside the dough). This helps ensure the bombs bake evenly and stay juicy.

How do I shape and seal the bombs?

Steps:

  1. Roll out the dough and cut into squares or rectangles.
  2. Place a small scoop of seasoned beef and cheese in the center.
  3. Fold the dough over the filling to enclose, pinch the edges shut, and place seam-side down on a baking sheet.
  4. Brush with garlic parmesan butter for extra flavor.
What are the oven baking instructions?

Preheat to 375°F (190°C). Bake for about 16–20 minutes, or until the dough is golden brown and cooked through. Let them rest a couple of minutes before serving.

Can I cook these in an air fryer?

Yes. Preheat the air fryer to 360°F (182°C). Cook for 8–12 minutes, flipping halfway, until the bombs are golden and the filling is hot. Check that the internal temperature reaches 165°F (74°C).

How should I store leftovers?

Store cooled bombs in an airtight container in the fridge for 2–3 days. For longer storage, freeze unbaked bombs on a tray, then transfer to a freezer bag for up to 2–3 months. Bake from frozen, adding 5–7 minutes to the original bake time.

How do I reheat leftovers?

Best results come from reheating in the oven at 350°F (175°C) for 8–12 minutes to restore crispiness. The air fryer at 350°F (175°C) for 5–7 minutes also works well.

Can I make dairy-free or gluten-free versions?

Yes:

  • Dairy-free: use dairy-free cheese options and dairy-free butter for the glaze.
  • Gluten-free: use gluten-free dough (such as a gluten-free biscuit or puff pastry) and ensure any additives are gluten-free.
What are some serving suggestions or flavor variations?

Serve with marinara, ranch, or garlic butter dipping sauce. Variations include:

  • Spicy version with jalapeños or pepper jack cheese
  • Using different cheeses (asiago, mozzarella, or cheddar blends)
  • Herbs like parsley or chives for a fresh finish
  • Adding sautéed onions or sautéed mushrooms inside the bomb
Can I make these ahead and bake later?

You can assemble them in advance and refrigerate for up to 1 day before baking. If freezing, freeze unbaked bombs on a tray, then transfer to a bag and bake from frozen, increasing bake time by about 5–7 minutes.

Is there a suggested dipping sauce or side dish?

Great options include marinara or ranch for dipping, a side of green salad, or crispy baked fries. A squeeze of lemon over herb butter adds a bright finish.