Introduction / Hook
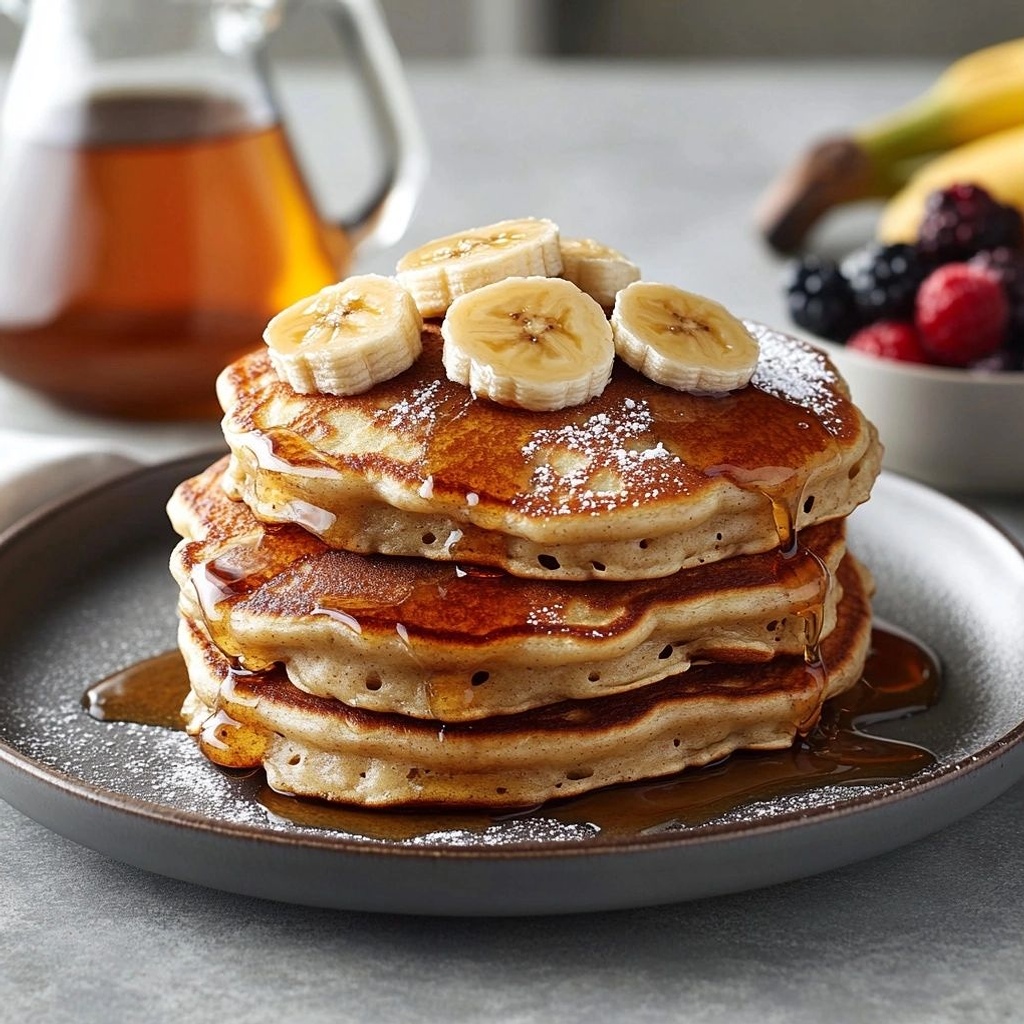
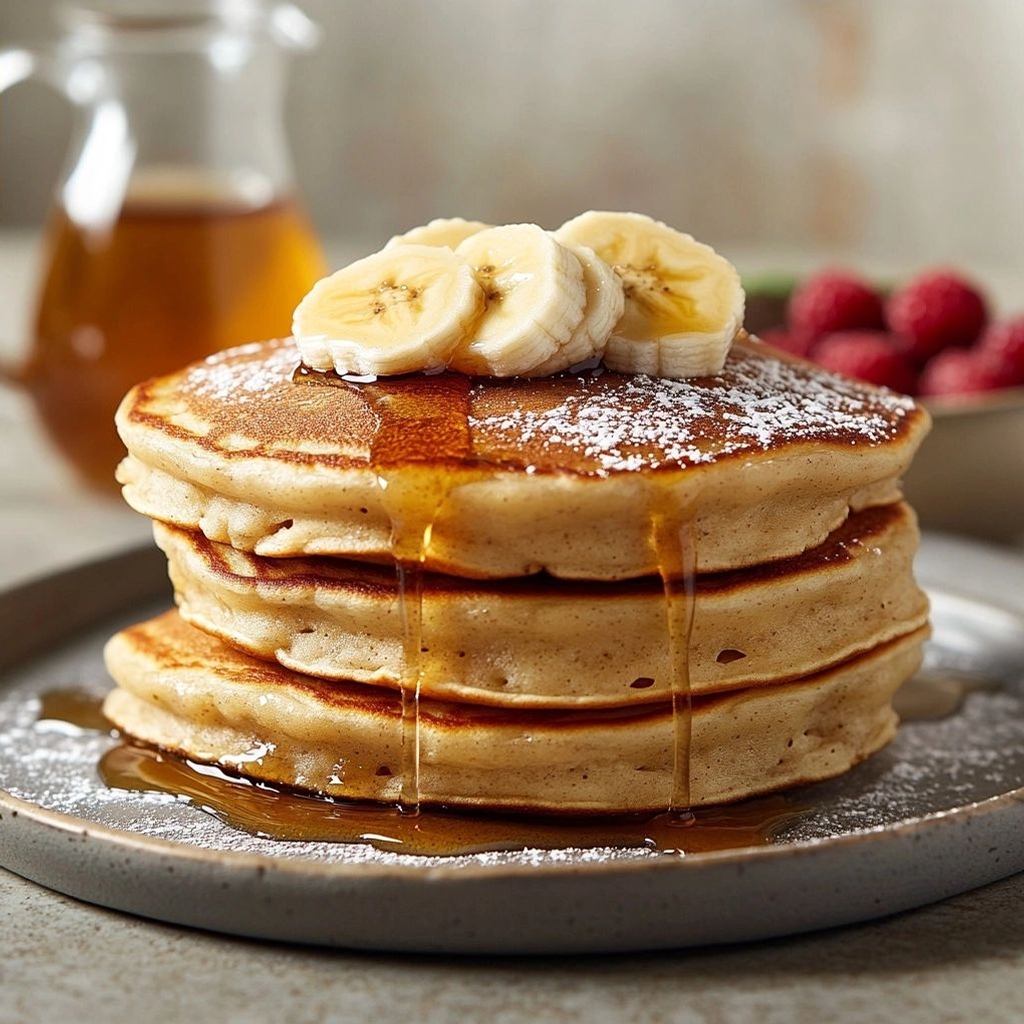
Imagine a muffin that tastes indulgent enough to satisfy a deep chocolate craving, yet light enough to fit into a nourishing, everyday routine. Picture a tender crumb that glows with rich cocoa, a whisper of sweetness, and a moist, almost melts-in-your-mouth interior. That’s the promise of Rich Healthy Chocolate Muffins. They are the kind of muffins you can bake on a busy weekday, share with friends during a lazy Sunday brunch, or tuck into a lunchbox with a smile. The aroma alone—wafting through your kitchen like a warm hug—is enough to turn ordinary mornings into small celebrations. These muffins strike a delightful balance between decadence and wellness: cocoa notes that feel luxurious, a hint of natural sweetness, and texture that stays soft even after the first bite. It’s chocolate that respects your health goals without compromising on flavor. Let this recipe be your new go-to for a treat that tastes like dessert, but behaves like a wholesome snack you can feel good about.
The Story Behind the Dish
Chocolate muffins have long lived in the realm of comfort food, but this particular rendition carries a quiet rebellion: it refuses to sacrifice nutrition for taste. The inspiration came from kitchens where practical ingredients—things already in the pantry—could be transformed into something extraordinary. It started with the simple idea that you don’t need heavy oils or loads of sugar to achieve a luscious muffin. By leaning on the natural moisture of ingredients like ripe bananas or applesauce, a touch of yogurt or Greek yogurt for tang and protein, and a well-calibrated amount of cocoa, you get a finished product that feels like a treat yet behaves like a balanced snack. The cultural arc here spans many traditions that pair chocolate with everyday nourishment—from the cocoa-darkened sweetness in European patisseries to the wholesome, everyday baking of homes around the world that rely on fruit purity, whole grains, and thoughtfully chosen fats. In a sense, these muffins tell a small story about modern baking: honoring taste while embracing smarter ingredient choices. They are the product of a kitchen who believes that thriving on flavor and thriving on wellness can coexist—one delightful bite at a time.
Why You’ll Love This Recipe
- Fast and convenient: One bowl, minimal tech, quick whisking, and they’re in the oven in minutes.
- Rich chocolate flavor, light texture: A deep cocoa presence that rivals any dessert, but with a tender crumb that feels airy rather than dense.
- Healthy-by-design ingredients: Balanced fats, protein, and fiber options that help keep you full longer and support steady energy.
- Versatile sweetness: Naturally sweetened with ripe fruit, a touch of maple or honey, and a dash of vanilla to elevate the chocolate without overpowering it.
- Family-friendly: A perfect bake-and-share treat for kids and adults alike, with enough sophistication for adults and enough sweetness for little ones.
- Customizable: Easily adapted to vegan, gluten-free, or dairy-free needs without losing taste or texture.
- Make-ahead potential: Bake, freeze, and reheat—great for meal prep and on-the-go mornings.
Flavor Profile & Texture
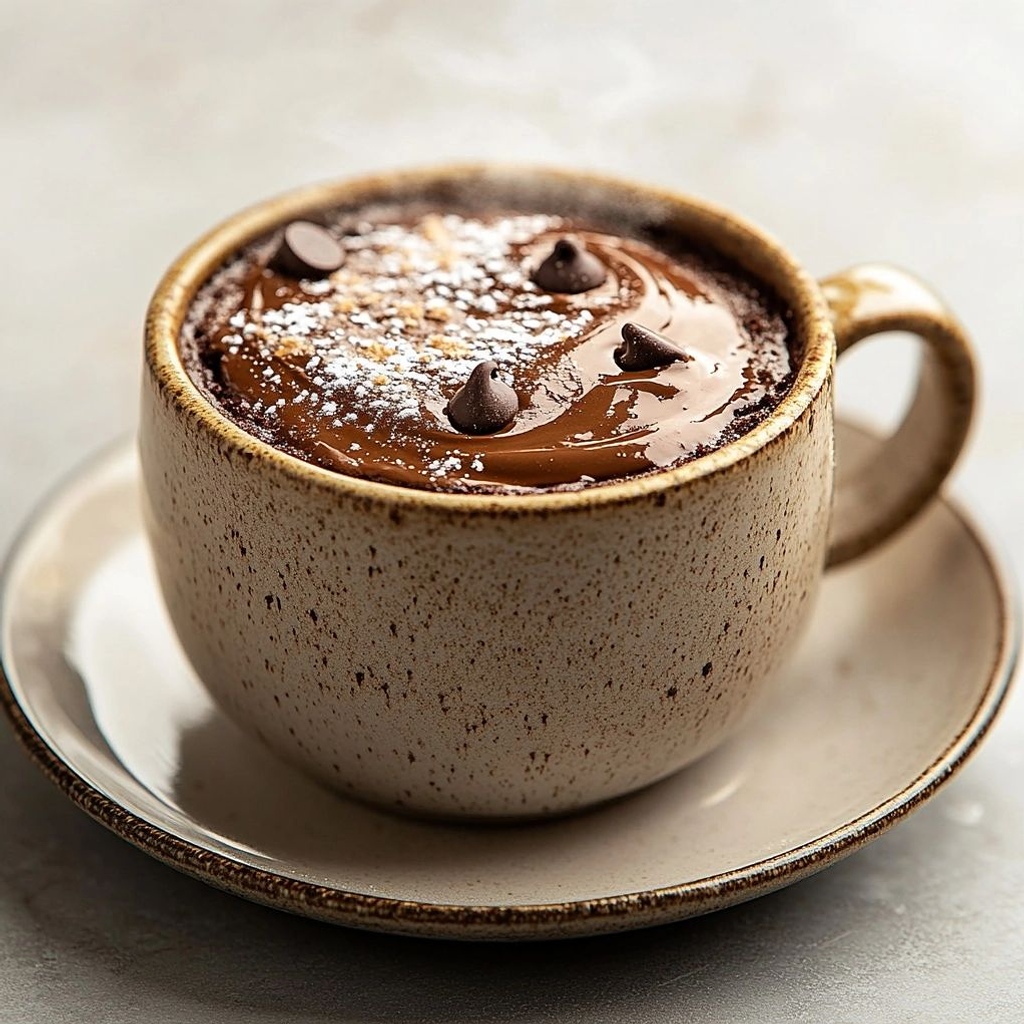
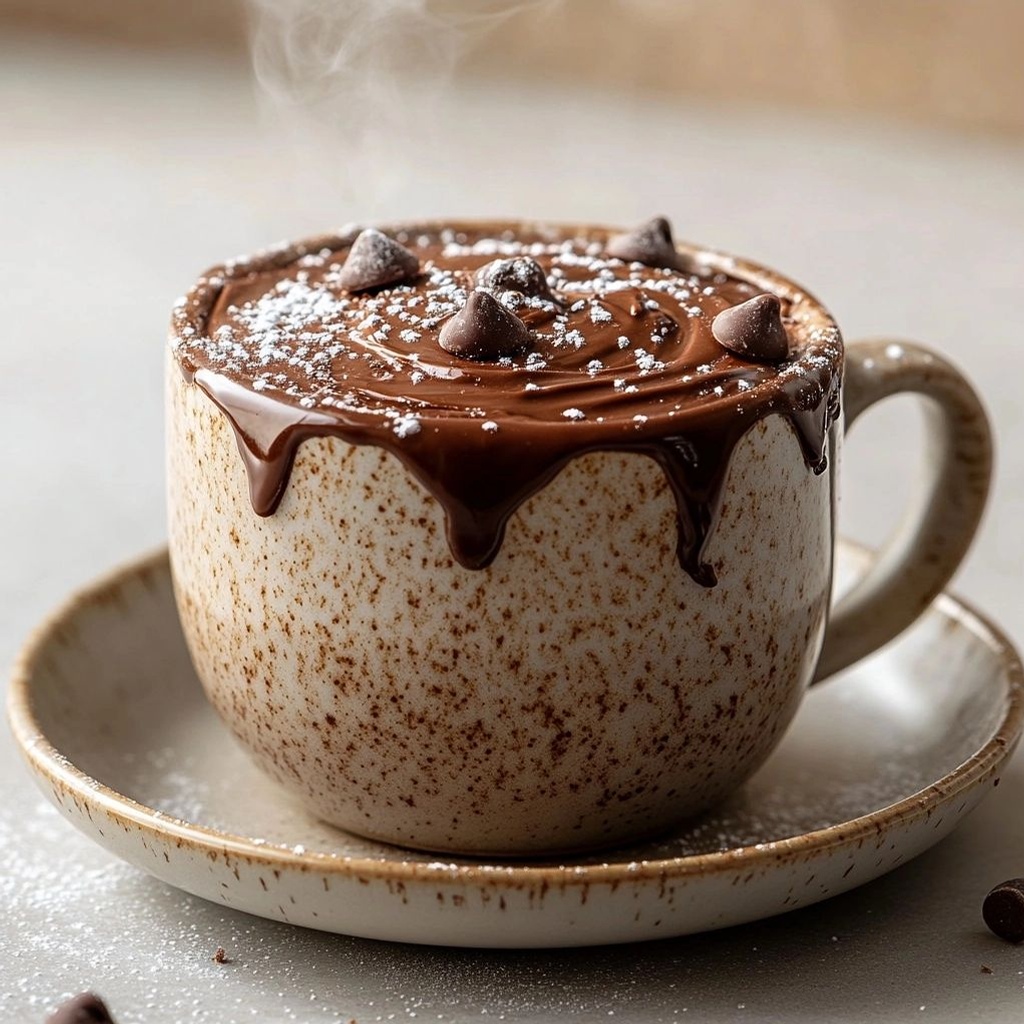
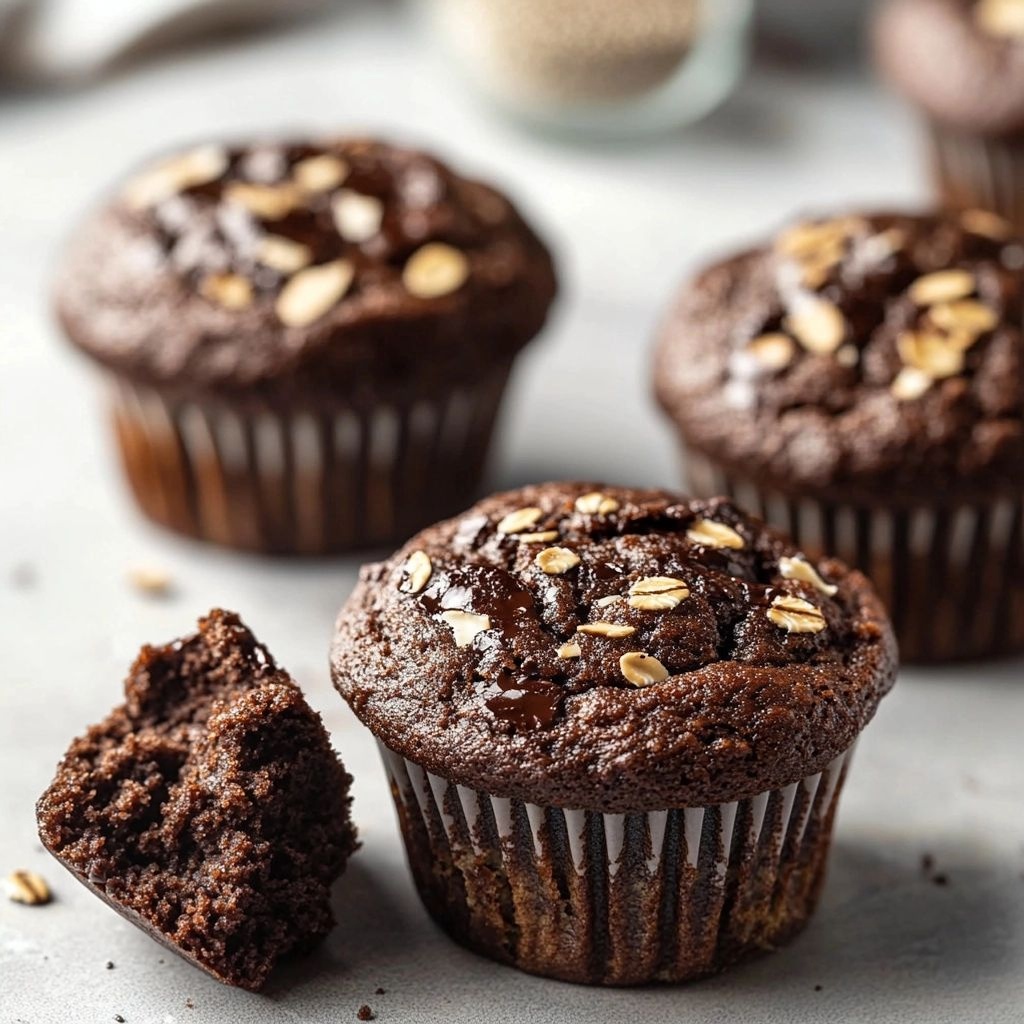
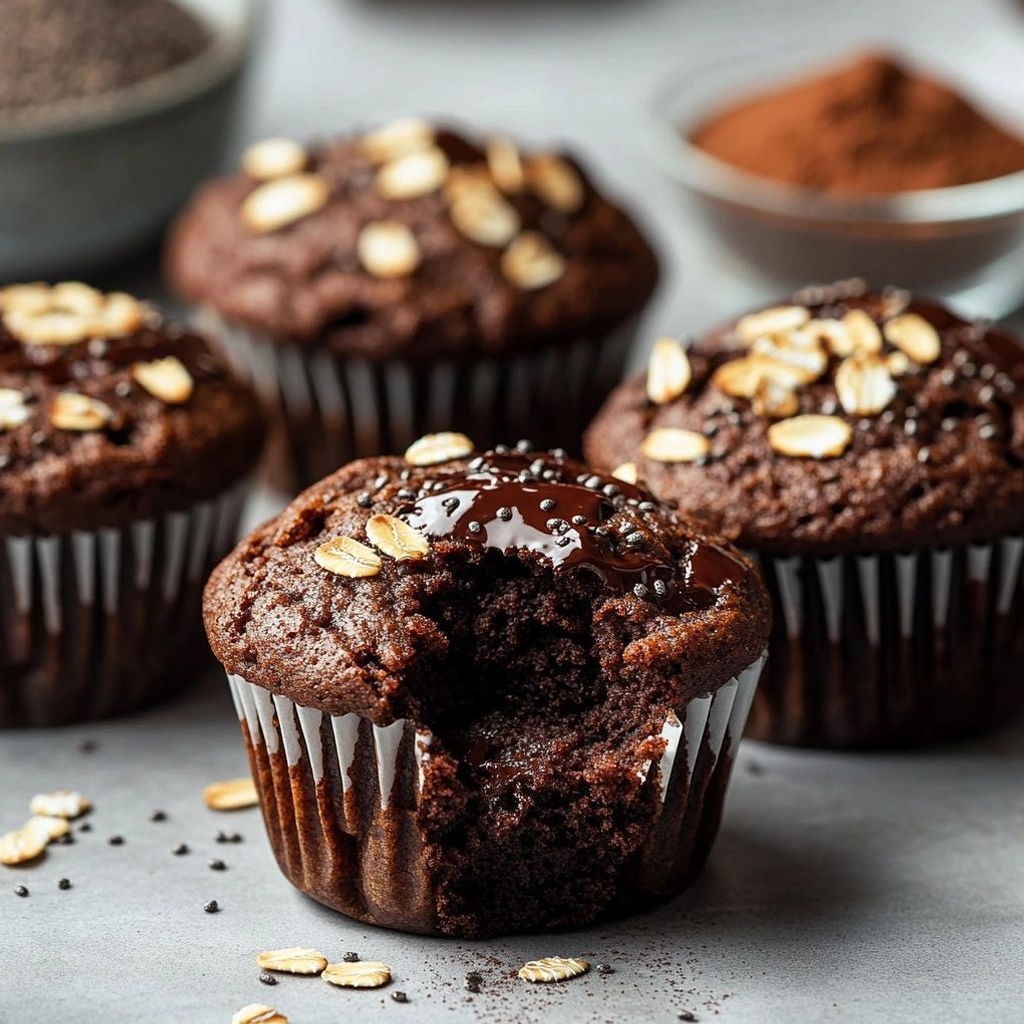
The flavor profile of Rich Healthy Chocolate Muffins is a confluence of deep, premium cocoa notes and a soft, almost velvety crumb. The cocoa provides a bitter-sweet backbone that invites you to lean in for more, while any sweeteners chosen are gentle enough to let the chocolate shine rather than overwhelm it. Depending on your ingredient choices, you might notice hints of vanilla, a whisper of coffee to intensify the chocolate, or a fruity undertone if you use banana or applesauce as part of the moisture. The texture is a celebration of balance: a tender, moist interior with a delicate rise and a slightly crisp outer edge from a gentle bake. You won’t find a dry, crumbly muffin here; you’ll experience a forgiving, cushiony bite that feels luxurious but never heavy. If you prefer a lighter rise, you can opt for a touch more leavening or incorporate a mild yogurt to help the batter loft. For an indulgent finish, a few chocolate chips folded in can melt into pockets of molten decadence as the muffins cool. The harmony of moist crumb, glossy cocoa aroma, and a clean finish makes these muffins a reliable crowd-pleaser for both everyday breakfasts and occasional celebrations.
Texture Notes to Look For
- Outer crust: Slightly crisp, providing a gentle crunch that contrasts with the moist center.
- Interior: Ultra-tender, with a fine crumb and a delicate spring when you bite into it.
- Moisture balance: The batter should hold its moisture without feeling heavy, thanks to thoughtful fat sources and natural sweeteners.
- Aroma: Rich cocoa blooming with vanilla and a hint of warmth from spices or espresso subtly integrated into the mix.
Occasions & Pairings
These muffins are versatile enough to star in a wide range of occasions—from weekday breakfasts to weekend indulgences. Here are some ideas to help you plan when and how to serve them, plus pairing suggestions that elevate the overall experience:
- Weekday mornings: Enjoy them warm from the oven with a cup of coffee, tea, or a glass of cold-pressed milk. Their protein and fiber content makes them a satisfying start to the day.
- Brunch centerpiece: Pair with a fruit salad, yogurt parfait, and a light citrusy sparkling beverage for a bright brunch spread.
- Kids’ lunchbox treat: A wholesome addition that feels like dessert but provides fruit-derived sweetness and protein to keep little ones energized for their day.
- Giftable baked goods: Wrap in parchment and tie with a ribbon for a thoughtful home-made present that travels well.
- Afternoon tea or coffee break: A sophisticated partner to a pot of tea, a dollop of whipped cream, or a drizzle of almond butter for extra richness.
Suggested Pairings
- Fruit options: Fresh berries, sliced bananas, or a citrus zest dusting to provide a bright contrast to the deep chocolate.
- Dairy or dairy-free complements: A dollop of yogurt, whipped cream, or an alt-milk like almond or coconut for a creamy finish.
- Spice and aroma boosters: A pinch of cinnamon, a dash of espresso powder, or orange zest can lift the chocolate and add depth.
- Savory accents: A thin smear of peanut or almond butter can create a delightful balance of sweet and salty flavors.
- Beverage pairings: Milk, a latte, or a robust black coffee for a classic pairing; or a glass of cold-pressed juice for a refreshing contrast.
Tips, Variations & Substitutions
One of the joys of a chocolate muffin recipe is its adaptability. Here are thoughtful tweaks and substitutions to tailor Rich Healthy Chocolate Muffins to your dietary needs, ingredient availability, or flavor preferences:
- Vegan option: Use flax eggs (1 tablespoon ground flaxseed mixed with 3 tablespoons water equals one egg) or commercial flax/egg replacer. Use dairy-free yogurt and dairy-free milk along with a neutral oil like avocado or melted coconut oil. Ensure your chocolate is dairy-free.
- Gluten-free version: Replace all-purpose flour with a high-quality gluten-free flour blend that’s suitable for baking. Add a touch more binder like xanthan gum if your blend lacks it, and consider a tablespoon of ground chia or flax to improve crumb.
- Low-sugar approach: Reduce the sweetener a bit more and rely on ripe banana, dates, or maple syrup for natural sweetness. If using dates, blend them into a smooth puree for even distribution.
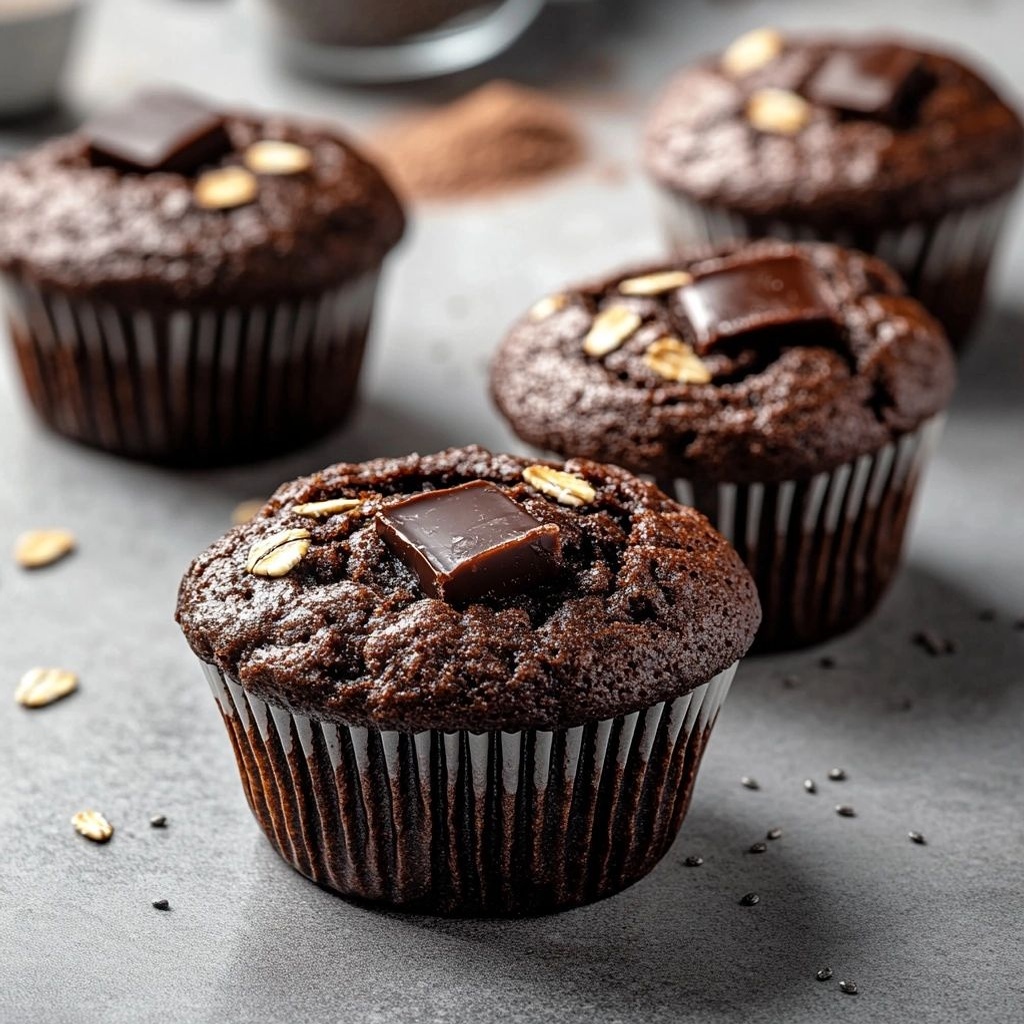
- Extra chocolate intensity: Add a handful of dark chocolate chips or cacao nibs for bursts of chocolate in every bite. A teaspoon of espresso powder enhances the chocolate without turning the muffins into mocha bombs.”
- Moisture boosters: If your batter looks a bit dry, fold in a couple of tablespoons of unsweetened applesauce or yogurt. This keeps the muffins tender without adding heaviness.
- Flavor twists: Integrate orange zest for a citrus-lift, or add a pinch of chili powder or smoked paprika for a subtle warm heat that pairs beautifully with cocoa.
- Nutty variation: Stir in chopped almonds, walnuts, or pecans for added texture and a nutty aroma. You can also use nut butters to glaze the tops after baking for extra richness.
Storage & Make-Ahead Ideas
Great muffins should be prepared in a way that suits your schedule. Here are practical tips to store, reheat, and make-ahead these Rich Healthy Chocolate Muffins so they stay fresh and delicious:
- Room temperature: Store in an airtight container for up to 3 days. Keep them separated from strong-smelling foods to prevent absorption of odors.
- Refrigeration: If you’re keeping them longer than 3 days, refrigerate for up to a week. Bring to room temperature or warm briefly before serving to revive the tenderness of the crumb.
- Freezing: Freeze muffins individually in freezer-safe bags or airtight containers for up to 3 months. To reheat, unwrap and warm in a 350°F (175°C) oven for about 8-10 minutes or microwave in short 15-20 second bursts until warmed through.
- Make-ahead strategy: Bake a batch, cool completely, portion into daily “grab-and-go” packs, and freeze. This approach ensures you always have a wholesome chocolaty option ready.
- Freshness boosters: If you’re worried about dryness after storage, brush tops with a tiny amount of light syrup or a gentle glaze made from chocolate and milk to restore sheen and moisture.
Fun Facts & Trivia (Optional)
Delving into the world of chocolate reveals a few charming tidbits that make any chocolate-focused bake even more enjoyable. For instance, did you know that cocoa content can dramatically alter flavor perception? A muffin made with higher cocoa percentage tends to taste richer and less sweet, which is why balancing with fruit puree or yogurt helps achieve a well-rounded sweetness. The practice of pairing chocolate with fruit, nuts, and dairy is ancient, but modern interpretations often emphasize healthier fats, protein, and fiber to create a more complete sensory experience. In many cultures, chocolate is celebrated not only as a dessert but as a versatile seasoning that can complement spices or be folded into beverages and baked goods. The humble chocolate muffin, then, sits at the crossroads of nostalgia and nutrition, a tiny emblem of how comforting flavors can be adapted to contemporary lifestyles without sacrificing pleasure. Fun fact: the aroma of chocolate is known to have mood-boosting effects in some studies, which makes fresh-baked chocolate muffins an even more delightful everyday ritual. And if you treat this recipe as a canvas, you’ll discover that countless regional twists—such as replacing a portion of the flour with almond meal, or substituting yogurt for sour cream—open up a treasure chest of flavor possibilities that can reflect your own culinary heritage and preferences.
Conclusion / Invitation
Rich Healthy Chocolate Muffins invite you to bake with intention: to savor the sensory richness of chocolate while honoring nourishment, to find balance between daily indulgence and steady energy, and to share a moment of warmth with the people you care about. Each bite offers a small celebration—of cocoa’s comforting depth, of a soft crumb that melts on the tongue, and of a baking routine that fits seamlessly into a busy life. Whether you’re whisking batter on a quiet weekend, packing a thoughtful treat for a coworker, or simply treating yourself after a long day, these muffins are a dependable, adaptable, and delicious companion. So preheat your oven, gather your ingredients, and prepare to fall in love with a muffin that feels like a luxury you can embrace every day. After all, when flavor meets balance, every bite becomes a tiny, wonderful celebration of life in the kitchen.
Practical Note
As you embark on making Rich Healthy Chocolate Muffins, remember that the joy of baking lies as much in the process as in the final bite. Take a moment to appreciate the aroma that fills your space, the way the batter comes together in a single bowl, and the golden tops that emerge from the oven, each one a small sculpture of warmth and comfort. Enjoy the ritual, adjust to your preferences, and savor the love baked into every muffin. Your future self—and your future taste buds—will thank you.
Ingredients
-
Muffin Base
– 1 3/4 cups whole wheat flour
→ Provides the main structure of the muffins with a wholesome grain texture. Whole wheat flour yields a denser crumb than all-purpose flour, which pairs well with the richness of chocolate. If you prefer a lighter texture, substitute up to 1/2 of this with all-purpose flour or a gluten-free flour blend (follow package guidelines for liquid adjustments).
– 1/4 cup unsweetened cocoa powder
→ Imparts the chocolate flavor core without added fat. Use natural or Dutch-processed cocoa depending on your flavor preference; Dutch-process will yield a milder, slightly sweeter chocolate note. Sift to remove lumps and ensure even distribution in the batter.
– 1/2 cup brown sugar
→ Adds moisture and a caramelized sweetness that complements the cocoa. For a lighter muffin, reduce to 1/3 cup or substitute with maple syrup or honey, adjusting the liquid by about 1–2 tablespoons if needed. Use loosely packed brown sugar for accurate measurement.
– 1/2 cup applesauce
→ Replaces part of the fat to keep muffins moist and tender while lowering saturated fat. Adds natural fruit sweetness and helps bind ingredients. Use unsweetened applesauce; avoid flavored varieties that could unbalance sweetness.
– 1/2 cup milk (dairy or plant-based)
→ Hydrates the dry ingredients and helps activate gluten or binding for structure. If using almond or soy milk, choose unsweetened to avoid extra sweetness. For thicker batters, add a teaspoon more of milk as needed to reach a spoonable consistency.
– 1/2 cup melted coconut oil or neutral oil (e.g., canola)
→ Provides richness and tenderness without the heaviness of butter. Coconut oil adds a subtle flavor note; neutral oil yields a more classic muffin taste. Do not overheat; keep it just melted to mix smoothly into wet ingredients.
– 2 eggs or 2 flax eggs (2 tablespoons ground flaxseed + 6 tablespoons water per flax egg)
→ Eggs bind the batter and help rise; flax eggs are a vegan substitute that still provide binding and moisture. Prepare flax eggs by mixing ground flax with water and letting it rest for 5–10 minutes until gel-like. If using eggs, ensure they are at room temperature for better emulsification.
– 1 teaspoon vanilla extract
→ Enhances the chocolate flavor and brightens overall aroma. Use pure vanilla for best depth; avoid artificial vanilla if possible. For a richer profile, you can add a pinch of espresso powder dissolved in the milk to intensify chocolate notes.
– 1/2 teaspoon baking powder
→ Provides light lift and helps muffins rise. Ensure it’s fresh for optimal leavening; replace if it’s past its best by date. If your batter seems very dense, a touch more leavening can help, but do not exceed 1 teaspoon total.
– 1/2 teaspoon baking soda
→ Works with the acidic component (like cocoa and yogurt if used) to create additional rise and a softer crumb. If you don’t have an acidic ingredient, you can omit soda, but results may be slightly denser.
– 1/4 teaspoon salt
→ Enhances sweetness and depth of flavor, balancing the chocolate. Use fine salt so it integrates evenly; if using salted butter or salted oils, reduce accompanying salt to avoid an overly salty finish.
Optional Add-ins
– 1/2 cup dark chocolate chips (optional)
→ Provides bursts of melted chocolate and extra indulgence. Choose chips with at least 60–70% cocoa for a balanced sweetness. Fold in gently at the end to prevent sinking. If keeping the recipe dairy-free, use dairy-free chocolate chips.
– 1/4 cup chopped walnuts or pecans (optional)
→ Adds textural contrast and a toasty, nutty flavor. Toast the nuts lightly in a dry pan or oven before chopping to deepen aroma and crunch. If you’re avoiding nuts, substitute with 1/4 cup shredded coconut or seeds like pumpkin seeds for crunch.
– 1/2 cup grated zucchini (optional)
→ Introduces moisture and a hidden veggie boost without a strong flavor risk. Squeeze excess moisture from the grated zucchini to prevent soggy batter. This keeps muffins moist while adding fiber.
Instructions
- Preheat your oven to 350°F (175°C) and line a 12-cup muffin tin with paper liners or grease it well.
→ This ensures the muffins release cleanly and prevents sticking, which helps them hold their tall, domed tops and protects delicate crusts from tearing. - In a large bowl, whisk together the 1 3/4 cups whole wheat flour, 1/4 cup unsweetened cocoa powder, 1/2 cup brown sugar, 1/2 cup baking powder? Wait: correct this: whisk together the dry ingredients: 1 3/4 cups whole wheat flour, 1/4 cup unsweetened cocoa powder, 1/2 cup brown sugar, 1/2 teaspoon baking powder, 1/2 teaspoon baking soda, and 1/4 teaspoon salt until completely integrated.
→ Sifting or whisking clears lumps and evenly distributes leavening agents, which helps the batter rise uniformly and prevents pockets of dry flour in the muffins. - In a separate bowl, whisk together the 1/2 cup applesauce, 1/2 cup milk, 1/2 cup melted coconut oil or neutral oil, 2 eggs or 2 flax eggs, and 1 teaspoon vanilla extract until the mixture is smooth and emulsified.
→ Combining wet ingredients thoroughly ensures a stable emulsion; this prevents the fat from separating and yields a tender, cohesive crumb. - Add the wet ingredients to the dry ingredients in two additions, stirring gently with a spatula until just combined and no large streaks of flour remain.
→ Stir until almost everything is hydrated; overmixing develops gluten excessively, leading to a tougher texture, so mix until barely combined and there is a few small lumps left. - Gently fold in optional add-ins: 1/2 cup dark chocolate chips, 1/4 cup chopped walnuts or pecans, and 1/2 cup grated zucchini if using, ensuring even distribution without overworking the batter.
→ Distribute chips and nuts evenly for uniform flavor and texture; folding zucchini in at this stage adds moisture without overhydrating the batter, helping maintain a tender crumb. - Let the batter rest for 5 minutes on the countertop to hydrate the flour and allow the cocoa to fully disperse, then give it a final gentle fold to neutralize any settling.
→ Resting relaxes the gluten and enables the starches to absorb moisture, resulting in a more tender muffin with a finer crumb. - Spoon or scoop the batter into the prepared muffin cups, filling each about 2/3 full for optimal rise and dome formation.
→ Filling to this level prevents overflow and ensures a tall, rounded top rather than a flat or sunken center. - Place the muffin tin in the center of the oven and bake for 18 to 22 minutes, rotating the pan once halfway through for even heat distribution.
→ A consistent oven temperature and rotation prevent hot spots and ensure all muffins bake evenly, forming a uniform crust and moist interior. - Check for doneness by inserting a toothpick into the center of a muffin; it should come out with a few moist crumbs, not wet batter. If needed, bake in 2-3 minute increments until the test is clean.
→ Proper doneness prevents under-baked centers that are gummy and over-baked tops that become dry, delivering a balanced, moist muffin. - Remove the tin from the oven and let the muffins rest in the pan for 5 minutes, then transfer them to a rack to cool completely.
→ Resting in the pan allows the muffins to finish setting and makes them easier to lift without tearing; cooling on a rack prevents condensation from soggy bottoms. - While cooling, if desired, dust lightly with a pinch more cocoa powder or a small drizzle of melted chocolate for a glossy finish, then let set for a minute before serving.
→ A light finish adds visual appeal and a touch more chocolate aroma without significantly altering texture or sweetness.
Notes
These rich healthy chocolate muffins are built with wholesome whole wheat flour and applesauce to keep them moist and satisfying without relying on heavy fats. You can customize them by swapping in up to half of the whole wheat flour with a gluten-free blend or all-purpose flour if you prefer a lighter crumb, but be mindful of liquid adjustments as needed. For lighter sweetness, reduce brown sugar to 1/3 cup or substitute with maple syrup or honey, and slightly increase milk to maintain batter consistency. If you want a dairy-free option, use plant-based milk and dairy-free chocolate chips.
Optional add-ins like dark chocolate chips, chopped walnuts or pecans, and grated zucchini give texture, extra flavor, and moisture. Toast nuts briefly before folding to maximize aroma, and squeeze excess moisture from zucchini to prevent a soggy batter. These muffins freeze well—flash-freeze on a tray, then transfer to a bag for quick grab-and-go snacks. Serve warm with a dollop of yogurt or a drizzle of almond butter for extra richness, and consider a pinch of espresso powder dissolved in the milk to intensify the chocolate notes. Always use fresh baking powder and baking soda for best rise and texture, and measure ingredients accurately for consistent results.
Tips
- Properly preheat and prepare: Preheat your oven to 350°F (175°C). Line a 12-cup muffin tin with paper liners or grease lightly to prevent sticking. This ensures even baking and easy removal.
- Measure correctly: Spoon flour into measuring cup and level off for accuracy. Packing flour leads to dense batter; sift flour with cocoa powder to remove lumps and promote a light crumb.
- Temperature matters for texture: Use room-temperature eggs and dairy-free milk to improve emulsification and rise. If ingredients are cold, gently warm the milk and eggs for a few minutes.
- Oil choice and mixing order: Whisk wet ingredients (applesauce, milk, melted oil, eggs or flax eggs, vanilla) until smooth before adding to dry ingredients. This helps create a tender, uniform crumb without overmixing.
- Avoid overmixing: Mix just until dry and wet ingredients are combined. A few lumps are fine. Overmixing activates gluten too much, resulting in dense muffins.
- Leavening balance: With 1/2 teaspoon baking powder and 1/2 teaspoon baking soda, muffins should rise nicely. If batter seems dense, sift in an extra 1/4 teaspoon of baking powder, but not more than 1 teaspoon total.
- Flavor depth: For a richer chocolate profile, dissolve a pinch of espresso powder in the milk before combining. This enhances chocolate without noticeable coffee flavor.
- Even distribution of add-ins: If using chocolate chips or nuts, fold them in gently at the end to prevent sinking and to distribute evenly.
- Moisture management with zucchini: If adding grated zucchini, squeeze out excess moisture and pat dry. This prevents soggy muffins and maintains structure.
- Texture and bake test: Bake 18–22 minutes, or until a toothpick inserted into the center comes out with a few moist crumbs. Ovens vary, so start checking at 18 minutes.
- Cooling: Let muffins cool in the pan for 5 minutes, then transfer to a rack. This prevents steam from making bottoms soggy and helps set the crumb.
- Storage: Store cooled muffins in an airtight container at room temperature for 2–3 days, or freeze for up to 3 months. Reheat briefly in the microwave for a fresh-taked texture.
- Healthy swaps and substitutions: If you want to reduce sugar further, substitute half of the brown sugar with an equal amount of maple syrup and reduce the milk by 1 tablespoon to maintain batter consistency.
FAQ
What makes these Rich Healthy Chocolate Muffins different from regular chocolate muffins?
They use healthier ingredients like whole wheat or almond flour, natural sweeteners, Greek yogurt or applesauce for moisture, and a higher cocoa content for intense chocolate flavor while reducing refined sugar.
What ingredients do I need to make these muffins?
Basic pantry staples: whole wheat flour or almond flour, cocoa powder, baking powder, baking soda, salt, eggs, plain Greek yogurt or yogurt alternative, milk (or non-dairy milk), honey or maple syrup, vanilla extract, and dark chocolate chips or chopped chocolate. Optional add-ins include mashed banana or applesauce for extra moisture.
Can I substitute ingredients to make it vegan?
Yes. Use plant-based yogurt, dairy-free milk, flaxseed or chia seed “egg” (1 tablespoon ground flaxseed mixed with 3 tablespoons water per egg), and dairy-free dark chocolate chips. You may also replace eggs with a commercial vegan egg replacer if desired.
How do I make the muffins moist without using too much oil?
Use Greek yogurt or applesauce as a partial fat substitute and avoid overmixing the batter. The combination of yogurt and mashed banana or applesauce keeps muffins tender without excessive oil.
What is the recommended baking time and temperature?
Preheat to 375°F (190°C). Bake for about 18–22 minutes, or until a toothpick inserted in the center comes out with a few moist crumbs. Ovens vary, so start checking at around 18 minutes.
How can I make the muffins richer in chocolate flavor?
Increase cocoa powder by 1–2 tablespoons, add a small amount of melted dark chocolate to the batter, or fold in extra dark chocolate chips. Use 70%+ cocoa content for deeper flavor without added sugar.
Can I freeze these muffins for later?
Yes. Allow them to cool completely, then freeze in an airtight container or freezer bag. Reheat in the microwave or a 325°F (165°C) oven for a few minutes. They typically keep well for up to 3 months.
Are these muffins suitable for a low-sugar or healthier diet?
They are lower in refined sugar if you use honey or maple syrup in moderation and choose dark chocolate. You can further reduce sugar by using mashed banana or unsweetened applesauce as natural sweeteners. Be mindful of portion sizes.
What are good mix-ins or toppings?
Chopped toasted walnuts or almonds, extra dark chocolate chips, a sprinkle of flaky sea salt, or a spoonful of peanut butter or almond butter swirled on top after baking.
What equipment do I need to bake these muffins?
A standard muffin tin, paper liners or nonstick spray, mixing bowls, a whisk or spoon, and a cooling rack. A kitchen scale can help with precise measurements if you prefer.