Introduction / Hook
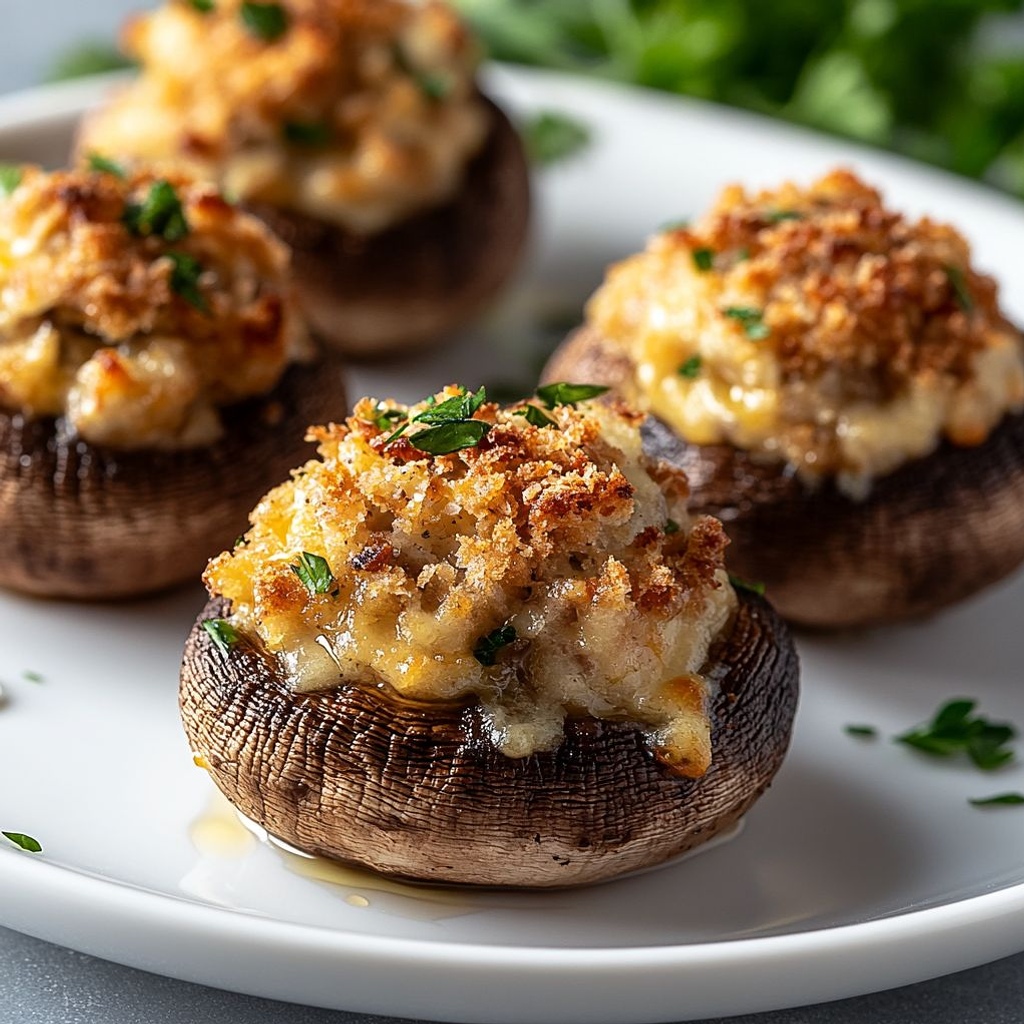
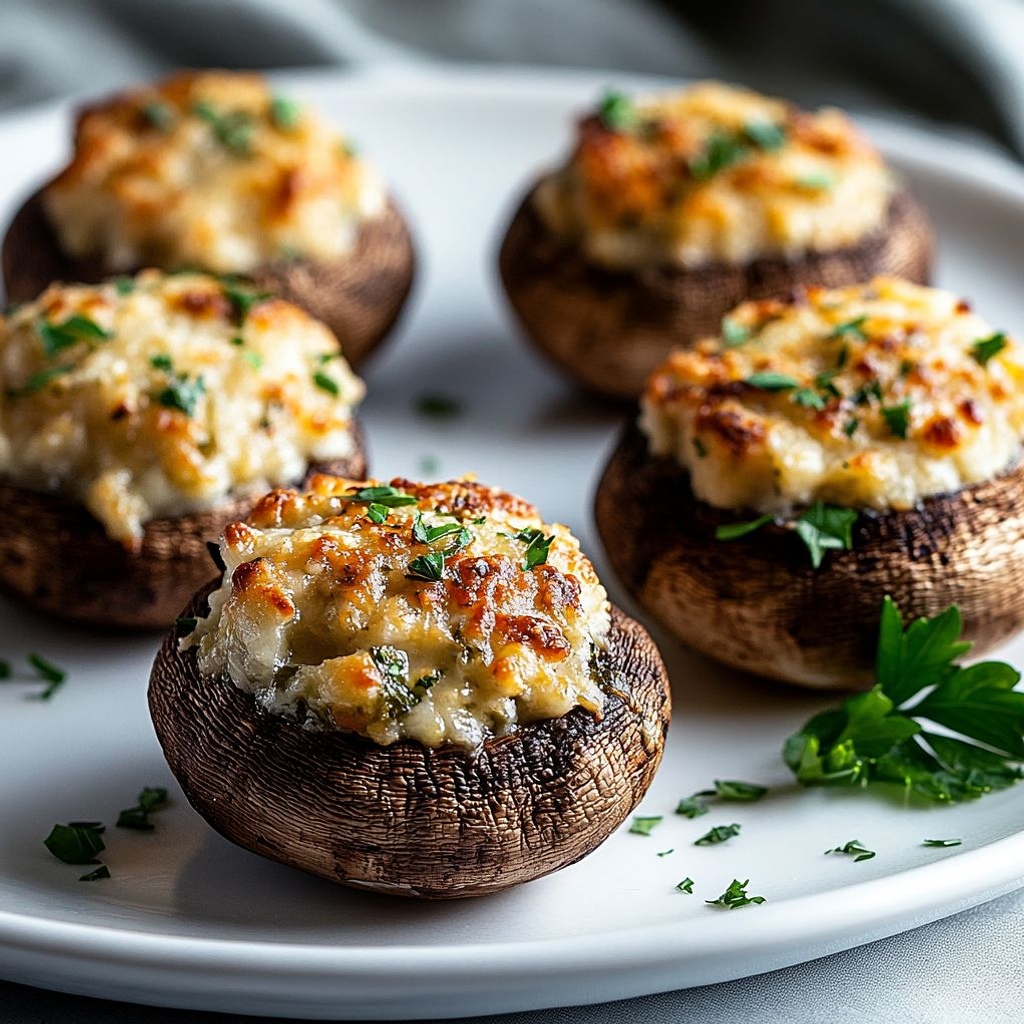
Imagine a platter of bite-sized treasures that instantly conjures gatherings, laughter, and lingering conversations. Stuffed mushrooms are the kind of dish that seems simple on the surface—appealing to both vegans and omnivores alike—but hides a world of flavor within each modest cap. As you set these little wonders on the table, the kitchen fills with a warm, earthy aroma: the forest-floor scent of mushrooms mingling with garlic, herbs, and something creamy or crunchy depending on how you crown them. The first bite releases a harmonious chorus of textures and tastes—tender mushrooms cradling a rich, savory filling, a foreground of umami that lingers long after the plate is cleared. They’re comfort food with a refined twist, elegant enough for a holiday spread and forgiving enough for a casual weeknight appetizer. In short, stuffed mushrooms are the culinary equivalent of a party invitation your guests are always happy to accept.
The Story Behind the Dish
Stuffed mushrooms have a long, worldwide lineage that ties together rustic home kitchens and festive banquets. In many European traditions, the humble mushroom has always held a prized place at the table—the forest’s gift that becomes a centerpiece when paired with the right accompaniments. The concept of “stuffing” a hollowed mushroom cap likely emerged as a practical way to transform a simple ingredient into something more substantial: a vessel that could carry flavors, textures, and for many homes, a touch of nostalgia. Across regions, you’ll find variations that tell their own stories. In Mediterranean-inspired versions, breadcrumbs absorb olive oil, garlic, and herbs, forming a crumbly, toasty cap that crackles at the edges. In Central and Eastern European kitchens, you might come across fillings brightened with tangy cheese or egg, bound into a creamy embrace that echoes comfort food traditions. In contemporary American cooking, stuffed mushrooms became a versatile canvas—a canvas that can mirror seasonal ingredients, from a leap of lemon zest and fresh herbs to bits of smoky sausage or sun-dried tomatoes. The underlying thread is universal: a small mushroom cap, a savory filling, and a touch of heat from the oven that awakens every taste bud. If you listen closely at a potluck or family gathering, you’ll hear the quiet anticipation for those first two-fork bites that signal a dish worthy of conversation, not just a quick snack.
Why You’ll Love This Recipe
- Crowd-pleasing and versatile: appropriate for vegetarians, adaptable for meat lovers, and friendly to a range of dietary preferences with just a few substitutions.
- Quick to assemble: a smart choice when you want something elegant without spending hours in the kitchen.
- Make-ahead potential: you can prep fillings or even assemble the caps ahead of time, making serving seamless for gatherings.
- Texture playground: the contrast between the tender mushroom and a crisp-t toasted breadcrumb topping (if you opt for one) or a silky, cheesy center is irresistibly satisfying.
- One of those dishes that feel special enough for holidays yet approachable enough for weeknights—perfect for entertaining or a cozy family meal.
- Grocery-friendly and budget-conscious: mushrooms are typically affordable, and the fillings can be built with pantry staples or seasonal produce.
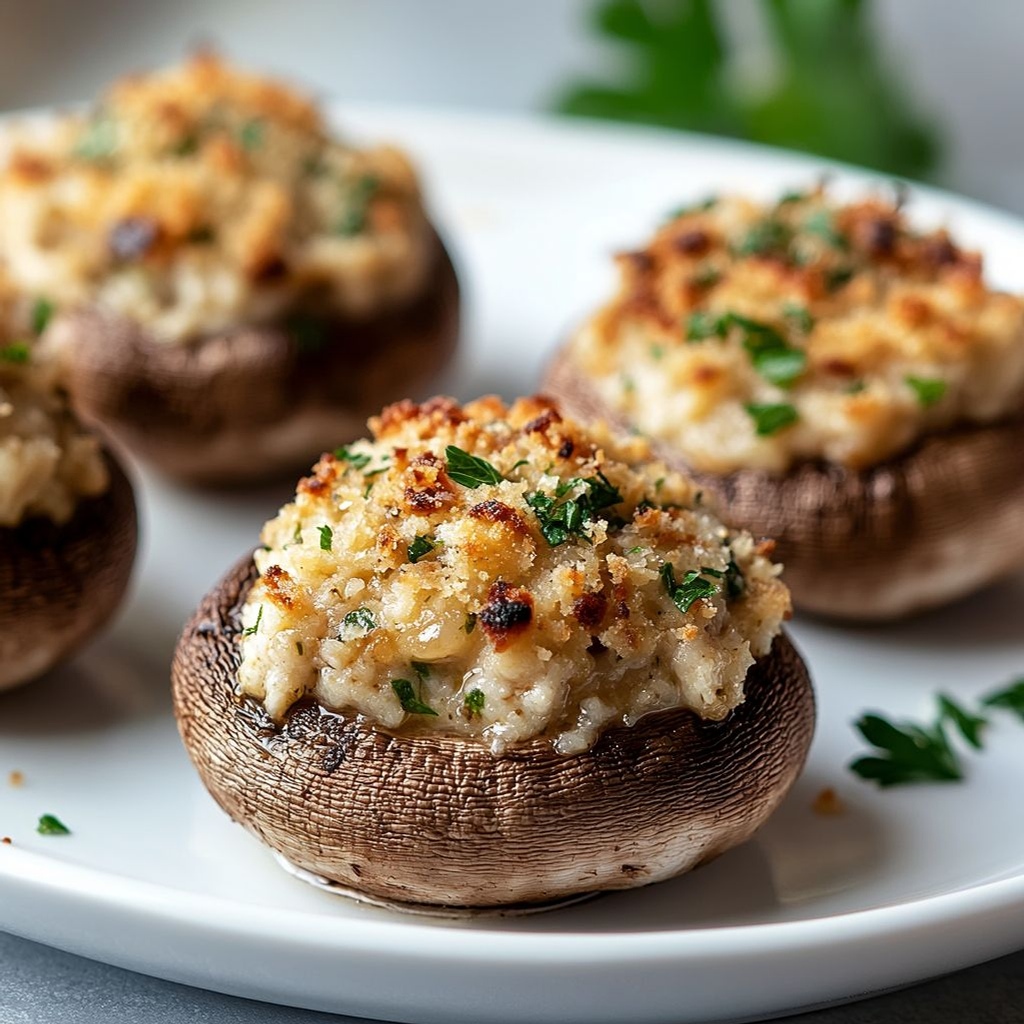
- Beautiful and camera-ready: the glossy, rounded caps with a golden crust make for a colorful, inviting presentation on any table.
Flavor Profile & Texture
Stuffed mushrooms are a symphony of contrasts that harmonize in each bite. The mushrooms themselves bring an earthy, slightly peppery depth—an essence of the forest that feels both comforting and luxurious. When the filling enters, the flavor universe expands: creamy, tangy, savory, and sometimes a hint of sweetness depending on add-ins like caramelized onions or roasted peppers. A well-seasoned filling carries umami—those savory notes that make meatless dishes feel satisfying—often enhanced by cheese, whether it’s a soft melt or a mellow grated variety. Garlic is the aromatic backbone, releasing its warmth as the mushrooms bake, while fresh herbs such as parsley, thyme, or chives brighten the filling with a green, sunlit lift. The texture is where the magic happens: a crisp, lightly browned edge on the exterior if you finish them with a breadcrumb topping, giving way to a tender, juicy interior. In vegetarian or lighter versions, the filling can be creamy and smooth, almost luxurious, with a silky mouthfeel that contrasts beautifully with the meaty bite of the mushroom cap. When you bite into one, you’re treated to a chorus of textures: a slight snap of the cap, a yielding center, and a satisfying, savory finish that invites another bite.
Occasions & Pairings
Stuffed mushrooms shine in a wide array of settings, from intimate dinners to large celebrations. They’re a natural fit for holiday spreads, dinner parties, potlucks, or an upscale casual canapé course. Because they’re inherently adaptable, they can be dressed up for formal occasions or kept cozy for weeknight meals. Here are some ideas to guide your serving plan:
- Holiday gatherings: present them as a warm, elegant starter that pairs nicely with roasted vegetables, a bright salad, and a sparkling wine or a crisp white.
- Weeknight snack or appetizer: serve alongside a simple green salad and a light soup to create a complete, balanced meal.
- Party favorite: set out a platter with a handful of garnishes (fresh herbs, a squeeze of lemon) and let guests customize their bites.
- Pairings: a bright white wine like Sauvignon Blanc or a light Chardonnay works well with the creamy, cheesy versions, while a dry rosé also complements the mushroom’s earthiness. For non-alcoholic options, a sparkling citrus mocktail or a crisp, cold ice tea elevates the dish without overpowering it.
- Side dish partners: balance them with a crisp arugula salad, roasted fingerling potatoes, or a grain like quinoa or farro to add heft to the meal.
Tips, Variations & Substitutions
Here is a toolbox of ideas to tailor stuffed mushrooms to your palate, dietary needs, or the ingredients you have on hand. The goal is a dish that remains delectable no matter how you customize it.
Vegan & Dairy-Free Variations
Skip dairy or cheese-based components by using a plant-based cream or a dairy-free cheese alternative, or go fully vegan with a binding ingredient like mashed white beans or silken tofu, seasoned well. Nutritional yeast adds a cheesy, nutty note that many people love, while a touch of lemon zest can mimic brightness from dairy. For a bit of creaminess without dairy, blend soaked cashews into the filling or use a dairy-free yogurt as a binder.
Gluten-Free & Low-Carb Options
To keep the dish gluten-free, substitute standard breadcrumbs with gluten-free breadcrumbs or use a finely ground gluten-free cracker mixture. For a lower-carb version, reduce or replace breadcrumbs with crushed almonds or ground nuts, or simply omit the crumb topping entirely for a smooth, rich filling—still delicious, especially when the filling is dense and well seasoned.
Regional Twists
Bring a regional flair to the filling by weaving in different flavor profiles. Italian-inspired fillings might include Parmesan or a pinch of oregano, a glossy drizzle of olive oil, and a whisper of red pepper flakes. Mediterranean versions could feature chopped olives, sun-dried tomatoes, and feta, balanced with fresh herbs. Japanese-inspired fillings might lean on miso for umami depth, sesame oil for a gentle nuttiness, and finely chopped shiitake with scallions. The possibilities are nearly endless, and the dish invites you to explore your pantry’s personality.
Make-Ahead & Meal Prep
Stuffed mushrooms lend themselves to make-ahead strategies. You can:
- Prepare the mushroom caps in advance, keep them hollow-side-down on a tray, and refrigerate; fill and bake just before serving.
- Make the filling ahead of time and refrigerate; bring to room temperature before mixing with any binding agents and stuffing.
- Freeze assembled unbaked stuffed mushrooms on a tray, then transfer to a bag or container; bake from frozen, increasing the baking time by several minutes.
Storage & Make-Ahead Ideas
Leftovers can be a gift when you plan for them. Store cooked stuffed mushrooms in an airtight container in the refrigerator for up to 3 days. If you’ve assembled them but haven’t baked them yet, you can refrigerate the raw stuffed caps for up to 24 hours before baking. For longer-term planning, you can freeze unbaked stuffed mushrooms on a sheet pan until solid, then transfer to a freezer bag; bake straight from the freezer, adding extra minutes to the bake time. Reheating is best done by warming in a hot oven or toaster oven to re-crisp the edges without drying the filling. If you’ve used a very soft filling, you may want to reheat at a slightly lower temperature to prevent it from separating or becoming overly dense. A gentle reheat preserves the texture and keeps the dish tasting bright and fresh.
Fun Facts & Trivia (Optional)
Did you know that mushrooms are not vegetables, but fungi? They belong to a large kingdom of organisms that feed on organic matter and contribute to the soil ecosystem. Some mushrooms, like cremini and white button varieties, share a family tree with the iconic portobello; in fact, portobellos are simply mature cremini mushrooms, which is why you’ll sometimes see them used interchangeably in recipes (with adjustments to texture and flavor). Mushrooms pack a surprising nutritional punch for such a small bite: they’re low in calories, rich in minerals like selenium and potassium, and offer umami—an intrinsic savoriness that can reduce the need for heavy fats or salt. The art of stuffing mushrooms bridges the rustic and the refined, turning a simple, earthy ingredient into an elegant, flexible vehicle for flavor. If you’ve ever noticed how a warm kitchen smells when mushrooms begin to brown, you know that this dish has a way of conjuring memories of home cooking and shared meals. And because mushrooms absorb the flavors around them, they’re an ideal partner for a wide range of pantry staples—olive oil, garlic, herbs, creaminess, and a little tang—making them a dependable go-to for cooks at every level.
Ingredients
- Mushroom Shells
- – 8 large cremini mushrooms, stems removed and caps cleaned to form stuffing shells
→ Purpose: Provide the edible mushroom shells that will hold the savory filling. Preparation: wipe each cap with a damp cloth to remove any grit; avoid soaking to prevent sogginess; gently hollow out a shallow cavity with the rounded end of a spoon to create space for the filling. Tip: choose evenly sized caps for uniform stuffing and even baking; discard any damaged caps. - – 1/2 cup finely chopped reserved mushroom stems (from the caps) to mix into the filling
→ Purpose: Adds extra umami, moisture, and texture to the filling. Preparation: chop stems finely so they blend with the other filling ingredients; you can sauté them briefly with garlic until softened to release flavor before combining with the other filling components. Tip: if you prefer a smoother texture, pulse stems briefly in a processor rather than finely mincing by hand.
- – 8 large cremini mushrooms, stems removed and caps cleaned to form stuffing shells
- Filling
- – 1 tablespoon olive oil
→ Purpose: Base fat for sautéing aromatics and adding moisture to the filling; helps to release flavors from the vegetables and mushroom stems. Preparation: heat in a skillet over medium heat and swirl to coat; avoid smoking the oil. Tip: use extra-virgin olive oil for richer flavor; if reducing calories, use a lighter oil or less oil. - – 2 cloves garlic, minced
→ Purpose: Provides the aromatic backbone and depth of flavor for the filling. Preparation: mince finely and add to the pan with onions; sauté until fragrant (about 30-60 seconds). Tip: let minced garlic sit for about 10 minutes after chopping to intensify its flavor before cooking. - – 1/2 cup finely chopped onion or shallot
→ Purpose: Adds sweetness, moisture, and body to the filling; onions/shallots contribute subtle caramelization. Preparation: dice very small; sauté until translucent and lightly golden. Tip: shallots offer a milder, sweeter note whereas onions deliver more bite—choose based on your preference. - – 1/2 cup breadcrumbs (gluten-free if needed)
→ Purpose: Provides structure and helps bind the filling; contributes texture and helps it hold shape inside the mushroom shells. Preparation: use fresh crumbs for tenderness or lightly toast stale crumbs for deeper flavor; adjust amount to achieve desired thickness. Tip: if the mixture seems too loose, add a bit more breadcrumbs; if too dry, add a splash of milk or cream. - – 4 oz cream cheese, softened
→ Purpose: Adds luscious creaminess and helps bind the filling for a cohesive texture. Preparation: bring to room temperature to blend smoothly; whisk until creamy before folding into the filling. Tip: substitute with ricotta for a lighter texture or goat cheese for tang; ensure it’s well softened to avoid lumps. - – 1/4 cup grated parmesan cheese
→ Purpose: Imparts a sharp, savory flavor and assists with browning. Preparation: grate finely for even distribution; fold into the filling. Tip: freshly grated parmesan yields stronger aroma and flavor than pre-grated; consider a mix with romano for extra bite. - – 1/4 cup shredded mozzarella or fontina (optional)
→ Purpose: Adds melt and a creamy, gooey texture to the filling. Preparation: fold into the mixture or reserve to top; use a good melting cheese for best results. Tip: skip if dairy-free is required; if included, balance with extra parmesan for flavor. - – 2 tablespoons chopped fresh parsley
→ Purpose: Brightens the filling with fresh herbal notes and color. Preparation: finely chop and fold in at the end to preserve vibrant green. Tip: substitute with chives for a milder onion-like note or basil for a Mediterranean twist. - – 1 teaspoon chopped fresh thyme or 1/2 teaspoon dried thyme
→ Purpose: Adds an earthy, aromatic note that complements mushrooms. Preparation: use fresh thyme for strongest flavor; if using dried thyme, increase slightly and crush to release essential oils. Tip: thyme pairs well with a hint of lemon zest for added brightness. - – 1/2 teaspoon salt
→ Purpose: Seasoning to balance cheese and mushroom flavors. Preparation: sprinkle evenly into the filling and taste before stuffing; remember that cheese can be salty. Tip: adjust if using salted cheeses; you may want to reduce added salt accordingly. - – 1/4 teaspoon black pepper
→ Purpose: Adds subtle heat and depth to the filling. Preparation: freshly ground is best for aroma and flavor. Tip: white pepper can be used for a cleaner look, but black pepper provides more visible specks of flavor. - – 1 large egg, lightly beaten (optional binder)
→ Purpose: Binds the filling so it stays intact inside the mushroom shells during baking. Preparation: whisk into the filling mixture and fold evenly; if omitting, you may need additional breadcrumbs or cheese to maintain cohesion. Tip: for a vegan option, substitute with 2 tablespoons ground flaxseed mixed with 6 tablespoons water and let thicken before use.
- – 1 tablespoon olive oil
- Topping and Finish
- – 1/4 cup grated parmesan cheese (for topping)
→ Purpose: Creates a crisp, flavorful crust on the stuffed mushrooms as they bake. Preparation: sprinkle evenly over filled caps just before baking; you can mix with a little breadcrumbs for extra crunch. Tip: freshly grated parmesan improves aroma and taste; consider a light brush of olive oil on top for extra browning. - – 2 tablespoons olive oil or melted butter
→ Purpose: Promotes browning and adds a glossy finish to the top. Preparation: brush or drizzle over the stuffed mushrooms before baking. Tip: butter provides richer flavor but can burn at high heat; mixing with oil raises the smoke point and yields a nice crust. - – 1/4 cup breadcrumbs (optional)
→ Purpose: Adds extra crunch to the top layer. Preparation: toss with a pinch of salt and a splash of oil, then sprinkle over the stuffed mushrooms before baking. Tip: gluten-free breadcrumbs work well; for a ultra-crispy top, broil on high for the last 1-2 minutes watchfully.
- – 1/4 cup grated parmesan cheese (for topping)
- Optional Add-ins
- – 1/4 cup chopped sun-dried tomatoes (packed in oil, drained)
→ Purpose: introduces tangy sweetness and a rich tomato flavor to the filling. Preparation: drain well; blot dry and chop finely to distribute evenly. Tip: oil-packed sun-dried tomatoes can leave excess oil—pat dry before adding to filling. - – 1/4 cup chopped olives (Kalamata or green)
→ Purpose: adds briny contrast that heightens savory notes. Preparation: pit if needed and finely chop; fold into the filling or sprinkle on top. Tip: adjust salt in the filling if using olives, since olives contribute saltiness. - – 1/4 cup toasted pine nuts or chopped walnuts
→ Purpose: provides a crunchy, nutty texture that complements the creamy filling. Preparation: toast in a dry skillet until fragrant; cool before adding to filling or using as a topping. Tip: watch closely to avoid burning; add just before baking for best crunch.
- – 1/4 cup chopped sun-dried tomatoes (packed in oil, drained)
Instructions
- Preheat your oven to 375°F (190°C) and line a large sheet pan with parchment paper or lightly grease it.
→ This ensures consistent baking heat and prevents the mushroom caps from sticking to the pan, so they release cleanly and the filling browns evenly. - Prepare the mushroom shells by wiping each cap with a damp cloth, removing the stems, and gently hollowing a shallow cavity with the rounded end of a spoon to create space for the filling.
→ Cleaning the caps removes grit without soaking, which would make them soggy; hollowing creates a generous space for the filling while keeping the caps structurally intact. - Finely chop the reserved mushroom stems to about 1/2 cup and transfer them to a small bowl; set aside for mixing into the filling.
→ This small, uniform dice distributes mushroom flavor and moisture evenly through the filling; using a sharp knife or a quick pulse in a processor ensures consistency. - Sauté the aromatics and stems: heat 1 tablespoon olive oil in a skillet over medium heat; add minced garlic and the finely chopped onion or shallot; cook until the onion is translucent and just starting to color, about 3-5 minutes, stirring to prevent scorching.
→ The oil carries the aroma of garlic and onion; cooking softens them to release sweetness and perfume, forming the flavor backbone for the filling. - Add the chopped mushroom stems to the pan, season with a pinch of salt, and sauté until the stems are softened and any released moisture has evaporated, about 2-4 minutes; remove from heat and cool slightly.
→ Thoroughly cooking the stems concentrates their umami and prevents extra moisture from making the filling watery. - Make the filling: in a large mixing bowl, combine the cooled mushroom-sautéed mixture with breadcrumbs, softened cream cheese, grated parmesan, mozzarella (if using), chopped fresh parsley, thyme, salt, and pepper; if you plan to use an egg as a binder, whisk the egg separately and fold it into the filling now.
→ The cream cheese provides cohesion and creaminess; parmesan adds depth and browning; the breadcrumb helps the mixture hold its shape; the egg (when used) binds without adding moisture, improving sliceability after baking. - If using optional add-ins such as sun-dried tomatoes, olives, or toasted nuts, fold them into the filling now so they distribute evenly rather than resting on top.
→ Even distribution of add-ins ensures every bite has a balanced contrast of textures and flavors rather than concentrated pockets. - Fill the mushroom shells with the filling: using a small spoon or piping bag, mound the filling into each cap, pressing gently to compact and form a neat dome; avoid overfilling to prevent spilling as the filling settles during baking.
→ A compact filling stays in place during baking and presents nicely when plated; tapping the filled caps once or twice helps settle the mixture. - Prepare the topping: in a separate small bowl, mix 1/4 cup grated parmesan with 2 tablespoons olive oil or melted butter and, if using, 1/4 cup breadcrumbs; this mixture creates a crisp crust and promotes even browning.
→ The fat in the topping aids browning and adds a toasty flavor; breadcrumbs provide crunch when toasted. - Top the stuffed mushrooms: sprinkle an even layer of the parmesan topping over each filled cap, and if desired, dot a few breadcrumbs on top for extra crunch; avoid a heavy crust that could detach the filling.
→ A light, even crust protects the filling while giving a golden finish; too much topping can overpower the filling and prevent even browning. - Bake the mushrooms: slide the tray into the preheated oven and bake for 18-25 minutes, or until the filling is set, the tops are lightly golden, and the mushroom caps are tender when pierced with a small knife.
→ The bake time ensures the cheese melts, flavors meld, and the mushroom caps soften without becoming mushy; test by gently wiggling a cap to gauge doneness. - Optional finish: for extra browning and a crisper top, switch the oven to broil on high for 1-2 minutes at the end, keeping a close watch to prevent scorching.
→ Broiling concentrates heat on the surface, intensifying color and texture; stay within a minute or two to avoid burning. - Rest and serve: remove from the oven and let the stuffed mushrooms rest on the pan for 5 minutes before transferring to a platter; this rest period allows the filling to firm up for clean bites and helps the flavors set.
→ Resting prevents the filling from sliding out when plated and enhances the ability to cut and pick up each stuffed mushroom with minimal mess.
Notes
These stuffed mushrooms are a savory, crowd-pleasing appetizer built around large mushroom caps filled with a creamy, herb-bright filling of sautéed mushroom stems, garlic, onion, cheese, and breadcrumbs. For a gluten-free version, use gluten-free breadcrumbs and check that any cheese, condiments, or sauces are gluten-free; you can omit the egg or substitute with 2 tablespoons ground flaxseed mixed with 6 tablespoons water for a vegan binder. Customize with sun-dried tomatoes, olives, or toasted pine nuts for added texture and brightness. To prep, wipe caps clean, remove stems and reserve 1/2 cup finely chopped stems to fold into the filling; sauté aromatics in olive oil until fragrant, then mix with cream cheese, parmesan, mozzarella or fontina (optional), herbs, salt, pepper, and the binder. Fill each cap generously, then finish with a parmesan topping and a light drizzle of oil or melted butter for shine and browning; for extra crunch, sprinkle gluten-free breadcrumbs on top before baking. Bake at 375-400°F (190-200°C) for about 18-22 minutes, until the tops are golden and the filling is set; if you like a crisper top, broil for the last 1-2 minutes watching carefully. Make ahead by assembling and refrigerating up to 1 day; reheat in a 350°F oven for 8-12 minutes. Leftovers keep in the fridge for up to 3 days and can be reheated in a moderate oven or air fryer. These stuffed mushrooms pair nicely with a crisp salad or a light white wine. Always taste and adjust salt after adding cheese, since cheese can be salty, and blot any excess moisture from the caps if the filling seems loose.
Tips
Stuffed Mushrooms – Expert Tips
Shell selection and preparation
- Choose eight large cremini mushrooms with caps that are similar in size for even stuffing and baking.
- Clean caps with a damp cloth or paper towel—avoid washing or soaking to prevent sogginess.
- Gently hollow out a shallow cavity in each cap using the rounded end of a spoon to create space for the filling.
- Reserve the removed stems for the filling; finely chop them to maximize texture and flavor.
Preparing the filling for maximum flavor and texture
- Reserve 1/2 cup chopped mushroom stems; sauté briefly with garlic to release moisture and deepen umami before mixing into the filling.
- Dice onions or shallots very small; they contribute moisture and subtle caramelization—sauté until translucent.
- Use fresh breadcrumbs when possible for lighter texture; lightly toast stale breadcrumbs for richer flavor if desired.
- Softened cream cheese should be at room temperature for easy whisking and a smoother filling.
- Grate parmesan just before adding to ensure sharp, bright flavor and even distribution.
- If using mozzarella or fontina, fold in gently for a creamy, melty texture; otherwise, you can omit for a dairy-free option.
- Add fresh parsley last to keep its color bright; if using herbs like chives, basil, or thyme, adjust to taste.
- Thyme adds earthiness—fresh is strongest; if using dried thyme, crush it a bit to release the oils.
- Season with salt and black pepper gradually; cheese brings saltiness, so taste as you go.
- For a binder, an optional lightly beaten egg helps the filling stay cohesive; for vegan or egg-free, substitute with a flaxseed egg (2 tbsp ground flaxseed + 6 tbsp water, thickened).
Cheese and binder handling
- Whisk cream cheese until smooth before folding into the filling to avoid lumps.
- Freshly grated parmesan provides more aroma and bite than pre-grated cheese; consider a parmesan-Romano mix for extra depth.
- If you include an egg, ensure the mixture is well combined but not overworked to maintain tenderness.
Toppings, finishing, and texture
- Top with 1/4 cup grated parmesan for a crisp, flavorful crust; you can mix with a little breadcrumbs for extra crunch.
- Brush or drizzle with olive oil or melted butter to promote browning and a glossy finish; butter adds richness but can burn at high heat, so oil helps with a stable crust.
- sprinkling 1/4 cup breadcrumbs on top adds additional crunch; use gluten-free breadcrumbs if needed and consider finishing with a brief broil for extra crisping at the end (watch closely).
Optional add-ins and flavor twists
- Sun-dried tomatoes: drain well, chop finely, and fold into the filling for tangy sweetness; pat dry to avoid extra oil in the filling.
- Olives: pit if needed, finely chop, and fold in for briny contrast; adjust additional salt accordingly.
- Toasted pine nuts or walnuts: add just before baking for a crunchy, nutty bite; toast nuts until fragrant to maximize flavor.
Make-ahead and storage tips
- Assemble stuffed mushrooms up to 24 hours ahead; cover and refrigerate, then bake when ready. If chilling, drain off any excess moisture from the caps before baking.
- Keep mushroom caps separate from the filling if you anticipate releasing a lot of moisture; stuff just before baking to avoid soggy shells.
- Differences in ovens exist—check at the 18–22 minute mark and bake until the filling is set and the tops are golden brown.
FAQ
What are stuffed mushrooms?
Stuffed mushrooms are mushroom caps filled with a savory mixture—usually breadcrumbs, cheese, herbs, and sometimes meat, seafood, or vegetables. They make a popular appetizer or side dish.
Which mushrooms work best for stuffing?
Best options are large cremini or white button mushrooms, and portobello caps for bigger servings. Choose caps that are intact, not split, and dry to the touch. Remove the stems and clean the caps gently.
What ingredients do I need for a basic stuffed mushroom?
Basic ingredients (serves 4):
- 12 large mushroom caps (cremini or white)
- 2–3 cloves garlic, minced
- 1/2 cup breadcrumbs (or gluten-free crumbs)
- 1/2 cup grated Parmesan or mozzarella
- 2 tablespoons finely chopped parsley
- 2 tablespoons olive oil or melted butter
- Salt and pepper to taste
Optional additions: chopped spinach, sun-dried tomatoes, cooked sausage or crab, paprika, or lemon zest.
How do I prepare the mushrooms before stuffing?
Wipe caps clean with a damp cloth, remove the stems, and gently hollow out a bit of the center to make room for the filling. Pat dry if there’s any moisture, then place caps cap-side up on a baking sheet.
Can I make stuffed mushrooms ahead of time?
Yes. You can assemble and Stuffed mushrooms unbaked and refrigerate up to 24 hours before baking. You can also freeze assembled (unbaked) mushrooms for up to 1 month; bake directly from freezing, adding a few extra minutes.
What temperature and how long should I bake stuffed mushrooms?
Preheat to 375–400°F (190–200°C). Bake for about 15–25 minutes, or until the filling is golden and the mushroom caps are tender. If using a wetter filling, you may need a few extra minutes.
How can I prevent stuffed mushrooms from getting soggy?
Tips: pat dry the mushroom caps to remove moisture, use drier fillings, and avoid overly liquid mixtures. Consider pre-baking the caps for 3–5 minutes to reduce moisture before filling, and cap the filling loosely rather than packing tightly.
Are stuffed mushrooms gluten-free or vegan options available?
Yes. For gluten-free, use gluten-free breadcrumbs. For vegan, substitute vegan cheese or omit dairy, and use olive oil instead of butter. You can also use cashew cream or dairy-free ricotta to mimic richness.
What are some tasty filling variations to try?
Try these popular fillings:
- Spinach, feta, and sun-dried tomato
- Sautéed sausage with Parmesan and herbs
- Crab meat with cream cheese and chives
- Ricotta, garlic, parsley, and lemon zest
- Walnut-quinoa with herbs for a vegetarian option
What should I serve stuffed mushrooms with?
They work well as an appetizer or side dish. Pair with a green salad, roasted vegetables, pasta, or crusty bread. A light yogurt or lemon-dill dip pairs nicely as a complement.