Introduction / Hook
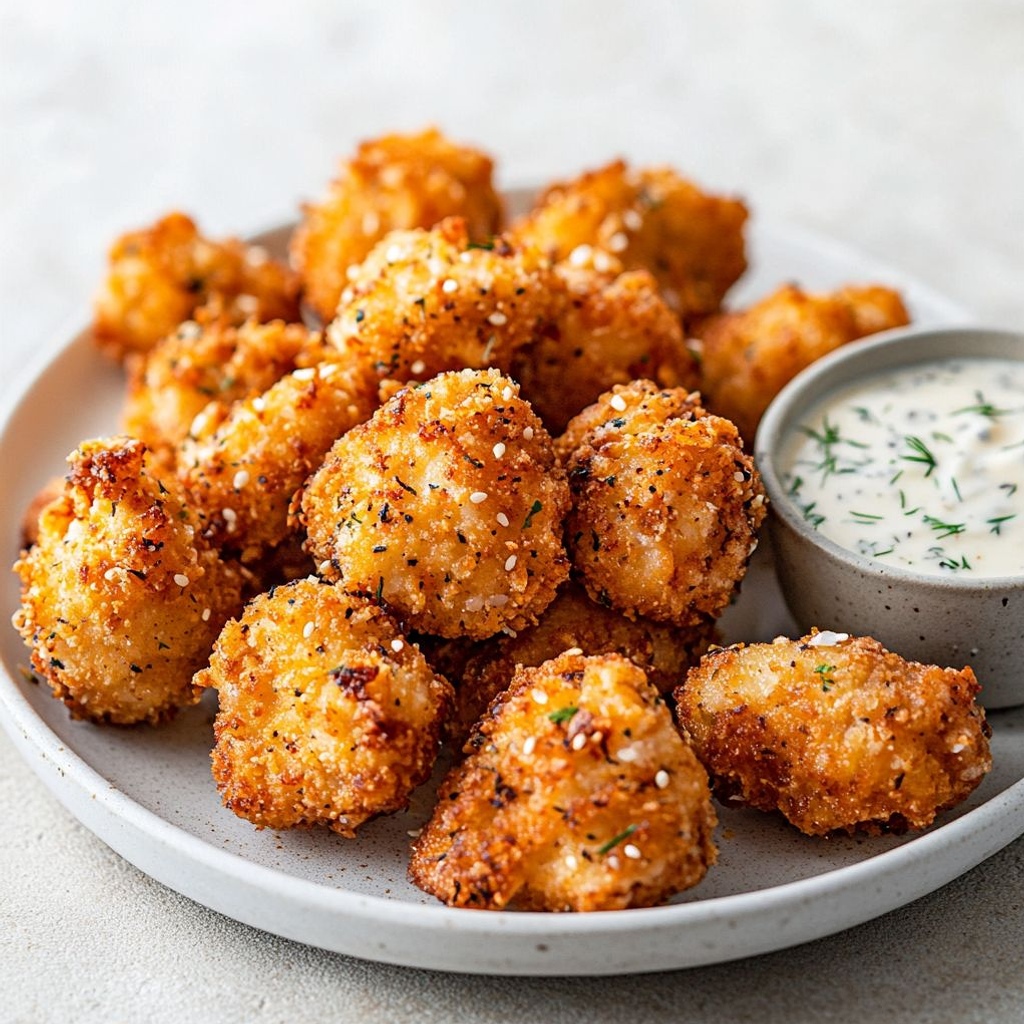
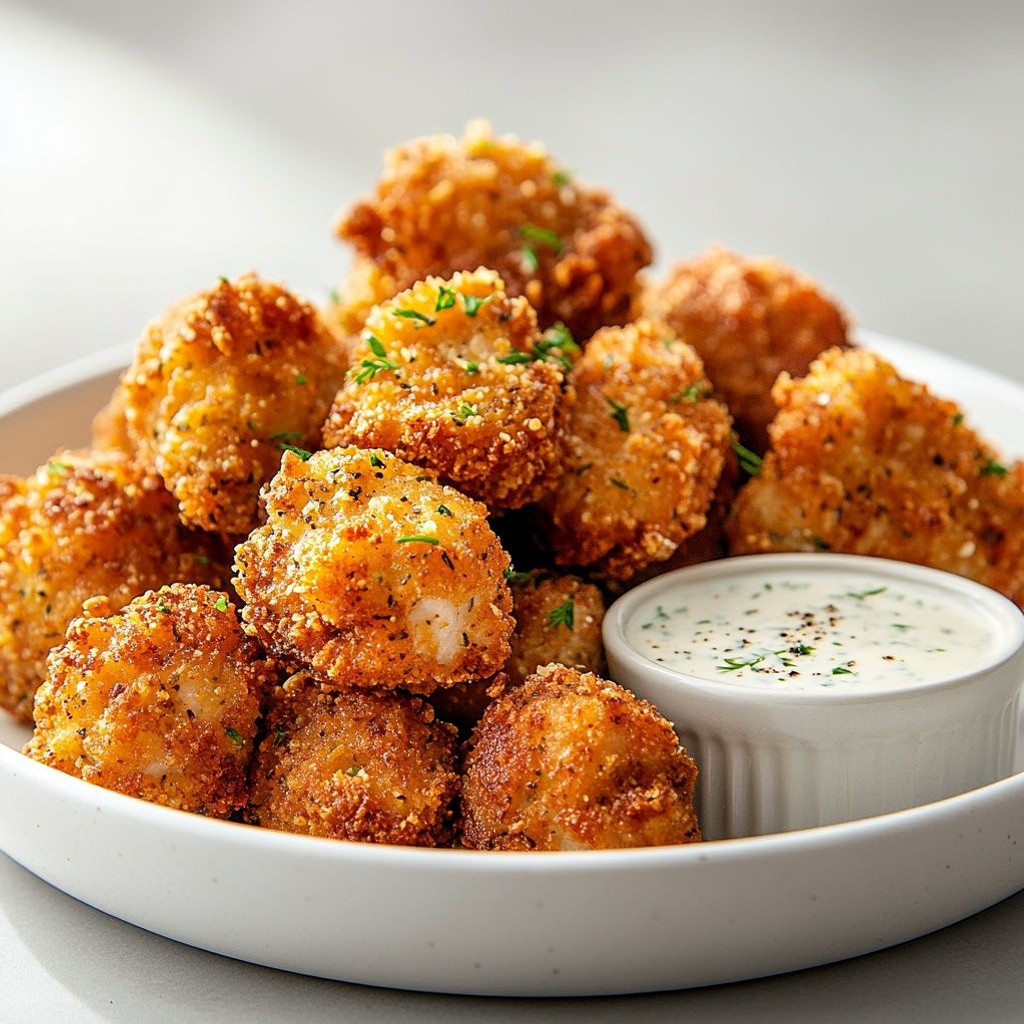
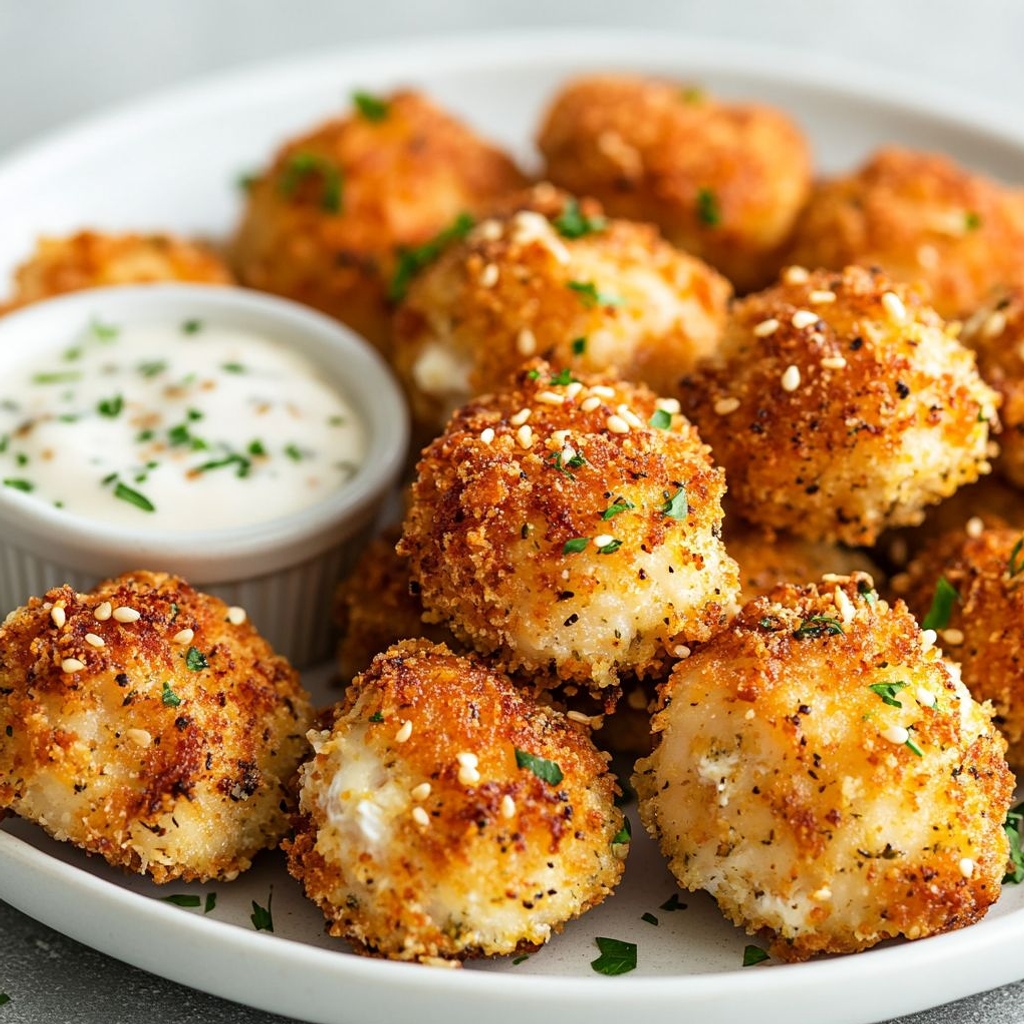
From the moment the oil begins to whisper with warmth and the first sizzle breaks the quiet, Crispy Chicken Bites announce themselves with a grin. They’re small, unassuming morsels that somehow carry the drama of a grand plate, the way a single note of spice can lift a melody, the way a perfectly timed crunch can redraw the room’s attention. Picture a platter that glows golden, each bite offering a crackle of crisp shell that gives way to a tender, juicy interior. The scent alone—garlic, paprika, a hint of lemon zest, and something comforting you can’t quite place—wraps around the room like a warm blanket on a chilly evening. These bites are the kind of dish that turns quick weeknights into celebratory moments, a crowd-pleasing glow-up that doesn’t demand elaborate effort yet delivers chef-level satisfaction. They’re playful and versatile, ready to be devoured with hands or dunked with a favorite dip, and they somehow taste like home no matter where you learned to love them. Welcome to a recipe that honors simplicity, warmth, and the irresistible joy of a perfectly crisp exterior giving way to a succulent center.
The Story Behind the Dish
Crispy Chicken Bites sit at the crossroads of tradition and modern convenience, drawing their charm from the timeless appeal of fried chicken while embracing the speed and adaptability demanded by today’s busy kitchens. The concept traces a lineage back to classic Southern frying techniques, where a well-seasoned coating and a hot, controlled fry create a contrast that makes mouths water: a delicate crust that gives way to a juicy interior, and aromas that cling to the air long after the plate has emptied. Over the years, these flavors migrated from tableside family dinners to party platters and lunchbox feasts, morphing into bite-sized versions that are easier to share, quicker to cook, and endlessly customizable.
In many households, the emergence of bite-sized fried chicken echoes a memory of Sunday gatherings, the sizzle of a skillet near the stove, and the delighted chaos of a kitchen that smells like comfort and possibility. There’s a playful nostalgia in these small morsels—the way they invite dipping, the way they multiply into a party’s MVPs, the way children and adults alike gleefully reach for more before the platter is even halfway emptied. The technique may be simple, but the result carries a story of care: picking the right balance of spices, tempering the heat to ensure a crisp without a dry finish, and letting the dish rest just long enough so the coating settles into its best self rather than crumbling away.
Crispy Chicken Bites also embody a modern twist on tradition. Chefs and home cooks alike chase a crust that stays crisp longer, a marination that keeps meat juicy without heaviness, and a texture that feels both indulgent and approachable. This dish invites experimentation—from different spice blends that recall regional flavors to the addition of citrus zest for brightness, from a traditional, bread-crumb crust to a lighter, gluten-free alternative that still delivers that coveted crunch. It’s a celebration of how a few thoughtful choices in seasoning, coating, and cooking technique can elevate ordinary chicken into something celebratory: a small, satisfying ritual that turns any table into a gathering place.
For many, Crispy Chicken Bites are a bridge between everyday meals and special-occasion comfort. They echo childhood favorites while standing up to adult palates that crave depth without fuss. The story behind them is really a story about sharing: sharing warmth, sharing time, sharing a platter that invites laughter, conversation, and the easy joy of a dish that feels both familiar and delightfully new with every bite.
Why You’ll Love This Recipe
- Quick and approachable: A fast, straightforward process that fits into busy weeknights or spontaneous gatherings.
- Everybody-friendly: Mild, balanced flavors that appeal to kids and grown-ups alike, with room to customize heat and brightness.
- Texture magic: An irresistibly crisp exterior that crackles on the bite while the interior remains juicy and succulent.
- Versatile serving options: Perfect as a snack, appetizer, or main component in bowls, salads, or wraps.
- Dip-ready goodness: Pairs beautifully with a range of dipping sauces, from tangy mustard to creamy garlic aioli or a zingy chili-lime dip.
- Make-ahead friendly: Tastes just as good after resting, reheating, or being kept warm for a shareable gathering.
- Adaptable for dietary needs: The technique can be tweaked to be gluten-free, dairy-free, or even plant-based with smart substitutions.
- Flavor playground: A reliable base that invites you to experiment with spice blends, citrus notes, or herbaceous accents.
- Comfort in a bite: A universal crowd-pleaser that brings a sense of home, warmth, and simple joy to the table.
Flavor Profile & Texture
At the heart of Crispy Chicken Bites is a carefully choreographed dance between heat, fat, and seasoning. The coating forms a delicate shield around the meat—a caramelized, amber-hued crust with a gentle sheen, evidence of careful timing and proper temperature. The coating’s grainy texture offers pleasing resistance at the outset, a satisfying crunch that gives way to the moist, tender interior. Inside, the chicken should feel like a small treasure: juicy, light, and flavorful, with a clean finish that doesn’t weigh you down. The flavor profile leans toward warmth and balance: a whisper of garlic and onion, a pinch of paprika for smoky sweetness, a touch of pepper for lift, and a citrusy brightness that pops against the savory backdrop.
The overall aroma is a magnet: toasty, slightly toasty, and comforting, with hints of butter or oil carrying the spices through the air. If you add a drizzle of lemon, lime, or a bright herb like parsley or cilantro, you invite a fresh finish that brightens every bite. The texture interplay—crisp shell versus juicy paste—creates a multi-sensory experience that satisfies several cravings at once. The crust acts as a barrier that seals in moisture, while its crisp texture adds an audible reaction when you bite into it. It’s a dish that can go from “just a snack” to “the star of the table” with a few well-chosen accompaniments and a meaningful dipping sauce.
Pairing ideas amplify the flavor experience. A tangy yogurt-herb dip or a creamy garlic aioli enhances the savoriness, while a honey-mustard or sriracha-mayo adds an agreeable zing. Fresh lemon or lime zest can brighten the finish, and a pinch of paprika or smoked paprika can push the dish toward a deeper, barbecue-like warmth. The balance is about contrast: crisp exterior and juicy interior, warm spices and fresh brightness, salty bite and a whisper of sweetness. When prepared with care, Crispy Chicken Bites become a textural voyage—crunch, chew, melt-in-your-mouth tenderness—all crafted to satisfy a wide range of palates in a single plate.
Occasions & Pairings
Ccrispy Chicken Bites shine in a variety of settings, turning ordinary meals into memorable experiences. They’re ideal for:
- Parties and game nights: A no-fuss, shareable crowd-pleaser that disappears quickly.
- Weeknight dinners: A fast, comforting main or a protein-forward side dish for bowls and salads.
- Lunchbox favorites: Handy, non-messy bites that stay tasty mid-day and entice steady, satisfying snacking.
- Holiday table centers: A playful addition to a festive spread, complementing sauces and sides with color and crunch.
- Kids’ celebrations: A fun, approachable dish that invites dipping games and creative sauces.
Pairings to consider, based on the mood or menu, include:
- Leafy greens salad with citrus vinaigrette for a bright counterpoint.
- Coleslaw or pickled vegetables to add crunch and acidity.
- Roasted potatoes or seasoned fries for a classic duo that feels indulgent yet balanced.
- Grain bowls with quinoa or farro to incorporate bite-sized protein into a wholesome meal.
- Cold beverages like sparkling lemonade, iced tea, or a light beer for refreshing contrast.
- Sweet dips like honey–mustard or a maple-bacon glaze for a smoky sweetness that harmonizes with the savory crust.
Tips, Variations & Substitutions
Almost every element of Crispy Chicken Bites invites customization. Here are ideas to tailor the dish to your pantry, dietary needs, or a particular flavor direction:
General tips
- Ensure the oil is hot enough before frying to achieve immediate crisping; if it’s too cool, the coating will absorb more oil and become soggy.
- Pat the chicken dry before coating to promote a crisp crust rather than a steam-prone exterior.
- Use a two-stage coating approach if you want extra crunch: first dip in a wet binder (egg or dairy-free binder), then coat in a seasoned dry mix.
- Let the coated bites rest briefly on a rack before frying to help the crust set and reduce sticking.
Dietary substitutions
- Gluten-free: Use a certified gluten-free flour blend or finely ground rice flour for the coating, plus gluten-free breadcrumbs if desired.
- Low-carb/keto: Use almond flour or coconut flour for the coating, with a high-fat binder to maintain moisture.
- Dairy-free: Use a dairy-free binder (such as a dairy-free egg substitute or aquafaba) and oil rather than butter in your pan or fryer, if applicable.
- Vegetarian/vegan alternative: Replace chicken with cauliflower florets or firm tofu cut into bite-sized pieces; use a plant-based binder and crumb mixture, and choose a vegan dipping sauce.
Flavor twists
- Smoky paprika and chili: Add smoked paprika, a dash of chili powder, and a touch of pimentón for a charred, barbecue-like profile.
- Herbaceous citrus: Incorporate lemon or lime zest, chopped parsley, and a pinch of dried oregano for a bright, Mediterranean vibe.
- Garlic butter finish: Toss hot bites with melted garlic butter and finely grated Parmesan for a rich, glossy finish (omit if dairy-free).
- Sesame-crunch: Finish with toasted sesame seeds mixed into the coating for an extra toasty texture and nutty aroma.
Regional twists
- Asian-inspired: Use Shaoxing wine in the marinade and a coating of panko with five-spice powder for an umami-forward profile.
- Latin-inspired: Add ground cumin, chili powder, and lime zest to the coating; pair with a cilantro-lime dip.
- Herby garden: Include finely chopped chives and thyme in the coating for a fresh, garden-fresh aroma.
Storage & Make-Ahead Ideas
Preparing Crispy Chicken Bites in advance can save you time while still delivering a crisp, satisfying result. Consider these strategies:
- Make-ahead coating: Prep the seasoned flour or crumb mixture in a shallow tray; store it in the fridge and use within a couple of days for ongoing batches.
- Cook and reheat: Fry or bake the bites until just cooked, then cool completely and refrigerate. Reheat in a hot oven or air fryer to restore the crust without overcooking the interior.
- Freezing option: Freeze raw, battered bites on a parchment-lined sheet, then transfer to a freezer bag. Freeze for up to 1–2 months. Fry or bake from frozen, adding a minute or two to the cooking time.
- Leftover plan: Use leftovers in wraps, over grain bowls, or chopped into salads for a crunchy protein boost.
Storage suggestions: keep in airtight containers in the refrigerator for up to 3–4 days. For freezing, wrap the bites well to prevent freezer burn and reheat straight from frozen.
Fun Facts & Trivia (Optional)
- Cracking the crust on fried chicken is as much about geometry as timing: a 2:1 ratio of wet to dry binder can help the coating adhere without tearing.
- Many cultures have bite-sized fried chicken variations that mirror this concept—think karaage in Japan, fried chicken karaage-style crusts, or spiced fried chicken bites across the globe.
- Texture experimentation is a long-standing culinary curiosity: some kitchens favor panko for extra crunch, while others lean on cornmeal for a rustic snap.
- The scent of fried chicken cooking is often cited as a powerful sensory memory cue, associated with family gatherings, comfort, and celebratory meals—one bite can trigger a flood of nostalgia for many.
Ingredients
Crispy Chicken Bites
Chicken
- 1.5 pounds boneless, skinless chicken breasts or thighs, cut into bite-sized pieces
→ Purpose: The chicken provides the protein backbone of the dish and the bites should be uniform in size to ensure even cooking. Thighs yield juicier, more flavorful results, while breasts offer leaner meat; choosing your cut depends on your texture preference and dietary need. Preparation: trim any visible fat, pat dry with paper towels to remove surface moisture (which helps coating adhere), and cut into roughly 1-inch pieces for consistent frying. If desired, you can lightly flatten thicker pieces for uniform thickness. Cooking note: fry or bake until the internal temperature reaches 165°F (74°C) to ensure safety and maintain juiciness; avoid overcooking to prevent dryness.
Marinade
- 1 cup buttermilk
→ Purpose: tenderizes the chicken and helps the coating cling for a crisp crust. Preparation: keep refrigerated until use; if you don’t have buttermilk, substitute with 1 cup milk plus 1 tablespoon lemon juice or white vinegar, let stand 5 minutes to curdle slightly. Marinade time: 30–60 minutes in the fridge is sufficient; for extra tenderness, you can extend to 2–4 hours, but avoid longer to prevent a mushy texture. Tip: add a pinch of salt to the marinade to enhance flavor penetration. - 1 teaspoon hot sauce (optional)
→ Purpose: adds a subtle heat and tang that complements the chicken and helps permeate the meat if used in the marinade. Preparation: whisk into the buttermilk or the dry mixture as desired. Tip: tailor the heat level to your audience; for kids, omit or reduce the amount.
Coating and Breading
- 1 cup all-purpose flour
→ Purpose: forms the initial dry coat that helps the egg wash and breadcrumbs adhere, giving structure to the crust. Preparation: season lightly with salt (and pepper if desired) and, for extra flavor, mix in a pinch of paprika or garlic powder. Tip: sift the flour to remove lumps for a smoother crust, and consider a 1:1 flour-to-starch ratio for a balanced crust. - 1/2 cup cornstarch
→ Purpose: increases crispiness by creating a light, crackly crust and aiding moisture absorption from the surface of the chicken. Preparation: whisk with the flour to distribute evenly; you can also replace with potato starch for a different crispness profile. Tip: cornstarch helps the crust stay crunchy longer as it cools. - 2 cups panko breadcrumbs
→ Purpose: provides a distinct, airy crunch that stays crisp after frying. Preparation: use unseasoned panko for control of flavor; you can mix in 1/4 cup grated Parmesan for extra savoriness. Tip: for maximum crunch, double-dip: dredge in flour, then egg wash, then panko; ensure the pieces are well-coated but not overloaded. - 1/4 cup grated Parmesan cheese (optional)
→ Purpose: adds a sharp, toasty depth to the crust and enhances browning. Preparation: mix into the breadcrumbs or scatter into the flour for an extra layer of flavor. Tip: use fresh, finely grated cheese for the best aroma and distribution. - 1 teaspoon paprika
→ Purpose: provides color and a mild smoky sweetness to the crust, enhancing visual appeal and taste. Preparation: mix into the flour or breadcrumb blend. Tip: smoked paprika accentuates the crust; regular paprika yields subtler color and flavor. - 1 teaspoon garlic powder
→ Purpose: introduces a savory backbone that complements the chicken; helps build a layered crust. Preparation: incorporate into the coating mix. Tip: garlic powder retains flavor longer than fresh garlic in dry coatings; store in a cool, dry place. - 1 teaspoon onion powder
→ Purpose: adds a gentle onion sweetness and depth to the crust. Preparation: blend evenly with the dry ingredients. Tip: onion powder performs well in dry coatings and blends smoothly without moisture. - 1/2 teaspoon salt
→ Purpose: enhances overall flavor balance and helps draw moisture to the surface for crisper browning. Preparation: season the dry mix lightly; adjust later after frying if your sauce is salty. Tip: taste the dry coating before applying to ensure you’re not over-salting the final dish. - 1/2 teaspoon black pepper
→ Purpose: adds a mild peppery kick that complements the chicken and crust seasoning. Preparation: evenly distribute in the coating. Tip: use freshly ground pepper for a more pronounced aroma and heat. - 1/4 teaspoon cayenne pepper (optional)
→ Purpose: introduces a controlled level of heat to suit spice preferences. Preparation: add to the dry mix or breadcrumb blend. Tip: start with a small amount and adjust; cayenne can quickly overpower the dish if used in excess.
Egg Wash
- 2 large eggs, beaten
→ Purpose: acts as the binding layer that helps the dry coating adhere firmly to the chicken and form a cohesive crust. Preparation: beat eggs until yolk and white are fully combined; for a looser coating, whisk in 1 tablespoon water or milk. Tip: for an extra-crispy crust, consider a double dip: coat in flour, egg wash, then breadcrumbs again.
Frying Oil
- Neutral oil for frying (vegetable, canola, or peanut), enough to fill a deep skillet or pot to at least 2 inches depth
→ Purpose: provides the hot, neutral medium needed to quickly transfer heat and create the crispy crust. Preparation: preheat oil to 350-365°F (175-185°C) and maintain that temperature between batches. Tip: monitor temperature with a thermocouple or deep-fry thermometer; crowding lowers oil temperature and makes the crust soggy. After frying, drain on a rack or paper towels to remove excess oil.
Dipping Sauce (optional)
- 1/2 cup mayonnaise
→ Purpose: creamy base for a cool dip to balance the spicy, crispy bites. Preparation: use good-quality mayo for best texture; for a lighter version, substitute with Greek yogurt or a 50/50 mayo-yogurt mix. Tip: chill the sauce for 15 minutes to let flavors meld and thicken slightly. - 2 tablespoons hot sauce (buffalo-style)
→ Purpose: provides heat and tang to complement the creamy base. Preparation: whisk into mayonnaise until evenly distributed. Tip: adjust to heat preference; add more hot sauce in small increments and taste. - 1 tablespoon honey or maple syrup
→ Purpose: adds a touch of sweetness to balance spice and richness. Preparation: whisk into the sauce; taste and adjust to your preferred sweetness. Tip: for a tangier finish, reduce honey and add a squeeze of lemon juice. - 1 teaspoon lemon juice or white vinegar
→ Purpose: brightens the dip, cutting through richness and enhancing overall flavor. Preparation: add in small increments, tasting as you go. Tip: fresh lemon juice provides brighter acidity than bottled. - 1 clove garlic, minced (optional)
→ Purpose: adds a mellow, aromatic bite to the sauce. Preparation: mince finely and fold into the mixture; alternative: use 1/4 teaspoon garlic powder for convenience. Tip: rest the sauce 15–20 minutes to mellow sharp garlic notes. - Salt and pepper to taste
→ Purpose: finishes the sauce by balancing acidity, sweetness, and fat. Preparation: add gradually and taste; adjust seasonings before serving. Tip: start with a small pinch of salt and increase as needed to achieve harmony with the dip’s other elements.
Instructions
- Trim visible fat from the chicken and pat dry with paper towels, then cut into roughly 1-inch bite-sized pieces and lightly flatten any thicker pieces to uniform thickness.
→ Why: Uniform size ensures even cooking; patting dry promotes better coating adhesion by removing surface moisture that would steam and prevent crispy crust. - Submerge the chicken pieces in the buttermilk and optional hot sauce in a nonreactive bowl, ensuring the pieces are fully covered, then refrigerate for 30–60 minutes.
→ Why: Buttermilk tenderizes the meat and helps the coating cling; chilling slows the process so flavors penetrate without turning the texture mushy if left too long. - While the chicken marinates, prepare the dry coating by whisking together the all-purpose flour, cornstarch, paprika, garlic powder, onion powder, salt, pepper, and optional cayenne in a shallow dish until evenly distributed.
→ Why: A well-mixed dry coating creates consistent color and flavor; sifting helps remove lumps for an even crust and a smoother finish. - Beat the eggs in a separate bowl until yolk and white are fully combined, and if desired whisk in 1 tablespoon water or milk to loosen the mixture for a thinner binding layer.
→ Why: The egg wash provides adhesion for the dry coating and helps create a cohesive crust that stays on during frying. - Preheat neutral frying oil in a deep skillet or pot to 350–365°F (175–185°C) and prepare for batch frying, keeping the temperature steady between batches.
→ Why: This temperature range sears the crust rapidly to crispness while cooking the chicken through; monitoring prevents greasy crust or greasy, undercooked centers. - Remove chicken from the marinade, letting excess drip back into the marinade, then dredge each piece in the dry coating, turning to coat completely and tapping off excess.
→ Why: The dry coating forms the first barrier to crispness and flavor; removing excess prevents clumping or uneven crust during frying. - Dip the coated piece into the beaten egg wash, allowing any excess to drip off to create a smooth binding layer for the breadcrumbs.
→ Why: The egg wash acts as a glue that helps the breadcrumbs adhere firmly and stay on through frying without flaking. - Roll the egg-washed chicken in the panko breadcrumb mixture (and Parmesan if using) until fully coated, pressing gently to ensure adhesion without crushing the crumbs.
→ Why: Panko yields a light, airy crunch and pressing ensures an even, durable crust that browns uniformly. - Fry the coated pieces in batches, lowering them carefully into the hot oil and cooking until the crust is deep golden and the internal temperature reaches 165°F (74°C), typically 4–6 minutes depending on piece size, turning halfway for even browning.
→ Why: Batch frying preserves oil temperature for crispness; accurate cooking times prevent undercooking or dryness while ensuring safety. - Transfer the fried bites to a wire rack set over a baking sheet or to paper towels to drain excess oil, avoiding crowding to maintain crispness.
→ Why: Proper drainage prevents soggy crust and helps retain surface crunch after frying. - If frying in batches, place finished bites in a 200°F (93°C) oven on the rack to hold hot and crisp while the remaining pieces finish.
→ Why: A gentle warm hold keeps the crust crisp and the chicken hot without continued frying, ensuring a consistent serving temperature. - In a small bowl, whisk together mayonnaise, hot sauce, honey, lemon juice, minced garlic (if using), and salt and pepper, then refrigerate or chill for 15 minutes to meld and thicken slightly.
→ Why: This dipping sauce provides a creamy, tangy balance to the crispy bites and benefits from chilling to mellow sharp flavors and improve texture. - Taste the dipping sauce and adjust salt, honey, or hot sauce as desired before serving to ensure harmonious balance with the crust.
→ Why: Final seasoning accounts for the salt and spice level of the coating and ensures the dip complements the chicken without overpowering it. - Serve the Crispy Chicken Bites hot with the prepared dipping sauce, optionally arranging on a platter with celery sticks or a light salad to provide balanced textures.
→ Why: Serving immediately preserves maximum crispness and juiciness; a fresh accompaniment adds color, freshness, and contrast to the dish.
Notes
These Crispy Chicken Bites are juicy, tender on the inside and crackly on the outside thanks to a buttermilk soak and a crunchy coating. You can customize them by adjusting the paprika, garlic powder, onion powder, and optional cayenne to control color and heat. They fry quickly in neutral oil and pair beautifully with a tangy dipping sauce; for a lighter option, bake them on a rack in a hot oven or air-fryer. They freeze well after cooking, so you can make a batch ahead and reheat in a hot oven or air fryer for crispiness. For extra crunch, double-dip: flour, egg wash, then breadcrumbs. Always ensure your flour and breadcrumbs are fresh, and if you have gluten intolerance, use certified gluten-free flour, gluten-free breadcrumbs, and gluten-free cornstarch if used, and verify other ingredients to be gluten-free.
Tips
Tips for Crispy Chicken Bites
General tips for best results
- Cook in small batches to maintain oil temperature; overcrowding leads to a soggy crust.
- Use a rack over a sheet pan to drain fried bites; avoid stacking them on top of each other.
- Let hot bites rest 2–3 minutes after frying to reabsorb juices and set the crust.
- Keep dipping sauce separate and rewarm gently so the crust stays crispy.
- Monitor oil with a thermometer and maintain 350–365°F (175–185°C) for consistent results.
Chicken selection and prep
- Thighs yield juicier, more forgiving meat; breasts are leaner but can dry out. If using breasts, consider pounding to an even thickness of about 1/2 inch for uniform cooking.
- Trim visible fat and pat pieces completely dry before marinades or coatings to promote crust adhesion.
- Aim for ~1 inch pieces to ensure even cooking and coating coverage.
- Fry to an internal temperature of 165°F (74°C) and let rest briefly before serving.
Marinade tips
- Buttermilk tenderizes and helps the coating cling. 30–60 minutes works; 2–4 hours yields extra tenderness, but avoid longer than 4 hours to prevent mushiness.
- If you don’t have buttermilk, substitute with 1 cup milk plus 1 tablespoon lemon juice or white vinegar; let stand 5 minutes to curdle slightly.
- Add a pinch of salt to the marinade to boost flavor penetration; adjust salt in the coating accordingly.
- Optional: add a small amount of hot sauce to the marinade for subtle heat throughout the meat.
Coating and breading tips
- Sift flour and cornstarch to remove lumps; a 1:1 flour-to-starch ratio gives a balanced crust with crisp bite.
- Season the dry mix lightly; add paprika or garlic powder for extra flavor. For deeper browning, consider a pinch of baking powder (about 1/4 teaspoon per cup of flour).
- For maximum crunch, double-dip: flour, then egg wash, then breadcrumbs. Press crumbs onto the surface to ensure adhesion without making a heavy coating.
- Grated Parmesan in the breadcrumbs adds savory depth; use fresh, fine grate for best aroma and even distribution.
- Let coated pieces rest 5–10 minutes on a rack before frying to set the crust and reduce coating shedding.
Egg wash tips
- Beat eggs until well combined; thin with 1 tablespoon water or milk if you want a looser coat. A thicker wash helps the crust cling more firmly.
- For extra binding, consider a light second dip in the egg wash before re-dredging in breadcrumbs.
- Keep the egg wash cold; refrigerate if prepping ahead to reduce bacterial risk.
Frying technique tips
- Choose a heavy-bottomed pot or deep fryer; maintain oil depth of at least 2 inches.
- Preheat to 350–365°F (175–185°C) and avoid temperature drops by frying in small batches.
- Cook 3–5 minutes per batch, depending on size and oil temperature; adjust time for thicker pieces.
- Carefully lower pieces into oil with tongs and avoid crowding; let crust form before turning.
- Drain on a rack over a sheet pan rather than piling on towels to keep crust crisp.
- Keep finished bites warm in a 200°F (93°C) oven if serving in multiple rounds.
Dipping sauce tips
- Mayonnaise-based dips pair well; substitute with Greek yogurt or use a 50/50 mayo-yogurt mix for a lighter option.
- Enhance flavor with garlic, lemon zest, smoked paprika, chipotle, or additional hot sauce for a buffalo-style dip.
- Thicken dips with sour cream or cream cheese; thin with more mayo or yogurt as needed.
- Chill the sauce 15–20 minutes to meld flavors and improve texture before serving.
- Prepare dipping sauce ahead of time; flavors deepen with a short rest.
Make-ahead, serving, and storage tips
- Coated raw bites can be held briefly in the fridge before frying; keep on a parchment-lined tray to prevent sticking.
- Leftovers store in a sealed container in the fridge 3–4 days; reheat in a 400°F (200°C) oven for 5–7 minutes to re-crisp. Do not re-fry in oil.
- For best texture when reheating, use a wire rack set on a sheet pan to allow air to circulate around the crust.
- Freeze coated bites on a tray first, then transfer to a freezer bag. Fry or bake from frozen, adding 1–2 minutes to the cooking time.
FAQ
What are Crispy Chicken Bites?
Crispy Chicken Bites are bite-sized pieces of chicken that are dredged in a seasoned coating and fried or baked until the crust is golden and crunchy. They stay juicy on the inside and are perfect with a dipping sauce.
What ingredients do I need to make Crispy Chicken Bites?
Gather these basics (adjust for gluten-free if needed):
- 1 lb (450 g) chicken breast tenders or cut into bite-sized pieces
- 1 cup all-purpose flour (or gluten-free flour)
- 1/2 cup cornstarch
- 2 large eggs, beaten
- 1 cup breadcrumbs or panko (plain or seasoned)
- 1 teaspoon paprika
- 1 teaspoon garlic powder
- 1 teaspoon onion powder
- 1/2 teaspoon salt
- 1/4 teaspoon black pepper
- 1/4 teaspoon cayenne pepper (optional for heat)
- Oil for frying (vegetable, canola, or peanut)
- Optional: 1/2 cup buttermilk or milk for marinating
Do I need to marinate the chicken?
Marinating helps keep the chicken juicy. Soak in buttermilk (or a light salt water brine) for 20–30 minutes in the fridge, up to 2 hours. Pat dry before dredging to help the coating adhere.
How do I make Crispy Chicken Bites?
Follow these steps for a crisp crust:
- Cut the chicken into even bite-sized pieces and pat dry.
- Set up a dredging station: separate bowls for seasoned flour mix (flour + cornstarch + spices), and beaten eggs.
- Dip each piece in eggs, then coat in the flour mixture. Repeat for a double-dredge if you want extra crunch.
- Heat oil in a deep pan to about 350–360°F (175–185°C).
- Fry in batches 3–5 minutes per batch until golden and cooked through. Drain on a rack or paper towels.
Can I bake or air-fry instead of frying?
Yes. For a crisper but less oily result:
- Baking: Preheat to 425°F (220°C). Place bites on a wire rack set over a baking sheet, spray lightly with oil, and bake 15–20 minutes, turning once, until golden.
- Air frying: Preheat to 400°F (205°C). Arrange in a single layer and air-fry 8–12 minutes, shaking halfway, until crisp and cooked through.
How can I ensure they stay crispy on the outside and juicy on the inside?
Tips for perfect texture:
- Dry the chicken pieces well before dredging.
- Maintain oil temp around 350–360°F (175–185°C) and avoid overcrowding the pan.
- Use a light cornmeal or cornstarch boost in the coating or a double dredge for extra crunch.
- Do not overcook; use a meat thermometer to check for 165°F (74°C) internal temperature.
Are gluten-free options available?
Absolutely. Use a gluten-free flour blend in place of all-purpose flour, and ensure your breadcrumbs are gluten-free. You can also omit breadcrumbs and use a higher ratio of cornstarch with extra spices for a crisp crust.
How long do Crispy Chicken Bites stay fresh and how should I store leftovers?
Storage tips:
- Refrigerate cooked bites in an airtight container for up to 3–4 days.
- Reheat in a 375°F (190°C) oven for 5–10 minutes (or air fryer at 350°F/175°C for 3–5 minutes) until crisp and heated through.
- To freeze raw bites, freeze on a sheet pan, then transfer to a freezer bag for up to 2–3 months; fry or bake directly from frozen (add a minute or two).
- To freeze cooked bites, cool completely and freeze in a single layer, then transfer to a bag for up to 1–2 months.
What dipping sauces pair well with Crispy Chicken Bites?
Popular options include:
- Honey mustard
- Ranch
- Garlic aioli or garlic butter sauce
- Spicy mayo or Sriracha mayo
- Sweet chili sauce
Can I make these ahead or in larger batches?
Yes. For best results, batch cook and keep warm on a rack in a low oven (200°F/95°C) while cooking in batches. For longer storage, freeze raw bites for later frying or baking, then cook from frozen when needed. You can also marinate in advance to save time on a busy day.