Introduction / Hook
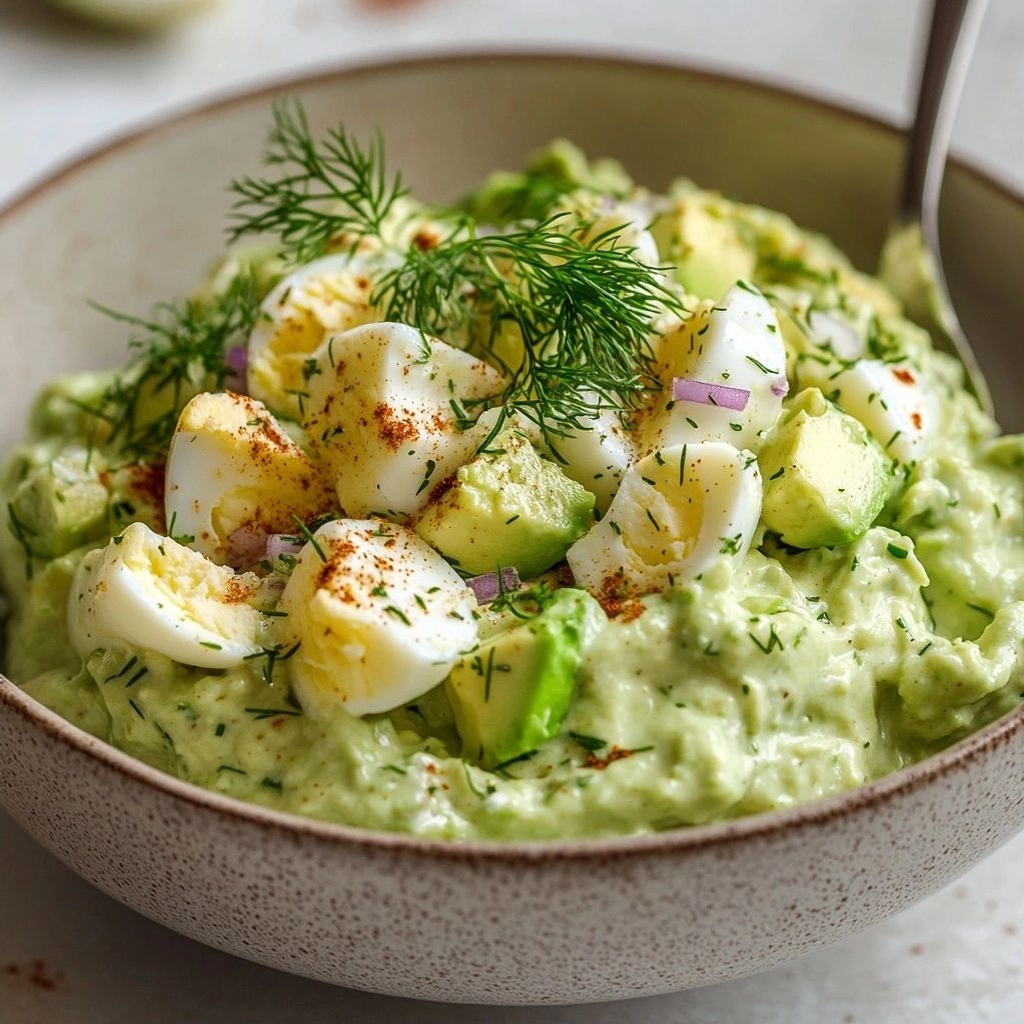
Picture a bright, sunny lunch countdown: ripe avocados, velvety egg yolks, and a whisper of citrus dancing with a hint of pepper. This is more than a salad—it’s a playfully modern take on a classic staple that feels indulgent yet effortlessly light. The avocado egg salad you’ll discover here is a celebration of contrast and balance: creamy, luscious bites tempered by crisp vegetables, zippy herbs, and a citrusy zing that lifts every mouthful. It’s the kind of dish that makes a quick afternoon meal feel like a small culinary vacation. And the best part? It’s endlessly adaptable to your mood, your pantry, and your dietary needs, so you can make it your own every time you recreate it.
What makes this concept so irresistible is not just the perfect texture, but the way it invites creativity. Avocado brings a luxurious silkiness that coats every chunk of egg with a gentle richness, while the eggs provide a familiar, comforting protein anchor. Add a handful of chopped celery for a crisp bite, scallions for a mild bite, or a whisper of cilantro for an herbaceous brightness. A squeeze of lemon or lime brightens the mixture, a dusting of paprika or chili flakes adds warmth, and a dollop of yogurt or mayo can tailor the creaminess to your preference. It’s the kind of recipe that feels both comforting and novel—a familiar favorite, given a fresh, summery makeover.
In this guide, you’ll find not just one version but a spectrum of avocado egg salad ideas designed to delight different palates and occasions. Whether you’re packing a bento, whipping up a quick lunch for a busy week, or crafting a spread for a casual brunch, this collection offers ideas that are simple, satisfying, and scalable. You’ll discover how easy it is to transform a simple combination into a star dish with the right balance of texture, acidity, and aroma. So, roll up your sleeves, gather a few ripe avocados, some eggs, and your preferred fixings, and let your creativity run free. The result will be a bright, nourishing bowl of goodness that tastes like sunshine in a spoonful.
The Story Behind the Dish
Avocado and eggs share a quiet chorus in modern comfort food—a duet that feels both timeless and contemporary. The creamy avocado, with its buttery flesh and heart-healthy fats, enters the stage alongside the humble egg, a universal symbol of nourishment and versatility. This pairing has roots in countless culinary traditions where creamy textures meet wholesome protein, evolving across continents into a dish that’s both satisfying and adaptable to whatever the pantry offers.
Historically, egg salads have long held a place in lunch culture—from packed school lunches to elegant picnic spreads. The humble egg, boiled to just the right firmness, has been a canvas for flavor. Avocado, a relatively newer superstar in Western kitchens, entered the scene as a beloved ingredient in the late 20th century, celebrated for its creamy mouthfeel and nutritional profile. When these two staples come together, they create a canvas that invites experimentation: crunchy vegetables, zesty herbs, tangy dressings, and a touch of heat can all be layered in without overpowering the core flavors. The result is a modern classic that can be tailored to dietary preferences—from dairy-free and vegan-friendly adaptations to low-carb and gluten-free glorifications.
Personal stories around this dish often emphasize its role as a crowd-pleaser that travels. Picture a picnic blanket, the sound of birds, and a container of avocado egg salad resting alongside sliced cucumbers, crisp radishes, and soft, crusty bread. It’s the kind of dish that evokes memory—family lunches, weekend gatherings, and spontaneous meals that feel special without requiring hours in the kitchen. The avocado’s richness balances the egg’s savoriness, while citrus brightness and fresh herbs brighten the entire experience, making it a dish you’ll crave again and again.
Why You’ll Love This Recipe
- Versatility: This is not a single recipe but a concept you can adapt endlessly. Whether you want a dairy-free version, a vegan twist, or a protein-packed lunch, the base remains delicious and forgiving.
- Speed and ease: With just a few pantry staples, you can assemble a satisfying meal in under 15 minutes. Perfect for busy weekdays or last-minute entertaining.
- Texture play: Creamy avocado meets tenderly cooked eggs, with optional crisp vegetables for crunch. The contrast keeps every bite exciting.
- Nourishing and balanced: A harmonious blend of healthy fats, high-quality protein, and fiber-rich vegetables makes this a satisfying meal that supports energy levels throughout the day.
- Bright, customizable flavor: The bright acidity from citrus, the herbal lift from greens, and the customizable spice level let you tune the dish to your mood and season.
- Great for entertaining: It scales easily—from a simple lunch to a spread for brunch or a light buffet—without compromising on flavor or presentation.
Flavor Profile & Texture
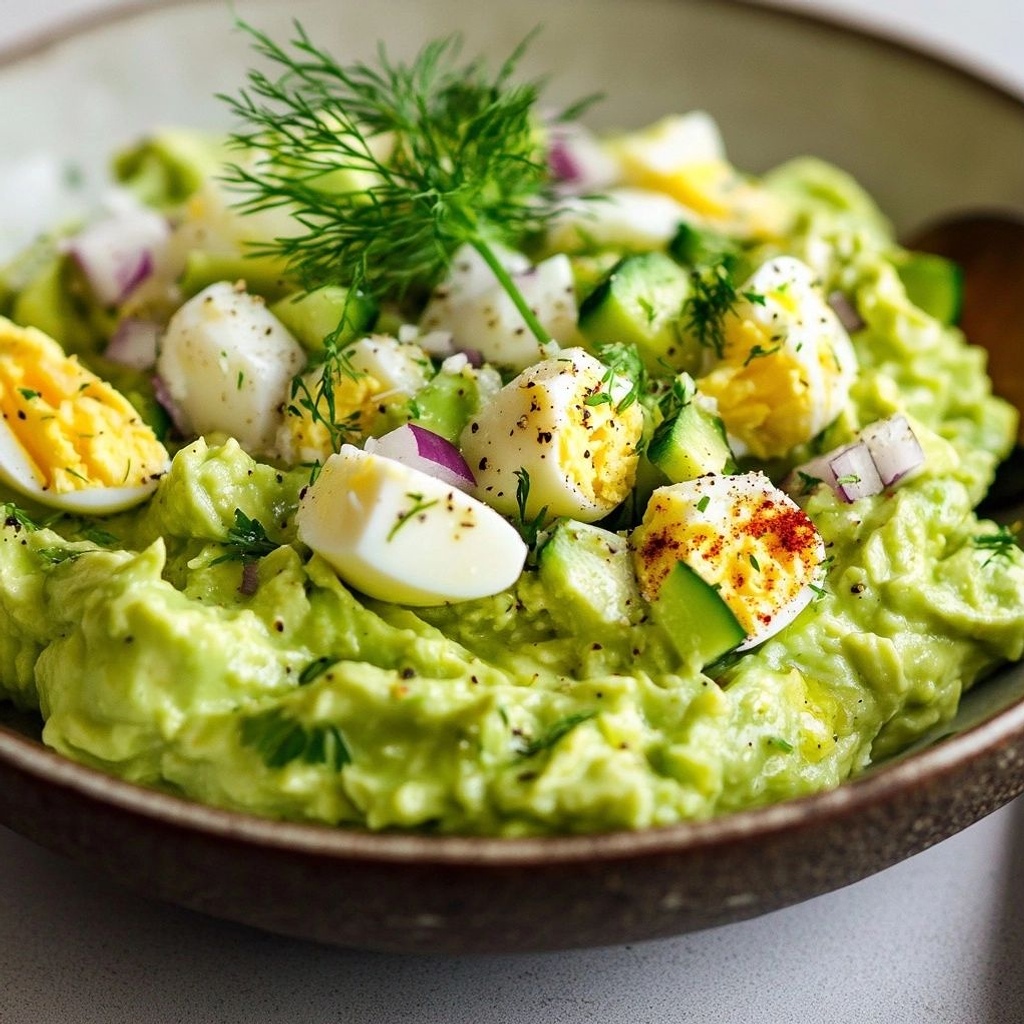
The avocado provides a luxuriously creamy base that wraps around bite-sized pieces of softly cooked egg. The yolk contributes a mellow, custardy richness, while the white parts deliver a clean, savory edge that keeps the mix from feeling too heavy. When you fold in a little yogurt or mayonnaise, the mixture gains a gentle silkiness that clings to each cube or scoop in a way that feels indulgent without tipping into heaviness.
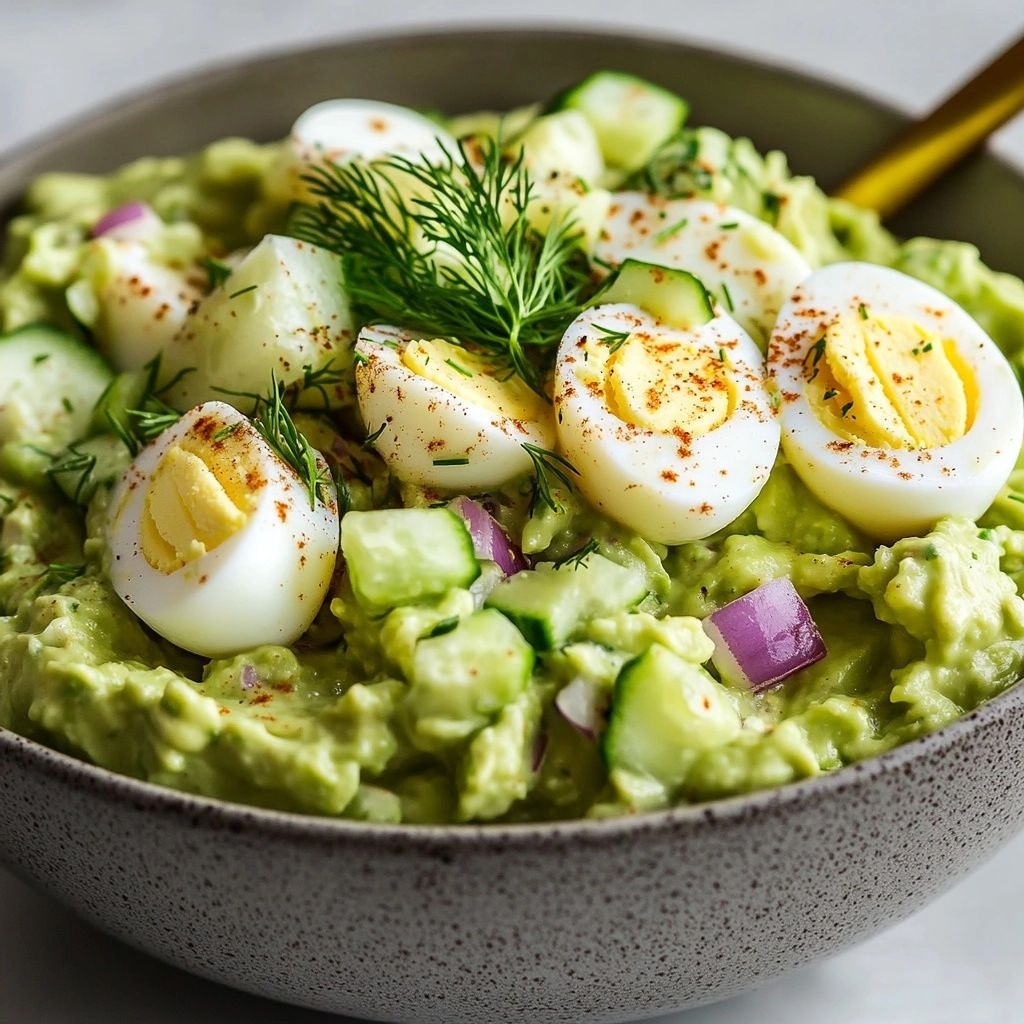
Texture is where this dish truly shines. The smoothness of avocado contrasts with the occasional snap of celery, cucumber, or radish, and the eggs bring a tender chew that’s deeply satisfying. A sprinkle of chopped herbs—dill for a fresh, almost pickle-like note; chives for a mild oniony brightness; or cilantro for a citrusy, green finish—adds aromatic complexity that elevates the entire salad. Citrusy brightness—lemon, lime, or even a splash of orange juice—lifts the richness and makes the flavors pop on the palate. A hint of mustard or a pinch of paprika can introduce a subtle bite or smoky warmth, depending on the mood you’re aiming for.
In terms of mouthfeel, envision a symphony of soft, creamy bites with occasional crisp interruptions. The avocado glides across the tongue, the egg pieces offer a gentle bite, and the vegetables or seeds you add bring a refreshing crunch. When served on light bread, a crisp lettuce wrap, or simply atop a bed of greens, the texture experiences a delightful balance between comfort and clarity—the kind of meal that satisfies without weighing you down.
Occasions & Pairings
This avocado egg salad is a flexible companion for a range of occasions. Here are some situations where it shines:
- Weeknight lunches: A fast, nourishing option that comes together in minutes and travels well for on-the-go meals.
- Brunch spread: Serve as a creamy centerpiece with bagels, toast, or crostini, accompanied by fresh fruit and a bright sparkling beverage.
- Picnics and potlucks: Pack in a sturdy container with a crisp veggie platter for a refreshing, crowd-pleasing dish.
- Light summer dinners: Toss with greens or wrap in lettuce for a low-carb, high-flavor meal.
- Children and picky eaters: The familiar flavors of egg and avocado can be a gateway to broader tastes when presented in a gentle, creamy form.
Pairings to consider:
- Crusty bread, toasted baguette slices, or whole-grain crackers
- Crunchy greens and cucumber ribbons for a refreshing base
- Fresh fruit like grapefruit segments or mango for a sweet contrast
- Herbed yogurt or a light vinaigrette drizzled on a salad bed
- A glass of crisp white wine, sparkling water with citrus, or a light iced tea for a summery vibe
Tips, Variations & Substitutions
Explore the customization playground of avocado egg salad with these ideas, designed to fit dietary needs and flavor preferences:
- Dairy-free: Use dairy-free yogurt or skip mayo altogether. A touch of olive oil can help achieve silkiness without dairy.
- Vegan adaptation: Replace eggs with soft tofu or use chickpea “egg” salad vibes to maintain protein content. Add extra avocado for creaminess.
- Low-carb / keto-friendly: Serve on lettuce wraps or cucumber boats instead of bread. Keep the avocado as the primary fat source.
- Gluten-free: This concept naturally leans gluten-free; simply avoid bread-based serving methods if needed.
- Herb-forward: Swap dill for cilantro or chives for a different aroma profile. Fresh tarragon can add a delicate anise-like note.
- Spice variations: For a heat kick, add finely chopped jalapeño or a pinch of cayenne. A smoky touch from chipotle powder can mimic grilled flavors.
- Crunchy accents: Include toasted almonds, sunflower seeds, or crushed celery stalks for an extra layer of texture.
- Herbal brightness: Finish with a squeeze of lemon, lime, or even grapefruit juice to lift the fat-heavy richness.
- Regional twists: Integrate roasted corn and paprika for a southwestern vibe; fold in capers and oregano for a Mediterranean-inspired version.
Storage & Make-Ahead Ideas
To keep avocado egg salad fresh and delicious, follow practical storage tips. Avocado tends to oxidize, so prompt assembly and proper containment are key to maintaining color and texture:
- Refrigeration: Store any leftovers in an airtight container in the refrigerator for up to 1 day to preserve color and texture. For longer storage, consider mixing only the egg and avocado components after you’re ready to serve.
- Preventing browning: A squeeze of lemon or lime juice over the surface before sealing helps slow browning. Press a little plastic wrap directly onto the surface to minimize air exposure.
- Make-ahead strategies: Prepare hard-boiled eggs in advance and store them peeled or unpeeled. Mash avocado close to serving time to keep color vibrant, or store avocado flesh with lemon juice in a separate container until ready to mix.
- Freezing: Avocado does not freeze well for texture, so this dish is best prepared fresh. If you must, freeze only the hard-boiled eggs or a version without avocado, and combine with fresh avocado just before serving.
- Serving ideas ahead: Assemble a light, crunchy base (lettuce cups or cucumber boats) in advance for a quick-to-serve, elegant presentation during gatherings.
Flavor Pairing Notes & Sensory Tips
Beyond the basic seasoning, there are subtle nuances that can elevate your avocado egg salad. Consider the following to heighten sensory appeal:
- Acidity balance: A bright citrus note can shave off the richness and make the flavors pop. If you prefer a milder tang, use a splash of white wine vinegar or apple cider vinegar in smaller amounts.
- Texture layering: A handful of crunchy add-ins—pomegranate seeds, toasted seeds, or crisp celery—adds a surprising and delightful contrast to the creamy base.
- Herbal magic: Fresh herbs released at the last moment deliver a vibrant aroma that lifts the entire dish. Chop them finely to disseminate their flavor evenly.
- Finishing flourish: A light drizzle of olive oil, a dusting of smoked paprika, or a few microgreens on top can turn a simple bowl into an elegant presentation.
Fun Facts & Trivia (Optional)
Here are a few tasty tidbits that may surprise you and deepen your appreciation for this beloved combination:
- Avocados are botanically a fruit and a member of the berry family. Their creamy texture comes from fat-rich monounsaturated fats, which give a velvety mouthfeel that pairs beautifully with eggs.
- The classic eggs-and-dairy-based salad has many regional names and variations, from “deviled eggs” to “egg salad” on deli menus. Combining avocado with this legacy creates a fresh, modern twist that remains comforting and familiar.
- In many cultures, a citrus finish is essential to balance richness in creamy dishes. A simple squeeze of lemon is a timeless technique to brighten flavors without overpowering them.
- Texture and temperature matter: slightly chilled mixtures feel more refreshing and can enhance the perception of creaminess in avocado-based salads.
- For plant-based eaters, the concept can be adapted with tofu or chickpeas as the protein base while keeping avocado as the luxurious binder.
Conclusion: Your Next Avocado Egg Salad Adventure
Delicious avocado egg salad ideas invite you to play, taste, and refine until you discover your preferred balance of creaminess, brightness, and crunch. This is a dish that rewards curiosity: small changes—a squeeze of citrus, a handful of herbs, a new crunch element—can transform the entire profile from comforting to celebratory. It’s a versatile canvas that fits a week’s worth of meals: a speedy lunch, a vibrant brunch plate, a light dinner, or a party-friendly spread that leaves guests impressed and coming back for seconds. Build your own variations with confidence, knowing that the core duo—avocado and eggs—offers a dependable foundation that’s both delicious and nourishing. Enjoy crafting your version, savoring each bite, and sharing the joy with family and friends as you turn a simple staple into a small, edible celebration of freshness and flavor.
Ingredients
- Avocados, ripe and creamy (mashed)
→ Avocados provide the creamy base for the salad, acting as a natural binder and moisture source. Mash them gently to your preferred texture—smooth for a classic spread, chunkier for a more textured bite. Choose medium to large avocados with dark, pebbled skin and yield to gentle pressure. If using from the fridge, allow to come to room temperature for easier mashing and better flavor. - Hard-boiled eggs, peeled and chopped
→ Eggs contribute protein, structure, and a familiar flavor profile. Use eggs that are fully cooled before chopping to prevent smearing into a paste. Chop to your desired size: finer for a smooth salad, larger chunks for a more toothsome bite. For easier peeling, start with eggs that are a few days old. - Lemon juice or fresh lemon juice
→ Adds bright acidity that balances the richness of avocado and eggs, helps prevent browning, and enhances overall flavor. Use freshly squeezed juice for the best zing. If avoiding citrus, a splash of white wine vinegar or a small amount of pickle juice can substitute. - Mayonnaise or Greek yogurt (or a dairy-free alternative)
→ Provides creaminess and helps bind the mixture. Mayonnaise yields a richer salad; Greek yogurt offers tang with lower fat, while dairy-free yogurts or tahini can be used for vegan versions. Start with a smaller amount and adjust to reach your desired consistency. For best flavor, use full-fat yogurt or mayo rather than light varieties. - Fresh herbs (such as dill, cilantro, or chives), chopped
→ Herbs brighten the salad with freshness and aroma, while also contributing subtle flavor layers. Use a combination you love or switch daily. Chop finely to distribute evenly and avoid overpowering the main ingredients. Fresh herbs are best added just before serving for peak aroma. - Salt and black pepper
→ Essential for building flavor and balancing the richness. Add gradually, tasting as you go to avoid over-salting. If your avocado is particularly creamy, you may need less salt; if using salty add-ins like pickles or olives, adjust accordingly. Freshly ground pepper adds nuance that pre-ground pepper cannot match. - Celery or green onions, finely diced (optional)
→ Adds crunch and a crisp, fresh bite that contrasts with the creamy base. Dice evenly to distribute throughout the salad. If using celery, consider a quick rinse and pat dry to remove any grit. Green onions contribute a milder onion flavor without sharpness. - Tomato, seeded and diced (optional)
→ Provides juiciness and a pop of color. Seed tomatoes to prevent extra moisture from watering down the salad. Use ripe but not overripe tomatoes for best flavor and texture. If your tomato is very watery, you can pat dry with a paper towel before mixing. - Paprika or smoked paprika (optional)
→ Adds a subtle smoky sweetness and color, enhancing the depth of flavor. Sprinkle a small amount to start, then adjust to taste. Smoked paprika can intensify the aroma; regular paprika yields a milder, slightly sweet note. - Whole-grain mustard or Dijon mustard (optional)
→ Introduces a tangy, sharp note that cuts through the richness and brightens the overall taste. Use a small amount at first and blend well to prevent a harsh flavor. Dijon will be more assertive; regular mustard yields a milder depth. - Liquid or moisture options for adjusting texture (olives brine, pickle relish, or a splash of olive oil)
→ These choices help tailor the salad to your preferred creaminess and flavor intensity. Olives or pickles can add a briny dimension; if using, finely chop and fold in gently to maintain balance. A light drizzle of olive oil can loosen the salad if it looks dry, but avoid making it greasy. - To Serve: bread, crackers, or lettuce cups
→ Provides the appropriate vehicle for enjoying the salad. Toast bread lightly for structure, layer onto crisp lettuce cups for a low-carb option, or use sturdy crackers or pita for a quick snack. If serving as a sandwich filling, hold back a bit of avocado and eggs to keep moisture from making the bread soggy.
Instructions
- Bring all ingredients to room temperature and assemble your mise en place to ensure even mixing and predictable texture.
→ Warmer ingredients blend more smoothly and integrate better; having everything measured and ready prevents delays that could cause over-mixing or uneven texture. - Gently scoop and pit the avocados, then scoop the flesh into a wide bowl and mash to your preferred texture.
→ Mashing gently preserves some creaminess and chunks if desired; use a fork or potato masher in a back-and-forth motion to avoid turning the flesh into a paste. - Add the lemon juice to the mashed avocado and stir to combine, ensuring the acid coats the surface to slow browning.
→ The citrus not only brightens flavor but also prevents enzymatic browning, helping maintain a fresh appearance; mix thoroughly so every portion gets a touch of brightness. - Fold in the chopped hard-boiled eggs, distributing evenly but preserving some larger pieces for texture.
→ Coarsely chopped eggs provide structure and a familiar bite; over-chopping can turn the mixture crumbly and pasty, so fold with a spatula using gentle rotations. - Stir in your chosen binder (mayonnaise or Greek yogurt) in small increments until the salad reaches your desired creaminess.
→ Start light to avoid a mayonnaise-heavy salad; the right amount binds without making the mixture overly slick, and yogurt adds tang when you want a lighter profile. - Season with salt and black pepper, then taste and adjust, adding more if you need to balance richness or a faint bitterness.
→ Seasoning should be layered; taste after each adjustment and aim for a balanced profile where avocado, egg, and citrus are harmoniously integrated. - Stir in finely diced celery or green onions and mix just until evenly dispersed for a crisp counterpoint.
→ The crunch contrast enhances mouthfeel; ensure even distribution by sprinkling the pieces around the bowl and folding with a light hand. - Fold in the tomato cubes if using, making sure to seed and pat dry first to minimize extra moisture in the salad.
→ Seeded, well-drained tomatoes reduce juice separation, keeping the salad cohesive and preventing a watery outcome. - Sprinkle paprika or smoked paprika and, if desired, a small amount of whole-grain or Dijon mustard, then fold to integrate.
→ A touch of color and a subtle smoky note or tang from mustard heightens depth of flavor; fold gently to avoid breaking the eggs further. - If the mixture looks dry or thick, loosen with a splash of olive oil or a spoonful of pickle relish, folding until the texture is creamy but not soupy.
→ A light moisture adjustment ensures the salad clings nicely to bread or lettuce without sliding off, and enhances mouthfeel with a silky finish. - Chill the avocado egg salad for 15 to 30 minutes to meld flavors and improve scoopability.
→ Resting the mixture allows the flavors to bloom and helps fats relax, resulting in a more cohesive taste when served. - Prepare serving vessels: lightly toast bread, rinse and dry lettuce leaves for cups, or arrange sturdy crackers as vehicles for serving.
→ Toasting adds structure and aroma for sandwiches, while crisp lettuce cups offer a low-carb option; correct vessel choice prevents sogginess and improves texture balance. - Serve the avocado egg salad as a sandwich filling, on lettuce cups, or with crackers, and present immediately for best texture and aroma.
→ Freshly assembled servings showcase the bright colors and aroma of herbs and lemon; timely service avoids the avocado from oxidizing on the plate.
Notes
These avocado egg salad ideas are rich and satisfying, with ripe avocado providing a velvety binder that luscious eggs bind into a protein-packed filling. Mash the avocado to your preferred texture—smooth for a classic spread or chunkier for a more textured bite—and mix in chopped hard-boiled eggs for structure. Squeeze fresh lemon juice to brighten flavors and slow browning; adjust acidity to taste. Start with a modest amount of mayo or yogurt and blend until you reach a creamy, scoopable consistency; dairy-free options like tahini or dairy-free yogurt can substitute as needed. Fresh herbs such as dill, cilantro, or chives lift the dish with aroma and freshness, and a pinch of salt and pepper helps balance richness. Add optional crunch from finely diced celery or green onions and a pop of color with tomato. A small dusting of paprika or smoked paprika adds a hint of warmth, and a touch of whole-grain or Dijon mustard introduces a bright, tangy note. If the mixture seems dry, loosen it with a little olive oil or a splash of pickle juice; if too loose, fold in more mashed avocado or eggs. These salad scoops are fantastic on bread, toast, lettuce cups, or crisp crackers, and they store well in the fridge for up to 2 days—best when prepared fresh and kept chilled until serving. For serving, lightly toast bread or serve in lettuce wraps for a lighter option. Always taste and adjust salt after chilling, as flavors intensify when cold.
Tips
Tip 1: Perfect avocado prep Choose avocados that yield softly to gentle pressure. If they’re a touch under ripe, let them sit at room temperature for a day or two to improve flavor and creaminess. Mash to your preferred texture—smooth for a classic spread or chunkier for bite.
Tip 2: Eggs that hold their shape Use fully cooled hard-boiled eggs to prevent the yolks and whites from crumbling. Chop to the size you like best—fine for a cohesive salad or larger chunks for texture. For easier peeling, age the eggs a few days before boiling.
Tip 3: Fresh acidity matters Fresh lemon juice brightens the dish and slows browning. Squeeze just before mixing to preserve vibrant flavor. If citrus is unavailable, a splash of white wine vinegar or a small amount of pickle juice can work as a substitute.
Tip 4: Creaminess without heaviness Start with a smaller amount of mayonnaise or yogurt and add as needed to reach your preferred creaminess. For a lighter option, Greek yogurt yields tang while dairy-free options can still provide a nice body.
Tip 5: Herbs that sing Add chopped herbs just before serving to preserve aroma. A mix of dill, cilantro, and chives creates brightness and depth. If you don’t have fresh herbs, a pinch of dried herbs can work, but fresh is best here.
Tip 6: Seasoning in layers Salt gradually and taste as you go. Remember that add-ins like olives, pickles, or sausages can salt the dish, so adjust accordingly. Freshly ground black pepper enhances the overall flavor profile.
Tip 7: Crunchy contrast (optional) Celery or green onions add a welcome crunch. Dice evenly to distribute throughout and rinse celery well to remove any grit.
Tip 8: Tomatoes without watery run-off Seed tomatoes to reduce extra moisture. Pat diced tomatoes dry with a paper towel before mixing to keep the salad creamy rather than watery.
Tip 9: Depth of flavor options Paprika or smoked paprika adds a subtle smoky sweetness. Start with a small pinch and adjust. Dijon mustard gives a tangy kick; opt for regular mustard for a milder depth.
Tip 10: Bind without over-mixing Fold ingredients gently to maintain texture. Overworking avocado with too much mixing can make the salad pale and pasty.
Tip 11: Texture adjustments If the mixture feels too thick, loosen with a splash of olive oil or a small amount of pickle relish. Conversely, a splash of lemon juice can brighten and lighten the texture if it’s too loose.
Tip 12: Make-ahead notes Avocado egg salad benefits from a brief chill to meld flavors, but it can brown if left exposed. Storing with a thin layer of plastic wrap directly on the surface helps minimize browning. Add fresh herbs just before serving.
Tip 13: Serving suggestions For a classic spread, serve on lightly toasted bread. For a lighter option, use lettuce cups or scoop onto crisp crackers. If making as a sandwich filling, reserve a portion of avocado and eggs to top just before assembly to prevent sogginess.
Tip 14: Dairy-free and vegan adaptations Use mashed avocado as the base, with dairy-free mayo and yogurt alternatives. A touch of tahini can add a creamy structure while staying free of dairy.
Tip 15: Storage and safety Store leftovers in an airtight container in the refrigerator for up to 2 days. If browning occurs, a thin layer of lemon juice on the surface can help preserve color.
FAQ
What is avocado egg salad?
A creamy mixture made from mashed avocado and chopped hard-boiled eggs, typically seasoned with lemon juice, salt, pepper, and herbs. It’s a healthier twist on traditional egg salad with extra healthy fats from avocado.
What ingredients do I need for a basic avocado egg salad?
Hard-boiled eggs, ripe avocado, lemon or lime juice, mayo or yogurt (optional for extra creaminess), salt, pepper, and optional add-ins like chopped celery, green onions, dill, or paprika.
How do I make a smooth, creamy avocado egg salad?
Mash the avocado until smooth, fold in chopped eggs, then mix in a small amount of mayo or yogurt. Add lemon juice to prevent browning and adjust seasoning. If too thick, loosen with a splash of milk or more yogurt.
Can I make avocado egg salad ahead of time?
Yes. Store in an airtight container in the fridge for up to 1–2 days. To prevent browning and separation, press a piece of plastic wrap directly onto the surface or top with a thin layer of avocado oil. Re-season before serving.
How can I customize the flavor and texture?
Try variations like adding chopped celery for crunch, diced cucumber for freshness, capers for tang, fresh herbs (dill, chives, parsley), smoked paprika, or a drizzle of hot sauce. For a lighter version, use more yogurt and less mayo.
Is avocado egg salad healthy?
It can be a healthier alternative to traditional egg salad due to heart-healthy fats from avocado and optional reduced-fat mayo or yogurt. For balanced nutrition, pair with whole-grain bread or lettuce wraps and include veggies on the side.
What are good serving ideas for avocado egg salad?
Serve on whole-grain bread or as a lettuce wrap, stuffed into cucumber boats, or on top of a green salad. It also makes a tasty dip for crackers or celery sticks.
How do I prevent the avocado from browning?
Use lemon or lime juice in the mixture, store with the pit or a piece of plastic wrap touching the surface, and keep it refrigerated. Adding a thin layer of olive oil on top can also help slow oxidation.
What are some quick substitutions if I don’t have eggs or avocados?
For a similar creamy texture, you can use mashed chickpeas + avocado for a chickpea-avocado salad, or use mashed ripe avocado with canned tuna or white beans. If avoiding eggs, try a vegan mayo-based mix with mashed tofu or chickpeas.
")