Introduction / Hook
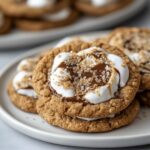
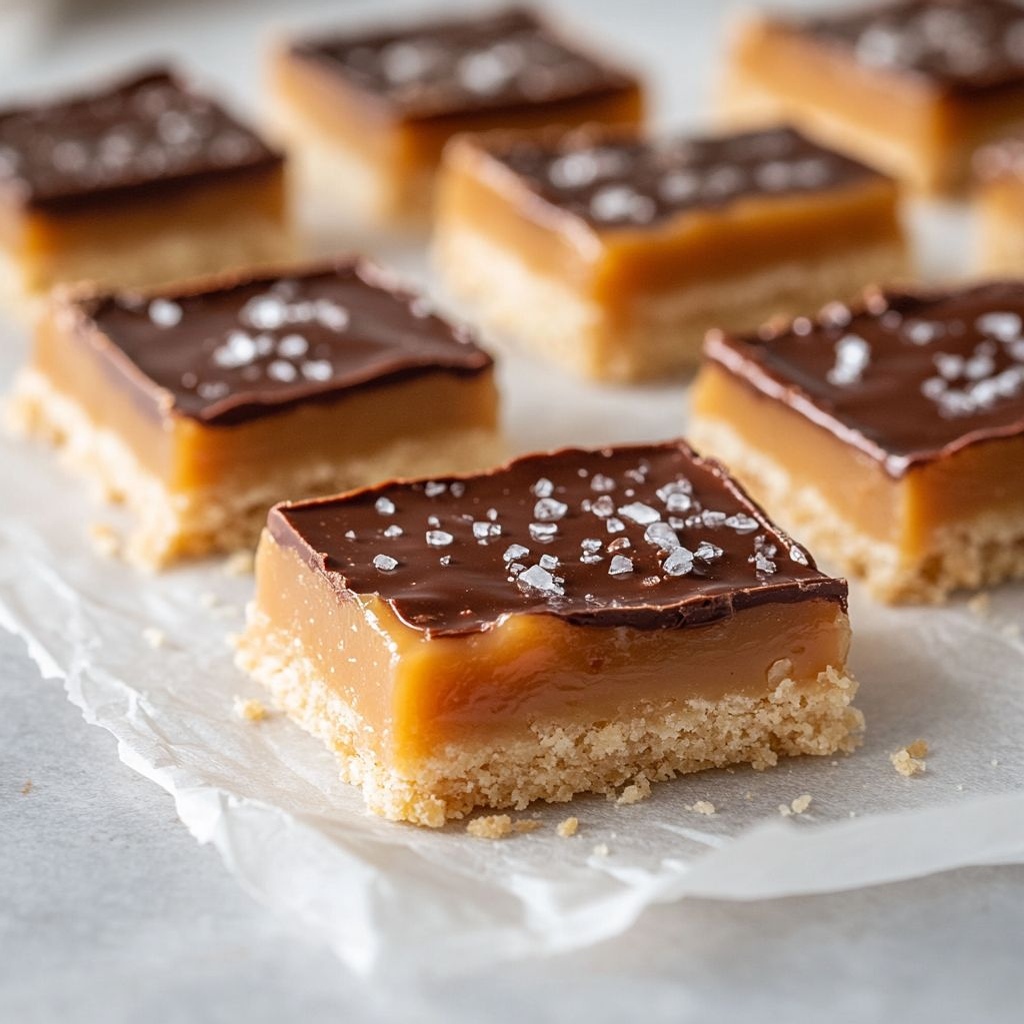
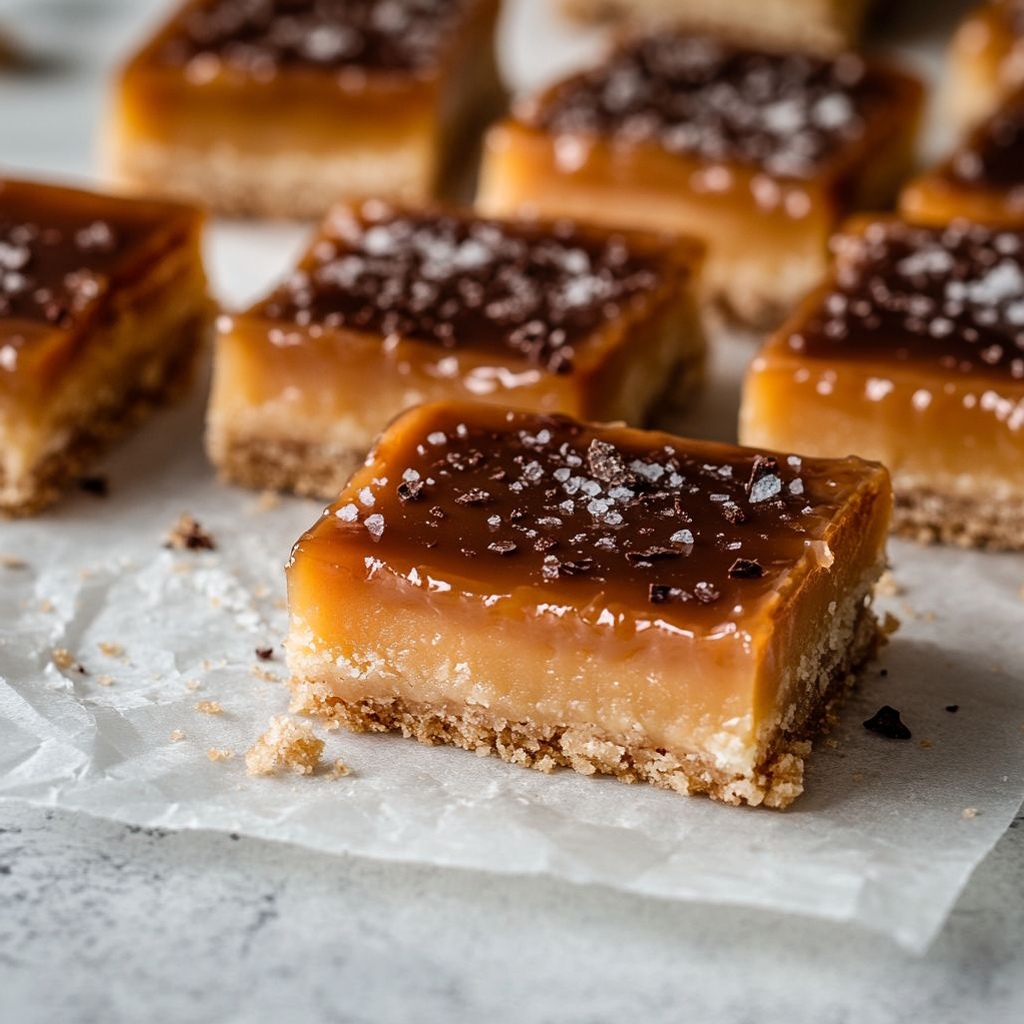
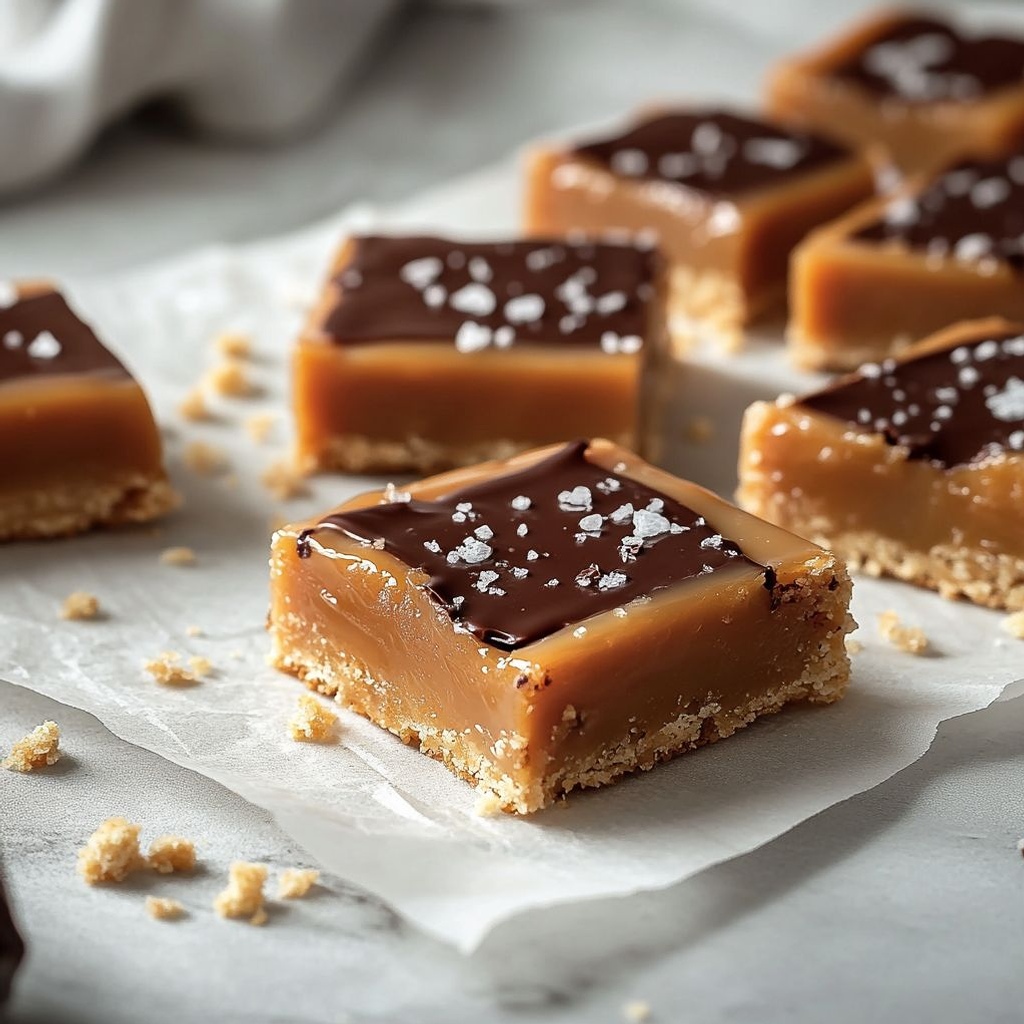
Picture a tray of golden slabs cooling on a kitchen counter, their edges tinged with a delicate crust and the center oozing with a satin-smooth caramel that sighs with sweetness and depth. Caramel bars are the kind of dessert that invites you to pause, slice, and savor—each bite a little drama of texture and taste. The bottom layer is a whisper of buttery crunch, the middle a caramel that feels both indulgent and comforting, and the top a glossy sheen of chocolate that snaps softly under your teeth. They’re the kind of bars that make ordinary afternoons feel like a cozy bakery window full of promise, and they’re equally at home at a family movie night or a picnic spread where you want something that travels well and shines in every square you share. If you’ve ever dreamed of a dessert that balances comfort with a touch of decadence, you’ve just found a favorite in these timeless caramel bars.
There’s something almost cinematic about caramel bars—the way the layers come together, the contrast between crumbly and chewy textures, and the way the flavors unfold as you bite. The scent alone can summon memories: the warm glow of sugar melting into butter, vanilla drifting through the air, and a hint of chocolate resting on top, ready to melt into the caramel with the gentlest press of your teeth. They’re not flashy in their construction, but they’re uncommonly generous in effect. In a world of quick sweets, caramel bars offer a slow, satisfying moment—the kind where you linger over the taste, the aroma, and the simple happiness of sharing a cut of something that feels crafted with care.
This description isn’t just about how they taste—it’s about what they evoke: family kitchens on Sunday afternoons, the quiet joy of a well-loved recipe handed down through generations, and the readiness to turn any ordinary day into a small celebration. The first bite brings a comforting familiarity, the middle layer speaks of caramel richness, and the top layer adds just the right amount of contrast with a touch of bitterness from dark chocolate that reminds you that sweetness can be a nuanced thing. Caramel bars are versatile enough to adapt to many moods and occasions, yet simple enough that you could whip up a pan with ingredients you probably already have in your pantry. The goal here is to invite you to explore texture, balance, and an unforgettable mouthfeel—the way a crust gives way beneath a caramel heart and the chocolate crown delivers a clean, satisfying finish.
As you read on, you’ll discover not only the sensory pleasures of caramel bars, but also the stories that wrap around them—the way cultures shape their versions, how bakers have turned this humble concept into beloved classics, and the reasons why this treat remains a staple at gatherings, bake sales, and quiet nights at home. You’ll also find ideas to tailor the bars to your dietary needs or to play with flavors—without losing the essence that makes them so universally appealing. So, take a moment to envision that first bite: the crack of a crisp edge, the creamy ribbon of caramel melting slowly, and the final kiss of chocolate that lingers on the tongue like a fond memory you want to repeat again and again.
The Story Behind the Dish
Caramel, in its essence, is the art of turning sugar into something new—deep amber sweetness coaxed from simple ingredients. The earliest caramelized sugar traces its roots through confectioners who experimented with heat, patience, and a little luck, turning grains of white sweetness into a palette of toasty, nutty flavors. Caramel bars, in their most beloved incarnations, are a cross-cultural celebration baked into a single indulgent slab. They’re the kind of dessert that can be found in many forms across continents: a shortbread-like base in one tradition, coconut and toffee in another, a cacao-touched topping in yet another. The unifying thread is clear: people love a bar that gives an initial crisp bite, then yields a luscious, chewy center that feels both decadent and approachable.
There’s a quiet charm in the way these bars have traveled through time. In North American kitchens, they often echo the lineage of the classic shortbread with a caramel heart—a reminder of how simple ingredients, treated with good timing and a little technique, can become something iconic. In other cultures, caramel layers mingle with condensed milk, coconut, or chocolate to create variations that still hinge on the same emotional appeal: something familiar, something comforting, something that invites you to slow down and savor. The ingredients might change with the seasons or the pantry you have on hand, but the fundamental pleasure remains the same. That is the magic of caramel bars: their adaptability and their ability to feel both ordinary and extraordinary at once.
In many families, these bars become a storytelling medium, a way to mark celebrations, holidays, or simple Sunday rituals. A sturdy pan of caramel bars might appear at bake sales, where their shimmer and scent draw people in from across the room. They travel well, slice neatly, and hold together even as you share them at room temperature or after a brief stint in the fridge. This portability makes them ideal for school lunches, potlucks, or a thoughtful gift tucked into a tin for a friend. The story is not only about the final bite, but about the kitchen rituals that bring them to life: creaming butter with sugar, rolling dough to the right thickness, watching the caramel bloom as it cooks to the perfect level of golden, and finishing with a glossy chocolate veil that seals the moment in a sweet, savored memory.
Why You’ll Love This Recipe
- Timeless comfort with universal appeal: the combination of a tender crust, lush caramel, and a chocolate finish creates a dessert that feels both nostalgic and special.
- Approachable for home bakers: you can achieve bakery-like results without specialized equipment or fuss—great for beginners and seasoned cooks alike.
- Versatile and forgiving: these bars adapt to your pantry and your taste—swap more or less chocolate, add a pinch of sea salt, or fold in chopped nuts for extra crunch.
- Make-ahead friendly: bake, cool, and store; these bars often taste even better the next day as the flavors meld and mellow into a cohesive, indulgent bite.
- Great for feeding a crowd: cut into generous squares and serve at parties, potlucks, or holiday gatherings where a crowd-pleasing, shareable dessert is a star of the table.
- Pairs beautifully with accompaniments: coffee, espresso, dark tea, or a glass of cold milk heighten the caramel and chocolate notes for a complete dessert experience.
- Kid-friendly and adult-approved: the balance of sweetness with a touch of chocolate makes them appealing to younger palates while still satisfying grown-up cravings.
- Customizable texture in every bite: the contrast between a crisp base and a chewy, gooey center offers a satisfying mouthfeel that’s hard to resist.
Flavor Profile & Texture
Caramel bars are a celebration of contrasts—textures and flavors that come together in a symphony of comfort and charm. The base is a crust that often carries a whisper of vanilla and a buttery, crumbly bite. It’s sturdy enough to support the sweet heart above, yet delicate enough to melt away on the tongue when cut into with a crisp knife. The middle layer is where the magic happens: a caramel that’s deeply caramelized, offering a mellow sweetness with a sophisticated depth. It’s not cloying; it’s rounded, with toasty notes that can carry hints of salt or butter depending on the recipe inspiration you follow. When cut, it yields with a gentle resistance, then plumps into a luxurious, chewy finish that lingers.
The top layer—often a glossy coat of chocolate—provides a final, satisfying bite. It offers a quiet bitterness that balances the sugar, a smooth sheen that catches the eye, and a snap that contrasts beautifully with the soft, resin-like pull of the caramel beneath. The chocolate isn’t simply there for decoration; it’s a counterpoint, a capstone that completes the experience by tying together the flavors in a neat, elegant way. The interplay among crust, caramel, and chocolate creates a multi-sensory moment: the aroma of butter and vanilla as the bars come out of the oven, the warm, inviting scent of caramel filling the room as they cool, and the final aroma of cocoa that wafts upward as you take your first bite.
If you’re thinking about the taste spectrum, imagine the sweetness of caramel tempered by a pinch of salt or a splash of vanilla, with the chocolate layer adding a subtle bitter edge that keeps the bar from tipping into one-note territory. Texture-wise, you’ll notice a crisp edge that gives way to a softer, fudgier interior, with the caramel center providing a luscious, melt-in-your-mouth feel. The combination is indulgent but balanced, making each bite feel like a small luxury that’s still entirely approachable and shareable. In short, these bars deliver a satisfying chorus of flavors and textures that make them feel both indulgent and homey—a rarity that makes them a true dessert classic.
Occasions & Pairings
Caramel bars shine in moments both casual and celebratory. They’re equally at home dotted into a weekend baking lineup as they are featured on a dessert table at a holiday gathering. Their sturdy, sliceable nature makes them ideal for sharing at potlucks, bake sales, book clubs, and school events. If you’re hosting a tea party or an afternoon gathering, these bars pair nicely with a pot of coffee or a pot of tea, offering a comforting sweet to end the moment on a high note. They’re also an excellent gift idea—the kind of treat that fits neatly into a tin with tissue paper, as a token of appreciation for teachers, neighbors, or coworkers.
Suggested pairings:
– Beverages: strong coffee, an espresso, black tea, or a tall glass of cold milk.
– Other desserts: serve with vanilla ice cream for a warm-and-cappy contrast, or alongside a bright fruit tart to balance richness.
– Savory notes to balance sweetness: a light salty-nut cheese board or a small plate of salted nuts can create a pleasing counterpoint without dominating the caramel flavors.
– Seasonal twists: for winter gatherings, a pinch of cinnamon or nutmeg in the crust or a hint of espresso in the chocolate can align beautifully with seasonal aromas; for spring or summer, a touch of citrus zest in the crust or a drizzle of dark chocolate over the top can brighten the profile.
Ocassions to consider:
– Holiday baking exchanges and office parties
– Birthday celebrations and family gatherings
– Weekend family movie nights or backyard gatherings
– Picnics and potlucks where a portable, shareable dessert is welcome
Tips, Variations & Substitutions
One of the joys of caramel bars is how forgiving they are, and how easily you can tailor them to your needs or preferences. Here are flexible ideas and options to consider, without turning the process into a strict recipe ritual:
Make-It-Your Own Variations
- Salt-forward: Finish with a light dusting of flaky sea salt on the top chocolate layer for a modern, balanced bite.
- Nuts and crunch: Sprinkle toasted chopped nuts (like pecans, almonds, or walnuts) between the crust and caramel or on top of the chocolate layer for added texture and flavor.
- Espresso kick: Infuse the chocolate layer with a pinch of espresso powder to deepen the chocolate notes and pair beautifully with coffee.
- Coconut twist: Allow a thin coconut layer to peek through the caramel for a tropical accent reminiscent of coconut caramel bars.
Dietary Alternatives
- Gluten-free: Use a gluten-free shortbread base or almond/flour blend suitable for gluten-free baking while keeping the texture pleasantly crumbly.
- Vegan-friendly: Replace dairy butter with a high-quality vegan butter or coconut oil, and use dairy-free chocolate for the top layer.
- Low-sugar or reduced-sugar: Choose a caramel with a lower-sugar variant or use a sugar substitute that behaves well in a caramel-like system, noting that texture and flavor may shift slightly.
Regional Twists
- Toffee-lovers’ version: Extend the caramel’s chew by letting it develop a deeper toffee note, perhaps using a touch of brown sugar in the caramel layer (if you’re exploring loose guidelines rather than precise measurements).
- Chili-chocolate contrast: A tiny pinch of chili powder in the chocolate layer can spark a subtle warmth that elevates the overall experience.
Storage & Make-Ahead Ideas
Caramel bars are wonderfully practical for make-ahead baking. Once fully cooled, you can cut them into squares and store them in an airtight container. They keep well at room temperature for several days, and refrigeration can extend their life a bit longer, though it can firm up the caramel and slightly alter the texture. If you’re planning to travel with them, wrap individual squares in parchment or wax paper before stacking them in a tin or container—it helps prevent sticking and keeps the edges tidy for easy sharing.
Make-ahead strategy:
– Prepare the crust and caramel layers a day ahead, refrigerate the unbaked pan, and finish with the chocolate layer on the day you plan to serve.
– If you’re short on time, you can bake the crust and caramel together in a single batch and store the fully cooled bars, then add the chocolate topping just before serving to preserve that glossy top and crisp edge.
Freezing is also an option for longer storage. Wrap individual bars well in plastic wrap and place in a freezer-safe container. Thaw at room temperature or refrigerate for a few hours before serving to restore optimal texture. Freezing may slightly affect the top chocolate’s gloss, so a brief re-melt over low heat or a quick light re-chill can help restore that finish just before presentation.
Fun Facts & Trivia
- Caramel is not a flavor in itself but a result of a chemical process—sugar caramelization—where sugar molecules break down under heat, creating hundreds of new compounds that give caramel its complex aroma and color.
- The word caramel comes from the Spanish “caramelo” or French “caramel,” reflecting centuries of confectioners experimenting with sugar to achieve depth beyond simple sweetness.
- Chocolate topping on caramel bars is a nod to the long-standing tradition of pairing chocolate with caramel in confections worldwide, a pairing that has inspired countless desserts, from candy bars to elegant desserts in high-end patisseries.
- Shortbread, the base often used in caramel bars, has a long European heritage, characterized by a high butter content that yields a tender, crumbly texture—a perfect counterpoint to the smooth caramel above.
- In some regions, caramel is used with condensed milk to achieve a creamy, fudge-like center—this variation reflects local tastes and pantry staples, showing how adaptable the caramel bar concept truly is.
- Caramel bars have become a staple at bake sales because they slice cleanly, travel well, and present beautifully in rows on a tray, making them a crowd-pleasing choice that can raise funds or simply bring joy to an event.
Ingredients
- Crust (Shortbread Base)
- 2 cups all-purpose flour
→ This forms the crust’s structure, giving a sturdy yet tender base. For best results, measure by spooning the flour into the cup and leveling off; cutting the butter into the flour until the mixture resembles coarse crumbs will yield a crumbly, melt-in-your-mouth texture once baked. Use unsalted butter at room temperature so it creams more evenly with any sugar and is easy to work into the dough; avoid overworking to prevent a tough crust. - 1/2 cup granulated sugar
→ Provides gentle sweetness and helps create a delicate, crumbly texture when combined with butter and flour. Whisk the sugar evenly into the flour before adding butter to ensure uniform sweetness; avoid packing the sugar as it can affect the dough’s texture. If you prefer a slightly drier, crisper crust, you can reduce sugar by a tablespoon or two. - 1 cup unsalted butter, softened
→ The fat component that creates a rich, tender, shortbread-like crust. Soften at room temperature until it yields to gentle pressure, then cut into pieces and blend into the flour-sugar mixture until the texture resembles coarse crumbs. Do not melt the butter entirely; melted butter will make the crust too soft and may cause it to spread excessively during baking. For a stronger crumb, you can chill the dough briefly before pressing it into the pan. - 1/4 teaspoon fine salt
→ Enhances overall flavor and helps balance the sweetness in the crust. If you are using salted butter, omit this amount to avoid an overly salty crust. Salt should be evenly distributed to prevent any salty pockets; a light pinch is sufficient for most batches.
- 2 cups all-purpose flour
- Caramel Layer
- 1 can (14 oz) sweetened condensed milk
→ Acts as the creamy caramel base in many bar recipes. When baked with the crust, it becomes a thick, luscious caramel layer that blends seamlessly with the shortbread. Do not open the can; use the condensed milk as-is or cook gently to deepen caramel flavor. If you want a darker, deeper caramel, you can reduce and intensify the flavor by cooking the can in a water bath before pouring onto the crust. - 1/2 cup unsalted butter, melted
→ Adds richness and helps create a glossy, smooth caramel texture when whisked with the condensed milk and sugar. Melting the butter ensures it blends evenly with the other caramel components and reduces risk of separation. Allow the melted butter to cool briefly before mixing to avoid cooking the condensed milk prematurely. - 1/2 cup light brown sugar, packed
→ Contributes depth and a hint of molasses to the caramel, enhancing flavor and thickness. Dissolve completely in the melted butter, then whisk in the condensed milk. If the sugar doesn’t fully dissolve, you may end up with a slightly grainy caramel after baking, so stir until smooth and glossy before pouring. - 1 teaspoon vanilla extract
→ Adds a warm, aromatic note that rounds out the caramel flavor. Use pure vanilla extract for a more pronounced aroma; add after removing the caramel from heat to preserve the fragrance. If you’re reducing the recipe or avoiding alcohol-based extracts, you can substitute with a vanilla bean scrap or omit entirely, though the flavor will be less complex. - 1/4 teaspoon sea salt
→ Balances sweetness and intensifies caramel richness. This small amount helps counteract the sweetness of the condensed milk and brown sugar, creating a more polished finish. If you used salted butter, adjust or omit to taste; always taste once the caramel cools slightly before finalizing the salt level.
- 1 can (14 oz) sweetened condensed milk
- Topping (Chocolate Ganache)
- 1/2 cup semisweet chocolate chips
→ Provides a luscious, glossy top layer that contrasts beautifully with the caramel. Chop chips if you want a smoother, faster-melting finish, and melt gently to avoid scorching. For a richer finish, mix with a small amount of warm heavy cream to create a pourable ganache, then spread evenly over the caramel once it has set. - 2 tablespoons heavy cream
→ Creates a silky ganache when combined with the chocolate chips. Heat the cream until just steaming, then pour over the chips or mix into the chocolate to form a smooth, shiny glaze. Adjust the cream amount to achieve your desired thickness: less cream for a thicker top, more for a thinner drizzle.
- 1/2 cup semisweet chocolate chips
- Optional Add-ins
- 1/4 cup chopped toasted pecans (optional)
→ Adds a crunchy contrast and a toasty, nutty flavor that pairs nicely with caramel. Toast pecans lightly in a dry skillet or in a 350°F (175°C) oven for 5–7 minutes until fragrant, then cool and chop finely so they distribute evenly when sprinkled over the caramel layer. If allergic to nuts or avoiding them, omit without affecting the base structure. - Pinch of flaky sea salt (optional)
→ Finishes the top with a delicate salt sparkle that intensifies both caramel and chocolate flavors. Lightly sprinkle after the chocolate has set for best results; too much salt will overwhelm the sweetness, so err on the side of restraint.
- 1/4 cup chopped toasted pecans (optional)
Instructions
- Preheat your oven to 350°F (175°C) and line a 9×13-inch baking pan with parchment paper, allowing an overhang on the long sides for easy lift-out.
→ This ensures the bars release cleanly from the pan and prevents sticking, making slicing and lifting the finished sheet much easier. - Whisk the crust dry ingredients together in a large bowl until evenly distributed.
→ Uniformly mixing flour, sugar, and salt prevents pockets of sweetness or saltiness and yields a consistently tender base. - Cut softened unsalted butter into the flour mixture using a pastry blender, two forks, or fingertip work until the mixture resembles coarse crumbs with some pea-sized bits of fat remaining.
→ This fat distribution creates a tender, shortbread-like crust; overworking the dough can develop gluten and make the crust tough. - Press the crust mixture into the prepared pan in an even, compact layer using the flat bottom of a glass or measuring cup.
→ A uniform thickness bakes evenly and prevents thinner spots from burning while thicker spots stay soft. - Bake the crust until the edges are lightly golden and the surface looks dry, about 15–18 minutes.
→ Partial baking sets the structure so the caramel layer sits on a firm base rather than a soggy one, reducing spreading and sogginess. - In a medium saucepan, whisk melted butter, light brown sugar, sweetened condensed milk, vanilla, and sea salt until smooth and fully combined.
→ Thoroughly blending these ingredients ensures the caramel will be glossy, cohesive, and evenly sweet without gritty sugar crystals. - Bring the caramel to a gentle simmer over medium-low heat and cook, whisking constantly, for 4–6 minutes until thickened and glossy; remove from heat when it coats the back of a spoon.
→ Constant whisking prevents scorching and ensures the sugar fully dissolves, giving a silkier caramel that sets properly on the crust. - Pour the caramel over the hot crust, then scatter 1/4 cup chopped toasted pecans evenly over the surface if using; spread into an even layer and return the pan to the oven, baking until the caramel is set and the surface is glossy, about 20–25 minutes.
→ Nuts add texture and flavor, and returning to bake ensures the caramel cures into a cohesive top that slices cleanly; avoid under-baking to prevent a tacky finish. - Remove the pan and let the caramel layer cool completely on a rack; this may take about 1–2 hours at room temperature or 30–60 minutes in the refrigerator to speed setting.
→ A fully cooled caramel provides a firm, non-sticky surface for the ganache to adhere and prevents sliding or mixing of layers. - Place semisweet chocolate chips in a heatproof bowl and heat heavy cream in a small saucepan until just steaming; pour the hot cream over the chips and let stand 2 minutes, then whisk until a smooth, glossy ganache forms.
→ Gentle heat ensures the chocolate melts evenly without scorching, producing a velvety ganache that lays smoothly over the caramel. - Spread the ganache over the cooled caramel layer in an even, glossy coating and set aside to firm at room temperature or refrigerate briefly to speed setting.
→ A firm ganache creates a clean, sharp top layer that contrasts beautifully with the caramel underneath and is easy to slice once fully set. - Optional: finish with a light pinch of flaky sea salt over the ganache once it has begun to set; you may also sprinkle additional chopped toasted pecans over the ganache for additional texture.
→ Salt enhances caramel and chocolate flavors, while nuts add complexity and crunch; use sparingly to avoid overpowering the chocolate. - Chill the assembled bars until the ganache is completely firm, about 1–2 hours; lift the slab from the pan using the parchment overhang and cut into bars with a very sharp knife, wipes the blade between cuts for clean edges.
→ Chilling ensures clean, neat slices and prevents the layers from shifting; a warmed knife can still smear the ganache, so keep it hot between cuts for best results.
Notes
These caramel bars feature a buttery shortbread crust, a creamy caramel layer, and a glossy chocolate ganache topping—an indulgent treat with a crisp edge and chewy center. For the crust, measure flour correctly, cut the unsalted butter into the mixture until it resembles coarse crumbs, and chill briefly if you want a sturdier base. Bake until the crust is pale golden and fragrant, then let it cool completely before adding the caramel layer.
For the caramel, whisk melted butter with light brown sugar until completely dissolved, then whisk in the sweetened condensed milk and vanilla. If you want a darker, deeper caramel, you can cook the unopened can of condensed milk in a water bath to intensify the flavor before pouring over the crust, following all safety guidelines. Pour and spread evenly to create a uniform layer, then let it cool to set before topping with chocolate.
To make the chocolate ganache, melt the semisweet chips with the heavy cream until smooth and glossy, then pour and spread over the cooled caramel. Allow the ganache to set fully at room temperature or in the fridge for a quicker finish; a thin, even layer looks best and slices cleanly.
Optional add-ins like chopped toasted pecans or a pinch of flaky sea salt add texture and depth; sprinkle after the ganache has set. If you need a gluten-free version, substitute the crust with a 1:1 gluten-free flour blend and verify that the caramel and chocolate ingredients are gluten-free. Store the bars in an airtight container; they keep well for several days at room temperature and freeze beautifully for longer storage.
Tips
Tips for Making Caramel Bars
Crust (Shortbread Base) tips
- Measure flour by the spoon-and-sweep method: spoon the flour into the measuring cup and level off to avoid a dense crust. Sift or whisk lightly if you’ve packed flour accidentally.
- Keep butter cold to start: softened butter should chill briefly if the dough feels too sticky. Cutting it into small pieces helps it blend into the flour-sugar mix evenly without overworking the dough.
- Use unsalted butter for a clean flavor; if you use salted butter, reduce or omit the extra salt to prevent the crust from tasting too salty.
- Chill the dough before pressing: a short chill (15–30 minutes) makes the dough easier to handle and helps it hold together when you press it into the pan.
- Press evenly and compactly: use the flat bottom of a glass or measuring cup to tamp the dough into an even layer. This prevents thin spots that bake unevenly.
- Prebake option to prevent a soggy bottom: bake the crust alone for about 12–15 minutes at 350°F (175°C) until lightly golden, then cool slightly before adding caramel. This helps set the base, especially with a moist caramel layer.
Caramel Layer tips
- Do not open the condensed milk can unless you’re using the water-bath method described elsewhere; if you choose to cook the can, ensure it remains completely submerged in water and never boil dry—this is a safety step some bakers use to deepen caramel flavor.
- Let melted butter cool briefly before whisking with condensed milk and sugar to prevent curdling or scorching the dairy.
- Whisk until the brown sugar is fully dissolved and the mixture is smooth and glossy. Any graininess will show up after baking, so keep whisking until completely integrated.
- Cook over medium-low heat and stir constantly to prevent scorching. A gentle simmer is key to a luscious, even caramel.
- Add vanilla off the heat to preserve its aroma, and salt to taste after the mixture has cooled slightly, since the heat can mellow or intensify the salt perception.
- Pour the caramel over the crust in an even layer, gently tapping the pan to release air bubbles. Let it settle into a smooth surface before moving to the next step.
- Chill the caramel layer until it is set and firm before applying the chocolate topping for clean, neat slices.
Topping (Chocolate Ganache) tips
- Choose good-quality chocolate chips or chop semisweet chocolate to ensure a smooth, glossy top. Finely chopped chips melt more evenly.
- Heat the cream just until it steams—do not boil—then pour over the chocolate and let stand briefly before stirring to a smooth ganache. For a pourable glaze, use a bit more cream; for a thicker topping, use less.
- Stir gently and steadily to avoid incorporating air bubbles that can mar the surface. If you see tiny crystals, a quick whisk or a pass with a warm spatula helps.
- Spread in an even, thin layer over the set caramel. If the ganache thickens too quickly, warm it slightly or add a touch more cream to reach your desired thickness.
- Let the ganache set at room temperature, then refrigerate briefly if you want clean, sharp edges when slicing.
Optional Add-ins tips
- Toast pecans or other nuts before adding to enhance flavor. Toast lightly in a dry skillet or a 350°F (175°C) oven for 5–7 minutes, then cool and chop finely so they distribute evenly over the caramel.
- Sprinkle flaky sea salt lightly after the chocolate has set to intensify caramel and chocolate flavors. Use sparingly to avoid overwhelming sweetness.
- If you have nut allergies, omit the add-ins or substitute with seeds (like pumpkin or sesame) for crunch without risk.
FAQ
What are caramel bars?
Caramel bars are a layered dessert featuring a buttery crust, a rich caramel filling, and often a chocolate topping or a sprinkle of sea salt. They’re typically cut into square or rectangular bars for easy sharing.
What ingredients do I need to make caramel bars?
Common ingredients include:
- Crust: butter, flour, sugar, and a pinch of salt
- Caramel: butter, brown sugar, sweetened condensed milk (or heavy cream), and vanilla
- Optional toppings: melted chocolate glaze or sea salt
Optional flavor add-ins: vanilla, almond extract, or a hint of espresso for depth.
Are caramel bars easy to customize?
Yes. Common variations include chocolate-topped caramel bars, sea-salt caramel bars, peanut butter caramel bars, or swapping half the crust for a graham cracker crust for a different texture and flavor. You can also make them gluten-free or dairy-free with suitable substitutions.
How do I make caramel bars?
Overview of steps:
- Preheat oven and line a 9×13-inch pan with parchment.
- Prepare the crust: cream butter and sugar, mix in flour (and a pinch of salt), press into the pan, and bake until lightly golden.
- Make the caramel: melt butter with brown sugar, stir in sweetened condensed milk (or cream) and vanilla until thick and glossy.
- Pour hot caramel over the crust and spread evenly.
- Return to the oven briefly to set the caramel, then remove and cool fully.
- Optional: drizzle with melted chocolate and sprinkle sea salt, then chill to set.
How long does it take to bake caramel bars?
Typical timing:
- Crust: about 18–22 minutes
- Caramel layer bake: 15–25 minutes (or until set)
- Cooling: at least 1–2 hours, or overnight for best cutting
Total active time is around 45–60 minutes with several hours of cooling.
How should I store caramel bars?
Store the bars in an airtight container. They keep best:
- At room temperature for 3–4 days (if not refrigerated)
- In the refrigerator for up to 1–2 weeks
- In the freezer for 2–3 months (wrap well or freeze in individual portions)
If topped with chocolate, chill briefly to prevent melting before serving.
Can I freeze caramel bars?
Yes. Freeze fully cooled bars wrapped tightly or in an airtight container. Thaw in the fridge or at room temperature before serving. Freezing may slightly affect crust texture, but they still taste great.
What should I do if the bars don’t set?
Troubleshooting:
- Caramel too soft: cook the caramel a bit longer or simmer a bit longer to thicken; ensure you don’t burn sugar.
- Crust soggy: bake crust longer or ensure it is fully cooled before adding caramel; avoid adding warm caramel to a crust that isn’t set.
- Separation: whisk caramel well; if using condensed milk, heat until thick and glossy and keep stirring to prevent separation.
What are tasty variations I can try?
Suggestions:
- Sea-salt chocolate caramel bars: drizzle melted chocolate on top and finish with flaky sea salt.
- Peanut butter caramel bars: swirl peanut butter into the caramel or mix peanut butter with the crust.
- Espresso or coffee caramel: add 1–2 teaspoons instant espresso to the caramel for a mocha flavor.
- Nutty crust: replace part of the flour with finely ground toasted nuts for extra texture.
Can I make gluten-free or dairy-free caramel bars?
Yes:
- Gluten-free: use a gluten-free flour blend in the crust (or a crust made from almond flour with a binder).
- Dairy-free: substitute dairy-free butter (or coconut oil) in the crust and use dairy-free condensed milk substitute or coconut cream for the caramel.
Is this recipe vegan?
Traditional versions use butter and dairy condensed milk. To make vegan caramel bars, use vegan butter and a plant-based condensed milk substitute, and ensure any chocolate topping is dairy-free.