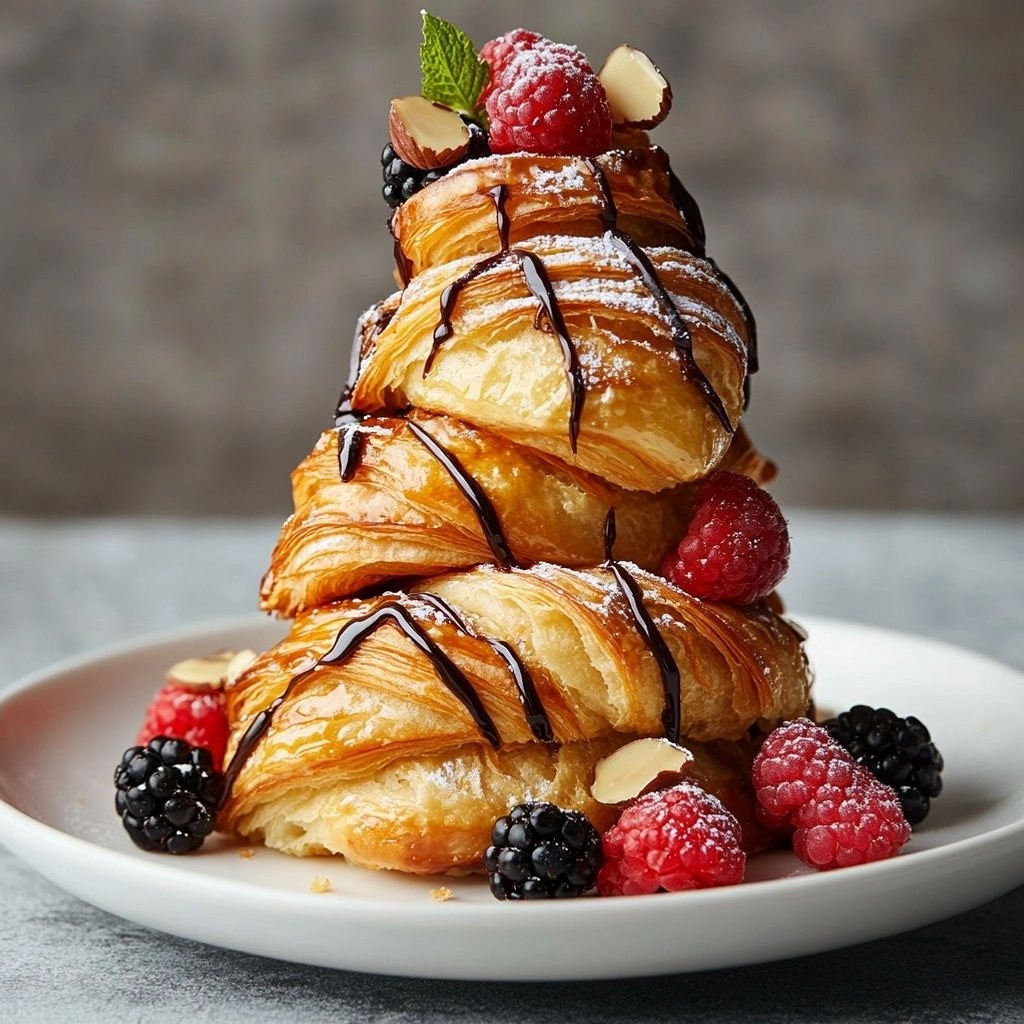
Author

Ocean Nightleaf

Browsing

Introduction / Hook

Imagine a kitchen that smells like sunlit citrus and a gentle breeze off the Aegean Sea. A pan on the stove releases a perfume of bright lemon, aromatic garlic, and peppery oregano, all kissed by a generous drizzle of olive oil. The chicken, taking on a rich, honey-gold color, glistens with juices that promise a bite of something both comforting and lively. This is Greek Lemon Chicken in its most inviting form: a dish that feels like a hug from the Mediterranean, a reminder of family tables on sun-soaked Sundays, and a reminder that simple ingredients can sing when treated with care. It’s not just dinner; it’s a travelogue in the kitchen, a quick escape to seaside tavernas where the air carries whispers of sea salt, oregano, and thyme. In a single pan, the recipe captures the heart of Greek home cooking: bright, honest, and deeply satisfying.

The Story Behind the Dish

Greek Lemon Chicken, sometimes affectionately referred to by home cooks as Kotopoulo Lemonato, sits comfortably at the crossroads of history, geography, and family tradition. Greece’s culinary identity is built on a trio of core elements: quality olive oil, vibrant citrus, and herbs that thrive in the sun–drenched landscapes of the mainland and its island shores. This dish embodies that triad, marrying the tang of lemon with the warmth of oregano and garlic, all coaxed to tenderness by olive oil and slow, attentive cooking. The result is a meal that recalls Sunday lunches in coastal villages, where neighbors gather to share a pan of roasted chicken, potato wedges, and bowls of olives, tzatziki, and crusty bread.

The origins of lemon-touched chicken in Greek kitchens are as humble as they are enduring. Lemons arrived along trade routes and with traveler’s stories, eventually becoming a staple that balanced the generous richness of olive oil and the heartiness of meat. Oregano, that pungent evergreen herb, is practically a culinary ambassador for Greece. It grows wild in sun-drenched fields and is tailed by the scent of thyme and bay, lending a rustic brightness to dishes that might otherwise lean heavy. In Greek households, a lemony roast chicken is not just a weekday meal; it’s a centerpiece that signals warmth, hospitality, and the joy of feeding people you love. The kitchen becomes a theater where the lemon’s acidity plays off the sweetness of caramelized garlic and the savory comfort of perfectly seared chicken. The dish is both simple and profound, a reminder that Greek cuisine often revels in few but extraordinary ingredients, treated with technique that honors their natural glory.

Why You’ll Love This Recipe

  • Bright, approachable flavor: Lemon, garlic, and oregano deliver a clean, vibrant profile that feels both refined and approachable.
  • One-pan comfort: The chicken, the aromatics, and any accompanying vegetables meld together in a single pan, reducing cleanup and maximizing flavor.
  • Versatile and forgiving: Works with different cuts of chicken, and it adapts easily to pan-searing, roasting, or even skillet-braising techniques.
  • Family-friendly and crowd-pleasing: The familiar Greek flavor profile is comforting without being spicy, making it ideal for weeknights or larger gatherings.
  • Pantry-friendly and budget-conscious: The core ingredients are simple pantry staples—lemon, garlic, oregano, olive oil—yet the result feels indulgent.
  • Make-ahead potential: The bright citrus and herb notes benefit from a little time to meld, making it suitable for meal-prep or a pull-taster on busy days.
  • Pairing versatility: Serves beautifully with roasted potatoes, rice, or a crisp salad; it also shines over a bed of orzo or with a side of yogurt-dill sauce.

Flavor Profile & Texture

The dish is an alchemy of contrasts working in harmony. The lemon introduces an acid brightness that cuts through the meat’s natural richness, leaving a clean, refreshing finish on the palate. Garlic contributes a mellow warmth, its sweetness blooming as it caramelizes against the pan or roasting surface. Oregano brings a Mediterranean, almost sun-warmed pine-like fragrance, earthy and slightly peppery, with a lingering herbal afterglow that makes the dish feel distinctly Greek. Olive oil acts as the velvet rope that ties everything together, enriching each bite with luscious fat and a silky mouthfeel, while also aiding in browning and a savory crust that delivers a satisfying crackle when you bite into the skin or crust.

Texture-wise, you can expect a range: crisp edges from well-seared skin or roasted surfaces, tender, juicy meat from properly rested chicken, and soft, honey-colored potatoes or vegetables (if you include them) that have absorbed the lemony, garlicky bath. When plated, the dish offers a tapestry of textures—nigglingly crisp components giving way to luscious, succulent bites, with the herbaceous aroma lingering in the air as you bring the fork to your mouth. The lemon’s brightness lingers without souring the palate, and the oregano leaves a fragrant memory that invites the next bite, the next mouthful becoming a small, celebratory ritual. It is comfort made bright, a reminder that everyday cooking can carry the soul of a sun-drenched Greek coastline into your home kitchen.

Occasions & Pairings

This dish is remarkably versatile, able to anchor weeknight dinners as easily as it can anchor a weekend feast. Here are a few ideal contexts and pairing ideas to elevate the experience:

  • Weeknight dinners: A fast, satisfying centerpiece that comes together with minimal fuss and is forgiving for busy days.
  • Sunday family meals: Serve with a side of roasted potatoes, a crisp Greek salad, and a dollop of yogurt or tzatziki for dipping.
  • Holiday gatherings: Elevate with a few extra lemon wedges, a scattering of olives, and a wine pairing that complements citrus and herbs.
  • Summer suppers: Pair with grilled vegetables, a light cucumber salad, and a glass of white wine with bright citrus notes.

Pairings to consider:

  • Side dishes: Roasted potatoes (classic), lemony rice or orzo, grilled or roasted vegetables, or a simple saffron-tlecked couscous for texture variation.
  • Salads: A crisp Greek salad with cucumbers, red onion, tomatoes, olives, and feta; or a refreshing herb yogurt salad to balance the citrus.
  • Sauces & accoutrements: Tzatziki or a light lemon-dill yogurt can echo the lemony notes; a drizzle of extra virgin olive oil enriches the presentation.
  • Wines & drinks: A dry white like Assyrtiko, Sauvignon Blanc, or a light Chardonnay; for a red option, a softly fruity Pinot Noir can work well if the dish leans heartier with potatoes.

Tips, Variations & Substitutions

  • Protein options: If you prefer a different cut, boneless, skin-on chicken thighs stay wonderfully juicy and yield crispier skin. You can also use bone-in thighs for deeper flavor. For a non-chicken adaptation, consider firm tofu or chickpeas as a vegetarian alternative, adjusting cooking time accordingly to retain tenderness and savoring the lemon-herb profile.
  • Herb and citrus variations: Dried oregano can substitute fresh if needed, though fresh herbs provide a brighter, more aromatic result. A hint of thyme or dill can alter the aroma in a pleasing way, depending on what you have on hand.
  • Seasoning balance: Use sea salt to enhance the citrus and olive oil; a pinch of black pepper adds warmth; a small amount of lemon zest intensifies fragrance and depth.
  • Hands-off options: If you’re pressed for time, you can sear the chicken to develop color and then finish in the oven with lemon slices and garlic for a gentle, even cook. This keeps the dish approachable while preserving its signature brightness.
  • One-pan versatility: When vegetables are included, choose potatoes, onions, and peppers that will roast well together; their natural sugars caramelize, adding sweetness that balances the acidity of lemon.
  • Low-carb or gluten-free: This dish is naturally compatible with gluten-free diets if you avoid any breadcrumb coatings or gluten-containing add-ins; pair it with a simple green salad or cauliflower mash for a satisfying meal.
  • Make-ahead flavor boost: The flavors deepen after resting for a few hours or overnight in the fridge, which makes this a wonderful option for meal-prep or a make-ahead dinner party.

Storage & Make-Ahead Ideas

Storage and make-ahead options help you plan your week with ease. Proper handling ensures the dish remains flavorful and safe to enjoy over several days.

  • Storage: Refrigerate leftovers in an airtight container for up to 3–4 days. Reheat gently on the stovetop or in a moderate oven to preserve moisture and texture.
  • Freezing: Cooked chicken can be frozen for longer storage, although the texture of the lemony glaze may intensify upon thawing. For best results, freeze without any fresh herbs that lose brightness after freezing, and reintroduce fresh lemon zest and herbs when reheating.
  • Make-ahead: The dish benefits from a little rest time after cooking, allowing the lemon, garlic, and oregano flavors to mingle. If you intend to serve later, consider finishing the chicken in the oven or pan and then adding a final warm splash of lemon juice to brighten the dish before serving.
  • Leftover transformations: Shred the chicken and fold into a warm, light pilaf, or toss with vegetables and greens for a quick Mediterranean-inspired bowl. The lemony notes translate well into sauces and wraps for the following day’s lunches.

Fun Facts & Trivia (Optional)

Nothing anchors a recipe like a few delightful tidbits. Here are some morsels of Greek culinary lore to savor alongside your lemony chicken experience:

  • Oregano, the “joy of the mountains,” is a staple herb in Greek gardens and markets. Its scent is so closely tied to Greek cooking that the herb is almost a cultural emblem, offering a peppery, slightly bitter note that pairs beautifully with lemon and garlic.
  • Lemons have long been a brightening force in Greek cuisine, often used to balance the richness of olive oil in both meat dishes and seafood preparations. The acidity helps to cut through fat while lifting the overall aroma of the dish.
  • Avgolemono, a traditional Greek lemon-egg sauce, demonstrates how lemon can transform savory soups and sauces into silky, zesty ensembles. While this dish doesn’t use the sauce, the lemon-forward philosophy is evident in its flavor structure.
  • Olive oil, the “liquid gold” of Greece, is not just a fat but a flavor-maker. The quality of olive oil used can noticeably alter the depth and aroma of the dish, making it a centerpiece in many Greek home preparations.
  • Herb-and-creathe cooking: Greek kitchens often rely on the piney, resinous notes of oregano, thyme, and bay leaves to carry dishes forward without overwhelming the base ingredients. This is a testament to how balance and restraint can yield powerful flavor without complexity.

Ingredients

Greek Lemon Chicken Recipe

Chicken & Marinade

  • 4 bone-in, skin-on chicken thighs (about 2 pounds / 900 g)
    → For best flavor and juiciness, bone-in thighs with skin provide richer taste and stay moist during roasting; the skin crisps and adds texture. If you prefer boneless, reduce cooking time and monitor moisture carefully.
  • 1/4 cup fresh lemon juice (from about 1–2 lemons)
    → Lemon juice provides acidity to balance the oil and salt, helps tenderize the chicken, and brightens the overall dish. Strain seeds if any and measure after squeezing.
  • Fresh lemon zest (from 1 lemon)
    → Adds fragrant citrus oils that perfume the dish; zest before juicing to capture the essential oils; use a fine grater and avoid the white pith for a cleaner lemon aroma.
  • 4 garlic cloves, minced
    → Garlic provides savory depth and aroma; mince finely to distribute evenly; crush to release more flavor and ensure even integration into the marinade.
  • 3 tablespoons extra-virgin olive oil
    → The oil carries the marinade flavors onto the chicken and helps keep the meat moist during roasting; use good-quality EVOO; avoid using oil that has cooled too much and clumping.
  • 1 teaspoon dried oregano (Greek oregano preferred)
    → Classic Greek flavor; dried oregano adds warmth and herbal notes; if you have fresh, use 1–2 tablespoons chopped instead of dried; mix into the marinade evenly.
  • 1/2 teaspoon dried thyme (optional)
    → Adds earthy herbaceous notes that complement lemon and oregano; if using fresh thyme, substitute with 1 teaspoon chopped; omit if you prefer a purer oregano-forward profile.
  • 1 teaspoon kosher salt
    → Essential for seasoning and to help draw out moisture from the chicken during marination; adjust to taste and consider salt in the broth if you are using salted stock.
  • Freshly ground black pepper, to taste
    → Adds warmth and a subtle bite; grind just before cooking for the best aroma and distribute evenly in the marinade.

Sauce & Cooking Liquids

  • 1 cup low-sodium chicken broth
    → Forms the base of the pan sauce and keeps the chicken moist as it roasts; using low-sodium broth helps control salt and lets the lemon and herbs shine. You can reduce to concentrate flavors during roasting.
  • 1/4 cup dry white wine (optional)
    → Adds acidity and depth to the pan sauce; if you prefer not to use alcohol, substitute with an equal amount of extra broth or water; allow wine to reduce for a velvety finish.
  • 1 tablespoon cornstarch
    → Thickens the lemon pan sauce to a glossy finish; make a slurry with 2 tablespoons cold water before adding; whisk vigorously to prevent lumps as it cooks.
  • 2 tablespoons cold water
    → Part of the cornstarch slurry to create a smooth, lump-free sauce; ensure water is very cold for the best emulsification.
  • 2 tablespoons fresh lemon juice (additional to marinade)
    → Brightens the sauce and adds a clean citrus note; adjust to taste at the end of cooking, balancing with salt and broth.

Add-ins & Garnish

  • 1/2 cup pitted Kalamata olives (optional)
    → Introduce a briny contrast typical of Greek flavors; add them about halfway through cooking to prevent them from becoming mushy; rinse to remove excess brine and pat dry before adding.
  • 1/2 cup crumbled feta cheese (optional)
    → Adds tangy creaminess; sprinkle on top just before serving or gently warm to melt a little while maintaining crumbly texture; avoid overmelting if you want distinct chunks.
  • Fresh parsley, chopped (about 2 tablespoons)
    → Fresh green notes brighten the dish and add color; chop leaves finely and sprinkle over before serving; stems can be saved for stock.
  • Lemon wedges for serving (optional)
    → Extra citrus brightness at the table; guests can squeeze onto chicken for a personalized zing.

Roasted Potatoes (optional side)

  • 1 1/2 pounds baby potatoes, halved
    → Classic Greek accompaniment; halved potatoes roast evenly with the chicken, soaking up lemon, oregano and olive oil flavors; cut sides down promote caramelization.
  • 1 tablespoon olive oil
    → Helps potatoes crisp and brown; toss with salt, pepper, and oregano for an even roast; drizzle and toss to coat evenly.
  • Salt and pepper to taste
    → Season potatoes evenly; they will absorb some salt from the chicken and broth, so adjust at the end of roasting.
  • 1 teaspoon dried oregano (optional)
    → Echoes the chicken’s Greek flavors; if you have fresh oregano, use 1 tablespoon chopped for stronger aroma.

Instructions

  • Preheat your oven to 425°F (220°C) and line a large rimmed baking sheet with parchment paper or lightly grease it with oil to prevent sticking and promote even browning.
    → High heat helps render the skin and achieve a crisp exterior; parchment ensures easy cleanup and prevents the chicken from sticking to the pan.
  • Pat the chicken thighs dry with paper towels and season lightly on all sides with 1/2 teaspoon kosher salt and freshly ground black pepper to create a flavorful surface and promote browning.
    → Moisture on the surface can steam the meat rather than brown it; drying before seasoning allows the heat to contact the skin directly for a crisp finish.
  • In a large bowl, whisk together 1/4 cup fresh lemon juice (strained to remove seeds), lemon zest from 1 lemon, 4 garlic cloves (minced), 3 tablespoons extra-virgin olive oil, 1 teaspoon dried oregano (Greek oregano preferred), 1/2 teaspoon dried thyme (optional), 1 teaspoon kosher salt, and freshly ground black pepper.
    → This creates a balanced, emulsified marinade that penetrates the meat and perfumes the chicken; strain seeds from the lemon juice before adding to ensure a smooth mixture and accurate acidity.
  • Gently loosen the skin of each thigh with your fingers and rub the marinade under the skin as well as over the exterior to maximize flavor distribution and create a barrier that keeps moisture in during roasting.
    → Placing marinade under the skin seasons the meat more evenly and helps render the fat to baste the flesh from within as it cooks; use clean hands or a blunt utensil to prevent tearing.
  • Place the seasoned chicken in the bowl or a resealable bag with the remaining marinade, turning to coat all surfaces evenly, then cover and refrigerate for 30 minutes to 2 hours (or up to overnight). If time is short, you can marinate at room temperature for about 20-30 minutes, but do not exceed 2 hours at room temperature.
    → Marinating allows the acids and oil to permeate the meat, which tenderizes slightly and infuses deeper flavor; keeping it refrigerated slows bacterial growth for safety.
  • If you are including Roasted Potatoes, pre-toss 1½ pounds baby potatoes (halved) with 1 tablespoon olive oil, salt, pepper, and 1 teaspoon dried oregano, and spread them on a separate parchment-lined sheet or around the chicken on the same sheet.
    → Potatoes roast in the same oven and soak up the lemony, herby flavors; halved potatoes caramelize better with cut sides down, which encourages browning.
  • Transfer the marinated chicken to the prepared baking sheet in a single layer, skin side up, leaving space between pieces; if using potatoes, nestle the potatoes around the chicken so they roast evenly and absorb the pan flavors.
    → Even spacing ensures uniform heat exposure and prevents steaming, which helps the skin crisp and the meat cook evenly.
  • Roast uncovered in the preheated oven for 28–35 minutes until the thickest part of the chicken reaches 165°F (74°C) on an instant-read thermometer and the skin is deeply golden and crisp; if the skin isn’t browning after 25 minutes, broil for 1–2 minutes, watching carefully to prevent burning.
    → Proper internal temperature ensures safety and juiciness, while a hot oven and exposed skin maximize browning and texture.
  • While the chicken roasts, prepare the pan sauce by combining 1 cup low-sodium chicken broth and 1/4 cup dry white wine in a small saucepan; bring to a simmer and reduce by half to concentrate the flavors.
    → Deglazing the roasting pan later with this reduction enriches the sauce with fond and minerals drawn from the chicken and herbs.
  • In a separate small bowl, whisk 1 tablespoon cornstarch with 2 tablespoons cold water to make a smooth slurry; set aside for thinning and thickening the sauce as needed.
    → Cold slurry spreads easily and prevents lumps when added to hot liquid, yielding a glossy, cohesive sauce.
  • Gradually whisk the reduced broth and wine back to the pan, then whisk in the cornstarch slurry in small additions until the sauce clings to the back of a spoon; simmer for 1–2 minutes until the sauce thickens to a coating consistency.
    → The starch activates heat to achieve a velvety texture; avoid over-thickening by adding slurry gradually and tasting for balance.
  • Stir in 2 tablespoons fresh lemon juice to brighten the sauce, then season with salt and freshly ground black pepper to taste; keep warm over very low heat while the chicken finishes resting.
    → Lemon juice in the sauce adds a bright, clean citrus note that cuts richness and ties the dish together with the marinade.
  • When the chicken comes out of the oven, tent loosely with foil and rest for 5–10 minutes to allow the juices to redistribute and the skin to set; this yields more tender chicken and prevents rapid juice runoff when carving.
    → Resting relaxes muscle fibers and reabsorbs moisture, improving juiciness and flavor distribution.
  • If using Kalamata olives, scatter ½ cup pitted olives around the chicken about halfway through roasting (approximately 15 minutes before the end) so they heat through without becoming mushy; pat dry to avoid extra brine.
    → Olives provide a briny contrast characteristic of Greek flavor profiles, and late addition preserves their texture and flavor.
  • Just before serving, crumble ½ cup feta cheese over the chicken or sprinkle it on individual plates so it remains slightly crumbly rather than fully melted; garnish with chopped fresh parsley (about 2 tablespoons) and lemon wedges on the side.
    → Feta adds tangy creaminess without overpowering the lemon and oregano; parsley adds color and a fresh finish that brightens the plate.
  • If you prepared Roasted Potatoes, transfer them to a serving dish, spoon over a portion of the pan sauce, and finish with a light sprinkle of chopped parsley; adjust seasoning with salt if needed.
    → The potatoes absorb extra sauce and citrus essence, creating a cohesive, lemony Greek-inspired plate.

Notes

These Greek Lemon Chicken thighs are juicy and bright, marinated with lemon, garlic, oregano, thyme, and olive oil to form a fragrant base for roasting. Bone-in, skin-on thighs stay moist and develop a crisp, flavorful skin, making them a reliable choice for a weeknight or special occasion dinner. For best results, marinate for at least 2 hours (or up to 12 hours in the refrigerator). If time is tight, a 30-minute quick marinate still yields great aroma and flavor.

Prep tips: pat the chicken dry before marinating to promote crisp skin, and mix the marinade ingredients thoroughly so every piece gets seasoned. If possible, rub some marinade under the skin for deeper garlic-lemon notes. Reserve a small portion of marinade (without raw chicken contact) to brush on during roasting for extra flavor. Strain the lemon juice and zest to remove seeds and prevent bitterness, then add to the marinade or sauce as directed.

Roasting and pan sauce: roast in a hot oven (around 425°F / 220°C, or 400°F if using a gentler heat) until the thickest part of the meat reaches 165°F (74°C) and the skin is golden and crisp. Use low-sodium chicken broth as the roasting liquid to control salt and let the lemon and herbs shine; if you like more depth, add the optional white wine and let it reduce. To finish a glossy pan sauce, whisk a cornstarch slurry (1 tablespoon cornstarch whisked with 2 tablespoons cold water) into the simmering sauce and cook until slightly thickened. Brighten the sauce with 2 tablespoons additional lemon juice, then taste and adjust salt and acidity as needed.

Add-ins and garnishes: if using olives, add 1/2 cup pitted Kalamata olives halfway through cooking to preserve their texture and briny character. Sprinkle 1/2 cup crumbled feta on top just before serving or warm briefly to soften without losing its crumbly texture. Finish with fresh parsley (about 2 tablespoons) and lemon wedges for a vibrant, color-rich presentation. If you prefer a dairy-free option, omit feta and olives or substitute with artichoke hearts for a different tangy note.

Optional side and adjustments: classic Greek roasted potatoes pair beautifully with this dish. Halved baby potatoes tossed with 1 tablespoon olive oil, salt, pepper, and optional oregano roast alongside the chicken to soak up the lemony pan flavors. The pan drippings can also serve as a quick, bright sauce base—reduce with broth and lemon until glossy. For gluten-free considerations, ensure the broth is labeled gluten-free and that any wine used is gluten-free. Leftovers refrigerate well for 3–4 days and can be reheated in the oven or a skillet; you can also freeze portions for later meals, though texture may soften slightly after freezing.

Tips

Tips for Perfect Greek Lemon Chicken

Marinade and flavor development

  • For maximum flavor, gently loosen the skin of the chicken thighs and dollop the marinade underneath the skin as well as on the surface. This helps aromatics penetrate the meat and keeps the meat juicy during roasting.
  • Use fresh lemon zest and juice. Zest before juicing to capture essential oils, and strain the juice to avoid seeds in the marinade.
  • Marinate thighs for 2–6 hours in the refrigerator for depth. Overnight is fine, but avoid overly long marinades if using delicate cuts or if you’re using highly acidic components.
  • Pat the chicken very dry before roasting. Excess surface moisture prevents skin from crisping and can steam the meat instead of browning.
  • Season evenly by mixing salt and pepper into the marinade and rubbing it under the skin. Remember the broth used later will contribute salt, so taste before roasting.

Roasting and texture

  • Preheat your oven to a hot range (about 425°F / 220°C) to render fat from the skin and develop a crisp exterior. If your oven runs cool, start at 400°F (200°C) and watch closely for browning.
  • Roast the thighs skin-side up so the fat renders and the skin browns evenly. If your pan starts to smoke, reduce heat slightly and continue roasting.
  • Use a meat thermometer to check doneness: 165°F (74°C) in the thickest part of the thigh. If using bone-in thighs, the bone can stay a bit warmer; aim for safe internal temp without overcooking the meat.
  • Halfway through roasting, spoon a little of the pan juices over the chicken to keep it moist and flavorful. This also helps season the meat evenly.

Pan sauce and balance

  • Combine broth, wine (if using), and lemon juice in the pan after the chicken roasts for a bright, acidic pan sauce. If you prefer not to use wine, substitute with extra broth or water and allow a gentle simmer to concentrate flavors.
  • Whisk in the cornstarch slurry (2 tablespoons cold water + 1 tablespoon cornstarch) gradually to achieve a glossy, clingy sauce. Keep the sauce simmering until thickened, whisking to prevent lumps.
  • Finish the sauce with a final squeeze of lemon juice and a pinch of salt to taste. If the sauce tastes flat, a small pinch of sugar or a splash more broth can balance sharp acidity.
  • Retain some of the browned fond from the pan—it’s full of flavor. If necessary, scrape and deglaze a bit more to lift the fond before thickening the sauce.

Add-ins and serving

  • Kalamata olives add a briny contrast. Add them about halfway through cooking to prevent them from becoming mushy, and rinse to remove excess brine before adding.
  • Feta adds tangy creaminess. Sprinkle crumbled feta on top just before serving or briefly warm to soften slightly while keeping some texture.
  • Fresh parsley brightens the dish. Chop finely and scatter over the finished chicken for color and freshness.
  • Lemon wedges at the table let guests brighten the dish to their taste.

Roasted potatoes (optional side)

  • Roast potatoes cut side down for maximum caramelization and flavor absorption from the lemon, oregano, and olive oil.
  • Toss potatoes with 1 tablespoon olive oil, salt, pepper, and oregano (fresh if possible) for even browning and a Greek flavor profile.
  • For crisper skins, give potatoes a head start: parboil or pre-roast for 5–7 minutes before combining with the chicken, then finish together in the same pan to mingle flavors.
  • Adjust salt at the end, considering the salt in the broth and any feta that may be added later.

FAQ

Greek Lemon Chicken Recipe – FAQs

What is Greek Lemon Chicken?

Greek Lemon Chicken is a bright, tangy dish featuring chicken cooked with lemon juice and zest, garlic, oregano, and olive oil. It’s often roasted with potatoes and onions for a flavorful, Greek-inspired meal, finished with fresh parsley.

What ingredients do I need for Greek Lemon Chicken?
  • Chicken thighs or breasts (bone-in or boneless, skin-on recommended for extra flavor)
  • Fresh lemons (juice and zest)
  • Olive oil
  • Garlic, minced
  • Dried oregano (or 1-2 tbsp fresh)
  • Salt and black pepper
  • Optional: potatoes and onion wedges
  • Optional: olives, white wine or chicken broth, parsley for garnish
Can I use chicken breasts or thighs?

Both work. Thighs stay juicier and more forgiving in the oven; breasts cook faster and can dry out if overcooked. If using breasts, consider bone-in, skin-on for more flavor, and monitor cooking time closely.

How do I marinate the chicken?

Whisk together lemon juice, lemon zest, minced garlic, oregano, olive oil, salt, and pepper. Toss the chicken in the marinade, cover, and refrigerate for 30 minutes to up to 24 hours for deeper flavor.

Can I bake it in the oven, and at what temperature?

Yes. Preheat to 425°F (220°C). Arrange the marinated chicken (and optional potatoes/onions) on a baking sheet or in a shallow pan. Pour the marinade over and roast until cooked through and lightly browned, about 25–40 minutes depending on thickness and whether you use bone-in pieces.

How long does it take to cook in the oven?

Bone-in pieces typically take 35–40 minutes; boneless breasts can finish in about 25–30 minutes. Start checking doneness around 25 minutes if using breasts, and let juices run clear with an internal temperature near 165°F (74°C).

How do I know when the chicken is done?

Check that the thickest part reaches 165°F (74°C) with an instant-read thermometer. The juices should run clear, and the meat should be tender and not pink.

How do I make the lemony sauce and pan juices delicious?

After baking, transfer the chicken and any pan juices to a small pan. Simmer briefly with a splash of chicken broth or water, plus a squeeze of lemon juice. You can thicken slightly with a cornstarch slurry if desired, then pour over the chicken or serve on the side.

What are good serving suggestions or accompaniments?

Serve with roasted potatoes and onions from the pan, or alongside rice, or a Greek salad. Garnish with chopped parsley and extra lemon slices for a fresh finish.

How can I customize or variations for this recipe?

Variations include adding olives, capers, or cherry tomatoes; swapping oregano for thyme or adding a pinch of cinnamon for a warmer note; using lime juice for a different citrus profile; and finishing with feta crumbles for a salty tang.

How should I store leftovers and can I freeze this?

Store cooled leftovers in an airtight container in the refrigerator for up to 3–4 days. Reheat gently in the oven or skillet. For freezing, freeze cooked chicken (without potatoes) for up to 2–3 months; thaw in the fridge before reheating and serving.

Introduction / Hook

Imagine a dessert that feels like a sun-drenched stroll through a berry-filled field, where the air carries a subtle tart-sweet perfume of wild blueberries and the promise of something creamy, luscious, and unexpectedly energizing. Welcome to the Wild Blueberry Protein Cheesecake—an indulgent treat that doesn’t ask you to trade your health for happiness, but rather invites you to savor both in a single, satisfying bite. This is not your ordinary cheesecake. It’s a celebration of small, intense fruit flavors meeting a silken, protein-rich filling that keeps you fueled for the moments that follow dessert as much as during it. With each forkful, you’ll feel the cool creaminess give way to bursts of bright berry fragments, the soft, reassuring body of the filling, and a crust that offers a gentle crunch and a comforting, nutty whisper. It’s a dessert that feels special enough for company, yet friendly enough to enjoy after a long day. If you’ve ever wished for a cheesecake that could stand up to a workout, a busy week, or a spontaneous gathering without compromising on taste, you’ve found your new favorite.

Beyond its irresistible charm, this cheesecake has a story to tell—a story of bright, tiny berries picked at the edge of summer, of a kitchen tradition that loves both flavor and function, and of a modern twist that makes a classic silhouette feel contemporary and accessible. The wild blueberry variety brings a concentrated, tangy sweetness that pops in contrast with a creamy, indulgent center. The protein component—carefully balanced so it enhances creaminess without turning the dessert into a chalky afterthought—transforms what might be a purely decadent slice into a more complete, nourishing experience. This is dessert as an everyday joy and a little self-care, a recipe you’ll crave on a leisurely weekend and reach for after a sweaty workout alike. It’s a dish that respects restraint while inviting a sense of celebration in every bite.

As you prepare to read on, picture the first bite: the cool slice sliding from the plate, a moment of creamy ease meeting a bright berry spark, followed by a lingering, comforting finish. Whether you’re welcoming guests, stocking the freezer for weeknights, or simply treating yourself after a long day, the Wild Blueberry Protein Cheesecake promises a moment of pleasure that feels both grounded and uplifting. It’s a recipe designed to travel well to gatherings, to shine on a summer table, and to remind us that dessert can be a thoughtful balance of flavor, texture, and nourishment. Let this be your invitation to bake something that tastes like a memory you’ll want to repeat again and again.

The Story Behind the Dish

Wild blueberries have a storied place in North American lore, often signifying the quiet strength of local forests and the summer rhythms of family gatherings. Unlike their cultivated cousins, wild blueberries tend to be smaller, with a more concentrated sweetness and a brighter, zestier tartness. They are the kind of berry that tastes of early mornings, late evenings, and the unhurried hours of harvest season. In many culinary traditions, blueberries have long been celebrated not only for their flavor but for their vibrant color and the small burst of juice they release when you bite into them. They carry a notion of rustic authenticity—fragrant, sun-warmed, and honest to the core.

This cheesecake traces a lineage from those same woodland berries to a modern desire: to enjoy dessert without sacrificing protein, energy, or balance. The concept of a protein-forward cheesecake isn’t about stripping away indulgence; it’s about reimagining what a dessert can be when nutrition and pleasure share equal footing. The idea here is simple: we celebrate the wild blueberry’s natural brightness and pair it with a creamy, smooth filling that’s subtly enriched with protein to create a cake that isn’t heavy, isn’t overly sweet, and remains remarkably satisfying from first bite to last. The result is a dessert that feels both artisanal and approachable—a cheesecake that looks like a special occasion treat but behaves like a reliable favorite you’d make any week.

As you read through the sections ahead, you’ll notice a gentle thread of influence from family kitchens and picnic baskets. Think of a grandmother’s summer bake sale meeting a modern, health-conscious lifestyle—a collaboration between tradition and contemporary wellness. The crust, the filling, and the blueberry topping or swirl come together to tell a story about texture, contrast, and balance. It’s a recipe built on the idea that we can savor soft, silky creaminess while still enjoying the bright, tart zing of wild berries, all while lending a little extra protein to support satiety and muscle recovery after activity. It’s a celebration of flavor, of heritage, and of the idea that something as beloved as cheesecake can be reimagined to fit a more mindful, energetic life.

Throughout its evolution, this dish has found a home in kitchen test moments, weekend meal preps, and celebratory menus alike. It’s the kind of recipe that invites curiosity: what happens if you swap in almond flour for a different crust texture? How does a light swirl of blueberry preserve the color and intensity of the berries? What if you tweak the protein level to suit a post-workout snack versus a refined dessert for guests? Each question opens a doorway to small, delicious experiments that keep the spirit of cheesecake intact while inviting new flavors, textures, and nutritional considerations to the table. That sense of possibility—paired with the unmistakable joy of blueberries—gives this dish its lasting appeal and makes it a favorite in kitchens that love both flavor discovery and practical, weeknight-friendly indulgence.

Why You’ll Love This Recipe

  • High-protein dessert without sacrificing creaminess or flavor. The cheesecake offers a luscious texture that feels indulgent, but the added protein helps balance sweetness and sustain fullness.
  • Bright, seasonal flavor from wild blueberries. The berries contribute a lively tart-sweet profile that cuts through the richness of the filling and lingers pleasantly on the palate.
  • Silky texture with a gentle crust contrast. Expect a smooth, almost velvety center that yields to a subtle, satisfying edge—crisp enough to provide structure, soft enough to melt in your mouth.
  • Adaptable for different diets. The concept easily lends itself to vegan or gluten-free tweaks, or to substitutions that accommodate dairy-free preferences, without losing the essence of the dish.
  • Make-ahead friendly. This cheesecake holds up well in the fridge and can be portioned for quick servings, making it ideal for gatherings, meal-prep, or gift-worthy jars for friends and family.
  • Versatile for occasions. From casual picnics and weekend brunches to post-workout treats and special celebrations, it pairs beautifully with a range of beverages and side dishes.
  • Beautifully photogenic and crowd-pleasing. The natural color of wild blueberries against a pale, creamy filling makes for a striking dessert presentation that’s as inviting to the eye as to the palate.

Flavor Profile & Texture

The flavor profile of the Wild Blueberry Protein Cheesecake is a careful dialogue between contrast and harmony. The filling is luxuriously smooth, with a gentle tang that comes from a balance of dairy and its protein-enhanced composition. It’s not overly sweet; instead, it has a refined sweetness that allows the blueberries to shine through. The wild blueberries bring a vibrant, almost citrusy brightness with a depth that ordinary cultivated berries sometimes lack. Their tartness acts as a counterpoint to the creamy interior, creating a layered experience with every bite.

The texture of the filling is where the magic often lies. It’s seductively light and airy yet substantial enough to hold its shape when sliced. This is not a mousse; it’s cheesecake—a structure that supports a delicate, almost silken mouthfeel. The crust offers a contrasting bite: a firmer, crumbly foundation that provides a crunchy-to-soft transition as you move from the first bite to the second. The crust’s subtle toasty notes anchor the dish and keep the blueberry brightness from feeling too delicate, creating a complete, cohesive mouthfeel that invites you to savor slowly.

In terms of aroma, expect a gentle bouquet of vanilla, a whisper of dairy richness, and the inevitable fresh perfume of wild blueberries. When you cut into the slice, you’ll notice the way the filling releases a faint, creamy fragrance that mingles with the fruit’s juice. On tasting, the initial coolness of the filling meets the lively fruit, then settles into a lingering finish that balances sweet, tart, cool, and comforting all at once. This is a dessert that respects the blueberry’s natural character while elevating it with a modern, protein-forward approach—an appealing proposition for both dessert lovers and the health-conscious alike.

Occasions & Pairings

Where this cheesecake shines is in its versatility. It suits warm-weather gatherings, weekend family dinners, and post-workout recovery moments that demand a treat without heavy heaviness. Here are some ideas for when to serve it and what to pair with it:

  • Summer gatherings and potlucks: the bright berry notes and elegant presentation make it a standout on a shared table.
  • Weeknight dessert with a point of pride: quick to portion and easy to store, it’s a refined finish after a busy day.
  • Post-workout snack or recovery treat: the protein boost supports satiety and can help replenish energy after activity.
  • Brunch hospitality: pairs gracefully with a light sparkling beverage, a citrus-forward tea, or a mild coffee.
  • Celebrations and special occasions: serves as a showpiece without feeling overly formal, inviting guests to linger over dessert.

Pairings to consider:

  • Beverages: a chilled sparkling beverage, a bright white wine, espresso, or a citrusy herbal tea.
  • Side bites: a light fruit compote, a dollop of whipped cream (or dairy-free yogurt), or toasted nuts for added crunch.
  • Flavor accents: a whisper of citrus zest (lemon or orange), a touch of mint, or a light drizzle of dark chocolate for contrast.
  • Complementary desserts: a small, tart sorbet or a simple lemon tart can create an engaging tasting menu with the cheesecake as the centerpiece.

Tips, Variations & Substitutions

The beauty of this cheesecake lies in its flexibility. Here are thoughtful ways to adapt it to different tastes, dietary needs, or ingredient availability, all while keeping the spirit of the dish intact:

  • Vegan or dairy-free version: use dairy-free cream cheese alternatives and plant-based yogurt or cream substitutes. Ensure the protein component remains balanced to maintain the cheesecake’s texture.
  • Gluten-free or nut-free crust options: swap in crushed nuts (almonds, pecans) or nut-free crushed cereals for the crust, or use a gluten-free crust base that suits your dietary needs.
  • Flavor boosters: incorporate a hint of citrus zest, vanilla bean, or almond extract to accent the blueberry brightness and the filling’s creaminess without overwhelming the fruit.
  • Protein variations: choose a protein powder that suits your preference (unflavored or vanilla works well). If you prefer a non-powder source of protein, consider using Greek yogurt as part of the filling to naturally boost the protein content while preserving texture.
  • Fruit variations: while wild blueberries are the star, you can experiment with a mix of berries or a blueberry compote swirl for a different visual and flavor profile, keeping the overall balance in mind.
  • Texture play: for a hint of extra bite, add a thin layer of chopped nuts or a crisp sugar-free crumble on top after the cheesecake sets (if you’re preparing ahead, keep toppings separate until serving).
  • Make-ahead ideas: this cheesecake often tastes better after a day or two, when flavors have had time to meld. Prepare, chill, and keep tightly wrapped; slice portions as needed to minimize handling.

Storage & Make-Ahead Ideas

Storage is one of the practical delights of this dessert. Its structure holds up well in the refrigerator, making it ideal for make-ahead meals, weekend entertaining, or gifting in portions. Here are some practical tips to keep texture and flavor at their best:

  • Refrigeration: store whole or sliced portions in an airtight container or wrapped tightly to prevent drying out. Typically, this cheesecake will stay fresh for up to 3–5 days in the fridge when properly covered.
  • Freezing: for longer-term storage, wrap slices individually and freeze. Thaw in the refrigerator overnight or at room temperature for a quicker finish. The filling can remain silky after freezing, though a slightly softer texture may occur.
  • Make-ahead strategy: if you’re planning a dessert spread, prepare the filling and crust separately and assemble the day you plan to serve, or freeze the assembled cheesecake and thaw the day you intend to present it.
  • Portion control: slicing into individual servings before refrigerating makes it easy to grab a ready-to-go treat without exposing the entire cheesecake to air each time.
  • Transportation: for picnics or potlucks, transport the cheesecake in its dish with a tight lid and a chilled pack to maintain a cool, fresh feel upon arrival.

Fun Facts & Trivia (Optional)

Did you know that blueberries—especially wild varieties—are celebrated not only for their flavor but for their nutrient density? Wild blueberries typically harbor a higher concentration of antioxidants per berry than cultivated varieties, contributing to their reputation as a berry with a superfood smile. The deep indigo hue of wild blueberries is a natural indicator of anthocyanins, compounds linked to potential health benefits and vibrant color in baked goods and desserts. In North America, blueberries have a long history of use in folk remedies, seasonal desserts, and festive table centers, where their bright color and tangy sweetness bring a sense of place and season to the table.

Cheesecake itself is a culinary traveler—its roots wander through ancient civilizations and diverse kitchens, evolving into the dense, creamy, and luxurious dessert many enjoy today. The twist of adding protein into a classic cheesecake is a modern innovation that aligns with a broader trend: treating indulgence as something that can harmonize with an active, health-minded lifestyle. This fusion of tradition and contemporary nutrition makes the Wild Blueberry Protein Cheesecake a representation of how kitchens adapt to the times—honoring history while inviting new possibilities.

Finally, there’s a simple but delightful consideration: the color story. The blueberry swirl or topping brings a rich, jewel-toned contrast to the pale cream filling, making the dessert as pleasing to the eye as it is to the palate. The berries’ natural pigments are more than just decoration; they signal the fruit’s robust flavor and the promise of a bright, satisfying finish that lingers long after the plate is cleared. In this dessert, color, aroma, texture, and taste converge to tell a story of summer, balance, and a little culinary science that makes joy easy to reach.

Whether you’re a longtime cheesecake devotee, a fitness-minded foodie, or someone who simply loves the taste of wild berries in dessert form, the Wild Blueberry Protein Cheesecake invites you to savor a moment that feels both comforting and invigorating. It’s an invitation to bake with intention, to celebrate seasonal fruit, and to treat yourself to something that nourishes as it delights. When you’re ready to plate it, you’ll find that this dessert isn’t just a dish—it’s an experience: cool, bright, creamy, and wonderfully complete in every sense.

Ingredients

  • Crust
  • 1 1/2 cups almond flour (unsalted, finely ground)
    → The crust provides the base and structure for the cheesecake. Almond flour yields a gluten-free, grain-free crust with a rich, nutty flavor and helps with moisture balance when combined with fat. Measure by spooning into a cup and leveling for consistency. For extra flavor, lightly toast the almond flour in a dry pan for 2-3 minutes before mixing with the fat to deepen nuttiness.
  • 2 tablespoons melted coconut oil (unrefined or refined)
    → Acts as the fat to bind the crust and help it set when chilled. Use melted and slightly cooled oil so it blends evenly with dry ingredients. If dairy is preferred, substitute with an equal amount of melted butter for a richer crust (note it will not be vegan).
  • 1-2 tablespoons maple syrup or honey (optional, for sweetness)
    → Adds a touch of sweetness and helps bind the crust together. If using honey, whisk thoroughly to distribute; adjust sweetness in the filling accordingly to avoid an overly sweet cheesecake. For a lower-sugar option, omit entirely or reduce to 1 tablespoon.
  • Pinch of salt
    → Enhances flavor and balances sweetness by bringing out the nutty notes of the almond flour. Use fine salt to ensure even distribution and avoid any grainy texture.
  • Filling
  • 16 oz (450 g) cream cheese, softened to room temperature
    → Provides the creamy base and body of the cheesecake. Softened cream cheese blends smoothly and prevents lumps; beat on medium speed for 1-2 minutes before adding other ingredients to achieve a silky texture. Use full-fat for best richness; lower-fat options can result in a lighter but less luscious result.
  • 1 cup Greek yogurt, full-fat (or 2/3 cup strained plain yogurt for a thicker texture)
    → Adds tang, moisture, and extra protein. If using regular yogurt, strain through cheesecloth or a fine sieve to remove whey and thicken; full-fat yogurt yields richer mouthfeel. Greek yogurt helps stabilize the filling and contributes creaminess without too much fat.
  • 1/2 cup vanilla whey protein isolate (unflavored or vanilla)
    → Boosts protein content and helps set the filling with dairy components. Sift to remove lumps and whisk with a small amount of the cream cheese mixture to form a smooth paste before folding into the rest of the filling; this minimizes gritty texture from clumps.
  • 2 large eggs, at room temperature
    → Bind and help the cheesecake set. Room-temperature eggs emulsify better, producing a smoother batter. Do not overmix after adding eggs; mix until just combined to prevent aeration and cracking during baking or chilling.
  • 1/3 cup maple syrup or honey (adjust sweetness)
    → Provides natural sweetness and moisture without overpowering the berry flavors. If using honey, whisk well to incorporate; adjust other sweeteners as needed to maintain balanced flavor and avoid a sugary aftertaste.
  • 1 teaspoon vanilla extract
    → Adds warmth and depth that complements blueberries. Use real vanilla for the best aroma; if you have vanilla bean, scrape the seeds for extra flavor and reduce extract by about half.
  • 1 tablespoon lemon juice (optional)
    → Brightens the filling and helps balance richness; acid also slightly improves setting and enhances blueberry flavor. If using lemon zest instead, reduce or omit juice based on desired citrus intensity.
  • 1 cup wild blueberries, fresh or thawed from frozen (well-drained)
    → The star fruit element, providing pop of color and tart-sweet flavor. Fold in gently to avoid breaking berries; if using frozen, pat dry to minimize extra moisture and prevent a watery cheesecake. Reserve a few berries for topping if desired.
  • Toppings (optional finishing touches)
  • 1/2 cup fresh wild blueberries, for topping
    → Creates a vibrant, fresh look and adds a burst of berry flavor at serving. Rinse gently and pat dry; arrange decoratively after the cheesecake is chilled to maintain shape and color. If you want a glossy look, you can gently warm a small amount of blueberry sauce and brush lightly on top.
  • Blueberry compote (optional) — 1/2 cup blueberries, 1-2 tablespoons water, 1 teaspoon lemon juice, 1 teaspoon maple syrup; simmer until thick and glossy
    → A luscious, fruity ribbon that enhances blueberry intensity. Cool completely before spooning or swirling into the top to avoid melting into the filling; store any leftovers in the fridge for up to 5 days.
  • 1 tablespoon lemon zest (optional)
    → Adds extra citrus aroma to pair with blueberry; use sparingly as a finishing note rather than an overpowering flavor. Zest before juicing to capture essential oils in the zest.
  • 1/4 cup chopped almonds or walnuts (optional)
    → For crunchy texture if you like a textured crust or topping. Toast the nuts lightly to deepen flavor and chop finely so they distribute evenly; add to the crust before baking or sprinkle on top after chilling for crunch.

Instructions

  • Preheat your oven to 325°F (165°C) and prepare a 9-inch (23 cm) springform pan by greasing the sides with a neutral oil and lining the bottom with a parchment circle for easy release.
    → A steady, even temperature ensures the cheesecake bakes uniformly and the crust releases cleanly when chilled and unmolded.
  • If desired, lightly toast 1 1/2 cups almond flour in a dry skillet over medium heat for 2–3 minutes, stirring constantly until it becomes fragrant and brings out a deeper nutty aroma.
    → Toasting intensifies almond flavor and helps dry the flour slightly, improving crust texture and preventing sogginess.
  • In a medium bowl, whisk together the toasted (or untoasted) almond flour with a pinch of salt, the 2 tablespoons melted coconut oil, and 1–2 tablespoons maple syrup or honey to form a cohesive crust mixture.
    → The fat binds the crust and the sweetener helps with binding and flavor; mixing thoroughly ensures an even distribution for mindful slicing later.
  • Press the crust mixture firmly into the prepared springform pan, spreading evenly across the bottom and a light rise up the sides with the back of a spoon or the flat of a glass. Chill the pan in the freezer for 15–20 minutes to set.
    → A chilled crust holds its shape during filling and baking, preventing slumping and reducing cratering at the edges.
  • In a large mixing bowl, beat 16 oz (450 g) cream cheese at room temperature on medium speed until smooth and creamy, about 1–2 minutes, to remove lumps.
    → Softened cheese emulsifies better, creating a silkier filling and preventing a grainy texture in the finished cheesecake.
  • Whisk in 1 cup full-fat Greek yogurt (or 2/3 cup strained plain yogurt for thicker texture) until fully incorporated and the mixture is glossy.
    → Yogurt adds tang, moisture, and protein while stabilizing the filling; ensure there are no visible lumps for a flawless batter.
  • Stir in 1/2 cup vanilla whey protein isolate, sifted first to remove lumps, and whisk with a small amount of the cheese mixture to form a smooth paste; fold this paste into the rest of the filling to distribute the protein evenly.
    → This boosts protein content and helps the filling set with a creamy, cohesive texture without making it chalky.
  • Beat in 2 large eggs, one at a time, on low-to-medium speed until each is just incorporated and the batter looks smooth; avoid overmixing to prevent air bubbles that can crack during chilling.
    → Eggs provide structure; overmixing introduces air that expands during baking and cooling, risking cracks.
  • Stir in 1/3 cup maple syrup or honey, 1 teaspoon vanilla extract, and optional 1 tablespoon lemon juice to brighten the filling; mix until uniform.
    → The natural sweeteners keep the cake moist and balanced, while vanilla and lemon elevate the blueberry flavor without overpowering it.
  • Gently fold in 1 cup wild blueberries, taking care not to crush them; if using frozen berries, pat them dry on a paper towel to minimize extra moisture.
    → Gentle folding preserves berry integrity for visible pockets of color and tart sweetness in every slice.
  • Pour the filling into the prepared crust, smoothing the top with a spatula so it is level and reaches the edges; tap the pan on the counter a few times to eliminate any air pockets.
    → A level, compact batter bakes evenly and reduces the likelihood of a sunken center or cracking.
  • Wrap the outside of the springform pan with two layers of heavy-duty foil and place it into a larger roasting pan; add hot water to the outer pan until it comes halfway up the sides of the springform to create a water bath.
    → The water bath provides gentle, even heat and helps prevent cracking by stabilizing the temperature and moisture during baking.
  • Bake at 325°F (165°C) for 60–70 minutes, or until the outer edge is set but the center still quivers slightly when the pan is gently shaken. If the center seems overly jiggly, bake in 5-minute increments, testing until just set.
    → The gentle jiggle indicates proper set without overcooking; residual heat will continue to set the center as it cools.
  • Turn off the oven, crack the door slightly, and let the cheesecake rest in the oven for 1 hour to gradually cool and prevent sudden temperature shifts that could cause cracking.
    → Slow cooling minimizes stress on the structure, reducing the risk of cracks and improving a silky texture.
  • Carefully remove the cake from the water bath, transfer to a rack, and let it come to room temperature before chilling; refrigerate for at least 4 hours or overnight for full set and sliceable texture.
    → Chilling firms the filling thoroughly, making clean slices and letting flavors meld for a smoother finish.
  • Prepare optional topping: simmer 1/2 cup blueberries with 1–2 tablespoons water, 1 teaspoon lemon juice, and 1 teaspoon maple syrup until thick and glossy to create a blueberry compote; cool completely before using.
    → The sauce adds intensity and a glossy finish; cooling prevents it from melting into the filling and softening the crust.
  • Just before serving, top with 1/2 cup fresh wild blueberries and a light sprinkle of lemon zest (optional) or a drizzle of blueberry compote; slice with a warm knife (hot water wiped dry) for clean cuts.
    → Fresh berries provide bright contrast and vibrant color; warming the knife reduces dragging through the creamy filling for neater portions.

Notes

These wild blueberry protein cheesecakes are a gluten-free dessert that balances a crisp almond crust with a luscious protein-packed filling and bright berry notes. The crust relies on almond flour and coconut oil for structure and richness, with a touch of maple syrup or honey for gentle sweetness. Toasting the almond flour briefly deepens its nutty aroma and helps with moisture balance when mixed with the fat. For a dairy-free version, substitute coconut oil and a plant-based cream cheese, keeping in mind texture may shift.

Crust

  • 1 1/2 cups almond flour (unsalted, finely ground) with a pinch of salt. Optional: lightly toast the almond flour in a dry pan for 2-3 minutes to deepen flavor.
  • 2 tablespoons melted coconut oil (unrefined or refined). Allow to cool slightly so it blends evenly with the dry ingredients.
  • 1-2 tablespoons maple syrup or honey (optional, for sweetness). Adjust to taste and bake time; sweeter crusts may require less sugar in the filling.
  • Press the mixture into a 9-inch springform pan to form an even crust about 1/4 inch thick. Chill for 15-20 minutes or bake at 350°F (175°C) for 8-10 minutes to set, then cool completely before filling.

Filling

  • 16 oz (450 g) cream cheese, softened to room temperature.
  • 1 cup Greek yogurt, full-fat (or 2/3 cup strained plain yogurt for a thicker texture).
  • 1/2 cup vanilla whey protein isolate (unflavored or vanilla). Sift to remove lumps and whisk with a small amount of the cream cheese mixture to form a smooth paste before folding into the rest of the filling.
  • 2 large eggs, at room temperature.
  • 1/3 cup maple syrup or honey (adjust sweetness).
  • 1 teaspoon vanilla extract.
  • 1 tablespoon lemon juice (optional) to brighten the filling; or lemon zest for extra aroma.
  • 1 cup wild blueberries, fresh or thawed from frozen (well-drained). Fold in gently to avoid breaking berries; reserve a few for topping if desired.

Pour the filling over the prepared crust, spreading evenly. Gently tap the pan on the counter to release air bubbles. Bake in a preheated 325-350°F (160-175°C) oven until the edges are set and the center has a slight jiggle, about 40-50 minutes. Turn off the oven and let the cheesecake cool in the oven with the door ajar for 1 hour to prevent cracking, then chill in the refrigerator for at least 4 hours or overnight for best texture.

Toppings and finishing touches

  • 1/2 cup fresh wild blueberries for topping. Rinse gently and pat dry; arrange decoratively after the cheesecake is chilled.
  • Blueberry compote (optional): 1/2 cup blueberries simmered with 1-2 tablespoons water, 1 teaspoon lemon juice, and 1 teaspoon maple syrup until thick and glossy. Cool completely before swirling or spooning onto slices.
  • 1 tablespoon lemon zest (optional) for a bright finishing note. Zest before juicing to capture essential oils.
  • 1/4 cup chopped almonds or walnuts (optional) for a crunchy texture. Lightly toast before using and sprinkle on top after chilling.

Storage and tips: Cover and refrigerate slices for up to 3-4 days. The cheesecake can be frozen, well-wrapped, for up to 2-3 months and thawed in the fridge before serving. For best texture, keep dairy components at room temperature only briefly during mixing, and avoid overmixing after adding eggs to minimize cracking. Always ensure your almond flour and whey protein isolate are certified gluten-free if you have gluten intolerance.

Tips

Tips for Perfect Wild Blueberry Protein Cheesecake

  • Crust flavor and texture: Toast almond flour in a dry skillet for 2–3 minutes until fragrant and lightly browned, then cool completely before mixing with the fat to deepen nuttiness and improve binding.
  • Crust binding and cleanliness: Use melted coconut oil (cooled slightly) to bind the crust. Press firmly into the pan and up the sides if you like, using parchment underneath to prevent sticking. Chill the crust for 15–30 minutes before filling to reduce crumbling.
  • Sweetness control: If using maple syrup or honey in the crust, whisk thoroughly to distribute sweetness; adjust sweetness in the filling accordingly to avoid an overly sweet cheesecake. For a lower-sugar option, omit the crust sweetener or reduce the filling sugar slightly.
  • Softening dairy for a smooth filling: Bring cream cheese to room temperature and beat until very smooth (about 1–2 minutes) before adding other ingredients to avoid lumps. Cut the blocks into cubes to speed even softening.
  • Yogurt texture: For a thicker, creamier filling, use full-fat Greek yogurt. If you use regular yogurt, strain through cheesecloth or a fine sieve to remove whey and thicken.
  • Protein powder handling: Sift the vanilla whey protein isolate to remove lumps, then whisk a small amount into a portion of the filling to form a smooth paste before folding back into the rest of the mixture to minimize grittiness.
  • Eggs and mixing: Add eggs one at a time and mix just until combined. Overmixing after eggs are added can incorporate air and cause cracking during baking or chilling.
  • Sweetness balance in filling: The 1/3 cup maple syrup or honey should be balanced with the tang from yogurt and lemon; taste the batter and adjust if needed. If you add lemon juice or zest, consider slightly reducing other sweeteners to avoid a citrus-forward sweetness clash.
  • Flavor depth: Use real vanilla extract for the best aroma; if you have vanilla bean, scrape the seeds and mix with the filling, reducing extract by about half.
  • Brighten with citrus: Lemon juice brightens the filling and enhances berry flavor; if using lemon zest, add it with the vanilla to release essential oils. If using juice, adjust sweetness accordingly to maintain balance.
  • Blueberry handling: Drain fresh or thawed blueberries well to prevent extra moisture from thinning the filling. If using frozen berries, pat dry before folding in and reserve a few to decorate on top after chilling.
  • Topping ideas: Fresh wild blueberries on top look stunning and add brightness. For a glossy finish, swirl a cooled blueberry compote (1/2 cup blueberries, 1–2 tbsp water, 1 tsp lemon juice, 1 tsp maple syrup) on the surface after the cheesecake chills, then refrigerate until set.
  • Texture and flavor with toppings: 1 tablespoon lemon zest adds a citrusy aroma; sprinkle finely chopped almonds or walnuts for a subtle crunch if you like texture in the crust or as a topping. Toast nuts lightly to deepen flavor before adding.
  • Chilling and serving: Chill the assembled cheesecake for at least 4 hours or overnight for clean slices. For neat cuts, run a knife under hot water, wipe dry, and slice. Keep leftovers refrigerated for up to 3–4 days or freeze individual portions for longer storage.

FAQ

What is Wild Blueberry Protein Cheesecake?

A creamy cheesecake swirled with wild blueberries and boosted with protein from ingredients like Greek yogurt and protein powder. It pairs the tangy richness of cheesecake with a berry-forward flavor and a crust, delivering a dessert that’s higher in protein than traditional cheesecake.

Is it baked or no-bake?

Both versions exist. No-bake versions set by chilling the filling in the fridge, while baked versions are cooked gently in the oven (often with a water bath) to help set the texture. No-bake is usually quicker, while baked can yield a firmer, sliceable result.

What ingredients provide the protein?

The main protein comes from Greek yogurt and cream cheese, plus protein powder added to the filling. Cottage cheese or ricotta can be used as alternatives. Protein per serving depends on the brands and amounts used, but you can expect a noticeable protein boost compared to a traditional cheesecake.

What protein powder types work best?

Unflavored or vanilla protein powders are the most versatile. Whey provides creaminess, casein adds thickness, and plant-based powders (pea, soy, rice, etc.) work well too. Start with 1–2 scoops and adjust to taste and desired texture.

Can you explain the crust and gluten-free options?

Crust ideas include almond flour crust with melted butter or coconut oil, or a gluten-free cookies crumb crust pressed into the pan. To keep it gluten-free, avoid wheat-based cookies or crackers and choose certified gluten-free ingredients. Chill the crust until set before filling.

Can I use frozen wild blueberries?

Yes. Thaw them and drain well before folding into the filling or arranging on top. Reserve a little juice to intensify color if desired, but avoid adding too much liquid, which can affect the filling’s texture.

How should I store and how long does it last?

Store in the refrigerator, covered, for about 4–5 days. For longer storage, freeze slices individually or the whole cheesecake (wrapped tightly) for 2–3 months. Thaw frozen portions in the fridge overnight before serving.

Can I make it dairy-free or vegan?

Yes. Use dairy-free cream cheese or a blend of silken tofu and plant-based yogurt, plus a plant-based protein powder. For the crust, use almond flour or gluten-free cookies with a dairy-free fat like coconut oil. Texture and flavor will vary slightly from dairy versions.

How do I prevent cracks or get a smooth texture?

Mix just until the ingredients are combined to avoid overworking the filling. If baking, bake at a lower temperature and use a water bath to maintain moisture. For no-bake versions, ensure the filling is fully chilled for several hours or overnight before slicing, and run a knife around the edges to release.

How can I customize flavor or sweetness?

Enhance the profile with a little lemon zest or vanilla extract. Adjust sweetness with sugar, maple syrup, or your preferred sweetener. You can also swirl in extra blueberries or top with fresh berries and a blueberry compote for an extra burst of berry flavor.

Introduction / Hook

Picture a slice that holds a symphony of textures and flavors in a single bite: the first whisper of a buttery, nutty crust giving way to a cloudlike, velvet-cheese center, then a kiss of bright cherry and a crunchy, emerald-green pistachio perfume that lingers on the palate. This Cherry Pistachio Cheesecake is not just a dessert—it’s a celebration of contrasts: glossy, jewel-like cherries that shine atop a pale, creamy surface; a filling that’s lush and satisfying without heaviness; and a nutty base that provides a satisfying bite stones the moment you cut through. It’s the kind of dessert that makes a dinner party feel intimate, a family gathering feel special, and a weeknight meal feel like a small, well-deserved celebration. It invites you to slow down, inhale the sweet aroma that rises from the oven or fridge, and imagine all the moments that lead to this very moment—summers spent picking cherries, winters spent dreaming up new twists on familiar pastries, and the simple joy of sharing something homemade with loved ones. The combination of tart cherries and pistachios has a long, storied lineage in many cuisines, yet this cheesecake marries them in a way that feels modern, approachable, and indulgent without being overpowering. Every forkful delivers a harmonious balance: tangy fruit, creamy richness, and a satisfying crunch that makes you want another bite before you even swallow. If you’ve ever wanted a show-stopping finale that’s still comforting and reliable, this cheesecake offers that rare blend—luxury with daylight-easy practicality, and a flavor profile that feels familiar yet freshly refined.

The aroma alone is enough to spark conversations: vanilla-scented cream cheese swirling with a hint of lemon zest, the nutty aroma of toasted pistachios, and the bright, almost cherry-syrup glow that coats the spoon as you swirl. When you bring the first slice to the table, you’re not just presenting dessert; you’re presenting a moment—an invitation to linger a little longer, to share, to reminisce, and to savor the quiet joy of something truly well-made. It’s a dessert that defies a single seasonal interpretation, feeling equally at home on a Christmas table as it does on a sunny summer afternoon when fresh cherries are at their peak. And because it sits beautifully on a platter or in a glass-fronted cake dome, it also adapts to the mood of the moment—elegant enough for a formal dinner, relaxed enough for Sunday brunch with friends, and forgiving enough to become a beloved staple in your own kitchen repertoire.

The Story Behind the Dish

This cheesecake is more than a recipe; it’s a small travelogue wrapped in a dessert. The idea took root in a sun-washed kitchen where a grandmother would improvise with whatever fruits and nuts were on hand, turning simple ingredients into something comforting and memorable. Cherries hold a special place in many cultural kitchens: their bright acidity cuts through richness, their color signals celebration, and their seasonality invites a moment of gratitude for the harvest. Pistachios, with their green glow and delicate sweetness, carry a whisper of distant spice and a reminder of markets in sun-warmed cities where street vendors offer warm, fragrant nuts in paper cones. The pairing of cherries and pistachios is a love letter to two distinct worlds—the tart-sweet temperament of stone fruit and the nutty, earthy aroma of roasted greens—brought together here in a cake that looks as refined as a piece of jewelry and tastes like a memory you wish would never end. There’s a tale of two culinary traditions tucked inside: the European cheesecake’s seductively smooth, citrus-kissed filling and the Middle Eastern and Mediterranean affinity for pistachios, dates, and bright fruit glazes. It’s a fusion by affection, a recipe born from curiosity and a handful of ingredients that seemed destined to be friends. Each time I slice through the surface and reveal the pistachio-speckled crust and the satin cream, I’m reminded of long afternoons spent in kitchens that smell of toasted nuts and lemon zest, of plates cleared with music in the background and stories shared across the table. The dessert has traveled with me through seasons and celebrations, picking up a few signatures along the way—a delicate cherry swirl here, a whisper of vanilla there, a sprinkle of crushed pistachios as if confetti—until it became something uniquely personal: a cheesecake that feels timeless, yet unfussy enough to become a go-to in your own repertoire.

In a broader cultural sense, this cheesecake respects the values of several traditions: the Italian influence of a creamy cheese canvas, the Levantine love for pistachio and fruit contrasts, and the European penchant for a dramatic, glossy finish. It’s a dessert that invites storytelling at the table—about where cherries come from, how pistachios are grown, and the little rituals that accompany baking: the soft rain tapping on the window while the oven warms, the moment you taste a sample and adjust a swirl with a flick of the spatula, the way a guest’s eyes light up when they realize there’s a second slice within reach. The recipe doesn’t demand a single approach—it welcomes adaptation, cultural nods, and personal tweaks, so your version can carry your own story forward with every slice you serve.

Why You’ll Love This Recipe

  • Impressive yet approachable: This cheesecake looks elegant on a dessert platter but is forgiving enough for bakers at all levels, making it ideal for entertaining or a special weeknight treat.
  • Layered flavors and textures: A crisp, nutty crust provides contrast to a supremely silky filling, while a cherry swirl adds brightness and a pop of color that makes the dessert visually irresistible.
  • Balanced sweetness: The natural acidity of cherries and the subtle sweetness of pistachios keep the cake from feeling cloying, so you experience a refined, well-rounded finish from first bite to the last crumb.
  • Make-ahead friendly: The harmonies develop with time, and the dessert stores well in the fridge, giving you flexibility for ahead-of-time preparations and last-minute gatherings.
  • Versatile pairing opportunities: It shines with a glass of dessert wine, a shot of espresso, or a fragrant mint tea, and it pairs beautifully with simple fresh fruit or a dollop of whipped cream for extra indulgence.
  • Customizable for dietary needs: The concept easily lends itself to gluten-free crusts or dairy-free fillings, allowing you to tailor the cheesecake to different guests without sacrificing flavor.
  • Elegant centerpiece: The cake’s vertical height, pale ivory surface, and jeweled cherry topping create a striking centerpiece deserving of celebration tables and guest admiration alike.

Flavor Profile & Texture

Every bite is a contemplation of textures and tastes. The crust—delicately toasted and studded with finely ground pistachios—offers a nutty, buttery foundation that gives a slight crumb with each cut. It’s not dry or hard; it’s gently crisp, with enough resilience to hold the filling without cracking under pressure. The filling itself is a sumptuous, cloud-like cream cheese layer, lightened enough to feel luxurious but dense enough to anchor the slice with a satisfying mouthfeel. There’s a subtle tang that dances on the palate, typically from a touch of lemon zest or a hint of natural acidity in the cream cheese, which brightens the entire experience and prevents the cheesecake from weighing down the senses. Swirled through the center or layered beneath the surface is a cherry ribbon that delivers a tart-sweet counterpoint. The cherries are not simply on top but integrated in ways that complement every mouthful; they provide bursts of juicy brightness that contrast with the mellow creaminess. The pistachios—both in the crust and as a finish or garnish—contribute a gentle, roasted warmth that lingers after the last bite. If you close your eyes and inhale, you’ll taste the delicate perfume of vanilla and perhaps a whisper of almond, which elevates the whole dessert. Texture-wise, the cake presents a duality: the outer edge has a little more structure and bite, while the center remains luxuriously smooth and almost baiting you to dip your fork again. The cherry swirl, when present, adds moisture and a slightly juicy texture that can feel almost confessional—an invitation to savor slowly rather than rush through a slice. This is a cheesecake that wants to be shared, admired, and tucked away for tomorrow’s tea-time ritual, because the flavors only become more harmonious as they mellow and mingle with time in the fridge, giving you a reason to look forward to the next slice as soon as you finish the current one.

Occasions & Pairings

There are few desserts that feel both celebratory and comforting in equal measure, and this Cherry Pistachio Cheesecake lands squarely in that sweet spot. It’s equally at home on a holiday table as it is on a casual weekend spread. For celebrations, it serves as a dramatic finale that doesn’t require elaborate plating; a simple dusting of finely chopped pistachios and a few gleaming cherries are enough to make it feel festive. It’s an ideal showpiece for birthday dinners, anniversaries, or even as a special addition to a brunch menu where guests expect something a touch more decadent than the usual sweet pastries. The cake’s pale surface and cherry accents also make it visually compelling in photographs, ensuring your memories—whether shared on a social feed or kept in family albums—are as beautiful as the taste.

Pairings elevate the experience. A glass of sparkling Moscato or a late harvest Riesling complements the fruit-forward notes without overpowering the cheesecake’s creaminess. If you prefer a more robust companion, a glass of aged tawny or a small pour of a well-balanced dessert wine can provide a warming contrast to the cool, silky texture of the slice. For a non-alcoholic option, consider a bright black tea with a touch of citrus or an exquisite cherry blossom- or almond-flavored tea that mirrors the dessert’s own flavors. Coffee lovers will appreciate a smooth, medium-roast espresso or a soft latte; the bitterness of coffee grounds contrasts with the cheesecake’s velvet sweetness in a delightful way. In terms of regional pairings, pistachio loves citrus; a lightly zested lemon or orange wedge on the side can intensify the overall brightness. A few candied cherries scattered around the platter can echo the topping and offer a tiny extra bite.

When it comes to menu planning, this cheesecake is surprisingly versatile. It can anchor a dessert course with a light, fruit-forward salad or a simple almond biscotti plate, or it can stand alone as the star of a dessert buffet. If you’re serving it at a casual gathering, consider a small tasting plate featuring a bite-sized square of the cheesecake alongside a few fresh cherries and a crisp mint leaf for color and fragrance. For a more formal presentation, present the slices on a chilled plate with a drizzle of cherry glaze and a sprinkle of crushed pistachios for texture and sparkle. The key is to maintain balance: the pairing should enhance the cheesecake without competing with its delicate flavors or overwhelming its texture. This dessert is a reminder that sometimes the simplest elements—a few cherries, a handful of pistachios, a smooth, creamy center—together create something unexpectedly luxurious and satisfying.

Tips, Variations & Substitutions

Crafting a cheesecake that mirrors your preferences is part of the joy. Here are ideas to tailor Cherry Pistachio Cheesecake to your pantry, dietary needs, and taste preferences:

  • Make ahead and flavor maturation: Cheesecake flavors deepen with time. Bake a day or two ahead, chill thoroughly, and let the flavors meld in the fridge. A gentle re-chill before serving helps settle the surface for a flawless slice.
  • Crust variations: If you’re avoiding gluten, use finely ground almonds or gluten-free cookies as the base with a touch of melted butter. For a richer crust, toast the nuts a bit longer and add a pinch of salt to intensify flavor.
  • Dairy-friendly vs. dairy-free: For a dairy-free version, substitute with a cashew-cream filling blended with coconut yogurt for tang and creaminess, and use plant-based butter in the crust. Be mindful that the texture may be slightly lighter, but the flavor will still be luxurious.
  • Vegan twists: Vegan cream cheese, when properly balanced with lemon zest and a touch of almond extract, can simulate the tang of dairy-based fillings while maintaining indulgence.
  • Fruit variations: If cherries are not in season, pomegranate arils or raspberry swirls can offer a similar counterpoint to the richness of the filling. For a different pistachio accent, crush pistachios with a little orange zest to create a bright, fragrant topping.
  • Texture tweaks: If you prefer a crisper crust, bake it a few minutes longer or finish with a light broil to set the surface. If you like a silkier filling, blend the filling for an extra minute or two to achieve maximum airiness without losing structure.
  • Flavor boosters: A whisper of vanilla is classic, but cardamom or a trace of orange blossom water can lend an aromatic lift that harmonizes with the pistachio and cherry.
  • Color play: For a dramatic effect, swirl in a small amount of cherry coulis just under the surface, so the cake blooms with red ribbons when cut.
  • Low-sugar or diabetic-friendly: Use a natural sweetener with a low glycemic index and balance with extra tart cherry accents to maintain brightness.

Storage & Make-Ahead Ideas

This cheesecake is as practical as it is dramatic. Store it properly to preserve its texture and flavor:

  • Refrigeration: After chilling fully, store covered in the refrigerator for up to four days. The flavors deepen with time, making day two or three especially delicious.
  • Freezing: Slice the cheesecake and wrap each piece tightly in plastic wrap, then seal in an airtight container or freezer bag. It freezes beautifully for up to two months. Thaw slices in the fridge overnight before serving for best texture.
  • Make-ahead strategy: If you’re entertaining, bake and chill the cake a day or two ahead. Prepare a cherry compote or fresh cherry topping separately and add just before serving to keep the topping vibrant and glossy.
  • Reheating or refreshing: If the texture has become a touch dense after refrigeration, whisk a small amount of cream cheese with a splash of milk to re-smooth the surface, then re-chill for a brief period before serving to restore the silkiness.

Fun Facts & Trivia

Delightful tidbits that enrich the experience of this dessert:

  • Cherries have a long-standing association with celebrations around the world, often used as symbols of abundance and happiness. Their vibrant color instantly evokes festivity and joy, making them a natural choice for a dessert that aims to impress.
  • Pistachios are among the oldest cultivated nuts, with a history stretching back thousands of years. They are celebrated for their distinctive green hue and pleasantly roasted aroma, which pairs wonderfully with creamy dairy-rich desserts.
  • The cheeseboard’s star ingredient, cream cheese, was popularized in the United States in the 19th century and became synonymous with luscious, spoonable desserts. When you blend it with citrus, vanilla, and fruit, you unlock a versatility that transcends regional boundaries.
  • Cheesecake’s global journey has produced many regional iterations—classic New York-style, Italian ricotta-based cheesecakes, and lighter European versions—each bringing its own texture and tilt. The Cherry Pistachio Cheesecake is a modern homage to that heritage, combining creamy filling with nuts and fruit in a contemporary presentation.
  • Color does more than please the eye here. The bright red hues of cherries against the pale cheesecake surface create a visual cue that prepares the palate for the sweet-tart flavors to come, making it as much a feast for the eyes as for the taste buds.

Ingredients

    Crust
    – 1 1/2 cups graham cracker crumbs (or digestive biscuits, finely crushed)
    → This crust forms the foundation of the cheesecake, providing a light, crunchy contrast to the creamy filling. Use finely crushed crumbs for an even, compact shell; mix with the sugar and melted butter until the texture resembles damp sand, then press firmly into a 9-inch springform pan. Bake the crust for 8–10 minutes before adding the filling if you prefer extra firmness; allow to cool slightly before filling. For gluten-free versions, substitute with gluten-free crackers and ensure they are finely ground.
    – 2 tablespoons granulated sugar
    → Adds a touch of sweetness to the crust to balance the biscuit flavor. Sprinkle the sugar over the crumbs to help with even distribution and consistency when mixing with the melted butter. If your crackers are already sweet, you can reduce or omit this sugar by taste.
    – 6 tablespoons unsalted butter, melted
    → The fat binds the crust into a cohesive, crumbly shell that holds up against the rich filling. Let the melted butter cool slightly before stirring into the crumbs to avoid soggy crusts; press the mixture firmly into the pan using the back of a spoon or a flat-bottomed glass to ensure an even layer. If you’re dairy-free, you can substitute with melted coconut oil, but note it will slightly alter flavor and texture.

    Filling
    – 4 (8-ounce) packages cream cheese, softened to room temperature
    → The creamy base of the cheesecake; softened cream cheese blends smoothly with the sugar to create a dense, velvety filling. Beat on low speed initially to avoid air pockets, then on medium until smooth. Do not overmix once the eggs are added, or the cake may crack. For ultra-smooth texture, ensure no lumps remain and all blocks are fully softened.
    – 3/4 cup granulated sugar
    → Sweetens the filling and helps achieve a balanced flavor with the tang from the dairy. Add gradually and mix until the mixture is light and creamy; overbeating after sugar is added can introduce air that may lead to cracks during baking. Adjust to taste if your cherries are very sweet or tart.
    – 1/2 cup sour cream
    → Adds tang, creaminess, and a touch of moisture that keeps the cheesecake from feeling dense. Use full-fat sour cream for best flavor and a glossy finish. Let sour cream come to room temperature and whisk before folding into the filling to maintain a smooth texture.
    – 1 teaspoon pure vanilla extract
    → Delivers the classic cheesecake aroma that rounds out the dairy richness. Use high-quality pure vanilla for depth; if you have vanilla beans, you can infuse the milk with a scraped bean for extra flavor. Avoid imitation vanilla if possible, as it can taste flat in rich dairy desserts.
    – 3 large eggs, at room temperature
    → Provide structure and binding to the filling. Add eggs one at a time, mixing just until incorporated after each addition to minimize air incorporation. Room temperature eggs blend more smoothly into the batter and prevent separation or cracking during baking. Do not overbeat after adding eggs.
    – 1 tablespoon all-purpose flour (or 2 teaspoons cornstarch)
    → Stabilizes the filling and helps it set with a smooth, crack-free surface. Sift the flour or cornstarch into the filling to avoid lumps, and fold in gently after the eggs are incorporated. If you prefer a lighter texture, you can omit flour or use a small amount of cornstarch but expect a slightly softer set.

    Cherry Sauce
    – 2 cups cherries, pitted (fresh or frozen)
    → The bright, tart-sweet topping that cuts the richness of the cheesecake. If using fresh cherries, select ripe fruit with a deep color; if using frozen, thaw and drain thoroughly to avoid a watery sauce. Chop larger cherries if desired for even distribution and a pronounced sauce.
    – 1/3 cup granulated sugar
    → Sweetens the cherry reduction and helps achieve a glossy, syrupy consistency as the sauce cooks. Taste as you go and adjust to your preferred sweetness, especially if your cherries are very sweet or tart. If using sweet cherries, you may reduce this a touch.
    – 1 tablespoon lemon juice
    → Brightens the cherry flavor and balances the sweetness. Add lemon juice toward the end of cooking to preserve brightness and avoid dulling the color. If you’re using bottled juice, adjust to taste since it might be sweeter or more acidic than fresh juice.
    – 1 teaspoon cornstarch, dissolved in 2 teaspoons water
    → Thickens the cherry sauce for a glossy, clingy topping that layers nicely over the cheesecake. Stir the slurry into the simmering cherries and cook until the sauce thickens to your desired consistency. For a looser sauce, you can reduce or omit the cornstarch; for a thicker glaze, cook a little longer while stirring.

    Pistachio Garnish
    – 1/2 cup shelled pistachios, roughly chopped, plus extra whole pistachios for garnish
    → Adds a nutty crunch and a complementary color to the cheesecake. Roughly chop to distribute bite-sized pieces throughout the topping and to contrast with the smooth cake. Reserve a few whole pistachios for decorative garnish along the edge or top for a professional presentation. For a more pronounced pistachio flavor, toast the chopped nuts in a dry skillet for 3–5 minutes before using.

    Optional Toppings
    – Whipped cream for serving (optional)
    → A light, airy contrast to the dense cheesecake. If using, whip cold cream with a touch of sugar and vanilla until soft peaks form, then dollop onto slices as desired. Keep the whipped cream refrigerated until serving and eat within a day for best texture; otherwise, it may separate or soften too much.

Instructions

  • Preheat your oven to 350°F (175°C) and prepare a 9-inch springform pan by greasing the interior or lining the bottom with parchment; if you plan to bake with a water bath, wrap the exterior with two layers of heavy-duty foil to prevent leaks.
  • Grind graham crackers (or digestive biscuits) into fine, even crumbs using a processor or by placing them in a resealable bag and crushing with a rolling pin; this creates a uniform crust that bakes evenly and holds together well under the filling.
  • Combine the graham cracker crumbs with 2 tablespoons granulated sugar in a medium bowl and whisk to distribute sweetness uniformly; even sugar distribution prevents pockets of sweetness and helps the crust set consistently as it bakes.
  • Stir in 6 tablespoons melted unsalted butter that has cooled slightly into the crumb mixture until the texture resembles damp sand and holds its shape when pressed; this binding fat is essential for a cohesive crust that layers nicely with the filling.
  • Press the crust firmly into the bottom and about 1 inch up the sides of the 9-inch springform pan using the flat bottom of a glass or the back of a spoon, applying steady pressure to create an even, compact shell that won’t crumble when the cheesecake is sliced.
  • Bake the crust for 8–10 minutes, then remove from the oven and let it cool on a rack; this brief bake sets the crust so it will support the filling and prevents it from becoming soggy when the cold filling is added.
  • Prepare the cherry sauce by combining 2 cups cherries, pitted, in a saucepan with 1/3 cup granulated sugar over medium heat; stir occasionally and allow the mixture to simmer until the sugars dissolve and the cherries release juices, creating a glossy base for the topping.
  • Make a cornstarch slurry by whisking 1 teaspoon cornstarch with 2 teaspoons water in a small bowl; this slurry will thicken the cherry sauce without leaving lumps when added to the hot fruit.
  • Stir in 1 tablespoon lemon juice to the cherry mixture for brightness, then whisk in the cornstarch slurry and continue to simmer gently until the sauce thickens to a nappe that coats a spoon; avoid over-thickening so the sauce remains pourable and glossy.
  • Toast the 1/2 cup roughly chopped pistachios in a dry skillet over medium heat for 3–5 minutes, stirring frequently, until fragrant and lightly browned; this enhances aroma and gives a deeper pistachio flavor and color to the garnish.
  • Set aside toasted pistachios for garnish and reserve a handful of whole pistachios to decorate the top of the cheesecake for a professional finish.
  • In a large mixer bowl, beat 4 (8-ounce) packages cream cheese that are softened to room temperature on low speed until smooth and free of lumps, then increase to medium and beat until creamy and uniform to create a luscious base for the filling.
  • Add 3/4 cup granulated sugar in a slow, steady stream while continuing to beat on medium until the mixture is light and fluffy, which helps to emulsify the fats and sugars for a silky texture without overworking the batter.
  • Beat in 1/2 cup sour cream and 1 teaspoon pure vanilla extract on low speed just until combined; the sour cream adds tang and moisture that keep the filling tender and glossy, while the vanilla deepens the dessert’s aroma.
  • With the mixer on low, add 3 large eggs one at a time, beating just until each egg is incorporated before adding the next; this preserves a smooth batter and minimizes air pockets that could cause cracks during baking.
  • Sift in 1 tablespoon all-purpose flour (or 2 teaspoons cornstarch) and fold gently into the filling until just combined; this stabilizer helps the cheesecake set with a crack-free surface while maintaining a rich, creamy mouthfeel.
  • Pour the filling over the cooled crust in the springform pan and smooth the surface with a spatula; then wrap the pan in two layers of heavy-duty foil to contain any leaks and place the pan in a larger roasting pan; pour hot water into the roasting pan halfway up the sides to create a gentle water bath for even baking and to minimize cracking.
  • Bake at 325°F (163°C) for 60–70 minutes, or until the center is slightly jiggly but the edges are set and lightly puffed; this controlled humidity and lower temperature prevent overbaking and cracking while ensuring a creamy center.
  • Turn off the oven, crack the door slightly, and let the cheesecake cool in the residual heat for 1 hour; this gradual cooling reduces thermal shock and helps prevent surface cracks.
  • Remove the foil and transfer the cheesecake to a rack to cool completely at room temperature, then refrigerate for at least 4 hours or overnight to achieve firm, sliceable consistency and full flavor development.
  • To finish, spoon the prepared cherry sauce over the chilled cheesecake in a decorative pattern or swirl it artfully over the surface; sprinkle the chopped pistachios evenly for texture and color, reserving a few whole pistachios to place at the edge or on top as a finished garnish.
  • Slice with a warmed knife (wipe blade between cuts) and serve chilled or slightly at room temperature; the contrast of the cool, dense cheesecake with the bright cherry sauce and crunchy pistachios creates a balanced sensory experience; offer optional whipped cream on the side for extra richness.

Notes

“These cherry pistachio cheesecake notes guide you to a perfectly balanced dessert, from a crisp crust to a velvety filling and glossy topping. Crust: bake the crust for 8–10 minutes and let it cool completely before filling to help prevent soggy edges; for gluten-free versions, substitute gluten-free crackers and grind until fine. Filling technique: ensure cream cheese is fully softened to room temperature, beat with sugar on low speed until smooth, then blend in sour cream and vanilla; add eggs one at a time, mixing just until incorporated to minimize air and cracks; sift in flour or cornstarch to help set the filling and keep it crack-free. Cherry sauce: simmer pitted cherries with sugar and lemon juice until the mixture is glossy and thickened to your liking; for a chunkier sauce, mash a portion of the berries; whisk in cornstarch slurry near the end to achieve the desired viscosity. Pistachio garnish: toast chopped pistachios 3–5 minutes for deeper flavor, then scatter through the topping and reserve a few whole nuts for decoration. Cooling and serving: allow the cheesecake to cool gradually in the turned-off oven for an hour, then refrigerate overnight for best texture; slice and serve chilled with whipped cream and extra pistachios or a drizzle of cherry sauce. Make-ahead and storage: this cheesecake can be made 1–2 days in advance or frozen in slices for up to 1 month; thaw in the fridge before serving. Food safety and tips: use full-fat dairy for richness, keep ingredients refrigerated, and avoid overmixing after eggs are added to preserve a smooth, crack-free surface.”

Tips

Tips for Cherry Pistachio Cheesecake

General make-ahead and stability

  • Bring cream cheese, sour cream, and eggs to room temperature before mixing to ensure a silky, lump-free filling.
  • Bake the cheesecake at a gentle temperature (about 325°F / 165°C). If your oven runs hot, use an oven thermometer to avoid cracks from heat spikes.
  • To minimize cracking, bake in a water bath: wrap the springform pan tightly with heavy-duty foil (two layers) and place it in a larger baking dish filled with hot water halfway up the sides of the pan.
  • Mix the filling on low speed, then only blend to smoothness. After adding eggs, mix just until incorporated to prevent air bubbles that can crack during baking.

Crust and pan prep

  • Press the finely crushed crumbs firmly into the pan using the back of a spoon or the flat bottom of a glass for an even, compact shell that doesn’t crumble when sliced.
  • Pre-bake the crust for 8–10 minutes for extra firmness; cool slightly before adding the filling. If you’re gluten-free, use finely ground gluten-free crackers and consider a light press to mimic a traditional crust.
  • Line the pan bottom with parchment for easy release and clean slicing.

Filling techniques

  • Beat the cream cheese with sugar and sour cream until completely smooth, scraping the bowl as needed to avoid lumps.
  • Add vanilla, then the eggs one at a time, mixing on low and stopping as soon as each addition is incorporated.
  • Sift the flour (or cornstarch) into the filling to prevent lumps, then fold in gently after the eggs are incorporated.
  • If you want a ultra-smooth texture, strain the filling through a fine sieve after mixing and before pouring into the crust.
  • Fill the crust to about 2/3 full to allow space for a gentle rise without overflowing the pan.

Cherry sauce

  • Thaw frozen cherries completely and pat dry to avoid a watery sauce. Fresh cherries should be ripe and firm for best flavor.
  • Taste the sauce as it cooks and adjust sweetness with sugar; add lemon juice toward the end to keep brightness.
  • Stir in the cornstarch slurry gradually and simmer until the sauce coats the back of a spoon. If you prefer a looser sauce, cook a bit less; for a thicker glaze, simmer a bit longer.

Pistachio garnish and finishing touches

  • Toast pistachios in a dry skillet for 3–5 minutes to deepen their nutty flavor before chopping. This also enhances color and aroma.
  • Reserve a few whole pistachios for decorative garnish around the edge or on top for a professional look.
  • Mix rough chopped pistachios into the topping and sprinkle extra on the finished slices for texture contrast.

Serving and storage

  • Chill the cheesecake for at least 4 hours, ideally overnight, to ensure clean slicing and firm, creamy texture.
  • When slicing, dip the blade in hot water and wipe clean between cuts for neat, even slices.
  • Serve with a dollop of whipped cream if desired (optional). Whipped cream should be kept cold and used within a day for best texture.
  • Store leftovers covered in the refrigerator for up to 3–4 days, or freeze individual slices for longer storage (wrap well to prevent freezer burn).

FAQ

What is Cherry Pistachio Cheesecake?

A creamy cheesecake layered with a pistachio crust and swirls of chopped cherries, finished with a pistachio and cherry topping. It blends the nutty flavor of pistachio with bright cherry brightness for a indulgent dessert.

What ingredients do I need?

For the crust:

  • 1 1/2 cups graham cracker crumbs
  • 1/3 cup finely chopped pistachios
  • 4 tablespoons unsalted butter, melted
  • 2 tablespoons granulated sugar (optional)

For the filling:

  • 3 cups cream cheese (about 24 oz), softened
  • 3/4 cup granulated sugar
  • 1/2 cup sour cream
  • 3 large eggs
  • 1 teaspoon vanilla extract
  • 1 tablespoon lemon zest
  • 1 cup chopped cherries (fresh or thawed frozen)
  • 1/2 cup chopped pistachios (for garnish or swirl)
What pan size and bake time should I use?

Use a 9-inch (23 cm) springform pan. Bake at 325°F (165°C) for about 60–70 minutes, or until the center is set with a slight jiggle. After baking, turn off the oven and let the cheesecake cool inside with the door ajar for about an hour, then refrigerate for several hours or overnight.

How do I make the crust?

1) Mix graham cracker crumbs, chopped pistachios, melted butter, and sugar (if using) until just combined. 2) Press the mixture firmly into the bottom and slightly up the sides of a 9-inch springform pan. 3) Optional: bake the crust at 350°F (175°C) for 8–10 minutes to set, then cool before filling. If you prefer no-bake, chill the crust just until set.

How do I make the cheesecake filling?

1) In a mixer, beat softened cream cheese and sugar until smooth and creamy. 2) Beat in sour cream, vanilla, and lemon zest. 3) Add eggs one at a time, mixing on low just until combined. 4) Fold in chopped cherries and, if desired, a portion of chopped pistachios. 5) Pour filling over the crust, tap to release air, and swirl in extra cherries/pistachios if desired. 6) Bake as directed and let cool gradually.

Can I use frozen or fresh cherries?

Both work. Use fresh cherries or thawed frozen cherries. If using frozen, drain well and pat dry to avoid extra moisture in the batter. If using canned cherries, drain well and pat dry before adding.

How should I toast the pistachios?

Spread chopped pistachios on a baking sheet and bake at 350°F (175°C) for 5–7 minutes, stirring once, until fragrant and lightly browned. Let cool completely before sprinkling on top or folding into the filling.

How can I prevent cracks in the cheesecake?

Tips to reduce cracking: use room-temperature ingredients, mix just until combined, avoid overbaking, and consider baking in a water bath (wrap the pan in foil and place in a larger pan with hot water). Let the cheesecake cool gradually in the oven with the door ajar, then refrigerate overnight.

How should I store and serve the cheesecake?

Keep it refrigerated, covered, for up to 4–5 days. Slice with a warm, sharp knife and serve with additional cherries or a light cherry compote. For a colder texture, refrigerate before slicing; for a softer texture, let it sit at room temperature for 15–20 minutes before serving.

Can I make this ahead or freeze it?

Yes. You can make the cheesecake up to 1–2 days in advance and keep it refrigerated. Freezing is possible: wrap slices tightly and freeze for 1–2 months. Thaw in the refrigerator overnight and bring to room temperature before serving. Crust and toppings may be best added fresh if freezing.

Introduction / Hook

Imagine a slice of thick, golden toast that crackles softly at the edges, its center a warm, inviting pocket of bold flavor. The moment you bite in, a chorus of contrasts explodes on your tongue: the first touch is smoky and savory from crispy bacon, then a whisper of peppery buffalo heat, followed by the sweet, caramel-like kiss of maple that lingers on the lips. This is Buffalo Maple Bacon Stuffed Toast—a modern brunch-star, a game-day crowd-pleaser, and a comforting, all-in-one indulgence that makes ordinary morning rituals feel like a special occasion. The aroma alone could lure a sleepy crowd from their seats—snappy toast meeting a luxurious, gooey center, all kissed by a glossy glaze of buffalo heat and maple sweetness. It’s not just a sandwich; it’s a celebration of texture and temperature that transforms simple pantry staples into something boldly memorable. Whether you’re feeding a hungry family on a weekend morning or tempting guests at a casual party, this dish speaks in a language of sizzle, sweetness, and savory satisfaction.

The Story Behind the Dish

The idea of stuffing toast with savory fillings is a timeless brunch instinct, but Buffalo Maple Bacon Stuffed Toast brings two quintessential American flavors into a single, radiant package. The Buffalo influence traces its roots to the legendary wings of Buffalo, New York, where, in the 1960s, a team of cooks transformed hot sauce into a cultural sensation crafted for late-night snacking and sizzling, bold meals. The tang, heat, and vibrant bite of buffalo sauce became a versatile backbone for countless dishes beyond wings, inviting cooks to experiment with meats, cheeses, and starchy bases. Maple bacon, on the other hand, embodies a sweeter, smoky tradition deeply cherished in breakfasts and comfort foods across North America. The maple gloss on bacon evokes campfires, maple trees tapping in early spring, and the cozy aroma of winter kitchens. When you blend those two iconic flavors with toasted bread as the vessel, you don’t just create a sandwich—you forge a memory. This dish reflects how home cooks often merge comfort and excitement into a single, show-stopping bite.

In many households, breakfast and casual gatherings share a creative kitchen DNA: repurposing leftovers with a twist, layering flavors that surprise the palate, and presenting something that looks as good as it tastes. Buffalo Maple Bacon Stuffed Toast captures that spirit. It’s a celebration of contrasts—crispy edges with a soft, flavorful interior; tart heat balanced by sugary maple; salinity from bacon tempered by the creamy, mellow notes that soften the punch. The result is both familiar and novel—a breakfast-for-anytime slab that feels indulgent without becoming overwhelming. It’s the kind of dish that invites conversation: Was it the crackle of the crust or the ribbon of maple that lingers on your tongue? Was the heat milder or hotter than you expected? The dish becomes a talking point as much as a treat, encouraging you to experiment with toppings, textures, and accompaniments while keeping a core of comforting, nostalgic flavors front and center.

Why You’ll Love This Recipe

  • Bold flavor without complexity: a confident trio of buffalo heat, smoky bacon, and maple sweetness that plays beautifully with the toasty bread.
  • Textural contrast that delights: a crispy crust giving way to a gooey, cheesy interior, with chewy bits of bacon for bite.
  • Versatile for different occasions: perfect for weekend brunch, a playful appetizer at a casual gathering, or a lazy Sunday lunch.
  • Comforting yet exciting: familiar flavors that feel cozy, elevated by a touch of heat and a glossy maple glaze.
  • Customizable to fit dietary needs: easy to adapt with gluten-free bread, plant-based proteins, or dairy-free creaminess.
  • Make-ahead friendly: components or assembled boards can be prepped in advance, saving time when guests arrive.
  • Impressive presentation: slices that look restaurant-worthy with minimal effort, ideal for sharing on a platter or board.

Flavor Profile & Texture

The flavor profile of Buffalo Maple Bacon Stuffed Toast is a deliberate symphony—one that balances heat, sweetness, salt, and creamy richness. The buffalo component delivers a clean, peppery heat with a tangy edge that wakes up the palate and lingers with a bright, vinegary finish. Maple, in its soft, amber-sweet grace, coats each bite with warmth and complexity, harmonizing rather than clashing with the heat. The bacon contributes a smoky depth and a crisp, chewy bite that punctuates every mouthful, while any cheese or creamy base adds a mellow, velvety mouthfeel that binds the flavors together. The bread itself is a stage for all this; a sturdy slice or loaf, toasted to a golden crust, offers a satisfying crunch that contrasts the tender, flavorful core. If you’re lucky, a light sheen of glaze from the buffalo-maple combination coats the bread, delivering a glossy finish and a final moment of sweetness that softens the heat just enough for lingering satisfaction.

Texture-wise, you’ll experience a delightfully crisp exterior and a creamy, melty interior. The filling, enriched by a gentle bonus of creaminess, oozes just enough to feel indulgent without overwhelming the bread’s structure. The bacon bits offer sporadic bursts of salt and chew, reinforcing the savory backbone of the dish, while the buffalo sauce adds a dynamic brightness—an aroma that’s equal parts zesty and comforting. The maple glaze soaks ever so slightly into the bread’s surface, leaving a kiss of sweetness that perfectly balances the savory warmth. The combined effect is a bite-sized moment of celebration: a symphony of texture and taste that invites you to take another slice, then another, until the plate looks a little too bare to resist filling again.

Occasions & Pairings

Buffalo Maple Bacon Stuffed Toast shines in a variety of contexts, from casual mornings to festive gatherings. It’s an ideal centerpiece for weekend brunches when guests crave something beyond the usual eggs; it’s equally at home as a hearty party canapé or a fun, low-effort appetizer at game-day celebrations. Its versatility makes it a crowd-pleaser for both picky eaters and adventurous tasters alike. If you’re serving it as a brunch staple, pair it with a bright citrus salad, a platter of fresh fruit, or a simple yogurt parfait to balance the flavors and keep the menu light. For game-day or casual gatherings, set out celery sticks and a tangy blue-cheese or ranch dip, which echo the classic buffalo pairing while offering a cool contrast to the heat. A crisp, cold beer—lager or pale ale—complements the smoky, maple-forward profile, while a sparkling cider or a light white wine can elevate the dish without overwhelming its bold character.

  • Brunch occasions: weekend gatherings, birthdays, or leisurely Sunday mornings.
  • Casual parties and game days: a standout appetizer that travels well on a serving board.
  • Pairing notes: light, refreshing sides like a citrus salad, quick pickles, or a goat cheese-studded greens plate.
  • Drink pairings: a crisp lager, an IPA with citrus notes, or a chilled sparkling cider.
  • Sweet-savory balance: consider a small maple-glazed fruit compote on the side for a contrasting finish.

Tips, Variations & Substitutions

Flexibility is part of the charm with a dish like this, so feel free to tailor it to your pantry, dietary needs, or flavor mood. Here are ideas to inspire your own version:

  • Vegan or dairy-free: swap to plant-based cream cheese or cashew-based cream, and use a vegan bacon substitute with maple for the smoky bite. Choose dairy-free cheese blends if you like a melty interior without dairy.
  • Gluten-free option: use a sturdy gluten-free bread that toasts well and holds up to the stuffing without crumbling.
  • Spice level variations: for a milder version, reduce buffalo sauce with a touch of honey; for extra heat, add a dash of cayenne or a hotter hot sauce to the maple glaze.
  • Alternative proteins: turkey bacon or mushrooms sautéed with a touch of salt can provide a similar savory backbone; for vegetarians, consider a robust, umami-rich mushroom mix with miso glaze.
  • Different breads: brioche or sourdough slices give a richer, crispier base; rye can add a deeper, malty note that pairs nicely with maple.
  • Cheesy options: a soft cream cheese spread folded with herbs creates a silkier interior; a sharp cheddar or pepper jack adds a more pronounced bite.
  • Regional twists: replace maple with a brown-butter maple glaze for a nuttier aroma; incorporate a tangy blue cheese crumble for a classic buffalo finish.
  • Make-it-ahead ideas: assemble the stuffed toast on a platter, cover, and refrigerate up to 24 hours. Bake or toast when ready to serve, allowing flavors to mingle.

Storage & Make-Ahead Ideas

Like many toast-based creations, this dish shines when you plan a little in advance. If you’re cooking for a crowd, you can prepare components ahead of time and assemble just before serving to preserve texture and freshness. For best results, consider these tips:

  • Leftovers: store cooled slices in an airtight container in the fridge for up to 2 days. Reheat in an oven or toaster oven to regain crispiness, avoiding microwaving if possible, which can soften the crust.
  • Freezing: avoid freezing fully assembled slices, as the texture of the bread can degrade after thawing. If you must, freeze the components separately (bread slices and filling) and reassemble to toast after thawing for best texture.
  • Make-ahead strategies: prepare the bacon (or alternative protein) and the maple buffalo glaze ahead of time. Keep the glaze separate and brush onto the assembled toast just before serving to maintain glaze shine and a fresh flavor burst.
  • Storage for brunch spreads: lay out a few toasted bread rounds on a platter with a warmed filling in a small ramekin or spoon, allowing guests to assemble their own stuffed toast on the spot for a fresh, interactive experience.

Fun Facts & Trivia

Delightful bite-sized trivia to garnish your conversation as you serve:

  • The term “Buffalo” in Buffalo sauce is not about the animal but about the city where the spicy creation was born, in a setting that embraced bold flavors and quick, satisfying meals.
  • Maple syrup has deep roots in North American culinary history, with maple-flavored products and traditions weaving into breakfasts and desserts for centuries, making it an ideal partner for smoky, savory foods.
  • Toast has been a staple across cultures for centuries, serving as a canvas for everything from delicate toppings to hearty fillings; stuffed toast is a modern homage to this timeless medium.
  • Combining sweet and spicy is a classic technique in comfort foods, because maple’s warmth tempers heat while enhancing caramelized flavors, leading to a more balanced, lingering finish on the palate.
  • When pairing with beverages, the choice often depends on the heat level: lighter lagers contrast with buffalo heat, while a slightly sweeter cider can echo maple notes in a harmonious way.

Ingredients

    – Bread Base
    – 4 thick-cut slices sturdy bread (sourdough or country loaf)
    → These slices form the vessel for the stuffed toast. Use bread that toasts well and can hold the filling without tearing. For a softer interior, use day-old bread; for more bite, use fresh.
    – 1-2 tbsp olive oil, for brushing the bread
    → Lightly brush or rub with oil to promote browning and crisp edges when toasting; butter can be used for richer flavor.

    – Buffalo Maple Bacon Filling
    – 6 slices maple bacon, cooked crisp and chopped
    → Provides smoky, sweet-savory crunch that will distribute through the filling. Cook until crisp, drain on paper towels, then dice finely so pieces mix evenly inside pockets.
    – 8 oz cream cheese, softened
    → Acts as the binding and creamy base for the filling; soften to room temperature so it blends smoothly with buffalo sauce. If you want lighter texture, mix in a tablespoon of Greek yogurt.
    – 1/4 cup buffalo sauce
    → Delivers the signature buffalo flavor and heat; adjust to your heat tolerance by adding gradually and tasting as you go. Stir into cream cheese until evenly combined.

    – Sauce & Assembly
    – 2 tbsp unsalted butter, melted
    → Used to emulsify with buffalo sauce and brush on the outside of the stuffed toast for even browning and shine, or to mix into the filling for a smoother texture.
    – Salt and black pepper, to taste
    → Season the filling and bread to balance flavors; start with a small pinch and adjust after mixing; cream cheese will dampen saltiness, so taste before finishing.

    – Optional Add-ins
    – 1/4 cup blue cheese crumbles (optional)
    → Adds tangy creaminess that pairs beautifully with buffalo; crumble and fold in, or sprinkle on top before finishing for extra bite.
    – 1/4 cup shredded cheddar cheese (optional)
    → Extra melt and cheesy mouthfeel; fold into the filling if you want a cheesier finish, or sprinkle on top during final toasting for a crust.
    – 2 tbsp chopped fresh parsley or chives (optional)
    → For color and a light herbal note; sprinkle on after cooking to maintain bright flavor and aroma.

    – Garnish & Finish
    – Extra buffalo sauce for dipping or brushing, to taste (optional)
    → Serve on the side for those who like extra heat; keep sauce warm in a small bowl for dipping.
    – Fresh parsley leaves or additional chopped chives (optional)
    → A finishing touch that adds color and aroma; scatter on top just before serving.

Instructions

  • Preheat your oven to 350°F (175°C) and line a baking sheet with parchment paper or a silicone mat; This ensures even heat distribution and prevents the stuffed toast from sticking as the filling melts and the bread crisps.
  • → A stable, non-stick surface prevents tearing when you handle stuffed slices and makes cleanup easier.

  • Trim or level the bread slices lightly if needed and then cut a wide pocket into the top side of each slice using a sharp serrated knife, stopping about 1/2 inch from the bottom and leaving a sturdy crust intact; This creates a hollow cavity large enough to hold the filling without breaking the bread apart during baking.
  • → The pocket directs the filling into the center while maintaining the slice’s structural integrity for slicing later.

  • Gently brush both sides of each slice with olive oil using a pastry brush, coating evenly; This promotes browning, crisp edges, and helps the bread resist becoming soggy from the filling during baking.
  • → Oil conducts heat more evenly and helps achieve a uniform golden crust with a slight sheen.

  • Cook the maple bacon until crisp in a skillet over medium heat, then transfer to paper towels to drain; Once cooled, chop the bacon finely into small pieces (about 1/4 inch) so it distributes evenly throughout the filling; This delivers smoky sweetness and prevents large bites that disrupt the texture of the toast.
  • → Crisp bacon holds its shape and provides a crunchy contrast within the creamy filling.

  • In a medium bowl, beat the softened cream cheese with the buffalo sauce until completely smooth and glossy; If the mixture is too thick, microwave for 5–10 seconds to loosen and whisk again; This creates a cohesive, spreadable base that bonds with the bacon and delivers even heat distribution in the pockets.
  • → A uniform emulsion ensures the buffalo flavor is well distributed and prevents lumps.

  • Season the buffalo cream cheese mixture with salt and black pepper to taste, then fold the cooled maple bacon pieces into the filling; If using optional add-ins, fold in blue cheese crumbles and/or shredded cheddar at this stage; This builds balance and depth of flavor with tang, saltiness, and melt.
  • → Remember that cream cheese already adds saltiness, so taste and adjust before stuffing the bread.

  • Fill each bread pocket with the buffalo cream cheese and maple bacon mixture, pressing gently with the back of a spoon to level the filling and ensure it sits flush against the interior walls; This prevents gaps that could ooze during baking and helps even heating.
  • → A compact filling ensures each bite has consistent flavor and texture.

  • If desired, sprinkle an additional 1/4 cup shredded cheddar over the top of each stuffed slice; The extra cheese will melt into a bubbly crust as the toast bakes, adding extra melt and richness; This step is optional based on your cheese preference.
  • → A cheesy crust provides a satisfying bite and visual appeal.

  • Brush the exterior of the stuffed slices with the melted butter, using a clean pastry brush; This enhances browning, adds richness, and helps create a glossy finish as they bake; If you prefer a lighter surface, you can skip this, but butter tends to yield a crisper crust.
  • → Butter emulsifies with the pan heat to promote even browning and a tempting sheen.

  • Bake the assembled stuffed toast on the prepared sheet in the preheated oven for 12–16 minutes, or until the bread edges are golden and the filling is hot and starting to bubble; If the tops brown too quickly, tent with foil to avoid burning while the centers finish cooking.
  • → The timing ensures the filling reaches safe temperature and the bread develops a crisp, golden exterior without drying out the interior.

  • Remove from the oven and let the stuffed toast rest on the sheet for 3–5 minutes; This brief rest allows the filling to set slightly, making slicing easier and preventing molten cheese from squirting out.
  • → Resting helps maintain the structure of the pocketed bread for clean servings.

  • Slice each stuffed toast in half or into manageable portions and serve with extra buffalo sauce on the side for dipping; Garnish with fresh parsley leaves or chopped chives to add color and a bright herbal note just before serving; These finishing touches elevate presentation and aroma.
  • → A vibrant finish makes the dish more appealing and adds a fresh contrast to the rich filling.

Notes

This Buffalo Maple Bacon Stuffed Toast is a bold, crowd-pleasing savory breakfast or brunch option featuring crisp maple bacon folded into a creamy buffalo-spiked filling, sandwiched between sturdy slices of toasted bread. Customize it by using your preferred bread (sourdough or country loaf for texture, or gluten-free bread for a gluten-free version) and by adjusting the buffalo sauce to taste—start with 1/4 cup in the filling and add more in small increments. The filling comes together quickly: whisk the softened cream cheese until smooth, blend in the buffalo sauce, and fold in the chopped bacon. Optional add-ins like blue cheese crumbles or shredded cheddar can be folded into the mix for extra tang and melt. For assembly, brush the bread with olive oil, toast the edges to golden and crisp, then press the filling between two slices; finish by brushing the outside with melted butter and giving it a final toast so the exterior is crisp and the filling is warm. Serve with extra buffalo sauce on the side and a sprinkle of fresh parsley or chives for color. Leftovers can be refrigerated for 1–2 days and reheated in a 375°F oven or toaster oven until hot and bubbly. If you want a lighter or dairy-free option, substitute part of the cream cheese with Greek yogurt or a dairy-free cream cheese. For gluten intolerance, always use certified gluten-free bread and check labels on any condiments used.

Tips

Tips for Buffalo Maple Bacon Stuffed Toast

  • Choose the right bread: sturdy slices like sourdough or country loaf toast well and hold their structure when stuffed. Day-old bread toasts more evenly; use fresh bread for more bite.
  • Toasting method: brush both sides with olive oil and toast lightly before assembly. This creates a golden crust that holds up to the filling and helps prevent sogginess.
  • Buffalo sauce balance: mix buffalo sauce into the softened cream cheese until completely smooth. For a milder version, start with 2 tablespoons and taste as you go, adding more gradually.
  • Filling texture: chill the filling slightly if it’s too soft or runny. This makes it easier to fill the bread pockets and reduces leakage during cooking.
  • Distribute bacon evenly: chop the maple bacon finely so pieces distribute evenly in each bite. Reserve a small amount to tuck into the edges for extra crispness if desired.
  • Pocket technique: if you want a more stuffed result, cut a shallow pocket in the side of each bread slice with a thin sharp knife (do not cut all the way through). Spoon some filling into the pocket, press gently to seal, and repeat. This helps keep the filling contained.
  • Cheese options: the cream cheese base is creamy, but optional blue cheese or shredded cheddar can be folded in for extra tang and melt. When using blue cheese, crumble finely to distribute flavor evenly.
  • Butter vs oil on exterior: melted butter brushed on the outside yields a richer, crisper crust; olive oil is lighter. You can mix a little butter into the filling for extra silkiness if desired.
  • Sauce application: reserve a bit of buffalo sauce to brush on the finished toasts for an extra kick, but avoid soaking the bread to prevent sogginess.
  • Cooking method: bake at 375-400°F (190-205°C) for 12-15 minutes or until the bread is golden and the filling is heated through. If using a skillet, cook over medium heat and finish with a brief under-broil or high-heat finish to brown the top.
  • Finish and garnish: scatter chopped parsley or chives after cooking for color and aroma. Serve extra buffalo sauce on the side for dipping if desired.
  • Make-ahead tips: prepare the filling up to a day ahead and refrigerate; assemble just before cooking to maintain bread texture. Leftovers refrigerate 1-2 days and reheat in the oven to restore crispness.

FAQ

What is Buffalo Maple Bacon Stuffed Toast?

Buffalo Maple Bacon Stuffed Toast is a savory snack or breakfast bite where thick-cut bread is filled with a creamy, spicy buffalo and maple bacon filling, then toasted or baked until the edges are crisp and the center is melty.

What ingredients do I need to make it?

Common ingredients:

  • Thick-cut sandwich bread or Texas toast
  • Cream cheese or softened cheddar
  • Buffalo sauce or hot sauce
  • Maple-glazed bacon or regular bacon with maple syrup
  • Shredded cheese (optional, such as cheddar or mozzarella)
  • Butter (for toasting)
  • Maple syrup or honey (to boost maple flavor)
  • Optional toppings: sliced green onions, celery sticks for dipping
Can I prepare this ahead of time?

Yes. You can assemble the stuffed bread and keep it unbaked in the refrigerator for up to 8–24 hours. Bake when ready to serve. If you’ve already baked it, store leftovers in the fridge and reheat in a warm oven or toaster oven.

How do I assemble the stuffed toast?

Options vary, but a common method:

  • Cut a pocket or slice a thick piece to create a well for filling.
  • Mix softened cream cheese with a splash of buffalo sauce for heat and creaminess.
  • Fill the pocket with the buffalo-cream cheese mixture and maple-bacon bits or crumbled bacon tossed with maple syrup.
  • Top with a little shredded cheese if desired, then seal and spread a thin layer of butter on the outside for extra crunch.
How long and at what temperature should I cook it?

Preheat the oven to about 375–400°F (190–200°C). Bake on a sheet pan for 12–15 minutes, or until the bread is golden and the filling is melty. If you like extra color, broil for an additional 1–2 minutes watchfully.

Alternative: in a toaster oven or air fryer, cook at 375°F (190°C) for about 8–12 minutes depending on thickness.

How spicy is it, and can I adjust the heat?

The heat level comes from the buffalo sauce. To adjust:

  • Use a milder buffalo sauce or mix in a touch of honey or maple syrup for sweetness with less heat.
  • For extra heat, add a few extra dashes of hot sauce or use a hotter buffalo blend.
  • Serve with ranch or blue cheese dip for cooling contrast.
Can I make a gluten-free version?

Yes. Use a good-quality gluten-free bread. Check all sauces and bacon labels to ensure they’re gluten-free and free from cross-contamination. Cooking surfaces and utensils should be clean if you have gluten sensitivities.

Can I make a vegetarian version?

Absolutely. Options include:

  • Replace bacon with vegetarian bacon or tempeh bacon and use maple syrup as is.
  • Use buffalo-flavored cauliflower or chickpeas as the filling base with cream cheese and cheese.
  • Adjust seasonings to taste and add extra veggies like bell peppers for texture.
How should I store leftovers?

Store cooled leftovers in an airtight container in the refrigerator for 2–3 days. Reheat in a 350°F (175°C) oven or toaster oven until warmed through and the edges are crisp again. Freezing is not ideal for this dish, as texture may change after thawing.

What are some serving suggestions?

Serve Buffalo Maple Bacon Stuffed Toast with:

  • Celery sticks and ranch or blue cheese dip
  • Extra maple syrup for drizzle
  • A simple side salad or fresh fruit
  • Optional toppings like sliced green onions or chopped chives for brightness
Any tips for achieving the best texture and flavor?
  • Use thick-cut bread for a sturdy pocket and good structure when stuffing.
  • Butter the outside lightly to promote browning and crispness.
  • Pre-cook the bacon with a touch of maple syrup if you want a stronger maple glaze.
  • Make sure the filling isn’t too wet; adjust with a little extra cheese if needed to prevent sogginess.

Introduction / Hook

Imagine a kitchen that smells like sun-warmed tomatoes, fresh basil, and the soft kiss of olive oil. A skillet glows with a chorus of colors—ruby-red sauce, pale beige chicken, emerald herbs—and every inhale pulls you closer to a table where family stories are told as loudly as the flavors sing. Chicken Pizzaiola is not just a dish; it’s a memory in the making. This humble, deeply satisfying centerpiece brings the warmth of coastal Italian cooking into your home: lean, succulent chicken braised in a bright, aromatically infused sauce that feels both rustic and refined. As the sauce simmers, you’ll hear the sizzle of the pan, you’ll smell garlic awakening in the heat, and you’ll imagine sunlit shores where citrus groves meet terracotta roofs. When you finally serve it, each bite offers a balance of tenderness, brightness, and a gentle brininess from olives and capers—a comforting, uplifting experience that feels like a hug on a plate.

What makes Chicken Pizzaiola so special isn’t just the way it tastes—though it’s undeniably delicious. It’s the way it invites you to slow down, savor, and share. In a single skillet, you harness the bright acidity of tomatoes, the peppery lift of oregano, and the savory richness that only a good olive oil can deliver. The dish is a celebration of everyday ingredients transformed through a simple method: sear, simmer, and finish with fresh herbs. It’s weeknight-friendly but refined enough for weekend company. It’s bold enough to stand up to crusty bread or a bed of pasta, yet gentle enough to pair with polenta or steamed greens. And because it’s built on pantry-friendly staples, it’s as comforting to cook as it is satisfying to eat. Welcome to a meal that makes the ordinary feel extraordinary, one saucy, tender bite at a time.

The Story Behind the Dish

The name “pizzaiola” echoes the craft of the pizza maker—the skilled pizzaiolo who would often improvise dishes in the heat of a bustling kitchen. In many Italian families, the kitchen is a living museum where food tells stories of place, season, and memory. The tradition of cooking meat in a bright, tomato-forward sauce with a kiss of olives and capers grew out of southern and central regions where tomatoes, garlic, and herbs mingle with a love of bold, expressive flavors. Chicken Pizzaiola embodies that regional spirit: it’s a dish born from practical home cooking, designed to stretch a modest ingredient into something generous and comforting.

Historical threads whisper of trattorias and rural households where a chicken leg or breast would be swiftly seared and then finished in a simmering, aromatically layered sauce. The technique is deceptively simple, but it yields a depth of flavor that feels almost celebratory. Tomatoes, whether in a passata, fresh purée, or a rustic chunk, provide brightness and body. Garlic adds warmth and a subtle bite, while dried oregano and fresh basil echo the sun-drenched herbs of the Mediterranean. Olives and capers bring a briny lift that keeps the dish from tipping too sweet, a reminder of the ocean’s proximity and the farm-to-table sensibilities that define Italian home cooking.

Beyond its culinary roots, Chicken Pizzaiola has traveled with Italian families across continents. Each cook adds a personal touch—maybe a splash of white wine to soften the sauce, a pinch of red pepper flakes for warmth, or a handful of sliced mushrooms for earthiness. The dish becomes a canvas for memory-making: a Sunday supper with cousins who tell old stories, a weeknight dinner after a long day, or a holiday centerpiece that somehow feels both familiar and special. It’s comfort with character, a dish that invites conversation as it invites appetite.

Why You’ll Love This Recipe

  • Quick to come together: a single skillet, a handful of minutes to sear, then a gentle simmer that does the rest.
  • Effortless elegance: bright tomato flavors, herbaceous aroma, and a silky texture that feels polished.
  • Versatile pairing options: works beautifully with crusty bread, creamy polenta, or a bed of al dente pasta.
  • Comforting yet vibrant: a balance of heartiness from the chicken and brightness from the tomato-based sauce.
  • Family-friendly and crowd-pleasing: simple ingredients, universally appealing flavors that kids and adults enjoy alike.
  • Make-ahead friendly: leftovers taste even better as flavors meld, making it ideal for meal prep.
  • Customizable to suit dietary needs: adaptable for gluten-free meals when served with appropriate sides; dairy-free variations are easily achievable with smart substitutions.
  • Historically rich and culturally grounded: a dish that connects you to Italian cooking traditions while remaining approachable for modern home kitchens.

Flavor Profile & Texture

Picture tender chicken steeped in a sauce that feels bright and comforting at the same time. The first bite delivers the softness of the meat, its natural sweetness coaxed to the surface by a gentle sear. The sauce—rich, slightly thickened, and alive with tomato’s tang—wraps around the chicken like a warm, velvety scarf. Aromatics sneak through in waves: garlic offers a savory warmth that lingers; oregano provides a grassy, sun-kissed note that borrows from the Mediterranean air; and a handful of fresh herbs, such as basil, finish with a lift that feels almost citrusy in its brightness.

The textural harmony is key: the chicken remains succulent and juicy, while the sauce carries a silkiness that clings to every bite. Olives add a satisfying bite and a salty depth that counterbalances the natural sweetness of tomatoes, while capers tuck in pockets of tang and surprise. The overall mouthfeel is cushiony and comforting, with a glistening sheen from olive oil that makes the dish feel luxurious without being heavy. Each element plays its part: the acidity of the tomato brightens the palate, the olive oil yields a glossy richness, and the herbs deliver that final aromatic kiss. The result is a sauce that feels both rustic and refined—picture a home kitchen meeting a trattoria kitchen, where simplicity becomes sophistication through careful balance and calm, unhurried simmering.

Texture also evolves as the dish sits. A brief rest allows the flavors to mingle more deeply, while the edges of the sauce cling to the chicken, creating that satisfying bite where meat, sauce, and a hint of briny bite converge. This is a dish that rewards patience in the pan and generosity at the table: a little more simmering time deepens the sauce’s character, while a quick sear keeps the chicken pleasantly reassuring rather than soggy.

Occasions & Pairings

This dish shines in a variety of settings, from weekday dinners that feel special to weekend gatherings where you want something comforting yet impressive. Consider these occasions and pairing ideas to elevate your experience:

  • Weeknight comfort: a cozy, fast dinner after a busy day, paired with crusty bread or a light pasta like spaghetti aglio e olio to soak up the sauce.
  • Sunday family meal: serve with creamy polenta or soft mashed potatoes to soak up every last drop of sauce, along with a simple green salad.
  • Casual dinner parties: the dish’s uncomplicated beauty makes it a conversation starter as guests admire the glossy sauce and aroma.
  • Romantic evenings: pair with a glass of medium-bodied red wine, such as a Chianti or a Grenache, and finish with a light dessert that won’t overwhelm the palate.
  • Holiday tables: use it as a comforting centerpiece that contrasts with roasted vegetables, citrusy salads, or a rustic bread assortment.

Suggested pairings to complement the dish:

  • Starch options: toasted ciabatta or a serving of polenta creates a comforting bed for the sauce; al dente pasta like fettuccine or pappardelle lets the sauce cling beautifully.
  • Greens and veggies: sautéed spinach, sautéed Swiss chard, or roasted peppers provide color and freshness to balance the richness.
  • Bread: a slice of rustic sourdough or crusty country bread makes it easy to scoop up the last kiss of sauce.
  • Wine pairings: a bright, fruit-forward white could work for lighter versions; otherwise, a medium-bodied red with moderate acidity and soft tannins pairs wonderfully.
  • Dessert: a light citrus-forward dessert or a simple almond biscotti to cleanse the palate after the savory richness.

Tips, Variations & Substitutions

Chicken Pizzaiola is wonderfully forgiving and highly adaptable. Here are ideas to tailor it to your preferences, dietary needs, or what’s in your pantry:

  • Protein options: you can use chicken thighs for richer flavor and a juicier result, or try boneless, skinless chicken breasts for a leaner version. For a pescatarian adaptation, replace chicken with firm tofu or white fish fillets that hold up to simmering.
  • Herb and spice tweaks: fresh basil at the end brightens the dish; a pinch of crushed red pepper adds warmth; for a more Mediterranean vibe, sprinkle a few torn oregano leaves or a bay leaf during simmering.
  • Tomato varieties: use high-quality canned tomatoes for a robust base or whole peeled tomatoes for a chunkier texture. If you want a lighter sauce, finish with a splash of cooking water or broth to reach your desired consistency.
  • Nutrition and dietary options: to make a gluten-free version, serve over gluten-free pasta, polenta, or steamed vegetables. For a dairy-free version, avoid any butter or cheese as a finishing touch and rely on the olive oil’s natural richness.
  • Texture variations: if you prefer a smoother sauce, blend lightly after simmering; for a chunkier sauce, keep the sauce as it is and finish with whole olives and capers.
  • Regional twists: substitute anchovies or capers with preserved lemon and olives for a brighter, tangier profile; add a handful of roasted peppers for a sweeter, smoky dimension.
  • Make-ahead ideas: this dish reheats beautifully. Prepare in advance up to the point of simmering, refrigerate, and finish simmering just before serving to refresh the flavors.

Storage & Make-Ahead Ideas

leftovers can be a gift, transforming a simple weeknight into a planned-quality meal for another day. Here are practical tips to maximize flavor and texture:

  • Refrigeration: store cooled leftovers in airtight containers for up to 3–4 days. The flavors often deepen over time, making the dish even more enjoyable after a day or two.
  • Freezing: if you want to freeze, portion the sauce and chicken separately or keep together in a freezer-safe container. It will maintain best quality for about 2–3 months. Thaw in the refrigerator overnight before reheating gently on the stove or in a microwave with a touch of water or broth to revive the sauce.
  • Reheating: rewarm slowly in a skillet over medium-low heat, adding a little water or broth to loosen the sauce if needed. A quick simmer will bring back the glossy texture and aroma.
  • Make-ahead strategy: for a Sunday meal, prepare the sauce base and sear the chicken in the morning, then simply finish the dish in the afternoon or evening when you’re ready to serve. This allows flavors to meld without overwhelming the kitchen with last-minute steps.

Fun Facts & Trivia (Optional)

– The term pizzaiolo refers to the pizza maker, but the cooking tradition behind pizzaiola extends beyond pizza. It embodies the spirit of Italian home cooking—improvisation, seasonal produce, and quick, flavorful meals that bring people together.

– Tomatoes in Italian cuisine have a storied history in the kitchen, evolving from a late-arriving ingredient in many regions to a central, comforting flavor in everyday cooking. Dishes like Chicken Pizzaiola celebrate tomatoes not as a mere sauce but as a living, vibrant component of a balanced plate.

– Olives and capers—common companions in this dish—are examples of briny elements that many Mediterranean cuisines use to create depth and contrast. They remind us that saltiness, acidity, and savoriness can work in harmony to elevate a dish rather than overpower it.

Chef’s Notes & Final Thoughts

Cooking Chicken Pizzaiola is as much about technique as it is about feeling. A gentle sear is essential to develop color and flavor on the chicken without drying it out. Then, the sauce should simmer low and slow enough to coax the flavors into a comfortable chorus, not a loud shouting match. Taste and adjust as you go—perhaps a pinch more salt if the tomatoes aren’t particularly savory, a splash of wine or broth to loosen the sauce’s body, or a final swirl of fresh herbs to brighten the finish. The beauty of this dish lies in its adaptability: you can tailor the intensity, texture, and accompaniment to fit your mood, your guests, and the season. In the end, Chicken Pizzaiola is about nourishment that tastes like a memory in the making—a plate that invites stories, laughter, and the simple joy of sharing a well-balanced, heartening meal.

Ingredients

  • Chicken
  • 4 boneless, skinless chicken thighs (about 1.5 lb / 680 g)
    → Primary protein for the dish; sear to develop a deep golden crust and lock in moisture before simmering in the tomato sauce. Thighs stay juicy, but if using chicken breasts, consider pounding to an even thickness for uniform cooking. Ensure internal temperature reaches 165°F (74°C) before serving.
  • 1-2 tablespoons olive oil (for searing)
    → Used to brown the chicken and create a flavorful fond in the pan. Heat the oil until shimmering before adding the chicken; avoid overcrowding the pan to achieve proper searing. Save any browned bits for the sauce.
  • 1/2 teaspoon kosher salt (to taste)
    → Season the chicken so the meat flavors the sauce and to help draw moisture for a better crust. Start with modest amounts and adjust after tasting the sauce.
  • 1/4 teaspoon freshly ground black pepper (to taste)
    → Adds aroma and a gentle heat; crack pepper just before cooking for maximum aroma. Adjust to your preference.
  • Sauce
  • 2 cups crushed tomatoes or tomato passata (about 28 oz can)
    → The tomato base of the pizzaiola sauce; crushed tomatoes give body and texture. If using whole peeled tomatoes, crush by hand or in the pan as the sauce simmers for a chunkier texture.
  • 2 garlic cloves, minced
    → Aromatic foundation of the sauce. Fine mincing ensures even distribution and prevents raw garlic bites; sauté briefly with onions if using before adding tomatoes.
  • 1/2 small onion, finely chopped (optional)
    → Adds sweetness and body to the sauce; cook until translucent to avoid sharp raw flavor in the finished dish.
  • 1 teaspoon dried oregano (or 1 tablespoon Italian seasoning)
    → Infuses classic Italian herb notes; if using Italian seasoning, keep in mind it often contains other herbs—start with a smaller amount and adjust to taste.
  • 1/4 teaspoon red pepper flakes (optional)
    → Provides a gentle heat; omit or reduce if you prefer a mild sauce. Remove seeds and membranes if you want less heat.
  • 1/2 cup dry white wine or chicken broth (optional)
    → Deglazes the pan and adds acidity and depth to the sauce. If omitting alcohol, substitute with extra broth or water; simmer until reduced to concentrate flavors.
  • 1 tablespoon olive oil (for sauce, optional)
    → Helps emulsify and enrich the sauce, adding a glossy finish. Use extra-virgin olive oil for fruity aroma; drizzle in during simmering.
  • Finish & Garnish
  • 4 oz mozzarella cheese, shredded or sliced (optional)
    → Classic topping that melts over the chicken and sauce. Fresh or whole-milk mozzarella yields the best melt; if using high-moisture cheese, pat dry to reduce sogginess.
  • Fresh basil leaves, torn or whole for garnish (optional)
    → Bright, peppery aroma to finish the dish; add just before serving to preserve oils and fragrance.
  • Optional Add-ins
  • 1/4 cup black olives, sliced (optional)
    → Briny, savory notes that complement the tomato sauce. Pit and slice evenly so they distribute in each bite; rinse if very salty.
  • 1 tablespoon capers, drained (optional)
    → Add tangy bite and texture; rinse to remove excess salt before adding to sauce, then scatter evenly.
  • 1/2 cup bell peppers, sliced (optional)
    → Adds sweetness, color, and texture; sauté with onions if using to build flavor base. Use a mix of colors for visual appeal.

Instructions

  • Pat the chicken thighs dry with paper towels and season evenly on both sides with 1/2 teaspoon kosher salt and 1/4 teaspoon freshly ground black pepper to promote thorough browning and flavorful crust.
  • → Dry surfaces brown more evenly, creating a rich crust; salt enhances flavor from the outside in and helps draw moisture to the surface for better searing.

  • Heat 1-2 tablespoons olive oil in a heavy skillet over medium-high heat until the oil shimmers just at the edge of smoking and a faint sizzle appears when the meat is added.
  • → A hot pan ensures rapid Maillard browning, which develops deep flavor; overcrowding will cause steaming, so sear in batches.

  • Add the chicken in batches and sear until a deep golden crust forms on the first side, about 3-4 minutes, then flip and sear the second side for 2-3 minutes more; transfer the browned chicken to a plate and tent loosely with foil.
  • → Searing creates texture and locking in juices; resting the meat after searing prevents carryover cooking and helps maintain a juicy interior.

  • Lower the heat to medium in the same pan and add the minced garlic and the optional finely chopped onion; sauté until the onion turns translucent and the garlic is fragrant, about 2-3 minutes, stirring frequently to prevent scorching.
  • → Building a fragrant aromatics base adds depth; onions caramelize gently to avoid sharp raw flavors, and garlic should be added after onions to prevent quick burning.

  • Stir in 1 teaspoon dried oregano (or 1 tablespoon Italian seasoning) and 1/4 teaspoon red pepper flakes (optional); cook for 30 seconds until the herbs bloom and release their aroma.
  • → Blooming dried herbs unlocks essential oils, intensifying the sauce’s character; red pepper flakes add gentle heat if desired.

  • Deglaze the pan with 1/2 cup dry white wine or 1/2 cup chicken broth, scraping up all browned bits from the bottom with a wooden spoon; simmer about 2 minutes to reduce slightly and concentrate the flavor.
  • → Deglazing lifts flavor-rich fond into the sauce; if using alcohol-free, broth brings body while preserving brightness.

  • Pour in 2 cups crushed tomatoes or tomato passata (if using whole peeled tomatoes, crush by hand or with the spoon as the sauce simmers for a chunkier texture); stir to combine and bring to a gentle simmer.
  • → The tomato base defines the pizzaiola; crushing whole tomatoes helps integrate texture, while passata provides a smooth, uniform sauce.

  • Return the seared chicken to the pan, nestling the pieces into the sauce; spoon sauce over each piece and maintain a gentle simmer, cooking until the chicken registers 165°F (74°C) and the sauce thickens, about 8-12 minutes.
  • → Safe internal temperature ensures doneness and safety; gentle simmer keeps the meat moist while allowing the flavors to meld with the sauce.

  • If using mozzarella, scatter 4 oz of shredded or sliced cheese over the chicken; cover the pan to melt the cheese, about 2-3 minutes, or transfer to a broiler-safe dish and broil 1-3 minutes until melted and bubbling.
  • → Melting cheese creates a classic pizzaiola finish; covering or brief broiling prevents dryness and achieves a smooth, glossy melt.

  • Stir in optional olives, capers, and bell peppers and simmer 2-3 minutes to heat through and distribute their briny, sweet, and crunchy notes evenly in the sauce.
  • → These add complexity and color; balance saltiness by tasting before serving and adjust if needed.

  • Finish the dish with torn fresh basil leaves, then taste and adjust seasoning with more salt or pepper as needed; remove from heat just before serving to preserve the basil’s bright aroma.
  • → Fresh basil adds peppery, aromatic brightness; heat can dull fragrance, so add at the end for maximum aroma.

  • To serve, spoon the chicken and sauce over cooked pasta or accompany with crusty bread; if serving with pasta, you may toss a portion of pasta with a little sauce to coat it before topping with the chicken and cheese.
  • → Pasta or bread provides a wholesome vehicle for the tomato-sauce richness; proper balance ensures the sauce coats rather than pools.

Notes

These Chicken Pizzaiola notes provide practical guidance to achieve a deeply flavored, weeknight-friendly Italian dish. Sear the chicken first to develop a rich, golden crust and secure moisture, then simmer it gently in a bright, garlicky tomato sauce for tender, juicy meat with a glossy finish.

Choose boneless, skinless chicken thighs for the most reliable juiciness; if you prefer breasts, flatten to an even thickness and monitor closely so they stay moist. Season the meat with kosher salt and freshly ground black pepper before searing to help the meat build flavor that carries into the sauce.

For the sauce, sauté minced garlic (and a finely chopped onion if using) to build a flavorful base, then stir in crushed tomatoes or tomato passata. Add oregano (or Italian seasoning) and, if you like a subtle heat, red pepper flakes. Deglaze the pan with dry white wine or chicken broth to lift the fond and deepen acidity; simmer until the sauce thickens slightly and the flavors concentrate. A splash of extra olive oil during simmering can create a silky, cohesive sauce.

Finish with mozzarella for a melty, comforting top, and scatter fresh basil just before serving to preserve its bright aroma. Optional add-ins such as olives, capers, and bell peppers bring briny, tangy, and sweet notes—add them during the simmer so their flavors meld without overpowering the sauce.

Serving and storage tips: serve over pasta, polenta, or with crusty bread to soak up the sauce. The dish stores well in the refrigerator for 3–4 days; the sauce can also be frozen (reheat gently and pool in a little water or broth if needed). Reheat leftovers slowly on the stove or in a gentle oven to maintain moisture in the chicken. For best results, taste and adjust salt after the sauce has simmered, since tomato richness and any add-ins can alter the seasoning balance.

Tips

Tips for Searing the Chicken

  • Pat the chicken thighs dry with paper towels before seasoning to promote a deep, golden crust. Excess moisture creates steam and inhibits browning.
  • Season with kosher salt (as listed) and a fresh grind of black pepper. A light salting early helps draw moisture for a juicy interior and a flavorful crust.
  • Use a heavy skillet (preferably cast iron or stainless) and heat olive oil until just shimmering. Do not overcrowd the pan—cook in batches if needed to achieve proper searing.
  • Resist the urge to move the chicken too soon. Let one side form a crust before flipping, about 3–4 minutes per side, until the exterior is deeply golden.
  • After searing, transfer the chicken to a plate and leave the fond in the pan. Those browned bits are the base of a flavorful sauce.

Tips for Building the Pizzaiola Sauce

  • Choose crushed tomatoes for a balanced body and texture; if you use whole peeled tomatoes, crush them by hand or with a spoon as the sauce simmers for a chunkier texture.
  • Minced garlic should be added early but not browned; sauté until fragrant to avoid a raw garlic bite in the finished sauce.
  • Optional onion adds sweetness and body—cook until translucent to avoid sharp raw flavors.
  • Season with oregano (or Italian seasoning). If using Italian seasoning, start with a smaller amount and adjust to taste since blends vary.
  • Red pepper flakes provide gentle heat—omit or reduce for a milder sauce. Remove seeds and membranes if you want less heat.
  • Deglaze the pan with dry white wine or chicken broth to lift the fond and introduce acidity and depth. If skipping alcohol, increase the broth slightly and simmer to concentrate flavors.
  • About 1 tablespoon olive oil added to the sauce (optional) helps emulsify and gives a glossy finish; swirl in toward the end of simmering.
  • Let the sauce simmer to meld flavors—15–20 minutes is a good baseline. If it tastes flat, a pinch of salt or a splash more wine/broth can wake it up.

Finish & Garnish Details

  • 4 oz mozzarella cheese melts beautifully atop the sauce. If using high-moisture mozzarella, pat dry to reduce sogginess and help it melt evenly.
  • For best aroma, add fresh basil just before serving. Tear leaves by hand to release essential oils rather than crushing them.

Optional Add-Ins and How to Use Them

  • Olives: slice and add 1/4 cup for briny depth. Rinse if very salty and distribute evenly so every bite has a touch of tang.
  • Capers: drain and scatter 1 tablespoon for a tangy bite; rinse to remove excess salt before adding to the sauce.
  • Bell peppers: slice and sauté with onions for color, sweetness, and texture. Use a mix of colors for visual appeal.

Make-Ahead, Storage, and Reheating

  • The sauce can be made ahead and stored in the refrigerator for up to 3–4 days; reheat gently on low with a splash of broth to loosen if needed.
  • Cooked chicken can be kept refrigerated for 3–4 days. Reheat gently in a skillet with a small amount of sauce to keep the meat moist.
  • For freezing, freeze the sauce separate from the chicken. Thaw overnight in the fridge and reheat with a little extra liquid.

Serving Suggestions

  • Serve over al dente pasta, polenta, or toasted crusty bread to soak up the sauce.
  • Additional fresh basil or a light drizzle of olive oil at the end enhances aroma and shine.

Common Troubleshooting

  • If the sauce tastes too acidic, balance with a pinch of sugar or a splash more tomatoes. Let it simmer a bit longer after adjustment.
  • If the sauce seems too thick, loosen with a splash of broth or water and simmer until desired consistency.
  • If the mozzarella sinks or makes the sauce watery, add the cheese in stages and keep the heat gentle; consider finishing under a quick broil to set the top layer.
  • If the chicken finishes cooking before the sauce thickens, keep the chicken warm covered and let the sauce reduce a bit longer in the pan without the lid.

FAQ

What is Chicken Pizzaiola?

Chicken Pizzaiola is a classic Italian-American dish where chicken (breasts or thighs) is braised in a bright tomato sauce with garlic, oregano, and olive oil. It often includes onions, peppers, and sometimes capers, olives, or cheese, creating a flavorful, pizza-inspired sauce that pairs well with pasta, bread, or polenta.

What ingredients do I need?

Main ingredients: chicken (breasts or thighs), olive oil, garlic, onion (optional), canned crushed tomatoes or tomato sauce, dried oregano, salt, and pepper. Optional additions include bell peppers, capers, olives, fresh basil or parsley, mozzarella or provolone. For extra depth, a splash of white wine or chicken stock can be used to deglaze.

Can I use chicken breasts or thighs? How do I choose?

Both work well. Chicken breasts are lean and cook quickly but can dry out if overcooked. Chicken thighs stay tender and flavor-rich but are higher in fat. For a balanced result, you can use boneless, skinless thighs or a mix of breasts and thighs. Adjust cooking time: breasts about 6–8 minutes per side to brown, thighs may require a bit more time to finish in sauce.

Should I sauté the vegetables first, or just simmer?

For best flavor, sauté diced onion (and bell peppers, if using) in olive oil until softened, then add minced garlic. Deglaze with a splash of wine or stock if desired, and stir in tomatoes and seasoning. This creates a richer sauce before returning the chicken to simmer in the pot.

How do I cook Chicken Pizzaiola step by step?

1) Season the chicken with salt and pepper. 2) Brown the chicken in olive oil on both sides in a large skillet. Remove and set aside. 3) Sauté onion and peppers (if using) until softened. 4) Add garlic and cook 30–60 seconds. 5) Pour in crushed tomatoes/tomato sauce, oregano, and other seasonings; simmer briefly. 6) Return chicken to the pan and simmer gently until cooked through and sauce thickens (about 15–20 minutes for breasts, a bit longer for thighs). 7) Stir in fresh herbs and, if desired, melt a bit of mozzarella or provolone on top just before serving.

How long does it take to cook?

Prep time is typically 10–15 minutes, with a 25–30 minute simmer for chicken to cook through. Total time is usually around 40–45 minutes, depending on the cut of chicken and your stove.

Can I make it ahead or freeze leftovers?

You can refrigerate cooked Chicken Pizzaiola for up to 3–4 days. For longer storage, freeze the cooked dish (without fresh mozzarella) for up to 2–3 months. Thaw in the fridge overnight and reheat gently on the stove or in the microwave, adding a splash of water or stock if needed to loosen the sauce.

What are good variations or substitutions?

Variations: add sliced mushrooms, capers, or Kalamata olives for extra brininess. Use fresh basil at the end, or a pinch of red pepper flakes for heat. Substitutions: skip cheese for a dairy-free version, use crushed tomatoes with a little tomato paste for a thicker sauce, or swap chicken with turkey cutlets. You can also swap oregano for Italian seasoning blend.

What should I serve it with?

Popular options include spaghetti, linguine, or penne tossed with the sauce, creamy polenta, mashed or roasted potatoes, or crusty bread to soak up the sauce. A simple side salad or sautéed greens pairs nicely to balance the meal.

Is Chicken Pizzaiola spicy or how can I adjust the heat?

The base recipe is mild. To add heat, include red pepper flakes or finely minced hot peppers, and adjust to taste. If you prefer milder flavor, skip the heat and rely on garlic and oregano for aroma instead.

Introduction / Hook

Picture a plate that gleams with a sunlit, golden crust, each edge crisp and whispering with the promise of a perfect bite. Beneath that crackling armor lies a tender, juicy fillet that sings with bright lemon, nutty parmesan, and a shy kiss of garlic and herbs. Italian Chicken Milanese is the kind of dish that makes a weeknight feel like a celebratory Sunday lunch, a meal that delivers comfort with a touch of elegance. The moment you bite in, you’re greeted by a symphony of textures: a delicate, wafer-thin crust that crackles on contact, a soft interior that almost flakes with moisture, and a fragrant lemon zest that lifts the whole plate to a sunny, Italian countryside feel. It’s familiar enough to feel like home, yet polished enough to serve to guests without stepping into culinary theater. And the best part? It comes together with a quick, confident rhythm—the kind of recipe you reach for when you want something spectacular without needing a long list of exotic ingredients or a marathon of steps.

This dish embodies the spirit of Italian home cooking: simplicity done well, where every component has a purpose and comes together to create something greater than the sum of its parts. The chicken is pounded to a uniform thickness so it cooks evenly and stays juicy; it travels briefly through a three-part crust of flour, egg, and a parmesan-forward breadcrumb mixture, then meets a hot skillet with a sizzle that promises a crusty exterior and a tender interior. A squeeze of lemon or a handful of fresh herbs at the end brightens the plate, turning a comforting classic into something luminous and crave-worthy. If you’ve ever wondered how to achieve that restaurant-crisp chicken at home, this Milanese approach offers a reliable pathway, every time you crave that quintessential, gilded bite.

The Story Behind the Dish

The name Milanese instantly evokes the crown jewel of Lombardy: cotoletta alla Milanese. Traditionally, this venerable dish was made with veal, a fine cut that cooks quickly and carries a delicate, almost velvet-like texture. In Italy—and across the globe—the Milanese tradition has evolved, giving us variations that suit modern kitchens and diverse palates. Chicken Milanese is one of the most beloved adaptations, turning a noble, century-old technique into a weeknight-friendly favorite without sacrificing the essence of the original: a light, crisp crust that embraces the meat without overpowering it, and a aroma of browned butter or olive oil that says “effortless premium.” The switch from veal to chicken is more than practical; it’s a delicious homage to the dish’s core identity—the art of transforming a simple protein into something bright, satisfying, and irresistibly crave-worthy.

In Milan and beyond, the method is classic: you season the meat, lightly dredge it in flour, dip it in egg, and coat it with breadcrumbs—often enriched with grated Parmigiano-Reggiano or Pecorino for depth. The pan is hot, the oil is abundant but not extravagant, and the goal is a crust that is both crisp and pliable, guarding a succulent center. Over the years, cooks have added their own touches—zest of lemon in the crust, a whisper of garlic in the egg wash, or a blanket of herb-infused butter at the finish—to honor the dish while making it sing for contemporary kitchens. Whether plated simply with a wedge of lemon and a peppery arugula salad or elevated with a silky potato purée or a shower of capers, Italian Chicken Milanese remains a testament to how few ingredients, treated with respect, can yield something truly memorable.

Why You’ll Love This Recipe

  • Quick and reliable: You can prepare this comforting dish in under 30 minutes, making it a perfect weeknight hero or a fast answer for a casual dinner party.
  • Crisp, juicy contrast: The three-layer dredge (flour, egg, breadcrumbs with parmesan) creates a satisfying crackle on the outside while preserving a moist, tender interior.
  • Bright, vibrant finish: A fresh squeeze of lemon and a scatter of parsley or arugula brighten the dish, balancing the richness with a clean, citrusy lift.
  • Versatile serving options: Serve it solo with a simple salad, pair it with a light pasta, or lay it atop a bed of creamy mashed potatoes for a comforting contrast.
  • Family-friendly appeal: The familiar flavors of parmesan and lemon are welcoming to kids and adults alike, making it an easy crowd-pleaser for gatherings.
  • Adaptable to dietary needs: You can customize the crust with gluten-free breadcrumbs, dairy-free cheese, or alternative coatings to suit different diets without losing the essence of the dish.

Flavor Profile & Texture

From the first bite, Italian Chicken Milanese unfolds in stages. The exterior crust—light, golden, and almost whisper-thin—offers a welcome crackle that yields to a soft, almost pillowy interior. The breadcrumbs, enriched with Parmigiano-Reggiano, give a nutty, savory backbone with a subtle saltiness that ties the dish together. If you’ve added lemon zest to the crust, you’ll enjoy a perfume of citrus that lingers pleasantly rather than turning sharp; the zest and a final squeeze of juice awaken the palate and prevent the richness from feeling heavy. The optional garlic in the egg wash adds a gentle warmth, but the dish remains balanced and not overpowering—the hallmark of Italian cooking that respects the meat’s inherent sweetness.

Milkiness or butteriness is not the centerpiece; rather, the dish shines through a chorus of textures: a crisp, almost wafer-thin crust that shatters with a delicate crack; a juicy, well-seasoned meat interior that stays tender; and a bright citrus note that keeps the flavors crisp and uplifting. The crust’s parmesan contributes a toasty, savory depth, while the light dusting of flour in the dredge helps create that first satisfying bite before the egg acts as the glue that seals the crust in place. When you pair the chicken with a peppery arugula salad or a simple squeeze of lemon, you introduce a balance of peppery greens and tangy brightness that refreshes the palate and turns a simple plate into a complete, satisfying meal. The aromas—the warm scent of browned crust in olive oil, the grassy perfume of fresh herbs, and the lemon’s citrusy zing—combine to evoke both rustic Italian kitchens and modern bistros, making this dish feel both timeless and current.

Occasions & Pairings

Italian Chicken Milanese is wonderfully versatile, lending itself to a variety of occasions and pairings. It’s equally at home as a weeknight main or the centerpiece of a relaxed dinner party. Here are ideas to tailor the dish to different moments:

  • Weeknights: Pair with a simple green salad, roasted potatoes, or a light pasta with olive oil and garlic. The dish cooks in minutes, so you can have a satisfying dinner on the table fast.
  • Sunday lunch or brunch: Serve with a bright citrus salad and a glass of chilled white wine for a leisurely, comforting meal that feels special but not fussy.
  • Entertaining guests: Plate the chicken atop a bed of arugula or rocket, drizzle with lemon-dill or lemon-caperto oil, and present with a side of risotto or soft polenta for a refined yet approachable menu.
  • Pairings: Light white wines such as Pinot Grigio, Verdicchio, or an unoaked Chardonnay work beautifully. For non-alcoholic options, a sparkling lemon water with a hint of basil or a citrusy iced tea complements the brightness of the dish.

When it comes to side dishes, a crisp salad with a tangy vinaigrette, blistered cherry tomatoes, or a simple herb-bathed potato purée can all shine next to the chicken. A few capers scattered on the greens can echo the crispy-savory notes in the crust, while a sprinkle of fresh parsley adds a burst of color and a clean finish. The chicken’s versatility makes it a reliable canvas for both minimalist and more elaborate pairings, depending on how you’re entertaining or what you’re craving that day.

Tips, Variations & Substitutions

Here are practical ideas to customize Italian Chicken Milanese while preserving its essence. Use them singly or mix-and-match to suit your pantry, dietary needs, or flavor preferences.

  • Crunch level: For extra crunch, replace part or all of the breadcrumbs with panko breadcrumbs. You can also mix in a little finely grated parmesan for a nuttier bite.
  • Parmesan variations: Combine Parmigiano-Reggiano with Pecorino Romano for a sharper, more complex savory note. If you’re avoiding dairy, use a dairy-free parmesan substitute or nutritional yeast to echo the cheesy vibe.
  • Gluten-free option: Use gluten-free breadcrumbs or crushed gluten-free crackers in the crust. Ensure the flour you use is gluten-free if you’re avoiding gluten entirely.
  • Herb and citrus boosts: Add lemon zest to the breadcrumb mix for a fragrant citrus glow. A pinch of finely chopped fresh thyme or flat-leaf parsley adds a fresh, green lift.
  • Egg wash upgrades: A touch of milk or cream in the eggs can help the crust hold moisture more effectively; for dairy-free, consider almond milk with a bit of oil.
  • Garlic and spice: A whisper of garlic powder or smoked paprika in the dredge adds warmth without overpowering the chicken.
  • Pan-frying technique: Use a heavy skillet and sufficient oil to create a true sear; monitor the heat to avoid burning the crust. If the crust browns too quickly, lower the heat slightly and finish in the oven for 5–7 minutes at 350°F (175°C) to ensure the inside cooks through evenly.
  • Air-fryer option: For a lighter crust, air-fry the breaded cutlets at 400°F (200°C) for 8–10 minutes, flipping halfway for a uniform crust. Finish with a tiny squeeze of lemon to brighten.
  • Serving accompaniments: Try pairing with a simple olive oil and lemon-dressed greens, a warm potato purée, or a light tomato-basil salad for a brighter, more summery version.
  • Make-ahead variations: The breaded cutlets can be prepared up to 2 hours in advance (covered and refrigerated). Bring to room temperature briefly before frying to ensure even cooking. For longer storage, you can freeze uncooked breaded cutlets on a baking sheet and transfer to a freezer bag; fry from frozen for best results, adding a minute or two to cooking time.

Storage & Make-Ahead Ideas

Leftovers, if any, should be treated with the same care you’d give to any prized lunch or dinner. The light, crisp crust is best enjoyed soon after cooking, but there are ways to extend the life of a graceful Milanese feast.

  • Storing cooked Milanese: Refrigerate in an airtight container for up to 2 days. Reheat in a 350°F (175°C) oven for about 8–10 minutes, or in a skillet with a thin layer of oil to refresh the crust. Avoid microwaving, which can soften the crust and dampen the crust’s crispiness.
  • Make-ahead crust: You can prepare the breading mixture and even the egg wash in advance and keep them refrigerated until you’re ready to bread the chicken. This can shave minutes off your prep time and keep the process organized for busy evenings.
  • Freezing options: Freeze breaded, raw chicken cutlets arranged on a sheet pan until firm, then transfer to a freezer bag. Bake from frozen, adding a few extra minutes to ensure the interior is fully cooked and the crust is golden.

When storing any dish that benefits from a bright finish, you can hold a small lemon wedge or lemon zest to sprinkle just before serving. A handful of chopped fresh parsley or arugula added after reheating can revive color and aroma, making the dish feel fresh even on day two.

Fun Facts & Trivia

Delightful tidbits that celebrate the culture and history behind Milanese-inspired cooking:

  • The traditional cotoletta alla milanese is most commonly made with veal, a nod to Lombardy’s culinary heritage. Chicken Milanese is a modern and beloved adaptation that preserves the essence of the technique—the breaded, fried cutlet with a crisp, flavorful crust.
  • Parmesan or Pecorino added to the breadcrumbs is a hallmark of the dish, enriching the crust with a toasty, umami kiss that echoes the Italy’s love affair with cheese and bread.
  • The dish often pairs with a light salad to maintain balance—arugula, bitter greens, or peppery herbs, which cut through the richness and invite a refreshing counterpoint to the fried crust.
  • In Italy, simple, seasonal ingredients and careful technique are valued above heavy sauces. The Milanese approach honors that philosophy: minimal components, maximum flavor, and a crisp crust that makes the chicken sing on its own.

Ultimately, Italian Chicken Milanese is more than a recipe; it’s an invitation to celebrate the art of turning simple pantry staples into something special. It’s a dish that travels well—across Italian kitchens and into homes around the world—always inviting you to savor the moment, to breathe in the aroma of browned butter or olive oil, to hear the crack of the crust, and to taste a piece of Italy at its most approachable and comforting.

Ingredients

Italian Chicken Milanese
Chicken Milanese Base

  • – 2 boneless, skinless chicken breasts (about 1 lb / 450 g total), trimmed and gently pounded to an even 1/4-inch thickness
    → Uniform thickness ensures quick, even cooking and a consistently crisp crust. Place the chicken between two sheets of plastic wrap and pound with a meat mallet or rolling pin until evenly thin.
  • – 1/2 teaspoon kosher salt
    → Salt seasons the chicken on both sides and helps draw out moisture for better browning and flavor. Sprinkle evenly on both sides before dredging. If time allows, salt 15–20 minutes ahead; otherwise salt right before breading.
  • – 1/4 teaspoon freshly ground black pepper
    → Adds a mild bite and aromatic depth to the chicken. Freshly ground pepper yields a brighter flavor than pre-ground. Adjust to taste.

Dredging Station

  • – 1/2 cup all-purpose flour, lightly seasoned with a pinch of salt and pepper
    → The flour layer helps the egg adhere to the chicken and begins the browning process for a crisp crust. Sift to remove lumps for an even, smooth coating.
  • – 2 large eggs, lightly beaten with 1 tablespoon water
    → Provides the binding medium that traps the breadcrumbs to the meat, forming a cohesive crust. Beat until uniform; add a splash of water if the mixture seems very thick or stiff.
  • – 1 cup breadcrumbs (Italian-style or panko)
    → Forms the main crispy crust. Panko yields extra crunch, while traditional breadcrumbs provide a denser crust. For gluten-free, use gluten-free breadcrumbs. For balanced crunch and flavor, consider a 50/50 mix of fine breadcrumbs and panko.
  • – 1/4 cup finely grated Parmigiano-Reggiano cheese (optional)
    → Adds savory, nutty depth and helps with browning. Mix evenly into the breadcrumb mixture. If dairy-free, omit or substitute with nutritional yeast for a similar cheesy note.
  • – 1 teaspoon dried Italian seasoning or 1 tablespoon chopped fresh flat-leaf parsley (optional)
    → Imparts aromatics and herbal brightness to the crust. If using fresh herbs, pat dry before mixing to avoid soggy coating.

Frying

  • – 1/4 cup extra-virgin olive oil for shallow frying (plus more as needed to maintain a thin layer)
    → Provides the fat necessary for browning and crisping the crust. Use enough oil to coat the bottom of a skillet in a thin layer; maintain medium-high heat and adjust as needed to prevent burning. Add more between batches if needed to keep a consistent crispness.

Serving

  • – Lemon wedges (from 1 lemon)
    → A bright squeeze of fresh lemon over the hot cutlets lifts the flavors and cuts the richness of the fried crust. Serve wedges on the side for guests to apply to taste.
  • – Fresh arugula or mixed greens (optional)
    → A light bed of greens provides a peppery contrast and helps balance the dish. Toss with a touch of olive oil and a pinch of salt if desired or serve plain on the side.
  • – Fresh parsley leaves for garnish (optional)
    → Adds color and a fresh aroma. Sprinkle chopped parsley over the finished dish just before serving for a polished presentation.

Instructions

  • Trim the chicken breasts and gently pound them to an even 1/4-inch thickness between two sheets of plastic wrap using a meat mallet or rolling pin; this prevents uneven cooking and ensures a uniformly crisp crust.
    → Uniform thickness ensures quick, even cooking and a consistently crisp crust. The gentle pounding prevents tearing and helps the meat stay tender during frying.
  • Season both sides with 1/2 teaspoon kosher salt and 1/4 teaspoon freshly ground black pepper to season the meat and initiate moisture extraction for better browning.
    → Salt flavors the chicken and aids browning by drawing out moisture; pepper adds aromatic depth. If possible, salt 15–20 minutes ahead; otherwise salt right before breading.
  • Set up the dredging station with three shallow dishes: one containing 1/2 cup all-purpose flour lightly seasoned with a pinch of salt and pepper; one with 2 large eggs lightly beaten with 1 tablespoon water; and one with 1 cup breadcrumbs (Italian-style or panko) with optional 1/4 cup finely grated Parmigiano-Reggiano and 1 teaspoon dried Italian seasoning or 1 tablespoon chopped fresh flat-leaf parsley.
    → This arrangement creates a classic breading ladder: flour helps the egg adhere and begins browning; eggs bind the crumbs; and breadcrumbs form the crisp crust with added flavor from cheese and herbs.
  • Beat 2 large eggs with 1 tablespoon water in a separate shallow dish until smooth and uniform.
    → A well-blended egg wash ensures even binding of crumbs and prevents irregular clumps on the crust.
  • In a third shallow dish, combine 1 cup breadcrumbs with 1/4 cup finely grated Parmigiano-Reggiano and 1 teaspoon dried Italian seasoning or 1 tablespoon chopped fresh flat-leaf parsley; mix until the cheese and herbs are evenly distributed.
    → Evenly seasoned crumbs yield a balanced, aromatic crust that browns uniformly.
  • Dredge each chicken cutlet by first coating in the seasoned flour, tapping off excess; then dip into the egg mixture, letting any excess drip back into the dish; finally press into the breadcrumb mixture, turning to coat evenly and pressing gently to ensure the crumbs adhere.
    → This sequence builds a sturdy, flavorful crust that clings to the meat during frying and stays intact.
  • Heat 1/4 cup extra-virgin olive oil in a heavy skillet over medium-high heat until it shimmers; maintain a thin, even layer to promote crisping without frittering the coating.
    → A hot, shallow oil layer browns the crust quickly and evenly while avoiding greasy outcomes; add more oil between batches to keep the crust consistent.
  • Fry the breaded cutlets in batches, placing them carefully into the hot oil without crowding the pan; cook 2–3 minutes per side until the crust is golden brown and crisp, adjusting heat to maintain steady browning.
    → Crowding lowers the pan temperature and yields pale crusts; turning when the edges set prevents crust damage and promotes even cooking.
  • Transfer the fried cutlets to a wire rack set over a sheet pan or to paper towels to drain; keep warm in a 200°F (93°C) oven if necessary to finish cooking or to serve later without sogginess.
    → Draining removes excess oil to preserve crispness; a low oven keeps the hot cutlets ready without softening the crust.
  • Repeat frying with the remaining cutlets, adding more oil as needed to maintain a thin layer and consistent browning throughout the process.
    → Fresh oil or a refreshed surface maintains crispness and prevents flavor carryover from previous batches.
  • Serve immediately with lemon wedges on the side to brighten the rich crust; optionally arrange on a bed of arugula or mixed greens and garnish with fresh parsley leaves for color and aroma.
    → The bright lemon cut cuts through the richness of the fried crust, and greens add a peppery balance while parsley provides a finished presentation.

Notes

These Italian Chicken Milanese are a quick weeknight classic featuring thin, pounded chicken cutlets that fry up to a tender center with a crisp, golden crust and a bright lemon finish. You can customize the crust by mixing in finely grated Parmigiano-Reggiano, a pinch of dried Italian seasoning or chopped fresh parsley, and a balanced blend of breadcrumbs for extra crunch. For gluten-free options, substitute gluten-free flour for dredging and use gluten-free breadcrumbs; for a dairy-free version, omit the cheese or replace it with a dairy-free alternative like nutritional yeast.

They fry best in a shallow pool of extra-virgin olive oil, kept at a steady medium-high heat until the crust is deeply golden and the chicken reaches 165°F (74°C). Let the cutlets rest a minute after frying to reabsorb juices before serving, and wipe the pan between batches to maintain consistent browning. If you prefer a lighter crust, use a 50/50 mix of fine breadcrumbs and panko; for extra richness, finish with a light squeeze of lemon while still hot.

To serve, arrange over fresh arugula or mixed greens and finish with lemon wedges and chopped parsley for color and aroma. Leftover Milanese can be refrigerated for 2–3 days and reheated in a hot skillet or a brief oven session to restore crispness. Always ensure your breading ingredients are gluten-free if you have gluten intolerance.

Tips

Tips for Italian Chicken Milanese

  • Prepare and rest: After pounding, let the chicken rest 5–10 minutes to relax fibers; this helps the crust adhere and cook evenly.
  • Seasoning timing: Salt the chicken 15–20 minutes ahead if you have time; otherwise season right before breading to prevent drawing moisture too early.
  • Crust prep: For the crispiest crust, sift the flour to remove lumps, and consider a 50/50 mix of fine breadcrumbs and panko for a balanced crunch.
  • Egg wash: Beat eggs with 1 tablespoon water until smooth; if the mixture seems thick, whisk in a touch more water to help it trap the crumbs.
  • Cheese option: Parmigiano-Reggiano adds color and depth; dairy-free option: nutritional yeast or omit entirely.
  • Herb boosts: Dried Italian seasoning or fresh parsley adds aromatics; if using fresh, pat the parsley dry to avoid soggy coating.
  • Crust-setting tip: Chill the breaded cutlets 10–15 minutes on a rack or tray before frying to help the crust set and reduce sogginess.
  • Pan-frying technique: Use a thin layer of olive oil to cover the bottom; keep heat medium-high and adjust as needed to avoid burning the crust. Add more oil between batches to maintain crispness.
  • Temperature control: If the crust browns too quickly, lower the heat; if it browns slowly, increase slightly or preheat the pan longer before adding chicken.
  • Drain and rest: Let fried cutlets drain on a rack or paper towels; rest 1–2 minutes before serving to keep the crust crisp.
  • Serving idea: Finish with a squeeze of lemon and a bed of arugula; parsley garnish adds color and aroma.

Storage and reheating tips: Cool completely, refrigerate in an airtight container for 1–2 days; reheat in a hot oven (375°F/190°C) or toaster oven to preserve crispness. Avoid microwaving as it softens the crust.

FAQ

What is Italian Chicken Milanese?

A classic Italian dish of thin, pounded chicken cutlets that are dredged in flour, dipped in beaten eggs, and coated with seasoned breadcrumbs (often with grated Parmesan). The cutlets are pan-fried in olive oil until the crust is golden and crisp. It’s typically served with lemon wedges and a simple green salad or arugula.

What ingredients do I need?

Basic setup (serves 2–4):

  • 2 boneless, skinless chicken breasts, pounded to 1/4 inch (6 mm) thickness
  • Salt and pepper
  • 1/2 cup all-purpose flour (or gluten-free flour)
  • 2 large eggs, beaten
  • 1 cup breadcrumbs (panko or regular; use gluten-free breadcrumbs if needed)
  • 1/4 cup grated Parmesan cheese (optional but traditional)
  • Finely grated zest of 1 lemon (optional, for brightness)
  • 2–3 tablespoons olive oil or a light oil for frying
  • Optional: chopped parsley or Italian seasoning for the crumb mix
  • Lemon wedges for serving
Can I use chicken breast or thighs?

Traditional Milanese uses chicken breast. You can use thin-sliced chicken thighs for juicier meat; they’re more forgiving if slightly thicker. If using thighs, trim excess fat, pound to an even thickness, and adjust cooking time as needed. The internal temperature should reach 165°F (74°C).

How do I bread and fry for a crisp crust?

Set up a breading station: flour, beaten eggs, and the breadcrumb mixture (breadcrumbs + Parmesan + seasonings).

  1. Season the chicken with salt and pepper.
  2. Dredge in flour, shaking off excess.
  3. Dip in eggs, allowing excess to drain.
  4. Coat with breadcrumbs, pressing gently to help adherence.
  5. Let the coated cutlets rest 5–10 minutes to set the coating.
  6. Heat 1/4 inch of oil in a skillet over medium-high heat (about 350–375°F / 175–190°C).
  7. Pan-fry 2–4 minutes per side until the crust is golden and the chicken is cooked through. Drain on paper towels.
Can I bake or air-fry instead of pan-frying?

Yes. For a lighter option:

  • Preheat oven to 425°F (220°C). Place breaded cutlets on a parchment-lined sheet; lightly spray or brush with oil.
  • Bake 12–15 minutes on the first side, then flip and bake 6–8 minutes more, until crust is golden and the chicken reaches 165°F (74°C).

Air-frying works well too: cook at 400°F (205°C) for about 8–12 minutes, flipping halfway, until crisp.

How long does it take to cook?

Plan about 25–40 minutes total from start to finish. Pounding and breading take ~15–20 minutes, and pan-frying adds about 8–14 minutes depending on thickness. Larger batches will take longer; keep the crust crisp by not overcrowding the pan.

What should I serve Italian Chicken Milanese with?

Classic accompaniments include:

  • Fresh lemon wedges to squeeze over the cutlet
  • A simple arugula salad or mixed greens with a light vinaigrette
  • Roasted or sautéed vegetables
  • Mashed potatoes, roasted potatoes, or a simple pasta aglio e olio
How do I store leftovers and reheat?

Storage: refrigerate any leftovers in an airtight container for up to 3 days.

Reheating: to retain crispness, reheat in a 350°F (175°C) oven or toaster oven until warmed through and crust is crisp again (about 5–10 minutes). Microwave can soften the crust, so it’s best avoided if possible.

How can I make this gluten-free or dairy-free?

Gluten-free options:

  • Use gluten-free flour for dredging and gluten-free breadcrumbs or crushed gluten-free crackers for the crust.

D dairy-free options:

  • Omit Parmesan or replace with a dairy-free Parmesan substitute or nutritional yeast for a similar savory note.

Eggs remain the binding agent in both cases, but you can season the crumbs with extra herbs and lemon zest for flavor.

Tips for perfect results and common mistakes to avoid

Tips:

  • Pat chicken very dry before breading to help coating adhere.
  • Pound to an even thickness (about 1/4 inch) for uniform cooking.
  • Keep oil at a steady medium-high temperature to avoid soggy crust or burnt coating (target around 350–375°F / 175–190°C).
  • Don’t crowd the pan; cook in batches to maintain heat.
  • Mix breadcrumbs with Parmesan and a pinch of salt for extra flavor and crispness.

Introduction / Hook

Imagine a pot simmering on the stove, the hum of a quiet evening settling in as the kitchen fills with a warm, enveloping aroma. You open the lid and are met with a creamy, velvety scent that feels like a cozy blanket wrapping around you. In that moment, the world slows just enough for you to notice the little details—the gentle sizzle of what’s browning to bronze, the soft sigh of steam rising as a spoon tests for tenderness, and the way the air tastes faintly savory and comforting, as if memories of family meals are drifting back to you. Creamy Smothered Chicken and Rice is exactly the kind of dish that makes a home feel a little brighter, a little more welcoming, and a lot more satisfying at the end of a long day. It’s not about chasing perfection in the kitchen; it’s about the simple magic of turning a handful of humble components into something that tastes like a celebration of togetherness.

There’s something irresistibly indulgent about a dish that feels like a hug on a plate—the way the creamy sauce clings to every grain of rice and coats each bite with silken richness, while the chicken stays juicy and flavorful, almost braised in its own savory comfort. This recipe offers that sense of warmth without demanding hours of labor. It invites you to slow down, savor the aroma, and let the comforting, familiar flavors do the talking. It’s the kind of dish you’ll reach for on weeknights when you need a quick payoff and on weekends when friends and family gather around the table. It’s the kind of dish that makes a home kitchen feel both nostalgic and excitingly modern, bridging generations with a flavorsome, story-filled spoonful each time you serve it.

As you read on, you’ll discover that Creamy Smothered Chicken and Rice isn’t merely about technique; it’s about creating an edible moment that people remember, the kind of dish that becomes a go-to request when the mood is for comfort without compromise. It’s approachable enough for weeknights, yet polished enough to serve guests with a smile. The beauty lies in balance: the sauce’s silkiness countering the gentle bite of perfectly textured rice, the chicken’s tenderness harmonizing with a kiss of seasonings that linger on the palate. By the end of each serving, you’ll notice how the flavors settle into a harmonious chorus—savory, creamy, comforting, and wholly satisfying.

The Story Behind the Dish

Every family has a version of this dish, a version that arrives at the table when there’s a need for reassurance, a desire for something that feels like a shared memory with every bite. Creamy Smothered Chicken and Rice draws its spirit from the timeless comfort foods that have traveled from kitchens to gatherings for generations. The “smothered” technique—where sauce becomes the generous, enveloping partner to the main component—has roots in regional home cooking that celebrates slow, steady flavor development. It’s the kind of method that rewards patience in little ways: a chicken that becomes melt-in-your-mouth tender, a sauce that thickens into a satin-like finish, and a rice bed that soaks up every nuance with gratitude.

Historically, many cultures have turned starch and protein into a single, soulful plate. The tradition of smothering doesn’t belong to one place alone; it’s a shared culinary practice that shows up in various forms: a stew’s comforting coating, a braise’s glossy glaze, or a pan sauce that leans into a final flourish. This recipe pays homage to those ideas while honoring the modern table—a dish that feels timeless yet completely doable on a busy weeknight. It’s a reflection of how households adapt to what’s on hand, transforming everyday ingredients into something bigger than the sum of their parts. The result is a dish that tastes like home, even if you’re cooking it for the first time in a new kitchen far from where you learned to love it.

As you savor the narrative of this dish, you might recall a grandmother’s kitchen where the door creaked with every step and the table was always set, or the first apartment you rented where the scent of a comforting meal made the space feel instantly warmer. The story of Creamy Smothered Chicken and Rice is a collection of moments—the laughter after a shared dish, the quiet satisfaction of a plate cleaned with a final forkful, the whisper of steam that signals “everything is going to be alright.” It’s a recipe that invites you to write your own chapter, to infuse it with your family’s memories, and to create new ones around the table you’re building, bite by fragrant bite.

This dish also carries a sense of practicality and resourcefulness. In many households, quick weeknight meals rely on pantry staples, flexible proteins, and a method that grows more comforting as it slows down toward the finish. The beauty of this recipe lies in its ability to layer flavor efficiently: a quick browning for color, a gentle simmer for depth, and a final finish that smooths everything into a luxurious, cohesive sauce. The result is a plate that looks as if it required more time than it actually did, a hallmark of home cooking at its most satisfying: honest, accessible, and deeply flavorful.

Why You’ll Love This Recipe

  • Comfort in a single skillet: A creamy, luscious sauce wraps around tender chicken and sits atop bedded rice, delivering comfort in every mouthful with minimal cleanup.
  • Weeknight friendly: The method is streamlined, designed to come together quickly without sacrificing depth of flavor, making it a reliable go-to for busy evenings.
  • Versatile and forgiving: The components can be adapted to different diets and preferences, and the sauce can be tuned with your favorite seasonings or add-ins.
  • Family-approved: Rich and satisfying, yet balanced enough to appeal to both kids and adults alike, encouraging everyone to gather around the table.
  • Balanced texture: The dish offers a delightful contrast between the silky, clingy sauce and the tender, juicy protein, all resting on a soft, flavorful rice base.
  • Economical: Built on simple ingredients and mindful cooking techniques, it’s a great way to stretch a budget while delivering restaurant-worthy comfort.
  • Make-ahead potential: Leftovers reheat beautifully, making it an excellent option for meal prep or lunch leftovers that taste even better the next day.

Flavor Profile & Texture

The first impression is creamy, smooth, and slightly indulgent, but not heavy in a way that overwhelms the palate. The sauce acts like a luxurious cloak, attaching itself to every grain of rice and to each morsel of chicken, ensuring that every bite is flavorful and satisfying. You’ll notice a delicate balance of savory tones with a gentle sweetness and a touch of umami that lingers long after the fork has left the plate. The chicken remains moist and succulent, its natural juices coaxed forward by a brief sear and by the gentle simmer that follows, allowing the meat to soak up the subtle seasoning and the sauce’s silky texture.

As the dish sits, the sauce thickens into a satin-like finish, gliding smoothly across the tongue. The rice—soft, fluffy, and tender—acts as a perfect canvas, soaking up the creamy sauce without becoming pasty or clumpy. There’s a comforting, almost nostalgic quality to the flavor profile: a union of familiar comfort food notes that feel both familiar and fresh, like a favorite sweater you don’t want to take off. The overall effect is a well-rounded harmony of textures and tastes—creamy and rich, yet buoyant enough to remain light on the palate; hearty and satisfying, but refined enough to feel special.

The dish also offers subtle layers of flavor that invite closer tasting. You might detect a gentle sweetness that tightens into a savory depth, a whisper of aromatic herbs, and a quiet, comforting savor that coats every element evenly. The chicken’s natural juices mingle with the sauce to develop a glossy, luscious mouthfeel, while the rice provides a mild, slightly nutty backdrop that keeps the entire plate balanced. The result is a profile that is comforting without being heavy, indulgent without feeling excessive—a smart, satisfying balance that makes this dish a reliable favorite.

For those who enjoy a touch of brightness, a squeeze of citrus or a light herb finish can lift the sauce at the end, adding a whisper of freshness that accentuates the dish’s creamy base. If you’re looking to emphasize a richer depth, a rustic note—like a hint of smoky undertone or a dry spice—can be introduced in a way that remains harmonious with the overall texture. The beauty of this recipe is that it remains approachable while offering ample room for personal interpretation, whether you’re cooking for one or feeding a crowd.

Occasions & Pairings

This dish shines in a variety of settings, from weeknight dinners that deserve a little consolation to casual gatherings that require something comforting and crowd-pleasing. It’s equally at home when you’re hosting a relaxed family dinner, feeding a husband’s or wife’s family, or preparing a meal to share with friends after a long day. Its generous yet balanced nature makes it a natural centerpiece for a cozy, low-key celebration or a simple, satisfying Sunday supper.

Pairing ideas to elevate the experience without complicating the recipe include:

  • Bright, crisp green vegetables on the side—think steamed broccoli, sautéed spinach, or roasted asparagus—to add color and a contrasting texture.
  • A light salad with a lemony vinaigrette to cut through the richness and bring a refreshing balance to the plate.
  • Crusty bread or warm cornbread to mop up the luscious sauce and add a comforting crunch.
  • A simple, refreshing beverage such as a sparkling iced tea, a crisp white wine, or a citrus-forward mocktail that echoes the dish’s brightness.
  • For a complete comfort spread, serve with a side of roasted vegetables that bring both flavor and color to the table.

Holidays, potlucks, or casual weekend meals alike can benefit from this dish’s adaptable nature. It pairs nicely with a simple dessert that isn’t overly heavy—think something light and fruit-forward—as a way to end the meal on a balanced note. The dish’s warmth and heartiness make it a wonderful anchor for a relaxed celebration, a family movie night, or a weeknight when you want everyone gathering around the table with smiles and full bellies.

Tips, Variations & Substitutions

Tips for a flawless result

Even though the recipe reads as straightforward, a few small tips can elevate the dish to restaurant-worthy comfort without adding complexity. Allow the chicken to brown well at the start—the color and fond left in the pan are flavor gold. Use a gentle simmer to encourage the sauce to thicken and develop its silkiness without breaking. Taste and adjust seasoning toward the end to ensure the sauce layers the dish with balanced salt, richness, and a hint of brightness if desired. Remember that patience in the final stage helps the sauce achieve that lush, cohesive quality that makes every bite feel coordinated and indulgent.

Variations

  • To keep the dish dairy-free, substitute the creamy component with a plant-based cream or a cashew-based blend that brings similar smoothness and body without dairy. A touch of nutritional yeast can add a gentle, savory depth without compromising creaminess.
  • Gluten-free adjustments: This dish can be naturally gluten-friendly, but if you’re serving to someone who is sensitive, ensure any thickeners or flavor boosters you use are certified gluten-free. The goal is a silky sauce that clings to the rice without introducing textural grittiness.
  • Protein swaps: While the title calls out chicken, the smothered technique adapts well to other proteins. Tender turkey, pork cutlets, or even hearty mushrooms can carry the creamy coating for a comforting variant. For a vegetarian version, use thick slices of hearty mushrooms or a protein-rich plant alternative that holds moisture well during cooking.
  • Rice alternatives: If you prefer, substitute a softer or more toothsome rice (like jasmine, basmati, or a short-grain rice blend) to alter the texture slightly. You can also go with a fluffy quinoa or a fusion mix for a different yet complementary base that still soaks up the creamy sauce.
  • Herbal finish: A handful of fresh herbs—parsley, chives, or dill—right before serving can brighten the dish and add a layer of aromatic lift that contrasts pleasantly with the richness.

Substitutions

Substitute according to dietary needs or pantry availability. If you’re avoiding certain ingredients, lean toward a smooth, dairy-friendly alternative or a plant-based option that maintains the sauce’s body. The goal is to preserve the dish’s comforting texture while honoring individual preferences. Don’t be afraid to experiment with a pinch of spice, a dash of citrus zest, or an herb blend to tailor the dish to your taste.

Storage & Make-Ahead Ideas

This dish stores beautifully, which makes it a practical choice for meal planning. Leftovers refrigerate well for several days, and the flavors often deepen with time as the sauce thickens slightly and the rice absorbs more of the creamy richness. When reheating, a gentle, low heat with an occasional stir helps preserve the sauce’s velvety satin texture and prevents sticking or separation. If you notice the sauce thinning a bit after storage, a light whisk or a splash of dairy or non-dairy cream can bring it back to its original creaminess without losing its cohesion.

Freezing is possible but requires a bit more care. The rice can become a touch grainy after freezing and thawing, so if you plan to freeze, consider storing the components separately if possible (or plan to reassemble and reheat gently to re-emulsify the sauce). Reheating on the stove with a splash of liquid, and a gentle whisk, tends to yield the best results. If you’re making ahead for a busy week, you can prepare the sauce and chicken up to a point, cool, refrigerate, and then finish with the rice and a quick reheat when you’re ready to serve.

Make-ahead ideas:

  • Prepare the creamy sauce in advance, store it in the refrigerator, and reheat with a new batch of freshly cooked rice and chicken for a quick finish.
  • Par-cook the rice and store it separately; reheat the rice gently and fold into the warm, creamy sauce just before serving to preserve texture.
  • Cook the chicken in advance and rewarm it gently in the sauce, which allows the flavors to meld beautifully while keeping the chicken tender.

Fun Facts & Trivia (Optional)

Here are a few lighthearted notes and culinary curiosities that connect to the spirit of this dish:

  • Smothering as a technique: The concept of smothering—a gentle method of enveloping food with a luscious sauce—appears in various regional cuisines. It’s a practical, comforting approach that makes every bite cohesively savory.
  • Rice pedagogy: Rice has long served as the humble vehicle for soaking up sauces across cultures. When paired with a creamy pan sauce, rice becomes less of a side and more of a partner in the overall mouthfeel, providing a soft, nourishing base that carries the richness without overpowering it.
  • Creamy comfort across generations: Cream-based sauces are a staple in many family recipes because they offer a reliable way to turn everyday ingredients into something luxurious without requiring advanced culinary techniques.
  • One-pot simplicity: The appeal of one-pot, or single-pan, dishes lies in the way they simplify cooking and cleanup while delivering generous, comforting flavors—an idea that resonates with busy households and home cooks seeking dependable, satisfying meals.
  • Seasonal adaptability: While the dish is inherently comforting, its flexibility makes it suitable for various seasons. In cooler months, the creamy sauce feels especially cozy, while in warmer months, a spritz of citrus or a bright herb can refresh the palate without sacrificing comfort.

Ingredients

Creamy Smothered Chicken and Rice
Main Protein & Base
  • – 4 boneless, skinless chicken thighs (about 1.5 to 2 pounds)
    → Searing the thighs first creates a flavorful crust and locks in moisture, serving as the heart of the dish. Pat dry to remove excess moisture so they brown instead of steaming; treat them as the foundation for the smothered sauce. After browning, rest briefly before returning to the pan to finish in the creamy sauce.
  • – 1 tablespoon olive oil (or neutral oil)
    → Used to sear the chicken and to sauté aromatics without sticking. A high-smoke-point oil helps achieve a golden crust; avoid overcrowding the pan to keep surfaces dry for proper browning.
  • – 1 1/2 cups long-grain white rice, rinsed until the water runs clear
    → Rinsing removes surface starch so the grains cook up light and separate rather than gummy; use a standard rice-to-liquid ratio to ensure fluffy rice that soaks up the creamy sauce.
  • – 3 cups chicken broth, divided (1 1/2 cups for cooking the rice, 1 1/2 cups for the sauce)
    → Broth provides depth of flavor and moisture while the sauce reduces; using separate portions helps rice cook properly and the final sauce stay nicely emulsified. If using low-sodium broth, adjust salt accordingly.
Aromatics
  • – 1 medium onion, diced
    → Adds sweetness and depth to the sauce as it caramelizes; cook until soft and translucent to release flavor without browning too darkly, which could introduce a bitter edge.
  • – 3 cloves garlic, minced
    → Brings pungent, savory backbone to the sauce; add toward the end of the onion sauté so the garlic doesn’t burn and turn harsh. For more aromatic intensity, crush garlic slightly before mincing for easier release of oils.
  • – 1/2 cup sliced mushrooms (optional)
    → If using, mushrooms add earthy depth and moisture; sauté with the onions until their edges brown and the liquid evaporates to concentrate flavor. If you want to skip, the dish will still be creamy and comforting.
  • – 2 tablespoons butter (or additional oil)
    → Adds richness and helps sauté aromatics; butter can be added with onions to create a silky base; use oil if you need a higher smoke point or dairy-free option. For the most flavorful base, brown the butter slightly before adding onions for a nutty note.
Dairy & Sauce
  • – 1/2 cup heavy cream
    → Provides a rich, velvety body to the sauce; simmer gently to avoid scorching and separation; if you prefer lighter, substitute with half-and-half though the sauce will be thinner.
  • – 4 oz cream cheese, softened (optional)
    → Adds luxurious thickness and a creamy texture that coats the chicken and rice; soften to room temperature and whisk into the pan with the dairy to emulsify smoothly, avoiding lumps. If you skip it, sauce will be looser but still delicious.
  • – 1/2 cup sour cream or Greek yogurt (optional)
    → Gives tang and extra creaminess; temper by whisking a tablespoon of hot sauce into it before adding to the pan to prevent curdling, especially if the heat is high. Use yogurt for lighter tang or sour cream for a richer bite.
  • – 1 tablespoon Dijon mustard (optional)
    → Adds a subtle tang and helps emulsify the sauce; whisk in with the broth to distribute evenly and prevent separation during simmering.
  • – 1/2 cup grated Parmesan cheese (optional)
    → For a cheesy finish; adds savory umami and body to the sauce. Stir in a little at the end if you want a richer, thicker texture without overpowering creaminess.
Seasonings & Thickening
  • – 1 teaspoon paprika (smoked preferred)
    → Provides color and a gentle smoky sweetness; adjust to taste for more warmth and depth; smoked paprika contributes a richer aroma to the creamy sauce.
  • – 1 teaspoon dried thyme or Italian seasoning
    → Adds herbal notes that complement chicken and rice; thyme pairs especially well with chicken; you can switch to Italian seasoning for a broader herb profile. Use fresh thyme if available for brighter aroma, but dried works well in one-pot cooking.
  • – Salt and freshly ground black pepper to taste
    → Essential for balancing all flavors; season the chicken well before browning and re-check the sauce after adding dairy; broth can be salty, so add minimally at first and adjust later.
  • – 1 tablespoon cornstarch mixed with 2 tablespoons cold water (slurry) to thicken the sauce (optional)
    → Use if you prefer a thicker, clingier sauce; whisk slurry into simmering sauce gradually until the desired viscosity is reached; this helps the sauce stay glossy and coat the rice and chicken.
Optional Add-ins
  • – 1/2 teaspoon red pepper flakes (optional)
    → Adds a gentle heat that balances the richness; adjust to taste or omit for a milder dish. If you like more heat, increase slightly and simmer with the onions to mellow.
  • – 1 cup shredded cheese (optional) such as cheddar or Monterey Jack
    → For an extra cheesy finish; melt the cheese into the sauce at the end or sprinkle on top and broil briefly to create a bubbly crust. If you prefer a traditional creamy finish, skip cheese or use a small amount to avoid separation.
Finish & Garnish
  • – 2 tablespoons chopped fresh parsley or green onions, for garnish
    → Adds a pop of color and fresh, grassy notes that cut through the richness; sprinkle at the end of cooking to preserve bright green color and crisp texture. For extra brightness, zest a touch of lemon over the finished dish.

Instructions

  • Pat dry the chicken thighs with paper towels and season generously on all sides with salt, pepper, and paprika to promote browning and depth of flavor.
    → Removing surface moisture helps the chicken form a golden crust instead of steaming, and paprika contributes color and a gentle smoky sweetness.
  • Heat 1 tablespoon olive oil in a heavy skillet over medium-high heat until shimmering, then arrange the chicken in a single layer without crowding the pan.
    → Adequate space prevents steaming and allows the Maillard reaction to develop a flavorful crust; crowding lowers surface temperature and yields pale, soggy results.
  • Sear the chicken for 3 to 4 minutes on the first side, without moving it, until the bottom is deeply golden and a crust forms, then flip and cook until the second side is just bearing color and the meat is mostly cooked through; transfer to a plate to rest for 5 to 7 minutes.
    → Resting redistributes juices, making the meat juicier, while finishing in the sauce later ensures it stays moist.
  • Add 1 tablespoon butter to the same pan and swirl until foamy; add the diced onion and a pinch of salt, and sauté over medium heat until the onion is soft and translucent (about 6–8 minutes).
    → Cooking onions gently releases sweetness and depth; salt helps draw out moisture, creating a flavorful base for the sauce.
  • Stir in the sliced mushrooms (if using) and cook until their edges brown and their moisture evaporates, about 4–6 minutes, then push them to the side of the pan.
    → Browning mushrooms concentrates their umami; evaporating moisture prevents a watery sauce later.
  • Add the minced garlic to the pan and sauté for 30 to 60 seconds, just until fragrant; do not let it burn, or it will taste bitter.
    → Garlic burns quickly; brief heating releases its aroma without bitterness, building the sauce’s backbone.
  • Sprinkle in the paprika and thyme, then cook for 30 seconds to bloom the spices and release their essential oils.
    → Blooming spices heightens aroma and deepens flavor; thyme complements chicken in a comforting, savory way.
  • Add the rinsed rice to the pan and stir to coat each grain with fat and aromatics; toast for 1 to 2 minutes until the edges look slightly translucent and you can smell a nutty fragrance.
    → Toasting reduces starch release, helping the rice stay fluffy rather than starch-laden, and coats grains with flavor.
  • Pour in 1 1/2 cups chicken broth and raise the heat to bring the mixture to a simmer, then use a spoon to scrape up any browned bits from the bottom of the pan.
    → The browned bits (fond) add color and depth; simmering with broth prevents scorching and helps the rice start cooking with flavor.
  • Return the browned chicken to the pan, nestling it on top of the rice, and pour the remaining 1 1/2 cups broth around the edges; bring the liquid to a gentle simmer, then cover and reduce heat to low.
    → Layering liquid around the rice keeps the grains evenly hydrated while the chicken finishes cooking, and a covered simmer creates a cohesive one-pot texture.
  • Simmer gently until the chicken reaches an internal temperature of 165°F (74°C) and the rice is tender, about 12 to 18 minutes depending on your stove and the thickness of the thighs.
    → The thermometer confirms safety and the timing ensures the starches finish without becoming mushy; avoid frequent lifting of the lid to maintain steady steam.
  • Meanwhile, whisk together the heavy cream, softened cream cheese (if using), sour cream or Greek yogurt, Dijon mustard, and grated Parmesan until completely smooth and glossy.
    → A smooth dairy mixture ensures a creamy, cohesive sauce that emulsifies into the cooking liquids without lumps; the cheese adds body and umami.
  • Once the chicken is nearly cooked, reduce the heat to low and whisk the prepared dairy mixture into the pan, stirring constantly to emulsify and prevent curdling; continue to simmer gently for 2 to 4 minutes until the sauce coats the rice and chicken.
    → Gentle heat preserves the dairy’s texture and helps the sauce thicken without separating; continuous stirring ensures even distribution.
  • If the sauce needs further thickening, whisk together 1 tablespoon cornstarch with 2 tablespoons cold water to make a slurry, then gradually whisk the slurry into the simmering sauce and cook until the sauce is glossy and reaches your desired thickness.
    → A slurry gives you precise, controllable thickening; add a little at a time and watch for the gloss that signals the right consistency.
  • Taste and adjust seasoning with salt and freshly ground black pepper, considering the saltiness of the broth and cheese; add red pepper flakes if you want a gentle heat.
    → Proper seasoning balances the entire dish and optional heat helps cut through richness; always adjust at the end after dairy is added.
  • Stir in a final handful of grated Parmesan or fold in extra shredded cheese if you desire a richer, cheesier finish, and simmer for another 60 seconds to meld flavors.
    → A final cheese addition enriches the sauce and creates a cohesive, glossy coating that clings to chicken and rice.
  • Turn off the heat and let the dish rest, covered, for 5 minutes to allow the sauce to thicken slightly and the flavors to meld; this makes serving neater and richer.
    → Resting gives the starch time to hydrate fully and helps the sauce settle into a uniform texture across rice and chicken.
  • Garnish with chopped fresh parsley or green onions just before serving to add a bright, herbal finish and a contrasting color that makes the dish look appetizing.
    → Fresh herbs bring a clean aroma and visually lift the plate; the vibrant green also cuts through the richness.

Notes

These creamy smothered chicken and rice are a comforting, one-pan meal that delivers juicy, pan-seared thighs enveloped in a rich, velvety sauce that braises into tender rice. To achieve the best crust, pat the chicken dry and season well before browning in a hot skillet with a little olive oil; avoid crowding the pan so the meat browns instead of steaming. Sauté the onion until soft and translucent, then add garlic (and optional mushrooms) for depth; if using mushrooms, cook until their moisture evaporates to concentrate flavor. Deglaze the pan with a splash of broth or wine to lift the browned bits. For the sauce, gradually whisk in the dairy components (heavy cream, sour cream or yogurt, and optional cream cheese or Parmesan) off the heat or on a low simmer to prevent curdling; simmer gently so the sauce thickens without separating. If you want a thicker coating, stir in the cornstarch slurry and simmer until glossy. The rice should be cooked in 1 1/2 cups of broth, rinsed white rice for fluffy grains; the remaining 1 1/2 cups broth is added to the sauce as the chicken finishes, so you’ll want to monitor and adjust liquid to keep a saucy but not soupy consistency. Season carefully with salt, pepper, paprika (smoked if possible), and thyme; taste and adjust as the sauce comes together because dairy and broth can change the salt balance. Finish with fresh parsley or green onions for color and a squeeze of lemon if desired for brightness. This dish is naturally gluten-free when made with gluten-free broth and cornstarch; you can customize with an extra half cup shredded cheese for a cheesier version, or omit for a lighter finish. Store leftovers in airtight containers, refrigerate up to 3 days or freeze for longer storage; reheat gently on the stove with a splash of broth to restore creaminess.

Tips

Tips for Creamy Smothered Chicken and Rice

  • Browning strategy: Pat the chicken thighs thoroughly dry, season well, and sear in a hot pan without crowding. A steady, high-heat sear creates a flavorful crust and helps retain moisture inside the meat. Let the chicken rest briefly after browning before returning to the pan for finishing in the creamy sauce.
  • Choosing the right pan: Use a heavy skillet, preferably cast iron or stainless with a thick base. This helps maintain even heat for consistent browning and reduces sticking when you deglaze to build the sauce.
  • Deglazing for flavor: After browning, splash in a small amount of broth or wine and scrape up the fond (the browned bits). This foundation deepens the sauce without needing extra spices, and it prevents lost flavor.
  • Rice prep and cooking ratio: Rinse long-grain white rice until the water runs clear to remove surface starch. Use the 1.5 cups rice to 3 cups broth ratio as in the recipe (1:2). Keep the lid on tight during simmering and avoid lifting the lid early, which can lead to uneven cooking.
  • Rice resting: Once the rice finishes cooking, let it rest, covered, for 5–10 minutes. This allows steam to finish the grains and yields fluffier, separate kernels that soak up the creamy sauce.
  • Aromatics timing: Sauté the onions until soft and translucent, then add garlic toward the end of the onion step to prevent burning and bitterness. If using mushrooms, add them with the onions to brown and release moisture for deeper flavor.
  • Managing dairy for a silky sauce: Keep the sauce at a gentle simmer when dairy goes in. High heat can cause curdling or separation. If using sour cream or yogurt, temper by whisking in a small amount of hot sauce or hot broth first before adding to the pan to stabilize the texture.
  • Thickening without graininess: If you prefer a thicker sauce, prepare a cornstarch slurry (1 tablespoon cornstarch with 2 tablespoons cold water) and whisk it in gradually during a simmer. Stir until the sauce reaches your desired glaze and gloss.
  • Cheese and cream options: Softened cream cheese blends in smoothly when added with the dairy. If you skip it, the sauce will be lighter, so you may want to balance with a touch more cream or Parmesan at the end for body.
  • Flavor balancing with dairy toppings: Parmesan adds savoriness; if you’re using it, stir in a small amount at the end to avoid gritty texture. Dijon mustard helps emulsify and brighten the sauce—add it early with the broth for even distribution.
  • Seasoning sensitivity: Broth can be salty, so season lightly at first and adjust later. Always taste the sauce after the dairy has been added and before serving to ensure proper salt balance.
  • Optional add-ins and heat: Red pepper flakes give a gentle kick—start with 1/2 teaspoon and adjust to taste. If using shredded cheese for extra gooeyness, melt it in gradually at the very end to avoid separation.
  • Finish with freshness: A sprinkle of chopped parsley or green onions brightens the dish. For a citrus lift, a light zest of lemon over the finished dish adds brightness that cuts through richness.
  • Make-ahead and reheating: The dish stores well in the fridge for 3–4 days. Reheat gently on the stove with a splash of broth or milk to loosen the sauce if needed; you may need to whisk in a touch more dairy to restore creaminess.

FAQ

Creamy Smothered Chicken and Rice — FAQ

What is Creamy Smothered Chicken and Rice?

It’s a comforting one‑pan dinner featuring seared chicken breasts smothered in a velvety creamy sauce with onions and garlic, finished with Parmesan. The rice cooks right in the pan with chicken broth, absorbing rich flavors for a hearty, satisfying meal.

How long does it take to make Creamy Smothered Chicken and Rice?

Plan for about 40–45 minutes total: 5–10 minutes for prep, 15–20 minutes to brown the chicken, and 15–20 minutes to simmer the rice in broth until tender and the sauce thickens.

What ingredients do I need?

Here’s a typical list for 4 servings. You can scale as needed.

  • 4 boneless, skinless chicken breasts (or thighs)
  • 1 tsp salt, 1/2 tsp black pepper, 1/2 tsp paprika (or your favorite seasoning)
  • 1 tablespoon olive oil
  • 1 small onion, diced
  • 2–3 cloves garlic, minced
  • 1 cup long-grain white rice (uncooked)
  • 2 cups chicken broth (low-sodium preferred)
  • 1/2 cup heavy cream or half-and-half
  • 1/2 cup grated Parmesan cheese
  • Optional: fresh parsley or thyme for garnish; optional mushrooms or peas
Can I make this dairy-free or gluten-free?

Yes. To make dairy-free, substitute the cream with a dairy-free alternative (such as coconut cream or almond-based creamer) and use a dairy-free Parmesan substitute or omit cheese. Use a gluten-free chicken broth and ensure any added thickeners are gluten-free. If needed, thicken with a cornstarch slurry (1 teaspoon cornstarch whisked into 1 tablespoon cold water).

Can I use chicken thighs instead of breasts?

Absolutely. Thighs stay juicier and can be a great swap. Boneless, skinless thighs cook a bit faster or slower depending on size; adjust time accordingly and ensure an internal temperature of 165°F (74°C). If using bone‑in thighs, sear, then simmer longer until cooked through before returning to the sauce.

Can I make this ahead or freeze leftovers?

You can prep the chicken and sauce ahead up to the simmer stage and finish later. Leftovers refrigerate well for 3–4 days in an airtight container. Freezing rice-based dishes can alter texture; for best results, freeze the sauce and chicken separately and reheat with fresh rice or reheated rice.

How do I keep the sauce from curdling or separating?

Cook over medium heat and avoid a full boil after adding the cream. Whisk the cream in gradually and off the heat if possible. If needed, thicken with a light cornstarch slurry (1 teaspoon cornstarch mixed with 1 tablespoon cold water) and simmer gently. Stir in Parmesan off the heat to help emulsify the sauce.

How should I adjust the recipe for more or fewer servings?

Multiply ingredients for more servings or halve for fewer, keeping the rice-to-liquid ratio reasonable. For larger batches, use a larger pan or Dutch oven to ensure even cooking. You may also cook the rice separately if your pan is small.

What sides pair well with Creamy Smothered Chicken and Rice?

Green vegetables (steamed broccoli, green beans, or peas), a simple salad, or a crusty loaf of bread to soak up the sauce. A light lemony side can balance the richness nicely.

What should I do if the rice is undercooked or too sticky?

If undercooked, add a splash more broth or water, cover, and simmer a few more minutes until tender. If too sticky, remove from heat, fluff with a fork, and let rest covered for a few minutes; you can add a bit more liquid and cook briefly to loosen. Rice type and ratio can affect texture, so adjust next time by using the recommended 1:2 rice-to-liquid ratio for this dish.

Introduction / Hook

Imagine a warm, sunlit morning where the kitchen perfume drifts through the house like a comforting embrace. A dish that looks unassuming at first glance—soft, pale, and inviting—unfolds into a symphony of textures and flavors as you cut your first slice. This is the Cottage Cheese Egg Bake: a breakfast-forward, supper-ready comfort that feels like a hug in a pan. The moment you lift the lid or crack the first forkful, you’ll be met with a gentle steam rising from a custardy, stone-gold crust, a whisper of sea-salt on your tongue, and the bright lift of herbs that give you a sense of clean mornings and endless possibilities. Creamy cottage cheese folds into airy eggs to form a light, comforting body that somehow manages to be both filling and delicate at the same time. It’s the kind of dish that makes weekend mornings feel intentional, inviting conversation and lingering at the table long after the coffee has cooled.

What makes this bake especially magnetic is its balance: a tender center with a hint of custard, a subtle tang that comes from the cottage cheese, and a golden edge that offers a crisp, almost toasty bite. There’s comfort here, yes, but also a surprising versatility. It’s flexible enough to serve as a nourishing breakfast for a crowd, a savory brunch centerpiece, or a nourishing weeknight dinner when you crave something wholesome without heavy cleanup. And because the ingredients come together in a single pan, there’s a sense of casual sophistication—enough to feel special for a holiday morning, yet straightforward enough for a busy weekday. The aroma alone will pull people toward the kitchen—the gentle perfume of eggs, faint dairy notes, peppery herbs, and a whisper of melted cheese all mingling into a scent that welcomes everyone to the table.

The Story Behind the Dish

There is something timeless about a cottage cheese egg bake: it’s a dish that travels easily from rustic kitchens to modern dining tables, and it carries with it a memory of mornings when time seemed to stretch a little longer and the world felt full of possibilities. Cottage cheese has long played the role of a versatile pantry staple—cool and creamy, it can be stirred into savory fillings, folded into batters, or spooned onto crisp crackers for a quick snack. In many homes, breakfast casseroles and baked eggs are a Sunday ritual, a way to nourish a family after a busy week and welcome the first day of rest with something modestly splendid.

In my own family, this bake became a gentle tradition long before it carried the polished label of a “recipe” in a cookbook. It began as a practical, thrifty solution: a bowl of pantry staples whisked into a satisfying bake that could stretch into leftovers for days and still taste fresh. We learned to season boldly enough to wake the senses—garlic, chives, a crack of black pepper—without overpowering the delicate sweetness of the cottage cheese. Over time, the dish grew into a comforting memory of weekend mornings when the kitchen was filled with the hiss of a hot oven and the soft clink of forks against plates. There’s something deeply reassuring about a dish that requires minimal fuss yet leaves you feeling contented and ready to greet the day.

Today, the Cottage Cheese Egg Bake travels beyond its humble origins. It has found a home in brunch menus, in meal-prep rotations, and in the hearts of people who value protein-rich, easy-to-customize meals that don’t require a long list of ingredients or complicated technique. Its charm lies not only in the ease of preparation but in the way it invites personal expression: fold in your favorite vegetables, adjust the herbs to suit your mood, or tailor the bake to accommodate dietary needs without compromising the comforting essence you love in a morning dish. In essence, this bake captures a spirit of welcoming—an invitation to slow down, savor the moment, and share something nourishing with the people who matter most.

Why You’ll Love This Recipe

  • High-protein, satisfying start: Built on eggs and cottage cheese, this bake provides steady energy to power your day without the heaviness of a breakfast that weighs you down.
  • Flexible and forgiving: It’s easy to adjust with whatever vegetables or herbs you have on hand, making it a practical solution for busy mornings or last-minute guests.
  • One-pan wonder: Mix, bake, and serve from the same dish. Less cleanup means more time around the table with family and friends.
  • Make-ahead friendly: It reheats beautifully, so you can cook once and enjoy for several meals—perfect for meal prep or weekend brunches.
  • Budget-friendly: Cottage cheese is an affordable, protein-packed option that stretches ingredients without sacrificing flavor or texture.
  • Customizable flavor journey: Fresh herbs, spices, vegetables, and even a touch of cheese on top can completely transform the profile from bright and herbaceous to savory and smoky.
  • Kid- and crowd-pleasing: Mild, comforting flavors tend to win over picky eaters, while the dish remains elegant enough for entertaining.

Flavor Profile & Texture

The Cottage Cheese Egg Bake is an ode to harmony—soft, custardy interiors enveloped by a delicate, lightly browned crust that offers a satisfying bite. The cottage cheese contributes a gentle tang and a creamy texture that keeps the center lush without weighing down the dish. The eggs provide structure and a mild, comforting flavor that blends seamlessly with dairy, while a careful selection of aromatics—garlic, scallions or chives, pinch of nutmeg or black pepper—create a subtle, rounded depth rather than a sharp bite.

Texture plays a starring role. The outer edges caramelize ever so slightly in the oven, delivering a whisper of crispness that contrasts with the pillowy inner mix. If you love a more sushi-like silkiness, you’ll appreciate how the cottage cheese lends a slightly curdled, creamy mouthfeel that is unique to this ingredient when heated gently. Add-ins like sautéed spinach, roasted peppers, or tender mushrooms bring a tender bite and a pop of color, while fresh herbs—parsley, dill, chives—provide a bright, green note that wakes up the palate. A light dusting of pepper or paprika adds a gentle warmth, and a modest sprinkle of grated cheese on top (if you like) can introduce a bubbly, toasty finish that looks as appealing as it tastes. The end result is a balanced, multi-dimensional dish where comfort and brightness coexist in every forkful.

In terms of flavor impact, think of this bake as a canvas. The base of cottage cheese and eggs offers a mild, slightly milky foundation that invites the character of your additives to shine through. Vegetables bring color and texture; herbs bring aroma and lift; a hint of salt ties everything together. The overall effect is neither too eggy nor too dairy-forward; it’s a clean, well-rounded flavor profile that feels wholesome and satisfying without veering into richness that weighs you down. This makes it suitable for a wide range of palates—from families with kids who prefer gentle flavors to adults who appreciate a nuanced, savory morning dish that still feels approachable.

Occasions & Pairings

  • Weekend brunch: A centerpiece that feeds a crowd without requiring a lot of fuss. Serve with a seasonal fruit salad, warm bread or biscuits, and coffee or sparkling water with a splash of citrus.
  • Holiday mornings: A comforting dish that can be prepped the night before and finished in the oven as guests arrive, ensuring everyone has a chance to chat and nibble between courses.
  • Weeknight dinner: Pair with a crisp green salad, a tangy vinaigrette, and a light roasted vegetable medley for a wholesome, quick meal.
  • Potlucks and gatherings: Bake in a disposable pan for easy transport and repurpose leftovers as a breakfast-for-dairly-next-day snack or a lunch option.
  • Brunch cocktails or mocktails: Complement with a light, citrusy beverage—perhaps a grapefruit spritz or a cucumber-mint cooler—to keep the meal bright and balanced.

Pairing ideas to elevate the experience include roasted cherry tomatoes with a splash of balsamic, a crisp green salad with lemon-Dijon dressing, or a simple avocado rhythm to add creaminess and color. A small bowl of sautéed mushrooms or spinach can be tucked into slices or plated on the side for extra texture and nutrients. If you crave something extra indulgent, a dollop of Greek yogurt or a few shavings of aged cheese can serenely heighten the savory profile without overpowering the subtle dairy sweetness at the core of the bake.

Tips, Variations & Substitutions

Vegan or dairy-free adaptations

To keep the spirit of a baked egg dish while accommodating dietary needs, consider a vegan scramble base using firm tofu or chickpea flour to mimic the texture of eggs. Blend silken tofu with nutritional yeast, a pinch of turmeric for color, and your favorite dairy-free milk. Fold in chopped vegetables and herbs, then bake in a well-greased dish. Note that flavor depth may shift, so season generously with garlic, onions, and herbs to compensate for the absence of dairy and eggs. A dairy-free cottage cheese alternative can be used if you have access to it, or you can swap in vegan cream cheese for a tangier bite.

Cheese and dairy options

Butter, cream, or a splash of milk can be used to moisten the mixture if you want a richer, more pudding-like texture. If you’re avoiding heavy dairy, a small amount of low-fat milk or a non-dairy option such as almond or oat milk works well without overpowering the dish. For a sharper bite, fold in a handful of grated Swiss or sharp cheddar right before baking, or drizzle a light amount of aged cheese on top before you bake for a bubbly, golden crust.

Vegetable and herb add-ins

Feel free to customize with peppers, onions, spinach, mushrooms, broccoli florets, or sun-dried tomatoes for color and sweetness. Fresh herbs upgrade the aroma dramatically—chives, dill, parsley, and basil all pair beautifully with cottage cheese. For a more robust flavor, a pinch of smoked paprika, cumin, or a dash of chili flakes adds warmth and depth. If you prefer a milder profile, stick with chives and parsley for a clean, bright finish.

Gluten-free and other dietary twists

The beauty of this bake is its naturally gluten-free base—eggs and cottage cheese. If you’re serving gluten-sensitive guests, you’re already in good shape. Add gluten-free toppings like roasted vegetables or a gluten-free bread crumb topping if you want extra texture on the surface. For low-carb or keto-friendly variations, skip starchy add-ins and emphasize high-protein, low-carb vegetables to maintain balance while keeping carbohydrates in check.

Regional twists

In a coastal region, you might fold in fresh dill and lemon zest to evoke a bright, seaside vibe. In a countryside kitchen, you could incorporate sautéed mushrooms and onions with a touch of thyme for an earthy, rustic persona. A Latin-inspired version could feature cilantro, jalapeño, and a small amount of cotija on top for a zesty finish. The key is to maintain the gentle custard-like center while letting your regional flavors take the lead in the aromatic profile.

Storage & Make-Ahead Ideas

This bake shines as a make-ahead hero. You can assemble the mixture a day ahead, refrigerate it, and bake it when ready to serve. The texture remains cohesive, and the flavors deepen slightly as they sit. If you plan to store leftovers, let the dish cool completely, then cover tightly with plastic wrap or transfer to an airtight container. Refrigerate for up to 3 days; reheat gently in the oven or in a microwave, adding a splash of milk or stock to refresh the center if it dries a bit. Freezing is possible but will alter the texture slightly; if you freeze, freeze after baking in single-serving portions and reheat covered in a low oven to prevent the surface from drying out. For optimal texture, consider baking a fresh batch for the actual meal, while preparing components or other dishes in advance that complement the bake’s light, airy character.

Make-ahead strategies to consider:

  • Prep chopped vegetables and herbs the day before; store in the fridge so you can mix and match quickly on the day of baking.
  • Prepare the egg and cottage cheese mixture in advance and refrigerate, bringing it to near room temperature before baking to ensure even cooking.
  • Pre-toast any nuts or seeds you plan to add to the topping; they’ll stay crisp and aroma-filled when sprinkled on top just before serving.

Fun Facts & Trivia (Optional)

– Cottage cheese is one of the oldest known cheeses, with a history dating back thousands of years. Its mild flavor and creamy texture make it incredibly versatile for both sweet and savory dishes.

– Egg bakes and casseroles have been staples in many traditional breakfast menus across diverse cultures, often serving as a practical way to feed a crowd with simple, affordable ingredients.

– The idea of baking eggs with dairy and herbs to create a cohesive dish taps into a long culinary tradition of turning pantry staples into a comforting, shareable meal. It’s a reminder that great flavors often come from simplicity and thoughtful seasoning.

– If you’ve ever baked a custard dessert, you’ll recognize the tender, set texture in this dish—a gentle reminder that eggs, when handled with care, can yield rich, comforting results even in savory applications.

As you explore this Cottage Cheese Egg Bake, you’ll discover that its beauty lies in its adaptability. It invites you to infuse your kitchen with warmth, to gently coax flavors from humble ingredients, and to present something that feels both nourishing and elegantly simple. Whether you’re feeding a crowd on a chilly weekend morning or crafting an easy, wholesome weeknight dinner, this bake offers a dependable foundation that welcomes your personal touch and your favorite seasonal produce. Let it become a dependable staple in your repertoire—one that brings people to the table with a smile and leaves everyone feeling satisfied, not just full.

Ingredients

  • Egg Mixture
    • 6 large eggs
      → The eggs provide the primary structure and binding for the bake, forming a custard-like matrix that holds the cottage cheese and vegetables together. For the best texture, let the eggs come closer to room temperature before mixing and beat just until combined to avoid a dense texture.
    • 2 cups cottage cheese (small curd, drained well)
      → Acts as a creamy, high-protein base that lightens the custard and adds moisture without making the bake heavy. Drain thoroughly to prevent watery separation; for an ultra-smooth texture, pulse briefly in a blender or food processor before mixing.
    • 1/2 cup milk (dairy or unsweetened plant milk)
      → Adds moisture and helps create a custard-like consistency that envelops all ingredients. Adjust the amount depending on how dense you want the bake; use whole milk or a touch of cream for richer results.
    • 1/2 teaspoon salt
      → Enhances the overall flavor of the dish; since cottage cheese can be salty, start with this amount and adjust after mixing if you’re using salty add-ins like bacon or smoked cheese.
    • 1/4 teaspoon black pepper
      → Provides savory depth and a hint of bite that balances the mildness of cottage cheese. Freshly ground pepper yields a more pronounced aroma than pre-ground.
    • 1/2 teaspoon garlic powder or 1 clove garlic, minced
      → Adds a warm, savory aroma that complements the eggs and cheese. Fresh minced garlic distributes more evenly; if using fresh garlic, sauté briefly with the vegetables to mellow its sharpness.
  • Vegetables & Aromatics
    • 1 cup fresh spinach, chopped
      → Introduces color, iron, and earthy flavor; wilt the greens briefly in a dry pan or sauté with a pinch of salt to remove excess moisture before adding to the mixture, ensuring the bake isn’t soggy.
    • 1/2 cup onion, finely diced
      → Builds the savory base with sweetness as it cooks. Sautéing onion until translucent helps release its sugars and prevents a raw onion flavor in the finished dish.
    • 1 cup mushrooms, sliced
      → Contributes umami and bulk. Sauté until browned to evaporate moisture; this step prevents releasing water into the bake and helps achieve a firmer texture.
    • 2 cloves garlic, minced
      → Intensifies the savory profile; distribute evenly to avoid concentrated bites. If pressed for time, you can add garlic powder as a substitute, but fresh garlic offers a brighter aroma.
    • 1 tablespoon olive oil
      → Used for sautéing vegetables; choose extra-virgin for better flavor. Heat the oil before adding onions and mushrooms to prevent sogginess and promote browning.
  • Cheese & Herbs
    • 1 cup shredded cheddar cheese (divided)
      → Provides melty, savory richness throughout the bake; reserve a portion to sprinkle on top for a golden crust. For a sharper bite, use sharp cheddar or blend with a bit of Gruyère for depth.
    • 2 tablespoons chopped fresh parsley or chives
      → Adds bright, herbal notes and a pop of color. Fold into the mixture for even distribution or sprinkle on top after baking for a fresh finish.
    • 1/4 teaspoon dried oregano (optional)
      → Gives a subtle Mediterranean herbaceous hint that pairs well with eggs and cheese; if used, reduce salt slightly to avoid over-seasoning.
  • Optional Add-ins
    • 4 slices bacon, cooked and crumbled (optional)
      → Introduces smoky crunch and extra protein; crumble evenly into the mixture or sprinkle on top before baking for a textured bite. If using bacon, reduce added salt elsewhere to prevent excessive saltiness.
    • 1/2 cup cherry tomatoes, halved (optional)
      → Provides fresh sweetness and a touch of acidity; pat tomatoes dry to minimize extra moisture, which can affect bake texture. Scatter evenly so every slice has a pop of color.
    • 1/2 cup bell pepper, diced (optional)
      → Adds color, sweetness, and crunch; sauté with onions to soften before mixing to maintain a pleasant texture in the final dish.
  • Toppings
    • 1/4 cup shredded cheddar cheese for topping
      → Creates a bubbly, golden crust on the surface when baked. Sprinkle on the top in the last 10 minutes of baking to prevent burning and ensure a nicely browned finish.
    • Fresh herbs for garnish (optional)
      → Finishing notes that make the dish look vibrant and lift the aroma just before serving. Use parsley, chives, or dill as you prefer.

Instructions

  • Preheat your oven to 350°F (175°C) and grease a 9×13-inch baking dish or line it with parchment paper so the bake releases cleanly; this initial step ensures even cooking and prevents sticking for easy slicing later.

    → A properly preheated, well-greased pan prevents the custard from sticking, which makes portioning and serving neat and effortless.
  • Drain the cottage cheese very well and press it briefly in a sieve or through a clean pastry towel to remove excess moisture; this prevents a watery bake and helps the custard set firmly.

    → Excess moisture can lead to a soggy texture; thorough drainage concentrates the cheese flavor and ensures a stable structure.
  • Place the eggs at room temperature for about 15 minutes and lightly beat them just until the yolks and whites are combined; this yields a smoother custard and helps with even coagulation during baking.

    → Room-temperature eggs blend more uniformly with dairy and cheese, producing a tender, cohesive texture rather than a dense bake.
  • In a large bowl, whisk the eggs, drained cottage cheese, milk, salt, pepper, and garlic powder (or minced garlic) until just combined and smooth; avoid overmixing to prevent a tough texture.

    → The goal is a silky custard that evenly coats the vegetables and cheese without becoming rubbery from excessive agitation.
  • Wilt the spinach briefly in a dry skillet over medium heat or sauté with a pinch of salt until just wilted and most of the moisture has evaporated; cool slightly and squeeze out any remaining moisture.

    → Removing moisture from greens prevents water from seeping into the bake and ensures a vibrant color without sogginess.
  • In the same skillet, heat the olive oil over medium heat and sauté the onion until translucent, about 3–4 minutes; this builds a savory base and releases gentle sweetness.

    → Softened onions mellow sharpness and contribute depth of flavor to the custard without overpowering other ingredients.
  • Add the sliced mushrooms to the onions and cook, stirring occasionally, until deeply browned and their moisture has evaporated, 5–7 minutes; this concentrates umami flavor and prevents excess liquid in the bake.

    → Browning mushrooms enhances their savoriness and ensures the final texture stays firm rather than watery.
  • Stir in the minced garlic (or a pinch more garlic powder) and cook for 30 seconds until fragrant, then remove the pan from heat to avoid burning; this keeps a bright, aromatic kick in the dish.

    → Fresh garlic releases its aroma and flavor best when heated briefly but not scorched, distributing evenly throughout the bake.
  • Fold the cooled spinach into the egg-and-cheese mixture along with the sautéed onions and mushrooms so the vegetables are evenly dispersed; this creates color, texture, and vegetable distribution in every bite.

    → Even distribution prevents pockets of vegetables and ensures all portions have consistent flavor and moisture balance.
  • Stir in 3/4 cup shredded cheddar into the mixture and fold in 2 tablespoons chopped parsley or chives; reserve 1/4 cup cheddar for topping and, if using, add 1/4 teaspoon dried oregano; these additions build melt, color, and a fresh herbal note.

    → Cheddar throughout the bake provides creamy pockets of cheese; fresh herbs brighten the final dish and oregano adds a subtle, savory warmth.
  • If you’re using optional add-ins, crumble the cooked bacon evenly into the mixture (or scatter on top later) and/or pat tomatoes dry before adding to prevent extra moisture; these ingredients boost flavor and texture but require moisture management.

    → Pre-cooked bacon adds smoky crunch, while dry tomatoes prevent excess moisture from compromising texture and set of the custard.
  • Pour the entire egg mixture into the prepared dish and spread it into an even layer; use a spatula to press it gently so it fills corners and there are no thick pockets, which ensures uniform cooking.

    → An even layer guarantees consistent bake time and a uniform texture from edge to center.
  • Top the surface with the remaining 1/4 cup cheddar cheese and scatter any additional parsley or chives for color and aroma; this creates a golden, bubbly crust as it bakes.

    → The topping cheese melts into a crisp, appetizing crust while the fresh herbs release aroma just before serving.
  • Bake in the preheated oven for 35–45 minutes, or until the custard is set in the center and the edges are lightly golden; test doneness by inserting a knife or toothpick—it should come out clean with a few moist crumbs.

    → Baking until just set ensures a tender, custardy interior with a stable structure that slices cleanly; avoid overbaking which can dry the bake.
  • Remove from the oven and let the cottage cheese egg bake rest for 5–10 minutes before slicing; resting allows the custard to finish setting and makes portions neat and easy to lift.

    → Resting helps the interior set fully and prevents crumbling when you cut into the bake.
  • Cut into portions and garnish with additional fresh parsley or chives if desired; serve warm as a protein-packed breakfast, brunch, or light dinner with a side salad or toast.

    → Finishing with garnish enhances aroma and presentation, signaling freshness and inviting aroma at the table.

Notes

This cottage cheese egg bake is a protein-packed, savory dish that makes a comforting breakfast, brunch, or light dinner. A creamy custard base formed from eggs and small-curd cottage cheese sets into a sliceable bake when combined with sautéed vegetables, garlic, and melty cheddar.

  • Customization: swap or add vegetables (spinach, mushrooms, onions, peppers, cherry tomatoes) and herbs; optional add-ins like crumbled bacon or cooked sausage can be folded in or scattered on top. If using bacon, reduce salt elsewhere.
  • Texture and moisture: drain cottage cheese well and squeeze out excess moisture from spinach or mushrooms; sauté vegetables until they are just tender to avoid sogginess. For an ultra-smooth custard, briefly pulse the cottage cheese before mixing.
  • Cheese and flavor balance: reserve a portion of the cheddar to sprinkle on top for a golden crust; consider a sharper cheddar or a bit of Gruyère for depth; add fresh parsley or chives for brightness.
  • Cooking and serving: bake at 350°F (175°C) until the center is set and the edges are lightly golden, about 35-45 minutes depending on dish size. Let stand 5-10 minutes before slicing. This rest time helps the custard firm up and makes serving easier.
  • Make-ahead and storage: assemble, refrigerate overnight, and bake the next day for convenience; leftovers keep refrigerated for 3-4 days and reheat well in the microwave or oven. You can freeze baked portions for longer storage; reheat from frozen in a 350°F oven.
  • Gluten-free considerations: this dish is naturally gluten-free as written; if you use any processed add-ins or flavorings, check labels to ensure they are gluten-free. Use certified gluten-free cottage cheese and cheddar if you are sensitive to gluten.

Serving ideas: pair with a light salad, avocado slices, or grilled tomatoes for a complete meal.

Tips

Tips for Cottage Cheese Egg Bake

  1. Let the eggs come to room temperature before mixing. Warmer eggs blend more evenly and help create a light custard texture rather than a dense bake.
  2. Drain cottage cheese thoroughly. Press it in a sieve or between paper towels to remove excess moisture; for an ultra-smooth texture, pulse briefly in a blender before adding to the mixture.
  3. Whisk the egg mixture just until combined. Overmixing can tighten the custard and make the bake tougher; a few streaks of egg is fine.
  4. Sauté vegetables to remove moisture. Spinach should be wilted, mushrooms browned, and onions softened so they don’t release liquid into the bake.
  5. Pat leafy greens and mushrooms dry after sautéing. Excess moisture is the enemy of a firm, sliceable bake.
  6. Cook garlic briefly with the vegetables to mellow its sharpness and ensure even distribution in the batter.
  7. Use olive oil and a hot pan for sautéing. Preheating the pan helps brown the vegetables and prevents sogginess in the final dish.
  8. Reserve part of the cheddar for topping. A sprinkle of extra cheese on top in the last minutes creates a bubbly, golden crust.
  9. Season in stages. Cottage cheese can be salty, so taste and adjust salt after mixing. If using salty add-ins like bacon or smoked cheese, start with less salt.
  10. Fold in fresh herbs gently. Parsley or chives add brightness without overpowering the custard; add some to the batter and some as a garnish if you like.
  11. Choose add-ins thoughtfully. Bacon adds smoky crunch; tomatoes add brightness but pat dry to prevent extra moisture; peppers add color and sweetness.
  12. For extra depth of flavor, use a mix of cheddar and a bit of Gruyère or another flavorful cheese.
  13. Grease the baking dish well and choose a size that gives a 1–2 inch thick bake for even cooking. Center should be set with a barely-golden top.
  14. Let the bake rest before slicing. A 5–10 minute rest helps the custard firm up, making clean slices and easier serving.
  15. Make-ahead option: assemble the bake, refrigerate for up to 24 hours, then bake. It saves time and flavors deepen nicely.

FAQ

Cottage Cheese Egg Bake — FAQs

What are the main ingredients in Cottage Cheese Egg Bake?

The classic bake combines eggs, cottage cheese, and some milk or yogurt to keep it creamy. Shredded cheese adds melty pockets, and you can mix in vegetables (like spinach, peppers, onions) and seasonings (salt, pepper, garlic). A typical bake uses about 8 large eggs, 1 cup cottage cheese, 1/2 cup milk, 1 cup shredded cheese, plus vegetables and herbs to taste.

How do I bake Cottage Cheese Egg Bake from start to finish?

Whisk the eggs with milk or yogurt, stir in cottage cheese and seasonings, fold in any vegetables or cooked meats, then pour into a greased baking dish. Top with cheese if desired. Bake at 350°F (175°C) for 35–45 minutes, until the center is set and the edges are lightly golden. Let rest 5–10 minutes before slicing.

Can I make this ahead for meal prep?

Yes. You can assemble the mixture and refrigerate overnight before baking, or bake it now, cool completely, and refrigerate for 3–4 days. Reheat portions as needed.

Can I make a dairy-free or lower-fat version?

Yes. Use dairy-free cottage cheese substitutes (like blended silken tofu with a splash of lemon juice) and non-dairy milk. For lower fat, use part-skim cottage cheese and reduce the cheese amount. The texture may be slightly different, but it still tastes great.

What add-ins are good for this recipe?

Try spinach, chopped bell peppers, mushrooms, onions, zucchini, or broccoli. For extra protein, add cooked sausage, bacon, turkey, or diced ham. Fresh herbs like chives or parsley boost brightness.

How many servings and what are the nutrition estimates?

Yield depends on pan size and how you slice. A typical 8-inch square dish yields about 6–8 servings. Each serving generally has around 180–240 calories, 16–22 g protein, 10–14 g fat, and 3–8 g carbohydrates, not counting added ingredients. For precise numbers, calculate with your exact ingredients.

How should I store leftovers?

Refrigerate leftovers in an airtight container for 3–4 days. For longer storage, you can freeze individual portions for 2–3 months. Label with the date.

How do I reheat without drying it out?

Microwave in 30–60 second bursts until warm, flipping once. Or reheat in a preheated 350°F (175°C) oven for 10–15 minutes, covered with foil, until heated through. Let it rest a minute before serving.

Is Cottage Cheese Egg Bake gluten-free or suitable for allergies?

Eggs and cottage cheese are naturally gluten-free. Check add-ins (like sausages or sauces) for gluten ingredients. If you have dairy allergies, use dairy-free substitutes as described above. Always read labels on packaged ingredients.

What if the bake is too watery or too dry?

If it’s watery, the cottage cheese may be very liquid—drain briefly or use a firmer-curd variety. If it’s dry, whisk in a splash of milk or a bit more cottage cheese. If the center isn’t set, bake a bit longer at 350°F (175°C), covered with foil to prevent over-browning.

Introduction / Hook

There’s something hypnotic about a dish that starts with a hiss and ends with a glow of golden edges. Jalapeño Sausage Baked Feta Eggs is not just a breakfast or brunch idea—it’s an invitation to linger at the table, to savor a breakfast that tastes like a vacation in a single skillet. Picture a sun-warmed tray pulled from the oven, the air perfumed with roasted peppers, the chorus of sausage sizzling and releasing its savory oils, and feta melting into creamy pools that cradle the eggs as they set. This is comfort with a wink of heat, a bold, joyful balance of briny tang and hearty, meaty richness. It’s the kind of dish that makes an ordinary morning feel like a celebration and a quick weeknight feel like a little vacation from the usual routine.

As the dish bakes, aromas rise and mingle—garlic creaminess from the feta softens with the peppery bite of jalapeño, while the sausage lends a smoky, meaty backbone. The eggs, nestled among the crumbled cheese and glossy, blistered peppers, heat slowly to a custardy perfection or remain slightly runny in the center, depending on your preference. Each bite carries a chorus of textures: the crisp edges of the feta turning slightly crunchy from the pan, the tender bite of sausages sliced into rough, satisfying chunks, and the yolk that oozes into the cheesy sauce, turning every mouthful into a luxurious, comforting finish. It’s the kind of dish that tastes like it took longer than it did—because the combination is meticulously tuned to deliver maximum satisfaction in minimal time.

What makes Jalapeño Sausage Baked Feta Eggs truly special is how effortlessly it bridges breakfast, brunch, and even a playful dinner. It’s a one-pan wonder that invites sharing, conversation, and a sense of communal joy around the table. It’s also incredibly adaptable: you can dial up or down the heat, swap in different cheeses, or switch the sausage for something leaner or spicier, all while maintaining that signature baked-feta magic. If you’re cooking for a crowd, this dish scales beautifully; if you’re feeding just you and a friend, it feels indulgent without being fussy. And the best part? It comes together with a handful of ingredients you’re likely to have on hand, which means less time chasing groceries and more time savoring the moment.

The Story Behind the Dish

Every great dish has a story, and Jalapeño Sausage Baked Feta Eggs was born in a kitchen where comfort food met adventurous flavor. The core idea—the magic of feta paired with eggs—has roots in Mediterranean lunch tables and Greek-inspired breakfasts that celebrate tangy cheese and bright herbs. What elevates this particular dish is the addition of jalapeño and sausage, a marriage of sharp, brisk heat with smoky, satisfying meat that feels both rustic and modern. The result is a dish that honors tradition while leaning into bold, contemporary flavors that resonate with breakfast lovers and late-night snack seekers alike.

The inspiration often came on weekend mornings when friends would gather around a sturdy skillet, cups of strong coffee steaming nearby, trading stories as the pan bubbled away. The feta would crumble into creamy shards, the sausages would curl and brown, and the jalapeños would blister just enough to release their peppery perfume. The eggs would follow, poured and nestled into the warm, savory landscape like sun rising over a familiar horizon. It’s a dish that embodies hospitality: a simple, generous plate that brings people together, sparks conversation, and invites everyone to add their own personal twists.

There’s also a dash of playful experimentation involved. In some kitchens, a spoonful of sun-dried tomatoes slides into the mix, offering a sweet-tart counterpoint to the heat. Others reach for different cheeses—goat cheese for a lactic tang, or a crumble of aged parmesan to deepen the savoriness. The sausage itself is a storyteller, too: mild pork for a gentler bite, or spicy chorizo for a more assertive, paprika-kissed note. The method remains intentionally approachable—ingredients are simply arranged, allowed to mingle, and finished with eggs that awaken the whole dish into a comforting, cohesive whole. It’s a recipe that travels well, carrying a sense of home whether you’re cooking in a sunlit kitchen in the countryside or a sleek urban apartment after a long day.

Why You’ll Love This Recipe

  • One-pan ease: No multi-pot juggling—everything cooks in one skillet or baking dish, making cleanup a breeze.
  • Bold, balanced flavors: The briny feta, the smoky sausage, and the bright heat of jalapeño play off the mellow eggs for a harmonious bite.
  • Versatile heat: Control the spiciness by adjusting the jalapeño amount or opting for a milder pepper variant; you can even remove seeds for a gentler heat profile.
  • Brunch-friendly and crowd-pleasing: Perfect for weekend gatherings, family breakfasts, or casual entertaining with friends.
  • Flexible substitutions: Vegan, gluten-free, or lighter options are easy to adapt without sacrificing personality or flavor depth.
  • Texture dynamic: Crispy feta edges, juicy sausage pieces, blistered peppers, and glossy, scoopable yolks create a satisfying textural journey.
  • Make-ahead potential: Assemble up to a point and finish baking when guests arrive, keeping the kitchen calm and the table lively.

Flavor Profile & Texture

The dish starts with a foundation of savory, peppery warmth. Sausage introduces a smoky, meaty depth that anchors the plate, offering a robust contrast to the tangy brightness of feta. Feta—whether crumbly and briny or just slightly softened in the heat—releases a salt-forward creaminess that melds with the eggs and cheese to form a luscious sauce. Jalapeño adds a bright, crisp heat that brightens every bite without overpowering the dairy sweetness, while the pepper’s essential oils infuse the dish with a mouthwatering aroma that wafts through the kitchen as it bakes.

As the cheese melts and browns at the edges, you’ll notice a subtle toasty note—feta’s surface catching a quick kiss of the hot pan before the eggs set. The eggs themselves contribute silkiness: when cooked to a soft set, the yolk streams into the feta and sausage, creating a lush, velvety texture that coats the tongue. If you prefer a firm center, bake a little longer; for a truly indulgent experience, stop just as the yolks are still luxuriously runny. The contrast between the crisp-edged feta, the chewy sausage, and the tender, custardy egg offers a symphony of textures that keeps every bite interesting and comforting in equal measure.

In terms of aroma, think of a sunny market open-air stall where herbs are bright and bold, peppers glow with heat, and dairy perfumes mingle with roasted garlic and olive oil. The scent alone invites you to start the meal before you even lift a fork. The final flavor is a delicate dance: the salt from feta and sausage punctuates the savory base; the jalapeño delivers a lift that makes the dish feel vibrant and alive; and the eggs tie everything together with their gentle, nourishing richness. It’s a balanced, multi-note experience that satisfies both the appetite and the imagination.

Occasions & Pairings

This dish shines in a variety of settings. It’s a natural centerpiece for weekend brunches when friends linger over coffee or mimosas. It also works beautifully as a hearty breakfast-for-dinner option on a busy weeknight, delivering comfort without heavy kitchen labor. For holiday gatherings, it can be scaled up to feed a crowd, served with a spread of bright, fresh accompaniments that complement the smoked meat and tangy feta. The versatility makes it a reliable go-to in any season.

Pairing suggestions to elevate the experience:

  • Sturdy crusty bread or warm pita: perfect for scooping up the cheesy, eggy goodness.
  • Fresh greens salad or arugula: a peppery counterpoint that brightens the richness.
  • Roasted cherry tomatoes or peppers: extra sweetness and color that echo the dish’s flavors.
  • Avocado slices or a dollop of yogurt: creamy contrast that plays well against the heat.
  • Bright beverages: a sparkling citrus mocktail, a glass of dry sparkling wine, or a classic Bloody Mary or mimosa to complement the brunch vibe.
  • Dessert finish: a light citrus tart or fresh fruit salad to close the meal with a refreshing note.

Tips, Variations & Substitutions

  • Heat control: If you want milder flavor, remove the seeds and membranes from the jalapeño or substitute with a milder chili pepper. For extra heat, leave the seeds in and consider a hotter sausage variety.
  • Cheese swaps: If feta feels too strong, mix feta with a milder cheese like ricotta or mozzarella to soften the tang while still achieving a creamy, melty texture. For a Mediterranean twist, add a touch of goat cheese for tang and creaminess.
  • Meat options: Traditional breakfast sausage is delicious here, but you can experiment with spicy chorizo, turkey sausage for a lighter option, or even crumbled spicy salami for a stronger bite.
  • Vegetarian/vegan version: Use plant-based sausage crumbles and a vegan feta alternative or crumbled tofu with nutritional yeast to evoke the tang. Maintain the baked egg component if using eggs; for a fully plant-based version, substitute with fluffy scrambled tofu or chickpea “eggs” and omit the eggs altogether, ensuring the cheese substitute remains creamy and flavorful.
  • Herbaceous lift: Fresh herbs like chives, parsley, or dill brighten the dish and add color. A pinch of oregano or paprika can echo Mediterranean notes if that’s your preference.
  • Texture boosters: For extra crunch, finish with a light sprinkle of breadcrumbs or crushed nuts (like pistachios) just before serving to add a contrasting texture.
  • Gluten-free considerations: The dish itself is naturally gluten-free if you use gluten-free sausage and feta; be mindful of any bread served on the side.
  • Make-ahead idea: Partially assemble the toppings and sausage in a pan, cover, and refrigerate. When you’re ready to serve, add the feta and jalapeños, then slide the eggs in and bake until set. This lets you entertain with less kitchen activity during the meal.

Storage & Make-Ahead Ideas

Leftovers can be a welcome early-morning reprise, but baked eggs don’t always reheat the same as freshly baked. If you have a portion left, store it in an airtight container in the refrigerator for up to 2 days. Reheating is best done gently—warm in a low oven or a microwave at short intervals to avoid overcooking the eggs or drying out the feta and sausage. If you intend to reheat, consider removing eggs and reheating the toppings separately, then reassembling to preserve texture and moisture. The feta, once cooled, can become a bit crumbly; reheating helps restore its creaminess, but avoid overcooking to prevent a rubbery texture.

Make-ahead strategies can elevate weekend entertaining. You can prepare the sausage, jalapeños, and feta in advance, crumble and toss them together in the baking dish, and then slide the eggs onto the surface right before baking. Alternatively, you can pre-bake the base until the eggs are almost finished setting, and then finish baking for guests as they arrive, ensuring a hot, freshly baked center without keeping everyone waiting.

For freezer-friendly planning, consider freezing portions of the sausage topping (cooked and cooled) separately from the feta. While eggs don’t freeze and reheat ideally, freezing the components can speed up assembly later: thaw, combine with a fresh batch of eggs, and bake until just set. If you choose this route, keep the cheese slightly separate to help preserve its texture upon reheating. These strategies help you deliver a satisfying, flavorful dish with minimal last-minute effort.

Fun Facts & Trivia (Optional)

  • Feta cheese is traditionally brined, which gives it its distinctive tang and a long shelf life. The brine also helps retain moisture during baking, ensuring the cheese remains creamy rather than crumbly.
  • Jalapeños hail from the Americas and have become a global favorite for adding bright heat without overwhelming spice. When roasted or blistered, their flavor deepens with a smoky sweetness that complements dairy beautifully.
  • The combination of cheese and eggs in baking forms a classic comfort-food archetype. Dishes like shakshuka, baked eggs with cheese, or gratins share this comforting lineage, each with regional twists that celebrate local ingredients.
  • One-pan breakfasts are a modern kitchen darling because they minimize cleanup while delivering maximum flavor. They’re particularly popular in busy households where mornings call for speed and satisfaction in equal measure.
  • Herbed, peppery, and cheesy baked eggs have a long history as celebratory brunch fare in many cultures, often tied to gatherings, shared meals, and the pleasure of cooking together as friends and family.
  • Vegetable and cheese-based bakes like this often improve after resting briefly; the flavors continue to meld as the dish cools slightly, making it an excellent option for make-ahead meals that still feel fresh when served.

Conclusion / Final Thoughts

Jalapeño Sausage Baked Feta Eggs is more than a recipe—it’s a warm invitation to slow down, gather people, and savor a meal that’s bold, comforting, and unfussy all at once. It celebrates the best of both worlds: the satisfying heft of sausage and the bright brightness of feta and jalapeño, all crowned by the soft, luxurious finish of baked eggs. Whether you’re planning a weekend brunch, feeding a sleepy crowd after a night out, or simply craving something delicious and satisfying with minimal effort, this dish answers the call with confidence and charm. Enjoy it as it comes, or use it as a jumping-off point for your own flavor adventures—the pan is your playground, and every bite is a quick trip to a table full of laughter, warmth, and good company.

Ingredients

    – Main Ingredients
    – 6 large eggs, at room temperature
    → The eggs provide the binding and body of the bake, creating a custardy texture as they set in the oven. Room temperature eggs blend more evenly with other ingredients, preventing cold eggs from cooling the skillet and causing uneven cooking. Whisk just until combined to avoid introducing too much air, which can make the eggs puff and then collapse.
    – 8 oz feta cheese, block, crumbled
    → Feta supplies a salty, tangy richness that contrasts with the heat from jalapeños and the sausage. Crumble the feta into bite-sized pieces and distribute evenly. If the feta is very briny, you can rinse quickly and pat dry to control salt; too much moisture can make the bake watery.
    – 1 lb Italian sausage, casings removed and crumbled
    → Ground sausage adds savory fat and protein; cook until browned and no pink remains to eliminate raw meat flavor. Drain excess fat after browning to avoid greasiness and to let the other ingredients shine.
    – 2 jalapeños, seeded and thinly sliced
    → Jalapeños bring fresh heat and brightness. Remove seeds and membranes for milder heat; slice evenly so heat is distributed in every bite. Wear gloves when handling to prevent irritation.
    – 1 cup cherry tomatoes, halved
    → Tomatoes add juicy sweetness and color. Halving allows them to roast quickly and release juices without overwhelming moisture; choose ripe but firm tomatoes to maintain texture after baking.
    – 1 small onion, diced
    → Onion builds the savory base; sautéing with garlic when browning the sausage softens its bite and releases sweetness, creating depth in the filling. Dice small for even cooking.
    – 2 cloves garlic, minced
    → Garlic adds aromatic backbone; mince finely so it disperses evenly and doesn’t burn. Add after the onions have softened to prevent scorching and bitter notes.
    – 2 tablespoons olive oil
    → Olive oil coats the ingredients, helps sauté vegetables, and adds richness without overpowering flavors. Use a light to medium olive oil; brush or drizzle so the dish bakes evenly.
    – 1/2 teaspoon dried oregano
    → Oregano provides a classic Mediterranean aroma that complements feta and sausage. If you prefer more herbaceous brightness, you can substitute with 1 teaspoon fresh oregano, minced, added to the dish before baking.
    – 1/4 teaspoon red pepper flakes (optional)
    → Adds a subtle kick; adjust to heat tolerance. If you skip them, you can amplify heat with a pinch of cayenne or more jalapeños instead.
    – Salt and freshly ground black pepper to taste
    → Season conservatively at first, because feta and sausage contribute salt. Taste after mixing and adjust to ensure the dish isn’t under-seasoned or overly salty.
    – 1/4 cup fresh parsley, chopped
    → Parsley provides a fresh, vibrant finish and helps brighten the rich flavors. Chop just before using for best color; sprinkle on top after baking as a garnish.

    Optional Add-ins
    – 1/4 cup black olives, sliced (optional)
    → Olives add a salty, briny note that pairs well with feta. Slice evenly so every bite has a touch of olive; if using pitted olives, pat dry to avoid extra moisture.
    – 1 cup fresh spinach, roughly chopped (optional)
    → Spinach adds greens and color; wilt quickly in the hot pan with the sausage or stir in after the oven is off to retain vibrant color. Excess moisture should be squeezed out if added raw to the eggs.
    – 1/4 cup grated Parmesan cheese (optional)
    → Parmesan adds a toasty, nutty finish and extra savoriness. Sprinkle on top just before baking or after for a slightly melted crust, depending on the texture you prefer.

Instructions

  • Preheat your oven to 375°F (190°C) and lightly grease a 9-inch cast-iron skillet or other ovenproof dish to prevent sticking and promote even cooking.
    → A hot, greased pan ensures the eggs set evenly around the filling and makes removal clean and easy.
  • Brown the Italian sausage in the skillet over medium-high heat, breaking it apart with a spatula until no pink remains and the meat is deeply browned.
    → Browning develops fond and rich sausage flavor; breaking it up ensures even browning and texture in every bite.
  • Drain excess rendered fat from the sausage, leaving about 1–2 tablespoons in the pan to carry flavor while preventing greasiness.
    → Excess fat can cause the bake to feel greasy and moisten the eggs too much; a little fat helps caramelize onions and garlic without pooling.
  • Add the diced onion to the pan and sauté with the sausage over medium heat until translucent and slightly golden, about 4–6 minutes.
    → Soft onions mellow their sharpness, contribute sweetness, and build a flavorful base for the filling.
  • Stir in the minced garlic and cook for about 30 seconds, just until fragrant, then remove from direct heat to prevent scorching.
    → Garlic burns quickly and develops bitterness; brief sautéing releases aroma without bitterness.
  • Scatter the thinly sliced jalapeños over the sausage mixture and cook for 1–2 minutes to soften and bloom their fresh heat.
    → Softening the peppers concentrates their flavor and distributes heat evenly in the bake rather than having raw bits.
  • Add the halved cherry tomatoes and cook until they blister slightly and begin to release juices, 2–3 minutes.
    → Tomatoes contribute moisture and sweetness; blistering concentrates their flavor without overwhelming the eggs.
  • Season the filling with dried oregano, red pepper flakes (if using), and salt and pepper to taste, stirring well to distribute spices.
    → Oregano provides a Mediterranean aroma that complements feta; salt should be added cautiously as feta and sausage are salty.
  • Whisk the eggs in a bowl until just combined but not overly aerated, seasoning lightly with a pinch of salt and pepper.
    → Minimal whisking creates a custardy texture without collapsing too much and prevents air bubbles from puffing the surface excessively.
  • Crumble the feta cheese into roughly bite-sized pieces and distribute evenly over the sausage mixture in the pan.
    → Feta adds salty tang and creaminess; distributing evenly ensures pockets of flavor in every bite.
  • Spread the sausage and feta mixture evenly in the skillet, then pour the beaten eggs over the filling, tilting the pan to help the eggs settle and fill gaps.
    → Even distribution prevents dense pockets and ensures the eggs set smoothly across the surface.
  • Place the skillet in the preheated oven and bake until the eggs are just set and the edges are lightly puffed, about 18–22 minutes; rotate the pan halfway for even browning.
    → The eggs should be barely set in the center to remain creamy; rotation ensures uniform heat exposure.
  • Remove from the oven and let rest for 5–10 minutes to allow the custard to firm slightly and for easier slicing.
    → Resting lets the eggs finish cooking with residual heat and helps hold slices together.
  • Sprinkle chopped fresh parsley over the top as a bright, aromatic finish, then slice into wedges and serve immediately.
    → Parsley adds color and freshness that balance the richness of feta and sausage while enhancing presentation.
  • Optional: If using black olives, scatter 1/4 cup sliced olives over the filling before baking to introduce a savory brine that complements feta.
    → Olives add a salty counterpoint and depth of flavor; distribute evenly so every bite has a hint of brine.
  • Optional: If including fresh spinach, wilt roughly 1 cup in the hot pan with the sausage or stir in after baking to retain its bright color; squeeze out excess moisture before adding.
    → Spinach adds color and freshness without diluting the egg custard; removing moisture prevents sogginess.
  • Optional: Finish with 1/4 cup grated Parmesan cheese by sprinkling on top just before baking for a toasty, nutty crust.
    → Parmesan adds an extra layer of savoriness and a light crust on top if desired.

Notes

These jalapeño sausage baked feta eggs are a hearty, savory skillet bake that works beautifully for brunch or a comforting weeknight breakfast. Feta delivers a salty, tangy bite that contrasts with spicy jalapeños and rich, browned sausage, while cherry tomatoes soften and burst with sweetness as they roast. For best texture, brown the sausage until fully cooked and drain excess fat, then sauté the onion until translucent and fragrant before adding the garlic so it doesn’t burn. Stir in the crumbled feta, halved tomatoes, jalapeños, and oregano, and season lightly with salt and pepper; finish with fresh parsley after baking for a bright finish. If you like extra heat, keep some jalapeño seeds or add a pinch of red pepper flakes; optional add-ins such as sliced black olives or chopped spinach can be folded in before baking, and a final sprinkle of grated Parmesan adds a toasty, savory finish. The dish can be assembled ahead: cook the sausage and onions, mix with the feta and veggies, then refrigerate; when you’re ready, pour over beaten eggs and bake until just set. Leftovers reheat well in the oven or microwave and make a great next-day meal. For gluten-free cooking, ensure the sausage is gluten-free and check any flavorings or olives for gluten, as this dish contains no gluten-containing ingredients; if you need a completely gluten-free option, serve with gluten-free bread or a simple green salad to balance richness.

Tips

Tips for Perfect Jalapeño Sausage Baked Feta Eggs

  • Egg temperature matters: Use eggs at room temperature to help them whisk smoothly and bake evenly. Cold eggs can chill the skillet and slow cooking, resulting in uneven texture.
  • Feta handling: Crumble feta into roughly bite-sized pieces and distribute evenly so every bite gets salty, tangy feta. If the feta is very briny, a quick rinse and pat-dry can reduce excess salt and moisture which could make the bake watery.
  • Sausage preparation: Cook the sausage until browned with no pink remaining to avoid raw meat flavor. Drain excess fat after browning to prevent greasiness and to keep the other ingredients from swimming in fat.
  • Managing heat: Jalapeños provide fresh heat and brightness. Remove seeds and membranes for milder heat, or leave them in for more spice. Wear gloves when handling to prevent skin irritation.
  • Tomato texture: Halved cherry tomatoes roast quickly and add juicy sweetness. If you’re worried about too much moisture, pat tomatoes dry with a paper towel before adding, or drain some juices after sautéing.
  • Onion and garlic layering: Sauté the onion until it softens and becomes lightly caramelized, then add the garlic just until fragrant to prevent scorching and bitterness.
  • Oil use: Use olive oil to coat and help sauté vegetables without overpowering the dish. A light drizzle or brush ensures even cooking and a cohesive bake.
  • Herb basics: Dried oregano adds a classic Mediterranean aroma that complements feta and sausage. For a brighter note, substitute with 1 teaspoon fresh oregano, minced, added to the dish before baking.
  • Heat tuning: Red pepper flakes are optional. If you skip them, you can boost heat with extra jalapeños or a pinch of cayenne, but taste as you go.
  • Seasoning strategy: Because feta and sausage are salty, season gradually and taste after mixing. A light hand on salt early on helps prevent an oversalted final dish.
  • Parsley finish: Fresh parsley provides color and brightness. Chop just before using and sprinkle on top after baking for a fresh finish.
  • Optional add-ins: Olives add a briny bite; spinach adds color and greens (wilting quickly is best). If adding spinach raw, squeeze out excess moisture to avoid watery eggs. Parmesan offers a toasty, nutty finish—sprinkle on top before or after baking depending on your texture preference.
  • Texture tips for the top: Bake until the eggs are just set and the edges are lightly puffed. If the center is not set, cover loosely with foil and bake a bit longer. For a crisper top, you can finish under a quick broil for 1–2 minutes, watching carefully.
  • Make-ahead ideas: You can brown the sausage and sauté the vegetables ahead of time, then assemble and bake when ready to serve. This can help save time on busy days.
  • Storage and reheating: Leftovers keep well in the refrigerator for 2–3 days. Reheat gently to avoid scrambling the eggs; a short microwave pulse or a warm oven works best.

FAQ

What is Jalapeño Sausage Baked Feta Eggs?

A skillet-style bake featuring crumbled sausage, diced jalapeños, and feta cheese, with eggs baked on top until set. It’s hearty, spicy, and ready in about 25–30 minutes. Serves 2–4 depending on portions.

What ingredients do I need?

Here’s a typical list (amounts can be adjusted for your servings):

  • 1 lb (450 g) sausage (breakfast or Italian style work well)
  • 2–3 jalapeños, diced (remove seeds for less heat)
  • 6–8 oz feta cheese, crumbled
  • 4–6 large eggs
  • 1–2 tablespoons olive oil or cooking spray
  • 2 cloves garlic, minced (optional)
  • Salt and black pepper to taste
  • Optional extras: cherry tomatoes, spinach, sliced onions, oregano or red pepper flakes
How do I prepare and bake it?

Steps:

  1. Preheat oven to 400°F (200°C). Lightly grease a baking dish or cast-iron skillet.
  2. Brown the sausage in a skillet over medium heat, breaking it into crumbles. Drain excess fat if needed.
  3. Add jalapeños (and optional onions/garlic) and sauté 1–2 minutes until fragrant.
  4. Spread the sausage mixture in the bottom of the dish. Sprinkle feta over the top.
  5. Create 4–6 small wells and crack an egg into each. Drizzle with a little olive oil, if desired.
  6. Bake 12–15 minutes, until the eggs are set to your liking. For runnier yolks, check earlier; for firmer yolks, bake a few minutes longer.
  7. Remove, season with salt/pepper, and serve immediately with crusty bread or a light salad.
What temperature and cook time should I use?

Preheat to 400°F (200°C). Bake for 12–15 minutes for softly set eggs, or 16–20 minutes for firmer yolks. If using a thinner skillet, you may need a minute or two longer.

How can I adjust the spiciness?

Control heat by the jalapeños and by removing seeds and membranes. For milder heat, use fewer jalapeños or substitute with bell peppers. For extra heat, add a pinch of red pepper flakes or an additional jalapeño.

Can I make this ahead or freeze leftovers?

You can prepare the sausage and veggie mix up to a day in advance and refrigerate. Assemble in your dish, cover, and store. Bring to room temperature before adding eggs and baking. Freezing baked eggs is not ideal, as texture may suffer; best to refrigerate and reheat.

What substitutions work well (dairy-free, gluten-free, etc.)?

Gluten-free: ensure the sausage is gluten-free (check labels). Dairy-free: replace feta with a crumbled dairy-free feta or omit entirely; you can also use a dairy-free cheese alternative. For meat substitutions: ground turkey, chicken sausage, or smoky kielbasa can work. For extra veg: spinach, bell peppers, or cherry tomatoes.

How should I store and reheat leftovers?

Store leftovers in an airtight container in the refrigerator for up to 2–3 days. Reheat in the microwave in 1-minute bursts, or rewarm in a 350°F (175°C) oven until hot, about 8–12 minutes. Do not reheat eggs more than once.

How many servings does this yield and are there nutrition notes?

Typically serves 2–4, depending on portion size. Nutrition varies based on sausage and feta amounts, but each serving is a high-protein, savory meal. If you need precise numbers, calculate using your exact ingredients and portion sizes.

Is it gluten-free?

Yes, as written, it is gluten-free as long as the sausage is gluten-free and no breadcrumbs or gluten-containing additives are used. Always check labels on processed ingredients.

Introduction / Hook

Step into a kitchen where comfort meets elegance in a single, shimmering skillet. Picture tender chicken, bronzed to a perfect kiss of caramel, nestled under a cloud of garlicky, herb-laden cheese that melts until it becomes a satin glaze. The bacon—smoked, crisp, and irresistibly savory—leaps in with its own smoky chorus, adding a chorus line of crunch that punctuates every bite. This is Boursin Bacon Chicken: a dish that feels luxurious enough for a special dinner, yet simple enough to vanish after a weeknight sigh of relief. The scent alone is a memory in the making—garlic and herbs waking up the air, a hint of sizzling bacon weaving through, and the creamy, slightly tangy beauty of Boursin embracing every morsel. It’s not just a meal; it’s a mood—creamy, comforting, and fiercely satisfying in a way that makes the whole room feel warmer.

What makes this recipe truly sing is the way the ingredients honor and elevate one another. The Boursin cheese acts like a velvet blanket for the chicken, infusing it with a bright (but not overpowering) garlic-herb aroma that dances with the smokiness of bacon. When melted, the cheese creates a luscious sauce that clings to each slice of chicken, turning every forkful into a little ceremony of texture and taste. The result is a one-pan wonder that feels indulgent but stays grounded in simplicity—the kind of dish that invites you to linger at the table, swap stories, and garnish with a sprinkle of fresh herbs while the pan quietly finishes its work in the oven.

In this long-form introduction, you’ll travel through the story behind the dish, discover why it resonates with home cooks and hosts alike, and explore how the flavors can adapt to different moods, seasons, and dietary preferences. You’ll also find practical tips for making this exact dish your own—whether you’re cooking for a family weeknight, a romantic dinner, or a casual gathering with friends. The journey from pan to plate is all about balance: the richness of Boursin coaxed into tenderness, the crisp edge of bacon providing contrast, and the chicken offering a receptive canvas for every fragrant note you fold in. By the end, you’ll understand not just how to recreate this meal, but how to tell its story at your table—one that blends French charm with American comfort in a single, delicious skillet.

The Story Behind the Dish

At the heart of Boursin Bacon Chicken lies a celebration of two flavors that have traveled far to meet on dinner plates around the world. Boursin cheese itself began as a humble idea in rural France, the brainchild of François Boursin in the 1950s. What started as a simple transformation of soft, creamy cheese into a spreadable, herb-laced delight blossomed into a pantry staple whose name became synonymous with ease, flavor, and a touch of French charm. The original incarnation was garlic and herb—an aromatic, tangy combination that brightens any dish and invites you to lean into the aroma long before you lift a fork. It is this very elixir of garlicky freshness and herbaceous lift that forms the anchor of our chicken dish, offering a creamy, bright counterpoint to the deep savor of sizzling bacon.

Over the decades, chefs and home cooks alike have used Boursin as a quick pathway to create sauces, dressings, and breads that feel special without demanding a long, complicated process. When modern cooks, in turn, add bacon to the equation, they weave in a familiar, comforting counterpoint—the way meatiness and smoke pair with soft, milky cheese to create something both rustic and refined. The result is a dish that feels almost like a small culinary story: starting with a classic French cheese that evokes the memory of a countryside kitchen, then weaving in the smoky, familiar character of American breakfast bacon, all kissed by the warmth of a well-seasoned chicken breast. It’s a fusion of textures and traditions that respects both heritage and home-cooked practicality.

There’s also something inherently communal about this combination. Bacon crackles and invites shared tasting; the cheese melts and coats, turning a simple protein into a generous, spoon-and-fork experience; and the herbs—parsley, chives, or thyme—fold in to lift the dish with a fresh, green brightness. In many ways, this dish embodies the spirit of gathering: a modest, well-loved protein dressed in a luxurious, easy cheese-gold that makes even a weekday meal feel like a celebration. The story here is less about a single moment of creation and more about a shared memory in the making—the clink of plates, the sigh of satisfaction, the quiet conversation that happens when a skillet delivers warmth, comfort, and a little bit of French-inspired glamour to your table.

Why You’ll Love This Recipe

  • Uncomplicated luxury: A single skillet, a handful of pantry ingredients, and a dish that feels elegant enough for guests but simple enough for weeknights.
  • Rich, comforting flavor with bright notes: The garlicky, herbaceous aroma of Boursin pairs with the meaty savor of bacon and the clean bite of chicken for a balanced, multi-layered taste.
  • Versatile foundation: This recipe works as a base for countless variations, whether you want to swap in different herbs, add vegetables, or tailor it to dietary needs.
  • Texture that delights: The contrast between the crisp bacon, the succulent chicken, and the creamy, luscious cheese sauce keeps every bite interesting.
  • Great for meal prep and entertaining: It scales up easily for a crowd and stores well for make-ahead dinners or next-day lunches.

Flavor Profile & Texture

From the first bite, the palate experiences a careful orchestration of flavors and textures. The chicken offers a mild, comforting base—the kind that soaks up the nuance of the cheese and herbs without competing. The Boursin cheese, when melted, creates a velvety robe around the chicken, infusing it with a gentle garlic-forward aroma and a herbal brightness that feels both sophisticated and homey. This cheese also brings a slight tang and a creamy body that coats the meat, ensuring each mouthful feels lush rather than heavy.

The bacon contributes a crucial dimension: a smoky, savory edge that punctuates the richness with a crisp, satisfying bite. When the bacon is cooked to the point of crispness, its crunchy texture beautifully contrasts the tender chicken and the silky sauce, offering a satisfying chorus of textures in every bite. And then there are the herbs—whether you’re using parsley, chives, thyme, or a combination—that leap from the pan with fresh aromatics, adding a green, peppery lift that brightens the whole dish and helps balance the richness of the cheese and meat.

Together, these elements create a sauce that is simultaneously luxurious and approachable. The creaminess of the Boursin is feather-light in feel, never greasy, and it clings to the chicken with a gentle sheen. It carries a nuanced garlic- herb profile that feels timeless rather than gimmicky, making the dish feel like the kind of recipe a grandmother might have tweaked with a modern eye. The overall effect is deeply satisfying: a warm, creamy finish that lingers on the palate, followed by a crisp, smoky bite from the bacon, and finished with a bright herb note that keeps the dish from feeling heavy or one-note.

Occasions & Pairings

This dish shines in a variety of settings, from weeknight dinners to more leisurely entertaining. Its balance of comfort and sophistication makes it suitable for family meals that still feel special, and it can easily adapt to a more celebratory tone with simple garnishes and a well-chosen side or two.

  • Weeknight dinners: Quick, satisfying, and still feel-good; pair with a simple green vegetable or a bed of mashed potatoes to soak up extra sauce.
  • Romantic dinners: A candlelit setting and a crisp white wine transform this into an elegant but unfussy centerpiece.
  • Entertaining guests: Serve with a side of roasted vegetables, a fragrant rice pilaf, or a light salad to balance the richness.
  • Holidays & gatherings: Turn this into a crowd-pleasing main by doubling the recipe and pairing with a bright vinaigrette and seasonal sides.

Pairings to consider:

  • Side dishes: Garlic mashed potatoes, creamy polenta, roasted asparagus, buttered green beans, or a delicate risotto.
  • Breads: A crusty baguette or sourdough to scoop up the luscious sauce.
  • Wine: A white with good acidity to cut through the richness—think Chardonnay (especially a lightly oaked style), Sauvignon Blanc, or a dry Riesling. For those who prefer red, a lighter Pinot Noir can complement without overpowering.
  • Non-alcoholic: A sparkling citrus beverage or a chilled herbal iced tea can provide a refreshing contrast.

Tips, Variations & Substitutions

Make it dairy-free

Swap the traditional Boursin for a dairy-free garlic-herb spread or a plant-based cream cheese designed for savory sauces. You can strengthen the herbal profile with extra chopped chives and parsley, and finish with a splash of olive oil to create a silky sauce that mirrors the original’s creaminess without dairy.

Make it gluten-free

The base dish is naturally gluten-free, but always check the Boursin label (or any substitute) to confirm there are no hidden gluten-containing thickeners or flavorings. If you’re serving this to guests with gluten sensitivities, pair it with gluten-free sides such as mashed potatoes made with cornstarch slurry or quinoa pilaf.

Low-carb / Keto-friendly tweaks

Keep the dish in a low-carbohydrate space by pairing with non-starchy vegetables (roasted broccoli, zucchini ribbons, or a crisp salad) instead of starchy sides. You can further emphasize fat and flavor by adding a touch more cheese or a dollop of sour cream to the sauce, if your dietary plan allows.

Regional twists & flavor variations

While the classic is garlic-herb, you can experiment with regional accents to match what’s in your pantry. Try adding a pinch of smoked paprika for a smoky note, sun-dried tomatoes for a touch of sweetness, or a handful of chopped olives or artichokes for a Mediterranean tilt. Fresh lemon zest brightens the sauce and elevates the aroma, while a handful of arugula folded in at the end adds peppery lift.

Make-ahead & busy-week ideas

To save time, pre-cry open-ready: prepare the herb-garlic mixture and portion the chicken in a bag or container. When you’re ready to cook, just sear the chicken, add the cheese, bacon, and herbs, and finish in the oven. Alternatively, you can fully assemble the sauce in advance and reheat gently with a splash of broth or cream to restore the gloss and texture before finishing in the oven to meld flavors.

Storage & Make-Ahead Ideas

Leftovers can be a blessing with this dish, and the flavors often deepen after a rest. Refrigerate any cooled leftovers in an airtight container for up to 3–4 days. Reheat gently on the stove over low heat or in a mild oven; if the sauce has thickened, whisk in a small splash of broth or milk to restore its satin texture. Because the Boursin cheese is soft and creamy, freezing is not ideal for the texture; however, if you have a batch of cooked chicken you’d like to repurpose, you can freeze the chicken separately and de-frost before reheating with fresh cheese and a touch of cream to recreate the sauce’s richness. For make-ahead meals, consider shredding or slicing the chicken and storing it with a separate bag of the cheese-herb mixture to reassemble into a freshly finished dish when needed.

When planning ahead, a practical approach is to prepare the components separately: cook a batch of bacon until crisp, have the chicken pre-seasoned, and keep the herb-garlic mixture ready to whisk in as you cook. This method reduces last-minute prep and keeps the dish at peak flavor and texture. If you’re hosting a dinner, you can pre-cook and refrigerate the chicken in a shallow pan and finish it in the oven just before guests arrive; the sauce will come together more quickly, and the bacon’s crispness can be refreshed with a quick re-crisp in a hot pan.

Fun Facts & Trivia (Optional)

  • The original Boursin cheese was created as a spreadable cheese with a distinct garlic-and-herb profile, designed to pair beautifully with bread or crackers as an aperitif—and it quickly became a symbol of French rustic elegance in everyday cooking.
  • While the cheese is synonymous with French charm, its popularity spans continents, showing up in everything from pasta sauces to savory trittas and, yes, skillet dishes like this one, where its creaminess shines against meat and vegetables.
  • Guesses about the name: Boursin comes from the founder’s surname, but the cheese’s brand identity has grown into a culinary icon recognized by home cooks for its soft texture and easy-to-use flavor.
  • Texture lovers rejoice: Boursin is not a hard cheese; it’s a soft, creamy cheese designed to melt smoothly, creating sauces that cling to ingredients rather than pooling on the plate.
  • In many markets, Boursin is celebrated for its versatility—sold in several flavors beyond garlic-herb, including pepper, shallot, and chive variations—yet garlic-herb remains the classic that many cooks reach for first when constructing comforting meals.

Ingredients

Main Ingredients

    – 4 boneless, skinless chicken breasts, pounded to even thickness
    → The chicken provides the primary protein for the dish; pounding to an even thickness ensures uniform cooking, so the meat remains juicy rather than overcooked on the edges while the sauce simmers. Pat dry before searing to promote a crisp exterior and season lightly with salt and pepper just prior to cooking.
    – 6 slices thick-cut bacon, chopped into 1/2-inch pieces
    → Bacon adds smoky, savory depth and a favorable fat base for the creamy sauce. Render the fat until it’s just shy of crisp, then crumble bits into the sauce for texture. If you prefer a leaner version, you can reduce the fat, but keep enough to flavor the pan. Reserve some crispy bits to sprinkle on top later for contrast.
    – 8 oz Boursin cheese, garlic and fine herbs, softened at room temperature
    → Boursin is the star ingredient, giving the sauce its creamy body and garlicky-herby aroma. Softening at room temperature enables smooth melting into the pan. If you can’t find Boursin, substitute with a mixture of cream cheese, minced garlic, and fine herbs.
    – 3 garlic cloves, minced
    → Garlic builds the essential savory aroma; mince finely so it distributes evenly and doesn’t burn. Add after the bacon renders to maximize flavor. For a milder note, grate or press instead of finely mincing.
    – 1 small yellow onion, finely chopped
    → Onion provides sweetness and a savory base to the sauce. Sauté with the bacon until translucent and lightly caramelized to deepen flavor. Finely chopping ensures the onion dissolves into the sauce rather than leaving chunks.
    – 1 cup heavy cream
    → Heavy cream delivers the sauce’s luxurious, silky texture and helps balance the saltiness from bacon and Boursin. Simmer gently to prevent curdling; for a lighter version, substitute half-and-half and adjust cooking time to avoid separation.
    – 1/2 cup chicken broth
    → Chicken broth adds moisture and helps loosen the sauce to a desirable pourable consistency. Use low-sodium broth to control salt; adjust with more cream if you want a richer sauce.
    – 1/4 cup dry white wine (optional)
    → White wine deglazes the pan, lifting browned bits and adding acidity to balance richness. If skipping, substitute with an extra 1/4 cup broth or a splash of lemon juice at the end. Let the wine simmer a couple of minutes to cook off the alcohol and concentrate flavor.
    – 2 tablespoons unsalted butter
    → Butter enriches the finish and helps emulsify the sauce for a glossy texture. Whisk in off the heat after simmering to prevent breaking; for dairy-free, omit or replace with a small amount of olive oil and a dairy-free cream substitute.
    – 1 tablespoon olive oil
    → Olive oil facilitates a good sear on the chicken and helps prevent sticking when starting the dish. Combine with butter to get a flavorful crust; choose a high-smoke-point oil to maintain color without burning.
    – 1 teaspoon dried thyme (or 1 tablespoon fresh thyme leaves)
    → Thyme adds a subtle herbaceous note that harmonizes with garlic and the herbal Boursin. If using dried thyme, crush between your fingers to release aroma; add fresh thyme early to bloom but avoid burning the leaves.
    – Salt to taste
    → Layering salt is crucial because bacon and Boursin contribute significant salt. Season the chicken lightly before searing, then adjust the sauce at the end after tasting. Start conservative and build gradually.
    – Freshly ground black pepper, to taste
    → Black pepper provides a gentle heat and depth that complements the creamy sauce. Grind fresh for maximum aroma and peppery bite; adjust after tasting the finished sauce.

Optional Add-ins

    – 8 oz mushrooms, sliced
    → Mushrooms add earthy depth and a meaty texture that pairs beautifully with the creamy sauce. Sauté with the onion and bacon to brown deeply before adding the cream, allowing moisture to evaporate so they brown rather than steam. Use cremini, button, or your preferred variety.
    – 2 cups fresh baby spinach
    → Spinach introduces color and a light, fresh note to balance richness. Add near the end and stir just until wilted to maintain bright green color. If using frozen spinach, thaw completely and squeeze out excess moisture to avoid thinning the sauce.

Garnish

    – Fresh parsley, chopped
    → Parsley adds a burst of color and a clean, herbaceous finish to the plate. Sprinkle just before serving to preserve brightness. If you prefer, substitute with chopped chives or a light lemon zest for a bright finish.

Instructions

  • Pat dry each chicken breast, then place between two sheets of plastic wrap and gently pound to an even thickness of about ½ inch using a flat meat mallet or rolling pin.
    → An even thickness promotes uniform cooking and juiciness; uneven pieces will overcook on the outside before the center is done.
  • Season the chicken lightly on both sides with salt and freshly ground black pepper just before cooking.
    → The salt enhances surface browning and flavor penetration, while pepper adds a clean heat that complements the creamy sauce.
  • Heat the 1 tablespoon olive oil and 2 tablespoons unsalted butter in a large skillet over medium-high heat until the fat shimmers and the butter foams.
    → This combination raises the pan’s heat tolerance for a proper sear and infuses the crust with buttery richness; avoid overheating to prevent smoking or burning.
  • Place the chicken in the skillet and sear without moving for 3 to 4 minutes, until a deep golden crust forms on the first side.
    → A good crust develops Maillard flavors and helps seal in juices; resist the urge to flip too early, which can tear the meat.
  • Flip the chicken and sear the opposite side for another 3 to 4 minutes until the internal temperature nears 160–165°F (71–74°C).
    → Finishing in the pan ensures doneness without drying out; use an instant-read thermometer for accuracy.
  • Transfer the seared chicken to a plate and loosely tent with foil to rest while you build the sauce.
    → Resting lets juices redistribute for a moister final bite, preventing a dry reheated slice.
  • Reduce the heat to medium and add the chopped bacon to the same skillet, cooking until the fat renders and the pieces begin to crisp, about 4 to 6 minutes.
    → Rendering fat builds a savory base for the sauce and the crisp bits add texture; stir occasionally to prevent scorching and render evenly.
  • Add the finely chopped yellow onion to the pan and sauté with the bacon until translucent and lightly caramelized, 3 to 5 minutes.
    → The onion sweetens the sauce base and depth of flavor; keep the heat moderate to avoid burning the sugars.
  • Stir in the minced garlic and cook until just fragrant, about 30 to 60 seconds, taking care not to let it brown.
    → Garlic releases aroma quickly, but burns easily; short cooking preserves its sharp, fresh notes.
  • If using mushrooms, add sliced mushrooms now and cook until deeply browned and their moisture evaporates, about 4 to 6 minutes, before proceeding.
    → Browning mushrooms concentrates their earthy flavor and prevents them from steaming in liquid later.
  • Deglaze the pan with ¼ cup dry white wine, scraping up the browned fond with a wooden spoon, and simmer until reduced by half.
    → Deglazing lifts all the flavorful browned bits into the sauce, lending acidity and depth; simmer to concentrate the flavors.
  • Pour in 1 cup heavy cream and ½ cup chicken broth, bringing the mixture to a gentle simmer to harmonize the dairy with the pan flavors.
    → The cream provides silkiness and richness while the broth adjusts the sauce consistency; simmering melds flavors together.
  • Crumble in the 8 oz Boursin cheese and whisk until completely melted and the sauce is smooth and glossy.
    → Boursin delivers a garlicky-herbal creaminess; whisking prevents lumps and ensures a uniform sauce texture.
  • Stir in 1 teaspoon dried thyme (or 1 tablespoon fresh thyme leaves) and season with salt and freshly ground black pepper to taste.
    → Thyme complements the herbal notes of Boursin; adjust salt after tasting since bacon and cheese contribute saltiness.
  • Return the chicken breasts to the pan, nestling them into the sauce, and simmer gently until the chicken registers 165°F (74°C) and the sauce thickens to a nappe consistency.
    → Reintroduction allows the flavors to meld and ensures the chicken finishes cooking while the sauce coats with clingy viscosity.
  • If using spinach, fold in 2 cups fresh baby spinach and cook just until wilted, about 1 minute.
    → Spinach adds color and a fresh contrast to the rich sauce; wilt quickly to preserve brightness and texture.
  • Off the heat, whisk in the remaining 2 tablespoons unsalted butter to emulsify the sauce and give it a glossy finish.
    → Butter at the end smooths and tightens the emulsion, creating a satin finish that coats the chicken beautifully.
  • Taste the sauce and adjust seasoning with additional salt or pepper as needed, then sprinkle with freshly chopped parsley just before serving.
    → Fresh parsley adds a bright, herbaceous finish and a pleasing color contrast to the plate; adjust seasoning after the sauce has settled for balance.

Notes

These Boursin Bacon Chicken notes guide you through a creamy, savory dish with tender, pan-seared chicken and a glossy herb-garlic sauce. Start by pounding the chicken to an even thickness and patting dry to promote a crisp exterior; season lightly with salt and pepper just before searing in olive oil and a touch of butter. Render the bacon until its fat is released and the pieces are lightly crispy, reserving some crispy bits to sprinkle over the finished dish for contrast. Sauté the onion and garlic in the rendered fat, then stir in the softened Boursin until melted and smooth; whisk in the heavy cream and chicken broth to form a lush sauce. Optional white wine adds brightness; if skipping, substitute with an extra 1/4 cup broth or a splash of lemon juice at the end and let it reduce a bit to concentrate flavor. Off the heat, whisk in the butter to emulsify the sauce; finish with thyme and adjust salt and pepper after tasting since the cheese and bacon contribute salt. Mushrooms and spinach can be added for extra depth: cook the mushrooms with the onion until browned, then fold the spinach in at the end just to wilt. Serve with potatoes, pasta, or steamed vegetables to soak up the sauce; refrigerate leftovers for 3–4 days and reheat gently over low heat to prevent curdling; dairy-free or lighter versions will require substitutes such as dairy-free cheese and olive oil, and will not be as lush. If Boursin is unavailable, substitute with cream cheese seasoned with garlic and herbs.

Tips

Prep and searing tips

  • For uniform cooking and juicy chicken, pound the breasts to an even thickness (about 1/2 inch). Pat dry before searing to promote a crisp exterior, then season lightly with salt and pepper just before cooking.
  • Let the chicken come to room temperature for about 15 minutes before hitting the pan. Preheat the skillet over medium-high heat and use a small amount of olive oil with a touch of butter for flavor and a better crust.
  • Avoid overcrowding the pan; cook in batches if needed. Sear without moving the chicken until the bottom is deeply golden and releases easily, then flip and finish to an internal temperature of 165°F. Let rest a few minutes before adding to the sauce.

Bacon and flavor base

  • Render the bacon slowly over medium heat until most of the fat is released and the pieces are lightly crisp. Reserve the crisp bits to sprinkle over the dish later for extra texture.
  • Use the rendered fat to sauté the onions (and mushrooms, if using) for deeper flavor. Don’t discard all the fat; a couple of tablespoons will help emulsify the sauce.

Sauce construction and dairy handling

  • Keep the garlic and onion in the pan long enough to soften and become fragrant, but add garlic after the onion to prevent burning, about 30 seconds of sautéing.
  • Deglaze with 1/4 cup dry white wine (if using); scrape up browned bits from the pan and let the wine reduce by about half to concentrate the flavor. If not using wine, substitute with extra broth or a splash of lemon juice at the end.
  • Stir in the Boursin cheese after simmering the aromatics; soften the cheese at room temperature first for smooth melting. Add the heavy cream and broth, then simmer gently—avoid a high boil to prevent curdling.
  • Finish the sauce with two tablespoons of unsalted butter off the heat and whisk until glossy. If the sauce seems too thick, loosen with a little more broth or cream; if too thin, simmer a bit longer to reduce.

Sauce stability and substitutions

  • If the sauce looks like it’s separating, remove from heat and whisk vigorously while adding a splash of cream or broth to re-emulsify. For a lighter version, use half-and-half and adjust simmering time accordingly.
  • salty balance: remember that bacon and Boursin contribute salt—taste the sauce before adding more salt and adjust gradually.
  • For dairy-free options, substitute the cream with a neutral dairy-free alternative (like cashew cream) and replace the Boursin with a dairy-free herbed cheese substitute or a mixture of dairy-free cream cheese, minced garlic, and herbs.

Add-ins: mushrooms and spinach

  • Mushrooms: cook them until deeply browned and moisture has evaporated, then add to the sauce with the onions for a rich, earthy note.
  • Spinach: add fresh spinach near the end of cooking and stir until just wilted to keep color vibrant. If using frozen spinach, thaw completely and squeeze out excess moisture to avoid thinning the sauce.

Finish, garnish, and serving

  • Finish with fresh parsley or chives for a bright, herbaceous note. A light lemon zest can also lift the richness.
  • Let the finished chicken rest briefly before slicing to retain juices, then spoon the sauce over or serve alongside for a creamy first bite.

Make-ahead, storage, and reheating

  • Parts of the dish can be prepared ahead: cook the chicken and bacon separately, then reheat gently and finish with the sauce just before serving.
  • Reheat sauce gently on low heat, whisking to re-emulsify. If it thickens too much, whisk in a splash of broth or cream. Reheat the chicken until warmed through and serve immediately with the sauce.

FAQ

What is Boursin Bacon Chicken?

A creamy, savory chicken dish where boneless chicken breasts are topped or stuffed with Boursin cheese and crispy bacon. It’s rich, garlicky, and comforting, often finished with herbs for a bright finish.

What ingredients do I need?

Common ingredients include:

  • Boneless, skinless chicken breasts (about 1 lb / 450 g)
  • Boursin cheese (Garlic & Fine Herbs) 4–6 oz
  • Cooked bacon, crumbled or chopped
  • Olive oil or butter
  • Garlic (fresh minced or garlic powder)
  • Salt and pepper
  • Fresh herbs (parsley or chives) optional
  • Optional for extra sauce: a splash of cream or sour cream
How do you prepare Boursin Bacon Chicken?

Basic steps:

  • Preheat oven to 375°F (190°C). Lightly oil a baking dish.
  • Season chicken with salt and pepper. If thick, butterfly to create a pocket.
  • Mix Boursin with chopped bacon and optional herbs to make the filling.
  • Stuff the pockets with filling or spread a generous layer of Boursin on top. Secure with toothpicks if stuffed.
  • Optional: Sear chicken in a skillet with a little oil 2–3 minutes per side to brown, then transfer to the baking dish.
  • Bake 18–25 minutes (longer for thicker breasts) until the internal temperature reaches 165°F (74°C).
  • Remove toothpicks, let rest a few minutes, and serve.
How long and at what temperature should I bake it?

Bake at 375°F (190°C). Cooking time is typically 25–30 minutes for average-sized breasts, longer if they are thick or if you stuffed them. Use a meat thermometer to ensure the internal temperature reaches 165°F (74°C).

Can I cook this in a skillet or an air fryer?

Yes:

  • Skillet: Sear stuffed or topped chicken in a hot skillet 4–5 minutes per side to brown, then finish in the oven or decrease heat and cover for 5–7 minutes until cooked through.
  • Air fryer: Preheat to 350°F (175°C). Cook 18–22 minutes, flipping once, until 165°F (74°C). Add extra Boursin in the last 2 minutes if desired to melt.
What should I serve with Boursin Bacon Chicken?

Great sides include:

  • Roasted or sautéed vegetables (green beans, asparagus, broccoli)
  • Mashed potatoes or mashed cauliflower
  • Rice or quinoa
  • A simple green salad with a lemony vinaigrette
Can I substitute Boursin cheese?

If you can’t find Boursin, try:

  • Cream cheese (seasoned with garlic and herbs) mixed with a bit of garlic powder and fresh herbs
  • Goat cheese with chopped fresh herbs
  • A soft herbed cheese such as herb cream cheese spread

The flavor will be similar, though texture may differ slightly.

How should I store and reheat leftovers?

Leftovers keep best in the refrigerator for 3–4 days in an airtight container. Reheat gently in the oven at 325°F (165°C) until warmed through, or briefly in the microwave, though the cheese may separate a bit. If you plan to reheat, cover to retain moisture.

Can I make this dairy-free or for a lower-carb diet?

Yes with modifications:

  • Use dairy-free cream cheese or a dairy-free herbed cheese alternative. Some options include almond or coconut-based cream cheese substitutes.
  • Replace bacon with turkey bacon for lower fat, or omit if needed.
  • Serve with low-carb sides like roasted vegetables or cauliflower rice instead of potatoes.
Are there common mistakes to avoid?

Common pitfalls:

  • Overcooking the chicken, which makes it dry. Use a thermometer and remove at 165°F (74°C).
  • Not securing stuffed chicken properly, causing filling to leak. Use toothpicks or kitchen twine.
  • Using cold Boursin directly from the fridge. Let it soften a bit for easier spreading or mixing with bacon.
  • Not allowing the chicken to rest after baking. Rest 5 minutes before slicing to keep juices in.