Author

Ocean Nightleaf

Browsing

Introduction / Hook

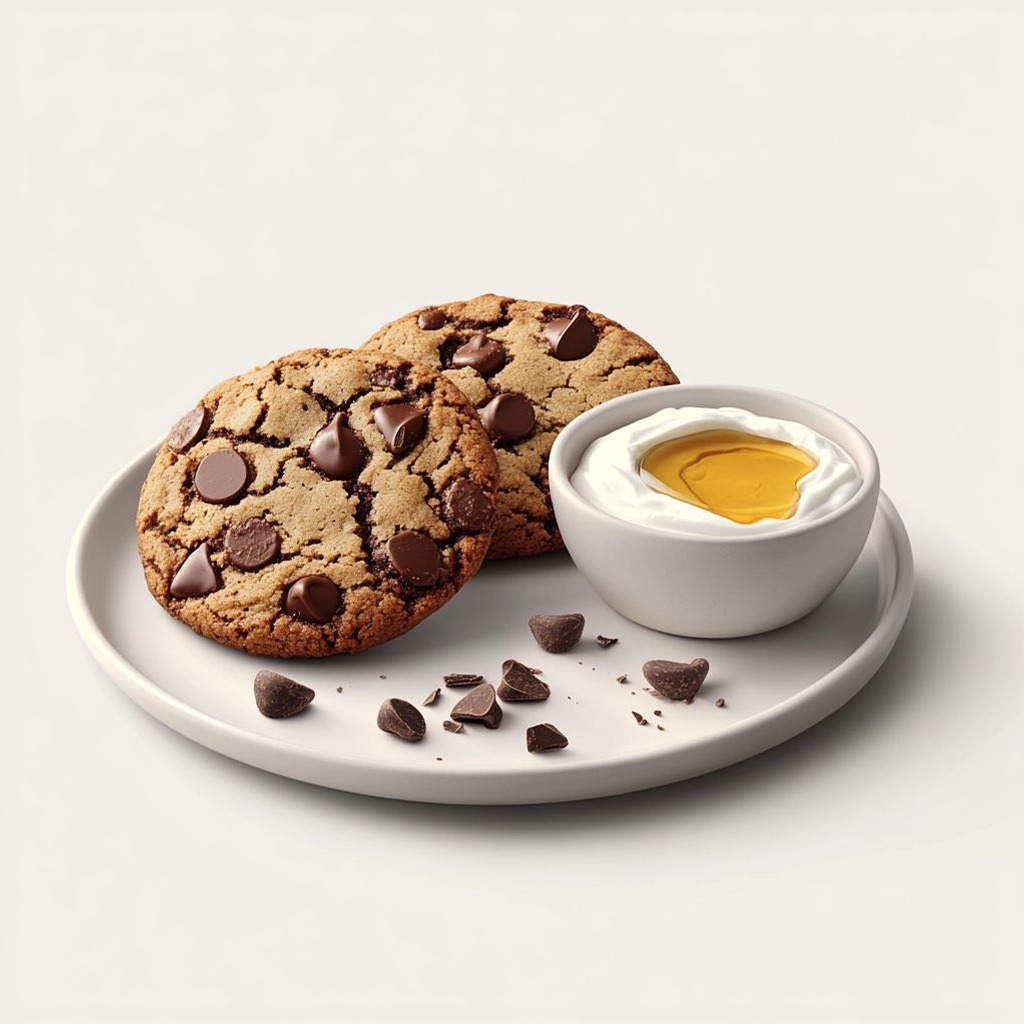
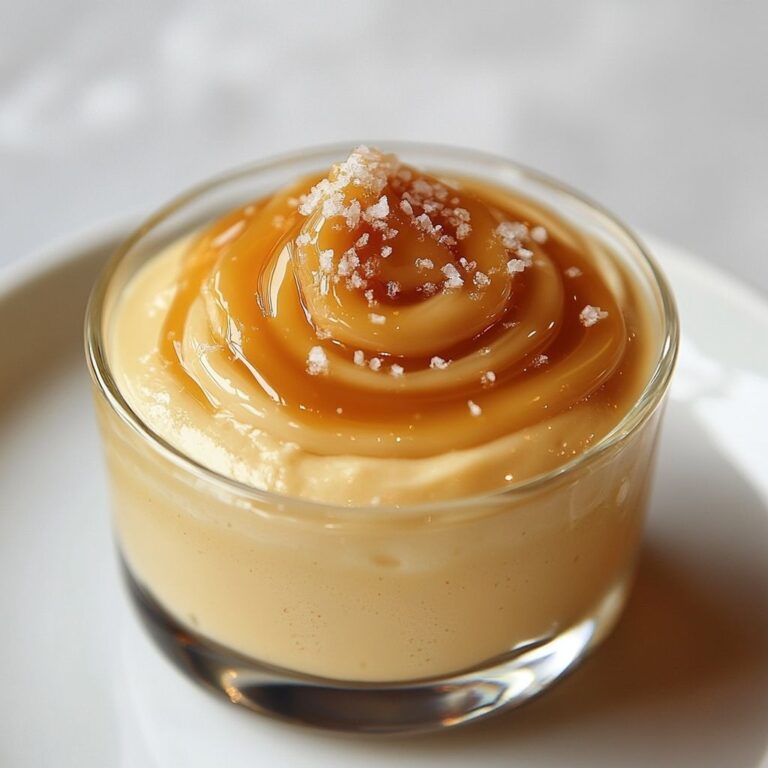
Imagine a velvet ribbon of sweetness that glides across your tongue, leaving a whisper of sea air and a satisfying contrast between silky creaminess and a subtle kiss of salt. Salted caramel cream is not merely a sauce or a spread; it’s an edible meditation on balance. It speaks softly of indulgence, yet it understands restraint—where the sweetness is lush and inviting, and the salt wakes the palate just enough to keep every bite exciting rather than cloying. This is the kind of confection that makes an ordinary afternoon feel like a small celebration, a moment when the world slows down and dessert becomes an invitation to linger a little longer at the table. The texture invites you to close your eyes and swirl a spoon through its silky surface, releasing warm aromas of caramelized sugar, creamy dairy, and vanilla that drift through the room like a comforting hug. If you crave something that feels both luxe and familiar, something that can turn a simple slice of bread or a bowl of fruit into a dessert-worthy experience, this salted caramel cream is your perfect companion.

In the kitchen, there are few pleasures as reliable as a good caramel that doesn’t overwhelm, a cream that stays smooth even as you coax it to perfect softness, and a hint of salt that makes the sweetness sing. Salted caramel cream is a study in texture and aroma: it’s lush enough to nap atop a slice of warm toast, yet bright enough to brighten a citrusy dessert or cut through the richness of chocolate. It’s the kind of recipe that invites experimentation—you can drizzle, dollop, or dip, and every approach reveals a new facet of its character. The magic lies in the moment when the sugar reaches the right amber hue, when the butter and cream come together in a glossy, almost satin-like veil, and when the salt crystals glisten like tiny stars you’ve earned for patience. This is not a one-note topping; it’s a versatile, everyday luxury that fits into countless treats and rituals, from casual family breakfasts to fancy occasions.

The Story Behind the Dish

Caramel, in its simplest form, is transformed sugar—an alchemy of heat that turns sweetness into something deeper, darker, and more complex. Salted caramel, with its characteristic balance of sweet and savory, emerged from a long history of palate experimentation. The idea of pairing salt with sugar isn’t new; salt has always been a natural enhancer, a mineral whisper that brightens flavors and clarifies undertones. The modern salted caramel phenomenon, however, blossomed in the late 20th and early 21st centuries, when pastry chefs and home cooks alike began to explore the surprising harmony that a pinch of salt can bring to a caramel. The story often traces its charm to coastal regions where saltwork and dairy tradition mingle: sea breezes, the scent of butter, and the ritual of caramelization performed in kitchens that double as laboratories of taste. In many homes, the discovery came when a cautious cook whisked a little salt into a batch of caramel and noticed how the sweetness sharpened, how the finish became more linger-worthy, how the bite felt more alive.

Salted caramel cream captures that evolution in a single, luscious form. It’s a celebration of two ingredients that humanity has cherished for generations—salt and cream—working together to elevate everyday desserts into something memorable. It’s also rooted in the culture of sharing. Think of late-night pantry moments, where a spoonful of this cream on a crisp apple slice becomes a tiny ritual of comfort. Think of gatherings where a jar of salted caramel cream sits at the center of the table, inviting guests to drizzle, dip, and dream. The dish is not tied to a single tradition; it borrows from countless culinary lineages—the simple elegance of French patisserie, the rustic abundance of indulgent household treats, and the modern kitchen’s habit of turning classics into versatile, pantry-friendly staples.

Why You’ll Love This Recipe

  • Versatility: A single spoonful can transform fruit, bread, pancakes, waffles, or even a spoonful stirred into coffee into a luxurious moment.
  • Silky texture: The cream provides a luscious mouthfeel that envelops the senses without being heavy, making it suitable for everyday indulgence.
  • Balanced sweetness: The salt amplifies caramel notes and keeps the flavor from tipping into overwhelming sweetness, creating a refined taste.
  • Cozy aroma: Vanilla, caramelized sugar, and a whisper of salt fill the kitchen with an inviting scent that feels like home.
  • Make-ahead friendly: This creamy spread develops depth as it rests, and it stores well for quick use later in the week.
  • Vegetarian by default: It fits well into many plant-forward menus, and with simple tweaks it can be adapted to dairy-free versions if desired.

Flavor Profile & Texture

The flavor of salted caramel cream is all at once indulgent and comforting, with a sophisticated edge. The initial impression is a gentle, buttery sweetness that mirrors the toasty notes of caramelized sugar. As the flavors deepen, hints of cream emerge, giving a soft, dairy-forward richness that coats the palate with a smooth, velvet-like texture. The salt, never aggressive, acts as a refined counterpoint, breaking through the sweetness and orchestrating a chorus of flavors—vanilla’s warm hug, a touch of caramelized depth, and a mineral brightness that keeps the finish crisp and memorable. The result is a balance that feels indulgent yet approachable, simple enough for weekday breakfasts and special enough to accompany dessert courses on festive nights.

Texture is a key to the appeal here. The cream should be luxuriously thick, almost spoonable in a way that invites generous dollops without signaling heaviness. When warmed or gently whisked, it should become light enough to drizzle in ribbons, yet cling beautifully to fruit, pastry, or a hot slice of bread. The mouthfeel is silken, with a gleaming sheen that hints at its glossy finish. Microtextures—tiny salt crystals, if you use flaky sea salt, or a softly grainy feel if you go with classic table salt—provide a micro-layer of interest that plays on the tongue. The aroma carries those warm caramel and dairy notes before a single taste touches the palate, creating anticipation that makes each bite feel like a tiny ritual rather than a simple bite of sweetness.

Occasions & Pairings

This salted caramel cream is a chameleon—elegant enough for celebrations and friendly enough for weeknights. Here are some ideas for how to enjoy it and what pairs well with it:

  • On toast or brioche for a decadent breakfast or satisfying afternoon snack.
  • Dolloped over vanilla ice cream, chocolate mousse, or a slice of warm cake to add depth and shine.
  • As a dip for apples, pears, roasted pears, or sliced peaches, turning fruit into dessert in minutes.
  • Swirled into coffee or hot chocolate for a café-at-home experience with a creamy finish.
  • As a garnish for pancakes, waffles, or yogurt bowls to elevate a familiar favorite.
  • Drizzled over certain cookies, financiers, or tuile crisps to add a glossy, luxurious finish.

For pairings beyond the plate, consider beverages that echo the creaminess and warmth: a robust French press coffee, a smooth almond milk latte for a dairy-free take, or a dessert wine that won’t overwhelm the delicate caramel notes. If you’re assembling a dessert spread, pair this cream with citrus elements (orange, lemon, or blood orange) to create bright contrast, with dark chocolate for a classic duo, or with light, airy pastries to balance richness.

Tips, Variations & Substitutions

Salted caramel cream invites creative interpretation. Here are several ideas to customize, adapt for dietary needs, or regionalize the flavor while keeping the essence of the dish intact:

  • Salt textures: Use flaky sea salt or fleur de sel for a delicate crunch and a brighter salt note. A pinch of salt added at the end can intensify flavors without making the cream taste salty.
  • Different milks: For a lighter version, swap heavy cream for a combination of milk and a splash of cream; for vegan options, use coconut cream or a dairy-free creamer blend designed for drizzle sauces. The texture will become silkier to start and will set differently when cooled.
  • Butter variations: Use salted or unsalted butter depending on your preference; if you prefer a robust caramel flavor, add a touch of browned butter to deepen the nutty aroma.
  • Vanilla notes: A real vanilla bean paste or a splash of vanilla extract can amplify the vanilla backbone. For a warmer, spicier profile, a pinch of cinnamon or cardamom can be added in small amounts.
  • Alcohol-free versions: If you’d like a non-alcoholic version that still feels festive, a teaspoon of orange blossom water or a hint of almond extract can add a fragrant lift without overpowering the base.
  • Regional twists: In a French-inspired approach, a hint of cognac or brandy can be stirred in to enhance depth; in a Spanish-inspired direction, a touch of orange zest can brighten the caramel with a citrus edge.
  • Texture play: For a creamier, almost spoonable texture, slightly increase the cream and reduce the heat to prevent scorching; for a more pourable sauce, keep it looser with a little more liquid and whisk until glossy.
  • Make it dairy-free with flair: Use a robust coconut cream and a neutral-tavored oil to mimic mouthfeel; a touch of almond or cashew milk helps maintain silkiness without dairy.
  • Flavor layering: Add a hint of espresso powder to deepen the caramel’s bite, or fold in finely grated citrus zest to introduce brightness that cuts the sweetness in a sophisticated way.

Storage & Make-Ahead Ideas

Salted caramel cream is forgiving in the refrigerator and can be a reliable staple in your fridge or freezer. Here are practical tips to keep it at its best:

  • Storage: Transfer the cream to an airtight jar or container and refrigerate. It will typically stay good for up to 1–2 weeks, depending on the freshness of the dairy used and storage conditions.
  • Reheating: When you’re ready to use it, gently reheat it in a double boiler or in short bursts in the microwave, stirring in between to restore a smooth, pourable consistency. If it thickens too much, whisk in a small amount of warm cream or milk to loosen.
  • Make-ahead: Prepare a larger batch and portion into small jars. This makes it easy to grab for quick desserts or breakfast treats, and the flavors often deepen with a little rest.
  • Freezer option: For longer-term storage, you can freeze salted caramel cream in ice cube trays or small portions. Thaw slowly in the fridge and reheat gently, stirring until smooth.
  • Usage plan: If you anticipate topping multiple desserts, keep an extra jar labeled and ready. A little anticipation goes a long way—having it on hand turns a simple recipe into a quick, elegant solution for guests or busy weekdays.

Fun Facts & Trivia (Optional)

Did you know that the science behind caramelization is a precise dance of sugar molecules breaking down and recombining to create the deep amber color and rich flavor we associate with caramel? The Maillard reaction, which contributes savory, browned notes, also plays a role as proteins react with sugars under heat. Salt lowers the perceived sweetness, allowing caramel to taste more nuanced and balanced—a trick chefs have leveraged for decades. The term “fleur de sel,” a light, delicate sea salt harvested from salt ponds, is often cited as the ideal finishing salt for desserts, because its crystals barely melt on the tongue, delivering a fleeting crunch and a bright salt note. Salted caramel’s rise to popular culture parallels the broader movement toward flavor layering in modern patisserie: a single component designed to do more than one job, a flavor that can support and elevate other ingredients without overshadowing them. Finally, caramel, even when made in the home kitchen, is a small act of alchemy—a transformation of ordinary pantry staples into something that feels almost magical, especially when the result is a creamy, salted finish that glows with a warm, comforting glow in your bowls and on your spoon.
Ingredients

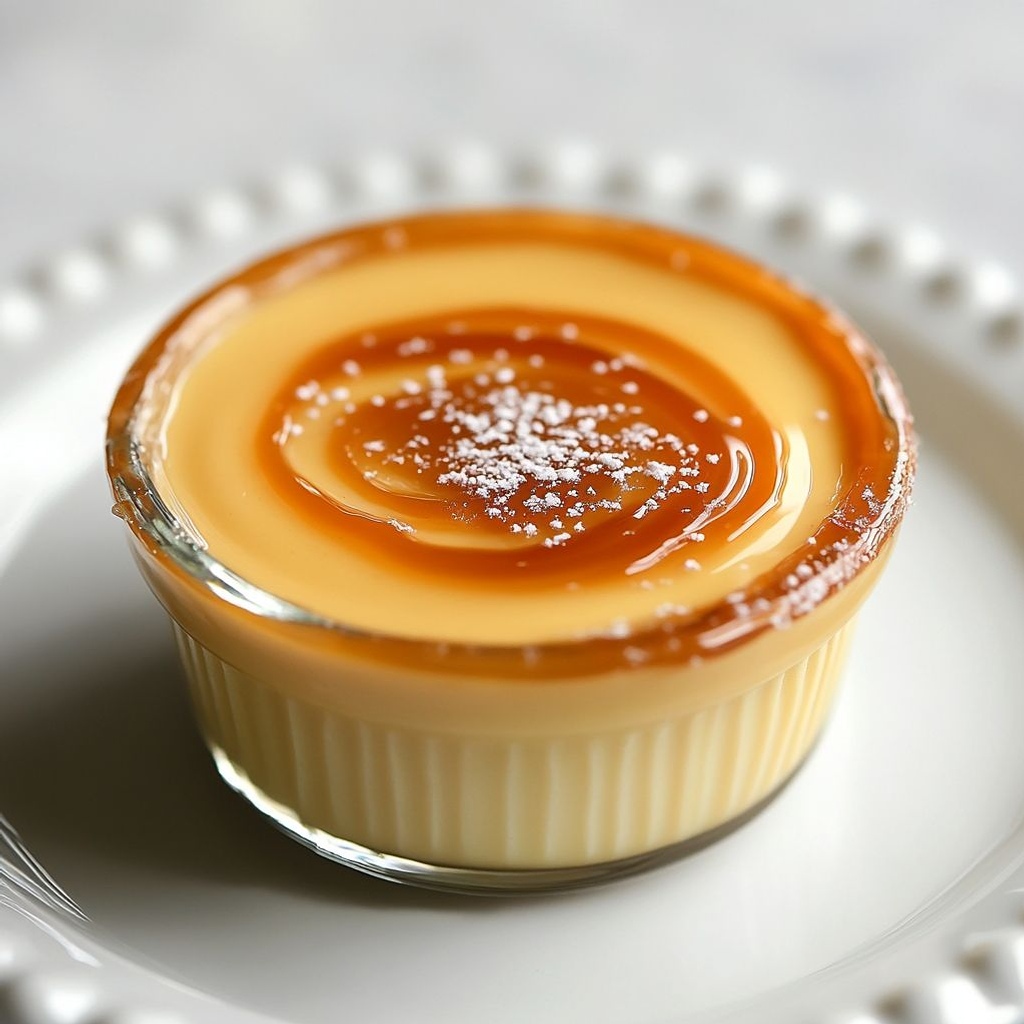
Salted caramel cream

  • 1 cup granulated sugar
    → This is the base of the caramel. It will melt and brown to a rich amber color, imparting the characteristic caramel flavor and color. Do not stir the sugar once it begins to melt; gently swirl the pan to promote even heat distribution. Use a heavy-bottom saucepan over medium heat to prevent scorching and monitor closely as it moves from amber to burnt quickly.
  • 2 tablespoons water
    → Water helps dissolve the sugar evenly at the start and controls the initial browning rate. It will evaporate as the caramel cooks, leaving you with a smooth caramel paste. If you notice crystallization, you can add a tiny splash of water and swirl to re-dissolve.
  • 1 cup heavy cream, warmed
    → The warm cream is whisked into the hot caramel to stop cooking, create a smooth, glossy sauce, and yield a pourable yet rich texture. Adding cold cream can cause the mixture to seize; pour slowly while whisking and keep the heat low until fully incorporated.
  • 1/2 cup unsalted butter, cubed
    → Butter enriches the caramel, adds shine, and helps emulsify the mixture. Cut into small cubes so it melts quickly and blends evenly. Add off the heat to maintain a stable emulsion and prevent the sugar from crystallizing.
  • 1/2 teaspoon flaky sea salt
    → Salt balances the sweetness and intensifies caramel flavor. Flaky salt distributes more evenly and provides a pleasant crunch if you prefer a more pronounced finish. You can adjust to taste after the initial incorporation.
  • 1 teaspoon pure vanilla extract
    → Vanilla adds warmth and depth to the caramel. Add off the heat to preserve the aroma of the vanilla and avoid evaporating its delicate flavor.

Optional Add-ins

  • 4 oz cream cheese, softened
    → If you want a thicker, creamier, tangier salted caramel cream, blend in softened cream cheese until completely smooth. This creates a luscious filling or frosting with more body. Ensure the cream cheese is at room temperature for easiest incorporation.
  • 2-4 tablespoons powdered sugar
    → Pleasantly sweetens and helps achieve a thicker, spreadable texture when using cream cheese. Add gradually, whisking until smooth to avoid lumps; adjust to desired sweetness.
  • 1/2 teaspoon vanilla extract (optional)
    → An extra touch of vanilla depth pairs well with cream cheese, especially if you’re making a thicker, cheesecake-like salted caramel cream. Adjust to taste.

Instructions

  • Prepare your mise en place by assembling all ingredients and equipment, including a heavy-bottom saucepan, a heatproof whisk, a spatula, and a clean jar for storage, so you can control the caramel’s temperature and texture precisely.
  • Measure 1 cup granulated sugar and 2 tablespoons water and combine them in the heavy-bottom saucepan over medium heat, ensuring the sugar is evenly moistened; this creates a uniform melt and prevents hot spots that can burn.
  • Gently swirl the pan or tilt it to promote even heat distribution as the sugar melts, avoiding stirring to prevent crystallization, which can cause gritty caramel and unstable emulsions.
  • Continue cooking until the sugar dissolves completely and deepens to a rich amber color, watching closely as the color shifts quickly from amber to burnt; remove from heat immediately at the first signs of scorching to preserve flavor and texture.
  • Off the heat, slowly pour in the warmed heavy cream while whisking vigorously to form a smooth, glossy emulsion; the cream will bubble up vigorously, so keep your face and hands at a safe distance and pour in a steady, thin stream to avoid splashing.
  • Return the pan to very low heat and whisk until the caramel and cream are fully incorporated and smooth, ensuring no lumps remain; this gentle heating helps stabilize the emulsion and prevents separation.
  • Gradually whisk in 1/2 cup cubed unsalted butter, adding a few cubes at a time and whisking continuously until each addition is melted and the mixture appears glossy and cohesive; this emulsification traps air and yields a velvety texture.
  • Off the heat, whisk in 1/2 teaspoon flaky sea salt and 1 teaspoon pure vanilla extract to balance sweetness and deepen aroma, allowing the warmth of the caramel to bloom the vanilla without evaporating delicate notes.
  • If you are enriching with cream cheese, place 4 oz softened cream cheese in a large bowl and beat until smooth; gradually whisk in the hot caramel in small additions to temper the cream cheese, then fold in the remaining caramel until completely smooth to create a richer, thicker texture.
  • Optionally, if a thicker, spreadable texture is desired, whisk in 2–4 tablespoons powdered sugar after the cream cheese is incorporated, adding gradually and whisking until fully integrated to avoid lumps and to reach the desired sweetness and firmness.
  • Taste and adjust: if the mixture needs more salt, whisk in a pinch more flaky sea salt; if it needs more vanilla, add a few drops and whisk well to distribute evenly; this step ensures a balanced, professional finish.
  • Let the salted caramel cream cool to a warm or room-temperature state for pouring, or refrigerate for a firmer, frosting-like consistency; note that chilling will thicken the mixture and intensify sweetness, so plan texture accordingly.
  • Transfer the finished salted caramel cream to a clean jar, seal tightly, and store in the refrigerator for up to 2 weeks; gently rewarm before use if you want a pourable sauce or a smooth frosting texture.
Notes

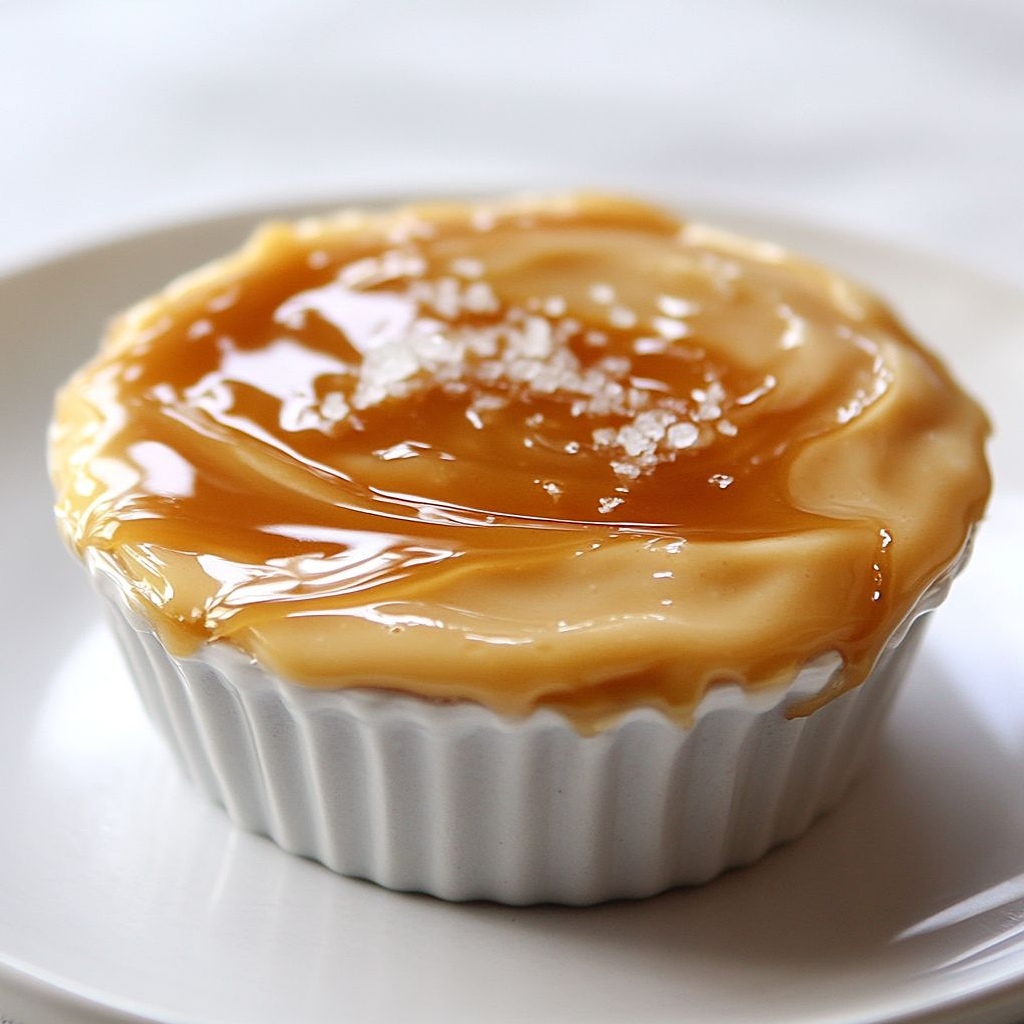
This salted caramel cream is a glossy, velvety sauce with a rich caramel flavor and a pinch of flaky sea salt that brightens sweetness. Start by melting the granulated sugar with water in a heavy-bottom saucepan over medium heat, and avoid stirring once it begins to melt; gently swirl the pan to promote even browning and watch closely as it shifts from amber to deep bronze. Once you have a deep amber color, slowly whisk in the warmed heavy cream off the heat to stop the caramel from cooking and to form a smooth emulsion. Return the pan to very low heat if needed and whisk until the mixture is smooth, then off the heat whisk in the cubed butter until glossy, followed by the flaky salt and vanilla extract. For a thicker, creamier version, blend in softened cream cheese until smooth and, if desired, add 2–4 tablespoons powdered sugar to reach your preferred sweetness and spreadable texture. If the sauce thickens as it cools, re-warm gently and whisk in a splash of warm cream or water. Store in a jar in the fridge for up to 1–2 weeks; reheat gently and whisk to restore gloss. To make a dairy-free version, substitute coconut cream and dairy-free butter, keeping in mind the flavor and texture will be slightly different. Optional: finish with an extra pinch of flaky salt just before serving for a briny lift, or add a touch more vanilla for depth. Always add the warm cream off the heat to maintain a stable emulsion and prevent seizing.
Tips

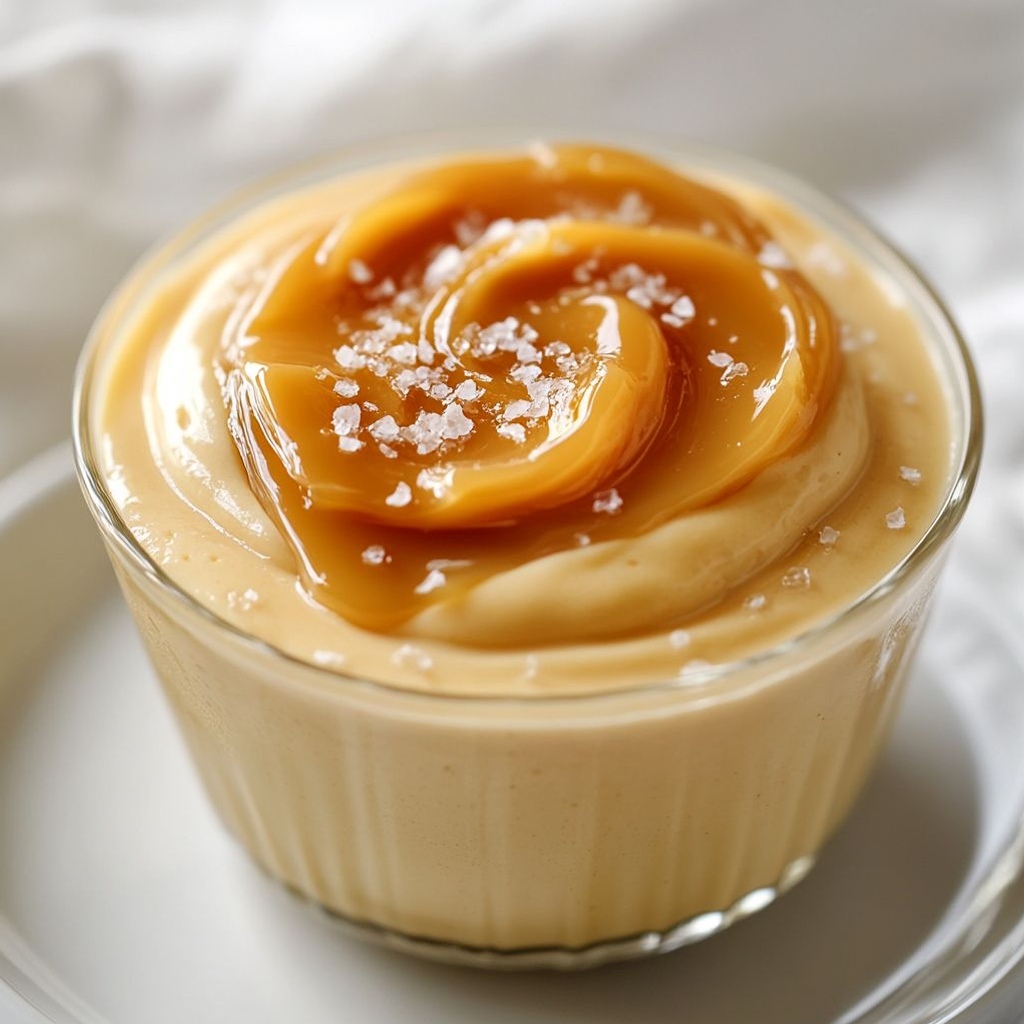
Tips for Salted Caramel Cream

  • Use a heavy-bottom saucepan and keep the heat at medium to prevent scorching. Caramel can go from perfect amber to burnt in seconds, so stay attentive and avoid rushing the process.
  • Once the sugar begins to melt, do not stir vigorously. Gently swirl the pan to promote even browning and prevent crystallization.
  • Introduce water at the start to help dissolve the sugar and control the browning rate. If you notice any crystallization later, add a tiny splash of water and swirl to re-dissolve.
  • Have the cream warm and ready before starting. Pour the warm cream in a steady, slow stream while whisking to maintain a smooth emulsion. Adding cold cream can cause the mixture to seize or become grainy.
  • Cut butter into small cubes so it melts quickly and blends evenly. Add the butter off the heat to preserve the emulsion and prevent sugar crystallization.
  • Toast the caramel aroma before adding salt and vanilla. Wait until the color is a rich amber and fragrant, then proceed with the next steps.
  • Salt level: start with 1/2 teaspoon flaky sea salt and adjust to taste after the caramel is smooth. Flaky salt provides bursts of saltiness and texture; you can finish with a light sprinkle on top after removing from heat.
  • Add vanilla extract off the heat to preserve its aroma. If you’d like a deeper vanilla note, you can steep a vanilla bean in the warm cream and remove it before combining, though this recipe uses extract for simplicity.
  • For a thicker, creamier version with cream cheese: soften 4 oz cream cheese to room temperature and blend until completely smooth before folding into the caramel. This adds body and a tangy contrast.
  • Powdered sugar helps achieve a thicker, spreadable texture when using cream cheese. Add 2–4 tablespoons gradually, whisking until smooth and fully incorporated; taste and adjust sweetness as you go.
  • If using extra vanilla with the cream cheese, start with 1/4 teaspoon and adjust to taste after blending.
  • Storage and reheating: let the caramel cool a bit before transferring to a jar. Refrigerate up to 1 week. Reheat gently in the microwave in short bursts or warm over low heat while stirring until smooth again.
  • Texture tips: if the mixture looks glossy and cohesive, you’ve succeeded. If it seems grainy, return to low heat and whisk vigorously to re-emulsify, or briefly blend smooth with an immersion blender while warm.
  • Usage ideas: use as a luscious frosting, cheesecake filling, pourable sauce for desserts, or a dip for fruits. If you want a looser sauce, whisk in a little more warm cream; for a thicker spread, use more cream cheese or reduce a touch longer before adding it.
  • Safety tip: hot caramel can cause severe burns. Keep kids and pets away from the cooking area, wear long sleeves, and use long-handled utensils.

FAQ

What is Salted Caramel Cream?

Salted caramel cream is a silky, pourable sauce made by caramelizing sugar and whisking in cream, butter, and a pinch of salt until smooth. It has a rich caramel flavor with a hint of salt to balance sweetness, and it can be used as a topping, filling, or mix-in for desserts and drinks.

What ingredients do I need to make salted caramel cream?

Typical ingredients:

  • Granulated sugar
  • Heavy cream (or full-fat coconut cream for a dairy-free option)
  • Unsalted butter
  • Salt (fine or flaky)
  • Vanilla extract (optional for extra depth)

Tips: If you’re making dairy-free, coconut cream works well, but expect a coconut note in the finished cream.

How do I make salted caramel cream?

Basic method:

  1. In a heavy-bottom saucepan, melt sugar over medium heat, stirring occasionally until it becomes a deep amber caramel.
  2. Carefully whisk in warm cream—the mixture will bubble vigorously.
  3. Whisk until smooth, then whisk in butter until melted.
  4. Remove from heat, stir in salt and vanilla (if using).
  5. Let cool slightly; the sauce will thicken as it cools.
Can I make salted caramel cream ahead of time?

Yes. It stores well and can save time later.

  • Refrigerate in a tightly sealed container for up to 1 week.
  • Freeze in portions (ice cube tray or small jars) for up to 3 months. Thaw in the fridge and rewarm gently.
Is there a dairy-free or vegan version?

Yes. Use:

  • Coconut cream or coconut milk as the dairy component
  • A dairy-free butter substitute or coconut oil
  • Keep the salt and vanilla for flavor

Note: Coconut-based versions may have a noticeable coconut flavor compared to dairy versions.

How should I store and reheat salted caramel cream?

Store in the fridge in an airtight container. Reheat gently on the stove over low heat or in short bursts in the microwave, stirring between intervals, until smooth and pourable. If it’s too thick, whisk in a splash of cream or milk to loosen it.

What if it separates or becomes grainy?

Graininess or separation usually comes from crystallization or improper emulsification. Fixes:

  • Whisk vigorously while reheating to re-emulsify the mixture.
  • Warm with a small splash of cream and whisk until smooth.
  • If separated, reheat gently while stirring until the texture comes back together.
How do I adjust the salt level?

Start with about 1/4 to 1/2 teaspoon of salt per cup of cream, then taste and adjust. For a more pronounced contrast, finish with a pinch of flaky sea salt on top when serving.

What can I use salted caramel cream for?

Use it as a topping for ice cream, brownies, or cheesecakes; as a filling for pastries and cakes; swirled into coffee, hot chocolate, yogurt, or oatmeal; or as a decadent sauce for pancakes and waffles.

What equipment do I need?

Common tools:

  • Heavy-bottom saucepan
  • Whisk and spatula
  • Candy thermometer (optional but helpful)
  • Measuring cups/spoons
  • Storage containers (airtight)
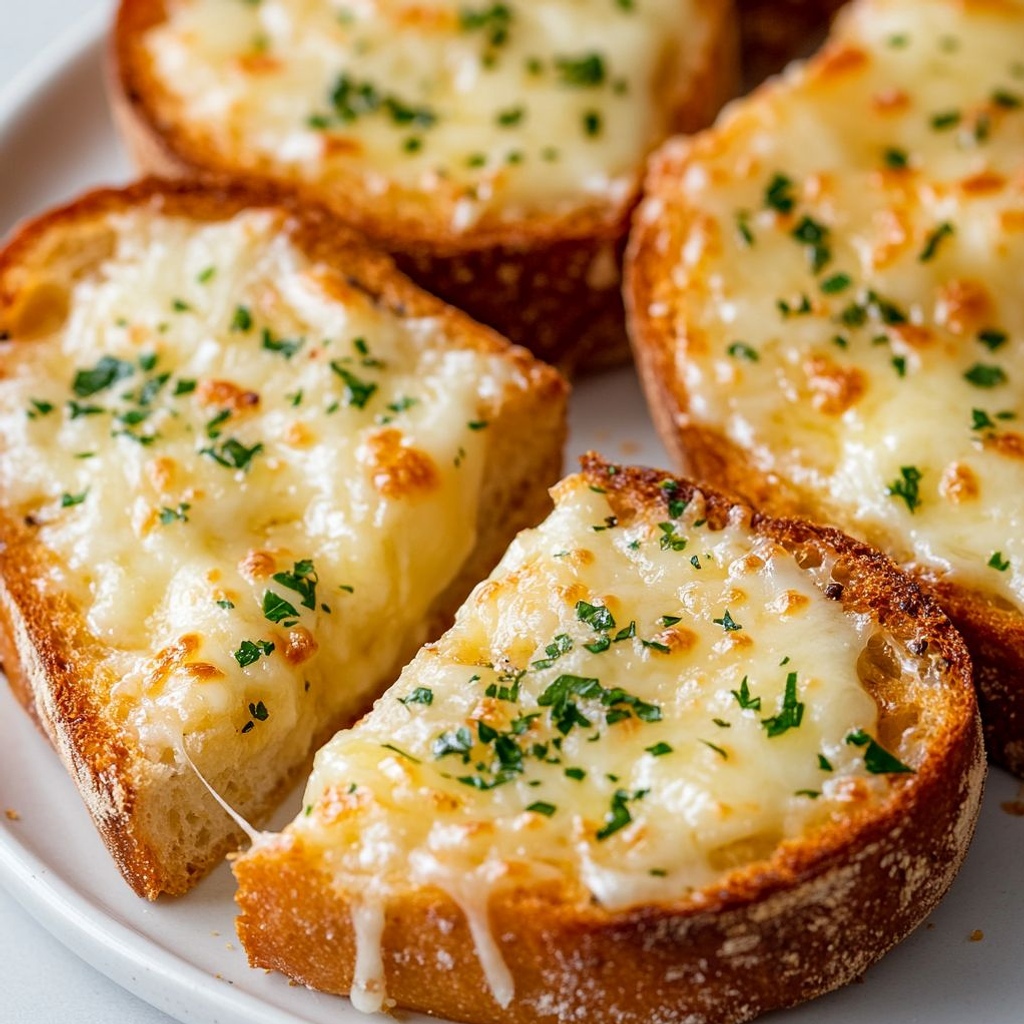
Introduction / Hook

Close your eyes and imagine the first kiss of a velvet night—silky, dark, and unapologetically luxurious. Chocolate cream is that memory you can taste in every spoonful: a whisper of cocoa that settles on the palate with the hush of silk silkiness, a warm melt of sweetness that lengthens on the tongue, and a fragrance that wraps the kitchen in a comforting, almost nostalgic spell. This isn’t merely a dessert; it’s a timeless ritual of comfort, a intimate moment you gift to yourself and to those you hold dear. Whether you’re celebrating a quiet victory, chasing after a rainy-day mood, or simply inviting a moment of indulgence into an ordinary afternoon, chocolate cream has a way of turning simple ingredients into something that feels ceremonial, ceremonial into everyday joy. In every silky swirl, there’s a story: of cocoa beans carried across oceans, of kitchens where laughter rose with steam, and of families gathered around a bowl that’s almost too beautiful to share. If you’ve ever longed for something that reads as luxury yet feels as easy as a cozy hug, this chocolate cream will become a pantry favorite, a go-to comfort that you’ll crave, time and again. Let’s set aside the ordinary and lean into a dessert that promises shimmer, depth, and a memory that lingers long after the last spoonful has disappeared.

The Story Behind the Dish

Chocolate has traveled a remarkable path from cocoa forests to the glossy, glossy comfort of a spoonful you find at the end of a long day. The idea of a cream-based chocolate dessert has roots that reach into European kitchens of the 18th and 19th centuries, where custards, pots de crème, and delicate puddings were celebrated as both art and science. The word “cream” in dessert terms often signals a certain pliancy—a texture that holds a gentle set, a gravity-defying softness that makes each bite feel almost airborne. Chocolate, in its many guises, became the perfect partner for this texture: it lends depth, a velvet darkness, and a lush, lingering finish that begs another taste. But beyond its history, chocolate cream is very much a reflection of home. It’s the dessert grandma might pull from a forgotten tin, the indulgence a student would savor after exam week, the treat that says: a little sweetness can make the world feel a touch more forgiving. In different cultures, you’ll find variations—pot de crème in France with its refined calm, chocolate mousse in Spain and Italy that leans lighter and airier, and regional twists that use local flavors like coffee, vanilla, or spices to shape the experience. What ties all these versions together is the same core intention: to cradle the senses with a glossy, rich, and undeniably comforting chocolate experience. This particular rendition of chocolate cream embraces that lineage while offering a certain modern ease: a custard-like silkiness that can be served cold, at room temperature, or gently warmed, depending on your mood and moment. It’s a dessert that can be dressed up for a special occasion or kept velvety and simple for a weeknight treat. The beauty lies in its adaptability—the way you can tilt it toward decadence or dial it back for everyday elegance, all while preserving that quintessential chocolate charm that makes a dessert feel almost like a warm hug in a bowl.

Why You’ll Love This Recipe

  • Luxuriously smooth and glossy texture that glides across the tongue, leaving a lasting, chocolatey kiss on the palate.
  • Relatively quick and approachable to make, with a focus on technique that yields a refined finish without fuss.
  • Versatile base that adapts to different dietary needs and flavor tweaks, making it suitable for a variety of gatherings and preferences.
  • Perfect balance of richness and sweetness; enough depth to feel indulgent, without tipping into heaviness.
  • Pairs beautifully with a wide range of accompaniments—berries, coffee, crisp cookies, or a flutter of whipped topping—allowing you to tailor the mood to the moment.
  • Make-ahead friendly: you can prepare this dessert in advance, letting flavors mingle and textures set for a more profound chocolate experience.

Flavor Profile & Texture

The signature of chocolate cream is its dual personality: it appears light at first glance, yet reveals a profound depth upon tasting. The aroma is a bouquet of roasted cacao with subtle notes of vanilla, cream, and a whisper of pastry-like sweetness. On the palate, you’ll notice a velvety, nearly satin-like mouthfeel that coats the tongue without being cloying. The chocolate flavor is rich but not overwhelming, a well-balanced dark sweetness that dances between bitter and sweet with nuance—think a fine ganache that has been taught to speak softly. There’s often a gentle undercurrent of dairy or a plant-based alternative that adds a touch of dairy-like creaminess, rounding out the richness and lending a luxurious, lingering finish. The texture holds a delicate set that offers a bit of spoonable structure but melts almost instantly with warmth, making each bite feel as if it’s dissolving into pure cocoa reverie. The finish tends to linger, with a clean aftertaste that invites the next bite without fatigue. If you savor accents, you’ll find that a hint of vanilla or a sprinkle of a bright acidity from berries can illuminate the chocolate’s sweetness, creating a chorus of flavors rather than a solo performance. This balance—richness without heaviness, silkiness without limpness, and sweetness with restraint—defines chocolate cream and is why it remains a beloved star on dessert menus and at family tables alike.

Occasions & Pairings

Chocolate cream shines in a spectrum of moments, from intimate nights to celebratory feasts. It’s a dream for weeknights when you want something special without a mountain of effort, yet it’s elegant enough for dinner parties and holiday menus. Here are some situations where this dessert truly shines:

  • Weeknights of self-care: a comforting, quick treat after a long day that feels deeply rewarding.
  • Romantic dinners: a refined ending that pairs beautifully with a glass of dessert wine, a bold coffee, or a smoky espresso.
  • Family gatherings and potlucks: a crowd-pleasing finish that can be served in individual portions for easy serving.
  • Special occasions: a chocolate finale that can be dressed with luxurious toppings or a dusting of cocoa, gold leaf, or finely chopped nuts for a festive touch.
  • Breakfast or brunch indulgence: in small portions, it can become a velvety accent served alongside fruit and pastry for a decadent weekend treat.

Pairings matter with any chocolate dessert. Consider these options to complement and elevate the chocolate cream:

  • Fresh berries or citrus segments to cut the richness and add a bright contrast.
  • Crunchy textures such as biscotti, almond cookies, or a crisp tuile to provide an exciting counterpoint to the creaminess.
  • Strong coffee, espresso, or a dark roast to mirror the chocolate’s depth and create a harmonious ending to the meal.
  • Whipped cream or a dollop of vanilla crème for extra cloud-like lightness and an inviting crest on top.
  • Silky liqueurs or coffee lusions for adults, adding a gentle warmth that enhances the dessert’s cocoa notes.

Tips, Variations & Substitutions

One of the joys of a dessert like chocolate cream is its adaptability. You can shape it to suit your pantry, your guests, and your dietary preferences without losing the essence of the dish. Here are ideas to consider as you plan your version:

  • Vegan or dairy-free: use a plant-based milk and a dairy-free substitute that provides richness. A good approach is to rely on a velvety plant cream to achieve that smooth texture, and to choose a high-quality dairy-free chocolate to maintain depth of flavor.
  • Gluten-free considerations: this dessert typically doesn’t rely on gluten-containing ingredients, but if you’re serving it with accompaniments, choose gluten-free cookies, biscuits, or crackers to keep the whole experience accessible for gluten-sensitive guests.
  • Low-sugar or sugar-free options: opt for high-percentage chocolate or cocoa that brings intensity with less sweetness, and use a sweetener that suits your preference. You can also rely on vanilla and a pinch of salt to heighten flavors without adding sugar.
  • Flavor twists: a touch of espresso, a hint of chili, or a whisper of cinnamon can transform the chocolate profile, giving a warm, inviting edge to the cream without overpowering the core themes.
  • Texture variations: for a lighter, mousse-like version, fold in a softly whipped plant-based cream just before serving. For a firmer custard-style cream, let it set longer and chill thoroughly before portioning.
  • Regional twists: incorporate pantry staples like orange zest for a bright twist, almond extract for a nutty aroma, or a splash of liqueur that suits your crowd to create a customized identity for the dish.
  • Make-ahead variations: this dessert often benefits from resting in the fridge, which helps flavors mellow and textures settle into a cohesive, luscious finish. You can prepare the base ahead and finish with toppings or accompaniments just before serving.

Storage & Make-Ahead Ideas

Chocolate cream is particularly well-suited to planning ahead. Here are practical guidelines to ensure it maintains its charm from the moment you make it to the moment you serve it:

  • Refrigeration: cover the dessert tightly and store in the refrigerator. It will typically stay fresh for 2–4 days, depending on the exact ingredients and the creaminess of the texture you achieve.
  • Freezing considerations: freezing can affect texture, especially if using dairy. If you anticipate freezing, consider setting up a version designed for freezing or plan to freeze a portion that will be served cold, then thaw slowly in the fridge before serving to recapture as much silkiness as possible.
  • Make-ahead strategy: prepare the chocolate cream base in advance and chill thoroughly. When ready to serve, portion into individual vessels or a serving dish, and add toppings or accompaniments to keep the experience fresh and inviting.
  • Reheating tips: if the texture allows, a gentle reheat can revive a slightly stiff set, but know that some smooth custard-like textures may not respond well to heat. If you reheat, do so slowly and with a protective swirl of cream to preserve silkiness.
  • Storage conditions for toppings: add delicate toppings just before serving to maintain their texture. If you’re including crunchy garnishes or fresh fruit, arrange them at service to keep contrast intact.

Fun Facts & Trivia

Delightful trivia can add a spark to your presentation and conversation. Here are a few morsels you can share with guests or simply keep for your own curiosity:

  • Chocolate has a storied history that spans ancient Mesoamerican civilizations and modern chocolate artistry. The journey from cacao beans to a glossy dessert is a remarkable tale of tradition, science, and flavor.
  • The word “chocolate” has origins in the ancient Nahuatl language, with terms related to “warm” and “bitter” that hint at the early experiences of tasting this prized ingredient.
  • Chocolate cream desserts often balance richness with lightness—an achievement that mirrors the aging of chocolate itself as it evolves from dark, intense notes to a more refined, velvet finish when tempered and combined with dairy or plant-based creams.
  • Many cultures have their own variations of chocolate desserts that center on a creamy, custard-like texture, reflecting a shared love for the comfort of a smooth, luxurious mouthfeel.
  • In modern kitchens, chocolate cream is a playground for chefs and home cooks alike, inviting small, personal experiments with flavors, textures, and presentation while honoring a timeless cocoa romance.

Conclusion & Final Thoughts

Chocolate cream stands as a testament to the power of simple ingredients elevated through technique, patience, and a dash of imagination. It invites you to slow down, savor the scent of cocoa as it unfurls through the room, and allow a silky, glossy dessert to become the centerpiece of a small ritual—one that turns an ordinary moment into something memorable. Whether you’re crafting a quiet end to a weeknight dinner or presenting a show-stopping finish for a special occasion, this chocolate cream delivers on the promises of luxury, comfort, and a touch of whimsy. It’s the kind of dessert that invites conversation, sparks smiles, and earns a cherished place in your dessert repertoire. May each spoonful remind you that the best joys in life often arrive wrapped in velvet chocolate, whispered sweetness, and the comforting glow of a kitchen well loved.

Ingredients

Chocolate Cream
  • – 2 cups whole milk
    → The custard base uses whole milk for maximum creaminess and body. It supplies the moisture and fat that create a smooth, luscious chocolate cream. If you substitute with lighter milk, expect a thinner texture and compensate with a touch more cornstarch or egg yolks.
  • – 1/2 cup heavy cream
    → Adds richness and a velvety mouthfeel to the final custard. Stir it into the hot mixture off the heat to prevent curdling and to achieve a glossy finish. For a lighter version, you can reduce this to 1/4 cup, but the texture will be less silky.
  • – 1/2 cup granulated sugar
    → Provides sweetness, depth, and helps with a smooth mouthfeel as the custard cooks. Whisk the sugar with cocoa powder and the yolks to ensure it dissolves evenly. If you prefer a less sweet dessert, reduce by 2–4 tablespoons, keeping in mind the balance with cocoa and vanilla.
  • – 1/3 cup unsweetened cocoa powder, sifted
    → Delivers the classic chocolate flavor and color. Sifting eliminates clumps for a smoother mix, and whisking it with warm milk prevents graininess. Use Dutch-processed for a mellower, richer chocolate, or natural cocoa for brighter acidity.
  • – 3 tablespoons cornstarch
    → Thickens the custard into a creamy, spoonable chocolate cream. To prevent lumps, whisk the cornstarch with a small amount of cold milk to make a slurry before adding to the hot mixture. If you desire a firmer set, you can increase to 4 tablespoons; for a softer result, use 2 1/2 tablespoons.
  • – 4 large egg yolks
    → Primary thickening and richening agents. Temper the yolks by whisking a ladle of the hot milk into them first, then gradually whisk the warmed yolk mixture back into the pot. This prevents scrambling and yields a silkier custard.
  • – 2 tablespoons unsalted butter, cut into pieces
    → Finishes the custard with a glossy sheen and extra richness. Stir in off the heat until fully melted and incorporated. Butter also contributes to a smooth, luxurious mouthfeel; avoid boiling after addition.
  • – 1 teaspoon vanilla extract
    → Enhances chocolate depth and aroma. Use pure vanilla extract for the most vibrant flavor; for an extra layer, you can add 1/2 teaspoon vanilla bean paste in addition to the extract.
  • – Pinch of salt
    → Intensifies chocolate flavor and balances sweetness. If you use salted butter, adjust to avoid an overly salty finish—start with a small pinch and taste as you go.
Optional Add-ins
  • – 1/2 teaspoon instant espresso powder
    → Deepens chocolate flavor by enhancing the cocoa bitterness. Dissolve in a teaspoon of hot water before whisking into the milk for even distribution. Omit if you prefer a purely classic chocolate profile.
  • – 1/4 cup semisweet chocolate chips or chopped dark chocolate
    → Adds extra pockets of melted chocolate and a richer texture. Stir in chips at the end or fold chopped chocolate into the warm custard off the heat so they melt just enough for ripples.
  • – 1/4 teaspoon ground cinnamon or a pinch of chili powder (optional)
    → A subtle spice can add warmth and dimension to the chocolate. Use sparingly; a little goes a long way—start with 1/8 teaspoon and adjust to taste.
  • – 1/2 teaspoon almond extract (optional)
    → Provides a delicate nutty note that complements chocolate nicely. Use sparingly, as too much can overpower the chocolate; pair with toasted almonds if desired.
Toppings
  • – Fresh berries (strawberries, raspberries, or blueberries)
    → Bright, tart notes provide a refreshing contrast to the rich chocolate cream. Rinse and pat dry; scatter over the surface just before serving for color and balance.
  • – Whipped cream (optional topping)
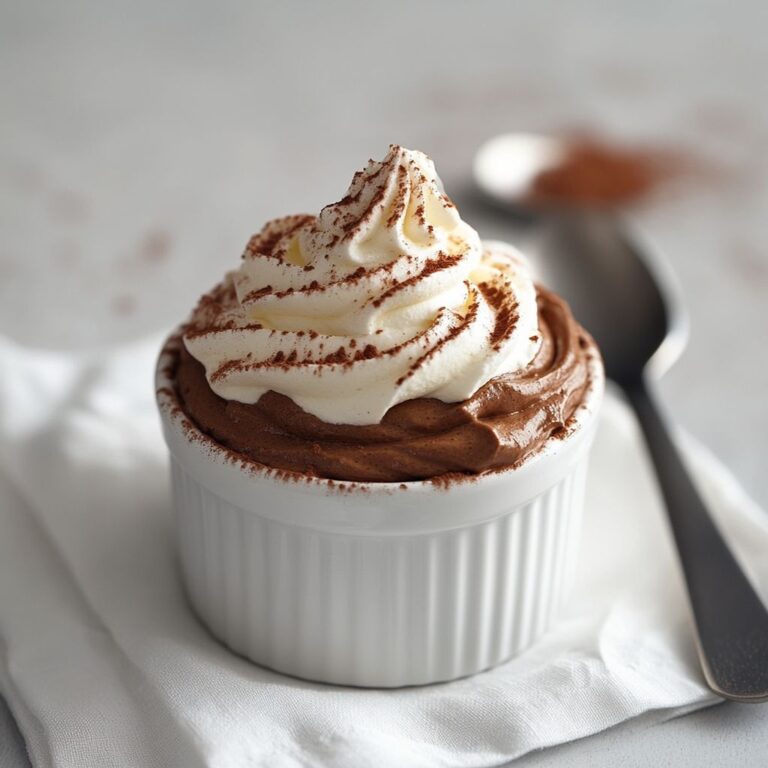
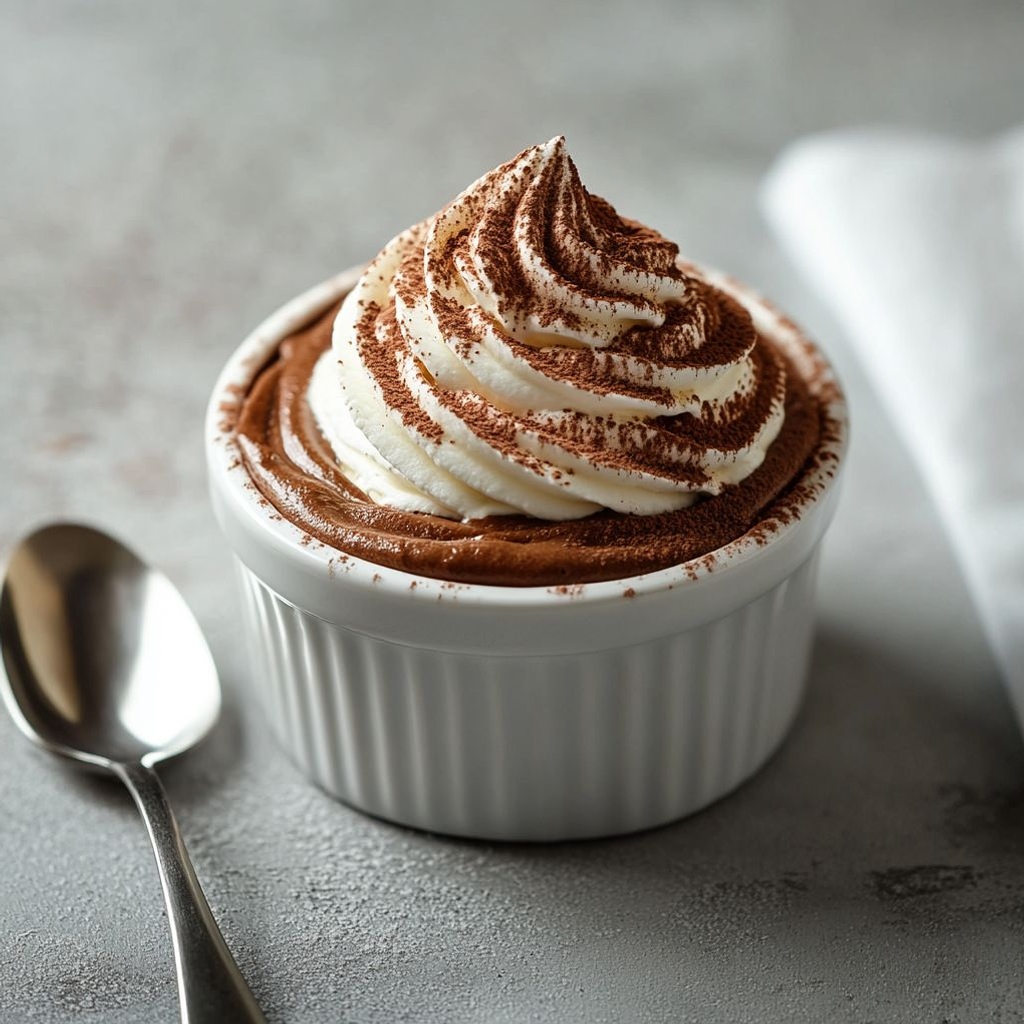
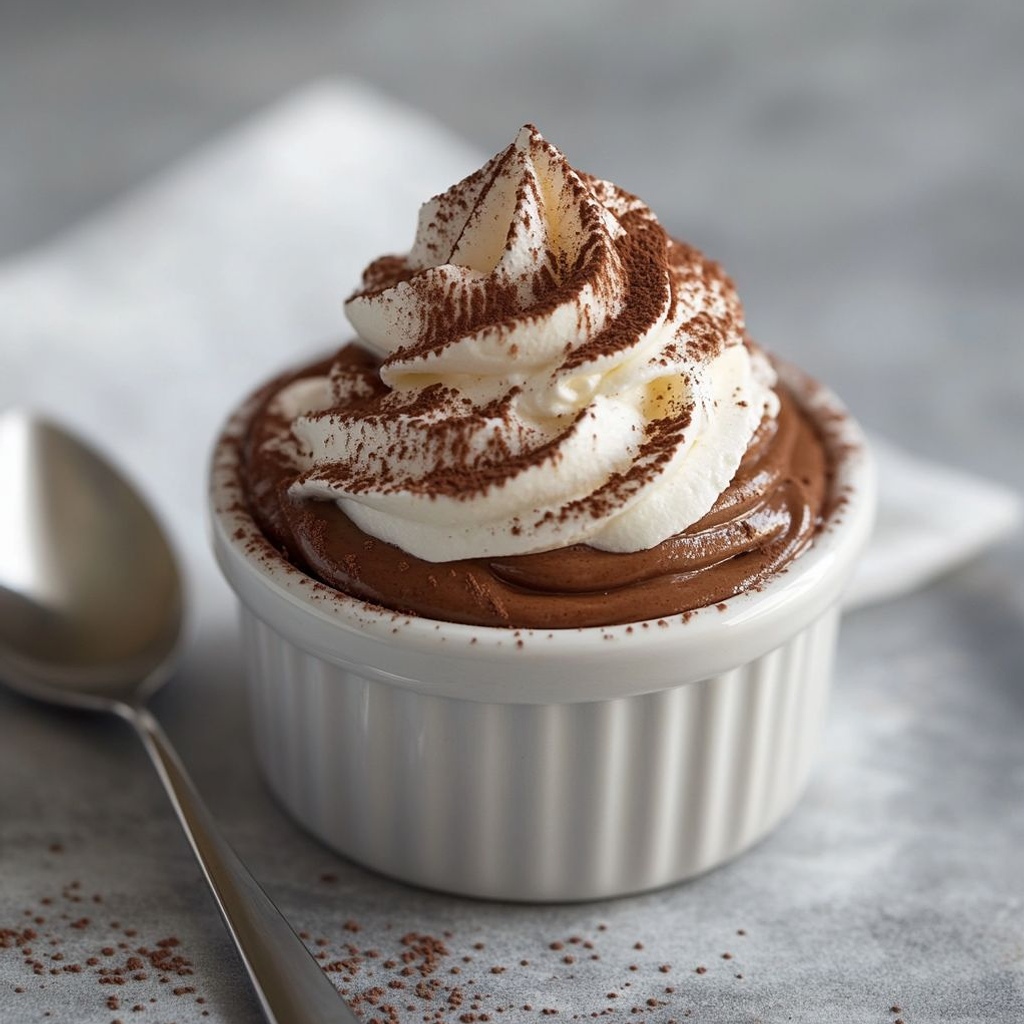
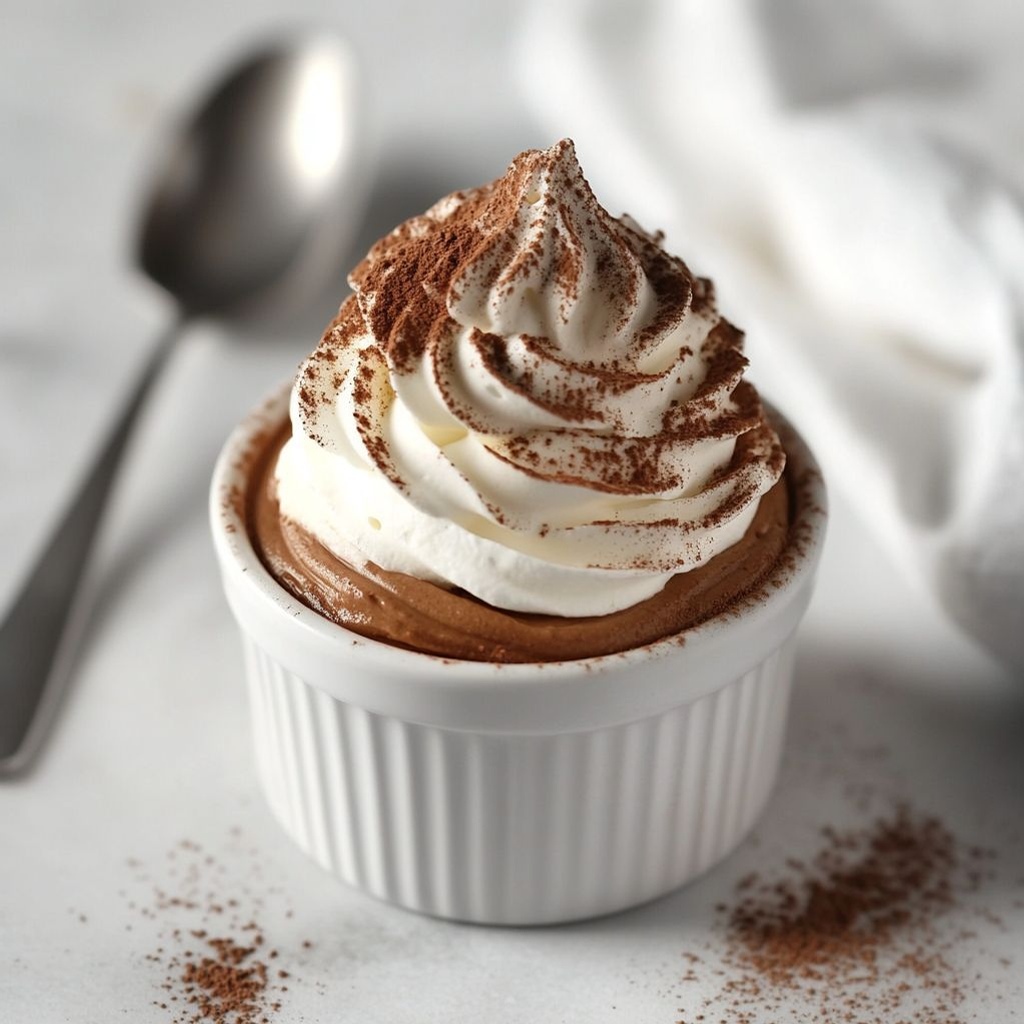
    → Lightens the dish and adds a classic dessert feel. To prepare, whip cold heavy cream with 1–2 tablespoons sugar and 1/2 teaspoon vanilla until soft peaks form. Dollop atop cooled chocolate cream for serving.
  • – Dark chocolate shavings or curls
    → An elegant finish that enhances aroma and chocolate intensity. Use a sharp knife or peeler to shave from a cold chocolate bar; sprinkle over the top just before serving.
  • – Cocoa powder dusting (optional)
    → A light dusting adds a finishing aroma and a touch of bitterness that complements sweetness. Sift a small amount over the surface for presentation and a subtle bite.

Instructions

  • Gather and arrange all ingredients and equipment on the counter before you start, including a heavy-bottom saucepan, a whisk, a heatproof bowl, a fine-mesh sieve, and serving dishes, so you can move efficiently and maintain proper temperatures.
  • → This ensures you have everything within reach and reduces the risk of missing ingredients mid-cook, which can lead to uneven texture or premature cooling of components.

  • Sift the unsweetened cocoa powder into a small bowl to remove any clumps, then whisk it with the granulated sugar until evenly combined, so the chocolate flavor distributes smoothly through the custard.
  • → Sifting prevents gritty specks and whisking with the sugar helps the cocoa dissolve evenly when it meets the warm dairy.

  • Whisk the 3 tablespoons cornstarch with 2–3 tablespoons cold milk in a separate small bowl to form a smooth slurry, ensuring there are no lumps that could cause streaks in the finished custard.
  • → A well-made slurry activates the starch evenly and prevents lumps during heating for a creamy, spoonable texture.

  • Whisk the 4 large egg yolks with the 1/2 cup granulated sugar in a medium bowl until pale, thick, and slightly ribbon-like, which helps create a luxuriously rich custard texture.
  • → Whipping yolks with sugar warms and aerates them slightly, which aids emulsification and contributes to a smooth finish when heated with dairy.

  • In a heavy-bottom saucepan, combine the 2 cups whole milk and 1/2 cup heavy cream with a pinch of salt and the vanilla extract, then heat over medium heat until the mixture is steaming and small bubbles gather at the edges but do not boil.
  • → Heating gently activates the dairy’s flavors and creates a warm base that will dissolve the cocoa and sugar evenly; avoid boiling to prevent scorching and loss of sheen.

  • Whisk the cocoa-sugar mixture into the steaming dairy until completely smooth and incorporated, then maintain a gentle simmer while you proceed, ensuring the color is deep and uniform.
  • → Integrating the cocoa at this stage ensures a rich chocolate base and prevents raw cocoa flavors from remaining.

  • Very slowly temper the yolks by whisking a ladleful of the hot cocoa-dairy mixture into the yolk-sugar bowl, then whisk the warmed yolk mixture back into the pot to combine without scrambling the eggs.
  • → Tempering gradually brings the yolks up to temperature, preventing curdling and achieving a silkier custard.

  • Stir in the cornstarch slurry into the pot and continue cooking over medium heat, whisking constantly, until the custard thickens to a coating consistency that leaves a clear path on the surface of the spoon.
  • → The slurry activates the thickening power of the starch; constant whisking prevents lumps and ensures an even, glossy texture.

  • Continue cooking until the custard reaches a light simmer and coats the back of a spoon, then remove from heat to finish the flavoring steps.
  • → A proper coat-and-sheet test indicates the custard has reached the right thickness before adding butter and off-heat refinements.

  • Add the 2 tablespoons of unsalted butter—one piece at a time—stirring gently off the heat until fully melted and the surface is glossy, which enriches mouthfeel and creates a velvety finish.
  • → Butter emulsifies into the hot custard, increasing silkiness; adding off the heat prevents separation.

  • Stir in the teaspoon vanilla extract and taste for salt, adding a tiny pinch more salt if needed to balance sweetness and deepen chocolate depth.
  • → Vanilla enhances aroma and flavor, while salt sharpens the chocolate and reduces perceived sweetness.

  • If using optional espresso powder, dissolve 1/2 teaspoon in 1 teaspoon hot water and whisk into the custard off the heat to deepen chocolate notes without muting sweetness.
  • → Espresso boosts the cocoa bitterness subtly and adds a professional depth to the chocolate profile.

  • If adding optional chocolate chips or chopped chocolate, fold 1/4 cup into the warm custard off the heat so they melt just enough to ripple without seizing the mixture.
  • → Melting chips in residual warmth creates pockets of melted chocolate for texture and flavor contrast.

  • Strain the custard through a fine-mesh sieve into a clean bowl to remove any trace of lumps or cooked egg bits, ensuring ultra-smooth chocolate cream.
  • → Straining yields a velvety, restaurant-quality texture free of specks or curdling residues.

  • Cover the surface of the custard with plastic wrap directly on the surface to prevent a skin from forming, then refrigerate until fully set and chilled, at least 2 hours or up to overnight.
  • → Direct contact with wrap prevents skin and chilling helps stabilize flavor and texture for serving.

  • Prepare optional toppings: whip cold heavy cream with 1–2 tablespoons sugar and 1/2 teaspoon vanilla until soft peaks form, for a light, airy contrast to the dense chocolate cream.
  • → Whipped cream adds a creamy, airy counterpoint and enhances presentation.

  • Before serving, shave dark chocolate with a sharp knife or vegetable peeler into curls and dust lightly with cocoa powder for an elegant finish, then arrange fresh berries or other toppings as desired.
  • → Finishing touches elevate aroma, texture, and color, making the dessert visually appealing and balanced in flavor.

Notes

These Chocolate Cream notes guide you to a silky, chocolate-rich custard with a glossy finish that sets into a luxurious dessert when chilled.

Start by whisking a cold-milk cornstarch slurry to prevent lumps, then gently heat the milk and cream with the sugar and sifted cocoa until just steaming. In a separate bowl whisk the egg yolks, then temper them with a ladle of the hot milk before returning the yolk mixture to the pot; cook over low heat, whisking constantly, until the custard thickens and coats the back of a spoon—do not let it boil.

Off the heat, whisk in the butter and vanilla until smooth and glossy, and strain if you want extra silkiness. For a deeper chocolate profile, whisk in espresso powder dissolved in hot water, or fold in chopped chocolate at the end so it melts into ribbons. Optional spices like cinnamon or a pinch of chili can add warmth, and a little almond extract can complement the chocolate; adjust to taste.

Chill the custard for at least 2 hours to set, then serve with fresh berries, a dollop of whipped cream, and shaved chocolate. Leftovers can be refrigerated for 2–3 days; whisk gently before serving if needed. To maintain the best texture, avoid boiling after the yolks are added and store in a covered container to prevent a skin from forming.

Tips

Tips for Perfect Chocolate Cream

  • Whisk the cocoa with a small amount of warm milk to form a smooth paste before adding to the pot. This helps prevent lumps and ensures even color.
  • Make the cornstarch slurry with cold milk (or a little of the whole milk) to avoid clumps, then whisk into the hot mixture gradually to prevent lumps.
  • Warm the milk gradually with the sifted cocoa and sugar so the base blends smoothly and foams less as it thickens.
  • Temper the egg yolks: whisk a ladle of the hot milk into the yolks, then return warmed yolk mixture to the pot. This keeps the custard silky and prevents scrambling.
  • Cook over medium-low heat, stirring constantly with a silicone spatula, scraping the bottom and sides to prevent scorching and promote even thickening.
  • Don’t boil after adding the yolks and cornstarch; once the mixture thickens to a nappe that coats the back of the spoon, remove from heat.
  • Finish with the butter off the heat. Swirl until melted and glossy—this adds shine and a luxurious mouthfeel.
  • For extra smoothness, strain the custard through a fine-mesh sieve into a clean bowl before chilling.
  • Add vanilla and a pinch of salt at the end; if using vanilla bean paste, add with the extract for a deeper aroma.
  • If you want a richer flavor, stir in a teaspoon of espresso powder dissolved in a teaspoon hot water, or a small bit of extra melted chocolate off heat.
  • To adjust texture: if the custard seems too thick after chilling, whisk in a small splash of warm milk; if too thin, whisk in a bit more cornstarch slurry and heat gently until it thickens again.

Make-ahead and storage

  • Chocolate cream can be made a day ahead; cover tightly and refrigerate. Re-whisk and warm gently before serving to restore silkiness.
  • Store in a glass jar or covered bowl; this helps preserve aroma and prevents crust from forming on the surface.

Optional add-ins and flavor balance

  • Instant espresso powder enhances the chocolate depth; dissolve in hot water before whisking into the milk for even distribution.
  • Stir in 1/4 cup semisweet chocolate chips off the heat for ribbons of melted chocolate, or fold in chopped dark chocolate to finish the custard just before serving.
  • A pinch of cinnamon or chili powder can add warmth—start with 1/8 teaspoon and taste, then adjust.
  • Almond extract provides a subtle nutty note; use sparingly (1/8 teaspoon) and consider pairing with toasted almonds as a topping.

Serving and presentation tips

  • Serve slightly chilled or at room temperature; a cooler center contrasts nicely with a warm, rich spoonful. Refrigerate for a firmer set if desired.
  • Keep toppings separate until serving; fresh berries brighten the dish, and a dollop of whipped cream adds lightness.
  • For a polished finish, dust with cocoa powder just before serving or shave dark chocolate on top for aroma and texture.

FAQ

What is Chocolate Cream?

Chocolate Cream is a rich, silky dessert made by gently heating dairy with chocolate and a thickener. It can be enjoyed on its own as a pudding or used as a filling or frosting for cakes, tarts, pastries, and more.

What ingredients do I need?

Common ingredients for a classic chocolate cream include:

  • Milk or a combination of milk and cream (about 2 cups / 480 ml)
  • Chocolate, chopped (4 oz / 115 g, dark or semisweet)
  • Sugar (1/3 to 1/2 cup / 65–120 g), adjust to taste
  • Thickener: egg yolks (2–3) for a custard, or cornstarch (2–3 Tbsp) for an eggless version
  • Vanilla extract (1 tsp)
  • Salt (a pinch)
  • Butter (1 Tbsp, optional) for shine and richness
Is this recipe dairy-free or vegan?

Yes, with substitutions. Use plant-based milk (almond, soy, or coconut) and vegan chocolate. If using cornstarch as the thickener, you can omit dairy completely. For a vegan finish, replace butter with a neutral oil or coconut oil and add a splash of vanilla for richness.

How do I make Chocolate Cream on the stove?

Two common methods:

  • Custard method (with eggs): Whisk yolks with sugar. Heat milk until steaming. Temper the yolks by slowly whisking in hot milk, then return to the pot and cook gently until thickened. Remove from heat, stir in chopped chocolate until melted, then whisk in butter (if using) and vanilla. Chill with plastic wrap directly on the surface to prevent skin.
  • Eggless method (with cornstarch): Whisk cornstarch with a little milk to form a slurry. Heat the rest of the milk with sugar and vanilla to just below a simmer. Whisk in the cornstarch slurry and cook until thick, then whisk in melted chocolate and butter (if using). Chill as above.
How long does it take to set and chill?

Chill in the refrigerator for about 2–4 hours, or overnight for a very thick, spreadable cream. If you’re in a rush, you can chill briefly in the freezer for 15–20 minutes, but be careful not to freeze it solid.

How should I store Chocolate Cream?

Store in an airtight container in the refrigerator. Use within 3–4 days. For longer storage, you can freeze the eggless version for up to 1–2 months; note that texture may change after freezing and thawing. If you freeze, thaw in the fridge and whisk to smooth before using.

What are common uses for Chocolate Cream?

Use it as:

  • Filling for layered cakes, tarts, eclairs, or cream puffs
  • Frosting or glaze for cupcakes and cookies
  • Layering in trifles or parfaits topped with whipped cream
  • A simple chocolate pudding served with berries or whipped cream
How can I fix lumps or a grainy texture?

Tips:

  • If using eggs, ensure you don’t overheat: cook until just thickened, then remove from heat.
  • If you see lumps, strain the cream through a fine-mesh sieve while it’s warm.
  • For eggless versions, whisk more vigorously as it cooks and whisk in melted chocolate gradually.
  • Warm a small amount of liquid separately and whisk into the mixture to smooth it.
Can I flavor or customize Chocolate Cream?

Yes. Try:

  • Adding a teaspoon of espresso powder for a mocha flavor
  • Vanilla bean seeds or vanilla paste for extra aroma
  • Orange zest or a pinch of cinnamon for a twist
  • Liquors such as rum, Grand Marnier, or Kahlua (add after removing from heat)
  • Salted chocolate version with a pinch of flaked salt on top
Can I use different types of chocolate?

Yes. Dark, semisweet, milk, or white chocolate all work. Adjust sugar accordingly, since white chocolate is sweeter and has less bitterness. For a deeper flavor, use a higher percentage dark chocolate and consider adding a pinch of salt.

Introduction / Hook

Imagine a morning ritual that feels like a warm hug for your senses: the bread crackles softly as it meets a sizzling skillet, a cascade of melted cheese threads through the air, and a glossy egg settles on top with a silky, runny yolk just begging to be pierced. Egg and cheese toast isn’t merely a dish to start the day; it’s a small celebration that takes everyday ingredients and elevates them into something comforting, indulgent, and incredibly satisfying. The magic lies in the contrast—the crisp, toasty edges giving way to the creamy, savory melt of cheese, and a yolk that streams like liquid sunshine when you cut into it. It’s fast enough for busy mornings, yet luxurious enough to feel like a treat you’ve earned, even on a weekday. Each bite brings a gentle sizzle, a toasty aroma, and a satisfying warmth that lingers long after the plate is cleaned. Welcome to a humble toast that wears its happiness on its crust.

The Story Behind the Dish

Egg and cheese toast sits at a crossroad of comfort foods that have traveled with people from breakfast tables to late-night kitchens across decades and continents. Its lineage is a charming collage of two timeless ideas: bread that’s been coaxed into golden crispness and eggs that embody breakfast simplicity at its most honest. The concept of dipping or pairing bread with a runny yolk has echoes in “eggs on toast” traditions found in many cultures, where a soft egg is perched atop a slice of bread, inviting you to pierce the yolk and let it mingle with the toasty crust. The cheese element is a more modern riff—a nod to the universally adored allure of melted cheese as a binding, flavor-boosting agent that makes every bite feel luxurious without turning it into a fuss. In many kitchens, this combination emerges as a spontaneous weekday staple, a dish that proves you don’t need a long shopping list or elaborate techniques to conjure something memorable. It’s the kind of recipe that turns a simple breakfast into a moment of pride, a tiny celebration before the day unfolds. The harmony of textures and flavors makes it a favorite not only for solo mornings but for brunch tables, sleepy weekends, and even comforting late-night suppers when you crave something familiar and nourishing.

Why You’ll Love This Recipe

  • Quick and unfussy: A satisfying meal that comes together in moments, perfect for busy mornings or a speedy weekend brunch.
  • Versatile and forgiving: Works with a wide range of breads, cheeses, and add-ins, so you can tailor it to what you have on hand.
  • Comforting and indulgent without being heavy: The crisp toast contrasts with oozy cheese and a silky egg for a balanced bite.
  • Kid-friendly and crowd-pleasing: Simple flavors that appeal to little palates while still exciting adult taste buds.
  • Budget-friendly: Uses everyday pantry staples, making it a economical choice for daily breakfasts or casual entertaining.
  • Make-ahead friendly in spirit: You can pre-toast the bread or pre-shave a few cheese shreds, reducing dawn-time prep.
  • Adaptable to dietary needs: With thoughtful substitutions, it can align with vegan, gluten-free, or dairy-free preferences.

Flavor Profile & Texture

Egg and cheese toast is a study in delicious contrasts. The bread provides a sturdy, crisp foundation—think of a golden crust that offers a satisfying bite, a gentle chew, and a hint of nutty warmth from the toasting process. The cheese, melted into a luscious blanket, adds a savory, umami-rich depth with a hint of meltiness that stretches between bites. The egg—whether you opt for a runny yolk that spills like liquid gold or a perfectly set white with a velvety interior—delivers richness and silkiness that ties the whole dish together. As you cut through, the yolk mingles with the cheese, creating a velvety sauce that seeps into the bread, while the crisp surfaces provide a textural counterpoint that keeps each bite exciting. Depending on the cheese you choose, you’ll also encounter a spectrum of flavors—from sharp and tangy to mellow, buttery, or even sweet-savory if you lean into a cheese with a touch of caramelization. When finished with a few bright touches—herbs, a kiss of black pepper, a whisper of chili heat—the dish goes from comforting to irresistible, like a warm memory in edible form.

Beyond the primary trio, the optional toppings and add-ins offer a chorus of flavors that can elevate the experience. A slice of tomato can add a juicy brightness; avocado can contribute creaminess and richness; a handful of fresh herbs—parsley, chives, or dill—can lift the dish with their fresh aroma. A pinch of red pepper flakes or a drizzle of chili oil introduces a welcome spark of heat. Even the saltiness of a touch of miso butter or a smear of pesto can harmonize with the cheese to pull the flavors in new directions without overpowering the core character of the dish.

Occasions & Pairings

This versatile toast shines in many moments. It’s ideal for a leisurely weekend brunch that invites lingering conversations over coffee. It also makes a comforting, speedy weekday breakfast when time is tight but you still crave something satisfying. It can anchor a light lunch, served with a bright salad or a bowl of soup, or be a savory partner to a fruit plate for a balanced, well-rounded morning meal. For special occasions, pair with a sparkling beverage or a crisp white wine if you’re enjoying a relaxed brunch spread with friends.

  • Pairings: A simple side salad with a lemony vinaigrette, fresh tomato slices, or a handful of arugula can provide a fresh counterpoint. A cup of coffee, a glass of orange juice, or a lightly sparkling beverage works beautifully alongside.
  • Occasion ideas: Weekday breakfasts, weekend brunch, after-work suppers, or a cozy, casual entertaining menu where guests can customize their own toppings.

Tips, Variations & Substitutions

While the core of the dish is wonderfully simple, a few thoughtful tweaks can unlock new flavors and textures, and accommodate various dietary needs or preferences.

  • Bread varieties: Sourdough adds a robust, tangy note with a sturdy bite; country loaf or rustic bakery bread delivers a hearty, satisfying base; whole-grain or multigrain bread adds extra texture and nutty flavor. For a lighter option, use a classic white loaf or baguette slices. To keep it gluten-free, choose a sturdy gluten-free bread that toasts well and doesn’t crumble under the egg and cheese.
  • Cheese choices: A sharp cheddar gives a bold punch, while Gruyère, Emmental, or Swiss melts deliver a luxurious creaminess. A melty mozzarella-based blend provides a stringy richness, and a pepper jack can add a gentle heat. For a tangy twist, try a bit of blue cheese with milder bread, balancing the bite with a sweeter element from the bread itself.
  • Egg preparation options: Sunny-side up keeps the yolk center-stage and creates a dramatic, decadent look. An over-easy or over-medium approach yields a slightly firmer yolk that’s easier to spread. If you prefer a fully set egg, scramble the eggs lightly with a pinch of salt and pepper and spoon over the cheese for a brunch-friendly variant.
  • Add-ins and toppings: Fresh herbs (chives, parsley, dill) brighten the dish. Sautéed mushrooms or wilted spinach add depth and earthiness. A slice of tomato or roasted peppers introduces acidity that cuts through the richness. A light dusting of smoked paprika, chili flakes, or a drizzle of hot honey can push the flavor profile toward smoky, spicy, or sweet-savory territory.
  • Dairy-free and vegan options: Use an egg-free alternative like a chickpea flour omelet or a tofu scramble layered on dairy-free cheese that melts well. Choose a sturdy gluten-free bread and a vegan cheese that melts smoothly for a satisfying plant-based version. For oil-based or butter substitutes, use olive oil or a dairy-free butter substitute to achieve the same crisp texture.
  • Make it your own: This dish thrives on personalization. Don’t hesitate to mix and match cheeses, experiment with herbs, or introduce a cultural twist—think adding a touch of sun-dried tomato and oregano for a Mediterranean vibe, or a drizzle of pesto for a bright, herby note.

Storage & Make-Ahead Ideas

Egg and cheese toast is best enjoyed fresh, when the toast is crisp and the cheese is perfectly melted. However, there are sensible ways to plan ahead so you can still savor the dish with minimal effort when time is scarce.

  • Toasting ahead: You can pre-toast slices of bread and store them in an airtight container or zip-top bag. When you’re ready to serve, reheat the slices briefly to restore their crispness before adding the cheese and eggs.
  • Cheese prep: Shred or grate cheese in advance and keep it in the refrigerator. It will melt quickly when layered over hot bread, saving you a moment at the stove.
  • Egg considerations: If you’re making this for a future meal, you can scramble eggs in advance and keep them refrigerated. When it’s time to serve, reheat the scrambled eggs gently in a skillet and fold in the cheese just long enough for it to melt before piling on the toast.
  • Storage of leftovers: If you do have leftovers, store the toast assembled with cheese and egg separately from the bread, and reheat in a toaster oven or skillet to re-crisp the bread. The yolk can thicken when reheated, so consider using the egg as a topping rather than pre-cooked if you anticipate leftovers.
  • Make-ahead brunch concept: Prepare a tray of toasted bread slices and a small cheese-and-egg topping station. Allow guests to build their own egg and cheese toasts, customizing with herbs, tomatoes, or peppers they prefer. It becomes a relaxed, interactive brunch moment rather than a rigid recipe.

Fun Facts & Trivia (Optional)

Did you know that eggs and toast have a long-standing cultural role across many cuisines? The concept of dipping bread into runny yolk is celebrated in some traditions as a symbol of unity and nourishment, while melted cheese on warm bread is a timeless favorite in many parts of the world. The combination is a reminder of the power of simplicity—how a handful of familiar ingredients, thoughtfully prepared, can create a moment that feels both heartwarming and special. Cheese has a way of binding flavors and elevating even the most basic breakfast into something memorable, and when paired with the comforting, toasty bread and a perfectly cooked egg, it becomes a small ritual of daily joy. Some kitchens even boast regional riffs—adding a sprinkle of paprika for a smoky edge in one locale, or finishing with a squeeze of lemon juice in another for a bright contrast. The enduring appeal lies in the dish’s adaptability and the universal appeal of a well-executed, hot, melty bite.

Ingredients

  • Toast Base
  • 2 slices sturdy bread (such as sourdough or whole grain)
    → These slices provide the foundation of the dish, offering structure and texture that can hold the egg and cheese without becoming soggy. Choose thick-cut slices for best results, and toast until the crust is lightly crisp to create a sturdy surface for topping.
  • 1 teaspoon unsalted butter, melted or 1 teaspoon olive oil for toasting
    → Adds richness and assists browning. Butter gives a mellow, toasty flavor, while olive oil keeps the dish dairy-free. Apply to the bread before toasting or toast first and brush while hot for best color and aroma.
  • Eggs
  • 2 large eggs
    → The eggs are the protein backbone and binding element for the toast. How you cook them determines the final texture: sunny-side up for a bright, runny yolk; over-easy for a slightly set yolk; or scrambled if you prefer a softer, evenly distributed egg layer. Use fresh eggs for best flavor and ensure even cooking.
  • 1–2 tablespoons milk or water (optional, for scrambled eggs)
    → If you plan to scramble, whisk the eggs with a splash of milk or water to create a softer, fluffier texture. Use cold milk or water to avoid thinning the mixture too much; adjust to achieve your preferred scramble consistency.
  • Cheese
  • 2 slices cheddar cheese (or 1/2 cup shredded cheddar, or a melt-friendly alternative like mozzarella or Gruyère)
    → Cheese provides creaminess and helps seal the egg to the toast as it melts. Choose a cheese that melts smoothly and pairs well with the bread; shredded varieties distribute more evenly and create a gooier texture than single slices.
  • Seasonings
  • Salt to taste
    → Enhances the overall flavor and heightens the eggs’ savoriness. Start with a light pinch, then adjust after assembling the toast to avoid oversalting the final dish.
  • Freshly ground black pepper to taste
    → Adds a hint of warmth and aroma; grind right before serving for maximum aroma and bite. If using flaky sea salt, sprinkle sparingly to avoid overpowering the cheese.
  • Optional Add-ins
  • Tomato slices (optional)
    → Fresh tomato adds brightness, juiciness, and a slight acidity that balances the richness. If using, pat the slices dry to reduce moisture and prevent soggy toast. Layer on the bread before the cheese for even heating.
  • Fresh herbs (e.g., chives or parsley) (optional)
    → Adds color and a fresh, delicate aroma. Finely chop and sprinkle on top after assembly to preserve their brightness; heat will dull their color if added too early.
  • Red pepper flakes (optional)
    → For a gentle heat kick; sprinkle sparingly if you like some warmth. Add at serving if you prefer a milder result, or mix into the eggs for a uniform subtle spice.

Instructions

  • Warm a nonstick skillet over medium heat and lightly oil or wipe with a bit of butter to create a seasoned surface for toasting.
    → A preheated, lightly oiled pan ensures the bread toasts evenly without sticking and develops a desirable crust.
  • Brush both sides of each bread slice with a thin coat of melted unsalted butter or olive oil to promote browning and flavor.
    → Butter adds richness and helps achieve a crisp, golden exterior, while olive oil keeps the toast dairy-free if desired.
  • Place the bread slices in the hot skillet and toast until the crust is lightly crisp and the surfaces are golden, about 2 to 3 minutes per side, flipping once.
    → Proper toasting gives a sturdy base that resists sogginess from the eggs and cheese and enhances aroma.
  • In a small bowl, crack 2 large eggs and, if you plan to scramble, add 1–2 tablespoons milk or water and whisk until the mixture is pale and evenly combined.
    → Whisking with a splash of dairy or water introduces air and yields fluffy, evenly cooked scrambled eggs; omit the milk if you prefer firmer texture, in which case beat just until combined.
  • Return to the skillet with a touch of butter or oil on medium-low heat and cook the eggs, stirring gently with a silicone spatula, until they are just set and creamy, removing from heat before they fully overcook.
    → Cooking eggs off the heat prevents dryness; residual heat finishes cooking while remaining soft and custardy.
  • Lay one slice of toast on a plate and arrange the cheddar cheese on top in an even layer, using slices or shredded cheese to create a uniform melt.
    → A even cheese layer ensures all parts of the toast receive melt and creaminess, and shredded cheese distributes more evenly than a single slice.
  • If using tomato, pat slices dry with a paper towel to remove surface moisture and layer them atop the cheese before adding the eggs.
    → Patting dry prevents soggy bread and helps tomatoes heat through without making the toast watery.
  • Spread the scrambled eggs over the cheese-covered toast in a smooth, even layer, leaving a small margin at the edges to prevent overflow.
    → A uniform layer of eggs ensures every bite has egg and cheese, and keeping edges helps the cheese melt toward the surface.
  • Top the eggs with the remaining cheese, or scrape additional cheese on top to crown the mixture, then cover the skillet with a lid or slide under the broiler for 1–2 minutes to melt and unite the layers.
    → A gentle finish melts the cheese evenly without browning too much, creating a glossy, cohesive surface.
  • Season with a light pinch of salt and freshly ground black pepper to taste, and sprinkle fresh herbs such as chives or parsley over the top for color and aroma.
    → Finishing with salt, pepper, and herbs heightens flavor and provides a fresh contrast to the richness of the eggs and cheese.
  • Serve the egg and cheese toast immediately while hot, cut in half if desired for easier handling, and enjoy the contrast between crisp bread, creamy eggs, and melted cheese.
    → Warm, just-made toast delivers the optimal texture and flavor, whereas cooling can dull the cheese’s gloss and soften the crust.

Notes

This egg and cheese toast is a quick, comforting option for breakfast, brunch, or a speedy weeknight meal. Start with sturdy bread that can hold up to the toppings; toast until the crust is lightly crisp to give the base structure and prevent sogginess. For a dairy-free version, brush the bread with olive oil and use a melting dairy-free cheese.

Eggs form the protein backbone and determine the final texture. Choose your preferred method: sunny-side up for a bright, runny yolk; over-easy for a softly set yolk; or scrambled if you prefer a soft, evenly distributed layer. If scrambling, whisk with a splash of milk or water to keep them light and fluffy, and cook just until set.

Cheese brings creamy richness and helps bind the egg to the toast as it melts. Traditional cheddar works beautifully, but mozzarella, Gruyère, or a melt-friendly blend are also delicious. Use enough cheese to create a gooey layer that melts smoothly over the egg without overpowering the toast.

Season lightly with salt and freshly ground black pepper. Optional add-ins can elevate the dish: a few tomato slices for brightness; chopped fresh herbs like chives or parsley for color and aroma; and a pinch of red pepper flakes for gentle heat. If using tomatoes, pat them dry to reduce moisture and prevent sogginess; add herbs after assembling to preserve their brightness.

To assemble: toast the bread, place a slice (or a layer) of cheese on each slice, add the cooked egg (or scrambled eggs), and top with the second slice. If you like, finish briefly in a hot skillet or under a broiler to melt the cheese and tighten the toast. Serve immediately for best texture and flavor. Leftover components can be stored separately and reheated, but the texture is best when fresh.

Tips

Tips for Perfect Egg and Cheese Toast

Toasting the bread

  • Use sturdy, thick-cut slices (such as sourdough or whole grain) to create a solid base that won’t sog when the egg and cheese melt on top.
  • Toast until the crust is lightly crisp and browned to add structure and help support the toppings.
  • Brush the bread with melted butter or olive oil before toasting to enhance browning and flavor. If you’re keeping things dairy-free, olive oil is a great alternative.
  • If toasting in a skillet, toast in a dry pan over medium heat, then brush with butter or oil while hot for optimal color and aroma.

Cooking the eggs

  • Fresh eggs taste best; decide texture before cooking: sunny-side up for a runny yolk, over-easy for a softly set yolk, or scrambled for a creamy, evenly distributed layer.
  • For scrambled eggs, whisk with 1–2 tablespoons milk or water to achieve a fluffier texture. Use cold milk or water and whisk just until combined.
  • Cook eggs in a lightly oiled or buttered non-stick skillet over medium-low heat to avoid browning and ensure even cooking.
  • If you want to add the egg on top of the toast, you can fry the egg first and then transfer it onto the toast, or scramble the eggs and spoon them onto the toast while they’re still warm to help melt the cheese.

Melted cheese tips

  • Choose melt-friendly cheeses: cheddar, mozzarella, or Gruyère work well. Shredded cheddar distributes heat more evenly and can yield a gooier texture than slices alone.
  • Place cheese on the bread first, then add the eggs on top; the cheese will melt and help seal the egg to the toast as it heats.
  • If using only slices, cover the pan for 1–2 minutes to trap heat and melt cheese quickly without overcooking the eggs.
  • For extra melty cheese, finish with a brief under-the-broiler or toaster oven (watch closely to prevent burning).

Seasoning and add-ins

  • Season lightly with salt and pepper; cheese already adds salt, so start with a small pinch and adjust after assembling.
  • Tomato slices add brightness and juiciness. Pat them dry to reduce moisture and prevent sogginess; layer tomatoes on the bread before the cheese for even heating.
  • Fresh herbs (such as chives or parsley) add color and aroma. Chop finely and sprinkle on top after assembly to preserve brightness.
  • Red pepper flakes provide a gentle heat. Sprinkle sparingly if you like a kick, or mix into the eggs for even distribution.

Assembly, serving, and storage

  • Let the cheese melt completely before serving for a cohesive bite. If needed, a quick 1–2 minute finish under the broiler helps.
  • Assemble while the toast is hot so the cheese melts rapidly and binds to the bread.
  • Serve immediately for the best texture and flavor. If making ahead, reheat gently: re-toast the bread and rewarm the eggs in a pan, then reassemble with fresh cheese if desired.
  • Leftovers can be stored separately (toast, eggs, and cheese) and recombined and reheated for a quick redo.

FAQ

Egg and cheese toast – FAQ

What is egg and cheese toast?

A quick open-faced breakfast: toasted bread topped with cooked eggs and melted cheese. It’s simple, comforting, and highly customizable.

What ingredients do I need?

Basic ingredients:

  • 2 slices of bread
  • 1–2 eggs
  • 1–2 slices of cheese (cheddar, American, Swiss, or your favorite)
  • Butter or oil for cooking
  • Salt and pepper to taste

Optional extras: a splash of milk or cream for fluffier eggs, hot sauce, herbs, tomato slices, avocado, and cooked bacon or sausage.

What are common variations?

Classic open-faced toast with a fried or scrambled egg and melted cheese. Variations include:

  • Scrambled eggs layered with cheese on toast
  • Fried egg on cheese-melted toast for a runny yolk
  • Top with tomato, spinach, avocado, or herbs
  • Use different breads like sourdough, rye, or gluten-free bread
Should I scramble or fry the eggs?

Both work well. Scrambled eggs melt into the cheese nicely and cook quickly. A fried egg gives a runny or soft yolk; cover briefly to help melt the cheese if needed.

How do I cook it step by step?
  1. Toast the bread until golden.
  2. Cook the egg in a lightly oiled or buttered skillet. For scrambled eggs: whisk with a splash of milk and cook gently, stirring. For fried eggs: crack into the pan and cook sunny-side up or over-easy.
  3. Place cheese on the hot toast so it starts to melt.
  4. Top with the cooked egg and let the cheese finish melting if needed.
  5. Season with salt and pepper and add any optional toppings. Serve hot.
How can I customize it for different diets?

Vegetarian: keep eggs and dairy. Vegan: use plant-based cheese and a tofu or chickpea “egg” substitute. Gluten-free: use gluten-free bread. Dairy-free: use dairy-free cheese and oil instead of butter.

How do I prevent soggy toast?

Use sturdy bread and toast it well. Cook the egg until just set and melt the cheese on hot toast. Assemble immediately and avoid adding wet toppings until after the toast is heated through.

How long do leftovers last and how do I reheat?

Store leftovers in the fridge for up to 1 day. Reheat in a toaster oven or skillet until heated through and the cheese is melty again. Note textures may change slightly after refrigeration.

Can I frozen or meal-prep this?

Best enjoyed fresh, but you can prep components ahead. Scrambled eggs can be made in advance and reheated; to reuse toast, re-toast for crispness. Freezing assembled tostadas is not recommended as texture may suffer.

What makes this recipe quick and budget-friendly?

Eggs, cheese, and bread are inexpensive and pantry-friendly. With a few minutes, you can have a warm, satisfying meal in 5–7 minutes.

Introduction / Hook

There’s a moment when a kitchen door opens and a warm, comforting scent floods the room—garlanded with toasty edges, a whisper of something indulgent, and a promise of shared bites around a crowded table. Garlic cheese bread is one of those enchanted, crowd-pleasing classics that feels like a hug in edible form. It’s the kind of dish that makes ordinary weeknights feel festive, and casual gatherings glow with a sense of cozy anticipation. Imagine a loaf that has transformed from everyday fare into a centerpiece of nibbling bliss: crusty on the outside, tender and inviting on the inside, with a savory glow that lingers in the air long after the first slice disappears. This isn’t just bread with toppings; it’s a small ceremony—a ritual of warmth, shared flavors, and the satisfying pull of a perfectly melted, golden topping that offers a little spellbinding stretch as you tear off the next piece.

What makes garlic cheese bread so special isn’t only the pleasure of tasting a single bite, but the experience of the moment: the crackle as you break through the crust, the steam that escapes in a delicate sigh, the way the flavors unfold on your tongue—rich, aromatic, and deeply comforting. It’s the kind of dish that invites conversation, laughter, and seconds, turning a simple loaf into a memory. In many homes, it accompanies bowls of soup on cold nights, brightens a casual pizza night, or stands proudly as an appetizer at a party, letting guests nibble their way toward a shared table. The beauty of this recipe is its flexibility and timeless appeal: it’s easy enough to master on a busy weeknight, yet generous enough to feel special when guests arrive unannounced. It invites you to add little personal touches, to adjust the mood from rustic and hearty to elegantly simple, all without losing its core, comforting charm.

The Story Behind the Dish

Garlic bread has roots that trace through Italian kitchen traditions and the broader tapestry of Italian-American cooking. The concept began as a practical, everyday transformation: stale or day-old bread found new life brushed with a fragrant mixture and toasted until the surface bronzed and crisp. Over time, cooks began layering on something richer and more indulgent—a soft, bubbling topping that melded with the bread’s heat to create a creamy, savory kiss across the surface. In North American dining rooms, pizzerias, and family kitchens, what started as a humble accompaniment to a simple meal evolved into a beloved star in its own right. The version that evolved into garlic cheese bread across many homes often borrowed techniques from both east and west: the alchemy of a warm, aromatic spread and the magic of cheese that stretches and glistens when hot. It’s a dish that feels both familiar and celebratory—a homage to the idea that comfort food can be both straightforward and strikingly satisfying.

From memory and tradition, this bread is most often associated with gatherings—a pot of soup on a chilly evening, a casual lunch with friends, or a family movie night where the lights are low and the room smells wonderful. It’s amazing how a simple loaf can become a shared experience, inviting people to pass the plate, trade stories, and savor the moment before the next bite. The dish carries a sense of memory-making: the way a warm slice triggers a familiar taste of home, how the cheese’s sheen reflects the light of the kitchen, and how the aroma lingers in the air like a soft reminder of presence and togetherness. These stories aren’t written in recipes; they’re whispered in the space between plates, in the clink of napkins, and in the satisfied sighs that follow the first, best bite.

Over the years, cooks have experimented with textures, finishes, and balance. Some prefer a crisp, nearly crackling edge that offers a satisfying bite, while others favor a plush, almost creamy center that melts away in seconds. Some kitchens lean toward robust, herbal notes that cut through the richness, while others chase a milder, purer dairy flavor that allows the bread’s character to shine through. The beauty of garlic cheese bread lies in its adaptability: it can be rustic or refined, simple or elegantly finished, and it remains incredibly forgiving—perfect for improvised weeknight meals or planned feasts alike. In all its variations, the dish remains a testament to the idea that simple ingredients can come together to produce something more than the sum of their parts: a moment of warmth that invites everyone to the table.

Why You’ll Love This Recipe

  • Quick to assemble and even quicker to disappear—ideal for busy weeknights or last-minute entertaining.
  • A universally loved starter or side that pairs with a wide range of dishes, from soups to salads to hearty mains.
  • Effortless crowd-pleasing appeal: the gooey, molten topping offers irresistible pull and comfort in every bite.
  • Highly customizable without losing its essence; you can adjust flavor intensity, texture, and finish with simple tweaks.
  • Creates a kitchen-smelling, heartwarming moment that signals welcome and togetherness to everyone at the table.
  • Versatile for different occasions—weeknights, casual gatherings, game nights, or holiday spreads.
  • Great for using up a few pantry staples and turning them into something special without fuss.

Flavor Profile & Texture

The essence of this dish lies in the interplay between a toasty, sturdy base and a luscious, ever-so-slightly clinging topping. Imagine crusty, golden edges giving way to a soft, tender interior—each slice revealing a glossy finish that catches the light and hints at the indulgent notes within. The topping carries a savory, comforting profile that is both aromatic and deeply satisfying. It offers a gentle saltiness that enhances the bread’s natural sweetness and a mellow, dairy-forward richness that feels lush without being heavy. The overall bite is a beautiful balance: a crisp, satisfying crack as you break through the crust, followed by a satisfying chew from the bread that carries the topping’s creamy, savory warmth to every corner of the mouth. Aroma plays a starring role here—the intoxicating scent of toasty bread mingling with a rich, fragrant top that fills the room and makes mouths water even before the first bite. The result is an experience that’s both comforting and indulgent, a reminder that the best simple foods can feel transformative when they’re prepared with care and attention to texture and balance.

The texture journey matters just as much as the flavor. You want that initial crackle to signal a proper bake, the inner crumb to be soft and yielding, and the topping to melt into a glossy, almost silk-like layer that clings to every slice. The toppings often bring a gentle melt and a slight pull as you tease apart each piece, giving you a moment of tactile satisfaction that matches the sensory delight of aroma and taste. In all its forms, the dish is about harmony: a warm, welcoming bite that feels both comforting and a touch festive, the kind of bite that makes you slow down and savor the moment rather than rush to the next one. It’s a texture chorus of crunch, creaminess, and cohesion—each element supporting the others to make the experience feel complete and deeply satisfying.

Occasions & Pairings

This dish loves both everyday and special occasions. On a weeknight, it can elevate a simple supper into something a little more indulgent without demanding hours in the kitchen. For weekend gatherings, it becomes a shareable starter that gets conversations going and hands passing plates in a relaxed, friendly rhythm. It also makes a generous addition to a party spread, where guests can nibble while mingling, allowing conversation to flow as freely as the laughter. When planning a menu, think of it as a versatile anchor that can anchor a light meal or complement a heartier one.

Pairing options extend beyond the plate. It slides nicely alongside warm bowls of soup or chunky salads, and it can serve as a comforting counterpoint to a bright, citrusy starter. For beverages, consider options that balance richness with brightness—something crisp and refreshing to cut through the fullness of the topping, or a light, fruity wine that complements the toasty notes without overwhelming them. For dessert, you might keep the finish simple and clean—something with fresh fruit or a light, creamy element that offers a gentle contrast to the depth of this savory starter. The beauty of this dish is that it sets a mood: cozy, friendly, and a little indulgent, the kind of dish that invites guests to linger a bit longer and savor the moment together.

Tips, Variations & Substitutions

Tips for a Perfect Finish

Think about balance and timing. If you’re aiming for a crisp edge, finish with a hotter, longer bake or broil briefly at the end to achieve a deep, bronzed crust. If you prefer a softer top, you can give the topping a lighter application or a shorter bake time while still ensuring the bread remains tender inside. An even, generous spread across the surface helps create a uniform melt and a cohesive slice. Pay attention to the finish, ensuring the topping melts evenly and the surface takes on that appealing, glossy look without becoming greasy. A little patience with the resting time after baking allows the topping to set and slice cleanly, which makes serving easier and more enjoyable.

Variations to Suit Different Tastes

There are countless ways to tweak the concept while preserving its essence. You can experiment with herbs to introduce fresh brightness or warm earthiness. A sprinkle of dried herbs, spices with a gentle bite, or a touch of zest can lift the overall profile in delightful ways. For those seeking indulgence without compromise, consider layering in a subtler or bolder dairy flavor, depending on personal preference, while staying mindful of balance with the bread’s texture. If you’re aiming for a vegetarian-friendly option, you’re not limited by tradition; you can explore alternatives that still deliver the creamy, melted topping without compromising on flavor depth. For gluten-free adaptations, think about using a sturdy gluten-free loaf that preserves the crunch and the melt that define the topping. If dairy-free is preferred, you can explore non-dairy analogs that replicate the creaminess and melt without losing the sense of indulgence. The goal is to retain the comfort and the pull of the topping while making it accessible to different dietary needs and preferences.

Regional twists can add a fun dimension: consider adding a hint of zest or warmth that nods to nearby culinary traditions, or adjusting texture to suit a preference for a softer interior or crisper exterior. The beauty of these adjustments is that they don’t require a complete overhaul of the concept; they’re small shifts that maintain the dish’s core identity while allowing you to tailor it to the occasion, the season, or your guests’ palates.

Substitutions for Dietary Needs

If you’re cooking for people with dietary restrictions, you can adapt the concept with mindful choices that preserve the spirit of the dish. For a dairy-free option, look for non-dairy spreads and cheeses designed to melt well, and pair them with a robust, sturdy base that still achieves a satisfying texture. Gluten-free adaptations often involve selecting a loaf with a strong crumb that holds the topping without crumbling, ensuring you still achieve that quintessential crackle on the edges. For those who want to cut back on heaviness, consider lighter toppings or smaller portions that deliver flavor without overwhelming the palate. The goal is to maintain the dish’s signature warmth and indulgence while respecting different needs and preferences.

Storage & Make-Ahead Ideas

The beauty of this dish extends to planning ahead. You can prepare the components in advance and assemble just before serving, or bake a batch and reheat portions when needed. If you like to plan ahead, consider preparing a batch of the base and the topping separately, storing them in the refrigerator, and assembling and finishing with a quick reheat when you’re ready to serve. For leftovers, store in an airtight container to maintain the surface’s texture and prevent the top from drying out. Reheating is best done gently to preserve the crust’s integrity and the topping’s melt, avoiding overheating that could make the bread feel dry or the topping overly greasy. Reheating methods will depend on your kitchen setup, but a moderate oven can bring back the warmth and the glossy finish effectively, while a quick skillet finish can re-crisp the edges in a few minutes.

Make-ahead strategies are particularly useful for gatherings. You can pre-slice the loaf or portion it into servings, wrap tightly, and refrigerate or freeze for later use. When you’re ready to serve, a short bake or warm-up will bring the dish back to life, with the topping re-melting and the surface regaining its inviting glow. If you choose to freeze, consider freezing after assembling but before baking, so you can bake from frozen when needed. The result should be a dish that tastes like it was made fresh, even after a period of storage.

Fun Facts & Trivia (Optional)

Garlic has a long-standing reputation for not only flavor but also its role in many culinary traditions across the world. While it’s a staple in countless savory dishes, its presence in comforting, shareable forms like this bread speaks to its universal appeal. The concept of toasting bread with a savory topping is a practical invention that has traveled across cultures and kitchens, morphing with regional tastes and ingredients. The visual appeal of a bubbling, golden topping on a warm loaf is a cue to everyone that a gathering is underway and that the table will soon be filled with laughter as much as with food. Some cooks find delight in little rituals—testing the crust’s crispness with the edge of a knife, watching cheese melt and bead at the surface, or noting how the aroma shifts as it nears completion. These small details are the magic that turns a simple snack into a shared moment. Garlic bread, in its many forms, has become a symbol of hospitality and comfort, a reminder that even the simplest foods can carry a sense of celebration when prepared with care and served with warmth.

Conclusion / Final Thoughts

Garlic cheese bread is more than a recipe; it’s an invitation. An invitation to slow down, gather around a table, and enjoy a moment of warmth and connection. It’s a dish that travels well—from a cozy kitchen to a lively gathering—carrying with it the universal language of comfort and sharing. Whether you’re settling into a quiet weeknight dinner, feeding a lively crowd, or simply looking for a way to elevate a loaf into something special, this timeless preparation offers a delightful balance: crisp edges, melt-in-your-mouth topping, and a heartening aroma that lingers in the air and in memory long after the last bite. Treat it as a canvas for your own twists—an opportunity to tailor textures, flavors, and finishes to your mood and guests—while always keeping the spirit of warmth, welcome, and togetherness at the center of the table.

Ingredients

Garlic cheese bread
Bread Base

    – 1 loaf crusty Italian bread or baguette, about 12-14 inches, halved lengthwise
    → The bread provides the base to hold the garlicky cheese topping. Choose a loaf with a sturdy crust and soft interior so the topping sticks and bakes into a chewy, flavorful crust without becoming soggy. Halving lengthwise creates a wide surface for even distribution of the garlic butter and cheese.

Garlic Butter

    – 1/2 cup unsalted butter, softened to room temperature
    → The butter is the carrier for garlic and herbs, giving richness and moisture to the bread. Softened butter spreads evenly and blends with minced garlic and seasonings; avoid melted butter, which can pool and prevent even topping adhesion. Let butter sit at room temperature for 30-60 minutes before mixing.
    – 4 garlic cloves, finely minced
    → Garlic is the star flavor in garlic bread; finely mincing ensures uniform aroma and distribution across the bread. For a stronger garlic punch, press to a paste with a pinch of salt or grate the cloves, which releases more essential oils.
    – 1 tablespoon fresh parsley, finely chopped
    → Adds fresh color and a hint of brightness to balance the richness. Finely chopping helps it incorporate evenly into the butter spread; if using dried parsley, reduce to 1 teaspoon and whisk in with the butter.
    – 1/2 teaspoon dried oregano or Italian seasoning
    → Provides warm herbal notes that complement the cheese. Use dried oregano to keep the spread evenly seasoned; you can substitute with a pinch of dried basil if you prefer.
    – 1/4 teaspoon salt
    → Enhances overall flavor and helps balance the rich butter and cheese. Taste as you go, especially if your cheese is salty; you can adjust upward slightly if needed.
    – 1/8 teaspoon ground black pepper
    → Subtle heat and depth that accentuates the garlic; optional if you want a milder flavor.

Cheese Blend

    – 2 cups shredded mozzarella cheese (low-moisture preferred)
    → Provides the signature melty, stretchy texture that makes garlic bread addictive. Low-moisture mozzarella reduces excess moisture, helping the topping crisp and brown. For extra gooeyness or richer flavor, mix in 1/2 cup shredded provolone or fontina.
    – 1/2 cup grated parmesan cheese (Parmigiano-Reggiano)
    → Adds sharp, savory bite and helps create a fragrant, golden crust. Freshly grate Parmesan for best aroma and texture; mixing some with the mozzarella yields a richer, more cohesive topping.

Optional Add-ins

    – 1/4 teaspoon red pepper flakes (optional)
    → A gentle kick of heat that enhances the savory cheese. Start with less and increase to taste; distribute evenly in the cheese mixture for balanced spiciness.
    – 1/4 cup chopped fresh parsley (optional)
    → Extra parsley provides vibrant color and a fresh finish. Use as a garnish after baking or mix into the cheese for more herb-forward flavor; if you prefer, substitute with fresh basil for a different aroma.

Dipping Sauce (Optional)

    – 1 cup marinara sauce, warmed for dipping
    → A classic accompaniment that contrasts the rich garlic cheese bread with a tangy tomato flavor. Gently reheat on the stove or in a microwave and keep warm in a small serving dish; for extra richness, swirl in a teaspoon of olive oil just before serving.

Instructions

  • Preheat your oven to 350°F (175°C) and line a baking sheet with parchment paper or grease it well to prevent sticking and ensure even browning.
    → This ensures the bread bakes uniformly and the cheese melts without sticking to the pan, simplifying cleanup.
  • Beat the softened unsalted butter with finely minced garlic, 1 tablespoon fresh parsley, dried oregano or Italian seasoning, 1/4 teaspoon salt, and 1/8 teaspoon black pepper until the mixture is smooth and cohesive.
    → The butter emulsifies with the garlic oils and herbs, distributing flavor evenly and creating a creamy base that coats the bread without pooling.
  • Halve the bread lengthwise if it is not already prepared that way, creating a wide, flat surface for even garlic butter and cheese distribution.
    → A long surface ensures consistent flavor application and uniform browning across the entire loaf.
  • Spread the garlic butter evenly over the cut surfaces of the bread using a spatula or the back of a spoon, extending right to the edges.
    → An even coat guarantees every bite is seasoned and moist; pressing the butter into the crumb helps adhesion and prevents dry patches.
  • In a bowl, combine 2 cups shredded mozzarella with 1/2 cup grated Parmesan; add 1/4 teaspoon red pepper flakes if using and toss to distribute evenly.
    → Mixing cheeses creates a cohesive melt with a balanced savoriness, while pepper flakes provide a uniform, gentle heat throughout the topping.
  • Evenly scatter the cheese mixture over the buttered surface of both bread halves, then press gently with the back of a spatula to help the cheese adhere to the butter and surface.
    → Pressing minimizes shifting during baking and promotes close contact between cheese and bread for an even melt and golden crust.
  • If desired, sprinkle 1/4 cup chopped fresh parsley over the assembled halves before baking for color and brightness, or reserve for garnish after baking.
    → Fresh parsley adds a vibrant note; incorporating some into the topping early infuses a touch of herbal freshness into every slice.
  • Bake in the preheated oven for 12–15 minutes, or until the cheese is melted, bubbling, and the bread edges are golden brown.
    → This time frame achieves a crisp exterior with a melty interior; color cues indicate doneness more reliably than timing alone.
  • Optionally, switch the oven to broil for 1–2 minutes to deepen browning on top, watching carefully to prevent scorching.
    → A brief broil adds caramelization and extra crunch, but requires vigilant monitoring to avoid burning the cheese.
  • Remove the bread from the oven and let it rest on the pan or a cutting board for 5 minutes to allow the cheese to set slightly.
    → Resting prevents the cheese from sliding off and makes slicing cleaner and safer while still releasing heat.
  • Cut the bread into portions using a serrated knife, aiming for thick sticks or squares that are easy to grab, and maintain the topping integrity by using a gentle sawing motion.
    → Clean, uniform portions ensure even cheese distribution with each bite and make dipping or sharing effortless.
  • If serving with a marinara dipping sauce, warm 1 cup marinara until steaming and transfer to a small serving dish; optional: swirl in 1 teaspoon olive oil just before serving for extra silkiness.
    → A warmed tomato sauce provides a bright contrast to the rich garlic cheese bread and the olive oil adds a luxurious sheen and flavor depth.
  • Serve the garlic cheese bread hot with the marinara on the side, encouraging immediate consumption to enjoy the full pull of melted cheese.
    → Freshly baked, bubbling cheese is best experienced immediately; reheating can cause texture loss in the crust.

Notes

These garlic cheese bread notes are designed to help you create a warm, comforting garlic cheese bread with a crisp, buttery crust and a perfectly melted cheese topping. Start with a 12–14 inch loaf of crusty Italian bread or baguette, halved lengthwise, to provide a wide surface for even garlic butter and cheese. For the garlic butter, use unsalted butter softened to room temperature and whisk in finely minced garlic, 1 tablespoon fresh parsley minced, 1/2 teaspoon dried oregano or Italian seasoning, 1/4 teaspoon salt, and 1/8 teaspoon black pepper; let the butter sit 30–60 minutes to let the flavors meld. This ensures a smooth spread that won’t clump or melt away. Prepare the cheese blend with 2 cups shredded mozzarella (preferably low-moisture) and 1/2 cup grated Parmesan; for extra gooey richness, stir in 1/2 cup shredded provolone or fontina. Optional add-ins: 1/4 teaspoon red pepper flakes for subtle heat and 1/4 cup chopped fresh parsley or basil for brightness. Assemble by slathering the garlic butter over the bread surface, then sprinkling an even layer of cheese. Bake on a sheet pan at 400–425°F (200–220°C) until the edges are golden and the cheese is bubbling and just starting to brown, about 12–15 minutes, rotating if needed for even browning. Slice and serve immediately with warmed marinara sauce for dipping; keep sauce warm in a small bowl or ramekin. If you have leftovers, reheat briefly in a hot oven to refresh the crust. For best flavor, use fresh garlic and high-quality cheeses; you can also finish with a light brush of olive oil or a sprinkle of chopped parsley after baking for extra color.

Tips

Tips for Garlic Cheese Bread

  • Make the garlic butter in advance: cream softened butter with minced garlic, parsley, oregano, salt, and pepper, then let the flavors meld for 15–60 minutes at room temperature or in the fridge overnight. This ensures even seasoning and a lush spread.
  • Choose the right bread: a sturdy crusty loaf (Italian or baguette) around 12–14 inches works best; halving lengthwise creates a wide, even surface for topping and helps crisp the edges.
  • Spread evenly: use a spatula to apply the garlic butter in a thin, uniform layer. Avoid pooling butter at the edges to prevent soggy crust.
  • Garlic texture matters: finely mince or grate the garlic to release flavor; a paste yields more intense aroma per bite. If using a pinch of salt, rub the garlic with salt first to extract oils.
  • Cheese selection and ratio: use low-moisture shredded mozzarella for a melty, stable topping, and grate fresh Parmesan to accent with a sharp bite. A 2:1 mozzarella-to-Parmesan ratio works well.
  • Fresh vs dried herbs: fresh parsley brightens the finish; dried oregano or Italian seasoning adds warmth. If using dried herb, whisk evenly into the butter.
  • Optional heat: add red pepper flakes to the cheese mixture for a gentle kick. Start with 1/8 teaspoon and adjust to taste, distributing evenly.
  • Herb add-ins: chopped fresh parsley mixed into the cheese adds color and herbaceous notes; or swap with basil for a different aroma.
  • Even topping distribution: sprinkle cheese evenly across the bread surface to avoid thick pockets that burn or under-melt.
  • Baking cues: bake until the cheese is fully melted and bubbling and the edges are golden. If the bread is very thick, you can tent the edges with foil to prevent over-browning.
  • Finish with a quick melt or toast: for an extra crisp top, run the bread under a hot broiler for 1–2 minutes, watching closely to prevent burning.
  • Make-ahead idea: you can prepare the garlic butter and cheese mixture up to 1 day ahead; keep refrigerated and bring to room temperature before spreading.
  • Dipping sauce: warm marinara for dipping; a drizzle of olive oil stirred in just before serving adds richness and gloss.

FAQ

What is garlic cheese bread?

Garlic cheese bread is a quick, savory side made by toasting bread with a garlicky butter spread and melted cheese until bubbling and lightly browned. It pairs perfectly with pasta, soups, or salads. You can use a baguette, a loaf, or sliced bread, served warm for the best flavor.

What ingredients do I need to make garlic cheese bread?

Typical ingredients include: bread (baguette, Italian loaf, ciabatta, or sliced sandwich bread), unsalted butter, fresh garlic, salt, shredded mozzarella cheese, grated Parmesan cheese, and chopped parsley (optional). Optional add-ins: olive oil, red pepper flakes, or Italian seasoning. A common starting point is 1 baguette, 1/2 cup butter, 3–4 garlic cloves, 1 cup mozzarella, 1/4 cup Parmesan, and 1 tablespoon parsley.

Can I use different kinds of bread?

Yes. Traditional garlic bread shines with crusty loaves, but you can use sourdough, ciabatta, French bread, or even sliced sandwich bread for a quicker version. For the best texture, choose something with a sturdy crust; avoid very soft, squishy bread if you want crisp edges.

How do I prepare the garlic butter and assemble the bread?

Soften butter at room temperature. Mix in minced garlic, a pinch of salt, and chopped parsley if using. If you like extra aroma, add a teaspoon of olive oil and a pinch of red pepper flakes. Slice the bread (either leave it intact and cut slits or slice into thick pieces). Spread the garlic butter on the bread, then top with shredded mozzarella and a light sprinkle of Parmesan.

What are the baking times and temperatures?

Preheat the oven to 400°F (200°C). Bake on a sheet for 8–12 minutes until the cheese is melted, bubbly, and the edges are golden. For extra crispness, you can broil for 1–2 minutes at the end, watching closely so it doesn’t burn.

Can I make garlic cheese bread dairy-free or gluten-free?

Yes. For dairy-free, substitute dairy-free butter and dairy-free shredded cheese, and use a dairy-free Parmesan alternative if desired. For gluten-free, use a gluten-free bread or baguette. Check labels to ensure all ingredients are gluten-free. Baking times remain similar; gluten-free bread can brown more quickly, so keep an eye on it.

How should I store and reheat leftovers?

Store cooled leftovers in an airtight container in the fridge for up to 2–3 days. Reheat in a 350°F (175°C) oven for 5–7 minutes, or until warm and cheese is melted. For a crisper crust, reheat on a baking sheet under a broiler for 1–2 minutes, watching closely.

Can I freeze garlic cheese bread?

Yes. You can freeze assembled bread before baking or freeze baked slices. To freeze before baking, wrap the unbaked loaf tightly and freeze up to 2–3 months; bake from frozen, adding a few minutes to the bake time. If freezing baked slices, reheat in a 350°F (175°C) oven for 7–10 minutes. Do not thaw frozen bread before reheating.

What are some popular variations or add-ins?

Try these ideas: add chopped fresh herbs (basil, oregano, or chives); mix in a blend of mozzarella and fontina for extra melt; sprinkle red pepper flakes for heat; add chopped sun-dried tomatoes or olives; drizzle with garlic-infused oil for a milder garlic flavor; top with a light dusting of Pecorino or Parmesan. You can also swirl in pesto for a different twist.

Introduction / Hook

Morning light spills across the kitchen as the first scent of cinnamon and vanilla fills the air. Berry French toast isn’t just breakfast—it’s a celebration of comfort and brightness in one plate. Picture thick slices of brioche turning a glorious amber on the skillet, the interior soft and custardy, while a jewel-toned berry compote glistens on top like a sunrise captured in a jar. The aroma of toasted bread mingles with vanilla, a hint of citrus zest, and a whisper of warm spices, waking your senses before you even bite. This dish takes the everyday ritual of French toast and elevates it into a brunch moment that feels indulgent without being fussy, simple enough for a cozy weekend, and impressive enough to anchor a festive table. Each mouthful is a dialogue of textures and flavors: the crisp edge yields to a tender center, the berries burst with tart-sweet brightness, and the creamy glaze or whipped topping adds a luscious counterpoint. Berry French toast invites you to slow down, savor every nuance, and share something truly comforting with the people you love. It’s the kind of dish that makes a quiet morning feel like a celebration and a busy weekday morning feel like a little vacation in the kitchen.

The Story Behind the Dish

French toast has a long and storied history that travels across kitchens and continents. Known in many places as pain perdu—“lost bread” in French—the dish emerged as a clever, thrifty way to rescue stale bread and transform it into something worthy of breakfast or brunch. The principle is simple and universally appealing: stale bread, milk, eggs, a touch of sweetness, and heat turn humble leftovers into something comforting that tastes distinctly special. Berry French toast builds on that tradition by adding a bright, fruit-forward component that speaks to seasonal produce and brighter mornings. The idea is not to mask the bread’s character but to pair it with a companion that enhances it. The berries bring acidity and vibrancy, the vanilla and spice round out the sweetness, and the slight lemon or orange zest lifts the dish so it never feels heavy. In many cultures, fruit-topped breakfast dishes are a celebration of abundance—berries, citrus, and stone fruits—echoing the joy of harvests and gatherings. When you plate Berry French toast, you’re weaving that universal mood into a modern, approachable breakfast that carries the memory of old-world technique with a contemporary, fresh twist.

Why You’ll Love This Recipe

  • Quick to prepare for a weekend brunch or a spontaneous weekday treat. The components come together with minimal hands-on time, yet the result feels indulgent.
  • Kid-friendly and adult-approved in equal measure. The berry topping adds natural sweetness and brightness, while the brioche provides a soft, comforting base.
  • Highly adaptable to your pantry and dietary needs. Use dairy-free milks, gluten-free bread, or a vegan twist without sacrificing flavor.
  • Vibrant presentation. The berry compote or fresh berries create a rainbow-like, glossy topper that makes the dish look as good as it tastes.
  • Perfect balance of textures and flavors. Crispy edges, creamy interior, juicy berries, and a hint of vanilla and citrus create a symphony in every bite.
  • A forgiving, forgiving dish. If your bread is a touch older, it will soak up the batter beautifully and yield a rich, custardy texture.

Flavor Profile & Texture

The flavor profile of Berry French toast is a celebration of balance. The base bread—often brioche or challah—provides a rich, eggy sweetness that becomes deeply toasted at the edges. The custardy interior is like a soft, comforting cloud, holding onto the lingering warmth of eggs, cream, and vanilla. The berry component introduces brightness and tang, with a natural tartness from berries like strawberries, raspberries, blueberries, or a mix of seasonal varieties. A touch of citrus zest—lemon or orange—brightens the dish, making the sweetness feel lively rather than heavy. Cinnamon or nutmeg whispers in the background, lending depth without overpowering the berries’ freshness. When you bite through, you first encounter the crisp, caramelized exterior that yields to a tender, almost soufflé-like interior. The berry sauce or compote delivers juicy bursts, releasing a syrupy sweetness that is tempered by berry acidity. A light dusting of powdered sugar, a dollop of whipped cream, or a spoonful of plain yogurt can introduce a creamy counterpoint that rounds the whole experience. The end result is a harmonious blend of textures and flavors: warm, comforting, and bright, with a playful fruit-forward finish that lingers pleasantly on the palate.

Occasions & Pairings

Berry French toast shines in a variety of settings and occasions, from casual Sunday mornings to festive gatherings. Here are some ideas to guide when and how to serve it and what to pair it with for a complete meal.

  • Weekend brunch centerpiece. Pair with a platter of crisp bacon or smoky sausages for savory contrasts, and serve alongside a bright citrusy beverage like sparkling lemonade or a light mimosa.
  • Holiday mornings. Elevate with a dollop of lightly sweetened whipped cream and a drizzle of real maple syrup. A side of roasted citrus wedges can add a festive note.
  • Family breakfasts on special occasions. Invite guests to customize their toppings—more berries, a spoonful of yogurt, a sprinkle of granola for crunch, or a drizzle of orange blossom honey.
  • Brunch for celebrations. Complement with a fennel- and herb-scented salad, a light savory casserole, or a cheese board to create a well-rounded spread.

Pairings to consider:

  • Drinks: Freshly squeezed orange juice, a sparkling wine option for adults, or a warm cup of cinnamon-spiked coffee for colder mornings.
  • Side dishes: A simple yogurt parfait with granola and a drizzle of honey, citrus segments to echo the zest in the dish, or a small green salad to counterbalance the sweetness.
  • Dessert-style finish: A light dollop of whipped cream, a splash of vanilla bean–infused yogurt, or a mint-touched berry compote on the side.

Tips, Variations & Substitutions

Tips for best results

To achieve a perfect Berry French toast, keep these tips in mind. Use sturdy bread with a bit of weight—brioche, challah, or even thick-cut Texas toast works beautifully. Allow the bread to soak briefly in a mixture that includes eggs, milk (or dairy-free alternatives), and a touch of vanilla; this ensures a custardy interior without turning mushy. Cook the slices over medium heat to give the exterior enough time to caramelize while the centers finish cooking. If you’re using berries that release a lot of juice, consider cooking the compote separately so it thickens to your preferred consistency and doesn’t sog up the toast. A handful of lemon or orange zest can brighten the whole dish, and a pinch of cinnamon or cardamom adds warmth without dulling the berry brightness.

Variations

  • Berry medley: Use a mix of strawberries, blueberries, raspberries, and blackberries for a dynamic color and flavor range.
  • Vegan option: Replace eggs with a flax egg or aquafaba, and use plant-based milk (almond, soy, or oat) with a touch of dairy-free butter or oil for frying.
  • Gluten-free version: Choose a sturdy gluten-free bread and ensure the batter uses a gluten-free milk option; many glazes and toppings remain naturally gluten-free.
  • Citrus note: Add a dash of orange blossom water or lemon zest to brighten the toast; finish with a citrus-poppy seed drizzle for extra texture.
  • Nutty crunch: Top with toasted almonds, pecans, or hazelnuts for a delightful contrast in texture and flavor.

Substitutions

Feel free to tailor to your pantry and dietary needs. For a lighter version, use half-and-half or a mix of milk and water with an extra splash of vanilla. For dairy-free households, coconut milk, almond milk, or oat milk work well, especially when paired with a small amount of dairy-free butter or oil to achieve crisp edges. If you don’t have brioche, thick-cut sourdough or loaf bread with a sturdy crumb can substitute nicely, though you may lose some of the iconic rich interior. For extra berry intensity, fold a spoonful of berry compote into the batter before dipping the bread; this infuses the toast with a concentrated fruit flavor from within.

Storage & Make-Ahead Ideas

Berry French toast is surprisingly forgiving when it comes to storage and make-ahead planning. Here are practical ideas to keep your brunch or breakfast efficient without sacrificing flavor.

  • Make-ahead soaking: Assemble the dipping mixture the night before and chill it. Slice the bread ahead of time and keep it wrapped in the refrigerator. In the morning, dip the slices and cook as usual. The bread may soak a little longer, so adjust soaking time accordingly.
  • Berry topping prep: Prepare a berry compote or sauce in advance and refrigerate. Reheat gently before serving or serve it cool as a vibrant contrast to warm toast.
  • Storage of leftovers: Keep cooked French toast slices in a loosely covered container in the refrigerator for up to 2 days. Reheat in a skillet or oven to restore crisp edges. For longer storage, you can freeze individual slices and reheat in a toaster oven or skillet.
  • Freezing and reheating tips: Freeze cooled French toast slices in a single layer on a tray, then transfer to a bag. Reheat directly from frozen in a toaster oven or oven at a moderate temperature to regain crispiness; top with warmed berry sauce to refresh flavors.
  • Meal-prep variant: If you want to avoid cooking multiple slices at once, pre-slice the bread and layer with a light coating of butter or oil; store tightly wrapped and cook in batches when ready to serve.

Fun Facts & Trivia (Optional)

Delightful tidbits to enrich your knowledge and conversation at the table:

  • Pain perdu translates to “lost bread” in French, a nod to the saving grace of turning stale bread into a beloved dish.
  • French toast has many regional variations around the world, often reflecting local ingredients, sweetness levels, and bread types—yet the core concept remains the same: transforming simple bread into a comforting, crave-worthy meal.
  • National French Toast Day is observed in several countries on different dates, reflecting the dish’s cross-cultural appeal and enduring popularity for breakfast and brunch moments.
  • Berry toppings echo the seasonal bounty of orchards and markets, making this dish a wonderful canvas for fruit-forward flavors and fresh produce.

Ingredients

  • French Toast Base
  • 6 thick-cut bread slices (brioche or challah; day-old)
    → The bread is the canvas for the custard; thick-cut brioche or challah holds up to soaking without becoming soggy. Day-old bread absorbs the custard evenly, creating a creamy interior with a crisp exterior once fried. If you only have fresh bread, toast slices lightly to dry them out a bit.
  • 4 large eggs
    → Eggs form the base custard, binding the mixture together while providing structure so the French toast holds its shape as it cooks. Use eggs at room temperature for a smoother mixture; whisk until completely blended. For extra richness, add a pinch of salt to the custard to balance sweetness.
  • 1 cup milk (whole or 2%)
    → Milk adds moisture and tenderness to the custard. Whole milk yields a richer, creamier texture, while 2% is a lighter option. For dairy-free versions, use a fortified plant milk (like almond or oat) and adjust with a splash of cream substitute if you want more body.
  • 2 tablespoons heavy cream (optional)
    → Heavy cream deepens richness and helps the custard set with a velvety mouthfeel. If using dairy-free, substitute with an equal amount of full-fat coconut milk or a splash of additional plant milk plus a teaspoon of oil to mimic richness.
  • 1 teaspoon vanilla extract
    → Vanilla enhances sweetness and aroma in the custard. Use pure vanilla extract for best flavor; for a more intense aroma, scrape in the seeds from a vanilla bean or use a split bean in the mixture.
  • 1 tablespoon granulated sugar (optional)
    → Adds a touch of sweetness and helps with browning during cooking. Omit if berries are very sweet or if you prefer a less sweet French toast.
  • 1/2 teaspoon ground cinnamon (optional)
    → Provides warm spice that pairs beautifully with berries. Adjust to taste or omit if you prefer a simpler, eggy custard flavor.
  • 1/4 teaspoon salt
    → Enhances overall flavor and helps balance the sweetness. Dissolve into the custard for even seasoning.
  • Berry Layer
  • 2 cups mixed berries (strawberries, blueberries, raspberries; fresh or frozen)
    → Berries add brightness, tartness, and natural sweetness. If using frozen berries, thaw completely and pat dry to avoid extra moisture; chop larger berries for even distribution.
  • Zest of 1/2 lemon (optional)
    → Lemon zest brightens the berry flavor and adds a hint of acidity that cuts richness. Grate finely and avoid the white pith for clean aroma.
  • Frying and Assembly
  • 2 tablespoons unsalted butter (for frying)
    → Butter provides rich flavor and helps achieve a crisp, golden crust. Cook on medium heat to prevent burning; you can blend with a small amount of neutral oil if needed for higher heat tolerance.
  • Serving and Toppings
  • Maple syrup for serving
    → Classic pairing that adds sweetness and moisture. Use real maple syrup for depth of flavor; drizzle generously just before serving.
  • Powdered sugar (optional)
    → Lightly dusts the finished toast for a pretty presentation and a touch more sweetness without overpowering the fruit flavors.
  • Extra berries for serving (optional)
    → Additional berries provide color, texture, and fresh contrast when plated. Slice larger berries as needed for even portions.

Instructions

  • Whisk together the custard base: whisk the 4 large eggs, 1 cup milk, 2 tablespoons heavy cream (if using), 1 teaspoon vanilla extract, 1 tablespoon granulated sugar, 1/2 teaspoon ground cinnamon, and 1/4 teaspoon salt in a wide, shallow dish until completely blended and smooth.
    → Room-temperature eggs blend more evenly and whisking until smooth prevents uneven custard that pools and leaves streaks on the bread.
  • Prepare the bread: choose 6 thick-cut bread slices (brioche or challah) and if the slices are day-old, use as-is; if bread is fresh, toast lightly on both sides until just dry and firm but not browned.
    → Sturdy, slightly dried bread absorbs custard evenly without becoming mushy, and toasting prevents soggy interiors.
  • Prepare berry layer: rinse and pat dry 2 cups mixed berries (strawberries, blueberries, raspberries), trim larger berries and cut into bite-size pieces, and zest 1/2 lemon if using; toss the berries with the zest (if used) and set aside.
    → Fresh berries release bright juices that pair with the custard, while zest adds aromatic fragrance and a touch of acidity to balance richness.
  • Assemble berry-layered sandwiches: pair three slices with their matches to create three stuffed sandwiches; spread a thin layer of the prepared berry mixture on the inner surfaces, top with the remaining bread slice, and press gently to seal and minimize filling leakage during soaking.
    → A compact seal keeps berry filling inside the bread during soaking and frying, ensuring even distribution of fruit sweetness in every bite.
  • Dip the assembled sandwiches in the custard: submerge each stuffed sandwich into the custard, allowing 30–60 seconds per side, then lift and let excess custard drip back into the dish; the bread should be thoroughly moistened but not falling apart.
    → Proper soaking ensures a custardy interior without slumping, while preventing a soggy exterior that won’t crisp properly.
  • Fry the French toast: set a large skillet over medium heat and add 2 tablespoons unsalted butter; swirl the pan until the butter foams and begins to brown lightly, taking care not to burn it.
    → Fat provides flavor, helps develop a crisp crust, and prevents sticking; medium heat avoids scorching the sugar in the custard.
  • Cook the stuffed toast: place the soaked sandwiches in the skillet and cook for 3–4 minutes per side, pressing gently with a spatula to ensure even contact and a uniform, golden crust; flip when the underside is deep amber and the center begins to set.
    → Even browning creates texture and helps the custard set inside, while gentle pressing ensures a cohesive sandwich rather than a soggy join.
  • Continue frying remaining sandwiches: repeat the cooking process for the remaining pieces, adding more butter to the pan as needed; keep finished portions warm on a rack in a low oven (about 200°F/95°C) if desired to prevent cooling and sogginess.
    → A gentle warm environment preserves crust crispness and ensures all pieces are served together at optimal temperature.
  • Finish and serve: transfer the hot berry French toast to plates, dust with powdered sugar if desired, drizzle maple syrup generously over the top, and arrange extra berries around the toast for color and contrast; serve immediately.
    → Powdered sugar adds a delicate sweetness and visual appeal; maple syrup provides moisture and a classic complement to the custard and berries, while extra berries add fresh brightness.

Notes

These Berry French toast slices are a luscious, brunch-worthy dish featuring a creamy vanilla custard threaded with lemon zest and a bright berry layer. Use thick-cut brioche or challah (preferably day-old) so the slices soak without falling apart, and if you only have fresh bread, toast slices lightly to dry them out. Whisk 4 eggs with 1 cup milk, 2 tablespoons heavy cream, 1 teaspoon vanilla, 1 tablespoon sugar (optional), 1/2 teaspoon ground cinnamon (optional), and 1/4 teaspoon salt until completely blended. Dip each bread slice for 20-30 seconds per side to saturate without becoming soggy, then spread a layer of berries and a little zest between slices or fold berries into the custard if you like. Fry in 2 tablespoons unsalted butter over medium heat until golden and crisp on both sides, flipping carefully and adjusting heat to prevent scorching. For dairy-free versions, substitute fortified plant milk and full-fat coconut milk or a splash of oil to replace the cream, and cook in a light coat of neutral oil instead of butter; you can add a small amount of dairy-free butter substitute at serving if desired. Serve with real maple syrup, extra berries, and a light dusting of powdered sugar if you prefer. Extra tips: thaw frozen berries completely and pat dry before using, grate a little lemon zest over the finished toast to boost brightness, and use day-old bread for the best texture. Leftovers refrigerate well for a day or two and reheat in a skillet or toaster oven to restore crispness.

Tips

Tips for Berry French Toast

  • Choose thick-cut brioche or challah for the best texture. Day-old bread soaks up the custard evenly and stays sturdy when fried; if you only have fresh bread, toast slices lightly to dry them out a bit before soaking.
  • Whisk the custard thoroughly: eggs, milk, optional cream, vanilla, sugar, cinnamon, and salt should be completely integrated. Let the mixture rest for 5 minutes to allow the flavors to meld before soaking the bread.
  • Soak timing matters: for thick slices, 30–60 seconds per side is typically enough. If your bread is very dense, you can extend soaking to about 2 minutes per side, but avoid oversoaking which can make the toast fall apart.
  • Berry layer prep: macerate berries with a touch of lemon zest and a pinch of sugar for 5–10 minutes. This draws out juices and creates a bright, natural syrup that enhances the filling and the top.
  • Frozen berries: fully thaw and pat dry to prevent extra moisture from making the custard watery. Chop larger berries for even distribution within the toast.
  • Pan setup: use medium heat and a combination of butter with a small amount of neutral oil if you’re worried about the butter scorching. This gives a rich flavor with a crisp, even crust.
  • Avoid crowding the pan: fry in batches so each slice has space. Crowded pan traps steam and softens the crust rather than browning it.
  • Flavor boosters: add a pinch of orange or lemon zest to the custard for extra brightness. A pinch of ground cardamom also pairs nicely with berries if you want a more aromatic profile.
  • Layering technique: distribute berries between slices or on top after frying for more pronounced berry bites. Lightly folding some berries into the custard bath can also infuse every bite with berry flavor.
  • Keeping warm: once cooked, keep toast warm in a low oven (about 200°F/90°C) while finishing the rest. This prevents serving cold portions and maintains crisp edges.
  • Serving notes: finish with real maple syrup and a dusting of powdered sugar for a classic look and a touch more sweetness. Extra berries on top add color, texture, and freshness.
  • Dietary tweaks: for dairy-free versions, use fortified plant milk and omit heavy cream or substitute with full-fat coconut milk. If you want more richness, add a splash of oil to the dairy-free custard.

FAQ

What ingredients do I need for Berry French Toast?

Core ingredients to gather:

  • 6 slices thick-cut bread (brioche or challah recommended)
  • 4 eggs
  • 1 cup milk (any kind, dairy or dairy-free)
  • 1 teaspoon vanilla extract
  • 1/2 teaspoon ground cinnamon
  • Pinch of salt
  • 1–2 tablespoons sugar (optional, adjust to taste)
  • 1 cup mixed berries (fresh or frozen, e.g., strawberries, blueberries, raspberries)
  • Butter or oil for cooking
  • Maple syrup or powdered sugar for serving
Can I make Berry French Toast ahead of time?

Yes. You can mix the batter up to 24 hours in advance and chill it in the fridge. For best texture, store the bread separately and dip it in the batter just before cooking to avoid sogginess.

What type of bread works best?

Use day-old or well-staled thick-cut bread like brioche, challah, Texas toast, or sturdy loaf slices. Softer sandwich bread can fall apart; gluten-free options can work but may be a bit denser.

How do I prepare the berry topping?

Option 1 (stovetop berry compote): Sauté berries with a tablespoon of sugar and a splash of lemon juice over medium heat until gently bubbling and saucy, 5–7 minutes. Option 2: toss berries raw on top just before serving. For frozen berries, thaw and drain before using.

Can I make this dairy-free or egg-free?

Yes. For dairy-free, use a plant-based milk and a dairy-free butter or oil for cooking. For an egg-free option, use an egg substitute or flax eggs (1 tablespoon ground flaxseed + 3 tablespoons water per egg, mixed and rested 5 minutes). Note that texture may be slightly different without eggs.

How do I cook it to avoid soggy centers?

Dip each bread slice briefly in the batter (about 10–15 seconds per side) and let excess drip off. Cook on a preheated skillet over medium heat with a little butter or oil. Cook 2–3 minutes per side until the outside is golden and the center is set. Work in batches to maintain even heat.

How do I reheat leftovers?

Rewarm in a skillet over low–medium heat with a touch of butter until warmed through and lightly crisp. Alternatively, reheat in a 350°F (175°C) oven for about 8–10 minutes. Avoid soggy microwaving if possible for best texture.

Can I freeze Berry French Toast or its components?

Freezing whole cooked slices works best when done after cooking and cooling, then reheated in the oven. To prep ahead, you can freeze the batter (in a tightly sealed container) for up to 1 month, but batter texture may change slightly. Thaw completely before dipping bread.

Are there good substitutions or ways to reduce sugar?

Yes. To reduce sugar, use only 1 tablespoon to 1 teaspoon, or omit entirely and rely on the berry sweetness and maple syrup. You can add a pinch of nutmeg or orange zest for extra flavor without extra sugar. If you prefer a lighter version, fewer eggs or a lower-fat milk can be used, but expect a lighter texture.

Serving ideas and toppings

Serve warm with maple syrup and extra berries. Add a dollop of yogurt or whipped cream for richness. A dusting of powdered sugar, a drizzle of berry compote, or a squeeze of lemon juice can brighten the dish.

Introduction / Hook

Imagine a dessert that crackles with the satisfying snap of a perfectly fried shell, then gives way to a velvety, imagining-cloud-soft filling that tastes like a cloud of creamy vanilla dream with a bright kiss of citrus. Cheesecake cannoli is that glorious paradox: a bite-sized luxury that starts with the playful crunch of a classic cannoli shell and ends with the lush, tangy-sweet embrace of cheesecake filling. It’s a dessert that feels both familiar and inventive, a celebration of contrasts that somehow harmonize into one irresistible treat.

This isn’t just a dessert; it’s a mood—an edible memory you can share with loved ones at the end of a long week or during a festive gathering. The shells provide the nostalgic, carnival-like scent of fried dough and almond, while the filling brings the refined, restaurant-quality creaminess you expect from cheesecake. The result is versatile enough for elegant dinner parties, cousin’s birthdays, or a Saturday night you want to make feel special. Each bite is a whisper of tradition and a wink at novelty, a mini dessert experience that invites you to savor texture, aroma, and balance in one compact package.

As you approach cheesecake cannoli, you’ll notice the sensory journey begins even before the first bite: the aroma of fried pastry mingling with vanilla, lemon zest, and a touch of cinnamon or almond—depending on how you season the shells—floods the room. Then comes the whispered crack of the shell as you bite, revealing the cool, creamy filling inside. You’ll taste the citrus notes that brighten the cheese blend, the gentle sweetness that never feels heavy, and the subtle crunch of finely chopped nuts or crisp pastry that adds a playful texture contrast. It’s a dessert that invites conversation, because every bite seems to tell a small story of careful technique, joyful improvisation, and the shared delight of a crowd gathered around a dessert table.

In short, cheesecake cannoli is more than a mashup; it’s a celebration of texture, technique, and culture. It honors the crisp tradition of cannoli while embracing the creamy, modern allure of cheesecake. The result is a showpiece that fits on a celebratory platter or a casual grazing board, a confection that feels special without being fussy. If you’re looking for a dessert that delivers theater in a single bite and comfort in every mouthful, this is your new go-to, ready to bring a touch of Italian-American charm to any occasion.

The Story Behind the Dish

Cannoli have long stood as a symbol of Sicilian pastry artistry. Their shells—delicate, fried crescents with a sheen of glossy oil and a whisper of almond and citrus—carry centuries of street-food charm and family tradition. In Sicily, cannoli were often part of festive tables, filled to order with a ricotta-based filling that could be sweetened with sugar, accented with candied fruit, chocolate chips, or pistachio. The technique—rolling dough into thin cylinders, frying to a crackly, lacquered finish, and piping a lavish filling into the hollow shell—relies on a careful balance between heat, texture, and timing. The result is a dessert that feels celebratory, almost ceremonial, yet intimate, because a forkful of cannoli suggests you’re sharing something special with someone you care about.

Meanwhile, cheesecake has its own distinct lineage, with roots stretching toward both ancient Mediterranean cheeses and the modern American dessert culture that popularized dense, creamy cheesecakes. In the United States, cheesecake evolved into a toast to dairy goodness and culinary ingenuity, with cream cheese and ricotta creating a lush texture that’s both indulgent and comforting. New York-style cheesecake, with its rich, velvety body, became a cultural icon, while other regional variations leaned into citrusy brightness, chocolate, or fruit layers. The beauty of cheesecake is its adaptability: it pairs well with vanilla, lemon, almond, and a host of textures—from smooth to grainy to silky—depending on the dairy blend and flavoring.

Conceiving cheesecake cannoli is a playful homage to these two cherished traditions. It borrows the cannoli’s crisp shell, a vessel for carrying and presenting a lighter, more buoyant filling that hints at cheesecake without becoming a heavy slice. It’s a bridge between the Italian-American street-food joy of cannoli and the refined indulgence of cheesecake. The result is a dessert that feels both nostalgic and contemporary, familiar enough to welcome guests who crave classic flavors, yet novel enough to spark conversation and appreciation for culinary invention.

The fusion also invites a mood of experimentation. You can shape the shells into tight tubes or rustic crescents, dip the ends in chocolate or pistachio, or leave them plain to let the filling speak. You can infuse the cheesecake filling with citrus zest, vanilla bean, or a whisper of liqueur to lift its perfume. You can garnish with chopped pistachios, chocolate shavings, candied citrus, or a dusting of powdered sugar. Each choice you make becomes a little signature, a way to imprint your personal touch onto a beloved classic.

Why You’ll Love This Recipe

  • Texture contrast: crisp, delicate shells meet a luscious, creamy filling for a satisfying bite every time.
  • Versatility: easily adaptable to a range of flavors—vanilla, lemon, orange, chocolate, pistachio—without losing balance.
  • Show-stopping yet approachable: elegant enough for guests, simple enough to assemble with a little planning.
  • Date-night-friendly dessert: quick to put together for a special end to a weeknight meal, with light, refreshing flavors.
  • Perfect for sharing: individual shells make serving easy at parties and gatherings, while still feeling indulgent.
  • Make-ahead potential: both shells and filling can be prepared ahead of time and assembled close to serving for maximum crunch and freshness.
  • Diet-friendly tweaks: the concept can be adapted for vegan, gluten-free, or dairy-free audiences with thoughtful substitutions.

Flavor Profile & Texture

The hallmark of cheesecake cannoli is the interplay of sensations. The shell—thin, crisp, and fried to a glossy, light-golden finish—delivers a moment of crack and a wafer-thin bite that dissolves at the edges, releasing a whisper of almond, vanilla, or citrus oils. It provides a crisp base that holds up to the softness of the filling without wilting, ensuring every bite remains lively and structured. The filling, on the other hand, is a velvet dance: tangy and creamy, with the familiar comfort of cheesecake but lightened with smooth cream cheese, ricotta or a soft cheese base, and a touch of sugar to balance its brightness. A hint of vanilla and citrus zest lifts the profile, like sunlight on a creamy fog.

Texture-wise, you’ll notice a delicate balance between the shell’s crunch and the filling’s silkiness. The filling can be infused with a tiny amount of lemon or orange zest to sharpen the cheesecake notes, while a small sprinkle of finely chopped pistachios or chocolate chips introduces subtle crunch and color. When chocolate-dipped ends are used, they add a glossy finish and an extra layer of flavor that pairs beautifully with the vanilla-cream baseline. The aroma is equally compelling: the scent of fried dough, butter, and almond, mingling with vanilla and citrus—the perfume of celebration.

Flavor-wise, the dish sings with contrasts that somehow converge. The filling maintains cheesecake’s characteristic richness without heaviness, thanks to the potential inclusion of ricotta for a lighter texture or a higher ratio of cream cheese for indulgence. The citrus zest brightens the dairy, providing a refreshing lift that makes the dessert feel lighter and more balanced. The optional pistachios lend a nutty, earthy note that complements the sweetness while adding visual appeal and a pop of color. When you savor it, you will notice how each component amplifies the other: the shell enhances texture; the filling heightens aroma and creaminess; together they create a dessert that feels both special and approachable.

Occasions & Pairings

Cheesecake cannoli shines in moments when you want to celebrate with flair but keep things intimate and approachable. It’s a superb choice for:

  • Holiday gatherings and family celebrations, where everyone loves a dessert that feels nostalgic yet modern.
  • Dinner parties as a show-stopper that travels well on a platter and looks stunning when plated individually.
  • Casual weekend gatherings or potlucks, where the bite-sized dessert encourages sampling and conversation.
  • Romantic dinners or date nights, offering an elegant finale without being overly indulgent.

Pairing ideas to elevate the experience:

  • Drinks: a glass of dessert wine, like Moscato d’Asti, or a creamy espresso martini can echo the coffeehouse charm of cannoli. For a non-alcoholic option, a lightly sweetened iced coffee or a citrus-forward sparkling lemonade pairs beautifully.
  • Sides: a small plate of fresh fruit—pomegranate seeds, orange segments, or berries—adds brightness and a contrasting lightness to the richness of the filling.
  • Garnishes: pistachios, finely grated lemon zest, shaved dark chocolate, or a dusting of powdered sugar. A drizzle of honey or orange blossom syrup can add a touch of floral sweetness if desired.
  • Decor: serve on a neutral platter with a few mint leaves for color, or align the cannoli ends in a row for a celebratory display that looks as good as it tastes.

Tips, Variations & Substitutions

Even though you’re reading about a dessert that seems simple, there are countless ways to personalize cheesecake cannoli to suit your preferences, dietary needs, or seasonal ingredients. Here are some ideas to help you tailor the concept.

  • Shell variations: Use traditional cannoli shells, or try baked almond shells for a lighter, less fatty alternative. For gluten-free audiences, explore shells made from almond flour or a gluten-free pastry dough that crisps up nicely.
  • Filling base: The classic is a cheesecake-inspired filling that blends cream cheese with a ricotta backbone. To soften the richness, consider a higher ricotta ratio or fold in whipped cream for airiness. For a dairy-free version, use full-fat coconut cream or a refined cashew cream as the base, seasoned with vanilla and a touch of citrus zest.
  • Flavor twists: Add citrus zest (lemon, orange, or blood orange) to brighten the filling. A splash of almond extract or a hint of cinnamon can deepen the flavor. For chocolate lovers, fold in mini chocolate chips or dust the filling with cocoa powder.
  • Nuts and accents: Finely chopped pistachios on the filling or the shell’s rim offer a classic cannoli touch. Toasted almond slivers or candied orange peel can bring additional aroma and crunch.
  • Vegan adaptations: Use vegan cream cheese and a plant-based ricotta substitute, ensuring the filling remains silky and smooth. The shells can be prepared with vegan-friendly dough or baked to replicate the crisp texture.
  • Low-sugar options: Reduce sugar in the filling slightly and rely on the natural sweetness of vanilla and citrus. Use sugar substitutes thoughtfully to preserve the creamy texture without adding excessive sweetness.
  • Regional twists: Incorporate regional flavors such as espresso powder for a coffee-kissed filling, or a drizzle of raspberry coulis on the plate to complement the vanilla and citrus notes.
  • Make-ahead strategy: Fry shells a day ahead and store in an airtight container to maintain crunch. Prepare the filling a day ahead and refrigerate; bring to room temperature and whisk briefly before piping into the shells to regain smoothness.

Storage & Make-Ahead Ideas

If you’re planning ahead for a party or holiday spread, you’ll appreciate how forgiving cheesecake cannoli can be. The shells, once cooled, retain their crispness best when stored in an airtight container in a cool, dry place. They may lose some crunch over time, so plan to fill close to serving for the most dramatic texture. The filling, on the other hand, benefits from chilling, which helps it hold shape and firm up slightly, making piping easier.

To maximize make-ahead potential:

  • Prepare shells a day or two ahead and keep them uncovered or in a breathable container to avoid moisture buildup. If you’re using pre-made shells, ensure they’re completely cooled before storage to prevent sogginess.
  • Whisk or beat the filling until it’s lump-free and silky, then refrigerate in an airtight container. Bring it to room temperature briefly and give it one final whisk before piping for the best texture.
  • Assemble just before serving to preserve shell integrity. If you must assemble in advance, place the filling in a piping bag and refrigerate; fill shells just before presenting.
  • Leftover fillings can be repurposed in other desserts, such as topping for waffles, folding into a cheesecake dip, or using as frosting with a lighter texture when thinned with a bit of cream or non-dairy alternative.

Fun Facts & Trivia

  • The term “cannoli” comes from the Italian word for “tubes” or “reed” (cannā), reflecting the classic cylindrical shape of the shell.
  • In traditional Sicilian cannoli, the filling is usually ricotta-based, often with zest of citrus and a hint of vanilla, sometimes with small pieces of candied fruit. The cheesecake cannoli adaptation replaces or complements ricotta with cream cheese or a blended cheese base to evoke cheesecake flavor.
  • American Italian communities during the 20th century embraced cannoli as a festive dessert, turning it into a beloved staple at family celebrations, fairs, and holiday feasts. Cheesecake cannoli is a modern homage to that memory—the invention of new generations honoring old-world technique with contemporary filling aesthetics.
  • Texture plays a starring role in cannoli—the shell’s crispness is essential, and achieving shell integrity often hinges on proper drying and storage. The best shells stay crisp for longer and crack at just the right moment when bitten, revealing the creamy interior.
  • Pairing cannoli-inspired desserts with wine or coffee is a tradition in many Italian-American households, where small, bite-sized treats punctuate an evening with warmth and conversation.

Closing Thoughts

Cheesecake cannoli is a celebration of contrasts: crisp shell against velvet filling, familiar comfort against modern whimsy, and Italian heritage meeting American dessert innovation. It’s a flexible, crowd-pleasing dessert that invites creative interpretation while delivering a guaranteed moment of delight with every bite. Whether you’re serving a dozen guests or an intimate family dinner, this dessert promises a memorable finale, one that lingers in the memory long after the plates are cleared. So gather your favorite ingredients, prepare your shells with care, and let the creamy cheesecake kiss of vanilla and citrus lead your palate into a sweet, satisfying finish.

Ingredients

Cannoli Shells

  • 12 cannoli shells, store-bought and crispy
    → Crisp, dry cannoli shells create a sturdy edible container for the creamy filling. They should be hollow and firm enough to hold piped cheesecake filling without cracking. If shells feel stale, re-crisp them briefly in a 350°F (175°C) oven for 3–5 minutes or toast in a dry skillet. Store in an airtight container away from humidity to preserve their crunch until ready to fill.

Cheesecake Filling

  • 8 oz cream cheese, softened to room temperature
    → Cream cheese provides the rich, tangy base typical of cheesecake fillings and helps create a smooth, pipe-able texture when beaten with other ingredients. Soften fully to prevent lumps; beat until creamy and free of curdled bits, but avoid over-whipping to prevent air pockets in the finished filling.
  • 8 oz ricotta cheese, well-drained
    → Ricotta lightens the filling with a creamy texture and subtle crumb. Drain well (even overnight in a cheesecloth or fine sieve) to remove excess moisture; if not well drained, the filling may be too loose or runny, causing the shells to sog.
  • 1/2 cup powdered sugar
    → Powdered sugar dissolves smoothly into the filling, giving sweetness without gritty texture. Sift before adding to avoid lumps, then blend until the mixture is uniform and fluffy. Adjust to taste, bearing in mind the shells are not very sweet on their own.
  • 1 teaspoon vanilla extract
    → Pure vanilla intensifies the creamy cheesecake flavor; use high-quality vanilla for best aroma and depth. If you have vanilla bean, you can scrape the seeds for a more intense vanilla note.
  • 1/4 teaspoon salt
    → A small pinch of salt enhances sweetness and balances the richness of the dairy. Do not omit entirely, as it sharpens flavors and prevents the filling from tasting flat.
  • 1 tablespoon lemon zest (optional)
    → Adds a bright citrus lift that pairs beautifully with creamy filling. Use finely grated zest and not the white pith; start with a smaller amount and increase if desired, but avoid overpowering the dairy flavors.
  • 1–2 tablespoons heavy cream (optional, to adjust consistency)
    → If the filling is too thick for piping, whisk in a little cream to loosen it to a smooth, pipe-able consistency. Add gradually and test by piping a small amount into a shell; stop once it holds shape but isn’t stiff.

Optional Add-ins

  • 1/4 cup mini chocolate chips (optional)
    → Fold in chopped or mini chocolate chips to create pockets of sweetness that contrast with the creamy filling. Use micro-chips to avoid tearing the shells and to ensure even distribution when piping. Do not overmix; a gentle fold will keep chips intact.
  • 1/3 cup chopped pistachios (optional)
    → Toast pistachios lightly to deepen flavor, then chop finely. They add color, texture, and a nutty note that complements the ricotta-cream cheese filling. Sprinkle into filling or press into the ends after filling for a decorative touch.
  • 2 tablespoons candied orange peel, finely chopped (optional)
    → Provides a citrusy brightness that harmonizes with the creamy filling. Chop finely to distribute flavor evenly; consider a light sprinkling on top for a citrusy finish. Store any leftovers in an airtight container to maintain moisture.
  • Powdered sugar for dusting (optional)
    → A delicate dusting of powdered sugar just before serving adds a festive look and a touch more sweetness. Use a fine-mesh sieve for an even, light coating.

Instructions

  • Refresh any stale cannoli shells by warming them briefly in a 350°F (175°C) oven for 3–5 minutes or toasting in a dry skillet, then let cool completely before filling to restore crispness and prevent soggy filling.
    → Crisp shells provide durable housing for the filling and prevent breakage; re-crisping ensures the shells stay crunchy even after being filled.
  • Soften the cream cheese to room temperature by removing 8 oz from the fridge and letting it sit in a bowl for 30–60 minutes, then cut into smaller pieces to accelerate even softening and avoid lumps.
    → Softening prevents lumps and creates a smooth base for a creamy, pipe-able filling while avoiding over-whipping later.
  • Drain the ricotta cheese well by lining a fine sieve or cheesecloth over a bowl and letting it drain for 1–2 hours (or overnight in the refrigerator) to remove excess moisture, then press gently to extract more liquid without forcing curds.
    → Excess moisture makes the filling loose and can cause soggy shells; thorough draining yields a stable, cohesive cream.
  • Beat the softened cream cheese in a large bowl with a mixer on medium speed until creamy and smooth, about 2–3 minutes, stopping to scrape the bowl as needed for even texture.
    → Proper creaming creates a light, uniform base free of lumps and reduces the risk of curdling when sugar is added.
  • Add the well-drained ricotta to the creamed cheese and beat on low to combine, then increase to medium and mix until the mixture is completely smooth and homogeneous.
    → Incorporating ricotta lightens the filling while maintaining richness; thorough blending prevents graininess from the ricotta.
  • Sift the powdered sugar, then add 1/2 cup to the cheese mixture with 1 teaspoon vanilla extract and 1/4 teaspoon salt; beat on medium until the filling is glossy and uniform.
    → Sifting prevents gritty pockets, while vanilla and salt balance sweetness and enhance depth of flavor.
  • Stir in 1 tablespoon lemon zest (optional) using a light hand to distribute zest evenly without clumping or introducing bitterness from the white pith.
    → Lemon zest provides a bright citrus aromatics that complements the dairy richness without overpowering it.
  • If the mixture seems too thick for piping, whisk in 1–2 tablespoons heavy cream, adding gradually while testing the pipeability until the filling holds its shape but pours smoothly.
    → A softer, pipe-able consistency makes filling easier and prevents excessive pressure on the shells.
  • Fold in optional add-ins, such as 1/4 cup mini chocolate chips or 1/3 cup finely chopped pistachios, using a gentle fold to distribute evenly without breaking down the cream.
    → Adds texture and flavor contrasts; folding gently preserves the smooth filling and prevents tearing of the shells.
  • Chill the filling for 15–30 minutes to firm slightly, which makes piping easier and helps the filling stay put inside the shells.
    → Chilled filling reduces air pockets and helps maintain clean, neat cannoli ends when filled.
  • Transfer the filling to a piping bag fitted with a large round or star tip and pipe into each cannoli shell from one open end, filling until full but not overflowing; if shells are delicate, pipe from both ends toward the center for stability.
    → Piping from the ends distributes filling evenly and minimizes shell stress; controlling the amount prevents leakage and keeps presentation tidy.
  • Alternatively, use a small spoon to press a line of filling into the center of the shell and gently roll or press to seal, which can be helpful for shells that crack easily or when piping tools are unavailable.
    → This method preserves shell integrity while delivering a satisfying, uniform filling profile.
  • Decorate and finish by dipping the exposed ends in 1) chopped pistachios or micro-chocolate chips, 2) finely chopped candied orange peel, or 3) a light dusting of powdered sugar just before serving.
    → Textural contrasts and aromatic notes enhance flavor, color, and visual appeal without masking the filling’s richness.
  • Refrigerate the assembled cannoli on a tray for 10–15 minutes to set the filling a little more and help shells stay crisp; serve within a few hours for best texture and contrast.
    → A short chill helps the filling firm enough to slice cleanly when eaten and maintains the shell’s crunch for a more satisfying bite.

Notes

These cheesecake cannoli deliver a creamy, tangy cheesecake filling tucked inside crisp store-bought cannoli shells. The filling combines softened cream cheese and well-drained ricotta for a light, velvety texture, brightened with vanilla, lemon zest, and a touch of powdered sugar. You can customize them by folding in mini chocolate chips, chopped pistachios, or finely chopped candied orange peel for pockets of sweetness and color. For the best finish, pipe the filling into the shells just before serving to keep the shells crisp and the filling smooth. If you prefer a thicker filling, chill it for 15–20 minutes to set slightly before piping.

Make-ahead tips: the filling can be made up to 1 day ahead and refrigerated; drain ricotta thoroughly and soften the cheeses before mixing. If the filling seems too thick for piping, whisk in a teaspoon at a time of heavy cream until you reach a pipeable consistency. Store unfilled shells in an airtight container to preserve crunch; you can re-crisp softened shells in a 350°F (175°C) oven for 3–5 minutes. Assemble and refrigerate filled cannoli for up to 24 hours; dust with a light snowfall of powdered sugar just before serving. For gluten-free notes, ensure your cannoli shells are certified gluten-free; otherwise use gluten-containing shells as desired.

Tips

Tips for Cheesecake Cannoli

  • Shell crispening and handling

    Store-bought cannoli shells should be crisp. If they feel stale, re-crisp: 350°F (175°C) for 3–5 minutes or dry-sauté in a skillet. Let cool completely before piping. Keep shells in an airtight container away from humidity; avoid stacking to prevent bending.

  • Preparing the cheeses

    Let cream cheese and ricotta come to room temperature for a smooth, lump-free filling. If ricotta is very wet, drain well overnight or press through a sieve to remove extra moisture; moisture can soften shells and affect texture.

  • Mixing order for smooth filling

    Beat cream cheese and ricotta together on medium speed until smooth, then add powdered sugar gradually. Add vanilla, salt, and optional lemon zest; mix just until combined. Over-whipping can introduce air pockets that collapse when filling shells.

  • Flavor balance

    Add lemon zest gradually; start with 1 teaspoon and taste. A pinch of salt enhances sweetness and depth. If using add-ins like chocolate, fold in gently to avoid tearing the filling.

  • Consistency adjustments

    If the filling is too stiff, whisk in 1 tablespoon of heavy cream at a time until pipe-able. If too loose, chill 15–20 minutes and/or add a bit more cream cheese and ricotta (in equal parts) and re-whip until smooth.

  • Incorporating add-ins

    Gently fold in mini chocolate chips or chopped pistachios. Toast pistachios lightly to deepen flavor, then chop finely. Fold-ins should be evenly distributed without deflating the filling or tearing shells.

  • Assembly technique

    Fill a piping bag fitted with a medium round or small star tip. Stand shells upright or place in a muffin tin to stabilize while filling. Pipe filling into the center to fill the hollow, then seal with a gentle twist so the filling doesn’t ooze out the ends.

  • Flavor finishes and garnishes

    Dust just before serving with powdered sugar for a festive look. You can also garnish the open ends with chopped pistachios or candied orange zest; keep add-ins to the ends to avoid soggy shells.

  • Make-ahead and storage

    Keep shells crisp at room temperature in an airtight container until ready to fill. The filling can be prepared a day ahead and refrigerated; pipe just before serving for best texture. Filled cannoli should be refrigerated and consumed within 1–2 days for optimal crispness.

  • Alternative flavor ideas

    For a lighter cheesecake note, substitute part of the ricotta with mascarpone or add a touch more cream cheese. If you prefer citrus, swap lemon zest for orange zest or add a tiny drop of orange extract. Balance to taste so the dairy flavors remain prominent.

FAQ

What is Cheesecake Cannoli?

Cheesecake cannoli are a dessert that combines crispy cannoli shells with a creamy cheesecake-flavored filling. The filling is usually a blend of cream cheese (and sometimes ricotta), sugar, vanilla, and a hint of lemon or orange zest, piped into shells and often finished with a dusting of powdered sugar or chocolate.

What ingredients are needed for the filling?

Common filling ingredients include: cream cheese (softened), powdered sugar or granulated sugar, vanilla extract, lemon or orange zest, and optional ricotta for a lighter texture. You can also fold in mini chocolate chips or chopped nuts for texture. For leftovers or dietary tweaks, dairy-free cream cheese or mascarpone can be used as substitutes.

What are the shell options for cheesecakes cannoli?

You can use store-bought cannoli shells for convenience, which are already crisp. If you prefer homemade, you can fry fresh cannoli shells from dough or bake them. Some bakers also use pre-baked mini tart shells filled with the cheesecake mixture, though traditional cannoli shells are tube-shaped pastry.

How do you prepare the cheesecake filling?

Beat softened cream cheese with sugar until smooth, then mix in vanilla and citrus zest. If desired, fold in ricotta for extra creaminess and lightness. Chill the filling briefly to help it firm up before piping. For a richer bite, you can add a small amount of mascarpone or a splash of lemon juice for brightness.

How do you fill the cannoli shells without breaking them?

Fill a piping bag fitted with a medium round or star tip with the chilled filling. Pipe from one end to the other to create a generous filling. If shells are delicate, insert a small amount of filling first at one end, then gradually fill to avoid cracking. Chill the filled cannoli briefly to help the filling set and reduce leakage.

How long does it take to make Cheesecake Cannoli?

Plan about 30–40 minutes of active prep time to make the filling and fill the shells, plus 1–2 hours of chilling if you want a firmer filling. If you’re making shells from scratch, add extra time for frying or baking. Overall, it’s a quick, make-ahead dessert.

How should I store and serve cheesecakes cannoli?

Store filled cannoli in the refrigerator, ideally the shells and filling assembled just before serving. If you must prep ahead, keep the filling refrigerated and shells stored in an airtight container at room temperature or in a cool place, then fill just before serving to maintain crispness. Dust with powdered sugar or drizzle with melted chocolate just before serving.

Can I make this ahead for a party or potluck?

Yes. You can make the filling a day ahead and refrigerate. Shells can be prepared or purchased beforehand and stored in an airtight container. Assemble the cannoli shortly before serving to keep the shells crisp. For best results, do not fill all shells too far in advance.

What are some variations or substitutions?

Variations include using mascarpone or a mix of cream cheese and ricotta, adding lemon or orange zest for brightness, or folding in chocolate chips, pistachios, or candied orange peel. For dairy-free versions, use dairy-free cream cheese and coconut cream or whipped coconut milk in place of dairy fillings, and choose shell options that are gluten-free if needed.

Any tips for perfect texture and flavor?

Use softened cream cheese to avoid lumps, sift powdered sugar for a smoother filling, and chill the filling before piping. Balance sweetness with a touch of lemon zest, and avoid overmixing once you add the zest to prevent a dense texture. If shells feel stale, crisp them briefly in a 350°F (175°C) oven for a minute or two (watch closely) before filling.

How many cannoli servings does this yield?

Typically, one batch fills about 12–16 small cannoli shells, depending on shell size and how generously you pipe the filling. You can scale the recipe by adjusting the filling quantity and the number of shells you have on hand.

Introduction / Hook

There’s something almost cinematic about Classic lasagna: the way the oven performs magic, transforming simple ingredients into a warm, mysterious revelation. A dish that feels like a family reunion in edible form, lasagna is a tapestry of ribbons of tender pasta, rich ragù that sighs with slow-cooked beef and tomatoes, and velvety layers of béchamel that cradle every bite with creamy warmth. When you slice into a pan of lasagna, steam escapes in fragrant swirls — garlic and sweet onion rising with the scent of caramelized meat, herbs, and cheese. The surface glistens with melted mozzarella and parmesan, and the edges bake to a bronzed, slightly crisp edge that crackles when you lift a forkful. It’s a dish that invites lingering at the table, conversations that wander from childhood memories to new discoveries, and seconds that arrive with a shared smile. Making classic lasagna is an act of hospitality; it says you’ve prepared something special, something that will fill the room with appetite and warmth long after the last bite has vanished.

Imagine a Sunday kitchen glow, a pot simmering with sauce that tastes like Sunday afternoons in every culture that loves robust, comforting food. The aroma tells you a story about tradition, about grandmothers who stirred the pot with a wooden spoon and whispered secrets of patience. Every layer is a quiet testament to balance: the softness of pasta, the savor of meat ragù, the silk of béchamel, and the sharp bite of aged cheese that makes the flavors feel both familiar and exciting. Classic lasagna isn’t just food; it’s a ritual of layering meaning — a culinary canvas where families write new memories across generations with each oven-warmed slice.

Whether you’re feeding a crowd, seeking the kind of meal that satisfies both the heart and the stomach, or simply wanting a dish that tastes like “home” even when you’re far from it, classic lasagna offers a culinary experience that is at once approachable and legendary. It’s a dish that invites experimentation within a beloved framework: you can honor tradition while adding personal touches, you can adjust richness to suit dietary choices, and you can transform leftovers into new adventures. The beauty of lasagna lies in its ability to be both timeless and adaptable, a canvas that holds the echoes of the past while embracing the creativity of the present.

The Story Behind the Dish

Lasagna’s roots wind through the annals of Italian cooking, weaving together regional traditions and centuries of home kitchens. The name itself is a clue: lasagna (singular lasagna) comes from the Greek word lasanon and the Latin lasanum, both referring to a cooking vessel. Over the centuries, the dish found its soul in northern Italy, particularly in Emilia-Romagna and its neighboring regions. The modern classic, with its three iconic components — ragù (a slow-simmered meat sauce), béchamel (a silky white sauce), and sheets of pasta — is often credited to the culinary culture of Bologna and the surrounding countryside. Here, the discipline of the kitchen meets the romance of family meals: hours spent coaxing flavor from simple ingredients, a reverence for texture, and a careful layering that results in a dish both rustic and refined.

In many Italian homes, lasagna is a weekend project, a ritual that grows from the idea that good things require time. The ragù, typically a slow-braising conversation between ground meat, tomatoes, wine, and aromatics, teaches patience. The béchamel, whisper-thin and creamy, provides a soft counterpoint that softens the tang of tomatoes and the savor of meat. The pasta sheets, whether fresh or properly prepared dried sheets, provide the connective tissue that binds everything together. Across Italy, families might weave in regional touches — a kiss of nutmeg in the béchamel, a veil of Parmigiano-Reggiano, a touch of prosciutto or mortadella in the layers — but the essence remains the same: a layered emblem of home, hospitality, and the kind of nourishment that makes guests stay a little longer at the table.

As it traveled beyond Italian borders, lasagna adapted to new tastes while preserving its core identity. In the United States and in many other countries, the dish often becomes a cherished centerpiece of celebratory meals and family gatherings. It’s a dish that invites substitutions and personal touches — a testament to its generous spirit. Some cooks celebrate the tradition with a classic recipe featuring a meat ragù, a veil of béchamel, and generous cheese; others experiment with variations: white sauces, vegetarian fillings, seafood-inspired choices, or gluten-free adaptations. Yet, at its heart, Classic lasagna remains a blueprint for comforting, soul-satisfying dining — a dish that makes ordinary days feel special and ordinary ingredients sing with purpose.

There’s a quiet poetry to lasagna’s layers: the first bite reveals a soft, pasta-friendly pillowy texture; the second warms with the beefy depth of ragù; and the third reveals the nutty, faintly sweet richness of the béchamel and cheese, all weaving together into a harmonious crescendo. For generations, people have returned to this dish as a reliable source of joy and nourishment — proof that some culinary ideas are simply timeless, cultivated with care and passed down with stories that keep the kitchen alive. Classic lasagna tells a story of family, of time honored techniques, of seasonal ingredients meeting the mastery of a patient cook, and of a comforting ritual that feels like a warm embrace as the oven hums and the room fills with the fragrance of home.

Why You’ll Love This Recipe

  • Crowd-pleasing comfort: A dish built for sharing, it scales beautifully for gatherings of friends and family.
  • Depth of flavor: Slow-simmered ragù grounds the dish with umami, while béchamel adds a luxurious silkiness that balances acidity and richness.
  • Make-ahead magic: Assemble once, bake later, or freeze prepared components to savor later without sacrificing flavor.
  • Textural harmony: The contrast between the tender pasta, meaty layers, creamy sauces, and lightly crisp edges creates a satisfying bite every time.
  • Versatile foundation: The classic formula welcomes adaptations — meat, poultry, or seafood ragùs; vegetarian fillings; or gluten-free and dairy-free variations without losing character.
  • Year-round appeal: It fits winter coziness, autumn feasts, and even celebratory meals in spring and summer when served with bright salads and chilled beverages.
  • Elegant yet approachable: It looks impressive when plated, yet a well-made lasagna is within reach for home cooks of all levels with the right mindset and a bit of patience.

Flavor Profile & Texture

Classic lasagna delivers a symphony of flavors in each slice. The ragù brings a robust, savory foundation: slow-cooked ground meat caramelized with onions and garlic, bright tomato acidity, and a whiff of wine and herbs that deepen with time. The depth of flavor often benefits from a long, gentle simmer, which allows the meat to mingle with the tomato, absorbing aromatic notes until the sauce becomes a cohesive, velvety partner to the pasta sheets. The béchamel layer contributes a buttery, creamy silk that coats the palate, offering a gentle sweetness and a luxurious mouthfeel that counterbalances the tang of the tomato and the savoriness of the meat. When cheese is added, its role is both flavor and texture: mozzarella melts into a molten, stringy embrace, while parmesan or aged cheeses bring a sharp, nutty bite and a salty finish that punctuates each bite.

The texture is a study in contrast and cohesion. The outer edges emerge with a pleasing crust — slightly crisp, deeply caramelized, and deeply satisfying. The interior remains pillow-soft, with layers that hold together when you slice but break apart gently toward the center. Each layer is a canvas for moisture, ensuring the dish doesn’t feel heavy but remains indulgent. The cheese binding and the béchamel’s creaminess help the lasagna retain its moisture without becoming mushy, while the ragù threads through the layers to ensure bite after bite carries the same balanced flavor profile. In a well-made lasagna, texture is not an afterthought but a central actor — a bridge between the soft, yielding pasta and the savory, aromatic filling that lingers on the palate.

The aroma is equally telling. There’s a comforting, almost universal scent of toasted pasta, simmering tomatoes, garlic, and onion, mingling with the perfume of fresh herbs like bay leaf, oregano, and sometimes basil. As cheese browns and the sauce thickens, the kitchen fills with a warm, inviting fragrance that evokes gatherings and shared stories. The sensory experience extends beyond taste: the sight of glossy, multi-hued layers through a neatly cut slice, the hiss of bubbling edges as it returns to the oven, and the steam that curls upward when the dish lands on the table — all contribute to the expectation that what you’re about to eat will be a memorable, satisfying experience.

Occasions & Pairings

Classic lasagna shines in moments when people come together: weekend family dinners that stretch long into the afternoon, holiday celebrations that demand heartiness, and casual gatherings where a single pan can feed a crowd with leftovers that taste just as good the next day. It’s equally at home on weeknights when you’re cradling a craving for something comforting and substantial but don’t want to spend hours in the kitchen. The dish also adapts gracefully to different dietary preferences with thoughtful substitutions, making it a versatile centerpiece for various tables.

Pairing suggestions to elevate the lasagna experience:

  • Side dishes: A bright green salad with a tangy vinaigrette adds a refreshing counterpoint to the richness. Garlic bread or crusty focaccia offers a crunchy contrast that’s perfect for mopping up sauce. Roasted vegetables — such as zucchini, bell peppers, or Brussels sprouts — provide a vegetal balance that lightens the plate.
  • Beverages: A glass of medium-bodied red wine with soft tannins, such as Chianti, Sangiovese, or a Merlot, complements the meatiness without overwhelming the acidity of the tomatoes. For non-alcoholic pairings, sparkling water with a squeeze of lemon or a richer grape juice can mirror the dish’s depth without distraction.
  • Desserts: Something light and crisp, like citrus sorbet or a simple vanilla panna cotta, can finish the meal without competing with the lasagna’s richness.
  • Seasonal and festive twists: A fresh herb salad with lemon, a drizzle of olive oil, and a few capers can offer a bright counterpoint to the heaviness. For holiday feasts, a dollop of lightly spiced tomato relish or a side of roasted garlic cloves can be served to echo the dish’s flavors.

Tips, Variations & Substitutions

One of the joys of Classic lasagna is its adaptability. Here are ways to tailor it to your pantry, dietary needs, or mood for the day, while preserving its celebratory essence.

  • Make-ahead strategy: Assemble the lasagna a day in advance, refrigerate, and bake when ready. The resting time in the fridge helps the layers mingle, often resulting in cleaner slices. You can also prepare the ragù and béchamel ahead of time and store them separately until you’re ready to assemble.
  • Meat variations: Ground beef is a traditional choice, but you can use a mix of beef and pork, or substitute with turkey, chicken, or a plant-based crumble for lighter or vegetarian versions. If you opt for seafood, a white fish-based ragù can offer a delicate alternative, though the profile shifts away from the classic comfort food feel.
  • Vegetarian version: Replace the ragù with a mushroom and spinach medley, or roasted vegetables like zucchini, bell peppers, and eggplant. A fragrant tomato sauce layered with a ricotta, herb, and egg mixture can create a different but equally satisfying depth of flavor.
  • Cheese variations: A blend of mozzarella for melt and parmesan or pecorino for sharpness is traditional. For a creamier finish, increase the béchamel ratio or incorporate a light ricotta layer, but be mindful of moisture balance to prevent sogginess.
  • Gluten-free and dairy-free options: Use gluten-free lasagna sheets and a dairy-free béchamel made with plant-based milk and a neutral oil or butter substitute. For the ragù, ensure the meat is rendered well and the sauce is thick enough to cling to the sheets; add a dairy-free cheese substitute if desired for a similar mouthfeel in the top layers.
  • Regional twists: A hint of nutmeg in the béchamel nods to classic Italian technique, while adding a splash of red wine to the ragù ties back to many regional versions. Some cooks finish with a light drizzle of olive oil and a handful of fresh parsley for brightness.
  • Texture play: If you prefer a slightly lighter finish, strike a balance between the sauces so that the top layer isn’t overly heavy. If you want a more indulgent crust, finish with an extra layer of cheese and a final quick bake until the top browns.

Storage & Make-Ahead Ideas

The beauty of lasagna lies in its resilience. Properly stored, it can stretch the life of a meal into multiple days of eating well, and even into future meals with minimal effort. Here are practical guidelines to maximize flavor and texture.

  • Refrigeration: Leftover lasagna can be stored in an airtight container for 3 to 5 days. Reheat gently in the oven, covered with foil to prevent drying, or in a microwave if you’re short on time. Oven reheating helps preserve the crusty edges and ensures the layers rehydrate evenly.
  • Freezing: Assemble the dish, but do not bake. Freeze the assembled pan or individual portions tightly wrapped. Thaw overnight in the fridge and bake as you would normally. Freezing can intensify flavors as the components meld during freezing and thawing.
  • Make-ahead meals: Prepare ragù and béchamel in advance and keep them chilled. When you’re ready, assemble, bake, and serve. This approach is ideal for hosting duties, allowing you to focus on other preparations while the kitchen aromas work their magic.
  • Storage for leftovers: If you expect leftovers, consider portioning into single-serving dishes that can be quickly reheated. This method makes it easier to manage serving sizes and ensures even reheating without overcooking any part of the dish.

Fun Facts & Trivia (Optional)

– The term lasagna is often used to refer to both the dish and the individual layers. In Italian, the plural form lasagne is used in some regions, while in English-speaking contexts, lasagna is commonly used for both the dish and the single portion.

– The iconic components — ragù, béchamel, and cheese — reflect a culinary dialogue between the rustic and the refined. Ragù grounds the dish with savory depth; béchamel elevates it with velvety texture; cheese provides a tangy, molten crown that draws the layers together.

– Bologna, a city in Emilia-Romagna, is frequently associated with the modern lasagna due to its celebrated ragù alla Bolognese and the riche culinary heritage of the region. The layering technique and sauces in many traditional recipes echo this influence, though every family might claim a personal touch that has become a signature over generations.

– Some cooks favor no-boil lasagna sheets for convenience, while others insist on boiling the sheets briefly to ensure tenderness. Both approaches have admirers, and the choice often comes down to preferred texture and time constraints. The key is ensuring the sheets absorb moisture and meld with the sauces rather than becoming dry or brittle.

– A well-made lasagna has a sensory power: the bubbling edges, the slight crackle when a slice breaks, the glossy sheen of the top layer, and the aroma that floods the room as it bakes. It is as much a performance as it is a meal, a dish that invites communal tasting and conversation.

Closing Thoughts: A Dish That Feeds the Heart

Classic lasagna is more than a recipe; it’s a shared ritual of nourishment and connection. It invites you to slow down, savor the moment, and approach the kitchen with a sense of purpose and warmth. The layers are a small universe: each sheet of pasta a foundation, each spoonful a memory, each melted cheese string a moment of comfort. It’s the kind of dish that lingers in memory as much as it lingers on the plate, inviting you to recreate the experience again and again for your people, in your own kitchen, with your own personal touches. Whether you’re cooking for a quiet weeknight or a bustling family gathering, Classic lasagna offers a dependable, crowd-pleasing centerpiece that never goes out of style. It’s a timeless invitation to come together, to nourish bodies and spirits alike, and to celebrate the simple, extraordinary joy of good food shared generously.

Ingredients

Lasagna Base

  • 12-14 lasagna noodles (regular or no-boil)
    → Purpose: Provide the structural layers that hold the filling and sauce together. Preparation: If using regular noodles, boil in salted water until just al dente per package directions, then drain and lay flat to prevent sticking. If using no-boil noodles, ensure sauce is generous and fairly moist so the sheets hydrate during baking. Tip: Cut sheets to fit your pan and avoid overlapping to ensure even layering.
  • 2 cups ricotta cheese (whole-milk)
    → Purpose: Creates a creamy, mild filling that balances the tomato sauce and meat with a gentle binding. Preparation: Mix with 1 large beaten egg and 2 tablespoons chopped fresh parsley, plus a pinch of salt until smooth. Tip: If ricotta is very watery, drain in a fine sieve or cheesecloth for 15–20 minutes to prevent watery layers; using full-fat ricotta yields richer flavor.
  • 2 cups shredded mozzarella cheese (divided between filling and topping)
    → Purpose: Provides melt and a gooey cheese layer between noodles; helps bind layers as it bakes. Preparation: Shred cheese just before use and reserve half for topping. Tip: For best melt, avoid pre-shredded blocks with anti-caking agents; if using store-bought shredded, break apart clumps before layering.
  • 1 cup grated parmesan cheese (freshly grated)
    → Purpose: Adds sharp, salty bite and aroma; enhances browning and depth in both filling and topping. Preparation: Grate just before use and mix a portion into the ricotta for flavor; reserve some for finishing on top. Tip: Freshly grated parmesan melts and flavors better than pre-grated; store leftovers in the fridge and use within a few days for best taste.
  • 1 large egg
    → Purpose: Binds the ricotta filling to help it hold together during baking. Preparation: Beat lightly and fold into the ricotta mixture with parsley. Tip: If your ricotta is very wet, you can reduce moisture by using slightly less egg or increasing parmesan for binding; avoid overmixing to keep the filling light.

Bechamel Sauce

  • 2 cups whole milk
    → Purpose: Base liquid for the béchamel, providing creaminess and moisture to each lasagna layer. Preparation: Warm gently in a small saucepan before whisking with the roux; add gradually to prevent scorching. Tip: Use room-temperature milk for a smoother sauce; whole milk yields richer texture than skim.
  • 2 tablespoons unsalted butter
    → Purpose: Creates the roux with flour to thicken the béchamel and add richness. Preparation: Melt over medium heat, then whisk in flour to form a pale roux. Tip: Do not brown the butter; keep it light to maintain a creamy béchamel.
  • 2 tablespoons all-purpose flour
    → Purpose: Thickens the béchamel sauce and helps achieve a silky texture. Preparation: Whisk into the melted butter until smooth, cooking 1–2 minutes to remove raw flour taste. Tip: Sift flour to prevent lumps; strain if needed after cooking for an ultra-smooth sauce.
  • Pinch ground nutmeg
    → Purpose: Classic warm note that complements the creamy sauce. Preparation: Add to the milk as it heats or directly into the béchamel; taste and adjust sparingly. Tip: Freshly grated nutmeg has stronger aroma; start with a tiny pinch and add more if desired.
  • Salt to taste
    → Purpose: Enhances overall flavor and balances richness. Preparation: Add in stages to the bechamel and taste; adjust after assembling the layers. Tip: If using salted butter, start with less salt and adjust gradually to avoid oversalting the dish.

Meat Sauce (Beef)

  • 1 pound ground beef (85-90% lean)
    → Purpose: Core protein and savory depth; forms the heart of the meat sauce. Preparation: Brown in a splash of olive oil over medium-high heat until fully cooked and crumbly, breaking up with a spoon. Tip: Drain excess fat after browning to keep the sauce from becoming greasy; for deeper flavor, brown the meat in batches to avoid steaming.
  • 1/2 pound ground pork (optional)
    → Purpose: Adds richness and moisture to the sauce; blends well with beef for a classic Bolognese texture. Preparation: Brown with the beef or separately until fully cooked; crumble well. Tip: If omitting pork, you can increase beef to 1.5 pounds or add mushrooms for umami depth.
  • 1 tablespoon olive oil
    → Purpose: Base for sautéing aromatics and encouraging even browning. Preparation: Heat in a large skillet or pot before adding onion and garlic. Tip: Extra-virgin olive oil adds fruity notes; do not overheating to avoid burning the oil.
  • 1 medium onion, finely chopped
    → Purpose: Introduces sweetness and body to the sauce; dilutes the meat’s density with aromatic moisture. Preparation: Finely dice and sauté until translucent and soft. Tip: Let the onion sweat with a pinch of salt early on to speed softening and reduce bitterness.
  • 2-3 garlic cloves, minced
    → Purpose: Imparts punchy, savory aroma that enhances the sauce’s depth. Preparation: Mince finely and add toward the end of browning to prevent burning. Tip: If you love garlic, you can grate it for even distribution; avoid overcooking to prevent acrid notes.
  • 1 can crushed tomatoes (28 oz / 796 ml)
    → Purpose: Provides the tomato foundation and body for the sauce. Preparation: Crushed tomatoes can be simmered with meat and aromatics; blend if you prefer smoother texture. Tip: Choose high-quality tomatoes; adjust acidity with a pinch of sugar if needed. Simmer to deepen flavors.
  • 2 tablespoons tomato paste
    → Purpose: Intensifies tomato flavor and thickens the sauce. Preparation: Stir into onions and meat after browning; cook 1–2 minutes to bloom. Tip: Tomato paste from a tube is convenient for small amounts and helps keep other paste fresh; it also intensifies flavor more quickly.
  • 1 teaspoon dried oregano
    → Purpose: Adds Mediterranean herbal notes that complement tomatoes. Preparation: Sprinkle into sauce and simmer. Tip: Crush dried oregano between fingers to release aroma; if using fresh, use a few torn leaves near the end for brightness.
  • 1 teaspoon dried basil (or a few fresh leaves)
    → Purpose: Contributes classic Italian herb aroma and sweetness. Preparation: If using fresh, chop and add near the end of cooking to preserve flavor; if dried, add early. Tip: Fresh basil is best added after simmering to preserve its fragrant oils; dried basil provides aroma but can taste less vibrant when overcooked.
  • 1/2 teaspoon sugar (optional)
    → Purpose: Balances acidic tomato flavors and rounds the sauce. Preparation: Add gradually during simmering and taste; adjust to your preference. Tip: Sugar is optional and depends on tomato acidity; use sparingly to avoid overly sweet sauce.
  • Salt and pepper to taste
    → Purpose: Fundamental seasoning to bring all flavors together. Preparation: Season in stages, tasting as the sauce reduces. Tip: Add salt gradually; remember that parmesan and ricotta also contribute saltiness, so adjust accordingly.

Optional Add-ins

  • Fresh basil leaves (optional)
    → Purpose: Finishing aroma and brightness; can be layered between sheets or used as garnish. Preparation: Tear or chiffonade leaves and fold into the sauce toward the end of simmering or sprinkle on top after baking. Tip: Add at the end to preserve vibrant aroma; avoid prolonged exposure to heat which dulls the fresh flavor.
  • Red pepper flakes (optional)
    → Purpose: Adds gentle heat and a little kick. Preparation: Stir a pinch into the meat sauce during simmering to distribute heat evenly. Tip: Start with 1/4 teaspoon and adjust to taste; too much can overpower delicate tomato flavors.
  • Chopped fresh parsley (optional)
    → Purpose: Adds color and a fresh, herbaceous note. Preparation: Finely chop and stir into ricotta filling or sprinkle over the finished dish. Tip: Parsley color fades with long cooking; add just before serving for best appearance.

Toppings

  • Extra grated parmesan cheese for serving (optional)
    → Purpose: Finishing saltiness and aroma; enhances browning and adds a slight crisp on top. Preparation: Grate finely and sprinkle over the hot lasagna just before serving or serve at the table. Tip: Freshly grated parmesan yields sharper flavor and smoother melt than pre-grated; store in the fridge and grate as needed.

Instructions

  • Preheat your oven to 375°F (190°C) and lightly grease a 9×13-inch baking dish with butter or olive oil.
    → Ensures even baking and prevents the lasagna from sticking to the pan, making clean slices and easy transfer from dish to plate.
  • Prepare the noodles: If using regular lasagna noodles, boil in salted water until just al dente according to package directions, then drain and lay flat to dry; if using no-boil noodles, skip boiling and rely on a generously moist sauce to hydrate them; lay a thin layer of béchamel on the bottom of the dish to prevent sticking.
    → Regular noodles need par cooking to achieve the right bite without turning mushy, while no-boil sheets rely on moisture in the sauce to hydrate; the béchamel on the bottom helps sheets release evenly.
  • Brown the meat: Heat 1 tablespoon olive oil in a large skillet over medium-high heat; add 1 finely chopped onion and sauté until translucent, about 4–5 minutes; add 2–3 minced garlic cloves and cook 30 seconds until fragrant; add 1 pound ground beef and 1/2 pound ground pork if using, crumbling with a spoon and cooking until fully browned; drain excess fat.
    → Fully browning the meat builds savory depth and removes excess fat that can make the sauce greasy; draining fat prevents a greasy final lasagna.
  • Season and simmer the meat sauce: Stir in 2 tablespoons tomato paste and cook 1–2 minutes to bloom the flavor; add 1 can crushed tomatoes (28 oz / 796 ml), 1 teaspoon dried oregano, 1 teaspoon dried basil, and 1/2 teaspoon sugar if desired; season with salt and pepper to taste; simmer gently for 20–30 minutes to meld flavors and thicken the sauce.
    → Slow simmering concentrates tomato flavor and softens acidity; the paste thickens the sauce and the herbs provide classic Italian notes.
  • Prepare the béchamel sauce: Warm 2 cups whole milk until steaming; melt 2 tablespoons unsalted butter in a separate saucepan over medium heat and whisk in 2 tablespoons all-purpose flour to form a pale roux, cooking 1–2 minutes to eliminate raw flour taste; gradually whisk in the warm milk, continuing to whisk until the sauce is smooth and thick enough to coat a spoon; season with salt and a pinch of grated nutmeg.
    → A smooth béchamel adds creamy moisture between layers and helps bind the dish; avoid lumps by whisking continuously and adding milk gradually.
  • Prepare the ricotta filling: In a mixing bowl, combine 2 cups whole-milk ricotta with 1 large beaten egg and 2 tablespoons chopped fresh parsley and a pinch of salt until smooth; if the ricotta is very watery, drain in a fine sieve for 15–20 minutes before mixing.
    → The egg acts as a binder to help the filling set; draining excess moisture prevents watery layers and potential sogginess.
  • Shred the mozzarella: Shred 2 cups mozzarella cheese just before assembling and reserve half for topping; keep the other half ready to scatter between layers for even melt; avoid pre-shredded cheese with anti-caking agents for best melt.
    → Freshly shredded mozzarella melts more evenly and yields a creamier texture than pre-shredded varieties.
  • Optional add-ins to enhance the sauce: If using fresh basil, tear and fold into the meat sauce near the end of simmering; if desired, stir in red pepper flakes for a gentle heat or sprinkle chopped parsley between layers for color; these additions should be added toward the end to preserve brightness and avoid overcooking delicate herbs.
    → Fresh basil and parsley add brightness and aroma; heat can dull delicate herbs, so add near the end for maximum impact.
  • Assemble the lasagna: Spread a thin layer of béchamel on the bottom of the prepared dish; ladle a layer of meat sauce over it; arrange a layer of noodles; spread an even layer of ricotta filling over the noodles; sprinkle a portion of mozzarella and a light dusting of Parmesan; repeat with sauce, noodles, ricotta, mozzarella, and Parmesan, finishing with a final layer of noodles; top with a final light coat of béchamel and the remaining mozzarella and Parmesan for a golden crust.
    → Layering in this order ensures moisture distribution, even cheese melt, and clean slicing; ending with cheese promotes browning and a flavorful crust.
  • Bake the lasagna: Cover tightly with foil to seal in moisture and prevent the top from drying; bake in the preheated oven at 375°F (190°C) for 25–30 minutes; uncover and bake 15–20 minutes more until the top is bubbling and golden brown; if the top edges brown too quickly, tent with foil to prevent scorching.
    → Covered baking keeps layers hydrated and allows flavors to meld; finishing uncovered fosters a desirable golden crust and bubbly sauce.
  • Rest before serving: Remove from oven and let the lasagna rest for 15–20 minutes on a cutting board or cool rack; resting lets the layers set, making clean, rectangular slices and preventing the filling from squishing out.
    → Resting stabilizes the structure so slices hold together when cut and served.
  • Serve and garnish: Cut into generous squares with a sharp knife, wipe the blade between cuts for neat edges, and dust with extra Parmesan or chopped parsley if desired for extra aroma and color.
    → Finishing touches heighten aroma and appearance; a clean cut improves presentation and portioning.

Notes

This classic lasagna is a comforting, make-ahead favorite built from tender noodles, a savory meat sauce, a creamy ricotta filling, and a silky béchamel. To ensure clean, sliceable portions, let the finished bake rest for 15–20 minutes before slicing. If using regular lasagna noodles, boil until al dente per package directions, drain, and lay flat to prevent sticking; if using no-boil sheets, ensure the sauce is generously moist so the sheets hydrate during baking. For a gluten-free version, use certified gluten-free lasagna sheets and check all ingredients—even sauces and cheeses—are gluten-free. You can customize the meat sauce by adding vegetables like mushrooms, finely chopped spinach, or a mix of beef and pork for deeper flavor. The ricotta filling benefits from a lightly beaten egg, a pinch of salt, and chopped parsley; mix it with some grated parmesan for extra richness. Assemble with a thin layer of béchamel between each noodle layer to keep the stack moist and cohesive, and finish with mozzarella and extra parmesan for a golden top. The béchamel should be cooked just until thickened and whisked in smoothly so it coats the noodles without clumping; avoid browning the roux to keep the sauce silky. This dish freezes well—assemble, wrap tightly, and freeze unbaked for up to 2–3 months, or bake then freeze and reheat until bubbly and hot in the center. For a lighter version, use part-skim mozzarella and ricotta, and balance the richness with more vegetables in the sauce. Serve with a bright green salad and crusty bread to soak up any sauce, and enjoy the flavors that often improve after a night in the fridge.

Tips

Tips for Noodles and Assembly

  • Regular lasagna noodles should be boiled until just al dente according to package directions, then drained and laid flat to prevent sticking. No-boil noodles rely on a fairly moist sauce to hydrate during baking, so don’t skimp on sauce in the layers.
  • Trim noodle sheets to fit your pan and avoid overlapping. This helps ensure even baking and clean edges for slicing.
  • If using no-boil sheets, distribute sauce generously between layers so the noodles hydrate evenly; reserve sufficient sauce for the top to prevent drying during baking.
  • To prevent soggy edges, start with a thin layer of sauce on the bottom of the pan and layer noodles, fillings, and sauce in balanced portions.

Ricotta and Filling Tips

  • Drain very watery ricotta in a fine sieve or cheesecloth for 15–20 minutes to keep layers firm and prevent watery pockets.
  • Mix ricotta with 1 large beaten egg and 2 tablespoons chopped fresh parsley, plus a pinch of salt, until smooth to help binding and flavor.
  • For richer flavor, fold a portion of freshly grated parmesan into the ricotta filling. Reserve some parmesan to sprinkle on the top.
  • If ricotta seems too loose, add a bit more grated parmesan or a tablespoon of breadcrumbs to help absorb excess moisture; avoid overmixing to keep the filling light and creamy.

Mozzarella and Parmesan Cheese Tips

  • Shred mozzarella just before use and reserve half for the topping to maximize melt and ooze between layers.
  • Avoid pre-shredded mozzarella with anti-caking agents; if using store-bought shredded cheese, break apart clumps before layering for even distribution.
  • Freshly grated parmesan melts and flavors better than pre-grated. Grate a portion into the filling for depth and reserve some to finish on top.
  • Pat mozzarella dry with paper towels if it’s very watery to prevent extra moisture from diluting the sauce.

Bechamel (White Sauce) Tips

  • Warm the milk before whisking with the roux to prevent lumps. Gradually whisk the milk into the pale roux (butter and flour) to achieve a smooth, silky texture.
  • Cook the roux for 1–2 minutes to remove raw flour taste, then slowly incorporate the milk, whisking continuously.
  • Use a pinch of ground nutmeg and salt to taste. Freshly grated nutmeg adds warmth; start small and adjust as you go.
  • If lumps form, whisk vigorously or strain the sauce to achieve ultra-smoothness. If the sauce thickens too much, whisk in a splash of milk until pourable.

Meat Sauce (Beef and Optional Pork) Tips

  • Brown ground beef (and pork, if using) in batches to develop deep flavor and crust; avoid overcrowding the pan to prevent steaming.
  • Drain excess fat after browning to keep the sauce from becoming greasy. Sauté onion and garlic in olive oil until translucent and fragrant.
  • Stir in tomato paste after browning meat to bloom its sweetness, then add crushed tomatoes. Simmer to concentrate flavors; longer simmer equals richer sauce.
  • Season with oregano, basil, sugar (optional), salt, and pepper in stages. Taste as it reduces and adjust. If using pork, ensure it is fully cooked; if omitting pork, you can increase beef or add mushrooms for depth.
  • For a deeper flavor boost, deglaze the pan with a splash of red wine after browning the meat and allow it to reduce before adding tomatoes.

Optional Add-ins and Finishing Touches

  • Fresh basil leaves add brightness; tear or chiffonade and fold into the sauce toward the end or sprinkle on top after baking. Add near the end to preserve aroma.
  • Red pepper flakes provide a gentle heat; start with 1/4 teaspoon and adjust to taste, mixing into the meat sauce during simmering.
  • Chopped fresh parsley adds color and a fresh note; stir into ricotta filling or sprinkle over finished dish. Add just before serving to keep color vibrant.

Toppings and Finishing

  • Extra grated parmesan for serving enhances finish and aroma; grate finely and sprinkle over hot lasagna just before serving for best melt and flavor.

Make-Ahead, Storage and Reheating Tips

  • Assemble up to 24 hours in advance; cover tightly and refrigerate before baking. Bake longer if starting cold from the fridge.
  • Leftovers refrigerate well for 3–4 days. Reheat covered in a moderate oven (325–350°F / 160–175°C) until hot, or reheat in the microwave in portions.
  • For long-term storage, freeze assembled unbaked lasagna or fully baked lasagna. Thaw overnight in the fridge, then bake as directed. Wrapped properly, frozen lasagna will keep for 2–3 months.

FAQ

Frequently Asked Questions — Classic Lasagna

What is classic lasagna?

Classic lasagna is a hearty casserole made with layered sheets of pasta, a rich meat sauce (ragù), a creamy cheese layer such as ricotta (often with egg), and melted mozzarella and Parmesan. It is baked until bubbly and golden on top.

What ingredients do I need?

Common ingredients include:

  • Lasagna noodles (regular or no-boil)
  • Ground beef or pork (or a mix) or Italian sausage
  • Onion and garlic
  • Crushed tomatoes or marinara, and tomato paste
  • Olive oil, salt, pepper, dried oregano or Italian seasoning
  • Ricotta cheese (mixed with egg and a pinch of salt)
  • Egg (to bind the ricotta)
  • Mozzarella cheese (shredded)
  • Parmesan cheese, grated
  • Optional béchamel sauce (milk, butter, flour) for a creamier version
Do I need to boil the lasagna noodles?

You can use either boiled noodles or no-boil sheets. No-boil noodles simply need adequate moisture from the sauce to cook through during baking. If you prefer, boil regular noodles for a few minutes and drain well before layering.

How do you assemble lasagna?

A common assembly method:

  • Spread a thin layer of sauce on the bottom of the pan.
  • Place a layer of noodles over the sauce.
  • Spread the ricotta mixture (ricotta + egg + salt) over the noodles.
  • Top with a layer of mozzarella and a spoonful of sauce.
  • Repeat layers (sauce, noodles, ricotta, mozzarella) until you reach the top, finishing with sauce and mozzarella/parmesan.
  • Let the assembled lasagna rest for 10–20 minutes before baking to help with slicing.
How long and at what temperature do you bake it?

Bake at about 375°F (190°C) for 45–60 minutes, covered with foil for the first part to prevent over-browning. Remove the foil for the last 10–15 minutes to melt and lightly brown the cheese. Let it rest for 15–20 minutes before slicing.

Can I prepare lasagna ahead of time?

Yes. You can assemble the lasagna up to a day ahead and refrigerate (covered). If baking from cold, add 15–20 minutes to the bake time. You can also bake it fully, then refrigerate leftovers for later.

Can I freeze lasagna?

Absolutely. Assemble and freeze unbaked, wrapped tightly, for up to 2–3 months. Or bake it, cool completely, then freeze slices wrapped well. To bake from frozen, thaw overnight in the fridge and bake as directed, or bake covered for longer if cooking from frozen.

How do I reheat leftovers?

Gently reheat in the oven at 325–350°F (165–175°C) until heated through, about 20–30 minutes for a slice or more for a full pan. You can cover with foil to prevent drying. Alternatively, reheat individual portions in the microwave in short bursts, checking frequently.

Can I make a vegetarian or lighter version?

Yes. Omit the meat and use sautéed mushrooms, spinach, zucchini, and/or roasted peppers. You can add lentils or finely chopped walnuts for protein. Consider using extra vegetables and a lighter sauce, and/or using a béchamel or ricotta mixture as the cheese layer.

What size pan should I use and how many servings does it yield?

A standard 9×13 inch (23×33 cm) baking dish is typical and yields about 8–12 servings, depending on portion size. If you need fewer servings, you can scale down to a smaller dish or freeze portions for later.

What are common mistakes to avoid?

Tips to prevent issues:

  • Use a proper sauce-to-noodle ratio; too little sauce can dry the lasagna, too much can soggy the layers.
  • Drain meat thoroughly to keep sauces from becoming watery.
  • Drain ricotta well and avoid overmixing, which can toughen the texture.
  • Let the lasagna rest after baking to set the layers for cleaner slices.
  • Keep the top layer well covered with cheese to prevent burning, but uncover toward the end for browning.
What are good serving suggestions?

Serve with a simple green salad, garlic bread or crusty bread, and a light red wine such as Chianti or Sangiovese. A side of steamed vegetables also pairs nicely to balance the richness.

Introduction / Hook

There’s something irresistibly comforting about the scent of cinnamon—a warm, toasty sweetness that seems to melt the day away. Now imagine that same comforting aroma wrapped into a cupcake, where every bite gives you a tender crumb, a whisper of spice, and a creamy, dreamy frosting that feels like a cozy hug. Cinnamon Roll Cupcakes are the charming mash-up you didn’t know you needed: the swirl of classic cinnamon rolls, reimagined as individual, portable treats that bake up light and fluffy, with the same caramel-kissed filling you love, and a frosting that elevates them to dessert status without losing their breakfast-heart. Picture a golden dome with a soft, cinnamon-gold interior, a delicate crack revealing a ribbon of cinnamon swirl, and a glossy cream cheese finish that hints at mornings spent at the kitchen counter, sleeves rolled up, making enough for the whole family—plus a few neighbors who wander by just in time for the sweet aroma to guide them straight to the cooling rack. The experience is multi-sensory: the first inhale of warm sugar and butter as they emerge from the oven; the gentle crack as you break into a cupcake to reveal its cinnamon spiral; the tangy-sweet glow of a rich frosting that clings to the crumb without overpowering it. And the flavor? Comforting, nostalgic, and totally irresistible—like a cinnamon roll and a cupcake had a delicious, flour-dusted conversation and decided to stay together forever.

The Story Behind the Dish

Cinnamon rolls themselves have a storied history that threads through European kitchens and American bakeries alike. The exact origins are a bit hazy, with cinnamon-sugar-softened dough appearing in various forms across Scandinavia, Central Europe, and beyond. In many families, cinnamon rolls became a weekend ritual—an opportunity to gather, mix, braid, and decorate as the house filled with the scent of butter and spice. Fast-forward to modern pastry culture, where bakers love to reinvent familiar favorites into approachable formats. Enter the Cinnamon Roll Cupcakes—a playful evolution that preserves the essence of the beloved pastry while translating it into a format that’s perfectly suited for celebrations, potlucks, or a Sunday brunch spread. The cupcakes offer the same delightful spiral of cinnamon-swirl through a tender crumb, but they present a neat, handheld alternative that’s easier to share and easier to portion. It’s a celebration of tradition with a wink of modern convenience, a nod to the nostalgia of home-baked cinnamon goodness, and a demonstration of how timeless flavors can be reimagined for today’s kitchen, without sacrificing warmth or depth. The idea is simple: take the comforting, iconic flavor profile of a cinnamon roll and embrace the cupcake as a vehicle for texture, sweetness, and visual appeal. The result is a dessert that feels familiar enough to comfort, yet fresh enough to feel special for a weekend brunch, a holiday morning, or a casual get-together with friends who appreciate a little whimsy with their sweetness.

Why You’ll Love This Recipe

  • Comforting flavor that bridges breakfast and dessert: warm cinnamon, brown butter notes, and a tangy-sweet cream cheese frosting.
  • Portable, shareable, and crowd-pleasing—perfect for parties, brunches, and potlucks where you want a treat that looks as good as it tastes.
  • Approachable technique with big wow-factor visuals: the swirl inside each cupcake mimics the classic cinnamon roll ribbon in a neat, bite-sized package.
  • Versatile foundation for customization: switch up spices, add a citrus zest, fold in chopped pecans or apples, or keep it classic for purists.
  • Make-ahead-friendly: bake ahead of time and assemble frosting on the day of serving, or bake and frost in advance for an events-ready dessert.
  • Kid-friendly yet sophisticated enough for adults: the flavor is universally appealing, with enough aroma and texture to impress.
  • Option to adapt for dietary needs: with mindful substitutions, you can create vegan, gluten-free, or dairy-free versions that still deliver the signature Cinnamon Roll experience.

Flavor-Driven Highlights

The hallmark of these cupcakes is the balance between the sweet, molten warmth of cinnamon-sugar and the tangy cream cheese glaze. You get a soft crumb that’s sturdy enough to hold its shape while remaining melt-in-your-mouth tender. The cinnamon-to-butter ratio should feel generous but never overpowering, allowing the subtle caramel notes from brown sugar to shine through. A touch of vanilla or almond extract can round out the depth of flavor, giving the frosting and the cake a cohesive, comforting aroma. The result is a dessert that tastes like a cross between Sunday morning breakfast and a festive celebration—comforting, nostalgic, yet fresh enough to feel special in any season.

Flavor Profile & Texture

Texturally, Cinnamon Roll Cupcakes aim for three harmonious layers. First, the cupcake crumb itself—soft, airy, and lightly crumbly with a gentle spring when pressed. It’s a delicate base that carries the spice without becoming dry. Second, the cinnamon swirl, which you’ll imagine as a delicate ribbon of warm caramel-brown sugar and butter tucked within the cake. The swirl should be noticeable but not overwhelming, creating a contrast between the tender crumb and a slightly richer, sweeter interior. Finally, the frosting—cream cheese with a hint of vanilla, lightly sweetened to balance the cinnamon’s warmth, and perhaps a light glaze that adds a glossy finish. The frosting acts as a silk road between the light cake and the deeper flavors inside, providing tang to cut through the sugar and a creamy texture that complements the crumb. When you bite into one, you should experience a gentle providence of sweetness—enough to satisfy a dessert craving, yet mellow enough to pair with a mid-morning cup of coffee or a festive brunch punch. If you’re partial to more texture, you might add a sprinkle of chopped pecans or a touch of flaky salt on top for a playful contrast that wakes up the palate with a moment of crunch and a mineral brightness that heightens the cinnamon’s spice. In short, the flavor profile is cozy, balanced, and indulgent, designed to evoke fond memories while delivering a technically appealing bake that looks as delightful as it tastes.

Occasions & Pairings

These cupcakes are at home in a wide range of settings. They shine on weekend brunch tables when you want something a touch more impressive than standard pastries, yet not as fussy as a multi-layer cake. They’re perfect for holiday breakfasts, baby showers, birthday mornings, and office celebrations where a dessert that’s both charming and comforting goes a long way. Their handheld nature makes them ideal for potlucks and parties, where guests can easily grab one with a hot cup of coffee or tea. For pairing, think creamy, dairy-forward beverages that echo the frosting’s tang, such as a lightly brewed coffee, a latte, or chai. If you want something lighter, a sparkling citrus beverage or a berry-forward iced tea can cut through the richness while maintaining the cozy theme. Sides can be as simple as fresh fruit or a light yogurt-tinged dip, but you’ll find the cupcakes don’t require heavy pairings to feel complete; they stand on their own and still feel festive when plated with a few seasonal berries or a dusting of cinnamon sugar. For holiday spreads, consider presenting them on a tiered minimalist stand or a rustic wooden board, interspersed with small sprigs of rosemary and cinnamon sticks to keep the aromatic moment alive even as guests reach for seconds.

Tips, Variations & Substitutions

Here are ideas to tailor Cinnamon Roll Cupcakes to your tastes, dietary needs, or available ingredients. Each variation keeps the spirit of the classic cinnamon roll while offering a slightly different texture, flavor emphasis, or dietary alignment.

  • Vegan version: use plant-based milk, dairy-free butter substitutes, and a vegan cream cheese for the frosting. You may need a touch more sugar or a pinch of lemon juice to balance tanginess, but the result will still feel indulgent and properly cinnamon-forward.
  • Gluten-free option: select a gluten-free flour blend designed for baking that preserves tenderness. You might add a little extra liquid to maintain moisture, as some GF flours can yield a drier crumb.
  • Nutty twist: fold in finely chopped toasted pecans or walnuts into the batter just before baking for added texture and a toasty flavor note that pairs beautifully with cinnamon.
  • Citrus lift: add a small amount of finely grated orange or lemon zest to the batter or frosting to brighten the spice with a fresh, uplifting note.
  • Brown butter enhancement: use browned butter in the batter for a deeper, nutty aroma that intensifies the caramelized edges of the cinnamon swirl.
  • Buttery glaze: finish with a light glaze made from powdered sugar and a splash of milk or lemon juice for a glossy sheen and extra sweetness that mirrors the glaze on a traditional cinnamon roll.
  • Spice variations: swap in cardamom, allspice, or a pinch of nutmeg to shift the aroma profile while staying within the cinnamon-forward family. Start with modest amounts and adjust to taste.
  • Special occasion vibes: color the frosting with a small amount of natural coloring (like beet juice for pink or matcha for green) and top with decorative sprinkles shaped like cinnamon sticks or stars for holidays and celebrations.
  • Smaller bite-size version: bake in mini muffin tins for bite-sized treats that are even easier to share and perfect for a tasting party or a festive brunch buffet.
  • Make-ahead frosting: keep the frosting refrigerated and frost cupcakes just before serving to maintain peak texture and color; or frost ahead and refrigerate, bringing to room temperature before serving for a softer frosting.

Storage & Make-Ahead Ideas

To keep Cinnamon Roll Cupcakes at their best, consider these storage and make-ahead strategies. Proper handling preserves moisture, texture, and flavor without compromising the frosting’s tang or the crumb’s tenderness. If you plan to bake ahead, you can store the unfrosted cupcakes in an airtight container at room temperature for up to 2 days. For longer storage, they freeze well—cool completely, wrap individually, and place in a freezer-safe container or bag for up to 1 month. When you’re ready to serve, thaw at room temperature and frost just before presenting. If you prefer to bake and frost in advance, you can prepare the cupcakes and frost them, then cover and refrigerate for up to 24 hours. Bring them back to room temperature for about 30 minutes before serving to re-soften the crumb and let the frosting set to its best texture. For guests with dietary needs, make separate batches using your chosen substitutions and keep them clearly labeled to prevent cross-contamination. Lastly, keep the frosting in a cool, airtight container to prevent it from spreading too thin or absorbing odors from the fridge; bring it to a comfortable spreading consistency before using.

Fun Facts & Trivia (Optional)

The cinnamon roll’s association with warmth and hospitality stretches across cultures. Cinnamon itself has a history that reaches back to ancient trade routes, prized not only for flavor but for its aroma, which was believed to ward off stagnation and bring good luck in many traditions. In some European households, the ritual of baking cinnamon rolls on Sundays became a family tradition, a way to gather, chat, and start the week with a shared sweetness. The idea of translating that comforting pastry into a cupcake form is a reminder that great flavors don’t have to remain fixed in one shape. Also, the cinnamon roll’s classic pairing with cream cheese frosting is a testament to how two simple components—spice and tang—can create a dynamic, memorable dessert. Finally, the visual appeal of a cinnamon swirl silhouetted against a tender crumb resonates with bakers who love to see the artistry of swirling patterns—each cupcake a tiny work of edible art that captures the essence of family breakfasts, cozy mornings, and celebratory events alike.

Final Thoughts & Serving Ideas

Whether you’re baking for a crowd or treating yourself to a sweet luxury, Cinnamon Roll Cupcakes strike a perfect balance of nostalgia and novelty. They invite lingering conversations around the table, paired with a pot of coffee or a glass of cold milk. The aroma alone can turn a kitchen into a warm, inviting space, sparking conversations about favorite memories of weekend mornings and holiday breakfasts. When plated, these cupcakes offer a visually appealing centerpiece that feels both familiar and festive—an ideal choice for any occasion that calls for a little extra comfort and a lot of smiles. Enjoy experimenting with the variations and substitutions, and tailor the cupcakes to reflect your own kitchen’s personality. After all, the best recipes are the ones that travel with you, adapting to your tastes, your pantry, and the people you’re feeding. And if you find yourself sharing these Cinnamon Roll Cupcakes with friends and family, you’re not just serving dessert—you’re delivering a warm, edible reminder of home, hospitality, and the timeless joy of a treat that tastes like a hug in a sweet, spiced bite.

Ingredients

Cinnamon Roll Cupcakes

CUPCAKE BASE

  • 2 1/2 cups all-purpose flour (or 2 1/2 cups gluten-free 1:1 baking flour)
    → Role: Provides the structure and body of the cupcakes. The flour type affects crumb and rise; if using a gluten-free blend, make sure it includes xanthan gum or add 1/4 to 1/2 teaspoon per cup of flour to mimic gluten. Preparation: sift with baking powder and salt to distribute evenly, then measure by spooning into the cup and leveling for accuracy. Tip: avoid overmixing once dry ingredients are added to keep the crumb tender.
  • 1 1/2 cups granulated sugar
    → Role: Sweetness, browning, and moisture through creaminess when creamed with butter. Preparation: cream with softened butter until light and fluffy to incorporate air for a light crumb; if you prefer a less sweet cupcake, you can reduce by a small amount. Tip: creaming time and temperature affect volume more than you might expect.
  • 1/2 cup unsalted butter, softened
    → Role: Tenderizes the crumb and adds rich flavor. Preparation: allow butter to come to room temperature and beat with sugar until pale and fluffy to trap air for a delicate texture. Tip: if butter is too soft, chill slightly and continue to beat; if too hard, it won’t emulsify properly.
  • 2 large eggs, room temperature
    → Role: Bind and structure, contributing to a stable crumb and tender rise. Preparation: let eggs warm to room temperature to promote even emulsification; add one at a time to prevent curdling. Tip: room temperature ingredients mix more evenly with cold batters, yielding smoother batter.
  • 1 cup whole milk, room temperature
    → Role: Moisture and tenderness; Preparation: ensure milk is at room temperature to prevent shocking the batter when combined with butter; Dairy-free alternatives can be used (e.g., almond or soy milk) with good results, though flavor will differ slightly. Tip: if using skim milk, the batter may be slightly lighter but less moist; consider adding an extra tablespoon of melted butter if needed.
  • 2 tsp baking powder
    → Role: Primary leavening for cupcakes. Preparation: sift with dry ingredients and ensure freshness for proper rise; Tip: old baking powder loses potency, so replace if it’s past its date. For extra lift, you can add 1/4 tsp baking soda if using a tangy element later.
  • 1/2 tsp baking soda
    → Role: Additional leavening and tenderizing; Preparation: balances acidity and helps browning; Tip: works best when paired with yogurt/sour cream or milk with a touch of acid in the batter.
  • 1/2 tsp salt
    → Role: Enhances flavor and balances sweetness; Preparation: whisk with the dry ingredients to ensure even distribution; Tip: blunting sweetness with salt can improve perceived depth of flavor.
  • 2 tsp vanilla extract
    → Role: Flavor base that rounds the sweetness of the batter. Preparation: use pure vanilla for a richer aroma; addition at the creaming stage ensures it’s evenly dispersed. Tip: if using vanilla beans, scrape the seeds for extra depth.
  • 1/2 cup plain yogurt or sour cream, optional
    → Role: Adds moisture, tenderness, and a slight tang that echoes cinnamon rolls. Preparation: whisk into the wet ingredients; if using yogurt, you can reduce the milk by 2 tablespoons to keep batter the right consistency. Tip: full-fat yogurt or sour cream yields a richer crumb; skip if dairy-free is required, or use dairy-free yogurt with similar fat content.

CINNAMON SWIRL

  • 1/4 cup unsalted butter, melted
    → Role: Acts as a carrier for the cinnamon-sugar filling and gives moisture to the swirl. Preparation: let cool slightly before mixing with sugar and cinnamon to avoid cooking the eggs in the batter. Tip: using cooled butter helps the swirl stay where you place it rather than sinking to the bottom.
  • 1/3 cup packed light brown sugar
    → Role: Provides sweetness along with a caramel-like depth that complements cinnamon. Preparation: pack the sugar firmly for accurate measurement; whisk with cinnamon and a pinch of salt to distribute evenly. Tip: if you prefer a sweeter flavor, increase to 1/2 cup, but balance with extra cinnamon.
  • 2 tsp ground cinnamon
    → Role: Primary flavor for the cinnamon roll effect. Preparation: use freshly ground cinnamon if possible for a stronger aroma; sift to remove any clumps, then whisk with the brown sugar. Tip: for a more pronounced swirl, use 2 1/2 to 3 tsp; for a subtler swirl, keep at 2 tsp.
  • Pinch of salt
    → Role: Balances the sweetness and enhances spice aroma. Preparation: add to the cinnamon-sugar mixture to keep flavors well-rounded. Tip: omit if using salted butter, or adjust other salt accordingly.

CREAM CHEESE FROSTING

  • 8 oz cream cheese, softened
    → Role: Tangy, creamy base that contrasts the sweetness of the cupcakes. Preparation: soften to room temperature and beat with a portion of the butter to create a smooth base; refrigerate briefly if too soft. Tip: avoid overheating the mixture to prevent grease separation; if it looks loose, chill and rebeat briefly.
  • 1/4 cup unsalted butter, softened
    → Role: Lightens the tangy cream cheese, helping with spreadability and piping control. Preparation: beat until completely smooth with the cream cheese; ensure there are no lumps. Tip: use softened butter to prevent graininess in the frosting.
  • 2 cups confectioners’ (powdered) sugar
    → Role: Sweetens and thickens frosting for piping. Preparation: sift to remove lumps, then beat gradually into the cream cheese mixture until smooth. Tip: adjust thickness by adding more sugar for stiffer piping or a splash of milk for a looser glaze—measure gradually to avoid over-thinning.
  • 1 tsp vanilla extract
    → Role: Flavor depth that rounds the tang of the cream cheese. Preparation: beat in with the sugar until evenly incorporated. Tip: use pure vanilla for best aroma; add a touch of salt if frosting tastes flat.
  • Pinch of salt
    → Role: Enhances sweetness and boundary flavors. Preparation: whisk into frosting to balance flavors; tip: skip if using salted butter.

OPTIONAL TOPPINGS

  • 1/2 cup chopped walnuts or pecans, toasted (optional)
    → Role: Add crunch and a toasty contrast to creamy frosting. Preparation: toast nuts in a dry skillet over medium heat for 3–5 minutes or in a 350°F (175°C) oven for 6–8 minutes until fragrant; cool and chop finely for even distribution. Tip: toast enhances aroma; store leftovers airtight to maintain crunch.
  • Ground cinnamon for dusting
    → Role: Finish with aroma and visual appeal. Preparation: dust a light layer over the frosting just before serving to preserve scent; tip: a fine sieve provides a delicate, even coating.
  • Caramel sauce or maple glaze for drizzling (optional)
    → Role: Additional sweetness and a glossy finish. Preparation: drizzle after frosting has set to avoid sliding; store leftovers in the fridge and rewarm slightly before serving. Tip: use a thin drizzle to avoid overwhelming the cupcake structure.

Instructions

  • Preheat your oven to 350°F (175°C) and line a 12-cup muffin tin with paper liners or grease it well.

    → This ensures the muffins do not stick to the tin and makes them easier to remove after baking, while liners help maintain a tidy crumb and clean edges on each cupcake.
  • Whisk together the dry ingredients: 2 1/2 cups all-purpose flour (or gluten-free 1:1 baking flour) with 2 tsp baking powder, 1/2 tsp baking soda, and 1/2 tsp salt until evenly distributed.

    → Proper distribution of leavening and salt prevents uneven rise and ensures a balanced flavor; sifting breaks up lumps for a tender crumb and accurate measurement.
  • Cream the 1/2 cup unsalted butter with 1 1/2 cups granulated sugar in a large bowl on medium speed until pale and fluffy, about 3–4 minutes.

    → Creaming traps air, which expands during baking to yield a light, tender crumb; scrape the bowl midway to ensure even incorporation.
  • Add 2 large eggs, one at a time, beating well after each addition until the mixture looks smooth and glossy.

    → Room-temperature eggs emulsify more evenly with butter, preventing curdling and creating a stable, homogeneous batter.
  • Beat in 2 teaspoons vanilla extract until fully incorporated.

    → Vanilla provides depth and aroma; distributing it early ensures an even fragrance throughout the batter rather than streaks.
  • In a separate bowl, whisk 1 cup whole milk with 1/2 cup plain yogurt or sour cream (if using) until smooth.

    → Yogurt or sour cream adds tenderness and a gentle tang that echoes cinnamon rolls; warming dairy to room temperature helps maintain a smooth emulsion when folded into the batter.
  • With the mixer on low, alternately add the dry ingredient mixture and the milk mixture to the butter-sugar-egg base, starting and ending with dry, mixing until just combined after each addition.

    → Alternating dry and wet ingredients prevents overdeveloping gluten (or its gluten-free equivalent) and yields a uniform, tender crumb; stop as soon as there are no visible dry streaks.
  • Prepare the cinnamon swirl by whisking together 1/4 cup melted unsalted butter, 1/3 cup packed light brown sugar, 2 tsp ground cinnamon, and a pinch of salt until smooth.

    → A cohesive swirl distributes cinnamon evenly without clumping; cooled melted butter helps the swirl stay suspended in the batter rather than sinking or cooking the eggs.
  • Divide the batter evenly among the prepared muffin cups to about one-third full, then spoon a teaspoon of the cinnamon swirl onto the center of each cup; use a toothpick or small skewer to gently swirl the filling into the batter, then cover with the remaining batter.

    → Layering with a swirl creates the signature cinnamon-roll ribbon; swirling too aggressively can push the filling to the surface or bottom, so aim for a gentle marble pattern.
  • Bake the cupcakes in the preheated oven at 350°F (175°C) for 18–22 minutes, or until a toothpick inserted into the center comes out with a few moist crumbs; rotate the pan halfway through to promote even browning.

    → The toothpick test confirms doneness without overbaking; rotation ensures uniform color and rise across all cups by mitigating oven hot spots.
  • Meanwhile, prepare the cream cheese frosting by beating 8 oz cream cheese and 1/4 cup unsalted butter in a medium bowl until smooth and creamy; gradually beat in 2 cups confectioners’ sugar, then beat in 1 tsp vanilla extract and a pinch of salt.

    → A smooth, cohesive frosting provides a glossy, scoopable finish that pipes cleanly; adding sugar gradually prevents graining and ensures stable texture.
  • Transfer the frosting to the refrigerator and chill for 10–15 minutes to firm slightly for easier piping.

    → A firmer frosting holds its shape when piped on top of cooled cupcakes and resists sliding off the curved surfaces.
  • Allow the cupcakes to cool completely on a wire rack before frosting to prevent the frosting from melting or sliding off.

    → Fully cooled crumbs provide a stable base for frosting, ensuring clean presentation and better flavor perception.
  • Pipe or spread the cream cheese frosting onto the cooled cupcakes in a smooth swirl or rosette, holding the bag at a 45-degree angle and applying even pressure to achieve a neat, uniform layer.

    → Proper piping technique yields an attractive finish and consistent frosting thickness; practice a steady wrist motion and stop before the tip touches the surface to avoid dragging frosting.
  • Optional toppings: sprinkle 1/2 cup chopped walnuts or pecans, toasted, and dust lightly with ground cinnamon; drizzle with caramel sauce or maple glaze after frosting has set.

    → Toasted nuts add crunch and aroma, while a cinnamon dust enhances aroma and visuals; a light glaze provides a glossy finish without compromising the frosting’s grip.
  • Store the finished cupcakes refrigerated in an airtight container for up to 3 days, and briefly rewarm before serving if desired.

    → Refrigeration slows spoilage and helps the frosting set; slight warming revives aroma and softens the crumb for a closer-to-fresh-baked experience.

Notes

These cinnamon roll cupcakes are a cozy treat that captures the warm spice of cinnamon rolls in cupcake form. The tender vanilla cake and the swirled cinnamon-sugar filling with tangy cream cheese frosting pair beautifully for a celebratory breakfast or indulgent dessert. You can customize them by adjusting the amount of cinnamon in the swirl, stirring in chopped nuts for crunch, or adding a drizzle of caramel for extra sweetness. They freeze well when baked and cooled; freeze unfrosted to keep the crumb intact, then frost after thawing for best texture. For dairy-free versions, use plant-based cream cheese and butter substitutes and a dairy-free yogurt in the batter if desired. If you’re using gluten-free flour, make sure the blend includes xanthan gum or add 1/4 to 1/2 teaspoon per cup of flour to mimic gluten and keep the crumb tender. Use room-temperature ingredients to help emulsification and rise; avoid overmixing once the dry ingredients are added to maintain a light, open crumb. For frosting, soften the cream cheese and butter, beat until smooth, then gradually beat in powdered sugar and vanilla; chill briefly if it becomes too loose. Finish with a light dusting of cinnamon or a caramel drizzle just before serving. Store leftovers refrigerated for up to 4–5 days and rewarm slightly for best texture.

Tips

Tips and Tricks for Cinnamon Roll Cupcakes

  • Room-temperature ingredients: Keep butter, eggs, and milk at room temperature before mixing to improve emulsification and a tender crumb. If short on time, place eggs in warm water for 5–10 minutes and measure milk warm rather than hot.
  • Fresh leavening is key: Use freshly opened baking powder and baking soda for optimal rise. If your powder is older than 6 months, replace. For extra lift, you can add 1/4 tsp baking soda if you’re using a tangy dairy (yogurt) in the batter.
  • Creaming matters: Cream the butter and sugar until pale and fluffy to trap air. This aeration helps light, fluffy cupcakes; under-creaming leads to denser texture.
  • Flour guidance (gluten-free): If using gluten-free 1:1 blend, ensure it contains xanthan gum or add 1/4–1/2 tsp per cup of flour to mimic gluten. Sift with baking powder and salt to distribute evenly; avoid overmixing once dry ingredients are introduced.
  • Texture control with mix-ins: Do not overmix after adding dry ingredients; mix until JUST combined to maintain a tender crumb.
  • Cinnamon swirl technique: To prevent the swirl from sinking, cool melted butter slightly before mixing with brown sugar and cinnamon, and layer batter and swirl in two steps: 1) fill cups halfway with batter, 2) spoon cinnamon swirl and lightly swirl with a toothpick, then top with remaining batter. This creates distinct cinnamon ribbons.
  • Even lift and dome control: Fill cupcake tins 2/3 full to prevent doming; rotate trays halfway through baking for even browning.
  • Temperature and doneness: Bake at 350°F (175°C) and start checking around 18–20 minutes for doneness with a toothpick (a few moist crumbs are okay). If tops brown too fast, tent with foil briefly.
  • Cream cheese frosting stability: Soften cream cheese and butter to room temp, then beat until completely smooth before adding sugar. Add powdered sugar gradually and fold in to maintain gloss. If frosting looks loose, refrigerate 15–20 minutes to firm up before piping; if too stiff, whisk in a teaspoon of milk or cream until smooth.
  • Flavor balancing: A pinch of salt in the frosting enhances sweetness; a touch of vanilla adds depth; consider a tiny pinch of cinnamon in the frosting for a cohesive cinnamon-forward dessert.
  • Make-ahead and storage: Frosted cupcakes are best the same day; you can refrigerate unfrosted cupcakes up to 2 days and frost before serving. Unfrosted cupcakes freeze well for up to 2–3 months; thaw at room temperature and frost fresh for best texture. Frosting can be made a day ahead and stored refrigerated; bring to room temperature and rebeat before piping.
  • Toasting nuts and toppings: If using toasted walnuts or pecans, cool completely before topping to keep crunch; dust with a little extra cinnamon for aroma before serving. For drizzle, apply caramel or maple glaze after frosting has set to avoid sliding.
  • Allergen-friendly option: For dairy-free, use dairy-free yogurt or sour cream, dairy-free butter substitutes, and a plant-based cream cheese; note flavor and texture may vary slightly.

FAQ

What are cinnamon roll cupcakes?

They are vanilla cupcakes that are swirled with a cinnamon-sugar filling and topped with a tangy cream cheese frosting, designed to capture the flavors of a cinnamon roll in a convenient cupcake form.

What ingredients do I need for the batter, filling, and frosting?

For about 12 cupcakes:

Batter: 1 1/2 cups all-purpose flour, 1/2 cup granulated sugar, 1 1/2 tsp baking powder, 1/4 tsp salt, 1/2 cup milk (dairy or non-dairy), 1/4 cup unsalted butter (melted), 1 large egg, 1 tsp vanilla extract.

Cinnamon swirl filling: 1/4 cup unsalted butter (melted), 1/3 cup light brown sugar, 2 tsp ground cinnamon.

Cream cheese frosting: 4 oz cream cheese (softened), 3 tbsp unsalted butter (softened), 1 cup powdered sugar, 1/2 tsp vanilla extract, 1–2 tbsp milk (as needed).

Optional glaze: a few teaspoons milk with powdered sugar to reach desired pourable consistency.

Notes: For dairy-free versions, use plant-based milk and dairy-free cream cheese/butter; for gluten-free, use a 1:1 gluten-free flour blend that contains xanthan gum if your mix requires it.

What equipment do I need?

Muffin tin with paper liners, mixing bowls, whisk or electric mixer, spatula, small spoon or cookie scoop, toothpicks for swirling, cooling rack, and measuring cups/spoons.

How do I prepare the cinnamon swirl filling?

Combine the melted butter, brown sugar, and cinnamon in a small bowl until smooth. This mixture should be thick enough to hold its shape when dolloped into the batter. Set aside until ready to use.

What temperature and how long do the cupcakes bake?

Preheat to 350°F (175°C). Fill lined muffin cups about 2/3 full with batter, add a small dollop of the cinnamon filling, then cover with a bit more batter. Bake 18–22 minutes, or until a toothpick inserted into the center comes out with a few moist crumbs. Rotate the pan halfway through for even baking.

How do you make the cream cheese frosting?

Beat the cream cheese and butter together until smooth and creamy. Gradually add powdered sugar, then vanilla. If the frosting is too thick, add a little milk a teaspoon at a time until it reaches a spreadable consistency. Chill 10–15 minutes before piping if you want it firmer.

How should I assemble and bake the cupcakes?

Line a muffin tin and pre-portion batter into each liner (about 2/3 full). Spoon or dollop a portion of the cinnamon swirl filling onto the batter in each cup, then cover with a little more batter. Use a toothpick or skewer to gently swirl the filling into the batter for a marbled effect. Bake as directed, cool completely, then frost with the cream cheese frosting. Optional: drizzle with a light glaze.

How should I store leftovers and how long do they keep?

Store cupcakes in an airtight container in the refrigerator for 3–4 days. Bring to room temperature before serving for best texture. You can freeze unfrosted cupcakes for up to 2 months; thaw in the refrigerator and re-frost before serving. Frosted cupcakes can also be frozen, but the frosting may become a bit softer after thawing.

Can I make these ahead or freeze them?

Yes. You can mix the batter and swirl filling, then refrigerate the batter for up to 12 hours before baking. For freezing, freeze baked (unfrosted) cupcakes in airtight containers; thaw and then frost. Freezing the batter or unbaked batter in the pan is more delicate, so freeze baked or unfrosted cupcakes instead for best results.

Can I adapt this recipe for gluten-free, dairy-free, or vegan diets?

Yes. For gluten-free, use a 1:1 gluten-free flour blend that contains xanthan gum. For dairy-free, substitute with plant-based milk and dairy-free cream cheese and butter for the frosting. For vegan, you can replace the egg with a flax egg (1 tablespoon ground flaxseed + 3 tablespoons water, per egg) and use a vegan cream cheese and vegan butter for the frosting; ensure any glaze uses a vegan milk. Keep in mind that texture may vary slightly with substitutions, especially for gluten-free or vegan versions.

Introduction / Hook

There’s something irresistibly comforting about a cookie that feels both familiar and a touch unexpected. Greek yogurt in a chocolate cookie might sound unconventional at first, but take a bite and you’ll discover a symphony of textures and flavors that feels destined to become a weekday ritual and a weekend treat all at once. Imagine a tender, almost fudgy center that clings to the palate, offset by a delicate lift from the yogurt’s tang—like a secret you uncover in the very first bite. The aroma wafts through the kitchen as chocolate metropolitans—the deep, glossy scent of cocoa—mingles with a subtle dairy brightness that hints at cozy breakfasts and late-night indulgences alike. These cookies are the kind that disappear quickly from a plate, leaving behind a sense of soft nostalgia and a promise that tomorrow you’ll bake them again, just to chase that first magical bite once more.

What makes them especially inviting is not just their flavor, but their texture and the story they tell. They’re not the dry, crumbly kind you might expect from a classic chocolate cookie; they’re moody, moist, and marvelously chewy, with a crisp edge that provides the perfect contrast. The Greek yogurt acts as a culinary bridge—adding moisture without heaviness, a whisper of tang that brightens the chocolate, and a tenderness that stays with you long after the last crumb has vanished. It’s a dessert that knows how to keep a secret: you’ll savor the first bite, then discover new notes with every subsequent nibble, as if the cookie is revealing its personality layer by layer.

The Story Behind the Dish

Greek yogurt has traveled a long, delicious path from the table of Mediterranean households to the modern pantry, where it has earned a reputation for velvet creaminess and a bright, tangy bite. Its rise is intertwined with the history of yogurt itself—an ancient technique of fermenting milk that civilizations refined across continents. What makes Greek yogurt distinct is straining away much of the whey, leaving a thicker, richer product that behaves differently in baked goods. Bakers discovered that this creaminess could replace heavier fats or enrich texture without making cookies feel heavy or greasy. The result? Cookies that offer a dance of moisture and structure, with a crumb that stays soft even after cooling, rather than drying out as some traditional cookies do.

In many kitchens—Greek, Mediterranean, and beyond—yogurt has long been a partner to dark chocolate, balancing bitterness with a touch of lactic sweetness. The idea of pairing yogurt with chocolate isn’t new in dessert theory, but translating it into a cookie format invites playful experimentation: you get the best of both worlds—a pillowy interior from the yogurt and a glossy chocolate exterior that crackles slightly when warm. This particular riff on chocolate cookies honors that heritage while offering a modern twist. It’s a nod to the way traditional ingredients can be repurposed to create something that feels both nostalgic and contemporary—perfect for sharing with family and friends who crave comfort without compromising on nuance.

For many cooks, yogurt in baking is a reminder of improvised breakfasts that turn into a sweet afternoon snack. It’s the magic of using what you have in the pantry to create something you’ll be proud to present to guests or to enjoy with a mug of tea after a long day. The cookies embody that ethos: simple, honest ingredients transformed through intention and care into something greater than the sum of its parts. They’re a testament to the idea that comfort foods can surprise us with subtle sophistication, and that texture—soft center, delicate crumb, slightly crisp edges—can elevate a humble chocolate recipe into something worthy of a special moment.

Why You’ll Love This Recipe

  • Moist, chewy interior thanks to the Greek yogurt, which keeps the cookies tender without making them sappy or heavy.
  • Bright chocolate flavor tempered by a tangy undertone that lingers pleasantly on the palate.
  • Simple pantry ingredients come together quickly, making these cookies ideal for spur-of-the-moment baking sessions.
  • Versatile texture with a satisfying bite—crisp edges that give way to a soft center—perfect for dunking in milk or coffee.
  • Family-friendly and crowd-pleasing—they strike a balance between indulgence and approachability, suitable for gatherings, school lunches, or a cozy night in.
  • Adaptable for diets with smart substitutions (gluten-free flours, dairy-free yogurt options) that keep the spirit of the recipe intact.
  • Great make-ahead potential—dough can rest in the fridge to deepen flavor, or be frozen for future baking emergencies when the cookie craving strikes.

Notes on Accessibility and Flavor Layers

One of the delights of this recipe is how you can tailor it to your taste without sacrificing the magic of yogurt’s role. If you’re a purist who loves deep chocolate, you can use a high-percentage cacao or add a pinch of espresso powder to intensify the chocolate notes. If you prefer a lighter sweetness, you can adjust sugar levels or opt for a small amount of coconut sugar for a hint of caramel. The yogurt offers not just moisture but a gentle acidity that makes the chocolate pop, and you can scale that brightness up or down by choosing a yogurt with a stronger or milder tang. The result is a cookie that feels custom-made for your kitchen and your mood, whether you’re baking for a cozy family night or for gifting to friends who adore chocolate with a sophisticated edge.

Flavor Profile & Texture

At first glance, these cookies present a glossy, inviting surface that hints at the softness inside. When you bite in, you’ll notice a multi-layered flavor experience: a rich, cocoa-forward profile with a subtle, almost vanilla-like sweetness that’s tempered by the yogurt’s tang. The tang is not sharp; it’s a gentle luminosity that lifts the chocolate, making the chocolate notes seem more vibrant rather than cloying. The texture is where the magic truly reveals itself. The exterior catches a slight crisp, providing a delicate snap as you bite, but the interior remains remarkably soft and tender—like a cross between a classic chewy cookie and a brownie’s fudgy heart. The yogurt keeps the crumb cohesive, preventing the dough from drying out while still allowing the cookies to hold their shape after cooling. It’s a balance of moisture and structure that makes you want to reach for another, and another, until the plate is nearly empty.

The balance of flavors can be described as a quiet, luxurious dance. The chocolate brings depth and comfort—the kind of familiarity that makes your senses feel grounded. The yogurt introduces a fresh, bright note that cuts through the richness, ensuring the sweetness never overwhelms. If you ever wonder how to achieve that perfect cookie texture—soft, not cakey, moist but not gummy—this approach offers a reliable blueprint: yogurt as the quiet collaborator that elevates both taste and texture, without stealing the spotlight from chocolate’s charisma.

Occasions & Pairings

These cookies are versatile enough to shine in a variety of settings, from everyday snacking to special occasions. Here are some ideas for serving and pairing:

  • Weeknight indulgence: bake a small batch for a comforting finish to dinner or a late-night treat with a glass of milk or a cup of tea.
  • Afternoon tea or coffee breaks: the cookies’ chew and chocolatey aroma pair beautifully with hot beverages, especially dark roast coffee or a cappuccino with a light dusting of cocoa.
  • Cookie exchanges and gifting: package cookies in decorative tins or bags for thoughtful, homemade gifts that travel well when kept in airtight containers.
  • Family celebrations: a tray of these cookies can stand in for richer desserts at casual gatherings, offering adult-friendly sophistication with kid-friendly familiarity.
  • School lunches and picnics: they hold up well in lunchboxes and can be enjoyed at room temperature, making them practical for on-the-go cravings.

Suggested pairings include a tall glass of a creamy beverage, such as a latte or a frothy milkshake, as well as delicate accompaniments like vanilla bean ice cream, a dollop of whipped cream, or a scattering of flaky sea salt to heighten the chocolate’s edge. For a more indulgent dessert course, serve with a small dish of berry compote or chocolate sauce to create a dual texture experience—soft cookies meeting a glossy, slightly tart fruit note.

Tips, Variations & Substitutions

Happy experimentation is the heart of baking, and this recipe is a friendly canvas for customization. Here are practical ideas to tailor the cookies to your preferences, dietary needs, or pantry inventory:

  • Yogurt variations: use full-fat Greek yogurt for a richer mouthfeel, or Greek-style yogurt with 2% fat for a lighter result. For dairy-free options, swap in a high-quality plain dairy-free yogurt (almond, coconut, or cashew) that contributes creaminess without overpowering other flavors.
  • Flour adaptations: the base is forgiving. If you need gluten-free, try a 1:1 GF flour blend that behaves similarly to all-purpose flour. For a nuttier profile, substitute a portion of the flour with finely ground almond flour, but adjust the hydration as needed to maintain the dough’s cohesion.
  • Sweetness control: you can adjust the sugar to suit your taste. If you prefer less sweetness, reduce granulated sugar by a few tablespoons and add a touch of maple syrup or honey for a gentle caramel note. If you crave extra richness, a tablespoon of brown sugar can deepen the flavor and enhance moisture.
  • Chocolate variations: swap in semisweet or dark chocolate chunks, or fold in a mix of chips—dark for intensity and milk chocolate for a mellower finish. A pinch of espresso powder enhances chocolate aroma without turning it into a coffee-flavored cookie.
  • Add-ins: a handful of toasted nuts (walnuts, hazelnuts) adds crunch; a scattering of flaky sea salt on top just before baking elevates the chocolate’s presence. Dried cherries or orange zest can introduce bright, fruity notes that play off the yogurt tang.
  • Texture tweaks: for a chewier center, chill the dough briefly before portioning and flatten the cookies slightly for uniform thickness. For thicker cookies with a more pronounced center, use less spreading dough and keep them spaced further apart on the baking sheet.
  • Flavor twists: fold in a teaspoon of vanilla bean paste or a hint of almond extract to enhance the nutty sweetness of the yogurt. A pinch of smoked paprika can surprise with a subtle, savory edge for a unique dessert experience.
  • Vegan option: use a dairy-free yogurt and a plant-based butter substitute that operates well in cookies, keeping in mind that texture may vary slightly due to the water content in non-dairy yogurts.

Storage & Make-Ahead Ideas

One of the practical joys of cookies is how well they adapt to advance planning. Here are reliable strategies to maximize flavor and texture while keeping kitchen time efficient:

  • Make-ahead dough: you can refrigerate the dough for up to 3 days before baking. Chilling helps deepen flavors and controls spread, resulting in cookies with a more uniform shape and a more pronounced center chew.
  • Freezing dough: portion the dough into balls and freeze on a sheet tray, then transfer to a freezer bag. Frozen dough balls bake directly from the freezer with a few extra minutes of bake time. This is ideal for spontaneous cookie cravings or stocking the freezer for gatherings.
  • Leftover baked cookies: store in an airtight container at room temperature for up to 3 days. For longer storage, freeze baked cookies in a single layer, then transfer to a bag; they’ll stay good for up to 2 months. Reheat gently in a low oven or a quick 15-second microwave interval to refresh their softness.
  • Texture maintenance: to maintain chewiness, avoid leaving cookies exposed to air for extended periods. A quick reheat can restore and refresh texture, but best results are achieved when they’re kept sealed and consumed within a few days.

Fun Facts & Trivia (Optional)

Did you know that yogurt itself is a byproduct of fermentation—an ancient technique that has been used to preserve and transform dairy into something both nourishing and delicious? The tang in yogurt comes from lactic acid produced by beneficial bacteria during fermentation, a process that not only adds brightness to desserts but can also aid in digestion for some people. The term yogurt originates from Turkish and Persian roots, reflecting a long history of dairy culture that thrived in climates where fresh milk could be transformed into a tangy, spoonable delight with remarkable staying power. When yogurt is incorporated into baking, it often replaces some fat or adds moisture, but what makes it special is how it interacts with gluten or flour to influence crumb structure. In cookies, the yogurt particles can help create a more tender crumb, reducing the risk of a dry bite while still allowing the cookie to hold its shape and showcase a glossy exterior that hints at its fudgy interior.

Beyond the science, there’s a cultural layer to Greek yogurt that resonates with many home cooks. It evokes images of sunlit breakfasts, bowls of creamy yogurt crowned with honey, walnuts, and fresh fruit, and the Mediterranean kitchen’s balance of bright acidity, rich dairy, and stone-ground chocolate decadence. Bringing that balance into a chocolate cookie is a nod to shared plates, late-night conversations, and the joy of turning pantry staples into something that feels special. It’s a reminder that cookies aren’t just desserts; they’re a way to tell a story with flavors that echo memories, travels, and the comfort of home.

Ingredients

Cookie Dough Base
  • 1 3/4 cups all-purpose flour
    → All-purpose flour provides the structure for the cookies. It forms the gluten network that gives the cookies their chew and body, while still allowing the dough to spread into a classic round shape as it bakes. Measure by gently spooning flour into the cup and leveling off to avoid packing. If you need a gluten-free version, substitute with a 1:1 gluten-free all-purpose flour blend for a similar texture.
  • 1/2 teaspoon baking soda
    → Baking soda acts as a leavening agent and also contributes to browning and spread. It reacts with the acidity from the Greek yogurt to produce a gentle lift, helping cookies stay tender rather than dry. Ensure even distribution by whisking with the dry ingredients.
  • 1/4 teaspoon baking powder
    → Baking powder provides a secondary lift and a lighter crumb. It helps cookies puff slightly in the center while the edges set, resulting in a balanced texture. Always sift or whisk into the flour to avoid uneven pockets of leavening.
  • 1/4 teaspoon fine salt
    → Salt enhances overall flavor and helps balance the sweetness. If you use salted butter, reduce this amount by half. Dissolve in the dry mixture for even distribution.
  • 1/2 cup unsalted butter, melted and cooled
    → Melted butter creates a chewy, rich cookie with a glossy crumb. The fat coats flour to limit gluten development, yielding a tender texture. Allow the butter to cool slightly to prevent cooking the egg or yogurt when added. For deeper flavor, browned butter can be used, but cool before mixing.
  • 3/4 cup granulated sugar
    → White sugar provides sweetness and helps with browning and crisp edges. It also contributes to spread as the cookies bake. Keep at this amount to avoid overly dry crumbs; you can adjust slightly for softer cookies.
  • 1/2 cup light brown sugar, packed
    → Brown sugar adds moisture and chewiness due to its molasses content, giving a softer center and richer flavor. Pack the sugar to ensure consistent moisture. If your brown sugar is very dry, warm the bag briefly or add a teaspoon of water to refresh.
  • 1 large egg
    → Egg acts as a binder and helps set the structure. At room temperature, eggs emulsify more easily with butter, yogurt, and sugar, resulting in an even texture. If eggs are cold, they’ll chill the dough momentarily, but will smooth with mixing.
  • 1/2 cup plain Greek yogurt
    → Greek yogurt adds moisture and tenderness with a tangy note, while also boosting protein for a softer crumb. Use full-fat yogurt for best flavor and structure; whisk until smooth to avoid lumps. If very thick, whisk in a teaspoon of water to loosen slightly.
  • 1 teaspoon pure vanilla extract
    → Vanilla enhances overall flavor, harmonizing with the yogurt’s tang and the chocolate sweetness. Use pure vanilla extract for a richer aroma; avoid imitation vanilla for the best depth of flavor.
  • 1 cup semisweet chocolate chips or chopped chocolate
    → The star of the cookies, chocolate provides sweetness and melty pockets of goodness. Chips distribute easily; if using chopped chocolate, cut into ~1/2 inch chunks for noticeable bites. Fold in gently to avoid overwork; chilling the dough briefly can improve distribution.
Optional Add-ins
  • 1/2 cup chopped walnuts or pecans, toasted (optional)
    → Adds a satisfying crunch and nutty contrast to the soft cookie. Toasting brings out the nutty oils and aroma; cool completely before folding into dough. Chop into roughly 1/4 inch pieces for even distribution.
  • 1/2 cup extra semisweet chocolate chips or chunks (optional)
    → For a more chocolate-forward cookie, add an additional batch of chips or chunks. Fold in after combining the dry ingredients to keep chips evenly dispersed without sinking.
  • 1/4 cup sweetened shredded coconut (optional)
    → Light coconut texture and a hint of tropical flavor. If using, gently toast the coconut to heighten aroma before stirring into the dough. Use in small amounts to avoid overpowering the chocolate and yogurt.
  • Pinch flaky sea salt, for finishing (optional)
    → Finishing salt enhances chocolate flavor and balances sweetness. Sprinkle a small pinch over warm cookies right after baking to help the salt adhere and intensify the chocolate notes.

Instructions

  • Preheat your oven to 350°F (175°C) and line a baking sheet with parchment paper or a silicone baking mat to prevent sticking and promote even spreading.
    → This ensures the cookies release cleanly after baking and that they spread evenly, avoiding sticking and uneven browning.
  • Whisk together 1 3/4 cups all-purpose flour, 1/2 teaspoon baking soda, 1/4 teaspoon baking powder, and 1/4 teaspoon fine salt in a medium bowl until evenly distributed.
    → Even distribution of leaveners and salt ensures uniform lift and balanced flavor in every cookie.
  • In a large mixing bowl, whisk 1/2 cup melted and cooled unsalted butter with 3/4 cup granulated sugar and 1/2 cup tightly packed light brown sugar until the mixture is smooth and glossy.
    → Whipping in the melted butter creates a tender, chewy crumb by limiting gluten development; the sugars also help aerate and promote browning.
  • Beat in 1 large egg, 1/2 cup plain Greek yogurt, and 1 teaspoon pure vanilla extract until the batter is smooth and homogeneous.
    → Room-temperature egg emulsifies better with the fats and yogurt, yielding an even crumb and preventing curdling.
  • Fold the dry ingredients into the wet mixture in two or three additions, mixing just until the flour streaks disappear and no large patches remain.
    → Do not overmix; overworking develops gluten, leading to tougher cookies; a few creamy lumps are acceptable.
  • Gently fold in 1 cup semisweet chocolate chips or chopped chocolate until evenly distributed without mashing the chips.
    → Even distribution ensures every bite has chocolate and that the chips don’t sink or clump; use a light hand to keep chips intact.
  • If you are using toasted walnuts or pecans, toast 1/2 cup chopped pieces in a dry skillet over medium heat for 3 to 4 minutes until fragrant, then cool completely before folding into the dough.
    → Toasting unlocks nut oils and intensifies aroma, adding a toasty contrast to the soft cookie; cooling prevents heat from melting the chocolate when folded.
  • If you are adding an extra 1/2 cup of semisweet chocolate chips or chunks, fold them in after the dough has come together to keep chips from sinking.
    → Additional chips heighten chocolate flavor and texture, but adding them too early can cause them to melt and smear.
  • If you want to include 1/4 cup sweetened shredded coconut, toast the coconut lightly until just golden and fragrant, then fold it into the dough with the chips.
    → Toasting heightens sweetness and aroma; use sparingly so coconut does not overpower the chocolate yogurt profile.
  • Chill the dough for 20 to 30 minutes on the baking sheet or in a chilled bowl to firm the fats and control spreading during baking.
    → Chilled dough holds its shape better and yields cookies with smoother, rounder centers rather than thin, ragged edges.
  • Scoop rounded tablespoon-sized portions (or use a cookie scoop) and space them about 2 inches apart on the prepared baking sheet to allow for even spreading.
    → Adequate spacing prevents cookies from merging into one another as they bake, ensuring individual round shapes.
  • Bake in the preheated oven at 350°F (175°C) for 9 to 12 minutes, rotating the sheet halfway through for even browning; remove when the edges are set and the centers look slightly underdone.
    → The cookies will continue to set as they cool; this timing yields chewy centers with lightly crisp edges.
  • Let the cookies rest on the baking sheet for 3 to 5 minutes before transferring to a wire rack to cool completely; this helps them finish setting and makes removal easier.
    → Resting allows internal moisture to redistribute and prevents breakage when transferring to the rack.
  • Finish with a light pinch of flaky sea salt on warm cookies if desired to enhance chocolate flavor and balance sweetness; sprinkle as soon as they come out of the oven so the salt adheres to the surface.
    → Finishing salt heightens chocolate notes and provides a contrast that brightens flavors.
  • Store cooled cookies in an airtight container at room temperature for up to 5 days; keep them in a single layer to avoid sticking when still warm, which can cause loss of shape.
    → Proper storage maintains softness and keeps cookies from drying out or absorbing fridge odors.
  • Serve the cookies at room temperature or slightly warm for the best texture, allowing the chocolate to remain melty and the yogurt-driven crumb to show its tenderness.
    → The contrast between a chewy center and a gently crisp edge is most enjoyable when the cookies are fresh and not cold.

Notes

These Greek yogurt and chocolate cookies are soft, chewy, and deliciously balanced with a tangy yogurt note and pockets of melted chocolate. For best texture, use full-fat Greek yogurt and a room-temperature egg, and be sure to whisk the yogurt smooth before mixing. You can customize them by folding in 1/2 cup chopped walnuts or pecans, adding an extra 1/2 cup semisweet chocolate chips, or stirring in 1/4 cup shredded coconut for a subtle tropical touch. They freeze well: scoop the dough, freeze on a tray, then transfer to a bag so you can bake a few at a time. Finish with a pinch of flaky sea salt while cookies are warm to heighten the chocolate. If you need a gluten-free version, substitute a 1:1 gluten-free all-purpose flour blend for the all-purpose flour and ensure the yogurt is plain and unsweetened; always check that your blend contains xanthan gum or add a 1/4 teaspoon for better structure.

Tips

General dough handling tips

  • To keep cookies tender and chewy, melt the butter and allow it to cool slightly before mixing. Hot or warm butter can cook the egg or yogurt and affect texture.
  • Whisk the dry ingredients (flour, baking soda, baking powder, salt) together first. This ensures even distribution of leaveners and salt, which promotes uniform rise and flavor.
  • Measure flour correctly by spooning it into the cup and leveling off. Packing flour leads to dense cookies. If you’re gluten-free, use a 1:1 gluten-free all-purpose flour blend and expect a similar texture.

Tips for yogurt, eggs, and flavor

  • Use full-fat plain Greek yogurt for moisture and tenderness. Whisk until smooth; if very thick, whisk in 1–2 teaspoons of water to loosen slightly.
  • Eggs at room temperature emulsify better, yielding a smoother dough. If needed, warm a cold egg in warm water for a few minutes before adding.
  • Pure vanilla extract enriches the tangy yogurt. Avoid imitation vanilla for the deepest aroma.

Texture and dough consistency

  • Because the dough relies on melted butter, it will be quite soft. If it’s too loose to scoop, refrigerate 30–60 minutes to help it firm up and prevent excessive spreading.
  • A gentle fold is best when adding chocolate chips. Overmixing after adding the dry ingredients can develop gluten too much and make the cookies tougher.
  • Chilling the dough also helps with even distribution of chocolate chips and makes it easier to form uniform cookies.

Chocolate and add-ins

  • Fold in 1 cup chips or chopped chocolate gently; if you want a more chocolate-forward cookie, add extra chips after combining dry ingredients as described in the recipe.
  • To amp up crunch or nuttiness, toast nuts (walnuts or pecans) beforehand and cool completely before folding in. Chop to about 1/4 inch for even distribution.
  • For a tropical note, lightly toast the shredded coconut before adding; use sparingly to avoid overpowering the chocolate and yogurt.

Baking, cooling, and texture targets

  • Line your baking sheets with parchment or a silicone mat to prevent sticking and promote even browning.
  • Bake at about 350°F (175°C) until the edges are lightly golden and centers look slightly underdone for a chewy center, typically 9–12 minutes depending on your oven. Do not overbake to keep them soft.
  • Let cookies rest on the baking sheet for 2–5 minutes before transferring to a rack. This helps them-set and prevents breakage.

Storage, make-ahead, and substitutions

  • Store baked cookies in an airtight container at room temperature for 3–5 days. For longer life, freeze baked cookies for up to 3 months.
  • To freeze dough, portion into balls on a parchment-lined tray and freeze; transfer to a freezer bag. Bake from frozen, adding 1–2 minutes to the bake time.
  • For a gluten-free version, use a 1:1 gluten-free flour blend and expect similar texture; you may need a touch more yogurt if the dough feels dry depending on the blend.
  • Finishing touch: a pinch of flaky sea salt sprinkled on warm cookies enhances chocolate flavor and balances sweetness.

FAQ

What are the key ingredients in Greek yogurt and chocolate cookies?

Typical ingredients include all-purpose flour, baking soda (or baking powder), salt, butter (or a neutral oil), brown sugar, granulated sugar, Greek yogurt, eggs (or an egg substitute), and vanilla extract. For chocolate flavor, use chocolate chips or chunks, and you can add cocoa powder for a deeper chocolate taste. Optional: a pinch of espresso powder, and a small amount of cornstarch for tender cookies.

How does Greek yogurt affect the texture of the cookies?

Greek yogurt adds moisture and tenderness, helping the cookies stay soft and chewy with a slight tang. It can also replace some fat, giving a lighter crumb without drying out the cookies.

Can I substitute Greek yogurt with sour cream or regular yogurt?

Yes. Sour cream can be used and will add richness; regular yogurt can work as well but may be thinner. Use the same amount as yogurt. If your yogurt is very thin, consider draining briefly or using a slightly smaller amount to maintain the right dough consistency.

Are these cookies gluten-free?

The standard version uses all-purpose flour. To make a gluten-free version, substitute with a 1:1 gluten-free flour blend (preferably one that contains xanthan gum). You may need a touch more or less flour to achieve the right dough consistency. None of the ingredients are inherently gluten-free unless you choose certified gluten-free options.

What is the best baking time and temperature?

Bake at about 350°F (175°C) for 9–12 minutes, depending on your oven and cookie size. The edges should be set and the centers still look slightly soft. Let them rest on the baking sheet for a couple of minutes before transferring to a rack to cool.

How can I prevent the cookies from spreading too much?

Chill the dough for at least 30 minutes (or longer) before baking. Use uniform scoop sizes, don’t overwork the dough, and avoid overcrowding trays. If your dough is very soft, a brief chill helps control spread.

How should I store these cookies to keep them fresh?

Store cooled cookies in an airtight container at room temperature for up to 3–5 days. For longer freshness, layer with parchment and freeze, or place in a sealed container and refrigerate for up to a week. Freeze baked cookies for 2–3 months; thaw at room temperature.

Can I freeze the dough or baked cookies?

Yes. You can freeze dough portions on a parchment-lined tray until firm, then transfer to a freezer bag. Bake from frozen, adding 1–2 minutes to the bake time. You can also freeze baked cookies, well-wrapped, for 2–3 months.

How can I customize flavors or add-ins?

Mix in chocolate chips of your preferred variety (dark, milk, or white). Add chopped nuts (walnuts, pecans) for crunch, or try a swirl of peanut butter. For a mocha twist, add a pinch of espresso powder with the cocoa. You can also fold in dried fruit for a different texture.

Are there vegan or egg-free options?

Yes. Use a flax or chia “egg” (1 tablespoon ground flaxseed or chia seeds + 3 tablespoons water per egg). Substitute Greek yogurt with a dairy-free yogurt (unsweetened, plain) and use dairy-free butter or oil. Ensure your chocolate is dairy-free if needed. You may need to adjust moisture slightly to get the right dough consistency.

Any tips for achieving chewy vs. cakey cookies?

For chewier cookies, increase brown sugar slightly, use a bit less white sugar, and opt for more yogurt. Use melted butter or a higherfat fat source for chewiness. For cakier cookies, use more white sugar, a touch more flour, and chill the dough less—though they’ll still benefit from chilling. Don’t overmix the dough to keep a tender crumb.

Introduction / Hook

Imagine a bowl that greets you with gentle steam, the aroma of ginger and garlic curling up like a warm invitation. A swirl of shimmering broth, crystal-clear and comforting, cradles delicate wontons that promise a bite of savory brightness with every spoonful. Wonton soup is more than a meal—it’s a small, elegant ceremony: the quiet clink of a spoon, the whisper of chopsticks, and the pause between each mouthful as the flavors unfold. This dish embodies balance: a light, fragrant broth that allows the dumplings’ sweetness to shine, a gentle warmth that meets you where you are, whether you’re seeking nostalgia, a quick weeknight fix, or a soothing bowl to share with someone you love. It’s the kind of soup you reach for when you want nourishment that feels both timeless and timelessly accessible.

In many kitchens around the world, wonton soup carries the soft gravitas of home cooking—humble ingredients transformed by technique, time, and care. The broth often carries a whisper of soy or a kiss of sesame, enough to deepen the flavor without overpowering the dumplings. And those dumplings themselves—pillow-soft wrappers cradling a tender filling—have a way of revealing layers of texture and taste as you bite through. The experience is as much about the aroma and the memory it stirs as it is about the spoonful you savor in the moment. Whether you’re revisiting a childhood favorite or discovering a new favorite comfort dish, this wonton soup invites you to slow down, inhale deeply, and enjoy the quiet joy of a well-made bowl.

What makes this version especially inviting is its adaptability. You can dress it up with a few bright garnishes or keep it simple, letting the essence of the dumplings and the clarity of the broth carry the day. It’s a dish that travels well—from a casual weeknight dinner to a centerpiece for a small, intimate gathering. And because it’s inherently comforting and approachable, it can be a gateway to exploring broader flavors and textures: a touch of heat, a citrusy brightness, or an herbaceous lift that transforms the same basic idea into something new each time you make it.

The Story Behind the Dish

Wonton soup is rooted in the rich culinary traditions of Chinese cuisine, with Cantonese influence shaping many of the classic forms we recognize today. The delicate dumplings—pockets of wrapper cradling a savory filling—are a testament to the artistry of balance: crisp, tender wrappers meeting a flavorful interior, all carried in a broth that is clear, light, and deeply satisfying. The term “wonton” itself hints at a long history of regional variations and regional pride, evolving across tables, markets, and kitchens.

Historically, wontons were a staple in dim sum and countryside banquets, where a handful of ingredients, carefully prepared, could transform into something special. In many families, wonton soup is a dish passed down through generations, a recipe spoken in whispers of technique—how long to wrap, how to fold, how to shape the tails of dumplings so they hold their integrity in hot broth. The soup’s popularity spread far beyond its Cantonese origins, taking on local flavors and philosophies in different cities and homes around the world. Each family—and each cook—adds a unique note: a splash of rice wine here, a dusting of white pepper there, a drizzle of sesame oil, or a handful of minced scallions to finish the bowl.

Personal stories often center on the idea of a simple act becoming something meaningful. I’ve heard of grandparents who stirred their broth with a wooden spoon as the wind turned cold outside, of friends who made a batch for friends after a long day, and of kitchens where the aroma of simmering broth drew everyone to the table like a gathering chorus. Wonton soup is not just about sustenance; it’s about connection—the way a shared bowl can spark conversation, memory, and a sense of belonging. In that spirit, this rendition respects the dish’s quiet elegance while inviting you to bring your own memories, preferences, and creativity to the pot.

Why You’ll Love This Recipe

  • Fast, comforting, and adaptable for weeknights or leisurely weekends.
  • Bright but gentle flavor profile that appeals to both seasoned palates and new cooks.
  • Versatile foundations that welcome substitutions, inclusions, and regional twists.
  • Elegant simplicity: a clear broth lets the dumplings shine, with a clean, satisfying finish.
  • Family-friendly and crowd-pleasing, easy to scale up for small gatherings or to save for future meals.
  • Great vehicle for vegetables or greens, making it a nourishing option that still feels light.

Flavor Profile & Texture

The hallmark of a great wonton soup is its harmony between a delicate broth and the tender, flavorful dumplings. The broth—often a clear, pale amber—has a quiet depth. It typically carries a whisper of ginger, a note of garlic, and a touch of soy or sesame, mingling with a light aromatic body that doesn’t overwhelm the senses. This means each sip feels warming and clean, allowing the dumplings to introduce the main act. When you bite into a wonton, you experience a soft, silky wrapper that yields to a savory, sometimes juicy filling. The filling is where the soul of the soup resides: a balance of seasoned meat (traditionally pork, sometimes with shrimp) and delicate aromatics that peek through with every bite. The wrappers offer a gentle chew, not a toughness, while the filling remains juicy and well-seasoned—enough to satisfy without overpowering the subtle broth that carries everything together.

Fresh scallions or chives provide a bright, peppery lift at the end, and a light drizzle of sesame oil or a splash of rice vinegar can lift the entire bowl with a quick, fragrant finish. The textures in this dish are tactile as well as culinary: the instant warmth of the steam, the softness of the dumpling skin, the cushion of the broth, and the occasional bite of a plump dumpling filling. When you layer in additional mouthfeels—citrus zest, a whisper of chili oil, or a handful of greens you add just before serving—the soup becomes a living textural experience. It’s not a heavy bowl; it’s a gently buoyant one that invites you to slow down and savor, spoon after spoon.

Beyond tradition, there is room to tailor flavor notes. A hint of white pepper can lend subtle heat, while a few drops of chili oil bring a welcome warmth for those who crave it. A touch of sweet soy or a splash of rice wine can lend complexity without tipping the balance. The beauty of this dish is that the core is flexible: you can lean into the traditional, keep it light and clean, or push it toward a bolder, more robust profile depending on your mood and pantry.

Occasions & Pairings

Wonton soup shines in a variety of settings. It’s the quintessential weeknight comfort you can prepare after a long day, a gentle starter for a small dinner party, or a soothing bowl to share with someone who needs a little warmth. It also works beautifully on colder days when a restorative, nourishing bowl feels like a hug in a cup. Because the dish is light yet satisfying, it can be part of a larger meal or stand on its own as a gentle, comforting entrée.

Pairing ideas emphasize balance and tradition. A crisp-glass of green tea or jasmine tea complements the broth’s subtle sweetness and cleanses the palate between bites. If you choose to garnish, fresh scallions and a few cilantro leaves can brighten the bowl, while a light drizzle of sesame oil adds fragrance and depth. For a more robust experience, serve with a simple side of steamed greens or a small plate of pickled vegetables to provide a contrasting tang and crunch. For a heartier meal, consider pairing with a light noodle or a warm, steamed rice side that absorbs the flavorful broth without overpowering the dumplings.

Holiday menus can incorporate wonton soup as a refined starter or a comforting main on a cozy night. It suits intimate gatherings where conversation takes precedence and the ritual of sharing a warm bowl becomes part of the celebration. In casual settings, it’s perfect for movie nights or family Sundays when everyone craves something soothing yet satisfying. Its versatility makes it a dependable cornerstone of a versatile repertoire.

Tips, Variations & Substitutions

Make It Your Own

While the classic version is a study in restraint, this dish welcomes thoughtful deviations. Consider small changes to tailor the soup to your preferences or dietary needs. You can experiment with the filling’s components, the broth’s seasonings, and the garnishes to craft a version that feels uniquely yours.

Fillings & Folds

Traditional wontons often feature a pork-and-shrimp filling with aromatics. If you prefer a lighter bite, you can use more finely minced vegetables, tofu, or mushrooms to create a vegetarian or vegan approach. The key is to maintain a balance of texture and moisture so the filling remains juicy and the wrapper does not become gummy. For a richer flavor, a touch of soy, a hint of sesame oil, or a sprinkle of white pepper can enhance the filling without overpowering the broth.

Gluten-Free & Dietary Tweaks

If you need gluten-free options, look for gluten-free wrappers made from rice or tapioca or choose a wrapper that explicitly notes gluten-free on the package. The broth itself can remain gluten-friendly with a gentle adjustment in seasonings. For a vegan route, substitute plant-based proteins or finely chopped mushrooms, and rely on miso or mushroom-based seasonings to provide depth without animal products. Always check labels on packaged sauces or condiments to ensure compatibility with your dietary needs.

Regional Twists

Across regions, wonton soup can carry different accents. Some versions include a touch of oolong or star anise for an aromatic lift, while others lean into a peppery bite with Sichuan peppercorns. A citrus note—zest or a squeeze of lime—can add brightness, especially in warmer climates or when you want a modern twist. If you love seafood, a few chopped shrimp in the filling can echo the ocean’s sweetness, pairing beautifully with a lighter broth that highlights the natural flavors.

Storage & Make-Ahead Ideas

The beauty of wonton soup lies in how forgiving it is for make-ahead planning and storage. If you like to prepare in advance, you can separate the components to assemble quickly later. Store the broth separately from the dumplings and any greens to preserve texture and freshness. Wontons can be prepared ahead of time and kept in the freezer—uncooked or pre-formed—so you can finish a bowl in minutes when you’re ready to eat. When reheating, avoid boiling the dumplings for too long to prevent the wrappers from becoming overly soft or breaking apart. Gentle simmering or a light reheating in a warm pot is often all that’s needed to bring everything back to life.

For weekly meal-prep, you can make a batch of broth ahead of time and freeze it in portions. Thaw and bring to a gentle simmer, then add freshly made or thawed dumplings. Fresh greens should be added just before serving to maintain their color and texture. If you’re using additional toppings or garnishes, keep them separate until serving to preserve their brightness and crunch. With a little planning, this comforting dish becomes not only delicious but surprisingly convenient for busy lives and spontaneous gatherings.

Fun Facts & Trivia (Optional)

  • The word “wonton” is believed to derive from Cantonese and can be translated as “swallowing clouds,” a poetic nod to the dumplings’ delicate, cloud-like wrappers.
  • Wonton soup is a staple in many Chinese households, but it has also become a favorite in cities worldwide, where chefs reinterpret the dish with local ingredients and techniques, creating a continually evolving comfort food.
  • In some regions, wontons are served fried instead of boiled or steamed, offering a contrasting crunch against a different broth or dipping sauce—an entirely different palate experience from the soup version.
  • Dim sum culture, in which wonton soup often appears, emphasizes bite-sized delights meant to be shared in a social setting, turning an ordinary meal into a shared event of discovery and conversation.
  • The simplicity of a well-made broth is a testament to the principle that less can be more—clear, well-seasoned stock can elevate humble ingredients into something memorable.

Ingredients

Wonton Wrappers

  • 1 package wonton wrappers (square)
    → Wonton wrappers form the delicate shells that hold the filling. Choose fresh, thin wrappers and keep them covered with a damp towel to prevent drying. Moisten the edges with a small amount of water to seal; work with a single wrapper at a time to avoid tearing; avoid overfilling to prevent leaking during simmering.

Wonton Filling

  • Ground pork (pork shoulder), 1/2 pound (225 g)
    → The primary protein base for the filling; pork shoulder with about 15–20% fat yields a juicy, flavorful filling. Chill the meat briefly before mixing to help it hold together when wrapped. Gently combine with other ingredients to avoid dense, compact texture.
  • Shrimp, finely chopped, 1/2 cup (optional)
    → Adds a sweet, briny bite and moisture. Use peeled, deveined shrimp; finely mince until pieces are small and uniform. If using frozen shrimp, thaw completely and pat dry to prevent excess moisture from diluting the filling; mix evenly with pork for consistent texture.
  • Green onions, 3–4, finely chopped (include white and green parts)
    → Provides fresh aromatics and moisture; finely chop so they distribute evenly and help with binding. Reserve a small portion if you want to use some for sealing the wrappers.
  • Garlic, 1 clove, minced
    → Adds aromatic warmth that enhances the pork and shrimp flavors; mince finely or press through a garlic press for even distribution. If you’re sensitive to raw garlic, you can sauté briefly in a drop of oil before adding to the filling.
  • Fresh ginger, 1 tablespoon, grated
    → Delivers bright, peppery warmth that complements pork; grate finely so it disperses evenly and doesn’t clump. Use fresh ginger for best aroma; remove fibrous bits for a smoother finish.
  • Soy sauce, 2 tablespoons (low-sodium preferred)
    → Adds savory umami and salt to the filling. Using low-sodium soy helps control overall saltiness; taste the filling and adjust after mixing. Avoid over-salting, as the broth and wrappers will contribute salt as well.
  • Shaoxing wine (or dry sherry), 1 tablespoon
    → Deepens flavor with a subtle sweetness and complexity. If avoiding alcohol, substitute with a splash of water and a pinch of sugar, or omit entirely and increase soy slightly. Let the filling rest for a few minutes so flavors meld.
  • Sesame oil, 1 teaspoon
    → Provides a toasty, nutty aroma that rounds the filling. Use a small amount to avoid overpowering other flavors; drizzle in after mixing and fold gently to distribute without making the mixture too oily.
  • Cornstarch or egg white, 1 tablespoon cornstarch or 1 large egg white (optional)
    → Acts as a binder to keep wontons plump during simmering. Cornstarch yields a light, juicy interior, while egg white adds extra binding. Mix in with filling gently to maintain a delicate texture; avoid overworking the filling.
  • Salt and White pepper, 1/2 teaspoon salt and 1/4 teaspoon white pepper (adjust to taste)
    → Basic seasoning for the filling; since the broth and wrappers contribute salt, start with modest amounts and adjust after testing a small pinch of filling. White pepper adds subtle heat without visible specks.
  • Sugar, 1/2 teaspoon (optional)
    → A touch of sweetness can balance the savory and seafood notes; omit if you prefer a sharper profile. If used, adjust salt afterward to maintain harmony.
  • Water for sealing edges, 1–2 teaspoons as needed
    → Moisten wrapper edges with water to seal securely. Use a clean fingertip or a small brush, and work with a damp surface to prevent wrappers from sticking or tearing. Keep unused wrappers covered with a damp towel.

Broth

  • Chicken stock, 6 cups low-sodium
    → The flavorful base of the soup. Use unsalted stock to better control saltiness; simmer with ginger and garlic to extract aroma. Skim any foam and strain if desired before adding wontons. Keep the broth hot but not vigorously boiling to prevent delicate wrappers from breaking.
  • Water, 2 cups
    → Adjusts broth volume and concentration; use filtered water if your stock is salty or concentrated. Add gradually to reach your desired consistency and flavor balance.
  • Fresh ginger, 2–3 thin slices
    → Infuses the broth with warm, bright notes; simmer with stock and remove before serving to keep the broth clear and not overly gingery.
  • Salt, 1/2 teaspoon (to taste)
    → Seasoning for the broth; add gradually after tasting the stock and early additions (like soy in filling). You can balance with a splash of rice vinegar or a squeeze of citrus if the broth tastes flat.
  • White pepper, 1/4 teaspoon
    → Provides a gentle, clean heat typical of wonton soup; adjust to taste. White pepper helps keep the broth visually clear without black specks.

Vegetables

  • Napa cabbage, 2 cups, chopped
    → Adds crunch, sweetness, and body to the soup. Briefly blanch or gently wilt in hot broth to soften, then use as a textural layer in bowls. Tear or cut into bite-sized pieces to match wonton size.
  • Shiitake mushrooms, 1 cup, stems removed, sliced (optional)
    → Contribute deep umami and a meaty texture. If using dried shiitake, rehydrate in warm water until soft, then slice. Remove tough stems and pat dry to prevent cloudiness in the broth.
  • Carrot, 1 small, julienned (optional)
    → Adds color and subtle sweetness; slice thinly so they cook quickly in hot broth. You can lightly blanch before serving for more tenderness.

Garnish

  • Green onions, 2–3, thinly sliced for serving
    → Fresh, sharp flavor to brighten each bowl; slice on the bias for visual appeal and sprinkle just before serving to preserve crispness.
  • Sesame seeds, 1 tablespoon, toasted
    → Adds a nutty aroma and slight crunch; toast in a dry skillet until aromatic and sprinkle over bowls at the end to preserve texture and fragrance.
  • Chili oil or chili crisp, 1 teaspoon (optional)
    → Provides a final kick of heat and color; adjust to your tolerance and drizzle sparingly to maintain balance with the broth and delicate wonton skins.

Instructions

  • Chill the ground pork for 15 minutes in the refrigerator to firm up fat and improve binding; a cooler, slightly fat-laden filling expands slowly in the hot broth, giving a juicier texture.
    → Cold fat helps fat render and keeps the filling cohesive when formed and cooked in the simmering broth.
  • In a chilled mixing bowl, combine pork, shrimp, green onions, garlic, and ginger with soy sauce, Shaoxing wine, and sesame oil; mix gently with chopsticks in a single direction until just incorporated, avoiding overworking to keep the filling tender.
    → Gentle mixing prevents the proteins from seizing and maintains a light, juicy texture inside the wontons.
  • Season with salt, white pepper, and optional sugar, then let the filling rest for 10 minutes to meld flavors and improve binding.
    → Resting relaxes the mixture and allows moisture to distribute evenly for easier sealing.
  • Line a clean work surface and keep wonton wrappers covered with a damp towel to prevent drying and tearing as you work.
    → Moist wrappers seal more reliably and fold without cracking.
  • Place a wrapper on the work surface, keep remaining wrappers covered, and spoon about 1 teaspoon of filling into the center of the wrapper; avoid overfilling to prevent bursting during simmering.
    → Proper portioning ensures a balanced filling-to-wrapper ratio and easier sealing.
  • Moisten the inner edges of the wrapper with water using a fingertip, then fold the wrapper to form a triangle or half-moon shape and press to seal, removing any trapped air as you work.
    → Water acts as an adhesive; sealing tightly prevents filling from leaking into the broth during cooking.
  • Continue assembling the remaining wontons, placing them on a lightly floured tray as you go and covering with a damp towel to prevent drying or sticking.
    → Even spacing and moisture prevent sticking and tearing when transferring to the pot.
  • Set a pot of chicken stock and water to a gentle simmer (about 180–190°F/82–88°C) and skim any foam; maintain a steady simmer to cook delicate wrappers without breaking.
    → A calm simmer yields tender wrappers without rupturing and keeps the broth clear.
  • Add 2–3 thin slices of fresh ginger to the broth to infuse brightness, simmer 5–10 minutes, then remove the slices to keep the broth clean and balanced.
    → Ginger provides aromatics that brighten the palate and cut through the richness of pork filling.
  • Prepare vegetables by blanching napa cabbage in boiling water for 1–2 minutes until just tender, then drain; set aside any shiitake mushrooms (stems removed) and julienned carrot for quick finishing in bowls.
    → Blanching preserves color and crisp-tear texture, ensuring the vegetables contrast with tender wontons.
  • When the broth is hot and scented, gently slide the wrapped wontons into the simmering liquid one by one and simmer 4–6 minutes, turning once; they are done when the wrappers are translucent and the filling is opaque and firm.
    → Gentle simmer prevents bursting and ensures the filling cooks through evenly.
  • Assemble bowls by placing napa cabbage, shiitake (if using), and carrot in each serving vessel, then ladle hot broth with wontons over top, ensuring an even distribution of vegetables and filling.
    → This builds texture and flavor layers from the first bite onward.
  • Finish each bowl with sliced green onions, a sprinkle of toasted sesame seeds, and a drizzle of chili oil or chili crisp if desired; serve immediately to preserve aroma and texture.
    → Fresh aromatics and a touch of heat heighten the dish and complement the delicate wrappers.
  • Offer extra bowls promptly and remind guests to sip the broth first to appreciate the balance of savory filling, crisp vegetables, and fragrant spices.
    → Proper pacing ensures each bite remains warm and flavorful, maximizing the experience of the soup.

Notes

These wonton soup notes guide you through assembling a cozy, flavorful bowl of wonton soup with pork-and-shrimp filling, a bright ginger-garlic broth, and crisp vegetables. To optimize texture, chill the filling briefly before wrapping, moisten the wrapper edges with a touch of water to seal, and work with a single wrapper at a time to prevent tearing. Avoid overfilling, as pockets of filling can burst during simmering.

The broth is best simmered gently; use low-sodium chicken stock and infuse with fresh ginger and garlic, then skim any foam for a clear, clean-tasting soup. Taste and adjust salt and white pepper after the wontons are added, since the filling and broth both contribute salt. For a richer aroma, you can add a splash of Shaoxing wine or dry sherry and finish with a drop of sesame oil just before serving.

For the filling, ground pork with about 15–20% fat yields a juicy interior. Finely chopped shrimp adds sweetness and moisture if you like. Include green onions (white and green parts), garlic, and fresh ginger; season with soy sauce, a touch of sugar, salt, and white pepper; bind with a little cornstarch or an egg white to keep wontons plump. Vegetables such as napa cabbage, shiitake mushrooms, and julienned carrot provide crunch and depth; add greens and mushrooms to the broth toward the end so they stay bright and tender.

To serve, ladle hot broth into bowls with several filled wontons and a generous handful of vegetables, then garnish with extra green onions, toasted sesame seeds, and a drizzle of chili oil or chili crisp if you like heat. Leftover uncooked wontons freeze well on a tray, then transfer to a bag for storage; cook them straight from frozen in simmering broth with a few extra minutes. For gluten-free needs, use gluten-free wrappers and tamari or coconut aminos instead of soy sauce.

Tips

Wonton wrappers: handling and sealing

  • Keep wrappers moist: cover with a damp towel to prevent drying and tearing.
  • Work with one wrapper at a time; keep remaining sheets covered while you fill.
  • Moisten the edges evenly with water or a tiny amount of beaten egg white for a stronger seal.
  • Place a small amount of filling in the center (about 1 teaspoon); overfilling leads to leaking and bursting during simmering.
  • Seal by pairing two opposite edges and pressing out any air; pinch firmly along the seam and check for gaps before cooking.
  • If a wrapper tears, patch with a new wrapper or use a tiny amount of filling to seal the gap.
  • To freeze, arrange filled wontons on a parchment-lined tray, freeze until solid, then transfer to a freezer bag; cook from frozen (add a minute or two).

Filling: texture and balance

  • Use pork shoulder with 15–20% fat for juiciness; chill the meat briefly before mixing to help it hold together.
  • If using shrimp, pat dry and finely mince; mixing with the pork should be done gently to keep texture delicate rather than mushy.
  • Combine green onions, garlic, and ginger finely for even flavor distribution; reserve a small portion of green onions for sealing if desired.
  • Lightly mix in soy, Shaoxing wine, and sesame oil; avoid overworking the filling to keep a tender texture.
  • Choose 1 tablespoon cornstarch or 1 large egg white as a binder only if you find the filling too loose; stir in gently until just incorporated.
  • Taste a small pinch of the filling (cooked) to adjust salt; remember the broth and wrappers will contribute saltiness.
  • If you like a smoother texture, chill the filling for 15–20 minutes before wrapping to help everything come together.

Broth: flavor, clarity, and balance

  • Use low-sodium chicken stock and add water to control saltiness; skim foam and strain for a clear broth.
  • Simmer with ginger and garlic to release aromatics; simmer gently, not at a full boil, to prevent delicate wontons from breaking.
  • Season broth gradually with salt; compensate with a splash of rice vinegar or a squeeze of citrus if the broth tastes flat.
  • Keep broth hot but not boiling when you add wontons; add them in batches to maintain gentle simmer.
  • Remove ginger slices before serving to keep the broth clear, unless you love the ginger-forward note.
  • If broth looks cloudy, strain and wipe the pot; for a refined look, you can skim fat and use a fine-mesh strainer to strain through a fine lattice.

Vegetables: timing and texture

  • Napa cabbage adds crunch and body; blanch quickly or wilt in hot broth to soften without losing brightness.
  • Shiitake mushrooms add depth; rehydrate dried mushrooms separately and use soaking liquid (strained) in broth for extra umami; remove tough stems.
  • Carrot julienne adds color; slice thinly so they cook quickly and evenly; you can blanch lightly for tenderness.

Garnish and finishing touches

  • Thinly slice green onions on the bias for a clean, bright finish; sprinkle just before serving to preserve crispness.
  • Toast sesame seeds in a dry skillet until fragrant; add just before serving to preserve crunch and aroma.
  • Chili oil or chili crisp adds a spark of heat; start with a small drizzle and adjust to taste; drizzle into bowls rather than over the entire pot to keep flavor balanced.

Make-ahead, freezing, and reheating

  • Wontons can be assembled, frozen on a tray, then stored in a bag; cook from frozen in simmering broth, adding 1–2 minutes to cooking time.
  • Broth can be made ahead and stored in the fridge up to 3–4 days or frozen; reheat gently and adjust salt before serving.
  • For fastest weeknight soup, prep filling and broth a day ahead; refrigerate separately and wrap and refrigerate wrappers.

FAQ

What is wonton soup?

Wonton soup is a classic Asian soup featuring delicate dumplings (wontons) filled with ground pork and shrimp (or other fillings) simmered in a clear, savory broth. It’s light, comforting, and highly customizable with greens and aromatics.

What ingredients do I need to make wonton soup from scratch?

Here’s a basic list for about 40–50 wontons and a liter of broth:

  • Wonton wrappers (store-bought or homemade)
  • Filling: ground pork (or chicken), minced shrimp, finely chopped green onions, garlic, ginger, soy sauce, sesame oil, salt, white pepper
  • Broth: chicken stock (or vegetable stock) plus water
  • Aromatics: garlic, ginger, scallions
  • Optional add-ins: bok choy or napa cabbage, sliced mushrooms, spinach
  • Garnishes: sliced scallions, cilantro, chili oil, sesame seeds
How do you make the broth for wonton soup?

To make a clear, flavorful broth:

  • In a pot, sauté a small amount of garlic and ginger just until fragrant (about 1–2 minutes).
  • Pour in chicken (or vegetable) stock and 1–2 cups of water. Add ginger slices and scallions.
  • Simmer gently for 15–20 minutes. Season with soy sauce and white pepper to taste. Strain if you prefer a clear broth.
  • Keep hot until you’re ready to cook the wontons.
How do you fold wontons?

Simple folding method:

  • Place about 1 teaspoon filling in the center of a wrapper. Wet the outer edges with water.
  • Fold to form a triangle or a purse shape, pressing firmly to seal and remove air pockets.
  • Press the edges so they stay sealed during cooking. Repeat until you use all the filling.
How long does it take to cook wonton soup?

From start to finish, plan about 30–45 minutes. Steps:

  • Make and simmer the broth: 20–25 minutes.
  • Prepare and fill wontons: 15–20 minutes (hands-on time).
  • Cook wontons in the simmering broth: 4–7 minutes (fresh) or a bit longer if frozen.
Can I use store-bought wontons or frozen wontons?

Yes. Fresh wontons cook faster (about 4–6 minutes). Frozen wontons usually need 1–2 extra minutes. Do not thaw frozen wontons before cooking; simmer them in the broth until plump and the filling is cooked through.

What toppings and garnish are common for wonton soup?

Popular options to finish the dish:

  • Sliced scallions or green onions
  • Cilantro
  • Chili oil or sliced fresh chili
  • A little sesame oil or sesame seeds
  • Leafy greens like bok choy or napa cabbage
  • Sliced mushrooms or spinach
How should I store leftovers?

Storage guidelines:

  • Refrigerate broth and wontons separately in airtight containers for up to 2–3 days.
  • Wontons tend to get soggy if stored in broth for too long; you can store the plain filling and wrappers separately and assemble when reheating.
  • Wontons can be frozen unassembled (wrapper and filling) on a sheet pan, then transferred to a bag for longer storage.
Is wonton soup gluten-free?

Traditional wonton wrappers are wheat-based, so classic wonton soup is not gluten-free. To make a gluten-free version:

  • Use gluten-free wrappers or rice paper wrappers for the wontons.
  • Choose gluten-free soy sauce or tamari for the broth and filling.
  • Check all ingredients for hidden gluten (broth, seasonings, and any added sauces).
What variations can I try?

Here are tasty twists you can experiment with:

  • Vegetarian/Vegan: use mushroom, cabbage, tofu or tempeh fillings with vegetable broth.
  • Shrimp-only or pork-only fillings for different flavors and textures.
  • Spicy version: add chili oil, Sichuan pepper, or fresh chilies to the broth.
  • With noodles: add cooked wheat or rice noodles for a heartier soup.