Author

Ocean Nightleaf

Browsing

Introduction / Hook

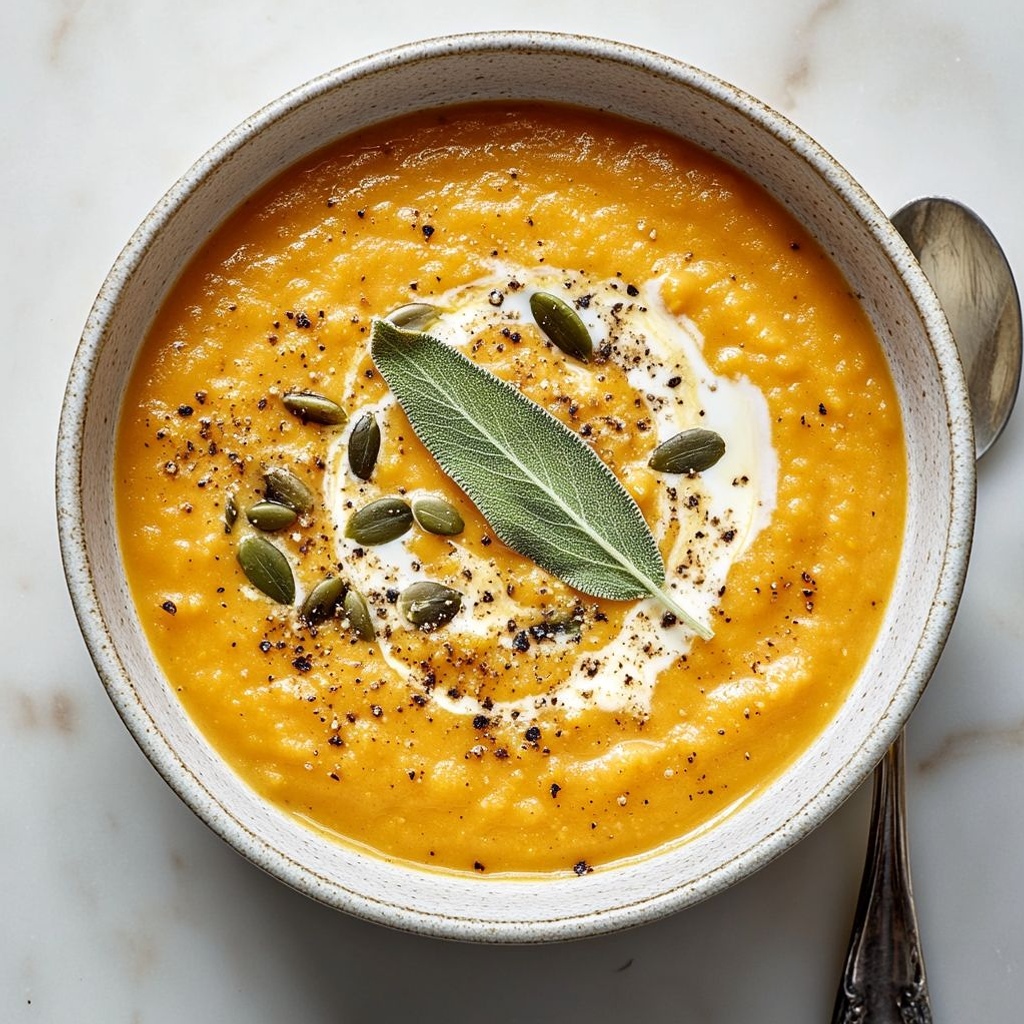
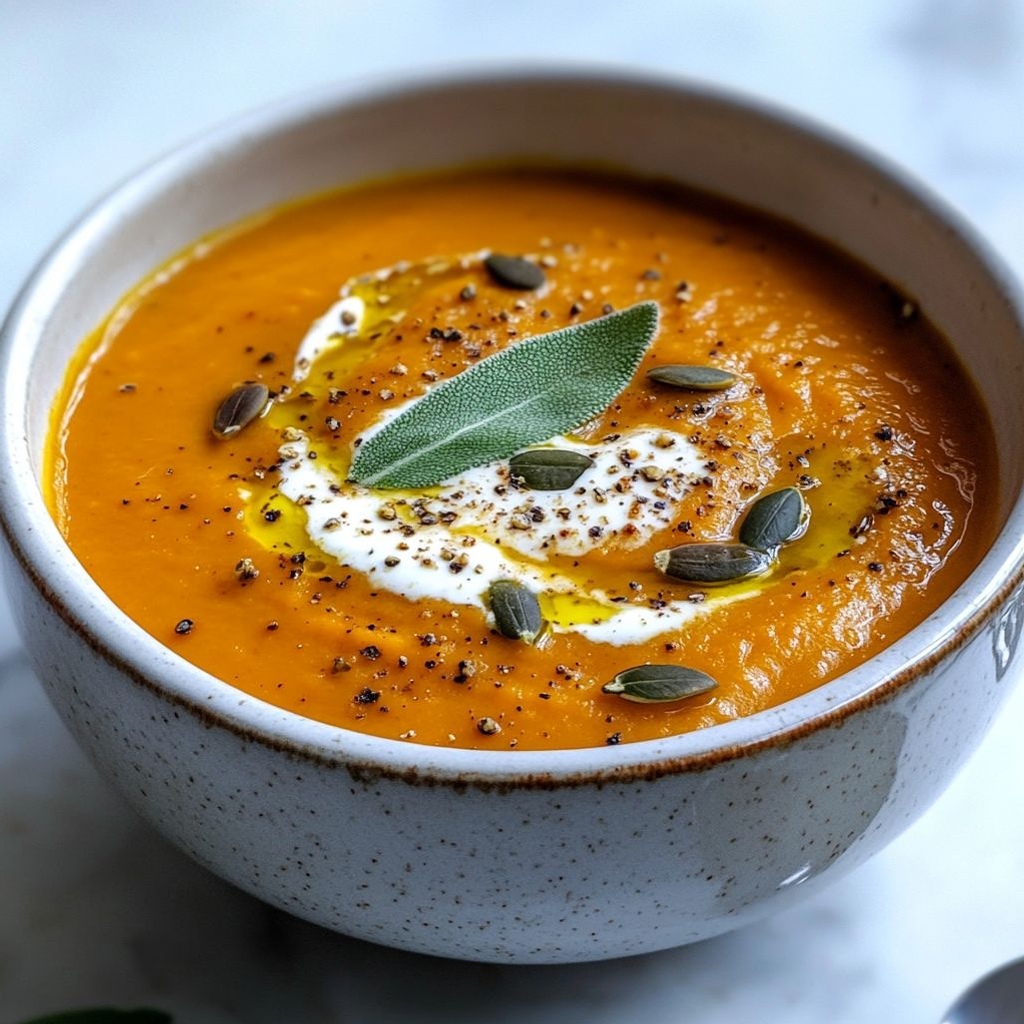
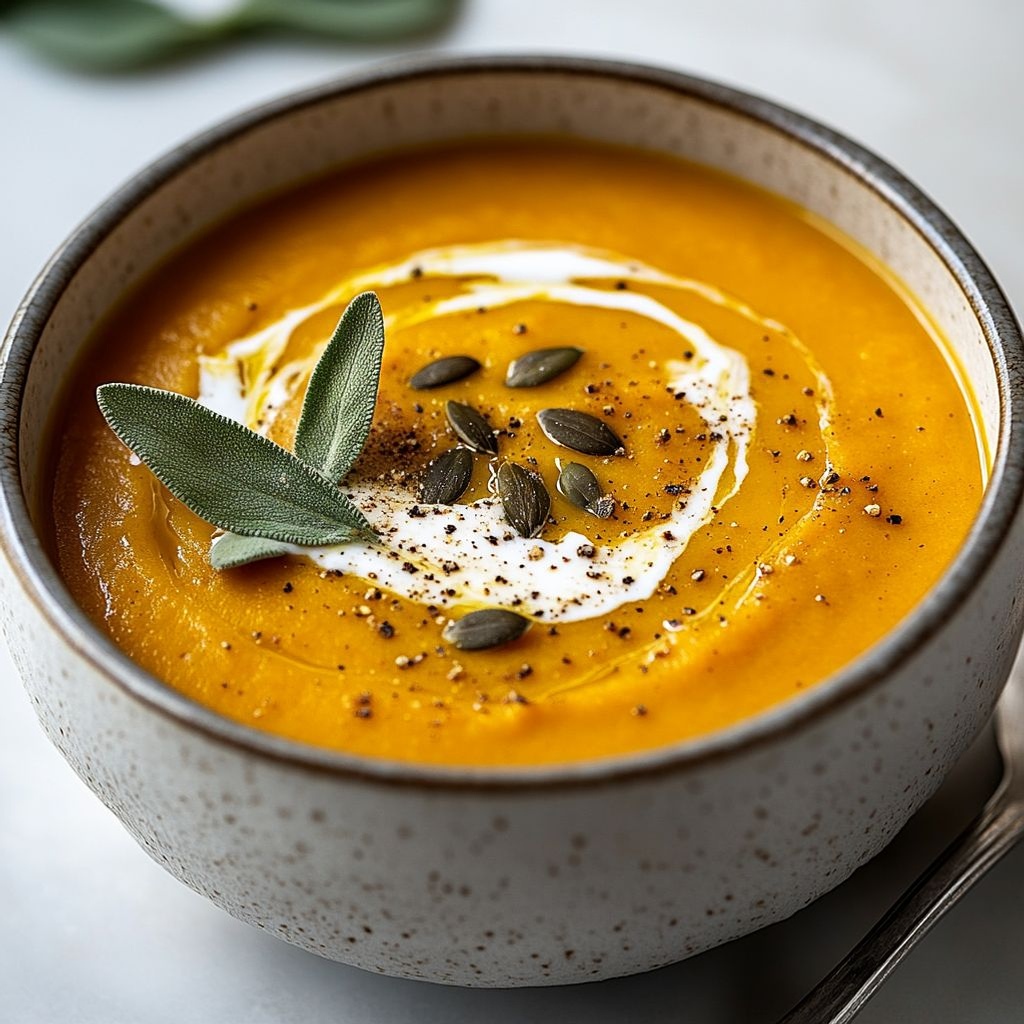
Imagine a bowl of sunlit orange velvet, steaming softly as you lift the first spoonful to your lips. Zuppa di zucca alla Ina Garten is more than a soup; it’s a warm embrace in a cup, a celebration of autumn harvests, and a lesson in how simplicity can become extraordinary when you coax flavor from good ingredients and patient technique. The aroma alone—roasted pumpkin caramelizing in a gentle glow of olive oil, onions turning translucent and sweet, a whisper of garlic and sage wafting through the kitchen—tells a story of cozy dinners and shared moments. This is the kind of soup that makes a weeknight feel special, the kind that invites lingering at the table as daylight fades and a glass of crisp white wine or a rustic bread wipe away the cares of the day. It’s comforting without being heavy, elegant without arrogance, and deeply satisfying with every velvety sip. If you’ve ever watched Ina Garten guiding you through a recipe with a calm, confident smile, you’ll recognize the DNA here: respect for good ingredients, a method that honors their natural brightness, and a finish so polished you feel you’ve just tasted a dish from a beloved home kitchen with a touch of summery sunshine and fall’s warmth blended into one spoonful. Zuppa di zucca alla Ina Garten captures that spirit—the art of making something feel effortless, even when you’ve poured a little extra time into roasting, tasting, and refining the texture until it glides across the palate like silk. Let this soup be your fallback-friendly, crowd-pleasing, soul-satisfying bowl that never fails to spark conversation and compliments, whether you’re cooking for a weeknight family dinner or a small, intimate gathering that rewards a dish with timeless appeal. In the world of comforting soups, this one stands out not because it shouts, but because it whispers: you deserve something gorgeous, and beauty is found in restraint, not bravado. Prepare to fall in love with the way pumpkin’s honeyed core meets a creamy, balanced finish, and how a drizzle of high-quality olive oil or a final dusting of Parmesan can elevate the entire experience without turning it into a showy production. It’s the sort of recipe that invites you to slow down, breathe in the aroma, and savor the moment of sharing warmth with people you care about.

The Story Behind the Dish

The tale of Zuppa di zucca alla Ina Garten begins in the same spirit that has defined the Barefoot Contessa ethos for years: a love affair with ingredients that speak for themselves, a kitchen where quality matters more than complexity, and a philosophy that great meals start with great produce and patient preparation. This particular soup is a love letter to the comforting, deeply Italian tradition of zuppa di zucca, a dish that appears in many regional guises across the peninsula: rustic, sweet, earthy, sometimes with a hint of spice, always designed to warm the soul as the days grow shorter. The inspiration, however, takes a page from Ina’s playbook—the way she approaches a seemingly simple dish with reverence for technique and a knack for elevating everyday flavors through careful roasting, careful layering, and a finish that lets each note ring true.

In many Italian kitchens, pumpkins and squash are treated as blank canvases upon which autumn’s sweetness, earthiness, and herbal brightness can shine. The traditions vary from town to town: some prefer a silky, almost custardy texture; others lean toward a more rustic, chunky soup with a bit of bite. What links them all is the sense that pumpkin, when handled with care, can become something celebratory rather than merely nourishing. Ina Garten, known for her insistence on high-quality ingredients and straightforward steps, would approach zuppa di zucca with a similar honesty: select a squash with deep orange color and a smooth, dense flesh; roast it to coax out caramel notes; blend to a silkiness that still carries a hint of nutty body; finish with a touch of dairy or dairy-free richness, a salty-sweet balance, and a final flourish of brightness—perhaps a drizzle of good olive oil, a crack of black pepper, and a few curls of fresh Parmesan.

This dish, then, becomes a bridge between two culinary worlds: the rustic Italian home kitchen that venerates the pumpkin’s seasonal glow and the American beloved host’s philosophy of approachable, dependable elegance. It’s a recipe that invites you to bring your best ingredients forward without feeling the pressure of perfection, to savor the ritual as much as the result, and to share something that tastes like a season’s best harvest transformed into a comforting, crowd-pleasing bowl. It’s also a reminder that the most memorable cooking often comes from combining reverence for tradition with a contemporary sense of ease—the kind of fusion Ina herself embodies when she takes a classic flavor and presents it in a way that feels both familiar and newly comforting.

Why You’ll Love This Recipe

  • Accessible yet sophisticated: It delivers the elegance of a restaurant-style soup in a home kitchen, without requiring culinary feats beyond roasting and blending.
  • Seasonal and comforting: The pumpkin’s natural sweetness, tempered by savory notes and herbal brightness, makes it perfect for fall and winter dining.
  • Vegetarian-friendly and versatile: Naturally meat-free, you can easily adapt with dairy or dairy-free accents to suit preferences or dietary needs.
  • Make-ahead potential: This soup lends itself to batch preparation, improving in flavor as the ingredients mingle, while maintaining a creamy texture when reheated gently.
  • Elegant but approachable presentation: A smooth, velvety consistency with a glossy finish, finished with a touch of olive oil and Parmesan, makes it look and feel refined without fuss.
  • Wine-friendly pairing: Its bright acidity and rich body pair beautifully with crisp whites or light, fruity reds, turning a simple weeknight into an occasion.
  • Texture balance: Silky soup with delicate depth, contrasted by a subtle, natural sweetness and a savory-savory finish that invites you to savor each spoonful.
  • Low-key crowd-pleaser: Perfect for gatherings, with enough personality to spark conversation but familiar enough to please guests of varied tastes.

Flavor Profile & Texture

The essence of this zuppa di zucca is a carefully harmonized triad of sweetness, savoriness, and brightness. Roasting pumpkin concentrates its inherent honeyed notes, transforming the raw squash into a caramelized, lacquered sweetness that remains clean and not cloying. When blended into a smooth base, that sweetness is tempered by gentle aromatics—onion, a subtle garlic presence, and aromatic herbs—creating a round, comforting body that coats the palate with a plush, velvety texture. The mouthfeel is luxurious but never heavy, a result of balancing fat (whether from cream, olive oil, or a plant-based alternative) with the squash’s natural creaminess and a splash of stock or water to achieve a satin-like consistency.

In the flavor baton pass, you’ll encounter a note of earthiness that grounds the dish, often provided by the squash itself and, in some variations, a trace of nutmeg or ginger to evoke autumnal warmth. A hint of herbs—sage, thyme, or a whisper of rosemary—adds an evergreen brightness that liftingly brightens the finish without overpowering the squash’s sweetness. Salt and a touch of acidity—be it from a drizzle of citrus zest or a small amount of vegetable stock—are what keep the soup from tipping too far into mellow richness, ensuring the final spoonful feels fresh and alive.

The texture is the star here: a creamy, almost soufflé-like smoothness that invites you to swirl the spoon slowly and let the flavors unfurl. The surface should gleam with a delicate sheen, a sign of careful emulsification and proper finishing fat. If you are in the mood for contrast, a handful of roasted pumpkin seeds, a swirl of olive oil, or a drizzle of nutty cream can introduce a delightful textural moment—crunch, silk, and a final aromatic lift—all without disturbing the soup’s serene base. The experience is one of balance: sweetness kept in check, body preserved, and a finish that lingers with a gentle, satisfying warmth rather than a hot, peppery punch. It’s an ideal example of how thoughtful temperature management, quality ingredients, and a respectful approach to flavor layering can turn a simple vegetable into something memorable.

Occasions & Pairings

This pumpkin soup is versatile enough to anchor several kinds of menus and occasions. It shines as a stand-alone starter for a dinner party, where guests can savor a delicate, yet deeply satisfying first course that primes the palate for more indulgent courses to come. It is equally suited for weeknight family dinners, offering a comforting bowl that feels special without requiring a lot of time or fuss. For holidays, think of it as a graceful, seasonal touch that signals the season’s approach with warmth and hospitality while maintaining the essence of everyday cooking that Ina Garten champions.

Pairing ideas to elevate the experience:

  • Breads and crostini: A slice of crusty sourdough, a light brushing of olive oil, and a quick toast to scoop with the soup creates a perfect textured contrast.
  • Herb and cheese accents: A few shavings of Parmigiano-Reggiano or a dollop of crème fraîche or tangy goat cheese can brighten the finish and add a creamy counterpoint.
  • Fresh herb finish: A sprinkle of chopped parsley, chives, or a few crisp sage leaves fried until crisp adds color and aroma.
  • Wine pairing: A bright Pinot Grigio, an Italian Vermentino, or a lightly tropical Sauvignon Blanc harmonizes with the sweetness and herbal notes. For a richer pairing, a lightly oaked Chardonnay can echo the creamy texture.
  • Seasonal sides: A simple clock-face of roasted vegetables, a warm farro or barley salad, or a citrusy green salad can complement the soup without competing with it.
  • Dessert balance: Light almond biscotti or a gently sweet, lemony tart offers a refreshing counterpoint after a comforting bowl.

Flavor Profile & Texture (Deeper Dive)

Delight in the sensory journey: the initial aroma carries roasted pumpkin with a toasty bath of olive oil, a whisper of garlic, and a hint of herbal fragrance. As the spoon glides through, you encounter a luxurious, almost satin-like creaminess, with pumpkin’s natural body providing structure that remains buoyant rather than dense. The finish delivers a clean sweetness that recedes gracefully, leaving a lingering warmth that invites another taste. The subtle saltiness from cheese or a light dairy accent ensures the flavors stay anchored rather than evaporating into sweetness. The overall effect is a bowl that feels both elegant and grounded—a testament to how a few well-chosen elements can carry a dish far beyond its humble roots. The texture’s balance—silky but not thin, rich but not heavy—allows the flavor profile to express itself fully, with roasted undertones peeking through and a final impression that remains bright and satisfying long after the last bite.

Tips, Variations & Substitutions

Ina Garten’s culinary philosophy often centers on flexibility, high-quality ingredients, and letting the primary flavors carry the dish. Apply that mindset to this zuppa di zucca with the following ideas:

  • Make it vegan or dairy-free: Use extra-virgin olive oil, a high-quality vegetable stock, and a splash of cashew or almond cream to achieve a creamy mouthfeel without dairy.
  • Play with intensity: For a deeper, earthier depth, roast the pumpkin until edges are deeply caramelized and slightly browned. This intensifies the squash’s natural sweetness and adds a subtle roasted note.
  • Herbal variations: Swap sage for thyme or rosemary for a different fragrant profile. Fresh herbs added at the end brighten the soup without cooking out their lively aromas.
  • Spice tinges: A pinch of white pepper, a dash of nutmeg, or a trace of ginger can introduce warmth. If you enjoy a hint of heat, a whisper of white pepper or Aleppo pepper can be interesting additions.
  • Texture twists: If you prefer a chunkier soup, reserve a portion of roasted pumpkin to fold back in after blending. Alternatively, a small amount of roasted chestnut puree stirred in at the end adds a lovely, autumnal richness.
  • Cheese and dairy accents: Finish with a light grating of Parmesan or a swirl of crème fraîche. For dairy-free, use a drizzle of olive oil and a handful of toasted almond slivers for texture.
  • Gluten-free considerations: Ensure any bread components served alongside are gluten-free if required, but the soup itself remains naturally gluten-free.
  • Regional twists: Add a splash of white wine during the simmering stage for a bright lift, mirroring the way some Italian soups incorporate a touch of acidity to balance sweetness.

Storage & Make-Ahead Ideas

This soup holds up well beyond its initial serving, making it an excellent option for meal prep, weekend cooking, or entertaining. To maximize quality and texture when storing:

  • In the refrigerator: Store in an airtight container for up to 3–4 days. Reheat gently over low heat, whisking or stirring to restore its creamy texture. If it thickens, thin with a little stock or water to reach the desired consistency.
  • Freezing: The soup freezes well for up to 2–3 months. Freeze in a freezer-safe container, leaving a little space for expansion. Thaw overnight in the fridge and reheat slowly, whisking to maintain smoothness.
  • Make-ahead strategy: You can roast the pumpkin, onions, and garlic a day ahead and refrigerate. When ready to serve, simply reheat, blend, and finish with your preferred dairy or oil to taste. This approach preserves the roasted depth and shortens active cooking time on Service Day.
  • Texture consideration on reheat: If you notice a slight separation after reheating, give the soup a vigorous whisk or a quick blend to reincorporate the oils and aeration, returning to a glossy, smooth finish.

Fun Facts & Trivia (Optional)

– Zuppa di zucca is a beloved staple across Italy, with regional variations that range from thick and rustic to silky and refined. The pumpkin’s presence in Italian cuisine is a testament to the harvest’s generosity and the belief that the simplest ingredients, treated with care, yield the most comforting dishes.

– Ina Garten’s cooking philosophy often emphasizes the joy of cooking with pristine ingredients and keeping techniques straightforward. This approach translates beautifully into a pumpkin soup that tastes like it came from a well-loved, sunlit kitchen—where every element has its place and nothing is wasted.

– The pairing ideas for this soup echo the idea that soup is not a standalone course but a gateway to a broader meal: a crusty loaf, a bright wine, and a modest cheese or dairy accent can elevate the entire dining experience without stealing the spotlight from the pumpkin’s natural glow.

Serving Notes & Final Thoughts

As you ladle this zureeine velvety zuppa into bowls, consider the small touches that can elevate the experience—an artful swirl of extra-virgin olive oil, a crack of fresh pepper, a few crisp sage leaves, or a delicate dusting of a fine cheese. These finishing touches need only a moment, but they leave a lasting impression, converting a simple soup into a moment of hospitality. The beauty of Zuppa di zucca alla Ina Garten lies in its balance: it is of the earth, yet elegantly refined; it is comforting, but has enough brightness to keep the palate engaged; it is a dish that a home cook can prepare with confidence, yet it rewards guests with that unmistakable sense of having been cooked with care and heart. Whether you’re plating for one or for a small gathering, this pumpkin soup offers a warm invitation that feels timeless, seasonal, and utterly satisfying—a quintessential nod to the comforting rituals of autumn evenings and the simple joy of sharing a bowl that tastes like home.

Ingredients

  • Base and Aromatics
    • 1 tablespoon olive oil
      → This will be used to sweat the onions, carrot, and celery, building a fragrant foundation for the soup. Use good-quality extra-virgin olive oil for fruity flavor; keep the heat medium to avoid browning the aromatics too quickly.
    • 1 tablespoon unsalted butter
      → Adds richness and helps bloom the soffritto. Combine with olive oil to prevent the butter from browning; if dairy-free is needed, omit or replace with more olive oil.
    • 1 medium onion, finely chopped
      → Provides sweetness and depth; sweat until translucent and just starting to soften. For a smoother soup, chop finely or puree later with the squash.
    • 2 medium carrots, diced
      → Contribute natural sweetness and color; dice evenly so they cook through with the squash. You can grate them for quicker cooking if you prefer.
    • 2 celery stalks, diced
      → Adds subtle celery flavor and structure to the base. Dice small for quick, even cooking; optional to omit if you want a lighter flavor.
    • 2 garlic cloves, minced
      → Boosts aroma and depth of flavor. Add near the beginning after the onions soften to avoid burning; use finely minced or pressed garlic for even distribution in the soup.
  • Butternut Squash
    • 2 to 2.5 pounds butternut squash, peeled, seeded, and cut into 1-inch cubes
      → The star of Zuppa di zucca. Uniform cubes ensure even cooking and a smooth purée when blended. If you’re short on time, you can use pre-cut squash; just trim any tough skin.
  • Herbs, Spices, and Seasonings
    • 1/2 teaspoon dried thyme (or 2 fresh thyme sprigs)
      → Adds warmth and earthiness that complements squash. Fresh thyme provides brighter aroma; dried thyme is fine if fresh isn’t available. If using fresh, strip leaves from stems and add during simmer; remove the sprigs before purée if you prefer a smoother texture.
    • 1/4 to 1/2 teaspoon ground nutmeg
      → Provides a cozy, spiced note that pairs beautifully with squash; use sparingly as it can overpower the dish. Freshly grate for best aroma.
    • 1 to 2 fresh sage leaves, finely chopped (or 1/2 teaspoon dried sage)
      → Sage adds savory, slightly piney aroma that works well with squash and butter. If using fresh, add with the aromatics; dried sage is more potent, so use less.
    • 1 to 2 teaspoons kosher salt (adjust to taste)
      → Essential for balancing sweetness and savoriness. Add gradually as you incorporate stock; you can always adjust at the end. Start with 1 teaspoon and adjust as needed.
    • Freshly ground black pepper to taste
      → Gives a subtle bite that brightens the soup’s flavors; add near the end after tasting the soup. Grind just before serving for maximum aroma.
  • Liquids and Dairy
    • 4 to 5 cups chicken stock (low-sodium) or vegetable stock
      → The main cooking liquid that unites the squash flavors into a creamy soup. Low-sodium stock gives you control over salt; add more stock if you prefer a thinner consistency, or less for a thicker purée.
    • 1/2 cup heavy cream or half-and-half (optional)
      → Adds luxury and silkiness to the finished soup. Stir in after purée to achieve a creamy texture; start with less to avoid overpowering squash, and omit entirely if dairy-free is needed.
  • Finish and Add-ins
    • 1 to 2 tablespoons fresh lemon juice
      → Brightens the squash’s natural sweetness and balances the richness. Add at the end, tasting and adjusting; if you prefer, use a splash of white wine vinegar instead.
    • 1/2 cup apples, peeled and diced (optional)
      → Adds a subtle tart sweetness and depth; use a firm apple (Granny Smith) to hold shape. Cook with the soup to integrate, or omit if you want a purer squash flavor.
    • 1/2 teaspoon curry powder (optional)
      → A warming note inspired by Ina Garten’s style; use sparingly so it doesn’t overpower the squash. Omit if you want a classic, simple purée.
    • 1-2 tablespoons crème fraîche or sour cream (optional)
      → A tangy swirl adds creaminess and a contrasting cool note when served. Gently whisk to blend and avoid curdling when reheating.
  • Garnish and Serving
    • Croutons or toasted bread cubes
      → Add a satisfying crunch that contrasts with the smooth soup. Toss with a little olive oil and salt, toast until golden, and scatter on top just before serving.
    • Roasted pepitas (pumpkin seeds), salted
      → Provide a nutty crunch and extra texture. Toast seeds in a dry skillet until they pop and release aroma; season lightly with salt and sprinkle over the soup.
    • Extra-virgin olive oil for finishing
      → A light drizzle just before serving adds aroma and a glossy finish. Use a high-quality oil and drizzle sparingly to avoid greasiness.
    • Crispy sage leaves for garnish
      → Aromatic and visually appealing; fry in a small amount of oil until crisp, then place on top of each bowl. Drain on paper towels to remove excess oil.

Instructions

  • Prepare your mise en place by gathering and prepping all ingredients for Zuppa di zucca alla Ina Garten: peel and cut the butternut squash into uniform 1-inch cubes, finely chop the onion, dice the carrots and celery, and mince the garlic; having everything ready ensures consistent chopping and smooth, uninterrupted cooking.
    → This ready setup keeps flavors organized, prevents overcooking aromatics, and ensures even distribution of the squash as it cooks.
  • Warm a large heavy-bottomed pot over medium heat to establish a stable platform for sweating the aromatics.
    → A properly heated pot prevents the vegetables from sticking and allows the fats to bloom the flavors without scorching.
  • Add 1 tablespoon olive oil and 1 tablespoon unsalted butter to the pot; swirl to coat the bottom and emulsify the fats as they melt.
    → The olive oil raises the smoking point while butter provides richness and helps bloom the soffritto without burning, creating a silky base for the soup.
  • Add the finely chopped onion, diced carrot, and diced celery to the pot; season with a pinch of kosher salt.
    → Sweat the aromatics slowly to unlock sweetness and depth without browning, which would dull the soup’s pale, velvety appearance.
  • Sauté the soffritto, stirring frequently, until the vegetables are translucent and just starting to soften, about 5 to 7 minutes; avoid browning to keep the soup light and creamy.
    → Gentle sweating concentrates flavor while preserving a clean texture that blends smoothly with the squash.
  • Add the minced garlic and thyme (fresh sprigs or dried); cook for about 1 minute until the garlic is fragrant and just begins to color, stirring to prevent scorching.
    → Fresh garlic blooms quickly when heated with the aromatics, imparting aroma without turning bitter; thyme adds warmth without overpowering the squash.
  • Stir in the squash cubes and coat them with the aromatics; if you are using apples, add 1/2 cup peeled and diced Granny Smith at this moment so they have time to integrate.
    → Uniform squash ensures even cooking and a cohesive purée, while apples add a subtle tart contrast if you choose to include them.
  • Pour in 4 to 5 cups low-sodium stock, just enough to cover the squash by about an inch; this forms the soup base and will be reduced slightly as flavors concentrate.
    → Using stock rather than water builds depth, and the modest level of liquid helps achieve a creamy texture once puréed.
  • Season the pot with 1/2 teaspoon dried thyme (or 2 fresh thyme sprigs), 1/4 to 1/2 teaspoon ground nutmeg, 1 to 2 fresh sage leaves (or 1/2 teaspoon dried sage), 1 to 2 teaspoons kosher salt, and freshly ground black pepper to taste; add 1/2 teaspoon curry powder if you want a warming note.
    → These aromatics and spices mimic Ina Garten’s comforting style; adjust salt gradually as the stock and squash release sweetness.
  • Bring the liquid to a gentle simmer over medium heat; uncovered, maintain a lively but gentle simmer to soften the squash and meld flavors, about 20 to 25 minutes.
    → A steady simmer ensures even cooking without breaking down the squash too aggressively, leaving a smooth texture for purée.
  • If using fresh thyme, remove the sprigs and any large sage leaves from the pot before puréeing to avoid woody or gritty textures; this step keeps the final soup silky.
    → Fresh herbs can become tough if left to linger through purée; removing them prevents stray texture in the final bowl.
  • Purée the soup with an immersion blender directly in the pot until very smooth and velvety, or carefully transfer to a blender in batches, venting steam and blending on a low speed to avoid splatter.
    → A full purée creates the classic creamy texture of zuppa di zucca; blending hot liquids requires caution to prevent burns.
  • Stir in 1/2 cup heavy cream or half-and-half if using; heat gently to warm through but do not boil after adding dairy to avoid curdling and separation.
    → The dairy adds luxurious silkiness and rounds the squash’s sweetness for a restaurant‑style finish.
  • Stir in 1 to 2 tablespoons freshly squeezed lemon juice to brighten the squash’s sweetness, tasting as you go and adjusting salt if needed.
    → Acidity balances richness and enhances the squash’s natural flavor; lemon is preferred for a bright, clean finish.
  • If you included apples, ensure they have softened and integrated; otherwise proceed to a final taste check and correct seasoning with salt and pepper.
    → Soft apples meld with the squash to add gentle tartness and depth without overpowering the puree.
  • Turn off the heat and adjust the soup’s seasoning; add more salt or pepper sparingly until the flavor is balanced and the sweetness is not overpowering.
    → A final seasoning check ensures the soup tastes cohesive and bright before serving.
  • Prepare croutons: toss 2 cups cubed bread with a little olive oil and a pinch of salt; spread on a baking sheet and toast in a 375–400°F (190–200°C) oven until golden and crisp, about 8–12 minutes, turning once.
    → Crunchy croutons provide a contrasting texture and carry savory notes that complement the creamy soup.
  • Toast pepitas in a dry skillet over medium heat until they pop and release aroma; season lightly with salt and let cool.
    → The toasted seeds add a nutty crunch and color, enhancing the soup’s garnish.
  • Fry a few fresh sage leaves in a small amount of olive oil until crisp, then drain on paper towels to remove excess oil.
    → Crisp sage leaves impart an aromatic, savory finish that pairs beautifully with squash and butter.
  • To serve, ladle the velvety zuppa into warm bowls and finish with a light drizzle of extra-virgin olive oil; top with croutons, toasted pepitas, and a crisp sage leaf for aroma and texture.
    → The finishing drizzle adds aroma and sheen, while the garnishes provide contrast in texture and a burst of nutty, herbal notes.

Notes

These Zuppa di zucca alla Ina Garten notes guide you to a silky, comforting squash soup. Begin by sweating the soffritto: heat 1 tablespoon olive oil with 1 tablespoon unsalted butter over medium heat, then add 1 finely chopped onion, 2 diced carrots, and 2 diced celery stalks with a pinch of salt. Sauté until the vegetables are translucent and deeply fragrant, not browned. Stir in 2 minced garlic cloves and cook for another minute until fragrant.

Add 2 to 2.5 pounds butternut squash (peeled, seeded, and cut into 1-inch cubes) and 4 to 5 cups stock. Bring to a simmer and cook until the squash is very tender, about 20 to 25 minutes. Purée with an immersion blender until smooth; for a lighter texture, purée only partially and leave some squash chunks for body.

Season with 1/2 teaspoon dried thyme (or 2 fresh thyme sprigs), 1/4 to 1/2 teaspoon ground nutmeg, and 1 to 2 fresh sage leaves (or 1/2 teaspoon dried sage). Add 1 to 2 teaspoons kosher salt and freshly ground black pepper to taste. Finish with 1 to 2 tablespoons fresh lemon juice to brighten the squash’s sweetness; adjust the citrus after tasting.

If you want extra silkiness, stir in 1/2 cup heavy cream or half-and-half after puréeing and gently reheat. To keep the dish dairy-free, omit the butter and cream and rely on olive oil plus stock; the soup will still be rich and comforting.

Optional add-ins to tailor Ina Garten style: 1/2 cup peeled and diced apples (Granny Smith) cooked with the soup for a subtle tart note, and 1/2 teaspoon curry powder for warmth. A dollop of crème fraîche or sour cream can be swirled in at serving for tang and contrast.

Garnish and finish: spoon on croutons or toasted bread cubes, scatter roasted pepitas for crunch, finish with a drizzle of extra-virgin olive oil, and optionally top with crispy fried sage leaves. This soup keeps well; refrigerate for 3–4 days and freeze for up to 3 months. Reheat gently, adding a splash of stock if it has thickened, and adjust seasoning before serving.

Tips

Tips for Zuppa di zucca alla Ina Garten

  • Foundational soffritto
    • Keep the heat at medium and sweat onions, carrots, and celery until translucent and just tender; avoid browning the aromatics, which can add bitterness.
    • Use 1 tablespoon olive oil with 1 tablespoon unsalted butter to bloom the soffritto; if dairy-free is needed, omit the butter and increase olive oil a touch.
    • Add minced garlic after the vegetables have softened to bloom its aroma without scorching.
  • Butternut squash prep
    • Cut squash into uniform 1-inch cubes for even cooking and smooth purée; if time is short, pre-cut squash works, just trim any tough skin.
    • For deeper sweetness and flavor, consider lightly roasting the squash cubes on a sheet pan at 400°F (200°C) for 15–20 minutes before simmering, then proceed with the soup.
  • Stock, salt, and seasonings
    • Use low-sodium chicken or vegetable stock; adjust salt gradually as you simmer and taste—start with about 1 teaspoon and add more as needed.
    • Fresh thyme and sage give aromatic depth; if using dried thyme or sage, add them early, but remove thyme sprigs before purée if you prefer a smoother texture.
    • Nutmeg should be freshly grated and used sparingly (1/4–1/2 teaspoon); it adds cozy warmth without overpowering the squash.
  • Texture and purée
    • An immersion blender directly in the pot yields a smooth, cohesive purée; or blend in batches in a blender if you prefer.
    • Want some texture? Purée only half the soup and leave the rest chunky, then stir together; for ultra-smooth, press through a fine sieve after puréeing.
  • Dairy finishing and acidity
    • Stir in 1/2 cup heavy cream or half-and-half after puréeing to achieve silkiness; start with less and adjust to taste. For dairy-free, skip or use coconut/almond milk in moderation.
    • Brighten with 1–2 tablespoons fresh lemon juice added at the end; if lemon isn’t available, a splash of white wine vinegar also works to balance sweetness.
  • Optional add-ins
    • 1/2 cup diced apples (Granny Smith) adds a subtle tart note; cook with the soup to integrate or omit for purer squash flavor.
    • 1/2 teaspoon curry powder provides Ina Garten–style warmth—use sparingly to avoid overpowering the squash.
    • Crème fraîche or sour cream (1–2 tablespoons per serving) creates a tangy contrast; whisk gently to blend and prevent separation when reheating.
  • Finish and garnishes
    • Garnish with croutons or toasted bread cubes for crunch; toss them in a little olive oil and salt, then toast until golden.
    • Roasted pepitas add nutty texture; toast in a dry skillet until popping and fragrant.
    • Finish with a drizzle of extra-virgin olive oil just before serving for aroma and shine.
    • Crispy sage leaves provide aroma and visual appeal; fry briefly in a small amount of oil until crisp and place on top of each bowl.
  • Make-ahead, storage, and reheating
    • Cool the soup completely before refrigerating; store in an airtight container for up to 4 days; reheat gently on the stove, stirring often.
    • For freezing: freeze without dairy; thaw and reheat, then add dairy (cream) after reheating if desired for best texture.
    • If the soup thickens after resting, thin with a little stock or water during reheating.

FAQ

Zuppa di zucca alla Ina Garten – FAQ

Che cosa è Zuppa di zucca alla Ina Garten?

Una zuppa cremosa e confortante, tipicamente a base di zucca, cipolla, carota e, spesso, mela o pera per una nota dolce. Si prepara con brodo, una piccola quantità di panna o crema e un tocco di burro e olio d’oliva, profumata con timo e una grattugiata di noce moscata, nello stile semplice ed elegante tipico di Ina Garten (Barefoot Contessa).

Quali sono gli ingredienti principali?

Ingredienti tipici (quantità indicative):

  • Zucca fresca (circa 700 g) o purea di zucca pronta (2–3 tazze)
  • Una cipolla grande
  • Una carota
  • Una mela o pera (opzionale, per dolcezza)
  • Brodo di pollo o vegetale (circa 750 ml – 1 litro)
  • Panna fresca o crema leggera (120–180 ml)
  • Burro (2 cucchiai) e/o olio d’oliva
  • Timbo fresco o secco
  • Noce moscata/macina, sale e pepe
  • Opzionali: yogurt o crème fraîche per servire, crostini o semi di zucca tostati per topping
È possibile rendere la zuppa vegetariana o vegana?

Sì. Per una versione vegetariana/vegana: usa brodo vegetale al posto di quello di carne e sostituisci la panna con latte di mandorla, latte di soia o crema di cocco leggera. Puoi aggiungere un filo di olio al posto del burro o utilizzare olio extra vergine d’oliva per mantecare. Aggiungi un pizzico di noce moscata per mantenere la nota cremosa.

Quale tipo di zucca è migliore per questa zuppa?

Zucca dal sapore dolce e polpa consistente sono ideali. Le migliori scelte sono la zucca butternut o la zucca Hokkaido. Se usi zucca a polpa arancione matura, otterrai una zuppa dal colore ricco e una consistenza vellutata. Se usi zucca in scatola, regola di conseguenza la dolcezza.

Come si prepara passo-passo?

Procedura di base:

  1. In una pentola capiente, scalda olio d’oliva e burro fino a che siano profumati.
  2. Aggiungi cipolla e carota tagliate a pezzi e soffriggi finché sono morbide e traslucide.
  3. Unisci mela/pera tagliata (se usata) e uno spicchio d’aglio; cuoci per 1–2 minuti.
  4. Aggiungi zucca a cubetti o purea e versa il brodo; porta a leggero bollore e lascia sobbollire 15–20 minuti.
  5. Frulla la zuppa fino a ottenere una crema liscia. Rimetti sul fuoco e aggiungi la panna, sale, pepe, e noce moscata; scalda delicatamente.
  6. Aggiusta di sapore e servi caldo, magari con un filo d’olio, crema, timo e topping a scelta.
Come regolare la densità e la cremosità?

Per una zuppa più leggera: aumenta la quantità di brodo e riduci la crema. Per maggiore cremosità: aggiungi più panna o una piccola patata lessa frullata con la zuppa. Se è troppo densa, aggiungi brodo caldo poco alla volta finché raggiungi la consistenza desiderata.

Come insaporire al meglio?

Usa un equilibrio di aromi: cipolla e carota come base, poi noce moscata, sale, pepe e timo. Per un tocco raffinato, aggiungi una piccola quantità di scorza d’arancia grattugiata o una punta di cannella. Un filo di panna al momento di servire aggiunge morbidezza.

Posso prepararla in anticipo o conservarla?

Sì. La zuppa si conserva in frigorifero per 2–3 giorni. Se vuoi prepararla in anticipo, cuoci e conserva separatamente la base e la panna; riscalda lentamente e aggiungi la panna al momento di servire per mantecare bene.

Si può congelare?

È possibile congelarla senza la panna. In genere la zuppa si congela bene; al momento di servire, scongelala lentamente e aggiungi la panna o crema e un possibile topping. La panna potrebbe separarsi al gelo; mescola bene e rifai la cremosità al riscaldarla.

Come si serve e quali topping accompagnano bene?

Servila calda con una cucchiaiate di crema o yogurt, una spolverata di pepe e semi di zucca tostati. Puoi aggiungere crostini di pane croccanti, un filo di olio extra vergine d’oliva e un rametto di timo. Una manciata di crostini al rosmarino è un abbinamento classico.

Posso adattarla per cotture lente o Instant Pot?

Sì.
– Slow cooker: soffriggi cipolla, carota e eventuali aromi su una padella, poi trasferisci nel slow cooker con la zucca e il brodo. Cuoci 4–6 ore a bassa temperatura. Frulla e aggiungi la panna al momento di servire.
– Instant Pot: usa la funzione Sauté per soffriggere cipolla e carota con olio/burro, aggiungi zucca e brodo, chiudi il coperchio e cucina in pressione per circa 8–10 minuti. rilascia naturalmente, frulla, poi manteca con panna e regolane la consistenza e il sapore.

Introduction / Hook

Immersi nel profumo dolce e inebriante dei mirtilli appena colti, vi presento un dessert che celebra l’equilibrio tra crema vellutata e frutta lucente. Il Cheesecake ai mirtilli è una sinfonia di contrasti: una crosticina leggermente croccante che cede sotto una crema al formaggio ricca e setosa, al cuore di una salsa ai mirtilli scintillante e leggermente acidula che danza tra lucentezza e conforto. Immaginate una fetta che si scioglie al primo morso, lasciando in bocca una nota di burro leggero, una sferzata di agrumi nascosta nelle dolcezze del formaggio, e la dolcezza fruttata dei mirtilli che chiude il cerchio come una nota finale di un pezzo musicale. Questo dessert non è solo una ricetta, è un invito a rallentare, a riunirsi con amici e famiglia attorno a una torta che racconta storie di estati condivise, di mercati di paese e di cucine illuminate dall’odore di burro fuso e scorza di limone. È un lusso che non richiede un’occasione formale: è adatto a una serata tra parenti, a una festa informale, a una cena di fine settimana o a una merenda elegante che sorprende senza sforzo.

La Storia Dietro al Piatto

La cheesecake è una figura leggendaria nelle cucine di tutto il mondo, con origini che affondano in tradizioni antiche e varianti regionali che raccontano la storia di commercio, viaggi e ricette tramandate di generazione in generazione. Se in America una cheesecake ben strutturata è spesso associata a croccantezza di biscotti e a una crema che sembra una nuvola, in molte cucine europee la base può ricordare una tarte semplice o una torta fredda che riunisce formaggio cremoso, zucchero e aromi delicati. Il Cheesecake ai mirtilli si inserisce in questa tradizione come una versione elegante e luminosa, in cui la frutta estiva diventa non solo decorazione ma protagonista di sapore. In Italia, dove la cucina domestica è spesso una celebrazione della stagione, l’uso dei mirtilli come simbolo di freschezza e vitalità si sposa perfettamente con la delicatezza del formaggio. La storia di questo dessert è quindi una piccola guida tra mercati contadini, bancarelle che traboccano di frutti vellutati e cucine dove la passione per la precisione e l’equilibrio fa la differenza tra una torta standard e un’opera che resta impressa nella memoria. Se viaggiate attraverso le regioni, scoprirete varianti che giocano con i sapori stessi: scorza di agrumi, una leggera nota di vaniglia, o un tocco di liquore che esalta i mirtilli senza mascherarli. Questa ricetta celebra quel fascino universale della cheesecake, elevato dalla stagione mirtillata e dall’arte di mantenere la crema perfettamente setosa senza eccessi di dolcezza.

Perché Ti Piacerà Questa Ricetta

  • Equilibrio perfetto tra cremosità e fruttosità: una crema morbida che incontra la vivacità dei mirtilli in salsa.
  • Versatilità: perfetta per chi cerca un dessert elegante ma non troppo pesante, adatta a molte occasioni.
  • Stagionalità: l’uso dei mirtilli freschi o quasi freschi aggiunge una nota di freschezza estiva che resta impressa.
  • Presentazione invitante: la tonalità rubino dei mirtilli contrasta con la crema pallida, offrendo una torta fotografica e invitante.
  • Facilità di personalizzazione: si presta a leggere variazioni senza perdere l’anima della cheesecake.
  • Confortante ma raffinato: un dessert che riunisce la famiglia ma resta adatto a una cena tra amici o una celebrazione speciale.

Profilo di Gusto & Texture

Il profilo gustativo di questa cheesecake ai mirtilli è un equilibrio calibrato tra dolcezza delicata, acidità rinfrescante e una leggera nota burrosa tipica della base. La crema al formaggio, morbida e vellutata, avvolge il palato con una sensazione di densità leggera, come una nuvola cremosa che non appesantisce. La salsa di mirtilli, lucida e brillante, introduce un contrappunto fruttato: una leggera acidità che riporta il palato a una sensazione di freschezza, bilanciata dalla dolcezza dei mirtilli maturi. La base, spesso descritta come compatta e croccante, aggiunge una nota di comfort e sostanza, offrendo una struttura che sostiene la crema senza rubarne la scena. L’esplosione di aromi è raffinata da un accenno di scorza di limone o di vaniglia, che illumina la dolcezza con una piccola spinta agrumata o floreale, a seconda della versione. Al primo morso, si percepisce la combinazione di texture: la croccantezza iniziale, la morbidezza della crema che cade al centro, e la salsa di mirtilli che accompagna come un velluto di frutta. Nel complesso, è un dessert che invita a proseguire con una nuova fetta, a scoprire strati di gusto che si sviluppano man mano che si gusta, lasciando una sensazione di freschezza persistente anche dopo l’ultimo boccone.

Occasioni & Abbinamenti

Questo cheesecake è un compagno versatile per diversi momenti di convivialità:

  • Serate estive tra amici: leggera e rinfrescante, perfetta come chiusura di una cena informale.
  • Dolce di fine settimana: una fetta che si presenta al centro della tavola con una luce invitante.
  • Compleanni e celebrazioni: elegante ma non eccessivamente formale, si adatta a contesti diversi.
  • Fine pasto con abbinamenti classici: si sposa bene con un dessert al cioccolato bianco, un sorbetto al limone o una tazza di tisana profumata.
  • Momenti di pausa caffè: una fetta accompagnata da un caffè espresso o un decaffeinato per un momento di coccole.

Abbinamenti Consigliati

  • Bevande: tè freddo alla menta, Moscato leggero, Prosecco brut o vino dolce aromatico a seconda dell’occasione.
  • Contorni dolci: scorze di agrumi canditi o una manciata di mirtilli freschi sul piatto per esaltare la frutta.
  • Altri dessert: una piccola porzione di gelato al pistacchio o al limone può offrire una bella contrapposizione di texture.

Tips, Variations & Substitutions

La bellezza di un cheesecake risiede nella sua capacità di adattarsi alle preferenze e ai bisogni dietro una ricetta di base. Ecco alcune idee per personalizzarlo senza allontanarsi dall’anima del piatto:

  • Versione vegana: sostituzioni mirate per crema e base possono creare una cheesecake vegan-friendly mantenendo la consistenza cremosa. Alcune varianti utilizzano crema di formaggio vegetale, latte di cocco o altrimenti sostituti della robiola, insieme a una base a base di noci o biscotti vegani.
  • Sfogliare l’acidità: se amate una nota più acidula, aumentate leggermente la proporzione di mirtilli o aggiungete un tocco di succo di limone nella salsa. Se preferite più dolcezza, bilanciate con una punta di vaniglia o scorza d’arancia.
  • Varianti di crosta: una base di biscotti al burro è la classica, ma potete usare biscotti integrali, fiocchi di avena o frutta secca macinata per una versione più rustica, oppure una base senza glutine per esigenze specifiche.
  • Texure contrastanti: per una crosta ancora più croccante, potete tostare leggermente la base prima di assemblare, o aggiungere una piccola quantità di nocciole tritate finemente all’impasto della base.
  • Versione senza lattosio: utilizzare formaggi e prodotti lattiero-caseari senza lattosio disponibili sul mercato, mantenendo la crema cremosa e ricca.
  • Profumi e aromi: a seconda dei gusti, si può giocare con una leggera nota di lavanda, basilico o pepe rosa per un tocco sorprendente e meno convenzionale.
  • Importanza della temperatura: per una crema liscia e priva di grumi, assicuratevi che gli ingredienti siano a temperatura ambiente prima di mescolare (quando possibile) e lasciate rassodare la cheesecake in frigorifero per diverse ore o durante la notte.
  • Versione al forno vs senza forno: molte varianti di cheesecake si cucinano al forno; tuttavia, esistono versioni “senza forno” che presentano una crema più morbida e una base fredda, separando però nettamente la salsa di mirtilli dalla crema per evitare umidità eccessiva.
  • Decorazioni finali: una goccia di salsa di mirtilli sulla sommità, qualche mirtillo fresco o una spolverata sottile di scorza di limone grattugiata completano l’effetto visivo senza appesantire la dolcezza.

Storage & Make-Ahead Ideas

Questa torta si presta bene al prep-up e al risparmio di tempo in vista di un evento:

  • Contenimento: conserva la cheesecake coperta bene in frigorifero. Il contenitore ermetico aiuta a mantenere la crema morbida e a prevenire la raccolta di odori indesiderati.
  • Make-ahead: questa torta può essere preparata con anticipo, idealmente una notte prima dell’occasione. In questo modo i sapori hanno il tempo di fondersi e la crema si rassoda naturalmente.
  • Congelamento: è possibile congelare porzioni singole una volta che si è ben rassodata. Avvolgete ogni pezzo singolarmente e conservatelo in freezer. Per servirlo, scongelatelo lentamente in frigorifero e, se desiderato, decorate con una salsa di mirtilli fresca e una leggera spolverata di scorza di limone.
  • Riscaldamento: in caso vogliate una versione un po’ più calda al momento di servire, potete scaldare leggermente una fetta in forno o al microonde, ma attenti a non farla perdere la sua struttura cremosa.

Curiosità & Trivia (Opzionale)

La scelta dell’ingrediente principale, i mirtilli, è ricca di benefici per il palato e per la cucina quotidiana. I mirtilli hanno una storia affascinante di utilizzo non solo come frutto fresco, ma anche come ingrediente in dolci e conserve. In molte culture culinarie, i mirtilli simboleggiano la leggerezza e l’energia estiva, fornendo una nota di colore intenso e una dolce acidità che lavora in armonia con altri sapori. Nel contesto delle cheesecake, i mirtilli non sono solo una guarnizione: rappresentano una parte integrante del carattere del dessert, offrendo una tinta di rosso-viola, una fragranza che ricorda boschi e giardini, e una consistenza che si sposa con la crema in modo sorprendente.

Conclusione

Il Cheesecake ai mirtilli è molto più di un dolce: è un invito all’equilibrio, una celebrazione della stagione e un gesto di condivisione. È una torta che si presta a mille interpretazioni, ma resta immediata da apprezzare, grazie a una crema soffice e a una salsa che lampioneggia di luce. Ogni fetta racconta una piccola storia di freschezza estiva, di incontri in cucina, di risate condivise e di quel tempo prezioso che trascorre tra aromi dolci e il profumo del frutto appena colto. Se cercate un dessert elegante ma accessibile, capace di fare colpo senza sforzo, questa cheesecake ai mirtilli è una scelta pronta all’uso, pronta a diventare un classico della vostra tavola e a regalarvi momenti che valgono una parola: indimenticabile.

Ingredients

Cheesecake ai mirtilli

Base di Biscotto

  • 200 g biscotti Digestive o biscotti secchi, polverizzati finemente
    → Base croccante che forma la crosta della cheesecake. I biscotti vanno macinati fino a una polvere uniforme; puoi usarli in un frullatore o inserirli in un sacchetto e pestarli con un mattarello. Mescola con lo zucchero se i biscotti non sono molto dolci, quindi aggiungi il burro fuso e lavora fino a ottenere una massa omogenea. Premila sul fondo di una teglia a cerniera rivestita con carta forno, livellando bene; raffredda in frigorifero per far compattare prima di riempire.
  • 90 g burro non salato, fuso
    → Agisce da legante per la crosta, conferendo struttura e compattezza al fondo. Lascia raffreddare leggermente il burro fuso prima di mescolarlo ai biscotti polverizzati; stampa poi la miscela sul fondo della teglia e premi bene con il dorso di un cucchiaio o con un fondo piatto. Il raffreddamento in frigorifero aiuta a mantenere la crosta compatta durante la cottura.
  • 2 cucchiai zucchero semolato (opzionale)
    → Aggiunge dolcezza al fondo secondo il sapore dei biscotti scelti. Se i biscotti sono già molto dolci, puoi ridurre o omettere lo zucchero; aggiungi poco alla volta e assaggia.

Ripieno al Formaggio

  • 600 g formaggio cremoso, morbido a temperatura ambiente
    → Crema base della cheesecake, morbida e lucida una volta cotta. Amalgamarlo a temperatura ambiente evita grumi e una texture burrosa pesante. Se usi formaggi freddi, lascia che raggiungano la temperatura ambiente prima di mescolare.
  • 150 g zucchero semolato
    → Dolcifica la crema in modo uniforme; puoi ridurre leggermente la quantità se preferisci un sapore meno dolce o usare zucchero di canna per una nota caramellata. Aggiungi lo zucchero poco alla volta per controllare la dolcezza.
  • 2 uova grandi
    → Forniscono struttura e leggera coagulazione durante la cottura. Aggiungi una uova per volta, mescolando solo fino a incorporarle per evitare smontamenti o bolle d’aria in eccesso. Assicurati che siano a temperatura ambiente per una miscela liscia.
  • 1/2 cucchiaino estratto di vaniglia
    → Profumo intenso e profondità di sapore. Preferisci estratto di vaniglia puro; se desideri un aroma più agrumato, aggiungi anche scorza di limone grattugiata molto fine.
  • 200 g panna acida o yogurt greco intero
    → Aggiunge cremosità, leggera acidità e facilita una consistenza cremosa e stabile. Se usi yogurt, scegli uno intero e screma l’acqua in eccesso; la panna acida offre una texture più vellutata e tradizionale.
  • 1 cucchiaio succo di limone
    → Bilancia la dolcezza, dona freschezza e aiuta a mantenere una crema lucida. Usa succo fresco; evita spremute concentrate che possono alterare la texture.

Salsa ai Mirtilli e Swirl

  • 200 g mirtilli freschi o congelati, non maturi eccessivamente
    → Conferiscono colore intenso e sapore caratteristico. Se usi congelati, non scongelarli completamente prima di usarli, in modo da mantenere una salsa più densa; risciacquali rapidamente se sono molto freddi o hanno ghiaccio.
  • 2 cucchiai zucchero
    → Dolcifica la salsa di mirtilli; aggiusta in base alla dolcezza dei mirtilli. Puoi ridurre o aumentare a seconda della stagione e della dolcezza dei frutti.
  • 1 cucchiaio succo di limone
    → Aggiunge brillantezza, bilancia l’acidità e aiuta a preservare il colore vivo dei mirtilli.
  • 1 cucchiaino amido di mais (maizena)
    → Addensante per una salsa leggera che resta lucida. Scioglilo in 1 cucchiaio d’acqua fredda prima di aggiungerlo ai mirtilli; cuoci fino a leggera épaissimento e lascia raffreddare prima di usarlo come swirl o topping.

Decorazioni opzionali

  • Panna montata fresca, da servire
    → Aggiunge morbidezza e ricchezza al piatto al momento del servizio. Montala ben fredda e tienila in frigorifero fino al momento di usare; per una versione leggera, puoi utilizzare panna acida o una crema vegana montata.
  • Mirtilli freschi extra per decorare
    → Conferiscono colore brillante e freschezza all’esterno della torta. Distribuiscili a piccoli gruppi o in anelli decorativi per un aspetto professionale.
  • Foglie di menta o scorza di limone grattugiata (opzionale)
    → Aggiungono aroma fresco e un tocco di colore. Usane solo piccole tracce per non sovrastare i mirtilli e bilanciare la presentazione.

Instructions

  • Preriscalda il forno a 170°C (325°F) e rivesti una teglia a cerniera da 23 cm con carta forno o ungila bene; questa temperatura e preparazione garantiscono una cottura uniforme e impediscono alla crosta di attaccarsi al fondo della teglia.
  • Riduci i biscotti Digestive in briciole fini usando un frullatore o inseriscili in un sacchetto per alimenti e pestali con un batticarne; una consistenza fine crea una crosta omogenea che si compatta meglio durante la cottura.
  • Aggiungi 2 cucchiai di zucchero semolato agli eventuali biscotti poco dolci e mescola bene per distribuire l’elemento dolcificante in modo uniforme; se i biscotti sono già dolci, puoi omettere lo zucchero o aggiungerne una quantità minima per equilibrarne il sapore.
  • Aggiungi 90 g di burro non salato fuso agli olididi di biscotto e mescola fino a ottenere una massa sabbiosa umida; il burro funge da legante che permette alla crosta di mantenere forma e compattezza durante la cottura.
  • Premi la massa di biscotto sul fondo della teglia a cerniera in modo uniforme utilizzando il dorso di un cucchiaio o un fondo piatto, creando uno strato compatto di circa 1,5 cm; questa compressione evita crepe nella cheesecake e garantisce una base stabile per il ripieno.
  • Metti la teglia in frigorifero e lascia solidificare la crosta per 15–20 minuti prima di riempirla; il raffreddamento rapido aiuta la crosta a mantenere la forma durante la cottura del ripieno.
  • In una ciotola capiente ammorbidisci 600 g di formaggio cremoso a temperatura ambiente con una frusta o con una spatola finché non risulta liscio e privo di grumi; lavorare a temperatura ambiente evita grumi e permette una texture setosa del ripieno.
  • Aggiungi 150 g di zucchero semolato al formaggio cremoso e mescola a velocità media finché lo zucchero non è completamente incorporato e la crema appare leggera e omogenea; questo passaggio garantisce una dolcezza uniforme senza grumi.
  • Incorpora 2 uova grandi, una alla volta, mescolando solo fino a incorporarle tra una aggiunta e l’altra; l’eccesso di miscelazione può incorporare aria interna e provocare crepe durante la cottura.
  • Unisci 1/2 cucchiaino di estratto di vaniglia e 1 cucchiaio di succo di limone, mescolando delicatamente per distribuire l’aroma e bilanciare l’acidità; la vaniglia aggiunge profondità aromatica mentre il limone aiuta a lucidare la crema.
  • Incorpora 200 g di panna acida o yogurt greco intero e mescola fino a ottenere una crema cremosa e leggermente aspra che manterrà la tessitura stabile del ripieno; se usi yogurt, sgrassa l’eccesso di liquido lasciandolo riposare in frigorifero per qualche ora o usand uno strato di panno assorbente.
  • Aggiungi 1 cucchiaio di succo di limone e mescola fino a distribuire uniformemente gli elementi aciduli nel composto; l’acidità aiuta a mantenere la lucentezza della crema durante la cottura e la stabilizza.
  • Versa la crema di formaggio sulla crosta fredda e liscia la superficie con una spatola; assicurati di creare una superficie uniforme che faciliti una cottura omogenea e una presentazione pulita.
  • Prepara un bagno maria: avvolgi la parte inferiore della teglia in due strati di carta stagnola resistente e riponi la teglia in una teglia più grande riempita di acqua calda fino a circa metà altezza; l’acqua aiuta a cucinare la cheesecake in modo delicato, prevenendo crepe e assicurando una texture cremosa.
  • Cuoci la cheesecake nel forno preriscaldato per circa 50–60 minuti, o finché il centro rispecchia una lieve tremolazione e i bordi sono appena set; se la superficie dovesse scurirsi troppo, copri con un foglio di alluminio; la cottura lenta previene crepe e assicura una crema liscia.
  • Spegni il forno, lascia lo sportello leggermente aperto e lascia raffreddare la cheesecake all’interno per circa 1 ora; questo raffreddamento graduale riduce il rischio di crepe dovute a sbalzi termici.
  • Trasferisci la teglia in frigorifero e lascia raffreddare completamente per almeno 4 ore o meglio durante tutta la notte; il freddo fondamentale permette al ripieno di rassodarsi e di sviluppare una texturesetosa al TAGLIO.
  • Prepara la salsa ai mirtilli: in una casseruola piccola unisci 200 g di mirtilli freschi o congelati, 2 cucchiai di zucchero e 1 cucchiaio di succo di limone; porta a lieve ebollizione e lascia sobbollire 5–7 minuti finché i mirtilli si ammorbidiscono e rilasciano i loro succhi.
  • Incorpora 1 cucchiaino di amido di mais sciolto in 1 cucchiaio di acqua fredda, mescolando costantemente finché la salsa non si addensa leggermente; cuoci per 1–2 minuti in più, poi lascia raffreddare completamente; l’amido impedisce che la salsa perda lucentezza e diventi troppo liquida.
  • Prima di servire, distribuisci la salsa ai mirtilli a tocchetti sul lato o crea una spirale sul top della cheesecake raffreddata; questa decorazione non solo aggiunge colore ma arricchisce il sapore con note fruttate fresche.
  • Montate panna fresca ben fredda per servire, se desideri, o usa panna acida stessa come topping; aggiungi mirtilli extra e, se vuoi, foglie di menta o scorza di limone grattugiata per una presentazione professionale.

Notes

These blueberry cheesecake slices are creamy and tangy with a crunchy biscuit crust and a glossy blueberry swirl that adds color and brightness. For the crust, finely crush Digestive biscuits (or any plain cookies) and mix with a little sugar if needed; blend in melted butter until the mixture clumps. Press firmly into the base of a lined springform pan and refrigerate to set before filling. For the filling, beat softened cream cheese with sugar until smooth, then add eggs one by one, followed by vanilla, lemon juice and yogurt or sour cream to create a silky, stable texture. Pour over the crust and bake until the edges are set and the center still has a gentle wobble; cool completely and refrigerate to firm up. For the blueberry sauce, simmer blueberries with sugar and lemon juice until thickened, then whisk in a little cornstarch slurry to obtain a glossy, pourable swirl. Cool before swirling through the top or serving alongside. Decorate with extra blueberries, whipped cream or mint leaves if desired. These cheesecakes refrigerate well for several days and can be frozen in slices for ahead-of-time desserts. If you have gluten intolerance, use gluten-free biscuits and make sure all ingredients (cream cheese, yogurt, baking powder) are certified gluten-free. Always bring ingredients to room temperature before mixing to avoid lumps and ensure a smooth filling.

Tips

Consigli generali

  • Gira le uova a temperatura ambiente prima di aggiungerle al ripieno: uova fredde possono causare una crema meno liscia. A temperatura ambiente si incorporano meglio e mantengono la consistenza vellutata.
  • Per evitare crepe, cuoci la cheesecake lentamente a temperatura moderata e, se possibile, usa un bagno-maria (pan di acqua) e lascia raffreddare gradualmente nel forno spento con lo sportello socchiuso.
  • Una volta terminata la cottura, lascia raffreddare la torta nel forno spento per circa un’ora, poi trasferisci in frigo per almeno 4 ore o preferibilmente tutta la notte: il riposo è fondamentale per una texture stabile.
  • Porta gli ingredienti a temperatura ambiente prima di iniziare: crema di formaggio, uova, panna acida/yogurt; ciò evita grumi e migliora l’assenza di bolle d’aria indesiderate.

Consigli per la Base di Biscotto

  • Macina i biscotti fino a una polvere uniforme. Se vuoi una crosta più leggera, puoi lasciare dei piccoli pezzi, ma evita grumi grandi che rovinano la texture.
  • Mescola i biscotti con lo zucchero solo se necessario: biscotti molto dolci potrebbero non richiederlo. Aggiungi il burro fuso tiepido poco alla volta fino a ottenere una massa che si pressa facilmente nel fondo della teglia.
  • Premi la base con il dorso di un cucchiaio o con un fondo piatto per ottenere uno strato uniforme. Per una crosta perfettamente compatta, metti la teglia in frigorifero almeno 15–30 minuti prima di infornare o prima di riempire.
  • Se preferisci una base più croccante, puoi preriscaldare la crosta per 8–10 minuti a 170°C prima di aggiungere il ripieno; altrimenti, procedi senza preriscaldamento ma controlla che non diventi molle durante la cottura.

Consigli per il Ripieno al Formaggio

  • Se usi formaggio cremoso freddo, lascialo ammorbidire a temperatura ambiente per 30–60 minuti. In alternativa, taglialo a pezzi piccoli per accelerare l’amalgamazione.
  • Per una crema liscia, forma una crema soffice con lo zucchero prima di incorporare le uova. Aggiungi le uova una per volta, mescolando a bassa velocità fino a completo incorporamento. Evita di lavorare eccessivamente la massa per non smontarla.
  • Aggiungi la vaniglia e il succo di limone per profumi e freschezza. Se vuoi un aroma più intenso, puoi inserire scorza di limone grattugiata molto fine insieme all’estratto di vaniglia.
  • La panna acida o lo yogurt intero aggiungono cremosità, acidità equilibrata e stabilità. Scolora lo yogurt dallo scolo dell’acqua in eccesso se lo usi.
  • Versa il ripieno sulla base, picchicando delicatamente la teglia sul piano per far uscire eventuali bolle d’aria. Per una superficie più liscia, liscia la superficie con una spatola dopo aver versato.
  • Se il centro dovesse rimanere molto morbido dopo la cottura, spegni il forno, lascia la porta socchiusa e lascia raffreddare lì per circa un’ora per ridurre le crepe da raffreddamento repentino.

Consigli per la Salsa ai Mirtilli e Swirl

  • Cuoci i mirtilli con zucchero e succo di limone a fuoco medio-basso finché si ammorbidiscono e rilasciano colore. Se vuoi una salsa più lucida, aggiungi il compagno di amido di mais sciolto in acqua fredda e cuoci finché addensa leggermente.
  • Per una salsa più densa, aumenta leggermente la quantità di maizena e cuoci qualche minuto in più; per una salsa più brillante usa meno amido.
  • Se usi mirtilli congelati, cuoci senza scongelarli troppo: questo aiuta a mantenere la salsa densa e colorata. Scalda solo quanto basta per sciogliere lo zucchero.
  • Lascia raffreddare completamente la salsa prima di usarla come swirl sul ripieno: calda potrebbe ammorbidire troppo la crema e creare una superficie non liscia.
  • Per il marblé, versa qualche cucchiaio di salsa a cucchiaiate sull’inchiostro del ripieno e usa un coltello o uno stecchino per creare sottili vortici decorativi prima che il ripieno si solidifichi.

Decorazioni e presentazione

  • Decorare con panna montata fresca ben fredda, mirtilli freschi e una spolverata di scorza di limone o menta per un tocco di colore e freschezza.
  • Per una presentazione più ordinata, rimuovi la cheesecake dal frigorifero 15–20 minuti prima di servire, in modo che sia tagliata facilmente e la crema sia setosa.
  • Se vuoi una versione meno calorica, puoi sostituire parte della panna acida con yogurt greco intero e utilizzare una spolverata leggera di scorza d limone anziché panna montata.

Varianti utili

  • Versione leggera: usa formaggio cremoso light e yogurt greco intero; riduci lo zucchero e aggiungi più scorza di limone per mantene un sapore vibrante.
  • Base alternativa: sostituisci i Digestive con biscotti integrali o biscotti alle noci per un sapore diverso e una crosta più rustica.
  • Versione senza glutine: usa biscotti senza glutine certificati e verifica che il burro sia puro senza contaminazioni.

FAQ

Cos’è Cheesecake ai mirtilli?

È una cheesecake fredda con base croccante, ripieno cremoso di formaggio e una salsa o topping di mirtilli che aggiunge freschezza e colore. Si conserva in frigorifero ed è ideale da servire fredda.

Quali sono gli ingredienti principali?
  • Base: biscotti (digestivi o savoiardi) tritati + burro fuso
  • Ripieno: formaggio cremoso, zucchero, uova, panna o yogurt, vaniglia, scorza di limone
  • Salsa di mirtilli: mirtilli freschi o congelati, zucchero, succo di limone, amido di mais
Come preparare la base croccante?

Sminuzza i biscotti, mescolali con burro fuso, premi il composto sul fondo di una tortiera a cerniera da 23 cm formando uno strato uniforme. Metti in frigorifero per almeno 15–30 minuti prima di aggiungere la crema.

Come si prepara la crema del cheesecake?

Amolla il formaggio cremoso, aggiungi lo zucchero, poi incorpora le uova una alla volta, infine la panna (o lo yogurt) e la vaniglia. Mescola fino a ottenere una crema liscia senza grumi; evita di montare troppo per non introdurre bolle d’aria.

Come si fa la salsa ai mirtilli per la guarnizione?

Cuoci i mirtilli con zucchero e succo di limone in una pentola finché si sfalzano e si ammorbidiscono. Mescola in una piccola quantità di amido di mais diluito in acqua fredda e continua a cuocere finché la salsa non si addensa leggermente.

Quali sono i tempi e la temperatura di cottura?

Cuoci in forno preriscaldato a 165–170°C per 45–60 minuti. Se preferisci una versione non cotta, prepara una base e un ripieno che si rassoda in frigorifero con l’aggiunta di gelatina; in genere la versione non cotta è meno comune per questa ricetta, ma è possibile. Spegni il forno e lascia raffreddare nel forno chiuso per evitare crepe.

Come raffreddare e servire la cheesecake?

Lascia raffreddare completamente a temperatura ambiente, poi trasferisci in frigorifero per almeno 4 ore o preferibilmente tutta la notte. Servi con la salsa ai mirtilli e, se vuoi, decorazioni di mirtilli freschi.

Posso fare varianti della base o renderla senza glutine?

Sì. Per una base senza glutine usa biscotti senza glutine o una base di mandorle tritate mescolate a burro. Puoi anche usare una piccola combinazione di cereali privi di glutine. Assicurati che il burro sia ben incorporato e compatto prima di mettere la crema.

Come conservare o congelare la cheesecake ai mirtilli?

In frigorifero si conserva 3–5 giorni. Puoi congelarla porzionata; avvolgi bene ogni pezzo o tagliarla e congelarla singolarmente. Si mantiene bene per 2–3 mesi. Scongelala in frigorifero e aggiungi la salsa di mirtilli prima di servire.

Introduction / Hook

Imagine a dish that feels like a special occasion, yet arrives at your Friday dinner table with the ease of a weeknight staple. The Million Dollar Chicken Casserole is that delightful paradox—a comfort classic wrapped in a glossy, bubbling top that gleams with promise. The moment it emerges from the oven, you’re greeted by a fragrance that mingles warm, savory steam with a hint of melted cheese and caramelized edges. It’s the aroma of home, of family gatherings, of long conversations that started around the table and lingered long after the plates were cleared. This casserole doesn’t just fill a plate; it fills a moment with nostalgia and joy, turning everyday meals into memories you’ll want to recreate again and again.

What makes this dish feel like a million dollars without costing a fortune is the way simple, familiar ingredients come together in a way that feels luxurious. It’s less about flashy splurges and more about technique—ensuring each bite delivers a creamy, indulgent center with a crisp, golden crown. The texture contrasts are irresistible: a velvety, saucy interior that clings to tender morsels, a soft, pillowy base beneath, and a top layer that crackles ever so slightly as you cut through. Whether you’re feeding a hungry family after a long day, or hosting a casual gathering with friends, this casserole carries an air of indulgence that’s entirely accessible.

And there’s a certain magic to the way this dish adapts to your kitchen. It loves to be dressed up with a handful of pantry shortcuts or dressed down with a few fresh herbs from the garden. It’s a canvas that invites you to tell a story with your ingredients—whether you keep it classic and creamy or introduce a playful twist that nods to regional flavors or dietary preferences. The Million Dollar Chicken Casserole is more than a recipe; it’s a celebration of comfort, generosity, and the quiet triumph of turning everyday cooking into something memorable.

The Story Behind the Dish

Every great dish carries a story, and the Million Dollar Chicken Casserole is no exception. Born from the tradition of potlucks, church suppers, and family dinners, it’s the kind of recipe that travels through kitchens, gathering whispers of technique and personal touches along the way. In many homes, casseroles were the answer to the question “What can we cook that feeds a crowd with warmth and without fuss?” They were the unsung heroes of busy weeknights and the comforting centerpiece of weekend gatherings. The name itself—Million Dollar—speaks to a time-honored kitchen truth: luxury doesn’t always require a long list of rare ingredients or a chef’s precision. Sometimes, abundance is achieved by layering flavor, using a few smart shortcuts, and cooking with confidence until everything harmonizes in one satisfying bite.

This particular casserole has a way of evolving with the cook’s memory. Some tell of a grandmother who swore by a glossy, custardy center that stayed tender even after a night in the refrigerator; others remember a neighbor who swapped in a splash of tangy dairy product to brighten the depths of the sauce. Over the years, friends and families have added their own touches—herbs from the balcony, a pinch of paprika for a gentle smokiness, a crusty topping that crackles when cut. The beauty of the dish lies not only in its taste but in its adaptability; it’s a recipe that invites storytelling as much as it invites tasting. It becomes a vehicle for hospitality, a way to gather people around a table, share a comforting slice, and relive favorite memories while creating new ones.

From a cultural standpoint, casseroles have long been a practical expression of care. They symbolize nourishment that’s straightforward and sincere—the kind of dish you prepare when you want to say, I’ve got you. The Million Dollar variant leans into that ethos with a sense of abundance ready to be shared. It’s the kind of casserole that travels well to reunions, school bake sales, or casual family reunions, carrying with it the aura of a home-cooked treasure that doesn’t demand a treasure’s price tag. In this sense, the dish is both a tribute to tradition and a testament to modern cooking: comforting, familiar, yet pliable enough to fit contemporary tastes and dietary needs without losing its essential character.

Why You’ll Love This Recipe

  • Ultimate comfort with a luxurious feel: creamy centers, a gentle acidity, and a topping that invites a satisfying crackle as you serve it.
  • Crowd-pleasing versatility: works beautifully for weeknights, potlucks, or holiday meals when you want one dish to anchor the table.
  • Make-ahead friendly: you can assemble earlier in the day and bake when ready, saving time without sacrificing texture or flavor.
  • Economical and filling: uses pantry-friendly ingredients and leaves you with generous portions to stretch for leftovers.
  • Adaptable to various dietary needs: easily transformed into a lighter version, a dairy-free rendition, or a gluten-conscious option with smart substitutions.
  • One-dish simplicity with multiple textures: a creamy interior contrasted by a lightly crisp top, offering depth in every bite.
  • Kid-friendly and adult-approved alike: familiar flavors that charm both young palates and grown-up taste buds.

Flavor Profile & Texture

The Million Dollar Chicken Casserole is a symphony of comforting tones and textures. On the first spoonful, you’re greeted by a mellow, savory depth that feels like a warm blanket wrapped around the senses. The interior is lush and velvety, a soft melt of tenderness that clings to each bite with a gentle, almost silky richness. It’s not heavy in a stodgy way; it carries a lightness that makes it feel indulgent without being oppressive. If there’s a hint of brightness, it’s often due to a touch of tang from dairy or a whisper of citrus or herbs that lift the palate just enough to keep the flavors from sinking into sameness.

The exterior offers a complementary contrast. The top layer browns to a delicate, honeyed crust that gives way to a tender, pillow-like center. That slight crackle, just as you cut through, releases a wave of steam and aroma, signaling the moment when the dish yields its warmth fully. The flavors are a balance of comforting richness and subtle, lingering brightness. There’s a backbone of savoriness, a whisper of sweetness from caramelization, and a softness that makes every mouthful feel like a hug. The overall effect is both hearty and soothing, an edible reminder that good food can feel like an embrace after a long day.

Texturally, the dish plays with contrasts. There’s the luxurious, almost satin-like sauce that coats each component, the tender morsels at its core, and the topping that adds a gentle resistance before giving way to the creamy heart beneath. If you close your eyes and imagine the sensation, you’ll feel the way the heat travels through the dish, releasing a chorus of scents that mingle with the steam to create a moment of pure comfort. The flavor profile invites you to savor not just the taste but the memory of comforting meals shared with loved ones—the way someone’s grandmother would sigh contentedly after a perfect bite, or how a family would cheer softly at the table when the last piece disappeared.

As for the aroma, think of warm dairy blends meeting toasty aromatics—an inviting perfume that promises nourishment and togetherness. The aroma lingers, prompting conversation and anticipation. When served, the first forkful reveals a gentle alignment of flavors—savory, creamy, and a touch of golden, toasty sweetness from the crust—before moving into more nuanced notes that make your palate linger for another bite. This is the kind of dish that, once tasted, leaves a desire for another helping not out of heaviness but out of pure satisfaction. It’s a flavor profile that has the power to comfort, celebrate, and unify in a single, satisfying experience.

Occasions & Pairings

This versatile casserole shines across a spectrum of occasions, from weeknights when time is tight to festive gatherings where you want something reliably delicious that doesn’t require a marathon of preparation. On busy weeknights, it’s a one-dish hero that feeds a crowd and leaves room for a simple green salad or a quick vegetable side. For potlucks, it travels well and maintains its creamy appeal, ensuring it remains the center of attention at the table. For holiday dinners, it can be scaled up or down, positioned alongside seasonal sides, and dressed with a few special touches to elevate the overall spread.

When thinking about pairings, you’ll want to complement the dish’s creamy, comforting character with crisp greens, lightly acidic salads, or vegetables that add brightness without overpowering the main star. A simple, refreshing salad with a tangy vinaigrette can cut through the richness and provide balance. For beverages, consider light, chilled options that refresh the palate between indulgent bites; a sparkling water with a squeeze of citrus, a dry white wine, or a light lager all work nicely depending on your preference. For dessert, aim for something that offers a clean finish—fruit-forward tarts, citrusy custards, or a softly sweet crumble can provide a satisfying end without clashing with the casserole’s richness.

Tips, Variations & Substitutions

  • Make-ahead method: assemble the casserole, cover tightly, and refrigerate for up to 24 hours. When ready to bake, add 15–20 minutes to the baking time to accommodate the cold start.
  • Vegetarian option: replace the chicken with hearty mushrooms or a plant-based protein equivalent. Use a savory, dairy-based sauce to preserve the luxurious texture.
  • Gluten-free approach: ensure any thickeners or toppings used are gluten-free. Cornstarch or gluten-free flours can be employed to achieve the same creamy consistency.
  • Low-carb or keto-friendly tweak: substitute a portion of the base with cauliflower mash or pureed cauliflower to maintain creaminess while reducing carbohydrates.
  • Herb-forward variation: experiment with fresh thyme, chives, tarrant leaves, or a pinch of nutmeg to add aromatic depth that complements the richness.
  • Global twists: introduce subtle regional flavors—smoked paprika for a hint of warmth, a touch of curry powder for an exotic lift, or a squeeze of lemon to brighten the dish.
  • Cheese choices: while a creamy, melty cheese is classic, you can mix in a sharper cheese for more tang or use a dairy-free cheese alternative to accommodate dietary needs.
  • Crunchy topping alternatives: if you want extra texture, add a light breadcrumb or almond crumble on top; bake until the top is golden and crisp.
  • Make it lighter: use a lighter dairy option or half-and-half combined with a dairy-free alternative to maintain creaminess with fewer calories per serving.

Storage & Make-Ahead Ideas

Leftovers are often the best part of a casserole, and this dish stores well enough to become a reliable next-day meal. After cooling, transfer portions to airtight containers and refrigerate for up to 3–4 days. The flavors often deepen overnight, giving you a richer bite on day two. To reheat, warm gently in the oven or a covered skillet to preserve moisture and prevent drying. If you’re planning to freeze, consider assembling fully (without baking) and freeze in a casserole dish or freezer-safe container. Freeze for up to 2–3 months. Thaw overnight in the refrigerator before baking, and add a few extra minutes to ensure the center heats evenly. When reheating from frozen, you may need to extend the bake time to ensure the dish is piping hot in the middle.

Practical tips for the best texture include avoiding overbaking, which can dry out the interior. If you notice the top browning too quickly while the center is still warming, loosely cover the dish with foil to shield the topping while the center catches up. Conversely, if you prefer a crisper top, remove the foil for the last 10–15 minutes of baking to encourage a golden, crackly finish. These simple adjustments let you tailor the dish to your oven’s behavior and your texture preferences, ensuring a consistently satisfying result every time.

Fun Facts & Trivia (Optional)

Fun kitchen lore often surrounds casserole classics. Did you know that casseroles became particularly popular in the United States during the mid-20th century as a practical solution for families with busy schedules? The concept—layering ingredients in a single vessel and baking to meld flavors—made weeknight meals feel more indulgent without requiring elaborate cooking sessions. The term “casserole” itself comes from the French word casseroles, meaning a large, deep dish or pan. In many traditions, casseroles are associated with generosity and hospitality—dishes that invite guests to linger, share stories, and savor time together. The Million Dollar Chicken Casserole taps into that legacy, offering a modern twist on a timeless formula: comfort, abundance, and a sense of celebration that you can pull from the pantry with confidence.

Some culinary historians note that the appeal of creamy casseroles aligns with the sensory pleasure of warm dairy and melted cheese—an experience that triggers comforting memories and a sense of safety. While the exact origins of this particular “million-dollar” variant are a bit of kitchen folklore, what remains true is its universal charm: it’s a dish that makes a table feel welcoming, and a weeknight feel special, with little more than a few ingredients and plenty of heart.

Ingredients

Million Dollar Chicken Casserole

  • 3 cups cooked chicken, shredded
    → Provides the protein backbone and body to the casserole; shredding helps the sauce cling and distribute evenly in every bite. Use leftovers from a roasted chicken or a pre-cooked rotisserie chicken for convenience. If you use chicken with skin, discard the skin before shredding to keep the filling from greasiness; measure after shredding to ensure the correct amount.
  • 2 cups broccoli florets, fresh or thawed from frozen
    → Adds color, crunch, and vegetable nutrition. Lightly blanch or steam until bright green and tender-crisp so it holds shape during baking; if using frozen broccoli, thaw and drain thoroughly to avoid extra moisture in the casserole. Cut into bite-sized florets for even cooking.
  • 1 can condensed cream of chicken soup (10.5 oz)
    → Creates a creamy, cohesive base that coats chicken and broccoli. Choose regular or low-sodium varieties to control salt; for a richer sauce, whisk in a splash of milk or chicken broth. If you prefer, substitute with 1 1/2 cups homemade cream sauce.
  • 1 cup sour cream
    → Adds tang and moisture while helping emulsify the mixture for a luscious texture. Let sour cream sit at room temperature before mixing to prevent curdling; use full-fat for maximum creaminess, or light sour cream for a lighter version.
  • 1/2 cup cream cheese, softened
    → Boosts silkiness and thickness of the sauce. Soften to room temperature and whisk into the sour cream and soup to prevent lumps; for a dairy-free option, substitute with a plant-based cream cheese alternative and adjust the broth accordingly.
  • 1/2 cup chicken broth
    → Adjusts the sauce consistency to your preference; warm the broth before adding so it blends smoothly with the cold dairy mixture and prevents separation. Use low-sodium broth to better control overall salt levels.
  • 1 cup shredded cheddar cheese
    → Provides melty richness and classic casserole flavor. For best results, shred cheese from a block rather than using pre-shredded to avoid anti-caking agents that can affect melt. Stir a portion into the sauce and reserve some for topping if desired.
  • 1/2 cup grated parmesan cheese
    → Adds sharp, salty depth to the sauce. Incorporate into the mixture for extra flavor or sprinkle on top with the cheddar for a golden crust. Freshly grated parmesan yields a more vibrant aroma than pre-grated varieties.
  • 1/2 teaspoon garlic powder
    → Flavor foundation for the creamy mixture; use as a convenient shortcut to fresh garlic. If you prefer, substitute with 1 clove minced garlic sautéed briefly in a little butter before adding, adjusting for taste to avoid overpowering the dish.
  • 1/2 teaspoon onion powder
    → Adds subtle sweetness and depth that complements garlic and dairy. Use to balance the savoriness; if you like a stronger onion note, you can slightly increase to 3/4 teaspoon.
  • Salt and pepper to taste
    → Essential for seasoning since canned soups and crackers can be salty. Start with a modest amount, mix well, then taste and adjust. Remember you can always add more but cannot remove excess salt.
  • 1 cup crushed Ritz crackers
    → Creates a crunchy, golden topping that bakes into a crisp crust. Toss the crumbs with the melted butter to ensure even coating and browning; if needed, substitute with panko breadcrumbs for a lighter crunch. Keep topping separate until the final minutes of baking for extra crunch.
  • 3 tablespoons unsalted butter, melted
    → Used to toss with the cracker crumbs for a buttery, crisp topping that browns beautifully. If dairy-free, substitute with an equivalent amount of olive oil or a dairy-free margarine alternative. You can add a pinch of paprika for color if desired.

Optional Add-ins

  • 1/2 cup sliced mushrooms (optional)
    → Adds earthy depth and umami. If using, sauté mushrooms in a little butter or oil until their moisture evaporates before folding into the casserole to prevent sogginess. Use cremini or white button mushrooms for best texture.
  • 1/2 cup corn kernels (optional)
    → Adds sweetness and a pop of color. If using canned corn, drain well; if using frozen, thaw and pat dry to minimize extra moisture in the bake.
  • 2 tablespoons chopped fresh parsley (optional)
    → Finishing touch that brightens the dish and adds a hint of fresh aroma. Stir a little into the casserole before baking or sprinkle on top after cooking for color.

Instructions

  • Preheat your oven to 350°F (175°C) and grease a 9×13-inch baking dish with butter or nonstick spray to ensure easy release and clean edges after baking.
    → A steady, moderate heat from the start helps the casserole hydrate evenly and prevents sticking that could tear portions during serving.
  • Prepare the broccoli florets by washing, trimming, and cutting into bite-sized pieces; if using fresh broccoli, blanch in salted boiling water for 2 minutes until the color is bright green and the texture is tender-crisp, then drain thoroughly and pat dry; if using frozen broccoli, thaw completely and squeeze out excess moisture.
    → Brief blanching preserves vibrant color and crisp-t tender texture, while removing moisture prevents a watery casserole that stews rather than bakes.
  • If using mushrooms, slice thinly and sauté in a small amount of butter or oil over medium heat until any moisture evaporates and the edges turn golden; cool before folding into the filling.
    → Sautéing draws out moisture and concentrates flavor, preventing soggy bites in the final bake.
  • If using corn, drain canned corn well or thaw frozen corn and pat dry; this minimizes added water that can dilute the sauce.
    → Dry corn kernels keep the filling from turning watery and maintain a pleasant bite.
  • Shred 3 cups cooked chicken, discarding skin and bones, and place the shreds in a large bowl; measure after shredding to ensure the correct amount for the filling.
    → Shredded chicken distributes evenly throughout the casserole, creating cohesive bites rather than streaks of meat.
  • In a large mixing bowl, whisk together the condensed cream of chicken soup, sour cream, softened cream cheese, and warmed chicken broth until smooth and fully integrated; whisk in garlic powder, onion powder, and salt and pepper to taste.
    → Warming the broth helps it blend smoothly with cold dairy, creating a creamy, cohesive base without lumps or separation.
  • Fold the shredded chicken and broccoli (and any prepared mushrooms or corn) into the sauce, then stir in 1 cup shredded cheddar cheese and 1/2 cup grated parmesan until evenly distributed; mix until the cheese melts into the sauce and coats the vegetables and chicken.
    → Cheese enriches the filling with melt and flavor, binding the components into one luscious casserole.
  • Pour the filling into the prepared baking dish and spread it into an even layer with a spatula, tapping the dish gently to remove air pockets that could cause uneven heating.
    → An even layer ensures uniform cooking and consistent slices when serving.
  • Prepare the Ritz cracker topping by crushing crackers into coarse crumbs and tossing with 3 tablespoons melted unsalted butter until the mixture is evenly moistened and clumps slightly; this yields a crisp, golden crust.
    → The butter-coating helps the crumbs brown and stay crunchy as the filling steams beneath.
  • Sprinkle about half of the buttered cracker topping in an even layer over the casserole to form the initial crust. Reserve the remaining cracker topping for the final baking stage.
    → Layering the topping in two stages creates a protected base crust during the early bake and a crisp, golden finish at the end.
  • Cover the casserole with foil and bake in the preheated oven at 350°F (175°C) for 20 to 25 minutes, until the casserole is hot throughout and the sauce lightly bubbles; covering prevents the topping from browning too quickly while the center heats through.
    → This step ensures gentle, uniform heat penetration and a creamy interior without scorched edges.
  • Remove the foil and sprinkle the remaining cracker topping over the hot casserole; return to the oven and bake for an additional 5 to 7 minutes, or until the topping is deeply golden and crisp.
    → The final exposure to heat finishes browning and crisping the crust for a satisfying contrast with the creamy filling.
  • Test for doneness by inserting a thermometer into the center; it should read 165°F (74°C) and the sauce should be bubbling at the edges; if needed, bake a few more minutes to reach safe internal temperature.
    → Safe internal temperature ensures the chicken is fully cooked while preserving the dish’s texture.
  • Let the casserole rest for 5 to 10 minutes before serving to allow the filling to set and the sauce to thicken slightly, making portions lift cleanly.
    → Resting helps theStructure settle and enhances cutting and plating quality, reducing runny slices.
  • If desired, sprinkle chopped fresh parsley over the top just before serving for a bright color and fresh aroma that complements the rich filing.
    → A little fresh herb elevates the dish’s presentation and notes of green contrast with the creamy filling.

Notes

These Million Dollar Chicken Casserole notes provide tips to perfect a creamy, comforting bake featuring shredded chicken, broccoli, and a cheesy sauce topped with a buttery cracker crumble. To customize, stir in optional mushrooms, corn, and chopped fresh parsley for color and brightness. For best texture, lightly blanch the broccoli until bright green and tender-crisp, and let dairy ingredients come to room temperature before mixing to prevent curdling; shred cheddar from a block for smoother melt. Make-ahead: assemble through the topping, cover, and refrigerate up to 24 hours; bake uncovered and add a few extra minutes if starting cold. Storage: refrigerate leftovers in an airtight container for 3-4 days, or freeze baked or unbaked casserole for up to 2-3 months; reheat gently in the oven or microwave. Gluten-free option: substitute gluten-free crackers or crushed gluten-free crackers for the topping, use a gluten-free condensed cream of chicken soup or homemade cream sauce, and ensure broth is gluten-free. For dairy-free or lighter versions, swap sour cream and cream cheese for dairy-free alternatives and use a lighter cheese or omit some butter in the topping; adjust the salt since canned soups vary in sodium. Serve with a crisp salad or steamed vegetables, and offer hot sauce or a dollop of yogurt for added tang.

Tips

Tips for Million Dollar Chicken Casserole

  • Shredded chicken: 3 cups of cooked chicken should be measured after shredding. Use leftovers from roasted chicken or a pre-cooked rotisserie bird for speed. If there’s skin, discard it before shredding to keep the filling from greasiness and to ensure the sauce coats evenly.
  • broccoli: Cut into bite-sized florets and aim for tender-crisp texture. Lightly blanch or steam until bright green; if using frozen broccoli, thaw and drain thoroughly to minimize extra moisture that can make the casserole watery.
  • Cream of chicken soup: Use regular or low-sodium varieties to control salt. For a richer sauce, whisk in a splash of milk or chicken broth. If you prefer, substitute with 1.5 cups homemade cream sauce.
  • Sour cream: Let it come to room temperature before mixing to prevent curdling and ensure a silky texture. Use full-fat for maximum creaminess, or light sour cream for a lighter version.
  • Cream cheese: Soften to room temperature and whisk into the sour cream and soup to prevent lumps. This will help create a smooth, cohesive sauce. For a dairy-free option, use a plant-based cream cheese and adjust the broth accordingly.
  • Chicken broth: Warm the broth before adding so it blends smoothly with the cold dairy mixture and doesn’t cause separation. Opt for low-sodium broth to better control overall salt.
  • Cheddar cheese: Shred from a block for best melt; stir a portion into the sauce and reserve some to sprinkle on top for a cheesy crust.
  • Parmesan: Freshly grate for sharper flavor. Integrate some into the sauce or sprinkle on top with the cheddar for extra depth and a golden crust.
  • Garlic powder and onion powder: These provide a reliable base flavor. If you prefer fresh garlic, sauté minced garlic briefly in a little butter before adding, but avoid overpowering the dish with too much garlic.
  • Salt and pepper: Taste as you go. Canned soups and crackers can be salty, so start modestly and adjust at the end. You can always add more salt, but you can’t remove it once mixed in.
  • Crushed Ritz crackers: They create a crunchy, golden topping. Toss the crumbs with melted butter to help even browning; for variation, you can use panko breadcrumbs. Hold the topping until the final minutes of baking for extra crunch.
  • Unsalted butter: Used to coat the cracker topping. If dairy-free, substitute with an equivalent amount of olive oil or a dairy-free margarine. A pinch of paprika adds color if desired.
  • Optional add-ins: Mushrooms add earthy depth; sauté them first to evaporate moisture so they don’t make the casserole soggy. Corn adds sweetness and color; parsley gives a fresh finish. Use as desired and fold in before baking or sprinkle on top after cooking for a fresh look.
  • Assembly notes: Gently fold ingredients to avoid breaking broccoli and to keep the chicken pieces intact. Don’t overmix; you want a creamy, cohesive filling with evenly distributed ingredients.

FAQ

What is Million Dollar Chicken Casserole?

Million Dollar Chicken Casserole is a creamy, hearty bake featuring tender chicken, a rich sauce, and a comforting cheese topping. It’s typically made with chicken, a creamy base (like cream of chicken soup and sour cream or mayo), and a flavorful mix of vegetables and starch (such as broccoli and cooked rice or pasta), topped with cheese and sometimes crispy onions for a final crunch.

What ingredients do I need?

Common base ingredients include:
– 2 cups cooked chicken, shredded or diced
– 1 can (10.5 oz) cream of chicken soup (or a mix of cream of mushroom)
– 1 cup sour cream or Greek yogurt (or a combination)
– 1/2 cup mayonnaise
– 2 cups shredded cheddar cheese, divided
– 2 cups broccoli florets (or your favorite veggies)
– 2 cups cooked rice or pasta
– 1/2 medium onion, diced
– 1 tsp garlic powder, salt, and pepper to taste
Optional toppings: crispy fried onions or crushed crackers/breadcrumbs
Feel free to customize with peas, corn, mushrooms, or different cheeses.

Can I use rice or pasta, and which works best?

Both work well. Rice keeps the dish a bit heartier and looser with sauce, while pasta (lycoprotein-free shapes like penne) yields a cheesier, more indulgent texture. If you use pasta, cook it until al dente and fold it in with the sauce. For rice, use fully cooked, fluffy rice. If the mixture seems dry, add a splash of milk or broth to loosen.

How do I prepare and bake the casserole?

Basic steps:
– Preheat oven to 350°F (175°C).
– In a large mixing bowl, combine chicken, broccoli, cooked rice/pasta, cream soup, sour cream, mayo, half the cheddar, onion, garlic powder, salt, and pepper.
– Stir until evenly mixed and transfer to a greased baking dish.
– Sprinkle the remaining cheese on top. If using toppings, add them now.
– Bake for 25–35 minutes, until bubbly and hot through. If you like a crisper top, bake a few extra minutes or broil for 1–2 minutes at the end.

Can I make this ahead or freeze it?

Yes. You can assemble the casserole up to 24 hours in advance and refrigerate covered. Bake time may increase by 5–10 minutes. For freezing, assemble without baking, wrap tightly, and freeze. Thaw overnight in the fridge before baking, then bake at 350°F for 45–60 minutes or until bubbling and hot in the center. You may need to add a splash of milk to loosen the sauce after thawing.

How can I adapt this for dairy-free or gluten-free diets?

Dairy-free: use dairy-free cream soups, dairy-free sour cream or yogurt, and dairy-free mayo; use dairy-free cheese if desired. Gluten-free: use a gluten-free cream soup (check labels) and gluten-free breadcrumbs or fried onions for topping. Ensure any add-ins (like pasta) are gluten-free if needed.

What toppings give the best crispiness?

Options for a crunchy finish include:
– Crispy fried onions sprinkled on top before baking
– Crushed crackers or gluten-free crackers mixed with a little melted butter
– Panko breadcrumbs tossed with a bit of butter
For extra color, broil for 1–2 minutes at the end, watching closely.

How should I store and reheat leftovers?

Store leftovers in an airtight container in the fridge for 3–4 days. Reheat in the oven at 350°F for 15–20 minutes until hot, or microwave in 1–2 minute bursts, stirring in between until heated through. If the casserole seems dry after reheating, stir in a splash of milk or broth.

Can I use other proteins or add-ins?

Yes. Swap in leftover turkey, rotisserie chicken, or canned chicken. Add-ins like corn, peas, mushrooms, or chopped bell peppers work well. For a seafood twist, cooked shrimp can be folded in, though adjust cooking time to avoid overcooking.

What are some flavor variations I can try?

Try these ideas:
– Swap cheddar for a blend of cheddar and mozzarella
– Add a teaspoon of smoked paprika or a pinch of cayenne for warmth
– Stir in chopped fresh herbs (parsley, thyme) after baking
– Mix in a splash of hot sauce or a teaspoon of Dijon mustard for brightness
– Use ranch dressing in place of part of the mayo for extra tang

Introduction / Hook

Imagine a dessert that looks like a couture confection but tastes like a soft, cloud-kissed dream. A roulade that unveils a supple ribbon of cheesecake wrapped in a delicate sponge, its edges kissed with citrus brightness and vanilla warmth. Rotolo cheesecake is the kind of showstopper that arrives at the table as if by magic, then settles into your palate with the quiet confidence of a familiar favorite. The cake’s exterior gleams with a satin sheen of glaze or a whisper of powdered sugar, while the inside unfurls into a creamy, tangy center that lingers long after the last bite. This is not just a dessert; it’s an invitation—an edible sculpture that celebrates texture, aroma, and balance in one elegant, rollable package.

What makes this rotolo cheesecake truly special is its harmony of contrasts. The outside sponge is light and airy, almost featherlike, offering a gentle sweetness that plays nicely with the tangy, velvety cheesecake filling inside. The rolling technique reveals surprising layers: a soft crust that yields to a creamy core, a subtle kiss of zest or fruit that brightens without overpowering, and a finish that feels indulgent yet refined. It’s the kind of dessert you can prepare ahead for a celebration or a refined Sunday supper, then slice into dramatic rounds to reveal the perfectly coiled center. The aroma alone—vanilla, citrus, and a hint of dairy sweetness—invites guests to gather round, plates ready, spoons poised, eager to savor the first bite and the next one after that.

Rotolo cheesecake embodies a playful yet sophisticated spirit. It’s a celebration of technique without fuss, of texture without turmoil, and of flavors that feel both timeless and modern. When you slice into it, you’re not just serving dessert—you’re offering an experience: the gentle peel of the sponge, the luxurious melt of the filling, the crisp snap of a lightly dusted crust, and a lingering citrus whisper that lingers on the tongue. It’s the kind of dessert that makes ordinary weeknights feel like a small holiday and turns a simple gathering into a memory you’ll revisit in conversation long after the plates have been cleared.

The Story Behind the Dish

The word “rotolo” in Italian literally means “roll,” and in pastry shops and home kitchens alike, it evokes the art of turning a sheet of batter into a slender, elegant form. The rotolo cake has long enjoyed a place in Italian patisserie as a versatile canvas: spread with jams, creams, or chocolate, then rolled into neat spirals that reveal their secrets only when sliced. The cheesecake version—where a creamy filling is paired with a light sponge—feels like a natural evolution of this tradition, marrying the Italian knack for balance with the universal appeal of cheesecake’s tang and silkiness.

Historically, Italian desserts have thrived on the beauty of a texture contrast and the elegance of simple, high-quality ingredients. The rotolo format is a clever celebration of fold, roll, and reveal: the idea that texture can be layered and that presentation can be both dramatic and accessible. The cheesecake component itself has a storied lineage across the Mediterranean and Europe, evolving from dense, rustic cheese-and-sugar fillings to the smooth, whipped creams and cultured varieties we adore today. When you bring these two ideas together in a rotolo cheesecake, you’re tapping into a heritage of craft and a modern appetite for refined, impressive sweets that still feel homey and comforting.

In many households, a roll is a symbol of care: something you bake with patience, then present with a flourish. The rotolo cheesecake captures that sentiment perfectly. It invites you to practice a bit of technique—the even spread, the careful roll, the precise chill—without demanding a culinary degree. It’s the kind of dessert that says you paid attention to the details, even as you kept the mood light and celebratory. And because the concept is so adaptable, it travels well across cultures and seasons: you can tailor the filling to match seasonal fruit, swap in a different zest or liqueur, or adjust the sweetness to suit your guests. The story of rotolo cheesecake is, at its heart, a narrative of versatility and warmth—the promise that a simple idea, treated with care, can become something memorably elegant.

Why You’ll Love This Recipe

  • Impressive presentation with minimal effort: The rolled form creates a dramatic reveal and a professional look that elevates any gathering.
  • Creamy indulgence meets light texture: A silky cheesecake filling wrapped in a tender sponge provides a delightful contrast that keeps every bite interesting.
  • Versatile fillings and flavor twists: This is a canvas for citrus, berries, chocolate, coffee, or herbs—you can tailor it to your mood or season.
  • Make-ahead friendly: Roll, chill, and set the flavors in advance so you can focus on hosting when the moment arrives.
  • Kid- and grown-up-friendly: A dessert that appeals to a wide range of palates, easily adjusted for dietary needs with smart substitutions.
  • Perfect for celebrations and everyday indulgence: From birthdays to Sunday dinners, it fits both special occasions and a cozy treat.
  • Texture and aroma mastery: Fragrant vanilla, citrus zest, and a whisper of cream create a multisensory dessert that lingers in memory.

Flavor Profile & Texture

The rotolo cheesecake brings together a chorus of flavors that play off one another in a harmonious duet. The outer sponge is subtly sweet, with a delicate crumb that yields to the bite without crumbling. It carries faint notes of vanilla, perhaps a touch of almond, and a light, almost chiffon-like tenderness. Inside, the cheesecake filling delivers the signature tang that cheesecakes are famous for, tempered by creaminess and a gentle sweetness that prevent any one note from overpowering the other.

To brighten the experience, many rotolo cheesecakes incorporate citrus zest—lemon, orange, or limoncello-infused aromas—that lift the richness and create a fresh, clean finish on the palate. When a fruit or berry compote is added, it introduces a tart-sweet counterpoint that pops against the richness of the filling, while a dusting of powdered sugar or a glossy glaze adds that final touch of elegance. The textures are what keep this dessert memorable: the sponge’s soft, airy fork-tolerance contrasts with the cheesecake’s dense, creamy center, and a delicate, almost velvety mouthfeel ties everything together. Every slice reveals a neat spiral, a visual reminder of the careful rolling that holds the layers in place and promises a consistent bite from edge to center.

Nose-to-plate sensory notes matter here as well: the aroma of vanilla beams softly, the citrus oils release a zesty perfume, and the dairy sweetness adds warmth that makes the finishing flavors feel cozy and approachable. The balance is precise but approachable, rewarding patient bakers who allow the roll to rest and set so that the layers stay intact when sliced. This is a dessert that invites you to observe textures and aromas as much as to taste them—a complete sensory experience designed to delight the eyes, the nose, and the palate in equal measure.

Occasions & Pairings

Rotolo cheesecake shines in a variety of settings. It’s equally at home gracing a festive holiday dessert table as it is a centerpiece for a weekend family dinner or a celebratory brunch. Its elegant silhouette and refined taste make it a natural choice for special occasions—birthdays, anniversaries, graduations, and intimate weddings—where guests appreciate a dessert that feels sophisticated but not fussy. Because the recipe is adaptable, it also shines on weeknights when you want something memorable without a marathon of steps.

Pairing suggestions to elevate the experience:

  • Drinks: A glass of Moscato d’Asti, Prosecco, or a late-harvest Riesling can echo the sweetness and citrus notes, while a small espresso or coffee after-dinner pairing complements the cheesecake’s richness.
  • Fruit accents: Fresh berries (strawberries, blueberries, raspberries) or a raspberry coulis can add brightness and a pop of color, while stone fruits in season offer a succulent contrast.
  • Side options: A light fruit salad, a lemon-scented yogurt, or a crisp almond biscotti provide textural variety on the plate and balance the creaminess.
  • Garnishes: A scatter of finely grated citrus zest, edible flowers, or a drizzle of berry glaze can transform the plate into a visually stunning dessert platter.

Tips, Variations & Substitutions

One of the greatest strengths of the rotolo cheesecake is its adaptability. Here are ideas to tailor the dish to different tastes, dietary needs, or ingredient availabilities, all while keeping the spirit of the roll intact.

  • Swap in a vegan cream cheese, plant-based butter, and a dairy-free sponge (often using a flax or aquafaba-based whipping technique). Ensure the sponge texture remains light with the right balance of leavening and moisture. A citrus glaze can be made with dairy-free ingredients to finish.
  • Use a gluten-free flour blend or an almond-based sponge for a soft, moist texture that still rolls neatly. The filling remains the same, but check that any glaze or toppings are gluten-free as well.
  • Reduce sugar in the filling slightly and rely on the natural sweetness of citrus and fruit compote. Use a sugar-free fruit topping if desired, or opt for a berry reduction that provides tang and sweetness with fewer refined sugars.
  • For a warm, comforting profile, infuse the cheesecake filling with vanilla bean and a small amount of cardamom or cinnamon. For a bright, modern twist, use lemon or orange zest and a splash of fruit liqueur or a dash of espresso for depth.
  • Introduce a chocolate-cream layer or swirl the filling with melted dark chocolate. A cocoa-spiked sponge adds a decadent contrast that still rolls gracefully.
  • Roll with a tangy berry compote or roasted stone-fruit purée inside for a vibrant layer of color and flavor. Seasonal fruits like figs, peaches, or cherries can offer unique profiles.
  • Consider pistachio or almond paste incorporated into the sponge for a Mediterranean vibe, or a saffron-infused cream for an exotic note.
  • Prepare the sponge and the filling a day ahead. Chill the filling well to maintain its shape when rolling, and roll the cake gently to preserve a clean spiral. This approach reduces stress on the day of serving and improves the texture as flavors meld overnight.

Storage & Make-Ahead Ideas

Rotolo cheesecake can be a wonderful make-ahead dessert if you plan ahead. The secret to a pristine slice lies in proper chilling and careful wrapping to preserve moisture and prevent the roll from drying out.

Storage tips:

  • Refrigeration: Once rolled and set, wrap the entire rotolo tightly in plastic wrap and refrigerate for up to 2–3 days. If you’ve added a glaze, keep it refrigerated until just before serving to maintain shine and texture.
  • Make-ahead steps: You can prepare the sponge a day ahead, bake and cool completely, roll with the filling, and refrigerate overnight. The next day, give the roll a gentle slice to ensure the spiral still looks neat, and finish with a final dusting or glaze just before serving.
  • Freezing: For longer storage, you can freeze the rolled dessert, tightly wrapped, for up to 1–2 months. Thaw in the refrigerator overnight, then re-cover with a light glaze or powder sugar just before serving. Note that the texture of the sponge and filling may adjust slightly after freezing.
  • If you have a few slices left, transfer them to an airtight container and refrigerate. Slices are best enjoyed within 1–2 days for optimal texture and flavor, though they remain safe to eat for a bit longer.

Fun Facts & Trivia (Optional)

– The concept of rolling desserts is a global delight, found in many cuisines with local twists, from Swiss roll-inspired treats to Japanese maki-inspired sweets. The rolling technique invites a sense of theater at the table and turns dessert into a mini performance.

– Cheesecake itself has a long history that stretches back to ancient civilizations around the Aegean Sea, where early versions combined soft cheese with flour and honey. Modern cheesecakes, with their smoother textures and refined sugars, came into prominence in the 19th and 20th centuries, evolving into the creamy, velvety creations we now adore. The rotolo format adds a baker’s artistry to this classic, blending a familiar filling with a fluffy, resilient outer shell that holds its shape when sliced.

– The interplay of citrus and dairy is a classic pairing in many culinary traditions, because citrus’ bright acidity cuts through richness, while dairy provides a comforting, mellow base. The rotolo cheesecake embodies this balance beautifully, making it a crowd-pleaser for both citrus lovers and cheesecake enthusiasts.

Ingredients

Rotolo cheesecake

  • Crepe Sheets
    • 1 1/2 cups all-purpose flour (180 g)
      → The flour forms the base structure of the crepe batter and provides the body for the thin sheets. Sift before measuring to avoid lumps and whisk thoroughly with the wet ingredients. For a gluten-free version, substitute with a 1:1 gluten-free flour blend and a pinch of xanthan gum to mimic elasticity.
    • 3 large eggs
      → Eggs act as the binding and emulsifying agents, giving the crepes their tender, pliable texture. Bring eggs to room temperature before mixing to help them incorporate smoothly into the batter and prevent curdling.
    • 1 1/2 cups whole milk
      → Milk hydrates the flour and provides moisture for a soft, delicate crepe. Whole milk yields richer flavor and texture; you can substitute 2% or a plant-based milk, but the batter may be slightly thinner and crepes may be a touch less tender.
    • 2 tablespoons unsalted butter, melted
      → Butter adds richness and helps the crepes release from the pan. Add the cooled (not hot) melted butter to the batter to avoid cooking the eggs. For dairy-free options, substitute with a neutral oil in the same amount.
    • 1/4 teaspoon fine sea salt
      → Salt enhances flavor and balances sweetness in the finished crepes. If you use salted butter, reduce additional salt accordingly to avoid oversalting.
    • 1 tablespoon granulated sugar (optional)
      → A small amount of sugar helps with browning and adds a hint of sweetness. Omit if you want savory crepes; they will pair well with a sweet cheesecake filling without needing extra sugar.
  • Cheesecake Filling
    • 16 oz (450 g) cream cheese, softened
      → The creamy, tangy foundation of the filling. Soften to room temperature so it blends completely and yields a smooth filling without lumps. Beat with sugar until silky, scraping the bowl as needed. For a lighter texture, blend a portion with a little sour cream, but keep the cream cheese as the primary base.
    • 1/2 cup granulated sugar
      → Provides sweetness and helps achieve a smooth, cohesive filling when beaten with the cream cheese. Ensure the sugar dissolves fully; if the cheese is very soft, a brief, steady whisk will dissolve it without creating air pockets.
    • 1 teaspoon pure vanilla extract
      → Adds depth and warmth to the filling. Use high-quality pure vanilla for best aroma. If you have vanilla bean, you can substitute with 1/2 teaspoon vanilla paste for a stronger flavor.
    • Zest of 1 lemon, finely grated
      → Brightens the richness of the cheese and provides a pleasant citrus note that contrasts with the creamy filling. Avoid the white pith; zest first, then fold into the mixture to distribute evenly.
    • 1/2 cup heavy cream, cold
      → Whipped into soft peaks and folded into the cheese mixture to lighten the filling and create a silky texture. Chill the cream and whip just to soft peaks, then fold gently to maintain volume. If desired, substitute with whipped dessert cream for convenience.
  • Optional Add-ins
    • 1/2 cup mini chocolate chips (optional)
      → Adds pockets of melted chocolate for a decadent touch. Fold in after the cream cheese has been blended to distribute evenly without tearing the crepes. Use mini chips to prevent tearing the delicate sheets.
  • Finish & Garnish
    • Powdered sugar, for dusting
      → A light dusting enhances presentation and adds a touch of sweetness. Sift evenly over the rolled cake just before serving to avoid clumps and create a neat finish.
    • 2 tablespoons melted dark chocolate, for drizzle (optional)
      → A decorative drizzle adds visual appeal and a final layer of richness that complements the cheesecake filling. Drizzle while the roll is still slightly warm to help the chocolate adhere; allow to set before slicing.
    • Fresh mint leaves, for garnish (optional)
      → Mint provides a color contrast and a fresh aroma that pairs nicely with citrusy notes. Use whole or torn leaves as a bright, aromatic finish; rinse and pat dry before garnishing.

Instructions

  • Bring eggs and milk to room temperature to ensure smooth emulsification and even blending with the flour.
    → Room-temperature ingredients mix more uniformly, preventing curdling and resulting in a tender, pliable crepe that is easy to roll.
  • Sift the flour with fine sea salt and the optional sugar into a large bowl to aerate the powder and remove lumps.
    → Sifting ensures an ultra-smooth batter and accurate measurement, which helps achieve thin, delicate crepes rather than dense lumps.
  • Whisk the eggs with the milk and cooled melted butter in a separate bowl until the mixture is completely combined and glossy.
    → Whisking separately helps emulsify fat into liquid, preventing greasy spots and producing a uniform batter.
  • Pour the wet mixture into the dry ingredients gradually and whisk until you have a smooth, lump-free batter; let it rest for 20–30 minutes.
    → Resting hydrates the flour and relaxes gluten, which yields tender crepes that won’t tear easily when rolled.
  • Preheat a nonstick skillet or crepe pan over medium heat and brush it lightly with melted butter or neutral oil.
    → Proper preheating creates instant set on contact, while a thin coating prevents sticking without making the crepe heavy.
  • Ladle a small amount of batter into the hot pan and tilt quickly to form a thin, even circle; cook until the edges are set and the surface looks dry and matte, about 1–2 minutes.
    → A thin, even layer yields pliable sheets that wrap smoothly; avoiding overcooking prevents toughness and tearing.
  • Flip the crepe with a spatula and cook the opposite side for 15–30 seconds, then transfer to a stack and keep warm between sheets of parchment.
    → Quick, gentle flipping prevents tearing and ensures both sides are lightly colored without browning too much.
  • Repeat with the remaining batter, stacking crepes with parchment and covering to maintain pliability until all sheets are made.
    → Consistent sheet thickness across all crepes ensures uniform rolling and appearance in the finished roulade.
  • Soften the cream cheese at room temperature until fully pliable for smooth blending.
    → Soft cheese blends without lumps and yields a silkier filling, which is critical for a refined cheesecake texture.
  • Beat the cream cheese with granulated sugar at medium speed until smooth and fluffy, scraping the bowl as needed.
    → This creates a cohesive base with no graininess and helps the filling hold together during rolling.
  • Beat in the pure vanilla extract and finely grated lemon zest until evenly incorporated.
    → Vanilla deepens flavor while lemon zest adds brightness that cuts the richness of the cheese.
  • In a separate bowl, whip the cold heavy cream to soft peaks; fold the whipped cream into the cheese mixture gently to maintain volume.
    → Soft peaks keep the filling light and airy, preventing it from becoming heavy or dense.
  • If using mini chocolate chips, fold them in after the cheese and cream are blended to distribute evenly without tearing the crepe.
    → Chips provide pockets of texture and sweetness while preserving a smooth filling across the roll.
  • Place a crepe on a clean work surface and spread a thin, even layer of filling across, leaving about a 1/2-inch border around the edges.
    → A restrained layer prevents overflow when rolling and creates neat, uniform slices.
  • Roll the crepe tightly from one long edge into a log, keeping the seam side down to seal, and remove any air pockets as you roll.
    → A tight roll maintains shape and prevents the filling from leaking out; the seam down helps keep the roll intact.
  • Wrap the log tightly in plastic wrap or parchment and refrigerate for at least 2 hours or overnight to set the filling and firm the roulade.
    → Chilling solidifies the structure, making slicing clean and preventing squishing of the filling.
  • Unwrap the chilled roulade and dust the surface evenly with powdered sugar just before serving.
    → Powdered sugar provides a delicate, visually pleasing finish and a hint of sweetness without humidifying the surface.
  • Optionally drizzle melted dark chocolate over the roll while it is still slightly warm so the glaze adheres and sets with a glossy finish.
    → Chocolate drizzle adds depth and a contrasting flavor while enhancing presentation; drizzle must be even and allow it to set before slicing.
  • Garnish with fresh mint leaves for a fragrant, color-contrast finish.
    → Mint provides a bright aroma and visual pop that complements the citrus note in the filling; rinse and pat dry before placing.
  • Just before serving, slice the roulade into rounds about 1 inch thick using a sharp knife warmed under hot water and wiped dry between cuts for clean, neat slices.
    → A warmed blade reduces tearing and yields precise, uniform slices that reveal the filling pattern.

Notes

“These rotolo cheesecake notes guide you through building delicate crepe sheets, a silky lemon-vanilla cheesecake filling, and a clean, sliceable roll that looks as impressive as it tastes.”

Crepe sheets: In a bowl, whisk together 1 1/2 cups all-purpose flour (180 g) or a 1:1 gluten-free flour blend with a pinch of xanthan gum, 3 large eggs, 1 1/2 cups whole milk, 2 tablespoons unsalted butter (melted and cooled), 1/4 teaspoon fine sea salt, and 1 tablespoon granulated sugar (optional) until smooth. Let the batter rest 20–30 minutes to relax the gluten and improve texture. Lightly grease a nonstick skillet and cook thin rounds over medium heat, tilting the pan to spread evenly; flip once when the edges lift and cook a few seconds more. Stack the finished crepes with parchment and keep them covered to prevent drying. For a dairy-free option, substitute melted butter with a neutral oil and use a plant-based milk blend.

Cheesecake filling: Beat 16 oz (450 g) cream cheese softened to room temperature with 1/2 cup granulated sugar until very smooth. Mix in 1 teaspoon pure vanilla extract and the zest of 1 lemon for brightness. Fold in 1/2 cup cold heavy cream that has been whipped to soft peaks to lighten the mixture, folding gently to keep the texture airy. Optional add-ins include 1/2 cup mini chocolate chips or a swirl of berry compote for variation.

Finish & assembly: Lay a crepe on a clean surface, spread a thin, even line of filling, roll tightly into a log, and repeat with the remaining crepes. Chill the assembled rotolo for at least 1 hour to help it hold its shape for clean slicing. Just before serving, dust with powdered sugar, and optionally drizzle with melted dark chocolate and garnish with fresh mint or berries for a vibrant plate.

Storage, tips, and gluten-free option: Refrigerate rolled rotolo for up to 3 days; wrap tightly to prevent drying. Freeze individual slices for up to 1 month and thaw in the fridge before serving. For a gluten-free version, ensure crepe batter uses a 1:1 gluten-free flour blend with xanthan gum and consider gluten-free crepe sheets. Always use softened cream cheese and keep ingredients close to room temperature for a smoother filling, and cut slices with a warmed, sharp knife to maintain neat edges.

Tips

Tips for perfect Rotolo Cheesecake

  • Crepe batter consistency: aim for a very thin pancake-like batter. If the batter seems thick, whisk in a little more milk until it flows smoothly in a thin stream. Thin sheets are essential for flexible rolling.
  • Batter resting: rest the batter 20–30 minutes at room temperature to hydrate the flour and relax the gluten. If you refrigerate, bring it back to room temperature and whisk briefly before cooking to prevent lumps.
  • Gluten-free option: sift the gluten-free flour blend and add a pinch of xanthan gum if your blend lacks elasticity. Resting the batter after mixing helps hydration and tenderness of the crepes.
  • Pan prep and fat: use a nonstick skillet or crepe pan, lightly brush with melted butter or neutral oil, and wipe away excess. Keep the pan at medium-low heat for even, delicate browning without scorching.
  • Cooking technique: swirl the batter quickly to form a nearly transparent sheet about 1/16 inch thick. If a crepe tears, use the broken piece in the roll or start with a fresh sheet—tears can weaken the roll.
  • Stacking crepes: cool on a rack and layer between parchment or plastic wrap to prevent sticking. Stacking while warm can trap moisture and cause tearing later.
  • Cheesecake filling texture: soften cream cheese to room temperature and beat until completely smooth. Add sugar gradually and scrape the bowl. For a lighter texture, fold in a portion of whipped cream or sour cream, keeping the cream cheese as the base.
  • Whipping cream: chill the mixing bowl and whisk, whip the cream to soft peaks, then fold in gently. Over-whipping or whipping to stiff peaks before folding can deflate the filling.
  • Flavor balance: add the lemon zest evenly for brightness; vanilla extract or paste enhances depth. Avoid overmixing to preserve a silky texture without a gummy mouthfeel.
  • Add-ins: if using mini chocolate chips, fold them in after the cheese is well blended to prevent tearing the crepes and to distribute evenly.
  • Assembling the roll: spread filling in a thin, even layer on each crepe, leaving about a 1 cm margin to seal. Roll tightly using parchment or a clean towel to minimize cracks, then chill 1–2 hours or until firm before slicing.
  • Setting and serving: refrigerate the assembled roll until the filling is fully set; longer chilling improves slice cleanliness. Just before serving, dust with powdered sugar and drizzle with melted dark chocolate if desired for a polished look.
  • Presentation tips: garnish with fresh mint for a color contrast and fragrant finish. Slice with a warmed knife (dip in hot water, wipe dry) for cleaner cuts.
  • Make-ahead and storage: crepes can be prepared a day ahead and kept layered between parchment in the fridge. The filled roll can be wrapped and chilled for up to 2–3 days or frozen for longer storage; thaw overnight in the fridge before slicing.
  • Allergen-friendly substitutions: to make dairy-free, use plant-based milk and a dairy-free cream cheese substitute. For gluten-free, follow the crepe guidance above and verify all add-ins are gluten-free.

FAQ

What is Rotolo cheesecake?

Rotolo cheesecake is a rolled dessert that combines a thin sponge cake or pastry sheet with a creamy cheesecake filling. The sheet is rolled around the filling to form a log, then chilled until set. It’s typically finished with a light dusting of sugar or cocoa and can be filled with jam, fruit, or chocolate.

What ingredients do I need for a classic Rotolo cheesecake?

For the cake layer: eggs, sugar, flour (or a flour blend), a bit of butter or oil, and a pinch of salt. For the filling: cream cheese, powdered sugar or granulated sugar, vanilla, and whipped cream or mascarpone. For rolling and decorating: a layer of jam or fruit compote inside, plus optional toppings like powdered sugar, cocoa, or fresh berries.

Can I use store-bought sponge cake instead of making the cake layer?

Yes. A thin, flexible sponge sheet or a very lightweight vanilla sponge works well. If using store-bought, trim to a rectangular sheet and ensure it’s not too thick or dry, so it can roll without cracking.

How do I make the cake layer?

Whisk eggs and sugar until pale and fluffy, then fold in sifted flour (and a pinch of salt) with a gentle motion. Bake in a thin sheet on a parchment-lined tray until just set. While still warm, roll it tightly in a clean kitchen towel to shape, then cool completely.

How do I assemble and roll the Rotolo?

Prepare the cheesecake filling (softened cream cheese, sugar, vanilla, and whipped cream or mascarpone). Unroll the cooled cake sheet, spread a thin layer of filling over the surface, add a layer of jam or fruit compote if desired, leaving a small edge. Roll the sheet tightly using the parchment or towel to help, then wrap and refrigerate until firm.

How long should the Rotolo cheesecake chill?

Chill for at least 3–4 hours, or better overnight, to let it set and make slicing clean. Keep it refrigerated until serving.

How should I store leftovers?

Store the rolled cheesecake in an airtight container or wrapped tightly in plastic in the fridge for up to 2–4 days. For longer storage, you can freeze individual slices wrapped well; thaw in the fridge before serving.

What are some tasty variations I can try?

Try lemon zest and berry jam for a bright flavor, chocolate ganache or Nutella filling for chocolate lovers, or a matcha and white chocolate version. You can also swap the jam for mango, strawberry, or raspberry compotes, and adjust the filling with lemon or vanilla as desired.

Is Rotolo cheesecake gluten-free or suitable for special diets?

You can adapt it by using gluten-free flour in the cake layer and a gluten-free biscuit or sponge. For dairy-free, use dairy-free cream cheese and whipping cream substitutes, though texture may differ. Always check ingredient labels for potential allergens such as eggs, dairy, or nuts.

What common problems should I watch for and how can I avoid them?

Cracks: ensure the cake layer is thin and flexible; roll while warm, or roll after cooling with a towel to set its shape. Soggy filling: don’t over-wet the cake with filling or jam. Dry sponge: avoid overbaking the cake layer. Filling separation: gently fold whipped cream into the cream cheese to keep a light, stable filling. If the roll is hard to slice, chill longer or lightly chill before slicing to help clean cuts.

Introduction / Hook

There’s something quietly majestic about muffins that honor yogurt in their batter—an everyday treat that feels indulgent yet wonderfully simple. Picture a warm bakery scent curling through a cozy kitchen: the faint whisper of vanilla, the soft tang of cultured dairy, and a crumb that stays tender long after the first bite. Muffin yogurt greco is not just a snack; it’s a ritual you can slip into your morning routine or tuck into a busy afternoon with confidence. The moment you lift a loaf from the oven, you’re greeted by a delicate crust that gives way to a supremely moist interior, as if the muffin itself decided to melt into a cloud of comfort. The beauty of this bake lies in its balance—gentle sweetness that doesn’t fight the yogurt’s brightness, a kiss of warmth from the oven, and a texture that pairs perfectly with a mug of coffee, a splash of tea, or a generous dollop of fruit. Whether you’re cooking for yourself, your family, or a crowd, this muffin is built to delight with every bite, offering a scent and flavor that evokes cozy mornings, slow Sundays, and the simple joy of homemade goodness.

The Story Behind the Dish

Greek yogurt has a storied place in Mediterranean kitchens, where dairy cultures have long supported a table of robust flavors and comforting textures. The practice of straining yogurt to create a thicker, creamier product has roots in regions where fresh milk met the patience of time and the craft of stirring. In many homes, yogurt isn’t merely a topping or a garnish; it’s a foundation—usable in sauces, marinades, and yes, baked goods that benefit from its tang and moisture. Muffin yogurt greco draws on that tradition, translating the spirit of a Greek pantry into a handheld treat that travels well and remains tender even after hours on a plate. The concept is simple yet resonant: take a batter that embraces the density and creaminess of yogurt, gently coax it with modest sweeteners and a whisper of aroma, then bake until the crust bronzes and the interior stays soft. In kitchens around the world, cooks have found that yogurt in bakery batters helps to keep crumbs tight, crumbly textures friendly, and flavors balanced—no heavy greasiness, just a moist, forgiving crumb that asks for nothing more than a moment of pause before the next bite. This recipe is, in a sense, a tribute to those quiet traditions: a modern muffin that feels both classic and unexpectedly bright, with a nod to cultural roots and a promise of everyday excellence.

Why You’ll Love This Recipe

  • Moisture that remains after cooling: the yogurt anchors the crumb so muffins stay soft, even days later.
  • Balanced sweetness: a gentle, comforting taste that never overpowers the tang of the cultured dairy.
  • Versatility: forgiving enough to pair with fruit, nuts, or a subtle spice without losing its signature profile.
  • Quick to prepare: simple whisk-and-bake method that fits into a busy schedule without sacrificing flavor.
  • Kid-friendly and crowd-pleasing: familiar textures and a warm aroma that appeals to all ages.
  • Perfect for make-ahead mornings: bake once, reheat gently, and you have a ready-to-go breakfast or snack.
  • Low drama, high reward: no complicated techniques required—just reliable, wholesome baking.

Flavor Profile & Texture

The flavor of muffins built around yogurt greco is a dialogue between tang and sweetness, with a gentle tang that brightens the crumb rather than stealing the show. The tangier notes come from the cultured dairy, which act like a natural brightener that lifts the perceived sweetness and adds depth. The interior is tender and soft, with a fine crumb that almost melts on the tongue. You’ll notice a subtle richness—earned not by heavy fats but by the balance of dairy and careful handling of the batter. The crust offers a light, delicate crust that yields to a moist interior, keeping each bite pleasantly soft. Aromas waft upward as they bake: a comforting warmth, a whisper of vanilla or citrus that lingers, and the faint sweetness that hints at a bakery’s morning rush. If you’re lucky, the finished muffins reveal tiny pockets of softness that catch the steam and release it slowly, making the first bite feel like a gentle reveal. In texture terms, these muffins are the kind that satisfy a craving for something comforting without being dense or heavy—a snack that feels like a small celebration of skill and care in the kitchen.

Occasions & Pairings

These muffins are incredibly adaptable, making them a dependable choice for many scenes—weekday breakfasts, weekend brunches, picnics, and even thoughtful gifts. Try them as a warm companion to a cup of coffee on a chilly morning, or as a light, portable option for a midday break. Their soft interior and approachable sweetness also make them suitable for family lunches, school snack boxes, and late-afternoon treats when you want something comforting yet not overbearing. For pairings, consider beverages that balance the tang: a mellow coffee, a black tea with a round body, or a subtle herbal tea. If you’re feeling adventurous, a squeeze of citrus on top or a light dusting of spice can elevate the experience without overshadowing the yogurt base. For add-ins (which you might choose to explore in variations), gentle options that complement the yogurt’s brightness include soft fruits, a small amount of chopped nuts for texture, or a whisper of cinnamon. The beauty of muffins is their candy-bar simplicity—one can be enough to satisfy, two can feel like a treat, and a dozen can be shared with friends, coworkers, or neighbors without overwhelming anyone’s day.

Tips, Variations & Substitutions

  • Make it dairy-friendly or plant-based: swap the dairy for a non-dairy yogurt that mirrors the tang and viscosity. Pair it with an equivalent fat source (like a plant-based oil) to maintain moisture in the batter.
  • Gluten-friendly and gluten-free options: you can adapt by using a gluten-containing or gluten-free flour blend. The yogurt helps keep moisture, so you’ll want a balance that maintains the crumb without becoming dense.
  • Flavor twists without naming ingredients here: consider citrus zest or a hint of warm spice to brighten the batter, or keep the profile simple for a more classic muffin experience.
  • Texture adjustments: for a lighter crumb, you can fold the batter more gently and avoid overmixing; for a denser, more rustic texture, mix just until combined but do not overwork the batter.
  • Sweetness control: opt for a natural sweetener that suits your sweetness preference, and remember that naturally ripened fruits or stewed fruit can add sweetness with less sugar.
  • Make-ahead hints: you can portion the batter into muffin cups and refrigerate before baking, or bake and freeze cooled muffins for longer storage, reheating gently when needed.

Storage & Make-Ahead Ideas

Storing muffins properly helps them stay fresh longer and preserves that tender crumb you worked to achieve. Once cooled, store muffins in an airtight container at room temperature for up to two days, away from direct sunlight or heat sources that could dry them out. For longer storage, wrap individual muffins in plastic wrap or place them in a sealed freezer bag and freeze. They’ll retain their moisture and flavor when reheated gently in a warm oven or toaster oven. If you’re planning ahead, consider baking a batch that you can freeze in portions, then thaw before reheating to restore that just-baked texture. When reheating, aim for a gentle warmth rather than high heat to avoid drying the crumb; a few minutes in a low-temperature oven or a brief spin in the microwave followed by a short rest can help the muffin regain its soft interior. If you prefer the most moisture possible for leftovers, rewarm with a light steam or cover to trap moisture in the muffin as it heats. In the fridge, muffins will keep their texture for a day or two longer than at room temperature, especially in a sealed container that minimizes exposure to air and humidity fluctuations.

Fun Facts & Trivia (Optional)

Did you know that thick, yogurt-based batters have been a pantry trick for centuries? The concentration of proteins in yogurt helps create a stable emulsion in baked goods, which contributes to a moist crumb and a crumb that doesn’t crumble easily. In some traditions, yogurt is used not only for moisture but also as a cultural note of hospitality—sharing warm muffins with neighbors as a gesture of welcome. The practice of pairing yogurt with simple sweetness reflects a universal desire to balance acidity with comfort. While muffins come in countless variations around the world, those that rely on yogurt stand as a small testament to how dairy can soften textures, enrich flavors, and make everyday baking feel a touch more luxurious without complicated methods. And for lovers of all things tangy and tender, this muffin style serves as a reliable, delicious reminder that the most satisfying bites can be achieved with modest ingredients, patience, and respect for the craft of baking.

Ingredients

  • Muffin Base
    • 2 cups all-purpose flour
      → Provides the structure and body for the muffin crumb. Sift or whisk with the dry leaveners to ensure even distribution and a light texture. For a lighter crumb, you can replace part of the flour with whole wheat or use 1 tablespoon cornstarch per cup of flour to soften the gluten.
    • 1/2 cup granulated sugar
      → Adds sweetness and helps with browning and moisture retention. If you prefer less sweetness, reduce to 1/3 cup or substitute part with maple syrup or honey, keeping in mind this may affect crumb and moisture.
    • 2 teaspoons baking powder
      → Leavening that lifts the muffins. Distribute evenly by whisking with the flour. Avoid overmixing once wet ingredients are added to keep the crumb tender.
    • 1/2 teaspoon baking soda
      → Works with the yogurt’s acidity to produce lift and a softer crumb. If you use a milder yogurt, you may want to increase this by 1/4 teaspoon, but be careful not to create soapy flavors.
    • 1/4 teaspoon salt
      → Balances sweetness and enhances overall flavor; helps tighten crumb and improve flavor perception. Use fine sea salt; if using salted butter in the batter, adjust accordingly.
    • 1 cup Greek yogurt, plain (unsweetened)
      → The key moisture and tenderness provider, plus adds a tangy note that complements vanilla. Whisk until smooth and at room temperature for easiest blending. If yogurt is very thick, whisk in a tablespoon or two of milk to loosen to a scoopable consistency.
    • 2 large eggs
      → Bind the batter and contribute moisture and structure. For a lighter crumb, ensure they are at room temperature and whisk well with the yogurt. If replacing one egg, you can use 2 tablespoons of applesauce or a bit extra yogurt, but this will alter texture.
    • 1/3 cup neutral oil (e.g., canola or grapeseed) or melted unsalted butter
      → Adds richness and tenderness; oil yields a moister crumb while butter provides richer flavor. If using butter, let it cool slightly before mixing to keep eggs from curdling and to prevent a greasy batter.
    • 1 teaspoon vanilla extract
      → Brings warmth and complements yogurt’s tang; use pure vanilla for best aroma. If you like, swap with citrus zest for a bright note.
    • 1/2 teaspoon lemon zest (optional)
      → Adds fresh, zingy aroma that pairs beautifully with yogurt. Zest before juicing a lemon to capture essential oils. If you add zest, you can reduce a touch of vanilla to avoid overpowering citrus.
    • 1/4 cup milk (as needed)
      → Use only if the batter seems too thick after mixing; add in small increments until it reaches a scoopable spoonability. Yogurt is already moist, so add just enough to loosen without making the batter runny.
  • Optional Add-ins
    • 1/2 cup fresh berries (blueberries, raspberries, or sliced strawberries) (optional)
      → Fold in gently at the end to maintain shape and avoid crushing berries. Fresh berries give juicy pockets and color; if using frozen berries, toss with a teaspoon of flour to prevent them from sinking and staining batter.
    • 1/2 cup chocolate chips (optional)
      → Adds pockets of sweetness and melty texture. Use dark or semisweet chips; lightly coat them in flour to prevent sinking to the bottom during baking.
    • 1/2 cup chopped nuts (optional)
      → For crunch and nutty flavor; walnuts or pecans work well. Toast nuts briefly in a dry skillet to enhance aroma before adding; cool completely to avoid softening the batter.

Instructions

  • Preheat your oven to 350°F (175°C) and line a 12-c cup muffin tin with paper liners or grease it well.
    → This ensures the muffins do not stick to the tin and makes them easier to remove after baking.
  • Whisk together the dry ingredients until evenly distributed: 2 cups all-purpose flour, 1/2 cup granulated sugar, 2 teaspoons baking powder, 1/2 teaspoon baking soda, and 1/4 teaspoon salt.
    → Sifting or whisking the dry ingredients ensures uniform leavener distribution and prevents dense pockets, giving a lighter, more uniform crumb.
  • Whisk the wet ingredients in a separate bowl: 1 cup Greek yogurt (plain, unsweetened) until smooth, then beat in 2 large eggs one at a time, followed by 1/3 cup neutral oil, 1 teaspoon vanilla extract, and 1/2 teaspoon lemon zest if using.
    → Proper emulsification of yogurt with eggs and oil creates a cohesive batter that stays moist without separating; tempering ensures eggs do not curdle the yogurt.
  • Pour the wet mixture into the dry ingredients and fold gently with a spatula until just combined, stopping as soon as there are mostly moistened lumps; if the batter seems very thick, add milk a tablespoon at a time.
    → Overmixing develops gluten and creates a tough crumb; a few streaks of dry flour are acceptable and will hydrate during baking, while a touch of milk adjusts the batter to scoopable consistency.
  • If using nuts, toast them in a dry skillet over medium heat until fragrant, about 3–4 minutes, then cool completely before folding.
    → Toasting concentrates flavor and aroma; cooling prevents residual heat from cooking the batter when mixed in.
  • If using add-ins, prepare them now: toss fresh berries with a teaspoon of flour to coat and lightly coat chocolate chips or chopped nuts with an additional tablespoon of flour to help distribute them; this prevents sinking during baking. Fold add-ins into the batter gently just until evenly distributed.
    → Coating add-ins reduces their weight sinking to the muffin bottom and helps them stay suspended for a more uniform bake.
  • Spoon or scoop the batter into the prepared muffin cups, filling each about 2/3 to 3/4 full to allow for domed tops; use an ice cream scoop or two spoons for even portions and to minimize overhandling.
    → Proper portioning ensures uniform bake times and prevents overflow or sticking; domed tops are visually appealing and bake more evenly.
  • Bake in the preheated oven for 18–22 minutes, rotating the pan halfway through if your oven has hot spots, until the muffins are golden brown and a toothpick inserted into the center comes out with only a few moist crumbs.
    → The specified window balances a tender, moist crumb with a fully cooked interior; rotating promotes even heat exposure for uniform rise.
  • Cool the muffins in the pan for 5 minutes, then transfer to a wire rack to cool completely before storing or serving.
    → Resting allows the crumb to set and the steam to escape, preventing soggy bottoms and ensuring a stable structure for slicing or biting.
  • Store baked muffins in an airtight container at room temperature for up to 3 days or freeze for longer storage, and reheat briefly to refresh the tender crumb before serving.
    → Proper storage preserves moisture and texture; gentle reheating revives the aroma and softness of the muffins.

Notes

These Greek yogurt muffins are tender and moist thanks to the plain yogurt and eggs, with a subtle vanilla aroma that complements the tang. You can customize them by folding in your favorite mix-ins: 1/2 cup fresh berries, 1/2 cup chocolate chips, or 1/2 cup chopped nuts, added at the end to avoid crushing. They freeze well and make a great grab-and-go snack; rewarm them briefly for a soft, bakery-like crumb. For an extra boost, serve with a dollop of yogurt, a drizzle of honey, or a smear of nut butter. If you’re gluten-free, use a 1:1 gluten-free flour blend and ensure the yogurt is plain and unsweetened; you may need to adjust with a tablespoon or two of milk to reach scoopable batter. For a lighter texture, whisk the eggs and yogurt to room temperature and do not overmix the batter. Optional lemon zest can brighten the flavor; if using zest, you can reduce the vanilla slightly to keep citrus from overpowering. Always measure flour and leaveners precisely and bake at the recommended temperature until a toothpick comes out clean.

Tips

Tips for Muffin yogurt greco

  • Prep and temperature: Ensure all ingredients are at room temperature unless noted otherwise. Cold yogurt or eggs can cause the batter to seize and result in a tougher crumb.
  • Dry ingredients: Sift or whisk flour, baking powder, and baking soda together to distribute leaveners evenly and avoid dense pockets.
  • Wet ingredients: Whisk Greek yogurt, eggs, vanilla, and lemon zest (if using) until smooth. This helps create a uniform batter and tender crumb.
  • Mixing method: Use the muffin method—combine wet and dry ingredients just until they come together. A few lumps are okay; overmixing develops gluten and makes muffins tough.
  • Consistency check: If the batter seems too thick, add milk a tablespoon at a time until it’s scoopable but not runny. Yogurt provides moisture, so add only as needed.
  • Fat choice: Oil yields a moister crumb, while melted butter adds richer flavor. If you choose butter, let it cool slightly before mixing to prevent curdling and a greasy batter.
  • Leavening care: Fresh baking powder is important for lift. If using a particularly acidic yogurt, you may notice more rise; don’t overcompensate with extra soda.
  • Add-ins handling: Toss berries or chocolate chips with a teaspoon of flour before folding to keep them evenly distributed and prevent sinking. Fold gently to preserve shape.
  • Flavor balance: Lemon zest adds brightness; add it with the vanilla and consider reducing vanilla slightly if using strong citrus to avoid overpowering tang.
  • Baking temperature and time: Bake at about 375–400°F (190–200°C). Rotate the pan halfway for even browning and test with a toothpick; it should emerge with a few moist crumbs, not wet batter.
  • Top texture: For a slightly crisper top, a light sprinkle of sugar on top of the batter before baking can enhance browning.
  • Storage: Cool completely before storing. Muffins keep 2–3 days at room temperature in an airtight container, up to a week in the fridge, or up to 3 months frozen.
  • Make-ahead tips: If you want to bake later, fill cups 2/3 full, freeze the tray, then transfer frozen portions to a bag. Bake from frozen, adding a few extra minutes.
  • Flavor variations: Try 1/2 cup fresh berries or 1/2 cup chocolate chips for variety. You can also swap vanilla for a citrus zest blend or a pinch of cinnamon for a warm note.

FAQ

What ingredients do I need for Muffin yogurt greco?

For about 12 standard muffins you will need:

  • 1 1/2 cups (190 g) all-purpose flour (or gluten-free 1:1 flour for GF version)
  • 1/2 cup (100 g) granulated sugar
  • 2 tsp baking powder
  • 1/2 tsp baking soda
  • Pinch of salt
  • 1 cup (240 g) Greek yogurt (full-fat for moister muffins)
  • 2 large eggs
  • 1/3 cup (80 ml) neutral oil or melted butter
  • 1 tsp vanilla extract
  • Optional: zest of 1 lemon and 1 cup mix-ins (blueberries, chocolate chips, or nuts)

Tip: If not using lemon zest, you can add 1/2 tsp lemon juice for brightness.

Can I substitute Greek yogurt with regular yogurt?

Yes, you can, but thickness matters. Greek yogurt gives a thick, moist crumb. If you only have regular yogurt:

  • Drain the yogurt in cheesecloth for 1–2 hours to thicken it, then measure 1 cup.
  • Alternatively, use 1 cup regular yogurt and be mindful of moisture; you may need to bake a minute or two longer and test with a toothpick.
  • If you skip draining, expect a slightly looser batter and crumb.
What is the baking temperature and time?

Preheat oven to 350°F (180°C). Line a muffin tin with papers or grease. Fill cups about 2/3 full and bake for 18–22 minutes, or until a toothpick inserted into the center comes out clean. Let muffins cool in the pan for 5 minutes, then transfer to a wire rack.

Can I make these muffins gluten-free?

Yes. Use 1 1/2 cups gluten-free all-purpose flour (choose a blend with xanthan gum or add 1/4 tsp xanthan gum if not included). Use gluten-free baking powder. Baking times remain similar, but monitor for doneness as some GF blends behave differently.

How should I store these muffins?

Store in an airtight container at room temperature for 2–3 days. Refrigerate for up to 5 days. Freeze baked muffins for 2–3 months; thaw at room temperature or reheat briefly in the oven or microwave.

What mix-ins work well with Greek yogurt muffins?

Popular options include:

  • Blueberries (fresh or frozen, not thawed)
  • Chocolate chips (dark or semi-sweet)
  • Raspberries or chopped nuts (walnuts, almonds)
  • Lemon or orange zest for brightness

Tip: Keep total mix-ins around 1 cup to avoid overloading the batter.

How can I prevent muffins from sinking or turning out dense?

Tips for light, tender muffins:

  • Do not overmix the batter; mix just until combined.
  • Ensure the leaveners are fresh and measured accurately.
  • Fill muffin cups about 2/3 full and bake on the center rack without opening the oven door early.
  • Let muffins rest in the pan 5 minutes before transferring to a rack.
Can I freeze the batter or the baked muffins?

Both are possible:

  • Batter: Assemble the dry and wet ingredients separately, then freeze the batter in a well-sealed container for up to 2 months. Thaw overnight in the fridge, whisk gently, and bake as directed (you may need a minute longer).
  • Baked muffins: Freeze individually wrapped in airtight bags for up to 2–3 months. Reheat in a 350°F (180°C) oven for 8–10 minutes or warm in the microwave for 30–45 seconds.
How many muffins does this recipe yield?

Approximately 12 standard muffins using a standard 12-cup muffin tin. If you fill cups more or less, adjust bake time accordingly.

Can I make dairy-free or vegan versions of these muffins?

Yes. Options include:

  • Use dairy-free yogurt (e.g., almond, coconut) in place of Greek yogurt in the same amount.
  • Replace eggs with vegan binders: two flax eggs (2 tbsp ground flaxseed + 6 tbsp water per egg) or another egg substitute. Let it thicken a few minutes before using.
  • Use a neutral oil instead of butter; ensure all other ingredients are dairy-free.
  • If using gluten-free flour, check that the baking powder is gluten-free.

Note: The texture may differ slightly, but the muffins will still be tasty.

Introduction / Hook

Imagine a little tower of pastry perfection, the kind that makes your kitchen glow with warmth even before the first bite. Cupcake al cioccolato is more than a treat—it is a celebration of chocolate, a tiny sunshine in a wrapper, a moment of velvet-soft decadence that arrives at the table with a smile. When you peel back the paper and reveal the moist, dusk-dark crumb, a shiver of cocoa aroma rises, as if a sweet secret has just been whispered into the room. The surface gleams with a gloss that hints at ganache or a cloud of buttercream, and the bite offers a dance: the first taste is a kiss of deep chocolate, a gentle sweetness, and then a lingering finish that invites another mouthful.

In every bite, there’s a story of warmth and comfort—the soft crack of the crust, the tender interior that yields to a slower, more luxurious center, and the way the flavors seem to bloom as they mingle with the ambient aroma of vanilla, a touch of coffee or almond, and the hint of something familiar and comforting. Cupcake al cioccolato is a bridge between indulgence and everyday joy: the quick dessert you reach for when you want to celebrate a small victory, a school-night pick-me-up, or a shared moment with friends and family. The magic lies not just in the chocolate itself, but in the way the batter holds moisture, the crumb structure that feels like a hug, and the moment you choose how to crown it—a silky buttercream, a shimmering ganache, or a light dusting of powdered sugar that catches the light like snowfall.

This description titled Cupcake al cioccolato invites you into a ritual as timeless as cocoa itself. It’s a recipe that respects tradition while inviting creativity: a classic foundation that welcomes experimentation, a pantry-friendly treasure that can be as simple or as elegant as your mood dictates. Whether you’re baking for a birthday, a cozy weekend indulgence, a bake sale fundraiser, or an afterschool treat for someone you love, this chocolate cupcake story has a place for you. The idea is simple: bake something that tastes like childhood and feels like a gentle hug—something that looks as beautiful as it tastes, so that every bite becomes a small, joyful event.

As you prepare to read on, picture the moment when a line of warm cupcakes emerges from the oven, their surfaces smooth and domed, a faint scent of cocoa tracing the air. Think of the way frostings gloss and set, the way toppings—strawberries, cacao nibs, a swirl of white chocolate—transform each little cake into a personal expression. Cupcake al cioccolato is not merely a dessert; it’s a shared ritual, a universal language spoken in a dozen languages across kitchens around the world, each bite translating into a memory that you’ll want to revisit again and again.

The Story Behind the Dish

Chocolate has traveled a long road to find its home in a cupcake. From the ancient cacao beans across Central and South America to the bustling cacao markets of Europe, chocolate became a language of celebration, luxury, and everyday delight. The cupcake, meanwhile, emerged from a desire to offer small, perfectly portioned confections—cakes that could be baked quickly, served easily, and enjoyed without ceremony. Over time, these two compelling ideas—intense, velvety chocolate and the intimate, personal touch of a single-serving cake—converged to create the modern chocolate cupcake.

The Italian influence on desserts is profound, and even in the world of cupcakes, you can sense its charm. In Italy, cioccolato is celebrated in many forms—tender tortes, silky ganache drizzles, and rich fritters—each presenting chocolate as a conductor of mood and memory. Cupcake al cioccolato feels like a respectful nod to that heritage: a dessert that carries a sense of old-world luxury, but still feels easy to assemble on a busy weekday. The origin story of this particular treat is less about a single moment in time and more about a cultural fusion—the American practice of portable, convenient confections meeting the Italian appreciation for cocoa’s depth and aroma. The result is a modern classic that invites you to savor chocolate in a form that’s approachable, universally loved, and endlessly adaptable.

There’s also a personal, almost intimate dimension to the dish: the ritual of whisking, mixing, and watching the batter come together, the quiet anticipation while it bakes, and the shared joy as you present a plate of glossy little domes to friends or family. The cupcake, after all, is a democratized luxury—a small, personal cake that invites conversation and connection, a moment to pause, savor, and exhale positively. Cupcake al cioccolato carries that spirit forward with every bake, offering a canvas for creativity—whether you keep it simple with a classic chocolate aesthetic or you gild it with inventive toppings and flavor pairings.

Why You’ll Love This Recipe

  • Supremely chocolatey without being heavy. The batter delivers a robust cocoa profile, balanced by gentle sweetness and a moist, tender crumb that melts softly on the tongue.
  • Versatile and forgiving. This recipe adapts to your pantry and your mood—swap in different types of cocoa, adjust sweetness, or tailor the finish with an array of frostings or toppings.
  • Perfect for both weeknights and celebrations. It’s quick enough to become a reliable everyday treat, yet elegant enough to brighten a party or a special occasion.
  • Lovely texture with a glossy, inviting finish. The surface catches light just right, hinting at a luxurious interior beneath a delicate shell.
  • Kid-friendly and adult-approved in equal measure. A crowd-pleaser that doesn’t require fancy equipment or hard-to-find ingredients to shine.
  • Great for customization. Flavors such as espresso, orange, almond, or peppermint can be woven in with ease, making each batch unique while preserving the core chocolate character.

Flavor Profile & Texture

Cupcake al cioccolato brings you a layered experience in a single bite. The aroma is a warmth-soaked invitation: roasted cocoa, a whisper of vanilla, and a faint note of something toasty that suggests coffee or browned butter—an echo of deep, comforting flavors that make the heart feel instantly at home. The crumb is tender and moist, a result of a careful balance between the dry and wet components, with just enough structure to hold its shape while still offering a soft, almost custardy inner core.

On the palate, the chocolate asserts itself with bold depth rather than brash boldness. Depending on the cocoa used, you might notice a dusky, almost midnight hue that’s neither too dry nor cloying; a faint fruity or fruity-nut undertone can emerge if a particular cocoa is used, giving the bite a subtle complexity. The sweetness is present but restrained, allowing the natural bitterness of good chocolate to peek through—what bakers call a balanced sweetness. The texture carries a whisper of oiliness from the richness in the batter, but it never feels greasy; instead, it glides with a smooth, velvety feel that makes the cupcake feel luxurious yet entirely approachable.

Finish is where the magic lingers. A short, lingering finish dries just enough to invite another bite, and if you crown the cupcake with a silky frosting, a light, creamy contrast will emerge—vanilla or a hint of creaminess that rounds the chocolate’s edges. The perfect Cupcake al cioccolato is not just about the cocoa, but about the way the entire experience unfolds: the aroma, the bite, the aftertaste, and the memory it creates as you share it with others.

Occasions & Pairings

These chocolate cupcakes shine in a range of settings—from everyday indulgence to more festive occasions. Their universal appeal makes them a reliable centerpiece on a birthday table, a comforting finale to a family dinner, or a thoughtful treat in a lunchbox that brings a smile to a child’s face. They also perform beautifully at bake sales, potlucks, or casual gatherings where flexibility and ease are valued as much as taste.

Pairing this chocolate beauty is easy and delicious. A glass of cold milk or a cup of a dark roast coffee creates a classic, comforting duo that never disappoints. For a more grown-up finish, a berry compote or a dollop of fresh cream can elevate the experience without overpowering the chocolate. If you prefer a more indulgent approach, a glossy ganache or a light buttercream—silky, pale, and sweet—complements the rich interior, turning the cupcake into a show-stopper. For an adventurous tilt, consider a hint of citrus with orange zest in the frosting or a splash of espresso in the batter to deepen the chocolate’s presence.

The beauty of Cupcake al cioccolato is that it adapts to many occasions. For a festive holiday table, dust with powdered sugar and add a few gold or silver dragées for a shimmer of holiday magic. For a casual weekend treat, keep the finish simple with a smooth white chocolate buttercream that contrasts beautifully with the dark cake. For a kid-friendly event, a colorful sprinkle crown can instantly transform each cupcake into a playful confection. The options are plentiful, and the soul of the dessert remains its rich chocolate essence wrapped in a tender, satisfying crumb.

Tips, Variations & Substitutions

  • Flavors and cocoa: Experiment with different cocoa powders. Dutch-processed cocoa yields a deeper, more velvety color and a mellower acidity, while natural cocoa can brighten the batter with a hint of brightness. You can even use a blend for a nuanced finish.
  • Vegan and dairy-free options: Replace dairy ingredients with plant-based milk (almond, soy, oat), use a neutral oil or coconut oil, and select a vegan-friendly butter or frosting. You’ll retain moisture and a rich chocolate character without animal products.
  • Gluten-free variations: Use a gluten-free all-purpose flour blend with a small amount of xanthan gum or a similar binder to mimic the texture of wheat flour. The cupcakes will still be moist and tender, with a crumb that collapses softly on the bite.
  • Flavor twists: Add a whisper of espresso for a mocha chorus, a hint of orange zest for a citrus lift, or a pinch of cinnamon for a warm, comforting note. A few crushed peppermint candies can provide a festive peppermint chocolate profile during winter.
  • Texture play: If you prefer a lighter crumb, whisk the wet ingredients just until combined and avoid over-mixing. For a deeper, richer crumb, use a touch of dark-brown sugar (or a similar substitute) and consider a splash of coffee to heighten the chocolate.
  • Frosting and toppings ideas: A classic vanilla buttercream, a ganache glaze, or a glossy chocolate mirror glaze can all work beautifully. For a simpler approach, a light dusting of powdered sugar or a sprinkle of cacao nibs adds texture and aroma without heavy frosting.
  • Make-ahead tips: Bake and cool the cupcakes in advance, then freeze unfrosted cupcakes in a single layer. Thaw and frost when ready to serve. This is especially helpful for parties or family gatherings where timing matters.
  • Portion and presentation: For a cleaner look, use a small ice-cream scoop to portion batter for uniform cupcakes. A tidy frosting swirl on each cake elevates the presentation and makes each bite visually inviting.

Storage & Make-Ahead Ideas

Leftover, properly stored cupcakes stay fresh for several days. If kept at room temperature in an airtight container, they typically maintain moisture and flavor for up to two to three days, depending on the climate and humidity. In a cooler, more humid kitchen, refrigeration can help maintain freshness, but be mindful that cold storage can dry out the crumb; if you refrigerate, bring cupcakes back to room temperature before serving to restore their tenderness.

For longer-term storage, freeze baked and cooled cupcakes individually wrapped or sealed in an airtight container. They can be frozen for up to two to three months. When you’re ready to enjoy, thaw them in the refrigerator or at room temperature, then frost and decorate as desired. If you’ve chosen to frost after freezing, a light re-whip of the frosting can restore a pillowy texture and a glossy finish.

Make-ahead frosting ideas are also a smart way to simplify hosting. You can whip up a batch of vanilla buttercream or a chocolate ganache and store it in the fridge for up to a week. When you’re ready to serve, give it a quick re-whip or warm it gently to bring it back to a smooth, spreadable consistency. These strategies let you focus on the joy of the moment rather than the last-minute scramble, ensuring you can greet guests with a tray of perfect little cakes.

Fun Facts & Trivia

– The word cupcake likely originated from the practice of baking in cup-shaped molds, or from the idea that the batter was measured in cups, making it easy to bake smaller, individual cakes.

– Chocolate was once considered a beverage rather than a dessert; its journey into confections like cupcakes is a testament to how flavors can reinvent themselves when combined with sugar and fat.

– The visual appeal of a cupcake—domed top, smooth frosting, and tidy wrapper—has made it a staple in party décor and social media photo moments. The ritual of choosing a frosting and topping has also become a personal expression, from classic to whimsical.

– In many cultures, the act of sharing sweets is a gesture of hospitality and celebration. Cupcake al cioccolato embodies that spirit, inviting people to pause, savor, and connect over something delicious.

– The pairing of chocolate with coffee has a long-standing culinary tradition in European and Italian-inspired kitchens, where a subtle bitterness from cocoa harmonizes with the roasted depth of coffee. This pairing enhances the chocolate’s complexity without overpowering its sweetness, leading to a balanced and deeply satisfying dessert experience.

Ingredients

Cupcake Base

  • 1 3/4 cups all-purpose flour (210 g)
    → All-purpose flour provides the structure and crumb for the cupcakes, forming the gluten matrix that traps air as the batter bakes. For best results, spoon the flour into the cup and level it, rather than scooping from the bag, to avoid a dense, heavy crumb. Sift the flour with the cocoa powder to distribute evenly and prevent lumps. For gluten-free versions, substitute with a 1:1 gluten-free all-purpose blend and add 1/2 teaspoon xanthan gum per cup of flour to mimic the elasticity of gluten.
  • 3/4 cup unsweetened cocoa powder (75 g)
    → Cocoa provides the deep chocolate flavor and color. Choose Dutch-processed cocoa for a smoother, less acidic batter or natural cocoa for a stronger, more bitter chocolate note; natural cocoa may require a touch more baking soda to balance acidity. Sift with the flour to break up clumps and ensure even distribution. Store cocoa in an airtight container away from light to preserve flavor.
  • 1 teaspoon baking powder
    → Leavening agent that helps the cupcakes rise and stay light. Distribute evenly with the dry ingredients to avoid dense pockets. Use fresh baking powder for maximum lift; old powder can lead to flat cupcakes.
  • 1/2 teaspoon baking soda
    → Reacts with acidic components to create additional lift and a tender crumb. If using natural cocoa (which is more acidic), this helps balance flavor; if using Dutch-processed cocoa, the extra baking soda helps ensure adequate rise. Ensure it’s evenly distributed in the dry mix for uniform texture.
  • 1/4 teaspoon salt
    → Enhances flavor and balances sweetness, helping the chocolate taste more pronounced. Measure accurately and mix with the dry ingredients to ensure even distribution throughout the batter.
  • 1 cup granulated sugar
    → Provides sweetness, tenderness, and contributes to browning. Sugar interacts with fat to influence crumb softness. Ensure the sugar is thoroughly incorporated with the melted butter to avoid a grainy texture.
  • 2 large eggs, room temperature
    → Bind the batter, add moisture, and help form the crumb structure. Room-temperature eggs emulsify more easily with the fat and liquids, resulting in a smoother batter. Beat lightly before adding to wet ingredients to ensure even distribution.
  • 1/2 cup unsalted butter, melted and cooled
    → Provides richness and a moist, tender crumb. Melted butter yields a slightly denser texture than creamed butter, but it helps keep the batter cohesive. Let it cool slightly to avoid cooking the eggs when it comes into contact with them, and whisk it in with the wet ingredients until evenly combined.
  • 1/2 cup whole milk, room temperature
    → Adds moisture and tenderness to the crumb. Room-temperature milk blends more smoothly with the other wet ingredients, preventing a lumpy batter. For dairy-free options, use a neutral plant milk with a small amount of oil to mimic fat content.
  • 2 teaspoons vanilla extract
    → Provides a warm, aromatic sweetness that enhances the chocolate flavor. Use pure vanilla extract for best depth; keep it as part of the wet ingredients to distribute evenly.
  • 1/2 cup hot water or hot brewed coffee
    → Blooms and intensifies the chocolate, yielding a moister, more cohesive batter. The hot liquid helps dissolve the cocoa and distributes moisture evenly. Pour at the end of mixing, after the rest of the wet ingredients are combined, to avoid overheating the eggs. If you prefer, use strong brewed coffee (espresso works well) for a deeper flavor without adding noticeable coffee taste.

Frosting

  • 1/2 cup unsalted butter, softened
    → Creates a creamy base for the frosting. Soften at room temperature until easily scoopable, then beat until pale and fluffy. Soft butter ensures a smooth, spreadable frosting and prevents a greasy or grainy texture. If the butter is too warm, chill briefly before beating.
  • 2 to 3 cups powdered sugar (icing sugar), sifted
    → Provides sweetness and body to the frosting. Start with 2 cups and add more to reach the desired thickness. Sifting removes lumps for a silky, pipe-able texture. For a lighter frosting, use the smaller amount; for a sturdier, piping-friendly finish, use the higher amount.
  • 1/4 cup unsweetened cocoa powder
    → Infuses the frosting with chocolate depth to pair with the cupcakes. Sift with the powdered sugar to prevent gritty specks and ensure an even chocolate color. For a deeper color, use Dutch-processed cocoa.
  • 2–3 tablespoons milk or heavy cream
    → Adjusts the frosting’s consistency. Begin with 2 tablespoons and add a little more as needed to reach a smooth, spreadable texture that holds its shape when piped. Use cream for a richer frosting; dairy-free options can use almond or coconut milk with a touch more cocoa powder if desired.
  • 1 teaspoon vanilla extract
    → Adds fragrance and rounds out the chocolate flavor. Use pure vanilla extract for best aroma; add with the liquids to ensure full distribution.
  • Pinch of salt
    → Balances sweetness and enhances chocolate perception. A tiny amount helps prevent the frosting from tasting flat; mix into the frosting while beating.
  • Espresso powder (optional) or 1 tablespoon hot coffee to intensify chocolate
    → A small amount of espresso powder boosts the chocolate flavor without imparting a distinct coffee taste. Dissolve the espresso powder in the milk before adding to the frosting or whisk it into the cocoa with the sugar to ensure even mixing. If you don’t have espresso powder, a dash of hot coffee can achieve a similar effect.

Optional Add-ins

  • 1/2 cup semisweet chocolate chips (optional)
    → Fold into the batter at the end of mixing to distribute evenly with pockets of melted chocolate. Chips add bursts of sweetness and texture but can sink if overwhelmed by the batter, so fold gently just until incorporated.
  • 1/4 cup finely chopped toasted nuts such as walnuts or pecans (optional)
    → Adds crunch and a toasty flavor that pairs well with chocolate. Toast nuts lightly before chopping to enhance aroma; fold in with minimal agitation to keep pieces visible and evenly distributed.

Instructions

  • Preheat your oven to 350°F (175°C) and line a 12-cup muffin tin with paper liners or grease it well.
    → This ensures the cupcakes release cleanly from the tin and prevents sticking, which makes frosting and serving easier.
  • Sift together the dry ingredients: all-purpose flour, unsweetened cocoa powder, baking powder, baking soda, and salt in a large bowl.
    → Sifting distributes leavening and cocoa evenly, breaks up any clumps, and creates a lighter, uniform crumb in the finished cupcakes.
  • Whisk the wet ingredients: eggs, granulated sugar, melted and cooled unsalted butter, whole milk, and vanilla extract in a separate bowl until the mixture is smooth and homogenous.
    → Room-temperature liquids emulsify with the fat for a smooth batter; whisking ensures even distribution of fat and sugar for tender cupcakes.
  • Pour the wet ingredients into the center of the dry ingredients and stir with a gentle, sweeping motion until just combined and there are no large dry pockets.
    → Do not overmix; a few small streaks of flour are acceptable to avoid a tough, elastic crumb.
  • Stir in the hot water or hot brewed coffee to the batter and mix just until evenly incorporated.
    → The hot liquid blooms the cocoa for a richer chocolate flavor and helps create a moist, cohesive batter; add at the end to prevent cooking the eggs.
  • If using optional add-ins, fold in semisweet chocolate chips and/or finely chopped toasted nuts with a light, folding motion to distribute evenly without deflating the batter.
    → Gentle folding keeps pockets of melted chocolate and crunch intact, while ensuring even distribution throughout the batter.
  • Fill each muffin cup about 2/3 to 3/4 full with batter, using a scoop or spoon to ensure uniform portions.
    → Proper filling promotes even rising and a consistent dome across all cupcakes, avoiding overflow or underfilled centers.
  • Bake in the preheated oven for 18–22 minutes, or until the tops are set and a toothpick inserted into the center comes out with a few moist crumbs.
    → Time and toothpick testing confirm doneness without drying the crumb; rotate the pan halfway for even browning.
  • Transfer the pan to a wire rack and allow the cupcakes to cool completely before frosting, about 20–30 minutes.
    → Cooling is essential to prevent the frosting from sliding or melting and to set the crumb for clean decoration.
  • Prepare the frosting: beat the softened unsalted butter on medium-high speed until pale and fluffy, about 2–3 minutes.
    → Creaming lightens the fat and creates a smooth, aerated base that will hold the frosting’s structure when sugar is added.
  • Gradually sift in powdered sugar and cocoa powder, starting with 2 cups of sugar and 1/4 cup of cocoa, while beating on low to prevent a sugar cloud; then increase speed as it comes together.
    → Sifting avoids lumps for a silky, pipe-able frosting and ensures even color and flavor distribution.
  • With the mixer on low, add 2–3 tablespoons milk or heavy cream, followed by 1 teaspoon vanilla and a pinch of salt; beat until the frosting is smooth, glossy, and spreadable, adjusting thickness with more sugar or milk if needed.
    → The liquid determines consistency; too loose and it won’t hold shape, too stiff and it’ll be difficult to pipe.
  • If using espresso powder, dissolve it in a small amount of milk or hot water and whisk it into the frosting (or whisk it directly into the cocoa with the sugar) to intensify the chocolate without overpowering it.
    → Espresso boosts depth and enhances chocolate flavor; dissolving ensures even distribution without gritty texture.
  • Frost the cooled cupcakes with a spatula or pipe on decorative swirls, and finish with any desired toppings or a light dusting; ensure the frosting grips the surface without tearing the crumb.
    → A well-frosted surface not only looks professional but also helps seal in moisture and flavors for serving.
  • Store the cupcakes in an airtight container at room temperature for up to 3 days, or freeze unfrosted cupcakes for longer keeping; frost just before serving for the best texture.
    → Proper storage maintains moisture and prevents the frosting from drying out or becoming greasy, ensuring peak flavor and appearance.

Notes

These chocolate cupcakes are rich and moist, with a deep cocoa flavor that comes from the cocoa and a touch of vanilla. You can customize them by folding in 1/2 cup semisweet chocolate chips for pockets of melty sweetness or 1/4 cup finely chopped toasted nuts for added crunch. If you like, swirl in a spoonful of your favorite jam in the center before baking for a surprising filling.

They freeze well: cool completely, wrap individually, and store in an airtight container or freezer bag for up to 2–3 months. Thaw at room temperature and rewarm slightly if desired. To finish, frost with the provided chocolate frosting and pair with a glass of milk or a dollop of whipped cream.

For a dairy-free version, substitute the butter with a neutral oil or dairy-free margarine and use a plant-based milk. For a gluten-free version, substitute the all-purpose flour with a 1:1 gluten-free flour blend and add 1/2 teaspoon xanthan gum per cup of flour; ensure the baking powder is gluten-free. Always ensure your baking powder is fresh and gluten-free if you have gluten intolerance.

Tips

Consigli utili per Cupcake al cioccolato

  • Misurazione accurata: per una frittella leggera, inserisci la farina nelle tazze, spolverala con un cucchiaio e livella con un coltello. Setaccia insieme farina e cacao per distribuire bene il cacao e evitare grumi nella massa.
  • Ingredienti a temperatura ambiente: uova, latte e burro fuso dovrebbero essere a temperatura ambiente per ottenere un impasto liscio e uniforme. Prepara tutto prima di iniziare e, se necessario, estrai gli ingredienti 30–60 minuti prima. Se hai fretta, scalda leggermente il latte o fai raffreddare rapidamente i liquidi freddi toccandoli con le mani immerse in acqua tiepida.
  • Burro fuso raffreddato: lascia raffreddare leggermente il burro fuso prima di aggiungerlo agli ingredienti liquidi per evitare di cuocere le uova. Mescola bene con lo zucchero per una crema lucida e setosa.
  • Mescola con equilibrio: incorpora gli ingredienti asciutti e quelli liquidi in cicli, evitando di lavorare troppo la pastella. L’eccessiva lavorazione può rendere i cupcake gommosi o tesi; pochi giri veloci bastano per amalgamare.
  • Acqua o caffè caldo: aggiungi l’acqua calda o il caffè al termine della fase liquidi, dopo aver unito gli altri liquidi. Il liquido caldo aiuta a sciogliere il cacao e a rendere l’impasto più umido. Se vuoi un sapore meno evidente di caffè, riduci o ometti questa presenza.
  • Riempimento degli stampi: riempi i pirottini circa 2/3 della loro capacità per permettere al lievito di agire e dare una bella cupola senza traboccare.
  • Tempismo in forno: preriscalda il forno a una temperatura moderata (circa 175–180°C / 350°F). Cuoci per circa 16–20 minuti, finché uno stecchino inserito al centro esce pulito. Evita di aprire spesso lo sportello durante i primi minuti per non far collassare la torta.
  • Controllo cottura: non cuocere troppo; i bordi dorati sono segno di cottura. Se la superficie si asciuga eccessivamente prima di risultare cotta, copri con un foglio di carta stagnola per gli ultimi minuti di cottura.
  • Raffreddamento: lascia raffreddare i cupcake nella teglia per 5–10 minuti, poi trasferiscili su una griglia per raffreddarli completamente prima di glassarli. Le basi fredde tengono meglio la glassa.
  • Glassatura liscia: per una glassa al cioccolato liscia, usa burro morbido e zucchero a velo setacciato. Aggiungi cacao setacciato per una profondità di sapore. Se la crema risulta troppo densa, aggiungi poco latte o panna fino a ottenere una consistenza spalmabile e stabile per la decorazione.
  • Espresso o caffè per intensificare: l’aggiunta di espresso in polvere (o una piccola quantità di caffè caldo) intensifica il cioccolato senza distinguersi come gusto di caffè. Sciogli l’espresso nel latte della glassa o scioglilo insieme al cacao per una colorazione più profonda.
  • Varianti e sostituzioni: per una versione senza glutine usa una 1:1 gluten-free flour blend e aggiungi 1/2 cucchiaino di xanthan gum per tazza di farina. Per versioni dairy-free sostituisci il latte con latte vegetale e considera olio neutro in uguale quantità al posto del burro fuso se vuoi una glassa veggie-friendly.
  • Aggiunte facoltative: se vuoi una nota extra, aggiungi 1/2 tazza di gocce di cioccolato fondente o 1/4 tazza di noci tostate tagliate finemente. Piega delicatamente al fondo dell’impasto per distribuire uniformemente senza farle affondare.

Consigli per la glassa e la presentazione

  • Raffreddamento completo prima della glassa: lascia raffreddare completamente le cupcake prima di glassarle per evitare che la glassa coli o si sciolga. Una glassa ben soda rimane in forma più a lungo.
  • Corpo della glassa: per una decorazione resistente, inizia con 2 tazze di zucchero a velo e aggiungi cacao e liquidi poco per volta per raggiungere la consistenza desiderata. Troppo liquido rende la glassa lucida ma morbida, poco zucchero la rende troppo dura.
  • Correttivi di consistenza: se la glassa è troppo soda, aggiungi un cucchiaino di latte per volta; se è troppo morbida, aggiungi zucchero a velo o cacao setacciato.

Varianti e suggerimenti utili

  • Versione al cioccolato extra: aggiungi 1–2 cucchiai di cacao extra all’impasto per un gusto ancora più intenso, tenendo conto della densità della massa.
  • Conservazione: i cupcake cotti e non glassati si conservano in contenitore ermetico a temperatura ambiente 2–3 giorni; possono essere congelati non glassati per 1–2 mesi. Glassati congelati mantengono la texture bene se conservati in contenitore ermetico ben chiuso.

FAQ

Quali sono gli ingredienti base per Cupcake al cioccolato?

Ingredienti comuni: farina per dolci, zucchero, cacao amaro in polvere, lievito per dolci, bicarbonato, sale, uova, latte (o latte vegetale), olio neutro o burro fuso, estratto di vaniglia, e pezzi o gocce di cioccolato fondente. Opzionale: una puntina di caffè per intensificare il cioccolato.

Come si prepara l’impasto dei cupcake al cioccolato?

Setaccia insieme farina, cacao, lievito, bicarbonato e sale. In una ciotola a parte sbatti uova e zucchero, aggiungi latte, olio e vaniglia. Unisci gli ingredienti secchi a quelli liquidi mescolando finché appena amalgamati, poi incorpori cioccolato fuso o gocce di cioccolato. Evita di mescolare troppo per non rendere l’impasto duro.

A quale temperatura e per quanto tempo cuocere?

Cuoci in forno preriscaldato a 180°C (statico) o 170°C (ventilato) per circa 15–20 minuti. Controlla con uno stecchino: deve uscire asciutto o con pochissime briciole.

Come evitare che i cupcake si affossino o si creino crateri?

Riempili circa 2/3 della capsula di carta, non riempire troppo l’impasto. Non mescolare troppo a lungo e non lasciare il forno aperto durante la cottura iniziale. Assicurati che il forno sia ben preriscaldato e mantenga una temperatura costante.

Si può fare una versione senza glutine?

Sì. Usa una miscela di farine senza glutine 1:1 e, se la miscela non contiene addensanti, aggiungi 1/4–1/2 cucchiaino di xantano per legare. Segui le stesse proporzioni e tempi; controlla la cottura con lo stecchino.

È possibile preparare una versione vegana?

Assolutamente. Sostituisci le uova con alternative vegane come 1 cucchiaio di purea di semi di lino (1 cucchiaio di semi di lino macinati + 3 cucchiai di acqua) o con purè di frutta (mele/banana). Usa latte vegetale e olio al posto del burro. Puoi anche utilizzare olio di cocco o di girasole al posto del burro e aggiungere una punta di lievito per dolci come già previsto.

Quale tipo di cacao o cioccolato è consigliato?

Preferisci cacao amaro in polvere di buona qualità. Per un sapore più intenso, aggiungi cioccolato fondente fuso all’impasto o usa gocce di cioccolato fondente. Se vuoi una versione extra cioccolatosa, aumenta la quantità di cioccolato fondente a pezzi nell’impasto.

Come preparare una crema al cioccolato (frosting) per decorare?

Frosting al burro e cacao: 100 g di burro morbido, 200 g di zucchero a velo, 20–30 g di cacao amaro, qualche cucchiaio di latte e alcune gocce di vaniglia. Sbatti burro e zucchero, aggiungi cacao, latte poco alla volta finché ottieni una crema soffice. In alternativa, ganache: 100 g cioccolato fondente + 120 ml panna calda, mescola finché liscia e lascia intiepidire prima di spalmare.

Come conservare i cupcake e quanto durano?

Conserva a temperatura ambiente in contenitore ermetico per 2–3 giorni. In frigorifero possono durare 4–5 giorni (copri bene il frosting). Per lunghe conservazioni, congela i cupcake cotti non farciti o l’impasto già diviso in porzioni (fino a 1–2 mesi); scongelali lentamente in frigorifero prima di consumarli e farcire.

Posso congelare l’impasto o i cupcake già cotti?

Sì. Puoi congelare l’impasto crudo in vaschette o porzioni per lateri, oppure congelare i cupcake cotti non farciti e non decorati. Per il congelamento del frosting, è meglio conservarlo separatamente e aggiungerlo una volta scongelato i cupcake. Scongela lentamente in frigorifero prima di farcire o decorare.

Introduzione / Hook

Immagina una soffice nuvola di dolcezza che si scioglie sul palato, profumi di vaniglia che sussurrano al naso e una cascata di mirtilli che esplodono in bocca con una nota fresca, leggermente aspra ma completamente accogliente. I cupcake ai mirtilli rappresentano quel momento di pura coccole quotidiana che potresti voler replicare ogni settimana: una piccola torta che sembra un abbraccio, una merenda di lusso pronta in meno di un respiro. La superficie dorata, leggermente lucida, invita a un morso immediato; l’interno è umido, soffice e impregnato di delicate fragranze agrumate che si intrecciano con la dolcezza mirtillata. Ogni boccone porta con sé una combinazione equilibrata di conforto e brio, come una canzone che passa facilmente dal sapore familiare a una nota sorprendente e rinfrescante. Se stai cercando qualcosa di memorabile ma semplice da realizzare, questa versione di cupcake ai mirtilli è una promessa mantenuta: una piccola festa di gusto che si adatta a colazioni lente, merende sportive, brunch domenicali o dolci finali di una cena improvvisata. Preparati a innamorarti del guscio leggero, della morbidezza interna e della gioia che si accende quando i mirtilli scoppiano al primo morso. E non è solo una ricetta: è una promessa di momenti condivisi, un rito di dolcezza che trasforma un pomeriggio qualunque in un ricordo speciale.

La magia non sta solo nel sapore, ma nell’esperienza sensoriale completa: il profumo avvolgente che invade la cucina, la texture che si scioglie sulla lingua e la velatura cremosa che accompagna ogni boccone. Un cupcake ai mirtilli non è una torta complicata; è un piccolo miracolo di equilibrio: dolcezza moderata, freschezza fruttata, un tocco di acidità che leviga la paletta gustativa e una nota di burro che rende tutto irresistibilmente confortante. Inoltre, i mirtilli, gemme vellutate di colore blu-molite, fanno da protagonisti naturali: non hanno bisogno di trucchi per brillare, basta un abbraccio leggero e una cottura attenta che li trattiene al centro senza soffocare l’impasto. Se vuoi offrire qualcosa di versatile e adatto a molte occasioni, questa ricetta ti accompagna passo dopo passo lungo una strada di semplicità raffinata: una porta d’ingresso perfetta nel mondo della pasticceria fatta in casa, dove la cura artigiana si manifesta in ogni dettaglio.

La storia dietro il piatto

Il cupcake ai mirtilli nasce dall’evoluzione di due撤classici americani che hanno attraversato oceani e culture per diventare simboli di convivialità. Da una parte c’è la torta soffice, nata per essere farcita e servita in porzioni facilmente maneggiabili, dall’altra i mirtilli, piccoli gioielli succosi che hanno accompagnato la panificazione in molte tradizioni europee. La combinazione di questi due elementi è diventata una versione eleggibile in cui la cuoca o il cuoco può portare in tavola una torta monoporzione che conserva la tavolozza di sapori di una torta tenera, ma con una praticità tutta da snack. Nelle cucine di casa, i cupcake hanno preso piede come soluzione rapida per feste, compleanni o colazioni durante la settimana, offrendo la possibilità di personalizzare la decorazione e la glassa a seconda del tema, della stagione o dell’umore. I mirtilli hanno una storia altrettanto affascinante: provenienti dall’emisfero nord, hanno ispirato dolci, confetture e dessert fin dall’antichità, resistendo a trasformazioni culinarie che hanno reso il frutto protagonista in molte cucine. L’idea di un cupcake ai mirtilli unisce nostalgia e modernità: un richiamo alle torte della nonna e, allo stesso tempo, una versione rapida, leggera e perfetta per presentazioni in stile contemporaneo. In molte culture, il mix di frutti di bosco e impasti soffici è stato reinterpretato con ingredienti locali, creando varianti che celebrano sia la festività sia i momenti quotidiani. Dí già che questa versione è una reinterpretazione delicata ma decisa: una porta aperta su ricordi affettuosi, una ricetta che invita a condividere, constando che il tempo di preparazione sia minimo ma la gratificazione massima.

Perché vi piacerà questa ricetta

  • Versatilità: perfetti per colazioni, spuntini, brunch o dessert veloci, con la stessa affidabilità di una torta.
  • Equilibrio di sapore: dolcezza bilanciata dalla succosità dei mirtilli e da una leggera acidità che rinfresca il palato.
  • Texture irresistibile: una superficie dorata e leggermente croccante che cede a un interno umido e soffice.
  • Fedele alla stagione: i mirtilli sono un richiamo immediato all’esterno, ai sentieri di bosco o ai mercati di frutta fresca.
  • Flessibilità: può essere personalizzato con decorazioni, glasse o una spolverata di zucchero a velo per presentazioni eleganti.
  • Facilità di preparazione: non richiede strumenti complessi né tecniche avanzate; è adatta anche a chi sta iniziando nel mondo della pasticceria fatta in casa.
  • Opzioni salutari o indulgenti: si presta a varianti con ingredienti alternativi per celiaci, vegani o chi cerca una versione meno dolce senza rinunciare al gusto.
  • Condivisione e socialità: la porzione singola favorisce il momento di condividere, offrendo una piccola dolcezza che ha un grande valore sociale.

Profilo di gusto e consistenza

Il profilo di gusto di questi cupcake è elegante nella sua semplicità. All’inizio, si percepisce una nota di vaniglia appena accennata che avvolge l’impasto, quasi a chiamare il palato in una danza leggera. Subito dopo, emerge la dolcezza dei mirtilli, che rilasciano una freschezza fruttata e una lieve nota acidula, creando un contrasto che mantiene viva l’attenzione. La nota burrosa, presente ma non invadente, lega tutto in armonia, dando una base calda e confortante. L’impasto, seppur soffice, ha una densità che lo rende sostanzioso senza appesantire: non si disfa al primo morso, ma cede morbidamente, lasciando una sensazione vellutata. La superficie, spesso con una doratura omogenea, offre una prima scintilla di croccantezza che introduce la morbidezza interna come in un abbraccio. I mirtilli interi, se presenti loro stessi all’interno, lavorano come piccoli nuclei di pop-surprise: un guscio esteriore equilibrato e una sorpresa succosa al centro. Quando la glassa o un tocco di zucchero a velo è presente, la dolcezza si avvicina al perfetto: una leggera carezza che non sovrasta il frutto, ma lo celebra. In sostanza, è un equilibrio di conforto familiare e freschezza fruttata, reso possibile da una tecnica precisa di cottura che mantiene i mirtilli integri e l’impasto soffice. L’esperienza olfattiva è altrettanto rilevante: la fragranza di vaniglia, burro e scorza di limone (quando presente) si mescola con il profumo intenso dei mirtilli, riempiendo la stanza e stimolando l’appetito fin dal primo sguardo. È una gustosa sorpresa che accompagna chiunque, offrendo una consistenza che invita a una seconda o terza dose senza esitazioni.

Occasioni & Abbinamenti

Questi cupcake si adattano a un’infinità di contesti: dal risveglio domenicale a una riunione di amici, da un compleanno a una merenda post-lavoro. Sono anche un’ottima scelta per brunch primaverili o estivi, quando i mirtilli sono al loro meglio e la luce è perfetta per foto appetitose e presentazioni eleganti. Per accompagnare:

  • Bevande: caffè light, latte freddo o un tè nero delicato che non sovrasti la delicatezza del dolce. Per chi preferisce un tocco rinfrescante, un tè verde leggero o una limonata fresca si sposano bene con la frutta.
  • Decorazioni: una leggera glassa al limone o al formaggio cremoso, scorzette di limone, bacche fresche o una spolverata di zucchero a velo per un look festoso.
  • Contorni: una leggera insalata di agrumi, una crema di yogurt neutro o un sorbetto al limone per chi desidera un abbinamento che equilibri la dolcezza.
  • Temi stagionali: per la primavera, decorazioni floreali o scorza di limone; per l’estate, una glassa agrumata leggera o una crema al mascarpone per un tocco festivo; per l’autunno, un accenno di cannella o scorza di arancia per un profumo speziato ma non invadente.

Tips, Varianti & Sostituzioni

  • Versione vegana: sostituisci uova con una purea di semi di lino o di chia, e utilizza un latte vegetale adatto.
  • Versione senza glutine: scegli una miscela di farine prive di glutine e aggiungi una punta di xantano per mantenere l’elasticità dell’impasto.
  • Versione leggera: riduci la quantità di zucchero e usa yogurt naturale al posto di burro o sostituti leggeri per una consistenza più leggera.
  • Decorazioni creative: aggiungi scorza di limone o arancia grattugiata all’impasto per una nota agrumata più intensa, oppure incorpora una manciata di scorze di limone candite per un tocco di croccantezza.
  • Varianti di frutta: se i mirtilli non sono di stagione, prova con more o lamponi per un profilo di gusto leggermente diverso pur mantenendo l’equilibrio tra dolcezza e acidità.

Conservazione & Idee per preparare in anticipo

Per mantenere intatta la morbidezza e la freschezza dei cupcake, è utile conservare correttamente gli elementi una volta pronti. Se li hai cuociti in anticipo, lasciali raffreddare completamente e conservali in un contenitore ermetico a temperatura ambiente per 2-3 giorni. Per una durata maggiore, puoi congelare sia i cupcake cotti sia l’impasto crudo non cotto: se congeli l’impasto crudo, trasferiscilo in singole porzioni in contenitori o sacchetti adatti al congelamento e, quando sei pronto, lasciali scongelare lentamente in frigorifero prima di cuocerli. I cupcake cotti, una volta completamente freddi, si mantengono bene in congelatore per circa 1-2 mesi. Per la riattivazione, lasciali scongelare a temperatura ambiente e, se necessario, scalda leggermente in forno caldo per alcuni minuti per ripristinare la consistenza soffice. Se hai intenzione di glassarli, è meglio farlo poco prima di servirli per mantenere la dolcezza fresca senza far diventare lo zucchero troppo molle o sciogliersi. Un’altra opzione pratica è creare una piccola scorta di cupcake singoli congelati pronti per l’asporto: prendi una porzione alla volta e scongelala lentamente, mantenendo intatta la texture.

Curiosità e trivia (Opzionale)

  • I mirtilli sono considerati un superfood per le loro proprietà antiossidanti; se includi una porzione di mirtilli freschi, stai offrendo un tocco di benessere che si riflette anche nel dessert.
  • La tradizione dei cupcake nasce come una soluzione pratica per porzionarizzare le torte, rendendo più facile distribuirle ai bambini o agli ospiti senza dover tagliare.
  • In molte culture, i piccoli dolcetti monoporzione diventano simbolo di festa: dai compleanni alle celebrazioni stagionali, i cupcake hanno una forma universale di gioia condivisa.
  • La combinazione di frutta fresca e impasto soffice è spesso un’occasione per sperimentare con aromi: scorza di agrumi, vaniglia, cannella e persino un tocco di miele o sciroppo leggero possono trasformare il sapore in qualcosa di memorabile.

Conclusione

In una sola confezione di cupcake ai mirtilli, trovi l’equilibrio delicato tra tradizione e modernità, tra la morbidezza di una torta e la praticità di una merenda monoporzione. È una ricetta che invita a rallentare: a respirare l’aroma di vaniglia e limone, a sorridere guardando i mirtilli piccoli e succosi, a immaginare il momento in cui il primo morso rivela tutte le sfumature di gusto racchiuse nell’impasto soffice. Non c’è bisogno di trucchi o complicazioni: la bellezza di questa preparazione risiede nella semplicità che permette di celebrare la cura artigianale in casa. Provala, e scopri come una piccola torta possa trasformare una giornata qualunque in un ricordo gustoso e luminoso. Se vuoi, torna con le tue decorazioni preferite o con una glassa fatta in casa che aggiunga un tocco personale: la tua versione unica sarà sempre la migliore, perché nasce dal tuo stile e dal tuo cuore in cucina.

Ingredients

Cupcake ai mirtilli
Blueberries

  • 2 cups all-purpose flour, sifted

    → The base structure of the cupcakes. All-purpose flour provides gluten that forms the cake’s crumb and helps it rise with the leavening agents. Sifting the flour (and whisking it with the baking powder and salt) ensures even distribution and a light, uniform texture. For a softer crumb, you can substitute half of the flour with cake flour or a gluten-free blend, but keep in mind this will change the final texture and flavor.
  • 1 cup granulated sugar

    → Sugar sweetens the batter and, when creamed with the butter, helps trap air to create a lighter crumb and better volume. It also contributes to browning during baking. Ensure the butter is softened so sugar can dissolve more easily and the mixture incorporates air efficiently; if you’re avoiding granulated sugar, you may try superfine sugar for quicker dissolution, though it will also alter texture slightly.
  • 1/2 cup unsalted butter, softened

    → Adds richness, moisture, and tenderness to the cupcakes. Softened butter creams more easily with the sugar, incorporating air that helps the batter rise. Do not melt the butter; use it at room temperature for best results. For very warm environments, you can chill the measured butter slightly after creaming to maintain structure during mixing.
  • 2 large eggs, room temperature

    → Act as binding and emulsifying agents, helping to stabilize the fat and liquid phases for a cohesive crumb. Eggs also contribute to moisture and structure, supporting a tender yet firm cupcake. If you only have cold eggs, place them in warm water for a few minutes to bring them to near room temperature before mixing.
  • 1/2 cup milk, room temperature

    → Provides moisture and helps dissolve dry ingredients, aiding even mixing. Whole milk is ideal for flavor and richness; dairy-free milks can be used if needed, but may result in a slightly different crumb and moisture level. If the batter seems too thick, add a tablespoon of milk at a time until you reach a smooth, pourable consistency.
  • 2 tsp baking powder

    → Leavening agent that gives the cupcakes height and a light, tender crumb. Fresh baking powder performs best, so check the expiry date and replace if it’s old. Sifting it with the flour helps ensure even distribution and consistent rise in every cupcake.
  • 1/4 tsp salt

    → Enhances the sweetness and boosts the overall flavor by balancing the batter. A small amount helps tighten the crumb and make the flavors pop. Use fine-grain salt to ensure even distribution throughout the batter.
  • 1 tsp vanilla extract

    → Provides depth of flavor that subtly enhances the sweetness and complements the blueberries. Use pure vanilla extract for a richer aroma; if you have vanilla paste or a scraped vanilla bean, you can substitute part of the extract for a more intense vanilla note.
  • Zest of 1 lemon (optional)

    → Adds a bright citrus aroma that pairs beautifully with blueberries and helps cut through their sweetness. Use only the yellow portion of the zest and avoid the bitter white pith. Fresh zest yields the best fragrance; add to the batter with the dry ingredients or just before mixing for maximum brightness.

Filling and Fold-Ins

  • 1 cup fresh blueberries, rinsed and thoroughly dried, lightly floured (to prevent sinking)

    → Blueberries provide burst of fruity flavor and color. If using frozen berries, do not thaw; keep them frozen until folding to prevent color bleed and soggy crumbs. Toss with 1 tablespoon of flour to coat and protect their shape during mixing. Fold in gently at the end of batter mixing to minimize bruising and maintain whole berries.

Cream Cheese Frosting

  • 8 oz cream cheese, softened to room temperature

    → Creates a tangy, creamy frosting that pairs perfectly with blueberry cupcakes. Softened cream cheese blends smoothly without lumps; for ultra-smooth frosting, beat until completely creamy before adding sugar. If you prefer a lighter texture, you can slightly reduce the cream cheese or blend it with a little butter first.
  • 1/4 cup unsalted butter, softened

    → Adds richness and helps stabilize the frosting with the cream cheese. Room-temperature butter creams evenly with sugar to form a fluffy, spreadable frosting. For a firmer finish, chill the frosting briefly after mixing before piping.
  • 2 cups powdered sugar, sifted

    → Provides sweetness and a smooth, spreadable texture. Sifting removes lumps for a velvety finish and easier mixing. Start with 1 1/2 cups and add more as needed to reach desired thickness; too much sugar can make the frosting stiff, so adjust with dairy as needed.
  • 1 tsp vanilla extract

    → Enhances the frosting flavor and complements the tang of the cream cheese. Use pure vanilla for best aroma; optional: a pinch of salt to balance sweetness and enhance depth.
  • 2–3 tablespoons whole milk (as needed)

    → Adjusts frosting consistency to your preference. Begin with 2 tablespoons and add more a teaspoon at a time if the frosting is too thick; add a splash of milk or cream to loosen if piping is desired but you want a softer finish.
  • Pinch of salt (optional)

    → A small amount helps balance the sweetness of the frosting and prevents an overly cloying finish. Add gradually and taste; this is particularly helpful if using salted butter already.

Optional Toppings

  • Extra blueberries for topping (optional)

    → For a polished appearance and extra fruity note. Choose uniform, plump berries; rinse and pat dry well to avoid extra moisture on the frosting. Add a few berries as a finishing touch just before serving for best visual appeal.
  • Lemon zest for garnish (optional)

    → A light dusting of lemon zest on top of the frosted cupcakes adds a fresh aroma and a pop of color that mirrors the batter’s brightness. Use a microplane to grate a fine zest over the finished cupcakes right before serving.

Instructions

  • Preriscalda il forno a 175°C (350°F) e prepara uno stampo per muffin da 12 porzioni, rivestendolo con pirottini di carta o ungendo bene gli alloggi; questo passaggio evita che i dolcetti si attacchino e facilita la rimozione una volta cotti.
    → Una base stabile e una superfice antiaderente garantiscono una cottura uniforme e una presentazione ordinata delle cupcake.
  • In una ciotola media setaccia insieme 2 tazze di farina, 2 cucchiaini di lievito in polvere e 1/4 di cucchiaino di sale, quindi aggiungi la scorza di limone se desideri un aroma agrumato; mescola bene per distribuire uniformemente gli agenti lievitanti.
    → Setacciare e mescolare gli ingredienti secchi previene grumi e garantisce una lievitazione omogenea in ciascun cupcake.
  • Nella ciotola a parte, sbatti 1/2 tazza di burro non salato ammorbidito con 1 tazza di zucchero semolato a velocità media-alta finché la miscela diventa chiara, gonfia e spumosa, circa 3–4 minuti; questo crea aria che aiuta a ottenere una consistenza leggera della torta.
    → Una crema burro-zucchero ben montata funge da base di volume e morbidezza nella futura crumb.
  • Aggiungi 2 uova grandi, a temperatura ambiente, una alla volta: lascia che ogni uovo sia completamente incorporato prima di aggiungere il successivo; incorpora anche 1 cucchiaino di estratto di vaniglia e, se usi, la scorza di limone; la miscela deve restare liscia e ben emulsionata.
    → Le uova rilasciano liquidi e proteine che legano l’impasto, mentre la vaniglia e la scorza donano profondità aromatica.
  • Aspira l’impasto e unisci gli ingredienti secchi precedentemente setacciati ai liquidi, alternando con 1/2 tazza di latte a temperatura ambiente, iniziando e terminando con gli ingredienti secchi; mescola a bassa velocità solo finché gli elementi si amalgamano, senza lavorare eccessivamente.
    → L’aggiunta alternata mantiene una struttura setosa e previene lo sviluppo di una rete di glutine troppo tenace, che renderebbe la torta dura.
  • In una piccola ciotola, prepara i mirtilli: 1 tazza di mirtilli freschi, lavati e asciugati, leggermente infarinati (1 cucchiaio di farina); questa operazione crea una barriera che riduce la perdita di colore e previene l’affondamento durante la cottura.
    → L’infarinatura leggera aiuta i mirtilli a rimanere distribuiti nel impasto e previene un fondo cupo e turgido.
  • Versa i mirtilli infarinati nell’impasto e mescola delicatamente con una spatola di silicone, eseguendo pieghe dal fondo verso l’alto per distribuire i frutti senza romperli; evita mescolate vigorosamente per preservare la loro forma e colore.
    → Una piega delicata ripartisce uniformemente i mirtilli senza creare macchie di colore o briciole spezzate.
  • Riempi gli alloggi del muffin fino a circa 2/3 della loro capacità (circa 18–20 mm di altezza); se vuoi una cupola più alta, riempi fino a 3/4, ma controlla la cottura per evitare traboccamenti.
    → Un riempimento controllato favorisce una cottura uniforme e una superficie dorata senza sfondamenti.
  • Inforna per 18–22 minuti finché uno stecchino inserito al centro esce pulito o con poche briciole umide; a metà cottura, ruota lo stampo per garantire doratura uniforme su tutte le cupcake.
    → Il controllo della cottura evita dolci crudi all’interno; la rotazione elimina le zone fredde o meno dorate.
  • Sforna e lascia raffreddare i cupcake nello stampo per 5 minuti, poi trasferiscili su una griglia per raffreddarli completamente; non far raffreddare sulla teglia troppo a lungo per evitare umidità residua che ammorbidisce la superficie.
    → Il raffreddamento progressivo stabilizza la crumb e impedisce che la crema si sciolga se decori subito.
  • Per la crema al formaggio, in una ciotola capiente lavora 226 g di formaggio cremoso ammorbidito con 56 g di burro non salato a temperatura ambiente fino a ottenere una crema liscia e priva di grumi; usare una velocità media inizialmente evita schizzi e grumi.
    → Un’emulsione omogenea è essenziale per una glassa setosa e stabile, senza grumi fastidiosi.
  • Aggiungi poco per volta 2 tazze di zucchero a velo setacciato, continuando a montare a bassa velocità finché è completamente incorporato; aumenta la velocità per rendere la crema più leggera e liscia.
    → Lo zucchero a velo senza grumi crea una glassa vellutata e facilitare la lavorazione trattando con spremitura o piping.
  • Unisci 1 cucchiaino di estratto di vaniglia e 2–3 cucchiai di latte (o latte intero) per regolare la consistenza; se preferisci una glassa più densa, riduci il latte, se vuoi una glassa più morbida, aggiungine un po’ alla volta.
    → Il latte stemperante controlla la fluidità; la quantità va bilanciata tra una chiusura stabile e l’abilità di pipare o spalmare.
  • Se necessario, aggiungi un pizzico di sale per bilanciare la dolcezza; mescola brevemente per distribuire uniformemente.
    → Il sale esalta i sapori e impedisce che la glassa risulti troppo dolce; assaggia e aggiusta se serve.
  • Quando le cupcake sono completamente raffreddate, spalma oComponents una sac-à-poche per glassarle, lasciando che la glassa si intiepidisca leggermente in frigorifero per 10–15 minuti se desideri una piping più definita.
    → Il raffreddamento parziale rende la glassa più stabile e meno incline a colare, facilitando decorazioni pulite.
  • Guarnisci con mirtilli extra e, se vuoi, una leggera grattugiata di scorza di limone per un tocco di aroma e colore; servili subito o conserva in frigorifero fino al momento di servire.
    → Le guarnizioni aggiungono freschezza, sazietà visiva e richiamano l’aroma del dolce, offrendo una presentazione accattivante.

Notes

These blueberry cupcakes are light, tender, and perfectly complemented by a tangy cream cheese frosting. For best texture, cream the softened butter and sugar until pale and fluffy, then beat in the eggs one at a time and alternate adding the dry ingredients with the milk to keep the batter emulsified. Do not overmix once the flour is added, or the crumb may become dense. Toss the fresh blueberries with a tablespoon of flour before folding to help suspend them in the batter and prevent sinking; if you’re using frozen berries, fold them in still frozen to minimize color bleed. Bake until a toothpick inserted into the center comes out with a few moist crumbs, then cool completely before frosting. For the frosting, beat the cream cheese and butter until smooth, sift in the powdered sugar, then mix in the vanilla and a splash of milk to reach a spreadable consistency; chill briefly if piping. Optional lemon zest in the batter or as a garnish adds a bright note that pairs beautifully with blueberries. These cupcakes keep well refrigerated for up to 3 days and can be frozen unfrosted for longer storage; bring to room temperature before serving. If you want a gluten-free version, substitute the all‑purpose flour with a 1:1 gluten-free blend and adjust with a teaspoon more milk if needed.

Tips

Consigli utili per Cupcake ai mirtilli

  • Temperatura degli ingredienti: lascia burro morbido a temperatura ambiente, uova e latte leggermente tiepidi prima di iniziare. Ingredienti a temperatura ambiente si amalgamano in modo uniforme, garantendo una trama più fine e una lievitazione più stabile.
  • Misurazione e sezione degli elementi: pesare la farina o dosarla con cucchiai riempiti e livellati, evitando di pressarla. Setacciare farina, lievito e sale insieme aiuta a distribuire in modo uniforme aria e agenti lievitanti.
  • Incorporazione dell’aroma: se vuoi un aroma più intenso di limone, aggiungi la scorza di limone all’impasto con gli ingredienti secchi, oppure leggermente nel burro e zucchero già cremosi.
  • Mirtilli: se usi mirtilli freschi, asciugali bene prima di aggiungerli all’impasto e infarinali leggermente per evitare che collagenino sul fondo. Se usi mirtilli congelati, non scongelarli; mantienili congelati e aggiungili con una leggera spolverata di farina per mantenere forme e colore.
  • Prevenire l’affondamento dei mirtilli: dopo aver lavato e asciugato i mirtilli, infarinali leggermente 1 cucchiaio di farina prima di unirli all’impasto. Incorpora delicatamente a fine mescolata per mantenere i frutti interi.
  • Empi delle formine: riempi i pirottini alle 2/3 della capacità per consentire la crescita durante la cottura e prevenire traboccamenti.
  • Tempo e temperatura di cottura: preriscalda il forno a 175–180°C (350°F). Controlla la cottura dopo circa 18–22 minuti. La prova stecchino dovrebbe lasciare poche briciole umide; evita di cuocere troppo per non asciugare l’interno.
  • Raffreddamento: lascia raffreddare completamente i cupcake prima di glassare. Il calore della base può ammorbidire la crema al formaggio e farla scorrere.
  • Crema al formaggio (frosting): lavora formaggio cremoso e burro fino a ottenere una crema liscia prima di aggiungere lo zucchero a velo. Aggiungi lo zucchero poco a poco e regola la consistenza con latte. Se la crema è troppo morbida, raffreddala 15–20 minuti in frigo prima di usare una sac-à-poche.
  • Varianti di gusto: per una nota più fresca, aggiungi un cucchiaino di succo di limone o un po’ di scorza all’impasto oppure al frosting. Per una versione più leggera, sostituisci parte del burro con yogurt naturale.
  • Visivo e texture: se vuoi una salsa lucida sui mirtilli dopo cottura, aggiungi qualche goccia di limone nel frosting per creare un contrasto di sapori.
  • Conservazione: i cupcake morbidissimi si mantengono a temperatura ambiente in contenitore chiuso per 2–3 giorni. Per tempi più lunghi, conserva i cupcake non glassati in freezer fino a 2–3 mesi; farciture e frosting vanno aggiunti al momento di servire.
  • Frosting fermo: se vuoi una finitura più ferma per decorare, aggiungi una puntina di sale al frosting per bilanciare la dolcezza o raffreddalo brevemente prima di procedere con la decorazione.
  • Decorazioni: per un aspetto elegante, guarnisci con extra mirtilli freschi e una leggera grattugiata di scorza di limone sul frosting prima di servire.
  • Varianti senza glutine: sostituisci la farina 1:1 con una miscela per torte senza glutine e aggiungi un cucchiaino di cremor di tartaro se la miscela non contiene lievito; controlla i tempi di cottura, potrebbero variare leggermente.

FAQ

Quali sono gli ingredienti principali per Cupcake ai mirtilli?
  • 250 g farina 00
  • 150 g zucchero
  • 2 uova
  • 180 ml latte
  • 90 ml olio di semi neutro (oppure burro fuso)
  • 1 bustina di lievito per dolci (circa 16 g)
  • 150 g mirtilli freschi
  • 1 cucchiaino estratto di vaniglia
  • Scorza grattugiata di mezzo limone (opzionale)
  • Pizzico di sale
Come preparare la pastella passo passo?
  • Preriscalda il forno a 180°C e prepara 12 pirottini.
  • In una ciotola, mescola farina, lievito e sale.
  • In un’altra ciotola sbatti le uova con lo zucchero finché diventano chiare e spumose.
  • Aggiungi latte, olio e vaniglia; mescola fino a ottenere un composto omogeneo.
  • Unisci gli ingredienti secchi a quelli umidi, mescolando solo fino a incorporare tutto.
  • Infarina leggermente i mirtilli e incorporali delicatamente all’impasto.
  • Distribuisci l’impasto nei pirottini riempiendoli per circa 2/3.
  • Inforna 18-22 minuti, finché una tipica doratura leggera si presenta.
  • Lascia raffreddare completamente prima di glassare o decorare.
Posso usare mirtilli surgelati?

Sì, ma asciugali bene prima di unirli all’impasto per evitare eccessiva umidità. Se usi mirtilli surgelati, non scongelarli completamente e infarinali leggermente prima di incorporarli. Potrebbe essere necessario aggiungere 1–2 minuti di cottura.

Quanta temperatura e tempo di cottura?

Forno statico: 180°C per circa 18–22 minuti. Forno ventilato: 170°C per 15–20 minuti. Verifica con uno stecchino: se esce pulito, sono pronti. Lascia raffreddare su una griglia prima di servire.

Come evitare che i cupcake affondino o si aprano?

Riempili circa 2/3, non oltre. Non mescolare troppo l’impasto e infarina leggermente i mirtilli per ridurre la loro caduta. Non aprire il forno nelle prime fasi di cottura. Usa pirottini di buona altezza e una teglia stabile per evitare oscillazioni.

Come conservarli al meglio?

Conservali in un contenitore ermetico a temperatura ambiente per 2–3 giorni. Per conservarli più a lungo, puoi congelarli una volta freddi (fino a 1–2 mesi) in contenitori o sacchetti adatti; scongelali a temperatura ambiente e, se vuoi, ammorbidirli leggermente prima di gustarli.

Posso sostituire il burro con olio o latte vegetale?

Sì. Per una versione più leggera o vegana, sostituisci il burro con olio di semi neutro in rapporto 1:1. Usa latte vegetale (mandorla, soia, avena) al posto del latte vaccino. La consistenza potrebbe variare leggermente, ma il sapore resta buono.

È possibile rendere la ricetta vegan?

Assolutamente. Utilizza olio vegetale al posto del burro, latte vegetale e sostituisci le uova con una miscela di semi di lino o chia: 1 cucchiaio di semi macinati + 3 cucchiai d’acqua per ogni uovo, lasciando addensare 5–10 minuti. Mescola al posto delle uova nell’impasto e prosegui come indicato.

Posso aggiungere scorza di limone o altri aromi?

Sì. Aggiungi scorza di limone grattugiata per un aroma fresco. Puoi also utilizzare una piccola quantità di estratto di limone o vaniglia. Mantieni l’equilibrio degli aromi in modo che i mirtilli restino protagonisti.

Come glassare o decorare i cupcake ai mirtilli?

Opzioni semplici:

  • Glassa al limone: zucchero a velo mescolato con succo di limone fino a ottenere una consistenza liscia.
  • Cream cheese frosting: formaggio cremoso, zucchero a velo, un po’ di burro o burro vegetale e vaniglia.
  • Glassa al burro leggera: burro ammorbidito, zucchero a velo e vaniglia.
  • Topping: mirtilli freschi, scorza di limone grattugiata, foglie di menta.

Introduzione / Hook

Immagina una tavolozza di sapori semplici ma irresistibili: fragole fresche, rosse come piccole rubini, che tonificano l’occhio con la loro lucentezza vigile. Le fragole vengono delicatamente immerse in un rivestimento di cioccolato che brilla come una sigla di festa, appena solidificato in cupole lisce e setose. Il profumo è avvolgente: cacao tostato, una nota fruttata appena agrumata e, a seconda della scelta, una dolcezza che ricorda la crema di una prima colazione al chiaro di luna. Quando mordiamo, scopriamo un doppio piacere: la fragranza della frutta che cede al graffio croccante del guscio di cioccolato e, al cuore, la succosità fresca della fragola, acida e rinfrescante, che si scioglie insieme a una scia leggera di dolcezza. Le fragole ricoperte al cioccolato non sono solo un dessert; sono un gesto, una piccola cerimonia di convivialità che trasforma una serata ordinaria in un momento speciale. In poche mosse, si creano ricordi: una cena informale che diventa elegante, un momento romantico che si accende di spontaneità, una merenda che si eleva a gran finale.

Questo piatto è una porta di ingresso a un mondo di gusto semplice ma raffinato: pochi ingredienti, poche regole, ma una resa sorprendente. La magia sta nel contrasto: la dolcezza vellutata del cioccolato che avvolge la freschezza acida della fragola, la superficie croccante che si spezza al primo morso, e quel sottile retrogusto di cacao che rimane sul palato. È una delizia che non impone ostacoli, ma invita a giocare: scegliere cioccolato fondente per un carattere deciso, oppure cioccolato al latte per una dolcezza più ampia; aggiungere una spolverata di sale marino per un nuovo equilibrio; o completare con un filo di bianco cioccolato per un tocco decorativo che sa di festa. Fragole ricoperte al cioccolato sono, in fondo, una celebrazione della semplicità ben fatta, una lezione di equilibrio tra ingredienti di qualità e tecnica delicata.

La storia del piatto

Le fragole coperte di cioccolato hanno viaggiato attraverso culture e decenni, trasformandosi da semplice leccornia di stagione a icona di celebrazione e convivialità. L’idea di un guscio di cioccolato che avvolge una frutta fresca risale a tempi antichi, ma fu nel XX secolo che questa combinazione conobbe una diffusione sorprendente, soprattutto nelle cucine occidentali dove cioccolato e frutta si incontrano con facilità. In molte tradizioni, la fragola è simbolo di novità, di romance e di buoni presagi, perfetta per ricorrenze come San Valentino, matrimoni e picnic all’aperto. Aggiungere il cioccolato diventa quindi un modo per elevare qualcosa di quotidiano—una fragola di mercato—in un piccolo lusso accessibile. In diverse regioni europee e nordamericane, i giardini e le cucine hanno cominciato a proporre versioni sempre più elaborate: dal cioccolato fondente intenso al guscio lucido, al tocco di cioccolato bianco, fino alle decorazioni con noci tritate, scorze d’arancia o una spolverata di cacao. Ogni variante racconta una storia di gusto e di occasione celebrata in modo semplice ma memorabile.

Non è raro che queste fragole siano associate ai momenti di festa domestica: una tavola di dolci al termine di una cena speciale, un regalo affettuoso per un amico o un familiare, o una piccola sorpresa servita come dessert in una serata romantica. La loro popolarità è cresciuta anche grazie alla praticità: bastano pochi ingredienti di base, un pizzico di savoir-faire e la voglia di trasformare ingredienti semplici in qualcosa di scenografico. La fragola, con la sua pelle lucida e la polpa succosa, sembra fatta apposta per risplendere sotto un velo di cioccolato quando arriva la stagione giusta. Ed è proprio questa semplicità a renderle così amate: non c’è bisogno di cucinare lunghi preparativi, basta gestire con cura la temperatura del cioccolato e mantenere le fragole fredde, in modo che il guscio si solidifichi rapidamente e rimanga lucido e croccante al contatto.

Perché amerai questa ricetta

  • Qualità senza complicazioni: pochi ingredienti di base, pochi gesti e un risultato che sorprende per raffinatezza.
  • Versatilità: adatte a merenda, dessert per una cena informale, regalo romantico o presentazione elegante per feste.
  • Equilibrio di sapori: la dolcezza del cioccolato si fonde con l’acidità e la freschezza della fragola, creando un contrasto affascinante ma armonioso.
  • Texture contrastante: esterno lucido e croccante che cede a un interno succoso e tenero.
  • Facilità di personalizzazione: puoi scegliere cioccolati diversi (fondente, al latte, bianco) o aggiungere toppings per creare versioni uniche.
  • Favorevoli a molte diete: naturalmente prive di glutine, facilmente adattabili a versioni vegane o senza lattosio scegliendo cioccolato appropriato.
  • Impegno minimo, premio massimo: è una ricetta che si presta a improvvisazioni, giochi di colori e presentazioni scenografiche senza richiedere abilità culinarie complesse.

Profilo di gusto & texture

Il profilo sensoriale delle fragole ricoperte al cioccolato è una sinfonia di contrasti coordinati. Il cioccolato, a seconda della scelta, può offrire note ambrate, con una lieve amarezza tipica del cioccolato fondente che si accompagna a sfumature di cacao intenso. Se si opta per una copertura al latte, si ottiene una dolcezza più rotonda e cremosa, che avvolge la fragola in una carezza vellutata. Il cioccolato bianco, invece, introduce una dolcezza burrosa con un tocco vanigliato, creando un insolito ma sorprendente abbinamento con la frutta. La fragola, fresca e succosa, fornisce una nota acida che “piega” il dolce del cioccolato, bilanciando l’esperienza gustativa e impedendo che diventi troppo pesante. L’esterno, una volta solidificato, è lucido e leggermente croccante. Al primo morso, il guscio si rompe con una piccola resistenza, rivelando al cuore una fragola leggermente più morbida e profonda, piena di succo che si sprigiona al contatto. In bocca, l’abbinamento tra il calore proveniente dal cacao e il raffreddore di fragola crea una sensazione di completezza: una chiusura dolce, pulita, che lascia una leggera nota di cacao sul finale. I profumi si mischiano in modo affascinante: l’aroma tostato del cioccolato, la freschezza fruttata e, a seconda della varietà, una lieve nota di vaniglia o di miele che rende l’esperienza ancora più invitante. Questo è un dessert che si presta a molte sfumature: una versione più audace con sale marino o pepe di Sichuan per una leggera nota piccante, oppure una decorazione di scorza d’arancia grattugiata che aggiunge un accento agrumato all’ensemble.

Occasioni & Abbinamenti

Queste fragole sono perfette in moltissime occasioni, dall’intimo all’elegante, dal casual al formale. Ecco alcune idee per inserirle al meglio nella vostra tavola e nel vostro momento di convivialità:

  • San Valentino e anniversari: un gesto romantico, semplice ma di grande effetto visivo ed emotivo.
  • Feste di compleanno e celebrazioni: servite come finger food chic o come finale colorato di una cena, abbinandole a un vino dolce, come un Moscato d’Asti o un passito aromatico.
  • Picnic o aperitivi all’aperto: perfette da gustare a temperatura ambiente o leggermente fresche, accompagnate da spumante o prosecco.
  • Ogni qualvolta si voglia dare un tocco di eleganza a un dessert semplice.
  • Regalo fatto in casa: confezionate con carta trasparente e un nastro, diventano un dono affettuoso e curato.

Abbinamenti consigliati:

  • Bevande: spumante brut leggero, Prosecco, Moscato o un vino rosso leggero per chi preferisce il dolce al vino.
  • Dolci e contorni: mascarpone leggero, crema chantilly, panna montata o gelato alla vaniglia per un dessert a strati o una piccola degustazione di sapori.
  • Frutta secca e spezie: pistacchi tritati, nocciole tostate o cacao nibs per un tocco di croccantezza e profondità di sapore.
  • Decorazioni: scorza d’arancia grattugiata, una spolverata di cacao amaro, sale marino in fiocchi o una pioggia di granella di pistacchio per colorare e dare carattere.

Consigli, Varianti & Sostituzioni

Per ottenere il miglior risultato possibile, tenete a mente alcune indicazioni chiave che non richiedono ricette complesse:

  • Scelta delle fragole: preferite fragole grandi ma ferme, con gambi integri. Le fragole troppo mature tendono a rilasciare troppa umidità e possono rompere il rivestimento di cioccolato.
  • Temperatura del cioccolato: se potete, temperare il cioccolato migliora la lucentezza e la croccantezza. È una tecnica che richiede pochissimo tempo ma fa una grande differenza. Se non avete modo di temperare, basta sciogliere lentamente il cioccolato e lavorarlo a temperatura ambiente finché non tinge bene la superficie.
  • Stabilità del rivestimento: per far sì che il guscio aderisca bene, asciugate bene le fragole prima di immergerle e posizionatele su un piano con carta da forno per far solidificare rapidamente.
  • Varianti di cioccolato: fondente per carattere, al latte per una dolcezza cremosa, bianco per una nota vanigliata e delicata. Per un tocco di luminosità, potete mischiare un po’ di cioccolato bianco con una punta di cioccolato al latte.
  • Decorazioni alternative: granella di nocciole, mandorle tritate, cocco grattugiato, ceci croccanti o scaglie di pistacchio per un effetto visivo accattivante.
  • Variazioni dietetiche: se seguite una dieta vegana, scegliete cioccolato vegano privo di latte e lattosio. Per una versione a basso contenuto di zuccheri, optate per cioccolato fondente con alto contenuto di cacao e limitate la quantità di zucchero aggiunto nella decorazione.
  • Rendi mediterraneo: aggiungi scorza di limone o arancia grattugiata per un tocco agrumato che richiama sapori mediterranei.
  • Abbinamenti regionali: per una versione ispirata all’Italia, sostituisci la classica decorazione con granella di nocciole tostate e una leggera spolverata di cacao amaro.

Conservazione & Idee Anticipo

La bellezza delle fragole ricoperte al cioccolato è che possono essere preparate con un certo anticipo, purché si seguano alcune accortezze per mantenere il guscio lucido e croccante.

  • Conservazione in frigorifero: una volta solidificato il guscio, potete conservare le fragole in un contenitore impermeabile in frigorifero per 1-2 giorni. Coprite bene per evitare che assorbano odori forti e che la fragola perda troppa umidità.
  • Risciacquo di gusto: evitate di lavare le fragole prima di questa preparazione; pompare umidità può compromettere la chiusura del rivestimento. Se le fragole hanno una peluria o sporcizia lieve, sciacquatele rapidamente e asciugatele subito prima dell’immersione.
  • Preparazione anticipata: potete preparare le fragole e farle raffreddare su carta da forno, quindi procedere all’ultimo tuffo in cioccolato poco prima di servire. In questo modo l’esperienza rimane fresca e il guscio resta lucido.
  • Congelamento: se avete intenzione di prepararle in anticipo per occasioni speciali, potete congelare le fragole già coperte. Disponetele su una teglia rivestita e congelatele singolarmente, poi trasferitele in un contenitore ermetico. In questo modo potete tirarne fuori una porzione al bisogno senza che si attacchino.
  • Riscaldamento e servizio: se le fragole si sono leggermente mosse in frigorifero, una breve sosta a temperatura ambiente aiuta a recuperare la lucentezza del guscio senza perdere la croccantezza iniziale.

Fatti divertenti & Curiosità (Opzionale)

Curiosità gustose per accompagnare questa dolcezza: le fragole sono tra i frutti più nostalgici, associati a ricordi di giardino e stagioni di maturazione. Il cioccolato, d’altro canto, ha una storia affascinante: le fave di cacao, lavorate con metodo, hanno reso celebre questa bevanda del passato oggi trasformata in una copertura setosa e lucida. La combinazione fragola-cioccolato è una di quelle accoppiate che attraversa culture e generazioni, forse perché tocca una corda universale: la voglia di cibo comfort, presentato con un tocco di eleganza. Per coloro che amano l’arte della presentazione, una piccola sfida divertente consiste nel creare motivi grafici conditi di cioccolato bianco su quella di fondente o in una serie di piccoli puntini decorativi: una vera gioia per gli occhi prima che per il palato.

Un altro fatto curioso: molte ricette moderne di fragole coperte di cioccolato hanno origini semplici, nate dalla pratica di voler prolungare la disponibilità di fragole di stagione conservando parte del loro sapore con un guscio di cacao. Questa combinazione è diventata una sorta di manifestazione culinaria di amore e festa in molte culture decorative durante le celebrazioni di primavera e di fine anno. La preparazione richiede attenzione al dettaglio: la temperatura del cioccolato, l’asciugatura delle fragole e la lucidità del guscio sono elementi chiave che fanno la differenza tra una dolcezza ordinaria e un piccolo capolavoro casalingo.

Ingredients

Fragole ricoperte al cioccolato

Fragole Base

  • Fragole fresche grandi, sode e asciutte; lavatele, asciugatele bene e rimuovete il picciolo prima dell’immersione nel cioccolato
    → Le fragole rappresentano la base dolce e succosa del dessert. È fondamentale che siano asciutte per permettere al cioccolato di aderire in modo uniforme e formare una superficie liscia. Scegli fragole di dimensioni simili per una presentazione equilibrata.

Copertura al cioccolato

  • Cioccolato fondente al 70-80% cacao, spezzettato o in gocce
    → Questo cioccolato è la componente principale che crea la crosta lussuosa e il sapore intenso. Scioglietelo lentamente a bagnomaria o nel microonde, mescolando ogni 20-30 secondi finché non è completamente lucido e liscio. Per una finitura particolarmente lucida, è possibile temperarlo oppure aggiungere una piccola quantità di olio di cocco per facilitare la fusione senza compromettere la texture.
  • Olio di cocco o burro di cacao (opzionale) 1 cucchiaino
    → L’aggiunta di una piccola quantità di olio di cocco o burro di cacao aiuta a rendere il cioccolato più fluido e lucido, facilitando l’immersione e la stesura uniforme sulla fragola. Usate poco olio e aggiungetelo gradualmente in base alla consistenza desiderata.
  • Foglio di carta forno o tappetino silicone per raffreddare le fragole
    → Condizioni ideali per far solidificare rapidamente la copertura senza che si attacchi. Disponi le fragole appena ricoperte su carta forno o su un tappetino e lasciale raffreddare a temperatura ambiente o in frigorifero per circa 10-15 minuti a seconda dello spessore della copertura.

Decorazioni opzionali

  • Sale marino fine un pizzico
    → Un pizzico di sale esalta il sapore del cioccolato e bilancia la dolcezza delle fragole. Aggiungilo al momento opportuno, preferibilmente dopo che la glassa ha iniziato a fissarsi, per evitare che si sciolga nel fondo.
  • Granella di nocciole o cocco grattugiato tostato
    → Aggiunge croccantezza e profondità di sapore. Tosta leggermente la granella in una padella asciutta prima di usarla, e distribuiscila in modo uniforme sulle fragole appena ricoperte o subito dopo il raffreddamento per una presentazione invitante.
  • Cioccolato bianco fuso per decorare (opzionale)
    → Per creare decorazioni o fili sui bordi delle fragole una volta che la copertura scura si è parzialmente solidificata. Sciogliete il cioccolato bianco con tecnica simile al fondente e aggiungete una piccola quantità di olio neutro se necessario per una consistenza facile da utilizzare per decorare.

Instructions

  • Seleziona e prepara le fragole: scegli fragole grandi, sode e asciutte, lavale rapidamente in acqua fredda, asciugale accuratamente con carta assorbente e rimuovi il picciolo prima dell’immersione nel cioccolato per consentire una superficie liscia e uniforme; l’assenza di umidità e picciolo evita difetti di adesione.
    → Le fragole asciutte e prive di picciolo facilitano una copertura omogenea e una finitura lucida.
  • Prepara una teglia foderata con carta forno o un tappetino silicone: allineala su una superficie stabile e prendi nota che le fragole finiranno lì per raffreddarsi rapidamentemente; utilizzare carta forno evita che le fragole si attacchino una volta indurita la glassa.
    → Il rivestimento antiaderente permette un raffreddamento uniforme e una rimozione facile senza spezzare la cioccolata.
  • Taglia o spezza il cioccolato fondente al 70-80% cacao in pezzi piccoli e uniformi e trasferiscilo in una ciotola resistente al calore: pezzi piccoli fondono più velocemente e in modo uniforme, riducendo il rischio di grumi o bruciature.
    → Pezzi piccoli assicurano una fusione costante e una texture lucida e setosa.
  • Fondi il cioccolato con metodo a bagnomaria o nel microonde, mescolando costantemente finché non è completamente lucido e liscio: a bagnomaria, poni la ciotola sopra una pentola con acqua appena sobbollente senza contatto diretto; al microonde, scalda a intervalli di 20-30 secondi, mescolando tra un intervallo e l’altro per evitare surriscaldamenti.
    → Una fusione controllata previene la separazione e garantisce una glassa lucida e setosa.
  • Aggiungi 1 cucchiaino di olio di cocco o burro di cacao al cioccolato fuso se vuoi una glassa più fluida e brillante, mescolando progressivamente finché la consistenza risulta liscia e lavorabile; evita di eccedere, altrimenti si compromette la texture.
    → Un minimo lipide facilita la fluidità e la lucentezza, facilitando l’immersione e la stesura uniforme.
  • Immergi le fragole nel cioccolato: afferra ogni fragola per il picciolo o con una pinza, immergila fino a circa 3/4 della lunghezza e ruota lentamente per una copertura uniforme; lascia scorrere l’eccesso contro i bordi della ciotola e trasferisci subito su carta forno, assicurandoti che la base non presenti gocce irregolari.
    → Una immersione controllata evita talloni e spessori irregolari, mantenendo una superficie liscia.
  • Raffredda e fai solidificare la copertura su piano: lascia le fragole coperte sulla teglia di carta forno o sul tappetino a temperatura ambiente o riponile in frigorifero per 10-15 minuti per far fissare la glassa; il raffreddamento rapido riduce la formazione di macchie e crea una superficie lucida.
    → Il raffreddamento agevola l’indurimento della ghiaccia e facilita le decorazioni successive.
  • Aggiungi un pizzico di sale marino sulle fragole appena la glassa ha iniziato a fissarsi: distribuine poco per bilanciare la dolcezza del cioccolato e non permettere che il sale venga assorbito troppo, che potrebbe sciogliere la glassa o alterarne la lucentezza.
    → Il sale evidenzia il sapore del cioccolato e migliora l’equilibrio gustativo.
  • Toasta leggermente granella di nocciole o cocco grattugiato in una padella asciutta a fuoco medio-basso per 1-2 minuti finché aromatiche; lasciale raffreddare brevemente e distribuiscile in modo uniforme sulle fragole ancora leggermente umide o subito dopo il raffreddamento per una texture croccante e una presentazione invitante.
    → La tostatura aumenta aroma e croccantezza; l’applicazione tempestiva garantisce che aderiscano bene.
  • Sciogli cioccolato bianco seguendo la stessa tecnica del fondente e, se necessario, aggiungi un piccolo filo di olio neutro per facilitare la fluidità; una volta che la superficie del cioccolato fondente è parzialmente solidificata, usa il cioccolato bianco per decorare con fili sottili o ghirigori sulla sommità delle fragole; evita surriscaldamenti che potrebbero “crackare” o diventare opachi.
    → Le decorazioni in bianco offrono contrasto cromatico e un aspetto artigianale elegante.
  • Conserva le fragole ricoperte in frigorifero in contenitore chiuso per 2-3 giorni al massimo, togliendole dal frigo circa 10-15 minuti prima di servire per gustarle a temperatura ottimale; evita l’umidità e profumi forti che potrebbero alterare la glassa.
    → Servire fresche migliora la consistenza croccante e l’intensità del gusto del cioccolato.

Notes

These chocolate-covered strawberries are a quick, elegant dessert that highlights the bright sweetness of fresh, dry strawberries with a luxurious chocolate shell. For best results, choose firm, ripe berries and ensure they are completely dry before dipping so the chocolate adheres evenly and forms a smooth surface. Melt 70-80% cacao dark chocolate slowly, using a bain-marie or short bursts in the microwave, and stir until glossy; if needed, whisk in a small amount of neutral oil (such as coconut oil) to improve pourability and shine without compromising texture. Optional: finish with a pinch of fine sea salt to balance sweetness, or roll in toasted hazelnuts or shredded coconut for extra crunch and aroma. For decoration, you can drizzle melted white chocolate once the dark coating has begun to set. Place the dipped berries on parchment paper or a silicone mat to rest, then refrigerate for 10-15 minutes until the coating is fully firm. These treats are best enjoyed fresh but can be stored in the fridge, in a single layer, for up to 1-2 days to preserve the glossy finish. If you have gluten intolerance, choose chocolate that is certified gluten-free to avoid cross-contamination.

Tips

Preparazione delle fragole

  • Scegli fragole fresche, grandi ma di dimensioni simili, sode e asciutte per garantire una base uniforme. Una frutta compatta regalerà una glassa più regolare e presentazione equilibrata.
  • Lavale delicatamente, asciugale bene con carta assorbente e rimuovi completamente il picciolo prima dell’immersione. L’umidità residua impedisce all cioccolato di aderire bene e può creare superficie opaca.
  • Se le fragole—anche dopo l’asciugatura—non sembrano completamente asciutte, lasciale a temperatura ambiente per qualche minuto prima di immergerle. Evita che l’acqua residua venga a contatto con il cioccolato.

Gestione del cioccolato

  • Fondi cioccolato fondente al 70-80% cacao lentamente, a bagnomaria o in microonde, mescolando ogni 20-30 secondi finché non è lucido e liscio. Evita surriscaldamenti prolungati per prevenire grumi o una consistenza troppo spessa.
  • Se desideri una finitura particolarmente lucida, valuta la tecnica di temperaggio: sciogli a circa 45-50°C, poi raffredda a 27-28°C e riporta a 31-32°C prima dell’immersione. Il temperaggio migliora lucentezza e croccantezza.
  • Puoi aggiungere 1 cucchiaino di olio di cocco o burro di cacao per rendere il cioccolato più fluido e lucido, facilitando l’immersione. Aggiungi poco alla volta e controlla la consistenza: troppo olio può compromettere la solidificazione.
  • Se il cioccolato sembra troppo denso o troppo liquido, regola la viscosità con piccole quantità di cioccolato fuso o di olio neutro. È meglio procedere con piccole modifiche graduali.

Immersione e finitura

  • Impugna la fragola per la base o usa una pinza per immergerla. Immergi fino a metà o a coprire completamente a seconda della preferenza, ruotando leggermente per ottenere uno strato uniforme.
  • Lascia che l’eccesso di cioccolato goccioli via prima di posarla su carta forno o tappetino silicone. Per una finitura liscia, picchietta delicatamente la fragola contro il bordo della ciotola per rimuovere bolle d’aria.
  • Per decorazioni extra, puoi utilizzare una sac à poche per creare fili o puntini con cioccolato bianco una volta che la base scura ha iniziato a rassodarsi.

Raffreddamento, asciugatura e conservazione

  • Disponi le fragole ricoperte su carta forno o su un tappetino silicone e lasciale solidificare a temperatura ambiente oppure raffreddale 10-15 minuti in frigorifero, a seconda dello spessore della copertura.
  • Una volta solidificate, conserva le fragole in frigorifero in un contenitore non ermetico per un massimo di 1-2 giorni. Evita di congelarle: la consistenza della fragola può deteriorarsi e la glassa potrebbe staccarsi.
  • Proteggi le fragole dal contatto diretto con l’umidità o condensa dopo averle raffreddate, soprattutto se le porti a tavola come dessert. Servile a temperatura ambiente circa 15-20 minuti prima di gustarle per apprezzarne meglio i sapori.

Decorazioni opzionali e varianti

  • Una spolverata di sale marino fine aggiunge una piacevole nota salata che valorizza il cioccolato. Aggiungi un pizzico al momento opportuno, dopo che la glassa ha iniziato a fissarsi.
  • Granella di nocciole o cocco grattugiato tostato aggiunge croccantezza e profondità di sapore. Tosta leggermente la granella in una padella asciutta prima di usarla e distribuiscila uniformemente sulle fragole.
  • Decorazioni con cioccolato bianco fuso: crea fili o puntini sui bordi delle fragole una volta che la copertura scura è parzialmente solidificata. Usa una sac à poche o una forchetta per decorare con precisione.

FAQ

Quali ingredienti servono per fragole ricoperte al cioccolato?

Per 200 g di cioccolato e circa 12 fragole: fragole fresche e ben asciutte, cioccolato di buona qualità (fondente, al latte o bianco a seconda dei gusti). Opzionali: olio di cocco o burro di cacao per una maggiore lucentezza, topping come granella di nocciole, cocco grattugiato, zuccherini o scaglie di cioccolato. Evita fragole con umidità o macchie.

Come scegliere le fragole migliori per l’impiego?

Scegli fragole sode, rosse e lucide, senza ammaccature. Hanno bisogno di essere asciutte. Preferisci quelle con calice verde ancora attaccato per una presa più comoda.

Qual è la temperatura ideale per sciogliere il cioccolato?

Sciogli il cioccolato a bagnomaria o al microonde fino a circa 45-50°C, poi raffreddalo a 27-28°C e riporta a 31-32°C (per cioccolato fondente) o 30-31°C (cioccolato al latte/bianco) per lavorarlo bene. Questo aiuta a ottenere una superficie lucida e croccante una volta raffreddato.

È possibile usare cioccolato bianco o al latte?

Sì. Puoi usare cioccolato fondente, al latte o bianco. Il bianco è particolarmente adatto se vuoi un contrasto di colore con fragole rosse, ma tende a sciogliersi facilmente; trattalo con l’attenzione fornita dalla tempera.

Come evitare che il rivestimento si stacchi o si crepi?

Assicurati che le fragole siano perfettamente asciutte prima dell’immersione. Immergi rapidamente, lascia cadere l’eccesso e lascia raffreddare su carta forno o griglia. L’umidità è il nemico del rivestimento lucido.

Come conservare le fragole ricoperte al cioccolato?

Conservale in frigorifero in un contenitore ermetico, preferibilmente entro 2-3 giorni. Se devi fotografarle o servirle più tardi, lasciale a temperatura ambiente solo per poco tempo prima di servirle per evitare condensazione.

Si possono congelare le fragole ricoperte al cioccolato?

È meglio non conservare fragole rivestite nel freezer, poiché la condensa rovina la superficie. Se vuoi prepararle in anticipo, congela le fragole non rivestite prima, poi rivestile dopo averle scongelate o congela le fragole già rivestite su una teglia, trasferiscile in un contenitore ermetico una volta solidificate.

Quali varianti di sapore o decorazioni consigliate?

Prova gocce di vaniglia nel cioccolato, scorza d’arancia grattugiata, una spolverata di sale marino, cannella, cocco grattugiato o granella di nocciole. Puoi decorare con codine di zucchero colorate o piccole scorze di limone per un tocco fresco.

Cono cosa fare se il rivestimento si taglia o forma bolle?

Controlla la temperatura: se è troppo alta, raffredda il cioccolato e ripeti l’immersione. Evita l’acqua o l’umidità; asciuga bene fragole e superfici. Se si formano bolle, rimuovile con una spatola e procedi con un nuovo rivestimento.

Quali attrezzature utili consigliate?

Una ciotola resistente al calore, una pentola per bagnomaria, una teglia rivestita con carta forno, e una griglia o una teglia per permettere al cioccolato in eccesso di scolare. Puoi usare anche uno stecchino o una pinzetta per maneggiare fragole delicate.

Introduzione / Hook

Immagina una tazza di caffè fumante al mattino, il profumo dolce e avvolgente di fragole maturate al sole che riempie la cucina, e una fetta che combina croccantezza e morbidezza in una danza irresistibile. La biscotti cheesecake alle fragole è quel tipo di dessert che sembra un sogno svegliato in una fetta: una base di biscotti fragranti che sostiene una crema setosa al formaggio, accarezzata da un River di purea di fragole lucente e da una nota di vaniglia che pare sussurrare segreti di estate. Non è solo una torta; è un racconto sensoriale in tre atti: croccante, vellutato e fresco. Ogni morso è una piccola celebrazione della semplicità elevata: pochi ingredienti di qualità, una tecnica mirata e tanto amore per la convivialità.

Questo dolce nasce dall’incontro tra due mondi apparentemente distanti ma incredibilmente complementari: la tradizione italiana dei biscotti croccanti e la cremosità delle cheesecakes che hanno conquistato il mondo. Il risultato è una creazione elegante ma accessibile, perfetta per i weekend in famiglia, i pranzi estivi con gli amici o una merenda che diventa un piccolo rito di gioia. Non serve essere esperti di pasticceria: la bellezza di questa ricetta sta nel bilanciare consistenze, sapori e colori in modo armonioso, lasciando che la fragola faccia da guida profumata e che la crema al formaggio abbracci ogni fetta con dolcezza avvolgente.

Lasciati trasportare dall’emozione del primo morso: la croccantezza della base di biscotti si scioglie quasi immediatamente al contatto con una crema setosa, mentre la nota acidula delle fragole incontra la dolcezza neutra della crema al formaggio. È un dessert che soddisfa occhi e palato, capace di conquistare anche chi è abituato a dolci più semplici. Prepararlo è un gesto di cura: si può realizzare in anticipo, si può preparare in porzioni individuali o in una grande teglia da servire in compagnia. È una promessa di felicità che si spezza in una batuffolo di crema al formaggio e una cascata di frutti rossi al primo taglio. Benvenuto in un pezzo di felicità che profuma di casa e di belle cose toccanti.

La storia dietro il piatto

La biscotti cheesecake alle fragole nasce dall’idea di fondere due patrimonio gastronomici molto amati: la tradizione dei biscotti croccanti come base di molti dolci italiani e la cremosità indulgente della cheesecake che ha conquistato il palato di mezzo mondo. In molte regioni italiane, i biscotti al burro o alle mandorle sono già presenti nelle ricette di dessert, spesso ridotti in una crumble elegante o pressati come base per torte e semifreddi freddi. Allo stesso tempo, la cheesecake – sebbene associata a luoghi come New York – ha suscitato nel tempo una versione più delicata e meno pesante, perfetta per essere reinterpretata in chiave mediterranea. L’idea di un dessert che unisce i due universi nasce soprattutto dall’esigenza di offrire qualcosa di raffinato ma al tempo stesso semplice da realizzare, che possa essere condiviso durante una tavolata estiva o un dopocena in compagnia.

Una storia personale spesso racconta di una nonna o di una casa di vacanza dove, al tramonto, si preparavano biscotti fragranti da sgranocchiare con un formaggio cremoso profumato, e dove la fragola fresca veniva trasformata in una glassa o in una salsa che accendeva la tavola. Da queste memorie nascono dettagli come una base di biscotti tritati finemente, miscelati con burro fuso fino a una consistenza che tiene la forma, e una crema al formaggio che diventa morbida, vellutata, capace di sostenere il brigliore di una cascata di fragole. La visita a mercati di frutta di stagione, i colori accesi delle fragole, la lucentezza delle superfici lavate dal sole, hanno ispirato l’idea di una cheesecake che non teme il caldo, bensì lo accoglie come un compagno di viaggio, grazie a una tecnica di raffreddamento e a un equilibrio di ingredienti che non corre rischi di sciogliersi eccessivamente.

In molte cucine regionali italiane, la cucina è una forma di narrazione: ogni pezzo di biscotto, ogni pennellata di crema, ogni goccia di fragola racconta una versiona diversa di estate, di famiglia, di condivisione. La cheesecake alle fragole diventa una tavolozza di colori: il bianco cremoso, il rosso vivo delle fragole, la tonalità dorata della base di biscotti. È una celebrazione di texture: la croccantezza iniziale, la morbidezza della crema, la freschezza vivace della frutta. È, in una parola, un dessert che parla al cuore e all’istinto di socialità che contraddistingue le nostre tavole: si prepara per condividere, si gusta come premio, si conserva per un momento di dolcezza dopo una lunga giornata.

Perché lo amerai / Why You’ll Love This Recipe

  • Equilibrio perfetto tra croccante e cremoso: la base di biscotti croccanti sostiene una cheesecake vellutata, creando una contrapposizione di consistenze che si esalta a ogni assaggio.
  • Profumo e freschezza: la fragola fresca o una salsa di fragole leggera aggiungono una nota erbacea e fruttata che rincuora e rinvigorisce, con una leggera acidità che completa la dolcezza della crema.
  • Versatilità stagionale: perfetta in primavera e in estate, ma degna di una presentazione elegante in qualsiasi stagione, soprattutto quando le fragole sono al loro massimo.
  • Allericità e personalizzazioni: è una base che si adatta a molte diete, includendo versioni senza glutine, vegane o senza lattosio, mantenendo comunque la sua eleganza e sapore.
  • Facilità di preparazione: non servono tecniche complesse né strumenti speciali; basta seguire una logica semplice: crosta, crema, topping, raffreddamento.
  • Ideale per condividere: una torta a strati o in porzioni singole, è pronta per la tavola e invita a brindare insieme, a chiacchierare e a fare foto memorabili per condividere sui social.
  • Conservazione rispettosa della freschezza: può essere preparata in anticipo e raffreddata, mantenendo una consistenza ottimale; si presta anche al servizio freddo, che esalta la freschezza della fragola.

Profilo di sapore e consistenza

Questo dessert è una sinfonia di sapori complementari. La base di biscotti offre una croccantezza robusta, con una nota burrosa che fa da fondazione solida e confortante. La crema al formaggio, morbida come una nuvola ma sufficientemente densa da tagliare con facilità, regala una dolcezza controllata, arricchita da una puntina di vaniglia o scorza di limone per una freschezza aromatica. La fragola, in seconda linea ma decisiva, introduce una vibrante nota fruttata e leggermente asprigna che equilibra la dolcezza della crema. Se si aggiunge una leggera salsa o una glassa di fragole, il dessert acquista un finish lucente e invitante, come una gemma rossa che brilla al centro della tavola.

Dal punto di vista tattile, la prima impressione è croccante: la base di biscotti si scioglie lentamente, lasciando spazio a una crema setosa. In bocca, si avvertono diverse texture: prima il croccante, poi la morbidezza vellutata della cheesecakes, e infine la freschezza succosa delle fragole. La combinazione è armoniosa: la dolcezza cremosa non è invadente, ma si integra con la leggera acidità delle fragole, creando un equilibrio che resta in memoria. Le note di vaniglia o di scorza di limone donano un profilo aromatico luminoso, che evita la pesantezza tipica di molti dessert a base di formaggio. È una resa elegante ma accessibile, una lezione di cucina domestica che premia la cura dei dettagli senza complicazioni.

Occasioni & Abbinamenti

La biscotti cheesecake alle fragole è un dessert ideale per molte occasioni:

  • Pranzi e cene estive: servirlo come dessert di chiusura aggiunge un tocco di raffinatezza senza appesantire.
  • Feste di compleanno e celebrazioni: la presentazione a fettine o in porzioni monoporzione è scenografica e facile da porzionare.
  • Picnic o aperitivi all’aperto: può essere preparata in anticipo e trasportata comodamente, mantenendo la freschezza se conservata in frigorifero o in una borsa termica.
  • Fine settimana coccolosi: un dessert che invita a rallentare, a godersi la tavola insieme alle persone care.

Abbinamenti consigliati:

  • Bevande: prosecco ghiacciato, sparkling rosé, коктейl a base di agrumi, oppure un espresso dolce al mattino per bilanciare la dolcezza.
  • Contorni: fragole fresche o una salsa di fragole da versare poco prima di servire; una spolverata leggera di scorza d’arancia può aggiungere una nota pungente ma elegante.
  • Dessert pairing: una pallina di gelato al limone o al fiordilatte, oppure una fetta di torta leggera di mandorle, per creare contrasti di gusto.

Tips, Variations & Substitutions

Consigli base

Per ottenere una cheesecake perfetta e uniforme, presta attenzione a questi accorgimenti:

  • Lascia che la crema al formaggio raggiunga una temperatura ambiente prima di lavorarla: si amalgama meglio e non strata.
  • Non mescolare troppo: basta mescolare fino a ottenere una crema omogenea; l’eccesso di aria potrebbe far gonfiare la cheesecake e creare creste durante la cottura o il raffreddamento.
  • Raffreddamento lento e costante: una volta assemblata, lascia raffreddare la torta a temperatura ambiente per una oretta, poi trasferiscila in frigorifero per almeno 4 ore (preferibilmente tutta la notte) per fissare la crema.

Varianti e sostituzioni

  • Versione vegan: sostituisci la crema al formaggio con una crema a base di anacardi o anacardi e latte di soia, e usa biscotti vegani per la base. Aggiungi un tocco di succo di limone per bilanciare l’acidità.
  • Gluten-free: scegli biscotti senza glutine o prepara la base con una miscela di farine alternative (mandorle macinate, cocco grattugiato e fiocchi di riso) per una croccantezza diversa ma gustosa.
  • Versione leggera: riduci la quantità di zucchero nella crema e aggiungi yogurt greco per una texture più leggera e una nota di acidità naturale che esalta le fragole.
  • Varianti di frutta: pur mantenendo la stessa base cremosa, sostituisci le fragole con lamponi, mirtilli o pesche mature per variare l’aroma e il colore, mantenendo l’effetto fresco e fruttato.
  • Finishing touches: una gelatina di fragole leggera o una coulis di fragole per un tocco lucente in superficie; scorza di limone o di arancia grattugiata per un profumo agrumato che alza la nota complessiva.

Conservazione & Idee per anticipare

Questo dolce si presta bene a preparazioni anticipate. Ecco alcuni consigli pratici per conservare al meglio la biscotti cheesecake alle fragole:

  • In frigorifero: copri bene con pellicola o poni in contenitore ermetico. Si mantiene fresca per 3-5 giorni. La crema può guadagnare un po’ di densità con il tempo, ma resta gustosa se ben refrigerata.
  • In freezer: è adatta al congelamento in singole porzioni o intere, preferibilmente senza la frutta fresca aggiunta in superficie. Avvolgi bene e congela per 2-3 mesi. Per servire, scongela in frigorifero per diverse ore o durante la notte e aggiungi fragole fresche a guarnire se vuoi un tocco di freschezza.
  • Make-ahead: la base di biscotti può essere preparata in anticipo e conservata in frigorifero, mentre la crema può essere montata e riposta in frigorifero. Assemblare solo all’ultimo momento è un’opzione comoda per eventi o cene.
  • Porzioni singole: taglia le porzioni in anticipo e tienile in frigorifero. È perfetto per buffet o brunch

Curiosità eTrivia

Il viaggio culinario di questo dolce è arricchito da piccole curiosità. La combinazione biscotti e crema in stile cheesecake è un esempio classico di come la pasticceria italiana possa accogliere influenze internazionali senza perdere la propria identità. I biscotti usati come base simboleggiano la convivialità: una base che si spezza sotto la forchetta ma che resta salda come una promessa di condivisione. Le fragole, entrate nel piatto, non sono solo un colore vivace, ma una fondamentale fonte di freschezza: la loro dolcezza naturale è un contrappunto capace di bilanciare la crema cremosa. Inoltre, l’uso di una crema al formaggio in una versione dolce è una modernità che ha fatto il giro del mondo, dimostrando che la cucina casalinga può essere audace, elegante e accessibile allo stesso tempo.

Nel contesto dell’arte culinaria, c’è chi ritiene che la cheesecake sia una forma di viaggio: da una base croccante a una crema soffice, ogni boccone è una tappa che racconta un posto diverso. E quando si aggiunge la fragola, si crea un legame con la stagione estiva italiana: una fragranza che riporta a mercati all’aperto, a giardini rinfrescati dal sole, a chiacchiere tra amici che si prolungano sino a sera. È una storia che nasce in cucina, ma che finisce sulla tavola come una piccola opera d’arte commestibile, pronta a essere condivisa, fotografata, e amata.

Ingredients

Crust

  • 1 1/2 cups biscotti crumbs (about 170 g)
    → Crushed biscotti form the crunchy base that supports the creamy cheesecake. Use plain biscotti or choose flavors that complement strawberries; process in a food processor until fine crumbs. After measuring, mix with melted butter and a pinch of salt if desired to create a cohesive crust that bakes to a crisp edge. Press evenly into the pan, then prebake the crust to set before adding the filling for best structure.
  • 3 tablespoons unsalted butter, melted
    → The fat that binds the biscotti crumbs into a sturdy crust. Ensure the butter is fully melted and still warm when mixing so it coats the crumbs evenly. If the crust seems dry, add a few more drops of melted butter until the mixture holds its shape when pressed. Chill briefly if the mixture feels too loose before pressing into the pan.
  • 1/4 teaspoon fine salt (optional)
    → Enhances sweetness by providing a subtle counterpoint to the sugar in the crust and biscotti. Use only if your biscotti are very sweet or unsalted; otherwise, you can skip to keep the crust from tasting too salty. Salt helps crust cling to the pan and adds overall balance.

Cheesecake Filling

  • 24 oz cream cheese, softened (680 g)
    → The creamy, rich foundation of the cheesecake. Softened to room temperature ensures a smooth, lump-free batter. Beat with sugar until light and fluffy to introduce air for a lighter texture. For best results, use full-fat cream cheese; if using reduced-fat, expect a slightly denser texture and adjust baking time accordingly.
  • 3/4 cup granulated sugar (150 g)
    → Provides sweetness and helps the filling set with the eggs. If the cream cheese is very tangy, keep an eye on the balance and adjust by a tablespoon or two. For ultra-smooth texture, sift the sugar before adding it to the mixture.
  • 3 large eggs
    → Structure and moisture; add eggs one at a time on medium speed to prevent curdling and excessive air incorporation, which can cause cracking. After each addition, mix just until incorporated to maintain a creamy, dense texture without overworking the batter.
  • 1/2 cup sour cream (120 ml)
    → Adds tenderness and a subtle tang that complements strawberry flavors. Use full-fat sour cream for richness; this ingredient also helps create a silkier crumb and prevents the filling from being too heavy.
  • 1 teaspoon vanilla extract
    → Deepens the flavor and rounds out the tang of the cream cheese. Use pure vanilla extract for the best aroma; if you have vanilla bean paste, you can replace part of the extract for a stronger vanilla presence.
  • 1 tablespoon lemon juice
    → Brightens the filling and enhances the fruit pairing with strawberries. Fresh lemon juice is preferred for its aroma and cleaner acidity; adjust to taste if you prefer a milder lemon note in the final slice.
  • 1/2 teaspoon lemon zest (optional)
    → Adds a delicate citrus perfume that complements the berry topping. Grate only the yellow part of the rind, avoiding the bitter white pith. Omit if you dislike citrus notes in the cheesecake.

Strawberry Sauce

  • 2 cups strawberries, hulled and sliced (about 300 g)
    → The fruity layer that gives the dessert its signature strawberry sweetness and aroma. Use ripe, fragrant berries for best flavor. If using frozen berries, thaw completely and drain excess liquid to avoid a watery sauce; macerate briefly with a teaspoon of sugar to draw out juices before cooking.
  • 1/4 cup granulated sugar (50 g)
    → Sweetens the sauce and helps the berries release juice as they cook. Adjust based on the natural sweetness of the berries; if the berries are very ripe and sweet, reduce sugar to 2 tablespoons. Taste as you go to reach your preferred balance.
  • 1 tablespoon lemon juice (optional)
    → Adds brightness and helps cut sweetness; use fresh juice for best aroma and acidity. Increase or decrease to suit your taste preferences; this also helps preserve the vivid strawberry color.
  • 1 teaspoon cornstarch dissolved in 1 tablespoon water (optional)
    → Thickens the sauce to a glossy, jam-like consistency that coats the cheesecake nicely. Stir the slurry into the simmering sauce and cook until the sauce thickens; avoid over-thickening to maintain a pourable texture.

Optional Add-ins

  • Whipped cream, for serving (optional)
    → Adds a light, airy contrast to the dense cheesecake and fruity sauce. Keep whipped cream cold and consider stabilizing with a pinch of powdered sugar and a few drops of vanilla or a tiny bit of cream of tartar if you plan to serve later to help it hold its shape.
  • Fresh strawberries, sliced, for garnish (optional)
    → Enhance color and fresh fruit flavor on top of the slice. Slice just before serving to avoid juice pooling; arrange in a decorative pattern around the edge or in the center for a polished presentation.
  • 1/2 cup chopped almonds or pistachios, toasted (optional)
    → Adds a crunchy contrast and nutty aroma that pairs well with the creaminess of the filling and the fruit sauce. Toast nuts in a dry skillet until fragrant, then cool and finely chop so they distribute evenly without overpowering each bite.

Instructions

  • Preheat your oven to 350°F (175°C) and prepare a 9-inch (23 cm) springform pan by lightly greasing the sides and lining the bottom with parchment; this prevents sticking and makes release clean in the final slice.
    → A parchment liner and greased sides create a smooth edge and reduce the risk of the crust tearing when you remove the cheesecake.
  • Process the biscotti until they form fine crumbs, measuring exactly 1 1/2 cups (about 170 g) for precise crust density; use a food processor in short pulses to avoid dusty flour-like crumbs, then transfer to a bowl to check the weight.
    → Fine crumbs bind evenly with butter to create a cohesive crust that bakes to a crisp edge and supports the creamy filling.
  • Combine the 1 1/2 cups biscotti crumbs with the 3 tablespoons melted unsalted butter and the optional 1/4 teaspoon fine salt; mix with a fork until the crumbs are evenly moistened and resemble damp sand.
    → The butter acts as the binder, setting the crust when baked and providing flavor balance with a hint of salt if used.
  • Press the crumb mixture into the bottom and slightly up the sides of the prepared pan using the flat bottom of a glass or a measuring cup, applying firm, even pressure to create a compact, level crust.
    → A uniform, compact crust bakes evenly, doesn’t crumble, and anchors the filling securely.
  • Chill the crust in the freezer for 10 minutes or refrigerate for 15 minutes to set the butter and firm the crust before blind baking.
    → Cooling locks the shape, preventing sagging and shrinking during the bake.
  • Bake the crust for about 10 minutes at 350°F (175°C) until the edges look lightly toasted and the crust is fragrant; remove from the oven and let it cool on a rack while you prepare the filling.
    → Partial baking sets the crust structure so the filling sits on a stable base rather than sinking.
  • Reduce the oven temperature to 325°F (163°C) and prepare the filling by beating the softened cream cheese and granulated sugar on medium speed until the mixture is smooth, fluffy, and free of lumps, about 2 to 4 minutes.
    → Proper aeration yields a creamy, cohesive cheesecake batter that holds its shape after baking.
  • With the mixer on low, add the eggs one at a time, mixing just until each is incorporated before adding the next; avoid overmixing to prevent excessive air and cracks.
    → Gentle incorporation preserves a dense, creamy texture and minimizes cracking.
  • Beat in the sour cream, vanilla extract, lemon juice, and the optional lemon zest until just combined; stop as soon as the mixture is homogeneous to avoid forcing air into the batter.
    → Sour cream adds tenderness and tang, while lemon brightness enhances the strawberry pairing.
  • Pour the filling over the cooled crust, then tap the pan firmly on the counter a few times to release any trapped air; this yields a smooth surface and even baking.
    → Eliminating air pockets prevents pitted or cracked tops and ensures uniform browning.
  • Bake the cheesecake at 325°F (163°C) for 50 to 60 minutes, or until the edges are set and the center still has a gentle jiggle; avoid overbaking to prevent deep cracks.
    → The center will continue to set as it cools, but excessive heat can dry out the interior and cause cracking.
  • Turn off the oven, crack the door, and let the cheesecake rest in the oven for 1 hour to cool gradually; this slow transition minimizes surface cracking from a sudden temperature drop.
    → A controlled cooling helps maintain a smooth top and a creamy interior.
  • Remove the cheesecake from the oven and refrigerate, uncovered if possible, for at least 4 hours or overnight until fully set and chilled; chilling enhances sliceability and flavor development.
    → A well-chilled cheesecake slices cleanly and retains a luxurious, dense texture.
  • Prepare the strawberry sauce by combining 2 cups hulled and sliced strawberries with 1/4 cup granulated sugar in a saucepan; bring to a gentle simmer over medium heat and stir occasionally.
    → Heating releases the strawberry juices and dissolves the sugar, creating a balanced sauce that complements the cheesecake.
  • Cook the sauce until the berries break down and the mixture thickens to a glossy, jam-like consistency, about 5 to 10 minutes; if you want extra body, whisk in the optional cornstarch slurry (1 tablespoon cornstarch dissolved in 1 tablespoon water) and simmer for 1 to 2 minutes more.
    → The slurry stabilizes the sauce for coating the cheesecake without becoming runny.
  • Remove the sauce from heat and cool it to room temperature, then refrigerate until ready to serve; a cooled sauce coats smoothly and maintains vibrant color and aroma.
    → A chilled sauce remains vibrant and prevents the cheesecake from becoming soggy on contact.
  • When ready to serve, unmold the cheesecake by running a thin knife around the edge, lift the sides of the springform pan, and transfer the cake to a serving platter; this ensures a clean presentation.
    → Releasing the sides prevents sticking and preserves the neatly defined crust edge for slicing.
  • Spread or spoon the cooled strawberry sauce over the top of the cheesecake, or create a gentle swirl for a decorative marbled appearance; garnish with fresh strawberries or toasted nuts if desired.
    → The bright strawberry sauce adds moisture and a vivid color contrast, while garnishes provide texture and visual appeal.
  • Optionally, pipe or dollop whipped cream alongside slices and sprinkle chopped almonds or pistachios for added crunch; keep whipped cream stabilized if serving later.
    → The airy cream complements the dense cheesecake, and the nuts introduce a pleasing contrast in texture.

Notes

These strawberry biscotti cheesecake alle fragole are a decadent dessert that pairs a crunchy biscotti crust with a velvety cream-cheese filling and a glossy strawberry sauce. To ensure clean slices and a sturdy base, prebake the crust until set and cool completely before filling.

Tips: bring the cream cheese, sour cream, eggs, and lemon juice to room temperature before mixing to achieve a silkier batter and reduce lumps. Beat the cheese with sugar until light and fluffy, then add eggs one at a time on low speed to avoid overmixing. Bake the cheesecake gently, ideally in a water bath, and avoid overbrowning the edges by shielding the pan if the top starts to brown too quickly. If you notice cracking, you can slice or glaze with extra sauce to mask imperfections.

For the strawberry sauce, simmer berries with sugar and lemon juice until they release juice and thicken to a glossy jam-like texture; stir in a cornstarch slurry if you prefer a thicker coat. Let the sauce cool before spooning over chilled slices. Make-ahead: the crust can be prebaked and stored, and the cheesecake can be prepared a day in advance then chilled; the sauce can be made a day ahead and refrigerated. To serve, chill the entire cheesecake thoroughly and garnish with fresh strawberries, whipped cream, or toasted nuts for crunch. If you need a gluten-free version, substitute gluten-free biscotti and ensure all other ingredients are gluten-free; this will yield a dessert with a similar texture and flavor profile. The dessert freezes well: wrap slices individually and freeze up to 1-2 months; thaw in the fridge before serving.

Tips

Tips for Biscotti Cheesecake alle Fragole

Base crust (Crust) tips

  • Use room-temperature butter so it coats the biscotti crumbs evenly and helps create a cohesive crust. If the mixture seems dry, add a few more drops of melted butter until it holds its shape when pressed.
  • Line the pan well and press the crust evenly into the bottom and a little up the sides for better structure. A parchment round on the bottom can help with release after baking.
  • prebake the crust to set before adding the filling. Bake until it is just set and lightly colored (about 8–10 minutes). This helps prevent a soggy crust once the filling is added.
  • Crush biscotti to a fine crumb for a uniform texture. If you want a slightly chunkier bite, leave a few larger pieces, but test the pressability so the crust holds together.

Cheesecake filling tips

  • Bring cream cheese, sour cream, and eggs to room temperature before mixing to ensure a super-smooth batter with no lumps.
  • Beat the cream cheese with the sugar until light and fluffy; this introduces air for a lighter texture. Do not overmix after adding eggs to prevent cracking.
  • Add eggs one at a time on medium speed, mixing just until incorporated. Overmixing can incorporate too much air and lead to cracks during baking.
  • Use full-fat ingredients for richer flavor and silkier texture. Reduced-fat variants can still work but may require slightly longer chilling and careful baking.
  • Fresh lemon juice (and optional zest) brightens the filling. Add gradually and taste to avoid overpowering the cheesecake with citrus.
  • For extra tenderness, fold in sour cream gently at the end. This also helps achieve a creamy crumb rather than a dense texture.
  • Consider a water bath (bain-marie): wrap the pan securely in foil and bake in a larger pan filled with hot water. This helps prevent surface cracking and keeps the filling very moist.
  • Cool gradually after baking. Turn off the oven, crack the door, and let the cheesecake cool in the oven for about an hour before refrigerating to minimize cracks.

Strawberry sauce tips

  • Choose ripe, fragrant strawberries for deeper flavor and color. If using frozen berries, fully thaw and drain excess liquid before cooking to avoid a watery sauce.
  • Macerate frozen or very underripe berries briefly with a teaspoon of sugar before cooking to help draw out juices and intensify flavor.
  • Cook the sauce gently; simmer until berries break down and the mixture thickens to a glossy, pourable consistency. Avoid overcooking to prevent overly thick jam-like sauce.
  • Stir in lemon juice gradually to brighten the sauce and help preserve color; adjust to taste as you go.
  • If using cornstarch to thicken, dissolve it fully in water and whisk into the simmering sauce. Cook a few minutes more until the sauce coats the back of a spoon.
  • Let the sauce cool slightly before serving so it thickens a bit more and sits nicely atop the cheesecake. It can be made ahead and refrigerated; rewarm gently when needed.

Optional add-ins and serving tips

  • Whipped cream, stabilized if serving later, adds lightness to each slice. For stability, whip with a pinch of sugar and a drop of vanilla or a touch of cream of tartar.
  • Fresh strawberries as a garnish enhance color and aroma. Slice just before serving to avoid juice pooling; arrange in an appealing pattern.
  • To add crunch, sprinkle toasted almonds or pistachios on top. Toast the nuts in a dry pan until fragrant, then chop finely for even distribution.
  • Make-ahead and storage: refrigerate the assembled cheesecake for at least 4 hours or overnight for best slicing. It can be stored covered in the fridge for 3–4 days, or frozen slices can be wrapped well and frozen for up to 1 month.

FAQ

Cos’è Biscotti cheesecake alle fragole?

È una cheesecake a strati composta da una crosta croccante di biscotti, una crema vellutata al formaggio e una guarnizione o salsa di fragole. Nel titolo “alle fragole” si enfatizza la freschezza della frutta, spesso con pezzi di fragola o una coulis.

Quali sono gli ingredienti principali?

Base: biscotti Digestive o simili, burro fuso. Crema: formaggio cremoso (es. Philadelphia), zucchero, uova, vaniglia, panna acida o yogurt. Guarnizione: fragole fresche e, opzionalmente, una coulis o glassa di fragole.

Posso usare biscotti diversi per la base?

Sì. Puoi usare Oreo, cracker al cioccolato o biscotti integrali. Se i biscotti sono molto dolci, riduci leggermente lo zucchero nella crema. Usa circa 200 g di biscotti e 90–100 g di burro per una teglia standard da 22–24 cm.

È una cheesecake cotta o no-bake?

Questa versione è cotta al forno, tipicamente a bagnomaria per evitare crepe, poi raffreddata in frigorifero. Esistono versioni no-bake, ma richiedono tecniche diverse (gelatina, tempi di riposo più lunghi) e cambiano la consistenza.

Quali sono i tempi e la temperatura di cottura?

Cuocere in forno statico a 160–170°C per circa 60–70 minuti. Il centro deve rimanere leggermente tremolante. Lasciare raffreddare nel forno spento con la porta socchiusa, poi trasferire in frigo per almeno 4 ore (meglio tutta la notte).

Come si prepara la base di biscotti?

Frulla o sminuza i biscotti fino a ottenere una granella fine. Mescola con burro fuso tiepido finché il composto è omogeneo. Premi sulla base di una teglia a cerniera da 22–24 cm, livellando bene. Metti in frigo 15–20 minuti prima di riempire.

Come si prepara la crema al formaggio?

In una ciotola ampia, lavora il formaggio cremoso con lo zucchero finché diventa liscio. Aggiungi le uova una alla volta, incorporando bene dopo ogni aggiunta. Unisci la vaniglia e la panna acida o lo yogurt. Se vuoi, aggiungi pezzi di fragola all’impasto o versa una leggera purea di fragole per un effetto marmorizzato.

Posso usare fragole congelate?

Sì, puoi usare fragole congelate scongelate. Asciuga l’eccesso di liquido prima di aggiungerle all’impasto o alla superfice per mantenere la crema consistente.

Come si conserva e per quanto tempo?

Conserva in frigorifero in contenitore chiuso per 3–4 giorni. Puoi anche tagliarla a porzioni e congelarle fino a 2–3 mesi; lascia scongelare in frigorifero prima di servire. Per una presentazione migliore, aggiungi fragole fresche al momento di servire.

Quali suggerimenti per evitare crepe o difetti di superficie?

Cuoci a temperatura costante e non aprire spesso la porta del forno durante la cottura. Se usi bagno-maria, assicurati che l’acqua non raggiunga la teglia. Raffredda lentamente nel forno spento con la porta socchiusa, quindi trasferisci in frigo. Evita mescolamenti intensi durante l’aggiunta delle uova per prevenire grinze e crepe.

Introduzione / Gancio

Immagina un lievitato soffice, profumato di cannella che avvolge l’intera stanza, con un sottile strato di sciroppo d’acero che scintilla tra gli strati. A questa delicatezza dolce si aggiunge un contrafforte aromatico e gustoso: bacon croccante che rilascia una nota affumicata e salata in perfetta armonia. Questi rotoli, rolls cannella acero e bacon, non sono solo una ricetta: sono una dichiarazione di gusto, una chiamata irresistibile per chi ama l’equilibrio tra dolcezza avvolgente e sapidità decisa. L’idea nasce dall’amore per i contrasti che trasformano una semplice colazione o brunch in un momento memorabile: una carezza al palato al mattino, un comfort food capace di sorprendere sia la famiglia che gli amici. Il profumo che invade la cucina mentre si avvicinano le prime luci dell’alba è già una promessa: ogni morso avrà una profondità di gusto, una morbidezza che si scioglie quasi al centro, e una nota di fumo che mette in risalto la dolcezza dello sciroppo d’acero. Se sei qui, è perché vuoi qualcosa di diverso senza rinunciare al calore di casa. Questa versione di rotoli è una celebrazione della convivialità: si presta a un brunch domenicale, a una colazione festaiola o a una merenda coccolosa che trasforma qualsiasi momento in un piccolo rito di piacere.

La storia dietro il piatto

La combinazione dolce-salato racconta una storia antica di scambi culinari, dove spezie e dolciumi attraversavano oceani e culture per trovarsi in una singola ricetta. La cannella, una spezia antica amata in molte tradizioni, porta calore e profondità aromatica a pasticceria e pane dolce. Lo sciroppo d’acero, simbolo della tavola nordamericana, aggiunge una dolcezza vellutata e una leggera nota floreale che si sposa magnificamente con i profumi del ristretto pane lievitato. Il bacon, con la sua croccantezza e il suo gusto affumicato, introduce una nota salata che taglia la dolcezza senza mai sovrastarla: è quel dettaglio che rende il piatto provocante e memorabile. L’idea di un rotolo che unisce questi elementi nasce spesso nelle cucine di fine settimana, dove si cerca di creare qualcosa di speciale con pochi ingredienti quotidiani, ma con una presentazione che faccia sentire gli ospiti al centro dell’attenzione. In molte culture gastronomiche, il contrasto tra dolce e salato è un ponte tra tradizioni diverse: americane, scandinave e italiane hanno tutte una certa familiarità con rotoli o dolci al forno che ricompensano chi gusta con un raise di sapore intrigante. Oggi, questa versione si propone come reinterpretazione contemporanea: niente è troppo audace se bilanciato con cura, niente è proibito se accompagnato da una tazza di caffè fumante o da una spremuta di agrumi fresca. È una storia di modernità e comfort, di gusto che vuole essere condiviso, di un brunch che diventa un piccolo evento da celebrare insieme.

Perché amerai questa ricetta

  • Confortevole e di grande impatto: un mix di dolcezza, salinità e affumicatura che stimola diverse coccole sensoriali in un solo morso.
  • Versatile per occasioni speciali: perfetto per brunch domenicali, anniversari a sorpresa o colazioni di festa con amici e familiari.
  • Equilibrio tra sapori: cannella profumata, sciroppo d’acero ricco, bacon croccante e una base morbida che si uniscono senza competere tra loro.
  • Visuale invitante: i rotoli dorati, lucidi dal tocco dello sciroppo e con pezzetti di bacon che spuntano tra gli strati, sono irresistibili da vedere e da gustare.
  • Facilità di adattamento: si presta a varianti semplici per esigenze alimentari diverse, pur mantenendo l’essenza golosa della ricetta.
  • Profondità di gusto: ogni strato racconta una storia diversa di profumi e consistenze, regalando un’esplosione di soddisfazione al palato.

Profilo di sapore e consistenza

Il profumo di cannella accende subito l’ambiente: caldo, avvolgente, quasi tentante. La cannella si unisce a una dolcezza ricca ma non stucchevole, proveniente dallo sciroppo d’acero che si insinua tra gli strati. Il dolce si scioglie in morbidezza, grazie all’impasto soffice dei rotoli, che rimane umido al punto giusto e si presta a una masticazione lenta, quasi carezzevole. In contrasto, il bacon introduce una nota salata, affumicata e croccante, che spezza la dolcezza in modo elegante, offrendo una textura diversa in ogni morso: croccantezza iniziale, seguito da una vellutata morbidezza. L’equilibrio tra saporito e dolce crea un’esperienza multisensoriale, dove la morbidezza della pasta si fonde con l’intenso carattere del bacon e con la lucentezza leggermente sciropposa della glassa o del rivestimento. A seconda della quantità di sciroppo presente tra gli strati, si ottiene una leggera caramellizzazione che aggiunge una nota di tostato, quasi di pane al forno, che rende ogni boccone una piccola celebrazione di texture: una dolcezza accogliente, una salinità confortante e una croccantezza seducente. La sinergia di questi elementi fa sì che il piatto non sia solo un dessert, né soltanto una colazione sostanziosa: è un inno al gusto bilanciato, capace di soddisfare tanto chi cerca un’esperienza golosa quanto chi desidera una colazione nutriente e memorabile.

Occasioni & Abbinamenti

Questi rotoli sono particolarmente indicati per momenti conviviali e festosi, ma si adattano anche alle mattine tranquille quando si desidera un tocco speciale. Ecco alcune idee su quando assaporarli e cosa accompagnarli:

  • Brunch domenicale: il centro della tavola, accanto a frutta fresca, yogurt e una tazza di caffè o latte caldo.
  • Colazioni di festa: compleanni, anniversari o celebrazioni familiari che meritano un tocco di gioia mattutina.
  • Snack pomeridiano: una versione meno dolce per una merenda dinamica, accompagnata da una tisana o un caffè freddo.
  • Abbinamenti consigliati: formaggi cremosi o morbidi (come un brie leggero), insieme a frutta secca o una composta di pere; bevande calde come caffè lungo, cappuccino o tè speziato; per chi preferisce una nota frizzante, un bicchiere di sidro di mele o una spremuta agrumata completa l’esperienza.
  • Occasione internazionale: un tocco di nostalgia per chi ha viaggiato tra Americhe e scandinavi, offrendo una versione fusion che richiama ricordi di colazioni di strada e banchetti festivi.

Consigli, Varianti & Sostituzioni

Varianti creative

La ricetta si presta a diverse varianti che possono esaltare o modulare l’equilibrio tra dolcezza e sapidità. Puoi esplorare:

  • Una versione ancora più coccolosa aggiungendo noci tostate o nocciole in piccoli pezzi tra gli strati per una croccantezza extra e una nota di frutta secca.
  • Un profilo agrumato: una grattugiata di scorza d’arancia o limone sull’impasto o una leggera glassa a base di sciroppo d’acero arricchita con scorza di agrumi.
  • Un tocco di vaniglia: l’aggiunta di una punta di estratto di vaniglia per una loro profondità extra aromatiche.
  • Versione senza panna: per una versione meno ricca, utilizzare un impasto a base di latte vegetale e una glassa leggera di sciroppo d’acero ridotto.

Sostituzioni per diete speciali

  • Vegana: sostituire il bacon con pancetta vegetale affumicata o strisce di seitan affumicato, mantenendo la dolcezza dell’acero e la cannella come carattere principale.
  • Gluten-free: utilizzare una miscela di farine senza glutine adatta per lievitati e magari un addensante specifico per garantire struttura e morbidezza.
  • Ridotto contenuto di zuccheri: utilizzare una quantità variabile di sciroppo d’acero, oppure sostituire parte dello sciroppo con purè di mele per una dolcezza naturale e più moderata.
  • Low-carb: optare per un impasto a base di farine alternative a basso contenuto di carboidrati, e ridurre la quantità di zuccheri; il sapore rimane intenso grazie all’aroma della cannella e al bacon.

Note sul bilanciamento

Per mantenere l’equilibrio dolce-salato senza sovraccaricare il palato, è utile bilanciare la quantità di sciroppo d’acero con una nota di sale delicata e, se possibile, una leggera acidità fornita da un tocco di agrumi o da una composta di frutta non molto dolce. L’obiettivo è una progressione di sapori che guidi il palato dall’inizio fino al finale, senza che nessun elemento predomini sugli altri.

Conservazione & Idee per preparare in anticipo

Questo tipo di rotoli si presta bene a preparazioni anticipate, con diverse strategie a seconda di quando si desidera gustarli. Ecco alcune linee guida generali per conservazione e make-ahead:

  • Conservazione a temperatura ambiente: i rotoli freschi si mantengono morbidi e fragranti per 1-2 giorni se conservati in un contenitore chiuso, lontano da fonti di calore che potrebbero asciugarli.
  • Conservazione in frigorifero: è possibile conservare gli eventuali rotoli avanzati in frigorifero per 2-3 giorni; riscaldati delicatamente restituiscono buona morbidezza e profumo. Evita di conservare a lungo in frigo per evitare che perdano lucentezza.
  • Congelamento: è possibile congelare rotoli non cotti una volta farciti; una volta scongelati, saranno pronti per la cottura senza perdere sapore. Per i rotoli già cotti, la congelazione è possibile ma potrebbe influire leggermente sulla consistenza della glassa o della superficie lucida.
  • Riscaldamento: preferisci un riscaldamento delicato, in forno o in un tostapane di dimensioni adeguate, per ripristinare morbidezza e profumo senza seccare la superficie.
  • Preparazione in anticipo: se vuoi ridurre i tempi al momento di servire, puoi predisporre gli ingredienti secchi, la pasta pronta o l’impasto lievitato (a seconda della tua ricetta di base) e assemblare i rotoli poco prima di volerli cuocere.

Fatti divertenti & curiosità

Curiosità che arricchiscono l’esperienza di questa ricetta: la cannella è una delle spezie più amate al mondo e ha viaggiato lungo rotte commerciali storiche, diventando simbolo di ospitalità e calore in molte cucine. Lo sciroppo d’acero è una vera icona del Nord America: la sua dolcezza vellutata viene dal cuore degli alberi di acero e racchiude una tradizione di coltivazione e raccolta radicata in decenni di metodi artigianali. Il bacon, invece, è un ingrediente cacio-saporito che ha subito una lunga evoluzione, diventando parte integrante di molte ricette oltre i confini tradizionali, grazie alla sua capacità di aggiungere una nota ricca e affumicata. In alcune culture scandinave, rotoli dolci al forno con spezie e sciroppo hanno una lunga tradizione di colazione conviviale; qui, la versione con bacon è una fusione molto contemporanea che celebra la spontaneità creativa della cucina domestica. Un dettaglio storico interessante: i rotoli di cannella hanno radici nelle tradizioni di lievitati dolciari europei, ma l’aggiunta di sciroppo d’acero e bacon riflette un dialogo tra continenti e gusti moderni, dove non c’è bisogno di scegliere tra dolce o salato quando si può godere di entrambi in un solo morso.

In conclusione, i rotoli cannella, acero e bacon sono una proposta audace ma accogliente, capace di stimolare i sensi con un equilibrio di profumi, sapori e consistenze. Sono una celebrazione della convivialità e della cucina che osa innovare, pur rimanendo radicata in un comfort che fa sentire chiunque a casa. Se stai pensando a una ricetta per stupire senza complicarti la vita, questa è una scelta perfetta: una presentazione invitante, un gusto memorabile e una sensazione di calore che rimane con te a lungo dopo l’ultimo morso.

Ingredients

Rolls cannella acero e bacon
Dough

  • 3 1/2 cups all-purpose flour (or bread flour)
    → Provides the framework and gluten development to trap gas as the dough rises, yielding soft, springy rolls that hold their shape. Sift or whisk the flour with the dry ingredients to ensure even distribution, and measure by weight if possible for accuracy. If using bread flour, expect chewier crumb; all-purpose yields a softer, tender bite.
  • 2 1/4 tsp active dry yeast (about 1 packet)
    → The leavening agent that makes the dough rise and create that signature cinnamon roll texture. If using instant yeast, you can mix it with the dry ingredients and reduce rising time; for traditional active dry yeast, proof it in the warm milk with a pinch of sugar to confirm it’s active before mixing.
  • 1/4 cup granulated sugar
    → Feeds the yeast during fermentation and adds a gentle sweetness to the dough. Balance flavor, as too much sugar can slow rise. If you prefer a less sweet dough, reduce slightly; if you want richer flavor, substitute part of this with brown sugar.
  • 1/2 tsp fine salt
    → Enhances flavor, tightens the gluten network a touch for better structure, and controls yeast fermentation. Sprinkle evenly into the flour and whisk to distribute before adding liquids; if using salted butter, you can cut this to 1/4 tsp.
  • 3/4 cup warm milk (about 110°F/43°C)
    → Hydrates the dough and activates the yeast; keep temperature in the range to avoid killing the yeast. If dairy-free, use a fortified plant milk; you may need to adjust by 1-2 tablespoons to achieve a soft, slightly sticky dough consistency.
  • 1/3 cup unsalted butter, melted and cooled
    → Adds richness, moisture, and tenderness; help the dough stay soft after baking. Add only when melted and cooled to below 120°F (49°C) to avoid overheating the yeast. For dairy-free, substitute with a light-tasting margarine or coconut oil that solidifies when cool.
  • 1 large egg
    → Contributes structure, tenderness, and helps with browning. Bring the egg to room temperature before mixing so it blends smoothly into the dough. If a vegan option is desired, use an equivalent weight of applesauce or flax egg, noting it will slightly alter texture.
  • 1 tsp vanilla extract (optional)
    → Subtle aromatic note that enhances the dough and pairs well with cinnamon; add to the wet ingredients for even distribution or mix with the milk before combining with flour. If omitted, dough remains straightforward cinnamon roll without extra perfume.

Filling

  • 1/2 cup light brown sugar
    → Creates a moist, caramelized swirl that bakes into the roll; brown sugar provides deeper flavor than white sugar. Combine with cinnamon before spreading onto the dough so the mixture distributes evenly. If you like a stronger caramel flavor, you can mix in a teaspoon of molasses per tablespoon of sugar.
  • 2 1/2 tbsp ground cinnamon
    → The hallmark spice for cinnamon rolls, providing warmth and aroma. Use fresh ground cinnamon if possible for maximum intensity; whisk with brown sugar to ensure even coverage within the dough. Adjust to taste but avoid over-saturating the surface to prevent gumminess.
  • 4 tbsp unsalted butter, melted
    → Creates a moist, buttery layer that helps the cinnamon-sugar to stick and spread evenly when rolling. Let the butter cool briefly so it doesn’t melt the sugar too soon, which keeps a defined swirl. Use dairy-free butter if needed for dietary restrictions.
  • Pinch of salt (optional)
    → Heightens flavor and counterbalances sweetness in the filling; optional but recommended if using unsalted butter in the dough. Sprinkle evenly over the cinnamon-sugar mixture to help balance flavors.

Bacon

  • 6-8 slices bacon, cooked until crisp and crumbled
    → Adds smoky, savory contrast to the sweet rolls. Cooking to crispness ensures the bacon bits hold shape inside the roll and don’t render excess fat. Drain on paper towels, cool completely, and crumble finely so they distribute evenly or sprinkle on top before baking depending on preference.

Maple glaze

  • 1 cup powdered sugar (confectioners sugar)
    → Provides the base for a glossy, easy-drizzle glaze. Sift to remove lumps for a smooth finish; adjust thickness by adding more sugar or a splash of milk as needed.
  • 2-3 tbsp pure maple syrup
    → Delivers authentic maple flavor that pairs beautifully with cinnamon and bacon; choose real maple syrup for depth. Warm slightly if too thick to mix with sugar; adjust sweetness to taste by adding more sugar if needed.
  • 2-4 tbsp milk or cream
    → Adjusts glaze consistency from thick to pourable; dairy yields a smoother glaze. Add gradually to reach desired drizzle; for non-dairy, use almond or soy milk. A warmer glaze flows better on warm rolls.

Optional Toppings

  • 4 oz cream cheese, softened
    → If you prefer a tangy, creamy frosting to complement the maple, this forms the base for a maple-cream cheese frosting. Beat with butter until smooth, then blend in powdered sugar and maple syrup; refrigerate briefly to set, then serve with the rolls.
  • 2 tbsp unsalted butter, softened
    → Adds richness and helps the frosting spread smoothly with the cream cheese; ensure butter is fully softened to avoid lumps.
  • 1 cup powdered sugar
    → Sweetens and thickens the frosting; sift to remove lumps and achieve a creamy texture; adjust amount for the desired consistency.
  • 2-3 tbsp maple syrup
    → Infuses maple flavor into the frosting; add gradually to reach your preferred sweetness and consistency. Too much syrup can thin the frosting, so balance with powdered sugar.
  • 1/2 tsp vanilla extract
    → Adds aroma to the frosting; blend with the other ingredients for a cohesive flavor. If using vanilla, adjust to taste to avoid overpowering maple and bacon notes.

Instructions

  • Preheat your oven to 350°F (175°C) and grease a 9×13-inch baking pan or line it with parchment; this ensures even baking and easy removal of the rolls after baking.
    → A hot, prepared pan prevents sticking and promotes uniform browning across the bottoms and edges of the rolls.
  • Proof the yeast by warming 1/4 cup of the milk to about 105-110°F (40-43°C) and sprinkling the yeast with a pinch of sugar, then let it sit 5-10 minutes until foamy.
    → This confirms the yeast is active; foaming indicates good leavening strength for a light, airy dough.
  • Whisk the 3 1/2 cups flour, the remaining 1 1/4 cups sugar, and 1/2 teaspoon fine salt in a large bowl until uniformly distributed; this builds an even gluten network and prevents dense pockets.
    → Even distribution of dry ingredients ensures consistent texture and rising throughout the dough.
  • Whisk the 3/4 cup warm milk (105-110°F) with the 1 large egg, the cooled melted butter (below 120°F/49°C), and the optional vanilla, creating a smooth, cohesive wet mixture.
    → Ensures the fats and proteins hydrate evenly, contributing to a tender crumb and reliable emulsification for the dough.
  • Stir the proofed yeast and its foamy liquid into the wet mixture, then pour all of the wet ingredients into the well of the dry ingredients and mix with a wooden spoon until a shaggy dough forms.
    → Incorporating liquid gradually prevents overhydration and helps sustain an even gluten development from the start.
  • Turn the shaggy dough onto a lightly floured surface and knead for 8-10 minutes until it becomes smooth, elastic, and only slightly tacky; this strengthens the gluten network for a soft yet sturdy roll.
    → Proper kneading develops structure, which traps gas during rising and yields a tender, springy crumb after baking.
  • Lightly oil a clean bowl, place the dough inside, turn to coat all sides, cover with plastic wrap or a damp towel, and let rise in a warm, draft-free spot until doubled, about 1 to 1 1/2 hours.
    → A controlled rise builds flavor and airy volume without overproofing, which can collapse during baking.
  • Meanwhile, combine 1/2 cup light brown sugar, 2 1/2 tablespoons ground cinnamon, and a pinch of salt in a small bowl and whisk to break any clumps; this creates an even cinnamon-sugar layer.
    → Even distribution of cinnamon and sugar ensures a consistent swirl and flavor from edge to center of each roll.
  • Pour 4 tablespoons melted butter into the cinnamon-sugar mixture and stir until fully integrated, then allow it to cool slightly so it does not melt the sugar too quickly and blur the layers.
    → A slightly cooled fat prevents the filling from sliding into a loose paste and helps it adhere to the dough for a clean swirl.
  • Cook the bacon until crisp, drain on paper towels, and crumble finely; this yields crunchy bits that distribute evenly without releasing excess fat during baking.
    → Crisp bacon holds shape inside the rolls and provides a distinct smoky contrast to the sweet filling; crumbled bits mix evenly rather than sinking to the pan.
  • Once the dough has risen, punch it down and turn it onto a lightly floured surface; roll it out into a rectangle approximately 12×18 inches and about 1/4 inch thick.
    → A uniform thickness ensures equal baking and a consistent spiral when rolled, preventing undercooked centers.
  • Brush the surface with a thin layer of the cooled melted butter, leaving a small margin at the far edge, then sprinkle the cinnamon-sugar mixture over the entire surface and sprinkle the crumbled bacon evenly on top.
    → The butter acts as a sticky carrier for the filling, the sugar-cinnamon layer creates the signature swirl, and bacon distribution ensures every bite has flavor.
  • Starting with the long edge, tightly roll the dough into a log, pinch the seam to seal, and tuck the ends under to create a neat cylinder for uniform slices.
    → A tight roll prevents the filling from oozing out and yields clean, defined spirals when sliced.
  • Slice the log into 12 equal pieces using a sharp knife or dental floss for clean cuts; place the rolls cut-side up in the prepared pan with even spacing to allow room for expansion.
    → Equal portions promote uniform browning and ensure each roll bakes thoroughly without crowding.
  • Cover the pan loosely and let the rolls rise again in a warm spot until puffy, about 25-40 minutes; this final rise enhances height and softens the crumb.
    → A second rise ensures a tall, airy roll with a tender interior after baking.
  • Bake in the preheated oven at 350°F (175°C) for 22-28 minutes, rotating the pan halfway through for even browning; bake until the tops are golden and the centers are set.
    → Even heat distribution yields uniform color and a fully baked interior; internal temperature should reach about 190°F (88°C) if checked with a thermometer.
  • While the rolls bake, whisk 1 cup powdered sugar with 2-3 tablespoons pure maple syrup and 2-4 tablespoons milk (adjust to achieve a pourable but thick glaze); warm slightly if too thick for easier pouring.
    → A glossy maple glaze blends sweetness with the rolls’ cinnamon aroma and gives a smooth, firm finish as it sets.
  • If using the optional maple cream cheese frosting, beat 4 oz cream cheese with 2 tbsp softened butter until smooth, then beat in 1 cup powdered sugar, 2-3 tbsp maple syrup, and 1/2 tsp vanilla extract; refrigerate briefly to set for a creamy, tangy contrast.
    → Cream cheese frosting provides a luscious, tangy counterpoint to the sweet maple and smoky bacon, with a stable texture that holds up well on warm rolls.
  • Remove the baked rolls from the oven and allow them to rest for 5-10 minutes so the structure sets slightly, then drizzle the maple glaze over while still warm to maximize absorption and shine.
    → Glazing while warm helps the sugars melt into the crust, creating a cohesive, glossy finish that clings to every side.
  • If using the optional frosting, spread or pipe a thin layer over the rolls once the glaze has set, or serve frosting on the side for dipping; this adds a rich, creamy texture that complements the maple and bacon notes.
    → The frosting adds a decadent option for plate presentation and a contrast in texture that many guests enjoy with cinnamon rolls.
  • Serve the cinnamon-maple-bacon rolls warm, and store any leftovers covered at room temperature for up to 2 days or freeze individually wrapped portions for longer storage; rewarm gently to preserve tenderness.
    → Gentle reheating revives the soft crumb and melts any glaze slightly for a more luscious bite, while proper storage maintains moisture and flavor.

Notes

These cinnamon rolls with maple and bacon are richly layered with a cinnamon-sugar filling swirled through soft dough and studded with crispy crumbled bacon, finished with a glossy maple glaze. You can customize them by adjusting the amount of cinnamon in the filling, adding chopped nuts, or using a cream cheese maple frosting for a tangy contrast. They freeze well and reheat beautifully in a 350°F oven for about 10-12 minutes to restore softness. For an extra indulgent touch, serve warm with additional maple glaze or a smear of maple cream cheese frosting. If you have gluten intolerance, make sure to use a gluten-free flour blend and certified yeast and other ingredients to ensure the rolls rise properly.

Tips

Tips for Rolls cannella acero e bacon

Dough tips

  • Proofing temperature matters: keep dough in a warm spot around 75–80°F (24–27°C). If your kitchen is cool, place the bowl in an off oven with the light on or set it near a warm bowl of water to encourage rising.
  • Gluten development: knead until the dough is smooth and elastic; perform a windowpane test to confirm you’ve developed enough gluten before shaping.
  • Hydration and texture: if the dough feels sticky, oil your hands and the work surface lightly rather than adding excess flour, which can toughen the crumb.
  • Rising options: you can refrigerate the shaped rolls for an overnight rise, which develops flavor and makes slicing easier; bake directly from the fridge with a longer bake time.
  • Dry yeast notes: if using instant yeast, mix with dry ingredients. If using active dry yeast, proof it in warm milk with a pinch of sugar to confirm activity before mixing.
  • Temperature of fats and eggs: use melted, cooled butter (below 120°F/49°C) and room-temperature egg for a smoother dough.
  • Substitutions: for dairy-free options, use plant milk and a neutral oil or dairy-free butter; for vegan, use flax egg or applesauce in place of the egg and a plant-based butter.

Filling tips

  • Even cinnamon-sugar distribution: mix brown sugar with cinnamon well before spreading; a pinch of salt helps balance sweetness.
  • Butter handling: let melted butter cool slightly to prevent it from dissolving the sugar too soon, which helps maintain distinct swirls.
  • Roll-out technique: pat the dough into a rectangle with the long edge facing you; spread filling evenly, leaving a small bare edge to seal.
  • Swirl control: don’t overload the filling; too much can cause a soggy center and uneven rolls.

Bacon tips

  • Cook to crispness: crisp bacon holds its shape and provides a savory contrast; crumble finely for even distribution.
  • Cool and drain: drain on paper towels and let cool completely before using so it doesn’t melt into the filling.
  • Placement choice: decide whether to fold the bacon into the rolls or sprinkle on top before baking for different textures.

Maple glaze tips

  • Glaze consistency: start with 1 cup powdered sugar and 2 tbsp milk; whisk until smooth, then add maple syrup to taste. Adjust with more sugar or a splash of milk to reach desired drizzly thickness.
  • Warm vs cold glaze: a slightly warm glaze flows best over warm rolls for a glossy finish and good adhesion.
  • Flavor balance: taste as you go; if the glaze is too sweet, add a touch more milk or a pinch of salt to mellow sweetness.

Optional toppings

  • Cream cheese frosting option: beat 4 oz softened cream cheese with 2 tbsp softened butter, then whisk in 1 cup powdered sugar and 1–2 tbsp maple syrup; refrigerate briefly to set before serving.
  • Alternative frosting: for a lighter finish, dust with powdered sugar or drizzle with maple glaze only.
  • Flavor harmony: adjust maple in the frosting to taste; too much maple can overshadow bacon, so balance with the other components.

FAQ

Cos’è questa ricetta Rolls cannella acero e bacon?

Una versione dolce-salata di cinnamon rolls che unisce l’aroma della cannella, la dolcezza dello sciroppo d’acero e la croccantezza del bacon. L’impasto è soffice, il ripieno è cannella e zucchero, e la glassa all’acero completa il profilo di sapori.

Quali sono gli ingredienti principali?

Ingredienti principali (per circa 12 rotoli):

  • 500 g farina 00 o Manitoba
  • 7 g lievito di birra secco (o 25 g lievito fresco)
  • 250 ml latte tiepido
  • 60 g burro morbido
  • 80 g zucchero
  • 1 pizzico di sale
  • 2 cucchiaini cannella in polvere
  • 120 g bacon cotto e tagliuzzato
  • 120 ml sciroppo d’acero (più extra per glassa)
  • 150 g zucchero di canna (per il ripieno insieme a cannella)
  • Per la glassa: 150 g zucchero a velo, 2-3 cucchiai sciroppo d’acero e latte q.b.
È possibile rendere questa ricetta vegetariana o vegana?

Sí. Per una versione vegetariana/vegana:

  • Sostituisci bacon con pancetta veg o con noci tostate o mais croccante a piacere, oppure ometti il bacon
  • Usa burro vegetale o olio di cocco al posto del burro
  • Utilizza latte vegetale e una glassa senza burro se preferisci
Come si prepara l’impasto della pasta lievitata?

Procedimento base:

  • Sciogli il lievito nel latte tiepido con un cucchiaino di zucchero e lascia attivare 5-10 minuti.
  • In una ciotola grande, mescola farina, zucchero, cannella e sale. Aggiungi burro morbido e il lievito attivato.
  • Impasta fino a ottenere una massa liscia ed elastica. Copri e lascia lievitare finché raddoppia di volume (circa 1-2 ore).
Come si prepara il ripieno di cannella e bacon?

Preparazione del ripieno:

  • Mescola zucchero di canna e cannella in una ciotola.
  • Cuoci il bacon finché è croccante, poi sbriciolalo.
  • Stendi l’impasto in un rettangolo, spalma una leggera dose di burro fuso, quindi cospargi con la miscela di cannella e zucchero e distribuisci il bacon.
Come si prepara la glassa all’acero?

Glassare i rotoli con:

  • 150 g zucchero a velo
  • 2-3 cucchiai sciroppo d’acero
  • Un po’ di latte per raggiungere la consistenza desiderata

Mescola fino a ottenere una glassa liscia e fluida, da spennellare sui rotoli appena sfornati.

Come si cuociono e a che temperatura?

Cuoci in forno preriscaldato a 180°C per 20-25 minuti, o finché i rotoli sono dorati e la glassa si è addensata. Se vuoi, spennella con altra glassa ancora calda per un finish lucido.

Posso preparare in anticipo o congelare?

Sì. Puoi preparare l’impasto in anticipo e lasciarlo lievitare in frigorifero una notte. Dopo aver arrotolato e tagliato i rotoli, puoi congelarli crudi o già tagliati; scongelali in frigorifero e lasciali lievitare prima di cuocere. La glassa va preparata separatamente e aggiunta al momento del servizio.

Quali varianti suggerite?

Varianti consigliate:

  • Aggiungere gocce di cioccolato fondente al ripieno
  • Sostituire parte del bacon con noci pecan o pistacchi
  • Aggiungere cubetti di mela o pere per un tocco fruttato
  • Usare una glassa al formaggio cremoso al posto della glassa all’acero
  • Ridurre la cannella per una versione meno pungente