Introduction / Hook
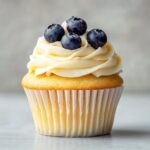
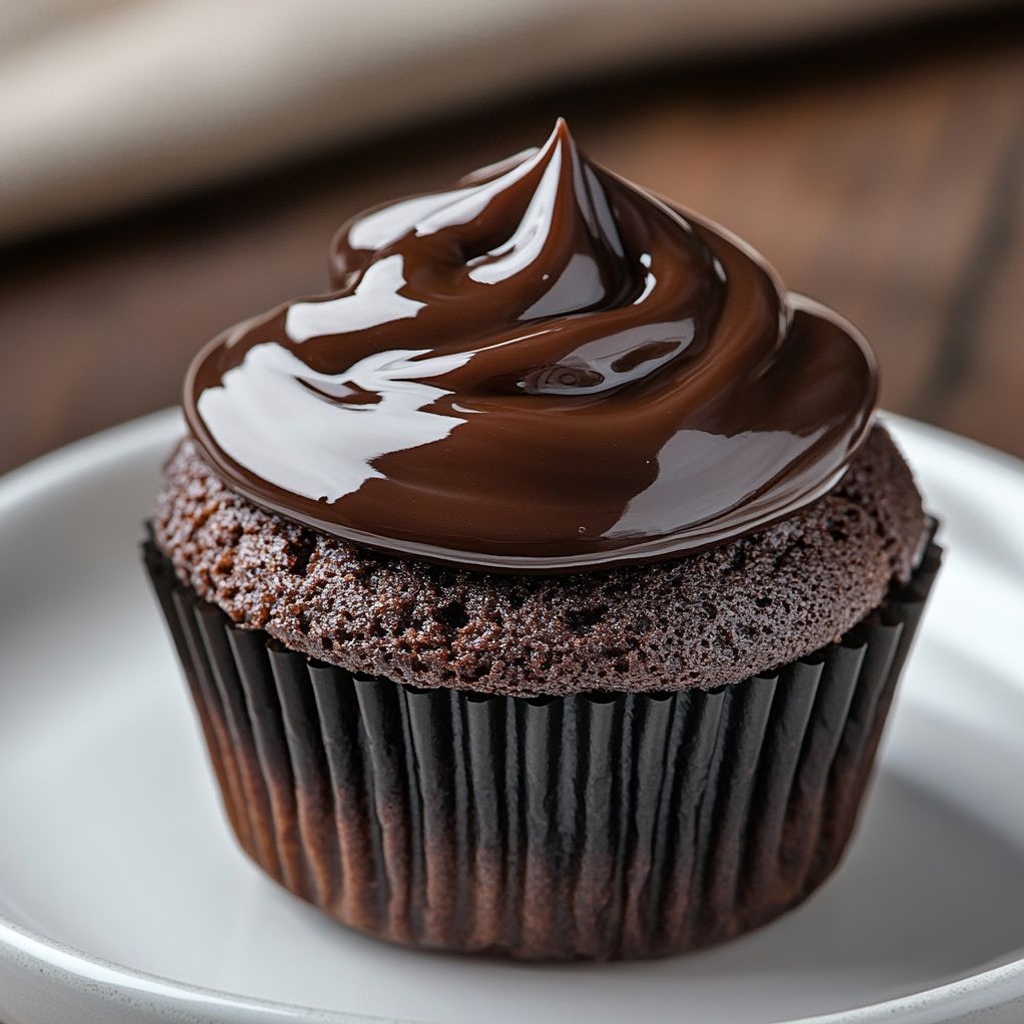
Imagine a little tower of pastry perfection, the kind that makes your kitchen glow with warmth even before the first bite. Cupcake al cioccolato is more than a treat—it is a celebration of chocolate, a tiny sunshine in a wrapper, a moment of velvet-soft decadence that arrives at the table with a smile. When you peel back the paper and reveal the moist, dusk-dark crumb, a shiver of cocoa aroma rises, as if a sweet secret has just been whispered into the room. The surface gleams with a gloss that hints at ganache or a cloud of buttercream, and the bite offers a dance: the first taste is a kiss of deep chocolate, a gentle sweetness, and then a lingering finish that invites another mouthful.
In every bite, there’s a story of warmth and comfort—the soft crack of the crust, the tender interior that yields to a slower, more luxurious center, and the way the flavors seem to bloom as they mingle with the ambient aroma of vanilla, a touch of coffee or almond, and the hint of something familiar and comforting. Cupcake al cioccolato is a bridge between indulgence and everyday joy: the quick dessert you reach for when you want to celebrate a small victory, a school-night pick-me-up, or a shared moment with friends and family. The magic lies not just in the chocolate itself, but in the way the batter holds moisture, the crumb structure that feels like a hug, and the moment you choose how to crown it—a silky buttercream, a shimmering ganache, or a light dusting of powdered sugar that catches the light like snowfall.
This description titled Cupcake al cioccolato invites you into a ritual as timeless as cocoa itself. It’s a recipe that respects tradition while inviting creativity: a classic foundation that welcomes experimentation, a pantry-friendly treasure that can be as simple or as elegant as your mood dictates. Whether you’re baking for a birthday, a cozy weekend indulgence, a bake sale fundraiser, or an afterschool treat for someone you love, this chocolate cupcake story has a place for you. The idea is simple: bake something that tastes like childhood and feels like a gentle hug—something that looks as beautiful as it tastes, so that every bite becomes a small, joyful event.
As you prepare to read on, picture the moment when a line of warm cupcakes emerges from the oven, their surfaces smooth and domed, a faint scent of cocoa tracing the air. Think of the way frostings gloss and set, the way toppings—strawberries, cacao nibs, a swirl of white chocolate—transform each little cake into a personal expression. Cupcake al cioccolato is not merely a dessert; it’s a shared ritual, a universal language spoken in a dozen languages across kitchens around the world, each bite translating into a memory that you’ll want to revisit again and again.
The Story Behind the Dish
Chocolate has traveled a long road to find its home in a cupcake. From the ancient cacao beans across Central and South America to the bustling cacao markets of Europe, chocolate became a language of celebration, luxury, and everyday delight. The cupcake, meanwhile, emerged from a desire to offer small, perfectly portioned confections—cakes that could be baked quickly, served easily, and enjoyed without ceremony. Over time, these two compelling ideas—intense, velvety chocolate and the intimate, personal touch of a single-serving cake—converged to create the modern chocolate cupcake.
The Italian influence on desserts is profound, and even in the world of cupcakes, you can sense its charm. In Italy, cioccolato is celebrated in many forms—tender tortes, silky ganache drizzles, and rich fritters—each presenting chocolate as a conductor of mood and memory. Cupcake al cioccolato feels like a respectful nod to that heritage: a dessert that carries a sense of old-world luxury, but still feels easy to assemble on a busy weekday. The origin story of this particular treat is less about a single moment in time and more about a cultural fusion—the American practice of portable, convenient confections meeting the Italian appreciation for cocoa’s depth and aroma. The result is a modern classic that invites you to savor chocolate in a form that’s approachable, universally loved, and endlessly adaptable.
There’s also a personal, almost intimate dimension to the dish: the ritual of whisking, mixing, and watching the batter come together, the quiet anticipation while it bakes, and the shared joy as you present a plate of glossy little domes to friends or family. The cupcake, after all, is a democratized luxury—a small, personal cake that invites conversation and connection, a moment to pause, savor, and exhale positively. Cupcake al cioccolato carries that spirit forward with every bake, offering a canvas for creativity—whether you keep it simple with a classic chocolate aesthetic or you gild it with inventive toppings and flavor pairings.
Why You’ll Love This Recipe
- Supremely chocolatey without being heavy. The batter delivers a robust cocoa profile, balanced by gentle sweetness and a moist, tender crumb that melts softly on the tongue.
- Versatile and forgiving. This recipe adapts to your pantry and your mood—swap in different types of cocoa, adjust sweetness, or tailor the finish with an array of frostings or toppings.
- Perfect for both weeknights and celebrations. It’s quick enough to become a reliable everyday treat, yet elegant enough to brighten a party or a special occasion.
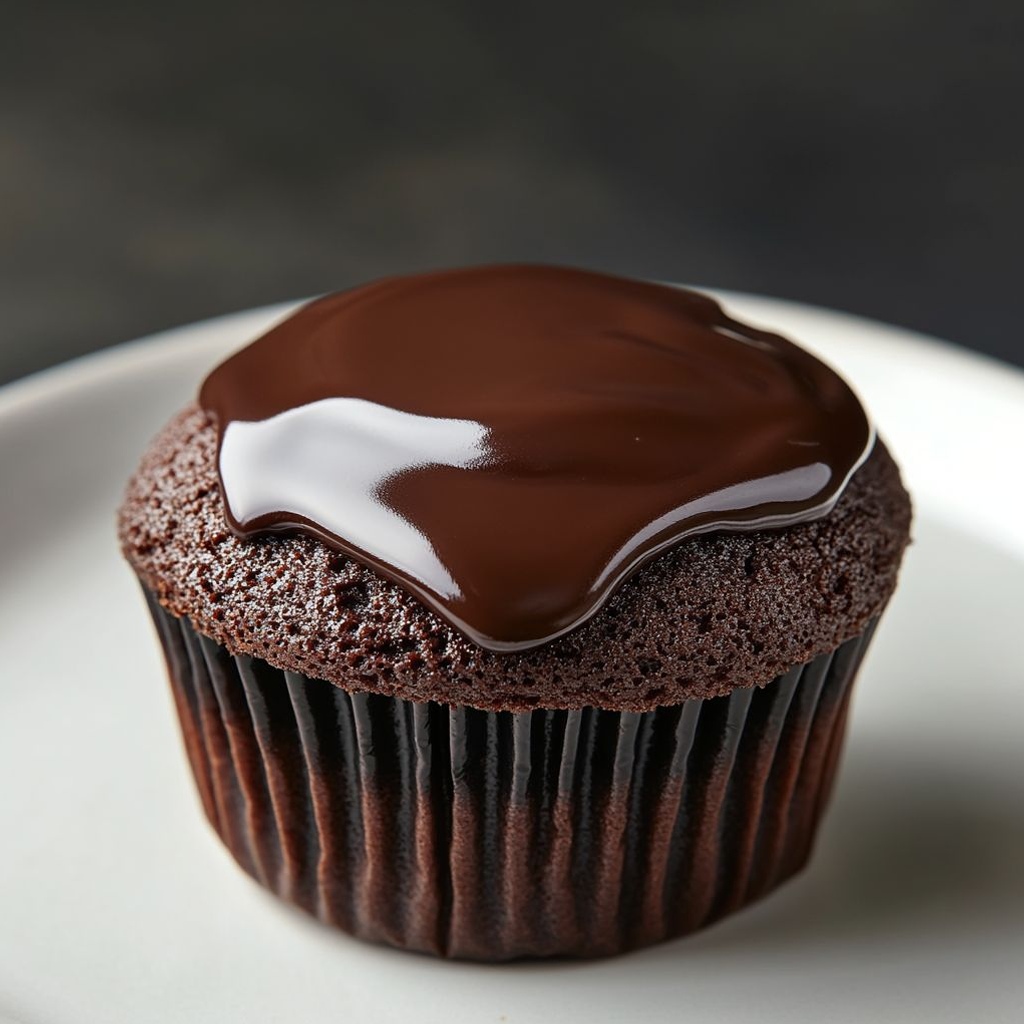
- Lovely texture with a glossy, inviting finish. The surface catches light just right, hinting at a luxurious interior beneath a delicate shell.
- Kid-friendly and adult-approved in equal measure. A crowd-pleaser that doesn’t require fancy equipment or hard-to-find ingredients to shine.
- Great for customization. Flavors such as espresso, orange, almond, or peppermint can be woven in with ease, making each batch unique while preserving the core chocolate character.
Flavor Profile & Texture
Cupcake al cioccolato brings you a layered experience in a single bite. The aroma is a warmth-soaked invitation: roasted cocoa, a whisper of vanilla, and a faint note of something toasty that suggests coffee or browned butter—an echo of deep, comforting flavors that make the heart feel instantly at home. The crumb is tender and moist, a result of a careful balance between the dry and wet components, with just enough structure to hold its shape while still offering a soft, almost custardy inner core.
On the palate, the chocolate asserts itself with bold depth rather than brash boldness. Depending on the cocoa used, you might notice a dusky, almost midnight hue that’s neither too dry nor cloying; a faint fruity or fruity-nut undertone can emerge if a particular cocoa is used, giving the bite a subtle complexity. The sweetness is present but restrained, allowing the natural bitterness of good chocolate to peek through—what bakers call a balanced sweetness. The texture carries a whisper of oiliness from the richness in the batter, but it never feels greasy; instead, it glides with a smooth, velvety feel that makes the cupcake feel luxurious yet entirely approachable.
Finish is where the magic lingers. A short, lingering finish dries just enough to invite another bite, and if you crown the cupcake with a silky frosting, a light, creamy contrast will emerge—vanilla or a hint of creaminess that rounds the chocolate’s edges. The perfect Cupcake al cioccolato is not just about the cocoa, but about the way the entire experience unfolds: the aroma, the bite, the aftertaste, and the memory it creates as you share it with others.
Occasions & Pairings
These chocolate cupcakes shine in a range of settings—from everyday indulgence to more festive occasions. Their universal appeal makes them a reliable centerpiece on a birthday table, a comforting finale to a family dinner, or a thoughtful treat in a lunchbox that brings a smile to a child’s face. They also perform beautifully at bake sales, potlucks, or casual gatherings where flexibility and ease are valued as much as taste.
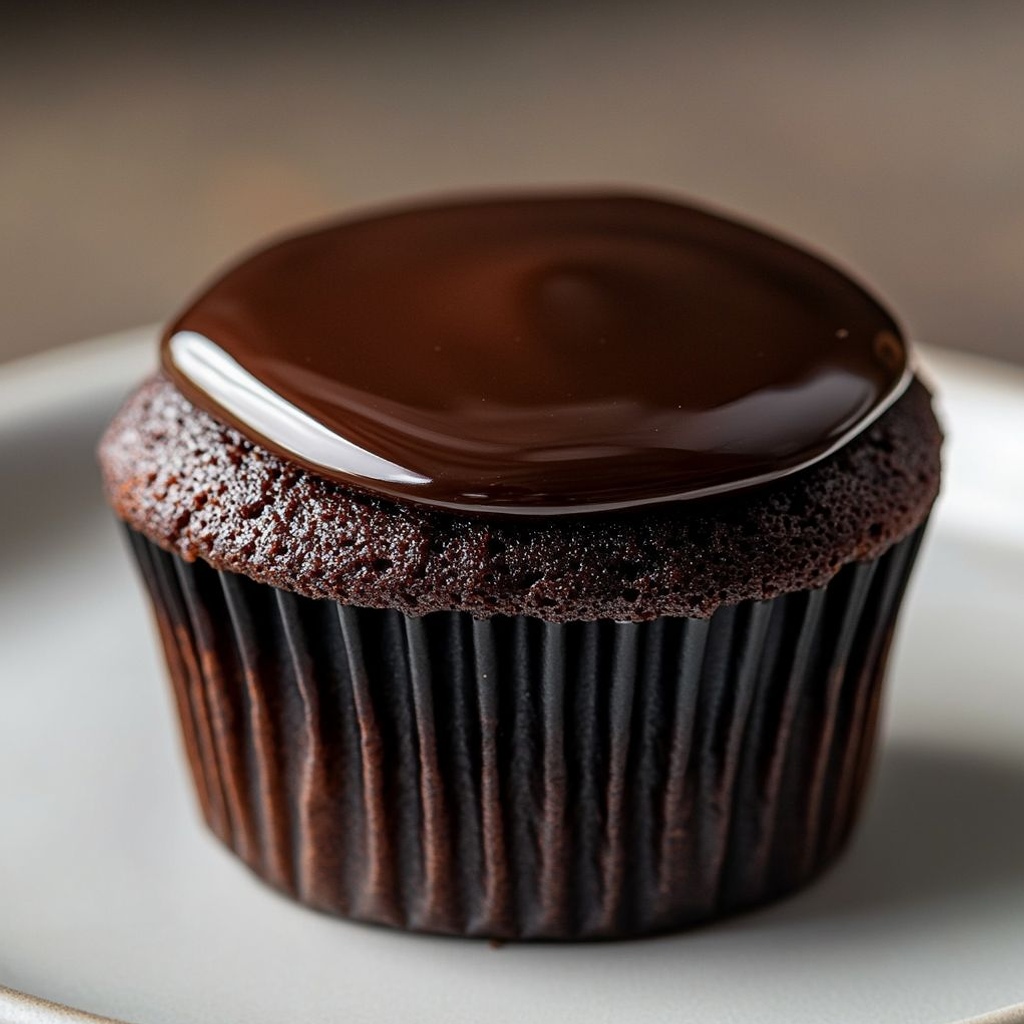
Pairing this chocolate beauty is easy and delicious. A glass of cold milk or a cup of a dark roast coffee creates a classic, comforting duo that never disappoints. For a more grown-up finish, a berry compote or a dollop of fresh cream can elevate the experience without overpowering the chocolate. If you prefer a more indulgent approach, a glossy ganache or a light buttercream—silky, pale, and sweet—complements the rich interior, turning the cupcake into a show-stopper. For an adventurous tilt, consider a hint of citrus with orange zest in the frosting or a splash of espresso in the batter to deepen the chocolate’s presence.
The beauty of Cupcake al cioccolato is that it adapts to many occasions. For a festive holiday table, dust with powdered sugar and add a few gold or silver dragées for a shimmer of holiday magic. For a casual weekend treat, keep the finish simple with a smooth white chocolate buttercream that contrasts beautifully with the dark cake. For a kid-friendly event, a colorful sprinkle crown can instantly transform each cupcake into a playful confection. The options are plentiful, and the soul of the dessert remains its rich chocolate essence wrapped in a tender, satisfying crumb.
Tips, Variations & Substitutions
- Flavors and cocoa: Experiment with different cocoa powders. Dutch-processed cocoa yields a deeper, more velvety color and a mellower acidity, while natural cocoa can brighten the batter with a hint of brightness. You can even use a blend for a nuanced finish.
- Vegan and dairy-free options: Replace dairy ingredients with plant-based milk (almond, soy, oat), use a neutral oil or coconut oil, and select a vegan-friendly butter or frosting. You’ll retain moisture and a rich chocolate character without animal products.
- Gluten-free variations: Use a gluten-free all-purpose flour blend with a small amount of xanthan gum or a similar binder to mimic the texture of wheat flour. The cupcakes will still be moist and tender, with a crumb that collapses softly on the bite.
- Flavor twists: Add a whisper of espresso for a mocha chorus, a hint of orange zest for a citrus lift, or a pinch of cinnamon for a warm, comforting note. A few crushed peppermint candies can provide a festive peppermint chocolate profile during winter.
- Texture play: If you prefer a lighter crumb, whisk the wet ingredients just until combined and avoid over-mixing. For a deeper, richer crumb, use a touch of dark-brown sugar (or a similar substitute) and consider a splash of coffee to heighten the chocolate.
- Frosting and toppings ideas: A classic vanilla buttercream, a ganache glaze, or a glossy chocolate mirror glaze can all work beautifully. For a simpler approach, a light dusting of powdered sugar or a sprinkle of cacao nibs adds texture and aroma without heavy frosting.
- Make-ahead tips: Bake and cool the cupcakes in advance, then freeze unfrosted cupcakes in a single layer. Thaw and frost when ready to serve. This is especially helpful for parties or family gatherings where timing matters.
- Portion and presentation: For a cleaner look, use a small ice-cream scoop to portion batter for uniform cupcakes. A tidy frosting swirl on each cake elevates the presentation and makes each bite visually inviting.
Storage & Make-Ahead Ideas
Leftover, properly stored cupcakes stay fresh for several days. If kept at room temperature in an airtight container, they typically maintain moisture and flavor for up to two to three days, depending on the climate and humidity. In a cooler, more humid kitchen, refrigeration can help maintain freshness, but be mindful that cold storage can dry out the crumb; if you refrigerate, bring cupcakes back to room temperature before serving to restore their tenderness.
For longer-term storage, freeze baked and cooled cupcakes individually wrapped or sealed in an airtight container. They can be frozen for up to two to three months. When you’re ready to enjoy, thaw them in the refrigerator or at room temperature, then frost and decorate as desired. If you’ve chosen to frost after freezing, a light re-whip of the frosting can restore a pillowy texture and a glossy finish.
Make-ahead frosting ideas are also a smart way to simplify hosting. You can whip up a batch of vanilla buttercream or a chocolate ganache and store it in the fridge for up to a week. When you’re ready to serve, give it a quick re-whip or warm it gently to bring it back to a smooth, spreadable consistency. These strategies let you focus on the joy of the moment rather than the last-minute scramble, ensuring you can greet guests with a tray of perfect little cakes.
Fun Facts & Trivia
– The word cupcake likely originated from the practice of baking in cup-shaped molds, or from the idea that the batter was measured in cups, making it easy to bake smaller, individual cakes.
– Chocolate was once considered a beverage rather than a dessert; its journey into confections like cupcakes is a testament to how flavors can reinvent themselves when combined with sugar and fat.
– The visual appeal of a cupcake—domed top, smooth frosting, and tidy wrapper—has made it a staple in party décor and social media photo moments. The ritual of choosing a frosting and topping has also become a personal expression, from classic to whimsical.
– In many cultures, the act of sharing sweets is a gesture of hospitality and celebration. Cupcake al cioccolato embodies that spirit, inviting people to pause, savor, and connect over something delicious.
– The pairing of chocolate with coffee has a long-standing culinary tradition in European and Italian-inspired kitchens, where a subtle bitterness from cocoa harmonizes with the roasted depth of coffee. This pairing enhances the chocolate’s complexity without overpowering its sweetness, leading to a balanced and deeply satisfying dessert experience.
Ingredients
Cupcake Base
- 1 3/4 cups all-purpose flour (210 g)
→ All-purpose flour provides the structure and crumb for the cupcakes, forming the gluten matrix that traps air as the batter bakes. For best results, spoon the flour into the cup and level it, rather than scooping from the bag, to avoid a dense, heavy crumb. Sift the flour with the cocoa powder to distribute evenly and prevent lumps. For gluten-free versions, substitute with a 1:1 gluten-free all-purpose blend and add 1/2 teaspoon xanthan gum per cup of flour to mimic the elasticity of gluten. - 3/4 cup unsweetened cocoa powder (75 g)
→ Cocoa provides the deep chocolate flavor and color. Choose Dutch-processed cocoa for a smoother, less acidic batter or natural cocoa for a stronger, more bitter chocolate note; natural cocoa may require a touch more baking soda to balance acidity. Sift with the flour to break up clumps and ensure even distribution. Store cocoa in an airtight container away from light to preserve flavor. - 1 teaspoon baking powder
→ Leavening agent that helps the cupcakes rise and stay light. Distribute evenly with the dry ingredients to avoid dense pockets. Use fresh baking powder for maximum lift; old powder can lead to flat cupcakes. - 1/2 teaspoon baking soda
→ Reacts with acidic components to create additional lift and a tender crumb. If using natural cocoa (which is more acidic), this helps balance flavor; if using Dutch-processed cocoa, the extra baking soda helps ensure adequate rise. Ensure it’s evenly distributed in the dry mix for uniform texture. - 1/4 teaspoon salt
→ Enhances flavor and balances sweetness, helping the chocolate taste more pronounced. Measure accurately and mix with the dry ingredients to ensure even distribution throughout the batter. - 1 cup granulated sugar
→ Provides sweetness, tenderness, and contributes to browning. Sugar interacts with fat to influence crumb softness. Ensure the sugar is thoroughly incorporated with the melted butter to avoid a grainy texture. - 2 large eggs, room temperature
→ Bind the batter, add moisture, and help form the crumb structure. Room-temperature eggs emulsify more easily with the fat and liquids, resulting in a smoother batter. Beat lightly before adding to wet ingredients to ensure even distribution. - 1/2 cup unsalted butter, melted and cooled
→ Provides richness and a moist, tender crumb. Melted butter yields a slightly denser texture than creamed butter, but it helps keep the batter cohesive. Let it cool slightly to avoid cooking the eggs when it comes into contact with them, and whisk it in with the wet ingredients until evenly combined. - 1/2 cup whole milk, room temperature
→ Adds moisture and tenderness to the crumb. Room-temperature milk blends more smoothly with the other wet ingredients, preventing a lumpy batter. For dairy-free options, use a neutral plant milk with a small amount of oil to mimic fat content. - 2 teaspoons vanilla extract
→ Provides a warm, aromatic sweetness that enhances the chocolate flavor. Use pure vanilla extract for best depth; keep it as part of the wet ingredients to distribute evenly. - 1/2 cup hot water or hot brewed coffee
→ Blooms and intensifies the chocolate, yielding a moister, more cohesive batter. The hot liquid helps dissolve the cocoa and distributes moisture evenly. Pour at the end of mixing, after the rest of the wet ingredients are combined, to avoid overheating the eggs. If you prefer, use strong brewed coffee (espresso works well) for a deeper flavor without adding noticeable coffee taste.
Frosting
- 1/2 cup unsalted butter, softened
→ Creates a creamy base for the frosting. Soften at room temperature until easily scoopable, then beat until pale and fluffy. Soft butter ensures a smooth, spreadable frosting and prevents a greasy or grainy texture. If the butter is too warm, chill briefly before beating. - 2 to 3 cups powdered sugar (icing sugar), sifted
→ Provides sweetness and body to the frosting. Start with 2 cups and add more to reach the desired thickness. Sifting removes lumps for a silky, pipe-able texture. For a lighter frosting, use the smaller amount; for a sturdier, piping-friendly finish, use the higher amount. - 1/4 cup unsweetened cocoa powder
→ Infuses the frosting with chocolate depth to pair with the cupcakes. Sift with the powdered sugar to prevent gritty specks and ensure an even chocolate color. For a deeper color, use Dutch-processed cocoa. - 2–3 tablespoons milk or heavy cream
→ Adjusts the frosting’s consistency. Begin with 2 tablespoons and add a little more as needed to reach a smooth, spreadable texture that holds its shape when piped. Use cream for a richer frosting; dairy-free options can use almond or coconut milk with a touch more cocoa powder if desired. - 1 teaspoon vanilla extract
→ Adds fragrance and rounds out the chocolate flavor. Use pure vanilla extract for best aroma; add with the liquids to ensure full distribution. - Pinch of salt
→ Balances sweetness and enhances chocolate perception. A tiny amount helps prevent the frosting from tasting flat; mix into the frosting while beating. - Espresso powder (optional) or 1 tablespoon hot coffee to intensify chocolate
→ A small amount of espresso powder boosts the chocolate flavor without imparting a distinct coffee taste. Dissolve the espresso powder in the milk before adding to the frosting or whisk it into the cocoa with the sugar to ensure even mixing. If you don’t have espresso powder, a dash of hot coffee can achieve a similar effect.
Optional Add-ins
- 1/2 cup semisweet chocolate chips (optional)
→ Fold into the batter at the end of mixing to distribute evenly with pockets of melted chocolate. Chips add bursts of sweetness and texture but can sink if overwhelmed by the batter, so fold gently just until incorporated. - 1/4 cup finely chopped toasted nuts such as walnuts or pecans (optional)
→ Adds crunch and a toasty flavor that pairs well with chocolate. Toast nuts lightly before chopping to enhance aroma; fold in with minimal agitation to keep pieces visible and evenly distributed.
Instructions
- Preheat your oven to 350°F (175°C) and line a 12-cup muffin tin with paper liners or grease it well.
→ This ensures the cupcakes release cleanly from the tin and prevents sticking, which makes frosting and serving easier. - Sift together the dry ingredients: all-purpose flour, unsweetened cocoa powder, baking powder, baking soda, and salt in a large bowl.
→ Sifting distributes leavening and cocoa evenly, breaks up any clumps, and creates a lighter, uniform crumb in the finished cupcakes. - Whisk the wet ingredients: eggs, granulated sugar, melted and cooled unsalted butter, whole milk, and vanilla extract in a separate bowl until the mixture is smooth and homogenous.
→ Room-temperature liquids emulsify with the fat for a smooth batter; whisking ensures even distribution of fat and sugar for tender cupcakes. - Pour the wet ingredients into the center of the dry ingredients and stir with a gentle, sweeping motion until just combined and there are no large dry pockets.
→ Do not overmix; a few small streaks of flour are acceptable to avoid a tough, elastic crumb. - Stir in the hot water or hot brewed coffee to the batter and mix just until evenly incorporated.
→ The hot liquid blooms the cocoa for a richer chocolate flavor and helps create a moist, cohesive batter; add at the end to prevent cooking the eggs. - If using optional add-ins, fold in semisweet chocolate chips and/or finely chopped toasted nuts with a light, folding motion to distribute evenly without deflating the batter.
→ Gentle folding keeps pockets of melted chocolate and crunch intact, while ensuring even distribution throughout the batter. - Fill each muffin cup about 2/3 to 3/4 full with batter, using a scoop or spoon to ensure uniform portions.
→ Proper filling promotes even rising and a consistent dome across all cupcakes, avoiding overflow or underfilled centers. - Bake in the preheated oven for 18–22 minutes, or until the tops are set and a toothpick inserted into the center comes out with a few moist crumbs.
→ Time and toothpick testing confirm doneness without drying the crumb; rotate the pan halfway for even browning. - Transfer the pan to a wire rack and allow the cupcakes to cool completely before frosting, about 20–30 minutes.
→ Cooling is essential to prevent the frosting from sliding or melting and to set the crumb for clean decoration. - Prepare the frosting: beat the softened unsalted butter on medium-high speed until pale and fluffy, about 2–3 minutes.
→ Creaming lightens the fat and creates a smooth, aerated base that will hold the frosting’s structure when sugar is added. - Gradually sift in powdered sugar and cocoa powder, starting with 2 cups of sugar and 1/4 cup of cocoa, while beating on low to prevent a sugar cloud; then increase speed as it comes together.
→ Sifting avoids lumps for a silky, pipe-able frosting and ensures even color and flavor distribution. - With the mixer on low, add 2–3 tablespoons milk or heavy cream, followed by 1 teaspoon vanilla and a pinch of salt; beat until the frosting is smooth, glossy, and spreadable, adjusting thickness with more sugar or milk if needed.
→ The liquid determines consistency; too loose and it won’t hold shape, too stiff and it’ll be difficult to pipe. - If using espresso powder, dissolve it in a small amount of milk or hot water and whisk it into the frosting (or whisk it directly into the cocoa with the sugar) to intensify the chocolate without overpowering it.
→ Espresso boosts depth and enhances chocolate flavor; dissolving ensures even distribution without gritty texture. - Frost the cooled cupcakes with a spatula or pipe on decorative swirls, and finish with any desired toppings or a light dusting; ensure the frosting grips the surface without tearing the crumb.
→ A well-frosted surface not only looks professional but also helps seal in moisture and flavors for serving. - Store the cupcakes in an airtight container at room temperature for up to 3 days, or freeze unfrosted cupcakes for longer keeping; frost just before serving for the best texture.
→ Proper storage maintains moisture and prevents the frosting from drying out or becoming greasy, ensuring peak flavor and appearance.
Notes
These chocolate cupcakes are rich and moist, with a deep cocoa flavor that comes from the cocoa and a touch of vanilla. You can customize them by folding in 1/2 cup semisweet chocolate chips for pockets of melty sweetness or 1/4 cup finely chopped toasted nuts for added crunch. If you like, swirl in a spoonful of your favorite jam in the center before baking for a surprising filling.
They freeze well: cool completely, wrap individually, and store in an airtight container or freezer bag for up to 2–3 months. Thaw at room temperature and rewarm slightly if desired. To finish, frost with the provided chocolate frosting and pair with a glass of milk or a dollop of whipped cream.
For a dairy-free version, substitute the butter with a neutral oil or dairy-free margarine and use a plant-based milk. For a gluten-free version, substitute the all-purpose flour with a 1:1 gluten-free flour blend and add 1/2 teaspoon xanthan gum per cup of flour; ensure the baking powder is gluten-free. Always ensure your baking powder is fresh and gluten-free if you have gluten intolerance.
Tips
Consigli utili per Cupcake al cioccolato
- Misurazione accurata: per una frittella leggera, inserisci la farina nelle tazze, spolverala con un cucchiaio e livella con un coltello. Setaccia insieme farina e cacao per distribuire bene il cacao e evitare grumi nella massa.
- Ingredienti a temperatura ambiente: uova, latte e burro fuso dovrebbero essere a temperatura ambiente per ottenere un impasto liscio e uniforme. Prepara tutto prima di iniziare e, se necessario, estrai gli ingredienti 30–60 minuti prima. Se hai fretta, scalda leggermente il latte o fai raffreddare rapidamente i liquidi freddi toccandoli con le mani immerse in acqua tiepida.
- Burro fuso raffreddato: lascia raffreddare leggermente il burro fuso prima di aggiungerlo agli ingredienti liquidi per evitare di cuocere le uova. Mescola bene con lo zucchero per una crema lucida e setosa.
- Mescola con equilibrio: incorpora gli ingredienti asciutti e quelli liquidi in cicli, evitando di lavorare troppo la pastella. L’eccessiva lavorazione può rendere i cupcake gommosi o tesi; pochi giri veloci bastano per amalgamare.
- Acqua o caffè caldo: aggiungi l’acqua calda o il caffè al termine della fase liquidi, dopo aver unito gli altri liquidi. Il liquido caldo aiuta a sciogliere il cacao e a rendere l’impasto più umido. Se vuoi un sapore meno evidente di caffè, riduci o ometti questa presenza.
- Riempimento degli stampi: riempi i pirottini circa 2/3 della loro capacità per permettere al lievito di agire e dare una bella cupola senza traboccare.
- Tempismo in forno: preriscalda il forno a una temperatura moderata (circa 175–180°C / 350°F). Cuoci per circa 16–20 minuti, finché uno stecchino inserito al centro esce pulito. Evita di aprire spesso lo sportello durante i primi minuti per non far collassare la torta.
- Controllo cottura: non cuocere troppo; i bordi dorati sono segno di cottura. Se la superficie si asciuga eccessivamente prima di risultare cotta, copri con un foglio di carta stagnola per gli ultimi minuti di cottura.
- Raffreddamento: lascia raffreddare i cupcake nella teglia per 5–10 minuti, poi trasferiscili su una griglia per raffreddarli completamente prima di glassarli. Le basi fredde tengono meglio la glassa.
- Glassatura liscia: per una glassa al cioccolato liscia, usa burro morbido e zucchero a velo setacciato. Aggiungi cacao setacciato per una profondità di sapore. Se la crema risulta troppo densa, aggiungi poco latte o panna fino a ottenere una consistenza spalmabile e stabile per la decorazione.
- Espresso o caffè per intensificare: l’aggiunta di espresso in polvere (o una piccola quantità di caffè caldo) intensifica il cioccolato senza distinguersi come gusto di caffè. Sciogli l’espresso nel latte della glassa o scioglilo insieme al cacao per una colorazione più profonda.
- Varianti e sostituzioni: per una versione senza glutine usa una 1:1 gluten-free flour blend e aggiungi 1/2 cucchiaino di xanthan gum per tazza di farina. Per versioni dairy-free sostituisci il latte con latte vegetale e considera olio neutro in uguale quantità al posto del burro fuso se vuoi una glassa veggie-friendly.
- Aggiunte facoltative: se vuoi una nota extra, aggiungi 1/2 tazza di gocce di cioccolato fondente o 1/4 tazza di noci tostate tagliate finemente. Piega delicatamente al fondo dell’impasto per distribuire uniformemente senza farle affondare.
Consigli per la glassa e la presentazione
- Raffreddamento completo prima della glassa: lascia raffreddare completamente le cupcake prima di glassarle per evitare che la glassa coli o si sciolga. Una glassa ben soda rimane in forma più a lungo.
- Corpo della glassa: per una decorazione resistente, inizia con 2 tazze di zucchero a velo e aggiungi cacao e liquidi poco per volta per raggiungere la consistenza desiderata. Troppo liquido rende la glassa lucida ma morbida, poco zucchero la rende troppo dura.
- Correttivi di consistenza: se la glassa è troppo soda, aggiungi un cucchiaino di latte per volta; se è troppo morbida, aggiungi zucchero a velo o cacao setacciato.
Varianti e suggerimenti utili
- Versione al cioccolato extra: aggiungi 1–2 cucchiai di cacao extra all’impasto per un gusto ancora più intenso, tenendo conto della densità della massa.
- Conservazione: i cupcake cotti e non glassati si conservano in contenitore ermetico a temperatura ambiente 2–3 giorni; possono essere congelati non glassati per 1–2 mesi. Glassati congelati mantengono la texture bene se conservati in contenitore ermetico ben chiuso.
FAQ
Quali sono gli ingredienti base per Cupcake al cioccolato?
Ingredienti comuni: farina per dolci, zucchero, cacao amaro in polvere, lievito per dolci, bicarbonato, sale, uova, latte (o latte vegetale), olio neutro o burro fuso, estratto di vaniglia, e pezzi o gocce di cioccolato fondente. Opzionale: una puntina di caffè per intensificare il cioccolato.
Come si prepara l’impasto dei cupcake al cioccolato?
Setaccia insieme farina, cacao, lievito, bicarbonato e sale. In una ciotola a parte sbatti uova e zucchero, aggiungi latte, olio e vaniglia. Unisci gli ingredienti secchi a quelli liquidi mescolando finché appena amalgamati, poi incorpori cioccolato fuso o gocce di cioccolato. Evita di mescolare troppo per non rendere l’impasto duro.
A quale temperatura e per quanto tempo cuocere?
Cuoci in forno preriscaldato a 180°C (statico) o 170°C (ventilato) per circa 15–20 minuti. Controlla con uno stecchino: deve uscire asciutto o con pochissime briciole.
Come evitare che i cupcake si affossino o si creino crateri?
Riempili circa 2/3 della capsula di carta, non riempire troppo l’impasto. Non mescolare troppo a lungo e non lasciare il forno aperto durante la cottura iniziale. Assicurati che il forno sia ben preriscaldato e mantenga una temperatura costante.
Si può fare una versione senza glutine?
Sì. Usa una miscela di farine senza glutine 1:1 e, se la miscela non contiene addensanti, aggiungi 1/4–1/2 cucchiaino di xantano per legare. Segui le stesse proporzioni e tempi; controlla la cottura con lo stecchino.
È possibile preparare una versione vegana?
Assolutamente. Sostituisci le uova con alternative vegane come 1 cucchiaio di purea di semi di lino (1 cucchiaio di semi di lino macinati + 3 cucchiai di acqua) o con purè di frutta (mele/banana). Usa latte vegetale e olio al posto del burro. Puoi anche utilizzare olio di cocco o di girasole al posto del burro e aggiungere una punta di lievito per dolci come già previsto.
Quale tipo di cacao o cioccolato è consigliato?
Preferisci cacao amaro in polvere di buona qualità. Per un sapore più intenso, aggiungi cioccolato fondente fuso all’impasto o usa gocce di cioccolato fondente. Se vuoi una versione extra cioccolatosa, aumenta la quantità di cioccolato fondente a pezzi nell’impasto.
Come preparare una crema al cioccolato (frosting) per decorare?
Frosting al burro e cacao: 100 g di burro morbido, 200 g di zucchero a velo, 20–30 g di cacao amaro, qualche cucchiaio di latte e alcune gocce di vaniglia. Sbatti burro e zucchero, aggiungi cacao, latte poco alla volta finché ottieni una crema soffice. In alternativa, ganache: 100 g cioccolato fondente + 120 ml panna calda, mescola finché liscia e lascia intiepidire prima di spalmare.
Come conservare i cupcake e quanto durano?
Conserva a temperatura ambiente in contenitore ermetico per 2–3 giorni. In frigorifero possono durare 4–5 giorni (copri bene il frosting). Per lunghe conservazioni, congela i cupcake cotti non farciti o l’impasto già diviso in porzioni (fino a 1–2 mesi); scongelali lentamente in frigorifero prima di consumarli e farcire.
Posso congelare l’impasto o i cupcake già cotti?
Sì. Puoi congelare l’impasto crudo in vaschette o porzioni per lateri, oppure congelare i cupcake cotti non farciti e non decorati. Per il congelamento del frosting, è meglio conservarlo separatamente e aggiungerlo una volta scongelato i cupcake. Scongela lentamente in frigorifero prima di farcire o decorare.