Author

Ocean Nightleaf

Browsing

Introduction: A Comforting Classic with a Twist

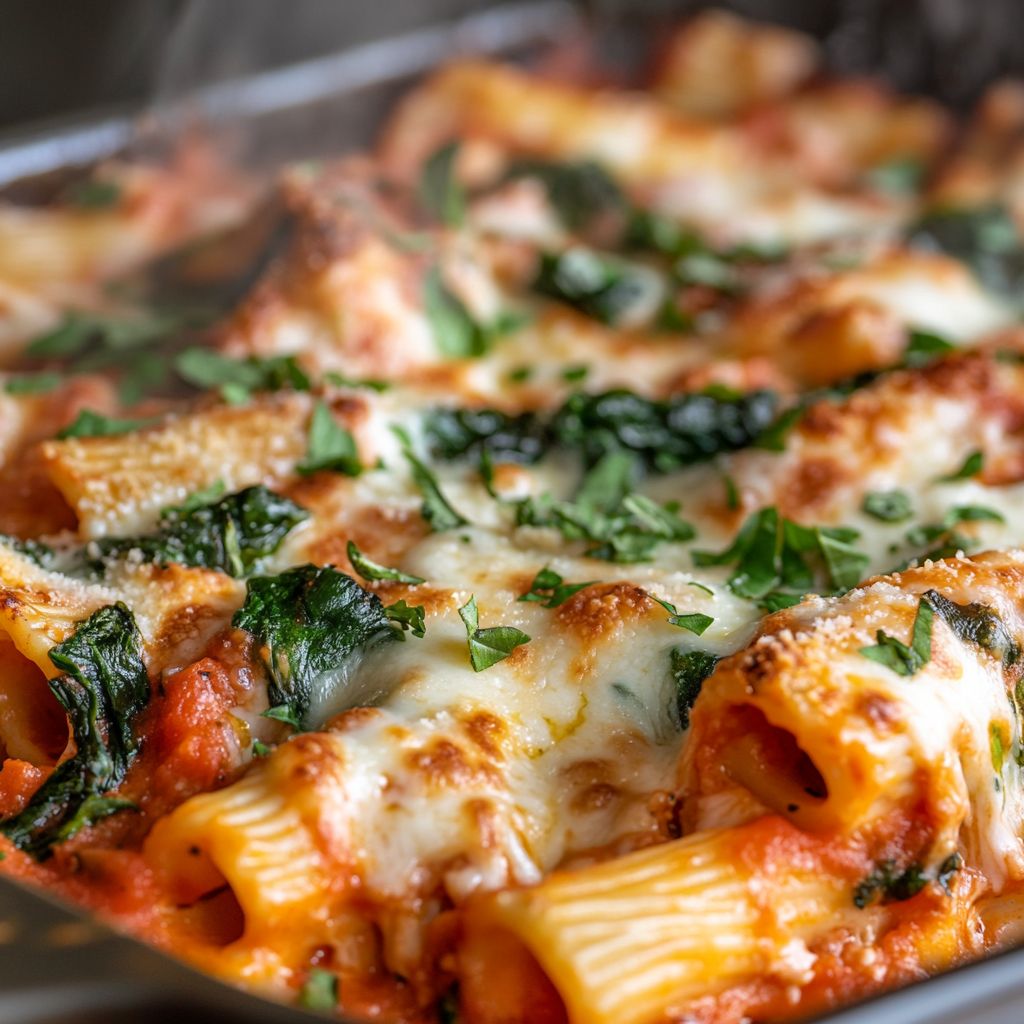
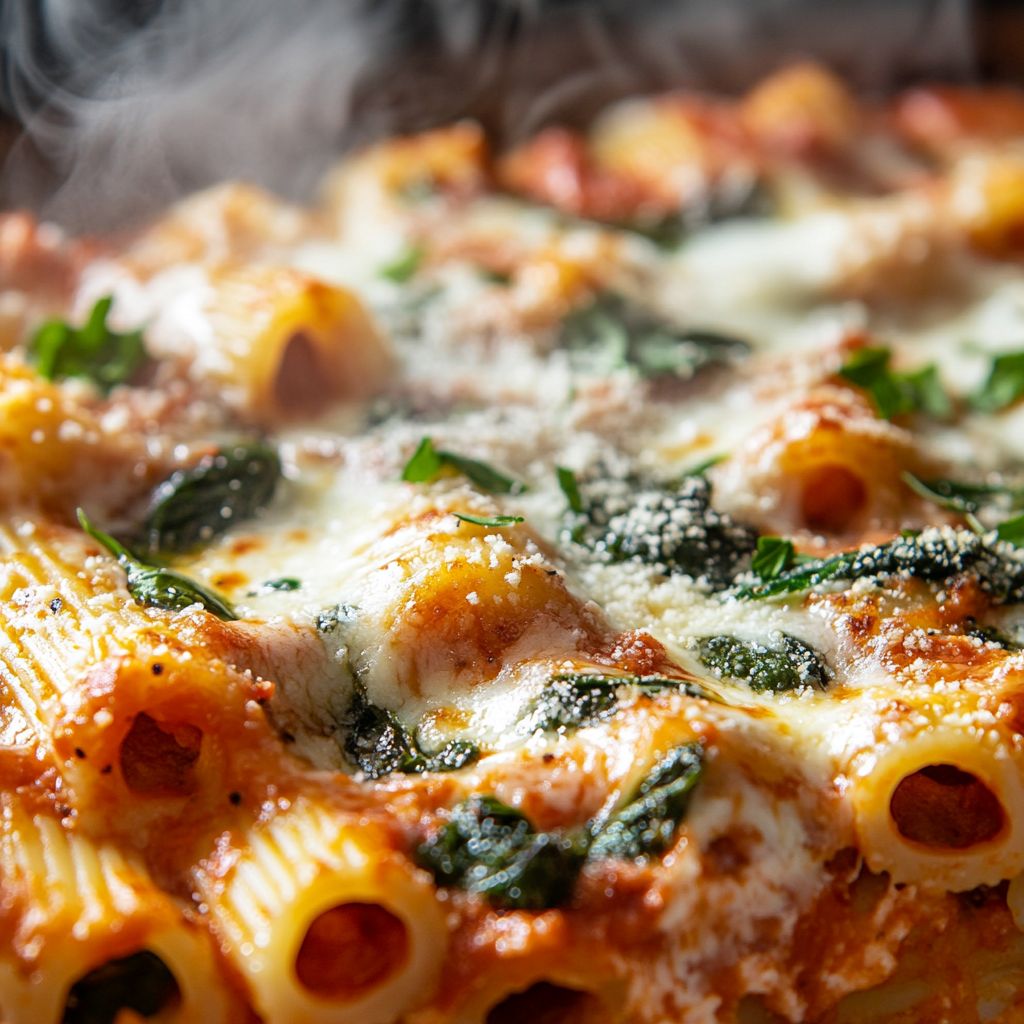
Imagine sinking your fork into a steaming plate of deliciously cheesy baked ziti, where each mouthful is a sumptuous mix of gooey cheese, hearty pasta, and a burst of fresh spinach. This dish does more than just satisfy hunger; it creates a culinary experience that envelops you in warmth and comfort. It’s the perfect marriage of protein-packed cheese and fresh, nutritious spinach entwined in pillowy pasta and layered with a zesty tomato sauce. One could easily say that Cheesy Baked Ziti with Spinach is a meal that spurs smiles, gathers family members, and creates unforgettable memories around the dinner table. Let’s embark on a delicious journey where we’ll uncover what makes this variation of a classic Italian dish a beloved favorite in households around the world.

The Story Behind the Dish

Baked ziti is an American-Italian comfort food that owes its ancestry to traditional Italian baked pasta dishes such as lasagna. Ziti, the pasta star of this dish, is thought to have origins in the Campania and Sicily regions of Italy. It was traditionally served at weddings, hence the name ‘ziti,’ derived from an Italian term for ‘fiancé.’ This classic pasta shape is ideal for trapping tasty sauces and enhancing its flavorful journey. While traditional versions of baked ziti focus on meat sauces, Cheesy Baked Ziti with Spinach shifts focus towards a more vegetarian-friendly fare that caters to a broader palate without sacrificing any of its delightful tastes.

By incorporating fresh spinach, this dish modernizes the classic, aligning with current culinary trends emphasizing wholesome and nutrient-rich ingredients. Spinach not only enhances the nutritional value of the meal but also introduces a tender green texture that marries wonderfully with melty cheese and robust tomato sauce. This fusion of Italian heritage with contemporary health-conscious dining creates a dish that’s familiar yet refreshingly innovative.

Why You’ll Love This Recipe

  • Perfect Balance: Cheesy Baked Ziti with Spinach achieves a perfect balance of flavors, where creamy cheese meets fresh greens.
  • Family-Friendly: This recipe is a hit with adults and kids alike, making it a great option for family dinners.
  • Convenience: It’s simple to prepare and bake, with ingredients that are easy to find and budget-friendly.
  • Comforting: The ultimate comfort food, offering a warm and satisfying hug with each bite.
  • Versatile: Can be served as a main dish, or a side for a larger meal, adaptable to various dining occasions.

Flavor Profile & Texture

The first thing that will strike you about this dish is its layered texture. The al dente bite of ziti compliments the creaminess of the cheese and the slight earthiness of the spinach. The cheese, often a blend of ricotta, mozzarella, and parmesan, melts into a smooth, creamy sauce that envelops each piece of pasta, while the tomato sauce adds an indispensable teeming of tangy flavor, balancing the richness of the cheese. The spinach adds an additional layer of flavor and nutrition, maintaining a slight crunch, which works wonders in creating a dynamic personality for the dish. The fusion of ingredients results in a satisfying symphony of flavors and textures that dance on the palate.

Occasions & Pairings

This versatile dish is perfect for numerous occasions. From a cozy weeknight dinner with family to an impressive main course during a warm, bustling potluck gathering, Cheesy Baked Ziti with Spinach is a stellar choice. It’s also a fantastic option for make-ahead meals, ensuring delicious, homemade food is available no matter how busy the schedule. For pairing, consider serving this dish with a simple side salad, garlic bread for scooping up that delicious sauce, or a crisp white wine that enhances its richness.

Tips, Variations & Substitutions

  • Customize Your Cheese: If you’re feeling adventurous, try different combinations of cheeses such as provolone, or experiment with a dash of goat cheese for a tangy twist.
  • Vegan-Friendly Option: Utilize plant-based cheese and creamy cashew sauce as a substitution for the dairy elements for a vegan version.
  • Herb Infusion: Add fresh herbs like basil or oregano to enhance the flavors of your sauce.
  • Protein Boost: For those craving additional protein, consider incorporating Italian sausage or shredded chicken.
  • Gluten-Free Alternative: Swap traditional ziti for gluten-free pasta alternatives to accommodate dietary needs without losing any of the dish’s soul-soothing qualities.

Storage & Make-Ahead Ideas

Cheesy Baked Ziti with Spinach is an excellent dish for meal prep, as it stores beautifully. To store leftovers, let the baked ziti cool completely, then transfer it to an airtight container and refrigerate for up to 4 days. To reheat, simply warm it in the oven at 350°F until heated through, ensuring the cheese is wonderfully re-melted over the top.

For longer storage, you can freeze the baked ziti. Prepare the dish as instructed but stop before the final bake. Cover it tightly with foil and plastic wrap, then freeze for up to 3 months. When ready to eat, thaw in the refrigerator overnight, then bake at 375°F. Baking time might be slightly longer given the chilled start, but the end result will be just as delicious as if it were made fresh.

Fun Facts & Trivia

Did you know that ziti makes frequent appearances in pop culture, particularly in mafia-related movies and TV shows? It’s often depicted as a comforting dish that brings characters together around a bustling table, symbolizing family unity and tradition. Its star turn in shows like “The Sopranos” has cemented its role as more than just a meal but a beloved American-Italian staple reflecting the importance of family and shared meals.

In conclusion, Cheesy Baked Ziti with Spinach is more than just a dish — it’s an experience of warmth, love, and creativity. Its rich flavors, delightful textures, and accommodating nature make it a joy to prepare and a pleasure to serve. Whether you’re a novice in the kitchen or a seasoned chef, this dish invites you to savor not only its deliciousness but also the comforting sense of home it evokes.

Ingredients

  • Pasta
    → Use 1 pound of ziti pasta, which will serve as the base and structure of the dish. Cook the pasta according to the package directions until al dente, as this will help prevent it from becoming mushy during baking. After cooking, drain and set aside, allowing it to cool slightly before combining with the other ingredients.
  • Cheese Mixture
    → Combine 15 ounces of ricotta cheese and 2 cups of shredded mozzarella cheese, which create a creamy and cheesy filling that binds the pasta together. Using whole milk ricotta can enhance creaminess, while the mozzarella contributes stretchy, gooey texture. Allow the cheese to come to room temperature for easier mixing.
  • Spinach
    → Add 5 cups of fresh spinach, which provides nutrients and a pop of color to the dish. Wash and chop the spinach roughly before cooking it down in a skillet until wilted. This helps reduce its volume and removes excess moisture, preventing the ziti from becoming watery.
  • Tomato Sauce
    → Use 3 cups of marinara sauce; this adds flavor and moisture to the baked ziti. Choose a high-quality store-bought sauce or homemade for the best flavor punch. Mix the sauce with the cooked pasta and cheese mixture to ensure that every bite is coated with deliciousness.
  • Seasonings
    → Incorporate 1 teaspoon of dried oregano and 1 teaspoon of garlic powder to enhance the overall flavor profile. These spices add depth to the dish without overpowering it. Ensure they are evenly distributed throughout the pasta mixture for balanced flavor.
  • Parmesan Cheese
    → Sprinkle 1/2 cup of grated Parmesan cheese on top before baking for a savory, cheesy crust. Use freshly grated Parmesan for superior taste and texture. This cheese will melt and form a delicious layer that enhances the presentation while adding a salty kick.
  • Olive Oil
    → Drizzle 2 tablespoons of olive oil over the finished ziti before baking. This helps to enrich the dish and encourages the cheese to brown nicely on top. Use high-quality extra virgin olive oil for the best flavor; moreover, you can use it to sauté the spinach, adding even more richness.

Instructions

  • Preheat your oven to 375°F (190°C) and prepare a 9×13 inch baking dish by lightly greasing it with cooking spray or olive oil.

    → Preheating the oven ensures that your baked ziti will cook evenly from the bottom up and create a perfect texture. Greasing the dish prevents sticking and makes for easier serving later on.
  • Bring a large pot of salted water to a rolling boil, and add 1 pound of ziti pasta. Cook the pasta according to the package directions until it is al dente, usually around 8-10 minutes.

    → Salting the water enhances the flavor of the pasta itself. Cooking to al dente means the pasta will still have a slight bite, which is essential in baked dishes to prevent it from becoming mushy.
  • Once cooked, drain the ziti pasta and let it cool slightly in the colander.

    → Allowing the pasta to cool prevents it from cooking further and ensures it binds well without becoming overly soft in the final dish.
  • In a mixing bowl, add 15 ounces of ricotta cheese and 2 cups of shredded mozzarella cheese. Allow these cheeses to come to room temperature if they were stored in the refrigerator.

    → Room temperature cheese mixes more smoothly and evenly, creating a better consistency in your filling. Look for whole milk ricotta, as its creaminess enhances the overall richness of the dish.
  • Wash and roughly chop 5 cups of fresh spinach, then place it into a skillet over medium heat. Cook the spinach until wilted, about 3-5 minutes, stirring frequently.

    → Cooking the spinach down reduces its volume and eliminates excess moisture, preventing a watery baked ziti. This also helps enhance the flavor of the spinach.
  • Once wilted, remove the spinach from the heat and let it cool slightly before adding it to the cheese mixture.

    → Cooling the spinach prevents it from cooking the ricotta and mozzarella when combined, helping maintain a creamy texture.
  • In the mixing bowl with the cheese, add the cooked spinach, 3 cups of marinara sauce, 1 teaspoon of dried oregano, and 1 teaspoon of garlic powder. Stir until well combined.

    → This mixture will be the flavorful binding component of your dish. Ensure the ingredients are evenly distributed for a balanced flavor throughout the pasta.
  • Gently fold in the cooked ziti pasta into the cheese and spinach mixture until all the pasta is evenly coated.

    → Folding helps maintain the integrity of the pasta while ensuring every piece is enveloped in the creamy cheese mixture, which is key to a well-combined dish.
  • Transfer the ziti mixture to the greased baking dish, spreading it out evenly.

    → Spreading the mixture ensures even baking and helps every portion receives the same amount of crispy cheese topping.
  • Sprinkle 1/2 cup of grated Parmesan cheese over the top of the ziti evenly.

    → Freshly grated Parmesan will melt beautifully, forming a delicious, golden crust that not only enhances the flavor but also improves the visual appeal of the final dish.
  • Drizzle 2 tablespoons of olive oil over the top of the assembled ziti before placing it in the oven.

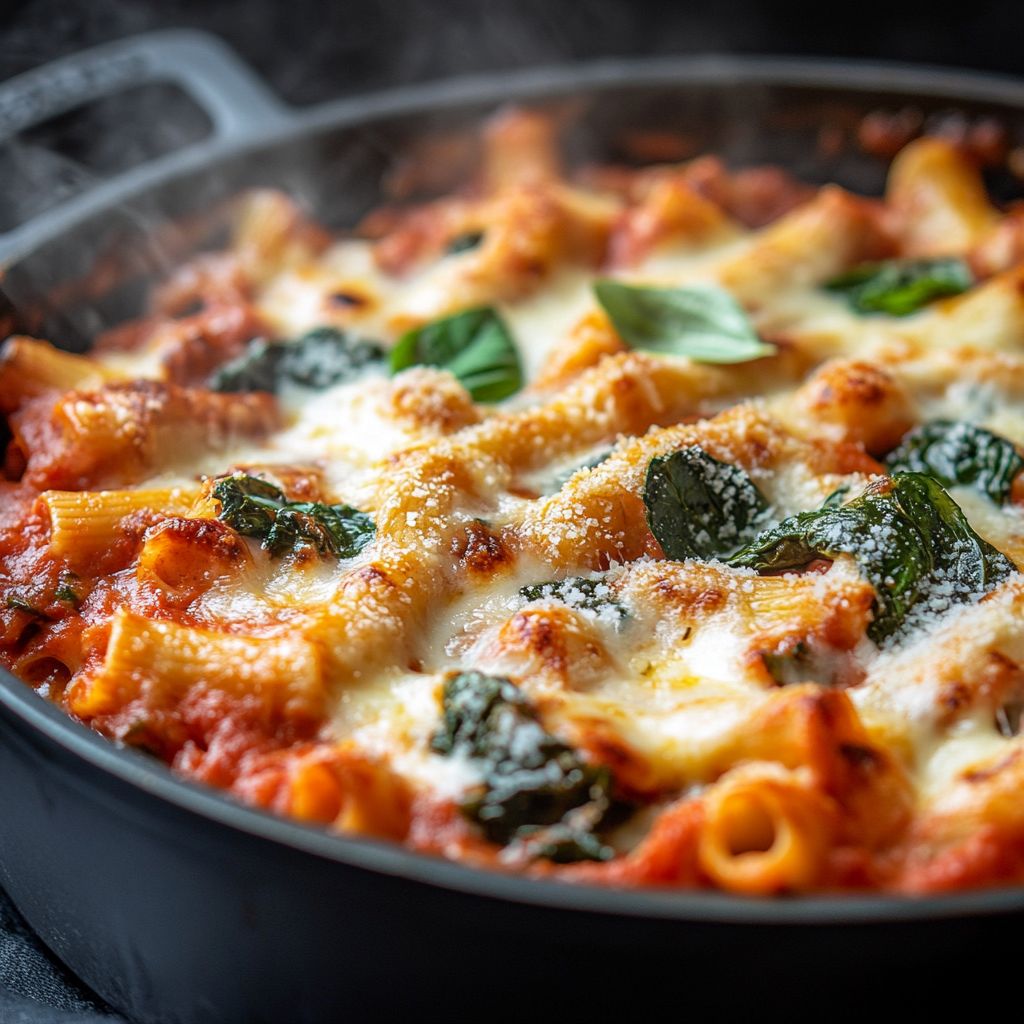
    → This step adds richness to the final bake and helps achieve a beautiful browning effect on the cheese, enhancing both flavor and texture.
  • Bake the ziti in your preheated oven for 25-30 minutes, or until the top is bubbling and golden brown.

    → Baking at the right temperature allows the ingredients to meld together, creating a harmonious dish. Check for doneness by observing the color and bubble action.
  • Once baked, remove the dish from the oven and let it rest for about 10 minutes before serving.

    → Allowing the ziti to rest helps the cheese firm up a little, making it easier to cut sections without the layers slipping apart.
  • Serve the Cheesy Baked Ziti with Spinach warm, optionally garnished with fresh basil or additional Parmesan cheese.

    → Fresh garnishes can elevate the presentation, adding a pop of color and an extra flavor dimension to the finished dish.

Notes

These cheesy baked ziti with spinach are a comforting and satisfying meal that the whole family will love. The combination of ricotta and mozzarella cheeses creates a wonderfully creamy texture that clings to the pasta, while the fresh spinach adds a nutritious twist and a beautiful burst of color. To enhance the flavor even further, consider using homemade marinara sauce or adding freshly chopped herbs such as basil or parsley.

For the best results, ensure that the pasta is cooked al dente to maintain its structure during baking. If you want to make this dish ahead of time, you can prepare it up to the baking step, refrigerate it, and bake it just before serving. Leftovers can be stored in an airtight container in the fridge and make for an excellent reheatable meal during the week.

Feel free to customize your baked ziti by adding other vegetables, such as bell peppers or mushrooms, or incorporating protein like cooked chicken or sausage for a heartier option. When ready to serve, allow the dish to cool for a few minutes after baking, as this will help with cutting clean slices. For an extra dash of flavor, consider adding a sprinkle of red pepper flakes for some heat or a drizzle of balsamic reduction before serving. Enjoy this wholesome dish as a quick weeknight dinner or a crowd-pleasing potluck option!

Tips

  • Cooking Pasta:
    When cooking your ziti, ensure to add a generous amount of salt to the boiling water. This helps season the pasta from the inside out and enhances the overall flavor of the dish. Once al dente, reserve a cup of pasta water before draining, as it can be used later to adjust the consistency of the sauce if needed.
  • Cheese Mixing Tips:
    For the cheese mixture, consider adding an egg to the ricotta mixture to enhance its richness and binding properties. This will create a firmer texture that holds up well during baking. You can also mix in some fresh herbs, like basil or parsley, for added depth of flavor.
  • Preparing Spinach:
    After cooking down the spinach, make sure to squeeze out any excess moisture using a clean kitchen towel. This prevents the dish from becoming too watery and helps maintain the perfect texture in your baked ziti.
  • Choosing Tomato Sauce:
    If you decide to use store-bought marinara, look for options labeled as ‘all-natural’ or ‘homemade-style’ for a richer, more authentic flavor. Adding a splash of red wine or a pinch of sugar to the sauce before mixing it with the pasta can further enhance its taste.
  • Even Seasoning:
    When incorporating seasonings, you can sauté them briefly in olive oil before adding to the pasta mixture. This helps release their essential oils and brings out more flavor. Don’t forget to taste and adjust salt and pepper to your preference.
  • Layering for Perfection:
    For a better texture and flavor blend, consider layering the baked ziti. Start with a spoonful of sauce at the bottom of the baking dish, then alternate between pasta, cheese, spinach, and sauce. This ensures that every layer gets optimal flavor and moisture.
  • Baking Timings:
    When baking, cover the ziti with foil for the first part of the baking time to avoid over-browning. Removing the foil for the last 10-15 minutes will allow the cheese to get golden and bubbly. Keep an eye on it to ensure it doesn’t burn.
  • Resting Period:
    After removing the baked ziti from the oven, let it rest for about 10-15 minutes before serving. This allows the dish to set and makes it easier to slice and serve while still being hot and delicious.

FAQ

What ingredients do I need for Cheesy Baked Ziti with Spinach?

You will need ziti pasta, ricotta cheese, mozzarella cheese, parmesan cheese, spinach (fresh or frozen), marinara sauce, garlic, onion, olive oil, salt, and pepper.

Can I use a different type of pasta instead of ziti?

Yes, you can substitute ziti with other pasta types such as penne, fusilli, or rigatoni. Just ensure that the pasta is similar in size and shape.

Is this recipe suitable for vegetarians?

Yes, Cheesy Baked Ziti with Spinach is a vegetarian dish as it contains no meat ingredients.

Can I make Cheesy Baked Ziti ahead of time?

Absolutely! You can assemble the dish ahead of time, cover it, and refrigerate it. Bake it when you’re ready to serve, but expect a longer cooking time if it’s cold from the fridge.

How can I make this dish healthier?

You can make it healthier by using whole wheat pasta, low-fat cheese, adding more vegetables, and reducing the amount of cheese or sauce used.

Can I freeze leftover Cheesy Baked Ziti?

Yes, you can freeze leftovers. Just ensure to store it in an airtight container. It can be frozen for up to three months. Thaw it overnight in the refrigerator before reheating.

What can I serve with Cheesy Baked Ziti?

Cheesy Baked Ziti pairs well with a side salad, garlic bread, or steamed vegetables for a complete meal.

How long does it take to bake the Cheesy Baked Ziti?

It typically takes about 25-30 minutes to bake at 350°F (175°C) or until the cheese is bubbly and golden brown on top.

Introduction

Dive into the savory world of culinary delight with our exquisite Creamy Garlic Chicken with Roasted Veggies. This dish is a symphony of flavors and textures, a feast for the senses that promises to enamor every taste bud with its aromatic presence and rich, comforting embrace. Imagine succulent pieces of chicken enveloped in a luxurious, creamy garlic sauce, perfectly paired with the crisp, earthy sweetness of roasted vegetables. This isn’t just a meal—it’s an experience, a culinary journey that transports you to a place where food truly nourishes both body and soul.

Whether you’re preparing a bustling family dinner or indulging in a quiet night savoring each delectable bite, this dish offers more than a meal; it offers a moment of pure, unadulterated joy. Each mouthful is a celebration of flavor, a testament to the artful blending of simplicity and sophistication.

The Story Behind the Dish

The origins of our Creamy Garlic Chicken with Roasted Veggies can be traced to a convergence of European culinary traditions. The use of garlic and cream is a hallmark of French cuisine, known for bringing depth and character to dishes since time immemorial. Chicken, a universally loved protein, found its way into this creamy symphony through the timeless technique of sautéing in Italian kitchens, while roasted vegetables, a staple of Mediterranean diets, add a harmonious, healthful touch.

The recipe evolved through generations, adapting to contemporary kitchens while never losing its rustic charm. Historically, cream sauces were a mark of refinement and celebration, used sparingly to elevate dishes during feasts. Today, we savor such combinations with an understanding of the ingenuity and spirit of those who passed these flavors down to us.

Why You’ll Love This Recipe

  • Quick and Easy: This recipe is designed for cooks of all levels, ensuring a delicious meal without the stress of complex preparation.
  • Healthy and Nourishing: With a balance of proteins, healthy fats, and fiber-rich vegetables, it’s a wholesome dish that nourishes without compromising on flavor.
  • Family-Friendly: The creamy texture and mild garlic flavor make it a hit with both kids and adults, bridging the gap between sophistication and comfort.
  • Customizable: Easily adaptable to include your favorite vegetables or dietary needs, it’s a versatile recipe that fits into any meal plan.

Flavor Profile & Texture

The Creamy Garlic Chicken is a delightful medley of robust and comforting flavors. The earthiness of the garlic complements the rich, buttery cream sauce, bringing a depth that’s both warm and inviting. Each bite of tender chicken is coated in this luscious sauce, offering a melt-in-your-mouth experience that’s both satisfying and indulgent.

The roasted veggies add a crucial textural contrast, their slight caramelization providing a sweet counterpoint to the savory notes of the chicken. The vegetables are crispy on the outside yet tender within, amplifying the dish’s complex flavor profile and offering a multifaceted culinary adventure with every forkful.

Occasions & Pairings

This dish is adaptable to a wide array of dining scenarios. Perfect for a cozy winter evening when comfort food is a necessity, it equally shines as a star attraction during festive gatherings, offering guests a taste adventure they won’t soon forget.

Pair this dish with a crisp, chilled white wine such as a Chardonnay or a Sauvignon Blanc. The acidity of the wine cuts through the richness of the sauce while complementing the subtle garlic notes. Alternatively, a dry rosé can accentuate the roasted flavors of the veggies. For a non-alcoholic option, try a refreshing homemade lemonade or iced tea with a hint of mint.

Tips, Variations & Substitutions

Creative Customizations:

  • Vegetable Variations: Almost any vegetable can be added to complement the dish. Consider adding asparagus tips, bell peppers, or even sweet potatoes for a burst of color and flavor.
  • Dietary Alternatives: For a dairy-free version, substitute the cream with coconut milk or almond milk, adding a hint of nutmeg for extra warmth.
  • Herb Enhancements: Enhance the dish with fresh herbs like rosemary, thyme, or basil to add an aromatic twist. Sprinkle them towards the end of cooking to preserve their freshness.

Storage & Make-Ahead Ideas

Efficient kitchen management makes this dish a convenient choice for meal prep or leftovers. The Creamy Garlic Chicken can be stored in an airtight container in the refrigerator for up to three days. For longer storage, freeze the chicken and veggies separately for up to a month. When ready to serve, thaw overnight in the fridge.

Reheating the chicken in a skillet with a splash of cream or broth can bring back its freshly-cooked texture. Ensure the temperature is regulated to avoid splitting the sauce. The roasted veggies can be re-crisped in the oven or an air fryer for about 5-10 minutes, ensuring their delightful texture remains intact.

Ingredients

  • Chicken
    → Chicken thighs or breasts are essential for this dish, providing the protein base. Thighs will yield a juicier dish due to their higher fat content compared to breasts. The chicken should be boneless and skinless for ease of cooking, and it should be patted dry before cooking to achieve a nice sear.
  • Garlic
    → Fresh garlic is key for creating the rich, creamy sauce. Use whole cloves and mince them finely to release their flavors. The more garlic used, the stronger the flavor, so feel free to adjust to your preference. Avoid pre-minced garlic for the freshest taste.
  • Heavy Cream
    → Heavy cream is crucial for achieving the creamy consistency of the sauce. It should be at room temperature before adding to the pan, as this helps it incorporate more easily without curdling. Opt for a good quality cream for optimal richness.
  • Vegetable or Chicken Broth
    → Broth adds depth to the sauce and enhances the overall flavor profile of the dish. Use low-sodium broth to control the saltiness; this allows for better flavor adjustment later in the cooking process. Ensure the broth is warmed slightly before adding to the pan for seamless blending.
  • Parmesan Cheese
    → Grated Parmesan cheese brings savory flavor and creaminess to the sauce. Use freshly grated cheese for the best texture and flavor; pre-grated versions often contain anti-caking agents that can affect melting. Stir in the cheese at the end of cooking for a smooth finish.
  • Olive Oil
    → Olive oil is used for searing the chicken and roasting the vegetables. A good-quality extra virgin olive oil will enhance the flavors of both the chicken and the veggies. Heat the oil before adding the chicken to ensure a proper sear and lock in moisture.
  • Vegetables
    • Bell Peppers
      → Bell peppers add sweetness and color to the dish. Use a variety of colors for visual appeal. They should be sliced into even strips to ensure even roasting. Aim for firm, glossy peppers free of blemishes.
    • Zucchini
      → Zucchini contributes moisture and a tender texture. Slice them into half-moons or rounds for even cooking. Choose smaller zucchini, as they tend to have fewer seeds and a sweeter flavor. Don’t overcook them to maintain their structure.
    • Red Onion
      → Red onion brings a mild sweetness and beautiful color. Cut them into wedges for roasting. Choose firm onions, as they have a better flavor and texture. Roasting will caramelize the sugars, enhancing their sweetness.
  • Herbs and Spices
    • Dried Oregano
      → Dried oregano brings an earthy flavor that complements both the chicken and the veggies. Use about a teaspoon for a balanced taste, and add it early in the cooking process to allow the flavors to infuse. Crushing it between your fingers before adding helps release more essential oils.
    • Salt and Pepper
      → Essential for seasoning, both should be adjusted to taste. Use kosher salt for a cleaner taste; it dissolves easily in cooking. Freshly cracked black pepper enhances the overall flavor without overpowering the dish. Remember to taste the sauce before serving to ensure it’s well-seasoned.

Instructions

  • Begin by preheating your oven to 425°F (220°C).

    → This high temperature is essential for roasting the vegetables properly, allowing them to caramelize and develop flavors while ensuring the chicken cooks thoroughly without drying out.
  • While the oven is heating, prepare the chicken by patting it dry with paper towels.

    → Removing excess moisture helps achieve a better sear and ensures the chicken doesn’t steam while cooking. Dry chicken will form a golden-brown crust, enhancing flavor and texture.
  • In a large oven-safe skillet, heat 2 tablespoons of olive oil over medium-high heat.

    → Heating the oil before adding the chicken creates a thermal shock that helps to seal the meat quickly, locking in juices. Use an oil with a high smoke point like extra virgin olive oil for best results.
  • Once the oil is shimmering, carefully add the chicken pieces to the skillet, spacing them apart for even cooking.

    → Placing chicken too close together can cause steaming rather than searing. Sear for 6 minutes on one side without moving them, allowing a rich, golden crust to form.
  • After 6 minutes, flip the chicken over to sear the other side for an additional 4-5 minutes.

    → This ensures that the chicken cooks evenly and enhances flavor development through the Maillard reaction, which enhances the overall taste of the dish.
  • While the chicken is searing, wash and chop the vegetables. Slice bell peppers into strips, zucchini into half-moons, and cut the red onion into wedges.

    → Uniform cutting promotes even cooking. Choose vegetables that are fresh, firm, and brightly colored for the best flavor and presentation.
  • Once the chicken is seared, remove it from the skillet and set aside on a plate.

    → This resting allows the juices to redistribute within the meat, resulting in a juicier bite when cooked completely.
  • Add the prepared vegetables to the same skillet and drizzle with an additional tablespoon of olive oil.

    → Using the residual oil and flavors from the chicken adds depth to the veggies, making the dish cohesive. Stir to coat the vegetables evenly with oil.
  • Sprinkle 1 teaspoon of dried oregano, salt, and pepper over the vegetables, mixing well to evenly season them.

    → Seasoning early helps the herbs and spices permeate the vegetables as they roast, enhancing flavor development.
  • Return the chicken to the skillet, nestling it amidst the vegetables.

    → This allows the chicken to absorb the aromas from the vegetables as they roast together in the oven, creating a harmonious dish.
  • Transfer the skillet to your preheated oven and roast for about 20-25 minutes, or until the chicken reaches an internal temperature of 165°F (74°C).

    → Accurate cooking is important for safety; use an instant-read thermometer to check the doneness without cutting into the meat, which keeps the juices intact.
  • While the chicken and vegetables are roasting, prepare the creamy garlic sauce. In a small saucepan, heat 1 tablespoon of olive oil over medium heat, then add minced garlic and sauté for 1-2 minutes, or until fragrant.

    → Add the minced garlic at this stage to prevent burning and bitterness; stirring continuously allows for even cooking and flavor release. Fresh garlic can burn quickly; watch it closely.
  • Once the garlic is fragrant, slowly pour in 1 cup of warmed heavy cream while stirring to combine.

    → Pouring in the cream gradually prevents it from curdling; warming it beforehand encourages smooth incorporation into the sauce.
  • Add ½ cup of chicken broth to the mixture and stir well.

    → This helps to dilute the cream and create a nice sauce consistency while boosting the flavor with the savory broth.
  • Let the sauce simmer for 3-5 minutes, then stir in the grated Parmesan cheese until melted and combined.

    → Gradually adding cheese allows it to melt smoothly without clumping, giving you a silky sauce. Freshly grated cheese will yield a better texture than pre-packaged varieties.
  • After 20-25 minutes of roasting, remove the skillet from the oven and let it cool slightly. Drizzle the creamy garlic sauce over the chicken and vegetables, or serve it on the side.

    → Allowing the dish to cool for a moment helps prevent burns and allows flavors to meld beautifully. Serve immediately to enjoy optimal texture and flavor!

Notes

These Creamy Garlic Chicken with Roasted Veggies offer a perfect blend of protein and comfort, ideal for a family dinner or meal prep. The creamy garlic sauce is rich, flavorful, and complements the tender chicken beautifully. To enhance the dish, consider marinating the chicken in olive oil, garlic, and herbs for added flavor before cooking.

The dish is versatile; you can swap in your favorite vegetables based on seasonal availability or personal preference. Asparagus, carrots, or broccoli would also work wonderfully. Ensure that your vegetables are cut uniformly for even roasting, and don’t forget to toss them in olive oil and seasonings before roasting to maximize flavor.

This meal not only makes for a hearty dinner but also provides excellent leftovers. The flavors meld well overnight, making it easy for a quick reheatable lunch option. Serve it with crusty bread to soak up the delicious creamy sauce or over a bed of fluffy rice or pasta for a complete meal. To add a fresh touch, garnish with freshly chopped parsley or basil before serving.

Always remember to adjust the garlic according to your preference. If you love a strong garlic flavor, feel free to add more cloves. Conversely, for a milder taste, stick to the recommended amount. Additionally, when incorporating the heavy cream, monitor the heat to prevent it from curdling. Stirring constantly will help achieve that velvety texture. Enjoy this delectable dish!

Tips

Cooking Tips for Creamy Garlic Chicken with Roasted Veggies

  • Pat Dry the Chicken: Always pat the chicken dry with paper towels before cooking. This step helps to achieve a well-seared exterior, locking in moisture for a juicier bite.
  • Mince Garlic Properly: To get the most flavor out of garlic, finely mince it rather than chopping it roughly. The finer the mince, the more flavor will be released into the sauce.
  • Room Temperature Ingredients: Allow the heavy cream and broth to come to room temperature before adding them to the pan, which helps to blend them smoothly into the sauce without curdling.
  • Use Fresh Parmesan: For the best flavor and texture, always opt for freshly grated Parmesan cheese. It melts better and combines more seamlessly into the sauce.
  • Properly Heat the Oil: Make sure to heat the olive oil until it’s shimmering in the pan before adding the chicken. This ensures a proper sear, which enhances flavor and texture.
  • Equal Vegetable Sizes: When preparing your vegetables, cut them into uniform sizes to ensure even cooking. This helps prevent some pieces from being undercooked while others become mushy.
  • Monitor Roasting Time: Keep an eye on the vegetables while roasting to avoid overcooking. Aim for vibrant colors and slight caramelization, which adds sweetness and flavor without losing their firmness.
  • Season Gradually: Add salt and pepper gradually during cooking and taste as you go. This technique helps achieve a balanced seasoning that’s perfectly customized to your preference.
  • Infuse Spices Early: Incorporate dried oregano and other spices early in the cooking process, allowing them to release their essential oils and deepen their flavors as the dish cooks.
  • Sauce Consistency: If you prefer a thicker sauce, allow it to reduce on low heat for a few more minutes before adding the Parmesan. This concentrates the flavors even further.

FAQ

What ingredients do I need for Creamy Garlic Chicken with Roasted Veggies?

You will need chicken breasts, garlic, heavy cream, assorted vegetables (like bell peppers, zucchini, and carrots), olive oil, salt, pepper, and fresh herbs like thyme or parsley.

How long does it take to prepare this dish?

Preparation time is approximately 15-20 minutes, while cooking time is around 30-40 minutes, making the total time about 55-60 minutes.

Can I use different vegetables for roasting?

Absolutely! Feel free to use any vegetables you enjoy or have on hand, such as broccoli, cauliflower, or asparagus. Adjust cooking times as necessary based on the vegetable’s tenderness.

Is this recipe suitable for meal prep?

Yes, Creamy Garlic Chicken with Roasted Veggies is great for meal prep! Store the components in separate containers in the fridge and reheat as needed.

Can I make this recipe dairy-free?

Yes, you can substitute heavy cream with non-dairy cream alternatives like coconut cream or cashew cream to make it dairy-free.

What kind of chicken should I use?

Boneless, skinless chicken breasts are commonly used, but you can also use chicken thighs for more flavor and moisture.

How do I know when the chicken is fully cooked?

The chicken is ready when it reaches an internal temperature of 165°F (75°C). You can check this with a meat thermometer.

Can I add more spices or seasoning to this recipe?

Definitely! Feel free to experiment with spices like paprika, cayenne pepper, or Italian seasoning to enhance the flavor profile to your liking.

Introduction: A Symphony of Flavors

Welcome to the world of culinary delight where tender chicken thighs meet the sweet and tangy embrace of honey mustard. Our Slow-Cooked Honey Mustard Chicken Thighs are not just a dish; they are an experience. Imagine juicy pieces of chicken cooked to perfection, each bite melting in your mouth, complemented by the harmony of honey’s sweetness and mustard’s sharpness. This recipe stands as a testament to the magical transformation that can occur when simple ingredients come together to create something truly memorable.

Perfect for a cozy dinner or for impressing guests, this dish promises an olfactory and gustatory journey that is rich and layered with flavor. Serve this elegant yet comforting meal, and watch as it becomes an instant family favorite, garnering compliments and smiles with every serving.

The Story Behind the Dish

Chicken has been a staple in cuisines across the world for centuries, appreciated for its versatility and ability to absorb a wide array of flavors. Honey mustard, on the other hand, has its roots deeply planted in culinary history, with mustard being one of the world’s oldest condiments. Honey adds a natural sweetness that counterbalances mustard’s pungency, creating a classic culinary marriage beloved around the globe.

The technique of slow cooking, which makes this recipe shine, has been used for generations. It allows rich flavors to develop slowly over time, resulting in a depth of flavor that is hard to achieve with quicker methods. This traditional method, combined with the timeless appeal of honey mustard, transforms humble chicken thighs into a dish that tells a story of heritage and taste.

Why You’ll Love This Recipe

  • Ease of Preparation: With minimal prep time and effort, the slow cooker does the hard work while you go about your day.
  • Flavor Explosion: A perfect blend of sweet and savory flavors that appeals to both adults and children alike.
  • Nutrient-Rich: Packed with protein from the chicken and antioxidants from the mustard, it’s a health-conscious choice you can feel good about.
  • Family-Friendly: The taste is universally pleasing, making it an ideal choice for family meals and special occasions alike.
  • Versatility: Pair it with a variety of sides to switch up the flavor profile anytime you want.

Flavor Profile & Texture

Describing the flavor of these Slow-Cooked Honey Mustard Chicken Thighs is like painting with a palette of harmonious tastes. The chicken thighs are succulent and juicy, absorbing the marinade’s ambrosial syrup of honey and mustard. The honey provides a subtle caramelized sweetness, while the mustard imparts a sharp, zesty contrast. With the slow-cooking method, the meat becomes unbelievably tender, allowing the flavors to penetrate deeply for a truly indulgent culinary experience.

This dish is not only about flavor; the texture is equally sublime. The slow cooking process allows the connective tissues in the meat to break down, resulting in a melt-in-your-mouth sensation that requires minimal effort to enjoy. The sauce thickens and clings to the chicken, providing bursts of tangy sweetness with every bite.

Occasions & Pairings

Whether you’re hosting a holiday gathering, preparing for a weeknight dinner, or planning a weekend feast, this dish fits every occasion. For a casual dinner, serve the chicken thighs over a bed of fluffy mashed potatoes or fragrant rice. For a more formal affair, accompaniments like roasted vegetables or a crisp green salad elevate the dish into something truly special.

Pair this recipe with your favorite wine—a sauvignon blanc or a light pinot noir would complement the flavors beautifully. If you prefer non-alcoholic options, a sparkling apple cider or ginger ale can highlight the honey mustard notes perfectly. Finish off your meal with a light dessert, like a fruit sorbet or a simple lemon tart, to cleanse the palate and complete the experience.

Tips, Variations & Substitutions

This recipe’s beauty is its adaptability. Here are some creative ways to tailor it to your preferences:

  • Spice It Up: Add a dash of cayenne or crushed red pepper flakes to the sauce for a hint of heat.
  • Make It Herbal: Fresh herbs such as thyme or rosemary can be added for a more earthy note.
  • Vegan Alternative: Try swapping the chicken for chickpeas or tofu for a plant-based version, keeping the same flavorful sauce.
  • Gluten-Free: Ensure your mustard is gluten-free, and you’re ready to serve this dish to those avoiding gluten.

Storage & Make-Ahead Ideas

This dish not only tastes amazing fresh out of the slow cooker but also makes for excellent leftovers. Store any remaining chicken thighs in an airtight container in the refrigerator for up to three days.

If you’re planning a busy week, consider preparing a double batch and freezing individual portions. These can be stored in the freezer for up to two months. To reheat, simply defrost overnight in the refrigerator and gently warm through on the stove or in the microwave. The flavors will have further developed, and the dish will be just as delicious as the day you made it. This make-ahead advantage allows you to enjoy home-cooked meals without needing to spend hours in the kitchen every day.

Fun Facts & Trivia

Did you know that mustard, as we know it today, was used as long ago as Roman times? They mixed the seeds with unfermented grape juice to create a spicy paste quite similar to modern preparations. Honey, with its timeless appeal, has been revered since ancient Egyptian times not just as a food but as a symbol of prosperity and joy. The ancient Greeks and Romans both used honey as a common sweetener and believed it to have medicinal properties.

The beautiful balance between honey and mustard we enjoy today in this dish takes its roots from these ancient practices—bringing together the warmth of honey with the sharp note of mustard in a combination that generations have loved.

In summary, Slow-Cooked Honey Mustard Chicken Thighs is much more than a recipe; it’s a celebration of time-honored traditions, flavors, and the comforting act of slow cooking. It bridges the gap between the simplicity of everyday meals and the elegance of special occasion dining, making it a must-try in every kitchen. From its aromatic allure to its unbeatable taste, this dish invites you to indulge in something truly special—and once you’ve tried it, you’ll find yourself returning to it time and again.

Ingredients

  • Chicken Thighs
    → The main protein of the dish, chicken thighs are chosen for their rich flavor and tenderness. They benefit from slow cooking, which retains moisture and enhances their natural taste. Look for boneless, skinless thighs for easier eating and more even cooking.
  • Honey
    → Honey acts as a natural sweetener that balances the tanginess of the mustard. It creates a beautiful glaze on the chicken as it cooks. Use a high-quality, raw honey for a more robust flavor and health benefits. Measuring it carefully will ensure the sweetness is just right.
  • Dijon Mustard
    → This mustard adds a zesty kick and depth of flavor to the dish. Its smooth texture helps it to coat the chicken evenly. Use a whole grain variety for added texture and flavor complexity, and mix it well with the honey to ensure an even distribution throughout the dish.
  • Garlic
    → Fresh garlic cloves infuse the chicken with aromatic flavors. They should be minced finely to release their essential oils and maximize their impact in the marinade. Using fresh garlic instead of pre-minced enhances the dish’s overall flavor profile.
  • Olive Oil
    → Olive oil serves as a cooking fat that helps to sauté the garlic and prevents the chicken from sticking to the pan. Use high-quality extra virgin olive oil for the best flavor. It should be measured carefully to add richness without making the sauce too oily.
  • Chicken Broth
    → Chicken broth adds moisture and depth to the cooking liquid, helping to keep the chicken thighs juicy. Opt for low-sodium broth so you can control the saltiness of the dish. If using homemade broth, ensure it is well-seasoned to enhance the overall flavor.
  • Salt
    → Salt is essential for enhancing the flavors of the dish. Use kosher salt for better control over seasoning. Be sure to taste the sauce before serving and adjust accordingly, keeping in mind that the broth and mustard will have some salt content.
  • Pepper
    → Freshly ground black pepper adds a subtle heat and depth of flavor to the dish. Use a coarser grind for a more pronounced peppery punch. Adding it at the beginning of cooking infuses the chicken with flavor, but you can adjust it to taste before serving as well.
  • Fresh Herbs (optional)
    → Fresh herbs such as thyme or rosemary can elevate the dish with vibrant notes of flavor. Add them during the last hour of cooking to preserve their bright taste. Chopping them finely will ensure their oils are released into the sauce, enhancing the dish’s aroma and complexity.

Instructions

  • Begin by preparing the chicken thighs by rinsing them under cold running water and then patting them dry with paper towels.

    → This step is essential to remove any potential bacteria and excess moisture, ensuring that seasoning adheres better and that the chicken browns optimally in the cooking process.
  • Season the chicken thighs with kosher salt and freshly ground black pepper.

    → This initial seasoning enhances the base flavor of the chicken. Make sure to sprinkle the salt and pepper evenly on both sides of the thighs, allowing them to absorb the seasoning.
  • In a bowl, combine the honey and Dijon mustard, whisking them together until well-blended and smooth.

    → This creates a sticky marinade that will coat the chicken evenly. Ensuring a smooth mixture helps in evenly distributing the flavors during cooking.
  • Mince the garlic cloves finely, aiming for a paste-like consistency for maximum flavor release.

    → The finer you mince the garlic, the more surface area is exposed, intensifying its aromatic qualities and infusing the dish more effectively. This step is key to achieving a robust flavor with each bite.
  • Heat the olive oil in a large skillet over medium heat until shimmering but not smoking.

    → This temperature ensures that the oil is hot enough to sauté the garlic without burning it, which would impart a bitter taste to the dish. Adding the oil at the right temperature enhances the overall flavor instead of detracting from it.
  • Add the minced garlic to the hot oil and sauté for about 30 seconds until fragrant.

    → Cooking the garlic briefly releases its essential oils, but be cautious not to let it brown, as burnt garlic can taste acrid. Stir continuously during this step for even cooking.
  • Remove the skillet from the heat and pour the honey-mustard mixture into the pan, stirring to combine with the garlic.

    → This cools the pan slightly and allows you to create a flavorful base for the sauce that will cook with the chicken later. Mixing ensures all flavors meld together before adding the chicken.
  • Place the seasoned chicken thighs into the slow cooker.

    → Arrange them in a single layer for even cooking, ensuring the thighs have enough space to absorb the flavors of the marinade fully.
  • Pour the honey-mustard sauce mixture over the chicken thighs, ensuring they are well-coated.

    → This allows the flavors to penetrate the meat during cooking, creating a delicious glaze. Gently spoon the sauce over the chicken to prevent displacing them from their arranged position.
  • Add the chicken broth into the slow cooker, pouring it directly around, not over the chicken, to keep the glaze intact.

    → The broth adds moisture and richness to the cooking liquid while preventing the glaze from washing off the chicken. This will help to keep the thighs juicy as they cook.
  • Cover the slow cooker with its lid and set it to low for 6-8 hours or high for 3-4 hours, depending on your available time.

    → Cooking on low allows the flavors to meld beautifully while the chicken becomes tender and succulent. Check for doneness around the recommended time to prevent overcooking.
  • If using, add finely chopped fresh herbs during the last hour of cooking to preserve their vibrant flavor.

    → This ensures that the fresh herbs maintain their aromatic qualities and add a burst of flavor to the dish, complementing the honey mustard beautifully.
  • Once cooked, check that the chicken reaches an internal temperature of 165°F (75°C) using an instant-read thermometer.

    → This critical step ensures the chicken is safe to eat, making sure it is fully cooked while retaining moisture and tenderness.
  • Carefully remove the chicken thighs from the slow cooker and place them on a serving platter.

    → Use tongs to avoid tearing the meat, allowing the glaze to cling to the chicken. Presentation matters, especially when serving guests!
  • For extra glaze, if desired, transfer the cooking liquid to a saucepan and simmer on medium heat for a few minutes to thicken.

    → Reducing the sauce intensifies its flavor and creates a syrupy glaze that can be drizzled over the chicken, enhancing the dish’s appearance and taste.
  • Serve the honey mustard chicken thighs warm with a side of your choice and drizzle the thickened glaze over the top.

    → Pairing with sides like roasted vegetables or rice will complement the rich, sweet, and tangy flavors, creating a well-rounded meal.

Notes

  • These slow-cooked honey mustard chicken thighs are a perfect blend of sweet and savory flavors, making a truly satisfying meal. The chicken thighs become tender and juicy as they simmer in the honey mustard sauce, allowing the flavors to deepen.
  • To achieve optimal results, sear the chicken thighs in olive oil before adding them to the slow cooker. This process caramelizes the meat and adds extra flavor. Be sure to brown the chicken on all sides for a rich, golden color.
  • For enhanced flavor, marinate the chicken thighs in the honey mustard mixture for at least 30 minutes before cooking, if time permits. This allows the flavors to penetrate the meat, resulting in a tastier dish.
  • When cooking, consider the size of your chicken thighs; larger pieces might require slightly longer cooking times. Always check for doneness with a meat thermometer, aiming for an internal temperature of 165°F (75°C).
  • Feel free to customize the recipe by adding vegetables like carrots, potatoes, or green beans directly into the slow cooker. This makes for a complete one-pot meal and adds nutrition to your dish.
  • Serve the honey mustard chicken thighs over a bed of rice, quinoa, or alongside roasted vegetables for a balanced plate. The sauce is delightful drizzled over your sides, ensuring nothing goes to waste.
  • Leftovers can be saved in an airtight container in the refrigerator and will keep well for a few days. Reheat on the stove or microwave, adding a splash of chicken broth to maintain moisture.
  • For a finishing touch, garnish the dish with chopped fresh herbs before serving. This adds not only color but also a burst of fresh flavor that brightens up the slow-cooked goodness.

Tips

Cooking Tips for Slow-Cooked Honey Mustard Chicken Thighs

  • Marination: For a more flavorful dish, consider marinating the chicken thighs in the honey mustard mixture for a few hours or overnight in the refrigerator. This allows the flavors to penetrate the meat more deeply.
  • Even Cooking: Ensure that the chicken thighs are of uniform size for even cooking. If some are larger than others, consider cutting them to size or cooking them in batches.
  • Temperature Control: When slow-cooking, ensure the temperature is low and steady. This prevents the chicken from drying out and allows for tender, juicy results.
  • Browning the Chicken: For added depth of flavor, consider browning the chicken thighs in the olive oil before adding them to the slow cooker. This creates a richer flavor profile through the Maillard reaction.
  • Adjusting Consistency: If the sauce is too thin after slow cooking, remove the chicken and set the cooker to high. Let the sauce reduce for 15-20 minutes to thicken it up before serving.
  • Serving Suggestions: Serve the chicken thighs alongside buttery mashed potatoes or a fresh green salad to balance the sweetness of the dish. The sauce can also be drizzled over rice or quinoa for a complete meal.
  • Storing Leftovers: Leftover chicken can be stored in an airtight container in the refrigerator for up to 3 days. Reheat gently on the stovetop or in the microwave, adding a splash of broth to keep it moist.
  • Freezing Tips: For longer storage, you can freeze the cooked chicken thighs and sauce in a freezer-safe container for up to 3 months. Thaw in the refrigerator overnight before reheating.
  • Flavor Variations: Feel free to experiment with the mustard type; whole-grain, spicy brown, or even honey mustard can change the flavor profile while maintaining the essential sweetness.

FAQ

What ingredients do I need for Slow-Cooked Honey Mustard Chicken Thighs?

You will need chicken thighs, honey, mustard (yellow or Dijon), garlic, soy sauce, olive oil, salt, pepper, and optional herbs like thyme or rosemary for added flavor.

How long should I cook the chicken thighs in the slow cooker?

Cook the chicken thighs on low for 6-8 hours or on high for 3-4 hours, or until the chicken is tender and fully cooked.

Can I use bone-in chicken thighs for this recipe?

Yes, bone-in chicken thighs can be used. Just adjust the cooking time to ensure they are fully cooked and tender.

Is it necessary to brown the chicken before slow cooking?

While it’s not necessary, browning the chicken thighs in a skillet first can enhance the flavor and add a nice color to the dish. It’s optional!

What can I serve with Slow-Cooked Honey Mustard Chicken Thighs?

This dish pairs wonderfully with steamed vegetables, rice, mashed potatoes, or a fresh salad for a complete meal.

Can I make this recipe in advance?

Yes, you can prep the ingredients and store them in the fridge overnight. Just transfer everything to the slow cooker in the morning and let it cook during the day.

How do I store leftovers?

Store any leftovers in an airtight container in the refrigerator for up to 3-4 days. You can also freeze them for up to 3 months.

Can I substitute the honey with another sweetener?

Yes, you can use maple syrup or brown sugar as an alternative to honey, but keep in mind that the flavor profile will change slightly.

Introduction / Hook

Welcome to the delightful world of chocolate indulgence with our irresistible Festive Chocolate Delights. Imagine biting into a decadent treat where velvety chocolate dances on your taste buds, offering warmth, comfort, and a blissful sense of joy with every mouthful. This recipe takes the joy of chocolate to new heights, making it the perfect centerpiece for any celebration. Indulge in the rich, luxurious aroma that fills your home as these treats bake, signaling the beginning of a truly enchanting experience. Whether you’re preparing for a holiday gathering or simply want to treat yourself to something special, these chocolate delights will captivate and seduce your senses.

The Story Behind the Dish

The allure of chocolate has enchanted palates for centuries, with its roots tracing back to the ancient Mesoamericans who revered it as the “food of the gods”. Over the ages, chocolate has evolved from a bitter beverage to a much-loved sweet delight cherished across the globe. Our Festive Chocolate Delights pay homage to this rich history and cultural significance, embodying the spirit of celebration and togetherness that chocolate has come to symbolize.

This recipe is inspired by the intricate chocolate craftsmanship that orators of fine patisserie have mastered over generations. By incorporating traditional techniques with a modern twist, these delights bring forth the joyous traditions of holiday baking with an added touch of sophistication and elegance.

Why You’ll Love This Recipe

  • Quick and Easy: Despite their gourmet appeal, these chocolate delights are surprisingly simple to make, perfect for both seasoned bakers and beginners alike.
  • Decadently Rich: Each bite promises a chocolate experience so indulgent and satisfying that it feels like a luxurious treat.
  • Perfect for All Occasions: Whether it’s a Christmas party, a birthday celebration, or a cozy family gathering, these offerings elevate any occasion.
  • Customizable: Personalize each bite with an array of favorite toppings and fillings, allowing for endless possibilities and creativity.
  • Kid-Friendly Fun: A great way to get the little ones involved in the kitchen, making it a family-friendly activity that everyone can enjoy.

Flavor Profile & Texture

The symphony of flavors in these Festive Chocolate Delights is nothing short of divine. Each morsel offers a decadent and lush taste profile that perfectly balances delicate sweetness with the deep, intense notes of chocolate. A subtle hint of vanilla accentuates the chocolate and lends an extra layer of warmth and comfort.

Texture-wise, these treats are a masterpiece: expect a soft, melt-in-your-mouth center that is contrasted by a slightly crisp exterior. Every bite delivers a satisfying blend of smooth and creamy, punctuated by optional nuts or fruit bits that add an appealing crunch and additional texture dimension.

Occasions & Pairings

These chocolate delights are perfect for a variety of occasions, making them a versatile addition to any baking repertoire:

  • Holidays: An ideal treat for festive gatherings, enchanting guests with their decadent charm.
  • Birthdays: Ditch the traditional cake for these delights that offer a classy and delicious alternative.
  • Casual Get-togethers: Add elegance to brunches, tea parties, or picnics with these delightful bites.

When it comes to serving suggestions, pair these delicious treats with a glass of port or a full-bodied red wine for adults. A warm cup of rich coffee or creamy hot chocolate complements the flavors beautifully. For a refreshing contrast, enjoy them with a scoop of vanilla ice cream or a dollop of fresh whipped cream.

Tips, Variations & Substitutions

While our recipe is delicious as it stands, here’s how you can personalize your Festive Chocolate Delights or adapt them to any dietary needs:

  • Spice it Up: Add a hint of chili powder or cayenne for a spicy twist, offering a subtle heat that complements the richness of the chocolate.
  • Nuts and Fruits: Incorporate crushed nuts like almonds or hazelnuts for an extra crunch, or add dried fruits like cranberries or cherries for a sweet-tangy bite.
  • Vegan Alternative: Substitute dairy products with plant-based versions such as coconut cream or almond milk, and use vegan chocolate.
  • Gluten-Free Option: Simply swap traditional flour for a gluten-free blend to accommodate dietary restrictions, without compromising texture or taste.
  • Miniature Variants: Prepare petite versions for holiday platters, adding variety and a touch of playfulness to your confectionery selections.

Storage & Make-Ahead Ideas

To maintain the freshness of your Festive Chocolate Delights, follow these storage tips:

  • At Room Temperature: Store in an airtight container at room temperature for up to 4 days, retaining their moist, tender texture.
  • Refrigeration: Keep them in the fridge for up to a week, although chilling may make them slightly denser.
  • Freezing: Freeze your treats for up to 3 months. To defrost, place them in the fridge overnight or at room temperature for a few hours before serving.

If you prefer to streamline your process, the dough can be prepared in advance and stored in the refrigerator for up to 48 hours. This allows you to bake them fresh for your special occasion, ensuring the most enjoyable eating experience.

Fun Facts & Trivia

Did you know that chocolate was once used as currency by the Aztecs? Given its high value, it was traded and consumed as a luxury, reserved only for the elite and used in sacred rituals. Today, chocolate still holds its status as a cherished luxury but is thankfully accessible for all to enjoy.

Beyond its delicious taste, chocolate is brimming with antioxidants and has been linked to various health benefits, including lowering the risk of heart disease and improving mood. Combined with the undeniable joy of eating these Festive Chocolate Delights, there’s more reason than ever to embrace this indulgent pleasure guilt-free!

In essence, our Festive Chocolate Delights bring together the best of what chocolate has to offer: history, indulgence, and joy. They’re a testament to the art of baking and the timeless appeal of one of the world’s most beloved ingredients. Enjoy making — and savoring — each batch as much as your loved ones will enjoy devouring them.

Ingredients

  • Chocolate Batter
    • 1 cup all-purpose flour
      → All-purpose flour serves as the main structure for the chocolate delights, providing the necessary framework for the batter. It’s best to sift the flour before measuring to incorporate air and prevent clumps, ensuring a light and fluffy texture.
    • 1 cup granulated sugar
      → Sugar not only sweetens the batter but also helps create a tender crumb through its interaction with the flour. It’s pivotal to use fine granulated sugar, which dissolves easily into the batter, promoting an even distribution of sweetness and moisture.
    • 1/2 cup unsweetened cocoa powder
      → Cocoa powder imparts the rich chocolate flavor that is central to these delights. Opt for high-quality unsweetened cocoa powder for the best taste. Sifting it before adding to the mixture can help avoid lumps and ensure a smooth batter.
    • 1/2 cup unsalted butter (melted)
      → The melted butter adds moisture and flavor, enriching the chocolate goodness. Use unsalted butter to control the amount of salt in the recipe. Allow it to cool slightly before mixing into the batter to avoid cooking any eggs added later.
    • 2 large eggs
      → Eggs function as a binding agent, providing structure and stability to the delights. It’s best if the eggs are at room temperature as they incorporate more easily into the batter, leading to a smoother texture and better rise.
    • 1 teaspoon vanilla extract
      → Pure vanilla extract enhances the chocolate flavor, adding depth and aroma. Avoid imitation vanilla to preserve the dish’s quality. Add it towards the end of mixing to prevent it from evaporating and losing its potency.
    • 1/2 teaspoon baking powder
      → Baking powder serves as the leavening agent, helping the delights to rise and achieve a fluffy consistency. Ensure that the baking powder is fresh for optimal leavening action, and mix it thoroughly with the dry ingredients to distribute evenly.
    • 1/4 teaspoon salt
      → Salt balances the sweetness and enhances the overall flavors of the chocolate delights. Using fine sea salt allows for easier integration into the batter, ensuring even distribution without creating any salty pockets.
  • Optional Mix-Ins
    • 1/2 cup chocolate chips (dark or milk)
      → Chocolate chips add bursts of melted chocolate in every bite, enriching the flavor. Choose high-quality chips to elevate the taste. For a fun texture, sprinkle some on top before baking for a melty decoration.
    • 1/4 cup chopped nuts (walnuts or pecans, optional)
      → Chopped nuts provide a crunchy texture and enhance the flavor profile. Toast the nuts lightly before adding them to the batter to boost their flavor. Chop them into even pieces to ensure they distribute throughout the batter uniformly.
    • 1/4 cup dried cherries or cranberries (optional)
      → Dried cherries or cranberries contribute a tart contrast to the rich chocolate, adding depth and complexity. If very firm, soak them in warm water for 10 minutes to plump them up before mixing into the batter.

Instructions

  • Preheat your oven to 350°F (175°C) and prepare a 9×9 inch baking pan by greasing it lightly or lining it with parchment paper.

    → Preheating the oven ensures an even baking environment right from the start, allowing the chocolate delights to rise properly. Lining the pan with parchment paper helps with easy removal after baking, avoiding the risk of breakage.
  • In a mixing bowl, sift together 1 cup of all-purpose flour, 1/2 cup of unsweetened cocoa powder, 1/2 teaspoon of baking powder, and 1/4 teaspoon of salt.

    → Sifting these dry ingredients removes lumps, aerates the flour, and promotes even mixing. Ensuring the baking powder is well mixed with the flour helps activate it uniformly when the wet ingredients are added, leading to better rise.
  • In another bowl, combine 1 cup of granulated sugar and 1/2 cup of melted unsalted butter. Mix until well blended and creamy.

    → Creaming these together helps to dissolve the sugar into the butter, incorporating air into the mixture which assists with the rise during baking. Allow the melted butter to cool slightly before this step to prevent curdling the eggs later.
  • Add 2 large eggs one at a time to the sugar-butter mixture, mixing thoroughly after each addition. Then stir in 1 teaspoon of vanilla extract.

    → Adding eggs individually ensures they incorporate smoothly and fully into the mixture. Room temperature eggs mix better and help create a smooth batter, while vanilla enhances the overall flavor profile.
  • Gradually add the dry ingredient mixture to the wet ingredients, folding gently with a spatula until just combined.

    → Folding prevents overmixing, which can lead to dense chocolate delights. This method gently incorporates the flour without deflating the air bubbles created during creaming.
  • If desired, fold in any mix-ins such as 1/2 cup of chocolate chips, 1/4 cup of chopped and toasted nuts, or 1/4 cup of plumped dried cherries or cranberries.

    → Adding mix-ins enhances the flavor and texture, providing delightful surprises in each bite. Ensure that the mix-ins are evenly distributed throughout the batter by folding gently but thoroughly.
  • Pour the batter into the prepared baking pan, smoothing the top with a spatula to create an even surface.

    → Smoothing the top leads to even baking, ensuring that all areas cook uniformly without any uneven peaks or dips.
  • Place the pan in the preheated oven and bake for 25-30 minutes, or until a toothpick inserted into the center comes out with a few moist crumbs.

    → Checking for doneness with a toothpick is essential; you want to avoid overbaking to ensure the delights remain moist and fudgy. Baking times may vary based on oven characteristics, so monitoring is key.
  • Once done, remove the baking pan from the oven and allow the chocolate delights to cool in the pan for about 10 minutes.

    → Letting them cool slightly helps set their structure, making them easier to cut and preventing them from crumbling when removed.
  • Carefully transfer the delights to a wire rack to cool completely before slicing into squares for serving.

    → Cooling on a wire rack allows air to circulate around the delights, preventing them from becoming soggy and ensuring a perfect texture.
  • Enjoy your Festive Chocolate Delights plain or serve with your choice of toppings such as whipped cream or a sprinkle of powdered sugar for an extra festive touch!

    → Adding a garnish not only enhances the presentation but can also elevate the flavor experience with contrasting textures and flavors.

Notes

These Festive Chocolate Delights are the perfect treat for any special occasion. The combination of rich chocolate flavor and sweet undertones creates a delightful dessert that everyone will love. Feel free to customize the recipe by adding your favorite mix-ins such as nuts, chocolate chips, or dried fruits to give each batch a unique twist. To achieve the best results, ensure all your ingredients are fresh, particularly the baking powder, and use high-quality cocoa powder for an intense chocolate taste.

For a festive presentation, dust the tops with powdered sugar or drizzle with melted chocolate once they have cooled. These delights can be stored in an airtight container at room temperature for a few days or frozen for longer storage. Just make sure to separate layers with parchment paper to prevent sticking. Serve them warm for a cozy treat, possibly with a scoop of ice cream or a dollop of whipped cream for an extra indulgence.

Always remember to preheat your oven before baking to achieve an even bake, and allow the delights to cool in the pan for a few minutes before transferring them to a wire rack. This helps set the structure while keeping them moist. Enjoy your baking experience!

Tips

Cooking Tips for Festive Chocolate Delights

  • Preparation is Key: Gather all your ingredients and equipment before you start. This ensures a smooth workflow and helps prevent missing any key components during the mixing process.
  • Sifting Dry Ingredients: Always sift the flour and cocoa powder before mixing. This not only removes any lumps but also aerates the ingredients, leading to a lighter batter.
  • Butter Temperature: Allow the melted butter to cool slightly before adding it to the batter to prevent cooking the eggs. This step is crucial for achieving a perfectly blended mixture.
  • Egg Temperature: Using room temperature eggs helps them incorporate easier and lead to better emulsification. Try taking them out of the fridge at least 30 minutes before using.
  • Mixing Technique: When combining wet and dry ingredients, mix just until combined. Overmixing can lead to tough delights, so keep it gentle.
  • Be Mindful of Baking Powder: Check the expiration date of your baking powder. If in doubt, you can test it by adding a teaspoon to warm water; if it bubbles vigorously, it’s still active!
  • Even Baking: To ensure even baking, rotate your baking pan halfway through the baking time. This promotes uniform heat distribution, resulting in evenly cooked delights.
  • Cooling Time: Allow the delights to cool in the pan for a few minutes before transferring to a wire rack. This prevents them from breaking apart and allows for better texture development.
  • Storing Leftovers: Store any leftover delights in an airtight container at room temperature for up to 3 days. To keep them fresh longer, you can refrigerate them, but be sure to bring them back to room temperature before serving for the best flavor and texture.
  • Customizing with Mix-Ins: Don’t hesitate to get creative with your mix-ins! Consider using different types of chocolate chips or incorporating spices like cinnamon or espresso powder for an added flavor twist.

FAQ

What are Festive Chocolate Delights?

Festive Chocolate Delights are rich and indulgent chocolate treats made especially for celebrations and holidays. They can include a variety of chocolate-based desserts like truffles, brownies, or chocolate-covered fruits, each with festive decorations and flavors.

What ingredients do I need to make Festive Chocolate Delights?

The basic ingredients typically include high-quality chocolate, cream or butter, sugar, and flavorings such as vanilla or peppermint. Additional ingredients may include nuts, dried fruits, or toppings like sprinkles and cocoa powder.

Are Festive Chocolate Delights suitable for special diets?

Festive Chocolate Delights can be made to suit various dietary needs. There are options for vegan chocolate, gluten-free ingredients, and reduced-sugar alternatives. Be sure to check specific recipes to accommodate dietary restrictions.

How long do Festive Chocolate Delights last?

When stored properly in an airtight container in a cool, dry place, Festive Chocolate Delights can last up to two weeks. For longer storage, you can refrigerate or freeze them, depending on the recipe.

Can I make Festive Chocolate Delights ahead of time?

Yes, many recipes for Festive Chocolate Delights can be made ahead of time. They often taste better after the flavors have melded together, making them ideal for preparing in advance for holidays or gatherings.

What are some popular variations of Festive Chocolate Delights?

Popular variations include peppermint bark, chocolate-covered strawberries, coconut truffles, and espresso-infused chocolates. You can also incorporate seasonal flavors like orange, ginger, or cinnamon for a festive twist.

How do I properly decorate Festive Chocolate Delights?

Decorating can involve dipping them in chocolate, rolling them in nuts or coconut, or drizzling with different colored chocolate. Adding edible glitter or fondant shapes can also enhance their festive appearance.

Can children help make Festive Chocolate Delights?

Yes! Children can help in various stages such as mixing ingredients, rolling truffles, or decorating. Just be sure to supervise them, especially when working with hot melted chocolate or sharp tools.

Introduction / Hook

The Vibrant Whimsy of Winter: Apple Beet Salad

Imagine nestling into the cozy allure of winter with a salad that embodies the vibrant spirit of the season. The Winter Apple Beet Salad is not just a dish, it’s a tapestry of textures and flavors, weaving together the crispness of apples and the earthy sweetness of beets. Perfectly suited to chase away the winter blues, this salad is a multi-sensory delight, offering a burst of color, a symphony of flavors, and an ode to freshness amid the chill. Your taste buds are in for a treat, as every bite promises a harmonious blend of tart, sweet, and refreshing undertones. This salad is your ticket to a winter culinary escape, where simplicity meets sophistication on a single plate.

The Story Behind the Dish

The Journey from Farm to Fork: A Tale of Tradition

Our Winter Apple Beet Salad traces its roots to the European countryside, where cold months were seasoned with creativity in the kitchen. Centuries ago, the robust nature of beets and the refreshing crunch of apples were brought together not only out of necessity but also out of a passion for flavor. Traditionally, ingredients that thrived in the colder months were the stars of winter dishes. In countries like Poland and Russia, beets and apples were common staples, cherished for their storability and versatility. This salad captures the essence of hearty, rustic winter fare, celebrating a rich history of culinary tradition.

As families gathered during the winter months, the warmth of shared meals was central to their routines. In this salad, we see echoes of those past gatherings, where innovation and resourcefulness took center stage. It’s a dish that not only transcends time but also bridges cultural gaps, offering a historical connection from farmhouse tables of old to contemporary kitchens today.

Why You’ll Love This Recipe

Five Reasons to Fall for Winter Apple Beet Salad

  • Healthy Yet Hearty: Packed with antioxidants and vitamins, it nourishes the body while delighting the palate.
  • Quick and Easy: With minimal prep time and straightforward steps, it’s perfect for busy winter evenings.
  • Visual Feast: Its vibrant colors bring a touch of summer brightness to your winter table.
  • Versatile: Serves beautifully as a side dish or a standalone lunch.
  • Family-Friendly: The naturally sweet ingredients are a hit with adults and kids alike.

Flavor Profile & Texture

Indulge in Layers of Flavor and Texture

This Winter Apple Beet Salad is a sensory journey, beginning with the earthy, sweet aroma of freshly roasted beets. The juxtaposition of crunchy apples and soft beets creates a delightful textural contrast that elevates each mouthful. The natural sweetness of the beets is perfectly complemented by the tart and crisp nature of the apples, working in symphony with a tangy vinaigrette that ties the flavors together seamlessly.

Each component of the salad brings its unique charm: the earthy base notes of the beets are highlighted by the vibrant zest of the apples. A dynamic dressing – perhaps hinting at mustard or citrus – further amplifies these core ingredients, creating a dance of flavors on the palate. The result is a salad that feels luxurious yet comforting, daring yet familiar.

Occasions & Pairings

Perfect Pairings and Celebratory Situations

Versatility is at the heart of this salad, making it an ideal addition to various occasions. Whether you’re serving it at a festive holiday gathering or a casual weeknight dinner, it brings both style and substance to the table. For holiday feasts, pair it with a juicy roasted turkey or a savory pork tenderloin to balance hearty flavors.

When thinking about drinks, opt for a crisp white wine like Sauvignon Blanc or a warm mulled cider to accentuate the dish’s refreshing notes. A crusty sourdough bread would also make a fitting accompaniment, offering a chewy counterpoint to the salad’s textures.

Tips, Variations & Substitutions

Customize Your Culinary Experience

The beauty of this Winter Apple Beet Salad lies in its adaptability. Here are a few tips and variations to customize it:

  • Vegan Twist: Opt for maple syrup in the dressing instead of honey, and replace any dairy additions with plant-based alternatives.
  • Nuts to Add Crunch: Consider sprinkling toasted walnuts or pecans for an extra layer of texture and warmth.
  • Cheese Lovers’ Delight: Crumbles of feta or goat cheese can enhance the salad with a creamy tang.
  • Gluten-Free: The salad is naturally gluten-free. Just ensure that all condiments used are certified gluten-free.

Whether you prefer a touch of spice with a dash of cayenne or a hint of citrus with some fresh orange zest, this salad can be tailored to suit any taste preference.

Storage & Make-Ahead Ideas

Preserve and Prepare for Flavors that Last

While best enjoyed fresh, the Winter Apple Beet Salad offers flexibility for those who love to prepare ahead. If you’re planning a busy week, consider roasting the beets in advance—this can be done days before assembly and kept refrigerated until needed. Likewise, the dressing can be prepared and stored separately in an airtight container for quick salad assembly.

For storing leftovers, keep the components separated if possible to preserve their textures, especially the dressing and apples. This ensures that when you’re ready to enjoy the salad, the apples maintain their crispness, and the flavors remain distinct and vibrant. If assembled, store in an airtight container in the fridge for up to two days—any longer may see the apples softening and losing some crunch.

Need a make-ahead meal for a relaxing evening or impromptu guests? Simply combine these elements when ready to serve, and present a salad that feels fresh and celebratory, no matter the time constraints.

Fun Facts & Trivia

Interesting Tidbits About Beets and Apples

The combination of beets and apples in culinary traditions stretches back centuries with fascinating mentions in folklore and farming lore. Beets were first cultivated by the Romans, rapidly spreading across Europe as their vibrant color and hearty nature were valued. Meanwhile, apples have a legendary status—it’s said that humans have been eating them since prehistoric times.

Did you know that the natural dye in beets, betalains, was often used as a coloring agent for food, textiles, and even as an early form of lipstick? These vibrant pigments are not only beautiful but also packed with antioxidants.

With deeper understanding emerges a richer appreciation for the harmonic pairing in this salad. So, next time you savor a bite, remember that you’re partaking in a historical tradition that spans cultures and eras, celebrated by palates from farm to city.

Ingredients

  • Salad Base
    • 4 cups mixed greens (such as arugula, spinach, and kale)
      → A blend of mixed greens forms the base of this salad, providing a complex flavor and a variety of textures. Choose fresh, crisp greens for the best taste, and wash them thoroughly under cold water before serving to remove any dirt or grit.
    • 2 medium beets (roasted and diced)
      → Beets add a sweet earthiness and vibrant color to the salad. Roast the beets in the oven wrapped in foil at 400°F (200°C) for about 45-60 minutes until they are tender. Allow them to cool slightly before peeling and dicing them to enhance their natural sweetness.
    • 2 medium apples (sliced, preferably tart varieties like Granny Smith)
      → Tart apples provide a refreshing crunch and a balancing acidity against the sweetness of the beets. Slice them thinly and toss them with a bit of lemon juice to prevent browning and maintain their crispness.
    • 1/2 cup crumbled feta cheese
      → Feta cheese adds a creamy and tangy flavor that complements the sweetness of the beets and apples. Choose a quality feta for the best flavor. Allow the feta to come to room temperature before serving, as it enhances its creaminess.
  • Vinaigrette
    • 1/4 cup extra virgin olive oil
      → Olive oil serves as the base for the vinaigrette, providing richness and a smooth texture. Use high-quality extra virgin olive oil for its robust flavor and health benefits. Allow it to sit at room temperature for optimal emulsion with the other ingredients.
    • 2 tablespoons apple cider vinegar
      → Apple cider vinegar provides acidity that balances the flavors of the salad. It also enhances the overall freshness and adds a slight tang. Choose unfiltered vinegar for a more complex flavor. Shake well before adding to ensure it blends nicely.
    • 1 tablespoon honey or maple syrup
      → Honey or maple syrup adds a hint of sweetness to the vinaigrette, complementing the beets and apples. If using honey, allow it to warm slightly to help it mix easily with the other liquids. Maple syrup offers a unique savory note.
    • Salt and pepper to taste
      → Salt enhances the overall flavor profile of the dressing and salad, while black pepper adds a touch of heat. Use sea salt or kosher salt for better texture and taste. Adjust according to your preference after tasting the vinaigrette.
  • Toppings
    • 1/4 cup toasted walnut halves
      → Toasted walnuts provide a crunchy texture and rich, nutty flavor to the salad. Toast the walnuts in a dry skillet over medium heat for 5-7 minutes, stirring frequently, until fragrant. Be careful not to burn them, as they can turn bitter.
    • 2 tablespoons fresh herbs (such as parsley or dill, chopped)
      → Fresh herbs add an aromatic element and brighten up the dish. Chop them finely and sprinkle them over the salad just before serving to maintain their freshness and color.

Instructions

  • Begin by preparing the mixed greens.

    → Rinse 4 cups of mixed greens, including arugula, spinach, and kale, under cold running water to remove any dirt or grit. Shake off excess water or use a salad spinner to dry the greens thoroughly, as excess moisture can make the salad soggy.
  • Roast the beets.

    → Preheat your oven to 400°F (200°C) and wrap the 2 medium beets individually in aluminum foil, sealing the edges to create a pouch. Place them directly on the oven rack and roast for 45-60 minutes, or until a fork easily pierces through. Let them cool slightly before peeling, as this minimizes mess and facilitates easier handling.
  • Dice the roasted beets.

    → Once cool enough to handle, peel the skin using your fingers or a paper towel. Cut the beets into small, even dice to ensure they distribute evenly throughout the salad, adding both color and flavor in every bite.
  • Prepare the apples.

    → Slice the 2 medium tart apples, like Granny Smith, thinly and uniformly to create a consistent texture in the salad. To prevent browning, toss the slices gently with a squeeze of fresh lemon juice. This step also adds a touch of acidity, enhancing the overall taste.
  • Allow the feta cheese to come to room temperature.

    → Remove 1/2 cup of crumbled feta cheese from the refrigerator and set it aside for about 15 minutes. This not only improves the flavor but also makes it easier to crumble and incorporate into the salad.
  • Make the vinaigrette.

    → In a small bowl or jar, combine 1/4 cup of extra virgin olive oil, 2 tablespoons of apple cider vinegar, and 1 tablespoon of honey or maple syrup. Whisk or shake vigorously until emulsified. The quality of your olive oil and the balance of the vinegar and sweetness will elevate the flavor profile of your salad.
  • Season the vinaigrette.

    → Add salt and pepper to taste to the vinaigrette. Start with a pinch of salt and a few grinds of fresh black pepper, then taste for seasoning. The right balance will enhance all components of the salad, so adjust according to your preference.
  • Toast the walnut halves.

    → In a dry skillet over medium heat, add 1/4 cup of walnut halves and toast them for approximately 5-7 minutes, stirring frequently. Watch for a change in aroma and color; they should be golden and fragrant but not burnt. Transfer them to a plate to cool, as they continue to cook in the hot pan.
  • Chop the fresh herbs.

    → Finely chop 2 tablespoons of fresh herbs, such as parsley or dill, and set aside. Fresh herbs should be chopped just before serving to retain their vibrant color and aromatic quality, giving the salad a fresh finish.
  • Assemble the salad.

    → In a large salad bowl, combine the washed mixed greens, diced roasted beets, apple slices, and crumbled feta cheese. Toss gently to combine the ingredients without bruising the greens, ensuring an even distribution of flavors and textures.
  • Dress the salad.

    → Drizzle the prepared vinaigrette over the salad and toss lightly to coat the ingredients uniformly. Take care not to overdress; you can always add more dressing at serving if needed.
  • Finish with toppings.

    → Sprinkle the toasted walnut halves and chopped fresh herbs over the top of the salad just before serving. This adds crunchy and aromatic elements that elevate the visual appeal and flavor of the dish, making it more inviting.
  • Serve immediately and enjoy your Winter Apple Beet Salad.

    → For the best flavor and texture, serve the salad fresh right after preparation. This salad makes a perfect light lunch or a vibrant side dish for any dinner.

Notes

  • Preparation Tips
    • For an effortless assembly, prepare all your ingredients ahead of time. Roast the beets a day in advance and store them in the refrigerator. This not only saves time but also enhances the flavors as they marinate in their juices.
    • When mixing the salad, use a large bowl to allow for easy tossing of the greens and other ingredients without spillage. Gently toss the mixed greens, diced beets, sliced apples, and crumbled feta to evenly distribute the flavors.
    • To elevate the vinaigrette, consider adding a teaspoon of Dijon mustard for a bit of zest and creaminess. This will also help in emulsifying the dressing more effectively. Shake well before drizzling over the salad.
  • Serving Suggestions
    • Serve the salad immediately after dressing to keep the greens crisp. If you’re preparing it in advance, coat the salad gently with the vinaigrette just before serving.
    • This salad pairs beautifully with grilled chicken or fish for a wholesome meal. Alternatively, it can stand alone as a light meal or a delightful side dish.
    • For a festive touch, consider adding pomegranate seeds for a pop of color and sweetness. They also add a crunchy texture that complements the other ingredients.
  • Storage Tips
    • If you have leftovers, store the salad components separately to keep everything fresh. Keep the dressing in a sealed container in the refrigerator, and avoid mixing it with the greens until you are ready to eat again.
    • To maximize freshness, consume the salad within 2 days of preparation. The apples may brown slightly, but will still be delicious. If browning is a concern, try soaking them in a mixture of water and lemon juice before slicing.

Tips

Tips for Preparing Winter Apple Beet Salad

  • Choosing Fresh Greens: When selecting mixed greens, opt for vibrant, unblemished leaves. Check for any wilting or browning, and choose organic whenever possible for the best flavor and health benefits.
  • Roasting Beets: For perfectly roasted beets, wrap them well in foil to retain moisture, which helps in cooking them evenly. Consider roasting a larger batch and storing leftovers for future salads or sides.
  • Apple Preparation: To enhance the tartness of the apple slices, consider pairing them with a pinch of cinnamon or a sprinkle of nutmeg before adding them to the salad. This can elevate the overall flavor profile.
  • Feta Cheese Tips: Crumbling feta can be easier if it’s cold; however, letting it come to room temperature will make it more creamy. If possible, use a fork rather than your hands to crumble it, preventing it from becoming too dense.
  • Making Vinaigrette: To achieve the perfect vinaigrette consistency, gradually whisk the olive oil into the vinegar mixture. This will help emulsify the dressing, preventing it from separating.
  • Adding Sweetness: If you prefer a sweeter vinaigrette, experiment with the amount of honey or maple syrup. Tasting as you mix will help you find the ideal balance between sweetness and acidity.
  • Seasoning to Taste: Always taste your vinaigrette before dressing the salad. You might find you need a bit more salt or pepper depending on your personal preference or the saltiness of the feta used.
  • Walnut Toasting: Keep a close eye on walnuts while toasting; they can go from perfect to burnt in seconds. Once they turn golden brown and fragrant, remove them from heat immediately and let them cool to enhance their crunchiness.
  • Herb Freshness: For the freshest flavor, add herbs at the last moment before serving. This prevents wilting and allows their aromatic oils to remain potent, giving the salad a burst of flavor.
  • Texture Variety: Feel free to add additional toppings like dried cranberries or pumpkin seeds for extra texture and flavor, enhancing the overall salad experience.

FAQ

What are the main ingredients in the Winter Apple Beet Salad?

The main ingredients include fresh apples, roasted beets, mixed greens, walnuts, feta cheese, and a vinaigrette dressing.

How do you prepare the beets for this salad?

To prepare the beets, wash them thoroughly, trim the ends, wrap in aluminum foil, and roast in the oven until tender, then peel and slice them.

Can I use canned beets instead of fresh beets?

Yes, you can use canned beets for convenience, but fresh roasted beets add a deeper flavor and better texture.

Is this salad suitable for vegan diets?

To make this salad vegan, simply omit the feta cheese or use a plant-based cheese alternative.

What type of dressing works best for this salad?

A light vinaigrette made with olive oil, balsamic vinegar, honey (or maple syrup for vegan), salt, and pepper complements the flavors very well.

How can I make this salad gluten-free?

This salad is naturally gluten-free. Just ensure that any additional ingredients like dressings or toppings are also gluten-free.

How long can I store leftover Winter Apple Beet Salad?

Leftovers can be stored in an airtight container in the refrigerator for up to 2 days, but it’s best to add the dressing just before serving.

What can I add to enhance the flavor of the salad?

You can add ingredients like avocado, cranberries, or pumpkin seeds to enhance both the flavor and texture of the salad.

Introduction

Imagine waking up on a crisp winter morning, the air tinged with excitement and the gentle scent of pine dancing around the house. As the festive season rolls in, the indulgence in rich, decadent treats is inevitable. But somewhere amidst the gingerbread cookies, turkey gravies, and eggnog, there’s a refreshing, revitalizing oasis waiting to cleanse and renew your senses: the Fresh Green Christmas Detox Juice. This invigorating blend is like a cool breeze on a snowy day, offering a burst of freshness with every sip. Packed with vibrant greens and subtle hints of holiday cheer, this juice is more than just a beverage—it’s an experience.

The Story Behind the Dish

Detox juices have been a part of various cultures for centuries, with their roots tracing back to ancient civilizations that utilized plant-based infusions to rejuvenate and energize. Over time, as global awareness of wellness and nutrition grew, detox juices evolved to become an essential part of health-conscious lifestyles. The Fresh Green Christmas Detox Juice pays homage to these age-old traditions while embracing the spirit of Christmas. This juice reflects a bridge between the celebratory opulence of the holidays and the simplicity of nature’s gifts, offering a moment of balance in an otherwise indulgent season.

While the specific recipe for this detox delight is a modern creation, the notion of using pure, verdant ingredients to promote well-being is deeply rooted in practices from around the world. From ancient Egypt to modern-day wellness hubs, the idea of renewing oneself through natural, unprocessed foods is a universal pursuit shared by cultures regardless of geography or era.

Why You’ll Love This Recipe

  • Refreshing Soother: Perfect for when you’ve had one too many Christmas cookies, it’s a revitalizing solution that soothes both body and soul.
  • Nutrient-Packed: This juice is bursting with vitamins, antioxidants, and essential minerals, making it a powerhouse of nutrition in every glass.
  • Colorful and Festive: The vibrant green hue adds a beautiful splash of color to your holiday table, perfectly complementing the traditional reds and whites of Christmas.
  • Quick and Simple: With natural ingredients and minimal preparation, it fits seamlessly into even the busiest of holiday schedules.
  • Low-Calorie Delight: This drink gives you all the flavor and satisfaction without the guilt, helping you maintain balance during the festive indulgence.

Flavor Profile & Texture

The Fresh Green Christmas Detox Juice is an exquisite symphony of flavors. Imagine the crispness of fresh spinach, kale, or cucumbers, combined with the subtle sweetness of ripe green apples or pears. A hint of ginger adds a warming spice reminiscent of Christmas, while a splash of citrus—perhaps lemon or lime—brings a zesty brightness that awakens your senses.

The texture is gently pulpy, a refreshing break from creamy holiday drinks. It’s smooth enough to be easily sipped from your favorite glass, yet it retains an essence of wholesome earthiness that speaks to the purity of its ingredients. This is a drink designed to enliven the palate while balancing the more indulgent flavors of the holiday season.

Occasions & Pairings

While this juice is apt for any time you wish to feel rejuvenated, it particularly shines during the holiday season. Serve it at a Christmas brunch as a healthy alternative amidst heavier dishes, or offer it as a refreshing welcome drink for holiday parties. It’s also ideal for a post-Christmas dinner digestif, cleansing the palate and aiding digestion after hearty meals.

For pairings, consider light, crisp salads or festive fruit platters that echo the juice’s fresh flavors. It can also be paired with simple, herb-infused chicken dishes or seafood for those looking to maintain a lighter menu during the holidays. For beverages, this juice can be complemented by warm, spiced teas or a lightly sparkling water to cleanse the palate further.

Tips, Variations & Substitutions

One of the best aspects of this detox juice is its flexibility. Here are some ideas to mix it up:

  • Greens: Swap out or combine the greens based on availability or taste preference—use chard, arugula, or even dandelion greens for distinct flavors.
  • Fruits: For a slightly sweeter juice, incorporate pineapple or kiwi, which also adds a tropical twist to your drink.
  • Spices: A dash of cinnamon or nutmeg can give a deeper, more aromatic dimension, reminiscent of classic holiday aromas.
  • Herbs: Mint or basil can introduce a refreshing herbal note, making the juice even more invigorating.
  • Dietary Needs: For an extra nutrient boost, add protein powder or spirulina. Adjust the citrus levels for those with sensitivities to acidic foods.

Storage & Make-Ahead Ideas

This juice is at its prime when fresh, capturing the peak of its flavors and nutrients. However, should you wish to prepare it ahead of time, here are some handy tips:

Store your juice in an airtight glass container or a mason jar to minimize oxidation. Keeping it in the fridge for up to 48 hours will ensure it stays fresh while providing maximum nutrient retention. For longer storage, consider freezing the juice in portions; just remember to leave room in your container for expansion. Once thawed, give it a good shake or stir to reincorporate any naturally separated layers.

For an easier holiday prep, gather and prepare your ingredients beforehand, storing pre-washed and chopped produce in the fridge. This will make juicing on the day a fast and seamless part of your routine.

Fun Facts & Trivia

Did you know that green juices, like our festive detox version, have been dubbed “liquid sunshine”? The name reflects their ability to capture chlorophyll and other plant goodness in a way that mirrors capturing sunlight itself, providing a boost of vitamins and minerals in liquid form.

Additionally, drinking juice made from fresh vegetables and fruits has long been associated with detoxifying rituals, as the vitamins and natural enzymes are believed to help the body cleanse and restore balance especially important after periods of indulgence, such as the holidays.

And finally, despite the belief that detox juices are a modern-day trend, ancient records reveal that Egyptians and Romans were known for fermenting herbs and plants into potent beverages thought to enliven the mind and spirit—a testament to their timeless allure.

Ingredients

  • Fresh Green Christmas Detox Juice
  • Base Ingredients
    • 4 cups kale leaves (stems removed)
      → Kale serves as the nutrient-dense base of the juice, providing a rich source of vitamins K, A, and C while also promoting detoxification. Make sure to remove the tough stems for a smoother juice. Wash the leaves thoroughly to remove any dirt.
    • 2 medium green apples (cored and chopped)
      → Green apples add a crisp tartness to balance the earthiness of the kale. It’s best to use firm apples for juicing to ensure a higher juice yield. Core them to eliminate bitterness from the seeds and chop them into quarters for easier juicing.
    • 1 cucumber (peeled and chopped)
      → Cucumber not only adds hydration but also contributes a refreshing flavor that lightens the juice. Peeling the cucumber can reduce its slightly bitter taste, ensuring a more pleasant drinking experience. Cut it into chunks to facilitate juicing.
    • 1 lemon (peeled and juiced)
      → Lemon juice adds a bright acidity that enhances the overall flavor profile and brings freshness to the juice. Use a fresh lemon for the best taste, and juice it to capture all the tangy goodness while discarding any seeds.
    • 1-inch piece of ginger (peeled)
      → Ginger adds a spicy kick and possesses anti-inflammatory properties, making the juice a great detox option. Peel the ginger to release its pungent oil and chop it into smaller pieces to help it blend seamlessly with the other ingredients.
  • Optional Add-ins
    • 1 tablespoon chia seeds (optional)
      → Chia seeds are packed with protein, fiber, and Omega-3 fatty acids. Adding them helps thicken the juice, making it more filling and nutritious. Soaking them in water for about 10-15 minutes before adding to the juice can help them absorb moisture for a better texture.
    • 1 tablespoon honey or agave nectar (optional)
      → Sweeteners like honey or agave can be added if you prefer a sweeter juice. Opt for raw honey for added health benefits and use it sparingly to avoid overpowering the natural flavors of the fruits and vegetables.
  • Preparation Tips
    • Ice cubes (optional)
      → Adding ice cubes to the juice after blending can make it more refreshing, especially if served during the warm holiday season. Blend ice cubes with the juice for a slushier consistency, ensuring the flavors are not diluted too much.

Instructions

  • Thoroughly wash the kale leaves under cold running water.

    → This step removes any residual dirt, pesticides, or impurities from the leaves, ensuring a clean and safe base for your juice.
  • Remove the tough stems from the kale leaves.

    → Stems can impart a bitter flavor and a gritty texture, so stripping the leaves from the stems will result in a smoother juice.
  • Chop the kale leaves into smaller pieces.

    → This makes it easier for your juicer to process the leaves, enhancing juice extraction and reducing wear on the juicing machine.
  • Core the green apples and chop them into quarters.

    → Removing the core and seeds prevents any bitter notes in your juice. Quartering them helps expose more surface area to the juicer for better extraction of juice.
  • Peel the cucumber and chop it into chunks.

    → Peeling removes any bitterness from the skin, leading to a fresher taste, while cutting it into manageable pieces aids the juicing process.
  • Peel the lemon and juice it completely, discarding any seeds.

    → This maximizes the vibrant acidic flavor of the lemon and avoids bitterness from the seeds, ensuring a harmonious balance in your juice.
  • Peel the ginger and chop it into smaller pieces.

    → Chopping releases the essential oils and flavors, allowing it to blend more effectively with the other ingredients, thus enhancing the overall taste of the juice.
  • Add all the prepared ingredients to your juicer.

    → Layer the ingredients as desired, but starting with leafy greens like kale can help the juicer pull juice from the denser ingredients following it.
  • Juice all the ingredients until you achieve a smooth consistency.

    → Keep the juicer running for sufficient time to ensure all nutrients are extracted, and check the consistency to see if any pulp remains, as you may want to strain it out for a smoother juice.
  • If desired, add the optional chia seeds after juicing.

    → Soaking them beforehand softens the seeds, allowing them to integrate better into the juice, adding a nutritious thickness without clumping.
  • Stir in honey or agave nectar if using.

    → Mix well to ensure the sweetener evenly disperses throughout the juice, enhancing the flavor without overwhelming the natural taste of the ingredients.
  • Optionally blend in ice cubes for a chilled beverage.

    → This creates a refreshing slushy texture, ideal for warming seasons, but blending carefully ensures flavor concentration is maintained.
  • Pour the juice into serving glasses immediately for optimal freshness.

    → Serving immediately preserves the vibrant flavors and nutrients of the juice, providing the best possible taste and health benefits.
  • Enjoy your Fresh Green Christmas Detox Juice!

    → This refreshing, nutrient-packed beverage will invigorate you and support your health goals, making it a fantastic addition to your holiday festivities.

Notes

These Fresh Green Christmas Detox Juice is a refreshing and nutrient-packed way to celebrate the season while giving your body a detox boost. Kale forms the foundation of this juice, providing essential vitamins and minerals while supporting overall health. The combination of green apples and cucumber adds a delightful crispness and hydration, making it enjoyable to drink.

Ginger enhances the flavor with a spicy undertone and promotes digestion, and the optional chia seeds enrich the juice with additional nutrients and a thicker texture, making it more filling. Sweeteners like honey or agave nectar can be adjusted to suit your taste preferences while still keeping the juice healthy.

To fully enjoy this drink, consider serving it chilled, especially during warm days. Ice cubes can be added or blended in for a slush-like texture. Customize the juice even more by adding your favorite superfoods or seasonal spices. Always opt for fresh and organic ingredients when possible to maximize health benefits. Enjoy this detox juice as part of a wholesome breakfast or a revitalizing afternoon pick-me-up!

Tips

  • Choose Fresh Ingredients:
    For the best flavor and nutritional value, always opt for fresh, organic ingredients. Check for vibrant colors and crisp textures when selecting your kale, apples, and cucumber.
  • Juicing Tools:
    If you have a juicer, that’s great! If not, a high-speed blender will work. If using a blender, you may want to strain the juice through a fine mesh sieve or cheesecloth to remove the pulp for a smoother consistency.
  • Prep Work:
    Before juicing, ensure all fruits and vegetables are thoroughly washed to remove any pesticides or dirt. Chop them into appropriate sizes to make the juicing process easier.
  • Add Water for Blending:
    If using a blender, you might need to add a little water or coconut water to help blend the ingredients smoothly. Just a splash will do, as you’ll want to keep the juice dense.
  • Experiment with Flavor:
    If you like a bit of heat, consider adding more ginger, or if you prefer a smoother taste, reduce the ginger. Taste as you go to achieve your preferred flavor balance.
  • Chill Before Serving:
    Chilling the ingredients before juicing can enhance the refreshing quality of the drink. Consider keeping your kale, apples, and cucumber in the fridge prior to preparation.
  • Storage Tips:
    Fresh juice is best consumed immediately, but if you need to store it, keep it in an airtight container in the fridge for up to 24 hours to preserve its nutrients and flavor.
  • Garnishing Ideas:
    Enhance presentation and flavor by garnishing your juice with a slice of lemon on the rim or a few sprigs of mint. This adds a touch of festive flair perfect for the holiday season.

FAQ

What are the main ingredients in Fresh Green Christmas Detox Juice?

The main ingredients are kale, spinach, cucumber, green apple, lemon, and ginger.

Is Fresh Green Christmas Detox Juice suitable for detoxing?

Yes, it is designed to help detoxify the body due to its nutrient-rich ingredients that support liver function and digestion.

Can I add other ingredients to the juice?

Absolutely! Feel free to add ingredients like celery, parsley, or mint for added flavor and nutrients.

How long can I store Fresh Green Christmas Detox Juice?

It is best consumed fresh but can be stored in the refrigerator for up to 48 hours in an airtight container.

What are the health benefits of the ingredients?

Kale and spinach are high in vitamins A, C, and K, while cucumber hydrates and lemon aids digestion. Ginger adds anti-inflammatory properties.

Is this juice vegan-friendly?

Yes, Fresh Green Christmas Detox Juice is entirely plant-based and suitable for vegans.

Can I use a blender instead of a juicer?

Yes, you can use a blender; however, it will result in a thicker juice, which you may want to strain to achieve a smoother consistency.

How many servings does this recipe make?

This recipe typically makes about 2 servings, depending on portion sizes.

Introduction: A Slice of Holiday Bliss

As the holiday season sneaks upon us, the familiar lure of comforting aromas wafts through the cool, crisp air, creating an enchanting tapestry of nostalgia and anticipation. At the heart of this sensory symphony lies a timeless classic whose golden crust and creamy interior promise happiness with every bite—the Healthy Holiday Sweet Potato Pie. Imagine a pie so decadently delicious that it invokes the warmth of a roaring fire and the jubilant laughter of loved ones gathered in celebration, all the while maintaining a lightness that allows you to savor each delightful mouthful guilt-free. Dive into this recipe as we explore how to transform a traditional favorite into a modern marvel that aligns with a health-conscious lifestyle, without sacrificing taste or indulgence.

The Story Behind the Dish: A Journey Through Time

The sweet potato pie has a rich history that travels through centuries, tracing its roots back to the culinary traditions of West Africa. Enslaved Africans brought the sweet potato—native to the Americas—into Southern U.S. kitchens, adapting recipes from the familiar yam dishes of their homeland. Over time, the sweet potato pie became a beloved staple of Southern cuisine, gracing tables of both modest family gatherings and grand holiday feasts.

In many African American households, sweet potato pie holds a cherished place as a symbol of resilience and tradition, often passed down through generations as a family heirloom. While traditionally made with sugar, butter, and a medley of spices, our modern rendition embraces the beloved flavors with a wholesome twist, ensuring that everyone at the table can relish in its storied legacy, from health enthusiasts to classic pie purists.

Why You’ll Love This Recipe

  • Nutrient-Rich Delight: Packed with vitamins and antioxidants, sweet potatoes serve as a nutritious base for this delightful dessert.
  • Guilt-Free Indulgence: By utilizing healthier ingredient substitutions, such as natural sweeteners and whole grain crusts, this pie offers all the indulgence with none of the regret.
  • Simple Elegance: Despite its complex flavors, this recipe is straightforward and streamlined, making it accessible to bakers of all levels.
  • Versatile Wonder: Whether served at a festive holiday gathering or a cozy fall evening, this pie perfectly complements any occasion.

Flavor Profile & Texture: A Harmonious Symphony

The Healthy Holiday Sweet Potato Pie is a masterclass in balance, where each ingredient melds seamlessly to create a taste profile that is both comforting and captivating. The earthy sweetness of the pureed sweet potatoes crafts a luscious base, heightened by the natural caramelization that occurs during baking. Notes of cinnamon, nutmeg, and ginger dance atop the palate, lending a warming spice that evokes the charming allure of autumn and winter.

The texture is silky smooth and airy, yet sufficiently rich to satisfy cravings for a more opulent treat. The tender, crumbly whole-grain crust cradles the filling, adding a delightful contrast and depth of flavor. Each bite is an experience, an ode to indulgence that leaves you wanting more.

Occasions & Pairings: Perfect for Any Table

Ideal for holiday celebrations, this pie shines brightest when surrounded by the joyful chatter of loved ones and the convivial spirit of the season. It holds its own on a dessert table overflowing with festive confections or wrapped in a cozy evening shared with family around the fireplace.

Pair it with:

  • Sides: Citrus-infused whipped cream, or a scoop of plain Greek yogurt for a touch of tang.
  • Drinks: A warming spiced chai, an earthy green tea, or for a festive touch, a mulled wine.
  • Dessert companions: Dark chocolate shavings or candied pecans to complement the natural sweetness.

Tips, Variations & Substitutions: Tailor to Your Tastes

While this pie celebrates tradition, there are countless ways to tailor it to fit your dietary needs or personal palate:

  • Vegan Option: Swap out dairy for coconut milk or almond milk and replace eggs with flax eggs for a plant-based version.
  • Low-Sugar Variant: Use maple syrup or honey as a sweetener and reduce quantities according to taste.
  • Spice Exploration: For those with an adventurous spirit, experiment with cardamom or allspice to evoke different dimensions of warmth.
  • Regional Twist: Add a touch of bourbon or vanilla extract to elevate the flavor profile with a subtle hint of richness.

Storage & Make-Ahead Ideas: Relishing Leftovers

The beauty of this sweet potato pie lies in its ability to retain flavor and freshness, making it perfect for advance preparation and storage.

  • Storage: Store any leftovers in an airtight container in the refrigerator for up to a week. Each day, the flavors meld further, enhancing the dessert’s richness.
  • Freezing: Wrap the pie tightly in plastic wrap, followed by aluminum foil, and freeze for up to three months. To enjoy, thaw overnight in the refrigerator and reheat gently in the oven.
  • Make-Ahead: Prepare the pie up to two days in advance. Bind the flavors by refrigerating and allow it to reach room temperature before serving.

Fun Facts & Trivia

Did you know? The sweet potato is not just delicious but highly nutritious and diverse in color and texture. Varieties range from white to deep orange, each with its own unique flavor. Historically, sweet potatoes have been called “yams” in the United States, though true yams are actually a different species native to Africa.

Moreover, sweet potatoes were an integral part of space missions — they were grown during the NASA sweet potato project as a reliable food source in controlled environments. This remarkable root vegetable is a testament to resilience and versatility, traits mirrored by the enduring appeal of this Healthy Holiday Sweet Potato Pie.

With its intertwined chapters of history, tradition, and health, this pie is more than just a dessert; it is a celebration of life’s simple pleasures, a culinary bridge between the past and the future. As you carve into your slice, savor the shared joy and the artistry of flavors that have traveled through time to enhance your holiday gathering with grace and warmth.

Ingredients

  • Sweet Potato Filling
    → Sweet potatoes are the main ingredient for the pie filling, providing a creamy texture and natural sweetness. They should be cooked until soft, either by boiling or baking, and then mashed to create a smooth consistency. For the best flavor, use orange-fleshed sweet potatoes, which are sweeter and have a richer taste.
  • 1 cup almond milk (or any plant-based milk)
    → Almond milk adds moisture to the pie filling while keeping it dairy-free. Use unsweetened almond milk for better control over sweetness. Bring it to room temperature before mixing to help it blend more easily with the other ingredients.
  • 3/4 cup maple syrup
    → Maple syrup serves as a natural sweetener, enhancing the flavor of the sweet potatoes without overpowering them. Use pure maple syrup rather than imitation for a deeper flavor. Adjust the amount based on your preference for sweetness; you can reduce it for less sweetness or add a bit more if desired.
  • 1 teaspoon vanilla extract
    → Vanilla extract enhances the overall flavor profile of the pie filling. Use pure vanilla extract for the best taste; artificial extracts may alter the flavor. Add it to the mixture just before blending to ensure even distribution.
  • 1/2 teaspoon ground cinnamon
    → Ground cinnamon adds warmth and a touch of spice to the filling. Use fresh, high-quality cinnamon for the best flavor. You can also increase or decrease the amount depending on your preference for spice. Adding it directly to the filling helps to distribute its flavor evenly.
  • 1/4 teaspoon ground nutmeg
    → Nutmeg complements the sweetness of the sweet potatoes with its warm, slightly nutty flavor. Use freshly grated nutmeg if possible for a more robust taste. Adding just a pinch can elevate the overall flavor of the pie without overwhelming it.
  • 1 tablespoon cornstarch (or arrowroot powder)
    → Cornstarch acts as a thickening agent, helping to set the pie filling as it bakes. Mix it with a small amount of the almond milk first to create a slurry, preventing clumps, before adding it to the sweet potato mixture to ensure a smooth texture.
  • Pie Crust
    → A pre-made or homemade crust serves as the base for the pie, holding all of the filling in place. If using a store-bought crust, choose one that is whole grain or made with healthier fats. If making your own, consider using whole wheat flour or almond flour for a nutritious option. Pre-baking the crust for a few minutes can prevent it from becoming soggy once the filling is added.

Instructions

  • Prepare the sweet potatoes by first peeling them and cutting them into evenly sized chunks, about 1 inch thick.

    → This ensures that they cook uniformly, avoiding undercooked or mushy pieces. Even size is key for consistent texture and flavor in the filling.
  • Boil or bake the sweet potato chunks until they are fork-tender, approximately 15-20 minutes for boiling or 45-60 minutes at 400°F (200°C) for baking.

    → Cooking the sweet potatoes until tender allows you to easily mash them into a smooth filling. If boiling, ensure they are not overcooked to the point of falling apart, as this can introduce excess water.
  • Once cooked, drain (if boiling) and allow the sweet potatoes to cool slightly before mashing them using a potato masher or a food processor until completely smooth.

    → Mashing while still warm helps to achieve a creamy consistency without any lumps. If using a food processor, pulse until smooth but avoid over-processing to prevent a gummy texture.
  • Preheat your oven to 350°F (175°C) and prepare a pie dish by greasing it lightly or using a non-stick spray.

    → Preheating the oven ensures even baking from the start, while greasing the dish helps prevent sticking and makes serving easier.
  • In a large mixing bowl, combine the mashed sweet potatoes with 1 cup of almond milk, 3/4 cup of maple syrup, 1 teaspoon of vanilla extract, 1/2 teaspoon of ground cinnamon, and 1/4 teaspoon of ground nutmeg.

    → This mixture creates a harmonious blend of flavors; adding them to the sweet potatoes allows for a more even distribution when mixing.
  • In a small bowl, make a slurry by mixing 1 tablespoon of cornstarch with a few tablespoons of the almond milk taken from the main bowl until smooth and lump-free.

    → This technique prevents clumping of the cornstarch when added to the warm sweet potato mixture. It ensures a smooth filling that sets well as it bakes.
  • Add the cornstarch slurry into the sweet potato mixture and stir well to combine all ingredients thoroughly.

    → Mixing well helps activate the thickening properties of the cornstarch, ensuring your filling will have the desired texture once baked.
  • Pour the finalized sweet potato filling into the prepared pie crust, smoothing the top with a spatula for an even surface.

    → An even surface allows for consistent baking and gives your pie a beautiful presentation once it’s turned out of the dish.
  • Bake the pie in the preheated oven for 45-50 minutes, or until the filling is set and a toothpick inserted into the center comes out clean.

    → Baking long enough will allow the filling to firm up, while checking for doneness with a toothpick is a reliable method to ensure it’s cooked perfectly.
  • Once baked, remove the pie from the oven and let it cool at room temperature for at least 30 minutes before serving.

    → Cooling allows the filling to set further, making it easier to slice and serve, and helps enhance the flavors as they meld together.
  • Optional: Serve the pie with a dollop of whipped coconut cream or a scoop of your favorite dairy-free ice cream for added richness.

    → This addition brings extra texture and flavor that pairs beautifully with the sweet potato filling, making it a delightful treat for the holidays.

Notes

These Healthy Holiday Sweet Potato Pie offer a delightful alternative to traditional pies, packed with nutrients and flavors that celebrate the season. The sweet potato filling provides a creamy, naturally sweet base that is complemented beautifully by the warm spices of cinnamon and nutmeg. For the best texture, ensure your sweet potatoes are cooked until soft and thoroughly mashed. Opt for orange-fleshed sweet potatoes for their superior sweetness.

When preparing the filling, almond milk adds moisture without any dairy, making this pie friendly for vegan diets. Bringing the almond milk to room temperature first will help it blend smoothly. The use of pure maple syrup not only enhances the flavor but also keeps the pie naturally sweetened; adjust it to suit your taste preferences. Vanilla extract is crucial for rounding out the flavors, so make sure to use pure for the best results.

Cinnamon and nutmeg provide warmth and depth, and you can adjust their amounts according to your spice preference. Make sure to mix the cornstarch with the almond milk to avoid clumps—this will help your pie filling set perfectly. For the crust, whether you opt for a pre-made option or make your own, consider a healthier variety that will keep the pie nutritious. Pre-baking the crust is an important step to avoid a soggy bottom. Enjoy this pie as a comforting dessert that captures the essence of the holidays while remaining healthy!

Tips

Cooking Tips for Healthy Holiday Sweet Potato Pie

  • Choosing Sweet Potatoes: Opt for orange-fleshed sweet potatoes, as they offer a sweeter and richer flavor. If possible, select medium-sized potatoes that are firm and free from blemishes for the best texture and taste.
  • Preparing the Filling: Whether you boil or bake the sweet potatoes, ensure they are fully cooked and soft enough to mash. If boiling, cut them into equal-sized chunks to ensure even cooking. For baking, scrub them clean, poke a few holes with a fork, and wrap in foil for moisture.
  • Mixing Ingredients: To achieve a lump-free filling, use a food processor or blender for mashing sweet potatoes. Combine all wet ingredients first before gradually adding the dry ones to maintain a smooth consistency.
  • Adjusting Sweetness: Taste the filling before you pour it into the crust. If you prefer a sweeter pie, you can add more maple syrup gradually, tasting as you go, to achieve your desired level of sweetness.
  • Spice Level Control: When adding spices like cinnamon and nutmeg, start with the recommended amount. You can always add more if you prefer a stronger flavor, but it’s easier to increase than to decrease spice levels.
  • Thickening the Filling: When mixing cornstarch, ensure that it is well blended with the almond milk before adding it to the sweet potato mixture. This step is crucial in preventing any lumps from forming in your filling.
  • Pie Crust Tips: If you’re using a store-bought crust, choose one that doesn’t contain preservatives for a healthier option. If making your own, let the dough chill before rolling to make it easier to handle, and remember to prick the crust with a fork before pre-baking to avoid bubbling.
  • Baking Time: Keep an eye on the pie while baking. The filling should be set and slightly puffed, and the crust should be golden brown. If the crust edges start to over-brown, cover them with foil to prevent burning.
  • Cooling: After baking, allow the pie to cool at room temperature for at least a couple of hours before slicing. This helps the filling set properly and makes for cleaner slices.

FAQ

What are the main ingredients in Healthy Holiday Sweet Potato Pie?

The main ingredients include sweet potatoes, almond flour, maple syrup, coconut milk, cinnamon, nutmeg, vanilla extract, and optionally pecans or walnuts for topping.

Is this recipe gluten-free?

Yes, this Healthy Holiday Sweet Potato Pie can be made gluten-free by using almond flour for the crust instead of regular flour.

How can I make this pie vegan?

This pie is naturally vegan if you use plant-based milk like coconut or almond milk and avoid using eggs. The sweet potato acts as a binder.

Can I use canned sweet potatoes instead of fresh?

Yes, you can use canned sweet potatoes as a convenient alternative. Just ensure they are unsweetened, and drain any excess liquid before using.

How long can I store leftovers?

Leftover Healthy Holiday Sweet Potato Pie can be stored in the refrigerator for up to 4-5 days. Make sure it’s covered properly to maintain freshness.

Can I freeze this pie?

Absolutely! This pie can be frozen for up to 2-3 months. To freeze, wrap it tightly in plastic wrap and then in aluminum foil before placing it in the freezer.

What can I substitute for maple syrup in this recipe?

You can substitute maple syrup with honey, agave nectar, or any other liquid sweetener to achieve a similar sweetness, although it will not be vegan if using honey.

Do I need to pre-bake the crust?

Yes, it is recommended to pre-bake the almond flour crust for about 10 minutes before adding the sweet potato filling to ensure it is crispy and fully cooked.

Introduction to the Christmas Pomegranate Yogurt Bowl

Imagine waking up on a crisp Christmas morning, the air filled with the comforting aroma of cinnamon and nutmeg from the kitchen, promising the festivities ahead. Amongst the joyous hustle, a vibrant Christmas Pomegranate Yogurt Bowl awaits, offering a perfect blend of creamy smoothness, refreshing tartness, and delightful sweetness — a harmonious symphony for the senses. This dish captures the essence of the holidays in a single bowl, making it a special treat worth savoring and sharing with loved ones. Let the succulent seeds of pomegranate burst with flavor in your mouth, while the rich yogurt provides a soothing and cool contrast. Elegant yet simple, this bowl is more than just a breakfast favorite; it’s an edible masterpiece of color and flavor that will make your Christmas morning truly unforgettable.

The Story Behind the Christmas Pomegranate Yogurt Bowl

Pomegranates have a rich and ancient history that spans millennia, often associated with prosperity, abundance, and celebration, making them an ideal centerpiece for holiday dishes. This fruit, one of the oldest known to mankind, finds mentions in Greek mythology and the Quran, symbolizing fertility and life itself. During Christmas, a time when families gather to celebrate the blessings of the past year, pomegranates carry forward their legacy of joy and abundance. By incorporating them into this yogurt bowl, you are not just serving a meal; you are honoring a tradition of festive culinary ingenuity.

Cultural Significance and Anecdotes

The pomegranate is revered across different cultures and religions, often appearing in art, literature, and ceremonial traditions. In ancient Greece, it was believed to have sprung from the blood of Adonis, enhancing its mystique and allure. Meanwhile, in Persian culture, pomegranates are said to hold the secrets of immortality. This Christmas Pomegranate Yogurt Bowl embraces this legacy, threading stories and myths into a modern-day feast for the senses, offering a unique way to connect with the past in every delicious spoonful.

Why You’ll Love This Recipe

  • Festive Flair: The ruby red pomegranate seeds resemble tiny jewels, adding a splash of holiday cheer to your breakfast table.
  • Health-conscious: Packed with antioxidants, vitamins, and probiotics, this yogurt bowl is as nutritious as it is delicious, perfect for the health-focused holiday-goer.
  • Quick and Easy: In the whirl of seasonal activities, this dish comes together in minutes, leaving you ample time to enjoy the Christmas magic.
  • Versatile: Whether it’s breakfast or a mid-day treat, this bowl adapts beautifully, fitting every occasion with ease.
  • Customizable: Tailor it to your taste with various toppings, making it a personalized delight for each family member.

Flavor Profile & Texture

This delightful concoction marries the smooth richness of yogurt with the bright, tangy notes of fresh pomegranate. Each spoonful provides a textured contrast of creamy yogurt, crunchy granola, and the satisfying pop of pomegranate jewels. Touches of honey or maple syrup introduce a balanced sweetness, while a sprinkle of cinnamon or nutmeg provides a warm, spicy undertone, offering a comforting embrace in each bite. Whether you’re dining alone or sharing the experience, each serving is sure to leave an indelible imprint of Christmas cheer on your palate.

Occasions & Pairings

The Christmas Pomegranate Yogurt Bowl is designed for festive mornings but easily transitions into any special brunch or holiday gathering. Serve it alongside freshly baked scones or croissants for a luxurious breakfast spread. Pair with a glass of sparkling apple cider or a warm cup of spiced chai to enhance the holiday ambiance. If hosting a holiday brunch, consider serving it with smoked salmon bagels or a quiche for a well-rounded, elegant menu.

Tips, Variations & Substitutions

Creative Twists

  • Add a Nutty Crunch: Consider topping the bowl with a mix of toasted nuts such as almonds or pistachios for extra flavor and crunch.
  • Experiment with Spices: Incorporate seasonal spices like vanilla or cardamom for a fragrant twist.
  • Boost with Seeds: Sprinkle chia seeds or flaxseeds for added nutrients and a delightful texture.

Dietary Alternatives

  • Vegan Version: Swap traditional yogurt for coconut or almond milk yogurt to make this dish vegan-friendly.
  • Gluten-Free: Use gluten-free granola to cater to gluten sensitivities without compromising on taste or texture.

Storage & Make-Ahead Ideas

This Christmas Pomegranate Yogurt Bowl lends itself well to advance preparation, allowing you to focus on enjoying the festivities. Pre-assemble the dry components, such as granola and seeds, in airtight containers. Refrigerate the pomegranate seeds separately, providing freshness when it’s time to serve. The yogurt can be mixed with any desired spices or sweeteners and kept chilled. On the morning of serving, simply layer the ingredients, dollop with yogurt, and top generously with pomegranate seeds for a fuss-free yet spectacular dish.

Leftovers are rarely an issue as this bowl tends to disappear quickly, but if needed, it can be stored with each component separated to maintain the texture and freshness.

Fun Facts & Trivia (Optional)

Did you know that pomegranates have been cultivated since ancient times and were even found in the tombs of Egyptian royalty? As a symbol of good fortune and fertility, pomegranates have a long-standing association with celebratory events, which continues to this day. Moreover, the tedious but rewarding process of deseeding pomegranates is sometimes compared to meditation, providing a moment of peace amidst the holiday chaos.

Incorporating this superfruit into your Christmas routine not only adds a burst of flavor but also an intriguing conversation starter bound to spark interest and appreciation among your guests. With this recipe, you are not merely serving a meal; you’re inviting history, tradition, and a sense of global culinary connection to your Christmas table.

Ingredients

  • Pomegranate Seeds
    → Fresh pomegranate seeds are the star ingredient that adds a burst of flavor and vibrant color to the yogurt bowl. To seed a pomegranate, cut it in half and gently tap the skin with a wooden spoon to release the seeds, or you can score the sections and pry them out. Opt for juicy, plump seeds for the best texture and sweetness.
  • Plain Greek Yogurt
    → Plain Greek yogurt provides a creamy base that is high in protein and calcium. It should be full-fat or reduced-fat for a richer texture. Use chilled yogurt for a refreshing bowl, and feel free to mix some vanilla extract into the yogurt for extra flavor.
  • Honey or Maple Syrup
    → Honey or maple syrup is optional but adds a natural sweetness to balance the tanginess of the yogurt. If using honey, ensure it is raw and preferably local for the best flavor. You can drizzle it directly over the yogurt or stir it in for even distribution.
  • Granola
    → Granola adds a delightful crunch and makes the yogurt bowl more filling. Choose a granola that is not overly sweet to maintain balance with the pomegranate and yogurt. You can sprinkle it on top just before serving to keep it crunchy.
  • Chopped Nuts (e.g., almonds or walnuts)
    → Chopped nuts provide healthy fats, protein, and an extra crunch that complements the other ingredients perfectly. Toast them lightly in a dry skillet for a few minutes to enhance their flavor, but be sure to keep a close eye on them to prevent burning.
  • Fresh Mint Leaves
    → Fresh mint leaves offer a refreshing aroma and flavor contrast to the dish. Tear the leaves gently by hand to release their oils, and use whole leaves as a garnish on top of the yogurt for an attractive presentation and enhanced taste.
  • Citrus Zest (e.g., orange or lime)
    → Citrus zest brightens the flavors in the yogurt bowl and adds a subtle zing. Use a microplane to finely grate the zest from a clean, organic citrus fruit. Avoid the white pith, as it can be bitter. Just a small amount will go a long way in elevating the overall taste.

Instructions

  • Prepare your ingredients by gathering all items on your countertop and measuring them out.

    → This organization will streamline your process, ensuring that you don’t miss any ingredients while preparing your Christmas Pomegranate Yogurt Bowl.
  • Seed the pomegranate by cutting it in half and gently tapping the skin with a wooden spoon.

    → This technique allows you to extract the seeds with minimal mess; the wooden spoon transfers just the right amount of impact to release the seeds without damaging them.
  • Place the plain Greek yogurt into a serving bowl, ensuring it’s chilled for the best texture and enjoyment.

    → Cold yogurt not only enhances the refreshing nature of this dish but also provides a creamy base that complements the toppings beautifully.
  • If desired, drizzle honey or maple syrup over the yogurt.

    → This will naturally sweeten the yogurt and balance its tang. Drizzling directly over the surface allows you to control the amount for your desired sweetness.
  • Top the yogurt with the freshly seeded pomegranate seeds evenly across the surface.

    → Distributing the seeds evenly ensures that every bite has a burst of flavor and color, making the presentation visually appealing and delicious.
  • Sprinkle granola atop the yogurt just before serving for added crunch.

    → Adding granola right before serving preserves its texture; this ensures it stays crispy and does not become soggy from the yogurt.
  • Chop your choice of nuts, such as almonds or walnuts, and lightly toast them in a dry skillet over medium heat.

    → Toasting enhances their flavor and aroma significantly; stir frequently to avoid burning, as nuts can quickly go from toasted to charred.
  • Sprinkle the toasted nuts over the yogurt bowl for an added crunch.

    → This step adds texture and healthy fats, making your yogurt bowl more satisfying.
  • Tear fresh mint leaves gently by hand and use them as a garnish on top.

    → Tearing rather than cutting helps release essential oils into the dish, enhancing the overall flavor profile and creating an aromatic experience.
  • Use a microplane to finely grate the zest of your chosen citrus fruit (e.g., orange or lime) and sprinkle it over the bowl.

    → This adds a fragrant punch and balances the sweetness; only the outer layer should be used to avoid bitterness from the pith.
  • Serve the Christmas Pomegranate Yogurt Bowl immediately and enjoy!

    → Serving right away allows you to relish the freshness of the ingredients and maintain the crunchiness of the granola and nuts.

Notes

These Christmas Pomegranate Yogurt Bowls are a festive and nutritious way to start your day or enjoy as a light snack. The combination of tart pomegranate seeds and creamy Greek yogurt creates a delicious flavor balance, enhanced by the optional sweetness of honey or maple syrup. For added texture and crunch, sprinkle a generous layer of granola on top, and consider adding some toasted chopped nuts for an extra boost of protein and healthy fats.

When preparing, make sure to use fresh, juicy pomegranate seeds, as they are the highlight of this dish. If you’re feeling adventurous, customize your yogurt bowl with different nuts, seeds, or even a dollop of nut butter for added richness. The fresh mint leaves provide a lovely aroma and a pop of color, making the dish visually appealing. You can also experiment with the citrus zest; it brings a lovely brightness that ties all the flavors together.

For serving, prepare the yogurt bowl right before you’re ready to enjoy it to keep the granola crunchy. This dish is not only perfect for breakfast or brunch but also makes a delightful dessert or a festive treat at holiday gatherings. Enjoy it fresh, and don’t hesitate to share with family and friends!

Tips

Cooking Tips for Your Christmas Pomegranate Yogurt Bowl

  • Selecting Pomegranates: Choose pomegranates that feel heavy for their size, as this indicates juiciness. Look for shiny, unblemished skin and avoid any that feel lightweight.
  • Preparing Yogurt: Using cold Greek yogurt not only enhances the refreshing quality of your bowl but also allows the toppings to stay crisp. If you prefer a sweeter yogurt, mix in a teaspoon of vanilla extract or a sprinkle of cinnamon for extra warmth.
  • Sweetener Options: If you opt for honey, try warming it slightly to make it easier to drizzle. For those using maple syrup, remember that grade A syrup is lighter in flavor while grade B offers a richer taste that pairs superbly with yogurt.
  • Granola Tips: If you want to make your own granola, consider adding spices such as cinnamon or nutmeg to the oats for an extra festive touch. Allow it to cool completely before adding it to the yogurt to maintain that desired crunch.
  • Toasting Nuts: For toasted nuts, aim for a golden brown hue, stirring often to avoid burning. A pinch of salt can also enhance their flavor, making them an excellent topping for your yogurt bowl.
  • Mint Preparation: Use fresh mint for the best flavor; dried mint will not provide the same aromatic quality. Tear the leaves right before serving to ensure they retain their vibrant color and fragrance.
  • Citrus Zest Application: When zesting, make sure to rotate the fruit to get only the colorful outer layer and avoid the bitter white pith underneath. Experiment with different citrus, such as grapefruit or lemon, for varied flavor profiles.
  • Presentation: Layer your yogurt, pomegranate seeds, and toppings in a glass bowl or jar for an impressive presentation. Not only does this look beautiful, but it also entices others to enjoy your creation!

FAQ

What ingredients are needed for the Christmas Pomegranate Yogurt Bowl?

The main ingredients include Greek yogurt, pomegranate seeds, honey, granola, and seasonal fruits such as oranges and mint for garnish.

Can I use a different type of yogurt?

Yes, you can substitute Greek yogurt with any type of yogurt you prefer, such as dairy-free or regular yogurt, but the consistency may vary.

Is this recipe suitable for a vegan diet?

To make it vegan, use a plant-based yogurt and substitute honey with maple syrup or agave nectar.

How can I make this recipe more festive?

You can add additional toppings such as chopped nuts, chocolate shavings, or edible flowers for a more decorative and festive touch.

Can I prepare this recipe in advance?

While the yogurt bowl is best served fresh, you can prepare the ingredients ahead of time and assemble it just before serving.

What health benefits does the Christmas Pomegranate Yogurt Bowl offer?

This dish is high in protein from the yogurt, packed with antioxidants from the pomegranate, and provides fiber from the granola and fruits.

How many servings does this recipe make?

This recipe typically serves 2 to 4 people, depending on portion sizes.

Can I include other fruits in the bowl?

Absolutely! Feel free to add your favorite seasonal fruits such as berries, bananas, or kiwi for added flavor and nutrition.

Introduction / Hook

Welcome to a culinary journey brimming with warmth and flavor — introducing the Holiday Roasted Sweet Potato Wedges! Imagine golden-brown wedges with crispy edges, a soft and fluffy interior, and a perfectly melded sweetness that dances on your palate with every bite. These delightful wedges are a celebration of flavors, blending natural sweetness with a symphony of spices that evoke the spirit of the holiday season. Whether it’s the aroma that wafts through the kitchen as they roast to perfection or the vibrant colors that captivate on the dinner table, these sweet potato wedges are a treat for the senses, sure to become a cherished holiday tradition.

The Story Behind the Dish

The beloved sweet potato has a storied history that dates back thousands of years. Originating in Central and South America, this versatile root vegetable has since traveled the globe, becoming a staple in diverse culinary traditions. Its natural sweetness and nutritional prowess made it a valuable commodity, especially during the holiday season when families gather and food takes center stage. The concept of roasting these vibrant tubers into wedges brings out their inherent earthy sweetness, a technique popularized in modern kitchens around the world. From simple beginnings, these roasted sweet potato wedges have evolved into a festive dish that conjures feelings of comfort and celebration, especially during the holidays.

Why You’ll Love This Recipe

  • Easy to Make: Simple preparation steps with minimal ingredients, perfect for both novice and experienced cooks.
  • Nutritious and Delicious: Packed with vitamins, fiber, and antioxidants, sweet potatoes are a healthy choice, without compromising on flavor.
  • Versatile: Can be served as a side dish, appetizer, or even a light snack.
  • Perfect for the Holidays: The combination of warm spices makes it an ideal addition to any holiday spread.
  • Vegan and Gluten-Free: Accommodates a variety of dietary preferences and restrictions, making it a crowd-pleaser.

Flavor Profile & Texture

The Holiday Roasted Sweet Potato Wedges are a delightful marriage of flavors and textures. The initial crispness achieved through careful roasting gives way to a tender, melt-in-your-mouth interior. Each bite offers a subtle caramelization, enhancing the natural sugars of the sweet potato. This pairs seamlessly with the fragrant spices used to season the wedges — think cinnamon, nutmeg, and cloves, creating a harmonious balance that is both savory and slightly sweet. The addition of fresh herbs adds a burst of aroma and color, making these wedges as visually appealing as they are tasty.

Occasions & Pairings

These sumptuous wedges are versatile enough to fit any occasion, yet special enough to take center stage during the holiday season. Serve them at Thanksgiving dinners, alongside roasted turkey and cranberry sauce, or as a Christmas side dish to complement ham or beef roasts. They’re equally suitable for casual get-togethers, potlucks, or New Year’s Eve celebrations, where they can be paired with a variety of dips and sauces. Consider pairing these wedges with light white wines or sparkling water infused with citrus for a refreshing contrast that highlights their flavors.

Tips, Variations & Substitutions

Customization is key to making these sweet potato wedges your own. Here are some creative ideas to explore:

  • Spice it Up: For a bit of heat, add a pinch of cayenne pepper or chili powder.
  • Sweeten the Deal: Drizzle with honey or maple syrup before serving for an extra touch of sweetness.
  • Herbal Variations: Experiment with different herbs such as rosemary, thyme, or sage for a unique flavor twist.
  • Dietary Substitutions: Use coconut oil instead of olive oil for a subtle tropical note or try a balsamic glaze for a tangy complement.

Storage & Make-Ahead Ideas

To make these wedges ahead of time, you can prep the sweet potatoes by cutting them into wedges and placing them in cold water for up to a day in advance. This helps to retain their freshness and can even make them crisper upon roasting. Once roasted, they can be stored in an airtight container in the refrigerator for up to three days. To reheat, simply place them back in the oven at a moderate temperature until crisp and warmed through. If you wish to freeze them, refrain from adding any fresh herbs until after they’ve been reheated to maintain freshness and flavor.

Fun Facts & Trivia

Did you know that sweet potatoes are often confused with yams, even though they belong to different botanical families? Sweet potatoes are richer in nutrients and sweeter than yams. Additionally, they have long been associated with good luck and prosperity in various cultures, particularly in African and Caribbean cuisine where they are integral to celebratory dishes. Their versatility and nutritional benefits continue to make them a beloved ingredient worldwide, proving that these humble tubers are much more than a side dish — they’re a taste of history, culture, and comfort all rolled into one.

Ingredients

  • Sweet Potatoes
    → Sweet potatoes provide the main base for this dish. They should be of medium size and evenly shaped for even cooking. Choose sweet potatoes that are firm and free from blemishes or soft spots. To prepare, scrub them clean under running water, peel if desired, and cut into wedges of uniform thickness to ensure they roast evenly.
  • Olive Oil
    → Olive oil is used to coat the sweet potatoes, enhancing their natural sweetness while helping them to crisp up during roasting. Use extra virgin olive oil for the best flavor. Drizzle the oil over the sweet potato wedges before roasting, ensuring they are evenly coated without being overly greasy.
  • Ground Cinnamon
    → Ground cinnamon adds a warm, fragrant flavor that enhances the sweetness of the sweet potatoes. Use fresh ground cinnamon for maximum flavor. Sprinkle it evenly over the wedges after coating them with olive oil to ensure an even distribution of flavor.
  • Ground Nutmeg
    → Ground nutmeg complements the cinnamon and adds a warm, nutty note to the dish. Use fresh ground nutmeg if possible for the best results. Add a small pinch to the sweet potato wedges before roasting, as its strong flavor should be balanced carefully with the cinnamon.
  • Salt
    → Salt enhances the overall flavor of the dish, balancing the sweetness of the sweet potatoes and spices. Use sea salt or kosher salt for better texture and flavor control. Sprinkle it evenly over the wedges, adjusting to personal taste but ensuring each piece is seasoned adequately.
  • Pepper
    → Freshly ground black pepper adds a subtle heat and depth to the flavor profile of the roasted sweet potatoes. Use the finest grind for better distribution. Season to taste, remembering that a little goes a long way; you want to enhance the dish without overpowering the sweet flavors.
  • Fresh Rosemary (optional)
    → Fresh rosemary provides a fragrant herbal note that pairs wonderfully with sweet potatoes. Use only fresh, not dried, rosemary to ensure an impactful flavor. Roughly chop the leaves and sprinkle over the wedges before roasting. Be mindful not to add too much, as it can be quite potent.

Instructions

  • Preheat your oven to 425°F (220°C) and prepare a large baking sheet by lining it with parchment paper or a silicone baking mat.

    → Preheating the oven ensures that the sweet potatoes start roasting immediately, which helps achieve a crispy exterior and soft interior. Using parchment paper or a silicone mat prevents sticking and makes cleanup easier.
  • Wash and scrub the sweet potatoes under running water thoroughly to remove any dirt or residue.

    → Cleaning the sweet potatoes is crucial as it removes any contaminants from the surface. You can use a vegetable brush if available to ensure a clean finish, especially if you plan to keep the skins on.
  • Peel the sweet potatoes if desired, then cut them into wedges of uniform thickness, about 1-inch wide, and place them in a large mixing bowl.

    → Cutting the sweet potatoes into uniform wedges ensures even cooking; uneven pieces may result in some being overcooked while others are undercooked. If you choose to leave the skins on, make sure they are firm and clean for texture.
  • Drizzle approximately 2-3 tablespoons of extra virgin olive oil over the sweet potato wedges in the mixing bowl.

    → Olive oil not only helps in achieving a crispy texture but also enhances the flavor of the sweet potatoes. Ensure to coat each wedge evenly by tossing with your hands or a spoon to prevent any from being too greasy.
  • Season the sweet potatoes with 1 teaspoon of ground cinnamon, ½ teaspoon of ground nutmeg, 1 teaspoon of salt, and ¼ teaspoon of freshly ground black pepper.

    → These spices and seasonings elevate the dish, with cinnamon and nutmeg enhancing the sweetness, while salt and pepper balance flavors. Make sure to sprinkle them evenly over the wedges to ensure every bite is flavorful.
  • If using fresh rosemary, rinse a few sprigs under cold water and pat dry, then finely chop and add to the bowl, tossing with the wedges.

    → Fresh herbs like rosemary can bring vibrancy and contrast to the sweet flavors. Be cautious with the amount you use, as rosemary has a strong flavor that can easily overpower the dish.
  • Spread the seasoned sweet potato wedges in a single layer on the prepared baking sheet, making sure they aren’t overcrowded.

    → Spacing the wedges properly allows for even roasting and caramelization. If the wedges are too close, they will steam instead of roast, resulting in a softer texture rather than the desired crispiness.
  • Place the baking sheet in the preheated oven and roast the sweet potatoes for 25-30 minutes, flipping them halfway through cooking.

    → Flipping the wedges allows them to brown evenly on both sides. Keep an eye on them towards the end of cooking; roasting time can vary depending on the thickness of the wedges and the oven’s temperature accuracy.
  • Check for doneness by piercing a thick wedge with a fork; it should be tender and easily fall apart.

    → Testing for tenderness ensures that the sweet potatoes are fully cooked through. If they still feel firm, return them to the oven for a few more minutes and check again.
  • Once cooked, remove the baking sheet from the oven and let the sweet potato wedges cool slightly before serving.

    → Allowing them to cool for a few minutes helps them set and can enhance flavors as they rest. Serve warm as a side dish, garnished with additional fresh rosemary if desired.

Notes

These Holiday Roasted Sweet Potato Wedges are a delicious side dish that perfectly captures the essence of festive flavors. The natural sweetness of sweet potatoes is elevated with aromatic spices such as cinnamon and nutmeg, making them a delightful addition to your holiday table. For best results, ensure that your sweet potatoes are cut into uniform wedges to guarantee even cooking. The olive oil not only helps the wedges to crisp up but also enhances their flavor, so make sure they are well-coated.

This dish can be easily customized depending on your taste preferences. If you love herbs, feel free to experiment with other fresh herbs like thyme or sage along with or instead of rosemary. For a bit of zest, a squeeze of lemon or a sprinkle of orange zest after roasting can add a refreshing touch. These wedges are not just limited to holiday meals; they can be enjoyed year-round and make a fantastic addition to salads, bowls, or as a healthy snack.

To serve, consider adding a sprinkle of feta cheese or a drizzle of balsamic glaze for an extra layer of flavor. Leftovers can be stored in an airtight container in the fridge and reheated in the oven to maintain their crispness. Just remember to adjust the seasoning to your preference before serving. Enjoy your festive cooking!

Tips

Cooking Tips for Holiday Roasted Sweet Potato Wedges

  • Choosing Sweet Potatoes: Opt for medium-sized, evenly shaped sweet potatoes to guarantee consistent cooking. Look for firm ones without blemishes or soft spots to ensure the best texture and flavor.
  • Uniform Cutting: Cut the sweet potatoes into wedges of equal thickness, about 1 inch wide, to promote even roasting. This prevents some pieces from cooking too quickly while others remain undercooked.
  • Coating with Olive Oil: Use a generous yet measured amount of extra virgin olive oil to coat the wedges. Toss them in a bowl to ensure each piece is coated evenly, promoting a crispy exterior during roasting.
  • Spice Balance: When adding ground cinnamon and nutmeg, start with smaller amounts and adjust to taste. The warm spices should complement the sweet potatoes without overpowering their natural sweetness.
  • Even Seasoning: To achieve well-seasoned wedges, sprinkle the salt and pepper evenly across the potatoes. Toss them again to spread out the seasoning evenly and enhance the overall flavor profile.
  • Using Fresh Rosemary: If adding rosemary, finely chop the leaves and sprinkle them over the wedges. Remember, it’s potent, so a little goes a long way. It’s best to taste as you go, ensuring the herb complements but does not overwhelm.
  • Roasting Temperature: Preheat your oven to 425°F (220°C) for optimal roasting. A high temperature helps caramelize the sugars in the sweet potatoes, resulting in a deliciously crispy exterior.
  • Flip for Even Cooking: Halfway through the roasting time, use a spatula to flip the sweet potato wedges. This ensures they cook evenly and develop a golden-brown crust on all sides.
  • Serving Suggestions: These roasted sweet potato wedges make a fantastic side dish for holiday meals or a healthy snack. Consider serving them with a dipping sauce like garlic aioli or a sweet chili sauce for extra flavor.

FAQ

What ingredients do I need for Holiday Roasted Sweet Potato Wedges?

You will need sweet potatoes, olive oil, salt, pepper, paprika, garlic powder, and optional herbs like rosemary or thyme for added flavor.

How do I prepare the sweet potatoes?

Start by preheating your oven to 425°F (220°C). Wash and peel the sweet potatoes, then cut them into wedges. Toss the wedges in olive oil with your desired seasonings.

How long should I roast the sweet potato wedges?

Roast the sweet potato wedges for about 25-30 minutes, flipping them halfway through to ensure they are evenly cooked and golden brown.

Can I make these sweet potato wedges ahead of time?

Yes, you can prepare the sweet potato wedges ahead of time and store them in the refrigerator. Reheat them in the oven before serving for best results.

What are some serving suggestions for roasted sweet potato wedges?

They pair well with dipping sauces like ranch, garlic aioli, or even a spicy salsa. You can also serve them alongside proteins like grilled chicken or fish.

Are there any variations of this recipe?

Yes! You can experiment with different spices such as cumin or chili powder, or add toppings like Parmesan cheese, fresh herbs, or a drizzle of balsamic glaze after roasting.

Can I use other types of potatoes instead of sweet potatoes?

While sweet potatoes are recommended for their flavor and sweetness, you can substitute regular potatoes or even other root vegetables, but adjust the cooking time accordingly.

Is this recipe suitable for a vegan diet?

Yes, the Holiday Roasted Sweet Potato Wedges are 100% vegan as they contain no animal products. They are a delicious and healthy choice for everyone.

Introduction: A Bowl of Comfort

Imagine coming home on a brisk, chilly evening, the scent of warm, inviting soup filling the air. Your senses are immediately captivated by the earthy, savory aromas wafting through the room. This is Slow-Simmered Chicken & Barley Soup, a comforting staple that wraps you in warmth and ease with each spoonful. Its rich, hearty flavors beckon you to sit back and indulge in a culinary embrace that only a classic, meticulously prepared soup can offer. Crafted with love and patience, this dish is uniquely special, simultaneously soothing and satisfying to the body and soul.

What sets this soup apart is the depth of flavor achieved through the slow-simmering process, ensuring every ingredient has mingled perfectly, creating a harmony of taste that’s both complex and refreshing. Whether you’re a seasoned home cook or a budding kitchen enthusiast, this dish promises to bring a smile to your face and warmth to your heart. Read on, and discover why this soup is more than just a meal; it’s an experience.

The Story Behind the Dish

The history of chicken and barley soup is as rich and layered as the flavors within the dish itself. Barley, one of the oldest cultivated grains, has played a significant role in culinary traditions across civilizations, from ancient Mesopotamia to the hearty cuisines of Eastern Europe. Known for its nutty flavor and chewy texture, barley was a staple in the diets of many cultures and served the dual purpose of nutrition and energy sustenance. Paired with chicken, which gained popularity due to its accessible and adaptable nature, the combination quickly became favored for its balance of proteins, carbs, and flavors.

In many families, this soup has been a testament to tradition, a recipe passed down through generations with each family adding its own unique touch. Some might add a pinch of regional spices, while others focus on local vegetables to enrich the broth. Regardless of the nuances, each version tells a story of comfort, nourishment, and the communal act of sharing a lovingly prepared meal.

Why You’ll Love This Recipe

  • Hearty and Satisfying: The perfect balance of tender chicken, wholesome barley, and fresh vegetables creates a soup that’s both filling and nourishing.
  • Flavorful Broth: Slow simmering brings out the profound flavors in the broth, delivering a rich and satisfying experience with every spoonful.
  • Nutritious: Packed with protein and fiber, this soup is a healthy choice that doesn’t sacrifice taste for nutrition.
  • Easy to Make: With simple, straightforward steps, this recipe is accessible to cooks of all skill levels.
  • Adaptable: Enjoy the freedom to tweak the recipe to fit your dietary needs or flavor preferences.
  • Perfect for Meal Prep: Make a large batch, and enjoy it throughout the week; it tastes even better the next day!

Flavor Profile & Texture

The magic of this slow-simmered soup lies in its depth of flavor and varied textures, satisfying a broad range of palates. Each mouthful offers a burst of complex flavors, beautifully orchestrated through the interplay of earthy barley, tender chicken, and a medley of fresh vegetables. The slow cooking process allows the flavors to meld together, creating a broth that’s both velvety and rich, with subtle notes of herbs and spices enhancing the overall experience.

Texture-wise, the barley offers a delightful chewiness that perfectly complements the softness of the cooked vegetables and the succulent pieces of chicken. The contrast in textures enhances each bite, making the soup feel substantial and well-rounded.

Occasions & Pairings

This soup is the epitome of versatility, making it suitable for various occasions and pairable with a range of dishes. It’s perfect for a cozy night in, complementing the serene ambiance with its warmth. Serving this as a starter at a small dinner party or during a family gathering is sure to impress guests while also offering comfort.

Consider pairing it with:

  • Crusty Bread: A thick slice of rustic bread, ideal for dipping, complements the soup’s flavors and adds to the enjoyment.
  • Light Salads: A crisp, refreshing side salad with a light vinaigrette can balance the warmth and richness of the soup.
  • Wine: A light, dry white wine like Sauvignon Blanc enhances the soup’s savory notes, while a medium red like Pinot Noir amplifies its heartiness.

Tips, Variations & Substitutions

One of the joys of homemade soup is its adaptability. Here are some tips and variations to tailor this recipe to your liking:

  • Vegetarian Variation: Swap the chicken for chickpeas or tofu, and use vegetable broth to make a delicious vegetarian version.
  • Spice it Up: Add a pinch of cayenne pepper or red chili flakes for a subtle, warming kick.
  • Herbal Twist: Experiment with different herbs such as dill, thyme, or rosemary to infuse new flavors into the broth.
  • Lower Carb Option: Substitute barley with cauliflower rice for those who are carb-conscious or gluten-free.

Storage & Make-Ahead Ideas

This soup not only improves in flavor over time but also stores exceptionally well, making it a fantastic choice for meal planning.

  • Refrigeration: Store in an airtight container for up to four days. Reheat gently on the stove, stirring occasionally, to ensure even warming.
  • Freezing: This soup is highly freezer-friendly. Allow the soup to cool completely before portioning it into freezer-safe containers or bags. It can be stored for up to three months. Thaw overnight in the refrigerator before reheating.
  • Make-Ahead: Prepare the soup ahead of time for a hassle-free meal. Simply reheat and serve, ensuring a quick and delicious dinner at a moment’s notice.

Fun Facts & Trivia

Did you know that barley, one of the key ingredients in this soup, was a key component in the diets of Roman gladiators? It was considered food for strength and almost sacred in its symbolic connection to stamina and resilience. Similarly, chicken, one of the world’s most popular proteins, has a history dating back thousands of years; it was even domesticated back to Southeast Asia around 7,000-10,000 years ago!

Savor each moment with this Slow-Simmered Chicken & Barley Soup, and you’ll be partaking in a tradition that nourishes both the body and soul, one spoonful at a time. Dive into the experience, and let every flavorful drop remind you of the blessings of food and warmth. Enjoy the process of crafting this delightful dish, and share the love of good food and good company. Bon appétit!

Ingredients

  • Chicken
    → Boneless, skinless chicken thighs or breasts are preferred for this recipe as they remain tender during the long simmering process. Cut the chicken into bite-sized pieces to ensure even cooking. If using whole pieces of chicken, be mindful to remove the skin and bones before serving for a smoother texture in the soup. Aim for high-quality, fresh chicken for the best flavor and texture.
  • Barley
    → Pearled barley works best in this soup as it cooks faster and adds a unique, nutty flavor to the broth. Rinse the barley under cold water before adding it to the soup to remove any dust and to help with the cooking process. Using a ratio of about 1/2 cup of barley per 4 cups of broth will yield a hearty texture.
  • Vegetables
    → A mix of diced onions, carrots, and celery is essential for the flavor base of the soup, commonly known as mirepoix. Chop the vegetables into uniform, small pieces for even cooking. Sauté them first to bring out their natural sweetness and deepen the overall flavor of the soup.
  • Garlic
    → Fresh garlic cloves, minced or chopped, add aromatic flavor to the soup. Use 2-3 cloves depending on your preference for garlic. For the best results, add the garlic towards the end of the sautéing process to prevent it from burning, which can result in a bitter taste.
  • Chicken Broth
    → Use low-sodium chicken broth to control the salt levels in the dish. Homemade broth is ideal if available; otherwise, choose a high-quality store-bought option. The broth serves as the main liquid, infusing the soup with rich chicken flavor and helping to tenderize the barley as it cooks.
  • Herbs
    → Fresh thyme and parsley enhance the flavor profile of the soup. Use a few sprigs of fresh thyme and a handful of chopped parsley for garnish before serving. Fresh herbs should be added towards the end of cooking for their bright flavor, while dried herbs can be added earlier in the cooking process for a more mellow taste.
  • Salt and Pepper
    → These basic seasonings are crucial for enhancing the overall flavor of the soup. Add salt gradually, tasting as you go to avoid over-seasoning, and freshly ground black pepper for a hint of spice. Always season to taste just before serving to ensure the flavors are balanced.
  • Lemon Juice (optional)
    → A splash of fresh lemon juice brightens the dish and enhances the flavors of the other ingredients. Squeeze in juice from half a lemon just before serving for a refreshing lift. Use fresh lemons for the best taste, as bottled lemon juice can lack in flavor.

Instructions

  • Begin by preparing the chicken by cutting it into bite-sized pieces.

    → This helps ensure that the chicken cooks evenly throughout the soup and allows for easier bites. Use a sharp knife for clean cuts, and remember to wash your hands and the cutting board thoroughly after handling raw chicken to prevent cross-contamination.
  • Rinse the pearled barley under cold water in a fine mesh strainer.

    → This step removes any dust and helps the barley cook more evenly. Make sure to swish the barley around gently to ensure a thorough rinse, and drain it well before adding it to the soup.
  • Dice the onions, carrots, and celery into uniform, small pieces.

    → This is known as mirepoix, which forms the flavor base of the soup. Aim for a consistent size—about 1/4 inch—so that all the vegetables cook at the same rate, adding a harmonious texture to the finished soup.
  • Heat a large stockpot over medium heat and add a couple of tablespoons of olive oil.

    → Heating the oil before adding the vegetables allows for even sautéing and helps to prevent sticking. Once the oil shimmers, it’s ready for the vegetables.
  • Add the diced onions, carrots, and celery to the heated oil and sauté for about 5-7 minutes.

    → Stir the mixture occasionally until the vegetables become tender and the onions turn translucent. This process caramelizes the natural sugars, enhancing the overall flavor of the soup.
  • Mince 2-3 garlic cloves and add them to the pot in the last minute of sautéing.

    → Adding garlic towards the end prevents it from burning, which can impart a bitter flavor. Stir constantly for around 1 minute until fragrant, which indicates that it is ready to bloom and release its essential oils.
  • After the garlic is fragrant, add the chicken pieces to the pot and season with salt and pepper.

    → This will help to season the chicken as it cooks. Sauté for about 5 minutes until the chicken is no longer pink, stirring occasionally to cook all sides evenly.
  • Pour in 4 cups of low-sodium chicken broth.

    → This broth serves as the main liquid for the soup and provides essential flavor. Be sure to scrape any browned bits off the bottom of the pot, as they add depth to the soup.
  • Add the rinsed barley to the pot and bring the mixture to a gentle boil.

    → Stir the barley into the broth to incorporate it well. A gentle boil ensures that the soup starts the cooking process properly, activating the barley to release its starches for a thicker consistency.
  • Once boiling, reduce the heat to low, cover the pot, and let the soup simmer for 30-40 minutes.

    → Simmering allows the flavors to meld together and the barley to cook through. Stir occasionally, and keep an eye on the consistency; add more broth or water if it becomes too thick.
  • During the last 5 minutes of cooking, add fresh thyme and parsley to the pot.

    → Fresh herbs added at the end of the cooking time retain their vibrant flavor and increase the freshness of the soup. Stir gently to combine them throughout the soup.
  • Before serving, taste the soup and adjust the seasoning with additional salt and freshly cracked black pepper as needed.

    → Balancing the seasoning at this stage ensures a well-flavored dish. Remember that flavors can evolve as they sit, so taste again if you need to.
  • If desired, squeeze in the juice of half a fresh lemon just before serving.

    → This adds a bright, refreshing note that enhances all the flavors within the soup. Always opt for fresh lemon juice for a superior taste.
  • Serve the soup hot in bowls and garnish with additional chopped parsley, if desired.

    → Serving the soup immediately ensures that it is enjoyed at its best temperature and freshness. This final touch not only adds flavor but also enhances the presentation.

Notes

  • Slow-simmered chicken and barley soup is a comforting and nutritious dish that can be enjoyed year-round. The long cooking time allows the flavors to meld beautifully while making the chicken tender and the barley delightfully chewy.
  • This soup is versatile; feel free to incorporate seasonal vegetables such as peas or spinach for added color and nutrition. If you’re looking to add some heat, consider including a pinch of red pepper flakes during cooking.
  • If you prefer a thicker soup, reduce the amount of broth used or allow it to simmer longer, uncovered, to let some of the liquid evaporate. Conversely, if you like a brothier soup, simply add more chicken broth or water until the desired consistency is reached.
  • This recipe is perfect for meal prep, as the soup keeps well in the refrigerator for several days. It can also be frozen for longer storage, making it an ideal dish to prepare in batches. Just be sure to leave some room in your container, as soups expand when frozen.
  • Serving suggestions include crusty bread or a side salad to balance the meal. For an elegant touch, top each bowl with a sprinkle of fresh herbs and a dash of freshly ground black pepper just before serving.

Tips

Cooking Tips for Slow-Simmered Chicken & Barley Soup

  • Perfecting the Chicken: When cutting the chicken into bite-sized pieces, try to keep them uniform to ensure they cook evenly. If you prefer a richer flavor, consider browning the chicken pieces in the pot before adding the vegetables. This will provide a deeper flavor to your soup.
  • Handling Barley: Rinse the pearled barley under cold water thoroughly to get rid of any excess starch, which can make the soup cloudy. It also helps the barley cook more evenly. If you’re short on time, you can soak the barley in water for a couple of hours before adding it to the soup to speed up the cooking process.
  • Vegetable Sauté: Sauté the mirepoix (onions, carrots, and celery) in olive oil on medium heat until they start to soften, about 5-7 minutes. This step builds an aromatic base for your soup. Consider adding a pinch of salt during sautéing to draw out moisture from the vegetables, enhancing their flavor.
  • Aromatic Garlic: To ensure the garlic maintains its fresh flavor, add it to the pot just 1-2 minutes before you add the broth and other ingredients. Stir it frequently to prevent burning. If you enjoy a stronger garlic flavor, feel free to toss in extra minced garlic, adjusting it to your taste.
  • Choosing Your Broth: If you’re making homemade broth, consider simmering it longer with herbs and spices for a deeper flavor. When using store-bought, taste it first and adjust seasoning as needed since some broths can be saltier than others. Always remember that the quality of your broth greatly influences the overall dish.
  • Herb Timing: Fresh herbs should be added at the end of cooking to retain their vibrant flavors and nutrients. If you do want to use dried herbs, add them during the simmering phase to allow their flavors to infuse into the broth. Consider tying thyme sprigs with kitchen twine for easy removal after cooking.
  • Seasoning Gradually: It’s better to add salt in small amounts throughout the cooking process rather than all at once. This allows you to fine-tune the seasoning. Be cautious with the last addition of salt, especially if using salty broth or salted ingredients.
  • Enhancing with Lemon: While optional, the addition of lemon juice at the end really brightens the flavors. If you prefer a more pronounced zing, you can also zest the lemon before juicing it, adding a layer of citrus fragrance to your soup.
  • Storage Tips: If you have leftovers, store the soup in an airtight container in the refrigerator. The barley will absorb some broth as it sits, so you may need to add a little water or broth when reheating to loosen the soup. This preparation freezes well, but for optimal texture, consider freezing it without the barley and adding it during reheating.

FAQ

What ingredients do I need for Slow-Simmered Chicken & Barley Soup?

The main ingredients include chicken (breast or thighs), pearl barley, carrots, celery, onion, garlic, chicken broth, herbs (such as thyme and bay leaf), and salt and pepper. You can also add vegetables like peas or corn if desired.

How long does it take to prepare Slow-Simmered Chicken & Barley Soup?

The preparation time is approximately 15-20 minutes, and the soup simmers for about 1.5 to 2 hours to ensure the flavors meld beautifully.

Can I use leftover chicken in this recipe?

Yes, leftover cooked chicken is a great option! Just add it in during the last 30 minutes of simmering to heat through.

Is this soup gluten-free?

No, traditional pearl barley contains gluten. However, you can substitute it with gluten-free grains like quinoa or rice if needed.

Can I make Slow-Simmered Chicken & Barley Soup in a slow cooker?

Absolutely! To make it in a slow cooker, combine all the ingredients and cook on low for 6-8 hours or on high for 3-4 hours until the chicken and barley are tender.

What can I serve with this soup?

This soup pairs well with crusty bread, crackers, or a light salad for a well-rounded meal.

How do I store leftovers of the soup?

Cool the soup completely, then store it in an airtight container in the refrigerator for up to 4 days. You can also freeze it for up to 3 months. Reheat before serving.

Can I adjust the seasonings to my taste?

Yes! Feel free to adjust the herbs and spices according to your preference. Adding a dash of lemon juice or some hot sauce can also enhance the flavor.