Author

Ocean Nightleaf

Browsing

Introduction / Hook

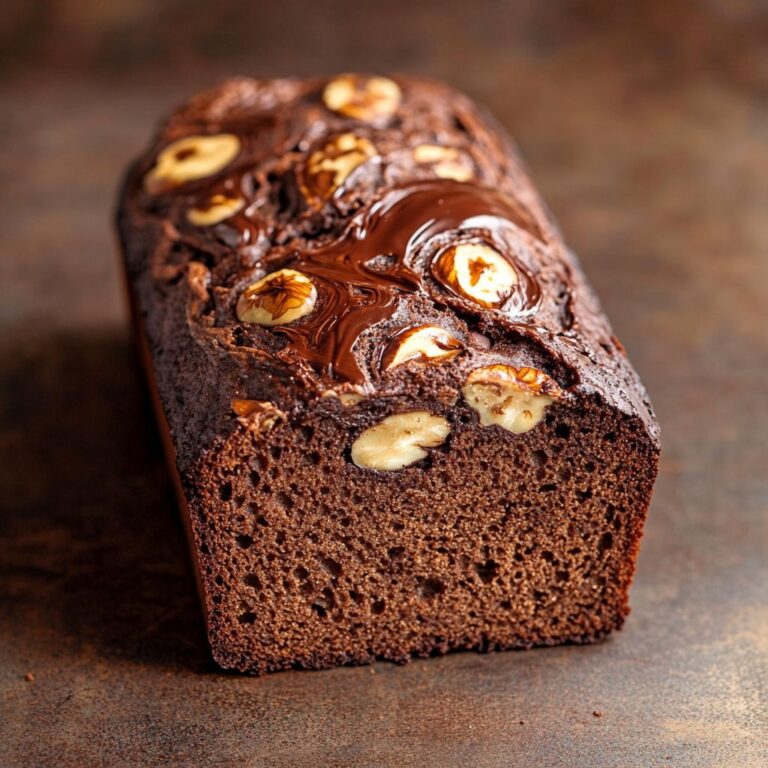
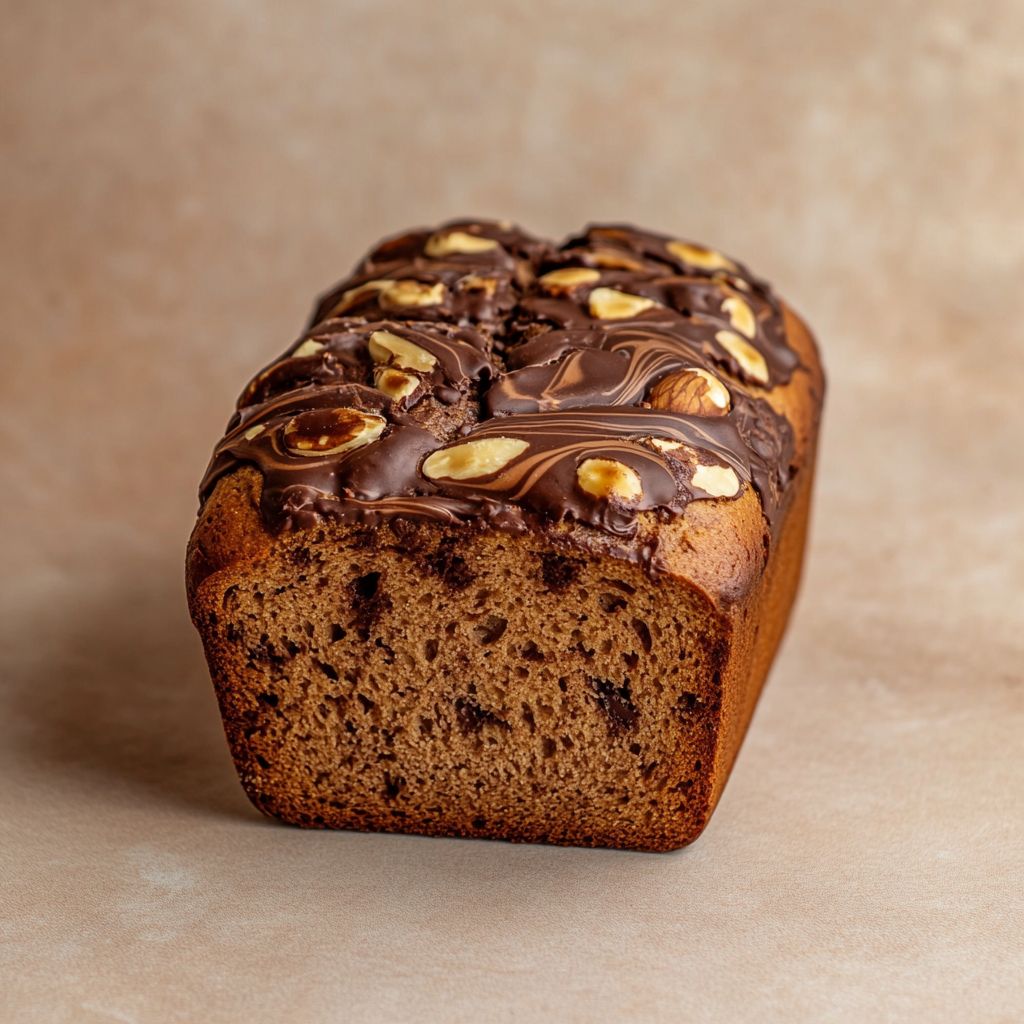
Imagine a warm slice of freshly baked Chocolate Hazelnut Loaf in your hands. Its delightful aroma filling your senses with the promise of sweet indulgence. There is something inherently comforting about this rich, moist treat that beckons you to savor each bite. Picture a perfect blend of velvety chocolate intertwined with the earthy, nutty flavor of roasted hazelnuts, crafting a melt-in-your-mouth experience that is both luxurious and heartwarming. This isn’t just any dessert—it’s a moment of pure bliss that can be enjoyed any time of the day. A slice of this delectable loaf may very well become your new guilty pleasure, promising a taste that’s both familiar and utterly captivating.

The Story Behind the Dish

Chocolate Hazelnut Loaf holds more than just deliciousness; it’s steeped in a tradition of European culinary heritage. The hazelnut-chocolate combination, widely popularized by the Italian spread, Nutella, has a long history that dates back to early 19th century France and Italy. Known as Gianduja, this initially difficult-to-find delicacy emerged when cocoa was scarce, and resourceful chocolatiers substituted hazelnuts to stretch their cocoa supplies. Since then, the chocolate hazelnut duo has become iconic, synonymous with indulgent treats like tortes, bars, and pastries.

Our loaf celebrates this historic pairing by combining the smooth richness of chocolate with the delightful crunch of hazelnuts, bringing a timeless classic to your kitchen. Bask in the storied depths of European tradition as you enjoy this delightful loaf, where every bite serves as a tribute to creative resilience in the face of scarcity.

Why You’ll Love This Recipe

  • Quick and Easy: This Chocolate Hazelnut Loaf comes together with minimal prep time, making it perfect for quick dessert fixes or unexpected guests.
  • Versatile Treat: Whether served at breakfast with coffee or as an after-dinner dessert, it fits perfectly into any occasion.
  • Indulgent Yet Simple: With straightforward ingredients readily available in most pantries, enjoy indulgence without fuss.
  • Aromatic Ambience: While baking, your home will be filled with the irresistible scent of melting chocolate and roasted hazelnuts.
  • Perfectly Balanced Flavors: Experience sweetness tempered by just the right amount of nutty undertones, striking the perfect balance on your palate.

Flavor Profile & Texture

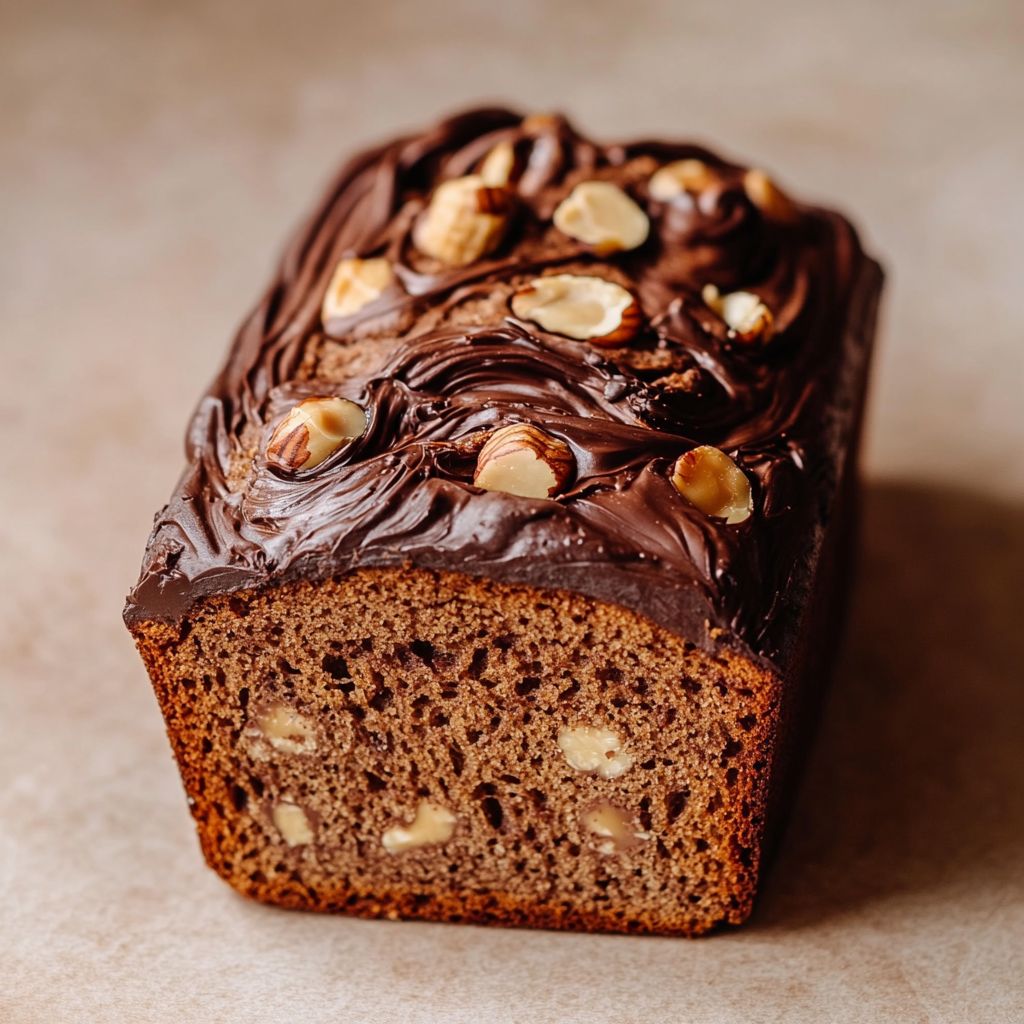
The Chocolate Hazelnut Loaf offers a complex yet comforting flavor profile featuring a symphony of tastes and textures. The rich, dark chocolate imparts a luscious, robust depth, wrapping around your taste buds like a warm hug. This silkiness is contrasted beautifully with the distinct flavor of toasted hazelnuts, adding a hint of rustic tradition to each mouthful. Every slice is a combination of melt-in-the-mouth softness punctuated with delightful crunches, thanks to the nuts interspersed throughout and perhaps scattered on top.

The loaf’s interior is soft and tender, providing a satisfying yet subtle sponge-like quality that holds its own in any setting. Meanwhile, the exterior bakes to a delicate, slightly crispy crust, encapsulating the flavors and textures in every delectable slice.

Occasions & Pairings

This loaf is as versatile as it is delicious, making it suitable for a variety of occasions:

When to Serve:

  • Afternoon Tea: Pair with a hot cup of Earl Grey to enhance the hazelnut notes subtly.
  • Brunch Gathering: Introduce a sweet touch to your assortment of savory delights at a weekend brunch.
  • Holiday Celebrations: A show-stopping addition to the festive table during seasonal festivities.

Suggested Pairings:

  • Ice Cream: Accompany with a scoop of vanilla or hazelnut ice cream for an ultimate dessert experience.
  • Cheese: For an adventurous palate, serve with soft cheeses to juxtapose the sweetness with creamy tanginess.
  • Wine: Complement with a glass of Pinot Noir or a soft-bodied Merlot to enhance the chocolate notes.

Tips, Variations & Substitutions

Embrace customization with this recipe to suit your dietary preferences or exploratory taste:

Creative Customizations:

  • Nut Variations: Swap hazelnuts with almonds or walnuts for a different nutty undertone.
  • Add Spices: Introduce a pinch of cinnamon or nutmeg for a warm, aromatic twist.
  • Extra Chocolate: Fold in chocolate chips or chunks for an extra dose of cocoa indulgence.

Dietary Alternatives:

  • Vegan Version: Use plant-based milk and a flaxseed meal egg replacement for an animal product-free loaf.
  • Gluten-Free: Substitute all-purpose flour with a gluten-free flour blend to accommodate dietary restrictions.
  • Low Sugar Option: Reduce sugar quantities and consider using natural sweeteners like honey or stevia.

Storage & Make-Ahead Ideas

One beauty of this Chocolate Hazelnut Loaf is its convenience when it comes to longer utilization:

Storing Leftovers:

  • Room Temperature: Keep in an airtight container at room temperature for up to 3 days.
  • Refrigeration: For an extended lifespan, refrigerate for up to one week, ensuring it is tightly wrapped or in a sealed container.

Freezing & Reheating:

  • Freeze: Wrap in plastic wrap and aluminum foil before freezing to maintain moisture and avoid freezer burn. It can be frozen for up to three months.
  • Reheat: Thaw overnight in the refrigerator, or warm individual slices in a toaster oven for a freshly-baked taste.

Make-Ahead Tips:

  • Batter Preparation: Prepare the batter ahead of time and store it in the refrigerator for up to a day before baking.
  • Partial Baking: Par-bake and freeze to complete baking upon serving to always deliver a fresh loaf.

Fun Facts & Trivia

Dive into a little bit of fun while enjoying your Chocolate Hazelnut Loaf:

  • Hazelnut Kingdom – Turkey reigns as the world’s largest producer of hazelnuts, providing approximately 72% of the global supply.
  • Chocolate Health Boost – Dark chocolate is not just a treat; it is loaded with antioxidants and has been shown to have various health benefits when consumed in moderation.
  • World Record Loaf – The largest chocolate and hazelnut loaf ever made weighed over a hefty 2,000 pounds and was constructed in Italy, highlighting the nation’s love for this iconic flavor combination.

With these insights, you’ll appreciate each bite of your Chocolate Hazelnut Loaf even more, connecting past, present, and tastefully-crafted excellence.
Ingredients

Chocolate Hazelnut Loaf

Muffin Base

  • 2 cups all-purpose flour
    → All-purpose flour provides the bulk and structure of the loaf. It creates the perfect balance between a tender crumb and adequate support for the loaf. Make sure to measure the flour properly by spooning it into a measuring cup and leveling it off to avoid a dense loaf.
  • 1 cup granulated sugar
    → Sugar not only sweetens the loaf but also contributes to the moisture and tenderness by creating a chemical reaction during baking. Using granulated sugar will ensure a nice even sweetness without altering the texture. Feel free to adjust the amount of sugar according to your taste preference.
  • 1/2 cup unsweetened cocoa powder
    → Cocoa powder adds rich chocolate flavor and depth to the loaf. Sift it before measuring to ensure no lumps and to allow for an even distribution throughout the batter. Opt for high-quality cocoa for the best flavor outcome.
  • 1 teaspoon baking powder
    → Baking powder acts as a leavening agent, helping the loaf rise and become fluffy. Be sure to use a fresh product, as old baking powder may result in a dense loaf. Mix it into the dry ingredients to distribute it evenly before adding wet ingredients.
  • 1/2 teaspoon baking soda
    → Baking soda works in conjunction with the acidic components, such as cocoa or buttermilk, to help the loaf rise. It’s essential to use this in proper proportions as too much can lead to a metallic taste. Verify the expiration date to ensure effectiveness.
  • 1/2 teaspoon salt
    → Salt enhances the flavors of the other ingredients and balances the sweetness. It also strengthens the gluten structure. Use fine sea salt for a subtle flavor that dissolves quickly in the batter.
  • 1/2 cup unsalted butter (melted)
    → Butter adds richness, flavor, and moisture to the loaf. Melt it gently and allow it to cool slightly before incorporating it into the batter. This ensures a smoother mixture and helps to prevent the eggs from cooking when added.
  • 3 large eggs
    → Eggs provide structure, moisture, and richness to the loaf. Use eggs at room temperature for better incorporation into the batter. Whisk them lightly before adding to the mixture to ensure even distribution and better aeration.
  • 1 teaspoon vanilla extract
    → Pure vanilla extract enhances the flavors in the loaf, lending a delightful aroma and overall depth. Avoid imitation vanilla, as it lacks the rich flavor profile that works wonderfully with chocolate.
  • 1 cup buttermilk
    → Buttermilk not only adds moisture and a slight tang but also activates the baking soda for leavening. If you don’t have buttermilk, you can substitute with milk mixed with a tablespoon of vinegar or lemon juice, letting it sit for a few minutes before using.

Add-ins

  • 1 cup chocolate hazelnut spread
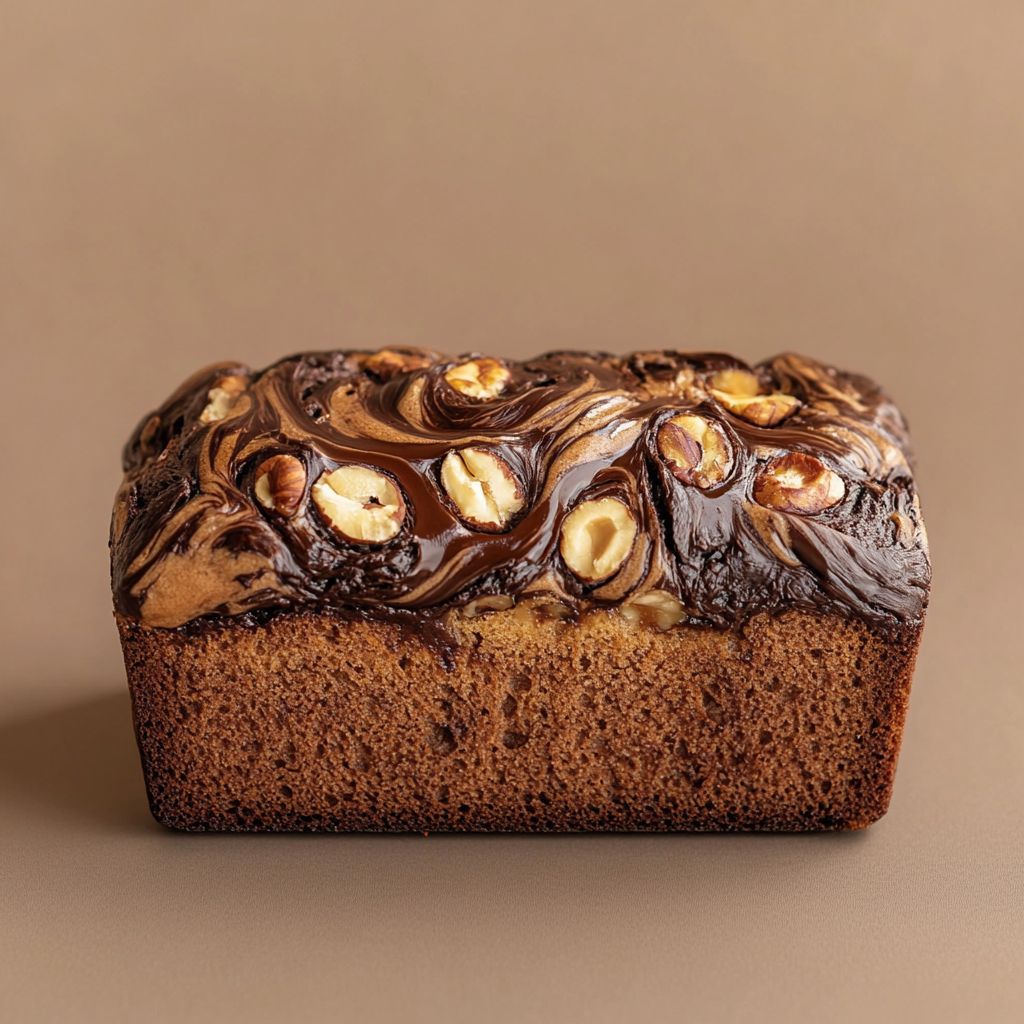
    → This ingredient adds intense chocolate flavor and a creamy texture. Swirl it through the batter for delicious pockets of flavor. Warm it slightly to make it easier to incorporate into the batter. Choose a high-quality spread for the richest taste.
  • 1/2 cup chopped hazelnuts (toasted)
    → Chopped hazelnuts provide a crunchy texture and nutty flavor that complements the chocolate. Toast them in a dry skillet or the oven to enhance their flavor before chopping. Allow them to cool to maintain their crunch.
  • 1/2 cup mini chocolate chips (optional)
    → Mini chocolate chips add bursts of extra chocolate flavor and sweetness throughout the loaf. Toss them in a little bit of flour before adding to the batter to prevent them from sinking to the bottom. Choose semi-sweet or dark chocolate chips depending on your preference.

Instructions

  • Preheat your oven to 350°F (175°C) and line a 9×5-inch loaf pan with parchment paper or grease it lightly.

    → Preheating the oven ensures that the loaf bakes evenly from the start, resulting in a perfectly risen loaf. Lining or greasing the pan makes removal hassle-free.
  • In a large mixing bowl, combine 2 cups of all-purpose flour, 1 cup of granulated sugar, 1/2 cup of unsweetened cocoa powder, 1 teaspoon of baking powder, 1/2 teaspoon of baking soda, and 1/2 teaspoon of salt.

    → Whisk these dry ingredients together thoroughly to ensure even distribution of the leavening agents and cocoa powder, which leads to a uniform texture and flavor throughout the loaf.
  • In a separate bowl, melt 1/2 cup of unsalted butter in the microwave or on the stove until fully liquid, then let it cool slightly.

    → Cooling the melted butter prevents it from cooking the eggs when mixed into the batter. Use low heat to avoid boiling the butter, which can cause it to separate.
  • Once the butter is cooled, whisk in 3 large eggs one at a time, ensuring each is fully incorporated before adding the next.

    → This method helps to aerate the batter, crucial for a light texture, and also ensures a uniform mix of ingredients.
  • Add 1 teaspoon of vanilla extract and 1 cup of buttermilk to the wet mixture, whisking until smooth.

    → The buttermilk adds moisture and acts to activate the baking soda in the batter, while vanilla enhances the overall flavor profile of the loaf.
  • Gradually pour the wet mixture into the bowl of dry ingredients, folding gently with a spatula until just combined.

    → This gentle folding method prevents overmixing, which can lead to a dense loaf. Stop mixing when the flour is barely incorporated to achieve a light texture.
  • Warm 1 cup of chocolate hazelnut spread slightly in the microwave for about 10-15 seconds and then swirl it into the batter without fully mixing it in.

    → Swirling the spread creates pockets of flavor, enhancing the loaf with rich chocolate hazelnut flavor. Be careful not to overmix to keep distinct swirls visible.
  • Fold in 1/2 cup of chopped, toasted hazelnuts and optionally, 1/2 cup of mini chocolate chips, tossing the chips in a little flour before adding.

    → Toasting the hazelnuts intensifies their flavor and tossing the chocolate chips in flour prevents them from sinking, ensuring even distribution throughout the loaf.
  • Pour the batter into the prepared loaf pan, smoothing the top with a spatula for an even bake.

    → Smoothing the surface helps ensure an even rise and finish during baking, which contributes to a pleasing appearance.
  • Bake in the preheated oven for 50-60 minutes, or until a toothpick inserted into the center comes out clean or with a few moist crumbs.

    → Checking for doneness with a toothpick avoids overbaking, which can lead to a dry loaf. Remember that the loaf will continue to cook slightly after being removed from the oven.
  • Once baked, remove the loaf from the oven and let it cool in the pan for about 10 minutes before transferring it to a wire rack to cool completely.

    → Cooling in the pan prevents the loaf from collapsing and helps it set properly, while moving it to a wire rack allows air to circulate around the loaf, avoiding a soggy bottom.
  • Slice and serve once the loaf has cooled fully, enjoying its rich flavors and textures.

    → Allowing the loaf to cool completely enhances the flavor as the loaf continues to firm up, making it easier to slice without crumbling.
Notes

This Chocolate Hazelnut Loaf is a decadent treat that combines rich cocoa with creamy hazelnut spread for an indulgent dessert or snack. The base is made from a blend of all-purpose flour, sugar, and cocoa powder, creating a wonderfully moist and tender loaf. Be careful to properly measure your flour to avoid any dense texture. If you’re looking for additional flavors, feel free to add in mini chocolate chips, which are optional but definitely recommended for those who can’t get enough chocolate!

For the best results, make sure your ingredients are at room temperature—especially the eggs and buttermilk—as this helps them blend more easily into the batter. You will want to melt the unsalted butter gently and let it cool slightly before adding it to the mix, to achieve a smoother batter and to avoid scrambling the eggs when combined. Toasting the hazelnuts will bring out their flavor, enhancing the overall richness of the loaf.

When adding the chocolate hazelnut spread, consider warming it up slightly for easier mixing. Swirl it through the batter gently rather than fully blending, which will create delightful pockets of flavor throughout the loaf. Baking your loaf in a preheated oven ensures even cooking, so don’t skip that step! Allow the loaf to cool in the pan for a few minutes before transferring it to a wire rack; this helps maintain its structure while cooling. This loaf is perfect for serving with a cup of coffee or tea, and it also freezes well, making it a great option for meal prep or unexpected guests.

Enjoy this Chocolate Hazelnut Loaf as a fantastic dessert, a sweet breakfast, or a delightful afternoon snack!
Tips

Cooking Tips for Chocolate Hazelnut Loaf

  • Preheat Your Oven: Always preheat your oven to the specified temperature before placing your loaf inside. This ensures even cooking and helps the loaf to rise properly from the start.
  • Use Room Temperature Ingredients: For best results, make sure your eggs, butter, and buttermilk are at room temperature. Room temperature ingredients blend together more easily, leading to a smoother batter.
  • Mix Gently: When combining the wet and dry ingredients, mix until just combined to avoid overmixing. Overmixing can lead to a tougher texture due to gluten development.
  • Check for Doneness: Baking times can vary based on your oven and the size of the loaf pan. Check for doneness by inserting a toothpick into the center of the loaf; it should come out clean or with a few moist crumbs attached.
  • Let It Cool: Allow the loaf to cool in the pan for about 10-15 minutes before transferring it to a wire rack. This prevents it from becoming soggy and helps maintain its structure.
  • Storage Tips: Store any leftover loaf in an airtight container at room temperature for up to 3 days. For longer storage, wrap it well and freeze for up to 2 months. Thaw at room temperature before serving.
  • Experiment with Flavors: Feel free to experiment with different add-ins like chopped dried fruits or other nuts. Just keep the total amount of mix-ins to about 2 cups to maintain the loaf’s structure.
  • Serving Suggestions: Serve slices warm with a dollop of whipped cream or a scoop of ice cream for an indulgent dessert. You can also drizzle with extra chocolate hazelnut spread for added flavor.

FAQ

What ingredients are needed to make Chocolate Hazelnut Loaf?

The main ingredients include flour, sugar, cocoa powder, eggs, butter, hazelnuts, baking powder, and chocolate. You may also need vanilla extract and a pinch of salt.

How long does it take to bake Chocolate Hazelnut Loaf?

The baking time typically ranges from 50 to 65 minutes, depending on your oven and the size of the loaf. It’s best to check for doneness using a toothpick.

Can I use chocolate chips instead of cocoa powder?

While cocoa powder is essential for the chocolate flavor, you can fold in chocolate chips for added texture and richness. Just reduce the amount of sugar slightly to balance the sweetness.

Is it necessary to use hazelnuts in this recipe?

Hazelnuts are a key ingredient that contributes to the unique flavor of the loaf. However, if you’re allergic or prefer not to use them, you can substitute with other nuts or omit them entirely.

Can I make this recipe gluten-free?

Yes, you can substitute the all-purpose flour with a gluten-free flour blend. Ensure that the baking powder is also gluten-free for the best results.

How should I store the Chocolate Hazelnut Loaf?

Store the loaf in an airtight container at room temperature for up to 3 days. For longer storage, you can wrap it tightly in plastic wrap and freeze it for up to 2 months.

Can I reduce the sugar in the recipe?

Yes, you can reduce the sugar to your taste, but keep in mind that it may affect the texture and moistness of the loaf. Start by reducing it by 1/4 cup and adjust from there.

Can I add fruit or other flavors to the Chocolate Hazelnut Loaf?

Absolutely! Dried fruits like cherries or raspberries can complement the chocolate flavor. You can also add spices like cinnamon or espresso powder for an extra depth of flavor.
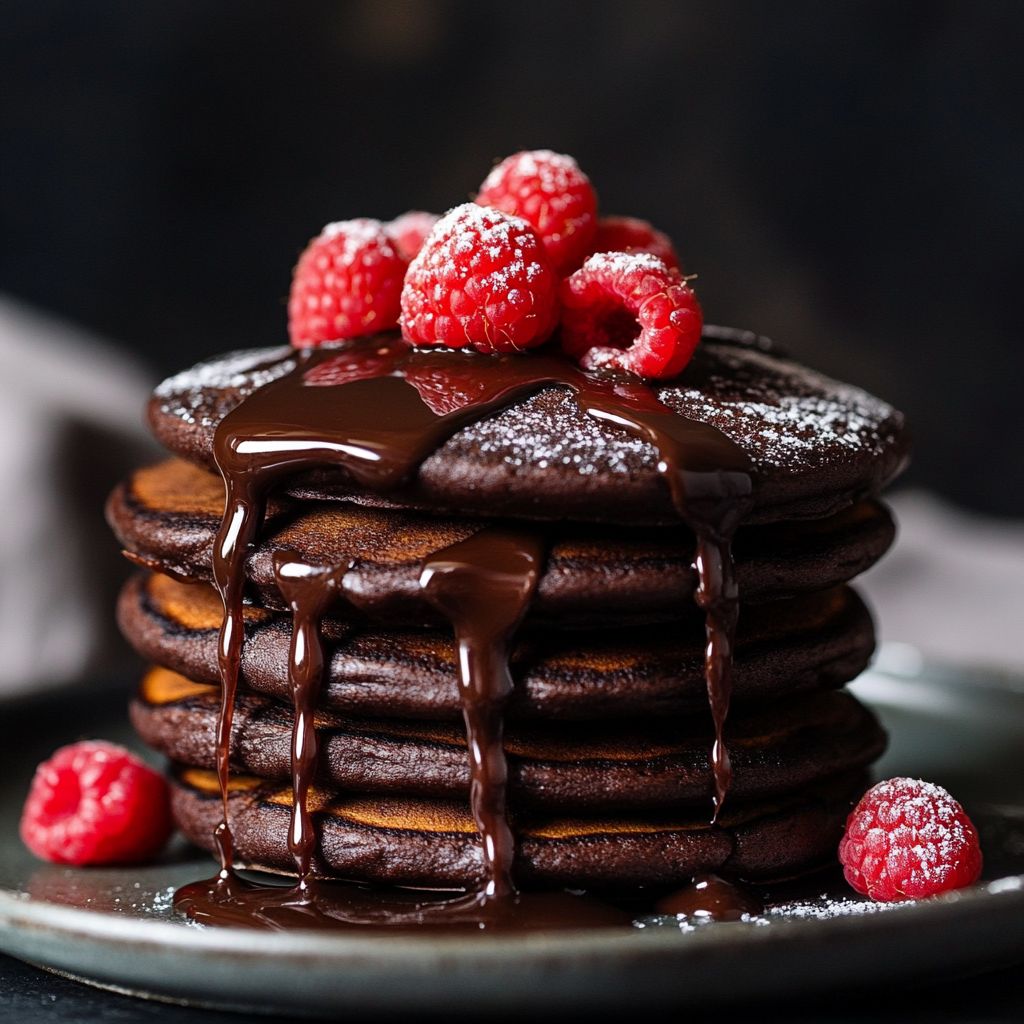
Introduction / Hook

Delight in Delectable Baked Chocolate Pancakes

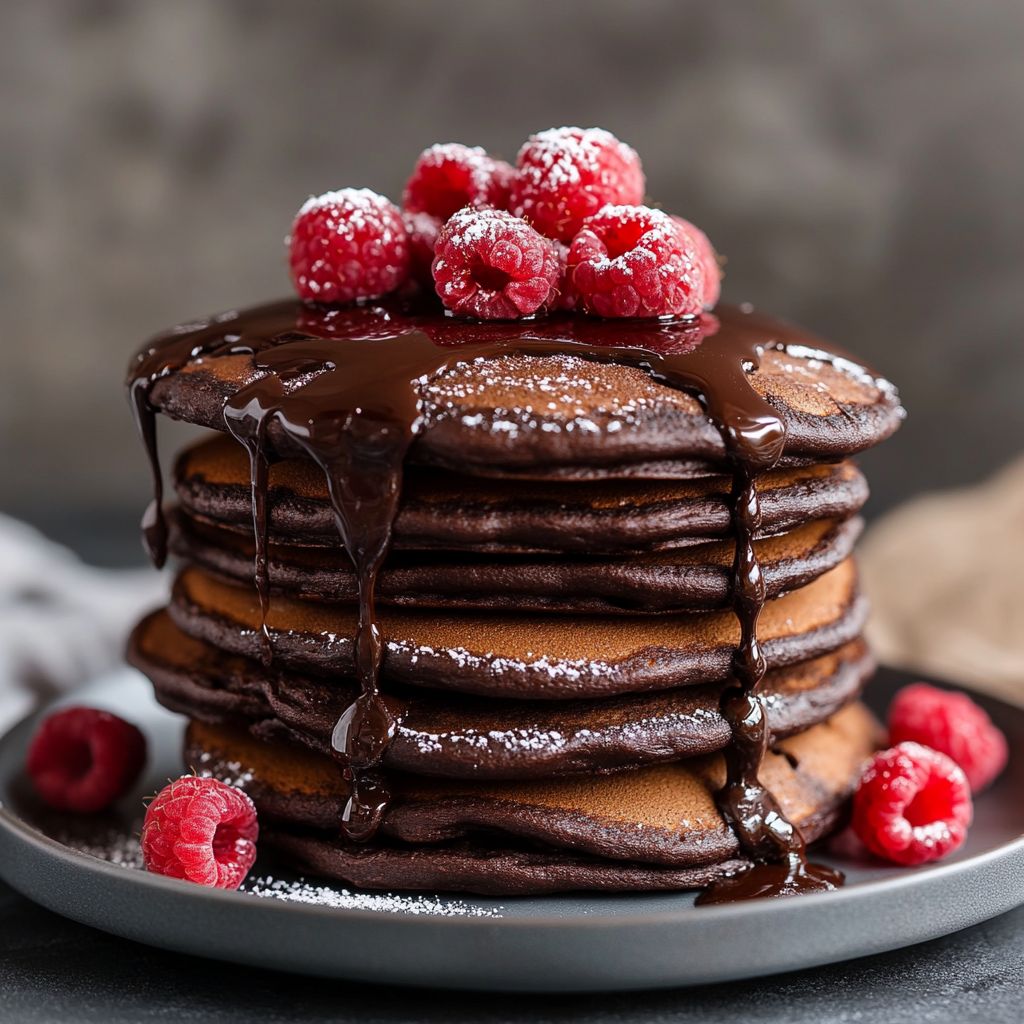
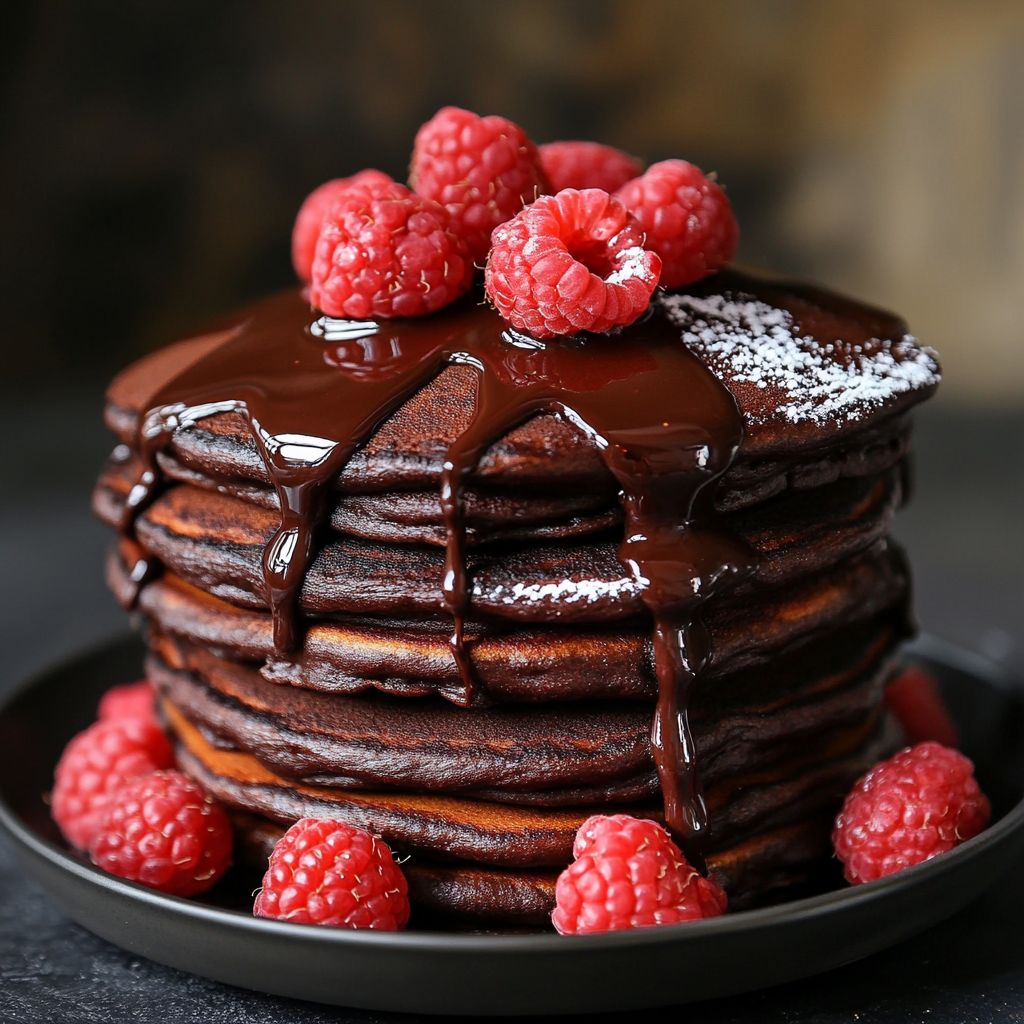
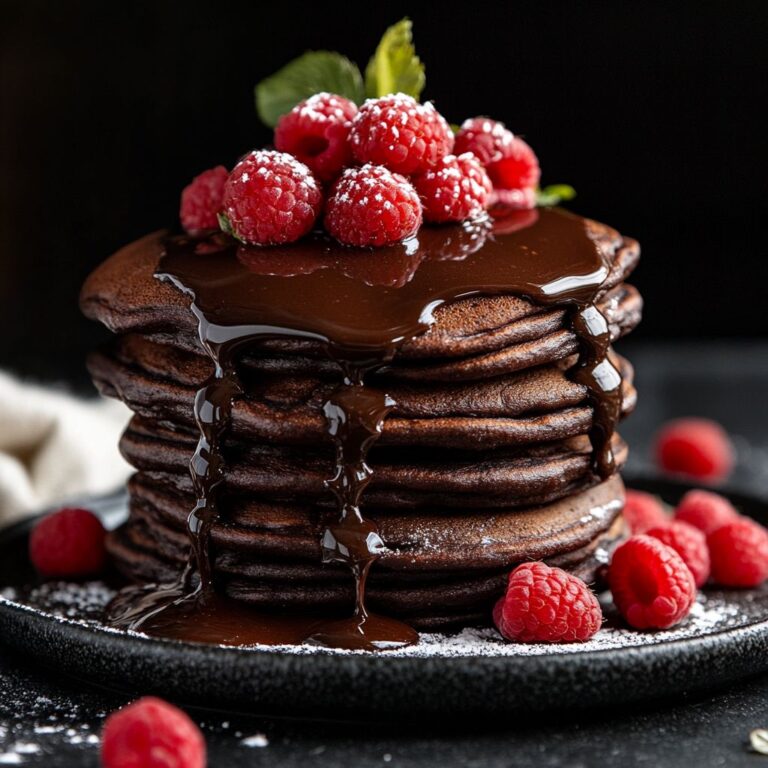
Imagine biting into a warm, fluffy pancake with a delightful, chocolatey aroma that invites you to savor its rich and comforting taste. That’s exactly what baked chocolate pancakes offer—an indulgence that transforms a simple breakfast into an exquisite culinary experience. Perfectly infused with decadent cocoa flavor and baked to perfection, these pancakes bring a satisfying twist on the classic morning treat, making it an irresistible choice for those who love to start their day on a sweet note.

The Story Behind the Dish

Baked chocolate pancakes are a delightful twist on the traditional stovetop pancake, drawing inspiration from a variety of culinary traditions. Pancakes have a long history, dating back to ancient times where every culture seemed to have its version—from the Russian blini to the French crêpe. However, the baked version was influenced by the modern cooking trend of simplifying and optimizing breakfast dishes, giving home cooks the flexibility of preparing a delicious breakfast without the constant attention required for stovetop cooking. By baking the pancakes, the process becomes more hands-off, allowing the cook to simply pour the batter into a pan and let the oven work its magic.

Why You’ll Love This Recipe

  • Easy to Make: With minimal preparation, this dish is perfect for busy mornings or relaxed weekend brunches.
  • Indulgently Chocolatey: Made with rich cocoa powder, these pancakes are perfect for chocolate lovers.
  • Less Mess: Baked in a single pan, it reduces the mess created by flipping individual pancakes on a skillet.
  • Batch Cooking: Ideal for serving a crowd, as you can bake many servings at once without having to attend to them individually.

Flavor Profile & Texture

The baked chocolate pancakes offer an exquisite balance of flavors and textures. The intense, chocolaty goodness instantly pleases the palate, while the soft, fluffy texture provides that quintessential pancake mouthfeel we all love, amplified by the baking process which allows the flavours to meld beautifully. As they bake, a slight crust forms on the exterior adding a subtle crunch that contrasts with the moist and tender interior. Each bite offers a burst of rich, yet not overpowering sweetness, making these pancakes a decadent treat that feels indulgent yet sophisticated.

Occasions & Pairings

These baked chocolate pancakes are perfectly versatile, suitable for a wide range of occasions. They make an excellent choice for brunch gatherings, where guests can enjoy them fresh out of the oven, and they are equally perfect for an indulgent weekend breakfast in bed. For the ultimate pairing, consider serving them with fresh berries like strawberries or raspberries, which add a refreshing tartness. A dollop of whipped cream, a drizzle of warm maple syrup, or a sprinkle of powdered sugar further enhances their chocolatey charm. To complete the meal, serve alongside a steaming cup of coffee or a glass of milk, adding a comforting touch to the overall experience.

Tips, Variations & Substitutions

  • Customization: Add nuts like almonds or walnuts for a crunchy texture.
  • Dietary Options: Use almond flour and a plant-based milk alternative for a gluten-free and vegan version.
  • Flavor Enhancements: For a mocha twist, incorporate a teaspoon of instant coffee granules into the batter.
  • Regional Twists: Incorporate spices such as cinnamon or nutmeg for a warming, spiced version suitable for cold mornings.

Storage & Make-Ahead Ideas

Baked chocolate pancakes are fantastic for meal prepping or enjoying as leftovers. Once they have completely cooled, store them in an airtight container in the refrigerator for up to four days. They can also be frozen for up to a month—just layer parchment paper between individual pancakes to prevent them from sticking together. When ready to enjoy, reheat in the oven at a low temperature to maintain their texture, or use a microwave for a quick option. For make-ahead mornings, prepare the batter in advance and store it in the fridge overnight; this not only saves time but also allows the flavors to develop further.

Fun Facts & Trivia

Did you know that pancakes, in their various forms, are one of the oldest breakfast dishes known to man? Records of pancake-like dishes can be traced back to the Ancient Romans, who called them “Alita Dolcia,” meaning “another sweet.” Their baked chocolate variant, while modern, continues this rich tradition, combining the enduring appeal of pancakes with the universal love for chocolate. This dish symbolizes the evolution of breakfast cuisine, demonstrating how simple ingredients can be transformed into an extraordinary experience.

Baked chocolate pancakes offer more than just a meal—they are a testament to culinary innovation, perfectly blending convenience and indulgence. Prepare to fall in love with this delectable dish that promises to elevate your breakfast or brunch game to deliciously new heights.

Ingredients

  • Batter Base
    • 1 cup all-purpose flour
      → All-purpose flour acts as the main structure of the pancakes, providing bulk and texture. For best results, spoon the flour into the measuring cup and level it off without packing it down to avoid dense pancakes.
    • 1/4 cup unsweetened cocoa powder
      → Cocoa powder provides a rich chocolate flavor and dark color. Use good quality, unsweetened cocoa for the best flavor. Sift the cocoa powder if it’s clumpy to ensure it evenly incorporates into the batter.
    • 2 tablespoons granulated sugar
      → Sugar adds sweetness to the pancakes, balancing the bitterness of the cocoa. Adjust the amount to your taste preference, keeping in mind that too much can affect the texture.
    • 1 teaspoon baking powder
      → Baking powder is the leavening agent that creates a light and fluffy texture in the pancakes. Ensure it’s fresh for optimal rise; check the expiration date before use and store it in a cool, dry place.
    • 1/2 teaspoon baking soda
      → Baking soda contributes to the browning and rise of the pancakes. It reacts with acidic ingredients in the batter, so make sure to mix it well with the flour to ensure even distribution.
    • 1/4 teaspoon salt
      → Salt enhances flavor by balancing sweetness and can also strengthen the structure of the pancakes. Use fine sea salt for the best results, ensuring it evenly dissolves into the batter.
    • 1 cup milk (dairy or non-dairy)
      → Milk provides moisture and helps achieve the right batter consistency. If using non-dairy milk, such as almond or oat, choose a plain unsweetened variety for the best flavor.
    • 1 large egg
      → The egg acts as a binder, bringing the ingredients together and providing structure. Make sure it’s at room temperature for better incorporation into the batter.
    • 2 tablespoons melted butter or coconut oil
      → Melted butter or coconut oil adds richness and flavor while helping to keep the pancakes moist. Allow it to cool slightly before adding to the batter to prevent cooking the egg.
  • Optional Mix-ins
    • 1/2 cup chocolate chips (optional)
      → Chocolate chips offer an extra chocolatey experience and melty goodness. Choose semi-sweet or dark chocolate chips for added richness, and sprinkle them on top of the batter just before baking for a beautiful finish.
    • 1/2 cup chopped nuts (optional)
      → Nuts like walnuts or pecans add crunch and healthy fats. Chop them into small pieces to ensure they are evenly distributed in the batter. Toasting the nuts lightly will enhance their flavor and crunch.

Instructions

  • Preheat your oven to 350°F (175°C) and lightly grease a 9×9-inch baking pan.

    → This step is crucial as it ensures your pancakes bake evenly and do not stick to the pan. Greasing the pan can be done with a cooking spray or a thin layer of melted butter, as it helps in easy removal after baking.
  • In a large mixing bowl, combine 1 cup of all-purpose flour, 1/4 cup of unsweetened cocoa powder, 2 tablespoons of granulated sugar, 1 teaspoon of baking powder, 1/2 teaspoon of baking soda, and 1/4 teaspoon of salt.

    → Mixing the dry ingredients thoroughly at this stage ensures even distribution of leavening agents and flavors, preventing pockets of flour or cocoa in the batter. Use a whisk to combine these ingredients to break up any clumps and create a uniform dry mixture.
  • In a separate bowl, whisk together 1 cup of milk, 1 large egg, and 2 tablespoons of melted butter or coconut oil until fully combined.

    → Combining the wet ingredients is essential for creating a smooth batter. Make sure the melted butter or coconut oil has cooled slightly so it doesn’t cook the egg, which can lead to an undesirable texture in your pancakes.
  • Gradually pour the wet mixture into the bowl of dry ingredients, stirring gently to combine.

    → It’s important not to overmix the batter; a few lumps are okay. Overmixing can lead to dense pancakes instead of light and fluffy ones. Use a spatula to fold the ingredients together until just combined.
  • If desired, fold in 1/2 cup of chocolate chips or 1/2 cup of chopped nuts into the batter.

    → Adding mix-ins enhances the flavor and texture of your pancakes, creating an extra chocolatey or crunchy experience. Ensure the mix-ins are evenly distributed without overmixing the batter.
  • Pour the pancake batter into the prepared baking pan, smoothing the top with a spatula for an even bake.

    → Smoothing the top helps the pancakes rise uniformly, which results in a better texture. Make sure the batter reaches all corners of the pan for consistent cooking.
  • Bake in the preheated oven for 15-20 minutes, or until a toothpick inserted into the center comes out clean.

    → This step is critical for ensuring the pancakes are cooked through. Begin checking for doneness at around 15 minutes to avoid overbaking, which could result in dry pancakes. The toothpick should come out with a few moist crumbs but not wet batter.
  • Once baked, remove the pan from the oven and let it cool in the pan for about 5 minutes.

    → Allowing it to cool slightly can help the pancakes set and makes it easier to cut them into squares or wedges without falling apart.
  • Carefully cut the baked chocolate pancakes into squares or wedges, and serve warm with your choice of toppings like syrup, whipped cream, or additional chocolate chips.

    → Cutting them while warm ensures clean edges. Serve immediately to enjoy the melty chocolate chips and warm flavor, or keep them warm in an oven set to low until ready to serve.

Notes

  • These baked chocolate pancakes are a delightful twist on the traditional pancake breakfast. They are fluffy and rich in chocolate flavor, making them a favorite among both kids and adults alike. The cocoa powder not only enhances the taste but also gives the pancakes a gorgeous color. Serve them warm with your favorite toppings, such as fresh berries, whipped cream, or a dusting of powdered sugar for an indulgent treat.
  • If you’re looking to make this recipe dairy-free, simply substitute the milk with a non-dairy alternative and use coconut oil instead of butter. The pancakes will still turn out rich and delicious!
  • The optional mix-ins, such as chocolate chips or nuts, can be varied based on your preferences. Feel free to use white chocolate chips for a change or add in dried fruit like cherries or cranberries for a tart contrast to the sweetness.
  • Store any leftover pancakes in an airtight container in the refrigerator for up to 3 days. Reheat them in a toaster or microwave for a quick breakfast option during the week.
  • For meal prep, you can also freeze the pancakes. Layer them with parchment paper in an airtight container; they will keep well for up to 2 months. Simply reheat directly from frozen – they’ll taste just as good!
  • For an extra touch, consider adding a pinch of cinnamon or vanilla extract to the batter to enhance the flavor profile even more. Top your pancakes with a drizzle of syrup or a dollop of yogurt to round out the meal.

Tips

Cooking Tips for Baked Chocolate Pancakes

  • Mixing the Batter: When combining the wet and dry ingredients, do not overmix. Stir until just combined; a few lumps are okay. Overmixing can lead to tough pancakes.
  • Proper Baking Dish: Use a greased or parchment-lined baking dish to prevent the pancakes from sticking. A round or square dish works well, depending on your preference.
  • Preheating the Oven: Make sure your oven is fully preheated before placing the batter in. This ensures even cooking and helps the pancakes rise properly.
  • Baking Time: Keep an eye on your pancakes towards the end of the baking time. They are done when the edges look set and the center is slightly jiggly but not wet.
  • Serving Suggestions: Serve warm with your favorite toppings, such as whipped cream, fresh berries, or a drizzle of chocolate sauce for an indulgent treat.
  • Storing Leftovers: If you have leftovers, store them in an airtight container in the refrigerator for up to 3 days. Reheat in the oven or microwave before serving.
  • Baking Variations: Feel free to add different flavors to the batter, such as a teaspoon of vanilla extract or a hint of espresso powder for a mocha twist.
  • Testing for Doneness: Insert a toothpick into the center; it should come out clean or with a few moist crumbs to ensure they are baked through.

FAQ

What ingredients are needed for Baked Chocolate Pancakes?

You will need flour, cocoa powder, baking powder, sugar, milk, eggs, vanilla extract, and chocolate chips.

How long does it take to prepare Baked Chocolate Pancakes?

The prep time is about 10 minutes, and the baking time is approximately 20-25 minutes.

Can I make Baked Chocolate Pancakes ahead of time?

Yes, you can prepare the batter and refrigerate it overnight. Just give it a good stir before baking.

What can I use as a substitute for flour?

You can use almond flour, oat flour, or a gluten-free flour blend as a substitute for regular flour.

Can I make these pancakes vegan?

Yes, you can use plant-based milk and replace eggs with flax eggs to make the recipe vegan.

How should I store leftover Baked Chocolate Pancakes?

Store them in an airtight container in the refrigerator for up to 3 days or freeze for longer storage.

What toppings pair well with Baked Chocolate Pancakes?

Delicious toppings include whipped cream, fresh fruits, maple syrup, or even peanut butter.

Can I add nuts or fruits to the pancake batter?

Absolutely! Chopped nuts, banana slices, or berries can be added to the batter for extra flavor and texture.

Introduction: Triple Chocolate Delight

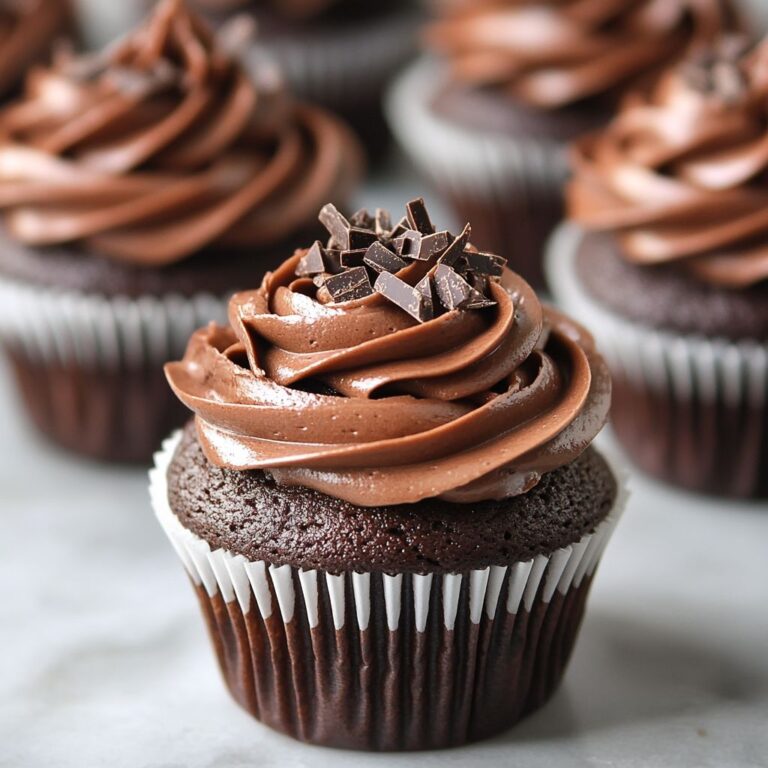
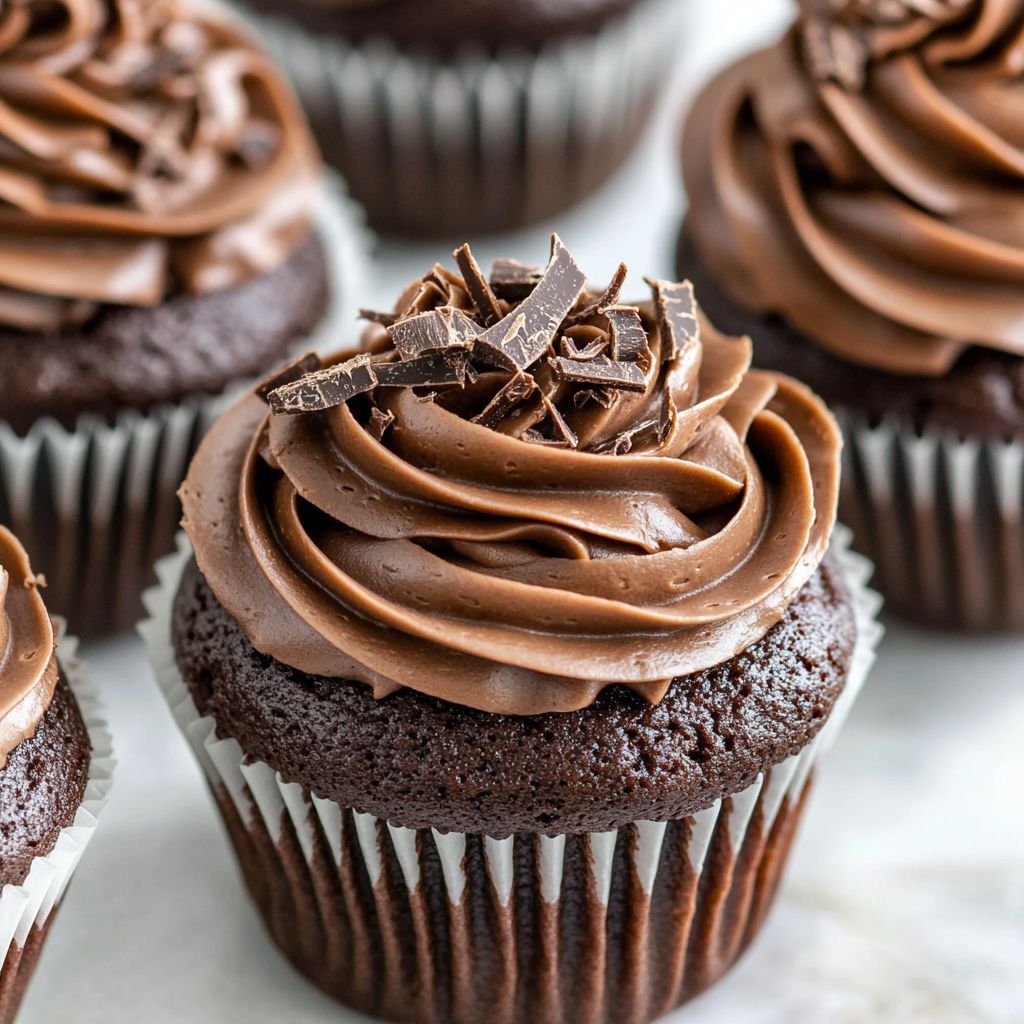
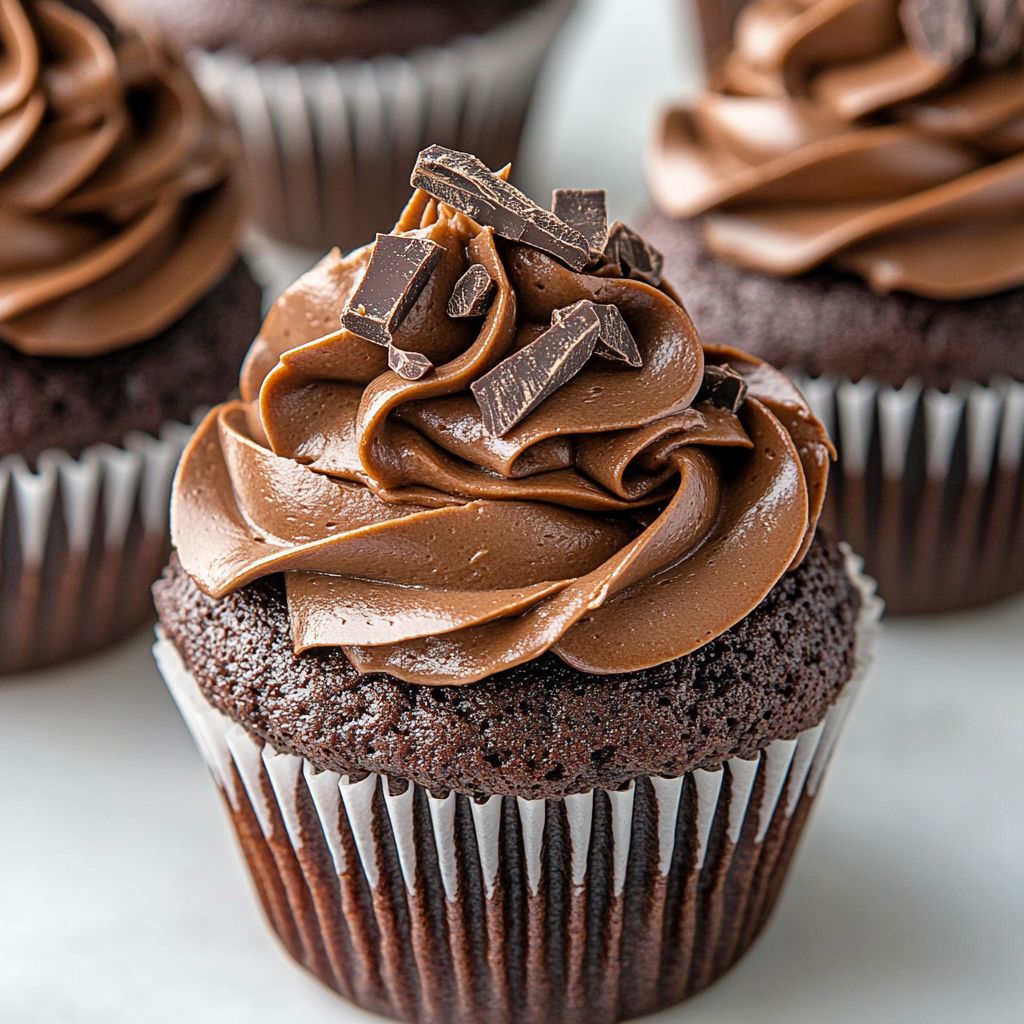
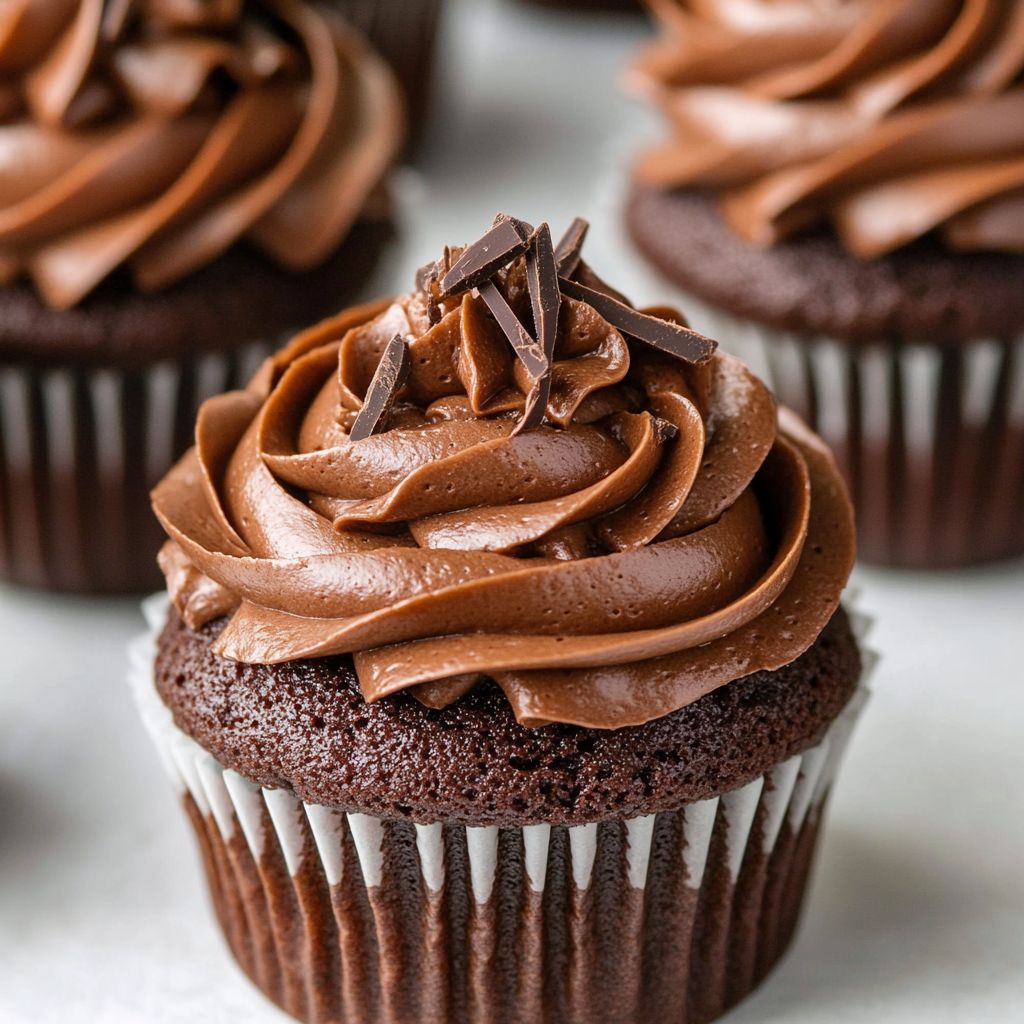
Imagine sinking your teeth into a velvety-soft cupcake, where each bite embodies layers of chocolatey decadence. The robust cocoa flavor seduces your taste buds from the first encounter, unveiling a rich, fudgy center that promises pure indulgence. Welcome to the world of Triple Chocolate Cupcakes — a treat for true chocolate aficionados. With each mouthful, you’re not just enjoying a dessert; you’re embarking on a cocoa-immersed journey. The mesmerizing aroma of chocolate and the cupcake’s moist, tender crumb make this delicacy an unforgettable experience. This is more than a cupcake; it’s a celebration of chocolate, elevated to sublime perfection.

The Story Behind the Dish

Chocolate has been celebrated since ancient times, revered by the Aztecs and Mayans as the “food of the gods.” Fast forward to the modern era, and chocolate remains one of the world’s most beloved flavors. The Triple Chocolate Cupcake is an evolution of a classic dessert that hails from the bustling bakeries of America, where creativity knows no bounds. The idea was simple yet revolutionary: instead of settling for a single chocolate entity, why not triple the pleasure? By combining cocoa powder, chocolate chips, and chocolate frosting, bakers enchanted cupcake lovers worldwide. This trifecta not only pays homage to chocolate’s storied history but also showcases the artistry of contemporary baking. Each component is a tribute to the versatility of chocolate, bringing a new dimension to this bakery staple.

Why You’ll Love This Recipe

  • Triple Chocolate Intensity: Three layers of chocolate — cocoa powder, chocolate chips, and a luscious chocolate frosting — culminate in an ultimate chocolate lover’s dream.
  • Simple Elegance: Despite its gourmet taste, this recipe is surprisingly straightforward, making it perfect for both novice and seasoned bakers.
  • Incredible Moistness: Incorporating specific ingredients ensures that each cupcake remains moist and tender, melting in your mouth with every bite.
  • Show-Stopping Presentation: The rich, glossy chocolate frosting provides a glamorous finish that will impress at any gathering.
  • Customizable: Options abound for tweaking the recipe to suit dietary preferences or to add a unique personal touch.

Flavor Profile & Texture

The Triple Chocolate Cupcake offers a harmonious trifecta of taste and texture. The cupcake base features a deep cocoa flavor, enhanced by a smooth, unfaltering richness that isn’t overly sweet. This is accented by the distinctive notes of chocolate chips that introduce a hint of crunch amidst the smoothness. The crowning glory is the frosting, a velvety infusion that spreads thickly, balancing the boldness of the cocoa with its creamy texture. Together, these components create a symphony in your mouth, capturing the pure essence of chocolate in every single bite.

Occasions & Pairings

Wondering when to serve such an exquisite treat? The answer: practically any time chocolate cravings strike, which is always! However, these cupcakes are particularly suited for special occasions:

  • Birthdays: These cupcakes serve as the perfect centerpiece for any birthday celebration, small or large.
  • Holidays: Triple Chocolate Cupcakes fit seamlessly into holiday dessert tables where indulgence is welcomed.
  • Parties and Gatherings: Easy to make in batches, they’re excellent for entertaining and are sure to captivate your guests with their rich flavor.

As for pairings, complement these cupcakes with a glass of cold milk, which enhances the chocolate’s depth. Alternatively, serve them with a scoop of vanilla or mint chocolate chip ice cream for a delightful contrast in temperatures and flavors.

Tips, Variations & Substitutions

While the classic recipe is divine on its own, customization can add a personal touch or cater to dietary needs:

  • Dietary Substitutes: To make these cupcakes vegan, replace eggs with flaxseed meal and use plant-based milk and butter. Opt for dark chocolate chips without dairy content.
  • Flavor Variations: Introduce a hint of coffee by mixing a teaspoon of espresso powder with the cocoa. This will enhance the chocolate flavor without overpowering it.
  • Gluten-Free Option: Substitute the all-purpose flour with a high-quality gluten-free blend. This ensures the texture remains impeccable.
  • Regional Twists: Infuse a bit of spice with a sprinkle of cinnamon or chili powder to add a warmth reminiscent of traditional Mexican chocolate.

Storage & Make-Ahead Ideas

These cupcakes can be efficiently prepared in advance, making life easier during the hustle and bustle of event planning:

  • Storing: Keep them in an airtight container at room temperature for up to 3 days. For longer storage, refrigerate and ensure they are brought to room temperature before serving.
  • Freezing: Cupcakes freeze wonderfully. Wrap them individually and store them in a freezer-safe bag. When ready to serve, thaw them in the refrigerator overnight, frost upon defrosting for optimal freshness.
  • Make-Ahead Strategy: Prepare the cupcakes and freeze the unfrosted base. Prepare the frosting on the day of serving for the freshest experience.

Fun Facts & Trivia

Did you know that cupcakes have an intriguing history themselves? Their origin dates to the 19th century when they were baked in small cups, hence their name. They were an American innovation designed for efficiency — fast baking, easily portable, and effortlessly portion-controlled. Today, these charming treats have evolved from simple vanilla or chocolate to include a spectrum of inventive flavors, yet the allure of Triple Chocolate remains eternal, embodying the timeless appeal of rich, satisfying chocolate indulgence.

Another fun tidbit: in the world of confectionery, combining chocolate in various forms (solid, liquid, powdered) to achieve a multi-layered experience is a testament to the ingredient’s versatility and universal love. This ancient delight has journeyed through time and cultures to become the star of the modern culinary world. Triple Chocolate Cupcakes not only celebrate this but also deliver an unforgettable sensory experience that cements chocolate’s place as a beloved treat across the globe.

Ingredients

  • Chocolate Cupcake Base
    • 1 1/2 cups all-purpose flour
      → All-purpose flour provides the structure and stability needed for a good cupcake. Make sure to spoon the flour into the measuring cup and level it off to avoid packing it down, which could lead to dense cupcakes.
    • 1 cup granulated sugar
      → Granulated sugar sweetens the cupcakes and helps to create a nice crumb. It also aids in the leavening process by retaining air when creamed with butter. For an even more moist cupcake, consider using a fine sugar for better integration into the batter.
    • 1/2 cup unsweetened cocoa powder
      → Cocoa powder provides the rich chocolate flavor. Opt for a high-quality Dutch-processed cocoa for deeper flavor, and sift it before adding to eliminate any lumps that could affect the texture of the batter.
    • 1 teaspoon baking soda
      → Baking soda is the leavening agent that will help the cupcakes rise. Make sure it is fresh to ensure effective leavening. You can test its potency by adding a little vinegar to see if it bubbles—this indicates it’s still active.
    • 1/2 teaspoon salt
      → Salt enhances the flavors in the cupcakes and balances the sweetness. It’s best to use fine salt, as it will dissolve easily into the batter before baking.
    • 1/2 cup unsalted butter (melted)
      → Melted butter adds richness and moisture to the cupcakes. Allow it to cool slightly after melting before mixing with sugars to avoid cooking the eggs, which can result in a curdled batter.
    • 2 large eggs (room temperature)
      → Eggs bind the ingredients together and provide moisture. For best results, use eggs at room temperature, as they will mix more smoothly into the batter and help create a lighter texture.
    • 1 teaspoon pure vanilla extract
      → Vanilla extract adds an essential depth of flavor to the cupcakes. Always opt for pure vanilla over artificial versions for better taste and aroma.
    • 1/2 cup buttermilk (room temperature)
      → Buttermilk adds moisture and acidity, which reacts with the baking soda to create a tender crumb. If you don’t have buttermilk, you can make a substitute by adding one tablespoon of vinegar to a half cup of regular milk and letting it sit for a few minutes.
  • Chocolate Chip Filling
    • 1 cup semi-sweet chocolate chips
      → These chocolate chips are melted into the batter or sprinkled throughout for bursts of chocolate flavor and texture. Use high-quality chocolate chips for the best results, and consider using mini chips for better distribution.
    • 1/2 cup dark chocolate chips
      → Dark chocolate chips add richness and depth to the chocolate flavor of the cupcakes. Choose a dark chocolate with at least 60% cocoa solids for a more intense taste.
  • Chocolate Frosting
    • 1/2 cup unsalted butter (softened)
      → Softened butter provides the perfect base for a creamy frosting. Ensure it is at room temperature for easy mixing; it should be soft but not melted.
    • 2/3 cup unsweetened cocoa powder
      → Unsweetened cocoa powder gives the frosting its rich chocolate flavor. Similar to above, sifting it before use will help prevent lumps in the final frosting.
    • 3 cups powdered sugar
      → Powdered sugar sweetens the frosting and provides its signature fluffy texture. For best incorporation and to avoid graininess, gradually add the powdered sugar to the wet ingredients during mixing.
    • 1/4 cup heavy cream
      → Heavy cream adds richness and helps to achieve a smooth, spreadable consistency. You can adjust the amount according to your desired frosting thickness.
    • 1 teaspoon pure vanilla extract
      → The vanilla extract in the frosting complements the chocolate and enhances the overall flavor. Always use pure vanilla for the best outcome.
  • Optional Toppings
    • Chocolate shavings or curls (for garnish)
      → Chocolate shavings or curls add a decorative touch and enhance the chocolate flavor. Use a vegetable peeler to create curls from a chocolate bar, and keep them chilled before using, as they can warm up and become soft and difficult to manage.
    • Whipped cream (optional)
      → Whipped cream adds a light, airy contrast to the rich chocolate cupcakes. For stability, use heavy cream and whip until soft peaks form, and consider stabilizing it with a little powdered sugar if you want it to hold up longer.

Instructions

  • Preheat your oven to 350°F (175°C) and line a 12-cup muffin tin with paper liners or grease it well.

    → This ensures the cupcakes do not stick to the tin and makes them easier to remove after baking. Properly preheating the oven also helps achieve an even bake and a good rise.
  • In a large mixing bowl, whisk together the all-purpose flour, granulated sugar, cocoa powder, baking soda, and salt until evenly combined.

    → This step allows the dry ingredients to mix thoroughly, ensuring an even distribution of leavening agents and flavoring. Whisking incorporates air, which is important for the texture of the cupcakes.
  • In another bowl, combine the melted unsalted butter, room temperature eggs, vanilla extract, and buttermilk, and whisk until the mixture is smooth and well blended.

    → Whisking these ingredients together creates an emulsion that aids in moisture retention. Ensure the melted butter is not too hot to prevent cooking the eggs, which can result in a curdled batter.
  • Slowly pour the wet ingredients into the dry ingredient mixture and gently fold them together using a rubber spatula or wooden spoon until just combined.

    → Folding helps to maintain the air incorporated into the batter, avoiding overmixing which can lead to dense cupcakes. Stop mixing as soon as you no longer see dry flour.
  • Add the semi-sweet and dark chocolate chips to the batter, and fold them in gently to distribute them evenly.

    → This step introduces pockets of chocolate flavor and texture into the cupcakes. Ensure they are incorporated without overmixing the batter further.
  • Scoop the batter into the prepared muffin tin, filling each cup about 2/3 full to allow room for rising.

    → Filling the cups appropriately ensures that the cupcakes have enough space to rise without overflowing, leading to a neat finish. Use a cookie scoop for uniformity.
  • Bake the cupcakes in the preheated oven for 18-22 minutes or until a toothpick inserted into the center comes out clean or with a few moist crumbs.

    → Checking for doneness with a toothpick avoids the risk of underbaking and ensures that they are perfectly moist. Start checking a couple of minutes before the suggested time.
  • Remove the cupcakes from the oven and allow them to cool in the tin for about 5 minutes, then transfer them to a wire rack to cool completely.

    → Cooling them in the tin briefly allows them to set but transferring to a wire rack ensures they cool evenly and prevents a soggy bottom.
  • Meanwhile, prepare the chocolate frosting by beating the softened unsalted butter in a mixing bowl until creamy and smooth.

    → Creaming the butter creates a light texture in the frosting and improves its ability to incorporate other ingredients easily.
  • Gradually add the sifted cocoa powder and powdered sugar to the creamed butter, mixing on low speed to avoid a sugar cloud.

    → Gradually adding the sugar prevents overwhelming the mixture and allows for smoother incorporation. Sifting the cocoa also helps to avoid lumps.
  • Once combined, pour in the heavy cream and add the vanilla extract to the frosting, then beat at medium speed until the frosting is light and fluffy.

    → Beating at this stage incorporates air into the frosting, achieving a desirable texture. Adjust the heavy cream amount to achieve your preferred frosting thickness.
  • Once the cupcakes are completely cooled, use a knife or an offset spatula to frost each cupcake generously with the chocolate frosting.

    → Using an offset spatula allows for even, smooth spreading of frosting. This not only enhances appearance but also ensures every bite has a balanced chocolate flavor.
  • For an optional finish, garnish the frosted cupcakes with chocolate shavings or curls and add a dollop of whipped cream if desired.

    → Decorating the cupcakes adds an appealing visual element and elevates the dessert’s richness. Lightly refrigerate the curls before use to make them easier to handle.

Notes

These triple chocolate cupcakes are the ultimate treat for any chocolate lover, providing a rich and decadent flavor with every bite. The combination of semi-sweet and dark chocolate chips not only enhances the chocolatey goodness but also adds delightful texture throughout the cupcakes. For the frosting, make sure your butter is softened to room temperature to achieve the smoothest consistency. Remember to sift the cocoa powder to avoid lumps in the frosting and to ensure that everything blends seamlessly.
You can get creative with your chocolate decorations! For a beautiful presentation, top the cupcakes with chocolate shavings or curls—and don’t forget the whipped cream for a touch of lightness to balance the rich, chocolate base. These cupcakes are perfect for parties, special occasions, or as an indulgent dessert after dinner. Store leftovers in an airtight container; they typically stay fresh for a couple of days. Enjoy your sweet creation!

Tips

Cooking Tips for Triple Chocolate Cupcakes

  • Preheat Your Oven: Always preheat the oven to the exact temperature before baking to ensure even cooking. This is crucial for the success of your cupcake rise.
  • Mixing Ingredients: When mixing wet and dry ingredients, do so just until combined to avoid overmixing, which can lead to tough cupcakes. A few lumps are okay!
  • Cupcake Liners: Use high-quality cupcake liners or lightly grease the cupcake pans for easy removal after baking. For extra fun, consider using themed liners to match occasions.
  • Filling the Cups: When filling the cupcake liners, aim to fill them about 2/3 full. This allows room for rising without overflowing.
  • Cooling Time: Allow the cupcakes to cool in the pan for about 5 minutes before transferring them to a wire rack. This prevents them from becoming soggy and helps maintain their structure.
  • Frosting Consistency: For the frosting, ensure that the butter is softened properly. If your frosting is too thick, gradually add more heavy cream until the desired consistency is reached.
  • Chill the Frosting: If the frosting seems too soft to pipe, chill it in the refrigerator for about 15-20 minutes until it firms up slightly before decorating.
  • Storing Cupcakes: Store the cooled cupcakes in an airtight container at room temperature to keep them fresh. If frosting ahead of time, consider refrigerating to maintain optimal texture.
  • Customizing Flavors: Feel free to customize the cupcake by adding spices or extracts, such as a dash of cinnamon or peppermint for a festive twist.
  • Experimenting with Fillings: If you want to get creative, try adding a spoonful of peanut butter or raspberry jam as a filling for an extra flavor dimension.

FAQ

What are Triple Chocolate Cupcakes?

Triple Chocolate Cupcakes are rich and decadent chocolate cupcakes made with three types of chocolate: cocoa powder, melted chocolate, and chocolate chips, offering a delightful and intense chocolate flavor in every bite.

What type of chocolate should I use?

It’s best to use high-quality cocoa powder for the batter, semisweet or dark chocolate for melting, and chocolate chips for added texture. Feel free to experiment with different chocolate varieties for a unique flavor profile.

Can I substitute ingredients in the recipe?

Yes, you can make substitutions such as using almond flour for a gluten-free option, or swapping out regular sugar for coconut sugar. Be mindful that substitutions may affect the texture and flavor of the final product.

How do I store leftover cupcakes?

Store leftover Triple Chocolate Cupcakes in an airtight container at room temperature for 1-2 days, or in the refrigerator for up to a week. You can also freeze them for longer storage; just make sure to wrap them well to prevent freezer burn.

Can I make these cupcakes in advance?

Absolutely! You can bake the cupcakes a day or two in advance. Just make sure to store them properly. You can also freeze them and frost them later when you are ready to serve.

How can I make the cupcakes more visually appealing?

You can enhance the visual appeal by using chocolate ganache or a chocolate buttercream frosting, and adding decorative toppings like chocolate shavings, sprinkles, or fresh berries.

Are Triple Chocolate Cupcakes suitable for special dietary requirements?

Yes, you can adjust the recipe to accommodate dietary needs. There are dairy-free and egg-free substitutes available, such as using almond milk, coconut milk, or flax eggs, to make them suitable for vegans or those with lactose intolerance.

How do I prevent the cupcakes from sinking in the middle?

To prevent sinking, avoid overmixing the batter, and ensure that ingredients are measured accurately. Also, ensure the oven is preheated properly before baking, and consider checking for doneness a few minutes early to avoid overbaking.

Introduction / Hook

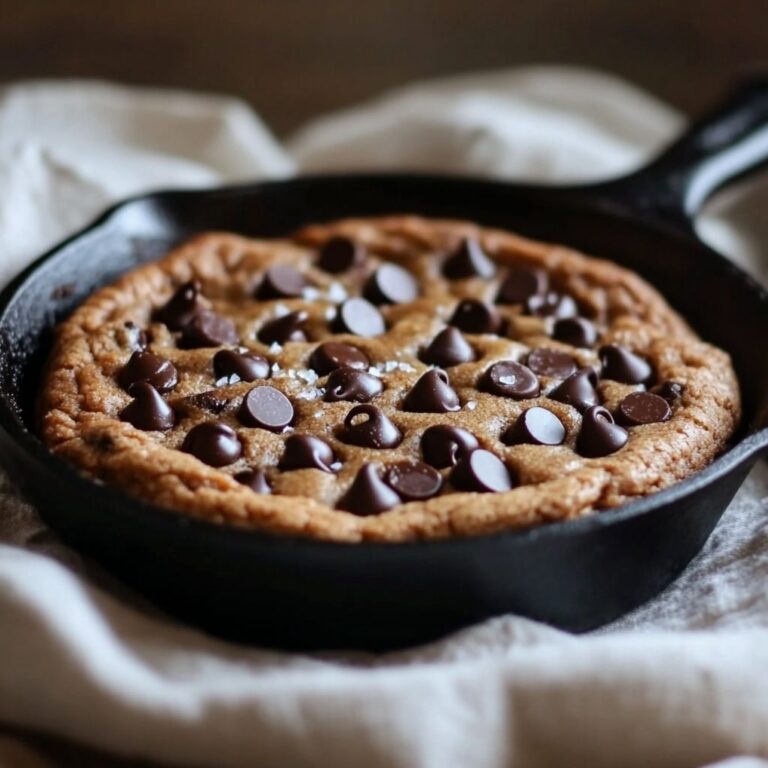
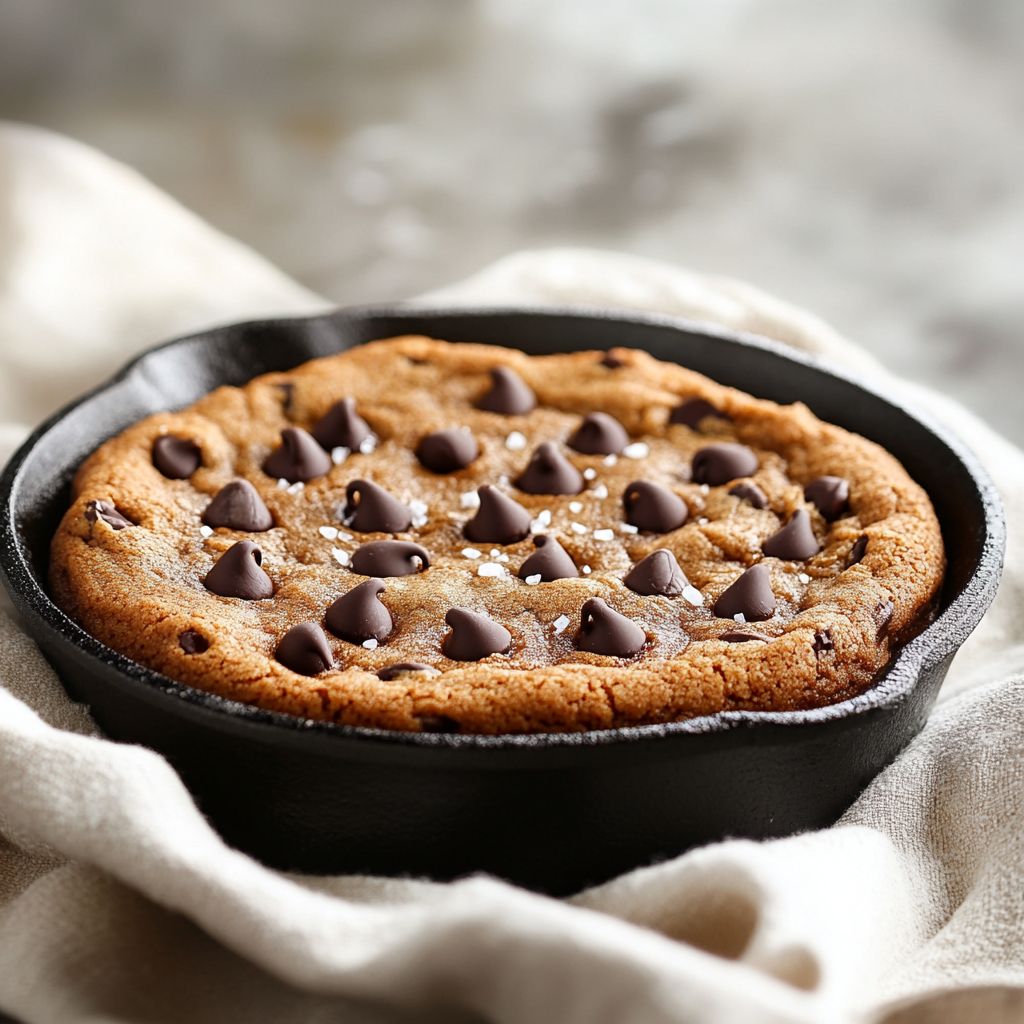
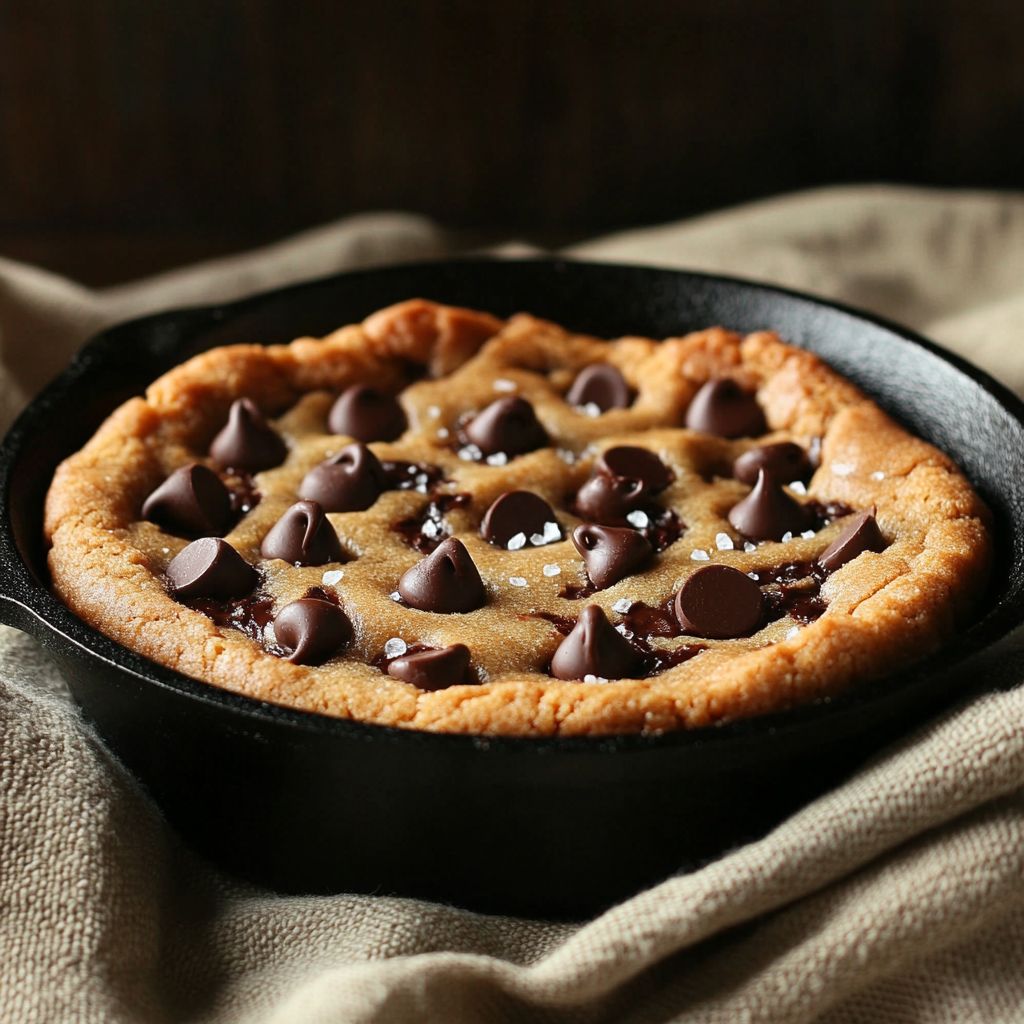
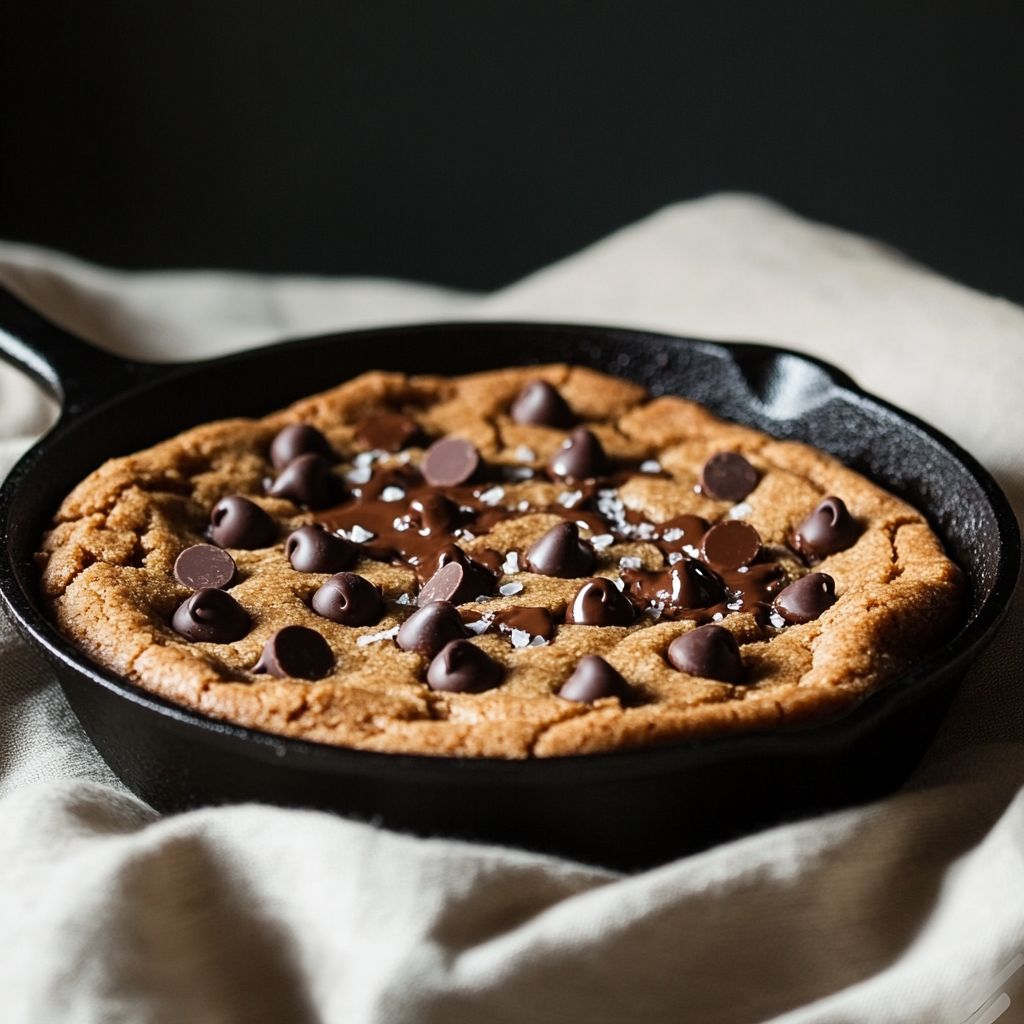
Imagine the warmth of freshly baked cookies merging with the creamy, melt-in-your-mouth richness of chocolate chips, all presented in one delightful skillet. The Chocolate Chip Cookie Skillet is not just a dessert; it’s an experience, a journey to the heart of comfort food that evokes nostalgia and culinary satisfaction in each bite. With its gooey center, crispy edges, and pockets of melty chocolate, this dish is a feast for the senses. Whether you enjoy it with a scoop of vanilla ice cream or straight from the skillet, it’s the kind of indulgence that’s impossible to resist. Perfect for sharing or savoring alone, this recipe is wonderfully simple yet profoundly gratifying, making every day feel like a special occasion.

The Story Behind the Dish

The iconic chocolate chip cookie has long been a symbol of American home baking, but the skillet version is a modern twist that amplifies that classic charm. This delightful transformation is thought to have originated from the desire to create a cookie that could be shared and served directly in its cooking vessel, doubling as both a creative and rustic presentation. Traditionally baked in cast iron, the skillet cookie draws from a rich heritage of using durable, seasoned cookware that brings out deep, indulgent flavors.

The melding of cookie dough into a skillet form was a natural progression for bakers looking to produce something communal yet casual. Over time, this dish has embraced numerous variations, reflecting individual tastes, regional influences, and global fusions. Its wide acceptance highlights the universal appeal of combining simple ingredients into something extraordinary.

Why You’ll Love This Recipe

  • Easy to Make: With a straightforward method and minimal ingredients, this recipe suits both novice bakers and seasoned cooks.
  • One-Pan Wonder: Minimal cleanup required, as everything comes together in just one pan.
  • Customizable: Whether you prefer gooey centers or crispy edges, this skillet allows you to choose your baking preference.
  • Shareable: Ideal for family desserts, gatherings, or intimate dinners, creating a warm, shared experience.
  • Comforting Yet Decadent: A timeless combination of flavors offering both familiarity and richness.

Flavor Profile & Texture

The Chocolate Chip Cookie Skillet is a delightful mosaic of textures and flavors. Imagine digging into its crispy, golden edges leading to a soft and chewy center, with every bite revealing sumptuous chocolate morsels. The sweet dough contrasts beautifully with the deep, slightly bitter notes of melted chocolate chips, creating a harmoniously balanced dessert.

The texture is where the magic truly happens. The outermost edges of the cookie develop a delicate, crisp crust, while the center stays plush and slightly underbaked, offering that sought-after gooeyness. This duality makes every mouthful wondrously complex, with each bite inviting you to explore different layers of this beloved dessert.

Occasions & Pairings

The Chocolate Chip Cookie Skillet is a versatile treat suited for a variety of occasions. Serve it at casual family dinners as a comforting finishing note or feature it at festive holiday gatherings where its inviting presentation can be admired. It’s particularly perfect for movie nights, where a warm scoop can be enjoyed while basking in the glow of your favorite film.

In terms of pairings, a classic choice is a scoop of creamy vanilla ice cream, which juxtaposes beautifully with the warm cookie, creating a delightful temperature contrast. For those craving a more adventurous palate, consider pairing with a sprinkle of sea salt for a gourmet touch or even a drizzle of caramel sauce for added indulgence.

Tips, Variations & Substitutions

While the classic chocolate chip version is a hit, there are numerous ways to tailor this skillet cookie to your liking:

  • Nutritional Boost: Substitute some of the all-purpose flour for whole wheat or almond flour to enhance the nutrition profile.
  • Flavor Variations: Introduce different nut varieties such as pecans or walnuts, or incorporate dried fruits like cranberries for a festive twist.
  • Dietary Adaptations: Make it vegan by using coconut oil instead of butter and flaxseed meal mixed with water as an egg substitute.
  • Gluten-free Option: Use a gluten-free all-purpose flour blend to accommodate those with gluten sensitivities.

Storage & Make-Ahead Ideas

Although best enjoyed fresh, the Chocolate Chip Cookie Skillet can be stored for future cravings. Simply cover the skillet with foil or transfer any leftovers to an airtight container and store at room temperature for up to two days. For longer storage, refrigerate for up to a week, though this may alter the texture slightly.

To reheat, place slices in the microwave for a few seconds to restore their warm, gooey allure. Alternatively, to retain some of the original crispness, reheat slices in a low-temperature oven for a few minutes.

If you’re planning ahead, prepare the dough and store it in the refrigerator up to 24 hours in advance. When ready to bake, bring to room temperature and follow the recipe’s baking instructions to achieve that fresh, just-baked taste.

Fun Facts & Trivia

The popularity of skillet cookies has soared alongside the rise of rustic, home-style cooking presentations. Unlike their traditional cookie counterparts that require multiple batches and baking sheets, the skillet cookie embraces a communal experience, drawing people together.

Did you know that the original chocolate chip cookie, invented in the 1930s by Ruth Wakefield of the Toll House Inn, was actually a happy accident? Contemporary variations, including the skillet format, continue to underscore the simple brilliance of impromptu creation, where the best of culinary inventions are crafted from unexpected origins.

Ingredients

  • Cookie Base
    • 1 cup unsalted butter (softened)
      → Softened butter provides the rich flavor and creamy texture essential for the cookie dough. Ensure it is at room temperature, which can be achieved by leaving it out for about 30–60 minutes. Properly softened butter will incorporate more air into the batter, resulting in a lighter and fluffier cookie.
    • 1 cup brown sugar (packed)
      → Brown sugar adds moisture and rich caramel flavors to the cookie dough. The molasses present in brown sugar also contributes to the cookies’ chewy texture. Always pack it into the measuring cup for accurate measurements, ensuring you get the appropriate amount for the cookie base.
    • 1/2 cup granulated sugar
      → Granulated sugar not only sweetens the cookies but also contributes to their crispiness on the edges. Combining it with brown sugar balances sweetness and texture. Measure accurately, and avoid packing it as you would brown sugar, to keep the right proportions.
    • 2 large eggs (room temperature)
      → Eggs act as a binding agent, helping to create a cohesive dough while also adding moisture. Using room temperature eggs helps them mix more easily and evenly into the batter, ensuring a uniform texture. If they’re cold, place them in warm water for a few minutes before use.
    • 1 teaspoon vanilla extract
      → Pure vanilla extract enhances the overall flavor of the cookies. Always opt for pure vanilla instead of imitation for a more authentic taste. Measure carefully, as too much can overpower the other flavors.
    • 3 cups all-purpose flour
      → All-purpose flour provides the structure necessary for the cookies. Be sure to spoon and level the flour in the measuring cup rather than scooping directly from the bag, as this can lead to too much flour and resulting dry cookies.
    • 1 teaspoon baking soda
      → Baking soda acts as a leavening agent, helping the cookies to rise and become fluffy. Make sure it’s fresh; otherwise, it can lose its potency, resulting in dense cookies. Sifting it together with the flour can help evenly distribute it throughout the dough.
    • 1/2 teaspoon salt
      → Salt enhances the flavor of the cookies and balances the sweetness. It also heightens the other flavors present in the cookie. Carefully measure the salt and consider using fine sea salt for better distribution throughout the dough.
    • 2 cups semi-sweet chocolate chips
      → Chocolate chips provide the signature chocolatey flavor and gooey texture in each cookie. Use high-quality semi-sweet chocolate chips for a perfect balance of sweetness. If you prefer, you can substitute dark chocolate chips for a richer taste.
  • Optional Toppings
    • 1/4 cup chopped nuts (optional)
      → Nuts, such as walnuts or pecans, add a satisfying crunch and earthy flavor to the cookies. Chop them into small pieces to ensure an even distribution in the batter. Toasting the nuts beforehand can intensify their flavor and add a delightful crispiness.
    • Ice cream or whipped cream (for serving, optional)
      → Ice cream or whipped cream makes a delicious topping for the warm cookie skillet. If serving warm cookies, a scoop of vanilla ice cream will melt slightly, creating a rich and decadent dessert experience. Consider using homemade whipped cream for a fresh touch, whipping it until soft peaks form.

Instructions

  • Preheat your oven to 350°F (175°C) and prepare an oven-safe skillet by lightly greasing it with butter or non-stick spray.

    → Preheating the oven ensures that the cookies cook evenly and properly. Greasing the skillet helps prevent the cookie from sticking, allowing for easy serving later on.
  • In a mixing bowl, cream together 1 cup of softened unsalted butter and 1 cup of packed brown sugar until the mixture is light and fluffy.

    → This step is crucial as creaming incorporates air into the batter, leading to a light texture in the finished cookies. Use a hand mixer or stand mixer on medium speed for about 2-3 minutes, scraping the sides of the bowl as needed to ensure even mixing.
  • Add 1/2 cup of granulated sugar to the creamed mixture and mix until fully incorporated.

    → Mixing in granulated sugar will further aerate the butter-sugar mixture. Continue mixing for about 1-2 minutes until the sugars are well blended and the mixture is smooth.
  • Crack 2 large room temperature eggs into a separate bowl, whisk them lightly, and then add to the batter along with 1 teaspoon of vanilla extract.

    → Whisking the eggs lightly helps them incorporate more easily into the batter, creating a uniform texture. Mixing in the eggs one at a time allows for better emulsification with the fat. Mix on medium speed until combined.
  • In another bowl, whisk together 3 cups of all-purpose flour, 1 teaspoon of baking soda, and 1/2 teaspoon of salt until evenly mixed.

    → This step ensures that the baking soda and salt are evenly distributed throughout the flour, preventing uneven rising or flavor in the cookies. Sifting the dry ingredients can further enhance distribution.
  • Gradually add the dry flour mixture into the wet ingredients, mixing on low speed until just combined.

    → Mixing on low speed helps prevent the flour from flying out of the bowl while ensuring the ingredients just come together without overmixing, which can lead to tough cookies.
  • Fold in 2 cups of semi-sweet chocolate chips (and chopped nuts if using) with a spatula until evenly distributed.

    → Folding prevents the chocolate chips from breaking and ensures they are uniformly spread throughout the dough. Be gentle and avoid over-mixing at this stage.
  • Transfer the cookie dough into the prepared skillet, spreading it evenly with the spatula.

    → Spreading the dough evenly ensures uniform cooking and helps the cookie attain a consistent texture. Use the spatula to gently press it down into an even layer.
  • Bake in the preheated oven for 25–30 minutes or until the edges are golden brown and the center is set but slightly soft.

    → Ovens can vary, so it’s important to check at the 25-minute mark. The center should look a little underbaked, as it will continue to cook while cooling.
  • Remove the skillet from the oven and allow the cookie to cool in the pan for at least 10 minutes.

    → This cooling time will help the cookie firm up slightly, making it easier to slice and serve while still warm and gooey.
  • Serve warm, optionally topped with a scoop of ice cream or a dollop of whipped cream.

    → The warm cookie with melting ice cream creates a delightful contrast in temperature and texture, enhancing the dessert experience. If using whipped cream, consider serving it in a separate bowl so that guests can add it to their liking.

Notes

  • Preparation Tips
    Before you start, make sure your kitchen is set up for success. Gather all your ingredients and tools—including a large mixing bowl, a whisk or electric mixer, a spatula, and a 10-inch cast iron skillet or oven-safe pan. Preheat your oven to 350°F (175°C) as you prepare the dough, so it’s ready when you are. This will help ensure even baking.
  • Mixing the Dough
    In a large mixing bowl, cream together the softened unsalted butter, brown sugar, and granulated sugar using an electric mixer or whisk until the mixture is light and fluffy. This should take about 2-3 minutes. Then, add the room temperature eggs one at a time, mixing well after each addition. Finally, incorporate the vanilla extract. In a separate bowl, whisk together the all-purpose flour, baking soda, and salt before gradually adding this dry mixture to the wet ingredients. Stir until just combined to avoid overmixing, which can lead to tough cookies. Fold in the semi-sweet chocolate chips (and nuts, if using) until evenly distributed.
  • Baking
    Spoon the cookie dough into the prepared skillet, spreading it evenly. If desired, sprinkle a few extra chocolate chips on top for a visually appealing finish. Bake in the preheated oven for about 25-30 minutes or until the edges are golden brown and the center looks just set. Remember that the skillet will continue to cook the cookies slightly after removing from the oven, so it’s better to underbake slightly for a gooey texture.
  • Serving Suggestions
    Allow the skillet cookie to cool for about 10 minutes before serving. For an indulgent experience, serve warm with a scoop of ice cream or a dollop of whipped cream on top, allowing it to melt slightly into the cookie. You can also slice it into wedges for easy serving, pairing it with a drizzle of chocolate sauce or caramel if you like. This dessert is perfect for sharing or enjoying as a treat for yourself!
  • Storage Tips
    If there are any leftovers (unlikely!), store them in an airtight container at room temperature for up to 3 days, or refrigerate for longer freshness. To reheat, simply pop it back in a warm oven for a few minutes or microwave for a few seconds to enjoy the gooey chocolate effect again. This skillet cookie makes for a wonderful treat any time!

Tips

Tips for Perfect Chocolate Chip Cookie Skillet

  • Butter Temperature: Make sure your butter is properly softened. This is crucial for a smooth batter. If in a hurry, you can cut the butter into smaller cubes and let it sit for about 15 minutes to speed up the softening process.
  • Mixing Ingredients: When mixing the sugars with butter, beat them until light and fluffy. This step is essential for incorporating air, which contributes to the lightness of the cookies. Use an electric mixer if possible to save time and effort.
  • Measuring Flour: Spoon the flour into the measuring cup and level it off with a straight edge. This technique helps prevent the cookies from becoming dry and tough due to excess flour.
  • Chilling the Dough: If you have time, consider chilling the cookie dough for about 30 minutes before baking. This can help enhance the flavors and prevent the cookies from spreading too thin while baking.
  • Baking Temperature: Preheat your oven to 350°F (175°C) to ensure even baking. Place the skillet in the center of the oven for the best heat distribution. Avoid opening the oven door too frequently, as it can lower the temperature and affect the baking process.
  • Check for Doneness: The cookies should be golden brown around the edges but still look slightly underbaked in the center when pulling them out of the oven. They will continue to cook slightly in the skillet as they cool.
  • Serving: For a more indulgent dessert, serve your cookie skillet warm topped with a scoop of ice cream or a dollop of whipped cream. This creates an exciting contrast between the warm cookie and the cold topping.
  • Storage: Store any leftovers in an airtight container at room temperature for up to 3 days. Reheating individual portions in the microwave for a few seconds can restore their gooey texture.

FAQ

What ingredients do I need for a Chocolate Chip Cookie Skillet?

You will need unsalted butter, brown sugar, white sugar, vanilla extract, eggs, all-purpose flour, baking soda, salt, and chocolate chips.

How do I prepare the skillet for baking?

Preheat your oven to 350°F (175°C). Grease your skillet with butter or non-stick cooking spray to prevent the cookie from sticking.

Can I use a different type of chocolate in the skillet cookie?

Yes, you can substitute semi-sweet chocolate chips with milk chocolate, dark chocolate, or even white chocolate chips based on your preference.

How long do I bake the Chocolate Chip Cookie Skillet?

Bake the skillet cookie for about 25-30 minutes, or until the edges are golden brown and the center is set but still slightly soft.

Should I serve the Chocolate Chip Cookie Skillet warm or cold?

It’s best served warm, directly from the oven, as the chocolate chips will be melty and delicious!

How can I store leftovers?

Store any leftovers in an airtight container at room temperature for up to 2 days. You can also refrigerate them for longer freshness.

Can I add nuts or other mix-ins to the batter?

Absolutely! Feel free to add nuts like walnuts or pecans, or even dried fruits or oats for added texture and flavor.

What can I serve with the Chocolate Chip Cookie Skillet?

It pairs perfectly with a scoop of vanilla ice cream, whipped cream, or even a drizzle of chocolate sauce for extra indulgence.

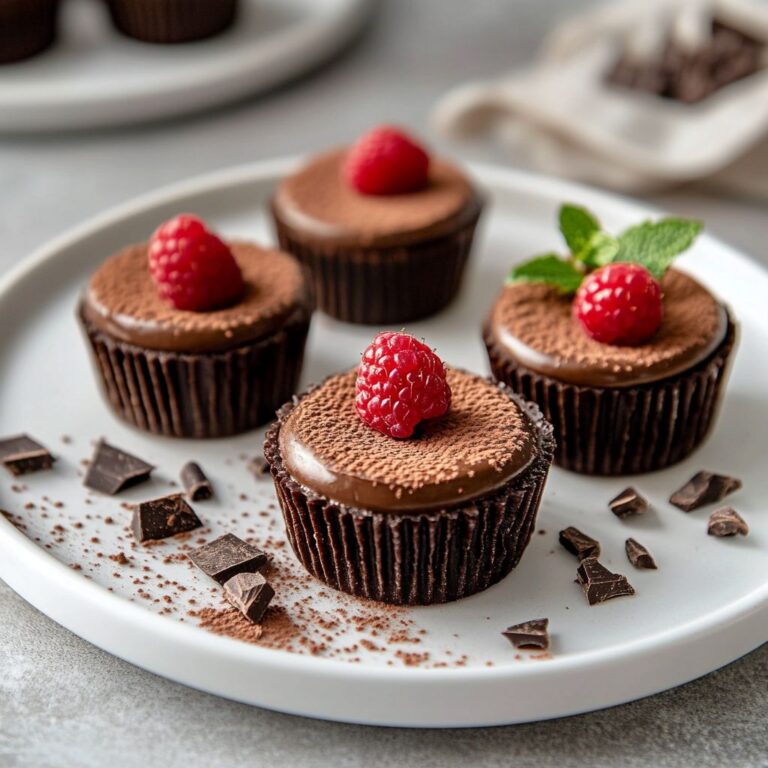
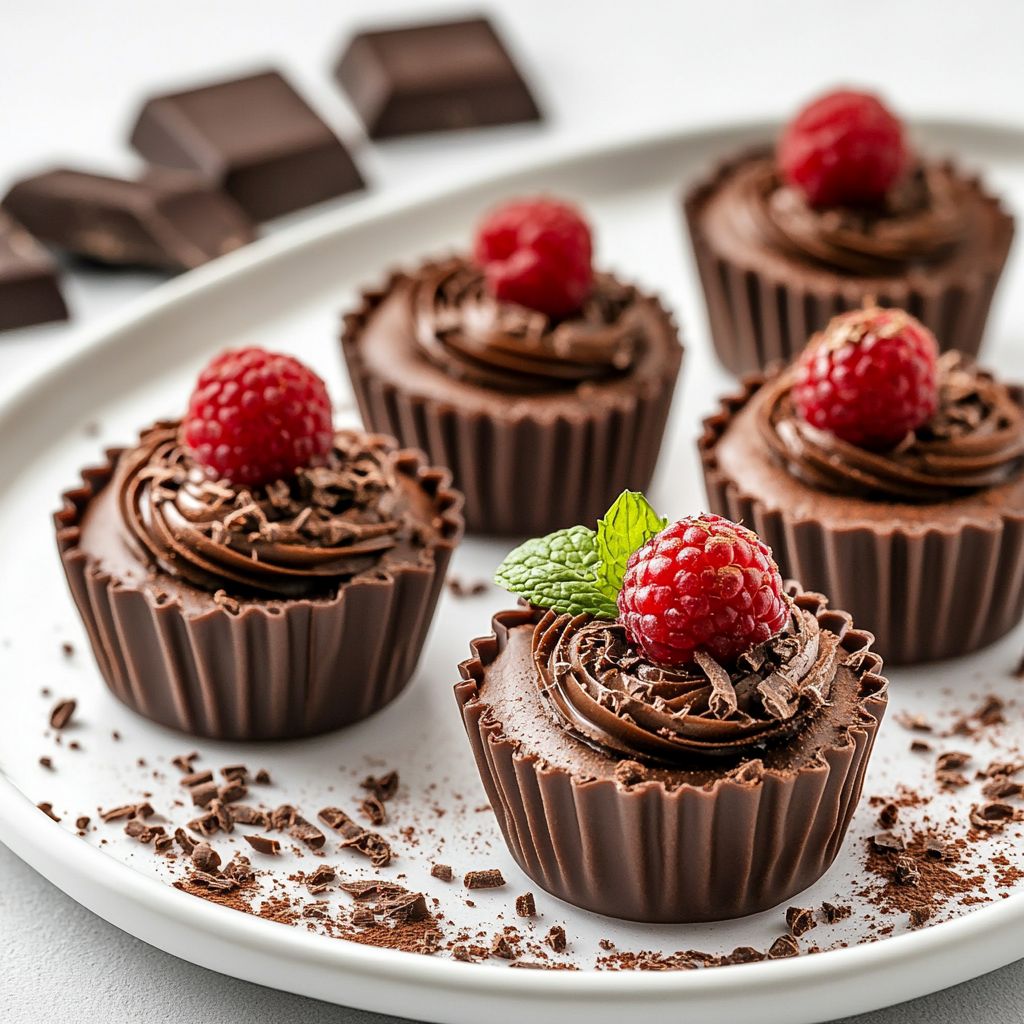
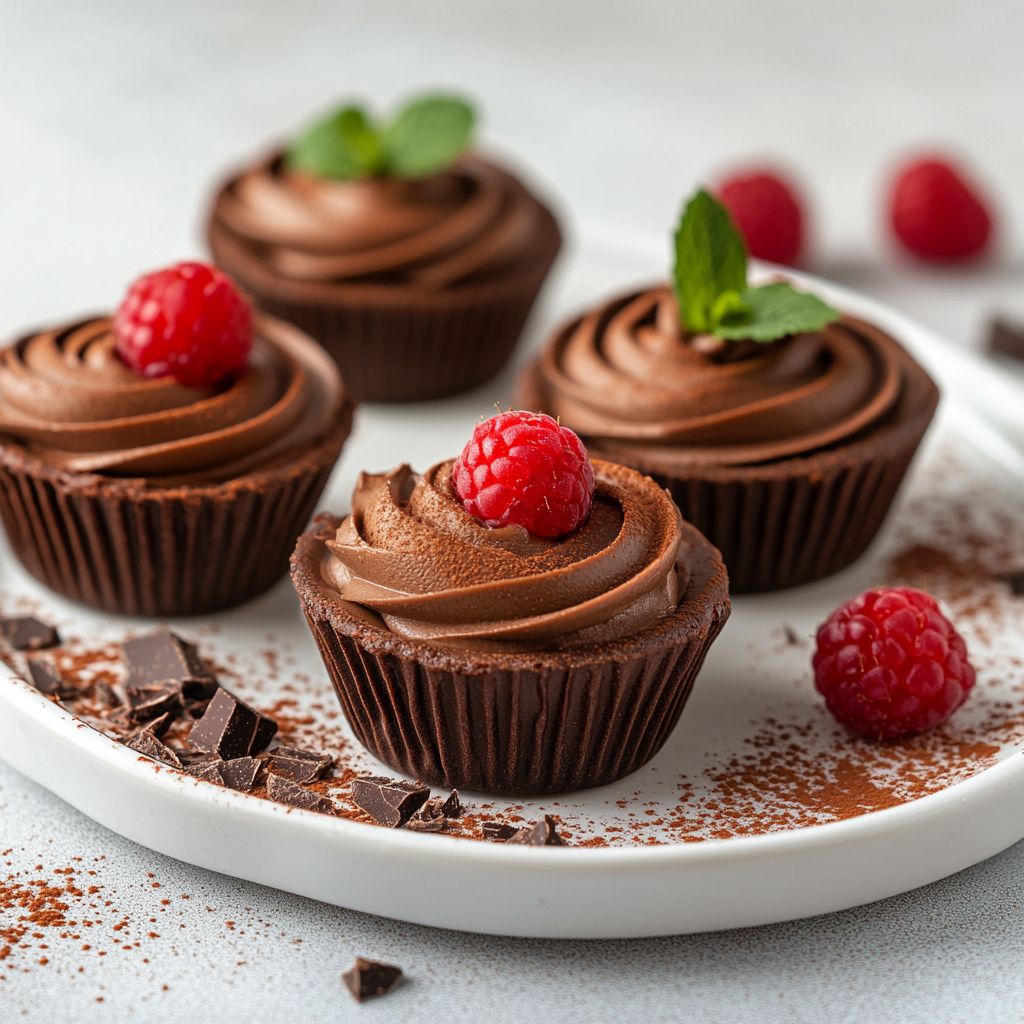
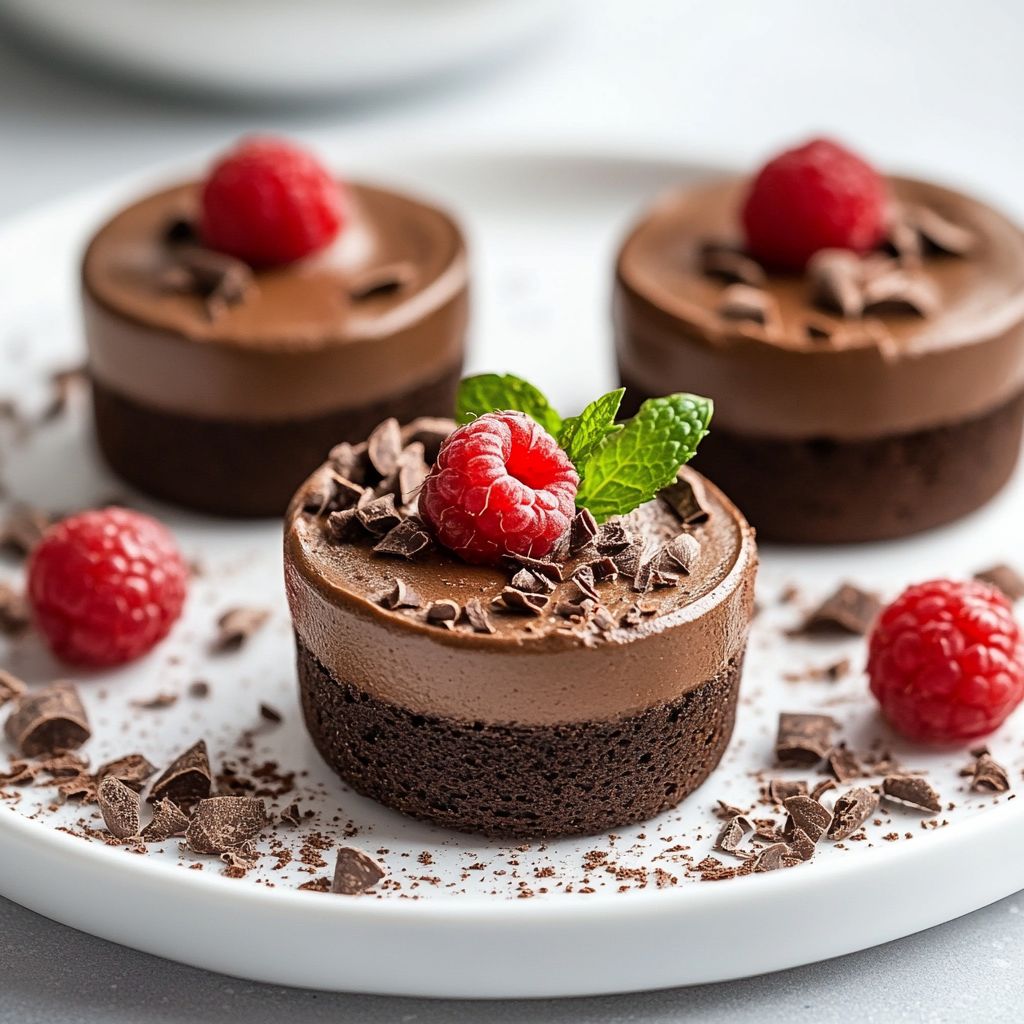
Introduction to Baked Chocolate Mousse Cups

Imagine a dessert that is both luxurious and comforting, a sweet treat that elegantly marries the rich, deep flavors of chocolate with the light, airy texture of a mousse. Enter Baked Chocolate Mousse Cups: a delectable fusion of chocolate intensity and melt-in-your-mouth softness, baked to perfection. These delightful cups offer a sophisticated indulgence that’s both visually stunning and extraordinarily palatable. Whether you’re a chocoholic in search of your next fix or simply looking for a show-stopping dessert to wow your guests, these mousse cups provide an unforgettable tasting experience. The moment you take a bite, the velvety smooth mousse envelops your senses with its decadent chocolate embrace, leaving you wanting more with each spoonful.

The Story Behind the Dish

Though mousse has its origins in France, where it was first recorded in the 18th century, its journey to oven-baked perfection in the form of these delightful cups is a more contemporary evolution. Traditional chocolate mousse was originally part of the haute cuisine, served cold, with chocolate’s luxurious appeal reflecting its status as a dessert for the affluent. Its transformation into a baked dessert is a testament to the endless creativity and adaptability of culinary arts. By baking mousse, you introduce a new textural element: the crispiness of a slightly baked top, paired with the creamy, rich interior that we have come to love. Baked Chocolate Mousse Cups marry the fine traditions of French cooking with modern pastry innovations to produce an irresistible confection.

Why You’ll Love This Recipe

  • Rich and Indulgent: The deep, aromatic chocolate flavor provides an intensely satisfying experience for chocoholics and dessert lovers alike.
  • Elegant Presentation: Individual cups not only create a sophisticated look but also allow for perfectly portioned servings, making it ideal for formal events or intimate gatherings.
  • Textural Contrasts: Enjoy the interplay between the crisp top layer and the smooth, airy mousse beneath, creating a delightful mouthfeel.
  • Easy to Customize: Endless possibilities to enhance and personalize these mousse cups with additional flavors or garnishes.

Flavor Profile & Texture

Baked Chocolate Mousse Cups bring an array of textures and flavors that dance harmoniously on the palate. The initial bite yields a light crust, giving way to the silken luxury of the mousse. This marriage of textures is a masterclass in balanced indulgence. The flavor is a rich symphony of dark, roasted chocolate with subtle bitter notes beautifully complemented by the creamy sweetness of the mousse. A hint of vanilla in the background elevates the chocolate, adding aromatic layers that further enhance the dessert’s allure. This complex yet comforting flavor profile makes these mousse cups both sophisticated and profoundly satisfying.

Occasions & Pairings

These Baked Chocolate Mousse Cups are perfect for a variety of occasions:

  • Dinner Parties: Impress your guests with an elegant end to the meal.
  • Romantic Dinners: The luxuriousness of chocolate makes these cups perfect for a Valentine’s Day dinner or anniversary celebration.
  • Festive Gatherings: Their rich and indulgent quality is ideal for holidays where dessert is a centerpiece, like Christmas or Easter.

For pairing, consider serving them with a glass of red wine or a cappuccino to complement the chocolate’s robust flavor. A scoop of vanilla ice cream on the side or some fresh berries could also add a delightful contrast and enhance the overall experience.

Tips, Variations & Substitutions

While this recipe for Baked Chocolate Mousse Cups is perfect as is, there are numerous ways to adapt and play with the flavors:

  • Spice it Up: Add a pinch of cayenne pepper or cinnamon for a spicy twist that intrigues the palate.
  • Diverse Chocolate: Experiment with different types of chocolate — from white to bittersweet — for varied flavor profiles.
  • Liqueur Infusion: Enhance the mousse with a splash of coffee liqueur, orange liqueur, or even raspberry cordial for depth and uniqueness.
  • Dairy-Free Options: Use coconut milk or almond milk for a dairy-free version that doesn’t skimp on creaminess.

Storage & Make-Ahead Ideas

Should you find yourself with leftover mousse cups or wish to prepare them ahead of time, consider these strategies:

  • Refrigeration: Store in an airtight container and refrigerate for up to 3 days, tightly sealed to maintain freshness.
  • Freezing: While the texture may alter slightly, freezing is an option. Allow them to thaw gently in the fridge before serving.

If you’re making them ahead of time for a special event, prepare the mousse, fill the cups, and refrigerate unbaked. Bake them fresh on the day of serving for that ideal texture contrast freshly baked goods offer.

Fun Facts & Trivia

Did you know that “mousse” means “foam” in French? This aptly describes the light and airy texture that defines mousse desserts. Moreover, the addition of chocolate-laden foods and dishes was historically restricted to the elite due to the high cost of importing cocoa beans. Thankfully, today we can all appreciate and indulge in the luxury once reserved for the few.

In closing, these Baked Chocolate Mousse Cups stand as an emblem of dessert decadence and ingenuity, marrying traditional flavors with modern culinary techniques. The next time you require a dessert that carries both visual appeal and an exceptional taste, allow these delightful cups to be your choice. They’re sure to bring a touch of elegance and a rich, decadent experience to your dining table.

Ingredients

  • Chocolate Mousse Base
    • 1 1/2 cups dark chocolate (at least 70%)
      → Dark chocolate is the star ingredient that provides the rich, deep chocolate flavor for the mousse. Choose a high-quality chocolate to ensure a smooth texture and intense taste. Break it into small pieces for easier melting. For the best result, use chocolate with a higher cocoa content, which will yield a more flavorful mousse.
    • 4 large eggs, separated
      → The eggs play a crucial role, with the yolks adding richness and creaminess while the whites are whipped to create a light and airy texture. Ensure the eggs are at room temperature before using, as this will help them whip to a greater volume. Be careful to separate the yolks from the whites completely to ensure that the whites whip properly.
    • 1/4 cup granulated sugar
      → Sugar sweetens the mousse while also helping to stabilize the whipped egg whites. Use granulated sugar for the most straightforward texture, and be sure to mix it with the egg yolks until thick and pale. This process helps to create a fluffy mousse. Adjust the amount of sugar based on the bitterness of the chocolate used.
    • 1 teaspoon vanilla extract
      → Vanilla extract enhances the chocolate flavor and adds a warm aroma to the mousse. For the best flavor, opt for pure vanilla extract instead of imitation, as the latter can have synthetic undertones. Measuring carefully ensures a balanced flavor in your mousse.
  • Whipping Cream
    • 1 cup heavy whipping cream
      → Whipping cream adds a light and creamy texture to the mousse. It should be chilled before whipping to achieve maximum volume and stability. Use heavy cream because it has a higher fat content, which will produce a richer, thicker mousse. Whip the cream until soft peaks form, being careful not to overwhip, as this can lead to a grainy consistency.
  • Serving and Garnishing
    • Cocoa powder (for dusting)
      → Sprinkling cocoa powder on top of the mousse cups adds a touch of elegance and a hint of extra chocolate flavor. Use unsweetened cocoa powder for a more intense taste, and be sure to use a fine mesh sieve for even dusting to avoid clumps on the surface.
    • Chocolate shavings or curls (optional)
      → Chocolate shavings serve as a beautiful and delicious garnish that enhances the dessert’s presentation. To create shavings, use a vegetable peeler on a block of chocolate. Ensure the chocolate is at room temperature, as cold chocolate will break instead of shave, while room temperature makes it easier to curl.
    • Fresh berries (optional)
      → Fresh berries offer a tart complement to the rich chocolate mousse, adding freshness and a pop of color. Rinse them gently and pat them dry before serving. Berries like raspberries, strawberries, or blueberries work particularly well, providing a delightful contrast in flavor and texture.

Instructions

  • Begin by preheating your oven to 350°F (175°C) for optimal temperature stabilization.

    → This guarantees that your oven reaches the desired temperature when you need it, ensuring your mousse cups set correctly during any potential baking phase. Even preheating prevents uneven cooking or sogginess.
  • Prepare a double boiler by filling a saucepan with a few inches of water and placing it over medium heat.

    → This indirect heating method will prevent the chocolate from seizing or burning. Make sure the water doesn’t touch the bottom of the bowl placed on top; the goal is to heat the chocolate slowly and evenly.
  • Place 1 1/2 cups of broken dark chocolate into a heatproof bowl and set it over the simmering water.

    → Continuously stir the chocolate with a spatula as it melts to avoid hot spots that could cause it to burn. This transforms the chocolate into a silky consistency essential for your mousse base.
  • While the chocolate is melting, separate 4 large eggs into two bowls—yolks in one and whites in another.

    → Use clean hands or egg shells to avoid any yolk in the whites, as any fat can inhibit them from whipping to full volume. This step is crucial for achieving the light and airy texture of the mousse.
  • Whisk the egg yolks with 1/4 cup of granulated sugar until the mixture becomes thick and pale.

    → This process, known as “ribbon stage,” allows the yolks and sugar to aerate properly, which is essential for creating a luxurious mouthfeel in your mousse. The sugar will also help to dissolve any graininess.
  • Add 1 teaspoon of vanilla extract to the yolk and sugar mixture and combine thoroughly.

    → This addition enhances the overall flavor profile of the mousse, complementing the richness of the chocolate without overpowering it. Be sure to blend well for a uniform taste.
  • Once the chocolate has melted completely and is smooth, remove the bowl from the double boiler and let it cool slightly.

    → Allowing it to cool prevents the heat from cooking the egg yolks prematurely. This cooling step is critical to maintaining the consistency and preventing curdling.
  • Carefully incorporate the cooled melted chocolate into the egg yolk mixture, stirring gently to combine.

    → Ensure that you fold the chocolate in thoroughly without deflating the yolks, which will help maintain aeration in the mousse and give it a luscious texture.
  • Take the egg whites and use a clean, dry mixing bowl along with an electric mixer to whip them until soft peaks form.

    → Whip on medium speed and watch closely; soft peaks need to be reached just before stiff peaks stabilize. This is crucial as it creates the lightness in your mousse. Avoid overwhipping to prevent a grainy texture.
  • Gently fold the whipped egg whites into the chocolate mixture in three additions.

    → Use a rubber spatula to fold carefully, starting from the bottom and moving upwards, ensuring you don’t deflate the egg whites. This folding process incorporates air without losing volume, crucial for a fluffy mousse.
  • In a separate chilled bowl, whip 1 cup of heavy whipping cream until soft peaks form as well.

    → Ensure the cream is cold to achieve the best volume. Whipping cream too long can lead to a grainy appearance; stop once soft peaks emerge for perfect integration into the mousse.
  • Fold the whipped cream into the chocolate and egg mixture in two parts, maintaining the mousse’s light texture.

    → Fold gently as with the egg whites, allowing the lightness of the whipped cream to blend without losing air bubbles, which are the key to creating the mousse’s signature airy structure.
  • Once fully combined, divide the mousse between serving cups or glasses and smooth the tops with a spatula.

    → Aim for an even distribution for aesthetic appeal, and this step also ensures consistent serving sizes, making it easier for guests to enjoy their dessert.
  • Chill the mousse cups in the refrigerator for at least 2 hours, or until set.

    → This chilling time allows the flavors to meld and the texture to firm up, creating the perfect balance of creaminess and richness necessary in a good mousse.
  • Before serving, dust each mousse cup with unsweetened cocoa powder using a fine mesh sieve for even coverage.

    → This final touch adds an elegant look and an extra layer of chocolate flavor, enhancing the dessert’s presentation. Strain the cocoa to avoid clumps for a professional finish.
  • Optionally, garnish with chocolate shavings or curls for added visual appeal.

    → Make these by using a vegetable peeler against a block of chocolate; this creates intricate designs that can elevate the dish. Ensure your chocolate is at room temperature for best results.
  • Serve the mousse cups topped with fresh berries if desired, to enhance flavor contrast.

    → Rinse and dry the berries gently, placing them on top or around the mousse. Choose vibrant berries like raspberries or strawberries for a delightful burst of color and freshness alongside the rich chocolate.

Notes

These Baked Chocolate Mousse Cups are an indulgent dessert that showcases the deep, rich flavor of dark chocolate while being surprisingly light and airy. The combination of whipped egg whites and heavy whipping cream creates a decadent treat that feels luxurious yet not too heavy. To ensure a perfectly smooth mousse, it’s essential to melt the dark chocolate gently, either using a double boiler or in short bursts in the microwave, stirring frequently.

When preparing the mousse, make sure your mixing bowls and utensils are free from grease; even a small amount can prevent the egg whites from whipping to their full volume. For a delightful flavor twist, consider adding a splash of espresso or coffee liqueur to the chocolate mixture, which can enhance the chocolate notes and add depth to your dessert.

After baking, let the mousse cups cool to room temperature before refrigerating them to set. This not only enhances the flavor but also ensures the perfect texture. If you’re making these in advance, they can be stored in the refrigerator for up to three days, making them perfect for entertaining.

For a stunning presentation, consider doubling the garnishes. You can layer the chocolate mousse in beautiful glasses or ramekins and alternate between layers of chocolate and whipped cream, then top with fresh berries or chocolate shavings for an impressive dessert that will wow your guests. Enjoy these mousse cups as a special treat for dinner parties, birthdays, or a cozy night in.

Tips

Cooking Tips for Baked Chocolate Mousse Cups

  • Melting Chocolate: When melting the dark chocolate, use a double boiler or microwave in short bursts (15-20 seconds), stirring frequently to prevent burning. Ensure the bowl doesn’t touch the simmering water if using a double boiler to avoid moisture in the chocolate.
  • Egg Separation: To ensure your egg whites whip properly, make sure no yolk is mixed in. You can crack the eggs one at a time into a small bowl before adding the whites to the mixing bowl to check for any shell fragments or yolk contamination.
  • Whipping Egg Whites: Use a clean, dry bowl to whip egg whites. Any grease or moisture can prevent them from achieving maximum volume. For added stability, consider adding a pinch of cream of tartar before whipping.
  • Folding Technique: When incorporating the whipped cream into the chocolate mixture, use a gentle folding motion rather than stirring. This helps retain the airiness of the cream, keeping your mousse light and fluffy.
  • Chilling Time: Allow the mousse to chill in the refrigerator for at least 2 hours before serving. This time helps it set properly, ensuring the right texture and flavor development.
  • Portioning: For serving, consider using small cups or ramekins for a more elegant presentation. This not only looks appealing but also helps with portion control, making it a perfect dessert for entertaining.
  • Customization: Feel free to customize your mousse cups by experimenting with different flavor extracts or incorporating crushed cookies or nuts in between layers for added texture and flavor.

FAQ

What are Baked Chocolate Mousse Cups?

Baked Chocolate Mousse Cups are a decadent dessert made from a rich chocolate mousse mixture, baked to perfection in individual cups. They combine the light and airy texture of mousse with a slightly firm exterior, creating a delightful contrast in every bite.

How long does it take to prepare Baked Chocolate Mousse Cups?

The preparation time for Baked Chocolate Mousse Cups typically takes about 20-30 minutes, while the baking time is around 15-20 minutes. Allow additional time for cooling and chilling before serving.

Can I make Baked Chocolate Mousse Cups ahead of time?

Yes, you can make the mousse cups ahead of time. They can be stored in the refrigerator for 1-2 days. Just make sure to cover them to prevent them from absorbing any odors from the fridge.

Can I use different types of chocolate?

Absolutely! You can use dark, milk, or even white chocolate, depending on your preference. Each type of chocolate will give a unique flavor to the mousse cups.

What should I serve with Baked Chocolate Mousse Cups?

Baked Chocolate Mousse Cups pair wonderfully with whipped cream, fresh berries, or a drizzle of chocolate or caramel sauce. Adding a sprinkle of sea salt on top can enhance the chocolate flavor as well.

Are Baked Chocolate Mousse Cups gluten-free?

Yes, Baked Chocolate Mousse Cups can be made gluten-free, as they typically do not contain flour. Always check the chocolate and other ingredients to ensure they are gluten-free.

What is the best way to store leftovers?

Store any leftover Baked Chocolate Mousse Cups in an airtight container in the refrigerator. They are best enjoyed within 2-3 days for optimal freshness and taste.

Can I add flavors like coffee or vanilla?

Yes, you can enhance the flavor of your Baked Chocolate Mousse Cups by adding a teaspoon of espresso powder or vanilla extract to the chocolate mixture before baking. This will add depth to the chocolate flavor.

Introduction / Hook

Imagine a dessert that delivers warmth, comfort, and a burst of creamy delight with every bite. Meet the Baked White Chocolate Blondies — an enchanting creation that marries the delicate, buttery richness of blondies with the exquisite sweetness of white chocolate. Picture a soft, chewy texture that envelops your taste buds, with each morsel leaving you yearning for more. The inviting aroma that fills your kitchen as these blondies bake is akin to a soft hug on a chilly afternoon, enticing you to taste the magic within. Special enough to impress guests, yet simple enough for a spontaneous craving, this is a recipe that transforms ordinary moments into extraordinary experiences.

The Story Behind the Dish

Blondies, the blonde cousin of brownies, trace their roots back to the 19th century before chocolate brownies became the sensation they are today. Originally, these desserts were made with molasses rather than chocolate, delighting dessert lovers with their subtle sweetness and rich texture. Over time, this classic dessert evolved, with creative bakers infusing their versions with a variety of flavors and textures. The introduction of white chocolate, a luxurious variant made from cocoa butter, sugar, and milk solids, adds a cascade of creamy sweetness, transforming traditional blondies into gourmet goodies. This blend of cultures and flavors makes Baked White Chocolate Blondies a delightful testament to baking innovation and culinary art.

Why You’ll Love This Recipe

  • Easy to Make: Minimal preparation and simple ingredients make it a fuss-free option for bakers of all skill levels.
  • Elegant Look: The glossy white chocolate speckles create a visually appealing presentation for gatherings and events.
  • Versatile: Perfect as a standalone treat or as a delightful companion to your favorite beverages.
  • Comforting Flavor: The warm, buttery profile with a touch of vanilla and caramel essence makes it irresistibly comforting.
  • Customizable: Numerous variations and substitutions allow it to fit different dietary needs and flavor preferences.

Flavor Profile & Texture

Every bite of Baked White Chocolate Blondies unveils a treasure of texture and flavor. The first thing you’ll notice is the indulgent creaminess of white chocolate, embracing your palate with an almost buttery smoothness. This is followed by the nutty rich undertone of the browned butter, which adds a warm, caramel-like depth to the mix. These blondies embody the sweetness of vanilla, highlighting that familiar cookie-dough-like aroma that brings our childhood memories rushing back. The finely balanced chewiness paired with a soft crumble gives each bite an appealingly textured experience — firm enough to hold its shape, yet tender enough to melt effortlessly in your mouth.

Occasions & Pairings

Whether you are hosting a sophisticated dinner soirée, enjoying a lazy Sunday brunch, or curling up on the couch with a good book, these blondies fit every occasion. Serve them with a side of freshly brewed coffee or tea for a perfect afternoon pick-me-up. During festive gatherings, they pair superbly with a scoop of vanilla ice cream or a drizzle of caramel sauce for an indulgent treat. Their luxurious yet familiar flavor makes them an endearing choice for holidays like Christmas, or simply as a comforting dessert after a wholesome family meal.

Tips, Variations & Substitutions

  • Gluten-Free Option: Substitute the all-purpose flour with a 1:1 gluten-free flour blend to make it celiac-friendly.
  • Vegan-Friendly Version: Replace the butter with a dairy-free substitute and use flax eggs in place of regular eggs.
  • Nutty Additions: For added crunch, consider integrating chopped macadamia nuts or pecans into the batter.
  • Flavor Twist: Infuse the batter with a dash of pure almond extract or a teaspoon of matcha green tea for a unique twist.
  • Mix-In Magic: Incorporate dried cranberries or raspberries for a tart contrast, or sprinkle in some cinnamon for a warming note.

Storage & Make-Ahead Ideas

Baked White Chocolate Blondies are as practical as they are delicious. Once cooled, store them in an airtight container at room temperature for up to a week, ensuring they remain tender and enticing. If you’re planning ahead, prepare a batch, cut them into squares, and freeze in layers separated by wax paper. They’ll be ready to thaw and serve at a moment’s notice, maintaining their delightful texture. When reheating, a brief stint in the microwave will restore their delectable chewiness, bringing them back to life as though they were freshly baked.

Fun Facts & Trivia

Did you know that white chocolate isn’t technically chocolate, given it contains no cocoa solids? Its creamy, buttery composition, however, makes it an integral part of the chocolate family. Moreover, blondies were often regarded as ‘blonde brownies’ for their appearance, standing in stark contrast to their chocolaty counterparts. The intrigue of blondies lies in their adaptability, making them a beloved choice across cultures and countries, evolving with every kitchen that embraces them.

In conclusion, Baked White Chocolate Blondies offer more than just sweetness; they are a journey through the warm notes of history, the creativity of flavors, and the joy of sharing something truly delightful. With each sumptuous bite, you’re partaking in a story of innovation and indulgence, suitable for every palate and moment worth celebrating.

Ingredients

Baked White Chocolate Blondies Ingredients

Blondie Base

  • 1 cup unsalted butter (melted)
    → The melted butter adds richness and moisture to the blondies. It should be cooled slightly before mixing with other ingredients to prevent the eggs from cooking. Use unsalted butter to control the salt content, ensuring a well-balanced sweetness in the final product.
  • 1 cup brown sugar (packed)
    → Brown sugar brings a deep caramel flavor and adds moisture to the blondies, helping to achieve a chewy texture. Pack it firmly into the measuring cup to ensure the right amount; excess sugar may lead to overly sweet blondies.
  • 2 large eggs
    → Eggs act as binding agents, providing structure and moisture to the blondies. Beat them lightly before incorporating to make it easier to mix with other ingredients. Ensure they are at room temperature for better emulsification.
  • 1 teaspoon pure vanilla extract
    → Pure vanilla extract enhances the overall flavor profile of the blondies. Choose high-quality vanilla for the best results, as imitation vanilla may alter the taste. Measure carefully to avoid overpowering the other flavors.
  • 2 cups all-purpose flour
    → Flour is essential for providing the necessary structure to the blondies. Sift it before measuring to aerate and eliminate lumps. Use a spoon to scoop flour into the measuring cup rather than scooping directly from the bag to avoid excess flour.
  • 1 teaspoon baking powder
    → Baking powder is a leavening agent that helps create a light texture in the blondies. Ensure it’s fresh for optimal rising. Mix it evenly with the flour to distribute its leavening properties throughout the batter.
  • 1/2 teaspoon salt
    → Salt enhances the sweetness and balances the flavors in the blondies. Use fine sea salt or kosher salt for even distribution in the batter. Adding it helps to highlight all the other ingredients’ flavors.

Mix-ins

  • 1 cup white chocolate chips
    → White chocolate chips provide a sweet, creamy richness and delightful bursts of flavor in every bite. They should be added to the batter just before pouring it into the baking dish. Opt for high-quality white chocolate with a high cocoa butter content for the best results.
  • 1/2 cup chopped macadamia nuts (optional)
    → Macadamia nuts contribute a buttery crunch and rich flavor to the blondies. Chop them into small pieces to ensure they distribute evenly. Toasting them lightly in a dry pan before adding can enhance their flavor.

Instructions

  • Preheat your oven to 350°F (175°C) and line a 9×13 inch baking pan with parchment paper, allowing some overhang on the sides.

    → Preheating the oven ensures that the blondies bake evenly from the beginning. Lining the baking pan with parchment paper allows for easy removal once they are cooled and prevents sticking.
  • Melt 1 cup of unsalted butter in a medium saucepan over low heat, then set it aside to cool slightly.

    → Melting the butter creates a smooth batter and contributes to the moist texture of the blondies. Allowing it to cool prevents the eggs from cooking when mixed together.
  • In a large mixing bowl, combine the melted butter and 1 cup of packed brown sugar using a whisk until smooth and well blended.

    → Whisking together these ingredients incorporates air and helps to dissolve the sugar, promoting a chewier texture. Ensure there are no lumps in the mixture before proceeding.
  • Add 2 large eggs, one at a time, to the butter and sugar mixture, whisking after each addition until fully incorporated.

    → This gradual addition helps the eggs emulsify, creating a uniform batter. Make sure the mixture is homogeneous; visible streaks of egg indicate insufficient mixing.
  • Stir in 1 teaspoon of pure vanilla extract and mix until evenly distributed throughout the batter.

    → The addition of vanilla enhances the flavor of the blondies and should be mixed in thoroughly to ensure a consistent taste throughout the dessert.
  • In a separate bowl, whisk together 2 cups of all-purpose flour, 1 teaspoon of baking powder, and 1/2 teaspoon of salt until well combined.

    → Whisking dry ingredients together helps eliminate lumps and ensures even distribution of the leavening agent, critical for achieving the right texture in your blondies.
  • Gradually add the dry ingredient mixture to the wet ingredients, stirring gently with a spatula until just combined.

    → Overmixing can lead to tough blondies; gently folding the ingredients ensures a tender crumb while incorporating them thoroughly without developing too much gluten.
  • Fold in 1 cup of white chocolate chips into the batter until evenly distributed.

    → Mixing in the white chocolate chips at this stage ensures they are evenly dispersed throughout the batter, providing pockets of sweet creaminess in every bite.
  • If using, chop 1/2 cup of macadamia nuts into small pieces and fold them into the batter gently.

    → Chopping ensures that the nuts are easier to chew and distribute evenly in the blondies. Toasting them lightly first enhances their natural flavor, adding depth to the dish.
  • Pour the batter into the prepared baking pan and use a spatula to spread it into an even layer.

    → Spreading the batter evenly in the pan will ensure that the blondies bake uniformly and avoid uneven edges or under-cooked areas.
  • Bake in the preheated oven for 25-30 minutes, or until the edges are golden brown and a toothpick inserted into the center comes out with a few moist crumbs, not wet batter.

    → Checking for doneness with a toothpick prevents overbaking, which can result in dry blondies. Moist crumbs indicate that they are perfectly baked and will firm up while cooling.
  • Remove the blondies from the oven and allow them to cool in the pan on a wire rack for about 10-15 minutes.

    → Cooling in the pan helps set the structure of the blondies while making them easier to remove without breaking. They will continue to firm up slightly during this time.
  • Using the parchment paper overhang, lift the blondies out of the pan and transfer them to a wire rack to cool completely before slicing.

    → Transferring them to a wire rack prevents the bottom from becoming soggy, allowing air to circulate around the blondies and ensuring an even texture.
  • Once cooled, slice the blondies into squares or rectangles, as desired, and serve.

    → Using a sharp knife to cut through the blondies gently prevents crumbling. For clean cuts, wipe the knife between slices.

Notes

These baked white chocolate blondies are a delightful treat, perfect for satisfying your sweet tooth. The combination of rich butter and packed brown sugar creates a moist and chewy texture that pairs wonderfully with the creamy white chocolate chips. You can easily customize this recipe by adding in your favorite nuts, like chopped walnuts or pecans, if macadamia nuts aren’t to your liking.

For the best flavor, consider allowing the blondies to cool completely before cutting them into squares. This helps them set properly and enhances their chewy texture. If you prefer a more fudgy blondie, reduce the baking time slightly. Serve them warm for a melty chocolate experience, or at room temperature for a chewy snack.

These blondies store well in an airtight container at room temperature for a few days or in the refrigerator for about a week. They also freeze beautifully; wrap them individually and store them in a freezer-safe bag for a sweet treat you can enjoy later. Just remember to let them thaw before enjoying or pop them in the microwave for a few seconds to warm them up.

For an extra special touch, consider drizzling a simple white chocolate glaze on top once they’ve cooled, or serve them with a scoop of vanilla ice cream. Enjoy your baking!

Tips

Cooking Tips for Baked White Chocolate Blondies

  • Prep Your Ingredients: Before starting, gather and measure all your ingredients ahead of time. This will help ensure a smooth mixing process and prevent any last-minute scrambling to find items.
  • Proper Butter Temperature: After melting the butter, let it cool slightly until it’s warm to the touch. This helps prevent the eggs from curdling when mixed in, ensuring a smooth batter.
  • Avoid Overmixing: When combining the wet and dry ingredients, mix just until combined to prevent tough blondies. Overmixing can lead to a dense texture instead of the desired chewy and soft consistency.
  • Use Parchment Paper: Line your baking pan with parchment paper, allowing for easy removal of the blondies once baked. Leave some overhang to create ‘handles’ for effortless lifting and cutting.
  • Check for Doneness: Bake the blondies until the edges are set and the center is slightly underbaked. They will continue to firm up as they cool, ensuring a soft and chewy texture.
  • Cooling Time: Allow the blondies to cool completely in the pan on a wire rack before cutting. This helps the flavors develop and makes them easier to slice without falling apart.
  • Storage Tips: Store leftover blondies in an airtight container at room temperature for up to a week. You can also freeze them by wrapping them in plastic wrap and then placing them in a freezer bag for longer storage.
  • Experiment with Mix-ins: Feel free to customize the blondies with different mix-ins like dried fruits, nuts, or even cookie crumbles. Just be mindful of the total add-ins so the batter stays balanced and doesn’t become too dry.

FAQ

What are baked white chocolate blondies?

Baked white chocolate blondies are a rich, sweet dessert bars made with white chocolate, butter, sugar, flour, and eggs. They have a chewy texture and a sweet, creamy flavor, making them a delicious alternative to brownies.

How do I store baked white chocolate blondies?

Store baked blondies in an airtight container at room temperature for up to 3 days. For longer freshness, you can refrigerate them for up to a week or freeze them for up to 3 months.

Can I use regular chocolate instead of white chocolate?

Yes, you can substitute regular chocolate for white chocolate if you prefer a more traditional brownie flavor. Keep in mind that this will result in a different taste and texture.

What can I add to my blondies for extra flavor?

You can add a variety of mix-ins such as nuts (like walnuts or macadamia), coconut flakes, dried fruit, or even chocolate chips to enhance the flavor and texture of your baked blondies.

What is the baking time for blondies?

Baked white chocolate blondies typically take about 25 to 30 minutes at 350°F (175°C). They are done when the edges are lightly golden and a toothpick inserted into the center comes out with a few moist crumbs.

Can I make baked blondies gluten-free?

Yes, you can make gluten-free baked blondies by substituting all-purpose flour with a gluten-free flour blend. Just ensure that the other ingredients used are also gluten-free.

Do I need to chill the batter before baking?

No, it’s not necessary to chill the batter before baking. You can pour the mixture directly into the baking pan and put it in the oven. However, chilling can help enhance the flavors if you prefer to prepare it in advance.

Can I double the recipe?

Absolutely! You can double the recipe to make more blondies. Just make sure to use a larger baking pan and adjust the baking time as needed, checking for doneness periodically.

Introduction to Gooey Chocolate Pudding Cake

Imagine a dessert that combines the rich, indulgent intensity of chocolate with the allure of a warm, gooey center. This is the essence of the Gooey Chocolate Pudding Cake. A symphony of flavors and textures, this cake is not just a dessert; it is an experience. As you plunge your spoon into its molten interior, the chocolaty aroma wafts up, encompassing your senses, and transporting you into a realm of decadence. This cake is special because it blurs the line between a pudding and a cake, offering both the comforting solidity of a baked treat and the creamy, almost magical fluidity that defines a perfect pudding. Dive in to explore why this dessert deserves a cherished spot in your culinary repertoire.

The Story Behind the Gooey Chocolate Pudding Cake

The Gooey Chocolate Pudding Cake traces its origins back to the mid-20th century when home cooks began experimenting with self-saucing puddings. Known by different names across the world, from “lava cake” in some circles to “self-saucing pudding” in others, this dessert was born out of a love for simplicity and the joy of culinary alchemy. The key moment of brilliance came with the discovery that a separate batter, when baked with a simple sugary topping, could create its own sauce. This was not just a twist of luck but a testament to the curious spirit of home bakers who sought to create something more than just a cake.

This dish has since become a beloved classic, celebrated for its hypnotic transformation in the oven, where the batter and liquid meld to form distinct layers of cake and pudding. Despite its refined appearance, the Gooey Chocolate Pudding Cake is steeped in the warmth of familiar tradition, making it a timeless comfort food ingrained in family get-togethers and nostalgic evenings.

Why You’ll Love This Recipe

  • Effortless Elegance: Despite its luxurious result, this cake is deceptively simple to prepare, requiring only basic pantry ingredients and straightforward steps.
  • Show-stopping Centerpiece: Its gooey center and rich chocolate taste provide a dramatic flair that makes it ideal for entertaining and impressing guests.
  • Versatility: Perfect for any occasion, it can serve as a comforting treat for a quiet night in or as a celebratory dessert for festive gatherings.
  • Customizable: With options to adapt it to suit dietary preferences, you can easily modify the recipe to be gluten-free or vegan, ensuring everyone can enjoy its delights.

Flavor Profile & Texture

The Gooey Chocolate Pudding Cake is a marvelous study in contrasts. Its flavor profile is dominated by the deep, resonant notes of high-quality chocolate, which carry both the bitter complexity of cocoa and the sweetness that saturates your senses. The top layer of the cake is tender, providing an initial bite that yields with a satisfying resistance before giving way to the luscious, molten core. This inner pudding is where the magic truly unfolds, releasing a silky texture that coats the palate with velvety chocolate decadence. Each mouthful is a harmonious blend of the slightly crisp top crust, the softer cake, and the gooey, rich pudding. It’s a multi-layered experience that plays out beautifully in every bite.

Occasions & Pairings

This versatile dessert is fitting for a wide range of occasions. Serve it warm after a cozy dinner on a chilly evening, when its comforting warmth can be fully appreciated. For a more festive setting, pair it with a scoop of vanilla ice cream or a dollop of whipped cream, the cold and creamy elements offering a delightful contrast to the warm, gooey cake. A rich, bold red wine or a smooth, full-bodied coffee can further elevate the experience, their complex flavors playing off the chocolate’s depth. Consider serving this cake at holiday celebrations, casual family gatherings, or even a romantic dinner – its allure is universally appealing.

Tips, Variations & Substitutions

To make this recipe your own, consider the following tips and variations:

  • Infuse with Coffee: Add a tablespoon of espresso powder to the batter for an enhanced chocolate depth and subtle coffee kick.
  • Nutty Variation: Stir in a handful of your favorite chopped nuts for a delightful textural twist.
  • Dietary Adjustments: Use almond or oat milk and a flaxseed egg to create a vegan version without sacrificing richness. Substitute almond flour for a gluten-free alternative.
  • Flavor Twists: Introduce a splash of orange or mint extract for a fresh dimension, or mix in some chili powder for a spicy, daring rendition.

Storage & Make-Ahead Ideas

The beauty of the Gooey Chocolate Pudding Cake is that it is best enjoyed fresh from the oven, when the textures and flavors are at their peak. However, if you have leftovers, store them in an airtight container in the refrigerator for up to three days. When ready to enjoy again, reheat gently in the microwave until warm.

If you need to prepare ahead for an occasion, consider completing the dry ingredients and wet batter separately in advance, storing them in separate containers. Assemble and bake the cake just before serving to ensure the freshest experience. Unfortunately, due to its self-saucing nature, the cake does not freeze well, as the pudding layer can become overly dense upon thawing.

Fun Facts & Trivia

Did you know that self-saucing desserts like the Gooey Chocolate Pudding Cake gained popularity as part of the home baking craze in the 1970s? This era sparked a revolution in quick-fix desserts that offered both convenience and deliciousness, catering to the busy lives of modern families. It’s fascinating to see how such an unassuming blend of ingredients can undergo a transformative process, rising in the oven to reveal its hidden treasure—a testament to the magic of baking.

Whether you’re introducing it to a new generation or rediscovering a beloved classic from childhood, the Gooey Chocolate Pudding Cake remains a testament to the enduring appeal of simple pleasures executed beautifully.

Ingredients

  • Cake Base
    • 1 cup all-purpose flour
      → The flour provides structure and stability to the pudding cake. It should be sifted before measuring to aerate it and remove any lumps. Use a light hand when mixing to avoid a dense texture. If preferred, you can substitute with gluten-free all-purpose flour for a gluten-free version.
    • 1 cup granulated sugar
      → Sugar sweetens the cake and aids in the creation of a tender crumb. It also helps in caramelizing during the baking process, contributing to a rich flavor. Ensure that it’s granulated and not confectioners’ sugar, as the latter will alter the texture.
    • 1/2 cup unsweetened cocoa powder
      → Cocoa powder is essential for giving the cake its chocolate flavor and dark color. Use high-quality Dutch-processed cocoa for a deeper flavor profile. Make sure to sift it to avoid clumps when adding to the dry ingredients.
    • 1 teaspoon baking powder
      → The baking powder acts as a leavening agent, helping the cake rise and become light and fluffy. Ensure that it is fresh for the best rise; check the expiration date and store in a cool, dry place.
    • 1/4 teaspoon salt
      → Salt enhances the flavor of the cake and balances the sweetness. Use kosher salt or sea salt for the best results, and make sure it is evenly distributed within the dry ingredients to avoid any clumps.
    • 1/2 cup milk
      → Milk adds moisture and richness, creating a soft texture in the cake. Use whole milk for creaminess, but you can substitute with any milk alternative or low-fat milk if desired. Allow it to come to room temperature for better mixing.
    • 1/4 cup vegetable oil
      → Oil adds moisture and tenderness to the cake, keeping it from becoming dry. Choose light vegetable oil or canola oil for a neutral flavor. Make sure it is at room temperature for easy mixing.
    • 1 teaspoon vanilla extract
      → Pure vanilla extract enhances the overall flavor of the cake, adding a warm, aromatic quality. Avoid imitation vanilla as it often lacks the depth of flavor; opt for high-quality extract made from real vanilla beans.
    • 2 large eggs
      → Eggs provide moisture and act as a binder, helping the ingredients to emulsify and create a cohesive batter. Ensure they are at room temperature for better incorporation; you can place them in warm water for about 10 minutes if needed.
  • Chocolate Pudding Sauce
    • 1 cup boiling water
      → The boiling water is essential for creating the gooey pudding layer beneath the cake. It activates the cocoa and helps to create the pudding effect as the cake bakes. Use freshly boiled water for the best results.
    • 1/2 cup packed brown sugar
      → Brown sugar adds moisture and a rich, caramel flavor to the pudding. The molasses in brown sugar will enhance the cake’s depth of flavor. Pack it firmly into the measuring cup to ensure accuracy.
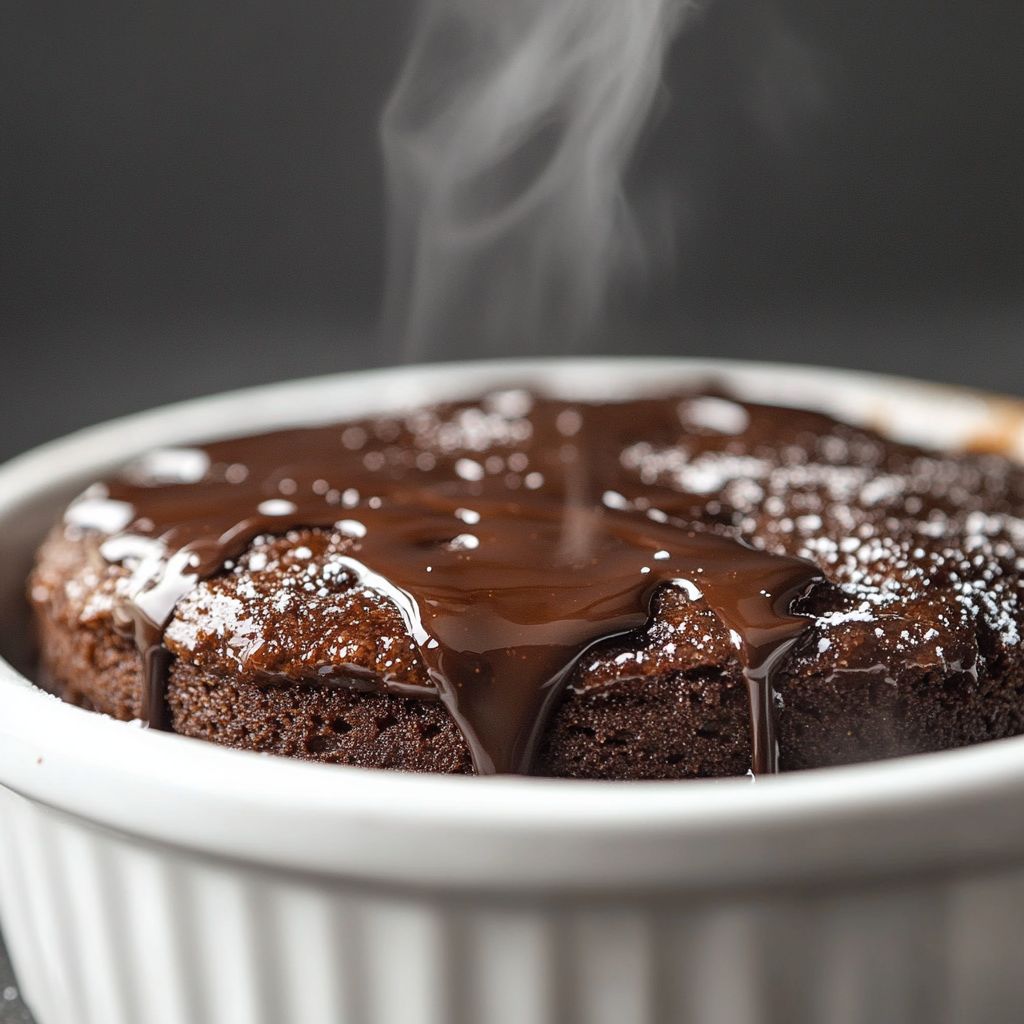
  • Optional Toppings
    • Whipped cream (for serving)
      → Whipped cream adds a light, airy element that contrasts beautifully with the rich, gooey cake. Use heavy whipping cream and whip until soft peaks form, sweetening lightly with sugar if desired. Serve immediately after whipping for the best texture.
    • Chocolate shavings or chips (for garnish)
      → Chocolate shavings add an appealing visual element and amplify the chocolate flavor. Use a vegetable peeler on a chocolate bar for elegant shavings or sprinkle chocolate chips on top just before serving for extra indulgence. Choose a high-quality chocolate for the best flavor.

Instructions

  • Preheat your oven to 350°F (175°C) and prepare a 9-inch square baking dish by greasing it well with butter or cooking spray.

    → Preheating ensures even baking, and greasing prevents the cake from sticking to the dish, making serving easier. You can also consider lining the bottom with parchment paper for extra security against sticking.
  • Sift together the all-purpose flour, granulated sugar, cocoa powder, baking powder, and salt in a large mixing bowl.

    → Sifting aerates the flour, cocoa, and other dry ingredients, ensuring a light texture in the final cake. It also helps to evenly distribute the baking powder and salt, which are crucial for consistent leavening.
  • In a separate bowl, whisk together the milk, vegetable oil, vanilla extract, and eggs until fully combined.

    → Whisking these wet ingredients together ensures that the eggs emulsify, which helps in the uniform mixing of ingredients. Ensure the mixture is homogeneous to avoid any clumps of egg or oil in the final batter.
  • Gradually add the wet mixture to the dry ingredients, stirring gently with a spatula or wooden spoon until just combined.

    → Mixing just until combined prevents overworking the batter, which can lead to a dense cake. It’s important to stop mixing as soon as there are no dry streaks left.
  • Pour the batter into the prepared baking dish and spread it evenly with the spatula.

    → Spreading the batter evenly ensures uniform baking; if the batter is uneven, some parts may overbake while others remain undercooked.
  • In a small bowl, combine the packed brown sugar and cocoa powder, mixing well to ensure there are no lumps.

    → Mixing ensures the brown sugar is evenly distributed, allowing for a uniform texture in the final pudding layer. Lumps will not dissolve during baking, which could lead to inconsistency.
  • Sprinkle the brown sugar and cocoa mixture evenly over the cake batter in the baking dish.

    → Sprinkling on top creates a layer that will interact with boiling water to form the gooey pudding base as it bakes, leading to the desired texture of the final dish.
  • Carefully pour the boiling water over the top of the cake batter and sugar mixture, making sure to cover it evenly.

    → Pouring boiling water is vital, as this activates the mix and creates a pudding layer beneath the cake. This unique preparation method is essential for achieving the gooey texture characteristic of this pudding cake.
  • Bake the pudding cake in the preheated oven for 30-35 minutes, or until the top is set and slightly cracked.

    → This duration allows the batter to bake through while forming a fluffy cake layer on top and the pudding layer to form beneath it. Check for doneness by gently shaking the dish; the center should be slightly jiggly but not liquid.
  • Once baked, remove the cake from the oven and allow it to cool for at least 10 minutes before serving.

    → Cooling slightly helps the pudding to set up a bit more and will make it easier to serve without falling apart. Serve warm for the best gooey texture.
  • Optional: While the cake cools, prepare whipped cream by beating heavy whipping cream in a chilled bowl until soft peaks form, adding sugar to taste if desired.

    → Whipping the cream in a chilled bowl helps keep the cream at a stable temperature, allowing it to whip faster and better retain its volume and texture. Serve immediately or refrigerate briefly.
  • To serve, scoop out portions of the warm chocolate pudding cake, ensuring you include some of the pudding sauce, and top with whipped cream and chocolate shavings or chips if desired.

    → This serving method ensures every bite is indulgent, and the toppings complement the rich texture of the cake beautifully, creating a visually appealing final presentation.

Notes

Indulge in this rich and decadent gooey chocolate pudding cake that is sure to impress. The combination of a light and fluffy cake base topped with a warm, luscious chocolate pudding sauce creates a delightful dessert experience. To ensure the best texture, make sure to measure your ingredients accurately and follow the mixing instructions carefully. Allow the cake to cool slightly before serving, as this will help the pudding sauce to thicken and intensify the chocolate flavor.

For an extra delicious touch, serve the cake with a generous dollop of freshly whipped cream to balance the richness. Feel free to personalize this dessert with your favorite toppings like chocolate shavings or chips, which not only enhance the chocolate experience but also add an aesthetic appeal to your plated dessert. This cake is best enjoyed warm straight from the oven but can be made ahead of time and reheated for a fantastic last-minute treat.

Remember to adjust the baking time if you are using a different size cake pan, as it may affect how evenly the cake cooks. For a fun twist, consider adding other flavors such as a splash of espresso or orange zest to elevate the chocolate flavor profile. Enjoy this delightful dessert with family and friends on special occasions or as a comforting treat after a long day.

Tips

Cooking Tips for Gooey Chocolate Pudding Cake

  • Measure Ingredients Accurately: Use the spoon-and-level method for dry ingredients to ensure you’re not packing them into the measuring cup, which can affect the final texture of your cake.
  • Room Temperature Ingredients: Make sure your eggs and milk are at room temperature before mixing. This helps create a smoother batter and a more uniform cake.
  • Don’t Overmix: When combining wet and dry ingredients, mix just until everything is blended. Overmixing can develop gluten and lead to a tougher cake.
  • Creating the Pudding Layer: Pour the boiling water over the cake batter without stirring. As it bakes, the water will create a fudgy pudding layer underneath.
  • Check for Doneness: The cake should appear set on top but still have a slight jiggle in the middle when done. It will continue to cook slightly once removed from the oven.
  • Cooling Time: Allow the cake to cool for at least 10-15 minutes before serving. This helps the pudding layer thicken and makes it easier to scoop out servings.
  • Serving Suggestions: For the best experience, serve warm with a dollop of whipped cream or a scoop of vanilla ice cream to balance the richness of the cake.
  • Storing Leftovers: Store any leftovers in an airtight container in the refrigerator. Reheat gently in the microwave, adding a splash of milk if needed to restore moisture.

FAQ

What ingredients are needed to make Gooey Chocolate Pudding Cake?

You will need flour, sugar, cocoa powder, baking powder, salt, milk, vegetable oil, vanilla extract, and chocolate chips.

How long does it take to prepare Gooey Chocolate Pudding Cake?

The preparation time is about 15 minutes, and the baking time is approximately 30-35 minutes.

Can I use unsweetened cocoa powder?

Yes, unsweetened cocoa powder is typically used in recipes for a deeper chocolate flavor. Make sure to adjust sugar levels to taste.

Is it possible to make Gooey Chocolate Pudding Cake gluten-free?

Yes, you can substitute regular flour with a gluten-free flour blend to make the cake gluten-free.

What is the best way to serve Gooey Chocolate Pudding Cake?

It is delicious served warm with a scoop of vanilla ice cream or a dollop of whipped cream on top.

How should I store leftovers?

Leftovers can be stored in an airtight container in the refrigerator for up to 3 days. Reheat in the microwave before serving if desired.

Can I add other ingredients like nuts or fruits?

Absolutely! Feel free to add chopped nuts or chocolate chips for extra texture or fruits like raspberries for a burst of flavor.

What if I don’t have vanilla extract?

If you don’t have vanilla extract, you can omit it or use a small amount of almond extract or another flavored extract instead.

Introduction

Imagine waking up to the warm, inviting aroma of freshly baked scones, the scent of rich chocolate mingling with the buttery dough to create a symphony of comfort that pulls you out of bed. Chocolate Chip Scones are more than just a breakfast treat; they are a delightful indulgence that promises a melt-in-your-mouth experience with each bite. Whether you are a seasoned baker or a kitchen novice, this recipe offers a deliciously accessible foray into the world of baking. Perfectly balanced with the sweetness of chocolate and the subtle tang of buttermilk, these scones are bound to be a crowd-pleaser, making mornings a little brighter and afternoons a touch more indulgent.

The Story Behind the Dish

The origins of scones follow a path through the rolling hills of the British Isles, steeped in a history rich with cultural significance. First mentioned in early 16th century Scotland, the humble scone has evolved from its early representations as a dense griddle cake to the light, crumbly baked goods we know today. Traditionally served at afternoon teas with clotted cream and jam, scones have become a staple in British culture, transcending borders and gaining global appreciation.

The introduction of chocolate chips into the classic scone is a modern twist, likely inspired by the success of chocolate chip cookies, a quintessentially American creation. This blend of traditions, old and new, has produced a fusion that is adored worldwide, marrying the cherished British teatime snack with the all-time favorite flavor of chocolate.

Why You’ll Love This Recipe

  • Simple to Make: Even if you’re not an experienced baker, this recipe is straightforward and easy to follow.
  • Quick Baking Time: From start to finish, you’ll have delicious scones ready in less than an hour.
  • Perfect for Any Occasion: These scones are versatile, making them suitable for breakfast, brunch, or even a cozy afternoon snack.
  • Rich Flavor: The semi-sweet chocolate chips elevate the traditional scone recipe, adding a decadent touch.
  • Customizable: Easily adapt the recipe to suit your taste preferences or dietary needs.

Flavor Profile & Texture

At the heart of every good scone is its texture. These Chocolate Chip Scones boast a light, flaky crumb with a slight crisp on the outside, making each bite a delightful contrast. The rich, creamy taste of butter is ever-present, enveloping your senses from the first nibble. As you bite in, the soft, gooey pockets of melted chocolate chips provide bursts of sweetness that complement the mild, subtle tang of buttermilk in the dough, creating a balanced, indulgent treat.

The hint of vanilla in the mix accentuates the chocolate chips, adding depth to each mouthful, while the tender crumb structure ensures a satisfying, not-too-dense bite, distinguishing them from other pastries and making them perfect for pairing with a hot beverage.

Occasions & Pairings

Chocolate Chip Scones are versatile enough to fit seamlessly into various settings:

  • Weekday Breakfast: Quick enough to whip up on a weekday morning, serving as a delicious alternative to traditional toast or muffins.
  • Brunch Get-Togethers: Their indulgent nature makes them a hit at brunch parties, paired with fresh fruits, jam, or a selection of cheeses.
  • Afternoon Tea: Perfectly at home among a selection of teas, add these to your afternoon tea spread for a classic touch with a twist.
  • Dessert Table: Serve warmed with a scoop of vanilla ice cream for a simple, yet elegant dessert.
  • Beverage Pairings: Complement with a robust coffee, creamy cappuccino, or a delicate Earl Grey tea to enhance their flavor profile.

Tips, Variations & Substitutions

While Chocolate Chip Scones are exquisite on their own, there are numerous ways to customize them:

  • Nutty Additions: For added texture, consider folding in a handful of chopped nuts such as pecans or almonds.
  • Dried Fruit: Add a burst of additional sweetness with dried cranberries or cherries.
  • Flavor Variations: Incorporate other flavors such as a hint of orange zest or a dash of cinnamon to complement the chocolate.
  • Dietary Adjustments: Substitute the buttermilk with almond milk to make it dairy-free, or use gluten-free flour to accommodate dietary restrictions.
  • Vegan Version: Swap butter for coconut oil or a vegan margarine and use a dairy-free milk alternative like oat milk with a splash of lemon juice.

Storage & Make-Ahead Ideas

These scones are best enjoyed fresh, straight out of the oven; however, they store quite well for later enjoyment:

  • Room Temperature: Keep scones in an airtight container at room temperature for up to 2 days.
  • Freezing: They freeze beautifully; place cooled scones into a ziplock bag or airtight container and freeze for up to 3 months. Reheat in a preheated oven at 350°F (175°C) for about 5 minutes.
  • Make-Ahead: Prepare the dough ahead of time, shape the scones, and freeze individually before baking. Bake directly from frozen, adding an extra 5 minutes to the baking time.

Fun Facts & Trivia

What’s a baked good without a little fun trivia? Here are some delightful tidbits about scones and their decadent pairing with chocolate:

  • The word “scone” is derived from the Dutch word “schoonbrot,” meaning beautiful bread.
  • In Scotland, scones were originally made from oat flour, often cooked on a griddle rather than baked because ovens were a luxury item.
  • Chocolate chips as we know them today did not become popular until the Toll House brand started selling them in 1941 after the accidental invention of chocolate chip cookies in the 1930s.

Embrace this comforting, delightful treat, and allow your kitchen to be filled with the rich, welcoming aromas of warmth, love, and chocolate in the making of Chocolate Chip Scones.

Ingredients

  • Scone Base
    • 2 cups all-purpose flour
      → All-purpose flour provides the structure for the scones, creating a tender yet flaky texture. For best results, use a spoon to scoop the flour into the measuring cup without packing it down. This ensures you don’t end up with too much flour, which can lead to dry scones.
    • 1/4 cup granulated sugar
      → The sugar adds sweetness to the scones, balancing the rich flavors of the chocolate chips. It also contributes to browning during baking, resulting in a lovely golden crust. For a deeper flavor, consider using brown sugar instead.
    • 1 tablespoon baking powder
      → Baking powder acts as the leavening agent, helping the scones rise and become fluffy. Be sure the baking powder is fresh for optimal results; expired baking powder can lead to dense scones without rise.
    • 1/2 teaspoon salt
      → Salt enhances all the flavors in the scones, balancing sweetness and bringing out the chocolate notes. Use fine sea salt for better distribution within the dough.
    • 1/2 cup cold unsalted butter (cubed)
      → Cold butter is crucial for creating flaky layers in the scones. Cut the butter into small cubes and add it to the dry ingredients. Use a pastry cutter or your fingertips to work it into the flour until mixture resembles coarse crumbs, taking care not to overwork the dough.
    • 2/3 cup heavy cream
      → Heavy cream provides richness and moisture, which is essential for achieving a tender scone. Use cold heavy cream directly from the fridge to maintain the temperature of the dough and enhance flakiness.
    • 1 teaspoon pure vanilla extract
      → Vanilla extract adds aromatic sweetness and depth to the scone’s flavor. Choose pure vanilla extract for the best results, as artificial flavors may not impart the same richness.
  • Chocolate Chips
    • 1 cup semi-sweet chocolate chips
      → Chocolate chips are the star ingredient, providing delightful bursts of chocolate flavor within the scone. Choose high-quality chocolate chips for the best melting and flavor. You can also use dark chocolate or milk chocolate based on your preference.
  • Optional Toppings
    • 1 egg (for egg wash)
      → An egg wash gives the scones a shiny, golden finish. Beat one egg with a tablespoon of water, then brush a thin layer over the scones before baking, taking care not to let it pool.
    • Additional sugar for sprinkling
      → Sprinkling a little sugar on top of the scones before baking adds a delightful crunch and extra sweetness to the finished product. Use coarse sugar for added texture and visual appeal.

Instructions

  • Preheat your oven to 400°F (200°C) and line a baking sheet with parchment paper.

    → Preheating the oven ensures that your scones bake evenly and achieve that perfect rise. The parchment paper prevents sticking and makes cleanup easier.
  • In a large mixing bowl, combine 2 cups of all-purpose flour, 1/4 cup of granulated sugar, 1 tablespoon of baking powder, and 1/2 teaspoon of salt.

    → Mixing these dry ingredients together helps distribute the leavening agent (baking powder) and sugar uniformly throughout the flour, resulting in an even rise and sweetness in the scones.
  • Add 1/2 cup of cold unsalted butter (cut into small cubes) to the flour mixture.

    → Using cold butter is key to creating flaky layers in your scones. The cold butter will create steam as it melts during baking, resulting in those light, airy textures.
  • Using a pastry cutter or your fingertips, work the butter into the flour until the mixture resembles coarse crumbs.

    → This technique is crucial: Overworking the dough can lead to tough scones. The goal is to have small pea-sized pieces of butter remain in the mix to ensure flakiness.
  • In a separate bowl, whisk together 2/3 cup of cold heavy cream and 1 teaspoon of pure vanilla extract.

    → Whisking the wet ingredients separately allows for an even incorporation of flavors and moisture into your scone dough, which will enhance the overall taste and texture.
  • Pour the wet ingredients into the dry mixture and gently stir until just combined.

    → Be careful not to overmix; over-mixing can lead to tough scones. The dough should be slightly shaggy and moist but not overly sticky.
  • Fold in 1 cup of semi-sweet chocolate chips using a spatula until evenly distributed throughout the dough.

    → Folding prevents the chocolate chips from breaking and ensures every bite has a delightful chocolate flavor. Aim for an even distribution without excessive mixing.
  • Transfer the dough onto a lightly floured surface and gently knead it a few times until it comes together.

    → Kneading helps the scones develop a bit more structure, but only do this for a few seconds to avoid toughening the dough.
  • Shape the dough into a circle about 1-inch thick and cut it into 8 equal wedges.

    → Creating even wedges promotes consistent baking and allows for uniform slicing after baking. Use a sharp knife or a bench scraper for clean cuts.
  • Place the scone wedges onto the prepared baking sheet, leaving space between each piece.

    → Leaving space allows the hot air to circulate, which helps the scones to bake evenly and rise properly.
  • If desired, prepare an egg wash by beating 1 egg with a tablespoon of water and brush a thin layer over the tops of the scones.

    → The egg wash gives a beautiful golden color and shiny finish to the scones. Be sure to apply it gently, avoiding pooling which could lead to sogginess.
  • Sprinkle a little additional sugar on top of the scones if desired for added sweetness and crunch.

    → Using coarse sugar adds a lovely texture and visual appeal, making your scones not only delicious but also beautifully finished.
  • Bake the scones in the preheated oven for 15-20 minutes or until they are golden brown on top and baked through.

    → To check for doneness, insert a toothpick in the center; it should come out clean or with just a few crumbs attached. The golden color indicates a perfect finish.
  • Once baked, remove the scones from the oven and allow them to cool on the baking sheet for about 5-10 minutes before transferring to a wire rack.

    → Cooling the scones properly helps set their structure while preventing them from becoming soggy from steam.
  • Serve warm or at room temperature, and enjoy your delicious chocolate chip scones!

    → These scones are best enjoyed fresh, either plain or with a pat of butter, making for a delightful treat with tea or coffee.

Notes

These chocolate chip scones are a delightful blend of buttery, flaky goodness, studded with rich chocolate chips for a sweet treat that’s perfect for breakfast or brunch. For best results, ensure your ingredients are cold; this helps the scones rise beautifully. When mixing the butter into the flour, aim for a crumbly texture without overworking the dough; this will maintain the desired flakiness. Feel free to experiment with different types of chocolate or even add nuts for additional flavor and texture. These scones are best enjoyed fresh out of the oven when they’re warm and the chocolate is just melted. Serve them with a pat of butter or a dollop of jam for an extra special touch. They can be stored in an airtight container for a few days or frozen for future enjoyment. Remember, the key to achieving that perfect scone is not to overmix the dough; you want it to be tender and light!

Tips

Tips for Making Chocolate Chip Scones

  • Measuring the Flour: To prevent dry scones, fluff up the flour in the container before scooping. Gently spoon the flour into your measuring cup and level it with a knife without packing it down.
  • Playing with Sweetness: If you’re looking for a unique flavor, substitute some of the granulated sugar with brown sugar. This will not only add moisture but also a subtle depth of flavor.
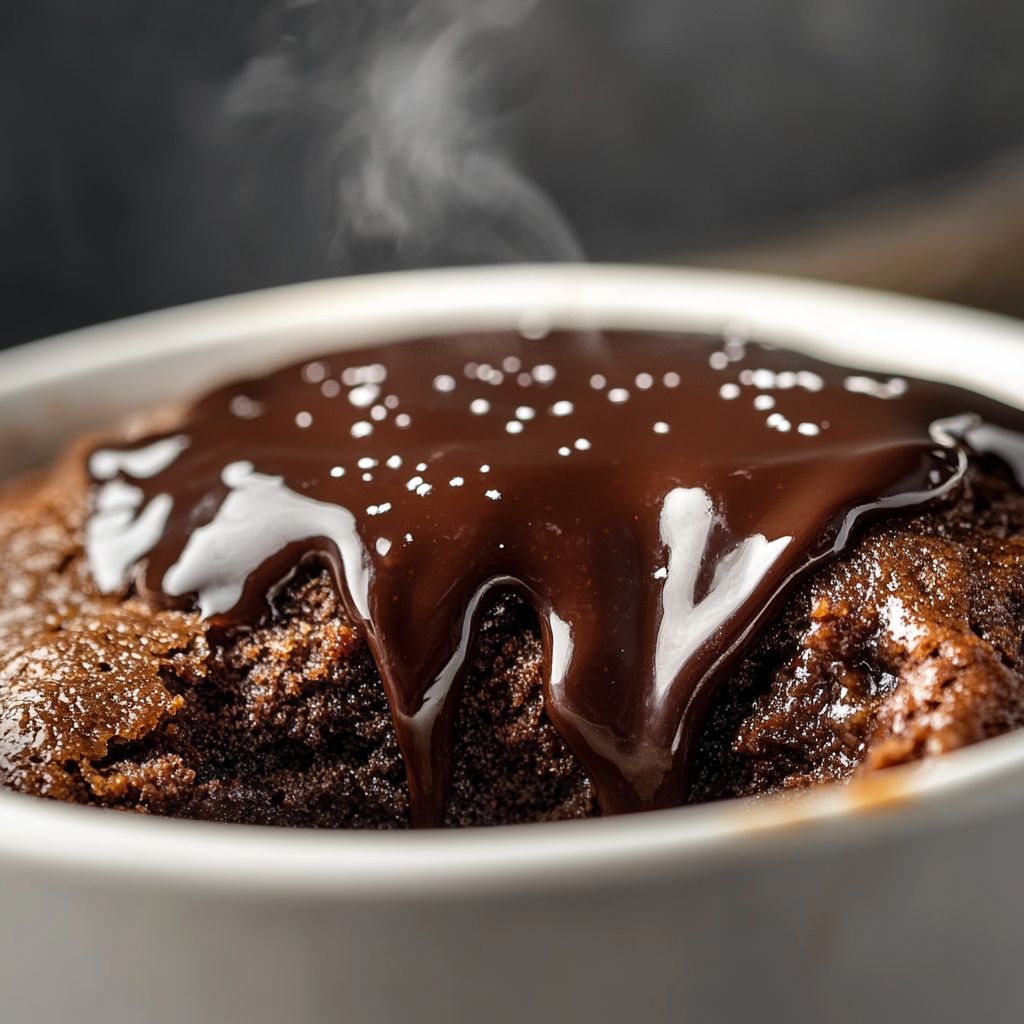
  • Freshness of Ingredients: Always check your baking powder for freshness. A simple test is to add a teaspoon to hot water; if it fizzes actively, it’s good to use!
  • Butter Consistency: Keep your butter very cold. If you’re concerned about it softening while you work, consider chilling it in the freezer for a few minutes before cutting it into cubes.
  • Mixing the Dough: When combining the flour and butter, stop as soon as you achieve a crumbly texture. Overmixing can lead to tough scones, which detracts from the desired lightness.
  • Chilling the Dough: After forming the scone dough, consider chilling it in the refrigerator for about 30 minutes. This helps keep the butter cold and gives the scones a better rise while baking.
  • Adding Chocolate Chips: Toss the chocolate chips in a small amount of flour before adding them to the dough. This prevents them from sinking to the bottom during baking.
  • Egg Wash Techniques: When applying the egg wash, use a light hand to avoid drips. This will give you an attractive finish without affecting the texture of your scones.
  • Sprinkling Sugar: Use coarse sugar like turbinado for sprinkling on top of your scones. It adds a lovely crunch and makes the scones more visually appealing.
  • Storage: To keep your scones fresh, store them in an airtight container at room temperature for up to two days. For longer storage, freeze them and reheat in the oven when ready to enjoy.

FAQ

What ingredients do I need to make Chocolate Chip Scones?

To make Chocolate Chip Scones, you will need these ingredients: all-purpose flour, baking powder, salt, sugar, cold butter, heavy cream, vanilla extract, and semi-sweet chocolate chips.

Can I use other types of chocolate in the scones?

Yes! You can substitute semi-sweet chocolate chips with dark chocolate, milk chocolate, or even white chocolate, depending on your preference.

How do I ensure my scones are light and fluffy?

Ensure that your butter is cold and cut into the flour mixture until it resembles coarse crumbs. Also, avoid overworking the dough when you mix in the cream and chocolate chips.

How long do Chocolate Chip Scones stay fresh?

Chocolate Chip Scones can stay fresh for up to 2 days at room temperature in an airtight container. For longer freshness, you can freeze them for up to 2 months.

Can I make the dough ahead of time?

Yes, you can make the dough ahead of time and refrigerate it for up to 24 hours. Just shape the scones and refrigerate them before baking to maintain their shape.

What should I serve with Chocolate Chip Scones?

Chocolate Chip Scones can be enjoyed plain or served with clotted cream, butter, or jam. They are also great with a hot cup of tea or coffee.

How do I know when my scones are done baking?

Your scones are done baking when they are golden brown on the top and bottom and a toothpick inserted in the center comes out clean. They should also feel firm to the touch.

Can I add nuts or dried fruit to my scones?

Absolutely! You can add nuts such as walnuts or pecans, or dried fruits like raisins or cranberries for added texture and flavor.
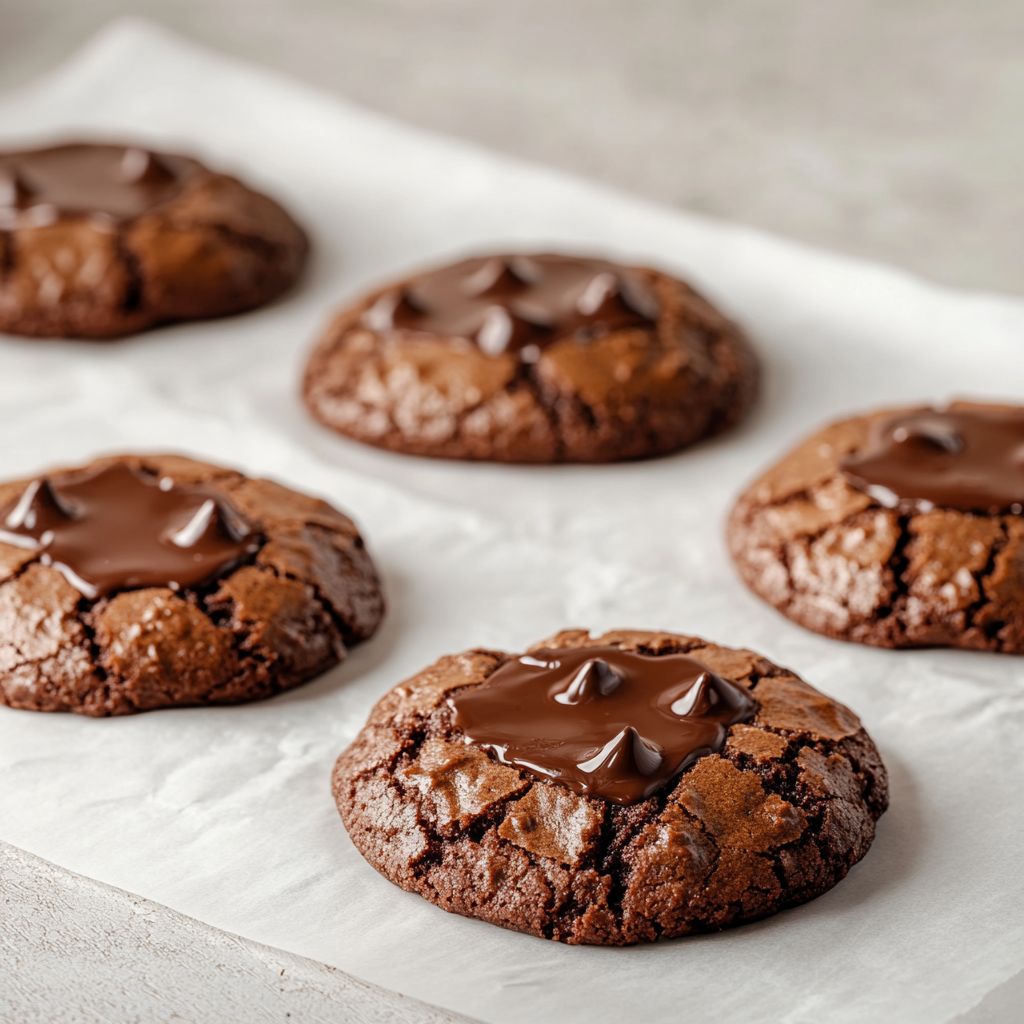
Introduction: The Allure of Soft Baked Chocolate Cookies

Imagine biting into a warm, fresh-out-of-the-oven chocolate cookie, its soft texture yielding with the slightest resistance to reveal glistening pockets of molten chocolate. The aroma alone is like an embrace, filling the kitchen with the comforting perfume of cocoa and vanilla. Soft Baked Chocolate Cookies bring a sensory delight that transcends simple indulgence — they are a nostalgic retreat, reminiscent of childhood days and cozy, lazy afternoons. This recipe promises not only to satisfy your chocolate cravings but also to create moments worth cherishing.

The Story Behind the Dish

The journey of the humble chocolate cookie began in the United States during the 1930s when Ruth Wakefield accidentally invented what is now a global sensation. At her Toll House Inn in Massachusetts, she stumbled upon this culinary marvel by adding broken pieces of semi-sweet chocolate to her cookie dough, unaware that they would retain their shape after baking. This serendipitous discovery led to the creation of the original chocolate chip cookie, forever changing the dessert landscape.

Over the decades, bakers and home cooks have put their own twist on this classic, experimenting with thickness, texture, and add-ins to suit personal preferences. The Soft Baked Chocolate Cookie is a variation that emerged to meet the desire for a chewier, softer bite—perfect for those who appreciate a texture that closely mimics that of cookie dough with the satisfying warmth of a baked treat.

Why You’ll Love This Recipe

  • Quick and Easy: These cookies are simple to make, requiring just a few basic ingredients you likely already have in your pantry.
  • Chewy Inside, Slightly Crisp Outside: The perfect combination of textures makes each bite irresistible.
  • Versatile: You can adapt the recipe with nuts, dried fruits, or different chocolates to suit various tastes.
  • Kid-Friendly: A fun activity for children to join in, from mixing the dough to scooping it onto the baking sheet.
  • Comfort Food at Its Best: Perfect for any comforting gathering, whether you need a pick-me-up on a dreary day or a celebratory treat for a special occasion.

Flavor Profile & Texture

The beauty of a Soft Baked Chocolate Cookie lies in its uncomplicated yet profoundly satisfying flavor profile. The dominant taste is, of course, chocolate — intense and rich, offering a deep, almost bittersweet pleasure. To balance this is the cookie’s sweetness, a soft and comforting note that enhances rather than overwhelms the cocoa flavors. Subtle hints of vanilla and a pinch of salt act as undercurrents, adding complexity and depth to each bite.

The texture is equally captivating. These cookies boast a melt-in-your-mouth softness, with a slight chewiness that lingers. The edges, slightly firmer and crispier, provide a contrast that heightens the overall sensory experience, making each mouthful a journey of taste and texture.

Occasions & Pairings

Soft Baked Chocolate Cookies are wonderfully versatile, making them suitable for a myriad of occasions. They are a beloved choice for holiday baking, bringing warmth and nostalgia to any festive table. Equally, they are perfect for casual gatherings, afternoon snack times, or as a delightful finish to a family dinner.

Pair these cookies with a tall glass of cold milk for the traditionalist, or venture into pairing them with a robust cup of coffee or a creamy hot chocolate for extra decadence. For an adult twist, serve them alongside a small glass of tawny port or a rich, full-bodied red wine, which complements the chocolate beautifully.

Tips, Variations & Substitutions

Customize your cookies to suit different dietary requirements or flavor preferences. Here are some suggestions:

  • Gluten-Free: Substitute regular flour with a 1:1 gluten-free baking blend to maintain the same soft texture.
  • Vegan: Use a flax egg in place of a regular egg and substitute butter with a vegan margarine or coconut oil.
  • Extra Indulgent: Enhance the richness by folding in chunks of dark or milk chocolate along with semi-sweet chips.
  • Nutty Variations: Add chopped walnuts or pecans for a crunchy contrast in texture.
  • Spice It Up: For an unexpected twist, incorporate a teaspoon of cinnamon or a dash of cayenne pepper to the batter.

Storage & Make-Ahead Ideas

These cookies are just as delightful when enjoyed fresh as they are when savored a day or two after baking. To keep them soft and chewy, store them in an airtight container at room temperature for up to a week. For longer storage, you can freeze the cookie dough balls on a baking sheet until solid, then transfer them to a freezer-safe bag. This way, you can bake a fresh batch whenever the craving strikes — simply add a few extra minutes to the baking time.

If you’re hosting a party or preparing for a busy week, consider making the dough ahead of time. It can be refrigerated for up to three days, allowing you to pop them in the oven moments before serving for a truly indulgent, fresh-baked experience.

Fun Facts & Trivia

Did you know the chocolate chip cookie became the official state cookie of Massachusetts in 1997? This recognition underscores its status as a beloved American treat. Furthermore, cookie lovers across the globe celebrate National Chocolate Chip Cookie Day on August 4th, a testament to its universal appeal.

In conclusion, Soft Baked Chocolate Cookies are more than just a dessert; they are a tradition, a celebration, and a versatile canvas for culinary expression. Whether you’re baking them to savor solo or to share with friends, each cookie invites comfort, joy, and connection in every soft, chocolatey bite.

Ingredients

  • Cookie Base
    • 1 cup unsalted butter (softened)
      → Softened butter is crucial as it aids in creating a creamy texture when beaten with sugars. Ensure the butter is at room temperature for optimal incorporation, allowing the cookies to achieve a soft, tender crumb. For best results, leave it out for about an hour before starting the recipe.
    • 1 cup granulated sugar
      → Granulated sugar not only sweetens the cookies but also contributes to their chewy texture by creating a crisp outer layer when baked. Make sure to measure it accurately to balance the sweetness and texture properly.
    • 1 cup packed brown sugar
      → The molasses content in brown sugar adds moisture and a rich caramel flavor, enhancing the overall taste of the cookies. Use light or dark brown sugar depending on your preference, but ensure it’s packed tightly in the measuring cup for correct measurement.
    • 2 large eggs
      → Eggs act as binders, helping to hold all the ingredients together. It’s vital to use large eggs at room temperature to ensure they emulsify properly with the butter and sugars, resulting in a smooth and consistent batter.
    • 1 teaspoon pure vanilla extract
      → Pure vanilla extract enhances the flavor profile of the cookies and adds depth. Avoid imitation vanilla; it lacks the complexity of pure extract. Add it with the wet ingredients for even distribution throughout the dough.
    • 2 cups all-purpose flour
      → All-purpose flour provides structure to the cookies. For soft cookies, ensure you measure it correctly by scooping and leveling off instead of packing it in. Too much flour can lead to dry cookies, so consider using the spoon and sweep method for accuracy.
    • 1/2 cup unsweetened cocoa powder
      → Cocoa powder gives the cookies their rich chocolate flavor and dark color. Choose a high-quality cocoa powder for better taste. Sift it before adding to the flour to prevent clumps and ensure an even distribution in the dough.
    • 1 teaspoon baking soda
      → Baking soda is a leavening agent that helps the cookies rise and become soft. Make sure it’s fresh for best results, and mix it thoroughly into the dry ingredients to prevent uneven rising during baking.
    • 1/2 teaspoon salt
      → Salt enhances the flavors and balances the sweetness of the cookies. It’s best to use fine sea salt to ensure even distribution throughout the dough. It’s an essential ingredient for elevating the overall taste.
  • Mix-Ins
    • 1 cup chocolate chips (semi-sweet or dark)
      → Chocolate chips are the star ingredient, offering gooey pockets of chocolate in every bite. For a richer flavor, opt for dark chocolate chips. You can also reserve a handful to sprinkle on top before baking for an appealing presentation.
    • 1/2 cup chopped nuts (optional)
      → Chopped nuts like walnuts or pecans can add a delightful crunch and nutty flavor to your cookies. Toast them lightly before chopping to enhance their flavor. Be sure to chop them evenly to distribute them throughout the dough.
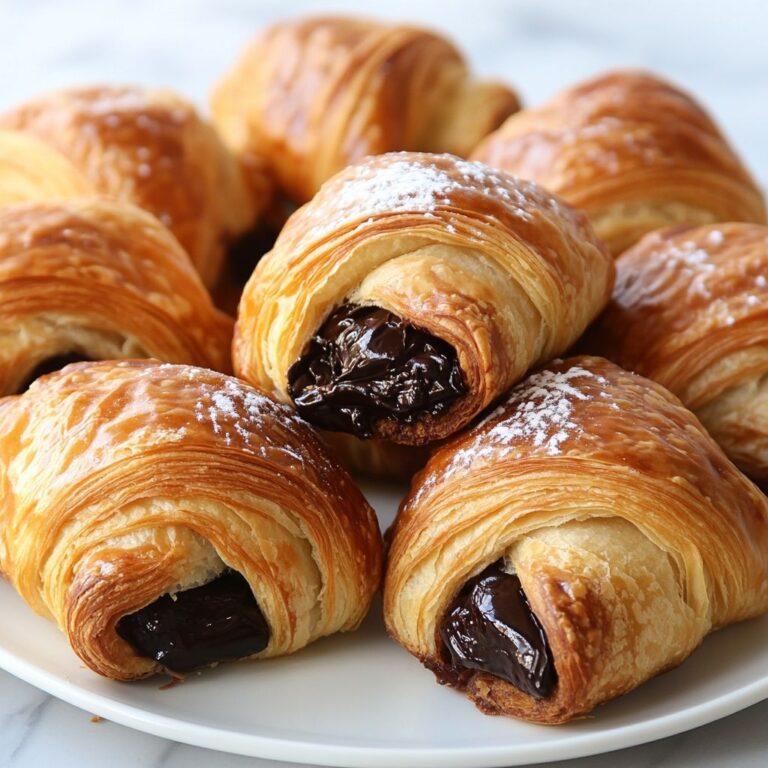
Instructions

  • Gather all your ingredients and weigh them accurately before starting the preparation.

    → This ensures you have everything you need at hand, minimizing the risk of missing components during the mixing process and ensuring consistent results.
  • Preheat your oven to 350°F (175°C) and line a baking sheet with parchment paper.

    → Preheating the oven allows the cookies to bake evenly, and using parchment paper prevents sticking, making for easier cleanup and preventing the cookies from becoming too dark on the bottom.
  • In a large mixing bowl, cream the softened butter with granulated sugar and brown sugar using an electric mixer on medium speed until the mixture is light and fluffy, about 3-5 minutes.

    → Creaming incorporates air into the butter and sugars, creating a light texture in the cookies. Ensure there are no lumps of butter remaining, as these can create uneven baking.
  • Add the two large eggs, one at a time, mixing on low speed until fully integrated, then mix in the teaspoon of pure vanilla extract.

    → Adding eggs one at a time allows for better emulsification, leading to a smoother and more cohesive batter. Mixing in the vanilla at this stage evenly distributes its flavor throughout the dough.
  • In a separate bowl, sift together the 2 cups of all-purpose flour, 1/2 cup of unsweetened cocoa powder, 1 teaspoon of baking soda, and 1/2 teaspoon of salt.

    → Sifting helps break up any clumps in the cocoa powder and flour, ensuring a smooth, even cookie dough without pockets of dry ingredients. Additionally, it aerates the flour for a lighter texture.
  • Gradually add the dry mixture to the wet mixture, mixing on low speed until just combined and no dry flour remains visible.

    → Avoid overmixing at this stage to prevent developing gluten, which can lead to tough cookies. Stop mixing as soon as you don’t see any flour; a few lumps are okay.
  • Fold in the 1 cup of chocolate chips and, if using, 1/2 cup of chopped nuts, using a spatula or wooden spoon to incorporate them evenly throughout the dough.

    → Folding gently helps maintain the airy structure of the dough while ensuring the chocolate chips and nuts are evenly distributed, leading to delightful bursts of flavor in each cookie.
  • Using a cookie scoop or tablespoon, portion the dough onto the prepared baking sheet, spacing them about 2 inches apart to allow for spreading.

    → This ensures even baking and prevents the cookies from merging into one another. If you desire larger cookies, adjust the portion size accordingly, but remember to increase baking time slightly.
  • Sprinkle any reserved chocolate chips on top of the cookie dough before baking for a visually appealing presentation.

    → This step not only enhances the look of the cookies but also ensures that there are plenty of chocolate morsels visible on top, inviting and tempting to anyone who sees them.
  • Bake the cookies in the preheated oven for 10-12 minutes, or until the edges are set and the tops look slightly puffed and soft.

    → The cookies will continue to cook as they cool on the baking sheet, so it’s important to underbake slightly for that soft, chewy texture desired. A toothpick inserted into the center should have a few moist crumbs attached but not be wet with batter.
  • Remove the baking sheet from the oven and let the cookies cool on the sheet for 5 minutes before transferring them to a wire rack to cool completely.

    → Cooling initially on the baking sheet allows them to set and makes handling them easier without breaking. Transferring to a wire rack allows air to circulate around the cookies, preventing them from becoming soggy.
  • Store the cooled cookies in an airtight container at room temperature for up to a week, or freeze them for longer storage.

    → Keeping them in an airtight container prevents them from drying out and maintains their optimal texture. Freezing allows you to enjoy freshly baked cookies at a later date; simply thaw them at room temperature or reheat in the microwave for a few seconds.

Notes

These soft baked chocolate cookies are a delightful treat that can be enjoyed any time of the day. The combination of granulated and brown sugars gives these cookies a balanced sweetness and a chewy texture that is incredibly satisfying. Using softened butter is key to achieving a creamy and tender dough that bakes beautifully. Make sure to allow your eggs to reach room temperature as well; this helps with the emulsification process, ensuring a uniform batter.

The richness of cocoa powder is what truly defines these cookies, providing an intense chocolate flavor. Be mindful of how you measure your flour; too much can lead to a dry cookie. Mixing your dry ingredients thoroughly helps to ensure a consistent texture throughout the batch. For those who crave extra chocolate, the addition of semi-sweet or dark chocolate chips creates gooey pockets that complement the cookie perfectly.
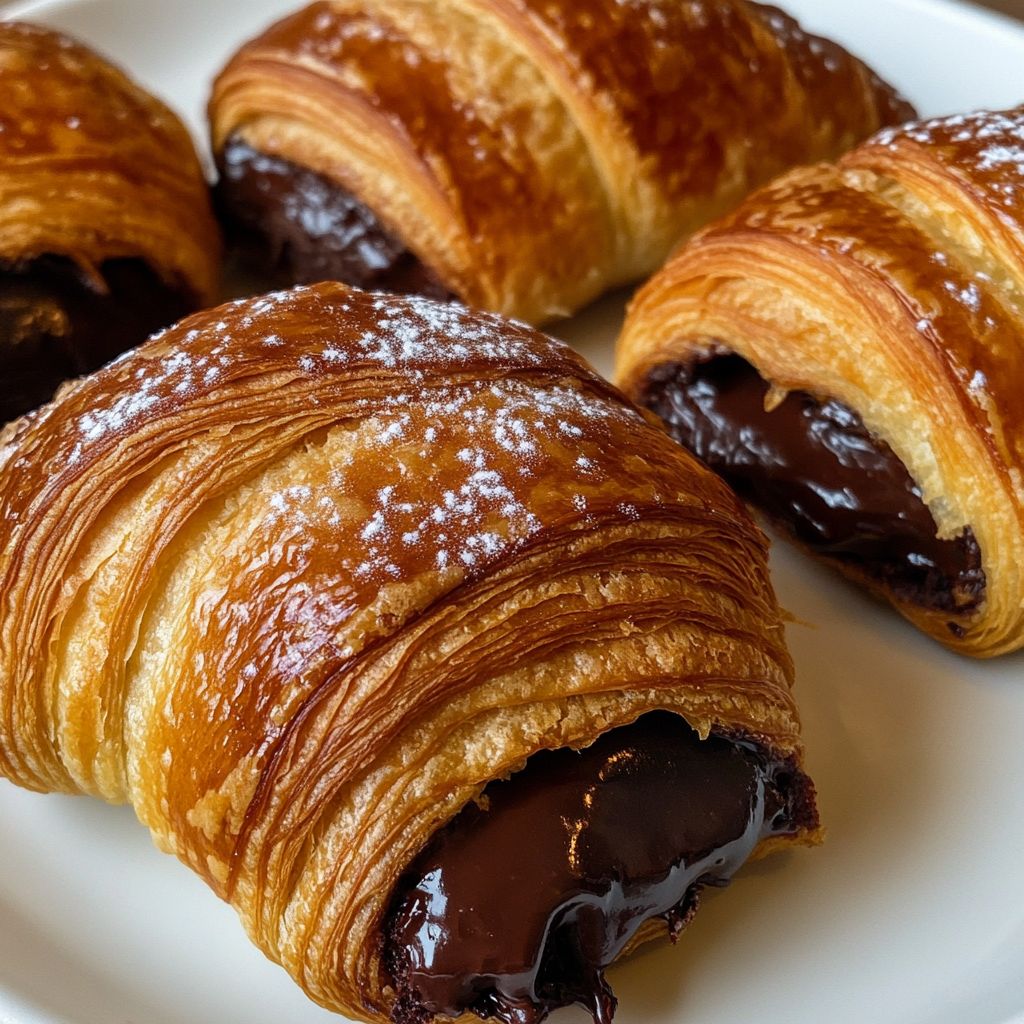
For added texture and flavor, consider mixing in chopped nuts, which not only enhance the crunch but also provide a wonderful contrast to the softness of the cookie. If you like, reserve some chocolate chips to add on top before baking for an appealing finish.

These cookies can be stored in an airtight container for several days, although they may not last long due to their deliciousness! For longer storage, you can freeze the baked cookies. Enjoy them warm from the oven with a glass of milk for a classic pairing or as a sweet snack any time of the day.

Tips

  • Temperature and Storage Tips
    • Preheat your oven: Always preheat your oven to ensure even baking. Set it to the temperature specified in the recipe before placing your cookie dough in, which helps achieve that perfect rise and soft texture.
    • Chill the dough: For thicker cookies, consider chilling the dough for at least 30 minutes before baking. This helps the cookies maintain their shape and prevents them from spreading too much in the oven.
    • Cooling the cookies: Allow the cookies to cool on the baking sheet for a few minutes before transferring them to a wire rack. This prevents them from breaking and allows them to firm up slightly, enhancing their texture.
    • Storage: Store leftover cookies in an airtight container at room temperature for up to a week. For longer storage, you can freeze the cookies or the unbaked dough for up to three months. Just make sure to wrap them tightly to avoid freezer burn.
  • Baking Techniques
    • Baking in batches: If you’re baking multiple trays of cookies, rotate them halfway through baking. This ensures that every cookie gets equal heat exposure, leading to a consistent bake.
    • Use parchment paper: Line your baking sheets with parchment paper or silicone mats. This helps prevent sticking and makes cleanup a breeze, while also promoting even baking.
    • Test for doneness: Cookies will continue to firm up as they cool. Look for the edges to be set and the centers to look slightly underbaked before taking them out of the oven for that perfect soft texture.
  • Customization Ideas
    • Flavor variations: Experiment with different types of extracts, such as almond or peppermint, to change up the flavor profile of your cookies. Just a few drops can make a big difference!
    • Different mix-ins: Get creative with your mix-ins! Consider adding toffee bits, dried fruit, or white chocolate for a unique twist on the classic chocolate cookie.

FAQ

What ingredients are needed to make soft baked chocolate cookies?

To make soft baked chocolate cookies, you will need all-purpose flour, cocoa powder, baking soda, salt, unsalted butter, granulated sugar, brown sugar, vanilla extract, eggs, and chocolate chips.

How do I ensure my chocolate cookies remain soft after baking?

To keep your cookies soft, be careful not to overbake them. Remove them from the oven when the edges are set but the centers look slightly underbaked. They will continue to cook on the baking sheet as they cool.

Can I substitute the all-purpose flour with gluten-free flour?

Yes, you can use a gluten-free all-purpose flour blend as a substitute for regular all-purpose flour. Make sure it contains xanthan gum or add it separately for the best texture.

What type of chocolate chips should I use for the cookies?

You can use semi-sweet chocolate chips for a classic flavor, but feel free to experiment with dark chocolate, milk chocolate, or even white chocolate chips according to your preference.

How long should I chill the cookie dough before baking?

Chilling the cookie dough for at least 30 minutes helps to enhance the flavors and prevents the cookies from spreading too much during baking.

How can I store leftover cookies to maintain their softness?

Store the cookies in an airtight container at room temperature. To retain their softness, you can also add a slice of bread to the container, as it helps to keep the cookies moist.

Can I freeze the cookie dough for later use?

Yes, you can freeze the cookie dough! Scoop the dough into balls, place them on a baking sheet to freeze, then transfer to a freezer bag once solid. They can be baked directly from frozen—just add a couple of extra minutes to the baking time.

How do I know when the cookies are done baking?

Your cookies are done when the edges are firm and the center looks slightly glossy. They should still look a little underbaked, as they’ll continue to set while cooling.

Introduction to Pure Indulgence: Baked Chocolate Croissants

Imagine the enchanting aroma of melted chocolate mingling with the enticing scent of freshly baked buttery pastry, wafting through your kitchen. That’s the irresistible allure of Baked Chocolate Croissants, a concoction that combines the soul-soothing richness of dark chocolate with the unparalleled flakiness of golden-brown croissant pastry. These delectable treats promise to transport you straight to a Parisian boulangerie, where culinary art meets the heavenly realm of chocolate bliss. Whether you’re a seasoned baker or a passionate novice, the joy of crafting and savoring these homemade delights is an experience like no other. Get ready to indulge your senses, satisfy your cravings, and create something truly memorable with these exquisite Baked Chocolate Croissants.

The Story Behind the Dish

The birth of chocolate croissants, or “pains au chocolat” as they’re affectionately known in France, can be traced back to the 19th century. This classic pastry has deep roots in the rich tapestry of French culinary arts, known for its elegant simplicity and decadent tastes. The croissant itself, with its layered buttery profile, became a breakfast staple across Europe as the art of baking perfected it over centuries. When dark chocolate found its luxurious way into their hearts, a beloved pastry was born, combining the simplicity of baking with the indulgence of fine chocolate. The Baked Chocolate Croissant has since become synonymous with leisurely mornings and cherished family gatherings.

Incorporating chocolate into the croissant was more than just a stroke of genius—it was an evolution of European confectionery traditions that embraced the abundance of cocoa brought in from the New World. Today, this classic remains a symbol of chic, yet it warmly invites innovate spins and personal tweaks, ensuring its place in the modern culinary playbook.

Why You’ll Love This Recipe

  • Effortlessly Elegant: Despite their sophisticated appearance, Baked Chocolate Croissants require minimal ingredients yet deliver maximum satisfaction.
  • Family-Friendly Fun: This recipe is perfect for a weekend baking project with loved ones. Involve the family, and make baking an engaging and rewarding experience.
  • Versatile Delight: Enjoy them for breakfast, as a snack, or as a delightful dessert.
  • Customizable Creations: Though originally featuring dark chocolate, feel free to experiment with a variety of fillings—create a different twist every time you bake.

Flavor Profile & Texture

Baked Chocolate Croissants are a testament to the magical union of diverse yet complementary flavors and textures. The pastry itself is tender yet flaky, with a delicate exterior that gives way to layers of buttery bliss. Inside, the rich, molten chocolate provides a satisfying, indulgent contrast, lending an irresistible depth that matches perfectly with the lightness of the pastry. The contrast between the slightly crispy crust and the tender interior, combined with the creamy chocolate core, creates a sensory experience that’s as joyful to discover as it is to savor.
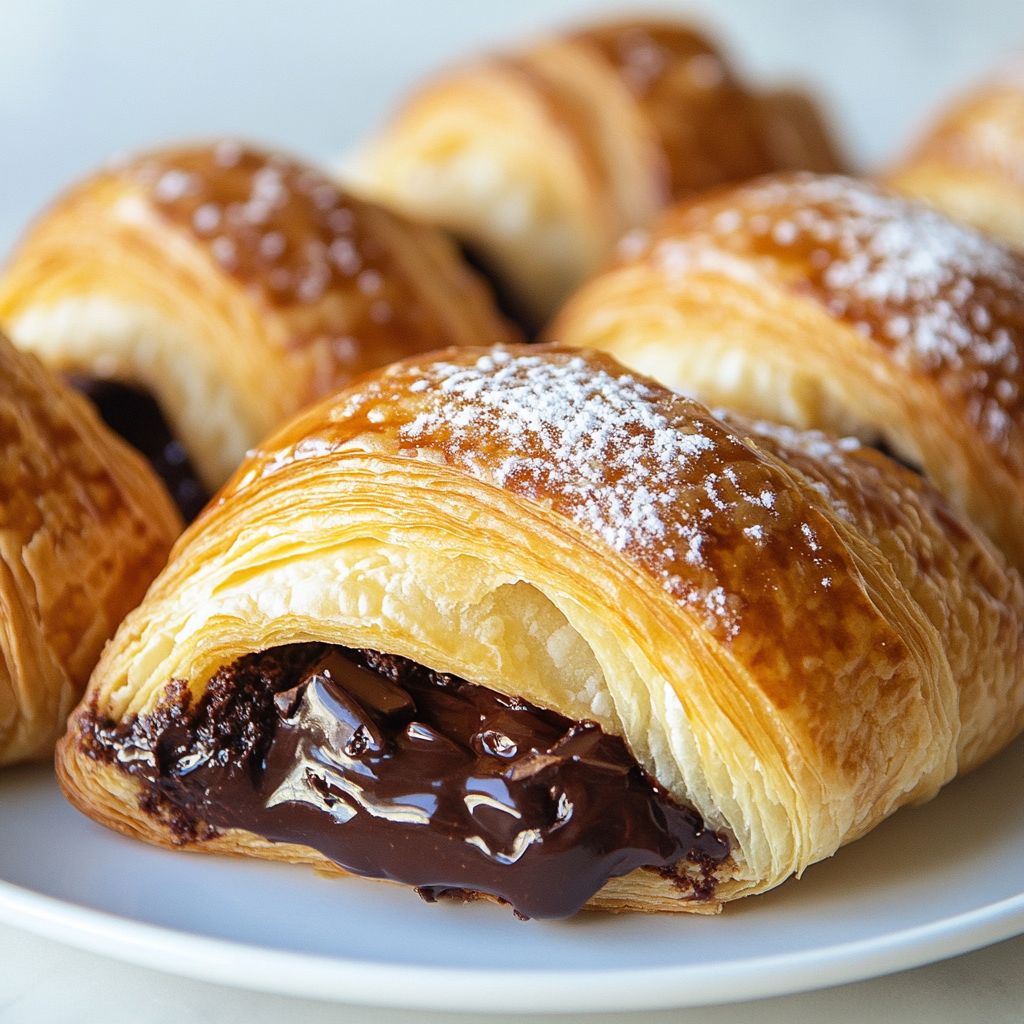
Occasions & Pairings

Baked Chocolate Croissants make a fabulous addition to any occasion, transforming ordinary moments into treasured memories:

  • Breakfast or Brunch: Start the day with a touch of luxury, pairing your croissants with a steaming cup of coffee or tea.
  • Celebrations & Gatherings: Make your brunches or tea parties feel extra special with these perfectly baked indulgences.
  • Dessert Course: Serve as a sophisticated dessert, perhaps with a dollop of whipped cream or a scoop of vanilla ice cream.

Tips, Variations & Substitutions

The classic nature of Baked Chocolate Croissants offers the perfect canvas for innovation and personalization. Here are a few ideas to consider:

  • Flavor Variations: Swap the dark chocolate with milk or white chocolate for a milder sweetness. Consider adding a hint of orange zest or a sprinkle of sea salt to enhance the chocolate’s depth.
  • Dietary Alternatives: Use gluten-free pastry dough or dairy-free chocolate to tailor the recipe to dietary needs without compromising on taste.
  • Regional Twists: Incorporate fruit preserves like raspberry or apricot for a fruity twist, or explore nut butters such as almond or hazelnut spread.

Storage & Make-Ahead Ideas

Baked Chocolate Croissants are just as delightful when enjoyed fresh from the oven or saved for later. Here’s how to make the most of leftover pastries:

  • Storing: Keep them in an airtight container at room temperature for up to two days or refrigerate them for longer shelf life.
  • Reheating: For a freshly baked experience, reheat the croissants in an oven preheated to 180°C (350°F) for about 5-10 minutes.
  • Freezing: Prepare the croissants and freeze them unbaked; simply bake from frozen with an additional few minutes in the oven.

With these storage tips, you’ll have delightful Baked Chocolate Croissants ready whenever the craving strikes, making any morning a special occasion.

Fun Facts & Trivia

Did you know that the croissant’s shape is steeped in history? Legend has it that its crescent shape was inspired by the Turkish flags, celebrating the defeat of the Ottoman Empire at the Siege of Vienna in 1683. True or not, the croissant’s iconic shape is timeless and instantly recognizable worldwide.

Another interesting tidbit: the worldwide proliferation of croissants is credited partly to the initiatives of Austrian baker August Zang, who introduced French-style bakeries to Paris in the 1800s. His Viennese bakery offered rich, buttery pastries that quickly became popular, setting the stage for the development of the beautifully layered pastries we enjoy today.

Finally, did you know that in France, regulations govern the specific proportions of ingredients and methods used to make ‘true’ croissants, ensuring consistency in quality and taste? This dedication to authenticity is just another reason why biting into a Baked Chocolate Croissant is a guaranteed irresistible pleasure.

In closing, Baked Chocolate Croissants are more than just a sweet treat; they are a fusion of cultures and history, wrapped up in layers of buttery pastry and luxurious chocolate. Let this recipe be your passport to creating comfort, indulgence, and a taste of French culinary craftsmanship right in your own kitchen.

Ingredients

  • Croissant Dough
    • 4 cups all-purpose flour
      → All-purpose flour provides the structure for the croissant. It should be measured precisely for the best texture. Consider using a kitchen scale for accuracy, and be mindful not to pack the flour into the measuring cup.
    • 1 teaspoon salt
      → Salt enhances the flavor of the dough and strengthens the gluten structure. It can be added directly to the flour before the other ingredients to ensure even distribution. Use fine sea salt for the best results.
    • 1/4 cup granulated sugar
      → Sugar adds sweetness and helps to create a rich flavor in the dough. It can be adjusted based on personal preference and provides a slight fermentation benefit during the dough’s rise.
    • 2 1/4 teaspoons instant yeast
      → Instant yeast acts as the leavening agent that helps the dough rise and develop a light texture. Be sure to verify the yeast is fresh for optimal results. It can be mixed directly with the dry ingredients.
    • 1 cup whole milk (warm)
      → Warm milk activates the yeast and helps with the dough’s fermentation. Make sure the milk is not too hot to avoid killing the yeast; it should be lukewarm, around 100°F (38°C).
    • 1/4 cup unsalted butter (melted)
      → Butter adds richness and flavor to the dough. It should be melted and allowed to cool slightly before being added to the mixture. This will prevent the heat from affecting the yeast.
  • Butter Layer
    • 1 cup unsalted butter (cold)
      → This butter will be rolled into the dough to create flaky layers in the croissant. It should be very cold and firm for optimal lamination. Cut it into cubes and shape it into a rectangle to make this process easier.
  • Chocolate Filling
    • 1 cup dark chocolate chips (or chopped chocolate)
      → Dark chocolate provides a rich, indulgent filling for the croissants, adding to the dessert’s sweetness and flavor. Choose high-quality chocolate with at least 60% cocoa solids for the best taste. Allow it to come to room temperature before using.
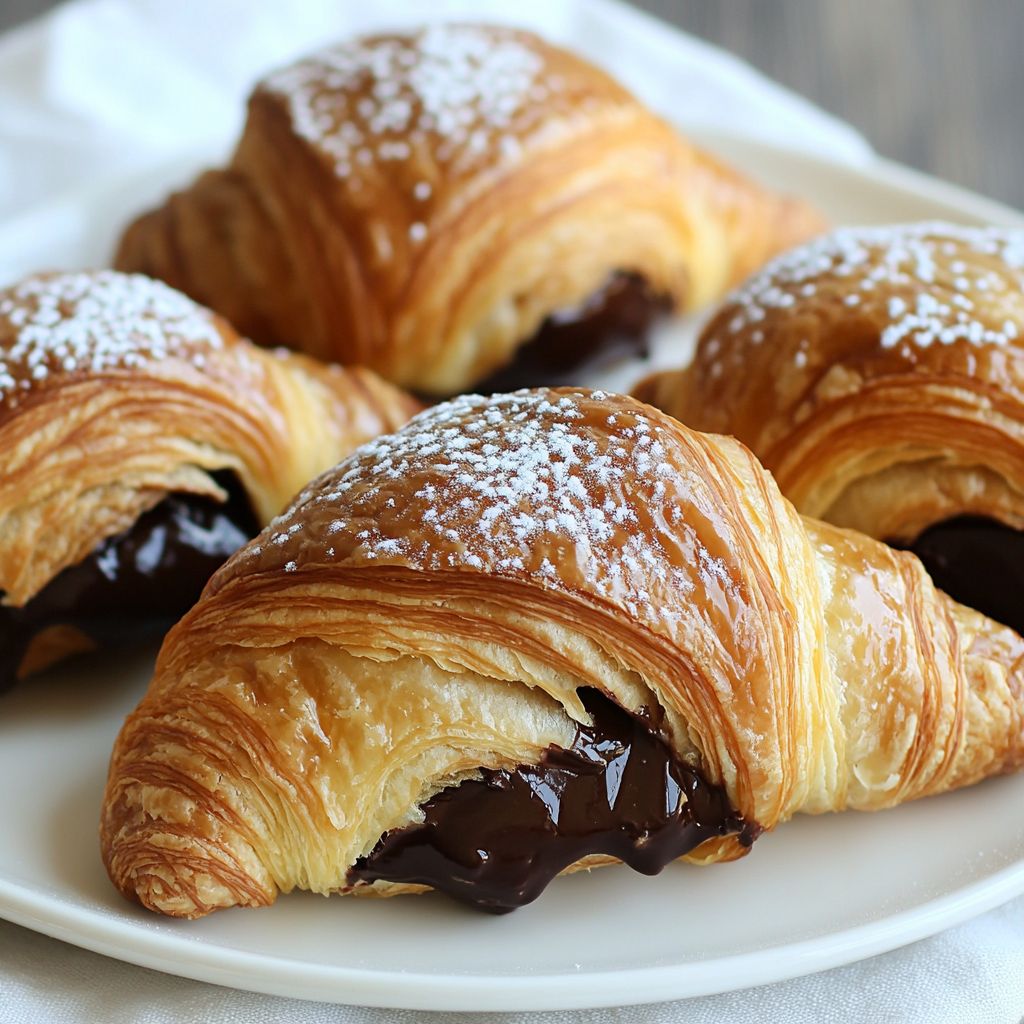
    • 1 tablespoon cocoa powder
      → Cocoa powder enhances the chocolate flavor and adds depth to the filling. Ensure it is sifted before mixing to avoid clumping. It can also help to balance the sweetness of the chocolate chips.
  • Egg Wash
    • 1 large egg
      → An egg wash provides a beautiful glossy finish to the croissants when baked. Whisk it lightly before brushing to ensure even coverage. You can also mix in a tablespoon of water or milk for a less intense sheen.

Instructions

  • In a large mixing bowl, combine 4 cups of all-purpose flour, 1 teaspoon of salt, and 1/4 cup of granulated sugar.

    → This combination forms the base of your croissant dough. Make sure to whisk the dry ingredients together thoroughly to ensure an even distribution of salt and sugar, which are essential for flavor and fermentation.
  • Add 2 1/4 teaspoons of instant yeast to the dry mixture.

    → Instant yeast does not require proofing, making it easy to mix directly into the dry ingredients. Ensure the yeast is fresh, as expired yeast can lead to poor rising and texture.
  • Warm 1 cup of whole milk to about 100°F (38°C) and pour it into the flour mixture.

    → Properly warming the milk is crucial because it activates the yeast, aiding in the fermentation process. Use a thermometer to check the temperature, ensuring it is not too hot, which can kill the yeast.
  • Add 1/4 cup of melted unsalted butter to the milk and flour mixture.

    → The butter adds flavor and richness while also improving the dough’s texture. Allow the melted butter to cool slightly before adding it to prevent scalding the yeast.
  • Mix the ingredients together with a wooden spoon or your hands until a shaggy dough forms.

    → The goal is to combine everything until no dry flour remains visible. Avoid over-mixing at this stage to keep the dough tender, as gluten develops when mixed too much.
  • Knead the dough on a lightly floured surface for about 10 minutes until it becomes smooth and elastic.

    → Kneading develops gluten, which gives the croissants their structure and chewiness. If the dough is too sticky, sprinkle a little more flour while kneading, but avoid adding too much to keep the dough tender.
  • Shape the dough into a ball and place it in a lightly greased bowl, covering it with a damp cloth. Let it rise in a warm place until doubled in size, about 1 to 2 hours.

    → This first rise is essential for developing flavor. Keeping the dough covered prevents it from drying out. You can create a warm environment by placing the bowl in an turned-off oven with the light on.
  • While the dough is rising, prepare the butter layer by cutting 1 cup of cold unsalted butter into cubes.

    → Using cold butter is crucial as it will be rolled into the dough to create flaky layers. Ensure the butter remains firm, as softened butter will lead to a greasy dough.
  • Shape the cold butter into a rectangle (about 6×8 inches) using a rolling pin between two sheets of parchment paper.

    → This rectangle needs to fit well in the dough for folding. The parchment paper helps prevent sticking and makes it easier to roll out the butter evenly.
  • Once the dough has doubled, turn it out onto a lightly floured surface and roll it into a large rectangle about 12×20 inches.

    → Use even pressure and roll from the center outward to maintain an even thickness. Make sure the corners are sharp and the edges are straight to ensure uniform folding.
  • Place the prepared cold butter rectangle in the center of the rolled-out dough and fold the dough over the butter, sealing the edges to encase the butter completely.

    → This process ensures that the butter is trapped within the dough, which is essential for creating the flaky layers characteristic of croissants.
  • Gently roll out the dough into a long rectangle about 12×24 inches.

    → Use light pressure to avoid squeezing the butter out. Keep flour available to dust the surface as needed to prevent sticking.
  • Fold the dough into thirds (like a letter) and wrap it in plastic wrap. Chill in the refrigerator for 30 minutes.

    → Chilling allows the butter to firm up and makes the dough easier to roll out for subsequent turns. It’s also important for developing the layers.
  • Repeat the rolling and folding process two more times, chilling between each turn, for a total of three turns.

    → Each turn increases the layers of butter and dough, which is what gives the croissants their flakiness and structure. Ensure that the dough remains cool during this process.
  • For the chocolate filling, in a bowl, mix 1 cup of dark chocolate chips with 1 tablespoon of sifted cocoa powder.

    → Sifting the cocoa powder avoids clumps and ensures that it integrates smoothly with the chocolate. This mix flavors the filling, giving it a rich chocolate taste.
  • Roll out the finished dough into a large rectangle about 1/4 inch thick. Cut the dough into triangles (about 4 inches wide at the base and 8 inches tall).

    → Sharp cuts are essential for clean edges; this helps in rolling the croissants without them losing shape. Make sure each triangle is uniform for even baking.
  • Place a tablespoon of the chocolate filling at the base of each triangle and roll them up from the base towards the point.

    → Tightly rolling the croissant ensures that the chocolate filling stays inside during baking while helping the croissant achieve its signature crescent shape.
  • Place the rolled croissants on a baking sheet lined with parchment paper, spacing them about 2 inches apart.

    → This spacing allows for expansion while baking without the croissants touching. Keeping them on parchment prevents sticking and simplifies clean-up.
  • Whisk 1 large egg in a small bowl to create the egg wash, then brush it lightly over each croissant.

    → An egg wash gives the croissants a beautiful golden-brown color and delicious glossy finish. Be gentle to avoid deflating the dough.
  • Cover the baking sheet loosely with plastic wrap and let the croissants rise again in a warm area until puffy, about 1 hour.

    → This second rise allows for further development of flavor and ensures the croissants are light and airy. Avoid drafts, as they may affect the rising process.
  • Preheat your oven to 375°F (190°C) while the croissants are rising.

    → An adequately preheated oven is crucial for achieving the right texture and color. Ensure your oven is hot before placing the croissants inside.
  • Bake the croissants in the preheated oven for 15-20 minutes or until they are golden brown and puffed.

    → Keep an eye on them as baking times can vary. They should have a beautiful, deep golden color, indicating they are perfectly baked and flaky.
  • Remove the croissants from the oven and allow them to cool on a wire rack for about 10 minutes.

    → Cooling on a wire rack prevents moisture from collecting underneath, which can make the bottoms soggy. This final step is vital for leaving the croissants crisp.
  • Serve the baked chocolate croissants warm or at room temperature, enjoying their flaky layers and rich chocolate filling.

    → Allowing them to cool slightly enhances the flavor profile, making every bite satisfying and indulgent. Enjoy with coffee, tea, or as a sweet treat on their own.

Notes

These baked chocolate croissants are a delightful treat that combines flaky, buttery pastry with rich chocolate filling. The dough is made from scratch, allowing you to truly appreciate the flavors and textures of freshly baked croissants. For the best results, ensure all ingredients are at the proper temperature, especially the cold butter for lamination, which is crucial for creating those signature layers. You can experiment with different types of chocolate for a customized flavor—a mix of dark and milk chocolate can provide a unique taste profile. Once baked, serve these croissants warm for the ultimate indulgence; they pair wonderfully with a cup of coffee or tea. If you have leftovers, they can be stored in an airtight container for a couple of days, or you can freeze them for longer storage. Reheat them in the oven for a few minutes to restore their flaky texture before serving.

Tips

Tips for Making Baked Chocolate Croissants

  • Preparing the Dough: When mixing the dough, ensure you do not over-knead it; this can lead to tough croissants. Knead until just combined and smooth.
  • Creating Layers: Lamination is key to flaky croissants. After placing the cold butter between the layers of dough, use a rolling pin to gently roll it out, keeping the butter cold throughout the process. If the butter becomes too soft, refrigerate the dough for a few minutes before continuing.
  • Shaping the Croissants: For a more uniform shape, roll the dough into a rectangle and cut out triangles. Make sure to stretch the triangle slightly while rolling it into a croissant shape to create more layering and a better rise.
  • Proofing: Allow the shaped croissants to rest until doubled in size, usually 1-2 hours. Keep them in a warm, draft-free area. This step is critical as it helps develop flavor and ensure a light texture.
  • Baking: Preheat your oven to the correct temperature and ensure it is fully heated before baking. This ensures the croissants puff up nicely. Consider using a baking stone for the best results, as it helps with even heat distribution.
  • Storage: If you have leftover croissants, store them in an airtight container at room temperature for a day or two, or freeze them for longer storage. Reheat in the oven to bring back their crispiness.
  • Experimentation: Feel free to experiment with the filling! Try adding nuts, fruits, or different types of chocolate to personalize your croissants to your taste.

FAQ

What ingredients are needed to make baked chocolate croissants?

You will need puff pastry, chocolate (dark, milk, or semi-sweet), butter, sugar, egg (for egg wash), and optional powdered sugar for dusting.

Can I use store-bought puff pastry?

Yes, store-bought puff pastry is perfect for making chocolate croissants as it saves time and effort without sacrificing taste.

How long does it take to bake chocolate croissants?

Typically, it takes about 15-20 minutes to bake chocolate croissants at 400°F (200°C) until they are golden brown and puffed.

Can I fill the croissants with other types of chocolate?

Absolutely! You can use different types of chocolate such as Nutella, white chocolate, or even flavored chocolate for a unique twist.

How can I make sure my croissants are flaky?

To achieve a flaky texture, ensure that your puff pastry is kept cold and handle it minimally to retain the layers of butter and dough.

Can I freeze baked chocolate croissants?

Yes, baked chocolate croissants can be frozen. Make sure to cool them completely, wrap them tightly, and store in an airtight container before freezing.

What is the best way to reheat frozen croissants?

The best way to reheat frozen croissants is to let them thaw in the fridge overnight and then heat them in a preheated oven at 350°F (175°C) for about 10-15 minutes.

How can I enhance the flavor of my chocolate croissants?

You can enhance the flavor by adding a pinch of sea salt, a sprinkle of cinnamon, or incorporating a flavored chocolate, such as orange or raspberry.