Author

Ocean Nightleaf

Browsing

Introduction to a Comforting Culinary Delight

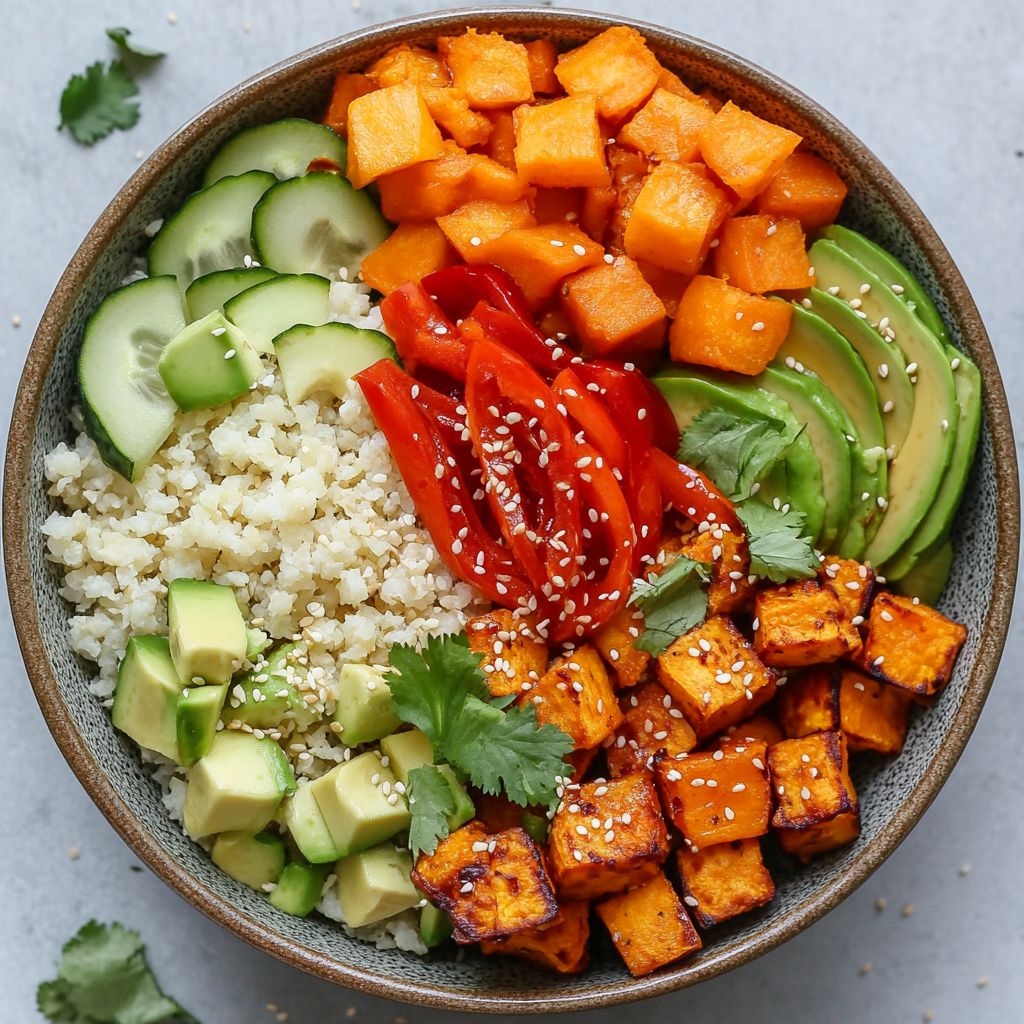
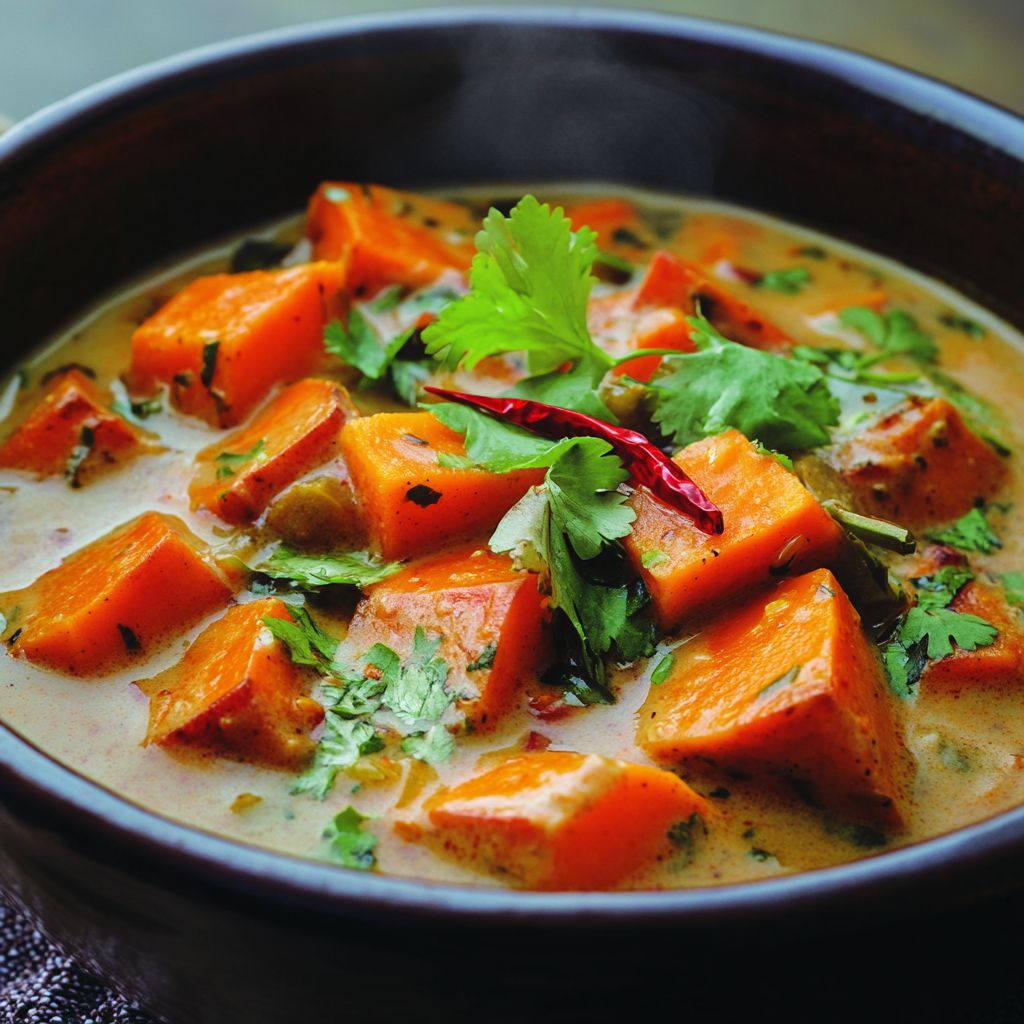
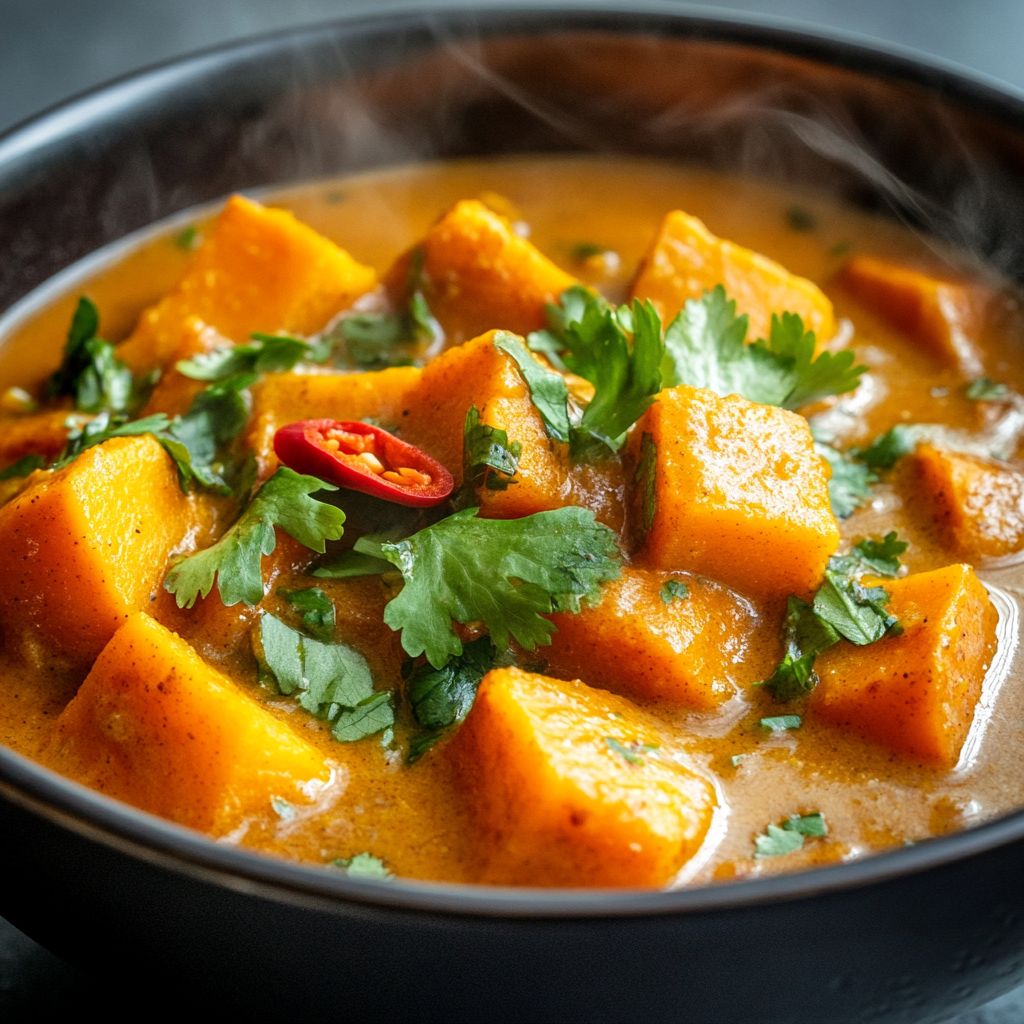
Welcome to a world of vibrant flavors and comforting aromas with our Spiced Sweet Potato and Coconut Stew. Imagine a dish that tantalizes your senses with the earthiness of sweet potatoes, the smooth richness of coconut milk, and an intricate blend of exotic spices. This stew envelops you in warmth with every comforting bite, perfect for cold winter evenings or as a delightful feature at your dinner table any time of the year. The harmonious balance of flavors is sure to make this recipe a staple in your kitchen. Dive into the silky, aromatic depths of this tantalizing stew and ignite your taste buds with its tropical allure.

The Story Behind the Dish

The Spiced Sweet Potato and Coconut Stew takes its roots from a fusion of African and Caribbean culinary traditions where sweet potatoes are a staple and coconut milk is commonly used to add a creamy texture to many dishes. Known for their affinity for spices, these cultures have long embraced the natural sweetness of sweet potatoes, using them in stews that are both hearty and flavorful. The lush, creamy texture of coconut milk complements the earthy sweetness of the potatoes beautifully, creating a dish that’s as nourishing as it is comforting.

This particular stew reflects centuries of influence from the spice trade, where warm spices like cumin, ginger, and coriander began traveling across oceans, infusing traditional dishes with layers of new flavors. It’s a testament to cultural blend and innovation in cooking, offering a historical journey that continues to evolve in kitchens around the world.

Why You’ll Love This Recipe

  • Warming and Hearty: Perfect for cozying up on a chilly day, this stew offers warmth in every spoonful.
  • Rich in Flavor: A blend of spices creates a medley that’s full of depth and zest.
  • Nutrient-Dense: It’s packed with vitamins and minerals, making it as healthy as it is delicious.
  • Versatile: Enjoy it as a meal on its own, or pair it with other dishes for a vibrant feast.
  • Simple to Make: With easy steps and just one pot, it’s ideal for both novice cooks and busy weeknights.

Flavor Profile & Texture

The flavor profile of the Spiced Sweet Potato and Coconut Stew is an exquisite tapestry of tastes. It starts with the natural sweetness of sweet potatoes, which are mellow and comforting. This sweetness is elevated by the aromatic coconut milk, creating a rich and velvety consistency. The symphony of spices adds warmth, depth, and complexity to the stew. Expect notes of ginger’s gentle heat, the earthiness of cumin, and a fragrant touch of coriander. A hint of sea salt ties all these elements together, enhancing each component without overwhelming their natural flavors. The texture is a beautiful contrast between the smooth creaminess of the broth and the tender bite of chunky sweet potatoes. Every taste and texture works in harmony, inviting you to savor each rich and exotic note.

Occasions & Pairings

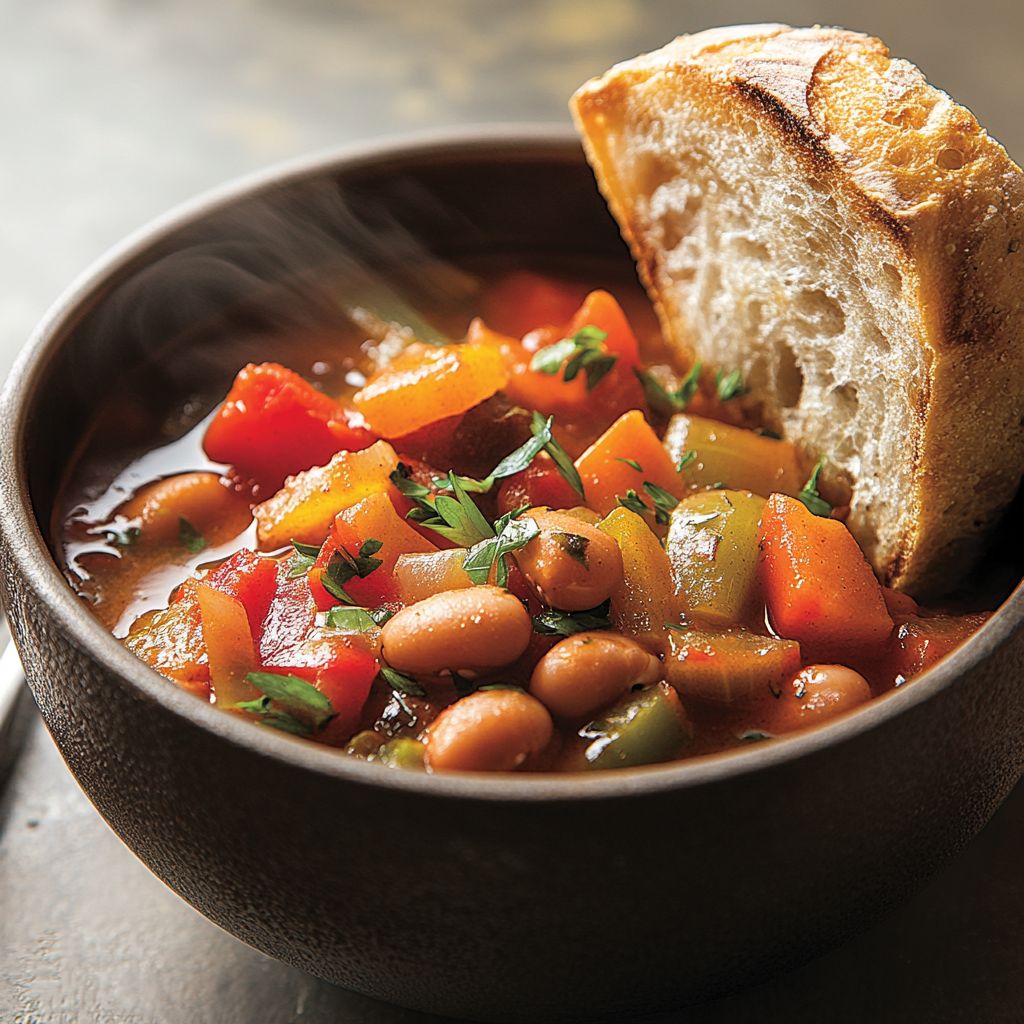
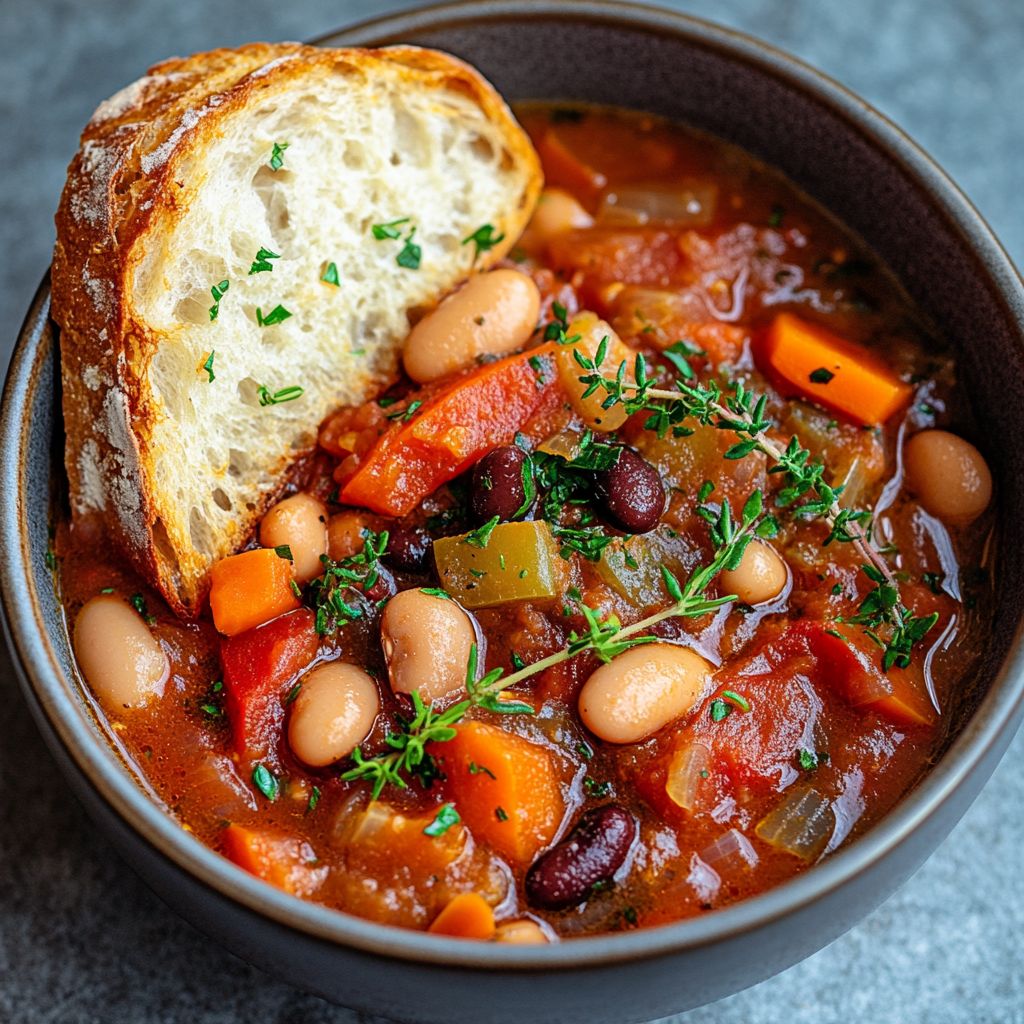
Our Spiced Sweet Potato and Coconut Stew is versatile enough to be served on numerous occasions. It shines as a heartening meal on a cold winter’s night but can also be a stunning centerpiece at a festive family gathering. Because of its rich, exotic flavors, it pairs wonderfully with a variety of sides. Pair it with warm, crusty bread to soak up the aromatic broth, or with fluffy jasmine rice to savor its creamy sauce in each grain. For drink pairings, consider a crisp white wine or a refreshing iced tea infused with mint and lemon to balance the stew’s richness.

Tips, Variations & Substitutions

This stew is flexible enough to accommodate various dietary preferences and creative modifications:

  • Vegan and Vegetarian: This stew is naturally vegan. For additional protein, consider adding chickpeas or lentils.
  • Gluten-Free: Ensure that all spices are certified gluten-free.
  • Spice Variations: Experiment with different spice combinations. Try adding turmeric for a golden hue or smoked paprika for a hint of heat.
  • Extra Vegetables: Kale or spinach can add a burst of green and an extra health boost.

Storage & Make-Ahead Ideas

Spiced Sweet Potato and Coconut Stew is perfect for meal prep enthusiasts and those who love having meals ready in advance. It can be made ahead and stored in the refrigerator for up to 5 days, allowing flavors to further meld and deepen. For longer storage, you can freeze it for up to 3 months. When reheating, gently warm it on the stove over medium heat, stirring occasionally to restore its creamy consistency. Avoid overheating to preserve the optimal texture of the sweet potatoes. Easily portable and ready to heat and serve, this stew is the ideal make-ahead meal.

Fun Facts & Trivia

Did you know that sweet potatoes are not only rich in vitamins and fiber but are also considered one of the oldest vegetables known to humankind, with archeological evidence suggesting cultivation as far back as 750 BC? Moreover, coconut trees, the second prominent ingredient in this stew, are known as the “tree of life” in many cultures due to the numerous nutritional and practical uses of the tree’s various parts. Understanding these elements adds a fascinating context to the humble stew, showcasing the remarkable journey of its ingredients throughout history.

Crafting this simple yet elegant Spiced Sweet Potato and Coconut Stew is not just about creating a dish but experiencing a culinary journey enriched with history and flavors from around the globe. Enjoy every spoonful as you savor its global heritage and delightful comforting warmth!

Ingredients

  • Stew Base
    • 2 medium sweet potatoes (peeled and diced)
      → Sweet potatoes add a natural sweetness and creaminess to the stew, making it hearty and filling. Ensure that they are peeled and cut into even-sized cubes to promote even cooking and tenderness throughout the dish.
    • 1 onion (diced)
      → Onions provide a foundational flavor that enhances the overall profile of the stew. Dice them finely to ensure they cook down quickly and meld seamlessly into the stew base, offering sweetness and depth.
    • 3 cloves garlic (minced)
      → Garlic infuses the stew with a fragrant aroma and subtle heat. Mince the garlic to release its essential oils, allowing its potent flavor to develop as it cooks. Avoid burning the garlic by adding it at the right moment during cooking.
    • 1 can (14 ounces) coconut milk
      → Coconut milk brings a rich and creamy texture to the stew, balancing the spices and sweet potatoes’ sweetness. Use full-fat coconut milk for the best flavor and creaminess. Shake the can well before opening to ensure it’s mixed properly.
    • 4 cups vegetable broth
      → Vegetable broth serves as the cooking liquid, providing depth and savory flavor to the stew. Use low-sodium broth to control the saltiness of the dish, and ensure it’s heated before adding to the pot to speed up the cooking process.
  • Spices
    • 1 teaspoon ground cumin
      → Ground cumin adds an earthy, warm flavor to the stew, enhancing the sweetness of the sweet potatoes. Toasting the cumin briefly in the pot before adding other ingredients can help bring out its flavor more deeply.
    • 1 teaspoon ground coriander
      → Ground coriander adds a light, citrusy note to the stew that complements the earthiness of the cumin. Ensure it’s fresh and aromatic; if possible, buy whole seeds and grind them just before use for the best flavor.
    • 1/2 teaspoon ground cinnamon
      → Cinnamon adds warmth and sweetness, enhancing the overall savory profile of the stew. Use Ceylon cinnamon for a more delicate and complex flavor. Add it early in the cooking process to allow its aroma to infuse the stew.
    • 1/4 teaspoon cayenne pepper (adjust to taste)
      → Cayenne pepper provides a spicy kick that contrasts beautifully with the sweet potatoes and coconut milk. Adjust the quantity to cater to your spice tolerance, and blend it well with other spices before adding to the pot to ensure even flavor distribution.
  • Add-ins
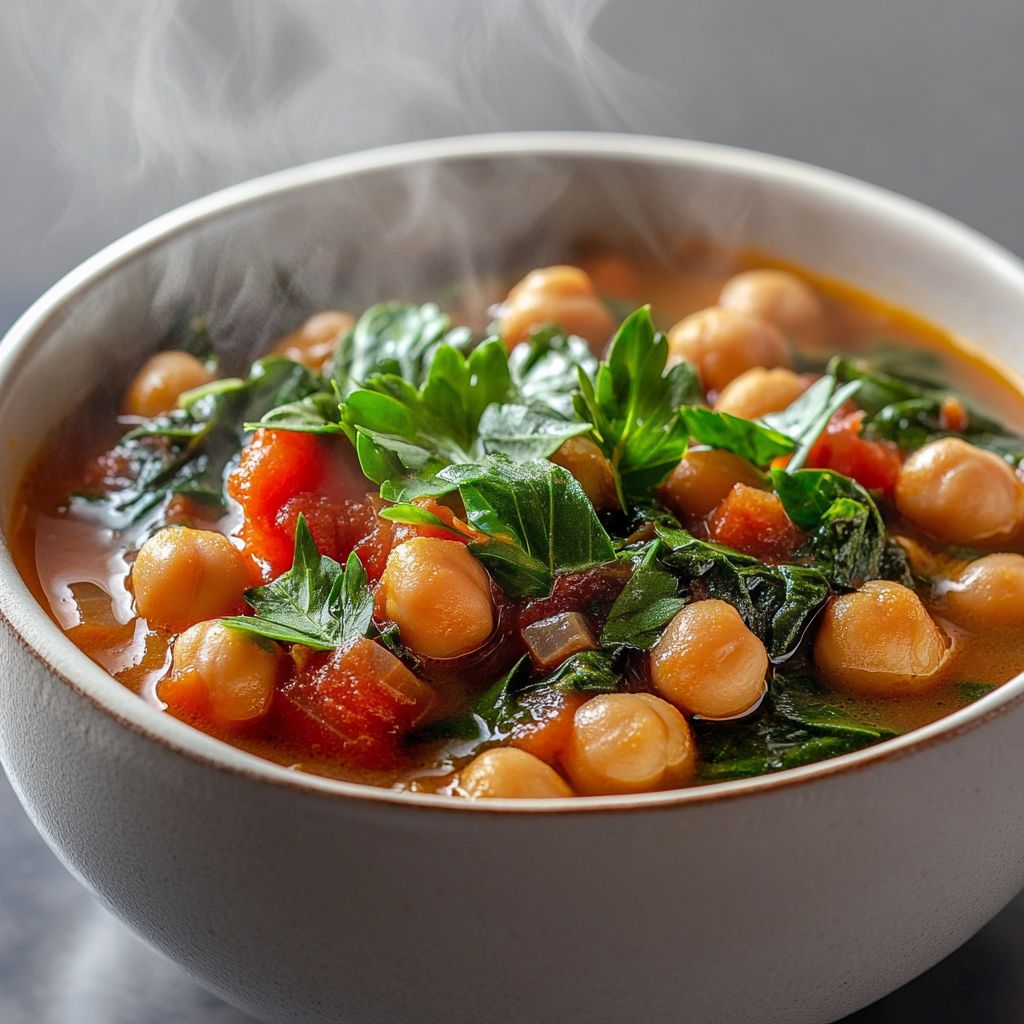
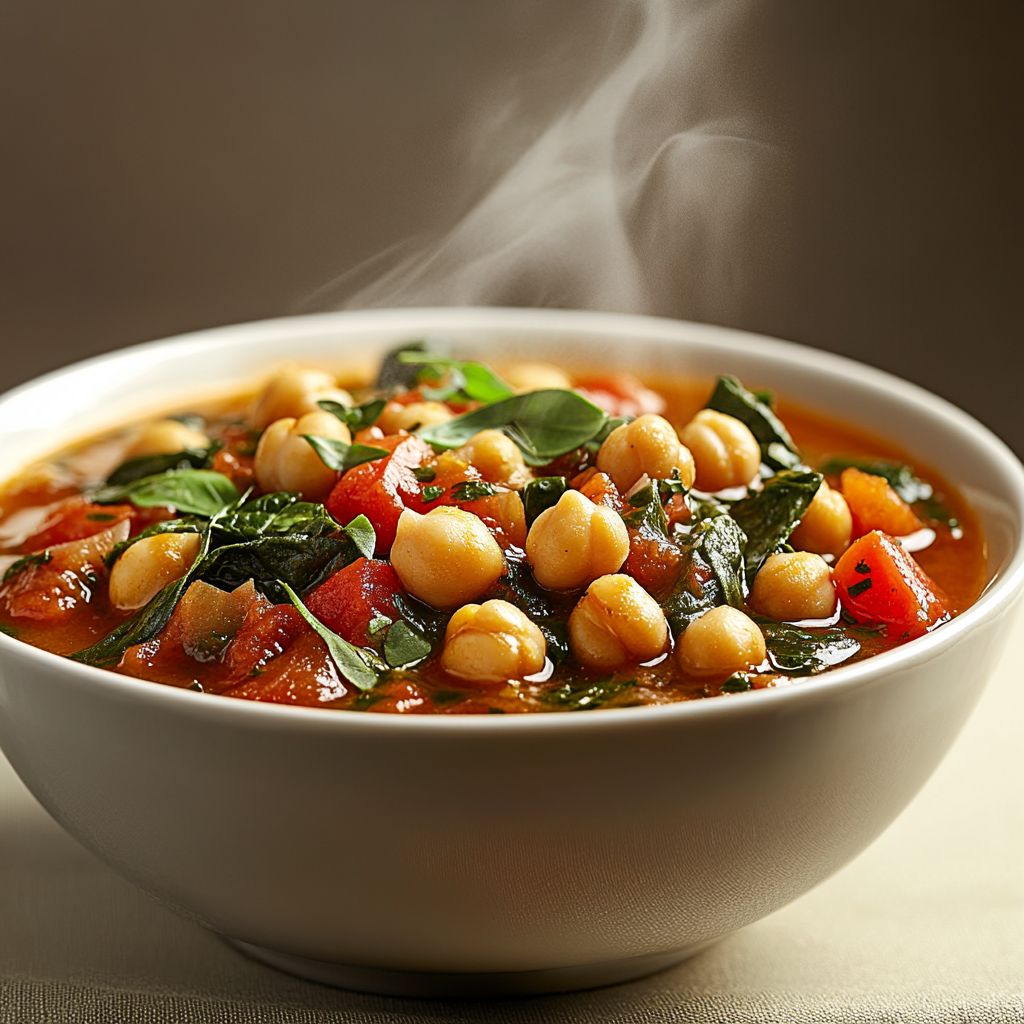
    • 1 cup canned chickpeas (drained and rinsed)
      → Chickpeas add protein and a hearty texture to the stew, making it more filling. Choose low-sodium canned chickpeas for convenience, and rinse them well under cold water to remove any excess sodium and improve taste.
    • 2 cups fresh spinach (roughly chopped)
      → Fresh spinach provides a nutrient boost and bright color to the stew. Add it towards the end of cooking to retain its vibrant color and freshness; it wilts down quickly but should not overcook, maintaining its nutrients.
    • 1 bell pepper (diced, optional)
      → Bell peppers add a sweet crunch and additional nutrients. Choose any color for visual appeal, and remove the seeds and stem before dicing. Add them at the same time as the onion for optimal cooking.
  • Garnish
    • Fresh cilantro (for garnish)
      → Fresh cilantro adds a burst of freshness and a bright flavor contrast to the rich stew. Chop the leaves just before serving to retain their aromatic oils and vibrant color, and sprinkle them over each bowl for a beautiful presentation.
    • Lime wedges (for serving)
      → Lime wedges provide a zesty finish that elevates the flavors of the stew. Squeeze fresh lime juice over the stew just before eating to enhance the overall taste and freshness of the dish.

Instructions

  • Begin by preparing your ingredients: peel and dice the sweet potatoes, onion, and bell pepper (if using).

    → This preparation step ensures that all vegetables are ready to go when you start cooking, allowing for a more fluid cooking process and preventing any of the ingredients from cooking unevenly.
  • Heat a large pot or Dutch oven over medium heat and add 2 tablespoons of cooking oil (like olive or coconut oil).

    → The cooking oil creates a non-stick surface and allows the vegetables to sauté evenly. Ensure the pot is hot enough to sizzle a drop of water to confirm it’s at the right temperature before adding the oil.
  • Add the diced onion to the pot, stirring occasionally until it becomes translucent, about 5-7 minutes.

    → Cooking the onions until translucent mellows their sharp flavor and allows them to contribute sweetness to the stew. Stirring prevents burning and helps cook them evenly.
  • Stir in the minced garlic and diced bell pepper (if using), and sauté for an additional 2-3 minutes until fragrant.

    → Adding garlic at this stage allows it to soften and release its flavor without burning, which can lead to bitterness in the dish. Cook until you can smell the aromatic garlic, but do not let it brown.
  • In a separate small skillet, toast the ground cumin, coriander, cinnamon, and cayenne pepper over low heat for about 2 minutes, stirring frequently until they release their aroma.

    → Toasting spices before adding them to the stew enhances their flavors and makes them more aromatic, deepening the overall taste profile of the stew.
  • Add the diced sweet potatoes to the pot and pour in the toasted spices from the skillet, mixing well to coat the sweet potatoes.

    → This coating allows the sweet potatoes to absorb the spices’ flavors as they cook, ensuring every bite is delicious. Stir thoroughly to ensure the sweet potatoes are evenly seasoned.
  • Add the can of coconut milk and the heated vegetable broth to the pot, stirring to combine all ingredients.

    → The coconut milk will enrich the stew and add creaminess, while the vegetable broth provides depth of flavor. Combining them with the other ingredients ensures consistent flavor throughout the stew.
  • Bring the stew to a gentle boil, then reduce the heat to low and cover the pot, allowing it to simmer for about 20-25 minutes until the sweet potatoes are tender.

    → Simmering allows the flavors to meld and develop while cooking the sweet potatoes through. To check for doneness, pierce a piece with a fork; it should be soft but still hold its shape.
  • Once the sweet potatoes are tender, stir in the drained and rinsed chickpeas and chopped spinach, cooking for an additional 5-7 minutes until the spinach is wilted and vibrant green.

    → This step incorporates additional protein and vegetables, enhancing the stew’s nutrition and texture. Adding the spinach at the end ensures it maintains its bright color and nutrients.
  • Remove the pot from heat and let the stew sit for a few minutes to allow flavors to settle.

    → Allowing the stew to rest can improve the flavor balance as the ingredients continue to meld together slightly off the heat.
  • Serve the stew warm in bowls, garnishing each with freshly chopped cilantro and lime wedges on the side.

    → Garnishing with cilantro adds a fresh, vibrant touch and enhances the visual appeal, while lime wedges allow for a zesty finish that brightens the dish’s overall flavor when squeezed over the top.

Notes

This Spiced Sweet Potato and Coconut Stew is a comforting and hearty dish, perfect for a cozy dinner. The combination of sweet potatoes and coconut milk creates a creamy base that is both satisfying and nourishing. Feel free to customize the stew by adding your favorite vegetables or proteins. Leftovers taste even better the next day, as the flavors continue to meld. Serve it with crusty bread or over rice for a complete meal. If you prefer a thicker consistency, let it simmer uncovered for a bit longer, allowing some of the liquid to evaporate. Don’t forget to adjust the spice levels according to your taste and enjoy the aromatic experience of this delicious stew!

Tips

Cooking Tips for Spiced Sweet Potato and Coconut Stew

  • Prep Ingredients in Advance – To make the cooking process smoother, prepare all your ingredients ahead of time. Dice, mince, and rinse as necessary so you can focus on cooking without interruption.
  • Control the Heat – When cooking onions and garlic, keep the heat on medium to avoid burning them. Stir frequently to ensure even cooking and to release their natural sweetness.
  • Layer Flavors – When adding spices, consider adding them in layers at different stages of cooking. This technique helps enhance the overall flavor profile. Start with toasting the spices before adding the vegetables for deeper flavor.
  • Adjust Thickness – If the stew is too thick, you can thin it out by adding more vegetable broth or water. Conversely, if it’s too thin, let it simmer uncovered for a bit to help it thicken.
  • Taste as You Go – Always taste your stew while it’s cooking. Adjust seasoning as needed, whether it’s salt, pepper, or more spices, to make sure it suits your palate.
  • Timing for Add-ins – Add sweet potatoes and chickpeas early on since they need time to cook through, but add spinach and bell peppers later to keep them fresh and vibrant.
  • Let it Rest – If you have time, let the stew sit for about 15-20 minutes after cooking. This allows the flavors to meld together even more, resulting in a tastier dish.
  • Garnish Generously – When serving, don’t skimp on garnishes like cilantro and lime. They add a fresh element that brightens the hearty flavors of the stew.
  • Store Leftovers Wisely – If you have leftovers, store them in an airtight container in the refrigerator. The stew can taste even better the next day as the flavors continue to develop.

FAQ

What ingredients are needed for the Spiced Sweet Potato and Coconut Stew?

The main ingredients include sweet potatoes, coconut milk, vegetable broth, onion, garlic, ginger, and a mix of spices such as cumin, coriander, turmeric, and chili powder. You may also add vegetables like spinach or kale for extra nutrition.

How long does it take to prepare and cook the stew?

Preparation time is approximately 15 minutes, and cooking time is around 30-40 minutes. Overall, you can have this stew ready in about 1 hour.

Can I use other vegetables in this stew?

Yes! In addition to sweet potatoes, you can add various vegetables like carrots, bell peppers, or peas. Just keep in mind that different vegetables may require different cooking times.

Is this recipe suitable for vegans?

Absolutely! The Spiced Sweet Potato and Coconut Stew is entirely vegan as it contains no animal products. It’s a great plant-based meal option.

Can I make this stew ahead of time?

Yes, you can prepare the stew ahead of time. It actually tastes even better the next day as the flavors meld together. Just store it in an airtight container in the fridge and reheat before serving.

How can I make the stew spicier?

If you prefer a spicier stew, you can add more chili powder or include diced fresh chilies such as jalapeños or serranos. Adjusting the spice levels according to your taste is always a good idea!

What can I serve with this stew?

This stew pairs well with a variety of sides such as rice, quinoa, or crusty bread. You can also garnish it with fresh cilantro or lime for added flavor.

How do I store leftover stew?

Store any leftover stew in an airtight container in the refrigerator for up to 4-5 days. You can also freeze it for up to 3 months, but it’s best to let it cool completely before freezing.

Introduction: Warm and Wholesome Moroccan Lentil & Vegetable Bowl

Embark on a culinary journey with the Moroccan Lentil & Vegetable Bowl, where each bite is an explosion of vibrant flavors and aromatic spices. Imagine the comfort of tender lentils complemented by a medley of seasonal vegetables seasoned with exotic Moroccan spices, bringing warmth and heartiness to your table. Whether it’s the irresistible aroma wafting through your kitchen or the vibrant colors that catch your eye, this dish is a feast for the senses. Easy to prepare yet rich in complexity, it promises a satisfying and nourishing experience that can be enjoyed by all.

The Story Behind the Dish

The Moroccan Lentil & Vegetable Bowl is a nod to the heart of Moroccan cuisine, where simplicity meets bold flavors. Lentils, a staple in Moroccan kitchens, have been cultivated and cherished for centuries due to their nutritional benefits and ability to absorb spices beautifully. This dish encapsulates the rich tapestry of Moroccan culinary history, influenced by Berber, Arab, and Mediterranean flavors. It’s a warm embrace from North Africa, inviting you to partake in the joyous celebration of spices that define Moroccan culture.

Moroccan Culinary Heritage

Morrocco’s cuisine is a reflection of its diverse cultural influences, from the indigenous Berbers to the Sufi mystics, each leaving their aromatic mark. The use of spices such as cumin, coriander, cinnamon, and ginger transforms simple ingredients into complex flavor profiles that can transport your taste buds to a different world. This dish is not just about the ingredients; it’s about the centuries-old tradition of gathering around the table to share food and stories.

Why You’ll Love This Recipe

  • Healthy yet Delicious: Packed with protein and fiber-rich lentils, this bowl is both nourishing and satisfying.
  • Vegan-Friendly: Entirely plant-based, making it perfect for those following a vegan lifestyle.
  • Flavorful Spice Mix: The spices used are not just for heat, but for creating depth of flavor, making each bite a delight.
  • Versatile Meal: Enjoy as a main course or a side, suitable for any meal of the day.
  • Easy Preparation: No elaborate techniques required, just simple cooking with robust results.

Flavor Profile & Texture

Prepare yourself for a taste adventure as this dish brings together an exquisite blend of flavors: the earthiness of lentils, the sweetness of caramelized onions, the gentle heat from spices, and the freshness of seasonal vegetables. The texture is equally inviting, with creamy lentils merging with the tender crunch of vegetables, offering a delightful contrast in every mouthful. It’s this perfect harmony of flavors and textures that makes the Moroccan Lentil & Vegetable Bowl a standout dish.

The Spice Symphony

The essence of the Moroccan Lentil & Vegetable Bowl lies in its carefully crafted spice blend. Cumin adds a warm, nutty element while coriander brings a hint of citrus. The subtle cinnamon whisper and a dash of ginger provide warmth, and paprika gives a gentle smokiness, creating a symphony of flavors that linger lovingly on your palate.

Occasions & Pairings

This Moroccan Lentil & Vegetable Bowl is the epitome of flexibility. Perfect for a family weeknight dinner or a potluck weekend gathering, its appeal is universal. Serve it alone as a wholesome meal or with crusty bread to soak up the delicious juices. Pair it with a crisp glass of white wine or a refreshing mint tea to enhance the flavors and create a well-rounded gastronomic experience.

Enhancing the Experience

For a complete Moroccan feast, pair this bowl with a side of couscous or a fresh salad, such as a cucumber and tomato salad drizzled with lemon juice. Finish with a light dessert like an orange blossom panna cotta or fresh seasonal fruits for a truly exotic affair.

Tips, Variations & Substitutions

This dish offers ample room for creativity and customization. Here are a few tips and variations to suit various tastes and dietary needs:

  • Spice Adjustments: Control the spice level to your taste; add chili powder for extra heat or omit entirely for a milder dish.
  • Protein Boost: Try adding chickpeas or tofu for an additional protein hit.
  • Herb Variations: Experiment with herbs like cilantro or parsley for a fresh finish.
  • Seasonal Swaps: Depending on what’s available, zucchini, eggplant, or bell peppers can be used instead of the recommended vegetables.
  • Dietary Alternatives: Substitute with cauliflower rice for a low-carb option or add nut-based creams for extra richness.

Storage & Make-Ahead Ideas

The Moroccan Lentil & Vegetable Bowl is as practical as it is delicious. Here are some storage and make-ahead ideas:

  • Storing Leftovers: Allow the dish to cool to room temperature before storing in an airtight container in the refrigerator for up to 3 days.
  • Freezing Tips: This bowl freezes well for up to a month. Portion it out and store in freezer-safe containers.
  • Reheating: Reheat gently on the stove with a splash of water to maintain moisture and flavor.
  • Make-Ahead Approach: Prepare the lentils and spice mix a day in advance to save time on the day of serving. Combine with fresh vegetables on the day for the best taste.

Fun Facts & Trivia

Did you know that Morocco was one of the first countries to cultivate lentils around 8000 BC? As a result, lentils have become a cultural and nutritional mainstay across various Moroccan dishes. Additionally, the spice trade routes that ran through Morocco have left a lasting impact, making it a melting pot of diverse flavors from African and Mediterranean cuisines. These historical threads come together beautifully in the Moroccan Lentil & Vegetable Bowl, offering not just a meal, but a story on your plate.

In conclusion, the Moroccan Lentil & Vegetable Bowl is more than just a recipe. It is a journey through flavors, cultures, and time, encapsulated in a single dish. Whether you’re seeking comfort, nourishment, or a taste of something exotic, this dish promises to deliver an unforgettable culinary experience. So, don your apron and allow yourself to be transported to the vibrant markets and fragrant kitchens of Morocco with every bite.

Ingredients

  • Lentils
    → Lentils serve as the primary source of protein and fiber in this bowl, adding a hearty texture. Use green or brown lentils as they hold their shape well during cooking. Rinse them thoroughly before cooking to remove any debris or dirt and to ensure even cooking.
  • Vegetable Broth
    → Vegetable broth provides a flavorful base for cooking the lentils and vegetables, enhancing the overall taste of the dish. Opt for low-sodium varieties to control the saltiness. Warm the broth before adding lentils to expedite the cooking process and ensure consistent flavor absorption.
  • Olive Oil
    → Olive oil is used for sautéing vegetables, adding richness and healthy fats to the dish. Use extra virgin olive oil for the best flavor, and make sure to heat it gently to avoid burning, which can create bitterness.
  • Onion
    → Onion adds a foundational sweetness and depth of flavor. Dice the onion finely to ensure it cooks evenly and blends into the dish. Sauté until translucent to bring out its natural sugars and sweetness.
  • Garlic
    → Garlic infuses the dish with aromatic flavor. Mince the garlic finely to maximize its flavor release, and add it to the pan after the onion has softened, cooking briefly to prevent burning, which can make it taste bitter.
  • Carrot
    → Chopped carrots provide sweetness and color, contributing to the overall nutrient profile of the bowl. Cut them into small, even pieces to ensure they cook at the same rate as the other vegetables, and opt for fresh, firm carrots for the best texture.
  • Zucchini
    → Zucchini adds moisture and a tender texture. Dice it into uniform pieces, as smaller pieces cook faster and blend seamlessly into the dish. Choose smaller zucchini for a sweeter flavor and less seediness.
  • Bell Pepper
    → Bell pepper adds crunch and a vibrant color to the bowl. Any color may be used, but red, yellow, or orange varieties provide additional sweetness. Dice them evenly and add them during the final minutes of cooking to maintain their crispness.
  • Spices (Cumin, Coriander, Paprika)
    → These spices contribute to the dish’s warm, earthy flavor profile. Use ground spices for easy incorporation; toast them briefly in the olive oil before adding the other ingredients to release their essential oils and intensify their flavors. Adjust the quantities according to your taste preference.
  • Chickpeas (canned or cooked)
    → Chickpeas provide additional protein and a creamy texture. If using canned chickpeas, drain and rinse them to remove excess sodium. If cooking from dry, soak them overnight to ensure even cooking. Add them toward the end of cooking to warm through without losing their shape.
  • Lemon Juice
    → Lemon juice adds a refreshing acidity that brightens the flavors in the dish. Squeeze fresh lemon juice over the bowl just before serving, and taste for seasoning; adding it early in the cooking process may diminish its bright flavor.

Instructions

  • Rinse the lentils under cold running water in a fine-mesh sieve to remove any dirt or debris.

    → This step is important as it cleans the lentils, ensuring you won’t find impurities in your dish…
  • In a medium saucepan, combine the rinsed lentils and 4 cups of vegetable broth. Bring to a gentle boil over medium-high heat.

    → Starting the lentils in cold broth allows them to gradually heat up, promoting even cooking and preventing them from breaking apart…
  • Once boiling, reduce the heat to low, cover the saucepan, and simmer for about 25-30 minutes until the lentils are tender but not mushy.

    → Properly simmering the lentils allows them to absorb flavor from the broth while maintaining their shape; check for doneness by tasting a few…
  • While the lentils are cooking, prepare the vegetables by dicing the onion, mincing the garlic, and chopping the carrot, zucchini, and bell pepper into even-sized pieces.

    → Ensuring uniform sizes in your vegetable prep allows them to cook evenly and enhances the visual appeal of the dish…
  • In a large skillet, heat 2 tablespoons of extra virgin olive oil over medium heat until shimmering but not smoking.

    → This helps to impart a subtle flavor to the vegetables and avoids burning, which can add bitterness to the dish…
  • Add the diced onion to the skillet and sauté for about 5-7 minutes until it becomes translucent and slightly golden.

    → Cooking the onion until translucent draws out its natural sweetness, forming a flavorful base for the rest of the vegetables…
  • Add the minced garlic and cook for an additional 30 seconds, stirring continuously to prevent burning.

    → Garlic cooks quickly; stirring ensures even cooking and prevents the garlic from turning bitter…
  • Stir in the chopped carrots, zucchini, and bell pepper to the skillet. Sauté for about 5-7 minutes until the vegetables are tender yet still crisp.

    → Adding the vegetables in this order allows firmer vegetables like carrots to soften before the more delicate zucchini and bell pepper…
  • Sprinkle in the ground spices (cumin, coriander, and paprika) and stir to coat the vegetables evenly, cooking for 1-2 minutes until the spices are fragrant.

    → Toasting the spices in olive oil releases their natural oils, intensifying their flavors and contributing depth to the dish…
  • Add the cooked lentils along with any remaining broth from the saucepan to the skillet with sautéed vegetables. Stir to combine and allow to cook for another 5 minutes to meld the flavors.

    → This step ensures all ingredients are well mixed and the dish heats through, thoroughly blending the flavors…
  • Gently fold in the drained and rinsed chickpeas, allowing them to warm through for about 2-3 minutes.

    → Adding the chickpeas at this stage prevents them from overcooking and helps retain their texture in the dish…
  • Taste the mixture and adjust seasoning as needed, potentially adding salt or pepper to suit your preferences.

    → Tasting allows for balancing flavors, ensuring every ingredient shines through while meeting your palate’s requirements…
  • Remove the skillet from heat and drizzle fresh lemon juice over the lentil and vegetable bowl just before serving.

    → The acidity from the lemon juice brightens the overall flavor, adding a fresh note that complements the earthy lentils…
  • Serve the Moroccan lentil and vegetable bowl warm, garnished with fresh herbs or additional lemon wedges if desired.

    → Presentation matters; serving it warm with a garnish elevates the dining experience, making it visually appealing…

Notes

These Moroccan Lentil & Vegetable Bowls are a hearty and nutritious meal, brimming with flavor and colorful ingredients. The combination of lentils and chickpeas offers a robust source of protein and fiber, making this dish not only filling but also satisfying. Feel free to customize the vegetables based on your preference or what’s in season; options like sweet potatoes or spinach can make delightful additions.

This dish can be served warm or cold, making it versatile for meal prep or quick lunches. For an additional layer of flavor, consider garnishing with fresh herbs like cilantro or parsley, or a dollop of yogurt or tahini. These lentil bowls also offer excellent leftovers; they store well in the fridge for a few days and can be reheated as necessary. If you’d like to add more depth, a sprinkle of feta cheese can enhance the overall taste profile and complement the flavors beautifully.

Always remember to adjust your spice levels according to your palate, and don’t hesitate to experiment with different spices or herbs to make this recipe your own. Enjoy the vibrant, comforting flavors of this Moroccan-inspired dish!

Tips

Cooking Tips for Moroccan Lentil & Vegetable Bowl

  • Preparation of Lentils: Always rinse your lentils thoroughly under cold water before cooking. This not only removes any impurities but also helps to reduce cooking time. Consider cooking a larger batch and storing leftovers for quick meals throughout the week.
  • Choosing Vegetable Broth: For an extra flavor boost, consider making your own vegetable broth using scraps of vegetables. This way, you can control the ingredients and ensure a fresher taste in your dish.
  • Sautéing Tips: When sautéing your vegetables, start with the ones that take longer to cook (like carrots and onions) and then layer in the quicker-cooking ones (like zucchini and bell peppers). This method ensures that all ingredients are perfectly cooked.
  • Enhancing Flavor: To deepen the flavor of your dish, sprinkle a pinch of salt on the vegetables right after you sauté them. This helps to draw out moisture and intensify their sweetness.
  • Mincing Garlic: Use the flat side of a knife to crush garlic cloves before mincing. This process releases more aromatic oils and enhances the garlic’s flavor in your dish.
  • Spice Toasting: Never skip the step of toasting spices. Heat them in a bit of olive oil until fragrant before adding to the dish. This simple technique amplifies their flavors and aromatic qualities tremendously.
  • Adjusting Spice Levels: Taste your dish as you go. Adjust the spices gradually; you can always add more but cannot take them out once incorporated.
  • Adding Chickpeas: If you’re using canned chickpeas, you can add them towards the last 5-10 minutes of cooking to warm them through. For dry chickpeas, make sure they are fully cooked and tender before adding them to the mix.
  • Lemon Juice Timing: To maintain the freshness of the lemon juice flavor, always add it just before serving. This will enhance the overall taste and provide a vibrant finish to your dish.
  • Garnishing Ideas: Consider topping your bowl with fresh herbs such as parsley or cilantro, and a dollop of yogurt for creaminess. This not only adds flavor but also enhances the presentation of your dish.

FAQ

What are the main ingredients in the Moroccan Lentil & Vegetable Bowl?

The main ingredients include lentils, assorted vegetables (such as carrots, bell peppers, and zucchini), spices (like cumin and coriander), vegetable broth, and fresh herbs.

Is this recipe suitable for vegans?

Yes, the Moroccan Lentil & Vegetable Bowl is entirely plant-based and suitable for vegans.

How long does it take to prepare this dish?

Preparation time is approximately 10-15 minutes, with an additional cooking time of 25-30 minutes.

Can I use canned lentils instead of dried lentils?

Yes, you can use canned lentils for convenience. Just be sure to rinse and drain them before adding them to the dish to reduce sodium levels.

How spicy is the Moroccan Lentil & Vegetable Bowl?

The spice level can be adjusted based on your preference. The recipe typically includes mild spices, but you can add chili powder or cayenne pepper for extra heat.

What can I serve with the Moroccan Lentil & Vegetable Bowl?

This dish can be served with couscous, quinoa, or flatbread on the side for a heartier meal.

Can I add protein to this dish?

Yes, you can add additional protein such as chickpeas, tofu, or grilled chicken if desired.

How should I store leftovers?

Store leftovers in an airtight container in the refrigerator for up to 4 days. Reheat gently on the stovetop or in the microwave before serving.

Introduction to Hearty Chickpea & Spinach Stew

Imagine a chilly evening, the wind whispering through the trees, and the comforting aroma of a rich and savory stew wafting through your kitchen. The Hearty Chickpea & Spinach Stew is the quintessential dish that embodies warmth in a bowl. Overflowing with wholesome chickpeas, vibrant spinach, and a symphony of spices, this stew is perfect for those who crave nourishment and flavor. Every spoonful delivers a delightful fusion of creamy textures and earthy tones, making it a truly unforgettable culinary experience. This stew not only satisfies your hunger but also nourishes your soul, making it a perfect meal to enjoy with loved ones around the dinner table.

The Story Behind the Dish

The origin of the Hearty Chickpea & Spinach Stew is deeply intertwined with the rich culinary traditions of the Mediterranean and the Middle East, regions known for their simple yet flavorful dishes. Chickpeas, also known as garbanzo beans, have been cultivated in these areas for thousands of years, representing a staple in their diet due to their versatility and nutritional richness. Spinach, meanwhile, offers a subtle bitterness balancing the sweetness of the chickpeas, and was introduced to Middle Eastern kitchens from Persian lands. This combination reflects a harmonious blend of flavors that travel across borders, signifying unity through food.

Historically, chickpea stew was a dish prepared to meet the needs of families seeking sustenance and energy. Gradually, it evolved as a platform for showcasing regional spices and seasonal vegetables, adapting to the local palate and available produce. This dish bears testimony to the adaptive nature of culinary practices, where ingredients tell stories of trade, travel, and terrain.

Why You’ll Love This Recipe

  • Simplicity & Speed: This stew is straightforward to prepare, requiring minimal effort while delivering maximum flavor.
  • Nutritious: Packed with protein from chickpeas, iron from spinach, and vitamins from other fresh ingredients, it’s a powerhouse of health benefits.
  • Comfort Food: The warm, soothing flavors make it a perfect comfort meal for any day.
  • Versatility: It can be served as a main dish or a hearty side. It’s also adaptable to many dietary preferences.
  • Budget-Friendly: Using inexpensive, everyday ingredients, it’s cost-effective and perfect for those who love flavorful dishes without breaking the bank.

Flavor Profile & Texture

The Hearty Chickpea & Spinach Stew delivers a delightful blend of textures and flavors. The chickpeas provide a creamy texture with a mild, nutty taste that absorbs the aromatic spices beautifully. Spinach adds a fresh, slightly earthy taste and soft texture, making the dish nutrient-rich and vibrant. The stew’s complex aromatic base, typically infused with garlic, cumin, and coriander, enhances its warmth and depth. Every mouthful is a wonderful mix of savory, tangy, and slightly spicy notes that invigorate the palate while providing a wholesome experience.

Occasions & Pairings

Perfect for any occasion, this stew shines during cool autumn evenings and winter nights. It’s an ideal choice for family dinners, cozy weekend meals, or even as a delightful starter for a festive gathering. Pair it with crusty bread or a loaf of garlic naan to sop up the rich broth, or serve it over a bed of fluffy rice or quinoa for a complete meal. Complement your dish with a glass of robust red wine, such as a Rioja or a Chianti, to enhance the flavors further. For dessert, consider a light citrus sorbet to cleanse the palate and provide a refreshing end to your meal.

Tips, Variations & Substitutions

Creative Customizations

The beauty of the Hearty Chickpea & Spinach Stew lies in its versatility. Here are some creative ways to customize your stew:

  • Vegetarian/Vegan: This recipe is inherently vegetarian and can easily be vegan by using vegetable broth.
  • Protein Boost: Add tofu or tempeh for an extra protein boost without altering the stew’s central flavors.
  • Herbal Infusion: Add herbs like rosemary or thyme for an earthy twist.
  • Spice Level: Adjust the heat with more cayenne pepper or swap in hot chili flakes for a spicier kick.

Dietary Alternatives

If you have dietary considerations or want to mix it up, consider these alternatives:

  • Low-Sodium: Use low-sodium broth and check seasoning to suit your needs.
  • Gluten-Free: Naturally gluten-free, ensure all spices and broth are certified gluten-free if needed.

Storage & Make-Ahead Ideas

This stew is perfect for making ahead and only gets better with time as the flavors meld. Store leftovers in an airtight container in the refrigerator for up to four days. When ready to eat, gently reheat it on the stovetop over low heat, stirring occasionally. For a quick meal prep option, portion the stew into individual containers for easy grab-and-go lunches throughout the week.

You can also freeze the stew for up to three months. To do so, allow the stew to cool completely, then transfer it into freezer-safe bags or containers, leaving some space for expansion. Remember to label with the date. To serve, let it thaw overnight in the refrigerator before reheating gently on the stove.

Fun Facts & Trivia

Did you know that chickpeas are one of the earliest legumes cultivated by humans? They were grown in 7000 BCE and have since become a global culinary staple. Not only are they delicious, but chickpeas also played a role in ancient folklore, where they were believed to have aphrodisiac properties. Spinach, on the other hand, gained its reputation as a superfood long before Popeye’s time. Known in the 16th century as the “Spanish vegetable,” it was much revered by the French nobility and Italian painters, often depicted in their works as a symbol of vitality and life.

This Hearty Chickpea & Spinach Stew is more than a meal; it’s a journey through time and taste, where every ingredient tells a story, every bite takes you somewhere magical, and every bowl fulfills more than just hunger. Enjoy this recipe with your heart open and a kitchen full of love.

Ingredients

  • Base Ingredients
    • 2 cups canned chickpeas (drained and rinsed)
      → Canned chickpeas provide the main source of protein and substance in this stew. Ensure they are well-drained and rinsed to remove excess sodium and any canning liquid, which can affect the taste. Alternatively, you can soak and cook dried chickpeas for a more traditional approach, but canned is convenient and quick.
    • 4 cups fresh spinach (roughly chopped)
      → Fresh spinach adds vibrant color, nutrients, and a mild earthy flavor to the dish. Use young, tender leaves for the best texture. It should be washed thoroughly to remove any grit and dirt. Add it towards the end of cooking to prevent overcooking, preserving its bright green color and tender texture.
    • 1 medium onion (diced)
      → Onion serves as the aromatic base for the stew, providing sweetness and depth of flavor as it cooks down. Dice it into small, even pieces for uniform cooking. Sautéing the onion until it’s translucent before adding other ingredients enhances its natural sweetness and flavors.
    • 3 cloves garlic (minced)
      → Garlic is essential for adding a robust flavor to the stew. Mince it finely to release its oils and ensure it infuses the dish well. Be careful not to burn the garlic as it can turn bitter. Adding it after the onions have softened helps to develop its full flavor.
    • 1 tablespoon olive oil
      → Olive oil is used for sautéing the onions and garlic, imparting flavor and aiding in the cooking process. Use good quality extra virgin olive oil for the best flavor. Heat it in a pot over medium heat before adding your aromatics to prevent sticking.
  • Broth and Seasoning
    • 4 cups vegetable broth
      → Vegetable broth serves as the stew’s liquid base, providing moisture and enhancing the overall flavor profile. Use low-sodium broth if you are managing salt intake. If making your own, simmer vegetable scraps, herbs, and spices for a few hours to extract deep flavors.
    • 1 teaspoon ground cumin
      → Ground cumin adds a warm, earthy flavor and is a key spice in this stew. Ensure it is fresh for the most potent flavor. If possible, toast whole cumin seeds briefly before grinding them to release an even deeper aroma.
    • 1 teaspoon smoked paprika
      → Smoked paprika brings a hint of smokiness and depth that complements the other ingredients beautifully. Look for high-quality, sweet-smoked paprika rather than the spicy variety to maintain the stew’s balance.
    • Salt and pepper to taste
      → Salt enhances all flavor profiles in the stew, while pepper adds a subtle kick. Adjust according to your taste preference, but remember to add a little initially and adjust later as the flavors develop during cooking.
  • Optional Add-ins
    • 1 can diced tomatoes (14 ounces) (optional)
      → Diced tomatoes introduce acidity and a rich, tangy flavor, creating a heartier base for the stew. Choose low-sodium varieties if desired. Add them early in the cooking process to allow their flavors to permeate the dish.
    • 1 medium carrot (diced) (optional)
      → Carrots add a subtle sweetness and texture to the stew. Dice them into small, uniform pieces to ensure they cook evenly. Sauté them with the onions for added depth of flavor and a slight caramelization.
    • 1 teaspoon red pepper flakes (optional)
      → Red pepper flakes give the stew a mild heat and spice. Adjust the amount based on your heat preference. Start with a smaller amount and add more as needed to avoid overpowering the other delicate flavors.

Instructions

  • Gather all your ingredients and prep your workspace.

    → Having everything at hand helps streamline the cooking process. Wash, chop, and measure your ingredients before you start cooking. This will ensure you can focus on cooking without interruptions.
  • Heat 1 tablespoon of olive oil in a large pot over medium heat.

    → Pour the olive oil into the pot and allow it to heat up until it shimmers. This temperature ensures that the onions will sauté evenly and develop a rich, sweet flavor without burning.
  • Add the diced onion to the pot and sauté it for about 5-7 minutes.

    → Stir the onion occasionally until it becomes translucent and soft. This process releases the sugars in the onion, enhancing the stew’s depth of flavor. Make sure the heat is not too high, as you want to cook the onion gently.
  • Stir in the minced garlic and sauté for an additional 1-2 minutes.

    → Add the minced garlic to the pot and stir constantly. Garlic cooks quickly and can burn easily, so keep a close eye on it. The garlic should become fragrant, indicating it’s ready without turning too brown.
  • If using, add the diced carrots to the pot and sauté for another 3-4 minutes.

    → This step is important for softening the carrots and allowing them to blend their flavors into the onion and garlic base. Make sure the carrot pieces are uniform in size for even cooking.
  • Optional: Add the can of diced tomatoes, along with their juices, if using.

    → The tomatoes will provide acidity and moisture, helping to create a rich stew base. Allow the mixture to cook for a couple of minutes so the tomatoes heat through and release their flavors.
  • Pour in the 4 cups of vegetable broth.

    → Carefully add the broth to the pot, scraping any browned bits stuck to the bottom. These bits contain concentrated flavors that will enhance the stew. Allow the mixture to come to a gentle simmer after adding the broth.
  • Add the drained and rinsed chickpeas to the pot.

    → Incorporate the chickpeas, which are the heart of the stew, providing protein and substance. Stir them gently to combine with the liquid and other vegetables, ensuring they are evenly distributed in the stew.
  • Incorporate the ground cumin and smoked paprika into the mixture.

    → Sprinkling in the spices at this stage allows their flavors to infuse the broth fully. Stir well to distribute the spices evenly throughout the stew for balanced flavor in each bite.
  • Season with salt and pepper to taste.

    → Start with about 1 teaspoon of salt and a few cracks of pepper, as these will enhance the overall flavor without overpowering it. You can adjust the seasoning later once the stew has thickened and flavors have developed.
  • Bring the stew to a simmer, then reduce heat to low and cover the pot.

    → Once simmering, reduce the heat to low to maintain a gentle simmer. Covering the pot helps the flavors meld together and the stew to thicken. Allow it to cook for about 20-30 minutes, stirring occasionally.
  • Add the roughly chopped fresh spinach in the last 5 minutes of cooking.

    → Adding spinach at the end preserves its bright color and nutrients. Simply fold it into the stew until it wilts but remains vibrant, about 2-3 minutes.
  • Taste the stew and adjust seasoning as needed before serving.

    → This is your opportunity to fine-tune the flavors. If it requires more salt, a dash of pepper, or even an extra pinch of cumin, don’t hesitate to make adjustments to suit your palate.
  • Serve the stew warm, garnished with a sprinkle of fresh herbs if desired.

    → Ladle the stew into bowls, and if you like, top with fresh herbs such as parsley or cilantro for an extra layer of freshness. Pair it with crusty bread or serve it over rice to make the dish more filling.

Notes

This hearty chickpea and spinach stew is a comforting dish packed with nutrients and flavor. It’s not only easy to prepare but also a great way to incorporate legumes and leafy greens into your diet. To enhance the flavors, be sure to sauté the onions until they’re translucent before adding the garlic. This caramelization will create a rich base that will shine through the stew.

The addition of vegetable broth ensures a delicious depth, but feel free to adjust the seasoning as it cooks. You can always add more salt or pepper as needed. If you opt for the canned tomatoes, adding them earlier allows their flavor to meld beautifully with the other ingredients. For those who enjoy a kick, sprinkle in some red pepper flakes, starting with a small amount to not overpower the stew’s flavors.

This stew is also very versatile; consider adding diced carrots for extra texture and sweetness or experimenting with the spices according to your preference. Feel free to serve it over cooked grains like quinoa or brown rice to make it even heartier. Leftovers of this stew can be stored in the refrigerator for a few days or frozen for later use, making it a practical option for meal prepping. Enjoy with a slice of crusty bread to soak up the delightful broth!

Tips

Cooking Tips for Hearty Chickpea & Spinach Stew

  • Prep your ingredients first: Before you start cooking, take the time to chop, dice, and measure out all of your ingredients. This will make the cooking process smoother and help you avoid burning the aromatics.
  • Layer your flavors: Start by sautéing the onions first until they are translucent, then add the garlic. Following this method helps to build a flavor foundation for your stew. Remember to stir frequently to avoid burning the garlic.
  • Cooking the spinach: Spinach wilts quickly, so add it in the last few minutes of cooking. This will help maintain its vibrant color and nutritional value while ensuring it’s tender but not overcooked.
  • Texture considerations: If you prefer a thicker stew, consider mashing a portion of the chickpeas with a fork or potato masher before adding them to the broth. This will give the stew a creamier consistency.
  • Season in layers: Since flavors develop as they cook, add a pinch of salt and pepper at the beginning and adjust to taste towards the end of cooking. This will help you achieve a balanced flavor profile.
  • Don’t rush the simmer: Allow the stew to simmer for at least 20-30 minutes. This time will help the ingredients meld together for a richer flavor. If you have time, letting it simmer longer will enhance the taste even more.
  • Enhance with herbs: For added brightness, consider stirring in a handful of fresh herbs, such as parsley or cilantro, right before serving. They will add freshness that complements the depth of flavor in the stew.
  • Serve with accompaniments: Pair this stew with crusty bread, cooked grains like quinoa or rice, or a dollop of yogurt or sour cream for a creamy contrast. These sides will enhance the meal and round it out.

FAQ

What ingredients are needed for the Hearty Chickpea & Spinach Stew?

The main ingredients for the Hearty Chickpea & Spinach Stew include canned chickpeas, fresh spinach, diced tomatoes, onion, garlic, vegetable broth, olive oil, and spices such as cumin and paprika.

How long does it take to prepare the Hearty Chickpea & Spinach Stew?

Preparation time is approximately 10 minutes, with an additional 20 to 30 minutes of cooking time, making the total time around 40 minutes.

Can I use dried chickpeas instead of canned?

Yes, you can use dried chickpeas. Make sure to soak them overnight and cook them until tender before adding them to the stew.

Is this stew suitable for vegans?

Absolutely! The Hearty Chickpea & Spinach Stew is entirely plant-based and suitable for vegans.

What can I serve with the Hearty Chickpea & Spinach Stew?

This stew pairs well with crusty bread, rice, or quinoa for a complete meal.

Can I freeze leftover stew?

Yes, you can freeze the stew! Allow it to cool, then transfer it to an airtight container. It can be frozen for up to three months.

What are some variations I can try with this recipe?

You can add other vegetables like carrots or bell peppers, try different spices such as curry powder, or even add coconut milk for a creamier texture.

How can I store the Hearty Chickpea & Spinach Stew?

Store any leftovers in an airtight container in the refrigerator for up to 4 days. Reheat thoroughly before serving.

Introduction to Creamy Roasted Cauliflower Soup

Imagine a soup that envelops your senses with its rich, velvety texture and a flavor profile that dances effortlessly between subtlety and depth. This is exactly what the Creamy Roasted Cauliflower Soup delivers. With every spoonful, you experience the warmth of roasted cauliflower, the silkiness of a creamy broth, and the gentle whispers of spices that elevate this dish into a luxurious dining experience. Whether you’re a long-time lover of hearty soups or seeking a new culinary adventure, this dish promises to captivate your taste buds and leave you longing for another bowl.

The Story Behind Creamy Roasted Cauliflower Soup

Cauliflower has long held a place in the culinary traditions across the globe, cherished for its versatility and nutritional benefits. The simple brassica dates back to around the 6th century B.C. when it was first cultivated in the eastern Mediterranean. Its journey through history has seen it transform from a staple in humble peasant meals to the star of gourmet kitchen tables worldwide. The creamy roasted cauliflower soup has its roots in ancient times where soups were considered both a meal and a form of medicine, used to invigorate the spirit and heal the body.

Throughout various cuisines, roasting has been a preferred method to coax out the natural sweetness and complexity of flavors from vegetables, and cauliflower is no exception. The roasting process caramelizes the surface of the cauliflower, imparting a nutty essence that is unmatched. The origins of melding roasted cauliflower into a silky soup likely stem from the necessity to utilize every part of the vegetable, creating a comforting and resourceful dish. Today, this soup serves not only as a nod to these historical practices but also as a contemporary culinary delight.

Why You’ll Love This Recipe

  • Nutritious and Delicious: Packed with vitamins and minerals, cauliflower is a powerhouse of nutrients. Combined with a creamy broth, this soup is both nourishing and indulgent.
  • Simplicity Meets Sophistication: The recipe requires minimal ingredients, emphasizing the natural flavors of cauliflower while showcasing culinary elegance.
  • Comfort in a Bowl: Ideal for chilly evenings or when you need a comforting dish that feels like a warm hug.
  • Versatile and Adaptable: Suitable for various dietary preferences with easy adaptations for vegan or dairy-free versions.

Flavor Profile & Texture

The flavor of creamy roasted cauliflower soup is both nuanced and pronounced. Roasting the cauliflower developes a rich depth, bringing out nutty, slightly sweet notes that make each bite a flavorful journey. The creaminess of the soup provides an indulgent, almost luxurious mouthfeel, while subtle spices enhance the savory quality without overwhelming the palate. The texture is smooth and velvety, a testament to the careful blending and quality ingredients used in its preparation.

Occasions & Pairings

This soup is versatile enough to fit perfectly into various dining settings. Enjoy it as a warming starter during a festive holiday dinner, or serve it as a light main course on a weeknight. The inherent elegance of the dish allows it to be an excellent choice for dinner parties where you wish to impress, yet its homey qualities make it suitable for a quiet, comforting meal on a lazy Sunday.

When it comes to pairings, consider some freshly baked crusty bread or a simple green salad to complement the rich flavors of the soup. To elevate the meal, pair with a chilled glass of Chardonnay or a light-bodied red wine like Pinot Noir, both of which complement the soup’s creamy and savory undertones.

Tips, Variations & Substitutions

This soup can be customized in numerous ways:

  • Make it Vegan: Substitute dairy elements with coconut milk or almond cream to suit a vegan diet without compromising on creaminess.
  • Add a Twist: Experiment with added spices like turmeric or nutmeg for a warmth and a hint of exotic flavor.
  • Extra Veggies: Enhance the nutritional profile with additions like roasted garlic or parsnips for added depth.
  • Garnishing Ideas: Top with crispy sage, a drizzle of truffle oil, or a sprinkle of toasted pine nuts to add a contrasting texture.

Storage & Make-Ahead Ideas

Creamy roasted cauliflower soup is perfect for make-ahead meals and stores beautifully. If making in advance, you can prepare the soup and let it cool completely before transferring it into an airtight container. It will keep in the refrigerator for up to 4 days, making it an excellent option for meal prepping. For longer storage, consider freezing the soup in portions. Just remember to leave about an inch of space at the top of the container to account for expansion.

When you’re ready to enjoy, thaw the soup in the refrigerator overnight and then warm gently on the stovetop over low heat, stirring occasionally. Add a splash of milk or broth to loosen the consistency if needed. This soup is also fantastic for batch cooking — double the recipe to keep some in the freezer for a later date.

Fun Facts & Trivia

Did you know that cauliflower comes in various colors, each with its own unique nutrient composition? Orange cauliflowers are rich in beta carotene, while purple varieties contain anthocyanins, both powerful antioxidants. Interestingly, California produces about 90% of the cauliflower grown in the United States, dominating the market with its favorable growing conditions.

In culinary circles, roasted cauliflower has been likened to truffles concerning its umami-rich flavor profile, sometimes leading to it being dubbed the “poor man’s truffle.” This reputation further uplifts the humble cauliflower as it transforms through roasting into an unexpected culinary star, especially when made into this irresistible soup.

Ingredients

  • Roasted Cauliflower Base
    • 1 large head of cauliflower (cut into florets)
      → The main ingredient of the soup, cauliflower adds a creamy texture when blended. It should be cut into even florets to ensure even roasting, which enhances its natural sweetness and flavor. Choose a cauliflower head that is firm and has tightly packed florets for the best results.
    • 2 tablespoons olive oil
      → Olive oil coats the cauliflower to help it roast to a golden brown, adding depth of flavor. Use extra virgin olive oil for its superior taste and health benefits. Drizzle it over the cauliflower and toss for an even coating before roasting.
    • 1 teaspoon salt
      → Salt is essential for enhancing the natural flavors of the cauliflower. Use kosher or sea salt for a more rounded flavor profile. Be sure to sprinkle it evenly over the cauliflower to ensure all pieces are seasoned properly before roasting.
    • 1/2 teaspoon black pepper
      → Black pepper adds a subtle heat and complexity to the soup. Use freshly ground black pepper for the most robust flavor. Adjust the amount based on your preference for spice.
  • Soup Base
    • 1 medium onion (chopped)
      → The onion serves as a flavor base, adding sweetness and depth to the soup when sautéed. Chop the onion into even pieces to ensure they cook uniformly. Choose a yellow onion for its balance of sweetness and savory flavor.
    • 2 cloves garlic (minced)
      → Garlic provides aromatic richness and a punch of flavor. Mince the cloves finely to release their oils and flavor more effectively. Fresh garlic is preferred over pre-minced for the best taste.
    • 4 cups vegetable broth
      → Vegetable broth is the liquid base of the soup, providing moisture and flavor. Use low-sodium broth to control the saltiness of the final dish. If homemade is available, it offers the freshest taste; otherwise, store-bought broth works well too.
    • 1 cup coconut milk (canned, full-fat)
      → Coconut milk adds creaminess and richness to the soup, balancing the flavors without dairy. Use full-fat coconut milk for the best texture and flavor. Shake the can well before opening to ensure the cream is combined. If you prefer a lighter version, light coconut milk can be used, but may alter the creaminess slightly.
    • 1 teaspoon cumin
      → Cumin adds an earthy, warm flavor that enriches the soup. Use ground cumin for ease, and toast it briefly in the pot before adding liquids to enhance its flavor. Be cautious not to burn it, as it can become bitter.
    • 1/2 teaspoon smoked paprika
      → Smoked paprika gives the soup a subtle smokiness and additional depth of flavor. Use high-quality paprika for the best results. Adjust the amount based on your preference for smokiness.
  • Toppings (optional)
    • Fresh parsley or chives (chopped, for garnish)
      → Fresh herbs add a pop of color and freshness to the finished soup. Chop them finely and sprinkle on top just before serving. Use parsley or chives depending on your flavor preference; both complement the cauliflower beautifully.
    • Croutons (for added texture)
      → Croutons provide a crunchy contrast to the creamy soup. Use store-bought or homemade croutons that are toasted until golden brown. Season them with herbs and spices to enhance their flavor, and add them just before serving to keep them crispy.

Instructions

  • Preheat your oven to 425°F (220°C) to prepare for roasting the cauliflower.

    → A higher roasting temperature caramelizes the sugars in the cauliflower, resulting in a deeper flavor and golden-brown color. Ensure your oven is fully preheated for even cooking.
  • Line a baking sheet with parchment paper or a silicone mat to prevent sticking.

    → This step not only allows for easier cleanup but also helps in even roasting as it promotes circulation around the florets.
  • Cut the large head of cauliflower into even-sized florets, ensuring they are about 1-2 inches in size.

    → Uniform florets ensure that they roast at the same rate, avoiding some pieces being overcooked while others remain raw.
  • In a large mixing bowl, combine the cauliflower florets, olive oil, salt, and black pepper.

    → Tossing these ingredients helps to ensure each floret is thoroughly coated with oil and seasoning, which is crucial for achieving maximum flavor during roasting.
  • Spread the seasoned florets evenly on the prepared baking sheet in a single layer.

    → Avoid overcrowding the pan as this will lead to steaming instead of roasting, which can result in a less desirable texture and flavor.
  • Roast the cauliflower in the preheated oven for 25-30 minutes, or until golden brown and tender.

    → Turning the florets halfway through cooking ensures they brown evenly. Check for doneness by piercing a floret with a fork; it should be soft yet have a slight bite.
  • While the cauliflower is roasting, heat a large pot over medium heat and add a tablespoon of olive oil.

    → Heating the pot first prevents the vegetables from sticking and helps to develop their flavors efficiently. Use medium heat to avoid browning too quickly.
  • Add the chopped onion to the pot and sauté for 5-7 minutes, or until translucent and softened.

    → Stir occasionally to prevent burning, as caramelizing the onions will enhance the sweetness and depth of the soup.
  • Add the minced garlic and sauté for an additional 1-2 minutes until fragrant.

    → Garlic cooks quickly; overcooking can lead to bitterness, so watch it closely. Stir to prevent sticking and allow the garlic to release its oils.
  • Once the cauliflower is roasted, add it to the pot with the sautéed onion and garlic.

    → This incorporates the roasted flavor into the soup base, enhancing the overall taste profile.
  • Pour in the vegetable broth and bring the mixture to a gentle simmer over medium heat.

    → Adding broth creates the soup’s liquid foundation and allows the flavors to meld together. Stir occasionally to help mix the ingredients.
  • Once simmering, add the coconut milk, cumin, and smoked paprika to the pot.

    → The coconut milk adds creaminess, while spices enrich the flavor. Stir well to combine everything before simmering for an additional 5-10 minutes, which allows the spices to infuse into the broth.
  • Using an immersion blender, blend the soup until smooth and creamy, or transfer it in batches to a countertop blender.

    → Be cautious of the hot liquid if using a countertop blender; allow it to cool slightly and remove the center cap of the lid. Blend until the texture is velvety with no lumps.
  • Taste the soup and adjust seasoning with more salt or pepper as needed before serving.

    → This final tasting ensures that the flavors are balanced and that the soup meets your preferences.
  • Serve the soup hot, garnished with chopped parsley or chives and sprinkle croutons on top just before serving for added texture.

    → Fresh herbs add a bright note while croutons give a satisfying crunch, enhancing the overall eating experience. Serve immediately to enjoy the best texture.

Notes

Creating a creamy roasted cauliflower soup is a delightful way to enjoy a wholesome and comforting dish. This recipe emphasizes the natural sweetness of roasted cauliflower, combined with a rich soup base for a velvety texture. Here are some helpful notes to guide you through the process:

Begin by roasting the cauliflower until it achieves a golden brown color, which will amplify its sweetness and flavor. Make sure to cut the cauliflower into even florets so that they roast uniformly. Toss the florets in extra virgin olive oil, salt, and freshly ground black pepper for enhanced taste.

As you prepare the soup base, start by sautéing the chopped onions until they are translucent to develop their natural sweetness. Add minced garlic for an aromatic punch; fresh garlic is best to maximize flavor. Incorporate the vegetable broth to create a rich liquid foundation for the soup.

The magic of this soup lies in the addition of full-fat coconut milk, which offers creaminess without using dairy. Be sure to shake the can of coconut milk well before opening to mix the cream and liquid thoroughly.

Cumin and smoked paprika bring depth and warmth to the dish. Toasting the cumin in the soup pot briefly before adding liquids enhances its flavor, so keep a close eye to ensure it doesn’t burn.

For the finishing touches, consider garnishing your soup with freshly chopped parsley or chives for a burst of color and freshness. Croutons are a fantastic optional topping, adding a satisfying crunch to contrast with the creamy texture of the soup. If using croutons, add them just before serving to maintain their crispness.

This creamy roasted cauliflower soup can be made ahead of time and stored in the fridge or freezer for a quick meal option later on. Enjoy it as a light dinner or alongside a salad or sandwich for a more filling meal.

Tips

Tips for Making Creamy Roasted Cauliflower Soup

  • Choosing the Cauliflower: Select a fresh cauliflower with firm, tightly packed florets. Smaller, evenly sized florets roast more evenly and create a smoother soup.
  • Roasting Technique: Spread the cauliflower florets in a single layer on the baking sheet to ensure they roast evenly. Avoid overcrowding, as this can lead to steaming rather than roasting.
  • Flavor Enhancements: For added flavor, consider roasting the cauliflower with a sprinkle of garlic powder or a squeeze of lemon juice before blending into the soup.
  • Casting a Broth: If using store-bought vegetable broth, opt for a low-sodium variety to better control the final seasoning of the soup. You can also consider using homemade broth for the freshest flavor.
  • Balancing Coconut Milk: For a balanced flavor, mix the coconut milk into the soup gradually, tasting as you go to ensure the creaminess complements the spices perfectly.
  • Blending Tips: For a smooth soup, use an immersion blender directly in the pot, or carefully transfer the soup to a standard blender in batches. Allow some steam to escape to prevent pressure buildup.
  • Adjusting Thickness: If the soup is too thick, add additional vegetable broth or water a little at a time until you reach your desired consistency.
  • Seasoning Earlier: Season the soup as it simmers to allow time for the flavors to meld. Taste frequently to adjust salt, pepper, and spices as needed.
  • Garnishing Ideas: Beyond parsley or chives, consider topping with a drizzle of olive oil or a sprinkle of chili flakes for extra color and flavor.
  • Storage Tips: The soup can be refrigerated for up to 3 days or frozen for up to 3 months. Store in airtight containers, and allow to cool completely before refrigerating or freezing.

FAQ

What ingredients do I need to make Creamy Roasted Cauliflower Soup?

You will need cauliflower, onion, garlic, vegetable broth, heavy cream (or a non-dairy alternative), olive oil, salt, pepper, and optional toppings such as croutons or fresh herbs.

Can I make this soup vegan?

Yes! You can substitute the heavy cream with a non-dairy milk or cream such as coconut milk or cashew cream to make it vegan.

How long does it take to prepare the soup?

The total time for preparing and cooking Creamy Roasted Cauliflower Soup is approximately 45 minutes to 1 hour.

Is it necessary to roast the cauliflower?

Roasting the cauliflower adds depth and enhances the flavor of the soup, but you can also steam the cauliflower if you’re short on time.

Can I add other vegetables to the soup?

Absolutely! You can add vegetables like carrots, potatoes, or celery for added flavor and nutrition.

How should I store leftover soup?

Store leftover soup in an airtight container in the refrigerator for up to 4 days. It can also be frozen for up to 3 months.

What is the best way to reheat the soup?

Reheat the soup on the stove over medium heat, stirring occasionally, until warmed through. You can also use a microwave, heating in short intervals and stirring in between.

What can I serve with Creamy Roasted Cauliflower Soup?

This soup pairs well with crusty bread, a fresh salad, or grilled cheese sandwiches for a complete meal.

Introduction: A Delightful Symphony of Flavors

Few dishes can encapsulate the essence of fine dining and simplicity as beautifully as our One-Pan Lemon Butter Salmon with Veggies. Imagine the tender, flaky salmon, its bright pink hue enhanced by an elegant shimmer of lemon butter glaze, paired harmoniously with a vibrant medley of vegetables. This recipe is more than a meal; it’s an immersive experience for the senses. The zesty aroma of lemon intertwines with the rich, nutty notes of butter, creating an inviting atmosphere that stirs up warmth and comfort. This dish is a quick escape to a gourmet restaurant, crafted effortlessly in your own kitchen.

The Story Behind the Dish

The roots of our One-Pan Lemon Butter Salmon with Veggies delve into the simplicity of home cooking, inspired by the coastal culinary traditions of the Mediterranean, where fresh seafood and crisp vegetables take center stage. Salmon, a staple in Northern European and American coastal cuisines, is beloved for its rich omega-3 fatty acids and delicate flavor. Combined with zesty lemon and wholesome veggies, this recipe exemplifies the beauty of combining minimal ingredients to craft something extraordinary, connecting culinary traditions across borders in a harmonious symphony.

Historically, the paring of lemon with fish has been a time-honored technique. Mediterranean fishermen were among the first to enhance their catch with citrus, a natural antioxidant, and preservative. The buttery richness added a layer of indulgence, signifying prosperity. This dish honors that tradition, offering a slice of historical luxury with a modern, fresh twist.

Why You’ll Love This Recipe

  • Effortlessly Elegant: Despite its gourmet appearance, this dish requires minimal effort and is prepared using only one pan, simplifying cleanup without compromising on flavor.
  • Health-Forward: Packed with nutrients from fresh vegetables and heart-friendly omega-3 fatty acids from the salmon, it’s a wholesome choice for any meal.
  • Versatile: Ideal for a cozy dinner, a quick weeknight meal, or impressing guests over a casual gathering. Its sophistication is suitable for all occasions.
  • Balanced Flavors: The harmony between the savory butter, the bright citrus, and the subtly sweet vegetables creates a dish that’s vibrant, balanced, and utterly satisfying.

Flavor Profile & Texture

The first bite of this dish is a testament to culinary harmony. The salmon offers a rich, buttery texture that melts in your mouth, beautifully contrasted by the crisp-tender veggies that burst with freshness. The lemon provides a zesty, tangy flavor that cuts through the richness of the butter, elevating the natural sweetness of the salmon. Combined, they create a balanced profile, wherein no one flavor overpowers the others. Instead, they dance together, offering a complex yet comforting dining experience that lingers on the palate long after the final bite.

Occasions & Pairings

This dish fits seamlessly into any dining scenario. Serve it during busy weeknights when time is of the essence but flavor is still a priority. It’s also a show-stopping centerpiece for family gatherings, dinner parties, or even romantic dates, where its simple elegance can truly shine. Pair this dish with a crisp Chardonnay or a delicate Pinot Grigio to complement its citrus notes, or offer a side of wild rice or quinoa salad for added satisfaction. For dessert, a light, lemon sorbet is the perfect finale, keeping the palate fresh and invigorated.

Tips, Variations & Substitutions

  • Substitute & Customize: If salmon is unavailable or not preferred, try using other flaky white fish like cod or halibut. The recipe readily adapts to a wide variety of proteins.
  • Vegetable Variety: Feel free to experiment with seasonal vegetables. Asparagus, bell peppers, and cherry tomatoes make fantastic additions and add layers of color and nutrition.
  • Flavor Enhancements: Consider adding a sprinkle of fresh dill or a pinch of cayenne pepper for an extra kick. A hint of garlic can enrich the butter sauce, providing aromatic depth.
  • Make It Vegan: For a plant-based variation, replace salmon with hearty vegetables like portobello mushrooms or a chickpea patty, and use vegan butter.

Storage & Make-Ahead Ideas

One of the enticing aspects of this dish is its make-ahead capability. The salmon and vegetables can be prepped and seasoned a day prior, allowing the flavors to deepen and meld in the refrigerator. Once cooked, the dish can be stored in an airtight container in the fridge for up to three days. To reheat, place the dish in a preheated oven or a hot pan to maintain the crispy texture of the veggies and the juiciness of the salmon.

For longer storage, freeze portions in freezer-safe containers, ensuring they are completely cooled before freezing. To reheat, thaw overnight in the refrigerator and warm gently in the oven to preserve texture and flavor.

Fun Facts & Trivia

Did you know that salmon’s pink color comes from its diet, primarily consisting of krill and shrimp, which are packed with carotenoids, a type of antioxidant? This vibrant hue is not only beautiful but also signifies the presence of these beneficial nutrients.

Lemon and fish combinations date back to ancient Rome, where fish was a prized delicacy, often adorned with lemons and herbs. The tradition holds strong today, exemplified in dishes like this, where the refreshing zest of lemon continues to enliven the palate.

Interestingly, in certain cultures, serving fish is a sign of prosperity and wealth, making this dish a symbolically lucky choice for celebrations and special occasions.

Your culinary adventure awaits with this One-Pan Lemon Butter Salmon with Veggies, where each bite transports you to the tranquil shores of the Mediterranean — a dish rooted in tradition but modern in its simplicity and grace.

Ingredients

  • Lemon Butter Sauce
    – 1/4 cup unsalted butter
    → Unsalted butter provides a rich, creamy base for the sauce, helping to balance the flavors of the lemon and salmon. It should be melted gently to prevent browning, which can create a nutty flavor that may not complement this dish.
    – 1 lemon (juiced and zested)
    → Use fresh lemons for both juice and zest, as bottled lemon juice lacks the bright flavor and aromatics. The zest contains essential oils that enhance the lemon flavor in the sauce. Ensure to zest gently avoiding the bitter white pith underneath the skin.
    – 2 tablespoons honey
    → Honey acts as a natural sweetener that balances the acidity of the lemon while adding a subtle floral note. If you want a deeper flavor, consider using raw or wildflower honey. Measure while it’s at room temperature for easier pouring and mixing.
  • Salmon
    – 4 salmon fillets (about 6 ounces each)
    → Choose fresh, high-quality salmon fillets with a bright pink color and a clean ocean smell. Remove any pin bones before cooking for a better eating experience. Allow salmon to sit at room temperature for about 15 minutes before cooking to ensure even cooking.
    – Salt and pepper (to taste)
    → Use kosher salt for seasoning as it dissolves well and enhances the natural flavors of the salmon and veggies. Freshly cracked black pepper adds aroma and a slight heat. Season generously for the best flavor.
  • Veggies
    – 2 cups asparagus (trimmed and cut into 2-inch pieces)
    → Asparagus brings a vibrant green color and a slight crunch to the dish. Trim the woody ends and cut them into equal pieces for even cooking. Blanching in boiling water for a minute before adding to the pan can help them maintain their bright color.
    – 1 cup cherry tomatoes (halved)
    → Cherry tomatoes offer a sweet burst of juiciness when cooked. Look for ones that are plump and shiny. Halving them allows the juices to mingle with the lemon butter sauce for added flavor.
    – 1 bell pepper (sliced)
    → A bell pepper adds vibrant color and sweetness to the meal. Choose a ripe one (red, yellow, or orange for sweetness), and slice into strips. Ensure even sizing to promote uniform cooking and tenderness.
  • Garnish
    – Fresh parsley (chopped, for garnish)
    → Chopped fresh parsley provides a pop of color and fresh flavor that brightens up the dish. Always use fresh parsley rather than dried, as fresh herbs have a more pronounced taste. Roughly chop to release the oils without over-chopping into tiny pieces.
    – Lemon wedges (for serving)
    → Serve with lemon wedges for an extra burst of brightness. Squeeze them over the finished plate just before eating to awaken the flavors. Choose juicy lemons, and cut them into wedges just prior to serving for the best freshness.

Instructions

  • Begin by preheating your oven to 400°F (200°C) to ensure it reaches the desired temperature by the time your dish is assembled.

    → Preheating is crucial for even cooking, allowing the salmon to bake perfectly from the start while helping the veggies to roast properly without becoming soggy.
  • In a small saucepan over low heat, combine 1/4 cup of unsalted butter, the juice and zest of 1 lemon, and 2 tablespoons of honey. Stir gently until the butter is fully melted and the ingredients are well mixed.

    → This slow melting process prevents the butter from browning, leading to a smoother sauce that enhances the dish’s flavors. Mixing the ingredients ensures each component is well-distributed, creating a balanced lemon butter sauce.
  • Next, prepare your salmon fillets by checking for pin bones and removing them with tweezers if necessary. Pat the fillets dry with a paper towel to remove excess moisture, which will help achieve a better sear later.

    → Removing pin bones enhances the dining experience, while drying the fillets ensures they roast rather than steam, leading to a more appealing texture.
  • Generously season both sides of the salmon fillets with kosher salt and freshly cracked black pepper.

    → Adequate seasoning is essential for bringing out the natural flavors of the fish and veggies. The kosher salt dissolves easily and enhances the dish while the black pepper adds a hint of spice.
  • Take a large rimmed baking sheet and arrange the prepared asparagus, cherry tomatoes, and sliced bell pepper on one side of the pan. Drizzle with olive oil, then season with salt and pepper.

    → Spacing out the vegetables allows for proper heat circulation, ensuring they roast evenly. Drizzling with olive oil enhances their natural sweetness and helps prevent sticking.
  • Add the salmon fillets to the baking sheet alongside the vegetables, skin-side down. Pour the lemon butter sauce over the fillets and veggies.

    → Adding the sauce at this stage allows the flavors to infuse into the salmon and veggies as they cook. Positioning the skin-side down provides a barrier that helps keep the fillet moist.
  • Place the baking sheet in the preheated oven and bake for 12-15 minutes, or until the salmon flakes easily with a fork and the vegetables are tender.

    → Baking at this temperature cooks the salmon through while allowing the vegetables to caramelize slightly, which enhances their flavor. Checking for flakiness is a reliable gauge for doneness.
  • Once cooked, remove the baking sheet from the oven. Let it rest for a few minutes to allow the juices to redistribute before serving.

    → Resting the dish is important for maximizing the moisture and flavor in the salmon, preventing it from drying out when served.
  • While resting, roughly chop fresh parsley for garnish and cut lemon wedges for serving.

    → Keeping the parsley pieces a bit larger helps maintain their flavor and aroma. Fresh lemon wedges add an additional bright touch when served, enhancing the citrus notes.
  • Serve the salmon and veggies on a platter or individual plates, garnishing with the chopped parsley and placing lemon wedges alongside.

    → The final presentation not only makes the dish visually appealing but also adds an aromatic component, creating an inviting meal that encourages a squeeze of lemon for freshness.

Notes

These One-Pan Lemon Butter Salmon with Veggies are a delightful and healthy meal that combines the richness of salmon with the freshness of seasonal vegetables, all elevated by a zesty lemon butter sauce. The butter should be melted gently to create a smooth sauce without browning. When preparing the veggies, consider blanching the asparagus to retain their vibrant color and crunch.

For the salmon, selecting high-quality fillets will enhance the overall taste and presentation of the dish. It’s crucial to season the salmon and veggies with an ample amount of kosher salt and freshly cracked black pepper to bring out their natural flavors.

When served, sprinkle chopped fresh parsley over the dish to add a fresh note and vibrant color, and don’t forget the lemon wedges! A squeeze of fresh lemon just before eating enhances the overall flavor profile and brightness.

Lastly, this dish is perfect for a quick weeknight dinner yet elegant enough for entertaining. Leftovers can be reheated, but the dish is best enjoyed fresh. Consider pairing it with a side of quinoa or brown rice for a complete meal, or serve on its own for a lighter option.

Tips

Cooking Tips for One-Pan Lemon Butter Salmon with Veggies

  • Melt the butter slowly: When preparing the lemon butter sauce, melt the butter over low heat. This prevents it from browning and allows it to maintain a creamy texture that will beautifully bind with the lemon and honey.
  • Room temperature salmon: Letting the salmon sit at room temperature for about 15 minutes before cooking helps it cook more evenly, reducing the risk of it being undercooked in the center.
  • Season generously: Don’t hold back on the salt and pepper when seasoning the salmon and veggies. This enhances the overall flavor profile, making the dish more enjoyable.
  • Cook veggies al dente: When cooking the asparagus, cherry tomatoes, and bell pepper, aim for them to remain slightly crisp (al dente). This not only preserves their nutrients but also adds a great texture to the dish.
  • Monitored cooking time: Keep an eye on the salmon while it’s cooking, as it can overcook quickly. A good indicator is when the salmon changes from a translucent to an opaque pink and flakes easily with a fork.
  • Fresh herbs make a difference: Always opt for fresh parsley over dried. The vibrant flavor and aroma of fresh herbs enhance the taste of the dish significantly.
  • Use one pan wisely: To prevent overcrowding the pan, cook the salmon and veggies in batches if necessary. This ensures everything cooks evenly and retains its crispiness.
  • Final squeeze of lemon: Just before serving, squeeze fresh lemon juice over the dish for an extra burst of acidity that will brighten up the rich flavors of the butter and salmon.

FAQ

What ingredients do I need for One-Pan Lemon Butter Salmon with Veggies?

You will need salmon fillets, butter, lemon, garlic, asparagus, cherry tomatoes, salt, pepper, and optionally, fresh herbs like parsley or dill.

How long does it take to prepare this dish?

The preparation time is approximately 10 minutes, and the cooking time is around 15-20 minutes, making the total time about 30 minutes.

Can I use frozen salmon for this recipe?

Yes, you can use frozen salmon. Just ensure it’s fully thawed before cooking to achieve even cooking and proper texture.

What type of salmon is best for this recipe?

Wild-caught salmon (like sockeye or coho) is recommended for its flavor and health benefits, but you can also use farmed salmon if preferred.

Can I add other vegetables to the recipe?

Absolutely! You can customize the recipe by adding other vegetables such as bell peppers, zucchini, or broccoli according to your taste.

Is this recipe suitable for meal prep?

Yes, One-Pan Lemon Butter Salmon with Veggies can be made in advance and stored in the refrigerator for up to 3 days. Just reheat before serving.

What can I serve with this dish?

This dish pairs well with rice, quinoa, or a fresh green salad for a complete meal.

How can I store leftovers?

Store leftovers in an airtight container in the refrigerator for up to 3 days. To reheat, gently warm in the oven or microwave until heated through.

Introduction: A Warm Hearth in Every Bowl

Imagine a brisk evening after a long day, the air crisp with a hint of wood smoke, and the comfort of home awaiting you. There’s nothing quite like returning to a warm and rustic meal that envelops you in its aromatic embrace. Enter the Rustic Veggie and Bean Stew with Crusty Bread, a hearty dish that transcends mere sustenance and becomes an experience of culinary warmth and nourishment. Each spoonful reveals layers of flavors that evoke images of rolling hills and bountiful gardens, while the accompanying crusty bread serves as the perfect vessel for soaking up every last drop.

The Story Behind the Dish: A Tale of Tradition and Comfort

This stew traces its roots back to the humble homes of rural Europe, where every meal was a testament to the land’s bounty and the hands that tended it. Originally, such stews were crafted from whatever vegetables were in season, complemented by beans and grains that formed the backbone of rural diets. Over time, this dish has become a beloved staple across many cultures, each adding its local twist, yet always maintaining its heartwarming simplicity and rustic charm.

In contemporary kitchens, this stew offers a nod to the past, inviting us to slow down and savor. It’s a dish that tells the story of harvests past and present, where each ingredient serves a purpose and adds to the overall tapestry of flavors. Whether shared around the family table or enjoyed in solitude, every serving is a reminder of culinary heritage and the joy of simple, real food.

Why You’ll Love This Recipe

  • Hearty and Filling: Packed with protein-rich beans and fiber-filled vegetables, this stew satisfies even the most prodigious of appetites.
  • Easy to Prepare: With straightforward steps and minimal preparation, this dish can be on the table with little fuss, making it ideal for weeknight dinners.
  • Healthy and Nutritious: Full of vitamins, minerals, and antioxidants, it aligns with a variety of dietary preferences, including vegetarian and vegan diets.
  • Versatile and Adaptable: Whether you have a surplus of root vegetables in winter or fresh greens in summer, this stew is easily adaptable to whatever produce is at hand.

Flavor Profile & Texture: Layers of Earthy Goodness

The Rustic Veggie and Bean Stew presents a symphony of flavors that dance around the palate. The earthy notes of potatoes and carrots meet the sweetness of slow-cooked onions and tomatoes, creating a deep, caramelized flavor base. Beans introduce a creamy texture contrasted by the crispness of tender vegetables. Each mouthful offers a complex interplay – the robustness of garlic and herbs mingling with a subtle smoky undertone, often enhanced by a splash of wine or a hint of chili for those who desire a touch of heat.

The accompanying crusty bread, whether a dense sourdough or a light baguette, provides the perfect contrast with its crunchy exterior and tender crumb, enhancing the overall experience by offering a satisfying texture and flavor complement.

Occasions & Pairings: Perfect for Every Gathering

This stew is as versatile in its service occasions as it is in flavor. It’s ideal for:

  • Family Dinners: Serve it on weeknights for a quick yet satiating meal.
  • Winter Gatherings: Its hearty nature warms up any cold night, perfectly suitable for festive get-togethers during the holiday season.
  • Picnics and Potlucks: Easy to transport, it can be a star attraction at outdoor gatherings.
  • Pairings: Enjoy it with a robust red wine or a crisp, chilled cider, and consider pairing it with a simple green salad dressed with vinaigrette for a complete meal.

Tips, Variations & Substitutions

This stew invites creativity and adaptation, allowing you to tailor it to individual tastes or dietary needs:

  • Vegetarian/Vegan: Naturally vegan, add nutritional yeast for an extra umami touch or incorporate greens like spinach or kale for a nutritional boost.
  • Protein Variants: Substitute beans with lentils or chickpeas for different textures or add cubed tofu for extra protein.
  • Flavor Enhancers: Experiment with spices such as smoked paprika or cumin for a more robust flavor profile.
  • Regional Twists: Add curry powders for an Indian twist or incorporate olives and artichokes for a Mediterranean feel.
  • Thickening Options: For a creamier stew, consider blending a portion of the beans to serve as a thickener.

Storage & Make-Ahead Ideas

One of the beauties of this stew is its excellent storage capability, which lets it shine as a make-ahead meal:

  • Refrigeration: Keep it in an airtight container in the fridge for up to four days, allowing the flavors to deepen over time.
  • Freezing: Store in portion-sized containers for up to three months. Defrost in the fridge overnight and reheat on the stovetop until piping hot.
  • Make-Ahead: Prepare the stew up to two days in advance, allowing flavors to meld, and reheat before serving, ensuring it remains the texture you prefer.

Fun Facts & Trivia (Optional)

The concept of bean and vegetable stews dates back to ancient times when communal pots simmered over open fires. As a dish that nourished both body and soul, it’s said that such stews represented the earliest form of true slow cooking. Across Africa, similar stews are prepared in huge pots over outdoor fires during festivals, symbolizing unity and community gathering, offers a culinary connection with our forebearers, whose ingenuity laid the groundwork for the rich culinary diversity we enjoy today.

In the context of today’s climate-conscious society, stews like these serve as a perfect example of sustainable eating. Utilizing both fresh and leftover ingredients, they exemplify a zero-waste philosophy. As you ladle this aromatic stew into your bowl, you’re not just partaking in a meal but a time-honored tradition of frugal innovation and savory satisfaction, resilient through the ages.

Ingredients

Rustic Veggie and Bean Stew Base

  • 2 tablespoons olive oil
    → Olive oil serves as the primary cooking fat in this stew, providing richness and depth of flavor. Use extra virgin olive oil for the best taste, and heat it gently to avoid burning, which can impart a bitter flavor to the dish.
  • 1 medium onion (diced)
    → Onions are essential for building the flavor base of the stew. Dice them finely to ensure they cook evenly and soften quickly, releasing their sweetness in the process, which enhances the overall taste of the dish.
  • 3 cloves garlic (minced)
    → Garlic adds a fragrant and savory element to the stew. Mince the garlic to a fine consistency so it blends seamlessly into the dish, maximizing its aromatic qualities and ensuring it doesn’t overpower the stew.
  • 2 medium carrots (chopped)
    → Carrots add sweetness and a slight crunch to the stew. Chop them into uniform pieces to promote even cooking. Young, tender carrots are preferred for their sweetness and vibrant color; however, any variety can be used.
  • 2 medium potatoes (diced)
    → Potatoes help to thicken the stew and provide heartiness. Dice them into even cubes so they cook at the same rate as other vegetables. Use starchy varieties, like Russets, for a creamier texture or waxy types for more bite.
  • 1 bell pepper (chopped)
    → Bell peppers add a pop of color and a sweet, earthy flavor. Choose any color you prefer and chop them into bite-sized pieces. For added flavor, consider roasting them before adding to the stew.
  • 1 can (15 oz) diced tomatoes (with juice)
    → Diced tomatoes provide acidity and moisture to the stew, balancing the flavors of the other ingredients. Use them directly from the can without draining for a chunky, rich addition. Opt for fire-roasted varieties for added depth of flavor.
  • 1 can (15 oz) cannellini beans (drained and rinsed)
    → Cannellini beans offer a creamy texture and serve as a protein source, making the stew hearty and satisfying. Rinse them thoroughly to remove excess sodium and enhance their flavor. They can also be substituted with other beans, like kidney or black beans, as per preference.
  • 4 cups vegetable broth
    → Vegetable broth serves as the liquid base for the stew, infusing it with savory flavors. For the best results, use low-sodium broth to control the salt level in the stew. You can also use homemade broth for an added depth of flavor.
  • 1 teaspoon dried thyme
    → Thyme adds an herbal aroma and pairs well with the vegetables. Use dried thyme for convenience, but fresh thyme can be used if available — just increase the quantity slightly as fresh herbs are less concentrated.
  • 1 teaspoon smoked paprika
    → Smoked paprika imparts a warm, smoky flavor to the stew. Use it sparingly, as it can be strong; start with a small amount and adjust to taste based on your preference for smokiness.
  • Salt and pepper to taste
    → Salt enhances the natural flavors of the ingredients, while pepper brings a hint of heat. Add salt gradually during the cooking process, tasting frequently to avoid oversalting. Freshly cracked black pepper adds the best flavor.

Crusty Bread

  • 1 loaf crusty bread (preferably sourdough or baguette)
    → A crusty loaf provides the perfect vessel for soaking up the flavorful stew. Choose a loaf with a firm crust and a soft interior for a satisfying contrast. Allow the bread to sit for a few hours at room temperature before serving for the best crust.

Instructions

  • Heat 2 tablespoons of olive oil in a large pot over medium heat until shimmering.

    → Heating the oil properly allows you to sauté the vegetables without them sticking or burning. You should see faint wisps of smoke rising from the oil before adding anything to the pot, signaling that it’s at the right temperature.
  • Add 1 medium diced onion to the pot and sauté for about 5 minutes or until it becomes translucent and soft.

    → Cooking the onion first helps develop the base flavor for your stew. Stir frequently to prevent it from browning too much; caramelized bits can add depth but should not dominate the base flavor.
  • Stir in 3 minced garlic cloves and sauté for an additional 1-2 minutes until fragrant.

    → Garlic can burn quickly, which can impart a bitter taste, so it’s added after the onion. Stir continuously just until you can smell its aroma, ensuring it becomes aromatic without darkening.
  • Add 2 medium chopped carrots to the pot and cook for about 3-5 minutes until they start to soften.

    → The carrots bring a nice sweetness to the stew. Ensure they are chopped uniformly so they cook at the same rate as the other vegetables, providing a more consistent texture in the stew.
  • Incorporate 2 diced medium potatoes and 1 chopped bell pepper into the pot, stirring well to combine.

    → The potatoes add heartiness, while bell peppers offer sweetness and color. Uniform dicing is crucial for even cooking; that way, everything reaches tenderness simultaneously.
  • Add 1 can of diced tomatoes (with juice) to the mixture and stir thoroughly.

    → The tomatoes will create a rich base for your stew, adding acidity and depth. Use the juice from the can as it helpsintegrate the flavors of the stew and balances the sweetness of the vegetables.
  • Add 1 can of drained and rinsed cannellini beans to the pot, followed by 4 cups of vegetable broth.

    → Rinsing the beans is essential for reducing sodium content and removing any metallic taste from the can. The broth is the liquid foundation of your stew, bringing all ingredients together; it should fully cover the vegetables for proper cooking.
  • Sprinkle in 1 teaspoon of dried thyme and 1 teaspoon of smoked paprika, then season with salt and pepper to taste.

    → Thyme and smoked paprika should be added now to infuse the stew as it cooks. Salt enhances the natural flavors, while freshly cracked black pepper adds a layer of complexity; add gradually, as it’s easier to adjust than to fix an oversalted dish.
  • Bring the stew to a gentle boil, then reduce the heat to low to let it simmer. Cover the pot, leaving a small crack for steam to escape, and cook for about 30-40 minutes.

    → Simmering allows the flavors to meld beautifully, while the covered pot helps retain moisture. Check periodically; you want it simmering gently, with small bubbles breaking the surface — not boiling vigorously.
  • After 30-40 minutes, check the doneness of the vegetables by piercing them with a fork; they should be tender but not mushy.

    → This step ensures all vegetables have cooked properly. Taste the stew at this point, checking for seasoning, and adjust salt and pepper as needed for balance.
  • While the stew finishes simmering, prepare your crusty bread by slicing it into thick pieces.

    → Thick slices are ideal for soaking up the stew, creating a satisfying experience when eaten together. If using sourdough or baguette, a diagonal cut gives larger surface area for dipping and enhances the visual appeal.
  • Toast the sliced bread in a toaster or under a broiler for a couple of minutes until golden brown and crispy.

    → Toasting the bread adds a delightful crunch and warmth, enhancing the textural contrast when served with the stew. Monitor closely to prevent burning.
  • Serve the rustic veggie and bean stew in bowls, garnishing with additional pepper or fresh herbs if desired, alongside the crusty bread.

    → Presentation is key; a sprinkle of fresh herbs not only adds color but also freshens the dish. Offer crusty bread on the side for an authentic rustic experience, allowing diners to enjoy both components together.

Notes

This Rustic Veggie and Bean Stew is a nourishing and hearty dish that makes perfect use of seasonal vegetables and pantry staples. The combination of fresh produce and canned beans creates a deliciously satisfying meal. Consider using a variety of vegetables based on availability — zucchini, spinach, or green beans work wonderfully as well.

For the perfect depth of flavor, allow the stew to simmer gently to let the ingredients meld together fully. If you prefer a thicker stew, mash a few of the beans against the side of the pot while cooking, or you can blend a portion of the stew and return it to the pot.

To enjoy this stew to the fullest, serve it hot alongside a slice of crusty bread, which will soak up the rich flavors, making every bite delightful. Adding a sprinkle of fresh herbs like parsley or basil right before serving can elevate the dish even further with a pop of freshness.

Leftovers can be stored in an airtight container in the refrigerator for 3 to 4 days or frozen for up to 3 months. Reheat gently on the stove, adding a splash of vegetable broth if necessary. This stew also works wonderfully as meal prep, allowing for easy lunches throughout the week!

Tips

Cooking Tips for Rustic Veggie and Bean Stew

  • Prepare Your Ingredients Ahead: Before you start cooking, chop and measure all your ingredients. Having everything ready to go will streamline the cooking process and help avoid any last-minute scrambles.
  • Use a Large Pot: Since this is a stew, make sure to use a large, heavy-bottomed pot or Dutch oven. This ensures even cooking and prevents the ingredients from overcrowding, which can lead to uneven flavors and textures.
  • Layer the Flavors: Start by sautéing the onions, garlic, and bell pepper in olive oil until they are soft and translucent. This will create a rich flavor base for your stew. Add the carrots and potatoes next, allowing them to cook for a few minutes before adding the tomatoes and beans.
  • Adjust the Consistency: If the stew is too thick for your liking, you can add more vegetable broth a little at a time. If it’s too thin, let it simmer uncovered for a while to allow some of the liquid to evaporate and thicken the stew.
  • Season Gradually: Since different broth and ingredient types can vary in saltiness, it’s best to start with less salt and gradually add more to taste after the stew has cooked for a while. This prevents oversalting.
  • Let It Simmer: Allow the stew to simmer for at least 30-40 minutes. This not only helps the flavors meld together but also ensures the vegetables are tender. If time allows, longer simmering can intensify the flavors even more.
  • Serve with Fresh Herbs: Consider garnishing your stew with fresh parsley or basil before serving. This adds a fresh note to the dish and enhances its visual appeal.
  • Perfectly Pair with Bread: When serving the crusty bread, consider toasting it lightly for an extra crunch. This provides a delightful contrast to the hearty stew. Serve butter or olive oil on the side for dipping.
  • Store Leftovers Properly: Any leftover stew can be stored in an airtight container in the refrigerator for up to five days. Reheat gently on the stove, adding a splash of broth if it has thickened too much.

FAQ

What ingredients are needed for the Rustic Veggie and Bean Stew?

The main ingredients include mixed vegetables such as carrots, bell peppers, and zucchini, canned beans (like kidney and black beans), vegetable broth, tomatoes, onions, garlic, and your choice of herbs and spices. Don’t forget the crusty bread for serving!

How long does it take to prepare the Rustic Veggie and Bean Stew?

The preparation time is approximately 15 minutes, and the cooking time is about 30-40 minutes, making the total time around 55 minutes to 1 hour.

Can I use frozen vegetables instead of fresh?

Yes, frozen vegetables can be used in place of fresh ones. They’re convenient and can save time while still being nutritious.

What type of bread pairs well with this stew?

A crusty baguette, sourdough, or ciabatta are excellent choices to complement the Rustic Veggie and Bean Stew, perfect for dipping into the broth.

Is this stew suitable for vegans?

Yes, the Rustic Veggie and Bean Stew is entirely plant-based and suitable for vegans, as it is made with vegetables and beans without any animal products.

Can I add meat to the stew?

Absolutely! You can add cooked chicken, sausage, or beef for a heartier version of the stew, but it will alter the dish’s rustic vegetarian character.

How can I store leftover stew?

Leftover stew can be stored in an airtight container in the refrigerator for up to 3-4 days. It can also be frozen for longer storage, lasting up to 2-3 months.

What spices work well in this stew?

Common spices include cumin, paprika, thyme, and bay leaves. Feel free to experiment with your favorite herbs and spices to customize the flavor to your liking.

Introduction / Hook

Imagine sinking your teeth into a perfectly tender piece of chicken, enveloped in a glossy, amber glaze that dances between sweetness and tang. The succulence of well-cooked thighs, combined with the rich, golden hue of honey and mustard, promises an experience that’s not just a meal, but a memory in the making. This is the magic of Honey Mustard Glazed Chicken Thighs — a dish that sings with simplicity yet dazzles with its complexity. As the savory aroma fills your kitchen, it invites not just the senses but stirs the soul, offering a perfect balance between comfort and luxury. With just a handful of ingredients and an uncomplicated approach, this dish promises to be a superstar in your culinary repertoire.

The Story Behind the Dish

The origins of honey mustard, as a flavor combination, trace back to ancient times where honey, often considered a precious commodity, was used alongside mustard seeds in various cuisines. For both Ancient Egyptians and Romans, using mustard with meats was common, and the sweetness of honey was a favored pairing to create balance. Through the centuries, this combination navigated through various culinary traditions, ultimately emerging in Europe as a popular condiment accompanying meats, especially in French cuisine.

Over time, honey mustard transcended the traditional confines of a dipping sauce or dressing, finding new life as a glaze that accentuates and complements the natural flavors of the meat. Chicken thighs, known for their juicy and forgiving nature, emerge as an ideal canvas for this vibrant glaze, creating a marriage of flavors that transcends cultures and traditions. This dish, though modern in its execution, rests upon centuries of culinary evolution, making each bite a celebration of history.

Why You’ll Love This Recipe

  • Easy to Prepare: Requiring minimal prep and simple ingredients, this recipe is perfect for weeknight dinners yet special enough for gatherings.
  • Rich Flavor: The unique blend of honey and mustard creates a striking contrast that elevates the natural taste of the chicken.
  • Family-Friendly: The sweet notes of honey combined with the mild zing of mustard make it a hit with both kids and adults.
  • Versatile: Serve it as a main dish, use leftovers for sandwiches, or toss it into a salad for a complete meal.
  • Budget-Conscious: Chicken thighs are not only more affordable than breasts but deliver superior flavor and moisture.

Flavor Profile & Texture

The interplay of flavors in Honey Mustard Glazed Chicken Thighs is a symphony for the palate. The initial sweetness of the honey caresses the taste buds, soon followed by the warmth and slight sharpness of mustard that cuts through the sugar’s richness to offer a balanced bite. The glaze’s aromatic undertones are complemented by the savory backdrop of chicken, enhancing its natural flavors while adding depth.

As for the texture, the glaze forms a sticky, luscious coating that seals in the juiciness of the chicken thighs. Each bite presents a tender and succulent inside contrasted by the slightly crisp, caramelized exterior, offering a satisfying mouthfeel. The end result is not just delicious but texturally rewarding, making it a favorite among those who savor a perfect bite.

Occasions & Pairings

Honey Mustard Glazed Chicken Thighs shine on any occasion, be it a cozy family dinner or a festive holiday gathering. Their alluring appearance and flavor-packed profile make them a delightful centerpiece. For weekday meals, they are a quick solution that won’t compromise taste.

When it comes to pairings, these chicken thighs are as versatile as they are delicious. Serve them with a refreshing summer salad to lighten the meal, or accompany them with roasted vegetables for a hearty feast. For beverage pairings, consider a chilled glass of white wine such as Chardonnay or Sauvignon Blanc, which will complement the dish’s sweet and tangy notes. A crisp apple cider or a smooth, full-bodied ale can also enhance the meal wonderfully.

Tips, Variations & Substitutions

To elevate this dish or adapt it to dietary requirements, consider some of these tips and variations:

  • Spicy Kick: For those who enjoy a bit of heat, add a dash of cayenne pepper or a spoonful of your favorite hot sauce to the glaze.
  • Herbal Infusion: Enhance the aromatic quality by introducing herbs like rosemary or thyme into the glaze or as a garnish.
  • Sweet Variations: Swap out the honey for maple syrup or agave syrup for a subtly different sweetness.
  • Vegan & Vegetarian Options: Replace chicken with tofu or tempeh. Marinate the substitute in the glaze before grilling for a similar experience.
  • Gluten-Free Alternative: Ensure all components, particularly mustard and any additional sauces, are certified gluten-free.

Storage & Make-Ahead Ideas

Honey Mustard Glazed Chicken Thighs store exceptionally well, making them a practical option for meal prep. To refrigerate, place the leftovers in an airtight container and consume within three days for optimal freshness. When reheating, do so gently to keep the chicken moist.

For those who love planning ahead, prepare the glaze a day or two prior and store it in the fridge. This allows the flavors to meld beautifully, intensifying the dish’s overall taste when cooked. Leftover chicken can also be shredded and turned into a delectable filling for sandwiches or wraps, perfect for lunchboxes or quick meals. If freezing, wrap the individual thighs tightly and use within two months, reheating straight from frozen or after thawing overnight in the refrigerator.

Fun Facts & Trivia

Did you know that the Ancient Egyptians were among the first civilizations to cultivate mustard for culinary uses? Meanwhile, honey’s entrenchment in culinary history is marked by its use not only as a sweetener but also as a gift in Egyptian tombs to accompany pharaohs into the afterlife. This historical context adds a fascinating layer to our humble honey mustard glaze, showcasing how ingredients can connect us across millennia.

Ingredients

  • Chicken Thighs
    → Chicken thighs are the star of this dish, providing a juicy and flavorful protein base. Choose bone-in, skin-on thighs for added richness and moisture; the skin will help keep the meat tender during cooking. If you prefer a healthier option, skinless thighs can also be used, but the cooking time may need slight adjustments to ensure they remain moist.
  • Salt
    → Salt is essential for enhancing the natural flavors of the chicken and the glaze. Use kosher salt for even distribution and to avoid over-salting. Season the chicken thighs generously before cooking to ensure the flavor penetrates the meat.
  • Black Pepper
    → Freshly ground black pepper adds a warm, peppery kick that complements the sweetness of the honey and the tang of the mustard. Grind your own if possible for a more robust flavor. Adjust the amount to your preferred spice level.
  • Honey
    → Honey is the sweet component of the glaze, helping to caramelize the chicken and create a shiny, sticky coating when cooked. Use a good quality, pure honey for the best flavor. If your honey is crystallized, gently warm it to return it to a liquid state for easy mixing.
  • Mustard (Dijon or Yellow)
    → Mustard brings tanginess and depth to the glaze, balancing the sweetness of honey. Dijon mustard offers a sharper flavor, while yellow mustard is milder. Whisk the mustard into the honey until fully combined for a smooth glaze. Adjust the quantity if you desire a stronger mustard flavor.
  • Garlic (minced)
    → Minced garlic infuses the chicken with aromatic flavors and enhances the overall taste of the dish. Use fresh garlic cloves for the best aroma; crush and mince them finely before adding to the glaze. Be careful not to overcook garlic, as it can turn bitter if burned.
  • Olive Oil
    → Olive oil is used to coat the chicken thighs before seasoning, helping the spices adhere better and improving the overall texture during cooking. Use extra virgin olive oil for its rich flavor and health benefits. Coat the thighs evenly to prevent sticking.
  • Fresh Herbs (optional, e.g., thyme or rosemary)
    → Fresh herbs can be added for an extra layer of flavor, with thyme or rosemary being excellent choices that pair well with chicken. Chop the herbs finely and sprinkle them over the chicken before baking. Use fresh herbs for the brightest flavor; if using dried herbs, halve the amount as they are more concentrated.

Instructions

  • Begin by preheating your oven to 400°F (200°C) to ensure that the chicken thighs cook evenly and thoroughly when placed inside.

    → Starting with a preheated oven allows for the proper caramelization of the glaze, enhancing the overall flavor and texture of the chicken.
  • While the oven heats, prepare a baking dish by lightly greasing it with a cooking spray or olive oil.

    → This prevents the chicken from sticking to the dish, making it easier to serve and clean up afterward.
  • In a small bowl, combine the honey, mustard, and minced garlic. Whisk thoroughly until the ingredients are well blended into a smooth glaze.

    → This creates a cohesive sauce that will coat the chicken. Adjust the ratio of honey to mustard based on your taste preference for sweetness or tanginess.
  • Take the chicken thighs and pat them dry with paper towels to remove excess moisture.

    → Drying the chicken helps the skin crisp up during cooking and allows the seasoning to adhere better, amplifying the flavor.
  • Place the dried chicken thighs in a large bowl or directly on a cutting board. Drizzle olive oil over the chicken, ensuring each piece is coated evenly.

    → The olive oil not only adds flavor but also promotes better browning and reduces sticking during the cooking process.
  • Sprinkle a generous amount of kosher salt and freshly ground black pepper over both sides of each chicken thigh, making sure to season them thoroughly.

    → This is crucial for enhancing the flavor of the chicken. A well-seasoned exterior ensures that the flavor penetrates the meat throughout cooking.
  • Transfer the seasoned chicken thighs into the prepared baking dish, skin-side up if using skin-on thighs.

    → Positioning the chicken this way allows the skin to crisp up nicely as it bakes and helps to retain moisture in the meat beneath.
  • Pour the honey mustard glaze over the chicken thighs, using a brush or spoon to coat them thoroughly and evenly.

    → Coating the chicken with glaze ensures every bite is flavorful, and the sugar in the honey will help caramelize, forming a beautiful crust.
  • If desired, sprinkle chopped fresh herbs over the glazed chicken for added flavor and aroma.

    → Fresh herbs can elevate the dish, providing a touch of brightness and complexity that complements the main flavors.
  • Place the baking dish in the preheated oven and bake for 35 to 45 minutes, or until the chicken reaches an internal temperature of 165°F (74°C) and the glaze is bubbly and caramelized.

    → Monitoring the internal temperature with a meat thermometer ensures food safety while preventing overcooking that can dry out the chicken.
  • Once cooked, remove the chicken from the oven and let it rest for 5 minutes before serving.

    → Resting allows the juices to redistribute within the meat, resulting in juicy and tender chicken. This step enhances the overall eating experience.
  • Serve the honey mustard glazed chicken thighs warm, spooning any leftover glaze from the baking dish over the top for extra flavor.

    → Using the glaze as a finishing touch amplifies the dish’s flavors and adds a beautiful glossy finish that is visually appealing.

Notes

These Honey Mustard Glazed Chicken Thighs are a delightful combination of sweet and tangy flavors, making them a crowd-pleaser for family dinners or gatherings. The chicken thighs, known for their juicy and rich flavor, are perfectly complemented by the glaze made from honey and mustard. This recipe can easily be customized by adding your favorite fresh herbs, such as thyme or rosemary, for an aromatic touch.

When preparing the chicken, make sure to season it well with salt and freshly ground black pepper to enhance the overall flavor. Using high-quality honey is essential for achieving that beautiful glaze, so opt for a pure variety. Remember to mince fresh garlic to infuse a warm aroma into the dish, but keep an eye on it to prevent bitterness from overcooking.

This dish is great served with a side of roasted vegetables or over a bed of rice to soak up the delicious glaze. For meal prep enthusiasts, cooked chicken thighs can be stored in the refrigerator for a few days or frozen for future meals. Just be sure to reheat them gently to maintain their tenderness. Enjoy your cooking!

Tips

Cooking Tips for Honey Mustard Glazed Chicken Thighs

  • Marinate Ahead: For even more flavor, consider marinating the chicken thighs in the honey mustard mixture for at least 30 minutes or up to 4 hours in the refrigerator. This allows the flavors to penetrate the meat, resulting in a more flavorful dish.
  • Preheat the Oven: Ensure your oven is preheated to the correct temperature before placing the chicken inside. This ensures even cooking and optimal glaze caramelization. An oven thermometer can help verify accuracy.
  • Baste for Best Results: While baking, occasionally baste the chicken thighs with the glaze to keep them moist and add an extra layer of flavor. This step is particularly helpful if you prefer a thicker glaze.
  • Check for Doneness: Use a meat thermometer to check the internal temperature of the chicken. When it reaches 165°F (75°C), it is safe to eat. This helps prevent overcooking, which can lead to dry chicken.
  • Let it Rest: After removing the chicken from the oven, let it rest for about 5-10 minutes before serving. This allows the juices to redistribute, ensuring juicy chicken when you cut into it.
  • Serving Suggestions: Pair your honey mustard glazed chicken thighs with a side salad, roasted vegetables, or fluffy rice to soak up the delicious glaze. This will create a balanced meal and enhance your dining experience.
  • Storing Leftovers: Allow any leftovers to cool completely before storing them in an airtight container in the refrigerator. They can be enjoyed for up to 3 days. Reheat in the oven to retain the glaze’s texture.

FAQ

What ingredients do I need for Honey Mustard Glazed Chicken Thighs?

You will need chicken thighs, honey, Dijon mustard, olive oil, garlic, salt, pepper, and optional herbs like rosemary or thyme.

How long does it take to prepare Honey Mustard Glazed Chicken Thighs?

The preparation time is approximately 10 minutes, and the cooking time is around 30-35 minutes, making it a total of about 45-50 minutes from start to finish.

Can I use chicken breasts instead of thighs?

Yes, you can use chicken breasts instead of thighs. However, keep in mind that cooking times may vary, as breasts cook faster and can become dry if overcooked.

Is it possible to make this recipe in the oven?

Absolutely! You can bake the glazed chicken thighs in the oven at 375°F (190°C) for about 30-35 minutes or until fully cooked and the internal temperature reaches 165°F (75°C).

What can I serve with Honey Mustard Glazed Chicken Thighs?

This dish pairs well with a variety of sides, such as roasted vegetables, mashed potatoes, rice, or a fresh salad.

Can I store leftovers? If so, how?

Yes, leftovers can be stored in an airtight container in the refrigerator for up to 3-4 days. You can also freeze them for longer storage, up to 2 months.

Is this recipe suitable for meal prep?

Yes, Honey Mustard Glazed Chicken Thighs are great for meal prep. You can cook a batch ahead of time and portion them out for lunches or dinners throughout the week.

Can I use a different type of mustard?

Yes, you can experiment with different types of mustard, such as whole grain or honey mustard. Each type will provide a unique flavor profile to the dish.

Introduction: A Savory Journey with Creamy Garlic Herb Chicken Bake

Imagine yourself walking into your kitchen, the air rich with the warm, irresistible aroma of garlic and herbs mingling in perfect harmony. A glossy, golden chicken dish awaits you, bubbling gently in its creamy sauce, whispering promises of comfort and satisfaction. The Creamy Garlic Herb Chicken Bake is not just another chicken recipe; it’s a symphony of flavors and textures that dance on your palate, inviting you into a realm of culinary delight. Ideal for any occasion, whether it’s a family dinner or a special get-together, this dish brings an ethereal experience to your dining table through its simplicity and elegance.

The Story Behind the Dish

This dish has roots that dig deep into the hearty, rustic cooking traditions of Europe, where using fresh ingredients like garlic and a bouquet of herbs become the cornerstone of culinary arts. The combination of chicken, garlic, and herbs has long been hailed as a triumphant trio in both Italian and French cuisines. The method of baking originated as a way to conserve heat and ensure every dish was cooked evenly. Over time, it became a beloved technique, cherished for the rich, deep flavors it produces. The creamy garlic herb chicken bake retains this timeless charm, encasing tradition with a modern touch—bringing that cozy, old-world appeal right into your kitchen.

Why You’ll Love This Recipe

  • Quick and Simple: On busy weeknights or when you want something easy yet delectable, this recipe comes together without hassle, transforming simple ingredients into a gourmet meal.
  • Comforting and Wholesome: With its rich, creamy sauce and savory chicken, this dish is a heartwarming dinner option, perfect for the colder months when you crave warmth in every bite.
  • Family Friendly: The mild and creamy flavors appeal to all ages, making it an instant favorite among both adults and children alike.
  • Customizable: With several options for variations in herbs and spices, it lends itself easily to personal touches and adaptations.

Flavor Profile & Texture

At the heart of this dish is its remarkable flavor profile. The garlic, gently sautéed, releases its sweet, nutty undertones which resonate throughout the dish. Freshly chopped herbs contribute their aromatic allure, while the cream brings everything together in a luscious, opulent blanket. The chicken, when baked, achieves a tender, juicy consistency that contrasts beautifully with the richness of the sauce. Each bite is a nuanced blend of smooth and savory, with a hint of herby brightness that provides a persistent, inviting complexity.

Occasions & Pairings

This versatile dish is suitable for a range of occasions:

  • Weeknight Dinners: Quick enough to prepare after a long day, it provides a stress-free dinner solution with extreme satisfaction.
  • Festive Celebrations: Its elegant presentation and rich taste make it an exceptional choice for holiday feasts or an intimate dinner party.
  • Comfort Meals: The creamy, heartwarming nature of this dish makes it a perfect go-to for those cozy, stay-in evenings.

As for pairings, this dish pairs seamlessly with a fresh green salad dressed in a light vinaigrette, garlic mashed potatoes, or steamed asparagus. For a delightful wine pairing, a chilled glass of Chardonnay or a light Pinot Noir complements the creamy herb flavors exquisitely.

Tips, Variations & Substitutions

While the classic creamy garlic herb chicken bake is a masterpiece on its own, there are myriad ways to make it your own:

  • Herb Variations: Experiment with different herbs like rosemary, parsley, or even a pinch of dried thyme for a unique twist.
  • Dietary Alternatives: Substitute cream with coconut milk for a dairy-free version. For a low-carb option, serve it with cauliflower rice instead of traditional sides.
  • Spicy Kick: For those who enjoy a little heat, a pinch of red pepper flakes or a dash of paprika can elevate the taste experience.

Storage & Make-Ahead Ideas

The flexibility of this dish extends to its storage and make-ahead possibilities. To store leftovers, simply cover the dish tightly and refrigerate for up to three days. The dish can also be prepared ahead of time—assemble the chicken and sauce in the baking dish up to a day in advance, keeping it covered in the refrigerator until you’re ready to bake. When reheating, gently warm in the oven at a low temperature to maintain its moisture and fantastic flavor. For a freezer-friendly option, portion the dish and freeze for up to two months, then thaw in the refrigerator overnight before reheating.

Fun Facts & Trivia

Did you know that the combination of garlic and herbs has been used since antiquity not just for flavor, but also for their medicinal properties? Garlic is renowned for its antioxidant attributes and cardiovascular benefits, while various herbs have been celebrated for their soothing and restorative qualities across cultures globally. This culinary practice evolved from the idea that food is not just a source of nourishment, but also a means to well-being.

Overall, the Creamy Garlic Herb Chicken Bake is more than just a meal—it’s a journey through history, flavor, and the comforting essence of home-cooked goodness. With each bite, you’re indulging in a rich tradition of culinary excellence that promises to delight and comfort, turning any dining experience into a cherished memory.

Ingredients

  • Chicken
    → Use 4 boneless, skinless chicken breasts for this recipe, as they provide a lean source of protein and absorb the flavors of the creamy garlic herb sauce well. Ensure the chicken is fresh or properly thawed if previously frozen, and pat them dry with a paper towel to encourage browning during cooking.
  • Olive Oil
    → 2 tablespoons of extra virgin olive oil are recommended for sautéing the chicken and creating a rich flavor base. Olive oil adds healthy fats and helps to ensure the chicken cooks evenly. Warm the oil in a skillet before adding the chicken to help seal in moisture.
  • Garlic
    → Use 4 cloves of fresh garlic, minced, to deliver robust flavor to the sauce. Fresh garlic offers a more pungent taste compared to pre-minced or powdered alternatives. Make sure to mince finely to release its aromatic oils, which infuse the dish with a rich aroma.
  • Heavy Cream
    → 1 cup of heavy cream creates the rich, creamy base of the sauce. Heavy cream has a high fat content, allowing the sauce to thicken beautifully and coat the chicken. Always use cold cream for the best results, as it incorporates more easily with other ingredients.
  • Chicken Broth
    → 1/2 cup of low-sodium chicken broth helps to create a flavorful sauce while keeping the dish moist. Low-sodium is preferred to maintain control over the saltiness of the dish. Add the broth to the pan gradually to scrape up any crispy bits from the chicken for added flavor.
  • Fresh Herbs
    → A mix of 1 tablespoon each of chopped fresh parsley, thyme, and rosemary adds freshness to the dish. Chop the herbs finely to distribute their flavors throughout the sauce. Opt for fresh over dried herbs for a brighter taste, and add them towards the end of cooking to preserve their flavor.
  • Salt
    → 1 teaspoon of salt enhances all the flavors in the dish. Use kosher salt for its texture, which is easy to control when seasoning. Remember to taste the sauce before adding more salt, as the chicken broth contributes saltiness as well.
  • Black Pepper
    → Freshly ground black pepper (to taste) adds a slight heat and depth to the dish. Grind the pepper just before adding it to release essential oils and ensure maximum flavor. Adjust according to your personal heat preference.
  • Parmesan Cheese
    → 1/2 cup of grated Parmesan cheese for a rich, savory finish. Use freshly grated cheese for a more intense flavor and better melting qualities. Add the cheese last to the sauce, stirring until melted and gooey for the best texture.

Instructions

  • Preheat your oven to 375°F (190°C) and prepare a 9×13-inch baking dish by lightly greasing it with cooking spray or butter.

    → Preheating the oven ensures that the chicken will cook evenly and thoroughly once it’s placed inside. Greasing the dish helps prevent the chicken from sticking and facilitates easy serving.
  • Pat the chicken breasts dry with paper towels to remove any excess moisture.

    → This step is crucial for achieving a golden-brown sear on the chicken when sautéing. The lack of moisture allows the chicken to brown rather than steam, enhancing flavor and texture.
  • Heat 2 tablespoons of olive oil in a large skillet over medium-high heat until it shimmers.

    → Warming the olive oil properly before adding the chicken is essential—this creates a non-stick surface in the skillet and helps to sear the chicken, locking in its natural juices.
  • Carefully add the chicken breasts to the hot skillet, making sure they are not overcrowded, and sear for 4-5 minutes on each side until golden brown.

    → This technique introduces a beautiful crust and enhances flavor through the Maillard reaction. Avoid moving the chicken around too much to ensure an even sear. You can check for doneness by looking for a golden color and checking if they release easily from the pan.
  • Once browned, transfer the chicken to the prepared baking dish and cover loosely with aluminum foil to keep warm.

    → This helps retain heat and moisture until the dish is ready to bake. Keeping the chicken covered prevents it from losing juices and drying out.
  • In the same skillet, add the minced garlic and sauté for about 30 seconds, or until fragrant, being careful not to burn it.

    → Sautéing garlic releases its essential oils and enhances its flavor. Garlic cooks quickly, so stirring constantly prevents burning, which can introduce bitterness.
  • Pour in 1/2 cup of chicken broth, scraping the bottom of the skillet with a wooden spoon to deglaze it and incorporate the savory brown bits.

    → Deglazing adds depth of flavor to the sauce, as those bits are full of concentrated chicken flavor. This step is key for creating a rich sauce that clings beautifully to the chicken.
  • Add 1 cup of cold heavy cream to the skillet, stirring gently to combine with the broth and garlic.

    → Cold cream helps it mix smoothly without curdling. Stirring well ensures a creamy consistency without lumps, forming the basis of the sauce.
  • Stir in 1 tablespoon each of chopped fresh parsley, thyme, and rosemary, along with 1 teaspoon of salt and freshly ground black pepper to taste.

    → Fresh herbs enhance the aroma and flavor profile of the dish, while the salt balances the richness. Taste before adjusting seasoning, as the broth provides some saltiness.
  • Bring the cream mixture to a gentle simmer and let it cook for about 3-5 minutes, stirring constantly to prevent sticking.

    → This allows the sauce to thicken slightly and the flavors to meld together. Keep the heat moderate to avoid boiling, which can split the cream.
  • Finally, remove the skillet from heat and stir in 1/2 cup of grated Parmesan cheese until melted and smoothly incorporated.

    → Adding the cheese last creates a velvety texture in the sauce, and freshly grated cheese melts more evenly, providing a richer flavor. Stir until fully blended to achieve a creamy finish.
  • Pour the creamy garlic herb sauce evenly over the seared chicken in the baking dish.

    → This ensures that every piece of chicken is coated in flavor, resulting in a succulent finish. Use a spatula to ensure even distribution of sauce.
  • Bake the dish in your preheated oven for 25-30 minutes or until the chicken reaches an internal temperature of 165°F (75°C) and is cooked through.

    → Baking allows the flavors to meld and the chicken to become tender. Use a meat thermometer to check for doneness, inserting it into the thickest part of the chicken to avoid undercooking.
  • After removing the dish from the oven, allow it to rest for 5 minutes before serving.

    → Resting helps redistribute the juices throughout the chicken, ensuring that it remains moist and tender when sliced.
  • Serve the creamy garlic herb chicken with your choice of sides, spooning extra sauce over the top.

    → This dish pairs wonderfully with pasta, rice, or a side of vegetables. The extra sauce enhances the flavor of the sides and makes for a delightful presentation.

Notes

These Creamy Garlic Herb Chicken Bakes are a delightful and comforting dish that combines succulent chicken with a rich creamy sauce infused with fragrant herbs and garlic. Start by ensuring your chicken is fresh or properly thawed and patted dry to achieve a nice sear. The use of heavy cream creates an indulgent base, while the chicken broth adds depth without overwhelming the dish with salt. Opt for fresh herbs like parsley, thyme, and rosemary for a pop of color and flavor; add them at the end of cooking to keep their bright essence. Always taste the sauce for seasoning during preparation, adjusting the salt and black pepper to your liking. For a luxurious finish, include freshly grated Parmesan cheese, stirring it into the sauce for added creaminess and a savory kick. This dish pairs perfectly with a side of steamed vegetables or over pasta or rice to soak up the delicious sauce. Enjoy the comforting flavors of this easy-to-make recipe, perfect for weeknight dinners or impressing guests.

Tips

  • Preparation Tips:
    • Start by preheating your oven to 375°F (190°C) to ensure an even cooking temperature for the chicken.
    • Before cooking, let the chicken breasts come to room temperature for about 15-20 minutes to promote even cooking.
    • Use a meat mallet to gently pound the chicken breasts to an even thickness; this helps them to cook uniformly without drying out.
  • Sautéing Tips:
    • When heating the olive oil, make sure it’s hot but not smoking before adding the chicken to achieve a nice sear and prevent sticking.
    • Don’t overcrowd the skillet; cook the chicken in batches if necessary to allow for proper browning.
    • After cooking the chicken, let it rest for a few minutes before slicing to retain the juices.
  • Garlic and Cream Sauce Tips:
    • Be careful not to burn the garlic; add it to the pan after the chicken has been removed and sauté for just 1-2 minutes until fragrant.
    • When adding the heavy cream and chicken broth, whisk continuously to keep the sauce smooth and prevent curdling.
    • Gradually adjust the thickness of the sauce by adding more chicken broth if needed, based on your desired consistency.
  • Herb and Seasoning Tips:
    • Add the fresh herbs to the sauce just before serving to maintain their vibrant color and fresh flavor, making the dish more aromatic.
    • For those who enjoy a little heat, consider adding a pinch of red pepper flakes alongside the black pepper for extra kick.
  • Serving Suggestions:
    • Pair this creamy garlic herb chicken with pasta, rice, or a crusty bread to soak up the delicious sauce.
    • Garnish with additional fresh herbs or a sprinkle of extra Parmesan before serving for a beautiful presentation.

FAQ

What ingredients are needed for the Creamy Garlic Herb Chicken Bake?

The main ingredients include chicken breasts, garlic, fresh herbs (like thyme and parsley), heavy cream, chicken broth, cheese, and seasonings such as salt and pepper.

How long does it take to prepare the Creamy Garlic Herb Chicken Bake?

Preparation time is approximately 15 minutes, and the baking time is around 30-35 minutes, totaling about 50 minutes to an hour.

Can I use boneless chicken thighs instead of chicken breasts?

Yes, boneless chicken thighs can be used as a substitute for chicken breasts, and they will add extra flavor and moisture to the dish.

What type of cheese works best in this recipe?

Parmesan cheese is typically used for its strong flavor, but you can also use mozzarella or a blend of Italian cheeses for a creamier texture.

Is this recipe suitable for meal prep?

Yes, the Creamy Garlic Herb Chicken Bake is great for meal prep. You can store leftovers in an airtight container in the refrigerator for up to 3-4 days.

Can I make this dish dairy-free?

Yes, you can substitute the heavy cream with a dairy-free alternative, such as coconut cream or almond milk, and use a dairy-free cheese option.

What side dishes pair well with Creamy Garlic Herb Chicken Bake?

This dish goes well with a side of steamed vegetables, rice, mashed potatoes, or a fresh green salad.

Can I freeze the Creamy Garlic Herb Chicken Bake?

Yes, you can freeze the dish before or after baking. Just make sure to store it in a freezer-safe container, and it can be kept for up to 3 months.

Introduction

Imagine the fragrant aroma of bubbling tomato sauce, mingling with the irresistible scent of melted cheese, wafting through your kitchen. Picture sinking your fork into layers of perfectly cooked pasta, laden with a velvety combination of ricotta and mozzarella, and punctuated by bursts of tender, vibrant spinach. This, dear friends, is the delightful experience of enjoying Cheesy Baked Ziti with Spinach—a dish that not only warms the heart but also embodies the essence of comfort food at its very best. Whether you’re gathering with family for a hearty dinner or seeking a satisfying and wholesome meal on a busy weeknight, this recipe promises a culinary experience that is as soothing as it is delicious.

The Story Behind the Dish

Ziti cuddlings surrounded by cheese and sauce hail from the Italian-American kitchens, a sought-after staple for generations. Baked ziti—a close cousin of lasagna—makes its mark with fewer layers and a less time-consuming preparation, while still delivering the same level of decadence. Its roots can be traced back to Southern Italy, where baked pasta dishes have been served for centuries as a testament to the Italian love for simple, yet flavorful, cooking.

Cheesy Baked Ziti with Spinach is a twist on the classic version, offering a nutritious pop of green that not only elevates its nutritional profile but also adds a layer of refinement. Spinach, steeped in history as a symbol of health and vitality, is seamlessly woven into the traditional tapestry of rich marinara and luxurious cheese, creating a dish that is both delightful and soul-satisfying.

Why You’ll Love This Recipe

  • Quick and Convenient: It’s an easy recipe that comes together with minimal fuss, perfect for weeknight dinners.
  • Nutritious and Delicious: The addition of spinach not only boosts the dish’s nutritional value, but also adds texture and flavor.
  • Family-Friendly: A universally appealing dish that caters to a wide range of palates—from the youngest family members to the most discerning taste buds.
  • Make-Ahead Friendly: Prepare in advance and simply bake when needed—ideal for meal prepping or busy weeknights.

Flavor Profile & Texture

Cheesy Baked Ziti with Spinach is a tribute to hearty flavors and delightful textures. The primary element is the pasta itself—ziti tubes perfectly capturing the rich tomato sauce within their hollow insides, ensuring each bite is drenched in flavor. The sauce, rich in tangy, sweet notes from ripe tomatoes and a hint of garlic, is the heart of the recipe.

Cheese serves as the crown jewel of this dish. Creamy ricotta provides a luscious base, while mozzarella melts across the top, forming a golden, bubbly crust that is both visually enticing and deliciously gooey. Spinach weaves its magic through the layers, providing earthy notes and bright pops of color and texture that punctuate every forkful.

Occasions & Pairings

This dish is a chameleon of sorts, easily transitioning between a comforting weeknight meal to a show-stopping main course at a holiday gathering. Its universal appeal makes it a hit at casual potlucks, family barbecues, or even intimate date nights.

Pair Cheesy Baked Ziti with Spinach with a crisp, green salad dressed lightly with lemon vinaigrette to balance the richness. For a delightful beverage pairing, consider a medium-bodied red wine like Chianti or a refreshing glass of iced herbal tea. Round out the meal with a simple dessert like lemon sorbet or panna cotta to complete the Italian-themed feast.

Tips, Variations & Substitutions

Every cook has the chance to make this dish their own. Here are some ideas to add your personal twist or adapt it to dietary needs:

  • Make It Meaty: Add cooked ground sausage, beef, or turkey for an extra layer of flavor and protein.
  • Gluten-Free Adaptation: Substitute regular ziti with gluten-free pasta to cater to dietary restrictions.
  • Vegan Version: Use plant-based cheese alternatives and tofu or cashew ricotta to transform this into a vegan delight.
  • Herb Infusions: Consider adding fresh basil, oregano, or parsley to enhance the flavor profile.

Storage & Make-Ahead Ideas

To enjoy Cheesy Baked Ziti with Spinach at its best, consider these storage and make-ahead tips:

  • Prepare and assemble the dish a day ahead and refrigerate unbaked. When ready to serve, simply pop it into the oven until hot and bubbly.
  • For leftovers, cover the dish tightly with foil and refrigerate for up to three days. Reheat individual servings in a microwave or the whole dish in the oven to maintain its texture and flavor.
  • If freezing, cover the unbaked dish with plastic wrap and foil. It can be stored in the freezer for up to two months. When ready to eat, thaw in the refrigerator overnight and bake as directed.

Fun Facts & Trivia

Did you know that the word “ziti” comes from the Italian term “zita,” meaning bride? Traditionally, “zita” was served as the first course of a wedding lunch in Southern Italy, its name forever linked to celebrations and new beginnings. This dish’s association with weddings and family gatherings has made it a symbol of togetherness and joy, providing not only sustenance but a shared experience that brings people closer with every forkful.

Whether you’re revisiting childhood memories or creating new ones, Cheesy Baked Ziti with Spinach brings more than just a meal to the table—it offers an enduring taste of tradition and the heartwarming flavors of home.

Ingredients

  • Pasta
    → Use 12 ounces of ziti pasta, boiled until al dente, as it will hold up well during baking and absorb the sauce without becoming mushy. Ensure to salt the water generously for flavor. After draining, toss the pasta with a splash of olive oil to prevent sticking while you prepare the other ingredients.
  • Spinach
    → Incorporate 4 cups of fresh spinach, washed and chopped. Spinach adds nutritional value and a pop of color to the dish. Sauté briefly in olive oil until wilted to enhance the flavor and reduce its volume, which helps the ziti hold together better.
  • Ricotta Cheese
    → Utilize 15 ounces of ricotta cheese for its creamy texture and flavor. It serves as a rich base that binds the pasta and spinach together. Mix with a bit of salt, pepper, and a pinch of nutmeg for extra flavor. Aim for a full-fat variety for the creamiest results.
  • Marinara Sauce
    → Use 4 cups of marinara sauce to provide moisture and flavor to the baked ziti. Choose a high-quality store-bought or homemade sauce that features rich tomato and herb flavors. Heat the sauce slightly before mixing for even distribution and to keep the dish warm during assembly.
  • Shredded Mozzarella Cheese
    → Incorporate 2 cups of shredded mozzarella cheese for a gooey, melty topping. Opt for whole milk mozzarella for the best flavor. Sprinkle generously on top and throughout the layers to create that irresistible cheese pull upon serving.
  • Parmesan Cheese
    → Use 1/2 cup of grated Parmesan cheese, mixed into the ricotta and sprinkled on top before baking for an additional layer of flavor. This cheese adds a salty, nutty taste that complements the other ingredients. Use freshly grated Parmesan for a more robust flavor contrast.
  • Olive Oil
    → Drizzle 1 tablespoon of olive oil for sautéing the spinach and greasing the baking dish. Olive oil adds flavor and helps prevent the pasta from sticking. Use extra virgin olive oil for the best taste.
  • Garlic
    → Add 2 cloves of garlic, minced, to enhance the dish’s overall flavor profile. Sauté with the spinach until fragrant but not burnt, as burnt garlic can impart a bitter taste. Fresh garlic is preferred for maximum flavor.
  • Salt and Pepper
    → Season with salt and pepper to taste, noting that these enhance all the flavors in the dish. Adjust after combining the ingredients to achieve a balanced flavor, taking into account the saltiness of the cheese and the marinara sauce.

Instructions

  • Begin by preheating your oven to 375°F (190°C) and greasing a 9×13 inch baking dish with a light coating of olive oil.

    → Preheating the oven ensures that your dish cooks evenly and at the correct temperature from the start, while greasing the dish helps prevent the ziti from sticking and makes cleanup easier.
  • In a large pot of salted boiling water, cook 12 ounces of ziti pasta until al dente, according to package instructions.

    → Cooking the pasta al dente allows for a firm texture that will hold up during baking without becoming mushy. Adding salt to the water enhances the pasta’s flavor; it should taste like the sea.
  • Once cooked, drain the pasta and transfer it back to the pot. Drizzle with a splash of olive oil and toss gently to coat.

    → Tossing the pasta with oil helps prevent it from sticking together as it cools and keeps it moist while you prepare the other ingredients for layering.
  • In a large skillet, heat 1 tablespoon of olive oil over medium heat. Add 2 cloves of minced garlic and sauté until fragrant, about 30 seconds.

    → Sautéing garlic releases its essential oils, enhancing the dish’s overall flavor. Keep a close eye on it to prevent burning, which causes bitterness.
  • Add 4 cups of washed and chopped fresh spinach to the skillet with the garlic, stirring until it wilts, about 2-3 minutes.

    → Cooking the spinach until wilted reduces its volume and intensifies its flavor. Once wilted, remove from heat and set aside to cool slightly.
  • In a large mixing bowl, combine 15 ounces of ricotta cheese, 1/2 cup of grated Parmesan cheese, a pinch of nutmeg, salt, and pepper to taste. Mix until smooth.

    → Mixing the cheeses together creates a uniform texture that helps bind the pasta and spinach. Nutmeg enhances the flavor of the ricotta, adding warmth.
  • Stir in the sautéed spinach and garlic into the ricotta mixture until well combined.

    → This incorporates the spinach’s flavor throughout the ricotta, ensuring every bite has a balanced taste.
  • In the same pot with the drained ziti, pour in 4 cups of warmed marinara sauce and mix thoroughly to coat the pasta evenly.

    → Warming the sauce before mixing allows it to heat the dish’s components more effectively and keeps the layers from cooling while being assembled.
  • Next, add the ricotta-spinach mixture to the pasta and sauce. Stir gently until the pasta is evenly combined with the cheese and sauce.

    → Using a gentle folding motion preserves the structure of the ziti, ensuring it doesn’t break apart while mixing.
  • Transfer half of the pasta mixture into the greased baking dish, spreading it out evenly across the bottom.

    → Layering the pasta ensures that the dish cooks evenly, and the creamy cheese mixture can be distributed throughout for optimal flavor.
  • Sprinkle 1 cup of shredded mozzarella cheese over the pasta layer before adding the remaining half of the pasta mixture on top.

    → Incorporating cheese into the layers creates a gooey texture throughout while still allowing for a delicious cheese pull on top.
  • Top the remaining pasta with the remaining 1 cup of shredded mozzarella and an additional sprinkle of Parmesan cheese.

    → The mozzarella will melt to form a golden-brown and bubbling crust, adding to the aesthetic appeal and texture of the dish.
  • Cover the baking dish loosely with aluminum foil to prevent excessive browning and bake in the preheated oven for 25 minutes.

    → Covering the dish allows it to steam and heat through without burning the cheese on top, ensuring the ziti is warm and properly cooked.
  • Remove the foil and bake for an additional 10-15 minutes or until the cheese is bubbly and golden brown.

    → Uncovering to bake gives you that coveted crispy top while ensuring everything underneath is cooked through and flavorful.
  • Once finished, remove the baking dish from the oven and let it cool for 10 minutes before serving.

    → Allowing the ziti to rest helps it set, making it easier to serve in square portions without falling apart, and the cooling enhances flavor absorption.
  • Serve hot, garnished with a sprinkle of freshly chopped parsley if desired, for an added touch of freshness.

    → Garnishing with fresh herbs adds color and an aromatic element that complements the cheesy flavors of the dish.

Notes

  • Preparation Tips
    → Before starting, preheat your oven to 375°F (190°C) to ensure it’s ready for baking once you assemble the dish. Gathering all your ingredients beforehand will make the cooking process smoother and more enjoyable.
  • Cooking the Pasta
    → Boil the ziti pasta according to the package instructions until al dente. This is crucial as it will continue to cook in the oven. Remember to reserve about 1/2 cup of pasta water before draining; it can be used to adjust the consistency of your sauce later, if needed.
  • Sautéing the Spinach
    → In a large skillet, heat the olive oil over medium heat. Add minced garlic and sauté for about 30 seconds until fragrant, then add the chopped spinach. Cook until just wilted, which should only take a few minutes. This process boosts the flavor and reduces the spinach’s bulk.
  • Combining Ingredients
    → In a large mixing bowl, combine the sautéed spinach, cooked pasta, ricotta cheese, marinara sauce, salt, and pepper. Mix thoroughly to ensure everything is evenly coated. Consider adding a splash of the reserved pasta water if the mixture seems too dry.
  • Layering the Dish
    → Lightly grease a baking dish with olive oil. Begin by spreading a thin layer of marinara sauce on the bottom to prevent sticking. Then, transfer half of the pasta mixture into the dish, sprinkle with half of the mozzarella and Parmesan cheese, and repeat with the remaining mixture and cheeses.
  • Baking
    → Cover the dish with aluminum foil and bake in the preheated oven for about 25 minutes. This will help the flavors meld together. After that, remove the foil and bake for an additional 10-15 minutes until the cheese is bubbling and golden brown. If you like a crispier top, broil for a minute or two while keeping an eye on it to avoid burning.
  • Serving Suggestions
    → Allow the baked ziti to cool for about 10 minutes before serving, making it easier to cut portions. Garnish with fresh basil or parsley for a touch of color and freshness. Pair with a side salad and garlic bread for a complete meal.
  • Storage and Reheating
    → Leftovers can be stored in an airtight container in the fridge for up to 3-4 days. To reheat, cover with foil in a baking dish and heat in the oven at 350°F (175°C) until warmed through. You can also microwave individual portions for convenience.

Tips

Cooking Tips for Cheesy Baked Ziti with Spinach

  • Perfect Pasta: Ensure that your ziti is cooked al dente, or slightly firm, to the bite. This is crucial as it will continue to cook while baking. Remember to salt the pasta water generously; it should taste a little like the sea.
  • Vitamin Boost: Don’t skip sautéeing the spinach! It not only enhances the flavor but also reduces its volume, making it easier to incorporate into the dish without overwhelming the pasta.
  • Ricotta Magic: For the best flavor, mix your ricotta with a little salt, pepper, and nutmeg. The nutmeg adds a warm spice note that complements the savory elements beautifully.
  • Marinara Sauce Tip: Heating your marinara sauce before mixing can help it blend better with the other ingredients. It also prevents temperature discrepancies that can cause uneven cooking.
  • Cheesy Goodness: Use a mixture of mozzarella and Parmesan cheeses. Layering them throughout the dish will ensure a melty, gooey texture that’s both satisfying and delicious.
  • Oiling Up: Lightly oiling your baking dish is key to ensuring that your ziti doesn’t stick. Make sure to use olive oil not just for sautéing but also for greasing the dish to enhance the bake.
  • Garlic Flavoring: Keep an eye on the garlic while it cooks; you want it to soften and become aromatic without burning. Burnt garlic can ruin the dish’s flavor balance.
  • Season Gradually: Taste your mixture before baking, as the cheeses and sauce add saltiness. Adjust with more salt and pepper if necessary, as you want every bite to be perfectly seasoned.
  • Even Layering: When assembling the ziti, consider layering the ingredients rather than just mixing everything together. This helps to distribute flavors evenly and ensures that every serving has a little of everything.
  • Rest Before Serving: Allow your baked ziti to sit for about 10-15 minutes before serving. This helps it set up better, making it easier to cut into portions without falling apart.

FAQ

What ingredients do I need for Cheesy Baked Ziti with Spinach?

You will need ziti pasta, ricotta cheese, mozzarella cheese, parmesan cheese, spinach, marinara sauce, garlic, onion, and Italian seasoning.

Can I use a different type of pasta?

Yes, you can substitute ziti with other types of pasta such as penne, fusilli, or even shells for a different texture.

Is it possible to make this recipe vegetarian?

Absolutely! This recipe is already vegetarian-friendly as it includes spinach and cheese without meat.

How long does it take to prepare Cheesy Baked Ziti with Spinach?

The preparation time is about 15-20 minutes, and the baking time is around 30-35 minutes.

Can I make this dish ahead of time?

Yes, you can assemble the ziti in advance, cover it, and store it in the refrigerator. Just bake it when you’re ready to serve!

What can I serve with Cheesy Baked Ziti?

This dish pairs well with a simple green salad, garlic bread, or roasted vegetables for a complete meal.

Can I freeze leftovers of Cheesy Baked Ziti?

Yes, you can freeze leftovers. Just ensure they are stored in an airtight container and consumed within 2-3 months for the best quality.

What can I substitute for ricotta cheese?

You can use cottage cheese or a vegan ricotta alternative if you’re looking for a dairy-free option.

Introduction

Imagine a dish that is both a feast for the eyes and a delight to the senses, offering a burst of flavors and textures with every bite! Welcome to the world of the Festive Cauliflower Rice Bowl, a culinary marvel that brings together the wholesomeness of cauliflower with a medley of vibrant ingredients to create a symphony of taste. This dish is nothing short of a celebration on a plate, with its vivid colors and aromatic flair enticing you to dig in.

In a world where health-consciousness is at the forefront of our dining choices, this recipe stands out by transforming the humble cauliflower into a low-carb alternative to traditional rice, without compromising on flavor. As you prepare this dish, you’ll find yourself immersed in a sensory journey where the fresh aroma of spices wafts through the air, and the enticing textures promise a culinary adventure like no other. Let’s embark on this delightful journey together!

The Story Behind the Dish

The Festive Cauliflower Rice Bowl has its roots in the quest for nutritious yet delicious meals that cater to a variety of dietary preferences. Cauliflower as a versatile vegetable has been a part of global cuisines for decades. From the cobblestone streets of medieval Italy where cauliflower first gained popularity to contemporary tables worldwide, it has long been admired for its adaptability and nutritional value.

In recent years, cauliflower has been celebrated as a food chameleon within the culinary world, transforming into all sorts of delightful foods — from pizza crusts to creamy soups and now, as a charming rice substitute in our bowl. This dish may not boast an ancient history, but it reflects a modern lifestyle shift towards mindful eating without sacrificing taste and satisfaction. It’s a bridge between tradition and innovation, embodying the essence of seasonal celebrations with a touch of health.

Why You’ll Love This Recipe

  • Health-Focused: It’s a perfect low-carb, gluten-free option that fits seamlessly into many diet plans, offering a guilt-free indulgence.
  • Quick and Easy: In under 30 minutes, you can have a gourmet meal ready with minimal effort, making it ideal for busy weeknight dinners or last-minute holiday gatherings.
  • Flavorful: Experience a complex array of flavors from earthy spices to the refreshing zestiness of herbs, every bite bursts with taste.
  • Visual Appeal: The vibrant colors of the ingredients make this dish a visual masterpiece, perfect for impressing guests or enhancing your meal’s presentation.
  • Customizable: Easily adapted to personal preferences with numerous variations and toppings, making it a versatile dish for any palate.
  • Wholesome and Satisfying: Despite being light, the dish is incredibly filling, leaving you satisfied without feeling heavy.

Flavor Profile & Texture

The Festive Cauliflower Rice Bowl is a delightful amalgamation of flavors and textures that truly resonate with the essence of celebration. The cauliflower rice, subtly nutty and tender, acts as the perfect canvas showcasing bold spices such as cumin, coriander, and turmeric that imbue it with warmth and depth. Oh, the aromatic basil and parsley elevate the dish with their herbal freshness, marrying the flavors exquisitely.

Beyond the spices, the toppings play a crucial role in the flavor profile. The tangy burst of lemon juice brightens each spoonful, while a sprinkle of toasted nuts or seeds adds a satisfying crunch. These components work together to create a rounded dish that is as pleasing to eat as it is to behold.

Occasions & Pairings

The Festive Cauliflower Rice Bowl is versatile enough for a myriad of occasions. Whether you’re hosting a health-focused fête, looking for a wholesome lunch option, or need a quick yet festive weeknight dinner, this recipe has you covered.

Here’s how you can complement this dish for various occasions:

  • Holiday Gatherings: Serve this bowl as a side dish alongside roasted meats or a vegan main like grilled portobello mushrooms for a complete feast.
  • Weeknight Dinners: Pair it with a simple mixed green salad and a glass of crisp white wine for a balanced meal.
  • Casual Luncheons: Complement it with a refreshing citrus-infused iced tea or a sparkling water infused with fresh herbs.
  • Family Brunch: Accompany it with a selection of freshly baked breads or savory muffins for an indulgent, health-conscious spread.

Tips, Variations & Substitutions

Customization is at the heart of the Festive Cauliflower Rice Bowl, making it adaptable to suit personal tastes and dietary requirements. Here are some tips and variations to consider:

  • Adding Protein: Consider adding grilled chicken, tofu, or chickpeas for an additional source of protein. These options blend seamlessly with the dish’s flavors.
  • Spice It Up: For those who crave heat, add a pinch of chili flakes or drizzle some hot sauce to elevate the spice level.
  • Dietary Substitutes: Use coconut aminos instead of soy sauce for a gluten-free alternative, or replace nuts with sunflower seeds to make it nut-free.
  • Flavor Variations: Experiment with different herbs like cilantro or mint for a unique take, and try incorporating seasonal vegetables like roasted squash or sweet peppers for added depth.
  • Regional Twists: Infuse a Mediterranean flair by garnishing with olives and feta cheese, or go for an Asian-inspired version with soy sauce and sesame seeds.

Storage & Make-Ahead Ideas

One of the wonderful aspects of the Festive Cauliflower Rice Bowl is its suitability for advance preparation and storage, making it a perfect solution for meal prep enthusiasts or those planning ahead for holiday feasts.

Here’s how you can manage your make-ahead strategy:

  • Preparing in Advance: You can prepare the cauliflower rice a day or two in advance and refrigerate it, making it a breeze to assemble on busy days.
  • Storage Tips: Store leftovers in an airtight container in the refrigerator for up to three days. Before serving, reheat gently on the stovetop or in a microwave to maintain its delightful texture.
  • Freezing Option: For longer storage, consider freezing the cauliflower rice without the toppings. Ensure it’s cooled down before placing it in sealed freezer bags. It can be frozen for up to a month.
  • Reheating Advice: Defrost frozen cauliflower rice in the refrigerator overnight or use the defrost function in your microwave. Reheat on low heat to retain flavor and texture.

With its rich tapestry of flavors and wholesome goodness, the Festive Cauliflower Rice Bowl promises to be more than just a meal — it’s an experience, an adventure in mindful eating that is both nourishing and utterly delicious. Ready to start your culinary journey with this delightful dish?

Ingredients

  • Cauliflower Rice Base
    – 1 large head of cauliflower (for ricing)
    → The star of this bowl, cauliflower serves as the low-carb, nutrient-dense base. To prepare it, remove the leaves and stem, then cut it into florets. Use a food processor to pulse the florets until they resemble rice grains. This method keeps the texture light and fluffy instead of mushy. Fresh cauliflower is preferred, ensuring maximum flavor and nutritional value.
  • – 1 tablespoon olive oil
    → Olive oil is used to sauté the cauliflower rice, adding richness and helping to bring out the vegetable’s natural flavors. Use extra virgin olive oil for the best quality and taste. Heat the oil in a large skillet over medium heat before adding the riced cauliflower to ensure even cooking.
  • – Salt and pepper to taste
    → Salt enhances the flavors of the ingredients while pepper adds a subtle heat. Use kosher or sea salt for a cleaner taste. Adjust according to personal preference, adding more as necessary during cooking to achieve the desired seasoning level.
  • Vegetable Mix
    – 1 red bell pepper (diced)
    → The red bell pepper adds sweet, crisp texture and vibrant color to the bowl. Dice it into small, uniform pieces to ensure even cooking and distribution throughout the dish. Look for peppers that are firm and shiny without soft spots for the best flavor.
  • – 1 cup cherry tomatoes (halved)
    → Cherry tomatoes provide a burst of juicy sweetness and acidity to balance the dish. Halve them before adding to the mix to expose their pulp and juices, which slightly caramelize when cooked. Use ripe tomatoes for the best flavor—look for a deep, rich color.
  • – 1 cup corn kernels (fresh, frozen, or canned)
    → Corn adds a pop of sweetness and color. If using fresh corn, remove the kernels from the cob. Frozen corn should be thawed and drained, while canned corn should be rinsed to remove excess salt. Corn also contributes fiber and a satisfying crunch to the dish.
  • – 1 teaspoon garlic powder
    → Garlic powder enhances the overall flavor profile with its warm, savory notes. It’s easy to use and evenly distributes throughout the dish. For the best results, opt for a high-quality brand and adjust the amount to taste, depending on your love for garlic.
  • Protein
    – 1 can black beans (drained and rinsed)
    → Black beans provide a hearty source of plant-based protein and fiber, making the dish filling and satisfying. Drain and rinse the beans to remove excess sodium and enhance their flavor before adding them to the bowl. Look for low-sodium varieties for a healthier option.
  • – 1 avocado (sliced)
    → Avocado contributes creamy texture and healthy fats to the bowl. Use a ripe avocado that yields slightly when pressed for maximum creaminess. Slice just before serving to keep it fresh and vibrant. Avoid any that have dark spots indicating overripeness.
  • – 1/2 cup feta cheese (crumbled, optional)
    → Feta cheese adds a salty, tangy flair that elevates the dish. Crumble the feta by hand or use a fork for even distribution. Opt for block feta for the best texture and flavor, and add it just before serving to maintain its freshness.
  • Toppings
    – 1/4 cup fresh cilantro (chopped)
    → Fresh cilantro brightens the dish with its herby flavor and vibrant color. Rinse the leaves before chopping, and use only the leaves for the best taste. Sprinkle it liberally over the bowl before serving for added freshness.
  • – Lime wedges (for serving)
    → Fresh lime wedges provide an acidic kick when squeezed over the dish, enhancing all the flavors. Use fresh limes for the most intense flavor, and serve alongside the bowl so everyone can adjust to their taste.

Instructions

  • Begin by preparing the cauliflower for the rice.

    → Remove the leaves and stem from the large head of cauliflower, then cut it into florets approximately 1-2 inches in size. This uniform size will ensure they blend evenly into rice-sized pieces.
  • Use a food processor to rice the cauliflower.

    → Working in batches, pulse the cauliflower florets in the food processor until they resemble rice grains. Avoid over-processing to prevent a mushy consistency; around 5-7 pulses should suffice. This provides a light and fluffy base for your dish.
  • Heat a large skillet over medium heat and add 1 tablespoon of olive oil.

    → The olive oil should shimmer slightly when heated, indicating it’s ready for cooking. This fat will help to sauté the cauliflower rice and capture flavor, so be patient and allow the oil to reach the right temperature before proceeding.
  • Add the riced cauliflower to the skillet and stir it well to coat in the olive oil.

    → This ensures even cooking and helps prevent the cauliflower from sticking to the skillet. Stirring also distributes the oil, which is crucial for achieving a tender, yet firm texture.
  • Season the cauliflower rice with salt and pepper to taste.

    → Start with a pinch of salt and a few cracks of pepper, then taste and adjust as necessary. Adding salt at this stage enhances the natural flavors of the cauliflower and will become more pronounced as it cooks.
  • Continue to sauté the cauliflower rice for 5-7 minutes, stirring occasionally.

    → The goal here is to cook the cauliflower until it’s tender but not mushy. It should have a slight crunch remaining. If it’s browning too quickly, reduce the heat slightly.
  • As the cauliflower rice cooks, prepare your vegetable mix. Start by dicing 1 red bell pepper.

    → Cut the bell pepper in half, remove the seeds and core, then slice it into thin strips. Finally, dice the strips into small, uniform pieces to ensure they cook evenly and integrate well into the dish.
  • Halve 1 cup of cherry tomatoes.

    → Holding each tomato securely, slice them in half with a sharp knife. This exposes the interior, which will caramelize during cooking, enhancing the flavor and sweetness. Look for ripe tomatoes for the best results.
  • If using fresh corn, cut the kernels from the cob. If using frozen or canned, ensure they are thawed or rinsed as needed.

    → Fresh corn provides a crisp texture; run a sharp knife down each side of the cob to remove the kernels. If using canned corn, rinse thoroughly under cool water to remove excess salt, which could overpower the dish.
  • Add the diced red bell pepper, halved cherry tomatoes, and corn to the skillet with the cauliflower rice.

    → Stir everything together to combine the flavors. The tomatoes will release juices as they cook, adding moisture and more flavor to the cauliflower rice. Allow this mixture to cook for another 5 minutes, stirring occasionally.
  • Sprinkle 1 teaspoon of garlic powder over the vegetable mix and stir well.

    → Garlic powder will distribute evenly throughout the dish, imparting its savory flavor without the risk of burning that fresh garlic can have. Stirring helps the garlic powder to bloom and release its oils.
  • While the vegetable blend cooks, rinse and drain 1 can of black beans.

    → This step removes excess sodium and enhances the flavor of the beans. Pat them lightly with a paper towel after rinsing to remove any moisture before adding them to the dish.
  • Add the black beans to the skillet and mix until all ingredients are well combined.

    → This addition boosts the protein content and gives the dish more body. Cook for an additional 2-3 minutes, just until everything is heated through. Ensure the mixture is steaming, which indicates it’s ready.
  • Prepare to serve by slicing 1 ripe avocado.

    → Cut the avocado in half, twist to separate, and remove the pit. Use a sharp knife to score the flesh into slices without cutting through the skin; then use a spoon to scoop it out carefully.
  • If using, crumble 1/2 cup of feta cheese and set aside.

    → Feta should be crumbled just before serving to maintain its texture. Using block feta gives a better flavor than pre-crumbled varieties, which can be drier.
  • Chop 1/4 cup of fresh cilantro leaves.

    → Rinse the cilantro under cool water, then pat dry. Remove the leaves by pinching off the stems, then chop finely. This fresh herb will add a burst of flavor to the dish, enhancing the overall brightness.
  • Serve your festive cauliflower rice bowl by arranging the cooked cauliflower and vegetable mix in bowls.

    → Create a vibrant display by adding sliced avocado on top and sprinkling with crumbled feta (if using) and fresh cilantro. This presentation elevates the dish, making it visually appealing.
  • Provide lime wedges for each serving.

    → The fresh lime juice will enhance all the flavors in the bowl when squeezed over just before eating, balancing the richness of the avocado and feta with its bright acidity.

Notes

These festive cauliflower rice bowls are a colorful and nutritious option, perfect for holiday gatherings or a hearty weeknight meal. The cauliflower rice serves as a light and healthy base, packed with vitamins, while the vegetable mix adds a wonderful variety of textures and flavors. Feel free to customize your bowl by adding your favorite proteins, such as grilled chicken or shrimp, or swap the black beans for chickpeas for a different twist.

For an even more festive touch, consider adding seasonal spices like cumin or paprika for warmth. This dish is versatile and can be served warm or cold, making it ideal for meal prep. The black beans and avocado not only provide a creamy richness but also ensure a fulfilling blend of protein and healthy fats. Top it off with fresh cilantro and a squeeze of lime for a zesty finish.

Remember, you can easily adjust the ingredients based on what you have on hand or to suit personal taste preferences. If you’re preparing this for a larger group, double the recipe and present it as a beautiful buffet-style bowl, allowing guests to customize their own servings. Enjoy your festive creation!

Tips

Cooking Tips for Festive Cauliflower Rice Bowl

  • Ricing Cauliflower: When processing the cauliflower, do it in batches if necessary to avoid overcrowding the food processor. This will help achieve a consistent rice-like texture. Additionally, consider using a box grater if you don’t have a food processor; just be sure to grate finely for the best results.
  • Sautéing the Cauliflower Rice: For an even better flavor, consider adding aromatics such as diced onions or shallots to the olive oil before adding the cauliflower rice. Sauté these for a couple of minutes until softened for a deeper flavor base.
  • Seasoning: Taste your cauliflower rice after sautéing for seasoning. It’s easier to adjust the salt and pepper levels while cooking than after the bowl is assembled. Remember that the added toppings (like feta) may also contribute some saltiness.
  • Vegetable Prep: To save time, you can prep the bell pepper and tomatoes ahead of time. Store them in the refrigerator until you’re ready to use them. Fresh, evenly diced vegetables will ensure a consistent cooking time and a lovely presentation.
  • Cooking Method: You can also roast the vegetables instead of sautéing them for a different flavor profile. Simply toss them in olive oil, salt, and pepper, and roast in a preheated oven at 400°F (200°C) for about 15-20 minutes until tender and slightly charred.
  • Bean Preparation: If you have time, soak and cook dry black beans for the most flavor; canned beans are still a great time-saver. Just make sure to rinse them thoroughly to improve taste and reduce sodium content.
  • Avocado Handling: To slice an avocado, cut it in half, remove the pit, and use a spoon to scoop the flesh out before slicing. This helps keep the slices intact and looking beautiful in your bowl.
  • Feta Cheese Alternatives: If you want a creamier option, consider using goat cheese or even a dollop of Greek yogurt instead of feta. Both will add a rich creaminess that complements the dish beautifully.
  • Cilantro Use: If you’re averse to cilantro, feel free to substitute it with fresh parsley or green onions for a different but equally fresh flavor profile.
  • Lime Zest: For an extra zing, add some lime zest along with the juice for a more intense citrus flavor. Just be sure to wash the lime thoroughly to avoid any pesticide residue.

FAQ

What is a Festive Cauliflower Rice Bowl?

A Festive Cauliflower Rice Bowl is a healthy, colorful dish made with finely chopped cauliflower that resembles rice, combined with a variety of festive vegetables, herbs, and spices, creating a flavorful and nutritious meal.

How do you prepare the cauliflower rice?

To prepare cauliflower rice, simply remove the leaves and stem from a head of cauliflower, cut it into florets, and pulse in a food processor until it resembles rice grains. Alternatively, you can grate the cauliflower using a box grater.

Can I use frozen cauliflower rice?

Yes, frozen cauliflower rice is a convenient option that can be used in place of fresh cauliflower. Just be sure to thaw it and drain any excess moisture before cooking.

What ingredients are typically included in a Festive Cauliflower Rice Bowl?

Common ingredients include cauliflower rice, roasted vegetables (like bell peppers and carrots), chickpeas or beans, fresh herbs (like parsley or cilantro), nuts or seeds, and a zesty dressing or sauce to tie it all together.

How can I make the bowl more filling?

To make your bowl more filling, consider adding protein-rich ingredients such as grilled chicken, tofu, tempeh, or quinoa, as well as healthy fats like avocado or a sprinkle of cheese.

Is this recipe suitable for meal prep?

Yes, the Festive Cauliflower Rice Bowl is great for meal prep! You can prepare the cauliflower rice and other ingredients in advance and assemble the bowls right before eating, ensuring freshness.

What are some dressing options for the bowl?

Popular dressing options include tahini dressing, lemon vinaigrette, creamy avocado dressing, or a spicy sriracha sauce, which can enhance the flavors of the bowl.

Is the Festive Cauliflower Rice Bowl gluten-free?

Yes, this dish is naturally gluten-free as it primarily consists of vegetables and cauliflower rice. Just ensure that any condiments or additional ingredients you use (like sauces) are also gluten-free.