Author

Ocean Nightleaf

Browsing

Introduction / Hook

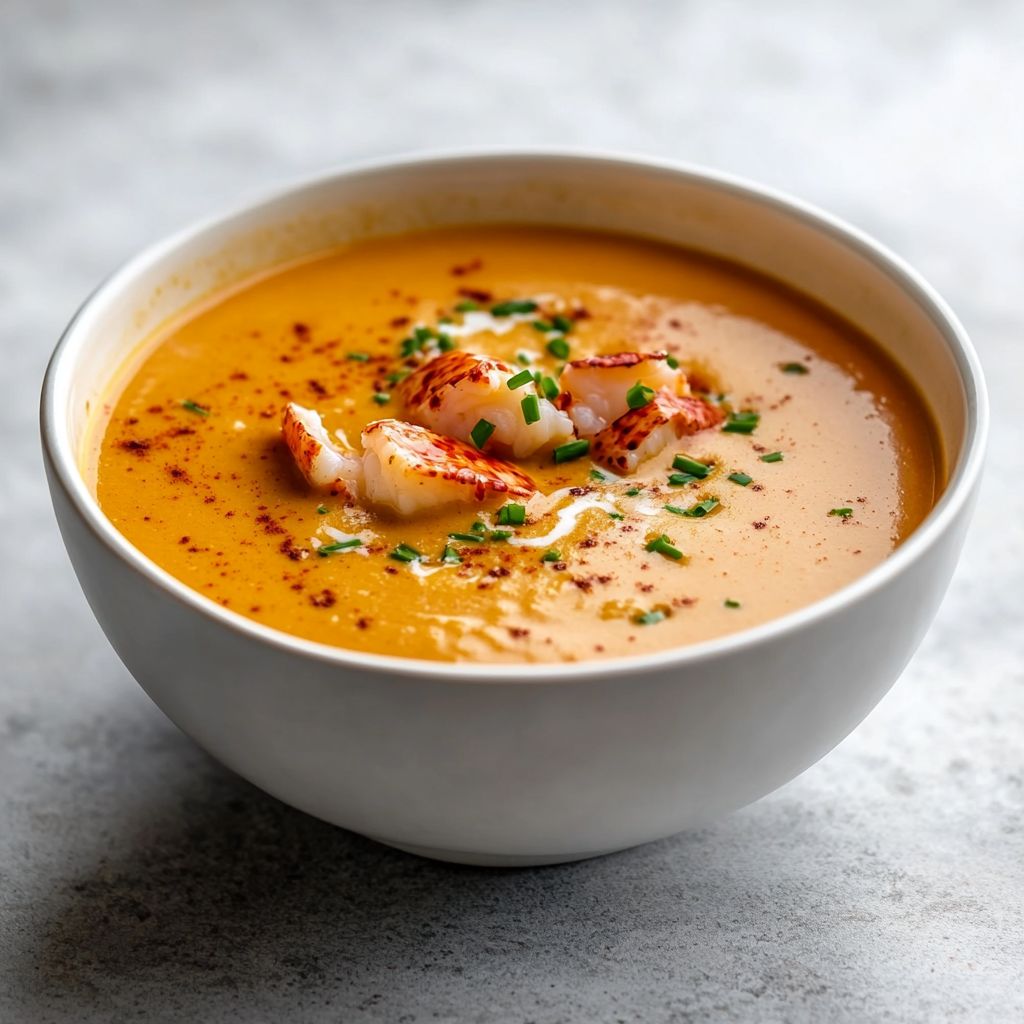
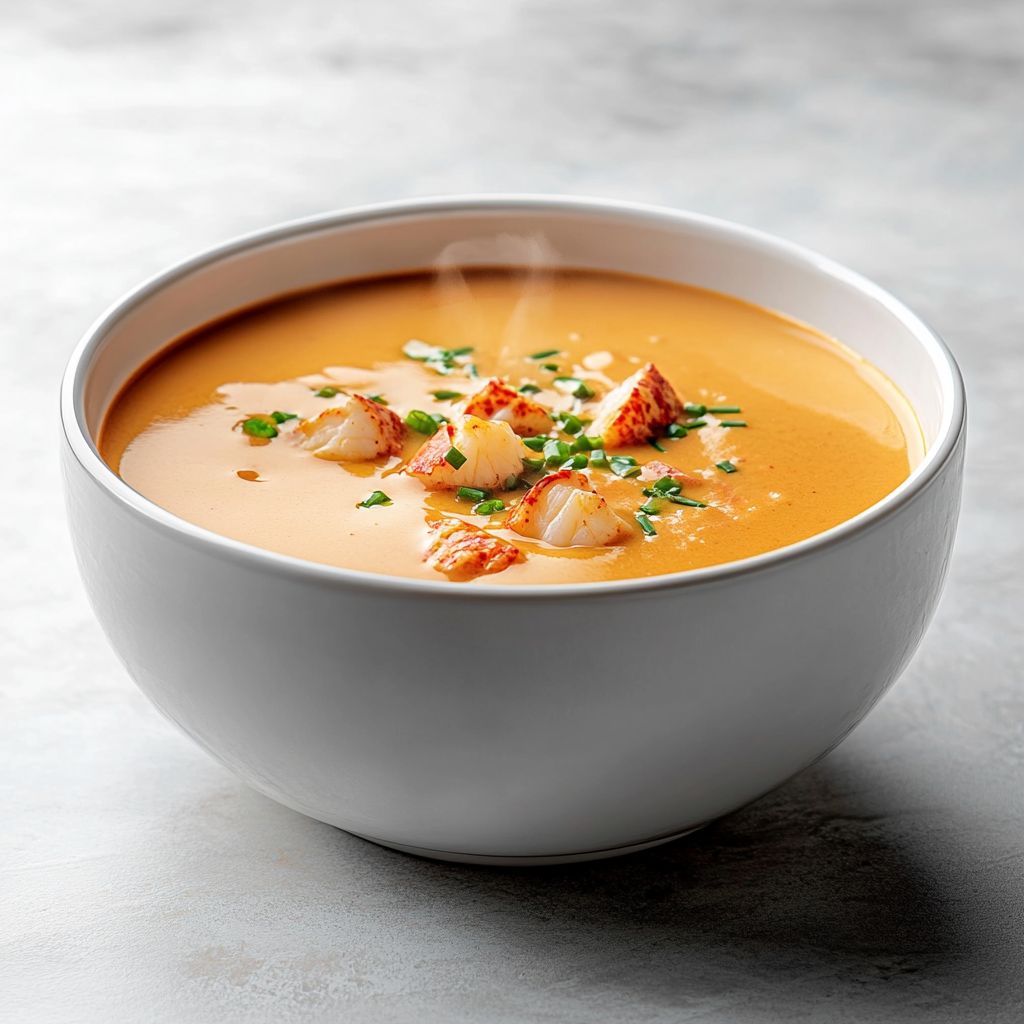
In the hush of a candlelit table, a copper pot sighs with a perfume of sea salt and roasted shells. A swirl of cream catches the light, turning the surface into a pale caramel tapestry. This is lobster bisque—a dish that feels like a coastal legend and a kitchen’s quiet triumph all at once. When you lift a spoonful, first comes the brightness of the sea—briny lobster notes with a whisper of cognac or madeira—then a velvet hug of cream that coats the palate without heaviness. It’s the kind of soup that makes a moment feel elevated, even on a weeknight, and yet it carries the whisper of dinner party grandness in every sip. The beauty of lobster bisque lies in its balance: the intensity of a shellfish stock tempered by dairy richness, the sweetness of lobster meat rising against a backdrop of roasted aromatics, and a finish that glints with a kiss of citrus or herb. If you’ve ever craved something that feels indulgent but refined, familiar yet unfamiliar, this bisque welcomes you with open arms and the promise of a sensorial voyage—creamy, bright, ocean-fresh, and utterly comforting.

Imagine the kitchen filled with the soft sigh of simmering shells, the nutty warmth of toasted aromatics, and the subtle crackle of a chef’s favorite pan, all converging into a single spoonful. Lobster bisque invites you to slow down, savor, and indulge in the kind of depth that only time can coax from humble ingredients. It’s a dish that can conjure a memory of seaside markets, a grandmother’s cookbook, or a first fancy dinner date—the kind of memory you chew on long after you’ve finished the last bite. The recipe you’re about to explore is less about chasing perfection and more about honoring generous ingredients with a technique that respects their essence: extracting every drop of flavor from lobster shells, coaxing sweetness from mirepoix and tomato, and finishing with cream that glows like morning light on a calm sea. If you’re ready to treat yourself and your guests to a voyage of aroma, texture, and nuance, this lobster bisque is your vessel.

The Story Behind the Dish

Lobster bisque sits at an intersection of maritime abundance and French culinary finesse. The word “bisque” is steeped in history and rumor, often traced to old European kitchens where the shells of crustaceans were not wasted but transformed into something greater than the sum of their parts. One prevalent theory suggests that bisque traces its name to the French phrase bis cuites, meaning “twice-cooked,” a nod to the careful, layered process of extracting flavor from shells and then refining it into a smooth, luxurious soup. Others associate it with a time when cooks were keen to stretch every morsel of seafood into a comforting, nourishing bowl for sailors, travelers, and families alike. Regardless of etymology, the technique has endured because it works: shells are roasted or sautéed to unlock deep, roasted sweetness; they’re simmered to yield a robust stock; and then the stock is enriched and refined to lacquer the palate with a silk-smooth texture.

The lobster bisque that has become a modern classic blends technique with a touch of opulence. In traditional preparations, the shells are simmered with aromatics, often a hint of tomato paste for color and acidity, and sometimes a splash of brandy or cognac to lift the freshwater-like sweetness of seafood with a flinty, bright note. The result is a deeply flavored stock that, after straining, is sometimes thickened with a small amount of rice or a classic roux—though contemporary versions often rely on emulsification or careful reduction to achieve their characteristic creaminess. In many coastal regions, bisque is as much a memory as a recipe: a family’s version passed down through generations, each generation adding its own signature flourish—whether a squeeze of citrus, a whisper of fennel, or a final swirl of cream that makes the surface gleam like satin.

Nova Scotia, Maine, Brittany, and Normandy each lay claim to the spirit of bisque in their seafood traditions. In New England kitchens, the bisque tradition often borrows the lobster’s own sweetness, letting it mingle with butter, wine, and cream to create a bowl that feels both celebratory and homely. In French kitchens, the emphasis lies in a velvety texture and a refined balance—shellfish stock that’s deeply savory yet bright, with dairy tones that soften the intensity without dulling the shellfish character. The modern lobster bisque you’ll discover here is a respectful blend of those lineages: the stock is robust, the texture limned with cream, and the finish polished with a hint of aromatics and a final kiss of warmth. It’s a dish that honors the sea’s generosity while celebrating the craft of the kitchen—patience, precision, and a little bit of showmanship, all coming together in a single spoonful.

Why You’ll Love This Recipe

  • Luxurious texture with silky, spoon-coating richness that feels indulgent but not heavy.
  • Deep, resonant seafood flavor built from a well-developed lobster stock, with just the right amount of sweetness from aromatics and a bright finish from citrus or wine.
  • Versatile and crowd-pleasing for special occasions, dinner parties, or romantic nights at home.
  • Relatively approachable for home cooks who want to explore French techniques without a daunting list of steps.
  • Make-ahead friendly: you can prepare elements in advance, then finish into a perfect bisque when guests arrive.
  • Customizable to fit dietary needs or preferences with thoughtful substitutions (vegan, gluten-free, dairy-free options available).
  • Beautiful as a course centerpiece or a luxurious starter that sets the tone for a memorable meal.
  • Pairs wonderfully with a range of beverages and sides—from crisp white wines to crusty bread with butter—enhancing the meal rather than competing with it.

Flavor Profile & Texture

At first touch, lobster bisque greets you with a gentle wave of sea-salt air and roasted complexity. The aroma alone is enough to conjure a coastal market at dawn—the brine of lobster, the sweetness of caramelized onions and celery, and the murmured warmth of garlic and herbs sautéed in butter. The stock carries a profound depth, a result of simmering lobster shells long enough to extract every ounce of seasoning and mineral from their hulls. When the liquid is strained and enriched, the texture becomes silk, a luscious velvet that glides across the tongue rather than clinging to it. The cream–stock relationship is a careful dance: dairy smooths the edges, but it never hides the lobster’s identity. In your mouth, you’ll sense layers—savory core, a hint of sweetness, a spark of acidity or citrus, and a subtle, wine-like finish that lingers with grace.

The flavor notes unfold in stages. There’s the initial brininess—a reminder of the ocean’s vastness—balanced by the sweetness of the lobster meat itself. Then comes a toasty, roasted depth from the shells, often enriched by a touch of tomato that provides color and a gentle tang. The aromatics—onion, celery, carrot, perhaps a small amount of fennel or garlic—offer savory sweetness and a hint of herbaceous lift. A splash of cognac, sherry, or white wine introduces a bright, fruity note that brightens the palate and prevents the bisque from tipping into sameness. Finally, the finish carries a silky coat of cream, sometimes a final squeeze of lemon or a delicate herb note (tarragon or chives) that keeps the flavors expansive rather than heavy. In texture, imagine a silken custard-like soup that still feels buoyant enough to be ladled with ease, a color that glows amber or pale porcelain depending on the stock and cream ratio, and a mouthfeel that coats without feeling slick or greasy. It’s luxurious without being exhibitionist—an edible embrace that invites lingering, conversation, and, of course, second helpings.

Occasions & Pairings

Lobster bisque is a dish that signals celebration, but it also adapts beautifully to intimate weeknight dinners when you want to elevate the ordinary. It shines as a course for holiday menus, an enticing starter before a seafood platter, or a luxe main for a seafood-forward dinner. Its versatility makes it suitable for multiple settings:

  • Holiday gatherings and special occasions where a dish with immediate wow-factor is welcomed.
  • Romantic dinners at home, where slow, deliberate tasting and a refined plate elevate the evening.
  • Dinner parties, where its impressive presentation proves a memorable opener that pairs well with wine and conversation.
  • Weeknights when you crave comfort without sacrificing sophistication—especially when you’re cooking for guests who appreciate seafood.

Pairings enhance the bisque’s elegance. A crisp, well-chilled glass of champagne or a dry sparkling wine can echo the celebratory feel. For more traditional pairings, a Chardonnay with a little oak, a Meursault, or a White Burgundy complements the wine-like finish and the buttery texture beautifully. If you prefer a lighter touch, a Sauvignon Blanc with bright acidity can cut through the richness and lift the dish. For non-alcoholic pairings, a chilled cucumber-mint water or a lemon-ginger iced tea provides refreshing balance without competing with the soup’s depth. On the side, offer thin slices of toasted baguette brushed with melted butter and a whisper of garlic, or a light salad with citrusy vinaigrette to provide contrast and a refreshing finish to the course. A final note: avoid overpowering sauces or textures that compete with the bisque’s refined flavor profile. The goal is harmony, not distraction, so let the soup be the star of the plate.

Tips, Variations & Substitutions

Here are practical ideas to tailor lobster bisque to your pantry, mood, or dietary needs while preserving its soul:

  • Stock first, flavor later: Build a rich lobster stock from shells, carrot, celery, onion, and a splash of white wine. Simmer slowly to draw out maximum depth, then strain for a clean base. This foundation sets the tone for the entire dish.
  • Roux or no roux: Traditional bisque often uses a light roux to help thicken and emulsify. If you want to avoid gluten or prefer a lighter texture, you can thicken with a small amount of rice that has been simmered and pureed, or simply reduce the stock until it coats the spoon before adding cream.
  • Finish with flair: A splash of cognac or brandy added toward the end of cooking brightens the dish and ties the seafood flavors together. If you’re avoiding alcohol, a touch of white wine vinegar or lemon zest can provide a similar lift.
  • Dairy variations: Classic bisque uses cream, but you can adapt for dairy-free by using coconut cream or almond milk, adding a touch of olive oil or coconut oil to maintain richness. The flavor will skew slightly, but it stays luscious and velvety.
  • Meat alternatives: If lobster isn’t available, you can use shrimp or scallops as a substitute, or create a “lobster-inspired” stock by infusing with seaweed for depth.
  • Texture play: For an extra-smooth bisque, pass the blended mixture through a fine sieve or chinois. If you prefer a heartier bite, reserve some lobster meat in chunky pieces to be folded back in at the end.
  • Color adjustments: If the stock looks pale, a teaspoon of tomato paste adds color and a gentle acidity; for a deeper hue, a small amount of burnt butter can contribute complexity (when used judiciously).
  • Make-ahead approach: Prepare the stock and the base (sans cream) up to a day ahead. Reheat gently, finish with the cream, and add the lobster meat just before serving for a fresh, silky texture.

Storage & Make-Ahead Ideas

Like many refined soups, lobster bisque stores well and can be a time-saver for entertaining. Here are guidelines to keep flavor intact and texture at its best:

  • Stock storage: Lobster stock can be made in advance and frozen for up to 3 months. Thaw in the refrigerator overnight before use, then rewarm gently.
  • Bisque storage: The finished bisque can be refrigerated for 2–3 days. Reheat slowly over low heat, whisking to restore a smooth emulsion. Add cream at the last moment to prevent separation.
  • Make-ahead workflow: If you’re entertaining, prepare the stock and aromatics ahead of time. On the day of service, reheat the stock, finish with the cream and any lobster meat, and serve promptly to preserve its silkiness.
  • Freezing tips: If you must freeze the final bisque, freeze without dairy and add cream after thawing and reheating, warming gently to re-emulsify the texture.
  • Ahead flavor boosters: A small amount of roasted aromatics, a squeeze of lemon, or a final splash of cognac right before serving can refresh the dish when made ahead.

Fun Facts & Trivia (Optional)

Did you know that bisque, by definition, should be a smooth, creamy soup typically made from shellfish? The term has become a culinary shorthand for luxurious seafood soups, but it originally denoted a specific method of preparation that extracted maximum flavor from crustaceans. Some chefs insist that a true bisque must be strained and then reintroduced to the shellfish meat, ensuring an even, refined texture without any graininess. The color of a classic lobster bisque, deep and amber-hued, is a visual cue to its intensity—the result of long, careful reduction and the natural pigments released by lobster shells during cooking.

Another fun note: lobster, once considered a mere “poverty food” in Europe, gained prestige over centuries as methods to capture and cook crustaceans evolved. Today, lobster bisque conjures images of seaside culinary elegance, often featured in menus that celebrate coastal ingredients and the artistry of French technique. In homes and restaurants alike, the dish serves as a bridge between rustic seafood stock and refined creaminess, a testament to how simple ingredients, when treated with patience and respect, can yield extraordinary comfort and sophistication.

Conclusion: A Dish That Feels Like a Moment

Lobster bisque is more than a soup; it’s an invitation to slow down, to savor the first fragrance that greets you when you lift your spoon, and to linger over the last, luxurious mouthful. It holds a memory of the sea and a promise of warmth, a touch of elegance without ceremony, and a sense that a well-made dish can turn an ordinary evening into something worthy of celebration. Whether you’re serving it to guests who expect a showstopper or to loved ones who deserve a little extra care, this bisque offers that rare balance: indulgence that nourishes, finesse that comforts, and techniques that empower you to create something truly memorable. Embrace the ritual—the roasting, the simmering, the emulsifying—and let the result be a tribute to sea, season, and the joy of sharing good food.

Ingredients

Lobster Bisque Base

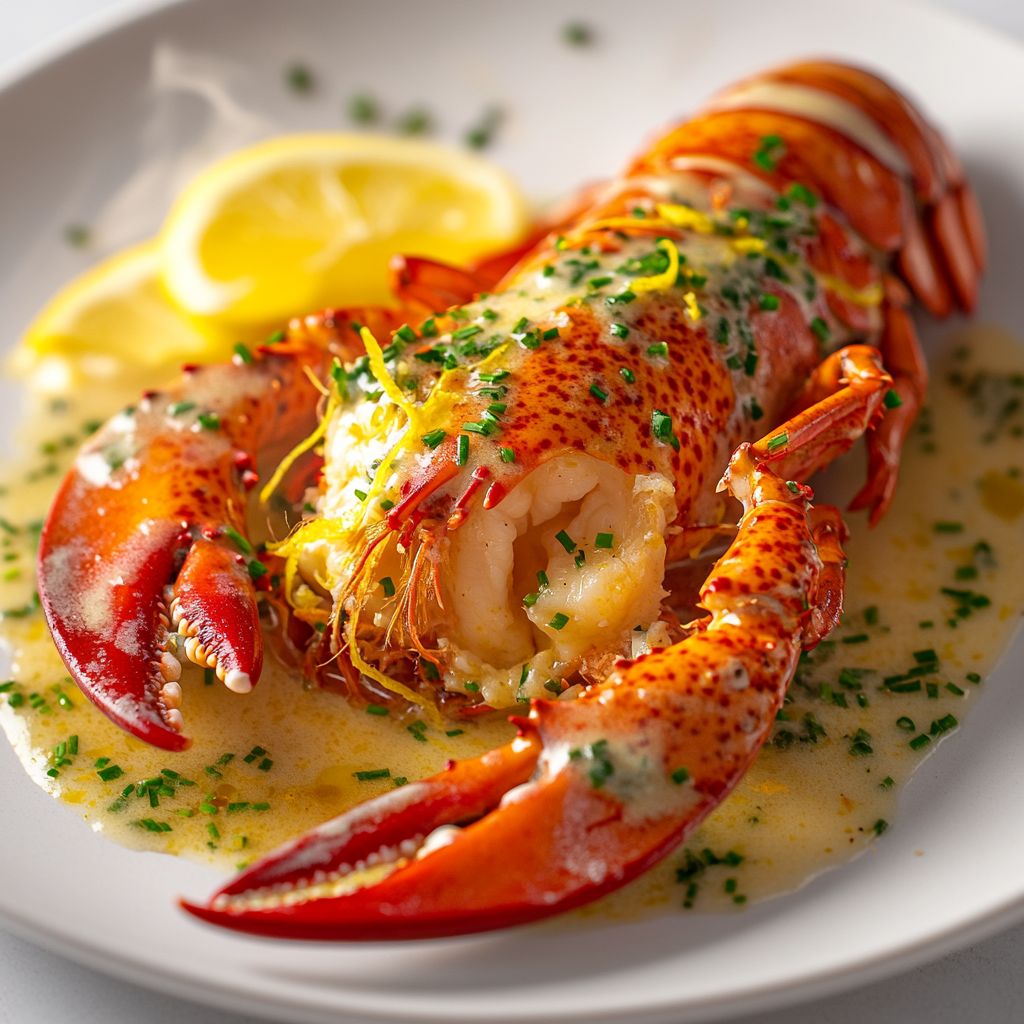
    – 1 1/2 pounds cooked lobster meat, chopped into bite-sized pieces
    → This is the star of the dish, providing both texture and luxurious lobster flavor. Use a mix of claw and tail meat for variety and color. If your lobster meat is refrigerated, pat it dry to remove excess moisture before adding to the bisque to prevent thinning. Reserve a few larger chunks for garnish just before serving.
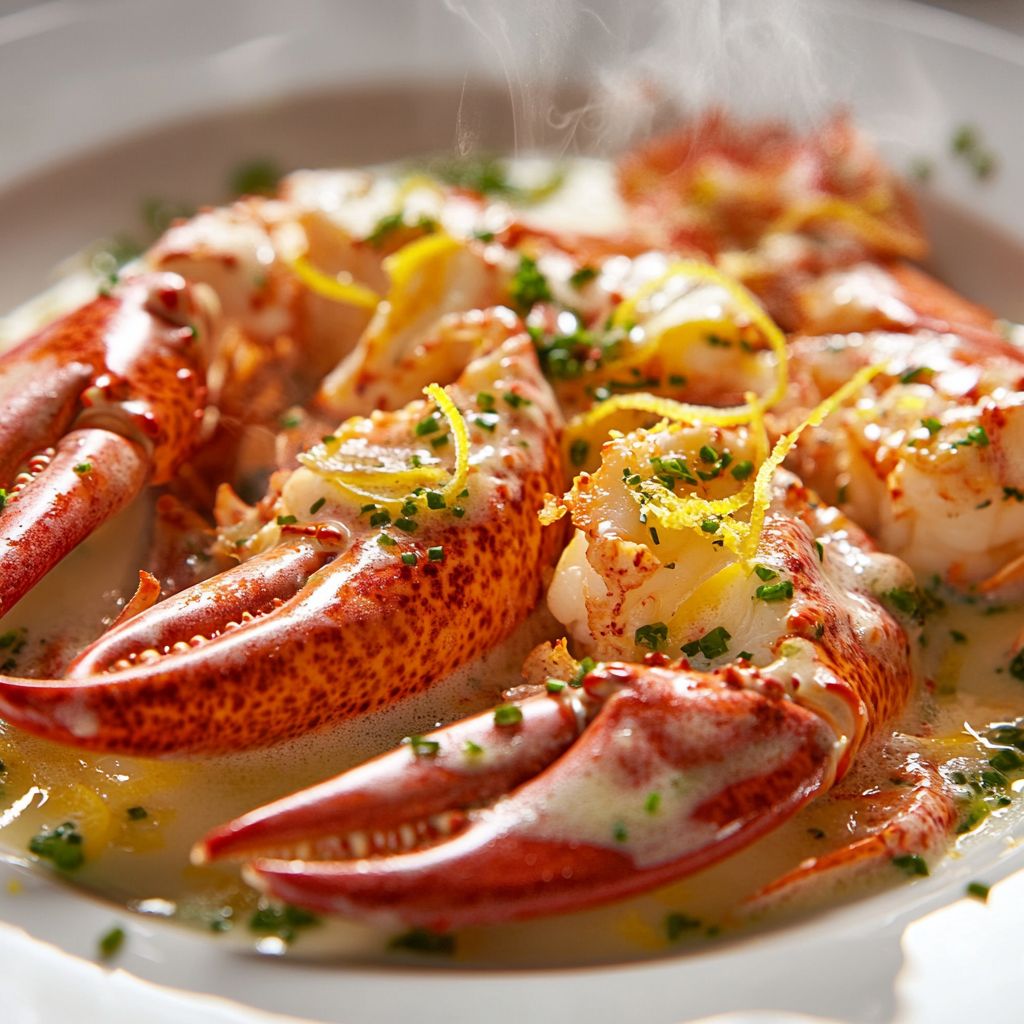
    – Lobster shells from 1-2 lobsters, cleaned and cracked to expose the interior
    → The shells are simmered to extract maximum lobster flavor and deep color for the stock. Roasting the shells lightly in a dry pan for 5–8 minutes before simmering intensifies the sweetness and umami. Strain the shells out well to keep the bisque velvety.

Base & Aromatics

    – Unsalted butter, 3 tablespoons
    → Butter provides a rich fat base to sauté aromatics and, if you make a roux, to help thicken the bisque. Using unsalted butter lets you control the final seasoning more precisely. Melt gently to avoid browning; you want sheen and aroma, not color.
    – Extra-virgin olive oil, 1 tablespoon
    → Olive oil raises the smoke point and prevents the butter from burning during sweating of vegetables. It also adds a light fruity note that complements seafood flavor.
    – Yellow onion, 1 medium, finely chopped
    → Onions form the sweet, foundational base of the flavor. Sweat slowly until translucent to release their sugars without browning, which keeps the bisque smooth and balanced.
    – Celery stalks, 2, finely chopped
    → Celery provides subtle earthiness and crunch to the early stage; it also adds depth to the aroma as the mixture sweats. Dice finely so it dissolves pleasantly into the stock during simmering.
    – Carrot, 1 medium, finely chopped
    → Carrot adds gentle sweetness and color, helping to balance the seafood richness. Chop small so it cooks evenly with the other aromatics.
    – Garlic, 2 cloves, minced
    → Garlic delivers a sharp, warming aroma that lifts the seafood flavors. Mince finely so it distributes evenly without biting into chunks in the bisque.
    – Tomato paste, 2 tablespoons
    → Tomato paste adds depth, color, and a subtle sweetness that complements the shellfish flavor. Cook it with the aromatics for a minute to mellow its rawness and bring out its umami.
    – All-purpose flour (or gluten-free flour), 1–2 tablespoons
    → Used to form a light roux with the butter, giving gentle body and helping the bisque cling to the lobster meat. If avoiding gluten, use a gluten-free flour blend; cook until the raw flour taste disappears.
    – Dry white wine, 1/2 cup
    → Deglazes the pan, lifting fond from the vegetables and shells while introducing acidity that brightens the rich flavors. Simmer briefly after adding to reduce and concentrate the aroma.
    – Brandy or cognac, 2–3 tablespoons (optional)
    → A classic enhancement for shellfish soups, adding depth and a touch of sweetness. If you choose to use it, stir in before adding stock and allow to cook off the alcohol for a minute or two.

Stock & Flavor Build

    – Lobster stock or seafood stock, 4 cups (preferably unsalted)
    → The primary liquid that carries the bisque’s seafood-forward flavor. If you’ve boiled shells, you should have stock on hand; otherwise, simmer shells with aromatics to make a fresh stock. Strain well to keep the texture velvety.
    – Water, as needed to adjust consistency
    → Use to reach the desired thickness after simmering and straining the stock. Add gradually to avoid thinning the bisque too much; you can always reduce again by simmering longer if it’s too thin.
    – Bay leaf, 1
    → A subtle, fragrant note that rounds out the aromatics. Remove before blending or serving to avoid an overpowering herbal edge in the final dish.
    – Fresh thyme, 2–3 sprigs (or 1/2 teaspoon dried)
    → thyme adds a woodland, herbal nuance that complements seafood beautifully. If using dried thyme, crush slightly between your fingers to release essential oils before adding.
    – Salt, to taste
    → Essential to balance the sweetness of vegetables and the richness of the cream. Start with a small amount and taste as you go, especially if your stock is salted.
    – Freshly ground black pepper, to taste
    → Adds a gentle bite that helps lift the lobster flavors. Grind fresh just before serving for maximum aroma and brightness.
    – Smoked paprika or cayenne pepper, 1/8–1/4 teaspoon (optional)
    → A light pinch can introduce a subtle warmth and a hint of smokiness without overpowering the delicate seafood notes. Use sparingly if you’re sensitive to heat.

Finish & Garnish

    – Heavy cream, 1/2–1 cup
    → Stirred in at the end to enrich and emulsify the bisque, giving a luxurious, silky texture. If you prefer a lighter version, you can use half-and-half or a splash of cream, but full cream yields the classic velvety finish.
    – Fresh lemon juice, 1 teaspoon
    → A small touch of brightness to cut through the richness and highlight the seafood sweetness. Add after tasting to avoid over-acidifying the soup.
    – Fresh chives or tarragon, finely chopped for garnish (optional)
    → Adds a fresh, herbaceous contrast and a pop of color. Chives give a mild oniony note; tarragon delivers delicate anise-like brightness that pairs well with seafood.
    – Reserved lobster meat for garnish (optional)
    → Extra large chunks reserved for topping the bisque at service create a visually appealing contrast and a burst of lobster flavor in every spoonful. If your meat is pre-cooked, briefly rewarm or warm through in the hot bisque before serving.

Serving & Accompaniments

    – Crostini or toasted bread slices
    → A crisp, neutral anchor to scoop the creamy bisque and soak up every bit of flavor. Toast with a touch of garlic for extra aroma if desired, and rub with a cut clove while hot for a quick finish.
    – Lemon wedges (optional)
    → Serve on the side for guests who want an extra burst of brightness. A quick squeeze just before eating brightens the rich soup without altering the texture.

Instructions

  • Roast the lobster shells in a dry skillet over medium-high heat until deeply golden and fragrant, about 5–8 minutes, turning once to color evenly.
  • → Roasting concentrates sugars and umami in the shells, building a deeper, more complex stock color and flavor before you simmer the stock.
  • In a large stockpot, combine the roasted shells with 4 cups unsalted lobster stock or seafood stock (or water if stock is not yet available); bring to a gentle simmer over medium heat, then cook for 30–40 minutes to extract maximum flavor and color.
  • → A steady simmer avoids toughening proteins and prevents clouding; simmering gently draws gelatin and mineral flavors from the shells without emulsifying fat into an opaque stock.
  • Strain the stock through a fine-mesh sieve or cheesecloth into another pot, pressing on the solids to extract every last drop, and discard the shells.
  • → Straining yields a velvety liquid free of shell fragments, ensuring a smooth bisque with a refined texture.
  • In a clean heavy-bottom pot, melt 3 tablespoons unsalted butter with 1 tablespoon extra-virgin olive oil over medium heat until the butter foams but does not color.
  • → The oil raises the butter’s smoking point, preventing burning while the butter provides rich flavor and a glossy mouthfeel essential to the base.
  • Add the finely chopped yellow onion, celery, and carrot; season lightly with salt and sweat until translucent and soft, about 8–10 minutes, stirring occasionally to promote even cooking.
  • → Sweating releases the vegetables’ sugars and aroma compounds without browning, creating a sweeter, smoother foundation for the bisque.
  • Add the minced garlic and tomato paste; cook, stirring, for 1–2 minutes until the paste darkens slightly and fades raw notes.
  • → Caramelizing tomato paste deepens color and umami, balancing the seafood sweetness and helping the bisque cling to the lobster meat later.
  • Sprinkle in 1–2 tablespoons all-purpose flour; whisk continuously to form a light roux and cook for 1–2 minutes to remove the raw flour taste.
  • → The roux provides gentle body to the bisque and helps it emulsify with the dairy without separating; gluten-free flour can be used as a direct substitute if needed.
  • Pour in 1/2 cup dry white wine; whisk to deglaze the pan, scraping up any fond, and simmer until the wine is reduced by about half to concentrate the acidity and flavor.
  • → Deglazing lifts flavorful browned bits from the pan, adding depth and a bright acidity that cuts richness without overpowering the shellfish.
  • If using brandy or cognac, add 2–3 tablespoons now and simmer 1–2 minutes to burn off the alcohol and concentrate the sweetness.
  • → Alcohol carries aromatics into the broth; simmering reduces it to a mellow, integrated note that enhances the seafood profile.
  • Pour the strained stock back into the pot with the aromatics; add enough water to reach the desired consistency, add the bay leaf and fresh thyme, and bring to a gentle simmer.
  • → The stock and added water balance intensity with body; bay leaf and thyme impart aromatic complexity that complements the lobster without overpowering it.
  • Simmer gently for 20–30 minutes, partially covered, to marry flavors while maintaining a silky texture for the final bisque.
  • → Slow simmering melds aromatics with stock, yielding a harmonious base that remains smooth when finished with cream.
  • Remove and discard the bay leaf and thyme sprigs; strain the aromatics again through a fine sieve to ensure an ultra-smooth base for finishing.
  • → Straining a second time ensures a perfectly velvety bisque free of leaf fragments or fibrous bits that could rupture the texture.
  • Return the smooth stock to the pot; season with salt and freshly ground black pepper to taste; add a pinch of smoked paprika or cayenne for a subtle, warming undertone if desired.
  • → Proper seasoning balances the sweetness of the vegetables with the richness of the dairy and seafood; spices should be added in small increments and adjusted by taste.
  • Stir in 1/2–1 cup heavy cream; bring the bisque to a gentle simmer and avoid boiling to prevent curdling and separation of the dairy.
  • → Cream adds a luxurious, velvety texture and a satin finish; overheating can cause separation, so keep heat steady and just below a boil.
  • Stir in 1 teaspoon fresh lemon juice and taste; adjust brightness with more juice if needed to lift the rich flavors without making the soup sour.
  • → A touch of acid brightens the sweetness of the lobster and cream, clarifying the palate and enhancing the overall balance.
  • Fold in the chopped lobster meat, warming it gently in the hot bisque for 2–3 minutes until just heated through; do not overcook to preserve tender texture.
  • → Pre-cooked lobster only needs gentle warming to maintain its delicate texture and prevent toughening; it contributes color and succulent bites to each spoonful.
  • Taste and adjust seasoning one final time, correcting salt, pepper, and acidity, and if the bisque is too thick, whisk in a little hot water or stock to reach the desired consistency.
  • → Final checks ensure the flavor is balanced and the texture is perfect, with the bisque coating the spoon smoothly.
  • Keep a few larger pieces of lobster meat reserved for garnish and gently rewarm them in the hot bisque just before service; if desired, tuck them into bowls as a show-stopping finish.
  • → Reserved chunks provide a visual and textural contrast at plating, echoing the lobster flavor and offering a luxurious bite in each serving.
  • Prepare crostini or toasted bread slices; rub with a cut clove of garlic if desired and toast until golden and crisp to serve alongside the bisque for dipping.
  • → Crisp bread adds a textural counterpoint to the creamy bisque, and a light garlic aroma enhances the seafood savor in every bite.
  • Serve the lobster bisque hot in warmed bowls with a few reserved lobster chunks on top and a squeeze of lemon on the side for guests who want extra brightness; accompany with the crostini and lemon wedges.
  • → Warming the bowls helps maintain a luxurious temperature from first spoonful to last, while the garnish and citrus offer aroma, color, and balance.

Notes

This lobster bisque is a luxurious, shellfish-forward soup built from roasted lobster shells, aromatics, and a silky cream finish. For maximum depth, roast the shells lightly in a dry pan to intensify sweetness, then simmer with the aromatics and stock, straining well to keep the liquid bright and velvety. Add the chopped lobster meat toward the end to preserve its texture, and if your meat is refrigerated, pat it dry before folding it in so the bisque stays creamy rather than thin. A small splash of brandy or cognac added after deglazing can deepen the flavors, while a pinch of smoked paprika or cayenne provides a subtle warmth without masking the seafood; finish with fresh lemon juice to brighten the finished soup. If you prefer a lighter version, substitute half-and-half or a dairy-free cream, but note that the result will be less rich and silky. To make ahead, prepare the stock and base up to the cream stage, refrigerate or freeze, then reheat gently and add the cream just before serving. Gluten-free or dairy-free adjustments are easy: use a gluten-free flour or omit the roux, ensure your stock is gluten-free, and use a dairy-free cream if needed. Serve with crostini or toasted bread and lemon wedges, and garnish with reserved lobster chunks and chopped chives or tarragon for color and a fresh finish; avoid boiling after adding the cream to prevent separation and keep the texture smooth.

Tips

Tips for Lobster Bisque

  • Maximize lobster flavor by using a mix of claw and tail meat and patting dry if refrigerated; reserve larger chunks to garnish for a visually appealing finish.
  • Lightly roast the lobster shells in a dry skillet for 5–8 minutes before simmering to intensify sweetness and umami; crush or chop the shells after to maximize flavor extraction.
  • Sweat the aromatics gently in a mix of unsalted butter and olive oil; keep the vegetables pale and translucent to build a clean base without caramelized notes that can deepen the color too much.
  • Cook the tomato paste with aromatics for about a minute to mellow its raw flavor and contribute depth and color to the bisque.
  • Prepare a light roux with butter and flour (or gluten-free flour) and cook 1–2 minutes; this gives gentle body to the bisque without a heavy paste; if gluten-free, use a blend and cook until the raw flavor disappears.
  • Deglaze with dry white wine and brandy or cognac (if using); simmer to reduce by about half to concentrate flavors and lift the seafood sweetness.
  • Simmer the shells with stock for 20–30 minutes (or longer if you have time) to extract maximum flavor and color; strain through a fine-mesh sieve to keep the liquid velvety.
  • Keep stock unsalted or lightly salted; adjust salt after incorporating the lobster meat and cream to avoid oversalting the bisque.
  • Reserve some large lobster meat chunks for garnish and warming gently in the hot bisque just before serving to preserve their texture and shape.
  • Finish with cream off the heat; add gradually and whisk or blend briefly to emulsify; avoid vigorous boiling after adding cream to prevent curdling.
  • Season gradually with salt, pepper, and a pinch of smoked paprika or cayenne for a subtle warmth; taste after each adjustment to maintain balance.
  • A splash of fresh lemon juice at the end brightens the flavors; add a little at a time and taste to avoid overpowering the seafood sweetness.
  • For a smoother texture, blend the bisque briefly and pass through a fine sieve; for a heartier mouthfeel, blend less and leave some small pieces of lobster.
  • Make ahead: bisque refrigerates well for 1–2 days; reheat slowly over low heat, stirring, and re-emulsify with a touch of cream if needed; add reserved lobster meat at service.
  • Serve with crisp crostini or garlic-rubbed bread and lemon wedges; garnish with chopped fresh chives or tarragon and some reserved lobster meat for a luxurious finish.

FAQ

What is lobster bisque?

Lobster bisque is a creamy, smooth soup traditionally made from lobster stock, lobster flesh, aromatics, a touch of wine or cognac, and cream. The lobster shells are simmered to extract flavor, then strained for a velvety texture.

What ingredients do I need to make lobster bisque?

For a classic lobster bisque, you’ll need lobster (tails or claws), shells for stock, aromatics (onion, carrot, celery, garlic), tomato paste, cognac or brandy, dry white wine, butter, flour (for a roux) or cornstarch for thickening, heavy cream or crème fraîche, salt and pepper, bay leaf, and thyme. Optional: paprika or cayenne for heat, lemon juice to brighten, and fresh lobster meat for the finished soup.

Can I use pre-cooked lobster or leftover lobster?

Yes. Use the meat from pre-cooked lobster for the finishing, and save the shells to make the stock. If you only have meat, you can simmer shells briefly in stock to extract flavor, or buy lobster stock.

How do I make the stock for lobster bisque?

Simmer lobster shells with onions, carrots, celery, garlic, and herbs in water to extract flavor. Deglaze with white wine, then simmer 30–60 minutes. Strain the stock and return to the pot. This forms the base; you can enrich with a bit of cream at the end if desired.

How do I thicken and smooth the bisque?

Traditionally, bisque is thickened with a roux (butter and flour) and then strained to a velvety texture. You can also purée a portion of the stock and lobster meat and whisk it back in, or use a cornstarch slurry for a lighter thickening. Finish with cream for silkiness.

Can I make a dairy-free or lighter version?

Yes. To reduce dairy, skip the heavy cream or use a plant-based cream. Use olive oil instead of butter, and thicken with a light roux made with flour or cornstarch. The texture will be lighter and the flavor will rely more on the lobster stock.

How should I store and reheat lobster bisque?

Store in an airtight container in the fridge for up to 3 days. Reheat gently over low heat, stirring often to prevent curdling. If the soup thickens, thin with a little broth or water. Do not boil after adding dairy; heat just until steaming hot.

How do I season and adjust the flavor?

Taste and adjust with salt, pepper, and a splash of lemon juice or white wine to brighten. A pinch of cayenne or paprika adds warmth. If stock is very salty, balance with a touch of cream or a splash of water.

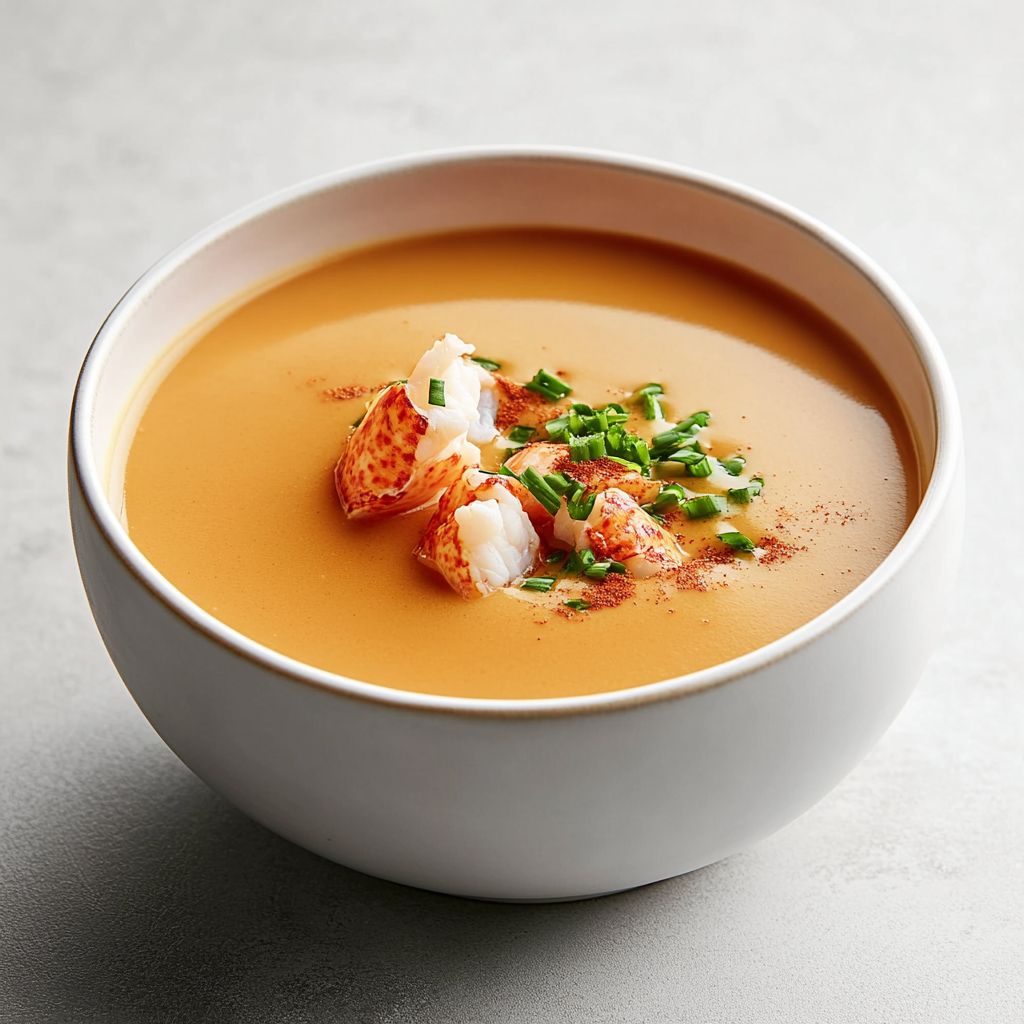
What are good garnishes and serving suggestions?

Serve hot with a drizzle of cream or crème fraîche, chopped chives or parsley, and a few lobster meat pieces. Pair with crusty bread or garlic croutons. A splash of cognac at the end can add depth (optional).

Can I freeze lobster bisque?

You can freeze the stock or the finished bisque (without dairy) for up to 2–3 months. Thaw in the fridge, then reheat gently and whisk in a little cream if desired.

Introduction / Hook

Imagine a sun-washed afternoon by the coast, where light breezes carry the scent of sea salt and the soft crunch of a butter-toasted bun gives way to a delicate, ocean-sweet treasure within. A lobster roll is not just a sandwich; it’s a moment of pure seaside indulgence that feels both timeless and effortlessly modern. This Lobster Roll Recipe invites you to savor coastal elegance with every bite. The meat—the tender, briny sweetness of lobster—meets a whisper of richness and a bright kiss of lemon and crunch, all tucked into a warm, glossy roll. It’s comfort that still feels celebratory, a dish you can share with friends on a summer evening or treat yourself to after a long day. The aroma alone—thin wisps of buttery toasting, a hint of citrus, the purity of fresh seafood—promises an experience that lingers long after the last bite disappears. Whether you’re near the water or simply chasing that coastal mood in your kitchen, this lobster roll captures the essence of a seaside restaurant without demanding a passport or a long meal. It’s a dish that invites you to slow down, savor, and toast to memories made around a simple, well-crafted bite.

The Story Behind the Dish

The lobster roll is a quintessential emblem of New England coastal culture, a dish born from practicality, abundance, and a love of crisp, satisfying simplicity. For generations, lobstermen hauled in their daily catch, and families turned the bounty into quick, nourishing meals that could travel—whether to a picnic on a fog-draped pier or a bustling seaside shore lunch. The concept of a lobster salad tucked into a soft bun emerged from the desire to combine the ocean’s prize with portability and comfort. In the early 20th century, clever cooks in Maine and parts of New England started pairing lightly dressed lobster with buttery, split-top buns—an idea that caught on in bistros, roadside shacks, and seasonal eateries across the coast. The result was a dish that felt luxurious without being fussy, a celebration of peak-sweet lobster meat, tender bread, and a creamy—but not heavy—balance of texture and flavor.

Over time, regional interpretations grew up around this humble sandwich. Some prefer a lean, almost bare rendition that lets the lobster shine; others crave a touch more creaminess, a sprinkle of celery for crunch, or a bright citrus note to mimic the sea air. The beauty of the lobster roll lies not only in its ingredients but in its adaptability—the way a single, well-made bite can evoke a day’s worth of memories: sun-warmed sunlit docks, cool sea spray, the laughter of friends, a gentle cheers of clinking glasses. The dish has traveled well beyond New England, finding homes in urban bistros and cozy home kitchens around the world, where cooks honor the same core ideas: fresh, pristine seafood, a comforting roll, and a balance that allows each element to speak for itself. This recipe captures that heritage while remaining approachable, a bridge between tradition and contemporary flavor that feels both nostalgic and entirely new with every serving.

Why You’ll Love This Recipe

  • Fast and satisfying: A lobster roll can come together in a matter of minutes, making it perfect for a quick lunch, a relaxed weekend dinner, or a standout addition to a casual gathering.
  • Elegant simplicity: The dish relies on high-quality lobster meat and a well-made roll, letting the ocean’s sweetness and the bread’s toasty warmth shine through without overwhelming the palate.
  • Versatile appeal: The lobster roll works beautifully for weeknights, weekend gatherings, or sunny al fresco meals. It adapts to a range of sides and dressings, from crisp greens to tangy pickles, depending on your mood.
  • Texture contrast that sings: Tender, succulent lobster against a softly crunchy, lightly buttered bun creates a balanced bite with each mouthful.
  • Luxurious feel, everyday practicality: Even though it feels indulgent, the dish is surprisingly approachable and can be assembled with pantry-friendly shortcuts if needed.
  • Family-friendly charm: It’s a crowd-pleaser that both kids and adults can enjoy, with room to customize the amount of dressing, spice, or lemon brightness to suit different tastes.

Flavor Profile & Texture

The lobster roll is a study in clean, bright contrasts. The lobster meat itself is typically tender, with a sweetness that hints at the ocean’s depth. When nestled in a split-top bun that has been gently warmed or lightly brushed with a bit of butter, the bread contributes a subtle, toasty crust and a soft, chewy crumb that yields with a delicate press of the teeth. This contrast—soft interior, crisp exterior—gives the bite a satisfying texture from the first to the last bite.

The overall flavor profile tends toward the refined and seaworthy: a pristine, almost pristine sweetness from the lobster is complemented by creamy richness from a dressing that binds without weighing down the meat. A touch of brightness—often from citrus or a touch of acidity—cuts through the richness and lifts the dish, keeping it feeling light and lively rather than heavy. There’s a gentle saltiness that mirrors the sea, balanced by the bun’s mild sweetness and a whisper of aromatics that can range from delicate herbs to a subtle savoriness from pepper or onion notes in the dressing. The result is a cohesive chorus of flavors: the sea’s own sweetness meeting toasty bread, where each bite reveals tenderness in the lobster and crispness in the bun. It’s a sandwich that tastes like summer—airy, bright, and deeply satisfying all at once.

A well-made lobster roll doesn’t overwhelm the senses with one dominant flavor. Instead, it invites you to explore the layers: the succulent meat’s natural sweetness, the bread’s comforting warmth, the dressing’s creamy tang, and a citrusy zing that reminds you of sunlit docks and breezy afternoons. The textures and flavors are designed to complement each other, so you notice each component as you take your next bite—the way the roll keeps the lobster juicy without sogginess, the contrast of warm bread and cool meat, and the subtle whisper of herbs or citrus that clean the palate between bites.

Occasions & Pairings

This dish shines in a range of settings, making it a versatile centerpiece for your menu. Its elegance and simplicity suit weekend lunches as well as more festive evenings. Here are some ideas to help frame occasions and pairings:

  • Summer picnics and beach days: A classic choice for warm-weather gatherings where a crisp salad, sliced fruit, or pickled vegetables offer a refreshing counterpoint.
  • Casual cocktails and social bites: Pair with light, sparkling beverages or cold beers to keep the mood breezy and fun.
  • Weeknight dinners: A quick, impressive option that feels special without requiring a long cooking session.
  • Celebrations and coastal-inspired menus: Elevate the experience with small, complementary courses like a crisp slaw, a light citrus salad, or a chilled seafood starter.

Pairings to consider (without stepping into actual recipe instructions):

  • Side dishes with crunch: A tangy coleslaw, a fennel and apple salad, or crisp pickle spears add brightness and textural contrast.
  • Bevy companions: A chilled white wine with bright acidity, a sparkling rosé, or a cold lager can harmonize with the dish’s oceanic notes.
  • Dessert options: A light lemon gelée, a vanilla bean ice cream, or a sorbet to cleanse the palate after the rich, creamy bite.

Tips, Variations & Substitutions

Here are ideas to tailor the lobster roll to your preferences, dietary needs, or available ingredients, all while preserving the dish’s core charm:

Classic Spin

Keep the essence of the traditional lobster roll by favoring a clean lobster-meat-forward approach with a lightly dressed mixture and a soft, toasted roll. The balance should feel airy and luxe rather than heavy, allowing the sweet lobster to remain the focal point.

Flavor Elevations

  • Herb accents: A gentle whisper of fresh chives, tarragon, or parsley can brighten the dish without overpowering the lobster’s natural sweetness.
  • Citrus lift: A subtle citrus note—fresh lemon or a hint of zest—can awaken the flavors and add a refreshing edge to the bite.
  • Crunchy contrasts: A light crunch from finely shredded celery or cucumber can provide a playful textural counterpoint while keeping the dish bright and light.

Vegan or Alternative Versions

  • Vegan substitutes: For those avoiding shellfish, a sea-inspired plant-based option can echo the texture and saltiness through carefully chosen plant proteins and a tangy, creamy dressing that mimics the mouthfeel of a classic lobster roll.
  • Non-shellfish seafood substitutes: If lobster isn’t available, other white, delicate seafood options or even crab can offer a similar tenderness and sweetness, adjusted with respectful seasoning and balance.

Gluten-Free & Dietary Adjustments

  • Gluten-free bun: Swap in a gluten-free roll or a sturdy gluten-free option that toasts nicely and holds up to the filling without crumbling.
  • Lightening the dressing: If you’re watching fat or calories, you can emphasize a lighter emulsified dressing while keeping the shellfish’s natural moisture and flavor.

Regional Twists

  • Mid-Atlantic influence: A touch of celery seed or a dash of cracked black pepper can give a nod to regional seasoning traditions while staying true to the dish’s spirit.
  • Southern coastal flare: A hint of a pale paprika or a delicate chili oil drizzle can introduce a subtle warmth and depth to the roll.

Storage & Make-Ahead Ideas

While lobster rolls are best enjoyed fresh, there are practical ways to plan ahead and reduce last-minute stress without sacrificing quality:

  • Properly cooled components: If you’re preparing elements ahead of time, keep the lobster meat and any dressing refrigerated separately from the bread. This helps prevent sogginess and keeps textures vibrant.
  • Rolls for serving: Toast or warm the buns just before serving to preserve the ideal contrast of textures. If you’re entertaining, you can toast a batch of buns in advance and store them in a clean, dry container to reheat gently as needed.
  • Leftovers: If you have leftover lobster meat, it can be stored in an airtight container in the refrigerator for a short period. Reheat gently and assemble fresh rolls when you’re ready to enjoy again; avoid prolonged refrigeration that could affect texture.
  • Freezing considerations: Freezing lobster meat is not generally ideal for quality, as moisture loss can alter texture. If you anticipate needing to store, consider freezing only the meat in a way that preserves its moisture, then thawing carefully and assembling fresh when possible.

Fun Facts & Trivia (Optional)

  • Historical abundance: Lobsters were once so plentiful in parts of New England that they were considered food for the poor. Today, they symbolize coastal luxury and culinary refinement, with the lobster roll acting as a bridge between everyday practicality and gourmet experience.
  • Regional pride: Maine is often celebrated as the home of the lobster roll, but the dish has a vibrant presence across coastal communities, each adding its own subtle twist to honor local ingredients and traditions.
  • Eating culture: The lobster roll’s popularity reflects a broader trend toward simple, high-quality ingredients prepared with respect. It embodies the idea that great flavors can come from a few well-chosen components, treated with care and balanced with texture and brightness.
  • A sensory tradition: The ritual of toasting the bun, selecting the freshest lobster, and savoring the first bite is a sensory experience that often becomes a shareable memory—one that lingers well beyond the meal itself.
  • Seasonality matters: In many regions, lobster is a seasonal treasure, and the lobster roll becomes a seasonal emblem—best enjoyed when the seafood is at its peak, enhancing both flavor and texture.

Closing Thoughts

A lobster roll is more than a sandwich—it’s a celebration of land and sea, a small luxury that fits into everyday life with effortless grace. This description-prelude aims to transport you, if only for a moment, to a breezy coastal afternoon where the world slows down and the pleasures of a well-crafted bite take center stage. By focusing on the lobster’s natural sweetness, the bread’s gentle warmth, and a balance of brightness and creaminess, this dish invites you to savor the sea’s bounty with a touch of nostalgia and a spark of novelty. Whether you’re recreating a classic by the coast or capturing that seaside mood in your kitchen, may every bite feel like a vacation you can savor again and again.

Ingredients

Lobster Roll Filling

  • – 1 1/2 to 2 pounds cooked lobster meat, chopped into bite-sized pieces
    → The star of the dish. Use freshly cooked lobster for the best sweetness and texture; if using leftovers, pat the meat dry to remove excess moisture so the dressing coats nicely rather than becoming watery. Break into uniform chunks to ensure each bite has lobster and dressing.
  • – 1/2 cup mayonnaise (full-fat)
    → Provides the creamy binding that holds the filling together without being dry. Use a high-quality mayonnaise for rich flavor. If you prefer a lighter dressing, you can mix in a small amount of sour cream or yogurt, but this will alter the texture and flavor profile.
  • – 2 tablespoons fresh lemon juice
    → Brightens the dressing and enhances the lobster sweetness while cutting through the richness of the mayo. Freshly squeezed juice yields a cleaner, more lively acidity than bottled substitutes.
  • – 1/4 cup finely chopped celery
    → Adds crisp texture and a subtle vegetal note that contrasts with creamy dressing. Dice celery finely so it distributes evenly without large crunchy chunks.
  • – 2 tablespoons finely chopped fresh chives
    → Provides mild onion-like aromatics and a pop of green color. Snip finely to release delicate flavor without overpowering the lobster.
  • – 1 tablespoon minced fresh dill (optional)
    → Dill pairs beautifully with seafood, imparting a light, grassy note. If using, fold in gently to preserve its aroma; omit if you dislike anise-like flavors.
  • – 1 teaspoon Dijon mustard (optional)
    → Adds a touch of tang and helps emulsify the dressing for a smoother texture. If not using mustard, a splash of white wine vinegar can provide similar brightness.
  • – 1/2 teaspoon kosher salt
    → Seasoning baseline; start here and adjust after tasting the mixture. Kosher salt blends more evenly with mayo than iodized salt, avoiding a metallic finish.
  • – 1/4 teaspoon freshly ground black pepper
    → Gives subtle sharpness that enhances all components. Grind just before use for maximum aroma.
  • – 1 teaspoon lemon zest (optional)
    → Adds a fragrant citrus lift without extra acidity; zest only the outer yellow layer to avoid bitterness.

Lobster Roll Buns

  • – 6 New England-style split-top hot dog buns (or brioche hot dog buns), lightly toasted with butter
    → Classic lobster roll buns that cradle the filling and stay sturdy when dressed. Split-top buns hold more dressing and toast beautifully; toast until lightly golden to add crunch and flavor. If you cannot find split-top buns, standard hot dog buns can work but won’t hold as much filling.
  • – 2 tablespoons unsalted butter, melted
    → For toasting the buns, this butter creates a glossy, crisp surface and helps keep the edges from getting soggy. Brush evenly on the cut sides before toasting.

Optional Add-ins

  • – 1/2 teaspoon Old Bay seasoning (optional)
    → A classic seafood spice that adds a gentle warmth and maritime character. Mix into the lobster filling or dust lightly on the surface for a coastal touch. Start with less if you’re sensitive to spice, then adjust to taste.
  • – 1 tablespoon finely chopped celery leaves or dill fronds (optional)
    → Extra herbaceous brightness; adds color and aroma without overpowering the lobster. Fold in at the end to preserve fresh flavor.
  • – 1 teaspoon capers, finely chopped (optional)
    → Introduces a briny bite that accents the sweetness of the lobster. Rinse and pat dry to control saltiness, then mince finely so they distribute evenly.

Serving & Garnish

  • – Lemon wedges, for serving
    → Offer additional acidity to brighten the roll at the table. Squeeze over the filling just before eating if desired to refresh the flavors.
  • – Fresh parsley or chives, for garnish (optional)
    → Fresh herbs add a final pop of color and aroma. Finely chop and sprinkle over the assembled rolls for a restaurant-worthy finish.

Instructions

  • Prepare the lobster meat by breaking it into uniform bite-sized chunks.
    → Uniform pieces ensure even distribution of filling in every bite and prevent stringy texture; if using leftovers, pat dry with paper towels to remove moisture so the dressing coats nicely rather than becoming watery.
  • Make the dressing by whisking full-fat mayonnaise, fresh lemon juice, and salt and pepper in a medium bowl until smooth and emulsified.
    → A stable emulsion helps the dressing cling to the lobster and prevents separation while you spoon it into the buns, yielding a creamy, cohesive filling.
  • Fold in finely chopped celery and fresh chives, then add dill if using; mix just until evenly distributed.
    → The crisp celery and bright herbs provide texture and aromatic contrast to the creamy dressing; dice celery finely so it distributes evenly without large crunches.
  • Season and brighten the mixture with optional lemon zest and Dijon mustard (if using); adjust salt and pepper to taste.
    → Zest adds a fragrant citrus lift without extra acidity, while mustard can enhance emulsion and tang; taste and balance to your preference for a clean, seafood-forward profile.
  • Incorporate optional add-ins such as Old Bay and finely chopped capers if desired; fold gently to avoid breaking the lobster chunks.
    → Old Bay imparts a maritime warmth and a touch of spice; capers introduce a briny bite that complements the lobster’s sweetness without overwhelming it.
  • Chill the filling for 15 to 20 minutes in the refrigerator to meld flavors and help the dressing cling to the lobster.
    → Chilling firms the mixture, improves ease of handling during assembly, and prevents the filling from sliding out of the buns.
  • Toast the split-top New England-style buns (or brioche buns) with melted butter on their cut sides until lightly golden and crisp.
    → Toasting creates a flavorful crust, helps prevent sogginess, and gives structural support to hold the filling without collapsing.
  • Fill each toasted bun generously with the lobster mixture, mounding slightly while keeping a neat edge; press gently to compact without crushing the lobster.
    → A well-packed filling ensures each bite delivers lobster and dressing together, and a tidy presentation is easier to eat.
  • Serve immediately with lemon wedges and a sprinkle of fresh parsley or chives for garnish.
    → A squeeze of lemon brightens the richness just before eating, and fresh herbs provide a restaurant-quality aroma and color.

Notes

These lobster rolls are best enjoyed with freshly cooked lobster for maximum sweetness and a tender bite; pat any leftovers dry to prevent a watery dressing so the mixture coats evenly without pooling.

For the dressing, use a full-fat mayonnaise to achieve creamy binding and brighten with freshly squeezed lemon juice; finely chopped celery and chives add crunch and color, while dill is optional for a classic seafood note.

A small amount of Dijon mustard helps emulsify the mixture and add a subtle tang; if you skip mustard, a splash of white wine vinegar can provide a similar brightness. Season with kosher salt and freshly ground black pepper, tasting and adjusting as needed.

Toast New England-style split-top buns brushed with melted butter until lightly golden to create a crisp edge that holds up to the filling. If you prefer a lighter version, reduce mayo and substitute some of it with yogurt or sour cream, keeping in mind texture will be looser and flavors may mellow slightly.

Optional add-ins like Old Bay, chopped capers, or celery leaves can add coastal nuance—add gradually to taste. For best results, assemble just before serving and serve with lemon wedges and a garnish of fresh parsley or chives for color. If making ahead, keep the filling and buns separate and refrigerate until ready to assemble.

Tips

Tips for Perfect Lobster Roll

  • Use the best lobster you can get: Freshly cooked lobster meat has the sweetest flavor and best texture. If you’re using leftovers, pat the meat very dry with paper towels to prevent a watery dressing and to help the dressing cling.
  • Keep the lobster chunks uniform: Break the meat into bite-sized, uniform pieces so every bite has a balanced lobster-to-dressing ratio. Avoid mashing the meat; you want distinct chunks for texture.
  • Emulsify the dressing properly: Whisk mayonnaise with lemon juice (and Dijon if using) until smooth and glossy. If the mix looks separated, whisk in a splash of cold water or a tiny bit more mayo to bring it back together.
  • Balance acidity and brightness: Fresh lemon juice brightens the filling, but be mindful of too much acidity. Add lemon zest (optional) for fragrance without adding more liquid.
  • Chop textures uniformly: Finely dice celery and chives to distribute crunch and aroma evenly. If you prefer more bite, you can leave a few pieces slightly larger, but keep the majority uniform.
  • Herbs and add-ins: Fold in dill (optional) and chives gently at the end to preserve their delicate aroma. If using Old Bay or capers, start with a small amount and taste before adding more.
  • Creaminess without sogginess: The mayo-based dressing should coat the lobster lightly, not drown it. Start with the recommended amount and add more only if needed to bind.
  • Toast the buns correctly: Use split-top New England buns or brioche buns. Toast with butter until lightly golden and crisp on the edges to create a barrier against sogginess from the filling.
  • Butter the buns generously: Lightly brush both sides of the cut surfaces with melted butter before toasting for a glossy finish and extra flavor.
  • Make ahead tips: The dressing can be prepared a day ahead, but keep the lobster chilled and add it to the dressing just before assembly to preserve texture. Assemble the rolls close to serving for best texture.
  • Assembly guidance: Spoon filling into the buns and press gently to help it stay put. Don’t overfill; you want a neat, easy-to-eat roll with a good lobster-to-dressing balance.
  • Safety and freshness: Keep the dressed lobster refrigerated if not serving immediately. Do not leave perishable seafood at room temperature for extended periods.
  • Garnish and serving: Offer lemon wedges and a sprinkle of chopped parsley or chives for color. A light squeeze of lemon just before eating brightens the flavors on the plate.

FAQ

What is a lobster roll?

A lobster roll is a sandwich featuring tender lobster meat dressed lightly with mayo or butter, packed into a split-top bun. This version uses a mayo-based relish, a touch of lemon, celery for crunch, and toasted buns for extra flavor.

What ingredients do I need?

For 4 servings: 1 to 1.25 pounds lobster meat (knuckle and claw meat is ideal), 3–4 tablespoons mayonnaise, 1–2 celery stalks finely chopped, 1 tablespoon lemon juice, 1–2 teaspoons chopped fresh chives or parsley, salt and pepper, unsalted butter, 4 split-top hot-dog buns. Optional: a pinch of paprika or Old Bay, scallions, or tarragon.

Can I use imitation lobster or other seafood?

Imitation lobster (surimi) is not ideal for authentic flavor. You can substitute langoustine or crab in a pinch, but it won’t taste exactly like lobster. If using canned lobster meat, drain well and pat dry.

How do I cook or prepare the lobster?

Boil or steam live lobsters until the shells are bright red and the meat is opaque (about 8–10 minutes for 1–1.25 lb lobsters). Let cool, then remove meat from tails, claws, and knuckles; chop into bite-sized pieces.

How do I dress the lobster for the roll?

In a bowl, mix the chopped lobster with mayonnaise, lemon juice, celery, chives, and a pinch of salt and pepper. For a lighter version, use half mayo and half Greek yogurt. Taste and adjust seasoning.

What bread should I use?

Classic Maine-style lobster rolls use split-top hot dog buns toasted in butter. You can also use brioche or soft sandwich rolls if you can’t find the real buns. Toast or butter the cut sides for extra flavor and to prevent sogginess.

How do I assemble the rolls?

Butter and toast the buns, then fill with a generous amount of dressed lobster. Keep extra dressing separate to add as needed. Serve immediately for best texture.

What are the differences between Maine and Connecticut styles?

Maine style is typically cold lobster meat mixed with mayo and served on a butter-toasted bun, often with lettuce. Connecticut style is warm lobster tossed in melted butter, served warm in a split-top bun. This recipe is closest to Maine style but can be adapted to Connecticut by using warm butter instead of mayo dressing.

How should I store leftovers?

Store lobster meat and dressing separately in the fridge for up to 1 day. Assembled rolls are best eaten the same day. Reheat lobster meat gently if using warm butter style, but do not reheat the mayonnaise-based dressing.

Can I prep this ahead or freeze it?

You can prep the dressing and chop the celery in advance. Hold off mixing with lobster until ready to serve. Fresh lobster meat does not freeze well; if you have frozen lobster, thaw and drain well before mixing.

Any tips for preventing soggy buns?

Toast buns with butter until golden, and mix just enough dressing to coat the lobster. Keep extra dressing separate and add at serving, so the buns stay crisp.

Introduction / Hook

Imagine a sun-soaked table set along a breezy coastline, the air thick with the scent of the sea and a mosaic of spices. Steam unfurls like wisps of cloud, a chorus of sizzling sounds rising from a grand, communal boil. This is more than a dish; it’s a celebration of gathering, of laughter echoing across the table, of fingers stained with gold and orange and the faint glint of lemon at the corner of every smile. A seafood boil is the kind of feast that instantly makes strangers feel like neighbors, neighbors feel like family, and family feel like the best version of themselves: warm, bold, and incredibly alive. Each bite carries a whisper of the ocean, a memory of long summer days, and a spark of fire that lingers just long enough for you to reach across and pass the next plate. Welcome to a one-pot celebration that honors the sea, the season, and the simple joy of sharing a generous, unhurried meal with people you love.

The Story Behind the Dish

The seafood boil is a vibrant thread in the culinary tapestry of coastal communities, with roots that drift through the Gulf Coast, the Atlantic seaboard, and the river towns where families gather to mark birthdays, birthdays of boats, and the annual return of seafood season. Its most spirited iterations often owe a debt to Cajun and Creole traditions, where bold spice profiles, homemade broths, and a sense of theater turn cooking into an event as much as a sustenance. Historically, these boils emerged as practical, communal feasts: a handful of fresh catch, a stockpot, a sturdy flame, and the instinct to share whatever bounty the tide delivered. Friends would bring what they could—corn, tubers, smoky sausages, or herbs from the garden—while someone kept watch over the fire and tasted the bubbling pot with a yes or no that carried the weight of home. Over time, each family or neighborhood added its own signature touches: a particular spice blend, a preferred finishing kick, or a traditional squeeze of citrus that brightens the entire spread. Today, the seafood boil remains an emblem of hospitality—a sensory symphony of briny sweetness, citrus zest, peppery warmth, and the satisfying, communal ritual of pulling apart a well-seasoned feast with your hands and your heart in equal measure.

Why You’ll Love This Recipe

  • One-pot celebration: A grand, shareable dish that brings people together around a single, steaming centerpiece.
  • Adaptable to any crowd: Easily scaled up or down, with the ability to accommodate different dietary needs and spice preferences.
  • Sensory delight: A chorus of aromas—briny, smoky, citrusy, and subtly sweet—builds anticipation from the moment the pot comes to life.
  • Palette-friendly complexity: A balance of warm heat, bright acidity, and deep, comforting savor creates layers of flavor in every bite.
  • Relaxed yet festive: It feels special enough for a celebration, but the method is forgiving enough for a casual weeknight with friends.
  • Make-ahead and social: The prep can be shared among guests, turning cooking into a collaborative, joyful activity rather than a solo task.

Flavor Profile & Texture

This dish delivers a multifaceted flavor profile that feels both coastal and comforting. The core is a brimming pot of broth or seasoned liquid that carries the essence of the sea—oceanic salinity softened by citrus brightness and a kiss of smoke or spice. The spice level—whether mild, medium, or fiery—acts as a warm invitation rather than a jolt, highlighting the natural sweetness of the seafood and the starches that soak up all the good flavors. Texturally, you’ll experience a dance between al dente, almost creamy interior of potatoes if present, the tender yet resistant bite of shellfish, and the yielding softness of corn-like components if included. The sausage or other smoky, savory elements (when part of the boil) contribute a meaty depth that anchors the dish, while fresh herbs and aromatics provide aromatic top notes that lift the whole plate. The result is a mosaic of textures: taut with chew, silky with brine, and juicy with a lingering coastal aftertaste. And then—once you squeeze a bright wedge of citrus over the spread—the entire table seems to glow with a fresh, mouthwatering finish that makes every bite feel like a small victory.

Occasions & Pairings

A seafood boil is inherently social, making it ideal for a variety of occasions beyond the ordinary weeknight. Consider these scenarios to tailor your gathering:

  • Summer backyard or beach gatherings where the heat requires a meal that’s forgiving and shareable.
  • Family reunions or milestone celebrations that call for a centerpiece dish with communal appeal.
  • Game-day feasts or weekend get-togethers where the aroma draws guests from room to room.
  • Holiday-forward events that want a coastal twist—something festive, tactile, and interactive.

Pairings can be crafted to suit the mood and season. Consider light, crisp beverages to cut through the richness, or a cool, citrusy drink to echo the brightness of the dish. For sides, think of simple, starchy accompaniments and fresh greens that balance the richness without stealing the spotlight. A bright, zesty finish—lemon, lime, or a splash of vinegar—can elevate the entire spread. If you’re serving a crowd with diverse tastes, a few colorful, crunchy garnishes or dips can provide extra texture and contrast that complement the main event without overpowering it.

Tips, Variations & Substitutions

  • Heat and spice: Start with a moderate level and offer additional heat on the side for guests who want more kick. The beauty of a boil is that it’s easy to customize at the table with bowls of hot sauce or pepper flakes.
  • Protein options: This concept travels well with a variety of seafood and shellfish. If you’re cooking for a crowd, mix a few types to create a diverse tasting experience. If seafood isn’t available, you can craft a vegetarian or plant-based version featuring hearty vegetables and plant proteins that mimic the textures of a seafood medley.
  • Vegetable and starch choices: While traditional boils include a mix of sturdy vegetables and starches, you can swap in seasonal produce to maintain freshness and color throughout the year. The goal is to complement the ocean-savory base with textures that hold up to a lively boil.
  • Calibrating the broth: The liquid you choose should be potent enough to carry aromatics and flavors, yet mellow enough to allow the natural sweetness of the seafood to shine through. A good balance of salt, acidity, and warmth is key.
  • Regional twists: A touch of coastal herb blends, a nod to smokiness from a favorite wood-smoked spice, or a signature citrus finish can give your boil a distinctive regional fingerprint.
  • Allergen-aware options: For guests with dietary restrictions, consider a version that keeps the core flavor profile intact while omitting common allergens or substituting with safer alternatives. The same technique and care apply—the emphasis remains on aroma, texture, and communal enjoyment.

Storage & Make-Ahead Ideas

Seafood boils are best enjoyed fresh, but practical planning can help you prepare ahead or store leftovers properly. Here are ideas to keep the spirit of the dish intact, even when schedules are tight:

  • Make-ahead components: If you’re hosting a large gathering, you can prepare the aromatics, broths, and herbs in advance, keeping them refrigerated until ready to cook. This minimizes last-minute rushing and preserves the vibrant flavors that make the boil special.
  • Storage for leftovers: Cold leftovers should be stored in airtight containers in the refrigerator and consumed within 1–2 days for best flavor and safety. Reheat gently to avoid overcooking delicate seafood components; a gentle rewarming ensures the texture remains enjoyable.
  • Freezing note: Most seafood items don’t reheat well after freezing and thawing, so it’s best to enjoy leftovers within a day or two if possible. If you do freeze components separately, thaw slowly in the fridge and rewarm with patience to maintain tenderness.
  • Make-ahead serving: If you’re hosting, consider serving in courses or stations so guests can assemble at their own pace. A well-timed warm-up of the final components can help the dish feel fresh and exciting even as the night goes on.

Fun Facts & Trivia (Optional)

Delightful tidbits that can spark conversations at the table or inspire future variations:

  • The concept of community boil gatherings reflects a long-standing maritime tradition of sharing catches and labor, turning cooking into a social event as much as a meal.
  • In some coastal communities, the boil is more than sustenance—it’s a ritual of gratitude to the waters, the boats, and the hands that worked to bring seafood to the table.
  • Regional spice blends often tell a story of trade routes, local agriculture, and personal family history, giving each boil its own flavorful signature.
  • Texture and aroma are not just sensory delights; they signal readiness and safety in cooking—steam and scent guide the cook as much as time and temperature do.
  • Secret family touches—such as a particular finishing squeeze, a fragrant herb, or a favorite dipping sauce—turn a standard boil into a personal tradition that travels across generations.

Closing Thoughts

A seafood boil is more than a recipe; it’s an invitation to slow down, to connect, and to revel in shared abundance. It celebrates the sea’s generosity and the kitchen’s warmth, turning a simple meal into a memorable event—one that lingers in the mind long after the last napkin has been folded and the last plate has been cleared. Whether you’re cooking for a bright summer evening with neighbors or a cozy weekend gathering with family, this boil offers a canvas wide enough for your favorite flavors and your most cherished company. So gather your crew, set the table beneath the open sky or the glow of kitchen lights, and let the aromas do the rest. The best part of this feast isn’t just the food—it’s the sense of belonging that comes with every shared scoop, every clink of glasses, and every story told between bites. Enjoy the journey of flavor, texture, and togetherness that a seafood boil so effortlessly embodies.

Ingredients

Seafood Boil Base

  • 2 pounds large shrimp, shells on, tails on
    → Shrimp: Adds a succulent protein that holds up well in boiling broth. Cooking with the shells on infuses the meat with flavor as the shells release briny juices. Keep the shells on until serving, and optionally peel the shrimp after cooking for easier eating. If you prefer peeled shrimp, you can shell and devein them before boiling, but you may lose some flavor that the shells contribute while simmering.
  • 2 pounds crab legs, thawed and broken into smaller sections
    → Crab legs bring sweet, delicate meat to the boil. Since most crab legs are sold pre-cooked, your goal is to warm them through without overcooking; add them in the last 5–7 minutes. Break the legs into smaller segments to speed cooking and make dipping easier. Fresh, high-quality crab legs yield the most flavor.
  • 1 pound smoked sausage (Andouille or kielbasa), sliced into 1-inch pieces
    → Sausage adds smoky, spicy richness and fatty notes that help carry flavor throughout the boil. Searing the slices in a hot pan for 1–2 minutes per side before adding to the pot helps render fat and deepen the flavor, though it’s optional if you want to skip extra steps.
  • 4 ears corn on the cob, husks removed, cut into halves or thirds
    → Corn provides sweetness and starch that soaks up the seasoned broth. You can blanch the corn halves for 2–3 minutes beforehand to speed cooking, but it’s not strictly necessary. Keep the corn pieces large enough to grab easily with tongs.
  • 1.5 pounds baby potatoes, washed and halved if large
    → Potatoes act as hearty starches that absorb the boil’s seasonings. Halving larger potatoes ensures even cooking; parboiling briefly (5–7 minutes) beforehand can shorten boil time. Check tenderness with a knife; they should be just tender, not mushy.
  • 1 large onion, cut into thick wedges
    → Onion adds aromatic sweetness to the simmering liquid and helps balance briny seafood. You can keep the skin on for extra flavor or discard after cooking. For more punch, alternate with shallots or add more garlic.
  • 6 cloves garlic, peeled and smashed or left whole in the pot
    → Garlic releases its pungent aroma and depth into the broth. Smash cloves lightly to help release oils; you can remove during serving if you prefer milder flavor. If you’re sensitive to garlic, you can reduce to 4 cloves.
  • 1 lemon, cut into wedges
    → Lemon adds bright acidity that enhances seafood sweetness. Add wedges to the pot early on for citrusy notes and finish with a squeeze of fresh juice over the boil at the end to wake up flavors.

Seafood Boil Broth & Seasonings

  • 4 cups seafood stock or water
    → The liquid forms the base of the boil, carrying spices into the ingredients. Use seafood stock if available for richer flavor; if using water, compensate with extra seasoning and a splash of white wine or beer for depth.
  • 2 bay leaves
    → Bay leaves add herbal aroma to the simmering liquid, subtly infusing the entire boil with resinous notes. Remove them before serving to avoid biting into a sharp leaf.
  • 1/3 cup Old Bay seasoning (or a similar seafood boil spice mix)
    → Old Bay is the signature seasoning for seafood boils, delivering a balanced blend of celery salt, paprika, mustard, and pepper. You can start with 1/4 cup and adjust to taste. If you have a different brand, adapt to the strength of spices by adding gradually.
  • 1 tablespoon smoked paprika (optional)
    → Paprika adds color and a gentle smoky warmth to the broth. If you don’t have smoked paprika, regular paprika works fine; you can also add a pinch of chipotle powder for more heat.
  • 1 teaspoon cayenne pepper (adjust to heat level)
    → Cayenne provides heat and a little depth to the broth. Start with a smaller amount and increase in increments, tasting as you go. For milder heat, omit entirely.
  • Salt to taste
    → Salt amplifies all flavors; since shellfish can vary in saltiness, add gradually toward the end of the boil and adjust as you’re serving. Use a flaky sea salt or kosher salt for better distribution.
  • Optional: 1–2 cups beer or white wine (for depth)
    → Beer or wine adds a malty or fruity note that complements seafood. If using, pour in after the stock to deglaze any browned bits and let it reduce slightly before adding the rest of the liquid.

Seafood Boil Dipping Sauce

  • 1/2 cup unsalted butter, melted
    → The butter serves as a rich, luxurious dipping sauce for the seafood and corn. Melt gently over low heat to avoid separating; add a touch of lemon juice for brightness if desired.
  • 2 cloves garlic, minced
    → Garlic in the butter creates a savory, aromatic dip that complements seafood. Sauté the minced garlic briefly in the melted butter for more intensity, but keep heat low to avoid browning the garlic, which can become bitter.
  • 1 tablespoon fresh lemon juice
    → Lemon juice brightens the butter and adds a crisp contrast to the rich fats from the seafood. Freshly squeezed is best; strain out any seeds for a smooth dip.
  • 1/4 teaspoon salt (adjust to taste)
    → Salt balances the richness of the butter and the brininess of the seafood. Start small and adjust after tasting the sauce with a sample of seafood.
  • Pinch of red pepper flakes (optional)
    → A light touch of heat from red pepper flakes adds a subtle kick without overpowering the dish. Omit if serving to children or guests who prefer milder flavor.

Seafood Boil Garnish

  • 2 tablespoons chopped fresh parsley or cilantro for garnish
    → Fresh herbs add color and a bright finish that lifts the overall flavor. Sprinkle just before serving to preserve vibrant color and aroma; you can also reserve a few leaves to sprinkle on top at the table for extra brightness.

Instructions

  • Choose a large, heavy-bottomed stockpot (12–16 quarts) and place it on a stable burner to ensure even heat distribution and prevent scorching as the boil develops.
    → A wide, sturdy pot allows the seafood and vegetables to move freely in the liquid, creating an even flavor throughout and reducing the chance of hot spots that could overcook delicate seafood.
  • Pour 4 cups seafood stock or water into the pot and set the heat to high to establish a strong base for the boil.
    → The liquid carries all the spices and aromatics; starting with enough volume prevents the broth from scorching and helps maintain a vigorous boil as ingredients are added.
  • Add 2 bay leaves, 1/3 cup Old Bay seasoning, 1 tablespoon smoked paprika (optional), 1 teaspoon cayenne pepper, and salt to taste; stir to combine evenly.
    → Bay leaves and the spice mix infuse the liquid with aroma and depth; stirring ensures that the spices are distributed, preventing clumps and uneven flavor pockets.
  • If using beer or white wine, pour in 1–2 cups now and use a wooden spoon to scrape up any browned bits from the bottom of the pot as the liquid heats; allow the mixture to simmer and reduce slightly.
    → Deglazing lifts flavorful fond from the pot walls, adding complexity and a bit of acidity to balance the brininess of seafood.
  • Bring the liquid to a vigorous simmer with rolling bubbles across the surface to ensure even extraction of aromatics and to start cooking the starches and proteins evenly.
    → A roaring simmer ensures the corn, potatoes, and sausage begin to cook promptly and absorb seasonings rather than steaming slowly in a cooler liquid.
  • Add thick onion wedges and smashed garlic cloves to the simmering liquid, tucking them into the liquid so their aromas permeate the broth; leave skin on the onion for extra sweetness if desired.
    → Aromatics release sweetness and depth as they soften, building a balanced base that harmonizes with seafood flavors.
  • Squeeze the lemon wedges over the pot, then drop the wedges into the liquid to release bright citrus oils; this step brightens the overall flavor profile.
    → The acidity of lemon lifts the briny notes of seafood and enhances the perception of freshness in the finished boil.
  • Add the baby potatoes to the pot and simmer until they are just tender, about 8–12 minutes depending on size; test with a knife to ensure they yield with slight resistance.
    → Paring time to achieve just-tender potatoes prevents mushiness and ensures they hold up when mixed with other components.
  • Stir in the corn pieces and continue to simmer for 5–7 minutes until the kernels are tender but still crisp; adjust cut pieces to ensure uniform cooking.
    → Fresh corn provides sweetness and texture that pairs well with the savory broth and briny seafood, absorbing spices without turning mushy.
  • Add sliced smoked sausage to the pot and simmer for 5–7 minutes to render some fat and infuse the broth with smoky, savory notes; if you prefer a deeper crust, sear the sausage in a hot skillet for 1–2 minutes per side before adding to the boil.
    → Rendering fat early helps distribute rich flavors throughout the boil, while searing adds a caramelized exterior and more pronounced smokiness if you choose that path.
  • Gently place the thawed crab legs into the simmering broth, breaking them into smaller sections as needed; cook for the last 5–7 minutes so they warm through without overcooking.
    → Crab meat is delicate and can become rubbery if overheated; warming just enough preserves sweetness and texture.
  • Finally, add the large shrimp with shells on and simmer for 2–4 minutes until they are pink, opaque, and just cooked through; if using peeled shrimp, reduce time accordingly to avoid toughness.
    → The shells contribute flavor to the broth; leaving them on during cooking also helps keep the shrimp moist and juicy. Peel after serving if desired.
  • Turn off the heat and, if desired, squeeze a little extra lemon juice over the boil; taste and adjust salt or spice level, adding more Old Bay or cayenne in small increments if necessary.
    → Finishing with a touch more acidity and seasoning helps balance the dish and ensures the flavors are vibrant at service.
  • Prepare the seafood boil dipping sauce by melting 1/2 cup unsalted butter on low heat, then whisking in 2 minced garlic cloves and 1 tablespoon fresh lemon juice; season with 1/4 teaspoon salt and a pinch of red pepper flakes if desired.
    → Gentle heat prevents butter from separating; garlic and lemon create a luminous, savory condiment that complements the seafood without overpowering it.
  • Transfer the contents of the pot to a large serving platter or a lined table surface, arranging the shrimp, crab legs, potatoes, corn, and sausage in even layers for easy access; keep warm with a tent of foil if needed.
    → A presentation-friendly spread makes it easier for guests to grab portions and enjoy the variety while maintaining moisture and flavor.
  • Sprinkle 2 tablespoons chopped fresh parsley or cilantro over the spread as a bright garnish to add color and a fresh aroma just before serving.
    → Fresh herbs finish the dish with vibrant color and a crisp aroma that enhances the overall perception of freshness and balance.
  • Serve with lemon wedges on the side and a small dish of the melted garlic butter dipping sauce for dipping; provide plenty of napkins and extra bowls for shells and peels.
    → Offering generous citrus, dipping sauce, and convenient cleanup tools ensures a relaxed, enjoyable communal eating experience.

Notes

These seafood boil notes are designed to help you craft a vibrant, crowd-pleasing feast at home. Start with fresh, high-quality seafood and simmer in a well-seasoned broth built with seafood stock, bay leaves, Old Bay, smoked paprika, cayenne, and a splash of beer or white wine if you like extra depth. Keep the shrimp in their shells (and the tails on) and add crab legs in the last 5–7 minutes so they warm through without overcooking. If using sausage, sear slices in a hot pan for 1–2 minutes per side to render fat and deepen flavor before adding to the pot. Parboil larger potatoes to shorten cook time, and you can blanch corn briefly to speed things up; cut corn into manageable pieces for easy grabbing. Add lemon wedges early for bright citrus notes and finish with a squeeze of lemon over the finished boil; serve with a garlicky melted-butter dipping sauce, lightly salted and enriched with lemon juice and optional red pepper flakes. Finish with chopped parsley or cilantro for color. This dish is naturally gluten-free if you use gluten-free spice blends and skip gluten-containing beer; always read labels and adjust salt and spice to taste. Leftovers refrigerate well for a day or two and reheat gently in the broth to preserve tenderness.

Tips

Pro tips for a flavorful and efficient seafood boil.

  • Use a large pot with plenty of headspace. For the quantities listed, choose a 12–16 quart pot and a strong burner to maintain a steady simmer without overflow.
  • Prep everything in advance. Have the potatoes halved, corn cut, shrimp and crab chilled, sausage sliced, and aromatics ready so you can stay focused on the boil once it starts.
  • Parboil starches if you’re pressed for time. Parboil potatoes 5–7 minutes and corn 2–3 minutes before the main boil to shorten total cooking time and ensure even tenderness.
  • Brown the sausage first. Sear the sliced sausage in a hot dry pan for 1–2 minutes per side to render fat and deepen flavor before adding to the pot.
  • Build a robust flavor base. In the pot, render some onion in a little oil until translucent, then add garlic and let it bloom for 30–60 seconds before adding liquids and spices.
  • Deglaze to lift flavor. After browning aromatics, pour in seafood stock (and optional beer or wine) and scrape up any browned bits from the bottom for richer depth.
  • Season in layers. Start with 1/3 cup Old Bay (or a similar seafood boil blend) and 1 teaspoon smoked paprika if using. Add cayenne gradually, tasting as you go to reach your preferred heat level.
  • Keep bay leaves in until mid-simmer, then remove them. They add aroma without leaving a sharp bite; remove before serving.
  • Use citrus wisely. Add lemon wedges early to infuse brightness; finish with a squeeze of fresh lemon over the boil for a final lift.
  • Add ingredients in stages by cooking time. Begin with potatoes and corn, then sausage, followed by crab legs, and finally shrimp. This keeps everything from overcooking.
  • Shrimp last and watch the time. Large shrimp cook quickly; add them for 2–4 minutes and remove as soon as they’re pink, opaque, and curled.
  • Heat crab legs just through. Since they’re typically pre-cooked, warm them in the boil for about 5–7 minutes, breaking larger legs into smaller pieces for easier eating.
  • Maintain a lively but controlled simmer. A roaring boil can break apart delicate seafood and reduce broth too quickly; adjust the heat to keep a steady simmer.
  • Taste and adjust salt near the end. Shellfish vary in saltiness, so add salt gradually as you near service and taste with a sample of the boil.
  • Whimsical dipping sauce benefits from gentle technique. Melt butter slowly, add minced garlic, lemon juice, and a pinch of salt; a light red pepper flakes pinch adds a subtle kick if desired.
  • Finish with fresh herbs. Scatter chopped parsley or cilantro just before serving for color and a bright aroma that cuts through the richness.
  • Serving setup matters. Line a large platter with paper or parchment, use tongs and seafood crackers, and offer plenty of napkins for a hands-on feast.
  • Storing and reheating leftovers. Refrigerate promptly in shallow containers. Reheat by steaming or simmering briefly in a little broth to re-warm without overcooking.
  • Substitutions and tweaks. If Old Bay isn’t available, combine paprika, celery salt, black pepper, dry mustard, and a pinch of cayenne to mimic the flavor profile; adjust to taste.
  • Keep your workspace clean. Have a separate bowl for shells and a clean area to place finished portions to maintain flavor and avoid cross-contamination.

FAQ

Seafood Boil — Frequently Asked Questions

What is a seafood boil?

A seafood boil is a communal, one‑pot meal where shellfish (such as shrimp, crab, crawfish, mussels or clams), corn on the cob, potatoes, and sometimes sausage are boiled in a heavily seasoned, aromatized liquid. The flavors come from spice blends, garlic, lemon, and butter, and the dish is typically enjoyed by pouring the contents onto a table for casual, shareable eating.

What seafood should I choose for a boil?

Popular choices include shrimp (with shells on for flavor), crab legs or clusters, crawfish, mussels, and clams. You can mix several kinds depending on what’s fresh and affordable. If using lobster or scallops, add them closer to the end to prevent overcooking. Always use fresh or properly thawed seafood for best texture.

What spices and flavorings should I use?

Common bases are Cajun seasoning or Old Bay, garlic, onion, paprika, cayenne or chili powder, black pepper, and bay leaves. Add lemon juice or slices for brightness, and finish with melted butter or a garlic-butter sauce. Some tables also use beer or a splash of fish stock to deepen the flavor.

What other ingredients are typically included?

Potatoes and corn on the cob are staples because they absorb flavor and hold up to long simmering. Sausage (like andouille or kielbasa) is often added for extra richness. You can also include mushrooms or onions, but keep the starches and seafood the focus.

How do I cook a seafood boil step by step?

Fill a large pot with enough water to cover everything and bring to a boil. Add your spice mix, lemon, garlic, and aromatics. Parboil potatoes for about 10–12 minutes, then add corn and sausage for another 5–7 minutes. Finally, add seafood and cook until shrimp turn pink, mussels or clams open, and everything is heated through (times vary by size). Drain and spread the contents on a table or platter; toss with melted butter and extra seasonings if desired.

How do I adjust for different pot sizes or servings?

Scale the water and seasonings proportionally to the volume of ingredients. For very large groups, use a bigger pot or cook in batches to avoid overcrowding, which can dilute flavor. If you’re cooking in stages, start each batch with the spice base and combine contents before serving.

How can I tell when the seafood is cooked?

Shrimp should be opaque and pink (tails may curl). Mussels and clams should open; discard any that don’t open after cooking. Crab legs should be firm, not mushy, and lobster pieces should be opaque. Overcooked seafood becomes chewy, so watch the times closely and remove items as soon as they’re ready.

How should I serve it and what sauces or sides work well?

Traditionally served on a large table covered with newspaper or disposable parchment. Provide melted butter or garlic-butter for dipping, lemon wedges, and optional hot sauces or remoulade. Sides like crusty bread or garlic bread, pickles, and a simple green salad complement the rich flavors without overpowering them.

Can I make a seafood boil if someone has dietary restrictions or allergies?

Yes. For shellfish allergies, skip the seafood and still enjoy potatoes, corn, and sausage with a dairy-free butter substitute for dipping. If fish or shellfish are allowed for others, you can prepare a separate, fully seafood boil batch and keep it separate to avoid cross-contact.

How long do leftovers keep and how should I store/reheat?

Leftovers refrigerate well for 2–3 days in an airtight container. Reheat gently in a steamer, on the stovetop with a splash of broth, or briefly in a hot oven to avoid overcooking the seafood. Do not re‑freeze seafood after it’s thawed and cooked, as texture and flavor deteriorate.

Introduction / Hook

Imagine a plate that captures the essence of the sea—the glimmer of sunlight on gentle waves, the subtle chorus of distant boats, and the first inhale that floods your senses with a brisk, ocean-bright aroma. This seafood-focused journey invites you to taste the coastline in every bite, where the freshness of the catch meets you with a welcoming warmth. It’s not just a dish; it’s a story told through briny depths, bright citrus, and a comforting hug of velvety richness. Each forkful offers a conversation between land and sea—a culinary bridge that celebrates the bounty of oceans, rivers, and estuaries while honoring the farmers and fishers who bring those treasures to our tables. If you’ve ever watched a gull wheel above a harbor, heard the sizzle of seafood meeting a hot pan, and felt your mouth water in anticipation, you’re already halfway there. This recipe is designed to transport you to a seaside kitchen, where ingredients are simple, techniques are approachable, and the results feel indulgent without being fussy.

Seafood has a universal language, spoken in markets from Lisbon to Lagos, from Boston to Busan. It carries with it a sense of place—a region, a season, a tradition. In this preparation, we honor that heritage by weaving together the clean sweetness of fresh seafood with aromatics and a gentle, luminous sauce that lets the ocean’s own character shine through. The goal is to create something that feels both timeless and modern: a dish that works as a comforting weeknight supper, a celebratory weekend centerpiece, and a clean canvas for experimentation. It’s as much about the moment as it is about the meal—the way a table becomes a gathering place, the way stories are exchanged as steam rises and the flavors mingle. You’ll notice how the ingredients behave in harmony, not as competing personalities, but as a chorus that elevates each other to something greater than the sum of its parts.

As you read through this description, let your senses drift toward the texture—the way seafood glides apart with a light lift when you pierce it, the way the juice carries a whisper of brine, the way herbs and citrus carry brightness without overpowering the sea’s natural sweetness. Picture a gentle simmer, a quick sear, a splash of wine or broth that creates a delicate, glossy glaze, and a plate that gleams with color and life. This is seafood that feels accessible—luxurious in its aroma yet simple in its execution, designed to reward you with depth and freshness without demanding obscure ingredients or complicated techniques.

The Story Behind the Dish

Seafood, in all its glorious variety, connects cultures across coastlines and continents. The dish you’re about to explore is a reflection of that maritime tapestry—a fusion of techniques and sensibilities drawn from fishing villages, seaside markets, and kitchens that know how to coax maximum flavor from modest catches. Think of it as a modern homage to centuries of coastal cooking: fishermen returning with the day’s haul, market stalls glowing with glistening shells, and cooks turning that bounty into something that can be shared at a long table with friends and family.

Across the Mediterranean, the Atlantic, and the Pacific littoral, seafood has long been a staple of nourishment and celebration. In some traditions, the emphasis is on speed and lightness—letting the natural sweetness of the seafood take center stage—while in others, a richer, more indulgent approach sits at the heart of the dish. The common thread is respect: for the catch, for the ingredients, and for the people who prepare, present, and savor the meal together. The recipe you’ll discover honors that spirit by offering a balanced approach—an uncomplicated method that respects seasonal seafood, highlights its intrinsic flavors, and invites you to tailor the dish to your coastline, pantry, and preferences.

In many coastal communities, seafood is a communal event. It’s the centerpiece of gatherings after long days by the water, a reason to linger around a table, and a trigger for shared stories—of boats, tides, storms weathered, and harvests celebrated. This recipe aims to recreate that sense of ritual: the anticipation of a simple, elegant plate that has the power to bring people closer, sparks conversation, and leaves everyone with a memory of sunshine, salt air, and a satisfying finish that lingers on the palate.

Why You’ll Love This Recipe

  • Quick to pull together: Perfect for weeknights when you crave something comforting yet bright, with minimal mise en place and straightforward steps that don’t sacrifice flavor.
  • Showcases the best of seafood: The dish is built to let the natural sweetness and delicate textures of the catch shine, with supporting notes that enhance without overpowering.
  • Versatile and adaptable: Works with a variety of seafood combinations, seasonality, and pantry staples, making it easy to customize to what you have on hand.
  • Balanced and nourishing: A thoughtful mix of lean protein, bright aromatics, and a silky sauce that comes together without heaviness, making it satisfying without feeling indulgent.
  • Beautiful for serving: The presentation invites celebration—the colors, the glistening sauce, and the aroma combine to create a memorable table moment.
  • Family-friendly and crowd-pleasing: Gentle flavors that appeal to different ages, making it a reliable choice for gatherings, potlucks, or a special weekend dinner.
  • Perfect pairings are natural: It lends itself to complementary sides and drinks that elevate the experience, from crusty bread to crisp white wine and a bright salad.
  • Resourceful and sustainable: Embraces seasonal seafood options and encourages mindful sourcing, so you can enjoy great flavor while supporting responsible fisheries.

Flavor Profile & Texture

The dish unfolds with a symphony of sea-forward flavors and textures. The seafood itself offers a clean, sweet backbone with a gentle brininess that signals its ocean origin. Surrounding notes provide contrast and depth—aromatics that are bright but not overpowering, a touch of acidity to lift the richness, and a soft, luscious finish that coats the palate in a velvety layer. The texture journey is equally appealing: succulent, tender fillets that flake easily, tender shellfish that release their juices with a satisfying pop, and a lightly silky sauce that binds everything together without binding the seafood down.

Think of the aroma as a bridge between land and sea. A warm spray of fragrant herbs—delicate and fresh—mingles with the natural sweetness of the seafood, while a gentle kiss of citrus or zest provides a lift that makes the dish feel bright and contemporary. The sauce, while comforting in its silkiness, carries just enough body to cling to each bite, ensuring that every mouthful offers cohesion and roundness. The result is a plate that feels polished and elegant, yet approachable enough for a weeknight kitchen. It invites you to savor slowly, to notice how the flavors evolve as the dish rests and the seafood gently mingles with its aromatic companions.

Texture interplay matters here: a crisp edge from a quick sear against a tender interior, a soft, almost creamy sauce, and the occasional bite of briny, chewy shellfish that provides surprise bursts of flavor and contrast. The overall balance is one of harmony—nothing overwhelms; everything contributes. When you take a bite, you should experience a sense of coastal air and sun-warmed seafood, tempered by the gentle tang of a bright note, and then finished with a lingering, comforting finish that invites a second bite rather than calling for a quick finish.

Occasions & Pairings

This seafood-inspired dish shines on a spectrum of occasions. It’s equally at home for a quiet weeknight dinner when you want something nourishing and satisfying, as it is for a celebratory weekend meal with friends and family. If you’re hosting a dinner party, the dish scales beautifully—serve it with a simple grain or a bed of greens for an elegant, effortless table. Its versatility makes it a reliable favorite for holidays that celebrate the sea and its flavors, such as coastal-inspired feasts, summer gatherings, or a special Father’s Day or Mother’s Day treat where seafood takes center stage.

Pairings elevate the experience without overshadowing the delicate notes of the dish. Consider crusty, warm bread to soak up any remaining sauce and juices. A crisp, mineral-driven white wine or a light sparkling wine helps to cut through the richness and keep the palate refreshed between bites. For non-alcoholic options, a chilled citrus-infused water or a subtly salted beverage can mimic the crisp, refreshing finish that wine provides. A bright, fresh salad with fennel, cucumber, and citrus adds a refreshing counterpoint, while a side of simple roasted vegetables or a light grain like quinoa or rice helps round out the plate. If you’re in the mood for a comforting contrast, a small dollop of mashed potatoes or a creamy polenta offers a comforting, indulgent pairing that still allows the seafood to shine.

For seasonal inspiration, tailor the dish to what your local markets offer. Spring brings delicate, sweet shellfish and younger greens; summer offers a bounty of briny fish and plump shellfish; autumn delivers heartier, richer seafood; winter can be brightened with citrus and herbs and a touch of warmth from a flavorful stock. By aligning with seasonal seafood, you not only optimize taste but also support sustainability and quality in your cooking. The right season can accentuate the dish’s aroma and texture, making every bite feel like a small celebration of the moment’s harvest.

Tips, Variations & Substitutions

  • Flexibility with seafood: This dish is forgiving and adaptable. You can mix and match different proteins—white fish fillets, shrimp, clams, mussels, or even calamari—to suit what you have on hand or what’s fresh at the market. The key is to maintain balance so that no single element overwhelms the others.
  • Seasonality and sourcing: Seek the freshest possible seafood, ideally sustainable and responsibly sourced. If you can’t find a particular variety, consider substitutes that offer similar texture or sweetness. For example, a flaky white fish can stand in for another mild, delicate variety, while shellfish can provide a different but complementary bite.
  • Flavor scaffolding: Rather than relying on a long list of ingredients, focus on a few bright, aromatic elements that lift the natural flavors of the seafood. Citrus zest or bright juice, a touch of aromatic herbs, and a gentle savory component can transform simple seafood into something vibrant and cohesive.
  • Vegan/vegetarian option: For a plant-based adaptation, you can use mushroom “seafood” substitutes or heartier vegetables with a similar mouthfeel, paired with a light, flavorful sauce that emphasizes brightness and umami from miso, mushrooms, seaweed, or nutritional yeast. The technique remains respectful to the idea of a seafood-inspired dish while offering a compassionate alternative.
  • Gluten considerations: If you’re avoiding gluten, ensure any thickeners or sauces used are gluten-free. The dish’s core flavors can remain intact without relying on gluten-based components, keeping the texture light and elegant.
  • Regional twists: Add a Mediterranean touch with herbs like dill and parsley, a hint of saffron for warmth, or a splash of white wine to create a subtle, coastal essence. A rustic Provençal or Italian influence can emerge with olive oil, garlic, and herbs—carefully balanced so the seafood remains the star.
  • Heat level: The dish can be prepared with a gentle warmth or a mild kick depending on your audience. If serving kids, keep spices mild and emphasize the seafood’s natural sweetness. For adults, a whisper of chili flakes or cracked black pepper can add nuance without overpowering the dish.

Storage & Make-Ahead Ideas

Seafood is best enjoyed fresh, but there are practical ways to handle leftovers and plan ahead. If you anticipate making this dish for a future meal, consider the following strategies to preserve quality and flavor:

  • Store leftovers promptly in a shallow, airtight container in the refrigerator. For best texture, aim to eat within 1–2 days after cooking.
  • To freeze, cook thoroughly and then freeze in a freezer-safe container. Label with date and use within 1–2 months for optimal flavor and texture. Note that texture can change after freezing, especially for delicate fish; plan to reheat gently to minimize firmness loss.
  • Reheating tips: Reheat slowly on low heat in a covered pan with a splash of broth or water to restore moisture. Avoid high heat that can make seafood rubbery. If you used a sauce, reheat it separately and then combine with the seafood to maintain gloss and texture.
  • Make-ahead ideas: You can prep aromatics (chopping herbs, zesting citrus, mincing aromatics) in advance, so assembly goes quickly on the day you plan to serve. If you’re hosting, consider pre-cimming the sauce to finish with the seafood just before serving, preserving the bright, fresh finish.
  • Storage for sides: If you’re serving alongside grains or vegetables, you can prepare those ahead of time and gently reheat or refresh them to serve with the seafood. Crisp textures in vegetables, for example, are best added close to serving time to maintain their bite.

Fun Facts & Trivia (Optional)

Did you know that the ocean provides an astonishing diversity of flavors, textures, and colors that can be coaxed into countless preparations? Here are a few tidbits to enrich your appreciation for seafood and the dining experience surrounding it:

  • The term “seafood” covers a broad spectrum, including fish, shellfish, and mollusks. Each category brings its own character to a dish, from the delicate flakes of white fish to the briny pop of shellfish and the bracing, mineral notes of mollusks like oysters and clams.
  • Texture and aroma are as important as flavor in seafood dishes. A quick sear can seal in juices and create a contrast between crisp exterior and tender interior, while a gentle simmer can yield a sauce that clings gracefully to every bite.
  • Seasonality matters. The peak flavor of seafood often coincides with fishing seasons and local harvest cycles, which means freshness—and sustainability—are more readily achieved when you shop with the local calendar in mind.
  • Oceans beyond flavor: Sustainable seafood choices not only taste better but also support healthier marine ecosystems. When possible, look for certifications or guidance from trusted seafood guides in your region to choose species that are abundant and harvested responsibly.
  • Pairing idea: A light, crisp white wine with mineral notes is frequently an excellent companion to seafood, as it can highlight the dish’s brightness and cleanse the palate between bites. For non-alcoholic options, a sparkling water with a squeeze of citrus offers similar refreshment and balance.

In the end, this seafood-centered dish is about more than satisfying hunger—it’s about connecting with the sea’s generosity and sharing that bounty in a way that feels effortless and elevated. It invites you to celebrate the ocean’s gifts with simple, confident technique, to honor seasonal availability, and to gather around a table where conversation and aroma mingle as warmly as the flavors themselves. May each bite carry you to a sunlit shoreline, a harbor breeze, and a sense of contentment that lingers long after the plate is cleared.

Ingredients

Seafood Stew

    – 1 lb firm white fish fillets (cod, halibut, or sea bass), cut into 1-inch pieces
    → Role: provides the main protein with flaky texture that soaks up the tomato-based broth. Handling: trim any small bones, pat dry, and cut into even chunks to ensure uniform cooking. Tips: choose fresh fish with a clean ocean scent; if using thawed fish, pat dry to reduce excess moisture and help the stew reduce properly. Do not overcook the fish; add toward the end of simmering to keep pieces tender.
    – 1/2 lb shrimp, peeled and deveined
    → Role: adds sweetness and a succulent, meaty bite to the stew. Handling: rinse and pat dry; tails are optional depending on presentation. Tips: add in the final 2–3 minutes of cooking so they stay tender and just-cooked; if using frozen shrimp, thaw completely and pat dry to prevent extra moisture from diluting the broth.
    – 1/2 lb mussels or clams, scrubbed and debearded (optional)
    → Role: contributes briny depth and a dramatic, shell-on presentation. Handling: scrub shells, remove beards, and discard any open shells. Tips: soak briefly if very sandy; add after the base has simmered and cook until shells open. Discard any shells that do not open.

Aromatics & Vegetables

    – 1 medium onion, finely chopped
    → Role: builds the savory base with natural sweetness; Handling: dice finely for even cooking and smoother texture. Tips: yellow onions give balanced sweetness; red onions will add color but still work well.
    – 3 cloves garlic, minced
    → Role: provides the dish’s aromatic backbone and depth; Handling: mince finely or crush lightly to release more oils. Tips: add after onions to prevent burning; stir frequently to avoid scorching and bitterness.
    – 1 celery stalk, finely chopped (optional)
    → Role: adds crunch and a subtle herbal note; Handling: chop small to blend into the base. Tips: optional if you want a lighter broth; celery also contributes moisture and aroma.
    – 1 carrot, finely chopped (optional)
    → Role: contributes natural sweetness and color; Handling: dice small for even cooking. Tips: adds body to the broth; parsnip can be substituted for a different sweetness profile.
    – 1 tablespoon olive oil
    → Role: base fat for sautéing aromatics and releasing flavors; Handling: use extra-virgin for a fruity, premium flavor. Tips: heat the pot until the oil shimmers before adding aromatics; avoid smoking the oil.

Tomatoes & Liquids

    – 1 can (28 oz) crushed tomatoes
    → Role: forms the rich, tomato-forward broth that carries seafood flavors. Handling: choose crushed for a smooth yet rustic texture; tips: for a silkier broth, blend the tomatoes briefly before adding.
    – 1 cup dry white wine (or additional fish stock)
    → Role: deglazes the pot, adds acidity and depth; Handling: pour in after aromatics have softened to lift browned bits from the bottom. Tips: use a dry wine such as Sauvignon Blanc or Pinot Grigio; substitute with extra stock or water plus a splash of lemon juice if avoiding alcohol.
    – 1–2 cups fish stock or water
    → Role: builds the broth thickness and body; Handling: adjust to desired consistency. Tips: use low-sodium stock to control saltiness; warm the stock before adding to maintain a steady simmer.
    – 2 tablespoons tomato paste (optional)
    → Role: intensifies tomato flavor and adds body to the broth; Handling: whisk into the simmering liquid to eliminate lumps. Tips: optional but helpful for a deeper, meatier sauce.

Herbs & Seasonings

    – 2 tablespoons chopped fresh parsley (plus extra for serving)
    → Role: adds bright, fresh herbal aroma and color; Handling: chop just before use to maximize scent. Tips: reserve some for garnish; parsley at the end keeps its vibrant flavor.
    – 1 teaspoon dried oregano or thyme
    → Role: introduces earthy herb notes that complement tomato and seafood; Handling: use sparingly to avoid overpowering seafood. Tips: if using thyme, strip leaves from the stems; oregano pairs well with tomato-based sauces.
    – 1 bay leaf
    → Role: provides a subtle aromatic layer that deepens the broth; Handling: add during simmer and remove before serving. Tips: it adds complexity without a strong taste, great for a more rounded flavor.
    – 1/2 teaspoon smoked paprika (optional)
    → Role: adds warm, smoky nuance to the broth; Handling: stir in during simmer to release its aroma. Tips: optional but enhances depth without heat; use sweet paprika if you prefer milder flavor.
    – Salt and freshly ground black pepper, to taste
    → Role: essential to balance and enhance seafood flavors; Handling: season gradually and taste as you go. Tips: salt the stock first if using store-bought stock; adjust salt at the end after seafood has released its own moisture.
    – Pinch of red pepper flakes (optional)
    → Role: provides a gentle heat to balance sweetness; Handling: add a small pinch and taste, increase if you like more heat. Tips: keep optional for sensitive palates or children.

Finish & Garnish

    – 1 tablespoon fresh lemon juice
    → Role: brightens the broth and enhances the natural sweetness of the seafood; Handling: add at the end of cooking to preserve citrus brightness. Tips: use freshly squeezed lemon juice and consider a touch of zest for extra aroma.
    – Lemon wedges or extra chopped parsley, for serving
    → Role: optional finish that adds fresh acidity and color; Handling: arrange on each plate for individual brightness. Tips: serve with wedges for diners to adjust acidity; parsley adds fragrance and a fresh look.

Instructions

  • Prep the seafood: Pat dry the fish fillets and cut into uniform 1-inch pieces; pat dry the shrimp after peeling and deveining; scrub mussels or clams, remove beards, and discard any shellfish that is open or smells off.

    → These steps ensure the seafood sears and cooks evenly with minimal added moisture, prevent gritty textures from shellfish, and safeguard against spoiled items. Tips: choose fresh, firm fish with a clean ocean scent; rinse mussels just before cooking and discard any with broken shells.
  • Chop aromatics: Finely dice the onion; mince the garlic; finely chop the optional celery and carrot if using; this creates a consistent base and ensures even extraction of sweetness and aroma.

    → Finely diced vegetables release flavor quickly and blend smoothly into the broth, while exposing maximum surface area for sautéing; keep hands steady with a sharp knife to avoid slipping.
  • Heat the olive oil: In a large heavy pot or Dutch oven, heat 1 tablespoon olive oil over medium heat until it shimmers; swirl to coat the bottom before adding aromatics.

    → A shimmering oil forms a nonstick surface for the vegetables and helps extract flavor; avoid smoking the oil which would impart bitter notes.
  • Sauté the aromatics: Add the onion (and carrot/celery if using) to the pot and cook, stirring occasionally, until the onion is translucent and edges begin to caramelize, about 5–7 minutes; season with a pinch of salt.

    → Sweat the aromatics to develop sweetness and depth; gentle heat prevents harsh flavors and ensures even cooking across pieces.
  • Garlic infusion: Add the minced garlic and sauté for 30–60 seconds until fragrant; stir continuously to prevent burning.

    → Garlic can scorch quickly and turn bitter; adding after the onions season ensures a bright, aromatic base rather than a burned taste.
  • Braise with tomato paste (optional): If using, stir in 1 tablespoon tomato paste and cook for 1–2 minutes until it deepens in color and adheres to the vegetables.

    → Blooming tomato paste concentrates sweetness and thickens the sauce, enriching the overall tomato character without relying solely on crushed tomatoes.
  • Add crushed tomatoes: Pour in the 28-ounce can of crushed tomatoes and mix with the aromatics; bring to a gentle simmer to meld flavors.

    → The crushed tomatoes create a smooth yet rustic broth that carries seafood flavors and provides body; gentle simmer prevents splashing and preserves color.
  • Deglaze with wine: Pour in 1 cup dry white wine and scrape the bottom of the pot with a wooden spoon to lift browned bits; simmer until the liquid reduces by about half.

    → Deglazing integrates caramelized fond into the broth, adding depth and acidity; reducing the wine concentrates its flavors and prevents watery results.
  • Build the broth: Add 1–2 cups warm fish stock or water, 1 bay leaf, and 1 teaspoon dried oregano or thyme (and 1/2 teaspoon smoked paprika if using); season with salt and pepper and bring to a gentle simmer.

    → Stock provides body and moisture; herbs and paprika introduce depth and warmth; simmering early allows flavors to meld before adding seafood, while careful seasoning prevents oversalting later.
  • Simmer the base: Let the tomato-based broth simmer gently, partially covered, for 15–20 minutes to concentrate flavors and harmonize the tomato, herbs, and aromatics.

    → Slow simmer reduces acidity and thickens the sauce slightly, creating a robust foundation for delicate seafood to shine without being overwhelmed.
  • Cook the fish: Gently add the 1-inch fish pieces to the simmering broth in a single layer; nestle them into the sauce and cook without stirring for 5–7 minutes until the fish is opaque and flakes easily when tested.

    → Gentle, even cooking preserves the fish’s texture and prevents breakage; testing with a fork ensures you stop cooking as soon as the center turns opaque.
  • Open the shellfish: Add the cleaned mussels or clams to the pot, cover, and simmer for 4–6 minutes until shells open; discard any shells that remain closed after cooking.

    → The shellfish release their briny juices into the broth, enriching the sauce; opening shells indicate doneness and freshness; discard unopened shells for safety.
  • Finish the seafood: Stir in the peeled shrimp and simmer for 2–3 minutes until they turn pink and are just cooked through; remove the pot from heat promptly to avoid overcooking.

    → Shrimp cook quickly and become tough if overcooked; adding them at the end preserves their delicate texture and sweetness in the final dish.
  • Finish and brighten: Remove the bay leaf, stir in 1 tablespoon fresh lemon juice, and adjust salt and pepper to taste; sprinkle chopped parsley over the surface for color and aroma.

    → Lemon lifts the seafood flavors and balances tomato acidity; fresh parsley adds brightness and a vibrant finish that carries through the aroma when served.
  • Serve: Ladle the seafood stew into warmed bowls and garnish with lemon wedges or extra parsley; present with crusty bread to soak up the flavorful broth.

    → A hot, fragrant bowl with a bright finish and complementary bread enhances the dining experience, offering textural contrast and a satisfying meal.

Notes

These seafood stews are a nourishing, one-pot meal featuring tender white fish, shrimp, and briny mussels or clams simmered in a rich tomato broth. You can customize them by swapping in your favorite seafood varieties or adding vegetables like fennel, celery, or peppers for extra sweetness and texture. They refrigerate and freeze well and reheat beautifully, making them perfect for make-ahead dinners. For an extra brightness, finish with fresh lemon juice and a drizzle of olive oil, and serve with crusty bread or over rice for a heartier meal. Always season in layers: taste the broth after the seafood has cooked and adjust salt and acid at the end to balance the flavors, especially if you used store-bought stock.

Tips

Tips for Perfect Sea Food Stew

  • Choose the freshest seafood you can find: firm white fish fillets, lively mussels or clams, and plump shrimp. If using thawed fish, pat dry to help the broth reduce properly and avoid extra moisture.
  • Prep mise en place: have all aromatics chopped (onion, garlic, celery, carrot) and measured before you start simmering to maintain a steady, controlled cook.
  • Saute aromatics gently: cook onions until translucent and soft, then add garlic. Browning can introduce bitterness; keep the heat moderate and stir frequently.
  • Deglaze to lift flavor: after sauteing, deglaze with the white wine to dissolve caramelized bits on the bottom; simmer until the wine reduces by about half to concentrate its acidity and aroma.
  • Tomato base options: crushed tomatoes give a smooth, rustic texture. For a silkier broth, briefly blend the tomatoes or purée a portion before adding to the pot.
  • Thicken and balance: whisk in tomato paste (if using) to deepen color and body. Start with 1 tablespoon and adjust to desired richness.
  • Stock strategy: warm stock or water before adding to maintain a steady simmer. Use low-sodium stock to better control salt levels; adjust seasoning later.
  • Herb and spice timing: bay leaf can go in early to perfume the broth; add chopped parsley at the end to preserve its bright aroma; oregano or thyme can be added early but use sparingly so they don’t overpower seafood.
  • Season gradually: seafood releases moisture and salt as it cooks; taste the broth as you go and adjust seasoning toward the end rather than at the start.
  • Seafood timing cheat sheet: add fish toward the end so it stays tender, shrimp in the final 2–3 minutes, and mussels/clams after the base has simmered and cook until their shells pop open. Discard any that do not open.
  • Shellfish prep: scrub mussels/clams, remove beards, and discard any broken or open shells; soak very sandy shellfish briefly if needed.
  • Heat and spice adjustability: a pinch of red pepper flakes adds warmth without heavy heat; smoked paprika offers a smoky depth without adding heat—adjust to taste.
  • Finish with brightness: finish with fresh lemon juice right at the end to lift the flavors; a hint of lemon zest can amplify aroma without souring the broth.
  • Garnish and serving: reserve some parsley and lemon wedges for serving; serve with crusty bread to soak up the flavorful broth.
  • Make-ahead and leftovers: this stew tastes great the next day as flavors meld; reheat gently over low heat to avoid overcooking delicate seafood.

FAQ

What counts as seafood?

Seafood includes fish, shellfish, mollusks, and crustaceans. Examples: salmon, shrimp, clams, scallops, oysters, mussels, crab, lobster, squid. It can be wild-caught or farmed.

Is seafood healthy?

Seafood provides high-quality protein and often contains heart-healthy omega-3 fatty acids, vitamins D and B12, and minerals like selenium. Fatty fish (e.g., salmon, mackerel) are especially nutrient-dense.

How can I tell if seafood is fresh?

Fresh fish should have clear eyes, bright, shiny skin, and firm flesh that springs back when touched, with a mild ocean scent. Shellfish should smell like the sea and be alive or tightly closed; discard shells that are cracked or do not close when tapped.

How should I store seafood before cooking?

Keep seafood cold at 32–40°F (0–4°C). Use within 1–2 days for most fish and shellfish. Store in the original packaging or a shallow tray on ice in the fridge, draining excess water. Do not keep raw seafood at room temperature.

How do I thaw frozen seafood safely?

Best: thaw in the refrigerator overnight. For quicker thawing, seal in a bag and submerge in cold water, changing the water every 30 minutes. Do not thaw at room temperature, which can promote bacterial growth.

How do I cook fish vs shellfish?

Fish can be baked, broiled, pan-seared, grilled, or poached. Shellfish (shrimp, mussels, clams, oysters, crab, lobster) are commonly steamed, boiled, or roasted. Cook fish to an internal temperature of 145°F (63°C) and shellfish until their shells open (discard ones that stay closed).

How long does seafood take to cook?

Times vary by type and size. As a rough guide: fish fillets 1 inch thick take about 8–12 minutes in the oven; shrimp take 2–3 minutes per side; scallops 2–3 minutes per side; clams and mussels steam for 5–7 minutes until they open. Always check doneness, not just time.

Are there common seafood allergies and safety tips?

Shellfish is a common allergen; fish allergies also occur. If you are allergic, avoid the seafood and cross-contact with utensils and surfaces. Read labels, wash hands and surfaces after handling, and consult a doctor about emergency plans if there’s a risk of severe reaction.

How do I choose sustainable seafood?

Look for certifications such as MSC (Marine Stewardship Council) or ASC (Aquaculture Stewardship Council). Prefer locally sourced, seasonal options and avoid species that are overfished. Ask your fishmonger for sustainable choices and check reputable guides from NOAA or seafood sustainability organizations.

What are common mistakes to avoid when cooking seafood?

Avoid overcooking, which dries out or tightens the flesh. Don’t overcrowd the pan, season appropriately, and avoid cross-contamination between raw and cooked seafood. thaw properly, and let seafood rest briefly after cooking to retain moisture.

Introduction / Hook

Imagine a plate that feels like a celebration, where each bite is a velvet ribbon of richness woven with the ocean’s kiss. Lobster ravioli sauce is more than a condiment; it’s a sensorial journey that begins with the gleam of lobster meat and ends in a creamy, citrus-bright finish that makes the room feel warmer. The sauce that accompanies lobster-stuffed ravioli is the quiet star of the show—sophisticated, luxurious, and surprisingly comforting all at once. Think of it as a bridge between refined Italian technique and the briny, sun-warmed flavors of the sea. The first aroma—salt and butter mingling with a whisper of garlic, the whispering sizzle of shallots, and a glassy sheen of white wine—promises a dish that is both timeless and modern. This isn’t just pasta with filling; it’s an edible memory you can carry to the table, a moment of restaurant-caliber elegance that you can recreate at home without needing a private chef or a pantry full of rare ingredients.

The Story Behind the Dish

Ravioli, in its many forms, has always carried a lineage of coastal inspiration and regional creativity. The concept of pairing delicate, rapturous seafood with the gentle decadence of cream and butter traces back to Mediterranean kitchens that learned early on to balance luxury with approachability. When chefs began to pair lobster with pasta, they weren’t simply combining two beloved textures; they were crafting a narrative—one that speaks of markets by the sea, of brick ovens warmed by aromatic breads, and of long, gleaming summers where dinners stretch into twilight. The lobster ravioli itself suggests a tradition of handmade pasta; the sauce, a velvety homage to the shellfish’s natural sweetness, elevates the humble ravioli into a chorus where every component has its part to sing.

In many culinary journeys, “seafood with cream” is a gateway dish—easy enough to make at home, yet indulgent enough to feel special. The sauce that accompanies lobster ravioli often borrows from classic seafood bisques and white wine reductions, borrowing their brightness and depth while letting the lobster’s flavor remain the star. It’s a story told in layers: the firm bite of the pasta, the tender morsel inside, and the sauce that ties everything together with a kiss of citrus, a hint of herb, and a glossy, unctuous finish. It’s also a tale of adaptation—an Italian technique embraced by coastal cooks across oceans and cultures who understand that the best sauces respect the seafood, never overpower it.

Why You’ll Love This Recipe

  • Luxurious flavor without endless labor: a sauce that tastes restaurant-worthy but is approachable enough for a dinner at home.
  • Balanced richness: a creamy, buttery base that carries lobster sweetness and a bright citrus note to keep the dish lively.
  • Textural harmony: the smooth sauce, the tender ravioli, and occasional bite of lobster morsels create a pleasing contrast that excites the palate.
  • Versatile pairings: works beautifully with simple greens, crusty bread, or a light risotto, letting the sauce shine without competing flavors.
  • Make-ahead friendly: elements of the sauce can be prepared in advance and finished with fresh pasta for a speedy weeknight luxury.
  • Elegant yet forgiving: you can adjust richness, brightness, and salt balance to suit your preferences, making it suitable for dates, holidays, or everyday celebrations.

Flavor Profile & Texture

The hallmark of a great lobster ravioli sauce is its ability to be simultaneously creamy and bright, indulgent yet clean enough to let the seafood shine. The base tends to be a careful fusion of dairy richness and a wine-driven acidity that lifts the sweetness of the lobster. A small amount of alcohol, often a crisp white wine, adds a subtle tang and complexity, while a touch of citrus—such as lemon zest or a whisper of orange—brightens the finish, preventing any heaviness from overwhelming the palate. Butter contributes a silken sheen, lending a satin finish that coats the tongue, while a mild garlic or shallot undertone provides depth without turning the sauce into a garlicky storm. If you imagine the perfect seafood sauce, this isn’t a heavy alfredo or a shy butter sauce; it’s a confident, eloquent liaison of sea and land, of sea-kissed sweetness and dairy-luxury, finally tied together with a whisper of herbs that sing rather than shout.

Texture-wise, you’ll experience a glossy, almost glassy surface that glides across the ravioli, a velvety mouthfeel that lingers pleasantly yet doesn’t cling too heavily. Small bits of lobster meat add occasional tenderness and a burst of brine that reminds you you’re tasting real shellfish, not a flavor impersonation. The pasta’s delicate bite contrasts with the sauce’s creaminess, creating a harmony that is both comforting and sophisticated. Aromatics—think a bay leaf, a splash of citrus oil, and a hint of fresh herbs—dress the sauce like a scarf, giving it a scent first, a taste second. This layered approach makes each forkful feel like a new experience, from the initial citrus lift to the lingering buttery finish that invites the next bite without saturation.

Occasions & Pairings

Lobster ravioli with a luxurious sauce is a dish tailor-made for special occasions, yet it can be adapted for quieter weeknights that deserve a touch of glamour. Consider these scenarios and pairing ideas to get the most from this dish:

  • an elevated starter or centerpiece that announces a celebration without requiring an entire menu overhaul.
  • a restaurant-caliber experience at home, ideally served with soft candlelight and a crisp, refreshing drink to balance the richness.
  • a stunning main course or first course that leaves guests feeling indulged and impressed, with room for lively conversation around the table.
  • Weeknight upgrade: when you want something luxurious but still doable in a reasonable timeframe, especially if you prep components in advance.

Pairing ideas:

  • White wines: a classic, such as a Chardonnay with moderate oak, or a Sauvignon Blanc for a crisp, citrusy lift. The wine’s acidity helps carve through the sauce’s richness.
  • Greens and textures: a bright arugula salad with a lemon vinaigrette, or wilted spinach with garlic (if you’re comfortable with a little extra aromatics).
  • Accompaniments: crusty garlic bread or a light, herbaceous risotto that won’t overshadow the main course.
  • Side show desserts: a light citrus-forward dessert, like a lemon panna cotta, to echo the zest in the sauce and finish cleanly.

Tips, Variations & Substitutions

Core ideas

While the heart of this sauce is the harmonious blend of lobster sweetness, dairy richness, and citrus brightness, you can tailor it to your pantry, dietary needs, or mood without losing the essence. The following ideas offer flexible directions rather than rigid instructions, so you can apply them as you see fit.

  • Rice or pasta pairing: Although ravioli is the star, this sauce works beautifully with other shapes that cradle the sauce—fettuccine, pappardelle, or even smaller filled pastas that capture the sauce well.
  • Herbs: Fresh chives, tarragon, or flat-leaf parsley add a fleeting brightness that can lift the dish without overshadowing the lobster’s sweetness.
  • Seafood variations: If lobster isn’t available, you can softly substitute with crab meat, shrimp, or a combination of shellfish to keep the seafood-forward profile intact.
  • Vegan or dairy-free options: To keep the concept while avoiding dairy, you can attempt a rich coconut cream base with a lobster-flavoring element such as seaweed or mushroom umami, though the lobster itself would be replaced by plant-based alternatives for a fully vegan version.
  • Gluten-free approach: Use gluten-free pasta or ravioli; the sauce itself remains naturally gluten-free, so it’s a good way to keep the dish inclusive.

Flavorful twists

  • Substitute part of the cream with a lighter stock reduction to coax more of the sea’s brightness into the sauce.
  • Infuse a small amount of saffron or-white wine reduction for a subtle, exotic aroma that pairs nicely with lobster’s sweetness.
  • Add a dash of white pepper for a gentle aromatic heat that doesn’t overwhelm.
  • Finish with a drizzle of high-quality extra virgin olive oil to add a fruity note and a satin finish just before serving.

Storage & Make-Ahead Ideas

When you’re planning a special meal, the idea of making components ahead of time is appealing. Here are practical ways to manage sauce components and leftovers without sacrificing quality.

  • Make-ahead: The sauce base can be prepared in advance up to a point, especially when you are balancing flavors and reducing. If you do this, cool promptly and refrigerate in an airtight container; reheat gently while whisking to re-emulsify if needed.
  • Leftovers: Store leftovers in the fridge for up to 2-3 days. Reheat slowly over low heat, adding a splash of cream or a little pasta water to adjust the texture if it thickens too much.
  • Freezing: Freezing a cream-based lobster sauce is not ideal, as dairy can separate and the texture may suffer. If you must freeze, do so with the understanding that you may need extra whisking and a gentle emulsification when reheating to restore gloss and smoothness.
  • Pasta storage: Cooked ravioli should be stored separately from the sauce if you’re preparing ahead; otherwise, toss lightly to prevent sticking and reheat together with minimal additional moisture for best results.

Fun Facts & Trivia (Optional)

  • The culinary memory of lobster as a celebratory food dates back to coastal cultures where lobster harvests were bountiful and cooking traditions turned abundance into hospitality.
  • Ravioli fillings can be a canvas for regional flavors: from crab and herbs in coastal Italian kitchens to ricotta and spinach in others, but the sauce that accompanies them often carries the sea’s memory with it.
  • In high-end kitchens, a lobster sauce may be finished with a whisper of citrus oil or a tiny amount of lobster bisque reduction, a nod to classic seafood sauces while keeping the dish contemporary and light on its feet.
  • Texture matters as much as flavor: the contrast between the tender ravioli and the smooth, glossy sauce is central to the overall experience, a reminder that great pasta lives at the intersection of technique and imagination.

Inspiration & The Perfect Moment

For those who love the theater of a well-prepared plate, this lobster ravioli sauce offers a moment where technique and luxury meet warmth and hospitality. It’s not merely about following a recipe; it’s about crafting an edible moment that invites conversation, slows time a little, and makes everyone around the table feel cared for. A sauce like this can turn a simple dinner into a memory—the way a fragrance can transport you to a favorite restaurant, or how the first bite lingers, inviting another. The sauce’s brightness, its silky texture, and the gentle saline kiss of lobster together conjure a coastal sunset—soft light, a breeze that carries hints of citrus, and the promise that good food can carry us to places both familiar and new.

Closing Thoughts

Whether you’re cooking for a romantic evening, a family gathering, or simply indulging in a personal culinary retreat, lobster ravioli with a luscious, well-balanced sauce offers a blueprint for making the ordinary extraordinary. It invites you to savor the luxury without pretension, to appreciate the elegance of a simple, well-assembled sauce, and to remember that great dining is as much about the story told by its flavors as the flavors themselves. As you plate this dish, consider the journey from sea to table—the lobster’s sweetness, the silky embrace of cream and butter, the light lift of wine and citrus—and savor the moment when the kitchen becomes a stage for something truly memorable.

Ingredients

Lobster Ravioli Sauce
Lobster & Aromatics

  • 1 cup cooked lobster meat, chopped
    → Use claw and tail meat from a fully cooked lobster; chop into bite-sized pieces so the sauce coats evenly and each bite includes lobster texture. If starting with raw lobster, cook until opaque, then dice; pat dry thawed meat to minimize extra moisture and fold in gently at the end to preserve chunks.
  • 2 tbsp unsalted butter
    → Start the sauce by melting butter over medium heat; it provides a rich, silky base and carries the aromatics. Using unsalted butter lets you control the final salt level; you can combine with a little olive oil to raise the pan’s heat tolerance and prevent browning the butter.
  • 1 tbsp olive oil
    → Adds extra fat and helps prevent butter from burning during sautéing. Choose a good-quality extra-virgin olive oil for flavor; if dairy-free is desired, you can increase oil and omit butter, keeping heat moderate to avoid scorching.
  • 2 shallots, finely minced
    → Shallots provide a subtle, sweet onion-like sweetness that complements seafood without overpowering it. Finely mince so they soften quickly and blend into the sauce; sauté until translucent and just starting to color, avoiding browning which can introduce bitterness.
  • 2 garlic cloves, minced
    → Garlic adds aromatic depth to the base. Add after the shallots and sauté briefly until fragrant (about 30 seconds); avoid browning to prevent acrid notes that can clash with delicate lobster flavor.

Sauce Base & Liquids

  • 1/2 cup dry white wine
    → Deglaze the pan after sautéing aromatics to lift any browned bits and introduce acidity. Choose a dry, crisp wine such as Sauvignon Blanc or Pinot Grigio; simmer until reduced by about half to concentrate flavor and prevent watery sauce. If you prefer no alcohol, substitute with additional lobster stock and a splash of lemon juice.
  • 1 cup lobster stock or seafood stock
    → Provides depth of shellfish flavor to the sauce. If making stock from shells, simmer shells with aromatics for 20–30 minutes, strain, then measure. Use low-sodium stock and adjust salt at the end to avoid oversalting.
  • 2 tbsp tomato paste
    → Adds color, body, and a subtle sweetness; bloom it with the aromatics to deepen flavor before adding wine and stock. This helps the sauce emulsify with cream and prevents a raw-tomato finish.
  • 1 cup heavy cream
    → Gives the luxurious, silky body that coats pasta and lobster pieces. Simmer gently after adding to prevent curdling; for lighter texture, you can mix in half-and-half, but heat must remain gentle and gradual to maintain smoothness.
  • 1-2 tbsp fresh lemon juice
    → Provides bright acidity to balance richness. Add gradually and taste as you go; lemon juice can curdle cream if added too early or boiled, so adjust toward the end of cooking.
  • Zest of 1/2 lemon (optional)
    → Adds fragrant citrus oils for extra brightness. Use a microplane to grate finely and fold in near the end to preserve aroma; if you skip the zest, rely on the juice for brightness.

Seasoning & Finishing

  • Salt, to taste
    → Season progressively; lobster stock and butter contribute salt, so taste after each addition. You want the sauce to be well-seasoned but not overly salty, since the lobster itself adds flavor and saltiness.
  • Freshly ground black pepper, to taste
    → A light crack of pepper enhances seafood flavors; grind just before using and taste after reductions to achieve a balanced finish.
  • Pinch of red pepper flakes (optional)
    → Adds a subtle warmth that complements the sweetness of lobster. Start with a small pinch and adjust based on heat tolerance.
  • 2 tbsp chopped fresh parsley or chives (or tarragon)
    → Fresh herbs brighten the sauce and add color. Add toward the end to preserve aroma; if using dried herbs, reduce to a pinch and add earlier, but fresh is preferred for this dish.
  • 1 tbsp cold butter, for finishing (optional)
    → Monter au beurre: whisk in small cubes of cold butter off the heat to emulsify and create a glossy, luxurious finish. Do not boil after adding the butter to maintain a smooth, cohesive sauce.
  • 1–2 tbsp cognac or brandy, to deglaze (optional)
    → Adds depth and a subtle, warm aroma; you can flambé safely if desired, or simmer briefly to cook off alcohol. If avoiding alcohol, substitute with an extra splash of stock and a touch more lemon for brightness.

Optional Add-ins

  • 1/2 cup roasted red peppers, diced (optional)
    → Provides color and a gentle sweetness that pairs nicely with lobster. Roasted peppers can be jarred or fresh; dice finely and stir in near the end to maintain texture without overpowering the lobster.
  • 1–2 tbsp chopped fresh chives (optional)
    → Finishing herb that adds a delicate onion note and bright green color. Sprinkle at the very end to preserve aroma and vibrancy.

Instructions

  • Prepare mise en place for the lobster ravioli sauce by measuring and arranging all ingredients: 1 cup cooked lobster meat, 2 tbsp unsalted butter, 1 tbsp olive oil, 2 shallots (finely minced), 2 garlic cloves (minced), 1/2 cup dry white wine, 1 cup lobster stock, 2 tbsp tomato paste, 1 cup heavy cream, 1-2 tbsp fresh lemon juice, zest of 1/2 lemon (optional), salt, black pepper, pinch of red pepper flakes (optional), 2 tbsp chopped fresh parsley or chives (or tarragon), 1 tbsp cold butter (optional), 1-2 tbsp cognac or brandy (optional), and any optional add-ins like 1/2 cup roasted red peppers. This upfront organization ensures you can execute each step smoothly without scrambling for components, keeps the sauce cohesive, and prevents over- or under-seasoning as flavors concentrate during reduction.
  • Warm a wide, heavy skillet over medium heat and melt 2 tablespoons unsalted butter with 1 tablespoon olive oil; swirl to coat the pan and maintain a steady medium temperature to prevent scorching, since butter alone can burn before the sauce develops its depth. This combination provides a rich base while the oil raises the pan’s tolerance for heat, preserving delicate aromatics.
  • Sauté the finely minced shallots in the fat until they are translucent and just starting to color, about 3-4 minutes; this softens their sweetness and creates a foundational sweetness that anchors the seafood flavors without overpowering them. Do not let them burn; if they color too quickly, reduce the heat slightly and stir more often.
  • Add the minced garlic and sauté briefly for about 30 seconds until fragrant; this layer of aroma should bloom quickly without browning, which can add bitter notes that clash with the lobster’s sweetness. Stir constantly to avoid hot spots and uneven cooking.
  • Stir in the tomato paste and cook for 1-2 minutes to bloom its sweetness and deepen its color, coating the aromatics evenly; this step helps develop body and ensures the paste emulsifies with the cream later rather than remaining raw-tasting.
  • Deglaze the pan with 1/2 cup dry white wine, scraping up any browned bits from the bottom of the pan with a wooden spoon; simmer until reduced by about half to concentrate the acidity and fruity notes, which balance the cream’s richness and the lobster’s sweetness.
  • Pour in 1 cup lobster stock and bring the mixture to a gentle simmer; reduce the stock by about one-third to intensify shellfish flavor and create a thicker sauce that will coat the pasta nicely.
  • Whisk in 1 cup heavy cream and maintain a gentle simmer, stirring occasionally to prevent scorching; simmer until the sauce thickens slightly and coats the back of a spoon, which indicates the emulsion is forming and the texture will cling to ravioli.
  • Add 1-2 tablespoons fresh lemon juice gradually, tasting as you go to balance richness with bright acidity; lemon juice can curdle cream if added too early or boiled, so add toward the end of reduction and adjust by taste. If desired, fold in lemon zest (half a lemon) in the final moments for additional aroma.
  • Season with salt and freshly ground black pepper, tasting after each adjustment; lobster stock contributes salt, so adjust carefully to avoid oversalting. A light crack of red pepper flakes can be added here for a subtle, warming note if you enjoy a hint of heat.
  • Optional: drizzle in 1–2 tablespoons cognac or brandy to deglaze again and add depth; you can flambé safely away from the heat or simmer for 1-2 minutes to cook off the alcohol, which leaves a refined warmth without harshness; if avoiding alcohol, substitute with a splash more stock and a touch more lemon for brightness.
  • Add the prepared 1 cup of diced lobster meat to the sauce, folding gently to coat each piece without breaking it apart; keep the lobster pieces tender by not overcooking, as they are already cooked and should only warm through and integrate with the sauce’s texture and flavor.
  • Stir in optional add-ins such as 1/2 cup roasted red peppers and 1–2 tablespoons chopped fresh chives or parsley toward the end of cooking to maintain color and fresh aroma; the peppers provide color and sweetness, while fresh herbs lift the dish and keep it vibrant.
  • Finish the sauce with 1 tablespoon cold butter, added off the heat in small cubes and whisked vigorously to emulsify into a glossy, luxurious sheen; this technique (monter au beurre) tightens the emulsion and creates a satin finish that clings to ravioli. Do not boil after adding the butter.
  • Keep the sauce warm on very low heat or in a warm area while you plate and sauce freshly cooked lobster ravioli; avoid overheating, which can separate the emulsion and dull flavor.
  • To serve, spoon the lobster sauce generously over freshly cooked lobster ravioli or toss the ravioli gently in the pan to coat; garnish with additional chopped parsley or chives and a light squeeze of lemon if desired for extra brightness. This presentation showcases the lobster pieces and ensures every bite is balanced with aromatic herbs and a creamy, citrus-kissed shellfish sauce.

Notes

These lobster ravioli sauce notes are intended to help you achieve a glossy, balanced sauce that clings to every lobster-studded bite. Start by melting 2 tablespoons unsalted butter with 1 tablespoon olive oil over medium heat; sauté 2 finely minced shallots until translucent, then add 2 minced garlic cloves and cook just until fragrant. Deglaze with 1/2 cup dry white wine and simmer until reduced by half. Stir in 1 cup lobster stock and 2 tablespoons tomato paste, letting the paste bloom to deepen color and body. Pour in 1 cup heavy cream and simmer gently; toward the end, whisk in 1–2 tablespoons fresh lemon juice (and optionally the lemon zest) to brighten; avoid boiling once the cream is in. For a finishing gloss, whisk in 1 tablespoon cold butter off the heat and, if desired, 1–2 tablespoons cognac or brandy to deglaze and add warmth; if you prefer to skip alcohol, substitute with a touch more stock and a little extra lemon. To keep the lobster texture tender, fold in 1 cup cooked lobster meat at the end, just until warmed through; pat dry thawed meat to minimize extra moisture and preserve chunks. Season gradually with salt and freshly ground pepper, tasting after each addition since the stock and tomato paste contribute salt. Optional: a pinch of red pepper flakes for subtle heat and 2 tablespoons chopped fresh parsley or chives added at the end for color and aroma. If you like color and sweetness, stir in 1/2 cup roasted red peppers near the end. For a dairy-free version, omit the butter and reduce the cream, using extra olive oil to maintain richness. Leftovers refrigerate well for 2–3 days; reheat gently over low heat, whisking to re-emulsify, and adjust seasoning as needed. Always cook the lobster just until opaque, and pat dry thawed meat to minimize moisture and preserve chunks.

Tips

Choosing and handling lobster meat

  • Use claw and tail meat from a fully cooked lobster; chop into bite-sized pieces so the sauce coats evenly and each bite includes lobster texture.
  • If starting with raw lobster, cook until opaque, then dice; pat dry thawed meat to minimize extra moisture and fold in gently at the end to preserve chunks.
  • Pat lobster meat dry after cooking to avoid watery sauce and dilute flavors.

Aromatics and the base

  • Sauté shallots until translucent and just starting to color; avoid deep browning which can introduce bitterness.
  • Add garlic after the shallots and sauté briefly (about 30 seconds) until fragrant; don’t let it brown.
  • Bloom tomato paste with the aromatics to deepen color, body, and to help the sauce emulsify with cream.

Deglazing, stocks, and building depth

  • Deglaze with dry white wine after sautéing aromatics; simmer until reduced by about half to concentrate flavor and avoid a watery sauce.
  • Use 1 cup lobster stock or seafood stock for depth; if making stock from shells, simmer with aromatics, strain, and measure. Use low-sodium stock and adjust salt later.
  • If you prefer no alcohol, substitute with additional lobster stock and a splash of lemon juice.

Dairy handling and texture

  • Stir in heavy cream and simmer gently; avoid boiling to prevent curdling. For a lighter texture, you can use half-and-half but keep heat gentle.
  • Finish with 1 tablespoon cold butter off the heat to emulsify and create a glossy, luxurious finish; do not boil after adding.
  • If the sauce thickens, loosen with a splash of lobster stock or water while maintaining a gentle simmer.

Acidity and brightness

  • Add lemon juice gradually toward the end; too early or boiling can curdle the cream. Optional lemon zest adds fragrant brightness when folded in near the end.
  • Season progressively; lobster stock and butter contribute salt, so taste after each addition to avoid oversalt.

Seasoning, heat, and finishing touches

  • Freshly ground black pepper enhances seafood flavors; a pinch of red pepper flakes adds subtle warmth if desired.
  • Add chopped fresh parsley, chives, or tarragon toward the end to brighten color and aroma; if using dried herbs, add earlier in smaller amounts.
  • 1–2 tablespoons cognac or brandy to deglaze adds depth; you can flambé safely or simmer briefly to cook off the alcohol. If avoiding alcohol, substitute with an extra splash of stock and a touch more lemon.

Make-ahead and storage tips

  • The sauce can be prepared up to a day ahead; rewarm gently and whisk in a splash of cream or stock if it thickens.
  • Keep lobster meat separate from the sauce until ready to serve to avoid overcooking; fold in at the end just before serving for best texture.

FAQ

What is lobster ravioli sauce?

A lobster ravioli sauce is a rich, velvety accompaniment designed to complement delicate lobster-filled pasta. It typically features butter, cream or dairy-free alternatives, garlic and shallots, white wine, lobster stock or shellfish stock, lemon, and fresh herbs to echo the seafood sweetness.

What ingredients are used for a classic lobster ravioli sauce?

Common ingredients include:

  • Butter
  • Garlic and shallots
  • Dry white wine
  • Lobster stock or shellfish stock
  • Cream (heavy cream or half-and-half) or a dairy-free alternative
  • Lemon juice or zest
  • Fresh herbs (tarragon, chives, or parsley)
  • Salt and white pepper
Can I use canned or pre-cooked lobster in the sauce?

Yes. Use drained, well-patted dry lobster meat from canned or pre-cooked lobster. Gently fold it into the finished sauce to warm through without overcooking. If using frozen lobster, thaw completely and pat dry before adding.

How do I make a quick lobster cream sauce?

Basic method:

  • Sauté minced garlic and finely chopped shallots in butter until translucent.
  • Add white wine and simmer until reduced by half.
  • Stir in lobster stock and reduce slightly.
  • Add cream and simmer until lightly thickened.
  • Return lobster meat to the pan, warm through, then finish with lemon juice and herbs. Season to taste.
How can I prevent the sauce from breaking or curdling?

Tips to keep it smooth:

  • Keep the heat low to avoid boiling the cream.
  • Whisk constantly while adding dairy or stock to emulsify.
  • Temper the dairy by adding a small amount of hot liquid before pouring it in.
  • If it starts to separate, remove from heat and whisk in a splash of cold cream or a cold small cube of butter, then rewarm gently.
Are there dairy-free or lighter versions of this sauce?

Yes. Options include:

  • Replace cream with coconut cream or a cashew cream (soaked cashews blended with water).
  • Use olive oil or dairy-free butter in place of dairy butter, and a dairy-free milk with a touch of starch for thickening (e.g., almond milk with cornstarch).
  • Skip the roux and rely on reduced stock and emulsified olive oil for a lighter texture.
What add-ins can customize the flavor of the sauce?

Flavor boosters to consider:

  • Fresh lemon zest or a splash of lemon juice
  • Chopped fresh herbs (tarragon, chives, parsley)
  • Finely grated tomato or a touch of tomato paste for color
  • A pinch of red pepper flakes for a subtle heat
  • Finely chopped roasted garlic or shallots
  • Truffle oil or a small amount of cognac for depth
How long does the sauce keep, and how should I store it?

Storage tips:

  • Refrigerate in an airtight container for up to 2–3 days.
  • Let it cool, then refrigerate promptly to prevent bacterial growth.
  • Chill the lobster separately if you plan to combine later with fresh pasta.
Can I freeze the sauce, and how should I reheat it?

Freezing is best for the dairy-free version or the base sauce without fresh lobster. For best results:

  • Freeze sauce (without lobster meat) in a freezer-safe container for up to 2 months.
  • Thaw in the fridge overnight, then rewarm gently over low heat, whisking to re-emulsify. If using cream, you may need to whisk in a splash of dairy-free milk or a little butter to restore texture.
  • Add pre-cooked lobster meat at the end to warm through, not cook further.
What wine or beverage pairs well with lobster ravioli sauce?

Pairings to enhance the dish:

  • Dry or demi-sec white wines such as Sauvignon Blanc, Chardonnay (unoaked or lightly oaked), or Pinot Grigio.
  • For a sparkling option, a brut Champagne or Prosecco adds brightness.
  • Non-alcoholic: a crisp citrus-forward sparkling water or a white grape juice spritzer with a squeeze of lemon.

Introduction / Hook

Imagine a dinner plate that captures the drama of the sea in every bite. A lobster, radiant in its shell, arrives at the table with a scent that mingles salt air, warm butter, and bright citrus. The moment you crack open the shell, a burst of sweetness and briny depth spills out, as if the ocean itself had been tucked inside a tender, pearly morsel. This isn’t just seafood; it’s a ritual—an edible celebration of coastal waters, patient fishermen, and the art of turning simple ingredients into something memorable. In this exploration of lobster, you’ll discover not only how to cook it with confidence, but why it holds a timeless appeal across cuisines and cultures. Whether you’re a seasoned seafood lover or someone who savors a luxurious yet approachable centerpiece, this dish invites you to slow down, savor the moment, and let butter melt into memory.

Lobster is one of those ingredients that instantly elevates a meal without requiring a kitchen full of fuss. It can be the star of a grand dinner or the elegant touch that turns a weeknight into a small coastal escape. The allure lies in its dual nature: the meat is incredibly delicate and almost creamy, while its shell carries a chorus of mineral, oceanic flavors that awaken the palate. When prepared with balance—gentle heat, a touch of acidity, and a whisper of aromatics—the lobster reveals a chorus of flavors: sweet, a touch of brine, citrusy brightness, and a luxurious richness that lingers without heaviness. This long-form guide will walk you through the story, the why, and the many ways to enjoy lobster, so you can approach your next lobster moment with confidence and joy.

The Story Behind the Dish

lobster has swum through centuries of culinary history, transforming from a forgotten fare of coastal communities to a symbol of coastal luxury. In early colonial America, lobster was so plentiful that it was often considered, proverbially, the “poor man’s protein.” Fishermen would haul the lobsters from traps and lay them out to dry in the sun while they tended their gear. It’s hard to imagine today, but in some places, lobster was simply ground into the daily meals of sailors and farmers, not the celebrated centerpiece we know now. The shift from communal staple to coveted delicacy is a tale of cultivation, transport, and shifting tastes. As transportation improved and markets expanded, lobster became more widely available. The rise of Maine as a lobster powerhouse in the United States played a pivotal role: clean cold waters produce meat that’s wonderfully sweet and firm, a quality that has endeared the species to chefs and home cooks alike.

Throughout Europe and parts of Asia, lobster appears in a mosaic of preparations—poached, steamed, broiled, or simmered in a fragrant court of wine, herbs, and butter. The French classic Lobster Thermidor—where lobster meat is enriched with egg yolks, brandy, and a light creamy sauce, then baked—speaks to the dish’s capacity for airborne elegance. In America, the lobster roll—sometimes hot with butter, sometimes cool with mayonnaise—became an iconic symbol of New England summers. The tale of lobster is a reminder that a single creature from the sea can travel through cultures, adapting to local tastes while preserving a core identity of sweetness, texture, and a certain luxury that makes the meal feel special without needing ostentation.

Modern lobster cooking also embraces sustainability and responsibility. Responsible fisheries practices, seasonal closures, and careful handling ensure that the abundant ocean harvest remains available for future generations. When you approach lobster with mindfulness—choosing fresh, responsibly sourced lobsters, cooking with respect for the meat’s delicate texture—you join a lineage of cooks who treat seafood as a privilege and a duty at once.

Why You’ll Love This Recipe

  • Impressive but approachable: Lobster makes a statement, yet with the right technique, it’s simply cooked and deeply satisfying.
  • Quick-to-prepare centerpiece: When done well, lobster can be on the table in a short, focused window—great for weeknights that feel like celebrations and for leisurely weekend dinners.
  • Versatile for occasions: From intimate date nights to festive gatherings, lobster fits a broad range of settings and moods.
  • Luxurious flavor with everyday accessibility: The taste is indulgent without requiring complicated equipment or long marination times.
  • Nutritious and protein-rich: Lobster meat is a lean source of high-quality protein, with a delicate fat profile that carries flavor beautifully.
  • Perfect canvas for variations: A simple shellfish can take on butter, citrus, herbs, or a bright wine-based reduction, making it adaptable to your pantry.

Flavor Profile & Texture

The essence of lobster lies in its tender, resilient meat that holds up to heat and sauces alike. When steamed or boiled, the meat is snow-white with a faint translucence and a clean, oceanic sweetness. The flavor sits squarely in the realm of refined seafood—bright, slightly mineral, with a subtle sweetness that intensifies with a kiss of heat. The texture is what makes lobster iconic: firm yet yielding, almost velvety in the mouth, and free of any rubbery chew when cooked with care. The shell offers a reservoir of flavor, which is why many preparations call for a light broth, wine, or lemony butter to carry the aromatics to the meat itself.

A classic pairing elevates this profile into a balanced celebration of contrasts. The richness of butter meets the brightness of lemon or verjus, while a touch of garlic or shallot provides savory depth without overpowering the sweetness of the meat. Fresh herbs—tender tarragon, chives, parsley, or a hint of dill—lift the dish, adding an herbal lift that echoes the sea breeze. A whisper of white wine or a splash of champagne can introduce an acidity that cuts through the butter, giving the dish a poised, restaurant-worthy finish. When you imagine the flavor, think of steam rising from a wooden board, a lemon wedge glistening with condensation, a necklace of butter brushing against pale lobster meat—an orchestration of temperatures, textures, and tastes that harmonize in every bite.

In terms of mouthfeel, lobster is a study in contrast. The exterior of the meat—especially if briefly broiled or kissed with hot butter—offers a slight caress of crispness, while the inside remains succulent and juicy. This contrast is part of the appeal: you get a brief, satisfying tarte-tang of texture with every mouthful, followed by a melt-in-your-mouth softness that lingers on the palate. When you pair lobster with a starch, such as corn on the cob, new potatoes, or a chunk of rustic bread, you add an earthy sweetness that complements the oceanic notes perfectly. The overall effect is a well-balanced plate that feels both celebratory and comforting at the same time.

Occasions & Pairings

Lobster is the kind of dish that lends itself to a range of occasions, each enriched by thoughtful pairings:

  • Romantic dinners: A candlelit table, a chilled glass of white wine, and lobster as the centerpiece create an intimate, luxurious atmosphere.
  • Weekend family feasts: Lobster pairs beautifully with simple sides like corn on the cob, warm bread, and a bright salad, turning a regular weekend into a memory.
  • Holiday celebrations: A whole lobster or lobster tails can anchor a celebratory seafood spread, alongside seasonal vegetables and festive sauces.
  • Summer al fresco dinners: Light, zesty sauces and citrusy accompaniments brighten the dish for warm-weather dining.

Pairings to consider:

  • Side dishes: Buttered corn, pan-seared potatoes, or a light citrus salad.
  • Sauces: Clarified butter with lemon, a garlic-herb butter, or a crisp white-wine and shallot reduction that adds a glossy finish.
  • Drinks: A crisp Sauvignon Blanc, a zesty Chardonnay, or a glass of Champagne or dry rosé to echo the brightness of the seafood.
  • Desserts: A light citrus sorbet or a delicate vanilla-infused custard to cleanse the palate after the richness.

Tips, Variations & Substitutions

Whether you’re cooking for two or feeding a crowd, these tips will help you nail lobster with confidence and flexibility:

  • Choosing the lobster: Live lobsters are the gold standard for flavor and texture, but pre-cooked lobster meat is a convenient alternative that still delivers excellent results. If you buy live lobsters, ensure they are still alive and showing good activity when you choose them.
  • Freshness cues: A live lobster should feel heavy for its size, with a clean, briny aroma. The shell should be hard and glossy, not soft or discolored. For pre-cooked meat, look for a bright, opaque color and a clean, oceanic scent.
  • Cooking times: Lobster meat cooks quickly. Overcooking leads to toughness, while undercooking risks texture and safety. If you’re boiling or steaming, plan on about 8-12 minutes for a 1¼–1½ pound lobster, and adjust slightly for larger lobsters. Tail meat should be opaque and firm; claw meat should be succulent but not tough.
  • Butter vs. oil: A classic method uses clarified butter to prevent a greasy finish. If dairy-free or avoiding butter, olive oil with a touch of garlic and lemon can create a luscious alternative that still feels indulgent.
  • Mind the shell: If you’re serving whole lobsters, a quick, gentle crack along the tail and claws makes the meat easier to access without damaging the delicate interior.
  • Variations by region: A Cajun-spiced boil with paprika and cayenne adds warmth; a Mediterranean twist with olive oil, lemon, garlic, and parsley brightens the flavor; a simple Asian-inspired version may include ginger, scallions, and a light soy-lish glaze for a savory-slightly umami finish.
  • Dairy-free options: Use a bright lemon-garlic vinaig with olive oil or a dairy-free butter substitute to maintain richness without dairy.
  • Meal-prep tips: If you’re planning ahead, cook the lobster meat and store it chilled. Reheat gently to preserve texture, or keep it chilled to fold into salads or cold preparations where you don’t want extra heat.

Storage & Make-Ahead Ideas

Lobster deserves respectful handling in terms of storage and timing. Here are practical guidelines to keep flavors at their best:

  • Cooked lobster meat: Refrigerate promptly within two hours of cooking, in an airtight container. It will stay best for up to 2 days. Reheat gently via a short steam or by briefly warming in a warm pan with a little butter—do not overheat, or the meat can become dry.
  • Raw lobster: If you buy live lobsters and don’t plan to cook them immediately, keep them in the refrigerator with a damp towel over them for up to 24 hours. Avoid submerging them in water or keeping them in a sealed bag; they need airflow.
  • Freezing: For longer storage, thawed lobster meat can be frozen in an airtight container for up to 2-3 months. If you’re freezing whole lobsters, they’ll be best used within a couple of months; the quality gradually declines over time.
  • Make-ahead sauces: A lemon-butter sauce or garlic-herb butter can be prepared in advance and warmed gently before serving to preserve the silkiness of the butter and the brightness of the lemon.
  • Leftover ideas: Toss chopped lobster into a light pasta with olive oil and herbs, fold into a spring salad with citrus, or serve on toast with a dab of herbed mayo for a refined sandwich—these keep the lobster feeling fresh and delicious beyond the initial meal.

Fun Facts & Trivia

Delightful morsels of lobster lore often accompany a good meal. Here are some tidbits that might surprise you:

  • Color change: Lobsters are naturally blue or blue-green due to copper-based proteins in their blood. When cooked, the pigments transform to a characteristic crimson red, which is why we associate cooked lobster with that iconic red shell.
  • Long-lived crustaceans: Some lobsters have been known to live well over a century in the wild, which makes them one of nature’s most patient seafood treasures.
  • Colorful shells: The shell’s bands of color can indicate species and regional variations, offering subtle hints about the terroir of the sea where they lived.
  • A shellfish that sparked recipes: Lobster is the muse behind numerous celebrated dishes, from Lobster Thermidor to Lobster Bisque, each reflecting a different culinary tradition and technique.
  • Economic and ecological note: The perception of lobster has evolved along with fisheries management. Sustainable harvesting practices help ensure that these creatures remain available for future generations to enjoy, while maintaining healthy ocean ecosystems.

In the end, lobster is more than a dish—it’s a narrative of the sea, a bridge between coastline culture and kitchen craft. Whether you’re crafting a simple, butter-kissed preparation or a more complex sauce with wine and aromatics, the lobster invites you to slow down, savor the process, and relish the connection between land and sea. As you prepare to cook, consider not just the technique, but the story behind each bite—the fisherman’s dawn, the tide’s rhythm, and the shared joy of gathering around a table to celebrate seafood at its finest.

Ingredients

Lobster

    – 2 live lobsters (1.25–1.5 lb each)
    → The main protein; select lively lobsters with glossy, unblemished shells and intact claws for best meat yield. Keep them cold until ready to cook and plan to cook promptly after purchase for optimal texture. If using previously frozen lobster tails, ensure they are fully thawed and pat dry before cooking to prevent excess moisture.
    – 4 quarts water (1 gallon) for boiling lobsters, plus 2–3 tablespoons kosher salt per gallon
    → A large pot with a rolling boil ensures even cooking and quick, tender meat. The salt seasons the lobster flesh like seawater; adjust if your water is very salty or if using pre-seasoned stock. Do not crowd the pot; give the lobsters space to submerge fully for uniform doneness.
    – 1 lemon, cut into wedges
    → Adds bright acidity that balances the rich butter and enhances sweetness in the lobster meat. Serve wedges on the side and squeeze over meat just before dipping. Fresh lemon is preferable; avoid bottled juice for maximum aroma.

Dipping Sauce

    – 1/2 cup unsalted butter, melted
    → The creamy, rich base for dipping. Using unsalted butter lets you control the final salt level; melt gently to keep a smooth emulsion and prevent separation. If needed, strain solids after melting for a cleaner sauce.
    – 2 cloves garlic, minced
    → Provides a warm, aromatic foundation for the sauce. Finely mince to distribute evenly; you can optionally sauté briefly in butter (30 seconds) to mellow sharpness, but do not burn the garlic, as it will taste bitter.
    – 1 tablespoon fresh lemon juice
    → Brightens the butter and cuts through richness. Use freshly squeezed juice for vibrant flavor; strain if you prefer a smooth, pulp-free dipping sauce.
    – 1 tablespoon chopped fresh parsley
    → Adds fresh, herbal note and color. Add parsley after the butter and garlic have blended to preserve its bright green color and aroma; mince finely for even distribution.
    – Pinch of salt
    → Seasoning is essential to balance the richness of the butter. Start with a small pinch and adjust after tasting, considering the natural saltiness of the lobster meat and any salt in the butter itself.

Optional Add-ins

    – 1 tablespoon dry white wine (optional)
    → Adds subtle acidity and depth to the sauce. Warm the wine with the butter and garlic, then simmer briefly to reduce and mellow before adding lemon and parsley. Avoid boiling vigorously to prevent the emulsion from breaking.
    – 1/4 teaspoon paprika (optional)
    → Provides a touch of color and a hint of sweet smokiness. Use mild or smoked paprika according to preference; it is optional and can be omitted to keep the pure butter flavor front and center.

Garnish & Serving

    – Fresh parsley for garnish
    → A small handful of chopped parsley adds a pop of color and fresh aroma to the platter. Use a clean knife and pat dry before sprinkling; avoid wilted leaves for best presentation.
    – Extra lemon wedges for serving
    → Additional wedges allow guests to adjust tanginess to taste. Keep wedges chilled until plating to preserve brightness and aroma; offer alongside the dipping sauce for a vibrant finish.

Instructions

  • Choose and prep the lobsters: Inspect 2 live lobsters (1.25–1.5 lb each) to ensure glossy, intact shells and claws; keep them cold until ready to cook and plan to cook promptly after purchase for optimal texture.
  • → Live, lively lobsters cook more evenly and yield firmer meat; cold storage slows microbial growth and preserves quality, so prepare to cook as soon as possible after purchase.

  • Set up the boiling water: In a large stockpot, combine 4 quarts (1 gallon) of water with 2–3 tablespoons kosher salt per gallon; bring the water to a full rolling boil over high heat.
  • → A salty, vigorously boiling bath seasons the lobster flesh like seawater and ensures quick, even cooking; do not crowd the pot so each lobster submerges fully for uniform doneness.

  • Submerge the lobsters: Using long tongs, grasp each lobster and gently lower it headfirst into the boiling water to ensure full immersion; return the pot to a rolling boil and maintain a vigorous boil during cooking.
  • → Submerging quickly minimizes stress and ensures an even start to cooking; maintaining a strong boil prevents uneven heat and undercooked meat.

  • Boil until cooked: Boil the lobsters for 8–12 minutes, depending on size (1.25–1.5 lb); the shells should turn bright red and the meat should appear opaque and firm.
  • → Proper timing yields tender, flavorful meat without rubbery texture; if uncertain, an internal temperature of 140–145°F (60–63°C) is a good guide.

  • Remove and rest the lobsters: Use tongs to lift the lobsters from the pot and drain; transfer to a rack or large platter to rest 5–10 minutes so the meat firms and is easier to crack.
  • → Resting stops further carryover cooking and prevents scorching of delicate meat; it also makes cracking and extracting meat cleaner and safer.

  • Make the dipping butter: Set a small saucepan over very low heat and gently melt 1/2 cup unsalted butter, ensuring the butter remains smooth and clear.
  • → Low, steady heat prevents separation and browning, yielding a silkier dipping sauce with a clean buttery flavor.

  • Flavor the butter with garlic: Add 2 cloves minced garlic to the melted butter and stir; simmer 30–60 seconds until fragrant, taking care not to brown the garlic.
  • → Gentle heating releases garlic aroma without imparting bitter notes; frequent stirring keeps garlic from scorching at the bottom.

  • Finish the sauce with lemon and parsley: Stir in 1 tablespoon fresh lemon juice and 1 tablespoon chopped fresh parsley; season with a pinch of salt and taste, adjusting as needed.
  • → Fresh acidity brightens the rich butter and complements the sweetness of lobster; parsley adds color and a fresh herb lift, so chop finely for even distribution.

  • Incorporate optional white wine (if using): If using 1 tablespoon dry white wine, add it to the butter-garlic mixture and simmer briefly to reduce by about one-third, then proceed with lemon and parsley.
  • → The wine adds a subtle acidity and depth; simmering concentrates its flavor and helps integrate it with the butter without diluting the emulsion.

  • Incorporate optional paprika (if using): If using 1/4 teaspoon paprika, whisk it into the sauce after the wine (or after garlic if not using wine) to add a touch of color and a hint of smoky sweetness.
  • → Paprika enhances visual appeal and adds a subtle flavor dimension; it remains optional to preserve pure butter-forward flavor.

  • Prepare lemon wedges and garnish: Slice lemon into wedges if not pre-cut and have fresh parsley ready for garnish; these brighten the plate and offer additional brightness at service.
  • → Fresh citrus and herbs refresh the dish at the table and provide aroma; keep parsley bright and dry for best presentation.

  • Crack and extract the lobster meat: When lobsters are cool enough to handle, twist off the tails and claws; crack the shells with a lobster cracker or the back of a heavy knife and remove the meat in clean, bite-sized pieces, trimming any cartilage.
  • → Properly extracted meat is easier to eat and looks cleaner on the plate; removing cartilage ensures a pleasant texture during dipping.

  • Plate and serve: Arrange lobster meat on a platter with some shells for visual appeal, ladle a portion of the warm dipping butter into small bowls, and place lemon wedges and parsley garnish nearby; present immediately for best flavor and texture.
  • → Serving promptly while hot ensures optimal tenderness and aroma; the butter sauce should be refreshed as needed to maintain its smooth, emulsion-like consistency.

Notes

“These perfectly boiled lobster tails are simple to prepare and pair beautifully with a luminous garlic-lemon butter for dipping. Begin with two live lobsters (1.25–1.5 lb each) and keep them cold until cooking; cook promptly after purchase for best texture. Fill a large pot with 4 quarts water and salt it with 2–3 tablespoons kosher salt per gallon; bring to a rolling boil, then add the lobsters headfirst, cover and return to a boil. Simmer 8–12 minutes depending on size until shells turn bright red and meat is opaque; remove and rest briefly before cracking to extract meat. Slice the tails and claws to access the meat, using tongs and kitchen shears for clean, even portions. Serve with lemon wedges to brighten the sweetness of the meat. For the dipping sauce, melt 1/2 cup unsalted butter on low heat, stir in 2 minced garlic cloves, 1 tablespoon lemon juice, 1 tablespoon chopped parsley, and a pinch of salt; keep warm but not hot enough to separate the emulsion. Optional: swirl in 1 tablespoon dry white wine and 1/4 teaspoon paprika for depth and color. If you prefer, you can steam the lobsters instead of boiling or finish under a brief grill blast for color. Garnish with extra parsley and serve lemon wedges on the side. Leftover lobster meat can be stored in the refrigerator for up to 2 days and used in salads, pasta, or lobster rolls. Always handle live seafood with care, discard any lobsters that do not look active, and sanitize utensils and surfaces to prevent cross-contamination.”

Tips

Tips for Lobster Preparation and Serving

  • Selection and handling: Pick live lobsters that are active and respond to touch. Their shells should be glossy with intact claws and no strong odors. Keep them cold and cook as soon as possible after purchase for the best texture. If you’re using thawed lobster tails, pat them dry to remove excess moisture before cooking.
  • Storage and thawing: If you must store live lobsters briefly, keep them in a breathable container in the coolest part of the kitchen. For frozen tails, thaw slowly in the refrigerator overnight or under cool running water just before use, then pat dry to ensure even cooking.
  • Boiling equipment and water: Use a large pot (at least 6–8 quarts) so the lobsters have room to submerge. Fill with enough water to cover them (about 4 quarts per batch as a guideline) and season with 2–3 tablespoons kosher salt per gallon. Bring to a vigorous rolling boil before adding the lobsters, and avoid crowding the pot so the temperature doesn’t drop.
  • Cooking times and doneness: For 1.25–1.5 lb live lobsters, expect about 8–12 minutes of boiling once the water returns to a boil after adding them. You’re looking for bright red shells and opaque, firm meat. If in doubt, test a claw meat for tenderness rather than solely relying on color.
  • Cooling and cracking: Remove lobsters with tongs and let them rest briefly before cracking. Resting helps the meat set and makes it easier to remove from shells. Use lobster crackers or the back of a small knife to avoid tearing the meat.
  • Dipping butter sauce technique: Keep the melted butter warm but not hot enough to separate. If the emulsion begins to break, whisk vigorously or briefly remove from heat and whisk until smooth again. For a smoother sauce, strain the melted butter to remove any solids after melting.
  • Garlic handling in the sauce: Finely mince garlic and, if desired, lightly sauté it in the butter for about 30 seconds to mellow sharpness. Avoid burning the garlic, which can impart bitter notes.
  • Lemon and acidity balance: Add fresh lemon juice gradually, tasting as you go to balance richness. A touch of lemon brightens the butter and enhances the lobster sweetness.
  • Herb and seasoning timing: Add chopped fresh parsley after the butter and garlic have blended to preserve color and aroma. A pinch of salt should be adjusted at the end, considering the saltiness of the butter and the lobster meat.
  • Optional add-ins—wine: If using dry white wine, warm it with the butter and garlic and simmer briefly to reduce and mellow before adding lemon and parsley. Do not boil vigorously after adding wine to preserve the emulsion.
  • Optional add-ins—paprika: A 1/4 teaspoon of paprika adds color and a hint of sweetness. Use mild or smoked paprika depending on preference, or leave out entirely to keep the butter-forward flavor front and center.
  • Serving presentation: Arrange lobsters on a large platter with lemon wedges, fresh parsley, and small bowls of melted butter. Offer extra lemon wedges so guests can adjust brightness to taste. Keep garnish bright by patting dry wilted leaves and cutting fresh parsley just before serving.

FAQ

Lobster FAQ

What lobster species are commonly used in recipes?

Most home recipes use American Maine lobster (Homarus americanus). European lobster (Homarus gammarus) is common in Europe. Langoustines are a different, smaller species. For best flavor, rely on fresh or properly thawed lobster rather than precooked meat.

Fresh vs. frozen lobster: which is better?

Fresh live lobster yields the best flavor and texture. Frozen lobster tail meat is convenient but can be slightly softer or firmer when thawed. If you buy frozen, thaw in the fridge or under cold running water and use promptly.

How do I choose a live lobster at the market?

Look for lobsters with intact claws and antennae, a hard, glossy shell, and a clean, seaworthy smell. The tail should curl underneath when picked up. Heavier for its size usually means more meat. Live lobsters should react to touch and stay lively until you cook them.

How do I thaw frozen lobster safely?

Most thawing is best done in the refrigerator overnight. If you’re in a hurry, place the lobster (in its packaging or in a sealed bag) under cold running water for 20–30 minutes, then cook promptly. Do not thaw at room temperature or in warm water.

How do I boil lobster step-by-step, and how long does it take?

– Fill a large pot with salted water (about 2–3 tablespoons salt per gallon) and bring to a rolling boil.
– Grasp the live lobster, headfirst, and submerge it into the boiling water. Cover.
– Boil times (rough guide): 1 lb: 8–10 minutes; 1.25–1.5 lb: 9–12 minutes; 2 lb: 12–15 minutes; 3 lb: 15–18 minutes. The shell should be bright red and the meat opaque.
– Remove with tongs, drain, and let rest briefly before cracking.

How do I steam lobster, and how does it differ from boiling?

Steaming uses less water and is gentler on the meat.
– Add 2 inches of water to a large pot and bring to a boil. Place a steamer insert or rack, then the lobster. Cover.
– Steam times (rough guide): 1 lb: 8–10 minutes; 1.5–2 lb: 10–12 minutes; 2–3 lb: 12–15 minutes. The lobster is cooked when the shell is bright red and the meat is opaque.

How can I tell if lobster is cooked properly?

The shell should be bright red. Meat should be opaque and firm, not translucent. If the meat looks glossy or undercooked, return it to the heat for a few more minutes. Avoid overcooking, which makes the meat tough and chewy.

How do I remove lobster meat from the tail and claws?

For the tail: twist the tail off the body, place on a cutting board, and trim off the flippers. Use a knife or kitchen scissors to cut along the top of the tail shell, pry open, and pull out the tail meat. For claws and legs: twist off the large claws, crack the claws with a lobster cracker or heavy knife, and pull out the meat. The small legs contain edible meat too—squeeze or bite off the tip to extract. Remove the dark vein (intestine) from the tail meat if visible.

What sauces or flavorings pair well with lobster?

Classic options include drawn butter (melted butter with a squeeze of lemon), garlic butter, lemon-herb butter, or a light white wine beurre blanc. Light additions like chives, tarragon, or dill complement lobster nicely. For a simple preparation, drizzle melted butter and a touch of lemon over the meat.

How should I store and reheat lobster leftovers?

Cool cooked lobster promptly, then refrigerate in an airtight container within two hours. Use within 2–3 days. To reheat, steam or warm gently in a little butter over low heat, or briefly reheat lobster meat in a skillet with a splash of white wine or broth to avoid drying it out. Do not reheat aggressively; it can turn rubbery.

Introduction / Hook

Imagine a plate where ocean brightness meets cozy hearth warmth—the whisper of butter, the kiss of sea salt, and the creamy hug of aged cheese all weaving together with ribbons of tender pasta. This lobster mac and cheese isn’t just a dish; it’s a celebration of contrast, a luxurious twist on a timeless comfort classic. From the first whiff of garlic gently sautéing in butter to the moment you encounter that glorious crust of breadcrumbs crunching atop a molten, ocean-kissed center, every bite feels like a small voyage. The lobster’s briny sweetness lights up the richness of melted cheeses, while a velvety béchamel binds everything into a silky, spoon-stopping groove. It’s the kind of dish that makes a weeknight feel like a special occasion and a special occasion feel like you’re dining at a sunlit coastal bistro.

In the kitchen, this recipe is a bridge—between sea and shore, between indulgence and homey comfort, between simpler weeknights and a party-worthy centerpiece. The aroma alone can pull a crowd toward the stove: a hint of citrus zest dancing with nutty butter, a chorus of melting cheese, and the faint sea-salt scent that reminds you you’re about to savor something truly coastal. It’s not merely about luxury ingredients; it’s about technique, balance, and the confidence to plate something spectacular without fuss. You’ll learn to coax out the best from each component, letting the lobster’s delicate sweetness mingle with the cheese without ever getting drowned by the sauce.

This lobster mac and cheese is for moments when you want to feel pampered without sacrificing warmth or approachability. It’s for a celebratory family dinner, a date night at home, or a dinner party that deserves a little extra shine. And because the heart of the dish lies in technique as much as in ingredients, you’ll gain a toolkit for recreating this indulgent comfort with confidence—whether you’re using lobster tails, leftover meat from a seafood boil, or a quick fresh catch. It’s a dish that rewards patience with a texture that sings and flavors that linger—creamy, toasty, briny, and bright all at once.

The Story Behind the Dish

Macaroni and cheese travels with a storied lineage, tracing its roots to both Italian kitchens and early American gatherings where a humble, dairy-rich sauce found a faithful home with elbow noodles. The addition of lobster to this classic is a distinctly coastal evolution—an homage to the yearning of seaside towns to elevate everyday meals into something worthy of a seaside sunset. In New England, where lobster boats rhythmically rise and fall with the tides, cooks began pairing the soft, yielding pasta with slices of sweet lobster and a lush béchamel—silky and pale, pale yellow from the cheese, and rich with subtle aromatics. It’s a dish that captures the spirit of the coast: robust, comforting, and just a touch glamorous.

In many homes and restaurants, the dish became a canvas for regional character and personal memory. A grandmother’s kitchen might carry a note of nutmeg or smoked paprika whispered into the sauce; a coastal bistro might finish the dish with a crackling breadcrumb crust that crackles like a shoreline shell. The essence is simple: take the sea’s best treasure, fold it into a velvety cheese sauce, and tuck it into pasta that holds its shape and heart. The result is a seafood-centered comfort food that feels special without being fussy, hearty without heaviness, and elegant enough to serve alongside a crisp green salad or a glass of sparkling wine.

When you prepare this recipe, think of it as a bridge between two culinary brooks—the classic, homestyle mac and cheese you grew up with and the premium, seaside dish you order on a celebratory evening out. The technique is timeless: a roux-based sauce that swells with dairy, seasoned with a light touch of mustard, white pepper, and a bright lift of lemon or zest. Fold in the lobster gently so the meat stays succulent, then finish with a layer of cheese that melts into a satin glaze. A final, buttery breadcrumb crust adds texture and a toasty tone that echoes the crackle of a seaside campfire. It’s a story told in flavors and textures, a narrative of comfort meeting coast in each indulgent bite.

Why You’ll Love This Recipe

  • Luxurious comfort: A show-stopping upgrade to a beloved classic that remains approachable for home cooks.
  • Seafood-bright without overpowering richness: The lobster sweetness and briny notes cut through the cheese for balance and glow.
  • Silky, never gluey texture: A well-made béchamel binds the pasta and lobster into a creamy, cohesive bite.
  • Texture contrast: A crisp, golden breadcrumb crust provides a satisfying crunch against the creamy interior.
  • Flexible and forgiving: Works with fresh lobster, pre-cooked lobster meat, or even high-quality crab if needed.
  • Customizable for your needs: Gluten-free or low-carb variations, and several cheese combinations to suit your palate.
  • Perfect for entertaining: A guaranteed crowd-pleaser that still feels thoughtful and gourmet.

Flavor Profile & Texture

The centerpiece of this dish is the luscious, cheese-forward sauce that carries the lobster’s delicate sweetness in its folds. The base is a classic velvety béchamel, enriched with a blend of cheeses that melt into a satin sheen—think sharp cheddar for a sly bite, plus a reserve of Gruyère or Parmesan to deepen the cheese map with a nutty, toasty note. A kiss of Dijon or a whisper of dry mustard heightens the dairy’s creaminess without stealing the spotlight. A touch of lemon zest or a splash of lemon juice brightens the richness, ensuring the sauce feels lively rather than heavy.

The lobster itself offers a gentle brine and sweet, tender meat that fluffs up beautifully within the pasta. When folded into the macaroni, the lobster pieces distribute in every forkful, offering a moment of sweetness and a distinct, refined character that elevates the entire dish beyond a traditional mac and cheese. The pasta chosen for this recipe should be sturdy enough to hold sauce without collapsing; tubes or shells are excellent as they cradle bits of lobster and sauce, while a classic elbow pasta can work in a pinch if you prefer a familiar bite.

Texture plays a starring role. The interior should be luxuriously creamy, with the pasta fully coated but not overwhelmed by the sauce. The surface benefits from a light, buttery breadcrumb crust that turns crisp and toasty under high heat, offering a welcome contrast to the velvet center. When you scoop in, you should hear a gentle crack of the crust, followed by the soft surrender of the cheese-laced interior. Aromas—garlic, butter, and a hint of lemon—rise from the pan, inviting you to lean in for a closer look and a deeper inhale before the first bite.

Occasions & Pairings

This lobster mac and cheese shines on occasions that deserve a touch of luxury without sacrificing warmth. It’s equally at home on a family table during a special weekend dinner, a celebratory birthday meal, or a holiday spread that calls for something memorable yet comforting. If you’re entertaining, it’s a dish that can be prepared with a little advance planning and then finished in the oven with a short, high-heat blast to achieve that coveted crust.

Pairing is part of the experience. For drinks, a crisp, citrus-driven white wine such as Sauvignon Blanc or a lightly oaked Chardonnay complements the lobster’s sweetness and the cheese’s richness. If you prefer something with more acidity, a dry sparkling wine or Prosecco can cut through the richness beautifully. For a non-alcoholic route, a chilled sparkling apple cider or a lemony iced tea with a hint of dill mirrors the dish’s briny brightness.

Side dishes can be as simple as a bright green salad with a tangy vinaigrette to balance the creaminess, roasted asparagus with lemon, or a light tomato and cucumber salad for freshness. A simple, lightly dressed slaw or a fennel salad can also pair nicely, adding crunch and peppery bite to contrast the softness of the main course. For a more complete seafood-forward menu, consider a light shellfish starter or a delicate crusty baguette to dip into the luscious sauce.

Tips, Variations & Substitutions

Make it your own

  • Cheese combinations: The classic approach uses a blend of sharp cheddar with a nutty cheese like Gruyère or fontina. You can experiment with a touch of Parmesan for salt and umami, or a blue cheese crumble folded in sparingly for a bold finish.
  • Breadcrumb crust: For extra crunch and color, mix breadcrumbs with a little melted butter and a pinch of paprika or lemon zest before sprinkling on top.
  • Herbs and aromatics: A whisper of fresh thyme, chives, or tarragon can brighten the overall flavor without overshadowing the lobster.
  • Mustard and citrus: A small amount of Dijon and a hint of lemon zest lift the dish, keeping the richness from feeling cloying.

Dietary variations

  • Gluten-free: Use gluten-free pasta and ensure any breadcrumbs are gluten-free. The sauce itself is naturally gluten-free if you skip any flour-based thickening beyond the roux, or you can use a gluten-free roux once per batch.
  • Lactose-light option: Use lactose-free milk and cheeses, and salt to taste. The texture will remain creamy, though the mouthfeel may be slightly lighter.
  • Low-carb alternative: Swap pasta for thinly sliced, blanched zucchini or spaghetti squash ribbons. You may need to adjust the sauce thickness, adding a touch more béchamel to coat the vegetables.
  • Vegetarian note: If you want a lighter, non-seafood version, omit the lobster and boost the cheese and a handful of sautéed mushrooms for umami and texture. This still delivers a luxurious mac and cheese with a deeper, earthy profile.

Regional twists

  • New England seafood twist: Fold in a touch of velouté and finish with a light drizzle of melted butter and lemon to echo a coastal fare.
  • Spice note: A pinch of white pepper or a tiny amount of smoked paprika can add warmth that pairs well with seafood milk sauces.

Storage & Make-Ahead Ideas

To make entertaining easier, you can assemble the dish up to the final bake stage and refrigerate for several hours or even overnight. If you’re refrigerating, hold off on the breadcrumb topping until you’re ready to bake, so the crust stays crisp. Once baked, portions can be stored in an airtight container in the fridge for a couple of days. Reheat gently on the stovetop over low heat with a splash of milk to loosen the sauce, or reheat in a moderate oven, covered, until heated through and then uncover and finish with a brief under-broiler blast to re-crisp the top.

Freezing is possible but not ideal for texture. If you must freeze, freeze the assembled but unbaked dish in a well-wrapped container; thaw fully in the fridge before baking, then finish with the breadcrumb topping. Expect the texture to be slightly less supple after defrosting, but the flavors will still sing with the lobster’s sweetness and the cheese’s glow.

Make-ahead tips: Prepare the sauce and lobster up to the point of combining with pasta, then store separately. When you’re ready to cook, toss the hot pasta with the cooled sauce and lobster, transfer to a baking dish, top with breadcrumbs, and bake until everything is warmed through and the crust is golden. This can save you time on busy evenings while still delivering a restaurant-worthy finish.

Fun Facts & Trivia (Optional)

  • Lobster was once considered the “poverty food” of colonial America and was often reserved for prisoners and servants; now it’s a coveted luxury, especially around festive occasions.
  • Macaroni and cheese dates back to early European kitchens, but the modern American version with elbow pasta and a cheese sauce became popular in the 18th and 19th centuries, evolving into countless regional riffs—this lobster variation is one of the most elegant evolutions.
  • Beurre monté and béchamel are age-old French techniques that lend this recipe a silky harmony. Mastery of the roux is what ensures the sauce coats the pasta without separating, even as it basks in cheese’s molten glow.
  • A crusted top isn’t just for texture; it’s a signal to the senses—the crack of crisp breadcrumbs releasing a toasty aroma that rounds out the creamy center and invites another generous scoop.
  • Pairing traditions matter: sparkling wines or a bright white with a touch of citrus can elevate shellfish-rich dishes by cleansing the palate between bites, making each mouthful feel as fresh as the first.

Ingredients

Lobster & Seafood

  • – 1 lb (450 g) cooked lobster meat, chopped into bite-sized pieces
    → Lobster provides the star protein and rich, sweet flavor. Use fresh cooked meat from a lobster or fully thawed frozen meat if needed. Chop into uniform bite-sized pieces so every bite has lobster without large chunks that are hard to eat. If you have a mix of tail and claw, keep larger pieces from the tail intact for textural variety.

Pasta

  • – 1 lb (450 g) elbow macaroni or small shells, dry
    → The pasta forms the body of the dish. Cook until al dente just before it’s fully tender to account for carryover cooking when folded into the hot cheese sauce. Reserve 1/2 cup pasta water to loosen the sauce if needed. Do not rinse after boiling to keep starch for emulsification.

Cheese Sauce Base

  • – 4 tablespoons (1/4 cup) unsalted butter
    → Base fat to create a smooth roux that thickens the cheese sauce. Melt gently over medium-low heat to avoid browning; whisk in flour to form a light, sandy roux that will not taste floury.
  • – 1/4 cup all-purpose flour
    → Acts as the thickening agent forming the roux with butter. Sift to remove lumps if necessary and cook briefly (1–2 minutes) to remove raw flour taste before adding liquids.
  • – 2 cups whole milk
    → Provides body and creaminess to the cheese sauce without making it overly rich. Warm before whisking into the roux to prevent curdling; if you only have 2% milk, you may thicken with extra cheese and a splash of cream.
  • – 1 cup heavy cream
    → Adds luxurious silkiness and helps stabilize the emulsified cheese sauce. For a lighter version, substitute an additional 1/2 cup milk but add a bit more cheese to maintain creaminess.
  • – 2 cups shredded sharp cheddar cheese
    → Provides bold cheddar flavor and a gooey melt. Shred from a block rather than using pre-shredded to avoid anti-caking agents that can hinder melting. Stir in gradually over low heat to prevent oil separation (the “oil slick”).
  • – 1 cup shredded Gruyere or fontina cheese
    → Adds subtle nuttiness and a mellower melt that complements the cheddar. Gruyere and fontina melt smoothly and contribute creaminess without overpowering the lobster. Use freshly shredded for best texture.
  • – 2 oz cream cheese (optional)
    → Extra creaminess and a silkier sauce; this helps emulsify and stabilize the cheese melt. Soften at room temperature before whisking into the sauce to avoid clumping.
  • – 1 teaspoon Dijon mustard
    → Brightens the cheese sauce and helps balance richness with a slight tang. Stir in with the roux before adding milk to distribute evenly.
  • – 2 cloves garlic, minced
    → Adds aromatic depth that complements the lobster. Sauté in the butter with the roux for a minute to release the aroma; for milder garlic, blanch briefly in warm milk rather than sautéing with butter.
  • – 1/4 teaspoon ground white pepper or black pepper
    → Enhances seasoning without adding color; white pepper keeps a clean sauce look. Adjust to taste after sauce thickens.
  • – Pinch of ground nutmeg
    → Classic mac and cheese flavor note that adds warmth and rounds the cheese. Use freshly grated nutmeg if possible for a more vibrant aroma.
  • – 1/4 teaspoon paprika or optional cayenne
    → Adds a hint of color and subtle warmth; adjust to heat tolerance. Cayenne will make the dish spicier; paprika is milder for a more family-friendly version.
  • – Salt to taste
    → The sauce will need salt to bring out the cheese flavors; add gradually after tasting the sauce since the cheese may already be seasoned. Remember the pasta water likely contains salt too, so adjust accordingly.

Toppings & Finish

  • – 1 cup panko breadcrumbs
    → Creates a crunchy top layer when baked. For extra crunch, mix with the melted butter before sprinkling over the dish; use light, dry breadcrumbs to avoid sogginess.
  • – 2 tablespoons unsalted butter, melted
    → Binds breadcrumbs with fat for a crisp, golden topping. Drizzle over breadcrumbs and toss to coat evenly if using buttered breadcrumbs; this helps achieve uniform browning in the oven.
  • – 1/4 cup grated Parmesan (optional)
    → Adds a sharp, salty note that complements the lobster and cheese sauce. Combine with breadcrumbs or sprinkle on top just before baking for a crisp crust.
  • – 2 tablespoons chopped fresh parsley (optional)
    → Fresh herb finish that brightens the dish and adds color. Add after baking for a fresh aroma, or mix into the breadcrumbs for a green speckle throughout the top.

Seasonings & Aromatics

  • – 1 teaspoon Old Bay seasoning (optional)
    → Classic seafood seasoning that enhances the lobster flavor without overpowering the dish. Use sparingly and adjust to taste; omit if you prefer a milder flavor or if you have dietary restrictions.
  • – Salt and black pepper to taste
    → Essential seasoning to balance the rich sauce and seafood. Season gradually, tasting as you go, because the lobster and cheese both contribute saltiness. Use white pepper if you want minimal visibility in the sauce.
  • – Zest of 1 lemon (about 1 teaspoon)
    → A bright citrus note that cuts fatty richness and refreshes the palate. Add to the sauce early for integrated aroma or sprinkle over the baked dish just before serving for a clean citrus aroma.
  • – 1 tablespoon lemon juice (optional)
    → Adds a touch of acidity to balance the richness; add at the end to taste to avoid curdling the sauce. Use fresh lemon for best brightness.

Instructions

  • Preheat your oven to 350°F (175°C) and lightly grease a 9×13-inch baking dish or line it with parchment; this ensures even heat transfer and easy removal of the finished dish.
    → A well-prepared pan prevents sticking and promotes uniform browning across the top and edges.
  • Bring a large pot of salted water to a rolling boil and cook the pasta until just al dente, about 1–2 minutes before the package directions; reserve 1/2 cup of the starchy pasta water and do not rinse the pasta.
    → Starch on the surface helps the sauce emulsify and cling to the noodles; the reserved water can loosen the sauce if it thickens too much.
  • Prepare the lobster meat by patting dry and ensuring bite-sized pieces; if tail pieces are larger, keep them a bit bigger for texture but trim any cartilage or shell fragments for clean bites.
    → Uniform pieces ensure even distribution and pleasant mouthfeel in every forkful.
  • In a heavy-bottom saucepan, melt 4 tablespoons (1/4 cup) unsalted butter over medium-low heat and whisk in 1/4 cup all-purpose flour to form a light roux; cook for 1–2 minutes, whisking constantly, until the mixture is pale and not browned.
    → The roux thickens the sauce and provides a smooth foundation without raw flour taste; avoid browning to keep the sauce silky.
  • Add the minced garlic to the roux and sauté for about 30–60 seconds until fragrant; keep the heat moderate to prevent scorching and bitterness.
    → Garlic flavor should be aromatic and integrated, not burnt, which would impart a bitter note to the sauce.
  • Whisk in 2 cups whole milk and 1 cup heavy cream gradually, heating the mixture until it is steaming and begins to thicken; do not boil vigorously to prevent curdling and separation.
    → A gentle simmer thickens the béchamel while preserving a glossy, cohesive sauce that coats the pasta evenly.
  • Stir in 1 teaspoon Dijon mustard, 1/4 teaspoon ground nutmeg, 1/4 teaspoon paprika (or cayenne if you want heat), and 1/4 teaspoon white pepper; season with salt to taste, and add 1 teaspoon lemon zest; consider adding up to 1 teaspoon Old Bay for a classic seafood kiss.
    → These aromatics sharpen and balance the richness, with lemon zest brightening the sauce and Old Bay enhancing the lobster’s flavor without overpowering it.
  • Reduce the heat to low and gradually fold in 2 cups shredded sharp cheddar and 1 cup shredded Gruyère (or fontina); if using 2 oz cream cheese, whisk it in after softening at room temperature; continue stirring until the cheese is completely melted and the sauce is smooth.
    → Gentle cheese incorporation prevents oil separation and yields a velvety, cohesive sauce that clings to the pasta.
  • If the sauce seems too thick, loosen with small additions of the reserved pasta water or a splash of milk, mixing until the sauce coats the back of a spoon; taste and adjust salt as needed since the cheese and lobster will contribute saltiness.
    → Proper thickness ensures a luscious coating without weighing down the pasta, and tasting early avoids over-salting later.
  • Gently fold in the lobster meat until evenly distributed, then fold in the drained pasta, using tongs to lift and turn until every noodle is coated with sauce.
    → Gentle folding preserves the lobster texture and ensures even sauce coverage on every bite.
  • Spread the lobster-cheese mixture into the prepared baking dish in an even layer; this promotes uniform heating and caramelization around the edges.
    → A level surface ensures consistent baking and a cohesive slice when serving.
  • Prepare the topping by mixing 1 cup bread crumbs (panko preferred) with 2 tablespoons melted butter and 1/4 cup grated Parmesan; evenly sprinkle the topping over the pasta; optional fresh parsley can be stirred into the crumbs for color.
    → The buttery breadcrumbs create a crisp, golden crust that contrasts with the creamy interior, enhancing texture and flavor.
  • Bake in the 350°F (175°C) oven for 20–25 minutes, until the top is golden and the filling is bubbling around the edges; if you desire a deeper crust, broil for 1–2 minutes at the end, watching closely to prevent burning.
    → Baking sets the sauce and cheese, while a brief broil deepens browning for a professional, restaurant-style finish.
  • Remove from the oven and allow the dish to rest for 5–10 minutes before serving to help the sauce set slightly for clean slicing; garnish with extra lemon zest or chopped parsley if desired.
    → Resting improves portioning and helps the sauce re-bind, making each serving smoother and more visually appealing.

Notes

This lobster mac and cheese is a luxurious, crowd-pleasing dish that pairs succulent lobster with a silky three-cheese sauce. For best texture, use freshly cooked lobster meat chopped into bite-sized pieces and keep larger tail pieces intact for variety. Cook the pasta to al dente and reserve 1/2 cup of the pasta water; do not rinse after boiling to preserve starch that helps emulsify the sauce. Melt the butter gently to form a light roux, whisk in the flour, then whisk in warm milk and heavy cream before gradually melting in cheddar and Gruyere (or fontina) to create a smooth, glossy sauce. Finish with Dijon, minced garlic, white pepper, a pinch of nutmeg, and a touch of paprika or cayenne, then season with salt to taste after tasting, since the lobster and pasta water contribute saltiness. A bright note from lemon zest and lemon juice helps cut the richness and keep the dish vibrant.

Tips for texture and adaptations: to make this gluten-free, use gluten-free pasta and replace the all-purpose flour with a gluten-free flour blend or a light cornstarch slurry; omit or replace the breadcrumbs with gluten-free crumbs. If you prefer a lighter version, reduce the butter and cream and compensate with more milk while maintaining enough cheese for creaminess. For a crisp top, toss panko with melted butter and a little Parmesan, then bake until golden, or finish with a quick broil. Leftovers store well in the refrigerator for up to 3 days and reheat gently in the oven or on the stove with a splash of milk to restore creaminess. Finish with extra lemon zest and chopped parsley for a fresh aroma just before serving. Always taste and adjust salt at the end, since cheese and lobster can vary in saltiness.

Tips

Tips for Lobster Mac and Cheese

1) Lobster selection and prep

  • Use fresh-cooked lobster meat when possible for the best flavor; fully thaw frozen meat and pat dry before using.
  • Chop lobster into uniform bite-sized pieces so every bite has lobster, and reserve some larger tail pieces for textural variety.
  • If you have mixture of tail and claw meat, keep larger tail chunks intact for visual appeal and chew.

2) Pasta preparation

  • Cook the pasta until just under al dente; it will finish cooking in the hot sauce and baking step.
  • Reserve 1/2 cup of the starchy pasta water to loosen the sauce if needed.
  • Do not rinse the pasta after boiling to keep starch that helps emulsify the cheese sauce.

3) Making a smooth cheese sauce (roux-based)

  • Melt butter over medium-low heat to avoid browning; whisk in flour to form a light roux that won’t taste raw.
  • Warm the milk and cream before adding to the roux to prevent curdling and help the sauce emulsify smoothly.
  • Add cheeses gradually, off the heat if possible, to prevent oil separation and ensure a glossy sauce.
  • Stir in Dijon mustard early to distribute its tang evenly; add garlic with the roux so it releases aroma without burning.
  • Keep heat low to medium and avoid boiling once the cheese is melted to prevent separation.

4) Seasoning and balancing flavor

  • Season gradually; the cheese and lobster add salt, so adjust salt at the end after tasting the sauce.
  • White pepper keeps a clean look in the sauce; nutmeg adds warmth—use freshly grated if possible.
  • Old Bay is optional but enhances seafood flavor; lemon zest brightens the dish, and lemon juice can be added at the end to taste to avoid curdling.

5) Incorporating lobster with the sauce

  • Fold lobster into the hot sauce off the heat to avoid overcooking the meat; reserve some pieces for topping if desired.
  • Be gentle when mixing to prevent broken pieces from turning mushy.

6) Topping and finishing nicely

  • For a crunchy top, use panko breadcrumbs mixed with melted butter; a sprinkle of Parmesan adds extra toasty flavor.
  • Uniformly coat breadcrumbs with melted butter to promote even browning; bake uncovered until golden and crisp.
  • Fresh parsley adds color and brightness—stir in after baking or sprinkle on top just before serving.

7) Seasonings and aromatics

  • Adjust Old Bay to taste; it enhances seafood flavor without overpowering the cheese.
  • Lemon zest and juice provide a refreshing contrast to the richness—add zest early for integrated aroma or finish with a squeeze just before serving.

8) Make-ahead, storage, and reheating

  • Prepare components ahead: sauce, pasta, and lobster; assemble just before baking if you want a crisp topping.
  • Leftovers store well in the fridge for 2–3 days; reheat gently in the oven with a splash of milk to restore creaminess.

FAQ

What is lobster mac and cheese?

A luxurious comfort dish that folds tender lobster meat into a creamy, cheesy sauce with pasta, usually finished with a buttered breadcrumb topping and baked until bubbly and golden.

What ingredients do I need?

Common ingredients include:

  • 1 lb lobster meat (about 2 cups chopped)
  • 1 lb pasta (elbow macaroni or shells)
  • 2 cups milk and 1 cup heavy cream
  • 4 tbsp butter and 4 tbsp flour (for a roux)
  • 2–3 cups shredded cheese (a mix of sharp cheddar with Gruyère or fontina; finish with parmesan)
  • 2 garlic cloves (optional)
  • Salt, pepper, and a pinch of cayenne or paprika
  • 1/2 cup dry white wine (optional)
  • 1/2 cup breadcrumbs and 1–2 tbsp melted butter (topping)
  • Fresh herbs like thyme or chives (optional)
Should I use fresh lobster or can I use pre-cooked?

Fresh lobster yields the best texture and flavor. You can use pre-cooked lobster meat or frozen lobster; thaw thoroughly and pat dry before adding to the pasta. If using live lobsters, boil or steam until just cooked, then remove meat.

How do I make the cheese sauce (béchamel)?

Make a smooth béchamel:

  • In a saucepan, melt 4 tbsp butter over medium heat.
  • Whisk in 4 tbsp flour to make a roux; cook 1–2 minutes (do not brown).
  • Gradually whisk in 2 cups milk and 1 cup cream; simmer until thick and smooth.
  • Season with salt, pepper, garlic, and a pinch of cayenne or paprika. Remove from heat and gradually stir in the shredded cheeses until melted. Add white wine if using for extra brightness.
How do I bake lobster mac and cheese?

Steps:

  • Cook pasta in salted water until just under al dente, then drain.
  • Fold the lobster meat into the cheese sauce, then combine with the hot pasta.
  • Transfer to a buttered baking dish. Mix breadcrumbs with melted butter and parmesan, then sprinkle on top.
  • Bake in a preheated 375–400°F (190–200°C) oven for 15–25 minutes, until bubbling and golden. For extra crust, broil briefly at the end.
How do I prevent the sauce from separating or curdling?

Tips:

  • Keep heat moderate and cook the béchamel slowly; don’t boil once the cheese is added.
  • Add cheese gradually off the heat to prevent clumping, and use a smooth, well-emulsified sauce.
  • Stir pasta and lobster into the sauce gently to avoid breaking the sauce.
Can I make this ahead or freeze it?

Yes:

  • Make the sauce and lobster up to a day ahead, then refrigerate. Assemble with pasta just before baking.
  • For freezing, freeze the assembled unbaked dish tightly wrapped. Thaw overnight in the fridge, then bake as directed (add 5–10 minutes if chilled).
  • When freezing, you may need a bit more liquid or a longer bake time to ensure the center is heated through.
What substitutions or variations work (gluten-free, dairy-free, etc.)?

Variations:

  • Gluten-free: use gluten-free pasta and gluten-free breadcrumbs.
  • Dairy-free: use dairy-free milk (almond, oat, or soy) and dairy-free cheese; use a dairy-free butter or oil and a gluten-free roux (starch-based sauce).
  • Flavor twists: add a pinch of truffle oil, smoked paprika, or a splash of white wine for depth; folded in finely chopped herbs for brightness.
What cheeses work best and how much should I use?

Best melting combo: 2 cups sharp cheddar for bite + 1 cup Gruyère or fontina for melt, finished with ½ cup grated Parmesan for depth. Total cheese: about 2–3 cups, adjust to taste. Use grated or shredded cheeses for smooth melting.

How do I store leftovers and reheat them?

Storage and reheating tips:

  • Cool to room temperature, then refrigerate in an airtight container up to 3–4 days.
  • Reheat in a 350°F (175°C) oven for 15–20 minutes, covered with foil, until hot and bubbly. Re-crisp the top under the broiler for 1–2 minutes if desired.
  • Microwave reheats quickly but can make the top soggy; if using, cover and heat in short intervals.

Introduction / Hook

Close your eyes for a moment and let the scent of the sea wash over you in a single, shimmering memory. A plate appears, twinkling with the glow of a coastal sunset: velvet strands of pasta wrapped around succulent morsels of lobster, a glossy sauce that clings like silk, and a whisper of citrus that cuts through the richness with a bright, cheerful zing. This isn’t just dinner; it’s a gateway to a seaside celebration you can summon any night of the week. Lobster pasta is one of those rare dishes that feels indulgent without being complicated, glamorous without pretension, and deeply comforting without ever tipping into heaviness. Every forkful carries a little piece of the ocean’s mystery—somewhere between the way the lobster meat stays tender and the way the sauce envelops the pasta so gracefully that time slows down just enough to savor the moment.

Imagine dining in a sunlit kitchen where the hum of a small town comes through the window: a chorus of clinking glasses, the distant chatter of neighbors, and the soft hiss of something wonderful coming together on the stove. The dish invites you to linger—to lean into a simple, well-balanced marriage of briny sweetness, creamy lushness, and a spark of brightness that keeps you reaching for just one more bite. It’s the kind of plate you want to share with someone you love, yet sturdy enough to serve as a showpiece for a weeknight treat or a special occasion. Lobster pasta has a way of turning ordinary evenings into memories, of transforming routine meals into something you’ll tell stories about later. In short, it’s comfort with couture, elegance with ease, and flavor that feels both timeless and thrillingly new.

This is a dish designed to celebrate craft—how a few high-quality ingredients, treated with respect and attention, can become something greater than the sum of their parts. It’s about savoring the briny sweetness of the sea and the comforting, almost nostalgic pull of well-made pasta, all brought together with a glossy, mouthwatering finish that makes every bite feel like a small celebration. Whether you’re feeding a family, hosting friends, or treating yourself to a restaurant-quality moment at home, lobster pasta stands ready to deliver a dining experience that’s worth lingering over. And the best part? It can be as quick as a weeknight and as luxurious as a weekend feast, depending on how you pace the prep and what you decide to pair with it. The journey from pan to plate becomes a little ritual of delight, a reminder that good food can be both an intimate ritual and a shared joy.

As you read on, you’ll discover not only the sensory magic of this dish but also the stories, textures, and techniques that make it robust yet approachable. You’ll learn how the dish balances oceanic sweetness with bright acidity, how the sauce clings to each strand of pasta without pooling, and how lobster’s natural sweetness is allowed to shine without being overwhelmed. This isn’t merely about following steps; it’s about inviting a sense of place into your kitchen—the harbor, the kitchen table, the clink of wine glasses, the whisper of a seaside breeze. And the best part is that you can adapt it to your own pantry, your dietary preferences, and your mood, without sacrificing the charm or the payoff. So, take a breath, imagine that first perfect bite, and embark on a culinary voyage that promises to be memorable, satisfying, and absolutely delicious.

The Story Behind the Dish

The lineage of lobster pasta is a romance between coastal abundance and Italian culinary craft. It’s the kind of dish that feels both timeless and modern because it sits at the crossroads of two great culinary traditions. On one shore you have regions where lobster is celebrated as a jewel of the sea—prepared simply to let its natural sweetness shine, with a light hand, in a way that honors the crab or crustacean’s delicate texture. On the other shore you have kitchens that prize a silky, cohesive sauce that keeps every strand of pasta contentedly coated, so nothing feels dry or separate. When these sensibilities meet, lobster pasta is born: a dish that speaks of sea air and sunlit kitchens, of long conversations over a shared plate, of family gatherings where everyone leans in to savor each bite.

There’s a charming anecdote often told in harbor towns: the first time a chef paired a lobster main with a simple, unadorned pasta, the room quieted as diners realized that luxury can live in restraint. The lobster’s sweetness carried the dish, while a modest, well-balanced sauce offered a satin backdrop that allowed the flavors to breathe rather than compete. Over generations, cooks refined the approach, discovering that a light aromatics strategy, a gentle simmer, and a careful reduction could elevate the dish without masking the lobster’s character. This story echoes in coastal communities around the world, where sea-breeze afternoons blur into evenings of convivial meals and the clatter of plates becomes a hymn to shared delight.

Culturally, this dish embodies a spirit of fusion—an appreciation for seafood’s natural superiority married to the comforting familiarity of pasta. It’s emblematic of how food travels, how chefs borrow and blend ideas across oceans and cuisines, and how a single plate can evoke a sense of place. In many homes, lobster pasta is reserved for holidays or celebratory dinners, but its essence is accessible: it invites you to slow down, to savor, and to enjoy the artistry of turning a few pristine ingredients into something greater than a momentary indulgence. The dish’s popularity also reflects a broader culinary truth: the best seafood dishes don’t rely on complexity for impact. They rely on balance, technique, and generosity of spirit—the kind of generosity that invites you to share, to smile after the first bite, and to remember that good food can make ordinary days feel special.

As you explore this recipe, you may notice echoes of coastal memories—salt on your lips after a swim, the warm glow of a kitchen window at dusk, the soft clink of a wine glass. The dish becomes a canvas on which you can project your own memories and preferences. It welcomes improvisation in the most comforting way: you can choose different shapes of pasta to alter texture, adjust the balance of richness and brightness to suit your palate, or add a subtle accent that nods to regional flavors you love. The beauty lies in its adaptability, in how a simple, well-executed dish can carry the weight of tradition while inviting personal expression. The lobster itself is the star, but it’s the way the entire plate comes together—via a glossy, envelope-like sauce that grips every strand, with the lobster’s tender morsels punctuating the bite—that truly tells the story of this dish.

Why You’ll Love This Recipe

  • Effort-to-delight ratio that feels special without being intimidating, making it perfect for both weeknights and celebrations.
  • A luxurious yet approachable seafood dish that showcases the sweetness of lobster without overpowering the pasta.
  • A velvety, glossy sauce that clings to every strand, delivering a cohesive bite each time you lift your fork.
  • Balanced flavors that pair briny, oceanic notes with bright citrus or herbal lift, creating a multi-dimensional tasting experience.
  • Comforting textures: the tender meat of lobster, the satisfying bite of al dente pasta, and the smoothness of a carefully emulsified sauce.
  • Versatility in presentation—from an elegant plated dinner to a cozy family-style meal with generous portions.
  • Flexible to dietary needs with potential for dairy-free, gluten-free, or plant-forward adaptations without sacrificing flavor.
  • Excellent runner for entertaining guests, as it feels sophisticated while still being achievable with patience and care.
  • Pairing-friendly profile that plays well with light white wines, crisp greens, and simple side dishes or desserts.
  • A sense of occasion: the dish signals care and celebration, even when prepared for a quiet, intimate dinner at home.

Flavor Profile & Texture

At its core, lobster pasta is a study in balance. The lobster meat lends a natural sweetness and a delicate, almost candy-like bite that remains tender against heat and time. The pasta provides a comforting, familiar foundation—plump, strand-like ribbons that coil around the fork with ease, offering a pleasing chew that sustains the luxurious bite. The sauce, when done well, is a glossy, almost satin-like curtain that gathers on each strand, transforming the entire mouthful into one cohesive moment rather than a sequence of separate flavors. The sea-salted umami of the lobster is tempered by a gentle richness, often achieved through a smooth emulsification. What makes this dish sing, however, is the brightness that dances across the palate—hint of citrus, a tincture of herb, a whisper of aromatic acidity that lifts the entire plate without stealing from the lobster’s sweetness.

Texture-wise, expect a luscious mouthfeel with a gentle, lingering finish. The pasta should be tender but not mushy, holding its shape and allowing the sauce to cling. The lobster chunks, if cut into bite-sized morsels, provide bursts of succulent texture—slightly firmer than the surrounding meat—creating moments of contrast that keep the eating experience dynamic. The sauce itself offers a silkiness that coats without heaviness, a balance of dairy-like creaminess and lighter, more translucent elements that keep the dish from tipping into richness overload. In many renditions, a subtle ring of emulsified liquid—perhaps a touch of the seas or a delicate reduction—gives the dish a lift that makes every mouthful feel alive and bright. When you pair the dish with a quick squeeze of citrus or a fresh herb note, you invite a crispness that awakens the senses and keeps the flavors vivid from first bite to last.

The seafood sweetness, the starch of the pasta, and the glossy finish of the sauce work in harmony to deliver a plate that feels simultaneously indulgent and refined. The aromatics—though not overpowering—provide a gentle perfume that lingers after the plate is cleared, inviting you to take another bite and another, as if the dish itself were telling a slow, delicious story. In practice, you’ll experience a progression: a first impression of velvety indulgence, followed by a mid-palate balance where the brininess of the sea meets the comforting depth of the sauce, and finally a bright, lingering finish that leaves a memory of ocean air and home-cooked warmth. This is the kind of dish that rewards those who savor the moment and appreciate the subtle craft that makes every element feel intentional and well-tuned.

Occasions & Pairings

This lobster pasta shines in a variety of settings, from festive dinners to quiet weeknights where you want a little luxury without a long prep timeline. It works beautifully as the centerpiece for a family celebration, a date night at home, or a dinner party where you want to impress without overwhelming your guests with complexity. Because the dish holds onto the lobster’s sweetness and doesn’t rely on heavy sauces, it also serves as a forgiving platform for a range of wine pairings and side dishes. A light, crisp white wine or a delicately fragrant sparkling option can complement the dish without competing with the seafood’s character. For sides, consider a simple green salad with a tart vinaigrette, a loaf of crusty bread to catch every drop of sauce, or a delicate vegetable sauté that brings color and balance to the plate.

If you’re planning a holiday dinner or a special weekend meal, this dish can act as a showpiece while still feeling approachable. It pairs nicely with courses that echo the same balance—light antipasti, a fresh caprese-style presentation, or a simple citrus-based appetizer to mirror the dish’s brightness. For a more robust pairing, you could choose a slightly fuller white wine with just a touch more body, or a light, dry sparkling wine that adds a celebratory sparkle to the table. Dessert can be something simple and refreshing, like a citrus-forward sorbet or a light, fruit-driven pastry that cleanses the palate after a rich, comforting main.

For everyday enjoyment, this dish becomes a little ritual: you plan a quiet evening, you select a good piece of seafood for freshness, you plate with care, and you let the sauce do the talking. It’s a reminder that a delicious, satisfying meal doesn’t always require grand gestures—sometimes it’s the quiet confidence of a well-executed plate that makes the biggest impression. And if you want to tailor the dish to your preferences, you can pair it with simpler, freer sides or build a multi-course menu that doesn’t overwhelm the palate but rather celebrates the stars of the dish: the lobster, the pasta, the silky sauce, and the gentle brightness that ties everything together.

Tips, Variations & Substitutions

  • Make it dairy-light or dairy-free: employ a silky emulsion that relies on a touch of a dairy-free option, or use olive oil-based finishing to preserve gloss and mouthfeel without dairy.
  • Pasta options: while classic long pasta is a favorite, you can experiment with broader ribbons or even shaped pasta to alter texture. Different shapes hold the sauce in unique ways, creating new bite experiences.
  • Seafood variations: if lobster isn’t available, a combination of other shellfish or a robust white fish can offer a similar seafood-forward profile, though flavor and texture will shift accordingly.
  • Gluten-free approach: choose gluten-free pasta that maintains a satisfying bite and texture; the sauce’s viscosity will help keep the coating intact.
  • Herbal and citrus accents: keep notes light and fresh. A few zest shavings or a gentle herbal finish can lift the dish without overpowering the seafood’s sweetness.
  • Regional twists: add a hint of a distant coastal influence by incorporating a subtle, peppery note or a small amount of a regional aromatic to nod to tradition without crowding the lobster’s character.
  • Make-ahead versatility: prepare a portion of the sauce in advance and reheat gently, finishing with fresh pasta to maintain texture and brightness. This approach helps when you’re entertaining and want to serve a hot plate without last-minute stress.

Storage & Make-Ahead Ideas

For leftovers, store the cooked pasta and lobster separately from any sauce in airtight containers in the refrigerator for up to a couple of days. When reheating, warm the sauce gently in a pan to coax its gloss back, then toss with fresh, hot pasta to bring the dish back to life. If you’ve prepared a larger batch, you can freeze the sauce portion for a future meal, keeping in mind that seafood flavors can shift slightly after freezing and thawing. Reheat slowly to preserve its delicate balance and avoid breaking the sauce’s emulsion. If you’re making this ahead for a party, consider cooking the pasta to al dente and finishing the dish with the lobster and sauce just before serving, ensuring the pasta resents less time soaking in moisture and maintains a desirable bite and sheen.

To keep everything vibrant for guests, you can offer a finishing station: a little zest of citrus, a handful of chopped herbs, and a light drizzle of the finishing sauce on top at the last moment. This preserves the experience of a freshly made plate and gives everyone the sense that they’re watching a chef’s workshop unfold, even in the comfort of a home kitchen. If you’re eager to keep the lobster whole and impressive, you can portion the meat into large chunks and plate with minimal mixing, letting guests scoop as they desire, creating an element of theater at the table. For those who want to minimize mess, pre-toss the pasta with a small amount of sauce and keep the rest on the side for a quick finish at the table. The key is to respect the texture of the lobster and the silkiness of the sauce, avoiding over-mixing or overcooking, which can dull the luxury of the dish.

Fun Facts & Trivia (Optional)

  • Lobster has long been considered a luxury food in many regions, but its availability has made it a celebrated staple for seafood lovers around the world.
  • The idea of pasta pairing with seafood has deep roots in both Italian and Mediterranean culinary traditions, reflecting a preference for simple, expressive flavors that let the ingredients speak for themselves.
  • The gloss on the sauce often comes from an emulsification process that blends fats and liquids into a cohesive, velvety finish—an ancient technique that remains central to many seafood pastas.
  • Lobster meat is naturally forgiving when prepared correctly, offering a delicate sweetness that carries well with lighter sauces and a gentle acidity to keep flavors buoyant.
  • The dish embodies the idea that simplicity can deliver grandeur—minimalist ingredients treated with care can result in a memorable, restaurant-worthy experience at home.

Ingredients

Lobster Pasta

Lobster Prep

  • 12 oz cooked lobster meat, roughly chopped
    → The star protein of the dish; chop into bite-sized pieces so they distribute evenly through the pasta. If you only have claw meat, that’s fine too. If starting from raw lobster, cook until just opaque, remove the meat from the shell, and pat dry before adding to the sauce to avoid thinning it.

Pasta and Base

  • 12 oz linguine or spaghetti (uncooked)
    → The pasta base that will carry and cling to the lobster sauce. Cook in well-salted water until al dente. Reserve about 1 cup of the starchy cooking water before draining to adjust sauce consistency later if needed.
  • 2 tablespoons extra-virgin olive oil
    → Used to coat the pan and begin the aromatics without burning the garlic. High-quality olive oil adds fruity, fresh notes to the sauce. Heat over medium before adding aromatics.
  • 2 tablespoons unsalted butter
    → Adds richness and helps emulsify the sauce as it finishes. Add after sautéing aromatics to prevent browning the garlic and shallot; swirl to distribute evenly for a glossy finish.
  • 3 cloves garlic, minced
    → Provides the savory foundation for the sauce. Mince finely so the garlic dissolves evenly; avoid letting it brown harshly, which can introduce bitterness.
  • 1 shallot, minced
    → Introduces a subtle sweetness and depth beyond onion. Sauté with the garlic until translucent and fragrant; if you don’t have shallot, substitute with 1/4 onion.
  • 1/2 cup dry white wine
    → Deglazes the pan and lifts any browned bits (fond) from the aromatics and shell flavor, adding acidity to balance richness. Allow it to reduce by about half to concentrate flavor before adding the stock.
  • 1 cup seafood stock or clam juice
    → Builds body and depth in the sauce with a hint of oceanic flavor. Use a stock you enjoy sipping; if salty, reduce salt in the final seasonings. Simmer briefly to reduce slightly before adding cream.
  • 1 cup heavy cream
    → Creates the creamy, luscious sauce that coats the pasta and lobster. For a lighter version, substitute with half-and-half, but note the sauce won’t be as thick. Do not boil vigorously after adding cream to prevent curdling; keep at a gentle simmer.
  • 1 cup crushed tomatoes or halved cherry tomatoes
    → Adds color, acidity, and a touch of brightness. Crushed tomatoes give a bit more body; fresh cherry tomatoes offer a sweeter, fresher note when simmered briefly with the sauce.
  • 1/2 teaspoon red pepper flakes
    → Introduces a subtle warmth to complement the lobster without overpowering it. Adjust to taste; start with a little and add more if you want more heat.
  • Zest of 1 lemon and 1 tablespoon lemon juice
    → Brightens the rich sauce and enhances the seafood’s sweetness. Add zest toward the end of cooking for aroma and stir in lemon juice just before serving to keep the brightness intact.
  • 1/2 cup freshly grated Parmesan cheese
    → Adds salty, nutty depth that helps thicken and finish the sauce. Best when grated fresh from a block; stir in off the heat to prevent clumping and to preserve flavor.
  • 2 tablespoons chopped fresh parsley
    → Finishes the dish with color and a light, herbaceous note. Stir in at the end to preserve brightness; reserve a little for garnish if desired.
  • Fine sea salt, to taste
    → Seasoning is key to bringing all components together. Start with a small pinch and adjust after tasting, especially since the seafood stock and Parmesan add saltiness.
  • Freshly ground black pepper, to taste
    → Adds a subtle kick that complements the richness. Grind just before serving for maximum aroma and bite.

Optional Add-ins

  • 1/2 cup chopped fresh basil (optional)
    → Basil adds a bright, aromatic note that pairs beautifully with lemon and seafood. Add at the very end to maintain vibrant color and fresh flavor.
  • 1/4 cup grated Pecorino Romano (optional)
    → Provides a sharper, tangier cheese flavor that complements lobster without masking its sweetness. Use sparingly and taste as you go to avoid overpowering the dish.

Instructions

  • Fill a large pot with 4 to 6 quarts of water, salt generously, and bring to a rolling boil so the pasta has enough room to cook evenly and to properly season as it cooks.
    → Well-salted water seasons the pasta from the inside as it cooks and prevents sticking by keeping starch separate.
  • Add 12 oz linguine or spaghetti to the boiling water and cook until al dente according to package instructions, stirring occasionally to prevent sticking; reserve about 1 cup of the cooking water before draining to adjust the sauce later if needed.
    → Saving pasta water provides a starchy, gluten-rich liquid that helps loosen and emulsify the sauce, making it cling to the noodles.
  • Pat the 12 oz cooked lobster meat dry with paper towels and roughy chop if not already; drying and rough chopping ensures even distribution and prevents excess moisture from thinning the sauce.
    → Dry meat re-heats quickly without diluting the sauce; bite-sized pieces ensure lobster appears in every forkful.
  • In a large skillet, heat 2 tablespoons extra-virgin olive oil over medium, swirling to coat the bottom; warming the oil first prevents the aromatics from scorching and gives an even base for the sauce.
    → A properly heated oil foundation prevents raw garlic flavor and builds a glossy base for the sauce.
  • Add 3 minced garlic cloves and 1 minced shallot to the skillet and sauté until just translucent and fragrant, about 2 minutes, stirring frequently and avoiding any browning that would introduce bitterness.
    → Gentle sweating unlocks sweetness and depth without introducing harsh notes from over-browned garlic.
  • Deglaze the pan with 1/2 cup dry white wine, scraping up any browned bits with a wooden spoon, and simmer until the wine reduces by about half to concentrate the aromatics.
    → The fond lifts flavor from the pan and the reduction intensifies acidity to balance richness.
  • Stir in 1 cup seafood stock or clam juice and bring to a gentle simmer; simmer briefly to reduce slightly and build a richer base for the sauce.
    → Stock adds body and oceanic nuance; reduction concentrates those flavors for the final sauce.
  • Pour in 1 cup crushed tomatoes or halved cherry tomatoes and simmer for 5 to 7 minutes, allowing them to soften and integrate color and brightness into the sauce.
    → Tomatoes contribute acidity, sweetness, and body, balancing the richness of cream and lobster.
  • Lower the heat to a gentle simmer and whisk in 1 cup heavy cream, maintaining a steady, just-bubbling simmer to keep the sauce creamy without curdling.
    → Cream creates the luscious texture that coats the pasta; a gentle simmer preserves silkiness and prevents separation.
  • Stir in the zest of 1 lemon and 1 tablespoon lemon juice, and add 1/2 teaspoon red pepper flakes; combine so the bright citrus and subtle heat lift the seafood while maintaining balance.
    → The acidity from lemon and a hint of heat balance the richness and echo the lemon notes in seafood dishes.
  • Off the heat, whisk in 1/2 cup freshly grated Parmesan cheese until smooth and emulsified, then season with salt to taste; this finishes the sauce with a nutty, salty kiss without clumping.
    → Adding cheese off the heat prevents clumping and preserves flavor; it also helps thicken the sauce slightly for coating.
  • Gently fold in the lobster meat and warm through for 2 to 3 minutes, turning the pieces to heat evenly without overcooking which can make the lobster tough.
    → Lobster retains moisture and tenderness when warmed briefly in the sauce rather than boiled or simmered extensively.
  • Add the drained pasta to the skillet with the sauce and lobster; toss with tongs, gradually adding the reserved pasta water as needed to loosen the sauce and help it cling to the pasta until glossy and evenly coated.
    → Starchy pasta water helps emulsify the sauce and ensures a cohesive, shiny coating on every strand.
  • Season the dish with fine sea salt and freshly ground black pepper to taste, tasting and adjusting as needed after combining the pasta and sauce.
    → Final seasoning balances all components since seafood stock and Parmesan contribute saltiness; taste before serving.
  • Stir in 2 tablespoons chopped fresh parsley at the end for color and a fresh, herbal note, reserving a pinch for garnish if desired.
    → Parsley provides brightness and contrast to the rich sauce; heat can dull herbs, so add at the end.
  • Optionally, if using basil, fold in 1/2 cup chopped fresh basil just before serving to preserve vibrant color and fragrance; or, if you prefer a sharper cheese presence, grate 1/4 cup Pecorino Romano over the top and taste as you go.
    → Basil adds a distinctive citrusy aroma that pairs beautifully with lemon and seafood; Pecorino Romano offers a tangier finish than Parmesan.
  • Divide the lobster pasta among warmed plates, spoon extra sauce over each portion, and finish with a light dusting of lemon zest and a final pinch of parsley for a visually vibrant, aromatic presentation.
    → Serving immediately ensures optimal texture and aroma while the sauce remains glossy and flavorful.

Notes

These lobster pasta dishes are luxurious, crowd-pleasing seafood meals built around tender lobster meat, a silky tomato-cream sauce, and al dente pasta. With a few smart prep steps and careful attention to seasoning, this dish comes together quickly and feels restaurant-worthy at home.

  • Prep the lobster meat first: chop 12 oz of cooked lobster meat into bite-sized pieces so they distribute evenly through the sauce. If you only have claw meat, that works too. If starting from raw lobster, cook until just opaque, remove the meat from the shell, and pat dry before adding to the sauce to avoid thinning the sauce.
  • Cook the pasta in well-salted water until al dente. Reserve about 1 cup of the starchy cooking water before draining; you may need it to loosen the sauce later and help it cling to the pasta.
  • Start the sauce with 2 tablespoons of extra-virgin olive oil and 2 tablespoons of unsalted butter. Sauté the minced garlic and shallot slowly over medium heat until translucent and fragrant, being careful not to brown them, which can introduce bitterness.
  • Deglaze with 1/2 cup dry white wine and simmer until it reduces by about half, concentrating the flavors and lifting any browned bits from the pan.
  • Stir in 1 cup seafood stock or clam juice and 1 cup crushed tomatoes or halved cherry tomatoes. Simmer briefly to meld the flavors; the tomatoes will provide brightness and body to the sauce.
  • Pour in 1 cup heavy cream and maintain a gentle simmer. Do not boil vigorously after adding cream to prevent curdling; if the sauce thickens too much, loosen with a splash of the reserved pasta water.
  • Season with 1/2 teaspoon red pepper flakes, fine sea salt, and freshly ground black pepper to taste. Add the lemon zest of 1 lemon and 1 tablespoon lemon juice toward the end of cooking to brighten the richness.
  • Stir in 1/2 cup freshly grated Parmesan cheese off the heat to create a glossy, silky finish. This helps thicken the sauce and adds a nutty depth without overpowering the lobster.
  • Fold in the lobster pieces and 2 tablespoons chopped fresh parsley just before serving. Taste and adjust seasoning with salt and pepper as needed; reserve a small amount of parsley for garnish if desired.
  • Optional accents: add 1/2 cup chopped fresh basil for a bright herbal note, or 1/4 cup grated Pecorino Romano for a sharper cheese edge. If using Pecorino, add sparingly and adjust salt accordingly.
  • Finishing tips: keep the sauce warm on a very low simmer and add a splash of pasta water if you need to loosen it. Toss the cooked pasta with the sauce over low heat until well coated and glossy.
  • Serving and leftovers: finish with extra lemon zest and parsley. The sauce will thicken as it sits, so a quick rewarm with a splash of pasta water helps restore the silkiness. This dish pairs well with a crisp white wine and crusty bread to mop up the sauce.

Tips

Lobster prep and handling tips

  • Chop the cooked lobster meat into bite-sized pieces so it distributes evenly through the sauce. If you only have claw meat, that’s fine too. If starting from raw lobster, cook until just opaque, remove the meat from the shell, and pat dry before adding to the sauce to prevent thinning the sauce.
  • Pat the lobster dry thoroughly after prepping. Any extra moisture can loosen the sauce and dilute the flavors. If you have time, chilling the meat for 10–15 minutes helps it hold its shape when folded into the hot sauce.

Pasta and base preparation tips

  • Salt the pasta water generously. The pasta itself should taste like the sea, not bland. Aim for the water to taste like the ocean itself, since it’s the primary seasoning for the sauce components.
  • Cook the linguine or spaghetti until al dente, since it will finish cooking in the sauce. Reserve about 1 cup of the starchy cooking water before draining to adjust the sauce consistency if needed.
  • Use high-quality olive oil to build the base flavor. Heat the oil to shimmering but not smoking to prevent burning the garlic and shallot later.
  • When adding butter, do so after the aromatics have softened. This helps emulsify the sauce and keeps it glossy rather than greasy.
  • Mince garlic and shallot finely so they dissolve evenly into the sauce rather than leaving raw bits that can taste sharp.

Sauce development tips

  • Deglaze with dry white wine and reduce by about half to concentrate the acidity and aroma. This step lifts any browned bits from the pan and adds depth to the base.
  • When adding stock and cream, keep the heat moderate and avoid a vigorous boil after cream is added. A gentle simmer helps the sauce emulsify and prevents curdling.
  • Crush the tomatoes for body, or use halved cherry tomatoes for brightness. Simmer just enough to meld their flavor without breaking down too much.
  • Red pepper flakes should be subtle. Start with 1/2 teaspoon and adjust to taste so the heat complements, not overwhelms, the lobster.

Finishing flavors and balance

  • Finish with the zest of 1 lemon and lemon juice just before serving to preserve brightness. Add zest toward the end for aroma and stir in lemon juice off heat to keep the citrus note lively.
  • Stir in freshly grated Parmesan off the heat to avoid clumping and to preserve its nutty aroma. If the sauce thickens too much, splash in a bit of reserved pasta water to loosen.
  • Add chopped fresh parsley at the very end for a bright, herbaceous note and vibrant color. Reserve a small amount for garnish if desired.
  • Season with fine sea salt and freshly ground black pepper to taste, remembering that the stock and cheese add salinity. Taste as you go and adjust in small increments.

Finishing the dish and serving tips

  • Toss the pasta with the sauce in the skillet so the starch helps emulsify the mixture and cling to every strand. If the sauce seems too thick, loosen with a splash of the reserved pasta water.
  • Fold in the lobster meat at the end and heat just to warm through to maintain tenderness; overcooking will make the seafood tough.
  • Garnish with extra parsley, a light dusting of Parmesan, and a final squeeze of lemon juice if desired. Serve immediately for best texture and aroma.

Optional add-ins and substitutions

  • 1/2 cup chopped fresh basil can be added at the very end for a bright, aromatic note; it pairs nicely with lemon and seafood.
  • 1/4 cup grated Pecorino Romano provides a sharper cheese accent. Use sparingly and taste as you go to avoid overpowering the lobster’s sweetness.
  • If you prefer a lighter version, substitute half-and-half for heavy cream, but expect a thinner sauce.

FAQ

What is lobster pasta?

Lobster pasta is a luxurious, comforting dish that features tender lobster meat tossed with pasta in a rich, flavorful sauce made with garlic, butter, white wine, and citrus. It’s commonly made with linguine or fettuccine to hold the sauce nicely.

What ingredients do I need to make lobster pasta?

Common ingredients include:

  • Lobster meat (1–1.5 lb cooked claw/tail meat or lobster tails)
  • Pasta (linguine, fettuccine, or spaghetti)
  • Butter and olive oil
  • Garlic (and optional shallot)
  • Dry white wine
  • Heavy cream or half-and-half
  • Lemon zest and juice
  • Salt, pepper, and red pepper flakes (optional)
  • Fresh parsley and grated Parmesan (optional)
How do I cook the lobster for this dish?

Options:

  • Live lobster: Boil in salted water until shells turn bright red and meat is opaque, about 8–10 minutes for 1 lb lobsters. Let cool, then remove meat from tails and claws and cut into bite-sized pieces.
  • Pre-cooked lobster: Use the meat directly in the sauce or briefly warm it in the sauce at the end.
  • Alternatively, you can steam lobster and then extract the meat.
How do I make the lobster pasta sauce?

In a large skillet, melt butter with a little olive oil. Sauté minced garlic (and shallot if using) until fragrant. Add dry white wine and simmer until reduced by half. Stir in lemon zest and juice, then add cream and simmer 2–3 minutes. Season with salt, pepper, and red pepper flakes if desired. Add the lobster meat to warm through, then toss in the cooked pasta. Finish with chopped parsley and a squeeze of lemon.

Can I use frozen lobster?

Yes. Thaw frozen lobster in the refrigerator overnight. Pat the meat dry before cooking. Do not thaw at room temperature. If using thawed lobster meat, you can skip the initial boiling/steaming step and simply warm the meat in the sauce at the end.

How do I avoid overcooking the lobster?

Cook lobster just until the meat is opaque and firm. When added to the hot sauce, keep the heat moderate and toss gently for 1–2 minutes to warm through without turning rubbery. If you’re using pre-cooked meat, heat it just enough to coat with sauce.

What pasta shape works best for lobster pasta?

Flat, saucy pastas hold the sauce well. Good choices include linguine, fettuccine, or pappardelle. Thick spaghetti can work too. Avoid very delicate shapes that won’t hold onto the sauce.

Can I make this dairy-free or gluten-free?

Yes:

  • Dairy-free: Use olive oil or a dairy-free butter substitute and replace cream with coconut cream or a dairy-free milk, thickened slightly with a slurry of cornstarch.
  • Gluten-free: Use gluten-free pasta and check that any added products (parmesan, stock) are gluten-free.
Can I prepare this in advance or store leftovers?

Keep sauce and lobster separate from cooked pasta if planning ahead. Reheat sauce gently and toss with freshly cooked al dente pasta when serving. Leftovers can be refrigerated for 1–2 days in an airtight container. Do not freeze pasta with the cream sauce, as it can separate.

What are good serving suggestions and wine pairings?

Serve with a light salad and crusty bread to mop up the sauce. For wine, try a dry white such as Chardonnay, Sauvignon Blanc, or Pinot Grigio. A sparkling wine or Prosecco also pairs nicely with the richness of lobster pasta.

Introduction / Hook

Close your eyes and imagine the scent of the sea carried on a gentle breeze, the soft crackle of a warm buttered bun meeting a treasure of sweet, succulent lobster meat, and a bright whisper of summer lemon kissing every bite. A lobster roll is more than a sandwich; it’s a coastal ritual, a celebration of peak-season ingredients, and a reminder that simple things, when treated with care, become transportive. In a single mouthful, you travel from a sunlit shoreline to a bustling seaside shack, from childhood picnics to weekend indulgence, all without leaving your kitchen. This dish is the culinary equivalent of a postcard—memories folded into a crusty bun, the ocean’s generosity translated into a creamy, citrus-touched richness, and a playful crunch that keeps you coming back for more.

What makes a lobster roll sing isn’t just the lobster itself, but the way its flavors are balanced and the textures thoughtfully layered. It’s about how the meat remains tender and glossy, how the bread achieves a delicate kiss of golden butter without surrendering its own character, and how a zing of citrus or a hint of mild sweetness from fine herbs can elevate the experience. It’s about restraint and respect: knowing when to let the lobster shine, when to add a whisper of mayo or a pat of butter, and when to tuck the whole thing into a sun-warmed bun that gives just enough give with every bite. This description preps you for a dish that feels like a vacation in a single, satisfying package—luxurious yet approachable, refined yet comforting, and always deeply satisfying in the way only a well-made lobster roll can be.

As you read on, you’ll discover not just how to savor this classic but how to make it yours: the way you choose the bun, the balance of creaminess and brightness, the choice between a cold mayo-based relish or a warmly buttered lobster experience, and the little touches that transform a good roll into an unforgettable one. Whether you’re cooking for a sunny weeknight treat, hosting friends on a warm weekend afternoon, or recreating a coastal escape in your own kitchen, this lobster roll guide is your passport to a dish that feels both timeless and wonderfully current. The goal is joy—uncomplicated, generous, and perfectly tailored to your preferences. So, lean in, take a breath of sea-salted air, and get ready to fall in love with a sandwich that has captivated diners for generations.

The Story Behind the Dish

The lobster roll grew from the working docks and picnic tables of New England, a region where seafood has long been the heartbeat of coastal life. Fishermen and coastal families would gather after a long day at sea or a long morning mending nets, turning simple, sturdy ingredients into something celebratory. The earliest versions were humble—crusty bread split open with a generous scoop of finely chopped lobster, perhaps a touch of mayonnaise or a light dressing, and a pinch of salt to make the flavors sing. As communities along the Maine and Atlantic coasts embraced the idea, regional twists emerged, each purist defending their method—whether to serve the lobster cold with a mayo-based coat or warm with a butter-drenched glaze. What binds these origins is a shared philosophy: honor the lobster’s sweetness, treat the bread as a canvas, and keep the preparation quick enough to preserve the meat’s delicate texture and aroma.

Over the decades, the lobster roll became a symbol of coastal summers and a testament to simple craftsmanship. Beach shacks, roadside stands, and family-owned markets would compete not with extravagant ingredients but with the perfect balance—bread toasted to a gentle bronze, lobster meat that remains tender rather than stringy, and a dressing that lifts without overpowering. In many ways, the roll mirrors the region’s character: unpretentious, generous, and a little bit indulgent without tipping into opulence. The term itself has inspired countless variations across the country and beyond, each claimant offering their own memory, their own coastal legend, and their own method for achieving that coveted bite—the moment when crust gives way to creamy, briny lobster and a whisper of citrus or butter lingers on the palate.

Today, the lobster roll sits at the crossroads of tradition and modern cooking. You’ll find purists who insist on specific bun types, precise lobster cuts, and exacted temperatures; you’ll find explorers who push the boundaries with regional herbs, spiced riffs, or gluten-free adaptations. The beauty of this dish is its flexibility, its ability to be both a precise homage to a cherished regional method and a canvas for personal taste. The goal remains the same: to celebrate the lobster’s natural sweetness and to present it in a way that feels right for you, whether you’re at a sunlit picnic, a bustling coastal market, or a quiet dinner at home that somehow tastes like a sea breeze made edible.

As you read the rest of this guide, you’ll encounter stories of seaside towns, small-town ingenuity, and the timeless joy of sharing something delicious with people you love. The lobster roll isn’t a complicated recipe; it’s a ritual of timing, texture, and balance. It asks you to pay attention to the lobster meat’s freshness, to lightly toast the bread to coax out a touch of buttered fragrance, and to choose a dressing or a butter finish that complements rather than competes with the lobster’s natural sweetness. When these elements align, every bite feels bright, creamy, and uplifting—a reminder that some of life’s best pleasures are born from simple, well-chosen ingredients treated with care and respect.

Why You’ll Love This Recipe

  • Quick to assemble and forgiving enough for weeknights or casual gatherings, yet refined enough to feel special for guests.
  • Celebrates the luxurious sweetness of lobster with a light, balanced dressing or a butter-kissed finish that preserves its delicate texture.
  • Versatile for different tastes and dietary needs: cold mayo-based versions, warm butter-enhanced styles, or dairy-free adaptations with plant-based spreads.
  • Perfectly portable for picnics, beach days, or elegant, minimal-effort dinners that still feel celebratory.
  • Textures play a key role: the soft, pillowy interior of the lobster meat, the gentle crunch of a crisped bun, and the silky creaminess of a dressing that glides across the palate.
  • Low-maintenance elegance: minimal equipment, quick assembly, and a dish that looks as good as it tastes with little fuss.
  • Heritage and storytelling baked into every bite—each roll invites you to partake in a coastal tradition that has delighted families for generations.
  • Great as a standalone hero or as part of a bigger seafood spread, pairing beautifully with light sides and bright beverages.

Flavor Profile & Texture

The lobster in a roll delivers a multi-layered flavor experience. The lobster meat—bright, slightly sweet, and richly oceanic—offers a natural brininess that is immediately inviting. When combined with a dressing or a butter finish, you get a creamy balance that coats the tongue without weighing down the meat. A hint of citrus—usually lemon—lifts the dish, cutting through the richness and sharpening the seafood’s inherent sweetness. If mayo is used, it should be light and tangy, providing a silkiness that remains distinct from the lobster itself, allowing the meat’s texture to shine rather than obscuring it. In butter-forward versions, the lobster takes on a luscious indulgence—an almost caramelized edge from a quick, gentle heat that enhances the butter’s sweetness and adds a delicate new dimension to the overall flavor.

The texture is the star here. The lobster meat should stay tender and juicy, not dry or crumbly, with an almost melt-in-the-mouth quality in every bite. The bun is more than a vessel; it’s a crucial component that frames the experience. A well-toasted, lightly crusted bun offers just enough bite and warmth to provide a satisfying contrast to the soft lobster filling, while its interior remains plush enough to cradle the meat without shredding. When executed with care, the roll offers a comforting, cohesive bite: you taste the lobster’s sweetness, the gentle salt from the sea, the warmth of the bread, and the zing of citrus or the smoothness of a carefully chosen dressing, all in a single, harmonious mouthful.

Texture and balance also come from proportion. Too much dressing or too much butter can overwhelm the lobster, dulling its bright, delicate flavors. Too little can make the roll feel dry and incomplete. The ideal roll respects the lobster’s integrity while using the bun and dressing to create a unified, luscious mouthfeel. The end result is bright, creamy, and satisfying—every component working in quiet concert to deliver a classically elegant yet casually approachable seafood sandwich.

Occasions & Pairings

A lobster roll is inherently versatile, making it a fit for a range of occasions. It shines on sun-drenched summer days at the beach or in the garden, but it’s also a wonderful choice for a relaxed weekend supper or a celebratory lunch when you want to feel special without overcomplicating the menu. Its elegance makes it appropriate for casual dinner parties, where guests can customize their own bites with different toppings or styles, turning a simple platter into an interactive experience.

Pairings elevate the whole experience. Light, crisp white wines such as Pinot Grigio, Sauvignon Blanc, or a chilled sparkling wine can brighten the dish without overpowering the delicate lobster. If you prefer beer, a pale ale or a light lager with a clean finish complements the sweetness of the meat and the butter or dressing’s richness. For non-alcoholic options, citrus-infused sparkling water or a homemade lemonade with a touch of sea salt can echo the dish’s brightness and coastline vibes.

Side dishes that harmonize well with a lobster roll include corn on the cob, a simple green salad with a lemon vinaigrette, crisp potato chips, or a light pickled vegetable slaw to add a refreshing snap. Desserts that finish the meal with a clean, bright note—like a lemon tart or a barely sweet fruit pavlova—keep the meal from feeling heavy after the richness of the roll. The key is to maintain balance: keep sides light and refreshing to let the lobster roll remain the central star of the plate.

Tips, Variations & Substitutions

Classic approaches

If you’re aiming for a traditional Maine-style experience, you may choose a lightly seasoned lobster dressed minimally with mayo or a touch of lemon juice, allowing the lobster’s natural sweetness to lead. A simple butter-toasted bun can offer a warm, glossy finish that highlights the meat’s texture. The bread should be soft but resilient enough to hold up to the filling without collapsing, and the lobster should be cut into bite-sized pieces that are easy to eat in a single mouthful. The goal is to create a balance where the lobster remains the dominant flavor, with the dressing and bun providing complementary notes rather than competing flavors.

Dietary substitutions

For dairy-free or vegan adaptations, you can use a plant-based mayo mixed with a squeeze of lemon and a dash of salt, or opt for a butter substitute to achieve a similar lacquer on the bun. For gluten-free versions, select a sturdy gluten-free bun or serve the lobster on a bed of crisp lettuce cups with the same dressing for a lighter, low-carb take. If you’re avoiding mayo entirely, a bright olive oil–based dressing with a hint of Dijon and capers can offer a tangy, savory counterpoint that still respects the lobster’s sweetness.

Regional twists

Regional twists abound. Some cooks prefer a Connecticut-style approach: a hot lobster filling drenched in browned butter for a deeply glossy finish with a toasty bun. Others lean toward a bright, colander-friendly mayo dressing with chopped celery for crunch and a sprinkle of chives for aroma. Fusion versions may incorporate a hint of tarragon, dill, or tarragon-lemon mayonnaise for an herbaceous lift. The beauty here is that the lobster roll invites personalization—you can craft the experience around your favorite flavor notes while honoring the dish’s coastal identity.

Storage & Make-Ahead Ideas

The best lobster rolls shine when the lobster meat remains plump and fresh. If you’re prepping in advance, store cooked lobster meat chilled in an airtight container for up to a day. Dressings or mayo mixtures are best prepared close to serving to maintain texture and brightness. To assemble ahead, keep the lightly toasted buns separate from the lobster mixture and add just before serving to prevent sogginess. If you style your rolls for a buffet or party, consider offering a few topping options—herbed mayo, lemon butter, crisp pickle slices, or scallion greens—so guests can customize their bites without compromising the integrity of the main attraction.

For a make-ahead approach with minimal compromise, you can toast and lightly butter the buns in advance and store them in an airtight container. When it’s time to serve, briefly rewarm the buns just until they release a gentle butter aroma, then fill with lobster that’s been lightly dressed, ensuring the meat remains moist and flavorful. This strategy keeps the dish quick to assemble while preserving the ideal textures and the lobster’s delicate sweetness.

Fun Facts & Trivia (Optional)

  • The lobster’s bright red color only appears after it’s cooked; raw lobster meat is typically bluish-green to translucent. The heat brings out a natural pigment called astaxanthin, which turns the shell red.
  • There are several claimed “origins” of the lobster roll, with stories spanning coastal Maine to Connecticut and beyond. The common thread is a celebration of lobster with simple, high-quality accompaniments that let the seafood shine.
  • In some regions, the butter-forward version of the roll is preferred, while others insist on a mayo-based filling. Both approaches honor the lobster and the sea, but each offers a distinct sensory experience.
  • Split-top buns, often lightly toasted with butter, have become a de facto standard for many lobster rolls, as they provide the perfect balance of tenderness inside and a bit of crispness on the outside.
  • Serving temperature matters: a cold, mayo-based filling delivers a refreshing bite, while a warm, butter-drenched filling creates a decadent, almost comforting sensation. Many cooks enjoy both styles across different meals and occasions.

Closing Thoughts

A lobster roll is a testament to the power of restraint and the beauty of high-quality ingredients treated with care. It invites you to pause, savor, and appreciate the way a few simple components—lobster, bread, and a supporting dressing or butter finish—can come together to create something exceptionally satisfying. Whether enjoyed as a quick weeknight treat or a centerpiece of a long, sunlit weekend lunch, the lobster roll offers a sensory journey as uplifting as a sea breeze. Use this guide as your compass to craft a roll that feels like a personal signature—one that reflects your preferences, honors traditional methods, and still feels as special as a coastal afternoon by the water.

Ingredients

Lobster Roll Filling

  • 1 1/2 pounds cooked lobster meat, claw and knuckle meat, roughly chopped into bite-sized pieces
    → The star filling of the dish. Use fully cooked lobster meat (preferably claw and knuckle meat for the best texture and sweetness). Fold gently to keep larger chunks intact so each bite offers a pleasing chew rather than a mushy filling. If you buy pre-shucked meat, pat it dry to remove excess moisture before mixing with the dressing to prevent a watery result.
  • 1/2 cup mayonnaise
    → Provides creaminess and acts as the binder that holds the filling together. Choose a high-quality, full-fat mayonnaise for best flavor and emulsification; if you want a lighter option, substitute part with Greek yogurt but keep enough mayo to maintain a smooth, cohesive texture. Chill the dressed lobster briefly before serving to help set the filling.
  • 2 tablespoons fresh lemon juice
    → Adds bright acidity to balance richness and bring out the lobster’s sweetness. Use freshly squeezed juice from a ripe lemon. Start with 2 tablespoons and adjust to taste; avoid overdoing it, which can skew the delicate seafood flavors. A touch of lemon zest can be added for extra aroma if desired.
  • 1 teaspoon Dijon mustard (optional)
    → Introduces a subtle tang and helps emulsify the dressing, giving it a bit of bite without overpowering the lobster. If you don’t have Dijon, a small amount of whole-grain mustard works too. Use sparingly to prevent masking the sea flavors.
  • 2 tablespoons finely diced celery
    → Provides crisp texture and a mild vegetal note that contrasts with the creamy filling. Dice celery very finely so it distributes evenly and doesn’t poke through the soft lobster; for extra crunch, you can reserve a tablespoon to fold in right before serving.
  • 1 tablespoon finely chopped chives or green onions
    → Adds color and a light onion lift without becoming overwhelming. Snip the herbs finely so they distribute evenly and avoid large, stringy pieces; they also contribute a fresh aroma that pairs well with lemon.
  • 1/2 teaspoon kosher salt (adjust to taste)
    → Balances the richness and enhances the lobster’s sweetness. Start with a conservative amount and taste the filling after the dressing has been incorporated; remember mayo can contribute salt, so add gradually and in increments.
  • 1/4 teaspoon freshly ground black pepper
    → Provides a subtle peppery backbone that complements seafood without overpowering it. Use freshly ground pepper for brighter aroma and flavor; grind over the bowl just before mixing for the most vibrant taste.
  • 1/4 teaspoon Old Bay seasoning or paprika (optional)
    → A classic seafood spice that adds warm, maritime aromatics. Use sparingly as a finishing touch; you can sprinkle a tiny pinch after tasting to avoid masking the lobster’s natural sweetness.

Lobster Roll Bun Prep

  • 4 New England-style split-top hot dog buns
    → The traditional vessel for a lobster roll, offering a sturdy, airy crumb that holds generous filling without collapsing. Split-top buns are ideal because they stay open when loaded and toast beautifully on the inside. If you can’t find them, use any soft, elongated bun but adjust technique accordingly to avoid spillage.
  • 2 tablespoons unsalted butter, melted
    → For toasting the buns to a golden-brown, buttery crust that adds flavor and helps prevent sogginess from the filling. Brush the cut sides evenly and toast until just browned; watch closely so the butter doesn’t burn and the buns stay light and crisp.

Optional Add-ins

  • 1/2 teaspoon prepared horseradish (optional)
    → Adds a sharp, spicy kick that enhances the lobster’s sweetness. Start with a small amount and taste, as horseradish can quickly dominate the delicate flavors; mix into the dressing or fold in at the end.
  • 1 tablespoon chopped fresh dill or tarragon (optional)
    → Introduces herbal brightness and a hint of anise or summer freshness. Dill is traditional with seafood; use sparingly to avoid clashing with lemon and lobster sweetness. Tarragon offers a similar brightness with a slightly different herbal note.

Instructions

  • Prepare the lobster meat by inspecting and chopping it to bite-sized pieces: Confirm you have about 1 1/2 pounds of cooked claw and knuckle lobster meat, then roughly chop into uniform chunks and pat dry any surface moisture if using pre-shucked meat to prevent a watery dressing.
    → Dry, evenly sized pieces guarantee consistent texture and prevent the filling from becoming soggy as the dressing coats each bite.
  • Make the dressing base by whisking the mayo, lemon juice, mustard, and seasonings: In a large mixing bowl, combine 1/2 cup mayonnaise, 2 tablespoons fresh lemon juice, 1 teaspoon Dijon mustard (optional), 1/4 teaspoon kosher salt, and 1/4 teaspoon freshly ground black pepper; whisk until smooth and emulsified.
    → Emulsification creates a creamy, cohesive dressing that clings to the lobster without separating, ensuring a glossy, bound filling.
  • Incorporate crisp texture by adding celery and chives to the dressing: Finely dice 2 tablespoons celery to about 1/8 inch and snip 1 tablespoon chives or green onions; fold them into the dressing until evenly distributed.
    → Fine dice distribute crunch and aromatics throughout the filling, so every bite has a balanced contrast to the soft lobster.
  • Gently fold the lobster into the dressing to coat without breaking chunks: Transfer the prepared lobster into the bowl and use a silicone spatula to fold with a lifting motion; continue until the lobster pieces are coated but still hold their shape.
    → Gentle folding preserves the lobster’s texture and prevents turning the filling into mush, yielding distinct, chewy chunks in every bite.
  • Optionally integrate horseradish or extra dill for brightness and heat: If using horseradish, whisk in 1/2 teaspoon into the dressing or fold in at the end; if using dill or Tarragon, fold in 1 tablespoon chopped herb; then taste and adjust seasoning.
    → A small amount of horseradish or fresh herbs enhances aroma and accents the lobster without overpowering its sweetness.
  • Chill the dressed lobster to set the filling and meld flavors: Cover the bowl with plastic wrap and refrigerate for 20–30 minutes; this helps the dressing emulsify further and makes the filling easier to portion.
    → Chilling firm-molds the texture and ensures the filling remains cohesive when stuffed into buns.
  • Prepare the buns for assembly by splitting and readying four New England-style split-top buns: Separate the buns and place them cut-side up on a clean surface, ensuring they are dry and ready for toasting.
    → Split-top buns stay open when loaded and toast evenly, preventing the filling from spilling out and giving a sturdy cradle for the lobster.
  • Toast the buns in butter to achieve golden color and a crisp, flavorful crust: Melt 2 tablespoons unsalted butter; Brush the cut sides of the buns evenly with butter, then toast them cut-side down in a hot skillet over medium heat until they are golden and lightly crisp, about 2–3 minutes.
    → The buttered, toasted surfaces add flavor, create a barrier against moisture, and provide a sturdy base that supports a generous filling.
  • Fill the toasted buns with the dressed lobster, distributing evenly and gently: Use a spoon or small scoop to portion the filling into each bun, keeping the chunks visible and not overpacking to avoid squashing the texture; leave enough room at the top for a neat presentation.
    → Even distribution prevents one bite from being overstuffed or underfilled, preserving the sandwich’s balance and mouthfeel.
  • Finish and serve immediately with lemon wedges for extra brightness: Arrange the filled lobster rolls on plates with lemon wedges and serve right away to maintain the contrast between the creamy filling and the crisp, warm bun.
    → Serving promptly preserves the ideal texture—the crisp bun, creamy dressing, and succulent lobster—before the mayo softens the crust.

Notes

These lobster rolls are a classic New England sandwich featuring tender, fully cooked lobster dressed in a bright, creamy mayo dressing and tucked into lightly toasted split-top buns. For best texture, use claw and knuckle meat and pat dry any pre-shucked meat to prevent a watery filling; fold gently to keep larger chunks intact so each bite offers chew. Chill the dressed lobster briefly before serving to help set the filling. Choose a high-quality, full-fat mayonnaise; if you want a lighter option, substitute part with Greek yogurt but keep enough mayo to maintain a smooth binding. Fresh lemon juice brightens the richness—start with 2 tablespoons and adjust to taste; a touch of lemon zest can be added for extra aroma. A little Dijon mustard is optional but helps emulsify the dressing; if unavailable, a small amount of whole-grain mustard works too. Add 2 tablespoons finely diced celery for crisp texture and 1 tablespoon finely chopped chives or green onions for color and a light onion lift. Season with 1/2 teaspoon kosher salt (adjust to taste) and 1/4 teaspoon freshly ground black pepper; 1/4 teaspoon Old Bay seasoning or paprika is optional and should be used sparingly as a finishing touch so you don't mask the lobster's sweetness. For the bun, toast 4 New England-style split-top buns brushed with 2 tablespoons melted butter until golden and just crisp. If split-top buns aren't available, use a soft elongated bun and toast similarly to resist sogginess. Optional add-ins include 1/2 teaspoon prepared horseradish for a sharp kick and 1 tablespoon chopped fresh dill or tarragon for herbal brightness; add to the dressing or fold in at the end. Serve immediately with lemon wedges; leftover filling can be refrigerated briefly if needed, but best enjoyed fresh to preserve texture. For best results, assemble right before serving or chill components separately if preparing ahead, then mix and fill just before serving.

Tips

Choosing and preparing the lobster meat

  • Opt for fully cooked lobster meat, focusing on claw and knuckle portions for the best texture and sweetness. Fold gently to keep larger chunks intact so each bite remains chewy and satisfying.
  • If you buy pre-shucked meat, pat it very dry to remove excess moisture before mixing with the dressing to prevent a watery filling.

Dressing the filling: emulsification and balance

  • Use a high-quality, full-fat mayonnaise as the base for creaminess and stable emulsification. For a lighter option, substitute part with Greek yogurt but retain enough mayo to keep a smooth, cohesive texture.
  • Fresh lemon juice brightens and balances richness; start with 2 tablespoons and adjust to taste. Avoid overshooting, which can dull the lobster sweetness. Add a touch of lemon zest if you want extra aroma.
  • Dijon mustard adds a subtle tang and helps emulsify the dressing. If you don’t have Dijon, a small amount of whole-grain mustard works too. Use sparingly to avoid masking delicate seafood flavor.
  • Fold in the mayo dressing gently to prevent breaking the lobster meat. Chill the dressed filling briefly before serving to help set the mixture for firmer scooping.

Texture and crunch: vegetables and herbs

  • Finely dice celery to provide crisp, vegetal contrast without disrupting the filling’s cohesion. You can reserve a tablespoon to fold in right before serving for extra crunch.
  • Chives or green onions should be finely chopped so they distribute evenly and add a light onion lift without large, stringy pieces.

Seasoning and finishing touches

  • Start with 1/2 teaspoon kosher salt and adjust to taste after the mayo is incorporated; mayo itself adds salt, so add gradually. A pinch of freshly cracked black pepper should be added just before mixing for a bright aroma.
  • Old Bay or paprika can be used sparingly as a finishing note to echo classic seafood flavors. If using, sprinkle a tiny pinch after tasting to avoid overpowering the lobster.

Buns: toasting and preparation

  • New England-style split-top buns are traditional for their sturdy, airy crumb that holds generous filling. If unavailable, use any soft, elongated bun but adjust technique to keep the filling contained.
  • Brush cut sides with melted unsalted butter and toast until just browned. Toasting enhances flavor and helps prevent sogginess from the filling; monitor closely to avoid burning.

Optional add-ins: horseradish, dill and Tarragon

  • Horseradish: a half-teaspoon can provide a sharp kick. Start with a small amount and taste, since horseradish can quickly dominate the delicate flavors. Mix into the dressing or fold in at the end for control.
  • Herbs: dill or tarragon add brightness. Dill is traditional with seafood; use sparingly to avoid clashing with lemon and the lobster’s sweetness. Tarragon offers a slightly different herbal note but should still be used in small amounts.

  • You can dress the lobster a bit in advance and refrigerate for up to a few hours; if you do, keep the mixture loosely covered to prevent drying. For best texture, fold in celery and herbs just before serving.
  • When ready to serve, spoon the filling into the toasted buns just before eating or assemble ahead and keep the filling chilled, then fill buns at service to maintain crunch.
  • Serve with lemon wedges and, if desired, classic pickle chips or coleslaw on the side for a refreshing contrast.

Troubleshooting and quick fixes

  • Filling is too loose or watery: pat the lobster dry again and add a bit more mayo or a touch of cream cheese to aid binding. Chill the mixture briefly to help set before filling the buns.
  • Filling tastes flat: re-balance with a small squeeze of lemon or a pinch more salt, then fold in a touch more celery or herbs for brightness.
  • Buns become soggy before serving: toast longer and consider lining the bun with a crisp lettuce leaf to create a barrier between the filling and the bread.

FAQ

What is a lobster roll?

A lobster roll is a sandwich built with lobster meat tucked into a split-top bun. It can be served warm with butter (Maine-style) or cold with mayonnaise (Connecticut-style).

What lobster meat should I use for the best lobster roll?

Use fresh, preferably claw and knuckle meat for texture. Aim for large chunks and avoid predominantly tail meat. If using pre-cooked lobster, gently dice it to keep a juicy texture without becoming mushy.

What bread is best for a lobster roll?

Split-top hot dog buns or New England-style rolls work best. Lightly butter and toast them to add flavor and prevent sogginess. Brioche buns are a tasty alternative for a richer bite.

What’s the difference between a Maine hot lobster roll and a Connecticut cold lobster roll?

A Maine hot lobster roll tosses lightly cooked lobster in melted butter and serves the meat warm. A Connecticut cold lobster roll uses mayonnaise (or a light mayo-dressing) and is served cold for a creamy salad-style filling.

How should I season and dress the lobster meat?

Keep it simple: lightly season with salt and pepper, then choose your dressing. For cold rolls, mix lobster with a small amount of mayonnaise, a squeeze of lemon juice, and optional chopped chives or celery. For hot rolls, toss with melted butter and a touch of lemon.

How do I prevent the bun from getting soggy?

Toast the split-top bun in butter until lightly golden, then fill it just before serving. If making ahead, keep the lobster filling separate and assemble at serving time. A light drizzle of lemon juice can help balance moisture without making it soggy.

How do I cook lobster for the roll?

If using live lobster, boil or steam until the meat is opaque and just cooked through, then cool, remove meat from the shells, and chop. For convenience, you can use pre-cooked lobster meat. Avoid overcooking to keep the meat tender.

Can I make lobster rolls ahead or store leftovers?

Best enjoyed fresh. Store cooked lobster meat in the fridge for up to 2 days. Do not assemble the sandwich ahead of time to prevent sogginess. Reheat or refresh the lobster meat gently if needed, then assemble with toasted buns when ready to serve.

What are some common variations and substitutions?

Variations include: cold mayo-based filling with celery and chives; hot buttered lobster with a touch of lemon; swapping mayo for yogurt for a lighter version; using gluten-free buns; adding herbs like tarragon or dill; and incorporating avocado or paprika for extra flavor.

Introduzione / Gancio

Immagina una crema dorata che danza tra la dolcezza matura delle banane e la profondità ricca del burro di arachidi, avvolta da una nuvola leggere di cremosa che si scioglie sul palato. Questo è Burro di Arachidi Banana, una fusione semplice ma irresistibile di due ingredienti che hanno accompagnato generationi di colazioni, merende e dessert veloci. È una ricetta che profuma di estate quando le banane sono al massimo della loro dolcezza, ma resta sorprendentemente confortevole in qualsiasi stagione: un abbraccio di gusto che non pretende abilità culinarie da maître patissier, ma premia chi sa apprezzare la semplicità con un tocco di creatività. In un solo cucchiaio trovi una texture vellutata, una nota affumicata o tostato tipica del burro di arachidi, e una nuance fruttata che anima il palato senza sovrastarlo. È lo snack perfetto per una pausa energizzante tra una riunione e l’altra, un dessert rapido che non tradisce la delicatezza delle banane mature, o un accompagnamento stuzzicante per crostini croccanti, pancake soffici, o una manciata di frutta fresca. Lascia che il profumo avvolgente ti guidi: una casa che inizia a riempirsi di una dolce promessa, una tavola che invita a condividere, un momento che trasforma un semplice ingrediente in un piccolo rituale di piacere quotidiano.

La storia dietro il piatto

Burro di Arachidi Banana è nato dall’incontro tra due alimenti iconici della cucina casalinga globale: l’umile banana, frutto naturalmente dolce e cremoso quando maturato, e il burro di arachidi, una crema ricca e corposa che racconta storie di scambi culturali, esplorazioni e cucina di recupero. Le banane hanno accompagnato l’umanità lungo secoli di coltivazioni tropicali, viaggiando dagli orti alle cucine di tutto il mondo, dove la loro versatilità è stata celebrata in mille preparazioni: frullate in smoothie cremosi, fritte in dolci sati, o semplicemente gustate da sole. Il burro di arachidi, invece, ha radici profonde nelle tradizioni di molte regioni, dove è diventato una fonte di proteine, energia e gusto, trasformando pane arrotolato e dolci semplici in piccoli capolavori quotidiani. Quando questi due elementi si incontrano, nasce una crema che parla di convivialità: ideale da spalmare su fette di pane tostato al mattino, da mescolare in una frullata per una colazione robusta, o da utilizzare come cuore di dessert veloci. La storia di questa ricetta è quindi una storia di praticità, di comfort e di gioia condivisa — un promemoria che le cose migliori a tavola sono spesso quelle nate dall’incontro di due ingredienti semplici ma pieni di carattere.

Perché amerete questa ricetta

  • Quick and comforting: una preparazione lampo che non richiede abilità avanzate, perfetta per chi ha poco tempo ma non vuole rinunciare al gusto.
  • Bilanciamento di sapori: la dolcezza naturale delle banane si fonde con la ricchezza tostata del burro di arachidi, creando una sinfonia di note che non stancano mai.
  • Versatilità infinita: si presta a molteplici utilizzi — spalmato su pane tostato, come accompagnamento a pancake o yogurt, o come finishing vibe per dessert freddi e semifreddi.
  • Comfort sano: una combinazione di ingredienti familiari che offre energia sostenuta, ideale come spuntino post-allenamento o merenda bambini-adulti.
  • Adatta a diverse diete: facilmente personalizzabile con alternative vegetariane o vegane, senza rinunciare al gusto.
  • Riduce lo spreco: una crema che valorizza banane成熟a con avanzi o piccole imperfezioni, trasformandoli in qualcosa di amatissimo.

Profilo di sapore e consistenza

La crema Burro di Arachidi Banana si distingue per un profilo gustativo che basta a sé stesso o, se si vuole, si integra con accompagnamenti talvolta sorprendenti. All’olfatto, emerge una dolce aromaticità di banana matura, con note terrose tipiche del burro di arachidi tostato: una punta di nocciola, leggero sentore di cacao o cioccolato fondente a seconda della varietà di arachidi utilizzata. Al palato, la consistenza è vellutata e longeva: una seta cremosa che avvolge il palato e lascia una sensazione nutritiva e avvolgente. Il contrasto tra la dolcezza fruttata e la rotondità salata del burro di arachidi crea una texture che scivola con facilità, offrendo una leggera viscosità che spinge a gustarne piccole cucchiaiate. Se aggiungi una punta di sale marino, note di vaniglia o un velo di cannella, emergono nuove sfumature: una profondità quasi caramellata, una leggera speziatura che riscalda e invita a proseguire. La crema è genericamente cremosa ma può essere resa ancora più seducente se si slotterà con un tocco di liquido (latte o latte vegetale) o se si lavora a una consistenza un po’ più densa per uso spalmabile. In ogni caso, la magia sta proprio nel trasformare due ingredienti semplici in qualcosa che sembra di lusso, pur mantenendo la facilità di realizzazione e l’immediatezza del piacere quotidiano.

Occasioni & abbinamenti

Questo Burro di Arachidi Banana è una compagna versatile per diverse occasioni:

  • Colazione casalinga: spalmatelo su pane tostato caldo o su una fetta di croissant per una partenza dolce e sostanziosa.
  • Merenda perfetta per bambini e adulti: spennellato su cracker croccanti o servito con bastoncini di mela e cetriolo per un tocco di freschezza e croccantezza.
  • Dessert express: una cucchiaiata tra due biscotti, oppure usato come cuore cremoso di una coppa di yogurt freddo, per un dessert che non rinuncia alla tradizione.
  • Dolci senza forno: come magnete di sapore per gelati, budini o semifreddi veloci, dove la crema funge da legante cremoso e arricchente.
  • Abbinamenti classici: si sposa bene con lamponi freschi, banane a fette, pezzi di cioccolato fondente, granella di nocciole o un filo di miele grezzo per enfatizzare la dolcezza naturale.
  • Bevande: una puntura di questa crema sul lato di un bicchiere di latte freddo o su uno smoothie di banana crea una texture ricca e appagante che resta leggera nel gusto.
  • Variazioni stagionali: se vuoi un tocco estivo, aggiungi scorza di limone o lime grattugiata per un profilo agrumato che illumina la crema; in inverno, una spolverata di cannella o noce moscata ne accentua l’aroma coccoloso.

Taglio sensoriale: texture, consistenze e sensazioni

La bellezza di questa crema risiede nella sinergia tra una base cremosa e una nota di croccantezza residua che può emergere a seconda delle aggiunte. Una versione base tende a offrire una silkness continua, ideale per essere miscelata in bevande, frullati o yogurt. Se preferisci una texture più audace, prova a aggiungere piccoli pezzi di banane essiccate o una spolverata di granola croccante sui bordi del bicchiere: l’effetto contrasto tra liscia e croccante amplifica la sensazione di comfort. Per chi ama una finish leggermente salata, una piccola punta di sale marino o di sale Maldon esalta la nota tostata del burro di arachidi e bilancia la dolcezza naturale della banana. Un ulteriore stratagemma: scaldare leggermente la crema per renderla lucida e setosa, poi raffreddarla per creare un effetto “spalmabile” ancora più invitante. Ogni piccolo dettaglio di texture è un modo per trasformare una merenda in un rituale sensoriale che coinvolge olfatto, gusto e tatto.

Tips, variazioni & sostituzioni

  • Versione vegana: assicurati che il burro di arachidi sia puramente vegetale e che non contenga latte. Puoi usare latte di mandorla o di soia per ammorbidire la crema se vuoi una consistenza meno densa.
  • Intensità di nocciola: scegli burro di arachidi tostato per un profilo più robusto; se preferisci una nota più delicata, opta per una versione non tostée.
  • Dolcezza modulabile: la banana matura offre una dolcezza naturale; se necessario, aggiungi un goccio di miele o sciroppo d’acero in piccole quantità per equilibrarne il sapore.
  • Varianti di gusto: un tocco di cacao amaro o una spolverata di peperoncino in piccole quantità può trasformare la crema in una versione audace e intrigante.
  • Abbinamenti di frutta secca: pistacchi, semi di chia, o anacardi tritati aggiungono croccantezza e profondità gustativa.
  • Texture a strati: per un dessert dal character presentabile, disponi strati di crema alternati a strati di banana fresca in bicchiere, creando un dessert finger-friendly.
  • Versione senza latticini: se la tua dieta esige l’esclusione di lattice, la crema resta cremosa con latte vegetale, oppure può essere usata in versione pura con banane ben mature per una consistenza più densa.
  • Sostituzioni di frutta: se le banane non sono di stagione, puoi utilizzare la purea di another frutto dolce, come la pera matura, per una crema con una tonalità di gusto leggermente diversa.

Conservazione & Idee per preparare in anticipo

La crema Burro di Arachidi Banana si conserva bene in frigorifero in un contenitore ermetico per 3–5 giorni. Per mantenere la texture cremosa, lascia che raggiunga la temperatura ambiente prima di riutilizzarla, o scalda leggermente al microonde o a bagnomaria. Se vuoi congelarla, congela in porzioni individuali e scongela lentamente in frigorifero o a temperatura ambiente; la consistenza potrebbe diventare leggermente meno setosa, ma è perfetta per arricchire smoothies o dolci freddi. Per azioni veloci, puoi preparare una base di crema e conservarla in frigorifero; quando vuoi servire, aggiungi una manciata di frutta fresca o una spolverata di cacao per dare un tocco di presentazione. Le idee make-ahead includono: preparare una base di crema da utilizzare come cuore di dessert freddi, oppure mescolare in anticipo con un po’ di latte vegetale per una crema pronta all’uso nei vostri snack quotidiani. Se vuoi fare una versione più leggera, riduci la quantità di burro di arachidi o sostituisci parte della banana con una purea di mela per un profilo meno intenso ma sempre piacevole.

Curiosità & Trivia (Opzionale)

Lo sapevi che sia la banana sia il burro di arachidi hanno una lunga storia di uso quotidiano in cucine di tutto il mondo? Le banane, originarie di regioni tropicali, hanno accompagnato mercati, caravans e cucine domestiche per secoli, diventando una fonte di energia rapida e un ingrediente versatile per dolci, snack e piatti salati. Il burro di arachidi, invece, è un classico della cucina nordamericana, ma è diventato popolare in molte culture grazie alla sua capacità di offrire proteine, grassi sani e gusto intenso in una forma facilmente spalmabile. La combinazione di questi due elementi in una crema unica non è solo una scelta di gusto: è un piccolo tributo alla convivialità e all’arte di trasformare spezzoni di frutta e cucina quotidiana in qualcosa di speciale. In molte cucine del mondo, la semplicità è la chiave: una crema come questa dimostra che la natura offre già tutto ciò di cui la nostra tavola ha bisogno per nutrire, confortare e sorprendere, a patto di avere la curiosità di esplorare nuove armonie di sapore.

Ingredients

Burro di Arachidi Banana

  • 2 ripe bananas (mashed)
    → Bananas should be very ripe (yellow with brown spots) to maximize natural sweetness and moisture. Peel and mash with a fork or potato masher until mostly smooth with a few small lumps for texture. For an ultra-smooth spread, pulse briefly in a small blender or food processor. Allow mashed bananas to come to room temperature to ensure easy mixing and a creamy final texture.
  • 1/2 cup creamy peanut butter (smooth)
    → Choose a smooth, creamy peanut butter without large peanut pieces to achieve a cohesive, spreadable base. If the oil has separated, stir well before measuring. For a vegan or low-sugar option, use unsweetened natural peanut butter and adjust sweetness with the banana and optional honey or maple syrup. Salt content will affect flavor, so adjust if using salted peanut butter.
  • 1 tablespoon honey or maple syrup (optional)
    → Adds gentle sweetness and helps balance the banana’s tang. Use pure maple syrup for a vegan option or honey for a slightly different flavor profile. If bananas are very ripe and sweet, you can omit this ingredient entirely; start with less and add to taste.
  • 1/2 teaspoon pure vanilla extract (optional)
    → Provides a warm aroma that rounds out the peanut butter flavor. Use high-quality vanilla; if unavailable, you can omit without compromising the recipe, or substitute a drop of almond extract carefully.
  • Pinch of salt
    → Enhances the peanut butter flavor and helps balance sweetness. Start with a small pinch and adjust to taste, especially if your peanut butter is salted.
  • 1-2 tablespoons milk (dairy or plant-based) to loosen the spread (adjust as needed)
    → Adds creaminess and helps reach a scooping consistency. Start with 1 tablespoon and mix; add more gradually until you reach your desired thickness. For a dairy-free version, unsweetened almond milk or soy milk works well and won’t alter flavor significantly.

Optional Add-ins

  • 2 tablespoons chopped dark chocolate or chips (optional)
    → Introduces pockets of chocolate sweetness and richness. Use mini chips or finely chopped chocolate to ensure even distribution; fold in after the base mixture is combined to avoid sinking to the bottom.
  • 1-2 tablespoons crushed roasted peanuts (optional)
    → Adds extra crunch and a deeper peanut flavor. Toast peanuts lightly to deepen aroma, then crush coarsely before folding in. Great for texture; skip if avoiding nuts for allergy reasons.
  • 1/4 teaspoon ground cinnamon (optional)
    → Adds warmth and a subtle spice that complements peanut butter and banana. Start with a small amount and increase to taste; works well with the vanilla if used.
  • 1 tablespoon chia seeds or ground flaxseed (optional)
    → Boosts nutrition and helps thicken the mixture as they hydrate. If using chia seeds, allow the mixture to rest a few minutes so the seeds can swell; for a smoother texture, use ground flaxseed instead.

Optional Toppings

  • Sliced banana rounds for serving (optional)
    → Fresh slices add brightness and extra banana flavor. Arrange on top just before serving to keep them from browning too quickly in the spread.
  • Drizzle of extra peanut butter (optional)
    → Intensifies peanut butter richness on toast or crackers. Warm the peanut butter slightly to loosen for easy drizzling; thin with a splash of milk if needed.
  • Cocoa powder dusting (optional)
    → Finishes with a chocolatey touch. Lightly dust on top to avoid overpowering the banana-peanut balance; pair with sliced bananas for a dessert-like presentation.

Instructions

  • Gather and prepare the ingredients by setting out 2 ripe bananas, 1/2 cup creamy peanut butter, 1 tablespoon honey or maple syrup (optional), 1/2 teaspoon vanilla extract (optional), a pinch of salt, and 1-2 tablespoons milk; ensure all items are ready at room temperature.
    → Use very ripe bananas to maximize natural sweetness and moisture; bringing ingredients to room temperature ensures easy blending and a creamy final texture.
  • Mash the bananas until mostly smooth with a few small lumps using a fork or potato masher.
    → Ripe bananas mash quickly and evenly; leaving small lumps adds a pleasant texture that complements the creamy peanut butter.
  • Stir the peanut butter to re-emulsify any separated oils, then measure 1/2 cup and fold into the mashed bananas until fully incorporated.
    → A smooth, emulsified peanut butter base prevents oily streaks and ensures even flavor distribution throughout the spread.
  • Whisk or fold in the honey or maple syrup if using, blending until thoroughly combined.
    → The added sweetness balances the banana’s tang and peanut butter’s savor, while also helping achieve a cohesive texture.
  • Add the vanilla extract (if using) and a pinch of salt; mix until evenly distributed.
    → Vanilla enhances aroma and rounds the flavors; salt amplifies peanut butter and banana sweetness while keeping the spread balanced.
  • Drizzle in 1 tablespoon of milk and whisk until the mixture becomes creamy and spreadable; add more milk in small increments until you reach the desired consistency.
    → Milk loosens the mixture for a scoopable spread; adding gradually prevents excess thinning and allows precise texture control.
  • If using optional add-ins, fold in chopped dark chocolate, crushed roasted peanuts, cinnamon, or chia or flaxseed after the base is well combined; distribute evenly with gentle folding.
    → Folding with a spatula preserves texture and prevents ingredients from sinking; even distribution ensures every bite has flavor and contrast.
  • If using chia seeds, allow the mixture to rest for 5–10 minutes to let the seeds hydrate and thicken the spread; if using ground flaxseed, whisk in and note it thickens as well.
    → Hydration by chia seeds thickens the mixture, giving it a more spoonable consistency without additional processing.
  • Check the texture and adjust with more peanut butter or milk as needed to achieve a balanced, spreadable, scoopable consistency.
    → You want enough cohesion to hold its shape on toast while remaining soft enough to spread easily; small adjustments gradually prevent over-thinning.
  • Spoon the finished Burro di Arachidi Banana into a serving dish or jar; cover and refrigerate if not serving immediately, and bring to room temperature before serving for best creaminess.
    → Refrigeration can firm the spread; warming slightly restores smoothness and ease of spreading on bread or crackers.
  • When serving, top with optional banana slices, a drizzle of extra peanut butter, and a light dusting of cocoa powder to finish; present promptly to preserve color and texture.
    → Fresh banana slices add brightness and aroma; warmed peanut butter drizzle enhances richness, while cocoa powder adds a chocolatey note that complements banana and peanut butter.
  • Serve on toast, pancakes, crostini, or as a dip for fruit; enjoy immediately for best texture and flavor.
    → The spread is versatile and best used when fresh; using it promptly ensures optimal moisture and mouthfeel.
  • Store any leftovers in an airtight container in the refrigerator for up to 3-4 days; stir before using and adjust thickness with a splash of milk if needed.
    → Proper sealing prevents drying out or absorbing odors; refrigeration extends freshness while maintaining a creamy texture when re-softened.

Notes

These gluten-free banana peanut butter spreads are naturally sweetened by ripe bananas and contain no added refined sugar, making them a wholesome and versatile topping for toast, fruit, or desserts. You can customize it by folding in chopped dark chocolate, crushed roasted peanuts, ground cinnamon, or chia seeds for extra texture and nutrition. It stores well in the fridge for up to 5–7 days and can be frozen for longer storage. For an extra boost, serve with sliced bananas, a drizzle of extra peanut butter, or a dollop of yogurt. If you need to loosen the spread for easier scooping, whisk in a splash of dairy or plant-based milk. Always choose smooth peanut butter with no added sugar; adjust salt if your peanut butter is salted.

Tips

Consigli utili per Burro di Arachidi Banana

  • Banane molto mature: l’aroma e la dolcezza massima si ottengono con banane gialle a maturazione avanzata (con macchie marroni). Sminuzzale con una forchetta o schiacciacele rapidamente nel robot se vuoi una superficie ultra liscia. Lasciare a temperatura ambiente facilita l’insieme degli ingredienti.
  • Controllo della texture: per una crema liscia e omogenea, frulla brevemente; per una versione con pezzetti, riduci i tempi di frullatura o schiaccia a mano in alcuni punti.
  • Burro di arachidi: mescola bene se l’olio si è separato. Scegli una versione cremosa e non zuccherata se vuoi controllare meglio la dolcezza. Se usi burro di arachidi naturale, aggiusta la dolcezza con la banana o con miele/sciroppo.
  • Dolcificanti: miele o sciroppo d’acero sono opzionali. Se le banane sono molto mature, potresti non averne bisogno. Aggiusta la dolcezza assaggiando durante la preparazione.
  • Vaniglia: opzionale. Conferisce profondità di aroma; se non disponibile, una punta di mandorla è possibile ma usala con parsimonia.
  • Sale: un pizzico aiuta a bilanciare la dolcezza e l’aroma. Aggiusta a gusto, soprattutto se usi burro di arachidi salato.
  • Latte per la consistenza: inizia con 1 cucchiaio e aggiungi poco alla volta fino a raggiungere la consistenza desiderata. Scegli latte vegetale non zuccherato se vuoi una versione vegan.
  • Temperatura degli ingredienti: lasca i banana a temperatura ambiente prima di unirli al burro di arachidi per evitare grumi o una crema troppo fredda.
  • Aggiunte opzionali:
    • Cioccolato fondente o gocce: aggiungili a fine preparazione per distribuire bene i pezzi senza affondare al fondo.
    • Arachidi tostate tritate: danno croccantezza extra; evita se hai allergie o preferisci una crema liscia.
    • Cannella in polvere: aggiunge calore e si sposa bene con banana e arachidi; inizia con 1/8 cucchiaino.
    • Seme di chia o lino macinato: aumentano fibre e aiutano ad addensare. Se usi chia, lascia riposare qualche minuto affinché si idratino; per una consistenza più liscia usa semi di lino macinati.
  • Guarnizioni suggerite: fette di banana per servire, un filo extra di burro di arachidi e una leggera spolverata di cacao per un tocco dessert; aggiungile al momento di servire per evitare che le banane anneriscano.
  • Conservazione: riponi in un contenitore ermetico in frigorifero. Consumalo entro 3–5 giorni; può anche essere congelato a porzioni per 1–2 mesi. In caso di conservazione prolungata, fai tornare la crema a temperatura ambiente e mescola prima di usare.
  • Preparazione in anticipo: è facile preparare una grande quantità e conservare in frigorifero o congelatore in porzioni. Per una consistenza extra cremosa al momento dell’uso, aggiungi un poco di latte e mescola bene.
  • Abbinamenti di servizio: ottimo su pane tostato, crackers, pancake oppure come crema per lo yogurt. Sperimenta con spezie o una spolverata di cacao per una presentazione più golosa.
  • Avvertenze allergie: contiene arachidi. Non prepararlo per chi ha allergie; etichetta chiaramente se lo servi a ospiti con allergie e considera alternative prive di arachidi.

FAQ

Cos’è Burro di Arachidi Banana?

Una crema spalmabile che combina burro di arachidi e purea di banana, offrendo una consistenza cremosa o leggermente densa a seconda degli ingredienti. Può essere arricchita con dolcificanti, cacao, vaniglia e un pizzico di sale per un sapore equilibrato. È uno snack nutriente e versatile per merenda o colazione.

Quali sono gli ingredienti base?

Ingredienti tipici:

Come si prepara in pochi minuti?

Procedimento rapido:

Qual è la differenza tra crema liscia e compatta?

Per una consistenza cremosa e liscia, frulla o mescola energicamente con un cucchiaio finché non è omogenea. Per una versione più croccante, aggiungi arachidi tritate grossolanamente o pezzi di banana piccolissimi. L’aggiunta di meno olio rende la crema più densa; più olio la rende più fluida.

Come posso variare il gusto?

Varianti popolari:

Come conservarla al meglio?

Conservala in un barattolo ermetico in frigorifero. Dura tipicamente 1–2 settimane. Se si separa olio dall’impasto, basta mescolare bene. Per una conservazione più lunga, puoi prepararla in piccole porzioni e congelarla per 1–2 mesi; scongelala in frigo e mescola prima dell’uso.

Quali sono i benefici nutrizionali?

Benefici principali:

Nota: è una crema calorica; dosarla secondo le esigenze energetiche individuali.

Come utilizzare questa crema in ricette?

Suggerimenti d’uso:

Cosa fare se si separa olio e massa?

Se compare separazione, mescola vigorosamente con un cucchiaio o frulla brevemente. Se è troppo densa, aggiungi un piccolo filo di olio neutro o latte vegetale poco alla volta fino a ottenere la consistenza desiderata. Conserva in frigorifero per ridurre la separazione.

Ci sono allergeni e alternative per chi è allergico alle arachidi?

Contiene arachidi, quindi chi è allergico deve evitarla. Alternative sicure:

Se si prepara per chi è vegano, evita dolcificanti di origine animale come miele.