Author

Ocean Nightleaf

Browsing

Introduction / Hook

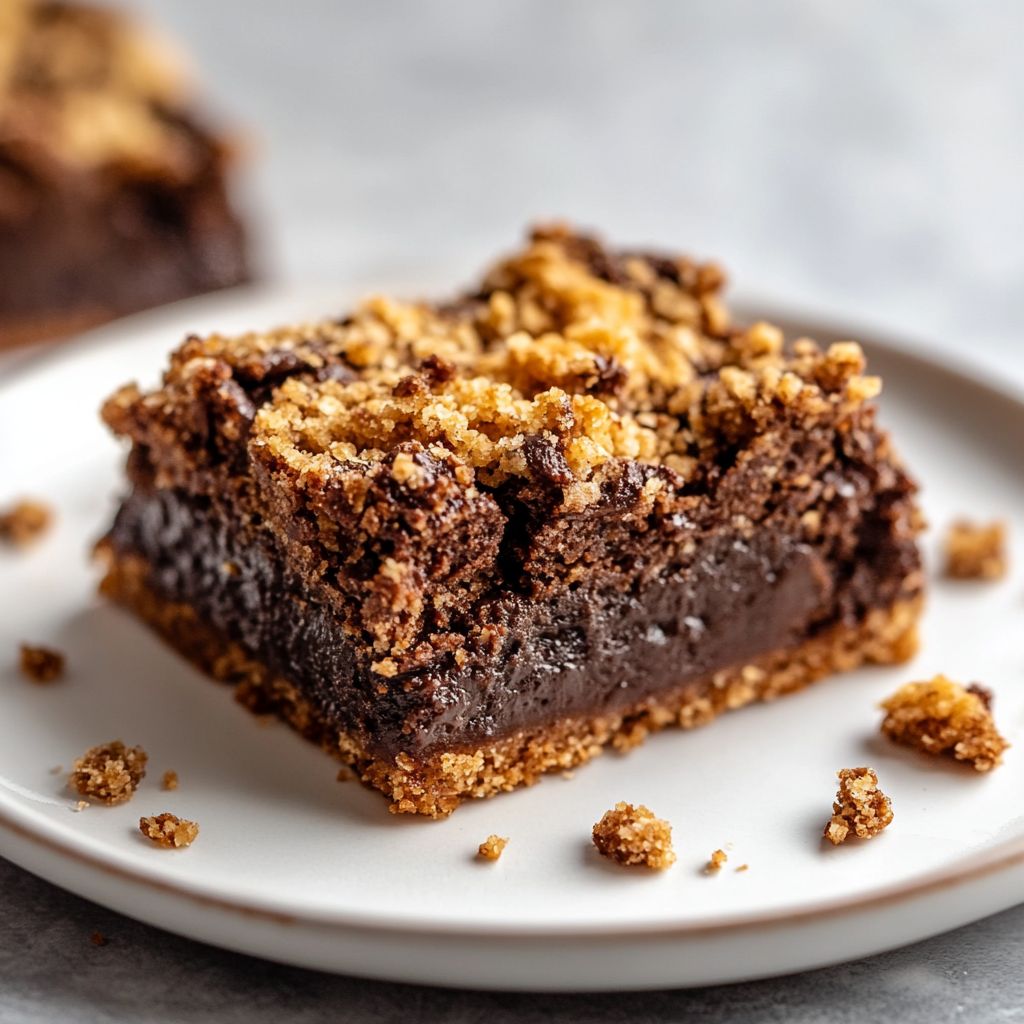
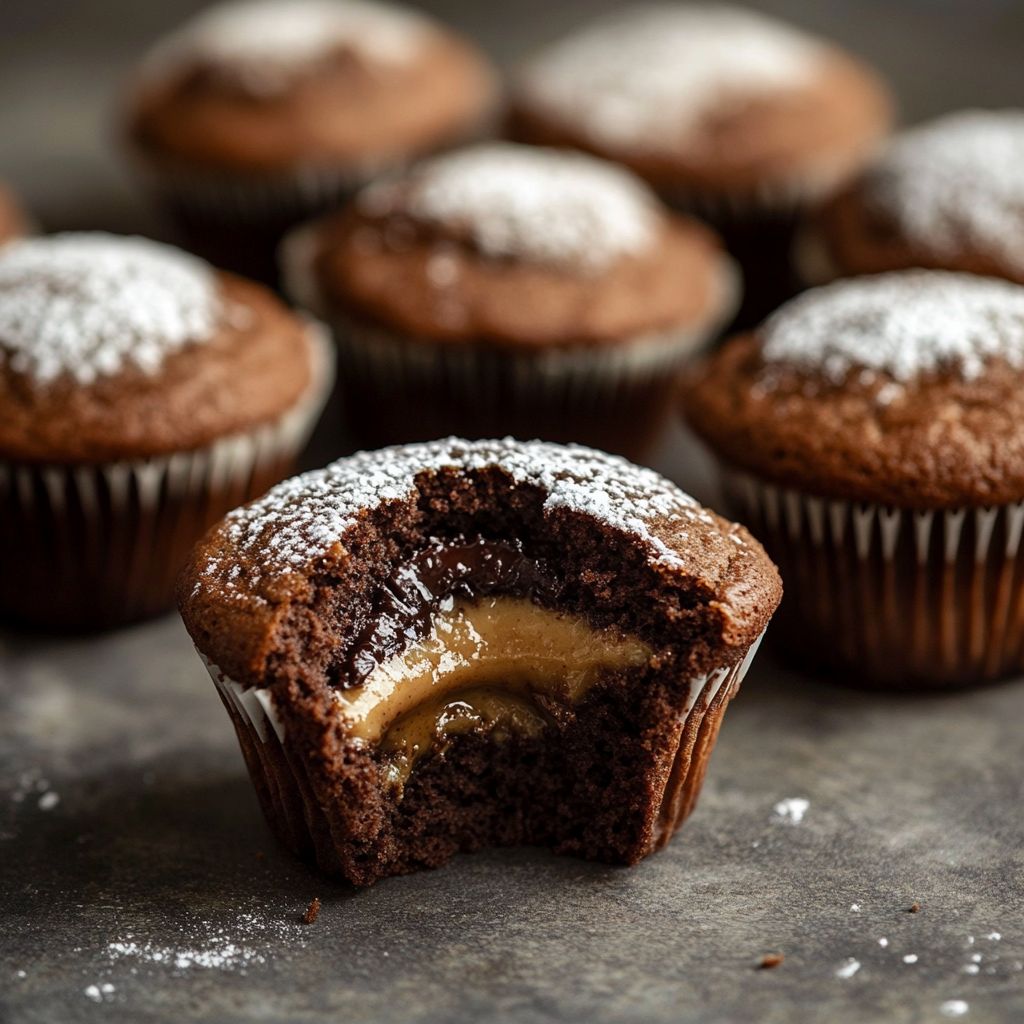
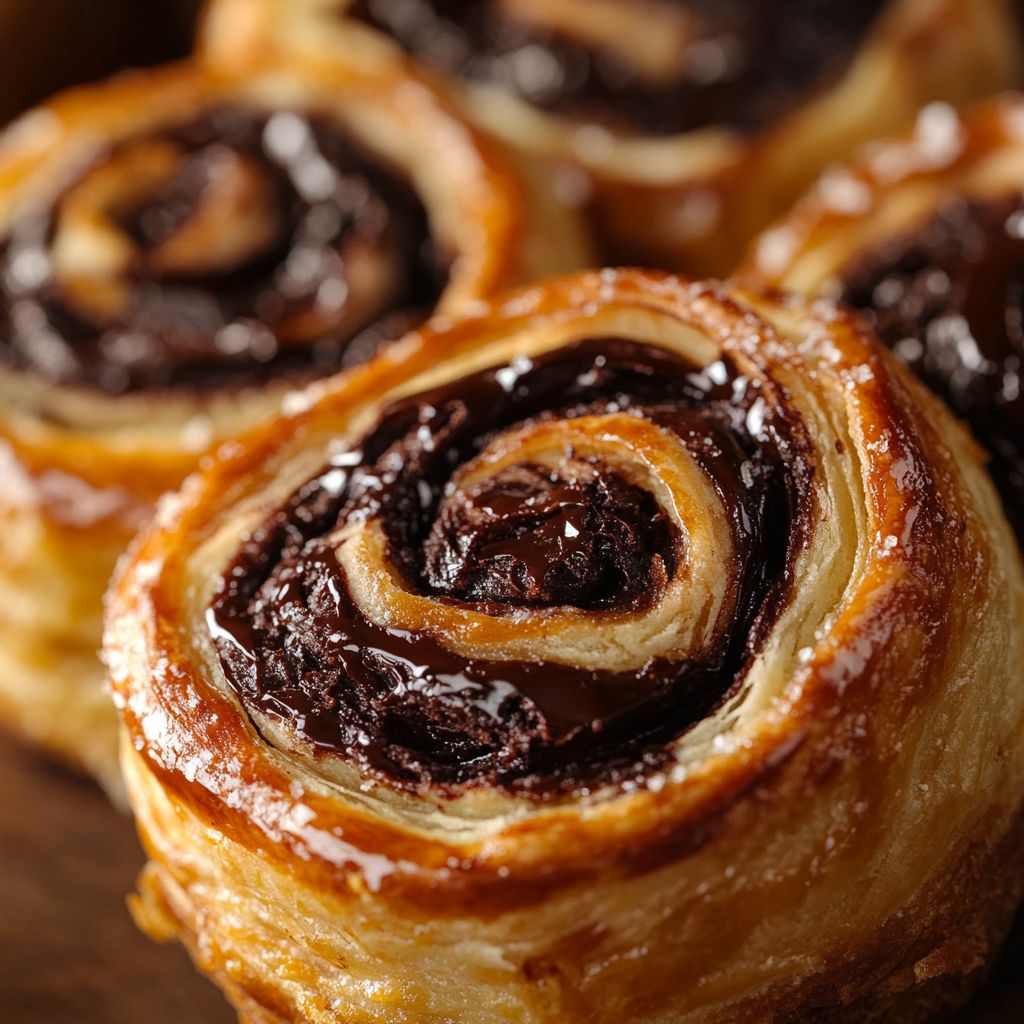
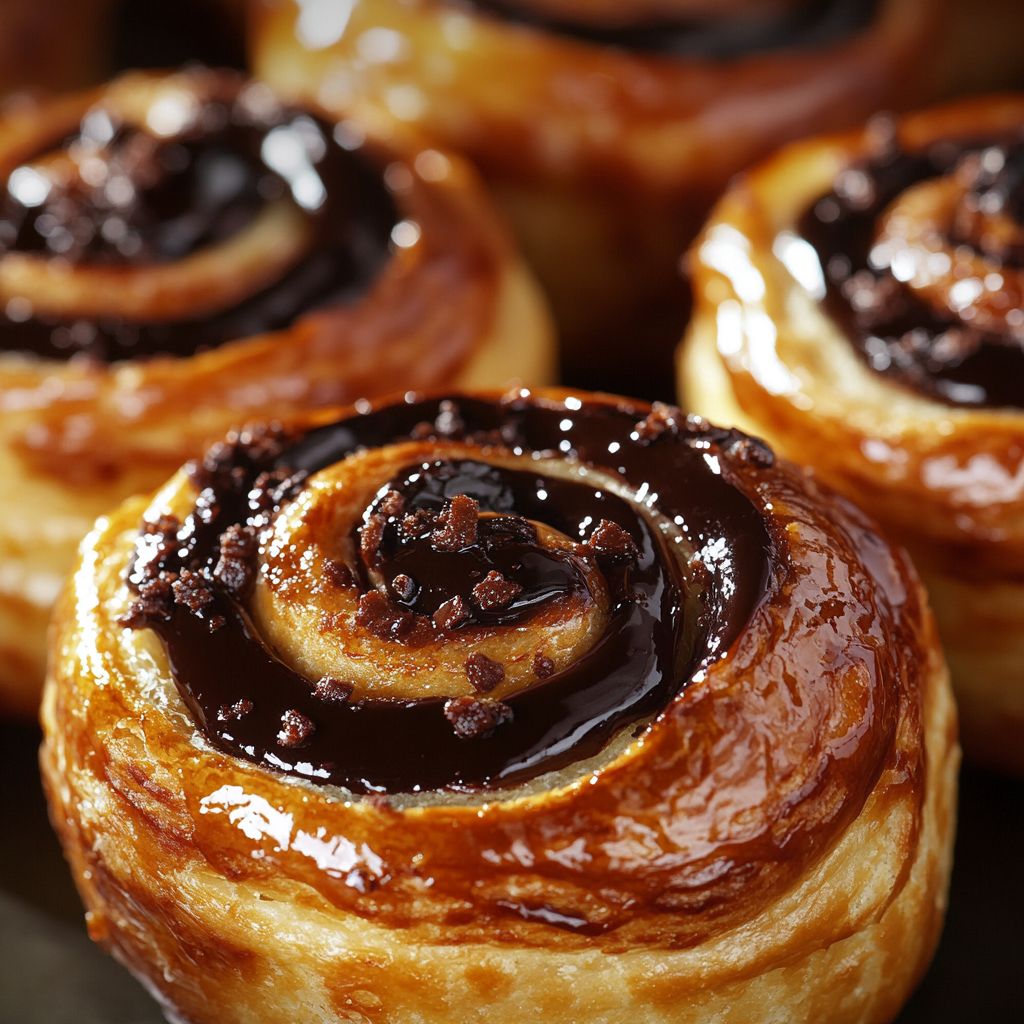
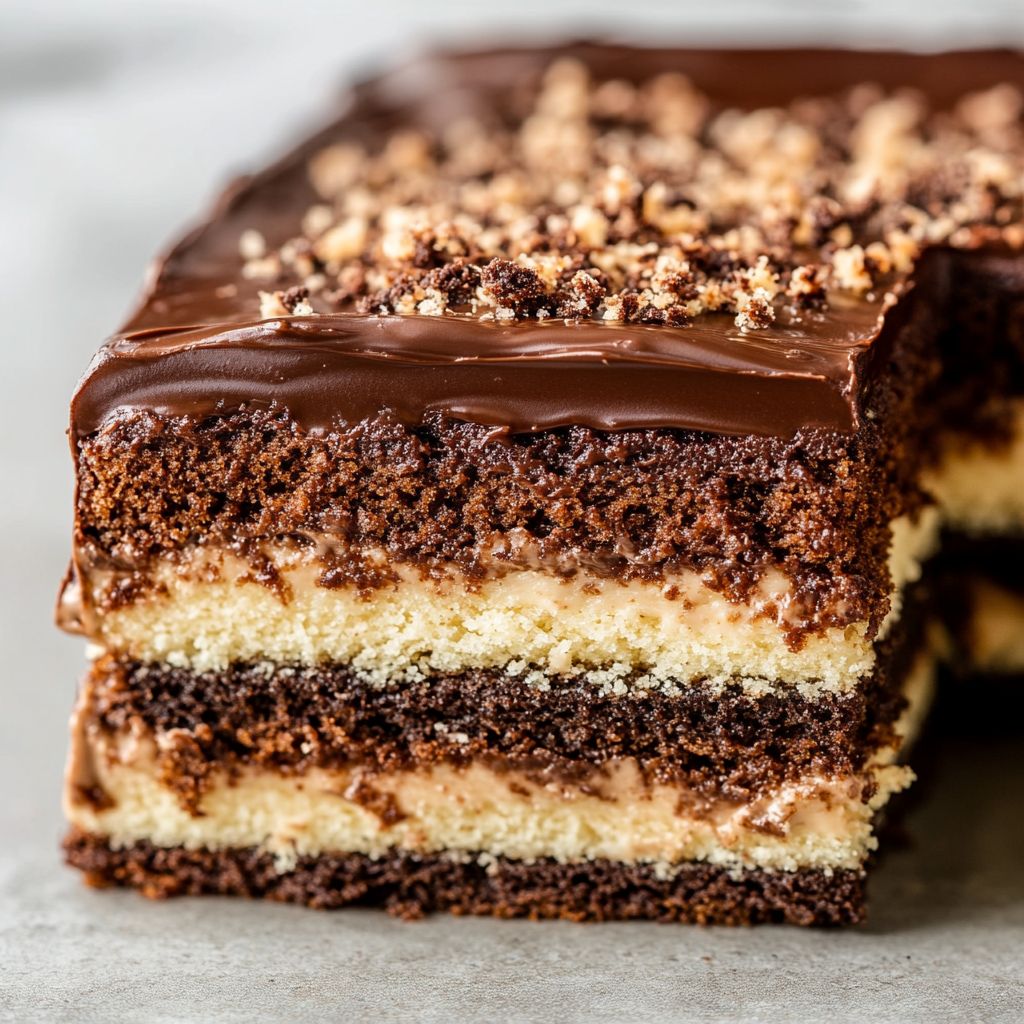
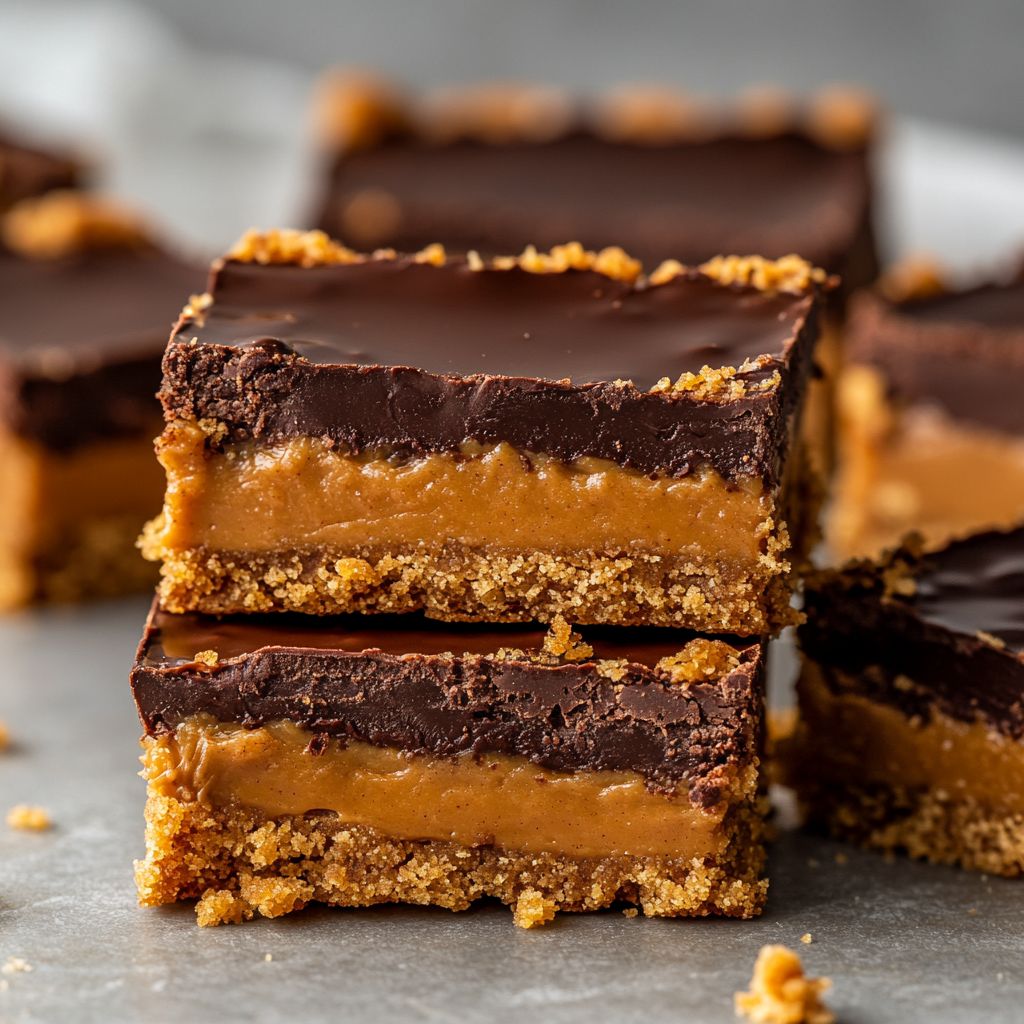
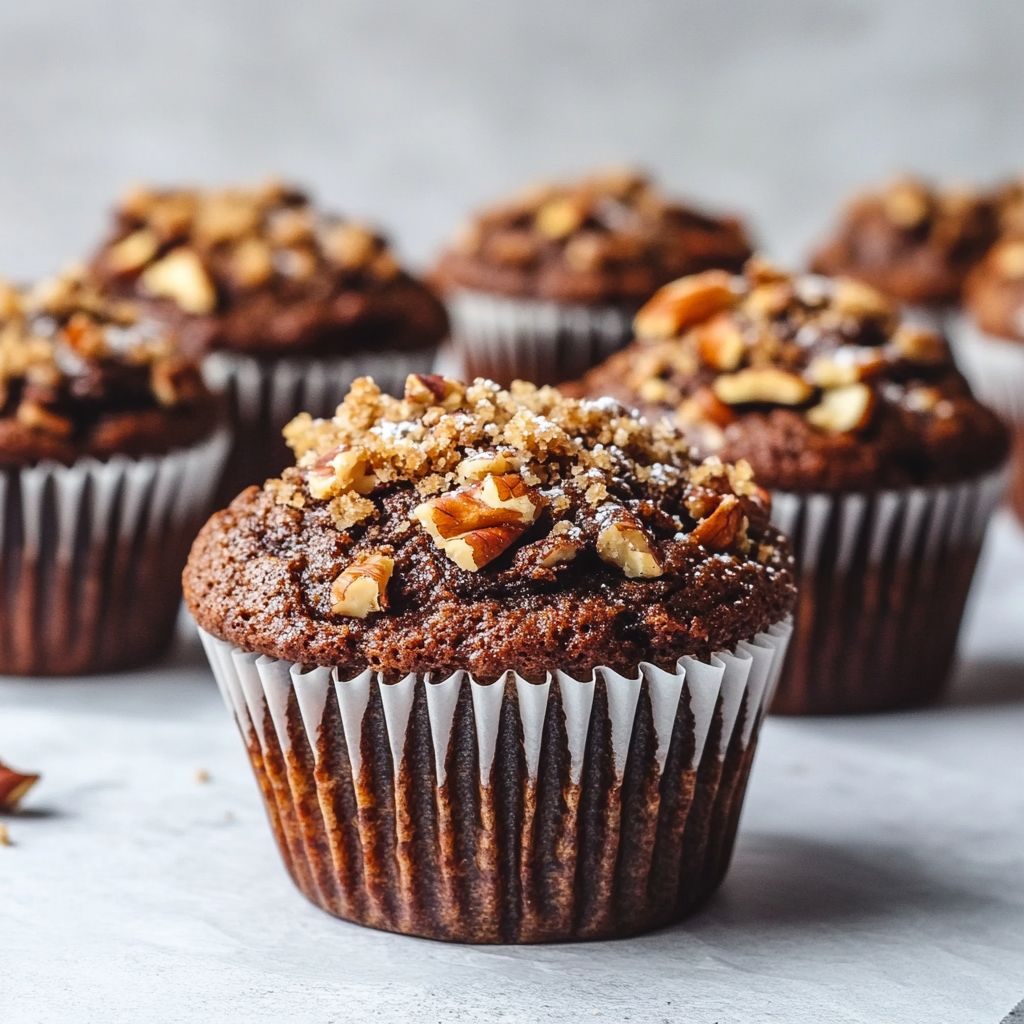
Imagine biting into a deliciously rich, chocolatey square that crumbles perfectly in your mouth, leaving behind a cocoa-infused bliss that lingers on your taste buds. You are not dreaming; these are the Chocolate Cocoa Crumble Squares—a decadent treat that promises to elevate your snacking experience to new heights. With every bite, experience the harmonious dance between the deep, rich essence of cocoa and the buttery, crumbly texture that defines these squares. Whether you’re a chocolate enthusiast or a casual dessert lover, these squares are guaranteed to captivate and leave you craving for more.

The Story Behind the Dish

The Chocolate Cocoa Crumble Squares hail from a legacy of indulgent desserts that have charmed generations around the globe. Tracing back to European roots, where chocolatiers first experimented with the delicate balance of crumbly textures and opaque chocolate flavors, these squares have evolved into a beloved treat across various cultures. In the late 18th century, when chocolate was often enjoyed in drinks or cakes, enterprising bakers began refining recipes to accommodate the contrasting textures that a crumble could offer. As this dessert made its way across continents, each culture infused it with a touch of local tradition and flavor. Today, the Chocolate Cocoa Crumble Squares stand as a testament to this rich history, embodying both the timeless allure of chocolate and the rustic appeal of a classic crumble.

Why You’ll Love This Recipe

  • Easy to Make: With straightforward steps and minimal ingredients, it’s an ideal choice for both novice and experienced bakers.
  • Heavenly Taste: The balanced blend of deep cocoa flavor with a buttery crumble is sure to satisfy your chocolate cravings.
  • Perfect for Any Occasion: Whether it’s a casual family gathering, a festive celebration, or an elegant dinner, these squares are versatile enough to suit any event.
  • Customizable: Various add-ins or tweaks make it easy to adapt to your personal preferences or dietary needs.
  • Child-Friendly: Simple enough that the kids can help out in the kitchen, sparking their creativity and love for cooking.

Flavor Profile & Texture

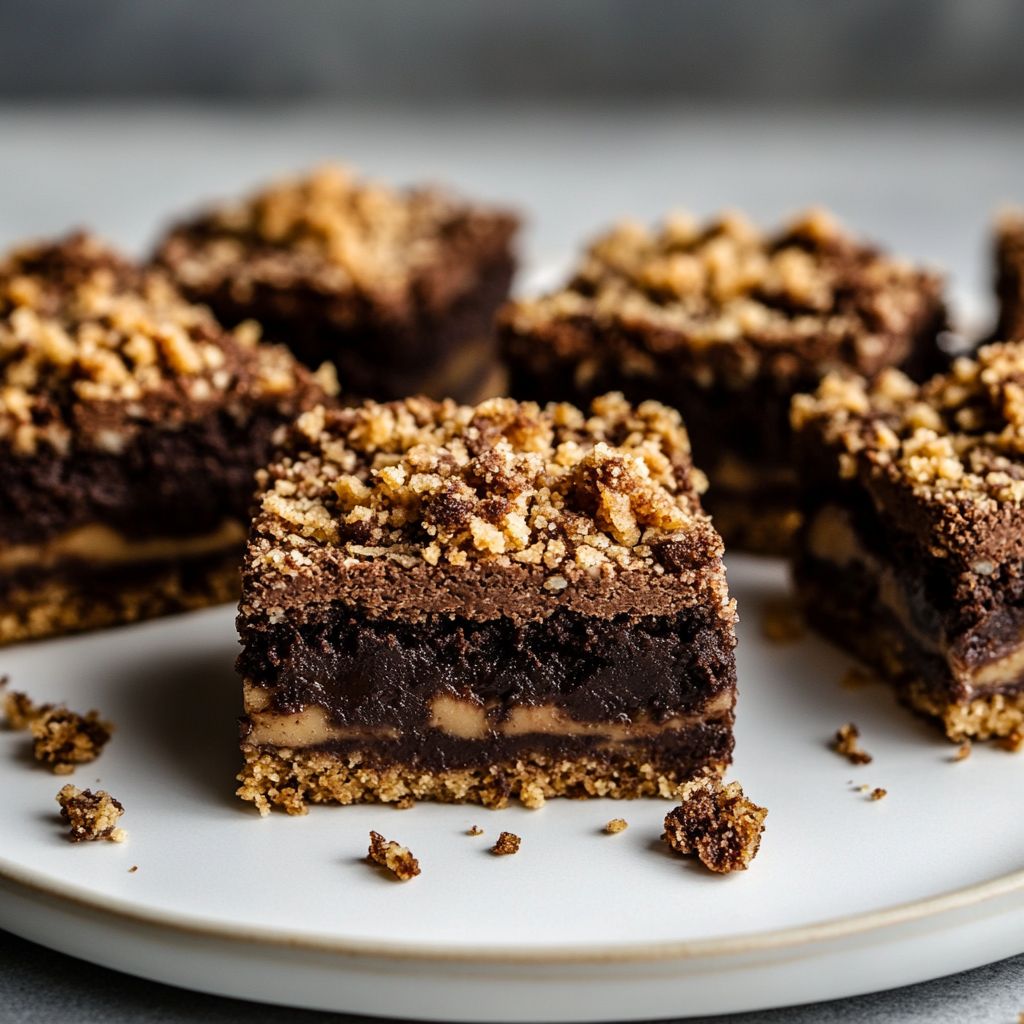
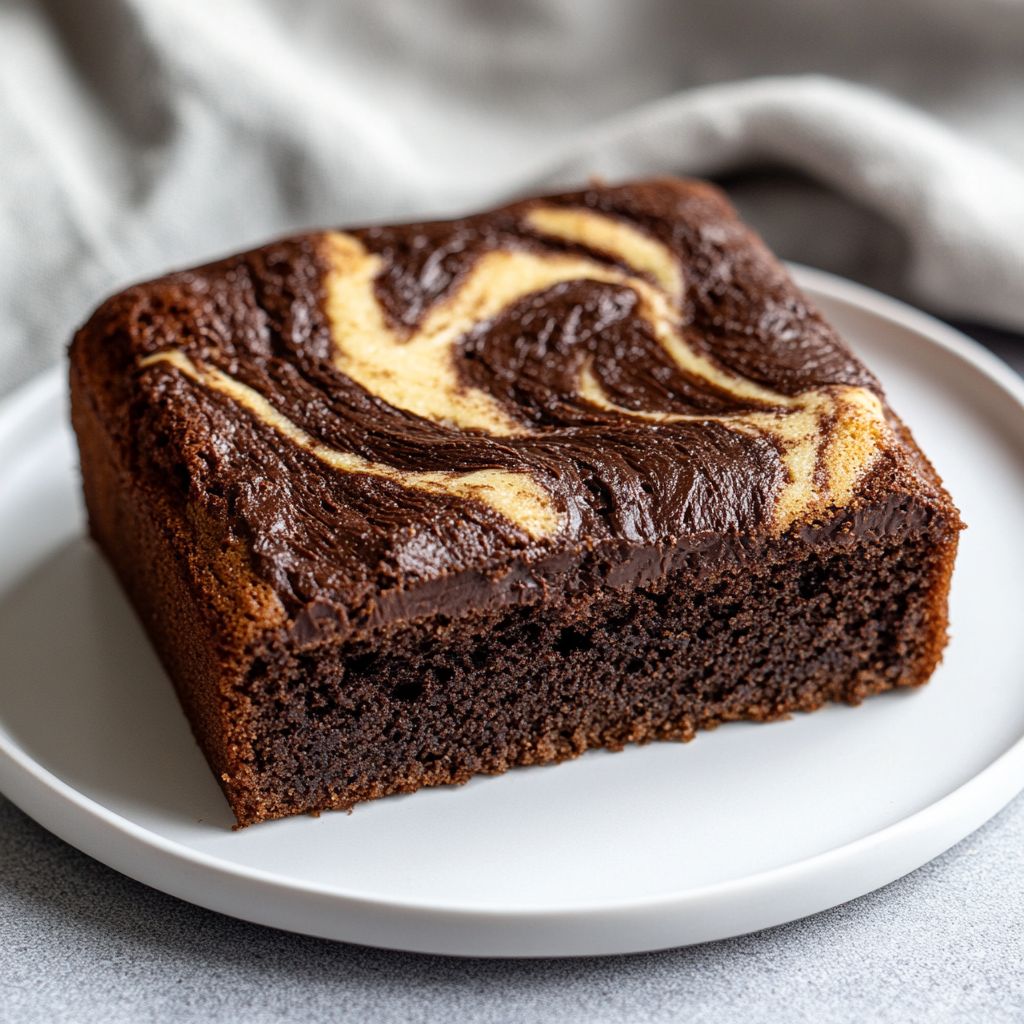
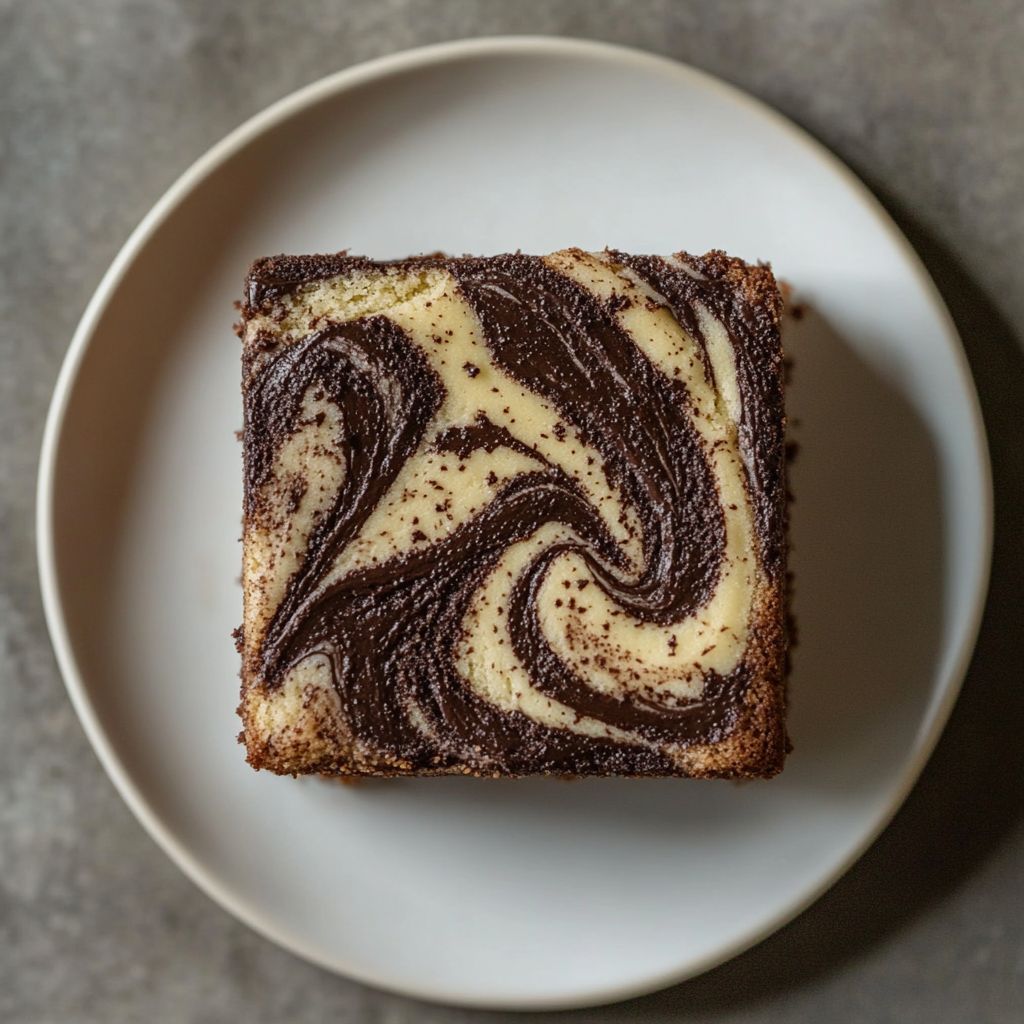
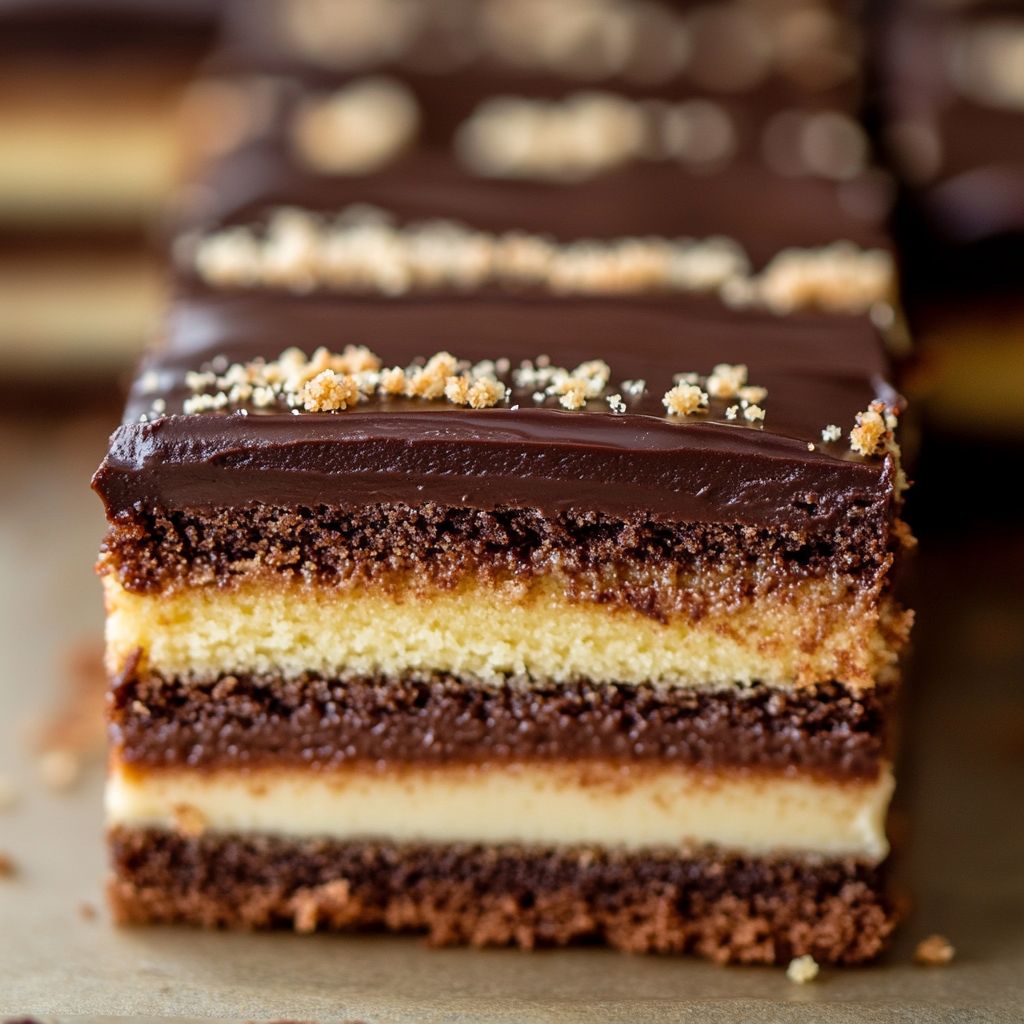
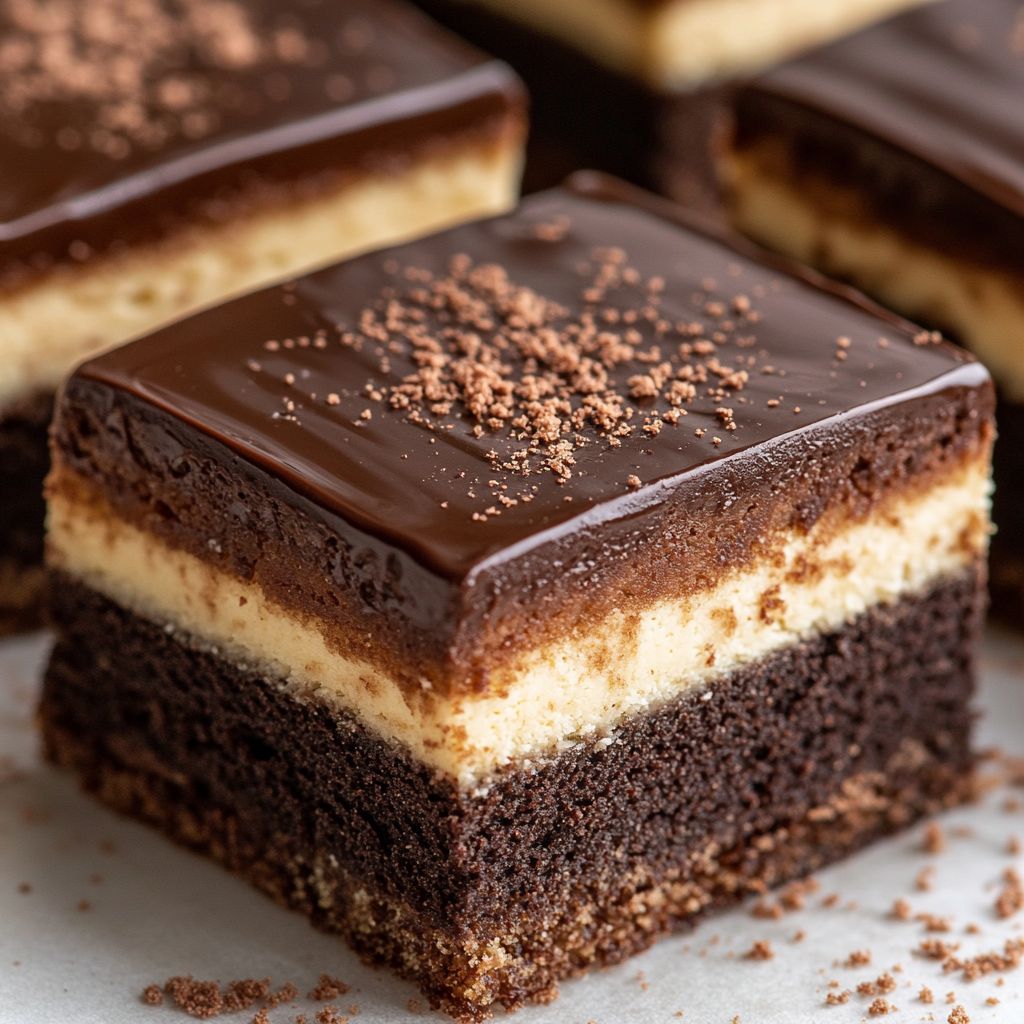
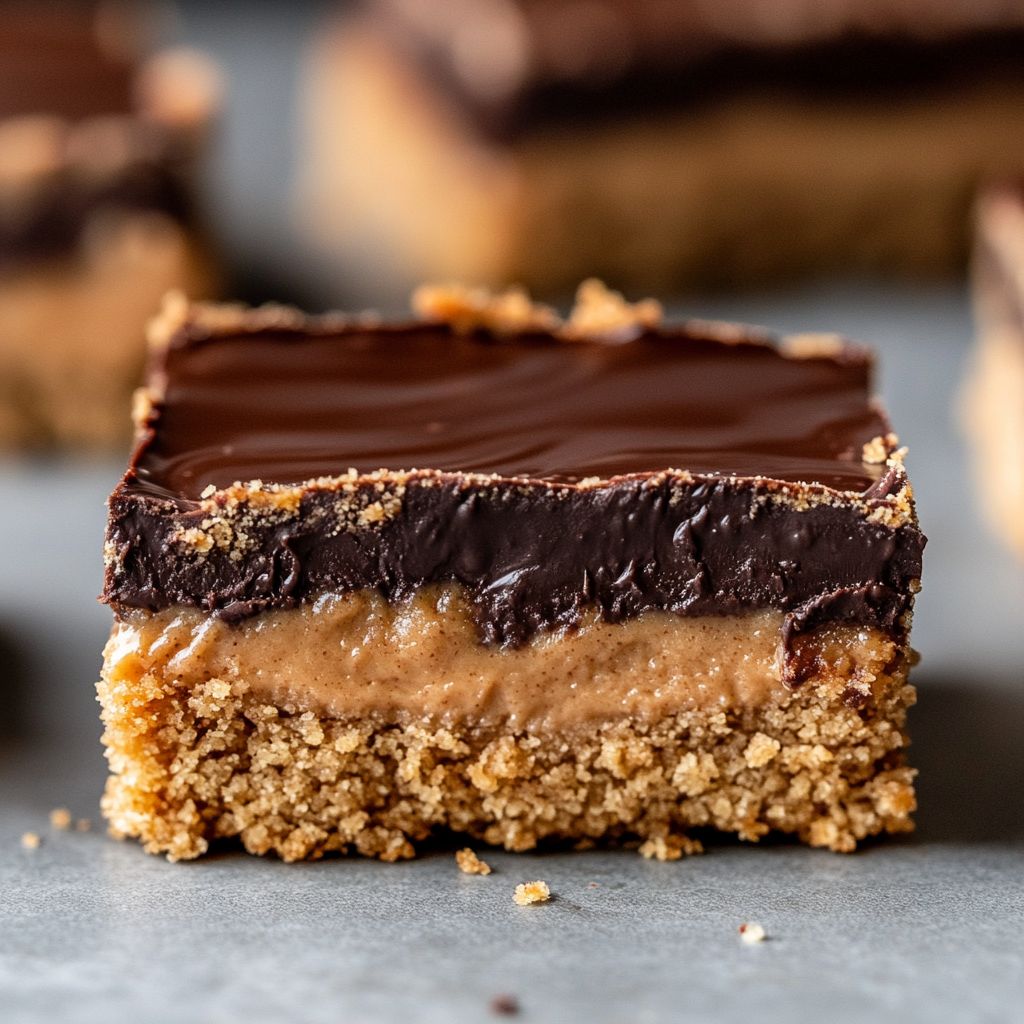
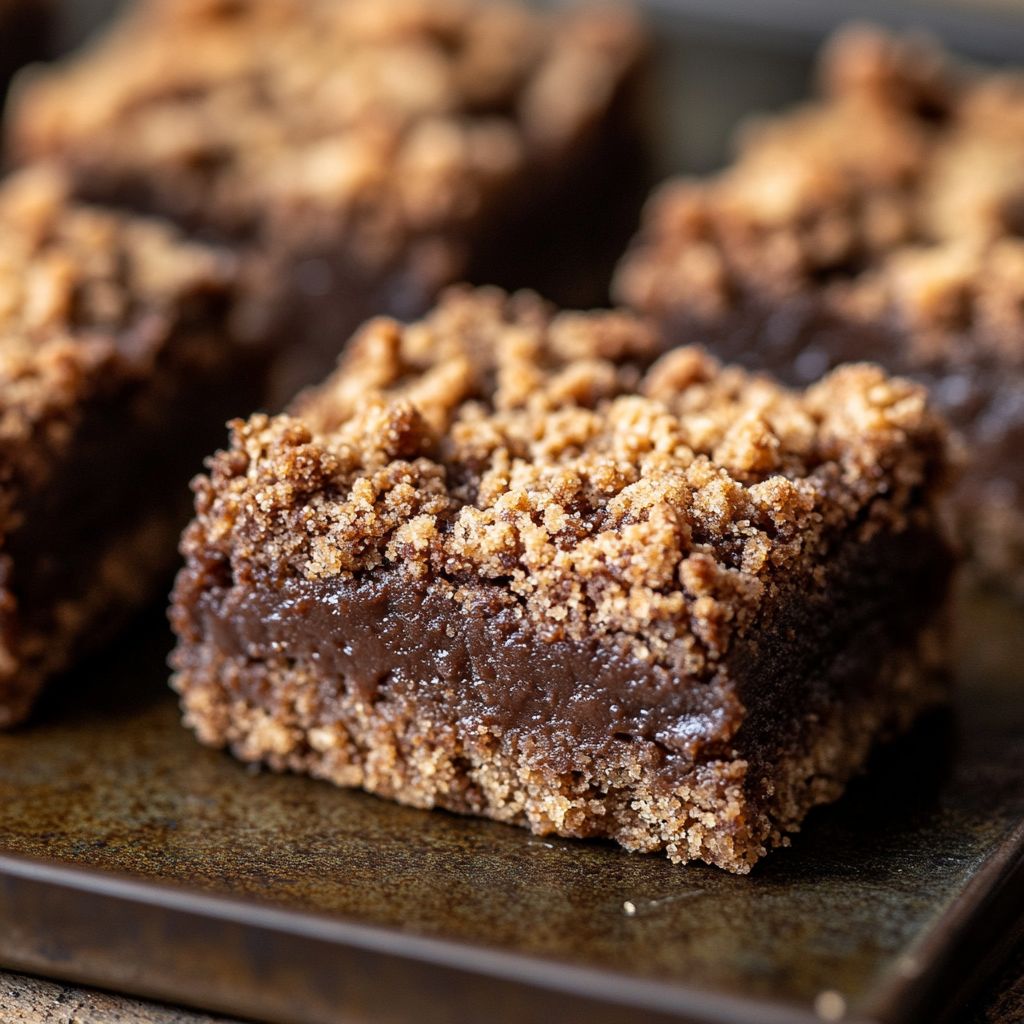
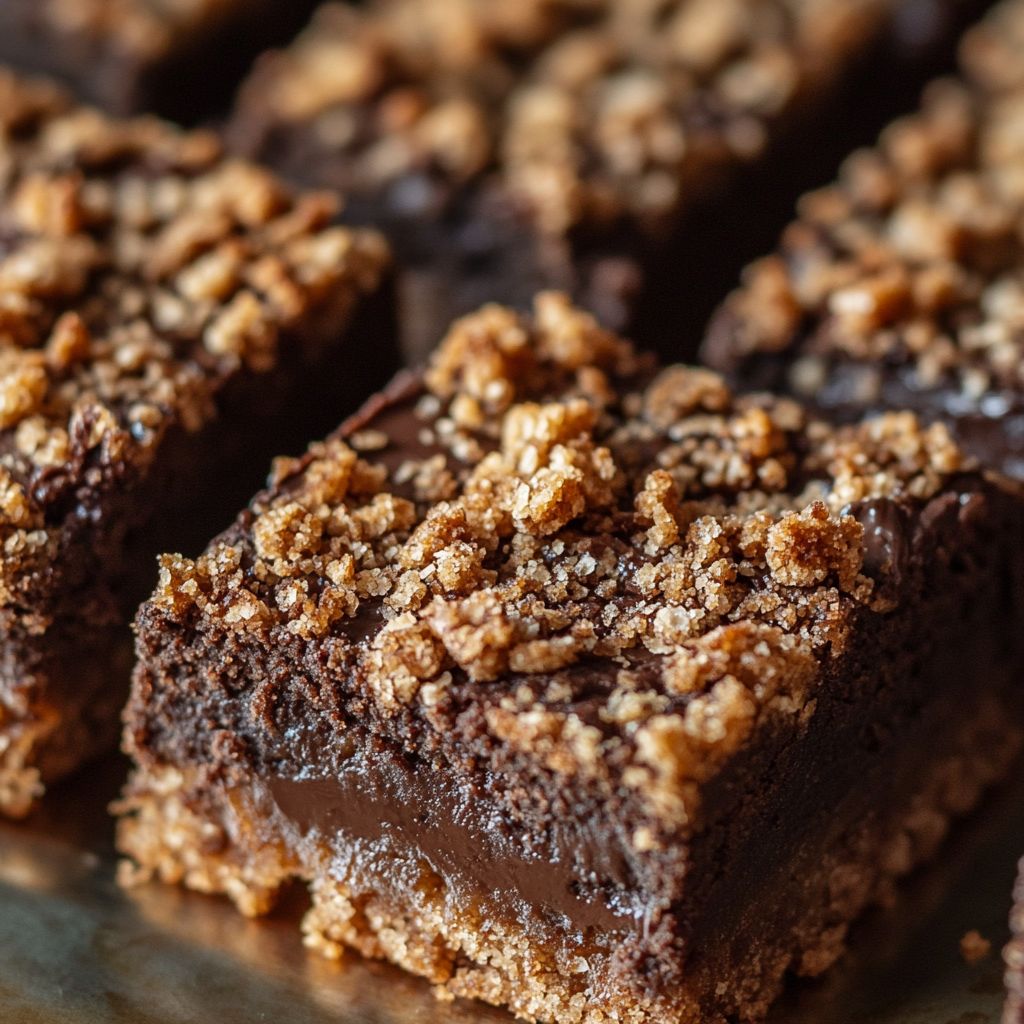
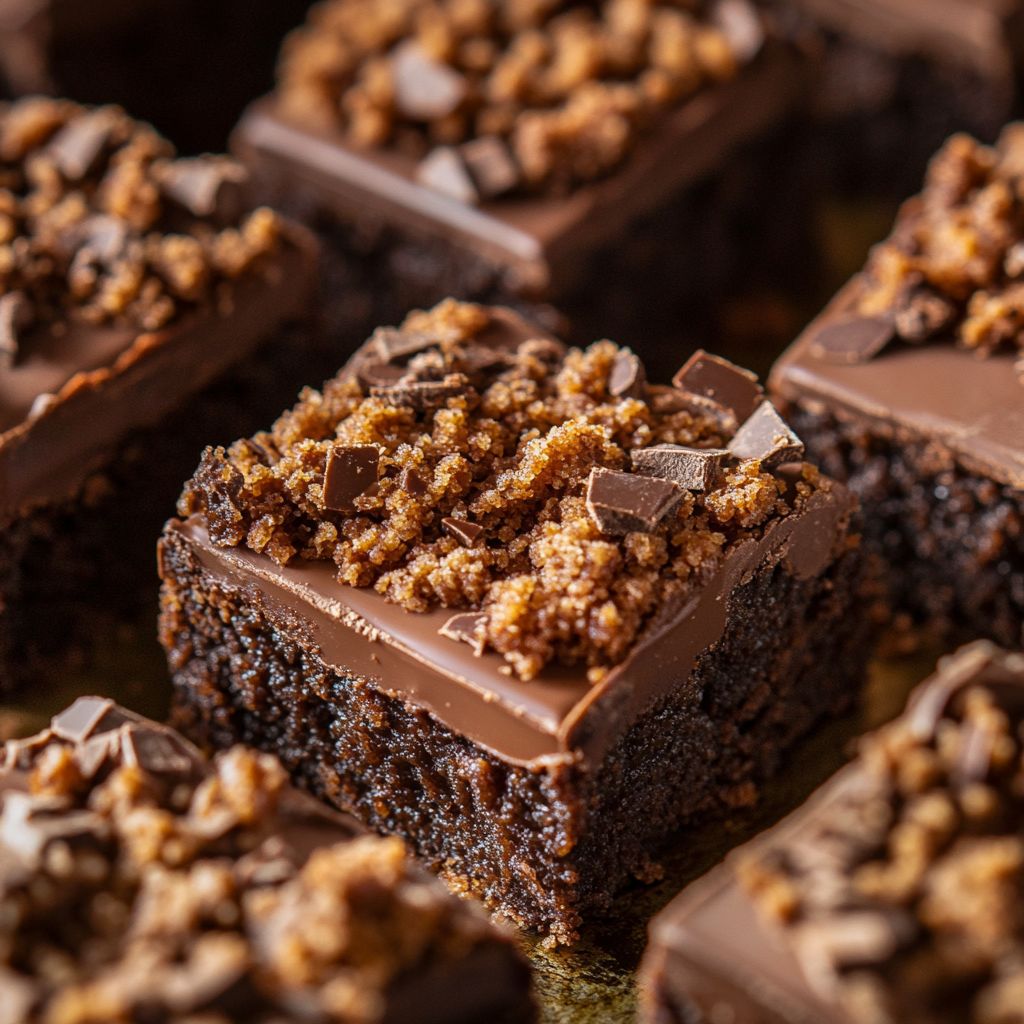
These squares are a chocolate lover’s dream, featuring a robust cocoa flavor that’s both sweet and slightly bitter—a delectable combination sure to tantalize your palate. The crumbly texture of the topping adds a delightful crunch that contrasts beautifully with the richness of the chocolate base. This interplay of flavors and textures enhances every bite, delivering a complex and satisfying culinary experience. Each morsel of the crumble top melts delightfully into the chocolate layer, creating an irresistible harmony that is both comforting and indulgent.

Occasions & Pairings

Chocolate Cocoa Crumble Squares are incredibly versatile, suitable for a wide range of occasions. Serve them fresh out of the oven on a chilly weekend brunch, accompany them with a scoop of vanilla ice cream for an after-dinner treat, or pack them up for a picnic under the summer sun. These squares pair wonderfully with a steaming cup of coffee or a glass of cold milk, and if you’re feeling adventurous, a sweet dessert wine with berry notes could bring out the richness of the chocolate even further.

Tips, Variations & Substitutions

Looking to customize your Chocolate Cocoa Crumble Squares? Here are some creative ideas:

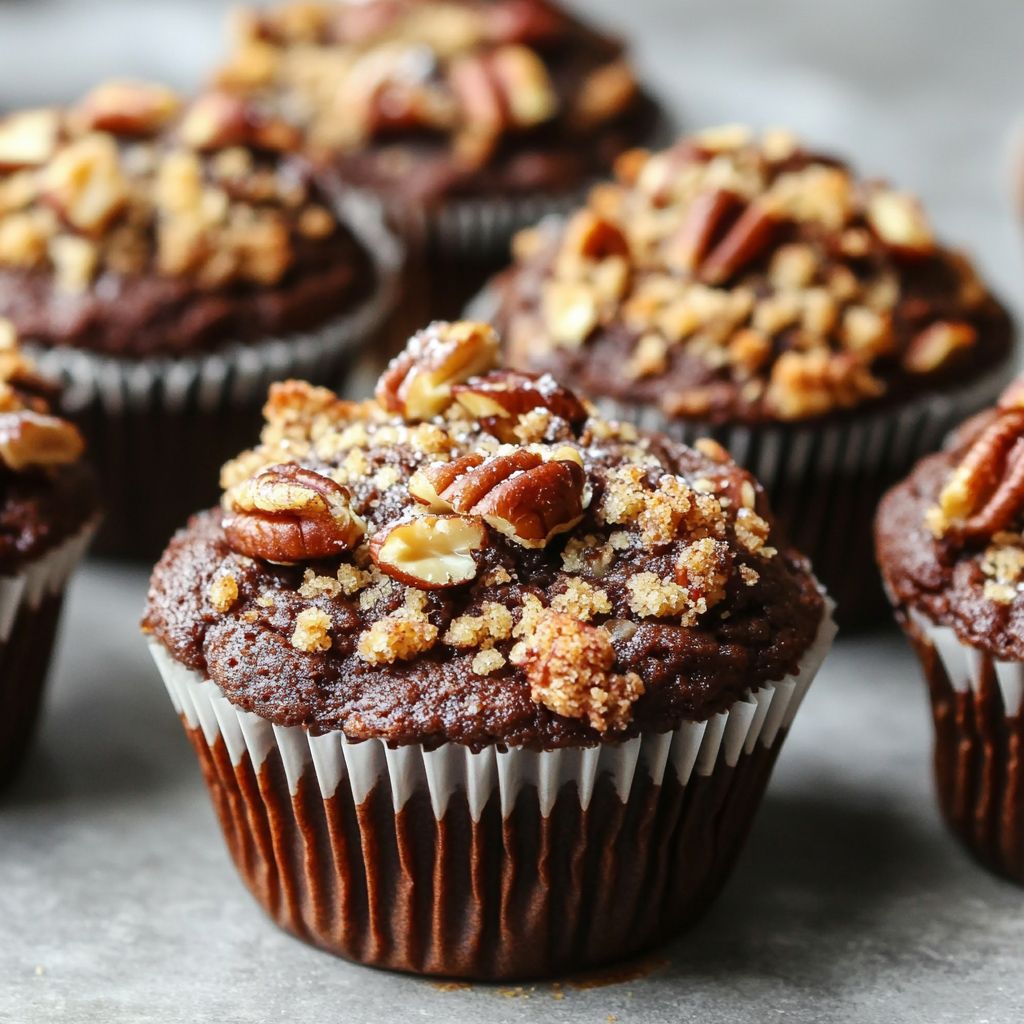
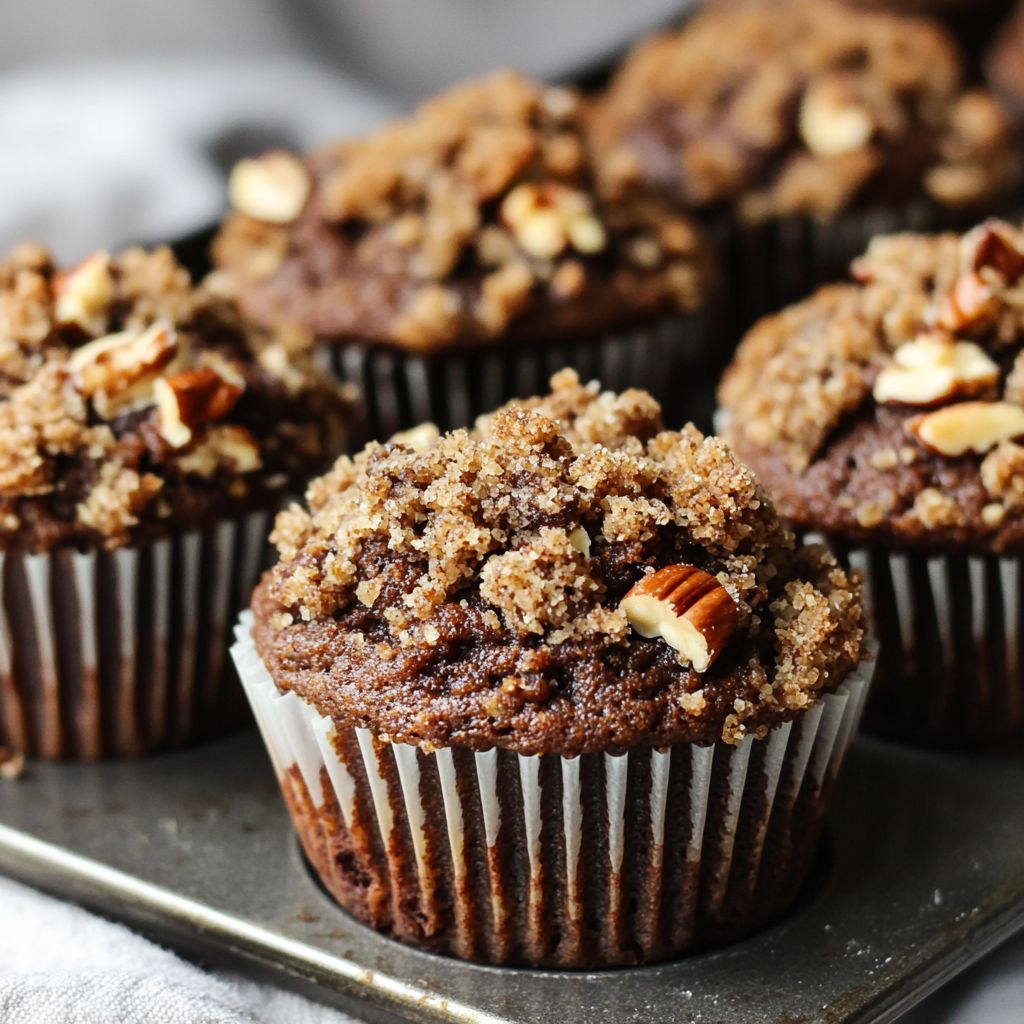
  • Nuts & Seeds: Add chopped nuts like almonds, walnuts, or pecans to the crumble for added crunch and texture.
  • Spice It Up: A hint of cinnamon or a dash of chili powder can introduce an exciting twist to the classic flavor profile.
  • Fruits: Incorporate dried fruits such as cranberries or apricots for a touch of sweetness and chewiness.
  • Gluten-Free Option: Substitute the flour with almond flour or a gluten-free baking mix to cater to dietary restrictions.
  • Vegan Substitution: Replace butter with coconut oil or a plant-based margarine to enjoy a completely vegan treat.

Storage & Make-Ahead Ideas

These Chocolate Cocoa Crumble Squares are not only easy to make but also convenient to store. Once baked, they can be kept in an airtight container at room temperature for up to five days, keeping their freshness intact. For those who prefer planning ahead, the batter and the crumble topping can be prepared separately and stored in the refrigerator for up to three days in advance. When you’re ready to enjoy your treat, simply assemble and bake. If you’d rather extend their shelf life, these squares freeze remarkably well—wrap them individually in plastic wrap and place them in a freezer-safe container for up to two months. To savor them, allow the squares to thaw at room temperature, or heat them briefly in the oven for a warm, gooey indulgence.

Fun Facts & Trivia

Did you know that chocolate was once so prized that it was used as currency in ancient civilizations? The Aztecs, for instance, valued cacao beans as highly as gold, considering them gifts from the gods themselves. In the context of this dish, the pairing of chocolate with a crumbly texture isn’t just about taste; it’s about savoring a piece of history enriched by centuries of cultural influence. Indeed, each bite of these delightful squares is a celebration of chocolate’s storied legacy—a symbol of joy, luxury, and timeless appeal.

With these Chocolate Cocoa Crumble Squares, you’re indulging in more than just dessert; you’re partaking in a rich tapestry of flavors and heritage. This recipe harmonizes simplicity and sophistication and brings a sense of warmth and nostalgia with every bite. The balance of flavors, the textural contrast, and the sweet, satisfying finish make these squares irresistible. Dive into the world of chocolatey goodness and discover why these squares are destined to become your new favorite treat.

Ingredients

Chocolate Cocoa Crumble Squares

Crumble Base

  • 1 1/2 cups all-purpose flour
    → All-purpose flour serves as the primary structure for the crumble base, providing a sturdy yet crumbly texture. It’s important to sift the flour before measuring to avoid compacting, ensuring an even distribution throughout the crumble. This allows the squares to hold together well once baked.
  • 1 cup unsweetened cocoa powder
    → Cocoa powder adds rich chocolate flavor and depth to the crumble. Opt for a high-quality, unsweetened cocoa powder for the best taste. Be sure to sift it to remove any lumps before mixing, which helps to create a smooth, uniform batter.
  • 3/4 cup granulated sugar
    → Granulated sugar sweetens the crumble and helps achieve a desirable caramelization during baking. For a more complex flavor, consider substituting part of the granulated sugar with brown sugar. Make sure to measure accurately for consistent sweetness.
  • 1/2 cup unsalted butter (cold, cubed)
    → Cold, cubed butter is essential for creating a flaky, tender crumble. It should be kept in the refrigerator until ready to use. When mixing, use a pastry cutter or your fingers to combine it with the dry ingredients until the mixture resembles coarse crumbs, ensuring the butter remains cold to achieve that perfect texture.
  • 1/4 teaspoon salt
    → A pinch of salt enhances the sweetness of the chocolate and balances the flavors. Use fine salt for even distribution throughout the mix. This small addition can elevate the overall taste profile of the crumble, making the chocolate flavor more pronounced.

Chocolate Filling

  • 2 cups chocolate chips (semi-sweet or dark)
    → Chocolate chips are the star of the filling, offering a gooey, rich texture. Choose high-quality semi-sweet or dark chocolate chips based on your sweetness preference. For best results, let them sit at room temperature before incorporating them into the mixture to avoid any temperature shock that might affect melting.
  • 1/2 cup heavy cream
    → Heavy cream adds richness and depth to the chocolate filling, creating a luscious consistency. Heat the cream over medium heat until just simmering before pouring over the chocolate chips. This gentle warming allows the chocolate to melt smoothly and evenly, ensuring a silky texture.

Optional Toppings

  • 1/4 cup chopped nuts (such as walnuts or pecans)
    → Chopped nuts introduce a delightful crunch and nutty flavor to the squares. Toast them slightly in a dry skillet for enhanced flavor and aroma. Chop them into small, even pieces for uniform distribution throughout the dessert.
  • 1/2 teaspoon flaky sea salt
    → Flaky sea salt sprinkled on top of the finished squares adds a sophisticated touch and enhances the sweetness of the chocolate. Use it sparingly to avoid overpowering the dessert. This finishing touch not only looks appealing but also adds a burst of flavor with each bite.

Instructions

  • Preheat your oven to 350°F (175°C) and line a 9×9 inch baking pan with parchment paper, leaving some overhang on the edges for easy removal.

    → Preheating the oven ensures that the crumble base starts cooking as soon as it is placed inside, contributing to a better texture. Lining the pan allows for effortless removal and cutting of the squares once they’re baked, providing clean edges for presentation.
  • In a large mixing bowl, sift together 1 1/2 cups all-purpose flour, 1 cup unsweetened cocoa powder, 3/4 cup granulated sugar, and 1/4 teaspoon salt.

    → Sifting these dry ingredients helps to aerate and combine them effectively, preventing lumps in your mixture. This step will ensure that the sugar dissolves evenly during baking, leading to a consistent flavor and texture throughout the crumble base.
  • Add 1/2 cup cold, cubed unsalted butter to the dry ingredients. Using a pastry cutter or your fingertips, mix the butter until the mixture resembles coarse crumbs.

    → Keeping the butter cold is crucial for creating a crumbly texture. Overworking the butter can lead to a tough base. Aim for a mixture that holds together when squeezed in your hand, indicating it’s ready for the next step.
  • Reserve about one-third of the crumble mixture in a separate bowl for topping later, and press the remaining two-thirds into an even layer in the bottom of the prepared baking pan.

    → Pressing the mixture down firmly helps to create a stable base that will support the chocolate filling. Making sure it is even will contribute to uniformly baked squares.
  • Bake the crumble base in the preheated oven for 10 minutes to set it slightly.

    → This initial baking creates a firmer base that prevents the filling from making it soggy. Allowing it to bake for a short period gives it a chance to form a lovely crust before adding the chocolate layer.
  • While the base is baking, prepare the chocolate filling by placing 2 cups of chocolate chips in a heatproof bowl.

    → Using a heatproof bowl ensures that it can withstand the heat of the heavy cream without cracking or breaking. This bowl should also be wide enough to allow for easy stirring later on.
  • In a small saucepan over medium heat, bring 1/2 cup of heavy cream to a simmer, stirring occasionally to prevent scorching.

    → Heating the cream until just simmering allows it to melt the chocolate evenly without burning it. Be attentive, as boiling the cream could result in a grainy filling.
  • Pour the hot cream over the chocolate chips and let it sit for about 2-3 minutes to soften the chocolate.

    → Allowing the chocolate to sit enables it to melt slowly, resulting in a smooth, silky consistency when you stir it. This patience is key for a luscious filling.
  • Stir the chocolate and cream mixture gently with a spatula until completely smooth and combined.

    → Mixing gently helps to minimize air bubbles in the filling and ensures a glossy finish. If the mixture appears lumpy, you can place it over a double boiler briefly while stirring until it smooths out.
  • Remove the crumble base from the oven and pour the chocolate filling evenly over it, smoothing the top with a spatula.

    → This even distribution helps all parts of the crumble base be enveloped in chocolate, ensuring every bite is delicious. Be careful not to disturb the base too much as you pour.
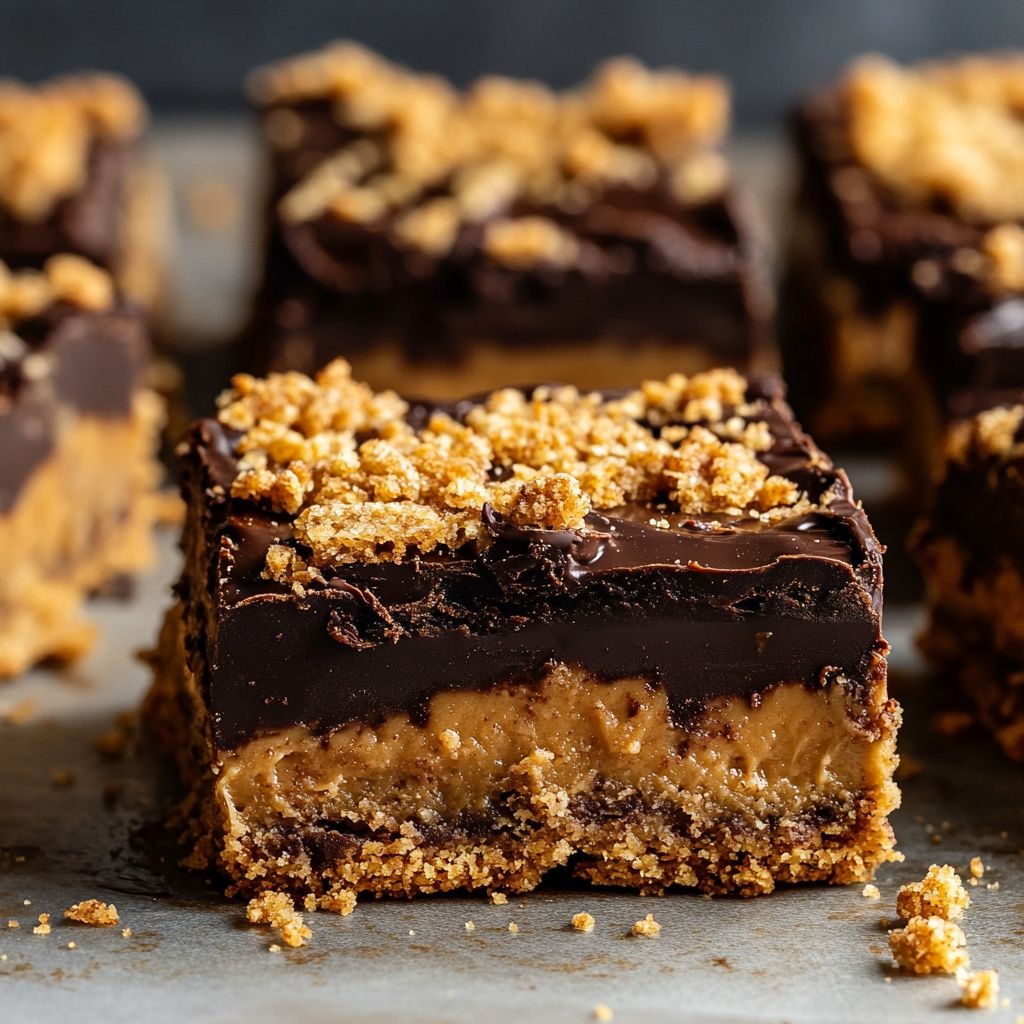
  • Sprinkle the reserved crumble mixture over the chocolate filling to create a topping.

    → This topping adds a textural contrast to the smooth chocolate filling, providing that signature crumble effect, so distribute it evenly for consistent bites.
  • Optionally, top with 1/4 cup chopped nuts and a light sprinkle of flaky sea salt.

    → Nuts add crunch and a rich flavor that complements the chocolate, while flaky sea salt highlights the sweetness. Ensure the nuts are evenly distributed and use salt sparingly to maintain a balanced flavor profile.
  • Return the pan to the oven and bake for an additional 20-25 minutes, or until the crumble topping is set and the filling is slightly bubbling.

    → This second baking allows the flavors to meld together while firming up the texture. Check for bubbling as an indicator that the filling is properly set, ensuring a gooey consistency.
  • Remove the squares from the oven and allow them to cool in the pan for about 10 minutes before lifting them out using the parchment overhang.

    → This cooling period prevents burns and allows the squares to set further, making them easier to slice. Patience here ensures cleaner cuts and better presentation.
  • Once cooled, cut the squares into even pieces using a sharp knife, wiping the blade between cuts for clean edges.

    → Clean cuts improve the visual appeal of your dessert and make serving easier. Use a sawing motion rather than pressing straight down to avoid squishing the squares.
  • Serve the chocolate cocoa crumble squares warm or at room temperature, optionally garnished with extra nuts or a drizzle of chocolate sauce if desired.

    → Serving at room temperature allows the chocolate filling to maintain its gooey texture, providing a delightful experience. The optional garnishes enhance presentation and add flavor complexity.

Notes

These Chocolate Cocoa Crumble Squares are a decadent treat perfect for chocolate lovers. The crumble base is rich and indulgent, thanks to the combination of all-purpose flour and high-quality cocoa powder. Ensure that you sift the cocoa powder before adding it to the mix to avoid lumps and create a smooth texture in your squares.

When preparing the crumble base, remember to keep the butter cold. This step is crucial for achieving a tender and flaky texture. Using your fingers or a pastry cutter, mix the cold, cubed butter into the dry ingredients until you achieve a coarse crumb consistency. This method will help maintain the butter’s temperature, ensuring your crumble is just right.

The chocolate filling is the highlight of this recipe. Choose between semi-sweet and dark chocolate chips based on your personal preference for sweetness. Heat the heavy cream gently to encourage even melting, combining to create a silky, rich filling. Letting the chocolate chips sit at room temperature before melting helps prevent any abrupt temperature changes that could alter the melting process.

If you decide to add toppings, consider toasting the chopped nuts beforehand to enhance their flavor and aroma. This additional step brings a delightful crunch and depth to your squares. A sprinkle of flaky sea salt on top complements the rich chocolate and adds a gourmet finish to the dessert, contrasting beautifully with the sweetness of the filling.

These squares can be served warm or at room temperature, making them a versatile dessert for any occasion. They also store well; just keep them in an airtight container to maintain their freshness. Enjoy your baking adventure with these delightful Chocolate Cocoa Crumble Squares!

Tips

Cooking Tips for Chocolate Cocoa Crumble Squares

  • Sifting Ingredients: Always sift your dry ingredients, such as flour and cocoa powder, before measuring. This process helps to break up lumps and aerate the ingredients, resulting in a lighter and better-textured crumble.
  • Butter Temperature: Ensure your butter is cold and cubed before you mix it with the flour. This helps create a flaky texture in the crumble. For an even easier mixing process, you can grate the cold butter using a box grater.
  • Mixing Techniques: When combining the butter and dry ingredients, aim for a mix that resembles coarse crumbs. Avoid overmixing, as this can lead to a dense texture. A pastry cutter or your fingers work best for this step.
  • Melting Chocolate: When melting the chocolate with cream, heat the cream until it just simmers and then pour it over the chocolate chips, allowing them to sit for a minute before stirring. This encourages the chips to melt evenly and prevent any graininess.
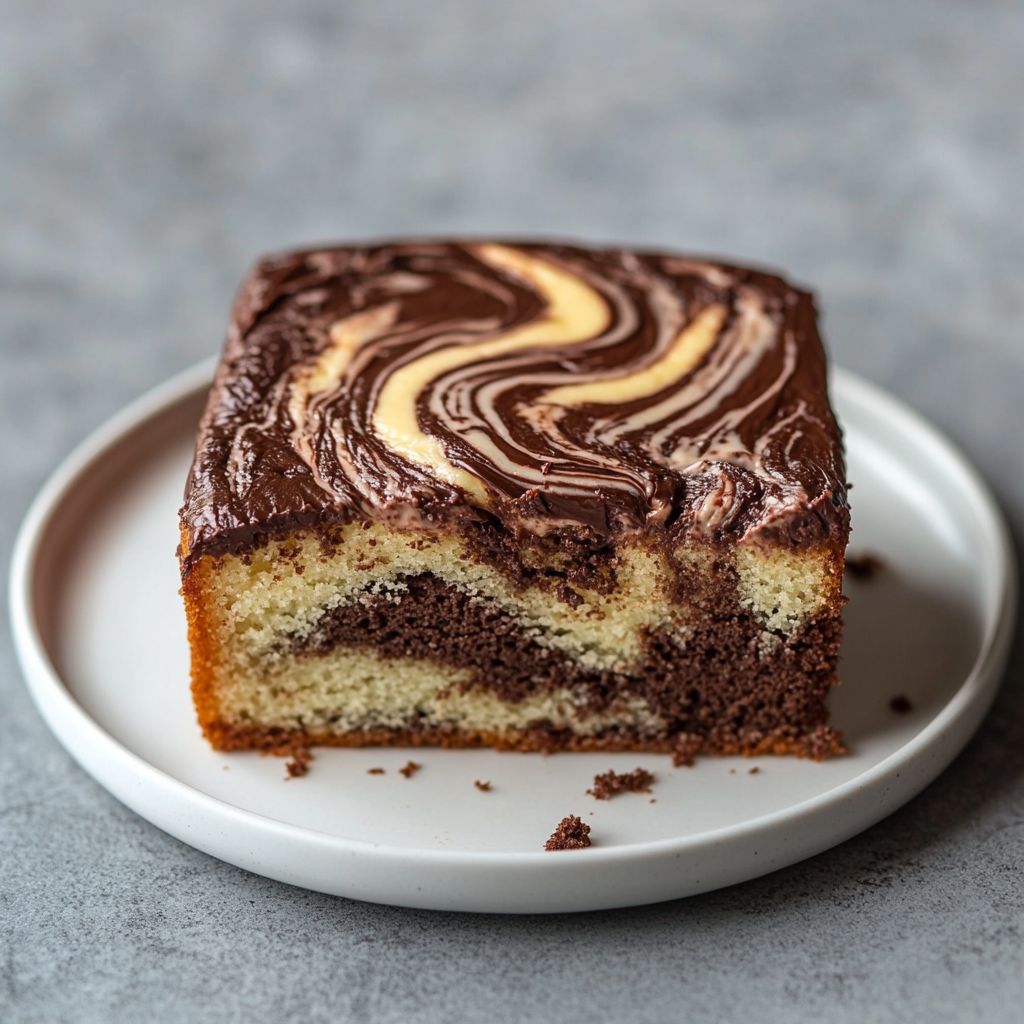
  • Layering Crumble: For an even bake, layer half of the crumble mixture in the bottom of the baking dish, then pour the melted chocolate filling over it, and finish with the remaining crumble on top. This makes for a beautifully textured square.
  • Baking Temperature: Make sure your oven is fully preheated before placing the squares inside. A consistent temperature ensures the crumble cooks evenly and achieves the right golden-brown color.
  • Using a Toothpick: To test for doneness, insert a toothpick into the center of the squares. It should come out with a few moist crumbs but not wet batter. Be sure not to overbake, as this can lead to a dry texture.
  • Letting Cool: Once baked, allow the squares to cool fully in the pan before cutting. This helps the chocolate filling set properly and makes for cleaner cuts when slicing.
  • Enhancing Flavor: For added flavor complexity, consider incorporating a splash of vanilla extract or a pinch of espresso powder into the chocolate filling for a deeper taste.
  • Storage Tips: Store leftover squares in an airtight container at room temperature for up to three days, or refrigerate them to maintain freshness for a longer period. They can also be frozen for up to a month—just ensure they are well-wrapped!

FAQ

What are Chocolate Cocoa Crumble Squares?

Chocolate Cocoa Crumble Squares are a delightful dessert made with a rich chocolate base that is topped with a crumbly cocoa layer. They are perfect for chocolate lovers and can be served as a treat for any occasion.

What ingredients are needed to make Chocolate Cocoa Crumble Squares?

The main ingredients include chocolate, cocoa powder, flour, butter, sugar, eggs, and vanilla extract. Some recipes may also include nuts or chocolate chips for added texture.

How long does it take to prepare Chocolate Cocoa Crumble Squares?

Preparation typically takes about 15-20 minutes, and baking time is around 25-30 minutes, depending on your oven. Overall, you should plan for about an hour from start to finish.

Can I use dark chocolate instead of milk chocolate?

Yes, you can use dark chocolate for a richer flavor. Just keep in mind that it may alter the sweetness of the squares, so you might want to adjust the sugar content accordingly.

How can I store Chocolate Cocoa Crumble Squares?

Store the squares in an airtight container at room temperature for up to 3 days, or in the refrigerator for a week. You can also freeze them for up to 3 months; just make sure to wrap them tightly to prevent freezer burn.

Can I make Chocolate Cocoa Crumble Squares gluten-free?

Yes, you can substitute the all-purpose flour with a gluten-free flour blend. Make sure that the other ingredients you use are also gluten-free to keep the recipe safe for those with gluten intolerance.

What can I serve with Chocolate Cocoa Crumble Squares?

These squares pair well with whipped cream, vanilla ice cream, or a drizzle of chocolate sauce. They can also be enjoyed with fresh fruits like raspberries or strawberries for a refreshing contrast.

Can I add other flavors to Chocolate Cocoa Crumble Squares?

Absolutely! You can incorporate flavors like coffee, orange zest, or even mint extract to give a unique twist to the squares. Experimenting with different add-ins such as nuts or dried fruits can also enhance the flavor.

Introduction: A Slice of Heaven in Every Bite

Imagine biting into a dessert so decadent, so rich, that it melts in your mouth, leaving you with layers of flavor that linger deliciously on your palate. This is exactly what you can expect from Chocolate Cocoa Crumble Squares. The perfect bite delivers a bold burst of dark chocolate, balanced with the subtle bitterness of cocoa, and topped with a crumbly, buttery texture that simply falls apart as you savor it. As the aromas of chocolate and vanilla waft through your kitchen, you’ll find yourself irresistibly drawn to this delightful treat. Chocolate Cocoa Crumble Squares aren’t just a dessert; they’re an experience, a small indulgence that transforms any ordinary moment into something spectacular.

The Story Behind the Dish

The history of chocolate desserts is a rich tapestry interwoven with tales of discovery, cultural exchange, and culinary evolution. Chocolate itself, first cultivated by the ancient civilizations of Central and South America, has always been surrounded by a sense of mystery and luxury. The Aztecs regarded cacao as the food of the gods, and it played a critical role in both their rituals and economy. This deep-seated reverence for chocolate journeyed across the oceans with European explorers and quickly became a beloved indulgence in kitchens around the world.

The creation of Chocolate Cocoa Crumble Squares speaks to this heritage, blending the timeless appeal of chocolate with the innovation of modern confectionery. By marrying the intensity of rich dark chocolate with a crumbly texture, this dessert pays homage to centuries of chocolate-loving tradition while also showcasing contemporary culinary flair. Whether enjoyed as an end to a meal or a late-night snack, Chocolate Cocoa Crumble Squares embody both the historical significance and the universal appeal of chocolate.

Why You’ll Love This Recipe

  • Quick and Easy: Perfect for chocolate lovers, this recipe can be made in under an hour, making it ideal for those spontaneous cravings or for impressing last-minute guests.
  • Indulgent yet Accessible: These squares are luxurious without requiring expensive or hard-to-find ingredients. With everyday pantry staples, you can treat yourself to something special.
  • Family-Friendly: Everyone from kids to adults will enjoy these squares, making them a crowd-pleaser at family gatherings or casual get-togethers.
  • Versatile: Serve them as a sophisticated coffee break snack, a delightful afternoon treat, or the grand finale to a dinner party.

Flavor Profile & Texture

The first thing you notice about Chocolate Cocoa Crumble Squares is the intense aroma of dark, rich cocoa that beckons you to take that first bite. Each square is a harmonious blend of flavors and textures. The base provides a robust chocolate foundation, intensified by the inclusion of pure cocoa. This richness is offset by a light, buttery crumble topping, adding a satisfying crunch and a melt-in-your-mouth experience that propels you to reach for another piece.

The taste is a seamless blend of sweet and bitter, emphasizing the natural flavor of high-quality chocolate. With each bite, the slight nuttiness of brown sugar in the crumble emerges, complementing the chocolate’s natural depth and creating a perfectly balanced treat that is neither too sweet nor overwhelmingly bitter.

Occasions & Pairings

Chocolate Cocoa Crumble Squares are as versatile as they are delightful. Here are a few occasions and pairings that make them an ideal choice:

  • Special Celebrations: These squares work wonderfully for birthdays and anniversaries, offering a sophisticated touch to any dessert table.
  • Holiday Treats: Perfect for Christmas, Thanksgiving, or Easter, add these to your platter of sweets to balance fruity or spicy desserts.
  • Coffee Pairing: Enjoy a square with your morning cup of joe or after a rich, aromatic espresso for a delightful start or end to your day.
  • Ice Cream Companion: For a decadent dessert, pair a warmed square with a scoop of vanilla bean ice cream or a dollop of fresh whipped cream.

Tips, Variations & Substitutions

While the classic recipe for Chocolate Cocoa Crumble Squares is undeniably scrumptious, there’s always room for personalization to accommodate dietary needs and preferences:

  • Dairy-Free Option: Substitute plant-based butter and a dairy-free chocolate chip brand to enjoy a lactose-intolerant-friendly version.
  • Nutty Twist: Add a handful of chopped walnuts or pecans to the crumble topping for added texture and nuttiness.
  • Gluten-Free Variation: Use almond or coconut flour instead of all-purpose to cater to those avoiding gluten, taking care to adjust proportions accordingly.
  • Spicy Touch: Experiment with the addition of a pinch of cayenne pepper or cinnamon to the chocolate batter for a spicy kick that beautifully complements the chocolate.

Storage & Make-Ahead Ideas

Chocolate Cocoa Crumble Squares are perfect for making ahead of time, allowing you more freedom to plan and relax on busy days. Here’s how to store them:

  • Refrigeration: Store the cooled squares in an airtight container in the fridge for up to a week. This not only helps maintain their freshness but also enhances their flavor over time as the ingredients meld together.
  • Freezing: Freeze them individually wrapped in plastic and placed in a zip-top bag. They’ll last for up to three months, ready to be defrosted and enjoyed any time a craving strikes.
  • Serving Suggestions: Thaw in the fridge overnight or warm them straight from the fridge before serving to bring out their full, decadent flavor.

Fun Facts & Trivia

Did you know that chocolate has historically been used for barter and even medicinal purposes? In medieval times, chocolate was prescribed as a remedy for a variety of ailments, from digestive issues to heart pain, owing to its natural stimulants and ability to induce feelings of comfort and pleasure. Furthermore, the successful cultivation of chocolate played a significant role in the social transformations of the countries that produced it.

There is also a day dedicated to celebrating this beloved ingredient: International Chocolate Day is observed annually on September 13th. So why not mark your calendar, whip up a batch of Chocolate Cocoa Crumble Squares, and join in the global homage to this timeless treat? Trust that every crunchy, chocolate-filled bite will add to the rich history of chocolate indulgences that have captivated taste buds across generations.

Ingredients

  • Chocolate Crust
    → The base for the crumble squares, providing a rich, chocolatey flavor and sturdy structure. It should be pre-baked to ensure it holds up against the topping. Use unsweetened cocoa powder for intense chocolate flavor and good quality dark chocolate to enhance the taste. Ensure the butter is melted and cooled slightly before combining with ingredients to prevent clumping.
  • 1 1/2 cups all-purpose flour
    → The main structural component for the crumble squares. It gives the squares their characteristic texture. Use the spoon-and-level method for measuring to avoid compacting the flour, which can make the squares dense. You may use a flour alternative if gluten-free is desired.
  • 1 cup unsweetened cocoa powder
    → Adds a rich, chocolate flavor to both the crust and crumble topping. Sift the cocoa powder before measuring to avoid clumps and to ensure even distribution in the batter, which helps create a light texture.
  • 1 cup granulated sugar
    → Provides sweetness and balances the bitterness of cocoa. It should be measured accurately and mixed well to ensure even sweetness throughout the squares. For a deeper flavor, consider substituting half of the granulated sugar with brown sugar.
  • 1/2 cup unsalted butter (melted)
    → Acts as a binding agent for the crust and crumble topping while also providing moisture and flavor. Melt the butter and let it cool slightly before mixing it with dry ingredients to prevent them from cooking prematurely.
  • 1/4 teaspoon salt
    → Enhances the sweetness and overall flavor of the chocolate. Use fine sea salt for an even distribution throughout the mixture. Salt is essential in balancing flavors, so do not skip it.
  • 1 teaspoon pure vanilla extract
    → Adds depth of flavor and enhances the sweetness in the recipe. Use high-quality pure vanilla extract for the best flavor; synthetic vanilla can have an off-taste that may overpower the chocolate.
  • 1 cup chocolate chips (semi-sweet or dark)
    → Adds melty pockets of chocolate throughout the crumble squares. Choose high-quality chocolate chips for a richer taste. Fold them into the batter gently to avoid melting them too early in the mixing process.
  • Chocolate Crumble Topping
    → This creates a crunchy texture that contrasts beautifully with the soft squares. It should be made with a combination of flour, cocoa powder, and butter to ensure it stays crisp when baked. Aim for a crumbly texture by mixing until just combined.
  • 1 cup rolled oats
    → Gives texture and chewiness to the topping. Use old-fashioned oats for the best crunch. Do not replace with quick oats, as they will not provide the same hearty texture.
  • 1/2 cup brown sugar (packed)
    → Adds sweetness and moisture to the crumble topping. Pack it into the measuring cup for accuracy and mix thoroughly to ensure even distribution of sweetness and flavor. If you prefer a caramel-like taste, use dark brown sugar.
  • 1/2 cup chopped nuts (e.g., walnuts or pecans) (optional)
    → Adds an additional layer of flavor and texture. Chop them into small pieces for even distribution. Toasting the nuts lightly before adding to the topping can enhance their flavor and crunch.

Instructions

  • Preheat your oven to 350°F (175°C) and line an 8×8 inch baking pan with parchment paper, allowing some overhang for easy removal later.

    → Preheating ensures your crumble squares bake evenly from the start, while the parchment will help lift the squares out cleanly once cooled, aiding in a precise cut.
  • In a large mixing bowl, whisk together 1 1/2 cups of all-purpose flour, 1 cup of unsweetened cocoa powder, 1 cup of granulated sugar, and 1/4 teaspoon of salt until well combined.

    → This process mixes the dry ingredients thoroughly, ensuring that the flavors are evenly distributed. Sifting the cocoa powder beforehand also helps to break up clumps, leading to a smoother batter.
  • In a medium bowl, combine 1/2 cup of melted unsalted butter and 1 teaspoon of pure vanilla extract. Stir until mixed well.

    → The melted butter should be slightly cooled before adding to prevent cooking the dry ingredients. This mixture serves as the binding agent, bringing everything together for a cohesive texture.
  • Pour the butter and vanilla mixture into the dry ingredients and stir with a spatula until just combined and a thick dough starts to form.

    → Mixing only until combined prevents overworking the dough, which can lead to tougher squares. The mixture will be thick, so use the spatula to press it into the pan.
  • Take about two-thirds of the chocolate crust mixture and press it evenly into the bottom of the prepared baking pan to create a solid crust layer.

    → Pressing firmly ensures the crust holds together during baking, while creating an even foundation for the crumble topping. Use a flat-bottomed spatula or your fingers for even distribution.
  • Bake the crust in the preheated oven for 10-12 minutes until set.

    → Pre-baking the crust helps to prevent it from becoming soggy once the topping is added. It should look firm and slightly darker in color when done.
  • While the crust is baking, prepare the chocolate crumble topping by mixing the remaining dry ingredients: in a medium bowl, combine 1 cup of rolled oats, 1/2 cup of packed brown sugar, 1 cup of all-purpose flour, and 1 cup of cocoa powder.

    → This mixture adds texture and sweetness to the topping; mixing dry ingredients together ensures a uniform crumbly structure.
  • Add 1/2 cup of melted unsalted butter to the dry mixture and stir until the mixture looks crumbly. If using, fold in 1/2 cup of chopped nuts at this point.

    → You want the mixture to have a crumbly texture that holds its shape but isn’t wet; ensure the butter is evenly mixed in for optimal crunchiness.
  • Once the crust is done baking, remove it from the oven and sprinkle 1 cup of chocolate chips evenly over the crust.

    → The warm crust will slightly melt the chips, helping them to adhere better to the topping added next, creating pockets of melted chocolate throughout the squares.
  • Evenly distribute the crumble topping over the chocolate chips, ensuring all areas of the crust are covered.

    → This allows for a balanced texture of crunchy topping and soft chocolate base in every bite. Use your hands to gently sprinkle and press the crumble, if necessary.
  • Bake the assembled squares for an additional 20-25 minutes, or until the topping is firm and slightly crisp.

    → This final bake allows the flavors to meld together, while the topping gains a crunchy texture. Ensure the edges are slightly set, and a toothpick inserted should come out with moist crumbs.
  • Allow the crumble squares to cool completely in the pan on a wire rack for at least 30 minutes before lifting them out using the parchment overhang.

    → Cooling helps the squares to set fully and makes cutting easier. If you cut while warm, the squares may crumble or fall apart.
  • Once cooled, cut into desired square sizes and serve.

    → Use a sharp, clean knife for smooth cuts, wiping it between slices for the best presentation. Enjoy the rich chocolate flavors and contrasting textures!

Notes

These Chocolate Cocoa Crumble Squares offer a delightful balance of rich chocolate flavor and a crunchy topping, making them a perfect dessert for any occasion. The chocolate crust serves as a sturdy base, while the crumble topping adds texture and sweetness. Remember to pre-bake the crust to ensure it holds its shape when combined with the topping. For best results, use high-quality unsweetened cocoa powder and dark chocolate to enhance the chocolate flavor.

When measuring flour, opt for the spoon-and-level method to maintain the perfect texture—this will help avoid dense squares. If you’re looking to reduce sugar, try substituting half of the granulated sugar with brown sugar for a deeper flavor profile. Always ensure your butter is melted and slightly cooled before mixing with other ingredients to prevent any cooking of the dry mix, ensuring optimal texture.

The inclusion of chocolate chips in the batter brings melty goodness to each bite. Gently fold them in to avoid melting before baking. For the crumble topping, using old-fashioned rolled oats is key to achieving that hearty chewiness; avoid quick oats as they won’t offer the same texture.

Feel free to add chopped nuts for an extra crunch if desired—toast them lightly before adding for enhanced flavor. These squares are best served slightly warm, allowing the chocolate to remain gooey and luscious. Enjoy your delectable Chocolate Cocoa Crumble Squares with a scoop of vanilla ice cream for a truly indulgent treat!

Tips

Cooking Tips for Chocolate Cocoa Crumble Squares

  • Pre-Baking the Crust: Don’t skip pre-baking the chocolate crust. This step is crucial for preventing a soggy bottom. Bake it until it’s firm to the touch before adding the crumble topping.
  • Measuring Ingredients: Always use the spoon-and-level method for measuring flour and cocoa powder. Spoon them into the measuring cup and level them off with a knife – this avoids packing and ensures accurate amounts.
  • Melting Butter: When melting the butter, use low heat or a double boiler to avoid overheating. Allow it to cool slightly before adding it to the dry ingredients to maintain the integrity of the mix.
  • Sifting Cocoa Powder: Sift the cocoa powder and powdered sugar (if using) to eliminate lumps. This enhances the texture and ensures a smooth batter.
  • Chilling Dough: If your crust mixture feels too soft or warm after mixing, consider chilling it in the refrigerator for about 15-20 minutes. This will make it easier to spread in the pan.
  • Mixing Techniques: When combining wet and dry ingredients, mix until just combined to avoid overworking the dough, which can lead to dense squares.
  • Adding Chocolate Chips: Carefully fold in chocolate chips by hand instead of stirring vigorously. This helps retain their shape and creates those luscious, melty pockets of chocolate in your dessert.
  • Oat Selection: Use old-fashioned rolled oats for the topping; quick oats will not provide the same texture. They contribute a heartiness that complements the chocolate well.
  • Nut Preparation: If using nuts, consider toasting them lightly in a dry skillet over medium heat for 5-7 minutes before adding them to bring out their flavor and crunch.
  • Cooling: Allow the chocolate crumble squares to cool completely in the pan before slicing. This helps them set and makes cutting cleaner and easier.
  • Storage Suggestions: Store any leftovers in an airtight container at room temperature for up to three days. They can also be refrigerated for longer freshness, though the texture may change slightly.

FAQ

What are Chocolate Cocoa Crumble Squares?

Chocolate Cocoa Crumble Squares are delicious dessert bars made with a rich cocoa crumb base, topped with a chocolate mixture and often sprinkled with additional cocoa or chocolate chunks for extra flavor and texture.

How do I store Chocolate Cocoa Crumble Squares?

You should store Chocolate Cocoa Crumble Squares in an airtight container at room temperature for up to 3 days. For longer storage, you can refrigerate them for up to a week or freeze them for up to 3 months.

Can I use dark chocolate instead of milk chocolate in the recipe?

Yes, you can use dark chocolate if you prefer a richer flavor. Adjusting the chocolate type may slightly alter the sweetness, so consider reducing any added sugar if desired.

Are there any gluten-free options for this recipe?

Yes, you can substitute regular flour with gluten-free flour blends. Make sure to check for cross-contamination if you’re making them for someone with a gluten allergy.

What can I substitute for cocoa powder?

If you don’t have cocoa powder, you can use carob powder as a caffeine-free alternative. However, this will change the flavor profile of the squares, making them more earthy and nutty.

How long do these squares take to prepare?

The preparation time for Chocolate Cocoa Crumble Squares is about 20 minutes, and they typically require about 25-30 minutes of baking time.

Can I add nuts or other mix-ins to the recipe?

Absolutely! Feel free to add nuts like walnuts or pecans, chocolate chips, or even dried fruits to enhance the flavor and texture of the squares.

Is this recipe suitable for kids to help with?

Yes, this recipe is beginner-friendly and suitable for kids to participate in! They can help with mixing, pouring, and sprinkling toppings, making it a fun family activity.

Introduction: Discover the Magic of Chocolate Custard Filled Muffins

Imagine biting into a warm, freshly-baked muffin with a luscious surprise at its core. The rich aroma of chocolate wafts through the kitchen, while the decadent, silky smooth custard center envelops your taste buds with each bite. Chocolate Custard Filled Muffins are a delightful fusion of classic comfort and sophisticated indulgence, making them an irresistible treat for chocoholics everywhere. This ingenious twist on traditional muffins will captivate your senses, offering a perfect balance between crunchy, doughy exteriors and creamy, chocolatey interiors. Whether you savor these delights with a cup of coffee in the morning or as a decadent dessert after dinner, they’re guaranteed to turn ordinary moments into extraordinary ones.

The Story Behind the Dish: A Sweet Evolution

The tale of Chocolate Custard Filled Muffins is a sweet journey through time and taste. While muffins themselves have long been celebrated as a breakfast staple, the addition of a custard filling propels them into a realm of luxurious desserts. Originating from humble beginnings, muffins have evolved in countless ways across different cultures. The idea of incorporating a filling was inspired by the desire to add a surprise element, elevating these baked goods beyond their traditional form.

Custard, with its velvety texture and rich history dating back to ancient Roman times, perfectly complements the muffin’s structure, creating a harmonious blend of flavors and textures. Chocolate, hailed as the “food of the gods” by ancient civilizations, adds an element of opulence and indulgence. Together, they create a culinary masterpiece that echoes the art of fine patisserie while remaining accessible to home bakers.

Why You’ll Love This Recipe

  • Delectable Combination: The luscious custard center pairs perfectly with a chocolate muffin, offering a unique blend of flavors and textures.
  • Versatile Delight: Enjoy these muffins for breakfast, brunch, dessert, or a special afternoon treat with tea or coffee.
  • Easy to Make: Despite their sophisticated appearance, these muffins are straightforward to prepare, even for novice bakers.
  • Impressive Presentation: Hidden custard centers will delight guests, making them perfect for entertaining.
  • Customizable: Adapt the custard flavor and muffin toppings to suit your personal taste or dietary preferences.

Flavor Profile & Texture: Indulgence in Every Bite

The magic of Chocolate Custard Filled Muffins lies in their enchanting contrast of textures and flavors. The exterior is a classic muffin, slightly crispy with a tender crumb that melts in your mouth. Its subtle sweetness and rich chocolate undertones provide a delectable base for the surprise center that awaits inside. As your teeth break through the muffin’s surface, they discover a luscious custard interior.

This custard, luxuriously smooth and creamy, provides a delightful contrast to the chocolatey crumb surrounding it. The combination results in a flavor profile that’s both rich and balanced, where the silkiness of the custard meets the comforting finish of the muffin. The creamy and airy textures play together beautifully, ensuring that each mouthful is as satisfying as the last.

Occasions & Pairings: Perfect for Any Moment

Chocolate Custard Filled Muffins are a versatile treat, suitable for many occasions. They shine during leisurely weekend brunches or become the star of birthday celebrations as an elegant yet cozy dessert option. They’re ideal for bridal showers, tea parties, or even as a show-stopping addition to a festive holiday spread.

Pair these muffins with a variety of beverages to enhance their appeal. A hot cup of freshly brewed coffee or a frothy cappuccino complements the rich chocolate flavors nicely, while a delicate herbal tea can provide a refreshing counterbalance. For an indulgent touch, serve with a glass of dessert wine or a scoop of vanilla ice cream, allowing the creamy custard to mingle warmly with the cool, sweet accompaniment.

Tips, Variations & Substitutions: Make It Your Own

There are countless ways to put a personal spin on Chocolate Custard Filled Muffins. Consider these tips and variations to tailor this recipe to your preferences:

  • Flavor Variations: Infuse the custard with flavors such as vanilla, almond, or espresso for a distinctive aroma. Alternatively, swirl in some fruit purees like raspberry or strawberry for a fresh and fruity twist.
  • Dietary Modifications: Adapt the recipe for specific dietary needs by choosing gluten-free muffin mixes or plant-based milk for a vegan-friendly dessert.
  • Additional Toppings: Sprinkle the tops of your muffins with chocolate shavings, crushed nuts, or a dusting of powdered sugar for added flair and texture.
  • Regional Twists: Incorporate specialty ingredients like chili powder or sea salt for a contemporary spin, highlighting regional flavors and preferences.

Storage & Make-Ahead Ideas: Enjoy Anytime

Chocolate Custard Filled Muffins not only deliver pleasure fresh from the oven but are also adaptable for future indulgence. To keep them at their best, store any leftover muffins in an airtight container in the refrigerator, where they’ll stay fresh for up to three days. Reheat them gently in the oven or microwave when ready to enjoy.

For longer storage, consider freezing the muffins without the custard filling. Once completely cooled, wrap them individually in plastic wrap followed by aluminum foil or place them in a sturdy freezer bag. They can be stored in the freezer for up to two months. When you’re ready to serve, thaw them at room temperature and then fill them with fresh custard.

By prepping the muffins ahead of time, you can ensure a delightful treat awaits whenever you’re in the mood for a bit of chocolate magic.

Fun Facts & Trivia: Sweet Tidbits to Ponder

Did you know that muffins have a dual identity across the pond? In the UK, “muffins” often refer to what Americans would call “English muffins” — a yeasted, bread-like treat most frequently enjoyed toasted and buttered, often accompanying a savory breakfast platter.

This culinary journey of Chocolate Custard Filled Muffins also involves the fascinating history of cocoa, discovered over 3,000 years ago by the ancient civilizations of Mesoamerica, and later revolutionized into the chocolate we cherish today.

By bringing together muffins and custard, you’ve got a dessert that unites multiple cultural influences, each with its own story, ultimately creating a delightful contemporary fusion that’s sure to inspire and delight bakers worldwide.

Ingredients

  • Muffin Base
    • 2 cups all-purpose flour
      → All-purpose flour serves as the primary structure for the muffins, providing the necessary gluten for rise and texture. Ensure to measure the flour correctly by spooning it into a measuring cup and leveling it off to avoid dense muffins.
    • 1 cup granulated sugar
      → Granulated sugar adds sweetness to the muffins and enhances the flavor of the chocolate custard. It also helps in creating a tender texture by incorporating air during the creaming process. Aim for a fine sugar to ensure it mixes evenly into the batter.
    • 1/2 cup unsweetened cocoa powder
      → Cocoa powder is essential for the rich chocolate flavor that defines these muffins. Use a high-quality unsweetened cocoa powder for the best taste. Sift it before adding to prevent clumping and to ensure a smooth batter.
    • 1 teaspoon baking powder
      → Baking powder acts as a leavening agent, helping the muffins rise and become fluffy. Make sure it is fresh for optimal effects; check the expiration date, and store it in a cool, dry place to maintain its potency.
    • 1/2 teaspoon baking soda
      → Baking soda complements the baking powder, providing an additional lift and helping to create a light texture. This ingredient reacts with acidic components in the recipe, so ensure it’s mixed thoroughly to avoid any unreacted pockets.
    • 1/2 teaspoon salt
      → Salt enhances the overall flavors of the muffins, balancing the sweetness and bringing out the rich chocolate notes. Use fine salt to ensure even distribution within the batter.
    • 1/2 cup unsalted butter (melted)
      → Unsalted butter adds richness and moisture to the muffins. Melt the butter and allow it to cool slightly before using, as hot butter can cook the eggs if added too soon. If you’re looking for a healthier option, you can substitute with an equal amount of applesauce.
    • 2 large eggs (room temperature)
      → Eggs are crucial for binding and providing moisture to the muffin batter. Ensure they are at room temperature for better incorporation into the batter, which also helps achieve a nice rise during baking.
    • 1 teaspoon vanilla extract
      → Pure vanilla extract enhances the flavor profile of the muffins, adding a rich aroma and depth of taste. Opt for pure vanilla instead of imitation for the best quality. Add it to the wet ingredients for even distribution.
    • 1 cup milk (room temperature)
      → Milk adds moisture to the batter, helping to hydrate the dry ingredients and create a tender crumb. Use whole milk for richness or any non-dairy milk as a substitute. Let it come to room temperature to ensure it blends well.
  • Chocolate Custard Filling
    • 1 cup milk
      → Milk is the base of the chocolate custard filling, providing creaminess and richness. Use whole or 2% milk for a creamier texture. Heat the milk gently to a simmer for best results.
    • 1/4 cup granulated sugar
      → Sugar is essential for sweetening the custard, balancing the bitterness of the cocoa. It’s important to fully dissolve it in the warm milk to create a smooth filling.
    • 3 tablespoons cocoa powder
      → Cocoa powder gives the custard its chocolate flavor; sifting it before adding helps prevent clumps and ensures a smooth mixture. Use unsweetened cocoa for a richer taste.
    • 3 large egg yolks
      → Egg yolks provide richness and help thicken the custard. Whisk them well before adding to the mixture for a more uniform texture. Be careful not to scramble the yolks by adding them to the hot mixture gradually.
    • 2 tablespoons cornstarch
      → Cornstarch is used as a thickening agent, giving the custard a creamy, velvety texture. Mix it with a small amount of cold milk before adding to prevent lumps from forming.
    • 1 teaspoon vanilla extract
      → Pure vanilla extract enhances the flavor of the custard, adding a warm, aromatic note. Since it’s added after cooking, it retains its full flavor profile. Choose quality vanilla for a richer taste.
  • Optional Toppings
    • Whipped cream (for serving)
      → Whipped cream adds a light and airy finish to the muffins, balancing the richness of the chocolate custard. You can make your own with heavy cream and sugar or use store-bought for convenience. Serve fresh for the best texture.
    • Chocolate shavings or sprinkles (optional)
      → Chocolate shavings or sprinkles serve as a decorative and flavorful topping to enhance the chocolate experience. Use a vegetable peeler for shavings and sprinkle them generously on top just before serving.

Instructions

  • Preheat your oven to 350°F (175°C) and line a 12-cup muffin tin with paper liners or grease it well.

    → Ensuring the oven is at the correct temperature allows the muffins to rise properly, while lining or greasing the tin prevents sticking, making cleanup easier.
  • In a large mixing bowl, combine the all-purpose flour, granulated sugar, cocoa powder, baking powder, baking soda, and salt.

    → Stir these dry ingredients together thoroughly with a whisk to ensure even distribution, which is vital for uniform baking and flavor throughout each muffin.
  • In a separate bowl, whisk together the melted unsalted butter, eggs, vanilla extract, and milk until fully combined.

    → Whisking these wet ingredients evenly allows air to incorporate, helping the muffins to achieve a light and airy texture; make sure the butter is not too hot to avoid cooking the eggs.
  • Pour the wet ingredients into the dry ingredients and gently fold them together using a spatula until just combined.

    → Be careful not to overmix, as this activates the gluten in the flour too much, leading to tough muffins. Aim for a few flour streaks remaining; the mixture will come together during baking.
  • Spoon a small amount of the muffin batter into each cup of the prepared muffin tin, filling them about one-third full.

    → This creates a base layer for the custard filling. Ensuring they are filled only one-third helps the muffins rise without overflowing when the custard is added.
  • For the chocolate custard filling, heat 1 cup of milk in a saucepan over medium heat until it is just about to simmer, then remove it from the heat.

    → Heating the milk slowly prevents scorching; it should not boil, as boiling can affect the texture of the custard and cause curdling.
  • Whisk in the granulated sugar and cocoa powder until fully dissolved and smooth.

    → This step is crucial for creating a creamy filling free from lumps, so taking your time to whisk until the mixture is completely combined will pay off in texture.
  • In a separate bowl, vigorously whisk the egg yolks until they are pale and slightly thickened.

    → Whisking the egg yolks sufficiently helps to temper them and incorporate air, which contributes to the custard’s creamy consistency.
  • Gradually pour the warm chocolate mixture into the egg yolks while continuously whisking to avoid cooking the yolks.

    → This process is called tempering; it helps to raise the temperature of the yolks without scrambling them, allowing for a smooth custard.
  • Once combined, return the custard mixture to the saucepan over low heat, stirring frequently.

    → This gentle heating allows the cornstarch you’ve mixed with a bit of cold milk to activate and thicken the custard. It’s important to stir constantly to prevent sticking to the bottom of the pan.
  • Continue cooking until the custard thickens and coats the back of a spoon, which usually takes around 5–7 minutes.

    → The right consistency should hold a line when you run your finger through it on the back of a spoon. This will ensure the filling is rich and holds its shape inside the muffins.
  • Remove the custard from heat and stir in the vanilla extract.

    → Adding vanilla at this stage enhances the flavor profile of the custard without compromising its taste from cooking. Stir until evenly distributed.
  • Use a spoon or a piping bag to fill the muffin cups with the chocolate custard until nearly full, leaving a small amount of space at the top.

    → This allows the muffins to rise properly without overflowing while still providing a generous filling. Ensure the custard is evenly distributed among the cups.
  • Top each filled muffin cup with a dollop of the remaining muffin batter, carefully spreading it to cover the custard.

    → This layer acts as a seal to prevent the custard from spilling out while they bake, ensuring a delicious surprise inside.
  • Bake in the preheated oven for 20-25 minutes, or until a toothpick inserted into the muffin comes out clean or with a few moist crumbs, not wet batter.

    → Proper baking ensures the muffins are cooked throughout; underbaking may leave a gooey center and overbaking can dry them out, so timing is essential.
  • Allow the muffins to cool in the tin for about 5 minutes before transferring them to a wire rack to cool completely.

    → Cooling allows them to set properly, making them easier to handle and preventing sogginess from steam. A wire rack prevents condensation from forming underneath.
  • Serve with optional toppings such as whipped cream and chocolate shavings or sprinkles for an indulgent finish.

    → Whipped cream adds a light and airy texture that complements the rich chocolate, while chocolate shavings enhance the visual appeal and chocolate flavor.

Notes

These chocolate custard filled muffins are a delightful combination of soft, chocolatey muffin bases and rich, creamy chocolate custard filling. When making the muffin base, be sure to measure your flour accurately to achieve the perfect balance of texture and rise. The melted unsalted butter not only adds moisture but also contributes to the overall flavor richness, so let it cool slightly before combining with the other wet ingredients. It’s crucial to mix in the eggs until fully incorporated at room temperature to ensure a nice lift while baking.

For the chocolate custard filling, heat the milk gently and dissolve the sugar fully to achieve a smooth custard. As you add the egg yolks, whisk them well and introduce them gradually to avoid scrambling. Cornstarch will help in achieving that velvety consistency, so dissolve it in a bit of cold milk first before adding to the hot mixture. The addition of vanilla extract at the end of the cooking process will enhance the flavor of the custard, making it more aromatic.

Finally, when it comes to assembling, be sure to fill the muffins appropriately with the chocolate custard. You can also add a light topping of whipped cream and chocolate shavings for an elegant finish that complements the rich flavors. These muffins not only make a fantastic dessert but can also be enjoyed as a sweet breakfast treat or snack!

Tips

Cooking Tips for Chocolate Custard Filled Muffins

  • Measuring Ingredients: Accurate measurements are crucial for baking success. Use the spoon and level method for flour, and ensure your baking powder and baking soda are fresh for optimal rise.
  • Mixing Technique: When combining the wet and dry ingredients, mix until just combined to avoid overworking the batter. This will keep the muffins tender and fluffy.
  • Room Temperature Ingredients: For best results, use room temperature ingredients like eggs and milk, as they incorporate more easily and contribute to a better rise and texture.
  • Muffin Tin Prep: Line your muffin tin with liners or grease them well to prevent sticking. You can also use parchment paper for an easy release.
  • Custard Cooking: When making the chocolate custard, heat the milk gently and whisk the egg yolks separately to avoid scrambling. Gradually add the hot milk to the yolks to temper them before combining everything.
  • Cooling the Custard: After cooking, allow the custard to cool before using it as a filling. This will help it thicken further and make it easier to pipe or spoon into the muffins.
  • Filling Muffins: To fill the muffins with custard, you can either slice the tops off or use a piping bag to inject the custard directly into the center of each muffin.
  • Storage Tips: Store any leftover muffins in an airtight container at room temperature for up to two days or refrigerate them for longer freshness. Reheat in the microwave for a few seconds before serving for a warm treat.
  • Optional Enhancements: Customize the muffins by adding chocolate chips or nuts to the batter before baking, or experiment with different extracts, like almond or hazelnut, for a unique flavor twist.

FAQ

What are Chocolate Custard Filled Muffins?

Chocolate Custard Filled Muffins are soft and moist muffins filled with a rich chocolate custard, offering a delightful combination of textures and flavors in every bite.

How do I make the chocolate custard filling?

To make the chocolate custard filling, you’ll need milk, sugar, cocoa powder, egg yolks, cornstarch, and vanilla extract. Whisk these ingredients together and cook on medium heat until the mixture thickens, then let it cool before filling the muffins.

Can I use a different type of filling?

Yes! You can experiment with different fillings such as vanilla custard, fruit preserves, or nut butter for a unique twist on the classic chocolate custard filled muffins.

How long do these muffins stay fresh?

Chocolate Custard Filled Muffins can be stored in an airtight container at room temperature for up to 2 days. For longer freshness, refrigerate them for up to a week or freeze for up to 3 months.

Can I make these muffins in advance?

Absolutely! You can prepare the muffin batter ahead of time and store it in the refrigerator for up to 24 hours. However, it’s best to fill the muffins with custard just before baking for optimal texture.

What type of chocolate is best for the custard?

For the best flavor, use high-quality unsweetened cocoa powder or semi-sweet chocolate in your custard. You can adjust the sweetness by adding more or less sugar as needed.

Are these muffins suitable for gluten-free diets?

Yes, you can make gluten-free Chocolate Custard Filled Muffins by substituting all-purpose flour with a gluten-free flour blend. Ensure the other ingredients are also gluten-free.

Can I add nuts or chocolate chips to the batter?

Yes! Feel free to add chopped nuts or chocolate chips to the muffin batter for added flavor and texture. Make sure to distribute them evenly for consistent results.

Introduction: A Bite of Pure Bliss – Chocolate Vanilla Snack Cake

Imagine a decadent blend of rich chocolate and creamy vanilla swirled perfectly into each bite, capturing your senses with a sweet melody of flavors. The Chocolate Vanilla Snack Cake is not just a treat; it’s an experience—beckoning with its aroma of fresh-baked goodness and an inviting appearance that promises comfort in every slice. Soft, moist, and infused with nostalgia-inducing flavor, this snack cake takes you on a delightful journey of contrasting tastes and textures that are both familiar and intriguing. Whether you’re new to baking or a seasoned dessert enthusiast, the simplicity yet elegance of this dessert makes it a must-try in every sense.

The Story Behind the Dish

The allure of chocolate and vanilla together is a love story as old as time, a culinary classic that transcends cultures and generations. This harmonious pairing harks back to the 18th century, when vanilla, rare and exotic, began its long-lasting romance with cocoa. The marriage of these two ingredients emerged as a staple in desserts, admired for their complementary characteristics. While chocolate offers a profound, bold indulgence, vanilla softens it with its subtle sweetness and floral notes, creating a perfect balance.

Our Chocolate Vanilla Snack Cake is inspired by the American tradition of ‘snack cakes’—simple, quick treats designed for everyday enjoyment. These cakes gained popularity during the mid-20th century when convenience became a sought-after quality in home cooking. However, while snack cakes are easy to assemble, their charm lies in the comfort they bring, reminiscent of family gatherings and kitchen warmth.

Why You’ll Love This Recipe

  • Simple Ingredients: Whip up this delight using pantry staples that you probably already have at home.
  • Quick to Make: Perfect for when you crave a homemade treat without the wait, this cake is ready in just under an hour.
  • Versatile: Enjoy it as a breakfast indulgence, an afternoon snack with tea, or a delightful after-dinner dessert.
  • Food for All Ages: Its universally loved flavors make it a hit with both adults and children.
  • Beautiful Presentation: The contrasting colors of chocolate and vanilla provide a visually appealing treat that’s sure to impress.

Flavor Profile & Texture

This cake epitomizes what it means for flavors to coexist in harmony. The chocolate offers a rich, slightly bitter depth that intertwines with the creamy sweetness of vanilla, offering a nuanced taste experience. Each bite reveals a pendulum swing from the slight dark allure of cocoa to the soft, aromatic richness of vanilla.

The texture is another highlight, as the cake boasts a light, airy crumb that melts in your mouth. The moistness achieved is that of perfection—dense enough to leave an impression, yet fluffy enough to feel like a sweet cloud grazing your palate. This delightful interplay of flavors and textures makes the cake utterly irresistible.

Occasions & Pairings

The Chocolate Vanilla Snack Cake is exceptionally versatile when it comes to serving occasions. Consider presenting it during:

  • Casual Weeknight Dinners: Enjoy a slice as a perfect conclusion to a family dinner.
  • Celebrations: With its appealing appearance, it’s a great addition to birthday parties or festive gatherings.
  • Afternoon Tea: Pair this cake with a classic Earl Grey or a robust coffee for a full-bodied complement.
  • Family Picnics: Pack it up for an outdoor lunch; it holds its texture well and doesn’t require frosting that could melt.

Consider pairing it with a scoop of vanilla ice cream or a drizzle of caramel sauce for extra indulgence.

Tips, Variations & Substitutions

While the classic combination of chocolate and vanilla is hard to beat, here are some ideas to make this recipe your own:

  • Nuts & Fruits: Add a handful of chopped walnuts or pecans for a crunchy texture or swirl in some raspberries for a tart surprise.
  • Flavored Extracts: Try adding a hint of almond or mint extract for a twist on the traditional flavor profile.
  • Dairy-Free/Vegan Options: Substitute regular milk with almond or oat milk and use plant-based butter for a vegan-friendly version.
  • Gluten-Free Adaptation: Use a one-to-one gluten-free flour blend to suit dietary needs without sacrificing taste.

Storage & Make-Ahead Ideas

This cake’s shelf life makes it an uncomplicated yet chic solution for preparing ahead:

  • Room Temperature: Keep the cake in an airtight container on the counter for up to three days. It remains moist and flavorful.
  • Freezing: Wrap individual slices in plastic wrap and store them in a freezer bag for up to three months. Thaw overnight in the fridge before serving.
  • Reheating: Warm slices in the microwave for a few seconds to enhance the cake’s tenderness and amplify its flavors.

Fun Facts & Trivia

Did you know that vanilla pods were so precious in the ancient times that they once equaled the value of silver? Today, its legacy continues as one of the most beloved flavors worldwide. Additionally, the complex flavor of chocolate comes from over 600 aroma compounds, making it one of the most intricate foods on the planet, which might explain its universal appeal.

As you embark on making the Chocolate Vanilla Snack Cake, remember that you are partaking in a time-honored tradition—celebrating the effortless congeniality of these two iconic flavors. Enjoy the process, savor the outcome, and take pride in the smile it brings to every face.

Ingredients

  • Chocolate Cake Base
    • 1 3/4 cups all-purpose flour
      → This flour forms the main structure of the cake, providing the necessary framework for it to rise and hold its shape. For best results, use a high-quality all-purpose flour, and be sure to measure it accurately by spooning it into the measuring cup and leveling it off with a knife, avoiding compaction that could lead to a dense cake.
    • 1 cup granulated sugar
      → Sugar sweetens the cake and also helps create a tender crumb by breaking down gluten. It should be added to the bowl with the flour and mixed well with the other dry ingredients to ensure an even distribution throughout the cake. For a healthier option, consider using coconut sugar or a sugar substitute that measures like sugar.
    • 1/2 cup unsweetened cocoa powder
      → Cocoa powder adds rich chocolate flavor and color to the cake. Use high-quality cocoa powder for the best taste. Sift the cocoa powder together with the flour and sugar to avoid clumps and ensure an even integration into the batter.
    • 1 teaspoon baking soda
      → This leavening agent helps the cake rise by producing carbon dioxide when it comes into contact with moisture and acid in the ingredients. It’s crucial to ensure the baking soda is fresh to provide maximum leavening power, so check the expiration date before use.
    • 1/2 teaspoon salt
      → Salt enhances the flavors of the cake and balances the sweetness. It’s important to use fine salt, as it dissolves more easily and distributes evenly in the batter. Avoid skipping this ingredient, as it plays a critical role in flavor enhancement.
    • 3 large eggs
      → Eggs act as a binder and also add moisture and richness to the cake. They should be at room temperature for better incorporation into the batter. Whisk them lightly before adding to the mixture to help them blend more seamlessly with the other wet ingredients.
    • 1/2 cup vegetable oil
      → Vegetable oil adds moisture and richness to the cake, creating a tender crumb. It can be substituted with melted coconut oil or melted butter for a different flavor. Make sure it’s measured accurately for consistent results.
    • 1 teaspoon pure vanilla extract
      → Vanilla extract adds depth of flavor and aroma to the cake. Always opt for pure vanilla extract instead of imitation for the best taste. This should be mixed in with the wet ingredients for an even distribution.
    • 1 cup buttermilk
      → Buttermilk contributes moisture and acidity, which react with the baking soda for leavening. If you don’t have buttermilk on hand, you can make a substitute by mixing 1 tablespoon of vinegar or lemon juice with 1 cup of regular milk and letting it sit for 5-10 minutes until it curdles.
  • Vanilla Frosting
    • 1/2 cup unsalted butter (softened)
      → Softened butter is crucial for creating a creamy texture for the frosting. Allow it to come to room temperature to ensure it blends easily with the other ingredients. Start beating it until it’s light and fluffy, which will help create a smooth frosting.
    • 2 cups powdered sugar
      → Powdered sugar sweetens the frosting and gives it the desirable thick, spreadable consistency. Sift it to remove any lumps before adding to the butter, and add it gradually to avoid a cloud of sugar when mixing.
    • 1 teaspoon pure vanilla extract
      → Similar to the cake, vanilla extract enhances the flavor of the frosting. Using pure extract is recommended for a more pronounced and natural vanilla flavor. Mix it in with the butter before adding sugar for even distribution.
    • 2-3 tablespoons heavy cream
      → Heavy cream adds richness and helps to achieve the right consistency for spreading. Start with 2 tablespoons, and add more as needed until you reach your desired thickness. Whip it lightly with the other ingredients to keep the frosting airy and fluffy.

Instructions

  • Preheat your oven to 350°F (175°C) and prepare a 9×13 inch baking pan by greasing it lightly with cooking spray or butter, or by lining it with parchment paper.

    → Preheating the oven ensures that the cake bakes evenly and rises properly from the moment it enters. Lining the pan with parchment makes it easier to remove the cake after baking while greasing it helps prevent sticking.
  • In a large mixing bowl, combine 1 3/4 cups of all-purpose flour, 1 cup of granulated sugar, 1/2 cup of unsweetened cocoa powder, 1 teaspoon of baking soda, and 1/2 teaspoon of salt.

    → Whisk these dry ingredients together thoroughly to ensure they are evenly mixed. This step prevents clumping and guarantees a uniform flavor and texture in your cake. Sifting the cocoa powder is crucial to eliminate any lumps, contributing to a smoother batter.
  • In a separate bowl, crack 3 large eggs and lightly whisk them until they are blended. Add in 1/2 cup of vegetable oil, 1 teaspoon of pure vanilla extract, and 1 cup of buttermilk.

    → Whisking the eggs first allows them to mix more easily with the other wet ingredients. Using room temperature eggs helps them integrate better into the batter, yielding a lighter cake. If you’re creating a buttermilk substitute, ensure it sits for 5-10 minutes to curdle properly before mixing it in.
  • Add the wet ingredient mixture into the dry ingredients and stir gently using a spatula or wooden spoon until just combined.

    → Be careful not to overmix, as this can develop the gluten in the flour and lead to a denser texture. Stop mixing as soon as there are no dry flour pockets visible—some lumps are okay.
  • Pour the batter into the prepared baking pan, spreading it evenly with a spatula to ensure uniform baking.

    → Spreading the batter evenly helps the cake to rise uniformly, reducing the chances of doming or collapsing in the center. Tilt the pan gently to encourage even distribution before setting it down flat.
  • Bake in the preheated oven for 30-35 minutes or until a toothpick inserted into the center comes out clean or with a few moist crumbs.

    → Checking for doneness is critical to avoid overbaking, which can dry the cake out. Start checking at 30 minutes to prevent overcooking, and use a toothpick to ensure an accurate reading.
  • Once baked, remove the cake from the oven and let it cool in the pan for about 10 minutes. Then, carefully transfer it to a wire rack to cool completely.

    → Allowing the cake to cool helps it set properly. Cooling it in the pan prevents it from becoming soggy, while transferring it to a wire rack allows air to circulate underneath, keeping it light.
  • While the cake is cooling, prepare the vanilla frosting by placing 1/2 cup of softened unsalted butter in a mixing bowl and beating it with an electric mixer until light and fluffy, about 3-5 minutes.

    → Softened butter is essential for creating a smooth and creamy texture; if the butter is too cold, it won’t incorporate well. Beating it until fluffy introduces air, giving the frosting a light consistency.
  • Gradually add in 2 cups of sifted powdered sugar while mixing on low speed to prevent a sugar cloud, until fully incorporated.

    → Adding the sugar gradually allows it to mix in more easily, creating a uniform frosting without lumps. Sifting the sugar prior to adding removes any clumps that could affect the frosting’s smoothness.
  • Mix in 1 teaspoon of pure vanilla extract and then add 2-3 tablespoons of heavy cream until the frosting reaches your desired consistency.

    → The vanilla extract will enhance the flavor of your frosting. Adjusting the heavy cream ensures that the frosting is neither too thick nor too runny—start with 2 tablespoons and add more if necessary, mixing well after each addition.
  • Once the cake has cooled completely, spread the vanilla frosting evenly over the top of the cake using an offset spatula.

    → Use the spatula to create an even layer of frosting, and if desired, you can create swirls or peaks for decorative effect. Ensuring the cake is cool prevents the frosting from melting and sliding off.
  • For best flavor, let the frosted cake sit for at least 30 minutes before slicing, allowing the ingredients to meld. Serve and enjoy your Chocolate Vanilla Snack Cake!

    → This resting period enhances the overall flavor and allows the frosting to set slightly, making it easier to cut and serve. It is also a good time to prepare any additional toppings or accompaniments.

Notes

Indulge in this delightful Chocolate Vanilla Snack Cake that combines the rich flavors of chocolate with a smooth vanilla frosting. This cake is perfect for any occasion – a snack, dessert, or even a special celebration! To achieve the best results, follow these detailed notes:

  • Preparing the Chocolate Cake Base:
    • Begin by preheating your oven to 350°F (175°C). Prepare a 9×13-inch cake pan by greasing it with butter or lining it with parchment paper for easy removal.
    • In a large mixing bowl, sift together the all-purpose flour, granulated sugar, unsweetened cocoa powder, baking soda, and salt. This vital step helps aerate the dry ingredients, ensuring a light and fluffy cake.
    • In a separate bowl, whisk together the eggs, vegetable oil, pure vanilla extract, and buttermilk until well combined. Ensure the eggs are at room temperature for better incorporation into the batter.
    • Gradually add the wet ingredients to the dry mixture, stirring until just combined. Be careful not to overmix, as this can lead to a dense texture.
    • Pour the batter into the prepared cake pan, spreading it evenly. Bake in the preheated oven for 30-35 minutes, or until a toothpick inserted into the center comes out clean. Allow the cake to cool in the pan for about 10 minutes, then transfer it to a wire rack to cool completely.
  • Making the Vanilla Frosting:
    • While the cake is cooling, prepare the vanilla frosting. In a mixing bowl, beat the softened unsalted butter on medium speed until creamy and light.
    • Sift the powdered sugar to remove lumps, then gradually add it to the creamed butter, mixing on low speed to prevent a sugar cloud. Once incorporated, increase the speed and beat until fluffy.
    • Add the pure vanilla extract and heavy cream, mixing until smooth. Adjust the consistency of the frosting by adding more cream if needed – you want it to be thick yet spreadable.
  • Assembling the Cake:
    • Once the cake has completely cooled, spread a generous layer of vanilla frosting over the top using a spatula. If desired, you can also frost the sides for a more polished look.
    • Decorate with chocolate shavings, sprinkles, or fresh berries for an added touch of elegance and flavor.
    • Slice the cake into squares and serve it at room temperature. It can be stored in an airtight container in the refrigerator for up to 4-5 days.

This Chocolate Vanilla Snack Cake is not only delicious but also a visually appealing treat. Feel free to experiment with different toppings or mix-ins to make it your own. Enjoy this cake with friends and family or savor it on your own for a satisfying treat any time of the day!

Tips

Tips for Preparing Chocolate Vanilla Snack Cake

  • Measure Ingredients Carefully: Accurate measuring is essential for baking. Use the spoon-and-level method for dry ingredients and a liquid measuring cup for wet. This ensures the right ratios, which are crucial for the cake’s texture and flavor.
  • Room Temperature Ingredients: For the best results, make sure your eggs and buttermilk are at room temperature before mixing. This helps to emulsify the batter, resulting in a smoother, more uniform cake.
  • Freshness is Key: Check the freshness of your leavening agents (baking soda) and spices (like vanilla extract) before use. Older ingredients may lead to poor rising and flavor.
  • Mixing Technique: When combining wet and dry ingredients, mix just until combined. Overmixing can lead to a dense cake due to gluten development. It’s okay if there are a few lumps in the batter.
  • Prepare Your Pans: Before pouring in the batter, grease your cake pans well and consider lining them with parchment paper. This will help prevent sticking and make for easier removal post-baking.
  • Baking Time: Keep an eye on your cake in the last few minutes of baking. Ovens vary, so start checking for doneness a few minutes early by inserting a toothpick in the center; it should come out clean or with a few moist crumbs.
  • Cool Properly: Allow the cakes to cool in the pans for about 10-15 minutes before transferring them to a wire rack. This helps them set and prevents breaking. Let them cool completely before frosting.
  • Frosting Consistency: If your frosting is too thick, gradually add more heavy cream until you reach your desired consistency. If it’s too thin, add more powdered sugar to thicken it up.
  • Decorative Touches: Consider adding chocolate shavings, sprinkles, or fresh fruit on top of the frosting for an attractive presentation. This adds both visual appeal and flavor contrast.
  • Storage: Keep the cake covered at room temperature if you plan to eat it within a couple of days. For longer storage, refrigerate the cake in an airtight container, but let it come to room temperature before serving for the best texture.

FAQ

What is a Chocolate Vanilla Snack Cake?

A Chocolate Vanilla Snack Cake is a delightful dessert that combines rich chocolate flavors with a light and fluffy vanilla base, making it perfect for any occasion or as an everyday treat.

Can I use different types of flour for this recipe?

Yes, you can substitute all-purpose flour with cake flour for a lighter texture or whole wheat flour for a healthier option, although it may slightly alter the taste and texture.

How long does the Chocolate Vanilla Snack Cake last?

The cake can be stored in an airtight container at room temperature for up to 3 days. For longer storage, it can be kept in the refrigerator for up to a week or frozen for up to 3 months.

Can I make this cake in advance?

Yes! You can bake the cake ahead of time. Just make sure to let it cool completely, then wrap it in plastic wrap or store it in an airtight container before refrigerating or freezing.

What toppings work well with this cake?

This cake pairs well with whipped cream, chocolate ganache, fresh berries, or a dusting of powdered sugar. You can also enhance the flavors with chocolate frosting or a vanilla glaze.

Is this recipe suitable for vegetarian diets?

Yes, the Chocolate Vanilla Snack Cake can be made vegetarian as it typically does not contain meat or meat products. However, always check your ingredient labels to be sure.

Can I add nuts or chocolate chips to the batter?

Absolutely! Feel free to fold in your favorite nuts, such as walnuts or pecans, or chocolate chips for an extra burst of flavor and texture in the cake.

How do I tell when the cake is done baking?

The cake is done when a toothpick inserted into the center comes out clean or with a few moist crumbs. It should also spring back when gently pressed in the center.

Introduction: A Delectable Delight Awaits

Imagine indulging in the rich aroma of cocoa swirling through your kitchen, enveloping you in an enticing promise of sweetness. Chocolate Sweet Pastry Rolls are not just a treat; they’re a delightful experience in themselves, designed to captivate both your taste buds and your soul. Whether warmly comforting during a chilly afternoon or celebratory at a festive gathering, these chocolate-infused treasures are the epitome of culinary pleasure. Embark on a journey that promises a symphony of flavors and textures, each bite unveiling layers of decadence balanced with subtle nuances of pastry perfection. With each roll, the world outside fades away, leaving only the pure joy of cocoa-laced indulgence.

The Story Behind the Dish: Tracing Sweet Heritage

The allure of the Chocolate Sweet Pastry Roll is steeped in a long tradition of pastry-making artistry, a craft that has traversed various cultures and eras. Rooted in the intricate processes of European patisseries, this recipe reflects a mosaic of historical influence and innovation. The age-old love affair with chocolate, spanning from ancient Mesoamerican civilizations to modern-day chocolatiers, has culminated in this delectable treat. Pastry rolls, a cornerstone of continental breakfasts and afternoon teas, find a new identity when infused with rich chocolate, making them a timeless classic adored across all ages.

From the cobbled streets of Vienna with its famed bakeries to the bustling boulangeries of Paris, these sweet rolls tell a tale of regional variations where chocolate has always found its place. Embodying an era where cocoa was a treasured delicacy, our Chocolate Sweet Pastry Rolls bridge tradition with everyday luxury.

Why You’ll Love This Recipe

  • Quick and Effortless: These rolls come together with surprising ease, suitable for both beginner bakers and seasoned chefs.
  • Family-Friendly Delight: Perfect for weaving into family gatherings, ensuring smiles and satisfied palates all around.
  • Versatile Indulgence: Whether for breakfast, dessert, or a midday pick-me-up, these rolls fit seamlessly into any part of your day.
  • Guilt-Free Pleasure: While they taste sinfully indulgent, moderation and choice ingredients help maintain an enjoyable balance.

Flavor Profile & Texture: A Harmonious Symphony

The Chocolate Sweet Pastry Roll is a study in contrasts—layers of buttery, flaky pastry cradle ribbons of rich, velvety chocolate. Each component is meticulously crafted to achieve the perfect balance, ensuring that neither sweetness nor firmness overpowers the other.

Upon the first bite, the outer pastry shatters delicately, revealing a moist and tender interior that is richly imbued with chocolate. The sweetness is refined; the aim here is not cloying inundation but a sophisticated interplay of deep cocoa tempered by buttery pastry. There’s a slight hint of vanilla and a whisper of spice that add complexity, heightening the overall experience.

Occasions & Pairings: Perfectly Suited for Every Event

Chocolate Sweet Pastry Rolls transcend the ordinary—their adaptability makes them a masterpiece for any occasion. Imagine them gracing a brunch table during a cozy Sunday morning with friends or serving as a delightful treat at afternoon tea, accompanied by a robust Earl Grey or a delicate Darjeeling.

For festive occasions, pair them with a sparkling white wine or a late-harvest riesling, allowing the effervescence or the wine’s sweetness to complement the chocolate’s depth. Add some fresh berries and a dollop of whipped cream on the side to elevate the experience. Alternatively, serve warm alongside a scoop of vanilla bean or hazelnut ice cream for a delectable dessert, ensuring your meals end on a high note.

Tips, Variations & Substitutions: Customize Your Culinary Creation

Creative Variations

Feel free to experiment with the foundations of the Chocolate Sweet Pastry Rolls by introducing diverse elements:

  • Nutty Goodness: Add finely chopped almonds, walnuts, or hazelnuts for added crunch and complementary flavor.
  • Spice it Up: Incorporate cinnamon or cardamom into the pastry dough for a touch of warmth.
  • Fruit Infusion: Dried cherries or apricots mixed into the chocolate filling create a delightful fruity contrast.

Dietary Alternatives

Accommodate dietary preferences with these substitutions:

  • Gluten-Free: Opt for gluten-free pastry flour, ensuring to tweak binding agents accordingly.
  • Dairy-Free/Vegan: Use plant-based margarine and high-quality dark chocolate free from dairy.
  • Low-Sugar: Incorporate sugar substitutes or naturally sweeten with applesauce or maple syrup.

Storage & Make-Ahead Ideas

Ensuring the lasting freshness of your Chocolate Sweet Pastry Rolls is both easy and advantageous for those who love to plan ahead:

  • Storage: Once baked, store the rolls in an airtight container at room temperature for up to two days, or refrigerate for up to a week.
  • Freezing: The pastry rolls freeze very well. Wrap them individually in aluminum foil and store in a freezer-safe bag or container. They can be kept frozen for up to three months.
  • Reheating: Reheat from frozen in a preheated oven at 350°F (175°C) for about 10-15 minutes or until the center is warm.
  • Make-Ahead: Prepare your rolls up to the point of final proofing and refrigerate overnight. Bake fresh in the morning as needed, capturing peak morning appetites.

Fun Facts & Trivia

The art of pastry making traces back to ancient civilizations, where savory and sweet pastry variations captivated ancient Romans. A remarkable aspect of history is how chocolate, originally consumed as a bitter beverage by the Aztecs, found its way to Europe, transforming into the sweet delicacy cherished today.

While croissants were traditional breakfast fare in France, filled versions with chocolate—’pain au chocolat’—became popular in the 19th century, epitomizing the French knack for elevating any dish to an art form.

Chocolate Sweet Pastry Rolls are inspired by this tradition yet embrace modern adaptability, welcoming a flavorful twist to a rich history.

Ingredients

  • Dough Base
    • 3 cups all-purpose flour
      → This flour serves as the main structure of the pastry rolls, providing the necessary gluten development for elasticity. Use a kitchen scale for accuracy when measuring. Ensure the flour is sifted to remove clumps and aerate it for a lighter texture.
    • 1/4 cup granulated sugar
      → Sugar not only sweetens the dough but also aids in browning during baking. Use fine granulated sugar for even distribution. If you prefer a deeper flavor, consider using brown sugar instead, which adds moisture and a hint of caramel.
    • 1 teaspoon salt
      → Salt enhances the flavors and balances the sweetness of the dough. Use fine salt to ensure it dissolves properly into the mixture. It also strengthens the dough’s structure for better rise and texture.
    • 1 package active dry yeast (2 1/4 teaspoons)
      → Yeast is essential for leavening the dough, allowing it to rise and become fluffy. Activate the yeast by dissolving it in warm water (not too hot) with a pinch of sugar. If using instant yeast, it can be mixed directly into the dry ingredients.
    • 1/2 cup unsalted butter (melted)
      → Butter adds richness and flavor to the dough while keeping it tender. Melt the butter gently and allow it to cool slightly before adding it to the mixture. This helps prevent overheating the yeast during the process.
    • 1 cup warm milk (approximately 110°F)
      → Warm milk provides moisture and activates the yeast for proper rising. Ensure it’s at a comfortable temperature; too hot will kill the yeast, and too cold delays activation. Whole milk adds richness, but low-fat can be used for a lighter dough.
  • Chocolate Filling
    • 1 cup semi-sweet chocolate chips
      → Chocolate chips provide a delicious gooey center for the rolls. Choose high-quality chocolate for the best flavor. For a more intense chocolate experience, consider using dark chocolate or a mix of chocolate types.
    • 2 tablespoons unsweetened cocoa powder
      → Cocoa powder intensifies the chocolate flavor in the rolls and adds a rich color. Sift the cocoa powder to avoid lumps and ensure even distribution in the filling.
    • 1/4 cup brown sugar
      → Brown sugar adds a touch of caramel flavor and moisture to the filling. Use light or dark brown sugar based on your preference for sweetness and molasses flavor. Make sure it’s well-packed in the measuring cup for accuracy.
    • 1 teaspoon vanilla extract
      → Vanilla extract enhances the overall flavor of the chocolate filling. Use pure vanilla extract for the best results, as imitation varieties can have a less complex flavor profile.
  • Toppings
    • 1 egg (for egg wash)
      → An egg wash creates a beautiful golden-brown crust on the pastry rolls. Beat the egg thoroughly and brush it over the tops before baking for an appealing finish. You may add a tablespoon of water or milk to the egg wash for a shinier effect.
    • 1 tablespoon coarse sugar (for sprinkling)
      → Coarse sugar adds a nice crunch and visual appeal to the baked rolls. Sprinkle it on top before baking. If you don’t have coarse sugar, granulated sugar can be used, but it won’t provide the same texture.

Instructions

  • Begin by activating the yeast. In a small bowl, combine 1 package (2 1/4 teaspoons) of active dry yeast with 1/4 cup of warm milk, and add a pinch of granulated sugar. Let the mixture sit for about 5 to 10 minutes until it becomes frothy.

    → The frothiness indicates that the yeast is alive and will effectively leaven your dough. Warm milk is crucial as it activates the yeast, ensuring your rolls achieve a light and airy texture.
  • In a large mixing bowl, sift together 3 cups of all-purpose flour, 1/4 cup of granulated sugar, and 1 teaspoon of salt.

    → Sifting the flour removes lumps and aerates it, which is essential for a light pastry. The sugar and salt should be evenly distributed, as they enhance the flavor and structure of the dough.
  • Make a well in the center of the flour mixture and add the melted and slightly cooled 1/2 cup of unsalted butter, the frothy yeast mixture, and 1 cup of warm milk.

    → Adding the melted butter when it’s not too hot protects the yeast. Stir gently with a wooden spoon until the mixture starts combining but is still slightly shaggy.
  • Knead the dough. Transfer the shaggy mixture onto a lightly floured surface and Knead it for about 8-10 minutes until the dough is smooth and elastic.

    → Proper kneading develops gluten, the protein structure that gives the pastry its texture. The dough should be soft and slightly tacky, but not sticky. If it sticks to your fingers, add a little more flour.
  • Form the dough into a ball and place it in a greased bowl, turning it once to coat with oil. Cover the bowl with a clean kitchen towel or plastic wrap.

    → Coating the dough prevents it from drying out while it rises. Allow the dough to rise in a warm, draft-free area for about 1 to 1.5 hours, or until it has doubled in size.
  • While the dough is rising, prepare the chocolate filling. In a medium bowl, combine 1 cup of semi-sweet chocolate chips, 2 tablespoons of unsweetened cocoa powder, 1/4 cup of packed brown sugar, and 1 teaspoon of vanilla extract.

    → Ensuring the cocoa powder is sifted helps avoid clumps, providing a smooth filling. The brown sugar adds moisture and flavor, enhancing the overall chocolate experience.
  • After the dough has risen, punch it down gently to release the air. Transfer it again to a floured surface and roll it out into a large rectangle approximately 1/4 inch thick.

    → Rolling it out evenly ensures uniform baking. If the dough resists, let it rest for a few minutes before continuing to roll, which helps relax the gluten.
  • Spread the chocolate filling evenly over the surface of the rolled-out dough, leaving a 1-inch border on all sides.

    → This border is crucial to allow for sealing the rolls, ensuring the filling doesn’t leak out during baking.
  • Begin rolling the dough tightly from one long edge to the other, forming a log. Once rolled, pinch the seams to seal the roll.

    → A tight roll helps maintain the integrity of the filling and creates defined layers within your rolls.
  • Using a sharp knife or a bench scraper, cut the roll into 12 equal pieces (about 1 inch thick each).

    → A sharp knife will create clean cuts, preventing the filling from oozing out. If necessary, you can also use dental floss for a clean slice without squishing the rolls.
  • Grease a baking dish or line it with parchment paper, and arrange the sliced rolls cut side up. Cover with a towel and let rise for another 30 minutes.

    → This second rise allows for an even fluffier texture, as the yeast continues to work and further develops the flavors.
  • While the rolls are rising, preheat your oven to 375°F (190°C).

    → Preheating ensures your rolls will bake evenly and helps achieve a nice golden color on the outside.
  • Prepare the egg wash by beating 1 egg in a small bowl. If desired, add a tablespoon of water or milk to make it shinier. Brush the egg wash over the tops of the rolls just before baking.

    → This step is crucial for achieving that golden-brown crust and an appealing finish to the pastry rolls.
  • Sprinkle 1 tablespoon of coarse sugar over the top of the rolls for added texture and sweetness.

    → Coarse sugar provides a delightful crunch and a touch of sparkle, enhancing the visual appeal of your baked rolls.
  • Bake in the preheated oven for 18-22 minutes, or until the rolls are golden brown and cooked through.

    → To test for doneness, tap the bottom of a roll; it should sound hollow. If they brown too quickly, cover loosely with foil to prevent burning.
  • Once baked, remove the rolls from the oven and allow them to cool in the pan for about 10 minutes before transferring them to a wire rack to cool completely.

    → Cooling on a wire rack prevents steam from building up underneath, which could make the rolls soggy. Enjoy your delicious chocolate sweet pastry rolls!

Notes

  • These chocolate sweet pastry rolls are a delightful treat perfect for breakfast or dessert. The dough is rich and fluffy, thanks to the combination of all-purpose flour, sugar, and yeast. When measuring the flour, ensure it is sifted to achieve the right texture. Create a warm environment for the dough to rise, preferably in a draft-free area until it doubles in size, usually about 1 to 2 hours.
  • The chocolate filling is simple yet indulgent. Feel free to adjust the amount of chocolate chips based on your preference for sweetness. For an extra flavor dimension, you could add a pinch of sea salt to the chocolate filling to contrast with the sweetness.
  • To achieve a glossy finish, make sure to apply the egg wash generously before baking. An additional sprinkle of coarse sugar will not only enhance the aesthetic but will also add a delightful crunch to every bite. If you’re baking in a humid environment, sometimes the dough may expand too quickly; keeping an eye on them will help prevent over-proofing.
  • These pastry rolls are best enjoyed fresh out of the oven; however, they can also be stored in an airtight container. They will keep well at room temperature for a couple of days or can be frozen for longer storage.
  • Consider serving the rolls warm with a scoop of vanilla ice cream or a dollop of whipped cream for an extra special treat. These rolls are sure to please any chocolate lover!

Tips

Tips for Preparing Chocolate Sweet Pastry Rolls

  • Measuring Ingredients: Precision is key in baking. Use a kitchen scale for measuring flour and sugar, as volume measurements can vary significantly. Always level off your measuring cups for accurate amounts.
  • Yeast Activation: To properly activate the yeast, ensure that the warm milk is between 100°F – 110°F (37°C – 43°C). If you don’t have a thermometer, test it with your finger; it should feel warm, not hot. Allow the yeast to sit in the milk mixture for about 5-10 minutes until it becomes frothy.
  • Dough Consistency: When combining the ingredients, mix until just combined. Overmixing can lead to tough pastry. The dough should be soft and slightly sticky; if it’s too sticky, add an additional tablespoon of flour at a time until it reaches the desired texture.
  • Proofing the Dough: For the best rise, let your dough rest in a warm, draft-free space. Cover it with a clean kitchen towel or plastic wrap to retain heat and humidity. The dough should double in size in about 1-2 hours.
  • Filling Distribution: When adding the chocolate filling, spread it evenly across the rolled-out dough to ensure every bite has a delicious center. You can also leave a small border around the edges to avoid spillage when rolling.
  • Roll Tightness: Roll the dough tightly but not too tightly as this can cause the rolls to burst during baking. Aim for a snug roll that still allows space for the dough to expand as it rises in the oven.
  • Baking Temperature: Preheat your oven thoroughly to ensure even baking. Baking at a consistent temperature ensures that the rolls cook through without burning the exterior. If you have an oven thermometer, use it to verify the accuracy of your oven’s temperature.
  • Cooling: Once baked, let the rolls cool on a wire rack. This prevents them from becoming soggy on the bottom. Allow them to cool sufficiently before drizzling with optional toppings or frosting to avoid melting.
  • Storage: Store any leftover pastry rolls in an airtight container at room temperature for up to 2 days or refrigerate for longer freshness. You can also freeze the unbaked rolls. Just bake them directly from the freezer, adding a few extra minutes to the baking time.

FAQ

What ingredients do I need to make Chocolate Sweet Pastry Rolls?

You will need puff pastry, chocolate (dark or milk), sugar, butter, and egg wash for glazing. Optional ingredients include nuts or fruit preserves for added flavor.

How long does it take to prepare and bake Chocolate Sweet Pastry Rolls?

The total time for preparation and baking is approximately 30-40 minutes. This includes 15 minutes for preparation and 15-25 minutes for baking.

Can I use store-bought puff pastry for this recipe?

Yes, using store-bought puff pastry is recommended for convenience. Make sure to thaw it properly according to the package instructions before using.

What type of chocolate works best for Chocolate Sweet Pastry Rolls?

Both dark and milk chocolate work great for this recipe, depending on your personal preference. You can also mix different types of chocolate for a more complex flavor.

Can I add fillings other than chocolate?

Absolutely! Feel free to experiment with fillings such as almond paste, fruit jams, or Nutella for a different taste experience.

How do I store leftover Chocolate Sweet Pastry Rolls?

Store leftover rolls in an airtight container at room temperature for up to 2 days. You can also refrigerate them for up to a week. Reheat in an oven for crispy texture.

Can these rolls be frozen for later use?

Yes, you can freeze unbaked rolls. Just assemble them, freeze on a baking sheet until solid, then transfer to a freezer-safe container. Bake directly from frozen, adding a few extra minutes to the baking time.

What can I serve with Chocolate Sweet Pastry Rolls?

These rolls pair well with fresh fruits, a scoop of ice cream, or a drizzle of chocolate sauce. Coffee or dessert wine also complements them perfectly.

Introduction

Imagine the smell of a cake baking wafting through your home, a delicious blend of rich chocolate and creamy vanilla intermingling in an inviting aroma. Welcome to the world of the Chocolate Vanilla Snack Cake—a delightful creation that’s not just a treat for your taste buds but an experience that captivates your senses. Perfectly moist, with a delightful crumb, this cake is a celebration of simplicity and elegance, offering a comforting warmth that is reminiscent of home. Whether you’re a chocolate lover or vanilla enthusiast, this snack cake hits all the right notes, bringing together the classic flavors in a balanced symphony that makes it undeniably special. Join us in discovering why this snack cake is worth a spot in your culinary repertoire.

The Story Behind the Dish

The Chocolate Vanilla Snack Cake draws its inspiration from the age-old culinary tradition of marble cakes. Originating from nineteenth-century Germany, marble cakes were a blend of light and dark batters swirled to produce a visually artistic and flavor-rich cake. Early recipes often incorporated molasses or spices like cinnamon for the darker batter. As the concept spread across other countries, chocolate became the preferred choice for the dark component.

This snack cake nods to its heritage while embracing the simplicity sought after in modern baking. Designed to be whipped up quickly without the need for elaborate decorations or complex techniques, it appeals to both novice bakers and seasoned dessert artisans seeking a quick yet satisfying confection. A slice of this cake is not just a bite of dessert history but also a slice of nostalgia, bringing back memories of childhood kitchens filled with the comforting aroma of fresh-baked goodies.

Why You’ll Love This Recipe

  • Simplicity: This recipe is straightforward, making it ideal for both beginners and experienced bakers.
  • Flexibility: Whether you’re entertaining guests or enjoying a quiet evening at home, this cake fits perfectly in any setting.
  • All-in-one Flavor: Combines the best of both worlds—rich chocolate and smooth vanilla.
  • Customizable: Easy to make substitutions and personal touches for dietary preferences or indulgence levels.
  • Comfort Factor: With its soft, moist texture, this cake is the ultimate comfort food, perfect to unwind with.

Flavor Profile & Texture

With each bite of the Chocolate Vanilla Snack Cake, you’ll experience a delightful contrast of flavors that complement each other beautifully. The chocolate layers offer a deep, rich cacao flavor, tempered by the soft, creamy undertones of the vanilla. It’s a harmonious dance of bitter and sweet, dark and light, creating an enticing flavor profile that appeals to a wide range of palates.

The texture is equally notable. It strikes a perfect balance between lightness and density, offering a tender crumb that melts in your mouth. The cake’s moistness ensures that it remains delectable and inviting even after several hours, or days, making it an enduring favorite for snack time or late-night indulgence.

Occasions & Pairings

One of the best features of the Chocolate Vanilla Snack Cake is its versatility. It’s perfect for:

  • Casual Gatherings: A delightful addition to any brunch or coffee date.
  • Festive Celebrations: While it’s modest, it can easily be dressed up with a glaze or icing for a more celebratory feel.
  • Everyday Treat: Serve it as a sweet treat after dinner or a Sunday afternoon snack.

When it comes to pairing, consider serving it alongside:

  • Hot Beverages: A steaming cup of coffee, tea, or hot chocolate makes an excellent companion.
  • Cold Delights: Pair with a scoop of vanilla ice cream or a glass of cold milk for a refreshing contrast.

Tips, Variations & Substitutions

The beauty of the Chocolate Vanilla Snack Cake lies in its adaptability. Here’s how to make it your own:

  • For a Healthier Version: Substitute whole wheat flour or almond flour for a nutty undertone.
  • Vegan Twist: Use plant-based milk and flaxseed eggs to transform it into a vegan delight.
  • Add Accents: Consider adding nuts, dried fruits, or chocolate chips for added flavor and texture.
  • Different Sweeteners: Swap out sugar with coconut sugar or honey for a different flavor profile.
  • Gluten-Free Option: Simply replace regular flour with a gluten-free blend to cater to dietary needs.

Storage & Make-Ahead Ideas

This snack cake is not only delicious fresh but also holds up well for future indulgence. Here’s how to store it:

  • Room Temperature: Store it covered on the counter for up to 3 days.
  • Refrigeration: Extend its life by wrapping it in plastic and refrigerating for up to a week.
  • Freezing: For longer storage, slice and wrap each piece individually in plastic wrap and foil, then freeze for up to 3 months. Thaw at room temperature or warm in the microwave before serving.
  • Make-Ahead: Prepare the batter in advance and refrigerate it for up to 24 hours before baking.

Fun Facts & Trivia

Did you know that marble cakes were once a symbol of prosperity and were gifted as tokens of goodwill during festive seasons in Germany? Beyond its cultural heritage, the marble effect became a popular aesthetic in Victorian England, too, where it was viewed as both a culinary challenge and a piece of edible art. Chocolate Vanilla Snack Cake proudly carries forward these rich traditions while offering a simpler, more accessible version that can be enjoyed any time of the year.

This cake is a testament to the timeless appeal of classic flavors and the joy of simple, home-baked goodness. As you savor each bite, you’re not just enjoying a piece of cake but partaking in a tradition that’s been cherished for generations.

Ingredients

  • Cake Base
    • 1 ¾ cups all-purpose flour
      → This forms the structure of the cake. It’s essential to sift the flour first to aerate it and avoid lumps for a light and fluffy texture. You can substitute with a gluten-free blend if needed, but make sure it’s suitable for baking.
    • 1 cup granulated sugar
      → Sugar sweetens the cake and helps achieve a golden-brown crust through caramelization during baking. Opt for fine granulated sugar for better incorporation into the batter, ensuring a smooth and even texture.
    • ¾ cup unsweetened cocoa powder
      → Cocoa powder provides the rich chocolate flavor in the cake. Use high-quality cocoa powder for the best taste. Sift it to remove any lumps before adding to the dry ingredients for a consistent chocolatey mix.
    • 1 teaspoon baking soda
      → This acts as a leavening agent, helping the cake rise during baking. Ensure it is fresh for optimal effectiveness; expired baking soda will not create the desired rise.
    • ½ teaspoon salt
      → Salt enhances the flavors of the other ingredients and balances the sweetness of the sugar and cocoa. Use fine salt for even distribution throughout the batter.
    • 2 large eggs (room temperature)
      → Eggs provide structure, moisture, and richness to the cake. Using them at room temperature helps them mix better into the batter, ensuring a uniform texture. You can place cold eggs in warm water for about 10 minutes to warm them up.
    • ½ cup vegetable oil
      → Oil adds moisture to the cake, contributing to a tender crumb. Opting for neutral oil like canola or sunflower ensures that the flavor remains focused on the chocolate and vanilla. Measure precisely for the best texture.
    • 1 cup buttermilk (room temperature)
      → Buttermilk brings acidity to the recipe, which activates the baking soda for leavening. It also contributes to a moist and tender cake. If unavailable, you can create a substitute by adding 1 tablespoon of vinegar or lemon juice to regular milk and letting it sit for 5 minutes.
    • 2 teaspoons pure vanilla extract
      → Vanilla extract adds a wonderful depth of flavor to the cake. Always choose pure vanilla extract over imitation for the best taste; a little goes a long way in enhancing the overall sweetness.
  • Chocolate Ganache Frosting
    • 1 cup heavy cream
      → Heavy cream will create a smooth and creamy ganache when combined with chocolate. Choose high-quality cream for the richest flavor, and heat it gently without boiling to prevent curdling.
    • 8 ounces semisweet chocolate (chopped)
      → Semisweet chocolate adds richness and depth to the frosting. Choose a chocolate bar for the best melting properties, and chop it into small pieces for even melting when combined with the warm cream.
    • 1 tablespoon unsalted butter (optional)
      → Adding butter to the ganache gives it a glossy, smooth finish and enriches the flavor. Make sure the butter is at room temperature to melt easily when mixed with the warm ganache.
  • Toppings
    • Chocolate shavings or curls (optional)
      → These add an elegant touch and extra chocolate flavor. To create shavings or curls, use a vegetable peeler on a block of chocolate, and sprinkle over the frosted cake just before serving for the best presentation.
    • Fresh berries (optional)
      → Fresh berries such as strawberries or raspberries provide a tart flavor that contrasts beautifully with the sweetness of the cake. Choose ripe, fresh berries and wash them just before serving to maintain their firmness.

Instructions

  • Preheat your oven to 350°F (175°C) and grease a 9×13-inch baking pan.

    → Preheating the oven ensures that the cake starts baking at the right temperature for optimal rise and texture. Greasing the pan prevents the cake from sticking, allowing for easy removal once baked. You can also line the bottom with parchment paper for added insurance.
  • Sift together 1 ¾ cups of all-purpose flour, ¾ cup of unsweetened cocoa powder, 1 teaspoon of baking soda, and ½ teaspoon of salt in a large mixing bowl.

    → Sifting these dry ingredients aerates them, which helps create a lighter texture in the cake. It also prevents lumps that can affect the batter’s consistency. Make sure to sift the cocoa powder to ensure a uniform chocolate flavor.
  • In another mixing bowl, combine 1 cup of granulated sugar with ½ cup of vegetable oil and mix well until fully incorporated.

    → This combination of sugar and oil will create a smooth, homogenous mixture that is essential for a tender cake. Use a whisk or electric mixer on medium speed to achieve a uniform blend without any graininess.
  • Add 2 large eggs, 1 cup of room temperature buttermilk, and 2 teaspoons of pure vanilla extract to the sugar-oil mixture. Mix until well combined.

    → Incorporating eggs at room temperature ensures they emulsify properly into the batter, creating a smooth mixture. Buttermilk not only adds moisture but also helps activate the baking soda, promoting leavening for a light cake.
  • Gradually add the sifted dry ingredients to the wet mixture, folding gently with a spatula or wooden spoon until just combined.

    → Be careful not to overmix the batter; this can develop gluten and lead to a dense cake. Folding helps to retain air bubbles and results in a fluffier texture.
  • Pour the batter into the prepared baking pan and spread it evenly with a spatula.

    → Ensuring the batter is evenly distributed allows the cake to bake uniformly, avoiding uneven risen areas or undercooked spots. Tap the pan gently on the counter to release trapped air bubbles.
  • Bake in the preheated oven for 25-30 minutes, or until a toothpick inserted into the center comes out clean.

    → Baking time can vary; start checking at the 25-minute mark. A clean toothpick indicates that the cake is done baking, while moist or gooey batter means it needs more time.
  • Once baked, remove the cake from the oven and allow it to cool in the pan for 10 minutes. Then, transfer it to a wire rack to cool completely.

    → Cooling the cake in the pan prevents it from sticking and allows it to set before transferring. A wire rack promotes even cooling and prevents sogginess on the bottom of the cake.
  • While the cake cools, prepare the chocolate ganache by gently heating 1 cup of heavy cream in a saucepan over medium heat until it starts to steam but does not boil.

    → Heating cream too quickly or allowing it to boil can cause it to curdle. Steam indicates that it’s hot enough to melt the chocolate. Stir occasionally to avoid scorching.
  • Remove the saucepan from the heat and add 8 ounces of chopped semisweet chocolate, letting it sit for about 2 minutes before stirring until smooth.

    → Allowing the chocolate to sit in the warm cream helps it melt evenly. Stir slowly until fully combined; this creates a rich ganache that will set properly when cooled.
  • If desired, add 1 tablespoon of unsalted butter to the ganache for a glossy finish and stir until melted and incorporated.

    → Butter adds shine and enhances the richness of the ganache, making it easier to spread or pour. Ensure the butter is at room temperature to melt smoothly.
  • Once the cake is completely cooled, pour the ganache over the cake, using a spatula to spread it evenly over the top.

    → Pouring the ganache ensures a smooth, even layer of frosting. Use the spatula to gently encourage the ganache to drip over the sides for a more visually appealing look.
  • For decoration, you may add chocolate shavings or curls and fresh berries on top of the ganache once it has set slightly.

    → Shavings and curls enhance the presentation and provide additional texture and flavor. Fresh berries add a delightful tartness that balances the sweetness of the cake; sprinkle them just before serving to maintain their firmness.
  • Slice the cake once the ganache has set, and serve to enjoy your delicious Chocolate Vanilla Snack Cake!

    → Allow the ganache to cool and firm up for at least 30 minutes before cutting for the cleanest slices. Serve with whipped cream or additional berries on the side if desired.

Notes

These Chocolate Vanilla Snack Cakes are the perfect treat for any occasion, delivering a delightful combination of rich chocolate and creamy vanilla flavors. The cake base is easy to prepare, ensuring a moist and fluffy texture that everyone will love. Don’t forget to sift your flour and cocoa powder; this step not only aerates these dry ingredients, making for a lighter cake, but also helps avoid lumps that could affect the texture.

The use of buttermilk in the batter is essential—it brings a unique tang that enhances the cake’s moistness while activating the baking soda for a great rise. If you don’t have buttermilk handy, making a quick homemade substitute with milk and vinegar is a great trick!

The chocolate ganache frosting is the cherry on top (literally), combining heavy cream and semisweet chocolate for a luxurious finish. Remember to let your cream heat gently and to chop your chocolate into small pieces to guarantee smooth melting. If you’d like added richness, a touch of unsalted butter will not only improve the texture but also give a lovely shine.

When it comes to embellishing your cake, consider topping it with chocolate shavings or fresh berries. The chocolate shavings add a beautiful decoration, while fresh berries lend a sweet tartness that pairs nicely with the rich cake. Be sure to add the toppings right before serving to maintain their quality.

Enjoy your homemade Chocolate Vanilla Snack Cake either as a dessert or as a delightful afternoon snack with coffee or tea. It’s perfect for sharing with friends and family—or keeping all to yourself!

Tips

Tips for Preparing Chocolate Vanilla Snack Cake

  • Prepping Your Ingredients: Before you start mixing, gather all your ingredients and measure them out. This ensures a smoother baking process and allows you to double-check that you have everything you need.
  • Room Temperature Ingredients: For the best texture, use room temperature eggs and buttermilk. This helps them combine more seamlessly with the dry ingredients, resulting in a more uniform batter.
  • Mixing Technique: When combining wet and dry ingredients, mix until just combined. Overmixing can lead to a tough cake. It’s okay if there are a few small lumps in the batter.
  • Baking Pan Preparation: Grease and flour your baking pan or line it with parchment paper to prevent sticking. Make sure to tap out any excess flour to avoid a white residue on the cake.
  • Baking Time & Temperature: Preheat your oven properly and place the cake in the center of the oven for even cooking. Use a toothpick or cake tester to check for doneness; it should come out clean or with a few moist crumbs attached.
  • Cooling the Cake: Allow the cake to cool in the pan for about 10-15 minutes before transferring it to a wire rack. This helps prevent it from breaking apart and ensures even cooling.
  • Making the Ganache: For a silky ganache, let the heavy cream come to a slight simmer, then pour it over the chopped chocolate. Allow it to sit for a minute to melt before stirring until smooth. For an extra rich flavor, stir in unsalted butter once the ganache is smooth.
  • Frosting Tips: Ensure the ganache is at room temperature before spreading it on the cake. If it thickens too much, you can gently warm it to achieve a spreadable consistency.
  • Decorating: Be creative with your toppings! Arrange fresh berries in a pattern or create peaks with chocolate shavings for added visual appeal. Serve just after decorating to keep the toppings fresh.
  • Storing the Cake: If you have leftovers, store the cake in an airtight container at room temperature for up to 2 days or refrigerate for up to a week. Allow it to come to room temperature before serving for the best flavor and texture.

FAQ

What ingredients are needed for the Chocolate Vanilla Snack Cake?

You will need flour, cocoa powder, sugar, baking powder, baking soda, salt, eggs, milk, vegetable oil, vanilla extract, and boiling water for the cake. For frosting, you need powdered sugar, cocoa powder, butter, milk, and vanilla extract.

Can I make this cake ahead of time?

Yes, you can bake the chocolate vanilla snack cake ahead of time. Just ensure to wrap it tightly in plastic wrap or store it in an airtight container to keep it fresh. You can frost it just before serving for the best texture and flavor.

Is this cake suitable for special dietary needs?

This recipe can be adapted for various dietary needs. To make it gluten-free, use a gluten-free flour blend. For a dairy-free option, substitute the milk with a non-dairy alternative and use dairy-free butter for the frosting.

How long should I bake the cake?

Bake the chocolate vanilla snack cake in a preheated oven at 350°F (175°C) for about 25-30 minutes, or until a toothpick inserted in the center comes out clean.

Can I use a different type of frosting?

Absolutely! While the classic frosting is delicious, you can use cream cheese frosting, whipped cream, or even ganache as alternatives to top your cake.

How should I store leftover cake?

Store leftover chocolate vanilla snack cake in an airtight container at room temperature for up to 3 days. If you need to store it longer, refrigerate it for up to a week or freeze it for up to 3 months.

What can I serve with the chocolate vanilla snack cake?

This cake pairs well with vanilla ice cream, fresh berries, or a drizzle of chocolate sauce. You can also serve it with a cup of coffee or tea for a delightful treat.

Is there a way to make this cake more decadent?

Yes! You can add chocolate chips to the batter or layer the cake with chocolate ganache or whipped cream between the layers for an extra indulgent treat.

Introduction to Chocolate Sweet Pastry Rolls

Imagine the intoxicating aroma of fresh pastries wafting through your kitchen, the warm, buttery scent mingled with the rich, deep aroma of chocolate. These delightful Chocolate Sweet Pastry Rolls are not merely desserts; they are an experience, one that envelops your senses and comforts your soul. Whether enjoyed with a morning coffee, offered as a decadent dessert at a dinner party, or savored in the solitude of early morning light, these rolls are a sweet indulgence that are hard to resist. Perfectly flaky on the outside and oozing with chocolate goodness on the inside, each roll is a little piece of heaven.

The Story Behind the Dish

Sweet pastry rolls have a storied history dating back centuries, with variations appearing in cultures worldwide. The concept of enveloping sweet fillings with buttery dough can be traced to Medieval Europe, where the nobility indulged in similar treats. Chocolate, introduced to Europe from the New World in the 16th century, quickly found its way into various recipes, evolving from a novelty to a staple ingredient cherished globally. The combination of pastry with chocolate creates a timeless classic that embodies both tradition and decadence. These chocolate pastry rolls, a modern twist on an age-old delight, celebrate this rich culinary heritage while catering to modern palates.

Why You’ll Love This Recipe

  • Quick and Easy: Despite their impressive look, these rolls are straightforward to make and don’t require extensive baking skills.
  • Irresistibly Delicious: The sweetness of the pastry combined with the richness of the chocolate offers a delightful contrast of flavors.
  • Versatile: Suitable for various occasions, these rolls can be breakfast, dessert, or a sweet treat at any time of the day.
  • Family-Friendly: Loved by adults and kids alike, these rolls are perfect for family gatherings.
  • Make-Ahead Option: Prepare in advance to enjoy freshly baked goodness on a busy morning.

Flavor Profile & Texture

The flavor of these Chocolate Sweet Pastry Rolls is complex despite its simplicity. The buttery, flaky pastry provides the perfect canvas for the rich, slightly bittersweet chocolate filling. When baked, the exterior achieves a golden brown, slightly crispy texture, while the interior remains soft and tender, with melted chocolate providing a luscious contrast. With each bite, you are met with the satisfying crunch of the pastry followed by the smooth, creamy chocolate, creating a harmonious blend that delights the palate.

Occasions & Pairings

These Chocolate Sweet Pastry Rolls are remarkably versatile, making them suitable for any number of occasions. Serve them for:

  • Breakfast: Pair with a steaming cup of coffee or hot chocolate for a cozy morning treat.
  • Brunch Gatherings: Accompany with fresh fruit and a selection of cheeses for a balanced meal.
  • Festive Holidays: Whether it’s Easter brunch or Christmas morning, these rolls add a touch of indulgence to any celebration.
  • Dessert at Dinner Parties: Present them with a scoop of vanilla ice cream or a dollop of whipped cream for a luxurious end to the meal.
  • A Midday Snack: A satisfying pick-me-up during a long workday or a treat to enjoy during a quiet moment to oneself.

Tips, Variations & Substitutions

The beauty of this recipe is its adaptability. Consider these variations to suit your preferences:

  • Add Nuts: Chop some almonds, pecans, or hazelnuts and sprinkle them over the chocolate for extra texture and flavor.
  • Spice It Up: A touch of cinnamon or chili powder can add a warming contrast to the chocolate.
  • Dietary Modifications: Substitute the regular flour with almond or coconut flour for a gluten-free version. Vegan chocolate and plant-based butter also work well for a vegan adaptation.
  • Alternative Fillings: Experiment with different fillings like Nutella, caramel, or berry jams for a unique twist.

Storage & Make-Ahead Ideas

These rolls are as convenient as they are delicious. Here’s how you can store them for later enjoyment:

  • Make Ahead: Prepare the rolls in advance and freeze them unbaked. When ready to serve, simply thaw and bake as directed for an easy, fresh pastry.
  • Storing Leftovers: Keep baked rolls in an airtight container at room temperature for up to two days. For longer storage, refrigerate and reheat briefly before serving.
  • Freezing Instructions: To enjoy at a whim, freeze baked rolls in a single layer. Reheat in the oven until warm for freshly-baked quality.

Fun Facts & Trivia

Did you know that while chocolate was initially consumed as a beverage, it quickly morphed into an integral ingredient in baking and confectionery? Its transformation from bean to bar is filled with fascinating history. Furthermore, the croissant-style pastry originated in Austria and was called “kipferl” before the French adopted and popularized it as the flaky delight we know today. Combining these rich histories with the universally adored chocolate gives these rolls a pedigree that truly delights gastronomic enthusiasts.

In summary, whether you’re a lover of classic pastry or a devout chocoholic, these Chocolate Sweet Pastry Rolls promise a sumptuous experience. Not only do they bring together tradition and taste, but they also offer a comforting indulgence that is sure to become a cherished addition to your baking repertoire. So go ahead, get your hands flour-dusted, unwrap your favorite chocolate, and prepare to embark on a journey of comfort and culinary bliss that only these delectable rolls can offer.

Ingredients

  • Dough Base
    • 3 cups all-purpose flour
      → All-purpose flour forms the backbone of the pastry dough, providing structure and elasticity. It should be spooned into the measuring cup and leveled off for accuracy to avoid overly dense rolls.
    • 1/4 cup granulated sugar
      → Sugar adds sweetness to the dough and enhances the overall flavor profile. It promotes browning during baking, which contributes to the rolls’ appetizing golden color.
    • 1 tsp salt
      → Salt elevates the flavors in the pastry and balances the sweetness. It should be mixed into the dry ingredients prior to adding wet ingredients to ensure even distribution.
    • 1/2 cup unsalted butter (cold, cubed)
      → Cold butter is essential for creating a flaky texture in the rolls. It should be cubed and added to the flour mixture, then cut in with a pastry cutter until the mixture resembles coarse crumbs.
    • 1/2 cup whole milk (warm)
      → Warm milk helps to activate the other ingredients, particularly the yeast, ensuring the dough rises properly. It should be heated gently, avoiding boiling, to keep the milk’s natural sugars intact.
    • 1 large egg (room temperature)
      → An egg acts as a binder, providing moisture and richness. It should be at room temperature to blend more easily into the dough. Whisk it lightly before incorporating.
    • 2 tsp active dry yeast
      → Yeast is responsible for the leavening of the pastry, creating light and airy rolls. It should be proofed in warm milk with a pinch of sugar for about 5-10 minutes until frothy, indicating it is active.
  • Chocolate Filling
    • 1 cup semi-sweet chocolate chips
      → Chocolate chips add rich flavor and a gooey texture to the filling. It’s best to use high-quality chocolate for the best taste; you can also chop chocolate bars into chunks for a varied texture.
    • 1/2 cup brown sugar (packed)
      → Brown sugar adds moisture and a deep, caramel-like sweetness, enhancing the chocolate flavor. It should be packed into the measuring cup to ensure the correct amount is used.
    • 1 tsp vanilla extract
      → Pure vanilla extract rounds out the flavors in the filling, adding a warm, aromatic note. Avoid imitation vanilla, as it often lacks the depth of flavor that enhances baked goods.
  • Egg Wash
    • 1 large egg (beaten)
      → The egg wash gives the pastry rolls a glossy, beautiful finish once baked. It should be beaten until smooth and applied with a pastry brush just before baking for an even coating.
    • 1 tbsp milk
      → A little milk mixed into the egg wash helps achieve a richer color on the crust. Use whole milk for the best results, as it adds fat that contributes to a tender, flaky finish.

Instructions

  • Start by proofing the yeast.

    → In a small bowl, combine the 1/2 cup of warm milk with 2 teaspoons of active dry yeast and a pinch of granulated sugar. Stir gently and let it sit for about 5-10 minutes until it becomes frothy, which indicates that the yeast is active and ready to leaven the dough.
  • In a large mixing bowl, combine the dry ingredients: flour, sugar, and salt.

    → Measure out 3 cups of all-purpose flour, 1/4 cup of granulated sugar, and 1 teaspoon of salt. Whisk them together to ensure that they are well mixed, which helps in even distribution of flavors and proper rising.
  • Cut the cold butter into the flour mixture.

    → Take 1/2 cup of cold, cubed unsalted butter and add it to the dry ingredients. Use a pastry cutter or your fingers to blend the butter into the flour until the mixture resembles coarse crumbs. This step is crucial for creating a flaky texture, as it prevents the butter from melting prematurely.
  • Add the yeast mixture and the egg to the dough.

    → Pour the frothy yeast mixture into the dry ingredients, followed by 1 lightly beaten large egg (make sure it’s at room temperature). Use a wooden spoon or spatula to combine everything until the dough begins to form, being careful not to overmix.
  • Knead the dough until smooth.

    → Lightly flour a clean work surface and turn the dough out onto it. Knead the dough for about 5-7 minutes until it becomes smooth and elastic. This is important as it develops the gluten structure, which gives the rolls their chewy texture.
  • Let the dough rise until doubled in size.

    → Place the kneaded dough in a greased bowl, cover it with a clean kitchen towel or plastic wrap, and leave it in a warm spot for 1-1.5 hours until it has doubled in size. This fermentation step allows the flavors to develop and the dough to rise properly.
  • Prepare the chocolate filling while the dough rises.

    → In a medium bowl, combine 1 cup of semi-sweet chocolate chips, 1/2 cup of packed brown sugar, and 1 teaspoon of vanilla extract. Stir them together until the chocolate chips are evenly coated with the sugar and vanilla, creating a rich and flavorful filling.
  • Punch down the risen dough.

    → Once the dough has doubled, gently punch it down to release the excess air. This step is key, as it ensures even texture in the rolls by redistributing the yeast cells.
  • Roll out the dough into a rectangle.

    → On a lightly floured surface, roll the dough into a rectangle about 12×16 inches in size. Use a rolling pin and apply even pressure to achieve a uniform thickness, which allows for better filling distribution and even baking.
  • Spread the chocolate filling over the dough.

    → Evenly distribute the chocolate filling over the rolled-out dough, leaving a small border around the edges. Use a spatula or the back of a spoon to spread it, ensuring that every bite of the rolls will be chocolaty.
  • Roll the dough into a log.

    → Starting from one long edge, carefully roll the dough away from you to form a tight log. This is important as tightly rolled dough ensures that the filling remains inside during baking, creating beautiful swirls in each roll.
  • Slice the roll into individual pieces.

    → Using a sharp knife or pastry cutter, slice the log into 12 even pieces (approximately 1 inch thick). Clean cuts help maintain the shape of the rolls, preventing them from squishing out the filling.
  • Prepare a baking sheet.

    → Grease a large baking sheet or line it with parchment paper. This prevents sticking and makes cleanup easier, allowing the rolls to bake evenly without burning on the bottom.
  • Place the rolls on the baking sheet.

    → Arrange the sliced rolls cut-side up on the prepared baking sheet, spacing them about 2 inches apart. This gives them room to expand while baking, resulting in a light and fluffy texture.
  • Cover the rolls and let them rise again.

    → Cover the rolls with a clean kitchen towel and allow them to rise for another 30-45 minutes. This second rise is essential for achieving a soft and airy texture.
  • Preheat your oven to 375°F (190°C).

    → While the rolls are rising, preheat your oven to ensure it reaches the desired temperature before the rolls go in, resulting in perfect, even baking.
  • Prepare the egg wash.

    → In a small bowl, mix together 1 beaten large egg with 1 tablespoon of milk until smooth. This mixture will be brushed on the rolls to create a beautiful golden-brown finish.
  • Brush the egg wash over the rolls.

    → Using a pastry brush, gently apply the egg wash over the tops of the rolls just before baking. Be careful to cover evenly, as this promotes a rich, glossy finish.
  • Bake the rolls in the preheated oven.

    → Place the baking sheet in the oven and bake for 20-25 minutes, or until the rolls are golden brown and puffed. Rotate the sheet halfway through for even baking, and keep an eye on them to prevent burning.
  • Let the rolls cool before serving.

    → Once baked, remove the rolls from the oven and let them cool on the baking sheet for about 5 minutes before transferring them to a wire rack. Cooling allows the filling to set slightly, making it easier to serve.
  • Serve the chocolate sweet pastry rolls warm or at room temperature.

    → These rolls are best enjoyed fresh, as the chocolate filling remains gooey and delicious. Optionally, you may dust them with powdered sugar or drizzle with melted chocolate for extra indulgence.

Notes

These Chocolate Sweet Pastry Rolls are a delightful treat that combines rich chocolate with a tender, flaky pastry. The key to achieving the perfect texture lies in using cold butter and properly proofing the yeast, which helps the dough rise beautifully. When making the dough, be sure to level off your flour accurately to avoid dense rolls. The addition of chocolate chips creates a luscious filling, while brown sugar enhances the overall sweetness with a caramel-like flavor.

For a glossy finish, don’t skip the egg wash; it not only improves the appearance but also contributes to a flavorful crust. Feel free to experiment with different types of chocolate or even add some chopped nuts for a delightful crunch in the filling. These rolls are best enjoyed fresh from the oven, but they can also be stored in an airtight container for a few days. Reheat them briefly to restore their flaky texture.

Perfect for breakfast or as a sweet snack, these Chocolate Sweet Pastry Rolls are sure to satisfy any chocolate lover’s cravings!

Tips

Cooking Tips for Chocolate Sweet Pastry Rolls

  • Prepping the Dough: Make sure all your ingredients, especially the butter and eggs, are at the right temperature. Cold butter is critical for flakiness, while room temperature eggs integrate more smoothly into the dough.
  • Mixing Technique: When mixing the dry ingredients, be careful not to overmix after adding the wet ingredients. This can develop gluten and result in tougher rolls. Mix just until combined for a light and tender pastry.
  • Proofing the Dough: Give your dough enough time to rise in a warm, draft-free area until it doubles in size. This helps ensure fluffy and airy rolls. If your kitchen is cool, consider placing the dough in a slightly warmed oven (turned off) to help it rise.
  • Filling Distribution: When spreading the chocolate filling, try to leave a small border around the edges of the dough to prevent the filling from spilling out during rolling and baking.
  • Rolling Technique: Roll the dough tightly when forming the rolls. This promotes even cooking and helps the filling stay enclosed while gaining that desirable spiral appearance.
  • Egg Wash Application: Make sure your egg wash is smooth and evenly mixed; a well-applied egg wash will result in shiny, golden-brown pastry rolls. Apply it carefully around the edges, as too much moisture can make the dough soggy.
  • Baking Tips: Bake the rolls until they are golden brown and the tops have a slight sheen. Be mindful of the oven temperature; using an oven thermometer can help ensure accurate baking conditions.
  • Cooling the Rolls: Allow the rolls to cool slightly on a wire rack after baking before serving. This helps maintain their texture and prevents them from becoming soggy if left in a pan.
  • Storage: Store any leftover rolls in an airtight container at room temperature for up to 2 days. For longer storage, consider freezing them; simply reheat in an oven to regain their fluffiness.

FAQ

What are Chocolate Sweet Pastry Rolls?

Chocolate Sweet Pastry Rolls are delightful pastries made of a flaky dough filled with rich chocolate, often baked until golden brown and served warm or at room temperature.

What ingredients do I need to make Chocolate Sweet Pastry Rolls?

You will need puff pastry, dark chocolate or chocolate chips, sugar, egg wash (egg mixed with water or milk), and optional toppings like powdered sugar or nuts.

How long does it take to prepare Chocolate Sweet Pastry Rolls?

The preparation time is approximately 15 minutes, while baking usually takes about 20-25 minutes, totaling around 40-45 minutes from start to finish.

Can I use store-bought puff pastry?

Yes, using store-bought puff pastry is highly recommended for convenience and consistency. However, you can also make your own if you prefer a homemade touch.

How should I store leftover Chocolate Sweet Pastry Rolls?

Leftover Chocolate Sweet Pastry Rolls can be stored in an airtight container at room temperature for up to 2 days or in the refrigerator for up to a week. For best results, reheat them in the oven before serving.

Can I make Chocolate Sweet Pastry Rolls ahead of time?

Yes, you can prepare them ahead of time. Assemble the rolls and refrigerate them before baking. Bake them just before serving for the freshest taste.

What can I serve with Chocolate Sweet Pastry Rolls?

These pastries pair wonderfully with coffee, hot chocolate, or a scoop of vanilla ice cream. You might also serve them with fresh berries or a drizzle of chocolate sauce.

Are Chocolate Sweet Pastry Rolls suitable for freezing?

Absolutely! You can freeze unbaked rolls. Just wrap them tightly in plastic wrap and then place them in a freezer bag. Bake them directly from the freezer, increasing the baking time slightly.

Introduction / Hook

Imagine biting into a perfectly baked muffin. As your teeth sink through the soft, fluffy exterior, you arrive at a rich, creamy core that explodes with a decadent chocolate custard filling. These Chocolate Custard Filled Muffins are not just ordinary pastries; they are mini adventures for your taste buds, a delightful dance between light, airy muffin texture and the luxurious, velvety custard hidden inside. Whether you’re a chocoholic or a casual dessert lover, these muffins promise to enchant your senses and leave you craving for more.

The Story Behind the Dish

The idea for chocolate-filled baked goods is hardly new. Delving into culinary history reveals the grand tradition of adding surprise elements to baked goods. From fruit-filled pastries in Renaissance Europe to the diverse array of stuffed desserts around the world, this muffin traces its lineage back to a global tapestry of food art. The notion of filling a muffin with custard, especially chocolate, is a reflection of a more modern tendency to fuse convenience with indulgence, offering simple pleasures perfect for today’s busy lifestyle.

This recipe draws inspiration from classic European techniques, merging them with New World creativity. Muffins, originating as a quick bread enjoyed by laborers in 19th-century England, have evolved into diverse expressions of flavor and texture, embracing everything from savory to sweet. By infusing these treats with a silky chocolate custard, a new chapter is written in their storied history, one that celebrates the timeless desire for culinary surprise and delight.

Why You’ll Love This Recipe

  • Easily Impress Guests: These muffins are show-stoppers at any brunch, offering a gourmet touch with minimal effort.
  • Versatile Delight: Perfect for breakfast, as a snack, or as an elegant dessert, they fit into any part of your day.
  • Kid-Friendly: The fun discovery of chocolate custard inside makes it an exciting treat for children.
  • Comfort with a Twist: Combining familiar muffin comfort with the exotic feel of rich custard, they offer a unique taste experience.

Flavor Profile & Texture

The outer muffin is tender and lightly sweet, complementing the more intense inner core. The custard offers a luxurious texture, smooth and creamy, enhancing the overall experience with its rich, chocolatey depth. The contrast between the light muffin and dense filling creates a memorable balance, delivering an experience that is both comforting and slightly decadent, making each bite something to savor.

Occasions & Pairings

These muffins are a versatile choice for many occasions. Enjoy them:

  • Weekend Brunch: Serve with fresh fruits and a hot cup of coffee or tea for a leisurely, indulgent breakfast.
  • Afternoon Tea: Pair with light sandwiches and a fragrant Earl Grey to create a sophisticated tea experience.
  • Birthday Parties: These muffins can hold their own alongside other desserts, offering an unexpected surprise for guests.
  • Holiday Gatherings: Their rich filling adds a festive touch to any holiday spread.

Tips, Variations & Substitutions

While these muffins are delightful as they are, there’s plenty of room for creativity:

  • Dietary Variations: For gluten-free options, use almond or coconut flour. Vegans can substitute dairy milk and butter with plant-based alternatives and use a flaxseed mix in place of eggs.
  • Flavor Twists: Incorporate spices like cinnamon or nutmeg into the batter for a warm, spiced profile. Swap out the chocolate custard for vanilla or even fruit-based custards for a different flavor profile.
  • Textural Add-ins: Add nuts, such as chopped pecans or walnuts, for an additional crunch in the batter.
  • Regional Flavors: Infuse the custard with coffee or flavored liqueurs for a more adult twist.

Storage & Make-Ahead Ideas

Maximize the enjoyment of these muffins by storing them properly:

  • Refrigeration: These muffins can be stored in an airtight container for up to five days. For best results, allow them to reach room temperature before serving.
  • Freezing: Freeze the muffins for up to a month. When ready to eat, thaw overnight in the refrigerator and reheat in a low-temperature oven to restore freshness.
  • Make-Ahead: Prepare the muffin batter and custard separately the day before. Assemble and bake when ready to enjoy fresh, warm muffins.

Fun Facts & Trivia

Did you know that muffins as a food category appeared in cookbooks as early as the 18th century and are distinct between two kinds: English and American? These muffins channel their American cousin’s spirit, innovatively enclosed with a nod to French pâtisserie with the custard filling, bridging culinary traditions. In celebrations of World Chocolate Day, such desserts remind us of the universal love for chocolate, showcasing how different cultures have embraced and innovatively infused this beloved ingredient into their desserts.

Ultimately, each Chocolate Custard Filled Muffin serves as a small token of culinary craftsmanship, offering a taste excursion from the predictable to the exquisite, from everyday routines to joyous celebrations.

Ingredients

  • Muffin Base
    • 2 cups all-purpose flour
      → All-purpose flour serves as the primary structure for the muffins, giving them a soft and fluffy texture. It should be sifted to aerate and remove any lumps before measuring. For a gluten-free option, consider using a blend of gluten-free flours.
    • 1 cup granulated sugar
      → Granulated sugar sweetens the muffins and helps to achieve a perfect rise by creating a tender crumb. Make sure it is evenly mixed into the dry ingredients to avoid any clumps.
    • 1/2 cup unsweetened cocoa powder
      → Cocoa powder adds rich chocolate flavor and color to the muffins. Opt for Dutch-processed for a smoother taste and vibrant color. Sift it to remove any lumps that could affect the texture of the batter.
    • 1 tablespoon baking powder
      → Baking powder acts as a leavening agent, helping the muffins rise and become fluffy. Ensure it is fresh for the best results; check the expiration date before using.
    • 1/2 teaspoon salt
      → Salt enhances the overall flavor of the muffins and balances the sweetness. It should be evenly distributed in the dry ingredients to prevent any salty bites.
    • 1 cup milk (or any dairy-free alternative)
      → Milk adds moisture to the batter, creating a tender muffin. Use it at room temperature for a smoother and easier mixing process. A non-dairy milk can be used for a vegan option.
    • 1/2 cup vegetable oil
      → Oil provides moisture and richness to the muffins, keeping them soft. It should be measured accurately; too much can make the muffins dense. You can substitute it with melted coconut oil for a different flavor.
    • 3 large eggs (room temperature)
      → Eggs are crucial for binding the ingredients together and providing structure. Use room temperature eggs for better emulsification; you can warm them in a bowl of warm water if needed.
    • 1 teaspoon vanilla extract
      → Pure vanilla extract adds depth of flavor to the muffins. For the best taste, use high-quality vanilla extract rather than imitation ones. It works best when added with the wet ingredients.
  • Chocolate Custard Filling
    • 1 cup whole milk (or dairy-free alternative)
      → Whole milk is used to create a creamy and rich custard filling. It should be warmed slightly before mixing with the other ingredients to help dissolve the sugar and cocoa.
    • 1/4 cup granulated sugar
      → Sugar sweetens the custard and helps it to thicken when heated. Make sure it is fully dissolved to ensure a smooth filling.
    • 3 tablespoons cornstarch
      → Cornstarch thickens the custard, giving it the right consistency to hold its shape inside the muffins. It should be mixed with a small amount of cold milk first to create a slurry before heating.
    • 2 tablespoons unsweetened cocoa powder
      → Cocoa powder gives the custard a rich chocolate flavor. Use the same type as the muffins to maintain consistency in taste.
    • 1 teaspoon vanilla extract
      → Vanilla enhances the flavor of the chocolate custard, making it more aromatic. Use pure vanilla extract for the best results.
    • 1 large egg yolk
      → The egg yolk adds richness and creaminess to the custard. It should be whisked separately before being added to the mixture to ensure even incorporation.

Instructions

  • Preheat your oven to 350°F (175°C) and line a 12-cup muffin tin with paper liners or grease it well.

    → This ensures the muffins do not stick to the tin and makes them easier to remove after baking. Greasing helps create a waterproof barrier, while the liners provide an added layer of convenience and a more appealing presentation.
  • In a large mixing bowl, sift together 2 cups of all-purpose flour, 1 cup of granulated sugar, 1/2 cup of unsweetened cocoa powder, 1 tablespoon of baking powder, and 1/2 teaspoon of salt.

    → Sifting helps break up lumps and aerates the dry ingredients, ensuring a light and fluffy texture in the muffins. Mix thoroughly to combine all dry ingredients evenly, which prevents any pockets of dry ingredients from appearing in the final batter.
  • In a separate bowl, whisk together 1 cup of milk, 1/2 cup of vegetable oil, 3 large room temperature eggs, and 1 teaspoon of vanilla extract until the mixture is smooth and well combined.

    → Whisking ensures that the wet ingredients are fully emulsified, which is crucial for the uniform texture of the muffins. Using room temperature ingredients allows for better integration, resulting in a more uniform batter without lumps.
  • Pour the wet mixture into the bowl with the dry ingredients and gently fold together using a rubber spatula or wooden spoon until just combined.

    → Folding prevents overmixing, which can lead to dense muffins. Stop mixing when you see a few streaks of flour; the batter should be slightly lumpy for best results.
  • Prepare the chocolate custard filling by warming 1 cup of whole milk in a saucepan over medium heat until it is just steaming but not boiling.

    → Heating the milk helps dissolve the sugar and cornstarch, leading to a smoother custard. Avoid boiling as it can scald the milk and affect the flavor.
  • In a small bowl, whisk together 1/4 cup of granulated sugar, 3 tablespoons of cornstarch, and 2 tablespoons of cocoa powder.

    → Mixing these dry ingredients together helps to evenly distribute the cocoa and prevents clumping when they are added to the warm milk.
  • Add the dry mixture to the warm milk gradually, whisking continuously until fully combined and no lumps remain.

    → Continuous whisking encourages the cornstarch to properly dissolve, preventing any graininess in the final custard. This creates a silky, smooth texture.
  • Continue to heat the custard mixture over medium heat, stirring constantly until it begins to thicken and bubble gently.

    → This step is crucial as it activates the thickening power of the cornstarch; stirring prevents it from sticking to the bottom of the pan and ensures smooth consistency.
  • Once thickened, remove the saucepan from heat and stir in 1 teaspoon of vanilla extract and 1 large egg yolk that has been whisked separately.

    → Adding the egg yolk enriches the custard and gives it a beautiful creamy texture. Make sure to whisk in the egg yolk quickly to prevent it from scrambling due to the heat of the custard.
  • Set the custard aside to cool slightly while you fill the muffin tins.

    → Allowing the custard to cool makes it easier to handle and prevents it from burning you when you add it to the muffins.
  • Fill each muffin cup about halfway with the batter, creating a small well in the center of each.

    → This well is important as it ensures room for the custard filling, allowing for an even distribution within each muffin. Use a spoon or an ice cream scoop for uniform portions.
  • Carefully spoon or pipe the chocolate custard filling into the well of each muffin, ensuring not to overfill.

    → Take care to keep the custard within the well to avoid overflow, which could lead to mess and uneven baking. Fill them about three-quarters full.
  • Top each filled muffin with the remaining batter, covering the custard filling completely.

    → This seals the custard inside and ensures that the muffins rise beautifully, creating a lovely dome shape.
  • Bake the muffins in the preheated oven for about 18-20 minutes or until a toothpick inserted into the muffin (away from the filling) comes out clean.

    → Testing doneness at the edges ensures that the batter is cooked while the custard remains soft. Do not over-bake as they will dry out; slight moistness is desirable.
  • Once baked, remove the muffins from the oven and let them cool in the pan for 5 minutes before transferring to a wire rack to cool completely.

    → Cooling in the pan allows for the muffins to set slightly, making them easier to remove without breaking. Then, cooling on a wire rack helps to prevent sogginess.
  • Serve the muffins warm or at room temperature, enjoying the rich chocolate flavor paired with the creamy custard filling.

    → This dish is best served fresh, however, they can be stored in an airtight container for a couple of days. Reheat briefly in the microwave if desired.

Notes

These Chocolate Custard Filled Muffins are a delightful treat, combining a soft, fluffy chocolate muffin base with a rich and creamy chocolate custard filling. The muffins are perfect for breakfast or a sweet snack. To ensure the best texture, make sure to sift your flour and cocoa powder and let your ingredients come to room temperature before mixing to achieve a better blend.

The muffin base is not only easy to make but also versatile. For a fun twist, consider adding chocolate chips, nuts, or even a hint of espresso powder to intensify the chocolate flavor. It’s important to fill the muffin cups only halfway with the batter before adding a spoonful of chocolate custard, then top them off with more muffin batter to enclose the filling completely.

For the chocolate custard filling, be patient as it thickens on the stove; constantly stir to prevent lumps. It’s best to use a whisk for this job. Once cooled slightly, it can be piped into the muffins, ensuring a generous portion in every bite. The custard adds a luxurious element to the muffins, making them stand out from typical chocolate muffins.

These muffins can be stored in an airtight container at room temperature for a few days, but they also freeze well for longer storage. Simply thaw at room temperature or microwave for a few seconds to enjoy a warm treat. For an extra indulgent experience, serve them with a dollop of whipped cream or a scoop of ice cream on the side. Enjoy your baking adventure!

Tips

Tips for Cooking Chocolate Custard Filled Muffins

  • Prepping the Muffin Base: Make sure to thoroughly sift the all-purpose flour and cocoa powder to avoid lumps in your batter. This step will ensure that your muffins are light and fluffy.
  • Mixing Dry Ingredients: When combining the flour, sugar, cocoa powder, baking powder, and salt, use a whisk to blend them well. This will evenly distribute the leavening agent and sugar, leading to uniform muffins.
  • Wet Ingredients at Room Temperature: For best results, allow the milk and eggs to reach room temperature before mixing. This helps to create a smooth batter and promotes better mixing.
  • Don’t Overmix: When combining the wet and dry ingredients, mix only until combined. Overmixing can lead to dense muffins. A few lumps are okay!
  • Chocolate Custard Filling: Prepare the filling while the muffins are baking. Make sure to whisk the egg yolk separately before adding it to the custard mixture to avoid scrambling the egg.
  • Creating a Slurry: When adding the cornstarch to the milk, mix it with a small amount of cold milk to create a slurry before heating. This prevents lumps from forming in your custard.
  • Adjusting Sweetness: Taste your custard before filling the muffins. You can adjust the sugar based on your chocolate preference to achieve the right balance.
  • Cooling Time: Let the muffins cool slightly before filling them with custard. This prevents the filling from melting and ensures it stays intact.
  • Using a Pastry Bag: For a neat and easy filling process, consider using a pastry bag to fill your muffins with the chocolate custard. This will give you better control and less mess.
  • Storage: Store the finished muffins in an airtight container to maintain freshness. Enjoy them within 2-3 days for the best taste; you can also refrigerate them for longer shelf life.

FAQ

What are Chocolate Custard Filled Muffins?

Chocolate Custard Filled Muffins are soft and moist muffins filled with a rich and creamy chocolate custard. They are a delightful treat for chocolate lovers and make a perfect dessert or snack.

What ingredients are needed to make Chocolate Custard Filled Muffins?

You will need flour, sugar, cocoa powder, baking powder, eggs, milk, butter, and chocolate for the custard filling. Additional ingredients may include vanilla extract and salt.

How do I make the chocolate custard filling?

The chocolate custard filling is made by cooking milk, sugar, egg yolks, cocoa powder, and cornstarch over low heat until thickened, followed by stirring in melted chocolate until smooth.

Can I make these muffins ahead of time?

Yes, you can make the muffins ahead of time. They can be stored in an airtight container at room temperature for up to 2 days or refrigerated for up to a week. Reheat them for a few seconds in the microwave before serving for the best taste.

Can I substitute any ingredients in this recipe?

Yes, you can substitute all-purpose flour with gluten-free flour, and you can use dairy-free milk alternatives if you’re looking for a dairy-free version. You can also replace granulated sugar with a sugar substitute of your choice.

How can I prevent the muffins from sticking to the pan?

To prevent sticking, ensure that you thoroughly grease the muffin pan with butter or non-stick spray. You can also use parchment paper liners to make it easier to remove the muffins once baked.

What is the best way to store leftover muffins?

Store leftover muffins in an airtight container at room temperature for up to 2 days. If you’d like to keep them longer, you can freeze them. Just wrap them tightly in plastic wrap and place them in a freezer-safe bag for up to 3 months.

Can I add any additional flavors or ingredients?

Absolutely! You can add chocolate chips, nuts, or even a hint of espresso powder to enhance the chocolate flavor. Additionally, you can experiment with adding different spices like cinnamon or nutmeg for a unique twist.

Introduction: Decadence in Every Bite

Imagine a snack or a dessert that captures the perfect harmony of rich chocolate and creamy peanut butter, all tied together with a buttery crumb topping that crumbles at the touch of your fork. This isn’t just a treat; it’s an experience that tantalizes the taste buds and leaves you yearning for more. Enter the world of Chocolate Peanut Butter Crumb Bars—a delectable concoction combining classic flavors with textures that will make you swoon. Each bite provides that much-sought-after balance between sweet and savory, soft and crunchy, making it worth every whimsical moment spent in the kitchen. Whether you’re satisfying a sugar craving or looking for that wow factor for your next gathering, these bars are the answer. Let the aroma of freshly baked dough and melted chocolate guide you through this delightful culinary journey.

The Story Behind the Dish

The pairing of chocolate and peanut butter is a union celebrated across cultures and cuisines, finding its roots surprisingly in history’s annals over a century ago. Originating from the United States, where peanuts were both prolific and loved, peanut butter found its perfect match in chocolate as early as the 1920s with candy innovations. Over the years, bakers and chefs have continued to perfect this sublime blend, incorporating it into various desserts to create iconic treats, including our star—Chocolate Peanut Butter Crumb Bars. The bars draw inspiration from both classic crumb cakes and modern confectionary trends, embodying the evolution of dessert-making where creativity meets nostalgia.

Why You’ll Love This Recipe

  • Effortless Elegance: Despite sounding gourmet, these bars are surprisingly easy to make, requiring minimal baking skills or tools. Perfect for both novice bakers and seasoned pastry chefs.
  • Indulgent Yet Balanced: Experience the richness of chocolate and peanut butter without overwhelming your palate. The crumb topping adds texture and enhances the overall flavor profile.
  • Perfect for Any Occasion: Ideal for potlucks, birthday parties, or simply a weekend indulgence at home. These bars are sure to be a hit wherever they’re served.
  • Customizable: Whether you want to add nuts, a hint of sea salt, or even a layer of caramel, these bars can easily be tailored to suit any craving.

Flavor Profile & Texture

The flavor profile of Chocolate Peanut Butter Crumb Bars is a harmonious blend of familiar comforts. The chocolate layer offers a deep, rich sweetness with undertones of cocoa, perfectly complemented by the creamy, nutty flavor of peanut butter. Together, they create a decadent duo that feels both indulgent and sophisticated. Meanwhile, the crumb topping provides a buttery, slightly sweet contrast that adds complexity to each bite. The textures between layers are delightful: soft, chewy chocolate and peanut butter filling give way to a delicate, crispy topping, making this an indulgent sensory experience from start to finish.

Occasions & Pairings

These bars are as versatile as they are delicious, making them a go-to option for a variety of occasions. Serve them:

  • Holidays: A welcome addition to any festive table, whether it’s Christmas, Thanksgiving, or Easter.
  • Casual Gatherings: Ideal for picnics, barbeques, or potlucks—easy to grab and guaranteed to please a crowd.
  • Everyday Indulgence: Perfect for satisfying mid-week cravings or as a sweet ending to a comforting dinner.

For the best pairings, consider a tall glass of cold milk, hot coffee, or a scoop of vanilla ice cream to complement the bar’s rich flavors. The creamy textures and complementary temperatures create a balanced dessert experience that takes it up a notch.

Tips, Variations & Substitutions

There’s no limit to customizing these bars to fit your preferences or dietary needs:

  • Nuts & Additions: Consider adding chopped nuts such as almonds or pecans to the crumb for added texture and flavor.
  • Vegan Options: Substitute dairy ingredients with plant-based alternatives like almond milk and vegan butter to create a vegan-friendly dessert.
  • Low-Carb Adaptations: Use almond flour in place of regular flour and consider a sugar substitute to make a lower carb version.
  • International Twists: Introducing a pinch of spice like cinnamon or cardamom can add an exotic twist to these traditional flavors.

Storage & Make-Ahead Ideas

To keep your Chocolate Peanut Butter Crumb Bars fresh and tasty:

  • Storage: Once cooled, place the bars in an airtight container at room temperature for up to five days. This will keep the crumb topping from getting soggy while maintaining the chewy texture of the layers beneath.
  • Freezing: Individually wrap bars in plastic wrap and place in a freezer-safe bag or container. They can be stored in the freezer for up to two months. Thaw at room temperature for an hour before serving.
  • Make-Ahead: Prepare the bars up to two days in advance. Bake, cool, and store as recommended, making them perfect for pre-planned gatherings or busy weeks.

Fun Facts & Trivia

Did you know that the idea of pairing chocolate with nuts or nut butters is a staple in many cultures’ confectionaries? Although the chocolate-peanut butter combo is perhaps most famously American, it enjoys popularity far beyond the country’s borders. Moreover, peanut butter itself has a fascinating history—it was supposedly conceived as early as the Aztec era, though widespread popularity in the states came in the 20th century with advancements by visionaries such as Dr. John Harvey Kellogg. This innovation was driven by the idea of providing nourishing protein in an accessible form, creating a beloved pantry staple that ties so well with its chocolate counterpart today.

Indulge in the rich history and flavor of these Chocolate Peanut Butter Crumb Bars, where each bite not only speaks of contemporary creativity but pays homage to culinary ingenuity of the past.

Ingredients

  • Crust Base
    • 1 cup rolled oats
      → Rolled oats are the foundation of the crust, providing texture and a wholesome taste. Use old-fashioned oats for a more robust structure. Ensure they are whole and dry for better binding with the other ingredients.
    • 1/2 cup almond flour
      → Almond flour adds a rich, nutty flavor while making the crust tender and crumbly. For the best texture, make sure to use finely ground almond flour, as coarser flour may result in a grainy texture.
    • 1/4 cup coconut oil (melted)
      → Coconut oil serves as the primary fat, providing moisture and richness to the crust. Melt it before using to ensure even blending with the dry ingredients. Opt for refined coconut oil if you prefer a neutral flavor.
    • 1/4 cup maple syrup or honey
      → This natural sweetener binds the ingredients together and adds sweetness to the crust. If using honey, choose a light-colored variety for a milder flavor. Heat slightly if too thick to drizzle easily.
    • 1/4 teaspoon salt
      → Salt enhances the flavors of the other ingredients and balances the sweetness. Use fine sea salt for a smoother incorporation into the crust mixture.
  • Peanut Butter Layer
    • 1 cup creamy peanut butter
      → Peanut butter provides flavor and richness while also helping to bind the layers together. Choose a natural, unsweetened variety for cleaner flavor. It should be at room temperature for easier spreading.
    • 1/4 cup maple syrup
      → Used to sweeten the peanut butter layer, adding a touch of natural sweetness without overpowering it. Feel free to adjust based on your sweetness preference. If the mixture becomes too thick, warm it slightly.
    • 1/4 teaspoon vanilla extract
      → Pure vanilla extract enhances the flavor profile and adds depth to the peanut butter layer. Choose high-quality extract for the best results, as imitation vanilla can lack complexity.
  • Chocolate Drizzle
    • 1/2 cup dark chocolate chips
      → Dark chocolate chips create a rich, indulgent topping that adds a nice contrast to the creamy peanut butter layer. Melt the chips gently over a double boiler or in short bursts in the microwave to avoid scorching.
    • 1 tablespoon coconut oil
      → Coconut oil helps to thin the chocolate, making it easier to drizzle over the bars and adds a subtle flavor. Use refined coconut oil for a neutral taste, and ensure it is melted before mixing with the chocolate.
  • Optional Toppings
    • Chopped nuts (e.g., peanuts or walnuts)
      → Chopped nuts can add a crunchy finish to the bars, enhancing both flavor and texture. Toast them lightly before chopping to bring out their natural oils and flavors. Sprinkle them on top of the chocolate drizzle for a decorative touch.
    • Sea salt flakes
      → A sprinkle of sea salt flakes can enhance the sweetness and add a delightful contrast to the richness of the bars. Use a light hand, as a little goes a long way in elevating the flavors.

Instructions

  • Preheat your oven to 350°F (175°C) and line an 8×8-inch baking pan with parchment paper, leaving some overhang on the sides for easy removal later.

    → Preheating the oven ensures that the crust bakes evenly and develops a nice, golden color. Lining the pan with parchment paper prevents sticking, allowing for a smooth extraction of the bars post-baking.
  • In a mixing bowl, combine 1 cup of rolled oats, 1/2 cup of almond flour, 1/4 cup of melted coconut oil, 1/4 cup of maple syrup or honey, and 1/4 teaspoon of salt.

    → Start by adding the dry ingredients (oats, almond flour, and salt) first and mix them together to ensure even distribution. Then add the melted coconut oil and maple syrup or honey. The melted oil should be combined thoroughly to avoid clumps. Use a spatula or wooden spoon to mix until the mixture resembles a coarse crumb.
  • Press the oat mixture firmly into the bottom of the prepared baking pan to form an even crust layer.

    → Use the back of measuring cup or your fingers to press the mixture down firmly, ensuring it is tightly packed. This will help your crust hold together after baking; it should be compact but not overly compressed.
  • Bake the crust in the preheated oven for 10-12 minutes or until it becomes lightly golden around the edges.

    → Baking allows the oats to toast and the fats to stabilize, creating a crunchy base. Keep an eye on it towards the end to prevent burning; it should smell fragrant and look golden, indicating it’s nearly done.
  • While the crust is baking, prepare the peanut butter layer by mixing together 1 cup of creamy peanut butter, 1/4 cup of maple syrup, and 1/4 teaspoon of vanilla extract in a bowl.

    → Ensure the peanut butter is at room temperature for easier mixing. Stir the ingredients together until smooth and well-combined. You can use a whisk or spatula; this mixture should be creamy and spreadable for easy layering.
  • Once the crust has finished baking, remove it from the oven and let it cool for about 10 minutes before spreading the peanut butter mixture evenly over the crust.

    → Allowing the crust to cool slightly prevents the peanut butter from melting too much; it keeps the layers distinct. Spread the mixture using an offset spatula for a smooth top, making sure to reach the edges.
  • In a microwave-safe bowl, combine 1/2 cup of dark chocolate chips and 1 tablespoon of coconut oil. Melt them together in 20-second intervals, stirring in between until fully melted and smooth.

    → This method prevents the chocolate from scorching. The addition of coconut oil thins out the chocolate for an easier drizzle. Make sure to stir thoroughly to combine the chocolate and oil seamlessly.
  • Drizzle the melted chocolate over the peanut butter layer, creating a decorative pattern.

    → Use a spoon or a piping bag to create fine, artistic lines with the chocolate, ensuring even coverage. This not only enhances visual appeal but also balances the flavors of the creamy peanut butter with the richness of dark chocolate.
  • If desired, sprinkle with chopped nuts and sea salt flakes immediately after drizzling the chocolate, while the chocolate is still warm.

    → This step allows the toppings to adhere well to the chocolate. Toast the nuts beforehand for added depth of flavor; a light crunch contrasts beautifully with the creamy layers.
  • Refrigerate the bars for at least 2 hours until the chocolate is set completely.

    → Chilling firmens the bars and makes cutting easier. It allows the chocolate to harden, creating a crisp texture on top that complements the creamy peanut butter layer.
  • Once set, lift the bars from the pan using the parchment overhang and cut them into squares or rectangles using a sharp knife.

    → For clean cuts, you can warm the knife slightly under hot water and dry it. This technique ensures your bars have a neat appearance and prevents the chocolate from cracking.
  • Enjoy your homemade chocolate peanut butter crumb bars, storing any leftovers in an airtight container in the refrigerator for up to a week.

    → Storing them in the fridge helps maintain their freshness and texture. These bars make an excellent snack or dessert that can be enjoyed chilled or at room temperature!

Notes

These Chocolate Peanut Butter Crumb Bars are a delicious treat that perfectly balances the richness of peanut butter with the sweetness of chocolate. The base is made from wholesome ingredients like oats and almond flour, giving it a hearty texture and making it a more nutritious option. You can customize the bars further by adding your favorite nuts or seeds on top for added crunch and nutrition.

When preparing the crust, be sure to mix the dry ingredients well before adding in the melted coconut oil and sweetener, ensuring an even distribution of flavors. If the crust feels too crumbly, a little extra melted coconut oil can help bind it better. Spread the peanut butter layer evenly over the crust, and take care to let it set slightly before drizzling with the melted chocolate to get a clean finish.

For the chocolate drizzle, melt the dark chocolate chips slowly to avoid overheating, as burnt chocolate can become clumpy. Adding coconut oil not only makes the chocolate easier to drizzle but also gives a nice sheen to the topping. If you’re feeling adventurous, you can also mix in a pinch of sea salt into the melted chocolate for an extra burst of flavor.

After assembling the bars, allow them to cool and set fully before cutting into squares. This helps the layers firm up, making them easier to handle. The bars can be stored in an airtight container in the fridge for a week, or they can be frozen for a longer shelf life. They make a great snack or dessert and are sure to be a hit with both kids and adults!

Enjoy these delicious bars packed with flavor and texture, perfect for satisfying your sweet tooth while also enjoying wholesome ingredients!

Tips

  • Preparing the Crust: Ensure your oats are properly measured and packed into the cup without excess air to avoid a crumbly crust. If possible, pulse the rolled oats a few times in a food processor for a finer texture that blends well with the almond flour.
  • Mixing the Crust Base: When combining the crust ingredients, use a fork or a pastry blender for an even texture. Mix until the ingredients are just combined; overmixing can lead to a dense crust.
  • Pressing the Crust: When pressing the crust mixture into the baking dish, use a flat-bottomed measuring cup to ensure an even and compact layer. This will help the crust hold together better when baked.
  • Baking Time: Keep an eye on the crust as it bakes. It should turn golden brown around the edges while remaining slightly soft in the center. Allow it to cool completely before adding the peanut butter layer to prevent it from melting.
  • Peanut Butter Layer Tips: Stir the peanut butter well before measuring to ensure a smooth consistency. If your peanut butter is too thick, warming it slightly in the microwave (10-15 seconds) can make it easier to spread.
  • Incorporating Sweeteners: When adding maple syrup to the peanut butter, do so gradually, tasting as you go to achieve your desired sweetness level. Be cautious not to overly sweeten the mixture.
  • Chocolate Drizzle Technique: When melting the chocolate chips, do it in 15-20 second intervals in the microwave, stirring in between to avoid seizing. A double boiler is preferable for more control over the heat.
  • Optional Toppings: For the chopped nuts, consider mixing various types (like peanuts, almonds, or walnuts) for added flavor and texture. Toasting them in a dry skillet for a few minutes can intensify their flavor.
  • Cool and Cut: Allow the chocolate drizzle to set before cutting the bars. Refrigerating them for about an hour will help achieve cleaner cuts. Use a sharp knife to slice into squares or rectangles for neat servings.
  • Storing Leftovers: Store any leftover bars in an airtight container in the refrigerator for up to a week. They can also be frozen for longer storage; cut them into squares first and layer with parchment paper for easy separation.

FAQ

What are Chocolate Peanut Butter Crumb Bars?

Chocolate Peanut Butter Crumb Bars are delicious dessert bars made with a crumbly crust, a creamy peanut butter filling, and a rich layer of chocolate on top. They combine crunchy and creamy textures with chocolate and peanut butter flavors.

What ingredients do I need to make these bars?

The basic ingredients include flour, oats, brown sugar, butter, peanut butter, chocolate chips, and salt. You may also need vanilla extract for added flavor.

Can I use natural peanut butter in this recipe?

Yes, you can use natural peanut butter. Just be sure it is well-stirred before measuring, as natural peanut butter tends to separate.

How do I store Chocolate Peanut Butter Crumb Bars?

Store the bars in an airtight container at room temperature for up to a week. For longer storage, you can refrigerate them or freeze them for up to 3 months.

Can I make these bars gluten-free?

Yes, you can make them gluten-free by using a gluten-free flour blend and ensuring that the oats you use are certified gluten-free.

What if I don’t like chocolate?

If you don’t like chocolate, you can omit the chocolate layer and replace it with a different topping, such as a layer of drizzled white chocolate or simply top with crushed nuts or toffee bits.

How long do these bars take to prepare and bake?

The preparation time is typically around 20 minutes, and the baking time is about 25 to 30 minutes. Allow additional time for cooling before slicing.

Can I add other toppings or mix-ins?

Absolutely! You can add toppings like mini marshmallows, chopped nuts, or even dried fruit. Feel free to customize based on your preferences.

Introduction

Imagine biting into a warm, freshly baked muffin straight from the oven. The comforting aroma of chocolate and nuts fills the air as you take the first bite, revealing a symphony of flavors: rich, velvety chocolate mingling effortlessly with the sweet, nutty crunch of pecans. Welcome to the irresistible world of Chocolate Pecan Crumble Muffins. More than just a delightful treat, this recipe is a celebration of textures and tastes that will transport your senses to a realm of pure indulgence. Whether you’re an aficionado of baked goods or someone seeking a comforting treat, these muffins guarantee a heavenly experience with every morsel.

The Story Behind the Dish

The evolution of the humble muffin into today’s variety of flavors and textures is a fascinating journey through culinary history. Originating in the kitchens of England, muffins were simple bread-based treats that grew popular for their quick preparation. As baking techniques evolved and global ingredients became more accessible, the classic muffin underwent a flavorful transformation. Adding chocolate and pecans to the mix reflects this evolution, combining the rich heritage of European baking with the diverse culinary influences of the Americas.

Chocolate, introduced to Europe in the 16th century, has since become a beloved ingredient, synonymous with luxury and indulgence. Pecans, native to North America, bring a distinctive taste and history to the dish, revered by indigenous peoples long before the arrival of European settlers. Together, they form a fusion that’s both traditional and innovative, marrying old-world techniques with new-world flavors.

Why You’ll Love This Recipe

  • Quick and Easy: Perfect for busy mornings, these muffins come together with minimal effort, making them a convenient go-to for breakfast or a quick snack.
  • Deliciously Decadent: Experience the rich, fudgy taste of chocolate paired with the buttery, nutty crunch of pecans.
  • Family-Friendly: Loved by kids and adults alike, they’re a hit at family gatherings or school events.
  • Versatile: Ideal for breakfast, brunch, dessert, or as an afternoon pick-me-up with coffee or tea.
  • Customizable: With simple modifications, these muffins can become a health-conscious treat or a gluten-free delight.

Flavor Profile & Texture

Chocolate Pecan Crumble Muffins are a taste adventure waiting to happen. The base of the muffin is a rich chocolate, creating a foundation of moist, fudge-like decadence that begs to be savored. This deep cocoa flavor is enhanced by bursts of sweetness from chocolate chunks or chips dispersed throughout, melting gently with the muffin’s heat.

The addition of pecans brings a contrasting crunch that complements the softness of the chocolate. Their sweet, buttery flavor doesn’t just add texture; it enhances the overall palatability, making each bite a complex yet harmonious blend of sweet and nutty notes. Topping it off, the crumble adds an extra layer of texture and flavor, creating a crispy, sugary finish that makes these muffins truly unforgettable.

Occasions & Pairings

Chocolate Pecan Crumble Muffins are perfect for a variety of occasions:

  • Brunch Gatherings: Surprise your friends with a treat that pairs perfectly with coffee or tea.
  • Festive Celebrations: They make a delightful addition to any holiday spread.
  • Everyday Indulgence: Enjoy a muffin or two as a well-deserved personal treat.
  • Dessert Delight: Serve with a scoop of vanilla ice cream for a sumptuous dessert experience.

Pair these muffins with a creamy hot chocolate for a decadent treat, or balance the sweetness with a cup of strong, black coffee. For a refreshing twist, a light herbal tea can cleanse the palate between bites, allowing each flavor to shine through fully.

Tips, Variations & Substitutions

These muffins are wonderfully adaptable to a range of tastes and dietary needs:

  • Healthier Options: Substitute part of the all-purpose flour with whole wheat flour, and use dark chocolate chips for a less sugary treat.
  • Gluten-Free: Replace traditional flour with a blend of almond and coconut flour to make these muffins suitable for gluten-sensitive individuals.
  • Vegan Alternatives: Use plant-based milk and a flaxseed substitute for eggs to make a vegan-friendly version without compromising on flavor.
  • Extra Texture: Add some dried fruits like cranberries or cherries for a sweet, chewy contrast.
  • Flavor Innovations: Incorporate spices such as cinnamon or nutmeg for a warming touch.

Storage & Make-Ahead Ideas

Proper storage is key to maintaining the freshness and flavor of your Chocolate Pecan Crumble Muffins:

  • Room Temperature: Store in an airtight container for up to three days.
  • Refrigerator: Extend the shelf life by refrigerating the muffins for up to a week.
  • Freezer: Individually wrap muffins in plastic wrap and store in a sealed freezer bag for up to three months. Thaw overnight in the refrigerator or reheat directly in the oven for a warm, fresh taste.
  • Make-Ahead: Prepare batter in advance and refrigerate for up to 24 hours. Bake freshly when needed to enjoy warm, fluffy muffins right from the oven.

Fun Facts & Trivia

Did you know that muffins date back to the 10th century in Wales, where they were known as “moofins”? Originally a food for the lower classes, muffins were often made with leftover scraps of bread and biscuit dough combined with mashed potatoes before being baked on a griddle. Today, muffins have evolved into a beloved snack worldwide, enjoyed across all demographics, thanks to their versatility and the myriad of flavors available.

Equally fascinating is the pecan, which is a type of hickory native to the southern United States. The word “pecan” is derived from an Algonquin word meaning “a nut requiring a stone to crack.” Pecans have been an integral part of Southern American cuisine and are a staple in traditional dishes like pecan pie and praline candies.

With their rich history and delightful taste, these Chocolate Pecan Crumble Muffins are a testament to the joy of baking and the creative possibilities of combining different culinary traditions. Let the warm, inviting scent of freshly baked muffins fill your home and celebrate the simple pleasures of life, one delicious bite at a time.

Ingredients

Muffin Base

  • 1 1/2 cups all-purpose gluten-free flour
    → This flour serves as the main structure for the muffins, providing the bulk necessary to hold the other ingredients together. Use a high-quality gluten-free blend to ensure good texture, and measure carefully to avoid dense muffins.
  • 1/2 cup unsweetened cocoa powder
    → Cocoa powder adds rich chocolate flavor and depth to the muffins. Opt for unsweetened cocoa for a balanced sweetness, and sift it before use to ensure there are no clumps in the batter, which can affect consistency.
  • 1/2 cup granulated sugar
    → Granulated sugar sweetens the muffins, providing balance to the deep chocolate flavor. For best results, use fine granulated sugar as it dissolves easily in the batter, contributing to a smooth texture.
  • 1 teaspoon baking powder
    → Baking powder acts as the leavening agent, helping the muffins rise and become light and fluffy. Ensure it is fresh for the best results, and measure accurately to avoid overly dense or crumbly muffins.
  • 1/2 teaspoon baking soda
    → Baking soda works with the cocoa to provide additional lift, reacting with the acids in the recipe to create carbon dioxide bubbles. Be sure to combine it well with the dry ingredients to ensure an even rise.
  • 1/4 teaspoon salt
    → Salt enhances the flavors of all the other ingredients, balancing sweetness and adding depth. Use fine sea salt for even distribution throughout the muffin batter.
  • 1/2 cup unsweetened applesauce
    → Applesauce acts as a natural moistening agent and can also replace some fat in the recipe, adding moisture without making the muffins greasy. Use room temperature applesauce for better incorporation into the batter.
  • 1/4 cup vegetable oil or melted coconut oil
    → Oil contributes to the muffins’ tenderness and moisture. Coconut oil adds a subtle flavor, so use it melted for easy mixing. If using vegetable oil, choose a neutral-flavored option to avoid altering the taste.
  • 2 large eggs
    → Eggs provide binding and structure, as well as richness to the muffins. Make sure they are at room temperature for optimal mixing, as this helps achieve an even batter.
  • 1 teaspoon pure vanilla extract
    → Pure vanilla enhances the overall flavor profile of the muffins, adding warmth and depth. Avoid artificial vanilla flavors, as pure extract contributes a more robust and authentic taste to the bake.

Chocolate Pecan Crumble Topping

  • 1/2 cup chopped pecans
    → Chopped pecans add crunch and a nutty flavor that complements the chocolate in the muffins. Make sure they are chopped uniformly so they distribute evenly throughout the topping and do not burn during baking.
  • 1/4 cup brown sugar
    → Brown sugar adds moisture and a slight caramel flavor to the crumble topping. Use packed brown sugar for the best results, as it melds well with the other crumb ingredients and preserves moisture.
  • 1/4 cup gluten-free oats
    → Oats bring texture to the crumble topping, providing a chewy contrast to the soft muffin. Use certified gluten-free oats to ensure they are safe for those with gluten allergies, and consider pulsing them in the blender for finer crumbs.
  • 2 tablespoons unsweetened cocoa powder
    → Cocoa powder in the crumble adds an additional layer of chocolate flavor that harmonizes with the muffins. Ensure it is well combined with the other topping ingredients for an even distribution.
  • 2 tablespoons melted butter or coconut oil
    → Fat binds the crumble topping together while adding richness. If using coconut oil, allow it to cool slightly after melting to prevent it from cooking the sugars when combined.
  • 1/4 teaspoon cinnamon (optional)
    → Cinnamon enhances the overall flavor profile, adding warmth and spice. Use fresh ground cinnamon for the best flavor, and adjust the amount to taste if you prefer a more pronounced spice.

Instructions

  • Preheat your oven to 350°F (175°C) and line a 12-cup muffin tin with paper liners or grease it well.

    → This ensures the muffins do not stick to the tin and makes them easier to remove after baking, while also helping them maintain their shape.
  • In a large mixing bowl, whisk together 1 1/2 cups of gluten-free flour, 1/2 cup of unsweetened cocoa powder, 1/2 cup of granulated sugar, 1 teaspoon of baking powder, 1/2 teaspoon of baking soda, and 1/4 teaspoon of salt until well combined.

    → This step ensures that all dry ingredients are evenly distributed; whisking helps break up any clumps, which aids in achieving a smoother batter and an even rise.
  • In a separate bowl, combine 1/2 cup of unsweetened applesauce, 1/4 cup of vegetable oil (or melted coconut oil), 2 large room temperature eggs, and 1 teaspoon of pure vanilla extract. Mix these ingredients well until smooth.

    → Room temperature ingredients blend more easily, creating a batter that holds air better, which contributes to a lighter muffin.
  • Gradually add the wet mixture to the dry ingredients, folding gently with a spatula until just combined.

    → Be careful not to overmix; mixing just until no dry flour remains preserves the muffins’ light texture. A few lumps are acceptable.
  • Prepare the chocolate pecan crumble topping by mixing 1/2 cup of chopped pecans, 1/4 cup of packed brown sugar, 1/4 cup of gluten-free oats, 2 tablespoons of unsweetened cocoa powder, 2 tablespoons of melted butter (or coconut oil), and 1/4 teaspoon of cinnamon (if using) in a small bowl.

    → Mixing in a small bowl allows you to evenly coat the oats and nuts with the fat and sugar, enhancing the flavor and texture of the crumble.
  • Scoop the muffin batter evenly into the prepared muffin tin, filling each cup about 2/3 full.

    → Filling the cups just enough allows room for the muffins to rise without overflowing, ensuring they maintain their shape.
  • Evenly sprinkle the chocolate pecan crumble topping over the batter-filled muffin cups.

    → This adds an appealing texture and an extra layer of flavor that enhances each bite of the muffin.
  • Bake the muffins in the preheated oven for 18 to 22 minutes, or until a toothpick inserted into the center comes out clean or with a few moist crumbs.

    → Baking time can vary based on your oven; checking for doneness with a toothpick ensures the muffins are cooked through without being overbaked, which would affect their moisture.
  • Remove the muffins from the oven and allow them to cool in the tin for 5 minutes before transferring them to a wire rack to cool completely.

    → Allowing them to cool slightly in the tin helps set their shape, making them less likely to break apart; transferring to a wire rack prevents sogginess from steam.
  • Serve the muffins warm or at room temperature, and enjoy the rich chocolate flavor paired with the crunchy pecan topping.

    → Muffins tend to taste best fresh; for optimal flavor, serve them soon after baking.

Notes

These Chocolate Pecan Crumble Muffins are a delightful treat that combines rich chocolate with the crunch of pecans and a crumbly topping. The gluten-free flour blend ensures everyone can enjoy them, while the unsweetened cocoa powder provides depth to the chocolate flavor without unnecessary sweetness. Consider using eggs that are at room temperature for optimal blending, resulting in a smoother batter.

The muffins can be customized further by adding chocolate chips or additional nuts if desired. For those who love a strong chocolate flavor, feel free to increase the cocoa powder slightly. When mixing your dry ingredients, ensure that the baking powder and baking soda are fresh to achieve maximum rise and fluffiness in your muffins.

When topping the muffins, make sure the pecans are uniformly chopped for even distribution, avoiding any burnt pieces. If you have extra crumble topping, feel free to sprinkle it on other baked goods or use it as an ice cream topping for an added crunch! Store any leftover muffins in an airtight container at room temperature for 2-3 days or freeze them for up to a month. When ready to enjoy, simply thaw and reheat for a warm, delicious snack.

For an extra indulgent experience, serve these muffins warm with a smear of nut butter or a drizzle of chocolate sauce on top. They make for a fantastic dessert or a sweet breakfast treat!

Tips

Cooking Tips for Chocolate Pecan Crumble Muffins

  • Measuring Ingredients: Accurate measurement is key to baking success. Use a kitchen scale for the flour and cocoa powder for the best results. Spoon the flour into the measuring cup and level it off with a knife to avoid compacting it.
  • Mixing the Batter: When mixing the wet ingredients, ensure they are well combined before adding to the dry ingredients. Avoid over-mixing the batter; mix just until the ingredients are combined to prevent tough muffins.
  • Incorporating Applesauce: Stir the applesauce gently into the wet ingredients. For a bit of added flavor, consider using flavored applesauce, like cinnamon or vanilla, if desired.
  • Room Temperature Ingredients: Ensure your eggs and applesauce are at room temperature. This helps to create a smoother batter and enhances the muffins’ rise.
  • Resting the Batter: Allowing the muffin batter to rest for 10-15 minutes before baking can enhance the texture by giving the gluten-free flour time to hydrate fully.
  • Baking Temperature: Preheat your oven adequately. Oven temperature is crucial; use an oven thermometer to ensure your oven is at 350°F (175°C) for consistent baking.
  • Crumble Topping Texture: When mixing the crumble topping, ensure that the butter or coconut oil is just melted—not hot—so that it combines evenly without cooking the other ingredients.
  • Even Distribution of Topping: For an even topping, sprinkle the crumble mixture over the muffins using your fingers to ensure an even distribution. This prevents clumping and ensures that every muffin gets a taste of the delicious topping.
  • Cooling Time: Once baked, let the muffins cool in the pan for about 5 minutes before transferring them to a wire rack. This prevents them from becoming soggy and allows steam to escape, ensuring a better texture.
  • Storing Muffins: Once completely cooled, store muffins in an airtight container at room temperature for up to 3 days. For longer storage, keep them in the refrigerator or freeze for up to 2 months. Reheat slightly before enjoying.

FAQ

What are Chocolate Pecan Crumble Muffins?

Chocolate Pecan Crumble Muffins are delicious baked goods made with rich chocolate and crunchy pecans, topped with a crumbly mixture for added texture and flavor.

What ingredients do I need to make Chocolate Pecan Crumble Muffins?

You will need ingredients such as all-purpose flour, cocoa powder, baking powder, sugar, eggs, milk, butter, chocolate chips, and pecans.

How long does it take to prepare these muffins?

The preparation time for Chocolate Pecan Crumble Muffins is approximately 15-20 minutes, followed by a baking time of about 20-25 minutes.

Can I use other nuts instead of pecans?

Yes, you can substitute pecans with other nuts like walnuts or almonds, depending on your preference.

How should I store Chocolate Pecan Crumble Muffins?

Store the muffins in an airtight container at room temperature for up to 3 days. For longer storage, refrigerate them or freeze them for up to 3 months.

Can I make these muffins gluten-free?

Yes, you can use a gluten-free all-purpose flour blend to make the muffins gluten-free, ensuring that all other ingredients are also gluten-free.

Are Chocolate Pecan Crumble Muffins suitable for breakfast?

Absolutely! They make a delightful and indulgent breakfast option or a tasty snack any time of day.

Can I add other ingredients like fruits to the muffins?

Yes, you can add fruits like banana or berries for added flavor and moisture if desired.