Author

Ocean Nightleaf

Browsing

Introduction / Hook

Imagine a breakfast that feels like a warm embrace: a bagel with a glossy, resonant crust that gives way to a tender, chewy interior. Steam rises as you slice through, releasing a soft perfume of toasty grains and a faint tang that hints at the dairy that makes them uniquely moist. This is the magic of cottage cheese bagels—bagels that marry traditional bakery chew with the light, creamy moisture of cottage cheese, creating a bite that is at once hearty and comforting.

These bagels are more than just a breakfast staple; they’re a small revolution for anyone who loves a bagel that stays soft longer, carries flavor with a gentle tang, and feels satisfyingly filling without being heavy. In every bite you’ll hear the story of a recipe that celebrates texture—chewy, elastic crumb balanced by a delicate crumb structure—while embracing the modern desire for protein-rich, pantry-friendly foods. They toast beautifully, split open with a soft sigh, and hold toppings without collapsing into sogginess. If you crave a morning ritual that feels both cozy and a little indulgent, cottage cheese bagels deliver that welcoming, nostalgic aroma with a contemporary twist.

Beyond the senses, these bagels offer a practical elegance: they’re versatile enough for leisurely weekend brunches, quick weekday breakfasts, or a comforting lunch with a smear of cream cheese and your favorite savory toppers. They invite creativity—savory herbs, sesame seeds, or poppy seeds catching a light roast; a hint of garlic or onion tucked into the dough; or a splash of olive oil brushed on the hot crust for an extra kiss of richness. They’re a reminder that a simple bake can be both indulgent and nourishing, a treat you can feel good about sharing with family and friends.

The Story Behind the Dish

Bagels have a storied past that travels from Eastern European bakeries to bustling American breakfast tables. The chewy rings, boiled to set their starches before they’re baked to a glossy brown, became a symbol of communal mornings in many urban neighborhoods. The version you’re reading today is a nod to that tradition, but with a modern, dairy-forward twist: cottage cheese plays a starring role in the dough, infusing moisture and a gentle tang that complements the classic bagel’s reserve.

The idea isn’t entirely new—home cooks have long experimented with dairy additions to bread dough to achieve a more tender crumb and a richer mouthfeel. Cottage cheese, with its curds and whey, brings a light, milky brightness that can feel almost magical when folded into a dough that needs to stretch and rise. In many kitchens, this kind of adaptation grows from a simple instinct: you want a bread that isn’t dense, that carries a little extra protein, and that stays fresh longer than the usual bagel. The resulting bagels honor the old-world technique of boiling and baking, while embracing a modern pantry staple that makes the dough feel more forgiving and moist. The end product is a bridge—between the timeless charm of a bagel and the bright, contemporary appeal of a dairy-forward loaf.

Personal anecdotes often pop up in conversations about these bagels. A home cook might tell you that a batch changed their weekend mornings: the first bite carried a cloud of warmth that reminded them of Sundays at their grandmother’s table, yet the texture felt refreshingly contemporary, sturdy enough for a hearty topping but tender enough to bite through with ease. Another friend might share how these bagels became a weekday hero, soft enough to toast lightly and still taste like a special treat, making breakfast feel like a little celebration even on busy days. The story is not just about a recipe; it’s about the comfort of a familiar shape reimagined with a gentle, dairy-driven brightness.

Why You’ll Love This Recipe

  • Protein-rich and comforting: cottage cheese brings a nourishing boost without sacrificing the familiar chew and structure of a classic bagel.
  • Moist, tender crumb: the dairy component helps create a softer interior that stays moist longer than traditional bagels.
  • Versatile and forgiving: adaptable to a range of flavorings, toppings, and pairings, from classic schmears to inventive toppings.
  • Great for make-ahead planning: you can prepare a batch, freeze or refrigerate, and toast to reawaken the aroma and texture.
  • Family-friendly and crowd-pleasing: a bake that appeals to kids and adults alike, perfect for weekend breakfasts or casual gatherings.
  • Simple pantry-friendly concept: you can tailor the flavor profile using what you have on hand, without losing the core texture that makes these special.

Flavor Profile & Texture

The first thing you notice when you bite into a cottage cheese bagel is the contrast—the crust offers a subtle snap and a deep, toasty aroma, while the crumb inside stays wonderfully soft and springy. The dairy element lends a mild tang and a gentle sweetness that pairs beautifully with a touch of malt, honey, or a simple savory smear. The texture is what truly defines these bagels: an outer crust that resists tearing, a hollow-sounding crack when you slice into it, and a ropey, elastic center that breathes as you bite.

In flavor terms, think of a balanced profile where the dairy notes don’t overpower the grains but rather lift them. There’s a quiet richness that comes with cottage cheese, a slight brightness from the natural acidity of cultured dairy, and a toasty warmth from the baking process. The resulting taste is versatile—savory enough to pair with smoked fish or tangy cream cheese, yet gentle enough to work with fruits and sweeter toppings if you’re in the mood for a brunch-with-dessert vibe. The aroma is inviting: a warm, bakery-like scent that wraps around you as the bagels emerge from the oven, a smell that says, “morning is here, and it’s going to be good.”

Texture-wise, the interior is pleasantly airy and resilient. It’s not a bread that collapses when you tear into it; instead, it offers a springy bite that returns with a bit of give. The crust, while glossy and crisp from the boil, softens ever so slightly as it cools, preserving that characteristic chew that defines a well-made bagel. The combination of moisture from the dairy and the starch’s natural structure creates a bagel that remains enjoyable from the moment you slice it to the last bite later in the day.

Occasions & Pairings

These cottage cheese bagels shine in a range of settings, from casual weekday mornings to leisurely weekend gatherings. Their flexibility makes them a practical choice for meal planning, school lunches, or a brunch spread that invites guests to experiment with toppings.

  • Weekday breakfast: toast lightly and top with herbed cream cheese, tomato slices, and a sprinkle of salt and pepper for a quick, satisfying start to the day.
  • Brunch centerpiece: serve with a trio of toppings—savory smoked salmon with capers, a bright herb-spread, and a sweet fruit compote—to create a balanced tasting station.
  • Lunch-friendly option: slice and fill with eggs, avocado, crisp lettuce, or your favorite lean protein for a portable lunch that travels well.
  • Special occasions: pair with sparkling beverages, a light salad course, or a cheese board to offer a twist on the classic bagel-and-smear combo.

Flavor partners are vast. Cream cheese remains a classic companion, but you can go in many directions: a tangy chive and feta blend, a smoky hummus spread, roasted peppers, or a creamy avocado mash. For savory lovers, a smear of garlicky herb cream cheese or a dollop of tangy yogurt-based sauce can complement the dough’s delicate tang. If you’re leaning into a sweeter angle, a touch of honey or berry preserves on a lightly toasted bagel can be a surprisingly harmonious contrast to the subtle dairy notes.

Tips, Variations & Substitutions

The beauty of cottage cheese bagels lies in their adaptability. Here are ideas to tailor the texture, flavor, and dietary needs without straying from the core concept.

  • Texture tweaks: for an extra-chewy bite, use bread- or high-gluten-style dough base and allow for a longer, cooler rising period. The extra time helps develop the gluten network for a more pronounced chew while preserving moisture from the dairy.
  • Flavor twists: fold in finely chopped fresh herbs, mild garlic powder, or finely grated onion in the dough for aromatic notes. Top with sesame seeds, poppy seeds, or a mix of seeds for added fragrance and crunch.
  • Whole grain warmth: substitute a portion of the base grain with whole wheat or spelt for a nuttier flavor and a heartier texture, while keeping the soft crumb thanks to the cottage cheese’s moisture.
  • Gluten-free option: for gluten-free lovers, use a 1:1 gluten-free flour blend designed for yeast breads, and add a small amount of binding agent (such as xanthan gum) as recommended by your GF flour blend’s guidance. Be prepared for a slightly different rise and texture, but the dairy moisture will still help keep the crumb appealing.
  • Vegan-friendly approach: for those avoiding dairy, substitute with a plant-based yogurt or yogurt alternative and a plant-based cheese that melts well. Add a touch of a mild acidic element (like lemon juice) to mimic the brightness cottage cheese would normally contribute, and consider a flax egg or other vegan binder if needed for structure. Note that the flavor and texture will shift slightly, but a careful balance can yield a satisfying result.
  • Herb and spice variations: experiment with dill, chives, or tarragon for a fresh, garden-inspired aroma; a pinch of smoked paprika or cumin can give a subtle smokiness that works wonderfully with eggs or avocado toppings.
  • Sweet edge: for a brunch twist, consider a light cinnamon-sugar finish on the crust and a dollop of ricotta or cream cheese with fruit preserves as a topping—this playful contrast can be delightful for a weekend treat.

A few practical notes: keep the dough hydrated enough to stay supple—if you’re experimenting with gluten-free or alternative flours, you may need to adjust moisture levels to prevent a dry crumb. Let doughs rest if they feel tight; warmth can help a dough relax and rise better, but a cool overnight rest can deepen flavor and improve texture. Finally, when shaping, aim for evenly sized portions so all bagels bake at the same rate, producing uniform texture and crust.

Storage & Make-Ahead Ideas

One of the joys of bagels is their versatility for make-ahead planning. Once baked and completely cooled, store them in an airtight container or zip-top bag at room temperature for a couple of days. If you’re preparing ahead, you can freeze individual bagels; wrap them well to prevent freezer burn, and freeze for up to a few months. When you’re ready to enjoy, simply rewarm them in a toaster, oven, or skillet to revive the crust’s gloss and restore some of that comforting snap.

A smart approach is to portion your bagels into singles or halves before freezing. This makes it easy to grab just what you need for a quick breakfast or lunch. For week-ahead planning, you can also freeze partially baked bagels for a faster finish—this preserves moisture and gives you a fresh-baked experience in a fraction of the time.

If you’re refrigerating leftovers, allow the bagels to cool fully, then place them in an airtight container. Reheat slowly to prevent drying out; a light toast or warm oven reawakens their soft interior and crusty exterior. For a crisper crust after toasting, brush a touch of water on the surface just before the final warm-up to help steam and heat evenly.

Fun Facts & Trivia

  • The technique of boiling bagels before baking is what gives them their characteristic chewy texture. The boiling starches set, creating a tight, glossy crust that holds up to toppings and spreads.
  • Bagels have a storied history in Jewish immigrant communities in North America, where they became a staple for early morning breakfasts in bustling markets and delis before becoming a worldwide icon.
  • Cottage cheese, a versatile dairy product, has a long-standing place in savory and sweet dishes. Its mild tang and creamy texture make it a natural ally for bread and doughs that crave moisture without heaviness.
  • All-in-one idea: the cottage cheese bagel is an example of how a single pantry staple can redefine a classic—proof that tradition and innovation can happily coexist in the same kitchen.
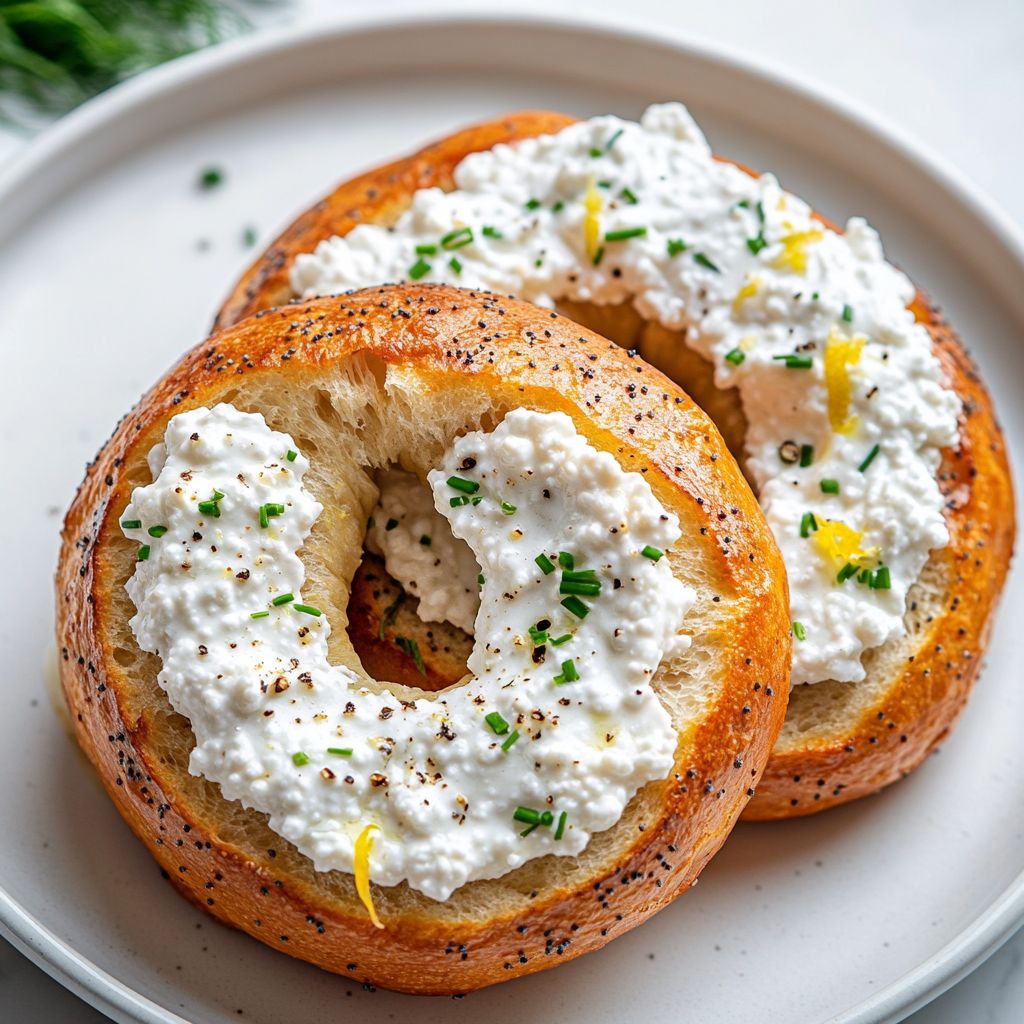
Ingredients

Bagel Dough

    – 2 1/2 cups bread flour (plus extra for kneading)
    → Chewy bagel texture relies on high-gluten flour; bread flour provides the protein needed to form a strong gluten network. Start with 2 1/2 cups and add a tablespoon or two more if the dough feels dry or stiff. Dust the counter lightly with flour to prevent sticking during kneading, but avoid adding too much flour to keep the dough hydrated.
    – 1 cup well-drained cottage cheese, pureed until very smooth
    → Cottage cheese provides moisture and a slight tang while adding protein; blending into a smooth puree eliminates lumps and ensures even distribution through the dough. Drain well if there is excess whey; too much liquid will weaken the dough structure. If you prefer a heavier cheese flavor, use full-fat cottage cheese.
    – 2 large eggs, divided: 1 for dough, 1 for egg wash (see notes)
    → Eggs enrich the dough, contributing tenderness and structure. Use one egg folded into the dough to bind and moisture the crumb; reserve the second egg for an optional glossy egg wash if you want a shiny crust. Bring eggs to room temperature for easier mixing and to avoid crusty spots in the dough.
    – 1 teaspoon instant yeast
    → Instant yeast is convenient and speeds up rise because it can be mixed directly with dry ingredients. If you only have active dry yeast, use 2 1/4 teaspoons and proof in 1/4 cup warm water with a pinch of sugar for 5–10 minutes before adding to the dough.
    – 2 teaspoons granulated sugar
    → Sugar feeds the yeast and helps browning while baking; it also balances the tang from cottage cheese. If you prefer a savory profile, you can reduce to 1 teaspoon or replace with honey or maple syrup, adjusting the liquid slightly to maintain dough hydration.
    – 1 teaspoon salt
    → Salt strengthens gluten and enhances flavor; distribute evenly in the dry ingredients for consistent seasoning. If your cottage cheese is salted, you may want to reduce this to 1/2 teaspoon.
    – 1 tablespoon olive oil (optional)
    → Oil improves dough softness and extensibility, helping with shaping and preventing sticking. If omitted, you may need a touch more water and flour during kneading; the crust may be slightly crisper but still tasty.
    – 1/4 to 1/3 cup warm water (as needed)
    → The cottage cheese influences hydration; start with 1/4 cup and add a little at a time until the dough comes together into a smooth, slightly tacky ball. Use warm water if the dough seems sluggish to come together, but avoid hot water that could kill the yeast.

Boiling & Finish

    – 2 quarts water for boiling
    → Boiling the shaped dough before baking creates the signature chewy crust by gelatinizing surface starches. Keep at a gentle simmer, not a rolling boil, to prevent bagels from deforming. The boil time is usually 1–2 minutes per side; adjust based on thickness and color desired.
    – 1 tablespoon barley malt syrup or 1 teaspoon sugar (for boil)
    → Malt syrup gives characteristic bagel color and shine; if you don’t have malt syrup, a touch of sugar in the boil promotes browning. You can skip if you want a more neutral crust, but the color might be lighter.
    – 1 tablespoon cornmeal or semolina for dusting (optional)
    → Dusting the boiling surface or the baking sheet helps prevent sticking and adds subtle texture. Not essential, but helpful for release and crust texture.

Egg Wash & Toppings

    – 1 large egg for egg wash, beaten with 1 tablespoon water (optional)
    → The egg wash gives bagels a glossy, golden crust when brushed on after boiling and before baking. Ensure the surface is dry before applying wash to avoid pooling. If you’re vegan, skip the wash or use a plant-based alternative.
    – 1 tablespoon sesame seeds
    → Adds a nutty aroma and crunch; press seeds into the surface after applying the wash so they adhere well. Toast seeds lightly beforehand to deepen flavor if desired.
    – 1 tablespoon poppy seeds
    → Classic appearance and a mild, nutty note. Use sparingly to maintain balance with the cheese base; press onto the surface after washing for best adhesion.
    – 1 tablespoon Everything bagel seasoning (optional)
    → A ready-made mix of sesame, poppy seeds, dried garlic, dried onion, and salt; adds bold savory flavor. Apply lightly so it complements rather than overpowers the cheese flavor. Check salt content to avoid over-salting.
    – 1 teaspoon dried onion flakes (optional)
    → Adds savory aroma; rehydrate briefly in a pinch of warm water before applying to help them stick and release their flavor.
    – 1 teaspoon dried garlic flakes (optional)
    → Provides a warm, savory note; rehydrate slightly before applying for better adhesion and aroma. Use sparingly to avoid overpowering the dough.

Instructions

  • Measure and whisk the dry ingredients: 2 1/2 cups bread flour, 1 teaspoon instant yeast, 2 teaspoons granulated sugar, and 1 teaspoon salt in a large mixing bowl until evenly distributed and free of clumps.
    → Even dispersion of salt and sugar ensures uniform fermentation and flavor; whisking minimizes dry pockets that could hinder gluten development.
  • Puree cottage cheese until very smooth: in a blender or food processor, blend 1 cup well-drained cottage cheese until completely smooth; if needed, press through a fine sieve to remove any remaining lumps, then drain any extra whey until the puree resembles thick yogurt.
    → A smooth puree distributes moisture evenly and prevents pinpoint pockets of moisture that can weaken the dough’s structure.
  • Beat one large egg and whisk it into the cottage cheese puree; add 1 tablespoon olive oil (if using) and begin adding warm water 1/4 cup at a time until the mixture is thick but pourable.
    → The egg provides moisture and helps bind the crumb; warming ensures better emulsification and a tender crumb. Add water gradually to avoid a overly wet dough.
  • Combine the wet mixture with the dry ingredients and mix until a shaggy dough forms; use a spatula or stand mixer on low speed to prevent flour dust from escaping; scrape down as needed.
    → This initial combination coats flour with moisture and begins gluten development without tearing the dough.
  • Turn the dough out onto a lightly floured surface and knead for 8 to 10 minutes until the dough is smooth, elastic, and just slightly tacky; perform the windowpane test by stretching a small piece between your fingers until it becomes translucent without tearing.
    → Kneading develops the gluten network that gives bagels their chew; the windowpane test confirms sufficient gluten strength for a sturdy crust and interior.
  • Oil a clean bowl, place the kneaded dough inside, cover with plastic wrap or a damp towel, and let it rise in a warm spot until doubled in size, about 60 to 90 minutes; avoid drafts and ensure the surface remains moist enough to prevent a skin from forming.
    → Environmental control yields consistent rise and prevents a crusty surface that would impede expansion during boiling and baking.
  • Gently punch the dough down to release gas, transfer to a lightly floured surface, and divide into 8 equal portions; if you prefer uniform sizing, weigh each piece to about 110 grams.
    → Even portions ensure uniform bagel size for even cooking and predictable yield.
  • Shape each portion into a tight ball, then use your thumb or a smooth cupped hand to poke a hole in the center and gently stretch to form a ring about 1 1/2 to 2 inches in diameter; pinch the seam to seal completely to prevent the hole from closing during boiling.
    → A well-sealed center ring prevents loss of the bagel’s shape and ensures a classic bagel hole that remains visible after boiling and baking.
  • Place shaped bagels on a parchment-lined baking sheet dusted with a little cornmeal or semolina, cover loosely, and allow a second proof 20 to 30 minutes; they should puff slightly but not double.
    → The second proof gives surface tension and helps bagels retain their chewy crust after boiling.
  • Meanwhile, preheat a wide pot of water to a gentle simmer over medium heat and add 1 tablespoon barley malt syrup or 1 teaspoon sugar to the water; this creates the characteristic bagel crust color and flavor.
    → Malt syrup or sugar in the boil helps with browning and gives that desirable chewy exterior; do not skip if you want traditional color.
  • Once the bagels are ready to boil, slide them into the simmering water a few at a time using a slotted spoon, boil for 1 to 2 minutes per side, turning halfway; keep the water at a gentle simmer to avoid deforming the rings.
    → Boiling gelatinizes surface starches, creating the crusty chew that defines bagels; time affects crust thickness.
  • Carefully lift bagels out of the water with a slotted spoon and drain on a clean towel for about 30 seconds, then transfer to the prepared sheet; you can re-briefly dry the tops if they’re too wet to improve adhesion of toppings.
    → Removing surface moisture prevents toppings from sliding off and helps the bagel surface crisp during baking.
  • Brush the tops with the second egg mixed with 1 tablespoon water to form an even, glossy surface, then apply toppings: sesame seeds, poppy seeds, or Everything bagel seasoning; lightly press toppings to help them adhere while the egg wash is still tacky. Optional: rehydrate dried onion or garlic flakes briefly in a drop of warm water before applying.
    → The egg wash promotes a shiny finish and gives toppings something to cling to; pressing ensures even coverage and flavor distribution.
  • Preheat the oven to 425°F (218°C) and bake the bagels on the sheet for 15 to 20 minutes, rotating the sheet halfway for even browning, until the crust is deeply golden and the interior sounds hollow when tapped.
    → A high initial heat helps set the crust quickly for chew and a uniform crumb; rotation ensures even color and texture across all bagels.
  • Transfer the bagels to a wire rack and let cool at least 15 to 20 minutes before slicing to allow the crumb to finish setting, which improves chew and prevents crumbles.
    → Cooling unlocks moisture and stabilizes the structure; slicing too soon yields gummy crumbs.
  • Store leftovers, if any, in an airtight container at room temperature for up to 2 days or freeze once cooled, then reheat in a toaster or under a hot oven to restore crust crispness.
    → Proper storage preserves texture and flavor; freezing slows staling and toasting revives the chew.
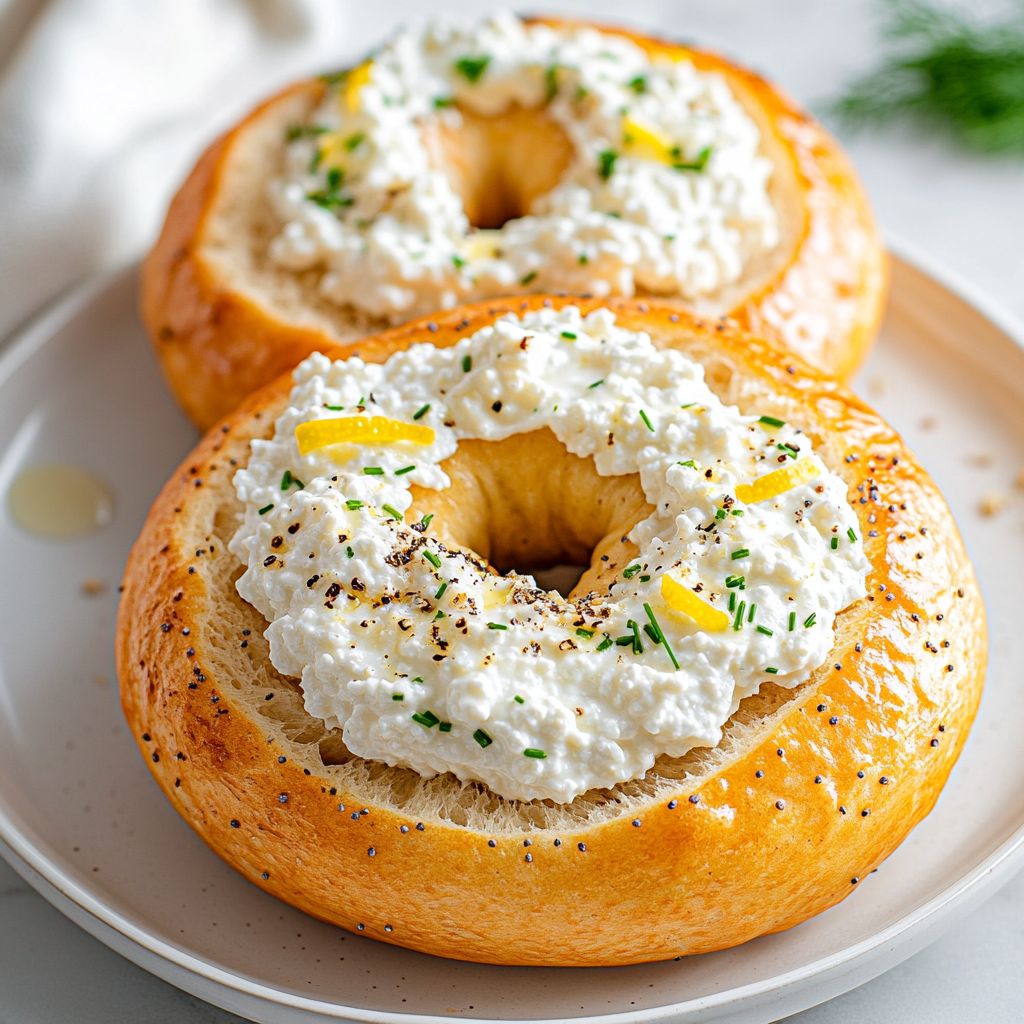
Notes

These cottage cheese bagels are tender and chewy with a mild tang from the smooth cottage cheese blended into the dough. Purée the cottage cheese until completely smooth and drain well to keep the dough from getting too loose; too much liquid will weaken structure. Start with 2 1/2 cups bread flour for a strong gluten network and only add more by the tablespoon if the dough feels dry or stiff. One egg folded into the dough helps bind moisture and tenderness, while the second egg is reserved for a glossy wash if you want a shiny crust. If the dough seems slow to come together, warm the water slightly and mix in gradually, aiming for a smooth, slightly tacky ball for easy shaping.

For a classic bagel finish, boil the shaped rounds in 2 quarts of gently simmering water with a tablespoon of barley malt syrup or a teaspoon of sugar to promote browning; 1–2 minutes per side gives a chewy, fully set crust. After boiling, brush with the optional egg wash for a glossy surface and press on toppings such as sesame seeds, poppy seeds, or Everything bagel seasoning; press firmly so they cling through baking. A light dusting of cornmeal or semolina on the counter or baking sheet aids release and adds a subtle crunch to the bottom crust. If you’re including onion or garlic flakes, rehydrate them briefly before applying so they stick and release aroma.

To store and customize, cool completely before freezing; bagels can be frozen once baked or shaped and par-boiled for faster weeknight baking. Rewarm from frozen in a toaster or oven. Fresh bagels last 2–3 days at room temperature in a loosely closed bag; freeze for longer storage. For variations, stir in chopped herbs or minced roasted garlic into the dough, reduce or increase sugar to taste, or swap the olive oil for extra water if you prefer a crisper crust. Always check your cottage cheese’s salt level; if it’s salty, reduce the added salt in the dough to keep the flavor balanced.
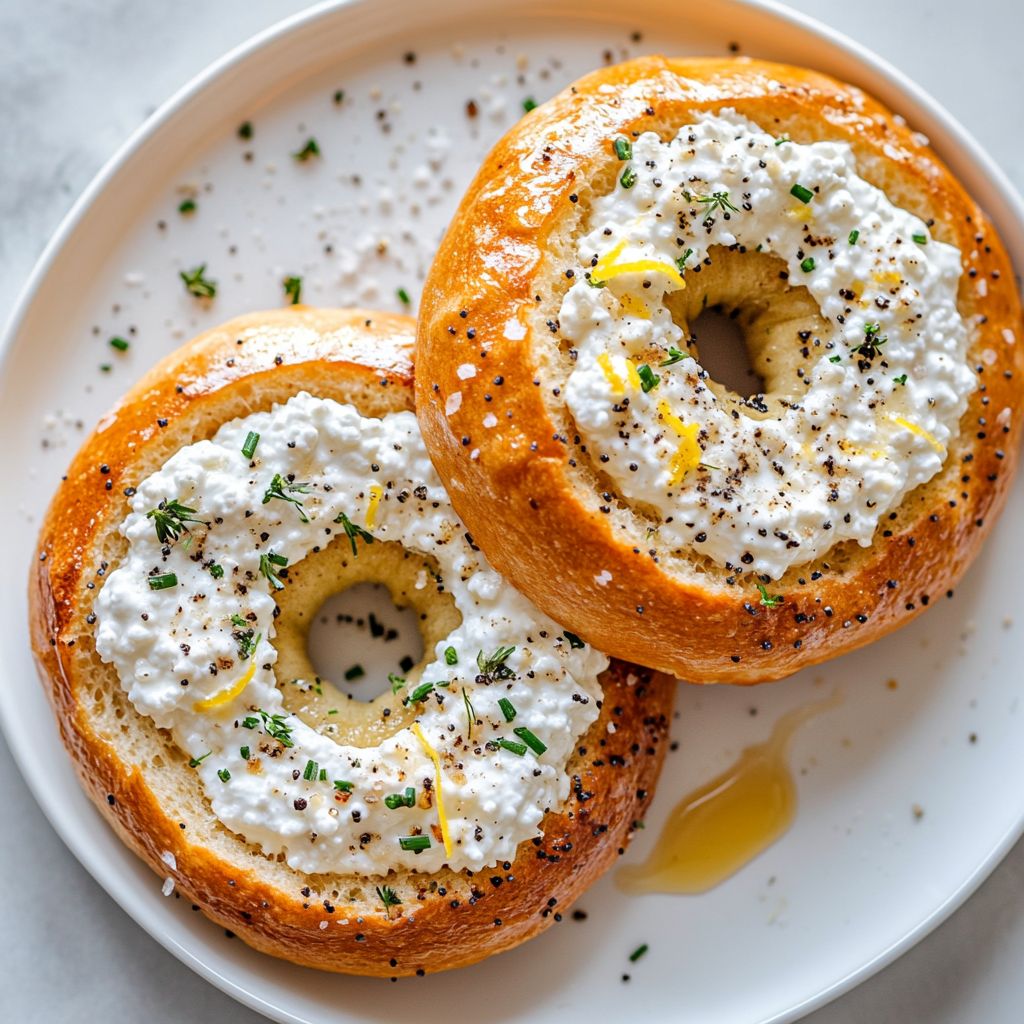
Tips

Hydration and dough texture

Because cottage cheese adds moisture, start with the 1/4 cup warm water and add more in small increments until the dough comes together as a smooth, slightly tacky ball. If the dough feels dry or stiff, drizzle in a little more water or a splash of olive oil to improve extensibility. Kneading should develop a strong gluten network; use the windowpane test (stretch a small piece until it becomes translucent) to gauge readiness.

Mixing and kneading technique

Whether by hand or with a stand mixer, mix until the dough is cohesive and elastic, not crumbly. If using a mixer, knead on medium speed for 6–8 minutes. If by hand, give the dough 10–12 minutes of steady kneading, dusting lightly with flour only as needed to prevent sticking.

Yeast and fermentation tips

Instant yeast is convenient, but if you only have active dry yeast, proof it in warm water (about 105–110°F/40–43°C) with a pinch of sugar for 5–10 minutes before adding to the dough. For richer flavor, consider a brief cold fermentation: after the first rise, refrigerate the dough 8–12 hours, then bring to room temperature before shaping.

Handling cottage cheese

Puree the cottage cheese until completely smooth to avoid lumps that can create uneven crumb. If the cottage cheese brand is very watery, drain excess whey well; too much liquid weakens dough structure. For a lighter texture, use a part-skim cottage cheese; for a richer crumb, full-fat works well.

Shaping the bagels

Divide the dough evenly and roll each piece into a tight ball before poking a hole with your finger to form a ring. Gently stretch the hole to about 1–2 inches in diameter to prevent shrinking during boiling and baking. If the dough resists shaping, let it rest 10–15 minutes covered; this relaxes the gluten and makes shaping easier.

Boiling the bagels

Keep the boil at a gentle simmer and boil each bagel 1–2 minutes per side for a chewy crust. Do not overcrowd the pot. After boiling, lift the bagels with a slotted spoon and let excess water drain briefly on a rack or parchment before applying toppings and baking.

Toppings and adhesion

Apply toppings after boiling and while the surface is still damp from the brief drain, but before the bagels go into the oven. If using an egg wash, brush lightly to avoid pooling. For seeds, press gently to help them adhere; to maximize flavor, toast sesame or poppy seeds briefly in a dry skillet before use.

Egg wash and crust color

The egg wash provides a glossy, golden crust; if you prefer a lighter finish, skip the wash or use just the egg white for a shinier surface. Bring the egg to room temperature to ensure an even wash and to prevent streaking on the crust.

Baking temperature and time guidance

Preheat the oven to 425°F (220°C). Bake the bagels until deep golden brown, typically 12–15 minutes, rotating halfway for even color. If you’re using a convection oven, you may shorten bake time slightly and monitor closely to prevent over-browning.

Flavor variations and substitutions

For a milder cheese flavor, use part-skim cottage cheese; for a richer crumb, use full-fat cottage cheese. If you want a savory punch, add a pinch of garlic or onion powder to the dough or try Everything bagel seasoning as a topping. You can also experiment with honey or maple syrup in the dough for a subtle sweetness balanced by the tang of cottage cheese.

Make-ahead, storage, and freezing

Bagels can be baked ahead and frozen once cooled. Cool completely, wrap tightly, and freeze for up to 1 month. Reheat directly from frozen in a 350°F (175°C) oven for 8–10 minutes or toast to restore crust crispness. For best texture, store leftovers in an airtight container for 1–2 days at room temperature.

FAQ

Cottage Cheese Bagels – FAQ

What are cottage cheese bagels?

They are soft, chewy bagels enriched with cottage cheese. The cheese adds moisture, tenderness, and extra protein, giving a slightly creamy crumb and a subtle tang.

Do these bagels require yeast?

Yes. Yeast helps the dough rise and creates the characteristic chewy texture. Use active dry yeast or instant yeast; if using instant, you can reduce rising times accordingly.

What ingredients are in cottage cheese bagels?

Common ingredients include flour (all-purpose or bread flour), cottage cheese (well-drained or blended into the dough), water, yeast, salt, and sometimes a bit of sugar or honey. Optional additions include eggs for richness or a splash of milk for extra tenderness.

Should I blend or drain the cottage cheese?

For a smooth dough, blend the cottage cheese until silky. If you prefer a chunkier crumb, mash it or stir in small curds. If the cottage cheese is very wet, drain some of the liquid to avoid a sticky dough.

How do I shape and boil cottage cheese bagels?

Shape dough into round portions and poke a hole in the center to form a ring. Boil in gently simmering water (optionally with a little sugar or malt) for 1–2 minutes per side to set the crust, then bake until golden.

What toppings work well?

Popular toppings include sesame seeds, poppy seeds, everything bagel seasoning, minced onion or garlic, or plain. Add toppings immediately after boiling and press them lightly to help adhesion before baking.

Can I freeze the dough or baked bagels?

You can freeze shaped, unbaked dough rounds after the final rise, or freeze fully baked and cooled bagels. Wrap tightly and store in the freezer. Reheat by baking or toasting from frozen, or thaw first.

How long does it take to make cottage cheese bagels?

Active steps typically take about 1.5–2 hours, including mixing, kneading, rising, shaping, boiling, and baking. Total time, with rising, is usually around 2–3 hours depending on your dough and kitchen temperature.

Can I make them healthier or lower in carbs?

To adjust nutrition, try using a portion of whole wheat or a mix of whole wheat and white flour, which adds fiber and flavor. Reducing cheese slightly and adding extra protein like flax or chia can change texture, so you may need to adjust hydration. For lower-carb options, substituting part of the flour with almond or coconut flour will require changes to the liquid and rising times.

How do I store leftover bagels?

Store cooled bagels at room temperature in an airtight container for 2–3 days. For longer storage, freeze. Reheat by toasting or warming in a 350°F (175°C) oven for a few minutes.

Can I make dairy-free or vegan version?

For a dairy-free or vegan version, substitute the cottage cheese with a plant-based alternative such as blended silken tofu with a little non-dairy yogurt or a dairy-free ricotta substitute. Expect some differences in texture and moisture; you may need to adjust flour and liquid amounts accordingly. Lactose-free cottage cheese can be used if preferred.

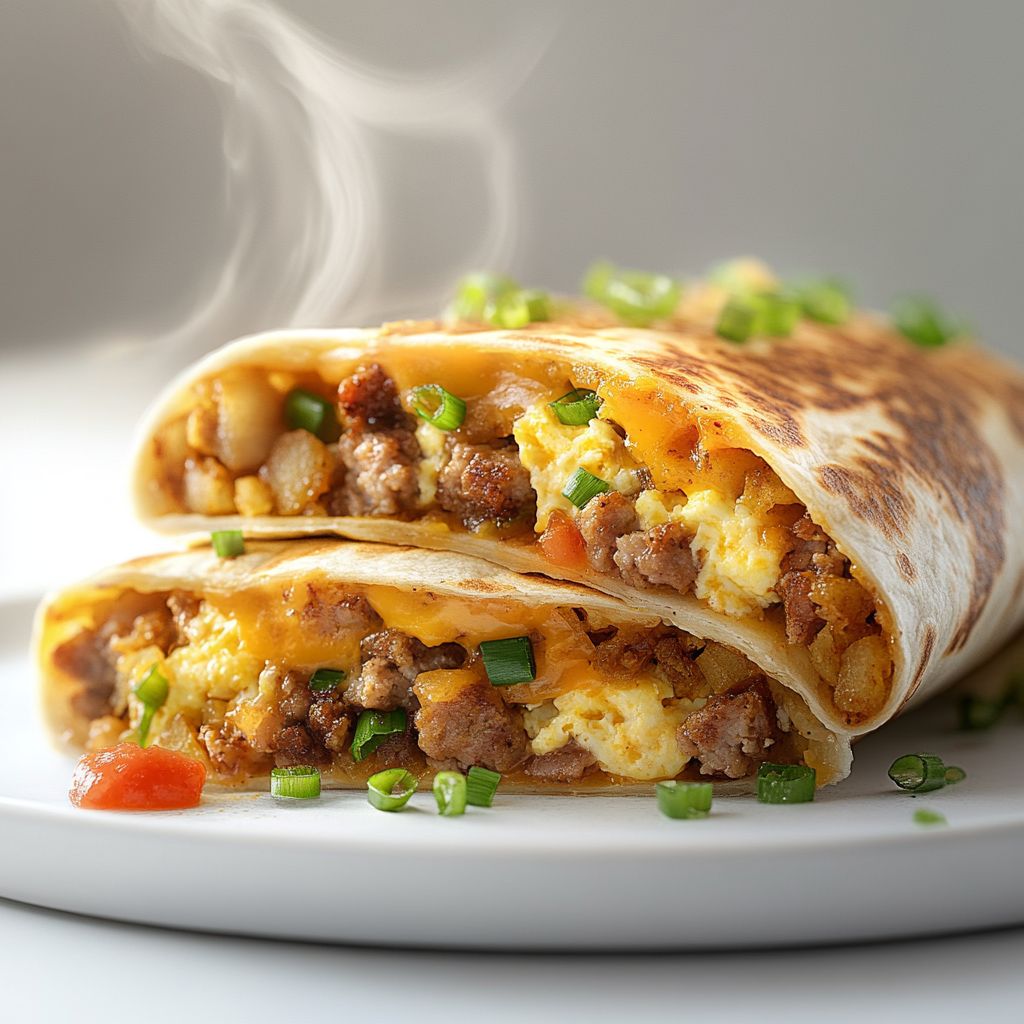
Introduction / Hook

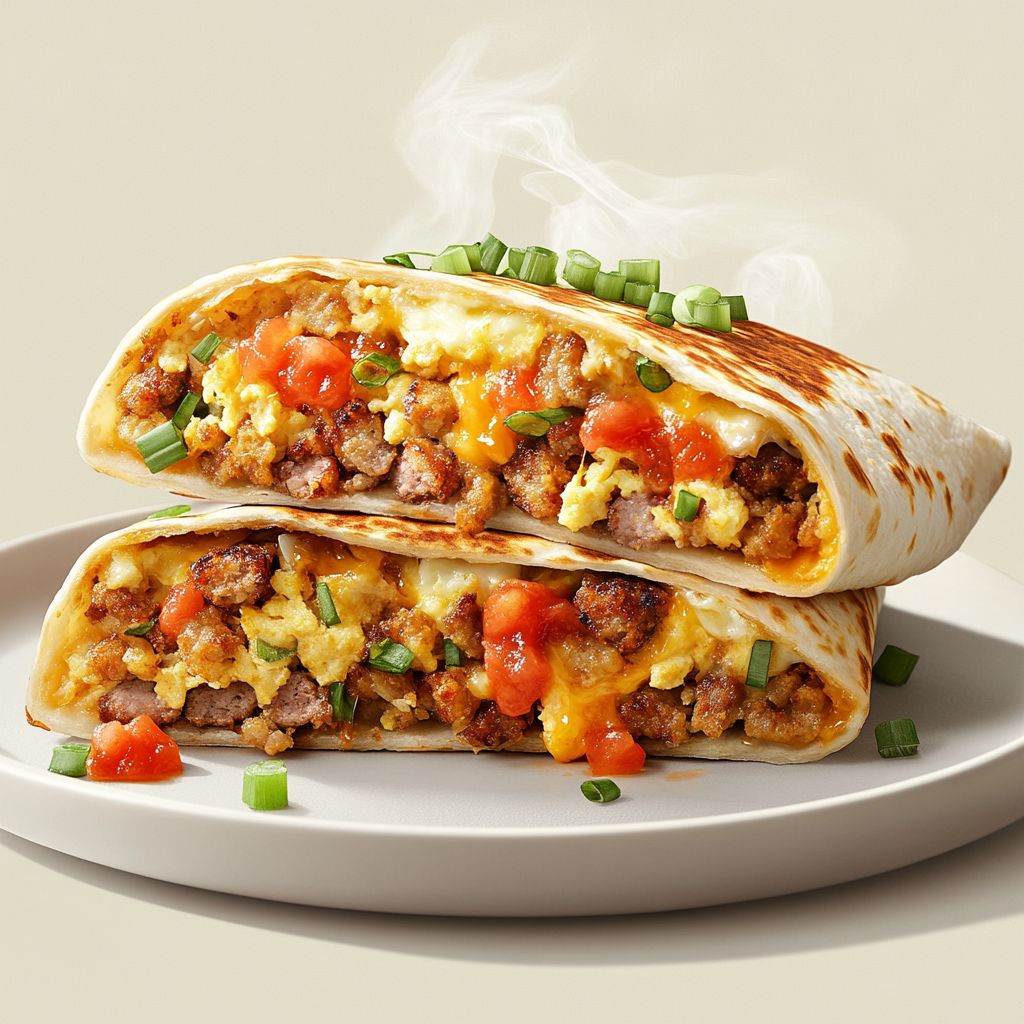
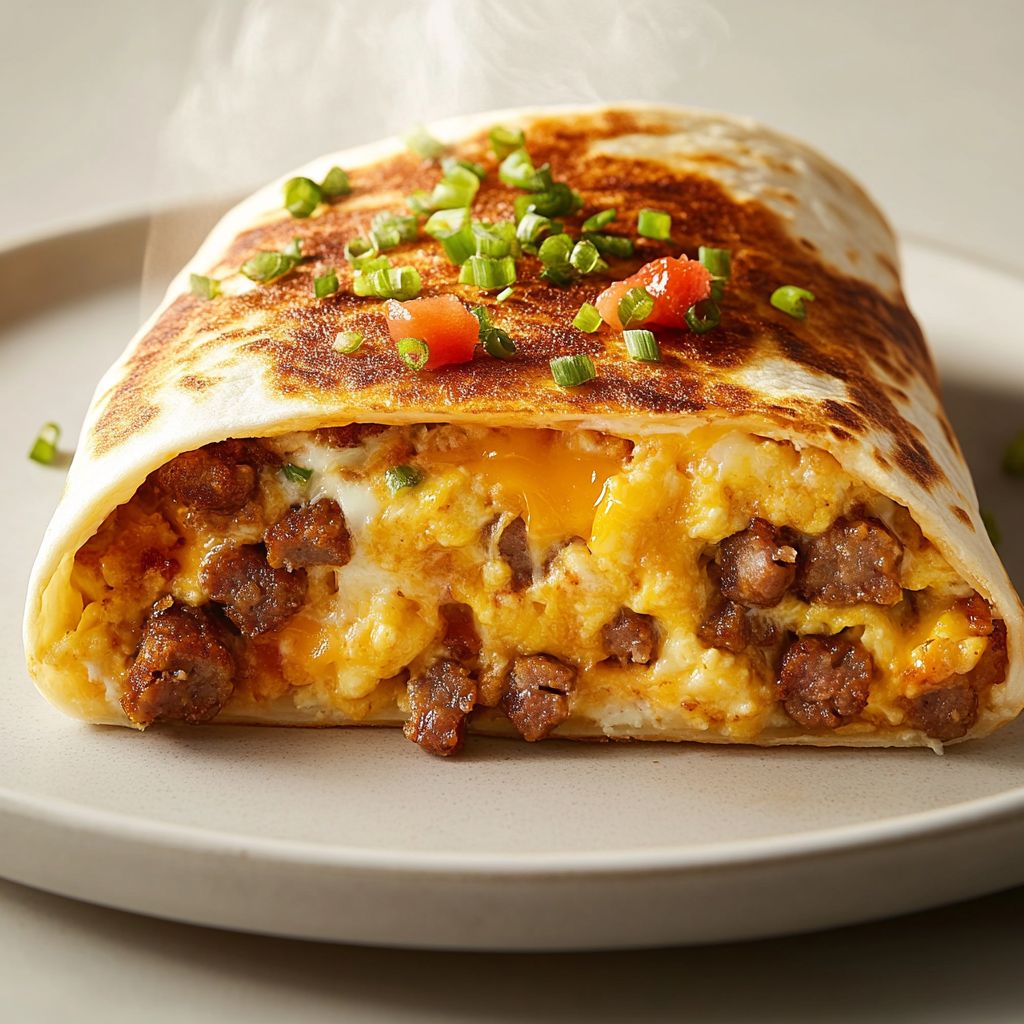
Imagine a breakfast that fits in your hand, yet feels like a celebration on a plate. The Irresistible Breakfast Crunchwrap is a symphony of textures and flavors designed to wake up your senses the moment you slice into it. Picture a warm tortilla cradle, its edges toasted to a delicate, honey-gold crisp, holding a cozy cloud of fluffy eggs and melty cheese. Inside, you’ll find pockets of savory richness—crisp potatoes or hash browns, sizzled breakfast meats or their vegetarian counterparts, and a bright, zippy kiss of salsa or crema that keeps every bite lively. On the outside, a crackling crunch gives way to a soft, steamy core, so every mouthful delivers a chorus of contrasts: hot and cool, salty and tangy, creamy and crunchy. It’s the kind of breakfast that makes mornings feel like a little celebration, a portable brunch you can savor on the go, yet still feel indulgently comforting at home.

The Story Behind the Dish

The idea for a breakfast that echoes the beloved Crunchwrap format—a handheld, all-in-one wrap with layers of texture—sprung from playful kitchen experiments and a love for weekend brunch traditions. It’s a marriage of two comforting breakfast motifs: the grab-and-go practicality of a burrito and the irresistible texture of a crispy tortilla edge. The concept nods to the way cultures around the world layer morning flavors—from the egg-and-cheese comfort of a classic American breakfast sandwich to the earthier, savory notes of a well-seasoned hash brown patty. The “crunch” in this dish isn’t merely about sound; it’s about the gentle toasting of each layer, the way a tortilla’s surface develops a kissed, caramelized sheen, and the way cheese melts into the nooks of egg and potato to form a cohesive bite that feels like a cozy hug in edible form. The origin story isn’t tied to a single place or tradition; instead, it’s a culinary memory shared by families who value speed without sacrificing savor, who want something substantial enough to anchor a morning, yet playful enough to brighten even the dreariest weekday. It’s a dish born from the desire to turn ordinary mornings into something worth waking up for, a portable feast that travels well, reheats beautifully, and invites experimentation with flavors you love. Think of it as a modern breakfast heirloom—versatile, forgiving, and endlessly adaptable to the pantry you keep and the cravings you wake up with.

Why You’ll Love This Recipe

  • One-hand, on-the-go friendly: Perfect for busy mornings, campus dorms, or weekend road trips.
  • Comforting yet exciting: A cozy egg-and-cheese core wrapped in a crisp, toasty shell with a bright finishing note of salsa or crema.
  • Customizable to fit any diet: Swap in plant-based proteins or cheese substitutes, or keep it veggie-forward with a hearty veggie scramble.
  • Make-ahead friendly: Assemble in advance and cook when you’re ready, or prepare components ahead to speed up week-day mornings.
  • Visual appeal: The layered structure is as photogenic as it is delicious—perfect for weekend brunch menus or a shareable breakfast board.
  • Balances flavors with texture: Creamy interior contrasts with a crunchy exterior; smoky, tangy, and savory notes mingle in every bite.

Flavor Profile & Texture

The Irresistible Breakfast Crunchwrap is a celebration of contrasts that somehow coexist in perfect harmony. The outer shell delivers a satisfying crackle and a toasty aroma, a signal that the experience inside will be both comforting and exciting. Within that shell, a soft, cloud-like interior of eggs provides a gentle, airline-soft texture that melts into the mouth. Cheese acts as a creamy bridge, weaving its rich, dairy-sweet notes through the other components and helping to fuse disparate flavors into a single, cohesive bite. Potatoes or hash browns introduce a toasty, roasted earthiness with a subtle starchiness that yields to a crisp edge on the pan or griddle. If meat is included, you’ll experience smoky, savory notes—bacon, sausage, or their plant-based equivalents—that bring a sun-warmed savor to the mix. For brightness, salsa, pico de gallo, or a dollop of tangy crema punctuate the center, delivering acidity, freshness, and a slight heat that lingers pleasantly without overpowering the other elements. The balance of salt from the cheese and cured meat (when used) with the zing of fresh herbs or green onions creates a layered profile that keeps the palate engaged from first bite to last. The texture journey—crunch, cream, melt, and a whisper of crispness in the finish—turns a simple breakfast into an event worth savoring, whether you’re sharing with family around a sunlit kitchen table or enjoying a quiet, solitary morning. This dish thrives on its ability to morph with your mood and pantry: it can feel indulgent with rich cheese and savory proteins, or bright and lighter with extra vegetables and a lighter cheese choice, all while preserving that signature crunch.

Occasions & Pairings

This breakfast wrap shines in many scenarios, making it a versatile addition to your culinary repertoire. It’s ideal for weekend brunch gatherings where guests arrive hungry after a leisurely morning, as it scales up easily to serve a crowd with a few extra wraps on hand. It also fits perfectly into weekday routines when you need a comforting, satisfying breakfast that travels well—think home-to-work mornings, road trips, or early-morning school runs. For special occasions, it can be plated with style as a centerpiece of a brunch spread, alongside a fresh fruit salad, yogurt parfaits, and a bowl of roasted tomatoes for color and aroma. When it comes to pairings, consider beverages and sides that complement the dish’s warmth and heft: a strong, hot cup of coffee with a touch of cream; a glass of fresh orange juice or a lightly sparkling beverage to cut through the richness; and a side of orchard-fresh fruit to add brightness and balance. If you’d like a more layered pairing, serve with a lightly dressed greens salad to introduce acidity and contrast, or with a simple avocado crema on the side to echo the dish’s creamy notes. For those hosting a brunch bar, offer a few sauce options—green salsa, pico de gallo, or a smoky chipotle crema—to allow guests to customize each wrap to their taste. The dish also adapts beautifully to seasonal ingredients: in colder months, heartier fillings like roasted peppers and onions or a sausage substitute bring warmth; in spring and summer, crisp herbs, fresh tomatoes, and a lighter cheese choice can lift the dish into a bright, sun-kissed mood.

Tips, Variations & Substitutions

Tips for the Best Crunchwrap Experience

While you don’t need a recipe card to enjoy this dish, a few mindful tweaks can elevate every bite. Start with a tortilla that’s sturdy enough to hold the fillings yet pliable enough to wrap without tearing. If your tortilla buckles under pressure, warm it gently to restore elasticity. Use a light touch with fillings to maintain that signature layer structure—you don’t want a soggy interior or a crowded wrap that won’t seal. For a crisp outer shell, toast or pan-sear the wrap briefly on a hot surface, letting the edges seal naturally as the tortilla browns. A gentle press during the finishing stage helps the wrap compact into a neat, manageable package with a visibly crisp edge. If you’ll be reheating leftovers, re-crisp the exterior in a skillet or air fryer to recapture that initial crunch and aroma.

Variations & Substitutions

The beauty of this dish lies in its adaptability. Here are ways to tailor it to your preferences or dietary needs:

  • Vegetarian: Swap in a hearty plant-based protein option or extra veggies, and use a cheese blend that melts well. A scramble made from tofu or chickpea flour can mimic the texture of eggs for lacto-vegetarian options.
  • Vegan: Use a vegan cheese that melts smoothly, a tofu or chickpea scramble, and a vegan crema or cashew-based dressing for creaminess. Choose vegan tortillas and a plant-based sausage or mushroom hash for depth.
  • Gluten-free: Opt for certified gluten-free tortillas (corn tortillas work beautifully) and ensure any added sauces are gluten-free. The crunch and layers remain just as delicious.
  • Low-carb or keto-friendly: Use large lettuce leaves or low-carb tortillas and keep the fillings high-protein with turkey or sausage substitutes, extra eggs, and cheese, while trimming starchy potatoes. A lighter salsa can preserve brightness without adding sugar.
  • Regional twists: Add a hint of smokiness with chipotle peppers in adobo, incorporate Mediterranean notes with feta and sautéed spinach, or bring Mexican-American comfort with chorizo and poblano peppers for a bolder finish.
  • Kid-friendly tweaks: Mild cheese blends, plain scrambled eggs, and a gentle salsa or a dollop of sour cream on the side can make this a hit with younger tasters who prefer familiar flavors.

Flavor Adjustments

If you crave more brightness, fold in fresh cilantro, a squeeze of lime, or a touch of pickled onions. For a richer bite, add a kiss of crema or sour cream within the center. For spiciness, a dash of jalapeño or a drizzle of hot sauce can wake up the palate without overpowering the other flavors. If you love a deeper egg flavor, a pinch of paprika or smoked paprika can deliver a gentle smoke that complements the cheese and any meat you’ve included. If you’d like a more rustic texture, leave some of the potato chunks a bit chunkier—these little pockets of starchy bite add contrast to the creamy egg and melted cheese.

Storage & Make-Ahead Ideas

One of the strengths of the Irresistible Breakfast Crunchwrap is its flexibility for make-ahead planning. You can assemble the wraps and refrigerate them for a day or two before cooking, ensuring you wake up to a quick, ready-to-cook breakfast option. If you anticipate needing to reheat, consider cooking the outer shell first to set it in a way that it can re-crisp nicely when reheated. Leftovers store well in an airtight container in the refrigerator for up to 2–3 days, though the texture is at its best soon after cooking. For longer storage, you can freeze assembled, uncooked wraps—wrap each tightly in plastic wrap and place in a freezer-safe bag. When you’re ready to enjoy, thaw overnight in the fridge, then cook as you would fresh, ensuring the exterior achieves that satisfying crunch. Reheating options include a hot skillet to restore crispness, an air fryer for a fast, even finish, or a 350°F oven if you’re reheating multiple wraps at once. If you’re planning a brunch binge, line up a few assembled wraps, refrigerate, and call them up as you need them. A crisp outside and a piping-hot interior can be achieved with a quick reheat, allowing you to serve a steady stream of comforting bites without sacrificing texture or flavor.

Fun Facts & Trivia (Optional)

Here are a few bite-sized tidbits that add a little extra flavor to the lore of this dish. The concept of a hand-held, multi-layered wrap with a crisp outer edge draws inspiration from popular fast-casual formats that celebrate portability and speed without sacrificing taste. The name and structure evoke the nostalgia of crunchy layers and melty centers, blending the best of breakfast burritos, quesadillas, and pan-fried discs into a single, shareable experience. The approach to make-ahead and versatile fillings reflects contemporary home cooking’s love affair with meal-prep-friendly breakfasts—foods that can be cooked, stored, and enjoyed with minimal fuss while still feeling indulgent and special. In many households, the “wrap” is a symbol of togetherness—a simple, familiar way to bring people around the table for a morning feast that travels well and leaves everyone satisfied. And if you’ve ever watched the crisp edge of a tortilla transform under a hot skillet into a honey-gold shell, you’ve witnessed a small daily miracle that this dish celebrates with gusto.

Ingredients

Irresistible Breakfast Crunchwrap
Crunchwrap Base

  • – 6 large flour tortillas (10-inch burrito-size)
    → These shells form the outer wrapper of the Crunchwrap, containing all fillings and giving the signature foldable, handheld structure. Warm them briefly to make them pliable (about 20-30 seconds per side) to prevent tearing when folding and to help them seal nicely when toasted. If you prefer a gluten-free option, substitute with certified gluten-free large tortillas; handle carefully as gluten-free wraps can be more delicate and prone to cracking.
  • – 1 cup shredded cheddar cheese (or Mexican blend)
    → The cheese melts into the eggs and hash browns, acting as a binding and flavor anchor that helps hold the filling together when the wrap is heated. For best melt, shred just before use rather than using pre-shredded blends containing anti-caking agents.
  • – 2 cups frozen hash browns (shredded), thawed and patted dry
    → Provides a crispy potato layer that contrasts with the soft eggs and cheese. Thaw completely and pat dry to minimize extra moisture; cook hash browns until they are lightly golden and crisp to maximize texture inside the wrap.
  • – 1 tablespoon vegetable oil
    → Used to lightly grease the pan for hash browns and to help toast the tortilla edges for a crisp shell. Use a neutral oil with a high smoke point; add just enough to lightly coat the pan.

Egg and Protein Filling

  • – 6 large eggs
    → Primary protein source and a natural binder that helps hold the filling together inside the wrap. Whisk eggs with a splash of milk and a pinch of salt before cooking for soft, tender curds; scramble gently until just set for a creamy interior.
  • – 1/4 cup milk (optional)
    → Lightens and softens the scrambled eggs, yielding a creamier texture. Use dairy or a non-dairy alternative; omit if you prefer firmer eggs, but the wrap will be less creamy.
  • – 8 oz breakfast sausage crumbles (or 6 slices bacon, cooked and crumbled)
    → Adds savory depth, fat, and protein. Pre-cook until browned and crumbly; drain excess fat to avoid soggy layers and to keep the wrap cohesive when folded and toasted.

Condiments and Fresh Toppings

  • – 1/2 cup pico de gallo or salsa
    → Brightness, acidity, and moisture that cut through richness. If your salsa is very watery, drain a bit before adding to prevent soggy layers; fresh pico or chunky salsa yields better texture than overly smooth sauces.
  • – 1/4 cup sour cream
    → Creamy coolness that counterbalances heat and adds moisture. Use as a drizzle inside the wrap or serve on the side for dipping; keep refrigerated until ready to use.
  • – 1 ripe avocado, sliced or mashed into guacamole
    → Provides rich creaminess and a silky counterpoint to savory fillings. Choose a ripe-but-firm avocado; slice just before serving to prevent browning or mash with a pinch of salt and lime juice for quick guacamole. Add inside the wrap for creamy layers or serve on top after cooking.

Seasonings and Finishing

  • – 1/2 teaspoon salt
    → Flavor amplifier across eggs, meat, and potatoes; adjust to taste. Sprinkle into eggs while cooking for even distribution or season hash browns as they cook.
  • – 1/4 teaspoon black pepper
    → Adds mild heat and depth; freshly ground pepper yields more aroma and bite; adjust according to preference.
  • – 1/2 teaspoon garlic powder
    → Subtle savory depth that complements all fillings; sprinkle into eggs, hash browns, or sausage for an aromatically balanced profile.
  • – 1/2 teaspoon chili powder or paprika (optional)
    → Introduces a hint of smokiness or heat; adjust to taste for preferred spice level; can be mixed into eggs or sprinkled on hash browns.
  • – Cooking spray or 1 tablespoon butter for crisping
    → Enables a crisp, golden shell when toasting the Crunchwrap; butter adds richer flavor, while spray or light oil keeps it lean. Apply evenly to the pan and tortilla edges before toasting.

Optional Add-ins

  • – 1/2 cup chopped fresh cilantro (optional)
    → Adds bright herbal brightness and color. Finely chop and sprinkle inside layers or on top after cooking for fresh aroma. If using, add at the end to preserve the herb’s brightness.
  • – 1 small jalapeño, thinly sliced (optional)
    → Provides extra heat and crunch. Remove seeds for milder spice; add into the eggs or between layers for a kick without overpowering the other flavors.

Instructions

  • Prepare hash browns by ensuring they are fully thawed and patted dry before cooking to achieve maximum crispness; spread the thawed shreds in a single layer in a lightly oiled pan and press them flat with a spatula to promote even browning; cook until lightly golden and crisp, then transfer to a paper towel-lined plate to drain excess oil and moisture.
    → Dry hash browns crisp up better and don’t release extra moisture inside the wrap, which helps the overall texture stay contrasty and prevents sogginess.
  • Heat a large nonstick skillet over medium heat and add 1 tablespoon vegetable oil to coat the surface; swirl the oil to create a thin, uniform coating that prevents sticking and encourages even browning of the hash browns.
    → A properly greased pan ensures the potatoes sear rather than steam, giving you a crisp layer that anchors the fillings.
  • Cook the hash browns until they are lightly golden and crisp, then remove them from the pan and set aside on a clean plate; allow the pan to return to medium heat before adding the sausage to maintain steady browning.
    → A crisp base layer provides texture contrast inside the wrap and helps distribute moisture evenly across bites.
  • Sauté the breakfast sausage crumbles in the same skillet over medium heat until browned and crumbly; break up any larger pieces with a spatula for uniform texture; drain excess fat on a paper towel-lined plate and set aside.
    → Browning enhances savory depth and the fat released can make the fillings taste richer, but draining prevents soggy layers inside the wrap.
  • Whisk the six large eggs with 1/4 cup milk and 1/2 teaspoon salt until the yolks and whites are fully combined and the mixture looks uniform; this creates a smoother, more cohesive scramble that folds neatly with the other components.
    → The milk lightens the eggs for a creamier texture, while salt ensures even seasoning throughout the scramble.
  • Scramble the eggs in a lightly oiled or buttered nonstick skillet over medium-low heat, stirring gently with a silicone spatula until just set and slightly creamy; remove from heat while still slightly undercooked to carry carryover heat into the wrap; let them rest briefly.
    → Soft, tender curds hold together with the other fillings and don’t become rubbery when heated again inside the Crunchwrap.
  • Drain any excess liquid from the pico de gallo or salsa to prevent watery leakage; transfer to a small bowl and set aside ready to layer inside the wrap.
    → Excess liquid can make the tortilla soggy and weaken the seal; draining preserves crisp edges and clean layering.
  • Prepare the avocado by slicing it into thick wedges or mashing it with a pinch of salt and a squeeze of lime juice for quick guacamole; if mashing, keep it slightly chunky to maintain texture inside the wrap.
    → Creamy avocado or guacamole adds luxurious richness and helps balance the heat and saltiness of the eggs and sausage.
  • Warm the six large flour tortillas individually in a dry skillet or in the microwave for 20–30 seconds per side until pliable; this makes them easier to fold without tearing and helps them seal when toasted.
    → Warming reduces resistance in the dough and prevents cracks during folding, which preserves the structure of the Crunchwrap.
  • On each tortilla, begin building the filling: dot a thin layer of shredded cheddar cheese in the center to act as a glue, then distribute a base of hash browns, followed by the scrambled eggs, browned sausage, another layer of cheese, pico de gallo, a dollop of sour cream, and slices or scoops of avocado; aim for balanced distribution so every bite contains all components.
    → The cheese melts into the eggs and potatoes, binding the stack together and creating a cohesive, delicious core inside the outer wrap.
  • Fold the outer tortilla to form a compact hexagonal shape: bring the bottom edge over the filling, fold in the sides toward the center in a pleated pattern, and continue folding until the tortilla forms a tight, stable bundle; if needed, dampen the edge with a little water to help seal. Place the seam-side down to prepare for toasting.
    → A secure fold prevents leaking during cooking and creates the characteristic Crunchwrap silhouette that holds its fillings in place.
  • Toast the assembled Crunchwrap in a lightly greased skillet over medium heat, pressing gently with a spatula to ensure full contact and even browning; cook 3–4 minutes until the bottom is deeply golden and the cheese begins to melt, then flip carefully and cook the other side 2–3 minutes until the exterior is crisp and evenly browned.
    → Even toasting crispifies the tortilla, melts the cheese inside, and locks the fillings together so the wrap holds its shape when eaten.
  • Transfer finished Crunchwraps to a warm oven rack or sheet at 200°F (90°C) to keep them hot and intact while you complete the remaining batches; this also prevents the first wraps from cooling and ensures consistent serving temperature.
    → Keeping hot wraps together ensures each bite remains hot and melded, especially when making multiple at once for gatherings.
  • Optionally garnish or serve with extra pico, sour cream, and guacamole on the side for dipping or topping; this allows guests to customize heat and moisture at the table and adds brightness to contrast the richness inside each bite.
    → Fresh toppings refresh the palate and add dynamic texture and flavor to the dish, elevating the overall experience.
  • If using optional add-ins, finely chop fresh cilantro and, if desired, thinly slice a jalapeño; sprinkle cilantro inside the layers or on top after cooking for a fresh aroma, and distribute jalapeño slices between layers or on top for a controlled kick; adjust quantity to taste.
    → Cilantro and jalapeño introduce brightness and heat, enhancing the dish without overpowering the core components.

Notes

These Irresistible Breakfast Crunchwraps bring together crispy hash browns, fluffy scrambled eggs, savory sausage, melty cheese, and fresh toppings all wrapped in a warm tortilla for a handheld breakfast that’s hearty, flavorful, and ready to eat on the go. For best results, keep fillings balanced so the wrap folds neatly and seals well, and toast until the edges are golden and crisp.

  • Tortilla prep: Warm the flour tortillas briefly (about 20–30 seconds per side) to make them pliable and easy to fold. If you’re making gluten-free, substitute with certified gluten-free large tortillas and handle them gently to avoid tearing.
  • Hash browns: Thaw the frozen hash browns completely and pat dry to remove excess moisture. Cook until lightly golden and crisp to create a satisfying contrast with the soft eggs inside.
  • Oil and pan readiness: Lightly grease the pan with a neutral vegetable oil (or use a small amount of butter for richer flavor). This helps toast the tortilla edges and creates a crisp shell without sticking.
  • Eggs: Whisk 6 large eggs with a splash of milk and a pinch of salt before cooking. Scramble gently over medium heat until just set for creamy, tender curds that bind the filling together inside the wrap.
  • Sausage: Pre-cook the sausage crumbles (or bacon) until browned and crumbly, then drain excess fat. This prevents soggy layers and keeps the wrap cohesive as it toasts.
  • Cheese: Shred cheddar or your preferred Mexican blend just before use for maximum melt. The cheese acts as a binding agent and adds a luscious, creamy layer to every bite.
  • Layering strategy: For a balanced bite, layer hash browns first, then eggs, then sausage, and finally cheese. Add pico de gallo and avocado toward the center to prevent pooling liquids at the edges.
  • Aroma and heat: Season the eggs and hash browns with salt, black pepper, garlic powder, and a hint of chili powder or paprika if you like a touch of smokiness. Adjust spice to taste before folding.
  • Finishing toast: To achieve a crisp, golden shell, toast the assembled crunchwrap in a hot, lightly oiled skillet or griddle. Press gently and cook until the tortilla is crisp and the cheese inside is fully melted. Flip carefully to toast both sides evenly.
  • Make-ahead and storage: Assemble the crunchwraps, then wrap individually in plastic or foil. Refrigerate for up to 1 day. They can be frozen before cooking and reheated in a skillet or toaster oven; reheat until the center is hot and the edges are crisp.
  • Gluten-free option: If you need a gluten-free version, ensure you use certified gluten-free tortillas and check all fillings (salsas, sausage, and any spice blends) for gluten-containing ingredients to avoid cross-contamination.
  • Serving suggestions: Serve with extra pico de gallo, a dollop of sour cream, or a drizzle of fresh lime juice and hot sauce for extra brightness. A side of fresh fruit can balance the richness nicely.
  • Variations: Personalize with extra veggies (bell peppers, onions), swap chorizo for sausage, or use pepper jack cheese for a spicier kick. Fresh cilantro can be sprinkled in at the end for color and aroma.

Tips

Tips for Perfect Irresistible Breakfast Crunchwrap

  • Prep all components in advance: thaw hash browns completely, have pico de gallo or salsa drained if watery, and keep sour cream and avocado ready for assembly or serving on the side.
  • Warm tortillas properly: heat each tortilla briefly (about 20–30 seconds per side) until pliable. This prevents tearing when folding and helps them seal more neatly when toasted.
  • Hash browns readiness: pat thawed hash browns very dry with paper towels to minimize moisture. Cook until lightly golden and crisp to create a distinct potato layer inside the wrap.
  • Egg texture tips: whisk eggs with a splash of milk and a pinch of salt, then scramble gently over medium-low heat until just set. Remove from heat a touch early—the residual heat will finish cooking the eggs inside the wrap.
  • Sausage handling: pre-cook sausage crumbles until browned and crumbly, then drain excess fat. This prevents greasy layers and helps the wrap stay cohesive when folded and toasted.
  • Cheese strategy: shred cheddar or Mexican blend fresh just before use. Layer cheese so it melts into the eggs and hash browns, acting as a binder to hold fillings together.
  • Moisture management for fillings: drain pico de gallo or salsa well to reduce moisture inside the wrap. Avoid adding wet sauces directly to the center to prevent soggy shells.
  • Avocado decisions: add sliced avocado or quick guacamole inside the wrap for creaminess, or serve on the side. If preparing ahead, drizzle with a little lime juice to slow browning.
  • Seasoning balance: season eggs with salt as they cook and add garlic powder for depth. A touch of chili powder or paprika can introduce a smoky note—adjust to taste without overpowering the other fillings.
  • Assembly technique: keep the inner stack compact and evenly layered. Fold the outer edges toward the center, then seal the tortilla edge with a light dab of water or the eggs to help it stick.
  • Toasting for crunch: use a lightly greased pan or butter for crisping. Toast over medium-low heat, pressing gently with a spatula and rotating to brown all sides to a golden shell while the center stays gooey.
  • Avoid soggy outcomes: if the tortilla starts to get soggy, finish toasting in a hot skillet or a panini press to restore crispness rather than microwaving.
  • Rest and slice: let the Crunchwrap rest 1–2 minutes after toasting before cutting. Use a sharp serrated knife and wipe it between slices for clean wedges.
  • Make-ahead and storage: assembled but unheated wraps can be refrigerated up to 24 hours. For longer storage, freeze assembled but unbrowned wraps on a baking sheet, then transfer to a bag; reheat in a skillet or oven for best texture (microwave is quicker but softer).
  • Variations to try: swap in bacon or chorizo for the sausage, add sautéed peppers and onions, or use a lighter cheese blend. Gluten-free option can be achieved with certified gluten-free large tortillas—handle with extra care as GF wraps can crack more easily.

FAQ

Irresistible Breakfast Crunchwrap – FAQ

What is an Irresistible Breakfast Crunchwrap?

A large flour tortilla filled with fluffy scrambled eggs, melted cheese, crispy hash browns, and your favorite breakfast fillings (bacon, sausage, or peppers), then wrapped and grilled to a golden, crunchy shell. It’s portable, hearty, and perfect for a weekend brunch or quick weekday breakfast.

What ingredients do I need?

You’ll need a few staples to build the crunchwrap:

  • Flour tortillas (burrito-size works best)
  • Eggs, scrambled
  • Shredded cheese (cheddar, Monterey Jack, or a blend)
  • Cooked hash browns or shredded potatoes
  • Preferred breakfast proteins (bacon, sausage, or chorizo)
  • Salsa or pico de gallo
  • Optional toppings: avocado, sour cream, hot sauce
  • Salt, pepper, and a little oil for cooking
Can I customize fillings for dietary needs?

Yes. Use dairy-free cheese and plant-based proteins for dairy- or meat-free versions. Use gluten-free tortillas if needed. For a lighter option, skip hash browns or use baked potatoes. You can also add sautéed peppers and onions for extra veggies.

How do I assemble the crunchwrap so it stays intact?

Center the fillings on the tortilla, leaving a margin to fold. Add a second tortilla on top if you like, then fold the bottom and sides in. If your fillings are juicy, pat them dry first. For extra security, wrap the finished crunchwrap in foil or use a light egg wash to help it hold together.

What cooking method yields the best crisp?

Pan-sear in a lightly oiled skillet over medium heat, pressing gently with a spatula. Cook 2–4 minutes per side, until the outside is golden and the cheese is melty. If you prefer, finish in a preheated 400°F (200°C) oven for 6–8 minutes to ensure even heating.

How do I store and reheat leftovers?

Cool completely, then refrigerate in an airtight container for up to 2 days. Reheat in a skillet over medium heat, turning to crisp both sides, or warm in a toaster oven. For quick reheating, microwave in 30–45 seconds, then finish in a skillet to regain crispiness.

How many servings does this make?

Depends on tortilla size. A standard burrito-size wrap yields 2–3 servings. If you’re feeding a crowd, multiply ingredients and cook in batches.

Can I make it ahead or freeze?

Assembled but uncooked crunchwraps can be refrigerated for up to 24 hours. For longer storage, freeze unassembled ingredients separately, then assemble and cook from frozen (add a few extra minutes). Cooked crunchwraps freeze well; reheat from frozen in the oven until hot.

Tips for faster prep?

Use pre-scrambled eggs or leftovers, pre-cooked hash browns, and pre-grated cheese. Have all fillings ready before assembly. Toast tortillas lightly to make them more pliable and easier to seal. You can also cook multiple at once in a large skillet or on a griddle.

Introduction / Hook

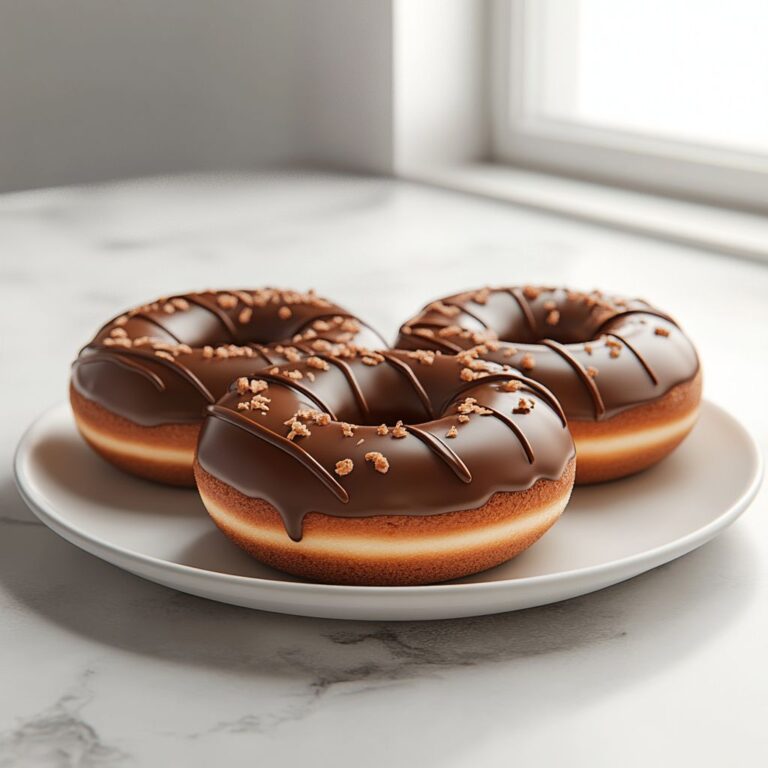
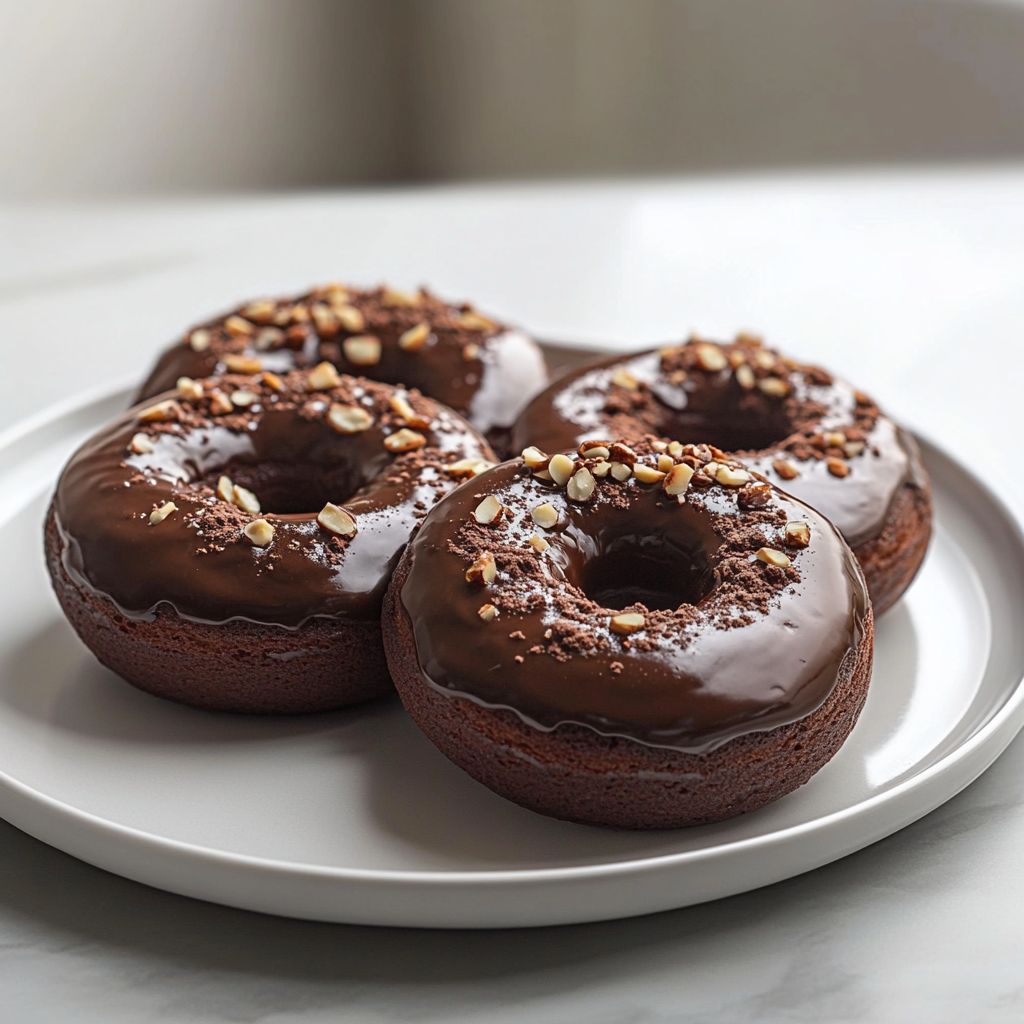
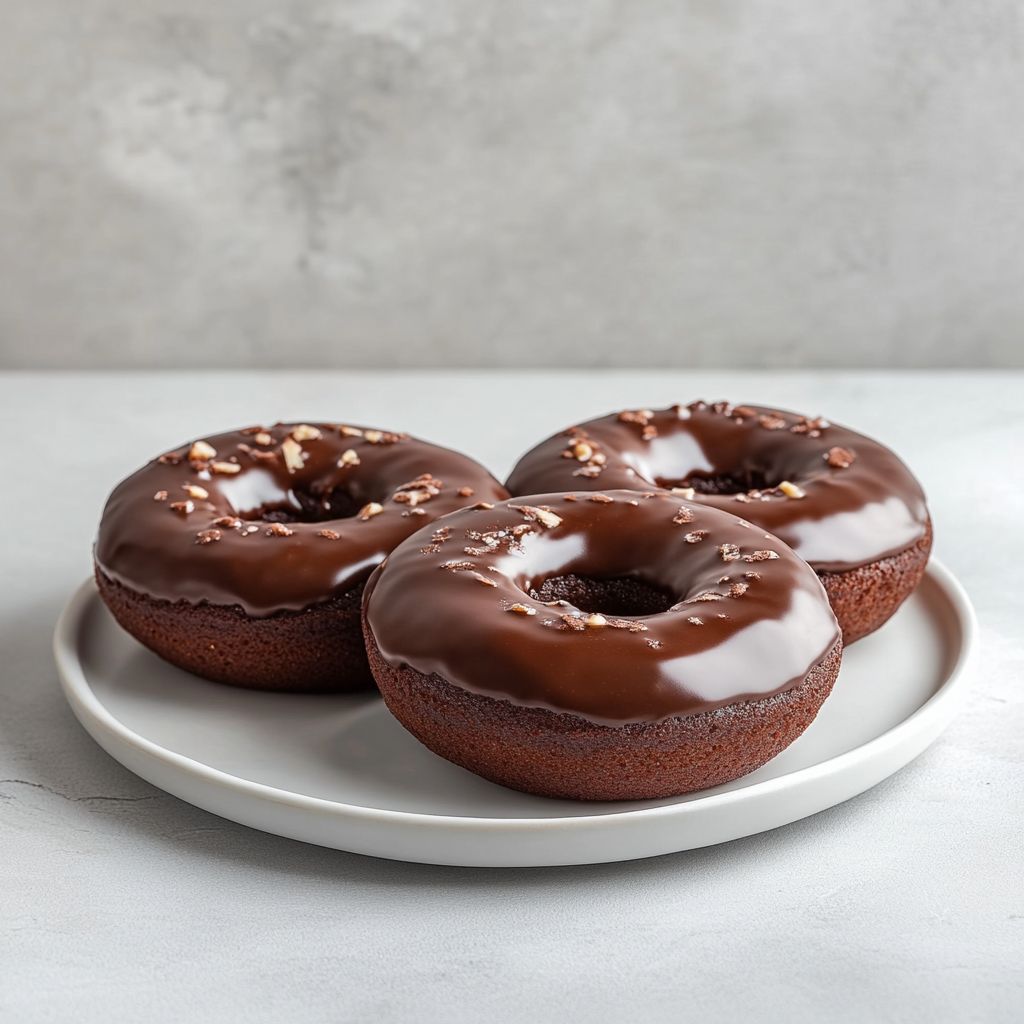
Imagine a moment of pure chocolate bliss that also gives your body a nod of appreciation. A donut that feels indulgent the way a bakery classic does, yet sneaks in a protein boost so you can power through your day without the post-snack slump. Picture a tender, moist crumb that yields to a soft, fudgy bite, the cocoa aroma curling around you like a warm hug. This is Chocolate Protein Donuts—the kind of treat that turns breakfast into a small celebration, a post-workout reward that actually supports your goals, and a snack that satisfies both the sweet tooth and the energy need you didn’t know you had until you tasted it. The beauty lies in the balance: a rich chocolate profile that tastes like dessert, paired with a thoughtful protein punch that helps with recovery, muscle maintenance, and steady hunger control. No guilt, just pleasure, texture, and aroma dancing together in one compact, handheld package.

These donuts are designed to feel special, yet be approachable enough for a busy morning, a relaxed weekend, or a simple “me time” moment. The crust sports a delicate crumble with a glossy, faint sheen from a light glaze or dusting of cocoa, while the interior stays improbably soft and springy—almost mousse-like in its tenderness. And because they’re built around protein, they won’t vanish in a single bite of nostalgia; you’ll savor each mouthful with the awareness that you’re fueling your body in a kind, nourishing way. If you’ve ever wanted dessert that behaves like a wholesome snack, this is your invitation to enjoy chocolate donuts with a modern twist—without compromise.

The Story Behind the Dish

The chocolate donut has a long and storied life in coffee shops, diners, and morning routines across the globe. It’s a symbol of small daily celebrations—an opening act to a day that might be demanding, complicated, or wonderfully ordinary. But as nutrition science and mindful eating became more mainstream, the donut began to shed its old identity as a purely decadent indulgence and embraced a new role: a treat that respects protein needs, time constraints, and dietary preferences. The idea of a “protein donut” feels almost like a modern legend—a pastry that still delivers the comforting ritual of biting into something soft and chocolaty, yet supports muscle repair after a workout, helps curb hunger until the next meal, and can fit into various dietary patterns when tweaked thoughtfully.

For many home cooks, the journey to a perfect chocolate protein donut began as a playful experiment after a gym session, a Sunday morning craving, or a desire to replace mass-market packaged snacks with something that tastes like care. Friends swapped tweaks: swapping in a plant-based protein for dairy-based options, using a blend of almond flour and oats for texture, or adding a touch of espresso powder to make the chocolate sing. The result is a recipe that carries with it the memory of kitchen counter brainstorms, late-night test bakes, and the satisfying moment when a batch of batter transforms into a tray of donuts that look almost too good to be true—and taste even better than they appear.

In many ways, these donuts echo a broader movement: baking that respects nourishment as a pleasure, not a sacrifice. They celebrate the intersection where comfort food meets fitness-conscious cooking, where you can savor a donut and still feel aligned with your wellness goals. The story isn’t about deprivation; it’s about smart, flavorful improvisation—taking a beloved classic and reimagining it with protein, balanced macros, and modern ingredients so that every bite feels like a small victory.

Why You’ll Love This Recipe

  • Protein-forward indulgence: Each donut provides a meaningful protein contribution, helping with satiety and muscle support while you satisfy your chocolate cravings.
  • Soft, cake-like crumb: The interior is light and fluffy, with a barely chewy crumb that melts in your mouth, then gives way to a delicate finish.
  • Rich chocolate flavor: A deep cocoa presence with just enough sweetness to feel comforting, not overpowering. It tastes like a proper chocolate treat, not a reduced-sugar afterthought.
  • Versatile sweetness: The glaze or finishing dust can be customized from simple powdered sugar to a glossy ganache, or kept light with a dusting of cocoa for a more refined finish.
  • Customizable to fit you: Whether you’re dairy-free, gluten-free, vegan, or keeping refined sugars low, there are flexible paths to make these donuts work for your dietary needs.
  • Kid-friendly and adult-approved: The flavor is broadly appealing, making it easy to share with the whole family or pack into lunchboxes as a wholesome treat.
  • Make-ahead friendly: These donuts can be prepared in advance and refreshed with a quick reheat or a light glaze, making weekday mornings easier.
  • Perfect for occasions: From weekend breakfasts to post-workout snacks, these donuts scale well for gatherings, brunches, or cookie-swap events—just plate them with a flourish.

What sets this recipe apart is the careful balance between indulgence and practicality. It’s not about erasing the joy of chocolate; it’s about elevating the experience with smart ingredients that honor flavor as much as function. The result is a donut that doesn’t tell you “you can’t have dessert”; instead, it whispers, “this is dessert that loves you back.”

Flavor Profile & Texture

The chocolate notes hit first, a warm, comforting embrace of cacao that feels almost brownie-like in its depth. There’s a gentle sweetness that never shouts, allowing the cocoa to lead the dance. If you’ve ever nursed a post-workout craving for something that tastes like a treat yet carries a protein uplift, you’re in the right territory. Depending on the exact ingredients you choose, undertones of vanilla, a hint of espresso, or a whisper of almond can subtly peek through, enhancing the chocolate without masking it.

The texture is where the magic happens. The donuts are designed to strike a balance between moist and airy: a crumb that’s just dense enough to feel substantial in your hand, yet soft enough to yield with a single bite. A glaze adds a velvety surface that gives way to a tender center, while a light dusting of cocoa or cinnamon can provide a finishing bitterness or warmth to bridge flavors. The protein base often contributes a slightly nutty or creamy undertone, depending on whether whey, casein, or plant-based powders are used. This subtle complexity is part of the charm: the dessert-like gratification without the heaviness or dryness that can sometimes accompany baked goods rich in protein powders.

Another savor-worthy aspect is texture harmony. The exterior can develop a gentle crust—especially if baked at a higher temperature for a brief period or finished with a glaze—while the interior remains plush and fragrant. The result is a satisfying contrast of surfaces: a slightly crisp edge with a luxuriously soft center that invites you to slow down and savor the experience. The aroma alone—the blend of melted chocolate, toasty protein, and a hint of vanilla—draws people to the kitchen, creating an anticipatory moment that tastes even better than it smells when you finally take that first bite.

Occasions & Pairings

Chocolate Protein Donuts shine in a wide range of moments. They are ideal for a weekend morning ritual when you want something a little special but not extravagant. They also fit neatly into post-workout recovery routines, providing a comforting treat that complements a balanced protein intake. On busy weekdays, they can serve as a reliable grab-and-go option that won’t derail your nutrition goals. And because they pair so well with coffee and dairy-free milks, they’re a natural companion for early-morning commutes, study sessions, or weekend catch-ups with friends.

Pairing ideas to elevate your experience:

  • Hot coffee or a velvety latte: The bitterness of coffee highlights the chocolate while balancing sweetness.
  • Cold almond, soy, or oat milk: A dairy-free pairing that keeps the texture light and refreshing.
  • Fresh berries or a light fruit compote: Adds brightness and a tang that cuts through the richness.
  • Greek yogurt or a dollop of whipped cream: Creates a contrast of acidity and creaminess that complements the donut’s softness.
  • Nuts and seeds: A sprinkle of chopped almonds, walnuts, or chia seeds adds crunch and a toasty note.
  • A touch of espresso powder or cinnamon: For an additional warm layer that deepens flavor complexity.

If you’re serving them at a brunch, arrange the donuts with a small bowl of dark chocolate drizzle or a light cocoa powder dusting so guests can customize their bite. For a post-workout snack, pair them with a protein shake or smoothie to further support recovery while keeping energy levels steady.

Tips, Variations & Substitutions

Vegan & Plant-Based Options

Turn these donuts into a plant-powered treat by using a vegan protein powder (peas, hemp, or rice) and a dairy-free milk. Opt for a neutral oil like avocado or light coconut oil, and consider replacing eggs with a flax egg (1 tablespoon ground flaxseed mixed with 3 tablespoons water per egg). To maintain a tender crumb, you may add a bit of unsweetened applesauce or mashed banana as a natural binder and moisture booster.

Gluten-Free & Dairy-Free

For gluten-free variations, use almond flour or a certified gluten-free baking mix as the base. Combine with a small amount of tapioca starch or arrowroot for improved structure. Dairy-free options are seamless with the vegan adjustments above, plus ensuring the glaze uses dairy-free options (such as coconut butter or cashew-based glazes) if you choose a glaze.

Flavor Variations

Make it your own with simple flavor twists. Consider stirring a tablespoon of instant espresso or strong brewed coffee into the batter for a mocha profile. Add a teaspoon of orange zest and a pinch of chili powder to evoke a spicy-chocolate note. Fold in dark chocolate chips for extra pockets of melty goodness. For a nutty dimension, incorporate finely chopped toasted hazelnuts or almonds into the batter or as a topping. If you prefer vanilla to shine, reduce the cocoa slightly and use a good-quality vanilla extract to elevate aroma.

Texture Tweaks

To achieve a lighter crumb, blend part of the dry ingredients with a portion of the wet ingredients until just combined, then rest briefly before baking. If you want a crisper edge, consider a short, high-temperature bake before finishing at a lower temperature to set the interior. A glaze with a small amount of coconut milk can provide a glossy finish while keeping the texture smooth rather than sticky.

Low-Sugar & Healthier Sweeteners

Swap in a natural sweetener blend (such as coconut sugar or a monk fruit–erythritol mix) to reduce refined sugar while maintaining a satisfying sweetness. If you’re strict about sugar, you can rely on protein’s natural sweetness with just a touch of sweetness from your protein powder or a minimal glaze with powdered sugar substitute. Remember that certain protein powders contribute sweetness on their own, so you may want to tailor the sugar level accordingly.

Regional Twists

Explore regional flavors that align with chocolate and donuts. A pinch of cardamom brings a Middle Eastern warmth; cinnamon evokes cozy nostalgia; or a touch of cardamom and pistachio makes a Middle Eastern-inspired version. In Latin American style, incorporate a hint of ancho chili powder and cinnamon for a smoky, warming chocolate donut. These variations keep the core concept intact while giving you a passport to new flavor adventures.

Storage & Make-Ahead Ideas

Chocolate Protein Donuts store well in the right conditions, which makes them a practical addition to your weekly meal plan. Freshness matters for both texture and flavor, but with proper care, you can enjoy them for several days or even longer when frozen. Here are practical tips to keep your donuts at their best:

  • Room temperature: Store in an airtight container for up to 2 days. Keep them away from direct sunlight and heat to prevent the glaze from melting or the crust from becoming soft.
  • Refrigeration: If you’re holding them longer than 2 days, refrigerate for up to 5 days. Allow to come to room temperature before serving for optimal texture and aroma.
  • Make-ahead: You can bake a batch in advance and freeze them. Wrap each donut individually in plastic wrap, then place in a freezer-safe bag. Thaw at room temperature or warm gently in a low oven or toaster oven for a few minutes to restore softness.
  • Freezing glaze separately: If you plan to glaze later, freeze the donuts without glaze and add the finishing glaze after thawing to preserve a glossy, appealing surface.
  • Reheating: A quick warm-up in a 350°F (175°C) oven for 5–7 minutes or a 20–15 second zap in a microwave (in short bursts) can refresh texture. Avoid overheating to preserve moistness and prevent dryness.

These strategies ensure you can enjoy Chocolate Protein Donuts as a ready-to-go option without compromising on texture or flavor. They also make it simple to plan ahead for busy weeks, special occasions, or weekend brunches where you want something polished without long prep times.

Fun Facts & Trivia (Optional)

– The donut originated in Europe but found a legendary home in the United States, where coffee shops and bakeries helped redefine it as a morning staple. Meanwhile, the modern protein donut trend blends traditional pastry love with nutrition science, a nod to the evolving palate of health-conscious eaters.

– Chocolate, in its many forms, has a long history dating back to ancient civilizations in Central and South America. The cacao bean was once considered a sacred plant, used in rituals and believed to offer mood-enhancing properties. Today, we celebrate that legacy with indulgent, comforting chocolate in a format that also supports active lifestyles.

– Protein powders come in many forms—whey, casein, soy, pea, rice, and more. Each type interacts with baked goods differently, affecting texture and moisture. The key is to balance the protein with other ingredients to maintain a tender crumb and avoid a dry finish.

– The balance between dessert-like flavor and functional nutrition is a growing trend in home kitchens. It reflects a shift toward mindful indulgence: savoring treats that align with personal wellness goals while still delivering joy, memory, and comfort.

In the end, Chocolate Protein Donuts aren’t just a snack; they’re a small ritual that invites you to pause, savor, and nourish yourself with intention. Whether you’re fueling a morning workout, celebrating small victories, or simply indulging in a beloved flavor, these donuts offer a sophisticated balance of taste, texture, and nourishment that feels both indulgent and smart.

Ingredients

Donut Base

  • 1 cup oat flour (certified gluten-free)
    → Oat flour provides the dry base and structure in this gluten-free protein donut batter. It blends with the protein powder to create a tender crumb. If you don’t have oat flour, grind rolled oats in a high-speed blender until powdery, then measure. Sift with the cocoa powder to prevent lumps. Store any leftovers in an airtight container for later use.
  • 1/2 cup vanilla-flavored or chocolate protein powder (whey, pea, or soy)
    → Protein powder boosts the donuts’ protein content and helps with structure and moisture balance. Use unflavored or chocolate-flavored protein to complement cocoa. Whisk the protein with the dry ingredients to prevent clumps; if the batter becomes too thick, add a splash more milk.
  • 1/4 cup unsweetened cocoa powder
    → Provides rich chocolate flavor and deep color. Sift with the dry ingredients to break up lumps. Dutch-processed cocoa yields a smoother, mellower chocolate note; natural cocoa will give a slightly more acidic edge and deeper color.
  • 1 teaspoon baking powder
    → Leavening to lift the donuts and create a light crumb. Use fresh baking powder for best rise; avoid overmixing once the wet and dry ingredients come together to prevent toughness.
  • 1/4 teaspoon baking soda
    → Works with the yogurt and/or milk to brighten the crumb and help with rise under the heat of baking. If you omit yogurt entirely, you can drop the baking soda or rely on baking powder for lift.
  • 1/4 teaspoon salt
    → Elevates sweetness and flavors; salt also helps control sweetness. If you are using salted oil or butter, reduce a pinch accordingly.
  • 3/4 cup unsweetened almond milk (or dairy milk)
    → Hydrates the dry ingredients and creates a pourable batter that can be piped or spooned into donut molds. Start with 3/4 cup and add 1–2 tablespoons more if the batter seems thick. Use room-temperature milk for better emulsification.
  • 1 large egg
    → Acts as a binder and contributes structure and moisture. For a vegan version, substitute with 1/4 cup unsweetened applesauce plus 1 tablespoon ground flaxseed mixed with 3 tablespoons water (let sit 5 minutes) to replace the egg. If using a flaxseed egg, reduce the milk slightly to maintain batter thickness.
  • 1/4 cup plain Greek yogurt (2% or fuller)
    → Adds moisture, tenderness, and a bit of tang that balances cocoa. Yogurt also contributes protein and helps keep the donuts moist as they cool. If you’re dairy-free, substitute with an equal amount of coconut yogurt or another dairy-free yogurt.
  • 2 tablespoons melted coconut oil (or neutral oil)
    → Provides fat for tenderness and flavor; melted and cooled slightly helps the batter combine smoothly. If you don’t have coconut oil, use light olive oil or avocado oil, but avoid extra-virgin olive oil as it can impart stronger flavor.
  • 2 tablespoons pure maple syrup (or honey)
    → Adds sweetness and moisture; maple syrup also helps keep the batter from drying out in the oven. If you use honey, reduce slightly or adjust with a touch more milk to keep batter from being too thick. You can swap with granulated sugar but would need to adjust liquid quantities.
  • 1 teaspoon vanilla extract
    → Enhances overall chocolate flavor; use pure vanilla for best aroma. If you only have vanilla bean paste, you can use 1 teaspoon paste; adjust sweetness as needed because paste can contain more concentrated flavoring.
  • 1/4 cup mashed ripe banana (optional)
    → Adds natural sweetness, moisture, and a slight fruity note. Use very ripe bananas with dark spots for maximum sweetness and moisture. If you skip the banana, you may want to add 1–2 tablespoons more yogurt or milk to maintain moisture and texture.

Optional Add-ins

  • 1/4 cup dark chocolate chips (optional)
    → Extra chocolate pockets enhance the donut experience. Fold chips in gently to avoid sinking; chips may cause the batter to be heavier. Toss chips with a teaspoon of flour before adding to help distribute evenly.
  • 2 tablespoons chopped walnuts or pecans (optional)
    → Adds crunch and a toasty, nutty flavor. Toast the nuts lightly in a dry skillet for 2–3 minutes before chopping to heighten aroma. Fold in at the end to prevent sinking.
  • 1 tablespoon espresso powder (optional)
    → Intensifies the chocolate flavor and gives a mocha note without adding liquid. Dissolve in a teaspoon of hot water or mix with the dry ingredients to avoid clumps. Adjust to taste; start with 1/2 tablespoon if you’re sensitive to coffee flavor.

Glaze (optional)

  • 1/2 cup dark chocolate chips
    → Creates a glossy glaze when melted with a little oil. Melt slowly with 1 tablespoon coconut oil until smooth; spoon or drizzle over cooled donuts. If the glaze is too thick, whisk in a teaspoon or two of milk until you reach a pourable consistency.
  • 1 tablespoon coconut oil
    → Helps the glaze set with a shiny finish and adds a subtle richness. Use refined coconut oil if you don’t want a coconut aroma; keep glaze warm but not hot so it doesn’t melt the donuts.
  • 1 teaspoon maple syrup (optional)
    → Adds a touch more sweetness to the glaze. Stir into the melted chocolate and coconut oil for a balanced glaze; adjust to taste.

Instructions

  • Preheat your oven to 350°F (175°C) and lightly grease a donut pan or line a 12-c cup muffin tin with paper liners.
    → This ensures the donuts release cleanly and retain their shape during baking, preventing sticking and tearing as they cool.
  • Sift and whisk the dry base ingredients together in a medium bowl: 1 cup oat flour, 1/2 cup protein powder, 1/4 cup unsweetened cocoa powder, 1 teaspoon baking powder, 1/4 teaspoon baking soda, and 1/4 teaspoon salt.
    → Sifting breaks up lumps and guarantees even distribution of leavening for a light, tender crumb; whisking prevents clumps that can create uneven pockets of flavor.
  • In a separate large bowl, whisk the wet ingredients: 3/4 cup unsweetened almond milk, 1 large egg, 1/4 cup plain Greek yogurt, 2 tablespoons melted coconut oil (cooled), 2 tablespoons maple syrup, and 1 teaspoon vanilla extract, adding 1/4 cup mashed ripe banana if using.
    → Bringing all liquids to a similar temperature improves emulsification and moisture distribution; banana adds natural sweetness and moisture that enhances tenderness.
  • Optionally dissolve 1 tablespoon espresso powder in 1 teaspoon hot water and whisk into the wet ingredients to intensify the chocolate flavor without adding liquid breadth.
    → Dissolving the espresso ensures even dispersion and prevents grainy pockets; use sparingly to avoid a coffee-forward finish unless you want a mocha note.
  • Pour the wet ingredients into the dry ingredients and fold until just combined; do not overmix so the batter stays tender, and if it seems very thick, whisk in 1–2 extra tablespoons of milk until it pours slowly but still holds its shape.
    → Overmixing gluten-free batters can create a dense crumb; a gently blended batter yields a light, cake-like texture.
  • If using optional add-ins, fold in 1/4 cup dark chocolate chips or 2 tablespoons chopped nuts after the batter comes together, tossing chips with a teaspoon of the dry mix to prevent sinking.
    → Add-ins should be distributed evenly without weighing the batter down; tossing with flour helps them stay suspended during baking.
  • Spoon or pipe the batter into the prepared donut cavities about 2/3 full, using a small cookie scoop or a piping bag for uniform portioning and even rising.
    → Filling to two-thirds prevents overflow and ensures a classic donut ring with a uniform top.
  • Bake for 12–15 minutes at 350°F (175°C) until the edges are set and a toothpick inserted into the center comes out with a few moist crumbs; rotate the pan halfway through for even browning if your oven has hot spots.
    → Proper baking time yields a tender crumb without dryness; rotation mitigates heat distribution irregularities.
  • Cool the donuts in the pan for 5–7 minutes, then transfer to a wire rack to cool completely before glazing to prevent the glaze from sliding off and to set the surface for a glossy finish.
    → Resting allows the structure to set and moisture to redistribute, producing a stable base for glaze adherence.
  • Prepare the glaze by melting 1/2 cup dark chocolate chips with 1 tablespoon coconut oil over low heat, stirring until smooth, and remove from heat just as it becomes glossy.
    → Gentle, slow melting prevents scorching and yields a shiny, even glaze that clings to the donuts.
  • Drizzle or spoon the warm glaze over the cooled donuts in a thin, even layer; if the glaze thickens, whisk in 1–2 teaspoons of milk to achieve a pourable consistency.
    → A proper glaze consistency ensures a smooth coating that sets without dripping excessively.
  • Optionally whisk in 1 teaspoon maple syrup into the melted glaze for a touch more sweetness and a balanced finish, then drizzle as desired and allow it to set.
    → The maple adds depth and aroma that complements the cocoa without overpowering the chocolate flavor.
  • Let the glaze set at room temperature for 20–30 minutes (or refrigerate briefly to speed the process) before stacking or serving.
    → A set glaze locks in moisture and provides a glossy, crack-resistant surface that stays intact during handling.
  • Store any leftovers in an airtight container at room temperature for up to 2 days, or refrigerate for up to 5 days; for longer storage, freeze and rewarm gently in a 300°F (150°C) oven for 5–7 minutes.
    → Proper storage maintains softness and prevents the donuts from drying out, while gentle reheating revives moisture and texture.

Notes

These Chocolate Protein Donuts are a gluten-free, protein-packed treat that deliver a tender crumb and rich cocoa flavor thanks to oat flour, protein powder, and unsweetened cocoa. You can customize them with add-ins like dark chocolate chips or chopped nuts for texture, or intensify the mocha note with espresso powder. For a dairy-free version, swap yogurt and milk for plant-based alternatives and use a flax egg instead of the egg; if you skip the banana, compensate with a touch more yogurt or milk to maintain moisture. The batter comes together by whisking the dry ingredients (oat flour, protein powder, cocoa, baking powder, baking soda, salt) separately from the wet ingredients (egg, yogurt, milk, melted coconut oil, maple syrup, vanilla, and mashed banana if using), then combining until just moistened; if the batter is too thick, add 1–2 tablespoons more milk and avoid overmixing to keep the donuts tender. Bake in donut molds at 350°F (175°C) for about 12–14 minutes, or until a toothpick comes out with a few moist crumbs; let cool completely before glazing or dipping. The glaze is optional but a glossy finish is easy: melt 1/2 cup dark chocolate chips with 1 tablespoon coconut oil, whisk until smooth, and drizzle over cooled donuts; for a thinner glaze, whisk in a splash of milk and/or a teaspoon of maple syrup. These donuts freeze well for make-ahead breakfasts or snacks; store leftovers in an airtight container or wrap individually, and rewarm briefly in a low oven or microwave. To maximize success, use certified gluten-free oats and baking powder if you have gluten intolerance, and keep your add-ins light so the donut remains soft rather than dense.

Tips

Tips for perfect Chocolate Protein Donuts

  • Prep first: Grease a donut pan thoroughly or use a nonstick spray, and set out all ingredients to avoid overmixing later.
  • Dry-to-wet balance: Whisk the dry ingredients (especially the protein powder and cocoa) together first, then mix with the wet components. This helps prevent clumps and ensures an even crumb.
  • Measure accuracy: Since this recipe relies on GF oat flour and protein powder, precise measurements matter more than with wheat flour. If you grind oats yourself, sift them with the cocoa to break up any lumps.
  • Consistency check: Start with the stated milk amount and add 1–2 tablespoons more only if the batter looks thick and stiff. If it’s too loose, whisk in a little more oat flour.
  • Don’t overmix: Mix until just combined after adding wet to dry. Overmixing can develop gluten-free batters too much, leading to a tougher texture.
  • Room-temperature ingredients: Use room-temperature milk and yogurt for better emulsification and a smoother batter.
  • Vegan option: If making vegan, replace the egg with 1/4 cup unsweetened applesauce plus 1 tablespoon ground flaxseed mixed with 3 tablespoons water. Reduce milk slightly to keep the batter thickness right.
  • Banana note: If using mashed banana, make sure it’s ripe and very soft to maximize moisture and sweetness. If skipped, you may need a touch more yogurt or milk to keep the batter hydrated.
  • Optional add-ins—chips: Toss dark chocolate chips with a teaspoon of flour before folding in to keep them from sinking.
  • Nut texture: Toast chopped walnuts or pecans lightly in a dry skillet (2–3 minutes) to heighten aroma, then fold in at the end to prevent sinking.
  • Espresso boost: Dissolve espresso powder in a teaspoon of hot water before adding it to the dry ingredients to avoid gritty clumps and achieve a balanced mocha note.
  • Glaze preparation: When making the glaze, melt dark chocolate chips with 1 tablespoon coconut oil slowly. If it’s too thick, whisk in a splash of milk until pourable and glossy.
  • Glaze alternatives: For dairy-free glaze, use dairy-free chocolate chips and a neutral oil; ensure the glaze isn’t too hot when dipping to avoid melting the donuts.
  • Storage and freshness: Cool donuts completely before storing. Keep in an airtight container at room temperature for 2–3 days, or refrigerate up to 5 days; rewarm briefly in the microwave (8–12 seconds) for a fresh texture.
  • Freeze for later: Baked donuts freeze well; wrap individually and freeze up to 2–3 months. Thaw at room temp and warm briefly to restore softness.
  • Taste and balance: If you want a deeper flavor, a pinch of salt can balance the sweetness; adjust if using salted oil or butter to avoid oversalting.
  • GF safety: Use clean utensils and bowls to prevent gluten exposure if you’re baking for someone with celiac disease or strong gluten sensitivity.

FAQ

What are Chocolate Protein Donuts?

Chocolate Protein Donuts are a healthier take on classic donuts. They’re baked (not fried), higher in protein thanks to protein powder, and feature a rich chocolate flavor. They’re soft, a bit chewy, and make a satisfying post-workout or snack option.

What ingredients do I need?

Typical ingredients include:

  • 2/3 cup (about 70 g) oat flour or almond flour
  • 1/2 cup (45 g) chocolate or vanilla protein powder (whey or plant-based)
  • 2 tablespoons unsweetened cocoa powder
  • 1 ripe banana or 1/2 cup unsweetened applesauce
  • 2 eggs or 2 flax eggs (for vegan)
  • 1/4 to 1/2 cup milk or dairy-free milk
  • 1 teaspoon baking powder
  • 1/4 to 1/3 cup sweetener (honey, maple syrup, or sugar)
  • 1 teaspoon vanilla extract
  • Pinch of salt
  • Optional: 1–2 tablespoons yogurt or dairy-free yogurt for moisture
How many donuts does this recipe yield?

Typically 6 standard-size donuts in a 6-cavity donut pan. If you’re using mini donuts, you’ll get about 12–18 mini donuts depending on size.

Are these baked or fried?

These donuts are baked. Bake in a preheated oven at about 350°F (175°C) for 12–15 minutes, or until a toothpick inserted comes out clean with a few crumbs.

Can I make them dairy-free or gluten-free?

Yes. For dairy-free: use dairy-free milk (almond, soy, oat) and dairy-free yogurt if used. For gluten-free: use certified gluten-free oats or flour blends. If you use oat flour, make sure it’s labeled gluten-free if you have a gluten intolerance. You can also use almond flour for a denser texture.

What protein powders work best?

Whey, casein, or plant-based proteins all work. Chocolate or vanilla flavors tend to blend well with cocoa. Plant-based powders may require a touch more liquid or a splash more yogurt/milk. If your powder is very chunky or gritty, add an extra tablespoon or two of milk to smooth the batter.

How do I prevent them from being dry or crumbly?

Tips to keep them moist:

  • Avoid overbaking—check doneness at the 12-minute mark.
  • Use mashed banana or yogurt to add moisture (or both).
  • Include a bit of healthy fat, like melted nut butter or a tablespoon of olive oil.
  • Let the batter rest a few minutes to hydrate the dry ingredients before baking.
How should I store and reheat the donuts?

Store in an airtight container at room temperature for up to 2–3 days. For longer storage, refrigerate for up to a week or freeze individual donuts for 1–2 months. Reheat in the microwave for about 15–20 seconds or warm in a 325°F (165°C) oven for 5–7 minutes.

Can I make these vegan or lower in sugar?

Yes. To make vegan, use flax or chia eggs in place of eggs, plant-based milk, and a vegan protein powder. To reduce sugar, use a sugar substitute or reduce sweetener to 2–3 tablespoons and rely on ripe banana for sweetness. You can also add a drizzle of sugar-free chocolate glaze for flavor without extra sugar.

Can I customize flavors or toppings?

Absolutely. Try these ideas:

  • Swirl in peanut butter or almond butter before baking, or drizzle on top after baking
  • Fold in dark chocolate chips or chopped nuts
  • Add a pinch of cinnamon or espresso powder for a mocha flavor
  • Top with a light chocolate glaze or yogurt glaze

Introduction / Hook

Forgotten Chicken isn’t a dish you chase down from a cookbook; it’s a comforting memory you chase down with your senses. Imagine a kitchen that hums with the soft crackle of a crust turning amber, a stovetop sighing with simmering warmth, and a fragrance that wraps around you like a favorite blanket. This is the kind of meal that appears when life slows down—when the clock loosens its grip and the aromas take the lead, guiding you home. The bird, tender as a whispered secret, carries a chorus of browned edges and unassuming depth that makes the first bite feel like a welcome hug you didn’t realize you were missing. It’s the kind of supper that feels like a reunion, even if you’re eating alone, a reminder that nourishment often comes from quiet patience and a little gentle heat.

What makes Forgotten Chicken feel so special is not just the outcome—the succulent meat, the skin that gives way to a juicy interior—but the way the dish invites you to slow down, savor, and create a small ritual in your own kitchen. There’s a subtle theater to it: the moment you open the oven or lift the lid, a warm, savory steam escapes in a friendly plume; the room fills with a scent that says, “Everything is going to be all right.” It’s a dish that tastes like home, even if you haven’t remembered a single family recipe. It’s a reminder that good food often grows from simple ingredients treated with care, patience, and a touch of curiosity about how heat can coax flavor from humble things.

In a world that moves quickly, Forgotten Chicken asks you to press pause for a moment and let the kitchen do the storytelling. It’s not about flashy technique or fancy ingredients; it’s about balance—the gentle interplay of roast and braise, dry heat and moist heat, crisp edges and velvet warmth. It’s about how the most modest supper can become something you remember fondly long after the plate is wiped clean. If you’re craving something that feels both uncomplicated and deeply satisfying, something that makes your house smell inviting and your heart feel nourished, this is your invitation to linger at the table a little longer and let the flavors do the talking.

The Story Behind the Dish

Origins and Echoes of the Kitchen

Forgotten Chicken speaks to a universal kitchen memory—the moment when a planned meal becomes a delayed, beloved ritual. Many households have a story of a Sunday bird that was meant to be a quick supper but evolved into a long, unhurried event. It’s the recipe that good kitchens accumulate not through precise measurements but through time—the way the pan’s surface darkens in small, patient increments, the way the air thickens with the scent of browning and softness, and the way the family gathers with a spontaneous sense of gratitude for the simple act of sharing a meal. In countless cultures, a chicken roasted or braised into tenderness becomes more than sustenance; it becomes a link to memory, a bridge between generations, and a soft-spoken anchor for a busy week.

The phrase “forgotten” here isn’t about negligence. It’s about the gentle neglect that allows flavors to develop. It honors the overlooked corners of the kitchen—the parts of the process that aren’t flashy but are essential: time, steady heat, a patient browning, and a comforting reduction of pan juices into something that coats the meat with a glistening lacquer of savoriness. It’s a dish born from the paradox that the most memorable meals are often the ones that arrive when you least expect them—when you’re not chasing perfection but inviting warmth, texture, and aroma to do the work of composition for you.

Historically, many households treated a simple chicken as a canvas rather than a final product. It absorbed the character of whatever aromatics or vegetables were accessible, becoming a flexible centerpiece adaptable to seasonality and circumstance. Forgotten Chicken embodies that adaptability. It’s the kind of dish that can emerge from a snowy weekday with a few pantry staples or blossom during a quiet weekend with seasonal produce nearby. The story behind it is less about a single lineage and more about a shared experience—the kitchen as a place where time slows, conversations soften, and the act of cooking becomes a quiet form of care.

Why You’ll Love This Recipe

Forgotten Chicken is a hug in a skillet, a dish that invites you to be present without becoming precious. Here’s why it resonates with home cooks and food lovers alike:

  • Effortless comfort: It feels luxurious without demanding complex techniques or hard-to-find ingredients.
  • Flexible and forgiving: The method adapts to what’s in your kitchen and your schedule, from a rushed weeknight to a lingering weekend.
  • House-friendly aroma: The kitchen is perfumed with a warm, inviting scent that acts as a welcome home signal for anyone nearby.
  • Budget-conscious centerpiece: It centers a meal around a single, modest bird and pantry-friendly flavors, leaving room for a couple of side dishes.
  • Textural harmony: Crisp, bronzed surfaces give way to succulent, tender meat, while pan juices mingle with gentle, comforting warmth.
  • Family-friendly appeal: It’s an approachable dish that pleases diverse palates, making it ideal for weeknight dinners or gatherings alike.
  • Make-ahead potential: The cooking method lends itself to timing that fits around other activities, so you can prepare parts in advance or finish with a relaxed pace.

Flavor Profile & Texture

Forgotten Chicken delivers a balanced, soulful flavor profile that sings with restraint. The exterior offers a satisfying crackle and a deeply caramelized crust that forms when the heat lingers on the surface just long enough to coax sugars into a toasty chorus. As you cut into the meat, you encounter a moist, yielding interior—meat that remains juicy rather than dry, with a tenderness that glimmers with a touch of resilience. The natural savoriness of the chicken is elevated by gentle, layered notes—an herbaceous whisper, perhaps a hint of citrus or aromatics that contribute brightness without overpowering the core meat.

Texture-wise, you’ll notice a pleasing contrast: the outer layer carries a slight crust or crispness, while the inside remains supple and almost velvety. The juices, when spooned back over the meat, create a gloss that makes each bite feel lush and comforting. If there’s a secondary texture, it’s the soft presence of vegetables and any accompanying elements that may have softened and fondly absorbed the cooking bath. The overall experience is a harmonious coupling of warmth, earthiness, and a touch of sweetness that arises from browning reactions and slow reduction of liquids. It’s the kind of flavor that lingers—mellow, yet memorable—encouraging you to take another, unhurried mouthful and savor how the different layers unfold in your mouth.

Occasions & Pairings

This dish shines on a variety of occasions, from quiet weeknights to festive weekends. Its versatility makes it a dependable go-to for meals that feel special without requiring a kitchen full of fancy gear.

When to Serve

• Weeknights when you want something satisfying but not fussy.

• Casual Sunday suppers that transition into the evening with warmth and conversation.

• Quiet family gatherings, where comfort food serves as the unspoken centerpiece.

• Potlucks or gatherings where you want a dish that travels well and still feels intimate when served hot or re warmed.

• Holidays when you crave a no-fuss centerpiece that pairs well with seasonal vegetables and simple sides.

Pairings to Consider

To round out the meal, think about sides that offer contrast and balance without competing with the chicken’s gentle flavor:

  • Starchy companions: Creamy mashed potatoes, silky polenta, or a rustic loaf that can sop up the pan juices.
  • Vegetable accents: Roasted root vegetables, sautéed greens, or a bright salad that adds a crisp note to the plate.
  • Grains and legumes: A soft bed of barley, farro, or a light orzo that catches a hint of the pan remnants.
  • Acidic lift: A light squeeze of citrus or a crisp vinaigrette on greens to brighten the richness.
  • Drinks: A medium-bodied white wine with fresh acidity or a lightly fruity red; non-alcoholic options like aromatic tea or a sparkling beverage can also harmonize well.
  • Desserts: Something comforting and not overly sweet, such as a simple poached fruit or a subtle custard, to close the meal with a gentle finish.

Tips, Variations & Substitutions

Here are thoughtful ways to tailor Forgotten Chicken to your preferences, dietary needs, or seasonal ingredients. The emphasis is on adaptability and creativity, rather than rigid steps.

  • Flavor levers: If you enjoy more pronounced aromatics, lean into herbs, citrus zest, or gentle spice blends that suit your palate. The character of the dish is defined by how you balance browning, moisture, and a touch of acidity or brightness.
  • Texture tweaks: For an even crisper exterior, consider finishing the dish under a hot broiler for a brief period, watching closely to prevent burning. A longer resting period after cooking helps the juices redistribute for juicier slices.
  • Vegetable variations: Include hearty vegetables that benefit from slow cooking, such as root vegetables or sturdy greens, which can accompany the chicken and absorb those comforting juices.
  • Dietary adaptations: For a plant-forward version, you can explore wholesome fungi or dense vegetables that provide a similar savoriness. The technique translates to other proteins or to vegetarian main dishes that rely on browning, moisture, and a gentle simmer.
  • Low-carb or gluten-sensitive tweaks: Use naturally gluten-free cooking methods and choose sides that avoid gluten-based thickeners or sauces if needed. The core technique remains the same—patience with heat and letting flavors develop gradually.
  • Regional twists: Adapt the flavor profile by drawing on regional aromatics and pantry staples—think warm spices for a soulful, grounded version or bright herbs for a more summery interpretation.
  • Make-ahead flexibility: You can plan parts of the process in advance—prep the aromatics, or have the cooking vessel ready to go. The dish shines when you can tuck it into a busy day and let the heat do the work.

Storage & Make-Ahead Ideas

Forgotten Chicken is forgiving when it comes to storage and reimagining leftovers. A few thoughtful practices can keep it delicious for days and useful for future meals.

  • Storage: Refrigerate leftovers in an airtight container within two hours of cooking. Properly cooled, they will keep well for a few days, preserving tenderness and flavor.
  • Reheating: Gentle reheating on the stove or in the oven helps maintain the meat’s moisture and prevents the exterior from becoming dry. Cover the dish to trap steam if reheating in the oven.
  • Make-ahead strategy: If your schedule allows, you can prepare components ahead of time (such as browning the exterior or pre-having aromatics on hand) and finish with a slow, unhurried heat before serving. This approach can be especially useful on busy days when you want a comforting meal without last-minute fuss.
  • Freezing: If you expect to freeze, consider the texture of the meat and how it will fare after thawing. Some people find that certain textures respond best to reheating rather than freezing, so plan to enjoy fresh or reheated leftovers within a reasonable timeframe.

Fun Facts & Trivia (Optional)

Food folklore often hides delightful tidbits in plain sight. Here are a few light, curious notes related to the mood and meaning behind a dish like Forgotten Chicken:

  • In many cultures, the roasted chicken has long symbolized hospitality and sharing, a bird that invites everyone to gather around a table and tell stories as the meat slowly yields its flavor to the heat.
  • The idea of “forgotten” in cooking echoes a common kitchen truth: some of the most beloved meals arise from moments when the cook’s attention is diverted just long enough for a gentle progression—low, steady heat doing most of the work, while the cook returns to finish with care.
  • Slow-roasted or braised preparations historically used affordable cuts or a single, well-used pan to coax maximum flavor, turning humble ingredients into soul-satisfying meals that sustain families through tough seasons.
  • Arthritic hands, busy days, or crowded kitchens all benefit from dishes that require patience more than precision—Forgotten Chicken embodies that philosophy, rewarding restraint with depth and warmth.

Ingredients

Forgotten Chicken – Main Ingredients

  • 4 bone-in, skin-on chicken thighs (about 1.75–2.5 lb / 0.8–1.1 kg total)

    → The main protein that provides rich flavor and moist, tender meat. Keeping the skin on helps seal in juices during browning and adds a golden, crisp texture. Pat the thighs dry with paper towels before seasoning to promote browning. If you prefer a lighter option, you can use boneless, skinless thighs, but expect a shorter cooking time and a different moisture balance; in that case, adjust searing and simmering accordingly.
  • 2 tablespoons olive oil

    → Used for searing the chicken and sautéing aromatics to develop a flavorful fond. Choose extra-virgin olive oil for deeper flavor, and keep the heat at medium-high to avoid burning. The oil also aids in creating a glossy, cohesive sauce when deglazed with wine and stock.
  • 1 large onion, thinly sliced

    → Adds sweetness, body, and depth to the sauce as it caramelizes. Slice evenly to promote uniform cooking. Salt lightly during sautéing to speed softening and prevent sticking. Caramelization builds a robust base for the pan sauce.
  • 3 cloves garlic, minced

    → Delicate, pungent aroma that layers into the sauce. Mince finely for even distribution; add after the onions have softened to avoid scorching and bitterness. Garlic blooms quickly, so minimize exposure to high heat once added.
  • 2 medium carrots, sliced

    → Contribute natural sweetness, color, and texture to the sauce. Slice into even pieces so they cook evenly. Carrots also help balance acidity with their natural sugars and give the dish a satisfying mouthfeel.
  • 2 stalks celery, sliced

    → Builds a savory backbone and adds subtle crunch if not overcooked. Slice uniformly and sauté until slightly softened to release their aromatic oils, enhancing the overall depth of the pan sauce.
  • 2 tablespoons tomato paste

    → Intensifies color and depth of flavor; adds a gentle acidity that brightens the sauce. Sauté the paste with the aromatics for 1–2 minutes to bloom its sweetness and remove some of the raw edge. This helps the sauce cling to the chicken better.
  • 1 teaspoon smoked paprika (or sweet paprika)

    → Provides a smoky, earthy note that rounds out the tomato and onion flavors. Bloom the paprika briefly with the onions to release its aroma. If using smoked paprika, use a light hand to avoid overpowering the dish; you can adjust to taste at the end.
  • 1 teaspoon dried thyme (or 2–3 sprigs fresh thyme)

    → Adds herbaceous warmth that pairs well with chicken and tomato. Dried thyme is more potent, so add early to allow it to hydrate in the simmering liquid; if using fresh thyme, add the sprigs during simmering and remove before serving for a clean finish.
  • 1 bay leaf

    → Subtle, rounded aromatic that deepens the sauce. Remove the bay leaf before serving to avoid a bitter, woody note. It’s best used in longer braises where the flavors meld slowly.
  • Salt and freshly ground black pepper to taste

    → Essential seasoning to balance sweetness and acidity. Salt the chicken lightly before searing and adjust seasoning after the sauce reduces, since reduction concentrates salt. Freshly ground pepper adds sharp aroma and bite without dominating the dish.
  • 1/2 cup dry white wine (optional)

    → Used to deglaze the pan, lifting fond from the bottom and introducing acidity and brightness to the sauce. Allow the wine to reduce by half to concentrate its flavors before adding stock. If you prefer not to use alcohol, substitute with an additional 1/2 cup chicken stock and a splash of lemon juice later for brightness.
  • 1 cup chicken stock (low-sodium)

    → Forms the base of the pan sauce and ensures the dish remains balanced in salt. Using low-sodium stock helps you control the final salt level, especially if you added wine or tomatoes. Simmer the sauce to reduce and thicken slightly, concentrating the flavors.
  • 1/2 cup crushed tomatoes (optional)

    → Adds acidity,.body, and color, enriching the sauce if you enjoy a tomato-forward profile. Stir in after deglazing to blend with the wine and aromatics. If you skip this, you’ll rely more on wine and stock for tang.

Forgotten Chicken – Sauce Finish

  • 1/4 cup heavy cream

    → Creates a silky, velvety finish that softens acidity and unifies the sauce. Add the cream after the sauce has simmered and reduced; keep the heat low to prevent curdling. For dairy-free, substitute with coconut cream or a thickened almond milk blend, adjusting thickness with a splash of stock.
  • 1 tablespoon lemon juice

    → Brightens the dish and balances richness. Add at the end, a teaspoon at a time, to achieve the desired brightness without tipping into sour. If you prefer, substitute with a small splash of white wine vinegar for a similar effect.
  • 1 tablespoon butter

    → Finishes the sauce with additional gloss and silkiness. Swirl in off the heat after removing from the burner to enrich the sauce and help it cling to the chicken. This step adds a luxurious mouthfeel without making the sauce heavy.
  • Fresh parsley, chopped (for garnish)

    → Adds a pop of color and a fresh herbal note at serving. Toss into the sauce off the heat or sprinkle on top just before plating to retain its brightness. If desired, substitute with chives for a milder onion-like aroma.

Forgotten Chicken – Optional Add-ins

  • 8 oz mushrooms, sliced

    → Earthy depth and meaty texture that complements chicken beautifully. Sauté mushrooms with the onions and garlic until browned and their moisture has evaporated to avoid a soggy sauce. They benefit from a quick pan sear to develop color before adding to the sauce.
  • 1/4 cup olives, pitted and chopped

    → Adds briny, savory contrast that brightens the overall profile. Add near the end to preserve their shape and texture. Rinse if very salty and pat dry to control saltiness in the dish.
  • 1 tablespoon capers

    → Provide tangy, salty bite that lifts the sauce. Stir in with the wine after deglazing to distribute evenly. Rinse lightly if very salty and pat dry before using to avoid overpowering the dish.
  • 1 teaspoon cornstarch mixed with 1 tablespoon water (optional)

    → Use to thicken the sauce if you prefer a more clingy, restaurant-style finish. Whisk the slurry into the simmering sauce and cook for 1–2 minutes until glossy and thickened. Avoid adding raw cornstarch directly to hot liquid to prevent lumps; adjust amount gradually for desired thickness.

Instructions

  • Pat the chicken thighs dry with paper towels and season them lightly on both sides with salt and freshly ground black pepper.

    → Dry surfaces promote even browning and a crisper skin; salt helps season the flesh from the surface and aids moisture management during searing.
  • Heat the olive oil in a heavy-bottomed Dutch oven or deep skillet over medium-high heat until shimmering.

    → A hot pan encourages rapid browning and the development of fond, which forms the flavor backbone of the sauce.
  • Place the chicken thighs skin-side down in the hot oil and sear without moving until the skin is deeply golden and crisp, about 6–8 minutes; then flip and sear the other side for 2–3 minutes.

    → Searing in two stages prevents crowding, builds a rich crust, and renders fat for the sauce foundation.
  • Transfer the thighs to a plate and tilt the pan to keep the browned bits (fond) in the pot; you’ll use them to flavor the sauce.

    → Retaining the fond maximizes flavor potential as you deglaze later rather than losing it to the plate.
  • Add the sliced onion and, if using, the mushrooms to the pan; sauté over medium heat until the onions are deeply softened and the mushrooms are browned, about 8–10 minutes.

    → Caramelized onions provide sweetness and body; browned mushrooms contribute earthy depth and texture to the sauce.
  • Stir in the sliced carrots and celery and cook until they begin to soften and their edges take a light color, about 5–6 minutes.

    → The vegetables form the core of the pan sauce; sautéing releases their sugars and aromatic oils for balance.
  • Add the minced garlic and cook briefly, 30–60 seconds, until fragrant; do not let it brown or burn.

    → Garlic adds perfume without turning bitter; excessive heat or time can create a harsh, burnt note.
  • Scrape in the tomato paste and cook for 1–2 minutes, stirring to coat the vegetables; this blooms the paste’s sweetness and deepens the tomato flavor.

    → Blooming tomato paste prevents a raw, metallic edge and helps the sauce cling to the chicken.
  • Stir in the paprika and dried thyme (and add the bay leaf); cook for about 30 seconds to bloom the spices.

    → Bloomed spices release their essential oils, enriching the sauce with warmth and a subtle smokiness from the paprika.
  • Pour in the dry white wine (if using) and deglaze the pan, scraping up any browned bits with a wooden spoon; bring to a boil and simmer until the liquid reduces by about half.

    → Deglazing lifts the fond into the sauce, concentrating flavors and adding a bright acidity that balances the sweetness of the vegetables.
  • Stir in the crushed tomatoes (if using) and the chicken stock, season to taste, then return the seared chicken to the pan, nestling the pieces into the sauce.

    → The liquid creates a moist braising environment; returning the chicken helps it pick up color and absorbed flavors from the sauce.
  • Reduce the heat to a gentle simmer, cover, and braise until the chicken is tender and cooked through (about 30–40 minutes); turn the pieces halfway if possible for even cooking.

    → Slow braising yields moist, tender chicken and allows the vegetables and aromatics to meld with the sauce.
  • If you are using olives and capers, stir them in during the last 5–7 minutes of braising to preserve their shape and brightness.

    → Adding these near the end preserves their distinct flavors and prevents them from turning mushy.
  • Remove the chicken to a plate and uncover the pan; simmer the sauce briefly to reduce to a nappe-like consistency that coats the back of a spoon.

    → Reduction concentrates flavors and achieves a luscious, clingy sauce to coat the meat.
  • Stir in the heavy cream and simmer for 2–3 minutes to mellow acidity and create a glossy, velvety finish.

    → Cream softens the tomato’s sharpness and yields a restaurant-style texture; keep the heat gentle to avoid curdling.
  • Finish the sauce with lemon juice, adding a little at a time to reach a bright balance without tipping into sourness.

    → A touch of citrus brightens the dish and harmonizes the richness with acidity.
  • Off the heat, swirl in the tablespoon of butter to enrich the sauce and give it a satin gloss; taste and adjust salt if needed.

    → Butter adds luxurious mouthfeel and helps the sauce cling to the chicken for a cohesive finish.
  • Stir in the chopped fresh parsley just before serving to add a pop of color and a fresh herbal note.

    → Parsley provides brightness and freshness; if desired, substitute chives for a milder onion-like aroma.
  • If you prefer a thicker, more nappe-like sauce, whisk together 1 teaspoon cornstarch with 1 tablespoon water to make a slurry and whisk it into the simmering sauce; cook 1–2 minutes until it thickens.

    → A slurry prevents lumps and yields a restaurant-like coating; add gradually and cook long enough to eliminate any raw starch flavor.

Notes

These Forgotten Chicken thighs boast a deeply savory, glossy pan sauce built from caramelized onion, garlic, tomato paste, and a splash of dry white wine. You can customize the dish by adding mushrooms, olives, or capers to introduce earthy depth and briny brightness. They reheat beautifully and the flavors often mellow and intensify after resting, making them ideal for leftovers or weekly meal prep. For a creamier finish, swirl in the 1/4 cup heavy cream off the heat and finish with a squeeze of lemon and a pat of butter to brighten and silk the sauce. If you prefer dairy-free, substitute coconut cream or a thickened almond-milk blend, adjusting thickness with a splash of stock. If you choose boneless, skinless thighs, sear and simmer longer to compensate for the moisture balance. To further tailor the sauce, add a 1 teaspoon cornstarch slurry (mixed with 1 tablespoon water) during simmer for a clingier finish. Always ensure your low-sodium stock and your wine are gluten-free if you have gluten intolerance; you can also substitute with extra stock and a splash of lemon if avoiding alcohol. Finish with chopped fresh parsley for a pop of color and bright aroma just before serving.

Tips

Forgotten Chicken — Practical Cook’s Tips

  • Preparation and browning: Pat the chicken thighs dry with paper towels before seasoning to promote even browning. If you chill the meat in the fridge, let it come to room temperature for about 15 minutes before searing to ensure more even cooking.
  • Seasoning strategy: Salt lightly on the chicken before searing and adjust salt later after the sauce has reduced. Freshly ground black pepper should be added at the end of cooking for a bright aroma.
  • Pan and heat: Use a heavy-bottom skillet or cast-iron pan for steady, even heat. Keep the oil at medium-high until shimmering, then brown the skin-side down without moving until deeply golden (about 5–7 minutes per side, depending on thickness).
  • Batching: Do not overcrowd the pan. Brown in batches if needed to maintain a strong fond foundation. Crowding lowers the pan temperature and steams the skin instead of browning it.
  • Aromatics timing: Add onions first and let them soften and lightly caramelize. Garlic should go in after the onions soften to avoid burning and bitterness.
  • Building the sauce: After browning, deglaze with white wine (if using) and scrape up all the browned bits. Let the wine reduce by half to concentrate its flavor before adding stock and tomatoes.
  • Tomato paste and paprika: Bloom tomato paste and paprika with the aromatics for 1–2 minutes to deepen color and flavor. This helps the sauce cling to the chicken.
  • Herbs and aroma: Use dried thyme if fresh isn’t available; if using fresh thyme, add the sprigs during simmering and remove before plating to avoid a grassy finish. Remove bay leaf before serving to prevent bitterness.
  • Liquid balance: If you skip the wine, substitute with an extra 1/2 cup chicken stock and brighten with a splash of lemon later. Keep stock low-sodium to better control final saltiness.
  • Texture and thickness: For a thicker, restaurant-style sauce, whisk in a cornstarch slurry (1 teaspoon cornstarch mixed with 1 tablespoon water) during simmering and cook 1–2 minutes until glossy and thickened. Gradually adjust until you reach the desired cling.
  • Finish with dairy and brightness: Add the heavy cream after the sauce has simmered and reduced. Keep the heat low to prevent curdling. Finish with lemon juice, adding a teaspoon at a time to reach the desired brightness.
  • Butter and shine: Off the heat, swirl in 1 tablespoon of butter to enrich and gloss the sauce. This gives a silky mouthfeel without heaviness.
  • Fresh finish: A handful of chopped fresh parsley adds color and a fresh herbal note. If you prefer milder onion notes, substitute with chopped chives as a garnish.
  • Optional add-ins handling:
    – Mushrooms: Sauté separately until browned and their moisture has evaporated, then fold into the sauce near the end to avoid soggy texture.
    – Olives and capers: Add olives near the end to preserve their shape and brightness; rinse capers lightly if very salty and add with the wine to distribute evenly.
  • Serving and pairings: This braise pairs beautifully with mashed potatoes, polenta, rice, or crusty bread to soak up the sauce. A simple green vegetable provides a nice contrast to the richness.
  • Make-ahead and storage: Braised chicken can be cooled, covered, and refrigerated for up to 3–4 days. Reheat gently on the stove over low heat or in a warm oven to maintain tenderness. Sauce may thicken upon refrigeration; loosen with a splash of stock or water during reheating.

FAQ

What is Forgotten Chicken?

Forgotten Chicken is a cozy, one‑pot braised chicken dish simmered with onions, garlic, tomatoes, herbs, and broth until the meat is tender and the sauce is rich and flavorful. The name hints at the idea that the dish slowly develops deeper flavors while it “sits,” perfect for a comforting family meal.

What ingredients do I need?

Common ingredients include:

  • Bone-in, skin-on chicken thighs (preferred) or breasts
  • Olive oil
  • Onion and garlic
  • Canned crushed tomatoes or tomato paste
  • Low-sodium chicken broth
  • Dried thyme and rosemary
  • Paprika or smoked paprika
  • Bay leaf, salt, and pepper
  • Optional: carrots, mushrooms, potatoes, parsley for garnish
Can I use chicken breasts instead of thighs?

Yes, you can, but thighs stay juicier and more flavorful in a braise. If using breasts, reduce simmering time to 25–30 minutes and monitor internal temperature to avoid overcooking. Consider leaving the skin on for extra moisture or adding a splash of oil to compensate for leaner meat.

How long does it take to make Forgotten Chicken?

Plan for about 60–90 minutes total. Roughly 15 minutes of prep, 5–10 minutes browning, and 40–60 minutes of simmering to develop a rich sauce and tender chicken. If you add vegetables like potatoes or carrots, add a little more simmer time.

What cooking equipment do I need?

A heavy pot with a lid works best—ideally a Dutch oven or a deep, wide skillet. You’ll also want a slotted spoon, tongs, and a knife for prep. If you don’t have a heavy pot, any sturdy pot with a good lid will do, but you may need to adjust simmering time.

How do I brown the chicken properly?

Pat the chicken dry and season with salt. Heat oil in a heavy pot over medium-high heat. Do not crowd the pan; brown in batches if needed. Place skin-side down first until deeply golden, then flip and brown the other side. Remove and set aside before simmering with the aromatics.

How do I finish the sauce and thicken it?

Return the chicken to the pot with the tomato-onion sauce and simmer until the sauce reduces and coats the chicken. To thicken, simmer uncovered a bit longer or whisk in a small cornstarch slurry (1 teaspoon cornstarch mixed with 1 tablespoon water) or a teaspoon of flour mixed into a bit of the hot sauce. Adjust seasoning with salt and pepper as needed.

How should I store leftovers?

Let the dish cool, then store in an airtight container in the refrigerator for 3–4 days. Reheat gently on the stove or in the microwave, adding a splash of broth if the sauce has thickened too much. The flavors often improve after a day or two.

Can I freeze Forgotten Chicken?

Yes. Freeze the chicken and sauce separately or together in a covered, freezer-safe container for up to 3 months. Thaw overnight in the fridge and reheat slowly on the stove, adjusting the sauce with a bit of broth if it looks too thick.

Can I adapt this for dietary needs?

Absolutely. For gluten-free, ensure the broth is gluten-free and avoid flour-based thickeners; use a cornstarch slurry if needed. For dairy-free, skip butter if the recipe calls for finishing with butter. Omit or reduce salt for low-sodium versions. You can also adjust herbs to taste or add more vegetables for a heartier meal.

What should I serve Forgotten Chicken with?

Great accompaniments include steamed or fluffy rice, mashed potatoes, crusty bread for soaking up the sauce, or sautéed greens. A fresh parsley or lemon zest finish can brighten the dish.

Introduction / Hook

Imagine opening a dessert that seems almost too beautiful to cut, its surface a deep, glossy amber that looks caramelized from a sun-kissed oven. The first bite releases a whisper-soft, velvety cloud of cream cheese custard, rich with vanilla and a hint of dairy sweetness, only to be challenged by a bold, toffee-like top that crackles faintly under the knife. This is Basque cheesecake at its most magnetic: a crustless, fearless creation that celebrates contrast—darkly toasted exterior meeting a pale, creamy center. It’s a dessert that makes a statement without shouting, inviting quiet reverence as much as it invites second helpings. The aroma alone—caramel, vanilla, and warm dairy—is enough to conjure memories of intimate gatherings, candlelit meals, and kitchens where the simplest ingredients have the power to surprise and delight. When you serve it, you’re not simply presenting a cake; you’re sharing an experience that travels from a tiny bakery in the Basque Country to kitchens all over the world, gathering fans with every wobble, every crack, and every luxurious spoonful. This is the kind of dessert that asks to be shared, talked about, and remembered long after the last bite has disappeared.

The Story Behind the Dish

The Basque cheesecake, or tarta de queso as it is affectionately known in its homeland, is a testament to the beauty of simplicity. It grew from a tradition that favors uncomplicated, high-quality ingredients and then turned that tradition into something both dramatic and comforting. The legend most closely tied to its modern identity centers on La Viña, a beloved bakery in San Sebastián, where a bake-master’s intuition transformed a humble filling into a spectacular dessert. The technique—though deceptively straightforward—calls for a high-heat, crustless bake that caramelizes the top to a dark, almost smoky finish while preserving a sumptuously soft interior. Bakers and home cooks alike fell in love with its effortless elegance: no crust to distract from the creaminess, no heavy glaze to conceal the texture, just a pure focus on the filling’s lush mouthfeel and the top’s dramatic shimmer. The cake’s character—dangerously wobbly in the center, with an outer ring that holds a bit more structure—has become a global icon of what happens when culinary courage meets restraint. There’s something almost theatrical about the Basque cheesecake: a cake that looks as if it were burnt by accident, yet is crafted with intention, patience, and a deep respect for the ingredient’s natural flavors. The origins, perhaps grounded in the kitchens of the Basque Country and popularized by a single bakery’s philosophy, remind us that great desserts don’t always need bells and whistles—they thrive on a fearless approach to heat, texture, and balance.

Why You’ll Love This Recipe

  • Minimalist base with maximum impact: a few ingredients create a cake that feels luxurious and sophisticated.
  • Contrasting textures that linger on the palate—the blistered, caramelized top juxtaposed with a silken, custardy core.
  • Crustless by design, offering a gluten-free-friendly dessert that lets the filling shine.
  • Quick to assemble and forgiving in spirit, making it approachable for both weeknights and special occasions.
  • Visual drama that doubles as a conversation starter—the dark top, the pale interior, and the gentle cracks that tell a story of honest baking.

Flavor Profile & Texture

The Basque cheesecake is a study in delicious contradictions. On the surface, the top is deeply caramelized, with a heat-kissed aroma that echoes burnt sugar and vanilla. The color shift is not merely cosmetic; it signals a concentrated sweetness and a toasty edge that provides a quiet, almost smoky dimension. When you slice into it, the first impression is the scent: a warm bouquet of vanilla, dairy, and a subtle hint of sweetness that invites you to lean in closer. Beneath that aromatic shell lies a cream-cheese filling that is rich, smooth, and seductively soft—almost like a custard that has learned to hold its shape just enough to offer a gentle wobble on the plate. The texture is not uniformly dense; it’s an orchestra of light and indulgent creaminess with pockets of air that keep each bite buoyant rather than heavy. The tang from the cream cheese maintains balance, preventing the dessert from tipping into cloying sweetness, while the eggs lend a satin structure that yields elegantly with every forkful. Flavors of vanilla are bold but not overpowering, and you may notice faint notes of citrus or citrus zest in some iterations, which brighten the composition without stealing attention from the core cheese. All together, it’s a sensory choreography: the crackle of the browned surface, the kiss of sweetness, and the lingering, creamy finish that lingers like a sweet memory after a long conversation with an old friend.

Occasions & Pairings

Basque cheesecake is both a comforting staple and a show-stopper, suited to a spectrum of occasions. It shines as a refined finish to a weeknight dinner, yet its charismatic top and chiseled edges also earn admiration at more festive gatherings. Because it’s crustless, it sits comfortably on a simple dessert table or a post-dinner spread without requiring elaborate plating. For pairing, think balance and a touch of contrast. A glass of dessert wine or a late-harvest sweet wine can mirror the cake’s sweetness, while a small cup of strong coffee or an espresso-based drink can cut through the richness and highlight its vanilla notes. Fresh berries—strawberries, raspberries, or blueberries—provide a bright, tart counterpoint that brightens the overall flavor. A dollop of lightly whipped cream or a quenelle of vanilla custard can add extra creaminess if you’re serving it as part of a more formal dessert course. For brunches or daytime events, consider a light fruit compote or a citrus zest drizzle to add a refreshing lift. The cake’s bold top makes it a natural centerpiece; simple garnishes such as mint leaves, curled citrus zest, or a few delicate berry skewers can elevate the presentation without distracting from the dessert’s core character. In short, it’s a versatile, crowd-pleasing choice that can anchor a dinner party, a holiday meal, or a casual dessert night with equal grace.

Tips, Variations & Substitutions

Tips for the Perfect Texture

To honor the signature crumble-free, crustless texture, focus on quality ingredients and gentle handling. Use softened cream cheese for a smooth, cohesive filling, and blend until just combined to avoid dense pockets. Room-temperature eggs blend in seamlessly and help the batter set with a refined, airy glow. Since there’s no crust, the choice of baking vessel matters less for structure and more for promoting even color on the top; a light-colored pan can help prevent overly scorching the exterior, while parchment lining ensures clean removal and neat slices.

Dietary Variations

Gluten-free by design? Yes, the crustless approach makes this naturally gluten-free, provided all ingredients are certified gluten-free. For dairy-free versions, experiment with a high-fat coconut cream and a dairy-free cream cheese substitute, keeping an eye on texture and balance. Vegan adaptations can be challenging to perfect because the set and creaminess rely on dairy proteins, but creative bakers have achieved admirable results by blending cashews or using silken tofu with coconut cream. If you choose to explore such substitutions, treat the result as a respectful homage to the original rather than a strict replica.

Regional Twists & Flavor Variations

While the classic Basque cheesecake revels in its pure form, there’s room for tasteful experimentation. A whisper of citrus zest can lift the filling without overpowering it. A ribbon of fruit compote on top or a light dusting of cocoa powder can introduce a playful contrast. Some bakers drizzle a thin layer of caramel on the surface to heighten the burnt-sugar effect before serving. For a nutty dimension, a light sprinkle of toasted almond slivers or chopped pecans around the edge provides gentle crunch and aroma. If you’re feeling extra bold, a hint of espresso can marry beautifully with the vanilla and cream cheese, producing a mocha-inspired twist that remains faithful to the cake’s core essence.

Storage & Make-Ahead Ideas

The Basque cheesecake travels well through the day and improves with a short rest in the refrigerator. Once cooled, store it in an airtight container or wrap tightly to preserve moisture and texture. It keeps beautifully for several days in the fridge, developing a slightly firmer set and deeper vanilla-tinted flavor as it chills. When you’re ready to serve, a brief return to room temperature—or a short gentle warm in a low oven or microwave—can restore that luscious, ladylike creaminess that makes the dish so memorable. If making ahead for a party, bake and refrigerate the cake a day in advance; then slice and plate just before guests arrive for maximum impact. Freezing slices is possible, but the texture may shift slightly; if you do freeze, wrap each slice tightly and thaw in the fridge before bringing to room temperature for serving. A quick re-whisk of the surface after slicing can help restore a silkier appearance if it has settled during storage.

Fun Facts & Trivia

  • The signature burnt top is a deliberate hallmark of the style, not a burnt mistake—caramelization adds depth and a dramatic contrast to the creamy interior.
  • Crustless by design, Basque cheesecake highlights the filling’s texture as the star of the show.
  • Though widely associated with Basque Country, this dessert has become a global favorite, with pastry lovers adding their own regional accents wherever it’s made.
  • La Viña in San Sebastián helped to popularize the modern Basque cheesecake, turning a regional specialty into an international phenomenon.
  • Its simplicity makes it a favorite “date-night” dessert and a comforting, crowd-pleasing option for gatherings of all sizes.

Serving Suggestions & Final Thoughts

When you present Basque cheesecake, let its natural beauty speak for itself. Slice with a sharp knife warmed slightly to keep cuts clean, and plate with a single berry or a light dusting of powdered sugar for a minimalist, elegant finish. Pair with a coffee, a glass of dessert wine, or a sparkling drink to cleanse the palate between bites. The first forkful should reveal a warm, creamy interior punctuated by a crackled top—an invitation to savor, linger, and share. This dessert doesn’t demand complex sauces or elaborate garnishes; its charm lies in the balance of bold top and velvety center, the sweet meeting the tangy, the familiar becoming something unexpectedly sophisticated. Every bite honors the story of its origins—the Basque insistence on honest ingredients and simple, effective technique—while also embracing the modern kitchen’s love for texture, contrast, and pure comfort. Whether you’re cooking for a quiet night in or a lively dinner with friends, this Basque cheesecake is a surefire way to end on a note that feels both timeless and exciting. Enjoy the journey from the first aroma to the last lingering crumb, and let this iconic dessert become a favorite in your ongoing baking story.

Ingredients

Basque Cheesecake Base

  • Cream cheese, softened, full-fat (900 g / 2 lb, typically two 450 g bricks)
    → Cream cheese forms the creamy, dense base of the Basque cheesecake. Use bricks of cream cheese at room temperature and beat until completely smooth to avoid lumps. Using full-fat cheese yields a richer, custard-like texture. Do not use low-fat or whipped cream cheese, which can cause a lighter, unstable filling.
  • Granulated sugar (150 g / 3/4 cup)
    → Sugar sweetens the batter and helps with browning on the deeply caramelized top. Cream the sugar with the cream cheese until very smooth and fluffy for a silkier custard; if your sugar is clumpy, whisk it with the cheese briefly before adding eggs.
  • Eggs, large (4 eggs)
    → Eggs contribute structure, richness and moisture. Add one egg at a time, mixing on low until just combined; overmixing after the eggs are added can incorporate too much air and lead to cracks or an overly fluffy interior.
  • Heavy cream (360 ml / 1 1/2 cups)
    → Heavy cream adds moisture, richness, and a velvety custard-like interior. Use room-temperature cream for easier emulsification; avoid adding cold cream directly into hot batter to prevent curdling. Whisk in gently with the cheese mixture.
  • All-purpose flour (2 tablespoons, about 16 g)
    → A small quantity of flour stabilizes the custard to help it set without becoming overly dense, and reduces moisture separation. Sift the flour and whisk into the cheese mixture just until incorporated; avoid lumps and overmixing after adding flour.
  • Pure vanilla extract (2 teaspoons)
    → Vanilla adds depth and warmth to the filling. Use high-quality pure vanilla extract or paste for best aroma; if using vanilla bean, scrape seeds and mix with the cheese mixture for intensified flavor.
  • Salt (1/4 teaspoon)
    → Salt enhances the dairy sweetness and balances the richness; adjust if your cream cheese is salted. If using salted cheese, reduce or omit the added salt accordingly.
  • Parchment paper, to line a 9-inch (23 cm) springform pan (and optional melted butter or nonstick spray to help the parchment adhere)
    → Lining with parchment ensures clean release of the tall Basque cheesecake without a crust. Leave a small overhang to easily lift the cake out when cooled; lightly grease the parchment if you want extra assurance against sticking.

Optional Add-ins

  • Lemon zest, finely grated (1 teaspoon)
    → Adds a bright citrus note that balances the richness and highlights the vanilla. Use very fresh lemon zest; zest only the yellow outer layer, avoiding the white pith which can impart bitterness. Fold zest into the cream cheese and sugar mixture just before adding the eggs for even distribution.

Instructions

  • Preheat the oven to 400°F (205°C) and line a 9-inch (23 cm) springform pan with parchment paper, letting the parchment extend about 2 inches beyond the rim on all sides to form a tall overhang; lightly grease the parchment with melted butter to help it cling.
    → This high heat drives the deep caramelization and the signature burnt exterior of Basque cheesecake, while parchment ensures clean release without a crust.
  • Set the prepared pan on a rimmed baking sheet to catch any overflow and to stabilize the pan during the high-heat bake.
    → The sheet helps prevent spills from smoking in the oven and keeps your oven cleaner.
  • Remove the cream cheese from the refrigerator and cut it into 3–4 pieces; let it sit at room temperature for about 60 minutes until very soft and pliable.
    → Softened cream cheese blends smoothly, preventing lumps and ensuring a dense, creamy filling.
  • In a large bowl or on a stand mixer fitted with a paddle attachment, beat the cream cheese on medium speed until completely smooth and creamy, about 2–3 minutes; scrape the bowl midway to incorporate any unmixed bits.
    → A smooth base avoids graininess and contributes to a velvety custard texture.
  • Add the granulated sugar and continue beating on medium-high speed until the mixture is very smooth, pale, and fluffy, about 2–3 minutes; ensure the sugar is fully dissolved to prevent gritty texture.
    → Sugar helps with sweetness, moisture balance, and browning on the top, yielding a glossy, silky filling.
  • If using lemon zest, fold in 1 teaspoon of finely grated zest now using a spatula, distributing it evenly through the cheese-sugar mixture.
    → Zest provides a bright citrus note that offsets richness and enhances vanilla aroma; add before eggs to ensure even distribution.
  • With the mixer on low speed, add the eggs one at a time, beating after each addition until just combined and the batter looks cohesive; avoid overmixing to prevent incorporating excess air that can crack the surface.
    → Adding eggs gradually and not overmixing preserves the custard’s delicate structure and reduces cracks.
  • With the mixer on low, gradually pour in the heavy cream in a thin, steady stream, beating until the mixture is smooth and fully emulsified; stop as soon as it is homogeneous.
    → Cream contributes moisture, richness, and a luscious, custardy texture; overheating can cause separation, so emulsify gently.
  • Beat in the pure vanilla extract and the salt on low speed until just combined; scrape the bowl to ensure even distribution.
    → Salt enhances the dairy sweetness and balances richness; vanilla deepens aroma and ties the flavors together.
  • Sift in the all-purpose flour and fold it in using a gentle motion with a spatula until just incorporated; do not overwork once the flour is added.
    → A small amount of flour stabilizes the custard, helping it set while remaining indulgently creamy, without making it dense.
  • Pour the batter into the prepared pan, smooth the surface with a spatula, and tap the pan firmly on the counter a few times to release any trapped air bubbles.
    → The tap removes air pockets that could cause cracks and an uneven top; a smooth surface bakes more evenly.
  • Bake on the center rack at 400°F (205°C) for 45–50 minutes, or until the top is deeply caramelized and the center still wobbles slightly when the pan is gently jiggled.
    → The high heat creates the characteristic burnt, caramelized top while the center remains custardy; the wobble ensures it is set but not overcooked.
  • Turn off the oven, crack the door open, and let the cheesecake rest in the oven for 15 minutes to finish setting gradually and minimize cracking.
    → A gentle finish in the oven stabilizes the interior and preserves the dramatic top color.
  • Remove the pan from the oven and allow the cheesecake to cool on a rack at room temperature for 2–4 hours, then refrigerate for at least 4 hours or overnight to fully set and develop flavor.
    → Chilling firms the custard, improves clean slicing, and mellow flavors after the intense bake.
  • Carefully run a thin knife or offset spatula around the inside of the parchment to separate any softened edges, then release the springform ring and lift the cake by the parchment overhang onto a serving platter.
    → This gentle release prevents tearing the tall, delicate top and makes presentation neat.
  • Slice into wedges and serve at room temperature or lightly chilled; offer optional accompaniments such as fresh berries or a dusting of powdered sugar if desired.
    → Basque cheesecake is typically enjoyed without crust, with a luxuriously creamy interior and a visually striking burnt top that remains tender inside.

Notes

These Basque cheesecakes are rich, creamy, and deeply caramelized on top, with a crustless, rustic finish. For best results, use full-fat cream cheese at room temperature and beat until completely smooth to avoid lumps; cream the sugar with the cream cheese until very smooth and fluffy for a silkier custard. Add eggs one at a time on low speed, mixing just until combined to prevent overmixing and cracks. Whisk in heavy cream until the mixture is silky, then sift in the all-purpose flour and whisk just until incorporated. Stir in pure vanilla and a pinch of salt, adjusting for salted cheese. Line a 9-inch (23 cm) springform pan with parchment, leaving overhang to lift the cake, and lightly grease the parchment for easier release. Bake in a hot oven (about 400–425°F / 205–220°C) until the top is deeply caramelized and the center still jiggles slightly, typically 45–60 minutes; the cake will puff and then deflate as it cools. Cool completely in the pan, then refrigerate for several hours or overnight before slicing for clean cuts. Serve plain or with a light dusting of powdered sugar, and optionally add lemon zest for brightness or a berry compote on the side. Leftovers keep refrigerated for up to 5 days, and the cake freezes well for longer storage. If using the optional lemon zest, fold it into the cheese mixture just before adding the eggs for even distribution. Always use fresh ingredients and avoid low-fat or whipped cream cheese to maintain the signature dense, custardy texture.

Tips

Tips for Best Basque Cheesecake

  • Let all dairy come to room temperature before mixing. Softened cream cheese (and heavy cream) emulsify better and help you achieve a silky, lump-free filling.
  • Cut the cream cheese into smaller pieces and beat with the sugar until completely smooth and very fluffy. This creates a creamy custard base and reduces the chance of graininess.
  • Add eggs one at a time on low speed, mixing just until combined after each addition. Overmixing after eggs are added can whip in too much air and cause cracks or an overly airy interior.
  • Whisk in the heavy cream gently until the mixture is smooth. If it looks curdled at first, keep mixing on low until it comes together.
  • Sift the flour and whisk it in just until incorporated. Too much mixing after adding flour can create a denser texture or lumps.
  • Use high-quality vanilla extract or paste for a warm, aromatic note. If using a vanilla bean, scrape the seeds and fold them in with the cheese mixture for deeper flavor.
  • Balance the salt by considering your cream cheese. If you use salted cheese, reduce or omit the added salt to avoid overly salty filling.
  • Line a 9-inch (23 cm) springform pan with parchment paper, leaving some overhang for easy lifting. Lightly grease the parchment to help it adhere and prevent sticking.
  • Optional add-in: lemon zest (1 teaspoon) can brighten the filling. Fold the zest into the cheese and sugar mixture before adding the eggs for even distribution.
  • Pour the batter into the pan and gently tap it on the counter to release any trapped air bubbles. Smooth the top with a spatula for an even bake.
  • Bake at a high temperature (roughly 400–425°F / 200–220°C) until the top is deeply caramelized and the center remains slightly wobbly. The characteristic Basque top is dark, almost burnt looking—this is intentional.
  • Avoid cracking by minimizing oven door openings during baking and cooling. Let the cake cool in the oven with the door cracked slightly for 15–30 minutes, then transfer to the counter to finish cooling.
  • Cool completely, then refrigerate for at least 4 hours or overnight. Chilling helps the filling set and makes slicing cleaner.
  • When slicing, use a sharp knife warmed under hot running water, wipe clean between cuts for neat, clean slices. Remove the cake from the pan using the parchment overhang if desired.
  • Store leftovers in the refrigerator, covered, for up to 5 days. For longer storage, wrap slices and freeze; thaw in the refrigerator before serving.
  • Serving ideas: serve plain to savor the caramelized top, or pair with a simple berry compote or fresh berries to add a tart contrast to the rich filling.

FAQ

What makes Basque cheesecake unique and why is it considered the “Best”?

Basque cheesecake is known for its crustless,-topped appearance and intensely caramelized top. It’s baked at a high temperature to create a deeply browned, almost burnt surface while the center stays creamy and smooth. The “Best” method focuses on using room-temperature ingredients, proper pan prep, and the traditional no-crust bake to achieve that signature texture and look.

Do I need a crust for Basque cheesecake?

No crust is traditional. The batter is poured directly into the pan, which allows it to bake into a tall, rustic cake with a dark, caramelized top. If you really want a crust, you can add a thin crust, but it won’t be the classic Basque style.

What pan size and lining do you recommend?

Use an 8-inch (20 cm) round springform pan for the classic height. Line the bottom and sides with parchment paper (grease lightly if needed) so the batter can rise and release cleanly. A taller, well-lined pan helps prevent sticking and yields the signature tall, bake-often domed cake.

What ingredients are needed and are there substitutions?

Common choices: cream cheese (at least 2 cups), granulated sugar, eggs, heavy cream, vanilla extract, and a pinch of salt. Optional: 1–2 tablespoons of all-purpose flour for a slightly firmer texture. Substitutions: use lactose-free cream cheese or dairy-free cream alternatives (texture will vary); eggs at room temperature help with emulsification; you can omit flour for a purer custard texture, or use a gluten-free flour blend if needed.

What is the baking temperature and approximate time?

Bake at a high temperature, typically 400–450°F (200–230°C), for about 40–55 minutes. The top should be deeply golden to dark brown and the center will be slightly jiggly when you remove it from the oven. If your oven runs hot or you see excessive browning, you can drop to 375–400°F (190–200°C) and bake a bit longer.

Should I use a water bath?

No water bath is traditional for Basque cheesecake. It’s baked dry to help achieve the characteristic tall, brûléed top and creamy interior. If you’re worried about cracking, avoid opening the oven door during the first half of baking and ensure your oven temperature is accurate. A slight crack is normal and part of the style.

How should I cool, slice, and serve Basque cheesecake?

Let the cake cool in the pan on a rack for about 1–2 hours until it’s stable but still slightly warm, then refrigerate for at least 2 hours or overnight for clean slicing. Use a warm knife to slice for neat squares. Serve plain or with a dusting of powdered sugar, fresh berries, or a berry coulis. It’s delicious at room temperature or slightly chilled.

How long does it stay fresh and can I freeze it?

Store slices in the fridge for 3–4 days. For longer storage, wrap slices tightly and freeze for up to 2–3 months. Thaw overnight in the fridge, then bring to room temperature before serving for best texture.

What are common problems and how can I fix them?

Cracks on top: usually from overbaking or temperature fluctuations. Fix by ensuring oven is accurate, bake until just set in the center, and avoid opening the door mid-bake. Sinking or wobbliness: the center should be gently jiggly when hot and set as it cools; if it sinks dramatically, it may have been underbaked or cooled too quickly. Burnt top with undercooked center: reduce heat slightly or bake a bit longer at a lower temperature, and position the cake in the middle of the oven. If the top browns too fast, tent with foil or rotate the pan halfway through baking. Sticking to the pan: line well with parchment and allow the cake to cool before attempting to release it.

Can I customize flavors or toppings?

Yes. Add a teaspoon of vanilla or a zest of lemon or orange for brightness. Toppings like fresh berries, berry compote, salted caramel, or a dusting of powdered sugar pair nicely. For variation, you can swirl in a small amount of citrus purée or a spoon of cocoa powder for a chocolatey Basque version. You can also experiment with a pinch of cinnamon or cardamom for subtle warmth.

How do I adjust the recipe for a larger or smaller pan?

To scale for a different pan, compensate the batter volume roughly by the pan area. A larger pan will yield a thinner cake, so reduce baking time slightly; a smaller pan will be thicker and may need a bit longer. If you’re changing pan sizes, aim for similar batter-to-pan height, and monitor the cake closely during bake—the center should remain slightly jiggly when it comes out of the oven.

Introduction / Hook

Imagine waking to the warm, inviting scent of vanilla and caramel drifting through the kitchen, a soft hum of espresso in the air, and a tray of breakfast that looks like a dessert and somehow tastes like a comforting hug. Overnight Crème Brûlée French Toast turns a humble loaf into an indulgent morning ritual, marrying the custardy richness of crème brûlée with the forgiving, dreamy texture of French toast. The magic happens while you sleep: you soak slices of bread in a lush custard mixture overnight, then in the morning you wake to a dish that is quivering with creamy depth yet crowned with a crisp, caramelized sugar crust that crackles like tiny winter fairy dust. It’s the kind of brunch centerpiece that makes guests swoon, kids cheer, and weekday mornings feel like a celebration. The scent alone—a blend of warm cream, vanilla bean, a hint of citrus, and a touch of cinnamon—promises comfort and elegance in every bite. If you’ve ever wished for a perfect balance between “make-ahead” and “special-occasion flavor,” this recipe is your answer. It feels luxurious, yet it’s surprisingly practical: simple pantry ingredients, a hands-off overnight rest, and a reveal that turns a plain breakfast table into a memory-making moment. And because it’s French toast with the crème brûlée vibe, you get that nostalgic brunch treat without abandoning the cozy familiarity of home. The result is a slice that’s custardy and lush, with a glossy sweetness that doesn’t overwhelm, a crust that shatters when tapped with a spoon, and a lingering vanilla-sugar perfume that lingers long after the last bite. This is breakfast that thinks it’s dessert, and dessert that knows it’s breakfast—perfect for weekends when you want to slow down, but still want to feel pampered from the first bite.

The Story Behind the Dish

Crème brûlée and French toast share a delightful kinship: both are celebrations of custard’s silken interior and a top layer that crackles with caramelized sugar. In many ways, Overnight Crème Brûlée French Toast is a love letter to the indulgent brunch traditions of Western Europe, reimagined for modern mornings. The concept draws from two classics: the custard-rich richness of crème brûlée, usually crowned with a brittle sugar crust, and the creamy, comforting simplicity of French toast, soaked bread transformed into a custard-soaked dream through gentle heating. The “overnight” twist is where the magic truly happens. Bread becomes a sponge, absorbing the flavors of eggs, cream, vanilla, and a whisper of zest. The next day, a quick bake or pan-sear sends the surface into a delicate, lacquered caramelization that crackles under the spoon, releasing the warm, vanilla-forward aroma that has made crème brûlée a timeless favorite. This dish, in its most comforting form, is the result of holiday brunches, lazy Sunday mornings, and improvised gatherings around a sunlit table. It embodies the spirit of hospitality—preparation that respects everyone’s time, flavors that evoke nostalgia, and the joy of sharing something you poured time into crafting. There’s a playful story in every slice: the patience of an overnight soak, the transformation from soft bread to a custard-laden centerpiece, and the triumphant moment when the sugar crystallizes into a glassy top. It is, in essence, a contemporary homage to a classic French dessert, distilled into a practical, crowd-pleasing morning that feels decadent without demanding top-tier culinary finesse—or hours of labor.

Why You’ll Love This Recipe

  • Make-ahead brilliance: assemble the custard-soaked bread the night before and wake up to a nearly effortless brunch centerpiece.
  • Ridiculously comforting: the custard is velvety and rich, with warm vanilla, a hint of citrus, and a whisper of spice that lingers in the palate.
  • Textural contrast: a soft, tender interior with a crisp, caramelized top that crackles under a fork, delivering that satisfying “crunch then melt” moment.
  • Versatile and forgiving: a forgiving recipe that works with everyday bread or a richer loaf, making it adaptable to what you have on hand.
  • Showstopper presentation: the caramelized crust adds an elegant, bakery-like finish that’s as impressive as it is delicious.
  • Family-friendly without feeling fussy: it feels like a treat, but it’s simple enough for weekend mornings or special occasions alike.
  • Customizable base: you can tailor the flavor profile with your favorite spices, citrus zests, or a hint of liqueur to suit the occasion.

Flavor Profile & Texture

The core of this dish is a custard-forward experience: the bread is gently soaking in a mixture of eggs, cream, milk, and vanilla, absorbing sweetness without becoming soggy. The vanilla anchors the flavor, while a touch of citrus zest—often lemon or orange—lifts the profile with a bright citrus note that keeps the custard from feeling heavy. A whisper of cinnamon or nutmeg can be introduced for warmth, and a pinch of salt heightens the sweetness, creating a balanced, dessert-like breakfast that doesn’t skew overly sweet. When baked or finished under heat, the surface of the dish develops a delicate caramelized layer: a thin, glossy crust that crackles under pressure, releasing a fragrant sugar perfume and a satisfying snap. Beneath that top lies a creamy, luscious interior, each slice holding its own soft, custardy richness—like a luxurious bread pudding with the elegance of crème brûlée. The texture is key: the interior should be smooth and tender, not dense; the outer crust should provide a delightful counterpoint with a light crunch that shatters into the melt-in-the-mouth center. The overall sensation is a harmonious duet of silk and snap, a temperature play between warm, comforting custard and the crisp top that adds a celebratory feel. The flavor is decadently vanilla-forward, but not cloying, so it pairs beautifully with maple syrup, fresh fruit, a dollop of whipped cream, or a splash of citrus-infused syrup. This is a dish that invites you to savor the process as much as the result—the anticipation of a sleep-time soak, the moment of the first golden bite, and the lingering aroma that makes the entire house feel instantly welcoming.

Occasions & Pairings

Overnight Crème Brûlée French Toast shines at a variety of occasions, from extra-special weekend breakfasts to festive holiday brunches. It’s a showstopper that feels grand enough for Christmas morning or a birthday celebration but approachable enough for a lazy Sunday with family and close friends. Because it’s forgiving and easy to scale, it’s also perfect for brunch with a crowd: you can prepare a large pan of it in advance and simply bake it to serve, freeing you to mingle rather than slave over the stove. This dish pairs beautifully with a range of accompaniments and beverages, enabling a cohesive brunch spread:

  • Fruit accents: fresh berries, sliced pears, or citrus segments provide bright contrast and a palate-cleansing note between rich bites.
  • Sweet accompaniments: a drizzle of maple syrup or honey, a dusting of confectioners’ sugar, or a quick berry compote elevates the dish without overpowering its vanilla essence.
  • Creamy counterpoints: a dollop of lightly sweetened whipped cream or a spoonful of vanilla yogurt adds a light, airy balance to the custard’s depth.
  • Beverage pairings: a bright, lightly sparkling beverage—orange juice with a splash of sparkling water, or a lightly roasted coffee—complements the creamy richness; for guests who enjoy a more decadent pairing, a sparkling wine or a light dessert wine can elevate the experience.
  • Side dish harmony: consider a simple, crisp green salad with citrus vinaigrette to cut through the richness, or a side of roasted fruit to mirror the caramel notes.

Tips, Variations & Substitutions

Every good recipe has room for personalization, and this one is particularly adaptable. Here are many ways to tailor Overnight Crème Brûlée French Toast to your pantry, dietary needs, or flavor preferences:

  • Flavor boosters: add a pinch of salt to the custard for balance, and mix in citrus zest (lemon, orange, or grapefruit) for a brighter aroma that complements the vanilla.
  • Spice palette: cinnamon and nutmeg are classics, but you can experiment with cardamom, ground ginger, or even a hint of clove for a warmer profile.
  • Oral nutrition tweaks: use a lighter cream or dairy-free milks (almond, soy, oat) with a touch more rice or cornstarch to maintain a custardy texture; for a richer vegan version, blend coconut milk with a neutral oil and a plant-based butter; for a gluten-free option, choose your favorite sturdy gluten-free bread that holds up to soaking.
  • Sweetness control: if you’re watching sugar, you can reduce the sweetness in the custard slightly and rely on the caramelized top for the sugar bite; for extra caramel crunch, finish with an extra sprinkle of sugar and a brief torching or broiling (carefully, with an oven-safe pan).
  • Bread choices: thicker-sliced brioche, challah, or a sturdy pull-apart loaf works beautifully; day-old bread with a slight staleness helps the custard soak evenly without getting soggy.
  • Nutty notes: a handful of toasted almonds, pecans, or pistachios sprinkled on top before baking adds texture and a toasty aroma.
  • Alcoholic twist: a splash of Grand Marnier, Rum, or Brandy in the custard can deepen the dessert-like quality; ensure it’s balanced with the creaminess and not overpowering.
  • Fruit-forward variation: fold in a layer of thinly sliced apples or peaches between bread slices for a fruity contrast that pairs well with the vanilla and caramel.
  • Make-ahead strategy: you can assemble the soaked bread in a casserole dish, cover tightly, and refrigerate for up to 12 hours before baking. If your schedule is tighter, you can reduce the soak time to a few hours, though the overnight method tends to yield the most indulgent texture.

Storage & Make-Ahead Ideas

One of the biggest advantages of the overnight approach is how well it stores and reheats. If you have leftovers or you want to prepare for the next day, here are practical tips to maintain flavor and texture:

  • Refrigeration: after soaking, cover the dish tightly and refrigerate. This helps the custard set slightly and lets flavors meld. The dish can rest in the fridge for up to 12 hours.
  • Reheating methods: for best results, bake the dish in the oven until the top crispest to your liking and the interior is heated through; you can also rewarm individual portions in a skillet with a splash of milk to rehydrate the custard, then finish with a quick caramelization on top.
  • Leftover storage: refrigerate slices in an airtight container for up to 2-3 days. For best texture, reheat gently to avoid drying out the custard.
  • Freezing: the dish can be assembled, then frozen before baking; bake from frozen, adding extra time and watching for the top to crisp up right as the interior fully warms.
  • Make-ahead tips: if you’re entertaining, prepare the custard and the bread a day in advance, arrange the slices in the dish, cover, and refrigerate. In the morning, you’ll simply bake and serve, turning prep time into a seamless flow from countertop to table.

Fun Facts & Trivia (Optional)

Curious notes that enrich the story behind this breakfast-forward treat:

  • Crème brûlée’s iconic crack is created by a very hot surface caramelization that creates a glassy sugar layer. In this breakfast adaptation, that crack is echoed on the top of the French toast, offering a playful breakfast-dessert contrast within each bite.
  • French toast itself is a centuries-old method known as “pain perdu” in France, which translates to “lost bread.” It’s a clever way to rescue day-old bread by turning it into a luscious, custard-soaked dish that tastes like a real treasure.
  • The combination of custard and caramelization is a nod to the culinary technique that blends egg-based custards with sugar work, bridging brunch and dessert in a way that feels both nostalgic and modern.
  • Vanilla, a star in crème brûlée, has long been celebrated for its aromatic complexity—its pods and vanillas origins in tropical climates add a globally inspired fragrance to this brunch staple.
  • Texture is a universal language in comforting foods; the crisp top in an otherwise soft custard interior evokes the sensory memory of a bakery, making this dish a crowd-pleaser across ages and cultures.

Ingredients

    – Bread
    – 8 thick-sliced brioche or challah bread, about 1.5-2 inches thick

    → These rich, sturdy slices soak up the custard without falling apart. If possible, use day-old bread for better texture; trim crusts if you prefer neater slices, but crusty edges add nice contrast when fried.

    – Crème Brûlée Custard
    – 6 large eggs

    → Eggs provide structure and richness to the custard. Using a mix of whole eggs helps create a firm yet silky set during baking or chilling. Whisk thoroughly to emulsify the mixture.
    – 4 large egg yolks

    → Yolks deliver extra silkiness and depth to the custard, creating that classic Crème Brûlée mouthfeel in French toast form. Strain if you want an ultra-smooth finish.
    – 1 1/2 cups heavy cream

    → The creamy base of the custard; use real heavy cream for a luscious texture. For a lighter version, substitute part with milk, but expect a looser set.
    – 1/2 cup whole milk

    → Adds a touch of lightness and helps the custard soak into the bread evenly. If you want richer flavor, reduce or omit, keeping more cream instead.
    – 1/2 cup granulated sugar

    → Sweetens the custard and helps balance the vanilla. Whisk until completely dissolved to avoid graininess; adjust to taste.
    – 2 teaspoons vanilla extract (or 1 vanilla bean, scraped)

    → Vanilla provides aromatic depth that pairs perfectly with caramelized sugar. Vanilla bean seeds offer a more intense, natural flavor; if using a bean, simmer the milk and cream with the pod first, then whisk in the seeds.
    – 1/4 teaspoon salt

    → Enhances overall flavor and helps bring out sweetness; a pinch makes the custard taste more vibrant.

    – Optional Spices
    – 1 teaspoon ground cinnamon

    → Adds warm spice that complements the brûléed crust. You can whisk cinnamon into the custard or dust lightly on top for aroma.
    – 1/4 teaspoon ground nutmeg

    → Classic pairing with custards; use sparingly so it doesn’t overpower the vanilla and creaminess.

    – Brûlée Topping
    – 2-3 tablespoons granulated sugar (for finishing)

    → The caramelized layer that creates the signature crack. Spread evenly in a thin layer; evenness ensures a uniform crust when torched.

    – Pan-Frying
    – 1-2 tablespoons unsalted butter

    → Used to fry the soaked bread slices until golden and crisp. Maintain medium-low heat to avoid burning; you can add a touch of oil if you prefer a higher smoke point.

    – Toppings and Finish
    – Fresh berries (optional), 1 cup mixed berries

    → Provide a bright counterpoint to the rich custard. Rinse and pat dry; slice larger berries for even distribution.
    – Powdered sugar, for dusting (optional)

    → A light dusting adds a festive touch and a touch of sweetness. Sift to prevent clumps for a clean finish.
    – Maple syrup or caramel sauce

    → Drizzle just before serving to add moisture and extra sweetness; maple syrup lends a warm, nuanced sweetness, while caramel offers a richer, toffee-like finish.

Instructions

  • Whisk together 6 large eggs, 4 large egg yolks, 1 1/2 cups heavy cream, 1/2 cup whole milk, 1/2 cup granulated sugar, 2 teaspoons vanilla extract, and 1/4 teaspoon salt until completely smooth and the sugar is dissolved.
    → This creates a cohesive custard base with no grainy pockets, promoting a silky, uniform set during cooking or chilling.
  • Whisk in the optional spices: 1 teaspoon ground cinnamon and 1/4 teaspoon ground nutmeg with the vanilla, ensuring even distribution; whisk until the spices are fully incorporated.
    → Even distribution prevents concentrated spice spots and keeps the aroma balanced in every bite.
  • Lightly toast the bread slices just enough to dry the surface and firm the crumb without drying out the interior; use a toaster or a gentle bake in a 300–325°F (150–165°C) oven for 1–2 minutes per side.
    → A lightly toasted crust helps the slices soak up the custard evenly and holds their shape during overnight soaking.
  • Arrange the bread slices in a large shallow dish and pour the custard evenly over all slices, turning them once to coat both sides; press gently with a spatula so every face absorbs custard.
    → Ensuring complete contact with the custard yields uniform texture and prevents dry edges when cooked.
  • Cover and refrigerate the assembled dish overnight (8–12 hours) to allow thorough penetration of custard into the bread; if possible, flip the slices halfway to promote even soaking.
    → A long soak yields a custardy interior and prevents soggy exterior, giving a balanced bite after frying.
  • Preheat a heavy skillet or cast-iron pan over medium-low heat and melt 1–2 tablespoons unsalted butter, swirling to coat the surface; this fat adds flavor and helps form a crisp, golden crust.
    → Proper fat distribution and controlled heat prevent sticking and scorching, producing an evenly browned crust.
  • Remove the slices from the custard one at a time, letting excess drip back into the soaking dish and allowing the surface to set briefly on a rack or plate; this prevents soggy patches in the skillet.
    → Draining keeps the crust from steaming in the pan and ensures a crisp exterior.
  • Fry each soaked slice until deeply golden on both sides, about 2–3 minutes per side, adjusting the heat to maintain a steady sizzle without burning; flip once with tongs for even browning.
    → A steady medium-low heat yields a crisp exterior while preserving a custardy interior and avoiding a tough texture.
  • Sprinkle 2–3 tablespoons granulated sugar evenly over the top of each slice and use a culinary torch to caramelize the sugar in even, overlapping sweeps, holding the torch 4–6 inches away; if using a broiler, place on a rack and broil 1–2 minutes until a crackling amber crust forms.
    → The brûlée layer provides the signature crack and a contrast of textures between the crisp crust and creamy center.
  • Plate the brûléed French toast immediately, garnish with fresh berries if desired, dust with a light veil of powdered sugar, and finish with a drizzle of maple syrup or caramel sauce to taste.
    → Fresh fruit brightens the dish, while the syrup adds moisture and enhances the overall sweetness and lacquer-like glaze.

Notes

These overnight crème brûlée French toast are ultra-decadent, with custard-soaked brioche that bakes into a silky center and a crackly brûléed top. You can customize them by adding citrus zest (orange or lemon), a splash of vanilla or liqueur, or by finishing with toasted nuts, fresh berries, or a dollop of whipped cream. They refrigerate well and can be assembled the night before for a make-ahead breakfast; you can freeze assembled slices (unbaked) for up to 2-3 months and bake from frozen when ready to serve. For an extra indulgent finish, serve with warm maple syrup, caramel sauce, or a dusting of powdered sugar. Always ensure your bread is gluten-free if you have gluten intolerance, and check that all add-ins and toppings are gluten-free if needed.

Tips

Tips for Perfect Overnight Crème Brûlée French Toast

Bread selection and soaking

  • Use sturdy, rich bread: 8 thick-sliced brioche or challah around 1.5–2 inches thick absorbs custard without breaking.
  • If possible, use day-old bread for the best texture; it holds up better during soaking and frying.
  • Trim crusts if you prefer neater slices, but don’t worry about removing all crusts—crusty edges add nice contrast when fried.
  • Slice slices evenly to ensure uniform soaking and cooking; consider toasting lightly if bread feels very fresh to help it soak evenly.

Custard mix: texture and balance

  • Whisk eggs, yolks, and sugar thoroughly until the mixture is smooth and pale to ensure a silky set.
  • Warm the cream and milk with vanilla (or vanilla bean) to help emulsify; temper the hot dairy into the eggs gradually to prevent curdling.
  • For an ultra-smooth finish, strain the custard through a fine-mesh sieve after mixing.

Flavoring and spices

  • Vanilla is key—use extract or scrape a vanilla bean for deeper aroma; if using a bean, simmer with the dairy and whisk in the seeds off heat.
  • Ground cinnamon and nutmeg add warmth; add sparingly so they enhance the vanilla and creaminess rather than overpower it.
  • Salt helps balance sweetness and enhances overall flavor; a small pinch makes the custard taste more vibrant.

Sugars: sweetness and texture

  • Whisk the sugar into the custard until fully dissolved to avoid a gritty, grainy texture.
  • Before serving, dust the brûlée surface with a thin, even layer of granulated sugar to guarantee a smooth, crackly crust.

Overnight soak and chilling

  • Pour the cooled custard over the bread in a single layer, then cover and refrigerate overnight to let the bread soak and flavors meld.
  • Remove the dish from the fridge about 15–20 minutes before cooking to promote even cooking and prevent a cold center.

Brûlée topping: caramelization tips

  • Spread 2–3 tablespoons of sugar evenly across the surface for a uniform, crisp crust.
  • Use a culinary torch for precise caramelization; keep the flame moving in thin, overlapping passes to avoid scorching the sugar.
  • Alternatively, finish under a hot broiler for 1–2 minutes, watching closely to prevent burning.

Pan-frying vs. baking: cooking method

  • For a crispy exterior, fry in 1–2 tablespoons unsalted butter over medium-low heat; add a touch of oil if you’re concerned about butter burning.
  • Cook until the underside is golden and crisp, then flip gently and cook the other side to set the custard center without overbrowning.
  • Or bake: preheat to 350°F (175°C) and bake for about 25–35 minutes, until the custard is set and edges are lightly golden; finish with brûlée topping after baking if desired.

Assembly, resting, and serving

  • Let fried slices rest briefly on a rack to drain excess butter and keep surfaces crisp.
  • Top with fresh berries for brightness; a light dusting of powdered sugar adds a festive touch without sweetness overwhelming the dish.
  • Drizzle maple syrup or caramel sauce just before serving to add moisture and flavor; maple gives warm nuance, caramel offers a rich toffee note.

Make-ahead, storage, and leftovers

  • Assemble and soak overnight, then refrigerate; this makes breakfast service easier and ensures maximum flavor absorption.
  • Leftovers refrigerate for 2–3 days; reheat in a 350°F oven or toaster oven to refresh the crust, and re-brûlée the top for extra crackle if desired.

FAQ

What is Overnight Crème Brûlée French Toast?

A rich breakfast casserole where day‑old brioche or challah is soaked in a vanilla custard inspired by crème brûlée. The bread absorbs the custard, is baked until set, and the top is caramelized to create a crisp brûlée crust when served.

What ingredients do I need?
  • 6 cups cubed brioche or challah bread (day-old works best)
  • 4 cups heavy cream
  • 1 cup whole milk
  • 6 large eggs
  • 1/2 cup granulated sugar
  • 1 teaspoon vanilla extract
  • 1/4 teaspoon salt
  • Optional: 1/2 teaspoon ground cinnamon and/or zest of 1 orange or lemon
  • Extra granulated sugar for the brûlée topping
  • Optional toppings: maple syrup, fresh berries, powdered sugar
What equipment do I need?
  • 9×13 inch baking dish (or similar)
  • Mixing bowls and a whisk
  • Measuring cups and spoons
  • Parchment paper or plastic wrap for chilling
  • Oven or stovetop for cooking the brûlée topping
  • Culinary torch or broiler to caramelize the top
How do I make the custard and soak the bread?

Steps:

  1. Whisk together the eggs, cream, milk, sugar, vanilla, salt, and optional cinnamon and citrus zest until smooth.
  2. Place the bread cubes in the baking dish in a single or lightly layered layer.
  3. Pour the custard over the bread, pressing gently to ensure each piece is soaked.
  4. Cover and refrigerate overnight (or at least 6–8 hours) to let the bread absorb the custard.
How long can I refrigerate the soak before cooking?

Let the bread soak overnight for best flavor and texture. You can refrigerate for 6–24 hours. If you’re short on time, even a 2–4 hour soak will work, but the texture won’t be as rich.

How do I bake it and how long does it take?

Directions:

  1. Preheat the oven to 350°F (175°C).
  2. Uncover the soaked dish and bake, covered, for 30–40 minutes until the center is almost set.
  3. Uncover and bake for another 15–20 minutes, or until the top is lightly browned and a knife inserted near the center comes out with just a few moist crumbs.
  4. Let it cool for a few minutes before brûlée topping.
How do I brûlée the top?

Caramelize the sugar on top for a brûlée crust:

  1. Sprinkle an even layer of granulated sugar over the baked French toast.
  2. Use a culinary torch to caramelize the sugar until it forms a deep amber crust. Move slowly to avoid burning.
  3. Alternatively, place under a hot broiler for 1–3 minutes, watching constantly until caramelized.
  4. Let the top rest for a couple of minutes before slicing and serving.
How do I serve and store leftovers?

Serving suggestions:

  • Serve warm with fresh berries, a drizzle of maple syrup, or a dollop of whipped cream.
  • Dust with a light sprinkling of powdered sugar for presentation.

Storage:

  • Leftovers refrigerate well for 2–3 days. Reheat gently in the oven or microwave and, if desired, re-brûlée the top briefly to restore crustiness.
Can I customize flavors or add mix-ins?

Yes. Try:

  • Spices: cinnamon, nutmeg, or cardamom
  • Citrus zest: orange or lemon
  • Flavor boosters: orange blossom water, almond extract, or a splash of liqueur
  • Mix-ins: chocolate chips, chopped nuts, or dried fruit
  • Bread swap: gluten-free bread or brioche if available
Can I make a dairy-free or gluten-free version?

Yes, with substitutions:

  • Dairy-free: use coconut milk or almond milk with a dairy-free cream substitute; keep eggs and sugar the same.
  • Gluten-free: use a sturdy gluten-free bread (or certified gluten-free brioche/challah) that can soak up the custard without falling apart.

Note: The brûlée topping depends on sugar caramelization, so ensure the sugar used is gluten-free if needed.

Any quick shortcuts or tips for best results?

Tips:

  • Use day-old brioche or challah for the best texture; it soaks up custard without getting soggy.
  • More custard = creamier center; if you want a richer dish, increase cream by 1/2 cup and reduce milk slightly.
  • Let the dish rest 5–10 minutes after baking before brûléeing to ensure the center sets properly.

Introduction / Hook

Imagine a morning revelation served on a warm plate: golden, flaky layers of pastry, edges crisp with a gentle butteriness, and the sunken richness of a perfectly poached egg nestled in a yolk-bright center. Baked Eggs Napoleon is not just a dish; it’s an invitation to slow down, to gather friends and family around the table, and to savor a moment where simple ingredients become something quietly, elegantly spectacular. The name itself conjures a touch of classic French refinement—the same air of indulgence that surrounds a mille-feuille, but reimagined for brunch and cozy weekend mornings. When you break into the top layers, you should hear a soft crack, like a kiss of snowfall on a copper pan, and beneath it, a silky, custardy interior that swirls with herbs, cheese, and bright yolks. The aroma would be nothing short of intoxicating: butter sizzling with delicate pastry, garlic and herbs waking up the air, a veil of melted cheese that streams into the soft center. It’s the kind of dish that makes a kitchen feel like a warm kitchen in a quaint Parisian bistro, even if you’re at home in sneakers and a coffee-stained apron. And the beauty of it is that you can coax that magic from everyday ingredients: eggs, pastry, dairy, herbs, and a little pantry romance.

The Story Behind the Dish

The name Baked Eggs Napoleon evokes more than a single recipe; it hints at a culinary spirit that loves layers, texture, and a touch of theatrical presentation. The classical Napoleon, or mille-feuille, is a pastry built from countless thin sheets of puff pastry and a decadent pastry cream, a confection that has traveled through time from grand patisseries to modern kitchens around the world. Transplanting that layering sensibility into a savory brunch dish creates something both familiar and novel: a savory homage that borrows the idea of layering from the dessert side of French patisserie and applies it to eggs, cheese, and aromatics. In Europe, brunch and late-morning meals often celebrate the seduction of texture—crisp tops yielding to tender interiors—so it’s natural to reinterpret a famous pastry concept into a hearty, egg-forward dish. Legend has it that French cooks, always lovers of technique and theater, began to pair flaky pastry with eggs for celebratory Sundays and festive gatherings, turning humble ingredients into a showpiece worthy of a toast and a round of compliments. The result is a dish that feels both indulgent and approachable: a baked ensemble where every bite offers a chorus of textures, from crisp pastry to creamy yolk to melty cheese, all bound together by herbaceous brightness and a whisper of spice. If you’ve ever dreamed of a breakfast that tastes like a celebration, Baked Eggs Napoleon leans into that dream with confident, playful elegance.

Why You’ll Love This Recipe

  • Impressive presentation with minimal effort: a single baking dish yields a shareable, elegant centerpiece that looks haute cuisine but is surprisingly simple to assemble.
  • Versatile and forgiving: adaptable to what you have in your pantry or to dietary preferences, from vegetarian to dairy-conscious to gluten-free variations.
  • Brunch-friendly and crowd-pleasing: perfect for weekend gatherings, holidays, or a special weekday treat that makes ordinary mornings feel extraordinary.
  • Textural contrast that delights: crisp, flaky pastry layers give way to a creamy, yolk-rich center, with cheese providing a savory depth and savory herbs lifting the whole plate.
  • One-dish convenience: no long, fiddly steps—just assembly, bake, and serve, with plenty of room for make-ahead prep if you wish.
  • Comforting yet refined: the dish feels luxurious without being indulgent to the point of heaviness, striking a balance between warmth and airiness.
  • Pairable with a range of beverages and sides: from sparkling wine to a bright green salad, it plays well with many brunch companions.

Flavor Profile & Texture

The flavor profile of Baked Eggs Napoleon rests on a delicate balance of buttery pastry, oozing yolk, and savory dairy. The pastry provides a flaky, lightly crisp exterior that crackles as you cut through the top, releasing a warm scent of butter and toasted flour. Inside, the egg yolk remains luxuriously creamy, its richness mellowed by a gentle kiss of cream or béchamel. The cheese—think Gruyère, Comté, or a sharp aged cheddar—adds a savory, slightly nutty bite that melts into the layers, pulling the elements together with a silky, substratal savor. Herbs—tarragon, chives, parsley, or a hint of thyme—brighten the dish with a green, fresh aroma; a whisper of garlic or shallot can deepen the savory backbone without overpowering the eggs or pastry. Salt and pepper accentuate the egg’s natural sweetness while a subtle heat from red pepper flakes can awaken the palate if you desire a touch of warmth. The result is a multi-sensory experience: you’ll hear the pastry crack at the moment of serving, see the glossy surface of the cheese, smell the herbs and butter, and taste the contrast between crisp exterior and luscious interior. The texture is what makes it memorable—the external shell is crisp and light, but as you break into the layers, the interior becomes a velvet pool of yolk and cheese intermingled with the gentle bite of pastry, each bite offering a new discovery as the mixture blends and expands across your tongue.

Occasions & Pairings

Baked Eggs Napoleon shines in a variety of social settings and occasions. It makes an exquisite centerpiece for a weekend brunch with friends, a Mother’s Day or Father’s Day celebration, or a festive pre-hest of the holidays where a crowd demands something more than the standard eggs and toast. Its level of elegance also invites a touch of romance for a quiet, luxurious morning shared between partners. When planning pairings, consider these ideas:

  • Bev­erages: a glass of sparkling wine or Champagne helps lift the richness; a crisp white like Sauvignon Blanc or a light rosé also works nicely. For coffee lovers, a strong, freshly brewed cup with a splash of cream creates a perfect counterpoint to the pastry’s fat and the yolk’s richness.
  • Salads and sides: a simple arugula salad with lemon vinaigrette adds brightness and peppery bite; roasted tomatoes or aCalendar of seasonal vegetables—grilled asparagus, sautéed mushrooms, or a bright number of sautéed greens—offers color and contrast to the dish.
  • Dessert-like finale: if your brunch feels indulgent, a light fruit sorbet or a citrus-based dessert can clean the palate after the rich main course.

Tips, Variations & Substitutions

Here are ideas to tailor Baked Eggs Napoleon to your kitchen, dietary needs, or mood. Each variation keeps the dish cohesive while introducing new textures or flavors.

  • Vegetarian-friendly: omit any meat-based additions and emphasize mushrooms, spinach, leeks, or roasted peppers layered with a light bechamel or cream layer to add moisture and depth.
  • Gluten-free option: substitute a gluten-free puff pastry or use thinly sliced potatoes as a layered base for a “potato mille-feuille” effect. You’ll still maintain the flaky, layered texture without gluten.
  • Vegan adaptation: replace eggs with a thickened cashew cream or silken tofu mixture, using vegan cheese and a dairy-free pastry that holds together in the bake. Be mindful of texture; you may want an extra layer of flavor with mushrooms or tomatoes to keep it satisfying.
  • Low-carb approach: skip the pastry entirely and build a “baked egg nest” in a ramekin with parchment or a lightly oil-sprayed base, layered with a cheese-thickened cream and greens for moisture.
  • Regional twists: swap in smoky paprika or saffron for a subtle regional twist; incorporate sun-dried tomatoes for a Mediterranean vibe or wild garlic in spring for a woodland aroma.
  • Herb-forward version: increase the green herb content—chives, dill, parsley—to create a vibrant, almost lawn-fresh aroma that lifts the eggs and pastry without overpowering them.
  • Protein accents: add slices of smoked salmon, prosciutto, or a gentle layer of sautéed mushrooms for umami depth. Ensure the pastry remains the star but the protein notes add a whisper of indulgence.

Storage & Make-Ahead Ideas

The beauty of this dish is that a good portion of the work can be done ahead of time, making it ideal for a stress-free morning or a sophisticated brunch event. Here are practical strategies to keep the dish as delicious as the day you made it:

  • Make ahead and bake later: assemble the dish up to the point of baking, cover tightly, and refrigerate for up to 24 hours. When you’re ready to serve, bake until the pastry is golden and the yolk is set to your liking, allowing a few extra minutes for the chill factor in the oven.
  • Freezer-friendly: you can freeze assembled, uncooked portions in individual ramekins or a baking dish, wrapped tightly. Bake from frozen, adding 10–15 minutes to the standard bake time and watching carefully to avoid over-browning.
  • Reheating leftovers: once baked, leftovers will reheat nicely in a low oven (around 325°F / 165°C) for 10–15 minutes. If the pastry has softened, place the dish under the broiler for 1–2 minutes to re-crisp the top, watching closely to avoid burning.
  • Storage for freshness: store any leftover pastry in a loosely covered container in the refrigerator for up to 2 days. Bring to room temperature briefly before reheating to regain some of the original texture.
  • Make-ahead tips: prepare the egg mixture and cheese sauce a day ahead, refrigerate separately, and layer with pastry just before baking. This ensures you have burger-level speed with breakfast-level indulgence.

Fun Facts & Trivia

Delightful tidbits can deepen your appreciation for a dish. Consider these fun facts as you plan to serve Baked Eggs Napoleon:

  • The term Napoleon is often used in pastry to describe the mille-feuille, a layered pastry that has a storied history across French patisserie, with origins tracing back to the 19th century or earlier in various European kitchens. The exact origin of the name in connection with savory dishes is skewed toward romanticized culinary storytelling rather than strict culinary canon, which makes this dish even more charming as a modern homage to classic techniques.
  • Eggs baked in a bed of pastry or a creamy sauce are a timeless comfort in many cuisines, from the classic eggs en cocotte to Italian baked eggs with polenta. Baked Eggs Napoleon sits at the intersection of these traditions, showing how technique—the stacking of delicate layers, the careful heat, and the gentle set of egg—translates across borders and courses.
  • Texture is a central theme in French cooking—pastry crispness, egg silk, cheese melt—an intentional balancing act that keeps the dish light enough to eat in generous portions, yet rich enough to feel luxurious. The name Napoleon nods to a style of culinary reverence for layered, refined construction, even in everyday meals.
  • For a playful, culinary-education twist, compare this dish to a savory mille-feuille: the pastry acts as a scaffold for eggs and cheese, while the layers evoke an elegant structure similar to the classic dessert, but designed for breakfast or brunch flavors.

Ingredients

Puff Pastry Base

  • 2 sheets puff pastry, thawed, cut into rounds (3-4 inches) to form the flaky layers of the napoleon-style bake
    → Puff pastry provides the signature lift and crisp, buttery layers between the creamy and saucy components. Keep the pastry cold until assembly and bake on parchment to prevent sticking; avoid overworking the dough to maintain tenderness.

Bechamel & Tomato Sauces

  • 2 cups béchamel sauce (homemade or store-bought), warmed to a pourable consistency
    → The béchamel acts as a creamy, binding layer that smooths the texture and helps eggs set without drying out. If making from scratch, whisk milk gradually into a pale roux for a silky finish; keep at gentle heat to avoid lumps.
  • 1 cup tomato sauce or passata with garlic and oregano, simmered briefly to concentrate flavors
    → Adds acidity, brightness, and a mild tang that contrasts the richness of the béchamel. If using canned tomatoes, crush and simmer to reduce excess water for a thicker layer that won’t soggy the pastries.

Vegetables & Aromatics

  • 1 tablespoon olive oil for sautéing
    → High-quality olive oil adds fruitiness and helps vegetables brown without sticking. Use extra-virgin for best aroma and flavor.
  • 1 clove garlic, minced
    → Aromatic foundation that enhances the savory depth of the vegetables. Sauté with mushrooms until fragrant, but avoid burning for a smoother flavor profile.
  • 1 cup sliced mushrooms, sautéed until browned and moisture evaporated
    → Provides earthy umami and texture. Cook mushrooms in a hot pan with a pinch of salt to draw out moisture; cool slightly before layering to prevent soggy pastry.
  • 1 cup fresh spinach, wilted and squeezed dry
    → Adds vibrant color and gentle greens to balance richness. Wilt quickly in a hot pan, then press to remove excess moisture so the layers remain crisp.

Eggs

  • 4 large eggs, cracked on top before baking
    → The centerpiece that becomes the soft, custardy yolk against the flaky layers. Bake until whites are set and yolks reach your desired doneness (slightly runny to fully set). If you prefer firmer yolks, bake a few minutes longer and ensure internal temperature reaches safe levels.

Cheese, Seasonings & Finishing

  • 1 cup grated Gruyère (or a Gruyère-Parmesan mix)
    → Melts into a luscious, nutty layer that browns beautifully on top. Freshly grate for best melt and flavor; a mix with Parmesan adds a saltier, crisper top texture.
  • 1/2 teaspoon sea salt, or to taste
    → Amplifies cheese and sauce flavors; remember béchamel and tomato will contribute salt, so adjust gradually to avoid oversalting.
  • 1/4 teaspoon freshly ground black pepper
    → Subtle heat and aroma that lifts the overall dish. Freshly ground pepper has a brighter, more pungent profile than pre-ground.
  • Pinch of nutmeg or paprika (optional)
    → Nutmeg adds warm creaminess to the béchamel; paprika adds a gentle smoky depth. Use sparingly to avoid overpowering the delicate layers.
  • 1 tablespoon fresh parsley or chives, finely chopped, for finishing (optional)
    → Bright herbaceous note at the end enhances color and aroma; sprinkle after baking to preserve freshness.

Dairy & Thickening

  • 2 tablespoons unsalted butter
    → Used to start the béchamel roux, contributing to the sauce’s gloss and silkiness. For a lighter version, you can substitute with olive oil, but butter gives the classic texture.
  • 2 tablespoons all-purpose flour
    → Thickens the béchamel and provides structure to the sauce. Cook the roux briefly to remove raw flour taste, then gradually whisk in milk for a smooth pourable consistency.
  • 2 cups milk (whole or 2%)
    → Primary liquid for the béchamel; whole milk yields a richer, creamier sauce, while lower-fat milk results in a lighter finish. Warm before whisking to prevent lumps.
  • 1/4 cup heavy cream (optional)
    → Adds extra richness and a satin mouthfeel to the béchamel; omit if aiming for lighter calories or when using very rich cheese.

Optional Add-ins

  • 1/4 cup sun-dried tomatoes, chopped (optional)
    → Provides concentrated sweetness and tang; rehydrate briefly if very dry to incorporate smoothly into layers without releasing excess moisture.
  • 1/2 cup crumbled feta or goat cheese (optional)
    → Introduces a tangy, creamy bite that contrasts with the milder béchamel and milder pastry. Use sparingly if other cheeses are already salty.

Garnish

  • Fresh parsley leaves or microgreens for serving (optional)
    → Finishes the dish with a pop of color and a fresh aroma that cuts through richness. Tear or chop just before serving to preserve bright flavor.

Instructions

  • Preheat your oven to 375°F (190°C) and line a large baking sheet with parchment; cut the thawed puff pastry sheets into rounds 3–4 inches in diameter and keep the rounds cold on the sheet until ready to bake.
    → Keeping the rounds cold helps maintain clean edges and prevents the butter from sliding, which preserves the pastry’s crisp, flaky layers when baked.
  • Arrange the rounds on the parchment-lined sheet, lightly dock each round with a fork to prevent large air pockets and uneven puffing, then bake for 8–10 minutes until lightly golden; remove and cool on a rack before assembling.
    → Docking and partial baking create a sturdy, flat base that won’t crumble or trap extra steam as the napoléon bakes with sauces and eggs.
  • Gently warm the béchamel sauce in a small saucepan over low heat until just pourable, whisking occasionally to prevent scorching; set aside off heat until assembly.
    → Warm béchamel flows smoothly between layers and helps bind the components without cooling the other ingredients.
  • Simmer the tomato sauce with garlic and oregano for 5–7 minutes to concentrate flavors and reduce excess moisture; taste and adjust salt, then keep warm.
    → A concentrated sauce provides brightness and tang that contrast the richness of the béchamel while preventing soggy pastry.
  • In a skillet, heat 1 tablespoon olive oil over medium-high heat and sauté minced garlic for 20–30 seconds until fragrant, then add sliced mushrooms with a pinch of salt; cook until browned and moisture evaporates, about 5–6 minutes, then transfer to a plate and cool.
    → Browning mushrooms develops deep umami; removing moisture prevents them from watering the layers.
  • In the same skillet, wilt the spinach over high heat for about 30 seconds, then transfer to a clean surface and squeeze out as much moisture as possible; chop roughly if needed and set aside.
    → Dry greens keep the layers crisp and prevent soggy pastry during baking.
  • If using sun-dried tomatoes, chop them finely and fold them into the mushroom mixture now; if using feta, crumble it and set aside to sprinkle over the top later.
    → Optional add-ins introduce brightness or tang, and distributing them evenly prevents gaps in texture and flavor.
  • In a 9×13-inch baking dish lined with parchment, place one par-baked pastry round as the base; spread a thin coat of béchamel to create a binding surface, then spoon an even layer of tomato sauce over it and scatter half of the mushroom-spinach mixture.
    → Layering in this order builds distinct, tender strata and ensures the fillings adhere to the pastry without sliding off.
  • Top the first layer with the second par-baked pastry round, press gently to seal, then spread a final light layer of béchamel over the top to create a smooth surface for the cheese and eggs.
    → A sealed top keeps fillings contained and the béchamel on top helps the cheese melt evenly without pooling.
  • Sprinkle the grated Gruyère (or Gruyère-Parmesan mix) evenly over the top; this yields a luscious, nutty crust and helps caramelize the surface for color and flavor.
    → Cheese on the exterior browns and forms a crisp, flavorful cap that contrasts with the creamy interior.
  • Crack four large eggs onto the top in a evenly spaced pattern, taking care not to break yolks; press each yolk slightly to center so they bake evenly and set to your preferred doneness.
    → Evenly distributed eggs create uniform custardy yolks against crisp pastry, while intact yolks bake to your desired richness.
  • Season the surface with 1/2 teaspoon sea salt and 1/4 teaspoon freshly ground black pepper, and add a pinch of nutmeg or paprika if desired; distribute seasoning evenly over the eggs for balanced flavor.
    → Salt and spice heighten the béchamel and tomato layers without oversalting, while nutmeg or paprika adds warmth or subtle smokiness.
  • Bake in the preheated oven for 18–22 minutes, rotating the pan halfway to ensure even browning, until the eggs are set to your liking and the cheese is melted and lightly bronzed.
    → Uniform heat and rotation promote even texture from edge to center and prevent hotspots that could scorch the pastry.
  • Remove from the oven and let rest 5–10 minutes to set the layers, then slice carefully into portions and serve; the rest helps the fillings reabsorb moisture for neat slices.
    → Resting prevents the fillings from slumping and ensures clean, tidy portions for serving.
  • Garnish with freshly chopped parsley or chives if desired for a bright color contrast and a fresh aroma just before serving.
    → Fresh herbs lift the dish’s aroma and color, balancing richness with a verdant finish.

Notes

These Baked Eggs Napoleon are a savory, multi-layered bake that pairs flaky puff pastry with a silky béchamel and a bright tomato sauce, finished with a custardy egg on top. The assembly builds distinct buttery layers between creamy and saucy components, delivering a luxurious yet comforting dish. Keep the pastry cold until assembly and bake on parchment to prevent sticking; avoid overworking the dough to maintain tenderness.

  • Keep puff pastry rounds cold and work quickly during assembly so they stay crisp once baked. Bake on parchment-lined trays to prevent sticking and to make cleanup easy.
  • Bechamel and tomato sauces should be warm and pourable. If making béchamel from scratch, whisk milk gradually into a pale roux over gentle heat to achieve a smooth, glossy finish; rewarm gently before layering to avoid lumps.
  • Sauté the mushrooms with a little salt until browned and moisture has evaporated; wilt the spinach quickly in a hot pan and press out excess moisture so the pastry layers stay crisp.
  • Crack the eggs on top before baking as directed. Bake until the whites are set and the yolks reach your preferred doneness; shorter bake for runny yolks, longer for firmer yolks. If you prefer firmer yolks, bake a few minutes longer and ensure internal temperature is safe.
  • Use 1 cup grated Gruyère (or a Gruyère-Parmesan mix) for a creamy, nutty melt that browns beautifully. Freshly grate cheese for best flavor and texture.
  • Season thoughtfully with sea salt and black pepper; the béchamel and tomato sauce contribute salt, so taste as you go to avoid oversalting. A pinch of nutmeg or paprika is optional and can add warm depth—use sparingly.
  • Finish with fresh parsley or chives for a bright, herbaceous note. Add just before serving to preserve color and aroma.
  • Make-ahead and storage: you can prepare the sauce and vegetables in advance, assemble up to the point of cracking the eggs, cover and refrigerate, then bake when ready. Leftovers reheat well in a low oven; enjoy the flavors as they mellow overnight.
  • Gluten-free option: to adapt for a gluten-free diet, substitute gluten-free puff pastry and ensure the béchamel and tomato sauce are certified gluten-free. This keeps the dish accessible while preserving the layered texture.
  • Plating and serving: slice carefully to keep the layers intact, and serve with a simple green salad or lightly dressed greens to balance richness. A light drizzle of olive oil or a splash of balsamic can finish the plate nicely.

Tips

Tips for assembling and cooking Baked Eggs Napoleon

Puff Pastry Base tips

  • Keep puff pastry cold until assembly and bake on parchment-lined sheets to prevent sticking and ensure even lifting. Chill rounds briefly if they feel soft to the touch.
  • Handle dough as little as possible and avoid overworking to maintain flakiness. If your dough is very warm, chill it for 10–15 minutes before cutting rounds.
  • Prick pastries lightly with a fork before baking to control puff and help create stable layers for stacking with sauces.

Bechamel & Tomato Sauces tips

  • Warm béchamel to a pourable consistency just before layering; if it thickens, whisk in a splash of milk or cream until smooth.
  • Whisk the béchamel gradually to avoid lumps; if lumps form, whisk vigorously or strain for a silky sauce.
  • Simmer tomato sauce with garlic and oregano to concentrate flavors. If using canned tomatoes, crush and reduce to a thicker consistency to prevent soggy pastry.
  • Let tomato sauce cool slightly before assembling to reduce steam that can sog the pastry.

Vegetables & Aromatics tips

  • Use high-quality extra-virgin olive oil and heat until shimmering before sautéing garlic and mushrooms to promote browning and depth of flavor.
  • Dry sauté mushrooms until all moisture evaporates; this enhances umami and prevents a watery layer.
  • Sauté garlic only until fragrant—avoid browning to prevent bitterness.
  • Wilt spinach quickly in a hot pan, then wring out as much moisture as possible to keep layers crisp.

Eggs tips

  • Crack eggs on top after assembling to ensure even distribution; bake until whites are set and yolks reach your preferred doneness. If you want firmer yolks, bake a few minutes longer and verify doneness with a gentle press.
  • Season lightly on top before baking if the sauces and cheese aren’t salty; otherwise rely on the salt in the béchamel and cheese.

Cheese, Seasonings & Finishing tips

  • Grate Gruyère fresh for optimal melt and nutty flavor; a Gruyère-Parmesan mix yields a crisper top and more pronounced color.
  • A pinch of nutmeg or paprika can add warmth or subtle smokiness; use sparingly to keep the delicate balance of the dish.
  • Finish with fresh parsley or chives after baking to add color and a bright aroma; chop finely for even distribution.

Dairy & Thickening tips

  • For a classic béchamel, cook the roux briefly to remove the raw flour taste, then whisk in warm milk gradually for a smooth, glossy sauce.
  • To lighten, reduce butter slightly and use more milk; to deepen richness, add a touch of cream or extra cheese.
  • Warm milk before adding to the roux to prevent lumps; whisk constantly during addition for a silky texture.
  • Optional heavy cream adds silkiness and richness; omit if you prefer a lighter version or dairy-free adaptation.

Optional Add-ins tips

  • Sun-dried tomatoes contribute concentrated sweetness and tang; rehydrate briefly and blot excess oil to avoid soggy layers.
  • Feta or goat cheese introduces tanginess; balance with milder cheeses if other ingredients are salty; crumble and distribute sparingly.

Garnish tips

  • Fresh parsley or microgreens add color and brightness; tear or chop just before serving to preserve freshness.
  • Serve with a light drizzle of olive oil or a subtle aromatic herb oil to finish the dish.

FAQ

What is Baked Eggs Napoleon?

A savory brunch dish built in layered components, typically featuring a base of flaky pastry or sturdy bread, a creamy sauce, and eggs baked until just set. It often includes vegetables, cheese, and optional meats, creating a rich, comforting entree that echoes the elegance of a Napoleon in flavor and presentation.

What are typical ingredients?
  • Puff pastry sheets or thick slices of baguette or brioche as the base
  • Cream or béchamel sauce for richness
  • Eggs (large)
  • Cheese such as Gruyère, mozzarella, or Parmesan
  • Vegetables like spinach, tomatoes, mushrooms, or onions
  • Protein options like ham, prosciutto, or bacon (optional)
  • Seasonings: salt, pepper, nutmeg, fresh herbs (parsley, chives)
What equipment do I need?
  • Oven and a baking dish or individual baking cups
  • A skillet or pan for sautéing vegetables
  • A whisk or spoon for sauce
  • Knife and cutting board
  • Optional: pastry brush, parchment paper, or foil for browning control
How do I assemble it?
  1. Preheat your oven to about 375°F (190°C). Lightly grease the baking dish.
  2. Prepare the base: cut pastry into rounds or line a shallow dish with bread slices.
  3. Sauté vegetables until tender; season lightly.
  4. Spread a thin layer of béchamel or cream over the base, then add vegetables and a handful of cheese.
  5. Crack one egg over each portion (or for a larger dish, crack eggs in wells).
  6. Top with more sauce and cheese, then bake until the eggs are just set and the pastry is golden.
How long and at what temperature should I bake it?

Preheat to 375°F (190°C). Bake until the eggs are just set and the pastry is golden, typically about 12–18 minutes for individual servings or 20–25 minutes for a larger casserole. If the top browns too quickly, tent with foil.

Can I customize it for dietary preferences?
  • Vegetarian: omit meat; load with extra vegetables and a cheese-based sauce.
  • Gluten-free: use gluten-free puff pastry or a thick slice of gluten-free bread as the base.
  • Dairy-free: use a plant-based béchamel (almond or oat milk) and vegan cheese.
  • Low-carb: use a cauliflower-based “crust” or skip pastry and bake in a shallow ramekin with egg and vegetables.
How should I store and reheat leftovers?

Store cooled leftovers in an airtight container in the refrigerator for up to 2 days. Reheat in the oven at 325°F (165°C) for 8–12 minutes until heated through, or microwave briefly in 30–60 second intervals until warm. Reheat gently to avoid overcooking the eggs.

Can I make this ahead or freeze it?

You can assemble and refrigerate unbaked portions for up to 24 hours before baking. For freezing, freeze unbaked portions on a tray, then transfer to a freezer bag. Bake from frozen, adding about 5–10 minutes to the bake time. Note that textures may shift slightly after freezing.

What should I serve with Baked Eggs Napoleon?

Pair with a simple green salad or arugula with lemon vinaigrette, a side of roasted or grilled tomatoes, and crusty bread or a light toast. A fruit salad or fresh berries also complements the richness nicely for brunch.

Introduction / Hook

Imagine a dessert that feels like a sweet whisper from a summer campfire, folded into a silky cheesecake that glides across the palate with the ease of a dream. Marshmallow Whip Cheesecake is that dream made edible: a luscious, cloud-soft center topped with a glossy, ember-kissed finish of marshmallow whip that tastes both nostalgic and modern. The moment you lift a forkful, you’re greeted with a tender creaminess that carries the faint, toasty aroma of vanilla and caramelized sugar, as if you’ve inhaled a warm, comforting memory. It’s the kind of dessert that turns ordinary evenings into small celebrations and makes even the simplest slice feel like a special occasion. Light enough to end a meal without heaviness, yet indulgent enough to feel like a celebration, this cheesecake is the perfect bridge between childhood whimsy and adult refinement. If you’ve ever wished for a cheesecake that feels airy, yet deeply satisfying, this recipe answers the call with a gleam of marshmallow sweetness and a chorus of textures that keep you coming back for more.

The Story Behind the Dish

Marshmallow Whip Cheesecake isn’t just a recipe; it’s a love letter to contrasts. It began as a kitchen experiment in which two very different cravings—airy, fluffy sweetness and the dense, decadent temptation of cheesecake—decided to collaborate rather than compete. The idea grew from childhood memories of toasting marshmallows over a campfire, watching their edges crisp and the centers melt into gooey pockets of sugar, then contrasting that with the elegant, cool richness of a classic baked cheesecake. The result was a dessert that captures the best of both worlds: the playful melt-in-your-mouth sensation of marshmallow fluff and the refined, velvet texture of a well-made cheesecake.

Culinary roots can be traced to the universal appeal of marshmallow as a symbol of celebration and comfort. Marshmallows have a long history of appearing in festive treats—from hot chocolate swirls on winter nights to campfire s’mores that spark laughter and storytelling. When you fold that familiar sweetness into a creamy cheesecake base, you create a dessert that invites conversation—the kind that happens when friends gather around a dessert with layers of flavor you can still taste on your tongue even after the last bite. The marshmallow whip topping is the crowning kiss, a modern technique that unites the nostalgic charm of a campfire treat with the chic polish of a contemporary dessert. This dish respects the past while embracing the present, offering a versatile backdrop for celebrations big and small.

Why You’ll Love This Recipe

  • A dessert that feels like a hug but finishes with a refined, creamy finish that suits grown-up gatherings as well as family feasts.
  • The marshmallow whip contributes a light, almost ethereal top layer that contrasts beautifully with the denser cheesecake beneath.
  • Marshmallow sweetness balanced by vanilla, a touch of citrus, and a hint of salt to keep every bite lively and balanced.
  • The glossy, soft peak of marshmallow whip on top makes for a show-stopping dessert that photographs beautifully.
  • This cheesecake is especially forgiving when it comes to planning, refrigerating into a luscious, sliceable state that rewards patience.
  • A familiar flavor that appeals to both kids and adults, ideal for birthdays, holidays, potlucks, or casual dinner parties.
  • The base can be dressed with fruit compotes, chocolate drizzle, or toasted nuts, depending on your mood and the season.

Flavor Profile & Texture

The flavor begins with the classic, comforting tang of well-made cheesecake—the delicate balance of creaminess and a faint lactic brightness that keeps the dessert from tipping into cloying sweetness. But the real star is the marshmallow whip topping, which introduces a feather-light texture and a toasty, caramel-tinged sweetness that lingers on the palate. You may notice hints of vanilla and a gentle buttery undernote from the crust that peeks through in every bite, providing a grounding contrast to the creamy center. The overall sensation is one of layered silk: first the cool, smooth mouthfeel of the cheesecake, then the ephemeral airiness of the marshmallow topping, followed by a subtle, satisfying finish that invites another forkful.

Textures play an equally important role. The crust—crisp at the edges and tender near the center—offers a gentle crunch and a toasty depth that anchors the dish. The filling remains luxuriously smooth, almost satin-like, with a slight, melt-in-the-mouth quality. The marshmallow whip topping introduces a light, fluffy texture with tiny pockets of air that pop on the tongue, creating moments of brightness against the denser cheesecake. When these elements converge, you experience a dessert that feels both indulgent and approachable, with a harmonious balance between dense richness and cloud-like relief. The result is a dessert that leaves you with a clean finish and a lingering, comforting sweetness that doesn’t overpower other flavors on the table.

Occasions & Pairings

Marshmallow Whip Cheesecake shines in a broad tapestry of occasions. It’s equally at home as a show-stopping centerpiece for holiday gatherings as it is a comforting conclusion to a weeknight dinner. The dessert’s approachable sweetness makes it a natural fit for family celebrations, birthdays, and potlucks, while its refined texture and striking topping lend an air of elegance to more formal occasions.

Occasions

  • Holiday dinners and festive celebrations
  • Birthday parties and family gatherings
  • Intimate date nights at home
  • Brunch finales or celebratory breakfasts
  • Potlucks and dessert buffets with a touch of whimsy

Pairings

  • Fruit compotes: raspberry, peach, or strawberry compote adds a bright contrast and a splash of color.
  • Dark chocolate drizzle or shards: a whisper of chocolate enhances the marshmallow’s sweetness and adds depth.
  • Fresh berries and citrus zest: a simple, refreshing counterpoint that brightens the palate.
  • Vanilla bean ice cream or a dollop of lightly whipped cream: classic accompaniments that amplify creaminess.
  • Herbal or floral teas: chamomile, vanilla rooibos, or lavender tea offer soothing balance after a rich dessert.
  • Port, dessert wine, or a late-harvest Riesling: for those who enjoy a little wine to accompany dessert.

Tips, Variations & Substitutions

Every baker loves a few levers to pull when personalizing a recipe. Here are thoughtful ways to tailor Marshmallow Whip Cheesecake to your tastes, dietary needs, or available ingredients.

Tips

  • Chill thoroughly: For clean slices, refrigerate the cheesecake for several hours or overnight. The marshmallow whip topping sets beautifully when cold, creating a striking contrast with the cheesecake beneath.
  • Room-temperature ingredients: Allow cream cheese and any dairy to come to room temperature before mixing to achieve the smoothest filling without lumps.
  • Gentle folding: When combining components, fold gently to preserve airiness. Overworking can deflate the mixture and reduce that signature cloudlike texture.
  • Even slicing: Run a warm knife under hot water, then wipe clean for neat, restaurant-style slices that showcase the topping’s glossy finish.

Variations

  • Use a dairy-free cream cheese substitute and dairy-free whipped topping to create a vegan Marshmallow Whip Cheesecake. Opt for aquafaba-based marshmallow whip or coconut cream-based topping to achieve a similar lightness.
  • Substitute graham crackers with gluten-free crackers or a mixture of almond flour and oats. Ensure all crust components are certified gluten-free if needed.
  • Add a teaspoon of fresh lemon or orange zest to the filling to brighten the flavor and complement the marshmallow sweetness.
  • Drizzle a thin line of salted caramel through the filling before setting to create ribbons of contrasting sweetness.
  • Include finely chopped toasted nuts (pecans, almonds, or hazelnuts) in the crust or sprinkle them atop the marshmallow whip for an appealing textural contrast.
  • Infuse the marshmallow whip with a pinch of cinnamon, nutmeg, or allspice for a warm, autumnal note that pairs beautifully with fall fruits.

Substitutions

  • Low-sugar version: Use reduced-sugar marshmallow fluff and a lighter cheesecake base, paired with a fresh berry topping to keep sweetness in check.
  • Low-fat option: Choose light cream cheese and a lighter whipped topping, with a crust made from crushed graham crackers with a smaller amount of butter.
  • Allergen-friendly: If dairy is an issue, experiment with plant-based cream cheese alternatives and whipped toppings, noting that texture may shift slightly but the overall concept remains intact.

Storage & Make-Ahead Ideas

One of the practical pleasures of Marshmallow Whip Cheesecake is how forgiving it can be when you plan ahead. Here are strategies to maximize flavor and texture without sacrificing convenience.

Make-ahead strategies

  • Prepare the crust and filling a day in advance. Assemble the cheesecake, cover, and refrigerate overnight. Top with marshmallow whip just before serving for a pristine appearance and optimal texture.
  • The topping can be prepared ahead of time and chilled, then spooned or piped onto the cheesecake just before serving to preserve its airy texture.

Storage

  • Refrigerator: Store leftovers, well covered, for up to 3–4 days. The marshalling effect remains best when the topping is fresh, so you may refresh with a quick re-whip if needed.
  • Freezing: Cheesecake slices freeze well. Wrap individual slices tightly in plastic wrap and place in an airtight container. Freeze up to 2–3 months. Thaw in the refrigerator overnight and re-whip the topping if it has softened.
  • Reheating: Cheesecake does not reheat well in the microwave if you want to preserve its texture. For best results, enjoy leftovers cold or at room temperature, or gently tease the topping back to life with a light whip after thawing.

Fun Facts & Trivia (Optional)

Did you know that marshmallows have a long lineage that predates modern confectionery? The earliest versions were made from the root of the mallow plant, used by ancient civilizations for soothing sore throats. Today’s marshmallow fluff is a far cry from those origins, but the spirit remains: a cloud-like sweetness that brings comfort and a sense of whimsy. Cheesecake, meanwhile, has a history that winds through centuries and cultures, with ancient Greek origins that evolved into the creamy, indulgent treat we crave today. Combining the two is a modern homage to the idea that the most comforting foods can come from blending tradition with playful innovation. The resulting Marshmallow Whip Cheesecake nods to nostalgia while delivering the clean, contemporary lines of a dessert that’s equally at home on a holiday table or a casual weeknight feast.

Another flight of fancy: marshmallow toppings have inspired countless pastry trends, from marshmallow peaks to speckled mini-mounds that resemble soft snowfall. In this cheesecake, the topping is more than decoration—it’s a textual and sensory moment, a kiss of sweetness that crowns the creamy center with a glossy, almost lacquered finish. The interplay between the sharpness of the crust, the smoothness of the filling, and the lightness of the marshmallow whip creates a symphony of textures that dessert lovers remember long after the last bite.

Closing Thoughts

Marshmallow Whip Cheesecake invites you into a dessert experience that’s at once familiar and unexpected. It is the comfort of a classic cheesecake, elevated by the whimsy and airiness of a marshmallow-driven topping. It’s a dish that travels well—from cozy evenings at home to celebratory gatherings with friends—because it speaks in flavors everyone recognizes while inviting them to linger on the palate a little longer. If you’re seeking a dessert that looks regal on the plate, tastes like a warm memory, and feels both celebratory and approachable, this cheesecake delivers in spades. When you finally slice into it, you’ll understand why this combination—cheesecake’s indulgence and marshmallow fluff’s playful lift—has admirers returning again and again to the table.

Ready to bring this dessert from your notebook to your table? Use the following recipe sections for a seamless crafting experience, then let the magic unfold as guests are drawn to the glossy topping, the whisper-soft filling, and the comforting, familiar fragrance that fills the room with anticipation.

Ingredients

Crust

  • 1 1/2 cups graham cracker crumbs (or digestive biscuits)
    → Provides the crunchy base that supports the creamy filling. If you need a gluten-free crust, use gluten-free graham crackers or crushed gluten-free biscuits. Mix the crumbs with 3 tablespoons granulated sugar and 6 tablespoons melted unsalted butter, then press firmly into a 9-inch springform pan. Bake at 350°F (175°C) for 8–10 minutes to set the crust, then cool completely before filling.
  • 3 tablespoons granulated sugar
    → Adds sweetness to the crust and helps bind the crumb mixture with the melted butter. Mix with the crumbs before pressing into the pan. If you prefer a less sweet crust, reduce to 2 tablespoons or omit entirely.
  • 6 tablespoons unsalted butter, melted
    → Acts as the binding agent that holds the crust together and gives a rich flavor. Let the melted butter cool slightly before mixing with the crumbs so the crust maintains a crumbly yet cohesive texture when pressed into the pan.

Filling

  • 24 oz cream cheese, softened to room temperature
    → The creamy, luxurious base of the cheesecake. Softening to room temperature ensures a smooth, lump-free mixture when beaten with sugar. Beat cream cheese and sugar together until fully combined and velvety, then proceed with adding eggs one by one to maintain a silky texture and minimize air pockets that could cause cracks.
  • 3/4 cup granulated sugar
    → Provides sweetness and helps achieve a balanced flavor with the tang of the cream cheese. Add gradually while mixing to avoid graininess and to ensure a smooth filling. If you prefer a less sweet cheesecake, reduce slightly.
  • 3 large eggs
    → Contribute structure and richness. Add eggs one at a time after the cream cheese is creamed with sugar to prevent curdling. Do not overbeat after adding eggs; mix just until combined to minimize air incorporation that could create cracks during baking.
  • 1/2 cup sour cream
    → Adds tang and extra creaminess, enhancing the cheesecake’s texture. Allow sour cream to come to room temperature before folding it in to avoid curdling and to keep the batter smooth.
  • 2 teaspoons pure vanilla extract
    → Depth of flavor that complements the tang of the cream cheese. Use high-quality vanilla for a noticeable aroma. If using vanilla bean, scrape the seeds for an extra layer of flavor, but adjust the liquid if necessary.
  • 1/4 cup all-purpose flour
    → Stabilizes the filling and helps prevent cracking during baking. If you need a gluten-free option, substitute with 2 tablespoons gluten-free all-purpose flour or 2 tablespoons cornstarch. Whisk the flour with the other dry ingredients before folding into the filling to avoid lumps.
  • 1/4 teaspoon fine salt
    → Balances sweetness and enhances the cheesecake’s flavors. Dissolve evenly by whisking into the filling; the small amount helps unify the flavors without making the batter taste salty.

Marshmallow Whip Topping

  • 1 cup marshmallow fluff (marshmallow creme), at room temperature
    → The signature marshmallow element that will be whipped into a light, airy topping. Room temperature fluff blends more easily with the cream and/or whipped cream rather than pulling it down. If very stiff, gently warm to loosen or whisk with a splash of cream to loosen.
  • 1/2 cup heavy cream, cold
    → Whips into a lush, fluffy component that pairs with the marshmallow fluff. Chill the bowl and whisk before whipping to achieve stronger peaks. Stop whipping when soft to medium peaks form to avoid turning into butter; fold into marshmallow fluff to create a stable, airy whip.
  • 1 teaspoon vanilla extract
    → Enhances the vanilla notes in the topping and complements the marshmallow flavor. Use pure vanilla for the best aroma; omit if you prefer a purer marshmallow sweetness.

Optional Add-ins

  • 1/2 cup fresh berries (strawberries, raspberries, or a mix) (optional)
    → Adds bright fruitiness and color. If you plan to swirl berries into the filling, macerate briefly with 1 teaspoon sugar for 5–10 minutes to draw out juices, then drain before adding. Use on top for a fresh finishing touch or gently swirl into the filling for a marbled effect before baking.
  • 1 teaspoon lemon zest (optional)
    → Brightens the overall flavor with a hint of citrus. Grate only the yellow layer of the zest, avoiding the bitter white pith. Fold into the filling or sprinkle on top of the finished cheesecake for a fresh aroma.
  • 1/2 cup mini chocolate chips (optional)
    → Creates little pockets of chocolate texture. Toss chips with 1–2 teaspoons of flour to prevent sinking, then fold in gently to distribute evenly without deflating the batter.

Instructions

  • Preheat your oven to 350°F (175°C) and prepare a 9-inch (23 cm) springform pan by lightly greasing the bottom and sides or lining with parchment to ensure easy release of the crust and filling; this base preparation prevents sticking and helps preserve clean edges when unmolding the cheesecake.
  • Combine graham cracker crumbs, 3 tablespoons granulated sugar, and 6 tablespoons melted unsalted butter in a medium bowl; mix with a fork or spatula until the mixture resembles damp, sandy soil with some cohesive clumps, which indicates even moisture distribution for a uniform crust.
  • Press the crumb mixture evenly into the bottom and up the sides of the prepared springform pan using the flat bottom of a measuring cup or a sturdy spoon; apply firm, even pressure to eliminate air pockets and create a compact crust that bakes into a stable base.
  • Bake the crust in the preheated oven at 350°F (175°C) for 8–10 minutes until the edges are set and the aroma is pleasant; this brief bake firms the buttered crumbs so the crust holds together when the filling is added.
  • Remove the crust from the oven and cool completely on a wire rack before filling; cooling prevents the filling from sliding and helps the crust stay crisp rather than becoming soggy from residual heat.
  • With a stand mixer or hand mixer on medium-low speed, beat 24 oz softened cream cheese and 3/4 cup granulated sugar in a large bowl until the mixture is smooth and velvety, about 2–3 minutes; scraping the bowl halfway ensures full incorporation of cream cheese for a uniformly creamy filling.
  • With the mixer on low, add the 3 large eggs one at a time, blending just until each egg is fully incorporated before adding the next; this careful incorporation builds structure while minimizing air pockets that could cause cracks during baking.
  • Beat in 1/2 cup sour cream, 2 teaspoons pure vanilla extract, 1/4 cup all-purpose flour, and 1/4 teaspoon fine salt until the mixture is just combined; avoid overmixing to maintain a tender, glossy batter, and ensure the flour is whisked in evenly to prevent lumps.
  • Pour the filling over the cooled crust and use a spatula to spread it to the edges, then gently tap the pan on the counter several times to release any trapped air and create a smooth, level surface that bakes evenly.
  • Wrap the outside of the springform pan tightly with two layers of heavy-duty aluminum foil and place the pan in a larger baking dish; fill the outer dish with hot water halfway up the sides to create a water bath that buffers the heat and reduces the risk of cracking for a creamier cheesecake.
  • Bake the cheesecake at 325°F (165°C) for 50–60 minutes, or until the edges are set and the center still jiggles slightly; test doneness by gently rotating the pan and nudging the center—if it trembles but the edges are set, it’s ready; the water bath and gentle heat help preserve a smooth center.
  • Turn off the oven, crack the door slightly, and let the cheesecake remain inside for 1 hour to cool gradually and settle without sudden temperature changes that can cause cracks or a dry texture.
  • Remove the pan from the water bath and cool completely at room temperature before refrigerating; chilling for at least 4 hours or overnight allows flavors to meld and the filling to firm for clean slicing.
  • In a chilled bowl, whip 1/2 cup heavy cream to soft peaks using an electric mixer on medium-high speed; chilling the bowl and whisk helps achieve stable, voluminous foam without turning the cream into butter, and soft peaks ensure easy folding later.
  • In a separate bowl, whisk 1 cup marshmallow fluff with 1 teaspoon vanilla extract until smooth and slightly loosened so it folds easily into the whipped cream, distributing the vanilla evenly and removing any stiff pockets in the fluff.
  • Gently fold the whipped cream into the marshmallow fluff with a silicone spatula, lifting from the bottom and turning over the top until the mixture is light, airy, and uniform in texture; folding preserves volume and prevents deflation of the whipped topping.
  • Spread the marshmallow whip topping evenly over the chilled cheesecake, smoothing to the edges with a spatula and creating decorative peaks if desired; this topping provides a glossy, airy finish that contrasts nicely with the rich filling and must be chilled to set before serving.
  • If using fresh berries as an optional add-in, macerate 1/2 cup berries with 1 teaspoon sugar for 5–10 minutes to draw out juices, then drain before topping to avoid a soggy crust; berries add brightness and color as a finishing touch.
  • If using lemon zest, grate the zest of one lemon (avoid the white pith), and fold 1 teaspoon into the filling before baking or sprinkle a light dusting on top of the finished cheesecake for a fresh citrus aroma that complements the sweetness.
  • If using mini chocolate chips, toss 1/4 cup chips with 1–2 teaspoons flour to prevent sinking, then fold into the filling during the final mixing; the chips create little pockets of chocolate that distribute evenly without weighing down the batter.

Notes

These Marshmallow Whip Cheesecake notes walk you through creating a creamy, dreamy cheesecake with a crisp crust and a light, airy marshmallow topping. For a gluten-free crust, substitute gluten-free graham crackers or crushed gluten-free biscuits and mix with 3 tablespoons granulated sugar and 6 tablespoons melted unsalted butter; bake the crust at 350°F (175°C) for 8–10 minutes to set, then cool completely before filling.

To ensure a silky filling, soften the cream cheese to room temperature and beat with the granulated sugar until velvety. Add the eggs one at a time, mixing just until blended, then fold in the sour cream and vanilla. If using, whisk in the 1/4 cup all-purpose flour and 1/4 teaspoon fine salt until incorporated. If you need a gluten-free option, substitute with 2 tablespoons gluten-free all-purpose flour or 2 tablespoons cornstarch, whisking with the dry ingredients before folding into the filling.

Bake the filled crust in a water bath to help prevent cracking and keep the texture smooth. Wrap the pan securely in heavy-duty foil and place it in a larger baking dish with hot water around the sides. Bake until the center is just set and a gentle wobble remains, then turn off the oven and let the cheesecake cool gradually to room temperature before chilling for at least 4 hours or overnight for clean slices.

For the Marshmallow Whip topping, whip the cold heavy cream to soft to medium peaks, then fold in the room-temperature marshmallow fluff and vanilla. Do not overbeat, or the topping may become dense or separate. Chill the whipped topping briefly if needed before spreading over the cooled cheesecake for a light, airy finish.

Optional add-ins offer fun variations: 1/2 cup fresh berries for brightness and color; 1 teaspoon lemon zest for a citrus lift; or 1/2 cup mini chocolate chips for chocolatey pockets. If adding berries to the topping, macerate briefly with 1 teaspoon sugar to release juice, then drain before topping. You can swirl lemon zest into the filling or swirl in some berry compote for a marbled effect before baking.

Make-ahead and storage tips: Prepare the crust and filling a day in advance and refrigerate, then assemble and bake when ready. The assembled cheesecake will keep in the refrigerator for 4–5 days; for longer storage, freeze slices wrapped well for up to 1–2 months. The topping is best added after chilling or kept separate and layered on just before serving to preserve its fluffy texture.

Tips

Tips for Marshmallow Whip Cheesecake

Crust tips
  • Chill the pressed crust for 15–20 minutes before filling to help it set and prevent crumbling.
  • Line the pan with parchment rounds under and up the sides for easy release and clean edges.
  • If using a water bath, wrap the outside of the springform pan tightly with heavy-duty foil to prevent water seeping into the crust.
  • For a crisper crust, press crumbs evenly and firmly using the flat bottom of a glass or measuring cup; avoid over-pressing to prevent cracking.
  • Using gluten-free crackers? Ensure they’re truly GF and consider adding a touch more butter if your crumbs feel dry to help binding.
Filling tips
  • Let cream cheese, sour cream, and eggs come to room temperature before mixing to achieve a silky, lump-free filling.
  • Beat cream cheese with sugar until completely smooth, scraping the bowl periodically; add eggs one at a time on low speed to minimize air pockets that can cause cracks.
  • Whisk in vanilla, salt, and flour last; whisk flour with the other dry ingredients before adding to the batter to avoid lumps. Do not overmix after adding eggs.
  • If you choose a water bath, place the filled pan in a larger pan with hot water halfway up the sides, then bake; this helps prevent cracks and creates an even bake.
  • Center may look slightly jiggly when you remove it from the oven; it will set as it cools. Cool gradually to avoid sudden temperature changes.
Marshmallow whip topping tips
  • Let marshmallow fluff come to room temperature to blend smoothly with the whipped cream.
  • Chill the mixing bowl and whisk; whip the heavy cream to soft-to-medium peaks, then fold into the marshmallow fluff gently to maintain volume.
  • If the marshmallow mixture is very stiff, warm it briefly or whisk with a splash of cream to loosen before folding; add vanilla for depth of flavor.
  • Fold the topping into the filling carefully to keep the texture light and airy without deflating the mixture.
Optional add-ins and finishing
  • For berry toppings, macerate fresh berries with 1 teaspoon sugar for 5–10 minutes to draw out juices; drain before adding to the topping or swirl into the filling for a marbled effect.
  • Brush in a little lemon zest (yellow part only) into the filling or sprinkle on top after chilling for a bright aroma.
  • To add chocolate chips, toss them with 1–2 teaspoons flour before folding to prevent sinking to the bottom.
Make-ahead and storage
  • Cheesecake can be baked a day ahead and refrigerated; add the marshmallow whip topping just before serving for the best texture.
  • Cover tightly and refrigerate the cake for up to 4 days. Topping can be prepared ahead and added before serving.
  • Cheesecake freezes well when un-topped; wrap well and freeze, then thaw overnight in the refrigerator before serving. Topping should be added after thawing for optimal texture.

FAQ

What is Marshmallow Whip Cheesecake?

Marshmallow Whip Cheesecake is a no‑bake dessert with a graham cracker crust and a light, fluffy filling. The filling is created by folding whipped cream and marshmallow fluff into softened cream cheese, then chilling until set for a creamy, sweet cheesecake texture.

What ingredients do I need to make Marshmallow Whip Cheesecake?

Crust:

  • 2 cups (200 g) graham cracker crumbs
  • 1/4 cup (50 g) granulated sugar
  • 5 tablespoons (70 g) unsalted butter, melted

Filling:

  • 16 oz (450 g) cream cheese, softened
  • 1/2 cup (60 g) powdered sugar
  • 1 teaspoon vanilla extract
  • 1 cup (240 ml) heavy whipping cream, cold
  • 7 oz (200 g) marshmallow fluff
  • 1–2 teaspoons lemon juice (optional, for brightness)
  • Pinch of salt (optional)

Toppings (optional):

  • Fresh berries, caramel or chocolate drizzle, whipped cream
Is this cheesecake baked or no-bake?

It’s a no-bake cheesecake. The crust is pressed and chilled, and the filling sets in the refrigerator as the whipped cream and marshmallow fluff incorporate into the cream cheese. Chill time is essential for a firm slice.

Can I make this dairy-free or gluten-free?

Yes, with substitutions:

  • Dairy-free: Use dairy-free cream cheese, dairy-free butter for the crust, and a dairy-free whipped topping. Look for vegan marshmallow fluff (check gelatin-free options) or ensure the marshmallow product is dairy-free.
  • Gluten-free: Use gluten-free graham crackers or cookies for the crust; grind finely and press. Always check packages to ensure no hidden gluten.

Note: Some marshmallow fluff contains gelatin; vegetarian/vegan options are available, but always check labels.

What pan size should I use?

A standard 8-inch (20 cm) springform pan is ideal for a traditional cheesecake height. If you use a 9-inch pan, the filling will be thinner. For a taller cheesecake, you can use a 7-inch pan or pack the crust a bit more firmly to reduce crumb loss.

How do I make the crust?

Steps:

  1. Combine graham cracker crumbs, sugar, and melted butter in a bowl until evenly moistened.
  2. Press the mixture firmly into the bottom and slightly up the sides of the pan to form a compact crust.
  3. Chill in the refrigerator for 10–15 minutes to set before filling.
How do I make the filling?

Steps:

  1. Beat cream cheese, powdered sugar, vanilla, and a pinch of salt in a large bowl until smooth and creamy.
  2. In a separate bowl, whip the cold heavy cream to stiff peaks.
  3. Fold the marshmallow fluff into the whipped cream gently until combined.
  4. Fold the marshmallow–whipped cream mixture into the cream cheese until smooth and fluffy.
  5. Fold in lemon juice if using. Pour into the prepared crust and smooth the top.
How long does it take to chill and set the cheesecake?

Chill the cheesecake in the refrigerator for at least 4–6 hours, preferably overnight, until fully set and sliceable. Keep it covered to prevent drying and absorbing fridge odors.

How should I store leftovers?

Store leftovers in the refrigerator, covered, for up to about 4–5 days. For longer storage, you can freeze portions for 1–2 months; thaw in the refrigerator overnight before serving.

Flavor and topping ideas to customize this cheesecake

Try these modifications:

  • Fold in a little citrus zest (lemon, lime, or orange) into the filling for a bright note.
  • Swirl in berry compote or raspberry sauce before chilling.
  • Top with fresh berries, a dusting of powdered sugar, or a chocolate drizzle.
  • For a chocolate twist, add a thin layer of chocolate ganache on top after chilling.
Troubleshooting: my filling is too soft or won’t set

Tips:

  • Make sure the cream cheese is fully softened to room temperature before mixing.
  • Whip the cream to stiff peaks; under-whipped cream can cause a soft filling.
  • Don’t overmix after adding the marshmallow fluff and whipped cream, or it can deflate the filling.
  • Ensure the filling is evenly distributed and the pan is chilled; a slowly set cheesecake is often due to uneven temperature.

Introduction / Hook

Imagine a plate of bite-sized sunshine: tiny rounds bursting with summer in every bite, the scent of lemon lifting the air, and blueberries glimmering like little midnight stars tucked into a tender shell. These Delicious Blueberry Lemon Bites are more than a snack; they’re a small, joyful ritual that turns an ordinary moment into something memorable. When you bite into one, you’ll hear a delicate crack of a perfectly balanced crust, feel a soft, almost melt-in-your-mouth interior, and taste a bright citrus kiss that dances with the sweetness of ripe berries. They’re the kind of treat that feels special enough for a celebration and simple enough for a weekday afternoon. Picture a sunlit kitchen, a tray of gold-edged morsels cooling on the rack, and the smile that follows when friends and family discover their irresistible charm. The blue and yellow duo is not just flavorful—it’s visually irresistible, a handheld moment of happiness that invites you to slow down and savor.

Delicious Blueberry Lemon Bites are designed to be approachable, portable, and universally appealing. They require no fancy techniques or hard-to-find ingredients, yet they deliver a sophisticated profile that satisfies both the sweet tooth and the craving for something bright and refreshing. The lemon’s zest and aroma infuse the bite with a clean, sunny brightness that perfectly balances the juicy, jammy blueberries. The result is a texture play that surprises with each mouthful: a crisp, delicate exterior gives way to a soft, tender center, then a lingering, puckering finish that keeps you reaching for another bite. Whether you’re planning a weekend brunch, a coffee table spread, or a quick after-school treat, these bites offer a little bite-sized luxury with no fuss.

What makes them truly special is how they harmonize a few everyday ingredients into something unexpectedly delightful. The gleam of a sugar-sprinkled top, the fragrance of fresh lemon zest, and the way blueberries release their grape-like depth when warmed—all combine to create a flavor profile that feels both timeless and modern. They’re versatile enough to pair with a glass of cold lemonade or a warm cup of tea, yet sturdy enough to hold up on a dessert platter or as a charming party favor. This description is more than a recipe; it’s an invitation to celebrate the simple pleasures of fruit and citrus, to enjoy the sun in a bite, and to share a moment of sweetness that feels personal and thoughtful.

The Story Behind the Dish

The idea for these bites grew from late-summer moments on a sunlit porch, where baskets of blueberries would arrive like small bundles of summer joy and lemons stood proudly at the edge of the kitchen counter, their bright rind signaling the promise of something zesty and uplifting. My family has always believed that the best desserts don’t demand grand gestures; they demand balance, calm, and a sense of place. Blueberries, with their silken flesh and gentle sweetness, meet lemon’s tart sparkle in a dance that feels quintessentially American in the best sense—fresh, fruity, and a touch nostalgic.

Traditions around blueberry desserts are as varied as the compotes, tarts, and muffins that populate the dessert table in homes across the country. In some families, blueberries symbolize blueberries of the harvest—the moment when the fields fall heavy with fruit and the kitchen turns into a buzzing workshop of jars, jams, and pastries. In others, lemon is the bright punctuation that brightens a plate and lifts the mood. The combination of these two flavors is universal in its appeal: the berry’s depth, the citrus’s lift, and a texture that rewards a patient bite. This dish borrows from that lineage, translating it into a neat, handheld form that’s easy to share with friends and family, from casual luncheons to elegant soirees. It’s the kind of recipe that travels well, carrying with it a whisper of porch swing afternoons, a lilac-scented breeze, and a kitchen sink full of fresh fruit that begged to be turned into something joyful.

There’s a small personal anecdote that often surfaces when I think about these bites: a lazy Sunday afternoon, a tray of berries on the table, and a conversation that drifted from weekend plans to favorite childhood desserts. At the center of that memory is a simple truth—bright flavors, a touch of sweetness, and a texture that’s comforting without being heavy can turn any moment into a celebration. This recipe embodies that sentiment. It’s a modern nod to the idea that even the smallest bite can carry a memory, can evoke a place, and can invite you to start anew with a bright, hopeful palate for the week ahead.

Why You’ll Love This Recipe

  • Quick to assemble: these bites come together without fuss, making them perfect for last-minute gatherings or a quick weekend project.
  • Bright, balanced flavor: the lemon provides a fresh, zippy brightness that complements the blueberry’s natural sweetness—the result is refreshing and not cloying.
  • Portable and shareable: bite-sized by design, they’re easy to transport for picnics, potlucks, and school lunch boxes.
  • Texture contrast: a delicate, slightly crisp exterior gives way to a soft, tender interior with juicy pockets of fruit, delivering a satisfying mouthfeel on every bite.
  • Versatile for diets and occasions: the concept can be adapted to vegan or gluten-free diets and works beautifully for casual weekdays or special occasions.
  • Visually appealing: the vibrant blueberries against sunny lemon tones make them irresistible on any dessert or snack board.
  • Low fuss, high charm: you don’t need fancy equipment or elaborate technique to achieve a polished result that looks and tastes sophisticated.

Flavor Profile & Texture

Delicious Blueberry Lemon Bites unfold with a layered flavor journey. The first impression is the citrusy aroma—fresh lemon zest and a whisper of bright lemon juice that instantly lifts the senses. As you take the first bite, a crisp outer layer gives way to a tender, almost melt-in-your-mouth interior. The blueberry presence adds a depth of fruitiness—jammy, slightly tart, with a subtle pop of berry juice that bursts gently as you press your teeth through the surface. The tangy citrus notes act like a spark, awakening the blueberry’s natural sweetness and balancing it so that the overall experience feels lively rather than sugary.

Texture-wise, you’ll notice a delicate crust or shell that yields to a soft, not-too-dense center. The crust offers a gentle snap, a satisfying contrast that makes each bite feel substantial without weighing you down. There’s a light gloss or sheen on the surface, hinting at a touch of glaze that clings just enough to gleam under light. When tasted together, the citrus, berry, and a subtle buttery nuance create a harmony that’s reminiscent of a refined pastry yet still decidedly approachable. The balance is crucial: too tart, and it would overwhelm; too sweet, and the lemon would fade. Instead, there’s an elegant synergy that lingers—a clean citrus finish with a fruity aftertaste that invites another bite rather than a cleansing swallow.

In essence, these bites celebrate contrasts: bright and mellow, crisp and soft, simple and delightful. They are the kind of treat that feels like sunshine on a plate, a small luxury that doesn’t demand a lot of space or time but rewards you with a memorable bite every single time.

Occasions & Pairings

Delicious Blueberry Lemon Bites shine in a wide range of settings, from casual family gatherings to polished brunch spreads. They are equally at home on a weekend dessert table as they are tucked into lunch boxes for a mid-day treat. Below are ideas to help you think about when and how to showcase these bites:

  • Brunch and brunchy gatherings: they pair beautifully with coffee, tea, or a glass of sparkling lemonade, adding a bright note to a leisurely morning.
  • Tea time and afternoon snacks: the citrus lift feels refreshing alongside a pot of herbal tea or a cup of Earl Grey.
  • Picnics and outdoor events: their compact size makes them easy to transport, and they won’t melt away in heat like cream-based desserts might.
  • Potlucks and party trays: they make an eye-catching addition to a dessert board thanks to their color contrast and tidy shape.
  • Gift-able treats: pack a batch into pretty boxes or tins to share with neighbors and teachers—an edible little gesture that travels well.

Pairing suggestions to enhance the tasting experience:

  • Drinks: a bright sparkling water with a twist of lemon, a delicate white wine spritzer, or a lightly sweetened iced tea.
  • Side bites: a dollop of light yogurt or a small scoop of lemon curd can complement the citrus notes.
  • Dessert companions: a simple vanilla ice cream or a dollop of whipped cream adds a creamy counterpoint to the fruity bites.

Tips, Variations & Substitutions

One of the beauties of this recipe concept is its adaptability. Here are ideas to customize the bites to fit different tastes, dietary needs, or seasonal fruit availability:

  • Vegan option: use a dairy-free butter substitute and ensure any glaze or crust components are made with vegan fats. The flavor remains bright and citrus-forward, with the blueberry sweetness shining through.
  • Gluten-free twist: replace any wheat-based crust with almond flour or a gluten-free flour blend to keep the bites tender and crumbly in the right way.
  • Flavor variations: swap lemon for lime or orange zest to alter the citrus character. A hint of vanilla or almond extract can also deepen the overall flavor without overpowering the fruit.
  • Berry substitutions: blueberries can be replaced with raspberries, blackberries, or a mix of berries for a different tart-sweet balance. Each berry brings its own micro-flavors and texture.
  • Texture play: for a more pronounced crust, incorporate a touch of finely chopped nuts or a sprinkle of coarse sugar on top. For a smoother bite, keep the exterior lighter and the interior silkier.
  • Low-sugar option: use a natural sugar substitute you prefer, or reduce the overall sweetener by balancing with slightly more citrus zing to maintain brightness.
  • Regional twists: add a pinch of lavender in the zest or a whisper of cardamom for a floral or warm-spice note that complements the fruit without overshadowing it.

Pro tips for achieving that irresistible texture and flavor balance without turning the process into a project:

  • Choose fruit at peak ripeness: intensely colored blueberries with a little bloom are sweet, fragrant, and juicy, which translates into more pronounced blueberry flavor in the bite.
  • Zest generously but finely: lemon zest releases essential oils that perfume the bites; avoid the bitter white pith for a clean citrus note.
  • Practice gentle handling: mix ingredients just until combined to prevent dense or gummy textures; a light hand helps maintain tenderness in the interior.
  • Finish with a light glaze or glaze-inspired sheen: a minimal, melted sugar glaze or a glaze-like finish can add a glossy, appealing exterior without making the bites heavy.

Storage & Make-Ahead Ideas

These bites are friendly to make ahead, which makes them ideal for busy weeks or event planning. Here are reliable strategies to keep them fresh and tasty:

  • Short-term storage: keep the bites in an airtight container at room temperature for up to 2-3 days. If your space is warm, refrigerate to maintain texture and flavor.
  • Make-ahead preparation: assemble the components a day in advance if needed, keeping elements separate (such as the crust and the fruit filling) and combine just before serving to preserve texture and brightness.
  • Freezing options: freeze baked bites individually on a tray, then transfer to a sealed container or freezer bag. Thaw at room temperature and, if desired, warm very briefly in a low oven to refresh the exterior.
  • Reheating guidance: if the bites feel soft after storage, a light gentle refresh in a warm environment can help restore the crisp exterior without drying them out.

Tips for maintaining quality during storage:

  • Airtight is essential: air is the enemy of crisp textures, so ensure a tight seal to prevent moisture from softening the exterior.
  • Avoid stacking heavy items on top: stack mindfully to prevent the tops from flattening; consider placing parchment between layers if you’re transporting them.
  • Keep the citrus aroma intact: store away from strong-smelling foods that could dull the lemon fragrance.

Fun Facts & Trivia (Optional)

Delicious Blueberry Lemon Bites carry little stories behind their main ingredients. Here are some fun notes to savor as you prepare or admire them on the plate:

  • Blueberries are among the most nutrient-dense berries, rich in antioxidants known as anthocyanins, which give them their characteristic blue hue and may contribute to a range of health benefits.
  • Lemon zest contains essential oils that deliver a potent citrus aroma and flavor with far more punch than lemon juice alone; zesting releases oils that brighten baked goods and confections.
  • The combination of blueberries and lemon is a classic in many culinary traditions, admired for its balance of floral berry sweetness with tart, sunny citrus—an enduring pairing in desserts and snacks around the world.
  • Small-bite desserts like these taps into the “little luxuries” philosophy: they offer a sophisticated sensory experience without requiring a lot of effort, making them a popular choice for entertaining.
  • From an aesthetic standpoint, the contrast between the deep indigo of blueberries and the bright lemon-yellow hints at the emotional effect of the dessert: it’s visually uplifting and mood-enhancing.
  • There is a long history of lemon as a culinary brightener in desserts, dating to early European kitchens, where citrus was used to cut through rich flavors and provide a refreshing counterpoint—this dish continues that tradition in a modern, approachable form.

Ingredients

Bite Base
  • 1 1/2 cups rolled oats (certified gluten-free)
    → The oats form the chewy, substantial base of the bites and will be partially ground into a smoother consistency to help bind the dough. If you need gluten-free results, be sure to use certified gluten-free oats to prevent cross-contamination. For a punchier texture, pulse some of the oats into a coarse flour while keeping some whole for bite.
  • 1/2 cup almond flour
    → Adds tenderness and helps bind the mixture without relying on gluten. Use finely ground almond flour for even distribution; if you only have whole almonds, pulse them briefly in a processor to a fine meal. Toasting the almond flour lightly before mixing enhances its nutty aroma and flavor.
  • 1/4 cup unsweetened shredded coconut (optional)
    → Introduces subtle sweetness and a delicate texture; omit if you want a simpler, nut-forward base or have coconut allergies. Toasting the coconut lightly until fragrant can intensify its flavor before folding into the base.
  • 6-8 pitted Medjool dates
    → Chief binder and natural sweetener; dates help the dough hold together without added sugar. Chop finely or pulse with a splash of water until you obtain a sticky paste. If your dates are dry, soak for 5–10 minutes to soften and ease blending.
  • 2 tablespoons maple syrup (or honey)
    → Adds moisture and a touch more sweetness to aid binding; adjust to taste depending on the sweetness of your dates. Use maple syrup for a vegan version; honey provides a richer flavor if not strictly vegan.
  • 1 tablespoon lemon zest
    → Provides a bright lemon aroma that complements the blueberry and balances sweetness. Grate zest from fresh, unwaxed lemons, taking care to avoid the bitter white pith beneath the peel.
  • 1/2 teaspoon vanilla extract (optional)
    → Subtly rounds the citrus sweetness with a warm note; use if you want a hint of vanilla alongside lemon. If you prefer a pure lemon-forward flavor, omit.
  • Pinch of salt
    → Sharpens sweetness and enhances overall flavor; essential even in small amounts to prevent the bite from tasting flat. Adjust if using salted nuts or salted ingredients elsewhere in the recipe.
  • 1 tablespoon neutral oil (e.g., light olive oil or refined coconut oil) (optional)
    → Improves moisture and helps the mixture bind when shaping the bites. Use sparingly to avoid greasiness; choose a flavor-neutral oil to keep lemon/blueberry notes dominant.
Blueberry Center
  • 1 cup fresh blueberries, halved or chopped (reserve a few whole for decoration)
    → The juicy berry center provides vibrant flavor and moisture. If using frozen berries, thaw and drain thoroughly to minimize extra moisture; tossing with 1/2 teaspoon lemon juice and a pinch of sugar (optional) can heighten sweetness and counterbalance tartness.
  • 1 teaspoon lemon juice
    → Lifts the blueberry flavor with bright citrus notes and helps slightly bind the center. Add gradually to prevent making the mixture too wet; this keeps the centers cohesive when the bites are formed.
  • 1 teaspoon cornstarch or arrowroot powder
    → Thickens the blueberry mixture so the centers set nicely and don’t leak. Mix with a small amount of water to form a slurry before folding in; this helps achieve a smooth, jam-like consistency as the bites chill. Omit if using very thick, low-moisture berries.
  • 1 tablespoon chia seeds (optional)
    → Acts as a natural thickener and adds a pleasant texture; hydrate the seeds in a tablespoon of water for 10 minutes to form a gel before incorporating. They also boost nutrition and help bind the center together.
  • 2 teaspoons maple syrup or honey (optional)
    → Adds a touch of sweetness to balance tart berries; adjust based on berry sweetness. If your blueberries are very ripe and sweet, you may skip this.
Lemon Glaze
  • 1/2 cup powdered sugar
    → Provides a light, glossy finish that lightly sweetens and lends a polished look. Sift to remove lumps. For a dairy-free version, use plant-based milk or water to adjust thickness as needed.
  • 1-2 tablespoons lemon juice
    → Delivers bright citrus flavor to the glaze and helps reach a pourable consistency. Start with 1 tablespoon and add more gradually to avoid a too-runny glaze.
  • 1-2 teaspoons dairy-free milk or water (optional)
    → Loosens the glaze to your preferred drizzle thickness. Choose a milk alternative that suits your dietary needs if avoiding dairy; add gradually until the glaze coats the bites evenly.

Instructions

  • Preheat your oven to 350°F (175°C) and line a 12-cup muffin tin with paper liners or grease it well.
    → This ensures the bites bake evenly and release cleanly from the cups, so you can unmold or serve without tearing the base.
  • Toast the almond flour in a dry skillet over medium-low heat, stirring constantly until it turns golden and releases a nutty aroma.
    → Toasting deepens flavor and improves browning, while also reducing any raw almond taste that could dominate the base.
  • If using shredded coconut, toast it lightly in the same skillet until fragrant, then transfer to a plate to cool.
    → Light toasting concentrates coconut flavor and prevents it from tasting soggy in the finished bites.
  • Pulse about half of the rolled oats in a processor or blender until they become a loose flour while keeping the rest of the oats chunky for texture.
    → A partial grind helps the dough bind, while the intact oats provide chew and structure in every bite.
  • In a large bowl, whisk together the oat mixture (ground and whole portions), the toasted almond flour, the optional toasted coconut, a pinch of salt, and the optional oil if you choose not to leave the dough dry.
    → Even distribution of dry ingredients ensures consistent texture and prevents density pockets in the final bites.
  • Prepare the date paste by finely chopping the Medjool dates, then pulsing with a splash of water until a sticky paste forms; if the dates are dry, soak for 5–10 minutes and drain before blending.
    → The paste provides natural sweetness and the primary binder so the bites hold together without refined sugar.
  • Stir maple syrup (or honey) and lemon zest into the date paste, and add vanilla extract if using; mix until the flavors are evenly integrated.
    → The syrup hydrates the paste for binding and the lemon zest reinforces the citrus profile across the base.
  • Pour the date mixture into the dry oat-almond mixture and mix with a spoon or hands until a cohesive, slightly sticky dough forms; if the dough seems dry, add a teaspoon at a time of neutral oil or water to reach the right consistency.
    → A cohesive dough molds cleanly into cups and bakes evenly without crumbling.
  • Chill the dough in the refrigerator for 15–20 minutes to firm up, making it easier to shape and less prone to sticking.
    → Chilled dough yields neat, compact bases that hold their shape during baking and filling.
  • Portion the dough into the prepared muffin tin and press firmly to form an even base about 1/4 inch (6 mm) thick in each cup; use the flat bottom of a glass or measuring spoon to compact evenly.
    → A uniform base ensures even baking and prevents center leakage when filling.
  • Bake the crusts at 350°F (175°C) for 12–14 minutes or until the edges are set and the centers are just pale; transfer to a rack and let cool completely in the pan before filling.
    → Baking sets the base for handling and creates a stable platform for the blueberry center; cooling prevents soggy bottoms during assembly.
  • In a small bowl, combine the blueberries with 1 teaspoon lemon juice and 1 teaspoon cornstarch (or arrowroot) to begin thickening; if using chia seeds, hydrate them in 1 tablespoon water for 10 minutes and then stir in.
    → The acid brightens the berries and the starch thickens the center so it stays put in the bite.
  • Add 1 tablespoon maple syrup or honey to the blueberry mixture and stir until evenly distributed; adjust sweetness to your liking based on the blueberries’ ripeness.
    → A touch of sweetness balances tartness and helps the center set without becoming syrupy.
  • Let the blueberry mixture rest for 5–10 minutes to slightly macerate and thicken; if using chia, you’ll see a gel form as the seeds hydrate.
    → Resting allows the flavors to meld and the mixture to gain viscosity for neat filling.
  • Fill each cooled crust with a generous spoonful of the blueberry mixture, pressing gently to create a compact center and leaving a small edge of crust visible; reserve a few whole berries for garnish.
    → Proper filling prevents overflow during chilling and contributes a vibrant color contrast once glazed.
  • Chill the assembled bites in the refrigerator for 30–60 minutes or until the centers are set and hold their shape when gently touched; this ensures the centers don’t bleed into the crust when glazing.
    → Chilling locks the structure in place for a clean finish and easier glazing.
  • Sift the powdered sugar into a small bowl to remove lumps, then whisk in 1 tablespoon lemon juice and enough dairy-free milk or water to reach a pourable glaze; adjust with additional sugar or liquid to achieve your desired thickness.
    → A smooth glaze coats evenly and contributes a polished look with a bright lemon flavor.
  • Drizzle the glaze over the chilled bites in a light, even motion, turning the pan to avoid heavy pooling; garnish with reserved whole berries for color and contrast.
    → The glaze provides sweetness and a glossy finish while the berries add visual appeal and fresh aroma.
  • Refrigerate the glazed bites for 15–20 minutes to set the glaze, then serve chilled or at room temperature depending on preference; store any leftovers in an airtight container up to 3 days.
    → A short chill helps the glaze set firmly and maintain the bite’s neat presentation during handling.

Notes

These gluten-free blueberry lemon bites are naturally sweetened with Medjool dates and a touch of maple syrup, making them a wholesome and guilt-free treat.

You can customize them by folding in chopped nuts or seeds (such as almonds, chia, or pistachios) for extra crunch, or boost the lemon aroma with additional zest or a pinch of salt to balance sweetness.

They freeze well and make a great grab-and-go snack; store in an airtight container and thaw briefly before enjoying for best texture.

For an extra shine, drizzle with the lemon glaze or serve with a dollop of dairy-free yogurt to contrast tart berries with creamy tang.

Always ensure your oats are certified gluten-free if you have gluten intolerance.

Tips

Tips for Delicious Blueberry Lemon Bites

Bite Base tips

  • Use certified gluten-free oats if you need gluten-free results to prevent cross-contamination. Clean your processor or bowl between steps to avoid any oat flour mixing with other ingredients.
  • Pulse some oats into a coarse flour while keeping some whole oats for a chewy texture. This balance helps the base hold together yet still feel substantial.
  • Lightly toast almond flour before mixing to deepen its nutty flavor; watch closely so it doesn’t burn, which can impart bitter notes.
  • Shredded coconut is optional; it adds subtle sweetness and texture. If using, toast it gently to intensify aroma before folding in.
  • Chop Medjool dates finely or blitz with a splash of water into a sticky paste. If your dates are dry, soak 5–10 minutes to soften and improve binding.
  • Maple syrup or honey provides moisture and helps binding. Adjust to taste depending on your date sweetness; maple keeps things vegan.
  • Zest lemon from fresh, unwaxed lemons, avoiding the bitter white pith. Fresh zest boosts brightness in every bite.
  • Vanilla (optional) rounds the citrus sweetness. If you want a pure lemon-forward flavor, skip vanilla.
  • Pinch of salt enhances sweetness and overall flavor; balance with other salty ingredients if used elsewhere in the recipe.
  • Optional neutral oil improves moisture and binding; use sparingly to avoid greasiness. A little goes a long way.
  • Mix until just combined; overmixing can make the base dense. If the dough seems dry, add 1 teaspoon water or lemon juice at a time.
  • Chill the base mixture for 15–20 minutes before shaping to help it hold its form better.
  • Shape with a small scoop or gently between hands; press firmly so bites don’t crumble during assembly.

Blueberry Center tips

  • If using frozen berries, fully thaw and drain to minimize extra moisture; pat dry to prevent soggy centers.
  • Toss berries with 1/2 teaspoon lemon juice and a pinch of sugar (optional) to brighten flavor and balance tartness.
  • Make a smooth slurry by whisking 1 teaspoon cornstarch or arrowroot with a little water before folding; this thickens the center without lumps and creates a jam-like texture as it chills.
  • Optional: hydrate 1 teaspoon chia seeds in 1 tablespoon water for 10 minutes to form a gel; fold in to boost thickness and nutrition.
  • Sweeten to taste with 2 teaspoons maple syrup or honey if berries are tart; adjust based on berry sweetness.
  • Chill the center mixture briefly (15–20 minutes) to help it set before forming the bites; this reduces the risk of leaking into the base.
  • For extra color and brightness, macerate berries with a tiny splash of lemon juice before mixing into the center.

Lemon Glaze tips

  • Sift powdered sugar to avoid lumps and achieve a smooth, glossy finish. Dairy-free options work well with plant milks or water.
  • Begin with 1 tablespoon lemon juice and add more gradually to reach your desired pourable thickness; too much juice can make the glaze too runny.
  • Use 1–2 teaspoons dairy-free milk or water to loosen the glaze; choose a milk alternative that suits your dietary needs and whisk until smooth.
  • For a shiny, set glaze, apply in thin, even layers after the bites have chilled slightly. A second light layer can build more gloss if needed.
  • If you want a stronger lemon aroma, whisk in a touch of lemon zest into the glaze at the end.
  • Avoid glazing the edges too heavily; wipe excess glaze from the bite edges for clean presentation and to prevent drips.

FAQ

What are the main ingredients for Delicious Blueberry Lemon Bites?

Typical components include a crust made from crushed graham crackers or digestive biscuits with melted butter, a lemon-flavored creamy filling (cream cheese or Greek yogurt with lemon zest and juice and a touch of sugar), and fresh blueberries for topping. You can adapt with dairy-free or gluten-free substitutes if needed.

Can I make this gluten-free or dairy-free?

Yes. For gluten-free, use gluten-free graham crackers or a crushed almond flour crust. For dairy-free, substitute the crust with dairy-free cookies and use dairy-free cream cheese or coconut cream/yogurt for the filling. Ensure any sweeteners are dairy-free as well.

Are frozen blueberries okay to use?

Absolutely. Use thawed, well-drained blueberries. Pat them dry before topping to avoid excess moisture that could make the bites soggy.

How do you assemble and set the bites?

1) Make and press the crust into mini muffin cups. 2) Chill briefly to set. 3) Beat the filling until smooth and spread or pipe into the crusts. 4) Top with blueberries and a little lemon zest. 5) Chill again until firm, about 30–60 minutes.

How long do they chill and what is the total time?

Chilling the crust and again after filling helps the bites hold their shape. Plan for about 1–2 hours of chill time in total, plus 15–25 minutes active prep. Total time is typically around 1.5–2.5 hours, depending on your cooling pace.

How should I store leftovers, and how long do they last?

Store in an airtight container in the refrigerator. They usually stay fresh for 3–4 days. For longer storage, you can freeze them for up to 1–2 months; thaw in the fridge before serving.

Can I make these ahead for a party or event?

Yes. You can prepare the crust and filling up to a day in advance and assemble the bites the day you plan to serve. For best texture, add the topping blueberries just before serving or shortly before refrigerating.

How can I adjust the sweetness or tartness?

Adjust sugar levels to taste in the filling. If you prefer more tang, add extra lemon zest or a bit more lemon juice. For a milder flavor, reduce the sugar by a tablespoon or two. You can also use honey or maple syrup as alternatives to sugar.

What variations or toppings work well?

Try variations like a lemon-curd swirl, a mint leaf on top, or a white chocolate drizzle. You can swap blueberries for raspberries or sliced strawberries for a fruity twist. Adding a thin layer of yogurt or cream cheese frosting can also change the texture nicely.

What equipment do I need?

Essential tools include a small muffin tin or mini muffin cups, a resealable bag or piping bag for neat filling, a mixing bowl, and a spatula. If you don’t have a mixer, you can whisk the filling by hand, though it may require extra effort to achieve a smooth texture.

Introduction / Hook

Imagine a snack that fuses the creamy, delicate bite of cottage cheese with the crisp, satisfying snap of a perfectly baked chip. Crispy Cottage Cheese Chips take the best of both worlds: the protein-y, tangy richness of cottage cheese as a canvas, and a workflow that transforms it into wafer-thin, golden-edged crisps that crackle at the first bite. The aroma is irresistible—think toasty dairy perfume mingling with a whisper of garlic, sea salt, and a garden of fresh herbs. Each chip unfurls a faint, lacy edge that dissolves into a crisp center, a textural dance that keeps you reaching for more without the heaviness of heavier snacks. This is not a heavy fried chip or a dense cracker; it’s a modern, health-conscious snack canvas that invites playful flavor exploration and a little kitchen alchemy.

Crispy Cottage Cheese Chips are a celebration of contrasts: light yet hearty, mild yet deeply savory, soft-curd interior transformed into a brittle, golden border. They’re the kind of snack you can whip up for a quick weeknight bite, yet they hold their own as a chic appetizer for a casual party or a sophisticated grazing board. The concept is simple in spirit—use cottage cheese as the base, press and dry it to shed moisture, then bake until the edges shimmer with a gold that’s almost caramelized—yet the possibilities are endless. You can tailor them to your mood, your pantry, and your guests, layering in flavors that range from Mediterranean brightness to smoky, zesty heat. The result is a versatile snack that invites dipping, nestles beside a crisp salad, or serves as a crunchy, satisfying foundation for a cheese-board-inspired nibble.

Beyond their immediate crunch, these chips carry a friendly, health-forward vibe. Cottage cheese brings a gentle protein punch and a creamy mouthfeel that contrasts beautifully with the normalized, low-carb nature of a chip-like bite when prepared with care. They’re naturally gluten-free and can be tuned to be vegan or dairy-free with thoughtful substitutions, making them an inclusive choice for a crowd. The method—quietly drying a luscious dairy base into a crisp, wafer-thin canvas—feels both ancient and cutting-edge at once: a nod to traditional snack crackers and a modern embrace of high-protein, low-crank, crave-worthy snacks.

The Story Behind the Dish

The idea for Crispy Cottage Cheese Chips arrived in a sun-warmed kitchen, where a half-used tub of cottage cheese sat beside a scattering of herbs, a jar of garlic powder, and a craving for something snackable but not greasy. It began as a playful experiment on a rainy Sunday: what if you could coax cottage cheese into a crisp, cracker-like form without turning to flour or starches as a binder? The result felt like a revelation—a snack that honors the brightness of dairy while delivering a satisfying crunch that stands up to dip sauces, salsas, and even a splash of citrus.

Historically, cottage cheese has long lived in the realm of wholesome, everyday dairy—cultured curds with a mild tang that has fed generations from rural kitchens to urban pantries. It’s been celebrated for its versatility: folded into salads, swirled into baked dishes, or enjoyed simply with herbs. The transformation into chips feels like a natural extension of that versatility, a way to take a beloved, everyday ingredient and give it a new form—one that marries comfort with culinary play. In a sense, these chips echo the story of a kitchen where frugality meets invention: taking what’s on hand, treating it with respect, and letting texture guide the experience.

As the idea spread, friends and family began naming variations—Mediterranean-style with oregano and lemon zest, smoky with paprika and chili, or herby and fresh with dill and chives. The chips became a symbol of hospitality too: a quick, glamorous snack that doesn’t demand a lot of planning but delivers a lot of pleasure. The story behind the dish is really a story about turning the ordinary into something special—the moment when pantry staples become a little piece of edible artistry that brightens a day and invites conversation.

Why You’ll Love This Recipe

  • Protein-forward snacking: cottage cheese brings gentle protein, making these chips more satiating than typical crackers or chips.
  • Customizable flavor playground: you can lean into herbs, spice blends, citrus, or smoky seasonings to suit any mood or theme.
  • Quick to assemble: no long soaking or elaborate prep; the emphasis is on texture and temperature control for crispness.
  • Gluten-free and adaptable: naturally gluten-free and easy to tailor for dairy-free, vegan, or low-carb preferences with thoughtful substitutions.
  • Ideal for dipping and pairing: they shine with a bright yogurt-herb dip, a zesty salsa, a velvety avocado spread, or a simple olive tapenade.
  • Perfect for entertaining: elegant enough for a casual party, movie night, or light nibbles after work, yet simple enough for a weeknight treat.
  • Kid-friendly texture and flavor: the crisp bite is appealing to kids, while you can adjust seasonings to keep it interesting for adults too.
  • Make-ahead potential: you can prepare the base and bake in batches, re-crisping to refresh texture when serving later.

From the pantry to the plate, these chips offer a blend of practicality and charm. They reward careful handling—the moisture in cottage cheese must be managed, the bake must be guided by attentive heat, and the finish must celebrate a delicate balance: a crisp, brittle shell that gives way to a soft, creamy interior you already know and love. The result is a snack that feels familiar—comforting, wholesome, and satisfying—yet with a surprising twist that makes it worthy of a second and third bite.

Flavor Profile & Texture

Crispy Cottage Cheese Chips deliver a nuanced sensory experience. On the outside, you’ll encounter a thin, crisp shell that shimmers with a light golden hue. The surface often offers tiny, appealing crinkles that whisper of caramelized dairy sugars and careful dehydration. When you bite in, the crackle gives way to a tender, almost creamy interior—a lovely paradox to savor. That interior is where cottage cheese shines: a mild tang and a gentle dairy sweetness mingle with the right touch of salt, creating a balance that’s comforting and bright at once.

Flavor-wise, you’ll detect a canvas that readily takes on seasonings. A whisper of garlic or onion powder adds a savory backbone without overpowering the dairy’s natural brightness. Herbs—like dried oregano, thyme, dill, or chives—bring an aromatic lift, a garden-fresh note that makes the chips feel light and lively. If you crave warmth, a pinch of smoked paprika or chili powder introduces a subtle, sun-kissed heat that lingers. Citrus zest or a burst of lemon juice can lift the flavor, giving the chips a clean finish that pairs beautifully with creamy dips or bright salsas.

Texturally, the chips offer a luminous contrast: a fragile edge that crunches crisply, giving way to a softer, nearly pillowy core. The interplay of textures is deliberate—the outer crisp keeps the bite lively, while the interior remains approachable, avoiding chalkiness or dryness. The balance is what makes these chips addictive: they’re satisfying without feeling heavy, and their flavor carries through even when dipped into bold sauces. The mouthfeel invites you to slow down and savor the transition from crust to crumb, from crispy exterior to creamy interior.

Occasions & Pairings

These chips shine in a variety of moments. They’re perfect for a casual weeknight snack, a relaxed movie night at home, or a light, elegant appetizer for gatherings. They also work wonderfully as part of a brunch spread or a grazing table, offering a crisp contrast to soft cheeses, creamy dips, and bright vegetables.

Pairing ideas:

  • Dips and spreads: tangy yogurt-herb dip, creamy avocado salsa, dill yogurt dip, zesty salsa, or a smoky tapenade.
  • Salads and bowls: crumble over a crisp salad for texture, or serve alongside a grain bowl with cucumber and feta for contrast.
  • Proteins: alongside grilled chicken skewers, roasted chickpeas, or a bowl of roasted vegetables for a balanced bite.
  • Drinks: light, citrus-forward beverages, sparkling water with a squeeze of lemon, or a cool white wine that doesn’t overpower the dairy notes.
  • Dessert-style pairing: a small dollop of herbed ricotta and a drizzle of honey can transform them into an unexpected, playful course.

Occasions range from casual game nights to more refined gatherings that still crave easy, crowd-pleasing bites. They are particularly welcome at potlucks, backyard barbecues, and weekend gatherings where guests appreciate a snack that feels both comforting and novel.

Tips, Variations & Substitutions

Here are ideas to tailor Crispy Cottage Cheese Chips to your pantry, dietary needs, and flavor moods.

  • Texture optimization: for maximum crispness, pat cottage cheese dry before mixing with seasonings and spread very thinly on parchment. Avoid thick clumps—thin, even layers crisp more evenly.
  • Herb-forward version: use dried oregano, thyme, marjoram, and a pinch of lemon zest for a bright, grassy aroma that pairs beautifully with a yogurt dip.
  • Garlic-forward version: add garlic powder or granulated garlic and a pinch of onion powder for a robust, savory profile.
  • Smoky and spicy: smoked paprika, cumin, chili powder, and a touch of cayenne create a heat-forward profile that’s balanced by the dairy’s gentleness.
  • Regional twists: drizzle with za’atar and sesame for a Middle Eastern influence; use dried dill and lemon zest for a bright Mediterranean note; add garam masala and coriander for a warm Indian-inspired edge.
  • Vegan and dairy-free option: substitute with a plant-based cream cheese alternative or a well-blended mix of silken tofu with lemon juice, nutritional yeast, and a pinch of salt to mimic tang. Bind lightly with a plant-based binder (e.g., aquafaba) if needed, and bake to crispness. Ensure all seasonings align with dairy-free needs.
  • Low-carb and gluten-free: these chips are naturally gluten-free; keep thins and avoid crumbly additions that introduce starches. Test different herb blends to maintain a satisfying snap without adding flour.
  • Make-ahead and batch prep: prepare the base mixture (or the pressed sheets) in advance and refrigerate. When ready to bake, simply cut into desired shapes and bake until crisp. This is especially handy for entertaining where you want to serve hot, freshly crisp chips.
  • Flavor boosters for serving: pair with a bright yogurt dip, a garlicky olive oil dip, or a chunky tomato-salsa for contrast in texture and temperature.

If you’re feeling playful, you can also create a “chip flight” with several flavor profiles—one with fresh herbs, one smoky, and one citrus-kissed—so guests can explore textures and tastes in one platter.

Storage & Make-Ahead Ideas

Crispy Cottage Cheese Chips are best enjoyed fresh right after they’ve baked and cooled to their crisp apex. However, with thoughtful storage, you can extend their life and keep that pleasing snap.

  • Storage: keep cooled chips in an airtight container at room temperature away from humidity. Moisture is the enemy of crispness, so a dry, sealed environment is key.
  • Make-ahead strategy: you can prepare the base sheets ahead of time and refrigerate. When ready, slice and bake to crispness. Alternatively, bake in batches and re-crisp in a low oven for a few minutes just before serving.
  • Reheating tips: to restore crunch, reheat in a warm oven or toaster oven for a few minutes until the chips re-crisp. Avoid microwaving, which can soften them.
  • Freezing note: freezing baked chips is not ideal for texture; if you must, store in a freezer-safe bag and re-crisp thoroughly after thawing. Expect a slight loss of peak crunch, but a respectful recovery with proper re-crisping.
  • Best practices for freshness: store in a dark, dry cabinet or pantry; avoid exposure to steam or humid air. Use within a few days of baking for optimal texture and flavor.

If you’re hosting, consider making a second batch for guests who arrive later or for a second round of snacking. The chips hold well when kept crisp, and their lightness makes them easy to replenish without heavy kitchen work.

Fun Facts & Trivia (Optional)

– Cottage cheese has a storied history as a staple in many cultures, celebrated for its mild tang and versatility in both savory and sweet dishes. Its name evokes a rustic heritage of cottage kitchens and simple, wholesome meals.

– The texture contrast—crisp exterior with a creamy interior—parallels the classic experience of eating a well-made cheese cracker or a delicate rice puff, but with the dairy-forward richness that cottage cheese uniquely provides.

– The idea of drying and crisping dairy soft-curds into chips taps into a broader culinary tradition of turning soft, moist ingredients into crisp, snackable forms. It’s a playful example of how texture can redefine a familiar ingredient.

– For many, these chips evoke the charm of a cheese board but with the convenience of a snack you can bake in a standard oven, in a fraction of the time it takes to craft a more elaborate hors d’oeuvre.

– If you’re curious about the science, the moisture content in cottage cheese is what you’re managing to achieve crispness. By spreading in thin layers and applying heat, water molecules escape, forming a dry matrix that becomes crisp at the edges while retaining a gentle interior. The careful balance of heat, thickness, and moisture results in that characteristic crackling bite.

Ingredients

Cottage Cheese Chips Base

  • 1 cup well-drained cottage cheese (full-fat)
    → Moisture content controls crispiness and binding. For best chips, press the cottage cheese through a sieve or squeeze excess whey with paper towels until it forms a thick, creamy mass. Full-fat cottage cheese yields richer flavor and crisper edges; drain well to prevent soggy chips. If you use low-fat, you may need slightly more almond flour to offset moisture.
  • 1 large egg, lightly beaten
    → Acts as a binder and helps set the chips so they hold their shape during baking. Use at room temperature to blend smoothly with the cottage cheese. If avoiding eggs, substitute with 1 tablespoon ground flaxseed mixed with 3 tablespoons water and allow to thicken, though texture may vary. Do not overmix after the batter comes together to keep the chips tender rather than crumbly.
  • 1/4 cup grated parmesan cheese (freshly grated)
    → Adds salty, sharp flavor and contributes to browning and a crisp crust. Freshly grated parmesan melts more evenly than pre-shredded; Pecorino Romano adds a stronger bite if desired. If dairy-free, nutritional yeast can provide some savoriness, but expect a softer crust.
  • 2 tablespoons almond flour (or coconut flour if you prefer a grain-free option)
    → Almond flour provides structure and moisture-absorption without gluten; coconut flour is more absorbent, so you may need to adjust by adding a little extra egg or cottage cheese. Use to achieve a dough that holds together and bakes into thin, crisp chips. If you want extra crunch, you can mix in 1 teaspoon corn starch for added crispness.
  • 1/2 teaspoon garlic powder
    → For savory depth; use powder rather than minced garlic to avoid extra moisture. If you prefer a stronger garlic presence, increase to 3/4 teaspoon. Fresh minced garlic can be used but may introduce moisture; if used, reduce cottage cheese drainage accordingly and consider slightly less liquid elsewhere.
  • 1/4 teaspoon onion powder
    → Adds mild savory aroma without adding moisture. Optional: substitute with 1/2 teaspoon granulated onion if you don’t have powder. For a stronger onion note, you can add a pinch of minced dried onion, but keep moisture in mind to maintain crispness.
  • 1/4 teaspoon smoked paprika (or chili powder)
    → Provides color and a hint of smokiness or heat; adjust to taste. Smoked paprika yields a robust smoky flavor that pairs well with cheese chips. If you prefer no heat, omit or use sweet paprika instead.
  • 1/4 teaspoon salt
    → Essential for flavor balance. Depending on the saltiness of your cheese, you may need less or more. If using salted cottage cheese, start with 1/8 teaspoon and adjust after tasting. Salt on the surface can also help with browning during baking.
  • 1/8 teaspoon ground black pepper
    → Adds subtle pungency; adjust to taste. Freshly ground pepper is more aromatic. If you’re avoiding pepper, you can omit, though a light touch helps highlight cheese and spice notes.

Optional Add-ins

  • 1 tablespoon chopped fresh herbs (such as chives, parsley, or dill) (optional)
    → Fresh herbs brighten the chips with color and aroma. Chop finely for even distribution; mix into the batter or sprinkle on top before baking for a more vibrant appearance. Dried herbs can be used if fresh are unavailable, but fresh will yield a more pronounced flavor.
  • 1 tablespoon sesame seeds or poppy seeds (optional)
    → Adds crunch and a toasty note. Toast seeds lightly in a dry skillet before using to enhance aroma; they also create an attractive speckled pattern on the chips. If avoiding seeds, omit and rely on cheese and flour for texture.
  • 1-2 tablespoons nutritional yeast (optional)
    → Adds a cheesy, nutty savoriness without additional dairy; increases umami. Start with 1 tablespoon and adjust to taste. Note that it can slightly dry the batter, so compensate with a touch more cottage cheese if needed.
  • Oil spray for baking sheet (optional) or 1 teaspoon olive oil
    → Helps prevent sticking and promotes even browning on the bottom. Lightly spray the sheet or brush a thin layer of oil on the chips before baking. Too much oil can make the chips greasy; a light mist promotes crispness.

Instructions

  • Preheat your oven to 350°F (175°C) and line a large baking sheet with parchment paper or a silicone baking mat to create a nonstick surface for thin, even chips.
    → A hot, prepared surface ensures the batter spreads and bakes quickly without sticking, promoting uniform browning on the bottoms.
  • Drain the cottage cheese well and press it to remove as much moisture as possible using a sieve or by wrapping in paper towels and squeezing gently; transfer to a medium bowl.
    → Controlling moisture is crucial for crisp chips; excess liquid makes the batter runny and prevents the edges from drying and crisping properly.
  • Stir in the lightly beaten egg with the cottage cheese until you achieve a thick, cohesive paste that holds its shape when pressed; do not overmix once the batter comes together.
    → The egg acts as a binder to set the chips, and gentle mixing preserves a tender crumb without turning the mixture gluey.
  • Fold in the freshly grated parmesan cheese until evenly distributed and glossy; this creates a savory foundation and promotes browning during baking.
    → Freshly grated parmesan melts more uniformly than pre-grated, enhancing flavor and the crust’s color.
  • Add the almond flour (or coconut flour, if preferred) and mix just until a cohesive dough forms; if using coconut flour, anticipate needing a touch more moisture or a second egg.
    → Almond flour provides structure and moisture absorption without gluten; coconut flour is highly absorbent and can require adjustments to maintain a dough that holds together.
  • Stir in garlic powder, onion powder, smoked paprika (or chili powder), salt, and black pepper; blend until the spices are evenly dispersed throughout.
    → Even distribution ensures every bite has balanced savory notes and consistent color; powders prevent extra moisture from minced aromatics.
  • Optionally fold in 1 tablespoon chopped fresh herbs or 1 tablespoon sesame or poppy seeds after the spices for added aroma and crunch. If toasting seeds, do so briefly in a dry skillet before using.
    → Fresh herbs brighten flavor and appearance; toasted seeds contribute crunch and a toasty aroma that complements cheese chips.
  • If the batter seems too wet and is difficult to shape, sprinkle in a teaspoon of additional almond flour at a time until it holds its form; if it’s too stiff, add a few teaspoons of cottage cheese.
    → Balancing moisture ensures the chips spread thin and bake to a crisp rather than crumble or steam.
  • Scoop small portions of batter onto the prepared sheet and gently press them into thin rounds roughly 2 inches in diameter and about 1/8 inch thick; use the back of a spoon or a small silicone spatula for uniformity.
    → Thin, even rounds bake through to the center and achieve crisp edges; uniform thickness prevents overbrowning on some chips while others remain soft.
  • Lightly spray or brush the tops with oil (optional) to promote even browning and extra crispness on the surface; avoid heavy coating which can make the chips greasy.
    → A light fat helps heat transfer and creates a crisp, caramelized crust without saturating the chips.
  • Bake for 12–15 minutes, rotating the sheet halfway through for even browning; watch for golden edges and set centers rather than pale, soft bottoms.
    → Rotating ensures uniform heat exposure; timing may vary with sheet thickness and oven calibration, so monitor closely near the 12-minute mark.
  • Remove the sheet and let the chips cool on the pan for 5–7 minutes to firm up, then transfer to a rack to finish cooling; this helps them achieve maximum crispness as they shed steam.
    → Resting on a rack prevents trapped moisture from making the chips soggy and ensures crisp edges throughout.
  • Serve the chips warm or at room temperature with your favorite dips, such as herb yogurt, tomato salsa, or a garlic aioli; store leftovers in an airtight container at room temperature for up to 2 days or re-crisp in a 300°F (150°C) oven for 3–5 minutes.
    → Crispness diminishes as they cool; reheating briefly revives texture without overcooking the cheese.

Notes

These gluten-free cottage cheese chips are crispy and savory, built on a creamy cottage cheese base with parmesan for a rich, crisp crust. You can customize them by adding fresh herbs (such as chives, parsley, or dill), sesame seeds or poppy seeds, or nutritional yeast for extra umami. They store well in an airtight container and reheat to crispness in a hot oven; you can also freeze baked chips for quick snacks. For extra browning and crunch, lightly spray the baking sheet and bake until deeply golden, and avoid overmixing to keep the chips tender rather than crumbly. Always press the cottage cheese to remove excess moisture and adjust with a little extra almond flour or egg if needed to help the batter hold together and bake into thin, crisp chips.

Tips

Tips for Perfect Crispy Cottage Cheese Chips

  • Moisture control is key: after draining the cottage cheese, press it through a fine sieve or wrap in paper towels and squeeze out as much whey as possible. The drier the base, the crisper the chips will be. Full-fat cottage cheese will yield richer flavor and crisper edges; if you use low-fat, you may need a touch more almond flour to compensate for extra moisture.
  • Use the egg at room temperature to help the batter come together smoothly. If you need a dairy-free or egg-free option, substitute with 1 tablespoon ground flaxseed mixed with 3 tablespoons water and allow to thicken; note that texture may vary and you should avoid overmixing after the batter comes together to keep chips tender rather than crumbly.
  • Freshly grated parmesan yields better browning and a sharper, more even melt than pre-grated. If you are dairy-free, nutritional yeast can contribute savoriness, but expect a softer crust.
  • Choose almond flour for structure and moisture absorption; coconut flour is more absorbent, so you may need to adjust by adding a little extra egg or cottage cheese. If you want extra crunch, you can mix in 1 teaspoon cornstarch with the batter.
  • Seasoning: start with 1/4 teaspoon salt and adjust after cooking depending on the saltiness of your cottage cheese and parmesan. Garlic powder provides savory depth; you can increase to 3/4 teaspoon for a stronger garlic presence, but fresh garlic adds moisture and should be used sparingly or compensated elsewhere.
  • Onion powder provides mild savory aroma without adding moisture. If you don’t have powder, substitute with 1/2 teaspoon granulated onion. For a stronger onion note, you can add a pinch of dried minced onion, but keep moisture in mind to maintain crispness.
  • Smoked paprika or chili powder adds color and depth. Start with 1/4 teaspoon; adjust to taste. If you prefer no heat, omit or use regular paprika instead.
  • Spread batter into a very thin layer on the prepared sheet (about 1-2 mm thick) or form small rounds. Thinner sheets will crisp faster and more uniformly; use parchment or a silicone mat for easy lifting.
  • Oil helps prevent sticking and promotes bottom browning: lightly spray the baking sheet or brush a thin layer of olive oil on the chips before baking. Too much oil will make them greasy; a light mist is best for crispness.
  • Optional add-ins: scatter chopped fresh herbs like chives, parsley, or dill into the batter for color and aroma, or sprinkle on top before baking for a vibrant surface. Toast sesame seeds or poppy seeds briefly in a dry skillet before adding for extra crunch and aroma.
  • Oven technique: bake in a single layer until edges are golden and chips are firm. If needed, rotate the pan halfway through and flip chips for even browning to prevent soggy bottoms, especially with higher moisture bases.
  • Batch handling and storage: bake in small batches to ensure even browning. Store cooled chips in an airtight container at room temperature for 2-3 days or refrigerate for up to a week; re-crisp in a 300–325°F (150–160°C) oven for 5–7 minutes before serving.
  • Serving ideas: pair with a cool yogurt dip, tzatziki, tomato salsa, or use as a crunchy crouton substitute on salads or soups for a low-carb option.

FAQ

What are Crispy Cottage Cheese Chips?

They’re a crunchy, savory snack made from cottage cheese mixed with a binder and seasonings, spread thin on a baking sheet, and baked until crisp. The result is cracker-like chips that are higher in protein and lower in carbs than traditional chips.

What ingredients do I need?

Common ingredients:

  • 1 cup cottage cheese, well drained
  • 1 large egg white (or 1 small egg)
  • 2–3 tablespoons grated parmesan or almond flour
  • 1/4 teaspoon garlic powder
  • 1/4 teaspoon paprika or chili powder
  • 1/4 teaspoon salt (to taste)
  • Freshly ground pepper
  • Optional: chopped fresh herbs (parsley, chives), nutritional yeast, or sesame seeds
  • Oil spray or 1 teaspoon olive oil for brushing (optional)
Can I customize the flavors?

Yes. Try these variations:

  • Herbed: add dried or fresh herbs like parsley, thyme, and oregano.
  • Cheesy: increase parmesan and a pinch of onion powder.
  • Spicy: add extra paprika, chili powder, or a dash of cayenne.
  • Lemon-pepper: swap in lemon zest and cracked pepper.
How do I bake them in the oven?

Basic method:

  • Preheat oven to 400°F (200°C). Line a baking sheet with parchment.
  • Blitz or crumble cottage cheese until mostly smooth, then mix with binder and seasonings.
  • Spread mixture very thinly on the parchment to about 1/8-inch thickness.
  • Bake 12–18 minutes, flipping once halfway, until edges are golden and chips are crisp. Let them cool on a rack to crisp further.
Can I use an air fryer?

Yes. Preheat to 360–380°F (180–190°C). Spread a thin layer or form small rounds on a piece of parchment that fits your basket, or place directly if your basket tolerates it. Cook 8–12 minutes, checking for crispness and flipping once if needed. Let cool to crisp before storing.

How do I keep them crispy after baking?

Tips to stay crispy:

  • Spread very thin and bake until edges are golden.
  • Cool completely on a rack, not on a plate.
  • Store in an airtight container away from moisture.
  • If they lose crunch, re-crisp in a hot oven (or air fryer) for a few minutes.
How should I store leftovers?

Store in an airtight container in the refrigerator for 3–4 days. Re-crisp in the oven or air fryer for 3–5 minutes before serving. They don’t freeze well if already baked, but you can freeze the unbaked mixture to bake later.

Are Crispy Cottage Cheese Chips gluten-free or keto-friendly?

Gluten-free: yes, as long as you use gluten-free seasonings and avoid any breading. Keto-friendly: they can be, especially if you use full-fat cottage cheese and minimal added carbs (skip breadcrumbs). Using almond flour or extra parmesan helps keep carbs lower; check the exact nutrition of your chosen ingredients.

What dips go well with them?

Great pairing ideas:

  • Herbed yogurt dip or tzatziki
  • Salsa or pico de gallo
  • Guacamole or avocado sour cream
  • Spicy yogurt dip or ranch
What are common mistakes to avoid?

Watch for:

  • Not draining the cottage cheese well—moisture makes chips soft instead of crisp.
  • Spreading the mixture too thick—aim for a thin, even layer.
  • Overcrowding the pan—give each chip space to crisp.
  • Skipping the cooling rack—steam softens chips; cooling helps them stay crisp.
Can I freeze or prep these in advance?

Prep tips:

  • Unbaked mixture can be shaped into rounds or a thin sheet, then frozen on a tray and transferred to a bag for later baking from frozen (add a few extra minutes).
  • Unbaked portion sizes help with quick, portioned baking.