Author

Ocean Nightleaf

Browsing

Introduction / Hook

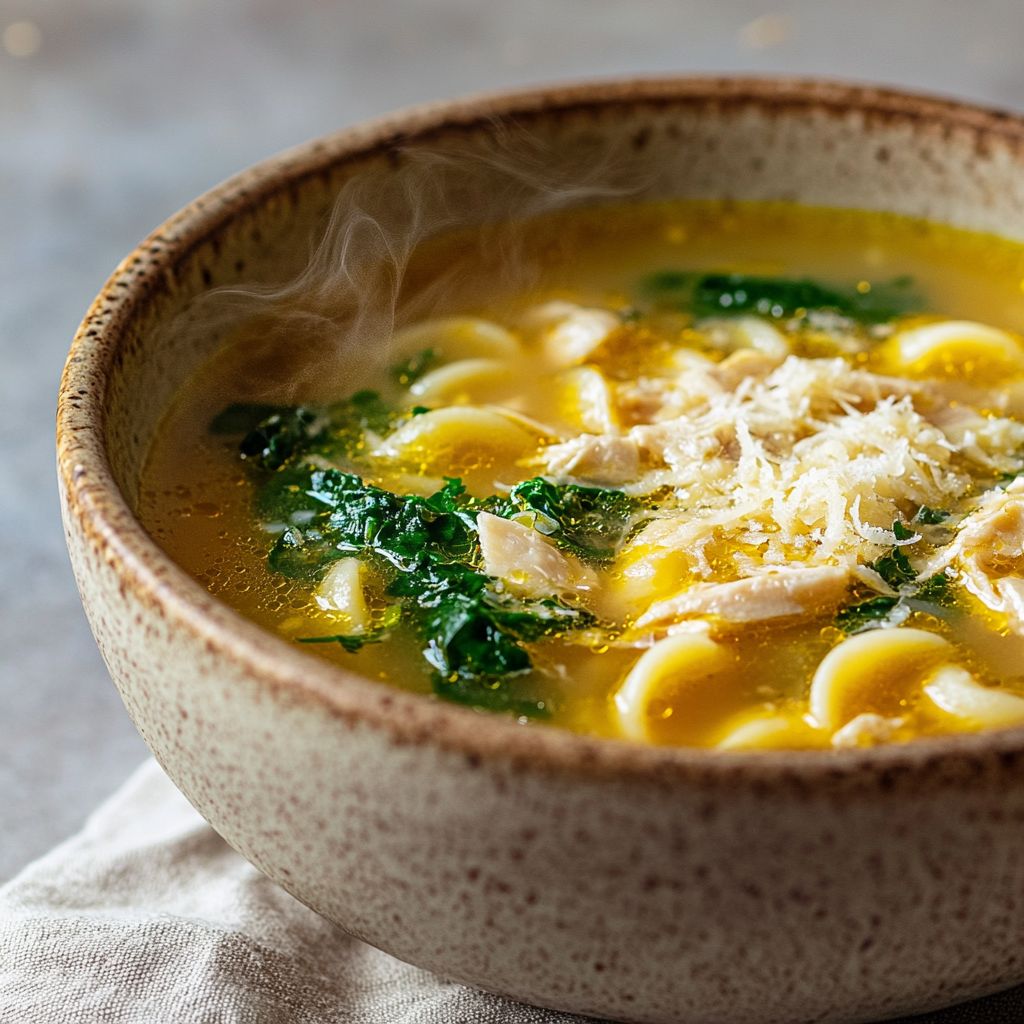
Imagine a bowl that feels like a warm hug from a grandmother who learned to coax flavor from a simple pantry. A simmering pot, steam curling into the kitchen with the scent of garlic and olive oil, tomatoes glistening like morning sun, and a medley of vegetables and beans turning humble ingredients into something almost miraculous. This is Penicillin Soup, the Healing Italian Penicillin Soup—a comforting, nutrient-dense ritual you can pull together any night of the week and turn into a celebration of nourishment. It’s not just a soup; it’s a restorative ceremony, a one-pot promise that dinner can be satisfying, soothing, and deeply satisfying at the same time. The moment you ladle it into a bowl, you’ll taste the balance of earthiness, brightness, and velvety broth that lingers on the palate and in the memory. It’s a dish that whispers: you deserve something soothing, something wholesome, something that tastes like home—on days when you need a little extra care or whenever you crave a comforting, uncomplicated, and incredibly satisfying meal.

The Story Behind the Dish

Penicillin Soup has a storied place in Italian-American kitchens, where generations have turned a few stalwart ingredients into a pot that nourishes body and soul. The name isn’t about medicine or a cure-all in the literal sense; it’s a fond nod to the “sick-day” healing heuristics that older generations swore by—simple, honest, and robust enough to ease fatigue and appetite. The soup grew out of the Italian tradition of minestra, a broad category of soups that vary by region but share a common thread: vegetables, legumes, and grains simmered together until the flavors mingle in a comforting union. In many households, this soup became a weekly staple during gloomy weather or after a long day, a dish that was always there to lift spirits and restore energy. The “healing” reputation comes not from any miracle ingredient, but from the way the dish invites you to slow down, breathe in the aroma, and allow nourishment to do its quiet, restorative work. As families migrated, adapted, and swapped stories, the recipe picked up a few modern touches—pasta shapes that soften to al dente perfection, a kiss of tang from tomatoes, a splash of olive oil, and leafy greens that brighten both color and flavor. Today, Penicillin Soup stands as a comforting bridge between tradition and practicality: it’s easy to make, deeply satisfying, and flexible enough to accommodate whatever is in the pantry while still feeling like a spoonful of warmth on a chilly evening.

Why You’ll Love This Recipe

  • One-pot simplicity: All the elements simmer together in a single pot, minimizing cleanup and maximizing flavor development.
  • Budget-friendly nourishment: Built from pantry staples like beans, tomatoes, vegetables, and pasta, with a flexible approach to what you have on hand.
  • Wholesome, comforting, and versatile: A nourishing meal that can be cozy or bright, depending on your mood and add-ins.
  • Customizable for diets: Easily vegan, vegetarian, or gluten-friendly with simple substitutions; a forgiving canvas for creativity.
  • Kid-friendly appeal: Gentle flavors, a comforting texture, and a soup that feels like a hug—often a hit with children and adults alike.
  • Make-ahead and meal-prep friendly: Flavors deepen with time; it reheats beautifully and can be portioned for quick lunches.
  • Texture and depth: A satisfying contrast of silky broth, tender beans, al dente pasta, and a layer of greens that bring brightness and color.
  • Perfect for sick-day comfort: When the stomach isn’t hungry for heavy meals, this soup offers nourishment without being overpowering.

Flavor Profile & Texture

The flavor profile of Penicillin Soup is a harmonious blend of comforting, savory, and subtly bright notes. The broth, often tomato-based, carries a gentle acidity that wakes up the palate without overwhelming it. Garlic and onion form a savory foundation, releasing their fragrance as they soften and sweeten in olive oil. Beans contribute a creamy, earthy richness that makes the soup feel substantial and satisfying while keeping the texture light enough to enjoy with a spoon. The pasta adds a nostalgic bite—an al dente chew that holds up even as the soup continues to simmer, releasing starches that thicken the broth ever so slightly.

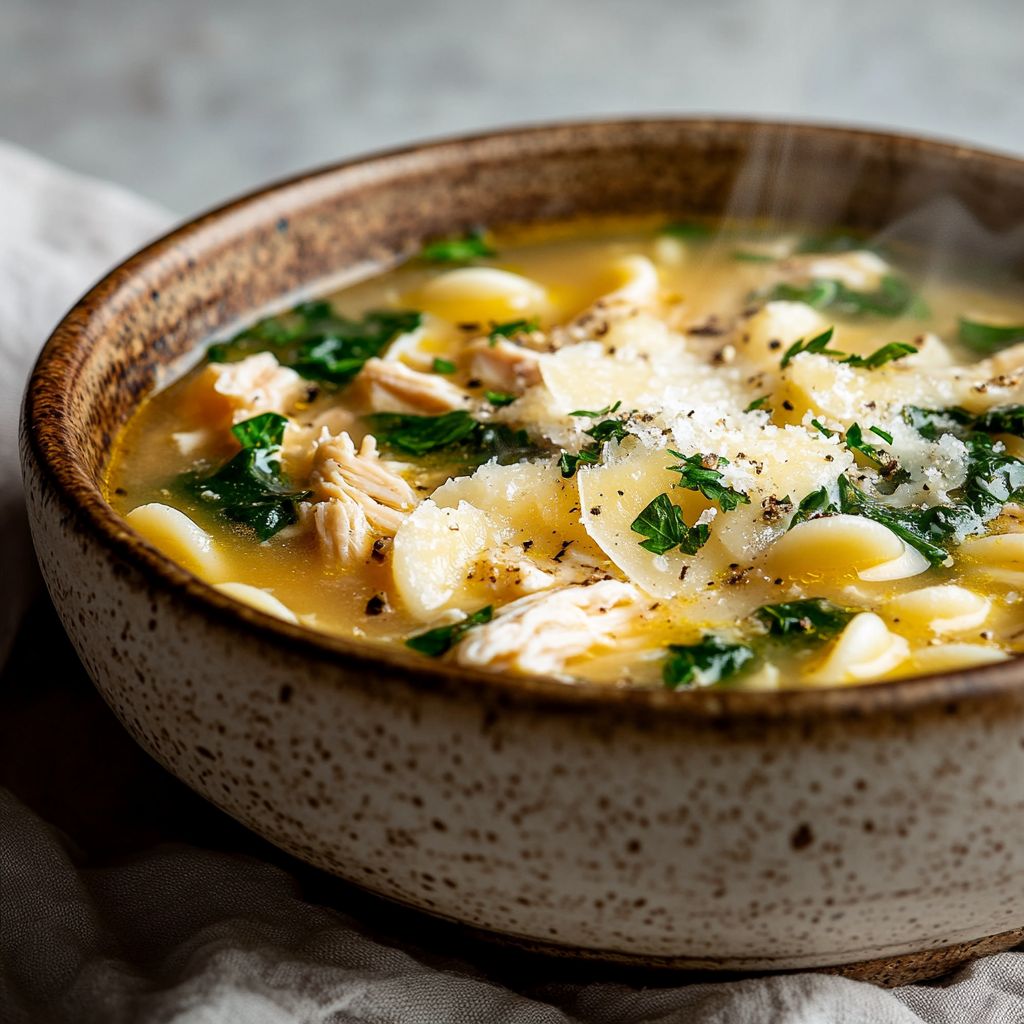
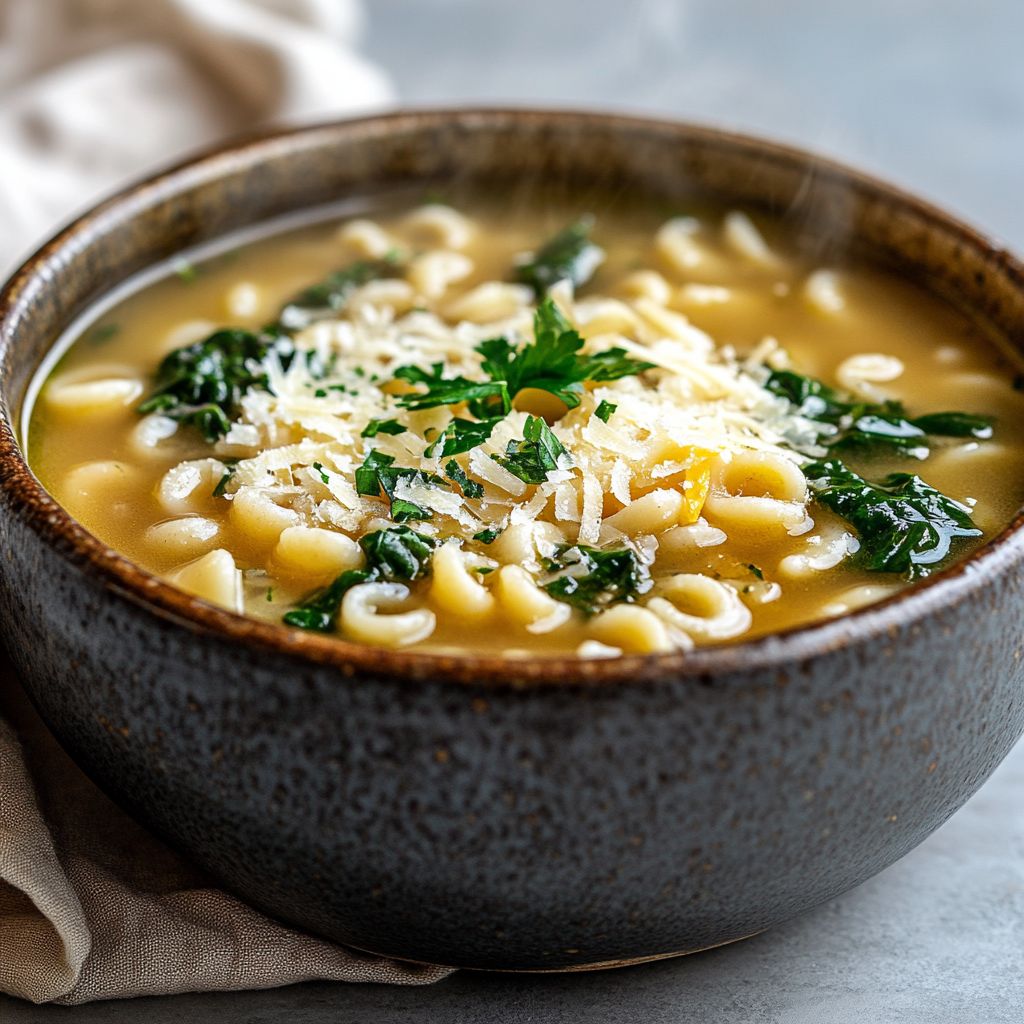
Leafy greens—whether spinach, kale, or Swiss chard—introduce a vibrant, peppery note and a pop of color, finishing the bowl with a fresh, vegetal aroma. A grated or shaved cheese on top can add a salty, umami-rich finish, melting into the broth for a luxurious finish; for a dairy-free version, you can skip the cheese and rely on a splash of olive oil and a squeeze of lemon to brighten the finish. The overarching taste is rustic and heartwarming—watchful of the pantry’s rhythm, generous with herbs, and generous with care. You’ll notice familiar Italian flavors without any single element shouting for attention; instead, they mingle into a soft, comforting chorus that lingers on the tongue. The texture is a masterclass in contrast: the broth is silky and light, the beans offer a creamy bite, the pasta is tender yet a touch firm, and the greens provide a fresh, almost crisp counterpoint. It’s a bowl of balance—the kind of dish that feels like a recovery, a celebration, and a practical, weeknight staple rolled into one.

Occasions & Pairings

This soup shines in a variety of settings, from quiet weeknights to lively casual gatherings. Its forgiving nature makes it ideal for family meals, sick days, and meal-prep Sundays. Here are a few occasions and pairing ideas to elevate the experience:

  • Weeknights: A quick, comforting dinner after work. Serve with warm crusty bread or garlic knots and a simple green salad for a complete meal.
  • Sick days or chilly weather: A soothing, nutrient-dense option that’s easy on the stomach but deeply satisfying. Pair with a mug of herbal tea and a light dessert if desired.
  • Casual gatherings: A potluck-friendly dish that travels well in a thermal container and holds up for reheating at the venue.
  • Comfort-food Sundays: A family staple that can be varied with add-ins like small pasta shapes, extra greens, or a swirl of pesto for a bright finish.

Pairings to consider:

  • Crusty sourdough, rustic Italian loaf, or warm focaccia to soak up every last drop of broth.
  • Salads: A crisp, tangy salad with lemon vinaigrette to brighten the meal—think arugula with shaved parmesan or a simple cucumber-tenn salad.
  • Proteins (optional): If you’re not vegetarian, a light poached chicken breast or Italian sausage can be added for extra heartiness; if you prefer plant-based, roasted chickpeas or white beans work beautifully.
  • Drinks: A dry white wine like Pinot Grigio or a light red such as Dolcetto can complement the soup without overpowering it; non-alcoholic options include sparkling water with a squeeze of lemon or a spritz of citrusy soda.

Tips, Variations & Substitutions

Penicillin Soup is wonderfully adaptable. Here are some ideas to tailor it to your pantry, dietary needs, or flavor preferences:

  • Vegan or dairy-free: Omit cheese or use a dairy-free parmesan alternative. A drizzle of extra-virgin olive oil at the end adds richness without dairy.
  • Gluten-free: Use gluten-free pasta or swap with brown rice, quinoa, or barley substitutes, depending on your preference and dietary needs.
  • Beans and legumes: Swap in the beans you love or have on hand—cannellini, borlotti, chickpeas, or even lentils all work well and contribute their own textures.
  • Greens and vegetables: Kale, chard, spinach, or a mix of any leafy greens add color and brightness. You can also fold in grated zucchini, carrots, or celery for extra depth.
  • Herbs and aromatics: Fresh parsley, oregano, thyme, or a bay leaf can elevate the aroma. A pinch of red pepper flakes adds a gentle kick if you like spicy warmth.
  • Acid and brightness: A splash of white wine, a squeeze of lemon or a dash of balsamic vinegar at the end can lift the flavors and keep the dish from feeling heavy.
  • Cheese options: If you’re including dairy, a modest grating of parmesan or pecorino adds a savory finish; for a richer finish, finish with a swirl of cream or a small knob of butter (optional).
  • Make-ahead twists: The soup often tastes even better the next day as flavors meld. Consider cooking a larger batch and refrigerating or freezing portions for quick future meals.
  • Regional twists: Add fennel seeds for a scent reminiscent of Italian home kitchens, or incorporate a small amount of crushed tomatoes for a deeper tomato presence.

Storage & Make-Ahead Ideas

Penicillin Soup stores beautifully and lends itself to make-ahead preparation. Here are practical tips to keep the soup at its best:

  • Refrigeration: Store any leftovers in an airtight container in the refrigerator for up to 4-5 days. Reheat gently on the stove over low heat, adding a little water or stock if the broth thickens too much.
  • Freezing: Freeze in individual or family-sized portions for up to 2-3 months. Thaw in the fridge overnight, then reheat on the stovetop, adding a splash of water or broth if needed.
  • Make-ahead: You can prepare the base components in advance (sauté aromatics, simmer beans and tomatoes, and have greens ready). Combine and finish with pasta and greens when you’re ready to serve for a quicker weeknight dinner.
  • Storing greens: If you plan to freeze the soup, consider adding greens after reheating to maintain color and texture; greens can wilt slightly during freezing, but they still offer a pleasant finish when reheated.
  • Flavor boosts: A Parmesan rind or a splash of olive oil added just before serving can elevate a cold or reheated batch, restoring its depth and mouthfeel.

Fun Facts & Trivia (Optional)

Delightful tidbits that might spark a conversation at the table or inspire a small culinary adventure:

  • The nickname “Penicillin Soup” conjures images of kitchens as sanctuaries—places where simple ingredients become restorative rituals, especially during the cold season or after a long day.
  • Soups like this are part of a long lineage of minestra in Italian cuisine, where every family has its own version shaped by regional vegetables, beans, and grain pairings.
  • In many households, soups are more than meals; they’re a way to teach children about patience and savoring, as good flavors often require gentle simmering and time for ingredients to mingle.
  • Vegetable-forward, bean-rich soups like this one are excellent examples of plant-forward nutrition, offering fiber, protein, and satisfying textures with a relatively low environmental footprint compared to meat-forward dishes.
  • If you ever wonder why such soups feel so comforting, you’re tapping into the science of sensory memory—aromas and textures trigger fond memories, making a simple bowl feel like a warm, familiar tradition.

Closing Notes

Penicillin Soup is a versatile, heartening dish that celebrates the beauty of restraint and the joy of nourishment. It invites you to lean into the rhythm of the kitchen: sautéing aromatics until they perfume the room, letting vegetables and legumes mingle in a simmer, and finishing with greens that lift the mood and color. It’s a dish you can tailor to your pantry, your dietary needs, and your mood, all while preserving the essence of home-cooked Italian comfort. Whether you’re cooking for a family, feeding yourself after a restful but tired day, or preparing a pot for a crowd, this soup offers warmth, sustenance, and a sense of well-being—one bowl at a time.

Ingredients

Penicillin Soup Base

  • 2 tablespoons extra-virgin olive oil
    → This oil forms the flavor-rich base for sautéing the aromatics and softening vegetables. Use a good quality extra-virgin olive oil to impart fruitiness and depth; heat it gently before adding onions to prevent browning too early and to bloom the garlic’s aroma.
  • 1 medium onion, diced
    → Provides natural sweetness, body, and a foundational flavor for the soup. Dice finely so it cooks evenly and blends with other ingredients. If you prefer a smoother texture, you can blend a portion of the onions with the tomatoes at the end.
  • 2 carrots, diced
    → Adds subtle sweetness, color, and texture. Dice small so they soften at the same rate as other vegetables; for a quicker finish, you can grate one carrot and stir it in.
  • 2 celery stalks, diced
    → Contributes classic soffritto flavor and a crisp-tresh contrast. Small dice help release aromatic compounds quickly and distribute evenly through the soup.
  • 3 garlic cloves, minced
    → Delivers the characteristic punch that defines this healing Italian-style soup. Mince finely to maximize surface area and avoid strong bursts of raw garlic; add after the onions have softened to prevent burning.
  • 8 oz cremini or white button mushrooms, sliced
    → Impart earthy umami and body to the broth. Slice evenly and brown lightly in the oil to deepen flavor; this step enhances the soup’s comforting, rustic character.

Tomatoes, Stock, and Moisture

  • 1 (28 oz) can crushed tomatoes (or whole tomatoes crushed by hand)
    → Provides acidity, brightness, and body to the soup. If using whole tomatoes, crush them in the pot to release pulp before simmering for a smoother, thicker broth. Tomatoes set the flavor foundation for the dish.
  • 4 cups low-sodium chicken stock or vegetable stock
    → The primary savory liquid that forms the soup’s backbone. Choose stock with a flavor you enjoy; using low-sodium allows better control over the final salt level. If you prefer a lighter soup, start with 3 cups and adjust with water.
  • 1 cup water
    → Additional moisture to reach your desired consistency. Add gradually and adjust as the soup simmers to avoid thinning out flavors; you can omit this if you prefer a heartier result.

Cannellini Beans

  • 1 can (15 oz) cannellini beans, drained and rinsed
    → Adds protein, creaminess, and substantial texture. Rinse well to remove canning liquid and excess salt; you may mash a portion of the beans for a slightly velvety texture or leave them whole for more bite.

Optional Add-ins

  • 1 cup cooked shredded chicken (optional)
    → Extra protein and heartiness for a more substantial meal. Fold in near the end to warm through without overcooking the chicken; use leftovers for convenience or poach fresh chicken beforehand.

Greens and Brightness

  • 2 cups kale leaves, stems removed, chopped (or spinach as alternative)
    → Adds vibrant color, nutrients, and a pleasant contrast to the tomato base. Remove tough stems and tear or chop into bite-sized pieces so they wilt evenly and maintain some texture during simmering.
  • 1 tablespoon fresh lemon juice (or 1 teaspoon lemon zest)
    → Brightens and balances the richness of the soup. Add at the end of cooking to preserve brightness; if using zest, grate finely and stir in just before serving for a fresh citrus aroma.
  • 1 teaspoon dried oregano (or Italian seasoning)
    → Classic Italian flavor that ties the ingredients together. If using dried oregano, bloom it in the oil with the aromatics early in cooking to release its aroma; you can supplement with fresh herbs at the end for brightness.

Seasonings

  • Salt to taste
    → Essential for bringing out the depth of flavor in tomatoes, stock, and beans. Add gradually and taste as you go, since stock and tomatoes contribute salt along with the cheese later if used.
  • Freshly ground black pepper to taste
    → Adds subtle heat and a touch of bite that enhances the overall flavor profile. Grind right before serving for maximum aroma.
  • Red pepper flakes, to taste (optional)
    → For a gentle warmth; start with a pinch and adjust. This is optional and can be omitted for a milder, family-friendly version.

Finishing Touches

  • 2 tablespoons grated parmesan cheese or nutritional yeast (for vegan option)
    → Finishes the soup with a savory, umami note. Stir in at the end or sprinkle over bowls; parmesan adds a silky richness, while nutritional yeast provides a dairy-free umami boost.
  • Fresh parsley, chopped for garnish (optional)
    → Adds a fresh, bright aroma and color just before serving; scatter on top to lift the dish and provide a pleasant herbal finish.

Instructions

  • Arrange all ingredients and equipment on the counter so you can move in a clean, efficient line during cooking.

    → This mise en place minimizes delays, ensures you measure ingredients accurately, and keeps the heat steady as you begin sautéing.
  • Heat a large heavy-bottomed soup pot over medium heat and add 2 tablespoons extra-virgin olive oil, swirling to coat the bottom.

    → Heating the oil first prevents the aromatics from scorching and allows the fat to carry flavor into onions and garlic, creating a cohesive base.
  • Add the diced onion, diced carrots, and diced celery to the pot and sauté until the vegetables are tender and the onions are translucent, about 6 to 8 minutes, stirring occasionally and seasoning lightly with a pinch of salt to draw out moisture.

    → Sweating the vegetables builds sweetness and depth; not browning too quickly preserves a fresh savory foundation for the soup.
  • Add sliced mushrooms to the pot and cook until they release their moisture and begin to brown, about 5 minutes, stirring occasionally so they caramelize evenly.

    → Browning mushrooms deepens umami and adds body to the broth, reinforcing the comforting character of the dish.
  • Add the minced garlic and cook for 30 to 60 seconds until fragrant, watching closely and lowering the heat if it starts to sizzle too aggressively.

    → Finely minced garlic has more surface area for aroma; cooking briefly avoids bitterness from overcooking.
  • Sprinkle in the dried oregano (or Italian seasoning) and cook for another 15 to 30 seconds to bloom the herbs in the warm fat, stirring to evenly distribute.

    → Blooming the oregano releases its essential oils, enhancing the soup’s Italian flavor profile rather than leaving a raw herbal bite.
  • Pour in the crushed tomatoes (or add crushed whole tomatoes with their juices) and bring the mixture to a gentle simmer, using a spoon to crush any larger chunks if you used whole tomatoes.

    → Tomatoes provide acidity, brightness, and body; breaking up large pieces ensures a uniform texture and steady thickening as it cooks.
  • Add the four cups of stock and one cup of water (if you prefer a thicker soup, start with less water or omit it), then increase the heat to bring the pot to a gentle boil before lowering to a simmer.

    → The stock forms the savory backbone; water is used to control thickness and intensity, allowing you to tailor to your preference.
  • Simmer the soup uncovered for 15 to 25 minutes to soften vegetables and meld flavors, adjusting the heat as needed to maintain a gentle simmer.

    → Gentle simmer prevents breaking the tomato pulp, keeps the aromatics intact, and concentrates flavors without scorching the bottom.
  • Stir in the drained and rinsed cannellini beans and simmer 5 to 7 minutes to heat through and integrate their creamy texture with the broth.

    → Beans add protein and creaminess; warming through ensures they absorb some flavor without disintegrating.
  • If you are using optional cooked shredded chicken, fold it into the soup now and heat through for 2 to 3 minutes without simmering vigorously, so the meat stays tender.

    → Folding in already cooked chicken at the end avoids toughening and keeps it moist while distributing its flavor evenly.
  • Add the chopped kale (or spinach) and simmer 2 to 4 minutes until the greens are bright, tender, and just wilted, then taste and adjust salt and pepper.

    → Greens provide color and a fresh bite; timing preserves a bit of texture and nutritional value.
  • Finish the soup with fresh lemon juice (or grated lemon zest) added off the heat, stirring to distribute brightness evenly throughout the pot.

    → The citrus cuts richness and lifts the overall flavor; adding off the heat preserves the lemon’s aroma and vibrancy.
  • Season the soup with salt and freshly ground black pepper to taste, and if desired, add a pinch of red pepper flakes for gentle heat, then stir thoroughly.

    → Proper seasoning balances acidity from the tomatoes, salt from the stock, and the savoriness from beans and cheese; adjust gradually and taste.
  • Stir in 2 tablespoons grated parmesan cheese (or nutritional yeast for a vegan option) to introduce a silky, umami finish, then taste and adjust seasoning again before serving.

    → The cheese or yeast enhances depth and rounds the acidity; adding at the end prevents it from becoming gritty or separating.
  • Ladle the Penicillin Soup into warm bowls, garnish with chopped fresh parsley, and serve with crusty bread on the side while the soup is hot and fragrant.

    → A warm bread accompaniment helps sop up the broth and creates a comforting, hearty experience; parsley adds a final aromatic lift and color.

Notes

This healing Italian Penicillin Soup is a comforting, nourishing bowl built on a flavor-rich base of sautéed aromatics, mushrooms, and a bright tomato-bean broth that come together into a cozy, soothing dish.

Flavor-building tips: heat the olive oil gently, sauté the onion until translucent, then add carrots and celery to soften; add garlic after the vegetables have begun to soften to bloom its aroma, and brown the mushrooms for deeper umami to enrich the broth.

Texture and protein: use the drained cannellini beans for natural creaminess; mash a portion if you like a silkier texture, or leave them whole for more bite; fold in 1 cup cooked shredded chicken near the end if you want extra protein and heartiness.

Greens and brightness: stir in 2 cups kale (stems removed) or spinach for color and nutrients, and finish with 1 tablespoon lemon juice or grated zest to brighten the richness; bloom the oregano early in the oil with the aromatics if using dried, or add fresh herbs at the end for a fresh aroma.

Seasoning and finishing: salt to taste, freshly ground black pepper to taste, and a pinch of red pepper flakes if you like gentle heat; finish with 2 tablespoons grated parmesan or nutritional yeast for a savory, dairy-free umami boost.

Make-ahead and storage: this soup keeps well in the fridge for up to 4 days and freezes nicely in portions; reheat gently on the stove or in the microwave, adjusting thickness with a splash of stock or water after reheating if needed.

Gluten-free note: if you need gluten-free, ensure the stock and any added flavorings are certified gluten-free and check all packaging; this soup can be naturally gluten-free with careful ingredient choices.

Tips

Tips for Perfect Penicillin Soup

  • Mise en place matters: have all ingredients prepped and within reach before you start. This helps you stay in the flow and prevents overcooking aromatics.
  • Oil temperature: heat the olive oil gently to bloom the garlic and onions without browning them too quickly. This keeps the base from tasting bitter and lets the aromatics release their sweetness evenly.
  • Aromatics order: sauté onions, celery, and carrots until the vegetables begin to soften and release their aroma, then add garlic just before the mushrooms to prevent garlic from burning.
  • Mushroom magic: dry mushrooms well and brown them in a single layer for best color and umami. Don’t overcrowd the pan; you may need to work in batches.
  • Tomatoes: crush whole tomatoes by hand if you’re using a whole product. A gentle simmer helps the tomatoes mingle with the aromatics and thicken the broth; for a smoother broth, partially blend after simmering.
  • Stock and salt: use low-sodium stock and taste as you go. Add salt gradually—stock and tomatoes contribute salt, so you’ll want to adjust at the end after the beans and cheese are in.
  • Bean handling: drain and rinse cannellini beans to remove canning liquid. For a velvety texture, mash a portion of the beans and fold back in; for more texture, leave them whole.
  • Protein options: if using chicken, fold it in near the end so it stays tender. Leftover chicken works great and saves time.
  • Greens timing: kale or spinach should be added toward the end so they wilt but don’t turn mushy. Remove tough kale stems and tear leaves into bite-sized pieces for even cooking.
  • Brighten at the end: lemon juice or zest should be added after simmering to preserve brightness. A squeeze of lemon right before serving lifts the entire dish.
  • Herb strategy: bloom dried oregano with the aromatics early to release its fragrance; finish with fresh herbs if available for a brighter finish.
  • Taste and adjust: keep tasting as you go. Adjust salt, pepper, and heat (red pepper flakes) to suit your preference before serving.
  • Finishing touches: stir in parmesan or nutritional yeast at the end for depth and savoriness. If you’re dairy-free, nutritional yeast adds a similar umami boost.
  • Texture balance: if you prefer a thicker soup, reserve a cup of beans and vegetables, blitz gently, and stir back in, or puree a portion of the soup briefly with an immersion blender.
  • Make-ahead and storage: flavors deepen overnight. Reheat gently on the stove to preserve texture; store leftovers in airtight containers in the fridge up to 3–4 days, or freeze for longer.

FAQ

Penicillin Soup (Healing Italian Penicillin Soup) — FAQ

What is Penicillin Soup and why is it called that?

Penicillin Soup is a comforting Italian-inspired chicken soup filled with garlic, lemon, vegetables, and pasta. The name is a playful nod to its reputation for feeling soothing when you’re under the weather. It is not an actual antibiotic.

Is this soup actually penicillin?

No. It does not contain penicillin or act as a medical antibiotic. It’s a nourishing, home-style soup meant to comfort and support recovery. If you have a medical infection, follow your healthcare provider’s instructions.

What are the core ingredients?

Typical core ingredients include: chicken (bone-in or boneless), chicken broth, garlic, onion, carrot, celery, lemon juice, parsley, oregano or Italian seasoning, small pasta (or rice), olive oil, salt, and pepper. Optional add-ins: grated parmesan or a splash of cream for richness.

How do I make Penicillin Soup?

Basic method: Sauté aromatics (onion, carrot, celery, garlic) in olive oil. Add chicken and broth, simmer until the chicken is cooked. Remove and shred the meat, return to the pot, add pasta and cook until tender. Finish with lemon juice and chopped parsley. Adjust seasoning to taste. Optional finishing touches: a drizzle of olive oil or parmesan.

Can I make a vegetarian or vegan version?

Yes. Use vegetable broth and substitute meat with white beans, chickpeas, or cubes of firm tofu. Use pasta, rice, or quinoa for texture. The soup remains comforting without meat.

Is Penicillin Soup gluten-free?

Gluten-free option: use gluten-free pasta or substitute with rice or quinoa. If you skip pasta, the dish becomes naturally gluten-free as long as you use gluten-free broth. Be mindful of added sauces or parmesan that may contain gluten.

How should I store and reheat leftovers?

Cool the soup and refrigerate in an airtight container for 3–4 days. For best texture, store pasta separately or reheat and add freshly cooked pasta. Reheat on the stove over medium heat until steaming, or microwave in short intervals, stirring in between.

How long does the recipe take?

Most cooks can prepare it in about 30–40 minutes from start to finish, depending on whether you’re using raw chicken or pre-cooked meat. Slower simmering can deepen the flavors.

How can I customize the flavor or add extra healing ingredients?

Try adding more garlic, lemon zest, or a pinch of red pepper flakes for warmth. Add greens like spinach or kale near the end for extra nutrition. Finish with chopped parsley, a drizzle of good olive oil, or a light sprinkle of parmesan (omit for vegan). A bay leaf during simmer adds depth of flavor.

What about allergens and nutrition?

Allergens: dairy is optional if you skip parmesan or cream; gluten is an issue if using wheat-based pasta. The soup provides protein from chicken or beans, vitamins from garlic and vegetables, and a comforting broth. Sodium will vary with the broth; consider a low-sodium option if needed.

Introduction / Hook

Imagine a Sunday bakery at dawn, the air perfumed with vanilla and warm sugar. A golden lantern of dough emerges from the fryer, its surface kissed by a delicate crust that crackles when touched. Inside, a clandestine treasure waits: a silky, custard-filled heart that oozes with creamy sweetness the moment you bite. These are Italian custard bomboloni — not merely doughnuts, but little celebrations wrapped in pastry and memory. They are the kind of treat that makes a kitchen feel like a tiny trattoria, where time slows, conversations deepen, and every bite carries the quiet drama of a well-loved family recipe. The scent alone—note of citrus, a whisper of almond, a touch of vanilla—can summon childhood mornings or long-held travel dreams, all at once. If you crave something that is at once comforting and exhilarating, familiar yet unexpectedly luxurious, you’ve found it in this beloved Italian classic: a doughy pillow, a custard plume, and a sugar-dusted halo that glitters like a street festival in Naples.

The Story Behind the Dish

Bomboloni, or bombolini in some regions, is a term that evokes street-side bakers, warm windows, and the soft glow of dawn light over Italy’s piazzas. These doughnuts are deeply rooted in Italian pastry culture, with their most recognizable incarnation being the custard-filled variety that Naples and its surrounding towns have celebrated for generations. The name itself hints at drama: “bombolone” translates loosely to a big bomb, not for danger, but for the glorious explosion of flavors and textures packed into a single bite. The tradition of fried dough in Italy stretches far back, drawing from centuries of technique and regional twists. What makes custard-filled bomboloni distinct is the marriage of a light, airy interior with a luscious, vanilla-scented custard that offers a smooth counterpoint to the crisp, sugar-crusted exterior. In many Italian bakeries, you’ll find bomboloni lined up like little golden moons, some plain, some dusted with granulated sugar, and others lovingly stuffed with custard, jam, or chocolate. The custard-filled version—aboard by a pastry chef’s deft touch or a grandmother’s practiced hand—embodies a shared ritual: the fun of filling, the satisfaction of the first bite, and the lingering pleasure of a treat that’s meant to be shared and savored, ideally with a strong coffee or a sweet dessert wine on the side.

Historically, Italian desserts have always been about balance—humble ingredients elevated by technique and a touch of lemon zest or citrus blossom. Bomboloni fit neatly into this tradition. They existed in a landscape of carnival pastries, Sunday markets, and festive breakfasts where households would gather to celebrate meals, neighbors, and the joy of good food. The custard filling is a nod to the Italian love for creaminess and vanilla, while the dough itself carries the memory of patiently fermented doughs and the comforting aroma of fried dough, which makes the entire kitchen feel welcoming and alive. Across regions, you’ll hear different names and subtle differences—some prefer a simpler jam filling, others adore a rich, custardy center. But the essence remains the same: a soft, pillowy dough exterior that gives way to a luxurious center, all wrapped in a delicate dusting of sugar and a whisper of citrus. This dish is as much about the ritual as the result—the moment of dipping, the gleam of the pastry, the first pull to reveal the creamy treasure beneath, and the shared laughter that often follows. It’s a small, portable celebration of Italian comfort and culinary artistry.

Why You’ll Love This Recipe

  • Quick-to-approach comfort with a truly indulgent finish. The dough yields a tender crumb that stays soft, even when enjoyed a little after the fact, making it ideal for gatherings or a special weekend treat.
  • Silky custard filling that delivers a luxurious surprise in every bite. The contrast between the light, airy dough and the smooth, creamy center is a delight to the senses, offering both warmth and a touch of luxury.
  • Versatile flavor options. Beyond classic vanilla custard, you can imagine citrus-bright fillings, chocolate, or almond-flavored creams to suit your mood or the season, all while preserving the iconic bomboloni texture.
  • Textural balance that feels celebratory. The outer layer—glossy, slightly crisp from light frying and dusted with sugar—gives way to a cloud-like interior that releases aromatic steam with each bite.
  • Perfect for entertaining. They look irresistible on a dessert table or a weekend brunch spread, and they pair beautifully with coffee, sparkling wine, or a dessert wine for a touch of indulgence.
  • Family-friendly appeal. They’re a crowd-pleaser for kids and adults alike, inviting stories, shared bites, and a sense of togetherness that makes meals memorable.

What to Expect in Each Bite

From the moment you gently bite into a bombolone, you’ll notice a crisp, sugared crust that yields to a whisper-light, airy interior. The custard filling offers a mellow sweetness that never feels heavy, often with a kiss of vanilla and faint floral notes from a hint of citrus zest or orange blossom water. The texture is a rhythm: the outside crackles, the middle melts, and the experience ends with a lingering sweetness that invites the next bite. It’s a balanced dessert that isn’t too sweet, but deeply comforting and thoroughly Italian in its devotion to texture and mood.

The Flavor Profile & Texture

These custard-filled bombs are where contrast becomes the star. The exterior presents a delicate, almost bread-like chew with a satisfying crust that has been lightly fried to golden perfection. This is not a heavy dough; it’s a soft, supple foundation that carries air pockets, making the interior feel like a cloud waiting to be punctured by a spoon or a fork. The custard at the center is the heart—silky, creamy, and fragrant with vanilla, sometimes tempered by a whisper of lemon or orange zest to lift the sweetness and brighten the profile. The result is a dessert that feels luxurious yet approachable, like a pastry you could enjoy at any pace, from a quick bite to a lingering after-dinner indulgence. When you pair bomboloni with coffee or a light dessert wine, the flavors intertwine with the roasted notes of the beverage, creating a comforting duet of bitter, sweet, and aromatic vibes.

The texture story is equally important as the flavor. The dough’s interior is airy and soft, with a tender crumb that almost dissolves on the tongue. The exterior offers a subtle resistance that yields to a creamy, luscious filling, providing a mouthfeel that’s both decadent and comforting. The sugar coating adds a light crunch that contrasts beautifully with the smooth custard—each element playing its part so that the whole is more than the sum of its parts. The aroma alone—vanilla, a hint of citrus, warm fried dough—awakens memories and conjures images of bakeries, markets, and Sunday family rituals. The sensory combination is deliberately balanced: sweet without being cloying, rich without heaviness, and aromatic without overwhelming the palate. It’s a texture-forward dessert that rewards slow, thoughtful bites and conversation with friends and family.

Occasions & Pairings

Bomboloni are incredibly versatile and shine in a range of settings. Here are moments when they feel especially at home:

  • Weekend brunches: a show-stopping pastry to accompany coffee, fresh juice, and fruit.
  • Festive celebrations: add a playful centerpiece to dessert tables at birthdays, anniversaries, or holiday gatherings.
  • Italy-inspired dinners: a fitting finale to a menu that highlights Italian flavors and stories.
  • Tea time and indulgent afternoons: pair with a robust espresso or a sweet dessert wine for a refined treat.
  • Casual get-togethers: a crowd-pleasing option that’s easy to share and delight in with friends and family.

Pairings that complement bomboloni include:
– Espresso or cappuccino: the bitter edge of coffee amplifies the vanilla sweetness and the citrus notes in the pastry.
– Moscato d’Asti or sparkling rosé: light, fruity wines that refresh the palate between bites.
– Simple berry compote or fresh fruit: a bright counterpoint to the richness inside the dough.
– A drizzle of dark chocolate or a side of hazelnut spread: for chocolate lovers who want a more decadent experience.

Tips, Variations & Substitutions

While the classic custard-filled bomboloni are a timeless choice, there are many ways to adapt and personalize them. Here are ideas to explore, with an emphasis on flexibility rather than precise instructions:

Tips for Enjoying the Best Version

  • Freshness is key. Bomboloni shine when enjoyed soon after frying, while the crust remains pleasantly crisp and the interior remains soft.
  • Gently dust with sugar just before serving to preserve the texture and sheen.
  • Choose a smooth, rich custard that balances sweetness with a creamy mouthfeel for a refined center.

Variations to Try

  • Classic vanilla custard: the traditional, timeless choice that highlights the dessert’s elegant simplicity.
  • Citrus-infused custard: bright lemon or orange zest in the cream to add a lively aroma and a clean finish.
  • Chocolate custard: a decadent alternative for chocolate lovers, offering a deeper flavor profile.
  • Almond or amaretto custard: a nutty, aromatic variation that pairs beautifully with the fried dough.
  • Jam or fruit preserves: a more accessible filling option that still delivers a delightful contrast with the crust.

Dough Variations & Dietary Alternatives

  • Gluten-free version: use a gluten-free pastry blend that yields a soft, springy crumb while preserving the light texture.
  • Vegan option: replace dairy components with plant-based milk and a dairy-free custard or piped almond cream; ensure the dough uses a vegan leavening approach or egg substitutes if needed.
  • Low-fat or lighter-crust option: bake instead of fry to achieve a lighter crust while maintaining the dough’s tenderness, though the texture will differ from traditional fried bomboloni.
  • Nutty coatings: finish with finely chopped toasted almonds or pistachios for extra crunch and aroma.

Regional Twists

  • Naples-inspired: keep the custard classic and finish with a gentle dusting of powdered sugar and a hint of citrus zest.
  • Sicilian influence: a hint of pistachio or almond cream in the center, with a light sugar glaze on the outside.
  • Venetian twist: pair with a light vanilla custard and saffron-scented dairy for a subtle golden hue and aroma.

Storage & Make-Ahead Ideas

Bomboloni are best enjoyed fresh, but with thoughtful storage and a few make-ahead options, you can extend their life and keep their charm intact:

  • Unfilled dough: refrigerate or freeze the dough rounds (before proofing) for a short period, then fry or bake when you’re ready to serve. This allows you to prepare ahead without sacrificing too much texture.
  • Filled bombs: fill just before serving to preserve the integrity of the dough’s exterior and the cream’s texture. If you must store filled bombs, keep them in an airtight container in the refrigerator for a day or two, noting that the soft interior may soften as time passes.
  • Custard can be prepared in advance: make a smooth custard a day ahead and refrigerate. Bring to a cooler room temperature before filling to maintain a pleasant, not overly cold custard center.
  • Reheating: if you’re reheating, do so gently to preserve the outer crust’s crispness, and avoid overheating the custard to prevent curdling or a mealy texture.
  • Make-ahead serving: consider a “serve-by” plan for gatherings—have the dough ready to fry or bake, and prepare custard in advance so you can assemble fresh as guests arrive for maximum contrast in textures.

Fun Facts & Trivia (Optional)

  • “Bomboloni” is the plural form; the singular is “bombolone.” In many Italian bakeries, the display cases celebrate both forms with a charming assortment.
  • Custard-filled bomboloni often appear at markets and fairs as a quintessential Italian street food, reflecting the country’s love for fried sweets that balance richness with lightness.
  • There is no shortage of regional fillings in Italy: while custard is iconic, you’ll also encounter jam, chocolate cream, or ricotta-based fillings in various towns.
  • The ritual of filling—the precise moment when a pastry bag or spoon punctures the dough to reveal the custard—has become a small performance that delights both the maker and the eater.
  • Bomboloni embody a broader Italian pastry tradition of transforming simple pantry ingredients into something celebratory, illustrating how technique and simplicity can merge into a dish that feels both timeless and modern.

Ingredients

Bomboloni Dough

  • 4 cups all-purpose flour (unbleached)
    → Provides the base structure for the yeasted dough. Preparation: sift with 1/4 cup granulated sugar and 1/2 teaspoon salt to distribute evenly; measure by spooning into the cup and leveling to avoid packing. The dough should be soft and slightly tacky—avoid overworking to keep the crumb tender. If dough feels dry, add small amounts of warm milk as needed.
  • 1/4 cup granulated sugar
    → Sweetens the dough and supports yeast activity. Preparation: whisk with the flour mixture to distribute evenly; tip: a tiny amount of vanilla added here can boost aroma. Ensure sugar is evenly integrated to prevent uneven sweetness.
  • 2 1/4 teaspoons active dry yeast
    → Leavening agent that yields a light, airy dough. Preparation: proof the yeast in 1/4 cup of the warm milk with a pinch of sugar until foamy, about 5–10 minutes; if it doesn’t foam, your yeast may be dead. Once foamed, proceed with mixing into the dough.
  • 1 cup warm milk (110°F/43°C)
    → Hydrates flour and helps activate the yeast; use whole milk for richer crumb. Preparation: keep milk at a steady warm temperature; too hot kills yeast, too cold slows rising. Reserve a portion to dissolve the yeast as described above.
  • 2 large eggs
    → Enriches dough and provides structure; preparation: bring eggs to room temperature for smoother mixing; lightly beat and whisk into the wet ingredients to create an even emulsion with the milk and butter.
  • 1/4 cup unsalted butter, melted
    → Adds richness and tenderness to the crumb; preparation: cool melted butter briefly before adding to the dough to avoid cooking the eggs; you can substitute with 2 tablespoons olive oil for a dairy-free version if desired.
  • 1 teaspoon vanilla extract
    → Aromatic depth that complements the custard filling; preparation: add to the wet ingredients to evenly distribute flavor; use pure vanilla for best aroma; if using vanilla bean, scrape seeds and infuse with the milk.
  • 1/2 teaspoon salt
    → Balances sweetness and enhances overall flavor of the dough; preparation: whisk with the flour before mixing to ensure even salt distribution throughout the dough.
  • 1 teaspoon lemon zest (optional)
    → Bright citrus aroma that pairs well with the vanilla and custard filling; preparation: zest finely with a microplane, avoiding white pith; fold into the dough with the wet ingredients for even distribution.

Custard Filling

  • 2 cups whole milk
    → Base for the crema pasticcera; preparation: warm gently just to a light simmer, then gradually whisk into the yolk mixture; use full-fat milk for a silkier custard. For dairy-free versions, alternative milks can be used but will affect texture and flavor.
  • 4 large egg yolks
    → Thickens the custard and provides richness; preparation: reserve the whites for other uses; temper the yolks by whisking in a small amount of hot milk before returning to the pan to prevent scrambling.
  • 1/2 cup granulated sugar
    → Sweetens the custard and helps achieve a smooth, glossy finish; preparation: whisk with yolks until pale, then gradually whisk in cornstarch and hot milk; be careful not to scorch the sugar at the bottom while heating.
  • 3 tablespoons cornstarch
    → Thickening agent that gives the custard body; preparation: whisk with a few tablespoons of cold milk to make a slurry before adding to hot milk; cook until it thickens and coats the back of a spoon.
  • 1 teaspoon vanilla extract
    → Classic custard flavor; preparation: stir in off the heat to preserve aroma; for intensified vanilla, add seeds from half a vanilla bean in addition to the extract.
  • Pinch of salt
    → Enhances sweetness and rounds the flavor; preparation: add with the yolk mixture to evenly distribute.
  • 2 tablespoons unsalted butter (optional)
    → Adds silkiness and sheen to the finished custard; preparation: whisk in off the heat until melted and smooth; cool completely before filling bombs to avoid a runny filling.

Frying & Finishing

  • 6 to 8 cups neutral oil for frying (canola, grapeseed, or light peanut oil)
    → For deep-frying the dough; high smoke-point oil yields a crisp exterior without imparting heavy flavors. Preparation: heat to 350–365°F (175–185°C) and maintain temperature during frying; do not crowd the pan to avoid temperature drop; strain and reuse oil if clean.
  • 1/2 to 3/4 cup granulated sugar (for coating)
    → Sweetens the freshly fried bomboloni; preparation: roll the warm doughnuts in sugar immediately after removing from oil so it adheres best; optional cinnamon can be added for a spiced finish.
  • Powdered sugar for dusting (optional)
    → Finishing touch for presentation; preparation: dust after donuts have cooled slightly to prevent clumping; optional lemon zest can be added to the sugar mix for aroma.

Instructions

  • Prepare the dry and aromatic components by sifting 4 cups all-purpose flour (unbleached) with 1/4 cup granulated sugar and 1/2 teaspoon salt into a large mixing bowl to distribute evenly; if using lemon zest, add 1 teaspoon zest now to integrate fragrance.
    → Sifting aerates the flour and distributes sugar and salt evenly, ensuring the dough will rise uniformly and have a tender crumb; zest adds a fresh citrus note that pairs with the custard filling.
  • Proof the yeast by warming 1/4 cup of the milk to about 110°F (43°C), whisking in a pinch of sugar, and sprinkling 2 1/4 teaspoons active dry yeast over the surface; let sit 5–10 minutes until foamy.
    → Foamy activity confirms the yeast is alive and ready to leaven the dough; if no foam forms, the yeast is inactive and should be replaced for proper rise.
  • Whisk 2 large eggs to break the yolks and lightly combine, then whisk in 1 cup warm milk (110°F/43°C), 1/4 cup melted unsalted butter cooled, and 1 teaspoon vanilla extract to create a smooth, emulsified wet mixture.
    → Warming the liquids helps them integrate with the dry ingredients without cooling the yeast-activated mixture; a smooth emulsion prevents greasy patches and contributes to an even crumb.
  • Stir the foamy yeast mixture into the wet ingredients until fully incorporated, forming a loose, cohesive batter-like dough; do not rush the integration to avoid breaking the emulsion.
    → Proper integration ensures even fermentation and a uniform crumb structure; if the dough seems too loose, proceed to combine with the dry ingredients and adjust with small amounts of warm milk as needed.
  • Add the wet components to the bowl with the sifted dry ingredients and mix on low speed (or with a wooden spoon) until a soft, tacky dough forms; if the dough feels dry, incorporate small amounts of warm milk sparingly until the dough is cohesive.
    → A soft, tacky dough yields a light, airy interior after frying; overworking or adding too much flour will lead to a dense texture.
  • Knead the dough by hand on a lightly floured surface for 8–10 minutes (or knead with a stand mixer on low for about 6–8 minutes) until smooth and elastic; perform a windowpane test by stretching a small piece until translucent to verify gluten development.
    → Gluten development provides structure and chewiness characteristic of bomboloni; the windowpane test ensures the dough is ready to rise without tearing.
  • Oil a clean bowl lightly, place the dough inside, turn to coat with oil, cover with plastic wrap or a damp towel, and let rise in a warm area until doubled in size, about 1 to 1.5 hours.
    → A proper first rise builds flavor, tenderness, and volume; keep the dough away from drafts and maintain a steady warm temperature for an even rise.
  • While the dough rises, prepare the custard filling: in a medium bowl whisk 4 large egg yolks with 1/2 cup granulated sugar until pale and thick, then whisk in 3 tablespoons cornstarch to form a smooth paste.
    → Crema pasticcera relies on thoroughly beaten yolks and a smooth starch paste to avoid lumps and ensure a glossy, thick texture.
  • Warm 2 cups whole milk in a medium saucepan until just steaming (do not boil), then gradually whisk the hot milk into the yolk mixture to temper; return the combined mixture to the saucepan and whisk in 1 teaspoon vanilla and a pinch of salt.
    → Tempering prevents scrambling the yolks; returning to the pan activates the cornstarch thickening that creates a rich, scoopable custard.
  • Cook the custard over medium heat, whisking constantly until it thickens and coats the back of a spoon; remove from heat and whisk in 2 tablespoons unsalted butter (if using) until melted and smooth; transfer to a clean bowl, cover with plastic wrap flush to the surface, and cool completely in the refrigerator.
    → Proper thickening ensures a creamy filling that won’t leak out of the bombs; chilling helps it hold its shape during filling.
  • Once the dough has risen, punch it down gently to expel excess gas, then cover and rest for 10 minutes to relax the gluten for easier shaping.
    → A brief rest prevents springing back when rolling and helps achieve evenly thick donuts that fry evenly.
  • Roll the dough on a lightly floured surface to a 1/2 to 3/4 inch (1.25–2 cm) thickness; cut rounds using a 2.5–3 inch (6–7.5 cm) round cutter, re-rolling scraps as needed to maximize yield; keep the rounds evenly thick.
    → Consistent thickness ensures uniform fry and color; re-rolling scraps minimizes waste but excessive re-rolling can toughen the dough.
  • Arrange the dough rounds on a parchment-lined sheet, leaving at least 1 inch (2.5 cm) between them, cover loosely, and let proof until puffed but not overly loose, about 25–45 minutes.
    → A gentle second rise yields light, airy bomboloni; over-proofing can cause them to deflate or blub when fried.
  • Heat neutral oil in a heavy, deep pot to 350–365°F (175–185°C); monitor with a candy / thermometer and adjust the heat to maintain temperature during frying; fry no more than 4–6 donuts at a time to prevent crowding.
    → Stable oil temperature ensures a crisp exterior without absorbing excess fat, and prevents undercooked centers.
  • Fry the dough rounds, turning once, until golden brown and puffed, about 1–2 minutes per side; use a slotted spoon to transfer to a rack and drain briefly; repeat with remaining rounds.
    → A quick fry yields a crisp surface and moist interior; cooling on a rack prevents sogginess from steam buildup.
  • While the donuts are still warm, roll them gently in granulated sugar (2/3 cup to 3/4 cup for all of them) to help the coating adhere; you can add a pinch of cinnamon if desired for a warm spice note.
    → Sugar adheres best when the surface is warm and slightly oil-slicked after frying, producing a sparkling, sweet crust.
  • Fill each bomboloni by piping cooled custard into the center: insert the tip of a pastry bag into the side or poke a small hole, then pipe custard in until you feel resistance and the center is fully filled; avoid overfilling to prevent bursting.
    → Proper filling delivers a creamy, indulgent center without leaks; use a steady, slow squeeze and rotate the donut to fill evenly.
  • Dust with powdered sugar just before serving (optional) or serve with a light lemon zest dusting for aroma; display on a platter and offer with additional warm custard for dipping if desired.
    → Powdered sugar provides an elegant finish and contrasts with the rich custard; lemon zest can lift the overall sweetness with a bright note.

Notes

These custard-filled Italian doughnuts are light and fluffy with a silky vanilla crema tucked inside. For best rise, proof the yeast in 1/4 cup warm milk with a pinch of sugar until foamy, then fold it into the dough and keep the dough in a warm spot until doubled. Handle the dough gently and avoid adding extra flour; it should stay soft and slightly tacky. Sift the flour and measure by spooning into the cup and leveling to ensure even structure, and consider adding a touch of lemon zest for a bright aroma at the end. The custard filling should be thick yet pipeable: whisk the yolks with sugar and cornstarch, gradually whisk in warm milk, then return to the pan and cook until it coats the back of a spoon. Off heat, stir in vanilla, salt, and optional butter, then chill completely and strain if you want a ultra-smooth filling. Fry the bombs in 350–365°F (175–185°C) oil until golden, turning as needed, then drain and roll in granulated sugar while still warm so it clings. Dust with powdered sugar for a finishing touch or a whisper of lemon zest. If you’re dairy-free, substitute plant-based milk and a neutral oil, but expect a slightly different texture and flavor. Always monitor the oil temperature to maintain a crisp exterior and tender crumb.

Tips

Tips for Perfect Italian Custard Bomboloni

  • Yeast and temperature: Always proof the active dry yeast in 1/4 cup warm milk with a pinch of sugar until foamy (about 5–10 minutes). If it doesn’t foam, discard and restart with fresh yeast to ensure a light, airy dough.
  • Dough handling: The dough should be soft and slightly tacky. Avoid adding too much flour; overworking or stiff dough leads to a dense crumb. If it’s too sticky to handle, oil your hands and the work surface lightly, then fold rather than knead.
  • Ingredient temperature: Use ingredients at room temperature (eggs, milk, butter) for a smooth emulsion. Cool melted butter briefly before adding to the dough to prevent cooking the eggs.
  • Flavor balance: The optional lemon zest adds brightness. If using, fold it in with the wet ingredients to distribute evenly. For a deeper vanilla aroma, add vanilla seeds from half a bean along with the extract.
  • Rising times: Allow the dough to rise until doubled in a warm, draft-free spot. If your kitchen is cool, consider a longer rise or a short warm prove in an oven set to a very low temperature (around 85–95°F/29–35°C).
  • Shaping and scraps: Roll dough to about 1/2 inch thick and cut with a round cutter. Gather scraps, re-roll once, and let the cut rounds rest briefly before frying to maintain good puff in the final bomboloni.
  • Oil management: Use neutral oil with a high smoke point (canola, grapeseed, or light peanut oil). Maintain frying temperature at 350–365°F (175–185°C). Too hot oil will brown quickly but burn inside; too cool oil will yield greasy donuts.
  • Frying technique: Fry a few at a time to avoid temperature drop, turning once for even color. Expect 1–2 minutes per side until deep golden.
  • Custard consistency: The custard should be thick enough to coat the back of a spoon. If it’s too loose, whisk in a little extra cornstarch slurry (cold milk whisked with cornstarch) and cook a bit longer until thickened, then cool completely before filling.
  • Cooling and filling: Chill the custard completely before filling to prevent it from oozing. Fill bombs with a piping bag fitted with a long narrow tip, inserting into the side or bottom and injecting until plump but not bursting.
  • Finish and flavor: Toss hot fried bomboloni in granulated sugar (and optionally cinnamon) while they’re still warm so it adheres nicely. A light dusting of powdered sugar just before serving adds a pretty finish.
  • Variations and extras: For a dairy-free version, substitute milk with almond or oat milk and replace butter with a neutral oil (e.g., olive oil can be used in moderation). The crumb will be slightly different, so adjust folding and rising times accordingly.
  • Storage and freshness: Best enjoyed the day they’re made. If needed, store unfried dough portions covered in the fridge for up to 12–24 hours (bring to room temp and let them relax before frying). Fried bombs are best eaten fresh; reheat briefly in a low oven to re-crisp.
  • Safety tip: Do not leave freshly prepared dough or custard at room temperature for more than 2 hours to ensure safety and quality.

FAQ

What are bomboloni and how do they differ from regular doughnuts?

Bomboloni are soft, fluffy Italian doughnuts traditionally fried until golden and filled with a creamy custard or jam. They’re usually dusted with sugar and often served warm, offering a richer interior compared to plain glazed doughnuts.

What makes Italian custard bomboloni special?

The hallmark is the creamy crema pasticcera (Italian custard) injected inside after frying. The dough is enriched with eggs and butter, yielding a tender crumb that pairs perfectly with the smooth custard.

What ingredients do I need for the dough?

Typical dough ingredients include:
– All-purpose flour
– Active dry yeast
– Milk (warm)
– Sugar
– Eggs
– Unsalted butter (softened)
– Vanilla extract
– Lemon zest (optional)
– Pinch of salt

What ingredients do I need for the custard filling?

For a classic crema pasticcera:
– Milk
– Sugar
– Egg yolks
– Cornstarch (or flour)
– Vanilla extract or a vanilla bean
– Pinch of salt

How do I make the custard filling?

Steps:
– Warm milk with vanilla; whisk yolks, sugar, and cornstarch until smooth.
– Slowly temper yolks with hot milk, then return to the stove.
– Cook over medium heat, whisking until thickened.
– Strain, cool to at least room temperature, then refrigerate until needed. The custard should be thick but pipeable.

What oil is best for frying bomboloni, and at what temperature?

Use a neutral oil with a high smoke point (like canola, sunflower, or refined peanut oil). Heat to about 350°F (175°C). Fry until the bombs are golden and puffed, usually 2–3 minutes per side. Avoid overheating to prevent browning too quickly.

How do I shape and proof the dough?

Shape into small rounds or pinch off pieces to form discs. Place on a lightly floured surface, cover, and let rise until puffy and about 1.5x their original size. Maintain a warm, draft-free environment to help proofing.

How do I fill the doughnuts with custard?

Best method:
– Fit a pastry bag with a long, narrow tip (or a clean piping bag).
– Poke a small hole or cut a slit in the side of each doughnut.
– Pipe a generous amount of custard into the center, then seal the opening with a light press.
– Dust with powdered or granulated sugar before serving.

How should I store bomboloni, and how long do they stay fresh?

Fresh bomboloni are best the day they’re made. Store at room temperature in an airtight container for up to 1 day. For longer storage, refrigerate the filled doughnuts for up to 2 days, though custard fillings may soften the dough. Reheat gently if desired.

Can I bake bomboloni instead of frying?

Baking yields a lighter result with less rich flavor. If you prefer baking, shape into rounds, lightly brush with oil, and bake at around 350°F (175°C) until puffy and cooked through. They won’t be as airy or custard-filled by default, but you can still pipe custard into them after cooling.

What are some flavor variations I can try?

Suggestions:
– Add lemon or orange zest to the dough and custard for a bright, citrus note.
– Flavor custard with vanilla bean paste or a splash of liqueur (e.g., amaretto, rum).
– Dust with cinnamon sugar or roll in finely grated orange zest sugar.
– Try a chocolate custard filling or raspberry jam in place of custard for a different twist.

Introduction / Hook

There’s a certain cozy magic in watching a tray of puffed crescents emerge from the oven, their golden edges curling with confidence around a cloud of silken cheesecake filling. The first bite is a whisper-soft reveal: a tender, lightly blistered crescent giving way to a creamy, tangy center that tastes like a miniature cheesecake wearing a warm, buttery coat. The aroma alone—cream cheese mingling with vanilla, a hint of citrus, and a kiss of caramelized sugar—is enough to summon a carefree smile, as if you’d just stumbled onto a tiny, delicious secret. Cheesecake Crescent Rolls are more than a dessert or an appetizer; they’re a portable moment of indulgence that fits in the palm of your hand and in the rhythm of any occasion. Whether you’re hosting a brunch, catering a party, or simply treating yourself after a long day, these little wonders offer comfort, elegance, and a touch of whimsy all at once.

What makes them so compelling is their delightful balance: a light, flaky exterior that crackles softly when you bite, paired with a creamy center that’s both indulgent and accessible. No matter the season, they feel celebratory—like a tiny, edible handshake that says, “Let’s enjoy this moment together.” And because they’re inherently versatile, you can tailor the flavor to your mood, the occasion, or the ingredients you have on hand. In short, Cheesecake Crescent Rolls are a smart, satisfying way to bring the magic of a classic cheesecake into a playful, shareable format.

The Story Behind the Dish

Cheesecake Crescent Rolls are a modern twist on two timeless, beloved concepts: the crescent roll and the cheesecake. Crescent rolls, with their origin in the early 20th century, became a staple of quick, friendly baking—soft, flaky layers that whisper of Sunday breakfasts and picnic baskets. Cheesecake, meanwhile, traces a longer, richer lineage through cuisines around the world, from ancient Greek traditions to the indulgent New York style that has become a symbol of comfort and celebration. The marriage of these two ideas feels almost inevitable: a familiar, joyful dough that embraces a luxurious, tangy filling. The result is both comfort food and a celebration in miniature, a dish that can traverse casual weeknights and more festive gatherings with the same warm charm.

In many homes, the crescent roll is a trusted canvas for creativity—rolled around savory fillings, sprinkled with cinnamon sugar, or tucked with fruit jams. Pair that with the universal appeal of cheesecake—a creamy, slightly tart center that pairs beautifully with citrus, vanilla, and a touch of sweetness—and you have a dish that resonates across generations. The idea behind Cheesecake Crescent Rolls is simple: take the ease and crowd-pleasing appeal of crescent rolls, elevate them with a creamy cheesecake filling, and present them as a handheld bite that feels special without demanding a parade of ingredients or hours in the kitchen. It’s a small, sunlit idea that travels well, making it perfect for brunch buffets, potlucks, school events, or a cozy night at home when you want something a little luxurious yet undeniably approachable.

There’s also something nostalgic in these bites—the way the dough’s gentle rise echoes the warmth of a conversation, the way the filling’s tang cuts through sweetness like a familiar companion who knows just when to say “let’s enjoy this.” The result is a dish that invites sharing, conversation, and a sense of culinary play. It’s not about technique alone; it’s about the experience—the way a single bite can transport you to a sunlit bakery, a family kitchen at holiday time, or a spontaneous celebration with friends gathered around a plateful of gold-crusted crescents.

Why You’ll Love This Recipe

  • Quick and comforting: a smart shortcut that delivers a bakery-worthy treat in a fraction of the time.
  • Crowd-pleasing versatility: works as a party appetizer, a fancy brunch addition, or a sweet finish after a casual dinner.
  • Luxurious texture with everyday simplicity: flaky pastry on the outside and a creamy, smooth center inside.
  • Make-ahead friendly: you can prepare elements ahead of time and assemble just before baking.
  • Customizable flavors: easily adapt with citrus zest, chocolate, berries, or spice to suit the season or mood.
  • Kid-friendly charm: familiar flavors and gentle sweetness make them a hit with younger guests and adults alike.
  • Portion-perfect: bite-sized portions factor into easy grazing menus or playful dessert plates.

In essence, these rolls deliver a little bit of celebration with the ease of a familiar favorite. They reward with every bite, encouraging you to dip, bite, and repeat—and perhaps to experiment with a playful twist next time you bake them. Whether you’re new to fancy-looking desserts or a seasoned host who loves a simple showstopper, Cheesecake Crescent Rolls offer a reliable, uplifting experience that never feels over-the-top.

Flavor Profile & Texture

The flavor profile is a delicate conversation between tangy cream cheese, vanilla-sweetened richness, and the toasty, buttery crescent exterior. The cream cheese filling carries a gentle acidity that cuts through sweetness, providing balance that keeps the bite sophisticated rather than cloying. A whisper of lemon zest or a trace of almond adds a bright note that lifts the palate and brightens the overall impression. The crescent dough itself provides a flaky, tender texture with a light crunch at the edges, creating a satisfying contrast to the creamy center. When warm, the filling becomes luxuriously smooth, almost dreamy, while the outer shell maintains its structure, offering a satisfying bite and a slight resistance before giving way to that creamy heart.

Tactilely, you’ll experience a dance between crisp edges and soft, pillowy interiors. The top surfaces may glisten with a subtle glaze or a dusting of powdered sugar, catching the eye with a tiny gleam that promises sweetness without shouting. ароматically, the dish releases a comforting blend of dairy richness, vanilla, and caramelized dough, with hints of citrus that awaken the senses just as the first bite lands. The overall mouthfeel is indulgent yet approachable, a balance that makes each roll feel as if it’s worth savoring slowly, even as you crave the next one. This is dessert comfort with a twist—a familiar, well-loved format reimagined as a playful, handheld treat.

Occasions & Pairings

These rolls shine at a wide range of occasions, from quiet mornings to lively gatherings. They’re ideal for a brunch buffet, where their airy interior and elegant warmth shine against berries, yogurt, or a sparkling beverage. They work beautifully as an hors d’oeuvre at parties, where their compact size invites easy passing and sharing. They also fit well into a holiday dessert spread, offering a comforting alternative to richer cakes while still feeling festive. For weeknights, they bring a touch of celebration to a simple dinner, turning leftovers or pantry staples into something special after the kids are tucked in or guests arrive late.

Pairings that elevate these rolls include:

  • Beverages: a light sparkling wine, a mimosa, a late-harvest tea, or a cappuccino makes a harmonious match with the creamy center and flaky crust.
  • Fruit accents: fresh berries, a drizzle of berry coulis, or a compote can provide bright, fruity contrast to the cheesecake filling.
  • Accompaniments: a dollop of whipped cream, a splash of citrus glaze, or a dusting of cinnamon or powdered sugar can enhance aroma and visual appeal.
  • Side dishes: a lightly dressed greens salad or a small fruit salad can balance the richness and add a refreshing note to the plate.

Seasonal variations make them especially charming. In spring, a hint of citrus and a scattering of fresh berries accentuates the bright flavors. In autumn and winter, a touch of vanilla and nutmeg with caramelized edges evokes warm, cozy moments. For festive occasions, consider a gold-dust finish or a light glaze that catches the light, turning each roll into a tiny, edible celebration.

Tips, Variations & Substitutions

  • Vegan or dairy-free option: use a cream cheese substitute that mirrors the tang and texture, and opt for crescent dough that’s dairy-free if available. Consider adding a touch of dairy-free butter to the exterior for a similar flavor and a crisp finish.
  • Gluten-free approach: seek gluten-free crescent dough or use sheeted gluten-free pastry cut into triangles, then shape as directed. Be mindful of cross-contamination if serving guests with gluten sensitivities.
  • Flavor twists: swap in lemon or orange zest for a bright citrus note, or fold in finely grated chocolate for a subtle decadence. A pinch of espresso powder can enhance the cream cheese’s depth for a mocha-like kiss.
  • Texture play: brush the baked rolls with a light syrup or glaze that includes vanilla, citrus zest, or almond extract to deepen aroma and add a gentle sheen.
  • Fruit-forward version: add a small spoonful of fruit preserves tucked around the filling before folding the dough for a fruity aroma and color pop inside each bite (avoid overwhelming the filling’s balance).
  • Make-ahead ideas: prepare the filling and dough portions ahead, refrigerate, and assemble just before baking to keep the texture light and flaky. If you’re making ahead for a party, bake the rolls and rewarm gently before serving to recapture the softness of the interior.
  • Texture variations: for a crisper finish, bake a few minutes longer or place the rolls on a rack toward the top of the oven. If you prefer a softer bite, reduce bake time slightly and allow a touch more residual warmth to soften the center.

Storage & Make-Ahead Ideas

Leftovers, if you’re fortunate enough to have any, store best in the refrigerator in an airtight container for up to 2–3 days. Reheating is simple: warm gently in a toaster oven or conventional oven until the exterior edges regain their crispness and the center looks irresistibly creamy. Avoid microwaving for too long, as it can soften the outer crust and dull the flaky texture that gives these rolls their charm. If you’d like to prep ahead, consider combining the prepared dough triangles with a ready-to-fill cheesecake center and refrigerating them on a parchment-lined tray. When you’re ready to bake, transfer them to the oven straight from the fridge; the chill will slightly slow the rise, producing a dramatic, beautiful puff once they meet heat.

Freezing options exist for both pre-assembled and fully baked versions. For unbaked, filled crescents, freeze on a tray before transfer to a bag; bake from frozen, adding a few extra minutes as needed. For baked rolls, once fully cooled, wrap individually in parchment and then place in an airtight container or freezer bag. Reheat gently to preserve their delicate texture and prevent the filling from seeping or losing its airiness.

Fun Facts & Trivia (Optional)

Did you know that crescent rolls, as a product, owe much of their iconic shape and texture to the way dough is layered and rolled? The crescent form is not just a cute shape; it’s a clever technique that grants each bite multiple layers of tenderness. Cream cheese, a central player in these rolls, was first created in the United States in the 1870s, and it quickly became a cornerstone of many beloved desserts and spreads. The combination of these two elements—flaky, buttery dough and a silky, tangy filling—embodies a quintessentially American approach to dessert: comfort, efficiency, and a touch of indulgence that feels both familiar and fresh. The playful nature of pairing a classic cheesecake with a handheld pastry also speaks to the evolving palate of home cooks who love recreating bakery-style treats with a friendly, approachable twist.

In many ways, Cheesecake Crescent Rolls capture a broader trend in modern cooking: taking beloved, classic flavors and reimagining them into versatile, shareable formats. This approach honors tradition while inviting creativity—an edible reminder that a dish can be simple yet sophisticated, modest yet memorable, and most importantly, made for easy sharing with those you care about.

Ingredients

Cheesecake Crescent Rolls

  • 2 cans refrigerated crescent roll dough (8-count each)
    → The outer pastry that encloses the cheesecake filling. Keep the dough cold and handle it gently, separating the triangles from each can without stretching too much. Place the filled crescents seam-side down on a parchment-lined baking sheet and bake at 350°F (175°C) until golden, about 12–15 minutes. Seal any small gaps by pinching the perforations together to prevent filling from leaking out during baking.
  • 8 oz cream cheese, softened
    → Core of the cheesecake filling; use full-fat cream cheese for best flavor and a smooth, creamy texture. Allow to come to room temperature, then beat until completely smooth with no lumps. This base gives a tangy, rich filling that contrasts with the sweet dough.
  • 1/4 cup granulated sugar
    → Provides gentle sweetness to balance the tang of the cream cheese. Beat it with the cream cheese until fully incorporated and fluffy. If you prefer a sweeter filling, you can increase by 1–2 tablespoons, but start with this amount for a classic cheesecake flavor.
  • 1 teaspoon pure vanilla extract
    → Enhances the depth and roundness of the filling’s flavor. Use high-quality pure vanilla rather than imitation for best aroma and sweetness. Add to the cream cheese mixture and beat until integrated for a smooth, fragrant filling.
  • 1 tablespoon lemon juice or 1 teaspoon lemon zest (optional)
    → Adds brightness and a subtle tang that echoes traditional cheesecake. Lemon zest provides aroma and flavor without thinning the filling; lemon juice offers a lighter tang but can thin the mixture, so use sparingly. If using juice, whisk in gradually.
  • 1 tablespoon sour cream or heavy cream (optional)
    → Keeps the filling silky and slightly lighter in texture. Full-fat dairy works best for richness; fold in gently after beating the cream cheese and sugar until smooth. If omitted, the filling will still set but may be a touch firmer.
  • Pinch of salt (optional)
    → A tiny amount enhances sweetness and sharpens the tang of the cream cheese. Use only a pinch to avoid oversalting the filling.
  • 1 large egg, beaten with 1 tablespoon water (egg wash) to brush on dough before baking for golden color (optional)
    → An egg wash gives the rolls a glossy, evenly browned finish and helps seal seams. Brush lightly just before baking; avoid over-wetting the dough to prevent sogginess. If you skip this, the rolls will still bake nicely but with less shine.
  • 2 tablespoons melted butter (for brushing the hot rolls)
    → Adds rich flavor and helps keep the pastry tender after baking. Brush on the rolls as soon as they come out of the oven to melt into the pastry, or gently rewarm and brush for extra gloss. If you prefer, drizzle a tiny bit of honey into the butter for a sweeter finish.
  • Powdered sugar for dusting (optional)
    → A light dusting on cooled rolls adds a touch of sweetness and a decorative finish. Best applied after the rolls have cooled slightly to prevent clumping and uneven coverage. If you’re serving with a glaze, dusting is optional or can be omitted.
  • Glaze (optional): 1/2 cup powdered sugar + 1–2 tsp milk, whisked until smooth
    → A simple drizzle glaze that complements the creamy filling. Adjust consistency with a little more milk for a thin drizzle or a bit less for a thicker glaze. Add a splash of vanilla or lemon juice for extra flavor. Drizzle after the rolls have cooled to prevent running.

Instructions

  • Preheat your oven to 350°F (175°C) and line a large baking sheet with parchment paper or generously grease it with nonstick spray so the crescents lift cleanly after baking.
    → A proper preheat ensures the dough sets at the right temperature on contact, while parchment or greasing prevents sticking and makes removal easy without tearing the delicate pastry.
  • Open both cans and separate the dough into 16 individual crescent triangles, keeping the dough cold and handling it gently to avoid tearing or stretching; keep the perforations intact as you work.
    → Cold dough yields neater layers and helps the filling stay contained; avoid stretching the dough to prevent thin spots that can leak during baking.
  • In a medium bowl, soften the cream cheese to room temperature, then beat until completely smooth with no lumps; this creates a velvety filling that distributes evenly when baked.
    → Softened cream cheese blends fully with sugar and flavorings, preventing lumps and ensuring a creamy, cheesecake-like texture in every bite.
  • Add granulated sugar to the cream cheese and beat until fully incorporated and fluffy, followed by the vanilla extract; this builds the classic cheesecake sweetness and depth of flavor.
    → Beating air into the mixture lightens the filling so it doesn’t become heavy; proper vanilla distribution yields a rounded aroma without overpowering tang.
  • If desired, whisk in lemon zest or lemon juice gradually and, if using, optional sour cream or heavy cream, then season with a pinch of salt; adjust brightness and creaminess without thinning the mixture excessively.
    → Lemon zest provides aroma and a subtle tang; lemon juice adds brightness but can thin the filling, so add little by little while checking texture. Sour cream or heavy cream adds silky texture and prevents the filing from being too stiff.
  • Using a small spoon or spatula, place a modest amount of filling at the wide end of each crescent triangle, taking care not to overfill which could cause leakage.
    → A generous but careful amount ensures a creamy center without oozing; overfilling strains the dough and can split seams during rolling.
  • Starting at the wide end, roll the dough toward the tip to form a classic crescent, pinch the seam to seal and press the perforations closed so the filling cannot escape during baking.
    → Rolling helps encase the filling securely; sealing seams and perforations prevents gaps that could leak cheese during heat exposure and ensures a neat appearance.
  • Transfer the formed crescents to the prepared sheet with the seam-side down, leaving about 1 inch of space between each piece for expansion during baking.
    → Spacing allows heat to circulate around each pastry for even browning and prevents sticking or merging of neighboring crescents.
  • If you are using an egg wash, whisk a large egg with 1 tablespoon water and lightly brush the tops of the crescents just before baking to promote an even, glossy golden crust; avoid soaking the dough to prevent sogginess.
    → The egg wash sets up a delicate sheen and helps the dough achieve a uniform color, while a light application avoids soggy surfaces that can dull crust texture.
  • Bake the crescents in the preheated oven for 12–15 minutes, rotating the pan halfway if your oven runs hot or unevenly, until the tops are deep golden and the filling looks set.
    → Turning helps achieve even browning, and the 12–15 minute window prevents undercooking the centers or overbrowning the edges; the filling should appear set and not jiggly when lightly touched.
  • Remove the baking sheet and allow the crescents to cool on a wire rack for 5–10 minutes so the centers finish setting and the pastry firms up enough to handle.
    → Resting prevents the hot filling from slipping out and helps achieve a stable texture for handling and any finishing glaze.
  • Brush the hot rolls with melted butter, allowing it to melt into the pastry for added richness and a tender crumb after baking; this also helps the tops stay moist and shiny.
    → Butter on hot pastries melts into the crust, enhancing flavor and creating a slight gloss typical of bakery-quality crescents.
  • Dust with powdered sugar if desired, or prepare a glaze by whisking 1/2 cup powdered sugar with 1–2 teaspoons milk until smooth, then drizzle once the rolls have cooled to your preferred temperature.
    → The sugar dust or glaze adds a finishing sweetness and moisture balance; wait until the rolls are cooled enough that the glaze sets without sliding off.

Notes

These cheesecake crescent rolls are a delicious balance of tangy, creamy filling and flaky, buttery dough. Keep the crescent dough cold and handle it gently, separating the triangles from each can without stretching too much, and seal seams well to prevent filling from leaking during baking. For the filling, use 8 oz cream cheese softened to room temperature, 1/4 cup granulated sugar, and 1 teaspoon pure vanilla extract; beat until completely smooth and fluffy. If using optional brightness, fold in 1 tablespoon lemon juice or 1 teaspoon lemon zest, and for extra silkiness you can add 1 tablespoon sour cream or heavy cream. A pinch of salt enhances flavor. Roll a generous spoonful of filling inside each dough triangle, pinch to seal, and place seam-side down on a parchment-lined sheet. Brush the tops with an egg wash (1 large egg beaten with 1 tablespoon water) for golden color, and bake at 350°F (175°C) for 12–15 minutes until golden. If you like, brush hot rolls with 2 tablespoons melted butter and dust with powdered sugar once cooled, or whisk together a glaze of 1/2 cup powdered sugar with 1–2 teaspoons milk for a light drizzle. These rolls are best served warm but will keep in an airtight container for a day or two; reheat gently to refresh the texture. For make-ahead, refrigerate assembled rolls on the baking sheet for up to 24 hours before baking. Always ensure your cream cheese is fresh and soft for the smoothest filling, and use high-quality vanilla for depth of flavor.

Tips

  • Keep the crescent dough cold until you’re ready to use it. Cold dough yields flakier layers and less sticking. If the dough becomes warm, chill it for a few minutes before proceeding.
  • When separating crescent triangles, handle gently and avoid stretching. If the perforations tear, pinch them closed to prevent filling from leaking during baking.
  • Work on parchment or a silicone sheet to prevent sticking. Lightly flour the surface only if needed; too much flour can dry the dough and weaken the seams.
  • Use softened, room-temperature cream cheese for a smooth, lump-free filling. Beat until completely creamy before adding sugar—this helps achieve a silky texture rather than a dense mass.
  • Gradually beat in sugar to avoid gritty texture. If you like a sweeter filling, increase sugar by 1–2 tablespoons, but start with the specified amount for classic cheesecake flavor.
  • For brightness, add lemon zest rather than juice when possible. Zest provides aroma without thinning the filling; if you use juice, whisk in sparingly to maintain thickness.
  • Add a pinch of salt to balance sweetness and enhance the cheesecake tang. A little salt goes a long way—don’t skip it, but keep it minimal.
  • If using sour cream or heavy cream, fold in gently after beating the cream cheese and sugar to preserve a smooth texture and prevent the filling from becoming too runny.
  • Use a light egg wash (egg beaten with water) to brush on the dough just before baking. This helps seal seams and gives a glossy, golden finish. Apply sparingly to avoid soggy dough.
  • Brush the rolls with melted butter after they come out of the oven to lock in moisture and add shine. If you prefer a crisper shell, consider brushing with a light glaze of butter instead.
  • When assembling, don’t overfill the crescents. A small amount of filling near the wide end yields a neater roll and less leakage during baking.
  • Place filled crescents seam-side down on the baking sheet for best shape retention and easier sealing. If a seam opens slightly, press gently to seal while the dough is still warm from shaping.
  • For a glossy finish and finer glaze, let the baked rolls cool 5–10 minutes before glazing. This helps the glaze cling rather than sliding off a hot surface.
  • Dust with powdered sugar once the rolls have cooled slightly, or drizzle with the glaze once fully cooled if you prefer a sharper sweetness.
  • Make-ahead option: Assemble and refrigerate unbaked crescents on parchment for up to 24 hours. Brush with egg wash and bake from the fridge, adding 1–2 minutes to the bake time if needed.
  • Freezing tips: Freeze unbaked rolled crescents on a parchment-lined sheet, then transfer to a bag. Bake from frozen, adding 2–3 minutes to the bake time. For baked leftovers, store in an airtight container up to 2 days and rewarm gently.

FAQ

What are Cheesecake Crescent Rolls?

Cheesecake Crescent Rolls are a quick, easy dessert made by filling crescent roll dough with a smooth cream cheese filling, rolling them up, and baking until golden. They’re often finished with a light glaze or dusting of powdered sugar.

What ingredients do I need?

For the filling: softened cream cheese, granulated sugar, vanilla extract, and optional lemon zest or a splash of lemon juice. For the dough: store-bought crescent roll dough. Optional toppings include melted butter for brushing, powdered sugar for dusting, or a simple glaze (powdered sugar with milk or water).

Can I use store-bought crescent dough?

Yes. Using store-bought crescent dough is common and convenient. Separate the dough into triangles, place a small amount of filling at the wide end, roll up, seal, and bake as directed.

How do I assemble and fill them?

Beat the cream cheese with sugar and vanilla until smooth. Place about 1 tablespoon of filling on the wide end of each dough triangle, roll toward the tip to form a crescent, and pinch the seams to seal. Place seam-side down on a baking sheet.

What are the baking time and temperature?

Preheat to 375°F (190°C). Bake the rolls for about 12–15 minutes, until the edges are golden and the filling is set. Let them cool slightly before serving.

How can I prevent the filling from leaking or cracking?

Use softened cream cheese and don’t overfill the triangles. Chill the filling briefly if it’s very soft, and seal the seams well. Avoid overbaking, which can cause cracking.

What variations can I try?

Try lemon-zest or lemon-juice in the filling for brightness; fold in mini chocolate chips; swirl in Nutella; add a berry compote or a sprinkle of cinnamon sugar before rolling; finish with a glaze or powdered sugar.

How should I store and can I freeze them?

Store baked rolls in the refrigerator for 2–3 days. Reheat gently in the oven or microwave. For freezing, freeze unbaked assembled rolls on a tray, then transfer to a bag for up to 1–2 months; bake from frozen, adding 5–7 minutes. Baked rolls can also be frozen and reheated.

Are there dairy-free or gluten-free options?

Yes. Use dairy-free cream cheese and a dairy-free butter substitute if desired. If you need gluten-free, choose a gluten-free crescent dough (check labels) or a gluten-free pastry alternative; note texture may differ slightly.

Introduction / Hook

Imagine the first bite of a muffin that tastes like a warm, dreamy slice of French toast. Cinnamon-sugar sweetness embraces a tender crumb, while a gentle shimmer of caramelized edges offers the satisfying snap you crave from a morning treat. These Cinnamon Sugar French Toast Muffins are the kind of breakfast that feels like a hug from your favorite chef—cozy, comforting, and just a little indulgent—yet somehow bright enough to kick-start the day with sunshine.

Take a moment to inhale the aromatic invitation they extend—the scent of toasted bread, vanilla, and brown sugar mingling with a whisper of butter. Each muffin wears a delicate crust that crackles softly under a gentle press, revealing a surprisingly fluffy interior. It’s breakfast nostalgia transformed into a portable, week-starting marvel: an easy way to enjoy a classic French toast experience without the fuss of standing at the griddle. It’s the perfect balance between the comforting ritual of weekend brunch and the practical ease of a grab-and-go morning, ready to be shared with family, coworkers, or anyone who appreciates a mood-elevating bite.

What makes this particular rendition stand out is not merely the flavor, but the texture and the way the cinnamon-sugar glaze seems to caramelize ever so slightly as the muffins bake. The fragrance alone can transport you to a sunlit kitchen, where a grandmother’s recipe card sits beside a bowl of warm batter, and the idea of turning yesterday’s bread into something new feels like a delicious act of culinary alchemy. These muffins capture that sense of everyday magic—something you can bake on a busy weekday and still feel like you’ve treated yourself to something special on a lazy weekend morning.

The Story Behind the Dish

French toast is a time-honored technique with humble beginnings and a universal appeal. It’s the sort of dish that rises from the practical need to rescue stale bread and transform it into something comforting and elegant. Across cultures and kitchens, the idea remains the same: a simple medley of pantry staples turned into a breakfast you can savor slowly or share with a crowd. Cinnamon and sugar, two pantry staples cherished in so many homes, have a way of conjuring memories of grandmother’s kitchen, weekend breakfasts, and holiday mornings where the table is a stage for stories and laughter.

The muffin version of this old favorite is a modern tribute to both convenience and nostalgia. It takes the essence of French toast—egg-drenched bread that becomes custardy inside and lightly crisp on the outside—and folds it into a portable form. The texture is a delicate balance: the crumb is tender and moist, while the exterior has just enough structure to hold its shape and a subtle caramelized edge that crackles with each bite. Cinnamon’s warm spice mingles with vanilla’s smooth sweetness, while a brown sugar finish creates a gentle molasses-like depth that lingers on the palate. This dish speaks to those who crave the comforting familiarity of a breakfast classic, but also relish the novelty of a muffin with a breakfast-flavored personality all its own.

There’s a touch of whimsy in the idea that a dish so rooted in the quiet rituals of morning can become a crowd-pleasing, shareable treat. These muffins are the bridge between a homey, slow Sunday breakfast and a busy weekday rush. They carry the spirit of a cozy kitchen into a practical format—perfect for a make-ahead brunch with friends, a school-day treat that travels well, or a simple weekend breakfast that doesn’t demand you to stand at the stove for half an hour. In every bite, you’ll sense history and warmth—the old world charm of bread turned into something new, the universal appeal of cinnamon sweetness, and the modern joy of a muffin you can enjoy anywhere, anytime.

Why You’ll Love This Recipe

  • Portable comfort: Enjoy French toast flavors in muffin form, great for busy mornings, school lunches, or on-the-go cravings.
  • Morning nostalgia, without the mess: No standing at a griddle required—all the cozy vibes in a neat, grab-and-go package.
  • Soft, tender crumb with a delicate crust: The interior stays moist and fluffy, while the exterior offers a subtle, satisfying bite.
  • Warm spice with a touch of sweetness: Cinnamon, vanilla, and a hint of brown sugar create a balanced flavor that feels both comforting and indulgent.
  • Make-ahead friendly: These muffins adapt well to batch-baking, pairing well with coffee or tea as part of a leisurely brunch or a busy weekday breakfast.
  • Kid- and family-friendly: Familiar flavors and a friendly texture make them a hit with younger tasters and adults alike.
  • Adaptable to diets and preferences: The base concept can be tailored with gluten-free flours, dairy-free substitutes, or vegan tweaks without sacrificing the character of the dish.

Flavor Profile & Texture

From the moment you lift the muffin to your nose, a warm fragrance blooms: toasted bread mingles with vanilla bean and melted butter, while cinnamon settles into the air like a soft autumn afternoon. The aroma alone is enough to elicit a smile—the kind that makes someone pause and anticipate the first bite. As you break into a muffin, the exterior offers a light, crisp edge that gives way to an incredibly plush interior. The crumb is tender and moist, with just enough density to feel substantial without weighing you down. The center carries a gentle custardy softness, reminiscent of classic French toast, yet the muffin format prevents any soggy undercurrent; instead, there’s a refined balance between structure and softness that invites slow savoring rather than quick, hurried chewing.

The flavor is a harmonious blend of familiar breakfast nostalgia and a touch of bakery elegance. Cinnamon provides a warm, peppery-sweet heat that lingers pleasantly on the tongue, while vanilla lends a creamy roundness that makes the batter feel almost custardy in character. A brown sugar undertone contributes a subtle molasses note, creating depth and a hint of caramel as the muffins bake. If you bite into the top, you’ll experience a gentle crackle that yields to a moist, cloud-like middle. The sugar crystals on the top caramelize ever so slightly in the heat, creating micro-crunch that contrasts beautifully with the soft interior. The overall effect is a balanced, comforting sweetness—a morning treat that satisfies without being cloying, and a flavor profile that remains recognizable and comforting with each bite.

Texture-wise, this dessert-for-breakfast achieves an appealing dichotomy: a sturdy muffin shell and a soft, springy crumb inside. It’s a surface and interior conversation that delights the senses—the outside offers a delicate snap while the interior remains airy and light. The cinnamon-sugar finish on the top adds a light crust with crisp edges, ensuring that every bite begins with a satisfying sound and ends with a melt-in-your-mouth tenderness. There’s a subtle moisture from the “French toast” essence that keeps the muffins lively rather than dry, letting you enjoy them for a morning stretch or a mid-day pick-me-up with equal grace.

Occasions & Pairings

These Cinnamon Sugar French Toast Muffins are versatile enough to shine in many moments. Here are some ideas for occasions and how to pair them for a complete breakfast or brunch spread:

  • Weekend brunch brilliance: Offer alongside a fresh fruit platter, a light yogurt parfait, and a pot of good coffee or chai for a crowd-pleasing, balanced spread.
  • Holiday mornings: They add a touch of bakery-style sophistication to Christmas, Easter, or Mother’s Day breakfasts, especially when displayed with warm syrup and a dusting of powdered sugar.
  • Office mornings & potlucks: Their portable nature makes them ideal for sharing in a work setting or at a potluck, where they pair nicely with fruit salad and a creamy coffee beverage.
  • School-day treats: A ready-to-go breakfast option that fits easily into lunchboxes or snack bags, offering a comforting, familiar flavor in a wholesome form.
  • Special-occasion breakfast-for-dinner: Yes, these muffins can take center stage at a “breakfast for dinner” night, paired with a light greens salad and a citrusy dressing to balance the sweetness.

Pairings that elevate the experience include maple syrup or a light cream cheese glaze (if you enjoy a glaze, a drizzle provides extra sweetness and silkiness). Fresh berries or a warm fruit compote can add brightness and acidity to cut through the richness. A dollop of lightly sweetened yogurt or a spoonful of lemon-curd on the side can provide a refreshing contrast. For drinks, hot coffee with a splash of vanilla or a creamy latte complements the cinnamon profile beautifully, while a glass of cold milk or a dairy-free plant-based milk beverage provides a comforting, classic pairing for the younger crowd or those who prefer a milder finish.

Tips, Variations & Substitutions

  • Flour choices: While a standard muffin batter works beautifully, you can experiment with different flours for texture and dietary needs. For gluten-free lovers, explore reputable gluten-free flour blends that yield a tender crumb. For a nuttier flavor, a small amount of almond flour can be incorporated in limited amounts if the blend is appropriate for your recipe.
  • Milk and dairy options: The richness of this treat benefits from room-temperature milk or milk alternatives. If you’re avoiding dairy, consider almond, soy, oat, or coconut milk to maintain creaminess without altering the flavor excessively. A touch of melted plant-based butter or neutral oil can help mimic the dairy fat’s mouthfeel.
  • Egg substitutes: If you’re avoiding eggs, there are several commercially available vegan egg substitutes on the market, or you can experiment with aquafaba (the liquid from canned chickpeas) to mimic the binding and moisture without compromising the final texture.
  • Sweetness level: Brown sugar provides a caramel note that complements cinnamon well, but you can tweak the sweetness with white sugar, coconut sugar, or a combination. A pinch of salt is a small but impactful way to balance flavors and keep the sweetness from feeling flat.
  • Flavor variations: Add a citrus twist by incorporating orange or lemon zest into the batter to brighten the aroma. For spice lovers, a pinch of nutmeg or cardamom can add warmth. If you crave a more indulgent profile, a swirl of cream cheese filling (vegan or dairy) tucked into the center of each muffin can elevate the overall experience without overpowering the cinnamon-sugar character.
  • Texture tweaks: If you want a crisper top, you can finish with a light sprinkle of coarse sugar just before baking, which will caramelize in a compelling, sparkling crust. For a softer top, skip the extra sugar or reduce the amount slightly.
  • Regional twists: Use brown-butter flavor by browning the butter before mixing it into the batter for a nutty, popcorn-like aroma that deepens the overall flavor profile. In some regions, a touch of vanilla bean paste can intensify the vanilla notes with a little extra depth.
  • Vegan and keto-adaptable ideas: To make a vegan version, substitute eggs with a flax egg substitute and use plant-based milk with a healthy fat (like coconut oil or melted vegan butter). For a lower-carb approach, consider a muffin base built on almond flour and a sugar substitute that suits your dietary needs, while preserving the cinnamon aroma and soft interior.

Storage & Make-Ahead Ideas

These muffins are forgiving and friendly to make ahead, which is a big part of their appeal. If you’re planning a brunch or simply want to have breakfast ready for several mornings, consider these ideas:

  • Refrigeration: After baking and fully cooling, store muffins in an airtight container in the refrigerator. They will stay moist and show flavors of cinnamon and vanilla without losing their tenderness for several days.
  • Freezing: For longer-term storage, freeze fully cooled muffins in a freezer-safe bag or container. They freeze nicely and can be thawed at room temperature or reheated gently in a toaster oven or microwave until warmed through. If reheating, a light toast can help revive the gentle crust and keep the interior soft.
  • Make-ahead bake day: If you want to prep ahead, you can prepare the batter base or the dry mix portion in advance and complete the baking process on the day you plan to serve. This minimizes active kitchen time while still delivering freshly baked muffin goodness.
  • Reheating tips: Reheat muffins slowly to preserve moisture and texture. A brief stint in a warm oven or a low-temperature toaster oven helps restore the crisp top without drying out the interior. A splash of milk or a light glaze during reheating can reintroduce moisture and a touch of sweetness for a brunch setup.

Fun Facts & Trivia (Optional)

Did you know that the idea of turning bread into a sweet morning treat predates modern bakeries? French toast has a long history dating back centuries, with variations found in many cultures under different names. The concept of dipping stale bread in a custard-like mixture and baking or frying it appears across continents, evolving with each culture’s pantry staples. Cinnamon, often tied to warm, cozy kitchens, has a reputation for providing comfort and a sense of home—tools that have helped this simple breakfast staple stay relevant across generations. Muffin culture—a favorite for grab-and-go mornings—emerges from the broader love for individually portioned, easily portable treats. When you combine these two ideas, you get something that feels both timeless and refreshingly modern—a small bite of morning sunshine that travels wherever life takes you.

There’s also a little science of texture at play. The gentle moisture of a well-balanced batter, the surface tension that creates a slight crust at the top, and the caramelization of sugar as it meets heat—all contribute to a mouthfeel that is both comforting and exciting. Cinnamon’s aroma compounds are released as the muffins bake, creating a scent profile that can trigger appetite and memory at the same time. It’s little moments like these that remind us how food can connect memory with function—turning a routine morning into a moment worth savoring and sharing.

Ingredients

Muffin Base

  • 2 cups all-purpose flour
    → Provides the primary structure and crumb for the muffins. If you prefer a lighter texture, you can substitute half of the flour with cake flour or use a mix of all-purpose and whole-wheat flour. For gluten-free needs, substitute with a high-quality gluten-free all-purpose blend and add 1/2 teaspoon xanthan gum if your blend doesn’t already include it.
  • 1/2 cup granulated sugar
    → Adds sweetness and helps achieve a lightly golden crust as the muffins bake. It also contributes to a slightly tender crumb when evenly distributed. If you like a less sweet muffin, reduce this to 1/3 cup or omit for a more bread-pudding style treat.
  • 1/4 cup light brown sugar
    → Introduces moisture and a deeper caramel-like flavor thanks to the molasses in the brown sugar. It helps keep the interior moist and adds speckled sweetness that pairs well with cinnamon. Pack the brown sugar into the measuring cup for accuracy, and consider using dark brown sugar for a richer taste.
  • 1 tablespoon baking powder
    → Leavens the batter to create a fluffy, muffin-like rise rather than a dense loaf. For best results, ensure it’s fresh and evenly dispersed by whisking with the dry ingredients. Do not overmix after adding wet ingredients to keep the crumb tender.
  • 1/2 teaspoon baking soda
    → Works with the acidic elements (like the optional yogurt or dairy if used) to contribute extra lift and a light, tender crumb. If you omit acidic components, you can still include the soda for a bit of extra rise, but be mindful not to over-bake which can neutralize its effect.
  • 1/2 teaspoon salt
    → Balances sweetness and enhances overall flavor. In muffins, salt helps to tighten the texture and heighten the aroma of the spices. If you’re using salted butter instead of unsalted, reduce this to a pinch to avoid overly salty notes.
  • 2 teaspoons ground cinnamon
    → The defining spice that delivers the classic French toast aroma. Use freshly ground cinnamon if possible for a brighter, more complex flavor. If you love bold spice, you can increase to 2 1/2 teaspoons, but start with this amount and adjust next time.
  • 1/4 teaspoon ground nutmeg (optional)
    → A warm, nutty note that complements cinnamon and enhances the “French toast” profile. Freshly grated nutmeg is preferred for the most vibrant aroma; skip if you’re sensitive to the spice or prefer a milder flavor.
  • 6 slices day-old bread, torn into 1-inch pieces
    → Adds a bread pudding-like texture and helps mimic the traditional French toast experience. Day-old or stale bread absorbs the custard mixture better and yields a heartier crumb. If you don’t have bread on hand, you can omit this and rely on the batter alone, though the result will be lighter and less “toasty.”
  • 3 large eggs
    → Bind the batter and enrich the crumb with protein and fat. Eggs help the muffins set properly and provide structure as they cook. For a dairy-free version, you can try an equivalent amount of aquafaba or a flaxseed/egg substitute, though texture may vary slightly.
  • 1 1/2 cups milk
    → Adds moisture and helps dissolve the sugars and spices. Whole milk yields a richer crumb, while 2% or non-dairy milks will still work well. If using non-dairy milk, consider adding a touch of melted butter or oil to maintain tenderness.
  • 1/3 cup unsalted butter, melted and cooled
    → Contributes richness, moisture, and a tender crumb. Make sure the butter is cooled so it doesn’t scramble the eggs. You can substitute with an equal amount of neutral oil (like canola or grapeseed) if you prefer a lighter texture or need dairy-free options.
  • 2 teaspoons vanilla extract
    → Heightens the sweetness and enhances the aroma, pairing beautifully with cinnamon and maple. Use pure vanilla extract rather than imitation for the best flavor. If you have vanilla bean paste, you can substitute 1 teaspoon for a more intense vanilla note.
  • 2 tablespoons maple syrup
    → Adds a subtle maple sweetness that aligns with the French toast theme. Use real maple syrup for the best flavor; if you prefer, honey or agave can be used, but maple is ideal for an authentic taste.
  • 1/4 cup heavy cream (optional)
    → Enriches the batter and yields an ultra-tud crumb with a slightly decadent mouthfeel. This is optional; you can substitute with additional milk if you want a lighter texture or dairy-free version. If using heavy cream, reduce the milk by a few tablespoons to keep the batter from becoming too loose.
  • 1/2 teaspoon almond extract (optional)
    → Provides a subtle almond note that pairs well with cinnamon and maple. Use sparingly, as it can overpower the other flavors. If you’re not a fan of almond, omit entirely and rely on vanilla for flavor.

Cinnamon Sugar Topping

  • Cinnamon sugar topping (optional)
    → Mix 1/4 cup granulated sugar with 1 teaspoon ground cinnamon. Sprinkle this mixture over the batter in the muffin cups just before baking to create a crisp, caramelized crust that captures the cinnamon-sugar French toast vibe. For even coverage, tap the tin gently after adding the topping to distribute evenly; you can adjust the amount if you prefer a heavier cinnamon crackle or a lighter finish.

Optional Add-ins

  • 1/2 cup chopped pecans or walnuts (optional)
    → Adds a pleasant crunch and toasty nuttiness. Toast the nuts in a dry skillet for 2–3 minutes or in a 350°F (175°C) oven for 5–7 minutes to deepen flavor. Chop coarsely so they’re visible in the muffin but still distribute evenly, ensuring bites with nuts in every few muffins.
  • 1/2 cup raisins or chopped dates (optional)
    → Introduces pockets of chewy sweetness that contrast nicely with the custardy muffin. If using dried fruit, soak them briefly in warm water or a touch of bourbon or orange juice for 5–10 minutes to rehydrate and plump, then pat dry before mixing in to prevent them from sinking.

Instructions

  • Preheat your oven to 350°F (175°C) and line a 12-ccup muffin tin with paper liners or grease it well.
    → This ensures the muffins do not stick to the tin and makes them easier to remove after baking, preserving domed tops and clean liners.
  • Whisk together the Muffin Base dry ingredients: 2 cups all-purpose flour, 1/2 cup granulated sugar, 1/4 cup light brown sugar, 1 tablespoon baking powder, 1/2 teaspoon baking soda, 1/2 teaspoon salt, 2 teaspoons ground cinnamon, and 1/4 teaspoon ground nutmeg (optional) until evenly dispersed.
    → Uniformly distributing leaveners and spices prevents uneven rise, ensures consistent sweetness, and avoids pockets of cinnamon or baking soda.
  • Tear day-old bread into 1-inch pieces and measure about 6 cups loosely; spread on a large sheet to inspect for uniform size and to promote even moisture distribution during mixing.
    → Smaller, uniform pieces soak up custard evenly and contribute to a cohesive, muffin-like crumb rather than a gummy center.
  • Whisk the wet ingredients: 3 large eggs, 1 1/2 cups milk, 1/3 cup unsalted butter melted and cooled, 2 teaspoons vanilla extract, 2 tablespoons maple syrup, and optional 1/4 cup heavy cream and 1/2 teaspoon almond extract in a separate bowl until smooth and fully integrated.
    → Avoid scrambling the eggs by adding warm (not hot) butter and ensuring all ingredients are at about room temperature; a fully emulsified custard yields an even, tender crumb.
  • Pour the wet mixture into the dry ingredients and stir gently with a spatula until just combined; stop as soon as you no longer see dry flour to prevent overdevelopment of gluten, which would make the muffins tough.
    → A few small flour streaks are normal; overmixing creates a dense, rubbery crumb and can cause tunneling as the muffins bake.
  • Fold the torn bread pieces into the batter and, if using, fold in optional add-ins such as 1/2 cup chopped pecans or raisins; let the batter rest 5–10 minutes to allow the bread to hydrate and soften slightly, improving texture.
    → The rest period helps the custard penetrate the bread and stabilizes the crumb for a uniform bake.
  • If using the cinnamon sugar topping, mix 1/4 cup granulated sugar with 1 teaspoon ground cinnamon in a small bowl and set aside; this mixture will create a crisp, caramelized crust on top.
    → The topping intensifies the cinnamon aroma and provides a contrast of texture between a soft interior and a sugared crust.
  • Fill each muffin cup about 2/3 full with batter and then sprinkle a light layer of the cinnamon sugar topping over each cup; avoid pressing it into the batter to maintain a crisp top that bakes separately from the moist crumb.
    → Proper fill ensures even rise and prevents muffins from overflowing; the topping will caramelize and set as the muffins bake.
  • Bake in the preheated oven for 20–25 minutes, rotating the pan halfway through if your oven runs hot or uneven; test doneness by inserting a toothpick into the center—if it comes out with a few moist crumbs or clean, the muffins are done; allow to cool in the pan for 5 minutes before transferring to a wire rack.
    → Rotating ensures even browning; the toothpick test confirms interior set without overbaking, which would dry the crumb.
  • Cool muffins completely on a rack before storing or serving; this rest lets the steam escape and the structure set, preventing a soggy bottom and helping the crumb to become tender and uniform.
    → A proper cool prevents steam from softening the crust and preserves the muffin shape for clean slicing or eating with toppings like maple syrup.
  • Store leftovers in an airtight container at room temperature for up to 2 days or refrigerate up to 5 days; for longer storage, freeze muffins individually wrapped and rewarm gently to restore tenderness without drying out.
    → Proper storage maintains moisture, prevents drying, and makes reheating quick and even without scorching the edges.

Notes

“These Cinnamon Sugar French Toast Muffins are a cozy brunch treat that captures the comforting flavors of classic French toast in a portable muffin form. Use day-old bread torn into bite-sized pieces to soak up the custard, creating a tender interior with a hint of caramel from the cinnamon-sugar crust. For gluten-free needs, substitute the all-purpose flour with a high-quality gluten-free all-purpose blend and add 1/2 teaspoon xanthan gum if your blend doesn’t already include it. You can customize with add-ins like chopped pecans or raisins for extra texture and sweetness. To keep things dairy-free, swap dairy ingredients for non-dairy equivalents (non-dairy milk and neutral oil or dairy-free butter) and reduce or omit the heavy cream if used. To ensure a tender crumb, whisk the dry ingredients separately, then fold in the wet ingredients just until combined and avoid overmixing. Let the batter rest for 5–10 minutes so the bread can fully hydrate before baking. Bake until the muffins are puffed, golden, and a toothpick inserted in the center comes out with only a few moist crumbs. The cinnamon-sugar topping lends a crisp, caramelized crust; sprinkle it over the batter just before baking or omit if you prefer a softer top. These muffins freeze well and reheat beautifully in a 350°F (175°C) oven or toaster oven for about 5–7 minutes. Always use fresh baking powder, and check your cinnamon for brightness to keep the aroma true.”

Tips

Tips for Perfect Cinnamon Sugar French Toast Muffins

  • Pan preparation: Line a 12-cup muffin tin with paper liners or grease well with butter or nonstick spray. This helps prevent sticking and makes removal easy, especially when the tops are caramelized from the cinnamon sugar topping.
  • Bread handling: Use day-old bread for best texture. If your bread is fresh, dry it in a low oven (300°F/150°C) for 5–7 minutes or toast lightly to reduce moisture that can make the muffins dense.
  • Dry ingredients distribution: Whisk together the flour, granulated sugar, light brown sugar, baking powder, baking soda, salt, and ground cinnamon before adding the wet ingredients. Even distribution avoids uneven rise and cinnamon blotches in the muffins.
  • Room-temperature components: Let eggs, milk, and cream (if using) sit at room temperature for 20–30 minutes before mixing. This improves emulsification and yields a more tender crumb.
  • Wet-to-dry balance: Mix wet ingredients separately and then combine with dry ingredients just until incorporated. A few small lumps are okay; overmixing can create a tough, dense texture.
  • Custard texture and dairy substitutions: If you use heavy cream, the batter will be richer and slightly looser. If dairy-free, replace milk with a fortified non-dairy milk and consider adding a little neutral oil or melted dairy-free butter to maintain tenderness.
  • Flavor boosts: Freshly grated nutmeg (optional) adds warmth; if you’re sensitive to spice, start with a pinch. For a more pronounced almond note, ensure almond extract is used sparingly (a tiny amount goes a long way).
  • Even cinnamon distribution: If you’re concerned about cinnamon sinking, mix it with the dry ingredients thoroughly or sift once to ensure even color and aroma throughout the muffins.
  • Custard soaking (optional technique): If using extra bread pieces, you can briefly soak the torn bread in a small portion of the milk and egg mixture for 5–10 minutes to intensify the French toast flavor, then fold into the batter gently.
  • Maple flavor: Use real maple syrup for the best aroma. If you substitute with honey or agave, the flavor will vary; you can still achieve a delicious result with these but the final profile won’t be exactly traditional.

Tips for the Cinnamon Sugar Topping

  • Texture and coverage: The optional topping creates a crisp, caramelized crust. Mix 1/4 cup granulated sugar with 1 teaspoon ground cinnamon and sprinkle evenly over the batter just before baking. Gently tap the tin after topping to help the sugar settle evenly.
  • Thickness control: If you love a stronger crackle, slightly increase the topping amount in small increments in future bakes, but avoid overloading to prevent sugar from burning.

Optional Add-ins

  • Nut add-ins: Toast chopped pecans or walnuts in a dry skillet for 2–3 minutes to deepen their nutty flavor before adding. Chop to a size that distributes evenly in the muffins.
  • Raisins or dates: Rehydrate dried fruit in warm water, bourbon, or orange juice for 5–10 minutes, then pat dry before folding into the batter to prevent sinking.

Baking and Storage

  • Oven temperature and doneness: Bake at a moderate temperature (around 375°F / 190°C) until a toothpick inserted into the center comes out with a few moist crumbs. This typically takes 18–22 minutes, depending on muffin size and oven accuracy.
  • Cooling: Let muffins cool in the pan for about 5 minutes, then transfer to a wire rack to finish setting. This helps prevent soggy bottoms.
  • Make-ahead and storage: Store muffins in an airtight container at room temperature for up to 2 days, or freeze them for up to 2 months. Reheat in a 350°F (175°C) oven for 5–8 minutes or a quick 15–20 seconds in the microwave per muffin.

Flavor and Texture Tweaks

  • Texture variation: For a lighter crumb, substitute half of the all-purpose flour with a light-dant cake flour or a half-and-half blend with whole-wheat flour. For gluten-free bakers, use a quality gluten-free all-purpose blend and add 1/2 teaspoon xanthan gum if your blend doesn’t include it.
  • Vanilla and dairy notes: Use pure vanilla extract; a vanilla bean paste can intensify the vanilla presence. If you prefer a hint of almond, keep the almond extract at a conservative level (or omit if you’re not fond of almond).

FAQ

What are Cinnamon Sugar French Toast Muffins?

They’re muffin-sized French toast treats made by soaking bread cubes in a vanilla–cinnamon egg mixture, coating them with cinnamon sugar, and baking until golden. They’re perfect for a quick breakfast or a weekend brunch—soft inside with a light cinnamon-sugar crust.

What ingredients do I need?

Common ingredients include:

  • 6 cups day-old brioche or challah bread, cut into 1-inch cubes
  • 4 large eggs
  • 3/4 cup milk (dairy or dairy-free)
  • 1 teaspoon vanilla extract
  • 1 teaspoon ground cinnamon
  • 2–3 tablespoons brown sugar (plus extra for topping)
  • Pinch of salt
  • 2 tablespoons melted butter (plus more for greasing)
  • Optional: maple syrup or powdered sugar for serving

Optional add-ins: a pinch of nutmeg or cardamom, or a tablespoon of orange zest for a brighter flavor.

How do I prepare the batter and assemble the muffins?

Follow these steps for best results:

  1. Preheat the oven to 350°F (175°C) and grease a 12-c Cup muffin tin.
  2. In a large bowl, whisk together eggs, milk, vanilla, cinnamon, brown sugar, and salt.
  3. In a separate small bowl, mix the remaining cinnamon with a little extra brown sugar (cinnamon-sugar coating).
  4. Toss bread cubes with the egg mixture until well coated, then let sit 5–10 minutes to absorb.
  5. Shake or toss the moist bread cubes in the cinnamon-sugar mixture to coat.
  6. Distribute the coated bread cubes into the muffin cups, pressing lightly so they’re compact.
  7. Drizzle or brush with melted butter over the tops of the muffins.
  8. Bake for 18–22 minutes, until the tops are golden and the centers are set. Let cool slightly before serving.
What oven temperature and bake time should I use?

Preheat to 350°F (175°C). Bake for about 18–22 minutes, or until the muffins are puffed, lightly golden, and a toothpick inserted in the center comes out clean. If using a darker muffin tin, start checking around 16 minutes.

Can I use different types of bread?

Yes. Day-old brioche or challah works best due to their richness and texture. You can also use white sandwich bread in a pinch, but the result won’t be as tender. For extra flavor, try cinnamon-raisin or egg bread.

How should I store leftovers?

Store cooled muffins in an airtight container in the refrigerator for up to 4 days. Reheat before serving to regain softness and warmth. They also freeze well when fully cooled.

Can I freeze these muffins?

Yes. Freeze baked muffins in a single layer on a tray, then transfer to a freezer-safe bag for up to 2–3 months. Reheat in the oven at 350°F (175°C) for about 8–10 minutes or until warmed through, or microwave in short bursts.

Are there dairy-free or vegan substitutions?

Absolutely. For a dairy-free or vegan version, use:

  • Dairy-free milk (almond, soy, oat, etc.)
  • Egg substitute or 2–3 flax eggs (1 tablespoon ground flaxseed + 2.5 tablespoons water per egg)
  • Vegan butter or neutral oil instead of melted butter

Note: The texture may be slightly different, but the muffins will still be delicious.

How can I customize flavors or add toppings?

Try these variations:

  • Swirl in Cream Cheese: beat 4 oz cream cheese with 1–2 tablespoons sugar and a pinch of vanilla; spoon a small amount into the center of each muffin before baking.
  • Orange Zest: add 1 teaspoon orange zest to the egg mixture for a citrus note.
  • Caramel Drizzle: drizzle warm maple caramel over the cooled muffins.
  • Extra Crunch: sprinkle chopped pecans or walnuts on top before baking.
How many muffins does this yield and how should I plate them?

This recipe yields about 12 muffins. For serving, dust with powdered sugar and serve warm with maple syrup or a pat of butter on the side.

Introduction / Hook

Imagine a bowl that seems to hum with warmth from the first whiff, where the steam carries a chorus of roasted garlic, tangy soy, and a flirt of citrus. Fiery Chicken Ramen with Creamy Garlic Sauce is that invitation—an artful balance of heat and comfort that turns a weeknight dinner into a small celebration. The noodles glide like satin between your chopsticks, slick with a silken garlic sauce that clings and coats every bite. A kiss of chili oil wakes up the senses, while tender chicken pieces offer a succulent counterpoint to the lush, almost velvety richness of the sauce. This is ramen designed to excite your palate without overwhelming it, a dish that finishes with a savory glow on your lips and a comforting warmth that lingers long after the bowl is empty.

What makes this recipe truly special is how the creamy garlic sauce is coaxed into life—rich and indulgent, yet bright with a hint of acidity and a faint citrus note to cut through the indulgence. The sauce feels indulgent enough to feel like a treat, but its foundation is built on everyday pantry stars: garlic, dairy or dairy-free substitutes, a splash of soy, and a touch of umami from miso or a kiss of broth. The fiery element isn’t about burn; it’s a measured embrace that elevates the savoriness and depth of the dish. Every bowl promises a comforting hug with a spark—an experience you’ll want to repeat again and again.

As you approach the counter and ladle a serving, you’ll notice how the steam carries the scent of toasted sesame, scallions, and the soft perfume of simmered chicken. The look is inviting: pale, milky swirls of garlic cream pooling around amber-toned noodles, punctuated by sun-bright slices of chicken and emerald bits of green onion. This is not merely a bowl; it’s a sensory story—the sort of dish that makes you slow down, take a deep breath, and savor the moment as if time itself paused to allow you to enjoy every component in harmony.

The Story Behind the Dish

Ramen has traveled a long and delicious road—from humble broths served in street stalls to refined bowls gracing contemporary kitchens. This particular rendition of Fiery Chicken Ramen with Creamy Garlic Sauce is a modern homage to that journey, drawing from East Asian techniques and a Western appetite for velvety, comforting sauces. The idea began with a craving for something that felt both fiery and comforting—an anti-doldrums dish for a chilly evening that wouldn’t require hours of simmering. The plan was simple: create a robust, spoonable cream that could cradle the noodles without muting their bite, and pair it with a chicken preparation that remained juicy and well-seasoned even when tucked into a lacquered bowl swirled with chili oil.

The garlic sauce emerged as the heart of the recipe—garlic roasted or lightly sautéed until sweet, then coaxed into a silky, dairy-tinged emulsion with a touch of miso and stock to deepen the umami. The “fiery” element arrived through chili oil or a carefully chosen chili paste, added in a way that warms the lips without overpowering the garlic’s sweetness. The chicken pieces—lean, tender, and seared to a light caramel—bring a satisfying bite that holds up well against the creamy sauce. The noodles themselves are the bridge, a springy, resilient canvas that soaks up the sauce and provides that essential chew. It’s a dish that feels both intimate and celebratory, suitable for cozy dinners, casual gatherings, or a feast of your own creation on a weekend night.

In some sense, this dish tells a story of cultural fusion done with respect and balance. It borrows the ramen framework, the indulgent garlic sauce aesthetic, and the playful intensity of chili heat—yet it remains unmistakably personal. It’s the kind of recipe that invites you to adapt: swap in mushrooms for a vegetarian version, adjust the heat to suit your crowd, or layer in seasonal greens for color and crunch. Through its flavors and textures, it tells a story of home cooking that’s both adventurous and comforting—a meal that makes you want to linger at the table, listening to the soft clink of spoons and the soft sigh of satisfied diners.

Why You’ll Love This Recipe

Fiery Chicken Ramen with Creamy Garlic Sauce is designed to satisfy multiple cravings in one bowl. Here are the reasons you’ll reach for it again and again:

  • Comfort with a Kick: The peppery warmth of chili oil contrasts with a velvety garlic cream, delivering a comforting hug with a bright spark.
  • Rich Yet Light: The sauce feels indulgent, but the overall balance remains lighter than it looks thanks to fresh aromatics and a crisp finish from bright citrus or vinegar notes.
  • Protein-Packed and Satisfying: Juicy chicken pairs beautifully with chewy noodles and a sauce that clings beautifully, turning every mouthful into a satisfying, balanced bite.
  • One-Bowl Magic: A complete, satisfying meal in a single bowl—protein, starch, and aromatics all harmonizing together.
  • Versatile and Adaptable: The creamy garlic base invites substitutions—dairy-free options, gluten-free noodles, or plant-based proteins—without losing its soul.
  • Weeknight Friendly: While layers of flavor feel luxurious, the dish is approachable and doable on a busy weeknight with ingredients you likely have on hand.
  • Colorful and Inviting: The final presentation is visually appealing—pale creamy swirls, golden-browned chicken, and vibrant greens—making it as appetizing to the eyes as to the palate.

Flavor Profile & Texture

This dish is a study in contrast and harmony. The foundation rests on a creamy garlic sauce that is indulgent, smooth, and luxurious. It carries the soft sweetness of roasted or gently sautéed garlic, which melts into a satin-like emulsion. The dairy or dairy-free alternative adds body and a gentle, comforting richness that coats the noodles with every twist and turn of the chopsticks. The subtle saltiness of soy and a whisper of miso contribute a deep, savory umami that anchors the brightness of the aromatics.

The heat is present, but not abrasive. Fiery notes emerge through chili oil or chili paste; they arrive with a poised confidence, warming the lips and cheeks without stealing the spotlight from the garlic. The spice is more about layering than shouting, helping to enhance the sauces’ sweetness and umami while keeping the dish balanced for all eaters. If you prefer more intensity, you can adjust the chili component to suit your tolerance—just remember that the cream will mellow the heat a touch, so start with a measured amount and build to taste.

Noodles provide texture that’s essential to the experience. They’re springy, with enough bite to resist becoming mushy in the luscious sauce. The chicken thighs or breasts (as you prefer) are seared to a light bronzing, delivering a juicy, tender bite that holds up to the sauce’s creaminess. Vegetables, if added, contribute crunch and color—think blistered bok choy, crisp-edged mushrooms, or emerald scallions that brighten the dish both visually and in flavor. Creamy garlic, chili warmth, and savory chicken all ride on a bed of luscious, well-treated noodles, creating a multi-sensory experience from first aroma to final bite.

Occasions & Pairings

This ramen shines in a variety of settings. It’s ideal for weeknights when you want something comforting yet exciting, and it’s equally suitable for casual gatherings where guests arrive hungry and ready for something heartwarming. It’s also a terrific option for cold-weather dinners when you crave something spicy and soothing in equal measure. The dish’s versatility makes it suitable for intimate dinners, casual family meals, or a small dinner party where you want to impress without overcomplicating the process.

Pairings to consider:

  • Beverages: A light, crisp lager or a cold Japanese beer can complement the chili heat and cut through the richness. For non-alcoholic options, try a sparkling yuzu or lemon-ginger soda, which adds brightness and a slight citrusy bite that echoes the dish’s aromatics.
  • Side Dishes: A simple sesame cucumber salad or pickled vegetables provides a refreshing counterpoint. A small side of kimchi or pickled radish can add a tangy crunch that contrasts beautifully with the creamy sauce.
  • Toppings & Garnishes: Thinly sliced scallions, toasted sesame seeds, a drizzle of chili oil, microgreens, or a soft-boiled egg can elevate the dish and add textural contrast.
  • Desserts: Keep it light after this meal. Consider a ginger-scented poached pear or lime sorbet to cleanse the palate without competing with the dish’s bold flavors.
  • Seasonal Variations: In winter, add wilted greens for color and nutrients; in summer, bright citrus zest can lift the sauce and add a refreshing poke to the heat.

Tips, Variations & Substitutions

Every home cook brings a unique pantry to the table. Here are practical ways to adapt Fiery Chicken Ramen with Creamy Garlic Sauce to your needs, preferences, or dietary restrictions:

  • Creamy Garlickess, Dairy-Free: Use a neutral dairy-free milk or cream substitute (such as oat cream or almond milk with a bit of coconut cream for body). A touch of cashew cream can also replicate the silkiness of dairy without sacrificing texture.
  • Protein Variations: Swap chicken for pork, beef, or tofu cubed. For a vegetarian version, use hearty mushrooms (like king oyster or shiitake) and firm tofu or tempeh for protein and texture.
  • Gluten-Free Options: Choose gluten-free ramen noodles and tamari instead of soy sauce. Ensure any miso used is gluten-free if needed.
  • Spice Level Customization: Tweak the chili component by starting with a small amount of chili oil or paste and gradually increasing. For a smokier finish, use a smoked chili oil or add a drop of ancho chili paste.
  • Flavor Boosters: A splash of rice vinegar, a drizzle of sesame oil, or a hint of toasted sesame seeds can enhance the aroma and depth. A teaspoon of miso paste stirred into the sauce can deepen the umami even further.
  • Regional Twists: Add a miso-tahini swirl for a sesame-sun vibe, or fold in a small spoonful of Korean gochujang for a deeper heat and a touch of sweetness.
  • Make It Lighter: Use less cream or substitute with a lighter stock-based sauce. You can still achieve silkiness with a bit of blended cashews or silken tofu for body.
  • Make-Ahead Variants: Prepare the garlic cream sauce 1–2 days ahead and reheat gently, adding a splash of stock to loosen if needed. Cooked chicken can be marinated and seared just before serving to preserve juiciness.

Storage & Make-Ahead Ideas

While this particular ramen is best enjoyed fresh, there are practical ways to store components so you can assemble quickly when time is tight.

  • Storage: Store any leftover sauce separately from noodles and toppings in airtight containers in the refrigerator for up to 3–4 days. Reheat gently on the stovetop with a splash of stock or water to restore the silky texture.
  • Noodles: Fresh or store-bought ramen noodles can become mushy if reheated too long. If you must pre-cook, undercook slightly and reheat briefly in simmering water or broth to regain elasticity.
  • Make-Ahead Strategy: Prepare the garlic sauce in advance, and have cooked chicken, greens, and ready-to-warm noodles on hand. When you’re ready to serve, reheat the sauce, toss with warm noodles, fold in the chicken, and finish with fresh garnishes for a bowl that tastes freshly prepared.
  • Freezing: The sauce and chicken can be frozen separately. The texture of noodles is compromised after freezing, so it’s best to prepare only the sauce and chicken for freezer storage and add fresh noodles when serving.

Fun Facts & Trivia (Optional)

Ramen is a dish that has inspired countless regional variations and countless stories. Here are a few tidbits that add flavor to your cooking approach:

  • Ramen entered popular culture as a symbol of comfort in Japan in the early 20th century, evolving from Chinese noodle traditions and regional broths into diverse, modern interpretations.
  • The concept of a creamy sauce with ramen is a modern nod to fusion cuisine, where different culinary lineages meet to create something new—this recipe leans into that spirit by pairing a garlic-forward cream with a touch of fiery heat.
  • Chili oil and chili paste have long served as culinary bridges—they deliver heat while allowing the delicate notes of garlic and soy to remain prominent rather than overwhelmed.
  • Seaweed, sesame, and scallions are not just toppings; they are flavor anchors that bring a crisp, bracing, and slightly briny note, balancing the sauce’s richness with brightness and texture.
  • Garlic is a universal comfort ingredient: when sautéed or roasted, its aroma fills a kitchen and signals warmth, which makes it the ideal centerpiece for a creamy ramen sauce that feels both indulgent and inviting.

Ingredients

Ramen Broth & Noodles

  • 4 cups low-sodium chicken stock (or vegetable stock for vegetarian)
    → Base of the broth that delivers savoriness and body. Use a low-sodium stock to keep the final salt level under control, and adjust with soy sauce. For a richer result, you can simmer longer or substitute part of the water with a splash of dry white wine or mirin (optional). If you’re avoiding animal products, use a high-quality mushroom or vegetable stock as the foundation.
  • 2 cups water
    → Dilutes the stock to achieve a balanced ramen broth. Use filtered water for a cleaner taste; adjust concentration by adding more stock if you want a heartier, deeper broth.
  • 3 tablespoons soy sauce or tamari (gluten-free)
    → Adds salt, umami, and color to the broth. Tamari is a good gluten-free option. If your stock is very salty, start with 1.5 tablespoons and taste before adding more.
  • 1 tablespoon rice vinegar
    → Provides brightness to cut through richness and chili heat. Add toward the end of cooking and taste. If you don’t have rice vinegar, a light white wine vinegar can work in a pinch.
  • 2 tablespoons gochujang (Korean chili paste)
    → The fiery core of the dish, delivering heat, depth, and a subtle sweetness. Adjust to taste: use 1 tablespoon for milder heat or up to 3 tablespoons for a bold kick. Stir in gradually to avoid overpowering the garlic sauce.
  • 1 teaspoon toasted sesame oil
    → Finishes the broth with a toasted, nutty aroma. Add at the end of cooking to preserve its fragrance; avoid long simmering which can mute the aroma.
  • 12 oz ramen noodles (fresh or dried)
    → Cook noodles separately per package instructions, then drain and add to bowls just before serving to prevent sogginess. Fresh noodles cook quickly (about 2-3 minutes); dried will take a bit longer. Rinse briefly if using egg noodles to remove excess starch.

Protein

  • 1 lb boneless skinless chicken thighs, thinly sliced
    → Thighs stay juicy and flavorful in hot broth; slicing thin ensures quick cooking and tender texture. For a lighter option, you can use chicken breast, but thighs are more forgiving in soups. If desired, marinate briefly in soy sauce and a pinch of cornstarch to enhance browning and moisture.
  • 1 tablespoon soy sauce (for marinating chicken, optional)
    → Adds a touch of salt and savory depth to the chicken before cooking. Combine with 1 teaspoon cornstarch and a splash of rice vinegar if you want a simple velvety coating; marinate 10-15 minutes.
  • 1 teaspoon cornstarch (for marinating chicken, optional)
    → Helps coat the chicken for a light, crisp sear and locks in moisture. Toss sliced chicken with soy sauce and cornstarch, then rest briefly before searing in a hot pan.

Creamy Garlic Sauce

  • 4 cloves garlic, minced
    → The backbone of the creamy garlic sauce. Mince finely for maximum aroma and even distribution in the sauce. If you love bold garlic, grate the cloves instead of slicing.
  • 2 tablespoons unsalted butter
    → Creates a rich, smooth base for the garlic sauce. If dairy-free, substitute with olive oil and a splash of dairy-free cream to maintain creaminess.
  • 1 cup heavy cream (or full-fat coconut milk for dairy-free)
    → Provides the luscious creaminess. Heavy cream yields a silky, thick sauce; coconut milk gives a dairy-free alternative with a light coconut note. Whisk well and simmer gently to prevent separation.
  • 1/4 cup grated Parmesan cheese (or nutritional yeast for vegan)
    → Adds a savory, cheesy depth and helps thicken the sauce. If using dairy-free, nutritional yeast provides a similar umami boost; stir in off the heat to avoid clumping.
  • 1/2 teaspoon lemon juice (optional)
    → Brightens the sauce and balances richness. Add a small amount and taste, as too much can clash with the chili heat.
  • 1 tablespoon cornstarch mixed with 2 tablespoons water (slurry) to thicken (optional)
    → If you prefer a thicker, coats-the-spoon sauce, add the slurry a little at a time while simmering. Whisk to avoid lumps; simmer until glossy and smooth.
  • Salt and pepper to taste
    → Essential for balancing flavors after the sauce comes together. Add gradually, tasting as you go since the stock and soy introduce saltiness.

Vegetables & Aromatics

  • 2 cups shiitake mushrooms, stems removed and sliced
    → Earthy, savory mushrooms add depth and meaty texture to the ramen. If shiitake aren’t available, use cremini or button mushrooms, sliced thin so they cook quickly.
  • 2 cups baby bok choy, trimmed and separated into leaves
    → Provides crunch, color, and a fresh note. Add towards the end of cooking to keep some crispness, or blanch briefly if you prefer softer greens.
  • 1 cup corn kernels (optional)
    → Sweet pops of corn add contrast to the spicy broth. Use fresh or thawed frozen corn; sauté briefly in a tiny bit of oil if you want to intensify sweetness.
  • 2-3 green onions, sliced (for garnish and aroma)
    → Fresh onion brightness; white parts bring bite and green parts give color. Slice thinly and scatter as a finishing touch.
  • 1 small carrot, julienned (optional)
    → Adds color and a touch of sweetness; cut into thin matchsticks so they cook evenly in the broth.

Toppings & Garnishes

  • 4 soft-boiled eggs (halved)
    → Classic ramen topping; a jammy yolk enriches the broth as you crack it into the soup. Cook eggs to about 6-7 minutes for a slightly runny yolk, then chill in ice water and peel carefully before halving. For firmer yolks, cook longer.
  • 2 tablespoons sesame seeds, toasted
    → Adds a nutty aroma and a subtle crunch. Toast in a dry skillet over medium heat 1-2 minutes until fragrant, then cool and sprinkle over bowls.
  • Nori sheets (optional), cut into strips
    → Briny, umami notes that mimic traditional ramen toppings. Store sealed; add a strip to each bowl just before serving for texture and color.
  • Extra gochujang or chili oil for finishing
    → A final drizzle to tailor heat and depth at the table. Add sparingly to avoid overpowering the creamy garlic sauce; adjust per-serving to taste.

Oils, Seasonings & Salt

  • 1 tablespoon neutral cooking oil (vegetable or canola) for searing chicken
    → High-heat oil helps brown the chicken quickly without sticking or steaming. Pat the chicken dry before searing to maximize browning and flavor.
  • 1 teaspoon sesame oil (optional, for finishing)
    → Finishing touch that adds a toasty aroma; drizzle at the end only to preserve its fragrance and avoid bitterness from overheating.
  • Salt and freshly ground black pepper to taste
    → Essential for balancing the dish after the broths and sauces are combined. Season in stages, tasting as you go to avoid oversalting.

Instructions

  • Prepare soft-boiled eggs by simmering eggs in gently boiling water for 6-7 minutes, then transferring to an ice-water bath for 5 minutes to halt cooking; peel carefully and halve just before serving to reveal a runny yolk that enriches the broth as it mingles with the spicy sauce.
    → The jammy yolk adds luxurious richness to each bite and the ice bath prevents overcooking, making peeling easier.
  • Prepare the fiery broth base by combining 4 cups low-sodium chicken stock with 2 cups water in a large pot over medium heat; whisk in 3 tablespoons soy sauce or tamari, 1 tablespoon rice vinegar, 2 tablespoons gochujang, and 1 teaspoon toasted sesame oil, then bring to a gentle simmer for 15-20 minutes to bloom flavors and meld heat with savory depth.
    → Heating gently releases the chili paste’s essential oils and allows the salt, acidity, and umami to balance before serving.
  • Marinate the sliced chicken thighs in 1 tablespoon soy sauce and 1 teaspoon cornstarch for 10-15 minutes to tenderize the meat and create a light coating that browns evenly; this step enhances moisture retention during searing.
    → The cornstarch helps form a delicate crust and locks in juices, yielding more flavorful, juicy chicken in the finished bowls.
  • Sear the marinated chicken in a hot skillet with 1 tablespoon neutral oil until browned and just cooked through, about 1-2 minutes per side for thin slices; let rest 5 minutes to reabsorb juices before slicing if needed.
    → Searing creates a flavorful crust that contrasts with the silky broth, and resting prevents moisture loss when you cut or layer the meat.
  • Prepare the creamy garlic sauce by melting 2 tablespoons unsalted butter in a small saucepan over medium heat; add 4 minced garlic cloves and sauté until fragrant but not browned (about 30-60 seconds); whisk in 1 cup heavy cream and bring to a gentle simmer; stir in 1/4 cup grated Parmesan and 1/2 teaspoon lemon juice, then season with salt and pepper; if you prefer a thicker sauce, whisk in a cornstarch slurry (1 tablespoon cornstarch mixed with 2 tablespoons water) and simmer until glossy; keep warm off heat.
    → Gentle garlic frying releases aroma without bitterness, and the cheese helps thicken the sauce for a luxurious coat that clings to the noodles.
  • Cook 12 oz ramen noodles in a large pot of salted boiling water according to package directions until just shy of done (al dente); drain and rinse briefly if using egg noodles to remove surface starch that can cloud the broth; set aside and toss with a touch of oil if not serving immediately.
    → Properly cooked noodles stay firm and slippery, preventing sogginess when hot broth is poured over them.
  • Sauté 2 cups shiitake mushrooms in a skillet with a touch of oil until deeply browned and their moisture has evaporated to concentrate their umami flavor; season with a pinch of salt and set aside.
    → Browning mushrooms heightens their earthiness, adding depth to the ramen’s savory profile.
  • Blanch 2 cups baby bok choy by boiling in salted water for 30-45 seconds until vibrant and just tender, then transfer to an ice bath to halt cooking and preserve color; drain well and set aside.
    → Crisp-tender greens provide fresh contrast to the rich broth and help maintain textural variety in each bowl.
  • If using corn, quickly sauté 1 cup kernels in a small amount of oil for 1-2 minutes until lightly caramelized to release sweetness; set aside.
    → Caramelized corn adds a sweet pop that contrasts with the heat and creamy sauce, brightening the overall flavor.
  • Finish the broth by tasting and adjusting with additional gochujang, soy sauce, or a splash of rice vinegar to balance heat, salt, and brightness; simmer a couple more minutes to meld flavors.
    → Balancing sweet, salty, sour, and spicy components ensures the broth tastes cohesive and not raw or flat.
  • If you desire a creamier base, whisk in a portion of the creamy garlic sauce into the hot broth a little at a time to integrate the flavors and achieve a uniform texture; reserve the remaining sauce for finishing drizzles.
    → A controlled addition prevents over-thickening and ensures the sauce disperses evenly through the soup.
  • Assemble the bowls by placing a portion of noodles in each bowl, ladling hot broth over them to cover, and artfully arranging sliced chicken, sautéed mushrooms, blanched bok choy, and corn around the noodles; tuck halved soft-boiled eggs on top.
    → Layering toppings while the broth is hot ensures each bite delivers warmth, texture, and a balanced mix of flavors.
  • Finish each bowl with a sprinkle of toasted sesame seeds, sliced green onions, and, if desired, nori strips; offer extra gochujang or chili oil on the side for personal heat adjustment.
    → The sesame and onions add aroma and crunch, while nori contributes sea-saltiness and visual appeal; extra heat allows diners to customize their experience.
  • Serve immediately while the broth is steaming and the noodles are at their best; instruct guests to mix gently to distribute the creamy garlic sauce and savor the evolving flavors in every bite.
    → Immediate serving preserves the texture of the noodles and the integrity of the toppings, delivering a cohesive, restaurant-quality experience at home.
  • Store leftovers promptly in airtight containers in the refrigerator for up to 2-3 days; reheat gently over low heat, adding a splash of broth or cream as needed to restore creaminess and prevent separation.
    → Proper cooling and reheating maintain texture and flavor, preventing a voiceless, reheated mess.

Notes

These fiery chicken ramen with creamy garlic sauce are a bold, comforting bowl that balances a punchy gochujang broth with a luscious garlic cream sauce. You can customize the heat by adjusting the gochujang from mild to bold, and swap the chicken for firm mushrooms or tofu for a vegetarian version while keeping umami with mushroom stock or soy-based products. For gluten-free needs, use gluten-free noodles and tamari instead of soy sauce, and ensure your stock is certified gluten-free. The noodles should be cooked separately and added to bowls just before serving to prevent sogginess; keep the sauce warm but not boiling to avoid curdling the cream. Sear the chicken thighs well for depth of flavor, but pate dry to promote browning and avoid steaming. The creamy garlic sauce can be made ahead and gently reheated, adding a splash of broth if it thickens too much. Finish with sesame seeds, chopped green onions, and nori strips for texture and aroma, and offer extra chili oil or gochujang at the table for more heat. If preparing in advance, store components separately: broth and sauce refrigerate for up to 3 days or freeze for longer; reheat gently while whisking to re-emulsify. Always taste and adjust salt after combining with the salty broth and soy components.

Tips

Tips for the Broth & Noodles

  • Skim fat from the surface after the broth has cooled for a clearer, cleaner tasting soup. A quick chill in the fridge makes fat easier to remove with a spoon or fat separator.
  • For a deeper color and fuller flavor, reduce the broth slightly after simmering by keeping it uncovered for 10–20 minutes, then taste and adjust salt as needed.
  • When adding optional white wine or mirin, let it simmer to cook off the alcohol and concentrate the sweetness before returning it to the pot.
  • Keep noodles separate and cook them to package directions just before serving to prevent sogginess; if you prep ahead, rinse dried noodles briefly after cooking and toss with a touch of oil to prevent sticking.
  • Finish the broth with a light drizzle of toasted sesame oil after turning off the heat to preserve its aroma and flavor.
  • Taste the broth near the end and adjust salt using soy or tamari. If the stock is particularly salty, reduce the amount of soy slightly and compensate with a splash of vinegar or a pinch of sugar to balance.

Tips for the Protein

  • Pat chicken slices very dry and sear in a hot, lightly oiled pan in batches; overcrowding lowers the pan temperature and steams the meat rather than browns it.
  • For extra browning and moisture retention, marinate briefly (10–15 minutes) with a splash of soy sauce and a teaspoon of cornstarch, then pat dry again before cooking.
  • Slice the chicken against the grain for the most tender bite, and consider using a meat thermometer to ensure an internal temperature of 165°F (74°C).
  • If you prefer a lighter protein option, substitute with chicken breast, but thighs remain juicier in hot broth.

Tips for the Creamy Garlic Sauce

  • Mince garlic finely or grate it for the most even, powerful aroma; grate garlic for a bolder, more integrated flavor distribution.
  • Warm the cream slowly with the garlic and butter; avoid boiling after adding dairy to prevent separation. If it looks glossy but slightly thick, whisk off heat until smooth.
  • Stir in Parmesan off the heat to prevent clumping; for a dairy-free version, whisk in nutritional yeast and a little extra dairy-free cream or olive oil at the end.
  • To adjust thickness, start with the recommended slurry and add a little at a time while simmering; whisk constantly to prevent lumps and ensure a glossy finish.
  • Taste and balance with lemon juice gradually; a little brightness helps cut the richness and heat from the chili paste.

Tips for the Vegetables & Aromatics

  • Dry-sauté mushrooms first to concentrate umami, then add a splash of broth to prevent sticking and to release their moisture.
  • Trim bok choy leaves into uniform pieces so they cook evenly; add the leaves near the end to keep their crispness and vibrant color.
  • Char corn kernels briefly in a dry skillet to deepen their sweetness if using fresh corn.
  • Slice green onions thinly on the bias for a prettier garnish and more surface area to release aroma as you eat.
  • Cut carrots into thin matchsticks for quick, even cooking and a bright visual contrast.

Tips for Toppings & Garnishes

  • Soft-boiled eggs: cook at 6–7 minutes for a jammy yolk, then chill in ice water to stop cooking and peel easily. For firmer yolks, cook a bit longer.
  • Toast sesame seeds in a dry skillet until fragrant, about 1–2 minutes; cool completely before sprinkling to preserve their crunch.
  • Nori strips stay crisp longer if added just before serving rather than long before the bowls are eaten.
  • If you like more heat, offer extra gochujang or a light chili oil on the side so guests can customize their bowls.

Tips for Oils, Seasonings & Salt

  • Use a high-smoke-point oil for searing the chicken; pat dry to maximize browning and minimize sticking.
  • Finish with a small drizzle of sesame oil just before serving to preserve its toasty aroma; add sparingly to avoid overpowering the sauce.
  • Season in layers: salt the broth lightly, season the sauce at the end, and adjust the toppings as needed to achieve balanced overall flavor.

FAQ

What is Fiery Chicken Ramen with Creamy Garlic Sauce?

It’s a noodle soup featuring spicy, flavorful broth with tender chicken and a rich, creamy garlic sauce that coats the ramen. The dish balances heat from chili with a smooth garlic cream, and is typically finished with fresh toppings for extra texture and flavor.

How spicy is this ramen, and how can I adjust the heat?

The heat comes from chili paste or chili oil stirred into the broth. To adjust: reduce or omit the chili paste for milder flavor, or add more chili oil/chili flakes for extra heat. You can also serve with a small side of hot sauce for individual spice control.

What ingredients are needed to make this recipe?

Core ingredients typically include:

  • Chicken (thighs preferred for juiciness)
  • Ramen noodles
  • Chili paste or chili oil
  • Garlic and ginger
  • Cream or a dairy-free substitute (coconut milk, cashew cream, or oat cream)
  • Broth (chicken or vegetable)
  • Soy sauce or tamari
  • Green onions, sesame seeds, and optional toppings like nori
Can I make this dish dairy-free?

Yes. Replace dairy cream with a dairy-free option such as coconut milk, cashew cream, or oat cream. Stir in the dairy-free cream toward the end of cooking and taste for saltiness, adjusting with a splash of soy sauce if needed.

Can I make this gluten-free?

Absolutely. Use gluten-free ramen noodles and tamari (gluten-free soy sauce) instead of regular soy sauce. Check all packaged ingredients to ensure they’re certified gluten-free if you have a strict intolerance.

What type of noodles work best for this ramen?

Fresh or dried ramen noodles that you’d typically use for ramen work well. If you can’t find ramen, shinramen or other alkaline noodles are good substitutes. Cook the noodles just until al dente according to package directions so they hold up in the hot broth.

How long does it take to prepare and cook?

From start to finish, plan about 30–40 minutes. This includes searing the chicken, simmering the broth, preparing the creamy garlic sauce, cooking the noodles, and assembling the bowls.

How should I store leftovers and how do I reheat?

Store cooled leftovers in an airtight container in the refrigerator for up to 2–3 days. Reheat gently on the stove over low to medium heat, adding a splash of broth or water if needed to loosen the sauce. Avoid boiling after the dairy has been added to prevent separation.

What toppings pair well with this ramen?

Great toppings include a soft-boiled or jammy egg, sliced scallions, sesame seeds, nori, chili oil, and lightly blanched greens like baby spinach or bok choy for extra color and texture.

Can I substitute protein or add vegetables?

Yes. You can substitute with firm tofu, tempeh, or shrimp for the protein. Add vegetables such as mushrooms, baby corn, bok choy, or spinach to boost nutrition and texture. If using tofu or tempeh, pan-sear first for extra flavor.

Introduction / Hook

Imagine a plate that instantly conjures the sunlit streets of Milan: a thin, tender chicken cutlet cloaked in a crackling, golden crust, brightened by a sharpened whisper of lemon and a kiss of parmesan. Italian Chicken Milanese is the kind of dish that makes a weeknight feel like a celebration and a Sunday supper feel like a memory you’ll return to with a satisfied sigh. The aroma alone—warm butter slipping into sizzling olive oil, bread crumbs turning to a toasty bronze, faint notes of garlic and herbs drifting through the kitchen—is enough to make you pause, slow down, and savor. This is comfort food with a sophisticated edge: rustic in its simplicity, elegant in its finish, and wonderfully adaptable to whatever you have in the pantry.

At its heart, Italian Chicken Milanese is about balance: a crisp, savory crust that gives way to juicy, delicate chicken, with acidity and brightness cutting through the richness. It’s a dish that knows how to make a statement without shouting. The crust carries the savory perfume of cheese and herbs, while the inside stays moist and tender, almost scoffingly easy to love. It’s the kind of dish that invites conversation—pair it with a bright salad, a splash of white wine, and a slice of lemon—so the table becomes a place where flavors mingle as gracefully as friends.

Beyond the plate, this dish carries a sense of tradition. It’s a modern iteration of cotoletta alla milanese, a classic from Lombardy that has traveled across kitchens and continents, finding its own voice in chicken form. The result is not just a meal, but a small ceremony: a bite that crackles, followed by the gentle yield of the chicken, finished with a citrusy finish that lingers just long enough to invite another bite.

The Story Behind the Dish

Cotoletta alla milanese, historically made with veal, is a storied emblem of Milanese cooking. In the heart of Lombardy, cooks learned to honor the simple two- or three-ingredient crust—breadcrumbs, cheese, and a hint of herbs—while keeping the meat tender and juicy. The concept traveled, adapted, and evolved. Chicken, being more widely accessible and versatile in many modern kitchens, became a popular stand-in that still carries the soul of the original: a crisp exterior that seals in moisture, and a bright, lemon-touched finish that cleanses the palate.

The tale of this dish is also a story of shared tables. In Italy, meals are not just sustenance; they are daily rituals, opportunities to gather, reflect, and celebrate. Milanese cooks would often serve cotoletta with simple accompaniments that honor the dish itself—perhaps a wedge of lemon, a handful of fresh greens, and a drizzle of olive oil. As families migrated and cuisines blended, chicken versionals emerged in homes and restaurants around the world, keeping the essence intact while inviting new interpretations: a whisper of garlic here, a hint of parsley there, or a citrusy sparkle from a squeeze of lemon.

Historically, the technique mirrors the practical cooking cultures of Europe: a sequence of dabs and dredges that protects the meat, followed by a quick, high-heat sear that creates that unmistakable crust. This is not a heavy, bread-drowned fry; it’s a deft, almost artisanal crust that delivers texture without masking the chicken’s tenderness. The result is a dish that feels timeless, yet versatile enough to adapt to dietary preferences and seasonal ingredients—proof that classic traditions can sing in a modern kitchen.

Why You’ll Love This Recipe

  • Fast and adaptable: a weeknight hero that delivers restaurant-worthy texture in a home kitchen.
  • Bright and comforting: the crisp crust paired with juicy chicken and a citrus finish is simultaneously satisfying and refreshing.
  • Versatile sides: pairs beautifully with a peppery arugula salad, roasted vegetables, or a silky potato purée.
  • Family-friendly: approachable flavors that appeal to both kids and adults, with room for customization.
  • Impressive for guests: despite its elegant presentation, it’s surprisingly simple to prepare, making you look like a seasoned host.
  • Make-ahead friendly: components can be prepped in stages, giving you flexibility during busy days.
  • Gluten- and dairy-friendly options possible: with mindful substitutions, you can maintain the crisp crust while accommodating dietary needs.

Flavor Profile & Texture

The flavor of Italian Chicken Milanese comes from a harmonious trio: the savory, cheesy crust; the delicate chicken; and the lemony brightness that punctuates every bite. The crust, often a blend of breadcrumbs with grated parmesan or pecorino, delivers a toasty, slightly nutty note that lingers in the mouth. If you enjoy a hint of garlic or fresh herbs in the crust, these flavors offer a subtle perfume rather than a dominant punch, ensuring the chicken stays the star.

Texture plays a starring role. The exterior is crisp and crackly, a tactile contrast to the moist, tender interior. When you bite through, you experience a satisfying crunch that yields to the soft, succulent meat within. The cheese in the crust adds a mild savoriness, while lemon brings a bright citrus lift that cuts through the richness. There’s a whisper of butter or olive oil from the pan finish that rounds out the crust’s edge. If you accompany the dish with a fresh salad, the acidity from tomatoes or a lemon vinaigrette can echo the lemon’s tang, creating a balanced and lively dining experience.

Occasions & Pairings

This dish shines in many settings. It’s equally at home on a casual weeknight table as it is on a shared Sunday family meal. Its elegance makes it a natural choice for intimate dinners, date nights, or dinner parties where you want to impress without overcomplicating the process. The citrus kiss keeps it bright enough for spring and summer menus, yet comforting enough for cooler evenings when you crave something familiar and satisfying.

Pair it with a crisp white wine that mirrors the dish’s brightness—think Pinot Grigio, Soave, or a young Verdicchio. For non-wine enthusiasts, a sparkling water with a splash of lemon or a light, lemony soda can be a refreshing accompaniment. On the plate, consider a simple arugula salad with cherry tomatoes and shaved parmesan, a roasted vegetable medley, or a creamy potato purée to anchor the meal. For a more rustic approach, a side of sautéed greens or a lemon-infused risotto provides a complementary taste and texture narrative.

Tips, Variations & Substitutions

Tips for an ultra-crisp crust

Choose a crumby breadcrumb mixture with a little cheese for extra savoriness. Let the crust rest on the meat for a moment after dredging in a light layer of flour or cornmeal to help it adhere evenly, then let the coated cutlets come to a brief room-temperature rest before cooking. This rest improves crust adhesion and ensures even browning. When you cook, maintain a steady, moderate heat so the crust becomes deeply golden without burning. A touch of butter toward the end of cooking can enrich the crust’s color and flavor, but add it gradually to prevent scorching.

Variations: proteins, coatings, and flavors

Traditional cotoletta alla milanese uses veal, but chicken is the beloved modern adaptation. You can also explore variations such as pork cutlets or turkey cutlets for a lighter alternative. For a gluten-free version, swap regular breadcrumbs for toasted gluten-free breadcrumbs or finely crushed almonds or cornmeal. If you like a stronger cheese presence, fold finely grated parmesan or pecorino into the crumb mix. For a herb-forward crust, mix in finely chopped parsley, thyme, or oregano.

Flavor twists are easy to implement. A squeeze of lemon right before serving enhances the dish’s citrus footprint. A touch of capers, a few olives, or a light herb garden salad on the side can transform the palate without overpowering the core flavors. If you prefer a richer finish, finish the dish with a drizzle of high-quality extra-virgin olive oil or a tiny dollop of garlicky aioli on the side for dipping.

Dietary-friendly twists

Gluten-free: use a gluten-free breadcrumb or crushed almonds for texture. Dairy-free: omit cheese in the crust or substitute with a dairy-free cheese option, while maintaining the crisp crust with an extra pinch of salt and lemon zest. Low-carb: use an almond meal-based crust; skip breading altogether and finish with a lemon–garlic pan sauce for moisture and flavor. Vegan: substitute chicken with cauliflower or king oyster mushrooms in the same breading and cooking process, adjusting the crust to be oven-crisp instead of pan-fried if needed.

Regional twists & inspiration

Add a touch of regional Italian flavor by swapping in pecorino for parmesan, using fennel pollen for a fragrant finish, or finishing the dish with a quick parsley-lemon gremolata for brightness. In coastal regions, a light squeeze of lemon paired with a drizzle of olive oil echoes the sea breeze. In the mountains, a crisp herb crust with thyme and rosemary can evoke rustic, hearty dinners. The beauty of Milanese-style cooking lies in its adaptability: the technique remains the same, while the flavor accents reflect your pantry and preferences.

Make-ahead ideas

Pre-bread the crusted cutlets and refrigerate them on a parchment-lined tray for up to a day before cooking. This can save time on a busy evening. You can also prepare the salad or greens ahead of time and dress just before serving to preserve crispness. If making a larger batch for a gathering, keep the cooked cutlets warm in a low oven on a wire rack to maintain the crust’s crunch as you finish the rest of the dish.

Storage & Make-Ahead Ideas

Leftover Milanese will stay fresh in an airtight container in the refrigerator for a couple of days. Reheat gently to maintain crispness: the best approach is a quick re-crisp in a hot skillet with a tiny bit of oil, or in a hot oven for a few minutes until the crust regains its crunch. Avoid microwaving if you want to preserve texture; the crust can become soggy in the microwave. For longer storage, you can freeze the breaded, uncooked cutlets (before frying). When ready to use, thaw them completely and cook as you would fresh cutlets, ensuring the crust has enough time to crisp.

If you’re hosting a larger dinner, consider preparing a big batch of the crusted coating and keeping the coated chicken ready in the fridge. When you’re ready to cook, the process becomes nearly hands-off: heat oil, fry until golden, rest briefly, and serve with your favorite lemony accents and greens. This approach keeps the dish approachable while allowing you to scale up for gatherings without sacrificing texture or flavor.

Fun Facts & Trivia (Optional)

– The term “alla milanese” translates to “in the Milanese style,” a designation that has spread across Italian and international menus to denote breaded and fried meat with a crisp crust. The milk-white, buttery butter sauce of some traditional versions is a nod to the old-fashioned finishing touches that elevated everyday meals into special occasions.

– While cotoletta alla milanese is often associated with veal, chicken, pork, and even mushrooms have found homes in this culinary niche, proving that the technique and spirit can be adapted to many ingredients without losing its essence.

– The lemon wedge on the plate isn’t just for garnish; the citrus acidity brightens the crust’s richness, balances the savory cheese, and complements the tenderness of the meat. It’s a tiny flourish with a huge impact.

– In some culinary circles, the crust’s cheese-to-breadcrumb ratio is seen as a signature: more cheese yields a richer, nuttier crust, while a lighter approach emphasizes crunch and the chicken’s natural flavors.

Ingredients

Chicken Prep

  • 4 boneless, skinless chicken breasts (pounded to 1/4 inch thickness)
    → This is the protein base for Italian Chicken Milanese. Pounding to about 1/4 inch thickness ensures quick, even cooking and a tender bite beneath the crisp crust. Place the breasts between sheets of plastic wrap and gently flatten with a meat mallet or rolling pin to uniform thickness. If fillets are particularly thick, butterfly or halve them before pounding. Rest the flattened cuts briefly to redistribute moisture, which helps the crust adhere better.

Dredging & Breading

  • 1/2 cup gluten-free all-purpose flour
    → The flour provides the first dry layer that the egg wash will cling to and begins creating the crust. For gluten-free cooks, this keeps the dish accessible. Lightly season the flour with a pinch of salt and pepper to add a subtle base flavor; for extra crispness, consider whisking in 1 teaspoon cornstarch or using a blend of GF flour and fine rice flour.
  • 2 large eggs, lightly whisked with 1 tablespoon water or milk
    → The eggs act as the binding mechanism that holds the breadcrumbs to the chicken and forms a cohesive crust as it fries. Use room-temperature eggs for better emulsification; for richer flavor, you can add a teaspoon of Dijon mustard or a splash of cream to the egg wash. After coating, let the coated chicken rest a few minutes so the crust adheres firmly.
  • 1 cup gluten-free breadcrumbs
    → The main crispy shell of the Milanese. Gluten-free breadcrumbs (or gluten-free panko) provide crunch and texture; when mixed with Parmesan they yield a savory, browned crust. For extra color and aroma, toast the crumbs lightly in a dry skillet for 2–3 minutes before coating to deepen flavor.
  • 1/2 cup finely grated Parmesan cheese (Parmigiano-Reggiano)
    → Adds sharp, nutty umami to the crust and helps it brown nicely. Use freshly grated Parmigiano for maximum aroma and flavor; mix evenly with breadcrumbs so every bite has balanced cheese, and press gently to help the crust cling.
  • 1 teaspoon dried oregano
    → Provides a classic Italian herb note that complements the lemon and parsley later. If you prefer, you can substitute with 1 tablespoon finely chopped fresh parsley in the coating to brighten the crust, but be mindful that fresh herbs can burn more readily during frying. Adjust to taste.
  • 1/2 teaspoon garlic powder
    → Offers savory depth without risking raw garlic burning during frying. Garlic powder distributes evenly in the crust; if you prefer fresh garlic, you can finely mince one small clove and mix it into the egg wash, but keep the amount modest to avoid overpowering the chicken.
  • 1/2 teaspoon kosher salt
    → Essential to season the crust and the chicken interior; Parmesan will contribute salt, so taste as you go. Lightly salt the flour or the breadcrumbs to ensure a balanced flavor; you can adjust after frying if needed.
  • 1/4 teaspoon freshly ground black pepper
    → Adds a gentle kick and depth, ensuring flavor is distributed through every bite. Pepper complements the lemon and parsley; distribute evenly in the crumb mixture for consistent seasoning.

Frying

  • 1/3 to 1/2 cup extra-virgin olive oil
    → The fat used to fry the chicken and achieve a crisp, golden crust. Maintain medium-high heat (about 350°F/175°C); avoid overcrowding the pan to ensure even browning. Fry the coated cutlets 2–3 minutes per side until golden and the chicken registers 165°F (74°C). Transfer to a rack or paper towels to drain; strain and reuse the oil if desired and not degraded by previous cooking.

Finish & Serve

  • 1 lemon, cut into wedges
    → A bright finishing touch that cuts through the richness of the fried crust. Squeeze some lemon over the hot chicken just before serving to brighten flavors; serve wedges on the side for individual adjustment and consider a light zest finish for added aroma.
  • 1 tablespoon finely chopped fresh flat-leaf parsley
    → Adds color and a fresh herbal note to balance richness. Sprinkle over the hot chicken immediately after frying so the parsley stays vibrant; if you prefer, you can omit, but it does elevate the dish with a visually appealing finish.

Instructions

  • Flatten each chicken breast to 1/4 inch thickness by placing it between two sheets of plastic wrap and gently pounding with a meat mallet or rolling pin until uniform.

    → This uniform thickness ensures quick, even cooking and a tender bite beneath the crust. If a fillet is particularly thick, butterfly or halve it before pounding, then let the pieces rest briefly on a rack to redistribute moisture and help the crust adhere.
  • Arrange three shallow pans in a line to create a dredging station: one with gluten-free all-purpose flour lightly seasoned with a pinch of salt and pepper, one with eggs lightly whisked with 1 tablespoon water or milk, and one with gluten-free breadcrumbs blended with 1/2 cup finely grated Parmigiano-Reggiano, 1 teaspoon dried oregano, 1/2 teaspoon garlic powder, 1/2 teaspoon kosher salt, and 1/4 teaspoon freshly ground black pepper.

    → The dry flour provides the first coating for the egg wash, the eggs act as the binding bridge, and the breadcrumb-cheese mixture creates the crisp, savory crust. Toasting the crumbs lightly in a dry skillet for 2–3 minutes before coating deepens flavor and color; cool before use.
  • Dredge each pounded chicken breast first in the seasoned flour, coating completely and tapping off excess; then dip into the egg wash, allowing excess to drip off; finally press into the Parmesan–breadcrumb mixture, turning to coat all surfaces and pressing gently so the crust adheres firmly.

    → The flour helps the egg wash cling and begins the crust; the egg wash helps the crumbs bind; pressing ensures thick, even crust coverage that won’t slid off during frying. Let coated pieces rest 5–10 minutes to set the crust.
  • Heat 1/3 to 1/2 cup extra-virgin olive oil in a wide skillet over medium-high heat until shimmering and reaching about 350°F (175°C).

    → This precise temperature creates an immediate sear that crisps the crust without absorbing excessive oil, while cooking the chicken through. If you don’t have a thermometer, test with a crumb; it should sizzle briskly. Maintain temperature and avoid overcrowding the pan.
  • Fry the breaded chicken in batches, cooking 2–3 minutes on the first side until the crust is deeply golden, then flip and cook 2–3 minutes on the other side until the crust is browned and the internal temperature reaches 165°F (74°C).

    → A steady, hot pan yields an even, crisp crust and juicy interior. Use tongs to turn gently to avoid crust loss; if the oil begins to deplete in temperature, briefly lift the pan and adjust the heat to recover the crust.
  • Transfer fried cutlets to a rack set over a baking sheet or to paper towels to drain the excess oil and let them rest 1–2 minutes to set the crust.

    → Draining prevents sogginess and resting helps the crust re-crisp slightly as the surface heat dissipates.
  • Repeat the dredging and frying steps for any remaining chicken pieces, maintaining oil temperature and frying in batches to preserve crispness; refresh or strain oil if it becomes dark or foamy.

    → Consistent batches ensure uniform browning and texture across all cutlets, and prevent flavor contamination from degraded oil.
  • Finish the dish by immediately squeezing a wedge of lemon over each hot chicken Milanese, then sprinkle with 1 tablespoon finely chopped fresh flat-leaf parsley and, if desired, a touch of lemon zest; serve with additional lemon wedges on the side.

    → The citrus brightens the rich, fried crust and the parsley adds color and a fresh aroma; serve promptly to enjoy the crust while it stays crisp.
  • If planning to reuse the frying oil, allow it to cool completely, strain through a fine-mesh sieve to remove crust bits, and store in a sealed container for future frying if the oil still smells clean and is not excessively dark or degraded.

    → Reusing clean oil is economical and reduces waste, but discard oil that shows signs of rancidity or heavy darkening to avoid off flavors.

Notes

These gluten-free Italian Chicken Milanese are crispy, lemon-bright, and satisfying with a crust built from gluten-free flour and breadcrumbs. To ensure a tender bite and quick, even cooking, pound the chicken to about 1/4 inch thickness and let the flattened cuts rest briefly before breading. Use certified gluten-free flour and gluten-free breadcrumbs (or gluten-free panko) and toast the crumbs lightly in a dry skillet for 2–3 minutes to deepen flavor and promote browning. The eggs act as the binding around the crust, so keep the eggs at room temperature and let the coated chicken rest a minute or two before frying so the crust adheres well. Fry in about 1/3 to 1/2 cup extra-virgin olive oil at medium-high heat (around 350°F/175°C) until golden and the chicken reaches 165°F (74°C). Drain well on a rack or paper towels. Finish with lemon wedges and a sprinkle of finely chopped fresh flat-leaf parsley to lift the flavors and add color. These notes also apply if you want to remake the dish: reheat gently in a hot skillet to recrisp the crust. For variation, add a pinch of garlic powder to the breading or substitute fresh parsley for oregano in the crust to taste, but avoid overpowering the citrus finish.

Tips

Chef’s Tips for Italian Chicken Milanese

  • Let the pounded chicken sit about 10 minutes after flattening to redistribute moisture. Pat dry with paper towels if any moisture remains; a dry surface helps the crust cling and stay crispy.
  • To maximize crust adhesion, lightly season the chicken itself with a pinch of salt before dredging, then season the flour and breadcrumbs as a separate step so the crust tastes balanced in every bite.
  • For extra crispness, mix a small amount of cornstarch or rice flour into the gluten-free breadcrumbs. Toasting the breading mixture in a dry skillet for 2–3 minutes before coating adds aroma and color without burning.
  • Use room-temperature eggs for the egg wash to improve emulsification and binding. A teaspoon of Dijon mustard or a splash of cream in the wash can add depth, but keep it subtle so the crust remains crisp.
  • When using gluten-free breadcrumbs, consider adding a tablespoon of grated Parmesan or a touch of finely grated lemon zest to the crust for extra savoriness and brightness.
  • Opt for freshly grated Parmigiano-Reggiano rather than pre-grated cheese. It melts more evenly and provides a richer nutty flavor that browns nicely with the breadcrumbs.
  • Herbs in the crust matter: dried oregano is classic, but you can swap in finely chopped fresh parsley (about 1 tablespoon) for a fresh lift. Be mindful that fresh herbs can burn easily; add them to the finishing lemon zest instead if desired.
  • Keep the coating uniform by dredging first in gluten-free flour, then egg wash, then breadcrumb mixture. Let the coated chicken rest 5–10 minutes before frying to help the crust set.
  • Maintain a steady frying temperature around 350°F (175°C). If the oil is too hot, the crust will burn before the chicken cooks; if too cool, you’ll end up with a soggy crust. Use a thermometer for accuracy.
  • Do not overcrowd the pan. Fry in batches if needed; crowded pan lowers oil temperature and leads to uneven browning. Transfer finished pieces to a rack set over a sheet pan instead of paper towels for crisper results.
  • After frying, drain briefly and keep the crust crisp by finishing in a warm oven (about 200°F/95°C) for a few minutes if you’re not serving immediately.
  • Finish with lemon: squeeze fresh lemon over hot chicken to brighten the richness, and serve lemon wedges on the side. A touch of lemon zest over the crust just before serving adds a fragrant finish.
  • Parsley adds color and freshness; sprinkle the chopped parsley immediately after frying so it stays vibrant. If you prefer a milder look, omit or add a pinch of zest instead.
  • Make-ahead option: bread the chicken and refrigerate the coated cutlets up to 2 hours before frying. You can also freeze breaded, uncooked cutlets for up to 1 month; bake or fry directly from frozen, adding a minute or two to the cook time.
  • For a lighter approach, you can bake the breaded cutlets on a parchment-lined sheet at 425°F (220°C) until golden and cooked through, then finish with a quick broil to brown the crust.

FAQ

What is Italian Chicken Milanese?

Italian Chicken Milanese is a classic Milanese dish featuring thin, breaded chicken cutlets that are pan-fried in olive oil or butter until golden and crisp. It’s typically served with a squeeze of lemon and a simple salad or arugula on the side.

What cut of chicken is best?

Use boneless, skinless chicken breasts. For even cooking, lightly pound them to about 1/4 inch (6 mm) thickness, then trim to an even size.

What ingredients do I need?

Basic setup:

  • Chicken breasts (pounded thin)
  • All-purpose flour (or gluten-free flour)
  • Eggs (beaten)
  • Breadcrumbs (panko for extra crunch, or seasoned breadcrumbs)
  • Grated Parmesan cheese
  • Salt and pepper
  • Optional herbs: parsley, oregano
  • Olive oil or neutral oil for frying
  • Lemon wedges for serving
How do I bread and prep the chicken?

Steps:

  1. Season the chicken lightly with salt and pepper.
  2. Dredge in flour, tapping off excess.
  3. Dip in beaten eggs to coat.
  4. Coat with a mixture of breadcrumbs and grated Parmesan (and herbs, if using). Press gently to adhere.
  5. Set on a rack or plate for a few minutes to help the crust set before cooking.
How do I fry it to get a crispy crust?

Heat about 1/4 inch of oil in a skillet over medium heat until shimmering (around 350–360°F / 175–180°C). Fry the cutlets 2–3 minutes per side, until golden and cooked through (internal temperature 165°F / 74°C). Let excess oil drain on paper towels.

Can I bake it instead of frying?

Yes. Preheat the oven to 425°F (220°C). Place breaded cutlets on a baking sheet lined with parchment or on a wire rack. Lightly spray or brush with oil. Bake 20–25 minutes, flipping halfway, until the crust is golden and chicken reaches 165°F (74°C).

How long does it take to cook?

Pan-fried: about 4–6 minutes total (2–3 minutes per side) depending on thickness. Baked: about 20–25 minutes at 425°F (220°C), flipping once.

What should I serve it with?

Common pairings include a simple arugula or green salad with lemon, roasted or boiled potatoes, risotto, or a light pasta with lemon and olive oil. A lemon wedge on the side brightens the dish.

How should I store leftovers?

Store cooked Milanese in an airtight container in the fridge for up to 3 days. Reheat in a hot skillet or oven to restore crispiness; avoid microwave reheating if you want crunch. You can also freeze cooked or breaded uncooked portions for longer storage.

Are there gluten-free or dairy-free variations?

Yes:

  • Gluten-free: use gluten-free breadcrumbs and flour.
  • Dairy-free: omit Parmesan or use a dairy-free Parmesan alternative; use dairy-free breadcrumbs if needed.
  • Oil choice: olive oil or other neutral oils work well for frying; you can also use clarified butter for a richer crust.
Tips to avoid a soggy crust and common mistakes

Tips:

  • Pat the chicken dry before breading to help the crust adhere.
  • Keep oil hot enough and avoid overcrowding the pan to prevent steaming.
  • Rest the breaded chicken for a few minutes before cooking to help the crust set.
  • Mix breadcrumbs with Parmesan for extra flavor and crunch.
  • If baking, place on a rack so air can circulate and the crust stays crisp.
Can I make ahead or freeze?

You can bread the chicken and refrigerate for up to 24 hours before cooking. You can also freeze raw breaded cutlets for up to 1 month; thaw before cooking. Do not freeze after cooking as texture may be affected.

Introduction / Hook

Imagine biting into a cloud—one that feels gentle on the tongue yet undeniably luxurious in taste. Fluffy Japanese Cotton Cheesecake Cupcakes are a masterclass in restraint and elegance: a delicate balance of lightness and richness that somehow feels both everyday-friendly and utterly special. The cupcake-sized version of a classic Japanese soufflé cheesecake, these little wonders rise like pillows of vanilla-tinged air, with a subtle tang that awakens the palate without overpowering it. The moment you slip one from the tray, a faint citrus-y aroma teases your senses, and the surface yields to reveal a springy, cloud-soft interior. They’re not just desserts; they’re a mood lifted into a bite, a reminder that sophistication can arrive in the most approachable, cup-sized form.

In the kitchen, these cupcakes invite a quiet focus: gentle folding rather than aggressive stirring, patience as the batter expands in a warm oven, and the slow magic of a baked cloud taking shape. They’re perfect for a weekend bake that doubles as a centerpiece for a tea party, a low-key celebration, or a thoughtful gift to someone who deserves something airy and tender. The texture is what people remember—an almost souffle-like interior with a custardy, creamy center that lingers on the tongue. The flavor is bright and comforting at once: a whisper of vanilla, a delicate tang, and a finish that feels both indulgent and refreshing. This is the kind of treat that makes ordinary afternoons feel like a small, celebratory ritual.

The Story Behind the Dish

Cotton cheesecake, as it’s affectionately called in many kitchens, traces its charm to the culinary fascination with airy, cloud-like desserts. In Japan, where precision meets playfulness in pastry, bakers sought a texture that was at once elegant and approachable—a cake that rose high, was impossibly soft, and carried a sweetness that felt light as air. The Cotton Cheesecake became a beloved bridge between the soft, wobbly texture of a soufflé and the comforting familiarity of a traditional cheesecake. The result is a dessert that looks ethereal yet behaves with the reliability of a well-made cupcake. Its success lies in a careful balance: the batter must be bright and wavy with air, yet stable enough to support a gentle rise without collapsing into a dense crumb. When baked properly, the cake separates into a tender interior and a wafer-thin crust that crackles ever so slightly, creating a symphony of textures in every bite.

The “cupcake” adaptation is a modern, accessible twist on a classic. By portioning the batter into individual cups, you invite a neat portion control without sacrificing the signature airy texture. It’s a playful homage to street-side cafés and refined patisseries alike, where the aroma of vanilla and a hint of citrus dances through the kitchen. As a story about technique, the Cotton Cheesecake honors patience and respect for the batter: the air you fold in, the gentleness with which you bake, and the careful post-bake handling that keeps the cloud intact. For many families and bakeries, this dessert became a gentle signature—something that looks delicate, tastes luxurious, and feels approachable enough to share with friends, neighbors, and loved ones.

Beyond the kitchen, this dish has traveled through generations of home cooks who treasured the idea that dessert can be light as a feather yet deeply satisfying. The cupcakes become a canvas for small personal touches—a drizzle of something fragrant, a dusting of sugar, or a pairing that elevates the overall experience. The tradition of crafting something so airy also echoes a broader culinary conversation: how to achieve indulgence without heaviness, how to savor sweetness with restraint, and how to transform humble ingredients into something memorable through technique and care.

Why You’ll Love This Recipe

  • Ultra-light, cloud-like texture that feels luxurious yet surprisingly gentle on the palate.
  • Cupcake form makes serving effortless and elegant, ideal for gatherings, picnics, or gifting.
  • Balanced sweetness with a subtle tang and a whisper of vanilla, so flavors feel refined rather than cloying.
  • Impressive presentation: the pale, flawless domes and delicate cracks convey artistry with minimal effort.
  • Adaptable to different occasions and diets, offering a delightful base for creative twists.
  • Minimal equipment and a forgiving batter when treated with care—perfect for confident beginners and seasoned bakers alike.
  • Versatile pairing options, from light fruit accents to a sophisticated cup of tea or matcha latte.
  • Make-ahead friendly for entertaining; bake in advance and finish with a finishing touch just before serving.

Flavor Profile & Texture

The flavor profile of these cotton cupcakes is an artful balance. The interior carries a creamy, custard-like richness that dissolves into a delicate, airy crumb. There’s a whisper of vanilla that acts as a warm umbrella for the palate, complemented by a gentle brightness—often a citrus note—that lifts the cake rather than competing with it. The crust offers a light kiss of toasty sweetness, a tiny textural contrast that makes each bite feel dynamic rather than uniform. The overall mouthfeel is soft, almost ethereal, with a resilient tenderness that resists crumbling into dry crumbs. The aroma is inviting long before the first bite, with a perfume of vanilla, a hint of citrus zest, and an almost imperceptible dairy scent that signals comfort and familiarity.

Texture-wise, the hallmark is contrast: a thin, resilient outer shell that holds a cloud-soft center, a crumb that springs back with a gentle bounce, and a moistness that stays with you. This is not a dense cheesecake nor a traditional sponge cake; it’s a hybrid of lightness and creaminess that feels like a confection born from patience and precision. The mouthfeel is buoyant enough to be refreshing, but richly satisfying enough to feel indulgent. The result is a treat that makes people lean in, curious to explore the interplay between air, dairy, and that signature, mellow sweetness that lingers in the finish.

Occasions & Pairings

These cupcakes shine in moments when you want something that’s special without being over-the-top. They’re ideal for weekend gatherings, intimate tea parties, or a delicate dessert after a bright, cheerful lunch. Their refined yet approachable nature makes them a crowd-pleaser at baby showers, bridal showers, and book club meetings alike. Because they’re individually portioned, they’re perfect for potlucks and holiday trays, adding an airy luxury to any spread without the need for slicing or plating drama.

Pairing ideas to elevate the experience include:

  • Light tea teams: green tea, matcha latte, or citrus-infused black tea.
  • Fresh fruit accents: berries, stone fruits, or a simple compote to add a pop of color and brightness.
  • Neutral desserts: a dollop of lightly sweetened whipped cream or a faint drizzle of a simple fruit glaze.
  • Wine or bubbly notes: a sparkling wine or a glass of late-harvest dessert wine to complement the creaminess.

The beauty of this recipe lies in its versatility. You can keep it clean and understated for sophisticated gatherings, or you can introduce playful twists for birthdays and celebrations. An afternoon with a cup of tea becomes a ceremony when these little cakes are part of the spread, inviting conversation, smiles, and a shared appreciation for the lightness of the moment.

Tips, Variations & Substitutions

Vegan & Dairy-Free

Transforming these cupcakes into a vegan or dairy-free version is a delightful experiment that highlights how adaptable airy desserts can be. A vegan approach typically uses plant-based substitutes for creaminess and structure—think dairy-free cream cheese alternatives and a replacement for any dairy-dependent elements with a neutral, plant-based fat. Egg alternatives, often proteins or aquafaba-based foams, are used to replicate the lift that egg whites contribute to the original texture. The aim is to preserve the signature cotton-like interior while maintaining an indulgent, melt-in-your-mouth finish. Expect a slightly different mouthfeel, but one that remains light, bright, and satisfying. The key is to maintain the overall buoyancy of the batter and to handle it with the same gentle touch you’d apply to the traditional version.

Gluten-Free Options

Gluten-free adaptations can be accomplished with the right choice of flours or gluten-free blends that mimic the tenderness of standard batters. A blend of light gluten-free flours, plus a touch of starch to improve tenderness and lift, can help maintain the cloud-like texture. The same principles—gentle folding, careful handling, and stable heat—apply. If you opt for gluten-free, you may notice a slightly different crumb and a very light bite, but the overall experience remains buoyant and refined. Consider pairing gluten-free cupcakes with similar toppings and serving styles to preserve cohesion across a dessert spread.

Flavor Twists & Add-Ins

While the classic version shines with its own name, there are charming ways to personalize these cupcakes without losing their essence. Subtle citrus zest (like lemon or orange) can brighten the profile without overpowering the creaminess. A touch of vanilla bean adds a luxury aroma. For a more sophisticated angle, a light matcha or green tea infusion can introduce an earthy, aromatic note that pairs beautifully with the dairy sweetness. Chocolate lovers can pursue a quiet cocoa swirl inside the batter or a delicate chocolate drizzle on top. If you’d like a fruit-forward version, a swirl of berry purée folded into a portion of the batter creates miniature flavor landscapes within the same cloud-like cake.

Regional Twists

Drawing on regional flavor profiles is a wonderful way to honor tradition while adapting to modern tastes. A hint of yuzu (or lemon-yuzu) can infuse the cake with an unmistakable brightness associated with East Asian citrus. A light drizzle of roasted sesame or a pearly dusting of ground almonds can add texture and aroma without shifting the dessert away from its airy identity. In some cultures, a gentle spice note—like cardamom or a whisper of cinnamon—gives warmth to the finish while maintaining elegance. The key is to stay within the language of “soft, airy, refined” and to let any additions be modest, serving to enhance the cloud rather than overwhelm it.

Storage & Make-Ahead Ideas

One of the great joys of these cupcakes is their ability to be prepared ahead and enjoyed at leisure. Ideally, bake, cool completely, and store in an airtight container to protect the tender crumb from humidity. They keep well for a couple of days at room temperature if kept in a cool, dry place, and refrigeration can extend their life by a little longer; however, chilling may alter the texture slightly, making it feel more dense than ethereal. If you’re planning ahead for a special event, consider baking the cupcakes a day in advance and finishing with any toppings or garnishes just before serving to preserve their buoyant interior. Freezing is possible for longer storage, but for the best texture, freeze them unadorned and defrost gently at room temperature, re-tilting with a light finishing touch to restore the soft, cloud-like surface.

Make-ahead strategies can also involve preparing the batter in stages if you want to ensure peak lift at serving time. For example, you could prepare a purely whipped, airy component and fold it into a softly integrated base closer to the moment of baking. The result remains the same: a tender, air-filled bite that invites a lingering smile. If needed, a brief reheat after refrigeration can help revive some of the fresh-soft feel, but avoid overheating, which can dull the cake’s delicate texture.

Fun Facts & Trivia (Optional)

Hidden in the airy elegance of these cupcakes are a few small facts that delight pastry enthusiasts. The term “cotton” in Cotton Cheesecake evokes the notion of cotton candy-like airiness, but not the sugary sweetness; it’s a playful metaphor for the light, fluffy crumb that seems to melt almost instantly. In Japan, the technique of incorporating air through careful folding and careful baking mirrors the broader culinary philosophy of precision and balance—a nod to how the simplest, most refined desserts can emerge from meticulous technique and patient execution. The cupcake format is a modern homage to street-side café culture, where the combination of portability and beauty makes a dessert feel both intimate and shareable. Finally, many people love these for their photogenic appeal—the pale domes with a delicate surface crack are a favorite subject for food photography, turning a humble kitchen into a little studio of sweetness.

Ingredients

Cotton Cheesecake Batter

    – Cream cheese, softened to room temperature (approx 300 g)
    → The creamy base of the cotton cheesecake; cream cheese provides tang and body. Softened to room temperature ensures it blends into a silky batter without lumps. Beat with sugar until smooth and airy, then fold in yolks to maintain lightness. If the cheese is still cold, warm gently in 5–10 second bursts in the microwave or leave at room temperature for 1–2 hours before mixing.
    – Granulated sugar – 120 g
    → Adds sweetness and helps create a smooth, pale batter when beaten with the cheese. Add sugar gradually to the cheese and yolk mixture to emulsify fat with moisture, preventing graininess. For the silkiest batter, use superfine sugar; avoid overmixing after adding flour to preserve airiness.
    – Egg yolks, large – 5
    → Richness and structure; yolks contribute to a creamy custard-like texture. Whisk yolks with part of the sugar until thick and pale, then whisk into the cheese mixture to ensure smoothness. Temper the yolks with a little of the milk if adding warm liquids to prevent scrambling.
    – Whole milk – 60 ml
    → Adds moisture and helps loosen the batter for a light, airy crumb. Use lukewarm milk to aid emulsification with the cheese and yolks; excessive liquid can weigh the batter, so keep to a small amount.
    – Melted unsalted butter – 60 g
    → Provides richness and tenderness to the crumb. Cool butter to lukewarm before mixing so it doesn’t cook the yolks; fold in after yolk mixture to maintain a smooth emulsion and avoid greasy separation.
    – Lemon juice – 1 tablespoon
    → Brightens the flavor and balances richness with a touch of acidity. Freshly squeezed juice is best; you can add a teaspoon of lemon zest as an optional aroma boost. Ensure to strain to avoid seeds.
    – Vanilla extract – 1 teaspoon
    → Adds depth and fragrance; use pure vanilla for the best aroma. If using a vanilla bean, scrape seeds into the batter or infuse the milk briefly for extra flavor.
    – All-purpose flour – 40 g
    → Provides a delicate structure to help the batter hold its shape in cupcake form. Sift with cornstarch to keep the crumb extra tender and to minimize lumps; do not overmix after combining to preserve light texture.
    – Cornstarch – 15 g
    → Creates the ultra-tender, cloud-like crumb characteristic of cotton cheesecake and helps stabilize the batter. Sift with flour to distribute evenly and prevent lumps; this also helps the cupcakes rise softly rather than collapse.
    – Salt – 1/4 teaspoon
    → Enhances overall flavor by balancing sweetness and acidity. Use fine salt for even distribution; a pinch goes a long way in this delicate batter.

Meringue

    – Egg whites – 5 large
    → The aerating component that gives the cupcakes their signature loft. Whip to stiff, glossy peaks and gently fold into the batter to preserve volume. Bring whites to room temperature before whipping for maximum volume; ensure no yolk contaminates the whites.
    – Cream of tartar – 1/4 teaspoon
    → Stabilizes the whipped whites to prevent collapse during baking. If you don’t have cream of tartar, substitute with 1/2 teaspoon lemon juice or white vinegar; this helps achieve stable, foamy meringue.
    – Granulated sugar – 60 g
    → Sweetens and hardens the meringue structure; add in 2–3 additions while whipping until the meringue becomes glossy and holds stiff peaks. Dissolve sugar completely to avoid gritty texture and ensure fluffy cupcakes.

Optional Toppings

    – Powdered sugar – for dusting
    → Finishing touch that adds a light, elegant look and helps hide minor cracking. Sift lightly over cooled cupcakes just before serving for a pristine appearance.
    – Fresh berries – 1/2 cup
    → Adds color, brightness, and a pleasant tart contrast to the rich cheesecake. Rinse, pat dry, and if using frozen berries, thaw and pat dry to prevent excess moisture; arrange on top or serve on the side.

Instructions

  • Preheat your oven to 350°F (175°C) and line a 12-cup muffin tin with paper liners or grease it well.
    → This ensures the cupcakes release cleanly and the crumb stays tender as it bakes evenly without sticking.
  • If using a water bath, place the prepared muffin tin in a larger, deep baking dish and arrange it on the rack. Fill the outer dish with hot water to come halfway up the sides of the muffin tin.
    → The water bath provides gentle, even heat that helps the cotton cheesecake rise without cracking and keeps the texture ultra-soft.
  • Sift the all-purpose flour (40 g) and cornstarch (15 g) together with the salt (1/4 tsp) into a small bowl and set aside.
    → Sifting distributes dry ingredients evenly, minimizes lumps, and the cornstarch helps create the shatteringly tender crumb characteristic of cotton cheesecake.
  • In a mixer or large bowl, beat the softened cream cheese (300 g) with granulated sugar (120 g) on medium speed until completely smooth and airy, about 2–3 minutes. Scrape the bowl, then continue beating until light and fluffy.
    → Beating until smooth and airy prevents a grainy texture and ensures the batter will emulsify with the other liquids for a cloud-like rise.
  • Whisk in the egg yolks (5 large) one at a time, allowing each yolk to fully incorporate before adding the next, then whisk in the lemon juice (1 tablespoon) and vanilla extract (1 teaspoon).
    → Adding yolks one by one builds a stable emulsion; lemon juice adds brightness and helps balance richness, while vanilla deepens aroma.
  • Warm the whole milk (60 ml) to lukewarm, then whisk it in gradually with the melted unsalted butter (60 g) that has cooled to lukewarm.
    → Lukewarm liquid aids emulsification with the cheese base; cool butter prevents partial scrambling of yolks and keeps the emulsion silky.
  • Stir in the sifted dry ingredients (flour and cornstarch mixture) in two or three additions, folding just until the batter is smooth and uniform; avoid overmixing to preserve air.
    → Gentle folding maintains the batter’s aeration so the cupcakes stay light after baking.
  • In a separate clean bowl, whip the egg whites (5 large) with cream of tartar (1/4 teaspoon) on medium speed until foamy, then gradually add granulated sugar (60 g) in 2–3 additions and continue whipping to stiff, glossy peaks.
    → Proper meringue stability locks in volume; room-temperature whites whip to maximum volume and the sugar helps form a crisp, glassy structure that folds into the batter without deflating.
  • Gently fold one third of the meringue into the cheese batter to lighten it, then fold in the remaining two additions in a careful, under-and-over motion until no white streaks remain.
    → This technique preserves trapped air that gives the cupcakes their signature cotton-like crumb while evenly distributing the meringue for uniform rise.
  • Spoon or pipe the batter into the prepared muffin cups, filling each about two thirds to three quarters full to leave room for expansion.
    → Filling to the right level prevents overflow and ensures a domed, uniform top without cracking.
  • Bake in the preheated oven (350°F / 175°C) for 18–22 minutes, or until the centers are set and the tops are pale with a slight wobble; to prevent cracking, do not open the oven too early.
    → The gentlest heat and minimal disturbance maintain the delicate structure; a slight jiggle indicates a custardy center without being underdone.
  • Turn off the oven and leave the cupcakes inside with the door ajar for 8–10 minutes to gradually finish cooking and set, then remove and cool on a wire rack completely.
    → Gradual cooling helps prevent sudden contraction that would crack the surface and tear the delicate crumb.
  • Dust cooled cupcakes with powdered sugar and garnish with fresh berries if desired, arranging berries on top or serve on the side for a bright contrast; keep refrigerated until serving.
    → A light dusting elevates presentation and adds a thin barrier to moisture, while berries provide color and tart balance that complements the cheesecake flavor.

Notes

These fluffy Japanese Cotton Cheesecake Cupcakes are light, cloud-like treats formed by folding a silky cream cheese batter with a glossy meringue to create a delicate, souffle-inspired crumb. Using room-temperature ingredients and gentle folding helps maximize height and tenderness. For extra lift and stability, whip the meringue until stiff, then fold into the batter in three additions, taking care to maintain volume.

  • Bring cream cheese, eggs, milk, and butter to room temperature (approx 20–25°C) before mixing to ensure a smooth, cohesive batter with no lumps.
  • Beat the cream cheese with sugar until completely smooth and airy, then whisk in egg yolks with the milk, melted butter (cool to lukewarm), lemon juice, and vanilla until evenly combined. For extra brightness, you can fold in lemon zest as an aroma boost.
  • Sift the flour with the cornstarch and salt; fold lightly into the cheese mixture to give just enough structure without deflating the batter.
  • Whip the egg whites with cream of tartar until stiff, glossy peaks, then gradually add granulated sugar in 2–3 additions until the meringue is smooth and stable.
  • Gently fold the meringue into the cheese batter in three additions, using quick, folding motions to preserve air and softness.
  • Fill muffin cups 3/4 full. For moisture and even rise, bake with a light water bath by placing the muffin tin in a larger pan of hot water, or omit the bath if your oven runs humid and you prefer a crisper top.
  • Bake at a low temperature around 150–160°C (300–320°F) until the centers set and the tops are lightly golden, then cool gradually in the pan to avoid sudden shrinkage.
  • Let cool completely before dusting with powdered sugar or topping with fresh berries for color and a contrast of acidity.
  • Store leftovers in an airtight container in the refrigerator for 2–3 days; bring to room temperature before serving for the best texture. The cupcakes can be gently reheated for a few seconds to revive creaminess.

Optional gluten-free adaptation: Substitute the all-purpose flour with a 1:1 gluten-free baking blend and add 1/2 teaspoon xanthan gum per cup of flour to maintain structure. Fresh lemon juice is preferred; strain to remove seeds.

Tips

Tips for Fluffy Cotton Cheesecake Cupcakes

Preparation and ingredient readiness

Cheesecake batter technique

Meringue technique

Baking, assembly, and the water bath

  • Fill cupcake liners about 2/3 full to leave room for a gentle rise without overflow.
  • To keep the texture ultra-tender, bake the cupcakes in a water bath: place the filled muffin tin inside a larger roasting pan, then pour hot water into the outer pan halfway up the sides of the muffin tin.
  • Double-check that the cupcake tin is well-sealed from the water (wrap the outer pan with foil if needed) and bake at 150–160°C (300–320°F) for about 50–60 minutes, or until the tops are pale and the centers feel set with a gentle jiggle.
  • Turn off the oven and leave the cupcakes inside with the door slightly ajar for 1–2 hours to cool gradually and prevent cracking. Then refrigerate (preferably overnight) to firm the interior and intensify flavor.
  • If cracks appear, dust with powdered sugar or garnish with fresh berries to camouflage and enjoy the characteristic cotton-soft texture.

Cooling, serving, and storage

  • Allow cupcakes to cool completely before removing liners to prevent breakage. Chill to set the delicate crumb.
  • Store in an airtight container in the refrigerator. Bring to room temperature for 15–20 minutes before serving for best flavor and texture; best consumed within 2–3 days.
  • Just before serving, dust with a light shower of powdered sugar and/or top with fresh berries for color and a bright contrast to the creamy interior.

FAQ

What makes Japanese Cotton Cheesecake Cupcakes different from regular cheesecake?

They are lighter and fluffier, with a soufflé-like texture. The batter folds whipped egg whites into a cream cheese base, giving a delicate rise. They are typically baked at a lower temperature in a water bath to stay moist and prevent cracking, and they are sized as cupcakes rather than a single large cheesecake.

What ingredients are typically used?

Common ingredients include cream cheese, sugar, eggs, a splash of milk or cream, melted butter, vanilla, and a small amount of flour or cornstarch to stabilize. Optional additions include lemon zest or juice for brightness. For dairy-free or gluten-free versions, swap with dairy-free cream cheese, plant-based milk, and gluten-free flours as needed.

Do I need a water bath, and how do I set it up?

Yes, a water bath helps maintain moisture and prevents cracking. Place the filled muffin tins in a larger baking pan, then pour hot water into the outer pan until it reaches about halfway up the sides of the muffin cups. Bake as directed, then remove the water bath and cool gradually in the oven or at room temperature.

How can I prevent cracks or a sunken center?

Tips: use room-temperature ingredients, gently fold the whipped whites into the cheese batter, and avoid overmixing. Bake at a lower temperature with a water bath, and do not open the oven door during the first 20–25 minutes. Fill cups about 2/3 full and allow them to cool gradually in the oven with the door slightly ajar before removing.

What pan size and filling amount should I use?

Use a standard 12-cup muffin tin or mini muffin tin. Fill each cup about 2/3 full to give space for rising. Baking times vary: cupcakes may take roughly 18–22 minutes (larger cups) or 12–15 minutes (mini cups); watch for a pale top and a soft jiggle in the center.

Can I make a dairy-free or gluten-free version?

Yes, with adjustments. For dairy-free, substitute cream cheese, butter, and milk with dairy-free alternatives. For gluten-free, use gluten-free flour or cornstarch as a stabilizer. Note that texture and rise can vary with substitutions, so you may need to tweak amounts or mixing times.

How should I store and serve leftovers?

Store leftovers in an airtight container in the refrigerator for up to 3–4 days. Bring to room temperature for about 15–20 minutes before serving for best texture and aroma. They’re lovely with fresh berries or a light dusting of powdered sugar.

Can I freeze these cupcakes?

Yes. Freeze cooled cupcakes wrapped well in plastic wrap and then foil. They keep well for 1–2 months. Thaw in the refrigerator or at room temperature, and re-warm gently if desired. Frosting can be added after thawing if preferred.

Common troubleshooting: my cupcakes sank, cracked, or browned too fast — what went wrong?

Sinking often means underbaking or chilling too soon after baking. Cracking can be caused by too-high oven heat or not using a water bath; keep heat gentle and use a water bath. Excess browning usually means the oven is running hot; consider lowering the temperature by about 25°F (14°C) or tenting lightly with foil if the tops brown too quickly.

What flavors or toppings work well with these cupcakes?

Enhance aroma with vanilla, lemon zest, or a touch of almond extract. For variation, mix in matcha powder for a green-tea twist or cocoa for a chocolate version. Top with fresh berries, a light glaze, whipped cream, or a small dollop of lemon curd. A dusting of powdered sugar also adds a simple finish.

Introduction / Hook

Close your eyes and imagine the hush of a shoreline at golden hour—the air scented with salt, a caress of sea breeze, and the soft clink of a spoon against a warm, porcelain bowl. This lobster bisque is your invitation to that moment, condensed into a spoonful of velvet richness. It’s not just a soup; it’s an experience that feels indulgent without demanding extravagance. The first sip carries the sweet, briny kiss of lobster, a whisper of dairy that smooths every edge, and a gentle, lingering warmth that seems to echo the glow of a sunset on calm water. It’s the kind of dish that tastes like a memory you’ve been saving for a special occasion—even if that occasion is simply Tuesday night when you deserve a little celebration.

What makes this lobster bisque truly special is its balance. It isn’t loud or boisterous; it speaks softly in layers. There’s depth from carefully coaxed shell flavors, a touch of sweetness that comes from caramelized aromatics, and a creamy silk that never veers toward heaviness. It’s a dish that teaches you to trust patience: the more you let the flavors mingle, the more they reveal themselves. The aroma when you lift the lid is enough to make you pause—an aromatic chorus of the sea, roasted undertones, and a hint of brightness that hints at a citrus or herb finish. And when you finally taste it, the texture glides across the tongue—luxuriously smooth, with a subtle bite of delicate seafood sweetness that lingers like a fond memory.

In the pages that follow, you’ll discover a recipe that respects tradition while welcoming modern convenience. It’s a dish that rewards careful technique without requiring a culinary degree. It invites you to savor every step—from a gentle simmer that unlocks hidden flavors to a final, elegant finish that makes the entire kitchen feel like a small, celebratory dining room. If you’ve ever wanted to serve something that feels both sophisticated and comforting, this lobster bisque is your gateway. It’s the kind of dish you’ll want to share, the kind that becomes a family favorite, a dish you’ll crave on chilly evenings, and a dish that invites your guests to linger, spoons in hand, long after the last mouthful has disappeared.

The Story Behind the Dish

Lobster bisque sits at a crossroads of maritime history and French culinary artistry. The term “bisque” itself has roots in the maritime ports of Brittany and the Atlantic coast, where fishermen learned to coax every possible flavor from humble catch. In traditional versions, the shells—once discarded as waste—were simmered to extract a rich stock, then reduced to concentrate the essence of the sea. This practice gave birth to a technique that feels almost magical: transform discarded shells into a treasure, turning scarcity into luxury. The bisque, then, is a triumph of transformation, a celebration of resourcefulness, and a reminder that even in the kitchen, the sea provides when you know how to listen.

There is a romantic thread in the dish’s journey as well. In coastal communities, seafood was not only sustenance but a shared ritual—frequently prepared for celebrations, visitors, and family gatherings. A pot that breathes with the coastal breeze, simmering on a stove as gulls wheel above, becomes a storyteller. The bisque, with its silky finish and deeper notes from roasted vegetables and aromatics, captures that sense of place. It’s a story of shells carefully opened, of patience in reducing a stock to its most concentrated form, and of a final flourish that turns humble seafood into something that feels ceremonial.

Over time, chefs across regions embraced the bisque’s elegance, but they also brought their own sensibilities to it. Some leaned into brighter acidity with a touch of citrus or tomato for brightness; others preferred a purer, creamer profile, relying on dairy to blanket the richness and mellow the oceanic notes. The beauty of lobster bisque lies in its flexibility: the core idea remains simple—build depth from the sea, refine the texture until it glides on the palate, and finish with a whisper of brightness that keeps the dish from tipping into heaviness. This particular rendition honors that lineage while offering a warm, accessible approach that home cooks can master with patience and attention.

And there’s a small, almost serendipitous beauty to the act of making it. The shells, once a practical byproduct, become the custodians of flavor. The slow simmer, the careful straining, the way the aromas fill the kitchen with salty sweetness and faint roasty notes—these elements turn cooking into an intimate, almost cinematic moment. The bisque invites you to pause, to savor the process, and to acknowledge that great seafood cuisine is as much about the journey as the destination: a pot, a spoon, a kitchen filled with scent, and a table set for those you love most.

Why You’ll Love This Recipe

  • Luxurious texture without heaviness: a silky, spoonable richness that feels indulgent yet balanced.
  • Deep, layered flavor: shell-derived savor, a hint of aromatics, and a subtle, refined finish that lingers.
  • Elegant but approachable: a dish that makes everyday dinners feel festive without requiring formal training.
  • Perfect for special occasions or weeknights: it adapts to both intimate dinners and larger gatherings with ease.
  • Flexible and forgiving: small adjustments in technique or finishing touches allow for personalization while preserving the core character.
  • Aromatic and comforting: the warm aroma alone conjures memories of coastal markets and family meals.
  • Beautifully presentable: the pale, rose-gold hue and smooth surface invite admiration and conversation at the table.

Flavor Profile & Texture

The fundamental allure of lobster bisque is the sense of contrast that unfolds with every spoonful. At its core you’ll encounter a mellow sweetness from the sea, a refined saline note that speaks of fresh coastal waters, and a linen-soft creaminess that coats the mouth without clinging. The lobster itself contributes delicate sweetness and a subtle brine, while the most careful preparation extracts a deeper, more contemplative background—a mineral backbone that anchors the dish. The shell-based reduction lends a distant, hushed complexity: roasted undertones, faint caramelization, and a whisper of earthiness that makes it not just a soup, but a narrative of flavors.

Texture-wise, this bisque is all about balance. It glides smoothly across the tongue, offering a velvety mouthfeel that remains audibly light, never heavy. There is a gentle body to it, achieved by a refined emulsification that keeps fat from becoming greasy. A touch of acidity or brightness at the finish can lift the final note, so the palate ends with a crisp, clean impression rather than a lingering heaviness. The aromatics—the quiet warmth of alliums, the gentle perfume of herbs, the faint tang of citrus—work in concert to evoke the sea’s personality without overpowering the seafood itself.

In practice, the flavor journey unfolds in stages. First, the aroma opens with the sea’s whisper, balanced by the mild sweetness of roasted aromatics. As the bisque warms, you perceive the stock’s depth—a chorus of savory, mineral flavors that have been coaxed from the shells until they sing. Then, the dairy component rounds the edges, lending a satin character that makes the soup feel like a luxurious blanket rather than a brittle cheese-and-salt bite. Finally, a curated finish introduces a spark—whether from a splash of spirit, a citrus kiss, or a delicate herb note—that ensures the dish stays bright and inviting from first bite to last.

Occasions & Pairings

This lobster bisque shines in moments that call for something a touch more refined. It’s perfect for holiday meals that deserve an upfront impression, intimate dinners that deserve a standing ovation, or any occasion that benefits from a sense of maritime grandeur. The dish pairs beautifully with a crisp white wine, especially one that mirrors the seafood-forward character with a bright acidity. A light herbaceous cushion or a citrus-forward note in the wine works particularly well, as it complements the dish’s brightness without clashing with its creamier, richer core.

Pairing ideas to consider:

  • Accompaniments: a thin, toasted baguette or a few crisp crostini spread with a mellow topping that doesn’t overwhelm the bisque’s delicacy.
  • Side dishes: a simple green salad with a lemony vinaigrette or roasted vegetables that offer a gentle sweetness to contrast the soup’s richness.
  • Drinks: a dry sparkling wine or a chilled white with subtle mineral notes; for non-alcoholic options, a citrusy sparkling beverage with a clean finish works well.
  • Dessert: something light and citrusy, such as a lemon sorbet or a delicate vanilla-infused pastry, to close the meal without competing with the memory of the sea.

Tips, Variations & Substitutions

Tips for Best Results

Even though this is a refined dish, approachable techniques help you achieve a consistently luxurious result. Pay attention to temperature control as you reheat and finish the bisque to preserve the delicate texture. If you’re simmering a stock or a base, keep the heat low and steady to avoid breaking emulsions. When you strain, do it slowly and purposefully to preserve the smooth texture and remove any small particles that might disrupt the creamy surface. A gentle hand with seasoning—tasting as you go and adjusting for balance before serving—will reward you with a more harmonious final plate.

Variations

There are many ways to tailor this dish to your preferences or to reflect regional flavors, while keeping the essence of a refined lobster bisque. Consider these directions, all of which maintain the dish’s core character without veering into complexity:

  • Seafood-forward refinement: emphasize the lobster’s natural sweetness by limiting aggressive ingredients and letting the oceanic notes stand at the forefront.
  • Brighter finish: finish with a touch of citrus or a bright herb finish to lift the palate and offer a modern contrast to the creaminess.
  • Woodsy depth: introduce a hint of smoke or a roasted component to add a subtle, comforting dimension that pairs well with white wine.
  • Make it lighter: for a lighter version, reduce dairy slightly and emphasize a clearer stock for a cleaner, more bouillon-like finish.
  • Make it vegan or dairy-free: use a plant-based cream substitute and a robust vegetable or mushroom-based stock, ensuring the texture remains silk-like with emulsification methods that preserve body.
  • Gluten-free by design: ensure any thickeners or additions are gluten-free, particularly if you’re using pre-made stocks or mixes—stick to naturally compatible ingredients and you’ll maintain texture and flavor.
  • Regional twists: add a whisper of fennel, saffron, or smoked paprika to evoke a coastal market in different locales, always balancing the intensity so the lobster remains the star.

Substitutions & Accessibility

If certain ingredients aren’t on hand, there are graceful stand-ins that preserve the essence. A well-made stock with robust flavor can stand in for more elaborate reductions, while a gentle dash of cream can substitute for a richer dairy addition. For substitutions, focus on maintaining balance: swap any component in ways that do not overwhelm the delicate sweetness of the lobster and the mellow dairy finish. The beauty of this dish is that it rewards thoughtful improvisation while still delivering a cohesive, sophisticated end result.

Storage & Make-Ahead Ideas

The bisque behaves well with some make-ahead planning. You can prepare the flavorful base in advance and finish the dish when you’re ready to serve, which is especially helpful for entertaining. If you’re refrigerating leftovers, store in airtight containers for up to 3 days. Reheat gently over low heat, stirring frequently to prevent scorching and to preserve the silkiness. If you’d like to freeze the dish, note that dairy can change texture when frozen and thawed; for best results, freeze the stock or base separately and re-create the final texture and balance upon reheating with a small additional amount of dairy if needed. A quick re-emulsification by whisking or a gentle blitz with an immersion blender can bring back the creamy, seamless texture.

Make-ahead suggestions that maintain quality:

  • Prepare the seafood stock or shell-based reduction a day ahead and refrigerate; reheat slowly and proceed with the finishing steps when ready.
  • Have ready a fresh garnish or bright finishing element to add just before serving to preserve color and aroma.
  • Scale up for a dinner party by preparing base flavors in larger batches and finishing in smaller portions to ensure texture remains optimal at service time.

Fun Facts & Trivia (Optional)

– The word bisque is believed to come from the French word “bis cuites,” meaning twice-cooked, referring to the long method of extracting maximum flavor from seafood shells.

– Lobsters have long fascinated cooks because their flavor scales up with age and size, and the method of building flavor from shells highlights a clever approach to turning what might seem like waste into something luxurious.

– In some coastal traditions, bisques are served with a light touch of citrus zest or a delicate herb oil that adds aromatic complexity right at the moment of tasting, making the finish feel freshly lifted rather than heavy.

– The bisque technique showcases the elegance of emulsification: a careful marriage of stock and cream, yielding a surface that remains smooth and inviting even as flavors deepen. This is a classic example of how science and artistry meet in the kitchen to create something that tastes effortless yet is built on precise technique.

– While the seafood industry evolves, the appeal of well-prepared bisque endures as a symbol of hospitality and refined taste—proof that good cooking can feel timeless, even as trends change.

Ingredients

  • Lobster Bisque Base
      – 2-3 lobster tails and/or lobster bodies (about 2 lb total), cooked and peeled, shells reserved for stock
      → These shells are simmered to extract gelatin and deep seafood flavor that form the backbone of the classic bisque. Keep the meat for finishing (chopped into bite-sized pieces later). If you only have meat, you can supplement with store-bought lobster stock, but shells deliver the richest, traditional texture and aroma.
      – 2 tablespoons unsalted butter
      → Butter provides the fat necessary to sauté aromatics and to form a smooth roux with the flour. Use unsalted butter so you can control the final salt level. Do not let it burn; keep the heat medium so it glazes the vegetables without browning.
      – 1 tablespoon olive oil
      → Olive oil raises the smoke point of the butter and adds a fruity note that complements seafood. Heat until shimmering before adding aromatics to prevent the butter from scorching.
      – 1 medium onion, finely chopped
      → Onions give natural sweetness and depth to the base. Finely dicing ensures a silky texture after puréeing. Sauté until translucent and soft, not browned, to keep the bisque bright.
      – 1 celery stalk, finely chopped
      → Provides a gentle, herbaceous counterpoint to the sweetness of the onion. Finely chop so it blends smoothly into the final soup rather than delivering crunch.
      – 1 carrot, finely chopped
      → Contributes natural sweetness and color; cut small so it breaks down evenly during simmering and contributes to the body of the bisque.
      – 2 garlic cloves, minced
      → Adds a sharp, aromatic bite that enhances the shellfish flavor. Mince finely and add after onions begin to soften; garlic can become bitter if burned, so keep heat moderate and stir frequently.
      – 2 tablespoons tomato paste
      → Deepens color and rounds out sweetness, creating a richer flavor profile. Cook the paste with the aromatics for 1–2 minutes to caramelize its sugars and reduce sharp acidity.
      – 1/2 cup cognac or brandy (optional for flambé)
      → De-glazes the pan, lifting browned bits and imparting a luxurious, fruity aroma. If you’re comfortable, flambé to burn off alcohol and intensify flavor; otherwise, simply let it simmer a few minutes to reduce and concentrate.
      – 1 cup dry white wine
      → Provides acidity and brightness that balance the seafood sweetness. Choose a dry, reputable wine and reduce by about half to intensify flavors before adding stock.
      – 4 cups lobster stock (or high-quality seafood stock)
      → The primary liquid and flavor carrier. If using homemade stock, the gelatin from shells will help give the bisque its luscious body; store-bought stock should be concentrated or reduced slightly to mimic that body.
      – 1 teaspoon dried thyme or 1 tablespoon fresh thyme leaves
      → Thyme threads a subtle, earthy note through the seafood. Use fresh thyme if possible; add dried thyme early in the simmering so its flavor melds with the base, and fish out the sprigs before puréeing.
      – 1 bay leaf
      → Promotes a gentle, herbal aroma that complements the shellfish. Remove before puréeing to avoid a sharp or resinous aftertaste.
      – 1/4 teaspoon cayenne pepper or white pepper
      → Light heat to enhance flavor complexity without overpowering the delicate lobster. Start with a small amount and adjust to taste after the rest of the ingredients have simmered.
      – 2 tablespoons all-purpose flour
      → Used to create a light roux with the butter, giving the bisque body and a smooth texture after puréeing. Whisk in and cook briefly to remove raw flour flavor, aiming for a pale blond color.
      – Salt to taste
      → Salt levels will depend on the stock you’re using; season gradually after the bisque has reduced and the flavors have melded. Remember that lobster stock often carries salt, so add sparingly and adjust at the end.
  • Cream, Thickener, and Finish
      – 1/2 cup heavy cream
      → Adds luxurious richness and a velvety mouthfeel. Temper it by whisking in a little hot stock before adding to the pot to prevent curdling; avoid boiling vigorously after adding to preserve the creaminess.
      – 1-2 tablespoons lemon juice
      → Brightens the soup and cuts the richness, balancing the sweetness of the seafood. Add gradually, tasting after each addition, until you reach a clean, fresh tang without sourness.
      – Salt and white pepper to taste
      → Fine-tuning after cream addition is essential since dairy can dull flavors. White pepper gives a subtle heat without visible specks in the pale bisque.
      – 1/2 cup chopped lobster meat (optional)
      → If you reserved meat from the initial shelling, fold in at the end for tender bites and to showcase the lobster flavor. Chop into bite-sized pieces so they distribute evenly and don’t overwhelm the soup’s texture.
      – Fresh parsley or chives for garnish (optional)
      → Finishing herbs add a pop of color and a fresh aroma. Slice thinly and sprinkle just before serving to preserve brightness; they also offer a clean contrast to the soup’s richness.
  • Garnish and Serve
      – Lemon wedges for serving (optional)
      → A bright squeeze at the table enhances the overall flavor and pairs beautifully with seafood. Serve with a small wedge on the side for guests to adjust brightness to taste.

Instructions

  • Warm a heavy-bottom pot over medium heat and melt 2 tablespoons unsalted butter with 1 tablespoon olive oil until the butter foams and just begins to shimmer.
    → This fat pairing prevents the butter from burning while creating a glossy, flavorful base for sweating the aromatics.
  • Sauté the finely chopped onion, celery, and carrot in the butter–oil mixture until they are translucent and soft, about 5–7 minutes, stirring occasionally to promote even cooking without browning.
    → Sweating these vegetables draws out their sweetness and builds a smooth sweetness foundation; avoid browning to keep the bisque bright and clean.
  • Add 2 minced garlic cloves and 2 tablespoons tomato paste; continue sautéing for 1–2 minutes, stirring constantly until the paste deepens in color and becomes fragrant.
    → Tomato paste concentrates umami and colors the base; cooking removes raw sharpness and integrates flavors evenly.
  • If using cognac or brandy, pour in 1/2 cup and flambé carefully, or reduce gently by simmering 2–3 minutes to burn off alcohol while concentrating the aromatics.
    → Flambéing dissolves browned fond and elevates the aroma with a subtle sweetness; if not flambéing, simmer briefly to reduce and intensify flavor.
  • Ahurst: Deglaze with 1 cup dry white wine, increasing heat to medium-high and simmering until reduced by about half, 4–6 minutes.
    → Reduction concentrates acidity and bright fruit notes that balance the shellfish sweetness.
  • Stir in 4 cups lobster stock and add 1 teaspoon dried thyme (or 1 tablespoon fresh thyme leaves) along with 1 bay leaf; bring to a gentle simmer.
    → Thyme and bay leaf introduce herbal depth; simmering helps these aromatics meld with the shellfish flavors without becoming overpowering.
  • Sprinkle 2 tablespoons all-purpose flour evenly over the simmering mixture and whisk vigorously to form a light roux; cook 2–3 minutes to remove raw flour taste and achieve a pale blond color.
    → The roux provides body and helps the bisque attain a luxurious, silky texture once fully combined with liquid.
  • Gradually whisk in the remaining stock (if any) or continue whisking the 4 cups of lobster stock already in the pot to ensure a smooth, lump-free consistency; maintain a gentle simmer as the mixture thickens slightly.
    → Slow incorporation prevents lumps and ensures the roux fully emulsifies, delivering a refined mouthfeel.
  • Maintain a gentle simmer for 20–30 minutes, skimming any foam, and keep the heat steady to avoid boiling which can dull flavors and create a grainy texture.
    → Slow simmer extracts gelatin from shells (if stock is homemade) and allows flavors to meld into a cohesive bisque.
  • Remove the bay leaf and any thyme stems; if using fresh thyme leaves, discard the stems and leave the leaves behind for a clean herbal finish.
    → Removing the aromatics prevents resinous or bitter notes from overpowering the delicate lobster flavor.
  • Use an immersion blender to puree the bisque directly in the pot until completely smooth and velvety, or carefully transfer to a blender in batches and blend on high, venting steam as needed.
    → A smooth texture is essential for a classic bisque; blending breaks down vegetables and any small shell fragments for a restaurant-grade satin finish.
  • Optional: Pass the pureed bisque through a fine-mesh sieve into a clean pot to remove any remaining fibrous bits for an ultra-silky finish.
    → Sieving guarantees the most refined texture, especially useful if any shell particles or tough fibers passed through the blender.
  • Stir in 1/2 cup heavy cream and warm the bisque over low heat until just heated through; do not allow it to boil vigorously to prevent curdling.
    → Cream enriches the texture and adds luscious mouthfeel; tempering with a small amount of hot bisque before adding helps prevent curdling.
  • Gradually add 1–2 tablespoons lemon juice, tasting after each addition, and season with salt and white pepper until the flavor is balanced and bright.
    → A touch of acidity lifts the richness, brightening the overall profile; adjust salt carefully since the stock may already contain salt.
  • Fold in 1/2 cup chopped lobster meat and heat just until warmed through, about 1–2 minutes; avoid overcooking the meat to keep it tender and succulent.
    → The reserved lobster meat delivers textural contrast and prominent aroma without turning firm or rubbery.
  • Ladle the bisque into warmed bowls, garnish with finely chopped fresh parsley or chives, and serve with lemon wedges on the side for guests to adjust brightness.
    → Fresh herbs provide color and a lift of aroma; a lemon wedge lets each diner tailor the brightness to their liking and complements the seafood.

Notes

This lobster bisque is a luxurious, silky soup built on a deeply flavored stock and a pale roux, finished with cream and tender lobster meat. For maximum depth, simmer the reserved lobster shells with the aromatics to extract gelatin and shellfish aroma, then strain; the meat can be chopped and reserved to fold in at the end. Sauté the onion, celery, and carrot in butter and olive oil over medium heat until translucent but not browned, then stir in garlic and tomato paste and cook briefly to deepen color and sweetness. If you choose to flambé the cognac or brandy, do it safely after the aromatics have released their fragrance to lift the pan and caramelize the sugars; otherwise let it simmer to reduce and concentrate. Add the white wine and reduce by about half before adding your stock to maintain bright acidity that balances the seafood sweetness. Whisk in the flour with the fat to make a smooth roux; cook it long enough to lose the raw flour taste but keep a pale blond color so the bisque stays light and refined. Add the stock, thyme, bay leaf, cayenne, salt, and pepper, then simmer gently until the flavors meld and the vegetables are tender. For the smoothest texture, blend the soup and pass it through a fine sieve or chinois; return to the pot and stir in the cream and lemon juice, warming gently without boiling to prevent curdling. Fold in chopped lobster meat at the end so it stays tender, and garnish with chopped parsley or chives. Taste and adjust salt, finishing with a touch more lemon juice if you like a brighter finish. If you prefer a gluten-free version, substitute cornstarch or a gluten-free flour for the roux and whisk in slowly to avoid lumps. Make-ahead tip: prepare the stock and base, then refrigerate up to 1 day or freeze up to 1 month; reheat gently, add cream and lobster meat just before serving. Leftovers refrigerate 2–3 days and can be gently reheated, adding a splash of stock if needed to restore body.

Tips

Tips for Lobster Bisque

  • Maximize shell flavor: simmer the shells with the aromatics to extract gelatin and depth; if you have time, roast the shells lightly before simmering to deepen color and richness.
  • Skim fat for a glossy bisque: after simmering, chill the stock and remove the fat layer for a cleaner, lighter finish. A fat separator also helps.
  • Aromatics technique: sweat the onions, celery, and carrot until translucent rather than browning; garlic should be added after the aromatics soften to prevent bitterness.
  • Build depth with tomato paste: cook the tomato paste with the aromatics for 1–2 minutes to caramelize its sugars and mellow acidity.
  • Alcohol handling: if flambéing with cognac or brandy, do it safely with a long lighter and away from flammable objects; otherwise simmer to reduce and concentrate flavor.
  • Wine reduction: use a dry white wine and simmer until reduced by about half to intensify acidity and aroma before adding stock.
  • Roux technique: whisk in flour to make a light roux and cook briefly until pale blond; this prevents raw flour taste and keeps the bisque silky.
  • Prevent lumps: sprinkle flour gradually while whisking; if lumps form, blend briefly or strain after cooking before adding cream.
  • Seasoning: salt levels depend on your stock; taste the bisque after reduction and before finishing with cream, then adjust gradually to avoid oversalting.
  • Strain for silkiness: strain the bisque through a fine-mesh sieve or chinois to remove solids and achieve a velvety texture; press solids gently to extract more flavor without grit.
  • Finish with lobster meat: fold in the reserved lobster meat at the end so it stays tender; cut into bite-sized pieces for even distribution.
  • Cream handling: temper the cream by whisking in hot stock before returning to the pot; avoid boiling after adding dairy to prevent curdling.
  • Texture control: for extra body, blend 1/2 of the soup and then reincorporate, or use an immersion blender in short bursts to emulsify without breaking the stock.
  • Brighten and balance: add lemon juice gradually, tasting after each addition; you want a clean brightness without sourness.
  • Make-ahead tips: bisque can improve when rested overnight; reheat gently, skim fat again, and adjust seasoning before serving.
  • Serving ideas: finish with a swirl of cream, a few chopped herbs (parsley or chives), and a lemon wedge; serve with crusty bread or buttered toast for contrast.

FAQ

Lobster Bisque Recipe – FAQ

What is lobster bisque?

Lobster bisque is a smooth, creamy soup made from lobster shells to create a rich stock, then enriched with cream and pieces of lobster meat. It’s typically flavored with cognac or brandy, white wine, aromatics, and tomato paste for depth of flavor.

What ingredients do I need for a classic lobster bisque?

Common ingredients include:

  • lobster shells (from 1–2 lobsters) and lobster meat
  • onion, carrot, celery, garlic
  • tomato paste
  • brandy or cognac and white wine
  • seafood stock or water
  • butter and olive oil
  • heavy cream
  • bay leaf, thyme, salt, pepper, cayenne or paprika
  • optionally parboiled rice or stale bread for thickening
Can I use lobster tails or just whole lobster?

You can use lobster tails, but you’ll still want some shells to build the stock. If you only have tails, you can purchase seafood stock or use additional lobster meati—however, shells are essential for the classic bisque flavor and body.

How do I prepare the lobster for the soup?

Steps:

  • Cook the lobster (boil or steam) until just done, then remove meat and reserve.
  • Break down the shells and reserve them for making stock.
  • Chop aromatics (onion, carrot, celery, garlic) for the stock base.
How is the bisque thickened if I don’t want to use heavy cream?

Traditional bisque uses a small amount of starch to emulsify and thicken. Common methods:

  • blend in parboiled rice (about 1/4 cup per 4 cups stock) until smooth
  • use a bread paste (stale bread soaked and blended)
  • finish with a light roux or a slurry of cornstarch if you prefer
Can I make lobster bisque ahead or freeze it?

Yes. You can make the stock ahead, refrigerate, and then finish the bisque when ready. The bisque (without the final cream) can be refrigerated for 1–2 days. For freezing, freeze the stock or the cooled bisque (without adding cream) for up to 2–3 months. Thaw gently and reheat, then whisk in cream just before serving.

What’s the best way to deglaze and flavor the bisque?

After sautéing the vegetables, add the lobster shells and cook briefly to release flavor. Deglaze with brandy or cognac and light-flame if safe to do so, then add white wine. This step concentrates the shell flavors and helps emulsify the final soup.

How do I finish and garnish lobster bisque for serving?

Finish by stirring in warm cream (do not boil after adding cream to avoid curdling). Add chopped lobster meat and adjust seasoning with salt, pepper, and a squeeze of lemon if desired. Garnish with a drizzle of cream, fresh chives or tarragon, and an extra piece of lobster meat.

What are common mistakes to avoid when making lobster bisque?
  • Overcooking or breaking down the lobster meat, making it tough
  • Not properly roasting or simmering the shells to develop depth
  • Not deglazing properly, which can leave the stock flat
  • Adding cold cream to a hot pot and causing curdling
  • Using low-quality stock or not straining the stock, resulting in a gritty texture
How can I adapt lobster bisque for dairy-free or gluten-free diets?

For dairy-free: substitute coconut cream or almond/cava milk blends and use olive oil instead of butter; keep the thickness with rice or bread, which are gluten-free if using rice. For gluten-free: ensure stock and any thickeners (like roux) are gluten-free; rice or bread-based thickeners can be replaced with gluten-free bread.

Serving tips: what to pair with lobster bisque?

Serve hot with crusty baguette slices or buttery croutons. A light green salad, a glass of chilled white wine (Sauvignon Blanc or Chardonnay), or a splash of extra cognac stirred in at the table can elevate the experience.

Introduction / Hook

Imagine the shiver of a sea breeze, the glittering sheen of a perfectly chilled shell, and the scent of butter melting into a gentle chorus of garlic and lemon. A single bite of lobster can carry you from a crowded coastal market to a sunlit terrace overlooking the ocean, where laughter echoes and every forkful feels like a small celebration. Lobster recipes aren’t merely meals; they are gateways to seaside memories, to summer evenings that stretch into velvet nights, to the sense that you’ve discovered something both elegant and deeply comforting. When you choose lobster, you’re choosing an experience—one that turns ordinary dinners into occasions and weeknights into feasts for the senses. The thrill lies not only in the meat itself but in the way you present it: the crack of the shell, the way the meat holds a kiss of heat and the bright kiss of citrus, and the way a well-chosen herb lifts the dish without shouting over its delicate sweetness. This collection of lobster recipes invites you to explore the many faces of this regal crustacean—from refined, classic preparations to bright, breezy coastal twists—so you can savor the ocean in every bite, no matter the season or setting.

In the pages ahead, you’ll discover a tapestry of lobster-inspired ideas designed to be both approachable for home cooks and enchanting for guests. Whether you’re planning a quiet weekend supper, a festive dinner with family, or a glamorous dinner party where you want to impress without overcomplicating the kitchen, these lobster-centric dishes offer a wealth of possibilities. We’ll wander through traditional favorites and modern reinterpretations, all anchored by the same truths: lobster pairs exquisitely with butter, citrus, herbs, and a touch of salt, and the most memorable lobster dishes are built on balance—where oceaniness meets richness, simplicity meets technique, and texture plays with tenderness. As you read on, let your imagination drift toward the coastline, toward a platter that gleams with pale pink and ivory meat, and toward the satisfying crack of the shell that announces a truly special bite. This is your invitation to cook with confidence, curiosity, and a dash of coastal glamour.

Whether you’re a long-time lobster lover or a curious newcomer, the recipes gathered here celebrate the spirit of lobster in all its versatility. From buttery, lemon-kissed preparations that give the meat a radiant gloss to lighter, herb-forward interpretations that let the lobster shine, you’ll find a spectrum of flavors and textures. The goal is simple: to help you recreate the magic of the sea in your kitchen—no matter where you are or how much time you have. So take a deep breath of that briny air and set your plan in motion. The lobster is ready, the kitchen awaits, and the heat of the pan promises that first, glorious mouthful that will make your senses sing.

The Story Behind the Dish

Lobster has long carried a dual aura in the culinary world: it is both a symbol of luxury and a beloved staple of seaside culture. In many coastal regions, fresh lobster has defined local markets, seasonal menus, and family celebrations for generations. The allure of lobster can be traced back to ancient and medieval times when crustaceans were a cherished resource in coastal communities, and as shipping and trade expanded, so did the reach of lobster into grand banquets and refined dining rooms. Over the centuries, the lobster’s wild sweetness, its firm texture, and its ability to take on a range of flavors—whether mellow with butter or bright with citrus—made it a canvas for chefs and home cooks alike.

Across the Atlantic, lobster traditions took shape in different forms. In New England, the lobster roll emerged as a quintessential summer staple—virtually a ritual: fresh cooked lobster meat tucked into a butter-toasted bun, often dressed lightly to preserve the lobster’s clean taste. In France, more indulgent preparations—think lobster in a creamy, wine-kissed sauce or treated to a delicate gratin—highlighted a different culinary sensibility: one that pairs opulence with restraint. In both cases, the essence is the same: pristine lobster meat, a respectful balance of fat and brightness, and a setting that invites leisurely savoring rather than hurried consumption. The dish you’re about to explore brings together these maritime whispers—the adventurous spirit of seaside markets, the comforting sway of butter and citrus, and the sense that cooking with lobster is, at its heart, an act of celebration.

Personal memories often flavor the way we approach lobster. For many families, the ritual starts with a trip to the docks or the fishmonger, followed by a lively kitchen scene where children help crack shells and adults share stories while the air fills with the smell of sizzling butter. Those memories inform the way we approach lobster recipes: with respect for the meat’s delicate sweetness, a love for bright acidity to cut through richness, and an appreciation for textural contrast—where succulent, yielding lobster meat meets a crisp green herb, or a crunchy, toasty edge on crusty bread. In this collection, you’ll find that same spirit of storytelling in every recipe: a chance to pass down favorite techniques, to experiment with new flavor pairings, and to create a moment that feels both timeless and freshly inspired.

Why You’ll Love This Recipe

  • Elegant yet approachable: Lobster has a luxurious aura, but the recipes here are designed for home cooks who want a chef-worthy result without daunting techniques.
  • Versatile for all seasons: Whether you’re craving a light citrus-forward dish in summer or a richer, comforting option in cooler months, there’s a lobster recipe for every mood.
  • Fast and simple elements that shine: The focus is on the lobster’s natural sweetness, with supporting flavors that enhance rather than overpower.
  • Impressive presentation: A well-plated lobster dish makes any table feel special—perfect for date nights, anniversaries, or celebratory dinners with friends and family.
  • Protein-packed and satisfying: Lobster provides a luxurious texture and a satisfying protein boost, making these dishes both nourishing and indulgent.
  • Customizable to dietary needs: Many of the concepts can be adapted for dairy-free, gluten-free, or lighter preparations by swapping ingredients and sauces.
  • Great for learning techniques: From selecting the right lobster to balancing flavors with citrus, herbs, and light fats, these recipes offer opportunities to refine your cooking instincts.

Flavor Profile & Texture

The hallmark of lobster is its bright, sweet meat—firm yet yielding, with a delicate brininess that carries the crispness of summer in every bite. When paired with butter, garlic, and lemon, the meat becomes a radiant centerpiece: the fat from the butter coats the mouth with a silky richness while the lemon lightens the palate, letting the natural sweetness shine through. Add fresh herbs—tarragon, chervil, parsley, chives—and you invite green, aromatic notes that feel almost seaside herb garden in a single mouthful.

Texture-wise, lobster offers a pleasing contrast: the shell provides a satisfying crack, exposing the tender meat within, which is then complemented by a crisp, lightly browned surface or a velvety sauce that clings to every strand. Sauces and accompaniments can range from a bright, citrusy reduction that sizzles with a sheen of gloss to a rich, velvety beurre blanc or a robust garlic butter that invites dipping and dunking. The balance is key: you want the dish to feel luxurious and indulgent, yet clean and bright enough to savor in long, lingering bites. The interplay of textures—soft, buttery meat with a slight chew, the crunch of fresh herbs or toasted bread, and the gentle silkiness of a well-made sauce—creates a symphony in your mouth that keeps you reaching for more without fatigue.

In seafood cooking, the concept of brightness is everything. The lobster’s sweetness can quickly become overshadowed by heaviness if the dish relies solely on rich fats. The recipes here cultivate a thoughtful balance: citrus acidity to punctuate richness, a touch of heat or pepper for depth, and herbs that add fragrance and lift. The result is a repertoire of lobster flavors that range from clean and ocean-forward to deeply comforting and luxurious, always anchored by the unmistakable personality of the lobster itself.

Occasions & Pairings

Where and when you enjoy lobster can elevate the eating experience as much as the dish itself. Here are ideal occasions and thoughtful pairings to consider as you plan menus and moments.

  • Holiday dinners and special celebrations: A glamorous centerpiece that impresses guests without requiring an entire restaurant-scale kitchen.
  • Weekend indulgence: A refined treat that feels like a hotel lounge moment, served with a glass of something crisp and sparkling.
  • Summer al fresco dinners: Light, citrus-bright preparations paired with corn on the cob, green salad, and crusty bread to soak up sauce.
  • Date nights and anniversaries: A romantic, accessible way to show care with a dish that looks and tastes special.
  • Family gatherings and tastings: A way to introduce lobster to younger palates or those new to shellfish with gentle, balanced flavors.

Pairing suggestions to complement lobster dishes include;

  • Wine: A bright, mineral white such as Chablis or a crisp Chardonnay; for lighter, citrusy preparations, a Sauvignon Blanc or a dry sparkling wine works beautifully. If you prefer red, opt for a light, peppery Pinot Noir with richer, butter-laden versions.
  • Side dishes: Grilled corn on the cob, a simple green salad with a lemon vinaigrette, garlic bread or a crusty baguette for the perfect dunking, and a light potato preparation to round out the meal.
  • LIBATIONS and desserts: A light sorbet or citrusy dessert to refresh the palate; a gentle Limoncello or sparkling water with a twist of lemon can be refreshing between bites.

Tips, Variations & Substitutions

Cooking with lobster invites creativity while respecting the delicate nature of the meat. Here are practical tips and variations to help you tailor dishes to your taste, dietary needs, or available ingredients.

  • Choose the lobster wisely: Fresh lobster or high-quality frozen lobster meat both work well. If using whole lobsters, look for bright shells and a clean, oceanic smell; if using meat, seek a firm, translucent texture with a pale pink or white color.
  • Herb and citrus balance: Fresh herbs and citrus zest are your friends. Tarragon, chives, parsley, and chervil offer brightness; lemon or lime introduces a tangy counterpoint to the richness.
  • Butter vs. dairy-free alternatives: Butter adds depth and silkiness; for a dairy-free version, use olive oil or a blend of olive oil with a starchy component like a white wine reduction to mimic body without dairy.
  • Gluten-free considerations: If a sauce or topping uses flour as a thickener, swap with a gluten-free option such as cornstarch or arrowroot to keep textures light and glossy.
  • Protein swaps and variations: If you can’t find lobster, you can adapt recipes using langoustines, jumbo shrimp, or a seafood medley. For a vegetarian or vegan nod, you can treat king oyster mushrooms as a “lobster” substitute in certain sauces with a robust, umami foundation and citrus notes to mimic brightness.
  • Regional twists: Incorporate fennel or tenné (tarragon-based) notes for a French-inspired finish; or add smoky paprika and roasted garlic for a Spanish-leaning version.
  • Make it lighter or richer: For a lighter, more citrus-forward version, lean on lemon, white wine, and herbs; for a richer profile, deepen the sauce with a touch of cream or a butter-based emulsion, ensuring balance so the lobster remains the star.

Storage & Make-Ahead Ideas

Fans of seafood know that timing matters. Lobster is best enjoyed fresh, but there are thoughtful ways to store and reuse leftovers so you don’t waste a precious ingredient or flavor. Here are practical ideas to help you plan and maximize your lobster dishes.

Leftover lobster meat can be stored in the refrigerator for a couple of days if kept in a well-sealed container. For longer storage, cooked lobster meat can be frozen, ideally within a day of cooking, and kept for up to several months. When ready to enjoy, defrost gently in the refrigerator overnight or use a cold-water method if you’re in a hurry, then reheat carefully to preserve tenderness; overheating can make the meat tough.

To make ahead for a special occasion, consider preparing components that store well in advance—such as a bright lemon-butter sauce, herb blends, or a light seafood stock (if you’re crafting a dish that calls for it). You can assemble the dish close to serving time, adding the lobster at the last moment to preserve its delicate texture. If you’re pairing with a starchy side like roasted potatoes or a bakery loaf, you can complete the baking or roasting steps ahead of time and finish with a quick, gentle reheat just before plating.

For sauces and dressings, making them a day ahead can deepen flavors. A citrus-herb reduction or a light, emulsified butter sauce often benefits from resting; keep it refrigerated and rewarm gently, whisking as needed to restore gloss and cohesion. If you’re serving a dish that features raw or semi-cooked components, ensure proper chilling and handle with care to preserve both flavor and safety.

Fun Facts & Trivia

Delightful tidbits and surprising notes about lobster can add flavor to your table talk as you serve. Consider these morsels of trivia as you plan meals or host guests:

  • Color changes: Lobsters are typically blue or dark when alive, but the moment they’re cooked, their shell turns bright red due to a pigment called astaxanthin; the shell’s other pigments are masked until heat releases them.
  • Age and size variety: Lobsters grow throughout their lives, and larger lobsters tend to have more meat in their claws—a prized feature for many cooks and eaters who want substantial bites.
  • Claws and meat distribution: The two claws often differ in texture; the crusher claw provides chunkier meat, while the pincer claw yields a more delicate, fibrous texture. A well-prepared dish will celebrate the unique characteristics each claw offers.
  • Historical cuisine: The “thermidor” style—a refined French preparation—revolves around a creamy, wine-laced sauce that envelops lobster meat before it’s baked briefly under a crust or broiled to finish. The name itself evokes a sense of luxury and technique developed through generations of French culinary craft.
  • Sea-to-table storytelling: In many coastal communities, lobster is more than food—it can be a daily rhythm, a seasonal heartbeat, and a memory shared with neighbors and loved ones who gather around boiling pots, sunny decks, and candlelit tables to celebrate togetherness.

With these sections, you have a thorough and inviting guide to lobster recipes that honors the meat’s natural brilliance while offering a spectrum of ideas to suit many occasions. This content is designed to be easily navigated, SEO-friendly, and rich with sensory language that invites readers to imagine, plan, and cook with confidence. Whether you’re dreaming of a simple lobster dinner that feels like a vacation or a sophisticated feast that turns an ordinary night into something memorable, these sections work together to inspire, educate, and delight.

Ingredients

Lobster Base

    – 2 lobster tails (8 oz each), thawed if frozen, shells intact and tails split lengthwise to expose meat
    → The main protein for this dish. Splitting the tails allows the meat to rest over the shell for even heat transfer and faster cooking. If using frozen tails, thaw completely in the refrigerator or under cold running water before prepping.
    – 4 tablespoons unsalted butter, melted
    → Provides rich, glossy flavor and serves as the primary sauce base. Melting ensures it can be brushed evenly onto the lobster meat and mixed smoothly with aromatics. Use unsalted butter to better control seasoning.
    – 2 cloves garlic, finely minced
    → Delivers a foundational savory aroma that infuses the butter quickly. Finely mince to maximize surface area for quick flavor release; if you prefer milder garlic, you can gently sauté it in a teaspoon of butter before adding to the sauce.
    – 1 tablespoon fresh lemon juice
    → Adds bright acidity to balance the richness of the butter and enhances the freshness of the seafood. Freshly squeezed juice yields a cleaner, more vibrant flavor than bottled varieties.
    – 1/2 teaspoon lemon zest (optional)
    → Intensifies citrus aroma by releasing essential oils from the zest; grate only the yellow part of the rind to avoid bitter white pith. Use if you want an extra zing.
    – Salt to taste
    → Essential for highlighting the lobster’s natural sweetness and to balance the butter. Start with a small amount and adjust after tasting the sauce; if your butter is salted, reduce the salt accordingly.
    – Freshly ground black pepper to taste
    → Adds a subtle peppery bite that complements seafood. Grind just before use for maximum aroma; adjust to your preferred heat level.
    – 1/4 cup dry white wine (optional)
    → Deglazes the pan and adds dimension and acidity to the sauce. Let it reduce by half to concentrate flavors. If avoiding alcohol, substitute with seafood stock or extra lemon juice.
    – 1 teaspoon neutral oil for brushing shells (optional)
    → Helps prevent sticking and promotes even browning when finishing under heat. Use sparingly and wipe away any excess to avoid greasy texture.

Lemon-Butter Finish and Garnish

    – 2 tablespoons chopped fresh parsley
    → Fresh parsley provides a vibrant green color and a light, herbal note. Chop finely so it distributes evenly and doesn’t clump when sprinkled on the dish after cooking.
    – Pinch of paprika or red pepper flakes (optional)
    → Adds a touch of color and a subtle warm note without overpowering the lobster’s delicate flavor. Use sparingly to keep the focus on the lobster.
    – Lemon wedges for serving
    → Offer an extra citrus brightness for guests who want a stronger lemon kick at the table. Place on the side for easy squeezing.
    – 1 teaspoon chopped fresh chives (optional)
    → Provides a mild oniony lift and a pop of green; sprinkle just before serving to preserve flavor and texture.
    – Extra melted butter for dipping (optional)
    → A traditional finishing touch for dunking the lobster meat; serve warm in a small dish alongside the plate. Use unsalted butter if you want full control over saltiness.

Instructions

  • Preheat your oven to 425°F (218°C) and line a rimmed baking sheet with parchment paper or a silicone mat; position a small bowl of the lemon-butter sauce nearby so you can baste the lobster tails during cooking.
    → A hot, prepared surface ensures quick, even cooking and makes cleanup easier by preventing sticking and scorching of the butter.
  • Pat the thawed lobster tails dry with paper towels to remove surface moisture before cooking, which helps the meat brown and the butter glaze adhere better.
    → Moisture on the surface turns to steam in the oven, preventing nice browning and causing the sauce to wash away.
  • Arrange the tails on the prepared sheet with the meat side up and the shells curved away from each other; brush the shells lightly with neutral oil to prevent sticking and to encourage even browning around the edges.
    → Oil on the shell conducts heat more evenly and helps render a subtle gloss without oil pooling on the meat.
  • In a small saucepan, gently melt the 4 tablespoons unsalted butter over low heat, then add the finely minced garlic and swirl until fragrant but not browned; remove from heat to keep the aroma bright.
    → Low, steady heat draws garlic flavor into the butter without scorching, which would impart a bitter taste.
  • Whisk in 1 tablespoon fresh lemon juice and, if using, 1/2 teaspoon lemon zest, then season with salt and freshly ground black pepper; if you are using white wine, pour in 1/4 cup now and simmer until reduced by about half.
    → The acid brightens richness, zest intensifies citrus aroma, and reduction concentrates flavors for coating the lobster evenly.
  • Brush the exposed lobster meat generously with the warm lemon-butter mixture, reserving a portion to finish the dish; ensure every ribbed area is coated so the butter can baste during cooking.
    → Coating the meat creates a glossy glaze, protects against drying, and distributes flavor uniformly as the tails heat through.
  • Transfer the sheet to the oven and bake for 8–12 minutes, depending on tail size; rotate the pan midway to promote even browning and check for doneness by looking for opaque, firmly set meat that is just shy of not raw.
    → Lobster cooks quickly; turning ensures consistent heat exposure and prevents uneven pockets of underdone meat near the center.
  • If you desire deeper color and a slightly crustier exterior, switch oven to broil for 30–60 seconds at the end while watching closely to prevent burning.
    → High, direct heat finish adds attractive color and texture without overcooking the interior if kept brief.
  • Remove the tails from the oven, brush with any remaining lemon-butter sauce, and rest the meat for 2–3 minutes to allow carryover heat to finish gentle cooking and to reabsorb moisture.
    → Resting stabilizes the juices and ensures the meat remains tender and juicy when cut into.
  • Scatter 2 tablespoons chopped fresh parsley over the lobster and, if desired, a pinch of paprika or red pepper flakes for a subtle warm note and color; arrange lemon wedges on the side for bright bursts of citrus at the table.
    → Fresh herbs brighten the plate, paprika adds color, and lemon wedges empower guests to customize acidity to taste.
  • Serve with extra melted butter on the side for dipping, allowing guests to deepen richness if they wish; offer chopped fresh chives on top just before serving for a final herb lift.
    → Dipping butter is a traditional finish that enhances mouthfeel, while chives add a fresh oniony note and color.

Notes

“These lobster tails with lemon-butter finish are luxurious, quick to cook, and pair beautifully with bright citrus and a rich butter sauce.”

For best results, thaw tails completely, pat dry, and split them lengthwise as described in the ingredients so the meat sits over the shell for even heat. Keep the shells intact to help insulate the meat and make serving elegant.

  • Prepare the lemon-butter base: In a small saucepan, whisk together the melted butter, minced garlic, fresh lemon juice, and lemon zest (if using). Season with salt and freshly ground black pepper. If you’d like a subtle complexity, simmer in 1/4 cup dry white wine until reduced by half; or substitute with seafood stock or additional lemon juice to keep it alcohol-free.
  • Shell prep and oil: Brush the shells lightly with neutral oil (optional) to prevent sticking and promote even browning. This also helps the exposed meat develop a glossy, appetizing finish.
  • Cooking method: You can bake, broil, or grill. For oven-broiling, preheat to 425°F (220°C). Place tails on a baking sheet, meat side up, shell-side down. Brush with the lemon-butter sauce and baste halfway through cooking. Bake/broil for about 6–8 minutes, depending on tail size, until the meat is opaque and just cooked through. If grilling, cook cut-side up for 4–5 minutes, then finish shell-side down for 1–2 minutes and baste.
  • Basting and finishing: Re-toss the meat with a little extra warm lemon-butter mid-cooking to keep it moist. After cooking, drizzle a touch more sauce and sprinkle with finely chopped parsley and a pinch of paprika or red pepper flakes for color and a gentle warmth. Serve with lemon wedges on the side for extra brightness and a few chopped chives if you like a mild onion note.
  • Optional butter depth: Keep extra melted butter on the side for dipping to enhance richness at the table; use unsalted butter if you want precise salt control.
  • Gluten-free note: This dish is naturally gluten-free, but check that wine, stock, and any seasonings are gluten-free if you have gluten intolerance. If you prefer not to use wine, use seafood stock or additional lemon juice instead.
  • Make-ahead and storage: The sauce can be prepared a few hours ahead and gently warmed just before serving. Leftovers refrigerate well for 1–2 days; reheat gently to avoid breaking the butter emulsion.
  • Pairings and presentation: Serve with a simple green salad or steamed vegetables and gluten-free crusty bread for mopping up sauce. A bright white wine like Sauvignon Blanc or a light sparkling wine pairs nicely with the citrusy, buttery flavors.

Tips

  • Thaw and prep properly: If your lobster tails are frozen, thaw completely in the refrigerator or under cold running water. Pat dry before splitting to expose the meat for even cooking and better sauce adhesion.
  • Split tails correctly: Split the tails lengthwise to expose the meat, keeping the shells intact. This creates a natural bed for the meat to rest on and helps heat transfer evenly from the shell to the meat for a more uniform cook.
  • Work with the butter base: Use unsalted melted butter as your sauce base. Keep the heat gentle to prevent browning or separating; a glossy, emulsified finish comes from patience and gentle simmer rather than a hard boil.
  • Aromatics timing: Add minced garlic to the melted butter and cook briefly just until fragrant—about 30–60 seconds. Don’t let it brown, or it’ll turn bitter and overpower the lobster’s delicate flavor.
  • Brighten with lemon: Add fresh lemon juice to the sauce for acidity that cuts richness and enhances seafood brightness. If using lemon zest, grate only the yellow zest to avoid bitterness from the pith; zest can be added near the end for fresh aroma.
  • Seasoning fundamentals: Salt the sauce gradually, tasting as you go. Remember your lobster shells and any salt in the butter will contribute to overall seasoning, so adjust accordingly. Finish with freshly ground black pepper to taste.
  • Wine option and reductions: If using dry white wine, add it to the sauce and let it reduce by half to concentrate flavors. If avoiding alcohol, substitute with seafood stock or extra lemon juice for acidity.
  • Shell brushing tip: If you plan to finish the tails under heat, brush shells lightly with neutral oil to prevent sticking and promote even browning. Wipe away any excess to avoid greasiness.
  • Managing emulsion: If the sauce starts to separate, whisk in a tiny splash of cold water or a little extra lemon juice to re-emulsify. Maintain a gentle simmer and avoid high heat.
  • Finish options: For a luxurious finish, simmer the tails briefly in the butter sauce then finish under a hot broiler or on a hot grill for a minute or two until the meat is just opaque and lightly caramelized at the edges.
  • Sauce vs meat timing: Keep the lobster meat hot while finishing the sauce; spoon the warm lemon-butter over the meat or pour it onto the plate to ensure every bite has glossy, buttery coating without cooling the lobster.
  • Herb and garnish strategy: Use fresh parsley, chives, and a light sprinkle of paprika or red pepper flakes for color and a gentle aroma. Sprinkle chopped parsley just before serving to preserve bright color and fresh flavor.
  • Serving and dipping: Offer extra melted butter on the side for dipping. Provide lemon wedges for guests who want a stronger citrus kick.
  • Make-ahead and storage: Sauce can be prepared up to a day ahead and gently reheated over low heat, whisking to re-emulsify. Fresh lobster is best enjoyed the day it’s cooked; store cooked meat separately if you have leftovers.

FAQ

How do I boil a whole lobster?

Fill a large pot with water and salt it generously (about 2–3 tablespoons per gallon). Bring to a rolling boil. Grasp the lobster from the back and lower it headfirst into the pot. Return to a boil and cook:

  • 1 lb lobsters: about 8–10 minutes
  • 1–1.5 lb lobsters: about 9–12 minutes
  • 1.5–2 lb lobsters: about 12–15 minutes
  • Larger lobsters: 15–20 minutes

When done, remove with tongs and let rest a few minutes before cracking the shell.

How do I steam lobster instead of boiling?

Place a steamer insert in a large pot with about 2 inches of water. Bring to a boil, add the lobsters, cover, and steam until cooked:

  • About 8–10 minutes per 1 lb
  • 12–15 minutes for larger lobsters

The shell will be bright red and the meat opaque when done.

How can I tell if lobster is cooked properly?

Look for:

  • The shell turning bright red
  • The meat turning opaque white or pink
  • An internal temperature of 140–145°F (60–63°C)
How do I crack and extract lobster meat safely?

Let the lobster cool slightly. Use a lobster cracker or heavy kitchen shears to crack claws and tails. Twist off the claws, crack the shells, and pry out the meat. For the tail, cut along the underside to loosen the meat and pull it out. Use a small fork or pick for the legs and body meat. Optional: reserve the tomalley or discard it if you prefer.

How should I prepare lobster tails?

Thaw frozen tails fully if needed. Preheat oven to 425°F (220°C). Using kitchen shears, cut the top of the shell down the center to the tail fin, then gently pry the meat up and over the shell so it sits on top. Brush with melted butter and lemon if desired. Cooking times (varies by size):

  • 4–6 oz tails: 8–10 minutes
  • 6–9 oz tails: 10–12 minutes
  • 9–12 oz tails: 12–14 minutes

Alternatively, broil for 4–6 minutes until the meat is opaque and lightly browned.

What is a quick, tasty lobster dish I can start with?

Try a simple Lobster Garlic Butter Pasta:

  • Sauté minced garlic in butter until fragrant
  • Add chopped lobster meat and a splash of lemon juice
  • Toss with cooked pasta, fresh parsley, and grated Parmesan
  • Season with salt and pepper to taste
How do I make lobster bisque from scratch?

A classic lobster bisque uses shells to build stock, then creamy, smooth soup base:

  • Sauté lobster shells with onion, carrot, celery, and tomato paste
  • Deglaze with brandy or dry sherry (flambé if desired)
  • Simmer in water or broth for 30–45 minutes, strain, then return to pot
  • Puree part of the liquid, whisk in cream or milk, season with salt, pepper, and a pinch of paprika or cayenne
How do I make classic lobster rolls?

Use warm, buttered rolls and lobster meat dressed lightly with mayo, lemon juice, chopped celery, salt, and pepper:

  • Gently mix lobster meat with mayo and seasonings
  • Fill lightly toasted buns and serve with a squeeze of lemon
How should I store and freeze lobster meat?

Proper handling keeps flavor and texture:

  • Cooked lobster meat can be refrigerated in an air-tight container for up to 3–4 days
  • Freeze cooked lobster meat for 2–3 months in a freezer-safe container or bag
  • Thaw frozen lobster in the refrigerator overnight or under cold running water before use
Can I substitute frozen lobster meat in recipes?

Yes, but plan for a slightly shorter cooking time since frozen meat releases moisture as it thaws. Pat dry if needed before tossing into hot dishes to prevent excess water.

What sides and beverages pair best with lobster?

Classic pairings include:

  • Drawn butter and lemon wedges
  • Grilled corn on the cob or boiled potatoes
  • Light, crisp white wines like Chardonnay or Sauvignon Blanc, or a dry sparkling wine
  • A simple green salad to balance richness

Introduction / Hook

Imagine cracking open a glistening lobster tail, the shell giving way to pristine, snow-white meat that yields with a gentle press. The aroma unfurls in the air like a sunlit breeze off the sea: a seductively rich, silky finish that clings to every bite, a whisper of citrus and a subtle herbaceous lift that makes the senses sing. This lobster tail recipe isn’t just a dish; it’s an invitation to slow down, savor the moment, and celebrate the simple luxury of seafood that tastes of the coast. It’s a celebration you can recreate at home without the fuss of a five-star kitchen, yet it delivers the same sense of occasion—an experience that feels special enough for a date night, yet approachable enough for a weekend family dinner. The moment you glimpse the shell turning pinkish-gold under heat and hear a soft sizzle, you’ll know you’re in for something memorable.ox

The Story Behind the Dish

Lobster has long been a marker of coastal abundance and maritime hospitality. Across coastal towns, the first glimpse of a glimmering lobster tail signals a meal that bridges the salt of the sea with the warmth of the hearth. In many traditions, tails are shared during festive gatherings, weddings, and milestone celebrations, where the elegance of the crustacean is matched by the care with which it’s prepared. The practice of presenting lobster in a way that highlights the tenderness of the meat—without drowning it in overpowering flavors—speaks to a philosophy of restraint paired with luxury. This recipe draws on that heritage: a technique that respects the lobster’s delicate sweetness while accentuating it with a light, glossy finish and a gentle kiss of aromatics. The result is a dish that feels timeless, yet fresh, capable of transporting a dinner table to a seaside bistro even if you’re dining in a cozy apartment kitchen. It’s the kind of dish that prompts stories—of summers spent by the water, of celebrations with loved ones, and of the quiet joy found in perfectly cooked seafood shared around a well-set table.

Why You’ll Love This Recipe

  • Elegant, restaurant-quality flavor at home: tangy brightness meets a rich, velvety finish without requiring a mountain of ingredients or elaborate technique.
  • Versatile cooking approach: whether you prefer a quick broil, a gentle bake, or a quick grill, the method keeps the lobster tender and the texture pristine.
  • Impressive presentation with minimal effort: the result looks sophisticated on the plate, making any weeknight feel like a special occasion.
  • Fast cooking time: lobster tails adapt quickly, so you can have a stunning dish on the table in a pinch—perfect for weeknights or spontaneous celebrations.
  • Customizable flavors: you can tailor the aromatics and finishing notes to suit your preferences or dietary needs, from clean and citrusy to rich and herbaceous.

Flavor Profile & Texture

The meat of a lobster tail is famously tender and subtly sweet, with a texture that’s firm enough to hold its shape yet Jell-O-soft where the fibers pull apart in strands. When cooked properly, it remains juicy, moist, and almost buttery in its mouthfeel, even without any added richness. The outer shell provides a crisp, caramelized contrast that anchors the dish, while the inner meat glides through with a delicate, saline finish that hints at the ocean but doesn’t overwhelm. The finishing notes of this recipe bring a glossy, silky mouthfeel that lingers on the palate—the kind of finish that makes the last bite feel like the first bite again. Aromatics contribute a gentle warmth rather than a sharp bite, offering a balanced complexity: a faint breath of something herbaceous, a whisper of citrus tang, and a soft, almost nutty underpinning that ties everything together. The overall impression is refined and comforting at once—sophisticated enough for a celebration, yet intimate enough for a cozy dinner at home.

In terms of texture, anticipate a pleasant contrast: a lightly crisp edge where the meat meets the shell, giving way to the tender, luscious flesh in the center. The final flourish, a satin-smooth finish, makes each bite feel luxurious without being heavy. The dish thrives on balance—the bright, clean lift that cuts through the richness, the tender bite that invites you to linger, and the subtle aftertaste that keeps you reaching for another mouthful.

Occasions & Pairings

This lobster tail recipe shines in a variety of settings, from intimate weeknight dinners to festive gatherings. It’s equally at home as the centerpiece of a romantic date night, a special family celebration, or a guest-worthy addition to a holiday menu. Its versatility also makes it a welcoming star for seasonal menus—think spring freshness with bright citrus accents, or a luxurious autumn treat that pairs beautifully with roasted vegetables and crisp greens. For beverage pairing, a chilled, crisp white wine with good acidity—think a bright Chardonnay or a dry Sauvignon Blanc—helps cut through the richness and keep the dish feeling light on the palate. If you prefer bubbles, a brut sparkling wine or a light, citrus-forward sparkling wine can elevate the experience without overpowering the seafood’s sweetness. When it comes to sides, consider simple, high-contrast accompaniments: a lemony herb quinoa or a light, peppery arugula salad; roasted asparagus or haricot verts; or a small serving of velvety mashed potatoes to cradle the succulent meat. For a complete seafood-forward menu, include a light soup or a garden-driven starter and a fresh, citrusy dessert to finish on a bright note.

Tips, Variations & Substitutions

  • Cooking methods: The technique works well across several heat sources. You can broil for a crisp, caramelized surface; bake for even, gentle cooking; or grill to pick up a smoky finish and those appetizing grill marks. Each method highlights the lobster’s natural sweetness in a slightly different way, so choose based on your equipment and mood.
  • Flavor twists: If you love a brighter finish, lean into citrus-inspired notes with a light, zesty finish. For a richer profile, introduce a subtle, herb-forward aroma that builds a gentle complexity without overwhelming the meat’s sweetness. A touch of warmth from mild spices can be added sparingly for a cozy, comforting edge during cooler months.
  • Dietary adaptations: This approach can be translated into lighter or plant-forward options by using a similar finishing technique on a robust plant-based protein or a hearty vegetable roast with a similar glossy finish. If a dairy-free version is desired, focus on a glossy, oil-based emulsion that carries all the aromatics without dairy richness.
  • Regional twists: For a nod to coastal regions, incorporate regional herbs and citrus varieties that are commonly used in your area. A Southwestern-inspired version might lean into a citrus and herb backbone with a hint of smoky paprika, while a Mediterranean twist could lean on olive oil, garlic notes, and a touch of saffron’s aroma.
  • Make it your own: If you’re cooking for a crowd with varying tastes, offer a couple of finish options at the table—one light and citrus-forward, another with a richer, more decadent touch—so guests can choose their preferred profile.

Storage & Make-Ahead Ideas

Lobster meat is best enjoyed freshly cooked for peak texture and flavor. If you have leftovers, store them promptly in the refrigerator in an airtight container. Consume within a day or two for best quality. Reheating should be done gently; a quick warm-up in a low-heat oven or a gentle, indirect reheating on a skillet with a light amount of the finishing liquid helps preserve moisture and texture. If you anticipate making ahead for a celebration, consider preparing the shell portions in advance and finishing them with a light application of the glossy sauce just before serving. For entertaining, you can set up a small, elegant crustacean station where guests crack and savor the lobster themselves; this not only reduces the final plating workload but also elevates the dining experience with a sense of shared delight. If you plan to freeze lobster tails, do so only if they are precooked, and remember that freezing and thawing can affect texture; plan accordingly to ensure the best possible final result when you reheat.

Fun Facts & Trivia (Optional)

  • Lobster was once considered so common and abundant that it was often fed to prisoners in colonial times, a far cry from today’s luxury impression. Over the centuries, the perception of lobster transformed into a delicate indulgence enjoyed in refined settings.
  • In some coastal traditions, lobster tails are celebrated for their symbolism of renewal and abundance, making them a popular choice for milestone celebrations and seasonal feasts.
  • The delicate white meat in lobster tails becomes wonderfully tender when heated just to the right temperature—overcooking can lead to a rubbery texture, while undercooking can leave the meat overly firm and less flavorful. Achieving the perfect balance is the hallmark of a seasoned cook’s touch.
  • Culinary scientists often highlight the way heat triggers the proteins in lobster meat to denature, resulting in a melt-in-the-mouth texture that’s simultaneously firm and yielding—a rare combination that explains the dish’s enduring appeal.

Ingredients

Lobster Tail Prep

    – 2 lobster tails (6-8 oz each), thawed if frozen; split the shell lengthwise and gently lift the meat on top of the shell for even cooking
    → Splitting and lifting the meat allows for even heat distribution and easy basting with the garlic butter, while presenting a neat, restaurant-style presentation. If tails are frozen, thaw completely in the refrigerator and pat dry before preparing.
    – 1 tablespoon olive oil (optional, for brushing on shell)
    → A light brushing of oil helps prevent sticking and promotes even browning on the shell during broiling or baking; use sparingly to avoid greasing the meat.

Garlic Butter Sauce

    – 4 tablespoons unsalted butter, melted
    → The butter is the flavor backbone of the sauce; melted butter ensures a smooth, cohesive base that can be easily whisked with aromatics to coat the lobster meat.
    – 2 cloves garlic, minced
    → Freshly minced garlic infuses the sauce with robust aromatics; mince finely to distribute flavor evenly and avoid large garlic pieces that may burn.
    – 1 tablespoon fresh lemon juice
    → Brightens the richness of the butter and enhances the natural seafood flavor; fresh juice yields a cleaner citrus note than bottled.
    – 1 teaspoon lemon zest (optional)
    → Adds an intense citrus aroma that complements the lobster; zest before juicing to capture essential oils and avoid bitterness from the white pith.
    – 1/4 teaspoon salt, or to taste
    → Enhances overall flavor and balances the butter’s richness; adjust after tasting the sauce.
    – 1/8 teaspoon freshly ground black pepper
    → Subtle heat and depth that pairs well with seafood; freshly ground pepper provides more aroma than pre-ground.
    – 1 tablespoon dry white wine or seafood stock (optional)
    → Adds depth and a touch of acidity; if used, simmer 1–2 minutes to reduce before whisking in butter for a glossy finish.

Finish and Serve

    – Fresh parsley, chopped, 2 tablespoons
    → Provides a bright green contrast and fresh herbal note; chop finely and sprinkle just before serving to preserve color and aroma.
    – Lemon wedges, for serving
    → Offer a final burst of acidity; guests can adjust brightness to taste by squeezing over before eating.

Optional Add-ins

    – Breadcrumbs (panko) mixed with 1 tablespoon melted butter, 2 tablespoons total
    → A light, crisp topping adds texture; sprinkle over the lobster during the final broil for a delicate, golden crust.
    – Pinch of paprika or Old Bay seasoning
    → A small amount of spice and color that pairs nicely with seafood; start with a pinch and adjust to preference.

Instructions

  • Thaw your lobster tails completely if frozen, placing them in the refrigerator overnight; pat dry with paper towels before prep.
    → Thawing ensures even cooking and prevents excess steam from moisture on the shell; drying helps the butter and seasonings adhere for a better crust and flavor development.
  • Preheat your broiler to high (approximately 500°F / 260°C) and position the rack about 6 inches from the heat source; line a rimmed sheet pan with foil or parchment for easy cleanup and optimal heat transfer.
    → High, direct heat yields a quick, even char and vibrant color on the shell and meat; lining the pan prevents sticking and makes cleanup effortless.
  • Using kitchen shears, cut along the center of the back of each lobster tail from the open end toward the tail but stop just before the tail fan; gently spread the shell apart and lift the meat over the shell so it sits on top; press down lightly to rest.
    → This split-and-lift technique exposes the meat for even heat, allows the butter to baste directly onto the flesh, and creates the classic restaurant presentation where the meat fans over the shell.
  • Lightly brush the exposed shell with olive oil using a small pastry brush, applying only to the shell and not the meat.
    → A thin oil coating on the shell promotes browning and prevents sticking to the pan, while oil on the meat can hinder browning and texture.
  • Arrange the tails on the prepared sheet pan with the meat resting on top of the shell; keep them curled as needed but avoid overlap so each tail receives direct heat.
    → Proper spacing ensures uniform cooking and allows the garlic butter to coat every piece evenly, resulting in consistent flavor and color.
  • Make the garlic butter sauce: In a small saucepan over low heat, melt 4 tablespoons unsalted butter until just fluid; add 2 minced garlic cloves and simmer 1–2 minutes until fragrant but not browned.
    → Gentle heating releases garlic aroma without turning it bitter; melting butter first ensures a smooth, cohesive base for emulsification with aromatics.
  • Whisk in 1 tablespoon fresh lemon juice, 1 teaspoon lemon zest (optional), 1/4 teaspoon salt, and 1/8 teaspoon freshly ground black pepper; if using, stir in 1 tablespoon dry white wine or seafood stock and simmer 1–2 minutes to reduce slightly.
    → The lemon brightens the richness, while the wine or stock adds depth; reducing concentrates flavors and gives the sauce a glossy, clingable texture.
  • Remove sauce from heat and keep warm until ready to baste; if it begins to separate, whisk vigorously to return to a smooth emulsion.
    → A cohesive emulsion ensures the sauce coats the lobster evenly without oily separation, producing a silky finish.
  • Brush or spoon a portion of the warm garlic butter over the exposed lobster meat, turning the tails slightly to coat all sides; reserve any remaining sauce for finishing.
    → Even coating guarantees consistent flavor and moist meat; basting during cooking helps prevent drying and builds a luscious finish.
  • For optional breadcrumbs topping: in a small bowl mix 2 tablespoons panko breadcrumbs with 1 tablespoon melted butter and a pinch of paprika or Old Bay; set aside.
    → This light crust adds texture and color; the butter helps the crumbs brown and adhere during the final moments of broiling.
  • Broil the lobster tails until the meat is opaque and just firm to the touch, 8–12 minutes total depending on tail size; rotate the pan halfway to promote even cooking.
    → Doneness is indicated by an opaque, pink-white meat; undercooking results in a soft texture, while overcooking can make the meat tough.
  • During the final 1–2 minutes of cooking, if using breadcrumbs, sprinkle the breadcrumb mixture on top and continue broiling until golden; watch closely to prevent burning.
    → The quick high-heat finish crisps the topping and adds an appealing contrast of texture without compromising the lobster meat.
  • Remove the pan from the oven; spoon any remaining garlic butter over the meat for a final glaze; let the lobster rest 2 minutes to reabsorb juices and set the butter.
    → Resting relaxes the proteins, redistributes moisture, and ensures a juicy bite with a glossy finish.
  • Sprinkle fresh parsley over the lobster tails and serve with lemon wedges on the side; the parsley adds color and a fresh herbal note, while the lemon offers a bright finish.
    → The final garnish enhances aroma and appearance, and the lemon lets guests adjust brightness to taste for a balanced, elegant presentation.

Notes

“These lobster tails are prepared by first thawing completely if frozen and patting dry, then splitting the shell lengthwise and gently lifting the meat onto the shell for an even cook and a restaurant-style presentation. Brush the exposed shell lightly with olive oil to prevent sticking and help with browning. For the garlic butter sauce, whisk together 4 tablespoons melted unsalted butter, 2 minced garlic cloves, 1 tablespoon fresh lemon juice, and 1 teaspoon lemon zest (optional); season with 1/4 teaspoon salt and 1/8 teaspoon freshly ground black pepper, and add 1 tablespoon dry white wine or seafood stock if you like a touch of acidity. Simmer 1–2 minutes to blend, then whisk in a bit more butter for a glossy finish. Broil or bake the lobster tails on a lined sheet pan, about 6–8 minutes, until the meat is opaque and just cooked through; baste once or twice with the sauce during cooking for maximum flavor. Finish with 2 tablespoons chopped fresh parsley and lemon wedges for squeezing at the table. Optional add-ins include a light breadcrumb topping: combine breadcrumbs (panko) with 1 tablespoon melted butter and a pinch of paprika or Old Bay, sprinkle over the tails during the final broil for a delicate golden crust. For a gluten-free option, omit the breadcrumbs or use certified gluten-free breadcrumbs. If you prefer a lighter version, reduce the butter slightly and increase stock or lemon juice to maintain moisture and brightness. Leftovers can be stored in an airtight container in the fridge for 1–2 days and reheated gently; any extra sauce can be warmed over low heat with a splash of stock or water to loosen. Always taste and adjust salt after the sauce has combined with the lobster, and serve with extra lemon for brightness. A crisp white wine, like Sauvignon Blanc, pairs beautifully with this dish.”

Tips

Tips for Perfect Lobster Tail with Garlic Butter

  • Thaw and prep: If tails are frozen, thaw completely in the refrigerator (allow ~24 hours for typical 6–8 oz tails). Pat dry before preparing to ensure cleaner separation from the shell and better browning.
  • Shell prep and presentation: Split the shell lengthwise using sharp kitchen shears, from the base to the tip. Gently lift the meat onto the shell so it sits on top—this helps with even heat distribution and creates a restaurant-style presentation. Keep the meat attached at the base for stability during cooking.
  • Oil on the shell: Brush a light layer of olive oil on the outside of the shell to promote even browning and prevent sticking. Avoid coating the lobster meat heavily; you want the butter to flavor the meat, not slip off.
  • Meat moisture: After splitting, pat the lobster meat dry with paper towels. Extra moisture can create steam and prevent browning, especially under high heat.
  • Butter sauce foundations: Melted butter forms the base of the sauce—keep it warm but not bubbling vigorously. Whisk in minced garlic, citrus (juice and zest), salt, and pepper off heat, then rewarm gently before finishing. If using optional wine or stock, simmer briefly to reduce before adding butter for a glossy finish.
  • Flavor balance: Fresh lemon juice brightens the richness; add zest before juicing to capture essential oils. Taste the sauce and adjust salt at the end, since the butter can mellow the saltiness.
  • Cooking timing and doneness: For 6–8 oz tails under a hot broiler, expect about 6–10 minutes total, depending on heat and tail size. The lobster meat should be opaque and firm to the touch; avoid overcooking, which makes it tough.
  • Basting technique: Brush the lobster meat with garlic butter 2–3 times during cooking to build flavor and keep the meat moist. Reserve a small amount of sauce for finishing and table service.
  • Crust option: If using breadcrumbs for a light crust, mix 1 tablespoon melted butter with 2 tablespoons breadcrumbs and a pinch of paprika or Old Bay. Sprinkle over the lobster during the final 1–2 minutes of broiling and watch closely to prevent burning.
  • Herbs and garnish: Finish with chopped fresh parsley for color and a fresh aroma. Serve with lemon wedges for guests to add brightness to taste at the table.
  • Make-ahead and storage: Sauce can be prepared a day ahead and gently reheated. Leftover lobster can be stored, then reheated gently in a low oven with a little extra melted butter to re-moisten the meat.

FAQ

What ingredients do I need for a simple lobster tail recipe?
  • Lobster tails (1–2 per person)
  • Unsalted butter, melted (about 2–4 tablespoons per tail)
  • Garlic, minced (1–2 cloves per tail)
  • Lemon juice (1 teaspoon per tail)
  • Salt and freshly ground black pepper
  • Optional: paprika for color, chopped parsley for garnish
How do I thaw lobster tails safely?

Thaw frozen tails in the refrigerator overnight for the best texture. If you’re short on time, seal the tails in a plastic bag and submerge in cold water for 30–40 minutes, changing the water if it warms up.

How should I cut the lobster tail before cooking?

Butterfly the tail to expose the meat:

  1. Place tail on a cutting board, shell side up. Using kitchen scissors, cut along the center of the top shell from the open end toward the tail, stopping just before the tail fin.
  2. Gently spread the shell apart and lift the meat through the slit so it sits on top of the shell (this is the “butterflied” presentation).
  3. Optionally, cut along the center of the meat with a sharp knife to create a more even portioning, then set aside.
What is the best cooking method for lobster tails?

Broiling or baking are quick and reliable:

  • Broil: Place tails on a foil-lined pan, cut side up, brush with butter, and broil 6–10 minutes depending on size, until the meat is opaque and slightly opaque near the shell.
  • Bake: Preheat to 425°F (220°C). Arrange tails on a baking sheet, brushed with butter, and bake 10–12 minutes, or until internal temperature reaches 140–145°F (60–63°C).
  • Alternative: Steam or grill for extra smoky flavor, following similar timing guidelines.
How do I tell when lobster tail is done?

Check for these signs:

  • The meat is opaque and firm, not translucent.
  • The internal temperature reaches about 140–145°F (60–63°C).
  • The shell turns bright red and the meat separates easily from the shell.
How much butter and seasoning should I use?

A good baseline per tail (4–6 oz tail):

  • 2–4 tablespoons melted butter
  • 1–2 cloves garlic, minced
  • 1 teaspoon lemon juice
  • Salt and pepper to taste
  • Optional: pinch of paprika for color, chopped parsley for garnish
Can I cook lobster tails on the grill?

Yes. Grilling adds a smoky flavor:

  • Preheat grill to medium-high. Brush tails with oil or melted butter.
  • Place tails cut-side down and grill 2–4 minutes, until the shell begins to color. Flip and baste with butter, then cook 3–6 more minutes until the meat is opaque.
  • Keep an eye on timing; tail thickness affects how long it takes.
How do I avoid overcooking and keep the meat tender?

Tips to prevent dry lobster:

  • Cook tails in short intervals, checking early for doneness.
  • Use a thermometer to reach 140–145°F (60–63°C).
  • Butter, lemon, and a gentle oven heat help keep moisture.
  • Pull the tails off just as the meat turns opaque.
What are some tasty flavor variations I can try?

Try these popular options:

  • Garlic butter with lemon and parsley
  • Lemon-dill or lemon-zest with fresh herbs
  • Spicy Cajun or paprika rub on top
  • White wine butter sauce for dipping
What are good sides and serving suggestions for lobster tails?

Serving ideas to complete the plate:

  • Steamed or roasted asparagus, green beans, or zucchini
  • Classic corn on the cob or corn salad
  • Buttery mashed potatoes or garlic risotto
  • Fresh lemon wedges and chopped parsley for garnish