Author

Ocean Nightleaf

Browsing

Introduction / Hook

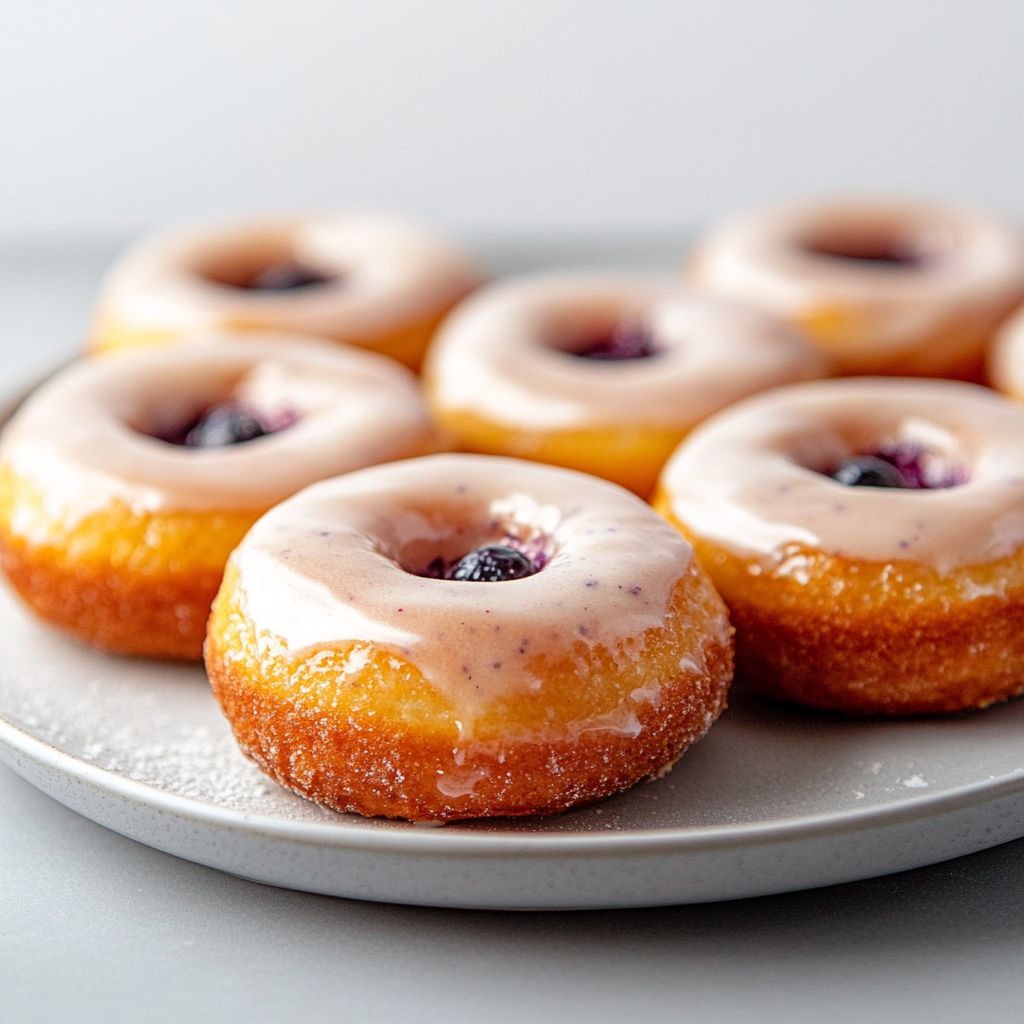
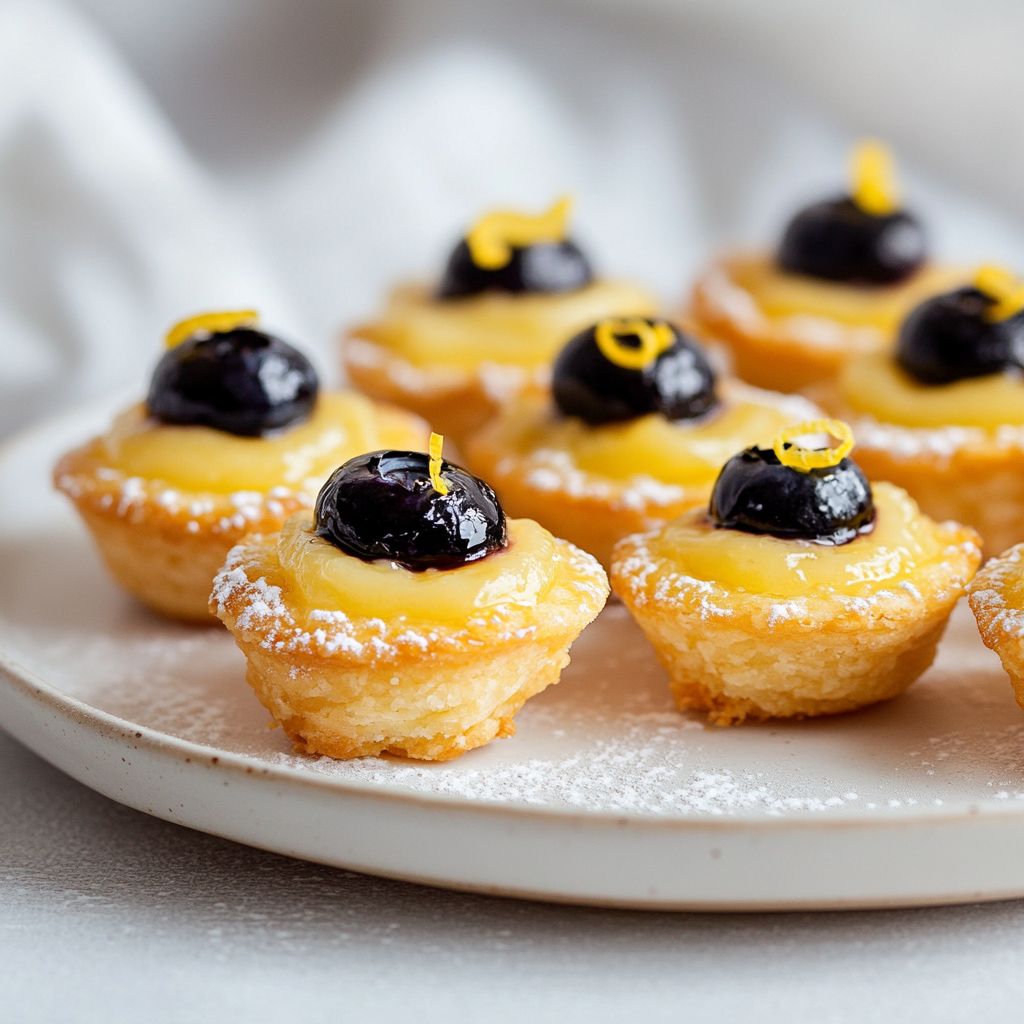
Imagine a plate of bite-sized sunshine: tiny rounds bursting with summer in every bite, the scent of lemon lifting the air, and blueberries glimmering like little midnight stars tucked into a tender shell. These Delicious Blueberry Lemon Bites are more than a snack; they’re a small, joyful ritual that turns an ordinary moment into something memorable. When you bite into one, you’ll hear a delicate crack of a perfectly balanced crust, feel a soft, almost melt-in-your-mouth interior, and taste a bright citrus kiss that dances with the sweetness of ripe berries. They’re the kind of treat that feels special enough for a celebration and simple enough for a weekday afternoon. Picture a sunlit kitchen, a tray of gold-edged morsels cooling on the rack, and the smile that follows when friends and family discover their irresistible charm. The blue and yellow duo is not just flavorful—it’s visually irresistible, a handheld moment of happiness that invites you to slow down and savor.

Delicious Blueberry Lemon Bites are designed to be approachable, portable, and universally appealing. They require no fancy techniques or hard-to-find ingredients, yet they deliver a sophisticated profile that satisfies both the sweet tooth and the craving for something bright and refreshing. The lemon’s zest and aroma infuse the bite with a clean, sunny brightness that perfectly balances the juicy, jammy blueberries. The result is a texture play that surprises with each mouthful: a crisp, delicate exterior gives way to a soft, tender center, then a lingering, puckering finish that keeps you reaching for another bite. Whether you’re planning a weekend brunch, a coffee table spread, or a quick after-school treat, these bites offer a little bite-sized luxury with no fuss.

What makes them truly special is how they harmonize a few everyday ingredients into something unexpectedly delightful. The gleam of a sugar-sprinkled top, the fragrance of fresh lemon zest, and the way blueberries release their grape-like depth when warmed—all combine to create a flavor profile that feels both timeless and modern. They’re versatile enough to pair with a glass of cold lemonade or a warm cup of tea, yet sturdy enough to hold up on a dessert platter or as a charming party favor. This description is more than a recipe; it’s an invitation to celebrate the simple pleasures of fruit and citrus, to enjoy the sun in a bite, and to share a moment of sweetness that feels personal and thoughtful.

The Story Behind the Dish

The idea for these bites grew from late-summer moments on a sunlit porch, where baskets of blueberries would arrive like small bundles of summer joy and lemons stood proudly at the edge of the kitchen counter, their bright rind signaling the promise of something zesty and uplifting. My family has always believed that the best desserts don’t demand grand gestures; they demand balance, calm, and a sense of place. Blueberries, with their silken flesh and gentle sweetness, meet lemon’s tart sparkle in a dance that feels quintessentially American in the best sense—fresh, fruity, and a touch nostalgic.

Traditions around blueberry desserts are as varied as the compotes, tarts, and muffins that populate the dessert table in homes across the country. In some families, blueberries symbolize blueberries of the harvest—the moment when the fields fall heavy with fruit and the kitchen turns into a buzzing workshop of jars, jams, and pastries. In others, lemon is the bright punctuation that brightens a plate and lifts the mood. The combination of these two flavors is universal in its appeal: the berry’s depth, the citrus’s lift, and a texture that rewards a patient bite. This dish borrows from that lineage, translating it into a neat, handheld form that’s easy to share with friends and family, from casual luncheons to elegant soirees. It’s the kind of recipe that travels well, carrying with it a whisper of porch swing afternoons, a lilac-scented breeze, and a kitchen sink full of fresh fruit that begged to be turned into something joyful.

There’s a small personal anecdote that often surfaces when I think about these bites: a lazy Sunday afternoon, a tray of berries on the table, and a conversation that drifted from weekend plans to favorite childhood desserts. At the center of that memory is a simple truth—bright flavors, a touch of sweetness, and a texture that’s comforting without being heavy can turn any moment into a celebration. This recipe embodies that sentiment. It’s a modern nod to the idea that even the smallest bite can carry a memory, can evoke a place, and can invite you to start anew with a bright, hopeful palate for the week ahead.

Why You’ll Love This Recipe

  • Quick to assemble: these bites come together without fuss, making them perfect for last-minute gatherings or a quick weekend project.
  • Bright, balanced flavor: the lemon provides a fresh, zippy brightness that complements the blueberry’s natural sweetness—the result is refreshing and not cloying.
  • Portable and shareable: bite-sized by design, they’re easy to transport for picnics, potlucks, and school lunch boxes.
  • Texture contrast: a delicate, slightly crisp exterior gives way to a soft, tender interior with juicy pockets of fruit, delivering a satisfying mouthfeel on every bite.
  • Versatile for diets and occasions: the concept can be adapted to vegan or gluten-free diets and works beautifully for casual weekdays or special occasions.
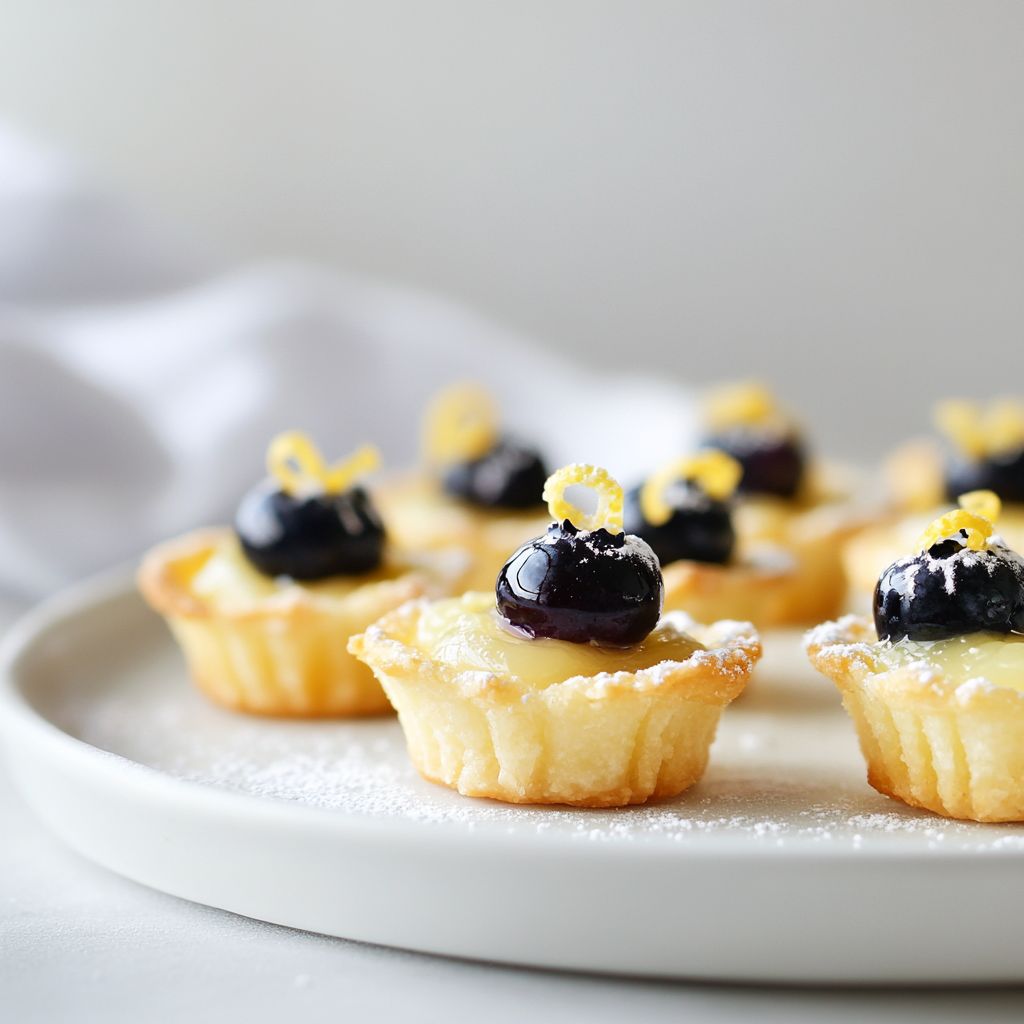
  • Visually appealing: the vibrant blueberries against sunny lemon tones make them irresistible on any dessert or snack board.
  • Low fuss, high charm: you don’t need fancy equipment or elaborate technique to achieve a polished result that looks and tastes sophisticated.

Flavor Profile & Texture

Delicious Blueberry Lemon Bites unfold with a layered flavor journey. The first impression is the citrusy aroma—fresh lemon zest and a whisper of bright lemon juice that instantly lifts the senses. As you take the first bite, a crisp outer layer gives way to a tender, almost melt-in-your-mouth interior. The blueberry presence adds a depth of fruitiness—jammy, slightly tart, with a subtle pop of berry juice that bursts gently as you press your teeth through the surface. The tangy citrus notes act like a spark, awakening the blueberry’s natural sweetness and balancing it so that the overall experience feels lively rather than sugary.

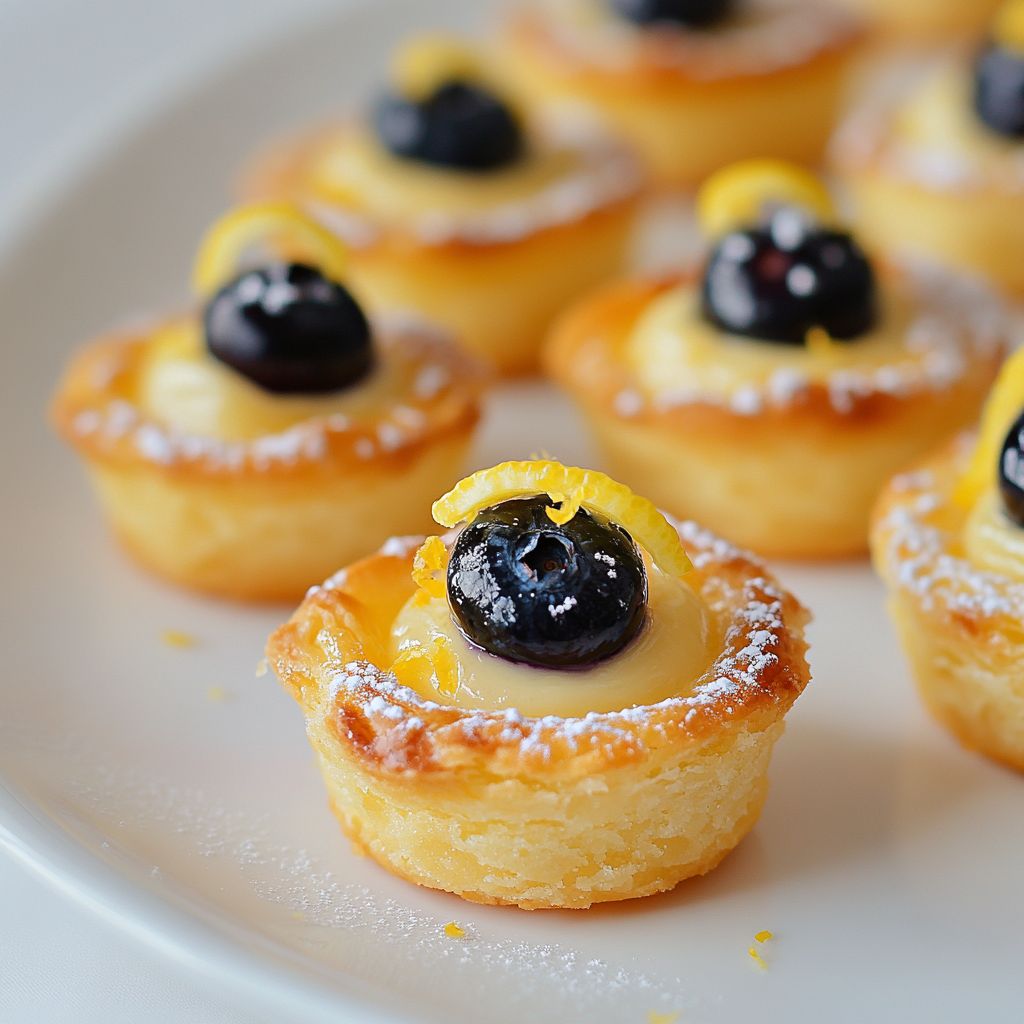
Texture-wise, you’ll notice a delicate crust or shell that yields to a soft, not-too-dense center. The crust offers a gentle snap, a satisfying contrast that makes each bite feel substantial without weighing you down. There’s a light gloss or sheen on the surface, hinting at a touch of glaze that clings just enough to gleam under light. When tasted together, the citrus, berry, and a subtle buttery nuance create a harmony that’s reminiscent of a refined pastry yet still decidedly approachable. The balance is crucial: too tart, and it would overwhelm; too sweet, and the lemon would fade. Instead, there’s an elegant synergy that lingers—a clean citrus finish with a fruity aftertaste that invites another bite rather than a cleansing swallow.

In essence, these bites celebrate contrasts: bright and mellow, crisp and soft, simple and delightful. They are the kind of treat that feels like sunshine on a plate, a small luxury that doesn’t demand a lot of space or time but rewards you with a memorable bite every single time.

Occasions & Pairings

Delicious Blueberry Lemon Bites shine in a wide range of settings, from casual family gatherings to polished brunch spreads. They are equally at home on a weekend dessert table as they are tucked into lunch boxes for a mid-day treat. Below are ideas to help you think about when and how to showcase these bites:

  • Brunch and brunchy gatherings: they pair beautifully with coffee, tea, or a glass of sparkling lemonade, adding a bright note to a leisurely morning.
  • Tea time and afternoon snacks: the citrus lift feels refreshing alongside a pot of herbal tea or a cup of Earl Grey.
  • Picnics and outdoor events: their compact size makes them easy to transport, and they won’t melt away in heat like cream-based desserts might.
  • Potlucks and party trays: they make an eye-catching addition to a dessert board thanks to their color contrast and tidy shape.
  • Gift-able treats: pack a batch into pretty boxes or tins to share with neighbors and teachers—an edible little gesture that travels well.

Pairing suggestions to enhance the tasting experience:

  • Drinks: a bright sparkling water with a twist of lemon, a delicate white wine spritzer, or a lightly sweetened iced tea.
  • Side bites: a dollop of light yogurt or a small scoop of lemon curd can complement the citrus notes.
  • Dessert companions: a simple vanilla ice cream or a dollop of whipped cream adds a creamy counterpoint to the fruity bites.

Tips, Variations & Substitutions

One of the beauties of this recipe concept is its adaptability. Here are ideas to customize the bites to fit different tastes, dietary needs, or seasonal fruit availability:

  • Vegan option: use a dairy-free butter substitute and ensure any glaze or crust components are made with vegan fats. The flavor remains bright and citrus-forward, with the blueberry sweetness shining through.
  • Gluten-free twist: replace any wheat-based crust with almond flour or a gluten-free flour blend to keep the bites tender and crumbly in the right way.
  • Flavor variations: swap lemon for lime or orange zest to alter the citrus character. A hint of vanilla or almond extract can also deepen the overall flavor without overpowering the fruit.
  • Berry substitutions: blueberries can be replaced with raspberries, blackberries, or a mix of berries for a different tart-sweet balance. Each berry brings its own micro-flavors and texture.
  • Texture play: for a more pronounced crust, incorporate a touch of finely chopped nuts or a sprinkle of coarse sugar on top. For a smoother bite, keep the exterior lighter and the interior silkier.
  • Low-sugar option: use a natural sugar substitute you prefer, or reduce the overall sweetener by balancing with slightly more citrus zing to maintain brightness.
  • Regional twists: add a pinch of lavender in the zest or a whisper of cardamom for a floral or warm-spice note that complements the fruit without overshadowing it.

Pro tips for achieving that irresistible texture and flavor balance without turning the process into a project:

  • Choose fruit at peak ripeness: intensely colored blueberries with a little bloom are sweet, fragrant, and juicy, which translates into more pronounced blueberry flavor in the bite.
  • Zest generously but finely: lemon zest releases essential oils that perfume the bites; avoid the bitter white pith for a clean citrus note.
  • Practice gentle handling: mix ingredients just until combined to prevent dense or gummy textures; a light hand helps maintain tenderness in the interior.
  • Finish with a light glaze or glaze-inspired sheen: a minimal, melted sugar glaze or a glaze-like finish can add a glossy, appealing exterior without making the bites heavy.

Storage & Make-Ahead Ideas

These bites are friendly to make ahead, which makes them ideal for busy weeks or event planning. Here are reliable strategies to keep them fresh and tasty:

  • Short-term storage: keep the bites in an airtight container at room temperature for up to 2-3 days. If your space is warm, refrigerate to maintain texture and flavor.
  • Make-ahead preparation: assemble the components a day in advance if needed, keeping elements separate (such as the crust and the fruit filling) and combine just before serving to preserve texture and brightness.
  • Freezing options: freeze baked bites individually on a tray, then transfer to a sealed container or freezer bag. Thaw at room temperature and, if desired, warm very briefly in a low oven to refresh the exterior.
  • Reheating guidance: if the bites feel soft after storage, a light gentle refresh in a warm environment can help restore the crisp exterior without drying them out.

Tips for maintaining quality during storage:

  • Airtight is essential: air is the enemy of crisp textures, so ensure a tight seal to prevent moisture from softening the exterior.
  • Avoid stacking heavy items on top: stack mindfully to prevent the tops from flattening; consider placing parchment between layers if you’re transporting them.
  • Keep the citrus aroma intact: store away from strong-smelling foods that could dull the lemon fragrance.

Fun Facts & Trivia (Optional)

Delicious Blueberry Lemon Bites carry little stories behind their main ingredients. Here are some fun notes to savor as you prepare or admire them on the plate:

  • Blueberries are among the most nutrient-dense berries, rich in antioxidants known as anthocyanins, which give them their characteristic blue hue and may contribute to a range of health benefits.
  • Lemon zest contains essential oils that deliver a potent citrus aroma and flavor with far more punch than lemon juice alone; zesting releases oils that brighten baked goods and confections.
  • The combination of blueberries and lemon is a classic in many culinary traditions, admired for its balance of floral berry sweetness with tart, sunny citrus—an enduring pairing in desserts and snacks around the world.
  • Small-bite desserts like these taps into the “little luxuries” philosophy: they offer a sophisticated sensory experience without requiring a lot of effort, making them a popular choice for entertaining.
  • From an aesthetic standpoint, the contrast between the deep indigo of blueberries and the bright lemon-yellow hints at the emotional effect of the dessert: it’s visually uplifting and mood-enhancing.
  • There is a long history of lemon as a culinary brightener in desserts, dating to early European kitchens, where citrus was used to cut through rich flavors and provide a refreshing counterpoint—this dish continues that tradition in a modern, approachable form.

Ingredients

Bite Base
  • 1 1/2 cups rolled oats (certified gluten-free)
    → The oats form the chewy, substantial base of the bites and will be partially ground into a smoother consistency to help bind the dough. If you need gluten-free results, be sure to use certified gluten-free oats to prevent cross-contamination. For a punchier texture, pulse some of the oats into a coarse flour while keeping some whole for bite.
  • 1/2 cup almond flour
    → Adds tenderness and helps bind the mixture without relying on gluten. Use finely ground almond flour for even distribution; if you only have whole almonds, pulse them briefly in a processor to a fine meal. Toasting the almond flour lightly before mixing enhances its nutty aroma and flavor.
  • 1/4 cup unsweetened shredded coconut (optional)
    → Introduces subtle sweetness and a delicate texture; omit if you want a simpler, nut-forward base or have coconut allergies. Toasting the coconut lightly until fragrant can intensify its flavor before folding into the base.
  • 6-8 pitted Medjool dates
    → Chief binder and natural sweetener; dates help the dough hold together without added sugar. Chop finely or pulse with a splash of water until you obtain a sticky paste. If your dates are dry, soak for 5–10 minutes to soften and ease blending.
  • 2 tablespoons maple syrup (or honey)
    → Adds moisture and a touch more sweetness to aid binding; adjust to taste depending on the sweetness of your dates. Use maple syrup for a vegan version; honey provides a richer flavor if not strictly vegan.
  • 1 tablespoon lemon zest
    → Provides a bright lemon aroma that complements the blueberry and balances sweetness. Grate zest from fresh, unwaxed lemons, taking care to avoid the bitter white pith beneath the peel.
  • 1/2 teaspoon vanilla extract (optional)
    → Subtly rounds the citrus sweetness with a warm note; use if you want a hint of vanilla alongside lemon. If you prefer a pure lemon-forward flavor, omit.
  • Pinch of salt
    → Sharpens sweetness and enhances overall flavor; essential even in small amounts to prevent the bite from tasting flat. Adjust if using salted nuts or salted ingredients elsewhere in the recipe.
  • 1 tablespoon neutral oil (e.g., light olive oil or refined coconut oil) (optional)
    → Improves moisture and helps the mixture bind when shaping the bites. Use sparingly to avoid greasiness; choose a flavor-neutral oil to keep lemon/blueberry notes dominant.
Blueberry Center
  • 1 cup fresh blueberries, halved or chopped (reserve a few whole for decoration)
    → The juicy berry center provides vibrant flavor and moisture. If using frozen berries, thaw and drain thoroughly to minimize extra moisture; tossing with 1/2 teaspoon lemon juice and a pinch of sugar (optional) can heighten sweetness and counterbalance tartness.
  • 1 teaspoon lemon juice
    → Lifts the blueberry flavor with bright citrus notes and helps slightly bind the center. Add gradually to prevent making the mixture too wet; this keeps the centers cohesive when the bites are formed.
  • 1 teaspoon cornstarch or arrowroot powder
    → Thickens the blueberry mixture so the centers set nicely and don’t leak. Mix with a small amount of water to form a slurry before folding in; this helps achieve a smooth, jam-like consistency as the bites chill. Omit if using very thick, low-moisture berries.
  • 1 tablespoon chia seeds (optional)
    → Acts as a natural thickener and adds a pleasant texture; hydrate the seeds in a tablespoon of water for 10 minutes to form a gel before incorporating. They also boost nutrition and help bind the center together.
  • 2 teaspoons maple syrup or honey (optional)
    → Adds a touch of sweetness to balance tart berries; adjust based on berry sweetness. If your blueberries are very ripe and sweet, you may skip this.
Lemon Glaze
  • 1/2 cup powdered sugar
    → Provides a light, glossy finish that lightly sweetens and lends a polished look. Sift to remove lumps. For a dairy-free version, use plant-based milk or water to adjust thickness as needed.
  • 1-2 tablespoons lemon juice
    → Delivers bright citrus flavor to the glaze and helps reach a pourable consistency. Start with 1 tablespoon and add more gradually to avoid a too-runny glaze.
  • 1-2 teaspoons dairy-free milk or water (optional)
    → Loosens the glaze to your preferred drizzle thickness. Choose a milk alternative that suits your dietary needs if avoiding dairy; add gradually until the glaze coats the bites evenly.

Instructions

  • Preheat your oven to 350°F (175°C) and line a 12-cup muffin tin with paper liners or grease it well.
    → This ensures the bites bake evenly and release cleanly from the cups, so you can unmold or serve without tearing the base.
  • Toast the almond flour in a dry skillet over medium-low heat, stirring constantly until it turns golden and releases a nutty aroma.
    → Toasting deepens flavor and improves browning, while also reducing any raw almond taste that could dominate the base.
  • If using shredded coconut, toast it lightly in the same skillet until fragrant, then transfer to a plate to cool.
    → Light toasting concentrates coconut flavor and prevents it from tasting soggy in the finished bites.
  • Pulse about half of the rolled oats in a processor or blender until they become a loose flour while keeping the rest of the oats chunky for texture.
    → A partial grind helps the dough bind, while the intact oats provide chew and structure in every bite.
  • In a large bowl, whisk together the oat mixture (ground and whole portions), the toasted almond flour, the optional toasted coconut, a pinch of salt, and the optional oil if you choose not to leave the dough dry.
    → Even distribution of dry ingredients ensures consistent texture and prevents density pockets in the final bites.
  • Prepare the date paste by finely chopping the Medjool dates, then pulsing with a splash of water until a sticky paste forms; if the dates are dry, soak for 5–10 minutes and drain before blending.
    → The paste provides natural sweetness and the primary binder so the bites hold together without refined sugar.
  • Stir maple syrup (or honey) and lemon zest into the date paste, and add vanilla extract if using; mix until the flavors are evenly integrated.
    → The syrup hydrates the paste for binding and the lemon zest reinforces the citrus profile across the base.
  • Pour the date mixture into the dry oat-almond mixture and mix with a spoon or hands until a cohesive, slightly sticky dough forms; if the dough seems dry, add a teaspoon at a time of neutral oil or water to reach the right consistency.
    → A cohesive dough molds cleanly into cups and bakes evenly without crumbling.
  • Chill the dough in the refrigerator for 15–20 minutes to firm up, making it easier to shape and less prone to sticking.
    → Chilled dough yields neat, compact bases that hold their shape during baking and filling.
  • Portion the dough into the prepared muffin tin and press firmly to form an even base about 1/4 inch (6 mm) thick in each cup; use the flat bottom of a glass or measuring spoon to compact evenly.
    → A uniform base ensures even baking and prevents center leakage when filling.
  • Bake the crusts at 350°F (175°C) for 12–14 minutes or until the edges are set and the centers are just pale; transfer to a rack and let cool completely in the pan before filling.
    → Baking sets the base for handling and creates a stable platform for the blueberry center; cooling prevents soggy bottoms during assembly.
  • In a small bowl, combine the blueberries with 1 teaspoon lemon juice and 1 teaspoon cornstarch (or arrowroot) to begin thickening; if using chia seeds, hydrate them in 1 tablespoon water for 10 minutes and then stir in.
    → The acid brightens the berries and the starch thickens the center so it stays put in the bite.
  • Add 1 tablespoon maple syrup or honey to the blueberry mixture and stir until evenly distributed; adjust sweetness to your liking based on the blueberries’ ripeness.
    → A touch of sweetness balances tartness and helps the center set without becoming syrupy.
  • Let the blueberry mixture rest for 5–10 minutes to slightly macerate and thicken; if using chia, you’ll see a gel form as the seeds hydrate.
    → Resting allows the flavors to meld and the mixture to gain viscosity for neat filling.
  • Fill each cooled crust with a generous spoonful of the blueberry mixture, pressing gently to create a compact center and leaving a small edge of crust visible; reserve a few whole berries for garnish.
    → Proper filling prevents overflow during chilling and contributes a vibrant color contrast once glazed.
  • Chill the assembled bites in the refrigerator for 30–60 minutes or until the centers are set and hold their shape when gently touched; this ensures the centers don’t bleed into the crust when glazing.
    → Chilling locks the structure in place for a clean finish and easier glazing.
  • Sift the powdered sugar into a small bowl to remove lumps, then whisk in 1 tablespoon lemon juice and enough dairy-free milk or water to reach a pourable glaze; adjust with additional sugar or liquid to achieve your desired thickness.
    → A smooth glaze coats evenly and contributes a polished look with a bright lemon flavor.
  • Drizzle the glaze over the chilled bites in a light, even motion, turning the pan to avoid heavy pooling; garnish with reserved whole berries for color and contrast.
    → The glaze provides sweetness and a glossy finish while the berries add visual appeal and fresh aroma.
  • Refrigerate the glazed bites for 15–20 minutes to set the glaze, then serve chilled or at room temperature depending on preference; store any leftovers in an airtight container up to 3 days.
    → A short chill helps the glaze set firmly and maintain the bite’s neat presentation during handling.

Notes

These gluten-free blueberry lemon bites are naturally sweetened with Medjool dates and a touch of maple syrup, making them a wholesome and guilt-free treat.

You can customize them by folding in chopped nuts or seeds (such as almonds, chia, or pistachios) for extra crunch, or boost the lemon aroma with additional zest or a pinch of salt to balance sweetness.

They freeze well and make a great grab-and-go snack; store in an airtight container and thaw briefly before enjoying for best texture.

For an extra shine, drizzle with the lemon glaze or serve with a dollop of dairy-free yogurt to contrast tart berries with creamy tang.

Always ensure your oats are certified gluten-free if you have gluten intolerance.

Tips

Tips for Delicious Blueberry Lemon Bites

Bite Base tips

  • Use certified gluten-free oats if you need gluten-free results to prevent cross-contamination. Clean your processor or bowl between steps to avoid any oat flour mixing with other ingredients.
  • Pulse some oats into a coarse flour while keeping some whole oats for a chewy texture. This balance helps the base hold together yet still feel substantial.
  • Lightly toast almond flour before mixing to deepen its nutty flavor; watch closely so it doesn’t burn, which can impart bitter notes.
  • Shredded coconut is optional; it adds subtle sweetness and texture. If using, toast it gently to intensify aroma before folding in.
  • Chop Medjool dates finely or blitz with a splash of water into a sticky paste. If your dates are dry, soak 5–10 minutes to soften and improve binding.
  • Maple syrup or honey provides moisture and helps binding. Adjust to taste depending on your date sweetness; maple keeps things vegan.
  • Zest lemon from fresh, unwaxed lemons, avoiding the bitter white pith. Fresh zest boosts brightness in every bite.
  • Vanilla (optional) rounds the citrus sweetness. If you want a pure lemon-forward flavor, skip vanilla.
  • Pinch of salt enhances sweetness and overall flavor; balance with other salty ingredients if used elsewhere in the recipe.
  • Optional neutral oil improves moisture and binding; use sparingly to avoid greasiness. A little goes a long way.
  • Mix until just combined; overmixing can make the base dense. If the dough seems dry, add 1 teaspoon water or lemon juice at a time.
  • Chill the base mixture for 15–20 minutes before shaping to help it hold its form better.
  • Shape with a small scoop or gently between hands; press firmly so bites don’t crumble during assembly.

Blueberry Center tips

  • If using frozen berries, fully thaw and drain to minimize extra moisture; pat dry to prevent soggy centers.
  • Toss berries with 1/2 teaspoon lemon juice and a pinch of sugar (optional) to brighten flavor and balance tartness.
  • Make a smooth slurry by whisking 1 teaspoon cornstarch or arrowroot with a little water before folding; this thickens the center without lumps and creates a jam-like texture as it chills.
  • Optional: hydrate 1 teaspoon chia seeds in 1 tablespoon water for 10 minutes to form a gel; fold in to boost thickness and nutrition.
  • Sweeten to taste with 2 teaspoons maple syrup or honey if berries are tart; adjust based on berry sweetness.
  • Chill the center mixture briefly (15–20 minutes) to help it set before forming the bites; this reduces the risk of leaking into the base.
  • For extra color and brightness, macerate berries with a tiny splash of lemon juice before mixing into the center.

Lemon Glaze tips

  • Sift powdered sugar to avoid lumps and achieve a smooth, glossy finish. Dairy-free options work well with plant milks or water.
  • Begin with 1 tablespoon lemon juice and add more gradually to reach your desired pourable thickness; too much juice can make the glaze too runny.
  • Use 1–2 teaspoons dairy-free milk or water to loosen the glaze; choose a milk alternative that suits your dietary needs and whisk until smooth.
  • For a shiny, set glaze, apply in thin, even layers after the bites have chilled slightly. A second light layer can build more gloss if needed.
  • If you want a stronger lemon aroma, whisk in a touch of lemon zest into the glaze at the end.
  • Avoid glazing the edges too heavily; wipe excess glaze from the bite edges for clean presentation and to prevent drips.

FAQ

What are the main ingredients for Delicious Blueberry Lemon Bites?

Typical components include a crust made from crushed graham crackers or digestive biscuits with melted butter, a lemon-flavored creamy filling (cream cheese or Greek yogurt with lemon zest and juice and a touch of sugar), and fresh blueberries for topping. You can adapt with dairy-free or gluten-free substitutes if needed.

Can I make this gluten-free or dairy-free?

Yes. For gluten-free, use gluten-free graham crackers or a crushed almond flour crust. For dairy-free, substitute the crust with dairy-free cookies and use dairy-free cream cheese or coconut cream/yogurt for the filling. Ensure any sweeteners are dairy-free as well.

Are frozen blueberries okay to use?

Absolutely. Use thawed, well-drained blueberries. Pat them dry before topping to avoid excess moisture that could make the bites soggy.

How do you assemble and set the bites?

1) Make and press the crust into mini muffin cups. 2) Chill briefly to set. 3) Beat the filling until smooth and spread or pipe into the crusts. 4) Top with blueberries and a little lemon zest. 5) Chill again until firm, about 30–60 minutes.

How long do they chill and what is the total time?

Chilling the crust and again after filling helps the bites hold their shape. Plan for about 1–2 hours of chill time in total, plus 15–25 minutes active prep. Total time is typically around 1.5–2.5 hours, depending on your cooling pace.

How should I store leftovers, and how long do they last?

Store in an airtight container in the refrigerator. They usually stay fresh for 3–4 days. For longer storage, you can freeze them for up to 1–2 months; thaw in the fridge before serving.

Can I make these ahead for a party or event?

Yes. You can prepare the crust and filling up to a day in advance and assemble the bites the day you plan to serve. For best texture, add the topping blueberries just before serving or shortly before refrigerating.

How can I adjust the sweetness or tartness?

Adjust sugar levels to taste in the filling. If you prefer more tang, add extra lemon zest or a bit more lemon juice. For a milder flavor, reduce the sugar by a tablespoon or two. You can also use honey or maple syrup as alternatives to sugar.

What variations or toppings work well?

Try variations like a lemon-curd swirl, a mint leaf on top, or a white chocolate drizzle. You can swap blueberries for raspberries or sliced strawberries for a fruity twist. Adding a thin layer of yogurt or cream cheese frosting can also change the texture nicely.

What equipment do I need?

Essential tools include a small muffin tin or mini muffin cups, a resealable bag or piping bag for neat filling, a mixing bowl, and a spatula. If you don’t have a mixer, you can whisk the filling by hand, though it may require extra effort to achieve a smooth texture.

Introduction / Hook

Imagine a snack that fuses the creamy, delicate bite of cottage cheese with the crisp, satisfying snap of a perfectly baked chip. Crispy Cottage Cheese Chips take the best of both worlds: the protein-y, tangy richness of cottage cheese as a canvas, and a workflow that transforms it into wafer-thin, golden-edged crisps that crackle at the first bite. The aroma is irresistible—think toasty dairy perfume mingling with a whisper of garlic, sea salt, and a garden of fresh herbs. Each chip unfurls a faint, lacy edge that dissolves into a crisp center, a textural dance that keeps you reaching for more without the heaviness of heavier snacks. This is not a heavy fried chip or a dense cracker; it’s a modern, health-conscious snack canvas that invites playful flavor exploration and a little kitchen alchemy.

Crispy Cottage Cheese Chips are a celebration of contrasts: light yet hearty, mild yet deeply savory, soft-curd interior transformed into a brittle, golden border. They’re the kind of snack you can whip up for a quick weeknight bite, yet they hold their own as a chic appetizer for a casual party or a sophisticated grazing board. The concept is simple in spirit—use cottage cheese as the base, press and dry it to shed moisture, then bake until the edges shimmer with a gold that’s almost caramelized—yet the possibilities are endless. You can tailor them to your mood, your pantry, and your guests, layering in flavors that range from Mediterranean brightness to smoky, zesty heat. The result is a versatile snack that invites dipping, nestles beside a crisp salad, or serves as a crunchy, satisfying foundation for a cheese-board-inspired nibble.

Beyond their immediate crunch, these chips carry a friendly, health-forward vibe. Cottage cheese brings a gentle protein punch and a creamy mouthfeel that contrasts beautifully with the normalized, low-carb nature of a chip-like bite when prepared with care. They’re naturally gluten-free and can be tuned to be vegan or dairy-free with thoughtful substitutions, making them an inclusive choice for a crowd. The method—quietly drying a luscious dairy base into a crisp, wafer-thin canvas—feels both ancient and cutting-edge at once: a nod to traditional snack crackers and a modern embrace of high-protein, low-crank, crave-worthy snacks.

The Story Behind the Dish

The idea for Crispy Cottage Cheese Chips arrived in a sun-warmed kitchen, where a half-used tub of cottage cheese sat beside a scattering of herbs, a jar of garlic powder, and a craving for something snackable but not greasy. It began as a playful experiment on a rainy Sunday: what if you could coax cottage cheese into a crisp, cracker-like form without turning to flour or starches as a binder? The result felt like a revelation—a snack that honors the brightness of dairy while delivering a satisfying crunch that stands up to dip sauces, salsas, and even a splash of citrus.

Historically, cottage cheese has long lived in the realm of wholesome, everyday dairy—cultured curds with a mild tang that has fed generations from rural kitchens to urban pantries. It’s been celebrated for its versatility: folded into salads, swirled into baked dishes, or enjoyed simply with herbs. The transformation into chips feels like a natural extension of that versatility, a way to take a beloved, everyday ingredient and give it a new form—one that marries comfort with culinary play. In a sense, these chips echo the story of a kitchen where frugality meets invention: taking what’s on hand, treating it with respect, and letting texture guide the experience.

As the idea spread, friends and family began naming variations—Mediterranean-style with oregano and lemon zest, smoky with paprika and chili, or herby and fresh with dill and chives. The chips became a symbol of hospitality too: a quick, glamorous snack that doesn’t demand a lot of planning but delivers a lot of pleasure. The story behind the dish is really a story about turning the ordinary into something special—the moment when pantry staples become a little piece of edible artistry that brightens a day and invites conversation.

Why You’ll Love This Recipe

  • Protein-forward snacking: cottage cheese brings gentle protein, making these chips more satiating than typical crackers or chips.
  • Customizable flavor playground: you can lean into herbs, spice blends, citrus, or smoky seasonings to suit any mood or theme.
  • Quick to assemble: no long soaking or elaborate prep; the emphasis is on texture and temperature control for crispness.
  • Gluten-free and adaptable: naturally gluten-free and easy to tailor for dairy-free, vegan, or low-carb preferences with thoughtful substitutions.
  • Ideal for dipping and pairing: they shine with a bright yogurt-herb dip, a zesty salsa, a velvety avocado spread, or a simple olive tapenade.
  • Perfect for entertaining: elegant enough for a casual party, movie night, or light nibbles after work, yet simple enough for a weeknight treat.
  • Kid-friendly texture and flavor: the crisp bite is appealing to kids, while you can adjust seasonings to keep it interesting for adults too.
  • Make-ahead potential: you can prepare the base and bake in batches, re-crisping to refresh texture when serving later.

From the pantry to the plate, these chips offer a blend of practicality and charm. They reward careful handling—the moisture in cottage cheese must be managed, the bake must be guided by attentive heat, and the finish must celebrate a delicate balance: a crisp, brittle shell that gives way to a soft, creamy interior you already know and love. The result is a snack that feels familiar—comforting, wholesome, and satisfying—yet with a surprising twist that makes it worthy of a second and third bite.

Flavor Profile & Texture

Crispy Cottage Cheese Chips deliver a nuanced sensory experience. On the outside, you’ll encounter a thin, crisp shell that shimmers with a light golden hue. The surface often offers tiny, appealing crinkles that whisper of caramelized dairy sugars and careful dehydration. When you bite in, the crackle gives way to a tender, almost creamy interior—a lovely paradox to savor. That interior is where cottage cheese shines: a mild tang and a gentle dairy sweetness mingle with the right touch of salt, creating a balance that’s comforting and bright at once.

Flavor-wise, you’ll detect a canvas that readily takes on seasonings. A whisper of garlic or onion powder adds a savory backbone without overpowering the dairy’s natural brightness. Herbs—like dried oregano, thyme, dill, or chives—bring an aromatic lift, a garden-fresh note that makes the chips feel light and lively. If you crave warmth, a pinch of smoked paprika or chili powder introduces a subtle, sun-kissed heat that lingers. Citrus zest or a burst of lemon juice can lift the flavor, giving the chips a clean finish that pairs beautifully with creamy dips or bright salsas.

Texturally, the chips offer a luminous contrast: a fragile edge that crunches crisply, giving way to a softer, nearly pillowy core. The interplay of textures is deliberate—the outer crisp keeps the bite lively, while the interior remains approachable, avoiding chalkiness or dryness. The balance is what makes these chips addictive: they’re satisfying without feeling heavy, and their flavor carries through even when dipped into bold sauces. The mouthfeel invites you to slow down and savor the transition from crust to crumb, from crispy exterior to creamy interior.

Occasions & Pairings

These chips shine in a variety of moments. They’re perfect for a casual weeknight snack, a relaxed movie night at home, or a light, elegant appetizer for gatherings. They also work wonderfully as part of a brunch spread or a grazing table, offering a crisp contrast to soft cheeses, creamy dips, and bright vegetables.

Pairing ideas:

  • Dips and spreads: tangy yogurt-herb dip, creamy avocado salsa, dill yogurt dip, zesty salsa, or a smoky tapenade.
  • Salads and bowls: crumble over a crisp salad for texture, or serve alongside a grain bowl with cucumber and feta for contrast.
  • Proteins: alongside grilled chicken skewers, roasted chickpeas, or a bowl of roasted vegetables for a balanced bite.
  • Drinks: light, citrus-forward beverages, sparkling water with a squeeze of lemon, or a cool white wine that doesn’t overpower the dairy notes.
  • Dessert-style pairing: a small dollop of herbed ricotta and a drizzle of honey can transform them into an unexpected, playful course.

Occasions range from casual game nights to more refined gatherings that still crave easy, crowd-pleasing bites. They are particularly welcome at potlucks, backyard barbecues, and weekend gatherings where guests appreciate a snack that feels both comforting and novel.

Tips, Variations & Substitutions

Here are ideas to tailor Crispy Cottage Cheese Chips to your pantry, dietary needs, and flavor moods.

  • Texture optimization: for maximum crispness, pat cottage cheese dry before mixing with seasonings and spread very thinly on parchment. Avoid thick clumps—thin, even layers crisp more evenly.
  • Herb-forward version: use dried oregano, thyme, marjoram, and a pinch of lemon zest for a bright, grassy aroma that pairs beautifully with a yogurt dip.
  • Garlic-forward version: add garlic powder or granulated garlic and a pinch of onion powder for a robust, savory profile.
  • Smoky and spicy: smoked paprika, cumin, chili powder, and a touch of cayenne create a heat-forward profile that’s balanced by the dairy’s gentleness.
  • Regional twists: drizzle with za’atar and sesame for a Middle Eastern influence; use dried dill and lemon zest for a bright Mediterranean note; add garam masala and coriander for a warm Indian-inspired edge.
  • Vegan and dairy-free option: substitute with a plant-based cream cheese alternative or a well-blended mix of silken tofu with lemon juice, nutritional yeast, and a pinch of salt to mimic tang. Bind lightly with a plant-based binder (e.g., aquafaba) if needed, and bake to crispness. Ensure all seasonings align with dairy-free needs.
  • Low-carb and gluten-free: these chips are naturally gluten-free; keep thins and avoid crumbly additions that introduce starches. Test different herb blends to maintain a satisfying snap without adding flour.
  • Make-ahead and batch prep: prepare the base mixture (or the pressed sheets) in advance and refrigerate. When ready to bake, simply cut into desired shapes and bake until crisp. This is especially handy for entertaining where you want to serve hot, freshly crisp chips.
  • Flavor boosters for serving: pair with a bright yogurt dip, a garlicky olive oil dip, or a chunky tomato-salsa for contrast in texture and temperature.

If you’re feeling playful, you can also create a “chip flight” with several flavor profiles—one with fresh herbs, one smoky, and one citrus-kissed—so guests can explore textures and tastes in one platter.

Storage & Make-Ahead Ideas

Crispy Cottage Cheese Chips are best enjoyed fresh right after they’ve baked and cooled to their crisp apex. However, with thoughtful storage, you can extend their life and keep that pleasing snap.

  • Storage: keep cooled chips in an airtight container at room temperature away from humidity. Moisture is the enemy of crispness, so a dry, sealed environment is key.
  • Make-ahead strategy: you can prepare the base sheets ahead of time and refrigerate. When ready, slice and bake to crispness. Alternatively, bake in batches and re-crisp in a low oven for a few minutes just before serving.
  • Reheating tips: to restore crunch, reheat in a warm oven or toaster oven for a few minutes until the chips re-crisp. Avoid microwaving, which can soften them.
  • Freezing note: freezing baked chips is not ideal for texture; if you must, store in a freezer-safe bag and re-crisp thoroughly after thawing. Expect a slight loss of peak crunch, but a respectful recovery with proper re-crisping.
  • Best practices for freshness: store in a dark, dry cabinet or pantry; avoid exposure to steam or humid air. Use within a few days of baking for optimal texture and flavor.

If you’re hosting, consider making a second batch for guests who arrive later or for a second round of snacking. The chips hold well when kept crisp, and their lightness makes them easy to replenish without heavy kitchen work.

Fun Facts & Trivia (Optional)

– Cottage cheese has a storied history as a staple in many cultures, celebrated for its mild tang and versatility in both savory and sweet dishes. Its name evokes a rustic heritage of cottage kitchens and simple, wholesome meals.

– The texture contrast—crisp exterior with a creamy interior—parallels the classic experience of eating a well-made cheese cracker or a delicate rice puff, but with the dairy-forward richness that cottage cheese uniquely provides.

– The idea of drying and crisping dairy soft-curds into chips taps into a broader culinary tradition of turning soft, moist ingredients into crisp, snackable forms. It’s a playful example of how texture can redefine a familiar ingredient.

– For many, these chips evoke the charm of a cheese board but with the convenience of a snack you can bake in a standard oven, in a fraction of the time it takes to craft a more elaborate hors d’oeuvre.

– If you’re curious about the science, the moisture content in cottage cheese is what you’re managing to achieve crispness. By spreading in thin layers and applying heat, water molecules escape, forming a dry matrix that becomes crisp at the edges while retaining a gentle interior. The careful balance of heat, thickness, and moisture results in that characteristic crackling bite.

Ingredients

Cottage Cheese Chips Base

  • 1 cup well-drained cottage cheese (full-fat)
    → Moisture content controls crispiness and binding. For best chips, press the cottage cheese through a sieve or squeeze excess whey with paper towels until it forms a thick, creamy mass. Full-fat cottage cheese yields richer flavor and crisper edges; drain well to prevent soggy chips. If you use low-fat, you may need slightly more almond flour to offset moisture.
  • 1 large egg, lightly beaten
    → Acts as a binder and helps set the chips so they hold their shape during baking. Use at room temperature to blend smoothly with the cottage cheese. If avoiding eggs, substitute with 1 tablespoon ground flaxseed mixed with 3 tablespoons water and allow to thicken, though texture may vary. Do not overmix after the batter comes together to keep the chips tender rather than crumbly.
  • 1/4 cup grated parmesan cheese (freshly grated)
    → Adds salty, sharp flavor and contributes to browning and a crisp crust. Freshly grated parmesan melts more evenly than pre-shredded; Pecorino Romano adds a stronger bite if desired. If dairy-free, nutritional yeast can provide some savoriness, but expect a softer crust.
  • 2 tablespoons almond flour (or coconut flour if you prefer a grain-free option)
    → Almond flour provides structure and moisture-absorption without gluten; coconut flour is more absorbent, so you may need to adjust by adding a little extra egg or cottage cheese. Use to achieve a dough that holds together and bakes into thin, crisp chips. If you want extra crunch, you can mix in 1 teaspoon corn starch for added crispness.
  • 1/2 teaspoon garlic powder
    → For savory depth; use powder rather than minced garlic to avoid extra moisture. If you prefer a stronger garlic presence, increase to 3/4 teaspoon. Fresh minced garlic can be used but may introduce moisture; if used, reduce cottage cheese drainage accordingly and consider slightly less liquid elsewhere.
  • 1/4 teaspoon onion powder
    → Adds mild savory aroma without adding moisture. Optional: substitute with 1/2 teaspoon granulated onion if you don’t have powder. For a stronger onion note, you can add a pinch of minced dried onion, but keep moisture in mind to maintain crispness.
  • 1/4 teaspoon smoked paprika (or chili powder)
    → Provides color and a hint of smokiness or heat; adjust to taste. Smoked paprika yields a robust smoky flavor that pairs well with cheese chips. If you prefer no heat, omit or use sweet paprika instead.
  • 1/4 teaspoon salt
    → Essential for flavor balance. Depending on the saltiness of your cheese, you may need less or more. If using salted cottage cheese, start with 1/8 teaspoon and adjust after tasting. Salt on the surface can also help with browning during baking.
  • 1/8 teaspoon ground black pepper
    → Adds subtle pungency; adjust to taste. Freshly ground pepper is more aromatic. If you’re avoiding pepper, you can omit, though a light touch helps highlight cheese and spice notes.

Optional Add-ins

  • 1 tablespoon chopped fresh herbs (such as chives, parsley, or dill) (optional)
    → Fresh herbs brighten the chips with color and aroma. Chop finely for even distribution; mix into the batter or sprinkle on top before baking for a more vibrant appearance. Dried herbs can be used if fresh are unavailable, but fresh will yield a more pronounced flavor.
  • 1 tablespoon sesame seeds or poppy seeds (optional)
    → Adds crunch and a toasty note. Toast seeds lightly in a dry skillet before using to enhance aroma; they also create an attractive speckled pattern on the chips. If avoiding seeds, omit and rely on cheese and flour for texture.
  • 1-2 tablespoons nutritional yeast (optional)
    → Adds a cheesy, nutty savoriness without additional dairy; increases umami. Start with 1 tablespoon and adjust to taste. Note that it can slightly dry the batter, so compensate with a touch more cottage cheese if needed.
  • Oil spray for baking sheet (optional) or 1 teaspoon olive oil
    → Helps prevent sticking and promotes even browning on the bottom. Lightly spray the sheet or brush a thin layer of oil on the chips before baking. Too much oil can make the chips greasy; a light mist promotes crispness.

Instructions

  • Preheat your oven to 350°F (175°C) and line a large baking sheet with parchment paper or a silicone baking mat to create a nonstick surface for thin, even chips.
    → A hot, prepared surface ensures the batter spreads and bakes quickly without sticking, promoting uniform browning on the bottoms.
  • Drain the cottage cheese well and press it to remove as much moisture as possible using a sieve or by wrapping in paper towels and squeezing gently; transfer to a medium bowl.
    → Controlling moisture is crucial for crisp chips; excess liquid makes the batter runny and prevents the edges from drying and crisping properly.
  • Stir in the lightly beaten egg with the cottage cheese until you achieve a thick, cohesive paste that holds its shape when pressed; do not overmix once the batter comes together.
    → The egg acts as a binder to set the chips, and gentle mixing preserves a tender crumb without turning the mixture gluey.
  • Fold in the freshly grated parmesan cheese until evenly distributed and glossy; this creates a savory foundation and promotes browning during baking.
    → Freshly grated parmesan melts more uniformly than pre-grated, enhancing flavor and the crust’s color.
  • Add the almond flour (or coconut flour, if preferred) and mix just until a cohesive dough forms; if using coconut flour, anticipate needing a touch more moisture or a second egg.
    → Almond flour provides structure and moisture absorption without gluten; coconut flour is highly absorbent and can require adjustments to maintain a dough that holds together.
  • Stir in garlic powder, onion powder, smoked paprika (or chili powder), salt, and black pepper; blend until the spices are evenly dispersed throughout.
    → Even distribution ensures every bite has balanced savory notes and consistent color; powders prevent extra moisture from minced aromatics.
  • Optionally fold in 1 tablespoon chopped fresh herbs or 1 tablespoon sesame or poppy seeds after the spices for added aroma and crunch. If toasting seeds, do so briefly in a dry skillet before using.
    → Fresh herbs brighten flavor and appearance; toasted seeds contribute crunch and a toasty aroma that complements cheese chips.
  • If the batter seems too wet and is difficult to shape, sprinkle in a teaspoon of additional almond flour at a time until it holds its form; if it’s too stiff, add a few teaspoons of cottage cheese.
    → Balancing moisture ensures the chips spread thin and bake to a crisp rather than crumble or steam.
  • Scoop small portions of batter onto the prepared sheet and gently press them into thin rounds roughly 2 inches in diameter and about 1/8 inch thick; use the back of a spoon or a small silicone spatula for uniformity.
    → Thin, even rounds bake through to the center and achieve crisp edges; uniform thickness prevents overbrowning on some chips while others remain soft.
  • Lightly spray or brush the tops with oil (optional) to promote even browning and extra crispness on the surface; avoid heavy coating which can make the chips greasy.
    → A light fat helps heat transfer and creates a crisp, caramelized crust without saturating the chips.
  • Bake for 12–15 minutes, rotating the sheet halfway through for even browning; watch for golden edges and set centers rather than pale, soft bottoms.
    → Rotating ensures uniform heat exposure; timing may vary with sheet thickness and oven calibration, so monitor closely near the 12-minute mark.
  • Remove the sheet and let the chips cool on the pan for 5–7 minutes to firm up, then transfer to a rack to finish cooling; this helps them achieve maximum crispness as they shed steam.
    → Resting on a rack prevents trapped moisture from making the chips soggy and ensures crisp edges throughout.
  • Serve the chips warm or at room temperature with your favorite dips, such as herb yogurt, tomato salsa, or a garlic aioli; store leftovers in an airtight container at room temperature for up to 2 days or re-crisp in a 300°F (150°C) oven for 3–5 minutes.
    → Crispness diminishes as they cool; reheating briefly revives texture without overcooking the cheese.

Notes

These gluten-free cottage cheese chips are crispy and savory, built on a creamy cottage cheese base with parmesan for a rich, crisp crust. You can customize them by adding fresh herbs (such as chives, parsley, or dill), sesame seeds or poppy seeds, or nutritional yeast for extra umami. They store well in an airtight container and reheat to crispness in a hot oven; you can also freeze baked chips for quick snacks. For extra browning and crunch, lightly spray the baking sheet and bake until deeply golden, and avoid overmixing to keep the chips tender rather than crumbly. Always press the cottage cheese to remove excess moisture and adjust with a little extra almond flour or egg if needed to help the batter hold together and bake into thin, crisp chips.

Tips

Tips for Perfect Crispy Cottage Cheese Chips

  • Moisture control is key: after draining the cottage cheese, press it through a fine sieve or wrap in paper towels and squeeze out as much whey as possible. The drier the base, the crisper the chips will be. Full-fat cottage cheese will yield richer flavor and crisper edges; if you use low-fat, you may need a touch more almond flour to compensate for extra moisture.
  • Use the egg at room temperature to help the batter come together smoothly. If you need a dairy-free or egg-free option, substitute with 1 tablespoon ground flaxseed mixed with 3 tablespoons water and allow to thicken; note that texture may vary and you should avoid overmixing after the batter comes together to keep chips tender rather than crumbly.
  • Freshly grated parmesan yields better browning and a sharper, more even melt than pre-grated. If you are dairy-free, nutritional yeast can contribute savoriness, but expect a softer crust.
  • Choose almond flour for structure and moisture absorption; coconut flour is more absorbent, so you may need to adjust by adding a little extra egg or cottage cheese. If you want extra crunch, you can mix in 1 teaspoon cornstarch with the batter.
  • Seasoning: start with 1/4 teaspoon salt and adjust after cooking depending on the saltiness of your cottage cheese and parmesan. Garlic powder provides savory depth; you can increase to 3/4 teaspoon for a stronger garlic presence, but fresh garlic adds moisture and should be used sparingly or compensated elsewhere.
  • Onion powder provides mild savory aroma without adding moisture. If you don’t have powder, substitute with 1/2 teaspoon granulated onion. For a stronger onion note, you can add a pinch of dried minced onion, but keep moisture in mind to maintain crispness.
  • Smoked paprika or chili powder adds color and depth. Start with 1/4 teaspoon; adjust to taste. If you prefer no heat, omit or use regular paprika instead.
  • Spread batter into a very thin layer on the prepared sheet (about 1-2 mm thick) or form small rounds. Thinner sheets will crisp faster and more uniformly; use parchment or a silicone mat for easy lifting.
  • Oil helps prevent sticking and promotes bottom browning: lightly spray the baking sheet or brush a thin layer of olive oil on the chips before baking. Too much oil will make them greasy; a light mist is best for crispness.
  • Optional add-ins: scatter chopped fresh herbs like chives, parsley, or dill into the batter for color and aroma, or sprinkle on top before baking for a vibrant surface. Toast sesame seeds or poppy seeds briefly in a dry skillet before adding for extra crunch and aroma.
  • Oven technique: bake in a single layer until edges are golden and chips are firm. If needed, rotate the pan halfway through and flip chips for even browning to prevent soggy bottoms, especially with higher moisture bases.
  • Batch handling and storage: bake in small batches to ensure even browning. Store cooled chips in an airtight container at room temperature for 2-3 days or refrigerate for up to a week; re-crisp in a 300–325°F (150–160°C) oven for 5–7 minutes before serving.
  • Serving ideas: pair with a cool yogurt dip, tzatziki, tomato salsa, or use as a crunchy crouton substitute on salads or soups for a low-carb option.

FAQ

What are Crispy Cottage Cheese Chips?

They’re a crunchy, savory snack made from cottage cheese mixed with a binder and seasonings, spread thin on a baking sheet, and baked until crisp. The result is cracker-like chips that are higher in protein and lower in carbs than traditional chips.

What ingredients do I need?

Common ingredients:

  • 1 cup cottage cheese, well drained
  • 1 large egg white (or 1 small egg)
  • 2–3 tablespoons grated parmesan or almond flour
  • 1/4 teaspoon garlic powder
  • 1/4 teaspoon paprika or chili powder
  • 1/4 teaspoon salt (to taste)
  • Freshly ground pepper
  • Optional: chopped fresh herbs (parsley, chives), nutritional yeast, or sesame seeds
  • Oil spray or 1 teaspoon olive oil for brushing (optional)
Can I customize the flavors?

Yes. Try these variations:

  • Herbed: add dried or fresh herbs like parsley, thyme, and oregano.
  • Cheesy: increase parmesan and a pinch of onion powder.
  • Spicy: add extra paprika, chili powder, or a dash of cayenne.
  • Lemon-pepper: swap in lemon zest and cracked pepper.
How do I bake them in the oven?

Basic method:

  • Preheat oven to 400°F (200°C). Line a baking sheet with parchment.
  • Blitz or crumble cottage cheese until mostly smooth, then mix with binder and seasonings.
  • Spread mixture very thinly on the parchment to about 1/8-inch thickness.
  • Bake 12–18 minutes, flipping once halfway, until edges are golden and chips are crisp. Let them cool on a rack to crisp further.
Can I use an air fryer?

Yes. Preheat to 360–380°F (180–190°C). Spread a thin layer or form small rounds on a piece of parchment that fits your basket, or place directly if your basket tolerates it. Cook 8–12 minutes, checking for crispness and flipping once if needed. Let cool to crisp before storing.

How do I keep them crispy after baking?

Tips to stay crispy:

  • Spread very thin and bake until edges are golden.
  • Cool completely on a rack, not on a plate.
  • Store in an airtight container away from moisture.
  • If they lose crunch, re-crisp in a hot oven (or air fryer) for a few minutes.
How should I store leftovers?

Store in an airtight container in the refrigerator for 3–4 days. Re-crisp in the oven or air fryer for 3–5 minutes before serving. They don’t freeze well if already baked, but you can freeze the unbaked mixture to bake later.

Are Crispy Cottage Cheese Chips gluten-free or keto-friendly?

Gluten-free: yes, as long as you use gluten-free seasonings and avoid any breading. Keto-friendly: they can be, especially if you use full-fat cottage cheese and minimal added carbs (skip breadcrumbs). Using almond flour or extra parmesan helps keep carbs lower; check the exact nutrition of your chosen ingredients.

What dips go well with them?

Great pairing ideas:

  • Herbed yogurt dip or tzatziki
  • Salsa or pico de gallo
  • Guacamole or avocado sour cream
  • Spicy yogurt dip or ranch
What are common mistakes to avoid?

Watch for:

  • Not draining the cottage cheese well—moisture makes chips soft instead of crisp.
  • Spreading the mixture too thick—aim for a thin, even layer.
  • Overcrowding the pan—give each chip space to crisp.
  • Skipping the cooling rack—steam softens chips; cooling helps them stay crisp.
Can I freeze or prep these in advance?

Prep tips:

  • Unbaked mixture can be shaped into rounds or a thin sheet, then frozen on a tray and transferred to a bag for later baking from frozen (add a few extra minutes).
  • Unbaked portion sizes help with quick, portioned baking.

Introduction / Hook

Imagine a dish that feels like a breath of fresh air on a hot summer day, a bright whisper of green that instantly lifts the most modest meal into something memorable. Easy Creamy Asian Cucumber Salad is that little miracle on a plate: crisp cucumber ribbons bathed in a luscious, tangy-smooth dressing that glides across the tongue with a gentle, comforting richness. It’s the kind of dish that disappears before it’s even fully plated—stolen forkfuls between bites of grilled chicken, sizzling dumplings, or a bowl of steaming rice. The flavors are crisp, clean, and unexpectedly indulgent all at once: cool cucumbers, a creamy dressing with a kiss of sesame, a touch of tang from rice vinegar, a whisper of garlic, and a hint of sweetness that keeps every bite balanced and bright. This salad isn’t just a side—it’s a bright, edible moment that makes a weeknight dinner feel celebratory and a weekend gathering feel effortless. If you’ve ever wished for a salad that feels both refreshing and satisfyingly creamy, you’ve found it in this dish. It’s easy to pull together, versatile enough to please a crowd, and absolutely satisfying enough to stand proudly on its own as a light lunch or a perfect accompaniment to bolder flavors. Let this salad become your go-to quick-fix that never fails to charm your guests or your own taste buds.

The Story Behind the Dish

Cucumber salads have a long, storied presence across Asia, where gardeners and home cooks alike celebrated the cucumber’s crisp texture and refreshing palate. In many East Asian cuisines, cucumber is treated as a canvas—a vehicle for bright dressings that balance acidity, sweetness, and umami in a single, neat bite. The classic sunomono of Japan, for example, highlights the cucumber’s natural crunch with a lightly vinegared dressing and sesame accents, casting a glow of simplicity that feels elegant in its restraint. Across borders, similar preparations appear—slender ribbons or thin slices tossed with tangy, sesame-kissed dressings that honor the cucumber’s watery crunch and let fresh herbs or seaweed provide subtle complexity.

The creamy interpretation of this simple cucumber dish is a modern twist born from home cooks who crave texture and comfort in every bite. It’s the kind of recipe that travels well—from bustling kitchens of city apartments to sunlit picnic tables—without losing its charm. The dressing often borrows elements that are common in Asian pantry staples: a touch of mild soy or miso for depth, a splash of rice vinegar or citrus for brightness, a drizzle of sesame oil for warmth, and a creamy element that could be yogurt, sour cream, or mayo depending on preference and dietary needs. The result is a sodium-sweet balance that doesn’t shout, but rather hums at a satisfying, medium-high note. In many households, this dish became a beloved staple during the hottest months, when cucumbers bloom in abundance and the urge for something cool, creamy, and fast is strong. It has a way of turning a simple salad into a conversation starter—your guests leaning in to savor the delicate perfume of sesame, then rediscovering the crispness of cucumber with every bite.

Beyond its practicality, this salad carries a sense of kitchen harmony: a fusion of techniques that honor both dairy-based creaminess and the crisp, watery bite of cucumber. It’s a reminder that comfort can be refreshing, that indulgence can emerge from everyday ingredients, and that a small bowl can hold a story—one of freshness, balance, and the joy of sharing food that feels both modern and timeless.

Why You’ll Love This Recipe

  • Quick and effortless: ready in a flash, perfect for busy weeknights or last-minute gatherings.
  • Crisp and refreshing: the cucumber’s natural crunch pairs with a smooth, creamy dressing for a satisfying contrast.
  • Balanced flavors: tangy, slightly sweet, and pleasantly savory with sesame warmth.
  • Versatile: works as a side for grilled proteins, a topper for greens, or a light, stand-alone dish.
  • Always crowd-pleasing: approachable enough for weeknight meals, yet elevated enough for entertaining.
  • Flexible for dietary needs: dairy-free or dairy-friendly versions, easily adaptable to vegan or gluten-free diets.
  • Make-ahead friendly: can be prepared in advance and kept chilled, with dressings and textures staying delightful when stored properly.

Flavor Profile & Texture

The magic of Easy Creamy Asian Cucumber Salad lies in its harmonious interplay of textures and flavors. The cucumbers provide a crisp, water-rich bite that snaps pleasantly with each chew. They carry the dressing beautifully, delivering freshness with every mouthful. The dressing itself is creamy without being heavy, balancing silkiness with a gentle tang. The tang comes from a bright acidity—typically rice vinegar or a light citrus note—that wakes up the palate and cleanses the finish, leaving space for the cucumber’s natural sweetness to shine through.

Key flavor elements you’ll notice include:

  • Creamy smoothness that coats the cucumber while still letting its texture shine.
  • Subtle umami depth from a touch of soy or miso in the dressing, mingling with sesame for a nutty finish.
  • A sesame aroma that adds warmth and a hint of toasty richness, grounding the salad in a familiar, comforting way.
  • A crisp, clean brightness from vinegar or citrus, delivering a refreshing bite that lingers pleasantly.
  • A lightweight sweetness that rounds out the savory and tangy notes, ensuring the salad never tastes sharp or metallic.

Texture-wise, expect a delightful contrast: the cucumber’s crunch against a velvety creaminess, punctuated by tiny sesame seeds or slivered herbs that add a delicate bite. When you take a bite, you should feel the coolness of the cucumber, the silky dressing coating the surface, and a final whisper of sesame that lingers on the palate—an invitation for the next bite rather than a finish. It’s a balanced, versatile flavor profile that pairs nearly any main dish without clashing or overpowering it, making it a reliable side or even a light, satisfying dish on its own.

Occasions & Pairings

This salad shines in a wide range of settings, from casual weeknight dinners to festive gatherings. Its simplicity makes it a welcome addition to any menu, while its creamy, inviting character helps it stand out as a memorable accompaniment. Here are some ideal occasions and pairings to consider:

  • Weeknight dinners: serves as a cool counterpoint to warm, bold mains like ginger chicken, lacquered pork, or crispy tofu.
  • Summer barbecues and picnics: a refreshing side that travels well in a bowl or jar, staying bright after time in the sun.
  • Potlucks and parties: easy to scale up, light on heavy dishes, and universally liked.
  • Lunches: a quick, satisfying side to pair with a grain bowl, sandwich, or a small protein.
  • Holiday spreads: adds contrast to richer holiday dishes, offering balance and a palate-cleanser between richer courses.

Pairing ideas to elevate the experience:

  • With proteins: grilled chicken, salmon, shrimp, or tofu provide a versatile canvas for the salad’s brightness and creaminess.
  • With sides: serve alongside jasmine rice, quinoa bowls, or a light miso soup for a balanced meal.
  • With drinks: consider a light, citrusy beverage like sparkling water with a splash of lime, a dry sake, or a chilled green tea to echo the salad’s fresh notes.
  • With textures: add a small portion of pickled vegetables or a few toasted sesame seeds for extra crunch and umami.

Tips, Variations & Substitutions

Every home cook has a pantry that tells a story. This salad is wonderfully adaptable, inviting you to tailor it to your tastes, dietary needs, and the ingredients you have on hand. Here are practical ideas to customize and elevate the salad without overcomplicating it:

  • Vegan or dairy-free version: swap the creamy element for a plant-based yogurt or a dairy-free mayo blend. A touch of tahini can add body and a nutty note.
  • Gluten-free option: use gluten-free soy sauce or tamari in place of regular soy if you include a soy component in the dressing.
  • Health-forward tweaks: lighten the dressing with a yogurt base and add grated fresh ginger for a zingy, digestive-friendly twist.
  • Herbal lift: fold in finely chopped mint, cilantro, or Thai basil for a bright, aromatic finish that brightens the dish even more.
  • Crunchy accents: sprinkle toasted sesame seeds, white sesame, or crushed roasted peanuts for extra texture and a toasty aroma.
  • Herbaceous note: add thinly sliced green onions or a few microgreens on top for color and a pop of sharpness.
  • Regional twists: a light drizzle of chili oil or a pinch of gochugaru can transform the salad into a spicy, smoky version inspired by Korean or Sichuan flavors.
  • Texture play: for a more substantial bite, incorporate thinly sliced radish or shredded carrot to complement the cucumber’s tenderness.

Storage & Make-Ahead Ideas

One of the greatest strengths of this salad is its flexibility when it comes to prep and storage. To preserve texture and flavor, consider these tips:

  • Dress separately for longer storage: if you anticipate keeping leftovers, store the sliced cucumbers and the creamy dressing in separate containers. Toss together just before serving to maintain maximum crunch.
  • Short-term refrigeration: the salad keeps well for 1–2 days in an airtight container. The cucumbers will release some water over time, so draining excess liquid before serving can help maintain creaminess.
  • Make-ahead strategies: you can pre-slice the cucumbers and refrigerate them with a light sprinkle of salt to draw out excess moisture. Prepare the dressing in advance and whisk before tossing with the cucumbers for best texture and flavor.
  • Freezing guidance: cucumbers do not freeze well and will become mushy when thawed. This dish is best prepared fresh or with minimal advance prep if you plan to serve later in the day.
  • Serving temperature: while it’s traditionally served cold or at room temperature, a quick chill in the fridge before serving can intensify the refreshing sensation, especially on hot days.

Fun Facts & Trivia (Optional)

Delightful little facts can deepen appreciation for a simple dish. Here are some tidbits that deepen the story of this creamy cucumber salad:

  • Cucumbers are over 95% water, which makes them wonderfully hydrating and naturally cooling—a perfect match for creamy dressings that can feel rich.
  • Sesame oil not only adds flavor but also contributes a gentle aroma that signals comfort and warmth, a hallmark of many Asian-inspired dressings.
  • Salads featuring cucumber with a creamy, tangy dressing became popular in many culinary cultures as a fast, satisfying side that could be whipped up with pantry staples.
  • Yogurt-based creamy dressings have roots in many Asian and Middle Eastern cuisines, where tangy dairy pairs beautifully with fresh vegetables for a balanced, light yet comforting dish.
  • In some versions of sunomono-inspired salads, rice vinegar is the star for brightness, while a hint of sweetness from a natural sugar or mirin echoes the delicate balance found in Japanese flavor profiles.

Ingredients

  • Cucumber Prep
  • 2 medium cucumbers (English cucumbers recommended), washed, ends trimmed, and thinly sliced into rounds or half-moon shapes
    → These cucumbers form the crisp, refreshing base of the salad. Keeping them sliced thin ensures they coat evenly with the creamy dressing and stay tender without becoming watery. If using regular cucumbers, pat dry after slicing to remove excess moisture.
  • 1/4 teaspoon kosher salt (for sweating cucumbers)
    → A light sprinkle of salt draws out excess water from the cucumber slices, helping the salad maintain a crisp texture rather than turning watery as it sits. After sweating, lightly pat the slices dry or rinse quickly and drain well before mixing with the dressing.
  • Creamy Dressing
  • 1 cup plain Greek yogurt (full-fat preferred for richness)
    → The yogurt provides a tangy, creamy base that coats the cucumber without the heaviness of mayonnaise alone. Use full-fat yogurt for thicker, silkier texture; for a lighter version, you can blend with a little water or milk to reach the desired consistency.
  • 2 tablespoons mayonnaise (optional, for extra silkiness)
    → Mayonnaise enhances creaminess and helps emulsify the dressing with yogurt, giving a smooth mouthfeel. If you skip it, you’ll still have a creamy salad; choose a light mayo if you want fewer calories.
  • 1 tablespoon rice vinegar (or apple cider vinegar)
    → Adds bright acidity to balance richness and prevent the dressing from tasting flat. Start with 1 tablespoon and adjust after tasting with the cucumbers.
  • 1 teaspoon sesame oil
    → A little sesame oil imparts a nutty aroma that complements Asian flavors. Use toasted sesame oil for a stronger note; drizzle lightly to avoid overpowering the other ingredients.
  • 1 tablespoon light soy sauce or tamari (gluten-free)
    → Provides umami and saltiness to the dressing. If using tamari, ensure it’s gluten-free; alternatively coconut aminos can be used for a different flavor profile and salt level.
  • 1 tablespoon honey or maple syrup (adjust to taste)
    → A touch of sweetness helps balance acidity and chili heat, creating a well-rounded dressing. If you prefer a savory profile, reduce or omit the sweetener.
  • 1 clove garlic, finely minced or grated
    → Garlic adds aromatic bite and depth to the dressing. Grate or mince finely so it disperses evenly; for a milder flavor, press through a garlic press and blend well.
  • 1 teaspoon grated fresh ginger (optional)
    → Fresh ginger provides a subtle zing and warmth that pairs nicely with cucumber. Grate finely so the fibers blend into the dressing; omit if you want a milder profile.
  • 1/4 to 1/2 teaspoon chili flakes or Sriracha (to taste)
    → Heat level is adjustable: start with a small amount and increase gradually to your preferred heat. For a milder salad, omit the chili; for more kick, add a bit more.
  • Salt and pepper to taste
    → Taste the dressing after combining with cucumbers and adjust with a pinch of salt or a few cracks of pepper. The soy sauce already contributes salt, so add more sparingly and taste before serving.
  • Finish and Garnish
  • 2 tablespoons chopped green onions (scallions)
    → Green onions add a fresh, mild onion note and color. Slice thinly to distribute throughout the salad. For a milder flavor, use only the white parts or reduce the amount slightly.
  • 1 tablespoon sesame seeds, toasted
    → Toasted sesame seeds give a delicate crunch and a toasted nutty aroma that complements the dressing. Toast in a dry skillet over medium heat until fragrant, then cool before sprinkling over the salad.
  • Optional Add-ins
  • 1/4 cup shredded carrot (for color and subtle sweetness)
    → Carrot adds visual appeal and a touch of sweetness that pairs well with tangy dressing. Shred finely so it mixes evenly with cucumber pieces.
  • 1/4 cup thinly sliced red bell pepper (for color and crispness)
    → Red pepper provides vibrant color, a juicy crunch, and a fresh brightness that enhances the overall texture.
  • 2 tablespoons chopped fresh cilantro or mint (optional, for brightness)
    → Fresh herbs lift the dish with aromatic oils. Cilantro yields a classic Southeast Asian profile, while mint gives a cool, refreshing note; choose based on your flavor preference.
  • 1/4 cup chopped peanuts or cashews (optional, for crunch)
    → Adds a contrasting crunchy texture and roasted nut flavor. Lightly crush and sprinkle on top for even distribution; for nut-free versions, omit or substitute with additional sesame seeds.

Instructions

  • Prepare the cucumbers: Rinse the cucumbers, trim ends, and slice into thin rounds or half-moons for a crisp base that coat evenly with dressing.
    → Uniform slices maximize surface area for dressing adhesion and ensure consistent texture throughout the salad.
  • Sweat the cucumber slices: In a colander or large bowl, toss the cucumber slices with 1/4 teaspoon kosher salt and let them rest 10 minutes to draw out excess water. Then pat dry thoroughly with a clean kitchen towel or paper towels to prevent watery dressing.
    → Sweating reduces moisture that can water down the dressing and helps maintain a crisp bite.
  • Whisk the creamy dressing base: In a medium bowl, whisk the 1 cup plain Greek yogurt and 2 tablespoons mayonnaise until smooth and fully emulsified; this creates a rich, luscious base that clings to the cucumbers.
    → Emulsification gives a silkier dressing and prevents separation between dairy and oil components.
  • Balance acidity and sweetness: Add 1 tablespoon rice vinegar (or apple cider vinegar), 1 teaspoon sesame oil, 1 tablespoon light soy sauce or tamari, and 1 tablespoon honey or maple syrup; whisk to combine and taste.
    → The acid brightens the dressing while the honey counters excessive tang; balance is essential for a refreshing result.
  • Incorporate aromatics and heat: Add 1 clove minced garlic, 1 teaspoon grated fresh ginger (optional), and 1/4 to 1/2 teaspoon chili flakes or Sriracha; whisk again to evenly distribute.
    → Garlic and ginger provide depth, while chili adds customizable heat without overpowering the cucumber sweetness.
  • Season the dressing: Taste and season with a pinch of salt and pepper as needed; remember the soy sauce contributes salt, so adjust gradually to avoid oversalting.
    → Proper seasoning ensures the dressing complements the cucumbers without tasting raw or flat.
  • Toast the sesame seeds: In a small dry skillet over medium heat, toast 1 tablespoon sesame seeds until they are fragrant and just golden, about 2 to 4 minutes, shaking the pan frequently; cool before using.
    → Toasting deepens the nutty aroma and adds a subtle crunch to the finished salad.
  • Slice the green onions: Finely slice 2 tablespoons green onions, keeping the slices thin for even distribution; set aside.
    → Green onions provide fresh bite and brighten the dish; fine slices ensure they blend with every bite rather than bunching up.
  • Dress the cucumbers: Transfer the sweat-dried cucumber slices to a large mixing bowl; pour the prepared dressing over the cucumbers and toss gently with tongs or a wide spatula until every piece is coated.
    → Gentle folding prevents breaking the delicate cucumber slices and ensures uniform coverage.
  • Finish with onions and sesame: Sprinkle the sliced green onions and toasted sesame seeds over the dressed cucumber, then toss lightly to distribute; this step adds color, aroma, and textural contrast.
    → Fresh aromatics at the finish lift the salad and the sesame contributes a crisp counterpoint to the creamy dressing.
  • Chill and meld flavors: Refrigerate the salad for 15 to 20 minutes before serving to allow the dressing to meld with the cucumbers; give it a final gentle toss before tasting.
    → Resting time lets the cucumber slices soak up the dressing’s flavors while remaining crisp.
  • Optional additions: If using shredded carrot, thinly sliced red bell pepper, chopped cilantro or mint, or chopped peanuts or cashews, fold them in after the salad has rested for a bright, textured finish; adjust quantities to taste.
    → Add-ins provide color, texture, and nuanced flavor; keep them evenly distributed for balance in every bite.

Notes

These easy creamy Asian cucumber salad notes guide you to a crisp, refreshing dish with a silky yogurt-based dressing and a bright balance of tang, sweetness, and umami. For best texture, thinly slice English cucumbers and lightly sweat them with a pinch of salt to draw out excess moisture, then pat dry before tossing with the dressing. If using regular cucumbers, pat dry well after sweating to prevent watering the salad as it sits. The dressing combines full-fat Greek yogurt for richness with optional mayonnaise for extra silkiness, along with rice vinegar or apple cider vinegar for acidity, toasted sesame oil for aroma, and gluten-free soy sauce or tamari for depth and salt. Add honey or maple syrup to taste to balance the acidity, and season with a finely minced garlic, a teaspoon of grated fresh ginger if you like a zing, and chili flakes or Sriracha to your preferred heat level. Taste and adjust salt carefully, noting that soy sauce already contributes salt. Finish with chopped green onions and toasted sesame seeds for color and crunch. Optional add-ins like shredded carrot, thin red bell pepper, chopped fresh cilantro or mint, and chopped peanuts or cashews bring extra texture and brightness. For best results, chill the salad for 20–30 minutes to let flavors meld, then toss again just before serving. This dish can be prepared ahead, but cucumber water will accumulate over time, so you may prefer to mix dressing and cucumber closer to serving or drain excess moisture before serving. For a gluten-free version, use tamari or gluten-free soy sauce and ensure all dairy components are labeled gluten-free. It pairs beautifully with grilled proteins, noodles, or as a cooling side on hot days.

Tips

Prep and Crisper Cucumber Tips

  • Sweat the cucumbers: after slicing, sprinkle with ¼ teaspoon kosher salt and let them rest 10–15 minutes. This draws out excess water so the final salad stays crisp and not watery. Pat dry thoroughly with paper towels before mixing with the dressing.
  • Choose cucumbers wisely: English cucumbers are ideal for their thin skins and lower bitterness. If using regular cucumbers, cut thicker and pat dry well to reduce extra moisture.
  • Slice consistently: aim for 1/8-inch rounds or half-moon slices for even coating and a uniform texture. A mandoline can help for razor-thin, uniform pieces.

Dressing Tips

  • Use full-fat plain Greek yogurt for thickness and richness. If you prefer lighter options, blend in a splash of water or milk to reach the desired consistency.
  • Mayonnaise adds silkiness and helps emulsify the dressing; if you skip it, your salad will still be creamy but slightly lighter. For dairy-free or vegan versions, substitute with plant-based yogurt and vegan mayo.
  • Ace the acidity: start with 1 tablespoon rice vinegar (or apple cider vinegar) and adjust after tasting with the cucumbers. Too much can overwhelm the cucumber sweetness.
  • Toasted sesame oil: a little goes a long way. Drizzle lightly and taste; use a bit more if you love a stronger nuttiness, but avoid overpowering the other flavors.
  • Umami and salt: 1 tablespoon soy sauce or tamari adds depth. If using tamari, ensure it’s gluten-free; coconut aminos are a milder alternative with different salt levels.
  • Sweet balance: 1 tablespoon honey or maple syrup helps balance acidity and chili heat. Reduce or omit if you prefer a savory-forward dressing.
  • Garlic and ginger: finely mince/grate the garlic and ginger so they disperse evenly. If you’re sensitive to bold garlic, press and blend well or omit for a milder profile.
  • Heat level: ¼ to ½ teaspoon chili flakes or Sriracha is optional. Add in increments, tasting as you go to reach your preferred heat level.
  • Taste as you go: the soy/tamari adds salt, so taste the dressing before extra seasoning. A pinch of pepper can brighten the finish.

Emulsification and Consistency

  • Whisk vigorously or blend the dressing ingredients until smooth and emulsified. If the dressing thickens too much after chilling, whisk in a teaspoon of water or milk to loosen.
  • If you notice separation after mixing, give it a quick whisk or shake; the fats (yogurt, mayo, sesame oil) will re-emulsify with proper mixing.

Assemble, Chill and Serve

  • Pat dry sweat-out cucumber slices thoroughly before tossing with the dressing to keep the salad crisp.
  • Toss the cucumbers with the dressing gradually in a large bowl, ensuring even coating without overdressing. Start with half the dressing, then add more as needed.
  • Chill the salad for 15–30 minutes before serving to let flavors meld and the cucumber to stay cool and refreshing.
  • Add finish garnishes just before serving to preserve crunch: green onions, toasted sesame seeds, and optional herbs.

Flavor Balancing and Substitutions

  • For dairy-free: substitute with dairy-free yogurt (unsweetened) and vegan mayo. Adjust sweetness and salt to taste since some dairy-free products can have different water content.
  • Herbs and brightness: cilantro pairs well with Southeast Asian notes; mint offers a cool counterpoint. Use what you prefer or mix for a brighter aroma.
  • Nutty crunch: keep or omit chopped peanuts/cashews based on dietary needs. If nut-free, rely on extra sesame seeds for texture.

Make-Ahead and Storage

  • Best fresh, but you can prepare components ahead: sweat and pat dry cucumbers, whisk dressing, and refrigerate both separately up to 1 day. Toss together just before serving.
  • Store leftovers in an airtight container up to 1–2 days. The cucumber may release more water over time; drain any excess liquid and toss with a small amount of dressing to refresh.
  • Do not freeze; cucumbers don’t retain texture well after freezing, and the dressing may separate upon thawing.

FAQ

What is Easy Creamy Asian Cucumber Salad?

It’s a light, refreshing cucumber salad with a creamy dressing inspired by Asian flavors. Crunchy cucumber slices are tossed in a tangy-slightly-sweet dressing made with yogurt or mayo, rice vinegar, soy sauce, sesame oil, garlic, and ginger, finished with green onions and sesame seeds.

What ingredients do I need?

For the salad and dressing, you’ll need:

  • 2 large English or Persian cucumbers, thinly sliced
  • 1/4 red onion, thinly sliced (optional)
  • 2–3 green onions, sliced
  • 1/2 cup plain yogurt or 1/2 cup mayonnaise (or a dairy-free alternative like almond yogurt or vegan mayo)
  • 2 tablespoons rice vinegar
  • 1 tablespoon soy sauce or tamari
  • 1–2 teaspoons honey or sugar (adjust to taste)
  • 1 teaspoon sesame oil
  • 1 clove garlic, minced
  • 1/2 teaspoon grated fresh ginger
  • 1–2 teaspoons sesame seeds
  • Salt and pepper to taste

Optional flavor tweaks: chili flakes for heat, a squeeze of lime, or chopped cilantro/mint for freshness.

Are there vegan or dairy-free options?

Yes. Use a dairy-free yogurt or vegan mayo to keep the dressing dairy-free. For a gluten-free version, use gluten-free soy sauce or tamari. Sesame seeds are optional if you have sesame allergies.

How do I make it?

Steps:

  1. Thinly slice the cucumbers and red onion. If you prefer less moisture, sprinkle with a little salt and let sit 10 minutes, then pat dry.
  2. Whisk together the dressing: yogurt or mayo, rice vinegar, soy sauce, honey or sugar, sesame oil, garlic, and ginger. Adjust sweetness and salt to taste.
  3. In a large bowl, combine the cucumbers, red onion, and green onions. Pour the dressing over and toss to coat.
  4. Sprinkle with sesame seeds. Chill for 10–20 minutes to meld flavors, then serve.
How long does it last in the fridge?

Store in an airtight container in the refrigerator for up to 2–3 days. The dressing and cucumber can release water over time; you can drain excess liquid before serving if needed.

Can I prepare this ahead of time?

Yes. You can slice the cucumbers and onion ahead and whisk the dressing in advance. Toss everything together about 10–15 minutes before serving to keep cucumbers crisp.

How can I customize the flavors?

Ideas to vary the salad:

  • Add shredded carrots or thinly sliced bell peppers for color and crunch.
  • Swap in lime juice for a brighter tang, or add a pinch of chili paste for heat.
  • Use chopped cilantro or mint for fresh herbal notes.
  • Try a sesame-only dressing with a splash of soy and a touch of honey for a lighter version.
How many servings does this make?

Typically about 4 side-dish servings or 2–3 main-serving portions when paired with other dishes.

What dishes pair well with Easy Creamy Asian Cucumber Salad?

It goes well with grilled chicken, shrimp, or tofu, fried rice, teriyaki dishes, or a light noodle bowl. It also makes a refreshing accompaniment to spicy dishes to balance heat.

What allergens should I be aware of?

This recipe commonly contains dairy (yogurt or mayo) and sesame and soy. To make it dairy-free, use vegan mayo or dairy-free yogurt and ensure the soy sauce is gluten-free if needed. For sesame allergies, omit sesame seeds or use a sesame-free dressing.

Introduction / Hook

Imagine a warm autumn evening, the kitchen glowing with the soft amber of a slow oven, and the air thick with the sweet, almost caramel-like scent of onions caramelizing to perfection. Picture tender pieces of chicken nestled in a rich, creamy embrace, their flavors deepened by thyme, a kiss of garlic, and a generous veil of melted cheese that turns the dish golden and irresistible. This French Onion Chicken Casserole is not just a meal; it’s a comforting ritual. It invites you to pause, breathe in the savory steam, and let the stress of the day fade as you anticipate the first forkful—the way the creamy sauce coats your palate, the way the onions release their natural sweetness, the way the top crisps to a delicate crust that crackles with every slice. It’s the kind of dish that feels like a welcome, a hug from your own kitchen, a promise that a busy week can still end with something soul-satisfying on the table. And beyond the surface warmth, there’s something quietly nostalgic about this casserole—an echo of family dinners, church suppers, and potluck gatherings where a single pan could feed a room full of smiles.

The Story Behind the Dish

French onion soup has a storied place in culinary history, tracing routes through medieval kitchens and noble dining rooms, gradually evolving into the caramel-soft onions nearly everyone recognizes. The essence of that dish—slow-cooked onions coaxed into sweetness, a rich, savory stock, and a top that melts and browns—is a flavor memory for many. Transfer that memory to a casserole form, and you’ve got something that speaks to modern home cooks: the best of slow, soulful flavor, reimagined for weeknights and family-style feasts. The concept of combining onion-forward depth with protein in a single baking dish has long served home cooks well in North America, where casseroles became symbols of comfort, practicality, and shared meals. They emerged as a practical solution for busy households, a way to stretch ingredients while preserving the sense of a kitchen prepared for company.

In this particular dish, the elegance of French onion flavor meets the heartiness of chicken in a way that’s utterly approachable. It’s a culinary bridge between two worlds: the sophisticated, simmered sweetness of an onion-forward sauce, and the homey, sturdy satisfaction of a one-dish supper. The result is a casserole that feels both elegant and everyday—perfect for a family weeknight yet refined enough to serve to guests who drop by unannounced. There’s a charm in this fusion: a story you can tell through the aroma, a memory you can create with your own spoons, and a comforting reminder that good food often travels best when it travels in a single, well-loved pan.

Why You’ll Love This Recipe

  • Effortless weeknight salvation: a single pan, minimal active time, maximum comfort.
  • Creamy, velvety texture with a luxurious cheese crust that adds both richness and a gentle crunch.
  • Balanced flavor profile: the natural sweetness of caramelized onions meets savory chicken and herbs for depth without heaviness.
  • Versatile for a crowd: easy to scale for family dinners, potlucks, or weekend gatherings.
  • Make-ahead friendly: the flavors meld beautifully as the dish sits, making planning simple for busy days.
  • Leftovers that still feel special: the casserole reheats beautifully, maintaining tenderness and savoriness.
  • Adaptable to different dietary needs with thoughtful substitutions (gluten-free, dairy-free, lighter options) without sacrificing flavor.

Flavor Profile & Texture

At first bite, you’re met with a comforting harmony: the initial warmth of the creamy sauce, the gentle kiss of melted cheese, and the soft, yielding texture of chicken that has absorbed the dish’s most intimate flavors. The onions, slow-cooked to a deep, honeyed brown, release a robust sweetness that lingers on the tongue—an aromatic sweetness that doesn’t shout, but rather sofens and sweetens every other note. Herbs add a whisper of earth and brightness, lifting the dish from simple comfort to a meal that feels thoughtfully crafted. The surface offers a delicate contrast: a golden, slightly crisp top that gives way to a smooth, luscious interior. It’s a balance of texture you crave—the silken sauce clinging to each strand of chicken, the onions offering their tender bite, and the cheese forming a tender crust that folds into the sauce as you scoop along.

The aroma is an invitation before the first bite: onion notes mellowed by caramelization, a dairy-forward creaminess that suggests cozy kitchen warmth, and a hint of garlicky savoriness that ties the dish together. If you’re fans of classic comfort flavors, this dish lands squarely in your wheelhouse. It’s not heavy in a dull way; it’s hearty, satisfying, and indulgent in all the right measures. The flavor profile plays well with a touch of thyme or a bay leaf, a whisper of pepper, and a little brightness from a squeeze of lemon or a fresh herb finish just before serving. All in all, the dish delivers a caramelized, savory, and deeply comforting experience that feels both timeless and modern at once.

Occasions & Pairings

This casserole shines across a spectrum of occasions, from simple weeknight dinners that feel special to bigger gatherings where a crowd-pleasing dish is a guarantee of easy success. It works beautifully for:

  • Weeknights when you want something cozy yet not fussy.
  • Sunday suppers that lean into comfort and conversation.
  • Potlucks and church suppers where a single dish can warm a room.
  • Holiday menus that call for familiar, crowd-pleasing flavors without complicated steps.

Pairing ideas to elevate the experience without overshadowing the casserole:

  • Crusty bread or garlic toast to soak up every last bit of creamy sauce.
  • A simple green salad with a tangy vinaigrette to cut through richness.
  • Roasted vegetables, such as carrots, Brussels sprouts, or broccoli, for color and a textural contrast.
  • Lightly dressed potato options or mashed potatoes for comforting starch harmony.
  • White wine with a gentle acidity (think unoaked Chardonnay or Pinot Grigio) or a bright non-alcoholic spritzer with citrus notes.

Seasonal Fit

The dish particularly resonates in cooler months when caramelized onions and creamy textures feel most comforting. It also scales well for holiday menus, offering a signature dish without requiring every family member to contribute separate components. The simplicity of the casserole makes it a reliable centerpiece, allowing you to focus on ambiance, conversation, and the joy of sharing a well-loved meal with those you care about.

Tips, Variations & Substitutions

Here are ways to tailor the dish to your kitchen, dietary needs, or flavor preferences without compromising the essence of the dish:

  • Protein options: If you prefer, you can swap in other proteins such as turkey, chicken thighs for extra juiciness, or even a mix of chicken and mushrooms for a vegetarian-leaning variation (see substitutions below).
  • Cheese options: A mix of cheeses deepens the flavor—Gruyère, mozzarella for melt, or a sharp cheddar for a more pronounced tang. If you’re dairy-free, consider vegan cheese shreds that melt well or a dairy-free cream sauce with a hint of nutritional yeast for savoriness.
  • Herb & aromatics: Fresh thyme, a bay leaf, or a pinch of rosemary can lift the onion foundation. Finish with chopped parsley or chives for a fresh green finish just before serving.
  • Spice tweaks: A touch of paprika or smoked paprika adds a subtle warmth. A pinch of nutmeg can echo the creamy base, especially if the sauce leans toward a dairy-forward richness.
  • Gluten considerations: If you’re avoiding gluten, use a gluten-free creamy base or stock and ensure any thickening components are gluten-free. Breadcrumbs on top can be swapped for gluten-free breadcrumbs or a baked cheese crust for texture without gluten.
  • Make-ahead approach: Assemble up to the point of baking, cover tightly, and refrigerate for up to 24 hours. Bake a little longer to account for chilling if you’re cooking straight from the fridge.
  • Low-carb or lighter versions: Use a lighter dairy base, reduce cheese slightly, or swap in a cauliflower-cream base to maintain creaminess with fewer carbs.
  • Regional twists: A pinch of herbes de Provence or a splash of white wine can bring a Provençal nuance; a dash of anchovy paste (a classic secret for deepening savory tones) can be whisked into the sauce for those who enjoy umami depth.

Storage & Make-Ahead Ideas

One of the most appealing aspects of casseroles is their resilience. This dish benefits from a little rest and reheat, allowing flavors to meld and the sauce to thicken slightly. Here are practical tips for making the most of leftovers and planning ahead:

  • Storage: Store leftovers in an airtight container in the refrigerator for up to 3–4 days. The flavors typically grow deeper with time, making the second or third day especially satisfying.
  • Freezing: If you want to freeze, portion the casserole once cooled. It freezes well for up to 2–3 months. Thaw in the refrigerator overnight before reheating.
  • Reheating tips: Reheat gently in the oven at a moderate temperature until the center is hot and the surface is bubbling. If the top looks dry, spoon a little cream or milk over the surface to regain creaminess, then re-crisp the top briefly under the broiler if desired.
  • Make-ahead serving: Prepare the dish through any browning step and refrigerate. Bake directly from the chilled state with a slightly extended bake time to ensure the center heats through fully.

Fun Facts & Trivia (Optional)

Delightful little tidbits can add flavor to your hosting as you share this dish:

  • Caramelized onions are a hallmark of many classic European comfort dishes; their sweetness comes from the slow breakdown of natural sugars, which intensifies with time and heat.
  • The idea of baking a casserole to marry flavors is a practical cornerstone of many kitchen traditions, especially in regions with long winters where hearty, all-in-one meals were essential for family nourishment.
  • Cheese on top of a hot, creamy dish isn’t just about taste—it provides a textural contrast that satisfies the urge for a little crisp, a little melt, and a lot of comfort.
  • Even though the name evokes French influence, the dish embodies a universal, cross-cultural appeal: the marriage of savory meat, onion sweetness, and a creamy, comforting sauce is a global favorite.

Closing Thoughts

French Onion Chicken Casserole invites you to savor a moment of uncomplicated dining that still feels abundant and special. It speaks to the joy of a kitchen where simple ingredients become something greater through patience, gentle heat, and a little culinary curiosity. Whether you’re feeding a bustling family, entertaining friends, or simply enjoying a quiet night in, this casserole offers a dependable, soul-satisfying centerpiece. It’s the kind of dish that earns compliments and invites revisits—an uncomplicated classic that never tires of a second helping. Put simply, it’s home cooking elevated by a touch of elegance—portion by portion, bite by bite.

Ingredients

Chicken & Onion Base

    – 1.5 pounds boneless, skinless chicken thighs, trimmed and cut into bite-sized pieces
    → The protein foundation of the casserole; thighs stay juicy and flavorful when cooked slowly. Pat the pieces dry and season lightly with salt before browning for best color and texture.
    – 2 tablespoons olive oil
    → Used to brown the chicken and sauté the onions. Heat until shimmering and avoid overcrowding the pan to ensure proper browning and flavor development.
    – 1 tablespoon unsalted butter
    → Helps caramelize the onions and enrich the overall flavor. Add with the onions to achieve a glossy, deep caramel; dairy-free option: substitute with a touch more oil.
    – 2 large yellow onions, peeled and thinly sliced
    → Caramelized onions form the casserole’s sweet, deep base. Slice evenly and cook slowly on medium-low heat until amber and jammy, about 20–30 minutes, stirring occasionally.
    – 4 cloves garlic, minced
    → Adds aromatic depth. Add toward the end of the onion caramelization to prevent burning; 30–60 seconds of sautéing is enough to bloom the garlic.
    – 1/2 teaspoon kosher salt
    → Seasoning in layers helps build flavor without oversalting. Use modest amounts and adjust after the sauce is finished.
    – 1/4 teaspoon freshly ground black pepper
    → Provides subtle heat and balance to the sweetness of the onions. Taste and adjust after saucing to keep overall saltiness in check.

Creamy Sauce & Seasonings

    – 1 can condensed cream of mushroom soup (10.5 oz)
    → Forms the rich, velvety base for the casserole. Opt for a low-sodium variety to better control the final salt level; keep the soup undiluted for the proper consistency.
    – 1 cup low-sodium chicken broth
    → Thin the soup to create a pourable sauce that coats the chicken evenly. Use low-sodium broth to manage salt while preserving flavor.
    – 1/2 cup sour cream
    → Adds tang and extra creaminess; soften to room temperature and whisk in gradually to prevent curdling when it hits hot sauce. As a lighter alternative, Greek yogurt can be used.
    – 2 cups shredded Swiss cheese (Gruyère) – divided: 1 cup stirred into the sauce, 1 cup reserved for topping
    → Melts into the sauce for richness and forms a bubbly, cheesy crust on top. Grate finely for smooth melting and distribute evenly between sauce and topping.
    – 1/2 cup dry white wine (optional)
    → Provides brightness and cuts richness; if omitted, substitute with an equal amount of additional broth. Add with the liquid and simmer briefly to cook off the alcohol.
    – 1 tablespoon Dijon mustard
    → Adds a subtle tang and helps emulsify the sauce for a smooth texture. Whisk into the sauce with the soup and broth to prevent separation.
    – 1 teaspoon dried thyme (or 1 tablespoon fresh thyme leaves)
    → Classic herb pairing with onions and chicken. Dried thyme blends quickly; fresh thyme offers a brighter aroma—adjust to taste and availability.
    – 1 bay leaf (optional)
    → Infuses a gentle, earthy aroma. Remove before serving; omit if you don’t want any bay notes.
    – Salt and pepper to taste
    → The exact salt level depends on the soup and broth; taste after mixing and adjust gradually to avoid over-salting.

Toppings & Finish

    – 1 cup breadcrumbs (panko or regular)
    → Creates a crisp, golden crust on top. For extra flavor, season breadcrumbs lightly with garlic powder and a pinch of Parmesan; toss with 2 tablespoons melted butter to help browning.
    – 2 tablespoons melted unsalted butter
    → Binds with the breadcrumbs to promote browning and crunch in the oven. If dairy-free, substitute with olive oil or a dairy-free butter substitute.
    – Fresh parsley leaves, chopped (optional)
    → Finishes the casserole with a pop of color and fresh aroma. Sprinkle after baking to preserve vibrant green color.

Optional Add-ins

    – 8 oz cremini or button mushrooms, sliced (optional)
    → Adds earthy depth and moisture. Sauté the mushrooms first to brown and evaporate their water, then fold into the casserole for extra umami.

Instructions

  • Preheat your oven to 350°F (175°C) and lightly grease a 9×13-inch casserole dish or spray with nonstick spray.
    → This ensures even cooking and that the casserole releases cleanly for slicing and serving.
  • Pat the chicken thighs dry with paper towels and cut into bite-sized pieces; season lightly with salt and pepper.
    → Drying the surface promotes browning and the salt helps build flavor in layers without oversalting the finished dish.
  • Heat 2 tablespoons olive oil in a large skillet over medium-high heat and brown the chicken pieces in batches until deeply golden on all sides, about 3–4 minutes per batch; transfer to a plate as you go.
    → Browning creates flavorful fond that will enrich the sauce; overcrowding causes steaming and pale meat.
  • In the same skillet, add 1 tablespoon unsalted butter and 2 large yellow onions; season with a pinch of salt and cook over medium-low heat, stirring occasionally, until the onions soften and then caramelize to amber and jammy, about 20–30 minutes.
    → Slow caramelization concentrates sweetness and depth, forming the flavor backbone of the casserole.
  • Add 4 minced garlic cloves to the onions and sauté for 30–60 seconds until fragrant, being careful not to burn.
    → Quick sauté blooms the garlic’s aroma without bitterness; burnt garlic can impart acrid notes.
  • Deglaze the skillet with 1/2 cup dry white wine (or substitute with 1/2 cup additional chicken broth) and scrape up all the browned bits with a wooden spoon, letting the liquid reduce slightly for 1–2 minutes.
    → The fond dissolves into the sauce, adding depth and a glossy sheen.
  • In a medium bowl whisk together 1 can condensed cream of mushroom soup, 1 cup chicken broth, and 1/2 cup sour cream until completely smooth; reserve the mixture.
    → This creates a creamy, cohesive base that coats the chicken evenly without separating when heated.
  • Stir in 1 cup shredded Swiss cheese (Gruyère) into the sauce mixture, so it melts into the base; reserve the remaining 1 cup for topping.
    → The cheese in the sauce adds richness and a velvety texture throughout the casserole, while the topping cheese provides a bubbly crust.
  • Add 1 tablespoon Dijon mustard, 1 teaspoon dried thyme (or 1 tablespoon fresh thyme), and salt and pepper to taste to the sauce; whisk to emulsify and distribute the seasonings evenly. If using, tuck in 1 bay leaf and remove it before serving.
    → The mustard stabilizes the emulsion and brightens the sauce; thyme pairs with onions and chicken; bay leaf imparts subtle aroma nullified by removal before serving.
  • Return the browned chicken and caramelized onions to the skillet with the sauce; stir to coat the pieces evenly and simmer gently for 2–3 minutes to meld flavors. Remove the bay leaf if used.
    → Gentle simmer ensures the chicken remains juicy and the sauce thickens slightly before baking.
  • If you are adding mushrooms, sauté 8 oz sliced cremini or button mushrooms in a small skillet until they release their moisture and brown; then fold them into the chicken-onion mixture.
    → Mushrooms add earthy depth; browning them first concentrates their flavor and prevents soggy texture in the casserole.
  • Transfer the sauced chicken and onion mixture to the prepared casserole dish and spread it into an even layer; sprinkle the remaining 1 cup Gruyère over the top.
    → Even distribution ensures consistent melt and a uniform cheesy crust across the surface.
  • In a small bowl mix 1 cup breadcrumbs with 2 tablespoons melted unsalted butter until the crumbs are evenly coated; sprinkle the mixture over the cheese-topped casserole.
    → Buttered breadcrumbs toast and crisp in the oven, creating a crunchy, golden crust that contrasts with the creamy interior.
  • Bake in the preheated oven at 350°F (175°C) for 25–30 minutes, until the casserole is hot throughout, the cheese is melted and bubbling, and the breadcrumb topping is golden brown. If the topping needs more color, finish under the broiler for 1–2 minutes watching closely.
    → Baking until bubbling ensures the sauce thickens and flavors meld; finishing under the broiler gives a crisp, caramelized crust.
  • Remove from oven and let rest for 5–10 minutes before serving to allow the sauce to thicken and slice cleanly.
    → Resting helps the fats rebind and the casserole set, making portions neat rather than soupy.
  • Garnish with chopped fresh parsley just before serving to add a bright, fresh note and to enhance the dish’s presentation.
    → A final herb finish enlivens the color and aroma, balancing the richness of the casserole.

Notes

These French Onion Chicken Casserole notes guide you through building a deeply savory, creamy bake that serves the whole family. Start by browning the chicken in batches in olive oil to develop color, then remove and set aside; caramelize the onions slowly in the same pan with the tablespoon of butter until amber and jammy (about 20–30 minutes). Add minced garlic in the last minute to bloom without burning. Deglaze with a splash of dry white wine (optional) or additional broth to lift the fond, then return the chicken to the pan. Whisk the condensed cream of mushroom soup with the low-sodium broth and sour cream; whisk in Dijon mustard, thyme, and a bay leaf if using, and season with salt and pepper to taste. Fold in 1 cup of the shredded Swiss cheese (Gruyère) into the sauce for richness. If you want a lighter version, substitute Greek yogurt for the sour cream or use a dairy-free cheese and butter substitute. For a smoother texture, you can remove the bay leaf before combining with the chicken and onions. Assemble the casserole by mixing the sauced chicken and onions in a baking dish, then top with the remaining 1 cup Gruyère and the breadcrumbs tossed with melted butter for a crisp crust. Bake at 350°F (175°C) until bubbling and the top is golden, about 30–40 minutes; if the top needs more browning, a quick broil for 1–2 minutes works well. For gluten-free diets, use gluten-free condensed soup and breadcrumbs or omit the breadcrumbs altogether and rely on extra cheese for a crust. Leftovers store in the fridge for 3–4 days and reheating gently helps preserve tenderness; this dish also freezes well (unbaked) for up to 2 months. Optional add-ins like sliced cremini mushrooms can be sautéed until brown and folded into the casserole for extra depth. Fresh thyme offers a bright aroma; dried thyme is a suitable substitute if fresh isn’t available. If you’re watching salt, start with the lower end of the seasoning and adjust after the sauce comes together and the final dish is tasted. Preparing the components ahead—caramelizing the onions and browning the chicken—allows you to assemble and bake quickly when you’re ready to eat.

Tips

Tips for Perfect French Onion Chicken Casserole

  • Prep the chicken thoroughly: pat the 1.5 pounds of boneless, skinless chicken thighs dry and trim any excess fat. Season lightly with salt before browning to build flavor without oversalting later.
  • Browning is key: work in batches and avoid overcrowding the pan. Use 2 tablespoons olive oil and heat until shimmering so the pieces sear nicely rather than steam. This deepens color and flavor.
  • Caramelize the onions slowly: slice the onions evenly and cook on medium-low heat with 1 tablespoon butter (and a pinch of salt) until amber and jammy, about 20–30 minutes. Patience here pays off in sweetness and depth.
  • Mind the garlic: add the minced garlic toward the end of the onion caramelization to bloom its aroma without burning. 30–60 seconds is usually enough before adding the rest of the sauce components.
  • Build a smooth sauce: whisk the condensed soup with 1 cup low-sodium chicken broth, sour cream, Dijon mustard, and thyme. If using wine, add 1/2 cup with the liquids and simmer briefly to reduce the alcohol and integrate flavors.
  • Balance salt carefully: taste the sauce after mixing in the soup and broth, then adjust with salt and pepper. The soup and broth can vary in saltiness, so go slow.
  • Cheese strategy: stir 1 cup of shredded Swiss cheese (Gruyère) into the sauce and reserve 1 cup for topping. Finely grate the cheese for smooth melting and even coverage.
  • If using wine: allow it to simmer with the liquids to reduce and concentrate flavor; if you skip it, compensate with a touch more broth for body.
  • Herb handling: thyme pairs beautifully with onions and chicken. If using dried thyme, it blends quickly; fresh thyme leaves offer brighter aroma. Remove the bay leaf before serving if you used it.
  • Layering and texture for the topping: mix breadcrumbs with 2 tablespoons melted butter (and a pinch of garlic powder or grated Parmesan if desired) for a crisp, golden crust. Toss with a little salt for seasoning.
  • Bake smart: assemble the casserole and bake until the edges are bubbly and the cheese topping is golden. If you like a crisper top, uncover during the final 10–15 minutes of baking.
  • Make-ahead option: you can assemble the casserole through the sauce and onions, cover, and refrigerate overnight. Bring to room temperature before baking and plan for a slightly longer bake time.
  • Storage and leftovers: refrigerate leftovers in an airtight container for 3–4 days. Reheat gently on the stove or in the oven to preserve moisture; add a splash of broth if it looks dry.
  • Optional add-ins: sliced cremini or button mushrooms cook well and add umami. Sauté them first to brown and evaporate moisture, then fold into the casserole for extra depth.
  • Diet considerations: this recipe uses condensed soup, which may contain gluten or other allergens. If needed, substitute with a gluten-free condensed soup or a homemade cream of mushroom base to maintain the same texture.
  • Moisture management: if the sauce seems too thick, whisk in a little extra broth until it coats the chicken evenly. If it’s too thin, simmer a few minutes longer to thicken.
  • Serving suggestions: pair with crusty bread or a simple green salad to balance the richness. A light parsley garnish adds a fresh pop of color after baking.

FAQ

What is French Onion Chicken Casserole?

A cozy baked dish that combines caramelized onions, tender chicken, a creamy sauce, and melted cheese, finished with a crunchy topping. It captures the comforting flavors of French onion soup in a hearty casserole form.

What ingredients do I need?

You’ll need:

  • 1.5–2 pounds chicken breasts or thighs, cut into chunks
  • 3 cups sliced onions (yellow) or 2–3 large onions
  • 2 tablespoons butter
  • 2 cloves garlic, minced
  • 1 cup cream of mushroom soup (or 1 cup heavy cream)
  • 1/2 cup chicken broth
  • 1 teaspoon dried thyme
  • Salt and pepper to taste
  • 1 cup grated Gruyere or Swiss cheese (or cheddar)
  • 1/2 cup breadcrumbs or French fried onions for topping
  • Optional: sliced mushrooms
Can I make it ahead?

Yes. You can caramelize the onions up to a day in advance. You can also assemble the casserole up to 24 hours ahead, cover, and refrigerate. If baking from cold, add about 15–20 minutes to the bake time. Let the dish rest for 5–10 minutes before serving.

How do I caramelize the onions properly?

In a large skillet, melt butter over medium-low heat. Add onions and a pinch of salt. Cook slowly, stirring occasionally, until deep golden brown and very soft, about 25–35 minutes. If they start to stick, deglaze with a splash of broth. For quicker caramelization, you can add a pinch of sugar to help browning.

What temperature and how long do I bake it?

Preheat oven to 375°F (190°C). Cover and bake for 25–35 minutes, then uncover and bake 5–10 minutes more until the cheese is bubbly and lightly golden. The chicken should reach an internal temperature of 165°F (74°C).

Can I use substitutions or adaptations?

Absolutely:

  • Use rotisserie or cooked chicken for quick assembly
  • Replace cream of mushroom soup with a simple homemade white sauce or heavy cream + broth
  • For dairy-free: use non-dairy cream or milk, dairy-free cheese, and dairy-free butter
  • For gluten-free: use gluten-free breadcrumbs or omit the topping, or use gluten-free fried onions
  • Add mushrooms or other vegetables like bell peppers if you like
How can I thicken the sauce if it’s too runny?

If the sauce is too thin, whisk together a small slurry of 1 tablespoon cornstarch with 2 tablespoons cold water and stir it into the casserole. Return to the oven and bake a few more minutes until the sauce thickens. Alternatively, simmer the mixture on the stovetop to reduce before baking.

Is this dish gluten-free or dairy-free?

Gluten-free: Use gluten-free cream of mushroom soup or a homemade sauce, and gluten-free breadcrumbs or omit the topping. Dairy-free: use non-dairy cream, broth, and cheese, and a dairy-free butter substitute. Always check ingredient labels for hidden gluten or dairy.

What are good sides or serving suggestions?

Pair with a simple green salad, steamed green beans, roasted Brussels sprouts, or crusty bread. A light side such as a cucumber dill salad also works well to balance the richness. A glass of white wine like Chardonnay complements the flavors nicely.

How should I store and reheat leftovers?

Store leftovers in an airtight container in the refrigerator for 3–4 days. Reheat in the oven at 350°F (175°C) until heated through, or microwave in 1–2 minute intervals, stirring as needed. The casserole may thaw and reheat best if you re-bake for a few minutes to restore the topping crispiness.

Introduction / Hook

Imagine a sun-drenched kitchen in Sicily, where the air is sweet with citrus and the warmth of a wood-fired oven lingers on the walls. You slice into a cake that gleams with the pale glow of orange zest and almond-flecked crumb, its aroma rising in soft, fragrant swirls that wrap around you like a coastal breeze. The Sicilian Whole Orange Cake is more than a dessert; it is a celebration of the island’s citrus bounty, a comforting ritual that turns simple ingredients into something radiant and unforgettable. Every bite offers a harmony of brightness and warmth: the fruit’s natural sweetness, the nutty depth of almonds, and the gentle, fruity perfume of orange oil, all wrapped in a moist, tender crumb that feels at once rustic and refined. It’s the sort of cake that invites lingering, conversation, and the quiet joy of sharing something made with love.

What makes this cake so enchanting is not just its flavor, but its philosophy. In many Sicilian kitchens, whole citrus fruits are beloved for the way they dissolve into batter, releasing oils and pulpy goodness that enrich the texture and aroma. There’s a sense of resourcefulness and reverence here: no part of the fruit is wasted, and the result is a cake that carries the sun and sea of the Mediterranean in every slice. This cake embraces that spirit—fragile, sunny, and deeply satisfying all at once—making it a perfect centerpiece for a family gathering, a tea-time ritual, or a memorable end to a weeknight meal.

Bold yet comforting, bright yet soothing, the Sicilian Whole Orange Cake is a recipe that speaks to contrasts in the most delicious way: a moist, almost custard-like interior with a slightly nutty undertone, a crisp crust that yields to a soft, cloud-like center, and an aroma that lingers long after the plate is cleared. It’s a cake that rewards patience and care, inviting you to notice the way the orange’s essential oils bloom when heated, how the almonds lend a toasty whisper, and how a drizzle of syrup or a dusting of powdered sugar can elevate the experience without overpowering it. If you’re searching for a dessert that tastes like a memory in the making, this is the one.

The Story Behind the Dish

The tale of the Sicilian Whole Orange Cake begins in the groves that dot the slopes of Sicily, where orange trees reach toward the blue Neapolitan sky and the fragrance of blossoms drifts on the afternoon air. Throughout the island, citrus is more than a flavor; it is a cultural lifeblood, woven into traditional pastries, savory sauces, and everyday life. Historically, households made do with what was abundant, turning what could be considered a simple fruit into something celebratory and enduring. The idea of using a whole orange—peel, pith, and pulp together—stems from a long-standing belief in optimizing the fruit’s natural oils and sweetness. When baked with almond meal or finely ground nuts, the fruit helps to create a cake that is plush and vibrant in one breath.

Stories from coastal towns tell of markets buzzing with the scent of citrus, of families gathering around warm ovens as the night cools and the harbor lights begin to twinkle. In these households, desserts were not merely ends to meals but expressions of hospitality—an invitation to linger, to sip a sweet wine or a cup of strong espresso, and to savor the moment of togetherness. The whole orange cake embodies that ethos: a simple, honest recipe that emerges from the pantry, transforms with gentle heat, and returns as a shared pleasure. There is a sense of heritage in every slice, a quiet nod to generations of bakers who knew that citrus carries sunshine, flour carries memory, and patience yields tenderness.

As with many traditional Sicilian sweets, this cake carries a touch of regional identity in its technique and mood. It echoes the coastal climate—bright and uplifting, with a hint of sea salt carried on the breeze—and the inland warmth of almonds and olive oil that ground the sweetness in a comforting, earthy foundation. The result is a dessert that doesn’t demand attention by shouting its greatness; it earns appreciation by unfolding gradually, allowing a bite to reveal more complexity than the last, much like a seaside conversation that leaves you feeling enriched and a little wiser.

Why You’ll Love This Recipe

  • Quick, approachable elegance: it feels special enough for guests, yet simple enough for a busy weeknight.
  • Bright and comforting flavor in every bite: the orange’s acidity balances the almond’s warmth, creating a nuanced, satisfying sweetness.
  • Moist, tender crumb with a delicate crust: a texture contrast that is endlessly comforting without being heavy.
  • Low-key glamour: no fancy garnish required—natural citrus aroma and a subtle golden hue speak for themselves.
  • Versatile for many occasions: perfect for brunches, holidays, tea time, or an after-dinner treat with espresso.
  • Flexible flavor scaffolding: adapts well to substitutions and regional twists, so you can tailor it to your pantry or preferences.

One of the most delightful aspects of this cake is its adaptability. It’s a canvas that invites you to lean into familiar flavors or to experiment with small twists. A splash of vanilla or a pinch of citrus zest can heighten the aroma, while a handful of toasted nuts or a light glaze can add a new textural dimension. Because the base relies on the citrus and nutty components, you can confidently substitute or adjust ingredients to suit dietary needs or seasonal availability without losing the cake’s essence. The result remains recognizably Sicilian in spirit: sunny, generous, and deeply comforting.

Beyond flavor, this cake feels nourishing in a way that pairs beautifully with shared moments. It’s the kind of dessert that invites conversation and lingering, whether around a family table, a potluck with friends, or a casual Sunday afternoon. The aroma alone has a way of pulling people in—the bright citrus lifting spirits, the almond warmth evoking cozy memories, and the gentle sweetness that feels both indulgent and wholesome. If you’re seeking a dessert that makes ordinary occasions feel a touch more extraordinary, this cake rewards curiosity and care with every slice.

Flavor Profile & Texture

The flavor profile of the Sicilian Whole Orange Cake is a harmonious duet between citrus brightness and almond-nutty depth. Your first encounter is likely the aroma: an intoxicating blend of sweet orange blossoms, fresh zest, and a whisper of olive oil that wafts up as the crust warms. As you cut into the cake, the surface reveals a faint golden crust that yields to a moist, almost custard-like interior. The crumb tends to be tender and light, with a subtle density that comes from finely ground nuts or almond meal. The orange’s natural sweetness is tempered by its slight tartness, creating a balanced sweetness that doesn’t veer into cloying territory.

In texture, imagine a cake that feels soft and pillow-like yet carries a gentle structure. The crust provides a delicate crispness that contrasts with the inner softness, making each bite a layered experience. The almonds contribute a gentle nuttiness that lingers on the palate, like a comforting memory of warm bakery windows on a cool Sicilian morning. If a glaze or syrup is incorporated, it adds a glistening sheen and an extra kiss of citrus, enhancing the aroma without masking the bread-like, yeasty comfort of the base. The overall mouthfeel is luxurious but approachable, inviting you to savor slowly rather than rush through the slice.

The citrus character is not just bright; it’s complex. The peel oils release delicate bitterness that keeps the sweetness from becoming one-note, adding dimension and a touch of sophistication. This is dessert with nuance: a sunny expression tempered by factured notes of nutty warmth and a faint, almost floral citrus bouquet. People often remark on how the orange’s perfume lingers after the last bite, a reminder of the fruit’s prominence in the crumb and the way heat unlocks its essential oils. The result is a sensory experience that feels both grounded and uplifting—an edible celebration of Sicily’s most emblematic fruit.

Occasions & Pairings

This cake shines in a variety of settings, making it a versatile addition to any dessert repertoire. Its sunny character makes it an ideal centerpiece for spring gatherings, Easter desserts, or a celebratory weekend brunch. It also wears well as a simple, comforting finish to a weeknight dinner, particularly when paired with a cup of strong coffee or a post-dinner espresso. For holiday menus, it can offer a bright counterpoint to richer dishes, providing balance and a sense of festive optimism.

Pairing ideas to consider:

  • Drinks: a lightly sweet dessert wine or a sparkling Moscato pairs beautifully with the citrus and nutty notes. For non-alcohol options, a fragrant black tea or a lightly brewed green tea complements the cake without overpowering it.
  • Side dishes: a dollop of lightly whipped cream, a spoonful of citrus curd on the side, or a small scoop of vanilla gelato can elevate the dessert with contrasting textures and temperatures.
  • Desserts: serve alongside almond biscotti, pistachio brittle, or a tangy citrus sorbet to create a multi-component tasting experience.
  • Occasions: elegant enough for a dinner party finale, cozy enough for a family Sunday, and festive enough for birthdays or anniversaries with a Sicilian flair.

If you’re entertaining, you can present the cake with a simple garnish that nods to its Mediterranean roots: a light dusting of powdered sugar, a few thin citrus slices arranged artistically, or a drizzle of a minimal citrus glaze to catch the light. The visual appeal is understated but effective, letting the cake’s luminous interior steal the show.

Tips, Variations & Substitutions

The beauty of the Sicilian Whole Orange Cake lies in its adaptability. Here are ideas to tailor the bake to your preferences, dietary needs, or pantry:

  • Fruit options: in place of a single orange, you can experiment with a combination of citrus fruits (e.g., orange and lemon) for a brighter, more tart edge, or use blood oranges for a deeper color and a slightly different aroma.
  • Nut options: almonds are traditional, but you can blend in pistachios or hazelnuts for a more pronounced nutty note. If you have a family member with nut allergies, substitute with oat or coconut flour for a differently textured, nut-free version.
  • Flour/fiber substitutions: to create a gluten-free version, use a finely ground almond flour or a gluten-free flour blend with added almond meal to preserve the crumb’s tenderness and moisture.
  • Oil choices: olive oil brings a characteristic Mediterranean nuance, but a light neutral oil or melted butter can shift the flavor profile slightly toward a more classic cake taste.
  • Sweetness and texture tweaks: for a glossier finish, you can finish with a light citrus glaze or dust with a very fine powdered sugar. If you prefer a denser crumb, you can reduce the almond content slightly and use a touch more fruit puree (subject to testing if you’re translating a recipe).
  • Flavor enhancers: a hint of vanilla, a pinch of cinnamon, or a trace of cardamom can add warmth and complexity without overpowering the citrus.
  • Vegan option: use a plant-based egg substitute and replace dairy ingredients with almond or soy milk if included in your adaptation. The citrusy brightness and almond backbone hold well in vegan versions.
  • Storage-friendly twists: the citrus and almond combination tends to improve with a day or two in the fridge, so this cake is particularly good for make-ahead preparation.

When experimenting, start with small changes and keep tasting as you go. The most important aspect is preserving the cake’s delicate balance between brightness and warmth, so adjustments should enhance rather than overshadow the core citrus-almond character. The result should feel like a sunlit bite that comforts the soul as much as it delights the palate.

Storage & Make-Ahead Ideas

The Sicilian Whole Orange Cake stores well and travels nicely, making it a reliable choice for parties, potlucks, and weekend baking projects. Here are practical tips to maximize freshness and flavor:

  • Cooling and storage: allow the cake to cool completely before storing. Keep it covered at room temperature for a day or two, or refrigerate it to extend freshness for up to several days. If you’re refrigerating, bring slices to room temperature before serving to regain softness and aroma.
  • Make-ahead strategy: bake the cake a day or two in advance and wrap tightly. The flavors often develop more depth after a short rest, so fretting about timing isn’t necessary—this cake benefits from a little age.
  • Freezing options: slice the cake and freeze individual portions wrapped securely. Thaw at room temperature and, if desired, warm slightly for a comforting, aromatic serving. A light glaze can be re-applied after thawing if you like extra shine or brightness.
  • Reheating and serving: for the best aroma, reheat slightly or leave at room temperature for a gentle refresh. Fresh slices with a cup of coffee or tea are a classic pairing that never goes out of style.

If you’re planning ahead for a holiday table or a weekend gathering, consider baking the cake a day early and finishing with a simple citrus glaze just before serving. The glaze can add a glossy finish and extra zing, while still letting the cake’s natural citrus fragrance shine through. The simplicity of storage and the flexibility of serving options make this cake a dependable choice for cooks who value both flavor and convenience.

Fun Facts & Trivia (Optional)

– Sicily’s citrus tradition dates back centuries, with influence from Mediterranean trade routes, agricultural practices, and a climate that supports year-round fruit production. The orange is not just a flavor; it is a cultural symbol that appears in crafts, literature, and daily life across the island.

– The idea of using a whole orange in baked goods is a testament to the Italian culinary ethos of minimizing waste and maximizing flavor. The fruit’s oils, pith, and pulp all contribute to moisture and aroma, creating a nuanced, multi-layered texture.

– Almonds have long been a staple in Sicilian desserts, from the classic cassata to various almond-based cakes and cookies. Their warmth and subtle sweetness complement citrus beautifully, giving baked goods a distinctive Mediterranean character.

– In some versions of this concept, bakers incorporate a light glaze or dust with powdered sugar to brighten the final appearance and add a touch of sweetness that enhances the citrus notes without overpowering them.

Ingredients

Sicilian Whole Orange Cake

Cake Base

  • – 1 whole orange (unpeeled, about 250–300 g)
    → The orange is simmered in water to soften the entire fruit so you can blend it into a smooth, fragrant puree with its rind. Do not discard the peel; the zest and oils from the rind provide the cake’s signature bright aroma. After cooling slightly, remove seeds if present and blend with a small amount of the cooking water until completely smooth. Reserve a spoonful of the cooking water if the puree is too thick, to help achieve the right batter consistency.
  • – 3 large eggs
    → Eggs act as the primary binder and help create a tender yet structured crumb. Bringing them to room temperature before mixing helps them blend smoothly into the orange puree and oil, creating a uniform batter. Beat lightly to combine yolks and whites, then fold with other ingredients—avoid overmixing once the flour is added to prevent a dense texture.
  • – 1 cup granulated sugar
    → Sugar supplies sweetness and contributes to browning and moisture-retention in the crumb. It also helps emulsify with the eggs for a smoother batter. If your orange puree is particularly sweet, you can reduce by 1–2 tablespoons; for a lighter sweetness, consider boosting with a touch of vanilla or orange zest.
  • – 1/2 cup extra-virgin olive oil
    → Provides moisture and a subtle fruitiness characteristic of Sicilian desserts. Use a good-quality EVOO with a mild to medium fruitiness so it complements rather than overpower the citrus. Whisk the oil with the eggs to form a smooth emulsion before combining with the orange puree; add to the batter gradually to keep it cohesive.
  • – 1 teaspoon vanilla extract (optional)
    → Enhances the overall aroma and rounds out sweetness; if you prefer a pure citrus-forward flavor, you can omit it and rely on the orange zest for fragrance.
  • – Zest of 1 orange (optional)
    → Intensifies citrus aroma without adding liquid. Grate only the orange part of the zest, avoiding the white pith, then fold evenly into the batter with the dry ingredients for an even citrus glow throughout the cake.
  • – 1 1/2 cups all-purpose flour
    → Provides the structure and body of the cake. Sift before measuring to remove lumps and ensure the batter distributes evenly with the leavening agent. If you want a lighter crumb, substitute up to one-third of this with almond flour or a gluten-free blend that behaves similarly.
  • – 1 teaspoon baking powder
    → Leavening that gives lift and a tender crumb. Use fresh baking powder for maximum rising power. If you use self-raising flour, omit this item or reduce accordingly, depending on your flour choice.
  • – 1/4 teaspoon salt
    → Balances sweetness and enhances citrus flavor; a small quantity helps the cake taste more vibrant. Use fine table salt or sea salt for even distribution.
  • – 1/4 cup almond flour (optional)
    → Adds moisture, tenderness, and a delicate nutty note that pairs beautifully with orange. If you skip almond flour, you can replace with an additional 2–3 tablespoons of all-purpose flour to maintain structure, or use another gluten-free option if needed.

Optional Add-ins

  • – 2 tablespoons sliced almonds for topping (optional)
    → Provides a toasty crunch and visual contrast on the cake’s surface. Toast the slices in a dry pan until lightly golden to maximize aroma before scattering on top before baking. Evenly sliced almonds help with uniform browning.
  • – 1/4 cup chopped pistachios (optional)
    → Adds color, flavor, and a pleasant crunch. Fold a portion into the batter for specks of green, and reserve a few to press on top for an attractive finish. Do not overmix to avoid breaking the pistachios into fine pieces.

Sugar Syrup / Finish

  • – 1/2 cup confectioners’ sugar (for glaze, optional)
    → Creates a light, glossy finish when brushed or drizzled on cooled cake. If you prefer a thinner glaze, whisk in 1–2 tablespoons orange juice or water until you reach the desired consistency. Apply while the cake is still warm for best absorption.
  • – 2 tablespoons orange juice (optional)
    → Liquefies the glaze and amplifies citrus flavor. Use fresh juice; adjust the amount to reach the glaze consistency you like. If you used a lot of orange zest in the batter, this glaze helps balance extra sweetness and keeps the surface shiny.

Instructions

  • Preheat your oven to 350°F (175°C) and grease a 9-inch round cake pan, then line the base with parchment to ensure easy release later.

    → This creates a reliable nonstick surface and prevents the cake from sticking, preserving a smooth, clean bottom for slicing.
  • Place the whole orange in a medium saucepan and cover with water by at least 2 inches, then bring to a gentle boil and simmer until the fruit is very tender, about 60–75 minutes.

    → Softening the entire fruit, including the rind, integrates the citrus oils into the puree for a bright, cohesive orange flavor without bitterness.
  • Carefully remove the orange from the water and allow it to cool slightly, then cut into quarters, remove any seeds, and discard the hard core or excessive white pith.

    → Seed-free fruit prevents bitterness and seeds from interrupting the puree’s texture, ensuring a silky batter.
  • Place the warm orange quarters into a blender with 2–4 tablespoons of the cooking water and blend on high until completely smooth, adding more water a little at a time if the mixture is too thick to blend.

    → A smooth puree distributes evenly through the batter, unlocking the orange aroma and zest without leaving fibrous bits.
  • If the orange puree seems thick, reserve a spoonful of the cooking water and stir it in gradually after blending to reach a thick, spoonable consistency; set the puree aside.

    → The right thickness ensures the batter emulsifies properly and bakes with a tender crumb rather than a dense texture.
  • Meanwhile, bring the eggs to room temperature by leaving them out for 20–30 minutes, then lightly whisk to combine yolks and whites without incorporating air.

    → Room-temperature eggs emulsify better with the oil and sugar, yielding a smoother batter and even rise.
  • In a large mixing bowl, whisk the 3 eggs with the granulated sugar until the mixture is pale, thick, and slightly ribboned when the whisk is lifted.

    → This aerates the eggs and sugar, creating a light foundation for the batter and improving volume during baking.
  • Fold the orange puree into the egg-sugar mixture until fully integrated and uniform in color, scraping down the sides to ensure there are no pockets of raw orange.

    → Uniform distribution of puree guarantees consistent citrus flavor throughout the cake rather than concentrated patches.
  • With the mixer on medium speed, slowly drizzle in the 1/2 cup extra-virgin olive oil in a fine, steady stream, continuing to whisk to form a smooth emulsion.

    → A controlled oil incorporation creates a cohesive batter and a moist, tender crumb without separation or greasy streaks.
  • Stir in the optional vanilla extract and the zest of 1 orange if using, distributing them evenly through the batter with a gentle fold.

    → Vanilla deepens aroma while orange zest amplifies citrus oils; folding avoids crushing the zest’s delicate oils.
  • Sift together the all-purpose flour, almond flour (if using), baking powder, and salt, then whisk to combine and aerate the dry ingredients.

    → Sifting and whisking ensure even distribution of leavening and prevent lumps, contributing to a uniform crumb.
  • Gently fold the dry ingredients into the wet mixture in 2–3 additions until just combined, stopping as soon as there are no visible flour streaks.

    → Overmixing develops gluten and can make the cake dense; folding preserves tenderness and lift.
  • If using pistachios, fold in 1/4 cup chopped pistachios now, reserving a few to press on top for color and crunch, then, if desired, fold in the sliced almonds for topping and toast them separately.

    → Nuts add texture and flavor; folding evenly distributes them without crushing pieces, while toasting enhances aroma.
  • Pour the batter into the prepared pan, then lightly tap the pan on the counter to settle any large air pockets and level the surface with a spatula.

    → This eliminates air pockets that can cause uneven doming and helps the cake bake uniformly.
  • Bake in the preheated oven for about 40–50 minutes, or until the top is golden and a toothpick inserted into the center comes out with a few moist crumbs; rotate the pan halfway through to ensure even browning.

    → The toothpick test confirms doneness without overbaking, while rotation prevents hot spots from darkening one side too quickly.
  • Allow the cake to cool in the pan for 15–20 minutes, then invert onto a wire rack and let cool completely before glazing.

    → A proper cool ensures the crumb sets and the cake slices cleanly, while glazing on a cooled surface prevents the glaze from running off.
  • Prepare the glaze by whisking 1/2 cup confectioners’ sugar with 2 tablespoons orange juice until smooth and glossy; adjust by adding more sugar for thickness or more juice for a runnier glaze.

    → A balanced glaze adds sheen and citrus brightness; the consistency should be thin enough to coat without pooling excessively.
  • Brush or drizzle the glaze over the cooled cake, letting it set for a few minutes to form a thin, glossy finish, then scatter any reserved nuts or zest for an attractive finish.

    → The glaze enhances flavor and moisture, while the decorative toppings provide contrast and visual appeal.
  • Store leftovers covered at room temperature for up to 2 days or refrigerate for up to 5 days; bring to room temperature before serving for the best aroma and texture.

    → Proper storage maintains moisture and prevents the cake from drying out, while resting before slicing helps the flavors to mellow and blend.

Notes

These Sicilian Whole Orange Cake notes guide you to a citrus-forward bake built from a whole orange simmered until tender and blended with a little cooking water to a smooth puree, rind and all, for intense aroma and moist texture. The eggs provide structure while the olive oil keeps the crumb tender and light; if you wish, fold in orange zest for extra brightness and, optionally, a small amount of almond flour for a softer crumb. Customize with toppings such as toasted sliced almonds or chopped pistachios, or stir in extra citrus zest evenly into the batter. Finish with a glaze or a light orange syrup; brush the glaze on while the cake is warm to help it set and shine. The cake stores well wrapped at room temperature for a few days, or refrigerates for up to a week; it also freezes well for longer. For a gluten-free version, substitute the all-purpose flour with a gluten-free flour blend and ensure your baking powder is gluten-free; the optional almond flour can remain, or you can omit it if you prefer a more traditional crumb. For best results, bring the eggs and orange puree to room temperature before mixing to help them emulsify into a silky batter.

Tips

Tips for making Sicilian Whole Orange Cake

Preparation and orange purée

  • Choose a medium to large orange that is well-weighted and fragrant. Since the peel is part of the flavor, wash thoroughly or use organic if possible to avoid any waxy residues.
  • Simmer the whole orange until tender (about 30–40 minutes). This softens the rind and allows the zest and oils to infuse the batter with citrus aroma. Save a few tablespoons of the cooking water to adjust the purée consistency if needed.
  • Cool slightly before removing any seeds. Blend the entire fruit with a little of the cooking water until completely smooth; the rind adds brightness, so don’t skip this step.
  • If the purée seems thick, add a spoonful of the reserved cooking water gradually until you reach a pourable, spoonable batter consistency.

Batter, emulsification and flavor

  • Bring the eggs to room temperature to help them blend smoothly with the orange purée and oil, creating a lighter crumb.
  • Whisk the eggs with the sugar just enough to combine; overbeating at this stage can emulsify too much and affect texture.
  • Whisk the extra-virgin olive oil with the eggs to form a smooth emulsion before adding to the orange purée. Pour the oil mixture in a thin, steady stream to maintain a cohesive batter.
  • Add vanilla only if you want a warmer sweetness; for a brighter citrus-forward cake, you can omit it and rely on the orange zest for aroma.
  • Fold in orange zest (if using) evenly with the dry ingredients for a consistent citrus glow without adding extra liquid.

Dry ingredients and texture

  • Sift the flour and baking powder to remove lumps and ensure even distribution in the batter. If you replace part of the flour, consider using almond flour or a gluten-free blend as suggested in the recipe notes.
  • Combine the dry ingredients with the wet ingredients gently—fold until just incorporated to keep the cake tender. Overmixing can lead to a dense crumb.
  • For a nuttier, moister crumb, keep the optional almond flour but remember it may alter the texture slightly; if skipped, compensate with a touch more all-purpose flour (about 2–3 tablespoons).

Optional add-ins and toppings

  • Toast sliced almonds in a dry pan until lightly golden to maximize aroma; scatter on top before baking for a crisp finish and attractive appearance.
  • Chopped pistachios add color and crunch. Fold a portion into the batter for specks of green, and reserve some to press on top for a decorative finish. Avoid overmixing to keep pistachios chunky.

Sugar syrup and glaze finishes

  • If using the glaze, whisk confectioners’ sugar with orange juice or water to reach your desired consistency. Apply while the cake is still warm so the glaze can soak in and set with a glossy finish.
  • For a lighter glaze, start with 1 tablespoon of liquid and add gradually until the glaze flows evenly; for a thicker glaze, add more sugar. A smooth, drizzly consistency gives a beautiful sheen without pooling.
  • Freshly squeezed orange juice brightens the glaze; adjust the amount to balance sweetness with acidity, especially if your orange purée was very sweet.

Make-ahead, storage and serving

  • Purée can be prepared ahead (even freeze in portions) and thawed before mixing. This helps streamline bake day and ensures a bright citrus flavor.
  • Bake the cake in advance and cool completely before glazing; otherwise the glaze may not adhere well.
  • Store the finished cake in an airtight container at room temperature for 1–2 days, or refrigerate for up to 4–5 days. Bring to room temperature before serving for the best texture and aroma.
  • Reheat slices gently in a low oven (about 150°C/300°F) for 5–7 minutes if you’d like the cake to feel freshly baked and the glaze to soften again.

FAQ

What is Sicilian Whole Orange Cake?

A moist, citrusy cake from Sicily that uses whole oranges (with peel) blended into the batter. It’s typically made with eggs, sugar, olive oil, and almond flour or ground almonds, plus a leavening agent. The result is a fragrant, dense loaf with intense orange flavor and a natural sweetness from the fruit.

What oranges should I use?

Choose medium, thin-skinned oranges with lots of zest. Organic or unwaxed oranges are ideal since you blend the whole fruit. Blood oranges or Seville/valencia oranges can add different flavor profiles and color.

Do I need to boil the oranges before blending?

Yes. Most traditional recipes require boiling the whole (unpeeled) oranges until tender, then cooling and blending them into a smooth purée with the other ingredients. This softens the rind and helps it emulsify into the batter.

What are the main ingredients?

Typical ingredients include:

  • 2–3 medium whole oranges (with peel)
  • Eggs
  • Sugar
  • Almond flour or finely ground almonds
  • Baking powder
  • Olive oil
  • Pinch of salt

Optional extras: vanilla, a little lemon zest, or a splash of almond extract.

Is this cake gluten-free?

It can be gluten-free if you use almond flour or finely ground almonds instead of wheat flour and a gluten-free baking powder. If you use regular all-purpose flour, it won’t be gluten-free.

Can I make it dairy-free or vegan?

Yes. For dairy-free, rely on olive oil as the fat (no butter). For vegan, substitute eggs with flax eggs or aquafaba (for example, 2 flax eggs: 2 tablespoons ground flaxseed + 6 tablespoons water, mix and let thicken). Note that texture may differ slightly from the classic version.

What pan size and baking time should I use?

Common options:

  • 9-inch (23 cm) round cake pan or springform
  • 8×8 inch (20×20 cm) square pan

Bake at about 350°F (180°C) for 40–60 minutes, depending on pan size and oven. Check doneness with a skewer—it should come out clean or with a few moist crumbs.

How should I store and serve the cake?

Let the cake cool completely before slicing. Store in an airtight container at room temperature for 2–3 days, or refrigerate up to 4 days. It freezes well—slice and wrap portions for easy thawing. Serve on its own or with a dollop of yogurt, ricotta, or a light dusting of powdered sugar. A drizzle of light orange glaze also works nicely.

What are common troubleshooting tips?

If the cake is dense or dry: ensure the orange purée is smooth and well incorporated, don’t overmix, and don’t overbake. If it sinks in the center: oven temperature may be too high or the batter was overmixed; try a shorter bake and let it cool in the oven with the door ajar for a few minutes. If it browns too quickly: cover loosely with foil and lower the oven temperature slightly.

Can I add flavors or variations?

Yes. Try these variations:

  • Swap a portion of almond flour for coconut or mix in about 2–3 tablespoons almond flour with a bit of all-purpose flour (for texture adjustments).
  • Add a teaspoon of vanilla or a pinch of cinnamon for warmth.
  • Fold in chocolate chips or chopped almonds for contrast.
  • Finish with a light orange glaze or a dusting of powdered sugar.

Introduction / Hook

Imagine a bowl that tastes like a sunset: corn kernels bright as summer afternoons, sun-dried tomatoes glinting like preserved rubies, and a velvet-smooth creaminess that coats your palate with warmth. This Sun Dried Tomato Corn Chowder is a cozy, luminous hug in a bowl, a comforting fusion of sun-kissed sweetness and hearty richness. The moment you lift the spoon, fragrant notes of roasted garlic, caramelized onions, and a whisper of herbs fill the air, drawing you in with the promise of something both familiar and delightfully new. It’s the kind of dish that makes a weeknight feel like a celebration and a chilly weekend afternoon feel like a pilgrimage to a sunny, coastal market—where the scent of corn silks, olive oil, and sun-dried tomatoes mingles with the sea breeze of memory. The color is inviting—the pale cream body swirled with ruby-red ribbons and bright corn yellow—inviting you to dive in again and again. In every spoonful, you’ll taste a balance of sweetness from corn, tang from sun-dried tomatoes, and a luxurious, comforting finish that lingers on the tongue. This chowder isn’t just nourishment; it’s a small ritual of savoring the present moment, a dish that invites sharing, storytelling, and a little indulgence in the simplest of pleasures.

What makes this Sun Dried Tomato Corn Chowder stand out is how effortlessly it marries different culinary influences into a single, coherent experience. It draws from the soul-warming tradition of chowders—creamy, velvety, and satisfying—while brightening the profile with the bright, tart-sweet intensity of sun-dried tomatoes. It’s not a heavy-handed, rustic soup, nor is it a delicate consommé. It’s a thoughtfully layered bowl that speaks to homespun comfort and to a chef’s palate who loves a little brightness on a cool day. And because it relies on pantry-friendly savors—corn, sun-dried tomatoes, aromatics, and a creamy stock—it’s the kind of recipe you’ll return to when you want something deeply satisfying but not fussy. You can customize it to your mood, your pantry, or your guests, making it a timeless staple with limitless variations.

The Story Behind the Dish

The lineage of chowder is rooted in seaside towns and harvest kitchens, where sailors and farmers traded stories as much as bowls. Traditional corn chowder—thick, comforting, and whispering of cornfields and sea air—has a long-standing place on North American tables. Sun-dried tomatoes, on the other hand, are a pantry treasure born of sun-warmed afternoons in the sunlit hills of the Mediterranean, where tomatoes are peeled and slowly dried to concentrate their sweet-tortured flavors. It’s a culinary marriage born not of necessity but of curiosity: what happens when the rustic goodness of corn meets the sun-dried brightness of tomatoes? The result is a chowder that carries both the memory of the sea and the sun, a dish that feels both timeless and modern. This recipe often evokes family kitchens where improvisation ruled the stove—a pot of something comforting, a crate of corn on the cob, a jar of dried tomatoes, and a splash of cream turning humble ingredients into something memorable. In many homes, a recipe like this becomes a bridge between generations: the old stories of harvests and summer fairs, and the new stories of creative, weeknight-friendly cooking that still feels special.

Personally, this dish has a little story of its own. I recall a late-summer farmers’ market, baskets of corn stacked high, the air sweet with ripeness and the scent of herbs. A friend handed me a jar of sun-dried tomatoes picked on a hillside, and we chatted about comfort foods that could be shared around a table at the first chill of autumn. When I brought those two ingredients together in a pot, the kitchen seemed to glow with color and scent—the corny sweetness and the tomatoes’ rosy tang weaving a memory you could taste. Since then, this chowder has become a dish I reach for when I want both heartiness and a touch of brightness, a reminder that the simplest pantry items can come together to create something both evocative and deeply satisfying.

Why You’ll Love This Recipe

  • Comfort with a bright twist: The familiar, creamy foundation of a chowder is brightened by sun-dried tomatoes, providing an uplifting, tangy note without overpowering the corn’s natural sweetness.
  • Makes everyday feel special: It’s accessible enough for weeknights but refined enough to serve to guests, turning a casual dinner into a memorable moment.
  • Versatile and forgiving: Customize with pantry staples, swap dairy for dairy-free options, or add proteins to suit your dietary needs.
  • Layered textures and flavors: Silky broth, tender vegetables, plump corn, and chewy tomato ribbons create a pleasing mouthfeel in every bite.
  • One-pot vibe, big flavor: While you’ll find variations, the finished dish often comes together with one pot or a small number of steps, making cleanup a breeze.
  • Meal-prep-friendly: It reheats beautifully, and leftovers can inspire other meals—slightly thickened soup as a sauce for roasted vegetables or a bed for crusty bread.

Flavor Profile & Texture

The Sun Dried Tomato Corn Chowder is a study in balance. The sweetness of corn provides a sunny baseline that invites you to take a gentle, comforting bite. Sun-dried tomatoes contribute a deep, savory tang with a slight tanginess that contrasts beautifully against the corn’s gentle sweetness. The cream or dairy-based base brings a lush richness that glides across the palate, smoothing any sharp edges and tying the components together into a cohesive whole. Aromatics—garlic, onion, and a hint of herbs—deliver a perfume that wafts through the bowl, inviting you back for another sip. The texture is a pleasing continuum: silky, slightly thickened broth that clings to tender chunks of vegetables and corn, with occasional chewy ribbons of tomato for bursts of concentrated flavor. If you prefer a lighter mouthfeel, you can adjust the thickness with stock or dairy substitutes; if you crave more body, you can allow the soup to simmer a little longer or add a small amount of potatoes to naturalize the starches. The end result is an indulgent yet balanced chowder that never feels heavy, but always feels nourishing and deeply satisfying.

Key taste notes you’ll notice include: a gentle sweetness from the corn, a tangy sun-dried tomato presence that remains savory rather than tart, a creamy all-encompassing finish, with a whisper of herbal brightness from thyme or chives. Each bite unfolds like a mini landscape—the corn fields of summer, the salty edge of the sea, and the sun-dried, sun-kissed tomatoes echoing warm afternoons. The dish can carry subtle notes of garlic and onion without dominating; rather, they serve as the bridge that allows the fruit-forward corn and the tomato richness to mingle gracefully. If you’re a dairy lover, the creamy texture is luxurious; if you’re dairy-free, you can achieve a similar mouthfeel with coconut milk or almond milk plus a bit of emulsifier like a small amount of cornstarch blended into the liquid stage. Either way, you end up with a chowder that is comforting, soulful, and precisely the sort of dish that makes you feel cared for simply by sitting down to eat it.

Occasions & Pairings

This chowder shines in a variety of settings, from casual family dinners to festive autumn gatherings. It’s particularly welcome on cool weeknights when you want something cozy yet not overly indulgent, and it also holds its own as a starter or a main in a larger menu for weekend entertaining. The creamy, luxurious texture and bright flavor make it a fine match for a rustic crusty loaf, a sprinkle of fresh herbs, and a drizzle of olive oil. For a complete dining experience, consider these pairings:

  • Side dishes: Warm crusty bread, herbed flatbreads, a light salad of peppery greens with a lemony vinaigrette, or roasted vegetables that echo the chowder’s sweetness (like carrots and parsnips).
  • Drinks: A crisp white wine such as Sauvignon Blanc or a lightly oaked Chardonnay pairs nicely with the richness while cutting through the creaminess. For non-alcoholic options, a sparkling citrus water or a light, herb-infused tea works beautifully.
  • Desserts: A simple fruit dessert, like poached pears or citrus-infused yogurt, offers a clean finish that won’t clash with the soup’s richness.
  • Occasions: Weeknight comfort dinners, weekend gatherings, casual dinner parties, autumn or winter menus, and even a special-looking potluck dish that travels well.

Tastes, Textures & Texture Play: Flavor Profile Deep-Dive

In this section, think about how the flavors speak to each other as you savor the bowl. The corn sweetness provides a mellow, almost floral layer—think corn silks and sunlit fields—while the sun-dried tomatoes add a concentrated, savory brightness that lingers pleasantly. The dairy or non-dairy creaminess binds everything in a cocoon-like finish, ensuring the flavors don’t drift apart. The aromatics—onions and garlic—are present but not aggressive, offering a background perfume that allows the main players to shine. If you’re texture-focused, notice the contrast between the silky broth and the more substantial pieces of corn and vegetables, each bite delivering a slightly different feel. The optional add-ins, such as pieces of tender potato or shreds of smoked meat, introduce another layer of texture and a subtle saltiness that can elevate the dish even further. The world of chowders invites you to play with texture and depth, and this recipe makes that play accessible and delicious.

Tips, Variations & Substitutions

Here are ideas to customize the dish to your dietary needs, pantry, or mood. Each option preserves the soul of the dish while offering a different experience at the table.

  • Dairy-free/vegan: Use olive oil or a neutral-tavored oil to sauté the aromatics. Replace dairy with coconut milk or almond milk, and optionally whisk a tablespoon of cornstarch with the plant milk to help thicken the soup. Use a vegetable stock for the base. The result remains creamy and satisfying with a bright tomato note.
  • Meat-forward version: Add cooked bacon, pancetta, or diced ham for a smoky, savory depth. Sauté the meat first to render fat, then cook the aromatics in the rendered fat for a richer base.
  • Gluten-free: The dish is naturally gluten-free if you use stock that is gluten-free and check any thickeners; most chowders rely on dairy and starches rather than gluten-containing ingredients, making it easily adaptable.
  • Potato boost: Dice a potato and simmer it with the vegetables to give the chowder more body and a heartier bite. Potatoes also help create a naturally creamy texture as they break down slightly during cooking.
  • Tomato variations: If you don’t have sun-dried tomatoes, you can use a bit of tomato paste for depth, adding it early to bloom with the aromatics. For a different brightness, a small splash of lemon juice at the end can lift the flavors.
  • Herbal twists: Use chives, thyme, or a pinch of smoked paprika for a regional twist. A bay leaf during simmering can add a subtle earthy note that enhances the chowder’s complexity.
  • Chunkiness level: If you prefer chunkier chowder, reserve some corn kernels and vegetables to stir in at the end for a contrasting texture. If you want it silkier, blend a portion of the soup and fold back into the pot.
  • Regional twists: A touch of Southwestern spice (cumin and a dash of chili powder) can transform this into a sun-dried tomato-corn cowgirl chowder, while a pinch of fennel seeds gives an Italian-inspired fragrance.

Storage & Make-Ahead Ideas

Like many comforting soups, this chowder keeps well and often tastes better the next day as flavors meld. Here are practical tips for storing and making ahead:

  • Refrigeration: Cool the chowder completely, then store in airtight containers for up to 3–4 days. Reheat gently on the stove over low to medium heat, stirring frequently to prevent scorching. If the chowder has thickened too much in the fridge, whisk in a splash of stock or dairy-free milk to loosen it to your preferred consistency.
  • Freezing: Cream-based soups can separate when frozen and thawed, but you can still freeze them if you’re okay with a quick emulsification step later. Freeze in portioned containers for up to 2–3 months. Thaw overnight in the fridge, then reheat slowly, whisking or stirring vigorously to re-emulsify the cream and restore texture. If you notice separation, a quick whisk with a splash of stock can bring it back together.
  • Make-ahead strategy: Sauté the aromatics and prepare the base a day ahead. Store the sautéed aromatics and stock separately, and then combine and simmer when you’re ready to serve. This approach brings a sense of fresh-cooked aroma with minimal last-minute effort.
  • Meal-prep idea: Cook the corn and sun-dried tomato elements ahead of time, then combine with hot stock and cream when you’re ready to eat. This can be a time-saver for busy families or entertaining.

Fun Facts & Trivia

To add a little extra flavor to your culinary curiosity, here are some tidbits about the ingredients and the dish’s spirit:

  • Corn in chowder: Corn has been a staple in New World diets for centuries, and corn chowder remains a symbol of hearty, rustic cooking that’s equally at home in a seaside kitchen or a kitchen table in the hinterlands.
  • Sun-dried tomatoes: The art of drying tomatoes concentrates their sugars and intensifies their umami, transforming a simple tomato into a pantry hero with a long shelf life and a dramatic flavor boost.
  • Chowder etymology: The term “chowder” likely derives from the halting of French fishermen’s boats to gather chow-chow, a mixed dish, or from the French word “chaudière,” meaning cauldron, emphasizing the communal, shared nature of this hearty category of soups.
  • Color psychology: The warm hues in this dish—golden corn, ruby sun-dried tomatoes—are known to evoke comfort and appetite, making the dish naturally appealing even before the first bite.
  • Regional fusion symbolism: A sun-dried tomato accent on a classic chowder reflects a broader culinary trend of blending Mediterranean brightness with New England heartiness, illustrating how pantry staples can cross borders to create something both nostalgic and novel.

Closing Thoughts: Serving the Dish with Confidence

Sun Dried Tomato Corn Chowder is more than a recipe; it’s a mood, a memory, and a celebration of how simple ingredients can become something remarkable when treated with care and imagination. Embrace the creamy warmth, adjust the brightness to your liking, and let the dish evolve as your pantry and preferences shift with the seasons. Whether you’re feeding a hungry family, sharing with close friends, or simply treating yourself on a quiet evening, this chowder offers nourishment with a touch of sunshine—comfort, character, and a little bit of bright, summery joy in every spoonful.

Optional: Quick Tips for a Perfect First Serve

  • Taste and adjust seasoning at the end; sun-dried tomatoes can bring a salty component, so a gentle balance with salt or a dash of sugar or citrus can help.
  • Finish with a squeeze of lemon or a drizzle of olive oil to brighten the final flavor before serving.
  • If using dairy, a light dusting of freshly cracked black pepper adds a pleasant spark to the creamy finish.

Ingredients

  • Sauté Base
  • – 2 tablespoons extra-virgin olive oil
    → Used to sauté the aromatics and create a flavorful foundation for the chowder without burning. Maintain medium heat and swirl the oil to coat the pot; a touch of butter can be added for richer browning if desired.
  • – 1 medium onion, finely diced
    → Provides sweetness and depth as it softens; dice evenly so it cooks at the same rate as the other vegetables. Sauté until translucent and starting to caramelize for added flavor.
  • – 2 cloves garlic, minced
    → Adds bright, aromatic punch that forms the flavor backbone; add after the onion to prevent browning and cook 30–60 seconds until fragrant.
  • – 2 celery stalks, diced
    → Introduces crisp, vegetal notes and texture; dice uniformly for even cooking and to contrast with the creamy base.
  • – 2 cups potatoes, diced (Russet or Yukon Gold)
    → Contribute body and starch that slightly thickens the chowder as they cook; cut into roughly 1/2-inch pieces for even cooking.
  • Vegetables & Corn
  • – 3 cups corn kernels (fresh from 2 ears or thawed frozen)
    → Provides sweetness, color, and a crisp bite; if using fresh, slice kernels off the cob just before adding; frozen should be thawed and drained well to avoid extra water diluting the chowder.
  • – 1/2 cup sun-dried tomatoes, chopped (rehydrated if using dry varieties)
    → Contribute a tangy, concentrated tomato flavor and chewy texture; if using dry tomatoes, rehydrate in hot water for 10–15 minutes, then drain; if oil-packed, drain the oil (reserve a teaspoon or so for extra flavor) and chop.
  • Broth & Dairy
  • – 4 cups vegetable broth
    → The primary simmering liquid that carries all flavors; use low-sodium broth to control salt; you can adjust with salt later as needed.
  • – 1 cup heavy cream (or full-fat coconut milk for dairy-free option)
    → Adds lush creaminess and body; if using coconut milk, expect a light coconut note and avoid boiling after adding to prevent separation; simmer gently.
  • Seasonings
  • – 1 teaspoon dried thyme
    → Provides earthy herbal aroma that complements corn and tomatoes; if using fresh thyme, use about 1 tablespoon chopped and add early in the simmering stage for maximum flavor.
  • – 1 bay leaf
    → Adds subtle aromatic depth; remove before serving to avoid a lingering bay flavor in the final bite.
  • – Salt and freshly ground black pepper to taste
    → Essential for building the final flavor; start with light seasoning and adjust after tasting the chowder, especially if your broth is salted.
  • Optional Add-ins
  • – 4 slices bacon, cooked until crisp and crumbled (optional)
    → Adds smoky, salty richness and a contrasting texture. If using, render the fat from the bacon first and sauté the aromatics in it for extra depth; fold the crumbled bacon in at the end or serve on top.
  • – 1/2 teaspoon smoked paprika (optional)
    → Adds a subtle smoky note that pairs well with corn and sun-dried tomatoes; add during simmering for even distribution.
  • – Fresh parsley or chives, chopped for garnish (optional)
    → Brightens the dish with color and aroma; sprinkle just before serving for maximum freshness.

Instructions

  • Rehydrate sun-dried tomatoes (if using dry varieties) in hot water for 10–15 minutes until plump, then drain and pat dry; chop to bite-sized pieces so they distribute evenly through the chowder.

    → Rehydration reactivates concentrated flavors and softens the texture, ensuring the tomatoes meld into the soup rather than staying chewy.
  • If you are using bacon, cook the slices in the pot over medium heat until crisp, then crumble and set aside; reserve the rendered fat in the pot for depth of flavor.

    → Rendered bacon fat provides a smoky, salty foundation that enhances the chowder; crumbled bacon later adds texture and richness.
  • Heat 2 tablespoons extra-virgin olive oil in a large heavy pot over medium heat, using the rendered bacon fat if you chose to cook bacon; swirl to coat the bottom and prevent hot spots.

    → A well-coated pot ensures even cooking and prevents sticking, while medium heat preserves aromatics without burning.
  • Add the finely diced onion and a pinch of salt; sauté until translucent and beginning to caramelize at the edges, about 5–7 minutes.

    → Sweating the onions draws out sweetness and develops depth; salted onions soften more evenly and prevent uneven browning.
  • Stir in the diced celery and continue cooking until the celery is tender and starting to soften, about 4–6 minutes longer.

    → Uniformly softened celery contributes subtle vegetal aroma and textural contrast to the creamy base.
  • Add the minced garlic and cook for 30–60 seconds until fragrant, being careful not to brown it; adjust heat if necessary.

    → Garlic releases its fragrant compounds quickly; overheating can make it bitter, so brief sautéing preserves aroma.
  • → Coating the potatoes helps their starches gelatinize during simmering, contributing to creaminess without added roux.
  • Add the corn kernels and sauté for 2–3 minutes to bloom their sweetness and create a slight char on some kernels for flavor complexity.

    → Fresh corn develops a bright, sweet flavor when heated briefly; this step enhances texture and color in the final dish.
  • → Heating tomatoes helps their acidity complement the corn and cream, while distributing their chewy texture evenly.
  • Pour in 4 cups vegetable broth; add 1 teaspoon dried thyme and 1 bay leaf; bring the mixture to a gentle simmer over medium-high heat.

    → The broth carries all flavors; thyme adds earthy aroma and the bay leaf provides a subtle, layered depth to the soup.
  • Reduce the heat to maintain a gentle simmer and cook for 15–20 minutes, or until the potatoes are tender when pierced with a fork; stir occasionally to prevent sticking and ensure even cooking.

    → Gentle simmering gently breaks down potatoes and melds flavors without breaking down the vegetables into a mushy texture.
  • Stir in 1 cup heavy cream (or full-fat coconut milk for a dairy-free option); simmer gently and avoid a rolling boil if using coconut milk to prevent separation or curdling.

    → Cream adds silkiness and body; coconut milk requires gentler handling to maintain smoothness and structure.
  • Remove the bay leaf and season to taste with salt and freshly ground black pepper, adjusting gradually after tasting to account for the broth’s salt level.

    → Bay leaf removal prevents an overly resinous aftertaste, and careful seasoning ensures the chowder is balanced and flavorful.
  • If using bacon, fold in the crumbled bacon now or reserve it to sprinkle on top when serving for a contrasting texture and smoky finish.

    → Adding bacon at the end preserves its crisp texture and distinct flavor against the creamy chowder.
  • Optionally whisk in 1/2 teaspoon smoked paprika during simmer for a subtle smoky note that pairs well with corn and sun-dried tomatoes.

    → Paprika enhances depth and rounds the sweetness of corn with a gentle, earthy-smoky nuance.
  • Rinse and chop fresh parsley or chives and set aside for a bright garnish; sprinkle over the chowder just before serving to lift aroma and color.

    → Fresh herbs finish the dish with a clean, aromatic note that contrasts the creamy base.
  • Ladle the Sun Dried Tomato Corn Chowder into warm bowls and serve with crusty bread or crackers on the side for textural contrast and soaking.

    → A sturdy loaf or crackers help balance the richness and provide a satisfying bite to accompany the creamy chowder.

Notes

These sun-dried tomato corn chowder notes are designed to guide you from simmer to serving, ensuring a dreamy, creamy chowder with bright tomato tang and sweet corn.

  • Flavor base: Sauté the onion (and celery) in olive oil over medium heat until onions are translucent and just starting to caramelize. A small knob of butter can enrich browning if you want richer depth.
  • Sun-dried tomatoes: If using dry tomatoes, rehydrate in hot water for 10–15 minutes, then drain well; chop and add to the pot with the corn. If oil-packed, drain the oil (reserve a teaspoon or so) and chop.
  • Garlic: Add minced garlic after onions have softened, cooking 30–60 seconds until fragrant to prevent browning bitter notes.
  • Vegetables: Dice celery evenly for uniform cooking; potatoes should be ~1/2 inch pieces so they soften at the same rate as corn.
  • Gentle simmer: Pour in 4 cups low-sodium vegetable broth and bring to a gentle simmer; add the bay leaf and thyme (see note below) and simmer until potatoes are just tender (about 12–15 minutes).
  • Thickening and texture: The potatoes and corn help body the chowder; for extra body, you can lightly mash a portion of the potatoes in the pot or blend a cup of the chowder and stir back in.
  • Add dairy: Stir in 1 cup heavy cream (or full-fat coconut milk for dairy-free). Do not boil vigorously after adding coconut milk to avoid separation; simmer gently to heat through and meld flavors.
  • Seasoning: Add 1 teaspoon dried thyme and one bay leaf, then taste and season with salt and black pepper near the end, after tasting the broth. If you use fresh thyme, chop about 1 tablespoon and add early in simmering for freshest aroma.
  • Optional add-ins: For smoky depth, crumble 4 slices of bacon (cook until crisp) and fold in at the end, or serve on top. A 1/2 teaspoon smoked paprika can be added during simmering for a subtle smoke. Garnish with fresh parsley or chives.
  • Finish: Remove the bay leaf before serving. Adjust salt, pepper, and a squeeze of lemon juice or a splash of vinegar if you want a touch of brightness to balance the creaminess.
  • Make-ahead and storage: Chowder can be cooled and refrigerated for up to 3–4 days; reheat gently on the stovetop, adding a splash of broth if it thickens too much. Dairy-based chowders can separate after freezing; best texture is achieved by freezing without dairy and adding cream after thawing, or using dairy-free milk alternatives and thickening with potatoes.
  • Tips for dietary needs: Ensure all broths and sun-dried tomatoes are gluten-free if you need a gluten-free dish. To make vegan, use coconut milk instead of cream and omit any bacon; keep other vegetables and seasonings standard.

Tips

Tips for Sun Dried Tomato Corn Chowder

  • Prep mise en place before you start: chop onions, celery, potatoes to uniform sizes, chop sun-dried tomatoes, and measure thyme, bay leaf, and pepper so everything is ready when you begin.
  • Maintain medium heat when sautéing the base. The goal is fragrant aromatics and golden-brown bits, not burnt edges. If the onions start to look darker, lower the heat and add a splash of water or broth to deglaze.
  • Cook garlic after the onion for maximum aroma without scorching. Add garlic, cook 30–60 seconds until just fragrant, then proceed with the rest of the aromatics.
  • Uniformly dice vegetables (celery and potatoes) to ensure even cooking; 1/2-inch potato pieces work well for a creamy interior with a slight bite.
  • For corn: if using fresh corn, cut kernels off the cob just before adding; if using frozen corn, thaw and drain well to avoid diluting the chowder with extra ice water.
  • Sun-dried tomatoes add tang and chew. For dry tomatoes, rehydrate in hot water for 10–15 minutes, then drain. For oil-packed, drain the oil (reserve a teaspoon for extra flavor) and chop.
  • Choose your broth wisely. Low-sodium vegetable broth helps you control the final salt level; simmer until the potatoes are tender and flavors meld.
  • Dairy or dairy-free: heavy cream adds luxurious body. If using full-fat coconut milk, add after the chowder has simmered for a while and keep the heat gentle to prevent separation; do not boil vigorously.
  • Herbs and aromatics: add dried thyme with the simmering liquid and tuck in the bay leaf. If using fresh thyme, use about 1 tablespoon chopped and add early. Remove the bay leaf before serving.
  • Salt and pepper: season gradually. Start with a light amount, then taste and adjust after the chowder has simmered and dairy has been added, since dairy can mask salt.
  • Optional bacon: if using, render bacon first until crisp, then sauté aromatics in the rendered fat for deeper flavor. Fold in crumbled bacon at the end or serve on top for contrasting texture.
  • Smoked paprika (optional) can be added during simmering for a subtle smoky edge that complements sun-dried tomatoes and corn.
  • Finish with fresh herbs at the end: chopped parsley or chives adds color and brightness just before serving.
  • Texture and consistency tips: if the chowder seems too thin, simmer a bit longer with the pot uncovered to reduce, or mash a few potato pieces against the side to release starch and thicken naturally.
  • Make-ahead and storage: this chowder stores well in the fridge for 3–4 days. Reheat gently on the stove over medium-low, stirring often. Dairy-based chowders tend to thicken as they sit; you can thin with a little broth or water as needed. For freezing, most dairy-based chowders freeze best without the cream; freeze the base separately and add cream on reheating if possible.

FAQ

Sun Dried Tomato Corn Chowder – Frequently Asked Questions

What are the main ingredients for Sun Dried Tomato Corn Chowder?

Classic base includes onion, garlic, sun-dried tomatoes, corn kernels (fresh, frozen, or canned), potatoes for body, and a creamy element from milk or cream plus butter or olive oil. Season with salt, pepper, and herbs such as thyme. Optional extras: crispy bacon or pancetta, shredded cheese, and chopped herbs for garnish.

Is this chowder dairy-free or can I make it dairy-free?

Yes. To make it dairy-free, skip the butter and cream. Use olive oil for sautéing and substitute dairy milk with a plant-based milk (almond, oat, or coconut) and/or coconut milk for richness. You can thicken with potatoes or a small amount of cornstarch slurry. If you want a closer texture to traditional chowder, add a little dairy-free yogurt or cashew cream at the end.

Can I use fresh corn instead of canned or frozen?

Absolutely. Use fresh corn kernels cut from the cob. Fresh corn adds great sweetness and texture. If you’re using fresh corn, you may want to roast or lightly sauté the kernels for extra depth before adding them to the chowder. If using canned corn, drain well; frozen corn can be used directly.

How can I make this recipe vegetarian or vegan?

For vegetarian: use vegetable stock instead of chicken stock and omit any meat. For vegan: use vegetable stock, olive oil instead of butter, and a plant-based milk or coconut milk for creaminess. Omit cheese or use a vegan cheese substitute. All other ingredients can remain the same.

What are the best ways to thicken the chowder?

Body comes from the potatoes and simmering. You can also mash 1 cup of the chowder and stir it back in to thicken. For a quicker fix, whisk a small amount (1–2 teaspoons) of cornstarch or gluten-free flour with a splash of cold milk, then stir into the soup and simmer until thickened. If avoiding gluten, use cornstarch or arrowroot instead of flour.

How long does it take to cook Sun Dried Tomato Corn Chowder?

Plan for about 40 minutes total. Sauté aromatics (onion, garlic) for 5–7 minutes, simmer with stock and potatoes for 15–20 minutes until potatoes begin to soften, then add corn and sun-dried tomatoes and simmer 5–10 more minutes until flavors marry and the chowder thickens.

How should I store leftovers?

Let the chowder cool, then store in an airtight container in the refrigerator for up to 3–4 days. Reheat gently on the stove over medium-low heat, stirring occasionally. If using dairy, you may notice slight separation when reheated; whisk well to smooth it out.

Can I freeze this chowder?

Yes, but dairy can separate after freezing. For best texture, freeze the chowder base without cream or milk; reheat, then whisk in fresh dairy or a milk alternative at the end. It can be frozen for 2–3 months. Thaw in the fridge overnight and reheat slowly on the stove, adding the dairy at the end.

What toppings or garnishes pair well with this chowder?

Suggestions include chopped fresh parsley or chives, extra sun-dried tomato ribbons, a drizzle of olive oil, grated cheese (Parmesan, Pecorino), a dollop of sour cream or yogurt (or dairy-free alternative), crispy bacon or pancetta for non-vegetarian versions, and cracked black pepper or smoked paprika for extra aroma.

How can I customize the spice level or add flavor twists?

To add heat, stir in crushed red pepper flakes or a diced jalapeño with the onions. For depth, try a pinch of smoked paprika or a splash of lemon juice for brightness. Fresh herbs like thyme or dill also lift the flavor. You can swap sun-dried tomatoes for roasted tomatoes for a different tang.

Introduction / Hook

Picture a delicate, sun-kissed pastry that melts at the edge of a bite, releasing a warm whisper of almonds and vanilla. Easy Flaky Sweet Almond Pastry is not just dessert; it’s a memory waiting to unfold on your plate. The first bite is a crisp, whisper-light crunch that gives way to a tender, almost cloudlike interior. You’ll taste toasty almond sweetness that dances with a kiss of caramelized sugar and a hint of citrusy brightness, as if the pastry itself were telling a soft, comforting story. The aroma rises with every bake, a comforting invitation that fills the kitchen like a cozy and fragrant hug. This is the kind of pastry that feels luxurious without demanding perfection; it rewards attention with a flaky texture that seems to puff up with friendly pride. It’s the kind of treat you reach for on a quiet weekend morning, when the sun slides through the blinds just so, turning the kitchen into a stage for cinnamon-dusted dreams and almond-laced reveries. Yet it’s simple enough to pull off on a weekday afternoon, a testament to the idea that extraordinary flavor can be coaxed from humble ingredients and patient, careful layering. The result is not merely a pastry, but a memory you’ll want to recreate—the scent of almonds lingering in the air, the flaky layers yielding to a soft, buttery crumb, and a sweetness that feels balanced, comforting, and utterly irresistible.

The Story Behind the Dish

Flaky pastry and almonds share a long, interwoven history that spans continents and centuries. The concept of a crust that rises into delicate, almost snow-light layers traces back to the evolution of puff pastry, a technique that transformed simple dough into a tapestry of thin sheets that crackle and sigh with every bite. Almonds, meanwhile, have a treasure-laden lineage in pastries worldwide—from the marzipan dreams of European patisseries to the almond-honey notes found in North African and Middle Eastern sweets. The marriage of almond flavor with a buttery, flaky crust feels as if it were written in the margins of kitchen journals across generations: a practical, comforting solution that elevates a humble crumb into something festive and familiar at once. In many homes, a pastry like this has been a staple during family gatherings, holidays, or the quiet, sunlit hours when the best conversations happen around the scent of warm pastry cooling on a rack. The sweetness is gentle, almost motherly in its warmth, while the almond undertone carries a just-right nuttiness that doesn’t shout but lingers—inviting another slice, then another, then another until the plate is bare and the memories linger on the palate.

A Personal Note on Craft and Comfort

For generations, bakers have understood that the joy of pastry lies less in complexity and more in restraint—the precision of layers, the patience to chill, the gentle rolling that preserves the lightness. This Easy Flaky Sweet Almond Pastry is designed to honor that tradition while embracing modern kitchens. It’s a nod to the timeless technique of lamination, but presented in a way that feels approachable: no intimidation, just a rhythm you can follow, a rhythm that rewards careful handling with a final product that is at once refined and warmly familiar. The dish invites you to slow down a touch, to take a moment to listen for the quiet crackle of the crust as it yields to the first bite, to notice how the almond notes unfold in stages—nutty and toasty, then softly sweet, and finally linger with a gentle, comforting aftertaste. It’s a pastry that celebrates contrasts—the crisp exterior meeting a soft interior, the brightness of citrus with the depth of toasted almond, the simple pleasure of butter and dough transformed into something a little magical. It’s not merely about feeding the body; it’s about feeding the senses, the nostalgia, and the small daily rituals that make life feel a little more delicious.

Why You’ll Love This Recipe

  • Effortless elegance: A bakery-worthy flaky crust that you can achieve with careful technique, without needing professional equipment.
  • Versatile sweetness: A delicate almond sweetness that pairs beautifully with coffee, tea, or a glass of dessert wine.
  • Comforting nostalgia: The familiar aroma of toasted nuts and butter evokes memories of family kitchens and festive gatherings.
  • Impressive texture: Layered, light, and crispy on the outside with a tender, almost melt-in-your-mouth interior.
  • Beginner-friendly sophistication: A recipe that feels special yet rewards beginners with a forgiving, approachable process.
  • Make-ahead friendly: The pastry can be prepared in stages, allowing you to plan ahead for busy days or entertaining.
  • Customizable base: While the classic version shines, this pastry lends itself to fillings or flavor variations that can be adapted to seasons or dietary needs.
  • Kid-friendly charm: A sweet indulgence that can be enjoyed as a weekend treat or a special school-day dessert with minimal fuss.
  • Pairs well with conversation: Its aroma invites lingering at the table, making it a delightful centerpiece for gatherings and shared moments.

Flavor Profile & Texture

The flavor profile of Easy Flaky Sweet Almond Pastry unfolds in layers. The first impression is a crisp, delicate crackle from the outer crust, a sensory whisper of butter that seems almost to sigh with the shift of air as the knife glides through. As you bite deeper, you encounter the core—an interior texture that remains tender, almost airy, with a brief moment of flakiness that dissolves into creamy sweetness. The almond presence is the star, offering a nutty richness that is simultaneously toasty and bright. It’s not a heavy almond flavor; rather, it’s a refined, well-balanced essence that carries hints of sweetness without tipping into cloying territory. A subtle kiss of vanilla or citrus zest—depending on adjustments you might enjoy—brightens the almond notes, lifting them just enough to feel lively rather than heavy. The pastry’s base carries a mild butteriness that serves as a comforting foundation, enhancing the sense of warmth and indulgence, while a gentle sugar glaze or dusting (optional in some variations) provides a whisper of gloss and a final note of sweetness that lingers pleasantly on the tongue. The overall experience is one of harmony: the crispness of the crust, the soft resilience of the interior, the aromatic fragrance that fills the room, and the sweetness that feels refined rather than overbearing. It’s a dessert that respects the palate with balance and invites you to slow down and savor each moment of the tasting journey.

Occasions & Pairings

This pastry shines in a variety of settings, from quiet weekday mornings to festive weekend gatherings. It’s equally at home as a refined brunch component, a dramatic centerpiece for a tea party, or a comforting after-dinner treat alongside a warm beverage. For occasions, consider:

  • Brunch gatherings: Serve alongside coffee, espresso, or a light citrusy yogurt parfait for a balanced spread.
  • Holiday mornings: A refined alternative to cinnamon rolls—pair with sparkling or a light dessert wine to elevate the experience.
  • Afternoon tea or coffee break: A perfect companion to a pot of tea, especially Earl Grey, chai, or vanilla latte.
  • Seasonal celebrations: The pastry’s almond base adapts well to glazes or garnishes that reflect seasonal flavors—citrus zest in winter, berry compotes in summer, or a touch of orange blossom in spring.

Pairing suggestions to complement the flavor and texture include:

  • Beverages: Black tea, espresso, or a lightly sweetened almond milk latte; dessert wines such as Moscato or a light Riesling can work nicely if you desire a touch of sweetness at the end of a meal.
  • Side dishes: A light vanilla yogurt or a citrus-infused fresh fruit compote can contrast beautifully with the pastry’s richness.
  • Desserts: A simple, fresh berry salad or a scoop of vanilla bean ice cream creates a pleasing balance of hot/cold and crisp/soft textures.

Tips, Variations & Substitutions

Here are practical ideas to tailor Easy Flaky Sweet Almond Pastry to your preferences, dietary needs, or seasonal ingredients:

  • For a vegan version: Use plant-based butter and a dairy-free egg wash (or skip the wash entirely) to maintain the flaky texture. Some recipes also use yoghurt or almond milk substitutes in the dough to preserve moisture.
  • Gluten-free option: Replace the all-purpose flour with a high-quality gluten-free pastry blend. Add a touch more cold butter and chill the dough thoroughly to preserve lamination and flakiness.
  • Nut-free adaptation: If you’re avoiding almonds, consider a pastry made with sunflower or hazelnut alternative paste, or rotate to a cinnamon-sugar twist with a subtle citrus note to maintain balance.
  • Flavor twists: Fold in a touch of lemon zest or orange blossom water into the pastry dough (or sprinkle zest on top before baking) to brighten the almond profile without overpowering it.
  • Texture tweaks: For extra flakiness, ensure the dough remains cold and perform gentle, rapid folds during shaping. Avoid overworking the dough to keep the layers distinct and light.
  • Sweetness control: If you prefer a sweeter pastry, finish with a light glaze made of powdered sugar and a splash of citrus juice; for a more restrained sweetness, serve with fresh fruit or a dusting of powdered sugar instead of a glaze.
  • Regional flavor twists: In regions with a rich tradition of marzipan, a thin layer of marzipan tucked inside before the final roll can create a delightful, concentrated almond profile that melts into the pastry as it bakes.

Storage & Make-Ahead Ideas

To preserve the pastry’s texture and flavor, consider these practical storage strategies and make-ahead options:

  • Make-ahead: Prepare and chill the dough in advance. If you prefer, you can roll and even bake the pastry ahead of time, then reheat gently to crisp up the crust just before serving.
  • Room temperature storage: The pastry keeps well for 1–2 days when stored in an airtight container at room temperature. A light parchment layer between slices will help prevent sticking and maintain the crispness of the outer crust.
  • Refrigeration: For longer storage, refrigerate wrapped pastries for up to 3–4 days. Reheat gently in a low oven to restore crispness before serving.
  • Freezing: The baked pastry can be frozen for up to 1 month. Wrap tightly to prevent freezer burn, and reheat in a moderate oven to regain texture. If freezing unbaked dough, keep it well-wrapped and chill for a few minutes to firm before baking as usual.

Fun Facts & Trivia (Optional)

Did you know that almonds have been treasured for thousands of years in Mediterranean and Middle Eastern cuisines? They were once considered a symbol of good fortune and prosperity in some cultures. Marzipan, a sweet paste made from almonds and sugar, became a beloved candy across many European kitchens and is often associated with festive seasons and celebratory confections. The artistry of flaky pastry—its pleated layers and delicate crackle—owes much to the invention of laminated doughs, a technique that requires patience and precise temperature control. The magic of this Easy Flaky Sweet Almond Pastry lies in the quiet science of fat distribution, flour quality, and the moment when the dough’s layers unlock their light, airy internal structure in the heat of the oven. This harmony of tradition and technique is what makes a seemingly simple pastry feel like a small triumph every time you bake it.

Ingredients

Easy Flaky Sweet Almond Pastry

Dough (Flaky Pastry)

  • 2 1/2 cups all-purpose flour (unbleached)
    → The base structure of the crust, providing the framework for flakiness. Sift and chill the flour to minimize gluten development and keep the fat cold for distinct laminated layers. Using unbleached flour helps produce a cleaner flavor and texture.
  • 1/2 cup almond flour (finely ground, blanched if possible)
    → Adds a delicate almond flavor and extra tenderness to the crust. Blanched almond flour keeps the crust lighter in color and texture; if using almond meal, the crust may be slightly nuttier and crumblier.
  • 2 tablespoons granulated sugar
    → Subtle sweetness in the crust and helps with browning. Adjust to taste; reduce if serving with a very sweet filling.
  • 1 teaspoon fine sea salt
    → Enhances overall flavor and balances sweetness; use fine salt for even distribution.
  • 1 cup cold unsalted butter, cut into 1/2-inch cubes
    → The cornerstone of flaky pastry. Cold butter creates separate, tender layers when the dough is baked. Keep butter as cold as possible and handle the dough with a light touch to avoid melting the fat.
  • 1 large egg yolk, lightly beaten
    → Enriches the crust and provides gentle binding for a sturdier roll-out. The yolk adds tenderness and richness; use along with the icy water to bring the dough together.
  • 2-3 tablespoons ice-cold water (as needed)
    → Adds just enough moisture to bind the dough. Add gradually and mix until the dough just holds together. Too much water makes the crust tough; stop as soon as it comes together.
  • 1 teaspoon white vinegar or lemon juice (optional)
    → A touch of acidity helps to tenderize gluten slightly and promote flakiness. Keep on the small side to avoid altering flavor; refrigerate dough before rolling for best results.

Almond Filling (Frangipane)

  • 1/2 cup unsalted butter, softened
    → Creates a rich, creamy base for the frangipane. Beat until smooth and airy with the sugar to help the filling set with a tender, custardy texture.
  • 2/3 cup granulated sugar
    → Provides sweetness and balances the almond flavor. Adjust to taste, especially if the crust is already sweet.
  • 1 cup almond flour (finely ground)
    → Key component of the frangipane, delivering intense almond flavor and a moist, custard-like texture when baked. Use finely ground flour to avoid graininess.
  • 2 large eggs
    → Bind the mixture into a cohesive filling that holds its shape as it bakes. Room-temperature eggs mix more evenly for a smooth frangipane.
  • 1 teaspoon pure vanilla extract
    → Deepens and brightens the almond flavor. Use high-quality vanilla for best aroma and sweetness balance.
  • 1/2 teaspoon almond extract (optional)
    → Intensifies almond aroma. Use sparingly to avoid overpowering the filling; combine with vanilla for a rounded almond profile.
  • 1 tablespoon all-purpose flour
    → Helps stabilize the filling and prevents weeping during baking. Use a light hand to keep the custard silky.
  • Pinch of salt
    → Enhances flavors and balances sweetness in the filling.

Egg Wash

  • 1 large egg, beaten with 1 tablespoon water
    → Provides a shiny, golden finish on the baked pastry and helps seal edges. Brush lightly to avoid pooling; reserve any extra wash for brushing other surfaces if needed.

Glaze and Toppings

  • 1/4 cup apricot jam, warmed and strained to remove chunks (glaze)
    → Creates a glossy finish that complements almond flavor. Warm and strain to brush smoothly; brushing onto the cooled pastry yields a bright sheen without clumping.
  • 1 tablespoon water (to thin jam)
    → Adjusts the glaze consistency for brushing; add as needed to reach a spreadable, brushable texture.
  • 1/4 cup sliced almonds, lightly toasted
    → Decorative and adds a pleasant crunch that echoes the almond theme. Toast until lightly golden to maximize flavor; scatter over the filling before final bake or right after cooling for texture.
  • 1-2 tablespoons confectioners’ sugar (optional, for dusting)
    → Finishing touch for a dessert-like look. Dust after the pastry has cooled to prevent the sugar from dissolving into the glaze.

Instructions

  • Whisk together the dry ingredients for the dough: 2 1/2 cups all-purpose flour (unbleached), 1/2 cup almond flour, 2 tablespoons granulated sugar, and 1 teaspoon fine sea salt, until completely blended.
    → The dry mix ensures even sweetness, tenderness, and salt distribution so the crust bakes evenly and tastes balanced.
  • Cut in the cold butter: add 1 cup cold unsalted butter, cut into 1/2-inch cubes, and work it into the dry ingredients with a pastry blender, two forks, or fingertips until the mixture resembles coarse cornmeal with small, pea-sized bits of butter remaining.
    → Cold butter creates distinct laminated layers as the pastry bakes, yielding flakiness; avoid warming the butter to keep those layers intact.
  • Whisk the egg yolk with 2-3 tablespoons ice-cold water and 1 teaspoon white vinegar or lemon juice (optional) in a small bowl to make the binding liquid.
    → The yolk provides richness and tenderness, while the small amount of acid can help relax gluten slightly and improve tenderness; keep the liquid cold so it doesn’t melt the butter.
  • Drizzle the yolk mixture over the flour and fat and mix gently with a fork until the dough just begins to cling together in a shaggy mass.
    → Minimal moisture helps maintain a tender, flaky crumb; stop as soon as the dough holds together to avoid a tough crust.
  • Turn the dough onto a lightly floured surface, press into a rough disk, wrap tightly in plastic, and refrigerate for at least 60 minutes.
    → Chilling relaxes gluten and keeps fat solid, which promotes easier rolling and flakier layers when baked.
  • Prepare the almond frangipane filling by beating 1/2 cup softened unsalted butter with 2/3 cup granulated sugar in a medium bowl until pale and fluffy.
    → Creaming introduces air, producing a tender, custard-like base that set nicely during baking.
  • Beat in 1 cup almond flour until smooth, then add 2 large eggs one at a time, beating after each addition until the mixture is glossy and cohesive.
    → Almond flour provides the characteristic almond custard texture; adding eggs gradually prevents curdling and ensures a silkier filling.
  • Stir in 1 teaspoon pure vanilla extract and 1/2 teaspoon almond extract (if using), plus 1 tablespoon all-purpose flour and a pinch of salt; mix until the frangipane is smooth and uniform in color.
    → Vanilla and almond extracts deepen aroma and flavor; the flour helps stabilize the custard so it does not weep while baking.
  • Preheat your oven to 350°F (175°C) and place a rack in the middle of the oven.
    → Even heating ensures consistent crust and filling browning without scorching the bottom.
  • Roll the dough on a lightly floured surface to about 1/8 inch (3 mm) thickness and gently transfer it to a 9-inch tart pan with a removable bottom, pressing into corners and up the sides.
    → A thin, uniform thickness promotes even baking and crisp edges; a removable-bottom pan makes unmolding easier after cooling.
  • Trim the overhang, flute the edge with your fingers, dock the bottom with a fork to prevent air pockets, and chill the lined pan for 15-20 minutes.
    → Chilling re-solidifies the fat, reduces shrinkage during baking, and helps maintain an even crust during blind baking.
  • Line the chilled crust with parchment and fill with pie weights or dried beans to weight the crust during blind baking.
    → Weights prevent the dough from puffing and shrinking, ensuring a flat, sturdy foundation for the frangipane.
  • Bake the crust in the preheated oven for 12-15 minutes until the edges just begin to color; carefully remove the parchment and weights and bake 5-8 minutes more to dry and set the base.
    → Blind baking creates a firm surface that won’t become soggy when the moist filling is added; this step preserves the crust’s crispness.
  • Spread the frangipane evenly into the pre-baked crust, smoothing with an offset spatula to the edges for a uniform layer.
    → A flat, even surface ensures the filling bakes evenly and slices cleanly; excess height near the edges can overbrown while the center remains underdone.
  • Brush the exposed crust edges with the prepared egg wash to promote even browning and a glossy finish.
    → The wash aids browning and helps the crust achieve a professional, golden sheen along the rim.
  • Return the tart to the oven and bake at 350°F (175°C) for 25-30 minutes, or until the frangipane is puffed, set in the center, and the edges are deeply golden.
    → The gentle bake sets the custard without burning the crust; you can test doneness by gently jiggling the center—if it has a slight wobble, it will firm as it cools.
  • Warm 1/4 cup apricot jam with 1 tablespoon water and strain to remove chunks, then brush a thin, even glaze over the cooled tart surface.
    → The glaze provides a glossy finish and a subtle sweetness that complements the almond flavor while sealing the surface for a lasting sheen.
  • Lightly toast 1/4 cup sliced almonds in a dry skillet over medium heat until lightly golden, about 3-5 minutes, then scatter them over the glazed surface while the jam is still tacky.
    → Toasting intensifies almond aroma and adds a pleasant crunch; placing them while the glaze is tacky helps them adhere.
  • Dust with confectioners’ sugar if desired after the tart has completely cooled, for a delicate finish and dessert-like presentation.
    → A light dusting enhances visual appeal and sweetness without overwhelming the almond flavor.
  • Slice and serve the Easy Flaky Sweet Almond Pastry at room temperature; store any leftovers covered in the refrigerator for up to 3 days.
    → Refrigeration slows moisture migration and maintains the pastry’s texture while keeping flavors fresh for subsequent servings.

Notes

These flaky almond pastries are built on a cold, laminated crust that uses a blend of all-purpose flour and almond flour for a tender, crisp bite and a delicate nutty aroma. Keep the butter very cold and handle the dough with a light touch to maintain distinct layers; chilling the dough between steps helps minimize gluten development and prevents shrinking. The 1 large egg yolk enriches the dough, while ice-cold water (and a touch of vinegar or lemon juice, if you like) brings the dough together without making it tough.

For the almond filling, beat the softened butter with sugar until pale and fluffy, then blend in almond flour, eggs, vanilla, and, if you like, almond extract. The optional extra tablespoon of flour helps stabilize the frangipane so it sets with a custardy texture as it bakes; a pinch of salt rounds the flavors. Room-temperature eggs mix evenly to create a smooth filling.

Assemble and finish with care: roll the crust thin but sturdy, spread the frangipane in the center, brush the edges with egg wash for a glossy finish, and glaze the cooled pastry with warmed apricot jam. Toasted sliced almonds add aroma and crunch; scatter them on top during the last minutes of bake or after the pastry has cooled for best texture. If you prefer a dusting, a light shower of confectioners’ sugar yields a dessert-like look.

Storage and tips: pastries can be baked ahead and stored cool in an airtight container for 1–2 days, or frozen baked pastries for longer storage. You can also freeze unbaked assembled pastries and bake from frozen; add a few extra minutes to the bake time. For gluten-free preparation, substitute a certified gluten-free all-purpose flour blend in place of the regular flour and ensure your almond flour is finely ground; handle the dough gently and chill well for best flakiness. Always refrigerate the dough before rolling for optimal lamination.

Tips

Tips for Easy Flaky Sweet Almond Pastry

Dough and Crust Tips

  • Keep everything cold: chill the flour and butter, and use ice-cold water. Cold fat creates distinct laminated layers for flakiness.
  • Handle the dough lightly. Mix just until the dough comes together to avoid gluten overdevelopment and a tough crust.
  • Sift the flours and use finely ground almond flour to ensure a smooth, tender crust without gritty bits.
  • Add water gradually; stop as soon as the dough holds together. Too much water makes the crust tough and greasy.
  • Optionally add a teaspoon of white vinegar or lemon juice to gently tenderize gluten and boost flakiness, but keep it small to avoid altering flavor.
  • Chill the formed dough for at least 1 hour (or overnight). A rested dough rolls more evenly and stays tender during baking.
  • Roll on parchment or a lightly floured surface, rotating the dough 90 degrees as you roll for even thickness.
  • If the dough springs back, wrap and refrigerate briefly; don’t overwork it or the layers will clump together.

Almond Filling Tips (Frangipane)

  • Beat softened butter and sugar until pale and fluffy to create a custardy, tender base for the frangipane.
  • Use room-temperature eggs and beat them in gradually to avoid curdling and achieve a smooth filling.
  • Finely ground almond flour gives a rich almond flavor and a moist, custard-like texture; almond meal will be nuttier and slightly coarser.
  • Balance vanilla and almond extracts; start with the recommended amounts and adjust to taste.
  • Add a tablespoon of all-purpose flour to stabilize the filling and help prevent leaking during baking.
  • Finish with a pinch of salt to enhance sweetness and deepen almond flavor.
  • If the mixture seems too thick, whisk in a small amount of milk or cream to reach a spreadable consistency.

Egg Wash and Glaze Tips

  • Beat 1 large egg with 1 tablespoon water for a shiny, golden finish; brush lightly on the pastry surface to avoid pooling at edges.
  • Warm the apricot jam and strain to remove chunks for a smooth glaze; brush onto cooled pastry for a bright sheen without streaks.
  • Thin the glaze with a little water if needed to achieve a brushable consistency.
  • Toast sliced almonds until lightly golden to maximize flavor; scatter on top before the final bake or immediately after cooling for extra crunch.
  • Dust with confectioners’ sugar after the pastry has cooled to add a dessert-like touch without dissolving the glaze.

Baking and Assembly Tips

  • Preheat the oven to the recipe’s specified temperature and bake on a parchment-lined sheet for easy cleanup.
  • To prevent sogginess, you can blind-bake a bit (partially bake) the crust before adding the frangipane, especially if the filling is very wet.
  • Seal the edges well with egg wash to prevent the filling from leaking and to promote even browning.
  • Scatter almonds on top before final bake for extra texture, or press them into the surface during the last 10 minutes for a toasted look.
  • Allow the pastry to cool completely before glazing or dusting to preserve shine and structure.
  • Store leftovers in the refrigerator and gently rewarm to refresh the flakiness; the crust may soften slightly when cold.

FAQ

What is Easy Flaky Sweet Almond Pastry?

Easy Flaky Sweet Almond Pastry is a light, buttery dough flavored with almonds that bakes into crisp, flaky layers. It’s versatile for tarts, turnovers, or simple almond-filled pastries and pairs beautifully with fruit jams, frangipane, or lemon curd.

What ingredients do I need?

Basic dough ingredients and flavor elements:

  • 2 cups all-purpose flour (plus extra for rolling)
  • 1/2 cup almond flour or finely ground almonds
  • 1/2 cup cold unsalted butter, cubed
  • 1/3 cup granulated sugar
  • 1 large egg
  • 1 teaspoon vanilla extract
  • 1/2 teaspoon almond extract
  • Pinch of salt
  • 2–4 tablespoons ice-cold water (as needed)
Can I make this gluten-free?

Yes. Use a 1:1 gluten-free flour blend in place of all-purpose flour and add 1–2 tablespoons of almond flour to help mimic fat content. Consider adding 1/4 teaspoon xanthan gum if your blend lacks elasticity. Chill the dough well and roll between parchment for best results.

Can I make the dough ahead of time?

Absolutely. The dough can be wrapped and refrigerated for 1–2 days or frozen for up to 2–3 months. Thaw in the refrigerator before rolling. If frozen, let it come to a workable chill in the fridge for 6–8 hours.

How do I roll and shape it to get flaky layers?

Keep everything cold. After chilling the dough, roll it between two sheets of parchment to about 1/8 inch (3 mm). If it cracks, chill 10–15 minutes and roll again. Use a light touch and avoid overworking the dough. For a filled tart or turnover, cut shapes, add filling, seal edges with a little water, and brush with an egg wash for shine.

What fillings pair well with this pastry?

Try these classic combinations:

  • Frangipane (almond cream) + sliced apples or pears
  • Apricot or raspberry jam
  • Lemon curd with slivered almonds on top
  • Chocolate ganache and toasted almonds
How long and at what temperature should I bake it?

Preheat to 350–375°F (175–190°C). Bake until the pastry is golden and set, typically 25–30 minutes for a tart shell or 16–22 minutes for petit pastries. If you’re making turnovers, bake until the filling is bubbling and the edges are golden.

How should I store leftovers?

Let the pastry cool completely. Store at room temperature in an airtight container for 1–2 days for best flakiness. For longer storage, refrigerate for up to 5–7 days or freeze individual pastries for up to 1 month. Reheat in a 325°F (165°C) oven for 6–8 minutes to restore crispness.

Can I freeze the dough or baked pastries?

Yes. Freeze dough discs wrapped tightly for up to 2–3 months. Bake from thawed dough as directed, or roll while still slightly chilled. Baked pastries freeze well for up to 1 month; reheat gently to avoid sogginess.

Do you have a vegan option?

Yes. Use a plant-based butter substitute and replace the egg with a flax egg or aquafaba (1 tablespoon ground flaxseed whisked with 3 tablespoons water, or 3 tablespoons aquafaba). You may also use a dairy-free glaze if desired. The texture remains flaky when kept cold and not overworked.

Any troubleshooting tips for common issues?

Common fixes:

  • Dough too dry and crumbly: add 1–2 teaspoons ice-cold water at a time, mixing gently until it comes together.
  • Dough too sticky: chill 20–30 minutes, then roll between parchment; use extra flour sparingly.
  • Pastry shrinks in the pan: refrigerate the shaped dough for 15–20 minutes before baking, and avoid stretching when placing.
  • Not flaky enough: ensure butter is very cold and cut into small cubes; don’t overwork the dough.

Introduction / Hook

Imagine a morning where the scent of warm vanilla mingles with the bright aroma of blueberries, curling through the kitchen like a welcome committee. Picture a soft, tender crumb that carries a hint of citrus-touched sweetness, the kind of bite that makes your coffee nervous with anticipation. Welcome to Sugar Free Baked Blueberry Donuts—a pastry that looks like a treat from a bakery window, but feels light enough for a weekday breakfast and friendly enough for a mindful snacker. These donuts offer the comfort of a classic favorite without the heaviness that sugar can bring, trading the fried-grease myths for a delicate, cake-like texture that is both satisfying and surprisingly versatile.

From the very first bite, you’ll notice the juiciness of blueberries popping against a subtly vanilla background, as if summer decided to send a small gift to your morning routine. The outside glimmers with a gentle crust that gives way to a moist interior, and there’s a whisper of warmth that lingers on the palate long after the plate is cleared. This is not merely a healthier version of an indulgence; it’s a reimagined ritual—an invitation to start the day with something nourishing, flavorful, and genuinely comforting. And because it’s baked rather than fried, the donuts carry a lighter footprint, letting you enjoy the pleasure of a classic pastry without the heaviness that can weigh down an afternoon.

What makes Sugar Free Baked Blueberry Donuts especially compelling is how they blend familiar charm with modern baking sensibilities. You don’t need to sacrifice taste or texture to reduce sugar; you simply lean into the fruit’s natural sweetness, embrace a gentle crumb structure, and rely on wholesome, pantry-friendly ingredients that support a balanced lifestyle. They’re ideal for hurried mornings, leisurely weekend brunches, or a thoughtful treat that you can share with family and friends who appreciate something that feels indulgent yet mindful. The donuts become a small, everyday celebration—an edible bookmark that marks the moment you chose nourishment with a smile.

As you read on, you’ll discover a dish that carries a sense of nostalgia and a promise of adaptability. It’s a recipe that invites experimentation—whether you’re aiming for a dairy-free version, a gluten-free approach, or a different berry twist—without losing the essential character that makes these donuts so appealing: a soft, yellow-tinged crumb, a burst of blueberry brightness, and a finish that feels like a little morning luxury.

The Story Behind the Dish

Donuts have long enjoyed a place in the urban morning ritual—the moment when flour, fat, and sugar collide in a hot pan or a hot oven to create something that feels both celebratory and comforting. The classic doughnut has roots that reach deep into culinary history, evolving from simple fried rings into an array of shapes, flavors, and textures. The baked donut, in particular, emerged as a friendlier alternative for home bakers who craved that same spongy, cake-like sweetness without the heaviness of deep-frying. This Sugar Free Baked Blueberry Donut is part of that lineage, an expression of how tradition can be gentle and modern at the same time.

Blueberries, in their turn, carry a storied charm of their own. Native to North America, these little gem-like berries arrived at markets with a promise of color, brightness, and a touch of tartness that balances sweetness beautifully. They’re a natural companion for baked goods, lending moisture and a depth of flavor that can feel almost culinary “magic”—the kind of magic that turns a straightforward batter into something that tastes distinctly summery, even in the chill of early mornings or during a crisp season when berries aren’t at their peak.

The idea behind a sugar-free version is a nod to evolving dietary preferences without compromising the sense of indulgence. The donut becomes a canvas for the fruit’s natural sweetness and for thoughtful substitutions that strip away refined sugars while preserving a rounded, comforting finish. It’s a story about balance: the gentle restraint of sweetness, the soft embrace of a tender crumb, and the invigorating brightness of blueberries all meeting in a morning staple that feels like a treat without shouting decadence.

There’s also a playful nod to the way kitchens have always evolved—from grandmotherly pie plates to modern bakers who experiment with textures, flours, and sweeteners. In many homes, the ritual of baking is as much about the process as the product: measuring by feel, smelling the batter as it rises, watching the batter puff as it bakes, and sharing a tray of warm donuts with someone you love. This recipe captures that sense of home and invention: it is a contemporary homage to a classic that invites you to slow down, savor, and smile at the simple pleasure of a well-made bite.

Why You’ll Love This Recipe

  • Balanced sweetness: Sugar-free by design, but not by taste. The natural fruitiness of blueberries carries the dish, while a gentle sweetness keeps the donuts approachable for all ages.
  • Healthier approach to a beloved treat: Baked donuts with a cake-like crumb offer a lighter alternative to fried varieties, with less oil and a more even crumb structure that’s ideal for breakfast or a midday pick-me-up.
  • Versatile for different diets and preferences: The concept translates well to dairy-free, gluten-free, and plant-based adjustments, depending on the flours, milks, and sweeteners you choose to embrace—without losing the donut’s characteristic charm.
  • Moist, tender texture with blueberry bursts: Each bite delivers a pop of berry juiciness that contrasts with the soft, airy interior and a thin, satisfying crust—texture that delights the senses from first bite to the last.
  • Fast and approachable for busy mornings: While the donuts feel bakery-worthy, the process is friendly for weekday execution, making a batch that can be enjoyed fresh or stored for later in the week.
  • Excellent for gatherings and brunches: The simple, approachable flavor invites pairing with coffee, tea, yogurt, or a light citrus glaze for an elevated brunch centerpiece or a casual weekend treat.
  • Family-friendly and crowd-pleasing: The familiar shape and comforting flavors appeal to kids and adults alike, turning a simple breakfast into a shared moment of joy.
  • Great make-ahead potential: After baking, these donuts retain their softness well, which makes them suitable for prepping ahead for the week or for a weekend batch to freeze and reheat.

Flavor Profile & Texture

At the heart of these donuts is a delicate balance between fruit brightness and a mellow, comforting base. The blueberries contribute a natural sweetness and a slight tang that keeps the flavor fresh rather than cloying. Their juicy bursts create pockets of surprise throughout the bite, giving you little moments of fruit-forward sweetness that lift the crumb rather than weigh it down. The surrounding batter offers a soft, cake-like texture—light and tender with a gentle crumb that yields to a satisfying bite. There’s a cinematic moment when you take a bite: the crust forms a subtle, almost caramelized edge—crisp enough to add structure without becoming a barrier, and soft enough inside to feel almost like a cloud.

In terms of aroma, expect a welcoming blend of vanilla and fruit with a whisper of warmth from the baking process. The vanilla layers through the crumb, echoing in the background as the blueberry notes rise forward, creating a balanced harmony rather than a single-note sweetness. The finish is clean, lingering, and comforting—the kind of flavor that invites you to take another bite, then another, before you even realize you’ve had two or three.

Texture plays a crucial role in the overall experience. The exterior offers a gentle crust that gives a light resistance and a satisfying snap when you bite into it. The interior remains moist, tender, and slightly springy—enough to hold its shape when you pick up a donut with your fingers but soft enough to bite into with ease. If you’ve ever enjoyed a bakery-crackled edge on a baked good, you’ll recognize that same delight here—an unforced, natural crust that enhances the crumb rather than overpowering it. All the while, the blueberries contribute moisture and juiciness, ensuring that the donut doesn’t dry out and that each bite offers a moment of fruity brightness to balance the overall richness.

Occasions & Pairings

These Sugar Free Baked Blueberry Donuts shine in a range of settings, from casual weekday mornings to weekend gatherings. They’re ideal for a quick weekday breakfast when time is tight but you still crave something gratifying. They’re equally welcome at weekend brunches, where a tray of warm donuts can lead a conversation about mornings, memories, and new twists on old favorites. They also work well as a thoughtful dessert or a comforting snack on a road trip or busy afternoon, when a familiar, cake-like bite can lift spirits and provide a sense of home on the go.

Pairing ideas to enhance the experience without overshadowing the donuts:

  • Bright beverages: Freshly brewed coffee, a spicy chai, or a lightly-scented tea can complement the donuts’ vanilla and berry notes.
  • Dairy pairings: A small dollop of yogurt or a splash of cream can add a cool contrast to the warm, textured donut, especially if you prefer a softer bite with a touch of tang.
  • Fresh fruit accents: A few extra blueberries or citrus segments on the side can echo the donut’s fruit profile and brighten the plate.
  • Light sweet sauces: A delicate sugar-free glaze or a drizzle of a citrus-based reduction can lend a glossy finish and an extra hint of sweetness without tipping the sugar balance.
  • Salty counterpoints: A light sprinkle of flaky sea salt or a tiny savory crumb on the plate can create a playful contrast that makes the flavors feel even more vivid.

For special occasions, you can present these donuts with a small tasting board: an assortment of berries, small bowls of yogurt, and a warm beverage selection. The result is a visually appealing, palate-pleasing setup that makes breakfast feel like a celebration, even on a busy weekday.

Tips, Variations & Substitutions

General Tips

To maximize flavor and texture, focus on balance and freshness. Let the batter come together just until the ingredients are harmoniously incorporated, avoiding over-mixing which can lead to a tougher crumb. When the donuts bake, you’ll notice the batter rising and forming a light, rounded top. A gentle rotation of the baking tray partway through ensures even browning. If you’re aiming for a slightly more pronounced crust, a brief, warm bake with a touch longer exposure on the exterior can deliver that satisfying snap without sacrificing interior tenderness.

Dietary Variations

If you’re exploring different dietary approaches, this concept adapts well without losing its essential character. For a gluten-free version, consider a gentle, fine-textured base that yields a soft crumb and holds its shape well. For dairy-free or vegan preferences, swap conventional dairy with plant-based milks and replace any eggs with plant-based substitutes that provide moisture and binding without altering the crumb’s delicate balance. The goal is to maintain the light, cake-like structure while ensuring the batter remains cohesive and easy to portion into donuts. You can also experiment with total sugar-free approaches by choosing non-sugar sweeteners that suit your taste and dietary needs—keeping in mind that some sweeteners can affect moisture and browning, so you may want to adjust proportions accordingly.

Flavor Tweaks & Substitutions (Non-Inclusive of Specific Ingredients)

Try variations that emphasize different fruit notes or add a new dimension to the flavor. For example, a citrus zest can lend a bright aroma that complements the berries. A pinch of warm spice, such as cinnamon or nutmeg, can create a comforting depth that works well with the fruit’s brightness. If you’d like a richer finish, a tiny amount of a smooth fat or milk alternative can be integrated to enhance tenderness, while still preserving the light texture that makes baked donuts appealing. For berry variety, you can explore other berries or stone fruits that pair beautifully with vanilla, provided you maintain a balance that keeps the donut from becoming too wet or heavy.

Regional Twists

Different culinary traditions can inspire small, comforting twists. A touch of almond character or a hint of citrus from a regional citrus variety can give the donuts a distinct personality while preserving the overall lightness. The key is to maintain that familiar donut structure and the bright fruit presence so that each bite remains recognizable and inviting, even as the flavor profile shifts with regional influence.

Storage & Make-Ahead Ideas

These baked donuts are well-suited to make-ahead routines, a practical feature for busy weeks or weekend meal-prep. After baking and cooling completely, you can store them in an airtight container at room temperature for a couple of days, preserving their tenderness. If you want to extend their life, refrigerating them in a sealed container can keep their texture and flavor intact for a little longer, though you may notice a slight firming over time. Freezing is an excellent option for longer storage; place cooled donuts in a freezer-safe bag or container, and they will hold their quality for several weeks. Reheating is simple: warm them gently in a toaster oven or conventional oven, or microwave briefly for a quick treat. The goal is to revive that fresh-from-the-oven warmth while preserving the moist interior and the gentle crust’s bite.

Make-ahead strategies can include preparing a batch of the donut batter (or partially baked donuts) in advance and finishing them off closer to serving time. When you plan ahead, you’ll have a reliable morning staple ready to go, minus the stress of last-minute baking. If you’re freezing, consider labeling with a date to keep track of freshness, and thawing in the fridge overnight before reheating to preserve texture and moisture. The convenience of a baked donut that can be stored and enjoyed over several days makes it a particularly useful addition to a home bakery repertoire.

Fun Facts & Trivia (Optional)

Did you know that the concept of baked donuts has been a delight for home bakers and professional pastry chefs alike for decades? The shift from frying to baking isn’t just about reducing fat; it’s also about expanding flavor and texture possibilities while maintaining a fresh, every-day appeal. Blueberries have long been associated with healthful associations and natural sweetness, and they perform beautifully in baked goods, delivering moisture, color, and a tart note that brightens baked desserts. The combination of these two elements—blueberries and a cake-like, sugar-conscious donut—blends a sense of nostalgia with contemporary dietary awareness, creating a pastry that honors both tradition and modern preference.

Another little nugget: many cultures celebrate donuts in different forms, from beignets in the American South to Berliner-style donuts in Europe. While each tradition has its own unique approach, the essence remains the same: to share something comforting, flavorful, and universally beloved. By reimagining the donut in a sugar-free, baked form, you’re participating in a long line of cooks who honor the past while embracing the present—an edible bridge between generations of morning rituals.

Ingredients

Sugar Free Baked Blueberry Donuts
Donut Base

  • 2 cups blanched almond flour (finely ground)
    → Almond flour forms the tender, gluten-free base and helps give the donuts structure and moisture. Use blanched almond flour for a smoother crumb; measure by spooning into the cup and leveling rather than packing. Store in an airtight container to maintain freshness and prevent rancidity.
  • 1/4 cup coconut flour
    → Coconut flour is highly absorbent and helps balance moisture in gluten-free batters, contributing to a cake-like texture. Use a small amount to avoid a gummy crumb; you may need to adjust liquids if you add more. Sift before measuring to remove lumps for even distribution.
  • 3 large eggs
    → Eggs provide binding, structure, and moisture, helping the batter rise and hold together without gluten. If you prefer a vegan option, substitute with flax eggs (1 tablespoon ground flaxseed + 3 tablespoons water per egg) and allow the mixture to thicken before using; note this will alter texture and rise.
  • 1/2 cup unsweetened almond milk
    → Adds необходим moisture and helps achieve a scoopable batter consistency. Use a dairy-free milk if needed; if your milk is particularly thick, warm it slightly to blend more easily with the other ingredients.
  • 1/2 cup plain Greek yogurt or dairy-free yogurt
    → Contributes creaminess and tenderness, improving crumb and moisture. If using dairy-free yogurt, choose a thick variety (coconut or almond-based) and let it reach room temperature to blend smoothly with the other ingredients.
  • 1/2 cup granulated sugar-free sweetener (erythritol or monk fruit)
    → Provides sweetness without added sugar and aids browning and texture. Choose a granulated form for best texture; avoid liquid sweeteners, which can alter batter consistency. Start with 1/2 cup and adjust to taste depending on the blend you use.
  • 1 teaspoon vanilla extract
    → Adds depth of flavor and enhances the blueberry profile. Use pure vanilla for the strongest aroma; imitation vanilla is acceptable but yields a slightly flatter flavor.
  • 1 teaspoon baking powder
    → Leavening agent that helps the donuts rise for a light, cake-like crumb. Ensure it’s fresh for reliable rise; if in doubt, test a pinch in hot water to confirm fizz.
  • 1/2 teaspoon baking soda
    → Works with the yogurt and dairy to promote browning and lift, contributing to a tender interior. Do not omit if you want a higher rise and softer crumb.
  • 1/4 teaspoon fine salt
    → Balances sweetness and enhances overall flavor; crucial in low-sugar recipes to prevent flat-tinish taste.
  • 1 cup fresh blueberries (or 1/2 cup frozen blueberries, thawed and well drained)
    → The star of the dish, providing pockets of juicy blueberry flavor. If using frozen berries, thaw completely, drain well, and pat dry to prevent color bleeding and soggy batter. Toss berries with a teaspoon of almond flour before folding to help distribute evenly and reduce sinking during baking.
  • 1 teaspoon lemon zest (optional)
    → Brightens the flavor and complements blueberries beautifully. Zest only the yellow part; avoid the bitter white pith. If you skip zest, you can increase vanilla or add a pinch of extra cinnamon for warmth.
  • 1/2 teaspoon ground cinnamon (optional)
    → Adds warmth and depth to the flavor profile. Useful if you want a cozy, bakery-style donut; omit if you prefer a cleaner blueberry note.

Optional Add-ins

  • 2 tablespoons chopped walnuts (optional)
    → Adds a crunchy texture and nutty flavor that contrasts the soft crumb. Chop finely for even distribution; you can toast the nuts lightly to intensify their aroma before folding into the batter. If nut allergies are a concern, substitute with toasted pumpkin seeds or omit entirely.
  • 2 tablespoons sugar-free chocolate chips (optional)
    → Provides pockets of chocolate without sugar; fold in at the end to minimize sinking. Choose chips that hold shape well when baked for best texture.
  • 1 tablespoon shredded unsweetened coconut (optional)
    → Adds chewy texture and aroma; use finely shredded coconut for even distribution. Remove if you prefer a purely blueberry-forward flavor instead.

Glaze or Toppings (Sugar-Free)

  • 1/2 cup powdered sugar substitute (sifted)
    → Gives a smooth, glossy finish without sugar. Use a granulated to powdered powdered form that measures like sugar; if your product isn’t powdery, blitz briefly in a blender.
  • 1-2 tablespoons unsweetened almond milk
    → To achieve a pourable glaze; start with 1 tablespoon and add more as needed. If the glaze becomes too thin, refrigerate briefly to thicken.
  • 1/2 teaspoon vanilla extract (optional)
    → Subtle vanilla note in the glaze; use pure vanilla for best flavor.
  • 1 teaspoon lemon juice (optional)
    → Adds a bright lemony glaze option that pairs well with blueberries; adjust sweetness to taste accordingly.

Instructions

  • Preheat your oven to 350°F (175°C) and thoroughly grease a donut pan with nonstick spray or brush it with melted coconut oil, ensuring every cavity is coated to prevent sticking.
    → Proper coating creates a nonstick surface and makes removing donuts after baking clean and intact, especially with delicate gluten-free batters.
  • In a large bowl, whisk together the dry ingredients: 2 cups blanched almond flour (finely ground), 1/4 cup coconut flour, 1 teaspoon baking powder, 1/2 teaspoon baking soda, and 1/4 teaspoon fine salt; sifted to remove lumps and ensure even distribution.
    → Coconut flour is highly absorbent; sifting and whisking ensure even moisture absorption and a tender, uniform crumb without pockets of dry flour.
  • Prepare the blueberries: rinse fresh blueberries and pat dry, or fully thaw frozen berries and drain well; pat dry to remove surface moisture; toss the berries with 1 teaspoon almond flour before folding to help suspend them in the batter and reduce sinking and color bleeding.
    → The flour coating helps blueberries distribute more evenly and minimizes color bleed into the batter during baking.
  • In a separate medium bowl, whisk together 3 large eggs, 1/2 cup unsweetened almond milk, 1/2 cup plain yogurt (or dairy-free yogurt of similar thickness), and 1 teaspoon vanilla extract (plus lemon zest if using) until the mixture is smooth and emulsified; ensure the eggs are fully integrated to create a cohesive batter.
    → Eggs provide structure and moisture; whisking with the dairy helps prevent curdling and ensures a smooth batter that rises evenly.
  • Pour the wet mixture into the bowl of dry ingredients and fold gently with a silicone spatula or wooden spoon until just combined; avoid overmixing to prevent toughness, and scrape the bottom and sides to incorporate any hidden pockets of flour.
    → Overmixing gluten-free batters can create a dense, crumbly texture; gentle folding preserves a tender, cake-like crumb.
  • Gently fold in the prepared blueberries (tossed with 1 teaspoon almond flour) along with any optional add-ins: 2 tablespoons chopped walnuts, 2 tablespoons sugar-free chocolate chips, and 1 tablespoon shredded unsweetened coconut; fold using a soft, figure-eight motion until just distributed.
    → Gentle folding keeps the berries intact and prevents color bleed; even distribution ensures consistent flavor in every donut.
  • Check batter consistency: if the batter appears too thick and scooping is difficult, whisk in small increments up to 2–3 tablespoons more unsweetened almond milk until the batter reaches a thick but scoopable consistency; do not thin excessively or it will spread during baking.
    → Almond flour and coconut flour absorb moisture; a slightly thick, spoonable batter gives the donuts a tender crumb without collapsing.
  • Spoon or pipe the batter into the prepared donut pan, filling each cavity about 2/3 full for rise and a flat top; tap the pan on the counter a few times to settle the batter and remove air pockets; wipe any drips from the cavity rims for clean edges.
    → Filling 2/3 ensures donuts rise properly without overflowing; tapping eliminates large air pockets and yields an even, rounded top.
  • Bake in the preheated oven for 14–18 minutes, rotating the pan halfway through to promote even browning; check doneness by inserting a toothpick into the center of a donut—no wet batter should cling, only a few moist crumbs; allow to cool in the pan for 5 minutes before transferring to a wire rack.
    → Donut texture depends on even heat; rotating prevents hot spots; a clean toothpick indicates doneness and prevents overbaking which can dry the crumb.
  • Place donuts on a wire rack and let them cool completely before glazing to ensure the glaze adheres and does not melt; if glazing sooner, the heat can cause the glaze to slide off.
    → Proper cooling ensures the glaze sets correctly and the donuts achieve a stable surface for decoration.
  • In a small bowl, whisk together 1/2 cup powdered sugar substitute with 1–2 tablespoons unsweetened almond milk until smooth and pourable; add 1/2 teaspoon vanilla extract and 1 teaspoon lemon juice if a lemon glaze is desired; adjust thickness with more sugar substitute or milk as needed; glaze should be thick enough to coat but thin enough to drip slightly.
    → A smooth, pourable glaze creates a glossy finish; the optional lemon adds bright contrast to blueberries, while vanilla deepens flavor.
  • Dip the top of each cooled donut into the glaze or drizzle with it using a spoon, ensuring an even coat; allow the glaze to set for a few minutes before stacking to avoid smearing and ensure a firm, attractive finish.
    → A consistent glaze enhances sweetness and provides a glossy, bakery-style appearance; setting time prevents running and pooling in the pan’s crevices.
  • If desired, sprinkle additional optional toppings such as a light dusting of extra powdered sugar substitute or a few lemon zest shreds while the glaze is still tacky for decorative contrast; allow to fully set before storing.
    → Toppings add texture and aroma; wait for the glaze to set so toppings adhere rather than sliding off.
  • Store baked donuts in an airtight container at room temperature for up to 2 days or refrigerate for up to 5 days; to rewarm, microwave in short 10–15 second bursts until warm and soft; this keeps the crumb tender and prevents drying out.
    → Proper storage preserves moisture and prevents the delicate gluten-free crumb from drying; gentle reheating restores softness without overcooking.

Notes

These gluten-free sugar-free blueberry donuts are naturally sweetened with ripe blueberries and a sugar-free sweetener, making them a wholesome and guilt-free snack or breakfast option. You can customize them by adding your favorite nuts, seeds, or shredded coconut. They freeze well and reheat beautifully for a quick grab-and-go treat. For an extra boost, serve with a dollop of dairy-free yogurt or a smear of almond butter. Always ensure your blanched almond flour is fresh for a light, tender crumb and your baking powder is active for reliable rise. If you prefer a vegan option, substitute flax eggs (1 tablespoon ground flaxseed + 3 tablespoons water per egg) and allow the mixture to thicken before using; note this will alter texture and rise. To prevent the blueberries from sinking, toss them with a teaspoon of almond flour before folding into the batter. For extra brightness, add lemon zest, and if you like a cozy bakery-style donut, add a pinch of cinnamon.

Tips

Tips for Perfect Sugar-Free Baked Blueberry Donuts

  • Choose the right almond flour: use finely ground blanched almond flour for a tender crumb. Measure by spooning into the cup and leveling, not packing. Store sealed to maintain freshness and prevent rancidity.
  • Balance moisture with coconut flour: coconut flour is highly absorbent. Use a small amount (1/4 cup) and be prepared to adjust liquids if the batter seems dry. Sift coconut flour before measuring to avoid lumps for even distribution.
  • Eggs and binding: eggs provide structure and moisture. If you need a vegan option, substitute with flax eggs (1 tablespoon ground flaxseed + 3 tablespoons water per egg) and allow the mixture to thicken before using; this will affect texture and rise.
  • Moisture from dairy alternatives: warm unsweetened almond milk slightly if your batter needs easier mixing. Add gradually to reach a scoopable consistency; if your batter is too thick, a splash more milk helps.
  • Yogurt tenderness: use plain Greek yogurt or a thick dairy-free yogurt to improve crumb and moisture. Let dairy-free yogurt come to room temperature for easier folding.
  • Sweetener choice: choose a granulated sugar-free sweetener (erythritol or monk fruit) for best texture and browning. Avoid liquid sweeteners as they can thin the batter. Start with 1/2 cup and adjust to taste after mixing.
  • Flavor boost: vanilla extract adds depth; lemon zest brightens blueberry flavor. If skipping zest, you can increase vanilla or add a touch of cinnamon for warmth.
  • Leavening confidence: use fresh baking powder for reliable rise; if unsure, test a pinch in hot water to confirm fizz. Baking soda works with yogurt to help browning and lift, so don’t omit.
  • Salt balance: a pinch of fine salt enhances sweetness and flavor, especially in low-sugar recipes.
  • Blueberry integrity: use fresh blueberries or well-drained thawed frozen berries. Toss thawed berries with 1 teaspoon almond flour before folding to help distribute evenly and reduce sinking, then pat dry to minimize color bleeding and soggy batter.
  • Optional zest and spice: lemon zest adds brightness while cinnamon adds warmth; adjust to your preference or omit if you want a purer blueberry note.

Tips for Optional Add-ins and Glaze

  • Nut add-ins: 2 tablespoons chopped walnuts add crunch; toast lightly to intensify aroma and chop finely for even distribution. If nut allergies are a concern, substitute with toasted pumpkin seeds or omit.
  • Chocolate chips: 2 tablespoons sugar-free chips fold in at the end to minimize sinking and keep pockets of chocolate visible.
  • Shredded coconut: 1 tablespoon shredded unsweetened coconut adds chew and aroma; use finely shredded coconut for even distribution or omit if you prefer pure blueberry flavor.
  • Glaze base: use 1/2 cup powdered sugar substitute (sifted) for a smooth finish. If it isn’t powdery, blitz briefly in a blender to avoid gritty texture.
  • Glaze consistency: start with 1 tablespoon unsweetened almond milk and add more as needed to reach a pourable glaze. If too thin, refrigerate briefly to thicken.
  • Flavor in glaze: add 1/2 teaspoon vanilla extract for a subtle note; optional lemon juice (1 teaspoon) creates a bright lemony glaze that pairs with blueberries. Balance sweetness to taste.

Baking, Cooling, Storage and Troubleshooting

  • Pan prep: grease the donut pan well or use silicone molds; preheat the oven and fill cups about 2/3 full to leave room for rise.
  • Avoid dryness and overbaking: bake until just set and a toothpick comes out with a few moist crumbs; overbaking can make the donuts dry and crumbly.
  • Cooling: let donuts cool in the pan for 5–10 minutes before transferring to a rack to prevent breakage; cool completely before glazing for best shine and adhesion.
  • Make-ahead and storage: donuts freeze well; freeze on a tray, then transfer to an airtight bag. Reheat in a 300°F oven for 5–7 minutes or gently warm in the microwave in short bursts.
  • Glaze storage: keep any leftover glaze refrigerated and re-whisk with a splash of almond milk if needed before use.
  • Allergen and storage notes: store away from strong-smelling foods to avoid odor absorption; ensure gluten- and dairy-free labeling remains intact if sharing with others who have allergies.

FAQ

Sugar Free Baked Blueberry Donuts – FAQs

What makes these donuts sugar-free?

They’re baked with a sugar substitute (such as erythritol, monk fruit, or a blend) and rely on blueberries for natural sweetness. There’s no refined sugar in the batter. If you prefer a sweeter result, you can adjust the sweetener slightly or finish with a sugar-free glaze.

What flour should I use for the best texture?

Almond flour is common for a moist, tender crumb. Coconut flour works but soaks up more liquid, so you’ll usually need extra eggs or added moisture. You can also use a gluten-free 1:1 blend, but texture may vary.

Are these donuts gluten-free?

Yes, when you use almond flour or a gluten-free blend and avoid gluten-containing ingredients. Check labels on any flavorings or sweeteners to be sure.

Can I make them dairy-free or vegan?

Yes. Use a plant-based milk (almond, soy, or oat) and dairy-free yogurt or omit yogurt. For vegan options, replace eggs with flax eggs (1 tablespoon ground flax + 3 tablespoons water per egg) or a commercial egg replacer. You may need to adjust liquids slightly.

Can I use frozen blueberries?

Yes. Frozen berries work well; there’s no need to thaw. Fold them gently to minimize color bleeding into the batter. If berries are very watery, pat them dry or toss with a little almond flour to help prevent sinking.

What are the baking time and temperature?

Preheat to 350°F (175°C). Bake for about 12–15 minutes, or until a toothpick inserted into a donut comes out with a few moist crumbs. If using a different pan, start checking a bit earlier.

How should I store leftovers?

Store in an airtight container at room temperature for 2–3 days. Refrigerate for up to 5–7 days or freeze for up to 2–3 months. Rewarm in the oven or microwave before serving.

Can I freeze the batter or baked donuts?

Baked donuts freeze well. Cool completely, then freeze in an airtight container. For batter, you can prepare dry ingredients in advance and mix with wet ingredients shortly before baking. Textures may vary after freezing.

Can I glaze or top them without sugar?

Absolutely. Try a sugar-free glaze made with cream cheese or yogurt sweetened with a sugar substitute, or a light chocolate drizzle using sugar-free chocolate. You can also finish with cinnamon, chopped nuts, or a dusting of cocoa powder for extra flavor.

How can I adjust sweetness or texture?

Taste the batter and adjust the sweetener to your liking. For a moister crumb, add a little yogurt or milk; for a lighter texture, add another egg or a touch more almond flour. Avoid overmixing and don’t overbake to prevent dryness.

Introduction / Hook

Picture a tray of golden, pillowy rounds that look as if they were plucked from a cloud, each whisper-soft edge tinged with a gentle tan, a delicate bite that gives way to a supremely light interior. This is not just bread; it’s a mood, a playful brunch moment, a memory waiting to happen. Fluffy Cottage Cheese Blueberry Cloud Bread is the kind of recipe that makes mornings feel special and afternoons feel celebratory. The aroma unfurls softly—vanilla, a hint of citrus, perhaps a whisper of almond—as the bread warms, turning a simple kitchen into a sun-drenched café. Then there are the blueberries: jewel-like bursts of sweetness that pop in every bite, painting little pockets of tangy brightness through the tender, cloud-like crumb. It’s comfort with a twist, a modern take that honors tradition while playfully bending it toward lighter, airier, more accessible baking. If you’ve ever imagined folding the comfort of cottage cheese into a dreamlike loaf, you’re about to meet that vision in a glorious, edible moment.

What makes this recipe truly special is its balance. It embraces the nostalgic, homey charm of soft, warm bread while leaning into a lighter texture that almost defies bread science. The cottage cheese adds a gentle tang and a protein-tinged creaminess that keeps the crumb soft and moist without heaviness. Blueberries bring brightness and a touch of tartness that cuts through the natural sweetness, giving you seconds that feel indulgent but somehow more wholesome. It’s the kind of dish that invites sharing—a plate passed around the table, a warm slice teased apart with the hiss of steam, a chorus of “mmms” that say you’ve hit the sweet spot between everyday and extraordinary. And because it’s cloud bread, it toasts beautifully—edges crisping into a delicate crunch while the center remains soft and pillow-like, a perfect foil for butter, honey, or lemon-curd glaze.

The Story Behind the Dish

Cloud bread has a breezy, modern origin story. It emerged from kitchens exploring lighter, low-carb, or gluten-conscious baking, where home cooks and professional chefs alike experimented with leavening alternatives and whipped textures to recreate the comforting mouthfeel of bread without traditional wheat. The concept—airy, egg-white–leaned “clouds” folded into a gentle base—felt almost alchemical: something that could rise with air, yet stay tender and delicate. Our version, Fluffy Cottage Cheese Blueberry Cloud Bread, is a friendly evolution of that idea. It borrows the cloud bread ethos but nudges it toward protein-rich, creamy Canadian-style cottage cheese, which brings a subtle tang and a moisture-retaining crumb that makes every bite feel plush, almost couture in its softness.

In developing this particular rendition, a sunny weekend kitchen became a playground. A scoop of cottage cheese joined eggs and a touch of vanilla, the walls filled with the scent of warm berries and citrus zest, and a sheet of parchment paper became a stage for little dreams forming into real, edible clouds. The blueberries, naturally, carried their own tiny drama—achingly sweet when warmed, they released pockets of juice that stained the crumb with purples and blues, as if the bread wore a delicate summer dress. It’s the kind of dish that started as a curiosity and then settled in as a family favorite—something you reach for on busy mornings, for leisurely weekend breakfasts, or for satisfying, not-too-sweet snacks that still feel celebratory.

Why You’ll Love This Recipe

  • Light, airy texture: The interplay of whipped components and the cloud-bread technique yields a crumb that feels like a soft hug, not a dense slice.
  • Protein-rich and satisfying: Cottage cheese adds a gentle protein boost that helps you feel nourished, even when you’re indulging in something decadently fluffy.
  • Naturally sweet, with fruit-forward brightness: Blueberries provide natural sweetness and tang, so you don’t need to rely on heavy syrups or excess sugar.
  • Gluten-free by nature: This isn’t a gluten-containing bread, which makes it appealing for gluten-sensitive eaters and those looking for an airy alternative to traditional bakery loaves.
  • Versatile and forgiving: It pairs beautifully with a spread of butter, a dollop of Greek yogurt, a drizzle of lemon honey, or a light cream cheese smear—no two bites feel the same.
  • Quick to assemble: Feels like a special treat but comes together with simple steps that don’t demand long waiting times or complicated equipment.
  • Kid-friendly and crowd-pleasing: The gentle sweetness and soft texture make it a hit with younger eaters, while adults appreciate the refined flavor balance.
  • Excellent for make-ahead moments: It holds up well in the fridge and can be refreshed quickly in a toaster or oven, making weekday mornings easier.

Flavor Profile & Texture

The aroma is a prelude to the main event: a mellow, comforting sweetness that comes from the subtle vanilla and the natural sugars in the fruit. The cottage cheese contributes a creamy, slightly tangy note that plays well against the gentle sweetness, a reminder that this is bread with personality rather than a bland, one-note loaf. When you bite in, you’ll notice an almost ethereal lightness—a crumb that lifts and parts with ease, like biting into a soft, warm postcard from a sunlit kitchen.

The blueberries are the stars of the show, delivering juicy pops that contrast beautifully with the soft, cushiony interior. Their fruity perfume is carried through the crumb, leaving behind delicate bursts of berry flavor rather than a cloying sweetness. The texture is a masterclass in balance: at once tender and resilient, with just enough structure to hold its shape when you slice it but so soft that it dissolves on the tongue. There’s a comforting, almost custardy whisper to the bite, tempered by the crisp, lightly toasted edges that emerge when the bread meets a hot surface. Depending on how you toast or warm it, you’ll notice a gentle caramelization along the crust, a small, fragrant crunch that invites you to take another, slower bite to savor the layers of flavor and texture.

In terms of flavor notes, think of a delicate vanilla meadow kissed by fruit and a hint of almond-like aroma from the toasting. The energy of a fresh blueberry, a touch of citrus zest if you choose to add it, and the creaminess of cottage cheese all converge to create something that feels indulgent without heaviness. It’s the rare bread that feels like comfort and novelty at once—soft enough to melt in your mouth, yet with enough personality to stay interesting bite after bite.

Occasions & Pairings

This cloud bread shines in many moments. It’s ideal for weekend brunches where guests arrive with hungry appetites and cheerful conversation; it’s equally welcome as a quick weekday breakfast when you’re dashing out the door but still deserve a moment of calm and delicious aroma swooping through the kitchen. Its versatility makes it a good candidate for tea time, picnic spreads, or even as a charming, less-sugary alternative to dessert on a light-end menu.

Pair it with items that compliment its softness and fruity brightness. Try:

  • Butter swirls and a drizzle of lemon-honey or vanilla honey for a simple, elegant finish.
  • A dollop of thick Greek yogurt or a spoonful of lemon curd to add tang and creaminess.
  • A light cream cheese spread with a whisper of vanilla and a pinch of salt to echo the bread’s flavors.
  • Fresh fruit on the side—strawberries, sliced peaches, or additional blueberries—for extra color and juiciness.
  • A sparkling beverage: a lightly sweetened citrus tea, a dry sparkling wine for brunch, or a cold-brew coffee with a splash of milk.

For holiday spreads or special brunches, consider fancy accompaniments like a dab of ricotta with orange zest, a tiny sprinkle of powdered sugar for guests who expect something a touch sweeter, or a berry compote spooned beside the slices to create a mini-deconstructed trifle feel on plates. If you’re serving children, you can layer on a small amount of nut-free fruit jam as a playful topping that won’t overpower the delicate crumb.

Tips, Variations & Substitutions

  • Texture tweaks: If you like an even lighter crumb, you can fold the blueberries gently into the batter at the end to minimize bursting and color bleed, keeping the crumb airy and evenly distributed with pockets of fruit throughout.
  • Berry swaps: While blueberries are ideal for their color and balanced tart-sweet profile, you can experiment with raspberries, blackberries, or diced peaches for a different fruit-forward version. Smaller berries tend to distribute more evenly; larger chunks give you pockets of juicy surprise.
  • Flavor enhancers: A light zest of lemon or orange can lift the bread’s aroma and brighten the finish. A touch of almond extract adds a pleasant nutty note that pairs well with blueberries.
  • Texture alternatives: If you’d like a more compact bite, consider a touch less binder or a slightly longer resting period to let the batter settle before baking. Conversely, if you crave extra loft, you can lightly whip the base components to introduce more air before folding in fruit.
  • Dietary adaptations: For a gluten-free approach, this recipe already leans gluten-free, thanks to the cloud bread concept. To make it dairy-free, substitute dairy-free cottage cheese and a dairy-free butter or spread. For a vegan version, you’ll want to reimagine the base with a plant-based cottage cheese substitute (such as almond or soy-based curd) and ensure the rest of the components align with vegan guidelines. Note that texture and flavor will shift with substitutions, so adjustments may be needed to maintain the lightness.
  • Sweetness level: If you prefer more sweetness, you can add a gentle touch of sugar or a drizzle of maple syrup after baking. For lower sugar, rely on the natural sweetness of the berries and a tiny amount of vanilla.
  • Even browning: If your oven tends to bake unevenly, rotate the pan halfway through to ensure uniform color on all sides. A light brush of melted butter along the tops before baking can also support a more appealing sheen and tenderness.
  • Make-ahead variations: Prepare the batter ahead, refrigerate for up to 24 hours, and bake when ready. This can be convenient for weekend plans and ensures fresh aroma when you finally bake.

Storage & Make-Ahead Ideas

Cloud bread is surprisingly forgiving when it comes to storage, which makes it perfect for meal prep or entertaining. Here are practical tips to keep it tasting as delightful as the first slice:

  • Room temperature: Freshly baked cloud bread will keep well for a day or two at room temperature in an airtight container or wrapped in parchment, with a light cover to maintain tenderness.
  • Refrigeration: For longer storage, refrigerate slices in an airtight container. They’ll stay soft and ready to rewarm. To restore the soft interior, warm slices gently in a toaster oven, skillet, or quick 10-15 seconds in the microwave—though the toaster oven will yield the best texture.
  • Freezing: You can freeze baked slices or the whole assembled bread once cooled. Wrap tightly and store for up to 1-2 months. Reheat in a moderate oven until warmed through and the edges regain a touch of crispness.
  • Make-ahead, ready-to-bake: If you enjoy planning ahead, prepare a day-before batter with your chosen fruit; store in the fridge. When you’re ready, portion onto a sheet and bake, saving a step on the day you serve.
  • Storage tips for best texture: To preserve the cloud-like crumb, avoid stacking hot slices directly atop one another; let the slices cool completely before stacking, and separate with parchment to prevent sticking.

Fun Facts & Trivia (Optional)

  • Cloud bread has become a symbol of “lighter” baking, often associated with low-carbohydrate and gluten-conscious trends, yet it remains a comforting treat that appeals to a broad audience beyond diet circles.
  • The term cloud bread evokes the idea of lifting, floating textures—airy, light, and ethereal—capturing the imagination of home bakers who crave something that feels whimsical yet familiar.
  • Blueberries are a natural match for dairy-based dream breads because their tart-sweet profile complements creaminess without overpowering it, creating a balanced bite that feels indulgent but not heavy.
  • In some traditions, bread is a symbol of hospitality and warmth; serving a cloud-like loaf with bright berries can evoke a sense of celebration and thoughtfulness, making a simple morning feel like a small ceremony.
  • Many home bakers enjoy experimenting with citrus notes in cloud bread, discovering that a touch of zest or a squeeze of lemon juice can lift the entire crumb and provide a fresh aftertaste that lingers pleasantly on the palate.

Ingredients

Cloud Bread Base

    – 1 cup cottage cheese, blended until smooth
    → The cottage cheese acts as the creamy base of the cloud bread, providing moisture, protein, and a tender crumb. For the smoothest texture, blend until completely lump-free. If your cottage cheese is very watery, drain briefly or press through a fine sieve before blending. Using full-fat cottage cheese yields a richer flavor and softer texture.

    – 4 large eggs, separated
    → Egg whites are whipped to create the light, airy structure of cloud bread, while the yolks enriched with the cottage cheese mixture contribute moisture and body. Ensure no yolk contaminates the whites and that bowls and beaters are impeccably clean for maximum volume. Bring eggs to room temperature for best whipping results.

    – 1/4 cup granulated sugar
    → Adds gentle sweetness and aids with light browning and a slightly more tender crumb. If you prefer, reduce to 2 tablespoons or substitute a sugar alternative and adjust other liquids slightly to maintain balance. Dissolve well into the yolk mixture to avoid graininess.

    – 1 teaspoon vanilla extract
    → Enhances overall flavor and pairs beautifully with blueberries. Use pure vanilla for a richer aroma; add to the yolk/cottage cheese mixture before folding in the whites for even distribution.

    – 1/4 teaspoon salt
    → Elevates the flavors and helps balance sweetness. Fine salt blends quickly and ensures even distribution throughout the batter.

    – 1/2 teaspoon baking powder
    → Provides a gentle lift, helping the cloud bread stay light rather than dense. Don’t overmix after folding in the whipped whites to preserve volume.

    – 1 cup fresh blueberries, rinsed and patted dry, folded gently into batter
    → Blueberries contribute juicy bursts of sweetness and blueberry aroma. Fold them in carefully to avoid breaking them and staining the batter; if using frozen berries, thaw completely and pat dry to minimize extra moisture and color bleed.

Optional Add-ins

    – 1/2 teaspoon lemon zest
    → Brightens the flavor and complements blueberry beautifully. Zest the lemon finely with a microplane, avoiding the white pith, and fold into the batter with the vanilla.

Toppings

    – Powdered sugar for dusting (optional)
    → A delicate dusting adds a touch of sweetness and a polished finish. Dust after the cloud bread has cooled slightly to prevent clumping and melting; use a fine sifter for even coverage.

Instructions

  • Preheat your oven to 325°F (165°C) and line a large baking sheet with parchment paper or a silicone baking mat to create a nonstick, even surface for the cloud bread.
    → This prevents sticking, ensures uniform browning, and makes removal after baking clean and effortless.
  • Blend cottage cheese until completely smooth and lump-free using a blender or food processor for 30 to 60 seconds, stopping to scrape down the sides as needed.
    → A silky cottage cheese base yields an ultra-tine crumb and even texture; any remaining lumps can create irregular pockets and uneven rise. If the cottage cheese is watery, briefly drain or press through a fine sieve before blending for a firmer base.
  • Separate the eggs into two clean, dry bowls—yolks in one and whites in the other—and bring both to room temperature to maximize volume and stability.
    → Room-temperature eggs whip to greater volume, producing the light, airy structure characteristic of cloud bread; ensuring bowls are impeccably clean prevents yolk contamination from inhibiting foam formation.
  • In a medium bowl, whisk the yolks with the blended cottage cheese, granulated sugar, vanilla extract, and salt until the mixture is smooth, pale, and slightly creamy, folding in optional lemon zest if using.
    → Properly combining these elements builds a cohesive, moist base; dissolving the sugar completely prevents gritty texture and evenly distributes vanilla for a balanced flavor. Lemon zest adds bright aromatic notes that enhance blueberries.
  • Whip the egg whites with a pinch of salt at medium-high speed until they hold soft peaks, then increase to stiff peaks; optionally beat in 1/8 teaspoon cream of tartar to stabilize the foam.
    → Stiff, glossy peaks trap air and give cloud bread its signature height; underwhipped whites lead to a dense texture, while overbeating can cause the foam to break.
  • Gently fold about one third of the whipped whites into the yolk–cottage cheese mixture to lighten it, then fold in the remaining whites in two additions using a gentle, figure-eight or over-under motion until just combined.
    → Light folding preserves the air in the whites, preserving volume; heavy stirring deflates the batter and reduces rise.
  • Fold in fresh blueberries gently, distributing them evenly without breaking them; if using frozen blueberries, thaw completely and pat dry to minimize extra moisture and color bleed.
    → Even berry distribution yields balanced flavor in every bite; drying frozen berries prevents extra moisture from weakening the batter and causing soggy spots.
  • Scoop the batter onto the prepared sheet in rounds about 2 to 3 inches in diameter, spacing them 1 to 2 inches apart, and lightly flatten the tops for uniform baking.
    → Even spacing ensures consistent heat exposure and prevents merging; flattening promotes uniform browning and a polished final shape.
  • Bake for 18 to 22 minutes, or until the edges are set and the centers spring back slightly when touched and the rounds are just lightly golden; avoid overbaking to keep the interior tender and cloud-like.
    → Baking within this window sets the structure while preserving the delicate, airy crumb; rotating the sheet halfway can help achieve even browning if your oven has hot spots.
  • Carefully transfer the baking sheet to a rack and cool the cloud bread for 10 to 15 minutes before handling to prevent tearing and collapse.
    → Gentle cooling allows the steam to escape gradually and firms the crumb, making removal and slicing clean without crumbling.
  • Dust the cooled cloud bread lightly with powdered sugar if desired, using a fine sieve to achieve an even, delicate coating.
    → A light sugar dust enhances presentation and sweetness without saturating or masking the blueberry flavor; apply after cooling to prevent clumping.
  • Store any leftovers in an airtight container in the refrigerator for up to 2 to 3 days and rewarm briefly if desired to revive softness.
    → Cloud bread dries as it cools, so refrigeration slows staling; a short reheat restores the tender, fluffy texture without drying out the crumb.

Notes

These fluffy cottage cheese blueberry cloud breads are a light, protein-packed treat with a tender crumb and bursts of blueberry sweetness. To achieve the signature cloud-light texture, blend the cottage cheese until completely smooth, and bring the eggs to room temperature before whipping the whites. Fold the whipped whites into the yolk-cottage cheese mixture gently and stop just before streaks remain to preserve volume. If your cottage cheese is very watery, drain briefly or press through a fine sieve; using full-fat cottage cheese yields a richer flavor and softer crumb. When folding in blueberries, do so gently to avoid breaking berries and staining the batter; if using frozen berries, thaw completely and pat dry to minimize extra moisture and color bleed. For flavor variations, add 1/2 teaspoon lemon zest and a little more vanilla for brightness, and you can adjust the sugar to your taste (1/4 cup works well, or reduce to 2 tablespoons if you prefer less sweetness). Bake on a parchment-lined sheet at 350°F (175°C) until the edges are lightly golden and the centers are set, about 12-15 minutes. Allow to cool slightly on a rack before slicing to help the structure set. These cloud breads store well in an airtight container for 2-3 days, or freeze for longer storage; reheat gently in a toaster or oven to restore softness. You can customize them by sprinkling a light dusting of powdered sugar or serving with a dollop of yogurt. This recipe is gluten-free, so ensure your baking powder is gluten-free if you have gluten intolerance.

Tips

Tips for Fluffy Cottage Cheese Blueberry Cloud Bread

Prep and texture of the base

  • Blend the cottage cheese until completely smooth and lump-free to ensure a tender crumb.
  • If the cottage cheese is very watery, drain briefly or press through a fine sieve before blending. Using full-fat cottage cheese yields a richer flavor and softer texture.
  • Let the cottage cheese come to room temperature if possible for easier blending and a smoother batter.

Egg whites and yolk handling

  • Separate the eggs carefully; ensure no yolk contaminates the whites and that bowls and beaters are impeccably clean for maximum volume.
  • Bring the eggs to room temperature for best whipping results. Whip the whites to stiff, glossy peaks; a pinch of cream of tartar can help stabilize.
  • Whisk the yolks with the cottage cheese mixture along with the sugar, vanilla, and salt until smooth and light, then fold in the whites in stages.

Sweetness, vanilla, and balance

  • The granulated sugar adds gentle sweetness and helps with light browning and a softer crumb. If you reduce sugar to 2 tablespoons or substitute a sugar alternative, adjust other liquids slightly to maintain balance and dissolve sugar well to avoid graininess.
  • Use pure vanilla extract for a richer aroma; add to the yolk mixture before folding for even distribution.

Folding to preserve lift

  • Fold the whipped whites into the yolk–cottage cheese mixture in several additions using a gentle cut-and-fold motion to preserve volume.
  • Avoid overmixing after the whites are incorporated; stop as soon as there are no white streaks left.

Blueberries and add-ins

  • Fold in fresh blueberries gently to keep them intact and avoid color bleeding. If using frozen berries, thaw completely and pat dry to minimize extra moisture and color bleed.
  • Optional lemon zest (½ teaspoon) brightens the flavor and complements blueberry beautifully; zest finely with a microplane and fold in with the vanilla.

Baking and finishing

  • Line the baking sheet with parchment paper or a silicone mat to prevent sticking and promote even browning.
  • Shape the batter into evenly sized rounds to ensure uniform rising. Bake at 300–325°F (150–160°C) until set and lightly golden, about 25–30 minutes; avoid overbaking to keep the clouds soft.
  • Let the cloud bread cool completely on a rack before slicing to allow the crumb to set.

Serving, dusting, and storage

  • Dust with powdered sugar just before serving for a delicate finish; sift for an even dusting.
  • Store leftovers in the refrigerator, covered, for up to 3 days. Reheat briefly in a toaster or a low oven to refresh the texture.
  • Cloud bread freezes well once cooled—wrap well and freeze; reheat from frozen at 325°F (160°C) for 5–7 minutes until warm.

FAQ

What is Fluffy Cottage Cheese Blueberry Cloud Bread?

It’s a light, airy cloud bread made by blending cottage cheese with eggs, vanilla, and a touch of sweetness, then folding in whipped egg whites and fresh blueberries. The result is soft, pillowy rounds with bursts of blueberry flavor.

What ingredients do I need?

Common ingredients (yields 6–8 small rounds):

  • 1 cup cottage cheese (plain, full-fat or part-skim)
  • 3 large eggs, separated
  • 2–3 tablespoons granulated sugar or your preferred sweetener
  • 1 teaspoon vanilla extract
  • 1/2 teaspoon baking powder
  • 1/8 teaspoon salt
  • 1/2 cup fresh blueberries
  • Optional: 1 teaspoon lemon zest or 1/4 teaspoon cinnamon for extra flavor

Tip: Toss blueberries with a teaspoon of flour to help prevent sinking during baking.

Should I separate the eggs, and why?

Yes. Separate the eggs to whip the whites and yolks separately. Whipped egg whites create the fluffy, cloud-like texture, while the yolks add richness. Fold the whipped whites back into the yolk mixture gently to keep the light structure.

How do I mix the batter without deflating it?

Steps:

  • Blend cottage cheese, egg yolks, sugar, vanilla, baking powder, and salt until smooth.
  • Beat egg whites separately until stiff peaks form.
  • Gently fold the whipped whites into the yolk mixture in 2–3 additions until just combined.
  • Fold in blueberries and optional lemon zest.
What oven temperature and bake time should I use?

Preheat to 350°F (175°C). Line a baking sheet with parchment paper and drop rounded tablespoons of batter, or shape into 6–8 rounds. Bake for 12–15 minutes, or until the edges are lightly golden and centers are set. Let cool on a rack before serving.

How many servings does this make, and what is the texture like?

About 6–8 small cloud bread rounds. The texture should be soft and airy with a slight chew near the edges. It’s not as bready as traditional toast, but pleasantly fluffy.

Can I make a dairy-free or vegan version?

Yes, with substitutions:

  • Vegan option: use a plant-based cottage cheese substitute or blended silken tofu in place of cottage cheese. Replace eggs with a vegan binder such as aquafaba (egg white substitute) whipped to stiff peaks, or use flax/chia eggs subbing for each egg.
  • Sweetener and flavor: keep the vanilla and blueberries, and add a touch of lemon zest if desired.

Note: Texture and rise may vary with substitutions; you may need to adjust based on the binder you choose.

How should I store and reheat leftovers?

Store leftovers in an airtight container in the refrigerator for up to 3 days. Reheat gently in a toaster oven or microwave in short bursts until warm. You can also freeze baked rounds for up to 1–2 months; thaw before reheating.

Can I customize the recipe with other fruits or flavors?

Absolutely. Try substituting raspberries, sliced strawberries, or diced peaches. You can also add a pinch of cinnamon, nutmeg, or lemon zest for different flavor profiles. Dried fruit or chocolate chips can be used in moderation, too.

What are common mistakes to avoid?

Common issues and fixes:

  • Overmixing after adding whipped whites can deflate the batter — fold gently.
  • Not whipping whites to stiff peaks — you’ll lose fluffiness. Ensure they hold their shape.
  • Not lining or greasing the sheet well — the rounds may stick. Use parchment and a light spray if needed.
  • Blueberries sinking to the bottom — toss them in a little flour or fold them in with extra batter to distribute.
Does this provide any nutritional information?

Approximate per cloud bread round (varies by exact ingredients and yield): around 60–100 calories, with a balance of protein from cottage cheese and eggs. If you use different sweeteners or dairy substitutes, values will change. For precise numbers, calculate based on your exact brands and measurements.

Introduction / Hook

There’s a dish that evokes kitchen-table nostalgia with every bubbling bubble and golden edge: Chicken Divan Casserole. Imagine a steaming, velvet-soft blanket of creamy sauce embracing tender chicken shards, nestled with florets of emerald broccoli, all crowned by a crisp, butter-kissed crust that crunches like a welcome-home sigh. The aroma will coax even the busiest schedules to pause, the way a familiar comfort song can stop time for a moment. This isn’t just dinner; it’s a memory you can recreate with minimal fuss and maximum warmth. The beauty of Chicken Divan lies in its balance—savory richness that feels indulgent, yet bright with the fresh, green contrast of broccoli and a light, uplifting finish from lemon or herbs. It’s the kind of dish you crave on a busy weeknight and want to tuck away for a cozy weekend at home with family or friends. Every slice promises a little celebration in the form of a casserole, a dish that invites seconds, and perhaps even a story or two to share around the table.

As the oven door opens and the steam rises in wavy ribbons, you’ll notice how the dish transforms the simple ingredients into something that feels special. The scent—creamy, toasty, with a hint of cheese and a whisper of garlic—fills the room and creates an instant sense of occasion. Yet, at its heart, Chicken Divan Casserole is approachable, forgiving, and endlessly adaptable. It’s the kind of recipe that rewards a keeping-it-simple mindset: use what you have, lean on pantry staples, and let the natural flavors of chicken, broccoli, and a smooth sauce do the heavy lifting. The result is a comforting, family-friendly dish that’s as perfect for weeknights as it is for a casual dinner with friends, and it has a timeless appeal that tends to become a favorite in households across generations.

The Story Behind the Dish

Chicken Divan’s charm comes not just from its creamy allure, but from a story that echoes the mid-20th century spirit of American home cooking. In a era when families gathered around the table to savor simple, satisfying meals after long days, casseroles became the language of togetherness. The name “Divan” itself evokes a certain elegance—think of a comfortable seating area in a grand hotel where travelers would linger over conversations, coffee, and a shared sense of hospitality. It’s not an accident that a dish like this feels both refined and practical: a casserole that can be assembled ahead, baked to perfection in a single dish, and served with minimal fuss to a crowd or a small dinner party. The origins aren’t tied to one exact kitchen or city; rather, Chicken Divan is a product of American culinary imagination—twisted into a familiar shape by countless home cooks who wanted to elevate a simple weeknight supper without sacrificing convenience or comfort.

Traditionally, the pairing of chicken with broccoli in a creamy base reflects pantry-friendly thinking of the time: use leftover roast chicken or quickly poached chicken, fold in a velvety sauce that often relied on dairy and stock, and finish with a topping that would brown beautifully in the oven. The broccoli brings a green, fresh counterpoint to the richness, creating a dish that feels balanced and complete on a single plate. Over the years, cooks have added their own touches: a hint of nutmeg in the sauce, a dusting of paprika for warmth, or a scattering of toasted breadcrumbs or cheese on top for that irresistible crackly crown. The result is a timeless classic that resonates with many generations because it answers a universal desire: to eat well, together, without spending hours in the kitchen.

In many kitchens today, Chicken Divan is a bridge between vintage charm and modern practicality. It embraces the idea that comfort food can be refined yet accessible, elegant yet easy. It’s a dish that travels well in memory and in the dish itself: you can recreate the sense of a comforting family meal, adapt it to different dietary needs, and experiment with flavors while keeping the essence intact. The story of Chicken Divan is, in many ways, a love letter to home cooking—an invitation to gather, to savor, and to create new memories around a dish that already feels like a familiar favorite.

Why You’ll Love This Recipe

  • Comforting, crowd-pleasing flavor that feels like a warm hug on a plate.
  • Versatile and forgiving; it accommodates a range of ingredients and a variety of dietary needs.
  • Perfect balance between tender chicken, crisp-tender broccoli, and a luscious, creamy sauce.
  • Make-ahead friendly: assemble, refrigerate, and bake later for effortless entertaining.
  • One-dish convenience with a satisfying, golden topping that adds texture and color.
  • Great for weeknights, Sunday dinners, potlucks, or feeding a crowd without stress.
  • Leftovers reheat beautifully, tasting almost as good as the first slice.
  • A classic dish that invites personalization—swap vegetables, adjust seasonings, or add a final flourish.

Flavor Profile & Texture

From the first bite, Chicken Divan Casserole delivers a textural and flavor journey that feels thoughtfully layered. The sauce is creamy and rich, a gentle, velvety coating that clings to each bite without feeling heavy. Depending on your preparation, this sauce can lean toward a light, dairy-forward finish with a hint of butter and a kiss of stock, or toward a more decadent, indulgent mood with cheese melted throughout. The broccoli provides a bright, fresh bite and a delicate, grassy note that cleanly cuts through the richness, preventing the dish from tipping too far into heaviness. When baked to a delicate amber on top, the breadcrumbs or cheese create a crisp, toasty crust that offers a satisfying contrast to the tender interior—an irresistible combination of soft and crisp in every mouthful.

The chicken itself is the backbone of the dish: succulent, white-meated, and easy to portion. If you’re using leftovers, the texture can become wonderfully resilient, taking on the sauce’s silkiness while still maintaining some bite. If you’re starting from scratch with fresh chicken, you can achieve a similarly tender result by gentle poaching or light sautéing before it meets the sauce. The overall flavor profile is subtly seasoned, with notes that allow broccoli’s vegetal brightness and any added aromatics to shine through. A whisper of garlic, a touch of lemon zest, or a light dusting of nutmeg can elevate the dish without overpowering its classic roots. The result is a comforting, balanced dish that makes every spoonful feel deliberate and comforting at once.

Occasions & Pairings

Chicken Divan Casserole is wonderfully versatile when it comes to occasions. It shines on weeknights when you want something satisfying but not fussy, and it scales up easily for family gatherings, potlucks, or a casual dinner party. Its universal appeal makes it a safe choice for mixed-age crowds, and its make-ahead potential is a boon for hosts who want to plan ahead without sacrificing warmth on the day of the gathering.

Pairing ideas to complement the dish:

  • Side dishes: a light green salad with a bright vinaigrette to cut the richness; a simple lemon herbed rice or wild rice for texture; crusty bread or a warm baguette to sop up sauce.
  • Drinks: a crisp white wine such as Sauvignon Blanc or a Chardonnay with a touch of oak; sparkling water with a wedge of lemon for non-alcoholic options; a light beer with a clean finish for casual meals.
  • Desserts: a citrusy mousse or a tangy fruit tart to balance the creaminess; a light yogurt-based dessert to echo freshness.
  • Seasonal twists: in winter, a hint of roasted garlic can deepen the savoriness; in spring, fresh herbs like dill or tarragon add a fragrant lift; in autumn, a touch of thyme pairs beautifully with roasted notes.

For holiday gatherings or weekend dinners with friends, this casserole makes an impression without requiring you to be tied to the stove for hours. It’s a dish that sparks conversations—about how you prefer to season it, what vegetables you love with it, and how you like to finish it off with a crisp topping. The simplicity of the dish invites personalization, ensuring that no two versions are exactly the same, while the core comfort remains a unifying thread.

Tips, Variations & Substitutions

Make it lighter or dairy-free

Swap in lighter dairy or non-dairy substitutes to suit dietary needs. Use a milk alternative with a touch of olive oil or a vegan cream alternative, and choose a non-dairy cheese or omit cheese altogether for a softer finish. You can mimic the silkiness with a combination of non-dairy cream and broth, or opt for a lighter béchamel made with a splash of olive oil and a gluten-free flour blend.

Gluten-free options

For a gluten-free version, ensure that any thickeners or toppings are gluten-free. Use gluten-free breadcrumbs or swap to a toasted almond or breadcrumb topping made from gluten-free grains. If you’re using condensed soups or packaged sauces, check the label for gluten-containing ingredients and substitute with gluten-free alternatives.

Flavor twists

Introduce subtle twists to suit your pantry or mood. A pinch of curry powder can give a gentle warmth that echoes classic curry-tinted versions of the dish. Fresh lemon zest brightens the sauce, while a handful of chopped fresh herbs like parsley, dill, or tarragon adds a fragrant finish. A small amount of grated Parmesan or Gruyère can deepen the savoriness, or you can leave cheese out entirely for a lighter finish.

Vegetable variations

Broccoli is traditional, but you can mix in other vegetables for texture and color. Cauliflower florets, sliced carrots, or frozen peas add pops of sweetness and color. If you’re using frozen vegetables, thaw and pat dry to minimize extra moisture in the sauce. A mix of vegetables can transform the dish into a seasonal showcase without sacrificing its essence.

Protein options

While chicken is iconic, you can experiment with turkey, rotisserie chicken for convenience, or even a plant-based protein for a vegetarian-friendly rendition. If using plant-based proteins, adjust the sauce to ensure it carries the same creaminess and savoriness, and consider adding a little extra flavor through mushrooms or vegan cheese substitutes.

Make-ahead strategies

Assemble the casserole a day ahead, cover tightly, and refrigerate. When you’re ready to bake, increase the baking time slightly to ensure the center heats through. If you’re using a two-casserole approach for a large crowd, you can freeze one for later by assembling and freezing before baking; just bake from frozen, adding extra time as needed.

Storage & Make-Ahead Ideas

This dish lends itself to advance preparation and practical storage. You can assemble the casserole, cover it well, and refrigerate for up to 24 hours before baking. If you want to freeze it, assemble up to the point of baking, wrap tightly, and freeze for up to 2–3 months. Thaw overnight in the refrigerator before baking, then bake with a little extra time to ensure the center is hot and the topping turns golden.

Leftovers store well in the refrigerator for about 3–4 days in an airtight container. Reheat gently in the oven to preserve the creamy texture and to keep the topping crisp at the edges, rather than microwaving, which can make the topping soggy. If you’re reheating in the oven, cover the dish with foil for the first part of reheating to prevent over-browning, then uncover to finish crisping the top.

Tips for maximum flavor on reheat: a light sprinkle of fresh herbs or a squeeze of lemon can refresh the dish, and a quick broil at the end can restore a crackly top if it has softened during storage.

Fun Facts & Trivia (Optional)

  • Chicken Divan is a quintessential example of mid-20th-century American home cooking that blends practicality with a touch of elegance, often reflecting how households made the most of pantry staples.
  • The name “Divan” evokes a sense of refinement and worldly charm, linking the dish to the idea of a comfortable, inviting space where guests are welcomed to linger and share a meal.
  • Variations of the dish proliferated across home kitchens, with cooks adding ingredients like curry powder, nutmeg, or cheddar to tailor the flavor to family preferences or regional tastes.
  • While many modern versions rely on a cream-based sauce, some contemporary interpretations experiment with lighter or dairy-free sauces, showing how a classic can evolve while preserving its comforting core.
  • In the grand tradition of casseroles, Chicken Divan lends itself to storytelling: it’s the dish that often gets passed down as a comforting memory, reshaped by each generation to fit new tastes and dietary needs.

Ingredients

Chicken Divan Casserole

  • 2 cups cooked chicken breast, diced
    → Use cooked chicken to save time and to maximize flavor. Dice into bite-sized pieces so they distribute evenly in the casserole. Leftover rotisserie chicken works well; ensure it is cooled before mixing to avoid drawing moisture during baking.
  • 4 cups broccoli florets, lightly steamed until just tender
    → Classic Divan pairs broccoli with chicken. Steam until bright green and crisp-tender so the broccoli keeps some bite after baking. Drain well to prevent watery sauce and soggy layers.

Creamy Sauce

  • 1 can condensed cream of chicken soup (10.5 oz)
    → This provides the creamy binding for the casserole; choose regular-fat version for best flavor and texture. If you prefer a lighter dish, whisk in a splash of milk to reach your desired sauce consistency.
  • 1/2 cup mayonnaise
    → Adds richness and a smooth base to the sauce. Use full-fat for best mouthfeel; if avoiding eggs, you can substitute an equal amount of plain Greek yogurt with a bit of sour cream.
  • 1/2 cup sour cream
    → Contributes tang and extra creaminess; use full-fat for deeper flavor and a creamier texture. For a lighter version, use fat-free sour cream but expect a slightly thinner sauce.
  • 1 tablespoon fresh lemon juice
    → Brightens the overall flavor, cutting through the richness of the mayo and cheese. Use freshly squeezed lemon juice for the best aroma; omit if you want a milder profile.
  • 1 cup shredded sharp cheddar cheese, divided
    → Adds cheesiness to the sauce and a bubbling crust on top. Shred cheddar just before using (avoid pre-shredded if possible) and split between sauce and topping (usually half stirred into the sauce, half reserved for topping).
  • 1/2 teaspoon garlic powder
    → Subtle savory note that pairs well with cheddar; adjust to taste. If you prefer a stronger garlic flavor, increase to 3/4 teaspoon or sauté a small minced garlic clove briefly in the sauce base.
  • 1/4 teaspoon onion powder
    → Adds depth without visible onion; optional if you want a cleaner cheesy flavor. You can omit if you’re sensitive to onion powder.
  • 1/2 teaspoon salt
    → Seasoning base; adjust amount depending on the saltiness of the soup and cheese. Taste the sauce and adjust before baking.
  • 1/4 teaspoon black pepper
    → Adds a touch of heat and balance; grind fresh for best aroma; adjust to taste.

Topping

  • 1/2 cup breadcrumbs (panko recommended)
    → Creates a crisp, golden crust on the surface. Panko offers the best crunch; mix with a little melted butter or olive oil to help browning.
  • 2 tablespoons melted butter
    → Used to moisten and toast the breadcrumbs for a rich, crunchy topping. If dairy-free, substitute with olive oil or a dairy-free spread.

Optional Add-ins

  • 1/2 cup sliced mushrooms, optional
    → Adds earthy flavor and moisture. Sauté the mushrooms in a teaspoon of butter (or olive oil) until the water has evaporated before adding to the casserole to avoid extra liquid.
  • 1/4 teaspoon paprika, optional
    → Provides color and a gentle warmth to the sauce or crumb topping. Sprinkle into the sauce or over the top before baking to tint the crust slightly.
  • 1/4 cup chopped fresh parsley, optional
    → Finishes with color and a hint of brightness. Mix into the sauce at the end or sprinkle on the finished dish as a fresh garnish.

Instructions

  • Preheat your oven to 350°F (175°C) and lightly grease a 9×13-inch baking dish or casserole pan.

    → A hot, greased pan prevents sticking and ensures clean, even slices when the casserole is baked and served.
  • Dice the cooked chicken breast into bite-sized pieces (about 1/2-inch cubes) if it is not already pre-diced, so every forkful contains poultry and the pieces distribute evenly.

    → Uniform dice ensures even cooking and helps the sauce cling to each piece rather than sliding off in clumps.
  • Lightly steam the broccoli florets until they are bright green and just tender, then drain thoroughly and pat dry to remove excess moisture.

    → Steaming preserves color and snap, while thorough drainage prevents watery sauce and soggy layers.
  • Whisk the sauce base: in a medium bowl, whisk together the condensed cream of chicken soup, mayonnaise, sour cream, lemon juice, garlic powder, onion powder, salt, and pepper until smooth and cohesive.

    → This creates a silky binding for the vegetables and chicken; well-emulsified sauce coats without separation, and the spices balance richness.
  • Stir in half of the shredded cheddar cheese into the sauce until it melts and is evenly distributed, reserving the remaining cheddar for topping.

    → Melting into the sauce thickens it slightly and infuses the dish with cheesy flavor while the reserved cheese forms a bubbling crust on top.
  • In a large bowl, fold the diced chicken and broccoli into the sauce, along with any optional add-ins such as sautéed mushrooms, a pinch of paprika, or chopped parsley, until everything is evenly coated without mashing the broccoli florets.

    → Gentle folding ensures even distribution of texture and flavor and keeps broccoli florets intact for texture contrast.
  • Spread the coated mixture into the prepared baking dish in a single, even layer.

    → An even bed ensures uniform baking and consistent portion sizes; avoiding mounds prevents undercooked centers.
  • Sprinkle the remaining cheddar cheese evenly over the surface to begin forming a cheesy crust as the dish bakes.

    → Top cheese melts into a bubbly crust that adds color, flavor, and a pleasing texture contrast with the creamy interior.
  • In a small bowl, combine the breadcrumbs with the melted butter (and a pinch of salt, if desired) until the crumbs are evenly moistened and crumbly.

    → Butter-coated breadcrumbs toast and color beautifully, creating a crisp topping that contrasts with the creamy filling.
  • Distribute the breadcrumb topping evenly over the casserole so every portion develops a crisp crown.

    → A consistent topping bakes to an even, crunchy crown rather than pooling in spots that would stay pale or soggy.
  • Bake the casserole in the preheated oven for 25 to 30 minutes, or until the sauce is bubbling at the edges and the cheese has fully melted; if the topping browns too quickly, tent with foil for the last 5 to 10 minutes.

    → Bubbling indicates thorough heating; foil prevents excessive browning and preserves moisture in the interior.
  • Optionally, for a deeper crust, switch to a brief 1- to 2-minute broil at the end, watching closely to prevent scorching, until the crumb topping is deeply golden.

    → Quick broiling intensifies color and crunch without overcooking the creamy interior.
  • Remove the dish from the oven and let it rest for 5 to 10 minutes before serving to allow the sauce to re-set and the slices to firm up for clean portions.

    → Resting lets the casserole thicken slightly so it slices neatly and the flavors meld without runny sauce.
  • Garnish with chopped fresh parsley if desired, then portion and serve hot, ideally with a light salad or grain side to balance richness.

    → Parsley adds a fresh color and a hint of brightness that complements the dish’s creamy depth.

Notes

These Chicken Divan Casserole notes guide you to a creamy, comforting bake with broccoli and savory chicken. Use cooked chicken to save time and maximize flavor—leftovers such as rotisserie chicken work beautifully; dice into bite-sized pieces to distribute evenly. Lightly steam the broccoli just until tender-crisp and drain well to avoid watery sauce. For the creamy sauce, whisk together condensed cream of chicken soup with mayonnaise and sour cream, then fold in fresh lemon juice, half of the cheddar, garlic powder, onion powder, salt, and pepper, tasting and adjusting before assembling. Stir the sauce with the chicken and broccoli or spread a portion of it to coat the veggies, then spoon into a casserole dish and top with the remaining sauce and the remaining cheddar for a glossy, bubbling crust. The topping is a crisp crumb layer: mix breadcrumbs (panko for extra crunch) with melted butter or olive oil and sprinkle over the casserole; bake until the top is golden and the sauce is bubbling, about 25–30 minutes at 350°F (175°C). Optional add-ins like sliced mushrooms or a sprinkle of paprika can add depth and color, while a final scattering of chopped fresh parsley brightens the finished dish. Let the casserole rest 5–10 minutes before serving to let the sauce set, and refrigerate leftovers promptly; this dish re-heats well in the oven or microwave. If you prefer a lighter version, you can substitute part or all of the sour cream with plain yogurt and use a lighter mayo, but plan for a slightly thinner sauce.

Tips

Pro Tips for Chicken Divan Casserole

  • Keep chicken pieces uniform: Dice the cooked chicken into even bite-sized pieces so they distribute evenly. If using leftovers like rotisserie chicken, let it cool completely before mixing to avoid extra moisture.
  • Broccoli texture matters: Lightly steam the broccoli just until tender and vibrant green. Drain thoroughly and pat dry to prevent extra moisture from making the casserole watery.
  • Sauce harmony: Whisk the condensed soup with the mayonnaise and sour cream until smooth before folding in lemon juice and cheese. A smooth base helps the sauce emulsify with the cheddar as it bakes, giving you a creamy, cohesive result.
  • Cheese handling: Use freshly shredded sharp cheddar whenever possible. Reserve about half for the topping and fold the rest into the sauce for a cheesier center. Pre-shredded cheese can melt unevenly and clump.
  • Flavor boosters: If you want a stronger garlic note, sauté a minced garlic clove in a teaspoon of butter for about 30 seconds before adding to the sauce, or increase garlic powder to 3/4 teaspoon. Fresh lemon juice should be freshly squeezed for the brightest flavor.
  • Season gradually: The soups and cheese provide salt, so start with 1/2 teaspoon salt and 1/4 teaspoon pepper. Taste the sauce before baking and adjust to your preference.

Cheese and Sauce Craft

  • Prevention of separation: Heat the sauce gently and remove from heat before adding cheese; stir until melted and smooth to avoid gritty textures.
  • Lighter options: For a lighter version, whisk in a splash of milk to adjust thickness, or substitute part of the sour cream with plain Greek yogurt. You can also use light mayo, but expect a slightly thinner sauce.

Topping and Browning

  • Crunchy topping: Use panko for the crispiest crust. Toss breadcrumbs with 2 tablespoons melted butter and a touch of olive oil to improve browning. A light sprinkle of paprika can add color and warmth.
  • Even browning: Bake at 350–375°F (175–190°C) until the casserole is bubbling and the top is golden. If the top browns too quickly, loosely tent with foil to finish cooking through the center without scorching the crust.

Make-Ahead, Storage, and Variations

  • Make ahead: Assemble the casserole up to 24 hours in advance, cover, and refrigerate. Bake 30–40 minutes from chilled, adding a few extra minutes if needed until hot and bubbly.
  • Gluten-free option: Use gluten-free condensed cream of chicken soup. Ensure all add-ins are gluten-free as well.
  • Optional add-ins: Sautéed mushrooms (moisture evaporated) add depth; paprika adds color and a gentle warmth; chopped fresh parsley brightens the finish—stir in parsley at the end or sprinkle on top as a garnish.
  • Storage for leftovers: Refrigerate in an airtight container for 3–4 days. Reheat gently in the oven or microwave, covered, to preserve moisture and texture.

FAQ

Chicken Divan Casserole – FAQ

What is Chicken Divan Casserole?

Chicken Divan Casserole is a comforting baked dish featuring tender chicken, broccoli, and a creamy sauce, typically topped with cheese and breadcrumbs. It’s often assembled in a casserole dish and baked until bubbly and golden.

What ingredients are typically used?

A typical version includes:

  • Cooked chicken (diced or shredded)
  • Steamed broccoli florets
  • Creamy sauce (such as a combination of mayonnaise or sour cream with a creamy soup or bechamel)
  • Cheese (shredded cheddar and/or parmesan)
  • Breadcrumbs or crushed crackers for topping
  • Butter or a light drizzle to help the topping brown

Variations may use cooked rice or noodles, and different cheeses or seasonings.

How do I make Chicken Divan Casserole?

Basic steps:

  1. Steam or lightly blanch the broccoli until just tender.
  2. Mix the creamy sauce (mayonnaise or sour cream with a light cream soup or bechamel) and season to taste.
  3. Combine the chicken, broccoli, and sauce in a baking dish.
  4. Top with shredded cheese and breadcrumbs; dot with butter if using breadcrumbs.
  5. Bake in a preheated oven at 350°F (175°C) for about 25–30 minutes, until bubbly and the top is golden.
Can I use rotisserie chicken?

Yes. Rotisserie chicken is a convenient option. Shred or dice the meat and use it in place of cooked chicken breasts or thighs.

Can I freeze or make this ahead?

Yes:

  • Assembled but unbaked casseroles can be frozen for up to 2–3 months. Thaw in the fridge before baking, then bake as directed, adding a few extra minutes if needed.
  • Leftovers can be refrigerated for 3–4 days and reheated in the oven (or microwave) until hot.
Is there a gluten-free version?

Absolutely. Use gluten-free cream soup or a homemade bechamel, and replace breadcrumbs with gluten-free breadcrumbs or omit them. Check all pantry items to ensure there’s no hidden gluten.

What are good variations or add-ins?

Try:

  • Adding sliced mushrooms, bell peppers, or sun-dried tomatoes
  • Using a different cheese blend (Swiss, Gruyère, or mozzarella)
  • Stirring in a splash of lemon juice or Dijon mustard for brightness
  • Using a lighter sauce with Greek yogurt or low-fat mayo

Keep the broccoli visible for color and texture balance.

What should I serve with Chicken Divan Casserole?

Good accompaniments include:

  • Steamed white or brown rice
  • Buttered noodles or mashed potatoes
  • A simple green salad or steamed vegetables
How many servings does this yield?

Most standard casseroles yield about 6 servings, depending on the dish size and portion thickness. You can adjust the recipe to fit a larger or smaller bake if needed.

How should I store leftovers?

Store cooled leftovers in an airtight container in the refrigerator for 3–4 days. Reheat in the oven at 350°F (175°C) until hot, or microwave in short intervals until warmed through. If frozen, thaw before reheating.