Author

Ocean Nightleaf

Browsing

Introduction / Hook

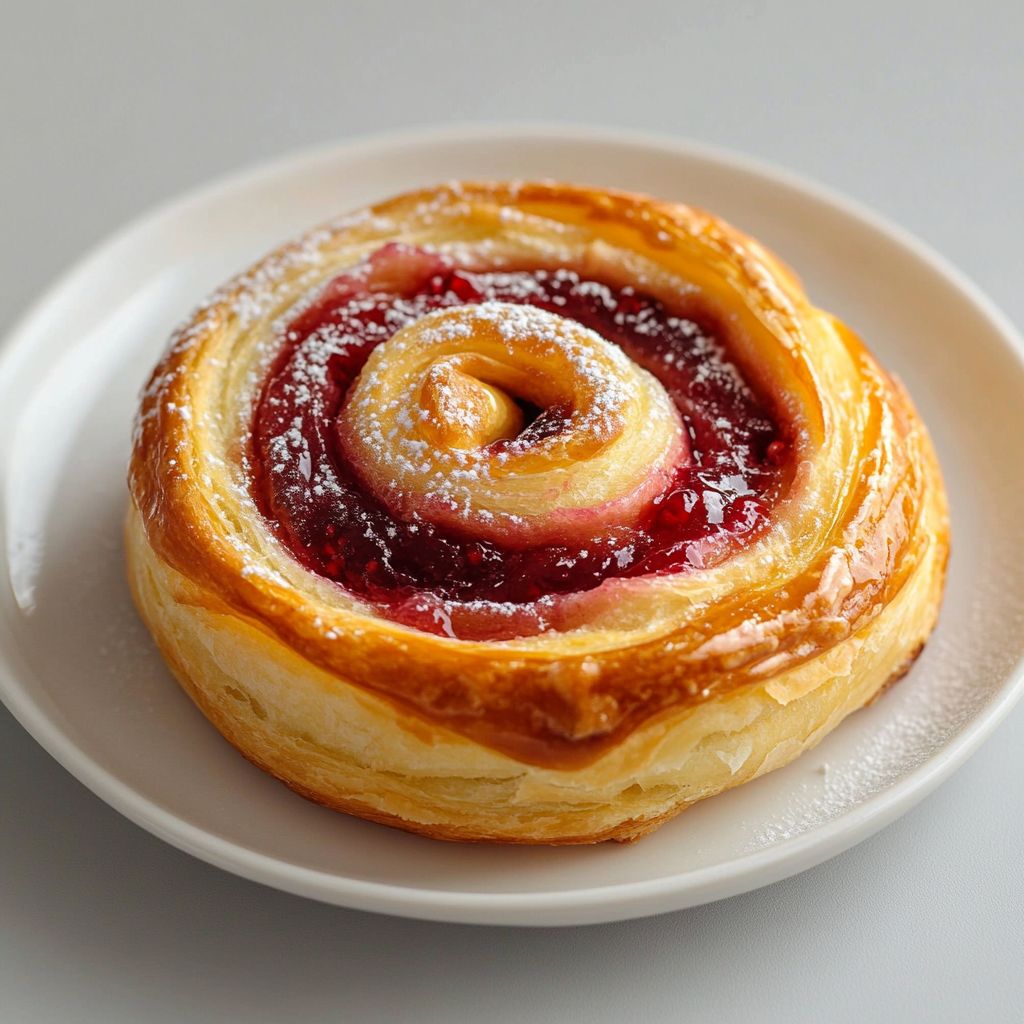
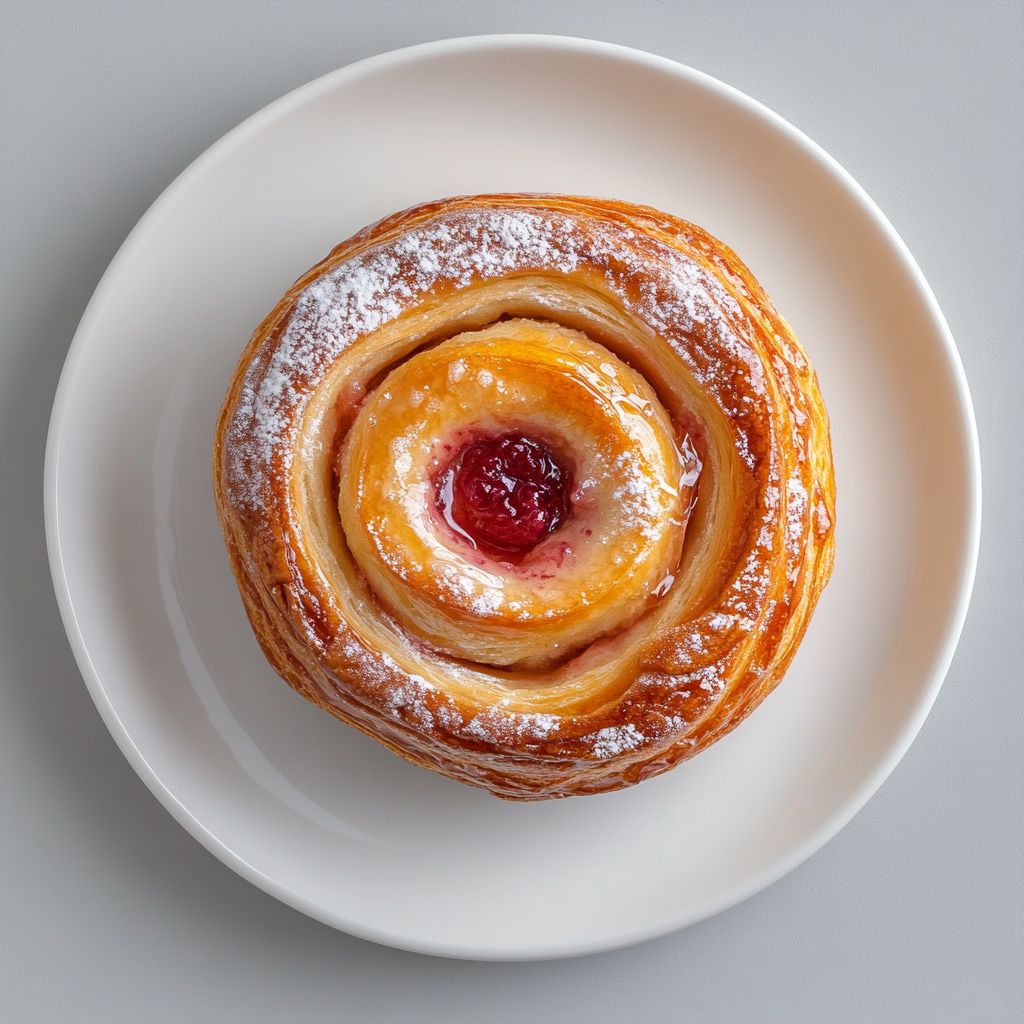
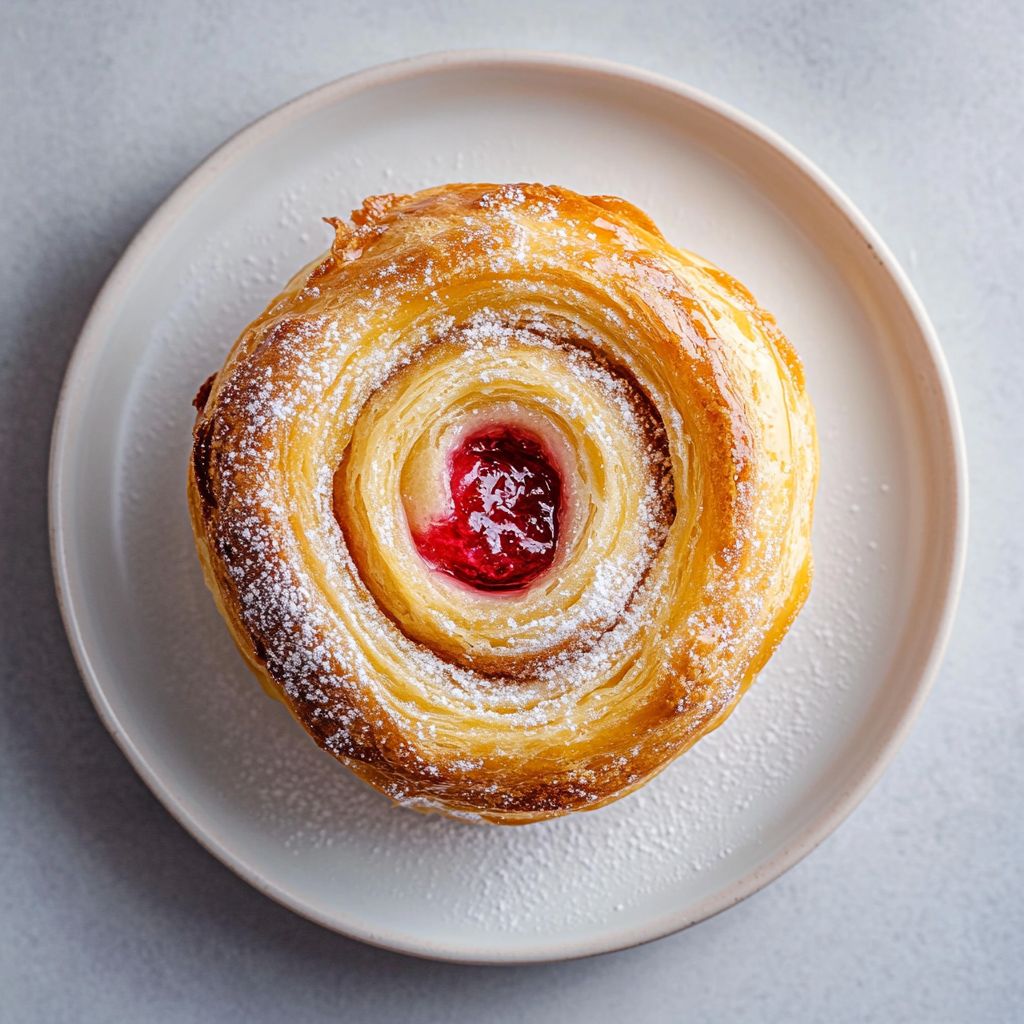
Picture a pastry that welcomes you with a warm, golden glow the moment you lift the lid on the bakery box. A light, silky steam escapes, carrying the comforting scent of butter and vanilla, mingled with the bright sweetness of ripe raspberries. The Sugar Raspberry Danish Bun is a celebration of morning rituals: a flaky, laminated dough that behaves like a whispered secret, layers rolling into delicate folds with every bite. Imagine bite-sized pockets of jammy brightness tucked between buttery sheets, a kiss of sugar glaze catching the light, and a soft, tender crumb that melts on the tongue. This bun isn’t merely a pastry; it’s a sensory invitation—an aroma that lingers in the kitchen, a texture that delights both the eye and the palate, and a moment of quiet indulgence that turns an ordinary breakfast into a small, luxurious ceremony. If you crave something that feels both nostalgic and irresistibly modern, this is the pastry that welcomes you to slow mornings, bright with fruit, and finished with a touch of sweetness that sings in harmony with coffee or tea. Welcome to a bake that feels like a warm hug from the oven, a memory in the making, and a dessert-like treat that tastes just as good next to a steaming mug as it does as a centerpiece for a weekend brunch.

The Story Behind the Dish

Sweet, buttery laminated pastries have a storied history that travels across continents and centuries. The concept of a Danish pastry, often called a viennoiserie marvel, originated when bakers in Vienna perfected a layered, yeasted dough and then traveled northward and westward, where local tastes and local ingredients wove new narratives. Denmark, with its own rich baking traditions and a knack for turning fruit into art, embraced this technique and transformed it into morning pastries that could be filled, rolled, and glazed with an artful balance of sweetness and tang. The Sugar Raspberry Danish Bun sits at the intersection of that heritage and a modern craving for bright, fruit-forward fillings. Raspberry, with its tart-to-sweet journey from fresh-picked summer to jam-dotted fillings, provides a vivid contrast to the deep, toasty butter of the dough. In many homes, a danish is more than a pastry; it’s a memory of weekend breakfasts, a grandmother’s kitchen, or a café where a pastry case becomes a colorful window into the season. The sugar glaze adds a subtle sparkle, a reminder of morning sunlight catching on the glaze as the bun rests on a plate. This recipe honors tradition while inviting you to personalize it—whether you’re a purist who loves the classic, a creative home cook who enjoys a twist, or someone who wants a comforting, elegant treat for a special morning.

Why You’ll Love This Recipe

  • Versatile breakfast or brunch centerpiece: These buns look and taste impressive, yet they’re approachable enough for a weekday treat or a weekend celebration.
  • Flaky, tender texture with a fruity counterpoint: The laminated dough delivers a delicate, layered bite, while the raspberry pockets provide bright contrast and juiciness.
  • Sensory appeal in every bite: You’ll notice the aroma of butter and vanilla, the sugary glaze catching the light, and the soft crackle of the crust giving way to a plush interior.
  • Make-ahead-friendly: Prep the dough in advance, rush through a gentle rise, and bake when you’re ready to savor the moment—perfect for weekend anticipation and party planning alike.
  • Customizable to fit dietary needs: The concept scales well with substitutions, from dairy-free to gluten-conscious adaptations, without losing its charm or structure (see Tips & Variations).
  • Crowd-pleasing and shareable: A dozen bites disappear quickly at gatherings, elevating coffee, tea, or a mid-afternoon chat with friends.
  • Perfect balance of sweetness and fruit brightness: The raspberries lend a natural acidity that keeps the pastry tasting lively rather than cloying, while the sugar glaze adds gentle shine and a touch of crunch.
  • Elegant yet comforting: This bun feels celebrations-ready but remains cozy enough to enjoy with a mug of cocoa in the early hours or after a long day.

Flavor Profile & Texture

The Sugar Raspberry Danish Bun is a study in contrasts: the crust is crisp and pale-golden at the edges, yielding to an interior that is whisper-soft and richly layered. Each bite reveals a mosaic of textures—a light, flaky lattice that cracks neatly, a tender crumb that dissolves on the palate, and pockets of ruby-red raspberry that pop with brightness. The dough offers a gentle butteriness, a calm sweetness that never overwhelms, and a comforting depth that comes from a long, patient lamination process. The raspberry filling (or jam) provides a tart-sweet counterpoint that wakes the senses, with a slightly jammy, jam-like center that stays moist without being wet. A whisper of vanilla from the dough or a note of almond from the glaze can lift the aroma into something almost fragrant, reminiscent of warm, sunlit pastry windows on a spring morning. The glaze adds a tiny gloss and a delicate sugar finish—enough to catch the light and add a subtle snap as you separate the layers. In total, the flavor is a harmonious duet: buttery warmth on the outside, bright fruitness on the inside, and a final kiss of sweetness that invites another bite without stealing the show from the raspberry’s lively personality.

Occasions & Pairings

These buns shine in many settings, making them a reliable choice for various occasions and moods.

  • Weekend brunch: A showpiece that pairs beautifully with a pot of coffee, a citrusy yogurt parfait, or a fruit salad.
  • Holiday mornings: Elevate a table with a tray of warm buns and a few berry-topped desserts for a balanced dessert-and-breakfast spread.
  • Afternoon tea or coffee break: The pastry sits well with tea accompaniments and a light cheese board for a sophisticated, relaxed moment.
  • Giftable treat: A cinnamon-sugar-dusted or lemon-zested twist can be packaged as a thoughtful, homemade gift to friends and neighbors.
  • Brunch-for-a-crowd: Bake a batch and slice into elegant mini portions to serve as a pastry assortment alongside quiches and fruit tarts.

Pairing suggestions to complement the Sugar Raspberry Danish Bun include:

  • Drinks: a light-bodied coffee like a Brazilian or Colombian roast, a vanilla latte, Earl Grey tea, or a glass of dry sparkling wine for a celebratory touch.
  • Side dishes: creamy yogurt with vanilla or lemon zest, fresh fruit medleys, a simple ricotta drizzle, or a mild cheese board to balance the sweetness.
  • Dessert companions: a tart lemon or berry compote on the side, a dollop of whipped cream or crème fraîche, or a light almond pastry cream if you’re feeling decadent.

Tips, Variations & Substitutions

The beauty of a Sugar Raspberry Danish Bun lies as much in its adaptability as in its classic charm. Here are ideas to tailor the pastry to your kitchen, dietary preferences, or seasonal produce while preserving its character.

  • Vegan version: Use plant-based butter and a dairy-free milk in the dough, and select a dairy-free glaze. Many bakers achieve excellent lamination with high-fat vegan margarines designed for baking; look for options labeled suitable for laminated dough if you’re attempting a closer mimic of traditional textures.
  • Gluten-conscious adaptations: Traditional laminated dough relies on gluten for structure. A lighter gluten-free approach often uses a mix of gluten-free flours and a binding agent like xanthan gum, plus careful handling to maintain tenderness. Expect a slightly different texture, but you can preserve the idea of multiple thin, flaky layers with patient resting and chilling between folds.
  • Different fruit fillings: Swap raspberries for blueberries, blackberries, or a peach-berry compote. A citrus zest twist—lemon, orange, or lime—can brighten the filling and complement the buttery notes of the dough.
  • Almond or pistachio accent: A thin layer of almond paste or a sprinkle of finely chopped toasted pistachios can add a nutty depth that plays wonderfully with fruit fillings.
  • Spice notes: A pinch of cinnamon, cardamom, or a hint of nutmeg can elevate the pastry, especially in autumn and winter versions. Start with a small amount and adjust to taste.
  • Sweetness balance: If you prefer less sweetness, reduce the glaze or use a glaze with a splash of lemon juice to cut the richness.
  • Alternative sweeteners: For a more caramelized finish, brush with a light honey or maple glaze instead of classic sugar glaze. If using alternative sugars, consider their moisture content to maintain a tender crumb.
  • Make-ahead variations: Prepare the dough, shape the buns, and freeze unbaked. Thaw and proof before baking for a fresh-baked result with minimal day-of effort.

Storage & Make-Ahead Ideas

Having a plan for storage and make-ahead preparation helps you enjoy these buns whenever the mood strikes, without sacrificing texture or flavor.

Store baked Sugar Raspberry Danish Buns at room temperature in an airtight container for up to two days for best texture. If you need to keep them longer, refrigerate for up to four days, but be mindful of potential drying; reheat gently to restore softness. For longer-term storage, freeze baked buns individually wrapped in plastic and stored in a freezer bag for up to two to three months. Reheat in a low oven (around 300°F / 150°C) until warmed through, or microwave briefly for a quick indulgence that still retains some of the pastry’s tenderness.

Make-ahead strategies include:

  • Dough preparation: Mix, shape, and layer the dough as you would for a weekend bake, then chill or freeze the formed buns. When you’re ready, thaw in the refrigerator, proof, and bake to a just-out-of-the-oven finish.
  • Filling prep: Prepare raspberry fillings or compotes in advance. A quick, fresh-trozen berry compote can be stirred into the center when you fill the buns for a burst of color and flavor that’s as vibrant as a market stall in summer.
  • Glaze timing: If you’re serving later in the day, glaze buns just before serving to maintain the glossy finish and a slight crunch from the sugar.

Fun Facts & Trivia (Optional)

Delving into pastry lore reveals delightful tidbits about our favorite sweet treats. For example, the name “danish” in Danish pastries reflects a broad European influence on the dough technique, rather than a single country’s origin, and the iconic laminated layers owe much to the early 19th century innovations in butter-rich doughs. Raspberry, with its vibrant color and balance of tart and sweet, has long been a beloved filling in pastries across many cultures, from classic jam tarts to elegant chandeliers of pastry in patisseries. The sugar glaze is not merely decorative; its crystalline surface can provide a whisper of sweetness that enhances the pastry’s aroma as it cools. Some bakers even stress the importance of a patient rest between folds—the quiet time that allows butter to stay cold and the dough to relax—because texture, more than any other factor, determines the joy of a laminated pastry. When you bake a Sugar Raspberry Danish Bun, you’re participating in a centuries-old dialogue between technique, fruit, and the alchemy of heat—an ordinary morning turned into a small, exquisite ritual that travels well from kitchen to table.

Ingredients

Sugar Raspberry Danish Bun
Danish Dough

    – 3 1/2 cups all-purpose flour (or bread flour)
    → The backbone of the Danish dough. all-purpose flour yields a tender crumb, while bread flour provides more gluten and a chewier bite. Measure by scooping into the cup and leveling for accuracy, then whisk with the salt to distribute evenly.

    – 2 1/4 teaspoons active dry yeast (or 1 packet instant yeast)
    → Leavens the dough to create a light, airy bun. If using active dry yeast, activate in warm milk with a pinch of sugar for 5–10 minutes until foamy before mixing with the rest; instant yeast can be mixed directly with dry ingredients.

    – 1/2 cup granulated sugar
    → Provides gentle sweetness and helps feed the yeast early in fermentation; also contributes to browning. Adjust to taste if you prefer a less sweet dough.

    – 1 teaspoon fine salt
    → Balances sweetness, strengthens gluten development, and enhances overall flavor. Distribute evenly with the flour so the salt isn’t concentrated in one spot.

    – 3/4 cup warm milk (110–120°F/43–49°C) or dairy-free milk alternative
    → Hydrates flour and activates the yeast; warmth is crucial for proper rise. If using dairy-free milk, pick one without strong flavors and consider a touch of neutral oil to mimic richness.

    – 2 large eggs, room temperature
    → Enriches dough, addsStructure, and improves crumb. Room-temperature eggs blend more smoothly; keep the dough from overheating to avoid curdling.

    – 6 tablespoons unsalted butter, softened and cut into pieces
    → Provides tenderness, flavor, and moisture. Softened butter folds in more evenly; for a laminated feel, you would incorporate butter later in a layering process, but here it enriches a smooth, tender dough.

    – 1 teaspoon vanilla extract
    → Enhances overall aroma and sweetness; use pure vanilla for best flavor. Add to the wet ingredients for even distribution.

    – 1/2 teaspoon lemon zest (optional)
    → Adds a bright citrus note that balances the sweetness and accents the raspberry filling. Zest finely to avoid large pieces that could tear the dough.

Raspberry Filling

    – 1 cup fresh raspberries (or 1/2 cup seedless raspberry jam)
    → The tangy, fruity center of the Danish. Fresh raspberries give texture and brightness; jam provides a glossy, uniform center. If using fresh berries, gently crush a few to release juice while keeping some whole for pockets of sweetness.

    – 1–2 tablespoons granulated sugar (adjust if using sweetened jam)
    → Balances tartness from raspberries; reduce if your jam is already sweet. Add gradually, tasting as you go.

    – 1 teaspoon lemon juice (optional)
    → Brightens the filling and helps cut through richness. Use freshly squeezed juice for best aroma and flavor.

    – 1–2 teaspoons cornstarch (or arrowroot)
    → Thickens the filling as it cooks, preventing runny centers. Make a slurry with a small amount of cold water before stirring into the berries; simmer briefly if using fresh berries.

Glaze and Topping

    – 1 cup powdered sugar (confectioners’ sugar)
    → Creates a smooth, glossy glaze that lightly sweetens the buns. Sift to remove lumps for a silky finish, then whisk with liquid to desired consistency.

    – 2–3 tablespoons milk (or dairy-free alternative)
    → Adjusts glaze thickness; add gradually until you reach a drizzle-able texture that coats without dripping excessively. Vanilla extract can be added here for extra depth.

    – 1/2 teaspoon vanilla extract (optional)
    → Deepens the glaze flavor; use if you want a richer finish. Add with the milk to infuse the glaze evenly.

    – Pearl sugar or coarse sanding sugar (for topping, optional)
    → Provides a crunchy, bakery-style finish and attractive sparkle. Scatter on the formed buns just before baking so it adheres and browns slightly.

    – 1 large egg, beaten with 1 tablespoon water (for egg wash)
    → Helps the outer crust develop a shiny, golden color and crisp texture. Brush over the risen buns before baking to promote even browning.

Instructions

  • Bloom the yeast in warm milk: If using active dry yeast, whisk 2 1/4 teaspoons of yeast into 1/4 cup of the warm milk (110–120°F / 43–49°C) with a pinch of sugar and let sit 5–10 minutes until foamy; if using instant yeast, skip this bloom and mix the yeast directly with the dry ingredients. This confirms the yeast is alive and ready to leaven the dough so your buns rise properly.
    → This step ensures the yeast is active before combining with flour, preventing dense, heavy pastries.
  • Whisk the dry ingredients: In a large bowl, whisk together 3 1/2 cups all-purpose flour (or bread flour), 1/2 cup granulated sugar, and 1 teaspoon fine salt until evenly distributed; this creates a uniform dough and prevents salt pockets from killing the yeast.
    → Even distribution of salt and flour promotes consistent gluten development and flavor throughout the dough.
  • Beat the wet ingredients: In a separate bowl, whisk 2 large eggs, 3/4 cup warm milk, 1 teaspoon vanilla extract, and 1/2 teaspoon lemon zest (optional) until well combined; this enriches the dough with fat-soluble flavors and helps emulsify the butter later.
    → Using room-temperature eggs and warm liquids aids smooth incorporation and prevents curdling or uneven texture.
  • Combine the wet and dry ingredients and begin kneading: Pour the wet mixture into the dry ingredients and mix with a spatula or dough hook until a shaggy dough forms; then knead on a lightly floured surface until smooth and elastic, about 8–10 minutes; this develops gluten structure for a tender yet sturdy Danish crumb.
    → Proper kneading aligns gluten strands for strength without tearing, yielding a dough that can hold the filling without collapsing.
  • Incorporate the butter gradually: With the mixer on low or by hand, add 6 tablespoons unsalted butter, softened and cut into pieces, one piece at a time, until fully absorbed; the dough will become glossy and softer as the fat envelops the gluten.
    → Gradual incorporation prevents tearing of the dough and creates a rich, velvety crumb with delicate layering.
  • First fermentation: Lightly oil a large bowl, place the dough inside, turn to coat, cover with plastic wrap or a damp towel, and let rise in a warm, draft-free place until doubled in size, about 60–90 minutes; this fermentation builds flavor and gas bubbles for a light crumb.
    → Allowing proper rise creates air pockets that yield a soft, airy interior once baked.
  • Prepare the raspberry filling: In a small saucepan, combine 1 cup fresh raspberries (or 1/2 cup seedless raspberry jam), 1–2 tablespoons granulated sugar, and 1 teaspoon lemon juice; heat gently to release juices and meld flavors, optionally crushing a few berries; whisk in 1–2 teaspoons cornstarch (slurry with a little cold water) and simmer briefly until thickened; cool completely before using.
    → Thickened filling prevents ooze during baking and concentrates raspberry brightness for a defined center.
  • Roll out the dough and apply the filling: After punching down, roll the dough on a lightly floured surface to a 12-by-18-inch rectangle; spread an even, thin layer of cooled raspberry filling over the surface, leaving a 1/2-inch border to seal; a careful, even layer prevents gaps and promotes tidy spirals.
    → A uniform filling ensures each bite has consistent flavor and prevents leakage during baking.
  • Roll, seal, and chill the dough: Starting from the long edge, roll the dough tightly into a log; pinch the seam to seal and wrap loosely; refrigerate 15–20 minutes to firm the butter and make slicing easier, which helps achieve clean, defined spirals.
    → Chilling firms the fats so slices hold their shape during cutting and baking.
  • Slice and arrange the buns: Remove the log and cut into 12 equal slices with a sharp serrated knife; place slices cut-side-up on parchment-lined baking sheets, spacing about 2 inches apart to allow expansion; this forms the classic raspberry Danish appearance with visible centers.
    → Even spacing prevents sticking and ensures even heat distribution for uniform browning.
  • Second proof and preheat: Cover the formed buns loosely and let rise until puffy, about 30–45 minutes; while they proof, preheat the oven to 350°F (175°C) and line the sheets again if needed; this ensures a quick, even bake and a glossy crust.
    → A proper second rise yields a soft, airy interior and a well-formed surface during baking.
  • Egg wash the buns: Brush each bun with a beaten egg mixed with 1 tablespoon water; this promotes a shiny, gold crust and helps any toppings adhere; avoid pooling along edges to prevent soggy bottoms.
    → The egg wash encourages browning and a professional-looking finish.
  • Bake the buns: Bake in the preheated oven for 15–18 minutes until tops are golden and the centers reach about 190–195°F (88–90°C); rotate the baking sheets halfway for even browning.
    → Proper baking ensures a fully cooked interior with a crisp, flavorful exterior.
  • Prepare the glaze: While the buns bake or while they cool slightly, whisk 1 cup powdered sugar with 2–3 tablespoons milk and 1/2 teaspoon vanilla extract until smooth and drizzly; add milk a drop at a time to reach a glaze consistency that coats without running.
    → A glossy glaze adds sweetness and a polished bakery-style finish to the buns.
  • Finish with topping and glaze: Once the buns are warm, drizzle the glaze over the tops; if desired, scatter pearl sugar or coarse sugar while the glaze is still tacky to add a satisfying crunch and sparkle; this completes the visual and textural presentation.
    → The glaze sets with a gentle sheen, and the sugar topping provides a contrasting crunch against the tender crumb.

Notes

These Sugar Raspberry Danish Buns are a buttery, flaky treat with a tangy raspberry center and a glossy vanilla glaze. For the best texture, keep the Danish dough cold and handle it gently to preserve the layers; chilling the dough between folds helps achieve a laminated-like crumb. Use warm milk around 110–120°F to activate the yeast; if you’re using active dry yeast, proof it in warm milk with a pinch of sugar until foamy before mixing with the rest. The filling should be brightened with lemon juice and lightly sweetened; cook it briefly with a cornstarch slurry until thick and glossy, then cool before using to avoid leakage. You can customize the filling by swapping in other berries or adding citrus zest to the dough. Bake until the buns are deeply golden and the centers are set; finish with a glaze made from confectioners’ sugar and milk, adding vanilla or lemon for depth, and scatter pearl sugar on top for bakery-style sparkle. These buns freeze well when cooled; reheat in a low oven (about 325°F) for 8–10 minutes to refresh the flaky texture. Always ensure your yeast is fresh and your ingredients are at room temperature for a smooth, even rise.

Tips

Tips for Sugar Raspberry Danish Bun

  • Measure flour accurately: for best results, weigh flour; if using cups, scoop lightly into the cup and level off with a knife, then whisk with salt to distribute evenly.
  • Yeast handling: if using active dry yeast, proof in warm milk with a pinch of sugar until foamy (5–10 minutes); instant yeast can be mixed directly with dry ingredients.
  • Temperatures matter: warm milk around 110–120°F (43–49°C) to activate the yeast without killing it; eggs should be at room temperature for smooth emulsification.
  • Butter integration: use softened, not melted, butter cut into small pieces; fold in gradually to avoid tearing the dough and to keep a tender crumb.
  • Flavor boost: add vanilla and optional lemon zest to the wet ingredients for a fragrant dough; zest finely to avoid large specks.
  • Raspberry filling prep: with fresh raspberries, gently crush a few berries to release juice while keeping some whole for pockets; if using jam, it will be glossier and easier to fill evenly.
  • Thickening the filling: make a slurry of cornstarch with a small amount of cold water before stirring in the berries; cook briefly to activate the starch and thicken the center.
  • Balance sweetness: taste the filling as you add sugar; 1–2 tbsp may be adjusted depending on jam sweetness and berry tartness.
  • Prevent runny centers: cook the filling until slightly thickened or let cool completely before filling the dough to avoid seepage during baking.
  • Shaping tips: keep the dough cool while rolling and filling; if it springs back, rest it for 10–15 minutes to relax the gluten.
  • Egg wash and glaze: brush buns with the egg wash for a shiny crust; glaze the cooled buns with sifted powdered sugar mixed with milk; add vanilla to glaze if desired.
  • Texture and finish: sprinkle pearl sugar or coarse sugar on top before baking for a bakery-style crunch and sparkle.
  • Storage and make-ahead: unbaked buns can be frozen on a tray, then transferred to a bag; bake from frozen, adding a few extra minutes; baked buns keep 2–3 days in an airtight container.
  • Troubleshooting: if dough is too dry, add milk a teaspoon at a time; if too sticky, refrigerate the dough for 15–20 minutes to firm up before shaping.

FAQ

What is a Sugar Raspberry Danish Bun?

A Sugar Raspberry Danish Bun is a laminated, buttery pastry similar to a croissant, filled with a sweet raspberry filling and often a delicate glaze or cream cheese topping. It combines flaky, tender layers with a bright raspberry center and a touch of sweetness from sugar in the dough and filling.

What ingredients do I need for the dough, filling, and glaze?

Dough: flour, sugar, salt, milk (or dairy-free milk), active dry yeast, eggs, and butter. Filling: raspberries (fresh or thawed frozen), sugar, and a little cornstarch for thickening. Optional glaze: cream cheese glaze or a simple powdered sugar glaze. You may also add vanilla or lemon zest for extra aroma.

Can I make this recipe without a stand mixer?

Yes. You can mix the dough by hand. Combine dry ingredients, whisk in wet ingredients, then knead on a floured surface until smooth. You’ll need a bit more kneading time to develop the gluten. After the first rise, fold in and roll out the butter as you would in a laminated dough, keeping the butter cold.

How do I shape the buns for the classic Danish look?

Roll out the dough into a rectangle, spread a thin layer of butter, fold, roll again, and chill. Cut into smaller rectangles, place spoonfuls of raspberry filling along the center, then roll up or fold to form individual buns with visible layers. Seal edges well and place on a baking sheet with space to rise.

Do I need to chill the dough between folds (lamination)?

Chilling between folds helps keep the butter solid and creates distinct flaky layers. Chill the dough for 20–30 minutes between each set of folds, and allow a final longer chill before shaping to slow fermentation and maintain structure.

How do I bake them to perfection?

Bake at a moderate temperature (about 375–190°C) until the buns are puffed and golden brown, about 20–25 minutes depending on size. If the bottoms brown too quickly, cover loosely with foil for the last few minutes. Check for an internal temperature around 190–200°F (88–93°C) if you’re unsure.

Can I freeze the dough or baked buns?

You can freeze both. Freeze shaped, unbaked buns on a tray until solid, then transfer to a bag. Bake from frozen, adding a few extra minutes. Alternatively, freeze fully baked buns and rewarm in a low oven or microwave, though they may lose some flakiness.

How should I store leftovers and how long do they stay fresh?

Store baked buns in an airtight container at room temperature for up to 2 days, or refrigerate for up to 5 days. Reheat gently in a 300–325°F (150–165°C) oven for 5–8 minutes to restore flakiness. Freeze for longer storage.

Can I use frozen raspberries or other fruit substitutes?

Frozen raspberries work well as long as you thaw and drain excess liquid before filling, or lightly thicken with a touch of cornstarch. You can substitute with other berries (strawberries, blueberries) or a jam swirl, but berries with seeds may alter texture.

Are dairy-free or gluten-free variations possible?

Yes. Use dairy-free butter and milk to make the dough dairy-free, and consider gluten-free flour blends designed for laminated pastries; note that gluten-free laminated doughs can be harder to handle and may yield a denser result. For strict gluten-free, consider a gluten-free puff pastry base and adjust as needed.

What are good serving suggestions for Sugar Raspberry Danish Buns?

Serve warm with a cup of coffee or tea. A light cream cheese glaze or a dusting of powdered sugar complements the sweetness. You can also pair with fresh raspberries or a light lemon glaze for a tart contrast.

Introduction / Hook

The moment the oven opens and a waft of warm cinnamon greets you, you’ll know you’re in for something special. Baked Cinnamon Sugar Donuts are not just a treat; they’re a comforting invitation to slow down, savor the morning, and share a moment with someone you love. Picture a dozen rain-washed mornings transformed into a cozy bakery in your own kitchen: the air is perfumed with vanilla, butter, and that familiar, homey spice that seems to turn every bite into a memory. These donuts are light and tender, with a gentle crumb that yields to a soft, fluffy center and a delicate, crisp edge—like a cloud that has learned how to caramelize. And because they’re baked rather than fried, they offer the same irresistible warmth with a little less of the heavy, indulgent feel. The cinnamon-sugar coating crackles just enough on the outside to provide a whisper of crunch as you bite in, while the inside stays wonderfully moist and satisfying. This is the kind of treat that makes Saturday cravings feel like a celebration, a small ritual that says: you deserve something special, and you deserve it now.

The Story Behind the Dish

Donuts have long held a place in kitchens and bakeries around the world, evolving from simple fried cakes to the sugar-dusted delights we crave on weekend mornings. The origin story is a tapestry of cultures and clever improvisations: early fried doughs, sometimes shaped into rings or filled with fruit, traveled across oceans and were embraced by bakers who found delight in their versatility. In the United States, the ring donut became a symbol of quick, comforting sweetness—an accessible indulgence that could be enjoyed with coffee, tea, or a glass of milk. Cinnamon and sugar joined this story as a natural pairing; the spice’s warm notes bridge the softness of the crumb with the brightness of sweetness, creating a flavor profile that feels both cozy and festive. This baked version leans into the same tradition but celebrates a lighter approach: using a tender batter that rises softly in the oven, then coating with a fragrant cinnamon-sugar dusting while they’re still warm enough to cling to each donut’s surface. It’s a modern nod to a timeless classic, an homage to the chain of memories that begin with a weekend kitchen and end with a plate of donuts shared around a table.

Personally, I remember a Sunday morning when Grandma would pull a pan from the oven, its surface glistening with a buttery sheen and the air already thick with cinnamon. The kids would line up, toes ready for the first bite, while the adults whispered about what cup of coffee would perfectly complement the sweetness. That sense of community—the slow, delighted anticipation before a bite, the stories that flow as freely as the steam—became the spirit I try to carry into these baked donuts. They’re a tribute to those quiet breakfasts and to the timeless appeal of a simple, well-made treat that can turn any ordinary morning into a little celebration with family or friends.

Why You’ll Love This Recipe

  • Effortless comfort: the batter comes together in minutes, and the baking process frees you to prep coffee, set the table, or simply breathe in the aroma.
  • Healthier indulgence: baked donuts deliver that familiar, cozy sweetness without the deep-fried heaviness, making them a more approachable weekend treat.
  • Kid-friendly and shareable: the form factor is approachable for little hands and big hands alike, perfect for a family breakfast or a classroom bake sale.
  • Versatile base: a simple canvas that welcomes a variety of flavor twists, from citrus to chocolate, without losing the core cinnamon-sugar charm.
  • Make-ahead ready: the batter rests well, and the donuts can be stored or even prepared in advance for a party or brunch.
  • Reliable texture: a tender, cake-like crumb with a delicate, almost melt-in-your-mouth interior and a lightly crisp exterior when fresh from the oven.
  • Perfect dunking companions: pairs beautifully with coffee, latte art, chai, or a glass of cold milk; ideal for dunking or simple drizzle.

Flavor Profile & Texture

These donuts deliver a balanced symphony of flavors and textures that makes each bite feel like a small, comforting ritual. The base batter is subtly sweet, with a hint of vanilla that rounds off the grainy warmth of the flour. Cinnamon takes the lead, its woody, citrusy notes infusing the crumb and creating a fragrance that rides the steam as soon as the donuts emerge from the oven. A touch of nutmeg or allspice can be introduced for a more autumnal or holiday-savory note, but the classic combination remains clean, bright, and comforting. The cinnamon-sugar coating is where the magic happens on the first bite—the crystal-like granules cling to the surface, delivering an immediate pop of sweet-spice that is both familiar and exciting. Underneath, the interior is soft and moist, with a crumb that is tender and airy rather than dense. The edges brown lightly, offering a light caramelization that adds a whisper of toffee-like depth as you chew. When you bite, you get a gentle resistance that becomes pleasantly delicate, followed by a melt-in-your-mouth moment that lingers without cloying sweetness. The overall experience is warm, homey, and just a touch indulgent, like a hug you can eat with your hands.

Occasions & Pairings

These baked donuts shine in many settings. They’re ideal for a weekend brunch with friends, a cozy breakfast treat for casual family mornings, or a quick homemade dessert when you’re craving something comforting but not overly heavy. They also work beautifully as a party snack, a potluck addition, or a coffee-hour bite that pairs nicely with a spread of beverages and fruit. For beverages, consider:

  • Freshly brewed coffee or a cinnamon-spiced latte to echo the donut’s flavors.
  • Chai tea or spiced herbal tea for a complementary spice profile.
  • Cold or warmed milk, especially for kids or anyone who enjoys dunking.
  • Aromatic hot chocolate or a caramel cappuccino for an extra indulgent pairing.

Side dishes and accompaniments to consider include:

  • A light citrus yogurt or orange zest crème as a dollop on the side to cut through the sweetness.
  • Fresh fruit on the side to balance richness with brightness.
  • A small platter of nuts—pecans or almonds—to introduce a contrasting texture and a nutty note.

Tips, Variations & Substitutions

Here are ideas to customize and broaden the scope of this recipe, whether you’re accommodating dietary needs or chasing a new flavor twist.

Dairy-Free & Gluten-Free Variations

  • Use a dairy-free milk such as almond, oat, or coconut milk and a plant-based butter or oil for the fat component.
  • Gluten-free options: select a gluten-free all-purpose flour blend that contains xanthan gum or add 1/2 teaspoon xanthan gum per cup of flour to help mimic the structure of wheat flour. You may also experiment with almond flour blends for a nuttier taste, though texture will differ slightly.

Flavor Twists

  • Cardamom or nutmeg can replace or augment the cinnamon for a different spice profile. A pinch of espresso powder can deepen the chocolatey or caramel notes in a glaze variant.
  • Orange or lemon zest brightens the batter and pairs beautifully with the cinnamon. Finish with a citrus glaze for a lively finish.
  • For a chocolate-kissed version, drizzle lightly with a rich chocolate glaze or dip the tops in melted dark chocolate before coating in cinnamon-sugar.

Regional Twists

  • Maple-bourbon glaze or a maple-cinnamon dusting pays homage to the American breakfast table in the fall.
  • Brown-butter cinnamon sugar: use browned butter for the coating to deepen the caramel notes.
  • Inspiration from the tropics: a touch of coconut sugar in the coating for a subtler, caramel-coconut finish.

Storage & Make-Ahead Ideas

The beauty of baked donuts is that they adapt well to planning. You can enjoy them fresh from the oven or have a batch ready for later in the week. Here are practical tips to maximize freshness and flavor.

  • Storage: store cooled donuts in an airtight container at room temperature for up to 2 days. For longer storage, refrigerate for up to 5 days or freeze individual donuts wrapped tightly for up to 1 month.
  • Reheating: warm donuts briefly in a 300–325°F (150–165°C) oven for 5–7 minutes to revive the softness and re-crisp the edges. A quick 10-12 second zap in the microwave can work in a pinch, but the oven helps maintain texture better.
  • Make-ahead: you can mix the batter and refrigerate it for up to 24 hours before baking. Allow the batter to come to room temperature and rest briefly before portioning into the donut pan. This makes weekend mornings as effortless as a quick coffee pull.
  • Meal-prep trick: bake a half batch and freeze the donuts; the other half can be kept for a fresh-topped, midweek treat, ensuring you always have a comforting option on hand.

Fun Facts & Trivia (Optional)

Delving into the little-known, delightful tidbits surrounding donuts and cinnamon can deepen your appreciation for this everyday pleasure. Here are a few fun notes to savor while you wait for the timer to ding:

  • The shape of a traditional ring donut is iconic, but fried dough has been found in many cultures—sometimes filled, sometimes ring-shaped, sometimes free-form. The donut has always been a flexible canvas for cooks to showcase flavor and technique.
  • Cinnamon has a long history as a fragrance and flavor enhancer. In ancient times, it was valued as a spice and a symbol of hospitality; today, it still signals warmth and welcome when you bake with it.
  • Coatings like cinnamon-sugar became a popular pairing because they provide instant texture contrast: a crisp, lightly sugary crust that yields to a tender bite beneath.
  • Donuts have inspired countless variations around the world, including those that embrace fruit fillings, powdered sugar dustings, coffee glazes, and even savory renditions in some culinary traditions.

Ingredients

    – Donut Base
    – 2 cups all-purpose flour (or 2 cups 1-to-1 gluten-free flour blend with xanthan gum)
    → Role: Provides the structure and body of the donuts. The gluten in wheat flour forms a network that traps gas as the batter bakes, yielding a light, airy crumb. If you are using a gluten-free blend, choose a 1-to-1 substitute that already contains xanthan gum (or add 1/2 teaspoon xanthan gum per cup of flour) to mimic the binding. Preparation: sift the flour with the sugar, baking powder, baking soda, salt, and spices to ensure even distribution and prevent clumps. Tips: avoid overmixing once wet ingredients are added to keep the donuts tender; if using a gluten-free blend, rest the batter briefly to hydrate before piping or spooning into the pan.
    – 1/2 cup granulated sugar
    → Role: Sweetener and browning agent that helps create a tender crumb. Preparation: whisk with the dry ingredients to distribute evenly; Tips: you can substitute part of the sugar with coconut sugar for a richer flavor, but this may affect texture and color slightly.
    – 2 tsp baking powder
    → Role: Leavening agent that creates air pockets for a light, springy crumb. Preparation: sift with dry ingredients to ensure even distribution; Tips: use fresh baking powder for maximum rise and avoid overmixing to prevent a dense texture.
    – 1/4 tsp baking soda
    → Role: Additional leavener that reacts with the acidic components to boost rise. Preparation: measure precisely and whisk into dry ingredients; Tips: if you’re not using buttermilk, you can omit or reduce it to avoid over-leavening.
    – 1/2 tsp salt
    → Role: Flavor enhancer that strengthens the crumb and balances sweetness. Preparation: distribute evenly in the dry mix; Tips: use fine sea salt for even distribution; too much salt can dull the sweetness.
    – 1 tsp ground cinnamon
    → Role: Primary spice that defines the donut’s aroma and flavor. Preparation: stir into the dry mix; Tips: use freshly ground cinnamon for a brighter aroma; you can adjust to taste, but avoid overpowering the batter.
    – 1/4 tsp ground nutmeg (optional)
    → Role: Adds warm spice and depth. Preparation: include in the dry mix if using; Tips: start with a small amount since nutmeg can quickly dominate the flavor.
    – 2/3 cup buttermilk (or 3/4 cup milk + 1 tbsp lemon juice)
    → Role: Provides moisture and acidity that interacts with baking soda/powder for a tender crumb. Preparation: if using regular milk, sour it with lemon juice or vinegar to mimic buttermilk; Tips: use at least 2% or higher for moisture and flavor; bring to room temperature before mixing to avoid clumps.
    – 2 large eggs
    → Role: Bind and structure; adds richness and helps with leavening. Preparation: bring eggs to room temperature for a smoother batter; Tips: lightly whisk before adding to the wet ingredients to promote even distribution.
    – 1/4 cup unsalted butter, melted and cooled (or 3 tbsp neutral oil)
    → Role: Fat that tenderizes the crumb and adds richness and flavor. Preparation: melt and cool the butter before mixing to avoid scrambling the eggs; If using oil, note it yields a lighter, more cake-like texture and can extend shelf life. Tips: butter adds depth of flavor; oil keeps donuts softer for longer but lacks the same roasted butter aroma.
    – 1 tsp vanilla extract
    → Role: Enhances the overall flavor and complements the cinnamon. Preparation: use high-quality pure vanilla; Tips: if you have vanilla bean, scrape the seeds for extra aroma; store extract tightly closed to prevent flavor loss.
    – 2 tablespoons unsalted butter, melted (for brushing after baking)
    → Role: Adds a glossy, flavorful finish and helps the cinnamon sugar adhere. Preparation: brush donuts while they are still warm from baking; Tips: brush generously to maximize flavor and ensure even coating; allow a minute to set before handling.

    – Cinnamon Sugar Coating
    – 1/2 cup granulated sugar
    → Role: Primary crust for sweetness and texture. Preparation: mix with the ground cinnamon in a shallow dish to ensure even coating; Tips: keep at a consistent depth so donuts can be rolled easily while still warm; shakes of extra cinnamon can be added to taste.
    – 2 tsp ground cinnamon
    → Role: Aromatic spice that creates the classic cinnamon-sugar crust. Preparation: whisk into the sugar until evenly distributed; Tips: use fresh cinnamon for maximum fragrance; adjust to taste for a stronger or milder coating.

    – Optional Glaze
    – 1 cup powdered sugar
    → Role: Adds a smooth, creamy sweetness that sets over the surface. Preparation: sift to remove lumps; Tips: for a thinner glaze, add more liquid gradually; for a thicker glaze, use less liquid and/or more sugar; dairy-free glazes can be made with non-dairy milk and a touch of dairy-free butter.
    – 2-3 tbsp milk or cream
    → Role: Liquid to achieve the desired glaze consistency. Preparation: add gradually to the powdered sugar while whisking; Tips: start with 2 tablespoons and adjust; use dairy-free milk for a vegan option.
    – 1/2 tsp vanilla extract
    → Role: Flavor enhancer for glaze. Preparation: whisk into glaze; Tips: vanilla deepens sweetness and aroma; optional if you prefer a pure sugar glaze.
    – pinch of salt
    → Role: Balances sweetness and helps glaze set smoothly. Preparation: whisk into glaze; Tips: a small amount makes flavors pop without tasting salty.

    – Optional Add-ins
    – 2 tbsp sour cream or plain yogurt (optional)
    → Role: Adds moisture and tenderness to the crumb. Preparation: whisk into the wet ingredients or fold gently into the batter; Tips: use full-fat for best texture; dairy-free yogurt works well as a substitute.
    – 1/2 cup mini chocolate chips (optional)
    → Role: Pockets of melted chocolate add indulgence and texture. Preparation: fold into the batter at the end or sprinkle on top before baking; Tips: coat chips lightly in a little flour to prevent sinking to the bottom.
    – 1/4 cup chopped walnuts or pecans (optional)
    → Role: Adds crunch and a toasty nutty note. Preparation: toast nuts lightly in a dry skillet to heighten aroma, then chop evenly. Tips: keep pieces uniform for even distribution; store leftovers in an airtight container to maintain crunch.

Instructions

  • Preheat your oven to 350°F (175°C) and generously grease a standard 6-cavity donut pan or line the wells with paper liners; this ensures the donuts release cleanly and retain their shape.
    → Proper heat distribution and a well-greased surface prevent sticking, which makes removal after baking clean and preserves the donut’s form.
  • Sift or whisk together the dry ingredients in a large bowl: 2 cups all-purpose flour (or 2 cups gluten-free 1-to-1 blend with xanthan gum), 1/2 cup granulated sugar, 2 tsp baking powder, 1/4 tsp baking soda, 1/2 tsp salt, 1 tsp ground cinnamon, and 1/4 tsp ground nutmeg (optional); this ensures even distribution and prevents clumps that can cause uneven rise.
    → Sifting breaks up any lumps and coats the dry particles with dry sugar and leaveners for uniform crumb.
  • Whisk the wet ingredients in a separate bowl: 2/3 cup buttermilk (or 3/4 cup milk with 1 tbsp lemon juice or vinegar, pre-soured), 2 large eggs, 1/4 cup melted and cooled unsalted butter (or 3 tbsp neutral oil), and 1 tsp vanilla; whisk until completely combined to create a smooth, cohesive batter.
    → Room-temperature wet ingredients blend more evenly and melted fat impacts tenderness and crumb structure.
  • Pour the wet mixture into the dry ingredients and whisk just until combined; stop as soon as there are no visible dry pockets to avoid developing gluten or overworking gluten-free starches; a few small lumps are acceptable for a tender crumb.
    → Gentle mixing preserves a light, delicate texture and prevents toughness from overworking the batter.
  • If using optional add-ins, fold in 2 tbsp sour cream or plain yogurt (for extra moisture and tenderness), 1/2 cup mini chocolate chips (tossed lightly with a tablespoon of flour to prevent sinking), or 1/4 cup chopped walnuts or pecans; fold gently to distribute without deflating the batter.
    → Add-ins add flavor and texture, but folding gently keeps the batter airy and the chips from sinking.
  • If you are using a gluten-free flour blend, rest the batter for 5 to 10 minutes to hydrate the starches and hydrate the xanthan gum (if included); this helps the batter hold its shape during baking and yields a softer crumb.
    → Resting allows ingredients to hydrate, reducing crumbles and improving overall structure.
  • Transfer the batter to a piping bag fitted with a large round tip or use a spoon to fill each donut well about 2/3 full; avoid overfilling to prevent overflow and to allow room for proper rise.
    → Filling appropriately ensures uniform donut size and prevents batter from spilling over the pan edges during baking.
  • Bake the donuts in the preheated oven for 10–12 minutes, or until they are light golden and a toothpick inserted into the center comes out clean or with a few crumbs; do not open the oven door during the first half of baking to prevent settling.
    → Proper bake time yields a tender interior with a slight spring and prevents under- or over-baking.
  • Remove the pan from the oven and let the donuts cool in the pan for about 5 minutes, then transfer to a wire rack to cool completely or until just warm for best cinnamon-sugar adhesion.
    → Cooling on a rack prevents residual heat from softening the crust and helps set the glaze or coating.
  • While the donuts bake or cool, prepare the cinnamon sugar coating by whisking 1/2 cup granulated sugar with 2 tsp ground cinnamon in a shallow dish; this creates an even surface for rolling and a consistent crust.
    → Uniform coating ensures every bite has balanced sweetness and spice without clumps.
  • Prepare the butter glaze finish by melting 2 tablespoons unsalted butter; keep it warm but not hot so it can be brushed evenly onto the donuts to help the coating adhere.
    → Butter gives flavor and helps cinnamon sugar adhere to the warm surface for a glossy, cohesive crust.
  • While the donuts are still warm, brush each donut all over with the melted butter, then roll or dip the donuts in the cinnamon sugar coating to coat completely; the warmth helps the sugar stick and form a crisp crust.
    → The warm surface activates the fat, creating a tacky surface that welcomes the sugar crust for even coverage.
  • For a glaze option, whisk 1 cup powdered sugar with 2–3 tbsp milk or cream, 1/2 tsp vanilla, and a pinch of salt until smooth and pourable; drizzle or dip cooled donuts to desired thickness and let the glaze set before stacking.
    → The glaze adds a silky sweetness and can be adjusted in thickness by adding more sugar or liquid; sift the sugar first to avoid lumps.

Notes

These baked cinnamon sugar donuts are tender, warmly fragrant, and crowned with a classic cinnamon-sugar crust. The batter uses flour (or a 1-to-1 gluten-free flour blend with xanthan gum) for structure, sugar for sweetness, and buttermilk (or milk soured with lemon juice) for moisture and tenderness, with eggs, melted butter or neutral oil, and a touch of vanilla to amplify the spice. The cinnamon together with the sugar coating creates that signature aroma and a slight snap when biting through. You can customize them by folding in mini chocolate chips or chopped nuts, or by whisking in a spoon of sour cream or yogurt for extra tenderness. They bake up moist and store well in an airtight container; they also freeze nicely and reheat in a 350°F oven for a quick treat. For an extra indulgence, brush warm donuts with a little melted butter and toss in the coating, or drizzle with a simple glaze made from powdered sugar and milk. For gluten-free needs, ensure you use a 1-to-1 gluten-free flour blend with xanthan gum (or add 1/2 teaspoon xanthan gum per cup of flour) and rest the batter briefly before filling the pan. Always measure leaveners accurately, bring eggs and dairy to room temperature, and sift dry ingredients to prevent clumps for a lighter crumb.

Tips

Tips for Perfect Baked Cinnamon Sugar Donuts

  • Prepare the pan well: Generously grease the donut pan or use a nonstick spray with a light dusting of flour to prevent sticking. A quick spray-and-flour method helps release the donuts cleanly.
  • Dry ingredients first: Sift the flour (or gluten-free 1-to-1 blend with xanthan gum), sugar, baking powder, baking soda, salt, and spices to ensure even distribution and a tender crumb. If using a gluten-free blend, resting the batter briefly after mixing helps hydrate the mix and improve texture.
  • Room-temperature ingredients: Bring buttermilk (or milk + lemon juice), eggs, and butter to room temperature. This promotes better emulsification and a smoother batter.
  • Mixing technique matters: Whisk wet ingredients separately and whisk dry ingredients separately, then combine just until moistened. Overmixing activates gluten or overworks gluten-free blends, resulting in a tougher donut.
  • Hydration and rest: A brief batter rest (5–10 minutes) can improve hydration and crumb, especially with gluten-free blends.
  • Leavener freshness: Use fresh baking powder (and baking soda). Fresh leaveners produce a lighter, springier crumb; avoid overmixing after adding wet ingredients.
  • Filling strategy: If you pipe batter into the pan, fill each cavity about 3/4 full for domed, uniform donuts. If spooning, level the batter to promote even heights.
  • Oven temperature and doneness: Bake at about 350°F (175°C). Donuts are done when a toothpick inserted into a center comes out with a few moist crumbs, typically 12–15 minutes depending on pan and oven. Do not overbake.
  • Cooling step: Allow the donuts to rest in the pan for 5–7 minutes before transferring to a rack. This helps them set and reduces breakage.
  • Flavor foundation: The butter vs. oil choice affects texture and aroma. Melted butter offers deeper flavor but can make the crumb slightly richer; neutral oil yields a softer, more cake-like crumb and longer shelf life.
  • Coating the donuts: For a classic cinnamon-sugar crust, brush warm donuts with melted butter and roll in a mixture of granulated sugar and cinnamon. Do this while they’re warm so the coating adheres well; set on a rack briefly to let the coating set.
  • Glaze tips: If using a glaze, whisk powdered sugar with milk or cream and vanilla, adding a pinch of salt. Start with 2 tablespoons of liquid and add more as needed to reach your desired thickness. Sift the sugar to avoid lumps.
  • Glaze consistency options: For a thinner glaze, add more liquid gradually; for a thicker glaze, use less liquid or add more powdered sugar. Dairy-free glazes can be made with non-dairy milk and a dairy-free butter substitute.
  • Optional add-ins: Fold in mini chocolate chips or chopped nuts at the end of mixing to avoid sinking. If using yogurt or sour cream, use full-fat for best tenderness; dairy-free yogurt works well too.
  • Storage and freshness: Store baked donuts in an airtight container at room temperature for 1–2 days (or refrigerate up to 3 days). Reheat briefly before serving to refresh the texture. Freeze unglazed donuts for longer storage; glaze or coat after thawing.
  • Flavor variations: A touch of citrus zest (orange or lemon) can brighten the aroma without overpowering the cinnamon. If using nutmeg, start with a small amount and adjust to taste.

FAQ

What are baked cinnamon sugar donuts and how do they differ from fried donuts?

Baked cinnamon sugar donuts are cake-like donuts cooked in the oven rather than fried in oil. They’re generally lighter, less greasy, and easier to make with simple pantry ingredients. After baking, they’re coated in a warm cinnamon-sugar mixture for a classic cinnamon donut flavor. Typical bake: 350°F (175°C) for about 10–12 minutes, depending on size.

What ingredients do I need for the batter?

Basic batter (about 6 standard donuts):

  • 1 cup (120 g) all-purpose flour
  • 1/2 cup (100 g) granulated sugar
  • 1 teaspoon baking powder
  • 1/4 teaspoon salt
  • 1/2 teaspoon ground cinnamon
  • 1/4 teaspoon ground nutmeg (optional)
  • 1/2 cup (120 ml) milk (dairy or non-dairy)
  • 1 large egg
  • 2 tablespoons melted butter or neutral oil
  • 1/2 teaspoon vanilla extract

Topping (for rolling): 1/4 cup granulated sugar plus 1–2 teaspoons ground cinnamon. You can adjust the cinnamon amount to taste.

What pans can I use if I don’t have a donut pan?

A donut pan is ideal, but there are alternatives:

  • Mini muffin tin: the batter will yield mini donut-shaped rounds that bake in about 9–11 minutes. Roll in cinnamon sugar after cooling slightly.
  • Silicone donut mold: works like a metal donut pan, often with easy release.
  • Muffin tin with a circular cutter: bake as round donuts and punch out a hole with a small round cutter after baking if you want a traditional donut ring look.
How do I mix the batter without overmixing?

Steps to avoid dense donuts:

  • Whisk dry ingredients (flour, sugar, baking powder, salt, cinnamon, nutmeg) in one bowl.
  • Whisk wet ingredients (milk, egg, melted butter/oil, vanilla) in another bowl.
  • Pour wet into dry and stir just until combined. A few small lumps are okay; do not overmix, or the donuts may turn out tough.
What is the bake time and temperature?

Preheat oven to 350°F (175°C). Bake standard donuts for about 10–12 minutes, or until a toothpick inserted comes out clean and the tops are lightly golden. Mini donuts or donut holes may take 9–11 minutes. Let them cool briefly before coating.

How do I apply the cinnamon sugar topping?

Coating while warm helps the sugar stick:

  • Brush each donut with a little melted butter or a light glaze of milk.
  • Roll or toss in a mixture of 1/4 cup granulated sugar and 1–2 teaspoons ground cinnamon (adjust to taste).
  • Let the coating set as they cool for a minute or two before serving.
Can I make gluten-free or dairy-free versions?

Yes. Try these substitutions:

  • Gluten-free: Use a 1:1 gluten-free all-purpose flour blend. If the blend lacks xanthan gum, add 1/4 teaspoon xanthan gum per cup of flour. Bake as directed and check for doneness with a toothpick.
  • Dairy-free: Use dairy-free milk (almond, soy, oat, etc.) and melted vegan butter or oil in place of dairy butter. Toppings can use coconut oil instead of butter if desired.
How should I store leftovers and can I freeze them?

Storage and freezing tips:

  • Store at room temperature in an airtight container for 2–3 days. For best texture, keep them uncovered for the first day to prevent sogginess, then seal.
  • Freeze unfrosted donuts for up to 2–3 months. Thaw at room temperature and reheat briefly in a 325–350°F (165–175°C) oven for 5–7 minutes, or microwave in short 10–15 second bursts.
  • If already coated in cinnamon sugar, re-crisp gently in a warm oven to help refresh the coating.
Can I make donut holes or mini donuts instead of full donuts?

Absolutely. Use the same batter and bake in mini muffin tins or donut molds. Donut holes typically bake in 9–11 minutes; full donuts take about 10–12 minutes. Coating in cinnamon sugar after baking remains the same.

How do I know the donuts are done?

Check with a toothpick: insert into the center of a donut—if it comes out clean or with a few moist crumbs, they’re done. The tops should be lightly golden and springs back when touched. Avoid overbaking, which can dry them out.

What are some easy variations or add-ins?

Try these simple twists:

  • Add 1–2 teaspoons of lemon or orange zest to the batter for a citrusy note.
  • Fold in 1/4 cup mini chocolate chips or chopped nuts.
  • Make a simple vanilla glaze (powdered sugar with a little milk) instead of the cinnamon sugar coating.
  • Use brown sugar in place of white sugar for a deeper flavor.

Introduction / Hook

Imagine a sunlit kitchen where the morning air tastes faintly of vanilla and citrus, and the stovetop softly hums as a tray of golden, crisp shells browns to a delicate amber. In that moment, you lift a single Blueberry Cream Cheese Egg Roll and the room fills with a chorus of sensations: a crackle of the wrapper, a rush of blueberry sweetness, and a silken ribbon of cream cheese that glides across the tongue with comforting ease. The fragrance is effortless nostalgia—blueberries bursting with color, the tang of cream cheese mellowed by a touch of lemon zest, a whisper of cinnamon or vanilla drifting in as if to say, “ indulge a little.” These egg rolls aren’t just a dessert or a fancy treat; they’re a bridge—between breakfast and dessert, between everyday meals and a festive gathering, between the familiar and the playful. They promise bite-sized moments of joy: crisp exteriors giving way to lush, creamy centers, each bite punctuated by the bright tang of berries. And because they’re so inviting, they’re perfect for eagerly sharing with friends and family who linger over coffee or linger over bedtime laughter alike.

The Story Behind the Dish

The idea of Blueberry Cream Cheese Egg Rolls sits at the delightful crossroads of tradition and whimsy. Egg rolls, with their origins rooted in East Asian culinary traditions, have long traveled the globe, mutating and adapting to local tastes and fears—then turning those adaptations into new favorites. In many American kitchens, the idea of turning the familiar into something sweet and playful has a storied history: a weekend brunch that wanders past the savory into a golden, fried finale; a dessert tray that begs for a crispy twist rather than a plate of soft slices. Blueberries, meanwhile, carry their own seasonal romance. Native to North America, they arrive in late spring and peak in the warmth of summer, offering not just color and sweetness but a tart, bright counterpoint that wakes the palate. When you combine these two elements—blueberry vibrancy and the creamy richness of cheese inside a brisk, fried wrapper—you arrive at a recipe that feels both timeless and modern. Personal memories often color this dish: a kitchen counter scattered with berries on a rainy Sunday, a grandparent’s laugh as the skillet sings, the first bite of a warm roll shared with a friend who just walked in from the cold. Those stories become the flavor of the dish, a comforting thread that makes every bite feel like a small celebration.

Why You’ll Love This Recipe

  • Quick to assemble and flexible enough for weeknights or weekend gatherings, with no need for complicated steps or long marinating times.
  • Crisp, golden exteriors contrasting with a creamy, cool filling create a delightful texture party in your mouth.
  • Bright blueberry notes pair beautifully with creamy cheese and a hint of citrus, making each bite refreshingly balanced rather than overly sweet.
  • Kid-friendly and crowd-pleasing, yet sophisticated enough for a brunch menu or a dessert platter at a party.
  • Make-ahead friendly: you can prep the filling and wrappers ahead of time, then fry or bake when you’re ready to serve.
  • Highly customizable to suit dietary needs or flavor preferences, from vegan fillings to gluten-free wrappers and beyond.

Flavor Profile & Texture

From the first bite, your senses are treated to a layered experience. The outer wrapper—the signature crisp shell—offers a satisfying crackle and a delicate, almost caramelized edge that hints at toasty sugar and a kiss of oil. Inside, the filling is a creamy, dreamlike contrast: smooth cream cheese, lightly sweetened and whipped with vanilla or lemon zest to sharpen the flavor without turning it grainy or heavy. The blueberries provide pockets of juicy, tart-sweet pop, their juices releasing like little bursts of summer as you bite through the wrapper. The citrus note—subtle lemon zest or a whisper of orange—lifts the entire filling, preventing it from feeling heavy and tying the flavors back to the bright, fresh fruit theme. The textures play off one another masterfully: the initial crisp crack gives way to a soft, luscious center that holds a cool, mousselike finish on the palate. The overall effect is indulgent without being cloying, comforting yet bright, a perfect balance that invites you to savor each bite slowly and then reach for another.

Occasions & Pairings

Blueberry Cream Cheese Egg Rolls shine in a variety of settings, making them a versatile addition to your repertoire. They’re ideal for brunches that call for a playful yet polished centerpiece, weekend breakfasts when you want something special but not fussy, and dessert tables at casual parties where guests love something sweet but not heavy. They also work beautifully as a make-ahead option for gatherings, allowing you to assemble them in advance and finish with a quick fry or bake just before serving. For beverages, consider pairing these egg rolls with:

  • Herbal or citrus-forward teas that complement the brightness of the berries
  • Fizzing sparkling waters infused with lemon or mint
  • Light sparkling wines or Prosecco for a celebratory touch
  • A dollop of lightly sweetened yogurt or a lemon-lace cream for dipping

Side dish or accompaniments ideas include a light fruit salad, a sprinkle of fresh mint for aroma, and a simple yogurt-berry sauce that echoes the filling without overpowering the bite-sized rolls. For seasonal twists, serve them with a drizzle of honey or a light vanilla syrup to add a mellow sweetness that glows against the blueberry tang. They’re also an excellent candidate for a “make-it-a-dessert” moment at a dinner party—serve warm, with a scoop of vanilla ice cream or a spoonful of whipped cream and a few fresh berries to mirror the filling inside.

Tips, Variations & Substitutions

  • Vegan option: use dairy-free cream cheese and a plant-based wrapper that crisps nicely when fried or baked. You can also switch to coconut yogurt as a tangy filling foil if you prefer a lighter texture.
  • Gluten-free variant: look for gluten-free egg roll wrappers or substitute with rice paper wrappers, which provide a similarly crisp texture when fried or baked (soak briefly if using rice paper, then crisp in oil or air-fry).
  • Fruit variations: try blackberries, raspberries, peaches, or even chopped strawberries—the key is to balance sweetness with a touch of tartness so the filling remains bright.
  • Flavor boosters: a pinch of cinnamon, cardamom, or a hint of vanilla bean can deepen the aroma; lemon zest or orange zest adds a sunny citrus note that pairs beautifully with berries.
  • Texture tweaks: sprinkle a light coating of sugar on the outside of the wrappers before frying to enhance the crunch and create an appealing sheen.
  • Cooking method: for a lighter version, bake or air-fry the egg rolls until crisp; for a traditional treat, shallow-fry in a neutral oil until the wrappers turn a rich amber.
  • Make-ahead ideas: prepare the filling in advance and refrigerate; keep the wrappers wrapped and chilled so they don’t dry out. Fry or bake just before serving to preserve that crisp, warm finish.
  • Flavor balance tips: if the blueberries are particularly sweet, add a touch more lemon zest or a splash of lemon juice to keep the filling lively; if they’re tart, a bit more sugar or vanilla can smooth the edge without dulling the fruit.

Storage & Make-Ahead Ideas

These rolls are forgiving when you want to prep ahead for a crowd. You can assemble the rolls in advance and refrigerate them, covered, for several hours or overnight before cooking. If you’re freezing them, arrange them flat on a tray to freeze individually, then transfer to an airtight container; this prevents sticking and makes it easy to grab a few as needed. For best results, cook them from chilled so they crisp evenly and stay tender inside. If you’re reheating leftovers, a quick re-crisp in an oven or air fryer revives the shell’s texture and helps prevent the filling from drying out. A gentle reheat is key—the goal is to preserve the contrast between the crackly wrapper and the creamy center, not to steam the filling into a watery consistency. When storing, keep the filling tightly sealed and away from strong-smelling foods to maintain the delicate blueberry fragrance and to prevent the cream cheese from picking up other flavors.

Fun Facts & Trivia (Optional)

  • Blueberries are among the few natural foods that appear to help fight inflammation thanks to antioxidants called anthocyanins, which contribute to their vivid color and subtle tartness.
  • Cream cheese was first commercialized in the United States in the 1870s by dairyman William A. Lawrence, whose recipe was notably refined and popularized in bakeries and households alike.
  • Egg rolls in America have a rich, evolving history and are often associated with Chinese-American cuisine rather than representing a single traditional dish from a specific region; their sweet cousins—fried fruit or dessert rolls—are part of many cultural cuisines too, showing how wrappers and frying can transform simple fillings into celebratory bites.
  • The combination of warm, crispy shell and cool, creamy filling is a classic example of textural contrast, a culinary technique that elevates everyday ingredients into a special-occasion experience.
  • If you’re curious about regional twists, some chefs experiment with adding a splash of liqueur to the filling or layering fruit compotes inside the roll for an extra, dessert-like complexity.
  • Blueberries have a long-standing association with the American countryside and summer picnics, making these egg rolls a charming way to celebrate the season in any kitchen.
  • Pairing these egg rolls with a light, sparkling beverage mirrors the dish’s bright, refreshing character and makes for a festive, approachable dessert or after-brunch treat.

Ingredients

  • Egg Roll Wrappers & Filling Base
  • Egg roll wrappers – 1 package (about 12-14 wrappers)

    → These wrappers form the outer shell that holds the creamy blueberry filling. Keep the stack covered with a damp towel to prevent drying and cracking. Work with 1-2 wrappers at a time to avoid tearing, and lightly moisten the edges with the beaten egg wash to seal securely. If using vegan wrappers, follow package instructions for sealing without eggs.
  • Cream cheese – 8 oz (softened)

    → Provides the creamy, tangy binding that holds the blueberries together and gives the filling its smooth texture. Soften at room temperature for 30-60 minutes and beat until completely smooth before mixing with sugars and zest. For a lighter texture, you can use part low-fat cream cheese, but full-fat gives richer flavor.
  • Blueberries – 1 cup fresh or 1 cup frozen (thawed and drained)

    → The star filling component; fresh berries give brighter flavor and color, while frozen berries are convenient when fresh are out of season. If using frozen, thaw completely, drain excess liquid, and pat dry to minimize soggy wrappers. Toss with sugar and lemon zest to balance sweetness and concentrate flavor.
  • Granulated sugar – 2 to 3 tablespoons

    → Sweetens the filling and helps draw out some juice from the blueberries to create a cohesive, glossy filling. Start with 2 Tbsp and adjust to taste depending on berry tartness. Dissolve evenly by mixing with the blueberries before folding in the cream cheese.
  • Cornstarch – 1 tablespoon

    → Acts as a thickener to keep the filling from leaking out during frying. Make a small slurry with 1 teaspoon of water if needed, then whisk into the blueberry mixture and cook briefly to activate the thickening; allow to cool slightly before filling wrappers.
  • Lemon zest – 1 teaspoon (finely grated)

    → Adds bright, aromatic citrus notes that lift both the berries and cream cheese. Grate finely and avoid the white pith to prevent bitter flavors. Zest before juicing the lemon for efficiency.
  • Lemon juice – 1 teaspoon

    → Provides acidity to balance sweetness and enhances flavor perception. Use freshly squeezed juice for best brightness; adjust to taste depending on sweetness of berries and cream cheese.
  • Vanilla extract – 1/2 teaspoon

    → Deepens the overall flavor of the filling and complements the cream cheese. Use pure vanilla for the best aroma; add after the cream cheese is smooth and well blended with sugar and zest.
  • Salt – 1/4 teaspoon

    → Heightens and balances the sweetness, helping all components taste more rounded. Measure accurately and adjust to preference if using sweeter cream cheese.
  • Egg – 1 large (for egg wash)

    → Used as a glue to seal the wrapper edges and promote a glossy, golden crust when fried. Whisk with 1 tablespoon water (or milk) to brush onto wrapper edges before folding; for vegan options, substitute with a small cornstarch slurry and water for sealing.
  • Vegetable oil – for frying (enough to fill a deep pan to 2-3 inches depth)

    → Used to fry the egg rolls until crisp and lightly browned. Use a neutral oil with a high smoke point (canola, peanut, or sunflower). Heat to 350-365°F (175-185°C) and maintain temperature between batches to ensure even frying; overcrowding lowers oil temperature and yields greasy rolls.
  • Powdered sugar – for dusting (optional)

    → Finishing touch that adds a delicate sweetness and attractive finish. Dust while the rolls are warm to help the sugar adhere, and keep the dusting light to avoid overpowering the filling.
  • Paper towels – for draining (optional but recommended)

    → Used to blot excess oil after frying, ensuring the rolls stay crisp and not greasy. Have ready in a tray or plate to catch oil from the hot rolls.
  • Dipping & Finish
  • Plain Greek yogurt – 1/2 cup (for dipping)

    → Bases a tangy dipping sauce that complements the sweet filling. Whisk with honey and a splash of lemon juice to create a quick, balanced dip. If the yogurt is too thick, whisk in a teaspoon of milk or water to achieve desired consistency.
  • Honey – 1 tablespoon (for dipping)

    → Natural sweetener that pairs nicely with the cream cheese and blueberries. Mix into the yogurt for a smoother dip or drizzle over the rolls for a light finish. Warming honey slightly makes it easier to blend into the yogurt.
  • Lemon juice – 1 teaspoon (for dipping)

    → Adds a bright citrus note to the dip, balancing the richness of the filling. Use freshly squeezed juice and adjust to taste; a little goes a long way, so start small and taste.

Instructions

  • Prepare the blueberries by thawing completely if using frozen, then drain excess liquid and pat dry with a paper towel to prevent soggy wrappers.
    → Removing excess moisture helps the filling set properly and fry to a crisp crust without the wrappers becoming soggy.
  • Set the cream cheese out to soften at room temperature for 30-60 minutes, then beat until completely smooth to remove lumps and create an even, cohesive filling.
    → Soft, smooth cream cheese blends evenly with sugar and zest, ensuring a creamy interior that fills the wrappers without tearing them.
  • Whisk 2 to 3 tablespoons granulated sugar with the lemon zest, lemon juice, vanilla extract, and salt in a small bowl, then fold this fragrant mixture into the softened cream cheese until smooth.
    → Incorporating the citrus and vanilla at this stage infuses the filling with bright aroma while balancing sweetness for a rounded flavor.
  • In a small saucepan, combine the prepared blueberries with a touch more sugar and a little lemon juice, then simmer just until the berries release juice and the mixture begins to thicken slightly.
    → Gentle reduction concentrates blueberry flavor and sets up the filling so it stays intact inside the wrapper during frying.
  • Whisk a 1 teaspoon cornstarch with 1 teaspoon cold water to make a slurry, then whisk this into the simmering blueberry mixture and cook 30 to 60 seconds until the liquid thickens to a glossy coating.
    → The slurry activates thickening without lumps, helping the filling stay cohesive and prevent leakage during frying.
  • Remove the berry mixture from the heat and let it cool slightly until warm, then fold it gently into the cream cheese base until just combined.
    → Cooling prevents the cheese from melting excessively and ensures the filling maintains structure inside the wrapper.
  • Arrange the egg roll wrappers on a clean surface, cover them with a damp towel to prevent drying, and prepare an egg wash by whisking one large egg with 1 tablespoon water.
    → The damp towel prevents the wrappers from drying and cracking; the egg wash acts as a glue for sealing and yields a glossy crust when fried.
  • Place 1 to 2 tablespoons of filling on the bottom third of each wrapper, forming a tight log with a uniform width to ensure even rolling and sealing.
    → A consistent filling shape helps the rolls seal properly and fry evenly without spillage.
  • Moisten the top edge of the wrapper with egg wash, fold the sides inward, and roll away from you until sealed; press gently to ensure the seam adheres.
    → Proper sealing prevents leakage during frying and creates a neat, compact roll with a crisp exterior.
  • Heat vegetable oil in a deep, heavy pot or fryer to 350-365°F (175-185°C) and monitor the temperature with a thermometer, maintaining it between batches to ensure even frying.
    → Stable oil temperature yields evenly browned rolls and prevents greasy interiors from under- or overcooking.
  • Fry the egg rolls in batches, turning occasionally with tongs, for about 2-3 minutes or until golden brown and crisp; avoid overcrowding to maintain oil temperature.
    → Gentle turning promotes uniform browning and a crisp crust without tearing the wrappers.
  • Transfer fried rolls to a rack or plate lined with paper towels to drain briefly, blot lightly, and keep warm; dust with powdered sugar only if desired while they are still warm.
    → Draining removes excess oil to keep the crust crisp, and a light sugar dusting adds a delicate finish without making them sweet.
  • Prepare a dipping sauce by whisking plain Greek yogurt with honey and lemon juice, thinning with a teaspoon of milk or water if needed to reach a desirable scoopable consistency.
    → The tangy yogurt pairs with the sweet filling; slight thinning ensures the dip coats the rolls evenly without clumping.
  • Serve the warm blueberry cream cheese egg rolls with the yogurt-honey dipping sauce on the side and an optional light dusting of powdered sugar for a polished presentation.
    → Serving immediately guarantees the crust remains crisp and the filling stays luscious and gooey, while the dipping sauce provides a balanced contrast.

Notes

These blueberry cream cheese egg rolls are a luscious balance of creamy filling and crispy wrappers, making a crowd-pleasing treat for dessert, brunch, or a special occasion.

To keep the filling glossy and prevent leaks during frying, fully thaw and drain any frozen blueberries, whisk the sugar with the cornstarch before adding to the cream cheese, and let the mixture cool slightly before rolling. Work with 1-2 wrappers at a time and keep the rest under a damp towel; brush the egg wash along the wrapper edges to seal securely, and consider vegan wrappers if needed, using a cornstarch slurry for sealing.

For a lighter or gluten-free option, bake the rolls at 425°F (220°C) on a parchment-lined tray until golden, flipping once, instead of deep frying; or use certified gluten-free wrappers and follow the same rolling technique.

To brighten the filling, fold in the lemon zest and lemon juice with the cream cheese, and balance sweetness with the optional pinch of salt. If you want extra flavor depth, blend part of the cream cheese with a touch of vanilla extract for a smoother, richer finish.

Serve with a tangy yogurt-dipping sauce by whisking plain Greek yogurt with honey and a splash of lemon juice; thin the dip with a teaspoon of milk if needed. You can also mix in a bit of vanilla yogurt for a sweeter profile or use a light honey to adjust sweetness.

Temperature and technique: keep frying oil at 350-365°F (175-185°C) and avoid overcrowding to maintain crispiness; drain on paper towels after frying. For make-ahead: the unfried rolls can be assembled and refrigerated for up to 2 hours, or frozen unfried for longer storage and fried from frozen when ready.

Storage and serving notes: dust with powdered sugar if desired, and garnish with a touch of lemon zest or fresh berries for color. Leftover filling can be repurposed as a topping for yogurt, pancakes, or waffles.

Tips

Tips for Making Blueberry Cream Cheese Egg Rolls

  • Wrapper handling and sealing: Keep the stack of egg roll wrappers covered with a damp towel to prevent drying. Work with 1–2 wrappers at a time to avoid tearing, and lightly moisten the edges with the egg wash or vegan sealant to ensure a secure seal. If using vegan wrappers, follow the package guidance for sealing without eggs.
  • Softening and blending cream cheese: Let the cream cheese come to room temperature for 30–60 minutes and beat until completely smooth before mixing with sugar and zest. For a lighter texture, you can use part low-fat cream cheese, but full-fat gives richer flavor and creaminess.
  • Blueberries—fresh vs. frozen: Fresh berries provide brighter color and flavor, while frozen berries are convenient. If using frozen, thaw completely, drain excess liquid, and pat dry to minimize soggy wrappers. Toss with sugar and lemon zest to boost brightness and balance sweetness. If your berries release a lot of juice, cook the mixture briefly to reduce moisture before filling.
  • Sweetness and balance: Start with 2 tablespoons sugar and adjust to taste. Sugar helps draw out juice from the berries and creates a glossy filling, but you can reduce or increase based on your berry tartness. Dissolve sugar evenly by mixing with the blueberries before folding in the cream cheese.
  • Thickening your filling: Use 1 tablespoon cornstarch to help the filling set and prevent leaking during frying. If the mixture seems too loose, whisk in a small cornstarch slurry (1 teaspoon cornstarch in 1 teaspoon water), cook briefly to activate, then cool slightly before filling wrappers.
  • Lemon zest and juice for brightness: Finely grate 1 teaspoon lemon zest and 1 teaspoon lemon juice to brighten the filling. Avoid the white pith on the zest and adjust lemon juice to taste based on how tart your cream cheese is. Fresh juice will give the best brightness.
  • Flavor depth with vanilla and salt: Add 1/2 teaspoon vanilla extract and 1/4 teaspoon salt to the filling to enhance all components. Stir after the cream cheese is smooth to ensure even distribution of flavors.
  • Egg wash vs vegan sealing: Use a large egg beaten with 1 tablespoon water to brush the wrapper edges for sealing and a glossy crust. For vegan, create a slurry with equal parts cornstarch and water and brush along the edges to seal.
  • Frying technique for crisp, non-greasy rolls: Use vegetable oil heated to 350–365°F (175–185°C). Maintain temperature between batches to avoid greasy rolls; overcrowding lowers the oil temperature and results in soggy wrappers. Fry until golden and crisp, then drain on paper towels.
  • Drying and finishing: Drain fried rolls on paper towels and dust with powdered sugar while they are still warm for better adherence and a delicate finish. Keep the dusting light to avoid overpowering the filling.
  • Make-ahead and storage tips: Assemble rolls and refrigerate (unfried) for up to 2 hours before frying. For longer storage, freeze assembled rolls on a sheet pan, then transfer to a bag; fry from frozen and add 1–2 minutes to the fry time. You can also bake or air-fry for a lighter option (see below).
  • Alternative cooking methods: For a lighter option, air-fry the rolls: arrange in a single layer, brush lightly with oil, and cook at 380°F (193°C) for 8–10 minutes or until golden and crisp. To bake, preheat to around 425°F (220°C) and bake on parchment-lined sheets for 12–14 minutes, flipping once for even browning.
  • Dipping sauce tips: For the dipping sauce, whisk Greek yogurt with honey and a splash of lemon juice. If the yogurt is too thick, whisk in a teaspoon of milk or water to reach desired consistency. Taste and adjust sweetness and tang as needed; a pinch of salt can balance overly sweet dips.
  • Serving presentation: Serve warm for best texture; re-crisp briefly in a 350°F (175°C) oven if they have softened. Pair with fresh blueberries or a light lemon zest garnish to echo the filling flavors.

FAQ

What are Blueberry Cream Cheese Egg Rolls?

Blueberry Cream Cheese Egg Rolls are a sweet treat where a creamy mix of softened cream cheese and juicy blueberries is wrapped in an egg roll wrapper and fried or air-fried until the exterior is crisp and golden. They’re often served warm with a light dusting of powdered sugar or a fruit glaze.

What ingredients do I need?

Typical ingredients:

  • 8-10 egg roll wrappers
  • 8 oz (225 g) cream cheese, softened
  • 1 cup fresh blueberries
  • 2-3 tbsp granulated sugar (to taste)
  • 1 tsp lemon zest (optional)
  • 1 tsp vanilla extract
  • 1-2 tsp cornstarch or arrowroot (to thicken)
  • Pinch of salt
  • Neutral oil for frying or a light spray if air-frying

Optional for serving: powdered sugar, vanilla yogurt glaze, or berry compote.

How do I assemble the egg rolls?

Steps:

  1. In a bowl, mix cream cheese, blueberries, sugar, lemon zest, vanilla, cornstarch, and salt until well combined.
  2. Place about 1-2 tablespoons of filling near the bottom corner of an egg roll wrapper.
  3. Fold the bottom edge over the filling, then fold in the sides, and roll tightly to enclose.
  4. Moisten the top corner with water to seal. Repeat with the remaining wrappers.
  5. Chill assembled rolls 10-15 minutes to help them seal better.
What cooking methods work best?

You can use air frying, deep frying, or baking:

  • Air fryer: Preheat to 400°F (200°C). Lightly spray rolls with oil. Cook 6-8 minutes, flipping halfway, until golden and crisp.
  • Deep fry: Heat oil to 350°F (175°C). Fry 2-3 minutes until golden; drain on paper towels.
  • Bake: Preheat to 425°F (220°C). Lightly oil a baking sheet. Bake 12-15 minutes, turning once, until crisp and golden.
How long does it take to make Blueberry Cream Cheese Egg Rolls?

From start to finish, plan about 30-45 minutes: 15 minutes for filling, 10-15 minutes to assemble, and 8-15 minutes for cooking (time varies by method). Chill time is optional but helpful for sealing.

How can I prevent the filling from leaking out?

Tips:

  • Don’t overfill each wrapper.
  • Roll tightly and seal the edges with a light dab of water or a cornstarch slurry.
  • Seal with the seam facing down if frying or baking.
  • Chill the rolls for 10 minutes before cooking to help set the filling.
  • If using very juicy berries, slightly macerate and thicken with extra cornstarch to reduce leakage.
Can I freeze these or make them ahead?

Yes. Assemble the rolls and freeze them on a parchment-lined tray until firm, then transfer to a freezer bag. Cook from frozen, adding 2-3 minutes to the cooking time. You can also prepare the filling ahead of time and refrigerate up to 24 hours; assemble just before cooking.

What dipping sauces or toppings pair well?

Suggestions include:

  • Powdered sugar or a light vanilla glaze
  • Berry compote or a simple fruit sauce
  • Vanilla yogurt glaze or cream cheese glaze
  • A drizzle of maple syrup or honey
Can I customize the filling with other fruit or flavors?

Definitely. Try raspberries, diced peaches, or apples. Swap lemon zest for orange zest, or add a pinch of cinnamon for warmth. If using different fruits, you may need to adjust sugar and cornstarch to taste and thickness.

What is the approximate nutrition per roll?

Nutrition varies by wrapper size and filling. A typical blueberry cream cheese egg roll is roughly 150-200 calories per roll, with about 6-10 g fat, 15-25 g carbohydrates, and 2-6 g protein. Cooking method (air-fry vs deep-fry) will affect fat content. These are approximate values.

Introduction / Hook

Picture this: a bubbling dish fresh from the oven, its edges kissed by a bronzed crust, emitting a warm, inviting aroma that wraps around you like a favorite cardigan. The Ultimate Chicken Casserole is not merely a weeknight meal; it’s a comforting ritual that turns ordinary evenings into small celebrations. As you lift the lid, steam sweeps upward in hungry puffs, carrying notes of savory depth and a hint of sweetness that makes the room feel cozier before the first bite lands on your plate. The first forkful delivers tenderness and richness in perfect balance—an embrace of silky texture, gentle seasoning, and a lingering finish that lingers on the palate long after the last bite. This is the kind of dish that makes a kitchen feel like a gathering place, where stories are shared as you ladle seconds and thirds without a second thought.

In its essence, this casserole is about texture as much as flavor: creamy curvature that coats each morsel, a soft, comforting core surrounded by a subtly crisp top, and a chorus of vegetables that bring brightness and contrast. It’s a recipe that respects time—using slow, patient simmering or gentle bake to coax flavor from the ingredients—while still delivering something reliable and quick enough to fit into a hectic week. The Ultimate Chicken Casserole stands up to the most demanding tastes because it doesn’t rely on flashy gimmicks; it relies on balance, restraint, and the kind of homey warmth that makes you breathe a little easier the moment you sit down at the table.

What makes this dish especially magical is its adaptability: a culinary chameleon that can be dressed up for a special occasion or kept simple for busy nights, all without losing its comforting soul. It’s one of those timeless favorites that families pass down with a wink, along with a memory of a kitchen that always smells like home. Whether you’re cooking for a crowd, feeding a family, or seeking a reliable make-ahead option, the Ultimate Chicken Casserole offers consistency, satisfaction, and a little bit of nostalgia with every serving. If you’ve ever muttered to yourself, “What should I make for dinner?” and reached for something that feels like a warm hug, you’ve found your new culinary companion in this dish.

The Story Behind the Dish

Comfort casseroles have a storied place in many kitchens, often born from the desire to stretch a modest meal into something generous and crowd-pleasing. The concept of layering tenderness with a creamy sauce and a gentle topping has roots in mid-20th-century home cooking, where practical ingenuity and a pinch of nostalgia converged to create dishes that could feed a family after a long day. The chicken casserole, in particular, emerged as a reliable workaround for busy households—protein that remained moist, vegetables that cooked down into mellow sweetness, and a sauce that bound everything into one satisfying slice of comfort. Over time, cooks added their own fingerprint: a dash of herbs here, a hidden crunch there, a tweak to the sauce’s richness, or a final flourish of texture on top. The Ultimate Chicken Casserole embodies that tradition: a dependable base that welcomes improvisation while preserving the generous spirit of a shared meal.

Think of it as a conversation between humble pantry staples and timeless technique. The dish invites you to anchor it in familiar flavors—seasoning that is confident but not overpowering, a velvety sauce that glides through every bite, and vegetables that provide color, bite, and sweetness. It’s a recipe that travels well from oven to table, from weekend family dinners to potlucks with friends, all the while carrying a sense of home that feels universal yet personal. The story of the Ultimate Chicken Casserole is really the story of nourishment that tastes like welcome, the kind of dish that makes guests linger at the table and find themselves planning seconds in advance as if they’ve discovered a savory lullaby they never knew they needed.

Why You’ll Love This Recipe

  • Universal appeal: a comforting classic that satisfies a wide range of ages and tastes, from kids who adore creamy textures to adults who appreciate a savory, well-balanced finish.
  • Make-ahead friendly: the flavors deepen with time, making it ideal for meal prepping, weekend cooking, or feeding a crowd with minimal last-minute effort.
  • Versatile and forgiving: easily adaptable to what you have on hand, from pantry staples to seasonal produce, with room for personalized twists.
  • One-dish convenience: a satisfying, reheatable meal that minimizes dishwashing and maximizes memory-making moments around the table.
  • Comfort without heaviness: a thoughtfully balanced profile that delivers richness and creaminess without overwhelming heaviness, making it suitable for weeknight dinners as well as special occasions.
  • Family-friendly texture: tender bites, a gentle sauce, and a harmonious top layer that adds subtle crunch without overpowering the softness inside.

Flavor Profile & Texture

The Ultimate Chicken Casserole is built on a harmony of elements that play well together and linger pleasantly on the palate. The core is a velvety, mouth-coating sauce that brings richness without weighing you down. Think of it as a soft blanket of savoriness—creamy, slightly savory, with a touch of sweetness that comes from gentle caramelization and roasted edges. The chicken itself is tender and succulently moist, typically simmered or gently baked to preserve its juiciness so each bite feels like a small, comforting reward.

Vegetables contribute color, brightness, and texture—kept tender and not mushy, so they provide gentle bite rather than a competing softness. The sauce often develops a delicate depth through slow reduction and the natural sweetness of aromatics softened in fat and heat. A lightly crisp top offers a satisfying textural contrast: a thin, amber-gold crust that gives way to a creamy interior. There is a whisper of savory herbal notes, perhaps a hint of garlic, onion, or pepper, but not so strong as to overpower the dish’s essence. The overall flavor is that classic homey balance—comforting, familiar, and inviting, with enough richness to feel indulgent without being excessive. The taste lingers warmly, making you want a second helping and a third conversation around the table.

The aroma is a crucial part of the experience. As the dish bakes, steam rises, carrying the fragrance of gentle dairy notes mingled with toasty edges and the faint sweetness of vegetables caramelizing in the oven. The scent acts as a prelude to the experience you’re about to have, preparing your senses for a satisfying, comforting meal that feels both familiar and just a touch special.

Occasions & Pairings

This casserole shines in a variety of settings, from brisk weeknights to weekend gatherings. It adapts to the energy of your table—quiet, intimate dinners or bustling family nights with chatter and a chorus of forks and spoons. It’s equally at home as a cozy comfort on a rainy evening or as a star dish at a casual dinner party where guests expect something heartwarming and reliable yet thoroughly delicious.

Pairings can elevate the experience or keep it simple, depending on your mood and your guests. Here are some ideas to consider:

  • Side dishes: light, crisp salads that provide a contrast to the creamy main, roasted vegetables for depth, or steamed greens for a pop of color and freshness.
  • Breads and grains: crusty bread to mop up any lingering sauce, or a side of fluffy rice or tender noodles to stretch portions and create a comforting, cohesive plate.
  • Drinks: a balanced white wine with gentle acidity to complement the richness, a sparkling option to cut through the creaminess, or a simple iced tea for a non-alcoholic pairing that remains refreshing.
  • Desserts: something light and citrusy or a gently sweet pastry to finish the meal without competing with the richness of the casserole.

Tips, Variations & Substitutions

One of the joys of a well-loved casserole is its capacity to adapt. Here are ideas to customize the Ultimate Chicken Casserole to suit different diets, occasions, or pantry situations, while maintaining its comforting soul.

Make it lighter or dairy-free

  • Replace heavy cream with a lighter dairy option (skim or 1% milk) and a touch of yogurt or a small amount of plant-based cream to retain creaminess, then thicken with a bit of cornstarch if needed.
  • Use olive oil or a light butter substitute in place of fuller-fat fats to reduce saturated fat while preserving flavor.
  • Introduce a dairy-free alternative for the sauce, using a cashew cream or coconut cream, while balancing with bright acidity from lemon or vinegar.

Protein and vegetable twists

  • Swap in turkey, shredded cooked chicken thighs for extra moisture, or a mix to vary texture.
  • Seasonal vegetables shine here: swap mushrooms for bell peppers, peas for spinach, or add corn for a hint of sweetness.
  • For a lighter bite, add more vegetables and reduce the proportion of protein or sauce, letting the flavors breathe.

Global twists

  • Herbs and spices: experiment with thyme, tarragon, or a pinch of nutmeg for warmth; a dash of smoked paprika can add depth. Fresh parsley or chives finish brighten the dish at the end.
  • Large-grain grains: fold in cooked quinoa, barley, or wild rice for a heartier, more textured casserole.

Diet-friendly variations

  • Gluten-free: use gluten-free cream soups or stocks and ensure any thickeners are gluten-free; the structure remains intact with a similar texture and taste.
  • Low-carb or keto-friendly: reduce or remove starch-based components in the topping, increase the veggie content, and maintain the creamy sauce with a low-carb thickener.
  • Vegan: craft a robust vegetable base with mushrooms, onions, garlic, and herbs, and use a plant-based cream or cashew sauce to replace dairy; top with dairy-free breadcrumbs for crunch.

Storage & Make-Ahead Ideas

The beauty of a casserole is how well it stores and travels in time. You can assemble, refrigerate, and bake when you’re ready, or bake once and store for another day or two. Here are practical tips to maximize flavor and texture:

  • Make-ahead: assemble the casserole the day before and refrigerate until ready to bake. Expect a slightly longer bake time if it’s cold from the fridge, and cover with foil to prevent over-browning.
  • Storage: refrigerate leftovers in an airtight container for up to 3-4 days. Reheat gently in the oven at a moderate temperature or in the microwave, adding a splash of milk or broth to revive creaminess if needed.
  • Freezing: for longer storage, freeze the unbaked assembly (or baked dish) in a sealed container. Thaw overnight in the fridge before reheating; you may need to adjust soak time to ensure even reheating.
  • Reheating tips: cover the dish to retain moisture, and consider finishing with a brief broil or a few minutes of hot oven to refresh the topping’s texture.

Fun Facts & Trivia (Optional)

  • Comfort foods like casseroles often gained popularity during the mid-20th century as households sought economical, one-dish meals that could feed many with modest ingredients.
  • Crunchy topping textures in casseroles were historically achieved through breadcrumbs or cracker crumbs mixed with butter; modern twists often employ parmesan, toasted nuts, or crispy onions for varied textures.
  • Chicken casseroles frequently showcase the philosophy of “build a sauce, deliver tenderness, and top with a texture contrast”—a timeless formula that appears across many culinary traditions under different names.

Ingredients

  • Chicken & Vegetables
    • – 1.5 to 2 pounds boneless, skinless chicken thighs, cut into 1-inch pieces
      → The chicken is the protein base of the casserole. Thighs stay moist and flavorful during baking. Pat dry and lightly season with salt and pepper before searing to promote a good crust.
    • – 1 medium yellow onion, diced
      → Creates the savory foundation. Let it sweat with a pinch of salt until translucent for deeper flavor. If pressed for time, you can sauté with the chicken for extra depth.
    • – 2 garlic cloves, minced
      → Aromatics that brighten the dish. Mince finely so they disperse evenly; add with onions to mellow their bite. If you prefer a milder garlic note, sauté a bit longer with the onions.
    • – 2 celery stalks, diced
      → Adds crunch and a clean, herbaceous note that complements the chicken. Dice evenly so they cook through without becoming mushy.
    • – 2 medium carrots, diced
      → Introduces color and natural sweetness. For quicker softening, grate the carrots or sauté with aromatics.
    • – 8 oz mushrooms, sliced (optional)
      → Adds umami and body. Sauté until the liquid evaporates to avoid a watery casserole; this concentrates flavor and improves texture.
  • Sauce & Thickening
    • – 2 tablespoons butter (or olive oil)
      → Used to sauté aromatics and form a light roux with flour. Butter provides richer flavor; olive oil keeps the dish lighter and helps prevent scorching when using higher heat.
    • – 2 tablespoons all-purpose flour (or gluten-free all-purpose flour)
      → Creates a roux that thickens the sauce as it cooks. Cook the flour with the fat for 1–2 minutes to remove raw flour taste; for gluten-free versions, ensure your blend thickens well and consider alternative thickeners if desired.
    • – 2 cups low-sodium chicken broth
      → The primary liquid that hydrates vegetables and chicken while carrying the sauce. Choosing low-sodium helps control overall salt; adjust later with salt if you use canned soup.
    • – 1 cup heavy cream
      → Adds luxurious, silky mouthfeel and tenderness to the sauce. If you prefer lighter, substitute with 1 cup milk and a couple of tablespoons of cream cheese or yogurt, keeping temperature gentle to avoid curdling.
    • – 1 cup sour cream
      → Provides tang and creamy texture while helping emulsify the sauce. Temper the sour cream by whisking in a small amount of hot broth before adding to the hot mixture to prevent curdling.
    • – 1 can condensed cream of chicken soup (10.5 oz) (optional)
      → Classic shortcut that enriches flavor and helps bind the casserole. If avoiding canned soup, use a homemade béchamel and slightly reduce broth to maintain consistency.
    • – 1 teaspoon dried thyme (or 1 tablespoon fresh thyme, chopped)
      → Adds earthy aroma that complements chicken. Fresh thyme should be added toward the end to preserve aroma; dried thyme should be crushed to release essential oils.
    • – Salt and freshly ground black pepper to taste
      → Essential to balance flavors. Taste as you go since broth, soup, and cheese can add salt; adjust gradually for a harmonious result.
  • Cheese & Finish
    • – 2 cups shredded cheddar cheese (divided)
      → Provides melty, savory richness that forms a gooey top. Shred cheese yourself for best melt; reserve about 1/4 cup to sprinkle on top for a golden crust.
    • – 1/2 cup grated Parmesan cheese (optional)
      → Adds sharp, nutty depth that complements cheddar. Freshly grated yields the best flavor; use sparingly to avoid overpowering the dish.
    • – 1/2 cup breadcrumbs or panko (optional)
      → For a crunchy topping that contrasts with the creamy casserole. Lightly toast with a touch of melted butter before sprinkling to ensure crisp browning.
    • – Fresh parsley or chives for garnish (optional)
      → A bright finishing touch that adds color and a hint of fresh aroma. Sprinkle just before serving for maximum impact.
  • Optional Add-ins
    • – 1 cup frozen peas (optional)
      → Adds color, sweetness, and a pop of texture. Add directly from frozen to the hot mixture and bake; they thaw during cooking. For fresh peas, blanch briefly before adding.
    • – 1 cup corn kernels (optional)
      → Provides subtle sweetness and a pleasant bite. Use frozen corn for convenience; thaw and drain well to avoid extra moisture.
    • – 1 teaspoon dried herbs (such as thyme, Italian seasoning, or herb blend) (optional)
      → Additional aroma and depth. If using dried herbs, bloom them in the butter-fat mixture during cooking to maximize flavor.

Instructions

  • Preheat your oven to 350°F (175°C) and lightly grease a 9×13-inch baking dish with butter or oil.
    → This ensures even baking and prevents sticking, giving you clean slices and a evenly textured casserole.
  • Cut the chicken thighs into 1-inch pieces, pat them dry with paper towels, and season lightly with salt and freshly ground black pepper.
    → Dryness promotes a flavorful sear and a better crust; seasoned pieces ensure flavor from the first bite.
  • Heat a large skillet over medium-high heat and melt 1 tablespoon butter (or use olive oil). In batches, sear the chicken pieces until deeply golden on all sides, about 2–3 minutes per side, then transfer to a plate.
    → Searing creates Maillard flavor, which adds depth to the casserole; do not crowd the pan to achieve proper browning.
  • In the same skillet, add the remaining 1 tablespoon butter and sauté the diced onion, celery, and carrots until the onion is translucent and the vegetables begin to soften, about 5–7 minutes; season with a pinch of salt.
    → Sweat the vegetables to release their flavors and create a savory foundation that thickens the sauce as it cooks.
  • Add the minced garlic and sliced mushrooms; cook, stirring frequently, until the mushrooms release their moisture and the pan looks relatively dry and lightly browned, about 4–5 minutes.
    → Garlic should be aromatic but not burnt, and mushrooms concentrate flavor by evaporating excess water, preventing a soggy casserole.
  • Push the vegetables to the sides of the pan, melt 2 tablespoons butter in the center, sprinkle in 2 tablespoons flour, and whisk to form a pale roux; cook 1–2 minutes to remove raw flour taste.
    → The roux thickens the sauce evenly; cooking it briefly eliminates raw flour flavor and creates a smooth base for the dairy liquids.
  • Slowly whisk in 2 cups low-sodium chicken broth, scraping up any browned bits from the pan, then bring to a gentle simmer; whisk in 1 cup heavy cream and 1 cup sour cream, smoothing until fully integrated; if using condensed cream of chicken soup, whisk it in now.
    → The liquids emulsify with the roux to form a rich, cohesive sauce that coats the chicken and vegetables; warming helps prevent curdling of dairy.
  • Stir in 1 teaspoon dried thyme (or 1 tablespoon fresh thyme, chopped) and season with salt and pepper to taste, adjusting gradually as the broth and soup contribute salt.
    → Thyme provides earthy aroma that complements chicken; fresh thyme should be added later to preserve brightness, while dried thyme is more robust and can bloom in the fat classically.
  • Return the seared chicken and any juices from the plate to the pan; simmer gently for 5–7 minutes until the chicken is just cooked through and the sauce thickens to coat the back of a spoon.
    → Returning the meat to the sauce finishes cooking gently and helps all flavors meld, while the sauce thickens so the casserole holds together during baking.
  • Stir in optional frozen peas and corn, adding them directly from frozen if using, and cook 2–3 minutes to heat through; this adds color, sweetness, and texture to the dish.
    → Vegetables should retain a slight bite for contrast; warming them in the sauce prevents them from becoming mushy after baking.
  • Transfer the chicken mixture to the prepared baking dish; sprinkle in 1 cup of the shredded cheddar into the sauce and spread evenly.
    → Incorporating cheese into the sauce creates a creamy, cohesive center and prevents a dry dish; reserving the remaining cheese for topping ensures a bubbly, golden crust.
  • Top the casserole with the remaining cheddar cheese, then scatter 1/2 cup grated Parmesan and 1/2 cup breadcrumbs over the surface; optional toasty the breadcrumbs in a teaspoon of melted butter first for extra crunch.
    → The cheddar gives melt and richness, Parmesan adds sharpness, and breadcrumbs provide a crisp topping that contrasts with the creamy interior.
  • Slide the filled baking dish into the preheated oven and bake uncovered for 25–35 minutes, or until the sauce is bubbling and the top is golden brown; if the top browns too quickly, loosely tent with foil.
    → Baking allows flavors to meld, the sauce to thicken fully, and the cheese to achieve a glossy, attractive crust without scorching.
  • Remove from the oven and allow the casserole to rest for 10 minutes before serving; the resting period helps the sauce set slightly and makes slicing cleaner.
    → Resting hydrates the starches and helps the dish reach its final creamy texture, so portions hold together when plated.
  • Garnish with chopped fresh parsley or chives just before serving for a bright, herbaceous finish.
    → Fresh green herbs provide a color contrast and a fresh aroma that lifts the dish at the final moment.

Notes

These Ultimate Chicken Casserole notes guide you toward a deeply comforting bake with juicy chicken, a silky sauce, and a bubbling cheesy topping.

You can customize by swapping in vegetables like bell peppers, mushrooms, peas, or asparagus, and by adding fresh thyme, parsley, or a squeeze of lemon for brightness.

They pair beautifully with mashed potatoes, rice, or crusty bread; for a lighter option, serve over cauliflower rice or a crisp green salad.

For make-ahead meals, assemble, cover, and refrigerate for up to 24 hours before baking, then bake until bubbling and golden; you can also freeze the assembled casserole and bake from frozen, adding 20–30 minutes to the bake time.

If you want to reduce richness, use half-and-half or milk in place of heavy cream, and use less cheese; temper dairy to avoid curdling.

Always ensure your flour (or gluten-free thickener) and any canned soup or seasoning are gluten-free if you have gluten intolerance.

Tips

Tips for Perfect Ultimate Chicken Casserole

  • Dry the chicken well before searing. Pat the thighs dry with paper towels to promote a good crust. Don’t crowd the pan; sear in batches for even browning and juicy meat.
  • Sweat the onions with a pinch of salt until they are translucent. This builds a rich, savory base; if you’re pressed for time, you can sauté them together with the chicken for deeper flavor.
  • Add garlic after the onions begin to soften to prevent burning; minced garlic should disperse evenly for a fragrant, balanced aroma.
  • Dice vegetables evenly for uniform cooking. If you’re in a rush, grate carrots or give the vegetables a quick sauté to help them soften faster.
  • When using mushrooms, cook until all moisture has evaporated to avoid a watery casserole. This concentrates umami and helps the texture stay creamy, not soggy.
  • Cook the roux (butter and flour) briefly—1 to 2 minutes—to remove raw flour taste. For gluten-free versions, use a well-behaved GF blend and whisk thoroughly to prevent lumps.
  • Season the sauce gradually. Because broth, soup, and cheese add salt, taste as you go and adjust with salt and pepper in small increments.
  • Temper dairy to prevent curdling. Warm sour cream and heavy cream slightly, then whisk a small amount of hot broth into them before adding to the hot mixture.
  • If using condensed cream of chicken soup, consider balancing with a homemade béchamel for control over richness and salt. If you skip the soup, rely on the cream, sour cream, and broth for the sauce.
  • Cheese layering matters for melt and crust. Stir about 1 cup of the cheddar into the sauce and reserve the remaining for topping. Grate cheese yourself for better melt; sprinkle a little extra on top for a golden finish.
  • For a crunchy topping, mix breadcrumbs or panko with a small amount of butter and lightly toast before sprinkling. Fresh herbs on top just before serving add brightness and color.
  • Optional add-ins like peas and corn should be added toward the end of cooking if they’re frozen; they’ll thaw and heat through without draining the casserole of moisture. If using fresh peas, blanch briefly first.
  • Cover the casserole while it bakes to keep moisture in and prevent the top from drying. Uncover for the last 10–15 minutes to develop a bubbly, lightly browned crust.
  • Make-ahead and storage: Assemble the casserole and refrigerate for up to 1 day before baking. You can also freeze unbaked assembled portions; bake from frozen with a 25–35 minute longer bake time, covered, then uncover to finish.
  • Rest before serving. Let the casserole sit for 5–10 minutes after baking to let the sauce thicken and the flavors meld, which also makes it easier to slice.

FAQ

What ingredients do I need for Ultimate Chicken Casserole?

Common version (serves 6–8):

  • 3 cups cooked chicken, shredded
  • 1 can (10.5 oz) condensed cream of chicken soup
  • 1/2 cup sour cream
  • 1/2 cup milk
  • 1 cup shredded cheddar cheese, divided
  • 1 cup frozen mixed vegetables (or chopped fresh veggies)
  • 1 cup cooked egg noodles or cooked rice
  • 1/2 cup onion, diced
  • 2 cloves garlic, minced
  • <2 tablespoons butter

  • 1/2 teaspoon paprika (optional)
  • Salt and pepper to taste
Should I use cooked chicken or can I use rotisserie chicken?

Both work well. Use leftover cooked chicken or shred a rotisserie chicken for quick prep. If using raw chicken, cook it first until no pink remains and then shred.

How do I assemble the casserole?

Steps:

  1. Preheat oven to 350°F (175°C).
  2. Sauté onion in butter until translucent; add garlic and cook 1 minute more.
  3. In a large bowl, whisk together soup, sour cream, milk, and paprika. Stir in vegetables and cooked noodles/rice.
  4. Fold in shredded chicken and half of the cheddar cheese.
  5. Spread the mixture in a greased baking dish. Top with remaining cheese.
How long and at what temperature should I bake it?

Bake uncovered at 350°F (175°C) for 25–30 minutes, until the casserole is bubbly and heated through. If you like a crustier top, you can broil for 1–2 minutes at the end, watching closely.

Can I make this ahead or freeze it?

Yes:

  • Assemble and refrigerate the unbaked casserole for up to 24 hours. Increase bake time by about 5–10 minutes if the dish is cold.
  • To freeze: assemble without baking. Wrap tightly and freeze up to 3 months. Thaw in the fridge overnight before baking; bake at 350°F (175°C) for 35–45 minutes until hot and bubbly.
How should I store leftovers?

Let cool, then store in an airtight container in the refrigerator for 3–4 days. Reheat in the microwave (about 2–3 minutes, stirring halfway) or in a 350°F (175°C) oven until warmed through.

What are dairy-free or gluten-free variations?

Diet-friendly swaps:

  • Dairy-free: Use dairy-free cream soup, dairy-free sour cream, and dairy-free shredded cheese. You can substitute with a dairy-free yogurt (unsweetened) if needed, and use a dairy-free milk like almond or oat milk.
  • Gluten-free: Use gluten-free condensed soup and gluten-free noodles or rice.
What substitutions or add-ins can I try?

Customize to your liking:

  • Add mushrooms, corn, green beans, or peas for extra texture.
  • Swap noodles for brown rice or quinoa for a different texture.
  • Top with crushed crackers, breadcrumbs, or fried onions for extra crunch.
  • Spice it up with a pinch of cayenne or hot sauce.
What are common mistakes to avoid?

Tips to ensure a creamy, well-cooked casserole:

  • Using raw chicken without properly cooking it first can lead to undercooked poultry. Use pre-cooked chicken or cook thoroughly before mixing.
  • Letting the dish sit too long after baking can dull the flavors; a brief rest (5 minutes) helps set the casserole.
  • Adding too much liquid will make it soupy. Use the soup, sour cream, and milk in balanced amounts as listed.

Introduction / Hook

Imagine a slice of dessert that glows with the color of a sunlit berry hedge and tastes like a memory you didn’t know you were missing. The Exquisite Berry Cream Pastry Cake is more than the sum of its parts; it’s a chorus of textures and flavors that harmonize with every bite. Crisp, flaky pastry forms a delicate foundation, a whisper-light veil of vanilla cream glides across the palate, and jewel-like berries burst with bright, sun-kissed sweetness. There’s a gentle tartness that cuts through the sweetness just enough to keep the whole affair lively, while a glossy berry glaze lends a lacquered finish that catches the eye and the tongue in one fluid moment. The aroma alone—vanilla, citrus zest, and warm butter—has the power to summon memories of markets at dawn, of grandmother’s kitchen windows fogging with humidity, and of friends gathered around a table where stories are traded as generously as seconds of dessert. This cake doesn’t rush you; it invites you to savor the journey from first look to final bite, to linger over the layers, to notice the way the pastry crackles, the cream sighs, and the berries pop with color and life.

The Story Behind the Dish

There’s a little bakery in a seaside town where summer feels like a festival and the air carries the scent of lemon zest and honeyed pastries. The story of the Exquisite Berry Cream Pastry Cake began there, one late afternoon when a fresh batch of puff pastry was coming out of the oven and a bowl of vanilla cream stood at the ready. The baker, inspired by the ripening berries that painted the hillside—raspberries like tiny rubies, blueberries the color of twilight, and strawberries the shade of sunrise—began layering, tasting, and adjusting until the balance felt just right. It wasn’t about a single perfect ingredient but about how a handful of elements could talk to each other across the plate. A grandmother’s memory of a summer pie, a farmer’s market stall with baskets of berries, a drizzle of glaze catching the light like lacquer—these moments converged to form a recipe that felt both timeless and modern.

In the years since, this cake has traveled from that sleepy coast to bustling city kitchens, from intimate family dinners to celebratory gatherings. Each baker who adapts it brings a thread of their own history—perhaps swapping in heirloom berries from a local orchard, or letting citrus zest brighten the cream with a sunlit note. Yet the essence remains: a celebration of berries, a whisper of pastry, and a generous helping of creamy charm. The dish invites story-sharing as much as savoring: a dessert that becomes a centerpiece for conversation, a reason to linger after the last bite and swap memories the way the glaze catches the light on its surface.

Why You’ll Love This Recipe

  • Quick to assemble for a show-stopping result: the cake feels luxe yet approachable, with components that can be prepared ahead and brought together with ease.
  • Versatile for many occasions: from casual family dinners to holiday gatherings, it adapts to seasons and settings without losing its elegance.
  • Balanced sweetness with bright berry acidity: the berries provide natural tartness that brightens the cream and contrasts with the pastry’s richness.
  • Textural harmony: a crisp, flaky pastry base contrasts with silky vanilla cream and a lush, juicy fruit layer, finished with a glossy glaze.
  • Beautiful visually: the layers reveal themselves in a slice, offering a gallery of colors that makes the dessert a focal point on any table.
  • Customizable for dietary needs: with careful substitutions, you can craft vegan, gluten-free, or reduced-sugar versions without sacrificing impact.

Flavor Profile & Texture

The Exquisite Berry Cream Pastry Cake performs like a well-choreographed symphony of flavors and textures. The pastry layer—delicately flaky, buttery, and faintly salted—offers a crisp bite that yields to the soft, cloud-like vanilla cream. The cream itself is whisper-light, subtly perfumed with vanilla bean and a touch of vanilla’s gentle sweetness, coating the mouth with a creamy, luxurious comfort. The berry component provides the dish’s bright, fruity heart: a mix of berry varieties that deliver juicy pockets of sweetness, a gentle tartness, and a vibrant aroma that lingers after the bite. When the cake is assembled, a glaze or glaze-like finish glistens on the surface, elevating the dessert with a polished sheen and a subtle fruit gloss that hints at the fruit within.

Every mouthful reveals a stage-specific experience: the initial crisp crack of pastry, the creamy smoothness that slides over the tongue, and the burst of berry juice that punctuates the finish. The interplay between the warm, toasty notes of the pastry and the cool, airy cream creates a comforting temperature contrast that makes the cake feel both decadent and reassuring. The berries themselves are the stars—fresh, bright, and full of aroma, they bring acidity that keeps the cake lively rather than cloying, and their color adds a visual party that signals celebration before you even taste it. The overall balance is designed to be indulgent without being heavy, sophisticated yet approachable, and memorable enough to linger as a highlight of any menu or occasion.

Occasions & Pairings

Occasions

This cake shines in moments that call for a touch of elegance without ceremony. Consider it for:

  • Weekend family gatherings where everyone wants something refined but approachable.
  • Birthday celebrations for berry lovers or dessert enthusiasts who appreciate layered, nuanced sweets.
  • Special-occasion dinners, anniversaries, or romantic dinners at home that deserve a showpiece dessert.
  • Spring and summer celebrations, picnics, and garden parties where fresh berries are in peak season.
  • Brunch desserts or a refined after-dinner option that sits comfortably alongside coffee or sparkling wine.

Pairings

To complement the cake, think beverages and accompaniments that echo the berry brightness and creamy notes:

  • A light, fruity sparkling wine or a glass of Moscato to echo the berry flavors without overwhelming the cream.
  • A bright, citrus-forward tea (such as citrus-infused black tea) that mirrors the zest in the cake’s profile.
  • Fresh berries on the side as a bright, tart counterpoint or a small berry compote spooned alongside a slice.
  • A dollop of lightly whipped cream or a small quenelle of citrus-infused crème fraîche to echo the cake’s creaminess (depending on the level of richness you want).
  • A simple, lightly dressed green salad with a citrus vinaigrette to refresh the palate between bites at a large gathering.

Tips, Variations & Substitutions

Here are ideas to tailor the Exquisite Berry Cream Pastry Cake to your pantry, dietary needs, or mood:

  • Make-ahead layering: bake the pastry layers and prepare the berry components a day ahead. Assemble the cake the day you plan to serve, keeping the components refrigerated until just before serving to preserve texture and freshness.
  • Vegan option: use a dairy-free pastry that crisps beautifully and replace the cream with a stable, plant-based vanilla cream. Choose a dairy-free glaze and ensure any gelatinous components are substituted with plant-based thickeners if needed.
  • Gluten-free variation: replace regular pastry with a gluten-free flakey crust mix designed for pastries, ensuring a similar crumb and lift. Take care to handle the dough gently to preserve flakiness.
  • Low-sugar tweak: switch some of the berry filling to a naturally sweetened puree and use a lighter glaze with a fruit-forward profile. Balance with extra lemon or lime zest for brightness to compensate for the reduced sugar.
  • Different berries, same magic: swap in seasonal berries or add a local favorite to tailor the flavor. Raspberries, blackberries, blueberries, and strawberries each bring a unique tang and aroma to the mix.
  • Flavor boosters: a whisper of citrus zest (lemon, orange, or lime) in the cream or in the glaze can elevate brightness. A small pinch of almond extract can add depth if you enjoy a more nutty aroma.
  • Texture twists: for a nuttier contrast, incorporate a thin dusting of finely chopped toasted nuts on the pastry layers or in the crust’s edges, ensuring they stay crisp and visible between layers.
  • Regional twists: add a hint of cardamom or coriander to the berry mixture to evoke a dessert with a global dimension, or pair with a lavender-scented cream for a floral note (use sparingly).

Storage & Make-Ahead Ideas

Properly stored, components of the Exquisite Berry Cream Pastry Cake can help you prepare in advance without sacrificing quality. Here are practical tips for keeping the cake at its best:

  • Pastry layers: store baked pastry layers in an airtight container at room temperature for up to 2 days, or freeze for longer-term prep. If freezing, wrap tightly to prevent freezer burn and maintain flakiness upon thawing.
  • Berry filling: refrigerate the berry component in an airtight container for up to 3 days. Reheat gently or cool and use directly in the cake assembly; a fresh glaze can be applied just before serving to restore shine.
  • Vanilla cream: keep the cream chilled in an airtight container for up to 2 days. Whisk briefly before use to restore its light, airy texture if it has settled or separated slightly.
  • Assemble last minute: for the best texture, assemble the cake up to a day in advance, but hold off on applying the final glaze until just before serving. If you must store assembled cake, cover lightly to prevent the surface from drying out.
  • Make-ahead serving strategy: prepare individual slices in advance and refrigerate, if desired, for easier service at a party. Bring to room temperature for about 15-20 minutes before serving to maximize flavor and texture.

Fun Facts & Trivia (Optional)

Did you know that berries burst with natural pectin, which helps them thicken berry fillings and glazes? This is part of why berry-based desserts can achieve a glossy, cohesive finish without heavy added thickeners. The word pastry itself comes from the French “pâtisserie,” which refers to both the pastry and the shop that bakes it—a nod to the craft and artistry that go into a layered cake like this. Vanilla, a bean that grows on orchids, is one of the world’s most cherished flavors, beloved for its ability to round out dairy textures and bring warmth to desserts. In many culinary traditions, cream in desserts symbolizes indulgence and celebration, while berries represent the bounty of the harvest and the sweetness of summer. When you bring these elements together, you’re not just making a dessert—you’re crafting a small ceremony of taste, color, and aroma that invites people to slow down and savor the moment.

Ingredients

Cake Base

  • 2 cups cake flour (sifted)
    → Cake flour yields a lighter, softer crumb ideal for a pastry cake. Sift after measuring to aerate and remove lumps; spoon-and-sweep to prevent overpacking the cup for accurate volume.
  • 1 1/2 tsp baking powder
    → Leavening helps the cake rise for a soft, airy crumb. Distribute evenly by whisking with the dry ingredients; ensure your baking powder is fresh for predictable rise.
  • 1/4 tsp salt
    → Enhances sweetness and flavor while strengthening the batter’s structure. Salt also helps balance the richness from butter and milk.
  • 3/4 cup granulated sugar
    → Provides sweetness and aids browning and moisture retention. When creaming with butter, sugar helps to trap air for a lighter texture; adjust to taste.
  • 3 large eggs, room temperature
    → Bind and give structure to the cake. Room temperature eggs emulsify better, contributing to a uniform batter and even rise. Let eggs sit at room temp 15–20 minutes before mixing.
  • 1/2 cup unsalted butter, melted and cooled
    → Adds richness and moisture; melted butter helps create a tender crumb. Make sure it’s cooled so it doesn’t scramble the eggs when mixed with the warm batter.
  • 1/2 cup whole milk, room temperature
    → Hydrates ingredients and softens the crumb. Room temperature milk ensures smooth emulsification with eggs and butter for an even batter.
  • 1 tsp pure vanilla extract
    → Deepens overall flavor and aroma of the cake. Use high-quality vanilla for best fragrance; you can also add a small amount of almond extract if you like a nutty note (omit if not desired).

Vanilla Pastry Cream

  • 2 cups whole milk
    → The base for crème pâtissière; heat gently just until steaming so flavors infuse. Do not boil. This creates a silky texture when thickened with yolks and starch.
  • 1/2 cup granulated sugar
    → Sweetens the pastry cream and helps balance the slight egg-y richness. Adjust to taste, especially if using very sweet berries later in the assembly.
  • 4 large egg yolks
    → Primary thickening and richness; yolks provide silkiness and glossy texture to crème pâtissière. For lighter texture, reserve 1–2 yolks to save calories, though the cream will be looser.
  • 1/4 cup cornstarch
    → Thickening agent that gives the pastry cream its characteristic set without heavy flour flavors. Sift with the sugar to prevent clumps; fully cook until the starch granules are translucent.
  • 1 tsp vanilla extract
    → Flavoring that complements berries and pastry layers. Fresh vanilla paste can be used for intense aroma.
  • 2 tbsp unsalted butter, cut into small pieces
    → Off-heat fold-in for silkiness and gloss; butter enriches the texture and helps smooth the final pastry cream. Add while hot and whisk until melted and incorporated.

Berry Layer

  • 2 cups mixed berries (fresh or thawed; strawberries, blueberries, raspberries)
    → The colorful, juicy filling layer. If using frozen, thaw and drain excess liquid; hull strawberries and cut larger berries to even bite-size pieces for even distribution.
  • 2 tbsp granulated sugar
    → Macerates berries to draw out juices and create a light syrup that harmonizes with the pastry cream. Amount can be reduced if berries are very sweet.
  • 1 tsp fresh lemon juice
    → Brightens berry flavors and helps maintain vibrant color while the cake rests. Avoid too much lemon juice to prevent overpowering the berries.
  • 1 tsp lemon zest (optional)
    → Adds a fragrant citrus aroma to the berry layer; zest before juicing for maximum oils.

Toppings

  • Powdered sugar for dusting
    → A delicate finish that adds a light sweetness and elegance. Dust just before serving to avoid moisture from berries dissolving the coating. Use a fine-mesh sieve for an even coat.
  • 1 cup fresh berries for topping (assorted)
    → Extra berries provide color contrast and juicy pops on the finished cake. Wash and pat dry; arrange artistically around the top to enhance presentation.
  • 6–8 fresh mint leaves (optional)
    → A touch of green and a fresh aroma to cut through the richness; place leaves near the center or scattered for garnish. Mint pairs well with berry flavors.

Optional Add-ins

  • 1/2 cup white chocolate chips (optional)
    → Adds sweet pockets of chocolate that melt softly in the crumb. Toss chips with a tablespoon of flour before folding to prevent sinking to the bottom; keep chip pieces cold to minimize melting during mixing.
  • 1/2 cup sliced almonds, toasted (optional)
    → For crunch and a toasty nutty note. Toast almonds in a dry skillet or oven until fragrant and lightly golden; cool before folding into batter or using as a topping.
  • 1 tsp lemon zest (optional)
    → Extra brightness that can be mixed into the cake batter or sprinkled over for aroma; only add if you want a citrusy note without affecting moisture significantly.

Instructions

  • Preheat your oven to 350°F (175°C) and grease two 8-inch round cake pans and line the bottoms with parchment rounds.
    → This ensures even heat distribution, prevents sticking, and yields flat, clean cake layers for precise layering.
  • Sift the cake flour, baking powder, and salt together in a bowl to aerate and evenly distribute leavening.
    → Sifting removes lumps and creates a lighter crumb by ensuring dry ingredients are evenly incorporated into the batter.
  • Whisk the dry ingredients briefly to harmonize them, so the baking powder and salt are evenly dispersed when the batter comes together.
    → Even distribution of leavening prevents uneven rises and dense spots in the cake.
  • In a large bowl, beat the eggs and granulated sugar until pale, thick, and ribbon‑like, about 2–3 minutes with an electric mixer on medium speed or whisk vigorously by hand.
    → This aerates the mixture and creates the light, tender crumb through trapped air; don’t rush—properly aerated eggs lighten the batter.
  • Whisk in the melted and cooled butter in a slow, steady stream, followed by the milk and vanilla, until the batter is smooth and emulsified.
    → Adding the fat gradually prevents curdling and yields a cohesive batter with even moisture distribution.
  • Sift the dry ingredients over the wet and fold in two additions until just combined, stopping as soon as there are no visible flour streaks.
    → Overmixing develops gluten and tapes a tougher crumb; gentle folding preserves tenderness.
  • If using optional add‑ins (white chocolate chips, toasted almonds, or lemon zest), toss them with a tablespoon of flour and fold in now to prevent sinking and to distribute evenly.
    → Coating add‑ins with flour reduces migration to the bottom and helps them suspend evenly in the batter.
  • Divide the batter evenly between the prepared pans, smoothing the tops with a spatula and tapping the pans on the counter to release trapped air.
    → Even portions bake at the same rate and flat tops prevent wobbling when stacked later.
  • Bake in the preheated oven until the cakes are golden and a toothpick inserted into the center comes out with a few moist crumbs, about 22–25 minutes; rotate pans halfway for even browning.
    → Rotating the pans helps compensate for hot spots; avoid overbrowning by checking a few minutes early if your oven runs hot.
  • Cool the cakes in the pans for 10 minutes, then invert onto a wire rack to cool completely before assembly.
    → Cooling prevents steam from condensing and making the layers soggy; cooling also makes subsequent trimming easier.
  • Meanwhile, prepare the vanilla pastry cream: in a medium saucepan, warm the milk over medium heat just until steaming (do not boil).
    → Gentle heating keeps flavors intact and prevents scorching; steaming prepares the liquid for fast thickening with yolks.
  • Whisk the egg yolks with the sugar until pale and slightly thick, then whisk in the cornstarch until completely smooth.
    → This creates a smooth slurry that thickens evenly without lumps when heated with milk.
  • Tempt the yolk mixture by slowly whisking in a small amount of the hot milk, then gradually whisk the warmed yolks back into the saucepan with the remaining milk.
    → Tempering prevents scrambled eggs and ensures a silky, cohesive pastry cream.
  • Cook over medium heat, whisking constantly, until the pastry cream thickens and just comes to a boil; continue whisking for 1 minute to fully gelatinize the starch.
    → Boiling for a moment guarantees the starch is fully activated, giving a stable set without graininess.
  • Remove from heat, whisk in vanilla and the butter pieces until glossy and smooth, then strain through a fine sieve into a clean bowl; cover surface with plastic wrap and refrigerate until cold.
    → Straining removes any cooked lumps and chilling lets the cream set enough to spread cleanly between layers.
  • Prepare the berry layer by combining the mixed berries with the granulated sugar, fresh lemon juice, and lemon zest (if using) in a large bowl; let macerate for 15–20 minutes to draw out juices.
    → Maceration builds a juicy, flavorful layer and the lemon sharpens and brightens the berry flavor.
  • Level any domed tops of the cooled cake layers with a serrated knife so they stack evenly.
    → Level layers prevent slippage and give a clean, professional finish to the final cake.
  • Place the bottom cake layer on a serving plate and spread an even, thick layer of pastry cream over it, leaving a 1/2 inch border around the edge.
    → The border prevents filling from squeezing out when the top layer is added and ensures a tidy slice.
  • Spoon half of the macerated berries (including some juices) over the pastry cream in an even layer.
    → The berry juices mingle with the pastry cream for a cohesive berry‑cream filling and the remaining juices will flavor the top later.
  • Top with the second cake layer, pressing gently to align edges and set the stack; refrigerate briefly (about 15–20 minutes) to firm the filling slightly and make assembly easier.
    → A brief chill helps the layers hold together and reduces sliding during final assembly.
  • Spread a thin, even layer of the remaining pastry cream over the top cake layer or simply spoon another light layer if you prefer the berries to speak first; this helps the top surface receive berries more cleanly.
    → A light cream surface yields a polished finish and keeps the berries from seeping too quickly into the cake.
  • Top the cake with the macerated berries and their juices, arranging in an even pool across the center and toward the edges for a vivid, inviting appearance.
    → The berry arrangement distributes moisture and color evenly, making each slice visually appealing and flavorful.
  • Decorate the top with the reserved 1 cup of fresh berries and scatter 6–8 fresh mint leaves as a fragrant, color‑contrast garnish.
    → Fresh berries and mint provide brightness, texture contrast, and a refined presentation.
  • Dust the finished cake lightly with sifted powdered sugar just before serving to add a delicate sweetness and elegant finish.
    → Powdered sugar adds a subtle finisher that won’t weigh down the berries or cream if applied right before serving.
  • Chill the assembled cake for at least 30 minutes to help set the layers and meld flavors, then slice with a sharp, warmed knife for clean portions.
    → Chilling stabilizes the structure for neat slices, and warming the blade minimizes tearing the delicate cream and berries.
  • Serve slices with a few extra berries on the side if desired, and enjoy the balance of tender cake, silky vanilla pastry cream, and bright berry filling.
    → The combination showcases contrasting textures and flavors and makes a visually stunning dessert for any occasion.

Notes

These exquisite berry cream pastry cake notes guide you through assembling a dessert with a light cake base, silky vanilla pastry cream, and a vibrant berry layer for a show-stopping finish. You can customize by folding in white chocolate chips or toasted almonds into the batter, or by adding a touch of lemon zest to the pastry cream for brightness.

  • Make-ahead steps: Bake the cake layers and chill; prepare the pastry cream and macerate berries a day ahead to streamline assembly on the day of serving.
  • Assembly tips: Chill each layer before stacking; spread pastry cream evenly and press berry layer gently to avoid oozing, then refrigerate until set.
  • Storage: The assembled cake will keep refrigerated for 1–2 days; for longer storage, freeze unfrosted cake layers wrapped well and thaw in the fridge before assembling, or freeze individual slices for quick desserts.
  • Finish: Just before serving, dust with powdered sugar or glaze lightly with a fruit glaze; garnish with extra berries and mint for a polished look.
  • Notes on ingredients: Use fresh, high-quality vanilla and ensure berries are ripe for the best flavor; for a lighter texture, whisk pastry cream until glossy and smooth, not sticky.

Always ensure your ingredients are fresh and properly measured; this helps achieve a tender cake, silky pastry cream, and vivid berry layer with a cohesive, elegant finish.

Tips

Cake Base tips

  • Measure flour by spooning into the cup and leveling with a knife, then sift the dry mix. Sifting after measuring ensures a light, tender crumb and prevents dense pockets.
  • Bring all cold ingredients (eggs, milk, butter) to room temperature before mixing. This helps the batter emulsify evenly and results in a smoother, taller cake.
  • When creaming sugar with butter, beat until the mixture is pale and fluffy to trap air. Scrape the bowl a few times and mix on medium speed to maintain an airy crumb without overworking the batter.
  • Pour in the melted, cooled butter gradually and mix just until incorporated. If the butter is too warm, the eggs could curdle; aim for lukewarm to avoid scrambling.
  • Whisk dry ingredients with the dry mix before adding to the wet to promote even leavening and distribution of baking powder.
  • Prepare the pan by lining with parchment and greasing the sides to prevent sticking. If using multiple pans, rotate them halfway through baking for even rise.

Vanilla Pastry Cream tips

  • Warm the milk to steaming, not boiling, to extract maximum flavor without scalding. This helps the custard set with a silky texture.
  • Whisk yolks with half of the sugar and a portion of the warm milk to temper, then gradually whisk this back into the pan with the remaining milk.
  • Stir in the cornstarch slurry (cold water or a splash of milk mixed with cornstarch) to prevent lumps. Cook over medium heat, whisking constantly until the mixture thickens and the starch fully cooks (the tip of the spoon should leave a clear trail).
  • Remove from heat, whisk in vanilla and the butter pieces off the heat until glossy and smooth. The butter adds sheen and silkiness as the cream cools.
  • Strain the pastry cream for extra-smooth texture and press plastic wrap to the surface to prevent a film from forming. Chill thoroughly before assembly.

Berry Layer tips

  • If using frozen berries, thaw completely and drain excess liquid to avoid a watery layer. Hull strawberries and cut larger berries to uniform bites for even distribution.
  • Mac­erate berries with sugar for 15–20 minutes to draw out juices; if the berries are very sweet, reduce the sugar slightly to maintain balance.
  • Add lemon juice to brighten flavor and help preserve color; be careful with the amount so it doesn’t overpower the berries.
  • Optional lemon zest adds a fragrant citrus note; zest before juicing to capture the essential oils.

Toppings tips

  • Dust powdered sugar just before serving to keep the delicate finish intact; use a fine-mesh sieve for an even dusting.
  • Arrange fresh berries on top in a pleasing pattern for color contrast and juicy pops. Pat berries dry if they’re wet from washing to prevent sogginess on the surface.
  • Mint leaves add a fresh aroma and a color pop; place them strategically near the center or around the edge for visual balance.

Optional Add-ins tips

  • To keep white chocolate chips from sinking, toss with a tablespoon of flour before folding into the batter, and keep chips cold to minimize melting during mixing.
  • Toast sliced almonds in a dry skillet or 350°F (175°C) oven until fragrant and lightly golden; cool before folding or using as a topping for extra crunch.
  • Lemon zest is bright; add to the batter for citrus aroma or sprinkle lightly on top just before serving if you want a stronger lemon note.

Make-ahead, assembly, and storage tips

  • Pastry cream can be made a day ahead; cover the surface with plastic wrap to prevent a skin and refrigerate. Bring to a cold, stable temperature before assembly and whisk until smooth.
  • Store the cooled cake base, wrapped, at room temperature for up to 1–2 days or freeze for longer storage. Thaw fully and reseal with fresh pastry cream and berries when ready to serve.
  • Assemble the cake close to serving time to maintain the integrity of the berry juices and prevent sogginess. Keep the assembled cake refrigerated until serving and garnish with fresh berries and mint just before slicing.

Troubleshooting and quick fixes

  • If the cake is dense or gummy, check your oven temperature with an oven thermometer and avoid overmixing once dry ingredients are added. A gentle fold is best for a tender crumb.
  • If pastry cream seems lumpy, strain it and whisk vigorously; if it’s too thick, whisk in a little warmed milk gradually until smooth.
  • If berry juices bleed into the pastry cream, try assembling just before serving or briefly chill the berry layer before adding to reduce moisture migration.

FAQ

What is Exquisite Berry Cream Pastry Cake?

A delicate, layered dessert featuring a flaky pastry crust, a luscious berry cream filling, and a crown of fresh berries. It’s light, fruity, and elegant—perfect for celebrations or a special weekend treat.

What ingredients do I need?

Crust: 2 sheets puff pastry (or 1 shortcrust pastry).
Filling: 2 cups mixed berries (fresh or thawed), 1 cup vanilla pastry cream or lightly sweetened whipped cream. Optional: 1/2 cup berry compote for swirls or layering.
Vanilla pastry cream: 2 cups milk, 1/2 cup sugar, 4 egg yolks, 3 tablespoons cornstarch, 1 teaspoon vanilla extract, 2 tablespoons unsalted butter.
Finish: extra fresh berries for topping, apricot glaze or warmed berry jam for shine (optional), powdered sugar for dusting, fresh mint or lemon zest for garnish.

How do I prepare the crust?

Thaw puff pastry if frozen. Roll to fit your cake pan or to create even layers. If needed, cut into two equal rounds or sheets. Bake blind: line with parchment, fill with pie weights or dried beans, and bake at 200°C/400°F for 12–15 minutes until just golden. Remove weights and parchment, then bake another 3–5 minutes if needed until fully baked. Let cool completely on a rack before assembling.

How is the berry cream filling made?

Option A — vanilla pastry cream: whisk yolks with sugar and cornstarch. Heat milk with vanilla, then temper with the hot yolk mixture. Return to the stove and cook, stirring, until thick. Strain, whisk in butter, and chill. Optional: fold in 1/2 cup puréed berries for color. Option B — whipped-cream version: whip cream with a bit of sugar and vanilla, then gently fold in chopped berries or berry purée for a lighter filling.

How do I assemble the cake?

Place the baked crust as the base. Spread a layer of filling evenly, then scatter a handful of berries. Add the second crust layer (if using a multi-layer setup) and repeat with remaining filling. Finish with a top crust or a generous topping of whipped cream. Garnish with extra berries and a light dusting of sugar or a glaze for shine.

Can I make this ahead or freeze it?

You can assemble and refrigerate the cake for up to 1–2 days. For best texture, store unfrosted crusts and filling separately until you’re ready to assemble. Freezing is not recommended for best pastry texture, but you can freeze baked pastry portions and thaw before assembly; fresh berries are best added after thawing.

What substitutions work for gluten-free, dairy-free, or vegan menus?

Gluten-free: use gluten-free puff pastry or shortcrust and ensure fillings are gluten-free. Dairy-free/vegan: use plant-based milk (almond, oat) for the pastry cream, and use coconut or almond milk with a vegan butter substitute. For a vegan filling, use whipped coconut cream folded with berry purée and a vegan glaze if desired.

What are tips for achieving the best texture and flavor?

Chill each component before assembly to prevent sogginess. Blind-bake the crust until just golden. Don’t overreduce the pastry cream; cook until thick but still glossy, then chill thoroughly. Use a mix of firm berries (strawberries, blueberries, raspberries) for texture and color. A light glaze on the berries adds shine without making the cake slippery.

What toppings and garnishes pair well?

Fresh berries arranged on top, thin lemon zest or orange zest, mint leaves for a pop of color, a light dusting of powdered sugar, or a thin layer of apricot or berry glaze to give a glossy finish. Edible flowers can add an elegant touch for special occasions.

How should I store leftovers and how long will it keep?

refrigerate the assembled cake in an airtight container for up to 2 days. For longer storage, keep the crust and filling chilled separately and reassemble right before serving to preserve texture. Do not leave at room temperature for extended periods, especially in warm weather.

Common troubleshooting tips

If the crust becomes soggy, brush it with a light coating of melted butter or a thin layer of jam before layering to create a moisture barrier. If the filling is too thick, whisk in a splash of milk or cream; if too runny, simmer a bit longer or add a touch more cornstarch. If berries bleed color into the cream, add a small amount of lemon juice and zest to brighten flavor and help stabilize the color.

Introduction / Hook

Imagine a breakfast that lingers like dessert and feels like a warm hug from the inside out. Crème Brûlée French Toast is not merely a dish; it’s a sensory experience that starts with the scent of vanilla and toasty brioche wafting through the kitchen, rising as a promise of indulgence. The exterior, kissed by heat, becomes a delicate caramelized crust that shatters with a satisfying crack when you press a fork into it. Beneath that glistening shell lies a custard-soft interior, rich and silky, reminiscent of the classic crème brûlée but transformed into a brunch-worthy treat. This is the kind of breakfast that turns a ordinary weekend into a small celebration, inviting slow bites, lingering aromas, and conversation that tastes just as good as the dish itself.

What makes this fusion so irresistible is the way it marries textures and temperatures: the crisp sugar surface that crackles with the glow of a kitchen torch, the creamy, custardy center that melts in the mouth, and the warm, slightly vanilla-scented air that surrounds you as you serve it. It’s a dish that satisfies both the sweet tooth and the appetite for comfort. The first bite offers a gentle sweetness, the second reveals a lush depth of eggy richness, and every subsequent bite reveals a faint hint of citrus or spice that keeps the palate awake. It’s not merely a recipe; it’s an invitation to slow down, savor, and share a moment of brunch theater with family and friends.

Crème Brûlée French Toast is the kind of recipe that makes people ask, “What’s the secret?” The beauty lies in the contrast—the toasty outside, the custardy core, and that crackly top that sounds like a mini celebration every time you break it open. It’s a breakfast that feels special without requiring a long list of complicated steps, a dish that looks restaurant-worthy on a Sunday morning and still feels cozy enough for a casual family brunch. As you plate it, you’ll notice how the colors—golden browns, pale ivory interiors, and the glistening caramel sheen—come together like a visual ode to comfort food, inviting you to dive in with a smile before the first bite even lands on your tongue.

Whether you’re cooking for one indulgent weekend treat or laying out a little brunch spread for a crowd, this French toast incarnation brings a sense of theater and warmth to the table. It’s a celebration of the familiar, familiarized in a new form. The result is not only a dish you’ll crave again and again but also a memorable experience you’ll want to recreate, again and again, for anyone who loves the simple, refined pleasure of a well-made breakfast that tastes like a dessert and feels like a hug.

The Story Behind the Dish

Creme brulee and French toast—the two cousins of rich, comforting breakfasts—come from different culinary worlds, yet they share a surprising kinship when you bring them together. Crème brûlée, with its custard base and a hard, caramelized sugar crust, hails from French patisserie traditions that treasure refined technique and a balance of textures. French toast, on the other hand, has roots that reach back to antiquity and cross-cultural kitchens where stale bread found a second, higher purpose through soaking and pan-frying in fat until it became golden and tender. The idea of blending the two isn’t merely a clever trick; it’s a storytelling approach to brunch that honors both classic methods and modern whimsy.

This particular rendition often traces its charm to weekend mornings when bakers and cooks crave a decadent finish to a humble slice of bread. The genius lies in borrowing the luscious, custard-like interior from crème brûlée and wrapping it in the comforting, bread-forward exterior of French toast. A silky custard tucked inside a sturdy slice—perhaps brioche or challah—picks up notes of vanilla, citrus zest, and warm spices as it sits and basks. Then the surface is lacquered with sugar and kissed with heat until the sugar crystallizes into a crackling, glassy crust—the moment when breakfast becomes theater. The crack of the top is a tiny ritual, a sound that signals the convergence of pastry science and kitchen artistry.

In many homes, improvisation plays a big role in this dish. A splash of cream or a curling thread of citrus zest sometimes makes its way into the custard, a whisper of cinnamon or nutmeg dusts the surface, and a torch or hot broiler seals the top into that unmistakable brûlée gloss. The result is a dish that feels both luxurious and approachable—brunch-worthy without demanding a complicated, multi-course preparation. That balance—elegant yet forgiving—has helped Crème Brûlée French Toast migrate from occasional splurges to a beloved staple in many kitchen repertoires, loved by early risers and late-night feast planners alike.

For those who learned to cook from family stories, the dish can carry a memory: a grandmother who kept the kitchen light with the hum of the stove, a story shared over frost-kissed windows, or a joyful first bite after a long week where every moment felt earned. The dish becomes a culinary memory as much as a recipe, a bridge between tradition and modern brunch culture. It’s the kind of dish that invites questions about technique, sparkles with the glow of the kitchen’s flame, and leaves you with a sense of accomplishment that’s both humble and indulgent—proof that great flavors don’t always require complexity, just thoughtful pairing of technique with good ingredients and a little spark of showmanship.

Why You’ll Love This Recipe

  • Brunch drama without fuss. A show-stopping dish that feels special without an overflowing to-do list. It looks impressive on the plate, yet the concept remains approachable for weekend cooks.
  • Texture heaven. A crisp, caramelized top that cracks open to reveal a creamy, custardy center—a textural contrast that sings with every bite.
  • Versatile ingredients. Brioche or challah give a rich, buttery backbone; custard components can be adapted with dairy or plant-based substitutes to fit dietary needs; flavor boosters like vanilla, citrus zest, or warming spices offer endless customization.
  • Make-ahead-friendly for entertaining. You can plan ahead and savor the moment together, knowing the foundation is built for a relaxed, unhurried service.
  • Elegant but comforting. It feels like a dessert but wears the gown of a breakfast dish—perfect for birthdays, anniversaries, Mother’s Day, or a simple weekend treat that tastes like a celebration.
  • Impressive for guests. The caramel top and the fragrant aroma wafting from the kitchen create a moment of anticipation that makes guests feel pampered and invited to linger at the table.
  • Room for customization. With optional toppings, spice twists, or citrus accents, you can tailor the dish to seasons, occasions, or personal preferences.

Flavor Profile & Texture

The first impression is the crackle—the delicate, glassy crust formed by a sugar top that has been heated until it melts and hardens into a lacquered surface. This top delivers a quick, satisfying crunch that gives way to a cloud-soft interior. Inside, the custard—rich with eggs and cream (or dairy-free alternatives)—offers a luxuriously silky mouthfeel that clings to the bread, a gentle sweetness balanced by vanilla’s warmth. The bread itself acts as a stage for the custard, soaking just enough so that each slice yields a tender bite rather than a dry edge or a soggy center.

The flavor is a refined harmony of indulgent dessert notes and comforting breakfast familiarity. Vanilla provides a clean, creamy tone that’s complemented by a hint of sweetness that isn’t cloying. Depending on your mood or pantry, you can lean into citrus brightness—zest from lemon or orange can brighten the custard and lift the entire dish with a subtle citrus perfume. A whisper of warm spices such as cinnamon, nutmeg, or cardamom can turn the flavor profile into a brunch-ready version of a holiday dessert, giving it a nostalgic twist without tipping into heavy dessert territory. The caramelized sugar top adds a toasty, slightly burnt sugar depth that contrasts perfectly with the custard’s mellow richness, creating a layered tasting experience that evolves from bite to bite.

Texture-wise, this dish plays with multiple sensations: the initial crisp snap of the burnt-sugar crust, the soft and creamy center, and the bread’s gentle chew. The bread choice is critical—the right bread provides a sturdy soak without disintegrating, ensuring the interior remains tender and flavorful, while the exterior achieves that coveted crackly veneer. When finished, the dish presents a glossy surface that glitters under warm lighting, inviting the senses to explore both aroma and flavor before a single bite is taken. It’s a masterclass in balanced contrasts, where sweetness is refined, texture is dynamic, and aroma lingers long enough to make mouths water even before tasting begins.

Occasions & Pairings

This dish shines at many gatherings and moments, from quiet weekend indulgences to lively brunches. It’s ideal for birthdays and anniversaries when you want to turn a standard morning into a celebratory event, or for holidays when the table sighs with gratitude at the sight of something sumptuous but not overly fussy. Because it pairs so gracefully with coffee, sparkling water, or a lightly fruity beverage, it can anchor a brunch spread or stand alone as the star of a small gathering.

Pairings to consider include:

  • Fresh berries or a berry compote to add brightness and color that plays against the creamy interior.
  • Maple syrup or a drizzle of honey for an extra layer of sweetness.
  • Whipped cream or vanilla yogurt for a dairy-forward finish that heightens the dessert-like feel.
  • Light fruit salads or citrus segments to cut through the richness and provide a refreshing balance.
  • Cavendish or lightly roasted coffee, or a sparkling beverage like prosecco or an orange-spiked mocktail for a celebratory touch.

Seasonality can also steer the pairings. In cooler months, a cinnamon-spiced syrup or a warm citrus reduction can accompany the dish, turning the plate into a comforting, winter-leaning treat. In spring or summer, bright berries and a dollop of yogurt or crème fraîche keep the dish light while preserving its indulgent center. This flexibility makes Crème Brûlée French Toast a versatile choice for various occasions, from intimate family mornings to larger, more festive gatherings where you want something that feels special but still comfortable and approachable.

Tips, Variations & Substitutions

  • Bread choices. Rich, sturdy bread is your best friend here. Brioche or challah offer a luxurious, tender crumb that soaks beautifully while maintaining structure. If you’re working with a different bread, consider slightly thicker slices and a gentler soak to avoid sogginess.
  • Vegan and dairy-free options. Use plant-based milk (almond, oat, or coconut) with a splash of dairy-free cream and a neutral oil or vegan butter for a similar mouthfeel. For the top, a sugar substitute that caramelizes well can be experimented with, though the classic crackle comes most reliably from regular sugar. Coconut sugar can provide a more nuanced caramel note while staying within plant-based parameters.
  • Flavor boosters. Add a pinch of citrus zest, such as orange or lemon, to the custard base for a bright lift. A dash of cinnamon, nutmeg, or cardamom can warm the profile without overpowering the vanilla.
  • Caramel top variations. The brûlée top can be achieved with white sugar, brown sugar for deeper caramel notes, or a mix. For a gluten-free twist, use a fine sugar that melts evenly and supports a smooth crust when torched or broiled.
  • Make-ahead concept. The custard can be prepared in advance and stored briefly, while the bread slices can be pre-soaked and kept refrigerated for a short period. On serving day, complete the dish with the brûlée topping just before finish to preserve the crackle and texture contrast.
  • Texture tweaks. If you prefer a softer top, reduce the amount of sugar used on the surface. For a crispier top, ensure you apply a thin, even coating of sugar that caramelizes evenly under high heat.
  • Regional twists. Incorporate a splash of espresso into the custard for an affogato-like accent or finish with a light drizzle of orange blossom honey for a Mediterranean twist. A hint of almond extract can add a subtle nutty layer that pairs beautifully with vanilla.

Storage & Make-Ahead Ideas

Crème Brûlée French Toast can be planned with future mornings in mind, making it a smart choice for entertaining. If you’ve made this dish for a crowd, the leftovers can be stored in the refrigerator for a couple of days. Reheating is best done in a low oven or a gentle toaster oven to preserve the crisp top and prevent the custard from becoming overly dense. If you’ve prepared the custard and soaked the bread in advance, keep the components refrigerated separately until you’re ready to assemble and finish with the brûlée top. When you want the crackle on the day of serving, rewarm gently and then apply the sugar topping and run a kitchen torch or broiler for that final lacquered shell just before plating.

For freezer-friendly options, you can freeze individual slices after they have cooled fully, wrapped tightly to prevent freezer burn. Thaw in the refrigerator overnight and reheat slowly to maintain the interior’s tenderness. The brûlée top, formed just before serving, will still provide that signature crack when you give it a gentle tap with a fork.

To maintain the dish’s balance over a longer weekend or a brunch marathon, consider preparing a few components ahead of time: slice and toast the bread a day before or lightly toast them, keep the custard mixture ready, and assemble on the morning of serving. This approach minimizes stress on the day of your event while still delivering the full crème brûlée experience that your guests crave. The key is to protect the integrity of the custard’s creaminess and to ensure the sugar top has the best chance to caramelize and crack when the moment arrives.

Fun Facts & Trivia (Optional)

  • Crème brûlée translates to “burnt cream” in French, a nod to the iconic crackling sugar crust that defines the dessert’s signature moment.
  • French toast is sometimes called “pain perdu” in France, which means “lost bread,” reflecting its clever repurposing of stale bread into something delicious.
  • The combination of custard and sugar crackle found in this dish is a delightful culinary bridge between two classic techniques—custard-based desserts and the flash caramelization perfected in French patisserie.
  • Many kitchens use a culinary torch to create the brûlée top, but a hot broiler or a very hot oven can also achieve the crackly crust when sugar is spread evenly and heated aggressively.
  • Variations of this dish are loved worldwide, with pastry chefs and home cooks alike embracing the idea of infusing the custard and topping with local flavors—matcha, chai spice, citrus glazes, or even a hint of amaretto for adults-only brunch moments.

Ingredients

  • French Toast Base
  • 6 thick-sliced brioche or challah bread, cut into 1-inch thick slices, preferably day-old for best soaking
    → The bread is the vehicle for the custard. Brioche or challah provides a rich, tender crumb that absorbs the custard without falling apart. If using fresh bread, toast lightly or dry in a low oven (250°F/120°C) for 5–8 minutes to reduce moisture and improve absorption.
  • 4 large eggs
    → Eggs form the custard’s structure and binding. Use eggs at room temperature for easier whisking and a uniform mixture. Beat thoroughly to fully combine yolks and whites; this ensures a smooth, cohesive soak.
  • 1 cup whole milk
    → Milk lightens the custard and helps it soak into the bread evenly. Whole milk gives more body; for a lighter version you can use 2% but expect a less creamy texture. For dairy-free, substitute with a fortified dairy-free milk and adjust sweetness and spices accordingly.
  • 1 cup heavy cream
    → Heavy cream adds richness and a luscious mouthfeel to the custard. If you prefer lighter, reduce to 3/4 cup or substitute part with more milk, but the result will be less custard-like and more bread pudding-like.
  • 1/2 cup granulated sugar
    → Sugar sweetens the custard and helps with browning during cooking. It also aids in dissolving into the liquid for a smooth texture. You may reduce by 2–4 tablespoons if you want a less sweet dish, but not below 1/4 cup.
  • 2 teaspoons pure vanilla extract
    → Vanilla provides warmth and depth to the custard. Real vanilla extract is preferred; if using vanilla bean, scrape seeds into the mixture for more intense aroma. Let the mixture rest a few minutes to bloom the vanilla.
  • 1/4 teaspoon ground cinnamon
    → Cinnamon complements the custard with warm spice notes and blends well with the brûléed topping. Freshly ground is best; you can adjust to taste, up to 1/2 teaspoon for stronger spice.
  • Pinch of fine sea salt
    → Salt enhances sweetness and depth, amplifying the vanilla and spice. Use a light hand to keep flavors balanced; it also helps the custard set properly.
  • 2 tablespoons unsalted butter, for cooking
    → Butter creates a flavorful, golden crust on both sides of the French toast and prevents sticking. Use medium-high heat to avoid burning; start with a small amount and add more as needed to cover the pan surface.
  • Caramel Brûlée Topping
  • 1/3 cup granulated sugar
    → This sugar is melted and caramelized to form the crisp, amber crust on top of each toast slice. Work with a clean, dry pan over medium heat; avoid stirring once the sugar begins to melt to prevent crystallization. Caramel should be amber-colored, not dark brown, to avoid burnt flavors.
  • 2 tablespoons water
    → Water helps distribute heat and prevent the sugar from scorching. It also aids in the even dissolution of the sugar as it melts, resulting in a smoother caramel. For a more controlled caramel, you can skip water and melt sugar directly in a small, clean pan if you’re confident in your heat control.
  • Optional: a pinch of cream of tartar
    → Cream of tartar can stabilize the sugar syrup, reducing foaming and helping to prevent crystal formation, yielding a smoother top. It’s optional and can be omitted if you don’t have it.
  • To Serve / Toppings
  • Powdered sugar, for dusting (optional)
    → A light dusting enhances presentation and adds a touch more sweetness. Sift evenly over the top just before serving to avoid soggy caramel. This keeps the brûléed topping crisp for longer.
  • Fresh berries or sliced fruit (optional)
    → Bright, tangy fruit provides contrast to the rich custard and caramel, adding freshness and color. Choose ripe berries or sliced stone fruit to pair with the toast. Arrange around the slices for an attractive plate.
  • Maple syrup or honey for serving (optional)
    → A small drizzle adds extra sweetness and a complementary flavor to the custard. If you plan to brûlée, reserve the syrup for serving instead of topping before caramelizing to maintain the crisp shell. Use sparingly to avoid oversaturation that softens the top.

Instructions

  • Dry the bread slices and prepare them for soaking by arranging the 6 thick-sliced brioche or challah on a rimmed baking sheet in a single layer; if the bread is day-old, you are already in ideal condition, but if it is fresh, dry or toast lightly in a 250°F (120°C) oven for 5–8 minutes to reduce moisture so the custard absorbs evenly and the slices hold their shape during cooking.

    → Dry bread soaks evenly without becoming mushy and helps form a cohesive interior with a crisp exterior once cooked.
  • Whisk the custard base by beating the 4 eggs with the 1/2 cup granulated sugar in a large bowl until the mixture is pale and fully emulsified; this creates a uniform custard that coats the bread without separating.

    → Thorough whisking ensures yolks and whites are fully combined, giving a smooth, cohesive soak that sets evenly during cooking.
  • Whisk in the liquids and flavorings by adding the 1 cup whole milk, 1 cup heavy cream, 2 teaspoons pure vanilla extract, 1/4 teaspoon ground cinnamon, and a pinch of fine sea salt; whisk until completely smooth and homogeneous, then let the mixture rest 5–10 minutes to bloom the vanilla and integrate the spice.

    → Resting allows the vanilla and cinnamon to release their aromatics, giving a richer, more integrated custard.
  • Soak the bread slices by dipping each into the custard, turning to coat both sides, and soaking for about 60–90 seconds per side; remove with tongs and let excess drain briefly on the edge of the bowl or a rack before placing on a sheet for soaking; avoid over-soaking to prevent the slices from breaking apart.

    → Proper soaking yields a custard-filled interior without oversaturation that would cause sogginess or breakage during cooking.
  • Preheat a heavy skillet (cast iron preferred) over medium heat and melt 2 tablespoons unsalted butter, swirling the pan to coat; wait until the butter foams and subsides so the surface is hot but not actively browning before adding the bread; this ensures a crisp, golden crust without burning the fat.

    → A properly heated, well-oiled pan sears the exterior quickly, sealing in custard and creating a desirable contrast between crust and interior.
  • Cook the soaked bread slices in the hot, buttered skillet for 3–4 minutes per side, until deeply golden and the custard is just set in the center; flip gently with tongs and press lightly to ensure even browning; if the edges darken too quickly, lower the heat to maintain a soft interior with a crisp crust.

    → Even, patient cooking builds a sturdy crust while preserving a creamy interior that resembles classic French toast textures.
  • Keep the cooked slices warm by transferring them to a 200°F (93°C) oven or a warming rack while you finish the remaining slices; keeping them separate from stacked layers prevents trapped moisture from softening the crust.

    → Warm but dry resting keeps texture intact and prevents sogginess as you complete the batch.
  • Prepare the caramel brûlée topping by combining 1/3 cup granulated sugar, 2 tablespoons water, and an optional pinch of cream of tartar in a small, heavy-bottomed saucepan; cook over medium heat without stirring until the syrup turns a rich amber color, then remove from heat and let it rest briefly to avoid scorching when applied.

    → The caramel color indicates the sugar has reached the proper temperature for a crisp, crackly shell that contrasts with the custard beneath.
  • Apply and shape the caramel onto the toast by drizzling or brushing a thin, even layer of the hot caramel over the top of each custardy slice; allow a moment for the surface to set into a glossy film before brûlée to ensure an even shell.

    → A uniform caramel layer ensures a consistent crackly shell across all slices and prevents pooling that would soggy the surface.
  • Caramelize the tops by using a handheld culinary torch to sweep the flame across the caramelized surface in small, steady motions about 1–2 inches from the toast until the sugar darkens to a deep amber and forms a hard crackly crust; if a torch is unavailable, place the slices under a hot broiler on a rack and watch closely, rotating for even browning for 1–2 minutes.

    → The brûléed crust provides a dramatic, crisp contrast to the creamy custard beneath and instantly elevates the dish to a dessert-like finish.
  • Rest the brûléed tops for 1–2 minutes to allow the shell to finish setting and harden; if desired, dust lightly with powdered sugar just before serving to enhance the visual contrast and sweetness without softening the top.

    → A brief rest ensures the shell remains crackly and the interior remains pleasantly warm, preserving the intended texture balance.
  • To serve, arrange the slices on plates with optional fresh berries or sliced fruit around them and offer maple syrup or honey on the side; drizzle sparingly to avoid oversaturating the crisp top, and serve immediately to enjoy the contrasting textures of crackling top and velvety custard.

    → Fresh fruit adds brightness, while a small amount of syrup complements the richness without softening the brûléed surface, ensuring an optimal eating experience.

Notes

Crème Brûlée French Toast is a show-stopping brunch dish where slices of day-old brioche or challah soak in a rich custard, are fried to a golden crust, and finished with a crisp caramel brûlée shell. The custard comes from eggs, whole milk, heavy cream, vanilla, and cinnamon, yielding a luxurious center with a crackly, sugar-sheathed top.

Key technique: use day-old bread for maximum absorption; if your bread is fresh, toast or dry it briefly to reduce moisture. Allow the custard to rest a few minutes after whisking to bloom the vanilla and cinnamon, which deepens the flavor and helps even soaking.

Cook the toast in butter over medium-high heat until deeply golden on both sides. Dip each slice briefly in the custard (about 30 seconds per side) so the surface crisps while the interior stays creamy. For the brûléed topping, melt 1/3 cup sugar with 2 tablespoons water in a clean dry pan until the syrup turns amber, adding a pinch of cream of tartar if available. Avoid stirring once the sugar begins to melt to prevent crystal formation. Pour or spoon the hot caramel over the warm toast and, if you have a culinary torch, lightly brûlée the surface until a hard, glassy crust forms. If you don’t have a torch, you can briefly broil the tops, watching carefully to prevent burning.

To serve, dust with a light shower of powdered sugar, add fresh berries or sliced fruit, and finish with a drizzle of maple syrup or honey if desired. This dish is best served immediately to preserve the brûlée crust, but you can keep cooked slices warm in a low oven for a few minutes before topping. Make-ahead tip: you can batch soak the bread in the custard for 1–2 hours in the fridge, then cook and brûlée right before serving. Variations: for a dairy-free version, substitute fortified dairy-free milk and use coconut cream to maintain richness; for gluten-free, use gluten-free bread and ensure all flavorings are gluten-free. Note: always ensure your bread and any flavorings labeled gluten-free if you have gluten intolerance.

Tips

Tips and Techniques for Crème Brûlée French Toast

Bread selection and prep

  • Use thick‑sliced brioche or challah bread for a tender, soakable crumb. Day‑old bread absorbs custard best; if your loaf is fresh, dry it slightly in a 250°F (120°C) oven for 5–8 minutes to reduce moisture.
  • Aim for slices about 1 inch thick so they soak evenly without falling apart.

Custard base and soaking

  • Warmth matters: use eggs at room temperature for easier whisking and a smoother custard. Beat yolks and whites thoroughly to ensure a cohesive soak.
  • Balance the dairy: 1 cup whole milk plus 1 cup heavy cream gives a rich, custard‑like texture. For lighter or dairy‑free versions, substitute with fortified plant milk/cream and adjust sweetness and spices.
  • Flavor layering: 2 teaspoons vanilla extract (or vanilla bean seeds) plus 1/4 teaspoon ground cinnamon creates warmth; bloom flavors by letting the mixture rest a few minutes before soaking.
  • Salt matters: a pinch of fine sea salt enhances sweetness and depth, helping the custard set properly.

Soaking and assembly best practices

  • Soak time: let the bread soak in the custard long enough to absorb flavor but not so long that slices disintegrate. 15–30 minutes per side is a good guideline; overnight soaking in the fridge is also workable for a deeper soak.
  • Even soaking: arrange slices in a single layer in a shallow dish so all surfaces soak evenly; press gently to ensure full absorption without breaking the bread.

Cooking the French toast

  • Butter helps achieve a golden, crisp crust. Use 2 tablespoons of unsalted butter and cook over medium‑high heat, watching closely to prevent burning.
  • Avoid overcrowding the pan; cook in batches if needed to allow evenly browned exteriors without steaming.

Caramel brûlée topping

  • Caramel basics: combine 1/3 cup granulated sugar with 2 tablespoons water. Use a clean, dry pan over medium heat; once the sugar begins to melt, resist stirring—swirl gently to distribute heat and prevent crystallization.
  • Watch color closely: aim for amber, not dark brown, to avoid bitter caramel. If using cream of tartar, a pinch helps stabilize the syrup and reduces foaming/crystallization.
  • Even topping: once caramel is ready, keep the slices warm and top them evenly. For a traditional brûléed shell, finish with a culinary torch or a brief moment under a hot oven/broiler until the top is crisp and glassy.

To serve and toppings

  • Dust with powdered sugar just before serving to maintain the crisp caramel top. Avoid pre‑dusting, which can make the surface soggy.
  • Fresh berries or sliced fruit provide bright contrast to the rich custard and caramel; arrange around the slices for an appealing plate.
  • Drizzle maple syrup or honey sparingly at serving time. If brûlée is planned, reserve syrup for serving rather than topping before caramelizing to preserve the crisp shell.

  • Make ahead: the custard and bread soak can be prepared ahead and refrigerated (up to 8–12 hours). Bring to room temperature before cooking for best absorption and texture.
  • Storage: leftover French toast can be stored refrigerated for 1–2 days. Reheat gently in a 350°F (175°C) oven to help restore some crust; the brûléed top may soften with time.
  • Variations: for dairy‑free versions, use fortified almond/soy/oat milk and coconut cream. Add citrus zest (orange or lemon) to brighten, or a pinch of nutmeg for extra warmth. A splash of brandy or orange liqueur can be stirred into the custard for an adult twist.

FAQ

What is Crème Brûlée French Toast?

A decadent breakfast treat where slices of brioche are soaked in a crème brûlée–style custard, then cooked until golden and finished with a crisp, caramelized sugar topping that mimics the famous dessert.

What ingredients do I need?

Here’s a common lineup (adjust for dietary needs):

  • 6 slices brioche or thick challah
  • 4 large eggs
  • 1 cup heavy cream or half-and-half
  • 1/2 cup milk (dairy or plant-based)
  • 1/4 cup granulated sugar
  • 1 teaspoon vanilla extract
  • Pinch of salt
  • Butter for cooking
  • For the topping: 2–3 tablespoons brown sugar, a little water or orange juice (optional)
How do you make Crème Brûlée French Toast?

Steps (summary): whisk custard, soak bread, cook in butter until golden, then caramelize the top with brown sugar using a torch or broiler.

  1. Whisk eggs, cream (or half-and-half), milk, sugar, vanilla, and salt in a shallow dish.
  2. Dip each brioche slice, letting it soak briefly to absorb the custard without becoming soggy.
  3. Cook in a lightly buttered skillet over medium heat until golden on both sides.
  4. Sprinkle the browned sugar on top and caramelize with a culinary torch or under a hot broiler until crisp.
Can I make this ahead of time?

Yes. You can soak the bread in the custard in the refrigerator for up to 8 hours. Keep the pan ready; bake or cook just before serving, and caramelize the top just before serving for best texture.

How do I caramelize the top without burning it?

Sprinkle a thin, even layer of brown sugar on each slice. Use a culinary torch on a low to medium flame and move it constantly to evenly melt and caramelize. If using a broiler, place the pan close to the heat and watch closely for 1–2 minutes to prevent burning.

How long does it take to make Crème Brûlée French Toast?

Active cooking time is about 15–20 minutes per batch. If you soak the bread overnight, the hands-on time stays similar, but total time increases with chilling.

Can I make dairy-free or gluten-free versions?

Yes:

  • Dairy-free: Use plant-based milk and coconut or almond cream; replace butter with a dairy-free butter or oil.
  • Gluten-free: Use thick gluten-free bread or gluten-free brioche; ensure the custard uses dairy-free milk if needed.
What toppings pair well with Crème Brûlée French Toast?

Suggestions include:

  • Maple syrup or honey
  • Fresh berries (strawberries, blueberries, raspberries)
  • Whipped cream or mascarpone
  • Powdered sugar dusting
  • Orange zest or cinnamon for a warm note
How should I store leftovers?

Store cooled slices in an airtight container in the refrigerator for up to 2 days. Reheat in a 350°F (175°C) oven for 8–10 minutes or until warmed, then caramelize again if desired.

Any tips for the best texture and flavor?

Use day-old brioche for better soaking, avoid over-soaking to prevent sogginess, cook over medium heat to form a crisp exterior, and caramelize the top right before serving for a contrasting crackling surface.

Introduction / Hook

Imagine a centerpiece that steals the spotlight at the dinner table without shouting for attention. Crispy Baked Cauliflower Steaks are that quiet showstopper: elegant slices of cauliflower transformed into golden-brown, jam-packed-with-flavor slabs that deserve their own curtain call. When you crack the first bite, you’ll hear the satisfying crunch give way to a tender, almost creamy interior—like a tiny cloud of cauliflower comfort that has learned a few clever tricks from the oven. The aroma alone is enough to summon hungry family members from every room: toasty edges swirled with garlic, a whisper of smoke from the roasting pan, and a hint of nutty warmth that lingers in the air long after the plates are cleared. This dish takes a humble cruciferous vegetable and elevates it into a restaurant-worthy moment, without requiring a chef’s toolkit or a calendar’s worth of kitchen time. It’s the kind of recipe that makes weeknights feel special and dinner parties feel effortless.

What makes Crispy Baked Cauliflower Steaks truly special is that it balances technique with simplicity. The steaks themselves are sturdy enough to stand up to bold flavors, yet forgiving enough for home cooks who are still learning the rhythm of their ovens. The outer crust forms a savory, CRISP-edged robe around a tender, almost decadent interior. It’s a texture dance—crunch, chew, melt—accompanied by a chorus of toasty, caramelized notes that sing with every bite. And because this dish arises from roasting, there’s a natural caramelization that brings out the cauliflower’s innate sweetness, as if the vegetable has decided to glow from the inside out.

As you consider serving Crispy Baked Cauliflower Steaks, think of them not merely as a vegetable side, but as a centerpiece that invites conversation. They pair beautifully with bright, acidic dressings or sauces that cut through their richness. They hold their own against bold toppings, from nutty seeds and roasted garlic to tangy yogurt or smoky chilies. This recipe is your invitation to play with textures and flavors while keeping the cooking approachable, predictable, and deeply rewarding. Whether you’re planning a weeknight supper for a crowd or a more formal dinner, these cauliflower steaks bring a sense of celebration to the table with minimal fuss and maximum impact.

The Story Behind the Dish

Cauliflower has long lived in the shadow of more dramatic vegetables, but in recent years it has earned its own moment of culinary fame. It began as a pantry staple—versatile, affordable, and excellent at absorbing the flavors around it. People started pairing it with robust spices, roasting it until the edges turned caramel amber, and discovering that its pale, creamy interior could take on surprising richness. Crispy Baked Cauliflower Steaks is a modern homage to that journey: a dish that respects the vegetable’s natural sweetness while giving it a bold, almost indulgent crust.

The idea of cutting a whole head of cauliflower into big, steak-like discs is a playful nod to traditional steakhouse presentations, but with a plant-forward twist. The concept invites you to treat cauliflower as a venue for flavor, texture, and aroma rather than a mere accompaniment. In many cultures, roasted vegetables occupy the heart of a comforting meal, offering warmth and nourishment without overpowering the senses. This recipe continues that tradition, turning a humble vegetable into a star attraction—the sort of dish that travels well, satisfies a range of diets, and sparks curiosity at the table.

There’s a quiet storytelling thread woven through the method: slice down through the dense stalk, expose the creamy florets in the middle, then crown each slice with a crust that crackles as it bakes. The result is a cinematic moment, the kind you can announce with a flourish and then sit back to savor. Whether you’re cooking for a weeknight family dinner or a gathering with friends who love bold flavors, these cauliflower steaks arrive with a narrative you can tell with every bite—the story of a simple vegetable transformed by heat, patience, and a little culinary swagger.

Why You’ll Love This Recipe

  • Versatility: A single head of cauliflower becomes multiple generous portions, ideal for sharing or for hearty leftovers the next day.
  • Texture magic: A crisp, well-seasoned crust contrasted with a tender, flavorful center creates a satisfying bite that’s hard to resist.
  • Plant-forward comfort: Rich-sounding flavors and a satisfying texture make this feel indulgent without relying on meat or heavy dairy.
  • Low-effort brilliance: Simple ingredients, straightforward technique, and minimal hands-on time yield a spectacular result.
  • Adaptable to many diets: Naturally gluten-friendly, easily made dairy-free, and friendly to vegan or vegetarian menus with minor tweaks.
  • Great for entertaining: Their visually striking presentation makes them an impressive centerpiece for casual supper clubs or holiday tables.
  • Make-ahead potential: You can prep the components in advance and finish them off close to serving time for maximum freshness.

Flavor Profile & Texture

The flavor journey begins with a simmering chorus of toasty, nutty notes—the subtle sweetness of the cauliflower becomes more pronounced as it roasts. The crust introduces a savory depth: a blend of savoriness, a whisper of smokiness, and a hint of earthiness from any herbs or spices you choose to embrace. Garlic, pepper, and a touch of salt bring immediate, familiar comfort, while optional ingredients like smoked paprika or lemon zest can lend a brighter, more contemporary twist. The crust’s crunch provides a contrast that makes each bite an event; beneath it, the interior remains lush and tender, almost creamy, which makes the dish feel indulgent yet surprisingly light.

Texture-wise, this dish is a celebration of gradients. The exterior crackles in pleated ridges, each bite releasing a gust of roasted aroma that tempts you to take another taste. The center stays moist and pale, a tender counterpoint to the crisp shell. Depending on how you season or what you choose to brush onto the steaks, you can tilt the flavor toward herby, garlicky, smoky, or citrusy—each approach offering a distinct personality to the plate. The texture and flavor together create a sensory experience that is both comforting and forward-moving, satisfying cravings for something hearty without veering into heaviness.

Occasions & Pairings

These cauliflower steaks shine in a variety of settings—from weeknight dinners when you want something a bit more special to celebratory feasts that need a vegetarian centerpiece. They pair magnificently with bright, fresh salads that provide acidity to cut through the richness, as well as with creamy dips or yogurt-based sauces that offer a cooling contrast. They also work beautifully alongside grains such as quinoa, farro, or wild rice, where the nutty notes of the grains share the stage with the cauliflower’s own sweetness.

Recommended occasions:

  • Weeknight dinner star: Quick, satisfying, and easy to dress up with simple sauces or toppings.
  • Holiday or feast-table centerpiece: A stunning, crowd-pleasing main or side that makes the table feel special.
  • Brunch or lunch showcase: Pair with a tangy herb yogurt or bright citrus drizzle for a vibrant midday option.
  • Vegetarian or vegan mains: Create a complete plate by pairing with a protein-rich grain or legume-based dish.

Suggested pairings:

  • Side dishes: A lemony herb quinoa, wild mushroom sauté, or a sparkling-green salad with a zesty vinaigrette.
  • Drinks: A crisp, chilled white wine (like a Sauvignon Blanc) or a sparkling herbal tea for a refreshing contrast; for non-alcoholic options, a cucumber-mint cooler or a citrus-forward spritzer works beautifully.
  • Desserts: Light fruit-based desserts or yogurt-topped parfaits that echo the tang of a citrus glaze or yogurt drizzle.

Tips, Variations & Substitutions

Making it Crispy

To maximize crunch, consider a two-step approach: first, let the steaks rest at room temperature for a short time after cutting to reduce moisture, then give them a dusting of a light coating that includes a touch of cornstarch or almond flour to help crisping. A gentle brush of olive oil or a light spray of oil before baking encourages browning and an even crust. If you like extra texture, finish with a brief broil (watch carefully) to amber the crust and intensify the crackle.

Flavor Boosters

Add depth with a few flavor boosters that suit your pantry:

  • Smoked paprika or chipotle for a smoky edge.
  • Lemon zest or a splash of lemon juice for brightness that cuts through richness.
  • Finely grated hard cheese or vegan cheese alternatives for a savory kick (note that this will alter the dairy content).
  • Fresh herbs like thyme, rosemary, or parsley to lift the aroma and finish.
  • Garlic confit or roasted garlic cloves dispersed on top for a mellow, caramelized sweetness.

Vegan, Gluten-Free & Other Variations

The beauty of this dish is its adaptability. For vegan and gluten-free kitchens, the crust can be formed with almond flour, a touch of chickpea flour, or a gluten-free breadcrumb mix, all of which provide a satisfying crunch without gluten. Dairy-free options include olive oil-based coatings and dairy-free toppings, while keeping the interior luscious. For a lighter version, reduce the amount of coating and pair with a bright, tangy yogurt dip made from plant-based yogurt and lemon zest. For a heartier, wintery flavor, mix in warm spices like cumin and coriander, then finish with a drizzle of pomegranate molasses for a sweet-tinish tang that lifts the dish.

Cultural Twists

Bring in regional notes to reflect your mood or the season. In a Mediterranean twist, add oregano, lemon, and pine nuts for a sun-kissed crust. A North African vibe might lean on cumin, coriander, preserved lemon, and a crisp drizzle of olive oil. Japanese-inspired accents could include a sesame-soy glaze brushed on at the end, with sesame seeds sprinkled on top. Each variation preserves the core idea—the crisp exterior and tender interior—while offering a new cultural lens to enjoy the same base ingredient.

Storage & Make-Ahead Ideas

The beauty of these steaks is that they travel well and hold up gracefully as leftovers. If you’re meal-prepping, you can pre-slice the cauliflower into steaks a day ahead and refrigerate them unseasoned or lightly seasoned. When you’re ready to cook, bring them to room temperature for a short time before baking to ensure even cooking. Leftovers store well in an airtight container in the refrigerator for up to three days. Reheat gently to preserve the crust and avoid overcooking the interior, which can make the steaks mealy. If you plan to freeze, flash-freeze the raw, seasoned steaks on a tray, then transfer to a bag. They should keep for up to two months; bake from frozen—allow a little extra time for the crust to form and the interior to heat through.

Make-ahead ideas to maximize weeknight efficiency:

  • Prepare a batch of the crust mix or the coating components in advance and store in an airtight jar; you can combine them with the cauliflower slices just before baking.
  • Pre-roast florets for a quick reheat-and-serve variant by placing pre-cooked slices into the oven for a short period to re-crisp the crust.
  • Offer a variety of finishing toppings that can be added just before serving, allowing you to customize plates for a crowd.

Fun Facts & Trivia (Optional)

Did you know that cauliflower comes in a rainbow of colors beyond the familiar white? While white cauliflower is the most common, purple, orange, and green varieties exist. Each hue has its own slightly different flavor profile and nutritional emphasis, but all share the same satisfying versatility that makes cauliflower a kitchen workhorse. The crisp-tender texture you love in Crispy Baked Cauliflower Steaks is the result of careful roasting that concentrates natural sugars while maintaining a sturdy structure—cauliflower’s ability to transform from bland to brilliant with the right heat is a testament to why this vegetable has earned a permanent place on contemporary menus.

Historically, cauliflowers were prized in Middle Eastern and Mediterranean cuisines long before they appeared on modern Western tables as a mainstream vegetable. The idea of turning a head into steaks is a playful modern twist that embodies the spirit of culinary experimentation—honoring tradition while inviting new flavors and textures. The dish you’re about to savor is part of this evolving story, a bridge between comforting home cooking and adventurous, globally inspired plates.

In some culinary circles, the term “steak” signals a bold, substantial cut designed to deliver a satisfying mouthfeel. Here, the term’s usage is both metaphorical and practical: we’re embracing the dramatic, centerpiece-worthy presentation while celebrating a plant-based, approachable cooking method that any home cook can master. The result is a dish with a personality as confident as its textures—crisp, creamy, bright, and warmly seasoned—a modern classic that sits comfortably at the intersection of comfort food and contemporary dining.

Ingredients

Crispy Baked Cauliflower Steaks

Cauliflower Steaks

  • 1 large head cauliflower, core trimmed and leaves removed; cut into 3/4-inch thick steaks, using the center portion of the head to form “steaks” and saving any side florets as extra pieces
    → The base for the dish. Thick, intact steaks cook evenly and hold together during flipping. For best results, pick a firm head with tight florets; after trimming, pat dry and rinse quickly to remove any residual dirt. Slice into even thickness to ensure uniform browning. The scraps can be roasted as extra florets to serve on the side.

Coating & Seasoning

  • 2 tablespoons extra-virgin olive oil
    → Coats the cauliflower to help the crust adhere and promote crisping; use a light hand to avoid soggy crust. Toss the steaks in a bowl until evenly coated; pat dry if there is excess moisture before applying the crust mixture.
  • 1/2 teaspoon fine sea salt
    → Balances flavors and helps draw a little moisture to the surface to encourage crust formation; you can adjust after tasting. For lower-sodium options, reduce to 1/4 teaspoon or omit if the cheese adds enough saltiness.
  • 1/4 teaspoon freshly ground black pepper
    → Adds subtle heat and aroma; distribute evenly in the coating by whisking with spices or by adding to the oil before tossing. Pepper enhances flavor contrast and pairs with paprika.
  • 1 teaspoon garlic powder
    → Delivers robust savory depth; powder is ideal for even distribution across the uneven cauliflower surface. If you prefer real garlic flavor, you can substitute with 1 small minced garlic clove but this can burn if overcooked; add to oil and toss for extra bite.
  • 1 teaspoon smoked paprika (or regular paprika)
    → Provides color and a gentle smoky brightness that complements the roasted cauliflower. Smoked paprika creates a more pronounced crust; if using regular paprika, consider a dash of cayenne or chili powder for heat.
  • 1/4 teaspoon cayenne pepper (optional)
    → A hint of heat; add gradually if you like more punch. Omit entirely for a mild version. This also helps accentuate browning on the crust.
  • 1/3 cup grated Parmesan cheese (or 2 tablespoons nutritional yeast for a vegan option)
    → Adds umami and helps form a crisp, cheesy crust. Parmesan contributes richness and browning; nutritional yeast provides a dairy-free, nutty flavor. If using dairy, keep cheese amounts reasonable to avoid soggy crust; for vegan, rely on nutritional yeast and breadcrumbs for texture.
  • 1/3 cup breadcrumbs or gluten-free breadcrumbs (optional)
    → Adds extra crunch and helps trap moisture within the crust. To prevent sogginess, toast breadcrumbs lightly before mixing and distribute evenly around the cauliflower surface.
  • 2 tablespoons all-purpose flour or gluten-free flour blend (optional)
    → Acts as a dry binder and helps the crust adhere to the cauliflower while absorbing surface moisture for a crisp exterior. Use gluten-free flour for dairy-free/vegan version; if the coating seems too wet, whisk in a touch more flour.

Dipping Sauce

  • 3 tablespoons tahini (sesame paste)
    → Creates a creamy, nutty base for dipping; tahini emulsifies with lemon and water to form a smooth sauce that complements the roasted cauliflower. Stir well if separated; if very thick, whisk in small amounts of water or olive oil to reach desired pourability.
  • 2 tablespoons lemon juice
    → Adds bright acidity to balance richness; adjust to taste. Freshly squeezed juice yields the best flavor; substitute with lime juice if preferred.
  • 1 small garlic clove, minced
    → Provides a sharp, aromatic bite; mince finely to distribute evenly; omit if you prefer a milder sauce or roast the garlic beforehand for sweetness.
  • 1 tablespoon olive oil
    → Helps emulsify and create a silky texture; optional, you can substitute with water to adjust thickness, but oil enhances mouthfeel and gloss.
  • 2-3 tablespoons water (to thin)
    → Adjusts the sauce to your desired consistency; start with 2 tablespoons and add gradually. Warm water helps with emulsification.
  • Pinch of salt
    → Season to taste; depending on the saltiness of the tahini, lemon, and cheese in the crust, you may want less or more salt in the dip.

Garnish & Serving

  • Fresh parsley or microgreens, chopped (optional)
    → Adds color and a fresh aroma when sprinkled over the hot steaks; helps buoy the rich crust visually. Use flat-leaf parsley for best brightness.
  • Lemon wedges (optional)
    → Offer a bright, citrusy squeeze to finish the dish; the acid brightens the flavors and adds balance to the seasoned crust.

Instructions

  • Preheat your oven to 425°F (220°C) and line a large baking sheet with parchment paper or a silicone mat to ensure even browning and easy cleanup.
    → High heat drives rapid Maillard browning for a crisp crust, while parchment prevents sticking and makes flipping easier.
  • Prepare the cauliflower by removing its leaves and core, then cut into center 3/4-inch thick steaks; set the extra side florets aside to roast as crunchy crostini-like pieces.
    → Thick, intact steaks hold together during cooking and flip more reliably, while extra florets become tasty sides.
  • Pat the cauliflower steaks dry with paper towels after a quick rinse to remove any residual dirt; this moisture must be removed to promote crust adhesion and browning.
    → Excess moisture creates steam, which softens the crust and prevents crispness.
  • Toss the steaks with 2 tablespoons extra-virgin olive oil, then season evenly with 1/2 teaspoon fine sea salt and 1/4 teaspoon freshly ground black pepper; toss again to coat all surfaces.
    → Oil carries fat-soluble flavors and helps the crust cling; even seasoning ensures uniform taste on every bite.
  • In a separate bowl, combine 1/3 cup grated Parmesan cheese, 1/3 cup breadcrumbs (or gluten-free breadcrumbs), 1 teaspoon garlic powder, 1 teaspoon smoked paprika, and a 1/4 teaspoon cayenne pepper (optional); whisk until evenly blended.
    → This dry mix creates a flavorful, cohesive crust; whisking guarantees even distribution of spices for consistent browning.
  • If you are using a flour binder, whisk 2 tablespoons all-purpose flour or gluten-free flour into the crust mixture to help absorb surface moisture and improve crust adhesion; set aside.
    → The flour acts as a dry binder, reducing crust sogginess and enhancing crust structure during baking.
  • Press the crust mixture onto the top and sides of each cauliflower steak, rotating the steak as needed to cover all surfaces; press firmly to ensure the crumbs bond and do not shed during baking.
    → Firm pressing creates a cohesive crust that stays intact through flipping and yields a crisp, even coating.
  • Arrange the coated steaks on the prepared sheet with at least 1/2 inch of space between them, and scatter the extra florets around them if you plan to roast them as sides.
    → Adequate spacing allows hot air to circulate, promoting uniform browning and preventing steaming.
  • Bake for 12-15 minutes, then carefully flip each steak with tongs and bake for another 12-15 minutes until the crust is golden brown and the cauliflower is tender when pierced with a thin knife or skewer.
    → Flipping ensures both sides crisp evenly; visual color and a tender center confirm doneness beyond time alone.
  • Optional: If you desire extra-crisp edges, switch to a brief high-heat broil on high for 1-2 minutes, watching closely to prevent burning; this intensifies browning and flavor.
    → A quick blast of heat produces deeper caramelization without overcooking the interior.
  • Meanwhile, prepare the tahini dipping sauce by whisking 3 tablespoons tahini, 2 tablespoons lemon juice, 1 minced garlic clove, and 1 tablespoon olive oil in a small bowl; gradually whisk in 2-3 tablespoons warm water until smooth and pourable, then season with a pinch of salt.
    → The tahini sauce offers a creamy, tangy contrast to the roasted cauliflower; thinning with warm water yields a silky, clingy consistency.
  • Let the baked steaks rest on the sheet for 3-5 minutes to set the crust and redistribute moisture; this helps the crust stay intact when you plate them.
    → Resting firms the crust and prevents cracking or crumbling when cutting and serving.
  • Transfer the steaks to a serving platter, drizzle with a touch more olive oil if desired, and garnish with chopped fresh parsley or microgreens plus lemon wedges for brightness.
    → Fresh greens add color and aroma, while citrus finish brightens the savory crust and balances richness.

Notes

These crispy baked cauliflower steaks are a gluten-free-friendly vegetarian main that deliver a crowd-pleasing crunch with a tender, roasted interior. Start with a firm head, trim leaves and core, and slice into 3/4-inch thick steaks, reserving any side florets as tasty extras. Toss the steaks with olive oil, salt, pepper, garlic powder, and smoked paprika, then coat with Parmesan cheese for a cheesy crust or swap in nutritional yeast for a dairy-free version. For extra texture, add breadcrumbs and a touch of flour, and let the coated surfaces rest for about 5 minutes before baking to help the crust set. Bake on a parchment-lined sheet at 425°F (220°C) until golden and crisp, flipping halfway for even browning, about 18-22 minutes, then 8-12 more minutes until deeply browned and crusty. While the cauliflower bakes, make the tahini lemon dipping sauce by whisking together tahini, lemon juice, minced garlic, olive oil, and water, adding salt to taste and adjusting thickness with more water as needed. Serve the steaks hot with the dipping sauce spooned over or on the side, and garnish with fresh parsley or microgreens and lemon wedges if desired. Leftovers can be stored in the fridge for up to 3 days and reheated in a hot oven to restore crispness; for gluten-free prep, ensure breadcrumbs and flour are certified gluten-free and use a dairy-free cheese substitute if needed.

Tips

Tips for Crispy Baked Cauliflower Steaks

Preparation and cutting
  • Choose a firm head with tight florets. A compact head will slice into more uniform, sturdy steaks that hold together during flipping.
  • Trim leaves and core, then cut the head into about 3/4-inch thick center steaks. Save any side florets as extra pieces to roast alongside the steaks for a complete plate.
  • Pat the cauliflower dry after trimming to remove surface moisture. Excess moisture is the main culprit of a soggy crust, so dry thoroughly before coating.
  • Aim for even thickness on all steaks to ensure uniform browning and doneness from edge to center.
Coating, crust and seasoning
  • Toss the steaks with olive oil first to help the crust adhere and promote crisping. Use a light hand—too much oil can soggy the crust.
  • Pat dry any moisture after tossing to keep the crust from sliding off the surface.
  • For seasoning, distribute salt, pepper, garlic powder, paprika, and optional cayenne evenly. Whisk spices with the oil if you want a more uniform coating, or sprinkle over the oil-coated steaks and toss gently.
  • If using cheese, mix in the grated Parmesan (or nutritional yeast for vegan) so the coating forms a savory, browning crust. Don’t overdo the cheese or it can make the crust dense—balance with breadcrumbs and flour if you like a lighter texture.
  • Optional breadcrumbs add extra crunch. Toast breadcrumbs lightly before mixing to prevent sogginess and help them cling to the cauliflower.
  • The flour helps absorb surface moisture and helps crust adhesion. If the coating looks wet, whisk in a little more flour or breadcrumbs to reach a dry-but-sticky texture.
Cooking for best crispness
  • Preheat the oven to 425–450°F (220–232°C). Higher heat helps the crust blister and brown without overcooking the cauliflower center.
  • Use a parchment-lined sheet or a wire rack set over a sheet to promote air circulation and even browning. Avoid crowding the pan—space the steaks so heat can circulate.
  • Bake about 25–30 minutes, flipping halfway through. If your steaks are thicker, they may need a few extra minutes; keep an eye on the crust and interior doneness.
  • For a crisper crust, finish under the broiler for 1–2 minutes at the end, but watch closely to prevent burning.
  • If you’re not achieving the crust you want, dust the exposed crust with a little extra breadcrumbs or a pinch more flour mixed into the coating and give it a light pat to re-adhere.
Dipping sauce tips
  • Tahini-based sauce emulsifies with lemon and water to create a creamy, silky dip. If the sauce separates, whisk vigorously and add a touch more water or olive oil to re-emulsify.
  • Fresh lemon juice brightens the tahini; start with 2 tablespoons and adjust to taste. If the sauce is too tangy, a pinch of salt can balance it.
  • Minced garlic adds punch; to mellow it, roast the garlic briefly before adding to the sauce or use half a clove.
  • Olive oil helps with gloss and mouthfeel. If you prefer a lighter dip, substitute with water in smaller increments to reach your desired consistency.
  • Always season the sauce with a pinch of salt (and a whisper of pepper if desired) after adjusting thickness, as the tahini and lemon carry saltiness differently each time.
Garnish, serving and make-ahead
  • Finish with chopped fresh parsley or microgreens for color and a fresh aroma. A squeeze of lemon over the plated steaks elevates the dish just before serving.
  • The little side florets are perfect for roasting alongside the steaks; they’re a great way to use scraps and add variety on the plate.
  • Reheating tip: store leftovers in an airtight container for 2–3 days. Recrisp on a lined sheet at 400°F (205°C) for 5–7 minutes to restore crunch.
  • For a dairy-free version, keep Parmesan out and rely on nutritional yeast plus extra breadcrumbs for texture and umami.
  • If you want an air-fryer option, cook at 375–400°F (190–205°C) for 10–12 minutes, flipping halfway, until crust is crisp and center is tender.

FAQ

What are cauliflower steaks?

Cauliflower steaks are thick slices cut from a whole head of cauliflower. They’re roasted or baked until tender on the inside and nicely crispy on the edges.

How do I prepare the cauliflower to get crispy edges?

Trim the leaves and stem so the head sits flat, then slice into thick steaks about 3/4 to 1 inch thick. Pat dry, brush with olive oil, and optionally coat with a light crust (breadcrumbs or a starch mix) to help crisp. Bake on a parchment-lined sheet or on a wire rack for even browning. Flip halfway through.

What ingredients do I need?
  • 1 large cauliflower
  • Olive oil
  • Salt and pepper
  • Garlic powder or minced garlic
  • Paprika or your favorite spice (optional)
  • Breadcrumbs or crushed cornflakes (optional for extra crunch)
  • Parmesan or nutritional yeast (optional, for cheesy flavor)
  • Optional citrus zest or lemon juice
What temperature and how long should I bake it?

Preheat to 425°F (220°C). Bake for about 25–30 minutes, flipping halfway, until the edges are golden and the centers are tender. For extra crispness, finish under the broiler for 1–2 minutes, watching closely.

How can I keep the steaks from falling apart?

Slice thick steaks (3/4 to 1 inch) from a firm head, handle gently, and let them rest a minute after slicing. Baking on a rack or parchment helps them hold their shape and prevents sticking.

Can I make this vegan or dairy-free?

Yes. Use olive oil, dairy-free breadcrumbs or crushed cornflakes, and substitute parmesan with nutritional yeast or a vegan cheese alternative. Check labels for gluten if needed.

Can I make ahead or reheat leftovers?

Leftovers keep well in the fridge for 3–4 days. Reheat in a 350°F (180°C) oven for 8–10 minutes, or until hot and crisp. For the best texture, re-crisp under the broiler for 1–2 minutes.

What sauces or toppings go well with crispy cauliflower steaks?

Try lemon-tahini sauce, garlic yogurt (or dairy-free yogurt for vegan), chimichurri, or a garlic aioli. A squeeze of fresh lemon or a drizzle of hot honey also complements the flavor nicely.

How should I store and what about freezing?

Store cooked steaks in an airtight container in the fridge for 3–4 days. To freeze, freeze raw cauliflower steaks on a sheet tray, then transfer to a bag; bake from frozen at 400°F (200°C) for 25–30 minutes. You can also freeze baked steaks and reheat later in the oven.

Variations to try

Try different spice blends such as buffalo, za’atar, curry powder, or smoked paprika. Top with grated parmesan or nutritional yeast after baking. For extra crust, mix breadcrumbs with a little cornmeal or panko. Fresh herbs added after baking brighten the dish.

Introduction / Hook

Imagine a sun-dappled carnival of tropical warmth resting on a plate: coins of pineapple with a kiss of amber rum glaze, edges caramelized to a gentle crackle, and a perfume of coconut, vanilla, and smoky sugar drifting through the air. Rum-Soaked Fried Pineapple is a celebration of contrast—bright, juicy fruit meeting a kiss of heat and depth, crisp on the outside, tender and fragrant within. Each bite waltzes from sweet to tangy to a whisper of char, like a beach bonfire that lingers long after the last wave has receded. This dish isn’t just dessert or topping; it’s a mood—an invitation to slow down, savor, and let the sun-warmed flavors transport you to a sunlit terrace, a luau, or a quiet kitchen where conversation and laughter simmer alongside the pan. It’s approachable enough for a weeknight finale and exuberant enough to star at a party; a little caramel magic that makes ordinary moments feel extraordinary.

The Story Behind the Dish

Pineapple has long been a symbol of hospitality and warm welcomes in many island cultures, a bright tuft of sweetness handed to guests as a sign of good cheer. The fruit’s natural acidity and robust perfume pair beautifully with sugar and heat, a pairing that goes back centuries in tropical kitchens where fruit, spice, and distilled spirits converge. Rum, with its deep Caribbean roots and notes of vanilla, citrus, and molasses, has historically been used not just for drinking, but as a culinary companion—marinating, flambéing, and finishing dishes to lift flavors without overpowering them. When you marry pineapple with a kiss of rum and a touch of sizzling oil or butter, you awaken a bridge between sun-drenched island snacks and the comfort of a homey skillet technique. The result is a dish that feels both festive and familiar: a nod to tiki bars, a wink to family dinners, and a reminder that simple ingredients, treated with warmth and intention, become something magical.

In many kitchens around the world, variations of fried fruit with a spirited glaze have evolved as part of celebratory feasts and everyday joy alike. The idea is elegantly simple: you illuminate the pineapple’s natural sweetness and bright acidity with heat, letting the edges caramelize and the center stay juicy, then finish with a rum-bright sheen that ties all the flavors together. This particular interpretation—rum-soaked fried pineapple—embraces that heritage while leaning into modern sensibilities: a quick, satisfying treat that can be enjoyed warm from the pan, spooned over ice cream or yogurt, or served as a luscious topping for pancakes, waffles, or brunch bowls. It’s a recipe that invites storytelling as you cook, a reminder that flavors carry memory and place as surely as they carry aroma and texture.

Why You’ll Love This Recipe

  • Quick and forgiving: This approach to pineapple balances speed with technique, so you can enjoy something impressive without spending hours in the kitchen.
  • Layered flavor in every bite: The fruit remains bright and juicy while the exterior gains a delicate, crisp caramel crust with a hint of smoky sweetness from the pan.
  • Versatile finish: Perfect as a dessert on its own, a topping for ice cream or yogurt, or a glamorous addition to brunch plates with pancakes or Belgian waffles.
  • Impressive with minimal fuss: A small handful of pantry staples creates a big, party-worthy flavor profile that feels celebratory.
  • Adaptable to different diets and preferences: The concept works with dairy-free toppings, vegan ice creams, or dairy-based creams without losing its charm.
  • Comforting nostalgia with a tropical twist: It evokes the warmth of sunshine and vacation memories while staying grounded in everyday comfort food.

Flavor Profile & Texture

At first bite, you’ll encounter a tantalizing contrast: the pineapple’s lively, fruity brightness gives way to the toasty, almost-but-not-quite-crispy edge that forms where sugar caramelizes in a hot pan. The interior stays succulently juicy, a refreshing counterpoint to the exterior’s caramel-kissed depth. The rum introduces a gentle, warm-adjacent complexity—vanilla-laced with a whisper of spice—without intruding on the pineapple’s orchard-fresh essence. There’s a subtle saltiness from the pan or a light sprinkle of finishing salt, which serves to sharpen the flavors and keep them from tipping too sweet. If you add a drizzle of cream, a dollop of vanilla ice cream, or a chiffon of coconut cream, you’ll introduce a creamy, cooling community of textures that makes each mouthful feel luxurious yet effortless.

The texture journey is part of the delight: the fruit’s natural moisture keeps the center tender, while the outside forms a crisp, caramelized crust. The sugar that melts and then recrystallizes as it cools gives a gentle snap, almost like a candied shell that yields to the softness beneath. The rum, when used thoughtfully, doesn’t overpower—it rounds the sweetness, adds a peppery warmth, and brightens the fruit’s aroma, creating a bouquet of tropical notes that feel both nostalgic and fresh. The aromatics—the scent of caramelized sugar, toasted butter, vanilla, and a faint kiss of citrus—float through the kitchen, inviting conversation and anticipation before the first taste. This is a dish that dances between brightness and indulgence, a celebration of contrasts that never clobbers the palate.

Occasions & Pairings

This dish shines in multiple settings, making it a versatile choice for entertaining or a simple weeknight treat.

  • Holiday gatherings and festive dinners: A dessert or a refined topping that brings a tropical glow to the table without requiring elaborate preparation.
  • Brunch or weekend breakfasts: Pair with warm pancakes, waffles, or French toast for a sunny, indulgent start to the day.
  • Summertime barbecues and tiki nights: The fruit’s brightness and the rum’s warmth harmonize with grilled everything and fruity cocktails.
  • Dessert with a twist: A scoop of vanilla or coconut ice cream or a spoonful of tangy yogurt can elevate the experience into a show-stopping finish.

Pairing ideas to consider, depending on your mood and occasion, include:

  • Vanilla or coconut ice cream to create a creamy counterpoint that melts into the warm fruit.
  • Plain or Greek yogurt for a tangy, refreshing balance that brightens the sweetness.
  • A light drizzle of lime or orange zest to add a citrusy zing that lifts the dish even more.
  • A side of coconut whipped cream or a splash of coconut milk for extra indulgence.
  • Complementary beverages like a lightly spiced rum punch, a citrusy sparkling soda, or a cold brew coffee to contrast with the warmth of the dish.

Tips, Variations & Substitutions

Here are ideas to adapt the concept to your pantry, guests, or dietary needs:

  • Alcohol-free version: Use a splash of pineapple juice or a non-alcoholic rum-flavored syrup to capture the aroma without the alcohol.
  • Health-conscious angle: Use a heart-healthy oil like avocado oil instead of butter for frying, and opt for a lighter touch of sweetener or a drizzle of honey sparingly.
  • Vegan adaptation: Ensure any fats used for frying are plant-based and pair with dairy-free ice cream or yogurt for serving.
  • Gluten-free: The dish is naturally gluten-free; ensure any serving accompaniment (like ice cream or toppings) is gluten-free certified if needed.
  • Regional twists: Swap pineapple for other tropical fruits like mango or jackfruit to explore new aromatics and textures, or add a pinch of warm spices—nutmeg, cinnamon, or allspice—for a cozy twist.
  • Textural variation: For extra crunch without losing juiciness, finish with a light dusting of toasted coconut or chopped roasted nuts just before serving.
  • Make-ahead note: The pineapple can be prepared ahead (without the final frying step) and fried quickly right before serving, keeping the fruit juicy and the crust crisp.

Storage & Make-Ahead Ideas

Because this dish centers on a delicate balance of caramelized exterior and juicy interior, storage considerations matter for texture and flavor retention.

  • Leftovers: Store cooled fried pineapple in an airtight container in the refrigerator for up to 2 days. Reheat gently in a skillet over low heat, reserving a touch of fat to re-crisp the edges. Avoid overcrowding the pan to preserve the crispiness.
  • Make-ahead approach: If you’re planning a party, you can prepare the pineapple slices and marinate them in a light rum syrup ahead of time. When ready to serve, finish with a quick fry or pan-sauté to re-activate the caramelization and warm through the fruit.
  • Freezing: Freezing fried pineapple is not ideal for best texture, as the caramelized crust can become less crisp upon thawing. If you must freeze, freeze in a single layer on a sheet tray first, then transfer to an airtight container. Reheat in a hot pan to reclaim some of the crisp edges.

Fun Facts & Trivia (Optional)

Did you know that pineapple is not only a tasty fruit but also a symbol of hospitality across many cultures? Its distinctive crown makes it instantly recognizable and often used in decorative motifs that evoke the idea of welcome and festive sharing. Rum, meanwhile, has a storied history tied to the Caribbean and the global trade networks that connected distant islands to bustling ports. The fusion of pineapple and rum in cooking echoes centuries of exploration, colonization, and cultural exchange—each bite a reminder that food travels, evolves, and becomes something more than the sum of its origins. And the “fried” technique? It draws from a long tradition of skillet sweet treats where high heat creates a caramel-crust that crackles under a tender fruit interior, offering a comforting, almost universal appeal—from island markets to grandmother’s kitchen tables.

Inspiration Notes

For cooks seeking an emotionally resonant dish that still feels modern, Rum-Soaked Fried Pineapple hits a sweet spot. It blends nostalgia with novelty, the familiar with the adventurous. The dish invites storytelling—about family gatherings, tropical travels, or simply a moment when you decide to treat yourself with something bright and indulgent. Use it as a canvas to tailor sweetness, acidity, and aroma to your own taste profile, and you’ll find it becomes a personal signature, perfect for sharing with friends and loved ones.

Ingredients

  • Pineapple Prep
    • 1 medium pineapple, peeled, cored, cut into thick rings or chunky pieces
      → The star of the dish; choose ripe but firm pineapple to balance tartness with sweetness. Cutting into uniform rings or chunks ensures even soaking and frying. Remove the tough core to avoid fibrous bites. If using rings, trim uneven edges for consistent cooking.
    • 1/2 cup white or gold rum for soaking
      → Infuses pineapple with aroma and a light sweetness; use a light to medium rum so the flavor remains balanced. Soak the pineapple for about 20–30 minutes to impart flavor without turning the flesh mushy. Reserve any soaking liquid to use in the glaze if desired, but discard if strongly concentrated.
    • 2 tablespoons light brown sugar (optional)
      → Helps balance tartness and promotes caramelization during soak and frying. If you prefer less sweetness, reduce or omit. Dissolve the sugar in the soaking liquid to ensure even distribution.
    • 1 tablespoon fresh lime juice
      → Brightens pineapple flavors and helps cut through the richness of the fried crust. Use freshly squeezed lime for best acidity; strain to remove seeds if necessary.
  • Batter and Coating
    • 1 cup all-purpose flour (or gluten-free all-purpose flour)
      → Forms the dry base of the batter. All-purpose yields a light, crisp crust; gluten-free blends can be used in the same ratio but may require a touch more liquid. Sift to remove lumps for an even coating.
    • 1/3 cup cornstarch
      → Improves crispness and helps the coating cling to the pineapple. It also creates a delicate crust that stays crisp after frying; substitute with potato starch if needed.
    • 1/2 teaspoon baking powder
      → Provides lightness to the batter so the crust puffs slightly rather than staying dense. Do not skip or texture may be heavy.
    • 1/4 teaspoon salt
      → Enhances overall flavor and helps shell crispness; balances sweetness. Use fine sea salt for best results.
    • 1/2 teaspoon ground cinnamon (optional)
      → Adds warm spice that complements pineapple and rum. If you prefer a cleaner fruit flavor, leave out.
    • 1 cup very cold sparkling water or club soda
      → Creates a light, aerated batter that fries into a crisp crust. Keep the liquid ice-cold; for a thicker crust, slightly reduce the liquid or add a little more flour as needed.
  • Frying and Glaze
    • Neutral frying oil (vegetable, canola, or peanut) enough to fill your pan 1 to 2 inches deep
      → For frying, maintain a steady temperature around 350°F (175°C) for a crisp crust without scorching. Do not overcrowd the pan to preserve oil temperature and even cooking.
    • 2 tablespoons unsalted butter (for glaze)
      → Melts with sugar to create a glossy glaze that coats the pineapple. If dairy-free, substitute with coconut oil or omit and rely on sugar and rum glaze instead.
    • 2 tablespoons light brown sugar (for glaze)
      → Caramelizes with the butter and rum to form a luscious glaze that complements the tropical fruit. Adjust sweetness to taste; simmer until syrupy but not burned.
    • 2 tablespoons dark or spiced rum (for glaze)
      → Intensifies aroma and depth of flavor in the glaze; warm gently with butter and sugar to release complexity. If avoiding alcohol, omit and rely on a vanilla-imbued syrup or additional glaze sugar.
    • 1 teaspoon pure vanilla extract
      → Adds depth to the glaze; use genuine vanilla for best aroma. Add after the glaze has thickened slightly to preserve aroma during finishing.
    • Pinch of salt
      → Balances sweetness and enhances overall flavor of the glaze. Add toward the end of reduction for best integration.
  • Finish and Serving
    • Whipped cream or coconut cream for topping (optional)
      → Provides a creamy contrast to the hot, crisp pineapple and glossy glaze. For dairy-free, use whipped coconut cream; serve immediately for best texture.
    • Toasted shredded coconut (optional)
      → Adds extra tropical aroma and texture. Lightly toast in a dry skillet until lightly golden to release oils before sprinkling over the finished dish.
    • Fresh mint leaves (optional)
      → Adds a pop of color and a fresh aroma that brightens the overall flavor. Tear or finely chop and scatter on top just before serving.

Instructions

  • Prepare the pineapple by selecting a ripe but firm fruit and cutting it into uniform thick rings or chunky pieces for even soaking and frying; stand the pineapple on its base, trim the crown and base, then slice away the skin, core if desired, and cut into pieces of consistent thickness to prevent uneven cooking; pat dry with paper towels to remove surface moisture that would hinder coating adhesion.
    → Uniform pieces ensure even heat transfer and soaking, and dry surfaces help the batter adhere for a crisp crust.
  • Whisk together the soaking liquid by combining 1/2 cup rum, 2 tablespoons light brown sugar, and 1 tablespoon fresh lime juice in a wide bowl until the sugar dissolves completely and the mixture is smooth; taste for balance and adjust if needed; set aside briefly so the flavors meld.
    → Dissolving sugar ensures even sweetness and a smooth soak; the lime juice brightens the pineapple, countering richness later.
  • Immerse the pineapple pieces in the prepared soaking liquid, turning to coat fully, then cover and refrigerate for 20–30 minutes to infuse aroma without turning the flesh mushy; reserve any soaking liquid to use in the glaze if desired, but discard if it becomes strongly concentrated.
    → Soaking imparts tropical aroma and a touch of sweetness; do not over-soak to preserve texture for frying.
  • While the pineapple soaks, prepare the batter by sifting 1 cup all-purpose flour (or gluten-free alternative) with 1/3 cup cornstarch, 1/2 teaspoon baking powder, and 1/4 teaspoon salt in a large bowl; whisk in 1/2 teaspoon ground cinnamon (if using) to evenly distribute spice; chill or rest the dry mixture briefly to keep it light.
    → Sifting removes lumps for a smoother batter; airiness from the baking powder helps the crust puff lightly during frying.
  • Introduce the cold liquid to the dry mix by gradually whisking in 1 cup very cold sparkling water or club soda until the batter is thick enough to coat a piece but still flows; avoid overmixing to keep the batter light and aerated; if too thick, add a tiny splash more sparkling water.
    → The carbonation creates a crisper crust; cold liquid minimizes gluten development and yields a lighter fry.
  • Line a rack or baking sheet with parchment and pat the soaked pineapple pieces dry again to remove surface moisture; then dip each piece into the batter, turning to coat completely, and allow any excess batter to drip back into the bowl; place coated pieces on the rack so crust is set slightly before frying.
    → A thorough coating ensures a uniform crust; excess batter can cause greasy hot spots or clumping.
  • Heat neutral frying oil in a heavy, deep pan or skillet to 350°F (175°C); use a thermometer to monitor temperature and maintain it within 340–360°F during frying; avoid overcrowding the pan to prevent temperature drop and soggy crust.
    → A steady, hot oil produces a crisp crust and prevents greasy results; crowding lowers oil temperature and leads to uneven browning.
  • Fry the battered pineapple pieces in batches, cooking until golden brown and crisp, about 2–3 minutes per batch, flipping once if necessary for even color; use a slotted spoon to turn pieces and maintain control, then transfer to a wire rack over a sheet pan to drain excess oil.
    → Proper frying time yields a crisp exterior while keeping the pineapple tender inside; draining prevents sogginess from residual oil.
  • Prepare the glaze by in a small saucepan combining 2 tablespoons unsalted butter, 2 tablespoons light brown sugar, and 2 tablespoons dark or spiced rum; warm gently over medium heat until the butter melts and the sugar dissolves, then simmer briefly until the mixture thickens to a glossy syrup; remove from heat and stir in 1 teaspoon pure vanilla extract and a pinch of salt.
    → Gentle warming releases the rum’s aroma and integrates flavors; a light simmer ensures a coatable glaze that clings to the hot pineapple.
  • Add the fried pineapple to the glaze in small batches or brush the glaze over each piece; toss or swirl to coat completely, allowing the glaze to glossy coat and set slightly on the hot surface; if desired, keep glazed pieces warm on a rack while finishing the rest.
    → Coating while hot ensures adhesion and a luscious, shiny finish; stirring too vigorously can remove the crust, so handle gently.
  • Finish with optional toppings by dolloping whipped cream or coconut cream alongside the glazed pineapple, sprinkling toasted shredded coconut over the top for extra tropical aroma, and scattering fresh mint leaves for color and brightness; add these just before serving to preserve texture and aroma.
    → Cream and coconut add contrast to the hot, crisp pineapple and glossy glaze; toasted coconut heightens aroma and texture while mint provides a fresh finish.

Notes

These rum-soaked fried pineapple pieces are a tropical treat with a crisp, caramel-glazed crust. The pineapple is briefly soaked in light rum to infuse aroma and a touch of sweetness before being coated in a delicate batter and fried until golden. For best results, choose ripe but firm pineapple and cut it into uniform chunks to ensure even soaking and frying. A squeeze of fresh lime juice in the soak brightens the fruit, while a pinch of cinnamon in the batter adds warm depth that pairs beautifully with the tropical flavors. The glaze—made with butter, brown sugar, vanilla, and a little more rum—forms a glossy syrup that clings to the hot pineapple and enhances the aroma as it cooks. Keep your frying oil at about 350°F (175°C) and fry in small batches to avoid crowding, which can dull the crust and lower the oil temperature. Serve with whipped coconut cream or a light dusting of toasted coconut and fresh mint for contrast; dairy-free options substitute coconut oil for butter and use coconut cream as topping. To accommodate gluten-free diets, use gluten-free all-purpose flour and ensure the baking powder is gluten-free; you may need a touch more liquid if using a gluten-free blend. Leftovers reheat well in a 350°F (175°C) oven to re-crisp, though they are at their best fresh from the fryer.

Tips

Tips for Rum-Soaked Fried Pineapple

Pineapple prep tips

  • Choose pineapple that smells sweet at the crown and feels heavy for its size. Firm flesh with a little give is ideal for soaking and frying.
  • Cut into uniform thick rings or chunky pieces to ensure even soaking and consistent cooking; remove the tough core to avoid fibrous bites.
  • Pat the pineapple dry after cutting. Excess moisture can dilute the rum soak and cause splattering during frying.
  • Soak the pineapple for 20–30 minutes in the rum mixture. Keeping the soak brief but thorough preserves texture while imparting aroma; refrigerate during soak if you’re scaling up the time.
  • Dissolve the brown sugar in the soaking liquid to promote even caramelization during the soak and subsequent fry. If you prefer less sweetness, reduce or omit.
  • If using rings, trim uneven edges to promote uniform soaking and frying; arrange pieces in a single layer for even exposure.
  • Reserve soaking liquid for glaze only if it tastes balanced; discard if it’s too concentrated or strong.

Batter and coating tips

  • Sift dry ingredients (flour, cornstarch, baking powder, salt) to remove lumps and ensure a smooth, crisp crust.
  • Warmth and aeration matter: use very cold sparkling water and keep it on ice until ready to mix for a lighter, crisper coating. If the batter thickens, whisk in small amounts of cold water.
  • For a lighter crust, use 1 cup all-purpose flour with the indicated amount of cornstarch; for a slightly sturdier crust, you can increase cornstarch by up to 1–2 tablespoons.
  • Keep the pineapple pieces dry before dipping to improve batter adhesion. A quick pat with paper towels helps.
  • If you want a bit of extra warmth, add the optional 1/2 teaspoon ground cinnamon to the batter; for a cleaner fruit flavor, leave it out.
  • If you’re avoiding gluten, use a gluten-free all-purpose flour blend in the same ratio; you may need to adjust liquid slightly.
  • Test-fry a small piece first to check the crust thickness and oil temperature before proceeding with all pieces.

Frying and glaze tips

  • Maintain neutral frying oil at a steady 350°F (175°C). Use a thermometer and avoid overcrowding to prevent temperature drops and uneven cooking.
  • Pat the batter-coated pineapple briefly to remove excess batter; this prevents a thick, gummy crust.
  • Fry in batches until the crust is golden and crisp, about 2–3 minutes per batch. Transfer to a rack to drain excess oil.
  • For the glaze, melt butter with brown sugar over medium heat, then stir in the rum. Simmer until the mixture thickens to a glossy syrup; remove from heat before it scorches.
  • Add a splash of vanilla extract and a pinch of salt toward the end of the glaze reduction to deepen flavor and balance sweetness.
  • If you’d like a lighter glaze, you can substitute part of the rum with a touch of pineapple juice or water and simmer until syrupy but not overly thick.
  • Warmly glaze the fried pineapple while it’s still hot so the coating accepts the glaze evenly. Reserve a small amount for serving on the side if desired.
  • Alcohol notes: if you prefer no alcohol, omit the rum in the glaze and replace with a vanilla syrup or a small amount of pineapple juice reduced with sugar.

Finish and serving tips

  • Serve immediately for the best contrast between the hot crisp crust and the glossy glaze. If needed, keep warm in a 200–250°F (90–120°C) oven in a single layer until ready to plate.
  • Top with whipped cream or coconut cream for a creamy counterpoint to the warm fruit. For dairy-free, use whipped coconut cream.
  • To add texture and tropical aroma, sprinkle toasted shredded coconut just before serving; lightly toast in a dry skillet until fragrant and golden.
  • Finish with fresh mint leaves and a light drizzle of any remaining glaze for color and brightness.
  • If prepping ahead, keep the pineapple and batter components separate; fry just before serving to maintain crispness.

FAQ

What is Rum-Soaked Fried Pineapple?

A tropical dessert where pineapple chunks are briefly soaked in rum to infuse flavor, then coated and fried until crisp and caramelized. It’s typically served warm with vanilla ice cream or whipped cream. Note that some alcohol remains after cooking, but much of it cooks off during frying.

What ingredients do I need?

You’ll need a few ingredients for the pineapple, the rum soak, and the fried coating:

  • 1 medium pineapple, peeled, cored, and cut into 1-inch chunks (or rings)
  • 2–4 tablespoons light or dark rum (for soaking)
  • 2–3 tablespoons brown sugar (adjust to taste)
  • 1/2 teaspoon vanilla extract
  • Batter/coating: 1/2 cup all-purpose flour, 1/4 cup cornstarch, 1/2 teaspoon baking powder, pinch of salt, about 2/3 cup cold water or club soda
  • Oil for frying (neutral oil like canola or peanut)
  • Optional for serving: vanilla ice cream, whipped cream, mint leaves
Should I use fresh pineapple or canned?

Fresh pineapple is preferred for texture and brightness. Choose ripe but firm fruit, then cut into chunks. If you must use canned pineapple, drain well (and pat dry) and consider reducing extra sugar since the fruit may be sweeter from syrup. You may also rinse and pat dry to remove excess syrup before soaking.

How long should I soak the pineapple in rum?

Soak the pineapple for about 15–30 minutes. Soaking helps impart rum flavor, but too long can make the pineapple soggy. If you’re short on time, 10–15 minutes still adds noticeable aroma without compromising texture.

Can I omit the alcohol or use a substitute?

Yes. For a non-alcohol version, use pineapple juice with a few drops of almond extract or rum-flavoring, or simply skip the flavoring altogether for a milder version. The dish will still be delicious with a touch of vanilla or caramel notes from the fried coating.

What oil and frying method should I use?

Use a deep, heavy pan or a wide skillet with high sides. Heat oil to 350–375°F (175–190°C). Fry pineapple in batches to avoid overcrowding, about 2–4 minutes per batch until the coating is golden and crisp. Drain on a rack or paper towels.

How do I get a crispy coating and caramelized pineapple?

Tips for best results:

  • Pat the pineapple dry after soaking to help the coating stick and to prevent oil splatter.
  • Prepare the batter with ice-cold liquid and keep it just thin enough to coat the pineapple.
  • Dust the pineapple pieces lightly with a touch of cornstarch before dipping in batter for extra crisp.
  • Maintain consistent oil temperature and fry in small batches to avoid soggy results.
  • Let fried pieces drain well and serve immediately for maximum crispiness.
Is it safe to flambé the rum after frying?

Flambéing is optional. If you choose to flame, heat a small amount of rum separately and ignite it away from the pan, or carefully flame a warmed rum-soaked portion with a long lighter away from the fryer. Always prioritize safety: keep hair tied back, use a long-handled tool, and have a lid or fire extinguisher handy in case of emergencies.

How should I serve and pair it?

Serve the warm fried pineapple with vanilla ice cream or whipped cream. A light caramel sauce or extra rum sauce drizzled on top is nice, and a sprinkle of fresh mint or a pinch of cinnamon adds aroma and color.

How do I store leftovers and reheat?

Leftovers can be treated best when kept crisp. Store fried pieces on a rack in the refrigerator or a container with ventilation for up to 2–3 days. Reheat in a 350°F (175°C) oven or air fryer for a few minutes to restore crispiness. Avoid microwaving, which can soften the coating.

Introduction / Hook

There’s something almost magical about a single cauliflower transformed into a gleaming, golden “steak”—crisp on the outside, tender within, and infused with the comforting warmth of caramelized edges. Crispy Baked Cauliflower Steaks are not just a side dish; they’re a conversation starter, a centerpiece that proves you don’t need meat to achieve satisfying heft and depth. As the oven hums and the kitchen fills with a toasty, savory perfume, you’ll feel the anticipation rise: a plate that looks impressive enough for a dinner party, yet friendly enough for a weeknight crowd. Each bite offers a satisfying crack of crust, a whisper of nutty sweetness from the roasted cauliflower, and a delicate, almost creamy interior that gates the flavor with a gentle, lingering finish. This dish invites you to slow down, savor the aroma, and let the textures do the talking. It’s one of those recipes that makes you want to pull up a chair, plate seconds, and tell stories while the pan glistens with a sun-kissed glaze and the room smells like a warm, inviting kitchen on a late autumn afternoon.

What makes Crispy Baked Cauliflower Steaks so appealing isn’t merely the taste—it’s the confidence they bring to the table. There’s a sense of theater in presenting thick, uniform slices that hold their shape, a dramatic sizzle when they emerge from the oven, and a versatility that turns them into a canvas for countless flavor profiles. You can reach for a simple, bright finish with citrus and herbs, or lean into a deeper, smoky glaze that evokes cozy winter meals. The result is a plant-based star that can stand shoulder to shoulder with meat dishes, offering protein-friendly satisfaction without compromising on texture or aroma. In short, these cauliflower steaks celebrate vegetables in all their glory: sturdy, striking, and surprisingly indulgent.

Beyond the visual appeal, this recipe is a practical ally for any cook. It’s easy to prepare in advance, forgiving when a spice blend doesn’t quite hit the mark, and wonderfully adaptable to dietary needs or ingredient availability. The method embraces the natural porous structure of cauliflower, inviting it to soak up flavors while forming that coveted crust—crisp, nutty, and deeply toasted in every bite. It’s a dish that travels well from oven to table, pairs beautifully with a variety of sauces, and remains a comforting, familiar favorite even for those who aren’t sure what to do with a head of cauliflower. When you serve Crispy Baked Cauliflower Steaks, you’re serving a moment of culinary theater—without a lot of fuss—where simple ingredients are elevated by technique, care, and a touch of culinary bravado.

The Story Behind the Dish

The idea of turning vegetables into substantial, steak-like slices has roots in the modern plant-forward movement, where cooks began reimagining familiar shapes to celebrate vegetables as the centerpiece rather than a supporting cast. Cauliflower, with its compact cross-section and sturdy stalks, is uniquely suited to become a sliceable, shareable “steak.” The appeal is practical as well: when you slice a head into thick rounds, you reveal a clean geometry that bakes evenly and presents dramatically on a plate. The kitchen folklore around this dish suggests that the success lies in treating the cauliflower kindly—let it dry a bit after slicing, give it a gentle browning on all sides, and finish with a glaze or seasoning that evokes a contrast of toasted savoriness with bright, zesty notes. It’s a modern riff on classic roasts, a vegetable-forward homage to the concept of a hearty entrée, and a reminder that plant-based cuisine can offer the same satisfying textures and aromatic complexity you expect from traditional meat-centered dishes.

As with many iconic dishes, this recipe has traveled through home kitchens, test kitchens, and café menus before arriving at the confident place it occupies today. The cauliflower steak captures a trend—turning a humble vegetable into a visually striking and deeply flavorful main course—while maintaining accessibility. It’s the kind of dish that travels well: a café menu might feature it with a drizzle of lemon-tahini sauce and a sprinkle of herbs, a family dinner might pair it with a dollop of garlicky yogurt or a smoky pepper relish, and a weeknight rotation might see it dressed with olive oil, paprika, and a touch of grated cheese if desired. The story isn’t just about technique; it’s about how a simple head of cauliflower can become a canvas for seasonality, texture, and creative cooking that speaks to both tradition and experimentation.

Historically, vegetables have always played a starring role in many cuisines, and this dish is part of a broader dialogue about honoring plant-based ingredients with respect for how they’re cooked. The cross-sectional “steak” format evokes a sense of familiarity—an invitation to treat vegetables as you would a cut of protein—while reminding us that the most satisfying flavors often come from honest, time-honored techniques like roasting, searing, caramelizing, and finishing with a bright accent that lifts the profile. In that sense, Crispy Baked Cauliflower Steaks is more than a recipe; it’s a small celebration of how far home cooking has come, how delicious vegetables can be when given room to shine, and how a little heat, a little salt, and a little patience can transform something as unassuming as cauliflower into a centerpiece worthy of sharing with family and friends.

Why You’ll Love This Recipe

  • Impressive centerpiece without the heaviness: Thick, wine-stain slices that hold their shape and present beautifully on a plate.
  • Ultra-crispy crust with a tender interior: A contrast that feels indulgent and comforting, like a roasted vegetable au gratin without the dairy burden.
  • Versatile flavor canvas: Works with bright citrus, herby greens, smoky paprika, garlic-tinged sauces, or a tangy yogurt-based drizzle—perfect for customization.
  • Plant-based, gluten-free, and easily dairy-free: A friendly option for a wide range of dietary preferences without sacrificing taste or texture.
  • Make-ahead friendly: Slices can be prepared in advance, then crisped and finished just before serving for a streamlined weeknight or entertaining plan.
  • Great for meal prep: A single well-cooked head yields multiple satisfying portions that reheat nicely without losing flavor or texture.
  • High culinary versatility: Pairs beautifully with grains, legumes, salads, roasted vegetables, or a bright smear of sauce, making it suitable for everyday dinners and special occasions alike.

Flavor Profile & Texture

The flavor profile of Crispy Baked Cauliflower Steaks is a harmonious balance of roasted, nutty, and slightly sweet notes, with a toasty, caramelized crust that provides a direct hit of savoriness. The exterior develops a deep, amber-brown crust—almost like a crust that forms on a good roast—thanks to the natural sugars in the cauliflower and the gentle browning that occurs in a hot oven. This crust offers a crisp bite that’s as satisfying as potato skin, yet lighter, with a delicate crumb that reveals the soft interior beneath.

The interior is creamy and fork-tender, with the cauliflower’s natural sweetness peeking through. It isn’t mushy or watery; it holds shape and yields a comforting bite that invites you to savor each mouthful. The careful balance between the crust and the center is what makes these steaks so alluring: you get the best of both worlds—crisp texture and a tender, forgiving middle. Depending on how you season or glaze them, you can dial the flavor profile toward brightness and lift or toward warmth and depth. A subtle touch of lemon zest or a drizzle of olive oil with herbs can brighten the palate, while garlic, paprika, cumin, or smoked spices can deepen the profile and create a more roasty, comforting theme.

In terms of aroma, expect a toasty perfume that mingles with the soft, earthy scent of roasted cauliflower. The onion-and-garlic notes from seasonings (even if used lightly) fill the kitchen with a savory warmth, and any fresh herbs added at the finish release a hint of piney brightness or citrus lift. Texture-wise, the contrast between the crisp exterior and the tender center creates a sensory experience that’s both satisfying and elegant—an interplay of sound and softness that makes each bite a little celebration.

Occasions & Pairings

Crispy Baked Cauliflower Steaks shine in a variety of settings. They’re equally at home as a weeknight main course for vegetarians and as an impressive centerpiece at a dinner party. Their versatility makes them a wonderful option for seasonal menus, holiday tables, or casual family gatherings where you want something a bit luxe without a lot of fuss.

Here are a few ideas for occasions and pairings to help you envision the finished plate:

  • Weeknight comfort with a bright finish: Serve the steaks with a lemon-tahini drizzle or a garlicky yogurt sauce and a side of quinoa or farro for a complete, satisfying meal.
  • Entertaining with flair: Pair the steaks with a vibrant chimichurri, preserved lemon relish, or a herbaceous gremolata, plus a colorful salad and roasted root vegetables.
  • Holiday tables with a modern touch: Plate alongside roasted squash, braised greens, and a grain pilaf, finishing with a candied citrus zest to add festive brightness.
  • Meatless Mondays or plant-forward feasts: Use as a central protein-like element in a larger spread featuring legumes, grains, and seasonal vegetables.

Pairings to consider, depending on your flavor direction:

  • Sauces and drizzles: Lemon-tahini, garlic yogurt (dairy or dairy-free), herb chimichurri, roasted red pepper relish, or a smoky paprika-miso glaze.
  • Fresh, bright accompaniments: A cucumber-dill yogurt salad, simple arugula and citrus salad, or a tomato-caper relish to cut through the richness.
  • Starches and grains: Quinoa, barley, farro, or a small handful of herbed couscous offer a welcome textural contrast and balance.
  • Drink pairings: A crisp white such as Sauvignon Blanc or Vermentino; or a light red with gentle spice notes like Gamay or Pinot Noir; for non-alcoholic options, a sparkling citrus soda or a cold-pressed green juice can be refreshing contrasts.

Tips, Variations & Substitutions

Here are ideas to tailor Crispy Baked Cauliflower Steaks to your pantry, dietary needs, and taste preferences. The goal is to maintain the magic of the crust while letting you explore different flavor roads without stepping away from the core technique.

General Tips

– Dry the cauliflower slices well before applying any oil or seasonings; removing surface moisture helps the crust develop and adhere evenly.

– Don’t overcrowd the baking sheet; give each steak space so air can circulate and promote even browning.

– Consider finishing with a bright, fresh element at the end—such as a squeeze of lemon or a handful of chopped herbs—to keep flavors lively and not heavy.

Vegan & Dairy-Free Variations

– Use olive oil or a neutral oil with your preferred spice blend; skip any dairy-based toppings or sauces, opting for plant-based yogurts or tahini sauces instead.

– A miso-glazed finish can add a savory, umami-rich layer that remains dairy-free and adds depth.

Gluten-Free & Grain-Free Variations

– Use gluten-free breadcrumbs or ground nuts (like almonds or pistachios) for a crunchy crust alternative that adheres well to the surface of the steaks.

– For a grain-free option, finish with a sesame crust or a simple herb crust and a drizzle of olive oil and lemon.

Flavor Variations

– Mediterranean vibes: Za’atar, sumac, lemon zest, and a drizzle of olive oil before roasting; finish with fresh parsley and a dollop of almond yogurt.

– Smoky & savory: Smoked paprika, cumin, garlic powder, and a chili crunch topping to add a little heat and complexity.

– Herby and bright: Fresh dill, parsley, lemon juice, and a light yogurt or cashew-based sauce for contrast.

Regional Twists

– Indian-inspired: Turmeric, garam masala, coriander, and a yogurt-based raita-style topping to balance the heat and spice.

– North African-inspired: Ras el hanout, sesame seeds, preserved lemon zest, and a drizzle of olive oil to bring warmth and aromatics.

Storage & Make-Ahead Ideas

Cacking on a few practical strategies can help you plan ahead and keep the dish vibrant even when you’re short on time. These tips are designed to maintain texture and flavor so leftovers remain appealing.

Leftovers can be stored in an airtight container in the refrigerator for up to 3 days. Reheat in the oven or toaster oven to restore crispness; avoid microwaving if you want to preserve the crust, as moisture can soften it. If you anticipate hosting or meal-prepping, you can slice the cauliflower in advance and keep the raw slices wrapped in a damp cloth in the refrigerator for a short period or season lightly to reduce prep time on the day of cooking. Freezing is possible for very prepared portions, but note that freezing and thawing may affect the texture of the crust and interior softness; for the best texture, cook fresh when possible, or re-crisp thoroughly in a hot oven after thawing.

Make-ahead ideas include marinating the surfaces with olive oil, garlic, and herbs a few hours before cooking, or preparing a bright, citrusy sauce in advance to drizzle over just before serving. If you’re entertaining, you can roast extra heads, slice into steaks, and hold them at room temperature briefly before finishing in a hot oven; this allows plates to be ready to go without losing the crust’s crisp edge.

Fun Facts & Trivia (Optional)

  • Cauliflower is a member of the Brassica oleracea family, related to broccoli, kale, and cabbage—making it a versatile seed of flavors in many culinary traditions.
  • The “steak” presentation is a modern culinary trend that celebrates vegetables as the main attraction, encouraging creative plating and bold flavor pairings.
  • Cauliflower contains fiber, vitamins, and minerals that support digestion and satiety, making it a satisfying plant-based option for meals that feel indulgent without heaviness.
  • Roasting or baking cauliflower at high heat caramelizes its natural sugars, creating a nutty, slightly sweet profile that pairs surprisingly well with acidic, bright, or smoky accents.
  • Experiments with crusts and coatings let home cooks tailor texture, from crumbly granules to a crisp, crunchy crust that echoes roasted nuts.

Ingredients

Cauliflower Steaks
  • – 1 large head cauliflower (about 1.5 pounds / 680 g), trimmed of leaves and core, cut into 1-inch thick steaks

    → The cauliflower acts as the base and center of the dish; keeping the core helps slices stay intact and hold toppings. Wash the head well and thoroughly dry the surface to help crisping in the oven. If some slices crumble, you can shave them into florets and roast as a separate side dish.
  • – 2 tablespoons extra-virgin olive oil, divided

    → Oil provides moisture for the steaks to roast and helps the crust adhere; divide so you can brush the steaks first and also moisten the crumb coating if needed. If you prefer less fat, you can reduce to 1 tablespoon, but expect a softer crust.
  • – 1/2 teaspoon kosher salt

    → Salt enhances natural cauliflower flavor and helps draw out surface moisture, promoting crisper edges during baking. Use fine kosher or sea salt for even distribution; adjust to taste if your cheese is salty.
  • – 1/4 teaspoon ground black pepper

    → Adds subtle heat and aroma to balance richness; freshly ground pepper releases more flavor and should be evenly distributed on all sides of each steak for consistent seasoning.
Crust & Seasoning
  • – 1/2 cup breadcrumbs (plain or gluten-free)

    → The crumb layer forms the crisp outer crust. Plain breadcrumbs keep the flavor neutral and crisp; gluten-free options work well. For extra crunch, mix with a portion of panko or crushed nuts, if desired.
  • – 1/4 cup grated parmesan cheese (or 2 tablespoons nutritional yeast for vegan)

    → Parmesan adds a salty, nutty depth and helps brown the crust; if avoiding dairy, use nutritional yeast to achieve a cheesy, savory flavor and color.
  • – 1 teaspoon garlic powder

    → Garlic powder gives concentrated savory aroma without introducing moisture that could make the crust soggy; evenly mix into the crumb to ensure consistent flavor in every bite.
  • – 1/2 teaspoon smoked paprika (or use regular paprika for milder flavor)

    → Imparts color and a gentle smoky note that pairs beautifully with roasted cauliflower; adjust to taste depending on how bold you want the crust.
  • – 1/2 teaspoon onion powder

    → Builds a deeper savory profile in the crust and complements garlic; it helps create a more rounded, restaurant-like finish without needing fresh onion.
  • – 2 tablespoons chopped fresh parsley (optional)

    → Adds color and a burst of fresh herb aroma; fold into the crumb mix for even distribution or sprinkle on after baking for garnish. If using dried parsley, reduce to 1 teaspoon.
  • – 1/4 teaspoon red pepper flakes (optional)

    → A touch of heat to balance the richness; cancel if you prefer a milder result; adjust amount to tolerance.
  • – 1-2 tablespoons warm water or dairy-free milk (optional, to moisten crumb)

    → If the crumb mixture feels dry or doesn’t cling well, whisk in a small amount of liquid until it just comes together; this helps the coating adhere to the cauliflower steaks without pooling moisture.
Optional Add-ins
  • – 1 tablespoon fresh lemon juice (optional, for serving)

    → A bright splash of acidity helps cut through the rich crust and enhances overall flavor; squeeze a little over the steaks just before serving or offer lemon wedges on the side.
  • – Fresh parsley leaves for garnish (optional)

    → A final green accent and fresh aroma; tear or chop leaves and scatter lightly over the hot steaks; parsley adds visual appeal and a clean finish.

Instructions

  • Preheat your oven to 425°F (220°C) and line a large rimmed baking sheet with parchment paper or lightly grease it to prevent sticking and promote even browning; a hot, prepared surface helps the crust set quickly and yields crisper edges.
    → Ensures the cauliflower steaks start roasting immediately when they hit the sheet, which aids in achieving a firm crust rather than a soggy surface.
  • Wash the cauliflower head, remove the outer leaves and the fibrous core, and trim so that you can slice into even 1-inch thick steaks; uniform thickness ensures even cooking and crust adhesion.
    → Keeping the core helps the steaks stay intact; if some slices crumble, reserve them as florets for roasting or another side dish.
  • Slice the head into roughly 1-inch thick “steaks” by cutting straight downward through the stem and keeping as much core as possible intact; handle gently to avoid breaking delicate edges; place on the prepared sheet spaced apart.
    → Uniform slices roast evenly; the core acts like a natural backbone to hold the shape during baking.
  • Pat both sides of each cauliflower steak thoroughly dry with a clean kitchen towel or paper towels to remove surface moisture that would steam the crust; dryness promotes browning and crisp texture.
    → Moisture on the surface creates steam when heated, which undermines crust formation and softens the exterior.
  • Brush the tops and the sides of the steaks with 1 tablespoon of the extra-virgin olive oil (reserve the remaining 1 tablespoon for later use) and season with 1/2 teaspoon kosher salt and 1/4 teaspoon black pepper; even coating ensures consistent browning and flavor.
    → Oil helps moisture balance, carries fat-soluble flavors into the crust, and aids adhesion of the crumb coating; salt enhances surface dryness and taste perception.
  • In a separate bowl, whisk together 1/2 cup breadcrumbs, 1/4 cup grated parmesan (or 2 tablespoons nutritional yeast for vegan), 1 teaspoon garlic powder, 1/2 teaspoon smoked paprika, 1/2 teaspoon onion powder, and 2 tablespoons chopped fresh parsley (optional) until evenly combined; this forms a cohesive, flavorful crust.
    → Even distribution of the spices and cheese ensures every bite has consistent aroma and color, while parsley adds brightness.
  • If the crumb mixture seems dry and will not cling, whisk in 1–2 tablespoons warm water or dairy-free milk a little at a time until the mixture just holds together when pressed; avoid soggy crumbs that slide off.
    → A moistened crumb coats better without pooling moisture, yielding a crisp, adherent crust.
  • Gently press the crumb mixture onto the top and sides of each cauliflower steak, turning to coat all surfaces and pressing firmly so the crust adheres; if needed, brush a thin layer of the reserved olive oil onto the crust to help it grab.
    → Firm adhesion prevents the crust from flaking off during flipping and baking, producing a uniform crust throughout.
  • Place the coated steaks back on the prepared sheet, giving each space to breathe; lightly mist or brush the tops with the remaining 1 tablespoon olive oil to promote golden-brown coloration during bake.
    → A light oil boost on the crust encourages Maillard browning, enhancing both flavor and appearance.
  • Bake for 25–30 minutes, flipping the steaks once halfway through the cooking time to ensure even crusting and tenderness; monitor for doneness as ovens vary.
    → Flipping ensures both sides develop crust and prevents one side from over-roasting while the other remains pale.
  • For extra crispness, optionally broil on high for 1–2 minutes at the end, watching closely to prevent burning; this intensifies color and edge crunch.
    → Brief high heat finishing enhances crust texture and deepens caramelization without drying the interior.
  • Remove from the oven and let the cauliflower steaks rest on the sheet for 5 minutes; resting helps the crust set and makes them easier to handle when serving.
    → Resting allows juices to redistribute slightly and the crust to firm up, reducing the risk of breaking apart when plated.
  • Optional finishing and serving: squeeze fresh lemon juice over the hot steaks and scatter extra chopped parsley for a bright contrast; serve immediately to enjoy the crisp crust at its best.
    → Acidity from lemon cuts richness and enhances color and aroma, while fresh parsley provides a vibrant finish.

Notes

These crispy baked cauliflower steaks deliver a savory, crisp crust while keeping the creamier interior of the cauliflower. Start with a large head to yield sturdy, 1-inch thick steaks; trim leaves and core, rinse well, and dry completely to promote browning and crust adhesion. If some slices crumble, save them as extra florets to roast separately or toss into a side dish.

Prepare the steaks by slicing straight down through the stem to maintain stability; keep the core intact so the steaks hold their shape during roasting. Brush the steaks with olive oil (the full 2 tablespoons divided) to help moisture the surface and aid the crust, reserving a portion to moisten the crumb if needed. If you prefer fewer calories, you can use 1 tablespoon of oil, but expect a slightly softer crust.

Season lightly with salt and pepper to enhance natural cauliflower flavor and draw surface moisture for crisper edges. Sprinkle 1/2 teaspoon kosher salt and 1/4 teaspoon ground black pepper, distributing evenly on all sides of each steak.

For the crust, combine 1/2 cup breadcrumbs (plain or gluten-free) with 1/4 cup grated parmesan cheese (or 2 tablespoons nutritional yeast for vegan). Add 1 teaspoon garlic powder, 1/2 teaspoon smoked paprika, 1/2 teaspoon onion powder, and optional 1/4 teaspoon red pepper flakes for a gentle kick. Fold in 2 tablespoons chopped fresh parsley if available for color and brightness. If using dried parsley, reduce to 1 teaspoon.

To help the crust cling, whisk in 1-2 tablespoons warm water or dairy-free milk as needed until the crumb mixture just comes together. Avoid adding too much liquid, which can make the crust soggy or runoff from the steaks.

Optional finishing touches: finish with a squeeze of fresh lemon juice over the hot steaks to brighten the flavors, and scatter extra parsley leaves for a fresh, colorful garnish. You can also serve lemon wedges on the side.

Cooking tips: preheat your oven to about 425°F (220°C) and line a baking sheet with parchment or a light coating of oil. For the crispiest crust, place the steaks on a rack set over the sheet to allow air to circulate; you can also bake directly on the sheet. Press the crumb mixture onto the top and sides of each steak, then bake about 20-25 minutes, flipping halfway, until the crust is golden and the cauliflower is tender inside. If you want extra crispness, broil for 1-2 minutes at the end, keeping a close eye to prevent burning.

Storage and variations: leftovers refrigerate well for 2-3 days; reheat in a hot oven to restore crispness. For dairy-free versions, rely on nutritional yeast for cheesy flavor and use gluten-free breadcrumbs. If you’re gluten-sensitive, ensure your gluten-free breadcrumbs are certified gluten-free. The crumb mixture can be customized with crushed nuts for extra crunch or a peppery kick with additional red pepper flakes.

Tips

  • Thoroughly dry the cauliflower after washing. Moisture on the surface will steam the crust rather than crisp it. After trimming, pat dry with a clean towel and let the florets sit uncovered for a few minutes to air-dry as needed before cutting into 1-inch steaks.
  • Keep the core intact when slicing to maintain structure. If any steak crumbles, don’t waste it—roast the pieces as florets on the side and enjoy them as a crunchy, separate component.
  • Oil helps both moisture and crust adhesion. Brush each steak with olive oil on all sides before coating, using the remaining oil to moisten the crumb if it seems dry. Avoid puddling oil, which can make the crust greasy.
  • To maximize crust crunch, toast plain or gluten-free breadcrumbs lightly in a dry skillet for 1–2 minutes until just golden before mixing with cheese and spices. This deepens flavor and improves browning of the crust.
  • Parmesan adds a salty, nutty depth and browning color. If you’re dairy-free, substitute with nutritional yeast and consider a small extra pinch of salt if needed to achieve a similar savory profile.
  • Distribute the garlic powder, onion powder, smoked paprika, and red pepper flakes evenly in the crumb mixture to ensure every bite is balanced. Freshly ground pepper also enhances aroma—don’t skip it.
  • Binder the crust with liquid as needed. If the crumb feels dry or isn’t clinging, whisk in 1–2 tablespoons warm water or dairy-free milk until the mixture just comes together. Too much liquid will soggy the crust, so add gradually.
  • Use a parchment-lined sheet or a wire rack over a sheet to bake. A rack allows air to circulate around each steak, promoting even browning and a crisper bottom. If you don’t have a rack, rotate the pan halfway through.
  • Roast at 425–450°F (220–230°C) for about 18–25 minutes, flipping halfway for even browning. If you have convection, or if you prefer extra crispness, run the oven with convection and keep an eye on color—the crust should be deep golden and the cauliflower just tender.
  • Finish with bright contrast. A squeeze of fresh lemon juice just before serving brightens the dish and cuts through richness. Garnish with chopped parsley for color and aroma; if using dried parsley, reduce to a light sprinkle.
  • Storage and reheating: refrigerate leftovers in an airtight container for up to 3 days. Reheat in a hot oven (375–400°F) for 8–12 minutes to recapture crispiness; a brief broil at the end helps re-crisp the crust.

FAQ

How do I choose a good cauliflower and cut it into steaks?

Look for a firm, dense head with tight white florets and minimal browning leaves. Remove the outer leaves, trim the stem ends, and slice the head into 3/4 to 1-inch thick steaks. Cut straight down through the core to create sturdy “steaks.” You may get 2–3 good steaks per head; the extra bits can crumble into florets.

What makes these cauliflower steaks crispy?

Dry the surface well, use a crunchy coating, and bake on a hot, parchment-lined sheet with space between each steak. A crust formed from panko and Parmesan (or almond flour for gluten-free) with a touch of oil crisps nicely. Flip halfway and finish under the broiler for extra crispness if you like.

What should I use for the crispy crust?

Classic Parmesan–Panko crust: 1/2 cup panko, 1/4 cup grated Parmesan, 1 teaspoon garlic powder, 1/2 teaspoon paprika, salt and pepper to taste, plus 1–2 tablespoons olive oil to help bind. For gluten-free, substitute almond flour (about 1/2 cup) in place of breadcrumbs. You can also add a pinch of Italian seasoning or lemon zest for brightness.

What temperature and how long should I bake them?

Preheat to 425°F (220°C). Line a baking sheet with parchment, arrange the steaks, and brush or spray lightly with oil. Bake 20–25 minutes, flip, then bake another 5–10 minutes until the coating is golden and crisp. If you want extra crispness, broil for 1–2 minutes at the end, watching closely.

Do I need to preheat the sheet or avoid crowding?

Yes. A preheated, hot sheet helps crisp the crust. Keep about 1 inch of space between steaks; overcrowding causes steaming and soggy crusts.

Are these recipes dairy-free or vegan-friendly?

Yes. Use dairy-free Parmesan substitutes or nutritional yeast for cheesy flavor, and oil or dairy-free mayo as a binder. For gluten-free prep, use almond flour or crushed nuts in place of breadcrumbs. Most ingredient lists are naturally vegan with these substitutions.

What flavor variations can I try?

Try lemon zest and chopped parsley after baking, or a drizzle of tahini–lemon sauce. Add a pinch of cayenne for heat, smoked paprika for depth, or garlic–butter (dairy-free if needed) after baking. Nutritional yeast also provides a cheesy note without dairy.

How should I store and reheat leftovers?

Cool completely, then refrigerate in an airtight container for up to 3 days. Reheat in a 350°F (175°C) oven for 5–7 minutes until hot and crisp again. The oven helps restore crispness better than the microwave.

Can I freeze cauliflower steaks?

Fresh baked steaks freeze best for up to 1 month. Reheat from frozen in a 350°F (175°C) oven until hot and crisp. Freezing raw steaks is not recommended, as texture can degrade after thawing.

What are common problems and how can I fix them?

Problems like soggy crust or uneven cooking can be caused by excess moisture, overcrowding, or uneven steak thickness. Pat the cauliflower dry, cut steaks to uniform thickness, apply a thin, even coating, and ensure space on the baking sheet. If edges brown too quickly, tent with foil and adjust the rack height or oven temperature slightly.

Introduction / Hook

Imagine biting into a slice of toast that tastes like a dream you didn’t know you were allowed to have for breakfast. Crème Brûlée French Toast is where brunch elegance meets comforting childhood favorites. The outside wears a crackling caramel crust that shimmers like glass, giving way to a supremely tender, custard-soft center that whispers vanilla, cream, and a kiss of citrus. The aroma unfurls through the kitchen in warm waves—brown butter, vanilla bean, and a faint citrus brightness that lifts the dish from comforting to celebratory. This is a recipe that feels both luxe and familiar, a testament to the magic that happens when a storied classical dessert is reimagined for a lazy weekend morning or a festive brunch with friends and family. It’s the sort of dish that earns a chorus of “wow” before the first bite and a chorus of “again, please” after. The ritual begins with choosing the right bread—thick-sliced brioche or challah that can soak up custard without losing its structure—and ends with that satisfying crack of caramel meeting a silk-smooth interior. The taste memory lingers: butter-soft bread, vanilla-sweet custard, a whisper of orange or lemon zest, and a caramel top that crackles beneath a fork. It’s decadence without pretension, simple techniques elevated by a single, transformative finishing touch. If you’re seeking a breakfast that doubles as a dessert-worthy showstopper, this Crème Brûlée French Toast invites you to savor every moment—crispy, creamy, fragrant, and deeply comforting all at once.

The Story Behind the Dish

The idea of French toast is steeped in the history of thrifty, delicious breakfasts—a clever way to revive stale bread and turn it into something irresistible. The French call it pain perdu, literally “lost bread,” and for centuries cooks have embraced the humble loaf, soaking it in enriched custard and cooking until it achieves a soft custard interior and lightly fried exterior. Crème brûlée, by contrast, is a quintessential French dessert—a silky custard finished with a brittle sugar crust created by torched caramel. The beauty of Crème Brûlée French Toast lies in marrying these two culinary cousins: the comforting, custard-soaked bread of a grand brunch and the dramatic, dessert-like sugar crust that crackles with a precisely torched sweetness.

One might picture a sunlit kitchen in a vintage French home, where generations of cooks passed down the practice of elevating simple ingredients with patient technique. The modern twist—combining the custard-soaked slices with a caramelized top that shatters under a fork—represents a culinary conversation between old-world technique and contemporary brunch culture. It’s the kind of dish that could originate from a family breakfast table that wanted to feel special without straying too far from the familiar. In many ways, Crème Brûlée French Toast embodies a global breakfast philosophy: honor quality ingredients, embrace thoughtful contrasts of texture, and let a single, well-executed flourish do the heavy lifting. The result is a plate that feels celebratory, almost festive, but remains approachable enough to become a beloved weekend ritual in homes across the world.

Why You’ll Love This Recipe

  • Impressively luxe, with minimal effort. The crust delivers a show-stopping crack, while the interior stays luxuriously custardy—no complicated techniques required beyond a simple caramelizing finish.
  • Make-ahead friendly. The bread can be prepared in advance by letting it soak in a custard-like mixture, making weekend mornings easier and more relaxed.
  • Versatile and adaptable. Use your favorite bread (brioche, challah, or even sturdy morning rolls), and adjust sweetness and citrus notes to taste.
  • Perfect for brunch or special occasions. It looks like a dessert but works beautifully as a celebratory breakfast or a sophisticated brunch centerpiece.
  • Balanced flavor profile. The vanilla custard brings creaminess and depth, the citrus adds a brightness, and the caramelized sugar provides a crisp contrast that lingers on the palate.
  • Kid-friendly and adult-friendly alike. It’s indulgent enough for grown-up mornings and approachable enough to win over younger palates with comforting flavors.
  • Pairs beautifully with accompaniments. Fresh berries, whipped cream, a dusting of extra citrus zest, or a splash of maple syrup all enhance the experience without overpowering the core flavors.

Flavor Profile & Texture

Crème Brûlée French Toast is a study in contrasts—soft versus crisp, warm versus bright, indulgent versus familiar. The base is bread that has soaked in a custardy bath until it’s supremely tender and aromatic. Think silky vanilla bean custard, enriched with cream or milk, gently perfumed by vanilla and a hint of citrus zest. When the slices hit the hot pan, they set into a delicate, custard-soft interior that remains resilient enough to hold its shape. The exterior transforms into a glossy, amber-gold surface that caramelizes into a thin, crackling crust—a sugar crust that crackles with the bite of a dessert while staying perfectly edible with the fork’s press.

The flavor journey starts with the comfort of butter and vanilla. The bread’s natural sweetness—especially if you choose brioche or challah—provides the perfect canvas for the custard’s richness. The citrus essence, subtle but precise, lifts the dish from heavy indulgence to something more nuanced and refreshing on the palate. A pinch of salt balances sweetness and heightens flavor, mirroring the delicate alchemy of a classic crème brûlée. When you slice through the top, the crack reveals a velvety interior that glides across the tongue, followed by the crisp, tiny shards of caramel that provide texture and a satisfying snap. The overall experience is both comforting and exciting: a brunch dish that behaves like a dessert, yet remains wholeheartedly suited to the morning table.

Texture-wise, you’ll love the interplay: the outer shell offers a delicate crunch that gives way to a creamy, custard center, each bite releasing a chorus of vanilla, dairy richness, and a whisper of citrus. The bread’s crumb holds its own without becoming stodgy; the custard bridges the gap between soft and structured, and the final sugar top delivers that iconic brûlée crack that makes this dish feel special every single time.

Occasions & Pairings

Crème Brûlée French Toast is a versatile star that can anchor a weekend brunch, a special holiday breakfast, or a celebratory breakfast-in-bed surprise. Its showpiece finish and universally appealing flavors make it an ideal centerpiece for gatherings where you want to impress without feeling overwhelmed in the kitchen. Here are some occasions and pairing ideas to consider.

  • Serve with a cevitable spread of fresh berries, yogurt, granola, and a light syrup or honey. The dish’s richness pairs well with brighter accompaniments and a sparkling beverage to brighten the table.
  • Elevate a festive spread with a few citrus twists and edible flowers as garnish, turning a simple weekend breakfast into a memorable holiday indulgence.
  • A single, perfectly prepared slice on a warm plate, a side of fresh fruit, and a mug of strong coffee or a light mimosa to set the tone for a cozy morning.
  • The custard sweetness and caramel top tend to be a hit with kids, especially when served with a dollop of whipped cream or a sprinkle of powdered sugar and berries.
  • Since the bread can soak and the custard can sit in the fridge for a short while, you can stagger the assembly and have a hot, crispy finish ready just as guests arrive.

Pairings to consider:

  • Fresh berries and citrus zest for a bright contrast.
  • Whipped cream or a dollop of vanilla yogurt for extra creaminess.
  • A warm maple or spiced syrup to drizzle as you cut into the crackling top.
  • A light dusting of cinnamon, nutmeg, or cardamom to accent the custard’s warmth.
  • Complementary beverages: a flat white, a robust black coffee, or a sparkling wine for brunch celebrations.
  • Side dishes: buttery, salted roasted nuts, a small fruit compote, or a tangy yogurt parfait to balance the richness.

Tips, Variations & Substitutions

Here are practical ideas to tailor Crème Brûlée French Toast to your kitchen, dietary needs, and taste preferences. Each tip preserves the magic of the dish while offering flexible options to fit your life.

Make it vegan

Use a plant-based milk with a thick creaminess (such as coconut cream mixed with almond milk) and a flaxseed or chia “egg” to mimic richness. Replace butter with a plant-based butter substitute, and opt for a vegan caramelizing option, such as a maple-syrup-based glaze with a touch of coconut sugar to achieve a crackly top. Use a sturdy vegan bread that soaks well without dissolving.

Gluten-free and grain-free options

Choose a gluten-free brioche or challah alternative, or use thick slices of a sturdy gluten-free bread. The custard itself is naturally gluten-free; ensure any toppings, syrups, or flavorings are gluten-free and avoid cross-contamination if you’re serving guests with celiac disease.

Low-sugar or alternative sweeteners

To reduce sugar, you can replace part of the sugar in the custard with a natural sweetener such as tightly controlled amounts of monk fruit or erythritol. For the brûlée top, you can use a brown sugar substitute or a smaller amount of sugar with a higher caramelization technique. The key is to maintain the balance between the top crunch and the interior’s creaminess.

Flavor variations

  • Add more zest to the custard and a touch of orange blossom water or lemon oil for a brighter finish.
  • A pinch of cinnamon, nutmeg, or a tad of ground clove can provide a warm, autumnal note that pairs beautifully with maple syrup.
  • A few drops of almond extract or a pinch of finely ground nuts in the custard add depth and a nutty aroma.
  • A light pinch of sea salt and a drizzle of olive oil over the finished slices can create an intriguing savory-sweet contrast for adventurous palates (serve with fruit or yogurt to balance).

Regional twists

  • Fold a little finely ground espresso or coffee into the custard for a mocha-inspired finish that pairs perfectly with chocolate-dipped fruits.
  • Use a cinnamon-spiced syrup or glaze to echo the flavors of classic maple-cinnamon breakfasts.
  • A whisper of rosemary or thyme in the glaze creates an aromatic, savory-with-sweet contrast that is surprisingly elegant.

Storage & Make-Ahead Ideas

Crème Brûlée French Toast offers several practical paths for make-ahead preparation and storage, making it friendly for busy mornings as well as leisurely weekend plans.

  • Make-ahead custard soak: Slice the bread and lay it in a dish, then pour over the custard mixture and refrigerate. The bread can soak for several hours or overnight, soaking up flavors and becoming deeply tender. When ready to cook, simply finish with the brûlée topping and caramelize just before serving for the best crackle.
  • Storage of baked portions: If you bake slices to serve later, store them in an airtight container in the refrigerator for up to 2 days. Reheat gently in a low oven or toaster oven to restore some crispness, and re-crystallize a fresh sugar top for the brûlée finish if desired.
  • Freezing tips: Bread slices freeze well before soaking. Freeze slices after they are cut, then thaw and soak as usual. After cooking, the top can be caramelized quickly to regain that crisp crystalline crust.
  • Make-ahead topping: Caramelize the sugar just before serving to preserve the signature crack. If you must prepare in advance, keep the topping separate and apply the brûlée crust when you’re ready to plate.

Fun Facts & Trivia (Optional)

Delightful anecdotes and culinary trivia can deepen appreciation for this dish. For instance, the act of caramelizing sugar with a kitchen torch is a technique famously associated with desserts like crème brûlée and some modern brunch dishes alike. The contrasting textures—a crisp caramel top and a soft, custardy interior—mirror the way chefs in brasserie kitchens modernize classic comfort food. The use of brioche or challah bread pays homage to bread-making traditions that celebrate enrichment with eggs and butter, creating a luxurious base that absorbs custard while maintaining structure. And while crème brûlée and French toast may hail from different culinary heritages, Crème Brûlée French Toast is a fascinating synthesis—an edible bridge between a beloved, hedonistic dessert and a timeless, comforting breakfast—embodying the best of both worlds in a single, memorable bite.

Ingredients

Crème Brûlée French Toast

Crème Brûlée French Toast Base

  • 8 thick-sliced brioche or challah bread slices (about 1 inch thick)
    → The bread acts as the vessel for the custard. Choose sturdy, day-old bread for best soakability and structure; fresh bread may become overly soft, so if using fresh, lightly toast or dry it for 10–15 minutes to firm up the crust.
  • 4 large eggs
    → Eggs provide the custard’s binding and structure, yielding a creamy interior after cooking. Whisk until completely blended and slightly airy to promote even absorption and a smooth texture.
  • 1 cup heavy cream
    → The heavy cream delivers rich, velvety custard and a decadent mouthfeel typical of crème brûlée-inspired dishes. For a lighter version, substitute with an equal amount of whole milk or a 50/50 mix, understanding it will be less luscious.
  • 1/2 cup whole milk
    → Adds moisture and helps balance the richness of the cream. Using whole milk preserves some creaminess without tipping into heaviness; adjust to taste if you prefer a lighter custard.
  • 1/3 cup granulated sugar
    → Sweetens the custard base and aids in a tender texture by slightly browning during cooking. You can adjust down a bit if you prefer less sweetness, but keep some sugar to maintain the classic crème brûlée balance.
  • 1 teaspoon pure vanilla extract
    → Imparts a warm, aromatic sweetness that drives the flavor of the custard. Use high-quality vanilla; if you have vanilla bean, scrape seeds into the custard and simmer briefly for extra depth.
  • 1/4 teaspoon fine sea salt
    → Enhances overall flavor and counteracts sweetness, ensuring the custard tastes well-rounded rather than flat. Even in rich mixtures, a pinch of salt is essential.
  • 1/2 teaspoon ground cinnamon (optional)
    → Adds a comforting warmth that complements the egg custard. If omitted, the toast will still be delicious; you can also sprinkle cinnamon on top just before serving for aroma.
  • 2 tablespoons unsalted butter, plus more for the pan
    → Used to cook the French toast, providing flavor and preventing sticking. Add a small amount of butter to the pan between batches to maintain a nice, even crust.

Brûlée Topping

  • 1/4 cup granulated sugar for topping
    → This sugar creates the caramelized brûlée crust once torched or broiled. Distribute evenly over the cooked French toast; use a fine or superfine sugar for a smoother shell, and ensure the toast is hot but not steaming when applying the sugar so it caramelizes correctly.

Serving Suggestions (Optional)

  • Pure maple syrup for serving
    → A light drizzle of maple syrup adds sweetness and moisture without overshadowing the brûléed crust. Serve warm to maintain crispness on top.
  • Fresh berries or sliced fruit for serving
    → Adds brightness and acidity to balance the richness of the custard and the sweetness of the brûlé shell. Choose seasonal berries or stone fruits for best flavor.
  • Powdered sugar for dusting (optional)
    → A delicate dusting enhances presentation and a touch more sweetness without adding much moisture, helping the dish look as appealing as it tastes.

Instructions

  • Dry the bread slices if using fresh brioche or challah by toasting in a 300°F (150°C) oven for 10–15 minutes, turning once, until the exterior feels firm to the touch; this preserves structure during soaking.
    → Dry bread absorbs custard without becoming soggy and helps maintain a sturdy, souffle-like interior after cooking.
  • In a large bowl, whisk the 4 eggs with 1/3 cup granulated sugar, 1/4 teaspoon fine sea salt, and 1 teaspoon pure vanilla extract until completely blended and slightly airy; the aeration promotes an even, tender custard.
    → A smooth, airy mixture ensures uniform binding and prevents pockets of raw egg in the finished toast.
  • Whisk in 1 cup heavy cream and 1/2 cup whole milk until the custard is homogeneous and no streaks remain; the dairy provides richness and a silky mouthfeel.
    → Fully combined dairy prevents separation during soaking and results in a creamy interior once cooked.
  • If desired, whisk in 1/2 teaspoon ground cinnamon to the custard for warmth; omit if you prefer a pure vanilla profile.
    → Cinnamon adds a comforting aroma and depth that pairs well with the brûléed crust.
  • Measure 1/4 cup granulated sugar and set aside for topping, using a fine-grained sugar for a smoother brûlée crack; keep it ready near the stove.
    → A uniform sugar layer caramelizes evenly, forming a crisp, glassy shell when torched or broiled.
  • Dip each bread slice into the custard, allowing about 60–90 seconds per side for thorough soaking without oversaturation, then transfer to a rack to drain briefly before cooking.
    → Proper soaking ensures a creamy interior while the crust remains intact for a good sear.
  • Warm a large skillet over medium heat and add 1–2 tablespoons unsalted butter, swirling to coat; wait until the butter foams and just begins to brown for nutty aroma.
    → The butter provides flavor and helps develop a golden, crisp exterior without sticking.
  • Cook the soaked slices in the buttered pan until deeply golden on the first side, about 2–3 minutes; flip with tongs and cook the second side for another 2–3 minutes, adjusting heat to prevent burning.
    → Medium heat yields an even crust and a tender center, essential for a crème brûlée-style finishing.
  • Transfer finished slices to a warm oven (200°F/93°C) on a rack to keep them crisp while you complete the remaining slices.
    → Gentle warmth prevents moisture from building on the crust and maintains consistent texture across the batch.
  • Sprinkle a thin, even layer of the reserved 1/4 cup sugar over each warm slice just before brûlée; avoid piling sugar so it caramelizes uniformly.
    → An even sugar distribution ensures a uniform caramel shell and predictable browning during torching or broiling.
  • Use a handheld culinary torch to sweep the flame over the sugar in small circles until it melts, bubbles, and turns a deep amber, moving steadily to avoid hot spots; rotate the slice as needed for even coverage.
    → Direct heat creates a glassy, crackly crust that contrasts with the creamy custard underneath and should be applied evenly for uniform color.
  • If you do not have a torch, preheat the oven broiler on high, place the sugared toast on a parchment-lined sheet, and broil 1–2 minutes, watching constantly and rotating for even caramelization; remove as soon as the top is amber and crisp.
    → Broiling provides an alternative caramelization method, but requires vigilant attention to prevent scorching or soggy edges.
  • Serve the brûléed French toast immediately while the top remains crisp; drizzle with pure maple syrup and garnish with fresh berries or sliced fruit for brightness, offering a contrast to the rich custard.
    → The hot, crackly shell should crack on first bite, revealing the creamy interior and balanced sweetness from syrup and fruit.
  • Optionally dust lightly with powdered sugar just before serving to enhance presentation and add a touch more sweetness without moisture.
    → A delicate final touch elevates plating and aroma without sogginess.

Notes

“These Crème Brûlée French Toasts are indulgent and crowd-pleasing, built from sturdy brioche or challah soaked in a custard of eggs, heavy cream, milk, vanilla, sugar, and a pinch of salt for balance. Use day-old bread for the best soak and structure; if your bread is fresh, lightly toast or dry slices for 10–15 minutes before dipping. Whisk the eggs, cream, milk, sugar, vanilla, salt, and optional cinnamon until completely blended and slightly airy to encourage even absorption. Dip each slice briefly (do not oversoak) and cook in butter over medium heat until the edges are set and the surface is golden. The brûlée crust is created after cooking by sprinkling 1/4 cup sugar over the hot toast and caramelizing with a culinary torch or under a hot broiler until glossy and crackly. Serve immediately with maple syrup, fresh berries, or a dusting of powdered sugar, and consider a dollop of yogurt or crème fraîche for tang. Leftovers can be stored refrigerated for 1–2 days and gently reheated; re-brûlée the top quickly to refresh the crust. For a lighter version, substitute part of the cream with milk and/or reduce the sugar, keeping enough sweetness to maintain the brûlée signature. If making ahead for guests, you can prepare the custard and bread soak up to 24 hours in the fridge, then proceed with cooking and topping just before serving.”

Tips

Tips for Crème Brûlée French Toast

  • Bread selection and prep: Use thick-sliced, sturdy brioche or challah about 1 inch thick. If using fresh bread, dry or toast it lightly (10–15 minutes) to firm the crust so it soaks up the custard without becoming mushy. Trim uneven edges for even cooking.
  • Custard technique: Whisk eggs and sugar until pale and slightly airy. Warm the heavy cream and milk just to a gentle steam, then slowly whisk into the eggs to temper and prevent scrambling. Strain the mixture for an ultra-smooth custard. If using vanilla bean, scrape seeds into the cream for deeper flavor.
  • Soaking it right: Dip each bread slice in the custard and soak for about 8–12 minutes total, turning halfway. Thicker slices will hold more custard for a creamier interior. Avoid over-soaking to prevent the bread from disintegrating.
  • Seasoning balance: A pinch of fine sea salt enhances the custard’s sweetness. The optional 1/2 teaspoon cinnamon adds warmth; if omitted, you can finish with a light cinnamon dust just before serving for aroma.
  • Cook with flavor: Use a small amount of unsalted butter in a nonstick skillet and cook over medium heat. Let the pan come to temperature before adding the bread, and cook 2–3 minutes per side until deeply golden and the custard is set through.
  • Butter management: Add a touch more butter between batches to maintain flavor and prevent sticking. Wipe the pan with a paper towel between batches for even browning.
  • Applying the brûlée crust: After the toast is cooked, sprinkle a thin, even layer of granulated sugar on top. Use superfine sugar for a smoother shell. Apply the sugar while the toast is hot but not steaming to promote even caramelization.
  • Caramelizing the sugar: Caramelize with a culinary torch held about 6 inches away, moving in small circles to avoid hot spots. If using a broiler, place under a hot broiler for 1–2 minutes, watching closely to prevent burning.
  • Safety and control: Keep a damp towel handy and never rush the torch. If sugar begins to burn, move to a fresh slice and reapply sugar after a brief rest.
  • Make-ahead and serving notes: The custard can be prepared ahead; soak the bread and refrigerate for up to 24 hours before cooking. Let the brûléed crust rest 1–2 minutes to set, then serve immediately with maple syrup, berries, or a dusting of powdered sugar.

FAQ

Crème Brûlée French Toast — FAQ

What is Crème Brûlée French Toast?

Crème Brûlée French Toast is a custard-soaked French toast that captures the creamy interior and caramelized sugar crust of crème brûlée. Thick slices of bread are saturated in a rich egg–cream mixture, pan-fried until golden, and finished with a brûléed sugar topping for a crisp, glassy crust.

What ingredients do I need?

Essential ingredients:

  • Thick-cut brioche or challah bread
  • Eggs
  • Heavy cream (or a mix of milk and cream)
  • Milk
  • Granulated sugar
  • Vanilla extract
  • Salt
  • Butter for frying
  • Coarse sugar (demerara or turbinado) for the top

Optional serving ideas: fresh berries and maple syrup.

What bread should I use?

Use thick slices of sturdy bread like brioche or challah. Day-old bread is ideal because it soaks up the custard without falling apart. Avoid soft sandwich loaves that are too fresh and may become soggy.

How do I soak the bread?

Whisk together eggs, heavy cream, milk, sugar, vanilla, and a pinch of salt (and cinnamon if you like). Dip each bread slice in the custard, allowing it to absorb for about 30–60 minutes. For a stronger custard, you can soak overnight in the refrigerator, covered.

How do I cook Crème Brûlée French Toast?

Preheat a skillet over medium heat and melt a tablespoon of butter. Fry the soaked bread slices 2–3 minutes per side until golden and set. You can finish them in a 350°F (175°C) oven for 8–12 minutes to ensure the centers are cooked through. Remove from heat and prepare for brûlée topping.

How do I caramelize the top?

Sprinkle an even layer of coarse sugar over each slice. Use a culinary torch to caramelize the sugar until it’s melted and golden, forming a crisp crust. If you don’t have a torch, place the slices under a hot broiler for 1–2 minutes, watching closely to prevent burning.

How can I prevent soggy or undercooked centers?

Tips for best results:

  • Use thick, sturdy bread and not the freshest, most airy loaf.
  • Do not over-soak; 30–60 minutes is usually enough, and overnight soaking is optional.
  • Cook the slices on medium heat until the exterior is golden and the interior is set; finishing in the oven helps.
Can I prepare this ahead or store leftovers?

Yes. You can soak the bread overnight in the fridge (unbrowned). When ready to serve, cook the slices and brûlée the topping just before serving. Leftovers can be refrigerated for 1–2 days. Reheat in a toaster oven or moderate oven, then re-brûlée the top for a fresh crust if desired.

What variations can I try?

Try these tasty twists:

  • Add citrus zest (orange or lemon) to the custard for brightness.
  • Spice it with cinnamon, nutmeg, or cardamom.
  • Include a splash of liqueur (like Grand Marnier) for depth.
  • Top with fresh berries, a dollop of whipped cream, or a drizzle of maple syrup.
  • For a dairy-free version, use almond milk with coconut cream and a dairy-free butter substitute, and ensure the bread is dairy-free.