Author

Ocean Nightleaf

Browsing

Introduction / Hook

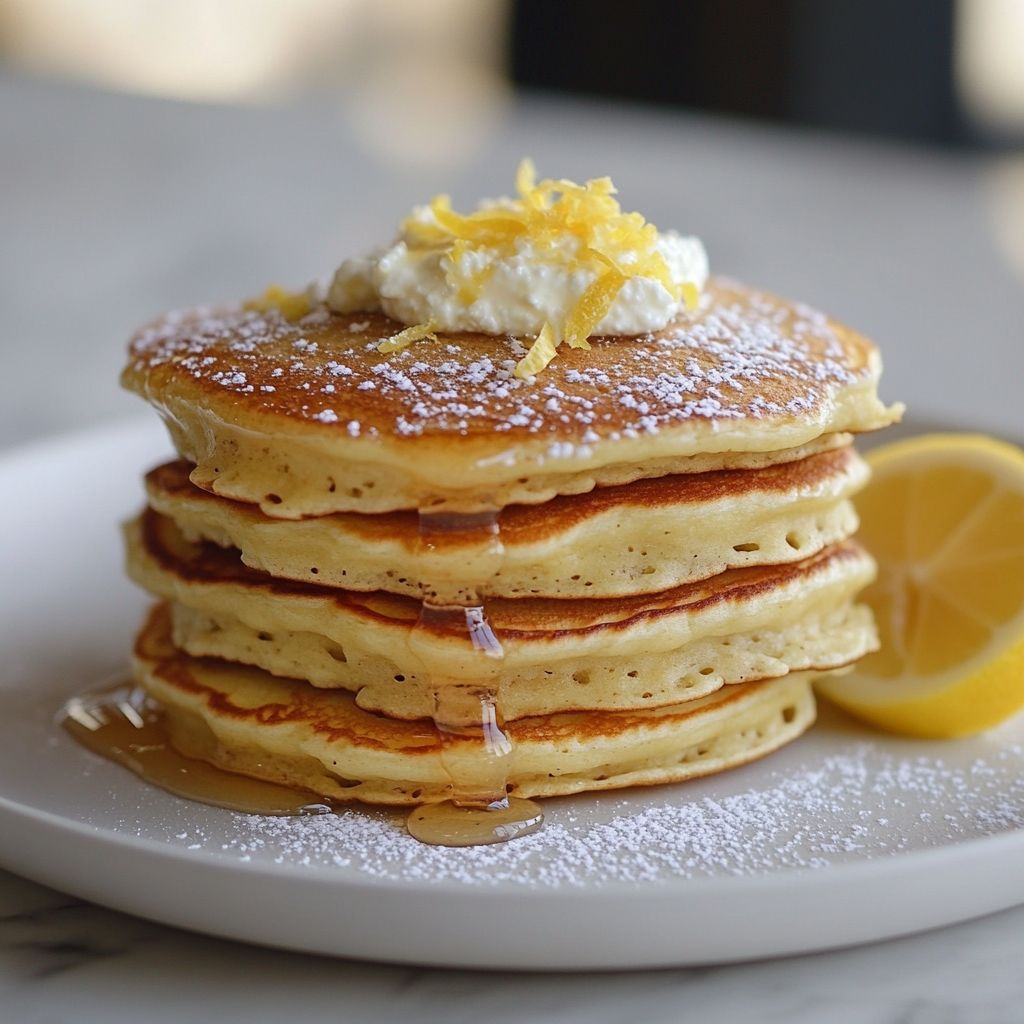
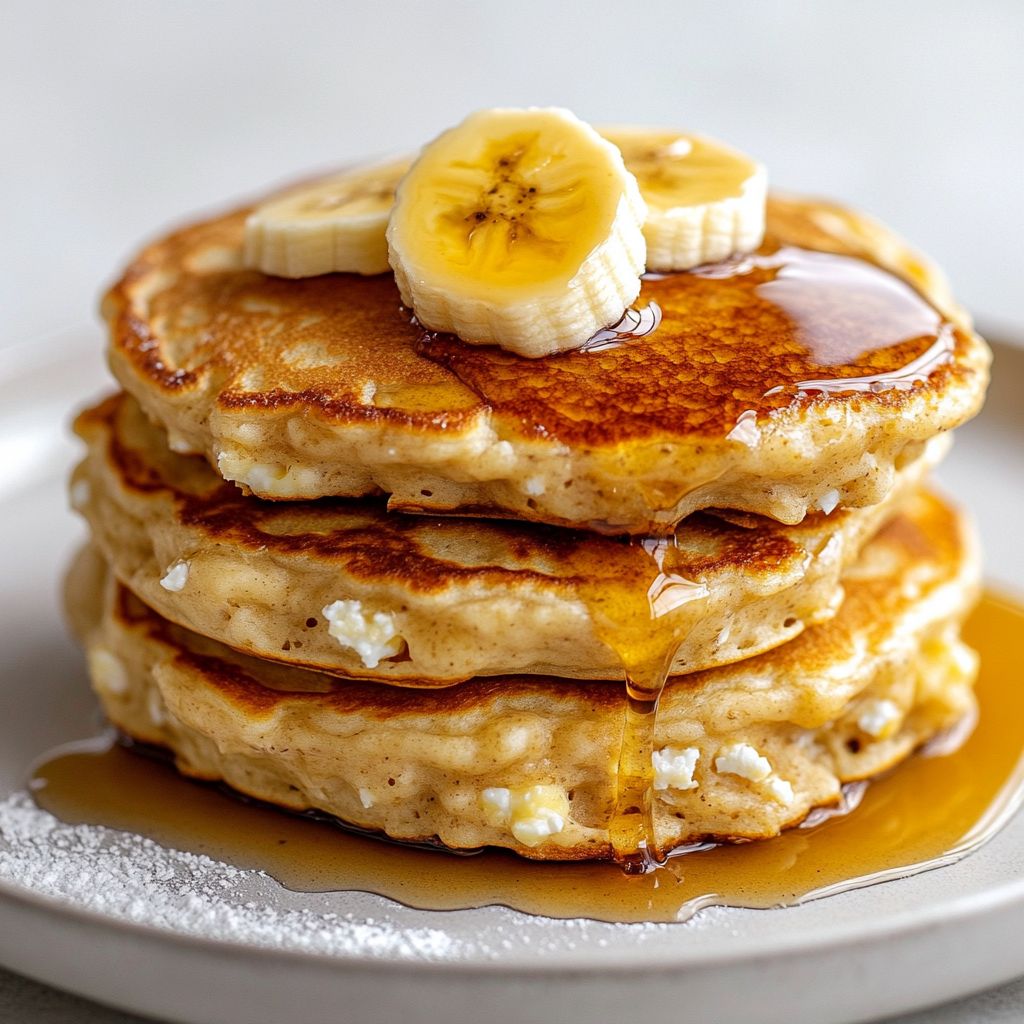
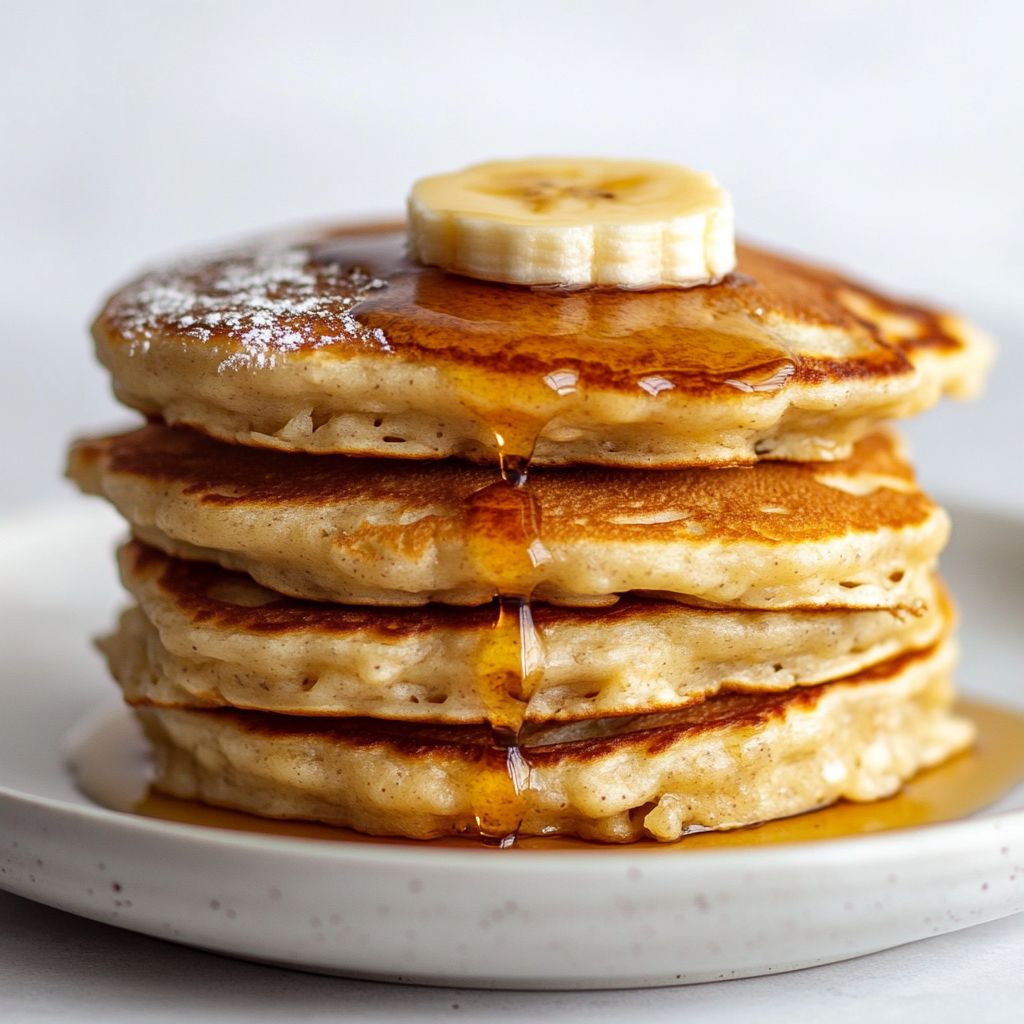
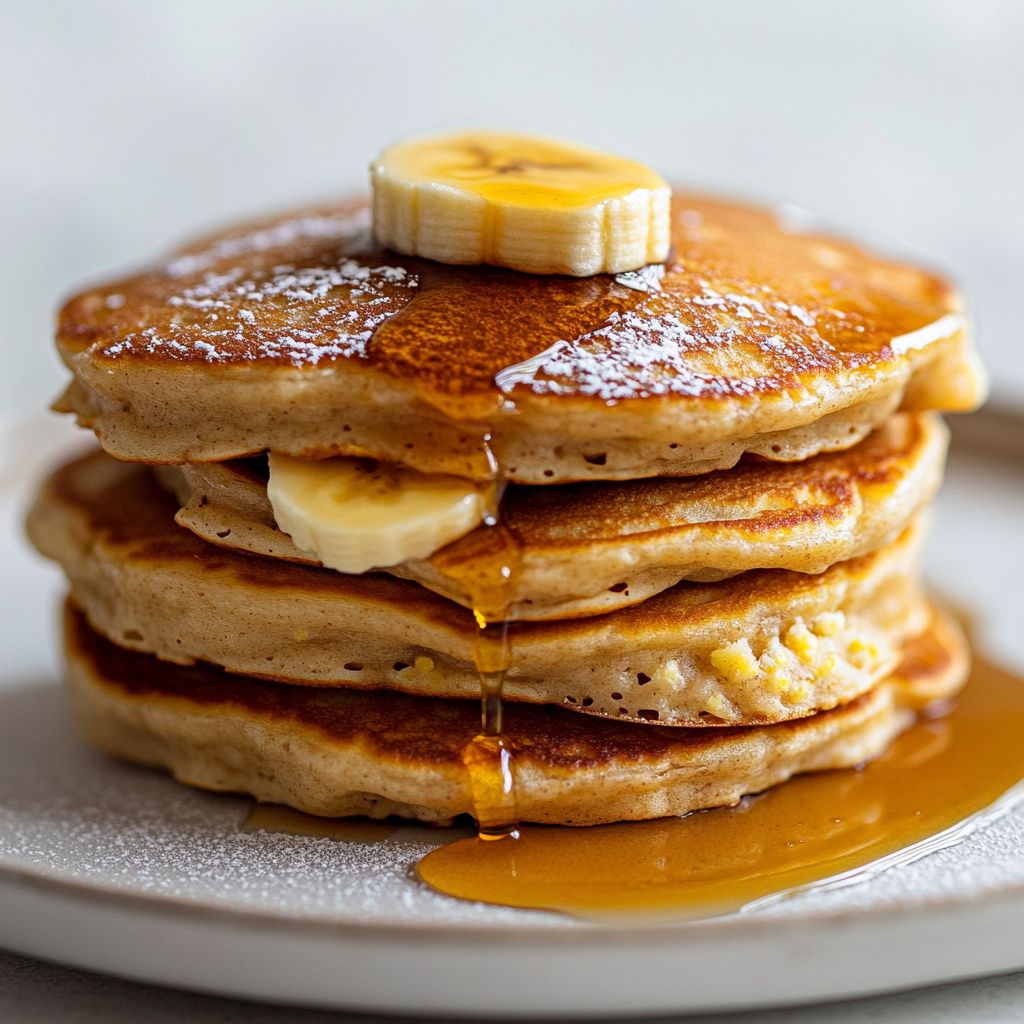
Imagine a stack of warm, cloud-soft pancakes that carry the gentle sweetness of ripe bananas, the creamy tang of cottage cheese, and a hint of vanilla in the air. The moment you lift a fluffy coin from the plate, a delicate steam swirls upward, carrying with it the comforting aroma of a cozy kitchen on weekend mornings. These aren’t just any pancakes; they’re a celebration of texture and balance. The banana lends natural sweetness and moisture, while cottage cheese folds in light, airy holes and a subtle tang that keeps the batter from feeling heavy. Each bite delivers a tender crumb that almost dissolves on the tongue, followed by a finish that’s softly fruity, softly creamy, and warmly comforting. If you’ve ever wished for pancakes that feel indulgent yet bright and wholesome at the same time, you’ve found them in this dreamy, fluffy rendition. This dish invites you into a ritual—mixing, scooping, and stacking—where the kitchen becomes a sanctuary of scent, sound, and sweet anticipation.

The Story Behind the Dish

Fluffy banana cottage cheese pancakes sit at an intersection of homey nostalgia and modern, lighter cooking. They evoke sleepy Sunday mornings and the idea that breakfast can be a little something special without demanding hours of time. The cottage cheese component isn’t accidental: it’s a nod to traditions that celebrate dairy as a tender-building block in morning fare. Cottage cheese brings a gentle creaminess and a touch of tang that keeps the sweetness of banana from tipping into cloying territory. The banana, a universal symbol of comfort and nourishment, adds moisture and natural sugar, reducing the need for heavy fat or long whisking sessions. The result is a pancake that feels like a breezy bridge between classic flapjacks and a fresh, contemporary breakfast idea. In different cultures, bananas and soft cheeses have found homes in breakfast blends, desserts, and even street-food-inspired stacks. This recipe tastes like a story told in layers: the fruit’s fragrance, the dairy’s smoothness, and the warm spice of a well-loved skillet. It’s a dish that travels well—whether you’re cooking for a busy weekday morning or a lazy weekend brunch—yet remains rooted in the simple pleasure of a well-made pancake.

Why You’ll Love This Recipe

  • Quick to assemble: You can have a stack on the table in minutes, with minimal mixing and no complicated steps.
  • Light and satisfying: The cottage cheese creates a tender crumb that feels indulgent but not heavy.
  • Balanced sweetness: Banana provides natural sweetness, reducing the need for extra sugar and allowing toppings to shine.
  • Kid-friendly and crowd-pleasing: The flavors are approachable for both little eaters and grown-ups, making it a versatile brunch option.
  • Customizable texture: The batter can be whisked to a gentle gloss or left a touch rustic to yield pockets of softness and airiness.
  • Pairing-friendly: Pairs beautifully with a drizzle of maple, berries, a dollop of yogurt, or a sprinkling of toasted nuts for texture.
  • Versatile base: Works well for those seeking lighter breakfasts, post-workout meals, or comforting weekend treats.
  • Make-ahead potential: The batter (if kept refrigerated) can rest briefly to enhance tenderness, and leftovers reheat beautifully.

Flavor Profile & Texture

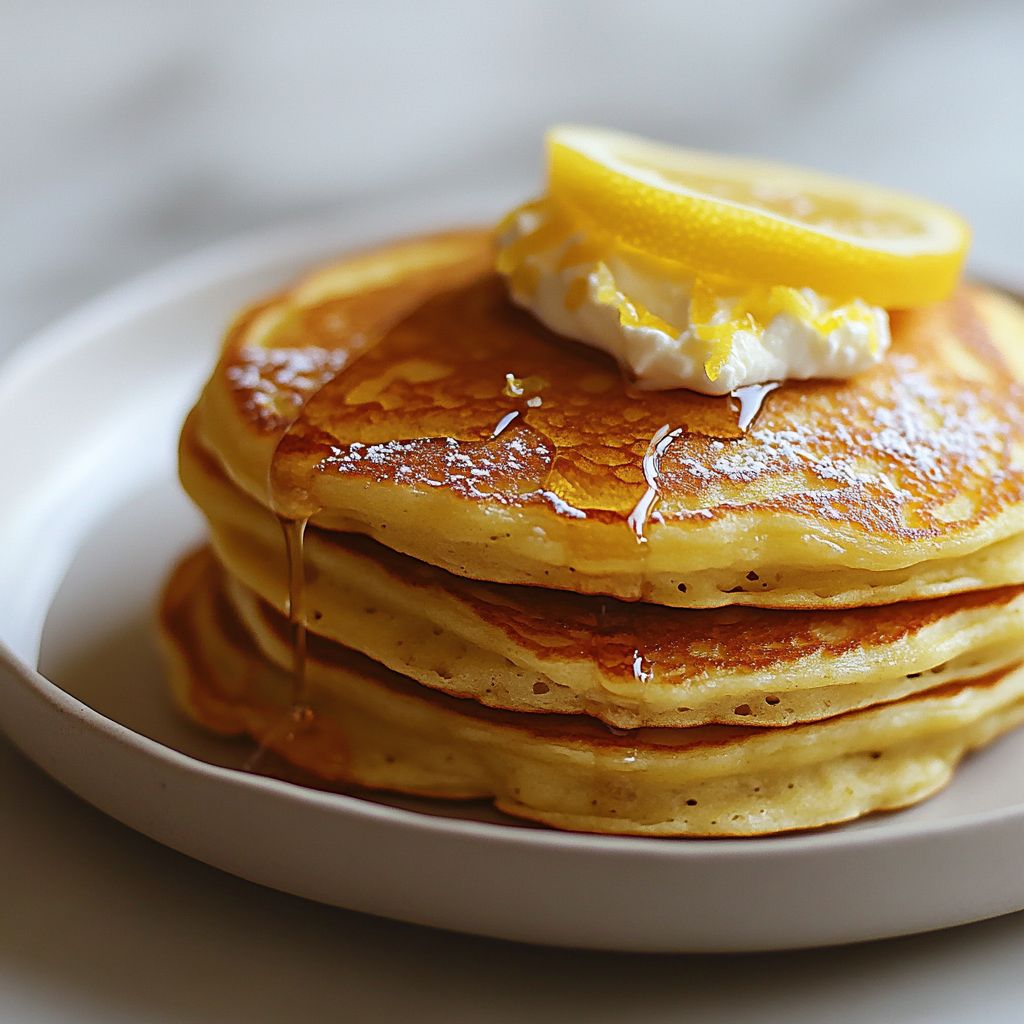
These pancakes present a symphony of textures and flavors that feel both sunny and comforting. The first impression is a soft, cushiony bite—the surface gently browned, the center tender and ethereal. The banana contributes a mellow sweetness and fruity aroma that feels natural rather than sugary, so the flavor remains light and approachable. Interwoven with that fruit softness is the cottage cheese’s discreet tang and its little wisps of curd, which create tiny air pockets inside the pancake. It’s almost like biting into a cloud that’s been kissed by fruit. The overall flavor is warm and familiar, not over-seasoned, letting the banana’s sweetness and the dairy’s smoothness take center stage. Subtle vanilla notes add a creamy perfume, while a whisper of cinnamon or nutmeg (if you choose to use them) can echo autumnal mornings without overpowering the dish. The texture offers a delightful contrast: the outer surface is gently crisped, offering a light bite; the interior remains velvety and soft, with occasional tender crumbs that melt as you chew. When topped with fresh fruit, a drizzle of maple, or a dollop of yogurt, the pancake becomes a complete, harmonious bite—soft, bright, and satisfying all at once.

Occasions & Pairings

This pancake recipe is incredibly versatile, making it a fitting choice for a variety of moments and settings. Here are some ideas to guide serving and pairing:

  • Weekend brunch centerpiece: Build a small pancake tower with alternating layers of fruit and yogurt, and set out a few toppings for guests to customize.
  • Weekday mornings: A quick, wholesome option that travels well in a container for school or work, especially if you keep a few toppings on hand.
  • Family-friendly breakfasts: A crowd-pleasing option that can be scaled up easily for larger gatherings.
  • Brunch-to-dinner transition: Serve with savory sides—such as eggs or a light sausage alternative—to create a balanced, satisfying meal.
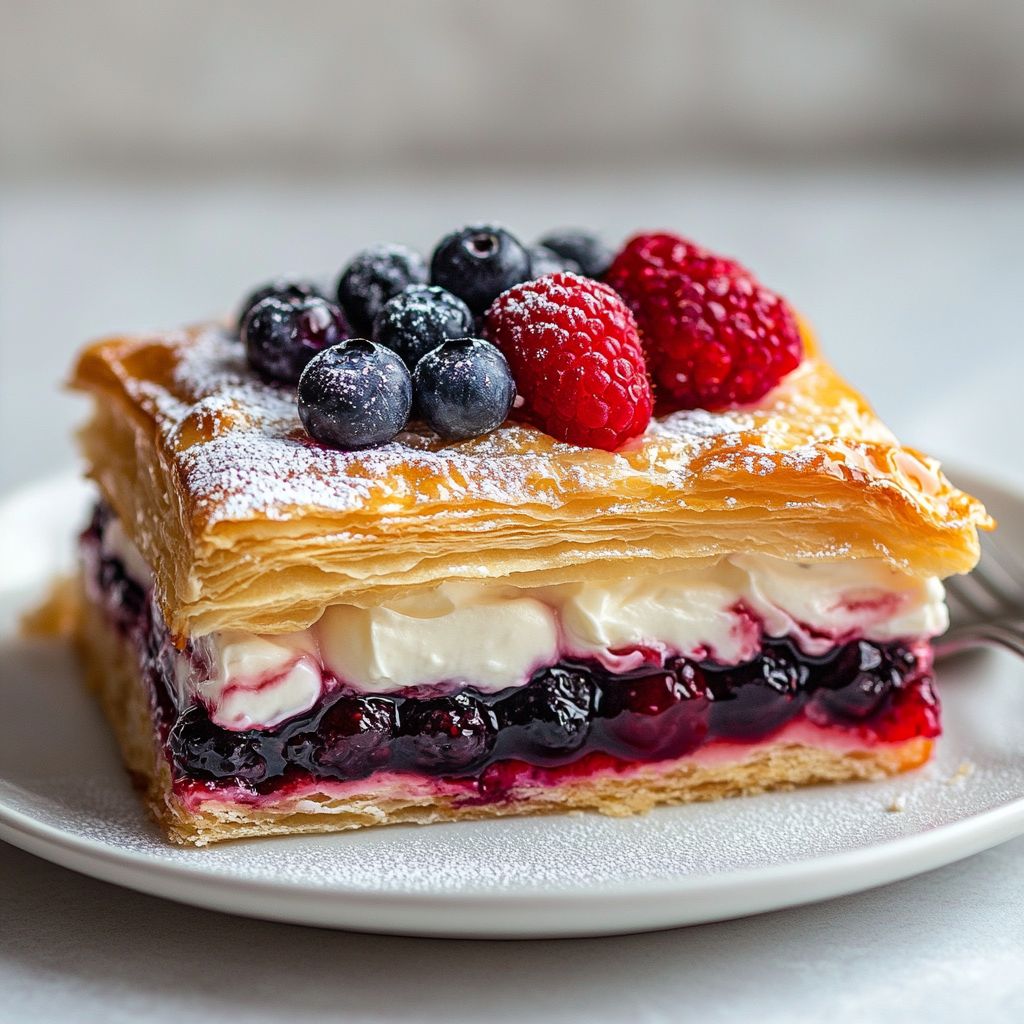
  • Special occasions: Elevate with a berry compote, a touch of citrus zest in the topping, and a dusting of powdered sugar for a celebratory feel.

Pairing suggestions to enhance the experience without overshadowing the pancake’s delicate character:

  • Fruity adornments: Fresh berries, sliced bananas, orange segments, or a spoonful of sliced peaches.
  • Dairy accents: A dollop of Greek yogurt, a smear of ricotta, or a glossy yogurt-based sauce to add tang and creaminess.
  • Sweet glazes and syrups: A light maple drizzle, a touch of honey, or a citrusy honey-lemon glaze for brightness.
  • Crunch and contrast: Toasted sliced almonds, walnuts, or a sprinkle of granola for texture.

Tips, Variations & Substitutions

Even though the core concept remains simple, there are numerous ways to tailor these pancakes to different tastes, dietary needs, or seasonal fruits. Here are ideas to inspire creativity while preserving the delicate balance that makes this recipe so appealing:

  • Texture tuning: If you prefer a lighter, more ethereal pancake, whip the egg whites separately and fold them into the batter just before cooking. For a heartier bite, skip the extra air and keep the batter more cohesive.
  • Milk and dairy swaps: If you want a dairy-free version, replace cottage cheese with a smooth plant-based alternative (such as blended silken tofu or a creamy almond yogurt) and use a dairy-free milk substitute. The texture will remain tender with careful blending.
  • Flavors and spices: A pinch of cinnamon, nutmeg, or vanilla bean can deepen the aroma without overpowering the banana’s sweetness. For a citrus lift, grate a little lemon or orange zest into the batter.
  • Vegan adaptation: Use fully ripe bananas, a smooth plant-based yogurt, and a splash of a neutral oil or applesauce to maintain tenderness without dairy.
  • Gluten-free approach: If you’re avoiding gluten, use a gluten-free flour blend designed for pancakes. The cottage cheese and banana still provide excellent moisture and structure, so you won’t miss a traditional wheat component.
  • Protein-boosting options: A scoop of neutral-flavored protein powder (adjusting liquid as needed) can help strengthen the batter for post-workout mornings while keeping the pancakes light.
  • Fruit-forward variation: Swap part of the banana with grated apple or pears for a different sweetness profile and a hint of crisp texture in each bite.
  • Sweetness control: For a less sweet end result, reduce the quantity of banana or pair with unsweetened fruit toppings and a minimal drizzle of maple.

Storage & Make-Ahead Ideas

These pancakes lend themselves to practical make-ahead strategies, so you can enjoy a comforting breakfast with minimal morning effort. A few friendly guidelines to help you store, reheat, and keep flavors vibrant:

  • Leftovers: Store cooled pancakes in an airtight container in the refrigerator for up to 2–3 days. Reheat gently in a skillet on low heat, covered, or in a warm oven to preserve their tenderness.
  • Freezing option: Layer pancakes with parchment between each cake and freeze. When ready to eat, reheat in a skillet, toaster oven, or microwave, though the skillet or oven method better preserves a slight outer crisp.
  • Make-ahead batter: If you’d like to prep the batter ahead of time, whisk the wet components and refrigerate, then fold in any dry elements just before cooking to maintain the light texture.
  • Flavor freshness: To preserve peak aroma, store any fruit toppings separately and combine just before serving. A quick squeeze of lemon or orange on certain fruits can help maintain bright color and flavor.

Fun Facts & Trivia (Optional)

Bananas and cottage cheese, two ordinary pantry staples, converge in this simple pancake to create a texture that delights the palate in surprising ways. Bananas have been a staple in many cuisines for centuries, prized for their natural sweetness, creamy texture, and accessibility. Cottage cheese, with its long history in dairy culture, was once a staple in many households for its protein and versatility. When these two ingredients meet pancake batter, they unlock a tender crumb that stands up to toppings while remaining light enough to feel almost self-indulgent. The result is a breakfast option that feels special without requiring special occasions or complicated techniques. And because this dish leans on naturally sweet fruit and dairy, it can be a wonderful starting point for introducing younger eaters to the joys of a homemade morning feast, one bite at a time.

Closing Thoughts

Fluffy banana cottage cheese pancakes offer a gentle invitation to slow down and savor a morning ritual that’s both comforting and exciting. They celebrate the beauty of simple ingredients transformed into something greater than the sum of its parts. The creamy hush of cottage cheese paired with the sunlit sweetness of banana creates a textural and flavor partnership that resonates with warmth, balance, and a touch of whimsy. Whether you’re cooking for a quiet family breakfast, a festive weekend brunch, or a slightly indulgent treat after a long week, these pancakes deliver a sense of home—airy, flavorful, and endlessly reassuring. As you slice into the first stack and watch the steam rise, you’ll understand how a few humble ingredients, treated with care, can become a small triumph in the kitchen—one tender, delicious bite at a time.

Ingredients

Pancake Batter
    – 2 ripe bananas (mashed)
    → Bananas provide moisture, natural sweetness, and binding; use very ripe fruit with brown spots for best flavor. Mash thoroughly until mostly smooth with a few tiny lumps for texture; if you want a lighter batter, whisk the bananas with the eggs a bit before combining with the cottage cheese.
    – 1 cup cottage cheese (blended until smooth)
    → Adds protein, moisture, and tenderness, contributing to fluffy pancakes. Blend in a blender or with a whisk until completely smooth to avoid visible curds; if you prefer a chunkier texture, blend less. If the mixture seems watery, drain a little whey and pat the cheese dry before mixing.
    – 2 large eggs
    → Provide structure and lift, helping the batter hold together and stay tender. Beat lightly and whisk into the banana-cottage cheese mixture; for extra light pancakes, fold in softly whipped egg whites at the end. Bring eggs to room temperature for easier emulsification.
    – 1 cup all-purpose flour
    → Gives the batter body and crumb structure. If making gluten-free, substitute with a 1:1 gluten-free flour blend and adjust with a splash of milk if needed. Sift to remove lumps and ensure a smooth batter; adjust thickness with additional milk if the batter is too thick.
    – 1/2 cup milk
    → Hydrates the dry ingredients and contributes to tenderness; use dairy milk for richer flavor or a non-dairy alternative if needed. Start with 1/2 cup and add 1–2 tablespoons more if the batter seems thick.
    – 1 tsp baking powder
    → Leavening that creates air pockets for fluffy pancakes; whisk into the dry ingredients before combining with the wet. Let the batter rest 5–10 minutes to hydrate and activate; avoid overmixing after resting to keep pancakes light.
    – 1/4 tsp salt
    → Enhances flavor and balances sweetness; use fine-grain salt for even distribution. Adjust to taste if using very sweet add-ins.
    – 1 tsp vanilla extract
    → Adds aroma and depth of flavor; use pure vanilla for best results; for extra depth, you can scrape in a bit of vanilla bean as well. Avoid excessive amounts which can overwhelm the banana and cottage cheese notes.
    – 1-2 tbsp sugar (optional)
    → Provides additional sweetness and browning; bananas add some sweetness, but you can omit sugar if fruit is very ripe. If using honey or maple syrup, reduce liquids slightly to keep the batter from getting too runny.
Cooking Fat
    – 1-2 tbsp butter or neutral oil for cooking
    → Used to grease the pan to prevent sticking and contribute a touch of flavor. Butter adds richness but can brown quickly, while neutral oil offers steadier heat. Heat the pan to medium and cook pancakes in batches, wiping the pan between batches to maintain even browning.
Optional Add-ins
    – 1/2 cup blueberries (fresh or frozen, not thawed)
    → Adds bright flavor and color; fold in gently just before cooking or sprinkle onto pancakes as you pour. If using frozen berries, do not thaw to avoid color bleed; pat dry if they release a lot of moisture.
    – 1/4 cup chocolate chips
    → Introduces pockets of sweetness and texture; toss chips with a teaspoon of flour before adding to batter to keep them from sinking; use mini chips or finely chopped dark chocolate for even distribution.
    – 1/4 cup chopped nuts (walnuts or pecans)
    → Adds crunch, protein, and healthy fats; toast nuts lightly to intensify flavor, then chop into small, even pieces so they distribute evenly throughout the batter.
    – 1/2 tsp ground cinnamon (optional)
    → Provides warm spice that pairs beautifully with banana and vanilla; adjust to taste, or replace with a pinch of nutmeg or cardamom for variation. Freshly ground spices offer the best aroma.
Toppings
    – Pure maple syrup
    → Classic accompaniment that enhances the banana-cottage cheese flavor; warm syrup slightly for easier pouring and fuller aroma. Use a small amount to control sweetness, or pair with yogurt and fruit for a lighter option.
    – Fresh fruit slices (banana, berries)
    → Adds brightness and contrast; slice fruit just before serving to maintain color and texture. Bananas and berries work particularly well with these pancakes.
    – Greek yogurt or whipped cream (optional)
    → Adds extra creaminess and protein; choose plain or vanilla yogurt for a tangy balance, or whipped cream for a richer topping. If using yogurt, consider a thicker, strained variety for nicer texture.

Instructions

  • Mash the bananas thoroughly with a fork or potato masher until they are mostly smooth, leaving a few tiny lumps for texture to contribute moisture and gentle banana flavor.
    → Provides natural sweetness and binding; thorough mashing ensures a uniform distribution when folded into the batter, while small bits keep the pancake pleasantly moist.
  • Blend the cottage cheese until completely smooth in a blender or with a whisk until no visible curds remain, then if the mixture seems watery, drain a tablespoon or two of whey and pat the cheese dry before combining with the other ingredients.
    → Smooth cottage cheese integrates fully for tender pancakes; removing excess whey prevents a watery batter that could make them flat.
  • Beat the eggs lightly in a separate bowl to emulsify the yolks and whites, then bring the eggs to room temperature for easier whisking and better incorporation into the batter.
    → Room-temperature eggs emulsify more evenly, contributing lift and a tender crumb to the final pancake.
  • Sift or whisk together the all-purpose flour, baking powder, and salt in a large mixing bowl to ensure even distribution and to remove lumps that could cause uneven pockets in the pancakes.
    → Dry ingredients evenly hydrated promote uniform rise and a light texture; sifting prevents clumps from forming visible streaks in the batter.
  • Whisk the mashed bananas, smooth cottage cheese, eggs, vanilla extract, and sugar (if using) in a medium bowl until the mixture is uniform and smooth with no large lumps remaining.
    → Creates a cohesive wet base so the batter stays moist and evenly flavored; whisking thoroughly helps with emulsification and structure.
  • Pour the wet mixture into the bowl of dry ingredients and stir gently with a rubber spatula until just combined, stopping as soon as there are no dry streaks to avoid tough pancakes from overmixing.
    → Gentle folding preserves tenderness; overmixing can develop gluten and make the pancakes dense.
  • Add milk in small increments, stirring after each addition until the batter is thick but pourable; you want a consistency that spreads slightly in the pan without running too thin.
    → Proper hydration of the flour yields a tender crumb; too thick or too thin batter will affect rise and texture.
  • Let the batter rest at room temperature for 5–10 minutes to hydrate the flour and allow the baking powder to activate, which will help create a softer, fluffier pancake after cooking.
    → Resting time enables better gas retention and a lighter final texture; do not skip for the best lift.
  • Preheat a nonstick skillet or griddle over medium heat (approximately 325–350°F / 170–175°C) and verify the surface is warm by sprinkling a few drops of water; if they dance and evaporate quickly, the pan is ready.
    → Consistent moderate heat ensures even browning and prevents burning; a properly heated surface helps pancakes set quickly without sticking.
  • Lightly grease the cooking surface with 1–2 teaspoons of butter or a thin film of neutral oil, wiped with a paper towel to remove excess, so the pancakes release cleanly and acquire a subtle toasty flavor.
    → A thin coat prevents sticking and adds a touch of richness without greasing the pan too heavily, which would dilute browning.
  • Fold in your chosen optional add-ins (blueberries, chocolate chips, chopped nuts, or cinnamon) with a gentle hand just before cooking to distribute evenly without overworking the batter.
    → Add-ins provide color, flavor, and texture; distributing them evenly avoids clumps or sinking to the bottom.
  • Spoon batter onto the hot pan in rounds about 1/4 cup each, spacing them evenly to allow room for spreading, and avoid crowding which can cause uneven cooking.
    → Uniform portions ensure consistent cooking times and easier flipping; spacing prevents pancakes from merging.
  • Cook the first side until bubbles form on the surface and the edges look set and slightly dry, about 2–3 minutes, then monitor and adjust heat if the bottoms brown too quickly or pale undercooked areas remain.
    → Bubbles indicate the batter is setting and releasing from the pan; waiting for edges to set prevents tearing when flipped.
  • Flip the pancakes with a wide spatula in one confident motion and cook the second side for 1–2 minutes more until golden brown and just cooked through; adjust timing based on pancake diameter and pan heat.
    → A swift, even flip ensures a clean edge and uniform doneness; the second side develops color and completes the cooking process.
  • Transfer the finished pancakes to a warm plate and repeat with the remaining batter, wiping the pan with a paper towel and re-greasing as needed to maintain even browning for subsequent batches.
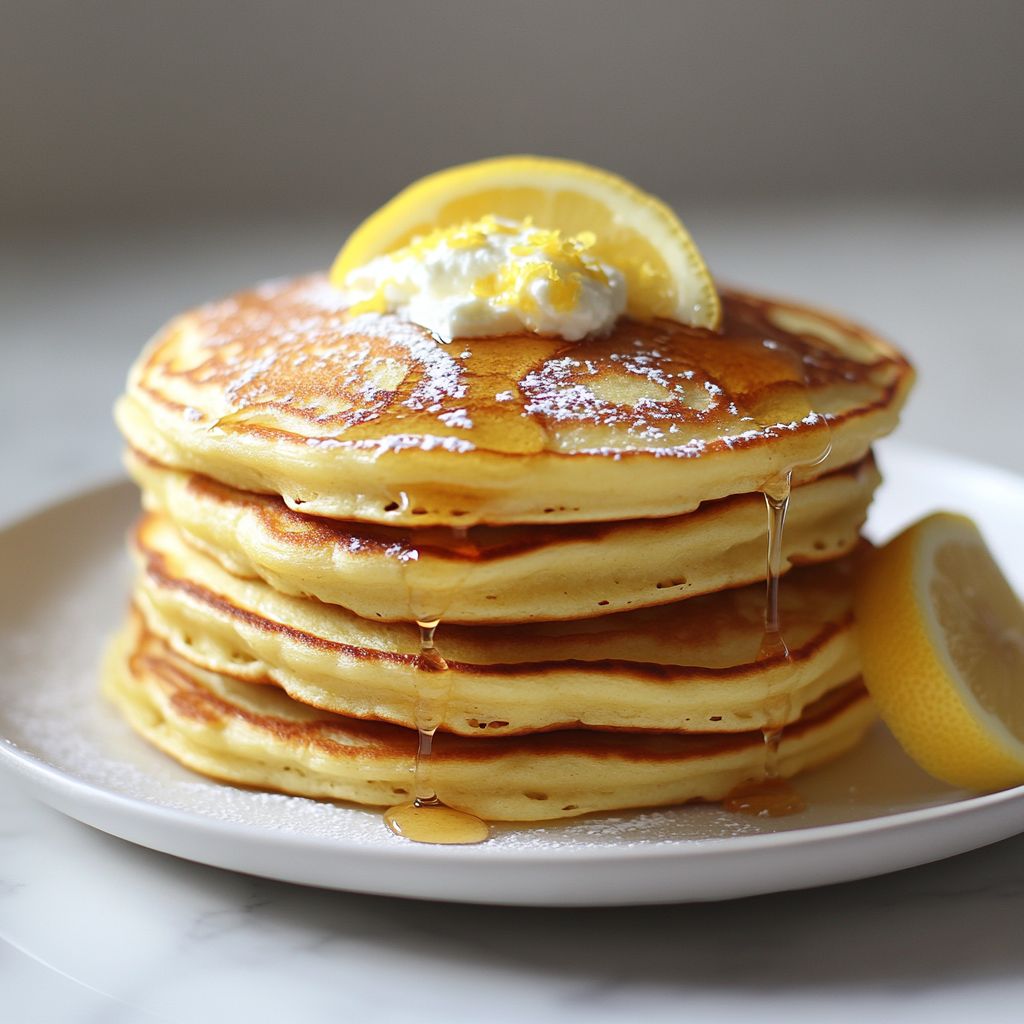
    → Keeping a clean, lightly oiled surface avoids sticking and ensures consistent texture across the batch.
  • Serve the pancakes stacked with warm maple syrup, fresh fruit slices, and optionally Greek yogurt or whipped cream for extra richness and contrast in texture.
    → The toppings amplify banana and vanilla notes; serving warm preserves the pancake’s tenderness and enhances overall aroma.

Notes

These fluffy banana cottage cheese pancakes are protein-packed and naturally sweetened by ripe bananas, yielding tender, comforting pancakes with a bright banana aroma. You can customize them with blueberries, chocolate chips, chopped nuts, or a pinch of cinnamon for warmth. They freeze well and reheat beautifully for quick breakfasts or snack times. For extra lift, you can fold in softly whipped egg whites at the end and let the batter rest 5–10 minutes to hydrate the flour and activate the leavening. If making gluten-free, substitute the all-purpose flour with a 1:1 gluten-free flour blend and ensure your baking powder is gluten-free; you may need a splash more milk to achieve a pourable batter. If the cottage cheese seems watery, drain a little whey or pat the cheese dry before mixing. Cook on medium with 1–2 tablespoons of butter or neutral oil, wiping the pan between batches for even browning. Top with pure maple syrup, yogurt, or fresh fruit to taste. Tailor the sweetness to your fruit ripeness and add-ins for a wholesome, satisfying breakfast any day of the week.

Tips

Tips for Fluffy Banana Cottage Cheese Pancakes

Pancake Batter Tips

  • Choose very ripe bananas with brown spots for natural sweetness and moisture. Mash until mostly smooth, leaving a few tiny lumps for texture. If you want an even lighter batter, whisk the mashed bananas with the eggs briefly before combining with the cottage cheese.
  • Blend the cottage cheese until completely smooth to avoid visible curds. If the mixture seems a bit watery, drain a small amount of whey and pat the cheese dry before mixing.
  • Bring eggs to room temperature to improve emulsification. Beat lightly and whisk into the banana–cottage cheese base; for extra light pancakes, fold in softly whipped egg whites at the end.
  • Sift the all-purpose flour to remove lumps and ensure a smooth batter. For gluten-free needs, use a 1:1 gluten-free flour blend and add a splash of milk if the batter is too thick.
  • Start with 1/2 cup milk and add 1–2 tablespoons more only if the batter seems thick. This helps achieve a pourable yet thick pancake batter.
  • Whisk the baking powder into the dry ingredients, then rest the batter for 5–10 minutes to hydrate and activate. After resting, mix just until combined to keep the pancakes light.
  • Use fine-grain salt to evenly distribute flavor. If using very sweet add-ins, you may want to reduce the added salt slightly.
  • Vanilla extract adds aroma and depth. Use pure vanilla and avoid overdoing it; a slight scrape of vanilla bean can intensify the flavor for a more pronounced banana note.
  • Sugar is optional. Bananas add sweetness, but you can omit sugar if fruit is very ripe. If using honey or maple syrup, reduce the liquids slightly to maintain the right batter consistency.
  • Aim for a batter that pours slowly off the spoon and holds its shape in the pan. If too thick, add a splash more milk; if too thin, whisk in a bit more flour until it thickens but remains pourable.
  • Let the batter rest briefly after mixing to relax the flour and improve tenderness, but avoid overmixing after resting to keep the pancakes fluffy.
  • Preheat your pan to medium and test with a tiny amount of batter. The surface should shimmer, and bubbles should form evenly before flipping.

Cooking Fat and Pan Tips

  • Use 1–2 tablespoons of butter or a neutral oil to grease the pan. Butter adds richness but can brown quickly; oil offers steadier heat. For best results, you can combine a small amount of butter with oil to balance flavor and browning.
  • Preheat the pan to a steady medium heat before cooking each batch. If the pan is too hot, pancakes will burn; if too cool, they may be pale and dense.
  • Wipe the pan between batches to remove any browned bits that could cause uneven browning or sticking.
  • Grease the pan lightly each time to prevent sticking, but avoid pooling fat which can lead to greasy pancakes.
  • When cooking, drop batter in evenly sized circles. Cook until edges look set and bubbles form on the surface, then flip and cook until golden and cooked through.
  • Keep finished pancakes warm in a low oven (about 200°F/95°C) on a rack while you finish the rest of the batch to prevent sogginess from steam.

Optional Add-ins Tips

  • Blueberries: fold in gently just before cooking or sprinkle onto pancakes as you pour. Fresh or frozen works; if using frozen, do not thaw to avoid color bleed. Pat dry if they release a lot of moisture.
  • Chocolate chips: toss chips with a small amount of flour before adding to batter to help keep them suspended and prevent sinking. Use mini chips or finely chopped dark chocolate for even distribution.
  • Nuts: toast walnuts or pecans lightly to intensify flavor, then chop into small pieces for even distribution throughout the batter.
  • Ground cinnamon adds a warm spice note that pairs beautifully with banana and vanilla. Start with 1/2 teaspoon and adjust to taste; you can also try nutmeg or cardamom for variation.

Toppings Tips

  • Warm pure maple syrup to release its aroma and make pouring easier; use a modest amount to keep the dish balanced with the pancakes’ flavor.
  • Fresh fruit slices (banana, berries) add brightness. Slice fruit just before serving to maintain color and texture; bananas pair especially well with these pancakes.
  • Greek yogurt (plain or vanilla) or whipped cream adds extra richness and protein. For a tangy balance, choose a thicker strained yogurt and consider a drizzle of honey or a squeeze of lemon zest for contrast. If using yogurt, thicker varieties can help keep the topping from pooling.

FAQ

What are the main ingredients for Fluffy Banana Cottage Cheese Pancakes?

The batter typically includes ripe bananas, cottage cheese, eggs, and a small amount of flour or oats. Add baking powder, vanilla, and a pinch of salt. Optional extras include cinnamon, a splash of milk to adjust consistency, and a little butter or oil for cooking.

Why are these pancakes so fluffy?

The combination of mashed banana, cottage cheese, and eggs provides moisture and structure, while baking powder adds lift. Avoid overmixing the batter to keep the pancakes light and airy.

Can I make these pancakes gluten-free?

Yes. Use gluten-free flour, almond flour, or gluten-free oats (certified gluten-free) in place of regular flour. You may need a touch more or less liquid to achieve a pourable batter.

Can I substitute cottage cheese with yogurt or ricotta?

Yes. You can substitute with equal parts Greek yogurt or ricotta. For Greek yogurt, you might need a splash more milk to adjust the batter’s consistency. Ricotta works well but may yield a richer texture.

How do I cook them so they don’t stick or burn?

Cook on a medium heat in a lightly greased nonstick skillet. Use about 1/4 cup of batter per pancake, wait until bubbles form and edges look set, then flip and cook 1–2 minutes more. Adjust heat as needed to prevent browning too quickly.

How should I store and reheat leftovers?

refrigerate cooked pancakes in an airtight container for up to 3–4 days. Reheat in a toaster oven or skillet until warmed through. For longer storage, freeze cooked pancakes for up to 1–2 months and reheat directly from frozen.

How can I naturally add sweetness?

Ripe bananas provide natural sweetness. You can also add a touch of maple syrup or honey to the batter, or serve with fresh fruit and a drizzle of syrup. If you like, add cinnamon for warmth without extra sugar.

Can I freeze the batter or the pancakes?

Best practice is to freeze cooked pancakes for 1–2 months; reheat in a skillet or toaster oven. Freezing batter is possible but may affect texture and leavening; if freezing batter, thaw fully and stir in a little milk to loosen before cooking.

What toppings pair well with these pancakes?

Top with sliced bananas, berries, a dollop of cottage cheese or yogurt, a sprinkle of nuts, and a drizzle of maple syrup or honey. A light dusting of cinnamon also complements the flavors nicely.

Are there common add-ins or variations I can try?

Try folding in blueberries, chocolate chips, or chopped nuts for texture. You can also mix in a tablespoon of chia seeds for extra fiber or swap some of the flour for rolled oats for a heartier bite.

Introduction / Hook

Imagine a sun-drenched kitchen, the windows open to a warm breeze, and a tray of glistening chicken resting on the counter, its surface lacquered with a honey-gold sheen. Fresh Honey Lime Chicken is more than a dish; it’s a bright, comforting hug on a plate. The moment you lift the lid or set the fork down, you’re greeted by a chorus of sensory notes: the sweet, floral kiss of honey, the zesty sparkle of lime, and a hint of savory depth that promises both satisfaction and a touch of adventure. This is the kind of meal that makes weeknights feel like a holiday, casual Friday dinners feel festive, and leftovers feel almost celebratory. It’s simple enough for busy families, yet nuanced enough to impress guests, with a glaze that shines and a balance that lingers on the palate long after the last bite.

What makes Fresh Honey Lime Chicken especially enchanting is its ability to pair with a wide range of sides and drinks while carrying a distinct personality all on its own. The fragrance that fills the kitchen when the sauce comes together is almost magical—a warm sweetness tempered by citrus brightness and a whisper of savory depth. It’s not a heavy dish; it’s a polished, approachable centerpiece that invites you to savor each bite and to explore the flavors at your own pace. Whether you’re cooking for a family meal, a casual weeknight date night, or a small gathering of friends, this dish adapts with grace and offers a sense of coastal sunshine no matter where you are.

As you read on, you’ll discover how the harmony of honey and lime translates into a cooking experience that feels both effortless and special. You’ll be immersed in the sensory journey—from the glossy sheen of a finished piece to the way the flavors unfold in layers as you chew. There’s something universally comforting about a dish that respects both simplicity and soul, something that makes you reach for seconds with a smile. Welcome to a recipe that invites you to press pause on the ordinary and embrace a moment of bright, comforting, everyday elegance.

The Story Behind the Dish

Fresh Honey Lime Chicken carries a small, sunlit history within its glaze. Its concept grew from and celebrates two universal kitchen inspirations: the sweetness of nature’s gifts and the vibrancy of citrus. The honey-tinged glaze is a nod to long afternoons spent gathering harvests in blooming orchards and meadows, where blossoms perfume the air and bees hum a soft, timeless tune. Lime—that lively citrus fruit—adds a spark reminiscent of seaside markets, where color is everywhere and tangy, refreshing scents mingle with the scent of grilled foods and ocean air. When those elements come together, they tell a story about balance: gentle sweetness that never overpowers, and brightness that never feels sharp or sour, but instead clean and uplifting.

In many kitchens around the world, bright glazes like this one have a shared purpose: to bring a simple protein to life with something more than salt and pepper. The dish’s lineage can be traced to culinary traditions that honor citrus as a brightener, honey as a natural sweetness that rounds the edges, and a touch of savory depth—often from aromatics or a hint of umami. It’s a modern interpretation that favors accessibility and versatility, crafted for cooks who want a dependable centerpiece without spending hours in front of the stove. The result is a dish that feels timeless and contemporary at once—comforting enough for everyday meals, yet polished enough to feel special when friends gather around the table.

There’s also a personal element to this recipe’s story. Many households share a favorite weeknight go-to that evolves over time—siblings swap tweaks, parents add a favorite herb, a grandmother’s technique sneaks in through the back door of the kitchen. Fresh Honey Lime Chicken has become one of those evolving memories: a dish that travels with people as they move, lands on different tables, and nonetheless retains its core identity—a bright glisten, a gentle kiss of sweetness, and a citrus note that lifts the whole plate into a moment of sunshine.

Why You’ll Love This Recipe

  • Quick and approachable: It’s designed for weeknights when you want something flavorful without spending hours in the kitchen.
  • Bright flavor profile: The interplay of honey sweetness and lime’s tangy brightness creates a refreshing, balanced finish that feels uplifting and satisfying.
  • Versatile pairing: Works beautifully with a wide range of sides—from fluffy rice and quinoa to roasted vegetables or a light greens salad.
  • Kid-friendly yet sophisticated: Gentle sweetness appeals to younger palates while the citrus note engages adult tastes, making it a crowd-pleaser for mixed ages.
  • One-glaze, many moments: The glossy, caramelized glaze adds visual appeal and depth without needing a complex sauce or multiple components.
  • Adaptable for different diets: The dish centers on a simple protein and a bright glaze, which can be tweaked with substitutions if needed.
  • Low-cost comfort: Uses everyday pantry staples combined in a way that feels special, delivering big flavor without a big price tag.
  • Timeless appeal: The flavors feel familiar and comforting, yet fresh enough to feel modern and vibrant in today’s dining landscape.

Flavor Profile & Texture

The essence of Fresh Honey Lime Chicken rests in its elegant balance of contrasts. At first bite, you encounter a gentle sweetness that is not cloying but rather polished and refined. The honey contributes a soft, floral note—like a whisper of nectar—that coats the palate in a velvety sheen. This sweetness is tempered by lime’s bright acidity, which cuts through the richness and adds a lively, citrus-driven lift. The result is a flavor that feels clean, uplifting, and deeply satisfying, leaving a lingering citrusy glow on the tongue that invites the next bite rather than demanding a palate cleanse.

Texture-wise, the chicken is tender and succulent, with a light, glossy glaze that gives a reassuring gloss without being sticky. The glaze often develops a subtle caramelized glaze where it meets the surface, adding a gentle, slightly chewy texture that contrasts with the soft interior of the meat. The overall mouthfeel is balanced: a delicate crispness or slight chew on the exterior gives way to juicy, yielding interior meat, while the glaze coats every bite with a harmonious mix of sweetness and citrus brightness. Aromatics—such as a hint of garlic or onion, and possibly herbs like cilantro or parsley—may emerge as you chew, adding depth and a fresh lift that keeps the flavors from feeling flat. It’s a sensory symphony that feels both comforting and lively at once.

Beyond taste and texture, the dish offers visual appeal. The glaze lends a warm amber hue, and the glaze’s sheen catches the light in a way that makes the plate look almost celebratory. This is a dish that photographs beautifully—its colors are bright, its edges invite closer inspection, and the glistening surface suggests a mouthwatering, flavorful experience awaiting the eater. The aroma, too, plays a crucial role: the scent of honey softening with citrus zest wafts up as you approach the table, signaling something delightful just around the corner. The sensory package—sight, aroma, taste, and texture—comes together to create a comforting, crave-worthy experience that elevates everyday meals into something memorable.

Occasions & Pairings

Fresh Honey Lime Chicken shines in a variety of settings, from casual weeknights to small gatherings where you want something nourishing and bright without fuss. It’s the kind of dish that effortlessly spans seasons; in warmer months, it pairs wonderfully with light, refreshing sides, and in cooler months, it can be accompanied by heartier grains and roasted vegetables to create a balanced plate.

When to serve this dish:

  • Weeknight dinners that want flavor without heavy effort
  • Casual family gatherings or potlucks
  • Summer barbecues or outdoor meals with a bright, citrusy centerpiece
  • Lunch-friendly option to pack for midday meals with a fresh, vibrant bite

Suggested pairings:

  • Side dishes: Fluffy rice, quinoa, or farro to soak up the glaze; roasted vegetables like broccoli, asparagus, or bell peppers; a crisp cucumber-tennap salad for contrast; or a simple herbed greens salad for balance.
  • Drinks: A light, citrus-forward white wine such as Sauvignon Blanc or a Pinot Gris; sparkling water with a splash of lime for a non-alcoholic option; or a refreshing iced tea with a hint of mint.
  • Desserts: A soft citrus-forward dessert such as lemon panna cotta or a vanilla yogurt–based dessert with a citrus zest finish to echo the flavors on the plate.

Tips, Variations & Substitutions

Although the core idea remains simple—bright citrus, gentle sweetness, and tender protein—the dish is flexible enough to accommodate preferences, dietary needs, and ingredient availability. Here are ideas to tailor the experience while preserving the spirit of the dish:

  • Flavor boosters: Consider adding a pinch of red pepper flakes or a small amount of finely grated fresh ginger for an extra layer of warmth and complexity that plays well with citrus.
  • Herb alternatives: If you love cilantro, fold in a little chopped cilantro after cooking for a fresh, green counterpoint. Parsley or Thai basil can also bring a different aromatic profile.
  • Sweetness adjustments: For a less sweet glaze, reduce the honey intensity by substituting part of the sweetness with a touch of brown sugar or a splash of maple syrup to introduce a gentle molasses note.
  • Citrus variations: If lime isn’t available, a whisper of lemon or orange zest can lift the glaze with a slightly different citrus personality, while still maintaining the bright, sunny vibe.
  • Protein swaps: To make a plant-forward version, substitute firm tofu or tempeh for the chicken, ensuring they soak up the glaze in a way that mirrors the original dish’s brightness. For seafood lovers, shrimp or firm white fish can be a quick, delightful alternative.
  • Gluten and dairy considerations: The glaze itself is naturally gluten-free and dairy-free if prepared with simple pantry staples. If you’re serving with a gluten-free starch, ensure your sides are labeled accordingly. If dairy is part of a served side (like a butter-based starch), you can adapt by using olive oil or dairy-free butter.
  • Spice and heat: If you relish a bit more heat, add a touch of chili and let the heat settle in the glaze as it rests, offering a gentle kick without overwhelming the citrus sweetness.
  • Make-ahead note: If you want to prep components in advance, you can stir up the glaze mixture ahead of time and store it in the fridge, then rewarm gently when ready to serve and apply to the cooked protein for a fresh glaze.

Storage & Make-Ahead Ideas

Storage and make-ahead strategies help you enjoy this dish even when your schedule is tight. You can imagine this approach as a way to extend the pleasure beyond dinner time, turning one meal into a few comfortable, lightly planned occasions.

  • Leftovers: Refrigerate any cooked portions in an airtight container for up to 3–4 days. Reheat gently to preserve moisture, and if possible, pour a touch of the glaze over the reheated chicken to refresh the surface and keep the glaze glossy.
  • Freezing: Cooked chicken can be frozen for longer storage. Freeze in shallow, airtight containers or sturdy freezer bags for up to 2–3 months. Thaw overnight in the refrigerator and rewarm slowly to maintain moisture.
  • Make-ahead serving ideas: Prepare the sides ahead of time and keep them crisp and fresh. When it’s time to serve, reheat the protein gently and plate with the sides for a nearly effortless, fresh-feeling dinner.
  • Leftover pairing ideas: Transform small leftovers into a new meal by tossing the sliced chicken with greens for a bright lunch bowl, or layer into a wrap with sliced veggies for a quick take-to-work option.

Fun Facts & Trivia (Optional)

Honey and lime each carry their own little bit of history that enriches the dining experience. Honey has been treasured across cultures for millennia, celebrated not only for its sweetness but also for its potential health benefits and its use in traditional remedies and cooking. Lime, with its vivid aroma and rind oils, has long been a staple in coastal cuisines where citrus brightens seafood and light proteins. Together, honey and lime form a pairing that’s both timeless and contemporary, a reminder that sometimes the simplest ingredients can create the most memorable meals. In many culinary traditions, citrus is used as a balancing agent—its acidity sharpens the flavors around it while its aroma enhances the overall sensory profile of the dish. The combination of these two elements with a mild protein creates a comforting, accessible dish that can feel like a small celebration in the kitchen no matter the occasion.

Ingredients

Fresh Honey Lime Chicken
Marinade
  • 4 boneless, skinless chicken breasts (about 1.5-2 lb)
    → The chicken is the protein base of the dish. Choose breasts of similar size for even cooking or lightly pound to about 1/2 inch thickness to ensure rapid, uniform browning and to prevent dry edges. Pat dry before marinating to promote better adhesion of the flavors and a nicer sear.
  • 3 tablespoons fresh lime juice
    → The lime juice provides bright acidity to balance the sweetness of honey and helps tenderize the meat slightly. Use freshly squeezed juice for the freshest, most vibrant citrus notes. Strain out seeds after juicing to avoid bitter pops in the sauce.
  • 1 tablespoon lime zest
    → Lime zest adds essential oils and aroma, intensifying the citrus profile without adding excess liquid. Zest before juicing the lime to maximize yield, and avoid the white pith which can introduce bitterness.
  • 2 tablespoons honey
    → Honey supplies gentle sweetness and contributes to a glossy glaze as the chicken cooks. Let honey come to room temperature or gently warm it to mix smoothly with lime juice and oil. If you prefer a stronger citrus balance, you can adjust upward by 1/2 tablespoon while tasting as you go.
  • 1 tablespoon olive oil
    → The oil helps distribute the marinade evenly, adds moisture to the chicken, and aids browning on contact with hot surfaces. Use extra-virgin olive oil for a richer flavor, or substitute with avocado oil if you’re cooking at higher heat.
  • 2 garlic cloves, minced
    → Garlic infuses savory depth and aroma that complements the citrus sweetness. Mince finely so the flavor disperses evenly throughout the marinade. If you prefer a milder profile, you can grate the garlic to maximize surface area and speed infusion.
  • 1/2 teaspoon salt
    → Salt enhances the overall flavor and helps the marinade penetrate the meat. Start with this amount and adjust after cooking if needed. If you’re using an additional salty component (like soy sauce in a variation), reduce the added salt accordingly.
  • 1/4 teaspoon black pepper
    → Freshly ground black pepper adds subtle heat and aromatic depth that pairs with lime and honey. Grind just before using for the strongest aroma, and adjust to taste if you prefer milder or hotter results.
  • Optional: 1/4 teaspoon red pepper flakes or 1 small jalapeño, minced
    → Adds a gentle kick that complements the citrus and honey glaze. Seed jalapeños to control heat; wear gloves when handling if you’re sensitive to capsaicin. Include in the marinade for infused heat or sprinkle over finished chicken for a brighter finish.
Finish & Serving
  • 1 lime, cut into wedges for serving
    → Fresh lime wedges provide an extra burst of brightness at the table. Squeezing a little over hot chicken just before eating enhances the citrus glaze and balances the sweetness. Remove seeds from wedges for cleaner servings.
  • 2 tablespoons chopped fresh cilantro for garnish (optional)
    → Cilantro adds a fresh, herbal note that lifts the dish and contrast with the honey-lime glaze. Chop just before serving to preserve color and fragrance; discard tough stems or chop finely to distribute evenly over the platter or plates.

Instructions

  • Pound the chicken breasts to an even thickness of about 1/2 inch (1.25 cm) to ensure rapid, uniform browning and juicy interiors; place the breasts between two sheets of plastic wrap and gently tap with a flat meat mallet or rolling pin until uniform, then pat dry with paper towels to remove surface moisture that would hinder searing and create steam.
    → Uniform thickness promotes even cooking from edge to center, and drying the surface helps achieve a crisp, caramelized crust rather than a steamed, pale result.
  • Whisk together the marinade ingredients — freshly squeezed lime juice, lime zest, honey, olive oil, minced garlic, salt, pepper, and the optional red pepper flakes or minced jalapeño — until the sugar dissolves and the mixture is well emulsified; this creates a balanced glaze with bright acidity, sweetness, and aromatic depth that will cling to the chicken.
    → An evenly combined marinade ensures consistent flavor in every bite and prevents uneven separation of the oils and liquids.
  • Place the chicken in a large resealable bag or shallow dish; pour the marinade over the chicken, turning to coat every surface; seal and refrigerate for 30 minutes to 2 hours to allow flavors to penetrate while avoiding over-tenderizing from lime acidity.
    → Marinading ensures flavor penetration and helps tenderize the meat slightly without breaking down the protein too much.
  • Carefully remove the chicken from the marinade, letting excess drip back into the bag or dish; pat dry to promote a strong sear; pour the remaining marinade into a small saucepan and bring to a rolling boil over medium-high heat for 2–3 minutes to kill any bacteria, then simmer briefly to produce a glossy glaze for finishing.
    → Boiling the used marinade renders it safe for use as a glaze and concentrates flavors without risking contamination.
  • Preheat your oven to 400°F (200°C) and line a rimmed sheet pan with parchment or lightly oil the surface to prevent sticking and promote even browning; a hot oven helps set the glaze quickly without drying the chicken.
    → Lining the pan makes cleanup easier and oiling reduces risk of sticking during roasting.
  • Heat 1 tablespoon olive oil in a large skillet over medium-high heat until just shimmering; add the marinated chicken in a single layer without crowding and sear for 2–3 minutes per side until deeply golden and crust forms, then flip only once to maximize browning and flavor development.
    → A good sear creates flavor compounds (Maillard reaction) and gives the chicken a visually appealing crust that holds in juices.
  • Transfer the seared chicken to the prepared sheet pan and arrange in a single layer; brush the tops with a thin coat of the boiled glaze to begin the finish and help the glaze cling during roasting, then place in the oven to finish cooking until the internal temperature reaches 165°F (74°C).
    → Finishing in the oven ensures even doneness through the thicker parts of the breasts while the glaze caramelizes for a glossy, lacquered look.
  • Roast the chicken for 8–12 minutes, rotating the pan halfway if needed for even browning and monitoring with a digital thermometer to ensure accuracy; smaller or thinner breasts will require less time, thicker pieces more, so rely on the temperature rather than time alone.
    → Internal temperature is the reliable indicator of doneness, protecting against undercooked center or dry edges.
  • While the chicken roasts, continue to simmer the reserved glaze in a small saucepan over medium heat until it thickens to a glossy, syrupy consistency, about 3–5 minutes; this concentrated glaze will impart a bright, honey-lime finish as you plate.
    → Reducing the glaze intensifies its citrus and honey notes and helps it cling to the chicken without making the surface too runny.
  • When the chicken reaches 165°F (74°C), remove it from the oven and tent loosely with foil; allow it to rest 5 minutes to reabsorb juices; during resting, brush with the thickened glaze for a final glossy finish and intensified flavor.
    → Resting redistributes juices for a juicier bite, and a final glaze application enhances aroma and appearance.
  • To finish and serve, optionally cut the chicken into thick slices, arrange on a platter, squeeze fresh lime wedges over the pieces to brighten the glaze, and garnish with chopped cilantro if using; serve immediately with extra lime wedges on the side for additional brightness.
    → Fresh lime juice at the table allows guests to adjust tartness to their liking, while cilantro adds a fresh, aromatic contrast to the honey-lime glaze.

Notes

These Fresh Honey Lime Chicken breasts are marinated in fresh lime juice, lime zest, honey and olive oil to create a bright, glossy glaze that sears beautifully while keeping the meat juicy. The combination of citrus, sweetness and garlic yields a vivid, restaurant-quality flavor with a simple, weeknight-friendly cooking method—pan-sear, bake, or grill until the internal temperature reaches 165°F (74°C). You can customize them by adding a pinch of red pepper flakes for heat, extra minced garlic, or fresh cilantro or parsley for brightness. Leftovers refrigerate well and reheat gently, making this a reliable make-ahead option. For a complete meal, serve with brown rice, quinoa, or a crisp green salad; a dollop of yogurt or a sprinkle of sesame seeds can add creamy richness or texture. If you’re cooking for gluten sensitivity, be sure all marinades and condiments you use are gluten-free, especially any soy sauce substitutes or flavorings. Always taste and adjust seasoning after cooking, as honey sweetness and lime acidity can vary between batches.

Tips

Tips for Perfect Fresh Honey Lime Chicken

  • Even pieces cook evenly: If your chicken breasts vary in size, gently pound the larger ones to about 1/2 inch thickness or slice the breasts in half horizontally to create uniform portions. This helps achieve uniform browning and prevents dry edges.
  • Marinating smartly: Marinate in the fridge for 30–60 minutes for citrus-friendly flavor. Avoid marinating much longer (beyond 4 hours) because the lime juice can begin to change the texture of the meat. Pat the chicken dry before adding to the marinade for better searing.
  • Use a non-reactive container: A zip-top bag or glass/ceramic dish works best to prevent any metallic or off flavors from reacting with the marinade.
  • Fresh zest and juice are key: Zest the lime before juicing to maximize flavor; strain the juice to remove seeds and pulp, which can introduce bitterness or seeds into the glaze.
  • Garlic preparation matters: Mince finely (or grate) the garlic so its flavor distributes evenly. If you prefer a subtler note, grate for more surface area and faster infusion.
  • Seasoning balance: The marinade contains salt, but you can adjust after cooking based on taste. If you’re using additional salty components (like soy sauce in other variations), reduce the added salt to prevent over-seasoning.
  • Handle heat carefully: Use a hot, well-seasoned skillet (cast iron or heavy stainless) and avoid overcrowding the pan. This ensures a good crust and prevents steaming the chicken.
  • Managing the glaze: The honey can burn if the pan is too hot. Sear over medium-high heat, then reduce slightly when you add the glaze to allow it to thicken without scorching.
  • Create a quick pan sauce: After searing, deglaze the pan with a splash of lime juice or broth to lift fond, then simmer to a glaze. This makes a glossy finishing sauce to spoon over the chicken.
  • Rest before slicing: Let the chicken rest for 3–5 minutes after cooking to reabsorb juices and stay moist; slice against the grain for the best texture.
  • Garnish and serving: Serve with lime wedges and cilantro just before plating to preserve color and aroma. Fresh cilantro brightens the glaze and adds a pop of color.
  • Food safety and reuse: If you plan to use any marinade as a sauce, boil it for at least 1–2 minutes to kill any bacteria from the raw chicken. Do not reuse leftover marinade that hasn’t been boiled.

FAQ

Fresh Honey Lime Chicken – FAQ

What ingredients do I need for Fresh Honey Lime Chicken?

Chicken: 4 skinless chicken breasts or 4 chicken thighs. Sauce: ¼ cup honey, ¼ cup fresh lime juice, zest of 1 lime, 2 cloves garlic (minced), 2 tablespoons olive oil, 1–2 tablespoons soy sauce or tamari (optional for depth), salt and pepper to taste, and red pepper flakes (optional). Garnish: fresh cilantro or lime wedges.

Can I use chicken thighs instead of chicken breasts?

Yes. Chicken thighs stay juicier and more forgiving. They may take a few minutes longer to cook; remove from heat when the internal temperature reaches 165°F (74°C).

Should I marinate the chicken before cooking?

Marinating for 15–30 minutes (or up to 2–4 hours in the fridge) adds flavor. If you’re short on time, you can skip marinating and proceed to cooking, using the honey-lime mixture as a glaze during cooking.

What is the best cooking method for this dish?

Pan-sear in a skillet over medium-high heat until browned, then cook through. You can finish with a quick glaze by spooning the honey-lime sauce over the chicken during the last few minutes. Alternatively, grill the chicken over medium heat for a smoky finish.

What temperature should the chicken be cooked to?

Cook until the internal temperature reaches 165°F (74°C) and the juices run clear. If using thighs, 175°F (79°C) is acceptable for well-done texture.

How do I prevent the honey from burning?

Cook over moderate heat and avoid high heat, which can burn the honey. If the glaze thickens too quickly, lower the heat and add a splash of lime juice or water to loosen, then continue cooking.

How should I store leftovers?

Store in an airtight container in the refrigerator for 3–4 days. Reheat gently in a skillet or microwave. You can freeze cooked chicken for 2–3 months; thaw completely before reheating.

What sides pair well with Fresh Honey Lime Chicken?

Try steamed rice, quinoa, or cauliflower rice, plus roasted or sautéed vegetables like asparagus, broccoli, or bell peppers. A simple cucumber cilantro salad also complements the citrusy glaze.

Is this recipe gluten-free?

Yes, provided you use gluten-free soy sauce or omit soy sauce altogether. Traditional soy sauce contains gluten, so choose tamari or coconut aminos if needed.

Can I adjust the spice level?

Yes. For milder flavor, skip the red pepper flakes. For extra heat, add a pinch more flakes or a dash of chili paste to the glaze.

Introduction / Hook

Picture a warm, sunlit bowl that feels like a hug in a hurry. The base sizzles with seared chicken, simmering tomato warmth, and a bright chorus of herbs, all crowned by a fluffy, creamy veil of cottage cheese that melts luxuriously into every bite. This is not your typical chicken parmesan—it’s a modern, lighter take that fits into busy weeknights, meal-prep Sundays, and cozy lunches without sacrificing the soul of the dish. The Cottage Cheese Chicken Parm Bowl is comfort food reinvented as a nourishing, protein-packed bowl that travels beautifully from stove to desk and back again. It invites you to take a spoonful and hear the crackle of a lightly crisped crust, the tang of tomato, and the gentle, almost velvety whispers of cottage cheese swirls mingling with melted cheese and fresh herbs. In a single bowl, you’ll taste tradition and innovation, familiarity and surprise, all harmonizing in a comforting, crave-worthy bite.

The Story Behind the Dish

Chicken parmesan arrived in American kitchens as a bold, indulgent riff on classic Italian flavors: breaded chicken, tangy tomato sauce, and melty cheese. Over time, cheffy technique gave way to homey simplicity, and home cooks began remixing the concept to suit busy lives and evolving dietary preferences. The Cottage Cheese Chicken Parm Bowl is a contemporary homage to that lineage—a dish that preserves the beloved elements—tomato brightness, garlic-scented aroma, and herbaceous lift—while swapping in cottage cheese for a lighter, creamier decadence that doesn’t bog you down. The idea grew from a desire to keep the signature creaminess that cheese typically provides, but with a tangy, fresh spin that pairs perfectly with a hearty grain or greens base. It’s the kind of recipe that feels both familiar and fresh, like a family favorite that has learned a few new dance steps. The bowl format honors the modern dining style that many crave: a complete, balanced plate in one convenient vessel, where each component can shine on its own or blend together in a comforting, cohesive bite.

Why You’ll Love This Recipe

  • Quick, weeknight-friendly preparation that fits into a busy schedule without sacrificing flavor or texture.
  • High-protein, satisfying meal thanks to lean chicken and cottage cheese, keeping you full longer.
  • Comforting yet lighter than traditional parm, delivering the classic flavors without heavy heaviness.
  • Highly customizable to suit dietary preferences, pantry staples, and family tastes.
  • Great for meal prep: assemble bowls in advance or pull together components for easy weekday lunches.

Flavor Profile & Texture

The Cottage Cheese Chicken Parm Bowl offers a confident balance of bright, savory, and creamy notes. The chicken, ideally cooked to a crisp, golden exterior, provides a confident, rib-sticking protein backbone. Tomato sauce or a bright pomodoro brings a gentle acidity and sweetness that wake up the palate, reminiscent of sunny afternoons and comforting Italian dishes. The cottage cheese acts as a light, airy counterpoint to the tomato’s tang and the chicken’s savoriness—its mild, dairy-forward flavor blends with a touch of salt to mimic the creaminess of ricotta or mozzarella, but with a distinctive lift that feels modern and approachable. When combined with a grain base—whether fluffy quinoa, nutty farro, or tender brown rice—the bowl develops a pleasing, multi-textured experience: the soft creaminess from the cottage cheese, the chew of the grain, the tender bite of chicken, and the slight bite of tomato sauce all mingle into harmonious layers. If you enjoy a little crispness, a sprinkle of toasted breadcrumbs or a light crust on the chicken’s edges adds a satisfying crunch that contrasts beautifully with the smoothness of the cheese. The fragrance is irresistible: garlic, oregano, basil, and a hint of parmesan waft through the air as the dish comes together, making your kitchen feel like a sunny trattoria while keeping it comfortably domestic.

Occasions & Pairings

This dish shines in a multitude of eating occasions, from weeknights to casual gatherings. It’s equally at home on a weeknight dinner table as it is in a bring-a-dowl lunch lineup, a meal-prep Sunday rotation, or a relaxed movie-night spread. The bowl format makes it easy to scale up for family meals or portion out for lunches, ensuring that you have a nourishing, satisfying option ready to go.

  • Weeknights: a quick, wholesome alternative to takeout that still delivers big on flavor.
  • Meal prep / lunchboxes: components can be prepared in advance and assembled in bowls for grab-and-go meals.
  • Casual gatherings: serve in small bowls as a playful, comforting appetizer or main course for a relaxed dinner party.

Pairing ideas to elevate the experience:

  • Side: a crusty garlic bread, a fresh green salad with lemon vinaigrette, or roasted vegetables for color and crunch.
  • Drinks: a simple red wine with light tannins, a sparkling water with a splash of citrus, or a chilled white wine for a brighter finish.
  • Desert: a tart citrus dessert or a light gelato to balance the creamy richness of the bowl.

Tips, Variations & Substitutions

  • Protein variations: swap chicken for turkey cutlets, shrimp, or plant-based proteins like chickpeas or seasoned tofu for a vegetarian or pescatarian option.
  • Cheese alternatives: if you want even lighter, use a portion of cottage cheese blended with a pinch of softened mozzarella for a creamy, stringy finish; for dairy-free, use a creamy cashew ricotta or a plant-based cheese substitute.
  • Bread crumb crunch: for a subtle crunch without making a full breading, sprinkle toasted breadcrumbs or crushed kife crackers over the top just before serving.
  • Base customization: choose your favorite grain or greens as a base—quinoa, farro, brown rice, barley, or even a bed of sautéed spinach and farro for a hearty, fiber-rich bowl.
  • Herb and spice tweaks: swap oregano for Italian blend, or add a pinch of red pepper flakes for a gentle heat that plays with the tomatoes.
  • Gluten-free and dairy-free: ensure any added crusts or toppings are certified gluten-free; use dairy-free cheese substitutes to maintain a dairy-free profile while preserving creaminess.
  • Make-ahead ideas: cook the chicken, sauce, and grains separately, then assemble the bowls in the morning for quick lunches, or portion everything into meal-prep containers for the week.

Storage & Make-Ahead Ideas

To preserve texture and flavor, store components separately when possible. The chicken can be stored in an airtight container for up to a few days; the cottage cheese blend stays freshest covered in the refrigerator. The grains or greens base hold well, but for the best texture, keep them separate from the sauce and cheese until serving. When ready to eat, reheat the chicken and sauce gently on the stovetop, then assemble with fresh cottage cheese and the warmed base. If you plan to freeze components, freeze the chicken and sauce separately from the dairy component, as dairy can separate or alter texture after freezing and thawing; for best results, add cottage cheese after reheating rather than freezing it. For make-ahead meals, you can prepare the sauce in advance (if you’re using a tomato-based base) and refrigerate for up to 3–4 days. When it’s time to serve, rewarm and combine with the chicken and the base, finishing with a dollop of cottage cheese and a fresh drizzle of olive oil and herbs to brighten the flavors.

Fun Facts & Trivia

Did you know that chicken parmesan, or “parmigiana di pollo,” grew popular in Italian-American communities as a hearty, affordable dish that could stretch a single chicken breast into a satisfying meal? The dish became a staple in diners and family kitchens across the United States, evolving with regional twists and personal family secrets. Cottage cheese, once a simple farmer’s product, gained prominence in the American pantry for its high-protein content and versatile texture, often used to mimic creaminess without adding heavy fats. In recent years, cooks have embraced cottage cheese in inventive ways beyond breakfast snacks, including as a surprising, airy cheese layer in dishes like this parm-inspired bowl. The Cottage Cheese Chicken Parm Bowl embodies the fusion of old-world comfort with modern nutrition-focused cooking—honoring a beloved classic while offering a lighter, more versatile format that fits into today’s fast-paced culinary landscape.

Final Thoughts

At its heart, this dish invites you to enjoy the best of both worlds: the familiar, comforting flavors of a traditional chicken parmesan and the bright, modern practicality of a bowl that can adapt to mood, season, and pantry. It’s a celebration of texture and contrast—the crisp bite of the chicken, the silky smoothness of cottage cheese, the tangy tomato, and the fresh, verdant lift of herbs. Whether you’re cooking for one or feeding a family, this Cottage Cheese Chicken Parm Bowl is a versatile, satisfying choice that proves supper can be both comforting and clever, simple and indulgent, all in one nourishing plate.

Ingredients

Cottage Cheese Chicken Parm Bowl

Base

    – 1 cup cooked quinoa
    → Quinoa provides a hearty, protein-rich grain base that soaks up sauce and complements the creamy cottage cheese layer. Prep: rinse quinoa, cook in 2 cups water or broth until fluffy and the liquid is absorbed, then fluff with a fork. Tip: season lightly with salt after cooking to enhance its nutty flavor.
    – 1 cup cooked brown rice
    → Alternative grain base with a slightly chewier texture and mild nutty flavor. Prep: cook according to package directions until tender, then fluff and season with a pinch of salt. Tip: use day-old brown rice warmed gently with a splash of water to restore moisture.

Chicken & Coating

    – 2 boneless skinless chicken breasts (about 1 lb total), pounded to 1/2-inch thickness
    → Provides the protein and ensures even cooking. Pounding creates uniform thickness for crisp coating and quick, even browning. Tip: pat dry and lightly season with salt before breading to help crust adhere.
    – 1 large egg, beaten
    → Binds the coating to the chicken, creating a cohesive crust. Tip: whisk with a pinch of salt and pepper, and ensure the egg is well combined with little streaks for even adhesion.
    – 1/2 cup breadcrumbs (panko recommended) or gluten-free breadcrumbs
    → Creates a crunchy, Parm-crusted exterior that mirrors classic chicken parm. Tip: for extra flavor, mix with 1/4 cup grated Parmesan and 1/2 teaspoon Italian seasoning; dry the chicken well to help the crust crisp up.
    – 1/4 cup grated Parmesan cheese
    → Adds sharp, salty notes and helps browning of the crust. Tip: use freshly grated Parmesan for best flavor and no clumping.
    – 1 teaspoon Italian seasoning
    → Provides the essential Italian herb profile that flavors the crust and complements the tomato sauce. Tip: if using a dried blend, give it a quick rub between fingers to release essential oils.
    – 1/2 teaspoon garlic powder
    → Delivers classic garlic aroma without moisture; you can replace with 1-2 cloves minced if you prefer fresh garlic, but monitor to prevent burning. Tip: lightly mix into breadcrumb mixture for even distribution.
    – 1/4 teaspoon onion powder
    → Adds subtle savory sweetness and aroma that pairs with tomato sauce. Tip: skip if you prefer pure garlic-forward flavors.
    – 1/4 teaspoon salt
    → Seasoning for the crust; adjust to dietary needs. Tip: remember the sauce and Parmesan add salt too, so taste as you go.
    – 1/4 teaspoon black pepper
    → Adds a mild kick and enhances browning. Tip: use freshly ground pepper for more aroma.
    – 2 tablespoons olive oil, for cooking
    → Used to sear and crisp the crust; helps deliver a golden exterior. Tip: keep heat medium-high to avoid burning breadcrumbs; cook in batches if needed to avoid crowding the pan.

Sauce

    – 1 1/2 cups marinara sauce (look for no added sugar or minimal sugar) or homemade tomato sauce
    → The flavorful base for the Parm bowl; provides acidity to cut richness and a bed for the chicken. Prep: if needed, simmer garlic and onion in a splash of olive oil before adding tomatoes; season with oregano and a pinch of red pepper flakes. Tip: choose a robust sauce for best flavor and simmer to develop depth.
    – 2 cloves garlic, minced
    → Builds aroma and depth for the sauce; sauté in olive oil until fragrant before adding tomatoes. Tip: press garlic or mince finely to maximize flavor; avoid burning by controlling heat.
    – 1/2 small onion, finely chopped
    → Adds sweetness and body to the sauce; sauté until translucent. Tip: dice finely for even integration and avoid large chunks in the sauce.
    – 1 tablespoon olive oil
    → Used to cook aromatics and enrich the sauce’s base. Tip: use extra-virgin for richer flavor; keep pan moderately hot to prevent burning.
    – 1/2 teaspoon dried oregano
    → Classic herb that pairs with tomato sauce; a little goes a long way. Tip: crush between your fingers to release aroma before adding to sauce.
    – Pinch red pepper flakes (optional)
    → Adds a gentle heat to balance the richness of the dish. Tip: start with a pinch and adjust to taste.

Cottage Cheese Layer

    – 1 cup small-curd cottage cheese
    → The creamy, protein-rich layer that substitutes for traditional ricotta or mozzarella; it adds moisture and tang. Prep: drain any excess whey briefly if very watery; season lightly with salt and pepper. Tip: for a smoother texture, whisk briefly with a fork to break up lumps.
    – 1/4 cup shredded mozzarella cheese (optional for extra melt)
    → Provides a meltier, cheesier finish atop the cottage cheese; omit for a lighter option. Tip: sprinkle on near the end and briefly broil to melt without drying the layer.
    – 1 tablespoon chopped fresh basil or parsley
    → Adds fresh herbal brightness that echoes classic parm flavors. Tip: tear or chop finely to distribute evenly through the layer.

Greens & Extras

    – 2 cups fresh baby spinach or arugula
    → A light bed of greens to add color, nutrients, and a contrasting bite to the creamy cheese and saucy chicken. Prep: rinse and spin dry; you can wilt them in a hot skillet with 1 teaspoon olive oil if you prefer warm greens. Tip: add greens under the chicken to create a nice texture mix in every bite.
    – 1 teaspoon olive oil
    → Used to lightly sauté greens if wilted; helps prevent dry greens and adds sheen. Tip: heat pan until shimmering before adding greens and drizzle with a touch of lemon for brightness.
    – 1 tablespoon lemon juice (optional)
    → Brightens greens and finishes with a clean acidity that cuts through the creamy cottage cheese. Tip: add in small increments to taste; can substitute with a splash of red wine vinegar if preferred.

Toppings & Garnish

    – 2 tablespoons grated Parmesan cheese
    → Finishing touch that adds savoriness and helps browning if you broil the assembled bowl. Tip: use freshly grated Parmesan for best aroma and texture.
    – Fresh basil leaves or parsley, for garnish
    → Finishing aromatics that lend color and a fresh scent; tear or chop just before serving to preserve oils. Tip: sprinkle over the top at the end for maximum brightness.
    – Salt and pepper, to taste
    → Final seasoning to adjust saltiness and balance; start with small amounts and taste as you go. Tip: consider the saltiness of the sauce, cheese, and crust before adding more.

Instructions

  • Preheat your oven to 400°F (200°C) and line a baking sheet with parchment paper or a silicone mat to prevent sticking and promote even browning on the crust.
    → This ensures the crust develops a crisp, golden exterior without burning and makes cleanup easier.
  • Place the chicken breasts between two sheets of plastic wrap and gently pound to an even 1/2-inch thickness using a meat mallet or rolling pin, rotating as needed to avoid tearing; pat dry with paper towels and lightly season on both sides with salt to help the crust adhere and cook evenly.
    → Uniform thickness promotes uniform browning and prevents thicker areas from remaining undercooked while thinner edges overcook.
  • Set up a dredging station with a shallow bowl of beaten egg seasoned with a pinch of salt and pepper, and a second shallow bowl containing breadcrumbs (panko recommended) mixed with grated Parmesan, Italian seasoning, garlic powder, onion powder, salt, and pepper.
    → Evenly seasoned crumbs create the Parmesan crust and ensure consistent flavor and texture around the chicken.
  • Dredge each pounded chicken breast first in the egg, allowing excess to drip back into the bowl, then press into the breadcrumb mixture, turning to coat all sides and pressing gently so the crumbs cling without shedding.
    → A thorough coating forms a protective crust that browns well and holds up to sauce without flaking off.
  • Heat 2 tablespoons olive oil in a large skillet over medium-high heat and sear the coated chicken pieces until the crust is deep golden brown on the first side, about 2–3 minutes, then flip and sear the other side for another 2 minutes; work in batches if necessary to avoid crowding the pan.
    → Searing builds depth of flavor via Maillard browning and creates a sturdy crust that won’t sog in sauce.
  • Transfer the seared chicken to the prepared baking sheet and finish in the preheated oven until the internal temperature reaches 165°F (74°C), about 8–12 minutes depending on thickness; remove and let rest 5 minutes before slicing to retain juiciness.
    → Oven finishing ensures the chicken is fully cooked through while the crust remains crisp, and resting redistributes juices for moist slices.
  • Meanwhile, prepare the sauce by heating 1 tablespoon olive oil in a skillet over medium heat, sautéing minced garlic and finely chopped onion until translucent and fragrant, about 2–3 minutes; add marinara, oregano, and red pepper flakes, then simmer gently for 10–15 minutes to meld flavors.
    → Sautéing aromatics builds depth, while simmering concentrates flavors so the sauce coats the chicken nicely instead of tasting watery.
  • Season the sauce with a pinch of salt and pepper, taste for balance, and adjust with a splash of water if it thickens too much; keep warm until ready to spoon over the chicken.
    → Proper seasoning in the sauce ensures the dish remains bright and cohesive with the crust and cheese.
  • Prepare the cottage cheese layer by whisking the 1 cup small-curd cottage cheese with a pinch of salt and pepper until smooth, then fold in the 1/4 cup shredded mozzarella and the chopped fresh basil; drain any excess whey if very watery.
    → A smooth, seasoned cottage cheese layer provides creaminess and an even distribution of cheese and herbs over the sauced chicken.
  • Rinse and dry the greens, then if desired, briefly wilt them in a hot skillet with 1 teaspoon olive oil for 30–60 seconds to soften and brighten their flavor, or keep them raw for more bite; wilted greens create a tender contrast to the creamy layer.
    → Using greens adds color, nutrition, and a refreshing counterpoint to the richness of the crust and cheese.
  • Reheat the cooked quinoa and/or brown rice: in a small saucepan or microwave, fluff the grains with a fork, add a splash of water or broth, cover, and heat until just steaming; season lightly with salt to taste.
    → Reheating and fluffing ensures the grain base is light and separates into individual grains, preventing a dense, paste-like texture in the bowl.
  • Assemble the bowls by dividing the warm grain base among four bowls, arranging a bed of greens if using, then placing a chicken breast on each; spoon some sauce over the chicken and top with a portion of the cottage cheese layer.
    → Layering in this order ensures each bite delivers crunch from crust, warmth from chicken, brightness from greens, and creaminess from the cottage cheese for a balanced bite.
  • Finish the bowls by sprinkling 2 tablespoons grated Parmesan over each, and optionally broil for 1–2 minutes on a high rack until the cheese is bubbly and lightly browned; watch closely to prevent burning.
    → A brief broil adds a toasty finish to the top, enhances aroma, and helps meld the components together without drying the cheese layer.
  • Garnish with fresh basil or parsley and season to taste with additional salt and pepper; serve immediately to enjoy the contrast of crisp crust, creamy cheese, saucy chicken, and vibrant greens.
    → Finishing with fresh herbs brightens the dish, and tasting at the end ensures the final seasoning is correct for all components combined.

Notes

These gluten-free Cottage Cheese Chicken Parm Bowls are a protein-rich, comforting meal built on a crisp Parm-crusted chicken over a bed of fluffy quinoa or brown rice, with a creamy cottage cheese layer and a bright tomato sauce. To keep it gluten-free, use gluten-free breadcrumbs (or crushed gluten-free crackers) and a no-added-sugar marinara. Prep: rinse quinoa and cook in 2 cups water or broth until fluffy, or cook brown rice to package directions; pound the chicken to 1/2-inch thickness and bread with a seasoned mix (1/4 cup breadcrumbs, 1/4 cup grated Parmesan, 1 teaspoon Italian seasoning, 1/2 teaspoon garlic powder, 1/4 teaspoon onion powder, salt and pepper). Pan-sear in olive oil until golden, then finish in a hot oven or under the broiler to set the crust. The cottage cheese layer should be small-curd and lightly seasoned; whisk briefly to smooth and optionally fold in 1/4 cup shredded mozzarella for extra melt, along with fresh basil or parsley. A bed of spinach or arugula adds color and nutrition; wilt greens in a teaspoon of olive oil or serve raw for contrast. Finish with extra Parmesan, a squeeze of lemon, and salt and pepper to taste. For serving, assemble bowls and heat until everything is warm and the sauce is bubbly; bake at 400°F for 10-15 minutes to glaze the top if you like. Leftovers refrigerate 3-4 days and rewarm gently on the stove or in the microwave. For make-ahead meals, prep grains, chicken, and cottage cheese layer separately and assemble when ready. Substitutions: swap quinoa for more veggies under the chicken or use brown rice for a chewier texture; dairy-free options include non-dairy cottage cheese alternatives and dairy-free cheese, plus gluten-free crusts as needed.

Tips

Tips for Cottage Cheese Chicken Parm Bowl

Base tips

  • Quinoa: Rinse thoroughly to remove bitterness, then cook in a 2:1 liquid ratio (water or broth) until fluffy. Fluff with a fork off the heat and season lightly with salt to bring out its nutty flavor. If you’re short on time, substitute with cooked brown rice or another grain you enjoy.
  • Brown rice: Cook to tender perfection, fluffy and separated. For best texture, use day-old brown rice warmed with a splash of water to restore moisture and prevent clumping.

Chicken & Coating tips

  • Pound the chicken to an even 1/2-inch thickness for uniform cooking and crisp coating. Pat dry and lightly season with salt before breading to help the crust adhere.
  • Coating: use breadcrumbs or gluten-free breadcrumbs; mix in 1/4 cup grated Parmesan and 1/2 teaspoon Italian seasoning for extra flavor. Dry the chicken well to promote a crisp crust.
  • Dip in a beaten egg and press the crumb mixture onto both sides; let the crust set for a minute before cooking to improve adhesion.
  • Cook in olive oil over medium-high heat, in batches to avoid crowding. Turn once to achieve an even golden crust and ensure the chicken reaches 165°F (74°C) inside.
  • Freshly grated Parmesan enhances browning and aroma. If you want extra melt, sprinkle mozzarella only in the final minute or briefly broil after assembling.
  • Crust questions: For an extra-crispy finish, finish in a hot oven (425°F/220°C) for a few minutes or until the crust is deeply golden.

Sauce tips

  • Enhance aromatics by sautéing minced garlic and finely chopped onion in olive oil before adding tomatoes. Simmer to develop depth and round out flavors; oregano and a pinch of red pepper flakes amplify the Italian profile.
  • Taste and adjust: if the sauce tastes too acidic, add a pinch of sugar or a drizzle of olive oil to balance. Allow the sauce to simmer 10–15 minutes to meld flavors and thicken slightly.
  • Texture control: for a smoother sauce, puree lightly or crush tomatoes; for a chunkier sauce, leave some texture intact.

Cottage Cheese Layer tips

  • Drain any excess whey if the cottage cheese is very watery. Season with a touch of salt and pepper, then whisk briefly to smooth lumps for a creamier layer.
  • For extra creaminess, whisk in a tablespoon of cream cheese or a splash of milk. If using mozzarella, add just before serving for a soft, gooey top.
  • Fresh herbs like chopped basil or parsley folded into the cottage cheese add brightness and a cohesive parm flavor.

Greens & extras tips

  • Greens add color and balance: rinse and dry well; wilt in a hot skillet with 1 teaspoon olive oil or serve raw for contrast. Placing greens under the chicken helps distribute greens in every bite.
  • Finish with a splash of lemon juice or a light drizzle of red wine vinegar to brighten the greens. Season lightly with salt to taste after wilting.

Toppings & garnish tips

  • Parmesan: use freshly grated Parmesan for maximum aroma and a better melt when briefly broiled.
  • Garnish with fresh basil or parsley right before serving to preserve color and aroma. Tear leaves by hand to release essential oils.
  • Season the final dish with salt and pepper to taste, considering the saltiness already present in the sauce and cheese. If in doubt, add less salt at the end and adjust as needed.

FAQ

What is Cottage Cheese Chicken Parm Bowl?

A protein-packed bowl inspired by classic chicken parmesan, featuring tender chicken, marinara, and a topping of cottage cheese for creaminess. Serve over a base like brown rice, quinoa, cauliflower rice, or greens for a complete meal.

What ingredients do I need to make this dish?

Core ingredients:

  • Chicken breasts or thighs, cut into tender pieces
  • Marinara sauce
  • Low-fat or full-fat cottage cheese
  • Shredded mozzarella or sliced mozzarella
  • Parmesan cheese, grated
  • Olive oil
  • Italian seasoning, garlic powder, salt, and pepper
  • Base options: brown rice, quinoa, cauliflower rice, or greens
  • Optional garnishes: fresh parsley or basil
Can I use different greens or bases for the bowl?

Yes. Good options include:

  • Base: cooked brown rice, quinoa, cauliflower rice, or a mixed greens bed
  • Extras: roasted vegetables (zucchini, bell peppers, mushrooms) or a handful of spinach

Adjust portions to match your nutrition goals and appetite.

How do I cook the chicken for the parm bowl?

Steps:

  • Pat chicken dry and season with salt, pepper, garlic powder, and Italian seasoning.
  • Heat olive oil in a skillet over medium heat and sear chicken until lightly browned, about 3–4 minutes per side.
  • Pour a thin layer of marinara over the chicken, sprinkle mozzarella on top, and cook just until the cheese melts. You can finish in a 400°F (200°C) oven for 5–8 minutes if you prefer.
How do I assemble the Cottage Cheese Chicken Parm Bowl?

Assembly:

  • Place your chosen base in a bowl (rice, quinoa, cauliflower rice, or greens).
  • Top with the chicken parmesan pieces.
  • Top with a generous spoonful of cottage cheese (or a cottage cheese mixture with a pinch of herbs).
  • Finish with extra marinara and a sprinkle of Parmesan and fresh herbs.
How can I make this dish lighter or higher in protein?

Suggestions:

  • Use 1% or fat-free cottage cheese or reduce the amount of cheese and add more lean chicken for protein.
  • Choose whole grains like quinoa or brown rice for extra fiber.
  • Skip extra cheese on top or opt for part-skim mozzarella.
  • Add more vegetables to increase volume without adding many calories.
How long does it take to make this dish?

Approximate timeline:

  • Prep: 5–10 minutes
  • Cook chicken and melt cheese: 10–15 minutes (or 15–20 minutes if baked)
  • Assemble and serve: 5 minutes

Total: about 20–30 minutes depending on fondness for oven finish.

How should I store and reheat leftovers?

Storage and reheating:

  • Store leftovers in an airtight container in the refrigerator for up to 3–4 days.
  • Reheat in the microwave in 1–2 minute bursts, stirring in between, or reheat in a skillet over medium heat until warmed through.
  • Keep cottage cheese topping separate if you want to preserve texture, then add just before serving.
Can I freeze any components or the whole dish?

Freezing notes:

  • Cooked chicken with marinara freezes well. Freeze in portions for convenience.
  • Cooked base (rice/quinoa) freezes okay, though texture may change slightly.
  • Cottage cheese does not freeze well; best added fresh after reheating.
Are there dairy-free or vegetarian options?

Yes. Alternatives:

  • Use dairy-free mozzarella and a dairy-free cottage cheese substitute, or replace cottage cheese with a dairy-free ricotta or blended tofu for creaminess.
  • For a vegetarian version, keep the marinara and cheese toppings but ensure the base remains plant-based (brown rice or quinoa with extra vegetables).
What are some tips to get the best flavor and texture?

Tips:

  • Pat the chicken dry to get a good sear and prevent steaming.
  • Don’t overcook the chicken; aim for juicy pieces with a light crust.
  • Use a good quality marinara with a balanced sweetness to pair with the cottage cheese.
  • Let the cottage cheese stand for a few minutes at room temperature for creaminess, or stir in a pinch of Italian seasoning.

Introduction / Hook

Imagine a warm, bubbly pan arriving at the table just as the day’s light begins to fade. The aroma rises first — a comforting, enveloping scent that mingles creaminess with toasty, golden notes. Then comes the sight: a casserole crowned with a delicate crust that glistens like kissed porcelain, steam curling upward in lazy ribbons. This is not merely a weeknight supper; it’s a little celebration you can pull together in moments when you crave something familiar, indulgent, and wholly satisfying. The Million Dollar Chicken Casserole is the kind of dish that makes a house feel like a home: simple ingredients transformed into something luxurious by warmth, patience, and a touch of nostalgia. It’s the kind of recipe that, once you’ve tasted it, becomes a trusted standby — a go-to solution for busy evenings, family gatherings, or any time you want to feed a crowd with minimal fuss and maximum comfort.

From the first bite, you’ll notice the creamy richness that surrounds every bite, balanced by a savory backbone and a topping that offers a gentle crunch. It’s the kind of dish that sparks conversation around the table, as everyone eagerly reaches for the last spoonful and exchanges whispers about how good it smells as it bakes. If you’ve ever wished for a dish that feels luxurious without demanding a long, complicated process, this casserole delivers. It’s a reminder that extraordinary flavor doesn’t always require extraordinary effort; sometimes, it just requires a little patience, a well-timed bake, and a generous handful of heart.

As you prepare to read on, picture the moment you pull the dish from the oven: the way the steam fogs the kitchen, the soft hiss as the top settles into a shimmering crust, and the first scoop that reveals a creamy, comforting interior. This is not a public chef’s plate; it’s a home cook’s invitation to gather, share, and savor. The Million Dollar Chicken Casserole is your passport to a cozy, memorable meal that tastes like a celebration, even on a Tuesday night.

The Story Behind the Dish

Casseroles have long held a cherished place in home kitchens around the world. They began as practical, make-ahead meals that could stretch a single everyday purchase into something substantial enough to feed a family, with flavors that promised warmth during chilly seasons and long workdays. The idea that a humble collection of ingredients could come together into something greater-than-the-sum-of-its-parts is at the heart of many traditional casseroles, and the Million Dollar Chicken Casserole is a modern homage to that timeless concept. It blends familiarity with a touch of indulgence, a nod to mid-century comfort cooking while embracing today’s love of convenience without sacrificing soul or flavor.

The “million-dollar” moniker is a wink to those make-ahead, crowd-pleasing dishes that feel priceless in their ability to nourish people, spark laughter, and create lasting memories. It’s the kind of dish that shows up at potlucks, church suppers, and family reunions, quietly outshining more elaborate meals with its reliable charm. In many households, a dish like this becomes a rite of passage: you learn to assemble it in half the time it took to learn your grandmother’s favorite family recipe, you discover how leftovers can become new, comforting lunches, and you realize that the best recipes often arrive not as grand gestures but as acts of daily generosity.

What makes this particular casserole special is its balance between decadence and homeliness. The creamy core suggests a touch of luxury, while the heartiness of the dish keeps it grounded in everyday comfort. It’s not about showmanship; it’s about the sensory pleasure of a dish that feels velvety and lush against the bite of a softly textured topping. The dish invites you to tell stories at the table, to linger over seconds, and to appreciate the way a well-crafted casserole can turn simple ingredients into something that feels celebratory without needing a special occasion.

Over the years, countless home cooks have adapted casseroles to reflect their families’ tastes, and the Million Dollar Chicken Casserole invites that same spirit of personal touch. Perhaps you’ll fold in a favorite herb, swap in a seasonal vegetable, or swap a portion of the protein for something plant-based. The beauty of this dish lies not only in its dependable comfort but in its adaptability — it’s a canvas for your kitchen personality, a dish that says “home” in a language everyone understands.

Why You’ll Love This Recipe

  • Comfort in a pan: Creamy, savory, and richly satisfying, this casserole delivers instant comfort with every forkful.
  • Make-ahead magic: It’s naturally forgiving for make-ahead meals, so you can assemble in advance and bake when you’re ready.
  • Crowd-pleasing versatility: Perfect for weeknights and potlucks, it scales up easily to feed a larger group without sacrificing flavor.
  • Texture harmony: A lush, creamy interior contrasts with a crisp, golden topping for a satisfying bite every time.
  • Economical luxury: Rich in flavor and satisfying in portion, it feels indulgent without being wasteful or extravagant.
  • Family-friendly: The familiar flavors and gentle seasoning make it a safe bet for diners of all ages.
  • Leftovers that reinvent themselves: Leftover casserole textures beautifully transform into quick lunches or a new dinner with a simple twist.
  • One-pan elegance: You’ll enjoy the sense of accomplishment that comes from creating something that looks and tastes special with minimal cleanup.

As you read further, you’ll see how the dish can be tailored to fit different seasons, dietary needs, and taste preferences, all while preserving that signature sense of indulgence and homey charm. The Million Dollar Chicken Casserole isn’t just a recipe; it’s a dependable storytelling tool for your dinner table — a dish that invites sharing, conversation, and the simple joy of good food enjoyed together.

Flavor Profile & Texture

At its core, this casserole offers a layered experience designed to satisfy a spectrum of cravings. The center presents a tenderness that speaks of slow, gentle heating — a comforting, almost lullaby-like mouthfeel that coats the palate with warmth. The dominant sensation is a lush creaminess that glides across the tongue, delivering a savory depth that lingers pleasantly after each bite. The overall flavor is thoughtfully balanced rather than overpowering: richness with a light lift of brightness, a whisper of herbal notes, and a subtle, comforting savor that makes you reach for another spoonful.

The topping provides the much-loved contrast that makes casseroles so appealing. As you encounter the first crusty layer, you’re met with a delicate crackle and a toasty fragrance that evokes bakery mornings and family dinners. Beneath the surface, the texture remains moist and cohesive, ensuring every mouthful has a harmonious blend of softness and substance. The interplay between the creamy interior and the crisp topping is where the dish truly shines, offering a satisfying bite that rewards both patience and appetite.

Flavors that weave through the dish tend to feel round and familiar, leaning into notes of comfort without overwhelming the senses. There’s a gentle savor that remains steady across bites, a touch of warmth that hints at caramelized edges, and a subtle, almost imperceptible sweetness that helps balance the savory backbone. If you savor balance and depth over punch, this casserole delivers in spades. It’s a dish that knows when to whisper and when to sing — never rushing, always inviting you to slow down and appreciate the texture and aroma as they unfold together.

The aroma is a big part of the experience. When the dish bakes, the kitchen fills with a nurturing scent that feels like a welcome hug: slightly herbaceous, toasty, and warm enough to make everyone pause at the door, take a deep breath, and smile in anticipation. That scent-laden moment is a signal that dinner is almost ready, and it’s one of those sensory cues that makes a home feel complete. In short, the flavor profile and texture marry comfort with sophistication, delivering a dish that tastes both immediate and timeless.

Occasions & Pairings

When to Serve

This versatile casserole shines in a range of settings, from casual weeknights to festive gatherings. It’s an ideal centerpiece for family dinners, especially when you’re feeding a mix of ages and appetites. It also works brilliantly for potlucks, church socials, or community events where a single dish can quickly become a crowd favorite. During cooler months, it becomes a reliable go-to for cozy evenings, while at any time of year it holds its own as a comforting, shareable dish that invites conversation and connection around the table.

Ideal Pairings

Pair this casserole with light, fresh counterpoints that balance its richness. A bright, crisp salad adds contrast and a necessary lift, while steamed or roasted vegetables provide color and a mild sweetness. Crusty bread or warm biscuits are excellent for mopping up any remaining sauce, turning each meal into a satisfying, all-inclusive experience. For drinks, a glass of chilled white wine or a lightly sparkling beverage can cut through the creaminess and refresh the palate, while a savory non-alcoholic option can complement without overpowering the dish. For dessert, consider something citrusy or fruit-forward to lift the meal and provide a clean finish after the comforting main course.

Tips, Variations & Substitutions

Flexible Foundations

The beauty of a Million Dollar Chicken Casserole lies in its adaptability. If you’re cooking for family members with different tastes, think of this dish as a base you can tailor at the table. You can explore gentle tweaks that preserve the comforting core while giving each iteration its own character. For instance, you might swap in a different protein or add a seasonal vegetable to shift the flavor profile slightly without losing the dish’s signature essence.

Dietary Alternatives

  • Vegetarian: Replace the protein with hearty vegetables, plant-based proteins, or legumes. You can also layer in mushrooms for a meaty texture and depth of flavor.
  • Gluten-free: Use gluten-free thickeners or pre-made gluten-free casseroles bases; ensure the topping or any crumb component is certified gluten-free if needed.
  • Dairy-free / Lacto-friendly: Choose dairy-free cream alternatives and a non-dairy cheese substitute if you wish to keep the creaminess without dairy.
  • Low-carb / Keto-friendly: Reduce or replace any grain-based toppings with low-carb alternatives such as crushed nuts or seeds for a crunchy finish, and emphasize the protein-to-veg balance for a lighter profile.

Flavor Twists & Add-Ins

  • Herb infusions can lift the dish without changing the texture dramatically. Try infusing the creamy base with a pinch of fresh herbs or dried aromatics that suit your pantry.
  • Roasted or caramelized onions add sweetness and depth, while a splash of tangy notes from a citrus zest or a light acidity can brighten the dish in a pleasing way.
  • Texture play: consider a different topping style, such as a crumbly, nutty crust or a crisp, seed-based layer for extra crunch and nuance.
  • Spice alternatives: a gentle whisper of warmth from mild spices or a touch of smoked paprika can transform the profile without overwhelming the dish’s comforting character.

Regional & Cultural Twists

Think about regional flavors and how they could subtly influence the casserole’s character. A touch of Southwestern-inspired seasoning for a zesty warmth, a Mediterranean olive oil and herb profile for brightness, or a hint of almond or pistachio crunch for a nutty accent can all offer delightful variations while keeping the dish approachable and familiar.

Storage & Make-Ahead Ideas

One of the greatest strengths of this dish is its suitability for make-ahead cooking and thoughtful storage. It’s a progenitor of the “plan ahead, savor later” approach that many home cooks cherish. Here are practical ideas to maximize flavor, texture, and convenience:

  • Make-ahead assembly: You can assemble the casserole up to the point of baking and refrigerate it for several hours or overnight. When you’re ready to cook, simply bake as directed, adding a few extra minutes if it’s cold from the fridge.
  • Make-ahead baked casserole: Prepare, bake until just set, and cool completely. Cover and refrigerate. Reheat gently in the oven, covered, to preserve moisture and prevent over-browning.
  • Freezing: Assemble and freeze unbaked, tightly wrapped. Thaw overnight in the fridge before baking. For frozen, baked leftovers, reheat slowly to prevent drying out and to maintain the creamy texture.
  • Leftovers: Store in an airtight container in the fridge for up to 3-4 days. Reheat in the oven or a covered skillet with a splash of liquid to restore creaminess without scorching the edges.
  • Portioning for meal prep: Consider dividing into individual portions for quick lunches or for easy freezer-to-oven meals during busy weeks.

Make It Your Season

Seasonality can influence how you store or reuse leftovers. In the fall and winter, embrace the comforting, oven-warm aroma; in spring and summer, keep portions light with vibrant salads on the side and a bright citrus note to balance richness. The dish is resilient and forgiving, adapting to your schedule and your preferences without losing its essence.

Fun Facts & Trivia (Optional)

  • casseroles emerged as a practical solution in mid-20th-century kitchens, offering nourishment for families with minimal time investment, and they continue to be treasured for their generosity and practicality.
  • The term “Million Dollar” in dishes often signals a luxurious, crowd-pleasing payoff without a prohibitive price tag, a nod to kitchens that stretch pantry staples into something extraordinary.
  • Casseroles have long been associated with potlucks and community gatherings, where sharing a hearty dish is an expression of hospitality and togetherness — a tradition that this recipe embodies in a modern, approachable way.
  • The comforting aroma of a bubbling casserole is scientifically linked to feelings of well-being and nostalgia, which is why these dishes feel like a warm welcome home after a long day.
  • Variations of this dish can be found in many cultures, each adding a unique twist. The core idea — layering ingredients, slow heating, and a satisfying top — remains a universal symbol of nourishment and shared meals.

Conclusion / Final Thoughts

The Million Dollar Chicken Casserole is more than a recipe; it’s a culinary ambassador for home, comfort, and connection. It invites you to slow down just enough to savor scents, textures, and flavors that feel both timeless and personal. Whether you’re cooking for a small family, a big crowd, or yourself on a night when you deserve a little luxury, this casserole offers a dependable path to a memorable meal. It’s the sort of dish you’ll return to again and again, drawing comfort from its creamy heart, its crisp crown, and the sense of abundance it brings to your table. Embrace the ritual: preheat, prepare, bake, and gather — because sometimes the simplest meals become the most cherished memories.

Ingredients

Million Dollar Chicken Casserole

Chicken and Noodles
  • 3 cups shredded cooked chicken (rotisserie works)
    → Purpose: Provides the protein backbone and moisture; Shredded texture helps the sauce cling to every bite and ensures even distribution throughout the casserole. Preparation: If using a rotisserie chicken, remove skin and bones, then shred the meat with two forks into bite-sized pieces. If starting from raw chicken, poach or bake until fully cooked (165°F/74°C) and cool slightly before shredding. Tips: For extra flavor and moisture, use a mix of white and dark meat; reserve a few tablespoons of pan juices to moisten the chicken if it seems dry.
  • 8 oz egg noodles, cooked and drained
    → Purpose: Adds substantial body and acts as a starch to help thicken and bind the creamy filling. Preparation: Cook noodles in salted water until al dente, drain well, and lightly toss with a teaspoon of oil to prevent sticking. Tips: Do not overcook; undercook slightly so they hold up during baking and don’t turn mushy.
Creamy Sauce Foundation
  • 1 can condensed cream of chicken soup (10.5 oz)
    → Purpose: Forms the creamy, savory base that coats the chicken and noodles. Preparation: Use the condensed soup undiluted as listed; do not water it down. Tips: Choose a low-sodium version if you’re watching salt, and whisk the soup well with the other dairy ingredients to ensure a smooth sauce.
  • 1 cup sour cream
    → Purpose: Adds tang, richness, and helps emulsify the sauce for a silkier texture. Preparation: Soften slightly at room temperature to prevent lumping when whisked into the hot mixture. Tips: Full-fat sour cream yields the richest flavor and creaminess; substitute with Greek yogurt for a lighter version (thin with a splash of milk if needed).
  • 8 oz cream cheese, softened
    → Purpose: Thickens and enriches the sauce for a luxurious mouthfeel. Preparation: Soften to room temperature, then whisk or beat until completely smooth before adding to the sauce to avoid lumps. Tips: Cutting into cubes or letting it sit out longer speeds softening; if lumps form, warm gently and whisk vigorously until silky.
  • 1/2 cup milk (whole or 2%)
    → Purpose: Adjusts the sauce thickness to a pourable, spoonable consistency. Preparation: Add gradually, heating briefly if needed to incorporate. Tips: Start with 1/2 cup and add more as you test the texture; if the mixture seems too thick after assembly, loosen with a little additional milk or chicken broth.
Vegetables and Aromatics
  • 1/2 medium onion, finely diced
    → Purpose: Provides sweetness and depth to the casserole’s aroma. Preparation: Sauté in a small amount of butter or oil until translucent and softened to mellow sharpness. Tips: If you prefer less onion, you can omit or reduce to 1/4 cup; cooking the onion first helps prevent a raw onion bite in the final dish.
  • 2 cloves garlic, minced
    → Purpose: Adds warmth and savory complexity to the creamy base. Preparation: Mince finely and add with onions or after onions begin to soften to prevent burning. Tips: Fresh garlic provides stronger aroma; if short on time, you can substitute 1/4 teaspoon garlic powder, but fresh garlic is preferred for flavor.
  • 1 cup frozen peas and carrots (optional)
    → Purpose: Introduces color, texture, and a touch of sweetness. Preparation: Thaw and drain if possible; fold in with the chicken and noodles before transferring to the baking dish. Tips: For a crispier bite, add these toward the end of the baking time; you can substitute with corn or green beans if desired.
Cheese Layer
  • 2 cups shredded cheddar cheese
    → Purpose: Core cheesy flavor and helps bind the filling as it melts. Preparation: Shred cheese freshly for the best melt; fold about half into the sauce mixture and reserve the rest to sprinkle on top before baking. Tips: Use sharp cheddar for a more pronounced cheese presence; consider a small amount of mozzarella (optional, see below) for extra stretch and gooey texture.
  • 1/2 cup shredded mozzarella (optional)
    → Purpose: Extra melt and a creamy, stretchy texture on top. Preparation: If using, mix a portion into the sauce and sprinkle the rest over the top in the final layer. Tips: Use sparingly to avoid overpowering the cheddar’s flavor; mozzarella can brown quickly, so keep an eye on the bake time.
Seasonings
  • 1/2 teaspoon garlic powder
    → Purpose: Amplifies savory notes and fills in gaps if fresh garlic is light in flavor. Preparation: Measure with a level spoon; sprinkle evenly into the sauce. Tips: If you have fresh garlic, you can use half the amount of powder in combination with the minced garlic for depth; avoid adding too much powder to prevent chalky taste.
  • 1/4 teaspoon black pepper
    → Purpose: Brightens flavors and balances richness. Preparation: Use freshly ground pepper for the strongest aroma. Tips: Taste the mixture before baking and adjust if you’ve used salted soup; build pepper gradually to your preferred heat level.
  • 1/2 teaspoon dried thyme (or substitute with 1 teaspoon chopped fresh thyme)
    → Purpose: Adds herbaceous, earthy notes that pair with chicken. Preparation: Sprinkle into the sauce so the flavor infuses during bake. Tips: If using fresh thyme, strip leaves from stems and chop; dried thyme is more concentrated, so adjust to taste and prefer 1/2 to 1 teaspoon if using dried leaves.
Topping
  • 2 cups Ritz crackers, crushed
    → Purpose: Creates a crisp, buttery crust on top that contrasts with the creamy filling. Preparation: Crush crackers finely to resemble breadcrumbs; mix with melted butter until evenly coated. Tips: If you prefer gluten-free, substitute with gluten-free crackers or panko; for extra crunch, reserve a small handful of cracker crumbs to sprinkle on top just before baking.
  • 4 tablespoons unsalted butter, melted
    → Purpose: Binds the cracker topping and contributes richness and gloss to the crust. Preparation: Melt and whisk into the cracker crumbs until evenly damp. Tips: Using unsalted butter helps you control the final salt level; adjust salt in the filling if you’re using salted crackers.
  • Salt to taste
    → Purpose: Seasoning to balance the creamy sauce and crackers. Preparation: Add gradually and taste as you go, because condensed soup and crackers can already contribute salt. Tips: Start with a pinch and increase in small increments; you can finish with a light seasoning after baking if needed.
Garnish (optional)
  • Chopped fresh parsley
    → Purpose: Visual appeal and a hint of fresh herb brightness to finish the dish. Preparation: Finely chop right before serving for the most vibrant color. Tips: Sprinkle over the hot casserole just after baking so the parsley stays bright; you can omit if you don’t have fresh herbs.

Instructions

  • Preheat your oven to 350°F (175°C) and grease a 9×13-inch baking dish with butter or nonstick spray.
    → This ensures even heat distribution and prevents the creamy casserole from sticking, making clean slices and easy serving.
  • Shred the chicken: If using rotisserie chicken, remove skin and bones and shred the meat with two forks into bite-sized pieces; if starting from raw chicken, poach in simmering water or bake until fully cooked (165°F/74°C), then cool slightly and shred. Reserve 2–3 tablespoons of pan juices if available to moisten the mixture later.
    → Purpose: Shredded meat evenly coats with sauce and yields a moist, cohesive filling rather than dry chunks; keeping some moisture helps prevent a dry casserole.
  • Cook the egg noodles in salted water until al dente, drain well, and lightly toss with a teaspoon of oil to prevent sticking.
    → This gives the filling body and ensures the noodles hold up during baking without turning mushy; undercook slightly so they retain texture after baking.
  • Whisk the sauce base: In a medium bowl, whisk the condensed cream of chicken soup (undiluted) with the sour cream, softened cream cheese, and milk until completely smooth; if lumps form, microwave the cream cheese for 10–15 seconds or warm the bowl and whisk again.
    → This creates a silky, stable foundation that coats the chicken and noodles without separation, ensuring even moisture and flavor distribution.
  • Sauté the aromatics: In a skillet, melt 1 tablespoon of butter over medium heat, add the finely diced onion and sauté until translucent and softened, about 3–4 minutes; then stir in the minced garlic and cook just until fragrant, 30–60 seconds, to prevent garlic from burning.
    → Sautéing builds sweetness and depth, mellowing sharp onion flavors and releasing garlic aroma without burning, which would impart bitterness.
  • Thaw and drain the peas and carrots: If frozen, transfer to a colander and run under a brief rinse or thaw at room temperature, then pat dry; squeeze out excess moisture before folding into the filling.
    → This preserves color and prevents excess water from thinning the sauce, while ensuring the vegetables stay tender-crisp rather than soggy.
  • Build the filling: In a large mixing bowl, combine the shredded chicken, cooked noodles, sautéed onion and garlic, and thawed peas and carrots; pour the prepared sauce over and gently fold with a spatula until everything is evenly coated without mashing the noodles; fold in 1 cup of the cheddar into the filling for binding and extra flavor.
    → Purpose: Even coating ensures every bite is creamy, while folding preserves noodle texture and distributes cheddar for a cohesive filling.
  • Season the filling: Sprinkle 1/2 teaspoon garlic powder, 1/4 teaspoon black pepper, and 1/2 teaspoon dried thyme (or 1 teaspoon fresh thyme, chopped) over the filling; whisk gently to incorporate and taste before assembling, adjusting salt if necessary since the soup is salty.
    → These seasonings boost savory depth and herbal brightness, filling gaps from the creamy base without overpowering the chicken.
  • Transfer the filling to the prepared baking dish and spread it into an even layer with a spatula or the back of a spoon so the top bakes uniformly.
    → An even layer ensures consistent heat penetration and a uniform slice; press lightly to compact without crushing noodles.
  • Prepare the topping: In a medium bowl, mix the crushed Ritz crackers with the melted butter until the crumbs are evenly coated; the butter should be fully absorbed for a cohesive crust; season lightly with a pinch of salt if your crackers are unsalted.
    → This yields a crisp, buttery crust that provides contrast to the creamy filling and helps seal moisture during baking.
  • Top the casserole and cheese: Sprinkle the remaining 1 cup cheddar evenly over the filling and, if using, scatter the 1/2 cup mozzarella; lay the cheese in a light, even layer so it melts smoothly without pooling.
    → Cheddar provides flavor and body; mozzarella adds stretch and surface gloss; layering helps achieve an attractive, gooey top without leaning too salty.
  • Scatter the cracker topping evenly over the cheese layer and press gently to help adhesion; then drizzle any remaining melted butter from the cracker mixture over the top to ensure a golden, crisp crust.
    → The butter-bound crackers crisp and brown evenly, creating a toasty topping that contrasts with the creamy filling.
  • Bake in the preheated oven for 25–35 minutes, or until the casserole is bubbling around the edges and the top is golden brown; test doneness by inserting a small knife in the center to ensure the filling is hot throughout; if the top browns too quickly, tent with foil for the last 5–10 minutes.
    → This cooks the chicken through, melts the cheese evenly, and achieves a crisp topping without drying the interior; a bubbling center indicates proper heating and cohesion.
  • Remove from oven and rest for 10 minutes before serving to allow the filling to set and make slicing easier; garnish with chopped fresh parsley if desired.
    → Resting helps the sauce thicken further and makes clean cuts; parsley adds a fresh color contrast and a hint of brightness to finish the dish.

Notes

“These comforting Million Dollar Chicken Casserole bites are a cozy, crowd-pleasing dish that brings together shredded chicken, egg noodles, a creamy sauce, and a buttery cracker crust for a golden top. Use rotisserie chicken to save time, or poach raw chicken until cooked and shred finely. Cook noodles to al dente, drain well, and toss with a little oil to prevent sticking. The creamy base comes from undiluted condensed cream of chicken soup whisked with sour cream, softened cream cheese, and a splash of milk; warm gently to blend smoothly. Fold in the chicken, noodles, and optional peas and carrots, then stir in half the cheddar (plus mozzarella if you like extra melt). Transfer to a greased baking dish, top with the remaining cheese, and finish with crushed Ritz crackers mixed with melted butter for a crisp, buttery crust. Bake at 350°F (175°C) for 25–30 minutes until bubbling and cheese is melted; let rest 5–10 minutes before serving. For a gluten-free version, substitute gluten-free crackers and a gluten-free condensed soup, or make a simple sauce with chicken stock and dairy thickened with cornstarch; always check labels to ensure all ingredients are gluten-free. Leftovers reheat beautifully and can be frozen after baking for future meals. Garnish with chopped fresh parsley for a bright finish.”

Tips

Prep and Plan Ahead

  • Scale flavors by degree of doneness: if using a store-bought rotisserie chicken, remove skin and bones first, then shred with two forks for even texture that clings to the sauce.
  • Cook noodles to al dente. They’ll finish cooking in the oven, so undercooking slightly prevents mushiness.
  • Have all dairy at room temperature before mixing. Soften cream cheese and sour cream to help create a smooth, cohesive sauce without lumps.
  • Read through the whole recipe once before you start so you can pace adding ingredients and prevent overbrowning of the cracker topping.

Make-Ahead and Storage

  • Assemble the casserole, then refrigerate up to 24 hours before baking. Add 10–15 minutes to the bake time if the dish is cold from the fridge.
  • Freeze unbaked portions for up to 2–3 months. Thaw overnight in the fridge, then bake as directed. You may need a splash more milk if sauce thickens after freezing/thawing.
  • Leftovers store well in the fridge for 3–4 days. Reheat gently in the oven at 325–350°F (165–175°C) until bubbling and hot, or reheat in portions in the microwave, covered to prevent drying out.

Sauce and Texture Tips

  • Keep the condensed soup undiluted for maximum creaminess. If you must thin, use a small splash of milk or chicken broth and whisk back to smooth consistency.
  • Whisk the sour cream, cream cheese, and milk together before adding to the chicken mixture to avoid curdling and ensure a silky sauce.
  • If sauce seems too thick after mixing, loosen with a little more milk or chicken broth—you want a pourable, spoonable consistency, not a dry lump.

Vegetables, Aromatics, and Flavor Balance

  • Finish onions and garlic sauté until fragrant but not browned to keep a clean, mellow base; raw onion bite can carry into the final bake if undercooked.
  • Frozen peas and carrots add color and sweetness; thaw and drain well or fold in near the end of baking if you prefer a crisper texture.
  • Fresh thyme provides bright herb notes; if using dried thyme, be mindful it’s more potent—start with ½ teaspoon and adjust to taste.

Cheese and Topping Tips

  • Shred cheddar fresh for best melt; reserve half to fold into the sauce and sprinkle the rest on top for a golden, flavorful crust.
  • Optional mozzarella adds extra stretch—use sparingly to avoid overpowering the cheddar. If used, mix some into the sauce and some on top.
  • Cracker topping: crush crackers finely, mix with melted butter for even coating. For gluten-free versions, use gluten-free crackers or gluten-free panko; consider adding a few extra crumbs just before baking for extra crunch.
  • Salt to taste after the filling is mixed. Condensed soup and crackers can contribute salt, so taste and adjust gradually.

Baking, Serving, and Variations

  • bake at 350°F (175°C) until the top is golden and bubbling; cover if the top browns too quickly, then uncover to finish.
  • Let the casserole rest 5–10 minutes after baking to set the filling for cleaner servings.
  • For lighter versions, substitute Greek yogurt for half of the sour cream (thin with a splash of milk as needed).
  • Gluten-free option: use gluten-free condensed soup and crackers; verify all ingredients are certified GF if needed.
  • To boost flavor, add a pinch of paprika, a dash of hot sauce, or a squeeze of lemon over the finished dish for brightness.

Serving and Presentation

  • Garnish with chopped fresh parsley for color and a fresh aroma just before serving.
  • Pair with a simple green salad or steamed vegetables to balance richness.

FAQ

What is Million Dollar Chicken Casserole?

A creamy, comforting chicken casserole featuring tender shredded chicken in a rich sauce, topped with buttery crackers. It’s quick to assemble and baked until bubbly and golden.

What ingredients do I need?
  • 3 cups cooked shredded chicken
  • 1 can (10.5 oz) cream of chicken soup
  • 1 cup sour cream
  • 1 cup shredded cheddar cheese
  • 1/2 cup finely chopped onion (optional)
  • 1 cup crushed Ritz crackers (or any buttery crackers)
  • 4 tablespoons butter, melted
  • Optional: 8 oz cream cheese, softened
  • Optional: 2 cups broccoli florets, steamed (for a veggie boost)
Can I assemble this ahead of time?

Yes. You can assemble the casserole up to 24 hours in advance and refrigerate it unbaked. Keep the topping separate if you want the crackers extra crisp, then sprinkle on just before baking. If you refrigerate, add a few extra minutes to the bake time when you start from cold.

How do I bake it?

Preheat oven to 350°F (175°C). In a bowl, mix the soup, sour cream (and cream cheese if using), onion, and half of the cheddar. Stir in the shredded chicken (and broccoli if using). Spread the mixture in a greased baking dish. Toss crackers with melted butter and sprinkle over the top with the remaining cheddar. Bake for 25–30 minutes, until hot and bubbly and the topping is golden. If the top browns too quickly, loosely tent with foil.

Can I freeze or refrigerate before baking?

Yes. You can freeze assembled unbaked casserole for up to 2 months. Thaw in the refrigerator overnight and bake as directed, adding 10–15 minutes to the bake time if needed. You can also refrigerate the assembled casserole for up to 24 hours; bake from the fridge, adding a few extra minutes to ensure the center is hot.

Is this dish gluten-free?

Traditional versions use crackers with gluten and a cream-of-chicken soup that may contain gluten. For a gluten-free option, use gluten-free crackers and a gluten-free cream soup (or make a white sauce from scratch with gluten-free stock). Check all labels to ensure they are certified gluten-free.

Is there a dairy-free or lighter variation?

Yes. For a dairy-free version, use dairy-free cream soup and sour cream alternatives, plus a dairy-free cheese substitute. You can also substitute light sour cream or yogurt and reduce butter in the topping. For a lighter option, use less cheese and crackers, and consider adding more vegetables to stretch the dish.

How can I customize the recipe?
  • Add steamed vegetables like broccoli, peas, or mushrooms.
  • Swap the cheddar for another cheese blend (e.g., Monterey Jack or mozzarella).
  • Play with spices: a pinch of paprika or garlic powder for extra flavor.
  • Use different crackers or a crumb topping with breadcrumbs and herbs.
How should I store leftovers and how long will they keep?

Store cooled leftovers in an airtight container in the refrigerator for 3–4 days. Reheat in the microwave in 1–2 minute intervals, stirring, or reheat in a 350°F (175°C) oven until hot. You can also freeze individual portions for longer storage.

What are good serving suggestions?

Serve with a simple green salad or steamed vegetables and a crusty bread or rolls. A light fruit side or pickles can balance the creamy richness nicely. For a complete meal, pair with rice or mashed potatoes.

Approximately how many servings does this yield and what are the rough nutrition notes?

Depending on portion size, this dish typically serves 6–8. Nutrition varies with ingredients and toppings, but a generous serving is often in the 400–550 calorie range, with protein from chicken and fats from the cheese and crackers. For precise values, calculate using your exact ingredients and brands.

Introduction / Hook

Picture a morning where the air carries a cozy swirl of cocoa and warm bakery notes, a moment when time slows just enough for you to savor a small, tender miracle. Healthy Chocolate Breakfast Donuts offer the best of two worlds: the comforting, chocolatey joy we crave on a lazy weekend and the smart, nourishing foundations that keep energy steady through a busy weekday. They’re not just a treat; they’re a morning ritual that says yes to flavor and yes to balance. The first bite reveals a soft, cake-like crumb that melts into your mouth with a gentle sweetness, while a whisper of cocoa lingers, rich enough to feel indulgent but light enough to start your day without that heavy aftertaste. Imagine a little ring of happiness—glossy enough to hint at a glaze you can skip or add, moist enough to satisfy without weighing you down, and crafted with wholesome ideas that your future self will thank you for. This isn’t about deprivation; it’s about a thoughtful reimagining of a beloved classic that fits into a modern, mindful morning routine.

In this version, the aroma does the talking—think espresso steam meeting cocoa, a hint of warmth from toasty spices, and perhaps a subtle sweetness that sneaks up on you as you take the first bite. The donuts stand as a gentle invitation to begin the day with a smile, a sense of nourishment, and a dash of everyday luxury. They’re portable for a quick commute, satisfying for a mid-morning craving, and sturdy enough to be enjoyed at a kitchen counter or shared at a sunlit breakfast table. There’s a quiet confidence in this recipe: you’re choosing something that tastes decadent but feels thoughtful, a compromise that respects both your cravings and your goals. Welcome to a breakfast donut that actually fits into real life—delicious, comforting, and entirely doable.

The story behind Healthy Chocolate Breakfast Donuts is one of balance, memory, and the joy of treating yourself without losing sight of nourishment. It’s about waking up to a little ritual that combines the sensory pleasure of chocolate with the comfort of a familiar pastry, all while leaning into wholesome ingredients and mindful portioning. It’s the kind of recipe you return to when you want something a touch celebratory on a Tuesday morning, something that makes the week feel special without requiring a long morning at the stove. And because mornings are personal, there’s room here for your own twists: a glaze you adore, a texture tweak you crave, or a flavor accent that speaks to your family’s favorites. This is not a one-size-fits-all indulgence; it’s a thoughtfully crafted canvas that invites your own morning story to unfold.

The Story Behind the Dish

Every beloved breakfast begins with a memory, and for these donuts the memory is of strolling into a sunlit bakery on a weekend morning, the air thick with sweet steam and the soft shuffle of feet on tile. Yet the more we pursued that bakery-like experience, the more we wanted to translate it into weekday practicality: something that could be whipped up with confidence, that traveled well, and that offered a gentler energy boost than a heavy pastry with a sugar spike. The idea grew from a simple realization: a do-anytime treat can be both satisfying and nourishing when its foundations are thoughtful and balanced, not overwhelming.

The evolution of this dish mirrors a shift in morning rituals across kitchens and coffee bars worldwide. People began to crave ritual without rigidity—something that feels special enough to kick off a celebration of the day, yet versatile enough to adapt to different schedules, dietary preferences, and seasonal moods. The concept of a breakfast donut, reimagined with a focus on wholesome texture and chocolate depth, emerged as a delightful compromise between indulgence and wellness. It’s a dish born from the intersection of comfort and practicality: a little ring of joy that nods to childhood memories but speaks to modern habits, family kitchens, and the desire to start mornings with intention and satisfaction.

Over time, the recipe gathered curious iterations—more fiber without sacrificing tenderness, a touch of natural sweetness that doesn’t overwhelm, and a structure sturdy enough to hold up in a lunchbox or a desk drawer. Each tweak was guided by a simple philosophy: treat the donut like a small celebration of the day, but design it so it can be enjoyed often, with a gentle, sustained energy that supports focus, creativity, and steady mood. The result is a donut that feels familiar and comforting, yet carries a modern, ingredient-conscious approach beneath its chocolatey surface.

Why You’ll Love This Recipe

  • Quick to bake and easy to customize, making weekday mornings feel like a small win.
  • Moist, tender crumb that delivers a satisfying bite without heaviness or excess sugar.
  • Chocolate-forward flavor that satisfies cravings while keeping the sweetness approachable for all ages.
  • Versatile base that invites gentle adaptations to suit preferences and dietary needs (without compromising texture).
  • Portable and snack-friendly, ideal for school lunches, commutes, or afternoon coffee rituals.
  • Flavorable enough to pair gracefully with a wide range of beverages and toppings, from warm drinks to bright fruit compotes.
  • Family-friendly appeal that can be enjoyed by kids and adults alike, turning ordinary mornings into shared moments.
  • Built on a foundation of balance: a treat that feels indulgent but remains thoughtful about nourishment and portion control.

Flavor Profile & Texture

The flavor profile centers on chocolate’s comforting richness, tempered by a soft sweetness that doesn’t overwhelm and a gentle, almost caramel-like undercurrent that emerges as the donut rests on the tongue. The chocolate is present but not domineering, offering a refined cocoa note that pairs beautifully with a mild, bakery-like crust and a moist interior. There’s an undertone of warmth—subtle spices or toasted hints—that elevates the chocolate without masking its character. The overall taste is indulgent without being heavy, a dare-to-satisfy-now-but-feel-good-afterwards kind of experience.

Texture-wise, these donuts strike a delicate balance between cake-like tenderness and a sturdy crumb that holds its shape when picked up and eaten by hand. The exterior offers a faint glaze-ready gloss or a gentle dry-sugar kiss, depending on your chosen finish, while the interior stays soft and pillowy. The moisture content, crafted with careful contrasts, yields a crumb that lightly springs back, with a refined crumb structure that hints at bakery style without sacrificing everyday practicality. If you choose to add a glaze or drizzle, it becomes a glossy, inviting finish that crackles just enough as you bite, adding an extra layer of textural delight. For those who prefer a more nuanced texture, a light dusting of cocoa or a delicate sprinkling of edible accents can provide a little crunch or shimmer without overwhelming the softness inside.

Occasions & Pairings

These Healthy Chocolate Breakfast Donuts shine in a variety of settings. They’re ideal for a relaxed weekend breakfast, a quick weekday treat that still feels special, or a sunny brunch where you want to offer something comforting but not overly rich. They are equally at home next to a cup of coffee or a glass of cold milk, pairing well with a simple fruit salad, a dollop of yogurt, or a small spoonful of bright jam that cuts through the cocoa with a tangy contrast. Their portability makes them a natural choice for school mornings or office snack breaks, turning a routine moment into a small pause filled with aroma and warmth.

For pairings, think about beverages that complement chocolate’s depth. A robust coffee or a mid-strength tea can enhance the cocoa notes, while a creamy dairy or plant-based milk can soften the finish. Fresh berries or citrus segments can provide a refreshing acidity that balances sweetness, and a light yogurt or a mild ricotta could serve as a gentle, tangy counterpoint if you’re serving these for a brunch spread. If you’re shaping a seasonal menu, pairings can shift subtly with the calendar—warming spices in autumn and a brighter, zesty zest in spring can influence your topping ideas or an accompanying fruit compote.

Tips, Variations & Substitutions

  • Think texture and sweetness first: if you prefer more bite or extra tenderness, adjust the moisture profile with subtle swaps in fat or liquid components, keeping the balance that makes the interior soft yet structured.
  • Flavor twists are welcome: a hint of spice, a touch of espresso-like depth, or a splash of vanilla can elevate the chocolate without complicating the finish. If you enjoy contrast, a bright citrus zest or a blueberry swirl can offer a delightful lift.
  • Finish options: decide between a light glaze for a glossy finish or a gentle dusting of something that adds visual appeal and a whisper of sweetness. A simple, cinnamon-tinged powder or a cocoa-sugar kiss can provide a beautiful finish without overpowering the core flavors.
  • Make it your own with gentle substitutions: you can explore different flour blends or moisture-adjusting components to suit preferences or dietary goals, and you can scale sweetness to taste by adjusting natural sweeteners and fruit accents in a respectful, balanced way.
  • Global twists: draw inspiration from traditional desserts around the world by incorporating subtle aromatics or toppings that nod to different culinary backgrounds, all while maintaining a soft and approachable profile.

Storage & Make-Ahead Ideas

Leftovers, if any, can be tucked away for later enjoyment, preserving the gentle sweetness and soft interior. Store gently in an airtight container at room temperature for a day or two, or refrigerate them to extend their freshness for another couple of days. For longer storage, these donuts freeze well—wrap them individually to protect against freezer burn and maintain their delicate texture when thawed. Reheat gently to bring back the warmth and aroma, giving them a quick revival that tastes almost as fresh as the first bite. If you’re making ahead for a busy week, consider freezing the donuts in stages and warming them as needed, so each morning starts with that sense of bakery-delight without a long morning prep.

To keep the experience bright and appealing, reheat with a brief gentle warmth and avoid overheating, which can dull the tender crumb. A light glaze or finish can be added after reheating if you prefer a more polished look, but even without a finish, their inherent tenderness remains a pleasure. If you like to refresh the flavor, a quick Canadian-tale moment, such as a squeeze of citrus or a sprinkle of a fragrant zest, can offer a new morning twist without complicating the overall approach.

Fun Facts & Trivia (Optional)

Donuts have a long, playful history that mirrors the evolution of breakfast culture. The beloved circular shape with a hole in the middle is not just for aesthetics; it was historically practical, allowing dough to cook more evenly and produce a uniform texture. Chocolate, as a flavor, has traveled a remarkable journey from ancient Mesoamerican origins to a global staple in desserts and beverages—its inclusivity across cultures makes it a natural fit for a breakfast treat that aims to feel comforting yet modern. The idea of turning a classic pastry into a wholesome morning option taps into a broader trend: honoring cravings while weaving in balance, nourishment, and a sense of everyday luxury. By reimagining a traditional indulgence as a breakfast donut, this recipe participates in a broader conversation about how we can enjoy the flavors we love while staying mindful of our energy, mood, and schedule. And that is a tiny, delicious celebration of the daily routine itself.

Ingredients

Donut Base

    – 1 cup oat flour (gluten-free if needed)
    → Oat flour provides a light, tender crumb that pairs well with chocolate and keeps the donuts naturally approachable for gluten-free diets. If you don’t have oat flour, blend rolled oats until very fine, then measure. Sift to remove any larger particles for a smoother batter.

    – 1/2 cup almond flour
    → Almond flour adds moisture, richness, and a subtle nutty note that improves crumb softness in baked goods. Use finely ground almond flour, not almond meal, to avoid a grainer texture. Gently whisk with other dry ingredients to ensure even distribution.

    – 1/3 cup unsweetened cocoa powder
    → Provides the chocolate flavor and color. Choose Dutch-processed for a smoother, milder chocolate or natural cocoa for a more robust bite; sift to remove lumps and ensure even coloring in the batter.

    – 1/4 teaspoon fine sea salt
    → Enhances the sweetness and brings out the chocolate flavor; use fine salt so it distributes evenly and doesn’t create pockets of saltiness in the batter.

    – 1 teaspoon baking powder
    → Leavening that helps the donuts rise to a light, cake-like texture. Make sure it’s fresh and evenly dispersed by whisking with the dry ingredients; this will prevent a compact crumb and give a nice dome on the baked donuts.

    – 1/4 teaspoon baking soda
    → Works with acidic ingredients to contribute to browning and lift, improving crumb tenderness. Ensure it’s evenly mixed with the other dry ingredients to avoid uneven pockets of leavening.

Wet & Sweeteners

    – 1 large ripe banana, mashed
    → Banana provides moisture and natural sweetness while acting as a binder in place of extra fat. Mash until smooth (a few small lumps are okay if you prefer a bit more texture). Very ripe bananas with dark spots offer the best flavor concentration.

    – 2/3 cup unsweetened almond milk (or any plant milk)
    → Hydrates the dry ingredients to form a cohesive batter without dairy. Use at room temperature for best mixing; if batter seems too thick, whisk in a tablespoon at a time until you reach a thick, spoonable consistency.

    – 1/4 cup unsweetened applesauce
    → Adds moisture and acts as a partial fat replacer, contributing to a lighter, tender crumb. It also helps bind the batter. Use unsweetened to avoid extra sugar; you can replace part of the banana with applesauce if you prefer.

    – 1 large egg, lightly whisked (or 1 flax egg: 1 tablespoon ground flaxseed + 2.5 tablespoons water, mix and let sit 5 minutes)
    → Egg provides structure and moisture; flax egg is a reliable vegan alternative that mimics binding when fully prepared. If using flax, let the mixture gel before adding to the batter to ensure a cohesive texture.

    – 2 teaspoons pure vanilla extract
    → Enhances overall flavor and depth, especially with chocolate. Use pure vanilla extract for the strongest aroma; avoid imitation if possible, and add to wet ingredients to distribute evenly.

    – 2 tablespoons pure maple syrup (or honey)
    → Adds a touch of natural sweetness and helps keep the donuts moist. If you prefer a lower sugar version, reduce to 1 tablespoon and rely more on banana ripeness for sweetness; drizzle extra at glaze stage if desired.

Optional Add-ins

    – 1/3 cup dark chocolate chips (70% cacao)
    → Pockets of melted chocolate provide extra indulgence. Fold in gently at the end to avoid overmixing and sinking; chips can slightly weigh the batter, so handle with light hands for even rise.

    – 1/4 cup chopped walnuts or pecans
    → Adds crunch and a toasty note that contrasts with the soft crumb. Toast nuts lightly before chopping to intensify flavor; fold in last to keep their texture intact in the finished donuts.

    – 1 tablespoon chia seeds or ground flaxseed
    → Boosts fiber and helps with binding, particularly in vegan versions. If using whole chia, you may notice slight texture; consider grinding flaxseed for smoother batter. Increase hydration slightly if batter thickens after adding seeds.

Glaze & Toppings

    – 1/3 cup dairy-free dark chocolate chips or chopped dark chocolate
    → Melted chocolate creates a glossy glaze that complements the chocolate base while keeping the recipe dairy-free. Melt gently over low heat or in 20-second bursts in the microwave, stirring between sessions to avoid scorching.

    – 1-2 teaspoons coconut oil
    → Helps thin and shine the glaze for easy drizzle. A small amount goes a long way; using refined or unrefined coconut oil will alter aroma slightly, so choose based on your preference for coconut note in the glaze.

    – 2-3 tablespoons unsweetened almond milk (to adjust glaze consistency)
    → Used to loosen the glaze to a pourable consistency for a smooth drizzle. Add gradually; if the glaze thickens after refrigeration, warm slightly or add a touch more milk to regain pouring consistency.

    – Optional toppings: shredded coconut (toasted), cacao nibs, or chopped hazelnuts
    → Finish with a textural contrast and visual appeal. If toasting coconut or nuts, do so briefly on low heat to release aroma; sprinkle immediately after glazing for best adhesion.

Instructions

  • Preheat your oven to 350°F (175°C) and lightly grease a 6-cavity donut pan with nonstick spray or brush with neutral oil; you may dust with a tiny amount of oat flour to prevent sticking.
    → A well-greased pan ensures donuts release cleanly and retain their domed shape without tearing the crust.
  • Sift or whisk together the dry base components—oat flour, almond flour, unsweetened cocoa powder, fine sea salt, baking powder, and baking soda—in a large bowl until evenly combined and free of lumps.
    → Sifting aerates the mix and distributes leavening uniformly, which promotes a light, tender crumb and consistent rise in every cavity.
  • Mash the ripe banana until completely smooth with a few tiny lumps optional for texture, then whisk in the unsweetened almond milk, applesauce, vanilla extract, and maple syrup until the mixture is uniform; keep mixture at room temperature for optimal emulsification.
    → Fully mashed banana provides moisture and binder; warming the liquids helps them integrate smoothly into the dry ingredients for a cohesive batter.
  • Whisk in the egg (or prepare a flax egg by mixing 1 tablespoon ground flaxseed with 2.5 tablespoons water and letting it sit 5 minutes until gelled), then fold the wet ingredients into the dry just until a thick batter forms; avoid overmixing to protect tenderness.
    → The egg or flax gel supplies structure and moisture; overmixing gluten-free batters can create toughness and a dense crumb.
  • If using optional add-ins (dark chocolate chips, chopped walnuts or pecans, or chia/ground flaxseeds), fold them in now with a gentle hand to distribute evenly without breaking up the batter or causing chips to sink.
    → Add-ins enhance flavor and texture, but gentle incorporation preserves lift and prevents sinking.
  • Spoon or pipe the batter into the prepared donut pan cavities, filling each about two-thirds to three-quarters full to allow room for expansion; tap the pan firmly on the counter to settle the batter and eliminate air pockets.
    → Proper filling ensures a uniform dome and prevents mis-shapen donuts; tapping minimizes large air gaps that can create cracks during baking.
  • Bake for 12–15 minutes, or until a toothpick inserted into a center donut emerges with only a few moist crumbs and the edges look set; if your oven bakes unevenly, rotate the pan halfway through baking.
    → Accurate doneness testing prevents dry, crumbly donuts and ensures a tender interior with a light crust.
  • Cool the donuts in the pan for 5–7 minutes on a rack, then invert or gently remove them to a cooling rack to finish cooling completely before glazing; this prevents steam from softening the glaze and helps the surface hold the glaze evenly.
    → Resting stabilizes the crumb and creates a dry surface that oozes less glaze during application.
  • Prepare the glaze by melting 1/3 cup dairy-free dark chocolate chips with 1–2 teaspoons coconut oil and 2–3 tablespoons unsweetened almond milk in a heatproof bowl over simmering water or in short bursts in the microwave, stirring until smooth; adjust with more almond milk to reach a pourable consistency.
    → Gentle heat preserves gloss and prevents scorching; coconut oil helps the glaze set with a glossy finish while maintaining dairy-free integrity.
  • Glaze the cooled donuts by dipping the tops or drizzling in a thin, even layer, then immediately scatter optional toppings such as toasted shredded coconut, cacao nibs, or chopped hazelnuts; allow the glaze to set at room temperature before stacking or serving.
    → A uniform glaze adheres best to dry surfaces, while toppings add texture, aroma, and visual appeal once the glaze begins to firm.
  • Store any leftovers in an airtight container at room temperature for up to 2 days or refrigerate for up to 5 days; rewarm individual donuts briefly in the microwave before serving to restore softness.
    → Donuts stay moist when stored properly; reheating revives a freshly baked texture without drying out.

Notes

These Healthy Chocolate Breakfast Donuts are softly sweet with moisture from ripe banana and unsweetened applesauce, plus a touch of pure maple syrup for natural sweetness. The batter relies on oat and almond flours for a tender, cake-like crumb and a rich chocolate flavor. You can customize them by folding in your favorite mix-ins such as chopped nuts, cacao nibs, or a small handful of dried fruit. They freeze well and make a great grab-and-go breakfast or snack; reheat in the microwave for a quick warm bite. For a polished finish, glaze with a smooth dairy-free chocolate glaze or drizzle with maple syrup, and serve with a swirl of dairy-free yogurt if you like.

Gluten-free note: if you are gluten sensitive, ensure your oat flour is certified gluten-free and that your baking powder is gluten-free. If you don’t need gluten-free options, you can experiment with using regular all-purpose flour in place of the oat and almond flours, but keep an eye on moisture—you may need to adjust with a splash of milk. For storage, keep baked donuts in an airtight container at room temperature for up to 3 days or freeze for longer keeping quality.

Tips

Tips for Healthy Chocolate Breakfast Donuts

  • Batter prep and ingredient handling: If you don’t have oat flour, blend rolled oats until very fine and measure before sifting. This helps achieve a tender crumb similar to traditional donuts. For best texture, sift all dry ingredients (oat flour, almond flour, cocoa, salt, baking powder, baking soda) together to break up lumps and ensure even distribution.
  • Flour choice and texture: Use finely ground almond flour rather than almond meal to avoid a gritty crumb. If you notice the batter is too dense, whisk in an additional tablespoon of almond milk at a time until it reaches a thick, spoonable consistency.
  • Chocolate handling: Sift cocoa powder to remove lumps and choose Dutch-processed for a smoother, milder chocolate or natural cocoa for more bite. This choice will influence how your dough browns and how noticeable the chocolate flavor is.
  • Leavening insight: Fresh baking powder helps donuts rise to a light, cake-like texture. If you’re using natural cocoa (which can be less acidic), you may rely more on baking powder for lift. If you use Dutch-processed cocoa, the baking soda’s role is smaller unless you add a bit of acidity (e.g., a splash of yogurt or a teaspoon of cider vinegar) to balance it.
  • Moisture balance: Bananas provide moisture and act as a partial fat replacer. Very ripe bananas offer the best flavor. If your batter seems dry, add a splash more plant milk or a teaspoon of applesauce to rehydrate.
  • Eggs vs flax eggs: If vegan, use a flax egg and let it gel for about 5 minutes before mixing. For best structure, add wet ingredients to the dry gradually and avoid overmixing once the dry and wet are combined.
  • Sweetness control: The combination of banana and maple syrup adds natural sweetness; taste the batter before baking and adjust with an extra teaspoon of maple if you like it sweeter, or rely on the glaze to add sweetness later.
  • Texture tips: Do not overmix the batter; mix until just combined to keep the donuts light and tender. If you notice a dense crumb, gently fold in 1–2 extra tablespoons of milk and a pinch more leavening if needed.
  • Optional add-ins (crunch and flavor): For chocolate chips, toss them with a teaspoon of flour before folding to prevent sinking. Toast nuts lightly to intensify their flavor, then fold in at the end to keep their crunch.
  • Donut pan prep: Grease a donut pan well or use a silicone mold to prevent sticking. Fill each cavity about 2/3 full to allow room for doming during baking. If you overfill, expect overflow and uneven shapes.

Baking, Glazing, and Finishing Tips

  • Baking temperature and timing: Bake at a moderate temperature (around 350°F / 175°C) until a toothpick inserted near the center comes out with a few moist crumbs. If your oven runs hot, lower the temperature 25°F and check a bit earlier to avoid over-browning.
  • Cooling: Let donuts cool in the pan for 5–10 minutes before transferring to a wire rack. This helps prevent breakage and ensures the interior finishes cooking without drying out.
  • Glaze consistency: Melt dairy-free dark chocolate with a bit of coconut oil and whisk in almond milk a little at a time until you reach a smooth, pourable glaze. If the glaze is too thick, warm slightly; if too thin, add a touch more melted chocolate and chill briefly to thicken.
  • Glazing technique: For a glossy finish, dip the tops of cooled donuts into the warm glaze or drizzle with a spoon. Allow the glaze to set completely at room temperature or in the fridge for a quicker seal. You can lightly re-warm the glaze if needed to maintain smooth drips.
  • Flavor boosts for glaze: If you want a deeper chocolate note, add a pinch of espresso powder to the glaze. For a nutty aroma, sprinkle toasted chopped hazelnuts or shredded coconut right after glazing.
  • Make-ahead glaze plan: Prepare the glaze and toppings ahead of time. Rewarm glaze in 20-second bursts in the microwave, stirring between bursts, and stir in a splash of almond milk to restore pourability as needed.
  • Storage: Store baked donuts in an airtight container at room temperature for up to 2 days, or refrigerate for 4–5 days. Freeze unfrosted donuts for up to 1–2 months; thaw at room temperature and glaze when ready to eat.
  • Make-ahead option: You can bake and cool the donuts up to a day in advance, then reheat briefly in a 300°F (150°C) oven for 5–7 minutes to refresh the crumb before glazing.
  • Troubleshooting – dense crumb: This can happen if overmixed or if there’s too much flour. Add a little more almond milk or applesauce to reach a thicker batter that still flows off a spoon. Ensure baking powder is fresh and evenly distributed.
  • Troubleshooting – uneven rise or sinking: Check that the batter is not too heavy from extra add-ins and that the pan is properly greased. Fill cavities to the same level to encourage even doming, and avoid opening the oven door during the first half of baking.

FAQ

What are Healthy Chocolate Breakfast Donuts?

A baked, wholesome donut designed for a balanced breakfast or morning snack. They’re choco-rich, naturally sweetened with fruit and a touch of maple, and made with then-healthy pantry staples like oats and yogurt for a soft, cake-like texture.

What ingredients do I need?

Common ingredients you might use (or swap with equivalents):

  • Rolled oats (blended into oat flour) or oat flour
  • Ripe banana or applesauce for moisture
  • Greek yogurt (or dairy-free yogurt)
  • Eggs (or flax/chia eggs for vegan)
  • Cocoa powder
  • Baking powder and a pinch of salt
  • Milk or dairy-free milk
  • Vanilla extract
  • Maple syrup, honey, or another natural sweetener (optional)
  • Optional add-ins: chocolate chips, chopped nuts, cinnamon
Can I make this gluten-free?

Yes. Use certified gluten-free oats (or oat flour) and gluten-free baking powder. Ensure all other ingredients are labeled gluten-free if you have celiac disease or a severe gluten sensitivity.

Is this vegan or dairy-free?

You can make a vegan/dairy-free version. Use flax eggs or chia eggs instead of real eggs, dairy-free yogurt, and plant-based milk, and choose dairy-free chocolate chips. Replace honey with maple syrup or agave.

How do I bake them (time and temperature) and what pan should I use?

Preheat your oven to 350°F (175°C). Bake for about 12–15 minutes, or until a toothpick inserted comes out with a few crumbs. Grease a donut pan well or use silicone donut molds. If you don’t have a donut pan, you can bake the batter in a muffin tin for muffins or mini muffins as an alternative.

How should I store and reheat leftovers?

Store donuts in an airtight container at room temperature for up to 3 days. They’ll keep in the fridge about 4–5 days and freeze well for 2–3 months. Reheat briefly in a microwave (15–20 seconds) or in a 325°F (165°C) oven for a few minutes to restore softness.

How can I customize the flavors?

Try these mix-ins and tweaks:

  • Add a teaspoon of espresso powder for a mocha flavor
  • Sprinkle cinnamon or a pinch of chili powder for warmth
  • Swirl in peanut butter or almond butter inside the batter
  • Add orange or peppermint zest for a bright twist
  • Top with a light glaze or sprinkle with crushed nuts
Can I reduce or substitute sugar?

You can rely on the banana and a small amount of maple syrup to sweeten. For less sugar, use a very ripe banana and only 1–2 tablespoons of maple syrup or omit it altogether. If you want sweeter donuts without added sugar, you can blend dates or use a sugar-free sweetener designed for baking, keeping in mind moisture balance may change.

Do I need special equipment like a donut pan?

A donut pan makes the classic shape easy, but it’s not strictly required. You can bake in a silicone donut mold, a standard muffin tin (as muffins), or even shape the batter into small rounds on a baking sheet. Just adjust bake time as needed.

Can I make these ahead for meal prep?

Yes. Bake and cool completely, then freeze in an airtight container or freezer bags. Thaw at room temperature or reheat in a toaster oven or microwave. For best texture, reheat just until warm and soft.

Introduction / Hook

When the oven glows soft and steady, a humble pan of baked cottage cheese eggs fills the kitchen with a warm, inviting aroma that feels like a morning hug. This dish doesn’t demand grand plans or hard-to-find ingredients; it sings with simplicity and grace, turning everyday staples into something special. Picture a shallow dish, its surface pale and speckled with herbs, rising into a delicate crust that crackles lightly as you cut through to a creamy, silken center. The first bite delivers a comforting balance: the mild, slightly tangy glow of cottage cheese meeting the gentle richness of eggs, all toasted by a whisper of golden, toasty edges. It’s breakfast, brunch, or a light supper with an indulgent feel—proof that a few well-chosen ingredients, treated with care, can become something memorable. If you’re craving something nourishing, quick to assemble, and quietly luxurious, this baked cottage cheese eggs offering will feel like a revelation on a busy day or a lazy weekend morning.

Think of it as a versatile canvas: a foundation that invites you to play with textures and flavors—creamy, airy, and gently savory—without ever tipping into heaviness. The aroma alone can spark a sense of anticipation, a reminder that cooking can be intimate, comforting, and creatively uplifting all at once. Whether you’re feeding yourself solo, sharing with a small gathering, or preparing a meal that doubles as a make-ahead option for busy weekdays, this dish adapts with ease. It’s not flashy in a showy sense, yet it carries a quiet sophistication—like a well-tailored sweater or a sunlit morning after a long night. Welcome to a dish that respects your time, your appetite, and your love of meals that feel both homey and slightly refined.

The Story Behind the Dish

The idea of combining eggs with dairy for a baked, custardy dish has roots that reach across kitchens and continents. Cottage cheese itself has a long history in dairy traditions around the world, cherished for its light texture and mild tang. It often appears in the pantry of families who value simple, protein-packed foods that stretch a little further with each serving. In rural homes and bustling city apartments alike, cottage cheese has earned its place as a versatile bridge ingredient—something that can soften a meal, enrich a sauce, or stand on its own in a comforting bake.

As for the precise concept of baked eggs in a dish, there is a charming lineage in European cooking known as œufs en cocotte or eggs baked in small ramekins. The technique is straightforward: beaten eggs whisked to soften into a gentle custard, combined with some dairy or creamy elements, then baked until just set. Your version—where cottage cheese lends its own distinct texture and tang—feels like a natural evolution of that idea: a comforting, dairy-forward breakfast that honors both simplicity and a touch of indulgence.

In my own kitchen lore, this dish has always felt like a morning ritual rather than a recipe. I remember a grandmother’s kitchen where the clock ticked softly, and the air carried the scent of fresh herbs and warm dairy. A splash of herbs, a pinch of salt, a quick whisk, and a shallow dish slid into the oven. While the specifics vary from family to family, the principle remains: you take a few honest ingredients, coax their flavors to speak in unison, and end up with something that feels greater than the sum of its parts. That memory—of a simple act becoming something comforting and memorable—is what I try to honor with every bake.

Over time, this dish has traveled beyond family tables and settled into morning routines, brunch menus, and flexible weeknight dinners. It invites improvisation: a dash of onion to wake the aroma, a handful of greens for color and bite, a few herbs for brightness, or a splash of hot sauce to spark the palate. The story is less about a single origin and more about a culinary philosophy: that the most satisfying meals often emerge from humble ingredients treated with care, patience, and a little creative flourish. And because it’s so forgiving and easy to customize, it has become a small staple for cooks who want something wholesome, comforting, and delicious without turning the stove into a battleground of pans and timing.

Why You’ll Love This Recipe

  • Protein-packed simplicity: a balanced combination of eggs and cottage cheese delivers satisfying nutrition without complicated steps or long ingredient lists.
  • Quick to assemble: you can whisk, layer, and bake in a single dish, making it ideal for busy mornings or lazy weekends.
  • Comforting yet light: the texture is creamy and tender with a delicate top, offering comfort without heaviness.
  • Versatile and forgiving: customize with herbs, vegetables, or a splash of dairy-free alternatives to suit dietary needs or preferences.
  • Budget-friendly: cottage cheese is an economical pantry staple, helping you stretch ingredients without sacrificing flavor.
  • Great for meal prep: bake once and enjoy portions throughout the week, reheated gently for quick breakfasts or lunches.
  • Family-friendly appeal: mild flavors and soft textures are usually a hit with kids and adults alike, making it a reliable crowd-pleaser.

Flavor Profile & Texture

The flavor of baked cottage cheese eggs is an elegant balance between tangy dairy and softly set eggs. The cottage cheese contributes a delicate tang and a bit of rustic heft, which is mellowed by the creaminess of the eggs. When baked, the mixture yields a custard-like interior that remains tender and moist, never watery, with tiny curds that melt in your mouth. The exterior forms a light, golden crust that offers a faint crunch and a toasty aroma—an irresistible contrast to the smooth center. Subtle hints of herbs—parsley, chives, dill, or tarragon—bring brightness, while a touch of salt and pepper enhances the natural sweetness of the dairy without overpowering it.

Texture-wise, you’re looking at a violin of contrasts: the outer rim is softly crisp and slightly browned, the middle is silkier and more custardy, and the bottom edges may have a gentle resenescence that adds a whisper of sweetness and depth. If you’re lucky enough to capture a touch of browning on top, that caramelized note amplifies the dish’s warmth, making each slice feel like a small celebration. The overall mouthfeel is comforting and soothing—an easy dish to savor slowly, with a soft sigh of satisfaction at the end of each bite. And because cottage cheese tends to melt into a lighter texture than a denser cheese, the result stays approachable and comforting rather than rich to the point of heaviness, which makes it a versatile option across meals and occasions.

Occasions & Pairings

This dish shines in many settings, from quiet mornings to cheerful gatherings. Here are a few ideas for when and how to serve it, along with complementary pairings that elevate the experience without complicating the process.

  • Weekend brunch centerpiece: present the bake in a warm, shallow dish at the center of the table and let everyone scoop their share. Pair with a bright green salad, a platter of grilled tomatoes, and slices of rustic bread or crusty toast.
  • Weekday breakfast or light supper: a simple greens salad and a wedge of avocado or cucumber on the side can transform a quick bake into a balanced, satisfying meal.
  • Brunch for guests: set out a variety of toppings—fresh herbs, a drizzle of olive oil, a dash of hot sauce, or a spoonful of relish—to customize each portion at the table.
  • Pairings to consider: roasted or sautéed vegetables (such as mushrooms, spinach, peppers, or zucchini), a bright tomato brine or coulis, and a side of grainy bread, toast, or warm pita.
  • Drinks: a simple sparkling water with a squeeze of lemon, a light herbal tea, or a glass of dry white wine or a light, fruity sparkling beverage for brunches.

Tips, Variations & Substitutions

The beauty of baked cottage cheese eggs lies in its adaptability. Here are many ways to personalize or tailor the dish to your preferences, dietary needs, or what’s fresh in your kitchen.

  • Herbs and aromatics: use a mix of bright herbs such as chives, parsley, dill, or tines of tarragon. A pinch of garlic powder or finely minced shallots can add a savory lift without overpowering the gentle dairy sweetness.
  • Vegetable add-ins: stir in finely chopped greens (spinach, kale), mushrooms, bell peppers, or a handful of wilted onions. These add color, texture, and nutrition while keeping the bake light.
  • Cheese swaps: if cottage cheese isn’t available or you want a different texture, try ricotta for a silkier interior or a small amount of feta or grated aged cheese for savory tang; for vegan options, blend silken tofu with a dairy-free yogurt to approximate the richness, then bake as directed.
  • Spice it up: a pinch of smoked paprika, cumin, or cayenne dust can introduce a subtle warmth that pairs beautifully with the mild dairy and eggs.
  • Texture tweaks: for a crisper top, finish the bake under a broiler for a minute or two, watching closely to prevent burning; for a softer top, cover the dish during most of the bake.
  • Diet-friendly variations: to make this dish lighter, use lower-fat cottage cheese and lake a bit of extra egg white. For gluten-free servings, ensure any accompanying bread or toppings are gluten-free if desired, but the bake itself remains naturally gluten-free.
  • Regional twists: add lemon zest and fresh oregano for a Mediterranean angle; fold in chopped green chilies for a Southwestern flavor profile; or grind fresh black pepper and lemon zest for a Nordic-inspired brightness.

Storage & Make-Ahead Ideas

One of the most appealing aspects of this dish is how well it travels from the hot oven to the fridge or a meal-prep plan. With mindful handling, you can enjoy it across multiple days and times without losing its charm.

  • Make-ahead option: assemble the batter in the baking dish, cover tightly, and refrigerate overnight. In the morning, bake as usual and you’ll arrive at a freshly baked meal with minimal effort.
  • Storage: refrigerate any leftovers in an airtight container for up to 3–4 days. Reheat gently in a low oven or microwave, covered, to maintain moisture and prevent overcooking the edges.
  • Freezing: while freezing baked eggs can affect texture, you can freeze pre-baked portions for short-term storage. If you do freeze, thaw slowly in the refrigerator and rewarm gently to preserve creaminess.
  • Make it ahead for a crowd: bake in a large dish and portion out into smaller ramekins for individual servings. This makes serving easy and helps maintain texture during reheating.

Fun Facts & Trivia (Optional)

Delightful little tidbits can enrich your appreciation for this dish and its ingredients:

  • Cottage cheese, sometimes called curds and whey in various regions, has a long history as a practical dairy product, valued for its ability to stretch resources and make a simple, nourishing protein source available year-round.
  • Eggs baked en cocotte have a classic French lineage, offering a gentle, custard-like texture. The cottage cheese version is a soft-meets-tour de force that marries two comforting dairy traditions from different corners of the culinary world.
  • Texture science: cottage cheese contains small curds that melt into a creamy matrix when warmed, which provides a unique mouthfeel not quite like mashed eggs or a solid omelet. This combination is part of what makes the dish feel luxurious without being heavy.
  • Versatility in naming: you may encounter this dish under several names—baked eggs, eggs en cocotte, or simply a cheesy baked egg bake—depending on regional menus or family traditions. The concept transcends labels, focusing on the comforting act of gently baking eggs with dairy to achieve a creamy interior and inviting top.
  • Servings and senses: the aroma of baking is as much a part of the experience as the taste. The scent of warm dairy, herbs, and toasty edges has a nostalgic pull for many home cooks, often signaling “comfort” before the first bite.

Ingredients

Baked Cottage Cheese Eggs
Cottage Cheese Egg Mixture

    – 2 cups cottage cheese (well-drained)
    → Purpose: forms the creamy, high-protein base that binds the eggs together and gives the bake a soft, custard-like crumb. Preparation: drain thoroughly to remove excess whey; for a silkier texture, briefly blend the drained cottage cheese until smooth before mixing with the eggs. Tips: choose whole-milk cottage cheese for richer flavor; if you use a lower-fat version, consider adding a splash more milk or a tablespoon of olive oil to maintain moisture; letting the mixture rest 5–10 minutes before baking helps the curds hydrate and set evenly.
    – 6 large eggs
    → Purpose: provide structure, binding, and gentle lift to the bake. Preparation: crack into a bowl and whisk until just combined and a bit pale; avoid overbeating once combined with the cottage cheese to prevent a dense texture. Tips: room-temperature eggs whip more evenly and yield a lighter texture; if you want extra lift, beat the eggs with a pinch of baking powder before folding in.
    – 1/2 cup milk (whole or 2%)
    → Purpose: adds moisture and helps the mixture achieve a tender, custard-like consistency. Preparation: whisk into the cottage cheese and eggs until smooth; tips: use full-fat milk for richer flavor and creaminess, or dairy-free milk (almond, soy) if dairy-free is required; adjust by adding a little extra shredded cheese if using non-dairy milks to maintain creaminess.

Vegetables and Aromatics

    – 1 cup fresh spinach, chopped
    → Purpose: adds color, nutrition, and a mild, earthy sweetness. Preparation: wilt briefly in a tiny amount of hot oil or microwave until just wilted, then squeeze out excess moisture. Tips: use fresh spinach for best flavor; if using frozen, thaw completely and press out as much liquid as possible to avoid a watery bake.
    – 1/2 cup onion, finely diced
    → Purpose: provides sweetness and depth to balance the dairy base. Preparation: sauté in a little olive oil until translucent and tender. Tips: soft onions merge better into the custard; if you prefer sharper onion flavor, you can skip sautéing and fold raw in, but expect more bite in the final texture.
    – 2 cloves garlic, minced
    → Purpose: aromatic foundation that boosts savory depth. Preparation: mince finely and add to onions during sauté to prevent burning. Tips: garlic browns quickly, so add toward the end of sautéing; for a stronger flavor, grate garlic instead of mincing to maximize surface area.
    – 1/2 cup bell pepper, diced (optional)
    → Purpose: adds sweetness, color, and crunch. Preparation: dice small and sauté with onions until tender. Tips: red or yellow peppers give a vibrant look; remove seeds and membranes to keep sweetness balanced.

Cheese and Flavorings

    – 1 cup shredded cheese (cheddar and/or mozzarella, or a blend)
    → Purpose: provides melt, richness, and a savory backbone. Preparation: choose a combination that melts well; avoid pre-shredded varieties if possible, as they contain anti-caking agents that can affect melt. Tips: reserve a portion to sprinkle on top for a golden finish; for deeper flavor, mix in a little Gruyère or fontina.
    – 1/4 cup grated Parmesan (optional)
    → Purpose: adds salty, sharp notes and enhances browning. Preparation: finely grate; tips: use sparingly if your other cheeses are salty; you can skip if you want a milder profile.
    – 1/2 teaspoon baking powder (optional)
    → Purpose: helps the custard rise slightly and keeps the texture light. Preparation: whisk into the eggs before combining with cottage cheese. Tips: a small amount goes a long way; too much can make the bake crumbly or gummy—stick to 1/2 teaspoon max.
    – 1 teaspoon fine sea salt
    → Purpose: builds overall flavor by enhancing dairy and vegetable notes. Preparation: add to taste and adjust after initial baking. Tips: remember that cheeses can be salty; start with 1 teaspoon and increase gradually if needed.
    – 1/2 teaspoon freshly ground black pepper
    → Purpose: adds warmth and balance to the richness. Preparation: grind fresh just before mixing. Tips: adjust to taste, especially if using salty cheeses; a light pinch of red pepper flakes can add a subtle heat if desired.
    – 1/2 teaspoon paprika or Italian seasoning
    → Purpose: imparts subtle warmth and aroma; Preparation: sprinkle into the mixture or over the top before baking. Tips: sweet paprika gives color without heat; Italian seasoning adds herb complexity—adjust to your preference.
    – 1 tablespoon fresh dill or chives, finely chopped (or a mix)
    → Purpose: bright herbal lift that pairs well with cottage cheese and eggs. Preparation: fold into the mixture or sprinkle on top after baking. Tips: use fresh for the best aroma; dried herbs can be used but lessen the量 and flavor intensity—use about one-third the amount.

Oils and Grease

    – 1 tablespoon olive oil
    → Purpose: used to sauté vegetables, helping them release flavor and moisture without sticking. Preparation: heat in a skillet and cook vegetables until just tender. Tips: use extra-virgin olive oil for best flavor; avoid overheating to prevent bitterness. If you prefer, you can skip if the vegetables release enough moisture on their own.
    – 1 tablespoon butter or neutral oil for greasing the dish
    → Purpose: prevents sticking and adds a touch of richness to the edges. Preparation: brush the inside of your baking dish with melted butter or oil. Tips: coat evenly to ensure easy removal after baking; butter adds a subtle nutty note if lightly browned.

Optional Add-ins

    – 1/2 cup chopped sun-dried tomatoes (oil-packed, drained)
    → Purpose: provides tangy sweetness and chewy texture that contrasts the creamy base. Preparation: drain oil and chop; tips: pat dry to prevent extra moisture from softening the texture; use oil-packed tomatoes sparingly if you want to avoid overpowering the dish with oil.
    – 1/2 cup crumbled feta or goat cheese
    → Purpose: adds creaminess with a salty tang that complements spinach and peppers. Preparation: crumble and fold in; tips: balance salt by reducing other salty ingredients; feta can be strong, so adjust other seasonings accordingly.

Toppings

    – 1/2 cup additional shredded cheese for topping
    → Purpose: creates a golden, bubbly crust on top. Preparation: sprinkle over the surface just before baking. Tips: using a blend that includes mozzarella helps browning; if you prefer a lighter finish, reduce this or omit entirely.
    – Fresh herbs for garnish (optional)
    → Purpose: adds fresh aroma and color when served. Preparation: chop and sprinkle over baked slices. Tips: choose delicate herbs like dill, chives, or parsley; add just before serving to preserve aroma.

Instructions

  • Preheat your oven to 350°F (175°C) and grease a baking dish (about 8×8 inches or a 9-inch square) with butter or oil, or line with parchment to ensure easy removal.

    → This ensures the bake edges crisp and release cleanly when sliced, preventing sticking and tearing.
  • Drain the cottage cheese thoroughly in a fine-mesh sieve for 5–10 minutes, then press gently with the back of a spoon to remove as much whey as possible; for a silkier texture, briefly blend the drained cottage cheese until smooth before mixing with the eggs.

    → Removing excess liquid prevents a watery batter and helps the custard set evenly, while blending achieves a creamy base without lumps.
  • In a large bowl, whisk the 6 large eggs with 1/2 teaspoon baking powder and 1 teaspoon fine sea salt until the mixture is pale and just combined; avoid overbeating to prevent a dense texture.

    → Baking powder provides a light lift to the texture, but too much can cause a crumbly structure; whisk until uniform but not foamy.
  • Stir in the drained cottage cheese and 1/2 cup milk, whisking until the mixture is smooth and homogeneous; break any remaining curds with the whisk for an even distribution.

    → The milk loosens the density of the cheese and helps the custard achieve a tender, custard-like crumb.
  • Heat 1 tablespoon olive oil in a skillet over medium heat and sauté 1/2 cup onion until translucent and tender, about 3–4 minutes; add minced garlic and cook for 30 seconds until fragrant, then stir in 1/2 cup diced bell pepper and 1 cup chopped spinach, sautéing until the peppers are tender and the spinach has wilted; remove from heat.

    → Cooking aromatics releases flavor and softens vegetables so they integrate smoothly into the custard without leaving raw bite or excess moisture.
  • Fold the sautéed vegetables into the cottage cheese–egg mixture, distributing them evenly with a gentle stir to avoid breaking the cheese curds.

    → Even distribution ensures every slice contains vegetables for color, texture, and nutrition, while gentle folding preserves the custard’s creaminess.
  • Stir in 1 cup shredded cheese (cheddar and/or mozzarella or a blend), 1/4 cup grated Parmesan (optional), 1/2 teaspoon black pepper, 1/2 teaspoon paprika or Italian seasoning, and 1 teaspoon fine sea salt; fold until just combined to avoid overworking the mixture.

    → Cheeses melt into the base to create cohesion and depth; seasoning should be balanced so the dairy flavors shine without becoming overly salty.
  • If using optional add-ins, fold in 1/2 cup chopped sun-dried tomatoes (drained and patted dry) or 1/2 cup crumbled feta (or goat cheese) now, distributing evenly through the mixture.

    → Add-ins provide tang, brightness, and texture; patting dry sun-dried tomatoes prevents extra oil from separating and greasing the batter.
  • Pour the mixture into the prepared baking dish and spread it into a uniform layer with a spatula; sprinkle 1/2 cup additional shredded cheese on top to create a bubbly, golden crust.

    → A top cheese layer promotes browning and a visually appealing crust; it also adds a bit more melt and flavor in every bite.
  • Bake in the preheated oven at 350°F (175°C) for 30–40 minutes, or until the center is set and the edges are lightly golden; test doneness by inserting a knife or toothpick into the center, which should come out with a few moist crumbs.

    → Proper bake time ensures a custard-like center with a stable texture; underbake yields a jiggle while overbake can dry the interior.
  • Remove the dish from the oven and let it rest for 5–10 minutes before slicing; resting allows the custard to complete setting and makes slicing cleaner.

    → Resting helps the moisture redistribute and the structure firm up so you obtain neat, intact portions.
  • Slice into portions and serve warm, optionally garnished with fresh dill or chives for a bright herbal finish.

    → Fresh herbs add aroma and a touch of color; add just before serving to preserve their delicate fragrance.

Notes

These high-protein baked cottage cheese eggs are creamy, savory, and built on a base of well-drained cottage cheese and eggs with spinach, onion, garlic, and peppers for color and nutrition. You can customize them by adding your favorite cheeses, herbs like fresh dill or chives, or extra vegetables. They refrigerate or freeze well and reheat beautifully for quick breakfasts or brunches. For an extra boost, serve with a dollop of yogurt or a light tomato salsa. If you include baking powder, choose gluten-free baking powder to accommodate gluten intolerance.

Tips

Tips for Cooking Baked Cottage Cheese Eggs

Base dairy and eggs preparation

  • Drain cottage cheese well: press the curds with a spoon or cheesecloth to remove as much whey as possible. This prevents a soggy bake and helps the custard set evenly. For a silkier texture, briefly blend drained cottage cheese before mixing with the eggs.
  • Choose the right balance of dairy: whole milk adds richness; if you use lower-fat cottage cheese, add a splash more milk or a tablespoon of olive oil to keep moisture. Let the mixture rest 5–10 minutes to hydrate the curds for even setting.
  • Eggs at room temperature: let eggs sit out 20–30 minutes before mixing for better whipping and a lighter texture. Whisk until just pale and combined; overbeating after mixing with the cottage cheese can make the bake dense.
  • Light lift option: for extra lift, whisk the eggs with a pinch of baking powder before folding in; do not overdo it—1/2 teaspoon is plenty.

Vegetables and aromatics

  • Spinach handling: use fresh spinach for best color and flavor; chop and briefly wilt, then squeeze out all moisture to avoid a watery bake. If using thawed frozen spinach, squeeze very well and pat dry.
  • Onions and peppers: sauté onions in olive oil until translucent and tender to bring sweetness and depth. Add diced peppers during the last minute to retain some bite and color.
  • Garlic: mince finely and add to onions midway through sauté to prevent burning. For stronger aroma, grate garlic instead of mincing to maximize surface area.

Cheese and flavorings

  • Cheese selection: use a blend that melts well (cheddar with mozzarella is reliable). Reserve some cheese to sprinkle on top for a golden crust; consider adding Gruyère or fontina for deeper flavor.
  • Parmesan: add a small amount (1/4 cup) if you want sharper notes and browning; adjust according to the saltiness of your other cheeses.
  • Seasoning: 1 teaspoon fine sea salt and 1/2 teaspoon black pepper provide balance; adjust after cooking because cheeses can be salty. Paprika or Italian seasoning adds warmth and aroma. Fold in 1 tablespoon chopped fresh dill or chives for brightness; use fresh for best aroma.
  • Herb timing: fold chopped fresh dill or chives into the mixture, or sprinkle on top after baking for a fresh finish. Dried herbs can be used in a pinch but use about one-third the amount.

Oils, greasing, and bake prep

  • Sauté fats: 1 tablespoon olive oil to cook vegetables adds flavor and helps moisture release; avoid overheating the oil to prevent bitterness.
  • Greasing the dish: grease the baking dish with butter or neutral oil to prevent sticking and add a subtle nutty note if browned. Coat evenly for clean removal.

Optional add-ins and toppings

  • Sun-dried tomatoes: drain oil and chop; pat dry to avoid extra moisture or pooling oil; use sparingly to keep the custard from getting too tangy.
  • Feta or goat cheese: crumble and fold in for a creamy, salty contrast; balance salt by reducing other salty ingredients.
  • Browning topping: finish with 1/2 cup extra shredded cheese on top for a golden crust; if you prefer a lighter finish, reduce or omit.

Baking, resting, and serving tips

  • Baking temperature and time: bake at 350°F (175°C) until set and just lightly golden around the edges, about 30–40 minutes depending on dish size and oven; center should be slightly jiggly but set after resting.
  • Rest before slicing: let the bake rest for 5–10 minutes after removing from oven to finish setting and make slicing cleaner.
  • Make-ahead and storage: the mixture can be assembled ahead and refrigerated for up to 24 hours; bake straight from the fridge, adding a few extra minutes if needed. Refrigerate leftovers for 3–4 days; reheat gently to avoid drying out.

Serving ideas

  • Pairings: serve warm slices with a simple green salad, whole-grain toast, or crusty bread. A light drizzle of olive oil or a dollop of yogurt can enhance richness without overpowering the flavors.

FAQ

What are the main ingredients for Baked Cottage Cheese Eggs?

The dish uses a simple base: cottage cheese and eggs. Typical measurements are 1 cup (226 g) of cottage cheese and 3 large eggs. Season with 1/4 teaspoon salt and 1/4 teaspoon pepper. You can fold in optional add-ins like 1/4 cup shredded cheese, chopped fresh herbs, and vegetables such as spinach, tomatoes, or bell peppers for extra flavor.

Can I use low-fat or fat-free cottage cheese?

Yes. Low-fat or fat-free cottage cheese can be used, but they may yield a slightly lighter texture. If you want a creamier texture, consider adding a tablespoon or two of milk or cream to the mixture to compensate.

Can I customize the dish with add-ins?

Absolutely. Good options include chopped spinach, diced tomatoes, green onions, mushrooms, or bell peppers. For richness, fold in a little grated cheese or crumbled feta. If using meat, pre-cook and drain any fat (e.g., ham, bacon, or sausage) before mixing.

What oven temperature and bake time should I use?

Preheat to 350°F (175°C). Lightly grease a baking dish and pour in the cottage cheese–egg mixture. Bake for about 25–30 minutes, or 30–35 minutes if you’ve added more fillings or are using a larger dish. The top should be lightly golden and the center should be set.

How do I know when it’s done?

Check the center: it should be set and not overly jiggly. A knife or toothpick inserted into the middle should come out clean or with only a few moist crumbs. If the center still looks loose, give it a few more minutes and test again.

How should I serve and flavor it?

Serve warm or at room temperature. Garnish with fresh herbs (chives, parsley, or dill) and a pinch of cracked black pepper. It pairs well with toast, avocado, or a simple side salad. A drizzle of hot sauce or salsa can add brightness for a quick meal.

How should I store leftovers and how long do they keep?

Let the dish cool completely, then refrigerate in an airtight container. Leftovers keep for 3–4 days. Reheat gently in the microwave in 30–60 second intervals or reheat in a skillet or oven until warmed through.

Can I freeze baked cottage cheese eggs?

You can freeze individual portions or slices. Wrap tightly and store in the freezer for up to 2–3 months. Thaw in the fridge overnight and reheat in the microwave or oven until warmed through. Note that texture may be slightly softer after freezing.

Can I make this ahead of time?

Yes. You can whisk the cottage cheese and eggs together, season, and refrigerate the mixture for up to 24 hours. When ready to bake, give it a quick stir and bake as directed. You may need a minute or two longer if it’s been chilled.

Are there gluten-free and dairy-free options?

The recipe is naturally gluten-free. For dairy-free, substitute with a dairy-free cottage cheese alternative (if available) or blend silken tofu with a little plant-based yogurt and lemon juice to mimic the tang, then proceed with the eggs and seasonings. Texture will differ, so adjust quantity and bake time as needed.

What equipment do I need?

You’ll need:

  • a mixing bowl and whisk or fork
  • a greased baking dish (1–2 quarts works well)
  • an oven and a timer
  • optional: a spatula for scraping and a knife to test doneness

Introduction / Hook

Imagine a pastry that greets you with the whispered scent of vanilla and warm butter, then opens to a wakeful treasure: layers of delicate pastry, rich cream, and a vibrant chorus of berries that seem to shimmer with each bite. Berry Cream Pastry Cake is the kind of dessert that doubles as an invitation—the moment you set it on the table, conversations bloom around it the way berries plump in the sun. It’s not merely a cake; it’s a celebration of early summer markets, a serenade to morning gatherings, and a memory you can slice into and relive long after the last forkful has vanished.

There’s a quiet drama to this dessert: a golden crust that gives way to a soft, custardy interior, a cloud of whipped cream or vanilla cream hugging every layer, and berries that provide bright bursts of sweetness and tartness in every mouthful. It’s a pastry that feels both rustic and refined—perfect for a weekend brunch that begs for a candle, a fancy dinner party that doesn’t want to take itself too seriously, or a simple family treat that makes ordinary afternoons feel special.

What makes Berry Cream Pastry Cake truly irresistible is the balance. The pastry offers a crumbly, tender bite with a buttery fragrance that wraps around a lush, creamy heart. The berries contribute contrast—their acidity cuts through the richness, their color brightens the plate, and their juice slicks the palate with a glossy sheen. A hint of citrus zest or a touch of vanilla threads through the cream, tying everything together in a comforting, vibrant harmony. It’s dessert that teaches your senses to pause—observe the color, listen to the crack of the pastry, inhale the bouquet of fruit and cream, and then savor how all those elements cohere into something greater than the sum of its parts.

Whether you’re baking for a crowd or soothing a craving for a late-night indulgence, this dessert offers a versatile, no-fuss approach to an impressive finale. It’s a showpiece that doesn’t require theatrical presentation—just a well-timed slice, a scattering of glossy berries, and a dollop of cream to crown the moment. If you’ve ever wanted a recipe that feels timeless yet modern, indulgent yet approachable, Berry Cream Pastry Cake is your invitation to a sensory dessert that leaves guests smiling and asking for seconds—every time.

The Story Behind the Dish

The origin of Berry Cream Pastry Cake is as much a tale of seasons and memory as it is a culinary invention. It began in a sun-kissed kitchen where summer berries poured in from a farmers’ market, their colors like stained glass against the pale wooden counter. A home cook with a soft spot for pastries and a soft spot for creams decided to marry two classics—the lightness of a pastry cake with the indulgence of a creamy center—into something that could travel from a cozy Sunday brunch to a celebratory wedding reception without losing its charm.

Legends say that the idea crystallized during an afternoon when the oven hummed a comforting tune and the air carried the sweet scent of vanilla and fruit. The baker laid out a plan: create a structure that could balance richness and brightness, so that each bite would feel both celebratory and familiar. The pastry was chosen for its versatility—crisp edges, tender crumb, a sturdiness that could hold delicate fillings without becoming soggy. The cream was chosen for its ability to soften the tart edge of berries, to cradle the fruit without overpowering it, and to add a luxurious texture that felt almost ceremonial. And the berries—carefully selected for color, sweetness, and juice—were the final brushstroke, lending a natural sweetness that sang against the pastry’s butteriness and the cream’s smoothness.

In many homes and kitchens around the world, desserts share a language of memory: a bite can transport you to a grandmother’s oven, a seaside cottage, or a city bakery window. Berry Cream Pastry Cake carries that tradition forward by inviting you to craft something that feels both timeless and fresh. It’s a modern riff on the classic fruit-filled cake, seasoned with a touch of whimsy and grounded in the simple joy of good ingredients treated with care. If you’re lucky, you’ll pass down the story too—the one about that first bite that tasted like summer in full bloom and promised future gatherings where laughter and conversation would mingle with the sweet scent of pastry and fruit. In this way, the dish carries not just flavor, but memory, and invites you to add your own chapters to its evolving narrative.

Why You’ll Love This Recipe

  • Elegant, crowd-pleasing presentation without complicated steps or a long ingredient list.
  • Balanced flavor profile that pairs fruity brightness with creamy richness and a crisp pastry crust.
  • Versatile enough for brunch, celebration desserts, or a refined weeknight treat.
  • Make-ahead friendly: you can assemble and refrigerate components in advance for easier serving.
  • Texture journey from flaky crust to silky cream to juicy berries keeps every bite interesting.
  • Adaptable to seasonal fruits beyond berries, allowing you to tailor the dessert to what’s freshest at market.
  • Plates up beautifully, making it a natural centerpiece for photos and sweet memories.

Flavor Profile & Texture

The Berry Cream Pastry Cake orchestrates a symphony of contrasts that feel both comforting and exciting. The pastry’s crust is buttery and slightly crisp at the edges, with a fragrance that recalls warm sugar and toasted almonds—an aroma that invites you to dive in. Inside, the texture softens into a tender, almost cloud-like crumb that holds its shape but yields easily to the fork. The cream or whipped cream component brings a cool, luxurious counterpoint, silky and smooth, with a delicate sweetness that glides across the palate without weigh-down. It forms a mellow sheath around each bite, ensuring that the cream never overwhelms the fruity brightness.

The berries themselves are the bright punctuation marks of the dish. When you bite through, you’ll encounter the tart pop of small berries or the lush sweetness of ripe, sun-warmed fruit. Their juices mingle with the cream, creating glossy ribbons of flavor that travel across the tongue. If a hint of vanilla or citrus zest is present, it acts as a conductor—an invisible thread that ties the components together and elevates the overall aroma and taste.

Texture-wise, the experience is dynamic: first a crisp bite from the pastry, followed by a soft, creamy melt, then a juicy burst from the berries. The interplay between the cool, airy cream and the warm, flaky crust mirrors the balance you seek in a good dessert—comfort without heaviness, sophistication without pretension. The result is a cake that feels indulgent yet accessible, something you’d be happy to share with friends yet wonderful to enjoy alone with a quiet cup of tea.

Occasions & Pairings

Berry Cream Pastry Cake shines at moments when dessert should feel special but not overly fussy. It’s ideal for weekend gatherings, birthday celebrations, Mother’s Day brunches, bridal showers, or a summer dinner party where the menu leans toward fresh produce and bright flavors. Its celebratory look and universally appealing taste make it a versatile finale that doesn’t demand elaborate plating or intricate timing. Serve it as a centerpiece on a cake stand, with a light dusting of powdered sugar or a delicate glaze that catches the light just so. A sprig of fresh mint or a few extra berries on top can add a note of color and scent that enhances its allure without overpowering the dish.

Pairings to consider:
– Beverages: a lightly sparkling prosecco, a crisp rosé, a gentle Earl Grey, or a vanilla-infused iced tea. For non-alcoholic options, a berry-infused shrub or a lemon-honey sparkling water echoes the fruit and cream balance.
– Sides: delicate lemon curd, a small plate of citrus segments to echo brightness, or a handful of lightly roasted nuts for a textural contrast.
– Desserts: simple vanilla yogurt or custard alongside for a lighter counterpoint, or a dollop of lightly whipped cream to echo the cake’s creaminess.
– Seasonal swaps: swap in stone fruits or orchard berries when they’re at their peak, or mix in edible flowers for a garden-fresh presentation.

This cake is inherently social. Its beauty invites a pause in conversation as guests admire the layers and the gleam of the fruit, while its comforting flavors encourage lingering, laughter, and convivial sharing. It’s the kind of dessert that makes a meal feel complete, a small, fragrant celebration tucked into a slice that travels from plate to memory.

Tips, Variations & Substitutions

  • Make-ahead strategy: bake the pastry layers in advance and store them cooled. Assemble closer to serving by layering with cream and berries just before presenting.
  • Gluten-free option: use a gluten-free pastry dough or a nut-based crust that remains sturdy enough to support the layers while maintaining tenderness.
  • Vegan adaptation: choose a plant-based pastry, coconut or almond milk for the cream, and a dairy-free butter substitute. Ensure your berries remain fresh and juicy to maintain brightness.
  • Flavor twists: add a touch of citrus zest (lemon, orange, or lime) to the cream for a zesty lift that brightens the berry flavors. A whisper of almond extract can echo the pastry’s nuttiness nicely.
  • Berry variations: mix strawberries, blueberries, raspberries, and blackberries for color and a range of tartness. For a deeper berry flavor, macerate a portion of the berries with a spoon of sugar for a few minutes before layering.
  • Herbal accents: a few crushed mint leaves or a tiny rosemary sprig on the plate can add an unexpected, refreshing note if used sparingly.
  • Portion control: if you’re serving a crowd, consider making mini pastry cakes or tartlets so guests can sample and share easily.

Storage & Make-Ahead Ideas

To preserve the integrity of Berry Cream Pastry Cake, plan ahead with smart storage. The pastry crust benefits from cooling completely before layering, and the creamy component should be kept cool to maintain its smooth texture. If you’ve prepared this dessert ahead of time, consider these tips:

  • Refrigeration: store assembled portions in an airtight container or cover with plastic wrap to prevent the pastry from drying out. The cream will stay firm and the berries will stay bright for up to 2–3 days in the fridge.
  • Freezing: for a longer-term option, you can freeze assembled slices wrapped well in plastic and foil. Thaw gently in the fridge and, if needed, re-wallow with a quick cold whip of cream to revive texture before serving.
  • Make-ahead strategy: you can bake the pastry layers up to 1 day in advance, wrap, and refrigerate overnight. In the morning, briefly reassemble with fresh cream and berries for a just-made impression at serving time.
  • Reheating: if you prefer a warm pastry experience, gently rewarm the crust in a low oven just until it regains some of its crispness, then add cold cream and berries to restore contrast of temperatures at the moment of serving.

Fun Facts & Trivia (Optional)

Here are a few tidbits that might deepen your appreciation for this dessert as you bake or share it with others:

  • Many cultures celebrate berries as symbols of abundance and vitality, often pairing them with creamy elements in desserts to symbolize harmony between earth and indulgence.
  • Pastry cakes like this emerged from a tradition of layering textures—crisp crust, soft filling, and fresh fruit—meant to delight the senses and provide a satisfying finish to a meal.
  • Vanilla cream (or custard) pairs especially well with berries because vanilla’s warmth helps coax out the fruit’s natural aromatics, making it a timeless combination in desserts around the world.
  • In some regions, a light glaze is brushed over fruit-tilled desserts to amplify gloss and color, making the berries look even more edible and inviting on the plate.
  • The practice of using fresh seasonal fruit in a cake aligns with modern culinary trends that celebrate sustainability, local ingredients, and vibrant natural flavors.

Ingredients

Berry Cream Pastry Cake

Cake Base

  • 2 1/2 cups all-purpose flour (unsifted)
    → All-purpose flour provides the cake’s structure and body. When measuring, spoon the flour into the measuring cup and level with a knife to avoid packing, which can make the crumb dense. Since this recipe uses a rich batter, unsifted flour will yield a slightly heavier crumb; if you prefer a lighter cake, sift the flour with the leavening and salt, or substitute 2 tablespoons of the flour with a little cornstarch for a softer crumb.
  • 1 1/2 cups granulated sugar
    → Sugar sweetens the batter and, when creamed with butter, helps trap air to create a tender, fluffy crumb. Use fine granulated sugar for smooth blending; if you only have coarse sugar, process briefly in a food processor. For a moister cake, you can substitute up to 1/4 cup with light brown sugar for a hint of molasses.
  • 1 cup unsalted butter, softened
    → Butter provides richness and moisture, and when creamed with sugar, helps create air pockets that contribute to a tender crumb. Ensure the butter is truly softened to room temperature before mixing. If you must substitute with a dairy-free option, use a plant-based butter or oil blend and adjust by adding a little yogurt or dairy-free milk for structure.
  • 4 large eggs, room temperature
    → Eggs contribute structure, moisture, and richness; they also help emulsify the batter for a tender yet sturdy cake. Bring eggs to room temperature to promote even incorporation and better volume. If you only have cold eggs, warm them in warm—not hot—water for a few minutes before using.
  • 1 cup whole milk
    → Milk adds moisture and tenderness; using whole milk yields a richer crumb. If dairy-free, substitute with an equal amount of almond or soy milk plus a teaspoon of extra oil or melted butter to mimic fat content. Do not substitute with very low-fat milk if you want a moist cake.
  • 2 teaspoons baking powder
    → Leavening agent that helps the cake rise and become light and airy. Use fresh baking powder for best lift; if your powder is older, perform a quick test (a pinch in warm water should fizz). Sift it with the flour to distribute evenly and prevent dense spots.
  • 1/2 teaspoon salt
    → Enhances overall flavor and tightens the crumb slightly by balancing sweetness and fat. Distribute evenly by mixing with the dry ingredients so it doesn’t concentrate in any one area.
  • 2 teaspoons vanilla extract
    → Adds depth of flavor and aroma. Use pure vanilla extract for best results; if you have a vanilla bean, you can replace part of the extract with scraped bean seeds for a richer fragrance. Add the vanilla with the wet ingredients for even distribution.

Cream Fillings

  • 2 cups whole milk
    → Base for pastry cream (crème pâtissière). Heat gently until steaming just before simmering; avoid boiling to prevent curdling. Use the milk fresh for best texture and flavor.
  • 1/2 cup granulated sugar
    → Sweetens the pastry cream and helps balance the slight bitterness of eggs. You can adjust by up to 1/4 cup depending on desired sweetness. For a lighter note, reduce by a couple of tablespoons.
  • 4 large egg yolks
    → Key thickening component and adds richness. Whisk yolks with some hot milk gradually to temper and prevent scrambling, then return to the pan with the rest of the milk to cook until thickened. If you want extra smooth pastry cream, strain after cooking to remove any lumps.
  • 2 tablespoons cornstarch
    → Primary thickening agent that gives pastry cream its glossy, custard-like hold. Dissolve it in a small amount of cold milk before adding, and cook the mixture gently until it boils and thickens (about 1-2 minutes after boiling). Do not overcook, or it may become rubbery.
  • 1 teaspoon vanilla extract (or 1 vanilla bean, scraped)
    → Flavor foundation for pastry cream. Vanilla beans give a deeper aroma and specks, while extract is convenient and reliable. If using a bean, simmer the milk with the bean pod to infuse, then remove before whisking with yolks.
  • Pinch of salt
    → Heightens sweetness and enhances the vanilla; a tiny amount balances the custard’s richness. Mix into the hot pastry cream off the heat for even distribution.
  • 1 tablespoon unsalted butter, optional (finish)
    → Finishes pastry cream with extra gloss and a silkier texture when stirred in off the heat. Add just after removing from the heat; the residual heat will melt it smoothly. If dairy-free, skip or use a dairy-free butter substitute.
  • 2 cups heavy whipping cream, cold
    → Used to make a light, airy whipped cream to fold into or layer with the pastry cream. Start with a cold bowl and beaters; chilling the cream ensures sturdy peaks. For stabilized whip, you can add 1-2 tablespoons of powdered sugar and a splash of vanilla, or a small amount of cream of tartar before whipping.
  • 1/4 cup powdered sugar
    → Sweetens and helps stabilize the whipped cream texture. Sift the sugar before adding to prevent gritty texture. If you prefer a less sweet whipped cream, reduce to 2 tablespoons.
  • 1 teaspoon vanilla extract
    → Flavoring for whipped cream; use pure vanilla for best aroma. If you used vanilla bean in the pastry cream, you can match flavors by using a simple vanilla in the whipped cream as well.

Berry Layer

  • 2 cups mixed berries (strawberries, blueberries, raspberries)
    → The berry layer provides brightness, tartness, and juiciness. Choose ripe, fragrant berries for the best flavor; hulled and halved or left whole depending on berry type. If using frozen, thaw completely and drain excess liquid to avoid a soggy cake.
  • 2 tablespoons granulated sugar
    → Macerates the berries to draw out juices and concentrate flavor, creating a natural glaze. Taste and adjust sweetness based on berry tartness. For stronger berry flavor, let them macerate 15-20 minutes, stirring occasionally.
  • 1 tablespoon lemon juice
    → Brightens the berry flavor and helps balance sweetness. Use fresh lemon juice for maximum brightness; adjust by taste, especially if your berries are very sweet. If you prefer a subtler taste, omit.
  • 1 teaspoon lemon zest, optional
    → Adds fragrant citrus aroma and complexity; zest finely to avoid large chunks. For a more intense lemon note, include zest in the macerating step with the sugar.
  • 1 teaspoon cornstarch, optional
    → If you want a thicker berry layer or a light compote to stand between layers, this will help set the juices into a cohesive filling. Dissolve in a small amount of water or berry juice before adding and cook until glossy. Do not overcook to prevent a gummy texture.

Glaze/Finish

  • 1 cup powdered sugar
    → Creates a smooth, glossy glaze to finish the cake. Sift to remove any lumps and whisk in small amounts of liquid to achieve a pourable consistency. The glaze adds a light sweetness and a polished appearance to the finished cake.
  • 2-3 tablespoons milk
    → Adjusts glaze consistency; start with 2 tablespoons and add more as needed. For a dairy-free option, use almond or oat milk. A touch of lemon juice can brighten the glaze if desired.
  • 1/2 teaspoon vanilla extract
    → Flavor partner to the cake and fillings; optional but recommended for a cohesive vanilla-forward profile. If you used vanilla bean in the fillings, you can keep vanilla in the glaze for consistency.
  • Optional: 1 teaspoon lemon juice
    → Adds brightness to the glaze, especially nice with berry flavors. Increase only if you enjoy a tangy finish; you can also grate a little lemon zest for color and aroma.

Optional Add-ins

  • 1/2 cup sliced almonds (optional)
    → Almonds add a toasty crunch and nutty flavor that contrasts with the soft cake and creamy fillings. Toast the almonds lightly in a dry pan or in the oven until fragrant, then fold into the batter or sprinkle on top before glazing for extra texture.
  • 1/2 cup freeze-dried berries (optional)
    → Intensify berry flavor and color in the batter or filling without releasing extra juice that can soggy the layers. Crush slightly and fold into the pastry cream or dust over the top for a speckled look.

Instructions

  • Step 1: Preheat your oven to 350°F (175°C) and prepare two 9-inch round cake pans by lining the bottoms with parchment rounds and greasing the sides thoroughly.
    → This ensures the cakes rise evenly, prevent sticking, and allow clean removal of layers for a smooth finish.
  • Step 2: In a medium bowl, whisk 2 1/2 cups all-purpose flour, 2 teaspoons baking powder, and 1/2 teaspoon salt until evenly distributed.
    → Sifting or whisking the dry ingredients together guarantees uniform leavening and prevents dense pockets in the crumb.
  • Step 3: In a large mixer bowl, beat 1 cup unsalted butter, softened, with 1 1/2 cups granulated sugar on medium speed until the mixture is pale, fluffy, and light, about 3 to 5 minutes.
    → Creaming builds air pockets that contribute to a tender, cake-like crumb; scrape the bowl occasionally to incorporate all fat and sugar evenly.
  • Step 4: Add 4 large eggs, one at a time, beating well after each addition until fully incorporated and the batter looks smooth and homogenous.
    → Room-temperature eggs emulsify better with the fat and sugar, improving volume and crumb texture.
  • Step 5: Mix in 2 teaspoons vanilla extract, ensuring it is evenly dispersed through the batter.
    → Vanilla enhances depth of flavor and aroma; adding with the wet ingredients promotes even distribution.
  • Step 6: With the mixer on low, alternate adding the dry ingredients in three portions and the milk in two portions, beginning and ending with the dry mixture, and mix just until combined between additions.
    → This gentle, intermittent mixing prevents gluten overdevelopment, yields a tender crumb, and avoids rough, gummy textures from overworking the batter.
  • Step 7: Divide the batter evenly between the prepared pans and smooth the tops with a small offset spatula to ensure even rising.
    → An even surface prevents lopsided layers and ensures uniform layer height after baking.
  • Step 8: Bake the cakes in the preheated oven for 25 to 30 minutes, or until the centers are set and a toothpick inserted into the middle comes out with only a few moist crumbs; rotate the pans halfway for even heat distribution.
    → Proper doneness prevents a dense center and ensures the layers are level for stacking; rotating halves avoids hot spots.
  • Step 9: Let the cakes cool in their pans on a rack for 10 minutes, then run a knife around the edges and invert onto a rack to cool completely before filling.
    → Cooling in air stops continuing bake from residual heat and helps prevent compression or soggy layers when assembled.
  • Step 10: Make pastry cream (crème pâtissière) by whisking 4 large egg yolks with 1/2 cup granulated sugar until pale and thick.
    → This creates a smooth, rich base that will set properly when heated with starch, providing the cake’s luxurious filling.
  • Step 11: In a separate small bowl, dissolve 2 tablespoons cornstarch in a few tablespoons of cold milk to make a slurry.
    → The slurry prevents lumps and ensures a glossy, evenly thickened custard.
  • Step 12: In a saucepan, bring 2 cups whole milk with a pinch of salt lightly to a simmer, then remove from heat.
    → Heating the milk gently preserves its flavor and prevents scorching while preparing the custard base.
  • Step 13: Temper the yolks by whisking a small amount of the hot milk into the yolk mixture, then pour the yolk mixture back into the pot with the remaining hot milk and the cornstarch slurry; return to medium heat and cook, whisking constantly, until the mixture thickens and becomes glossy, about 1 to 2 minutes after it begins to boil. Do not boil.
    → Tempering prevents scrambling the eggs; continuous whisking yields a smooth, cohesive pastry cream.
  • Step 14: Remove from heat, whisk in 1 teaspoon vanilla extract and a pinch of salt; if using, stir in 1 tablespoon unsalted butter until glossy; strain through a fine mesh into a clean bowl, then cover surface with plastic wrap and refrigerate until cold and set.
    → Straining removes any residual lumps and the plastic wrap keeps a skin from forming; chilling helps it firm for layering.
  • Step 15: In a chilled bowl, whip 2 cups cold heavy whipping cream with 1/4 cup powdered sugar and 1 teaspoon vanilla until soft peaks form, then continue beating to medium-stiff or stiff peaks as desired; refrigerate until needed.
    → A well-chilled bowl and cream ensure stable peaks that hold layers and fillings without weeping.
  • Step 16: Prepare the berry layer by combining 2 cups mixed berries with 2 tablespoons granulated sugar, 1 tablespoon lemon juice, and optional lemon zest; macerate 15 to 20 minutes, then if using cornstarch, dissolve 1 teaspoon cornstarch in 1 tablespoon water and gently simmer with the berries until glossy; cool completely.
    → Maceration unlocks berry juices for a bright glaze and intensifies flavor; thickening keeps the layer from making the cake soggy.
  • Step 17: Level each cake layer with a serrated knife or cake leveler to create flat, even surfaces; if domed, trim the tops to achieve uniform layers.
    → Flat layers stack cleanly, prevent slumping, and create a neat, professional glaze and finish.
  • Step 18: Place the first cake layer on a serving plate; spread a thin, even layer of pastry cream over the surface and fold 1/4 of the whipped cream into the pastry cream to lighten its texture, then spread this lightened filling evenly.
    → The pastry cream provides structure and richness while lightened filling prevents heaviness and ensures smooth spreading.
  • Step 19: Evenly distribute the macerated berry layer atop the filling, creating a bright, juicy middle that contrasts with the creamy filling and the soft cake crumb.
    → The berry layer adds tartness and color, balancing the sweetness and providing moisture and shine.
  • Step 20: Top with the second cake layer, press gently to secure, and spread a thin coat of pastry cream on the top to anchor the final layer; place a final cake layer if you are making a three-layer cake, then cover with more whipped cream to form a smooth exterior.
    → A cohesive, sealed surface prevents sliding fillings and prepares the cake for the glaze; pressing ensures alignment and stability.
  • Step 21: Frost the cake with the remaining whipped cream, smoothing the sides with a spatula or a cake scraper for a clean finish; you may pipe decorative borders if desired.
    → A generous, even coating hides the layers and creates an elegant, uniform appearance; cold, steady hands help achieve pristine edges.
  • Step 22: Prepare the glaze by whisking 1 cup powdered sugar with 2–3 tablespoons milk and 1/2 teaspoon vanilla until smooth and pourable; Add up to 1 teaspoon lemon juice for a brighter finish if desired.
    → The glaze provides a glossy, polished top and a delicate sweetness that complements the berries without overpowering them.
  • Step 23: Drizzle the glaze over the top and allow it to run down the sides in a controlled manner; let the glaze set for about 15 to 20 minutes before slicing.
    → A set glaze locks in moisture and creates a professional, finished look while keeping the interior layers intact during cutting.
  • Step 24: If desired, garnish with toasted almond slices or crushed freeze-dried berries for additional texture and color; chill the cake briefly to help the garnish set.
    → Garnishes add contrasting texture and visual appeal, and chilling helps them adhere to the surface.
  • Step 25: Slice the Berry Cream Pastry Cake with a warm knife (dip the blade in hot water and wipe clean) for clean cuts, and serve promptly to enjoy the contrast of creamy filling, bright berries, and tender cake.
    → A hot knife reduces dragging and squashing delicate layers, ensuring neat presentation and optimal texture with each bite.

Notes

These Berry Cream Pastry Cake notes provide practical tips for achieving a bakery-worthy, multi-layer dessert with a tender vanilla cake, silky pastry cream, light whipped cream, and bright berry filling. Gather all ingredients and bring cold components to room temperature before mixing, then cream the butter and sugar until pale and fluffy; beat in eggs one at a time, then alternate adding dry ingredients and milk to keep batter smooth and minimize tunnels; do not overmix. Bake until a toothpick comes out with a few moist crumbs and cool completely on a rack. For the pastry cream, heat milk with half the sugar and vanilla just to steaming, whisk yolks with remaining sugar and cornstarch, then temper the yolks with hot milk, return to the pan and cook until thickened, whisking constantly; strain if desired and stir in butter off the heat for extra gloss. Chill until cold. For the whipped cream, whip cold cream with powdered sugar and vanilla to stiff peaks; fold a portion into the pastry cream to lighten if you like, then reserve some to pipe or layer. Berry layer: macerate berries with sugar and lemon juice (and zest if using) for 15-20 minutes to draw out juices and intensify flavor; if you want a glossy finish, dissolve a little more cornstarch in water and cook briefly with the berries to slightly thicken. Glaze: whisk powdered sugar with milk and vanilla to a pourable glaze, adjusting with more sugar or milk; add lemon juice for brightness if desired. Assembly: level cake layers, spread a layer of pastry cream, pipe or dollop whipped cream, scatter berries, then top with the next cake layer; finish with more whipped cream, berries, and a thin glaze over the top. Make-ahead and storage: the components can be prepared a day ahead; keep pastry cream and whipped cream refrigerated and assemble within a day for best texture; the cake will keep chilled for 2-3 days; avoid freezing whipped cream-heavy components. Optional add-ins: toast sliced almonds for crunch and dust with extra berries, or fold in freeze-dried berries for concentrated color and flavor without extra juice.

Tips

Tips for Berry Cream Pastry Cake

Cake Base tips

  • Always bring butter and eggs to room temperature before mixing. This improves emulsification and helps the batter trap air for a light crumb.
  • Measure flour correctly: scoop into the cup and level with a knife to avoid packing, which can make the crumb dense.
  • For a lighter crumb, sift the flour with the baking powder and salt, or replace 2 tablespoons of flour with a little cornstarch.
  • Cream the butter and sugar until pale and fluffy (3–5 minutes). This forms air pockets that help the cake rise and stay tender.
  • Mix eggs in one at a time, fully incorporating each addition to maintain a stable emulsion.
  • Alternate adding dry and wet ingredients in 2–3 additions to keep the batter smooth and uniform.
  • Have pans prepared (greased and parchment-lined) and the oven preheated before mixing to ensure even rise.
  • When testing doneness, insert a toothpick; it should come out with a few moist crumbs, not wet batter.
  • Cool layers completely on a rack before assembling to prevent cream from melting or glazing from becoming runny.

Cream Fillings tips

  • Pastry cream: heat milk and sugar gently and temper egg yolks with hot milk to prevent scrambling. Cook until thickened but not boiling; a gentle simmer is ideal.
  • Strain the pastry cream after cooking to remove any lumps for a silky texture.
  • Cover the surface with plastic wrap directly on the cream and chill promptly to prevent a skin from forming.
  • If the pastry cream is too thick, whisk in a bit more warm milk until you reach a spreadable consistency.
  • To lighten the pastry cream, fold in whipped cream once the pastry cream has cooled to near room temperature.
  • Whipped cream should be cold and thickened to stiff peaks. Stabilize with a small amount of powdered sugar or a touch of cream of tartar if you plan to assemble ahead.
  • For dairy-free options, use coconut or almond milk-based pastry cream and a dairy-free whipped cream substitute, keeping in mind the texture may vary slightly.
  • Assemble layers when fillings are fully cooled to avoid sliding or runny borders.

Berry Layer tips

  • Choose ripe, fragrant berries and hull/halve according to variety to ensure even distribution and texture.
  • Macerate berries with sugar and lemon juice for 15–20 minutes to draw out juices and intensify flavor; taste and adjust sweetness as needed.
  • Drain excess liquid after maceration to prevent a soggy cake. You can reduce the collected juice in a small saucepan to a glossy syrup and brush it on the cake if desired.
  • Thaw frozen berries completely and pat dry to avoid extra moisture that can weaken the crumb.
  • If using cornstarch in the berry layer, dissolve it in a little water or berry juice before heating; cook until the mixture is glossy and thickened, then cool before layering.
  • Reserve some whole berries for a decorative top or for variation in texture within the layers.

Glaze/Finish tips

  • Whisk powdered sugar with a little milk and vanilla to a pourable but thick consistency. Add lemon juice for brightness if desired.
  • Sift the sugar first to avoid lumps; start with 2 tablespoons milk and add more as needed to reach the desired drizzle consistency.
  • Apply the glaze to a cooled cake for a smooth, glossy finish. A thin layer that sets quickly can help seal in moisture.
  • For a dairy-free glaze, use almond or oat milk and a neutral oil or dairy-free butter substitute to achieve shine.
  • Let the glaze set for a few minutes before slicing to maintain clean edges in your servings.

Optional Add-ins tips

  • Toast sliced almonds in a dry skillet or oven until fragrant; cool completely to maintain crunch in the final cake.
  • Fold crushed freeze-dried berries into the pastry cream or sprinkle on top for bursts of concentrated color and berry flavor without extra juice.
  • If adding nuts or add-ins to the batter, fold them in gently at the end to avoid breaking the emulsion and overworking the batter.

FAQ

Berry Cream Pastry Cake – Frequently Asked Questions

What is Berry Cream Pastry Cake?

A layered dessert with a crisp pastry crust, a velvety vanilla pastry cream, and layers of fresh berries, finished with a light berry glaze or a dusting of sugar. It combines a classic pastry with creamy filling and bright fruit for a balanced treat.

What components make up the cake?

The usual components are:

  • Crust (shortcrust or puff pastry)
  • Pastry cream (vanilla)
  • Berry filling (fresh or lightly cooked)
  • Glaze or dusting (optional)
  • Optional garnish (mint leaves, powdered sugar)
What ingredients do I need?

Common ingredients and approximate amounts (adjust to pan size and taste):

  • Crust: 1 1/4 cups all-purpose flour, 1/4 cup granulated sugar, 1/2 cup cold unsalted butter, 1 large egg yolk, 1–2 Tbsp cold water, pinch of salt
  • Pastry cream: 2 cups milk, 3/4 cup sugar, 1/4 cup cornstarch, 4 egg yolks, 2 tsp vanilla, 2 Tbsp butter
  • Berries: about 2 cups mixed berries (fresh or thawed if using frozen)
  • Glaze: 1/2 cup berry juice or purée, 2 Tbsp sugar, optional 1 tsp lemon juice
  • Optional toppings: mint leaves, powdered sugar
How do I bake the crust (blind bake) for Berry Cream Pastry Cake?

Roll the dough to about 1/8 inch thick and fit it into a 9-inch pan. Chill for 30 minutes. Line with parchment and add pie weights or dried beans. Bake at 375°F (190°C) for 15 minutes. Remove weights and parchment, bake 8–12 minutes more until lightly golden. Cool completely before filling.

How do I prepare the pastry cream?

Warm the milk until steaming. In a bowl, whisk together sugar, cornstarch, and egg yolks until smooth. Gradually whisk in hot milk to temper, then return to a pot and cook over medium heat, whisking constantly until thick and glossy. Remove from heat, whisk in vanilla and butter. Strain if needed, then cover with plastic wrap to prevent a skin and chill until cold.

How do I assemble Berry Cream Pastry Cake?

Spread a thin layer of pastry cream over the cooled crust. Layer with berries, then add another layer of pastry cream over the berries. Top with remaining berries. If desired, glaze the berries with warmed berry juice or diluted jam and chill 1–2 hours to set. Slice and serve chilled.

How can I prevent a soggy crust?

Prevent moisture from soaking into the crust by blind baking until just set and cooling completely. Apply a thin barrier (a light layer of jam or lemon curd) before the pastry cream. Drain berries well and pat them dry to minimize extra moisture. Chill the assembled cake briefly to help the layers set before slicing.

Can I use frozen berries?

Yes. Thaw and drain berries well. Pat dry to remove excess moisture before layering. Frozen berries can be juicier, so adjust the glaze or reduce additional liquid accordingly.

How should I store Berry Cream Pastry Cake and how long does it keep?

Store refrigerated in an airtight container for 2–3 days. The crust may soften slightly over time, but the pastry cream helps hold the layers together. Do not leave at room temperature for more than 2 hours. The cake is best eaten fresh or within a couple of days; freezing is not recommended due to the dairy filling.

Introduction / Hook

Imagine a Saturday morning where sunlight slides across your kitchen counter, filling the air with a bright tang of citrus and the soft, comforting scent of warm batter. Lemon ricotta pancakes are the kind of breakfast that makes the ordinary feel special—airy, almost cloud-like at the center, with a delicate lemon kiss that wakes up the senses without overpowering them. Each bite offers a tender, pillow-soft crumb that folds gently around creamy pockets of cheese, like little citrusy sighs that linger on the tongue. The aroma alone can turn a simple kitchen into a stage for celebration, a stage where patience rewards you with a stack of pancakes that glisten with a glaze or a dusting of powdered sugar, and perhaps a handful of fresh berries to crown the plate. This is not just a breakfast; it’s a ritual of comfort and brightness, a way to start the day with a sense of occasion even on routine weekdays. If you’ve ever wished for pancakes that feel indulgent yet light, indulgence without heaviness, lemon ricotta pancakes answer that call with a poised, elegant balance you’ll want to revisit again and again.

The Story Behind the Dish

Ricotta has long been a beloved soft cheese across Italian kitchens, a gentle, creamy ingredient born from the simple act of transforming milk into something luxuriously delicate. While many desserts and pastas showcase ricotta, its role in breakfasteering is a quieter tribute to regional Italian breakfasts and Sunday morning famiglia gatherings. The lemon, meanwhile, is a sun-drenched ambassador from the southern coast—think Amalfi or Sorrento—the zest releasing oils that perfume the batter with a bright, sunny lift. The idea of pairing ricotta with lemon in pancake form is a natural marriage of two sensibilities: the rustic warmth of a Sunday stack and the refined brightness of citrus. In many homes, these flavors evoke memories of freshly peeled lemons on a kitchen table, a grandmother’s gentle insistence on “zest, not just juice,” and the shared joy of flipping pancakes that puff up like soft little boats on a morning breeze. Over time, cooks have softened this tradition into a modern brunch classic—fluffy, tender, and airy enough to be served with a drizzle, a dollop, or a scattering of fruit—without losing the essence of its Italian heritage. The story of lemon ricotta pancakes is, in many ways, a story of cross-cultural comfort: a humble breakfast that travels well, adapts to different kitchens, and rewards both the chef and the eater with a sense of bright conviviality every time the skillet meets batter.

Why You’ll Love This Recipe

  • Cloud-light texture: The ricotta adds moisture and a tender crumb, while gentle aeration keeps the pancakes impossibly soft inside and lightly crisp on the edges.
  • Bright, balanced flavor: The lemon brings a zippy citrus note that lifts the richness of the dairy without turning it too sour or heavy.
  • Versatile and forgiving: This batter behaves well in a busy kitchen, forgiving minor deviations in timing or temperature and still delivering delicious results.
  • Make-ahead friendly: Whether you’re batch-prepping for a crowd or preparing snacks for the week, you can streamline your morning routine with smart prep ideas.
  • Customizable: From a light glaze to a berry-topped stack, these pancakes invite you to tailor toppings and accompaniments to your mood and season.
  • Kid- and family-friendly: Creamy texture, gentle lemon fragrance, and a subtle sweetness make these a hit with little ones and grown-ups alike.
  • Brunch-ready with little fuss: They pair beautifully with fresh fruit, yogurt, maple syrup, or a dollop of whipped cream for a show-stopping plate without complicated techniques.

Flavor Profile & Texture

The first impression is the aroma—the lemon oils rise from the hot skillet, carrying a clean citrus note that’s not piercing but gently uplifting. When you bite in, you’re met with a double-layered texture: a tender, almost custardy center that feels luxurious and a lightly crisp exterior that adds just the right amount of bite. The ricotta contributes the subtle, milky sweetness and a soft, creamy mouthfeel—enveloped by a batter that’s enriched enough to stay moist yet light enough to permit airy rising. The lemon’s brightness unfolds in stages: a fresh zest aroma that nudges the palate, followed by a quiet tartness that acts as a balancing counterpoint to the natural sweetness of the batter. If you close your eyes, you might imagine a delicate balance of flavors that echoes a sunlit citrus grove and a cozy, butter-warm kitchen at the same time. The texture is equally expressive—tender, almost pillow-like at the core, edged with a delicate crust that hints at the careful heat of the pan. And while the flavor is delicate, it’s not shy; it invites a chorus of toppings—berries, yogurt, honey, or a glossy glaze—to complete the symphony without overpowering the base character of the pancake itself.

Occasions & Pairings

These pancakes are the sort of dish that makes sense in many settings. They shine on weekend brunch tables, where a bright plate counters the lingering heaviness of late-night gatherings. They’re equally at home on a holiday breakfast spread, where a lemony lift can bring a sense of wakeful celebration to the morning. For a casual weekday breakfast, they offer a comforting promise of something special without requiring a lot of time or effort. Pairing ideas to elevate the experience:

  • Fresh fruit: Sliced strawberries, blueberries, raspberries, or a citrus segments provide a juicy contrast and a pop of color.
  • Dollop-worthy toppings: A light yogurt or ricotta dollop, whipped cream, or a drizzle of maple syrup creates a luxurious finish.
  • Bright accents: A spoonful of lemon curd or a dusting of powdered sugar adds visual appeal and enhances the citrus note.
  • Side dishes: A small fruit salad, a yogurt parfait, or a crisp bacon strip can balance the plate for a well-rounded brunch.
  • Drink pairings: A sparkling beverage with a hint of citrus, such as a light lemon spritz or iced tea with a citrus twist, complements the pancakes without competing with them.

Tips, Variations & Substitutions

Tips for Perfect Pancakes

For best results, let the batter rest briefly before cooking to hydrate the components and promote tenderness. Use a nonstick skillet or a well-seasoned griddle to ensure a gentle release, and moderate your heat so the pancakes cook evenly without browning too quickly. A light touch when folding in any extra mix-ins (berries, zest, or a touch of vanilla) helps maintain the airy crumb we’re chasing.

Variations

  • Vary the citrus: Swap lemon for orange or a mix of citrus zest for a slightly different aroma and sweetness profile. A touch of grapefruit zest can introduce a more sophisticated tang.
  • Blueberry ricotta pancakes: Fold in a handful of fresh or frozen blueberries for bursts of fruity sweetness that pop as you bite through the pancake.
  • Herbal brightness: A whisper of fresh thyme or mint zest can add an unexpected, refreshing note that complements lemon nicely.
  • Glaze or drizzle options: A light maple-lemon glaze, a lemon glaze with a hint of vanilla, or a simple honey drizzle can finish the stack with glossy allure.

Substitutions & Dietary Adaptations

  • Vegan option: Use a plant-based ricotta substitute (or blend silken tofu with a little lemon zest and a touch of dairy-free yogurt) and replace eggs with a flax or chia “egg” or commercial egg replacer. Use non-dairy milk and a vegan butter substitute. A vegan lemon glaze can complete the effect.
  • Gluten-free option: Use a gluten-free all-purpose flour blend, or opt for almond or oat flour blends that suit a gluten-free diet. The leavening may require slight adjustment, so test a small pancake first to gauge batter thickness.
  • Low-fat option: Use part-skim ricotta and reduce any added fats in the cooking process; the batter’s moisture typically keeps the pancakes tender even with lighter dairy.
  • Low-sugar option: Rely on the natural sweetness of the batter and the fruit toppings rather than a heavy glaze.
  • Regional twists: Add a pinch of vanilla or almond extract for a different fragrance, or fold in finely chopped pistachios for a nutty crunch that pairs beautifully with lemon.

Storage & Make-Ahead Ideas

Leftovers can be a practical joy or a challenge, depending on how you plan. If you’re cooking for a crowd, consider cooking a larger batch and storing the pancakes properly for later enjoyment. Here are practical strategies to keep the pancake experience fresh:

  • Make-ahead batter: You can rest the batter for a short period in the refrigerator before cooking, which helps flavors to meld and improves texture. Do not overmix; a light whisk is enough to bring everything together.
  • Storing cooked pancakes: Allow pancakes to cool completely, then layer them with parchment between each pancake in an airtight container. Refrigerate for up to 2–3 days; reheat gently in a skillet or in a warm oven to revive softness.
  • Freezing: Freeze individual pancakes on a tray first, then transfer to a freezer bag. Reheat directly from frozen in a skillet with a small splash of milk or water, covered, until warmed through. This method preserves texture better than thawing and reheating from a block.
  • Make-ahead topping ideas: Prepare a citrusy yogurt or ricotta topping, fruit compote, or a light syrup ahead of time and store in the fridge for quick assembly on busy mornings.

Fun Facts & Trivia (Optional)

Did you know that the word “ricotta” literally means “recooked” in Italian? It refers to the traditional method of making ricotta by reheating the whey to coax out extra curds. This humble technique yields a delectable, creamy texture that’s perfect for folding into batters or dolloping atop warm pastries. Lemons, with their aromatic zest and bright juice, have long been prized in Mediterranean cuisines for their ability to brighten both sweet and savory dishes. In desserts and breakfasts alike, lemon’s invigorating scent is often associated with clear mornings and springtime gatherings, making lemon-infused pancakes a favorite for family celebrations and casual brunches alike. The combination of lemon and ricotta can be seen as a bridge between rustic Italian comfort and modern brunch elegance—a reminder that good cooking often emerges when simple ingredients meet thoughtful technique and a little culinary imagination. For those who love pancakes that feel special yet comforting, lemon ricotta pancakes offer a balanced, memorable experience that travels well—from kitchen to table, from memory to tradition, and from weekend to weekday without losing its charm.

Ingredients

Lemon Ricotta Pancakes
Batter

  • 1 cup all-purpose flour (120 g)
    → All-purpose flour provides the foundational structure and body for the pancake batter. It carries the leavening action to create a light, tender crumb when cooked. To ensure even distribution of leavening and salt, whisk the dry ingredients (flour, sugar, baking powder, baking soda, and salt) together before adding liquids. If you need a gluten-free option, substitute with a 1:1 gluten-free flour blend and consider adjusting the leavening slightly. Allow the batter to rest for 5–10 minutes to hydrate the flour and relax the gluten, which yields fluffier pancakes. For best texture, measure the flour properly (spoon and level) to avoid dense results.
  • 2 tablespoons granulated sugar
    → Provides gentle sweetness and helps promote browning on the pancake surface, contributing to a velvety exterior. It also balances the lemon’s acidity. If you prefer less sweetness, reduce to 1 tablespoon or omit. Ensure sugar is evenly dispersed by whisking with the dry ingredients so the batter browns evenly as it cooks. In dairy-based batters, sugar can slightly enhance moisture retention; if the batter seems too stiff, whisk in a teaspoon of extra milk.
  • 1 teaspoon baking powder
    → The primary leavening agent that creates air pockets and lifts the pancakes to a light, fluffy texture. It reacts with liquids and acids during cooking to produce CO2. Fresh, not stale, baking powder is essential for reliable rise; sift it into the dry ingredients to avoid clumps, and don’t overmix once the wet and dry are combined, as too much handling can deflate the batter.
  • 1/2 teaspoon baking soda
    → Adds extra lift and helps brighten the crumb when paired with the lemon juice and ricotta. Use sparingly to avoid any soapy or metallic taste; if you omit lemon juice, you can reduce to 1/4 teaspoon. Ensure it’s evenly distributed by whisking with the dry ingredients. If you notice an off-flavor, you may reduce or omit slightly and compensate with a touch more baking powder.
  • 1/4 teaspoon salt
    → Enhances overall flavor and helps balance the sweetness and acidity from the lemon. Salt also subtly strengthens gluten (where present) and improves browning. Dissolve it in the dry mix for even distribution, and consider using a fine salt for uniform flavor.
  • 1/2 cup ricotta cheese (about 120 g)
    → The star of these pancakes, adding richness, moisture, and a tender crumb with a slight tang. For best results, drain any excess whey if the ricotta is very watery; otherwise the batter may be a bit loose. Gently fold the ricotta into the wet ingredients to distribute evenly without deflating the mixture. If you use very thick ricotta, you may whisk it with a small amount of milk to loosen before combining with the wet ingredients.
  • 2 large eggs
    → Provide structure, moisture, and binding to the batter. Beating the eggs into the wet components helps emulsify fats and liquids for a cohesive batter. If you want extra light pancakes, you can separate the eggs, whip the whites to soft peaks, then fold them in at the end to lift the batter without overmixing.
  • 1/2 cup milk (dairy or non-dairy)
    → Hydrates the batter, thinly blending the ricotta with the dry ingredients to achieve a pourable pancake batter. Adjust to achieve the desired consistency: the batter should be thick but pourable. If the ricotta is very thick, increase to 2/3 cup; if using very thin ricotta, use closer to 1/3 cup and compensate with a touch more flour. Dairy-free milks will work fine and may add a hint of nuttiness depending on the option chosen.
  • 2 tablespoons fresh lemon juice
    → Imparts bright lemon acidity that heightens flavor and activates the baking soda for extra lift. Use freshly squeezed juice for the best brightness; bottled juice can taste flat. Add the lemon juice to the wet ingredients so it can mingle with the ricotta and eggs, contributing to a cohesive lemony batter. If you substitute with lime or orange for variation, keep the acidity balanced with the baking soda to avoid over-tenderizing the batter.
  • 2 tablespoons lemon zest
    → Delivers a vibrant lemon aroma and intense flavor without the bitterness of the pith. Use a microplane to finely grate the zest and avoid the white zest (pith). Add the zest to the dry ingredients or whisk it into the wet ingredients to distribute evenly. Fresh zest yields the most fragrant, pronounced lemon notes; zesting ahead and letting it rest a few minutes can intensify the aroma.
  • 1 teaspoon vanilla extract (optional)
    → Adds warmth and rounds the lemon’s brightness, enriching the overall flavor profile. Keep this as an optional boost if you prefer a clean lemon flavor without competing sweetness. For a stronger vanilla note, use a high-quality extract or real vanilla bean content; if you’re avoiding alcohol, look for alcohol-free vanilla flavor.
  • 2 tablespoons unsalted butter, melted and cooled
    → Contributes richness and tenderness to the batter, helping to create a soft, moist crumb. Ensure the butter is fully cooled before adding to the wet ingredients to prevent cooking the eggs. If you prefer a dairy-free option, substitute with melted neutral oil (such as canola or grapeseed) in the same amount; you may notice a slightly lighter texture as a result.
  • 1–2 teaspoons unsalted butter or neutral oil for cooking
    → Used to grease the pan or griddle between batches, preventing sticking and promoting an even, golden crust. Start with 1 teaspoon and add a touch more between pancakes if needed. Cook on medium heat to avoid burning the outside before the inside cooks through; reapply fat as necessary to maintain a nonstick surface.

Toppings

  • Pure maple syrup for serving
    → Classic sweet drizzle that pairs beautifully with lemony ricotta pancakes. Real maple syrup has a deeper flavor than many pancake syrups and complements the citrus notes. Warm the syrup slightly for easier pouring, but avoid simmering as it can darken and intensify overly sweet flavors. If you prefer, honey or agave can be used as alternatives.
  • Fresh berries (blueberries or raspberries), optional
    → Adds bright, juicy contrast and a pop of color to balance the lemon’s acidity. Use ripe berries for maximum sweetness and flavor; if using frozen berries, thaw and pat dry to prevent a watery pancake topping. Berries also contribute a pleasant tart note that complements the ricotta’s richness.
  • Powdered sugar for dusting (optional)
    → Lightly dusts the finished pancakes for an appealing finish and a touch of sweetness. Sift a small amount over the top after the pancakes have rested briefly to avoid melting the sugar into the surface. This is purely for presentation and a hint of extra sweetness at the end.
  • Extra lemon zest for garnish (optional)
    → A final burst of lemon aroma that enhances the presentation and reinforces the citrus theme. Grate finely over the stack just before serving so the oils are fresh and aromatic. This is especially nice if you’re serving with a light lemon glaze or syrup.

Instructions

  • Whisk the dry ingredients together in a medium bowl until evenly combined, ensuring you whisk thoroughly to distribute the baking powder, baking soda, salt, and sugar.

    → Even distribution of dry components prevents uneven rise and flavor; sifting or whisking helps break up any clumps and yields a lighter batter.
  • Drain any excess whey from the ricotta and measure 1/2 cup (about 120 g) into a separate large bowl, breaking up any large clumps with a fork.

    → Removing excess moisture prevents a batter that’s too loose, which can cause pancakes to spread and cook unevenly; breaking up lumps helps the ricotta integrate smoothly.
  • Whisk the eggs, milk, lemon juice, lemon zest, and vanilla extract (if using) into the ricotta until the mixture is smooth and homogeneous.

    → This creates a cohesive wet base with bright lemon aroma; whisking emulsifies fats and liquids for a tender, uniform batter without separating.
  • Gently fold the dry ingredients into the ricotta–egg mixture with a spatula until just combined, leaving some small lumps; avoid overmixing to keep the pancakes tender.

    → Gentle folding preserves air pockets formed by the leaveners and prevents gluten overdevelopment, which would make the pancakes tough.
  • Let the batter rest at room temperature for 5–10 minutes to hydrate the flour and relax the gluten while allowing the leavening agents to activate.

    → Resting improves texture by giving the starches time to swell and the batter to emulsify, resulting in fluffier pancakes with a finer crumb.
  • Preheat a nonstick skillet or griddle over medium heat and lightly grease with 1 teaspoon of unsalted butter or neutral oil, warming until a drop of water sizzles.

    → Proper preheating ensures even browning and prevents sticking; a thin film of fat creates crisp edges and facilitates easy flipping.
  • Scoop approximately 1/4 cup of batter for each pancake onto the skillet, leaving space between portions; lightly tap the batter to distribute and shape into a round disk if needed.

    → Uniform portions promote even cooking across the surface and stack; shaping helps pancakes cook consistently rather than spreading unevenly.
  • Cook until bubbles appear on the surface and the edges look set, about 2–3 minutes, then flip carefully with a spatula and cook the second side until golden and cooked through, about 1.5–2 minutes more.

    → Monitoring for surface bubbles and edge set indicates sufficient structure; flipping when caramel color is achieved yields a crisp exterior and moist interior without burning.
  • Transfer the cooked pancakes to a warm plate and repeat with the remaining batter, re-greasing the pan as needed between batches.

    → Keeping pancakes warm prevents drying and stacking issues; re-greasing maintains a nonstick surface for even browning on subsequent pancakes.
  • Serve the stack with pure maple syrup, fresh berries if using, a dusting of powdered sugar, and a final pinch of extra lemon zest for aroma just before serving.

    → Toppings brighten and balance the lemon ricotta pancakes; warm syrup pours smoothly, berries add contrast, and lemon zest amplifies citrus fragrance.

Notes

These lemon ricotta pancakes are light and fluffy with a bright lemon tang from fresh lemon juice and zest, enriched by creamy ricotta for a tender crumb.

You can customize them by folding in fresh berries (blueberries or raspberries), a spoon of lemon curd, or a dollop of yogurt and a drizzle of honey. For a dairy-free option, substitute the ricotta with a dairy-free alternative or blended silken tofu with a splash of lemon juice.

They pair beautifully with pure maple syrup, extra lemon zest, and perhaps a light dusting of powdered sugar. Fresh berries add color and contrast to the lemon brightness.

Tips for best texture: rest the batter 5–10 minutes to hydrate the flour and relax the gluten, whisk the dry ingredients well, and avoid overmixing once the wet and dry are combined. Cook on medium heat and grease the pan between batches to prevent sticking; adjust with a touch more milk if the batter is too thick or a bit more flour if too thin.

Make-ahead and storage: cooked pancakes freeze well—layer with parchment between stacks and reheat in a skillet, toaster oven, or microwave with a damp paper towel to prevent drying out. The batter can also be made ahead and kept chilled for up to 24 hours.

Gluten-free option and substitutions: use a 1:1 gluten-free flour blend in place of all-purpose flour and ensure your baking powder is gluten-free. If needed, add a little extra milk or a touch more lemon zest to balance flavor. For a lighter lift, you can separate the eggs and fold in whipped whites at the end.

Flavor notes: add an extra 1/2 teaspoon of vanilla extract if you like a warmer aroma, and keep the lemon zest fresh by grating just before cooking. For variation, swap lemon juice for lime or orange, adjusting the leavening to maintain balance with the acid.

Tips

Batter and Mixing Tips

  • Whisk the dry ingredients (flour, sugar, baking powder, baking soda, and salt) together thoroughly, then whisk the wet ingredients in a separate bowl. This helps ensure even leavening and a smoother batter.
  • Drain excess whey from the ricotta before folding it into the wet ingredients. A very loose batter can make the pancakes spread too thin and cook unevenly.
  • Fold the ricotta in gently. Overmixing can deflate the batter and reduce tenderness; a few soft folds to combine is ideal.
  • Let the batter rest for 5–10 minutes after mixing. This hydrates the flour and relaxes the gluten, yielding fluffier pancakes.
  • For brighter lemon flavor, stir the lemon zest into the dry ingredients and the lemon juice into the wet ingredients. Fresh zest and juice give the most vibrant aroma and acidity.
  • If you want extra lift, you can separate the eggs: whip the whites to soft peaks and fold them in at the end, but this is optional for a lighter texture.
  • Adjust thickness by adjusting milk in small amounts. If the ricotta is very thick, you may use up to 2/3 cup milk; if very loose, use closer to 1/3 cup and a touch more flour to balance.
  • When using gluten-free flour, you may need a touch more liquid or a touch more leavening. Start with the same measurements and adjust as needed for the batter to drop slowly off a spoon.

Cooking Tips

  • Preheat your pan or griddle over medium heat and lightly grease with 1 teaspoon of butter or oil. Wipe away any excess fat to prevent greasy pancakes.
  • Test a small amount of batter first. It should sizzle gently and form small bubbles on the surface within 1–2 minutes.
  • Cook the pancakes until the edges look set and small bubbles form on the surface, then flip and cook the other side until golden brown. The second side should cook more quickly, so watch closely to prevent overbrowning.
  • Keep pancakes warm on a rack set over a baking sheet in a 200°F (95°C) oven while you finish the rest of the batter to prevent them from steaming and becoming soft.

Toppings and Serving Tips

  • Warm pure maple syrup enhances the lemon notes; if you prefer, a light glaze made from lemon juice and powdered sugar can be brushed on the stack for extra brightness.
  • Fresh berries add contrast and brightness. If using frozen berries, thaw and pat dry to avoid a soggy pancake topping.
  • Dust with powdered sugar after pancakes rest briefly to keep the surface crisp and prevent sogginess.
  • Finish with extra lemon zest for aroma right before serving. Finely grated zest releases essential oils that wake up the lemon flavor.

FAQ

What are Lemon Ricotta Pancakes?

Fluffy breakfast pancakes made with ricotta cheese and bright lemon zest/juice that create a light, creamy interior and a tangy-sweet flavor. They pair with fresh berries and maple syrup.

What ingredients do I need?

Basic batter includes: all-purpose flour (or a gluten-free blend), baking powder, salt, sugar; wet mix of ricotta cheese, eggs, milk (dairy or plant-based), lemon zest and juice, and a little vanilla. For cooking: butter or oil. Optional toppings: berries, maple syrup, lemon curd, powdered sugar.

How do I make the batter fluffy and moist?

Whisk dry ingredients separately, whisk ricotta with eggs and milk, stir in lemon zest/juice and vanilla, then fold wet into dry until just combined. Do not overmix; a few lumps are fine. Let the batter rest 5-10 minutes to hydrate the flour and loosen the ricotta.

Can I make a dairy-free or vegan version?

Yes. Use a plant-based ricotta (or use almond or soy yogurt and a small amount of olive oil to mimic ricotta texture), and choose unsweetened plant milk. If using vegan ricotta, you may need a touch more flour or a bit of baking powder to help with rise. Keep the lemon for brightness. Use a light oil or dairy-free butter for cooking.

What about a gluten-free version?

Use a gluten-free all-purpose flour blend that includes xanthan gum, or mix 1 cup GF flour with 2 tsp cornstarch to mimic structure. GF blends can vary, so start with a 1:1 substitution and adjust with a little extra milk if the batter seems too thick.

How do I cook them to perfection?

Heat a nonstick skillet or griddle over medium heat and lightly grease. Scoop 1/4 cup batter per pancake, cook until bubbles form and edges look set, about 2-3 minutes, then flip and cook 1-2 minutes more until golden. Adjust heat if they brown too fast.

How should I store and reheat leftovers?

Store cooled pancakes in an airtight container in the refrigerator for up to 3 days, or freeze individually with parchment between them for up to 1 month. Reheat in a warm skillet, toaster, or microwave until heated through. A quick re-warming with a light drizzle of lemon juice helps keep brightness.

What toppings pair best with lemon ricotta pancakes?

Fresh berries (strawberries, blueberries, raspberries), a dollop of yogurt or whipped cream, lemon curd, a drizzle of maple syrup, or a dusting of powdered sugar. For extra zing, add a small squeeze of lemon juice on top just before serving.

Can I customize flavors or add-ins?

Yes. Great add-ins include blueberries, sliced strawberries, grated lemon zest in the batter, a touch of orange zest, or a teaspoon of vanilla. If adding heavy mix-ins, fold them in gently to avoid deflating the batter.

Introduction / Hook

Imagine a warm, scent-filled morning where the hum of the kettle blends with the soft, comforting crack of a glaze meeting a tender crumb. Banana bread donuts are the delicious bridge between two beloved comforts: the homey, loaf-y charm of banana bread and the joyful, bite-sized indulgence of a donut. The moment you slice into one, you’re met with a whisper-soft interior—like a cloud infused with ripe banana sweetness, a hint of spice, and a kiss of vanilla—surrounded by a delicate, lightly crisp edge that gives way to a melt-in-your-mouth center. This is breakfast, dessert, and snack all in one, a versatile treat that still feels special enough for weekend gatherings or a quick, cozy weekday indulgence. The beauty of banana bread donuts lies in their approachable nature: you get the rustic warmth of banana bread in a form that’s easy to stack, share, and reheat. The glaze—whether a simple sugar glaze, a lemon-vanilla drizzle, or a drizzle of chocolate—adds a final sparkle that makes these donuts feel like a little celebration on a plate.

What makes them stand out is not just the flavor, but the story they tell: of overripe bananas rescued from the bin, of a kitchen that knows how to coax moistness without heaviness, and of a technique that can yield something indulgent without being fussy. They’re the kind of treat that invites lingering mornings, a mug of coffee, and a sense of contentment that lingers long after the last bite. With each bite, you’ll hear a soft sigh of gratitude from anyone who has ever sliced into a homemade loaf and wished for a more portable, shareable version. Banana bread donuts deliver that wish—soft, sunlit, and irresistibly comforting—while giving you the versatility to tailor sweetness to your taste and occasion.

In the pantry, a few ripe bananas, a little flour or batter base, and a handful of pantry spices become a passport to a moment of pure, familiar joy. These donuts celebrate the best of autumnal warmth and summer fruit brightness in one delightful package. They’re not overly sweet, they’re not overly fussy, and they carry with them the memory of sunlit kitchen windows, aproned hands dusted with flour, and the satisfaction of turning a simple ingredient into something wonderfully special. If you’ve ever wanted to bake something that feels indulgent yet cozy, something that can be made ahead for a crowd or for a quiet morning at home, banana bread donuts are your answer. They invite you to slow down, savor the aroma, and share a moment of sweetness that tastes like home.

The Story Behind the Dish

Banana bread itself has a humble, thrifty origin story. It grew out of kitchens where ripe bananas, once considered past their prime, were rescued from the scrap pile and transformed into something comforting and nourishing. The banana’s natural sweetness, paired with warm spices and a tender crumb, created a loaf that even busy families could bake with relative ease. Over the decades, banana bread evolved from a practical, “zero-waste” solution into a beloved staple of brunches, cookouts, and school lunches. Its aroma—bananas caramelizing as they mingle with vanilla, cinnamon, nutmeg, and a touch of butter—became a mnemonic for home and hospitality.

Meanwhile, donuts have long danced between the worlds of celebration and everyday joy. Fried or baked, they’re portable, shareable, and inherently festive. The donut’s history is as rich as its glaze: a symbol of indulgence that still feels comforting, a reminder that a treat can be both special and accessible. When you combine the two, you get something that feels like a celebration of simple ingredients transformed into something a little more magical. The idea of banana bread donuts likely emerged from home bakers who loved the loaf but craved the convenience and whimsy of a donut—plus the nostalgia of dunking, glazing, and enjoying a treat with your hands. It’s a partnership that honors tradition while inviting experimentation: you can swap spices, try different glazes, fold in chocolate chips or nuts, or add a citrus zest for brightness.

There’s also a broader cultural thread worth noting. In many cultures, bananas symbolize nourishment, abundance, and warmth. The gentle sweetness of banana bread resonates with autumn and early morning routines, while the donut’s playful shape invites casual sharing and conversation. When you bring these elements together, you’re not just making a pastry—you’re crafting an edible memory: a moment to connect with family, friends, or even your own sense of nostalgia for weekends long gone. Banana bread donuts celebrate that memory, then layer on a modern twist with glaze, toppings, and the soft, satisfying bite of a well-balanced crumb.

Why You’ll Love This Recipe

  • Versatile flavor that’s both comforting and bright: ripe banana sweetness, vanilla, warm spices, and optional citrus or chocolate notes come together in harmony.
  • Portable and shareable: donuts are easy to package for a brunch, bake sale, potluck, or school snack stash.
  • Soft, tender crumb with a delicate exterior: a balanced texture that feels substantial yet light on the palate.
  • Glaze that elevates without overpowering: you can opt for a vanilla sugar glaze, a tangy lemon drizzle, or a chocolate topper to suit your mood.
  • Customizable: easily adaptable to vegan, gluten-free, or dairy-free diets with simple substitutions, keeping the spirit of the dish intact.
  • Versatile for any occasion: breakfast on weekends, a sweet finishing touch after a savory brunch, or a comforting treat on a rainy afternoon.
  • Make-ahead-friendly: batter and baked donuts can be prepared ahead and refreshed with a glaze just before serving.
  • Budget-friendly: uses pantry staples and ripened fruit, turning what could be waste into a crowd-pleasing dessert or morning treat.

Flavor Profile & Texture

Flavor notes

At the center of a banana bread donut is that unmistakable banana sweetness, which is softened by a kiss of vanilla and a warm bouquet of spices—cinnamon, a touch of nutmeg, and a whisper of allspice or clove, depending on your mood. The fruit’s natural sugars caramelize slightly during baking, creating a gentle, toasty aroma that fans of banana bread will recognize—and crave. Some variations bring a citrus brightness to the party: a hint of orange zest or lemon zest can cut through the richness, waking the palate and brightening the glaze. If you’re a chocolate aficionado, a handful of mini-chocolate chips tucked into the batter or a rich chocolate glaze provides a tantalizing contrast that complements the banana’s lullaby sweetness.

When you bite into one, you’ll notice a balance between the crumb’s moisture and the exterior’s light crispness. The interior remains tender and almost cake-like in the best versions, with enough structure to hold its shape as you dunk and bite. The glaze contributes a gentle sweetness and a glossy sheen that makes the donuts look as inviting as they taste. If you prefer a less sweet finish, a simple sugar glaze with a splash of lemon or orange juice offers a bright counterpoint to the banana’s mellow depth. The overall flavor is familiar, comforting, and deeply satisfying, with layers that invite you to take another bite and another, all while the kitchen fills with a smile-inducing aroma.

Texture-wise, imagine a soft, airy center—almost cloud-like in its tenderness—surrounded by a thin, slightly crisp crust that yields with a gentle press. The contrast between the tender crumb and the delicate crust is more pronounced with baking than with frying, but either method, when executed with care, yields a donut that’s comforting and indulgent without feeling heavy. The optional add-ins—nuts for a toasty crunch, chocolate for a velvety counterpoint, or fruit zest for brightness—introduce subtle textures that play nicely with the crumb and glaze. In all its versions, the banana bread donut invites you to slow down, savor the aroma, and appreciate the careful balance between sweetness, spice, and the soft, comforting bite that lingers on the tongue.

Occasions & Pairings

Banana bread donuts shine in a myriad of settings. They’re ideal for weekend brunches, where a basket of warm donuts can mingle with coffee, fresh fruit, yogurt, and light pastries. They also make a charming addition to holiday breakfasts or celebratory breakfasts—just arrange a few on a platter with a dusting of powdered sugar and a glaze drizzle for a little extra sparkle. If you’re feeding a crowd, these donuts scale well: bake up a batch for a family gathering, a book club meeting, or a bake sale, and watch them disappear while the scent lingers in the room.

Pairings you might consider include:

  • Coffee and espresso-based drinks: the roasted notes of coffee harmonize with the banana’s sweetness and the warmth of the spices.
  • Milk, chai, or a creamy hot cocoa: dairy or plant-based, these beverages complement the donut’s softness and balance the glaze’s sweetness.
  • Fresh fruit or fruit compotes: a light, tangy contrast to the donut’s richness and a reminder of the banana’s fruit-forward nature.
  • Yogurt parfaits or yogurt-based toppings: a tangy element that brightens the overall profile and adds a creamy texture that pairs well with the donut’s crumb.
  • CHEESE pairings for a brunch twist: a mild cream cheese glaze or a light ricotta spread can elevate the dish to a more sophisticated brunch option.

Seasonal variations can also influence when you serve them. In autumn, they fit perfectly into a harvest menu with cinnamon, nutmeg, and a caramel drizzle. In spring, a citrus glaze or a lavender-infused drizzle can offer a floral note that makes the recipe feel lighter and more festive. For weekend mornings, a warm donut with a cup of coffee becomes an invitation to linger at the table, share stories, and start the day with a gentle sense of comfort and celebration.

Tips, Variations & Substitutions

  • Make it vegan: swap dairy milk with a plant-based alternative, use flax eggs or applesauce in place of eggs, and choose a dairy-free glaze. The texture remains tender, and the flavor stays balanced with the banana’s sweetness and spices.
  • Glaze versatility: a classic vanilla glaze, a lemon-vanilla glaze, or a chocolate glaze all work beautifully. For a tangy finish, add a splash of citrus juice to the glaze to brighten the finish.
  • Texture twists: fold in chopped walnuts, pecans, or toasted almonds for a satisfying crunch and nutty aroma. Chocolate chips or white chocolate chips can add pockets of rich sweetness that delight with every bite.
  • Glaze without sugar overload: if you prefer a lighter glaze, brush on a thin layer and finish with a dusting of finely grated citrus zest for color and aroma.
  • Gluten-free option: use a gluten-free flour blend that performs well in quick breads. The crumb will be slightly different, but the donut will still be tender and moist with the right fat and sugar balance.
  • Regional twists: swap banana for mashed plantain for a tropical twist, or incorporate a splash of dark rum or brandy into the glaze for an adult-friendly version.
  • Spice emphasis: for a bolder spice profile, increase cinnamon slightly and add a pinch of ground clove or cardamom to the batter for a deeper, more complex aroma.
  • Butter vs. oil: you can use melted butter for a richer flavor or a light neutral oil for a softer crumb. Each choice subtly shifts aroma and mouthfeel without changing the essential character.
  • Sweetness control: adjust the sweetness by choosing a glaze with less sugar or by glazing only part of the donuts for a semi-glazed version that highlights the banana flavor more.

Storage & Make-Ahead Ideas

Banana bread donuts are forgiving when it comes to storage, which makes them ideal for planning ahead. If you bake them in advance, allow them to cool completely before glazing to prevent the glaze from sliding off or forming a sticky surface. Here are practical tips to keep them fresh and enjoyable:

  • Room temperature storage: store in an airtight container or a resealable bag at room temperature for up to three days. If your climate is humid, place a clean paper towel inside the container to absorb moisture and keep the crust from getting soggy.
  • Reheating guidance: a quick warm-up in a low-temperature oven or a short microwave interval helps restore the soft interior and revives some of the glazed sheen. If you’re reheating multiple, place a damp paper towel over the donuts to keep them from drying out.
  • Make-ahead batching: you can mix and bake a batch of donuts ahead of time and store unfrosted donuts in the freezer for up to one month. Glaze fresh before serving to preserve the glossy finish and bright sweetness.
  • Freezer-friendly: freeze individually wrapped donuts for convenient, grab-and-go breakfasts. Thaw at room temperature and then rewarm gently to revive that just-baked texture.
  • Leftover ideas: crumble leftovers over yogurt or oats for a breakfast bowl or dessert option, or use small pieces as a topping for a fruit parfait or pancake stack for a playful twist.

Fun Facts & Trivia

– Banana bread rose to popularity in the United States during the Great Depression era as a practical, resourceful way to use overripe fruit, butter, and sugar, turning humble ingredients into something comforting and enduring.

– Donuts have a rich history in many cultures, with glazed varieties often symbolizing celebration and indulgence. The donut’s shape and glaze have inspired playful creativity in homes and bakeries alike, making them a universal canvas for flavor experimentation.

– The combination of banana and spice is a timeless pairing in baking, echoing flavors found in warm desserts and desserts that feel like a comforting hug from the oven. The addition of a glaze or drizzle elevates this familiar pairing into a treat that feels special without losing its heart.

– Fun culinary fact: the scent of baking banana bread has a mood-lifting effect for many people, evoking memories of home, family, and leisurely mornings. When these scents drift through the kitchen, it’s as if time slows down, inviting a moment of simple, sensory pleasure.

Ingredients

Banana Bread Donut Batter

    – 1 1/2 cups all-purpose flour
    → Provides the structure and crumb of the donuts. Flour forms the gluten network that traps air pockets created by the leaveners and gives the donuts their body. For best texture, sift or fluff the flour before measuring and avoid overmixing once wet ingredients are added to keep the crumb tender and not tough.
    – 1 teaspoon baking powder
    → Acts as a leavening agent that helps the donuts rise during baking, creating a light, airy crumb. Whisk it with the dry ingredients to ensure even distribution and prevent dense spots; use fresh powder for the best rising power.
    – 1/2 teaspoon baking soda
    → Works with the acidic components (bananas and buttermilk) to boost lift and browning. Dissolve evenly in the dry mix and avoid adding too much, which can give a soapy taste; freshness matters for maximum fizz.
    – 1/2 teaspoon fine sea salt
    → Balances sweetness and enhances overall flavor; a fine grind ensures even distribution throughout the batter. Measure carefully to avoid overly salty donuts.
    – 1/2 teaspoon ground cinnamon
    → Provides warm, comforting spice that complements the banana flavor. If you prefer stronger spice, increase to 1 teaspoon; best results come from whisking the spice into the dry ingredients so it distributes evenly.
    – 2 ripe bananas, mashed
    → The bananas supply moisture, natural sweetness, and banana aroma. Very ripe bananas with brown spots yield the deepest flavor; mash until mostly smooth with only a few small lumps. If banana puree seems very wet, gently blot with a paper towel to avoid soggy batter.
    – 1/2 cup granulated sugar
    → Sweetens the batter and aids browning during baking. Dissolves into the wet components to avoid a gritty texture; you can reduce slightly if your bananas are very sweet, but keep some sugar for a tender crumb.
    – 1/4 cup light brown sugar, packed
    → Adds moisture and a richer, caramel-like flavor due to its molasses content. Packed sugar integrates evenly and helps maintain a soft, moist interior; if you omit, replace with the same amount of granulated sugar for a lighter crumb.
    – 1 large egg, room temperature
    → Binds the batter and contributes structure and tenderness. Room temperature egg mixes more evenly with the other ingredients, helping to emulsify fats and liquids for a smoother batter.
    – 1/4 cup unsalted butter, melted and cooled
    → Provides richness, moisture, and flavor; melted butter distributes evenly and aids in a tender crumb. Let it cool briefly before mixing to prevent cooking the egg; for dairy-free, substitute with a neutral oil like canola or melted coconut oil.
    – 1/2 cup buttermilk (or 1/2 cup milk + 1 teaspoon lemon juice; let sit 5 minutes)
    → Adds moisture and tenderness, while the acidity reacts with baking soda/powder to encourage a light crumb and subtle tang. If using non-dairy milk, use a fortified version and let it sit with the lemon juice or vinegar for a few minutes to mimic buttermilk’s acidity. Bring to room temperature before using.
    – 1 teaspoon pure vanilla extract
    → Enhances overall flavor and rounds the sweetness; use pure vanilla for the best aroma. If you only have imitation vanilla, you can substitute with a tiny splash of almond extract for a different nuance, but this will alter flavor.
    – Nonstick spray or melted butter to grease donut pan
    → Ensures donuts release cleanly after baking. Apply a light, even coating to each cavity and consider dusting with a touch of flour or cocoa powder for extra release cues if using butter alone.

Optional Add-ins

    – 1/2 cup semi-sweet chocolate chips (optional)
    → Creates gooey pockets of chocolate throughout the donuts. To prevent chips from sinking, toss them with 1 tablespoon of flour before folding into the batter and fold gently at the end. For best flavor, choose chips with 40–60% cacao and fold in after the batter is mixed to avoid overworking it.
    – 1/2 cup chopped walnuts or pecans (optional)
    → Adds crunch and a toasty nutty contrast to the soft crumb. Lightly toast the nuts in a dry skillet until fragrant to deepen flavor, then cool and fold in just before filling the donuts to preserve crunch.
    – 1/4 cup shredded coconut (optional)
    → Provides a tropical aroma and additional texture. Toast lightly to heighten flavor; reduce slightly if using with chocolate chips to avoid overpowering the banana flavor; fold in at the end with other add-ins.

Vanilla Glaze

    – 1 cup powdered sugar
    → Forms the base of the glaze, creating a smooth, glossy finish that adds a gentle sweetness. Sift before mixing to avoid lumps; add liquid gradually to reach the desired glaze consistency. If you want a more opaque glaze, use a touch more sugar and less liquid.
    – 2-3 tablespoons milk (dairy or non-dairy)
    → Liquids to reach the right glaze thickness. Start with 2 tablespoons and add as needed; room-temperature milk helps the glaze come together smoothly. For a richer glaze, use a touch of cream or almond milk depending on your preference. If the glaze is too thin, add a pinch more sugar; if too thick, add a teaspoon of milk at a time.
    – 1/2 teaspoon vanilla extract
    → Adds fragrance to the glaze and enhances the sweetness. Use pure vanilla for best aroma; if you’re making vegan glaze, you can keep vanilla as is, since the glaze contains no eggs. This is optional but highly recommended for a well-rounded finish.

Instructions

  • Preheat your oven to 350°F (175°C) and grease a donut pan with nonstick spray or melted butter, ensuring every cavity is evenly coated.
    → This prevents sticking and allows the donuts to release cleanly after baking, preserving their shape and surface texture.
  • Whisk together the dry ingredients: all-purpose flour, baking powder, baking soda, fine sea salt, and ground cinnamon until fully combined and light; sift if available for an even distribution.
    → Uniform dry ingredients ensure consistent lift and flavor throughout the batter, and sifting breaks up lumps that could create dense spots.
  • Mash the ripe bananas in a medium bowl until mostly smooth with a few small lumps; aim for about 1 cup of mashed banana from two bananas.
    → Bananas provide moisture, sweetness, and aroma; mashing to a smooth yet slightly rustic texture prevents large chunks that could disrupt crumb.
  • In a separate large bowl, whisk the egg with granulated sugar and light brown sugar until the mixture is smooth and pale; this aerates the batter and helps dissolve sugars for a tender crumb.
    → Properly aerated sugars integrate evenly with the liquids, yielding a lighter, more uniform texture in the finished donuts.
  • Stir in the melted and cooled unsalted butter, buttermilk, and vanilla extract into the egg-sugar mixture until completely combined; ensure the butter is cooled to avoid cooking the egg.
    → Fats and dairy provide richness and moisture, while controlled temperature prevents curdling and promotes a smooth batter.
  • Fold the banana puree into the wet mixture until just incorporated; avoid overmixing to maintain a soft, tender crumb.
    → Gentle folding preserves the delicate structure and prevents the gluten from developing too much, which can make the donuts tougher.
  • Add the dry ingredients to the wet ingredients and stir with a silicone spatula just until no flour pockets remain; stop as soon as the batter comes together.
    → Overmixing develops gluten and leads to a dense crumb; mixing until just combined yields a light, cakey texture ideal for baked donuts.
  • If using optional add-ins, toss 1/2 cup chocolate chips with 1 tablespoon flour and fold them in with any nuts or coconut after the batter is combined.
    → Dusting chips with flour prevents them from sinking and distributes pockets of chocolate or nut flavor evenly in the batter.
  • Spoon or pipe the batter into the prepared donut pan, filling each cavity about two-thirds full to allow room for a domed top.
    → Proper filling ensures uniform size and a nice rise without overflow, producing professional-looking donuts.
  • Bake in the preheated oven for 12–15 minutes, rotating the pan halfway if your oven runs unevenly; test for doneness with a toothpick—the center should have a few moist crumbs, not wet batter.
    → This timing yields a light, tender crumb; the toothpick check prevents under- or overbaking and preserves texture.
  • Cool the donuts in the pan for 5–7 minutes, then transfer to a wire rack to cool completely before glazing.
    → Resting allows the structure to set so the glaze adheres and doesn’t slide off or smear the surface.
  • Prepare the vanilla glaze by whisking 1 cup powdered sugar with 2–3 tablespoons milk and 1/2 teaspoon vanilla extract until smooth and glossy; adjust thickness by adding more sugar or milk as needed.
    → A smooth, balanced glaze provides a polished finish and enough viscosity to cling to the donuts without pooling.
  • Dip each cooled donut into the glaze, allowing the excess to drain back into the bowl before placing on a rack; wait a few minutes for the glaze to set to a glossy, even finish.
    → A proper glaze seal prevents fingerprints and ensures an attractive, professional-looking surface.

Notes

These banana bread donuts are tender, moist, and warmly cinnamon-spiced, naturally sweetened by ripe bananas and a touch of brown sugar. You can customize them with your favorite mix-ins, such as chocolate chips, chopped walnuts or shredded coconut. They freeze well and reheat beautifully for quick breakfasts or snacks. For a glossy finish, drizzle a vanilla glaze made from powdered sugar and a splash of milk over cooled donuts. To adapt for gluten-free diets, substitute an all-purpose gluten-free flour blend and ensure your leaveners are gluten-free; avoid overmixing to preserve tenderness. If you prefer dairy-free, swap buttermilk for a plant-based version and use melted coconut oil or a neutral oil in place of butter. Let the batter rest briefly if you notice it’s very thick, then bake until a toothpick comes out with a few moist crumbs for a soft, moist interior.

Tips

Tips for Banana Bread Donuts

FAQ

What are Banana Bread Donuts?

Banana Bread Donuts are baked donuts that taste like banana bread. They’re made from a fluffy banana batter, poured into a donut pan, and baked until tender. Finish them with a glaze or sprinkle for a breakfast-friendly treat.

What ingredients do I need to make Banana Bread Donuts?

Basic batter: 2 ripe bananas, 1/2 cup granulated sugar, 1/3 cup melted butter or oil, 1 large egg, 1/2 cup milk (d dairy or non-dairy), 1 teaspoon vanilla. Dry ingredients: 1 1/2 cups all-purpose flour, 1 teaspoon baking powder, 1/2 teaspoon baking soda, pinch of salt. Optional: 1/2 teaspoon cinnamon or nutmeg, and add-ins like chocolate chips or chopped walnuts.

Do I need a donut pan? Can I bake them in a muffin tin or another pan?

A donut pan makes classic donuts, but you can bake the batter in a muffin tin for muffins or in a mini bundt pan for a different shape. For muffins, bake a few minutes longer; for bundt or other pans, adjust time accordingly to avoid overbaking.

How do I make the batter?

Mash the bananas until smooth. Whisk together sugar, melted butter (or oil), egg, milk, and vanilla until well combined. Stir in the flour, baking powder, baking soda, salt, and spices just until incorporated. Fold in optional chocolate chips or nuts. Do not overmix to keep the donuts tender.

What temperature and how long do I bake Banana Bread Donuts?

Preheat to 350°F (175°C). Lightly grease the donut pan and fill each cavity about three-quarters full. Bake for 12–15 minutes, or until a toothpick inserted comes out clean. Let them rest in the pan for 5 minutes, then transfer to a rack to cool completely.

Can I fry the batter instead of baking?

Yes. For fried donuts, heat oil (vegetable or canola) to about 350°F (175°C). Pipe or spoon batter into small rounds and fry until golden, flipping once. Drain on paper towels and glaze once cooled. Note that frying adds fat and calories.

How do I glaze or frost Banana Bread Donuts?

A simple glaze works well: whisk 1 cup powdered sugar with 2–3 tablespoons milk and 1/2 teaspoon vanilla until smooth. Dip cooled donuts or drizzle glaze. For a chocolate glaze, melt 1/2 cup chocolate chips with 1 tablespoon butter and a splash of milk. Add toppings like sprinkles, chopped nuts, or cinnamon sugar if you like.

How should I store leftovers?

Store in an airtight container at room temperature for 2–3 days. They refrigerate well for up to 5 days. For longer storage, freeze individually wrapped donuts for up to 2–3 months. Thaw and rewarm if desired.

Can I customize this recipe for allergies or dietary preferences?

Yes. Use a gluten-free all-purpose flour blend in place of regular flour and a dairy-free butter or oil with non-dairy milk for dairy-free donuts. To make them vegan, replace the egg with a flax egg or applesauce. For extra moisture, you can add a splash of yogurt or sour cream.

What makes ripe bananas best for this recipe?

Overripe bananas with dark spots are sweeter and mash smoothly, which keeps the donuts moist and flavorful. If your bananas are firmer, mash well and consider adding a little extra banana puree or a small amount of applesauce to maintain moisture.

Introduction / Hook

There’s something irresistibly comforting about a simmering dish that fills the kitchen with a warm, inviting aroma and a sense that a hearty, satisfying meal is on the way. Creamy Chicken Casserole is the kind of dish that feels like a hug on a plate—silky and luxurious without being fussy, familiar without being boring. From the moment the lid lifts and steam curls into the air, you’re transported to a cozy family table where laughter echoes and the clink of cutlery signals a shared moment of nourishment. This casserole is not just food; it’s a memory-making ritual—a weeknight end to the chaos, a Sunday ritual, a make-ahead champion that still behaves beautifully when reheated. Imagine velvety richness that glides across the palate, a savory depth that lingers, and a comforting, homey aroma that wraps around you like a soft blanket. Whether you’re feeding a hungry crew after a long day, bringing a dish to a potluck, or simply craving something soothing as the weather cools, Creamy Chicken Casserole delivers a sense of fulfillment that’s both simple and deeply satisfying.

The Story Behind the Dish

Casseroles are one of the enduring heroes of home cooking—a culinary concept born from practicality, frugality, and a love of communal meals. The term itself evokes images of sturdy baking dishes, layered ingredients, and the transformative magic of a single bake turning disparate components into a cohesive, comforting whole. Creamy Chicken Casserole sits at the heart of this tradition, drawing on classic American pantry staples and the universal appeal of a creamy sauce that clings to every tender bite. The dish you’re about to read is a modern homage to those humble beginnings: a recipe that respects the old-school charm of a one-dish supper while embracing the conveniences and flavors of today. In many homes, such casseroles have become seasonal rituals—inviting gatherings on chilly nights, easy weeknight triumphs after hectic days, and nourishing leftovers that taste just as good the next day. My own memories of this classic are filled with the soft crackle of edges turning golden in the oven, the steady hum of conversation, and the unmistakable scent of herbs and simmered goodness filling the home. It’s a dish that invites you to pause, breathe in the comforting scent, and savor the moment of nourishment you’re about to share with others.

Why You’ll Love This Recipe

  • Effortless yet impressive: A single baking dish, minimal hands-on time, and a result that looks and tastes like it required more effort than it actually did.
  • Creamy, velvety comfort: A luscious sauce that coats each bite, delivering a cozy, restaurant-worthy richness without being overly heavy.
  • Family-friendly and versatile: Gentle flavors that appeal to kids and adults alike, with plenty of room for customization to suit different tastes.
  • Make-ahead and meal-prep friendly: This casserole scales up beautifully for batch cooking, potlucks, or busy weeknights when time is precious.
  • Leftovers that sing: Reheating generates a comforting, even more integrated flavor as the ingredients meld over time.
  • Customizable for occasions: From weeknights to holidays, it adapts with ease, becoming a staple dish you can rotate with seasonal produce.
  • Balanced texture: The dish offers a satisfying contrast between creamy centers and lightly crisped edges, yielding a mouthfeel that’s always engaging.
  • Versatile pairing options: Works beautifully with a simple green salad, a crusty loaf, or a bright, zippy pickle relish to cut through the richness.

Flavor Profile & Texture

At its core, Creamy Chicken Casserole is built on a foundation of comfort: a smooth, luxurious sauce that coats tender morsels and blends seamlessly with gentle aromatics. Expect a harmonious blend of savory, slightly caramelized notes, with hints of onion, garlic, and herbaceous brightness weaving through each spoonful. The sauce tends to be velvety and rich, offering a silkiness that feels indulgent without being heavy—an elegant balance that makes the dish suitable for everyday dinners and special occasions alike. The chicken—when prepared in a casserole—tends to be moist and succulent, its natural sweetness amplified by slow, forgiving heat. Vegetables, whether they are earthy mushrooms, sweet peas, or roasted peppers, offer gentle texture and color, adding pops of flavor and a natural sweetness that complements the creamy base. The overall texture is a comforting tapestry: the core is soft and yielding, the sauce provides a satin-like gloss, and any topping or crust provides a delicate contrast—crisp, golden edges that give way to the creamy interior.

The flavor journey is rounded with a whisper of herbs—thyme, parsley, perhaps a hint of nutmeg or black pepper—that elevate the dish without shouting. There’s a subtle umami depth that lingers on the palate, often driven by slow-simmered components in the sauce and the natural savoriness of the chicken. If you’re fortunate enough to enjoy a slight browning on the surface, you’ll experience a gentle nutty aroma that adds character and a sense of home-cooked mastery. The interplay of salt and cream creates a balanced savory profile that feels both comforting and refined. Whether you serve it to a family who adores classic flavors or to guests who appreciate a timeless, soothing entrée, the flavor profile of Creamy Chicken Casserole tends to win smiles and quiet compliments alike.

Occasions & Pairings

This dish shines in a range of settings, from quick weeknights to larger weekend gatherings. It’s ideal for chilly weather when you crave heartwarming nourishment, yet it’s equally at home on a table during a casual family dinner or a friendly get-together. Its forgiving nature makes it a dependable choice for potlucks, church suppers, or school fundraisers, where a single dish can feed a crowd with dignity and comfort. If you’re cooking for a crowd, you’ll appreciate how well it scales and still tastes cohesive and satisfying. For lighter nights, it can be paired with a crisp salad and a bright vinaigrette to cut through the richness; for more indulgent occasions, a simple side of garlicky bread or a tangy pickled vegetable can provide that needed contrast to the creamy core.

Suggested pairings to consider, depending on the mood and season:

  • Salads: A lemon-dressed mixed greens salad, or a kale and apple salad for a touch of brightness.
  • Crusty bread: A crusty baguette or handwritten loaf to mop up every last velvety drop.
  • Side vegetables: Steamed green beans with almonds, roasted Brussels sprouts, or a light cucumber-tan vinaigrette slaw.
  • Drinks: A glass of chilled white wine with good acidity (like a Sauvignon Blanc) or a light sparkling beverage for a festive note.
  • Desserts: A citrusy finale, such as lemon bars or a yogurt-poached fruit dessert, to cleanse the palate after such a comforting main.

Tips, Variations & Substitutions

One of the wonderful aspects of a Creamy Chicken Casserole is how adaptable it can be. Here are ideas to tailor the dish to your pantry, dietary needs, or personal preferences, while preserving the essence of comfort and ease that makes it so appealing.

Meat and protein variations

  • Swap chicken for turkey or a mix of white and dark meat for different flavor dynamics.
  • For a pescatarian angle, consider a white fish or salmon folded into a creamy base with vegetables, keeping in mind cooking times will vary.

Dairy and dairy-free options

  • Use a dairy-free creamer or coconut milk-based cream for a vegan or dairy-free version; pair with a gluten-free starch to maintain creaminess.
  • Try Greek yogurt or plant-based yogurt for tang and creaminess—add gradually to achieve the desired thickness.

Gluten considerations

  • If gluten is a concern, choose gluten-free pasta or rice as the base, and ensure any thickeners used are gluten-free (such as cornstarch or arrowroot).
  • For a gluten-free topping, sprinkle with breadcrumbs made from gluten-free bread or crushed crackers that suit your diet.

Herbs, spices & brightness

  • Experiment with rosemary, tarragon, chives, or sage to shift the flavor profile.
  • Finish with a squeeze of lemon juice or a light zest to add a refreshing lift that cuts through the richness.

Texture twists

  • Add a topping with a bit of crunch, such as crushed crackers, toasted nuts, or a breadcrumb herb blend, baked until golden.
  • Incorporate sautéed mushrooms or roasted vegetables for added depth and a heartier bite.

Make-ahead and storage-friendly variations

  • Assemble the casserole the day before, refrigerate, and bake when ready—this develops flavors and saves time.
  • Portion into meal-sized servings for quick lunches or dinners; freeze unbaked portions for later use, then bake directly from frozen with extra baking time.

Storage & Make-Ahead Ideas

One of the greatest advantages of Creamy Chicken Casserole is its resilience and flexibility when it comes to storage and planning. You can prepare this dish ahead of time, store it safely, and reheat with minimal loss of texture or flavor. If you’re baking the casserole fresh, you’ll enjoy a straightforward process that rewards you with a comforting, ready-to-serve centerpiece. When it comes to leftovers, the dish generally stores well in the refrigerator for several days, maintaining much of its creamy appeal. For longer-term storage, you can portion it into individual containers and freeze; the sauce tends to chill into a beautifully cohesive mass that reheats smoothly in the oven or microwave, depending on your preference and schedule.

When reheating, you’ll want to approach it with patience. Reheat slowly to preserve moisture and prevent the sauce from separating. A gentle reheat in the oven—covered until warmed through, then uncovered for a few minutes to restore the top’s texture—helps maintain the integrity of the creaminess and keep the chicken tender. If you’re reheating in a microwave, consider covering the dish and reheating in short intervals, stirring gently between cycles to promote even temperature and prevent hotspots. For make-ahead planning, consider assembling portions that can be peeled apart and reheated individually for quick dinners or lunches, ensuring you always have a comforting, homemade option ready when life gets busy.

Fun Facts & Trivia (Optional)

  • casseroles have deep roots in 19th and early 20th-century home cooking, designed to be a practical way to feed a family using affordable ingredients.
  • The word “casserole” comes from the French word for a large, deep dish or the dish itself, which traditionally could be used both for cooking and serving.
  • In some regions, the term hot dish is used interchangeably with casserole, particularly in parts of the Midwest where such one-dish meals are a staple for gatherings and block parties.
  • Creamy sauces in casseroles often rely on a gentle emulsification of dairy and starch, which gives that signature glossy, clingy texture that many find irresistible.
  • The popularity of casseroles echoes the social aspect of cooking—food prepared in a single dish that fosters sharing, conversation, and a sense of togetherness.
  • Variations of chicken casseroles can be found in many cuisines worldwide, each with its own regional twist on herbs, vegetables, and creamy elements.
  • The aroma of a baking casserole is scientifically satisfying: Maillard reactions create those enticing nutty notes on the surface, while the steam carries a chorus of comforting scents through the home.

Whether you’re drawn to the nostalgic charm, the practical ease, or the simply irresistible flavor, Creamy Chicken Casserole offers a delicious invitation to slow down, savor the moment, and share something nourishing with the people you love. Each bite is a reminder that the best meals aren’t just about technique—they’re about warmth, memory, and the small rituals that turn everyday dinners into something a little more special.

Ingredients

Creamy Base

  • 2 cups cooked shredded chicken (from about 1 lb raw chicken breasts)
    → The protein base of the casserole. Use cooked chicken and shred into bite-size pieces. If you are starting with raw chicken, bake, poach, or rotisserie-chicken; cool and shred. White meat yields a lighter dish; dark meat adds richness. Mixing is fine.
  • 1 1/2 cups heavy cream (or substitute half-and-half for a lighter version)
    → Provides the luscious, silky body to the sauce. Warm the cream with the cheese to prevent separation; if using half-and-half, sauce will be lighter and may benefit from a starch slurry to thicken.
  • 8 oz cream cheese, softened to room temperature
    → Enriches the sauce with a creamy tang and helps thicken; soften and whisk until smooth. If the cream cheese is firm, microwave in short bursts or let it soften longer to avoid lumps.
  • 1 cup chicken broth (low-sodium)
    → Adds moisture and helps the sauce coat the pasta and vegetables. Use low-sodium to control salt; warm before adding to keep the sauce smooth and homogeneous.
  • 2 cloves garlic, minced
    → Aromatic base; fresh garlic releases the strongest flavor. Sauté with onion until fragrant, blooming the aromatics without burning.
  • 1 small onion, finely chopped
    → Provides sweetness and depth to the sauce. Sauté in butter until translucent; avoid over-browning to keep the sauce light. If short on time, substitute with 1/2 teaspoon onion powder.
  • 2 tablespoons unsalted butter
    → Fat for sautéing the aromatics and enriching the sauce. If you prefer, substitute with 1 tablespoon olive oil plus 1 tablespoon butter; do not let butter burn.
  • 1/2 teaspoon kosher salt
    → Balances flavors across dairy, chicken, and vegetables. Start conservative if using salted broth or cheese; adjust after combining everything.
  • 1/4 teaspoon freshly ground black pepper
    → Adds gentle heat and depth, helping to lift the richness of the dairy. Freshly ground pepper yields the best aroma and brightness.

Pasta and Veggies

  • 12 ounces egg noodles (or small pasta) cooked until al dente and drained
    → The pasta provides structure and soaks up some of the creamy sauce. Cooking al dente prevents mushiness after baking; for gluten-free, use GF pasta and follow package directions closely.
  • 2 cups broccoli florets, fresh or frozen (blanched or lightly steamed until just tender)
    → Adds color, fiber, and a crisp-tresh contrast to the creamy filling. If using frozen, thaw and drain well; fresh broccoli should be blanched briefly to maintain vibrant color.
  • 1 cup frozen peas, thawed and drained well
    → Provides a sweet pop of color and aroma. Thaw completely and pat dry to reduce extra moisture which can thin the sauce.

Cheese and Seasonings

  • 1 cup shredded mozzarella cheese
    → Melts into the sauce for a creamy, stretchy texture. For deeper flavor, use a mix of mozzarella with cheddar. Opt for full-fat mozzarella for the best melt.
  • 1/2 cup grated parmesan cheese
    → Adds sharp, nutty depth and helps thicken the sauce slightly. Freshly grated parmesan is preferred for maximum flavor and a smoother melt.
  • 1/2 teaspoon dried thyme (or 1 teaspoon fresh thyme, chopped)
    → Subtle earthy herb that complements dairy and chicken without overpowering. If using fresh thyme, add early in the cooking so its aroma infuses the sauce; dried thyme can be added with the onions.
  • 1/4 teaspoon smoked paprika (optional)
    → Adds a gentle smoky warmth and a touch of color. Use if you want a deeper, savory profile; otherwise omit for a purer white sauce.
  • 1/4 teaspoon ground nutmeg (optional)
    → A pinch of nutmeg heightens the creaminess and adds warmth. Use sparingly; if you don’t have it, you can omit without significantly changing the dish.

Toppings and Garnish

  • 1/2 cup breadcrumbs (panko or regular) for topping (optional)
    → Creates a crunchy, golden crust on top. If avoiding gluten, use gluten-free breadcrumbs. You can also mix the crumbs with the melted butter before sprinkling on top for even browning.
  • 2 tablespoons melted butter (for topping)
    → Binds the crumbs and helps them crisp and color nicely in the oven. If dairy-free, substitute with olive oil, though browning may differ slightly.
  • Fresh parsley or chives, chopped for garnish (optional)
    → Adds a fresh green note and polish to the finished dish. Sprinkle after baking; if using dried parsley, use about 1 teaspoon in place of fresh for garnish.

Instructions

  • Preheat your oven to 350°F (175°C) and grease a 9×13-inch baking dish or line it with parchment for easy removal.
    → A properly prepared pan prevents sticking and ensures clean slices after baking, while parchment makes lifting the casserole out effortless.
  • Melt 2 tablespoons unsalted butter in a large, heavy skillet over medium heat and swirl to coat the bottom; add 1 small onion, finely chopped, and sauté until translucent and just starting to soften, about 3–4 minutes. Then add 2 cloves minced garlic and cook until fragrant, 30–60 seconds, stirring to avoid browning.
    → Sautéing aromatics unlocks sweetness in the onion and bloom the garlic’s aroma without burning, which would impart bitterness.
  • Reduce heat to medium-low and whisk in 8 ounces of softened cream cheese until completely smooth and free of lumps, about 1–2 minutes. Gradually whisk in 1½ cups heavy cream (or substitute half-and-half for a lighter version) and 1 cup low-sodium chicken broth, bringing the mixture to a gentle simmer while whisking constantly to maintain a cohesive emulsion. If using half-and-half, consider a light starch slurry (1 tablespoon cornstarch whisked with 2 tablespoons cold water) added now to ensure adequate thickening as it simmers.
    → Cream cheese must melt fully to avoid graininess, and gentle simmer helps the sauce thicken evenly without breaking.
  • Season the creamy base with ½ teaspoon kosher salt and ¼ teaspoon freshly ground black pepper; stir in ½ teaspoon dried thyme (or 1 teaspoon fresh thyme, chopped) and ¼ teaspoon smoked paprika (optional) and ¼ teaspoon nutmeg (optional). Simmer 1–2 minutes to let the flavors meld.
    → Seasoning at this stage distributes salt evenly through the sauce and integrates the herbs for a cohesive, aromatic profile.
  • Fold in 2 cups cooked shredded chicken, ensuring each piece is coated with the sauce; simmer 1–2 minutes so the chicken re-warms evenly and infuses the sauce with moisture.
    → Coating the chicken ensures every bite is creamy and flavorful rather than dry, and warming it prevents cool spots in the finished dish.
  • Meanwhile, cook 12 ounces egg noodles in salted water until al dente, then drain thoroughly and lightly toss with a small amount of butter or oil to prevent sticking.
    → Al dente noodles hold their structure in the bake and resist turning mushy as the sauce thickens around them.
  • Blanch 2 cups broccoli florets in boiling salted water for 1½–2 minutes until vibrant but still crisp, then drain and cool briefly under cold water to halt cooking; pat dry to remove excess moisture.
    → Bright green color and crisp-tender texture contrast with the creamy sauce, and drying prevents extra moisture from thinning the bake.
  • Thaw and drain 1 cup frozen peas completely, squeezing out as much moisture as possible to avoid watering down the sauce.
    → Dry peas distribute evenly in the filling and maintain a distinct sweetness and color without adding excess liquid.
  • In a large mixing bowl, combine the cooked noodles, creamy chicken mixture, broccoli, and peas; fold gently to distribute evenly without mashing the pasta, then adjust thickening or seasoning with a splash more broth or salt if needed.
    → Even distribution ensures every bite has pasta, vegetables, and chicken with consistent seasoning and creamy sauce.
  • Spoon the noodle-vegetable-chicken mixture into the prepared baking dish and spread into an even layer; sprinkle 1 cup shredded mozzarella cheese over the top, followed by ½ cup grated parmesan for depth and melt.
    → Layering cheeses creates a glossy, stretchy top and a nutty aftertaste, while also helping to thicken the surface during baking.
  • Prepare the topping by combining ½ cup breadcrumbs with 2 tablespoons melted butter; stir to moisten evenly and sprinkle over the cheese layer for a crisp, golden crust (you can use gluten-free breadcrumbs if needed). If you prefer no topping, simply omit.
    → The buttered crumbs bake into a crunchy crust that contrasts with the creamy center, enhancing texture and appearance.
  • If garnish is desired, sprinkle chopped fresh parsley or chives over the top just before serving for a bright, herbal finish.
    → Fresh herbs add color and a clean, aromatic finish that cuts through the richness of the dish.
  • Bake uncovered in the preheated oven at 350°F (175°C) for 25–35 minutes, or until the sauce is bubbling around the edges and the top is golden brown; if the topping browns too quickly, tent loosely with foil and continue baking. Allow the casserole to rest 5–10 minutes before slicing to let the sauce set.
    → Resting helps the sauce rebind and makes clean slices possible; baking until bubbling ensures the flavors meld and the cheese fully melts for a cohesive final texture.

Notes

This creamy chicken casserole is a comforting, crowd-pleasing dish built on a luscious sauce of heavy cream, cream cheese, and chicken broth that envelopes shredded chicken, broccoli, and peas tossed with al dente pasta; start by preheating your oven to 375°F (190°C) and sautéing minced garlic and onion in butter until translucent, then whisk the cream cheese into the warm cream and broth to form a smooth base, season with kosher salt, freshly ground black pepper, dried thyme, and a hint of smoked paprika or nutmeg if you like; if you’re starting with raw chicken, bake, poach, or use a rotisserie chicken, cool and shred before adding; fold in the cooked chicken, broccoli, and peas, then stir in the cooked noodles and transfer to a greased baking dish; if the sauce seems too thick, loosen with a bit of chicken broth or milk; sprinkle with mozzarella cheese and grated parmesan on top, and if you want a crisp topping, mix breadcrumbs with melted butter and scatter over the cheese before baking; bake until the sauce is bubbling and the top is golden, about 25–35 minutes; for a lighter version, substitute half-and-half for heavy cream and/or use part-skim cheese, or omit the breadcrumbs; for dairy-free or gluten-free diets, use a dairy-free creamer and cream cheese, gluten-free pasta, and gluten-free breadcrumbs; make-ahead tip: assemble (without baking) and refrigerate up to 24 hours before baking, or freeze the unbaked casserole for longer storage; leftovers reheat well in the oven at 350°F until heated through, or in the microwave in short bursts; serving ideas: pair with a simple green salad or roasted vegetables to balance richness, and finish with a squeeze of lemon juice or fresh parsley for brightness; always taste and adjust the seasoning at the end, since cheeses and broths vary in saltiness and you may need a pinch more salt or a splash of broth to reach the perfect consistency.

Tips

Tips for Creamy Chicken Casserole

  • Use properly cooked chicken: If starting with raw chicken, bake, poach, or use a rotisserie bird. Cool completely before shredding for even texture and to prevent the sauce from breaking.
  • Softened cream cheese is key: Let the cream cheese come to room temperature or gently warm it in short bursts so it whisks in smoothly without lumps.
  • Warm dairy to prevent separation: Gently warm heavy cream (or half-and-half) before adding to the heat to help the sauce emulsify with the cheese and broth. Don’t boil the dairy once it’s blended.
  • Milk substitutes and thickening: If you’re using half-and-half, the sauce will be lighter. Consider a small starch slurry (trace amounts of cornstarch whisked with cold water) if you want extra body.
  • Temper the dairy with aromatics: Sauté onions and garlic in butter until fragrant and translucent, then gradually whisk in the warm dairy to avoid curdling.
  • Avoid over-browning aromatics: Cook onions until translucent and garlic just until fragrant; over-browning can add bitterness to the creamy base.
  • Butter and oil balance: Use unsalted butter for the base. If you replace part of the butter with olive oil, add it after sautéing to prevent smoking and preserve flavor.
  • Season gradually: Start with a modest salt and pepper, then taste after mixing in all components—the cheese and broth will add salt. Remember low-sodium broth helps control final saltiness.
  • Perfect pasta texture: Cook egg noodles or small pasta to al dente. They’ll continue cooking in the oven, so undercook them slightly to avoid mushiness post-bake. Reserve a little pasta water to loosen the sauce if needed.
  • Vegetable prep for color and texture: Blanch broccoli briefly to keep a vibrant color and snap. Thaw and drain frozen peas completely to avoid extra moisture in the sauce.
  • Cheese layering for the best melt: Use mozzarella for a creamy, stretchy texture and sprinkle parmesan for sharpness and extra body. Freshly grate the parmesan for best flavor.
  • Herbs and spice balance: Add dried thyme with the onions; if using fresh thyme, add early so its aroma infuses. Use smoked paprika and nutmeg sparingly—these are optional and should complement, not overpower, the base.
  • Breadcrumb topping that browns well: Mix breadcrumbs with melted butter for a crisp, golden crust. Gluten-free breadcrumbs work if you need a gluten-free version; you can also mix in a little grated cheese for extra flavor.
  • Even topping browning: Bake casserole uncovered or loosely covered to allow browning. If the top browns too quickly, tent with foil for the remainder of the bake.
  • Rest before serving: Let the casserole rest 5–10 minutes after baking to help the sauce thicken and settle for clean serving.
  • Make-ahead and storage: The casserole can be assembled and refrigerated for up to 24 hours before baking. It also freezes well—freeze unbaked in a covered dish, then bake from frozen, adding 25–35 minutes to the bake time.
  • Variations for dietary needs: To make it lighter, swap half of the heavy cream for milk or use more broth and less cheese. For a gluten-free version, use gluten-free noodles and gluten-free breadcrumbs for the topping (or skip breadcrumbs entirely).

FAQ

What is Creamy Chicken Casserole?

A comforting baked dish featuring tender chicken in a rich, creamy sauce, often with cheese and vegetables, and topped with crunchy crumbs. It’s typically served over pasta, rice, or potatoes and baked until bubbly and golden.

What are the main ingredients?

Common ingredients include cooked chicken (shredded or diced), a creamy base (cream of chicken soup or a homemade cream sauce), sour cream or cream cheese, shredded cheese, onions and garlic, vegetables (such as broccoli, mushrooms, or peas), and a starch like pasta, rice, or potatoes. A topping of breadcrumbs or crushed crackers adds crunch.

Can I customize with different proteins or vegetables?

Yes. Substitute with turkey or ham, or add crispy bacon for extra flavor. Veggies like broccoli, corn, peas, mushrooms, or bell peppers work well. You can also skip the starch or swap for mashed potatoes for a different texture.

Can I make this ahead?

Yes. You can assemble the casserole, cover it, and refrigerate for up to 24 hours before baking. Bake at 350°F (175°C) until heated through and bubbly (about 30–40 minutes). If freezing, assemble uncooked and freeze for up to 2–3 months; thaw in the fridge before baking and increase the bake time slightly.

How do I bake it?

Preheat the oven to 350°F (175°C). Mix all ingredients except the topping, transfer to a baking dish, sprinkle with the topping, and bake for 30–40 minutes, or until the center is hot (165°F/74°C) and the top is golden and bubbly. Let it rest for a few minutes before serving.

Is this recipe gluten-free?

It can be gluten-free by using gluten-free cream soups or a homemade gluten-free sauce, and choosing gluten-free pasta or a different starch. Check labels on any packaged ingredients to ensure they’re certified gluten-free.

Can I make it dairy-free or lower in fat?

Yes. For dairy-free, use dairy-free cream soup, sour cream or yogurt alternatives, and dairy-free cheese. Use olive oil or a light oil instead of butter. For a lighter version, reduce cheese and cream amounts and use low-fat options, though this may affect creaminess.

What are good add-ins or variations?

Try adding sautéed garlic, onions, spinach, or chopped herbs (parsley, thyme). For texture, top with crushed crackers, breadcrumbs, or crushed fried onions. You can also swap in different cheeses (cheddar, mozzarella, Parmesan) for varying flavors.

How long do leftovers keep and how should I store them?

Leftovers refrigerate well for 3–4 days in an airtight container. Reheat in the oven at 325–350°F (165–175°C) until hot or use a microwave in 30–60 second bursts, stirring between intervals. You can also freeze baked leftovers for up to 2 months.

What serving suggestions pair well with Creamy Chicken Casserole?

Serve with a light green salad, steamed vegetables (like broccoli or green beans), and crusty bread or garlic bread. A simple side of fruit or a tangy pickle can balance the richness.