Author

Ocean Nightleaf

Browsing

Introduction / Hook

There’s something irresistible about a dish that smells like a warm welcome. Imagine a bubbling casserole that turns a simple weeknight into a Sunday feast, where the kitchen glows with the glow of melted cheese, roasted aromatics, and the comforting sigh of a family gathering. Paula Deen’s Amazing Chicken Casserole (in the spirit of Southern hospitality and homey cookery) invites you to slow down, lift the lid, and let the steam carry you to a table where stories mingle with the scent of cream, garlic, and sun-kissed poultry. This isn’t just a recipe; it’s a memory in the making — a dish that travels easily from a busy weekday to a celebratory weekend, always with that signature Southern charm that feels like a hug from your grandmother, only with the ease of modern home cooking. The first bite releases a chorus: tender chicken that yieldingly parts with a gentle pull, a lush, velvety sauce that clings to every crumb of soft, fragrant noodles or rice, and a golden, toasty crown that crackles with every forkful. It’s the kind of dish you serve with a crusty loaf or a side of bright greens, and you’ll hear the same question from friends and family: “What did you put in this?” The answer, tucked into every bite, is simple generosity and timeless comfort — the core of Southern home cooking made accessible and incredibly satisfying.

The Story Behind the Dish

Southern cooking has a way of turning everyday ingredients into something memorable. Casseroles have long been the backbone of homes across the American South and Midwest, where the practical beauty of one-pan meals meets the heart’s desire for warmth, replenishment, and togetherness. Paula Deen, a beloved name in this culinary tradition, popularized a brand of soulful, family-friendly dishes that celebrate uncomplicated, deeply satisfying flavors. While every kitchen has its own version of “the” chicken casserole, the allure of a dish carrying the spirit of Paula Deen lies in its unapologetic richness and its ability to be both indulgent and friendly to a busy home cook. The story of this casserole echoes those values: a humbly stocked pantry, a pot that simmers until the flavors mingle and mellow, and a final flourish that invites warmth and comfort to fill the room. This is a dish that thrives on memory and texture—creamy, cozy, and just a little indulgent—reminding us that good food is an act of care, a way to say “you’re welcome at my table.”

In many Southern kitchens, casseroles came to life as a practical answer to feeding a crowd with minimal effort. Leftover roast chicken, a handful of pantry staples, and a few pantry-friendly ingredients could be coaxed into something substantial enough to feed a family and generous enough to share with neighbors. The beauty of Paula Deen-inspired chicken casserole is that it transcends regional boundaries. It borrows from Southern richness—creaminess, savory seasonings, a buttery finish—while inviting you to adapt to your own pantry, your dietary needs, and your family’s tastes. So while the title nods to a famous name, this dish is really a celebration of the universal joy of gathering around a casserole that feels like a warm invitation to stay, savor, and celebrate togetherness.

As you read through the sections that follow, you’ll notice the thread that runs through every step: balance. Balance between hearty protein and light freshness, between creamy decadence and bright acidity, between a soft, giving interior and a crisp, crunchy topping. It’s a careful dance that yields a dish both comforting and deeply satisfying, without feeling heavy. That balance is what makes this casserole versatile enough to serve at a family weeknight yet robust enough to star at a Sunday lunch with friends. And because it embodies the spirit of Southern hospitality, it’s a dish you’ll want to make again and again, tweaking ever so slightly to suit the season, your mood, or the guests you’re hoping to impress.

The Why Behind the Dish

Sometimes a recipe becomes beloved not just because of how it tastes, but because of what it represents. This chicken casserole captures a handful of timeless truths: good food is best when it’s shared, simple ingredients can become something special with a little technique, and comfort food can be a meaningful bridge between generations. The dish pays homage to the idea that a well-made casserole has a certain generosity baked into it: a single pan that feeds a table full of people and leaves everyone feeling deeply satisfied. It’s also incredibly forgiving—perfect for cooks who want a grand result without a long list of exotic ingredients or time-consuming steps. The creamy sauce, the tender chicken, the gentle seasonings, and the toasty top all come together to wine a story of home, belonging, and the old-fashioned pleasure of savoring something hearty that tastes like a hug in edible form. This is a dish that doesn’t demand perfection; it rewards warmth, patience, and a balanced palate, inviting everyone at the table to lean in and savor every moment.

Why You’ll Love This Recipe

Immediate Appeal

From the first whiff as it bakes to the last bite that lingers on your tongue, this casserole delivers instant comfort. The aroma alone is enough to pull people to the kitchen, eager to know what’s for dinner and who will claim the biggest second helping. It’s a dish that earns its place on the table through scent, texture, and a satisfying richness that feels like a warm secret being shared.

Ease & Accessibility

The beauty of a well-executed casserole lies in its practicality. You can assemble it with pantry staples or ingredients you already have on hand, and you don’t need to be a culinary virtuoso to achieve a great result. The technique is forgiving: a gentle simmer, a patient bake, and a finish that can be adapted to your cookware and schedule. It’s an ideal choice for cooks juggling work, kids, and social calendars, offering a meal that feels special without demanding hours in the kitchen.

Family-Friendly Comfort

Children and adults alike gravitate toward casseroles that deliver familiar flavors with a creamy, cozy texture. This dish hits that sweet spot: tender chicken with a creamy, savory sauce, a comforting aroma, and a golden surface that adds just the right crunch. It’s the kind of recipe that becomes a family favorite, one you’ll be asked to repeat again and again with perhaps a few personal twists along the way.

Adaptability & Customization

While the base concept remains deeply comforting, you can tailor the casserole to suit dietary needs, seasonal produce, or cultural preferences. The core idea—protein in a creamy, savory envelope with a crisp top—lends itself to countless variations, from lighter, dairy-conscious versions to robust, cheese-forward takes. The dish invites you to experiment with herbs, vegetables, and toppings, all while preserving the essence of homey Southern charm.

Make-Ahead & Leftovers Friendly

This casserole is well-suited for meal planning. You can prepare it ahead, refrigerate for a day or two, and bake when you’re ready. Leftovers reheat beautifully, maintaining tenderness and the appeal of the sauce. It’s the pinnacle of a “cook once, enjoy for days” meal, delivering value without compromising on taste or satisfaction.

Flavor Profile & Texture

Think of a symphony where each instrument has its moment. The base is a creamy, velvety sauce that coats each piece of chicken with a luxurious embrace. The chicken itself is tender and succulent, its natural juiciness amplified by gentle simmering and careful seasoning. The taste profile leans toward richness, but it’s grounded by savory notes, subtle aromatics, and a touch of mild sweetness that rounds out the finish. The sauce often contains elements like sautéed onion, garlic, and a hint of stock or broth, which builds a depth that’s both comforting and robust. The surface offers a pleasing contrast: a light, crispy crust or topping that crackles gently, providing texture that complements the soft interior. The interplay between creamy, soft interior and the crisp topping is where the dish finds its most satisfying texture, a mouthfeel that remains indulgent yet balanced.

In terms of flavor cues, expect cozy dairy warmth, a gentle savoriness, and an aromatic bouquet that might include garlic, onion, herbs like thyme or parsley, and a whisper of pepper. If you imagine the dish as a story, the chicken is the lead actor—tender and versatile—while the sauce is the narrator, providing context, warmth, and a slightly lush texture. The topping acts as a chorus, delivering a toasty finish that adds sparkle and a hint of crunch to the entire experience. The result is a well-rounded, comforting plate that feels both familiar and wonderfully satisfying, a true celebration of home cooking that’s easy to share and easy to love.

Occasions & Pairings

This chicken casserole shines in many settings, making it a versatile centerpiece for your week, weekend, or special occasions. It’s especially well-suited for gatherings where guests arrive with appetites and appetites linger after a long day. Here are a few guidance notes on when to serve and what to pair with it to elevate the whole experience.

  • Weeknight Comfort: A satisfying, single-pan meal that can be ready after a busy day. Pair with a bright green salad or steamed vegetables to balance the richness.
  • Family Sundays: Build a cozy table with crusty bread or warm biscuits, a side of roasted vegetables, and a simple dessert to round out the homey charm.
  • Potlucks & Gatherings: A crowd-pleasing dish that travels well and reheats nicely. Bring a baked casserole to share and watch it disappear quickly.
  • Holiday Tables: A comforting, familiar centerpiece that invites mingling and conversation, offering a sense of tradition amid festive dishes.

To complete the plate, consider pairings that balance the richness of the casserole. Crisp, lightly dressed greens provide a refreshing counterpoint. A side of buttery cornbread or a soft, fluffy biscuit makes the meal feel quintessentially Southern. For drinks, a cool, lightly sweetened iced tea or a sparkling lemon water can cut through the creaminess. If you’re indulging, a glass of Chardonnay or a light white wine can complement the dish without overpowering its delicate flavors. For dessert, something simple and comforting—like a classic peach cobbler, a vanilla pudding, or a citrus-forward fruit compote—will echo the meal’s warm, homey vibe without stealing the show from the main course.

Tips, Variations & Substitutions

One of the joys of a casserole is its adaptability. Here are thoughtful ways to customize, lighten, or regionalize this dish while keeping the essence intact.

  • Healthier Angles: Use a lighter cream alternative (such as a lower-fat milk plus a small amount of cornstarch slurry to thicken) or a portion of Greek yogurt stirred in at the end for tang and richness without overpowering the dish. Skip butter in the topping or replace a portion of cheese with nutritional yeast for a cheesy-but-lighter finish.
  • Dietary-Diverse Variations: For a dairy-free version, swap in a plant-based milk with a dairy-free butter or oil, and use a dairy-free cheese alternative or omit cheese from the topping. For gluten-free needs, opt for gluten-free noodles or a gluten-free crumb topping. If you’re avoiding meat, a hearty mushroom or chickpea-based casserole can capture the same creamy, comforting vibe with plant-forward protein.
  • Protein Substitutions: Ground turkey or leftover roasted chicken can stand in for fresh chicken. For a non-chicken option, firm tofu or tempeh can be marinated in mild herbs to mimic gentle flavors while preserving a casserole’s comforting texture.
  • Flavor Variations: Add a touch of herbs like thyme, rosemary, or a pinch of smoked paprika to deepen the aroma. A splash of vermouth or white wine in the sauce (if you use it) can lend a subtle lift. For a southern twist, a whisper of hot sauce or a spoon of Dijon mustard can brighten the ensemble without turning it spicy.
  • Texture Tweaks: If you like more crunch, finish with a higher proportion of breadcrumbs or crushed crackers mixed with a little melted butter. For extra creaminess, double down on the sauce base or swirl in a touch of cream cheese toward the end of cooking.
  • Make-Ahead Tactics: Assemble the casserole up to the baking stage and refrigerate overnight. Bake it longer by 15–20 minutes if it’s cold from the fridge, ensuring the center heats through and the top becomes golden.

Storage & Make-Ahead Ideas

This dish lends itself to planning ahead, which makes it a favorite for families and busy households. Here are practical guidelines to keep flavors bright and textures intact when you’re not serving it immediately.

  • Refrigeration: Leftovers keep well in an airtight container for 3–4 days in the refrigerator. Reheat gently in the oven at a moderate temperature, covered, to avoid drying out the top. If you’re using a microwave, heat in short bursts to preserve the texture and moisture.
  • Freezing: The assembled casserole freezes beautifully. Wrap tightly and freeze for up to 2–3 months. Thaw in the refrigerator overnight before baking. If the topping seems a little pale on the first bake, finish under a broiler or a high-heat oven for a few minutes to re-crisp it.
  • Make-Ahead Strategy: Prepare the sauce and chicken up to the point of combining with the starch (no baking). Store the components separately and assemble just before baking. This approach keeps textures at their best and lets you pull together a comforting meal with minimal effort when time is tight.

Fun Facts & Trivia (Optional)

Delightful tidbits that celebrate the culture surrounding casseroles, Southern hospitality, and the kind of kitchen wisdom that gets handed down through generations:

  • The casserole tradition has roots in frugal, practical cooking—turning leftovers and pantry staples into a satisfying, shareable meal that suits a large family or a crowd of neighbors.
  • In the South, casseroles often function as the centerpiece for comfort during life’s milestones: birthdays, anniversaries, illnesses, and recouping after a long day. They symbolize nourishment, care, and community.
  • Cheesy, creamy sauces paired with a golden crust become a signature of many classic casseroles, offering a mouthfeel that feels indulgent while still being welcoming for a wide audience, including kids.
  • Paula Deen’s cooking style—renowned for its generous textures and bold flavors—has inspired countless home cooks to embrace comforting, family-friendly meals that are both straightforward and deeply satisfying.
  • The “amazing” in the dish’s name nods to the idea that sometimes the simplest combination of chicken, creaminess, and a crisp top can feel like a culinary triumph, especially when shared with people you love.

In the end, Paula Deen’s Amazing Chicken Casserole is more than a recipe title. It’s a celebration of home cooking that invites you to gather, nourish, and delight those around you with a dish that’s comforting without being cloying, indulgent without being complicated, and deeply satisfying with every single bite. Whether you’re feeding a bustling family or a small circle of close friends, this casserole reminds us that the best meals are the ones that make us feel at home—the moment you lift the spoon and savor the way the flavors meet, melt, and linger, like a favorite memory returning to life at the dinner table. Enjoy the process, savor the aroma, and cherish the moment when everyone leans in for that first, inevitable, “This is delicious.”

Ingredients

Chicken Base

    – 3 cups cooked chicken, shredded
    → The chicken forms the protein-rich foundation of the casserole. Shred the meat into bite-sized pieces so they distribute evenly and soak up the creamy sauce as it bakes. Use leftovers or poach fresh to keep the meat tender and juicy.

    – 2 cups cooked rice (or 8 oz egg noodles), prepared
    → This serves as the starch base that soaks up the creamy mixture. Choose rice for a gluten-free, heartier result, or noodles for a classic casserole texture. Ensure they’re fully cooked and cooled slightly to prevent clumping when mixing with the hot sauce.

Creamy Sauce Mixture

    – 1 can (10.5 oz) condensed cream of chicken soup
    → Provides the thick, creamy backbone of the sauce and binds the casserole together. Do not thin with water; use the condensed soup as-is to maintain richness and body.

    – 1 can (10.5 oz) condensed cream of mushroom soup
    → Adds depth and a gentle earthiness that complements chicken. Like the chicken soup, use directly from the can to help achieve a smooth, cohesive sauce base.

    – 1 cup sour cream
    → Contributes tang, creaminess, and helps emulsify the mixture so it stays moist while baking. Let the sour cream come to room temperature before mixing to avoid curdling; whisk gently to blend with the soups.

    – 1/2 cup milk
    → Lightens the mixture just enough for easy spreading and to achieve a silkier sauce. Use whole or 2% for best texture; adjust to prefer a thicker or looser consistency.

Aromatics and Veggies

    – 1/2 cup diced onion
    → Adds sweet, savory depth. Sauté in a little butter until translucent to release their flavor before incorporating into the sauce. Finely dice so they blend smoothly without noticeable chunks in the final dish.

    – 2 cloves garlic, minced
    → Infuses the casserole with aromatic warmth. Mince finely or crush and add after the onions to prevent browning; sauté briefly with the onions for maximum aroma.

    – 1 cup sliced mushrooms (optional)
    → Contribute earthy savoriness and meaty texture. Sauté mushrooms in butter until their moisture evaporates before folding into the mix to avoid extra moisture in the casserole.

    – 1 cup frozen peas (optional)
    → Add color and a touch of sweetness. Thaw and pat dry to remove excess water before adding to maintain a creamy consistency.

    – 2 tablespoons butter
    → Used for sautéing the onion, garlic, and mushrooms, enriching the flavor. Do not burn; melt gently and cook until onions are translucent for best flavor release.

Cheese and Seasonings

    – 1 cup shredded cheddar cheese
    → Adds creamy, sharp cheese flavor that marries with the sauce. Stir half into the sauce for a richer texture and reserve the rest for topping if desired. Use sharp cheddar for more pronounced cheesiness.

    – 1/2 teaspoon salt
    → Enhances overall flavor and balances the richness of the dairy. Start with this amount and adjust after tasting, especially if your soups are salted.

    – 1/4 teaspoon black pepper
    → Provides gentle heat and depth. Freshly ground pepper yields a brighter bite; adjust to taste before baking.

    – 1/2 teaspoon paprika
    → Grants a subtle smoky sweetness and vibrant color. Use sweet paprika for milder flavor, or smoked paprika for a richer, barbecue-like tone.

    – 1/2 teaspoon dried thyme
    → Introduces herbaceous warmth that complements chicken and dairy. If using fresh thyme, about 1 teaspoon chopped; add early in the sauté to release its aroma.

    – 2 tablespoons chopped fresh parsley (optional)
    → Brightens the dish with color and fresh scent. Stir a portion into the sauce and sprinkle a little on top after baking for a vibrant finish.

Topping and Garnish

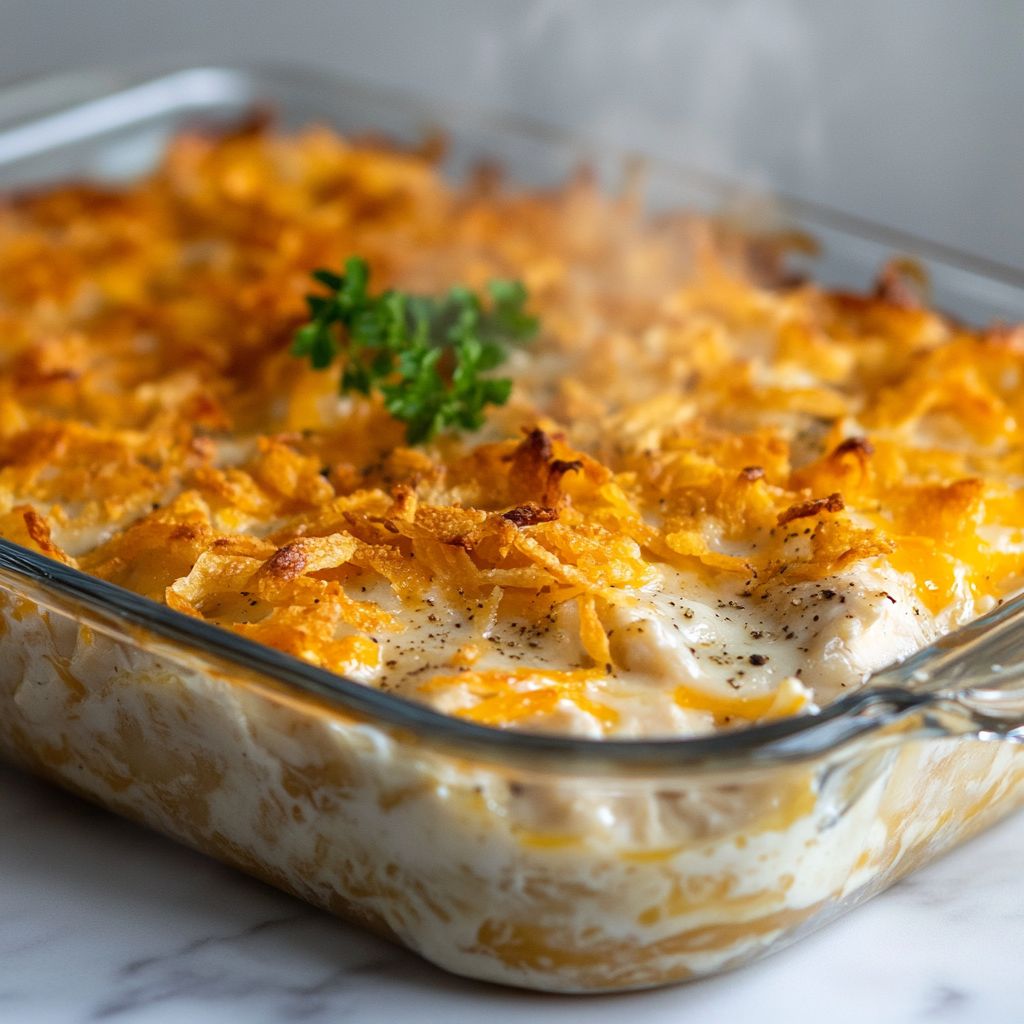
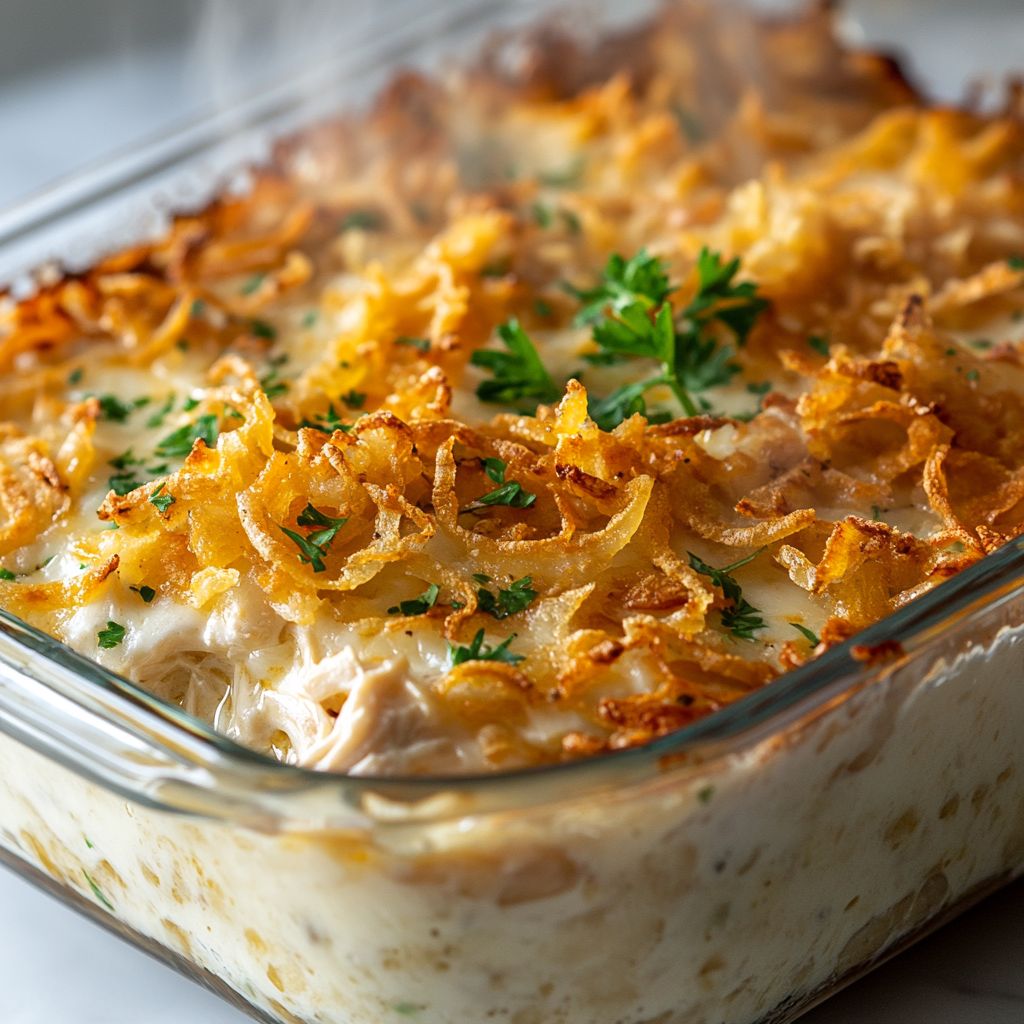
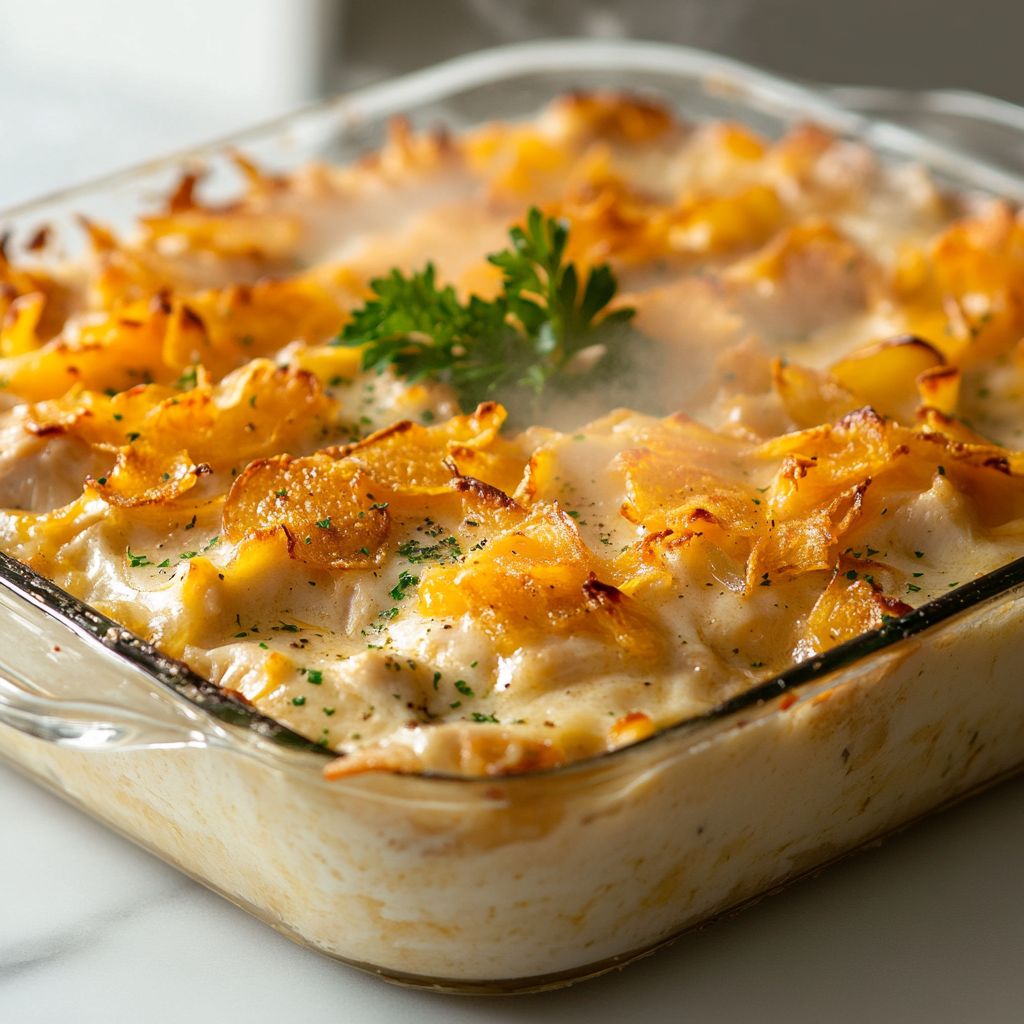
    – 1 cup French fried onions
    → Classic crispy topping that adds a savory, oniony crunch. For best texture, spread evenly and bake until topping is crisp; if you prefer a softer top, add onions toward the end of baking or reduce the amount slightly.

Instructions

  • Preheat your oven to 350°F (175°C) and grease a 9×13-inch baking dish with butter or nonstick spray.
    → This temperature ensures the sauce thickens properly and the casserole bakes evenly, while greasing prevents sticking so you can slice clean portions after baking.
  • Prepare the chicken and starch: Have 3 cups cooked shredded chicken ready and measure 2 cups cooked rice or 8 oz egg noodles, making sure they are cooled so they won’t seize or clump when mixed with the hot sauce.
    → Shredded chicken distributes evenly, and cooled starch prevents the sauce from breaking or becoming gummy.
  • Melt butter in a skillet over medium heat and sauté diced onion until translucent, 3 to 5 minutes, then add minced garlic and cook 30 seconds more to bloom the aroma.
    → Gentle sauté releases the onions’ sweetness and garlic’s aroma; overheating can brown them and push bitterness into the dish.
  • If using optional mushrooms, add sliced mushrooms to the skillet and sauté until their moisture evaporates and the edges brown slightly, about 4 to 6 minutes.
    → Removing moisture prevents the casserole from becoming soupy and concentrates the mushrooms’ umami.
  • Thaw the frozen peas in a small bowl or microwave briefly, then pat dry with a towel to remove excess water before adding to the mixture.
    → Excess moisture can separate the sauce; drying peas ensures creaminess stays intact.
  • In a large mixing bowl, whisk together the condensed Cream of Chicken Soup and condensed Cream of Mushroom Soup until smooth, then whisk in the sour cream that has been brought to room temperature. Add the milk and whisk until the mixture is cohesive and free of lumps.
    → The combined sauces create a rich, velvety base; warming the sour cream prevents curdling and helps emulsify fats for a silkier sauce.
  • Fold the shredded chicken, cooked rice or noodles, sautéed aromatics (onion, garlic, mushrooms), and thawed peas into the sauce, ensuring every piece is evenly coated with the creamy mixture.
    → Even distribution prevents dry pockets and guarantees consistent flavor in every bite.
  • Season the mixture with 1/2 teaspoon salt, 1/4 teaspoon black pepper, 1/2 teaspoon paprika, and 1/2 teaspoon dried thyme, then stir in 1/2 cup of the shredded cheddar cheese and, if using, 2 tablespoons chopped fresh parsley.
    → Salt and spices balance the richness; paprika adds color and mild warmth; thyme provides subtle herbaceous notes; cheese enriches the sauce; parsley adds freshness.
  • Pour the creamy mixture into the prepared baking dish, smoothing the top with a spatula to create an even surface for uniform cooking.
    → A level surface ensures even heat distribution and prevents hot spots that could burn the edges while the center remains undercooked.
  • Sprinkle the remaining 1/2 cup shredded cheddar cheese over the surface, then distribute 1 cup French fried onions evenly as the final topping to create a crisp, savory crust.
    → The cheddar melts into the sauce for extra cheesiness, while the fried onions supply a classic crunchy top that becomes deeply flavorful as it bakes.
  • Bake in the preheated oven at 350°F (175°C) for 25 to 35 minutes, or until the casserole is bubbling along the edges and the top is golden and set; if the onions brown too quickly, loosely tent with foil for the remaining time.
    → The bubbling indicates full heat penetration and proper emulsification of the sauce, while the foil prevents over-browning and maintains moisture inside.
  • Remove from oven and allow the casserole to rest for 10 minutes before serving to let the sauce thicken and the flavors to relax, which makes serving easier.
    → Resting helps the sauce retighten and cling to the components, so portions lift cleanly when plated.
  • If desired, sprinkle an extra pinch of fresh parsley over the top just before serving for a vibrant color contrast and a fresh aroma.
    → Fresh herbs finish the dish with brightness and a clean finish that complements the creamy richness.

Notes

“These Paula Deen’s Amazing Chicken Casserole notes guide you from prep to bake to achieve a creamy, crowd-pleasing dish. Start by ensuring you have all ingredients ready: shredded chicken, cooked rice or egg noodles, the condensed soups, sour cream, milk, aromatics, mushrooms, peas, butter, cheddar, salt, pepper, paprika, thyme, parsley, and French fried onions for topping. Sauté the onion, garlic, and optional mushrooms in butter until the onions are translucent to develop sweetness. Mix the soups with sour cream and milk without thinning; keep the mixture thick to coat the chicken and starch evenly. Fold in half the cheddar into the sauce for a richer melt and reserve the rest for topping. If using peas, thaw and pat dry to keep the casserole creamy rather than watery. Stir in thyme and paprika for warmth and a touch of color. Combine the chicken, cooked rice or noodles, and the sauce in a buttered casserole dish; season with salt and pepper to taste. Bake covered at 350°F (175°C) until hot and bubbly, about 25–35 minutes, then uncover and bake a few minutes more until the top is lightly golden. Remove from the oven and let rest 10 minutes before serving to set the sauce. Finish with the remaining cheddar and a generous layer of French fried onions for a crispy, irresistible crust. For gluten-free needs, use certified gluten-free soups and rice; you can substitute egg noodles with gluten-free pasta if preferred. This dish pairs nicely with a fresh green salad or steamed vegetables to balance its richness. Leftovers store well in an airtight container for 3–4 days or can be reheated in the microwave or oven; the flavors deepen after resting.”

Tips

Smart prep tips

  • Shred the chicken while still warm for easier handling and a more even distribution in the casserole. If you only have cooled leftovers, give it a quick chop or pull with forks to break into small bite-sized pieces.
  • Use rotisserie or poached chicken for extra tenderness. If you’re short on time, poach chicken just until cooked through, then chill before shredding to keep it juicy.
  • Cook the rice (or noodles) in advance and let them cool completely to prevent clumping when mixed with the hot sauce.

Creamy sauce tips

  • Do not thin the condensed soups with water; they provide the sauce’s body. If the mixture seems thick, whisk in a little milk gradually rather than thinning with more liquid at the start.
  • Let sour cream come to room temperature and whisk gently into the soups to prevent curdling and to create a smooth, cohesive sauce.
  • If the mixture looks too thick after folding in all ingredients, add a splash more milk or a bit of broth to reach a creamy, pourable consistency—then fold in the rice and chicken.

Aromatics and veggie tips

  • Sauté the onion in butter until translucent and fragrant to build a sweet, savory base. Finely dice for a smooth final texture.
  • Garlic should be minced finely or crushed and added after the onions so it doesn’t burn and turn bitter; sauté briefly for maximum aroma.
  • If using mushrooms, cook them until they release and evaporate their moisture to avoid extra liquid in the casserole. This also helps them develop a deeper flavor.
  • Thaw frozen peas completely and pat dry before folding in to prevent extra moisture from thinning the sauce.

Cheese and seasoning tips

  • Reserve about half of the cheddar to sprinkle on top for a rich, melty crust. Use sharp cheddar for a bolder cheesy bite.
  • Season gradually. Start with 1/2 teaspoon salt and 1/4 teaspoon black pepper, then tasting before baking—canned soups can vary in saltiness.
  • Sweet paprika adds color and gentle warmth; smoked paprika gives a subtle smoky note. Choose based on your flavor preference.
  • Fresh thyme provides bright herbal warmth; if using dried thyme, you’re already at the recommended 1/2 teaspoon—adjust if you switch to fresh (about 1 teaspoon chopped).
  • Stir in a small amount of chopped fresh parsley into the sauce for brightness, and sprinkle a little on top after baking for a vibrant finish.

Topping and texture tips

  • Evenly spread the French fried onions for a uniform, crispy top. Bake until the topping is crisp; if you prefer a softer top, add the onions toward the end of baking or reduce the amount slightly.

Make-ahead, storage and serving tips

  • Assemble the casserole ahead of time and refrigerate for up to 24 hours; bake longer and covered if chilled before baking.
  • Storing leftover casserole is best done in the original baking dish covered tightly; reheat gently to prevent dairy from splitting—consider adding a splash of milk to loosen if it thickens in the fridge.
  • Let the casserole rest 5–10 minutes after baking to allow the sauce to set and the flavors to meld, making it easier to slice and serve.

FAQ

Paula Deen’s Amazing Chicken Casserole – FAQ

What is Paula Deen’s Amazing Chicken Casserole?

Paula Deen’s Amazing Chicken Casserole is a comforting Southern-style dish featuring tender chicken in a creamy sauce, often with cheese and a crunchy topping. It’s baked until hot, bubbly, and lightly golden, making it a cozy, family-friendly meal.

Can I use rotisserie chicken or leftovers?

Yes. Shredded rotisserie chicken works wonderfully and saves time. You can also use shredded or diced leftover cooked chicken. If you’re starting from raw chicken, you’ll want to cook it through before or during baking.

What are the typical ingredients in this casserole?

Common ingredients include shredded cooked chicken, a creamy base (such as cream soup or a dairy-based sauce), sour cream or mayonnaise, shredded cheese, onions and garlic, and vegetables like peas or green beans. A buttery topping such as crushed crackers or breadcrumbs is often added for crunch.

Can I make it ahead of time?

Yes. You can assemble the casserole, cover it, and refrigerate for 1–2 days before baking. If you’ve refrigerated it, bake a bit longer (about 10–15 extra minutes) until it’s hot and bubbly. You can also freeze unbaked assembled casserole for longer storage; thaw before baking and adjust the bake time as needed.

How can I adapt it for dairy-free or gluten-free diets?

For dairy-free: use dairy-free cream soup or a dairy-free sauce, along with dairy-free sour cream or mayo and a dairy-free cheese substitute. For gluten-free: use gluten-free crackers or breadcrumbs, and ensure any condensed soups or sauces are labeled gluten-free. A simple cornstarch slurry can replace thickeners if needed.

What temperature and how long should I bake it?

Bake at 350°F (175°C) for about 45–60 minutes, or until the center is hot and bubbling and the topping is golden. If you’re starting from cold leftovers, you may need the full 60 minutes or a bit longer. If the topping browns too quickly, loosely cover with foil.

How do I know when it’s done?

The casserole should be hot throughout with a bubbly sauce around the edges. The internal temperature of the chicken should reach at least 165°F (74°C). A lightly browned topping is a nice indicator, but don’t rely on color alone—temperature matters for doneness.

How should I store and reheat leftovers?

Store leftovers in an airtight container in the refrigerator for 3–4 days. Reheat in a 350°F (175°C) oven for 15–20 minutes, or until hot and bubbly, or reheat in short intervals in the microwave, stirring as needed for even heating.

What add-ins or variations can I try?

Try mushrooms, bell peppers, spinach, or green beans for extra color and texture. Crispy bacon, cooked sausage, or a different cheese blend (like sharp cheddar and parmesan) can change the flavor. For a kick, add a pinch of hot sauce or red pepper flakes. You can also swap in cooked turkey for a different twist.

What sides pair well with this casserole?

Green salads, steamed or roasted vegetables, cornbread, mashed potatoes, or crusty bread are classic pairings. A light fruit salad can balance the richness, and a simple cucumber-dill yogurt salad works nicely as a cooling contrast.

Is this dish kid-friendly?

Yes. The flavors are mild and creamy, making it a family favorite. If you’re cooking for picky eaters, you can keep the topping simple and adjust seasonings to taste.

Introduction / Hook

Step into a kitchen where comfort meets simplicity, and a humble bowl becomes a passport to sunshine. Cottage Cheese Banana Pudding is a dessert that travels light but lands with memorable impact—a cloud-soft, softly tangy creation that invites you to pause, take a spoonful, and let the flavors do a little handshake on your palate. The moment the first scoop arrives, you’ll be greeted by a creamy, airy texture that glides across the tongue, echoing the banana’s natural sweetness while the cottage cheese lends a gentle, almost indulgent tang. It’s the kind of dessert that feels like a secret whispered through generations—a pantry-friendly treat that tastes like a party in a quiet kitchen. Imagine the aroma of ripe fruit mingling with a silken dairy note, a hint of vanilla or a kiss of cinnamon drifting through the air, and the sense that you’ve just discovered a special, almost timeless way to conclude a meal. In a world of heavy custards and elaborate preparations, this pudding stands out for its balance: light, fulfilling, and refreshingly easy to make, yet satisfying enough to serve to guests or to enjoy as a nightly indulgence without the heaviness. This is the kind of dessert that doesn’t demand a formal occasion to shine; it makes any moment feel a little brighter, a little more comforting, and a touch more celebratory.

What makes Cottage Cheese Banana Pudding especially inviting is its accessibility. You don’t need glamorous equipment or complex techniques to coax out its best texture. A few humble ingredients—carefully chosen for their quality and ripeness—come together in a way that is greater than the sum of their parts. The result is not merely a dessert but a small ritual: you blend, fold, and chill, then magnetize the room with a scent that feels like a warm hug. The contrast between the creamy, slightly granular mouthfeel of cottage cheese and the smooth, lush sweetness of the bananas creates a texture map that keeps the experience interesting from the first bite to the last. And because this pudding leans into natural ingredients and a light touch, it’s a versatile canvas for those who love to tweak and tailor. You can lean into nostalgia, add brightness with citrus zest, or keep things purely comforting with a touch of vanilla and a sprinkle of spice. It’s a recipe that invites you to trust your senses and to listen to what your kitchen tells you to do next.

The Story Behind the Dish

The origins of this pudding are as flavorful as its texture. It sits at the crossroads of pantry-friendly desserts and family-style comfort food, drawing on two ingredients that have long held a place in home kitchens around the world. Cottage cheese, with its soft curds and mild tang, has often served as a gentle dairy anchor in sweet and savory dishes alike. Bananas, with their natural sweetness, creaminess, and familiar aroma, have a universal appeal that transcends age and culture. When these two together are coaxed into a pudding, the result is something that feels both nostalgic and modern—a nod to thrifty pasts when cooks learned to transform simple staples into something special, and a nod to contemporary kitchens that celebrate quick, accessible dessert ideas without sacrificing texture or depth of flavor.

There’s a little romance in the origin story too. Imagine a kitchen where a family gathered after a long day, the fruit bowl offering the season’s best, a мешанина of pantry staples sitting on the counter, and everyone ready for a modest, satisfying treat. A quick whisk, a careful fold, and a cooling period in the fridge later, and the dish reveals its quiet charm: a light, airy centerpiece that earns its place on the table not by spectacle but by the sheer comfort it delivers. Over the decades, cooks around the world have discovered that some of the best desserts aren’t about dramatic techniques or hard-to-find ingredients; they’re about balance, structure, and an honest adherence to flavors that feel true to the everyday pantry. This pudding embodies that philosophy: it’s simple, it’s forgiving, it’s delicious, and it invites you to slow down just long enough to savor a moment of uncomplicated sweetness.

As stories go, this one travels well. It’s a dish that plays well in kitchens of all sizes and styles—from a cozy apartment to a sunlit farmhouse kitchen. It adapts with the seasons, taking on the character you give it: a gentle banana-perfumed canvas in summer, a cozy, vanilla-kissed treat in winter, or a zesty, citrus-tinged delight when you add a bright zest or a touch of orange blossom water. The pudding’s essence remains constant: a celebration of two humble ingredients elevated by care, texture, and a little bit of imagination. It’s the kind of dish that invites conversation, perhaps about childhood memories of dessert hours or about the little rituals that make family gatherings feel special. In short, Cottage Cheese Banana Pudding isn’t just a recipe; it’s a story you get to tell again and again with each serving.

Why You’ll Love This Recipe

  • Quick and forgiving: A simple assembly that comes together with minimal fuss and doesn’t require strict technique. It’s the kind of dish you can make on a weeknight and still feel like you treated yourself.
  • Light yet satisfying: Creamy, indulgent texture without heaviness. It provides comfort without weighing you down, making it a great finale for a busy day or a relaxed weekend gathering.
  • Naturally balanced sweetness: The gentle tang from cottage cheese balanced by the natural sweetness of ripe bananas creates a nuanced flavor profile that doesn’t rely on overly sugary ingredients.
  • Versatile and customizable: A forgiving canvas for tweaks—add a hint of vanilla, a pinch of cinnamon, citrus zest, or a splash of your favorite extract to tailor the aroma to your mood.
  • Kid-friendly and adult-approved: The flavors appeal to younger palates while still delivering depth that adults appreciate, making it a family-friendly dessert option.
  • Make-ahead friendly: The chilling step helps the flavors meld and the texture to set beautifully, which is ideal for entertaining or meal-prep.

Flavor Profile & Texture

The flavor profile of Cottage Cheese Banana Pudding is a quiet conversation between tangy dairy and mellow fruit sweetness, wrapped in a velvety, almost cloud-like texture. The cottage cheese provides a soft, slightly grainy body that, when whipped or blended, loses its rough edges and blossoms into a smooth, creamy foundation. It carries a gentle tang that acts as a counterpoint to the banana’s natural sweetness, preventing the dish from tasting overly rich or cloying. The overall result is a balanced dessert that feels comforting and easy to enjoy, yet carries enough complexity to keep the palate engaged from the first bite to the last.

The banana offers more than just sweetness; it contributes a rich, fruit-forward aroma and a creamy mouthfeel that harmonizes with the cottage cheese. As the pudding rests in the fridge, the banana’s sweetness becomes a touch more concentrated and lush, while the cheese’s tang settles into a consistent, smooth note. If you choose to add a whisper of vanilla or a pinch of cinnamon, you’ll notice an extra layer that brightens the aroma and lengthens the aftertaste. The texture is a highlight: light, airy, and spoonable, with enough body to hold its shape on a pudding cup or dessert glass without being heavy. The occasional bite of banana bits—if the bananas are left slightly chunky or folded gently—gives pleasant pockets of fruity sweetness that surprise the palate in the best possible way. Overall, the taste remains softly rounded, with clean lines between the dairy tang, the banana sweetness, and any optional warm spices or citrus notes you wish to introduce.

Occasions & Pairings

This pudding shines in a variety of moments. It’s ideal for weeknight desserts when you want something light and soothing after dinner, yet it’s polished enough to serve at casual gatherings, brunches, or potlucks. Its simplicity makes it a flexible companion to many settings, whether you’re feeding a family, sharing with friends, or enjoying a quiet night alone with a good book and a chilled bowl of goodness. The dish pairs beautifully with other light, complementary flavors and textures, creating a cohesive end to a meal without overwhelming the palate.

Suggested occasions and pairings include:

  • Weeknight treat after a leafy salad or a simple roasted vegetable dinner, offering a gentle finish that won’t sit heavily.
  • Casual gatherings or potlucks where a make-ahead dessert can be shared without fuss.
  • Brunches as a sweet component that remains crisp and fresh when served in mini cups or parfait glasses.
  • Pairs well with light, citrusy beverages—sparkling water with a twist of lemon, a delicate herbal tea, or a mild coffee for a post-meal option.
  • Accompaniments: a fresh berry compote, a dab of fruit coulis, or a few toasted nuts for textural contrast and a pop of color.

For a more seasonal approach, you can tailor the dish to the moment. In warmer months, consider a citrus zest lift or a splash of citrus juice to brighten the dish and echo the brightness of summer fruit. In cooler months, a touch of warming spice like cinnamon or cardamom can transform the pudding into a cozy, comforting finish. If you’re entertaining, presenting a few small glasses or jars with a delicate garnish—such as a sliver of banana, a dusting of spice, or a light swirl of fruit puree—adds a charming, restaurant-like touch without complicating the preparation.

Tips, Variations & Substitutions

Here’s where you can let your creativity roam a little. The beauty of this pudding is its adaptability and forgiving base. Whether you’re accommodating dietary needs, chasing different flavor vibes, or simply using what you have in the kitchen, you’ll find ways to personalize the dessert while keeping its core character intact.

  • Use a plant-based yogurt or silken tofu blended with dairy-free cream to replicate the richness of cottage cheese. Pair with mashed ripe banana and a splash of vanilla. The texture can be kept light by whisking thoroughly to introduce air.
  • Gluten-free approach: This dish is naturally gluten-free if you’re starting with ingredients that are gluten-free. Ensure any toppings or garnishes you add align with gluten-free standards.
  • Low-sugar version: Allow the natural sweetness of the banana to shine by using very ripe fruit and reducing any added sweeteners. Consider a touch of vanilla or citrus zest to amplify aroma without adding sugar.
  • Elevate or shift the flavor profile with a hint of vanilla bean, a tiny splash of almond extract, a pinch of cinnamon, or a delicate citrus zest. Each of these elements can transform the finish without overpowering the core balance.
  • Texture play: If you prefer a smoother texture, blend the mixture longer or use a food processor. For a chunkier bite, fold in small, soft fruit pieces or present a few banana slices as a topping just before serving.
  • Regional twists: Think tropical notes with a dash of coconut or a kiss of lime for brightness; or a warm note with honey and a touch of nutmeg for a homestyle pudding inspired by comforting desserts from various regions.
  • Diet-friendly substitutions: For a nut-free version, avoid any nut-based garnishes; for a higher-protein version, swirl in a spoonful of yogurt or add a little whipped topping on top as a separate garnish.

Storage & Make-Ahead Ideas

One of the practical advantages of this pudding is its make-ahead friendliness. Because it benefits from chilling, it often tastes better after resting in the refrigerator, allowing flavors to meld and the texture to firm up slightly. Here are practical tips to maximize its convenience and flavor:

  • Make-ahead: Prepare the mixture a few hours in advance or the day before, then transfer to serving dishes and refrigerate until ready to serve. If you blend everything together in advance, you can portion into individual cups for easy serving and a clean, elegant presentation.
  • Storage duration: Store covered in the refrigerator for up to 2–3 days. The texture may become a little more set as it sits, which some people prefer, while others enjoy whisking briefly to loosen before serving.
  • Freezing: Freezing is generally not recommended for this texture, as the cottage cheese can become grainy when thawed. If you must make ahead, keep it in the fridge rather than freezing, and avoid freezing any additional toppings you plan to add later.
  • Serving tips: If the pudding has thickened a bit too much after refrigeration, whisk gently or pulse briefly in a blender to restore a silky texture. For a more elegant presentation, re-whip the mixture before spooning into glasses.

Fun Facts & Trivia (Optional)

Delightful details that deepen the story of this dessert can enrich your appreciation and conversation around the table. Here are a few light-hearted facts and ideas to impress guests or simply enjoy.

  • Bananas have a natural sweetness that makes them a favorite choice in desserts across many cultures, and their creaminess helps achieve a pudding-like texture without heavy dairy or starches.
  • Cottage cheese has a long history as a versatile ingredient that can bridge sweet and savory dishes, thanks to its mild tang and adaptable texture.
  • In some regions, people enjoy fruit puddings that rely on simple dairy bases and ripe fruit, a testament to how households worldwide have perfected comfort foods with minimal ingredients.
  • Texture contrast is often the secret ingredient in satisfying puddings: the contrast between creamy base and soft, grainy curds can be unexpectedly delightful.
  • Flavor evolution matters: chilling is not just about safety; it also helps the flavors settle and mingle, turning a simple mixture into a more cohesive dessert experience.

Ingredients

Pudding Base

  • 1 cup cottage cheese (soft, blended until smooth)
    → Provides the creamy, protein-rich base for the pudding; blending smooths lumps for a silky texture. For best results, use full-fat cottage cheese and drain any excess whey if very watery. If you prefer a chunkier texture, blend less or mash by hand rather than blending to a completely smooth purée.
  • 2 ripe bananas (mashed)
    → Bananas contribute natural sweetness and moisture; very ripe with brown speckles yields the strongest flavor. Mash until smooth; leave some small chunks if you enjoy texture. For a colder pudding, you can mash then chill the fruit briefly to keep the mixture cool.
  • 1/2 cup milk (unsweetened dairy or plant-based)
    → Adds creaminess and helps achieve a scoopable consistency. Use unsweetened milk to control sweetness; adjust quantity to reach your preferred thickness. If using a thicker plant-based milk (like coconut milk), you may need less to avoid a too-rich result.
  • 2-3 tbsp honey or maple syrup (to taste)
    → Sweetener to balance tang from cottage cheese; maple syrup adds a subtle toasty note, while honey provides depth. Start with 2 tablespoons and adjust after tasting. If vegan, use pure maple syrup or agave; consider reducing sugar elsewhere to keep it light.
  • 1 tsp vanilla extract (or vanilla bean paste)
    → Enhances banana and dairy flavors; vanilla also helps mellow the tang of cottage cheese. For a stronger aroma, use 1/2 tsp vanilla extract plus 1/2 tsp vanilla paste. If using vanilla beans, scrape seeds into the mixture for added depth.
  • Pinch of salt (about 1/8 tsp)
    → A tiny amount of salt heightens sweetness and rounds flavors. It improves overall balance and makes banana notes pop. If using salted cottage cheese, reduce or omit the extra salt accordingly.
  • Optional: 1 tsp lemon juice or 1/2 tsp lemon zest (for brightness)
    → A note of citrus brightens the pudding and reduces perception of richness. Add lemon juice or zest to taste; avoid too much to prevent overpowering the banana flavor.

Optional Add-ins

  • 1/2 tsp ground cinnamon (optional)
    → Adds warmth that pairs well with banana; use if you enjoy spiced desserts. Cinnamon complements the vanilla but can overpower the banana if used in excess. Stir into the base or sprinkle on top before serving.
  • 1-2 tbsp chia seeds (optional)
    → Provides additional texture and helps thicken the mixture as it sits; chia seeds absorb liquid and gel. If using, whisk them into the base and let the pudding rest 10-20 minutes, or refrigerate overnight to achieve a thicker, creamier result. Increase rest time slightly if you add more chia.
  • 1/4 cup crushed graham crackers or cookies (optional)
    → Adds a crunchy contrast and a nostalgic banana-pudding vibe. Crumble and fold into the base for a layered effect or sprinkle on top just before serving. For gluten-free, use gluten-free crackers.
  • 1/4 cup chopped nuts (optional)
    → Adds texture and a nutty flavor; toast the nuts lightly to enhance aroma, then chop finely so they distribute evenly. If you’re avoiding dairy, nuts provide extra protein and healthy fats; store leftovers in a cool place to maintain crunch.
  • 1/2 cup fresh berries (optional)
    → Layer or top with berries to introduce tart brightness and color. Add just before serving to keep berries fresh; rinse and pat dry, then slice as needed. Raspberries, strawberries, or blueberries all pair well with banana and cottage cheese.

Instructions

  • Drain any excess whey from the cottage cheese by pouring it into a fine-mesh sieve set over a bowl and gently pressing with the back of a spoon to remove liquid; this prevents a watery base and yields a creamier pudding.
    → Removing excess moisture ensures the base thickens properly and sits well on refrigeration without separating.
  • Blend the cottage cheese until completely smooth and lump-free using a high-speed blender or food processor; scrape down the sides as needed to achieve an even consistency.
    → A smooth puree prevents gritty texture and creates a luxurious, silky pudding base that blends evenly with the bananas.
  • Mash the ripe bananas until you achieve a smooth puree with only a few small, tender lumps if you prefer texture; use a fork or potato masher and press through any larger chunks for uniformity.
    → Bananas contribute moisture and natural sweetness; mashing thoroughly distributes flavor, while leaving some texture can add pleasant bite if desired.
  • Stir the banana puree into the smooth cottage cheese until fully combined and uniform in color and texture with a wide whisk or spatula.
    → Thorough incorporation ensures the banana flavor is evenly dispersed and prevents separation during chilling.
  • Gradually whisk in the milk, adding just enough to achieve a creamy, scoopable consistency without making the mixture runny; test by dipping a spoon and noting how it holds its shape.
    → Milk moderates thickness and enhances creaminess; adding in stages lets you control texture precisely.
  • Whisk in the honey or maple syrup and the vanilla extract, then add a pinch of salt; whisk until the sweeteners are fully integrated and the aroma is balanced.
    → The sweetener coats the tongue and the vanilla amplifies banana and dairy notes; salt heightens overall flavor and rounds sweetness.
  • If using lemon juice or zest, fold it in now and whisk until evenly distributed to brighten the pudding without overpowering banana.
    → A touch of citrus cuts richness and adds a fresh lift to the flavor.
  • If you are including cinnamon, whisk in 1/2 teaspoon of ground cinnamon and distribute it evenly throughout the base; taste and adjust if you prefer a stronger warmth.
    → Cinnamon adds warmth that complements banana and vanilla, but use sparingly to avoid muting the fruit.
  • Optionally whisk in 1-2 tablespoons of chia seeds; let the mixture rest 10-20 minutes so the seeds hydrate and thicken the pudding further, stirring occasionally to prevent clumping.
    → Chia seeds absorb liquid and swell, creating a heartier, spoonable texture and greater nutritional value.
  • Optionally fold in crushed graham crackers or cookies in small, even portions to create a subtle crunchy contrast or reserve them to sprinkle on top just before serving.
    → They provide nostalgic texture and flavor; ensure they are crushed finely enough to distribute evenly without sinking to the bottom.
  • Optionally fold in chopped nuts, after lightly toasting them in a dry skillet to enhance aroma, then chop finely so they distribute evenly throughout the pudding.
    → Toasting boosts nutty aroma; uniform pieces ensure each bite has a consistent texture.
  • Optionally fold in fresh berries or reserve them for topping; if layering, alternate a spoonful of pudding with berries to create a visually appealing dessert.
    → Berries add brightness and contrast, and layering helps preserve color and texture when served.
  • Check the pudding’s texture and sweetness; adjust with a small additional spoonful of honey or a dash more milk if needed, then give the mixture one final whisk to ensure smoothness.
    → Fine-tuning ensures the final product has the exact balance and body you desire before chilling.
  • Cover the bowl or divide the pudding into serving dishes and refrigerate for at least 30 minutes to 2 hours, allowing flavors to meld and the mixture to set into a scoopable dessert.
    → Chilling firms the pudding and enhances the body, making it easier to portion and serve cold.
  • Serve the Cottage Cheese Banana Pudding chilled, with any chosen toppings or mix-ins visible—berries, nuts, or a light dusting of cinnamon—and enjoy the creamy, protein-rich dessert.
    → Chilled service preserves the texture and highlights the bright, banana-forward flavor with a creamy finish.

Notes

This cottage cheese banana pudding is a creamy, protein-rich dessert that’s naturally sweetened by ripe bananas and a touch of honey or maple syrup. It makes a satisfying treat any time of day.

To achieve a silky texture, blend the cottage cheese until smooth; if you prefer a chunkier bite, blend less or mash by hand rather than fully puréeing. Use full-fat cottage cheese for the richest mouthfeel and drain any excess whey if the mixture looks watery.

Bananas contribute moisture and natural sweetness; very ripe bananas with brown speckles yield the strongest flavor. Mash until smooth but leave some small chunks if you enjoy texture. If you want a colder pudding, mash and chill the fruit briefly before folding into the base.

Sweeten to taste with honey or pure maple syrup. Start with 2 tablespoons and adjust after tasting. For vegan versions, use maple syrup or agave and consider reducing sugar elsewhere to keep the dessert light.

Vanilla extract (or vanilla bean paste) and a pinch of salt round out the flavors and soften the tang of cottage cheese. If using vanilla beans, scrape seeds into the mixture for extra depth. For a citrus lift, stir in 1 teaspoon lemon juice or 1/2 teaspoon lemon zest.

  • Optional add-ins:
  • 1/2 teaspoon ground cinnamon (optional) — adds warmth that pairs well with banana; may be stirred into the base or sprinkled on top before serving.
  • 1-2 tablespoons chia seeds (optional) — absorb liquid and help thicken the pudding as it rests; whisk into the base and refrigerate 10–20 minutes or overnight for a thicker texture.
  • 1/4 cup crushed graham crackers or cookies (optional) — for a crunchy layer; use gluten-free crackers if needed; fold in or layer in cups.
  • 1/4 cup chopped nuts (optional) — toasted nuts add texture and aroma; chop finely so they distribute evenly.
  • 1/2 cup fresh berries (optional) — layer or top for bright contrast; add just before serving.

Make-ahead and serving tips: Chill the pudding for at least 1 hour to help set and meld flavors; the chia option will thicken as it sits. This pudding stores in the refrigerator covered for up to about 3 days. If you’re including dairy-based toppings, add them just before serving to preserve texture.

Notes on dietary considerations: adjust toppings and sweeteners to suit dietary needs; if you have gluten intolerance, ensure any add-ins like cookies are gluten-free; check that vanilla extract is gluten-free and that all add-ins align with your pantry preferences.

Tips

Tips for Perfect Cottage Cheese Banana Pudding

  • Use soft, blended cottage cheese as the base and blend until completely smooth for a truly creamy pudding. If you prefer a chunkier texture, blend less or mash by hand instead of aiming for a purée.
  • If the cottage cheese is watery, drain any excess whey or press briefly through a fine-mesh sieve to prevent a watery final texture.
  • Choose very ripe bananas (brown speckles) for the strongest sweetness and flavor. Mash until smooth, but leave a few small lumps if you like a bit of banana texture.
  • Add milk in small increments and stir until you reach your desired scoopable consistency. Start with 1/2 cup and adjust as needed; thicker plant-based milks may require less liquid to avoid a heavy result.
  • Sweeten gradually. Start with 2 tablespoons of honey or maple syrup and taste. Add more if needed, keeping in mind the banana sweetness and the tang of cottage cheese.
  • Vanilla enhances both banana and dairy flavors while mellowing tang. If you want a stronger aroma, use 1/2 tsp vanilla extract plus 1/2 tsp vanilla paste, or scrape vanilla bean seeds.
  • A pinch of salt really helps balance flavors and make banana notes pop. If you’re using salted cottage cheese, reduce or omit this salt.
  • Optional brightness: add 1 tsp lemon juice or 1/2 tsp lemon zest to counter richness. Add gradually and taste, so citrus doesn’t overpower the banana.
  • Optional cinnamon (1/2 tsp) adds warmth but can compete with banana flavor if overused. Stir cinnamon into the base or dust on top before serving.
  • Chia seeds (1/2 tsp to 1 tbsp) thicken as the pudding rests. If using, whisk into the base and let it sit 10–20 minutes, or refrigerate overnight for a thicker, creamier texture.
  • Graham crackers or cookies (1/4 cup) add a nostalgic crunch. Crumble and fold into the base for a layered effect, or sprinkle on top just before serving. For gluten-free needs, use gluten-free crackers.
  • Toast nuts lightly before adding (1/4 cup) to boost aroma and crunch. Chop finely for even distribution and a more uniform texture in each bite.
  • Fresh berries (1/2 cup) add bright contrast. Layer or top just before serving to keep their color and texture vibrant.
  • If you want a quicker set, chill the mixture for at least 2 hours; for chia-based versions or richer flavors, refrigerate overnight.
  • Store leftovers in an airtight container in the refrigerator. It will keep well for 3–4 days, though the texture may continue to thicken as it sits, especially with chia or crackers.
  • Want a dairy-free variation? The base already accommodates plant-based milk—use unsweetened almond, soy, or oat milk and adjust sweetness to taste.
  • To avoid browning banana pieces in the final layer, add banana and lemon zest to taste rather than all at once, and serve within a day or two.
  • Before serving, give the pudding a good stir or a gentle whisk to restore a smooth surface if it has set a bit during chilling.

FAQ

What is Cottage Cheese Banana Pudding?

A creamy, no-bake dessert that blends smooth cottage cheese with ripe bananas and a touch of milk, vanilla, and sweetener. It’s protein-rich and lighter than many puddings, with optional cookies or wafers for texture.

What ingredients do I need to make Cottage Cheese Banana Pudding?

Basic ingredients (serves 4–6):

  • 2 cups (about 450 g) small-curd cottage cheese
  • 2 ripe bananas
  • 1/2 to 1 cup milk (d dairy or non-dairy)
  • 1–2 teaspoons vanilla extract
  • 2–4 tablespoons sweetener of choice (sugar, honey, or maple syrup), to taste
  • Optional layering/add-ins: crushed vanilla wafers or graham crackers, sliced bananas for topping, cinnamon or nutmeg

Tip: For a smoother texture, use a blender or food processor to blend until creamy.

Can I make this dairy-free or lower-fat?

Yes. For a dairy-free version, substitute with:

  • Silken tofu or dairy-free cottage cheese alternative blended with non-dairy milk to mimic texture
  • Non-dairy milk (almond, soy, or oat) and a dairy-free yogurt or a touch of lemon juice for tang

To make it lower-fat, use low-fat cottage cheese and skim or light milk. The flavor remains similar; texture may be a touch lighter.

How do I make Cottage Cheese Banana Pudding?

Basic method:

  1. In a blender or food processor, blend cottage cheese, bananas, milk, vanilla, and sweetener until very smooth.
  2. If you want a chunkier texture, mash the bananas by hand and fold into the blended mixture.
  3. Optional: stir in a handful of crushed cookies or layer them in the serving dishes.
  4. Pour into serving dishes and refrigerate for 2–4 hours to set and chill.
  5. Top with sliced bananas, extra cookie crumbs, or a dusting of cocoa or cinnamon just before serving.
How should I adjust sweetness?

Bananas add natural sweetness, so start with 2 tablespoons of your chosen sweetener and taste. If you’d like it sweeter, add another tablespoon and blend again. For a sugar-free version, use a preferred sugar substitute and adjust to taste.

Do I need to chill it, and how long?

Yes. Chill the pudding in the refrigerator for at least 2 hours to let flavors meld and the pudding to set. For best texture, you can chill overnight. If you’re layering with cookies, wait to add the cookies until just before serving to keep them from becoming soggy.

How should I store leftovers?

Store leftovers in an airtight container in the refrigerator for up to 3–4 days. If cookies were mixed in, they may soften over time; you can sprinkle fresh cookies or wafers on top when serving again.

Can I add mix-ins or toppings?

Absolutely. Try:

  • Sliced bananas, crushed vanilla wafers, or graham crackers
  • Chopped nuts, shaved chocolate, or a light dusting of cinnamon
  • Unsweetened cocoa powder or a drizzle of maple syrup for extra flavor
Can I make this ahead for a party or meal prep?

Yes. Assemble the pudding, or blend the base and refrigerate in a covered dish up to 1 day ahead. If you plan to layer with cookies, add the cookies just before serving to maintain some crunch. Avoid freezing, as texture may become grainy or separate upon thawing.

What if I don’t have a blender?

If you don’t own a blender, mash the bananas thoroughly with a fork or potato masher, then whisk in cottage cheese, milk, vanilla, and sweetener until well combined. A hand whisk or a sturdy spoon will work, but the mixture may be chunkier.

What should I do if the mixture is too thick or too thin?

If too thick, whisk in a little more milk a tablespoon at a time until you reach your desired consistency. If too thin, add a few more spoonfuls of cottage cheese and blend again; a touch of extra banana can also help thicken it slightly as it chills.

Introduction / Hook

Imagine slicing into a sunlit morning where every bite feels like a celebration: a warm, golden slice of bread, its edges crisped to perfection, giving way to a fluffy, custardy center that whispers of vanilla, cream cheese, and ripe blueberries. Blueberry Cheesecake Stuffed French Toast is the kind of brunch dream that tastes indulgent without feeling heavy—a perfect marriage of two beloved classics: the comforting embrace of French toast and the dreamy tang of cheesecake. The aroma alone is enough to wake a sleepy house—milk-browned butter dancing with vanilla, a hint of lemon zest lifting the sweetness, and blueberries popping like tiny bursts of summertime in the pan. It’s the kind of dish that makes a quiet weekend feel like a small, yes-worthy celebration, a reason to linger at the table a little longer, savoring every glossy drizzle of syrup and every forkful that melds bread, creamy filling, and juicy fruit into one harmonious bite.

What makes this dish truly special is not just its flavors but the story it tells with each slice. The crusty exterior gives way to a creamy center that tastes like a dream you’d expect to find in a bakery window—soft, lush, and a little tangy from the cheesecake element. The blueberries aren’t merely garnish; they’re a chorus that sings through the filling and the topping, their sweetness intensifying as they warm, their juices turning a glossy, jewel-like purple. And when you finish with a ribbon of maple syrup and perhaps a dollop of whipped cream or a dusting of powdered sugar, you’ve crafted something that feels at once refined and cozy—a dish that invites long chats, shared plates, and a sense of taking your time to enjoy the morning.

Blueberry Cheesecake Stuffed French Toast is as versatile as it is indulgent. It can be as simple as a weekend breakfast for two or a show-stopping brunch centerpiece that greets guests with a promised memory of sunshine and summer berries. It’s a dish that rewards a gentle, patient approach—the eggs beating into a creamy custard, the bread soaking to just the right softness without collapsing, the filling swirled with blueberries until every bite holds a little burst of fruit. And because it sits happily at the intersection of two beloved comfort foods, it has a familiar, welcoming vibe that makes even reluctant cooks feel confident stepping into the kitchen and letting their intuition guide them. This is brunch made memorable, the kind of recipe you’ll want to revisit again and again, tweaking and personalizing with seasons, moods, or guest preferences, while still savoring that quintessential first bite that remains unmistakably special.

The Story Behind the Dish

French toast has a long and storied past, rooted in the idea of transforming humble leftovers into something worthy of a morning feast. The basic concept—bread dipped in a custard and fried until golden—has countless variations around the world, each culture adding its own twist and sentiment. In many homes, French toast is a rite of passage for aspiring cooks and a beloved weekend ritual for families who gather at the table to share stories, plans, and laughter as the bread browns in a skillet. The name itself hints at its origins: pain perdu in French, literally “lost bread,” a playful nod to rescuing day-old loaves from the trash and turning them into something irresistibly comforting. Over time, the dish evolved from humble leftovers to a brunch staple, a canvas for creativity, texture play, and dessert-like flavor profiles that still feel entirely appropriate for breakfast or a late Sunday morning.

The idea of stuffing French toast—creating a creamy center that elevates the dish from simple slices to a luscious sandwich—has roots in culinary experimentation that celebrates richness without losing the familiar bite of well-salted, buttered bread. Cheesecake, with its tangy cream cheese and bright vanilla notes, has been a beloved dessert for centuries, prized for its smooth texture and the way it holds together in a slice. Combine those two ideas, and you get a bright, indulgent breakfast option that feels special enough for a celebration yet approachable enough for a weekday brunch with a few thoughtful swaps. Blueberries, with their summer glow and subtle tartness, add a natural brightness that cuts through the richness, ensuring every bite remains balanced and lively rather than heavy. The result is a dish that threads history, comfort, and modern brunch culture into a single, memorable experience—one that invites you to slow down, savor the moment, and create new memories around a table full of warmth and flavor.

As a personal anecdote, the first time I tasted a variation of this concept, it was at a lakeside cabin where morning light spilled across checkered tablecloths and the air smelled faintly of pine and citrus. A neighbor had assembled a tray of stuffed French toast, and the berries looked like little jewels against the creamy filling. We began with hesitant bites, then shared stories and plans for the day as the skillet hissed softly. By the time the syrup was poured, it felt less like a recipe and more like a memory in the making—the kind of moment where a dish becomes a tradition, handed down with a wink and a warm plate. That memory is what inspired this particular version, a blueberry-cheesecake twist that preserves the comforting nostalgia of childhood brunches while offering stadium-rare flavors that feel celebratory and fresh at once.

Why You’ll Love This Recipe

  • Indulgent, yet approachable: The creamy cheesecake filling tucked inside slices of soft, eggy bread feels luxurious without requiring a fancy excuse to cook.
  • Bright and balanced: Blueberries bring a fruity brightness that pairs beautifully with vanilla, lemon zest, and a hint of cinnamon, creating a harmonious flavor profile that isn’t cloying.
  • Textural contrast: A crisp exterior gives way to a tender, custardy center, with bursts of juicy berries in every bite for a dynamic eating experience.
  • Make-ahead potential: This dish can be prepped in stages, allowing you to assemble components ahead of time and finish with a quick cook before serving—perfect for leisurely weekend mornings or brunch gatherings.
  • Versatile for occasions: From intimate breakfasts to festive brunch spreads, it scales up or down easily and pairs with a variety of beverages and sides.
  • Customizable to diet and preference: It’s friendly to substitutions and variations, from dairy-free and gluten-free options to fruit twists beyond blueberries—keeping the core feel intact while honoring dietary needs.
  • Impressive presentation: The idea of stuffed slices arranged on a platter, oozing creamy centers and studded with blueberries, makes this dish a natural centerpiece that guests instinctively admire.

Flavor Profile & Texture

Flavor-wise, this dish dances between sweet, tangy, and comforting. The bread carries a gentle, vanilla-laced sweetness that mirrors a classic French toast, but the star is the cheesecake-inspired filling—a smooth, mildly tangy cream cheese mixture that contrasts beautifully with the bread’s softness. Lemon zest adds a subtle citrus lift, a moment of brightness that wakes up the palate without turning the dish sour. The blueberries contribute both taste and texture: their juice swirls into the filling during cooking, releasing little pockets of jammy richness, while the fresh berries maintain a slight pop that keeps the bite interesting. A hint of cinnamon—just enough to deepen the warmth—binds the flavors together and echoes the natural spice profile of traditional French toast spiced with vanilla and a touch of nutmeg or cinnamon, depending on your mood.

Textures play a crucial role in the sensory experience. The exterior slice should be perfectly browned—slightly crisp at the edges, with a caramelized sheen that suggests the careful browning of butter. The interior remains luxuriously soft and custardy, the cheesecake portion creamy and airy, like a well-suspended mousse of sweet cream cheese with a whisper of vanilla. The blueberries punctuate the dish with succulent morsels of fruit and occasional bursts of tart juice, which cut through the richness and provide a refreshing counterpoint. When finished with warm maple syrup, the syrup threads through like silk, adding a viscous sweetness that accentuates the vanilla and berry notes without overpowering them. In every bite, the contrast between crisp exterior and silky interior is felt, and the flavor train moves from comforting nostalgia to bright, modern brunch elegance.

Tastes & Aromas

The aroma is inviting—the caramel of browned butter, the warm scent of vanilla, and lemon zest’s citrusy perfume mingle with a faint, fruity tang from the blueberries. Tasting reveals a layered profile: a foundation of vanilla-sweetened bread, a creamy, tangy core that feels like a soft cushion of cheesecake, and a fruity brightness that lingers on the tongue after each bite. The maple syrup adds a rich, amber sweetness that rounds out the flavors, leaving a gentle, lingering warmth that makes you want another bite.

Texture Journey

From the first forkful, you’ll notice how the surface gives way to a tender interior. The bread’s crust—crisp and browned—gives a satisfying crunch, while the inside remains swoon-worthy soft, almost custard-like, thanks to the egg mixture that has soaked through. The cheesecake filling locks into the bread, providing that signature velvety mouthfeel, and the blueberries keep the texture lively with their juicy bursts. It’s a symphony of contrasts—creamy versus creamy-chewy, hot versus cool (if you add a dollop of cold cream or a spoon of yogurt), and fruity brightness that lingers after the last bite.

Occasions & Pairings

This Blueberry Cheesecake Stuffed French Toast shines in a crowd-pleasing brunch setting, but it’s equally at home as a cozy weekend breakfast for two. It’s festive enough for a special occasion—birthdays, showers, or holiday weekends—yet approachable enough to become a beloved family staple. Its adaptability makes it a reliable centerpiece for any time you want to elevate a morning menu without resorting to a complicated recipe.

Seasonal Pairings

During blueberry peak season, serve alongside a bright citrus salad or a yogurt parfait, letting the fruit echo the toast’s blueberry notes. In cooler months, add a warm cardamom- or cinnamon-spiced compote on the side to weave seasonal warmth into the dish. A touch of lemon zest on top mirrors the zest inside, bridging layers of flavor and reinforcing the citrus lift that keeps the dish vibrant year-round.

Beverages

Pair with a sparkling mimosa or a light, citrus-forward punch to enhance the brunch atmosphere. A hot cup of chai or a lightly spiced coffee can balance the sweetness, while a glass of chilled sparkling water with a wedge of lemon refreshes the palate between bites. If you’re serving this for a celebratory morning, a dry sparkling wine can be a playful partner, adding a dash of sophistication without overshadowing the dish’s comforting nature.

Tips, Variations & Substitutions

Here are ways to tailor Blueberry Cheesecake Stuffed French Toast to your pantry, dietary needs, and flavor cravings, all while preserving the essential essence of the dish.

Make-Ahead & Prep Tips

To streamline a weekend morning, you can prepare components in advance. Whip the cheesecake filling a day ahead and refrigerate. Slice the bread the night before to speed assembly, or assemble the stuffed sandwiches and refrigerate them overnight, then cook in the morning. If you prefer fewer steps in the moment, you can pre-mull the blueberry compote or scatter fresh berries over the top just before serving, letting their juice mingles with the warm toast.

Dairy & Gluten Variations

Vegan option: use a plant-based cream cheese and a dairy-free milk in the custard for a vegan version. Choose a thick, sturdy gluten-free bread so the slices hold their shape during soaking and frying. For a gluten-free crust, a base of gluten-free brioche or challah works beautifully, maintaining the rich, tender texture that this dish relies on.

Flavor Tweaks & Substitutions

Switch up the fruit to suit the season: strawberries and rhubarb, peaches and blueberries, or blackberries all make delightful substitutions. For a tangier cheesecake fill, add a splash of lemon juice or a touch of yogurt to the cream cheese mixture. If you prefer a cinnamon-forward profile, increase the cinnamon slightly or incorporate a pinch of nutmeg. A touch of orange zest can brighten the filling and pair exquisitely with blueberries. For a more indulgent finish, top with a dollop of whipped cream or a light cream cheese glaze that drapes over the slices like a delicate curtain.

Storage & Make-Ahead Ideas

Leftovers can be stored in the refrigerator for a few days if properly covered. Reheat gently in a skillet over low heat to bring back the crisp edges and soften the center, or warm in a low oven to avoid sogginess. For longer storage, assembled and cooled slices can be frozen in a single layer, then transferred to a bag or container for up to a couple of months. Reheat by thawing and warming in the oven or toaster oven until heated through and the exterior returns to its crisp texture. If you’ve made a blueberry compote to accompany the dish, store it separately; rewarm gently before serving so the berries don’t break down too much and preserve their bright color and shape.

Make-ahead strategy: prepare the cheesecake filling in advance, and prep the bread and berries the day before. In the morning, assemble the stuffed slices, cook until golden, and finish with fresh berries and maple syrup. This approach makes brunch effortless while still delivering a show-stopping dish that tastes freshly assembled.

Fun Facts & Trivia (Optional)

Did you know that the concept of “lost bread” to rescue stale loaves traces back to ancient culinary practices, long before the concept was marketed as “French toast”? The dish has traveled cultures and continents, earning countless local twists—some savory, some sweet—yet the core idea remains the same: transforming simple bread into a comforting, satisfying start to the day. Cheesecake’s journey is equally storied; from ancient Greece to modern dessert menus, its signature tang and velvety texture have inspired countless reinterpretations, including this playful brunch mash-up that celebrates both nostalgia and innovation. And blueberries, often celebrated for their vibrant color and antioxidants, have a long history in North American cuisine, where they’re valued not only for flavor but for the festive, summer mood they evoke in recipes like this one. This dish, at its heart, reflects a culinary philosophy: elevate the everyday by layering comfort with a touch of elegance, resulting in a breakfast that feels like a celebration of flavor, memory, and togetherness.

Ingredients

French Toast Base

  • 6 slices thick-cut brioche or challah bread (day-old preferred; for gluten-free, use a sturdy gluten-free loaf)
    → The bread forms the backbone of the dish, providing structure to hold the creamy cheesecake filling and blueberry center. Day-old bread dries slightly, so it soaks up the custard without turning mushy. If bread is very fresh, you can toast it lightly or let it stand for 10–15 minutes to reduce excess moisture. Trim crusts if you want neater stuffed edges, or leave them on for rustic presentation.

Custard Dipping

  • 3 large eggs
    → Eggs are the primary binder and contribute to the custard’s richness and set. Use room-temperature eggs for a smoother, more cohesive mixture; if using cold eggs, whisk a bit longer to ensure full emulsification.
  • 1 cup whole milk
    → Provides moisture and body to the custard; whole milk yields a creamier texture than skim or 2% milk. For a dairy-free version, use a thick non-dairy milk (like coconut or almond) plus a splash of almond or dairy-free cream, understanding it will alter flavor and creaminess.
  • 1/4 cup heavy cream
    → Adds luxurious richness and helps the custard cling to the bread; if you skip it, add an extra tablespoon or two of milk to maintain moisture. This is optional but highly recommended for a luscious mouthfeel.
  • 1 tsp pure vanilla extract
    → Enhances sweetness and depth of flavor; use high-quality vanilla or paste for a more pronounced aroma. For a stronger vanilla presence, add a small scrape of vanilla bean as well.
  • 1/2 tsp ground cinnamon
    → Provides warmth that complements the blueberries; you can toasting the spice briefly in the milk before combining to intensify flavor. Adjust to taste; nutmeg or cardamom can be added in small amounts for variation.
  • Pinch of salt
    → Elevates all other flavors and helps balance sweetness; do not omit.
  • 2 tbsp granulated sugar
    → Adds a touch of sweetness to the custard; adjust according to the sweetness of your bread and the filling. If using very sweet bread, reduce this to 1 tbsp or omit.

Cream Cheese Filling

  • 8 oz cream cheese, softened to room temperature
    → The creamy center of the stuffed toast; soft, evenly whipped cream cheese blends smoothly with sugar and vanilla. Beat until light and lump-free to ensure a silky filling that doesn’t tear the bread.
  • 1/4 cup granulated sugar
    → Sweetens the filling and balances the tang of cream cheese. Beat with the cheese until airy; you can reduce by a tablespoon if you prefer tangier taste.
  • 1/2 tsp vanilla extract
    → Adds creamy aroma to the cheesecake filling. Use pure vanilla for best flavor; you can substitute with vanilla bean paste for a stronger note.
  • 1 tablespoon lemon zest (grated from 1 lemon) or 1 teaspoon lemon juice
    → Brightens the filling and complements blueberries; zest provides fragrance, while juice adds tanginess. Grate zest finely to avoid bitter white pith.
  • 1 tablespoon cornstarch (optional)
    → Helps the filling set slightly as it heats, reducing runny centers. If you plan to serve immediately after cooking, you can omit; otherwise, whisk cornstarch with a tablespoon of the cream cheese mixture before combining.

Blueberry Filling

  • 1 cup fresh blueberries (washed and patted dry)
    → Provides bursts of blueberry flavor and color inside the toast; keep berries whole or lightly smash a portion to release juice while cooking. If using frozen berries, thaw and drain well to avoid extra moisture.
  • 2 tbsp granulated sugar
    → Sweetens the berries; adjust based on berry sweetness. If berries are very ripe, reduce sugar by a tablespoon.
  • 1 tsp lemon juice
    → Brightens the berry filling and helps with a glossy sauce as it cooks. Use freshly squeezed juice for best flavor.
  • 1 tsp cornstarch
    → Thickens the blueberry mixture into a jam-like center that stays put inside the stuffed toast. Make a slurry with a teaspoon of water if needed before adding to the pan.
  • 1/4 cup water or blueberry juice
    → Provides liquid for simmering; adjust to achieve your desired sauce thickness. Using blueberry juice intensifies color and flavor, but plain water works well too.

Assembling & Cooking

  • 2 tablespoons unsalted butter, divided
    → For frying the stuffed French toast; the butter yields a golden, crisp crust and rich flavor. Use half the butter to sear the stuffed sides first, then add more to finish cooking. If concerned about burning, mix with a small amount of neutral oil or use clarified butter.
  • Optional: cooking spray or a light drizzle of neutral oil
    → Alternative fat to prevent sticking and to reduce amount of butter if desired; use sparingly to maintain a crisp exterior without greasiness.

Serving & Garnish

  • Powdered sugar, for dusting (optional)
    → Elegant finish and a touch of sweetness; dust just before serving to prevent clumping. If you prefer a bolder presentation, a dollop of whipped cream can be added.
  • Pure maple syrup, for serving
    → Classic pairing that compliments blueberry and cream cheese; drizzle lightly to avoid soaking the toast and losing the crisp edges. Real maple syrup (not pancake syrup) yields a richer flavor.
  • Fresh blueberries for garnish (optional)
    → Adds brightness and a fresh bite; rinse, pat dry, and scatter on top or around the plate for color contrast and vibrant presentation.

Instructions

  • Whisk the softened cream cheese filling with granulated sugar, 1/2 teaspoon vanilla extract, and the lemon zest until the mixture is light, smooth, and lump-free.
    → This ensures a silky center that distributes evenly into the bread pockets and prevents lumps that could tear the crust during stuffing.
  • Prepare the blueberry filling by combining blueberries, 2 tablespoons sugar, 1 teaspoon lemon juice, 1 teaspoon cornstarch, and 1/4 cup water or blueberry juice in a small saucepan; simmer over medium heat, stirring occasionally, until the mixture thickens to a glossy jam-like consistency.
    → Thickened filling stays in the center and coats the bread without seeping out excessively during frying.
  • Whisk the custard base in a medium bowl by blending eggs until uniform, then gradually whisk in 1 cup whole milk, 1/4 cup heavy cream, 1 teaspoon vanilla, 1/2 teaspoon ground cinnamon, a pinch of salt, and 2 tablespoons sugar until completely combined and smooth.
    → A well-emulsified custard yields even soaking without separating and helps set the filling as the toast cooks.
  • Trim or remove crusts if you prefer neater stuffed edges, then cut pockets into each slice of day-old brioche or challah using a sharp knife, creating a cavity about 1 inch deep without cutting all the way through the opposite edge.
    → Deep pockets are essential to hold both fillings securely while maintaining structural integrity during soaking and frying.
  • Fill the pockets by piping or spooning a generous amount of cream cheese filling into each cavity, followed by a generous dollop of blueberry filling; press the opening gently to seal and prevent leakage.
    → Layering gives a balanced bite of tangy cheese, bright berries, and soft bread; avoid overfilling to prevent spillage during cooking.
  • If time permits, rest the stuffed slices on a rack for 5–10 minutes at room temperature to allow the fillings to settle slightly.
    → A brief rest helps fillings set so they stay put when the slices soak and fry, reducing the chance of ooze.
  • Dip each stuffed slice into the prepared custard, submerging for 20–30 seconds and turning once to ensure thorough absorption without oversaturation.
    → Proper soaking fully flavors the bread while preventing it from turning mushy or falling apart during cooking.
  • Preheat a heavy skillet or cast-iron pan over medium heat and melt 1 tablespoon unsalted butter, swirling to coat the surface evenly.
    → Butter creates a rich, crisp crust and prevents sticking; maintain moderate heat so the butter foams without browning too quickly.
  • Carefully place the soaked, stuffed slices seam-side down in the skillet and cook until the first side is golden brown and firm, about 2–3 minutes; resist the impulse to flip too early to prevent tearing.
    → A steady, patient sear builds color and crust while forming a sturdy exterior that encases the filling.
  • Flip the slices and cook the second side, adding the remaining 1 tablespoon of butter to the pan if needed, until the second side is golden and the center is heated through, about 2–3 more minutes.
    → Extra butter enriches flavor and deepens color; adjust heat to avoid burning the sugar in the custard or the exterior.
  • If desired, transfer the cooked French toast to a warm oven (approximately 200°F / 90°C) to keep warm while you finish the remaining slices.
    → This step prevents soggy edges by maintaining crust crispness as you plate and serve.
  • To serve, dust each slice with powdered sugar, drizzle with pure maple syrup, and garnish with fresh blueberries for a vibrant finish.
    → The sugar and syrup provide a delicate sweetness that complements the tangy filling, while blueberries add brightness and color to the plate.

Notes

This Blueberry Cheesecake Stuffed French Toast is a decadent brunch centerpiece that layers a creamy cheesecake filling with a blueberry swirl inside custardy slices of bread for a truly indulgent breakfast treat. For gluten-free eaters, use a sturdy gluten-free loaf and certified gluten-free baking powder; day-old bread helps the filling hold its shape without becoming soggy, and you can prep the components in advance by whipping the cheesecake filling and macerating the blueberries, then refrigerating until you’re ready to assemble and cook.

To cook, sear the stuffed sides in butter to develop a golden, crisp crust, then finish cooking until the custard is set and the filling is warm and luscious. If dairy-free is preferred, substitute the milk and cream with a thick non-dairy blend and use a dairy-free cream cheese; the texture and flavor will shift slightly but remain delicious. Serve with a light dusting of powdered sugar, a drizzle of pure maple syrup, and extra fresh blueberries for brightness. Leftovers refrigerate well for 1–2 days and reheat nicely in a 350°F oven or a quick skillet, making this a great make-ahead option for weekend brunch.

Tips

Prep & Bread Selection

  • Use day-old brioche or challah for the best structure; if you’re gluten-free, choose a sturdy gluten-free loaf specifically designed for French toast. The bread should be firm enough to hold the filling without falling apart.
  • Trim crusts if you want neater stuffed edges for a cleaner slice, or leave them on for a rustic look. If your bread is very fresh, toast or leave it out to dry for 10–15 minutes to reduce excess moisture.
  • Lay the slices in a single layer and cover loosely so they don’t dry out while you prepare the fillings.

Custard Dipping Tips

  • Use room-temperature eggs for a smoother custard; if your eggs are cold, whisk longer to fully emulsify and prevent a lurching texture.
  • Choose whole milk for creamier custard; if you’re dairy-free, use a thick non-dairy milk plus a splash of dairy-free cream and adjust flavor accordingly.
  • Heavy cream adds richness and helps the custard cling to the bread; if you skip it, increase milk by a tablespoon or two to maintain moisture.
  • Mix vanilla, cinnamon, and salt thoroughly into the custard so every slice tastes evenly seasoned; a small pinch of salt goes a long way to balance sweetness.
  • For a sweeter filling, keep the sugar at 2 tbsp; if your bread is very sweet or you prefer less sweetness, reduce to 1 tbsp or omit.
  • Dip each bread slice briefly—about 15–20 seconds per side. Soaking too long can make the bread fall apart when cooking, while too little soaking yields a dry center.

Cream Cheese Filling Tips

  • Let cream cheese soften to room temperature and beat until light, fluffy, and lump-free to avoid tearing the bread when filling.
  • Beat the filling with sugar and vanilla until airy; this helps counteract tang from the cream cheese and creates a silky center.
  • Use lemon zest (grated finely) for bright aroma; if you prefer, you can swap in lemon juice but keep it to 1 tablespoon to prevent a too-sour filling.
  • If you want the center to set a bit more, whisk in 1 tablespoon cornstarch with a tablespoon of the cream cheese mixture before combining; this helps the center hold its shape as it cooks.
  • Test the filling thickness by scooping a small amount onto a spoon—if it slides off too easily, whip a bit longer or add a touch more cream cheese.

Blueberry Filling Tips

  • Fresh blueberries give brighter color and a pop of texture; if using frozen, thaw completely and drain excess liquid to prevent soggy centers.
  • Lightly smash a portion of the berries to release juice, but keep most whole for texture and to maintain distinct pockets of berry flavor.
  • Balance tartness with sugar based on berry sweetness; very ripe berries may need less sugar.
  • Use lemon juice to brighten and help the mixture thicken; add gradually and taste as you go.
  • Thicken the sauce with 1 teaspoon cornstarch dissolved in a little water (slurry) before adding to the pan; this helps the center stay contained during cooking.
  • Tip: simmer the blueberry filling briefly to combine flavors, then cool slightly before spooning into the bread pockets to avoid leaking while cooking.

Assembling & Cooking Tips

  • Butter is key for color and flavor. Use 2 tablespoons, adding half at the start to sear the stuffed sides and the rest later to finish cooking. If worried about burning, mix with a small amount of neutral oil or use clarified butter.
  • For a lighter crust, you can use cooking spray or a light drizzle of neutral oil as an alternative to butter, but you may lose some richness.
  • Preheat the pan to medium-low before adding the stuffed bread. A moderate heat ensures the custard sets without burning the exterior.
  • Cook the stuffed slices slowly, turning once to achieve an even golden crust. If you see excessive browning, lower the heat slightly and cover the pan briefly to finish cooking through.
  • If the filling seems runny as you cook, you can cover the pan for a minute to help set the center, then uncover to finish crisping the crust.

Serving & Garnish Tips

  • Dust with powdered sugar just before serving to avoid clumping; for a neater presentation, sift lightly from a height over each slice.
  • Drizzle real maple syrup sparingly to preserve the crisp crust; the syrup will melt into the filling, so a light pour is best.
  • Top with fresh blueberries or a dollop of whipped cream for a restaurant-style finish; a mint leaf adds a fresh, bright touch.

Make-Ahead, Storage & Reheating

  • Stuffed slices can be assembled, refrigerated loosely covered, for up to 12 hours before cooking. Allow to come to near room temperature before cooking for even results.
  • Leftovers: refrigerate in an airtight container for up to 2 days. Reheat gently in a skillet over low heat, adding a splash of milk if needed to loosen the center.
  • To freeze, freeze assembled but uncooked stuffed slices on a tray, then transfer to a freezer bag. Bake from frozen, adding a few minutes to the cooking time and ensuring the center is heated through.

Safety & General Tips

  • Keep raw eggs refrigerated; do not reuse dipping mixture that has sat at room temperature for more than 2 hours.
  • Wash berries and fresh produce well; pat dry thoroughly to prevent extra moisture from seeping into the bread.
  • Use separate utensils for the raw custard and the finished dish to avoid cross-contamination.

FAQ

What is Blueberry Cheesecake Stuffed French Toast?

A decadent breakfast/dessert idea featuring thick slices of bread stuffed with a creamy cheesecake and blueberry filling, dipped in an egg custard, then cooked until golden. Finish with warm blueberry sauce or maple syrup for a luscious finish.

What ingredients do I need?

Flavor and structure come from these basics (adjust to your servings):

  • 8 thick slices brioche or challah bread
  • 8 oz cream cheese, softened
  • 1/4 cup powdered sugar (plus extra for dusting)
  • 1 tsp vanilla extract
  • 1 cup blueberries (fresh or frozen)
  • 1 tsp lemon zest (optional)
  • 4 large eggs
  • 1 cup milk or half-and-half
  • 1/2 tsp ground cinnamon
  • 2 tbsp unsalted butter (for frying)
  • Optional blueberry sauce: 1 cup blueberries, 2 tbsp sugar, 1 tsp lemon juice, 1 tsp cornstarch (slurry)

Should I use day-old bread?

Yes. Slightly stale bread absorbs the custard better and holds the stuffed filling without falling apart. If your bread is fresh, toast lightly to dry it out.

How do I stuff the bread with cheesecake and blueberries?

Steps you can follow:

  • Beat together cream cheese, powdered sugar, vanilla, and lemon zest (if using) until smooth to make the filling.
  • Slice each bread slice to create a pocket or slit (do not cut all the way through).
  • Fill the pocket with a spoonful of cream cheese filling and a few blueberries; press gently to seal.
Should I bake it in the oven or cook it on the stove?

Both methods work:\n
– Stove: Melt 1–2 tsp butter in a skillet over medium heat. Dip stuffed slices in a light egg custard (eggs + milk + cinnamon) and cook 3–4 minutes per side until golden and cooked through.\n
– Oven: Preheat to 350°F (175°C). Dip stuffed slices in the custard, place in a greased baking dish, and bake 25–30 minutes, flipping halfway, until set and golden.

How long does it take to make this recipe?

Approximate timing:

  • Prep (filing and stuffing bread): 15–25 minutes
  • Cooking: 15–25 minutes (depending on method)
  • Total: about 35–60 minutes
How should I serve and garnish it?

Serve warm with a drizzle of warm blueberry sauce or maple syrup, a dusting of powdered sugar, and a dollop of whipped cream if desired. Fresh extra blueberries add a nice color contrast.

Can I make this ahead or freeze leftovers?

Yes. Options:

  • Assemble stuffed slices, then refrigerate unbaked overnight and bake when ready.
  • Up to you: freeze unbaked stuffed slices (individually wrapped). Thaw overnight in the fridge, then bake or sauté as directed.
  • Leftovers refrigerate 2–3 days; reheat in a toaster oven or skillet until warmed through.
Can I customize this recipe (fruit, dairy-free, gluten-free)?

Absolutely:

  • Fruit: Substitute or mix in raspberries, strawberries, or peaches with the cream cheese filling or sauce.
  • Gluten-free: Use sturdy gluten-free bread designed for French toast.
  • Dairy-free: Use dairy-free cream cheese, almond or soy milk, and dairy-free butter; the texture will be similar.
  • Lower-sugar: Reduce powdered sugar in the filling and use a sugar-free syrup or unsweetened fruit sauce.
What equipment is helpful for this recipe?

Helpful tools include:

  • Sharp knife or pocket-cutting tool for bread
  • Mixing bowls for filling and custard
  • Skillet with a lid or a baking dish for oven method
  • Whisk for custard, spatula for filling
  • Whisk or fork for blueberry sauce (if making sauce)
How do I know when it’s done?

To test doneness: For the stove method, the bread should be golden on the outside and the filling should be warm and slightly melted. For the oven method, the center should be set; a knife inserted in the center should come out clean. The blueberries should be softened and sauce thickened if using it.

Introduction / Hook

Picture a soft, sun-warmed donut that doesn’t derail your nutrition goals, but instead fuels them. A bite that feels indulgent, yet somehow light—like a comforting glaze of vanilla and cinnamon that whispers you’ve earned a treat without breaking a sweat. This is not your average pastry. It’s a modern take on a classic favorite: high protein donuts that deliver substance and satisfaction in every mouthful. The first inhale brings a hint of sweetness and bakery aroma, the kind that makes your kitchen feel like a wholesome cafe. The second bite reveals a tender crumb with a subtle bounce, as if the donut learned a new strength routine and came out glowing. If you’ve ever wanted dessert that doubles as a post-workout recovery or a smart snack that fits into a busy day, you’re about to discover a community of recipes built on protein-forward ingredients, gentle sweetness, and a texture that holds up to the best donut lovers among us. Welcome to a world where flavor meets fitness, where breakfast and snack time blur into one delicious ritual, and where every donut bite becomes a small celebration of nourishment and joy.

High protein donuts aren’t just a trend; they’re a bridge between indulgence and discipline—proof that you don’t have to choose between taste and nutrition. In these pages you’ll find donuts that are airy and chewy, lightly sweet without overwhelming sugar, and crafted with ingredients that support healthy habits. Whether you’re fueling a vigorous morning, winding down after a workout, or seeking a kid-friendly snack that’s a little more wholesome than the usual fried fare, these recipes aim to please a wide range of tastes and dietary needs. The approach is simple: maximize flavor while prioritizing protein, fiber, and balanced fats, so each donut offers real staying power rather than a fleeting sugar rush. Let’s embark on a journey through flavors you know and love, elevated by ingredients that help you feel good long after the last crumb is gone.

The Story Behind the Dish

Donuts have a storied place in culinary history, evolving from humble yeasted rings to modern variations that range from crumbly brioche coves to cloud-light cake donuts. The rise of high protein donuts is part of a broader shift toward mindful indulgence—where people want the joy of a sweet treat without the typical post-snack slump. The concept began weaving itself into fitness communities and wellness-minded kitchens as nutrition science highlighted the importance of protein for muscle repair, satiety, and energy balance. Bakers and home cooks started experimenting with textures and textures that could stand up to the extra moisture and structure required by protein-rich batters and batters inspired by yogurt, whey, or plant-based proteins. The result is a donut that feels familiar in the best possible way: soft, tender, with a gentle crumb and a finish that doesn’t leave you craving more sugar. It’s a culinary story of adaptation—embracing protein powders, Greek yogurt, nut flours, and clever binders to craft a treat that respects both flavor and function.

This evolution isn’t just about ingredients; it’s about a mindset. It’s about seeing a donut as a canvas for balance: a little sweetness, a lot of nourishment, and a texture that invites you to nibble again rather than reaching for something tasteless to tide you over. The home kitchen becomes a science lab and a bakery at once, where you can tailor protein sources to your preferences, swap flours to suit dietary needs, and still land on a finished product that looks as good as it tastes. The result is a set of donuts that feel familiar enough to crave, yet modern enough to fit into contemporary nutrition goals. In short, these high protein donut recipes honor tradition while embracing innovation, turning a timeless pastry into a flexible, everyday-friendly treat.

Why You’ll Love This Recipe

  • Protein-forward satisfying treats: Each donut is designed to deliver a meaningful amount of protein, helping support muscle repair and satiety between meals.
  • Soft, bakery-style crumb: The texture aims for a tender interior with a delicate crust, not a dense or crumbly bite, so they feel indulgent without being heavy.
  • Versatile base with room to customize: The recipes lean on adaptable ingredients—different flours, dairy options, and protein sources—so you can tailor them to allergies, preferences, or what you have on hand.
  • Quick to assemble and bake: A performance-friendly bake or even a skillet-based approach means you can whip up a batch on busy days or weekend mornings without a marathon in the kitchen.
  • Great for breakfast, snack time, or dessert: They bridge the gap between a post-workout ritual and a cozy treat, making them suitable for many occasions.
  • Kid-friendly potential: With gentle sweetness and familiar flavors, these donuts can become a smart, protein-rich favorite in a child’s lunchbox or after-school snack rotation.
  • Customizable macros and flavors: Build versions that are vegan, gluten-free, or lower in sugar by adjusting protein types, flours, and add-ins, all without sacrificing the donut identity.

Flavor Profile & Texture

These high protein donuts are crafted to balance sweetness with a restrained, refined depth. Expect a gentle aroma that mingles vanilla, a hint of citrus zest, and a touch of warmth from spices like cinnamon or nutmeg—subtle notes that wake up the senses without overwhelming the palate. The glaze or topping, when used, adds a glossy finish that hints at chocolate, berry, or caramel, depending on the variation, while staying light enough to preserve the integrity of the protein-forward base. The interior is moist but sturdy enough to hold its shape, a crumb that breathes with each bite and yields to a soft bounce rather than a dry crumble. The outer surface often develops a delicate crust or crisp edge from the baking process, creating a satisfying textural contrast with the tender core. The protein elements contribute a mild, pleasant fullness on the finish, helping the donut feel substantial without heaviness. Subtle dairy tang or nutty undertones can emerge, depending on the chosen ingredients, to create a rounded, multi-dimensional flavor that lingers pleasantly after the last bite.

Texture-wise, think of a donut that’s perfectly moist in the middle, with a gentle spring—almost a micro-ponge—when you press it. The mindful use of nut flours and binding agents ensures the donut doesn’t crumble or dry out, keeping a cohesive bite from first bite to last. If you’re leaning toward a lighter, more cake-like mouthfeel, you can lean into certain flours or lighten the sweetener slightly; if you crave a touch more density and protein punch, you can increase the protein ratio or opt for a richer dairy base. The flavor profile remains centered on comfort and familiarity, with modern touches that keep it exciting: a whisper of citrus zest for brightness, a dash of espresso powder for depth, or cocoa nibs for a chocolatey crunch. Each variation preserves the essence of a donut—soft, accessible, and joyfully edible—while elevating it with protein-powered nutrition.

Occasions & Pairings

High protein donuts are versatile enough to star in many moments. They’re ideal for a weekend grab-and-go breakfast when you want something more substantial than a plain pastry. They work wonderfully as post-workout treats that satisfy a sweet tooth without sabotaging recovery goals. They’re also a welcoming crowd-pleaser at brunches, potlucks, or kid-friendly gatherings, where a familiar treat carries a whisper of healthful intent. For a comforting after-dinner bite, pair them with a bold cup of coffee or a glass of milk, which complements the pastry’s sweetness and helps round out the macros. If you’re serving guests with different dietary needs, the gluten-free or vegan variants can provide inclusive options without sacrificing flavor or texture.

Suggested pairings:
– Coffee or espresso drinks, from a creamy latte to a robust black pour-over
– A glass of cold milk or a fortified plant-based beverage for a post-workout balance
– A small bowl of fresh berries or a berry compote to add brightness and acidity
– A simple yogurt or ricotta dip for a protein-friendly indulgence
– A light, citrus-forward fruit salad to cleanse the palate between bites

Tips, Variations & Substitutions

Flexibility is at the heart of these donuts. The core idea is to maximize texture and protein while staying within your flavor preferences. Below are several pragmatic directions you can take, depending on your dietary needs, equipment, and taste desires.

Vegan and Dairy-Free

Choose plant-based protein sources and dairy alternatives to keep these donuts cruelty-free and friendly for those avoiding animal products. Use a plant-based milk (almond, soy, oat, or cashew) in place of dairy milk, a dairy-free yogurt or dairy-free yogurt substitute for moisture and tang, and a vegan protein powder such as pea, rice, or a blend designed for baking. Flax or chia “eggs” can act as binders if you’re avoiding eggs entirely, helping to maintain structure without sacrificing crumb quality. For toppings, opt for a vegan glaze or simple dusting of coconut sugar and cocoa to preserve the clean, dairy-free profile.

Gluten-Free and Low-Carb Options

Gluten-free bakers often rely on almond flour, coconut flour, or a gluten-free all-purpose blend. For a lower carbohydrate approach, you can emphasize high-protein flours such as almond flour and coconut flour with a judicious amount of binding agents to maintain texture. Pea protein or whey protein isolates can be swapped in, but you may need to adjust moisture with additional dairy-free milk or yogurt to prevent a dry crumb. Keep in mind that coconut flour absorbs more liquid, so the batter consistency should be looser than a typical wheat-based dough. Fine-tuning is part of the process, and the end result tends to be wonderfully moist with a nutty, creamy finish.

Flavor Twists and Regional Variations

Turn these donuts into a gallery of flavors. Add a hint of citrus zest (orange, lemon, or lime) for brightness; fold in cacao nibs or dark chocolate chips for a chocolate-forward bite; or infuse with cinnamon, pumpkin spice, or cardamom for a cozy, bakery-inspired aroma. Global twists are also easy to test: a matcha-infused version for a gentle grassy note, a pistachio-tleck version with fine chopped nuts, or a cardamom-forward variant reminiscent of certain Middle Eastern pastries. If you love coffee flavors, a touch of espresso powder can deepen the profile without overpowering the protein-forward base.

Kid-Friendly Variations

To appeal to younger palates while maintaining a protein focus, keep the sweetness balanced and avoid overly strong flavors. Subtle vanilla, a dash of cinnamon, and a light glaze can make the donuts approachable for kids while still delivering a nutritious edge. You can also offer a toppings bar with options like crushed nuts, unsweetened shredded coconut, or a light chocolate drizzle so children can customize, encouraging curiosity and safe kitchen exploration.

Make-Ahead and Batch-Friendly Tips

Because these donuts are often baked in batches, planning ahead is key. Bake a larger batch and freeze the donuts individually, then reheat in a warm oven or toaster oven to restore the fresh-baked touch. Consider partially freezing the batter or batter portions to maintain portion control for on-demand baking. If you’re frosting or glazing, glaze portions separately after reheating to preserve the glossy finish and texture. This approach makes it easy to grab a protein-packed treat during a busy morning or a busy afternoon.

Storage & Make-Ahead Ideas

Proper storage preserves texture and flavor. If kept in an airtight container at room temperature, high protein donuts typically stay fresh for 2 to 3 days, depending on the base ingredients and moisture content. For longer storage, refrigerate for up to a week or freeze individually wrapped donuts for up to a couple of months. When you’re ready to enjoy, reheat in a low-temperature oven (about 325°F / 165°C) for 5 to 8 minutes or until warmed through, or use a microwave for a quick 15-20 seconds to restore moisture. If you’ve used a glaze, reheat without glazing to maintain the glaze’s integrity; re-glaze after reheating if desired. For batch prep, you can bake the donuts ahead of time and freeze them unglazed, applying a fresh glaze or topping after reheating to recapture that bakery-fresh appeal.

Make-ahead strategies that work well with these donuts include:

  • Prep dry ingredients in advance and store in an airtight container to speed up mixing on busy mornings.
  • Prepare dairy-free or vegan versions ahead of time and refrigerate the batter briefly to help with shaping and rising when you bake.
  • Freeze baked donuts once cooled and individually wrap them; reheat straight from the freezer to enjoy a near-fresh texture.
  • Assemble glaze or toppings separately and add just before serving for maximum gloss and crunch.

Fun Facts & Trivia (Optional)

– The donut’s distinct ring shape has practical roots: the hole made it possible for the dough to cook more evenly by increasing surface area and reducing center rawness during frying in traditional methods. While high protein donuts often rely on baking rather than frying for a healthier profile, the ring shape persists as a familiar and comforting silhouette.

– Protein-enriched donuts are part of a broader culinary trend that blends performance nutrition with everyday baking. This approach reflects a movement toward foods that support activity, recovery, and energy without sacrificing the joy of a sweet treat. It’s a reminder that nourishment can be enjoyable, balanced, and accessible to people with varied dietary needs.

– Many protein-forward donut recipes borrow techniques from traditional cake donuts—airy crumb, gentle sweetness, and a soft bite—while introducing modern ingredients like whey, casein, or plant-based proteins to bolster protein content without compromising texture. The result is a testament to how science and baking can collaborate to create desserts that align with wellness goals.

– The science of moisture management is particularly important in high-protein baking. Ingredients such as yogurt, mashed fruits, or puréed vegetables can contribute to moisture and tenderness, offsetting the drying tendency of protein-rich flours and powders. This balance is key to achieving a donut that feels luxurious yet approachable.

– Donuts have long been a symbol of convivial break times—affectionately shared among friends, coworkers, and families. When reimagined with protein-forward ingredients, they remain holiday-ready or everyday-friendly without requiring a special occasion to justify a treat. They invite you to slow down just long enough to savor a bite, then move forward nourished and satisfied.

With these insights, you’re prepared to explore a wide range of high protein donut variations that fit into your life, your values, and your taste preferences. The next time you crave something comforting and sweet, consider this family of donuts as your go-to option—rich in flavor, generous in protein, and wonderfully adaptable to your kitchen’s personality.

Ingredients

Donut Base

  • 1 cup almond flour
    → Almond flour provides a tender, moist crumb in gluten-free baking and adds healthy fats and protein to boost the donut’s protein content. It should be measured by spooning into a dry cup and leveling off for accuracy; using blanched almond flour yields a lighter texture with less grittiness. Because it’s denser than wheat flour, you may need to adjust the other dry ingredients slightly or rely on eggs for moisture. Store sealed in a cool place or refrigerate to maintain freshness, especially in warm climates.
  • 1/2 cup gluten-free oat flour
    → Oat flour gives a light, mildly sweet crumb and contributes fiber. If store-bought oat flour isn’t available, grind gluten-free rolled oats in a high-powered blender until fine, then sift. It tends to absorb more liquid, so you may need to adjust the milk slightly. Use certified gluten-free oats if you need to keep the recipe gluten-free; store extra flour in an airtight container to maintain freshness.
  • 1/2 cup vanilla protein powder (unflavored or vanilla)
    → Protein powder boosts the donut’s protein content and helps form a sturdy crumb that holds together after baking. Choose whey for a lighter texture or plant-based for dairy-free. Vanilla or unflavored works best to keep flavor balanced; if the batter is too thick, whisk in a splash more milk, and if too thin, add a touch more flour or protein powder to regain structure.
  • 2 large eggs
    → Eggs bind the batter, trap air for a bit of rise, and contribute moisture. Use eggs at room temperature for better emulsification and volume. If you must substitute, you can replace each egg with a flax egg (1 tablespoon ground flaxseed mixed with 3 tablespoons water, rested 5–10 minutes) for a denser but workable texture.
  • 1/2 cup unsweetened almond milk
    → Provides moisture and helps achieve a pourable batter that fills donut molds evenly. Use unsweetened to control sweetness and flavor; dairy milk can be substituted if preferred, but you may need to adjust the amount slightly to maintain the correct batter consistency.
  • 1/2 cup plain Greek yogurt
    → Adds richness, moisture, and extra protein, contributing to a tender crumb and a slight tang that complements banana and vanilla. If dairy-free is required, substitute with a thick coconut yogurt or other plant-based yogurt and whisk until smooth; note that dairy-free yogurts can alter texture slightly, so you may need to adjust thickeners accordingly.
  • 1/4 cup mashed ripe banana (or unsweetened applesauce)
    → Provides moisture, natural sweetness, and binding. Use a very ripe banana with plenty of brown speckles to maximize sweetness and aroma; mash thoroughly to a smooth texture to prevent lumps. If you prefer not to use banana, applesauce can be substituted in the same quantity, but expect a milder flavor and slightly different crumb.
  • 2 tablespoons pure maple syrup (optional)
    → Adds natural sweetness and moisture with a subtle caramel note that pairs beautifully with banana and vanilla. Use pure maple syrup rather than pancake syrups for better flavor; if omitted, reduce the total sugar in the batter accordingly or increase the yogurt slightly to compensate for moisture.
  • 1 teaspoon vanilla extract
    → Enhances aroma and depth of flavor; use pure vanilla extract for best results. If available, you can also use vanilla bean paste for a stronger vanilla presence. Add to the wet ingredients and whisk well to distribute evenly.
  • 1 teaspoon baking powder
    → Leavening that helps the donuts rise and achieve a lighter crumb. Use fresh baking powder for best lift; old powder loses potency and can result in dense donuts. Do not rely on baking soda alone here unless your batter contains a significant acidic component to activate it.
  • 1/4 teaspoon baking soda
    → Supplemental leavening that works with the yogurt and banana to create a bit more lift. Use only if your yogurt and fruit provide enough acidity; otherwise, the batter may become pale and dense. Ensure even distribution by whisking with the dry ingredients before combining with the wet.
  • 1/4 teaspoon fine salt
    → Balances sweetness and enhances the flavors of banana, vanilla, and chocolate in the glaze or toppings. Use fine salt for even distribution; if using salted butter in other components, adjust the amount accordingly to avoid oversalting.
  • 1–2 tablespoons melted coconut oil (or light neutral oil)
    → Adds moisture, tenderness, and a bit of richness to the crumb. Use melted and cooled oil to prevent cooking the batter; if you prefer a neutral flavor, substitute with avocado oil or light canola/rapeseed oil. Note that coconut oil will impart a subtle coconut aroma; refined coconut oil will be more neutral.

Glaze

  • 1/2 cup powdered sugar
    → A smooth base for the glaze; sift before mixing to avoid lumps and achieve a glossy finish. The glaze sets as it cools, so apply while donuts are still slightly warm if you desire a thin, glossy coating. If you want a thicker glaze, add more sugar gradually; for a thinner glaze, whisk in a little more milk. Use as the final sweet coating to complement the protein-forward base.
  • 1–2 tablespoons milk (dairy or non-dairy)
    → Liquid to reach your desired glaze consistency; start with 1 tablespoon and add more as needed. Warm the milk slightly if you’re in a cool kitchen to help dissolve the sugar and create a smooth glaze. Choose a milk that fits your dietary needs; unsweetened almond or oat milk are good options.
  • 1/2 teaspoon vanilla extract
    → Adds depth to the glaze and echoes the donut batter; use pure vanilla for best aroma. If you prefer a different flavor, you can replace with a touch of almond extract (used sparingly) or citrus zest for a bright finish.
  • Pinch of salt
    → Helps balance sweetness and prevents the glaze from tasting bland. A tiny pinch is enough; adjust to taste if you’re making a large batch.

Optional Toppings

  • 2 tablespoons chopped almonds (optional)
    → Adds a satisfying crunch and nutty flavor. To maximize aroma and crunch, toast the almonds in a dry skillet over medium heat for 2–3 minutes or bake at 350°F (175°C) until fragrant, then cool and chop evenly so they distribute evenly across the donuts. Almonds also contribute healthy fats and protein to the finished treat.
  • 2 tablespoons shredded coconut (optional)
    → Provides a tropical aroma and textural contrast. Lightly toast the coconut in a dry skillet to deepen flavor before scattering over the glaze. Use unsweetened coconut to keep sugar content in check and avoid added sweetness.
  • 1–2 tablespoons mini chocolate chips (optional)
    → Introduces melted pockets of chocolate for a decadent touch. Fold into the batter before baking or sprinkle on top of the glaze while it’s still tacky to help chips adhere. For vegan diets, choose dairy-free chocolate chips.

Instructions

  • Preheat your oven to 350°F (175°C) and grease a donut pan well, or line with silicone donut liners to ensure easy release.

    → This prevents sticking and allows for clean, uniform donuts with smooth glaze adhesion.
  • Whisk together the almond flour, gluten-free oat flour, vanilla protein powder, baking powder, baking soda, and fine salt in a large bowl until evenly combined and free of clumps.

    → Sifting or whisking first distributes leavening and salt uniformly for an even rise and tender crumb.
  • In a separate bowl, whisk the eggs, unsweetened almond milk, plain Greek yogurt, mashed ripe banana, maple syrup (if using), and vanilla extract until smooth and fully emulsified.

    → Room-temperature eggs emulsify better and create a cohesive batter with moisture and lift from the leaveners.
  • Gradually pour the wet mixture into the dry ingredients while stirring with a flexible spatula, folding just until there are no visible streaks of flour and the batter looks thick but pourable.

    → Overmixing develops gluten and can make the donuts dense; gentle folding preserves tenderness.
  • Let the batter rest for 5–10 minutes to hydrate the flours and allow the oats to fully absorb moisture, creating a cohesive, scoopable batter.

    → Resting helps prevent crumbly donuts and yields a sturdier structure for bake stability.
  • If the batter appears too thick to pipe or spoon into the pan, whisk in a tablespoon of almond milk at a time until the consistency is scoopable but not runny.

    → Slight adjustability ensures even filling and proper bake height without collapsing.
  • Spoon or pipe the batter into the donut cavities, filling each about 3/4 full and smoothing the tops with a small spatula so they bake evenly.

    → Filling to 3/4 prevents doming and overflow, yielding classic ring shapes with a uniform glaze surface.
  • Bake in the preheated oven for 12–15 minutes, or until the edges are lightly golden and a toothpick inserted in a donut tests clean.

    → Proper bake time yields a tender crumb with slight spring and prevents underbaking or dry centers.
  • Meanwhile, prepare the glaze by whisking powdered sugar, 1 tablespoon of milk at a time, vanilla extract, and a pinch of salt in a small bowl until smooth and glossy.

    → A smooth glaze adheres to the warm donuts and sets to a shiny finish as it cools.
  • Warm the glaze slightly if it thickens, or thin with additional milk in small increments to achieve a pourable consistency that coats evenly without dripping excessively.

    → Controlling thickness ensures a uniform coat that hardens into a gloss rather than pooling in the glaze.
  • Cool the donuts in the pan for 5–7 minutes, then transfer to a wire rack to finish cooling completely before glazing, preventing the glaze from sliding off on a hot surface.

    → This ensures a stable surface for the glaze and prevents a soggy bottom.
  • Dip the cooled donuts into the glaze or spoon glaze over the tops, allowing excess to drip back into the bowl and the glaze to set for a glossy cap.

    → Applying glaze while slightly warm helps it adhere and creates a smooth, even coating that hardens to a sheen.
  • If desired, toast the optional toppings—almonds and shredded coconut—in a dry skillet over medium heat for 2–3 minutes or until fragrant, then sprinkle them evenly over the still-wet glaze for texture and appearance.

    → Toasting enhances aroma and crunch, contrasting with the tender crumb of the donuts.
  • Sprinkle mini chocolate chips over the glaze while it is still tacky so they adhere and create pockets of melted chocolate after the glaze sets.

    → The pockets of chocolate add richness and appeal without overwhelming the protein-forward base.

Notes

These high-protein donuts are naturally tender and banana-forward with almond flour, gluten-free oat flour, and protein powder that boost the protein per bite. They stay moist from Greek yogurt and mashed banana, with eggs providing structure; vanilla and maple syrup add depth and a hint of caramel. For best texture, whisk the dry ingredients separately, then gently fold in the wet; avoid overmixing to keep the crumb light. If batter is too thick, splash in a little extra almond milk; if too thin, add a touch more almond flour or protein powder. Bake in donut molds until a toothpick comes out clean; they should be lightly golden and springy. Let cool slightly before glazing. The glaze of powdered sugar with a splash of milk and vanilla creates a glossy, protein-friendly finish; adjust thickness by adding milk gradually. Optional toppings like toasted almonds, shredded coconut, or mini chocolate chips add crunch and flavor. These donuts freeze well and make a great on-the-go protein snack. If you want dairy-free, substitute Greek yogurt with thick coconut yogurt and consider a dairy-free glaze; store-bought dairy-free chocolate chips work for toppings. Always ensure your oats and baking powder are certified gluten-free if you have gluten intolerance.

Tips

Tips for Perfect High-Protein Donuts

  • Measure dry ingredients by spooning into the cup and leveling off with a knife. This prevents packing almond flour and oat flour, which can make the donuts dense.
  • Blanched almond flour yields a lighter crumb than almond meal. If you use almond meal, expect a coarser texture and consider adding a touch more yogurt or milk to keep the batter moist.
  • Oat flour tends to absorb more liquid. Start with the specified amount of milk and add 1–2 teaspoons at a time if the batter seems too stiff.
  • Protein powder helps with structure and protein content. If the batter is too thick, whisk in a splash of milk; if too thin, add a bit more protein powder or a touch more almond flour to regain structure.
  • Eggs at room temperature emulsify better and add volume. If you substitute, a flax egg works but will yield a slightly denser texture.
  • For dairy-free needs, use a thick plant-based yogurt and dairy-free milk. The batter will still be rich, but you may want to adjust thickness with a small addition of yogurt or flour to maintain a tender crumb.
  • Very ripe bananas provide maximum sweetness and aroma. Mash thoroughly to avoid lumps; if using applesauce instead, expect a milder banana flavor and a slightly different crumb.
  • Warm milk slightly before mixing the glaze to help the sugar dissolve for a smooth, glossy finish.
  • When glazing, apply the glaze while donuts are still warm for a thinner, glossy coating that sets beautifully. If you want a thicker glaze, add sugar gradually and test the consistency.
  • Sift powdered sugar for a lump-free glaze. A pinch of salt in the glaze helps balance sweetness and enhances flavor.
  • Toasted toppings boost flavor and crunch. Toast almonds or coconut in a dry skillet until fragrant before using; ensure any chocolate chips are vegan if needed.
  • Fill donut molds about 2/3 full to allow for rising without overflow. Lightly grease the molds and dust with a little almond flour if sticking is a concern.
  • Store leftovers in an airtight container. For best taste and texture, reheat gently (about 10–15 seconds in the microwave or a few minutes in a low oven) to refresh the crumb.

FAQ

What makes a donut high-protein?

High-protein donuts use protein-rich ingredients like whey or casein protein powder, Greek yogurt or cottage cheese, and eggs to boost protein per serving. A typical high-protein donut can provide roughly 15–25 g of protein depending on the recipe and portion size.

What ingredients are typically used in a basic high-protein donut recipe?

Common ingredients include:

  • Protein powder (vanilla or unflavored)
  • Almond or almond-flour blend (or oat flour for gluten-free)
  • Eggs
  • Greek yogurt or cottage cheese (or dairy-free yogurt)
  • Milk or plant-based milk
  • Baking powder
  • Sweetener (sugar, honey, or erythritol)
  • Vanilla extract and optional spices (cinnamon, cocoa powder, nutmeg)
Should I bake or fry high-protein donuts?

Baking is the healthier, easier option with less oil and cleaner macros. Frying yields a crisper exterior but adds fat. Typical bake times are 12–16 minutes at 350°F (175°C) until a toothpick comes out clean. Frying is usually 2–3 minutes per batch in oil preheated to about 350°F (175°C).

How can I increase protein without adding too many carbs or calories?

Strategies include:

  • Use a protein powder with a higher protein-to-carb ratio (whey isolate or micellar casein).
  • Replace part of the flour with protein powder, not all of it.
  • Add Greek yogurt or cottage cheese for moisture and extra protein.
  • Choose unsweetened almond milk or dairy-free yogurt to keep carbs down.
Are high-protein donuts gluten-free and/or dairy-free?

They can be both. For gluten-free, use gluten-free protein powder and almond/oat flour (certified gluten-free). For dairy-free, use plant-based protein powder, dairy-free yogurt, and plant-based milk. Always check labels for hidden ingredients.

Can I customize flavors and add mix-ins?

Absolutely. Try variations like:

  • Chocolate: add cocoa powder and chocolate chips (dairy-free if using dairy-free chips)
  • Cinnamon-vanilla
  • Blueberry lemon with lemon zest
  • Peanut butter or almond butter swirls
How should I store and reheat leftovers?

Store in an airtight container in the refrigerator for up to 5–7 days. For longer storage, freeze for 1–3 months. Reheat: microwave for 15–20 seconds or warm in a 320–350°F (160–175°C) oven for 5–8 minutes until cozy and soft.

Can I make donut holes or mini donuts?

Yes. Scoop batter into a mini muffin tin or a donut-hole pan and bake at 350°F (175°C) for about 8–12 minutes, or until a toothpick comes out clean. Mini sizes cook faster, so check early.

What are common mistakes to avoid when baking high-protein donuts?

Avoid overmixing the batter, which can make them dense. Don’t use too much protein powder without adjusting liquids, or they may dry out. Ensure enough fat (yogurt, eggs, or a bit of oil) for moistness. Don’t underbake—protein-rich batters can stay wetter longer, so test with a toothpick.

What are typical nutrition estimates per donut?

Macros vary by recipe, but a typical high-protein donut might be around:

  • Calories: 150–230
  • Protein: 12–20 g
  • Carbs: 8–20 g
  • Fat: 6–12 g

Use your exact ingredients to calculate precise values.

Introduction / Hook

Imagine stepping into a kitchen where the air is perfumed with warm butter, vanilla, and a hint of caramelized sweetness. The oven bells and the soft crackle of delicate, laminated pastry layers create a symphony that whispers, “stay a while.” Flaky Homemade Cruffins are not merely pastries; they are edible postcards from a morning spent whisking, rolling, and patiently waiting for that first perfect bite. Each cruffin is a tiny, portable pastry sculpture: a croissant’s whisper-thin lamination folded into the familiar muffin’s pocket, yielding a dessert-turned-brunch-staple that looks as stunning as it tastes. The moment you break into one, you’ll hear the sigh of a crisp crust giving way to a tender, airy crumb, followed by the soft, butter-kissed interior that smells like sunlight on a cool morning. This is comfort, elevated—yet approachable enough for a weekend project or a show-stopping brunch centerpiece.

But there’s more to these beauties than their eye-popping appearance and irresistible aroma. Cruffins invite curiosity: they tempt you to taste not just with your palate but with your memory. They conjure childhood mornings when bakery bells rang from the corner shop and every pastry carried a story from the oven. They invite you to play with textures and flavors, to fold in surprises, to drizzle a glaze that gleams like morning dew, or to tuck a pocket of jam or cream inside for a playful, indulgent bite. In short, flaking, buttery layers meet muffin-size portability, creating a pastry that’s as comforting as a hug and as exciting as discovering a new favorite.

This long-form description will guide you through the soul of Flaky Homemade Cruffins—the craft, the warmth, the tradition-and-twist balance that makes them stand out. It’s a celebration of technique, an ode to simplicity done with intention, and a reminder that great pastries aren’t rushed; they’re coaxed from dough through patient folding, steady chilling, and a watchful eye on heat. If you’re craving an impressive, crowd-pleasing treat that still feels intimate and homey, you’ve found your muse in these cruffins.

The Story Behind the Dish

Cruffins are a modern pastry hybrid that grew out of the playful overlap between two beloved generations of dough: croissants and muffins. The idea is simple on the surface—combine laminated, butter-sweet layers with the handheld convenience of a muffin—but its execution is a delicate art. The lamination that gives croissants their signature flakiness requires patience, precise temperature control, and a gentle hand. To transform that dough into a muffin-sized pastry, bakers coax the dough into a dozen-nook form, letting each crescent of buttered layers create pockets of air that expand into a mosaic of crisp, honeyed edges and tender interiors.

Origin stories for cruffins vary by city and bakery, each claiming a tiny spark of inspiration: a pastry chef who wanted the portability of a muffin without sacrificing lamination’s flaky grandeur; a brunch cart that needed something that could be served with fingers and still feel luxurious; a home baker who decided that a crescent roll’s flakiness deserved a deeper, more complex texture. What’s beyond dispute is the sense of delight these pastries spark when they emerge from the oven—golden crowns perched atop a tray, a sheen that catches the light, and a scent that wraps the room in memory and anticipation.

Historically, the croissant as a laminated dough is rooted in layers of European technique—rolled folds that build countless sheets of butter and dough. The muffin, with its American heart, brought there a form that could be served warm in a hand, with a bite-sized convenience that made it a staple for weekend gatherings and breakfast buffets. The cruffin fuses these two traditions into a single, modern pastry that respects both lines of craft: the croissant’s lamination and the muffin’s ease of use. The result is a pastry that feels both familiar and refreshingly new—a glossy, knobby crown with a delicate interior, a symbolic bridge between morning ritual and culinary play.

Why You’ll Love This Recipe

  • Effortlessly impressive: The look of a cruffin in a tray is irresistible, yet the technique rewards patience rather than brute force. The reward is bakery-quality flakiness that sits comfortably in a home kitchen.
  • Versatile and forgiving (within reason): While laminated dough demands care, the flavor and texture adapt to many fillings and glazes, making each batch feel unique without starting from scratch.
  • Perfect for brunch and celebrations: These little pastries are conversation starters, ideal for holiday mornings, birthdays, or a cozy family weekend.
  • Textural variety in every bite: Expect the initial crisp, a delicate crumble, and a soft, airy center that melts in your mouth, with butter-forward notes that linger pleasantly.
  • Customizable fillings and toppings: From vanilla bean cream to jam, chocolate, lemon curd, or almond paste, the interior can be a playful secret—sealed until the first bite.
  • Make-ahead friendly: Once shaped, cruffins can be chilled or frozen for later finishing, making them ideal for feeding a crowd with limited day-of prep.

Flavor Profile & Texture

Flaky Homemade Cruffins deliver a symphony of textures that keep the palate intrigued. The exterior presents as a glossy crust with a honey-gold sheen and delicate crackles that yield under the bite. The lamination—the multiple sheets folded with butter—offers an almost wafer-like crispness that dissolves into a tender, cloud-light interior. The texture is enriched by the crumb structure: small, even air pockets that create a soft, pillowy bite rather than a dense chew. The flavors are deeply butter-forward, with a gentle, almost vanilla-sweet aroma that hints at toasted sugar and caramelization around the edges.

In terms of taste, the pastry carries a balanced sweetness that makes it versatile for both breakfast and dessert contexts. The croissant-like layers deliver a nutty, toasty note, while the folded muffin format invites a touch of caramelization near the crust, which intensifies as the pastry bakes. If you opt for fillings and glazes, the flavor spectrum broadens: a vanilla-cream center can lend a pudding-like softness; a tart raspberry or citrus curd can cut through sweetness with bright acidity; a dark chocolate or almond paste can add depth and a lovely contrast to the buttery profile.

The aroma is every bit as compelling as the texture and flavor. When the cruffins emerge, the kitchen fills with an inviting perfume: a blend of butter, malted pastry, and a whisper of sweetness that promises comfort and celebration in equal measure. The sensory experience—the sight of golden rims, the crackle of the crust, the melt-in-your-mouth interior, and the lingering scent—creates a moment of anticipation that makes you pause, savor, and smile.

Occasions & Pairings

These pastries shine in many settings. They’re perfect for slow Sunday mornings, weekend brunch buffets, gift boxes for friends and neighbors, or a show-stopping dessert course at a dinner party. Because they’re both elegant and approachable, cruffins bridge casual and festive occasions with ease.

  • Pair with a creamy coffee beverage—latte, cappuccino, or a lightly spiced chai. Add seasonal fruit, yogurt cups, and a light sparkling beverage for a bright, balanced spread.
  • Offer a selection of fillings and glazes to create a mini pastry flight. A citrus glaze, peppermint dusting, or a berry compote can elevate the trays for winter gatherings; a vanilla-bean glaze with a pinch of saffron or orange zest can feel sunny for spring events.
  • Serve warm with a mug of hot chocolate, tea, or an espresso-based drink. A simple jam or lemon curd can become a comforting ratio that feels like a hug after a long day.
  • These pastries offer the wow factor without requiring specialized equipment beyond a laminated dough approach and muffin tins. They’re ideal for budding pastry enthusiasts looking to push their technique just enough to feel accomplished.

For pairing ideas beyond beverages, consider small cream-based treats (think pastry cream or whipped cream with fresh berries), a light mascarpone topping, or a dusting of powdered sugar with a citrus zest for a crisp, bright finish. If you’re hosting a brunch or tea, a platter of cruffins alongside scones, croissants, and fruit tarts creates a balanced visual and flavor spectrum that invites guests to explore.

Tips, Variations & Substitutions

The beauty of Cruffins lies in their flexibility and the opportunity to tailor them to your pantry, dietary preferences, and seasonal flavors. Here are practical ideas to customize your batch while preserving the signature lamination and the tender crumb.

  • Fillings: Classic vanilla pastry cream, lemon curd, berry compote, almond cream, chocolate ganache, or salted caramel are all excellent. For a lighter touch, consider a light mascarpone with honey and citrus zest or a whipped cream folded with vanilla and a splash of liqueur.
  • Glazes & Finishes: A simple glaze of powdered sugar and milk or cream, a lemon glaze for brightness, or a chocolate glaze for decadence. A light dusting of powdered sugar or a sprinkle of citrus zest adds a decorative finish that highlights flavor.
  • Flavor Enhancers: A pinch of cardamom, cinnamon, or orange blossom water can add warmth, while a touch of vanilla bean paste elevates the aroma without overpowering the pastry.
  • Vegan Adaptation: Use dairy-free laminated dough alternatives and plant-based butter. Be mindful that vegan laminated doughs can behave differently; chill and roll with extra care to preserve lamination and structure. A coconut milk glaze can complement the butter substitute nicely.
  • Gluten-Free Variants: The laminated dough format is challenging to render gluten-free with the same flakiness, but you can achieve impressive results by using a high-fat gluten-free puff pastry or a specialty gluten-free laminated dough from reputable shops. Expect slightly different texture, with crispness anchored by the fat content of the dough.
  • Regional Twists: Replace vanilla with a pulverized eugenia seed mix for a nod to classic European flavors, or fold in citrus zest and poppy seeds for a northeast European-inspired twist. A pistachio paste center gives a Middle Eastern meets Mediterranean feel, while a dark cherry filling nods to a cherry bake tradition.
  • Make-Ahead Variations: Shape the cruffins and store the formed dough in the fridge overnight. Bake them the next day for a fresh-out-of-the-oven experience. You can also freeze unbaked cruffins on a tray, then transfer to a bag for up to a month; bake directly from frozen, adding a few minutes to the bake time.

A key tip for variations is to keep the core lamination intact: keep the butter cold, avoid overworking the dough, and maintain consistent thickness. The better you respect the dough during rolling and folding, the more pronounced the delicate layers will be when baked.

Storage & Make-Ahead Ideas

One of the practical joys of cruffins is that they’re friendly to planning. You can stretch the joy from a single bake into several days of breakfasts and treats with minimal stress.

  • Room Temperature: Keep baked cruffins in an airtight container for up to 2 days. If your house is warm or humid, refrigerate to maintain freshness and texture, then reheat gently before serving.
  • Reheating: Reheat in a 350°F (175°C) oven for about 5-8 minutes or until the pastry regains its crispness. Avoid microwaving, which can soften the flaky layers and dull the texture.
  • Make-Ahead Frozen: Freeze unbaked formed cruffins on a sheet tray, then transfer to a freezing bag. Bake from frozen, adding 8-12 minutes to the bake time and watching closely for the desired golden color.
  • Fridge Prep: The dough can be prepared in advance and chilled. This not only helps with scheduling but can also improve the lamination as the fat remains firm and the dough relaxes, resulting in better layers when baked.

Fun Facts & Trivia (Optional)

– The word “cruffin” is a portmanteau of “croissant” and “muffin,” reflecting the pastry’s hybrid nature. It’s a modern invention but one that draws deep from the lore of two centuries of European baking artistry.
– The laminated dough technique used for cruffins owes its origins to French patisserie traditions, where butter and dough are rolled and folded into countless thin sheets. Each fold is a promise of more delicate layers and more satisfying crunch when baked.
– In some bakeries, cruffins are piped with pastry cream or cream cheese fillings before being baked, creating a cross between a filled donut and a croissant—with half the effort and twice the wow factor.
– Cruffins pair beautifully with coffee culture because their richness cuts nicely with a robust roast, while their lightness makes them a gentle partner to a milky latte or a smoky espresso.
– For a celebratory touch, some bakers finish cruffins with a delicate glaze and edible confetti or a glaze that subtly gleams like morning dew, turning a simple pastry into a centerpiece for the table.

Ingredients

    Flaky Cruffin Dough
    – 4 cups all-purpose flour (plus extra for dusting)
    → Provides the gluten structure and foundation for the laminated dough. Measure by spoon-and-sweep and then weigh for accuracy to avoid overworking the dough. For a flakier, richer crumb you can substitute up to 1 cup with bread flour or use a 75/25 blend of all-purpose and bread flour. Keep ingredients cold and handle the dough gently to maximize lamination.

    – 1/3 cup granulated sugar
    → Adds gentle sweetness and helps feed the yeast during fermentation. If you prefer a less sweet pastry, reduce to 2 tablespoons. Mix sugar evenly with the flour so the dough preuves an even crumb rather than concentrated pockets of sweetness.

    – 2 1/4 teaspoons active dry yeast (1 standard packet)
    → The leavening that lifts the laminated dough. Bloom the yeast in warm milk (around 105–115°F / 40–46°C) with a pinch of sugar for 5–10 minutes until foamy; if you’re using instant yeast, you can whisk it directly with the dry ingredients and skip blooming. Use fresh yeast for best results.

    – 1 teaspoon fine salt
    → Balances flavor and helps control fermentation. Dissolve in the warm liquid before combining with the flour to ensure even distribution; avoid adding salt directly to the yeast to prevent inhibiting activity.

    – 1 cup warm milk or water (105–115°F / 40–46°C)
    → Hydrates the dough and activates the yeast; milk yields a richer crumb, while water produces a lighter texture. If you use eggs, you may reduce the liquid by 1–2 tablespoons to maintain proper dough consistency. Do not exceed the recommended temperature to avoid killing the yeast.

    – 2 large eggs, room temperature (optional)
    → Adds richness and helps bind the dough for a softer, more tender crumb. If you omit eggs, increase the liquid by 1–2 tablespoons to maintain hydration and adjust slightly for a crumbier texture.

    – 2 tablespoons unsalted butter, melted and cooled
    → Enriches the dough with fat and flavor; helps tenderize the crumb. Add after the initial mixing so the butter doesn’t seize the dough. Ensure the melted butter is cooled so it doesn’t melt the dough’s fat layer prematurely.

    Laminating Butter Block
    – 1 1/2 cups unsalted butter, cold and pliable, for the laminated block
    → The signature flaky layers come from the butter block. Keep the butter cold but pliable, shape it into a square that roughly matches the dough sheet, and chill between folds so it remains solid enough to create distinct, separated layers rather than mixing into the dough.

    – 2 tablespoons all-purpose flour, for dusting
    → Dusting helps prevent sticking when rolling and folding the butter block. Use sparingly; excess flour can dampen the butter’s ability to create crisp layers. Re-dust the rolling surface as needed.

    Egg Wash & Finish
    – 1 large egg, beaten with 1 tablespoon water (egg wash)
    → Gives the croissant-like cruffins a glossy, golden finish and helps any toppings adhere. Brush lightly on the surface after shaping and before baking. If you’re avoiding eggs, use a plant-based wash or milk for a subtler color.

    Optional Fillings
    – 1/2 cup chocolate chips or chopped dark chocolate (optional)
    → Creates pockets of melted chocolate inside the flaky layers. Use small chips or finely chopped chocolate to prevent large pools of melted chocolate that could leak during baking. Distribute evenly for balanced bites.

    – 1/2 cup fruit jam or preserves (optional)
    → Adds fruity sweetness and aroma; choose a thick jam/preserve so it doesn’t run too much during baking. Pipe or spoon a small amount along the dough before rolling to form a centered swirl or filling.

    – 1/2 cup almond paste or frangipane (optional)
    → Imparts a rich almond flavor and a creamy contrast within the flaky layers. Crumble or thinly spread a thin layer inside the dough before rolling to distribute evenly; keep it slightly chilled so it’s easy to work with.

    – 1/4 cup finely chopped nuts (optional)
    → Adds crunchy texture and depth of flavor. Toast nuts lightly to heighten aroma before folding them into the dough or sprinkling over the rolls before shaping for even distribution.

    – 1/2 teaspoon ground cinnamon or citrus zest (optional)
    → Introduces warmth (cinnamon) or brightness (citrus) to complement fillings. Add to the dough during the dry-mix stage or sprinkle inside the roll for a subtle swirl.

    Optional Toppings
    – Coarse sugar or pearl sugar for topping (optional)
    → Creates an appealing crunch and sparkle on the baked crust. Sprinkle evenly after shaping and just before baking to maximize texture and sweetness. Pearl sugar will caramelize and give a distinct bite; coarse sugar adds more crunch.

    Instructions

    • Preheat your oven to 350°F (175°C) and line a 12-cup muffin tin with paper liners or grease it well.
      → This ensures the cruffins have a clean, non-stick surface and hold their shape as they bake upright in the cups.
    • Bloom the active dry yeast in the warm 1 cup milk (105–115°F / 40–46°C) with a pinch of sugar for 5–10 minutes until foamy.
      → Foaming confirms the yeast is alive and ready to leaven; if you see no foam, warm the liquid slightly more within the safe range or start with fresh yeast.
    • Whisk together 4 cups all-purpose flour, 1/3 cup granulated sugar, and 1 teaspoon fine salt in a large bowl to ensure even distribution of sweetness and fermentation agents.
      → Dry ingredients must be evenly mixed so the dough proofs with a uniform crumb rather than concentrated pockets of salt or sugar.
    • In a separate bowl, whisk 2 large eggs (if using) with the remaining warm milk from the bloom and the 2 tablespoons melted and cooled butter until the mixture appears glossy and homogeneous.
      → The eggs (if used) add richness and help emulsify the dough; keeping the butter cool prevents it from seizing the dough and tearing the gluten network.
    • Make a well in the center of the dry ingredients and pour in the foamy yeast mixture plus the liquid egg mixture; stir with a wooden spoon or dough whisk until a shaggy dough forms.
      → A shaggy dough indicates enough hydration for the gluten to develop without overmixing; this will yield a tender crumb after lamination.
    • Turn the dough out onto a lightly floured surface and knead briefly for 4–5 minutes until cohesive and smooth, then fold in the 2 tablespoons melted butter in small additions until fully incorporated.
      → Incorporating the fat at this stage adds tenderness and helps the dough shear later during lamination; do not rush the emulsion or overwork, which can toughen the crumb.
    • Shape the dough into a disc, wrap, and refrigerate for 30–60 minutes to relax the gluten and firm the fats, making the dough easier to roll for lamination.
      → Chilled dough holds its shape during the rolling and folding steps and prevents butter from oozing into the dough, which would blur the flaky layers.
    • Meanwhile, prepare the laminated butter block by placing 1 1/2 cups unsalted butter between two sheets of parchment or plastic wrap and shaping it into a square roughly the same size as the dough sheet; dust with 2 tablespoons flour and chill until pliable but still cold, about 15–20 minutes.
      → A cold, pliable butter block is essential to form distinct, even laminations; too warm and it will blend into the dough, too hard and it will crack and tear the dough.
    • Roll the chilled dough on a lightly floured surface into a rectangle about 10×14 inches (25×35 cm); place the chilled butter block on the lower two-thirds of the dough, leaving a margin all around.
      → The butter must be sheltered within the dough so it can be enclosed by rolling; this creates the signature laminated layers when folded and rolled later.
    • Fold the top third of the dough down over the butter and then fold the bottom third up to enclose the butter completely, sealing the edges; this is the first turn. Chill for 15–20 minutes to set the butter barrier.
      → The initial turn traps the butter between dough layers; chilling prevents the butter from melting into the dough during subsequent rolls and helps form crisp layers.
    • Roll the dough again into a long rectangle, about 10×24 inches (25×60 cm), and perform a second turn by folding the top third down and the bottom third up; chill again for 15–20 minutes.
      → Repeated turns build multiple alternating fat and dough layers; patience here ensures a flaky, layered crumb rather than a dense pastry.
    • Roll the dough a third time into a rectangle and perform a final turn, then chill the dough for at least 20–30 minutes until fully stiff and easy to handle.
      → The final turn sets the last set of laminations and permits clean, even curls when shaped into cruffins.
    • Roll the laminated dough into a 12×24 inch (30×60 cm) rectangle and trim to neat edges; if you want optional cinnamon or citrus zest in the outer layers, dust evenly now.
      → Even distribution of flavorings within the outer sheets enhances aroma and provides a subtle swirl when the cruffins bake, without overpowering the filling.
    • If using optional fillings, distribute them as follows: for chocolate chips, scatter 1/2 cup evenly over the dough; for jam, pipe short lines or dollops along the center; for almond paste, crumble small bits across in a thin, even layer; for chopped nuts, sprinkle evenly; if using a combination, distribute in balanced portions.
      → Placing fillings before rolling ensures pockets of flavor throughout the cruffins rather than concentrated pools that can leak during baking.
    • Roll the rectangle into a tight log along the longer axis, seal the seam, and chill for 15 minutes to set the shape; then cut the log into 12 equal pieces.
      → Tight logs prevent air pockets and ensure uniform baking; equal portions guarantee consistent lift and crust color across all cruffins.
    • Gently lift each portion and place it into a greased or lined muffin cup, curling or coiling the dough to form an upright spiral that fills the cup about 2/3 full; repeat with all pieces.
      → Positioning the dough in the cup allows the pastry to proof upward into tall, croissant-like cruffins and ensures they bake evenly in their own cups.
    • Cover the pan loosely with a clean towel and proof at room temperature (70–75°F / 21–24°C) for 45–60 minutes until puffy and visibly risen; avoid over-proofing which can cause a flat final bake.
      → Proper proofing augments lift and tenderness; too short yields dense pastries, too long can cause gaps or collapsed centers.
    • While the dough proofs, whisk 1 large egg with 1 tablespoon water to prepare the egg wash; this will give the crust a glossy, golden finish.
      → The wash helps the surface color evenly and aids any optional toppings to adhere during baking.
    • Just before baking, brush the tops of the cruffins lightly with the egg wash and sprinkle with optional toppings such as coarse sugar or pearl sugar for additional crunch and sparkle.
      → Egg wash promotes browning and shine; toppings add texture and visual appeal that contrast with the tender interior.
    • Bake the cruffs in the preheated oven for 18–22 minutes, rotating the pan halfway through, until the tops are deeply golden and the internal temperature reaches about 190°F (88°C).
      → Even heat distribution ensures uniform color and doneness; a thermometer confirms the ideal crumb temperature for a flaky, fully set center.
    • Remove the pan from the oven and let the cruffins cool in the pan for 5–10 minutes, then transfer to a wire rack to cool completely before filling or glazing; this resting period sets the crumb and makes removing from cups easier.
      → Cooling stabilizes the butter in the layers, preventing collapse and allowing the steam to escape gradually for a crisp exterior and tender interior.
    • Optionally glaze or dust with powdered sugar once cooled, or serve warm with jam, butter, or citrus zest; store any leftovers in an airtight container for up to 2 days or freeze for longer storage.
      → Finishing touches personalize the flavor, while proper storage preserves flakiness and prevents staling.

    Notes

    These flaky cruffins are croissant-inspired pastries built from a laminated dough that yields distinct, buttery layers and a tender crumb. Keep everything cold and work quickly to maximize lamination; the dough should remain chilled between folds to prevent the butter from melting into the dough. You can customize them by filling with chocolate, jam, almond paste, or nuts to create a variety of bite-sized treats. They bake beautifully with an egg wash that gives a glossy, golden crust, and they freeze well for make-ahead breakfasts or snacks. For the best results, bake from cold or partially chilled dough and rewarm gently to restore that just-baked aroma. If you prefer dairy-free, you can adapt with plant-based butter and milk substitutes, but aim to maintain a similar fat content for flaky layers.

    • Lamination and dough handling: Keep ingredients cold, chill after every fold, and roll with a light touch to maintain distinct butter layers. Do not overwork the dough; warmth is the enemy of lamination.
    • Butter block management: Shape the butter into a square that matches the dough sheet, wrap well, and chill between folds. Dust lightly with flour only as needed to prevent sticking—excess flour can dull the layers.
    • Fillings and distribution: If using chocolate, jam, or almond paste, apply in modest amounts along the dough before rolling to avoid seepage. Slice or pipe fillings evenly to ensure balanced bites throughout the cruffins.
    • Shaping and proofing: Roll dough into a long rectangle, cut into strips, and roll into cylinders to form the cruffins. Place in muffin cups if desired, then proof until puffed but not overly airy. Temperature and time will depend on room conditions and yeast activity.
    • Baking and finishing: Brush with a beaten egg wash for a glossy, golden finish and optional sheen from the sugar topping. Bake at a moderate to high heat until deeply golden and crisp on the outside, with a tender interior.
    • Make-ahead and storage: Freeze unbaked, shaped cruffins on a tray, then transfer to an airtight container. Bake from frozen, adding a few extra minutes. Baked cruffins store 2–3 days at room temperature and can be frozen for 1–2 months; reheat in a 350°F (175°C) oven for 5–8 minutes to refresh the layers.
    • Substitutions and tips: For dairy-free options, use plant-based butter and milk substitutes while keeping fat content similar. If dough seems too sticky, chill longer; if butter leaks, re-chill the dough between folds. Adjust fillings and sugar depending on sweetness preference and desired richness.
    • Toppings: Coarse sugar or pearl sugar added before baking creates a pleasant crunch and sparkle. You can finish with a light dusting of cinnamon or citrus zest for extra aroma.

    Tips

    Tips for Flaky Homemade Cruffins

    Dough preparation tips

    • Keep ingredients cold and handle the dough gently. Use the spoon-and-sweep method to measure flour, then weigh it for accuracy to prevent overworking the dough which can reduce lamination.
    • To get a richer, crumby crumb, you can substitute up to 1 cup of all-purpose flour with bread flour, or use a 75/25 blend of all-purpose and bread flour. Cold ingredients help maintain the fat layers during rolling.
    • If you’re using eggs, you may reduce the warm liquid by 1–2 tablespoons to keep the dough from getting too soft. If you omit eggs, add a touch more liquid to maintain hydration.
    • When blooming the yeast, aim for a foamy result in warm milk (105–115°F / 40–46°C). If you’re using instant yeast, you can whisk it directly with the dry ingredients and skip blooming for a quicker mix.

    Laminating butter block tips

    • Keep the laminated butter block cold and pliable. Shape it into a square that roughly matches the dough sheet to ensure even lamination, and chill between folds to prevent the butter from seeping into the dough.
    • Dust the rolling surface lightly with flour—only as needed. Excess flour can dampen the butter and hinder crisp, distinct layers.
    • If the butter block becomes too soft, refrigerate briefly to regain body before continuing with the folds.

    Fermentation and temperature tips

    • Maintain a warm, draft-free spot for fermentation. If your kitchen is cool, extend resting times but monitor dough for a gentle rise rather than a rapid expansion.
    • A gentle, steady rise helps develop flavor without overproofing. If the dough has risen too quickly, refrigerate to slow fermentation and improve lamination integrity.

    Rolling, folding, and lamination

    • Chill the dough and the butter between folds to keep layers distinct. Typically, perform 3 full folds (turns) with rests in between for consistent lamination.
    • Roll to even thickness; uneven thickness can cause uneven baking and dusing. If the dough sticks, dust lightly with flour and peel away with a tapered roller to avoid tearing.
    • Work quickly but calmly to maintain consistent temperature between dough and butter. Warm dough will smear the butter and fuse layers, reducing flakiness.

    Fillings and flavor balance

    • Choose thick jams or preservatives to prevent runny centers. If using jam, pipe or dollop a small amount toward the center before rolling to create a centered swirl.
    • When adding chocolate, use small chips or finely chopped chocolate to avoid large pools that can leak during baking.
    • Almond paste or frangipane should be crumbled or spread in a thin layer and kept slightly chilled for easy handling; this helps distribute flavor evenly without oozing.
    • Toast nuts lightly to heighten aroma before folding or sprinkling for even distribution and better crunch.

    Shaping, egg wash, and finishing

    • Brush with an egg wash (1 large egg beaten with 1 tablespoon water) lightly for a glossy, golden finish and to help toppings adhere. If avoiding eggs, consider a plant-based wash or a milk wash for subtler color.
    • Apply toppings like coarse sugar or pearl sugar just before baking for maximum crunch and sparkle. Pearl sugar caramelizes nicely, while coarse sugar adds a crunchier bite.

    Baking, cooling, and serving

    • Bake until the crust is deeply golden and the interior is fully set. If you’re unsure, rotate the pan halfway through and check for even color.
    • Let cruffins cool on a wire rack to stop the steam from making the bottom soggy. Once cooled, pull apart or slice to reveal the flaky layers inside.

    Make-ahead, storage, and reheating

    • Unbaked shaped cruffins can be frozen on the tray, then transferred to a freezer bag for long-term storage. Bake directly from frozen, adding a few extra minutes as needed.
    • Store baked cruffins in an airtight container at room temperature for up to 2 days. Reheat briefly in a warm oven to restore flakiness, or re-crisp in a toaster oven.

    Troubleshooting quick tips

    • If the lamination seems to be failing (butter leaking into the dough), chill the dough and butter longer, or reduce the rolling speed to maintain clean layers.
    • If cruffins are dense or gummy, ensure you haven’t overworked the dough during mixing or rolling. Allow adequate rest between folds and avoid rushing the process.

    FAQ

    What exactly is a cruffin?

    A cruffin is a croissant-muffin hybrid. It uses laminated, buttery dough rolled and folded to create many delicate layers, then baked in a muffin tin to form a tall, flaky pastry with a crispy exterior and a soft, airy interior.

    What ingredients do I need for flaky homemade cruffins?

    You’ll typically need all-purpose flour, sugar, salt, yeast (instant or active), milk (or water), eggs, and butter for the dough. For lamination you’ll use additional cold butter. Fillings and glazes are optional but popular choices include chocolate, vanilla cream, jam, or almond paste. Keep everything cold to maintain distinct layers.

    Do I need special equipment beyond a muffin tin?

    Basic tools work well: a rolling pin, bench scraper, a pastry brush, parchment paper or plastic wrap, and a cooling rack. A stand mixer can help mix the dough, but you can mix by hand. A thermometer helps ensure the dough stays within the right temperature range during lamination.

    How do you laminate the dough for flaky layers?

    After making a soft dough, chill it. Prepare a cold slab of butter as the lamination layer. Encase the butter in the dough, roll it out, and perform folds (often a three-turn/turn-and-fold method). Refrigerate between turns to keep the butter from melting. Repeat turns to build many delicate layers, then rest the dough well before shaping.

    Can I skip steps or make a quicker version?

    Lamination gives the flaky texture, but you can make a quicker, non-laminated version with a butter-blend dough or use puff pastry as a shortcut. The result will be less layered, but still tasty. If you’re short on time, you can also bake a croissant-like dough in muffin cups with less folds, though the classic cruffin flavor is in the laminated layers.

    How should I shape and bake cruffins in a muffin tin?

    Roll the laminated dough into a wide rectangle, cut into strips, and wrap each strip into a spiral, placing the seam side down in lightly greased muffin cups. Let them proof until puffy, then bake until deeply golden. The muffin tin helps form a tall, cup-shaped pastry with even rise.

    What is the recommended bake time and temperature?

    Preheat the oven to about 375–400°F (190–200°C). Bake for roughly 18–25 minutes, or until the tops are deeply golden and the sides are well set. Ovens vary, so start checking around the 18-minute mark.

    How do I know when the cruffins are done?

    They should be deeply golden and pull away slightly from the muffin cups. The crust should be crisp, and the interior should be flaky with many visible layers. If pressed, they should feel hollow inside when tapped near the top.

    What fillings pair well with cruffins, and how do I add them?

    Popular fillings include chocolate ganache or chips, vanilla or almond cream, fruit preserves, lemon curd, or almond paste. You can place a small amount of filling in the center of the dough strip before wrapping it in the cup, or swirl fillings into the pastry before shaping. For a simple finish, dust with powdered sugar or drizzle glaze after baking.

    How should I glaze or finish cruffins?

    Options include a simple sugar glaze (powdered sugar plus a little milk or water), vanilla glaze, chocolate glaze, or a citrus glaze. A light brush of melted butter right after baking keeps the crust shiny and flavorful. You can also sprinkle sliced almonds or coarse sugar for extra texture.

    Can I make these ahead or freeze them?

    You can prepare the laminated dough and shape the cruffs ahead, then refrigerate overnight before baking. Baked cruffins freeze well; cool completely, wrap individually, and freeze. Reheat in a 350°F (175°C) oven for 6–10 minutes until warmed through. For best texture, re-crisp in a hot oven briefly.

    What are common troubleshooting tips?

    If the dough doesn’t rise well, check yeast activity and ensure the dough stays cold during lamination. If butter leaks or the layers merge, chill the dough longer between folds. If the final product isn’t flaky enough, increase the number of turns or chill time between folds. Overproofing can cause flat pastries, so proof until puffy but not overly soft.

Introduction / Hook

Close your eyes and picture a quiet morning kitchen, the first light brushing over a porcelain bowl as steam curls into the air. There’s a gentle sweetness in the room—the soft scent of vanilla, a whisper of cream, and a warmth that makes the day feel possible before you’ve even taken a bite. This is Danish Custard: a timeless, comforting creation that feels like a hug in a dessert spoon. It’s not flashy or loud; it’s the kind of thing you reach for when you want something familiar, yet thoughtfully elevated. The texture is whisper-soft, almost quivering with a velvet finish that coats your tongue and lingers in the memory long after the last spoonful. The flavor is pure and refined—delicately sweet, with the quiet depth of eggs, the serene roundness of dairy, and a true note of vanilla that seems to bloom as it cools. In a world full of quick-fix treats, Danish Custard invites you to slow down, savor the moment, and reconnect with the simple luxury of a dessert that speaks softly but carries a lot of character.

Imagine pairing it with the brightness of fresh berries, a drizzle of a fruit compote, or a cloud of a lightly sweetened cream. The dish rewards patience: the longer you let it rest, the more the flavors settle into a harmonious balance, like a song that reveals new verses with every listen. Its elegance lies not in extravagance but in restraint—an elegant balance of texture, aroma, and a whisper of sweetness that makes it suitable for both intimate weeknights and more festive gatherings. If you’ve ever wished for a dessert that feels both classic and modern, comforting and refined, Danish Custard delivers that dual magic: it comforts the heart while captivating the palate with a refined, almost architectural beauty. This introduction is just the opening note to a longer, richer conversation about a classic that deserves a place in your weekly repertoire and a dear spot at holiday tables alike.

Beyond its surface charm, Danish Custard embodies a philosophy of cooking that resonates across kitchens: integrity of ingredients prepared with care, an aroma that invites conversation, and a texture that invites lingering bites. It is, in many homes, the quiet centerpiece of a dessert course—simple to master, yet endlessly capable of adaptation. The first spoonful often carries you back to childhood kitchens, to the grandmother’s stove where the air was tinged with stories and the crackle of a hot pan. Yet it has a modern soul as well, able to shimmer with citrus zest, a hint of spice, or a modern dairy-free twist without losing its essential character. Whether you’re a longtime custard aficionado or a curious newcomer, Danish Custard offers a gateway to a dessert that feels both timeless and intimately personal.

The Story Behind the Dish

Custard has traveled through history with a quiet confidence, appearing in varied forms across many cultures. It’s a dessert that grew from the practical culinary needs of early kitchens—soft, nourishing, and capable of turning humble ingredients into something elegant. In Denmark, a country known for its hygge—the art of creating coziness—dessert traditions often celebrate comfort and balance. Danish Custard sits at the intersection of this philosophy: it is a refined yet approachable dish that can be dressed up for a celebration or kept rustic for a family supper. The idea of a smooth, pourable custard—slightly set, with a sheen that catches the light—has deep roots in European dessert lore, where flavors were coaxed into tenderness with careful heat, gentle stirring, and patience. The Danish approach to custard often leans toward simplicity married to quality: the best milk you can find, eggs that have a bright yolk, a trace of vanilla or citrus, and a method that respects the delicate structure of the mixture.

As with many beloved desserts, this custard has a social dimension. It’s the kind of dish that passes from hand to hand at family gatherings, afternoon tea, or intimate dinner parties, inviting conversation and comforting everyone at the table. While there are regional variations—the French crème anglaise with its lusciously thin texture, or the British syllabubs that mingle froth with egg and wine—Danish Custard holds its own by balancing a gentle firmness with a cloud-like mouthfeel. It’s the kind of dessert that can stand alone with a simple garnish or be crowned with seasonal fruit, a caramel drizzle, or a handful of pistachios for a touch of green and crunch. The story of Danish Custard is, in essence, a story about accessibility meeting refinement: a classic technique, executed with care, that invites everybody to experience a moment of quiet sweetness.

For cooks and bakers, the dish also represents a training ground for technique. The art of custard lies in tempering, heat control, and timing—knowing when to pull the mixture from the heat so it thickens without curdling. It’s a small mastery, but it yields a texture that feels almost magical: smooth, glossy, and spoon-able with grace. This dish invites you to embrace that craftsmanship, to observe how tiny adjustments in temperature, resting time, or even the choice of milk can create a noticeably different finish. In this sense, Danish Custard is not just a dessert; it’s a culinary practice—a ritual of patience, precision, and a sensorial payoff that makes every tasting feel meaningful and complete.

Why You’ll Love This Recipe

  • Silky, spoonable texture that glides across the palate and rewards slow, mindful tasting.
  • Versatility in presentation—serve warm for a cozy finish, or chill for a refined, elegant feel.
  • Elegant simplicity that pairs beautifully with seasonal fruit, a dusting of spices, or a drizzle of fruit compote.
  • Low-key luxury that suits both weeknights and special occasions without demanding a long, complex process.
  • Customizable to dietary needs with thoughtful substitutions while preserving the dish’s delicate balance.
  • A comforting dish rooted in tradition yet open to modern interpretations and twists.
  • Built-in make-ahead potential: you can prepare the base ahead of time and finish with toppings when ready to serve.

Flavor Profile & Texture

The flavor of Danish Custard is a study in understatement. The dominant note is a warm, true vanilla that lingers in a soft, almost floral way without shouting. This vanilla is the fragrance that invites you to lean in; it is the first whisper of sweetness that never drops into cloying territory. If you listen closely as you taste, you may notice a gentle dairy roundness—think of a well-balanced milkiness that carries the custard smoothly, with a faint, comforting richness. There’s a delicate nutty undertone from the eggs, a subtle silkiness that coats the tongue without heaviness, and a faint gloss of natural sweetness that feels like a whisper rather than a shout.

Texture-wise, this custard sits between a thick pouring custard and a soft set pudding. It should hold its shape enough to hold a delicate drizzle but remain pliant enough to yield to a spoon with a satin-smooth finish. When served warm, it presents as a luxuriously silky liquid with a slight waver of steam that hints at its freshly made nature. When cooled, it becomes more structured, yet never stiff or brittle—more like a satin curtain than a sheet of glass. The contrast of textures is a quiet celebration: the custard itself is creamy and soft, while toppings or accompaniments—like a tart berry compote, crisp cookies, or a handful of toasted nuts—introduce a satisfying bite and a bright counterpoint to the mellow base. Aromatically, the base is enriched by aromatics such as vanilla, a hint of citrus zest, or a whisper of spice, depending on the mood and season. The overall impression is one of balance: a dessert that is neither too simple nor too complicated, but rather exquisitely measured to satisfy without overwhelming the senses.

Occasions & Pairings

Where does Danish Custard shine? It fits a broad spectrum of moments, from everyday comfort to celebratory menus. Here are a few ideas on when to offer this dessert and how to present it with confidence:

  • Weeknight comfort: A quiet, satisfying end to a simple dinner, perhaps with berries and a light dusting of citrus zest.
  • Special occasions: A refined finish to a candlelit meal, plated in small, elegant portions with ornate toppings like edible flowers or a caramel ribbon.
  • Brunch pairing: A spoonful alongside a flaky pastry or as a cool counterpoint to a warm, crispy cookie for a brunch dessert twist.
  • Holiday tables: A versatile canvas for seasonal flavors—orange blossom water in winter, lemon zest in spring, or a autumn kiss of nutmeg and cinnamon.
  • Afternoon tea or coffee companion: A delicate indulgence that pairs beautifully with a cup of tea or a robust coffee, providing a gentle sweetness that doesn’t overwhelm.

Pairings to consider—both with flavor and texture—include:

  • Fresh berries (strawberries, blueberries, raspberries) that provide a bright acidity to contrast the custard’s creaminess.
  • Fruit compotes made from apples, pears, or stone fruits, offering a chewy-sweet finish and a burst of color.
  • Crunchy toppings like almond biscotti, pistachio shards, or toasted hazelnuts to introduce texture and a nutty note.
  • A light dusting of citrus zest, nutmeg, or cinnamon for warmth and fragrance.
  • A dollop of lightly whipped cream or a ribbon of whipped mascarpone for a touch of airiness and richness.
  • A small glass of dessert wine, such as late harvest or Moscato, to elevate the experience without overpowering the delicate flavors.

Tips, Variations & Substitutions

Tips for Perfect Texture

  • Heat control is everything. Use gentle, steady heat and stir constantly to keep the custard smooth and prevent curdling.
  • Tempering matters. If you’re incorporating eggs into a warm base, add a small amount of the hot mixture to the eggs first, whisking constantly to bring the temperature up gradually and avoid shocking the yolks.
  • Remove from heat at the right moment. The custard should thicken to coat the back of a spoon but still have a slight jiggle. It will continue to set as it cools.
  • Rest matters. Allowing the custard to rest after cooking helps the flavors meld and the texture settle into a more luxurious mouthfeel.

Variations

  • Vanilla bean enhancement: Use an entire vanilla bean (split and scraped) for a more intense vanilla aroma and visible flecks.
  • Citrus lift: Add a whisper of lemon or orange zest to brighten the custard with a fresh, aromatic note.
  • Spice route: A pinch of ground cardamom, nutmeg, or cinnamon adds warmth and depth, especially in cooler months.
  • Floral hints: A drop of lemon blossom, orange blossom, or rosewater can transform the custard into a delicate, fragrant variation.
  • Chocolate moment: A thin swirl of dark chocolate or a cacao dusting on top for a subtle chocolate-custard fusion.
  • Fruit-forward version: Layer with a bright fruit compote or puree for a playful, dessert-tinish dessert.

Substitutions

  • Egg-free version: Use a plant-based milk (almond, soy, or oat) with a touch of cornstarch or arrowroot to achieve a similar set and mouthfeel. A vegan custard can still be silky and luxurious with the right balance of starch and fat.
  • Dairy-free option: Coconut milk or cashew cream can provide a rich base; keep an eye on sweetness balance, as coconut can accentuate sweetness differently than dairy.
  • Low-sugar approach: Choose a natural sweetener or reduce sweetness slightly, then rely on the toppings (fresh fruit or a tangy coulis) to round out the flavors.
  • Gluten-free considerations: The custard itself is naturally gluten-free; pair with gluten-free cookies or a crisp, gluten-free praline if desired.

Storage & Make-Ahead Ideas

One of the charming aspects of Danish Custard is its adaptability for advance planning. You can do a lot in advance without losing the essence of the dish.

Make-ahead: Prepare the custard base and chill it in a closed container. When you’re ready to serve, rewarm gently or serve chilled, depending on your preference. If you’re planning to serve with fruit, you can prepare the fruit components in advance and assemble just before presenting the dessert.

Storage: Refrigerate any leftovers in a covered container. The custard will generally stay good for 2 to 3 days in the fridge. If the texture begins to feel a touch too firm after refrigeration, a gentle reheat can bring back the silkiness. Avoid freezing custard if possible, as freezing and thawing can alter the texture in ways that some find unappealing—the smooth, luxurious mouthfeel is best enjoyed fresh or within a couple of days of chilling.

Reheating tip: Warm the custard slowly over low heat or in short intervals in the microwave at a low power setting, stirring gently. The goal is to restore the gloss and loosen any set points without scorching or curdling. If you’re pairing with a fruit or sauce, consider warming those components separately so you can control the temperature of every element and keep the custard at the ideal state.

Make-ahead ideas for serving occasions: You can prepare a larger batch and portion into elegant serving dishes. Chill them and cover tightly. Right before serving, garnish with a bright component—fresh fruit, a citrus zest, or a few toasted nuts—to add a chef-crafted finish without a lot of last-minute effort.

Fun Facts & Trivia (Optional)

Delving into the playful corners of dessert history reveals that custards have long been a vehicle for culinary experimentation and regional expression. Here are a few tidbits that add flavor to the story of Danish Custard:

  • The word custard likely traces to old culinary terms that describe a custard-like mixture thickened with eggs and heated gently. Across Europe, cooks experimented with milk, cream, eggs, and sugar, leading to a dazzling variety of custard-based dishes—from pouring custards to baked, set versions.
  • Vanilla, often considered a luxury ingredient centuries ago, remains a hallmark of refined custards. Its fragrant warmth can transform a simple mixture into something that feels special and celebratory, which is part of why vanilla is so closely associated with classic custards worldwide.
  • In some Danish households, custards and custard-like desserts are tied to hyggeligt moments—simple, cozy times spent with family or close friends. The ritual of preparing something creamy and comforting aligns beautifully with a culture that prizes warmth, connection, and everyday joy.
  • Custards have a remarkable ability to be both delicate and forgiving. They can be the stage for subtle flavor experiments or restrained enough to let a single topping shine. That flexibility makes custard a favorite among home cooks who enjoy personalizing dessert without getting overwhelmed by complexity.
  • Seasonal life can color custard. In winter, a hint of spice or citrus can lend a toasty warmth; in summer, bright fruit and a light floral note can carry a refreshing brightness that feels light and uplifting.

In the end, Danish Custard is more than a dessert. It’s a quiet celebration of texture, aroma, and balance—an invitation to slow down, savor the moment, and share something beautiful with people you care about. It’s both a nod to cherished traditions and a canvas for your culinary creativity. Whether you’re serving it as a refined finish to a dinner party or a warm, comforting end to a weeknight meal, this custard brings a sense of grace to the table—an edible reminder that some of the best pleasures in life come from simple, thoughtfully prepared things.

Ingredients

Danish Pastry Dough

    – 4 cups all-purpose flour (plus extra for rolling)
    → This is the base structure of the laminated Danish pastry dough. Keep the flour cold and handle as little as possible to maintain tenderness and maximize flakiness. Sift before measuring to ensure accurate hydration.

    – 1 cup cold unsalted butter (for laminating)
    → Butter is layered into the dough to create the signature flaky, multi-layered texture. Keep butter very cold and cut into 1/2-inch slabs; chill the dough between folds if it becomes warm to maintain distinct lamination. Do not overwork the dough to avoid melting the butter into the layers.

    – 1/2 cup granulated sugar
    → Adds a touch of sweetness and helps with browning; use fine sugar for even distribution. Sugar also slightly briskly tenderizes the dough by interfering with gluten formation.

    – 2 1/4 teaspoons active dry yeast (1 packet)
    → Provides lift for the dough. Proof the yeast in 1/4 cup warm milk with a pinch of sugar until foamy, about 5–10 minutes. If it doesn’t foam, discard and start with fresh yeast. Proper proof ensures a light, airy pastry.

    – 1 1/2 cups cold milk
    → Hydrates the dough gradually; using cold milk slows fermentation and helps maintain lamination. For richer flavor, use whole milk; you can substitute part with cream if you prefer.

    – 1 large egg
    → Adds richness and helps bind the dough. Use at room temperature for even distribution and to promote smooth lamination between folds.

    – 1 teaspoon salt
    → Balances sweetness and strengthens flavor; distributes evenly with the flour to ensure uniform seasoning. Salt also moderates gluten development for a tender crumb.

    – 1 teaspoon vanilla extract (optional)
    → Subtle aroma that complements the custard filling. If using, choose pure vanilla; for deeper flavor, use vanilla bean seeds.

    – 1 tablespoon white vinegar or lemon juice (optional)
    → A small amount of acid helps keep dough tender by slightly weakening gluten, aiding flakiness. This is optional; omit if you prefer a more straightforward dough.

Danish Custard Filling

    – 2 cups whole milk
    → The base of the custard; heat until steaming to dissolve sugar and set the stage for a smooth, creamy filling. Avoid boiling. For richer texture, increase the milk-to-cream ratio as desired.

    – 1 cup heavy cream (optional)
    → Increases richness and silkiness. If you skip cream, use a bit more milk to maintain creamy texture without making the custard too thick.

    – 6 large egg yolks
    → Primary thickener and flavor carrier; whisk well and temper with hot milk to prevent scrambling. Strain after cooking for an ultra-smooth custard.

    – 2/3 cup granulated sugar
    → Provides sweetness and helps the custard set with a soft, silky texture. Whisk thoroughly to dissolve completely and prevent graininess.

    – 3 tablespoons cornstarch (or 2 tablespoons all-purpose flour)
    → Thickening agent that yields a smooth, glossy finish. Make a slurry with a small amount of the hot milk before adding to the pot, then cook until thickened and the raw starch taste disappears.

    – 2 teaspoons vanilla extract (or 1 vanilla bean)
    → Essential vanilla aroma; if using a bean, simmer the milk with the bean and seeds, then remove before finishing. Extract provides convenience but may be slightly less intense than bean seeds.

    – 1/4 teaspoon salt
    → Enhances sweetness and depth of flavor, balancing the richness. Dissolve in the hot custard to avoid gritty texture.

    – 2 tablespoons unsalted butter (off the heat)
    → Stir in off the heat for a glossy, luxurious finish; adds sheen and silkiness. Whisk until fully melted and smooth, then strain if you seek the smoothest texture possible.

    – Optional: 1/2 teaspoon ground nutmeg or 1 teaspoon lemon zest
    → A hint of warmth (nutmeg) or brightness (citrus) can complement vanilla; use sparingly so as not to overpower the custard.

Egg Wash

    – 1 large egg + 1 tablespoon water for egg wash
    → Gives a glossy, golden finish to baked pastries. Beat the wash well and brush lightly over the dough just before baking. For darker color, add a pinch of turmeric or paprika to the wash; for a lighter finish, simply use water.

Finish and Glaze (Optional)

    – Powdered sugar glaze: 1 cup powdered sugar + 2-3 tablespoons milk or lemon juice; 1/2 teaspoon vanilla extract (optional)
    → Drizzled over cooled pastries for a sweet, glossy finish. Adjust thickness with more liquid for a runnier glaze or less for a thicker coating. Lemon juice adds brightness that pairs well with vanilla custard.

    – Apricot glaze (optional): 1/4 cup apricot jam blended with 1 tablespoon water
    → Provides a subtle fruity sheen; heat gently to loosen, then brush onto cooled pastries for a glossy finish without overpowering the custard.

Instructions

  • Proof the yeast in 1/4 cup warm milk with a pinch of sugar until foamy, about 5–10 minutes; this activates the yeast and ensures a light, airy laminated dough.
    → If the mixture does not foam, discard and start with fresh yeast to avoid dense pastry.
  • Whisk together the dry ingredients: 4 cups all-purpose flour, 1/2 cup granulated sugar, and 1 teaspoon salt in a large bowl or stand mixer to ensure even distribution and to prevent pockets of salt or sugar that could stunt fermentation.
    → Even distribution promotes uniform texture and controlled gluten development during mixing.
  • Combine the wet ingredients: 1 1/2 cups cold milk, 1 large egg, 1 teaspoon vanilla extract (optional), and 1 tablespoon white vinegar or lemon juice (optional) in a separate bowl, ensuring the liquids stay cold to aid lamination.
    → Cold liquids help keep the butter solid during lamination, which is essential for defined layers and flakiness.
  • Mix the starter with the dry and wet ingredients to form a soft, slightly tacky dough; knead briefly or mix on low until just combined, then cover and refrigerate 1–2 hours to relax gluten and keep the butter from melting during lamination.
    → A relaxed dough yields clean folds and prevents tearing during sheet rolling.
  • Prepare the butter for laminating by cutting 1 cup cold unsalted butter into 1/2-inch slabs; arrange on a sheet of parchment and chill until firm but pliable, ensuring even thickness for uniform lamination.
    → Cold, uniform butter provides distinct, well-separated layers when rolled and folded.
  • Roll the dough into a rectangle about 1/4 inch thick on a lightly floured surface; place the butter slabs on two-thirds of the dough, leaving a margin of dough at the edges, then fold the uncovered third over the butter and seal the edges to enclose the butter completely.
    → Enclosing the butter creates a “pack” that will yield multiple, laminated layers when rolled and folded, producing flakiness.
  • Roll the dough with the enclosed butter to about 1/4 inch thickness and perform the first turn by folding the dough into a three-quarter book fold (one third over the center, then the remaining third over that), chill for 30–60 minutes to re-solidify butter and lock in layers.
    → Chilling slows butter leakage and preserves lamination for even rise during baking.
  • Rotate the dough 90 degrees, roll again to 1/4 inch, and perform a second turn in the same three-quarter fold, then chill again for 30–60 minutes; this builds additional lamination and a tender crumb.
    → Repeated turns create the classic multi-layer structure that characterizes Danish pastry.
  • Rotate a final time, roll to 1/4 inch thickness, and perform a third turn; chill the dough for at least 1 hour or overnight to allow gluten to relax and butter to re-firm.
    → Multiple turns maximize lamination; adequate chilling prevents butter from melting into the dough.
  • Shape and rest the laminated dough: roll to a large rectangle (about 12×16 inches), trim rough edges, then chill 20–30 minutes to make cutting and filling precise.
    → A cold, flat sheet ensures clean edges and uniform pockets for the custard filling.
  • Prepare the Danish Custard filling: heat 2 cups whole milk (and 1 cup heavy cream if using) just to steaming; in a separate bowl whisk 6 large egg yolks with 2/3 cup granulated sugar and 3 tablespoons cornstarch (or 2 tablespoons all-purpose flour) until pale and smooth.
    → Scant heating of dairy helps dissolve sugar and set up a smooth custard; whisking yolks with starch prevents curdling.
  • Temper the yolk mixture by whisking in a slow stream of the hot milk, then return the entire mixture to a clean pot and cook over medium heat, whisking constantly until thick and glossy (a gentle simmer that thickens but does not stick).
    → Tempering prevents scrambled eggs and yields a silky custard that holds its shape when cooled.
  • Off the heat, whisk in 2 teaspoons vanilla extract, 1/4 teaspoon salt, and 2 tablespoons unsalted butter until melted and glossy, then strain through a fine-mesh sieve into a clean bowl, press a plastic wrap directly on the surface, and chill until cold and set but still scoopable.
    → The butter adds shine and silkiness; straining removes any lumps for a ultra-smooth finish.
  • When the custard is cold and thick, pipe or spoon 1–2 tablespoons into the center of each pastry rectangle cut from the laminated dough, leaving a clean border around the edges to seal; this prevents leakage during baking.
    → A well-contained filling maintains shape and prevents soggy edges while the pastry bakes.
  • Seal the pastries by folding the long sides over the custard and pressing firmly to enclose; place seam-side down on parchment-lined baking sheets and brush lightly with egg wash (beat 1 large egg with 1 tablespoon water).
    → Sealing and an even wash promote a uniform golden crust and prevent custard from oozing out at the seams.
  • Bake in a preheated oven at 375°F (190°C) for 20–25 minutes, rotating the pans halfway if using multiple racks, until the pastries are deep golden and puffed; cool on a rack to set the custard completely.
    → Proper baking develops structure and a crisp exterior; cooling prevents the custard from scalding when touched.
  • Finish with a glaze if desired: whisk 1 cup powdered sugar with 2–3 tablespoons milk or lemon juice and 1/2 teaspoon vanilla; drizzle over cooled pastries for a sweet, glossy finish, or brush with a warmed apricot glaze for a subtle fruit sheen.
    → The glaze adds sweetness and a polished appearance; adjust thickness to desired consistency.
  • Serve Danish Custard pastries at room temperature or slightly warm for a creamier custard center, and store leftovers covered in the refrigerator for up to 2 days, gently re-crisping in a low oven before serving.
    → Proper storage preserves the delicate laminations and keeps the custard from drying out.

Notes

“These Danish custard pastries are a beloved laminated treat, where crisp, buttery layers encase a silky vanilla custard. To achieve the signature flakiness, keep the dough and butter extremely cold, handle it as little as possible, and chill the dough between folds. Proof the yeast in 1/4 cup warm milk with a pinch of sugar until foamy, then whisk it into the dough with the remaining cold milk, egg, salt, and vanilla. Roll the dough into a cool, even rectangle, place the cold butter slab on one half, fold, and perform several cold folds (book folds) to create many layers; chill between folds to maintain lamination. After the final roll, cut into shapes and refrigerate formed pastries for 15–30 minutes before baking to set the layers. Bake in a hot oven (around 375–400°F / 190–200°C) until deeply golden and puffed, about 15–20 minutes, brushing with an egg wash to enhance color. For the custard, heat 2 cups of whole milk (and 1 cup optional heavy cream) just to steaming; whisk 6 egg yolks with 2/3 cup sugar and 3 tablespoons cornstarch, then temper with hot milk, cook until thick and glossy, strain for extra smoothness, then off the heat stir in 2 tablespoons butter and 2 teaspoons vanilla (and a pinch of salt); optional nutmeg or lemon zest can be added sparingly for warmth or brightness. Let the custard cool slightly before filling the cooled pastries, or pipe into the centers after baking. Finish with a glaze: a powdered sugar glaze or a light apricot glaze to add shine without overpowering the custard. If desired, refrigerate baked pastries to firm the fillings and flavors; they are best eaten within 2–3 days and can be frozen either baked or unbaked for longer storage. Always use fresh ingredients and purify vanilla for the strongest aroma; for dairy-free versions, you can experiment with plant-based milks and thickeners, though the texture will differ from the classic version.”

Tips

Tips and Techniques for Danish Custard

  • Keep everything cold during lamination. The cold butter creates distinct, flaky layers. Chill the dough between folds for at least 20–30 minutes, and work on a cold surface. If the butter begins to smear, wrap the dough and refrigerate a bit longer before continuing.
  • Work the dough as little as possible. Overworking can smear the butter into the layers, reducing flakiness. Use quick, confident folds and a light touch when rolling to maintain separation between layers.
  • Laminate with a purposefully simple fold schedule. A classic approach is 3 turns (folds) with chilling between each turn. This builds laminated structure without overdeveloping gluten.
  • Dust the surface lightly, not heavily. Excess flour inhibits lamination and can dull the pastry. If the dough sticks, wrap and refrigerate rather than adding more flour.
  • Proof the yeast properly. If the mixture in 1/4 cup warm milk doesn’t foam after 5–10 minutes, discard and start with fresh yeast. A strong proof ensures light, airy pastries.
  • Roll to an even thickness and shape. Aim for a uniform sheet so all pastries bake evenly. If edges begin to curl, chill briefly, then continue rolling to restore a square sheet.
  • Temper the custard yolks carefully. Warm the milk gently and whisk hot milk into the yolks slowly to avoid scrambling. Strain the finished custard for ultra-smooth texture.
  • Thicken the custard correctly. If using cornstarch, mix it into a slurry with a little hot milk before adding to the pot. Cook until the custard thickens and the raw starch taste disappears; avoid boiling after thickening.
  • Finish the custard with butter off the heat. Whisk in 2 tablespoons of butter after removing from the stove to achieve a glossy, silky finish. Straining after adding butter helps remove any small lumps.
  • Season wisely. Optional nutmeg or lemon zest adds warmth or brightness, but use sparingly so it doesn’t overpower vanilla custard.
  • Temper and strain the custard before filling. If you plan to fill baked pastries, strain the custard to remove any cooked bits or clumps for a velvety texture.
  • Egg wash technique matters. Beat the egg with 1 tablespoon water and brush lightly over the dough just before baking. A light wash gives a glossy, golden finish; too much wash or pooling can prevent browning.
  • Avoid soggy bottoms. Bake pastries on a well-preheated rack and use parchment or a silicone mat. If the base looks pale, increase oven time slightly and rotate the sheet for even color.
  • Glazes should wait until pastries are fully cool. A powdered sugar glaze or apricot glaze adds shine without making the pastry soggy. Adjust thickness with more sugar or liquid as needed.
  • Make-ahead and storage. You can chill rolled dough overnight for convenience. Baked Danish custard pastries keep well in the refrigerator for a few days; reheat gently to preserve tenderness. Unbaked dough can be frozen for longer storage; bake from frozen when ready.

FAQ

What is Danish custard?

Danish custard is a creamy filling used in many Danish pastries. It’s typically a sweet, vanilla-flavored custard made from milk or cream, eggs, and sugar. It can be cooked until just thick and spoonable and then cooled before using as a filling between pastry layers or swirled into tarts.

How is Danish custard different from pastry cream or crème anglaise?

Crème pâtissière (pastry cream) is thickened with starch and holds its shape when cooled, ideal for tarts. Crème anglaise is a pourable sauce. Danish custard is usually richer and silkier, often used as a thick but spreadable filling in pastries; some recipes are closer to a lightly thickened dessert custard rather than a firm pastry cream.

What ingredients do I need for a basic Danish custard?

A simple stovetop Danish custard typically uses: 2 cups whole milk or half‑and‑half, 3–4 large egg yolks, 1/4 cup sugar, 1–2 tablespoons cornstarch (for extra thickness), 1 teaspoon vanilla extract, a pinch of salt. Optional: 1–2 tablespoons unsalted butter for richness. For a lighter version, omit the cornstarch and use only eggs.

How do I make a basic Danish custard on the stove?

Whisk eggs (yolks) with sugar and cornstarch in a bowl. Warm milk with vanilla and salt in a saucepan until steaming (do not boil). Slowly whisk hot milk into the egg mixture (tempering). Return to the saucepan and cook over low heat, whisking constantly, until thickened and coats the back of a spoon. Remove from heat, whisk in butter if using, then cool before using.

How can I prevent curdling or splitting the custard?

Use moderate heat and temper eggs slowly with warm milk. Whisk constantly and do not boil. Strain the custard to remove lumps, then chill. If the custard thickens too much, whisk in a little warm milk to loosen. If using cornstarch, dissolve thoroughly in a small amount of cold milk before adding to the hot mixture.

Can I make Danish custard ahead of time?

Yes. Refrigerate the cooled custard in an airtight container for up to 3–4 days. Stir well before using. If the custard becomes too thick after chilling, whisk in a small amount of warm milk to loosen. Do not freeze custard with dairy, as texture can change; pastry creams with eggs often separate when frozen.

Is Danish custard dairy-free or vegan?

Traditional Danish custard uses dairy and eggs. For dairy-free or vegan versions, use plant milk (almond, soy, coconut) and a thickener such as cornstarch or agar, plus a vegan egg substitute or blended silken tofu. Note that the texture and flavor will differ from classic dairy custard.

What flavors can I add to Danish custard?

Vanilla is classic, but you can add lemon zest or juice, orange zest, almond extract, coffee or espresso, or a splash of liqueur. If using citrus, add zest during heating or stir in after cooling. You can also swirl in melted chocolate or caramel for variety.

How do I use Danish custard in Danish pastries?

Cool the custard until it thickens slightly, then spread or pipe between layers of rolled pastry dough before shaping and baking, or use as a filling for cream horns, turnovers, or cookies. Some bakers glaze the tops after baking with a light sugar glaze.

Can Danish custard be baked instead of cooked on the stove?

Yes. You can bake a baked custard (like a flan) with eggs and dairy in a shallow dish. It will be set by baking rather than thickened on the stove and has a different texture—more jiggle and smoothness. For Danish pastries, stovetop custard is more common, but baked custards work for other desserts.

What temperature should Danish custard reach for safety?

Egg-based custards are typically heated to about 170–175°F (77–80°C) to ensure the yolks set and the custard is safe to eat. Use a thermometer for accuracy. Do not rely on color alone.

Introduction / Hook

Step into a kitchen that smells like autumn: the air perfumed with cinnamon, warm vanilla, and the bright orchard glow of apples. No Sugar Apple Cider Donuts invite you to taste a classic treat without the extra sugar that often lingers on the palate. These donuts deliver a soft, tender crumb that melts in your mouth, a delicate kiss of spice, and a sunshine-bright apple cider sweetness that comes from the fruit itself and the cider you use—as natural and comforting as a hug from a cozy sweater. Picture biting into a freshly baked donut that feels indulgent in the best possible way, yet somehow light enough to enjoy with a morning coffee or a mug of hot cider. The magic lies in balancing depth and brightness: orchard-fresh apple notes, a whisper of fall spices, and a texture that stays moist without weighing you down. This is more than a donut; it’s a small ritual that invites you to slow down, savor, and celebrate the harvest season in every bite.

No Sugar Apple Cider Donuts are built for moments when you crave something comforting and familiar, but you want to keep things a touch more mindful. They honor the generosity of the harvest—apples that sweeten naturally, cider that brings a crisp orchard sharpness, and spices that evoke crackling fireplaces and pumpkin patches. The experience is sensory from the first inhale—the warm, toasty aroma that rises as the donuts bake, to the final satisfying bite that leaves a gentle glow rather than a heavy aftertaste. It’s the kind of treat you can share with family and friends, knowing that the joy comes from simplicity, balance, and the subtle power of fruit-forward sweetness. Whether you’re baking for a weekend brunch, a seasonal gathering, or a quiet morning at home, these donuts offer a comforting, thoughtful indulgence that warms the heart as much as the belly.

The Story Behind the Dish

Apple cider donuts have long held a special place in autumn traditions across many parts of the United States, especially in regions where cider pressing is a seasonal ritual. In towns where orchards line the hills and farmstands glow with baskets of russet and gold, the donut becomes more than dessert; it’s a memory stitched into the fabric of harvest time. The original versions—often rolled in sugar or dusted with cinnamon—were beloved for their crisp exteriors and fluffy interiors, a testament to the joy of celebrating the season with something both comforting and celebratory. Over the years, home bakers and professional kitchens alike began exploring ways to keep the comforting nostalgia while making the indulgence a touch lighter or more inclusive for different dietary preferences. The idea behind No Sugar Apple Cider Donuts is to honor that heritage while adapting to contemporary cravings for more natural sweetness and balanced flavors. The result is a pastry that nods to its roots but speaks to today’s kitchen.

In this tale, the apple is more than an ingredient—it’s a symbol of the orchard’s generosity. Apples are picked at peak flavor, their sugars are complex and nuanced, and when pressed into cider they yield a bright tang that complements the spices perfectly. The kitchen becomes a small workshop where memory and science meet: the Maillard reaction on the crust promises a kiss of caramel, while the inside remains tender and moist, a canvas for the orchard’s fruit-forward sweetness to shine through. The no-sugar concept isn’t about denying sweetness; it’s about letting the natural sweetness of ripe fruit, the gentle caramelization during baking, and the warm spices do most of the work, so the diner experiences a clean, balanced finish rather than an overt sugar crash. This approach resonates with families looking for comforting treats that fit a mindful lifestyle, as well as bakers who love a challenge and a dash of culinary storytelling in their kitchen adventures.

Why You’ll Love This Recipe

  • Balanced sweetness that relies on natural fruit flavors rather than refined sugar, making every bite feel bright and lively rather than cloying.
  • Soft, springy crumb with a delicate crumb structure that stays tender even after cooling—perfect for a breakfast treat or a mid-afternoon pick-me-up.
  • A fragrant aroma that fills the house as they bake, turning ordinary mornings into a cozy celebration of harvest flavors.
  • Family-friendly and inclusive, appealing to kids and adults who crave a comforting treat without a heavy sugar load.
  • Versatile for different dietary needs. The concept can accommodate variations to suit gluten-free or vegan preferences without sacrificing flavor or texture.
  • Simple pantry-friendly approach that embraces the season’s produce, encouraging a less-processed, more natural sweetening approach.
  • Great make-ahead potential. The donuts hold their tenderness well, making them a reliable option for weekend gatherings or weekday mornings.
  • Pairs beautifully with warm beverages—coffee, tea, or a spiced cider—creating an inviting sensory experience from first bite to last.

Flavor Profile & Texture

From the first bite, No Sugar Apple Cider Donuts reveal a balance of bright fruitiness and cozy warmth. The apple cider brings a crisp acidity that lifts the richness of the donut’s crumb, creating an orchard-fresh backdrop for the spices. Think cinnamon’s familiar comfort wrapped around a core of apple sweetness that is present but not overpowering. There’s a whisper of vanilla, which smooths the edges and adds a hint of bakery-lab magic to the batter, while a touch of allspice or nutmeg can enhance the fall character without tipping into heavy nostalgia. The aromas are intoxicating—apple, cinnamon, vanilla, and a toasty note from the bake—like stepping into a sunlit kitchen on a cool autumn morning.

Texture wise, these donuts present a tender, cake-like interior with a slight density that keeps them satisfying. The exterior offers a gentle crust, a result of careful baking that encourages a light browning and a soft, not overly sugary, finish. What sets them apart is the restraint: the sweetness is governed by the natural sugars within the fruit and cider, so you taste the orchard and the spice more than any confectionery sweetness. This creates a harmonious contrast between the fruity, tangy notes and the warmth of the spices. The result is a donut that feels indulgent yet balanced, giving you a comforting sense of fullness without heaviness. If you ever crave that nostalgic donut moment, these deliver it in spades while keeping your palate refreshed and rejuvenated—an ideal balance for autumn daylight and crisp morning air.

Occasions & Pairings

These No Sugar Apple Cider Donuts shine in autumnal moments but are versatile enough for year-round enjoyment. Consider them for:

  • Weekend breakfasts that feel like a special occasion without requiring a long cleanup or a heavy sugar load.
  • Brunch menus that want to offer a lighter, fruit-forward pastry alongside richer savory dishes.
  • Autumn gatherings, harvest festivals, or potlucks where a comforting, crowd-pleasing treat fits seamlessly with seasonal flavors.
  • Cozy evenings by the fireplace, paired with a warm cup of cider, a latte, or a chai for a comforting nightcap.

Pairing ideas: a hot cup of coffee or tea that carries notes of cinnamon and vanilla; a glass of apple cider or a spiced tea blend to echo the donuts’ flavors; a simple yogurt or a light custard to offer a creamy contrast that lets the donuts remain the star. For celebrations, you can present them with a dusting of rustic spices or a light drizzle of a glaze that complements the natural sweetness without adding substantial sugar. The beauty of these donuts lies in their adaptability: they can anchor a fall-themed dessert table or simply elevate a quiet weekend morning with a touch of orchard-inspired luxury.

Tips, Variations & Substitutions

  • Keep the sweetness natural: embrace the fruit’s own sugars and the cider’s brightness. If you want a touch more sweetness without refined sugar, explore ultra-ripe fruit influences or a small amount of naturally sweeteners that align with your dietary preferences, keeping in mind that the goal is to preserve balance rather than overshadow the fruit’s character.
  • Texture considerations: if you’re aiming for a lighter crumb, allow the batter to rest briefly or consider gentle folding techniques to maintain airiness. Avoid over-mixing, which can toughen the crumb.
  • Dietary adaptations without sacrificing flavor: the concept translates well to different dietary needs. For a gluten-free approach, seek alternatives that mimic the tenderness of gluten without introducing heavy flavors. For a vegan version, choose plant-based substitutes that preserve moisture and provide a similar crumb. In all cases, aim to keep the batter cohesive and soft rather than wet or crumbly.
  • Flavor twists: while staying true to the core apple-cider-spice profile, you can explore complementary notes such as a touch of citrus zest (orange or lemon) for brightness, a hint of almond aroma for warmth, or a pinch of clove for a deeper spice profile. These tweaks can help you tailor the donuts to seasonal menus or personal preferences.
  • Regional twists: in places where cider is a year-round staple, you can swap in regional apple varieties or local spice blends to reflect local harvests. The essence remains the same—fruity sweetness balanced with autumn spices, delivered in a soft, comforting donut.
  • Avoiding over-sweetness in toppings: if you choose to add a glaze or finishing touch, keep it light and complementary. A thin glaze that enhances the donut’s natural flavors rather than masking them works best for the no-sugar philosophy.
  • Make-ahead ideas: these donuts can be prepared ahead of time for gatherings. Store them in a single layer at room temperature for a day or two, or freeze them after baking and reheat gently when ready to serve to preserve tenderness and aroma.

Storage & Make-Ahead Ideas

To preserve the tenderness and aroma of No Sugar Apple Cider Donuts, proper storage is key. If you’re keeping them for a short period, store them in an airtight container at room temperature, ideally in a single layer to prevent sticking or crushing the surface. For longer storage, you can freeze baked donuts. Wrap each donut individually to protect against freezer burn and maintain moisture. Reheat gently in a warm oven or toaster oven to restore that just-baked softness, and if you’d like, finish with a light glaze before serving for an extra touch of sweetness that remains true to the “no sugar” concept by relying on fruit-driven sweetness and a touch of spice. When making ahead for a brunch or party, consider baking the donuts a day in advance and refreshing them with a brief reheat and a soft glaze right before guests arrive. The key is to maintain moisture and prevent drying, so avoid overbaking and keep storage conditions moderate to preserve the delicate texture.

Fun Facts & Trivia (Optional)

Did you know that apple cider has a long history as a seasonal staple in many parts of the world? In colonial America, cider was a common beverage long before the widespread availability of bottled drinks, and orchards thrived in the Northeast, where generations learned to press, ferment, and enjoy the fruit’s juice in a variety of ways. Apple cider donuts themselves became a beloved autumn treat in farmstands and fairs, where the aroma of frying or baking donuts would draw crowds like a welcoming beacon on crisp mornings. The fragrance of cinnamon and warm spices often evokes images of harvest festivals, corn mazes, and family gatherings. The “no sugar” approach taps into a modern sensibility: celebrate the essence of seasonal produce while steering toward lighter, kinder indulgence. It’s a bridge between nostalgia and contemporary mindful eating, a reminder that comforting flavors can be enjoyed with balance and intention.

From a culinary standpoint, donuts are a study in texture: a moist crumb with a delicate crust, achieved through careful temperature control and gentle mixing. The choice of apple cider—not just as a flavor but as a leavening and moisture agent—adds a layer of complexity. The flavors of the orchard in bloom—apple, pear, or even quince when in season—can all offer nuance to this base concept, inviting bakers to adapt the dish to their local landscape. As autumn advances, these donuts become more than a pastry; they become a small celebration of the land’s bounty, a nod to family recipes passed down through generations, and a modern reinterpretation that invites everyone to enjoy seasonal sweetness without excess.

In folklore and culinary lore, autumn is a time of gathering, sharing stories, and savoring simple pleasures. No Sugar Apple Cider Donuts are a compact embodiment of that ethos: a treat that tastes like a memory in the making, a reminder that sweetness can be graceful, and a reminder to slow down and relish the moment with those you love. Whether you’re chasing a quiet morning breeze or hosting a bustling brunch, these donuts offer a story in every bite—one that begins in the orchard and ends with a satisfied smile.

Ingredients

Donut Base

  • 2 cups all-purpose flour
    → Provides the main structure and crumb of the donuts. For a lighter, more tender crumb, sift the flour first and measure by lightly spooning into the cup before leveling; if gluten-free is desired, substitute with a 1:1 gluten-free blend and consider adding 1/2 teaspoon xanthan gum per cup if your blend doesn’t include it.
  • 1 1/2 teaspoons baking powder
    → Leavening that helps the batter rise during baking, giving the donuts a soft, airy center. Keep baking powder fresh by storing in a cool, dry place; test freshness by a small pinch in warm water if you’re unsure.
  • 1/2 teaspoon baking soda
    → Additional leavening that works with the acids in applesauce and cider to produce a light crumb. Ensure even distribution by whisking with the dry ingredients; avoid overmixing once the wet ingredients are added to preserve tenderness.
  • 1/4 teaspoon fine salt
    → Enhances flavor balance and helps control perceived sweetness. Use fine salt for uniform distribution; mix with dry ingredients to ensure even seasoning throughout the batter.
  • 1 teaspoon ground cinnamon
    → Imparts warm, classic spice flavor that pairs with apple. For a stronger aroma, toast the spice lightly in a dry pan for a few seconds before adding to the dry mix, and use freshly ground cinnamon if possible.
  • 1/4 teaspoon ground nutmeg
    → Adds subtle warmth and depth to the apple-cider flavor. Nutmeg is potent, so measure carefully; omit if you prefer a milder spice profile.
  • 2 large eggs (at room temperature)
    → Provide structure, moisture, and help bind the batter for a sturdy yet tender crumb. Room-temperature eggs blend more smoothly with the fats and liquids; if they’re cold, warm them gently in warm water for a few minutes. Do not overbeat after adding dry ingredients to avoid toughness.
  • 1/2 cup unsweetened applesauce
    → Adds moisture and natural sweetness without refined sugar, contributing to a tender crumb and helping to bind the batter. Use smooth applesauce for a uniform texture; for more apple flavor, choose a slightly chunkier version and fold gently at the end.
  • 1/2 cup milk (dairy or plant-based)
    → Hydrates the dry ingredients to form a pourable batter and aids in releasing donuts from the pan. Use unsweetened varieties to maintain the no-sugar intent; choose a milk that complements the flavor you prefer (dairy for richness, almond or oat for dairy-free options).
  • 1/4 cup melted unsalted butter or neutral oil
    → Provides moisture and tenderness by coating flour particles to limit gluten development. Melted butter adds a rich flavor; neutral oil yields a lighter crumb. Whisk the fat with the wet ingredients to ensure even distribution.
  • 1 teaspoon vanilla extract
    → Enhances overall flavor and rounds the apple-cinnamon notes. Use pure vanilla for the best aroma; if you like a stronger vanilla presence, you can increase to 1 1/2 teaspoons, but avoid overpowering the spices.
  • 1/2 cup apple cider
    → Delivers apple-forward aroma and a touch of natural sweetness; complements the applesauce and spices. If your cider is very tart, you can balance with a touch more applesauce or a splash of vanilla; for a more intense cider flavor, reduce the cider to concentrate it before measuring.

Optional Add-ins

  • 1/2 cup finely chopped apples
    → Adds bursts of apple flavor and moisture throughout the donuts. Toss the apples in a teaspoon of flour before folding to prevent sinking and to distribute pieces evenly. For juicier apples, pat dry with a paper towel before adding to batter.
  • 1/4 cup chopped walnuts or pecans (optional)
    → Introduces a pleasant crunch and nutty note. Toast the nuts lightly in a dry skillet to enhance aroma before chopping and folding into the batter; omit if nut-free is required.

No-Sugar Glaze (optional)

  • 1/2 cup powdered erythritol
    → Creates a sugar-free glaze that coats the donuts without adding refined sugar. For best results, ensure donuts are completely cooled before glazing, and sift the powder to remove lumps. If the glaze is too thick, thin with a little citrus juice or dairy-free milk.
  • 2-3 tablespoons lemon juice or dairy-free milk
    → Use lemon juice for a bright, tangy glaze; dairy-free milk yields a creamier glaze. Add gradually to reach a pourable, but not runny, consistency that coats the donuts evenly without pooling. If using lemon juice, balance with a touch of vanilla to offset acidity.

Instructions

  • Preheat your oven to 350°F (175°C) and grease a donut pan (6- or 12-cavity) or line with nonstick liners; this ensures the batter releases cleanly and maintains the smooth shape of the donuts.
    → Proper greasing prevents sticking and helps donuts release intact after baking, preserving the delicate crumb.
  • Whisk and sift together the dry ingredients: all-purpose flour, baking powder, baking soda, fine salt, ground cinnamon, and ground nutmeg; sifting aerates the flour and distributes leaveners and spices evenly for a light, tender crumb.
    → Sifting removes lumps and ensures even leavening and spice distribution throughout the batter.
  • In a separate large bowl, whisk the wet ingredients: eggs at room temperature, unsweetened applesauce, milk, melted butter or neutral oil, vanilla extract, and apple cider until smooth and fully incorporated; if eggs are cold, warm them gently in warm water for a few minutes to reach room temperature.
    → Proper emulsification yields a uniform batter with even moisture and prevents streaks of fat or egg.
  • Pour the wet mixture into the dry ingredients and stir with a spatula or wooden spoon until just combined; stop as soon as the flour disappears and a few small lumps remain to avoid developing gluten and making the donuts tough.
    → Overmixing creates a denser, tougher crumb; mixing only until moistened preserves tenderness and a light texture.
  • If using optional add-ins, fold in finely chopped apples (tossed first in a teaspoon of flour to prevent sinking) and chopped walnuts or pecans; add these after the batter has come together and fold gently to distribute without deflating air pockets.
    → Floured apples distribute evenly and resist sinking; toasted nuts add aroma and crunch.
  • Spoon or pipe the batter into the prepared donut pan cavities, filling each about 1/2 to 2/3 full for a balanced dome; avoid overfilling to prevent overflow and uneven rising, and use a small spatula to level the batter for uniform appearance.
    → Even portions ensure uniform bake and shape; 2/3 full yields a gentle dome without overflow.
  • Bake in the preheated oven for 12 to 14 minutes, rotating the pan halfway if your oven has hot spots; test doneness by inserting a toothpick or skewer into the center of a donut—if it comes out with a few moist crumbs (not wet batter), they are done.
    → Rotating promotes even browning and a consistently tender crumb; proper doneness prevents underbaking or drying out.
  • Remove the donuts from the oven and allow them to rest in the pan for about 5 minutes, then transfer to a wire rack to cool completely before glazing or storing; this sets the structure and prevents steam from softening the glaze.
    → Cooling on a rack prevents condensation and keeps any glaze from becoming soggy.
  • Prepare the glaze if desired by whisking powdered erythritol with lemon juice or dairy-free milk to a smooth, pourable consistency; start with 2 tablespoons of liquid and add in small increments until the glaze coats the donuts without pooling.
    → Sifting the erythritol helps achieve a glossy, smooth glaze; controlling moisture yields a coating that clings evenly.
  • Dip the cooled donuts into the glaze or drizzle evenly over the tops using a steady motion; allow the glaze to set for about 10 to 15 minutes, applying additional thin coats if a thicker glaze is desired.
    → A thin, even coating sets faster and prevents pooling, while multiple light coats build a more pronounced glaze without becoming sticky.
  • Store unglazed donuts in an airtight container at room temperature for up to 2 days, or freeze unfrosted donuts for longer storage; glazed donuts keep best for up to 1 day at room temperature, or wrap securely and refrigerate for up to 3 days.
    → Proper storage maintains moisture and prevents staling or texture changes that dull the flavor.

Notes

These no-sugar apple cider donuts are tender, warmly spiced, and naturally sweetened by ripe apples and apple cider, with no refined sugar added. You can customize them by folding in finely chopped apples or toasted nuts for texture and extra flavor. They freeze well and make a great grab-and-go treat or dessert with coffee or tea. For a dairy-free option, use your favorite plant-based milk and an equal amount of melted coconut oil or neutral oil; if you’d like a glaze, use a sugar-free glaze made from powdered erythritol whisked with lemon juice or dairy-free milk. Always ensure your flour is gluten-free if you have gluten intolerance, and choose a 1:1 gluten-free blend if you need a gluten-free version (consider adding 1/2 teaspoon xanthan gum per cup if your blend doesn’t include it).

Preheat oven to 350°F (175°C) and generously grease a donut pan or use silicone molds. In a bowl, whisk together the dry ingredients: flour, baking powder, baking soda, fine salt, ground cinnamon, and ground nutmeg. In a separate bowl, whisk the wet ingredients: eggs, unsweetened applesauce, milk, melted butter or neutral oil, vanilla, and apple cider. Pour the wet mixture into the dry and stir just until combined; avoid overmixing to keep the crumb tender. If you’re using add-ins, fold in the apples and/or nuts now. Spoon batter into the prepared pan about two-thirds full. Bake 12–15 minutes, until a toothpick inserted into a donut comes out with a few moist crumbs. Let the donuts cool in the pan for 5 minutes, then transfer to a rack to cool completely before glazing or dusting with cinnamon sugar.

For a no-sugar glaze, whisk 1/2 cup powdered erythritol with 2–3 tablespoons lemon juice or dairy-free milk until smooth. Drizzle over cooled donuts and let the glaze set. Store leftovers in an airtight container at room temperature for 2–3 days, or freeze baked donuts for up to 2 months; rewarm in a 350°F oven for 5–8 minutes to refresh tenderness. If you prefer a dairy-free version, swap the butter for a neutral oil and use plant-based milk. When using gluten-free flour blends, add 1/2 teaspoon xanthan gum per cup if your blend does not already contain it to help mimic gluten’s structure.

Tips

Tips for Perfect No Sugar Apple Cider Donuts

  • Prepare the dry ingredients first: sift the flour and whisk it with baking powder, baking soda, salt, cinnamon, and nutmeg. This ensures an even distribution of leaveners and spices for a lighter crumb.
  • Use room-temperature ingredients when possible. Eggs, milk, applesauce, and cider mix more smoothly and evenly, yielding a more cohesive batter with less risk of lumps.
  • Fresh leavening matters: check that your baking powder is active (a small pinch in warm water should fizz). If it’s older, replace it for optimal lift; likewise, whisk baking soda with the dry ingredients to ensure even distribution.
  • Avoid overmixing: once you add the wet ingredients to the dry, mix just until the flour disappears. Overmixing develops gluten and can make the donuts dense and chewy.
  • Balance the fats: melted butter provides a rich flavor, while neutral oil yields a lighter crumb. Whisk fat into the wet ingredients to help create a tender, cohesive batter.
  • Apple pieces and chunkier texture: if you include optional finely chopped apples, toss them in a teaspoon of flour before folding to prevent sinking, and pat dry if they release a lot of moisture.
  • Glaze guidance: to keep things sugar-free, sift the erythritol and add lemon juice or dairy-free milk gradually until you reach a pourable, coatable consistency. Fully cool the donuts before glazing to prevent sliding.
  • Donut pan prep: thoroughly grease or spray the pan to minimize sticking. If your batter is thick, let it rest 5–10 minutes to relax the batter before spooning or piping into the molds.
  • Flavor layering: the combination of cider, applesauce, and spices is key. If your cider is very tart, a touch more applesauce or a hint of vanilla can round the flavor without adding sugar.
  • Adaptations for dietary needs: for gluten-free baking, use a 1:1 GF flour blend with 1/2 teaspoon xanthan gum per cup if the blend lacks it, and ensure all ingredients (cider, applesauce) are certified GF. For dairy-free, use plant-based milk and oil or melted dairy-free butter.
  • Storage and freshness: bake ahead and store cooled donuts in an airtight container for up to 2–3 days at room temperature, or freeze unfrosted donuts for longer storage. Reheat briefly to restore tenderness.
  • Optional glaze variations: add a splash of vanilla or a pinch of citrus zest to the glaze for a bright finish, but keep portions modest to preserve the no-sugar concept.

Quick Troubleshooting

  • If donuts are dense: double-check your leaveners are fresh, don’t overmix, and don’t overbake. A short rest of the batter before baking can help.
  • If the glaze won’t coating evenly: ensure donuts are completely cooled, and adjust the glaze thickness with a little dairy-free milk or citrus juice in small increments.

FAQ

What makes these No Sugar Apple Cider Donuts “no sugar”?

They are made without refined sugar. The sweetness comes from unsweetened apple cider and ripe apples, with optional sugar-free sweeteners like erythritol or monk fruit if you want extra sweetness. If you skip all sweeteners, the donuts will still have warm apple flavor from the spices and fruit.

Are these donuts baked or fried?

They are designed to be baked for a lighter, simpler process. Bake in a donut pan at about 350°F (175°C) for 10–12 minutes. You can also adapt for an air fryer at 350°F for 6–8 minutes. Frying is possible with neutral oil, but that adds fat and calories.

Can I make these gluten-free?

Yes. Use a 1:1 gluten-free all-purpose flour blend (preferably with xanthan gum). You can also substitute with almond or coconut flour, but you’ll need to adjust the moisture and eggs. Check the blend’s guidance for best results.

Can I make these dairy-free or vegan?

Absolutely. Use plant-based milk (almond, soy, oat, etc.) and replace butter with a neutral oil (like canola) or melted coconut oil. For eggs, use a flax egg (1 tablespoon ground flaxseed + 3 tablespoons water per egg) or applesauce (¼ cup per egg). The batter should remain pourable but not overly loose.

How do I sweeten without sugar?

Options include sugar-free sweeteners such as erythritol, xylitol, monk fruit, or stevia blends. Erythritol and monk fruit often substitute 1:1 with sugar, while stevia blends require much smaller amounts. You can also rely on the natural sweetness from apples and applesauce.

What are the basic ingredients?

Common ingredients include: flour (regular or gluten-free blend), baking powder, cinnamon, salt, unsweetened applesauce, unsweetened apple cider, eggs (or vegan substitute), non-dairy milk, and a neutral oil. Optional vanilla extract, diced apples, and a sugar-free sweetener can be added for extra flavor. Toppings or glaze ideas follow below.

How do I store and reheat leftovers?

Store baked donuts in an airtight container at room temperature for 1–2 days, or refrigerate up to 1 week. Reheat in a 325–350°F oven for 5–7 minutes, or briefly in the microwave (about 15–20 seconds) to warm through.

Can I freeze the donuts?

Yes. Cool completely, freeze in a single layer on a baking sheet, then transfer to a freezer bag or container. They keep for 2–3 months. Thaw at room temperature and reheat as above.

Can I customize flavors or toppings?

Definitely. Add diced apples or chopped nuts to the batter. For toppings, use a cinnamon-sugar mix made with a sugar-free sweetener, or drizzle a glaze made from a sugar-free powdered sugar substitute with a little milk and vanilla. Ground nutmeg or allspice can add extra warmth as well.

Introduction / Hook

Imagine a warm, comforting treat that fits in the palm of your hand, ready in minutes, and powered by simple staples you likely already have in your kitchen. The Vanilla Coconut Cottage Cheese Mug Cake is more than a dessert—it’s a tiny moment of indulgence that feels luxurious without demanding a long list of ingredients or a marathon of steps. The moment you lift a spoon to that first bite, you’re met with a delicate vanilla perfume, a whisper of coconut that conjures tropical sunshine, and a creamy center that tames sweetness with a tangy, satisfying tang. It’s the kind of recipe that makes you pause, take a breath, and appreciate how good a simple idea can taste when you treat it with a little care. In just a few minutes, a humble mug becomes a stage for flavor, texture, and mood-boosting comfort. It’s speed, it’s charm, and it’s that rare bite that feels both wholesome and crave-able—all in one delectable package.

The beauty of this mug cake lies in its balance. The cottage cheese provides a velvety, protein-rich base that keeps the crumb light rather than heavy, while vanilla lends warmth and depth. Coconut contributes a sunny aroma and a delicate crunch, especially if you let a tiny bit of toasty bits greet your palate. The result is not just sweetness; it’s a layered experience: creamy, fragrant, slightly tropical, with a tender crumb that melts on contact. Whether you’re craving a quick breakfast that tastes like a treat, a post-workout pick-me-up, or a comforting late-night bite, this cake adapts to your rhythm. It invites curious experimentation—swap in a citrus zest for brightness, fold in dark chocolate for a cozy contrast, or top with fresh fruit for a lively finish. And because it’s mug-sized, you can tailor portions to match your mood, your schedule, or your appetite without waste or guilt.

The Story Behind the Dish

There’s a quiet delight in mug cakes—the art of delivering a dessert-worthy moment with the simplest of tools. The concept grew out of late-night kitchen improvisations and the modern desire for quick, portion-controlled treats that don’t compel you to fire up the oven. Cottage cheese, with its soft curds and mild tang, emerged as a surprising hero in these tiny culinary rituals. Its high protein content helps create a creamy texture that feels indulgent yet lighter than heavier dessert bases, making it a favored ingredient in quick desserts and smoothies alike. Vanilla, with its warm, comforting aroma, has a timeless ability to evoke memories—grandmother’s kitchen, a perfect Sunday breakfast, or a lazy afternoon spent with a book. Coconut brings a bright, sun-kissed note that hints at beaches and vacation moments, even when you’re tucked into a quiet evening at home.

As a family, as a solo cook, or as a busy student juggling routines, the mug cake concept travels well across cultures. It’s not tied to a single tradition; rather, it’s a modern kitchen adaptation that respects the love of good taste without demanding an entire afternoon to prepare. The Vanilla Coconut Cottage Cheese Mug Cake captures that spirit: a small, intimate treat that travels with you from morning to night, adaptable to your pantry and your cravings. A story emerges in the aroma while it bakes—one of resourcefulness and joy—that makes every bite feel like a little celebration of everyday life.

Over time, cooks have learned to pair this mug cake with a spectrum of accompaniments, from a splash of warm coffee to a dusting of cinnamon or a handful of fresh fruit. The story behind the dish is as much about the moment as it is about the ingredients: a brisk morning ritual that becomes a noon-time pick-me-up, a post-workout reward, or a dessert that feels both satisfying and light. It’s a dish that invites personal touches and stories—every variation telling a small anecdote about who you are at the moment you savor it. And because it’s built on pantry-friendly staples—vanilla, coconut, cottage cheese—it travels easily from kitchen to kitchen, offering a reliable, comforting, and surprisingly sophisticated bite wherever you are.

Why You’ll Love This Recipe

  • Quick and convenient: a full-flavored treat in minutes, ideal for busy mornings or late-night cravings.
  • Protein-rich base: cottage cheese adds creaminess and a gentle protein boost without heaviness.
  • Versatile flavor platform: vanilla and coconut pair beautifully with a wide range of toppings and mix-ins.
  • Low-fuss indulgence: the portion-controlled mug keeps servings reasonable while still delivering satisfaction.
  • Gluten-free and adaptable: naturally aligns with gluten-free diets and welcomes substitutions for dairy-free or vegan preferences.
  • Wholesome comfort: the aroma and texture evoke cozy, comforting moments that feel like a treat without guilt.
  • Beginner-friendly concept: a simple, forgiving base that shines with small creative touches.
  • Child-friendly appeal: gentle flavors and creamy texture make it a winner for picky eaters or lunchbox snacks.

Flavor Profile & Texture

The flavor journey of this mug cake begins with a warm, enveloping vanilla note. It isn’t harsh or overpowering; it’s the aroma of vanilla tucked into a cozy bakery corner, inviting you to take a first bite. The coconut contributes a delicate tropical brightness that lifts the profile without dominating, delivering faint toasty hints that recall coconut macaroons and sunny climates. The cottage cheese provides a subtle tang that steadies the sweetness and adds a lush creaminess—think velvet-soft interior with a slightly airy crumb instead of a dense, heavy bite. In the mouth, you’ll encounter a gentle contrast: a tender, almost custard-like center that yields to a light, cake-like exterior. If you’ve ever bitten into a dessert that melts on contact while staying distinctly flavorful, you’ll recognize the joy here. The texture is key: not dry, not overly dense, but with a delicate spring that makes each mouthful feel rewarding and substantial despite the small portion.

Even without extra adornments, the base presents a satisfying balance between richness and brightness. When you add toppings or mix-ins—think a whisper of citrus zest, a sprinkle of cinnamon, or a few dark chocolate shards—the flavor expands into a layered, nearly festive experience. The interplay between the mellow tang of cottage cheese, the vanilla’s warmth, and the coconut’s light sparkle creates a comforting profile that can lean comforting-homemade or playful-experimental, depending on your mood. In short, it’s a small cake that feels big on personality: creamy, aromatic, and wonderfully crumb-tender, with enough character to keep every bite interesting yet familiar enough to feel like “home” in a mug.

Occasions & Pairings

This mug cake is at home in a spectrum of moments. It’s ideal for busy weekdays when time is tight but you still want something satisfying and not a junk-food feel. It’s equally welcome as a weekend treat that doesn’t derail your routine, and it can be a gentle dessert after a simple weeknight dinner. Because the flavors are light and flexible, it works for breakfast-adjacent moments too—think a cozy morning bite that still feels like a little luxury as you rise and greet the day.

Pairing ideas to elevate the experience:

  • Morning coffee or a cup of tea: the warm notes of vanilla and coconut complement a robust brew or a fragrant chai.
  • Fresh fruit: slices of mango, pineapple, berries, or kiwi offer bright contrast and a burst of acidity to balance the creamy base.
  • Whipped cream or yogurt dollop: a light crown adds extra creaminess and a gentle tang.
  • A dusting of spices: cinnamon, nutmeg, or a pinch of cardamom can shift the mood toward cozy or tropical.
  • Chocolate accents: a few dark-chocolate shavings or chips introduce a delightful contrast and depth.
  • Small indulges: a drizzle of honey or maple syrup can amp up sweetness if desired, without overpowering the core flavors.

For celebrations or brunches, present the mug cake on a small plate with a decorative drizzle or a delicate garnish. It can also be portioned into mini mugs for a crowd, letting everyone choose their preferred embellishments. It’s the kind of dish that adapts to the moment—whether you’re offering a quick bite before a meeting, treating yourself after a workout, or winding down with a dessert that won’t derail your goals.

Tips, Variations & Substitutions

  • Flavor twists: swap a portion of the vanilla with almond extract for a nutty, fragrant lift. A splash of coconut extract can intensify the tropical vibe without adding bulk.
  • Texture tweaks: for extra creaminess, blend the cottage cheese until it’s ultra-smooth before combining with the other elements. If you prefer a lighter crumb, whisk the mixture a little more to introduce air.
  • Fruit and zest: a tiny amount of citrus zest (orange or lemon) can brighten the profile and cut sweetness nicely. Fresh fruit toppings can add a fresh, juicy contrast.
  • Chocolate option: a handful of mini chocolate chips or cacao nibs folded into the batter creates pockets of rich, melted goodness that play beautifully with vanilla and coconut.
  • Dairy-free adaptations: for a dairy-free version, use a dairy-free yogurt or blended firm silken tofu in place of cottage cheese, and consider a plant-based milk that you enjoy. The texture will shift slightly, but the result remains satisfying.
  • Low-sugar or sugar-free approach: use a natural sweetener like a touch of maple syrup or a zero-calorie sweetener to suit your preference, and balance with a touch more vanilla or citrus zest to maintain aroma and flavor depth.
  • Gluten-free considerations: the base is generally gluten-free, but always check any added ingredients. If you’re adding mix-ins like oats, choose certified gluten-free oats to stay fully compliant.
  • Make-ahead variations: you can prepare a batch of the dry flavor base in small jars for quick future use, then just add cottage cheese and a little liquid to bring it together when you’re ready to bake or warm.
  • Portion control: the mug concept naturally supports portion control, but you can scale up to a mini-mcone or a larger dessert if needed by adjusting the ratio of ingredients and using a bigger cup or ramekin.

Storage & Make-Ahead Ideas

Because this treat centers on a friendly, easily assembled batter-like base, there are comfortable ways to plan ahead. If you want to keep a batch ready to go for busy mornings, consider these ideas:

  • Make-ahead dry mix: combine the dry flavor components in a jar or container and store in the pantry. When you’re ready, you simply add cottage cheese and any additional liquid or flavor boosters for quick assembly.
  • Refrigerating prepared batter: you can prepare a batter-equivalent ahead of time and refrigerate for a short window, typically up to a day. Allow it to come closer to room temperature before finishing, as this can help with texture when you eventually heat it.
  • Freezing portions: portion the base into small freezer-safe containers or silicone molds. Thaw in the refrigerator overnight and warm gently before enjoying. Freezing works well for occasional cravings and reduces waste when you have extra ingredients.
  • Storage suggestions after baking: single servings can be stored in the refrigerator for a couple of days, covered, and reheated gently to preserve the soft texture. Avoid long storage in the freezer, as the texture can transform more than you’d expect for this delicate cake.

When you’re ready to enjoy, bring the prepared element to a comfortable temperature, then savor the aroma as it rises to the occasion. The simplicity of this dish makes it ideal for quick re-creations, weekend experiments, or emergency dessert cravings that still feel special. The mug cake’s portability means you can savor it wherever you are—at home, in a dorm, or in a small kitchen turned into a cozy cafe for a moment.

Fun Facts & Trivia (Optional)

– Vanilla is one of the most beloved flavoring agents in the world, with a long history that spans ancient civilisations and modern kitchens alike. Its warmth can instantly conjure feelings of comfort and nostalgia.

– Coconut adds not only flavor but a sunny aroma that can boost mood and transport you to tropical locales, even if you’re just in a rain-soaked city apartment.

– Cottage cheese has a unique protein profile and a gentle tanginess that makes it a surprisingly versatile base for both savory and sweet dishes, especially when you’re aiming for lighter, protein-rich desserts or snacks.

– Mug cakes surged in popularity as a playful, fast way to enjoy a personalized treat. They celebrate the magic of single-serving desserts that don’t require oven preheating or multi-step preparation, aligning perfectly with busy lives and spontaneous cravings.

– The combination of vanilla, coconut, and cottage cheese is a learnable, approachable gateway to more adventurous flavor pairings—great for cooks who want to experiment with texture and aroma without committing to a longer recipe.

Ingredients

Mug Cake Base

  • – 1/4 cup cottage cheese, blended until smooth
    → Cottage cheese provides moisture and protein to the batter, helping create a soft, tender crumb and adding creaminess without heavy fat. For best results, blend the cottage cheese in a blender or with a whisk until very smooth to avoid lumps; use full-fat if you can for richer texture; drain any excess whey if it’s very watery to prevent a too-runny batter.
  • – 1 large egg, lightly whisked
    → Eggs act as the primary binder and structure-builder in this quick mug cake, helping the batter set into a light, cake-like texture. Lightly whisk the egg to emulsify with the cottage cheese; room-temperature eggs mix more evenly. If you want a fluffier crumb, whisk the whites separately and fold in lightly.
  • – 2 tablespoons unsweetened coconut flour
    → Coconut flour is highly absorbent and yields a soft, cake-like crumb. It requires moisture and eggs to behave; 2 tablespoons is a restrained amount to avoid a dense result. If substituting with almond flour, use about 3 tablespoons. Sift to remove lumps and, if batter seems too thick, add a splash of milk in small increments.
  • – 1 tablespoon granulated sugar (or 1 tablespoon maple syrup)
    → Sugar sweetens the cake and helps with browning and moisture balance in the quick microwave bake. If you swap in maple syrup or honey, reduce the liquid slightly and whisk longer to ensure even dispersion; adjust sweetness to taste.
  • – 1/2 teaspoon baking powder
    → Baking powder provides lift for a light, tender crumb in the microwave. Ensure it’s fresh for maximum effectiveness. Do not substitute with baking soda without adjusting acidity in the batter.
  • – 1/2 teaspoon pure vanilla extract
    → Vanilla adds aroma and depth to the batter. Use high-quality pure vanilla extract for best flavor; if you have vanilla paste, you can substitute with 1/4 teaspoon paste for an intensified vanilla experience.
  • – Pinch of salt
    → A small pinch enhances sweetness and helps coconut and vanilla flavors pop. Even a tiny amount makes a noticeable difference in balance; skip only if you’re using salted ingredients and prefer a cleaner-salt profile.
  • – 2 tablespoons shredded unsweetened coconut
    → Adds texture and a pronounced coconut note throughout the cake. You can toast the coconut lightly in a dry pan to boost aroma before mixing. If you prefer, reserve some to sprinkle on top after cooking for contrast in texture.
  • – 1-2 tablespoons unsweetened almond milk (optional, to loosen batter)
    → Depending on the absorbency of the coconut flour and the moisture in the cottage cheese, the batter may be quite thick. Add 1 tablespoon at a time until it reaches a thick, spoonable consistency. Use unsweetened to control sweetness and avoid thinning the batter too much.

Optional Add-ins

  • – 1 tablespoon mini chocolate chips (optional)
    → Chocolate chips add pockets of sweetness and a touch of indulgence. Fold them in after the batter is mixed, so they distribute evenly without sinking completely. For a lighter chocolate flavor, choose milk chocolate chips; for a richer bite, go with dark chocolate.
  • – 1 tablespoon toasted coconut flakes (optional)
    → Toasted coconut adds a crunchy contrast and a deeper coconut aroma. Toast briefly in a dry skillet until fragrant, then fold into the batter or sprinkle on top after microwaving for extra texture and aroma.

Instructions

  • Blend cottage cheese until completely smooth, using a blender on high for 30–45 seconds or whisk vigorously with a whisk until there are no lumps; drain any excess whey if the mixture seems watery to prevent a too-runny batter.
    → Smooth cottage cheese creates a creamy, uniform base and avoids a grainy texture; draining whey concentrates the proteins for better structure in a quick microwave cake.
  • Whisk one large egg in a small bowl until fully combined and lightly foamy to help with emulsification and structure.
    → A lightly foamy egg distributes more evenly through the batter, aiding a light, cake-like crumb rather than a dense result.
  • Stir in 1/2 teaspoon pure vanilla extract into the cottage cheese and egg mixture until evenly incorporated.
    → Vanilla enhances aroma and depth, creating a more rounded coconut flavor profile as the cake cooks.
  • In a separate small bowl, whisk together 2 tablespoons unsweetened coconut flour, 1 tablespoon granulated sugar (or 1 tablespoon maple syrup, noting that maple syrup adds liquid), 1/2 teaspoon baking powder, and 1/2 teaspoon salt; sift to break up any lumps.
    → Coconut flour is highly absorbent, so proper distribution of leavening and sugar is essential for a light, tender crumb; sifting prevents dense pockets that can undermine rise.
  • Pour the wet mixture from step 2 into the bowl of dry ingredients from step 4 and stir with a spatula just until the batter comes together and no streaks of flour remain; avoid overmixing to keep the crumb tender and airy.
    → Mixing until just combined ensures the coconut flour hydrates without developing a tough texture; overmixing can lead to a gummy bite in microwave-baked goods.
  • Fold in 2 tablespoons shredded unsweetened coconut, distributing evenly; if you like, toast the coconut lightly in a dry skillet for 1–2 minutes to boost aroma before folding.
    → Toasting amplifies coconut fragrance and adds a subtle depth of flavor that contrasts with the creamy base.
  • If desired, fold in 1 tablespoon mini chocolate chips, ensuring they are evenly dispersed without sinking; avoid excessive stirring to keep chips from clumping.
    → Chocolate chips create pockets of sweetness and texture without overpowering the coconut notes.
  • If the batter seems very thick, whisk in 1–2 tablespoons unsweetened almond milk, adding a little at a time until the batter is thick but spoonable; do not over-wet the batter.
    → Almond milk adds just enough moisture to hydrate the coconut flour without thinning the batter too much, preserving structure for microwaving.
  • Lightly grease or spray a microwave-safe mug with cooking spray or oil to prevent sticking and ensure easy removal after cooking.
    → Proper coating prevents a fragile cake from tearing when you unmold or scoop it out, and makes cleanup easier.
  • Spoon the batter into the mug, filling it to about halfway to leave room for the cake to rise in the microwave.
    → Filling only halfway prevents overflow and ensures a tall, domed center rather than a flat disk.
  • Microwave on high power for 1 minute 30 seconds to 2 minutes, depending on your microwave wattage; start checking at 1:30 and test for doneness with a gentle press—the top should be set and a toothpick inserted near the center should come out with a few moist crumbs.
    → Microwave ovens vary; testing and short intervals prevent overcooking, which can make the cake dry, while undercooking leaves a gummy center.
  • Carefully remove the mug from the microwave and let it rest for 1 minute to finish cooking through carryover heat and to set the crumb for clean slicing or scooping.
    → Resting allows the moisture to redistribute, yielding a uniform, tender crumb and easier handling.
  • Optionally top with 1 tablespoon toasted coconut flakes or a light sprinkle of shredded coconut, then serve warm; if desired, add a dollop of extra cottage cheese or a drizzle of vanilla for contrast.
    → Finishing with toasted coconut enhances aroma and texture, while extra dollop or vanilla intensifies the creamy, vanilla-coconut profile.
  • Store any leftovers in a covered container in the refrigerator and reheat briefly in the microwave in 15–20 second bursts, testing for warmth to preserve moisture and texture.
    → Freshness and texture are best when reheated gently to avoid drying out the crumb.

Notes

These vanilla coconut cottage cheese mug cakes are quick, protein-rich treats that come together in minutes with just a blender or whisk and a short microwave bake. For the smoothest batter, blend the cottage cheese until completely lump-free and whisk the egg with vanilla to distribute aroma. Because coconut flour is very absorbent, the batter will be naturally thick; if it looks too stiff, whisk in 1 tablespoon at a time of unsweetened almond milk until it reaches a thick, spoonable consistency. Use fresh baking powder for a light, tender crumb, and keep in mind that substitution with baking soda requires acidity adjustments. A pinch of salt enhances sweetness and makes the vanilla and coconut pop. The shredded coconut adds texture and tropical notes—toast it briefly in a dry skillet to boost aroma, then fold into the batter or sprinkle on top after microwaving. If you prefer a sweeter result, you can swap the sugar for maple syrup, but reduce the added liquid slightly and whisk longer to ensure even incorporation. Optional add-ins: fold in 1 tablespoon mini chocolate chips after batter is mixed, or sprinkle extra toasted coconut on top for crunch. Microwave times vary by wattage—start with 60-70 seconds on high for a typical 1000–1100W microwave, check doneness, and nudge with 10–15 second bursts until the center is set; let rest 1–2 minutes before eating. This mug cake is delicious warmed with a dollop of yogurt or a drizzle of nut butter. Store any leftovers in the fridge for up to 2 days and reheat briefly. Always ensure your ingredients are gluten-free if you have gluten intolerance.

Tips

Tips for Perfect Vanilla Coconut Cottage Cheese Mug Cake

  • Blending cottage cheese until completely smooth is essential. Lumps can create a dense, uneven crumb. If you don’t have a blender, whisk vigorously or push through a fine-mesh sieve after mashing to smooth out the texture.
  • Fresh, full-fat cottage cheese yields the richest, creamier results. If using lower-fat varieties, you may notice a lighter crumb; consider a touch more coconut milk or a splash more milk to compensate for moisture differences.
  • Fresh baking powder is crucial for lift in the microwave. If the powder is older or clumped, the cake may turn out dense. Sift the powder with the dry ingredients to ensure even distribution.
  • Microwave times vary with wattage. Start at 60–70 seconds on a 800–1000W microwave. If the center is still jiggly, microwave in 10–15 second bursts until set. Avoid overheating, which can make the cake dry or tough.
  • To keep the top from drying out, avoid overcooking. If you notice a dry or crusty top, try reducing the cook time by 10–15 seconds next time, or cover the mug loosely with a microwave-safe plate to trap moisture.
  • Tip for fluffier texture: whisk the egg well and, for extra height, fold in lightly whisked egg whites or whip the eggs separately and combine at the end. This adds air and a cake-like crumb.
  • Moisture balance is key with coconut flour. If the batter seems too thick, add 1 tablespoon of unsweetened almond milk at a time until it reaches a thick, spoonable consistency. Avoid adding too much liquid, which can make the mug cake gummy.
  • Toast the shredded coconut briefly in a dry skillet until fragrant to deepen the coconut aroma before mixing. You can also reserve a portion to sprinkle on top after microwaving for textural contrast.
  • If using optional add-ins: fold in mini chocolate chips after the batter is mixed to prevent sinking. For a lighter chocolate flavor, use milk chocolate chips; for a richer bite, use dark chips.
  • Toasted coconut flakes on top after cooking add an appealing crunch and aroma. A light sprinkle of extra vanilla or a drizzle of maple syrup over the top can amplify flavor just before serving.
  • Storage and reheating: mug cakes are best fresh. If needed, store the batter (unbaked) in the fridge for up to 24 hours, or refrigerate leftovers and reheat in 10–15 second bursts to avoid drying out.
  • Flavor variations: for a deeper vanilla, use 1/4 teaspoon vanilla paste or a pinch of vanilla bean seeds. A pinch of cinnamon can complement the coconut nicely if you’re in the mood for a warm note.

FAQ

What is Vanilla Coconut Cottage Cheese Mug Cake?

A quick, single-serving mug cake you bake in the microwave using cottage cheese, vanilla, coconut and a few pantry staples. It’s protein-packed, naturally sweetened, and ready in minutes.

What ingredients do I need?
  • 1/2 cup cottage cheese (low-fat or full-fat)
  • 1 large egg
  • 1–2 tablespoons sweetener (granulated sugar, maple syrup, honey, or your preferred sugar substitute)
  • 1/2 teaspoon vanilla extract
  • 1–2 tablespoons shredded coconut or 2 tablespoons coconut flour
  • Pinch of salt
  • Optional: 1/4 teaspoon baking powder for extra rise
How do I make it (step-by-step)?
  1. Blend or mash cottage cheese until smooth.
  2. Whisk in egg, vanilla, sweetener, salt and baking powder until well combined.
  3. Stir in shredded coconut or coconut flour.
  4. Grease a microwave-safe mug and pour batter inside.
  5. Microwave on high for 1–2 minutes, checking after 1 minute and then in 15–20 second increments until set but soft in the middle.
  6. Let cool briefly, then enjoy.
How long does it take to cook in the microwave?

Typically 1–2 minutes on high in a standard 1000W microwave. Every microwave varies, so start at 1 minute and add 15–20 second increments until just set.

Can I make a dairy-free or vegan version?

Yes. Replace cottage cheese with silken tofu or a dairy-free yogurt, and use a vegan egg substitute (such as a flax egg) if needed. For best texture, blend the tofu until smooth and adjust with a little extra coconut flour if the batter is too loose.

What are good substitutions or variations?

Try these variations: add chocolate chips or cocoa powder for a chocolate twist; swap in almond flour or more coconut flour for different textures; add cinnamon or nutmeg; top with fresh berries, shredded coconut, or a drizzle of maple syrup after baking.

How should I store leftovers?

Store in an airtight container in the fridge for 2–3 days. Reheat in the microwave in 15–20 second bursts until warm. The texture is best fresh, but it will reheat okay for a quick snack.

How can I prevent it from overflowing or being rubbery?

Use a mug with extra headroom (at least 12 oz). Do not overfill. Blend cottage cheese until completely smooth to avoid lumps. Do not over-mix the batter, and if it looks very loose, add a touch more coconut flour or a pinch more baking powder.

Is this recipe high in protein?

Yes. The cottage cheese and egg provide protein, roughly 14–16 g per serving depending on the exact brands and amounts used. This makes it a satisfying, protein-forward snack or dessert.

Serving suggestions

Top with a dollop of yogurt or whipped cream, a drizzle of almond butter or maple syrup, and a handful of fresh berries or toasted coconut for extra flavor and texture.

Introduction / Hook

Imagine peeling back the lid of a small glass jar and revealing a cloud of silky, lemon-kissed cheesecake tucked inside, layered with a crumbly, oat-tinged crust, and a glossy ribbon of berry compote catching the light. Picture biting into it and feeling how the first spoonful dissolves on your tongue—creamy, bright, and just the right amount of tang—followed by a subtle nutty crunch from the crust. Now imagine this same indulgence, but crafted with protein-rich cottage cheese to fuel your day rather than slow you down. Protein Cottage Cheesecake Jars are the kind of dessert that fits neatly into a busy schedule: prepared in advance, portion-controlled, and satisfying enough to double as a post-workout treat, a midday pick-me-up, or a weekend brunch centerpiece. The magic lies in balance—creamy dairy, gentle sweetness, a whisper of vanilla, and a chorus of fresh fruit or a swipe of chocolate almond butter—so you get indulgence without guilt, energy without crash, and comfort without heaviness.

This dessert invites you into a world where healthful ingredients harmonize with comforting nostalgia. The cottage cheese base offers creaminess without the heaviness of traditional cheesecake, while a light touch of yogurt or cream cheese can smooth the texture even further. The jars themselves are not just cute; they are practical. They travel easily, stack neatly in the fridge, and make portion control feel effortless. In a culture that often swings between “too healthy to enjoy” and “too indulgent to feel good afterward,” these jars sit in the sweet spot: dessert-as-sensible, dessert-as-nourishment, dessert-as-a small celebration. Every element is designed to be accessible—no exotic ingredients required, but room for you to improvise and make it your own. If you’re a busy caregiver, a student, an athlete in the middle of training, or simply someone who loves a bright, satisfying finish to a meal, you’ve found a recipe that respects your schedule while rewarding your senses.

Beyond the jar: think about the aroma that fills your kitchen as you swirl in vanilla, citrus zest, or a hint of cinnamon. Consider the way you can customize textures—from a smoother, spoon-friendly cream to a more chewy, almost-fudge-like layer. And once you’ve tasted the base, you’ll discover how the topping can pivot the entire experience: citrusy brightness, seasonal berries, roasted nuts for crunch, or a swirl of dark chocolate for decadence. It’s a dessert that invites curiosity, creativity, and a little bit of play in the kitchen, without demanding advanced technique or long, costly ingredients. The result is a dessert that feels special enough for guests and practical enough to share with the ones you love most—perfect for weeknights and weekend breakfasts alike.

The Story Behind the Dish

The idea of a cheesecake that travels in a jar is rooted in the modern appetite for portable, protein-forward desserts. Cottage cheese has long been a pantry staple in many households—priced accessibly, high in protein, and pleasantly adaptable. In a world where time is precious and wellness is personal, cooks began looking for ways to preserve the creamy texture of cheesecake without the richness that weighs you down. Cottage cheese, with its curd-like bite and mild tang, became a natural hero for this mission. It’s a humble ingredient that invites transformation: whipped to silk, blended with a splash of yogurt for extra creaminess, folded with a touch of vanilla and citrus, and set not in a heavy cake pan but in individual jars that encourage mindful portions.

The jar trend itself has a backstory in the “meal prep” movement, where food that is pre-portioned, visually appealing, and easy to grab wins hearts and calendars. Layering textures became as important as layering flavors—creating a narrative you can see on the jar lid and taste with every spoonful. The approach also speaks to a wholesome philosophy: desserts don’t have to be a luxury you regret after, they can be an everyday pleasure that fits your health goals. In many ways, Protein Cottage Cheesecake Jars are a tribute to that shift—dessert as a kind of nourishment, a celebration of simple ingredients, and a flexible canvas for seasonal produce and personal preferences.

There’s a touch of nostalgia too. Cheesecake evokes birthdays, family gatherings, and late-night conversations with friends. By presenting cheesecake in small jars, this recipe preserves that sense of warmth while updating it for contemporary kitchens. The jars make it easy to share, easy to portion, and easy to rotate through flavors—from lemon-blueberry to chocolate-strawberry to a rich cocoa-nut version—so you can keep the idea fresh while staying anchored to the core concept: a protein-rich, creamy cheesecake that travels with you and still feels like a special treat.

Why You’ll Love This Recipe

  • High-protein dessert: The cottage cheese base contributes a substantial protein boost, making this a more satisfying end to a meal or a post-workout treat than traditional cheesecake.
  • Portable and portion-controlled: Individual jars mean no carving and no leftovers begging to be eaten later; perfect for lunch boxes or on-the-go snacking.
  • Versatile and forgiving: The base works with many flavor profiles, from citrusy brightness to deep chocolate richness, and can be customized for dairy-free or gluten-free diets.
  • Make-ahead convenience: These jars are ideal for meal-prep Sundays or busy weeks—set, chill, and you’re done for several days.
  • Balanced sweetness: A gentle sweetness level keeps the dish accessible, while you can dial up or down with toppings and fruit choices.
  • Kid-friendly and crowd-pleasing: Creamy textures and familiar flavors appeal to younger palates while still exciting adults with nuanced notes like vanilla, lemon zest, or almond.
  • Visual appeal: The glass jars turn dessert into a presentation—layered textures, vibrant fruit coulis, and a glossy top layer that invites a close look and a big spoonful.
  • Healthy comfort with room for indulgence: You don’t have to sacrifice comfort for health; this recipe strikes a harmonious balance between nourishment and pleasure.

Flavor Profile & Texture

The flavor of Protein Cottage Cheesecake Jars starts with a gentle tang from cottage cheese, complemented by the creamy smoothness of yogurt and a whisper of vanilla. The lemon zest or a splash of citrus offers a bright lift that cuts through the richness, leaving a clean, refreshing finish on the palate. When you bite through the crust layer—made from oats, a touch of butter or dairy-free butter alternative, and perhaps a pinch of cinnamon—you get a welcome warmth and a comforting nutty note that lingers. The contrast between a slightly chewy or crumbly crust and a velvety cheesecake center creates a satisfying textural dynamic that keeps you reaching for another jar.

Texture is everything in this dessert. The cottage cheese needs to be blended or whirred until silky, so there is no gritty mouthfeel. If a lighter texture is desired, a few tablespoons of strained yogurt or a cream cheese alternative can be folded in to smoothness. The top layer can range from a crisp gloss of berry compote to a matte, almost satin finish of pureed fruit, to a delicate drizzle of dark chocolate or almond butter. In every version, you experience a gentle balance: the tang of dairy meets mellow sweetness, the citrus fragrance awakens the senses, and the crumb provides a satisfying bite that anchors the dessert in a familiar, comforting way.

From a nutritional perspective, this dessert favors steady energy over quick spikes. The protein helps with satiety, the natural sweetness from fruit or maple syrup can be moderated to fit your macro goals, and the oats contribute fiber that supports digestion. The result is a dessert that you can savor slowly, rather than inhale in one rapid rush, which is a rare and welcome quality in today’s fast-paced food culture.

Occasions & Pairings

These jars are versatile enough to appear in several settings, transforming a simple dessert into a charming centerpiece or a practical snack. They shine as:

  • Post-workout treats that help rebuild and refresh after a session, thanks to their protein content and satisfying texture.
  • Meal-prep options for weekday breakfasts or afternoon cravings, offering a tasty start to the day or a mid-day energy lift.
  • Party pleasers at potlucks, brunches, or kid-friendly gatherings—easy to transport, easy to serve, and easy to adapt to guest preferences.
  • Vacation-friendly snacks for beach days or road trips, because they’re portable and can be kept in a cooler for hours.

Pairings can elevate the experience. Consider these ideas to complement the jars:

  • Drinks: a lightly brewed coffee, an espresso, or a cold sparkler to balance the dairy richness and enhance the citrus notes.
  • Side dishes: a simple almond-crusted muffin, a light fruit salad, or a handful of roasted nuts to introduce a crunchy counterpoint.
  • Dessert pairings: a small square of dark chocolate, a dollop of whipped coconut cream, or a spoonful of berry compote to mirror the jar’s flavors.
  • Seasonal twists: summer berries for brightness, autumn apples with cinnamon, or citrusy tang with grapefruit or mandarin segments.

Flavor Profile & Texture (Deep Dive)

In practice, you’ll often begin with a base that is both familiar and comforting: a cheesecake that feels like a reward, yet lighter in body. The cottage cheese is the star here—its texture, when blended smooth, mirrors the creaminess of traditional cheesecakes but with a personality that is a touch airy and bright. The vanilla brings warmth, while a hint of citrus—zest from lemon or orange—adds a zing that prevents the dish from feeling too rich. If you prefer a more decadent chocolatey vibe, you can fold in cocoa powder or use a chocolate-flavored protein powder to transform the flavor profile without losing the integrity of the jar format.

The crust, composed of oats, perhaps a little ground nuts, and a binding element such as a small amount of honey or maple syrup, provides a gentle crunch. This contrast is critical: a purely soft filling can feel indulgent, but the crust’s texture introduces structure and a subtle, toasty depth. When you top the jars with a berry compote, you invite sweetness that doesn’t overwhelm; the fruit’s natural acidity brightens the entire experience, and those glossy red or purple tones are visually irresistible. If you opt for a fresh fruit topping, you’ll notice the crisp bite of berries and a burst of juiciness that makes each spoonful feel like a celebration.

Texture mastery also shines in the mouthfeel of the finished product. A properly blended cottage cheese base should be luxuriously smooth, almost like a light cheesecake mousse. If you notice a slight graininess, a quick blitz in the blender or food processor can remedy it. The final structure should hold without being overly stiff, allowing a gentle melt as you scoop. The top layer, whether glossy with jam or lightly set with a fruit puree, should have a slight sheen that hints at the serenity within. In all its forms, the flavor journey is upward: from the mild tang of the dairy, through the warm vanilla and the citrus’s spark, to the fruity brightness on top, and finally to the satisfying finish of the crust’s toasty crunch.

Tips, Variations & Substitutions

  • For a dairy-free version: swap regular cottage cheese for a dairy-free alternative designed for texture, such as blended silken tofu with almond milk ricotta or a plant-based cream cheese spread. Use a dairy-free yogurt and vanilla extract to maintain creaminess.
  • Protein powder options: whey protein, casein, or plant-based blends all work. If the texture becomes too thick with plant-based powders, loosen with a splash of milk (or non-dairy milk) and a touch of lemon juice to maintain brightness.
  • Crust variations: mix rolled oats with crushed almonds or walnuts, a spoonful of nut butter, and a pinch of salt. Use ghee, butter, or a dairy-free butter substitute to bind; you can also press in a little chopped nuts for extra crunch.
  • Flavor twists: lemon zest with blueberries; orange zest with dark chocolate shavings; cocoa and raspberry; or vanilla with roasted pecans and a drizzle of maple syrup.
  • Low-sugar approach: use unsweetened yogurt and berries; rely on the natural sweetness of fruit. If you need a sugar substitute, choose a mild option like monk fruit or stevia, but test to avoid an aftertaste.
  • Gluten-free: ensure your crust mix uses certified gluten-free oats and check any add-ins for gluten-free labeling if you’re serving someone with celiac disease.
  • Mini versions: scale down to smaller jars for precise portions or larger jars for a more indulgent dessert; the concept stays the same.
  • Vary the protein density: if you want a lighter dessert, use a bit less cottage cheese and add in extra yogurt; for a denser cheesecake, add a touch more cream cheese or a small amount of cream.

Storage & Make-Ahead Ideas

The beauty of these jars lies in their make-ahead practicality. After assembling, chill them thoroughly to allow the flavors to meld and the layers to set. When stored properly, they stay fresh and tasty for several days, making them excellent for meal-prep routines or for hosting guests with minimal last-minute effort.

Storage tips:

  • Refrigerate in the jars with lids tightly closed for up to 3–5 days. Keep toppings separate or add them just before serving to preserve texture and color, especially for citrus and berry toppings that may discolor over time.
  • Freezing: you can freeze the base (without toppings) for up to 1 month. Thaw in the fridge overnight and reassemble with fresh toppings if desired. Note that freezing may slightly alter the texture of dairy-based fillings, so plan accordingly if you crave a perfectly smooth finish after thawing.
  • Make-ahead strategy: prepare the crusts and fillings separately, then assemble the jars a day ahead. This approach ensures the crust remains crisp and the filling retains maximum creaminess.
  • Transportability: for trips, use jars with tight-sealing lids and place a small, insulated bag in your tote to keep them cool during transit.

Fun Facts & Trivia

– Cottage cheese, once a humble, time-honored pantry staple, has a long history dating back to early 20th-century dairy culture, where simple, high-protein foods were valued for their versatility and minimal processing. Its resurgence in modern wellness cooking highlights a sustainable loop: a straightforward ingredient becoming a star in nutrition-forward, crave-able recipes.

– The jar dessert trend has roots in both practicality and aesthetic appeal. Mason jars and similar vessels made it easy to transport, layer, and present food in an organized, gallery-worthy way. It’s the same logic that makes parfaits and overnight oats so popular, but cheesecake in a jar adds a decadent twist that remains unmatched in convenience.

– Protein-forward desserts challenge the stereotype that sweets must be heavy or unhealthy. By balancing dairy, protein, and fruit, you can satisfy cravings while supporting muscle repair and satiety—an appealing concept for athletes, students, and busy professionals alike.

– The flexibility of this concept invites regional twists. In coastal regions, you might see coconut-lime flavors with shredded coconut and pineapple; in farm country, apples with cinnamon and a crumbly oat topping can carry a rustic charm; in urban kitchens, you might find espresso-chocolate combinations that pair perfectly with a morning cup of coffee.

Closing Thoughts

Protein Cottage Cheesecake Jars offer more than a dessert; they offer a small ritual of self-care that fits into the rhythm of daily life. They invite you to slow down just enough to savor a moment of creamy satisfaction, then jump back into your day with a pep of protein and a burst of citrus brightness. They celebrate the idea that nourishing food can also be delightful, portable, and visually appealing. Whether you’re preparing a batch for the week, sharing jars with friends, or treating yourself after a workout, these jars deliver a balanced, comforting, and irresistibly tasty experience. So gather your jars, pull out your favorite toppings, and let the creamy mornings begin—one spoonful at a time.

Ingredients

    – Crust
    – 1 cup crushed gluten-free graham crackers (about 130 g)
    → The crust forms the base for the jars, providing a gentle sweetness and a light, crumbly texture. Use fine crumbs so the layer presses evenly into the jars. If you’re avoiding gluten, ensure crackers are certified gluten-free and crush to a consistent, sand-like texture. Melted butter is mixed in to bind the crumbs, helping the crust hold together when the jars are chilled.
    – 2 tablespoons unsalted butter, melted
    → Binds the crust crumbs into a cohesive, pressable base that holds its shape when filled and refrigerated. Use it warm so it blends smoothly with the crumbs, and press the mixture firmly into the bottom of each jar for an even layer. For dairy-free options, substitute with melted coconut oil in the same amount, noting it may add a subtle coconut note.

    – Filling
    – 1 cup well-drained cottage cheese, blended until smooth (about 240 g)
    → The star of this cheesecake, providing protein and a creamy body. Drain well to remove excess whey, then blend until silky smooth to avoid graininess. If your blender leaves tiny lumps, press the puree through a fine sieve after blending for an ultra-smooth texture that pipes or scoops easily into jars.
    – 8 oz cream cheese, softened to room temperature (about 225 g)
    → Adds richness, stability, and a velvety mouthfeel that supports the lighter cottage cheese. Soften fully to prevent lumps and blend with cottage cheese until homogeneous. If dairy-free, use an equal amount of dairy-free cream cheese as a substitute with the same softening step.
    – 1/2 cup plain Greek yogurt (about 120 g)
    → Contributes tang and extra creaminess while lightening the density of the filling. Use thick, strained yogurt for best results; avoid runny varieties. If you’re avoiding dairy, substitute with an equal amount of thick coconut yogurt or omit entirely and compensate with extra cottage cheese and protein powder.
    – 1 scoop vanilla protein powder (about 30 g) (whey or plant-based)
    → Increases protein content and adds a pleasant vanilla note. Choose a smooth-blending powder to minimize grittiness; if your powder is unflavored or already sweet, you may adjust sugar or vanilla accordingly. If you don’t use protein powder, increase cottage cheese to maintain filling volume.
    – 1/3 cup granulated sugar (adjust to taste)
    → Provides sweetness to balance tangy dairy; the exact amount can be reduced if your protein powder is sweet or if you prefer a less sweet dessert. For lower sugar, consider 2–3 tablespoons and rely on the vanilla and fruit topping for sweetness.
    – 1 teaspoon vanilla extract
    → Central flavor that ties all dairy elements together. Use pure vanilla extract for the richest aroma; if desired, substitute with vanilla bean paste (increase by 1/2 teaspoon and scrape seeds from one vanilla bean).
    – 1 tablespoon lemon juice
    → Brightens the filling and helps cut the richness of the dairy. Freshly squeezed lemon juice yields the freshest flavor; you can also add lemon zest (see below) for more aroma without adding extra liquid.
    – 1 teaspoon lemon zest (optional but recommended)
    → Adds a fresh, citrusy aroma that complements the vanilla and dairy without overpowering the cheesecake. Grate only the yellow part of the lemon to avoid bitterness from the white pith. If you don’t have a lemon, substitute with a small drop of orange zest for a milder citrus note.
    – Pinch of fine sea salt
    → Enhances sweetness and depth of flavor, balancing the richness of the dairy. If your cottage cheese is particularly salty, you may reduce or omit this pinch to taste.
    – 2–3 tablespoons milk (any kind; dairy or non-dairy) as needed to loosen the filling
    → Use gradually to achieve a silky, pipe-able consistency without making the mixture runny. Add milk a little at a time and blend until you reach a thick, spoonable texture that fills the jars smoothly.

    – Optional Add-ins
    – 2 tablespoons mini dark chocolate chips (optional)
    → A few chocolate chips add pleasant pockets of sweetness and richness. Fold in gently at the end to distribute evenly without sinking. Use mini chips to prevent heavy areas that could cause cracking on chilling.
    – 1 tablespoon chia seeds (optional)
    → For a slight crunch and a subtle thickening as the seeds hydrate. If using chia, let the filling rest for 5–10 minutes after mixing so the seeds swell before filling the jars. Note that this will thicken the filling slightly; adjust milk accordingly.
    – 1/4 cup chopped almonds or walnuts (optional)
    → Adds a toasty crunch and nutty depth. Toast the nuts lightly before chopping to bring out flavor, and chop finely so they distribute evenly and don’t puncture the smooth filling.

    – Toppings
    – 1/2 cup fresh berries (blueberries, strawberries, raspberries, or a mix) for topping
    → Fresh fruit provides brightness, moisture, and color on top. Rinse and pat dry, then arrange on the surface just before serving. If berries are particularly juicy, you can macerate with a teaspoon of sugar and a splash of lemon juice for a glossy finish, then spoon over the jars.
    – 2 tablespoons berry compote or sauce (optional)
    → A glossy layer that intensifies berry flavor and sweetness. Simmer berries with a splash of water and a touch of sweetener until saucy; cool completely before drizzling on top to avoid soggy crust.
    – Fresh mint leaves for garnish (optional)
    → A hint of color and aroma to finish. Tear or finely chop just before serving to release essential oils, and place a leaf atop each jar for a clean, fresh presentation.

Instructions

  • Chill the glass jars and mixing tools in the refrigerator for about 10 minutes before assembly to ensure the crust and filling set evenly and don’t warm too quickly.
    → Cold surfaces help the crust set firmly and keep the filling silky as you layer it into the jars, preventing bubbling or sliding while piping.
  • Crush gluten-free graham crackers to a uniform fine crumb measuring 1 cup (about 130 g) using a food processor or by sealing in a zip-top bag and crushing with a rolling pin until no large bits remain.
    → Fine crumbs press evenly into the jar bottoms for a cohesive base; coarse crumbs can create gaps and crumble later.
  • Melt 2 tablespoons unsalted butter gently until completely liquid, then whisk it into the 1 cup crumb mixture until the texture resembles wet sand and holds its shape when pressed.
    → The melted butter binds the crust so it maintains structure when chilled and filled; ensure the butter is warm but not hot to avoid hardening crumb pieces.
  • Divide the crumb-butter mixture evenly among the bottom of each jar and press firmly with the back of a spoon or a small flat-bottomed tamper to create a compact, even crust layer about 2–3 mm thick.
    → A uniform crust base yields consistent bites and prevents air pockets that could cause cracking or crumbling later.
  • Refrigerate the jars with the crust for 8–10 minutes to set the butter and firm the base.
    → A brief chill helps the crust lock into place so the filling can sit atop without shifting or leaking into the jar edges.
  • Drain 1 cup cottage cheese well in a fine-mesh sieve over a bowl, pressing with the back of a spoon to remove as much whey as possible, then let it drain for 5–10 minutes.
    → Removing excess moisture prevents a runny filling and yields a smoother, silkier texture that pipes cleanly into the jars.
  • Blend the drained cottage cheese until completely smooth using a blender or food processor; if any tiny lumps remain, pass the puree through a fine sieve to achieve ultra-smoothness.
    → A velvety base avoids gritty mouthfeel and ensures the filling holds its shape when chilled.
  • Allow the 8 oz cream cheese (about 225 g) to come to room temperature, then beat it with the cottage cheese until homogeneous and creamy, scraping the bowl as needed for even texture.
    → Room-temperature cream cheese blends more easily with cottage cheese, producing a stable, lush filling without lumps.
  • Add 1 cup plain Greek yogurt, 1 scoop vanilla protein powder, 1/3 cup granulated sugar, 1 teaspoon vanilla extract, 1 tablespoon lemon juice, and optional 1 teaspoon lemon zest and a pinch of fine sea salt; blend until the mixture is uniformly smooth and glossy.
    → Yogurt adds tang and creaminess; protein powder boosts nutrition and helps stiffen the filling; vanilla and citrus lift the overall aroma and balance the richness. Scrape the sides periodically to maintain even texture.
  • With the blender running on low or by folding with a spatula, gradually stream in 2–3 tablespoons milk, adding a little at a time until the filling reaches a thick, pipeable consistency that holds a gentle peak when tested with a spoon. Stop before the mixture becomes pourable.
    → Proper moisture yields a filling that pipes cleanly and fills the jars smoothly without slumping during chilling.
  • If using add-ins, fold in 2 tablespoons mini dark chocolate chips, or 1 tablespoon chia seeds (let the mixture rest 5–10 minutes to hydrate if used), or 1/4 cup chopped almonds or walnuts; distribute evenly by gentle folding to avoid deflating air bubbles.
    → Add-ins provide texture and flavor without destabilizing the filling; resting chia seeds ensures they hydrate properly for the desired bite.
  • Spoon or pipe a generous layer of filling over the crust in each jar, leaving about 1/4 inch (6 mm) of headspace; tap the jars lightly on the counter to release any trapped air and smooth the tops with the back of a spoon.
    → Proper portioning and air removal prevent pockets that can cause cracking and ensure a neat, uniform presentation.
  • Wipe rims clean and refrigerate the assembled jars, uncovered or loosely covered, for at least 2–4 hours or overnight to allow the filling to set fully and flavors to meld.
    → Chilling firming the filling improves texture and makes serving cleaner; overnight chilling intensifies vanilla and citrus notes.
  • Before serving, rinse and pat dry 1/2 cup fresh berries; if desired, macerate with 1 teaspoon sugar and a splash of lemon juice for 10 minutes to create a glossy topping.
    → Berries add brightness, moisture, and color; maceration enhances sweetness and juiciness for a more alluring finish.
  • Top each jar with fresh berries and, if using, 2 tablespoons berry compote or sauce; finish with a fresh mint leaf for aroma and a polished presentation.
    → The toppings provide contrast in texture, moisture, and color, elevating the overall dessert and giving a vibrant, restaurant-style finish.
  • Store any un-topped jars in the refrigerator and consume within 2–3 days for best texture and flavor.
    → Dairy-based desserts can soften or dull in flavor over time; shorter storage preserves the creamy structure and bright taste.

Notes

These Protein Cottage Cheesecake Jars are a creamy, protein-packed dessert you can customize with your favorite toppings and mix-ins. For a sturdy, even crust, crush gluten-free graham crackers to a fine sand-like texture and mix with melted butter; press firmly into the bottom of each jar and chill briefly so the base sets before filling. To achieve a ultra-smooth filling, drain the cottage cheese well and blend until silky; if any small lumps remain, push the purée through a fine sieve. Beat softened cream cheese with thick Greek yogurt, vanilla protein powder, sugar, vanilla extract, lemon juice, and optional lemon zest, plus a pinch of salt, then blend in milk a little at a time until the mixture is thick and pipeable. If you need a dairy-free version, substitute dairy-free cream cheese and yogurt and use a plant-based milk; you may also increase cottage cheese by a little to maintain creaminess. If your protein powder is sweet, reduce added sugar to 2–3 tablespoons and rely on the lemon and vanilla for balance. Fold in any optional add-ins like mini chocolate chips, chia seeds, or chopped almonds or walnuts, distributing evenly so they don’t sink or puncture the filling. To assemble, spoon or pipe the filling over the set crust in each jar, then refrigerate for at least 2–4 hours or overnight until firm. Top with fresh berries or a quick berry compote and, if desired, a mint leaf for color. These jars store well in the fridge for up to 4 days and can be frozen for longer storage; thaw in the fridge before serving. Always ensure your ingredients (crackers, cream cheese, yogurt, and protein powder) are certified gluten-free if you have gluten intolerance.

Tips

Tips for Perfect Protein Cottage Cheesecake Jars

Crust tips

  • Crush crackers to a fine, sand-like texture for an even, cohesive crust. Use a food processor or place them in a resealable bag and crush with a rolling pin for uniform crumbs.
  • Toast gluten-free crackers lightly if you want a deeper flavor, but avoid browning too much to prevent bitterness. Ensure gluten-free labeling if avoiding gluten.
  • Mix melted butter with the crumbs until the mixture resembles damp sand. Press firmly into the bottom of each jar using the back of a spoon or a flat-bottomed glass for an even, compact base. Chill briefly before filling to help it set.
  • For dairy-free options, substitute melted coconut oil in equal amounts. Note that coconut oil can add a subtle coconut note to the crust.

Filling tips

  • Drain cottage cheese very well to remove whey. For a silkier texture, blend until completely smooth, then pass through a fine sieve if any small lumps remain.
  • Softened cream cheese blends best when at room temperature. If using dairy-free cream cheese, ensure it’s truly soft and blends smoothly with cottage cheese.
  • Choose thick, strained Greek yogurt for extra creaminess and tang without adding too much moisture. If dairy-free, use thick coconut yogurt or adjust with additional cottage cheese.
  • Use a smooth-blending vanilla protein powder and fold in gradually to avoid grittiness. If you skip the powder, increase cottage cheese volume or adjust with a bit more yogurt.
  • Taste and adjust sweetness before filling jars. If your protein powder is sweet, reduce sugar; if not, balance with a touch more vanilla or a hint of lemon.
  • Add lemon juice to brighten the filling; lemon zest is optional but recommended for a fresh aroma. Grate only the yellow zest to avoid bitterness from the pith.
  • Whisk in a pinch of fine sea salt to enhance flavors, especially if your dairy products are very mild.
  • To achieve a scoopable, pipe-able texture, add milk gradually while blending. Stop as soon as the filling loosens enough to fill jars smoothly but isn’t runny.

Optional add-ins tips

  • Mini chocolate chips add pockets of sweetness; fold them in at the end to prevent sinking and ensure even distribution.
  • Chia seeds provide a subtle crunch and thicken the filling as they hydrate. If using chia, let the mixture rest 5–10 minutes before filling to allow hydration; you may need a touch more milk.
  • Toast chopped almonds or walnuts to bring out nutty depth; chop finely so they distribute evenly and don’t puncture the smooth filling.

Topping tips

  • Fresh berries add brightness and moisture. Rinse and pat dry. If berries are very juicy, macerate briefly with a pinch of sugar and a splash of lemon juice for a glossy finish, then spoon on top.
  • Berry compote or sauce intensifies berry flavor; cool completely before drizzling to avoid soggy crust.
  • Fresh mint leaves provide color and aroma; tear leaves just before serving to release essential oils and place on each jar.

Makes-ahead and storage

  • Prepare the crust ahead and press into jars; store in the fridge until ready to fill.
  • The filling can be made a day or two ahead; refrigerate, then portion into jars when ready to fill. Chill the filled jars for at least 2–4 hours or overnight for best setting.
  • For longer storage, freeze filled jars un-topped; thaw in the fridge and add toppings after thawing if desired.

Equipment and technique tips

  • Fill jars with a piping bag for clean, even layers, or use a sturdy spoon and smooth the top with the back of a spoon.
  • Use jars of similar size to ensure even crust depth and uniform servings.
  • Chill the completed jars thoroughly—2–4 hours minimum, but overnight yields the neatest slices.
  • Label jars with date and flavor notes if making multiple batches or gifts.

FAQ

Protein Cottage Cheesecake Jars — FAQ

Answers to common questions about making Protein Cottage Cheesecake Jars.

What are Protein Cottage Cheesecake Jars?

They’re individual, no-bake cheesecake fillings (often layered) stored in small jars. The filling combines cottage cheese, Greek yogurt, and protein powder for a creamy, high-protein dessert or breakfast. A crust is optional for extra texture, and the jars are ready to chill and enjoy.

What ingredients do I need?

Core filling: cottage cheese, plain Greek yogurt, protein powder (vanilla works best), a sweetener of choice (maple syrup, honey, or a sugar substitute), vanilla extract, and a pinch of salt if desired. Optional crust: crushed graham crackers or rolled oats with a little melted butter or nut butter. Toppings ideas: fresh berries, cocoa powder, melted chocolate, or a drizzle of nut butter.

Do I need a crust, and what can I use?

The crust is optional. For a quick crust, mix crushed graham crackers with a little melted butter and a pinch of salt, then press into the jar bottoms. You can also use crushed oats with a bit of nut butter or almond flour for a gluten-free crust. Dairy-free or vegan options can use shredded coconut or vegan crackers as a crust substitute.

How do I assemble and set them?

1) Blend the cottage cheese, Greek yogurt, protein powder, sweetener, vanilla, and salt until smooth. 2) Taste and adjust sweetness. 3) Layer or spoon filling into jars (add crust at the bottom if using). 4) Chill in the fridge for at least 2 hours, preferably overnight, to set and thicken.

How long do they last in the fridge?

Stored in an airtight jar in the fridge, they typically keep for up to 4 days. If you added fresh fruit on top, consume within 2 days for best texture and flavor.

Can I freeze Protein Cottage Cheesecake Jars?

Freezing is possible, but may change texture. Freeze in freezer-safe jars for 1–2 months. Thaw overnight in the fridge and gently stir or re-whip before serving. Crust integrity may be affected after freezing.

What protein powder works best?

Vanilla-flavored powders typically give the most versatile flavor. You can use whey, casein, or plant-based proteins. Plant-based blends may require a touch more sweetener. Aim for about 20–25 g protein per serving; adjust sweetness if your powder is very sweet or very bland.

How can I customize flavors and toppings?

Try these ideas: swirl in cocoa powder or caramel sauce; add lemon zest or cinnamon for warmth; fold in peanut butter or almond butter; top with fresh berries, sliced banana, or a drizzle of melted dark chocolate. You can also layer fruit compote between fillings for variety.

Are these suitable for different diets?

They’re dairy-based, so not vegan unless you substitute plant-based yogurt and protein powder. They can be gluten-free if you use gluten-free crust options. Check labels if you have lactose intolerance or dairy allergies. You can tailor sweetness and ingredients to fit your needs.

Yield and how to scale the recipe?

Using standard jar sizes (about 4 oz per jar), the base recipe yields roughly 4–6 jars. To scale up or down, multiply or divide all ingredients proportionally to fit the number of jars you want to make.

Introduction / Hook

Imagine a delicate tower that melts on your tongue, each crisp, paper-thin layer of pastry giving way to a silken cloud of vanilla cream. A whisper of sweetness coats the palate, while a glossy crown of glaze catches the light like a miniature jewel, inviting your eyes to feast before your tongue takes its turn. Mille feuille—the thousand leaves—lives up to its name with an elegance that feels almost ceremonial, as if you’re unwrapping a tiny edible bouquet of texture, aroma, and memory. This is not just a dessert; it is a sensorial ceremony that turns any moment into a celebration. The first bite promises a crisp snap, the second dissolves into lush cream, and with each subsequent bite you discover new nuances—hints of vanilla, a kiss of butter, a whisper of citrus zest in the cream, and a faint caramel glow from the glaze. The experience is both intimate and grand, simple in its components yet sophisticated in its execution, designed for those who savor the artistry of pastry in a way that feels timeless and yet approachable.

There is something irresistibly tactile about Mille Feuille. It speaks to the hands that roll the dough, the patience that waits as layers rise and stack, and the heart that shares a slice with someone you love. It is a dessert that invites conversation: “Do you like the crackle when you bite through the top layer?” “Would you like the pastry more layered or more creamy in the middle?” The questions themselves become part of the ritual, as communal as tea or coffee on a quiet afternoon. And yet, beneath its refined appearance lies a friendly soul: a dessert that can be perfected with a few mindful techniques and a few high-quality ingredients, but also forgiving enough to adapt to what you have on hand. Mille Feuille is a culinary invitation to slow down, to savor, and to celebrate craft in its most approachable form.

The Story Behind the Dish

The Mille Feuille is a cornerstone of classic French patisserie, a pastry that embodies the French reverence for technique, balance, and elegance. Its name—thousand leaves—captures the essence of the dish: countless, nearly imperceptible layers of puff pastry stacked with a lush filling, and finished with a polished glaze or a dusting of sugar that glows with refinement. The pastry layers themselves, delicate and crisp, reveal the hand of the baker in every bite, their lamination technique a quiet testament to patience and precision. While the exact moment of its invention remains shrouded in pastry lore, the Mille Feuille has been a beloved fixture in Parisian patisseries since at least the 19th century, with regional varieties and adaptations blossoming across France and beyond.

The origin of the dish is often tied to the long, ritualized craft of puff pastry, a marvel of lamination that folds butter into dough dozens of times, creating thousands of ultra-thin sheets that puff into a heavenly crunch when baked. In many histories, the Mille Feuille evolved from earlier mille-feuilles or napolitains that featured similar concepts—layers of pastry with creams and toppings—adapted to emphasize elegance and proportion. In some accounts, the “Napoléon” moniker is used in certain markets for a Mille Feuille, especially in more traditional Parisian patisseries, weaving a subtle thread of history with cultural memory. The pastry has traveled with explorers, artists, and families, turning into a canvas for regional flavors: vanilla creams that whisper of Tahitian beans, citrus zests brightening the middle, candied fruits, or even chocolate and coffee variations that honor global palates while preserving the essential architecture of the dessert.

Beyond Europe, Mille Feuille has found a home in many kitchens as a canvas for storytelling. Home bakers tend to adapt the recipe to seasonal fruits, local dairy, and personal preferences, while pastry chefs push the boundaries with intricate glazes, complementary textures, and modern pastry techniques. The dish thus becomes less a rigid formula and more a tradition—one that invites you to respect the layers, honor the cream, and finish with polish. The history is as much about technique as it is about taste: the crack of the pastry, the velvet smoothness of the cream, the gleaming glaze that makes the dessert sing on the plate. When you prepare Mille Feuille, you’re participating in a lineage of pastry artistry, a dialogue between centuries of bakers who have passed down the craft through practice, patience, and shared meals.

Why You’ll Love This Recipe

There are several compelling reasons Mille Feuille remains a beloved choice for both bakers and guests. Embracing this dessert is like inviting a classic conversation to the table—familiar enough to comfort, yet full of opportunities to personalize. Here are the reasons this recipe finds a spot on many tables again and again:

  • Timeless elegance, with approachable technique: The concept is simple—layers of puff pastry with a creamy filling—but the result feels extraordinarily refined. Master the lamination a little and you’ll impress with minimal fuss.
  • Textural harmony: The interplay of crisp pastry and velvety cream creates a symphony of textures that keeps each bite dynamic, never dull. The top glaze adds a final gloss that makes the whole plate glow.
  • Versatility and adaptability: The dessert can be tailored to your palate or occasion—vanilla-forward pastry cream for classicists, citrus or almond notes for a twist, or even a chocolate kiss for chocoholics. The base structure remains recognizably Mille Feuille, no matter how you switch the character.
  • Make-ahead friendly: With careful handling, components can be prepared ahead and brought together when you’re ready to serve. This makes it a smart choice for parties, birthdays, or holiday gatherings.
  • Show-stopping presentation with minimal effort: The vertical stacking and glossy finish on the top layer offer dramatic impact on the plate, making it perfect for celebrating milestones or special dinners without requiring flamboyant技巧.
  • Comforting yet refined: It straddles the line between homey pastry and dessert-showpiece, offering warmth and familiarity alongside a polished, restaurant-worthy finish.
  • Skill-building opportunity: Working with puff pastry teaches you control in rolling, folding, chilling, and timing—skills that translate into many other pâtisserie projects.

Whether you’re baking for a quiet weekend with loved ones or planning to dazzle guests at a formal dinner, Mille Feuille offers a balanced, rewarding experience. It invites you to slow down and savor not only the flavors but the process—the way layers accumulate, the patience required for perfect lamination, and the joy of presenting a dessert that feels greater than the sum of its parts.

Flavor Profile & Texture

The Mille Feuille is a study in contrast and cohesion. Its flavor profile centers on buttery, lightly crisp pastry that holds its shape yet yields to a creamy, smooth filling. The pastry cream—often a vanilla bean-forward custard—brings a comforting sweetness, a gentle aroma of vanilla, and a lush mouthfeel that lingers pleasantly. The top glaze, whether a delicate fondant, a clear sugar glaze, or a subtle fruit glaze, adds a sheen and a hint of sweetness that ties the layers together visually and gastronomically. When well executed, each bite unveils a progression: a hair-thin crack of pastry, a rush of cream, a cool sweetness, and a finish that persists with a clean, finish-worthy aftertaste.

Key sensory notes you’ll likely notice include:

  • Butter and pastry aroma: The dough exhales a warm, toasty scent of butter that becomes more pronounced as the sheets bake to a pale gold.
  • Silky vanilla: The custard’s hallmark is a velvety vanilla profile. Real vanilla beans or high-quality extract lend creamy depth and a lingering perfume that whispers of orchards and creamy desserts from grand patisseries.
  • Subtle citrus or almond accents (optional): A touch of lemon zest or orange zest can brighten the cream, while a hint of almond paste or extract adds a delicate, almost marzipan-like character that pairs beautifully with the pastry’s richness.
  • Glossy finish: The glaze on top catches the light, while a fine dusting of powdered sugar or a whisper of cocoa can introduce a second flavor layer that plays nicely against the sweet cream.
  • Texture gradient: First bite yields a crisp snap; the middle reveals pillowy cream; the finish leaves a soft, slightly caramelized aftertaste from the pastry’s edges and the glaze’s edge.

texture-wise, the ideal Mille Feuille balances crisp pastry layers with a creamy, airy filling, and a glaze that is not too thick or cloying. Too much glaze can overwhelm the delicate pastry, while too little can leave the dessert feeling dry. The best versions achieve a quiet luxury: pastry that shatters at the touch, cream that glides across the tongue, and a finish that invites another bite without being overwhelming.

Occasions & Pairings

Mille Feuille shines across a spectrum of settings, from intimate dinners to grand celebrations. Its refined appearance makes it a natural centerpiece for holiday menus, milestone birthdays, anniversaries, and festive weekend lunches. It can also be a glamorous yet approachable dessert for a dinner party where guests arrive hungry but your kitchen is buzzing with other dishes. If you’re serving it as a finale, allow for a moment of pause—the dessert deserves to be admired before it’s devoured.

Pairings enhance the experience without stealing the show from the pastry itself. Consider these options:

  • Beverages: A bright sparkling wine, a semi-sweet Champagne, or a late-harvest dessert wine (like Sauternes) can echo the pastry’s sweetness while cleansing the palate between bites. For non-alcoholic pairings, a vanilla-infused tea, a light chamomile, or an almond milk latte can complement the flavors without overwhelming them.
  • Fruit companions: Fresh berries (strawberries, raspberries, or a berry compote) or a light citrus segment can provide a fresh counterpoint that brightens the cream’s richness. A few raspberries tucked between the layers in a plated version also add color and a tart note that sings against the vanilla.
  • Side dishes: A simple, lightly dressed green salad with citrus vinaigrette offers a clean contrast and helps balance a meal featuring Mille Feuille as the final course. For more indulgent occasions, a small portion of dark chocolate or a coffee mousse can heighten the dessert’s chocolatey or roasted notes if you experiment with variations.
  • Seasonal twists: In summer, incorporate fresh stone fruit slices between layers for a juicy burst; in autumn, a hint of cinnamon or cardamom in the cream can evoke cozy, comforting flavors; in winter, a coffee-kavored glaze can complement the cold air and festive meals.

Tips, Variations & Substitutions

While the Mille Feuille’s essence remains the same, there are many avenues to customize it according to dietary needs, ingredient availability, or personal taste. Here are practical ideas to experiment with while preserving the spirit of the dish:

  • Glaze variations: Opt for a classic white fondant glaze for a pristine, traditional look. If you prefer a glossier finish, a thin sugar glaze made with a touch of lemon juice can add brightness. Chocolate glaze is a dramatic alternative, especially when paired with a coffee or vanilla cream. For a fruit-forward finish, brush a light fruit glaze (raspberry, passion fruit, or apricot) across the top for a glossy, tangy finish.
  • Make-ahead architecture: You can bake and chill the puff pastry sheets in advance, and prepare the pastry cream a day ahead. Store each component separately, then assemble shortly before serving. This helps you manage a busy schedule without sacrificing the crispness of the pastry.
  • Vegan and dairy-free options: Use dairy-free puff pastry (check labels for butter content) and a dairy-free pastry cream made from almond milk or coconut cream with a cornstarch-thickened base. Vanilla bean paste or extract remains central for the depth that the dish requires. A light almond or cashew cream can offer a similar mouthfeel when properly set and chilled.
  • Gluten-free adaptation: Choose a certified gluten-free puff pastry or make a gluten-free lamination using alternate flours that hold together well. The texture might shift slightly, but with careful rolling and chilling, you can achieve a delicate crispness that mirrors the traditional experience.
  • Flavor twists: Introduce citrus zest (lemon, orange, or blood orange) into the pastry cream for a bright lift. A touch of liqueur (Grand Marnier, Kirsch, or rum) can deepen the aroma if you enjoy a more complex profile. For chocolate lovers, a thin layer of white or dark chocolate between pastry sheets creates a delicious contrast with the vanilla cream.
  • Regional variations: In some regions, the top layer is glazed with a light almond glaze or a fondant tinted with subtle color to reflect seasonal palettes. A pistachio paste layered with the cream offers a nutty variation that remains faithful to the multi-layer concept.

Storage & Make-Ahead Ideas

To preserve texture and taste, treat Mille Feuille with care when storing and assembling. Here are practical guidelines to maintain quality:

  • Component storage: Keep baked puff pastry sheets in a cool, dry place in an airtight container. Pastry cream should be refrigerated in a covered container. The top glaze should be added just before serving to avoid softening the pastry’s surface.
  • Make-ahead strategy: Bake and cool the pastry sheets in advance, then freeze them flatted between parchment sheets. Thaw at room temperature before assembling. Prepare the pastry cream a day ahead and chill thoroughly. Assemble the Mille Feuille a few hours before serving to ensure the layers set, but avoid assembling too far ahead, as moisture can soften the pastry.
  • Leftovers: Leftover slices can be stored in the refrigerator for up to 1–2 days, ideally covered to prevent the pastry from picking up fridge odors. For best texture, reassemble just before serving or refresh the pastry sheets in a 350°F (175°C) oven for a few minutes to restore crispness, then proceed with re-glazing and cream if needed.
  • Freezing tips: Whole Mille Feuille is best served fresh, but you can freeze pre-baked pastry sheets and cream separately. When thawing, gently reassemble and apply a fresh glaze for a polished finish. Avoid freezing the assembled structure, as the pastry texture will degrade.

Fun Facts & Trivia (Optional)

Beyond its refined presentation, Mille Feuille carries a few delightful tidbits that pastry lovers often enjoy sharing:

  • Thousand leaves, many names: While Mille Feuille translates literally to “thousand leaves,” in different regions you may see it listed as Napoléon, mille-feuille, or vanilla cream layers—each name hinting at a slightly different emphasis on texture or presentation.
  • Lamination magic: The hallmark of good Mille Feuille is the lamination technique—folding and rolling dough to create ultra-thin sheets that puff into delicate layers. The artistry lies in achieving consistent thickness and even spacing between layers, a task that rewards patience and practice.
  • A pastry legend’s tension: The dessert sits at an intersection of tradition and innovation. While many chefs honor classic lamination, others push the boundaries with new fillings, glazes, or layer configurations, proving that heritage can gracefully coexist with experimentation.
  • Visual feast: The top glaze isn’t merely decorative; it protects the creamy interior, seals in moisture, and gives the final plated dessert an alluring sheen that makes it a focal point on the dessert cart or table.
  • Across the globe: The Mille Feuille has inspired countless adaptations worldwide, from custard mille-feuilles in Spain to chocolate-and-cream riffs in Japan. Each region adds its own accent while honoring the structure’s elegant core.

In the end, Mille Feuille is more than a dessert; it is a crafted experience that invites you to appreciate the layering of skill, patience, and taste. It celebrates versatility—whether you stick to the classical route with vanilla cream and a white glaze or breathe new life into the concept with seasonal fruits, bold flavors, or modern techniques. No matter how you choose to present it, Mille Feuille remains a testament to the enduring appeal of pastry art: precise, indulgent, and deeply satisfying to the senses.

Ingredients

Mille Feuille

Puff Pastry
– 3 sheets puff pastry (store-bought, thawed)
→ Mille-feuille relies on ultra-thin, flaky layers created by laminated puff pastry. Use three sheets cut to the same rectangle size as your final pastry blocks. Keep the sheets cold and work quickly to prevent the butter from melting before baking. Prick the dough with a fork before baking (docking) to control puffing; bake until evenly golden and crisp. Allow to cool completely before assembly to maintain crisp layers.
– Egg wash (1 large egg, beaten with 1 tablespoon water)
→ The egg wash gives a glossy, golden finish on baked puff pastry and helps the layers detach cleanly. Brush lightly on the top surfaces only to avoid soggy edges. If the sheets puff unevenly, you can gently press down the center after a short bake to level, but ensure they are completely cool before assembling.

Pastry Cream
– Whole milk (2 cups)
→ The base liquid for crème pâtissière. Heat gently until steaming (not boiling) and temper with the yolks to create a smooth, silky custard. Full-fat milk yields a richer texture; reduce fat for a lighter version, but expect a thinner result. Do not boil once the yolks are tempered.
– Egg yolks (4 large)
→ Provide the custard’s body and creaminess. Whisk with sugar to create a pale, thick ribbon, then slowly temper with hot milk to prevent scrambling. Strain if any lumps form for an ultra-smooth finish.
– Granulated sugar (1/2 cup)
→ Sweetens and helps achieve a smooth custard texture when beaten with the yolks. For the smoothest result, use superfine sugar so it dissolves quickly during mixing. Fully dissolve before tempering the yolks to avoid gritty custard.
– Cornstarch (1/4 cup)
→ Primary thickener that gives the pastry cream its firm set when cold. Make a slurry with a small amount of cold milk before adding to the hot mixture to prevent lumps. Cook until the mixture just comes to a boil and thickens, then remove from heat.
– Pinch of salt
→ Enhances vanilla and overall flavor, balancing sweetness. A small amount improves depth; skip if you are avoiding salt altogether.
– Unsalted butter (2 tablespoons)
→ Enriches the custard and adds a velvety sheen. Stir in off the heat, in small pieces, until melted and smooth. For an extra glossy finish, press plastic wrap directly on the surface to prevent a skin from forming while it cools.
– Vanilla extract (1 teaspoon)
→ Classic crème pâtissière flavor. Use pure vanilla extract or vanilla bean paste for maximum aroma. If using vanilla bean, infuse the milk with the scraped seeds and pod during heating, then strain before tempering the yolks.

Top Finishes
– Powdered sugar (for dusting)
→ Finishing touch that adds a delicate sweetness and a clean, professional look to the sliced mille-feuille. Sift the sugar lightly over the top after the pastry is fully assembled and chilled to avoid clumping and to keep the layers crisp. Avoid heavy dusting that could mask the clean edges of the pastry.
– Fondant glaze (optional)
→ Traditional smooth, glossy top finish for a classic mille-feuille. Make a pourable fondant by whisking 1 cup confectioners’ sugar with 1–2 tablespoons water and a touch of lemon juice if desired. Adjust thickness with more sugar or water as needed. Apply to a completely cooled pastry and allow to set before slicing.
– Chocolate glaze (optional)
→ A rich, dramatic finish alternative to fondant. Melt 100 g dark chocolate with 1–2 tablespoons unsalted butter (and 1 teaspoon corn syrup if you want extra shine). Drizzle or spread in an even, thin layer over the top and let set at room temperature. For a mirror shine, keep glaze slightly warm when applying and ensure the pastry is cold; tempering the chocolate slightly can improve gloss and texture.

Instructions

  • Thaw three puff pastry sheets completely and trim them to uniform rectangle shapes that match your final pastry blocks; keep the sheets cold during trimming to preserve the laminated butter layers and ensure even, crisp layers after baking.
    → Uniform rectangles ensure the final blocks stack neatly and slicing yields clean, professional portions; cold sheets prevent butter from smearing during handling.
  • Dock and prepare the sheets for baking by placing them on parchment-lined baking sheets and pricking the surface with a fork at 1/2-inch intervals to control puffing; this guides steam and yields a flat, crisp base rather than irregular domes.
    → Docking maintains even thickness and flat tops, which is essential for a visually pristine mille-feuille and easy stacking later.
  • Preheat your oven to 400°F (200°C) and brush the top surfaces of the chilled pastry with a light egg wash before baking to promote a glossy, golden finish; bake until evenly golden and crisp, about 12 to 15 minutes, rotating halfway for uniform browning.
    → The high heat rapidly sets the lamination, producing crisp layers; rotating ensures equal color development and prevents scorching on one side.
  • Cool the baked puff pastry sheets completely on a wire rack until they reach room temperature; this stabilizes the layers and prevents moisture from the cream softening the pastry during assembly.
    → Complete cooling preserves crisp edges and allows clean slicing later without sogginess.
  • Prepare the pastry cream by heating whole milk just to steaming; while warming, whisk egg yolks with granulated sugar until pale and thick, then whisk in cornstarch and a pinch of salt to form a smooth paste; this builds a sturdy custard base.
    → Whisking yolks with sugar creates volume and body, while cornstarch thickens without curdling, setting up a stable filling.
  • Make a cold slurry by dissolving a small amount of cold milk with the cornstarch, then whisk it into the hot milk in a steady, thin stream; cook while whisking until the mixture just comes to a boil and thickens, then remove from heat to avoid scorching.
    → The slurry prevents lumps and ensures a glossy, fully thickened custard that coats the back of a spoon.
  • Off the heat, whisk in 2 tablespoons unsalted butter pieces until melted and smooth, then add vanilla extract and a pinch of salt; strain the pastry cream into a clean bowl and press plastic wrap directly on the surface to prevent a skin from forming; refrigerate until fully cold and very thick.
    → Butter enriches the texture and gloss of the crème pâtissière; straining removes any lumps and sealing the surface prevents skin formation during chilling.
  • Trim the cooled puff pastry sheets again if necessary to ensure identical dimensions, then align them precisely on a flat work surface so the edges are square and even; this creates a neat, professional base for the layers when assembled.
    → Precise trimming and alignment guarantee uniform slices and a tidy finish.
  • Spread a thin, even layer of pastry cream on the bottom sheet with an offset spatula, leaving a small border to prevent overflow; avoid overfilling to keep the layers crisp and to allow clean slicing later.
    → A restrained layer prevents cream from seeping into the edges, preserving the distinct lamination and presentation.
  • Top with the second puff pastry sheet and gently press to seat it, then spread a second, even layer of pastry cream over this sheet; align edges carefully before placing the final sheet on top to complete the triple-layer structure.
    → Proper layering maintains the classic mille-feuille proportions and ensures visible, defined cream between each pastry layer.
  • Trim the outer edges to create a perfectly rectangular mille-feuille, wrap loosely, and refrigerate the assembled stack for 1–2 hours or until the layers are firm and the cream is set; this makes slicing clean and helps the layers hold their shape.
    → Chilling solidifies the structure so cuts reveal distinct layers and the pastry stays crisp rather than collapsing.
  • Slice the chilled stack into evenly sized rectangles with a sharp serrated knife, wiping the blade after each cut to prevent dragging cream and to maintain crisp, clean edges; use a gentle sawing motion to avoid squashing the layers.
    → Clean cuts showcase the lamination and cream between each layer for a professional presentation.
  • Dust the top surface of the slices with a light veil of powdered sugar for a refined finish and subtle sweetness; sift just enough to coat without hiding the precise edges of the pastry.
    → Powdered sugar adds a delicate, aesthetic contrast and helps balance the richness of the filling.
  • Optionally apply fondant glaze by whisking 1 cup confectioners’ sugar with 1–2 tablespoons water and a touch of lemon juice to a pourable consistency; pour or brush a thin, even coat over the top, then allow to set at room temperature before serving.
    → Fondant provides a classic, glossy finish that complements the crisp layers and smooth pastry cream.
  • Alternatively, prepare a chocolate glaze by melting 100 g dark chocolate with 1–2 tablespoons unsalted butter (and a teaspoon of corn syrup for extra shine), then drizzle or spread a thin, even layer across the top and let it set at room temperature for a glossy, dramatic finish.
    → Chocolate glaze offers a rich, sophisticated contrast to the light pastry and creamy filling, with a satisfying snap once set.

Notes

These mille-feuille are classic French pastries built from ultra-thin puff pastry sheets layered with a silky pastry cream. To achieve crisp, flaky layers, keep the dough cold and work quickly; cut all sheets to the same rectangle size as your final pastry blocks and dock (prick) before baking to control puffing. Bake until evenly golden and crisp, then cool completely before assembly to preserve the layers.

  • Puff pastry handling: Use three sheets cut to the same rectangle size as your final blocks. Keep everything cold; docking helps control puffing; bake until golden and crisp; cool completely before assembly to maintain crisp layers.
  • Egg wash: The egg wash gives a glossy finish and helps the layers detach cleanly. Brush lightly on the top surfaces only to avoid soggy edges; if sheets puff unevenly, gently press the center after a short bake and ensure they are completely cool before assembling.
  • Pastry cream: Heat the milk just until steaming; whisk yolks with sugar and cornstarch, then temper with hot milk. Return to the heat and cook until the mixture just boils and thickens; strain for smoothness; off the heat, whisk in butter and vanilla. Chill until cold and set.
  • Assembly: Place one rectangle on a serving board, spread a thin layer of pastry cream, add the second rectangle, repeat, and finish with the third. Chill to set, then slice with a sharp knife, wiping the blade between cuts for clean edges.
  • Finishes: Dust with powdered sugar for a classic look, or apply fondant glaze or a chocolate glaze for a richer finish. Ensure glazes are set before slicing to keep layers crisp.
  • Make-ahead and storage: The assembled mille-feuille can be refrigerated for a day, but crispness may soften. Keep covered to prevent moisture; for best texture, assemble and chill shortly before serving.
  • Variations and serving tips: For aroma, infuse the milk with vanilla pod seeds; add a touch of citrus zest to pastry cream; garnish with fresh berries or a light dusting of cocoa or edible petals. Use a sharp knife and wipe the blade after each slice for perfect presentation.

Tips

  • Puff Pastry handling tips:
    – Keep the three puff pastry sheets as cold as possible before assembling. If they feel soft, refrigerate for 10–15 minutes or briefly return to the freezer for a quick chill.
    – Work quickly when cutting and layering to prevent butter from melting into the dough and affecting the lamination. Use a sharp knife or a pastry ruler for clean, even cuts that match the final block size.
    – Dock the dough (prick with a fork) before baking to control puffing and prevent large air pockets. Bake until evenly golden and crisp; if any sheet puffs unevenly, gently press down the center after a short initial bake and return to the oven until fully cooled.
    – Bake on parchment or a silicone mat and cool completely on a rack to maintain crisp, separate layers. Stacking warm sheets can trap steam and make them soggy.
    – For extra neat edges, trim any uneven sides after baking so all three layers align perfectly in the final mille-feuille blocks.
  • Pastry Cream tips:
    – Heat the milk gently to steaming (do not boil) and temper the yolks gradually to avoid scrambling. A classic method is to whisk yolks with sugar, then ladle hot milk in a thin stream while whisking constantly.
    – Cook the custard until it just thickens and reaches a gentle boil, then remove from heat immediately. Overcooking can cause a grainy texture.
    – Strain the pastry cream through a fine sieve to catch any lumps for ultra-smooth filling.
    – Off the heat, whisk in butter in small pieces until melted and glossy. If you want a sheen, press plastic wrap directly on the surface to prevent a skin from forming as it cools.
    – For vanilla intensity, infuse the milk with vanilla seeds and pod during heating, then strain before tempering the yolks. If using extract, add it after cooking.
  • Assembly and chilling tips:
    – Ensure all components are completely cooled before assembly to keep layers crisp and prevent the custard from becoming runny.
    – Trim the pastry sheets to uniform rectangles to create clean, even layers when stacked.
    – Spread pastry cream evenly with a spatula, keeping thickness consistent but not overfilled to avoid squashing the layers.
    – Alternate the pastry sheets to maintain the three-layer structure, and chill the assembled blocks thoroughly (at least 1–2 hours, preferably longer) so the layers set and slices cleanly.
    – Slice with a sharp, warmed knife or a hot blade for neat, straight edges without dragging the cream.
  • Finishes and presentation tips:
    – Dust with a light veil of powdered sugar just before serving to maintain crispness of the top layer.
    – If using fondant, ensure the pastry is completely cooled; apply in a thin, even layer and let set before slicing for a glossy finish.
    – For a chocolate glaze, tempering the glaze slightly helps achieve a glossy, mirror-like look and prevents dull spots. Apply to a cool pastry and let set at room temperature.
    – For best visual appeal, refrigerate the assembled mille-feuille after final assembly and before slicing to help the cream firm and the layers stay crisp.
  • Tips for variations and troubleshooting:
    – If the pastry seems soggy at the edges, bake the sheets a little longer or finish the baking on a wire rack to maximize air circulation.
    – To reduce richness, you can use a lighter milk or a small amount of cornstarch in the custard, but be mindful it may affect texture.
    – For a fruit-laden version, layer fresh berries or a thin fruit purée between pastry layers, but keep fruit away from the outer glaze to avoid sogginess.
    – If the blocks crack during slicing, chill longer and ensure the knife is hot; clean the knife between slices for cleaner cuts.

FAQ

What is mille-feuille?

Mille‑feuille, also known as Napoleon, is a classic French pastry built from alternating sheets of flaky puff pastry and creamy filling, typically crème pâtissière (vanilla pastry cream). It is usually finished with a glaze or fondant and decorative stripes on top.

What are the main components of a traditional mille-feuille?

The traditional version uses three parts: puff pastry sheets (usually two or three layers), pastry cream (crème pâtissière) as the filling, and a glaze on top (often fondant or a light icing). Some renditions add chocolate or berry glazes for variation.

Can I make puff pastry from scratch for mille-feuille?

You can, but it requires time and technique to laminate butter into dough through multiple folds. Most home cooks use store-bought puff pastry for reliability and speed. If making from scratch, roll out, chill between folds, and bake until deeply crisp and golden.

How is the pastry cream (crème pâtissière) prepared?

Whisk together eggs, sugar, and a bit of cornstarch or flour. Heat milk with a vanilla pod or vanilla paste, then temper the hot milk into the eggs, return to the stove, and cook until thick and smooth. Cool completely and cover with plastic wrap to prevent a skin from forming.

How do you assemble mille-feuille to stay crisp?

Bake the puff pastry until very crisp and cool it completely. Spread a layer of cooled pastry cream on one sheet, top with another puff pastry sheet, and repeat. Chill the assembled pastry and apply the top glaze just before serving to help maintain crispness.

Can I use store-bought puff pastry?

Yes. Choose all-butter puff pastry if possible. Thaw as directed, roll to the desired thickness, and bake on parchment-lined sheets until puffed and golden. Let the sheets cool fully before filling to avoid soggy layers.

What are some popular variations of mille-feuille?

Common variations include vanilla pastry cream with almond frangipane, chocolate pastry cream, pistachio cream, or fruit fillings like berries. Toppings may be white fondant with chocolate stripes, a glossy chocolate glaze, or a simple powdered sugar dusting. You can also add a fruit layer between the pastry sheets for a lighter version.

How long does mille-feuille keep and how should I store it?

Best enjoyed fresh the same day. If needed, refrigerate covered for up to 1–2 days, but the pastry may lose crispness over time. Keep assembled mille-feuille refrigerated; if storing unfilled pastry sheets, keep them in a cool, dry place and assemble just before serving.

How should I plate and serve mille-feuille?

Slice with a sharp knife or dental floss for clean cuts. Serve chilled or lightly cooled, with a dusting of powdered sugar or fresh berries on the side. For an elegant presentation, drizzle a small amount of glaze or chocolate in a decorative pattern on top before slicing.