Author

Ocean Nightleaf

Browsing

Introduction / Hook

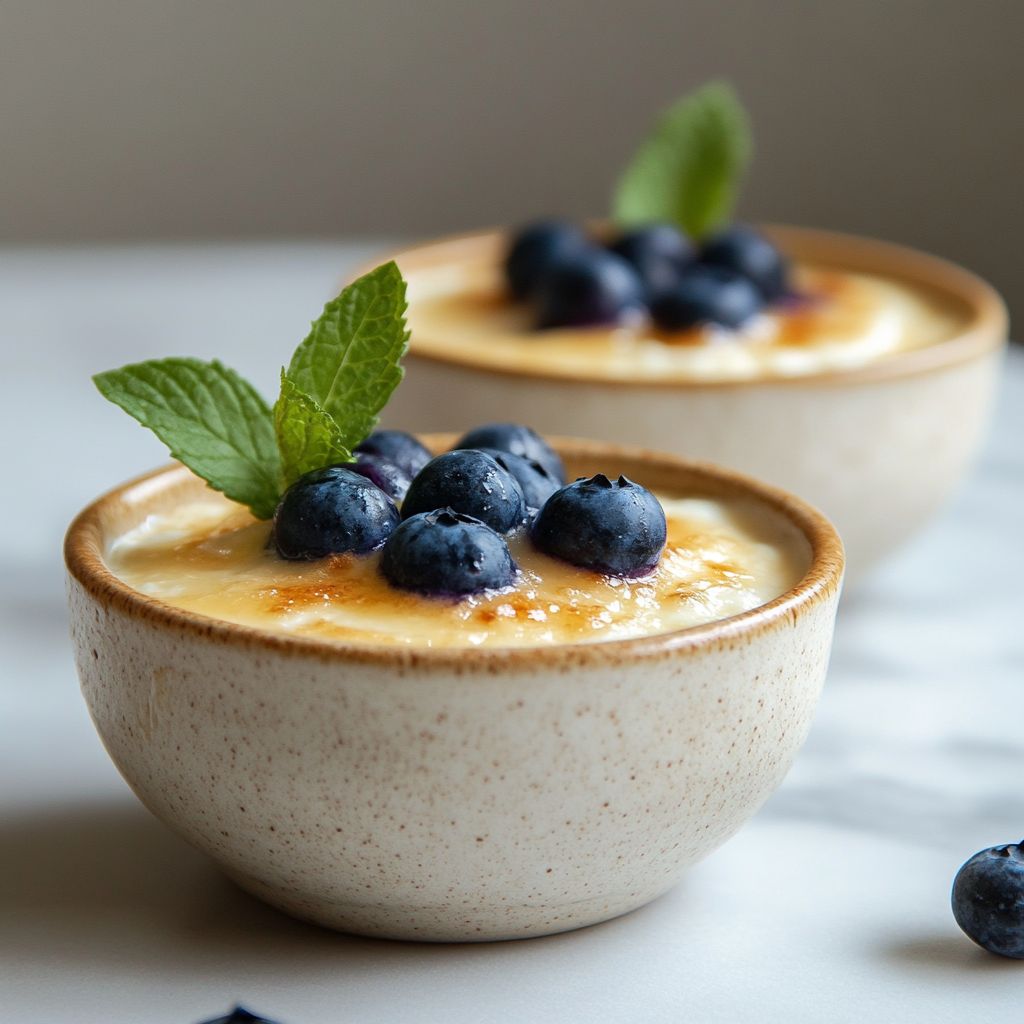
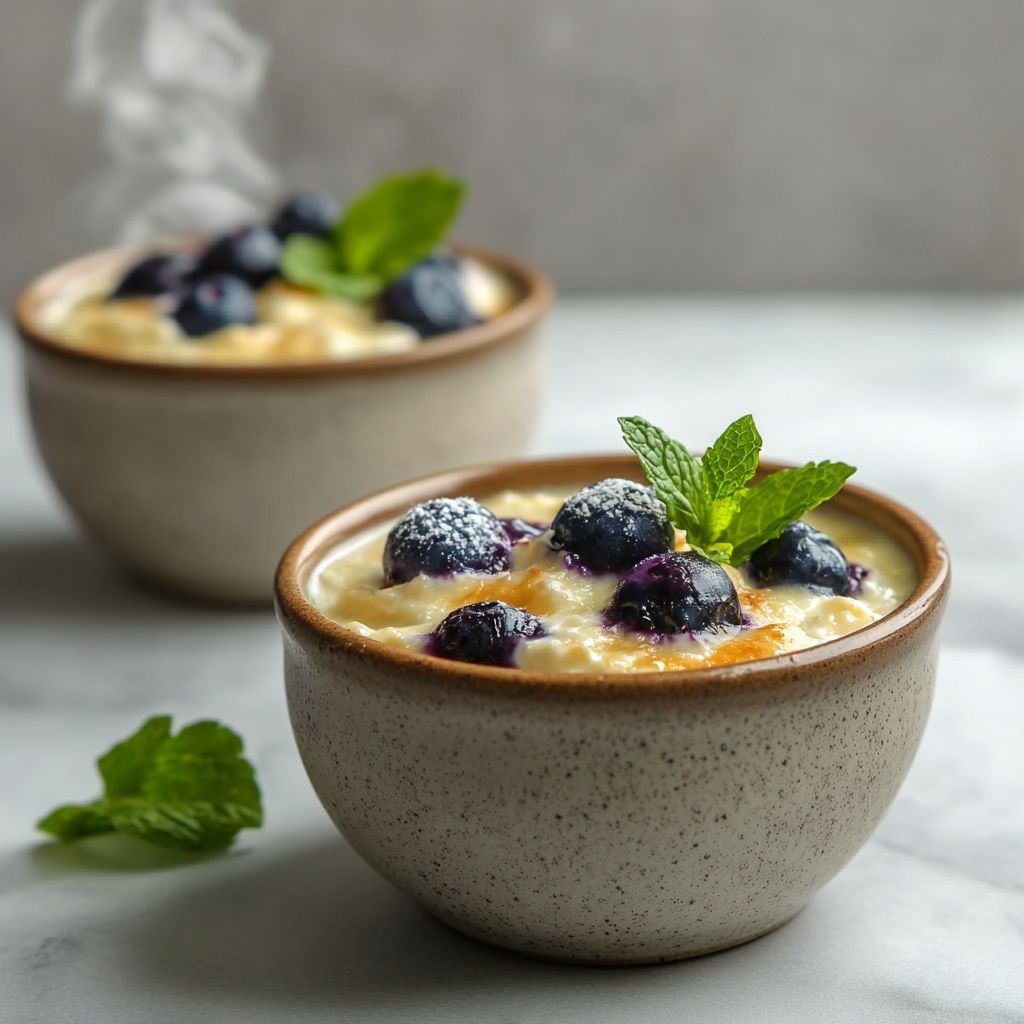
There’s something magical about waking up to a bowl that feels both comforting and exciting at the same time. Baked Blueberry Cottage Cheese Breakfast Bowls transform a simple morning routine into a tiny celebration you can savor before the day fully begins. Picture this: a warm, custardy top with pockets of juicy blueberries glimmering like midnight skies, surrounded by a creamy, slightly tangy chorus of cottage cheese that keeps you full and satisfied. The aroma alone is enough to coax even the sleepiest senses into waking—the scent of vanilla warming through the oven, a whisper of cinnamon, and a bright kiss of lemon zest that hints at sunshine on your plate. Each spoonful is a lullaby of textures: a tender, almost cake-like bite from baked oats, a soft, silky interior from the cottage cheese, and bursts of fruity sweetness that pop as you chew. It’s the kind of breakfast that feels indulgent without being heavy, elegant enough to serve to guests, and simple enough to become a beloved weekday staple. And the best part? It makes mornings feel deliberate and nourishing, giving you the energy you need to greet whatever the day brings with a confident, satisfied smile.

The beauty of these bowls is in their balance: protein from cottage cheese to fuel your morning, the natural sweetness of blueberries, and the comforting warmth of a baked treat that requires minimal fuss. It’s a dish that wears many hats—protein-packed brunch, make-ahead meal for busy families, a cozy weekend ritual, or a nutritious start after a workout. Imagine spooning into a bowl that tastes like dessert but behaves like a reliable, everyday breakfast. It’s the kind of recipe you return to when you crave something wholesome yet thrilling, something that feels both familiar and like a tiny culinary adventure with every bite.

The Story Behind the Dish

Every great breakfast has a story, and this one began in a kitchen where the morning rush met the stubborn desire for something nourishing and delicious. Cottage cheese has long earned its place as a protein-rich ally in breakfast bowls, lending a creamy tang that cuts through sweetness with a bright, tangy note. Blueberries, nature’s own little bursts of flavor, bring a pop of color and a tart-sweet balance that brightens even the cloudiest mornings. The idea of baking these simple elements together emerged from a desire to combine structure with comfort: a dish that holds its shape, reheats beautifully, and tastes like a hug in a bowl. The result is a recipe that feels both timeless and modern—a nod to classic baked goods, reimagined for a protein-forward, easy-to-make breakfast you can enjoy in your own kitchen or share with friends over a lazy weekend brunch.

The origin story mirrors a broader movement in home cooking: take pantry-friendly ingredients, give them a gentle twist, and let the oven do the heavy lifting. Baked breakfasts have a way of transforming ordinary mornings into effortlessly cozy experiences. The blueberry’s sweetness and the cottage cheese’s creaminess marry in a way that feels almost nostalgic—like something your grandmother might have prepared with a modern sensibility and a dash of culinary curiosity. It’s a dish that travels well too: you can bake a batch, portion it out for the week, and still find it breakfast-worthy on a hurried Tuesday when you need something dependable and delicious without pulling out every measuring cup in the kitchen.

In many homes, breakfast is a ritual of rhythm and warmth. This recipe embodies that spirit with its balanced flavors, practical make-ahead potential, and the way the blueberries release their juices as the bowls bake, creating little pockets of jam-like sweetness throughout. It’s a reminder that a day can begin with something comforting, nourishing, and a touch luxurious, all in one spoonful.

Why You’ll Love This Recipe

  • Protein-forward and satisfying: Cottage cheese provides protein to keep you full and focused through the morning.
  • Naturally sweet and flavor-forward: Blueberries deliver gentle sweetness and a bright, fruity aroma that pairs perfectly with vanilla and a hint of cinnamon.
  • Make-ahead friendly: The mixture bakes up well in advance and reheats easily, making weekday mornings a breeze.
  • Customizable and versatile: Switch up fruits, add-tunings like citrus zest, or swap in spices to suit your mood or season.
  • Balanced texture: A soft, custardy center with a tender oats veneer and juicy bites of fruit, finished with a cozy baked-top crust.
  • Kid-friendly and adult-approved: The flavors are approachable for little palates while still satisfying grown-up cravings for warmth and nuance.
  • Gluten-friendly options: With the right oats, this recipe can be enjoyed by those avoiding gluten, without sacrificing texture or taste.
  • Perfect for brunch gatherings: A single bake yields several portions, making it easy to feed a crowd without fuss.

Flavor Profile & Texture

The flavor profile of Baked Blueberry Cottage Cheese Breakfast Bowls is an inviting harmony of contrasts and complements. The base notes come from the cottage cheese itself—a mild, creamy tang that acts as a gentle counterpoint to the natural sweetness of the berries. Vanilla lends a soft, comforting sweetness while a whisper of cinnamon adds warmth and character, like a cozy blanket on a cool morning. A touch of lemon zest brightens the whole thing, lifting the flavors and preventing any heaviness from settling in. The blueberries contribute a pop of juicy tart-sweet fruitiness that bursts in your mouth as you bite, turning the experience into a little morning celebration.

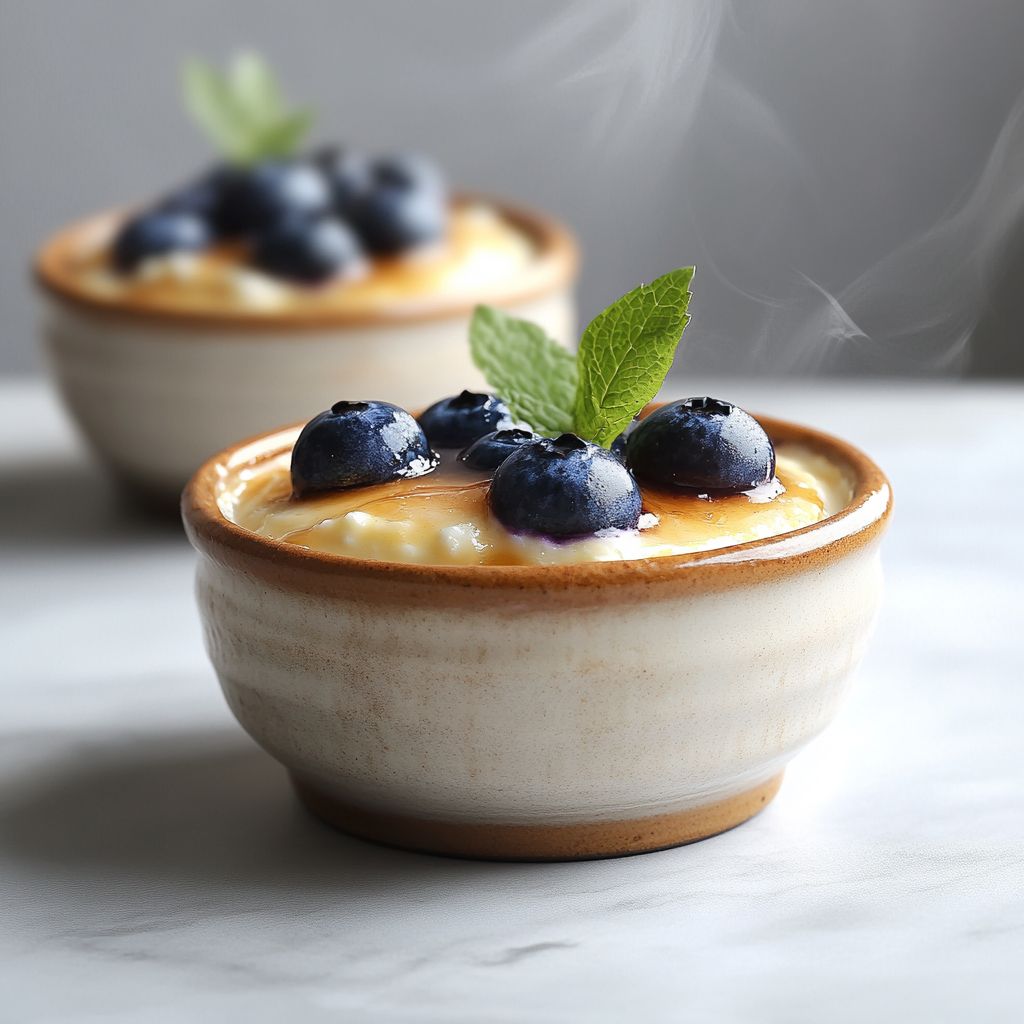
Texture-wise, you’re treated to a trio of sensations. The surface forms a delicate, slightly chewy crust from the baked oats, offering a satisfying bite that gives way to a soft, custard-like interior. Inside, the cottage cheese remains wonderfully creamy, its heft balanced by the lightness of the oats. The blueberries provide occasional bursts of moisture and sweetness, which keep the mouthfeel lively rather than dense. When served warm, the flavors mingle and glow, creating an aroma that fills the room and invites you to linger at the table rather than rush away. It’s a comforting, nourishing, and indulgent experience all at once, making every spoonful feel like a small reward for waking up early and choosing something delicious for your body.

Consider how the textures play with temperature too. A bowl straight from the oven will be softly set and gently steaming, while a quick reheat the next morning can reclaim that tender, plump contrast between the berries and the creamy cheese. If you prefer a crisper edge, a brief broil on high can give you a delicate toasted top that crackles just enough to add a new dimension to the familiar flavors. The scent—vanilla, cinnamon, lemon, and blueberry—alone is enough to spark anticipation, and the taste holds that promise with every spoonful.

Occasions & Pairings

This dish shines in a variety of settings, from intimate weekday mornings to leisurely weekend gatherings. Here are a few ideas to make the most of it:

  • Weekday ritual: Bake a batch on Sunday, portion into containers, and reheat quickly for quick weekday breakfasts that don’t compromise on taste or nutrition.
  • Brunch centerpiece: Serve alongside a bright citrus salad, a dollop of yogurt, and a light drizzle of honey for an easy but impressive brunch spread.
  • Family-friendly mornings: A comforting option that kids enjoy, with the gentle flavors of blueberries and vanilla making mornings feel special without added sugar bombs.
  • Post-workout nourishment: A protein-rich choice that helps replenish energy after a workout, while still feeling indulgent enough to kickstart recovery.

Pairings to consider include a dollop of plain yogurt or a small drizzle of maple syrup if you crave extra sweetness, a handful of toasted nuts for extra crunch, or a side of eggs prepared your favorite way to add a savory contrast. For beverages, a robust cup of coffee, a creamy latte, or a glass of cold-pressed juice can elevate the experience. If you’re entertaining, consider a seasonal variation: serve warm in small bowls with a scattering of fresh berries on top and a mint sprig for a pop of color. The dish’s versatility makes it easy to adapt to any occasion, from a quiet morning at home to a lively weekend brunch with friends.

Tips, Variations & Substitutions

  • Oats and textures: Use rolled oats as the base for a chewy, comforting bite. For gluten-free needs, ensure you use certified gluten-free oats. If you prefer a more cake-like texture, you can mix in a small amount of almond flour or chopped nuts for additional structure and flavor.
  • Fruit variations: Swap blueberries for raspberries, blackberries, or chopped peaches as the season allows. A mix of berries provides a more dynamic tart-sweet profile, while stone fruits bring a juicy, summery glow.
  • Sweetness adjustments: If you like a sweeter finish, add a light drizzle of honey or maple syrup to the mixture before baking, or finish with a delicate glaze after baking. For a lower-sugar version, rely on the natural sweetness of fruit and a touch of vanilla.
  • Dairy-free option: To make a dairy-free version, substitute dairy-free cottage cheese or a thick almond-based ricotta substitute. You can also use thick coconut yogurt for creaminess and a complementary tropical hint, though this will alter the flavor profile slightly.
  • Protein variations: If cottage cheese isn’t preferred, you can experiment with Greek yogurt (full-fat for creaminess) or a plant-based yogurt alternative with added protein to maintain a balanced breakfast.
  • Flavor boosters: Add citrus zest (orange or lemon) or a pinch of nutmeg for a different aroma. A touch of vanilla bean paste offers a deeper vanilla note than extract alone.
  • Spice play: Swap or augment the cinnamon with cardamom, ginger, or a pinch of allspice to create a different flavor personality while keeping the dish warm and comforting.
  • Texture boosters: Fold in a handful of chopped nuts or seeds (almonds, walnuts, or chia) for crunch and extra nutrients, or top the baked bowls with a light crumble of oats mixed with a little coconut oil for a toasty topping after baking.

Storage & Make-Ahead Ideas

The practicality of this recipe is one of its strongest appeals. Once baked, these bowls keep well in the refrigerator, making them ideal for meal prep and busy mornings. Here are practical tips to get the most from your bake:

  • Refrigeration: Store baked bowls in an airtight container for up to 3–4 days. Reheat gently in the microwave or the oven to restore warmth and softness. A light splash of milk or non-dairy alternative while reheating can help restore creaminess.
  • Freezing: If you want to freeze portions for longer-term storage, freeze in individual portions. Thaw overnight in the refrigerator and reheat slowly to avoid drying out the center. A splash of milk or yogurt during reheating helps reclaim texture and moisture.
  • Make-ahead method: Prepare the batter base (excluding fruit) in advance and refrigerate. Add blueberries and any quick-frime toppings just before baking to keep the fruit bright and juicy. This approach works well for weekend breakfasts or when you’re feeding a crowd and want to minimize morning steps.
  • Portioning: Slice or portion the baked bowls after cooling to facilitate quick reheats. This also helps with customizing portions for family members with varying appetites or dietary needs.

Fun Facts & Trivia (Optional)

  • Blueberries are not only delicious; they’re packing a small punch of antioxidants called anthocyanins, which give them their characteristic blue-purple hue and may contribute to overall health as part of a balanced diet.
  • Cottage cheese has a long history as a pantry staple in many cultures. Its mild flavor makes it a versatile canvas for both sweet and savory dishes, lending protein and a creamy texture that can anchor a wide range of breakfasts and snacks.
  • The concept of baked breakfast bowls is part of a larger trend toward make-ahead breakfasts that reduce morning stress, promote portion control, and help you start the day with a bowl you actually look forward to while still maintaining nutritional balance.
  • Lemon zest is a tiny trick of brightness in many recipes. Even a small amount can lift the entire dish, especially in dairy-based desserts or bakes where richness can otherwise weigh down flavor.

Ingredients

Bowl Base

    – 1 cup old-fashioned rolled oats (certified gluten-free option available)
    → These oats form the bulk and chewy texture of the bowls, absorbing moisture as they bake to create a hearty, filling base. If you need a gluten-free version, choose certified gluten-free oats to prevent cross-contamination. For a silkier batter, pulse half of the oats in a blender to a coarse flour before mixing or soak the oats in a portion of the milk for 10 minutes to soften.
    – 1 cup cottage cheese (drained if very watery)
    → Cottage cheese contributes high-quality protein and moistness, helping the mixture stay creamy rather than dense. For the smoothest texture, blend the cottage cheese until completely creamy and well-incorporated. If it seems loose, gently drain excess whey or blot with a paper towel. Dairy-free substitutes can work here, such as thick blended silken tofu or a dairy-free yogurt, though the flavor and texture will shift slightly.
    – 2 large eggs (room temperature)
    → Eggs act as the binder and help set the bowls with a light, cohesive structure. Room-temperature eggs emulsify more evenly, producing a smoother batter. If you’re avoiding eggs, substitute with 2 flax eggs (2 tablespoons ground flaxseed whisked with 6 tablespoons water; let sit 5–10 minutes to thicken) or a commercial egg replacer.
    – 1/2 cup milk (dairy or plant-based)
    → Provides moisture and helps the batter come together. Dairy milk yields a creamier result, while plant milks keep the dish dairy-free. Warm the milk slightly before mixing to help dissolve ingredients more quickly and prevent clumping; if using a very thick plant milk, you may need a touch more liquid.
    – 1 teaspoon vanilla extract
    → Pure vanilla adds fragrance and subtle sweetness that complements the blueberries. If you have a vanilla bean, you can scrape the seeds into the mixture for a deeper flavor; always prefer pure extract over imitation for a richer aroma.
    – 2 tablespoons pure maple syrup or honey (optional)
    → Natural sweetness helps balance the tartness of the blueberries and the tang of cottage cheese. Maple syrup keeps this dairy-forward dish vegan-friendly; honey will add a deeper, darker sweetness. Adjust to taste, and remember that honey browns a bit more during baking, so your bowls may caramelize slightly on top.
    – 1/2 teaspoon ground cinnamon
    → A warm, comforting spice that pairs perfectly with blueberries. If you like more warmth, add a pinch of nutmeg or cardamom. Store cinnamon in a cool, dry place to maintain its aroma.
    – 1/2 teaspoon baking powder
    → Provides a gentle lift so the mixture isn’t too dense after baking. Ensure it’s fresh for maximum rising power; do not substitute with baking soda unless you also adjust for acidity in the batter.
    – 1/4 teaspoon fine sea salt
    → Enhances all the flavors and balances sweetness. If using salted cottage cheese, reduce this slightly to avoid an overly salty finish.
    – 1 cup fresh blueberries (plus extra for topping)
    → Blueberries contribute bursts of juicy sweetness and vibrant color. If using frozen berries, thaw completely and drain well to prevent extra moisture; tossing the berries with a teaspoon of cornstarch before adding can help prevent them from bleeding too much into the batter and staining the final dish.
    – 1/2 teaspoon lemon zest (optional)
    → Brightens the overall flavor and helps cut through the richness of the cottage cheese. Zest the lemon before juicing, using organic lemons if possible. Avoid the white pith, which can be bitter.

Optional Add-ins

    – 1/4 cup chopped almonds or walnuts (optional)
    → Nuts add a pleasant crunch and a toasty, nutty note. Chop them finely so they distribute evenly and don’t sink to the bottom. For extra crunch, toast the nuts in a dry skillet until fragrant before adding.
    – 2 tablespoons chia seeds (optional)
    → Provide extra fiber, omega-3s, and a slight gelling effect that helps thicken the batter. If you’re using chia seeds, you can let them sit in a tablespoon of the milk for 5–10 minutes before mixing to hydrate; otherwise, they’ll add texture as-is. If you prefer a smoother batter, you can grind them to a meal first.
    – 2 tablespoons ground flaxseed (optional)
    → Adds fiber and acts as a binder; if you omit eggs, use flax eggs (2 tablespoons ground flaxseed to 6 tablespoons water, let sit 5–10 minutes) as a replacement. Flax also contributes a nutty flavor that complements blueberries nicely.

Toppings

    – 2 tablespoons Greek yogurt or dairy-free yogurt (optional)
    → Adds a creamy contrast and extra protein when swirled into the bowl or dolloped on top after baking. Plain, unsweetened yogurt keeps sugars in check; for a dairy-free option, use a coconut, almond, or soy-based yogurt. A light swirl of yogurt also helps balance the sweetness of the berries.
    – Extra blueberries for topping (optional)
    → Fresh berries on top make the bowls look vibrant and provide a final juicy bite. Use whole berries for presentation; keep them unwashed until serving to prevent sogginess, and rinse right before use.
    – Maple syrup or honey for drizzling (optional)
    → A final drizzle enhances sweetness and adds a glossy finish. Start with 1–2 teaspoons per bowl and adjust to taste; use pure maple syrup for a clean, fruity sweetness, or honey for a richer note (note that honey is not vegan).
    – Ground cinnamon or a sprinkle of lemon zest (optional)
    → A pinch of cinnamon on top adds aroma, while a tiny dusting of lemon zest can lift the flavor just before serving. Use sparingly so it doesn’t overpower the berries.

Instructions

  • Preheat your oven to 350°F (175°C) and grease an 8×8-inch baking dish or line it with parchment paper to prevent sticking and ensure even heat distribution.
    → A well-prepped pan guarantees clean release and uniform cooking from edge to center.
  • Prepare the oats for texture: pulse half of the oats in a blender to a coarse flour and measure, or alternatively soak the oats in 1/4 to 1/2 cup of milk for 10 minutes to soften.
    → Pulsing creates a smoother batter with better cohesion, while soaking softens the grains so the mixture hydrates evenly during baking.
  • Process the cottage cheese until completely creamy: drain any excess whey if very watery, then blend or whisk until smooth and lump-free.
    → A creamy cottage cheese base yields a silkier batter and prevents grainy pockets in the finished bowls.
  • Whisk the eggs, 1/2 cup of milk, vanilla extract, and maple syrup or honey (if using) with the pinch of salt and ground cinnamon in a medium bowl until completely combined.
    → Thorough whisking creates a uniform emulsion, ensuring even texture and flavor distribution throughout the bake.
  • Stir the cottage cheese purée from Step 3 into the wet mixture from Step 4 until smooth and homogeneous.
    → This integration distributes protein evenly for a moist, cohesive bake that holds together when sliced.
  • In a separate bowl, combine rolled oats (the reserved portion if you prepared half earlier), baking powder, and fine sea salt; whisk to distribute leavening and seasoning evenly.
    → Even dispersion prevents clumps and ensures a light lift across the entire dish.
  • Pour the wet mixture from Step 5 into the dry mixture from Step 6 and fold with a spatula just until integrated; avoid overmixing to keep the texture tender.
    → Gentle folding preserves the oats’ bite while allowing the batter to set into a cohesive breakfast bowl.
  • Gently fold in 1 cup of fresh blueberries and the optional 1/2 teaspoon lemon zest to distribute color and bright citrus notes without overworking the batter.
    → Blueberries melt slightly during baking, releasing juice; gentle folding maintains whole berries for bursts of flavor.
  • If using optional add-ins (1/4 cup chopped almonds or walnuts, 2 tablespoons chia seeds, and/or 2 tablespoons ground flaxseed), fold them in now in a light hand so they are evenly distributed.
    → Nuts and seeds add texture, nutrition, and help with structure when baked.
  • Spoon the batter into the prepared dish or divide evenly among ramekins; smooth the top with the back of a spoon to ensure an even bake.
    → A level surface bakes more evenly and yields uniform portions for serving.
  • Bake in the preheated oven for 25–35 minutes, or until the edges are lightly golden and the center is just set; test doneness by gently jiggling the pan or inserting a toothpick—it should come out with a few moist crumbs.
    → Time varies with pan size and berry distribution; avoid overbaking to keep the center tender and moist.
  • Remove from oven and let the bowls rest in the dish for 10–15 minutes to finish setting and make slicing neater.
    → Resting allows carryover cooking to complete and prevents crumbling when portions are served.
  • While resting, whisk 2 tablespoons yogurt with a pinch of cinnamon or a splash of vanilla to create a silky topping or swirl.
    → Creamy yogurt adds tang, balance, and extra protein when plated with the warm oats.
  • To serve, portion the baked bowls and top with dollops of yogurt, extra blueberries, and a light drizzle of maple syrup or honey; finish with a tiny dusting of cinnamon or a whisper of lemon zest if desired.
    → Toppings provide contrast in texture, brightness, and sweetness, elevating the dish from pantry staple to polished breakfast.
  • Store any leftovers in an airtight container in the refrigerator for up to 3 days and rewarm gently in the microwave or a low oven, adding a splash of milk if needed to restore moisture.
    → Proper chilling and careful reheating preserve moisture and tenderness without drying out the grains.

Notes

These gluten-free blueberry cottage cheese breakfast bowls are a creamy, protein-packed start to your day, with bright blueberries and a touch of lemon zest that cuts through the richness. You can customize them by stirring in chopped almonds or walnuts for a pleasant crunch, adding chia seeds or ground flaxseed for extra fiber and body, or using silken tofu or dairy-free yogurt in place of cottage cheese for a dairy-free version (note the flavor and texture will shift slightly). For best texture, pulse half of the oats to a coarse flour or soak them in a portion of the milk for 10 minutes to soften. They bake ahead well and can be reheated for quick mornings, and they freeze beautifully for make-ahead meals. Finish with a dollop of yogurt or a light drizzle of pure maple syrup, and add extra blueberries on top if you like. Always ensure your oats and baking powder are certified gluten-free if you have gluten intolerance.

Tips

Tips for Perfect Baked Blueberry Cottage Cheese Breakfast Bowls

  • Preheat the oven to 350°F (175°C) and lightly grease 4 ramekins or a small baking dish to prevent sticking. If you prefer, you can bake in parchment-lined muffin cups for easy portioning.
  • For gluten-free versions, ensure you use certified gluten-free oats and check that all add-ins are gluten-free to avoid cross-contamination.
  • Oats: to achieve a smoother batter, pulse half of the oats in a blender until they resemble a coarse flour, or soak the oats in a portion of the milk for 10 minutes to soften before mixing.
  • Cottage cheese: for the creamiest base, blend the cottage cheese until completely smooth. If it seems watery, drain excess whey or blot with a paper towel before mixing.
  • Eggs: use room-temperature eggs to help the batter emulsify evenly and bake more evenly. If you’re avoiding eggs, substitute with 2 flax eggs (2 Tbsp ground flaxseed whisked with 6 Tbsp water; let sit 5–10 minutes to thicken).
  • Milk: warm the milk slightly to help dissolve ingredients and prevent clumping; if you’re using a very thick plant-based milk, add a touch more liquid as needed.
  • Vanilla: pure vanilla extract delivers a richer aroma; if you have a vanilla bean, scrape in the seeds for extra depth.
  • Sweeteners: maple syrup keeps the dish lighter and vegan-friendly; honey adds a deeper caramel note. Taste the batter before baking and adjust sweetness gradually, since baking will intensify flavors.
  • Spice balance: 1/2 tsp ground cinnamon is a gentle warmth; if you like more warmth, add a pinch of nutmeg or cardamom in addition to the cinnamon.
  • Lemon zest: 1/2 tsp lemon zest brightens the flavor; zest before juicing the lemon to avoid bitterness from the pith. If you don’t have fresh lemon, a tiny splash of lemon juice can also brighten the dish.
  • Blueberries: fresh berries provide juicy pockets; if using frozen berries, thaw completely and drain well. Toss frozen berries with 1 tsp cornstarch before adding to reduce bleeding and staining; this helps maintain a lighter batter color.
  • Nuts and seeds: toasted almonds or walnuts add a pleasant crunch; chop finely so they distribute evenly and don’t sink. If you like more crunch, add a handful to the batter or sprinkle on top before baking.
  • Chia and flax boosts: 2 Tbsp chia seeds or 2 Tbsp ground flaxseed add fiber and help thicken; hydrate chia seeds in a tablespoon of milk for 5–10 minutes if you prefer a smoother texture.
  • Make-ahead: batter can be assembled 24 hours ahead and refrigerated; let come to room temperature for 15–20 minutes before baking to promote even rising.

Flavor, texture, and topping ideas

  • Swirl 2 Tbsp yogurt into each bowl after baking (dairy or dairy-free) for extra creaminess and protein; this also helps balance sweetness.
  • Top with extra blueberries and a light drizzle of maple syrup or honey for a glossy finish and extra fruitiness; adjust sweetness to taste.
  • Finish with a pinch of cinnamon or a few shavings of lemon zest just before serving for a bright aroma.
  • Try a citrus twist by adding a little orange zest along with the lemon for a different berry pairing.
  • Pair these bowls with a side of fresh fruit or a small glass of milk for a complete breakfast.

Handling and storage

  • Leftovers store in an airtight container in the refrigerator for up to 3 days; reheat gently in the microwave (about 30–60 seconds) or in a low oven until warmed through.
  • For longer storage, freeze baked bowls individually for up to 2 months. Reheat from frozen in the microwave or oven until heated through.
  • Unbaked batter can be portioned and frozen; thaw completely before baking. Textures may vary slightly after freezing.

Troubleshooting

  • If blueberries bleed too much into the batter, keep them separate from batter until folding at the end, and consider tossing them with a teaspoon of cornstarch if using frozen berries.
  • If the batter seems too dense, whisk in a little more milk, one tablespoon at a time; if it’s too loose, fold in a spoonful of oats or cottage cheese.
  • If the tops brown too quickly, tent with foil and continue baking until the centers are set; lowering the oven temperature by 25°F (15°C) can help with even browning.
  • To test doneness, insert a knife or toothpick into the center; it should come out with just a few moist crumbs, not wet batter.

FAQ

What are the main ingredients for Baked Blueberry Cottage Cheese Breakfast Bowls?

A typical batch uses cottage cheese, blueberries (fresh or frozen), rolled oats, eggs, milk (dairy or plant-based), vanilla extract, ground cinnamon, honey or maple syrup, and a pinch of salt. Optional add-ins include chopped nuts, yogurt, or a drizzle of extra honey.

How do I bake them and what equipment do I need?

Preheat to 350°F (175°C). Lightly grease 4–6 ramekins or a small baking dish. Mix wet and dry ingredients in one bowl, fold in blueberries, then divide the batter among the ramekins. Bake for about 20–25 minutes until the centers are set and the tops are lightly golden. You can serve directly in the ramekins or unmold into bowls.

How many servings does this yield?

Typically 4 small bowls or ramekins. If you use a single baking dish, it will yield 4–6 generous portions depending on portion size.

Can I use frozen blueberries?

Yes. Use frozen blueberries straight from the freezer. They may release more juice, so you can slightly extend bake time by 3–5 minutes if you notice the center is still soft.

Is this dish dairy-free or vegan-friendly?

It can be made dairy-free by using plant-based milk (almond, soy, oat) and replacing cottage cheese with a dairy-free alternative like blended silken tofu or a dairy-free ricotta. For a vegan version, use a flax egg or chia egg as a binder and ensure all other ingredients are plant-based.

Can I make this ahead for meal prep?

Yes. You can mix the batter and refrigerate it for up to 24 hours before baking. Alternatively, bake, cool, and refrigerate the bowls for up to 4 days; reheat in the microwave (30–60 seconds) or warm in a low oven until heated through.

How should I store leftovers?

Store baked bowls in an airtight container in the refrigerator for 3–4 days. For longer storage, freeze individual portions for up to 2 months, then thaw in the fridge overnight and reheat.

How can I adjust the sweetness?

Sweetness comes from the honey or maple syrup and the blueberries. Start with 1–2 tablespoons of sweetener and adjust to taste. You can also use ripe, naturally sweet blueberries to reduce added sugar.

What toppings or mix-ins work well?

Good options include extra blueberries, chopped nuts (almonds, walnuts), a dollop of yogurt, a sprinkle of chia seeds, or a drizzle of almond butter. A little grated lemon zest can brighten the flavor too.

Can I make gluten-free or grain-free tweaks?

Use certified gluten-free oats to keep it gluten-free. If you want to reduce or replace oats, you can use almond flour or a gluten-free oat alternative, but the texture will change; you may need to adjust the liquid and eggs accordingly.

What’s the best way to ensure the center sets without burning the top?

Ensure your batter is not too thick by measuring liquids accurately. Bake at 350°F (175°C) until the centers are just set and a toothpick inserted in the edge comes out clean; if the top browns too quickly, tent with foil for the last 5–10 minutes.

Can I substitute other fruits for blueberries?

Yes. Raspberries, sliced strawberries, or diced apples work well. If using apples, you may want to add a touch more sweetness and a pinch of cinnamon for extra flavor.

Introduction / Hook

Imagine a bite of pastry so soft it feels like a warm cloud resting on your tongue, infused with the gentle sweetness of milk and vanilla, and finished with a glossy kiss of glaze that gleams like morning dew. Fluffy Korean Milk Cream Donuts are not just treats; they’re a gentle invitation to slow down, inhale the comforting aroma of freshly fried dough, and surrender to a melt-in-your-mouth moment that lingers long after the last bite. This isn’t your typical donut. It’s a refined, cloud-soft indulgence born from the fusion of Korean bakery techniques and classic comfort food, designed to be the centerpiece of a weekend breakfast, a gleaming centerpiece for a tea party, or a bright gift tucked into a box for someone you adore. The first bite releases a whisper of sweetness and a velvet crumb that sighs with tenderness, while the milky cream filling—feather-light and not overly sweet—coaxes a delighted exhale from even the most supply-conscious snackers. Beyond the taste, the ritual matters: the dough that yields to a gentle press, the sighing steam as the glaze sets, and the satisfying, airy bite that leaves a pristine clean finish on the palate. This recipe is a celebration of texture as much as flavor, a celebration of patience paid off with a pastry that’s as comforting as a warm hug and as refined as a cafe-quiet morning in a city that moves at a brisk but grateful pace. Read on to discover a donut that feels like a memory you’ve yet to make, a promise of softness that’s always worth a little extra time, and a dessert that invites conversation as easily as it invites another bite.

The Story Behind the Dish

Donuts have traveled the world, but the version we’re celebrating here has a distinctly East Asian heart: a nod to the softness of milk-bread traditions and the artistry of Korean bakery culture that elevates everyday pastries into momentary luxuries. In Korea, bakery counters glow with the glow of fresh breads, buns, and sweets that strike a balance between comforting familiarity and modernist finesse. The concept behind Fluffy Korean Milk Cream Donuts owes much to two comforting influences: the tender, milk-forward crumb of enriched dough, and the meticulous filling that creates a creamy center without tipping into heaviness. The technique often employed in Korean brød (bread) shops—gentle folding, careful fermentation, and sometimes a tangzhong-style starter—creates a dough that remains supremely soft and moist, even after cooling, which is ideal for a donut that’s meant to stay pillowy as you bite into it hours later.

The milk cream element adds another layer of story. Cream fillings are a beloved feature in many Asian pastries, where the cream is luxuriously smooth yet bright in flavor, designed to complement the natural sweetness of the bread without overwhelming it. The idea is to marry the cloud-like exterior with a center that feels like liquid silk—an internal surprise that makes each bite feel like meeting a beloved cousin you haven’t seen in a while. In many bakery showcases across Seoul, Busan, and beyond, you’ll see pastries that emphasize milk, vanilla, and light citrus notes as a signature trio. This donut is a playful tribute to that spirit: not a heavy, fried dessert, but a soft, comforting, and refined pastry that invites you to savor the moment, not just finish it.

If you’ve ever stood at a bakery window on a rainy afternoon, watching steam rise from the donuts while the world outside drifts by, you’ve glimpsed the mood we’re aiming for: a pastry that feels almost therapeutic, a bite that anchors you in the present with a gentle, nostalgic sweetness. The origin story here is less about a single city street and more about a philosophy—the idea that the best treats are made with intention, patience, and a willingness to let texture do much of the talking. The result is a donut that’s airy enough to float on a bite, yet substantial enough to feel like a small, satisfying meal on its own. It’s a pastry that asks you to slow down, to breathe in the milk-rich aroma, and to linger a little longer in the happy glow of a dessert that’s both everyday-friendly and a touch special for special occasions.

Why You’ll Love This Recipe

  • Incredible tenderness: The enriched dough, often aided by a tangzhong technique, yields a crumb that’s light as a feather with a memory-foam-like resilience. Each bite rebounds gently, inviting you to take another, then another.
  • Creamy, not cloying filling: The milk cream center is luxuriously smooth and subtly sweet, balancing the dough’s natural milkiness without becoming heavy.
  • Glossy, inviting glaze: A simple glaze creates a mirror-like finish that stays crisp for longer and adds a bright finish that enhances flavor rather than overpowering it.
  • Versatile and approachable: While decadent, these donuts are approachable for weekend bakers and impressive enough for entertaining guests. They pair beautifully with a cup of tea or coffee, making them a reliable showstopper for any brunch table.
  • Make-ahead potential: The dough can be prepared ahead, and the filling can be kept separate until serving, allowing you to assemble fresh donuts with minimal daily effort.
  • Comforting nostalgia, with modern refinement: The recipe feels comforting and familiar, yet the technique elevates it, giving you the best of both worlds—a sense of home and a touch of bakery sophistication.

Flavor Profile & Texture

From the first bite, Fluffy Korean Milk Cream Donuts present a symphony of textures and flavors. The exterior offers a delicate crackle from a light surface fry or bake, followed by a breakthrough into a soft, pillowy interior that is impossible to rush through. The crumb is tender, almost bouncy, with a faint, comforting dairy sweetness that doesn’t shout but speaks softly, resonating with warmth. The milk-forward note is rarely overpowering; it lingers like a fond memory of fresh bread and warm milk on a cold morning. Vanilla provides a gentle fragrance, enhancing the natural sweetness of the dough while keeping a clean, comforting finish on the palate.

The milk cream center acts as a velvet heart, lightly sweet and decadently smooth. It carries hints of vanilla and a whisper of salt to keep the flavor grounded and balanced. The cream should feel airy, almost like a cloud that melts into the surrounding dough as you bite, releasing a soft, luxurious mouthfeel that contrasts beautifully with the slightly crisp glaze or dusting on the exterior. The glaze itself—often a simple confectioners’ sugar-based coating or a refined, thin vanilla glaze—offers a glossy, mirror-like sheen and a sweetness that adds a final layer of brightness without overwhelming the delicate flavors inside. Depending on your glaze choice, you can introduce citrus notes for a zing, or a deeper cocoa or matcha tone for a robust finish. The overall flavor profile is a gentle, comforting sweetness with a subtle dairy roundness, a touch of vanilla, and optional accents that can shift the donut toward warmth or brightness, depending on the occasion and your mood.

Occasions & Pairings

These donuts are surprisingly versatile. They shine on weekend brunch tables as a star pastry, they make a refined dessert for a tea party, and they’re a thoughtful gift when presented in a pretty box. Their understated elegance means they don’t overwhelm the table, yet their beauty and aroma make them memorable. Consider the following occasions and pairings to maximize the appeal of Fluffy Korean Milk Cream Donuts:

  • Weeknight treat: A quick, comforting dessert after a long day, paired with a mug of jasmine tea or a small glass of cold milk.
  • Brunch centerpiece: Place on a cake stand alongside light fruit, yogurt parfaits, and delicate pastries for a balanced spread.
  • Gifts & celebrations: Bundle a dozen in a decorative box with a handwritten note for birthdays, anniversaries, or thank-you gestures.
  • Pairings: Coffee with a dash of cream, matcha latte, hojicha or roasted almond milk beverages, and light citrusy desserts like lemon curd tarts to complement the donut’s milk-forward profile.
  • Seasonal twists: In autumn, pair with chai spice beverages; in spring, a bright yuzu glaze can lift the florals in the air and on the table.

Tips, Variations & Substitutions

Flavor versatility is part of the charm here. The base concept can be adapted to suit dietary needs or regional tastes without losing the essence of the dish. Use these ideas to customize your Fluffy Korean Milk Cream Donuts:

  • Vegan option: Use plant-based milk (such as almond, oat, or soy) and a dairy-free butter substitute. For the filling, use a coconut cream-based filling with a touch of vanilla and a pinch of sugar. Glazes can be made with powdered sugar and dairy-free milk for a glossy finish.
  • Glaze variations: Classic vanilla glaze, lemon glaze for a citrus uplift, or matcha glaze for a subtle green tea twist. A light chocolate glaze can add depth without overpowering the milk notes.
  • Flavor twists: Add 1-2 teaspoons of matcha powder to half of the glaze for a Matcha Milk Cream Donut, or swirl in a little black sesame paste for a nutty, toasty note.
  • Texture tweaks: For an even lighter crumb, incorporate a small amount of whipped egg white into the dough (if you aren’t avoiding eggs), or experiment with a tangzhong starter to lock in moisture.
  • Glaze-free option: Dust with a light veil of granulated sugar or a fine dusting of powdered sugar mixed with a hint of vanilla to keep the focus on the dough and the cream.
  • Gluten-free adaptation: Use a high-quality gluten-free flour blend designed for bread to help maintain chew and structure, though the texture will naturally differ from the wheat-based version.
  • Regional twists: Incorporate sesame or pine nut toppings for a roasted, nutty aroma that complements the milk sweetness, or finish with a light dusting of kinako powder for a subtle soybean-nutty aroma.
  • Mini variants: Turn the dough into donut holes for a playful, bite-sized version that’s perfect for parties or kids’ lunches.

Storage & Make-Ahead Ideas

Knowing how to store and plan ahead can extend the joy of these donuts beyond a single sitting. Here are practical tips to keep them at their best:

  • Freshness window: Donuts are best the day they’re assembled, but they’ll stay soft for up to 2 days if stored properly. Keep them in an airtight container at room temperature away from direct sunlight.
  • Reheating: To revive softness, reheat gently in a low oven (about 300°F / 150°C) for 3-5 minutes, or a quick 10-15 seconds in a microwave to regain a slight warmth without drying the crumb.
  • Make-ahead dough: If you’d like to prepare ahead, assemble the dough and refrigerate it overnight. Allow it to come to room temperature and complete the shaping before frying or baking. This can improve flavor development and still yield a tender interior.
  • Make-ahead filling: Keep the milk cream filling refrigerated until serving. Fill donuts just before serving to maintain the ideal texture and avoid sogginess.
  • Freezing option: Freeze unfilled, completely cooled donuts in a single layer, then transfer to a bag for longer storage. Thaw at room temperature and fill just before serving to preserve best texture.

Fun Facts & Trivia (Optional)

Delightful little historical tidbits add texture to the story of these donuts. For instance, the tangzhong method—often used in Asian breads to keep crumbs ultra-soft—was popularized in Asia as a clever way to lock in moisture and extend freshness. While it’s commonly associated with breads like Japanese milk bread, its influence has spread to many delicate pastries, including glazed and filled donuts, where it helps create that “cloud-like” bite that stays tender even after cooling. Milk-based fillings have long been cherished in many cultures for their smooth, comforting mouthfeel. In Korean bakeries, cream-filled pastries frequently feature a light, vanilla-forward profile with subtle sweetness to align with the delicate nature of the dough. The combination of milk, vanilla, and a gentle glaze captures a modern bakery aesthetic that resonates across continents, turning a simple donut into something that feels sophisticated yet familiar. And as with many beloved treats, these donuts are best enjoyed with company—sharing them amplifies the warmth and the sense of celebration that the recipe is meant to evoke. If you’re lucky enough to have a friend with a vintage recipe box or a grandmother who can recall the exact texture of a childhood favorite, you’ll know that the small details—quiet patience, precise timing, and a forgiving, loving approach to baking—are what elevate a good donut to something memorable.

Ingredients

Donut Dough

  • 3 cups all-purpose flour
    → Provides the primary structure and chew of the donuts. All-purpose flour yields a balanced gluten development that supports a light, airy interior when combined with yeast. For a slightly lighter crumb, you can substitute up to 1 cup with cake flour, but keep in mind this will reduce chewiness. Sift the flour before measuring and keep excess flour nearby for dusting the surface while shaping the dough.
  • 1/4 cup granulated sugar
    → Adds gentle sweetness and helps feed the yeast, contributing to a pleasant browning and tender crumb. Sugar also helps with moisture retention during frying, reducing the risk of a dense texture. Use regular granulated sugar for consistent results, and avoid replacing it with sugar substitutes in this yeast dough.
  • 2 1/4 tsp active dry yeast
    → The primary leavening agent that produces the fluffy, airy donut after frying. Proof the yeast in a small amount of the warm milk with a pinch of sugar for 5–10 minutes until foamy to ensure it’s active; if it doesn’t foam, start over with fresh yeast. For instant yeast, you can mix it directly with the dry ingredients, but you may need a slightly shorter rise time.
  • 1 cup warm whole milk
    → Hydrates and nourishes the dough, while the fat in whole milk contributes tenderness and flavor. Temperatures around 105–110°F (40–43°C) are ideal for activating the yeast without killing it. Use whole milk for a richer crumb; skim or 2% will yield a lighter, less moist result. If using freshly warmed milk, be mindful not to overheat.
  • 2 large eggs
    → Enrich the dough with moisture and structure, helping the donuts develop a tender yet sturdy crumb. Bring eggs to room temperature to promote smooth emulsification and even distribution. Add one egg at a time after the initial mixing to keep the dough from curdling and to maintain a glossy, cohesive mixture.
  • 4 tbsp unsalted butter, melted and cooled
    → Adds flavor and a tender, pillowy texture by shortening gluten strands. Ensure the butter is melted and cooled to just warm (not hot) before whisking it in to avoid cooking the eggs. For extra richness, you can substitute part of the butter with a light oil, but melted butter keeps the classic donut bite.
  • 1/2 tsp salt
    → Balances sweetness and enhances overall flavor while aiding gluten development for a proper structure. Dissolve or distribute salt evenly by mixing it with the flour early in the process to prevent concentrated pockets.
  • 1 tsp vanilla extract
    → Infuses the dough with warm, aromatic notes that pair beautifully with the milk-based filling. Use pure vanilla extract for the most vibrant flavor; add with the liquids to ensure even dispersion throughout the dough.
  • 4 cups neutral oil for frying (e.g., canola or sunflower)
    → The medium for cooking the donuts; a neutral oil prevents flavor transfer and yields a crisp, golden exterior. Heat the oil to about 350–360°F (175–180°C) and maintain steady temperature; avoid overcrowding the pot to ensure even cooking. Have a thermometer handy and drain on paper towels after frying for a light, non-greasy finish.

Milk Cream Filling

  • 1 cup whole milk
    → The base liquid for the pastry cream, contributing to a smooth, rich consistency. Whole milk yields a creamier filling than skim milk. Heat the milk until just steaming, then gradually temper the yolk mixture to avoid curdling. Do not boil once the mixture starts thickening.
  • 3 tablespoons granulated sugar
    → Sweetens the custard base and helps balance the egg yolks’ richness. Adjust to taste if you prefer a less sweet filling, but keep some sugar to maintain proper consistency and mouthfeel of the pastry cream.
  • 2 large egg yolks
    → Thickens the filling and provides a smooth, glossy texture. Bring yolks to room temperature to prevent curdling and whisk vigorously when tempering with hot milk to create a stable custard base.
  • 2 tablespoons cornstarch
    → Thickener that enables a creamy, pudding-like pastry cream without curdling. Sift cornstarch to avoid lumps and whisk it with a little of the cooled milk to create a smooth slurry before adding to the hot mixture. Do not skip this step if you want a true custard-like filling.
  • 1 teaspoon vanilla extract
    → Deepens flavor and provides a warm aroma that pairs perfectly with the milk filling. Add off the heat after the custard has thickened to preserve aroma.
  • 1 tablespoon unsalted butter
    → Finishes the pastry cream with richness and a silky texture. Stir in off the heat so the butter melts smoothly and the custard remains glossy; you can whisk in small pieces until fully incorporated.
  • 1/4 cup heavy cream, cold (to whip and fold, optional)
    → Optional to lighten the filling and create a creamier, mousse-like texture. Whip to soft peaks and fold gently into the cooled pastry cream for a lighter consistency, then keep chilled until filling the donuts.

Milk Glaze

  • 1 1/2 cups powdered sugar
    → Provides the sweet, glossy coating for the donuts. Sift to remove lumps and achieve a smooth glaze. The glaze sets quickly, so adjust thickness with the milk as you mix.
  • 3 tablespoons whole milk
    → Thin enough to pour and drip over the donuts; adjust with more or less milk to reach your desired consistency. Use a little at a time to avoid a runny glaze that won’t set.
  • 1/2 teaspoon vanilla extract
    → Adds a gentle aroma that complements the milk-based filling. Use pure vanilla for best flavor, and mix in with the glaze after the sugar has dissolved for even distribution.
  • 1–2 tablespoons sweetened condensed milk (optional)
    → For a richer, creamier glaze with a subtle dairy sweetness and a slightly opaque finish. Add cautiously, whisking into the glaze until you reach your preferred thickness and color. If used, reduce the plain milk accordingly to keep glaze from becoming too thick.

Optional Toppings

  • 1/4 cup toasted sesame seeds (optional)
    → Adds a nutty crunch and an aromatic note that pairs well with the milk theme. Toast seeds until fragrant and cool before sprinkling on the glaze for best adhesion and flavor. Use sesame oil-free to keep glaze clean and crisp.
  • 1/4 cup shredded coconut, toasted (optional)
    → Introduces a subtle tropical sweetness and texture contrast. Dry-toast coconut in a skillet over low heat until lightly golden, then sprinkle over the glaze for visual appeal and enhanced aroma.
  • 1/2 cup pastel or multicolor sprinkles (optional)
    → Fun, kid-friendly finish that adds color and sweetness. Apply sprinkles while glaze is still tacky so they adhere well; avoid overloading to keep the creamy filling visible inside the donut.

Instructions

  • Proof the yeast in a small mixing bowl by whisking 1/4 cup warm whole milk (105–110°F/40–43°C) with a pinch of sugar, then sprinkling 2 1/4 tsp active dry yeast over the surface and letting it sit 5–10 minutes until foamy and aromatic.
    → This confirms the yeast is alive and active; foamy bubbles indicate proper fermentation readiness, which is essential for a light, fluffy donut crumb.
  • Whisk together 3 cups all-purpose flour, 1/4 cup granulated sugar, and 1/2 tsp salt in a large bowl until evenly distributed and any lumps are broken up to ensure uniform dough texture.
    → Uniform dry ingredients promote consistent gluten development and even sweetness distribution, preventing dense pockets in the final pastry.
  • In a separate bowl, whisk 2 large eggs, the remaining 3/4 cup warm milk (105–110°F/40–43°C), 4 tbsp melted cooled unsalted butter, and 1 tsp vanilla extract until smooth and emulsified; these wet ingredients will provide moisture, richness, and aroma to the dough.
    → Temperature control ensures eggs emulsify and fat remains integrated, yielding a cohesive, tender crumb rather than a greasy or separated dough.
  • Pour the foamed yeast mixture into the dry ingredients, then add the wet mixture and stir with a wooden spoon or dough hook until a shaggy dough forms, scraping the bowl as needed to incorporate all flour; knead on a lightly floured surface or with a stand mixer on low for 6–8 minutes until the dough is smooth, elastic, and passes the windowpane test.
    → Proper kneading develops gluten to create structure and chew; the windowpane test ensures the dough is adequately developed without overworking it.
  • Transfer the dough to a lightly oiled bowl, turn to coat with oil, cover with plastic wrap or a damp towel, and let rise in a warm, draft-free spot until doubled in size, about 60–90 minutes depending on ambient temperature.
    → A proper first rise builds internal gas bubbles for a light, airy donut; avoid placing in direct heat or a cold draft, which can stall fermentation.
  • Gently punch down the risen dough to release built-up gas, then turn it onto a lightly floured surface and roll it to 1/2 inch (12–13 mm) thickness, rotating the dough a quarter turn halfway through to maintain an even sheet.
    → Rolling to a consistent thickness ensures uniform frying and uniform donut height; torquing the dough evenly prevents thin edges that cook too quickly.
  • Cut donuts using a 3-inch round cutter and a 1-inch circle cutter to create the classic ring shape; re-roll scraps and cut repeatedly, ensuring you maintain consistent thickness and shape for even frying.
    → Multiple passes with the scraps maximize yield while preserving uniform cooking times and texture across all donuts.
  • Arrange the cut donuts on parchment-lined sheets or a lightly floured tray, cover loosely, and allow a second proof at room temperature for 30–45 minutes until puffy and slightly springy to the touch.
    → The second rise relaxes the gluten after shaping and enhances a light, open crumb after frying; do not skip this step for a fluffier donut.
  • Pour neutral oil into a heavy, deep pot to a depth of 3–4 inches, attach a deep-fry thermometer, and heat to 350–360°F (175–180°C); maintain a steady temperature by adjusting the heat as needed and monitor with the thermometer for accuracy.
    → A stable fry temperature yields a crisp exterior and a tender interior, while preventing greasy donuts and uneven color.
  • Carefully slide donuts into the hot oil in small batches, frying 1–2 minutes per side or until golden brown and evenly colored; flip with tinged tongs, adjust heat to keep the oil in range, and avoid overcrowding to preserve oil temperature.
    → Gentle, controlled frying ensures uniform doneness and a crisp exterior without undercooking the center; overcrowding causes temperature drops and soggy donuts.
  • Transfer fried donuts to a rack or paper towels to drain briefly, then allow to cool completely before filling to prevent the pastry cream from melting or seeping out the filling.
    → Cooling stabilizes the donut structure and prepares a clean surface for piping the filling, ensuring a tidy finish and proper filling uptake.
  • Make the pastry cream filling by scalding 1 cup whole milk in a medium saucepan; in a separate bowl whisk 2 large egg yolks with 3 tablespoons granulated sugar and 2 tablespoons cornstarch until pale and smooth; gradually whisk a splash of hot milk into the yolks to temper, then whisk the yolk mixture back into the saucepan with the milk and cook over medium heat, whisking constantly until the mixture thickens to a nappe and just coats the back of a spoon; do not allow it to boil, then remove from heat and whisk in 1 teaspoon vanilla extract and 1 tablespoon unsalted butter until glossy; cover with plastic wrap touching the surface and chill until very cold, optionally folding in 1/4 cup cold heavy cream whipped to soft peaks for extra lightness.
    → Tempering prevents curdling; cooking to thick consistency ensures stable filling; chilling firms the pastry cream for clean piping and prevents leakage during filling.
  • Fill each cooled donut by piping pastry cream into the center or inserting a small hole with a paring knife and injecting filling with a narrow-tip pastry bag; fill until the donut feels slightly plump but not bulging, then wipe any excess filling from the surface to maintain a neat appearance.
    → Proper filling distributes flavor evenly and prevents overstuffing, which can tear the donut or overwhelm the delicate bread structure.
  • Prepare the glaze by whisking 1 1/2 cups powdered sugar with 3 tablespoons whole milk and 1/2 teaspoon vanilla until smooth and lump-free; adjust thickness by adding a little more milk or powdered sugar as needed, then whisk in optional 1–2 tablespoons sweetened condensed milk for a richer, creamier glaze if desired.
    → A smooth glaze adheres well to the slightly warm surface of the donut and provides a glossy coating that sets nicely as it cools.
  • Dip the top of each filled donut into the glaze or spoon glaze over the domed surface, allowing any excess to run off; let the glaze set for about 5–10 minutes before applying optional toppings for best adhesion.
    → A tacky, not fully set glaze will capture toppings like sesame, coconut, or sprinkles, while a fully set glaze can crack or crumble under toppings.
  • Finish with optional toppings: lightly press toasted sesame seeds, shredded coconut, or pastel sprinkles onto the still-tacky glaze in small, even amounts to avoid overpowering the filling’s flavor and to ensure visual appeal.
    → Toasted sesame seeds provide a nutty aroma and crisp texture; coconut adds a tropical note; sprinkles give a playful finish; use them sparingly for balance.
  • Serve the donuts fresh and enjoy promptly, or store in an airtight container at room temperature for up to 1–2 days; avoid stacking them while glazing to prevent sticking, and rewarm gently if desired to revive softness.

Notes

These fluffy Korean Milk Cream Donuts showcase a soft, tender crumb and a luscious milk custard filling that feels indulgent yet balanced. To achieve their airy texture, measure and sift the flour, proof the yeast in warm milk with a pinch of sugar, and avoid overmixing the dough once the flour is integrated; let it rise until doubled for maximum lightness. For best results, bring the eggs and milk mixture to room temperature, and whisk in the melted butter gradually to create a glossy, cohesive dough. The pastry cream filling should be silky and thickened with cornstarch and tempered yolks; heat the milk gently, temper the yolks, then cook until thick but not boiling, finishing with butter and vanilla. The glaze should be glossy but not too thick; adjust with extra milk or powdered sugar until it coats the donuts with a delicate sheen. You can customize with optional toppings like toasted sesame seeds, shredded coconut, or pastel sprinkles, and you can store unfrosted donuts in an airtight container for 1–2 days or freeze them unfrosted for longer; glaze the donuts just before serving for best texture. When frying, maintain the oil at 350–360°F (175–180°C) and avoid overcrowding the pan to ensure even cooking and a crisp exterior.

Tips

Tips for Fluffy Korean Milk Cream Donuts

Dough foundation and yeast activation

  • Proof the active dry yeast in a small amount of the warm milk with a pinch of sugar. It should become foamy within 5–10 minutes. If it doesn’t, discard and start again with fresh yeast to ensure a proper rise.
  • Keep the milk at a steady 105–110°F (40–43°C) when hydrating the yeast. If the liquid is too hot, it can kill the yeast and flatten your rise; if it’s too cool, the dough will ferment slowly.
  • When adding eggs, add them one at a time after the initial mixing to maintain a glossy, cohesive dough and prevent curdling. Room-temperature eggs emulsify more evenly with the fat and liquids.
  • For a lighter crumb, you can substitute up to 1 cup of the all-purpose flour with cake flour, but expect a softer, less chewy texture. Always sift flour before measuring to avoid dense pockets.

Texture, kneading, and temperature management

  • Keep melted butter cooled to just warm before whisking into the dough. Hot butter can cook the eggs and seize the dough, while cold butter can lead to a stubborn, dense crumb.
  • The dough will be soft and slightly sticky. Lightly flour your work surface and your hands as needed, but avoid adding too much flour or you’ll risk a dry, tough interior.
  • Allow the dough to rise in a warm, draft-free spot until doubled in size. Typical rise times range from 60 to 90 minutes, but environmental factors may vary. If your kitchen is cool, use a turned-on oven at a low temperature (about 100–110°F / 38–43°C) as a warming station.

Shaping and resting

  • After the first rise, gently shape the dough into rounds with lightly floured hands. Don’t over-press, or you’ll press out the air you’ve worked to build. Dust with flour to prevent sticking, not to add structure.
  • If you’re not frying immediately, you can refrigerate shaped dough disks for a short rest to slow fermentation and maintain control over the dough’s temperature before frying.

Frying technique

  • Maintain the oil between 350–360°F (175–180°C). A stable medium-high heat yields a crisp, golden exterior with a tender interior. Use a thermometer and adjust the heat as you fry.
  • Avoid overcrowding the pan. Fry in small batches to keep the oil temperature steady and to prevent uneven cooking.
  • After frying, drain donuts on a rack or paper towels. While hot donuts absorb oil, a quick drain helps prevent a greasy finish.

Milk cream filling technique

  • For a silky pastry cream, temper the egg yolks by slowly whisking hot milk into them, then return to the stove and cook until thick enough to coat the back of a spoon. Do not boil, or the custard may curdle.
  • Whisk cornstarch with a little cooled milk to form a smooth slurry before adding to the hot mixture to ensure a lump-free custard.
  • Strain the pastry cream after cooking to remove any lumps, then whisk in vanilla and butter off the heat for a glossy finish. Chill completely before filling the donuts.
  • If using whipped heavy cream folded into the cooled pastry cream, whip the cream to soft peaks and fold gently to keep a light, mousse-like texture.

Glaze consistency and application

  • Sift the powdered sugar to remove lumps. The glaze should be thick enough to coat but thin enough to drip for a glossy finish. Adjust with more milk or sugar to reach the desired thickness.
  • Dip cooled donuts into the glaze while it’s still warm but not hot. Let the glaze set briefly before applying toppings to ensure proper adhesion.
  • For a richer glaze, whisk in a little sweetened condensed milk and adjust the plain milk amount accordingly to maintain a glaze that sets with a smooth, slightly opaque sheen.

Toppings and texture contrasts

  • Toast sesame seeds until fragrant for best aroma; sprinkle on while glaze is still tacky to help them adhere firmly.
  • Dry-toast shredded coconut until lightly golden to add a tropical note and crunch; scatter just after glazing for best adhesion.
  • Apply pastel sprinkles while the glaze is tacky, but don’t layer too heavily so the creamy filling inside remains visible and inviting.
  • You can refrigerate the dough after the first rise for up to 12–18 hours; bring to room temperature and finish the second rise before frying for consistent results.
  • Store filled donuts in an airtight container for up to 1–2 days. Rewarm briefly in a low oven (around 325°F / 160°C) to refresh the texture before serving.
  • Unglazed, unfrosted donuts freeze well for up to 1 month. Thaw at room temperature, then glaze and fill before serving for best texture.
  • If the donuts come out pale or dense, check that the yeast is active and that the oil temperature stays within the recommended range.
  • If the glaze won’t set, it may be too thin. Let it rest a few minutes and add a touch more sugar or reduce the milk slightly.
  • If the filling is too runny, chill the pastry cream longer or whisk in a touch more cornstarch slurry, then refrigerate before filling.

FAQ

What are Fluffy Korean Milk Cream Donuts?

These are soft, pillowy yeast donuts filled with a silky milk cream. Inspired by Korean bakery styles, they pair a tender, fluffy dough with a rich, milky filling and optional glaze, making them look and taste indulgent yet light.

What ingredients do I need for the dough, filling, and topping?

Dough:

  • 2 1/4 cups (280 g) bread flour
  • 1/4 cup (50 g) granulated sugar
  • 2 teaspoons instant yeast
  • 1/2 teaspoon salt
  • 1/2 cup (120 ml) warm milk (about 110°F/43°C)
  • 1 large egg
  • 2 tablespoons (28 g) unsalted butter, softened

Milk cream filling:

  • 1 cup (240 ml) milk
  • 2 tablespoons cornstarch
  • 1/4 cup (50 g) granulated sugar
  • 1 teaspoon vanilla extract
  • 1–2 tablespoons butter (optional, for extra richness)

Optional glaze/topping:

  • 1 cup powdered sugar
  • 2–3 tablespoons milk
  • Vanilla or cocoa powder for flavoring
What makes these donuts fluffy and tender?

Fluffiness comes from a well-proofed yeast dough and careful handling. Key factors are using warm (not hot) milk to activate the yeast, kneading until the dough develops gluten, giving it a second rise after shaping, and frying at the right temperature so the outside sets quickly without absorbing excess oil.

Can I prepare this ahead of time or freeze the dough?

Yes. You can mix and knead the dough, let it rise once, then refrigerate the dough (covered) overnight. Bring it to temperature, shape into rounds, let them rise again, and fry or bake the next day. You can also freeze shaped, unfilled donuts on a parchment-lined tray until firm, then transfer to a bag. Thaw and fill before serving.

How do I fill the donuts with milk cream properly?

Cool the milk cream until it’s thick but pipeable. Use a piping bag fitted with a long narrow tip. Poke a small hole from the edge of each donut (or insert from the bottom) and pipe in a generous amount of filling until you feel resistance. Repeat for all donuts and dust with sugar or glaze if desired.

What oil and frying temperature should I use?

Use a neutral oil with a high smoke point (like vegetable, canola, or peanut oil). Heat to about 340–360°F (170–180°C). Fry 1–2 minutes per side until golden. Don’t overcrowd the pot; maintain a steady temperature for even cooking.

Can I bake these donuts instead of frying?

You can bake as a lighter alternative. Preheat to 375°F (190°C). Bake on a parchment-lined sheet 12–15 minutes, or until lightly golden and cooked through. The texture will be softer and a bit different from fried donuts, but they still pair well with milk cream.

How should I store and reheat them?

Store unfrosted donuts in an airtight container at room temperature for 1–2 days. Filled donuts are best eaten the same day, but can be refrigerated 1 day max; allow to come to room temperature before serving. To reheat, warm in a low oven (300°F / 150°C) for 5–7 minutes or briefly in the microwave if needed, then fill if not already filled.

What are common issues and how can I troubleshoot them?

Troubleshooting tips:

  • Dough won’t rise: Check that your yeast is active and not expired, and that the milk is warm but not hot. Ensure you knead enough to develop gluten and give it a proper second rise.
  • Donuts are dense or heavy: Avoid over-kneading or under-proofing. Also ensure the oil isn’t too cold, which can cause dense insides.
  • Donuts absorb too much oil or are greasy: Fry at the correct temperature and don’t overcrowd the pan, which lowers oil temperature.
  • Milk cream won’t set or tastes thin: Cook the filling long enough for the starch to thicken, or increase cornstarch by a little. Add a touch more vanilla for flavor depth.
Can I customize the flavor or toppings?

Absolutely. You can add a few variations:

  • Flavor boosters: a splash of almond or matcha powder in the dough, or a hint of citrus zest in the filling.
  • Fillings: swirl in coffee or caramel for a different milk-cream experience.
  • Toppings: glaze with vanilla, cocoa, or strawberry, and finish with chopped nuts, crushed cookies, or edible glitter.

Introduction / Hook

Imagine a bite-sized indulgence that crackles with golden goodness, yet stays surprisingly light on the palate. Crispy Cottage Cheese Mozzarella Bites are the kind of snack that feels like a celebration in miniature: the exterior is a sun-kissed, crunchy cloak that gives way to an irresistible, melt-in-your-mouth center. Inside, soft-curd cottage cheese mingles with strings of mozzarella, creating a playful contrast of textures—creamy, dairy-forward, and mildly tangy—wrapped in a seasoned coat that tastes of warm bread crumbs, garlic, and herbs. The aroma alone is enough to summon happy memories: the sizzle of oil, the scent of toasty parmesan, and a whisper of parsley lingering in the air. These bites are not just a snack; they’re an invitation to gather, share, and savor together.

What makes this recipe truly special is its modern twist on two classic cheeses that traditionally live on opposite sides of the flavor spectrum. Cottage cheese brings a gentle tang, bouncy texture, and protein-packed bite that feels light but satisfying. Mozzarella, with its signature melt and stringy pull, brings comfort and familiarity. When these two cheeses meet inside a crust that’s perfectly crisp, you get a texture symphony: a warm, crackly shell that yields to a soft, pillowy interior that oozes just enough cheese to delight without feeling heavy. It’s the kind of snack that can stand alone at a party, pair gracefully with dips, or serve as an unexpected crowd-pleaser on weeknights when you want something special without a lot of fuss.

These bites invite creativity as easily as they invite dunking. A pantry-friendly coating—crisp breadcrumbs mingled with parmesan and garlic—gives them a rustic, comforting vibe, while fresh herbs brighten every bite. The result is a versatile hors d’oeuvre that shines on a platter, a playful addition to kids’ lunch boxes, or a savory snack for movie nights. Whether you’re hosting a casual get-together, planning a game-day spread, or simply craving something delicious that doesn’t demand a long recipe book, these Crispy Cottage Cheese Mozzarella Bites deliver on taste, texture, and wow-factor in every bite.

Beyond the bite itself, this dish invites storytelling: the simple magic of combining two beloved cheeses into something that feels elegant enough for a dinner party but approachable enough for a weeknight treat. It’s the kind of recipe you reach for when you want to impress without complicating your schedule. The bites transport you to a cozy kitchen where there’s always room for a little extra crunch, a little extra cheese pull, and a lot of shared joy around the table.

The Story Behind the Dish

Like many great comfort foods, these bites grew from a kitchen experiment that happened to strike the right balance between indulgence and ease. The tradition of mozzarella as a crowd-pleasing, shareable cheese dates back to gatherings where strings of warm cheese signaled happiness and hospitality. Cottage cheese, on the other hand, has long been a pantry stalwart—light, approachable, and adaptable to a variety of uses. Pairing the two felt almost inevitable: a way to capture the best of both worlds—melty, luscious mozzarella and the bright, slightly tangy bite of cottage cheese—while maintaining a friendly, snackable form.

In the story you might tell around the table, a family host wanted something that felt both refined and unfussy. They envisioned a bite that could hold its own beside a platter of olives, pickles, and crisp vegetables, yet also be a delightful surprise for kids who loved cheese sticks. The result was a simple coating that clung to soft interiors, yielding a golden, peppery crust that crackled as teeth sank through. It wasn’t about perfection in the kitchen but about a small, joyful triumph—a recipe born from the desire to create something delicious, shareable, and a little magical all at once.

Today, these bites carry that same spirit: a modern, approachable appetizer that honors the generous spirit of gatherings while offering practical flavor for everyday moments. The technique—balancing a lightly seasoned breadcrumb crust with a creamy interior—reflects a timeless truth about food: great taste can emerge from thoughtful contrasts. They bridge comfort and sophistication, making them suitable for casual family dinners, dressed-up appetizer platters, or a playful brunch addition. The origins may be humble, but the experience is universally inviting: a little crunch, a lot of joy, and a cheese pull that’s hard to resist.

Why You’ll Love This Recipe

  • Protein-packed and satisfying: Cottage cheese brings softness and protein, while mozzarella lends irresistible melt, creating a bite that fills without weighing you down.
  • Versatile and forgiving: Adaptable to different coatings, herbs, and dipping sauces. It’s easy to tailor to the tastes of kids, adults, vegetarians, or guests with dietary preferences.
  • Quick to assemble: You can prepare a batch in minutes, making this a dependable go-to for last-minute gatherings or weeknight snacks.
  • Delightfully crunchy exterior: A well-seasoned crust becomes a crisp shield that crackles on contact and gives way to a soft, creamy center.
  • Dippable and shareable: Perfect for dipping into marinara, ranch, pesto, or a bright lemon-garlic aioli—every dip adds another layer of flavor to the experience.
  • Family-friendly and crowd-pleasing: The flavors are familiar and comforting, appealing to a wide range of palates while still feeling special.
  • Make-ahead options: Forming the bites ahead of time and refrigerating or freezing them makes serve-time quick and effortless.
  • Great for parties or weeknights: Whether you’re entertaining or simply indulging, these bites adapt to any occasion with ease.

Flavor Profile & Texture

The bite begins with a crispy, golden crust that encases a tender, slightly springy interior. When you bite in, the exterior’s crunch gives way to a creamy core where cottage cheese adds lightness and a delicate tang, while mozzarella threads pull pleasantly with every mouthful. The cheese combination channels comfort and brightness in one bite: the cottage cheese brings a subtle acidity and a soft, cloudlike texture, while mozzarella lends a comforting, familiar melt that feels indulgent without being heavy.

The coating is a symphony of savory notes: toasted breadcrumbs, a hint of parmesan for nutty savor, garlic powder or minced fresh garlic for warmth, and a whisper of dried herbs like oregano, parsley, and a touch of red pepper flakes for a gentle kiss of heat. The resulting contrast—crisp exterior, tender interior, and a well-seasoned, aromatic layer—creates a multi-sensory experience. The aroma alone tells you you’re in for something special: toasty breadcrumbs, a garlicky perfume, and the inviting scent of melted cheese merging with herbs.

Texture-wise, these bites deliver a menu of satisfying sensations. First comes the initial crackle of the crust, then a soft, almost pillowy interior. The cottage cheese adds a delicate granularity that keeps the center from feeling like a dense cheese block, while the mozzarella brings that satisfying pull that makes cheese lovers swoon. Salt and herb notes carry through to the finish, finishing with a light, clean aftertaste that invites another bite rather than overwhelming the palate. It’s a balance that makes these bites easy to eat by the handful, yet refined enough to feel special on a platter.

Occasions & Pairings

These Crispy Cottage Cheese Mozzarella Bites are an excellent fit for a range of occasions, from casual weeknight dinners to festive gatherings. Their portable, bite-sized nature makes them perfect for a party platter, a game-day spread, or a light but satisfying starter when you’re entertaining without facing a long cooking session.

When it comes to pairings, you’ll find dips can elevate the experience and tailor it to the moment:

  • Marinara sauce: the classic pairing that echoes Italian antipasti vibes and highlights the mozzarella’s cheese pull against a bright tomato tang.
  • Herbed garlic aioli or lemon-garlic yogurt dip: adds a creaminess and zesty lift that complements the savory crust.
  • Ranch or chipotle ranch: for a Western-inspired twist with a cooling, creamy contrast to the crisp bites.
  • Pesto or sun-dried tomato pesto: infuses a herby, olive-oil-rich bite that brightens the dish and adds depth.
  • Fresh salad or olives: a light, refreshing balance that acts as a palate cleanser between bites.

Occasion-wise, these bites shine as:

  • Party appetizers: arrange on a platter with toothpicks and a couple of dipping bowls for an instant crowd-pleaser.
  • Game nights: savory, satisfying finger food that’s easy to share and repeat.
  • Holiday gatherings: add a touch of whimsy to a cheese-and-dip spread with their warm, comforting vibe.
  • Weeknight dinners: a quick, gratifying starter that can be followed by a simple pasta dish or a vibrant salad.

Tips, Variations & Substitutions

Tips for Perfect Crispy Bites

  • Keep the interior cheese cold until you’re ready to coat and cook. Cold cheese helps maintain shape and prevents the mixture from oozing.
  • Chill formed bites before frying or baking. A short chill helps the coating adhere and reduces the chance of the filling leaking out during cooking.
  • Use a light, double-coating approach: a gentle first coat of seasoned crumb, then a quick dip back into a crumb mix for extra crunch and to seal in the cheese.
  • A gentle heat is best: start with medium heat if you’re pan-frying to ensure the crust becomes golden without browning too quickly and burning the filling inside.
  • If baking, place bites on a rack set over a sheet pan to promote even air circulation and maximum crispness on all sides.
  • For maximum flavor, lightly brush or spray the crust with a tiny amount of olive oil before baking or frying to encourage browning and a glossy finish.

Variations

  • Gluten-free option: use gluten-free breadcrumbs or almond flour mixed with finely grated parmesan for a nutty, crisp crust.
  • Herb-forward twist: increase dried oregano, thyme, and parsley with a pinch of smoked paprika for a complex, aromatic bite.
  • Spicy version: add a pinch of crushed red pepper flakes to the coating for a subtle kick that lingers after each bite.
  • Herby lemon variant: add lemon zest to the crumb mixture and finish with a squeeze of fresh lemon for a bright, zippy finish.
  • Dairy-free version: replace cottage cheese with a smooth almond or soy-based ricotta-style substitute and use a plant-based mozzarella-style shreds. Check that the coating still adheres well and adjust seasoning accordingly.
  • Regional twists: pair with Italian seasoning and parmesan for a more classic antipasti vibe, or swap in Cajun seasoning for a Southern-inspired flair.
  • Cheese-forward swap: instead of cottage cheese, use a finely crumbled paneer with a touch of mozzarella to maintain the bite’s texture in a slightly different cheese profile.

Regional twists & flavor pairings

In coastal regions, a drizzle of lemon-infused olive oil over the finished bites can brighten the flavor, echoing Mediterranean sensibilities. In heartland kitchens, a dusting of paprika and garlic powder mirrors the comfort-food approach, turning the bites into a robust, smoky treat. In Italian-inspired menus, a light herb blend—basil, oregano, and parsley—works beautifully with a marinara dip, while a basil-garlic aioli anchors the plate with a fragrant, fresh note. The beauty of this recipe is that it invites experimentation without losing its core charm: a crisp shell around a silky, cheese-lue interior.

Storage & Make-Ahead Ideas

One of the practical joys of these bites is their make-ahead flexibility. You can prepare the cheese centers and coating separately and assemble just before cooking, or you can form the bites and refrigerate them for up to 24 hours before frying or baking. If you’d like to freeze them for longer-term storage, freeze the formed bites on a parchment-lined tray until solid, then transfer to a sealed container or bag. When you’re ready to cook, bake or fry them from frozen, adding a few extra minutes to the cooking time to ensure the centers heat through and the crust becomes crisp.

Leftovers can be stored in the refrigerator for 2–3 days. Reheat in a hot oven or air fryer to regain maximum crispness. Microwave reheating is not ideal here, as it can soften the crust and reduce the desirable texture. If you’re serving them as part of a party spread, consider keeping dipping sauces separate and warming them just before guests arrive to preserve contrast between hot bites and cool, creamy dips.

Make-ahead strategies:

  • Prep the cheese fillings and the crumb mixture separately, then combine when you’re ready to shape and cook.
  • Shape bites and lay them on a parchment-lined tray; cover and refrigerate for up to 8 hours before cooking to save time when guests arrive.
  • Partially bake and finish at serving time for a faster assembly, especially if you’re feeding a crowd.

Fun Facts & Trivia (Optional)

  • The best mozzarella for these bites is the one with a good melt factor. Fresh mozzarella melts beautifully but can make the center too watery if not balanced with the crumb coating, so a blend of stringy mozzarella shreds and a touch of fresh mozzarella can work nicely.
  • Cottage cheese has seen a resurgence in culinary use beyond traditional breakfasts and dieters’ meals, thanks to its versatility in creamy fillings, whipped into spreads, or folded into savory batters. Its light texture helps keep dishes from feeling too heavy, which makes it ideal for appetizers like these bites.
  • Cheese pulls are not only visually satisfying; they signal a well-integrated melt between dairy components. A properly balanced bite will have a satisfying stretch without losing its shape at the crust, a sign of careful moisture management and a well-chosen cheese blend.
  • Seasoning matters. A correctly seasoned crust makes a big difference in how the bite reads on the palate; it’s easy to underestimate the impact of a little garlic powder, dried herbs, and a pinch of salt on the overall flavor profile.
  • Leftover crust toasts beautifully in a warm pan with a tiny drizzle of oil, turning crust into a savory crumb topping for salads or roasted vegetables the next day.

Ingredients

  • Bites Filling
  • 1 cup cottage cheese, well drained and pressed to remove excess whey
    → The cottage cheese provides moisture and a soft base that binds the filling. Drain thoroughly (preferably in a cheesecloth or fine sieve) to remove whey so the bites don’t release water during baking. For best results, use a low-moisture cottage cheese and pat dry after pressing to keep the mixture cohesive and not soupy.
  • 1 cup shredded mozzarella cheese (low-moisture)
    → Mozzarella adds the melted, gooey center that characterizes these bites. Use low-moisture shredded mozzarella to minimize extra moisture; pat it dry with paper towels after shredding to help the filling hold together. Keep the filling cold before shaping to prevent the cheese from smearing.
  • 1/2 cup grated Parmesan cheese
  • 1 large egg, lightly beaten
  • 2 tablespoons all-purpose flour or gluten-free alternative (e.g., cornstarch or rice flour)
    → Acts as a binder and helps soak up excess moisture from the filling, helping the mixture hold its shape. If you prefer a gluten-free option, cornstarch or a rice flour blend works well and can create a slightly crisper texture when baked.
  • 1/2 teaspoon kosher salt
  • 1/4 teaspoon black pepper
  • 1/2 teaspoon garlic powder
  • 1/2 teaspoon Italian seasoning (or 1/4 teaspoon dried oregano + 1/4 teaspoon dried basil)
  • 2 tablespoons finely chopped fresh parsley (optional, for color and freshness)
  • 1 tablespoon grated lemon zest (optional, for a bright contrast)
  • 1 tablespoon water or milk (as needed) to loosen the filling if very thick
  • 2 teaspoons cornstarch or additional flour (optional, if the mixture feels very loose)
  • Olive oil for brushing or light coating (about 1–2 teaspoons, optional)
  • Coating
  • 1 cup breadcrumbs or gluten-free breadcrumbs (panko-style breadcrumbs yield extra crunch)
    → The coating provides the crispy exterior. For gluten-free diets, use your preferred gluten-free breadcrumbs or crushed GF crackers for extra texture. Toasting the crumbs lightly in a dry pan for a minute or two before mixing with seasonings can deepen flavor and improve browning.
  • 2 tablespoons grated Parmesan cheese
  • 1/2 teaspoon garlic powder
  • 1/2 teaspoon dried Italian seasoning
  • 1/4 teaspoon black pepper
  • 1/2 teaspoon kosher salt
  • 2 tablespoons olive oil
  • Coating mix (optional for binding):
  • Extra 1 tablespoon cornstarch (to mix with breadcrumbs for a drier, crunchier crust)
  • Baking and Serving
  • Marinara sauce for dipping (about 1/2 cup)
    → Marinara provides a classic tangy-sweet contrast to the savory bites. Use a thick, chunky sauce for better dipping; gently warm before serving to keep the bites hot and dippable. If you prefer a garlicky dip, mix a little minced garlic into the warm marinara or offer a quick garlic aioli as an alternative.
  • Olive oil spray or additional olive oil for brushing (optional, to help with browning)
  • Optional Add-ins
  • 1/4 cup chopped fresh parsley or basil (optional)
    → Fresh herbs add color and brightness. Fold into the filling just before shaping or sprinkle over the baked bites as a fresh finish. Use flat-leaf parsley for a clean color or basil for a sweet, aromatic note.
  • 1/4 cup finely chopped sun-dried tomatoes packed in oil, drained (optional)
    → Sun-dried tomatoes introduce a chewy texture and tangy sweetness that pairs well with the cheese. If using oil-packed sun-dried tomatoes, pat dry to reduce extra oil; rehydrate briefly in hot water if very dry before chopping.
  • 1/4 teaspoon red pepper flakes (optional)
    → Adds a gentle heat that contrasts nicely with the creamy cheese filling. Start with a pinch and adjust to taste.

Instructions

  • Preheat your oven to 375°F (190°C) and line a large rimmed baking sheet with parchment paper or lightly grease it with oil to prevent sticking.
    → This temperature promotes even browning of the crispy coating without scorching the filling, and parchment or oil provides a non-stick surface for easy release after baking.
  • Thoroughly drain the cottage cheese: transfer to a cheesecloth or fine sieve and press to remove whey, then pat dry with paper towels; chill briefly if needed.
    → Removing excess moisture prevents a soupy filling that would leak during baking and helps the filling hold its shape.
  • In a large bowl, combine the well-drained cottage cheese, shredded mozzarella, grated Parmesan, lightly beaten egg, flour, salt, pepper, garlic powder, Italian seasoning, and chopped parsley; stir until just combined, avoiding overmixing to keep the filling light.
    → The egg and flour bind the mixture to hold its shape, while the cheese builds the creamy center; overmixing can develop glutens and make the texture tough.
  • If the mixture seems very thick and difficult to scoop, whisk in 1 tablespoon water or milk at a time until it just comes together and can be shaped; avoid adding too much liquid.
    → A slightly loosened binding aids smooth shaping while preventing runny filling that would spread during baking.
  • Fold in optional add-ins such as chopped sun-dried tomatoes or extra herbs if using, distributing evenly with a spatula and keeping the mixture cold to maintain shape.
    → Optional ingredients add color and brightness, but even distribution prevents uneven browning or gaps in the crust.
  • Refrigerate the filling for 10–15 minutes to firm up slightly, which makes shaping easier and helps the bites hold together during coating and baking.
    → Chilling helps set the proteins and creates a stable cold mass for uniform portions.
  • Prepare the coating by toasting breadcrumbs in a dry skillet over medium heat for 1–2 minutes until fragrant and lightly golden, then transfer to a shallow dish and stir in 2 tablespoons grated Parmesan, garlic powder, Italian seasoning, pepper, and kosher salt.
    → Toasting enhances flavor and creates a drier, crisper crust that browns evenly on the baked bites.
  • If using the optional extra binding, whisk 1 tablespoon cornstarch with the breadcrumb mixture in a separate small bowl to create a drier crust that clings to the filling.
    → The cornstarch absorbs moisture from the filling and improves crust integrity during baking.
  • Scoop the chilled filling and roll each portion between your palms into compact balls about 1 inch (2.5 cm) in diameter; place each ball on the prepared sheet, leaving about 1 inch of space between bites.
    → Uniform spheres ensure even cooking and consistent texture across all bites.
  • Roll or press each cheese ball in the breadcrumb coating, turning to fully enrobe, then set coated bites on the sheet; lightly press to help the crust cling and prevent cracking.
    → Proper adhesion prevents the crust from flaking off and ensures a uniform, crunchy exterior.
  • Lightly spray the coated bites with olive oil or brush with a thin layer to promote golden browning; avoid pooling oil, which can make the crust soggy.
    → Oil encourages a crisp, attractive crust and even browning during baking.
  • Bake in the preheated oven for 14–18 minutes, rotating the pan halfway through for even browning; the bites are ready when the coating is deeply golden and the filling is set.
    → Even heat distribution and turning prevents hot spots; a fully set filling ensures the cheese center remains intact when bitten.
  • Optional finishing: if you desire extra color and crunch, switch to broil for 1–2 minutes, watching closely to prevent burning; remove as soon as the crust is deeply browned.
    → A brief broil intensifies browning and adds texture, but requires careful monitoring.
  • Let the bites rest on the sheet for 5 minutes, then transfer to a serving platter; resting allows the filling to firm slightly, making them easier to pick up without tearing the crust.
    → Resting helps set the structure so guests can dip and bite with confidence.
  • Serve with warm marinara sauce for dipping; gently rewarm the sauce in a small pot or microwave to a dippable consistency before serving.
    → The tangy tomato contrast enhances the cheese flavors and the warm sauce keeps the bites at optimal temperature for dipping.
  • Store any leftovers in an airtight container in the refrigerator for up to 2 days or freeze for longer storage; reheat in a 350°F (175°C) oven for 6–8 minutes until the coating re-crisps.
    → Proper storage preserves texture and flavor, and reheating restores the crisp exterior.

Notes

These crispy cottage cheese mozzarella bites are a savory, snackable treat with a creamy interior and a golden, crunchy crust. To prevent a soggy center, drain the cottage cheese thoroughly and press out as much whey as possible (ideally in cheesecloth or a fine sieve) and pat dry after pressing. Use low-moisture mozzarella and keep the filling cold before shaping to help it hold together.

Flavors come from the binding mix: the egg and a small amount of all-purpose flour or a gluten-free alternative (cornstarch or rice flour) help the filling set and soak up excess moisture. If the mixture seems very loose, whisk in an extra teaspoon or two of cornstarch; if too thick, loosen with a drizzle of water or milk. Include garlic powder, Italian seasoning (or oregano and basil), salt, pepper, chopped fresh parsley (optional), and a hint of lemon zest (optional) for brightness.

Coating for maximum crunch: combine breadcrumbs or gluten-free breadcrumbs with grated Parmesan, garlic powder, Italian seasoning, pepper and salt. Lightly toast the crumbs in a dry pan to deepen flavor and improve browning, then mix with the coating. Dredge the shaped filling in the coating and press gently to ensure adhesion; a light olive oil spray on the coated bites helps achieve a crisp crust. If you like a drier crust, stir in an extra tablespoon of cornstarch with the breadcrumbs.

Baking and serving tips: bake on a parchment-lined sheet in a hot oven (about 400°F / 200°C) until deep golden and crisp, roughly 15–20 minutes, turning halfway if needed. Serve warm with marinara sauce for dipping (about 1/2 cup). For an extra punch, mix a bit of minced garlic into the warm marinara or offer a quick garlic aioli on the side. A light brush of olive oil before baking can enhance browning.

Make-ahead and variations: these bites freeze well—shape and coat, freeze on a tray, then transfer to an airtight container. Bake from frozen, adding 3–5 minutes to the bake time. Optional add-ins like finely chopped fresh parsley or basil or sun-dried tomatoes add color and flavor; for a gentle heat, add red pepper flakes.

Gluten-free and pantry notes: to keep this recipe gluten-free, use gluten-free breadcrumbs and ensure any starch in the filling (cornstarch or gluten-free flour) is certified gluten-free. If you’re not avoiding gluten, regular breadcrumbs work fine. For best results, pat dry the cheeses and maintain a cold filling before shaping to minimize oozing during baking.

Tips

Prep and moisture management

  • Drain cottage cheese very well: press in cheesecloth or a fine sieve to remove as much whey as possible. The drier the filling, the less moisture released during baking, helping the bites hold their shape.
  • Use low-moisture mozzarella and pat it dry after shredding. Keep the filling cold before shaping to prevent the cheese from smearing.
  • If the filling feels very thick, whisk in a teaspoon or two of water or milk to loosen it; if it’s too loose, stir in an extra 1–2 teaspoons of cornstarch or flour to help bind.

Flavor and texture boosters

  • Add lemon zest and chopped parsley to brighten the filling, folding them in just before shaping for fresh color and aroma.
  • Toast the breadcrumbs lightly in a dry skillet for 1–2 minutes to deepen flavor and improve browning.
  • For a little heat, sprinkle in 1/4 teaspoon red pepper flakes and adjust to taste.

Shaping and coating tips

  • Chill the filling for 15–20 minutes before shaping to help it hold its form during coating and baking.
  • Keep your hands or spoons lightly moistened or oiled to prevent sticking when forming bites, especially if the filling is slightly loose.
  • Pre-dill or lightly dust the formed bites with a bit of extra cornstarch or flour if the surface is very sticky before coating.

Breading and crust strategy

  • Toast breadcrumbs with the Parmesan and seasonings, then mix in olive oil to create a cohesive crust that browns evenly.
  • If you want an even crisper crust, consider a light double-dredge: first coating in a thin layer of coarsely crumbed mixture, then a quick second coating of breadcrumbs.
  • For gluten-free diets, use gluten-free breadcrumbs or crushed GF crackers; you can add a touch more cornstarch to help the crust stay dry and crunchy.

Baking and browning

  • Preheat the oven to 400°F (200°C). Line a baking sheet with parchment or a silicone mat and space bites 1–2 inches apart for even browning.
  • Lightly brush or spray the bites with olive oil to promote browning and a crisp crust; rotate the pan halfway through baking for uniform color.
  • If you want extra crispness, use convection and lower the temperature by about 25°F (15°C), then bake slightly longer until golden.
  • Bake until the crust is deeply golden and the filling is set, typically 15–20 minutes, depending on size. If the filling puffed and looks loose, give them a few extra minutes, watching closely to avoid burning.

Serving, sauce, and nacho-style options

  • Serve with warm marinara. For a garlicky dip, blend a touch of minced garlic into the warmed sauce or offer a quick garlic aioli as an alternative.
  • Keep marinara warm in a small pot or ramekin for dipping; a chunky sauce helps keep bites from sogging.
  • Garnish with extra chopped parsley or basil after baking for a fresh finish and color.

Make-ahead, storage, and freezing

  • Unbaked shaped bites can be chilled up to 24 hours before coating and baking for convenience. Bake directly from the fridge, adding a couple of minutes if needed.
  • To freeze unbaked bites, arrange on a parchment-lined tray until solid, then transfer to a freezer bag. Bake from frozen, adding 5–8 minutes to the bake time.
  • Store baked bites in an airtight container in the refrigerator for 2–3 days. Reheat on a parchment-lined sheet at 350°F (175°C) for 5–7 minutes until hot and crisp.

Optional add-ins and variations

  • Fold in 1/4 cup chopped sun-dried tomatoes (drained) for a tangy, chewy contrast; pat dry if oil-packed to minimize extra oil.
  • Use 1/4 cup chopped fresh parsley or basil for color and brightness; sprinkle on top after baking for a fresh finish.

FAQ

What are Crispy Cottage Cheese Mozzarella Bites?

A bite-sized snack made by combining creamy cottage cheese with melting mozzarella, then coating with seasoned breadcrumbs and baking or air-frying until golden and crispy. They’re perfect as an appetizer or a fun party bite.

What ingredients do I need?

Common ingredients include:

  • Drained cottage cheese
  • Shredded mozzarella
  • Eggs (for binding)
  • Breadcrumbs (panko for extra crunch)
  • Grated Parmesan (optional, for extra flavor)
  • Seasonings: garlic powder, onion powder, Italian seasoning, salt, pepper
  • Flour or cornstarch for dredging (optional, helps coating)
  • Oil spray or a little oil for baking
How do you make them crispy?

Drain the cottage cheese well to remove excess moisture. Mix with mozzarella and seasonings. Dredge the formed bites in flour or cornstarch, dip in beaten egg, then roll in seasoned breadcrumbs (you can add a little cheese to the coating). Chill briefly to set, then bake or air-fry until golden and crisp. A light spray of oil helps with browning.

Can I bake them or use an air fryer?

Yes.

  • Oven: Preheat to 425°F (220°C). Bake on a parchment-lined sheet 12–15 minutes, flipping once, until golden.
  • Air fryer: Preheat to 400°F (200°C). Air fry for 8–10 minutes, shaking halfway, until crisp.
Can I use only cottage cheese or only mozzarella?

For best texture and melt, a combination works well. Cottage cheese provides moisture and moisture-binding while mozzarella adds stretch. If you must, you can substitute with ricotta or cream cheese mixed with shredded cheese, but results will differ. Drain cottage cheese thoroughly to avoid sogginess.

Are these bites gluten-free?

They can be gluten-free if you use gluten-free breadcrumbs or crushed gluten-free crackers. You can also use almond flour or crushed cornflakes as an alternative coating. Ensure all components used are labeled gluten-free if needed.

How should I store leftovers?

Store cooled bites in an airtight container in the refrigerator for up to 3–4 days. Reheat in the oven or air fryer until hot and crisp again. You can also freeze them before or after cooking (see below).

Can I freeze these bites?

Yes. You can freeze them shaped and unbaked on a parchment-lined tray, then transfer to a bag or container. Bake from frozen, adding 3–5 minutes to the bake time, or air-fry longer until hot and crispy. If you bake first and then freeze, reheat in the oven to restore crispiness.

Is there a dairy-free or vegan version?

Yes, with substitutions. Use dairy-free cottage-cheese-alternative or mashed firm tofu for the filling, and plant-based mozzarella if available. Use dairy-free breadcrumbs and a plant-based egg substitute or aquafaba/water as the binder. The texture will be slightly different, but can still be delicious and crispy.

What dipping sauces pair well?

Good options include marinara sauce, garlic aioli, ranch, honey mustard, buffalo sauce, or a simple marinara with a sprinkle of Parmesan. A fresh herb yogurt dip also complements them nicely if dairy is allowed.

Can I customize spices or add-ins?

Absolutely. Try adding dried oregano, red pepper flakes for heat, smoked paprika for depth, or finely chopped herbs (parsley, basil). You can also mix in finely grated Parmesan into the coating or add a pinch of grated lemon zest for brightness.

Introduction / Hook

Imagine a bite-sized cloud of comfort that bursts with creamy, savory goodness the moment you sink your teeth in. Mashed Potato Cheese Puffs are the kind of treat that makes a weeknight feel like a celebration and a party spread feel just a little cozier. The exterior hints at a delicate crisp, a golden kiss that gives way to a pillowy interior where melted cheese threads and starch-sweet potato notes mingle in harmony. The aroma—a warm, inviting scent of roasted potato, toasty edges, and a subtle dairy richness—drifts through the house like a hug. This dish is not merely a snack; it’s a memory in the making, the kind of recipe you reach for when you want to impress without spending hours in the kitchen. There is something almost magical about transforming humble mashed potatoes into an ensemble of light, airy puffs that pop with personality, turning everyday leftovers or pantry staples into a show-stopping bite that tastes both familiar and utterly new.

In the mouth, the contrast is irresistible: a crisp crust that gives way to a tender, cheesecake-velvet interior, punctuated by pockets of melted cheese that string and stretch in the most satisfying way. The flavor is both comforting and slightly mischievous—the kind of bite you want to share, then secretly stash for yourself because it’s just that good. These puffs are forgiving, adaptable, and wonderfully shareable, making them a natural fit for gatherings, game nights, or a cozy afternoon snack with a cup of tea or coffee. The more you think about it, the more the idea of turning simple mashed potatoes into something so lively and delicious feels like a small culinary miracle—proof that comfort foods can surprise you with texture, aroma, and a new dimension of indulgence.

And there’s a playful versatility to these little delights. They can be enjoyed as a solo nibble, served with a bright herb dip or a tangy yogurt-based accompaniment, or arranged into a platter for a crowd where guests can pick and choose their favorites. They lend themselves to creativity: a sprinkle of chives or scallions for color and sharp bite, a whisper of paprika for warmth, or a drizzle of a light sesame–garlic glaze that nudges the flavor into a modern, global direction. The result is an irresistible fusion of old-world potato comfort with contemporary snack-craft flair, a dish that feels familiar enough to be instantly comforting and adventurous enough to keep guests guessing what delightful twist comes next.

The Story Behind the Dish

Potatoes have long been a staple of kitchens around the world, a humble canvas that invites invention. From the fields of Europe to the shores of the Americas, cooks learned early on that this versatile tuber could be transformed into everything from creamy purées to crisp, golden morsels. Mashed Potato Cheese Puffs emerge from that tradition as a playful evolution—a way to honor the everyday mashed potato while elevating it into a snack-page favorite. The idea is simple: embrace the softness and sweetness of well-whipped potatoes and pair it with something that sings—cheese, with its melting, savor-rich personality—then shape the result into little spheres or puffs that crackle and ooze with warmth when they meet the heat of the oven or a pan.

In many homes, leftovers become opportunities rather than obligations. A batch of mashed potatoes leftover from a family meal gains a new life here, transformed into a party-worthy bite that feels indulgent without being heavy. The concept also nods to the broader family of mashed or baked potato bites found across cuisines—little pockets of comfort that can stand proudly on a brunch table, a kids’ lunch spread, or a cozy movie-night lineup. The cheese element isn’t just about flavor; it’s a binding, glistening glue that binds the texture into something cohesive and irresistible. The result is a dish that feels both familiar—because it is built on mashed potatoes—and fresh—because of its airy texture, cheese pull, and snackable size.

There’s a gentle nostalgia in this dish—the kind of aroma that brings back Sunday dinners, late-night comfort-food cravings, and the joy of turning plain ingredients into something special. Yet Mashed Potato Cheese Puffs aren’t about nostalgia alone. They’re about modern practicality and playful presentation: snacks that can be prepared ahead, plated with flair, and shared without fuss. The origin story may be modest, but the impact is memorable. It’s the culinary equivalent of discovering that a well-loved sweater can be reimagined into a chic, modern piece of clothing; it feels both familiar and exciting at once.

Why You’ll Love This Recipe

  • Crowd-pleasing versatility: These puffs work beautifully as an appetizer, a canapé at a party, a game-day nibble, or a comforting bite for a movie night.
  • Short on time but big on flavor: The concept is fast to assemble and delightful to bite into, delivering indulgence without a long, complicated process.
  • Adaptable to different diets and tastes: Cheese-forward and creamy by nature, the dish invites easy substitutions—vegan, dairy-free, gluten-free, or lower-carb options—without compromising the charm.
  • Texture contrast that shines: A crisp exterior gives way to a tender, airy interior with pockets of melty cheese, creating an irresistible mouthfeel from first crunch to last chew.
  • Perfect for any season: Light and snackable in warmer months, cozy and comforting in cooler seasons, they easily slot into spring picnics, autumn gatherings, or winter celebrations.
  • Make-ahead potential: The concept translates well to make-ahead hosting ideas, enabling you to assemble or partially prepare portions in advance for easier entertaining.
  • Playful presentation: Shaped into bite-sized puffs, they look inviting on a platter—fun, elegant, and shareable—adding a touch of whimsy to your table.

Flavor Profile & Texture

At their core, Mashed Potato Cheese Puffs deliver a symphony of mild, comforting flavors with an accent of cheese that lingers pleasantly. The potato base offers a gentle sweetness and earthiness—a nod to the pantry and the garden—from which the dish draws its foundation. Melted cheese threads weave through the centers, offering pockets of gooey richness that stretch with every bite, creating that classic, comforting cheese pull you crave. The exterior delivers a crisp, light crust, a textural contrast that makes the inside feel even more cloud-like and delicate. The crust’s toasty notes add a subtle nutty depth, which balances the potato’s gentle creaminess and the cheese’s savory glaze.

A carefully chosen cheese or a blend can shift the flavor subtly—from a milder, buttery melt to a more pronounced sharpness that punctuates the potato’s sweetness. If you favor a more decadent profile, a touch of creaminess from the interior can feel almost custard-like, while a sharper cheese notes lend a modern edge. Herbs, spice, or a hint of garlic or onion powder can lift the aroma without overpowering the potato’s natural character, providing a fragrant foreground before the cheese notes take center stage. The overall experience is one of harmony: a balanced bite where the soft, creamy interior and the crisp, golden shell flirt with each other, and the cheese glistens just beneath the surface, inviting you to pull and savor in a single, satisfying moment.

Texture-wise, think of velvet-smooth mashed potatoes folded around a molten core, then wrapped in a delicate jacket of crispy crust. The surface crackles gently as you bite, releasing a puff of steam and a whisper of toasty aroma. Inside, the potato retains its lightness, never dense, never heavy, but with enough structure to hold its shape as you chew. This interplay between crust and crumb is what makes Mashed Potato Cheese Puffs so addictive: they’re substantial enough to feel indulgent, yet light enough to leave room for more bites and more dips. The cheese acts as both star and glue—pulling the puffs into a creamy, satisfying finish that lingers on the palate after the initial crisp fade.

Occasions & Pairings

  • Everyday gatherings: A relaxed addition to weeknight dinners, potlucks, or casual parties where you want to bring something comforting yet visually appealing.
  • Holiday spreads: They slot in beautifully as an unexpected but welcome finger food, offering a different texture amid a sea of more traditional treats.
  • Brunch or tea-time snacks: Their soft interior and buttery aroma pair well with a bright salad, a fresh herb yogurt, or a light sparkling beverage.
  • Kids’ favorites: A fun, bite-sized option that encourages little hands to grab and explore textures, while offering a familiar, comforting flavor profile.
  • Pairings (general, non-specific): They shine with a fresh herb dip or a cool, tangy yogurt-based accompaniment that balances the richness; a crisp green salad or lightly dressed vegetables can provide a refreshing contrast; a simple squeeze of citrus or a small herb oil can lift the overall balance.

Tips, Variations & Substitutions

  • Cheese options: A versatile protagonist, cheese choice can shift the character of the dish. Mild cheeses yield a creamy, gentle melt, while sharper varieties bring a more assertive, tangy note. A blend can offer both smooth melt and a bright finish.
  • Vegan and dairy-free: Use plant-based cheeses and a dairy-free binding to maintain the creamy feel without dairy. If using a vegan cheese, you may want to consider a touch of plant-based milk or cream substitutes to preserve the texture’s softness.
  • Gluten-free considerations: The base can remain naturally gluten-free if you don’t introduce wheat-based binders. If you include any binders or binding agents, opt for gluten-free alternatives to preserve the dish’s accessibility.
  • Herbal and spice twists: Fresh chives, dill, or parsley add color and a lift of brightness. A hint of garlic powder, paprika, or lemon zest can brighten the profile without overpowering the potato’s natural sweetness.
  • Texture play: For a lighter crust, aim for a very thin outer layer that crisps evenly. For a heartier bite, a slightly thicker exterior can deliver a more pronounced crunch with each bite.
  • Regional twists: Anise-like fennel seed, smoked paprika, or a touch of cumin can evoke regional flavors while preserving the dish’s core comfort-character.
  • Make-ahead concept: The idea scales well for entertaining. You could prepare portions in advance and bake or warm them later to maintain their crisp exterior and soft interior.

Storage & Make-Ahead Ideas

Leftovers are not a problem with this dish; they invite a second life as a tasty, reheated snack or a crunchy addition to a casual meal. If you anticipate having extra, consider storing the prepared portions in a cool, airtight container for a short period, keeping the texture intact as much as possible. When it comes time to reheat, gentle warming helps maintain the delicate interior softness while re-energizing the outer crispness. The beauty of this concept is its forgiving nature: even after a night in the refrigerator, a short re-friction of heat can restore that pop of texture and the cheese’s glossy, inviting sheen. For make-ahead planning, you can portion the mashed-potato canvas into molds or puffs and refrigerate them before the final bake, allowing you to finish them with minimal effort when guests arrive or a craving strikes.

For freezing, the general principle is to freeze before the final bake, preserving shape and texture. Then, bake or reheat directly from frozen to maintain crispness and ensure a hot, melted center. When serving after freezing, a light re-crisping can help restore the original texture, while the interior remains soft and creamy. This approach makes Mashed Potato Cheese Puffs an ideal option for holiday prep, parties, or any week when you want to pull out something delightful with minimal last-minute fuss.

Fun Facts & Trivia (Optional)

Potato lore runs deep in many cultures, and gnocchi—another beloved potato-based treat—offers a reminder that humble ingredients can inspire extraordinary textures and forms. While gnocchi relies on a doughy shape and bite, Mashed Potato Cheese Puffs celebrate the simpler, more modern concept of transforming leftovers into a playful, snackable form. The use of cheese as a unifying thread echoes centuries of cheese-making cultures, where the dairy component isn’t just indulgence but a tool for binding, flavor, and texture. The idea of “puffs” taps into pastry technique and fry or bake culture—where light, airy interiors emerge from careful handling of starches and moisture. In that sense, these puffs are a pastry-inspired snack without the complexity of a traditional pastry, a bridge between homey mashed potatoes and the world of bite-sized, shareable treats.

In kitchens around the world, the urge to repurpose leftovers into something new is a testament to culinary ingenuity. Mashed Potato Cheese Puffs capture that spirit with elegance and comfort, reminding us that good food is often about the joy of transformation—how simple ingredients can become memorable moments when shaped, heated, and shared with friends and family. And because the dish is as adaptable as it is comforting, it lends itself to countless micro-stories: a whispered experiment in a quiet kitchen, a lively improvisation at a bustling party, or a nostalgic nod to meals that gathered loved ones around a table long after the plating had been cleared. The puffs are more than a snack; they’re a tiny celebration of improvisation, texture, and taste that invites everyone to lean in and enjoy the magic of simple ingredients made extraordinary.

Ingredients

  • Mashed Potato Base
    • – 2 cups mashed potatoes, cooled
      → These mashed potatoes provide the soft, starchy base that binds with cheese and egg to form light, airy puffs. Use leftover mashed potatoes or freshly mashed and cooled so they hold shape when mixing. If your potatoes are very wet, drain or press to remove excess moisture before mixing.
    • – 1 cup shredded cheese (sharp Cheddar or Gruyère)
      → Cheese provides melt and flavor. Use a sharp Cheddar for bold taste or Gruyère for a nutty, gooey texture. Shred by hand for best melt and avoid pre-shredded blends that contain anti-caking agents.
    • – 2 tablespoons unsalted butter, melted
      → Butter adds richness and helps create a slight crust as the puffs bake. Use unsalted butter; melt and cool slightly before mixing to prevent cooking the egg.
    • – 1/4 cup milk or heavy cream, warmed
      → Adds moisture and helps bind the mixture. Warm slightly so it blends smoothly into the potato mixture without cooling it down.
    • – 1 large egg, lightly beaten
      → Acts as a binder and helps trap air for a light, puffier texture. Use at room temperature for easier incorporation.
    • – 1/3 cup all-purpose flour
      → Provides structure to the mixture and helps it hold shape when baking. Start with 1/3 cup and add a tablespoon at a time if the mixture feels too loose.
    • – 1/2 teaspoon salt
      → Enhances overall flavor and balances the richness of the cheese and butter. Taste and adjust after adding cheese.
    • – 1/4 teaspoon black pepper
      → Adds gentle heat and depth. Freshly ground pepper is best for aroma.
    • – 1/2 teaspoon garlic powder or 1 small garlic clove, minced (optional)
      → Garlic adds savory depth. If using fresh garlic, sauté it briefly in the melted butter until fragrant to mellow its bite before mixing. If using powder, add directly to the mix.
    • – 1 tablespoon chopped fresh chives or green onions (optional)
      → Fresh herbs brighten the flavor and give color. Stir in at the end of mixing to retain their fresh taste.
    • – 1/4 teaspoon paprika or smoked paprika (optional)
      → Adds a hint of warmth and color to the puffs. Use mild paprika if you prefer a subtle finish.
  • Optional Add-ins
    • – 1/2 cup cooked bacon bits (optional)
      → Bacon adds smoky savoriness and a bit of crunch. Distribute evenly by gently folding through the base; pat dry after cooking to prevent sogginess.
    • – 1/2 cup grated Parmesan cheese (optional)
      → Parmesan contributes a sharp, salty bite that complements the melted cheese. If used, consider reducing the salt slightly in the base.
    • – 1/2 cup breadcrumbs for coating (optional)
      → Coating with breadcrumbs creates a crisp crust on the baked puffs. Lightly spray puffs with oil or brush with a little butter before baking for maximum crunch.

Instructions

  • Preheat your oven to 375°F (190°C) and grease a 12-cup muffin tin or line with paper liners to prevent sticking.
    → A hot oven ensures the puffs rise properly and the centers set, while greasing or lining prevents sticking for clean removal.
  • Check the 2 cups mashed potatoes for moisture and spread them on a sheet to cool; if very wet, press between clean towels to remove excess moisture.
    → Excess moisture will make the dough loose and cause the puffs to collapse or be heavy; drying the potatoes helps the mixture hold shape.
  • Melt 2 tablespoons unsalted butter in a small saucepan over low heat; if using fresh garlic, add 1 minced garlic clove and sauté 30–60 seconds until fragrant, then remove from heat.
    → Melting butter provides fat to enrich the dough and the garlic, when used fresh, flavors without burning; cooling slightly prevents cooking the egg later.
  • Stir the 1 cup shredded cheese into the cooled mashed potatoes until evenly distributed, using a wide spatula to cut through and fold; use freshly grated cheese for best melt.
    → Even distribution of cheese ensures pockets of melt throughout the puffs and prevents dry spots; grated by hand melts more smoothly than pre-shredded varieties.
  • Whisk 1 large egg in a medium bowl; gradually whisk in 1/4 cup warmed milk or heavy cream to temper the egg, then whisk in the cooled garlic-butter mixture until the mixture is smooth.
    → Tempering the egg prevents scrambling and the warm dairy helps the dough come together without cooling the mashed potatoes too much.
  • Stir in 1/3 cup all-purpose flour, adding 1 tablespoon at a time, until the mixture just begins to hold together; if the dough looks loose, add additional flour in small increments.
    → The flour provides structure to the puffs so they hold their shape during baking; adding gradually avoids over-drying the dough.
  • Season the base with 1/2 teaspoon salt, 1/4 teaspoon black pepper, and 1/4 teaspoon paprika; if using garlic powder, add 1/2 teaspoon now; if using 1 tablespoon chopped fresh chives or green onions, fold in at this point.
    → Salt and pepper balance the richness and depth, paprika adds color and warmth, garlic powder boosts savoriness, and chives give brightness.
  • If desired, fold in 1/2 cup cooked bacon bits or 1/2 cup grated Parmesan cheese; distribute evenly by gentle folding to avoid breaking the potatoes.
    → Optional add-ins enhance texture and saltiness; folding evenly ensures consistent flavor in every puff.
  • Optionally, prepare a coating by placing 1/2 cup breadcrumbs in a shallow dish; when using breadcrumbs, roll each portion of dough in the crumbs to form a light crust, then place seam-side down in the muffin cups.
    → A crisp crust adds contrast to the soft interior and helps prevent the puffs from sticking to the pan.
  • Scoop or portion the potato-cheese mixture into the prepared muffin cups, filling about 2/3 full; level the tops with the back of a spoon to promote even rise.
    → Uniform portions ensure even baking and consistent texture across all puffs; gentle leveling prevents domed tops that bake unevenly.
  • Bake in the preheated oven for 18–22 minutes, until the puffs are golden around the edges and feel set in the center; rotate the pan halfway through for even browning.
    → Proper heat and time set the structure without drying the interior; rotating prevents hot spots from causing uneven color.
  • Let the puffs rest in the tin for 5 minutes, then transfer to a wire rack to cool slightly before serving.
    → Resting helps the structure set and makes handling easier; cool briefly to avoid steam making the crust soggy.
  • Serve warm as a savory snack or accompaniment, optionally sprinkling with additional chives or paprika for color and aroma.
    → Serving warm preserves the cheese’s melt and the puff’s airy texture; fresh herbs brighten flavor and appearance.

Notes

These mashed potato cheese puffs are a savory, crowd-pleasing bite built from cooled mashed potatoes bound with cheese, egg, and a touch of flour for structure. The result is light, airy puffs with melted cheese in every bite and a hinted richness from the butter.

You can customize them by adding your favorite herbs (like chives or green onions), extra Parmesan for a sharper bite, or cooked bacon bits for smoky savoriness. If the mixture feels loose, fold in a little more flour or breadcrumbs to help it hold shape. For a crisp crust, coat the puffs with breadcrumbs before baking and brush them with a little melted butter or oil.

These puffs bake in a hot oven until the outsides are lightly golden and the centers are set; turning once halfway ensures even browning. Use parchment on the baking sheet for easy release, and avoid overcrowding so they puff rather than steam.

They freeze well—shape and freeze on a tray, then transfer to a bag. Reheat from frozen in a 350°F (175°C) oven until hot and crisp, about 12–15 minutes. They also reheat nicely in a toaster oven for smaller batches.

Serving suggestions: pair with a dollop of sour cream or a quick chive yogurt dip, or serve alongside a green salad or roasted vegetables for a complete meal.

Gluten-free note: If you need to keep them gluten-free, substitute a gluten-free all-purpose flour or cornstarch for the all-purpose flour called for in the base, and ensure any add-ins like breadcrumbs are gluten-free. Always check the ingredients of any toppings to confirm they are gluten-free if you have gluten intolerance.

Tips

Tips for Perfect Mashed Potato Cheese Puffs

  • Cool and drain your mashed potatoes well. Use cooled, starchy potatoes and press out excess moisture so the mixture binds without becoming gluey.
  • Choose cheese wisely. Sharp Cheddar gives bold flavor, Gruyère adds a nutty melt. Shred by hand for best melt; avoid pre-shredded blends that contain anti-caking agents.
  • Use melted unsalted butter and let it cool slightly before mixing to prevent scrambling the egg and to keep the mixture cohesive.
  • Warm the milk or cream so it blends smoothly without chilling the potatoes; avoid adding cold liquid that would slow binding.
  • Let the egg be at room temperature for easier incorporation; don’t overmix once the flour is added to keep the puffs light.
  • Start with 1/3 cup flour and add a tablespoon at a time if the mixture is too loose; you want a scoopable, slightly stiff dough that holds its shape.
  • Season gradually. Salt in the base and taste after adding cheese, since cheese contributes saltiness; adjust as needed.
  • If using garlic, choose your method: fresh garlic should be sautéed briefly in the butter to mellow its bite; garlic powder can be added directly to the mix.
  • Fresh herbs like chives or green onions add brightness; fold them in at the end to maintain color and aroma.
  • Optional add-ins should be dry. Cooked bacon bits should be patted dry to avoid soggy puffs; Parmesan adds sharpness—consider reducing salt if using it.
  • For a crisp crust, coat puffs with breadcrumbs. Lightly spray with oil or brush with a little butter before baking.
  • Shaping matters. Use a cookie scoop or two spoons for uniform portions; keep hands lightly oiled or moistened to prevent sticking.
  • Bake in a preheated oven at 375–400°F (190–205°C) until puffs are puffed, set, and golden (about 12–18 minutes). Avoid overbaking to keep them tender inside.
  • Let the batter rest 5–10 minutes before shaping to help the flour hydrate and improve binding.
  • Make ahead notes: base can be prepared and chilled up to 24 hours; shape and bake from cold for convenient serving. Leftovers store in the fridge for 2–3 days and reheat in a 350°F (175°C) oven to regain crispness.
  • Freezing tip: freeze formed puffs on a tray, then transfer to a bag; bake from frozen, adding 3–5 minutes to the bake time.

FAQ

What are Mashed Potato Cheese Puffs?

Mashed Potato Cheese Puffs are bite-sized, airy snacks made by blending fluffy mashed potatoes with cheese and a binding agent, then shaping into small puffs and baking or frying until golden and crispy on the outside.

What ingredients do I need to make Mashed Potato Cheese Puffs?

Base ingredients:

  • 2 cups cold mashed potatoes
  • 1 cup shredded cheese (cheddar, mozzarella, or a mix)
  • 1 large egg
  • 1/4 cup all-purpose flour or breadcrumbs
  • 1/2 teaspoon salt
  • 1/4 teaspoon pepper

Optional add-ins and variations:

  • Chopped green onions or herbs, garlic powder, paprika
  • A splash of milk or cream if the mixture is too stiff
  • Oil for brushing or spraying (for crispier results)

You can adapt with dairy-free cheese and an egg substitute if needed.

Can I use leftover mashed potatoes?

Yes. Leftover mashed potatoes work great. They are already seasoned and fluffy. If they’re a bit dry, mix in a spoonful of milk or cream and a touch more cheese to help binding. If they’re very wet, add a little extra flour or breadcrumbs until the mixture holds its shape.

What cooking method works best for fluffy, crispy puffs?

Two reliable methods:

  • Oven bake: Preheat to 425°F (220°C). Shape puffs, place on a parchment-lined sheet, brush with oil, and bake 15–20 minutes, turning once, until golden.
  • Air fryer: Preheat to 380–400°F (193–204°C). Cook for about 10–12 minutes, shaking halfway, until crispy and lightly browned.

You can also shallow-fry in oil for extra crispness, but baked or air-fried puffs are lighter.

How should I shape and coat the puffs?

Shape into small mounds or 1-inch balls using a spoon or your hands. If you want extra crunch, roll lightly in breadcrumbs or additional grated cheese before baking. Place on a parchment-lined tray, spacing evenly. Lightly spray or brush with oil to help browning.

How long do they keep and how do I store them?

Storage tips:

  • Refrigerate leftovers in an airtight container for up to 2 days.
  • Reheat in a 375°F (190°C) oven or air fryer until hot and crispy (about 5–8 minutes in the oven, 5–7 in the air fryer).

For longer storage, freeze them either baked or unbaked (see the freezing section).

Can I freeze Mashed Potato Cheese Puffs, and how do I reheat them?

Yes. You can freeze them:

  • Unbaked: Assemble puffs on a tray, freeze until solid, then transfer to a freezer bag. Bake from frozen, adding 5–8 minutes to the bake time.
  • Baked: Let cool completely, then freeze in an airtight container or freezer bag. Reheat in a 350°F (175°C) oven until warmed through, about 10–15 minutes, or in an air fryer until heated.

Either way, consume within 2–3 months for best quality.

What variations can I try?

Flavor ideas:

  • Cheese swap: use a mix of cheddar and pepper jack, or add parmesan for a sharper bite.
  • Herbs and spice: minced chives, parsley, garlic powder, paprika, or dill.
  • Meaty twist: add crispy bacon bits or diced ham.
  • Vegetarian/vegan option: skip the egg and use a flaxseed or chia seed “egg” binder with dairy-free cheese.

For gluten-free options, substitute all-purpose flour with cornstarch, almond flour, or a gluten-free flour blend.

What are common mistakes and how can I avoid them?

Common issues and fixes:

  • Mixture too loose: add a bit more flour or breadcrumbs to help binding.
  • Too dry: whisk in a splash of milk or cream and a little cheese to moisten.
  • Flat puffs: ensure the mixture is well chilled before shaping, and don’t overcrowd the pan.
  • Sticking to the tray: use parchment or lightly greased foil.

Using cold mashed potatoes helps the mixture hold shape better than warm potatoes.

Introduction / Hook

Imagine a soft, cloud-like muffin that bursts with the bright sweetness of sun-ripened strawberries and a whisper of creamy tang in every bite. Soft Strawberry Cream Cheese Muffins are the kind of treat that turns a simple morning into a mini celebration. The crust gives you a delicate crack as you break through, while the interior stays tender and moist, almost cake-like, with ribbons of velvety cream cheese tucked into the center like little treasure chests. The aroma alone — warm vanilla, fruity strawberry, a hint of citrus zest — can wake a sleepy household and coax smiles from even the dullest mornings. These muffins strike a perfect balance: a polite sweetness that isn’t cloying, a luxurious cream cheese core that lends richness without heaviness, and a texture that remains springy long after they emerge from the oven. They’re the kind of recipe that feels comforting and familiar, yet carries a touch of bakery-inspired finesse that makes you feel like you’re serving something a little special for yourself and your loved ones.

The Story Behind the Dish

Strawberries and cream have long stood as a symbol of indulgence and simple luxury, a pairing that crops up in markets, festive brunches, and memories of sunny summers. The idea of infusing that familiar duo into muffins is a natural evolution: a portable, everyday treat that preserves the romance of a dessert while offering everyday practicality. The cream cheese swirl inside these muffins echoes the dreamy fillings of classic pastries, reimagined for a breakfast table or an afternoon tea. This recipe nods to centuries of baked goods that blend fruit and dairy, from early rustic breads filled with berries to the soft, pillowy cakes enjoyed at afternoon gatherings. It’s a modern homage to that lineage, transformed into a muffin style that’s perfectly suited for on-the-go mornings, school lunches, or a cozy weekend brunch at home. The result is a recipe that feels both timeless and current: a comforting flavor profile that can be dressed up for a party or kept simple for a lazy Sunday, all while delivering a sense of nostalgia with every bite.

Why You’ll Love This Recipe

  • Quick and forgiving: A straightforward batter with ample room for personal tweaks, designed for busy mornings and weekend baking alike.
  • Balanced sweetness: Fresh strawberries provide natural sweetness and brightness, while the cream cheese core adds a creamy, tangy contrast that elevates the muffin from ordinary to memorable.
  • Moist, tender crumb: The batter yields a soft, fluffy interior with a lightly springy texture that stays moist hours after baking.
  • Beautiful presentation: The strawberry ridges and creamy centers create a visually appealing muffin that looks as good as it tastes.
  • Versatile for occasions: Perfect for breakfast gatherings, brunch buffets, kid-friendly snacks, or a comforting treat with tea or coffee.
  • Make-ahead friendly: The batter can be prepared in advance and baked later, or muffins can be frozen for future enjoyment.

Flavor Profile & Texture

These muffins bring together a symphony of flavors that feel both fresh and comforting. The first bite presents a gentle sweetness from the strawberries, with sun-warmed berry notes and a hint of citrus or vanilla that brightens the profile. As you chew, the cream cheese center reveals a lush, creamy core that offers a mild tang and a velvety texture, creating a delightful contrast with the crumb of the muffin itself. The outer crust is just a touch crisp, yielding to a moist, tender interior that stays soft and springy rather than crumbly. The interplay between the fruity, fruity-sweet layers and the dairy-rich center is what makes these muffins particularly irresistible: they’re not overly sweet, which means the strawberry flavor shines without being overwhelmed, and the cream cheese provides richness that’s surprisingly light on the palate. Aromas of vanilla, lightly toasted batter, and warm strawberry fill the kitchen, making the entire room feel inviting and cozy. For texture lovers, the muffin’s crumb offers a delicate resilience that makes them feel substantial enough to satisfy, yet delicate enough to melt in your mouth. The finish lingers with a gentle sweetness and a subtle tang, encouraging another bite without overpowering the senses.

Occasions & Pairings

Soft Strawberry Cream Cheese Muffins are incredibly versatile and lend themselves to a wide range of occasions:

  • Weekend breakfasts and brunches: A crowd-pleaser that pairs beautifully with a pot of coffee or a glass of freshly squeezed juice.
  • Tea-time treats: Serve alongside hot tea or a latte for a comforting afternoon ritual.
  • Picnics and outdoor gatherings: Individually sized, easy to transport, and delicious at room temperature.
  • Birthday mornings or celebrations: A festive addition to a dessert table or a celebratory breakfast spread.
  • Light dessert option: A small plate with a dollop of whipped cream or a drizzle of strawberry glaze makes for a refined finish.

Pairings to consider (beyond beverages):

  • Cozy beverages: Coffee with a touch of cream, vanilla latte, or a light black tea.
  • Fruit accents: A light sprinkle of lemon zest on top to intensify brightness; a few fresh strawberry slices on the side for color and aroma.
  • Milk and dairy options: A cold glass of milk or a small bowl of yogurt can complement the tang of the cream cheese.
  • Dessert companions: A light dusting of powdered sugar, a drizzle of white chocolate, or a tiny dollop of whipped cream for a dessert-savory twist.

Tips, Variations & Substitutions

Whether you’re dairy-free, gluten-free, or simply looking for a twist on the classic, these muffins are highly adaptable. Here are ideas to tailor the recipe to your preferences without sacrificing texture or flavor:

Tips for Perfect Muffins

  • Use room-temperature ingredients for better emulsion and a tender crumb. If you’re in a hurry, give dairy items a few minutes to soften at room temperature or warm milk slightly to take the chill off the batter.
  • Avoid overmixing the batter. Stir just until the dry ingredients are moistened to keep the muffins light and avoid a dense texture.
  • Gently fold the cream cheese into the center, forming small pockets rather than large swirls. This helps ensure the cream cheese remains as a noticeable core in each muffin.
  • Fill muffin cups about two-thirds full to allow space for the tops to rise without overflowing.
  • Consider a light glaze or simple sugar dusting for a touch of sparkle and sweetness on top, if desired.

Variations

  • Gluten-free: Use a proven gluten-free all-purpose flour blend with a little extra binding agent (like xanthan gum) to maintain structure. You may need a touch more liquid to achieve a smooth batter.
  • Dairy-free: Swap dairy ingredients for plant-based equivalents. Use dairy-free cream cheese and a non-dairy milk (almond, soy, oat) with a neutral flavor. Ensure the leavening remains suitable for the substitute.
  • Lemon-berry twist: Replace a portion of the milk with fresh lemon juice and add lemon zest to the batter for a bright citrus note that complements the strawberries brilliantly.
  • Raspberry cream cheese: Substitute a handful of berries with fresh raspberries for a slightly tart, color-intense variation that still pairs beautifully with the cream cheese core.
  • Almond flourish: Add a touch of almond extract to the batter or sprinkle with a little finely chopped toasted almonds for extra aroma and crunch.
  • Spiced version: Introduce a pinch of cinnamon or cardamom in the batter to deepen the warmth and add a cozy dimension, especially good for autumns and holidays.

Storage & Make-Ahead Ideas

These muffins store well and are forgiving when you want to plan ahead. Proper storage helps preserve their tenderness and prevents the center from drying out:

  • Room temperature: Store in an airtight container at room temperature for up to 2-3 days. If you’re keeping them for the next day, consider placing a lightly damp paper towel in the container to maintain moisture (replace as needed).
  • Refrigeration: If you live in a warm climate or won’t consume them within a few days, refrigerate in an airtight container for up to 5 days. Bring to room temperature or warm briefly before serving for the best texture.
  • Freezing: To freeze, wrap individual muffins in plastic wrap and place in an airtight freezer bag or container. They’ll keep for up to 2-3 months. Thaw on the counter or reheat gently in a warm oven or microwave before serving to restore softness.
  • Make-ahead option: Prepare the batter the night before and refrigerate it, covered. The next day, bring to room temperature, fold in any additional strawberries, then portion and bake as usual. The resting time can help flavors meld and improve texture slightly, yielding a more cohesive crumb.

Fun Facts & Trivia (Optional)

Here are a few light tidbits that connect this dish to broader culinary culture:

  • Strawberries are one of the only fruits that wear their seeds on the outside. Each berry contains tiny seeds scattered across its surface, contributing to color and texture as it bakes.
  • Cream cheese has a storied history in American baking, gaining popularity in early 20th-century kitchens and becoming a staple in indulgent desserts and breakfast treats alike.
  • The term “muffin” traces back to medieval Europe, with variations in texture and shape across cultures. Muffins evolved from English muffins and other breads, becoming a universal, portable morning favorite in many households.
  • When choosing strawberries for baking, look for berries that are bright red, fragrant, and plump, but avoid mushy or overripe fruit. Fresh fruit can elevate the final flavor and texture of the muffins dramatically.
  • Texture matters: a well-made muffin should have a tender crumb with a slight crust on top, providing a pleasing contrast that enhances the overall eating experience.

Ingredients

  • Muffin Base
    • 2 cups all-purpose flour (or 2 cups gluten-free all-purpose flour)
      → Forms the structure and soft crumb of the muffins. If using a gluten-free blend, ensure it contains a binder (or add 1/2 teaspoon xanthan gum per cup of flour) to mimic gluten’s elasticity. Sift with leaveners to distribute evenly and avoid dense clusters.
    • 2/3 cup granulated sugar
      → Provides sweetness and helps with browning; you can reduce to 1/2 cup for a less sweet muffin. For a moisture-rich result, consider substituting part of the sugar with maple syrup, but adjust liquids slightly to compensate.
    • 2 teaspoons baking powder
      → The primary leavening agent that lifts the muffins for a soft, tender crumb. Use fresh powder for best rise; old powder can yield a flatter muffin.
    • 1/2 teaspoon salt
      → Balances sweetness and enhances flavor; even in sweet muffins, a pinch helps define the overall taste.
    • 1 cup milk (dairy or non-dairy; warm to body temperature if possible)
      → Hydrates the dry ingredients and activates the leaveners for a tender crumb. Dairy milk adds richness; unsweetened non-dairy milks are best to avoid altering flavor.
    • 2 large eggs
      → Provide structure, moisture, and help emulsify the batter. For a lighter texture, whisk eggs thoroughly and add gradually. Ensure eggs are at room temperature to promote smooth mixing.
    • 1/2 cup unsalted butter, melted and cooled
      → Adds richness, tenderness, and flavor. Let it cool before adding to prevent cooking the eggs; if dairy-free is required, substitute with neutral oil (e.g., grapeseed) but note it may yield a slightly different thickness and crumb.
    • 1 teaspoon vanilla extract
      → Enhances aroma and overall sweetness. Use pure vanilla for the best depth; if using vanilla bean, scrape in the seeds for extra flavor.
    • 1 cup fresh strawberries, hulled and diced
      → Imparts strawberry flavor and color throughout the muffin. Pat the pieces dry with a paper towel before adding to the batter to minimize extra moisture that can make muffins dense or soggy; fold gently to avoid crushing the berries.
  • Cream Cheese Filling
    • 8 oz (225 g) cream cheese, softened to room temperature
      → Creates a creamy, tangy swirl that contrasts with the sweetness of the muffin. Softened cream cheese blends smoothly; if used while still cold, beat until smooth before mixing with sugar.
    • 1/4 cup granulated sugar
      → Sweetens the filling; adjust to taste or substitute with 2 tablespoons powdered sugar for a silkier texture.
    • 1 teaspoon vanilla extract
      → Adds depth to the cream cheese flavor; use pure vanilla for best aroma.
    • 1 tablespoon all-purpose flour (optional)
      → Helps stabilize the filling so it stays put and doesn’t run when baked. For gluten-free, substitute with 1 teaspoon cornstarch or omit if preferred.
  • Optional Add-ins
    • 1/2 cup additional fresh strawberries, finely diced (optional)
      → Extra berry pockets; fold gently to avoid overmixing the batter and turning it pink throughout.
    • 1/2 cup mini chocolate chips or white chocolate chips (optional)
      → Provides a sweet contrast; choose chips that retain their shape and do not bleed color into the batter.
    • Streusel Topping (optional)
      • 3 tablespoons light brown sugar
        → Adds a caramel-like sweetness and a crunchy texture to the muffin tops.
      • 3 tablespoons all-purpose flour
        → Provides structure to the streusel; for gluten-free, use a gluten-free alternative with a bit more butter for crumb.
      • 2 tablespoons cold butter, diced
        → Cut into the dry ingredients to form a crumbly, sandy texture that bakes into a crisp topping; keep butter cold to maintain crumb structure.
      • pinch of salt
        → Enhances the streusel flavor and balances sweetness.

Instructions

  • Preheat your oven to 350°F (175°C) and line a 12-cup muffin tin with paper liners or grease it well.

    → This ensures the muffins do not stick to the tin and makes them easier to remove after baking, while starting the bake at the correct temperature for even rise.
  • Whisk the dry muffin base ingredients together: 2 cups all-purpose flour (or gluten-free all-purpose flour), 2/3 cup granulated sugar, 2 teaspoons baking powder, and 1/2 teaspoon salt in a medium bowl until evenly combined.

    → Sifting or whisking distributes leaveners and sugar uniformly, preventing dense pockets and ensuring a light, tender crumb.
  • Warm the milk to body temperature (about 105–110°F / 40–43°C) and whisk the eggs, 1/2 cup melted and cooled unsalted butter, and 1 teaspoon vanilla extract together in a separate bowl.

    → Heating the milk helps activate the leaveners smoothly; room-temperature eggs emulsify more easily with fat and sugar, while letting the butter cool prevents cooking the eggs.
  • Combine the wet ingredients into the dry ingredients: pour the milk–egg–butter–vanilla mixture over the dry ingredients and stir with a spatula just until the batter comes together with a few lumps remaining.

    → Overmixing develops gluten in wheat flour or toughness in gluten-free blends; a few small lumps will relax as the batter rests and bake into a tender crumb.
  • Gently fold in 1 cup fresh strawberries, hulled and diced, into the batter after it comes together; fold until the strawberries are distributed but not crushed, and pat the pieces dry before adding to minimize extra moisture.

    → Fresh berries release juice during baking; drying them prevents soggy muffins and helps maintain structure for a light crumb.
  • Prepare the cream cheese filling: in a bowl, beat 8 oz (225 g) softened cream cheese with 1/4 cup granulated sugar and 1 teaspoon vanilla until smooth and fluffy; if using 1 tablespoon all-purpose flour, whisk it in to stabilize the filling.

    → A smooth filling prevents lumps and helps the swirl hold its shape during baking; flour or cornstarch adds stability without adding lumpiness or altering flavor.
  • Optionally fold in 1/2 cup additional fresh strawberries (finely diced) or 1/2 cup mini chocolate chips into the batter for extra pockets of flavor; fold gently to avoid bleeding colors and overmixing.

    → Extra berries create bursts of sweetness and texture, while chips offer a contrasting bite without sinking or bleeding into the batter.
  • Assemble the muffins: Spoon batter into each muffin cup to about 1/3 full, then place a generous teaspoon of the prepared cream cheese filling in the center of each cup; cover with more batter to fill the cups about 2/3 full.

    → This method creates a visible cream cheese swirl that bakes into a creamy ribbon without leaking, and ensures consistent height across muffins.
  • Streusel topping (optional): In a small bowl, combine 3 tablespoons light brown sugar, 3 tablespoons all-purpose flour, 2 tablespoons cold butter (diced), and a pinch of salt; rub the butter into the dry ingredients until the mixture forms coarse crumbs. Sprinkle the streusel on top of each muffin if using.

    → The streusel adds caramel-like sweetness and a crunchy finish; keeping butter cold creates a crumbly texture that bakes into a crisp topping.
  • Bake the muffins at 350°F (175°C) for 18–22 minutes, rotating the pan halfway through for even browning; test for doneness by inserting a toothpick into the center—it should emerge with a few moist crumbs and the tops should be lightly golden.

    → Even heat and proper doneness testing prevent underbaking (gummy center) or overbaking (drier crumb), ensuring a tender, moist muffin with a creamy filling.
  • Cool the muffins in the pan for 5 minutes, then transfer to a wire rack to cool completely before serving; this allows the cream cheese filling to set and the muffin structure to finish firming.

    → Proper cooling prevents the centers from collapsing and helps maintain texture for storage or serving.
  • Store or serve: once cooled, serve immediately or store in an airtight container at room temperature for up to 2 days, or freeze for longer storage; rewarm briefly before serving to refresh the crumb.

    → Proper storage maintains moisture and flavor, while freezing extends shelf life without compromising texture.

Notes

These soft strawberry cream cheese muffins are light, tender, and filled with pockets of creamy cheesecake and fresh strawberry pieces. To ensure gluten-free success, use a gluten-free all-purpose flour blend and add 1/2 teaspoon xanthan gum per cup of flour (or rely on a blend that already contains binder); sift the flour with the baking powder and salt to distribute evenly and prevent dense clusters. The cream cheese filling adds tang and contrast to the sweet muffin base, so make sure the cheese is softened and well blended with sugar and vanilla. You can customize them by folding in an extra 1/2 cup diced strawberries, or a handful of mini chocolate chips for a chocolate-strawberry twist. A streusel topping or lemon zest can brighten the flavor. These muffins freeze well: cool completely, wrap individually, and freeze; reheat in a 350°F (175°C) oven for a few minutes or in the microwave in short bursts until warm. For an extra treat, serve with a dollop of yogurt or a light drizzle of honey or lemon glaze. Always use fresh ingredients and keep the cream cheese at room temperature for smooth filling and even distribution.

Tips

Tips for Soft Strawberry Cream Cheese Muffins

Muffin Base tips

  • Use ingredients at room temperature (eggs, milk, and melted butter cooled) to help emulsify the batter and give a smoother, more tender crumb.
  • Sift the dry ingredients (flour, sugar, baking powder, and salt) together with the leaveners to distribute them evenly and avoid dense pockets.
  • If using gluten-free flour, ensure your blend contains a binder (or add 1/2 teaspoon xanthan gum per cup of flour) to mimic gluten’s elasticity. If you skip binder, your muffins may be crumblier.
  • Avoid overmixing once the wet ingredients are added. Stir just until the batter comes together; overmixing can develop gluten (or pseudo-gluten) and make muffins tough.
  • Warm milk helps activate the leaveners more evenly and contributes to a tender crumb; if using dairy, full-fat milk yields a richer muffin. Unsweetened non-dairy milks are best to avoid altering flavor.
  • Pat the diced strawberries dry before folding to minimize extra moisture that can make muffins dense or soggy; fold gently to preserve berry shape.

Cream Cheese Filling tips

  • Let the cream cheese, sugar, and vanilla soften to room temperature; beat until smooth and creamy to avoid lumps.
  • If the filling seems too soft and runny, mix in the optional flour (or cornstarch) to help it hold its shape during baking.
  • Chill the filling briefly (15–20 minutes) before using, so it stays put when you spoon it into the batter.
  • For a swirled effect, dollop about a teaspoon of filling into the center of each muffin once the first layer of batter is in the cup, then cover with another spoonful of batter and gently swirl with a toothpick.

Optional Add-ins & Streusel tips

  • For extra berry pockets, fold in up to 1/2 cup additional strawberries very gently; avoid overmixing the batter and turning it pink.
  • If using chocolate chips, toss them in a tablespoon of flour before adding so they don’t sink and bleed color into the batter.
  • Streusel topping: keep butter cold and cut into small dice; rub or cut into the sugar and flour until crumbly for a crisp, sandy texture that bakes into a golden top. You can refrigerate the topping briefly to help it stay crumbly when baked.
  • Streusel can be prepared ahead; store in the fridge and sprinkle on just before baking for best crunch.
  • Gluten-free option for streusel: use a gluten-free flour mix and add a touch more butter for crumblier crumbs.
  • Filling/streusel ratio: too much streusel will weigh down muffins; keep it modest for a balanced top.
  • To prevent muffins from sticking, line the pan with paper liners or grease generously; muffins usually pop out easily when cooled slightly before removing liners.

FAQ

What ingredients do I need for Soft Strawberry Cream Cheese Muffins?
  • Dry ingredients: 2 cups all-purpose flour, 1/2 cup granulated sugar, 2 tsp baking powder, 1/2 tsp salt
  • Wet ingredients: 1 cup milk, 1/3 cup unsalted butter, melted; 1 large egg; 1 tsp vanilla extract
  • Cream cheese filling: 8 oz cream cheese, softened; 1/3 cup granulated sugar; 1 large egg yolk; 1/2 tsp vanilla extract
  • Strawberries: 1 cup fresh strawberries, diced
  • Optional: 1 tsp lemon zest
How do I prepare the cream cheese filling?
  • Beat the softened cream cheese with 1/3 cup sugar, 1 large egg yolk, and 1/2 tsp vanilla until smooth and creamy.
  • Chill the mixture for 15–30 minutes to firm up for easier scooping.
How do I make the muffin batter?
  • Whisk dry ingredients: flour, sugar, baking powder, and salt.
  • Whisk wet ingredients: milk, melted butter (or oil), egg, and vanilla.
  • Fold wet and dry ingredients together just until combined. Gently fold in diced strawberries.
Can I use frozen strawberries?
  • Yes. Thaw and pat dry to remove excess moisture to prevent soggy muffins. Drain well; you may dust with a little flour to reduce color bleed.
What is the baking time and temperature?
  • Preheat to 375°F (190°C). Line a muffin tin with liners or grease generously.
  • Fill cups about two-thirds full. Add a small scoop of cream cheese filling in the center or a dollop, then top with batter to cover. Bake 18–22 minutes, until a toothpick inserted into a muffin (not the filling) comes out with only a few moist crumbs.
How can I prevent the cream cheese from leaking during baking?
  • Chill the cream cheese filling before using. Do not overfill the cups—cover the filling with batter. Use a small scoop or spoonful to keep portions consistent. Bake on a middle rack for even heat.
Can I make this dairy-free or gluten-free?
  • Yes. For dairy-free: substitute dairy-free milk (such as almond or soy milk), dairy-free butter or oil, and a dairy-free cream cheese. For gluten-free: use a 1:1 gluten-free flour blend (or a mix that includes xanthan gum) and ensure your baking powder is gluten-free. You may need to adjust liquid by 1–2 tablespoons.
How should I store leftovers and can I freeze them?
  • Store cooled muffins in an airtight container at room temperature for 2–3 days or refrigerate up to 5 days. To freeze: wrap individually and freeze up to 2–3 months. Thaw overnight in the fridge and reheat gently.
Can I customize with lemon or other fruits?
  • Yes. Add 1 teaspoon lemon zest to the batter or 1/2 teaspoon to the cream cheese filling for brightness. You can substitute blueberries or raspberries for a different twist, but strawberries work best with lemon.

Introduction / Hook

Imagine a warm, inviting kitchen where the clock seems to slow down, the oven hums a gentle lullaby, and a single pan does the heavy lifting for tonight’s family dinner. The air is thick with the scent of toasty edges, creamy richness, and a hint of garlic and herbs that tease your senses long before the first bite. Easy Chicken Casserole is not just a dish; it’s a hug you bake, a memory you assemble one comforting layer at a time. In minutes you can set the mood for a cozy, crowd-pleasing meal—no fuss, no drama, just pure, satisfying warmth that turns a regular weeknight into something wonderfully special. Whether you’re cooking for a busy household, inviting neighbors over, or simply craving a reliable home-cooked classic, this casserole delivers tenderness, depth, and a lingering sense of home that lingers long after the last forkful.

As the dish bakes, the kitchen becomes a sanctuary where the ordinary becomes extraordinary. The scent swirls through the house, threading through conversations and easing the day’s fatigue. When you finally lift the lid, you’re greeted by a creamy, glossy surface that hints at melty cheese, succulent chicken, and a sauce that you can only describe as velvety and luxurious without being heavy. This isn’t a showy, overcomplicated recipe; it’s a dependable, everyday marvel that brings people together—with minimal effort and maximum comfort. It’s the kind of meal you crave in the middle of a busy week and remember fondly on the weekend as you reminisce about shared dinners and quiet laughter around the table.

What makes Easy Chicken Casserole especially delightful is its balance of textures and flavors: tender pieces of chicken nestled in a luscious, sauce-coated embrace, a gentle herbal note that lifts every bite, and a golden, lightly crisp top that gives way to creamy softness. It offers the comforting familiarity of a traditional casserole while inviting you to make it your own with simple, flexible choices. This is the dish you’ll reach for when you want something nourishing, satisfying, and genuinely easy to prepare—without sacrificing depth, character, or the joy of a homemade meal.

The Story Behind the Dish

Casseroles have a storied place in kitchen folklore, a practical solution born from the idea that a single pan could feed and comfort a family with minimal effort. The concept grew up alongside busy households, where leftovers, pantry staples, and a dash of creativity became the backbone of weeknight cooking. Easy Chicken Casserole emerges from this lineage as a modern keep-it-simple classic: a dish that honors the tradition of layering flavors and textures while leaning into contemporary tastes for creaminess, warmth, and a hint of nostalgia.

Historically, casseroles traveled across kitchens, adapting to regional ingredients and seasonal abundance. In many homes, the casserole became a symbol of hospitality—an inviting one-dish meal that invites friends and family to gather around the table. The chicken version, in particular, speaks to the universal appeal of comfort food that’s easy to pull together after a long day. In essence, this dish carries the spirit of home: a practical answer to hunger that also nurtures connection, conversation, and the simple pleasure of sharing food.

Beyond its practicality, there’s a culinary magic at play. A casserole blends the savory depth of braised proteins with the silkiness of a creamy sauce, the soft airiness of baked cheese, and the satisfying bite of a lightly roasted exterior. Each bite reveals a harmony of familiar flavors—meat, dairy, herbs, and a gentle sweetness from caramelized edges—delivering a comforting experience that feels almost like a spoonful of childhood and, at the same time, a refined dinner that suits adults as well as kids.

In homes around the world, similar dishes have adapted to local tastes, adding regional ingredients or substituting proteins while preserving the core idea: a single, forgiving vessel that feeds a crowd with warmth and ease. Easy Chicken Casserole is a contemporary homage to that enduring concept—an accessible, versatile, everyday-chef’s favorite that honors the past while embracing the needs of today’s kitchen rhythm.

Why You’ll Love This Recipe

  • One-dish comfort: A complete meal that bakes together in a single pan, minimizing cleanup and maximizing flavor.
  • Versatile and forgiving: Flexible with proteins, dairy options, and pantry staples, so you can tailor it to what you have on hand.
  • Speedy weeknight magic: Quick assembly and hands-off baking make it ideal when time is tight but you crave something hearty.
  • Creamy, savory goodness: A luscious sauce that clings to tender chicken, delivering depth without being heavy.
  • Family-friendly appeal: Gentle flavors that appeal to both adults and kids, with room for tweaks to suit different palates.
  • Comfort that feels special: The baked, slightly caramelized top and steaming interior create a restaurant-like finish at home.
  • Make-ahead and leftovers friendly: Great for planning ahead or stretching into another meal later in the week.
  • Economical and accessible: Uses everyday ingredients, making it an affordable favorite for busy households.

Flavor Profile & Texture

The essence of this dish lies in its harmonious balance of silkiness, savoriness, and softness with a whisper of toasty edges. Take a bite into the creamy sauce that coats every morsel of chicken, offering a gentle richness that is neither too light nor overpowering. The sauce acts as a velvety curtain that ties together the mild, approachable flavors of the chicken with a subtle depth from garlic, herbs, and a touch of warmth you’ll notice in the aftertaste. The chicken itself remains tender and succulent, having absorbed the sauce’s moisture through the baking process, ensuring each bite feels juicy and satisfying rather than dry.

Texture plays a crucial supporting role. The interior is luxuriously soft—the sauce lingering like satin—while the exterior forms an inviting crust that provides a soft contrast to the creaminess. If a topping is used, it may offer a hint of crispness or a light browning, adding a pleasing crunch that punctuates the smooth center. The overall mouthfeel is soothing, with a gentle creaminess that coats the palate and a restrained savoriness that invites another bite without overwhelming the senses.

Flavor-wise, expect a comforting, well-rounded profile: a mild roastiness from the surface, a comforting herbal aroma, and a subtle tang or sweetness depending on ingredients you choose to include. The dish offers familiar, comforting notes rather than bold, flashy flavors, making it a reliable canvas for personalization. It’s the kind of flavor you recognize instantly as “home,” while still feeling elevated enough to serve to guests or celebrate a casual occasion.

Occasions & Pairings

This versatile casserole shines in a variety of settings, from weeknight dinners to weekend gatherings. It’s especially well-suited for:

  • Weeknights when time is tight but you still crave something comforting and homemade.
  • Family dinners where you want a warm, satisfying center of the table that pleases multiple generations.
  • Casual potlucks or neighborhood gatherings where a shareable dish is appreciated.
  • Monday or post-holiday leftovers, offering a gentle, restorative meal after busy days.

Pairings can be tailored to the season and your mood. Consider these ideas to complete the plate:

  • Vegetable sides: Steamed green beans, roasted carrots, or a bright, lemony broccoli salad to cut through the richness.
  • Starch companions: Fluffy mashed potatoes, savory rice, or crusty bread to mop up the creamy sauce.
  • Greens and acidity: A crisp green salad with a light vinaigrette provides balance and freshness.
  • Drink pairings: A lightly chilled white wine with good acidity, a sparkling water with citrus, or a simple iced tea—all choices that complement the creamy profile.
  • Desserts to finish: A simple fruit tart, vanilla pudding, or yogurt parfait to end on a gentle, comforting note.

Tips, Variations & Substitutions

These ideas help you personalize Easy Chicken Casserole to fit dietary needs, pantry inventories, or flavor preferences, without changing the comforting essence of the dish.

  • Make it lighter: Use a lighter dairy option or a dairy-free milk mixed with a spoonful of natural thickener to maintain creaminess while reducing fat content. Consider adding more vegetables to stretch portions without sacrificing mouthfeel.
  • Protein swaps: Substitute chicken with turkey for a similar texture and flavor profile, or use firm tofu or chickpeas for a meatless variation that absorbs the sauce well.
  • Gluten-free friendly: Choose a gluten-free thickener or sauce base, and ensure any toppings or garnishes are gluten-free to keep the dish accessible for celiac or gluten-sensitive diners.
  • Flavor boosters: Add a pinch of paprika, a dash of nutmeg, or a whisper of thyme or rosemary to elevate the aroma and depth without complicating the core recipe.
  • Regional twists: Introduce sun-dried tomatoes for a touch of sweetness and tang, or swap in a regional cheese that melts beautifully, such as mozzarella, provolone, or a mild white cheddar for a luscious finish.
  • Make-ahead options: Assemble the casserole up to the point of baking, cover tightly, and refrigerate for up to 24 hours. Bake longer if starting cold, or bake as directed when ready to serve. Freezing before baking is also possible—thaw in the fridge overnight before baking.
  • Texture variations: If you like a crisper top, finish under a broiler for a few minutes after baking, watching closely to prevent burning. For a softer top, cover the dish during the initial bake to trap steam and keep the surface tender.

Storage & Make-Ahead Ideas

Knowing how to store and plan ahead can transform how you approach meals. This casserole lends itself to careful make-ahead strategies and practical leftovers management.

  • Refrigeration: Leftovers keep well in an airtight container for 3–4 days. Reheat gently in the oven covered, or in a microwave in short bursts to preserve the creamy texture and prevent drying.
  • Freezer-friendly: Assemble the casserole, wrap securely, and freeze for up to 2–3 months. Thaw in the fridge overnight before baking. Note that texture may vary slightly after freezing and thawing.
  • Make-ahead meal planning: Prepare the sauce and chicken components ahead of time and combine just before baking. This approach keeps flavors fresh and speeds up weeknight assembly.
  • Storage tips: If you notice pooling liquid after storage, give the dish a gentle stir before reheating to reincorporate moisture and maintain even creaminess.
  • Serving considerations: If reheating multiple portions, consider dividing into individual casserole dishes for even heating and easier portion control.

Fun Facts & Trivia (Optional)

Delightful tidbits that add a touch of whimsy to your cooking knowledge can make dinner even more enjoyable:

  • The word “casserole” comes from the French term casseroler, meaning “a dish for baking in a pan,” and it has long symbolized wholesome, communal eating in many cultures.
  • In American kitchens, casseroled meals became especially popular during the mid-20th century, a period when convenience foods and casseroles were celebrated for their ability to feed larger families with minimal effort.
  • While chicken is a staple protein in this dish, many cultures put their own spin on casseroles by incorporating seafood, beef, or legumes, showcasing how adaptable the concept is to different dietary preferences and regional flavors.
  • Cheese tops a large share of casserole recipes because melted cheese provides an appealing, binding texture and a comforting savoriness that resonates with a broad audience.
  • There’s a subtle science to achieving the perfect bake: a gentle, steady heat ensures the sauce thickens gradually, the chicken stays tender, and the top browns to a pleasing golden hue without burning.

Easy Chicken Casserole is more than a recipe—it’s a canvas for warmth, memory, and everyday comfort. It welcomes improvisation, invites conversation, and rewards you with a nourishing, satisfying meal that tastes like you spent hours in the kitchen, even when you didn’t. Whether you’re cooking for a bustling family or a quiet weeknight, this dish stands ready to become a favorite in your rotation, a dependable performer that delivers tenderness, flavor, and a sense of home in every bite.

Ingredients

  • Chicken and Cream Base
  • – 1.5 to 2 pounds boneless skinless chicken breasts, cut into 1-inch cubes (or 3 cups shredded rotisserie chicken)
    → This is the main protein and provides the structure of the casserole. If using raw chicken, ensure it cooks through in the oven; if using rotisserie chicken, shredding it fine helps distribute the meat evenly. Uniform pieces promote even cooking and moisture distribution.
  • – 2 cans condensed cream of chicken soup (10.5 oz each), undiluted
    → Forms the creamy base that binds the casserole together. Do not dilute unless the recipe specifies; if you prefer a lighter sauce, whisk in a small amount of milk, but keep the soup as the primary binder. Choosing a low-sodium version helps control overall salt.
  • – 1 cup sour cream, room temperature
    → Adds tang, richness, and helps create a smooth, velvety sauce when folded into the soup. Warming to room temperature prevents curdling and ensures even blending with the condensed soup.
  • – 1 cup whole milk or half-and-half
    → Lightens and loosens the sauce to a pourable consistency without adding excessive thickness. Use whole milk for the richest flavor; half-and-half provides a lighter alternative. If the mixture seems very thick after mixing, add a splash more milk as needed.
  • – 2 cups frozen mixed vegetables (peas, carrots, corn) or 2 cups fresh vegetables, chopped
    → Adds color, texture, and nutrition. If using frozen, thaw and drain well to avoid extra water in the casserole; if using fresh, blanch briefly to retain color and bite.
  • – 1 medium onion, chopped
    → Builds a savory aromatic base once sautéed; onion sweetness enhances the overall depth of the dish. Sauté with a little butter or oil until translucent before mixing into the casserole for best flavor.
  • – 2 cloves garlic, minced
    → Provides a warm, savory aroma that complements chicken and dairy. Mince finely for even distribution; you can adjust the amount to taste if you prefer a milder garlic presence.
  • Cheese and Dairy
  • – 2 cups shredded cheddar cheese, divided (1 cup folded into mixture, 1 cup for topping)
    → Cheese melts into the sauce, adding creaminess and depth of flavor; reserving half for the top creates a golden, bubbly crust. Use sharp cheddar for more pronounced flavor or a milder variety if you prefer a subtler taste.
  • – 1/2 teaspoon dried thyme or Italian seasoning
    → Adds herbal warmth that pairs well with chicken and dairy. If you don’t have thyme, you can substitute with 1/4 teaspoon dried rosemary or 1/2 teaspoon poultry seasoning for a similar effect.
  • – 1/2 teaspoon salt, or to taste
    → Salting helps build flavor, but the soup and cheese contribute salt as well. Start with a conservative amount and adjust after tasting the sauce before baking.
  • – 1/4 teaspoon ground black pepper
    → Subtle heat and aroma that enhances all other flavors. Use freshly ground pepper for the best brightness and aroma.
  • Fat, Binder, and Topping
  • – 2 tablespoons unsalted butter, for sautéing onions or for topping (optional)
    → Butter adds richness when sautéing onions; if you prefer, substitute with olive oil. If used on top, melted butter helps breadcrumbs or crackers brown and crisp.
  • – 1 cup breadcrumbs or crushed crackers for topping (optional)
    → Creates a crunchy, golden crust that elevates the casserole. Toss with a little melted butter and a pinch of salt or herbs before sprinkling on top for best browning.
  • – Fresh parsley, chopped, for garnish (optional)
    → Finishing touch that adds a fresh, vibrant note and color contrast. Sprinkle just before serving to maintain bright green color.
  • Sauce Thickener (optional)
  • – 1 tablespoon cornstarch (mixed with 2 tablespoons cold water to form a slurry) or 2 tablespoons all-purpose flour (optional)
    → If the casserole seems too thin after mixing, these thickeners can help achieve a creamier, more cohesive sauce. Add gradually while simmering briefly to prevent lumping.

Instructions

  • Preheat your oven to 350°F (175°C) and lightly grease a 9×13-inch baking dish or large casserole pan to prevent sticking and ensure even browning.
    → A well-greased dish keeps portions intact and allows the creamy sauce to release cleanly when serving.
  • Prepare the chicken by cutting raw boneless skinless breasts into 1-inch cubes or shredding 3 cups of rotisserie chicken, then pat dry any excess moisture to promote even searing and coating in the sauce.
    → Uniform pieces cook evenly and absorb flavors uniformly, preventing dry edges and uneven texture.
  • Sauté the chopped onion in 2 tablespoons unsalted butter over medium heat until translucent and lightly golden, then add minced garlic and cook for about 30 seconds more to bloom the aroma.
    → Sautéing releases sweetness from the onion and activates the garlic’s flavor, building a savory base for the casserole.
  • In a large bowl, whisk the undiluted cream of chicken soup with the sour cream and milk until smooth, then stir in 1/2 teaspoon dried thyme or Italian seasoning and 1/2 teaspoon salt and 1/4 teaspoon black pepper. If you want a thicker sauce, whisk in a cornstarch slurry (1 tablespoon cornstarch whisked with 2 tablespoons cold water) and heat briefly to activate the starch.
    → This creates a cohesive, velvety base that coats the chicken and vegetables without curdling, while the herbs add depth and the salt lifts all flavors. The slurry option gives you control over sauce thickness.
  • Pour the warm sauce over the chicken and fold gently to coat all pieces, ensuring every bite will have creamy moisture and flavor. If you used raw chicken, this helps begin the cooking process and prevents dry patches.
    → Even coating ensures consistent texture and prevents pockets of sauce from separating during baking.
  • Stir in 2 cups frozen vegetables (thawed and well-drained) or 2 cups fresh vegetables, chopped, distributing them evenly through the mixture for color, texture, and nutrition.
    → Thawed frozen veg prevents excess water from diluting the sauce, while fresh veg maintains crisp-tweet color and bite when baked.
  • Fold in 1 cup shredded cheddar cheese into the sauce mixture to melt throughout and provide a creamier, richer texture; reserve the remaining 1 cup to top later.
    → Melting cheese into the sauce builds depth of flavor and a luscious mouthfeel, while the reserved cheese creates a golden crust on top.
  • Taste the mixture and adjust seasoning with additional salt and pepper as needed, remembering that the canned soup and cheese contribute salt, so add gradually.
    → Tasting at this stage ensures the final casserole isn’t underseasoned or overly salty after baking.
  • Spread the chicken-sauce-vegetable mixture evenly into the prepared baking dish, using a spatula to level the surface for uniform baking.
    → A smooth, even layer bakes evenly, preventing undercooked edges and ensuring the center warms through properly.
  • Top the casserole with the remaining 1 cup shredded cheddar cheese for a glossy, melty finish, and sprinkle 1 cup breadcrumbs or crushed crackers over the cheese to create a crisp, golden crust. If using breadcrumbs, toss them with a teaspoon of melted butter and a pinch of salt for extra browning.
    → The cheese on top develops a bubbly melt, while the crumb topping adds texture and a visually appealing finish.
  • If using the optional butter for topping, dot with small knobs of 2 tablespoons unsalted butter or drizzle the melted butter over the crumb topping to promote browning and flavor.
    → Butter helps the topping brown evenly and adds a rich, toasty aroma as it bakes.
  • Bake in the preheated oven for 25 to 35 minutes, or until the sauce is bubbling around the edges, the cheese on top is melted and golden, and a toothpick inserted into the center of the chicken pieces shows no pink. An instant-read thermometer in the thickest part of the chicken should read 165°F (74°C).
    → Bubbling edges indicate the sauce has set and the chicken is fully cooked; proper internal temperature ensures safety and juiciness.
  • Remove from oven and let the casserole rest for 5 to 10 minutes before serving to allow the sauce to thicken slightly and for easier slicing.
    → Resting helps the starches set, preventing runny portions and making servings neater.
  • Garnish with freshly chopped parsley for a bright, fresh finish and a pop of color, then portion and serve while warm.
    → Fresh parsley adds a contrasting note and visual appeal, signaling a ready-to-serve dish and enhancing aroma.

Notes

These easy chicken casserole notes guide you to a creamy, comforting bake built from pantry staples and nourishing vegetables.

If using raw chicken, cut into uniform cubes so the pieces cook evenly, or use shredded rotisserie chicken for a quick weeknight version.

Keep the condensed cream of chicken soup undiluted to form the rich base, and choose a low-sodium version if you’re watching salt.

Warm the sour cream to room temperature and fold it in with the soup to create a silky sauce that coats every bite.

Stir in the milk (or half-and-half) to loosen the sauce to a pourable consistency; add a splash more if it seems thick.

Thaw and drain frozen vegetables well, or use fresh vegetables that are chopped and lightly blanched to maintain color and bite.

Sauté onion and garlic in a little butter or oil until translucent to build a savory base.

For the cheese: fold 1 cup into the sauce and sprinkle the remaining cup on top for a bubbly, golden crust.

Herbs like dried thyme or Italian seasoning add warmth; substitute rosemary or poultry seasoning if needed.

Season with salt and pepper gradually, tasting the sauce before baking.

Butter, oil, and breadcrumbs/crackers are optional toppings; toss breadcrumbs with a little melted butter for a crisper crust.

If the mixture seems too thin, whisk in a cornstarch slurry (or flour) gradually to thicken.

Bake until hot and bubbling and the cheese is melted and golden, usually about 25-35 minutes; for a crisp topping, place under the broiler for a minute.

Let the casserole rest 5-10 minutes before serving to set.

Leftovers store well in the fridge for 3-4 days, and can be frozen before or after baking for longer storage.

To make gluten-free: ensure soup is gluten-free, use gluten-free breadcrumbs or crackers, and choose gluten-free thickener if desired.

Tips

Tips for Easy Chicken Casserole

  • Uniform chicken pieces (1-inch cubes or evenly shredded) ensure even cooking and moisture distribution. If using raw chicken, make sure pieces are cooked through; rotisserie chicken should be shredded finely for even texture.
  • Handle the creamy base gently: keep the condensed cream of chicken soup undiluted as the recipe intends. If you want a lighter sauce, whisk in a small amount of milk, but don’t dilute the soup too much.
  • Warm sour cream to room temperature and fold gently into the sauce to prevent curdling and to maintain a smooth, velvety texture.
  • Use whole milk for richer flavor, or half-and-half for a lighter sauce. If the mixture seems very thick after mixing, whisk in a splash more milk until pourable.
  • Prepare the vegetables by thawing and draining frozen varieties well to avoid a watery casserole; or use fresh vegetables and blanch briefly so they stay crisp-tender.
  • Sauté the onion (and garlic) to build a savory base. Cook onions until translucent, and add garlic near the end to avoid bitterness; this boosts depth of flavor in the final dish.
  • Season thoughtfully: taste the sauce before baking and adjust salt and pepper. Cheese and soup can contribute salt, so add salt gradually.
  • Cheese strategy: fold 1 cup of cheddar into the sauce for creaminess and reserve the remaining cup for topping to create a golden, bubbly crust. Sharp cheddar yields more pronounced flavor; milder works too.
  • Binder and thickener: if you want a thicker, creamier sauce, use the optional cornstarch slurry (1 tablespoon cornstarch whisked with 2 tablespoons cold water) or flour. Add gradually and simmer briefly to avoid lumps.
  • Butter and topping: optional 2 tablespoons unsalted butter can be used to sauté onions or brushed on the topping for browning. For extra crunch, mix breadcrumbs or crushed crackers with a little melted butter and a pinch of salt before sprinkling on top.
  • Cooking time and bake: bake in a moderate oven (about 375°F) until bubbling and the top is golden. If you assemble it cold, plan for a longer bake time. Let the casserole rest 5-10 minutes after removing from the oven to set the sauce.
  • Garnish and finish: finish with chopped fresh parsley for color and a fresh aroma. Sprinkle just before serving to keep the color bright.
  • Make-ahead and storage: the casserole can be assembled a day ahead and refrigerated; bake the next day, adding extra baking time if cold. Leftovers keep 3-4 days in the fridge or freeze baked portions for longer storage. Reheat gently to avoid drying.
  • Flavor variations: to switch things up, try adding grated Parmesan to the topping, or a pinch of hot sauce or paprika for a warm note.

FAQ

What is Easy Chicken Casserole?

Easy Chicken Casserole is a comforting baked dish that combines tender cooked chicken with a creamy sauce, vegetables, and a crispy topping. It’s designed to be simple, comforting, and quick to prepare, usually serving about 6 people.

What ingredients do I need?

Common ingredients include: cooked chicken (shredded or cubed), a creamy base (cream of mushroom or chicken soup or a homemade white sauce), sour cream or Greek yogurt, shredded cheese, vegetables (such as peas, corn, onions, peppers, mushrooms), a starch (cooked pasta or rice), and a topping like breadcrumbs or crushed crackers with melted butter. You can tailor it to what you have on hand.

Can I customize or substitute ingredients?

Absolutely. Use leftover chicken, swap sour cream for yogurt or dairy-free options, try different vegetables, swap crackers for crushed chips or nuts for crunch, or opt for gluten-free soups if needed. If you skip the pasta, you can use extra rice or more vegetables. Keep the sauce moderately thick so it coats well.

How do I bake it (temperature and time)?

Preheat to 350°F (175°C). Bake for about 30–40 minutes, until the casserole is bubbling around the edges and the top is golden. If using raw chicken or starting with a cold casserole from the fridge, add 5–15 minutes. Ensure the chicken reaches an internal temperature of 165°F (74°C).

How many servings does it yield?

Most recipes yield about 6 servings, depending on portion size and the base (pasta or rice) used.

Can I make it ahead or store leftovers?

Yes. Assemble up to 24 hours in advance and refrigerate before baking. Leftovers keep in the fridge for 3–4 days. Reheat in the oven at 325°F (165°C) until heated through, or microwave in short intervals for convenience.

How do I freeze or meal-prep this dish?

Freeze unbaked assembled casseroles in a freezer-safe dish for 2–3 months, then thaw overnight in the fridge and bake as directed. You can also bake fully, cool, and freeze individual portions for quick reheating.

How can I adapt it for dietary needs?

Gluten-free: use gluten-free soup or a roux with gluten-free flour. Dairy-free: substitute dairy-free cream base and cheese. Low-carb/keto: omit pasta and add extra vegetables or use cauliflower rice; choose dairy-free cheese if needed. Always check labels for hidden gluten or thickening agents.

What sides go well with Easy Chicken Casserole?

Green salad or steamed vegetables, garlic bread, dinner rolls, or a simple rice or mashed potato side pair nicely with the creamy casserole.

Can I make this in a slow cooker or Instant Pot?

Yes. For a slow cooker, combine ingredients and cook on low 4–6 hours or high 2–3 hours, then add a crisp topping under the broiler or air fryer if you want a browned top. For an Instant Pot, pressure cook the chicken and sauce until tender, then finish with cheese and a quick broil/bake to brown the top. Times vary by model, so adjust as needed.

Introduction / Hook

Imagine biting into a cloud-soft donut that tastes like a comforting glaze-dusted treat, yet secretly fuels your morning with a protein punch. Picture the aroma of vanilla and warm spices wafting through your kitchen, mingling with the rich scent of almonds or cocoa as the crust gives way to a tender, airy crumb. These aren’t just any donuts; they’re high-protein delights designed to satisfy a craving for something indulgent while supporting an active lifestyle. Every bite should feel like a small reward after a workout, a protein-packed pick-me-up that doesn’t compromise on flavor. This is where pastry magic meets modern nutrition—the moment you realize you can have your treat and your gains too. Welcome to high-protein donuts, a bakery-inspired experience that fits into busy mornings, post-workout rituals, or cozy weekend moments without guilt or sacrifice.

The Story Behind the Dish

The concept of turning a beloved indulgence into a functional, nourishing snack has roots in the evolving dance between desserts and wellness. Donuts have long stood for comfort, casual coffee shop chats, and weekend rituals—golden rings that signal “pause” in a bustling day. Yet as fitness culture grew and people sought ways to balance taste with protein goals, the idea of “protein-forward pastries” began to take shape. Home bakers and professional chefs alike started experimenting with ingredients that could deliver a satisfying texture and familiar sweetness while skimming off extra sugar and empty calories. The result is a modern donut that doesn’t pretend to be a health food, but instead embraces both worlds: a luscious, moist crumb and a protein-rich profile that keeps you moving with energy and focus. These donuts aren’t about deprivation; they’re about redefining cravings. They celebrate the joy of baking, the precision of science, and the pleasure of a treat that loves you back—hour after hour, bite after bite.

The lineage of this recipe echoes a broader culinary trend: the fusion of comfort desserts with practical nutrition. In many kitchens, athletes, teachers, and parents discovered that you could bake something truly satisfying while layering in protein from whey, casein, or plant-based powders, along with nutrient-dense ingredients like Greek yogurt, nut flours, and portions of fruit puree. The result is a donut that feels like a classic, but behaves like a performance snack—soft on the inside, lightly crisp on the outside, and versatile enough to adapt to different dietary needs. This is the story of a treat that refuses to be pigeonholed as “off-limits” and instead invites everyone to indulge mindfully, with texture, aroma, and a smile that lingers after the last crumb vanishes.

Why You’ll Love This Recipe

  • Protein-forward without sacrificing the beloved donut texture. The crumb stays moist and springy, thanks to a careful balance of ingredients that support structure while keeping the bite light.
  • Versatile serving options. Whether you prefer a simple, lightly sweet glaze, a bold chocolate finish, or a fruity yogurt drizzle, these donuts are an ideal canvas for flavor experimentation.
  • Balanced sweetness that satisfies cravings and keeps you on track with daily macros. You can adjust sweetness with natural sweeteners while maintaining a tender crumb and a polished finish.
  • Short, everyday prep time. The batter comes together quickly, making these donuts a fantastic option for a Sunday bake, a weekday morning, or a post-workout treat.
  • Kid-friendly and adult-approved. The flavor profile remains approachable and familiar, so it’s easy to bake together as a family activity or enjoy with friends over a cup of coffee.
  • Customizable for dietary needs. Whether you’re gluten-free, dairy-free, vegan, or simply looking to lower sugar, there are many substitutions that preserve texture and taste.

Flavor Profile & Texture

High-protein donuts possess a nuanced flavor that straddles bakery sweetness and wholesome nourishment. The dominant notes are often vanilla, almond, or cocoa, depending on your chosen flavor direction. A whisper of natural sweetness comes from fruit purée, yogurt, or a dab of maple, not overpowering the dairy-free or dairy-containing base. The aroma, when these donuts bake, is a magnet: warm vanilla, toasty almond, and a hint of caramelized crust that grows more alluring as the donuts rise and set. The exterior forms a very delicate crust—soft, almost satin-like—while the interior reveals a luxurious, airy crumb. It’s a balance between the comfort of a classic treat and the lift of a protein-enhanced batter.

The texture is central: think of a donut that’s light enough to melt in your mouth, yet sturdy enough to hold a glaze or a fruit topping. The protein component is carefully integrated so it contributes to the structure rather than creating a dense mouthfeel. For many, the result is a pleasing compromise: a donut that tastes indulgent and satisfies a craving for something a little sweet, but with a more satisfying, lasting finish than typical bakery donuts. In short, these donuts deliver the sensation of a bakery-bought indulgence, while adding protein that supports energy, fullness, and recovery after activity. The result is a comforting bite that remains somewhat forgiving on the teeth—never crumbly, never dry—thanks to careful moisture management, the right kind of flour, and a touch of yogurt or dairy to help lock in tenderness. If you close your eyes and take a bite, you’ll likely notice a gentle sweetness that lingers, a soft crumb that resists crumbling, and a finish that invites the next bite rather than signaling “end of the line.”

Occasions & Pairings

High-protein donuts are surprisingly versatile. They shine in a plethora of moments, from brisk weekday breakfasts to leisurely weekend brunches. They pair beautifully with a hot cup of coffee or tea, a cold glass of milk, or a splash of almond milk for a dairy-free option. For a more indulgent vibe, pair them with a dollop of yogurt and a handful of fresh berries, turning a simple snack into a balanced mini-meal. They’re equally at home as a post-workout reward—the kind of treat that makes a cool-down feel like a victory lap. For families, these donuts can become a weekend ritual, a way to start Saturday with energy and a sense of accomplishment, especially when kids help mix, shape, and decorate.

If you’re entertaining, these donuts make a laid-back yet impressive addition to a brunch spread. Create a little donut bar with a few glaze options, fruit compotes, and chopped nuts, so guests can customize their own 성yled treat. They also pair nicely with a glass of cold-brew coffee or a warm latte, where the coffee’s roast complements the donut’s vanilla- or chocolate-forward flavors. For a special occasion, consider topping with a light glaze and a sprinkle of citrus zest for an aroma that’s bright and festive, or fold in hints of cinnamon or cardamom for a warm, spiced profile that feels cozy on cooler mornings. In essence, these donuts invite you to tailor the experience to your moment—whether you want a quick, nourishing breakfast, a celebratory brunch, or a comforting snack during a busy afternoon.

Tips, Variations & Substitutions

One of the best things about high-protein donuts is how forgiving they can be while still delivering a premium taste and texture. Here are ideas to customize and tailor this concept to your pantry, dietary needs, and flavor preferences:

  • Protein powder choices. Whey, casein, soy, or pea-protein powders each bring different textures and flavors. Select a powder that aligns with your dietary goals and taste preferences. For a smoother crumb, casein and whey blends often work well; for a fiber-rich, plant-based option, plant-based proteins can be excellent with the right moisture balance.
  • Flour options. Almond flour provides richness and a delicate crumb, while a small amount of oat flour or whole-wheat pastry flour can improve structure. If you’re gluten-free and want a lighter texture, consider a gluten-free blend designed for baking, but be mindful of moisture and binding requirements.
  • Moisture and binding. Greek yogurt or dairy-free yogurt can lend tenderness; adding a little applesauce or mashed banana can increase moisture without weighing down flavor. If you prefer a dairy-free version, choose a yogurt alternative and adjust the liquid balance accordingly.
  • Sweetener choices. Natural sweeteners like honey, maple syrup, or coconut sugar can impact moisture and browning. Start with a small amount and adjust to taste. If you’re watching sugar intake, you can reduce sugar slightly and rely on ripened fruit purée for gentle sweetness.
  • Flavor directions. Classic vanilla is a reliable base, but you can experiment with lemon zest for brightness, orange zest for a sunny citrus note, or a hint of cinnamon, cardamom, or chili powder for warmth and depth.
  • Glazes and toppings. A yogurt-based glaze, a light chocolate drizzle, a lemon glaze, or a berry compote can elevate the donut without making it heavy. Nuts, chia seeds, or cacao nibs add texture and crunch—use them as toppings to maintain the donut’s soft interior while offering delightful contrast on the crust.
  • Vegan or dairy-free variations. Replace dairy ingredients with plant-based milks and yogurt alternatives, and use a vegan protein powder. Depending on the powder, you may need to add a little extra moisture or a binding agent like flax egg to maintain structure.
  • Portion and shaping. If you don’t have a donut pan, you can bake in mini muffin tins for a similar experience with a slightly different texture. The important part is achieving a glossy, lightly browned exterior and a moist interior.
  • Flavor variations. For chocolate lovers, add a tablespoon of cocoa powder and a splash of espresso for a mocha profile. For a fruity twist, swirl in berry purée or fold in finely chopped dried fruit for pockets of sweetness.
  • Make-ahead notes. These donuts bake well in advance and can be stored and refreshed through gentle reheating. If you’re planning ahead, consider baking multiple batches and freezing them—they thaw quickly and reheat with minimal loss of moisture.

Storage & Make-Ahead Ideas

To keep your high-protein donuts at their best, proper storage is key to preserving moisture, tenderness, and flavor. If you bake a batch for the week, place cooled donuts in an airtight container or wrap individually in parchment and store in the refrigerator for up to five days. For longer storage, they freeze beautifully. Place cooled donuts on a tray to freeze individually, then transfer to a freezer-safe bag or container. This prevents them from sticking together and makes it easy to grab one or two as needed. When you’re ready to enjoy, reheat gently to restore that just-baked feel. A quick 10- to 15-second zap in the microwave or a few minutes in a 350°F (175°C) oven will revive texture and aroma, especially if you add a light glaze or a dusting of powdered sugar or cocoa for a finishing touch. If you have time, you can re-bake donuts at a low temperature for a few minutes to refresh the exterior crust and re-soften the interior, which can feel like stepping back into a bakery oven. For make-ahead ideas, consider portioning the dry ingredients and wet ingredients separately. When you’re ready to bake, combine and bake, saving you time while preserving the integrity of the protein-enriched batter. If you organize your freeze-and-reheat routine mindfully, you’ll always have a quick, satisfying, high-protein treat ready to go after workouts, early mornings, or between meetings.

Fun Facts & Trivia (Optional)

– Donuts have a long history dating back to Dutch settlers in early America, with the “oil-fried” shape becoming iconic in the 19th century. The modern ring donut is a later evolution, popularized by mass-produced bakeries and coffee houses. The ring shape offers a uniform bake and a pleasing symmetry that many bakers still adore today.

– Protein-enriched baked goods are part of a broader movement that blends indulgence with nourishment. The idea is to maintain flavor and texture while delivering functional benefits such as satiety, muscle maintenance, and energy, rather than simply adding empty calories.

– Donuts aren’t inherently unhealthy; it’s all about portion, ingredients, and balance. A high-protein donut can fit into a well-rounded diet when enjoyed in moderation and as part of a diet that includes fiber, protein, healthy fats, and a variety of micronutrients.

– Texture science matters in baked goods. A delicate balance of moisture, fat, and protein content can influence crumb structure, crust formation, and mouthfeel. Good bakers experiment with these variables to achieve that classic donut bite without sacrificing nutrition.

– The sensory experience—the aroma, the contrast between the soft crumb and subtle crust, and the gleam of glaze—creates a memory that invites return. In many cultures, desserts are more than just food; they’re moments of connection, comfort, and celebration. High-protein donuts aim to preserve that magic while aligning with contemporary dietary goals.

Ingredients

High Protein Donut Batter

  • 1 cup almond flour
    → Almond flour provides a gluten-free, moist base with a rich nutty flavor and tenderness. Use blanched almond flour for a finer crumb. Measure by lightly spooning into the cup and leveling, rather than scooping, to avoid packing and dense donuts.
  • 1/2 cup vanilla whey protein powder (or plant-based protein powder)
    → Adds high-quality protein to boost the donut’s nutrition profile and help with structure. Choose a vanilla-flavored powder for taste; if using unflavored, you may want to add a touch more vanilla extract or a pinch of sweetener. Sift to remove clumps and blend evenly with dry ingredients before combining with wet ingredients.
  • 2 large eggs
    → Provide structure, moisture, and helps the batter bind. For best results, bring eggs to room temperature before mixing to improve emulsification. If making vegan, substitute with 2 flax eggs (2 tablespoons ground flaxseed mixed with 6 tablespoons water, set 5–10 minutes).
  • 1/2 cup plain Greek yogurt
    → Contributes moisture, creaminess, and extra protein while helping to keep the donuts tender. Use full-fat for richer flavor; if using non-fat yogurt, consider slightly increasing the wet to maintain batter consistency. Stir yogurt until smooth before adding to the wet mixture.
  • 1/4 cup unsweetened almond milk
    → Adds light moisture and helps achieve a pourable batter consistency. Use milk of choice if preferred (cow’s, soy, oat). If batter seems thick, whisk in small increments of milk until just combined; avoid overmixing to keep donuts light.
  • 2 tablespoons melted coconut oil
    → Provides richness and helps keep donuts tender and moist. Prefer melted but cooled oil to avoid cooking the eggs; if you don’t have coconut oil, you can use light olive oil or avocado oil. For best texture, let the melted oil cool slightly before whisking into the wet ingredients.
  • 1/3 cup unsweetened applesauce or mashed banana
    → Acts as a natural binder and moisture source, reducing the need for extra fats while adding subtle sweetness. Use applesauce for a neutral flavor or ripe banana for extra banana flavor; mash thoroughly to avoid chunks that can disrupt batter smoothness.
  • 1 teaspoon vanilla extract
    → Enhances overall flavor and brightens the protein-rich batter. Use pure vanilla extract rather than imitation for a cleaner, deeper flavor. If you have vanilla bean paste, you can use a half-teaspoon for an intensified vanilla note.
  • 1–2 tablespoons maple syrup or honey (optional)
    → Adds a touch of sweetness and helps balance acidity from yogurt and protein powder. Adjust to your preferred sweetness and consider using sugar-free syrups if needed. If using a sweetened protein powder, you may omit this.
  • 1 teaspoon baking powder
    → Leavening agent that helps the donuts rise and become light. Ensure it’s fresh and not expired for reliable lift. If your batter seems dense, a touch more leavening may help; but avoid over-leavening to prevent a coarse crumb.
  • 1/4 teaspoon baking soda
    → Works with acidic yogurt to contribute extra rise and a softer crumb. If your yogurt is very low in acidity, the effect will be milder, but it still aids tenderness. Sift together with dry ingredients to distribute evenly.
  • 1/4 teaspoon salt
    → Balances sweetness and enhances flavors overall. Use fine sea salt for even distribution; omit if using salted butter or very salty ingredients elsewhere in the batter.
  • 1/2 teaspoon ground cinnamon
    → Adds subtle warmth and classic donut flavor. You can increase to 3/4 teaspoon if you love cinnamon, or replace with pumpkin spice blend for a seasonal twist. For less spice, reduce to 1/4 teaspoon.

Optional Add-ins

  • 1/4 cup mini chocolate chips (optional)
    → Chocolate chips provide pockets of melted chocolate and extra indulgence. Toss them with a small amount of almond flour before folding to help distribute evenly and prevent sinking to the bottom during baking.
  • 1/4 cup chopped nuts (e.g., walnuts or pecans) (optional)
    → Adds texture and healthy fats. Lightly toast the nuts before chopping to deepen flavor, and chop into small, even pieces so they distribute well without tearing the batter.

Glaze

  • 1/2 cup powdered sugar
    → Creates a smooth, glossy glaze that complements the protein-rich donuts. If you prefer a thinner glaze, start with 2 tablespoons milk and add more until you reach desired consistency. Sift sugar to avoid lumps.
  • 2–3 tablespoons milk (dairy or plant-based)
    → Adjusts glaze consistency; add gradually to avoid a runny glaze. For a richer glaze, use half-and-half or cream; for a lighter glaze, use skim milk or a non-dairy option.
  • 1/2 teaspoon vanilla extract
    → Adds depth to the glaze flavor. You can skip if you want a simple sugar glaze, or add a pinch of almond extract for a different aroma.

Instructions

  • Preheat your oven to 350°F (175°C) and line a 12-cup muffin tin with paper liners or grease it well.
    → This ensures the donuts release cleanly after baking and prevents sticking, which helps maintain their shape and makes icing or toppings easier to apply.
  • Whisk the dry ingredients together in a medium bowl: almond flour, vanilla whey protein powder, baking powder, baking soda, salt, and ground cinnamon.
    → Sifting or whisking distributes leavening evenly and the spice across the batter, preventing dense pockets and ensuring a uniform crumb.
  • Whisk the wet ingredients in a separate bowl: eggs at room temperature, plain Greek yogurt, unsweetened almond milk, melted coconut oil (slightly cooled), unsweetened applesauce or mashed banana, vanilla extract, and optional maple syrup or honey.
    → Room-temperature eggs emulsify more readily, yogurt adds moisture and tenderness, and combining wet ingredients before integrating keeps the batter smooth without streaks of oil; the optional sweetener can balance flavors if your protein powder is unsweetened.
  • Gently fold the wet ingredients into the dry ingredients using a wide spatula until just combined, stopping as soon as you see no large pockets of flour.
    → Gentle folding preserves the batter’s lightness and prevents overworking the mixture, which can make the donuts tough or dense.
  • If using optional add-ins, toss chocolate chips or chopped nuts with a spoonful of almond flour and fold them in evenly to suspend them throughout the batter.
    → Coating add-ins in a little flour helps prevent sinking to the bottom and ensures even distribution in every bite.
  • Spoon or scoop the batter into the prepared muffin tin, filling each cup about 3/4 full to create a generous dome without overflowing.
    → This fill level promotes even rise and a classic donut-top dome rather than a flat, dense top.
  • Bake in the preheated oven for 14–18 minutes, or until the tops are lightly golden and a toothpick inserted into the center comes out with only a few moist crumbs.
    → The bake time accommodates the protein-rich batter; testing with a toothpick confirms doneness without overbaking and drying the crumb.
  • Allow the donuts to cool in the pan for 5–7 minutes, then transfer them to a wire rack to cool completely before glazing.
    → Resting helps the structure set and prevents breaking; cooling on a rack prevents condensation from making the bottoms soggy.
  • Prepare the glaze by whisking powdered sugar with 2–3 tablespoons milk and vanilla extract until smooth and free of lumps, then adjust the thickness by adding more sugar or milk as needed.
    → A smooth, glossy glaze adheres evenly to the cooled donuts; gradual adjustments prevent a runny or overly stiff glaze.
  • Glaze the cooled donuts by drizzling or dipping the tops, then set them on a rack or parchment to allow the glaze to firm and set completely.
    → A thin, even coat that dries evenly gives a professional finish and prevents messy hand-sticky surfaces.
  • Store any leftovers in an airtight container at room temperature for up to 2–3 days, or freeze unfrosted for longer storage.
    → Proper sealing preserves moisture and texture; freezing extends shelf life without compromising crumb.

Notes

These gluten-free high-protein donuts are naturally sweetened with ripe bananas and Greek yogurt, offering a satisfying, protein-rich treat with no refined sugar. You can customize them by adding your favorite mix-ins, such as mini chocolate chips or chopped nuts, or a swirl of sugar-free syrup for extra flavor. They freeze well and make a convenient grab-and-go snack. For an extra boost, serve with a dollop of nut butter or a light yogurt glaze. Always ensure your almond flour is blanched and your baking powder is gluten-free if you have gluten intolerance.

Tips

Prep and Equipment

  • Preheat your oven to 350°F (175°C). Grease a donut pan thoroughly with a neutral oil spray or brush, or use a light coating of melted coconut oil to ensure easy release.
  • Measure almond flour by lightly spooning into the cup and level with a knife—do not scoop straight from the bag, which can pack the flour and make the donuts dense.
  • If you don’t have a donut pan, this batter can be baked as muffins or mini cakes; adjust bake time accordingly and monitor for doneness.

Mixing and Batter Consistency

  • Sift dry ingredients (almond flour, protein powder, baking powder, baking soda, salt, and cinnamon) to break up clumps and distribute leaveners evenly.
  • Whisk wet ingredients separately: eggs (brought to room temperature), yogurt (stirred smooth), milk, vanilla, and cooled melted coconut oil before combining with dry ingredients.
  • Combine wet and dry ingredients just until incorporated. Overmixing can develop gluten- or starch-containing batters and yield a tougher crumb.
  • If the batter feels too thick, whisk in small increments of milk until you reach a pourable, scoopable consistency. If it’s too loose, fold in a bit more almond flour.

Flavor Balance and Substitutions

  • For a vegan version, substitute 2 flax eggs (2 Tbsp ground flaxseed + 6 Tbsp water, mixed and set 5–10 minutes) for the eggs.
  • If using unflavored protein powder, consider adding a touch more vanilla extract or a pinch of sweetener to compensate for flavor loss. Thoroughly sift to remove clumps before mixing.
  • Use full-fat yogurt for richer flavor and moisture; if you use non-fat yogurt, you may need a bit more wet ingredients to maintain batter consistency.
  • Sweetness can be adjusted with maple syrup or honey. If your protein powder is sweetened, you may omit the additional sweetener.

Optional Add-Ins

  • To prevent chocolate chips from sinking, toss them first with a little almond flour before folding into the batter.
  • Toast chopped nuts lightly to deepen flavor, then fold in evenly so they distribute without tearing the batter.

Glaze Tips

  • Sift powdered sugar before whisking with milk to avoid lumps; start with 2 tablespoons milk and add more until the glaze reaches your desired thickness.
  • Vanilla enhances the glaze; add 1/2 teaspoon vanilla extract to the glaze or substitute with a pinch of almond extract for a different aroma.
  • For a richer glaze, use half-and-half or cream; for a lighter glaze, use skim milk or a non-dairy option.

Baking, Cooling, and Storage

  • Check doneness by inserting a toothpick—aim for a few moist crumbs, not wet batter. Don’t overbake to keep them moist and tender.
  • Let donuts cool in the pan for 5–7 minutes, then transfer to a rack to finish cooling. This helps prevent sticking and keeps the crust from becoming soggy.
  • Store leftovers in an airtight container at room temperature for up to 3 days; refrigerate for up to a week. For longer storage, freeze baked donuts up to 2–3 months and rewarm in the microwave for 10–15 seconds or in a warm oven.

FAQ

What makes these High Protein Donuts?

These donuts get a protein boost by using protein powder and yogurt, plus eggs for moisture and structure. This helps increase the protein content compared to regular donuts while still keeping a satisfyingly soft texture.

What ingredients do I need?

Most ingredients are pantry staples with a protein-focused swap. You can adapt with what you have on hand.

  • Protein powder (whey, casein, or plant-based)
  • Flour option: almond flour, oat flour, or a gluten-free blend
  • Eggs
  • Greek yogurt or dairy-free yogurt
  • Milk or plant-based milk
  • Sweetener of choice (sugar, honey, maple syrup, or a sugar substitute)
  • Baking powder
  • Vanilla extract
  • Pinch of salt
  • Optional add-ins: chocolate chips, berries, mashed banana, peanut butter
How much protein is in each donut?

Typically about 8–12 g of protein per donut, depending on the protein powder type, exact ingredients, and the donut size. You can adjust by using more or less protein powder or making smaller/larger donuts.

Can I customize flavors?

Yes. Try these ideas to switch things up:

  • Vanilla with cocoa powder for a chocolate twist
  • Lemon zest and blueberries
  • Banana-nut or peanut butter swirl
  • Chocolate-chips or white chocolate-chips
Are these donuts baked or fried?

They are baked for a lighter, protein-forward treat. Bake at about 350°F (175°C) for 12–15 minutes, or until a toothpick comes out clean.

What protein powder works best?

Whey or casein tends to give the best texture and rise. Plant-based proteins (pea, rice, soy) work well too—just note they can be a touch grittier or thinner, so you may need to adjust liquids slightly. Choose a flavor you enjoy, as it will affect the final taste.

Are these gluten-free or dairy-free?

Gluten-free: use a gluten-free flour blend or certified gluten-free oats. Dairy-free: use non-dairy yogurt and plant-based milk, and a plant-based protein powder if needed. Always check labels if you have dietary restrictions.

How should I store them and how long do they last?

Store in an airtight container. At room temperature, they last about 1–2 days; in the fridge, 5–7 days. For longer storage, freeze them and reheat as needed (see below).

Can I freeze them for later?

Yes. Freeze cooled donuts in a single layer, then transfer to an airtight bag or container. Reheat in the oven at 300–350°F (150–175°C) for 5–8 minutes or briefly in the microwave until warmed through. They keep well for up to 3 months.

Can I make them vegan?

Yes. Use flax eggs or chia eggs (1 tablespoon ground flaxseed or chia seeds + 3 tablespoons water per egg), dairy-free yogurt, non-dairy milk, and a plant-based protein powder. You may need to adjust the moisture slightly.

Troubleshooting: the donuts are dense or dry. What can I do?

Common fixes:

  • Avoid overmixing the batter to keep air incorporated.
  • Ensure you aren’t overbaking; remove when a toothpick comes out with a few crumbs.
  • Mix enough wet ingredients with the dry to avoid dryness (add a splash more yogurt or milk if needed).
  • Check that your leavening agents (baking powder) are fresh.
Can I glaze or top them?

Absolutely. A light glaze works well with protein donuts. Options:

  • Powdered sugar glaze (or sugar-free variant) with a touch of milk or yogurt
  • Chocolate glaze using melted dark chocolate and a splash of milk
  • Peanut butter drizzle or chopped nuts for crunch

Introduction / Hook

There’s a soft, irresistible moment when a warm donut hits your senses: the first inhale brings a whisper of maple vapor, the cinnamon dust on the crust tugs at your sweet tooth, and a cozy, comforting aroma swirls through the kitchen like a hug. Maple Cinnamon Protein Donuts are crafted to deliver that moment—an indulgent, bakery-worthy treat that doesn’t derail your day. Imagine a tender, lightly moist crumb with just the right amount of spring from a well-balanced protein blend. Each bite carries the familiar, comforting warmth of maple and cinnamon, with a subtle finish that hints at vanilla and a faint toasty note from a gentle browning. It’s dessert-level satisfaction you can feel good about, whether you’re fueling a morning workout, a mid-afternoon slump, or a weekend brunch. The magic lies in the balance: a donut that feels indulgent and comforting, yet built with protein-forward ingredients that help keep you full and steady. This isn’t just a snack; it’s a small ritual—one that begins with the whirr of a blender or mixer, ends with the soft crackle of a sugar-dusted crust, and leaves your kitchen smelling like a cozy, maple-scented breakfast paradise. It’s the kind of recipe that makes you look forward to a workout, a long drive home, or a lazy Sunday when you deserve something a little special, without the guilt or heaviness that sometimes accompanies sweet treats.

The Story Behind the Dish

Maple and cinnamon—a duo so quintessentially American in origin that they feel timeless—have traveled through kitchens and generations, carrying with them stories of maple forests, sugarhouses, and early morning rituals. Maple syrup, born from the sap tapped from sugar maples, was once a seasonal labor of love, a family affair where every drop carried the patience of winter’s end. Cinnamon, with its warm, resinous scent, has long been a staple in comforting bakes across cultures, from Nordic spice blends to Middle Eastern desserts. Put them together, and you get a flavor profile that’s instantly nostalgic: the same cozy vibe you’d expect from a Sunday pancake breakfast, but with a modern twist that aligns with a protein-forward lifestyle.

This particular donut concept grew from a desire to honor that familiar, comforting flavor while embracing the realities of busy days and active routines. It’s a nod to gym-goers who still crave something sweet after a tough workout, to parents who want a wholesome morning treat that doesn’t derail daily goals, and to anyone who loves the ritual of baking as a small act of self-care. The protein-forward version of a donut is a relatively new idea in the grand story of baked goods, but it fits naturally with the way many people now balance nourishment with pleasure. The result is a donut that feels like an indulgence while quietly delivering protein to support recovery, appetite control, and steady energy. It’s not about denying cravings; it’s about redefining them—so a morning workout can be followed by something you look forward to, not something you feel you must avoid.

Beyond the nutrition talk, there’s also a sentimental layer to this recipe. The maple-cinnamon aroma invites memories of old-fashioned diners, backyard vacations, and late-night baking sessions with friends. It’s a conversation between the past and the present—a pastry that carries tradition in one hand and practicality in the other. The donut becomes a canvas for your own stories, a small ritual you can share with family or savor solo as a moment of quiet joy. In the kitchen, as the batter comes together and the oven warms, you’re participating in a timeless, comforting act—one that honors simple ingredients, transformative technique, and the delightful surprise of waking up to something delicious and nourishing, all at once.

Why You’ll Love This Recipe

  • Protein-forward and satisfying: You get a sweet, comforting bite without the heaviness of traditional donuts, thanks to stock-friendly protein powders and balanced fats.
  • Weeknight-friendly sophistication: It tastes like a bakery treat, but it’s simple enough to whip up after work or before a workout.
  • Balanced sweetness: Maple provides depth and natural sweetness while cinnamon adds warmth without overpowering the palate.
  • Moist, tender crumb: The batter delivers a soft interior with a lightly crisp edge, a texture that feels indulgent yet light on the bite.
  • Customizable: The base concept invites a variety of twists—different protein powders, dairy-free options, or gluten-free adaptations—so you can tailor it to dietary needs or cravings.
  • Make-ahead potential: These donuts can be baked ahead and reheated, making weekend meal-prep or weekday breakfasts a breeze.
  • Visual appeal: A delicate maple glaze or a light dusting of cinnamon sugar can elevate their look for brunch gatherings or gifting—without complicating the recipe.
  • Kid-friendly appeal: Sweet and familiar flavors uncover a way to introduce protein-rich snacks to younger palates in a familiar form.

Flavor Profile & Texture

The flavor journey begins with the unmistakable aroma of maple, gently sweetened with a kiss of vanilla. As the donuts bake, the heat coaxes out the maple’s earthiness, producing a deep, nostalgic sweetness that isn’t cloying. Cinnamon travels with it, delivering a cozy warmth that percolates through the crumb and lingers on the tongue. There’s a delicate interplay between the sweet maple and the spicy-sweet cinnamon, a duo that feels timeless and comforting. The protein base—whether sourced from whey, casein, or a plant-based blend—adds a subtle, nutty backbone to the flavor profile, giving the donuts body without a heavy aftertaste. It’s a synergy: the indulgent aroma of maple and the homey spice of cinnamon, anchored by a protein-rich framework that keeps the bite clean and satisfying.

Texture-wise, you’re greeted with a light, airy crumb that still carries moisture and structure. The donut should be tender enough to yield to the bite, yet sturdy enough to hold its shape when picked up with a finger or a cup of coffee. A tiny crust forms on the exterior as the surface caramelizes ever so slightly in the oven, producing a gentle snap that gives way to the soft interior. The balance of moisture and bite is crucial here: too dense, and the donut feels like a heavy snack; too dry, and the maple-cinnamon magic is lost. When you pair the donut with a warm beverage—coffee, a creamy latte, or even a spiced tea—the flavors open up even more, the maple becoming syrupy and the cinnamon warming your palate with a lasting, comforting finish. The texture is versatile too: it holds up nicely for a grab-and-go morning, yet remains plush enough for a leisurely weekend brunch. If you decide to gild the lily with a light glaze or a dusting of cinnamon sugar, you’ll find that the glaze adds a glossy sheen without overwhelming the protein-forward base, while the cinnamon sugar crust adds a crackly, crunchy note that contrasts beautifully with the soft interior.

Occasions & Pairings

These Maple Cinnamon Protein Donuts shine in a variety of occasions, from early morning routines to festive gatherings. Here are some ideal moments to bake them into your week:

  • Weekend brunch: Serve alongside a fruit platter, yogurt parfaits, and a pot of coffee for a balanced, crowd-pleasing spread.
  • Post-workout snack: A protein-rich treat that helps replenish glycogen stores and supports muscle recovery, while still feeling like a reward.
  • Office mornings: A comforting, indulgent option that brightens the break room and pairs well with a robust cup of coffee or a chai latte.
  • Family breakfasts: A delicious way to introduce kids to the concept of a protein-forward pastry, without sacrificing sweetness or comfort.
  • Giftable treats: Wrap individually and share with neighbors or teammates; the maple aroma travels beautifully and feels personal.

Pairing ideas to enhance the experience:

  • Drinks: roasted coffee, almond milk lattes, cinnamon-spiced tea, or cold brew with a splash of vanilla.
  • Accompaniments: a dollop of lightly sweetened yogurt, a spoonful of ricotta, or a handful of toasted pecans for textural contrast.
  • Side dishes: fresh berries or sliced apples to juxtapose the donut’s warm sweetness with bright, crisp acidity.
  • Dessert context: for a brunch dessert, add a light drizzle of maple glaze and a sprinkle of finely chopped walnuts for crunch.

Tips, Variations & Substitutions

This section invites you to play with the concept while keeping the core idea intact: maple, cinnamon, and protein-driven goodness. Each variation maintains the balance between indulgence and nourishment, so you can tailor the donuts to your pantry, dietary needs, and flavor preferences.

Vegan & Dairy-Free Variations

If you’d like a vegan option, use plant-based protein powder and a dairy-free milk alternative (such as almond, soy, or oat milk). To help with structure in the absence of eggs, incorporate flax eggs or applesauce as a binder. A touch of coconut oil can replace butter sweetness, while keeping the crumb tender. For the glaze or finishing sugar, choose a vegan-friendly maple glaze or a light dusting of cinnamon sugar to preserve the donut’s integrity without relying on dairy.

Gluten-Free & Grain-Sensitive Options

To accommodate gluten sensitivities, use a gluten-free all-purpose flour blend that includes xanthan gum or another binder. You may need to adjust moisture with a touch more milk or a small amount of applesauce, depending on the blend. The result should be a comparable crumb—soft, light, and pleasantly springy—without a gritty or crumbly texture.

Low-Sugar & Reduced-Carb Tweaks

For a lighter sugar profile, reduce the maple flavoring slightly and lean on the cinnamon’s warmth to carry the aroma. If you’re aiming for a lower-carb option, consider a protein powder with lower net carbs and swap the maple flavor for a vanilla or maple-flavored extract with a sugar substitute in the glaze. The donut can still shine in aroma and texture with careful moisture management and a gentle bake.

Regional Twists & Flavor Variations

Try regional spices or extracts to put a personal stamp on the donut. A pinch of cardamom can elevate the maple-cinnamon base with a subtle floral note. Nutmeg or allspice adds a nostalgic fall or winter impression. For a nutty accent, fold in finely chopped toasted pecans or walnuts (if you’re not avoiding nuts). A cranberry-chunk variation can offer a surprising pop of tartness that balances the sweetness. If you love coffee, a coffee-flavored protein powder or a tiny espresso kiss in the batter can create a mocha maple donut that delights coffee lovers.

Storage & Make-Ahead Ideas

Longevity and convenience are part of the appeal. Here are practical tips to keep your Maple Cinnamon Protein Donuts fresh, tasty, and ready when you are.

  • Room temperature: Store in an airtight container for up to 2 days. Keep them away from direct sunlight to prevent moisture loss and staleness.
  • Refrigeration: If you won’t finish them within 2 days, refrigerate to extend freshness for up to a week. Bring to room temperature or warm briefly in a toaster oven before serving to restore softness.
  • Freezing: Layer donuts between parchment or parchment-like sheets in a freezer-safe container. They freeze beautifully for up to 2–3 months. Reheat in a 350°F (175°C) oven or toaster oven for 8–12 minutes, until warmed through and the exterior regains a slight crust.
  • Make-ahead strategy: You can bake a batch ahead of time and freeze them, or mix dry ingredients in advance and store them in an airtight jar; when you’re ready, simply combine with wet ingredients and bake fresh for a quick, comforting treat.

Technique-wise, the key to make-ahead success is preventing dryness. If you’re planning to store for a day or two, keep the donuts in an airtight container and consider a light drizzle of maple syrup or a touch of dairy-free glaze right before serving to refresh the surface and add a gloss that invites a first bite.

Fun Facts & Trivia (Optional)

Did you know that maple syrup used to be considered a valuable commodity, even used as currency in some early colonial economies? Its distinctive sweetness is caused by the sap’s natural sugar, which concentrates into maple syrup during the boiling process. Cinnamon, often associated with trade networks spanning Asia and the Middle East, was a luxury spice for many centuries before becoming a kitchen staple in households around the world. The combination of maple and cinnamon is a sensory passport to the past, a reminder of maple forests glowing with sugaring buckets and markets that offered fragrant spice blends for the home table. Donuts themselves have a long, evolving history—from Dutch settlers who introduced olefladen (oil-fried cakes) to American classic doughnuts—transforming into the soft, fluffy treats we know today. A protein-enhanced version is a modern response to changing dietary patterns, blending nostalgia with practical nutrition to create something that tastes like a celebration but satisfies a responsible, busy lifestyle.

In more recent culinary culture, “protein donuts” have emerged as a popular option among fitness enthusiasts who want comfort food that aligns with goals like muscle maintenance, appetite management, and steady energy. The maple-cinnamon duo adds a layer of familiarity that makes the experience comforting rather than experimental, bridging the gap between indulgent pastry and health-conscious snack. This dynamic reflects a broader trend: the kitchen as a place where flavor, nourishment, and joy coexist—where you can satisfy a craving, nourish your body, and enjoy a moment of everyday luxury all at once.

Ingredients

Donut Base
    – 1 1/2 cups almond flour (finely ground)
    → Purpose: Provides the tender, moist crumb and a sturdy structure for gluten-free donuts, supplying healthy fats that help mimic the density of fried donuts. Preparation: Use finely ground almond flour and measure by spoon-and-sweep to avoid packing. Tips: Store almond flour in a cool, dry place or in the fridge to maintain freshness; if your almond flour is coarser, run it through a quick sift for a smoother batter.
    – 1/2 cup oat flour (certified gluten-free)
    → Purpose: Adds lightness and helps with crumb structure when combined with almond flour; also contributes a subtle sweetness. Preparation: Sift with the almond flour to prevent clumps. Tips: If you don’t have oat flour, blend rolled oats in a processor until very fine, then measure. Ensure it’s certified gluten-free if needed.
    – 1/2 cup vanilla whey protein powder (or plant-based protein powder)
    → Purpose: Boosts protein content and helps bind the batter to improve texture and keep donuts moist. Preparation: Whisk into the dry ingredients to prevent lumps; if using a dense plant-based powder, start with the lower amount and adjust with liquid as needed. Tips: Vanilla protein enhances the maple flavor; if using unflavored, you can add a touch more vanilla or cinnamon to taste.
    – 1 teaspoon baking powder
    → Purpose: Leavening agent that lifts the batter for a light, cakey crumb. Preparation: Sift with dry ingredients to distribute evenly and avoid lumps. Tips: Use fresh baking powder for best rise; older powder can yield a dense texture.
    – 1/2 teaspoon baking soda
    → Purpose: Additional leavening and browning; reacts with acidic components to promote rise. Preparation: Add to dry ingredients and mix thoroughly. Tips: If your yogurt is very thick or sour, adjust with a splash of milk to balance acidity and moisture.
    – 1/4 teaspoon salt
    → Purpose: Enhances flavor and balances sweetness, helping cinnamon and maple pop. Preparation: Dissolve with dry ingredients. Tips: Use fine salt for even distribution; too much salt will dull sweetness.
    – 1 teaspoon ground cinnamon
    → Purpose: Core spice that defines the doughnut flavor profile and complements maple. Preparation: Use freshly ground cinnamon if possible for a stronger aroma. Tips: If you love warmth, you can bump to 1 1/2 teaspoons; store spice sealed in a cool, dark place to preserve aroma.
    – 2 large eggs
    → Purpose: Bind the batter, help structure, and contribute moisture. Preparation: Bring to room temperature for easier emulsification. Tips: For a dairy-free version, replace with standard flax eggs (2 tablespoons ground flaxseed whisked with 6 tablespoons water, let sit 5–10 minutes) or a commercial egg replacer; texture will be slightly different but still delicious.
    – 1/2 cup unsweetened almond milk
    → Purpose: Adds moisture and helps achieve a scoopable batter. Preparation: Use at room temperature; add a splash more if the batter seems too thick. Tips: If you’re using a thicker non-dairy milk, you may need a touch more liquid to loosen the batter.
    – 1/2 cup plain Greek yogurt
    → Purpose: Improves tenderness, moisture, and crumb structure while boosting protein. Preparation: Let yogurt come to room temperature to avoid curdling when mixing with eggs; whisk until smooth. Tips: Full-fat yogurt yields a richer crumb; dairy-free yogurt can be substituted with the same amount of dairy-free yogurt and a little extra milk if needed.
    – 1/4 cup maple syrup
    → Purpose: Natural sweetness and maple flavor that pairs perfectly with cinnamon. Preparation: Whisk into the wet ingredients for even distribution. Tips: Use real maple syrup rather than pancake syrup for deeper flavor; if you prefer less sweetness, reduce slightly and rely on glaze for sweetness.
    – 1/4 cup unsweetened applesauce
    → Purpose: Adds moisture and acts as a fat replacer to keep donuts tender. Preparation: Mix into the wet ingredients until fully incorporated. Tips: If you want a richer texture, you can substitute half with mashed banana; note it will add banana flavor.
    – 2 tablespoons melted coconut oil
    → Purpose: Provides fat for tenderness and helps create a soft crumb. Preparation: Melt and cool slightly before whisking into the wet ingredients to avoid scrambling eggs. Tips: If you want a neutral fat, substitute with light olive oil or avocado oil; coconut oil will contribute a light coconut note that complements maple.
    – 1 teaspoon vanilla extract
    → Purpose: Adds aroma and rounds out the maple-cinnamon profile. Preparation: Stir into the wet ingredients. Tips: Use pure vanilla extract for best flavor; store away from heat to preserve potency.
Maple Glaze
    – 1 cup powdered sugar
    → Purpose: Creates a glossy, sweet finish that hardens slightly as it sets. Preparation: Sift to remove lumps and whisk with liquids until smooth. Tips: For a thinner glaze, add a teaspoon of milk at a time; for a thicker glaze, add more powdered sugar. Gluten-free sugar is fine as long as it’s pure powdered sugar.
    – 2-3 tablespoons maple syrup
    → Purpose: Intensifies maple flavor in the glaze and contributes to its glossy texture. Preparation: Whisk into powdered sugar with a small amount of milk until smooth. Tips: If you want a stronger maple bite, use 100% pure maple syrup rather than imitation syrup.
    – 1-2 tablespoons milk (dairy or non-dairy)
    → Purpose: Adjusts glaze consistency to coat the donuts nicely. Preparation: Add gradually while whisking until you reach desired drippiness. Tips: Chill glaze briefly if you want a thicker coating that sets firmly; warm milk will make glaze slightly looser.
    – pinch salt
    → Purpose: Balances sweetness and enhances maple flavor. Preparation: Add a small pinch and whisk; Tips: A pinch is enough—too much salt will dull the glaze.
Optional Add-ins
    – 1/4 cup chopped pecans or walnuts (optional)
    → Purpose: Add crunch, toasty flavor, and additional texture. Preparation: Chop into small, even pieces so they distribute evenly; toast nuts first for extra aroma and crispness. Tips: Toasting enhances flavor; store leftovers in the fridge to maintain freshness.
    – 1/4 cup mini chocolate chips (optional)
    → Purpose: Provide pockets of chocolate sweetness and melt-in-mouth moments. Preparation: Toss chips with a teaspoon of flour to prevent sinking; fold in at the end of mixing. Tips: Use mini chips for even distribution; dairy-free chips are available if needed.
    – 2 tablespoons unsweetened shredded coconut (optional)
    → Purpose: Adds a subtle tropical note and textural contrast. Preparation: Lightly toast or fold in raw for texture; if using on top, press gently into the glaze. Tips: Toasting deepens flavor; avoid burning by keeping on low heat and stirring regularly.
Toppings
    – Ground cinnamon for dusting (optional)
    → Purpose: Finishing aroma and extra warmth that accentuates the maple-cinnamon profile. Preparation: Dust donuts lightly once glaze is set using a fine-mesh sieve. Tips: A light shake of cinnamon goes a long way; you can re-dust after the glaze sets if desired.

Instructions

  • Preheat your oven to 350°F (175°C) and grease a 6-cavity donut pan with a neutral oil or nonstick spray, ensuring every cavity is evenly coated for easy release.
    → This preparation prevents sticking and preserves the donuts’ smooth domes, making unmolding clean and effortless.
  • Sift together almond flour, oat flour, vanilla whey protein powder, baking powder, baking soda, salt, and ground cinnamon in a large mixing bowl, then whisk until completely incorporated and free of lumps.
    → Sifting and whisking distribute leaveners and spices evenly, which yields a uniform crumb and a balanced maple-cinnamon flavor in every bite.
  • Whisk eggs in a separate bowl until they are smooth and slightly pale, then whisk in room-temperature Greek yogurt, room-temperature almond milk, maple syrup, and applesauce; finally drizzle in the cooled melted coconut oil and vanilla extract and whisk until the mixture is glossy and fully emulsified.
    → Emulsification ensures fat and liquid components combine thoroughly for a moist, cohesive batter that traps air for a lighter crumb.
  • Pour the wet mixture into the dry mixture and fold with a silicone spatula just until you see no dry streaks, allowing a few small lumps to remain; avoid overmixing to prevent a dense texture.
    → Gentle mixing preserves tenderness in gluten-free batters and prevents toughness from excessive gluten development or clumping of proteins.
  • If using optional add-ins (chopped pecans or walnuts, mini chocolate chips, or shredded coconut), fold them in now with a few deliberate turns to distribute them evenly without overworking the batter.
    → Even distribution prevents concentrated pockets of flavor or crunch and ensures every bite has consistent texture.
  • Spoon or pipe the batter into the prepared donut pan cavities, filling each about 3/4 full to allow room for expansion; tap the pan firmly on the countertop to settle the batter and expel air pockets.
    → Filling to 3/4 and tapping creates a uniform rise and a smooth, rounded top without cracking or overflow.
  • Bake in the center of the oven for 12–15 minutes, or until the edges are lightly browned and a toothpick inserted into a donut comes out with a few moist crumbs; rotate the pan halfway if your oven runs unevenly.
    → Proper bake time ensures a tender, cake-like crumb while avoiding dry edges; toothpick testing confirms doneness without guessing.
  • Allow the donuts to cool in the pan for 5–10 minutes, then transfer them to a wire rack to cool completely before glazing to prevent the glaze from sliding off warm surfaces.
    → Cooling stabilizes the crumb and prevents heat from causing the glaze to separate or run, giving a cleaner finish.
  • In a medium bowl, whisk powdered sugar, maple syrup, 1–2 tablespoons milk, and a pinch of salt until smooth and glossy, adjusting thickness with additional sugar or milk to reach a coating-ready consistency.
    → A smooth, cohesive glaze adheres evenly to the cooled donuts and yields a professional, shiny finish.
  • When the glaze is ready, dip the top of each donut into the glaze or drizzle over with a spoon to achieve an even coat; allow the glaze to set at least 10 minutes before handling for a firm, slightly crisp exterior.
    → Fondant-like setting provides a pleasant contrast with the moist crumb and prevents the glaze from running off too quickly.
  • If desired, lightly dust the glazed tops with ground cinnamon for an extra aromatic kick and warmth that complements the maple and cinnamon profile; do this after the glaze has set.
    → A subtle cinnamon finish enhances aroma and repeats the donut’s flavor theme without overpowering the glaze.
  • Store any leftovers in an airtight container at room temperature for up to 2 days or refrigerate for up to 5 days; for longer storage, freeze the donuts unfrosted or freeze glazed donuts separately to preserve texture.
    → Proper storage maintains moisture, prevents staling, and makes the donuts convenient for later snacking without sacrificing quality.

Notes

These Maple Cinnamon Protein Donuts are naturally gluten-free and protein-packed, made with finely ground almond flour and certified gluten-free oat flour to create a tender, cakey crumb that stays moist thanks to Greek yogurt and eggs. For best texture, whisk the dry ingredients (almond flour, oat flour, protein powder, baking powder, baking soda, salt, and cinnamon) together, then whisk the eggs, yogurt, milk, maple syrup, applesauce, coconut oil, and vanilla in a separate bowl before whisking the wet into the dry until just combined; a brief rest of 5 minutes helps hydrate the flours and prevents a dry batter. Bake in a well-greased donut pan at 350°F (175°C) for about 12–15 minutes, until a toothpick comes out with a few moist crumbs; cool in the pan for 5 minutes, then transfer to a rack. To keep the crumb tender, avoid overmixing and ensure the batter isn’t too thick; if it seems tight, add a splash more milk. For a dairy-free version, substitute dairy-free yogurt and use flax eggs (2 Tbsp ground flaxseed + 6 Tbsp water, set 5–10 minutes) or a commercial egg replacer. Prepare the Maple Glaze while donuts cool: sift 1 cup powdered sugar, whisk in 2–3 Tbsp maple syrup and 1–2 Tbsp milk, plus a pinch of salt, adding more milk or sugar until glossy and pourable; glaze sets as it cools. Optional add-ins like 1/4 cup chopped pecans or walnuts, 1/4 cup mini chocolate chips (tossed with a teaspoon of flour to prevent sinking), or 2 Tbsp unsweetened shredded coconut can be folded in or sprinkled on top for texture. Finish with a light dusting of ground cinnamon after glaze sets, if desired. Store leftovers in an airtight container at room temperature for 2–3 days or refrigerate for up to 5 days; freeze baked donuts for up to 2–3 months and rewarm in a low oven or microwave. For best flavor and texture, use real maple syrup in both the batter and glaze, and ensure your oat flour and baking powder are certified gluten-free if you have gluten intolerance.

Tips

Tips for Maple Cinnamon Protein Donuts

General ingredient handling

  • Measure almond flour by spoon-and-sweep to avoid packing, which can make the donuts dense.
  • Keep almond and oat flours in a cool, dry place or refrigerate to maintain freshness; sift them together to ensure a light, uniform batter.
  • Whisk the whey or plant-based protein powder into the dry ingredients to prevent clumps and improve texture.
  • Use room-temperature eggs, milk, yogurt, and maple syrup for a smoother emulsion and more even crumb.

Leavening and structure

  • Use fresh baking powder for optimal rise;測older powder can yield a denser crumb.
  • Keep baking soda and yogurt balanced; if yogurt is very thick or acidic, a splash of milk can help moisture and lift.
  • Do not overmix the batter once the dry and wet ingredients are combined to avoid tough donuts.
  • Let the batter rest 5–10 minutes after mixing to hydrate flours and improve crumb.

Wet ingredients handling

  • Heat or warm maple syrup slightly if adding to cold ingredients to help it blend evenly.
  • Whisk eggs, yogurt, milk, maple syrup, applesauce, melted coconut oil, and vanilla together before folding into dry ingredients for a smooth batter.
  • If the batter seems thick, add a teaspoon at a time of dairy or non-dairy milk until it scoops easily.

Baking tips

  • Preheat oven to 350°F (175°C). Lightly grease donut pans or use a non-stick spray to help release evenly.
  • Fill each donut cup about 2/3 full to allow for gentle rising and a nice domed top.
  • Bake until a toothpick inserted into the center comes out clean or with a few moist crumbs, typically 12–14 minutes depending on pan and oven.
  • Cool in the pan for 5–10 minutes before transferring to a rack to prevent sticking and maintain a soft crumb.

Maple glaze guidance

  • Sift powdered sugar to remove lumps; whisk with maple syrup and a splash of milk until smooth.
  • Adjust glaze consistency by adding milk a teaspoon at a time; for a thicker glaze, add more powdered sugar.
  • Dip cooled donuts for a glossy finish; if glaze sets too quickly, rewarm the glaze briefly and whisk to smooth it again.
  • For a dairy-free glaze, use non-dairy milk and ensure pure maple syrup is used for a richer maple flavor.
  • Season with a pinch of salt to balance sweetness and enhance maple aroma.

Optional add-ins and texture

  • Toast chopped pecans or walnuts to enhance aroma; fold in after wet and dry ingredients are combined to distribute evenly.
  • Toss mini chocolate chips with a teaspoon of flour to prevent sinking; fold in at the end for even distribution.
  • Lightly toast shredded coconut to intensify coconut notes; fold in or sprinkle on top of glaze for texture.

Finish and storage

  • Dust with a little ground cinnamon just before serving for an extra aroma boost.
  • Store baked donuts in an airtight container at room temperature for 1–2 days; refrigerate to extend shelf life but rewarm gently to restore tenderness.
  • Freeze baked donuts for longer storage; thaw at room temperature and reheat briefly to regain softness.

FAQ

What ingredients do I need for Maple Cinnamon Protein Donuts?

This recipe makes about 6 donuts. You’ll need:

  • 1 scoop (about 30 g) vanilla or unflavored protein powder
  • 3/4 cup oat flour (gluten-free) or all-purpose flour
  • 1/2 cup milk (d dairy or plant-based)
  • 1/4 cup pure maple syrup
  • 1 large egg
  • 2 tablespoons melted coconut oil or light neutral oil
  • 1 teaspoon vanilla extract
  • 1 teaspoon baking powder
  • 1/2 teaspoon ground cinnamon
  • Pinch of salt

Optional glaze ingredients (see Q7): maple glaze and/or toppings like chopped nuts.

Can I use different types of protein powder?

Yes. You can use whey, casein, or plant-based powders (pea, rice, soy, etc.).

  • Whey/casein: typically baked well and give a mild flavor. Use about 1 scoop and keep the liquid amount as written.
  • Plant-based: may be slightly grittier or thicker. If batter seems thick, add 1–2 tablespoons more milk.

Tip: Vanilla or unflavored powders work best for maple cinnamon flavor. If using a strongly flavored powder, consider adjusting the cinnamon or maple amounts to taste.

How do I make Maple Cinnamon Protein Donuts step by step?

Steps:

  1. Preheat oven to 350°F (175°C). Grease a six-donut pan or line with nonstick spray.
  2. In a bowl, whisk together dry ingredients: protein powder, oat flour, baking powder, cinnamon, and salt.
  3. In another bowl, whisk wet ingredients: milk, maple syrup, egg, melted oil, and vanilla extract.
  4. Pour wet ingredients into the dry and mix until just combined. Do not overmix; a few lumps are fine.
  5. Scoop batter into the prepared donut pan, filling about 2/3 of each mold.
  6. Bake 12–15 minutes, or until a toothpick inserted comes out clean.
  7. Cool in the pan for 5–7 minutes, then transfer to a rack to cool completely before glazing if desired.
Can I make these dairy-free or gluten-free?

Yes with simple substitutions:

  • Dairy-free: use plant-based milk (almond, soy, oat, etc.) and replace any dairy-based fat with melted coconut oil or another plant oil.
  • Gluten-free: use certified gluten-free oat flour or a gluten-free flour blend. Ensure your protein powder is gluten-free if you have celiac disease or severe gluten sensitivity.

Note: If you don’t have oat flour, you can blend quick oats in a processor to make your own flour.

How should I store and reheat leftovers?

Storage and reheating tips:

  • Store in an airtight container in the refrigerator for up to 4–5 days.
  • For longer storage, freeze baked donuts in a single layer, then transfer to a freezer-safe bag for up to 2–3 months. Reheat in the microwave in 15–20 second bursts or warm in a 350°F (175°C) oven for 5–7 minutes.
  • Glazed donuts are best consumed within 2–3 days for the best texture.
How long should I bake them, and how do I test for doneness?

Bake at 350°F (175°C) for 12–15 minutes. Donuts are done when a toothpick inserted into a donut comes out clean or with a few moist crumbs.

Notes:

  • Oven temperatures vary; start checking at 12 minutes to avoid overbaking, which can dry them out.
  • If you see domed tops, you can level them with a very light press before glazing.
How do I make the maple glaze for these donuts?

Maple glaze option (quick and simple):

  • 1/2 cup powdered sugar
  • 1–2 tablespoons maple syrup
  • 1–2 teaspoons milk (adjust for desired consistency)

Whisk until smooth and drizzle over cooled donuts. If you prefer a thicker glaze, use 3–4 tablespoons powdered sugar and less milk. For a dairy-free glaze, use plant-based milk.

How can I customize flavors or add-ins?

Here are tasty options:

  • Add 1/4 teaspoon nutmeg or pumpkin spice for a seasonal twist.
  • Fold in 1–2 tablespoons chopped walnuts, pecans, or dark chocolate chips after mixing the batter.
  • Swap maple syrup for honey, or use half maple and half applesauce for different sweetness and moisture.
  • For extra moisture, replace up to 2 tablespoons of milk with plain yogurt or unsweetened applesauce (note: this may slightly increase density).
Can I bake these donuts in a muffin tin or without a donut pan?

Yes. If you don’t have a donut pan, you can bake the batter as muffins in a standard muffin tin:

  • Fill muffin cups 3/4 full and bake about 18–22 minutes at 350°F (175°C).
  • The texture will be a bit denser than donuts, but they’ll still be delicious with the maple cinnamon flavor.
What is the approximate nutrition per donut?

Nutrition varies by ingredients and brands. Rough estimate per donut (based on the stated ingredients and yields 6 donuts):

  • Calories: 180–220
  • Protein: 8–12 g
  • Carbs: 20–28 g
  • Fat: 7–10 g

For precise values, calculate with your exact brands and measurements using a nutrition calculator.

Can I adjust if I want fewer calories or more protein?

Yes. Suggestions:

  • Reduce maple syrup to 1–2 tablespoons and add a splash of vanilla for flavor without many extra calories.
  • Increase protein powder to 1 scoop and reduce flour by 1–2 tablespoons; add 1–2 tablespoons more milk if batter is too thick.
  • Use unsweetened applesauce instead of part of the oil to cut fat calories while maintaining moisture.

Introduction / Hook

Imagine a cozy kitchen filled with the soft clink of a baking dish, the warm hum of a homewarmed oven, and the irresistible scent of browned mushrooms kissing butter and garlic. Baked Chicken Stroganoff is the kind of dish that makes a weeknight feel like a celebration, without demanding a passport or a dozen pots and pans. The chicken stays tender and juicy beneath a creamy, mushroom-scented sauce that bakes to a velvet finish, while a rustic crust gathers a little caramelized character on top. It’s comfort food with an upgrade: stovetop ease, oven-to-table elegance, and a flavor balance that sings with savory depth and just the right hint of tang. If you’ve ever craved the indulgence of classic stroganoff but wanted something more approachable for a family dinner, this baked rendition is your new go-to. The moment the dish emerges from the oven, you’ll understand why this recipe has staying power—rich yet bright, indulgent yet practical, and wonderfully forgiving for cooks of all levels.

In this version, chicken takes center stage, paired with earthy mushrooms, a whisper of onions and garlic, and a creamy sauce that bakes into a luscious, slightly glossy coating. The result is a one-pan, sheet-pan-friendly miracle: you cut into tender, succulent chicken, scoop it up with saucy mushrooms, and finish with a gentle bake that seals in moisture and heightens flavor. It’s the kind of dish that asks for a soft pillow of mashed potatoes, egg noodles, or buttered rice to soak up every last drop, yet stands confidently on its own as a complete meal. The beauty of baked chicken stroganoff lies not only in its luxurious taste but in its forgiving, adaptable nature—perfect for a family supper, a casual dinner with friends, or an emergency-meal saved for those busy days when you still crave something soulful and satisfying.

From the very first bite, you’ll notice a harmony of textures: the tender, succulent chicken, the toothsome bite of sautéed mushrooms, the silky cream that coats each piece, and a gentle, almost caramelized top that adds a subtle depth. The aroma is equally inviting—garlic and onions mellowed into sweetness, mushrooms releasing their savory umami, and a hint of paprika or black pepper giving warmth without overpowering the balance. It’s a dish that feels indulgent but is surprisingly doable with pantry staples and a single baking dish. The magic is in how the oven does the heavy lifting—melds the flavors, softens the mushrooms to their earthy peak, and infuses every layer with a cozy, homey fragrance that makes mouths water before the first forkful even reaches the table.

The Story Behind the Dish

The classic Beef Stroganoff has its origins in 19th-century Russia, a dish that married tender beef with a creamy sauce and a touch of acidity to brighten the richness. Over the decades, it traveled across continents, mutating into variations that reflect local tastes and ingredients. Chicken Stroganoff, as a gentler, more accessible alternative, began making rounds as home cooks sought a lighter, quicker take on the original concept. The chicken version preserves the spirit of the dish—the luxurious creaminess, the savory mushroom notes, and the brightness of a tangy element—while offering a more forgiving texture and a faster cooking time, since chicken breasts or thighs cook quickly and stay juicy when handled with care.

This baked rendition is a modern homage to that evolution. Rather than searing the meat separately and finishing on the stovetop, the entire dish (or nearly so) comes together in a baking dish and goes into the oven. The oven’s steady, even heat allows the chicken to remain moist, the mushrooms to release their earthy juices, and the sauce to thicken naturally as it bakes. Some cooks like to finish with a dollop of sour cream or cream cheese stirred in after baking for added tang and shine, while others prefer a lighter, dairy-free approach using a plant-based cream substitute. The result is a comforting classic with a contemporary twist—an homage to tradition that’s deeply satisfying in a way that feels both familiar and newly comforting.

There’s also a small, sentimental layer to this dish. It’s the kind of recipe that travels with families, collected over years and adapted to the rhythm of everyday life. It’s the dish you reach for when you’ve had a long day but still want to put something nourishing on the table. It’s the one that invites you to set the table, share a conversation, and let the sauce do the talking as you pair it with your favorite starch. In stories told around warm plates, baked chicken stroganoff often becomes a memory in the making—a dish that your future self will want to recreate during holidays, weekends, or those spontaneous moments when you crave something flavorful and comforting without fuss.

Why You’ll Love This Recipe

  • One-dish meal: A complete, comforting dish that minimizes cleanup while delivering maximum flavor.
  • Juicy, tender chicken: Baking helps preserve moisture and yields succulent strips or cubes that stay flavorful after the oven finishes its magic.
  • Creamy, mushroom-forward sauce: Rich and velvety without being cloying, with a savory balance that complements poultry beautifully.
  • Versatility: Great with egg noodles, mashed potatoes, rice, or even crusty bread to soak up the sauce; easily adaptable for gluten-free or dairy-free diets.
  • Make-ahead and entertaining-friendly: Assemble, refrigerate, and bake later for a crowd-pleasing centerpiece that feels special without requiring constant supervision.
  • Weeknight-friendly yet impressive: A dish that tastes elevated enough for a dinner party but simple enough for a busy Tuesday.
  • Customizable flavor: Easy to tweak with different mushrooms, a splash of white wine, chives or parsley, or a dash of paprika for warmth.

Flavor Profile & Texture

The core of baked chicken stroganoff is its luxurious sauce, an elixir of creaminess that coats every bite without weighing you down. The sauce often starts with sautéed onions and garlic, which craft a gentle sweetness that anchors the dish. The mushrooms bring an earthy, umami-rich character—they release their juices as they cook, mingling with the aromatics to form a deeply savory base. When the chicken bakes in that environment, it absorbs the flavors slowly, remaining plump and tender under a light, creamy veil.

Texture-wise, you’ll experience a pleasing contrast. The chicken yields softly under the fork, while the surface of the dish may develop a delicate, slightly roasted crust—especially if you finish under a broiler for a minute or two or simply allow the top to bake until lightly golden. The sauce, smooth and glossy, clings to the meat and noodles (or your chosen starch) in a way that invites spoonfuls and careful savoring. Depending on your ingredients, a hint of tang from sour cream or yogurt can lift the richness, giving the dish a balanced brightness that prevents it from feeling too heavy. A touch of paprika, black pepper, or fresh herbs adds a subtle kick or herbaceous lift, helping the flavors remain vivid through the longer bake time.

In terms of aroma, the kitchen fills with comforting notes: garlic and onion caramelizing, mushrooms releasing their deep, forest-floor scent, butter softening into a delicate richness, and a hint of cream swirled through the air as the dish bakes. When you pull the dish from the oven, you’re greeted by a bouquet that feels both nostalgic and fresh, like a familiar favorite that’s been gently refreshed. The final result is a plate that feels indulgent without being heavy, satisfying a craving for something creamy and savory while still letting the natural flavors of quality ingredients shine through.

Occasions & Pairings

This baked chicken stroganoff shines in a variety of settings. It’s ideal for weeknights when you want something comforting yet quick enough to fit around homework, school runs, or late meetings. It also suits casual gatherings with friends or family, where you want a dish that feels special without requiring elaborate preparation. Holidays or weekend dinners benefit from its cozy, crowd-pleasing character, especially when you want a comforting main that complements a table of sides without stealing the show from lighter starters or desserts.

Pairing ideas to elevate the experience:

  • Starch companions: Egg noodles are a classic match, as they soak up the creamy sauce beautifully. Alternatives include buttered mashed potatoes, fluffy rice, or wide ribbons of pettuccine for a heartier bite.
  • Greens and color: A simple side of steamed green beans, sautéed spinach, or roasted asparagus adds a refreshing contrast and a pop of color to the plate.
  • Accompaniments: A crisp cucumber salad with dill, a tangy beet salad, or pickled onions offer brightness and a pleasing counterpoint to the richness.
  • Drinks: A light white wine with good acidity, such as Sauvignon Blanc or Pinot Grigio, can cut through the creaminess. For non-alcoholic pairings, a sparkling lemonade or a chilled herbal tea works well.
  • Desserts: A lemon tart, vanilla bean ice cream, or a poached fruit dessert can provide a refreshing finish that cleanses the palate after the creamy main.

Tips, Variations & Substitutions

Tips for Perfect Results

To ensure succulent chicken and a luscious sauce, keep these pointers in mind. Use boneless, skinless chicken cut into even pieces so they cook uniformly. If you’re using chicken thighs, they’ll stay even moister, while chicken breasts provide a leaner option that still holds flavor well. Sauté the mushrooms and onions until they release their juices and the edges start to caramelize slightly—this step builds the depth of flavor before the bake. Don’t rush the sauce thickening; a gentle simmer or a careful baking time helps it emulsify into a silkier texture. If you prefer a thicker sauce, you can reduce the first portion of your liquid a little on the stovetop before combining it with the other ingredients.

If you’d like a lighter feel without sacrificing creaminess, try a mixture of half-and-half and a small amount of cream cheese or Greek yogurt stirred through after baking. For dairy-free or vegan versions, swap in plant-based milk or cream substitutes and add a dairy-free cream cheese to achieve the same luxurious texture, keeping an eye on the consistency as it bakes.

Variations

  • Herb-forward: Add fresh thyme, tarragon, or chives to the sauce for a bright, herbaceous twist that complements the mushrooms beautifully.
  • Smoky paprika kick: Use smoked paprika for a gentle smoky depth that echoes the warmth of a well-browned crust on top.
  • Green peppercorn lift: A splash of green peppercorns in cream adds a mild, peppery note that complements chicken nicely.
  • Cheesy finish: A light sprinkle of grated Gruyère or aged cheddar over the top during the last few minutes of baking creates a glossy, melty crust.
  • Gluten-free: Use gluten-free pasta or serve with rice and ensure any thickening agents are gluten-free if the sauce requires it.
  • Low-carb option: Serve over cauliflower rice or steamed broccoli to keep carbohydrates lower while preserving creamy comfort.
  • Make-ahead approach: Assemble up to a day in advance, refrigerate, and bake when ready. Adjust bake time slightly for fully chilled ingredients.

Substitutions

  • Protein swap: Substitute turkey or pork if preferred, with adjustments to cook time to keep the meat tender.
  • Vegetarian option: Replace chicken with hearty mushrooms or a mix of roasted vegetables to maintain a satisfying texture and flavor profile.
  • Alliums: If you’re sensitive to onions or garlic, you can reduce their amount or use shallots for a milder sweetness that still builds depth.

Storage & Make-Ahead Ideas

This dish stores well, which makes it perfect for batch cooking or meal prepping. Once cooled, transfer to an airtight container and refrigerate for up to 3–4 days. Reheating is straightforward: gently warm on the stovetop over low heat, adding a splash of milk or broth to loosen the sauce if needed, or reheat in a covered dish in a low oven until warmed through. If you’ve finished the dish with cheese or a crispy top, you can re-toast under a broiler for a minute or two to refresh the texture, watching carefully to prevent burning.

For freezing, it’s best to freeze the cooled dish without the final top crust or cheese. Freeze in a well-sealed container for up to 2–3 months. Thaw overnight in the refrigerator and reheat gently on the stovetop or in an oven-safe dish at a moderate temperature, until the sauce thickens and the chicken is heated through. If you’re freezing with dairy, consider adding a touch of extra dairy-free milk or cream when reheating to restore the sauce’s smoothness, as freezing can alter texture slightly.

Make-ahead strategies include prepping the mushroom-onion mixture and the chicken in advance, then combining with the sauce base and baking just before serving. This approach saves you precious minutes on busy days and ensures your kitchen smells irresistible at the moment of serving.

Fun Facts & Trivia (Optional)

The name Stroganoff carries a hint of aristocratic history. It’s widely believed to have originated in the kitchen of a Russian noble family named Stroganov, who were patrons of gastronomy and known for elegant, robust dishes. The dish’s hallmark—a creamy, tangy sauce—appealed to many palates around the world, evolving as cooks added regional twists and substitutions. In translations and translations-adaptations, you may encounter Beef Stroganoff or Chicken Stroganoff worn through the years as a symbol of comfort cooking that crosses borders. The baked version, while a contemporary adaptation, preserves the essence: a nourishing, homestyle dish that feels like a warm embrace on a plate.

Another fun tidbit: the world of Stroganoff has inspired countless home cooks to experiment with textures and ingredients. Some families still prepare it exactly as a stovetop dish—sauce simmering to the perfect thickness while tender chicken rests in the pan—while others embrace the bake for its convenience and the way it concentrates flavors. The essential truth behind all these variations is the same: a humble combination of meat, mushrooms, and cream, transformed by heat, patience, and a little culinary courage. As you prepare this baked chicken version, you’re adding your own chapter to a long-running, evolving story of one of the most comforting, universally loved dishes in modern home cooking.

Ingredients

Baked Chicken Stroganoff

Chicken & Vegetables

  • – 2 pounds boneless, skinless chicken thighs, trimmed and cut into 1-inch pieces
    → The chicken provides the hearty base of the dish; thighs stay moist and flavorful through baking. Cut into uniform 1-inch pieces to ensure even cooking. Sear briefly in a hot pan to develop color and flavor, then nestle into the sauce for baking.
  • – 8 ounces cremini mushrooms, sliced
    → Mushrooms contribute earthy depth and moisture. Clean with a damp cloth, trim stems, and slice evenly. Sauté until all moisture evaporates and the edges brown deeply to enhance flavor and prevent a watery sauce.
  • – 1 medium onion, diced
    → Onion builds the savory base and adds sweetness that moderates the richness. Dice small for quick, even cooking; sauté with mushrooms until translucent and lightly caramelized to deepen the sauce.
  • – 3 cloves garlic, minced
    → Garlic adds aromatic punch and depth. Mince finely and add after onions begin to soften to avoid scorching; use fresh garlic for the brightest flavor.
  • – 2 tablespoons butter
    → Butter provides richness and helps brown the chicken and vegetables, forming a flavor foundation for the sauce. Melt and cook the aromatics in it; if you prefer, substitute with olive oil for a lighter version, but butter yields classic Stroganoff depth.

Sauce & Thickening

  • – 2 tablespoons all-purpose flour (or gluten-free 1:1 flour)
    → Flour is used to thicken the sauce and create a satin-like coating on the meat and noodles. Cook the flour briefly in the butter to remove raw taste, then whisk in liquids to prevent lumps. If using gluten-free flour, whisk with a splash of cold broth first to make a smooth slurry.
  • – 1 cup chicken broth (low-sodium)
    → The broth provides the main liquid for the sauce and helps emulsify with dairy. Use low-sodium to avoid oversalting; warm or whisk it gradually into the roux to keep the sauce smooth.
  • – 1/4 cup dry white wine (optional)
    → Wine deglazes the pan, lifting browned bits and adding acidity to balance richness. Allow it to reduce by half before adding dairy; substitute with extra broth if you prefer not to cook with alcohol.
  • – 1 cup sour cream (full-fat)
    → Sour cream gives the signature tang and creamy body of the sauce. Temper first by whisking in a small amount of hot sauce to prevent curdling, then fold in off heat. Keep the sauce gently warmed (do not boil after adding) to maintain a smooth texture.
  • – 1/2 cup heavy cream (optional)
    → Heavy cream adds extra richness and silkiness. If using, stir in near the end and avoid a boil to prevent separation; adjust with more sour cream or broth if you want a lighter sauce.
  • – 1 tablespoon Dijon mustard
    → Dijon contributes tang and helps emulsify the mixture for a smoother sauce. Whisk in with wine and broth so it distributes evenly and enhances depth without overpowering the dish.
  • – 1 teaspoon sweet paprika
    → Paprika provides color and mild warmth typical of Stroganoff. Use sweet paprika for traditional flavor; smoked paprika will add a subtle smokiness. Sprinkle in with the seasonings and let the aroma bloom during simmering.
  • – 1 teaspoon Worcestershire sauce
    → Adds umami and a touch of tang to complement mushrooms and chicken. Use sparingly and taste as you go; it should deepen the sauce, not dominate.
  • – 1/2 teaspoon dried thyme
    → Thyme adds herbal notes that pair well with mushrooms and chicken. Dried thyme is convenient for one-pot cooking; add early so the flavor can meld, or substitute with a little fresh thyme if available.
  • – Salt to taste
    → Salt is essential to balance the flavors across the sauce, dairy, and meat. Start with a small amount, then taste and adjust after the dish comes together, keeping in mind the saltiness of any broth or cheese used.
  • – Black pepper to taste
    → Freshly ground black pepper adds aroma and a gentle bite. Add toward the end of cooking, after the sauce has thickened, and adjust gradually to maintain a balanced heat without overpowering the other flavors.

Noodles & Assembly

  • – 12 ounces egg noodles (or gluten-free egg noodles)
    → Noodles provide the starch and body to carry the savory sauce. Cook them to just-al dente per package instructions, drain well, and optionally toss with a touch of butter to prevent sticking before mixing with the sauce.
  • – 1 tablespoon butter (for tossing with cooked noodles)
    → A small amount of butter keeps hot noodles glossy and prevents clumping when mixing into the sauce. Melt and toss through the hot noodles right after draining.

Toppings & Garnish

  • – 1/2 cup grated Parmesan cheese (optional)
    → Parmesan adds a mild, savory cheesy finish to the bubbling bake. Sprinkling on top before baking can enhance browning and create a luxurious crust; use sparingly if avoiding extra dairy.
  • – 1/2 cup breadcrumbs (optional)
    → Breadcrumbs give a crunchy topping when baked. Mix with a little melted butter and a pinch of paprika, then scatter over the casserole before baking for a golden crust.
  • – Fresh parsley, chopped, 2 tablespoons (for garnish)
    → Parsley provides a fresh, emerald color and a light herbal note to brighten the dish after baking. Chop finely and sprinkle over the hot casserole just before serving for best aroma and contrast.

Instructions

  • Preheat your oven to 375°F (190°C) and lightly grease a 9×13-inch baking dish with butter or oil to prevent sticking and ensure even heat distribution during baking.
    → Preheating ensures the casserole bakes evenly from the moment it enters the oven, and a greased dish prevents the sauce from seizing and the noodles from sticking.
  • Pat the chicken thighs dry with paper towels and season generously with salt and freshly ground black pepper to enhance browning and flavor.
    → Dry meat browns better, developing fond and deep flavor, while proper seasoning builds the initial layer of taste that will meld in the sauce.
  • In a large skillet, melt 2 tablespoons butter over medium-high heat and sear the chicken in batches until browned on all sides but not cooked through, about 2‑3 minutes per batch; transfer browned pieces to a plate.
    → Searing creates rich color and complex flavor via Maillard reaction; working in batches prevents steaming and ensures even browning.
  • In the same skillet, add the sliced cremini mushrooms and cook in a single layer until they release moisture and brown, about 5–7 minutes, then push mushrooms aside and add the diced onion; sauté until translucent and lightly caramelized, 4–6 minutes more.
    → Browning mushrooms and caramelizing onions concentrate their umami and sweetness, building a savory foundation for the sauce.
  • Add the minced garlic to the pan and sauté for 30 seconds until fragrant, stirring to combine with mushrooms and onions; remove from direct heat if the pan is very hot.
    → Garlic adds aromatic punch; adding it after the onions start softening prevents scorching and bitterness.
  • Sprinkle 2 tablespoons all-purpose flour over the vegetables and stir to form a light roux; cook 1–2 minutes to remove raw flour taste.
    → The flour thickens the sauce and creates a satin coat on the chicken and noodles; cooking it briefly eliminates the raw flour taste and prevents a chalky texture.
  • Deglaze the pan with 1 cup low-sodium chicken broth and 1/4 cup dry white wine (optional), scraping up all browned bits with a wooden spoon; simmer until reduced by about half.
    → The fond from browning adds depth; reducing concentrates flavors and creates a richer base for the sauce.
  • Stir in 1 tablespoon Dijon mustard, 1 teaspoon sweet paprika, 1 teaspoon Worcestershire sauce, and 1/2 teaspoon dried thyme; season with salt and black pepper to taste, then simmer the mixture for 3–5 minutes to meld flavors and thicken slightly.
    → This builds the classic Stroganoff flavor profile with tang, warmth, and herbal brightness; balancing salt now helps every component shine later.
  • Return the seared chicken to the pan, spooning sauce over the pieces; simmer for 3–5 minutes until the chicken is cooked through and the sauce coats the meat.
    → Finishing the chicken in the sauce ensures juiciness and allows the flavors to integrate before combining with noodles.
  • Remove the pan from heat and temper 1 cup sour cream by whisking in a few tablespoons of hot sauce or hot broth, then whisk the warmed dairy into the pan; if using 1/2 cup heavy cream, stir it in now; avoid boiling after adding sour cream to maintain a silky texture.
    → Tempering prevents curdling and keeps the sauce smooth, while the optional cream adds extra richness without breaking the emulsification.
  • Meanwhile, bring a large pot of salted water to a boil and cook 12 ounces egg noodles until just al dente according to package directions; drain well and toss with 1 tablespoon butter to keep them glossy and prevent sticking.
    → Properly cooked noodles provide the right bite and coat beautifully with the sauce when baked, while butter prevents clumping.
  • In a large mixing bowl, fold the chicken-and-mushroom sauce with the drained noodles so they are evenly coated; if the mixture seems thick, loosen with a splash of broth or a little reserved noodle water for a silky, cohesive coating.
    → Gentle folding distributes sauce evenly without breaking the noodles, ensuring every bite is saucy and flavorful.
  • Transfer the coated mixture to the prepared baking dish, spreading it into an even layer; if using Parmesan and breadcrumbs, mix 1/2 cup grated Parmesan with 1/2 cup breadcrumbs and 1 tablespoon melted butter, then sprinkle evenly over the top for a golden crust.
    → Layering creates a visually appealing casserole and the crumb topping adds a pleasant crunch and color contrast.
  • Bake uncovered in the preheated oven at 375°F (190°C) for 25–30 minutes, until the casserole is bubbling around the edges and the top is golden brown.
    → Baking finishes cooking the ingredients together, thickens the sauce, and forms a cohesive casserole with a inviting crust.
  • If you desire extra browning, broil on high for 1–2 minutes at the end, watching closely to prevent burning; this intensifies color and adds a crisp top.
    → A brief broil sharpens color and texture without significantly altering the custard-like interior.
  • Let the Baked Chicken Stroganoff rest 8–10 minutes before garnishing with chopped fresh parsley (about 2 tablespoons) to set the sauce and brighten the final plate.
    → Resting lets the sauce rebind and makes serving neater, while parsley adds a fresh aroma and vibrant contrast.

Notes

This baked chicken stroganoff is a comforting, creamy bake featuring tender chicken thighs, earthy cremini mushrooms, and a lush sour cream sauce enriched with Dijon, paprika, and a touch of Worcestershire. For best flavor, brown the chicken in butter to develop color, then sauté the mushrooms and onions until deeply caramelized. Create a quick roux with flour (or gluten-free 1:1 flour) and gradually whisk in warm chicken broth (and optional white wine) until the sauce thickens. Remove from heat and whisk in sour cream (temper first to prevent curdling), heavy cream if using, Dijon mustard, sweet paprika, thyme, salt, and pepper. Return the chicken and vegetables to the sauce and simmer gently to meld the flavors. Cook egg noodles (or gluten-free noodles) until just al dente, toss with a little butter to prevent sticking, then fold into the sauce or layer everything in a baking dish and bake until bubbling and the top is lightly golden. Top with grated Parmesan and breadcrumbs for a crunchy finish, and finish with fresh parsley for a bright, herbal note. For gluten-free versions, use gluten-free flour and gluten-free noodles, and substitute gluten-free breadcrumbs or omit them altogether. Leftovers reheat well in the oven or on the stove, and the dish freezes nicely when stored airtight. Customize with extra vegetables like peas or spinach, or adjust the dairy to taste—more sour cream for tang, or a splash of broth to lighten the sauce. Always taste and adjust salt at the end, especially if using salted broth or cheese.

Tips

Prep and Browning tips

  • Pat the chicken dry and season evenly with a little salt and pepper before searing. This helps develop a rich brown color and prevents steaming the meat.
  • Sear the chicken in batches to avoid overcrowding the pan. A hot pan and a light coating of oil will promote browning and deepen flavor.
  • Let the browned bits (fond) stay attached to the pan—they’re flavor gold. If the pan looks dry, deglaze later with a splash of broth or wine.
  • After searing, let the pieces rest briefly before nestling them into the sauce to retain moisture.

Mushrooms, aromatics and layering flavor

  • Clean mushrooms with a damp cloth and slice evenly so they brown uniformly. Pat dry if they release a lot of moisture.
  • Cook mushrooms until all moisture evaporates and edges brown deeply to maximize savory depth and to avoid a watery sauce.
  • Add onions and garlic in a sequence that keeps garlic from burning—mushrooms first, then onions, and finally garlic just as the onions begin to soften.
  • Grate or finely mince garlic for quick, even distribution. Fresh garlic gives the brightest aroma; add it toward the end of sweating to prevent scorching.

Sauce, thickening and dairy tips

  • Cook the flour in the butter briefly to make a smooth roux and remove raw flour taste before adding liquids. This yields a satin-like sauce.
  • Whisk warm broth gradually into the roux to prevent lumps. A whisk helps emulsify the sauce as it thickens.
  • For gluten-free needs, whisk the gluten-free flour slurry with a splash of cold broth first to avoid lumps.
  • Deglaze with white wine if using, and let it reduce by about half to concentrate flavor and balance richness.
  • Temper sour cream by whisking in a small amount of the hot sauce before folding it into the pot. Add off heat and avoid a rolling boil to prevent curdling.
  • If using heavy cream, stir in near the end and avoid boiling so the sauce stays silky.
  • Dijon mustard, paprika, and Worcestershire deepen the sauce’s tang, color, and umami. Whisk Dijon in with wine and broth for even distribution.
  • Taste and adjust salt and pepper after the sauce comes together. Dairy and broth can vary in saltiness, so add gradually.

Noodles, assembly, and texture

  • Cook egg noodles (or gluten-free alternatives) to just-al-dente per package instructions. Drain well and toss with a little butter to prevent sticking if not mixing immediately.
  • Keep noodles separate from the hot sauce until you’re ready to combine, then gently fold to coat without breaking the pieces.
  • When mixing noodles into the sauce, keep the heat low to prevent the dairy from separating. If the sauce thickens too much, loosen with a splash of broth.

Baking, toppings and finishing

  • Bake the assembled dish until the chicken reaches a safe internal temperature and the flavors meld. If using a topping (parmesan or breadcrumbs), add it near the end for a golden crust.
  • For a crusty top, scatter a light layer of breadcrumbs mixed with a bit of melted butter and paprika before baking; brown under a hot oven or broiler for a minute or two.
  • If the sauce seems too thin before baking, simmer uncovered on the stovetop to thicken slightly, then proceed to bake.

  • You can prep the chicken, mushrooms, and sauce components ahead of time and refrigerate. Reheat the sauce gently on the stove, then stir in the cooked chicken just to heat through before mixing with noodles and serving.
  • Leftovers store in the refrigerator for up to 3–4 days. Reheat gently on the stove over low heat, adding a splash of broth if it seems too thick.
  • For freezing, freeze the sauce and chicken separately or as a complete casserole. Thaw overnight in the fridge, then rewarm slowly, adjusting thickness with broth if needed.

  • If the sauce separates after adding sour cream, keep heat low and whisk vigorously while gently reheating; you can add a splash of hot broth to bring it back together.
  • Too thin? Simmer a few minutes longer to reduce, or whisk in a small cornstarch slurry (1 teaspoon cornstarch mixed with 1 tablespoon cold water) and simmer until thickened.
  • If the dish tastes flat, rebalance with a touch more salt, a pinch of pepper, and a tiny amount of acid (a splash of wine or a squeeze of lemon) to brighten the flavors.
  • Overcooked chicken can become dry; ensure thighs are cut uniformly and remove from heat as soon as they reach 165°F, letting the residual heat finish cooking in the sauce.

FAQ

What is Baked Chicken Stroganoff?

A comforting one-dish casserole featuring tender chicken, sautéed mushrooms and onions in a creamy sauce, seasoned with mustard and paprika, and baked until bubbling. It’s often served over egg noodles or rice for a cozy, satisfying meal.

What ingredients do I need?

Common ingredients include:

  • Chicken breasts or thighs, cut into bite-sized pieces
  • Mushrooms, sliced
  • Onion, diced
  • Garlic
  • Butter or oil for sautéing
  • Sour cream or cream cheese (for the creamy sauce)
  • Chicken broth
  • Dijon mustard and paprika
  • Salt and pepper
  • Egg noodles or another starch (optional, for baking with)
  • Fresh parsley for garnish (optional)
Can I make this ahead or freeze it?

Yes:

  • Refrigerate assembled (unbaked) dish for up to 24 hours before baking.
  • Freeze the assembled uncooked casserole for up to 2–3 months. Bake from frozen, adding 20–30 minutes to the bake time.
  • If you’ve already baked it, refrigerate leftovers in an airtight container for 3–4 days and reheat well-covered.
What is the baking time and temperature?

Preheat to 350–375°F (175–190°C). Bake for about 25–35 minutes, or until the chicken is cooked through and the sauce is bubbly. If using pre-cooked noodles, bake a bit shorter; if using raw noodles, ensure they’re tender and sauce is cohesive.

How do I prevent sour cream from curdling?

Tip the sauce by:

  • Tempering sour cream with a few tablespoons of hot broth before stirring it in.
  • Removing the dish from direct heat before adding sour cream; stir in off the heat and only re-warm gently if needed.
  • Using cream cheese or a stabilized mixture to help hold the emulsion.
Can I make a dairy-free version?

Yes. Use dairy-free sour cream or coconut yogurt in place of sour cream, dairy-free cream cheese if desired, and a dairy-free broth. Sauté vegetables in olive oil and thicken the sauce with a slurry of cornstarch and water if needed.

Can I use chicken thighs instead of breasts?

Absolutely. Chicken thighs stay tender and flavorful. They may require slightly longer bake time (about 35–45 minutes) depending on the size of the pieces. Ensure they reach a safe internal temperature of 165°F (74°C).

Is this dish gluten-free or can I serve with noodles?

It can be made gluten-free by using gluten-free pasta or serving over rice or mashed potatoes. If thickening the sauce, use cornstarch or gluten-free flour instead of wheat flour. Check labels on sour cream and broth if you need to ensure they’re gluten-free.

How should I store leftovers and reheat?

Let cool, then store in an airtight container in the fridge for 3–4 days. Reheat gently on the stove or in the microwave, adding a splash of broth or water to loosen the sauce if it thickens. For best texture, reheat slowly and avoid boiling the sauce.

What are good serving suggestions?

Pair with buttered egg noodles, rice, or mashed potatoes. Add a side of steamed greens, like broccoli or green beans, and a simple fresh parsley garnish for color.

Can I customize the flavor or add extra vegetables?

Yes. Add sliced bell peppers, spinach, or peas in with the mushrooms for extra color and nutrition. For a deeper flavor, a splash of dry white wine can be added with the mushrooms, or a pinch more paprika for warmth. If you like a milder dish for kids, reduce the Dijon mustard slightly and skip extra hot spices.

Introduction / Hook

Imagine radiant golden pastry croissants folded into delicate spirals, their edges kissed with a whisper of sugar that crackles in the first bite. Inside, a creamy swirl of tangy cream cheese threads through pockets of juicy blueberries, releasing a bright citrus perfume with every mouthful. The aroma of warm butter wafts through the kitchen, mingling with the sunlit sweetness of ripe berries as the pastry bakes to a perfect, honeyed glow. This, in essence, is Blueberry Cream Cheese Puff Pastry—a dish that feels like a celebration in every bite, a little theatre of texture and taste designed to turn ordinary mornings into something memorable. It’s the kind of treat that pairs cafe-worthy aesthetics with homey comfort: crisp, flaky layers that yield to a luxurious, soft center, where the blueberry jewels pop with a gentle tartness that keeps the sweetness balanced and inviting. Whether you’re layering it into a weekend brunch, brightening a holiday breakfast, or simply indulging yourself after a long week, this pastry makes a statement without shouting. It invites you to slow down, savor the moment, and let the flavors do the talking.

What makes this blueberry cream cheese puff pastry so special is not just the taste, but the sense of craft in every element. The puff pastry, when laminated with butter and baked at the right temperature, puffs into airy, crisp sheets that shatter on impact, releasing a warm, almost nutty butter aroma. The cream cheese swirl adds a smooth, tangy counterpoint that complements the fruit’s juiciness, while a kiss of vanilla or lemon zest brightens the profile and keeps it from tipping into cloying sweetness. It’s a dish that looks as good as it tastes, with a visual appeal that makes it perfect for sharing—photo-worthy on a breakfast spread, yet simple enough to bake on a casual Sunday morning. In its most delightful form, every bite offers a trilogy: the crisp exterior, the creamy interior, and the jewel-like burst of blueberry inside, a trifecta of textures and flavors that linger pleasantly on the palate.

The Story Behind the Dish

The humble puff pastry has a long, storied lineage that stretches back to early European kitchens, where master bakers coaxed sheets of dough into light, layered perfection through careful folding and rolling. The technique—often called lamination—creates the signature flakiness that delights bakers and eaters alike. Blueberries, on the other hand, are a North American treasure whose seasonal sweetness has inspired countless desserts, jams, and breakfast treats. When you combine these two ideas—an elegant, flaky dough and the fruit-forward charm of blueberries—you’re bridging continents and centuries of culinary technique into a modern, approachable dish.

As for the cream cheese element, its rise to prominence in American kitchens in the 19th and 20th centuries added a soft, indulgent dimension to many beloved pastries and sweets. Cream cheese brings a silky texture and a gentle tang that counters the sweetness of berries, creating a balanced harmony that feels indulgent yet not cloying. In this recipe, the cream cheese is not simply a filling; it’s a counterpoint, a suave counterpart to the bright fruit and crisp pastry. The fusion of puff pastry with a blueberry-cream cheese mixture is a contemporary nod to both old-world finesse and modern, comforting flavors—perfect for brunch companions, weekend feasts, or any time you want a little chef-level pastry without a lot of fuss.

Personally, this dish has traveled from a casual weekend kitchen experiment to a recurring weekend ritual in our home. It began as a “let’s try something fancy for once” moment, and soon became a conversation starter at the table—guests delighted by the visual drama of the pastry layers and the way the filling glows with blueberry specks when sliced. The story behind the dish isn’t just about ingredients; it’s about the rituals around preparation: chilling the dough to relax the gluten, waiting for the pastry to achieve its proper puff, and the almost ceremonial moment when the vanilla sugar frosting dusts the top and the tray emerges from the oven smelling like a warm, fruity promise. In that sense, Blueberry Cream Cheese Puff Pastry is as much about the experience as it is about the taste—a dish that invites stories, compliments, and a little time set aside for savoring life’s small delights.

Why You’ll Love This Recipe

  • Impressive but approachable: A bakery-worthy pastry you can master at home with relatively little hands-on time.
  • Balanced sweetness with bright fruit notes: The blueberries offer a gentle tartness that complements the creamy richness of the filling.
  • Textural delight: Crisp, flaky layers give way to a creamy center and juicy pockets of fruit.
  • Versatile for many occasions: Ideal for weekend brunch, special breakfasts, dessert trays, or a celebratory treat.
  • Make-ahead friendly and forgiving: You can prep elements in advance, allowing for a quick bake on the day you plan to serve.
  • Customizable: Easily adapt with other berries, citrus zests, or dairy-free substitutes to suit dietary needs while preserving the essential balance of flavors.

Flavor Profile & Texture

The flavor profile is a study in contrasts that come together in harmonious balance. The pastry delivers a delicate butter aroma with a light, airy crumb—every bite sharpens the senses with a subtle nuttiness and a crisp crackle that signals the pastry’s outer edge achieving that perfect bake. Inside, the cream cheese lends a lush creaminess that feels indulgent yet refined, a smooth counterpoint to the fruit’s bright acidity. The blueberries contribute a juicy pop of sweetness tinged with a gentle tang, so the overall sweetness remains approachable rather than cloying. A whisper of lemon zest or vanilla often sharpens the aroma, lifting the ensemble and preventing the dish from feeling heavy. The result is a sensory journey: first the crisp edge and the subtle chew of the laminated layers, then the creamy core with pockets of berry juice that burst in the mouth, leaving a lingering vanilla-berry glow that begs for another bite.

In terms of texture, it’s all about layers and balance. The outer pastry should be crisp and elegant, with a fine, sandy crumb that yields to a tender, delicate interior. The cream cheese swirls create a luscious, smooth contrast, almost like a soft cheesecake meeting a flaky pastry. The blueberries punctuate the experience with tiny bursts of juiciness, adding moisture and a lively tart note that brightens the finish. If you like, a light dusting of sugar on top adds a final spark of sweetness and a glossy appearance that catches the eye. The combination of crackly exteriors, creamy centers, and fruity surprises makes each bite feel like a new discovery, encouraging you to slow down and savor the journey rather than rushing to finish the plate.

Occasions & Pairings

This pastry shines across a spectrum of occasions, turning everyday breakfasts into small celebrations and elevating special gatherings with minimal effort. Here are some ideas to help you plan when and how to serve it:

  • Weekend brunch centerpiece: Slice into generous portions and arrange on a platter with fresh berries and a dollop of whipped cream.
  • Holiday mornings: A festive addition to the table, especially when paired with sparkling beverages or citrusy mocktails.
  • Tea-time or dessert: Offer alongside vanilla yogurt, a spoon of lemon curd, or a light dusting of powdered sugar for a refined finish.
  • Baby showers, bridal showers, and parties: Its elegant appearance and universally appealing flavor profile make it a crowd-pleaser.
  • Pairings: Cremier drinks such as a lightly sparkling wine, a glass of Prosecco, or a well-chilled cup of Earl Grey; sides could include a bright citrus salad, a light fruit compote, or a herbed yogurt dip to balance the sweetness.

When planning sides, think about balancing textures and temperatures. A yogurt-based fruit dip can echo the cream cheese filling while adding a tangy contrast. A citrus-infused ricotta or a dollop of light lemon curd can echo the lemon notes, tying the dish together with a coherent flavor thread. For those who love a savory counterpoint, a delicate baguette slice brushed with olive oil and a hint of sea salt can offer a satisfying bite between pastry portions, creating a balanced tasting experience from sweet to savory in a single meal.

Tips, Variations & Substitutions

  • Fruit variations: Use raspberries, blackberries, or a mix of berries for a different shade of sweetness and color. For a more autumnal feel, try apples or pears with a cinnamon-sugar twist.
  • Dairy and dietary swaps: For a vegan version, substitute plant-based cream cheese and use a dairy-free puff pastry; ensure the pastry used is vegan-friendly. For gluten-free options, look for a gluten-free puff pastry that still yields a light, flaky texture; the technique remains the same, though bake times may vary slightly.
  • Flavor boosters: A touch of lemon zest (or orange zest) brightens the filling. A splash of vanilla adds warmth. A pinch of almond extract can give a pleasant, nutty background that complements the blueberries beautifully.
  • Sweetness control: If you’re serving with very ripe berries, you might reduce the sugar in the filling slightly to avoid an overly sweet outcome. Conversely, a light sprinkle of coarse sugar on top before baking adds a sparkling finish and a tiny crunch.
  • Texture tricks: Chill the dough well before rolling to maintain pliability while keeping the layers crisp once baked. If you prefer a more pronounced cream cheese swirls, lightly chill the filling before spooning it onto the dough so it remains distinct from the fruit pockets.
  • Roll and shape options: Instead of a traditional sheet, you can cut the puff pastry into squares or triangles for easier portioning. Create a lattice top for an extra decorative touch that still bakes to a crisp finish.
  • Make-ahead ideas: Prepare the filling in advance and refrigerate; roll and shape the pastry in advance, then refrigerate the assembled tray for up to 24 hours before baking. This makes weekend mornings particularly easy—just bake and serve.
  • Storage-friendly variations: If you’re not baking all at once, freeze unbaked pastry portions on a tray, then transfer to a bag. Bake from frozen, adding a few minutes to the bake time to achieve the same golden, flaky result.

Storage & Make-Ahead Ideas

Storage that preserves texture and flavor is a key to enjoying this pastry over several days. If you have leftovers or intend to prepare ahead for a special occasion, here are practical guidelines to keep the pastry as vibrant as possible:

  • Refrigeration: Store baked pastries in an airtight container at room temperature for up to 2 days for the best texture. In the fridge, they will last up to 3 days, but the pastry may lose some of its crispness. Re-crisp in a hot oven for a few minutes to refresh the layers before serving.
  • Freezing: Baked pastries can be frozen for up to 1 month. Cool completely, wrap tightly, and freeze. To reheat, warm in a low oven (about 325°F / 165°C) until heated through and the edges regain their crispness.
  • Make-ahead components: You can prepare the pastry sheets, or you can prepare the blueberry-cream cheese filling in advance. Keep the components chilled separately and assemble just before baking to ensure peak puff and texture.
  • Day-of serving: For the freshest experience, bake and serve the pastry on the same day. If you must reheat, a quick bake or two minutes under a broiler can help re-crisp the surface without drying the filling.

Fun Facts & Trivia (Optional)

Here are a handful of tidbits that might inspire your culinary curiosity or lend you conversation at brunch:

  • The light, flaky texture of puff pastry is achieved through a time-honored lamination process that creates countless thin layers of butter and dough; when baked, the water between layers steams, pushing the layers apart to form that signature airiness.
  • Blueberries are packed with antioxidants and have a long season in many regions, making them a favorite in breakfast pastries that celebrate fresh fruit.
  • Cream cheese became popular in the United States in the 19th century, with major brands helping to shape the role of soft cheese in both savory and sweet applications.
  • Stretching the idea of “puff pastries” beyond savory pies, many bakers use them for creative breakfast pastries that resemble bakery storefront offerings—proof that these techniques translate beautifully into home kitchens.
  • In some culinary traditions, a spray of lemon zest is used not only for aroma but to curb any potential heaviness from rich fillings, keeping the dish bright and refreshing.

As you plan your next culinary moment, consider how this Blueberry Cream Cheese Puff Pastry can anchor a morning ritual or become a signature showpiece for guests. Its elegance is not about complexity, but about confidence: a few smart steps, high-quality ingredients, and a dash of inspiration. The result is a dish that feels indulgent, yet remains approachable enough to bake on a quiet weekend in, to celebrate a milestone with friends, or to brighten a simple breakfast with a sense of occasion.

Ingredients

Blueberry Cream Cheese Puff Pastry

    – 2 sheets puff pastry, thawed and kept cold until use
    → Puff pastry provides the flaky, buttery crust with distinct lamination. Keep it cold and lightly rolled to an even thickness to avoid tearing; handling should be minimal to maintain separate layers, which bake into crisp, golden sheets.
    – 8 oz cream cheese, softened to room temperature
    → Cream cheese creates a creamy, tangy filling that contrasts with sweet blueberries. Soften completely and whip until smooth and lump-free for an even, silky filling. If you want extra lightness, you can beat in a spoon of heavy cream.
    – 2-3 tbsp granulated sugar
    → Sweetens the filling; adjust to taste. Beat into the cream cheese with the vanilla until light and fluffy to avoid a gritty texture in the final pastry.
    – 1 tsp vanilla extract
    → Adds aroma and rounds the tanginess of the cream cheese. Use pure vanilla for the best flavor; if you have vanilla bean paste, substitute with 1/2 tsp.
    – Pinch of salt (optional)
    → A tiny amount enhances sweetness and rounds the flavors; omit if using salted butter or if your cream cheese is already salted.

Blueberry Filling

    – Fresh blueberries, 1 cup (or frozen, thawed and drained)
    → Provides juicy pockets of sweetness and vibrant color. If using frozen berries, thaw and drain excess liquid to avoid soggy pastry; avoid over-mashing the berries to keep texture.
    – 1-2 tbsp granulated sugar
    → Additional sweetener that helps draw out juices and create a glossy syrup with lemon juice; adjust to berry sweetness. You can reduce if berries are very ripe and sweet.
    – 1 tsp lemon juice
    → Brightens flavor and helps balance sweetness with a touch of acidity; lemon juice can also help the mixture set when thickened with starch.
    – 1-2 tsp cornstarch (or 1 tbsp all-purpose flour)
    → Thickens the blueberry mixture so it stays put in the pastry during baking; mix with a small amount of cold water to create a slurry before adding to berries, then cook briefly to activate thickening if heating.
    – Optional: 1/2 tsp lemon zest
    → Adds a fresh citrus aroma and extra brightness; zest should be finely grated and stirred in just before assembling.

Egg Wash

    – 1 large egg, beaten with 1 tablespoon water or milk
    → Creates a glossy, golden finish on the puff pastry; brush lightly onto the pastry surfaces before baking for even color. For a lighter look, use only a splash of water or milk and skip on the tops.

Toppings and Finish

    – Powdered sugar for dusting (optional)
    → Finishing touch that adds a delicate sweetness and professional appearance; dust after pastries have cooled slightly so the sugar sticks without clumping.
    – Optional: sliced almonds or coarse sugar for crunch (optional)
    → Adds texture and visual appeal; scatter on top before baking for extra crunch and nutty aroma. Toast almonds lightly beforehand to maximize flavor.

Instructions

  • Preheat your oven to 400°F (200°C) and line a large baking sheet with parchment paper or a silicone baking mat.
    → A hot, well-prepared surface encourages immediate steam rise from the puff pastry, promoting a crisp, even bake and easy release.
  • Beat the softened cream cheese with granulated sugar, vanilla extract, and a pinch of salt until completely smooth and creamy.
    → Fully smoothing the filling prevents lumps, ensures a silky texture, and helps the flavor meld with the pastry without graininess.
  • In a small saucepan, combine blueberries, granulated sugar, and lemon juice; whisk 1-2 teaspoons cornstarch with 1-2 teaspoons cold water to form a slurry, then whisk this into the blueberries. Bring to a gentle simmer and cook until the mixture thickens to a glossy sauce, about 1-2 minutes; remove from heat and cool to room temperature. Optional: stir in 1/2 teaspoon finely grated lemon zest just before cooling.
    → Thickening the filling prevents it from oozing out during baking, while lemon zest adds brightness without overpowering the filling.
  • On a lightly floured work surface, unfold the puff pastry sheets and lightly roll each sheet to an even thickness of about 1/8 inch (3 mm) to ensure uniform baking and to avoid tearing the lamination.
    → A uniform thickness yields consistent puff and ensures each pastry bakes evenly rather than sinking or drying out in spots.
  • Cut each puff pastry sheet into 6 rectangles roughly 4×5 inches to create a practical size for folding and sealing around the fillings.
    → Properly sized rectangles maximize filling-to-crust ratio while keeping edges manageable for sealing.
  • For each rectangle, place about 1 to 1.5 tablespoons of cream cheese filling on the lower half, then top with about 1 teaspoon of the blueberry filling; lightly brush the inner edge with a small amount of egg wash to help seal.
    → This ensures the fillings stay centered and the edges seal firmly for a neat, enclosed pastry; egg wash aids adhesion.
  • Fold the rectangle over to enclose the fillings, align edges, and press firmly to seal; crimp the edges with a fork and cut a small vent slit or two on the top to allow steam to escape.
    → Proper sealing prevents leaks during baking and venting prevents bursting, while crimping creates a tidy, bakery-style edge.
  • Transfer the sealed pastries to the prepared baking sheet, spacing them at least 1 inch apart to allow room for expansion as the pastry puffs.
    → Adequate spacing ensures each turnover can rise fully without sticking to neighbors, resulting in a uniform golden color.
  • Chill the assembled pastries in the refrigerator for 15 minutes before baking.
    → Chilling firms the fat in the pastry, helping maintain lamination and preventing the edges from relaxing and leaking during oven baking.
  • Brush the tops and edges of the pastries with the beaten egg wash for a glossy, uniform finish.
    → Egg wash promotes a deep, even golden color and a professional shine across the surface.
  • Optional: lightly sprinkle coarse sugar or sliced almonds on top before baking for extra crunch and visual appeal.
    → Textural contrast and a nutty aroma enhance the presentation and eating experience; toast almonds quickly if using for a deeper flavor.
  • Bake in the preheated oven for 18-22 minutes, rotating the sheet halfway through, until the pastries are puffed, deeply golden, and the filling is set.
    → High heat activates the puff and browns the crust; rotating ensures even coloration and baking on all sides.
  • Remove from the oven and transfer to a wire rack; allow the pastries to cool for 8-10 minutes before dusting with powdered sugar.
    → Cooling helps the centers finish setting and prevents the sugar from melting into a sticky glaze, preserving a crisp crust.
  • Serve warm or at room temperature, optionally alongside additional powdered sugar for a delicate finish.
    → Warm pastries highlight the cream cheese filling and berry aroma, while room temperature offers a clean filling texture and balanced flavors.

Notes

These blueberry cream cheese puff pastries are indulgent yet approachable, with a flaky, buttery crust that encases a creamy, tangy filling and vibrant blueberry pockets. Work with cold puff pastry and keep the dough cold; handle as little as possible to maintain distinct lamination and crisp layers. Soften the cream cheese completely and whip until smooth, then beat in vanilla and a pinch of salt for a balanced filling. For the blueberry filling, toss fresh berries with a little granulated sugar and lemon juice, and thicken with a light cornstarch slurry to help the filling set and stay put inside the pastries. If using frozen blueberries, thaw and drain to avoid soggy pastry. You can customize by adding a touch of lemon zest, a pinch of cinnamon, or swapping in a jam swirl. Brush the assembled pastries with egg wash for a glossy finish and, if you like, top with sliced almonds or coarse sugar for extra crunch. Bake until the pastry is puffed and deeply golden; let cool slightly before dusting with powdered sugar if desired. These pastries freeze well when assembled or baked; wrap individually and reheat in a moderate oven until crisp. For gluten-free diets, use certified gluten-free puff pastry and gluten-free thickener, and ensure all ingredients are gluten-free. Always chill the dough and filling, avoid overfilling, and bake on a parchment-lined tray to prevent sticking.

Tips

Tips for Blueberry Cream Cheese Puff Pastry

Puff pastry handling and assembly

  • Keep puff pastry cold until ready to use. Work on a lightly floured surface and handle as little as possible to preserve the delicate lamination; warmth will cause the butter layers to melt and the pastry to shrink.
  • Roll to an even thickness around 1/8 inch (3 mm). If the dough resists, chill for 10 minutes and resume; uneven thickness can cause uneven puffing.
  • Chill the cut pastry rectangles before filling to help them hold their shape and prevent butter from oozing when baked.
  • Space pastries apart on the tray to allow maximum rise; use parchment or silicone mats to prevent sticking.

Cream cheese filling

  • Soften cream cheese fully to room temperature, then whip until completely smooth with no lumps; this prevents speckled filling and a chalky texture.
  • Beat in sugar and vanilla until light and fluffy; if you like a lighter filling, whisk in a tablespoon or two of heavy cream or beat longer for extra air.
  • Scrape the bowl as needed to keep the filling uniform; a smooth mixture helps with even piping or spreading.
  • Optionally add a pinch of salt if using very sweet berries to balance flavors.

Blueberry filling

  • Use ripe berries for vibrant color and sweetness. If using frozen, thaw completely and drain excess liquid to prevent soggy pastry.
  • Thickener: mix cornstarch with a small amount of cold water to form a slurry before adding to the berries; this prevents lumps and helps set the filling. Cook briefly to activate thickening if you heat it.
  • Stir in lemon juice to brighten the filling; lemon zest is optional but adds a fresh aroma if desired.
  • Avoid over-mashing the berries to keep juicy pockets and texture inside the pastry.

Egg wash, assembly, and baking

  • Preheat oven to 400-425°F (200-220°C). Line the baking sheet with parchment for easy removal and even browning.
  • On each pastry, place a small dollop of cream cheese filling in the center, topped with a portion of blueberry filling. Don’t overfill, or the toppings may leak during baking.
  • Seal edges well: brush a thin layer of egg wash along the outer edges and press to seal; crimp edges with a fork if you like a decorative edge and extra sealing.
  • Vent the pastries by scoring or making 2-3 small holes on the top to release steam and prevent bursting.
  • Brush the tops lightly with egg wash for a glossy, golden finish. Avoid excess wash on the edges to prevent sogginess on the seams.
  • Bake until puffed and deeply golden, rotating the tray halfway through for even color. If the tops darken too quickly, tent with foil.

  • Dust with powdered sugar after the pastries have cooled slightly for a professional look and a touch of sweetness that won’t melt into the filling.
  • Optional toppings: scatter sliced almonds or coarse sugar on top before baking for extra crunch and nutty aroma; toast almonds lightly beforehand to maximize flavor.
  • Storage: refrigerate leftovers in an airtight container for up to 3 days. Reheat at 350°F (175°C) for 5-7 minutes to restore crispness.
  • For make-ahead: assemble unbaked pastries, freeze on a tray until solid, then transfer to a container. Bake from frozen, increasing bake time by about 5-7 minutes.

FAQ

Blueberry Cream Cheese Puff Pastry

What is Blueberry Cream Cheese Puff Pastry?

A flaky puff pastry filled with a creamy, slightly tangy cream cheese mixture and sweet blueberries, baked until golden and puffed.

What ingredients do I need?

Puff pastry sheets, cream cheese, granulated sugar, vanilla extract, lemon zest (optional), fresh or frozen blueberries, and an egg for egg wash. Optional cornstarch to thicken the filling slightly.

Can I use frozen blueberries?

Yes. Thaw them, drain well, and pat dry. Toss with a small amount of cornstarch to help prevent sogginess.

Do I need to thaw the puff pastry before assembling?

Yes. Thaw according to the package instructions (usually 40–60 minutes). Keep the dough cold and handle gently to avoid tearing.

How do I assemble the pastries?

Roll the thawed puff pastry if needed and cut into rectangles (about 3×5 inches). Beat the cream cheese with sugar and vanilla (and lemon zest, if using). Spread a line of filling along the center, add a small amount of blueberries, then fold or seal the edges with an egg wash. Bake seam-side down until golden.

What temperature and how long should I bake them?

Preheat to 400°F (200°C). Bake for 15–20 minutes, or until they are puffed and golden. If they brown too quickly, tent with foil.

Can I make these ahead of time?

Yes. You can assemble and refrigerate the unbaked pastries for up to 24 hours before baking. For longer storage, freeze unbaked pastries on a tray, then transfer to a bag and bake from frozen (add a few minutes to the bake time).

How should I store leftovers?

Store baked pastries in an airtight container at room temperature for 1–2 days, or refrigerate for up to 3–4 days. Rewarm in a 350°F (175°C) oven for about 5–8 minutes to refresh the crispiness.

Are there substitutions or variations I can try?

Yes. Swap in raspberries or strawberries for blueberries. Add a touch of lemon glaze on top after baking. Use almond extract in the filling for a different aroma. For dietary needs, use gluten-free puff pastry and dairy-free cream cheese if needed.

Helpful tips for best results?

Keep the filling and pastry cold to prevent sogginess, avoid overfilling, and don’t overwork the dough. Brush with egg wash for a shiny finish, and if you want extra crunch, sprinkle a little coarse sugar on top before baking.