Introduction / Hook
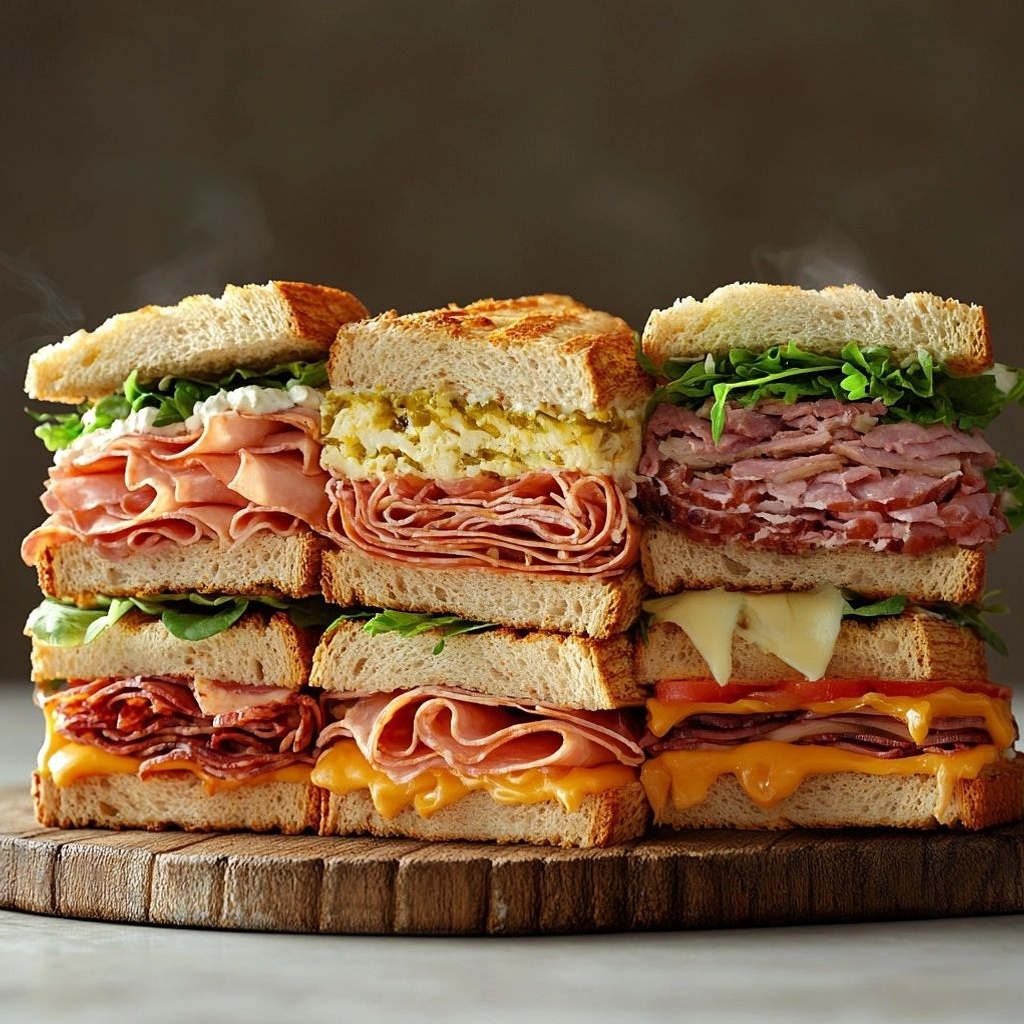
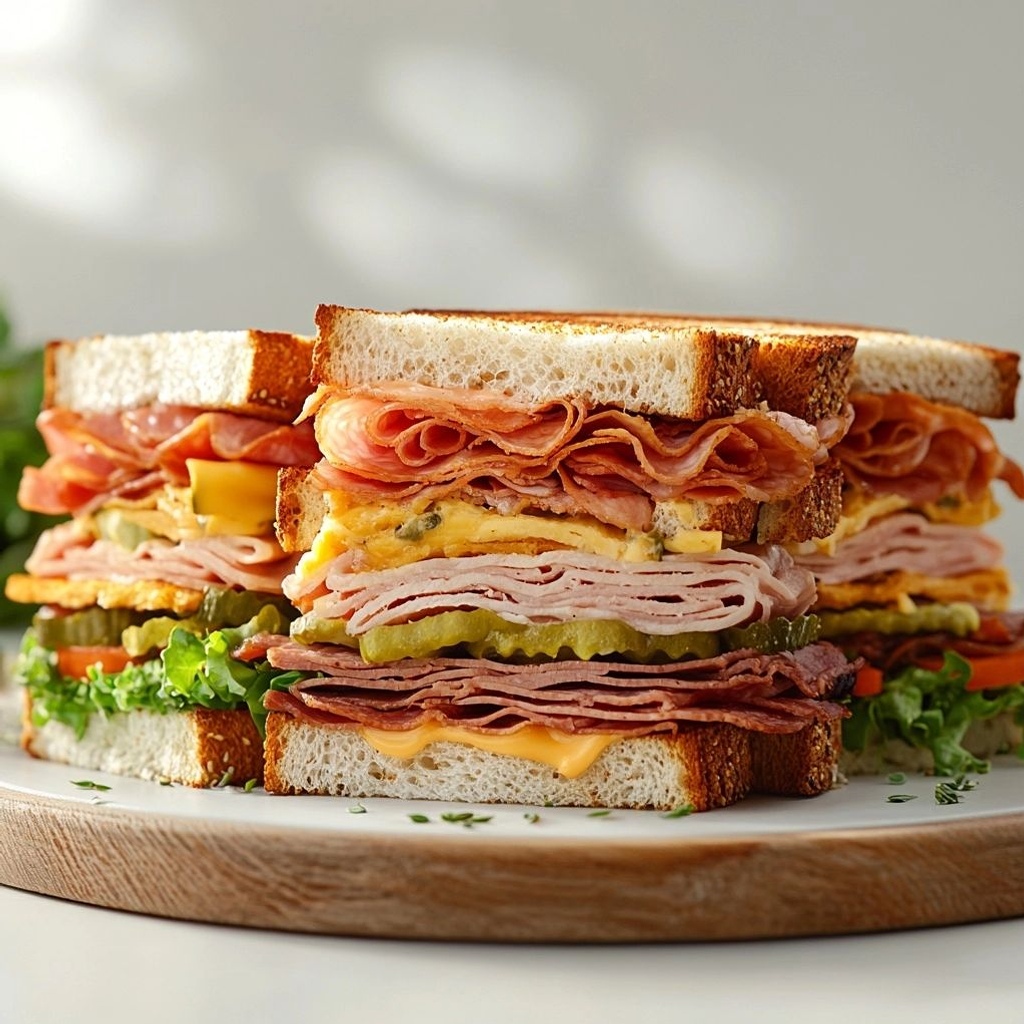
Imagine a lineup of handheld comfort that travels well, stacks up with personality, and somehow makes every bite feel like a little celebration. That’s the promise of the best sandwich recipes you’ll crave, from a robust Italian grinder that storms the senses with tangy provolone and peppery salami, to a crisp, sunny BLT that treats every ingredient with simple, honest respect. This description is your passport to a world where toasty bread becomes a canvas for salinity, sweetness, smoke, and acidity—where textures mingle in a single mouthful: a warm crust that gives way to a melted heart, a crunchy bite from fresh vegetables, and the savory whisper of seasoned proteins. It’s not just lunch; it’s an everyday ritual of comfort, creativity, and communal eating. Whether you’re feeding a busy weeknight crew, packing for a picnic, or crafting a weekend feast with friends, these sandwich ideas are designed to delight your palate, spark your imagination, and prove that a few humble ingredients can become unforgettable meals.
In this expansive guide, you’ll meet a chorus of crowd-pleasing classics and inventive variations: a Italian grinder that bursts with garlicky notes and cured meats; a club sandwich that layers textures like a symphony; a tuna melt that turns ocean fare into molten gold; a grilled cheese that’s more restaurant-worthy than you’d expect; and a Reuben that balances tangy kraut with creamy Swiss. There’s room for a perfect tuna niçoise-inspired twist, a zingy lime-blackened chicken version, and a vegetarian or vegan adaptation that doesn’t skimp on flavor. The aim is not only to satisfy hunger but to celebrate the craft of balance—where salt meets fat, fat meets acid, and crunch meets creaminess in a single, satisfying chorus of bites.
The Story Behind the Dish
Sandwiches are one of the most democratic foods in the culinary world. They traveled with sailors, crossed continents with merchants, and found a permanent home in lunchrooms, picnics, and late-night kitchen counters. The term “sandwich” itself hails from the 18th century, but the concept—placing flavorful fillings between bread to create a portable meal—exists across countless cultures. The recipes you’ll explore here are a mosaic of influences: Italian deli traditions, American diner nostalgia, Jewish deli classics, and modern pantry improvisations. Each sandwich tells a story about people, place, and appetite: the rebellious lunch-counter energy of a club sandwich; the bold, briny whisper of a pickled vegetable punch in a Reuben; the sunny brightness of a BLT with perfectly crisped bacon and ripe tomato; the comforting, oozy charm of a grilled cheese that makes cheese-pans into stage-worthy performers.
Consider the legacy of the Italian grinder. In many American delis, it’s more than a sandwich—it’s a ritualized ritual: layered meats, pepperoncini for a kick, provolone for a mellow tang, and rich olive oil that carries the flavors through every bite. The club sandwich, born out of multi-slice creativity, reflects a desire to maximize texture: toasted bread giving crunch, turkey or chicken adding lean richness, bacon adding salt and savor, and mayonnaise smoothing the way. The tuna melt—an enduring favorite—speaks to pantry ingenuity, transforming canned tuna into a warm, comforting dish with a kiss of cheese that melts into the filling. The Reuben whispers of deli counters and stovetop glows, with sauerkraut’s tang and corned beef’s savor melding with Swiss cheese in a crisp, golden crust. And the BLT—so seemingly simple—reminds us that great ingredients and precise execution can yield spectacular results with minimal fuss.
Why You’ll Love This Recipe
- Fast to prepare: Many of these sandwiches come together quickly, making them perfect for weeknights or a speedy weekend lunch.
- Versatile and customizable: Swap proteins, breads, and toppings to suit your mood, dietary needs, or what’s in your fridge.
- Comfort-forward flavor: A well-made sandwich marries salt, fat, acid, and umami for a satisfying wallop of flavor in every bite.
- Textural variety: The best sandwiches deliver a chorus of textures—crisp crusts, melty interiors, crunchy vegetables, creamy spreads, and tender fillings.
- Shareable and crowd-pleasing: This lineup works beautifully for gatherings, picnics, and potlucks, with options that cater to a range of tastes.
- Money-smart and pantry-friendly: Many components overlap with pantry staples, reducing waste and encouraging smart substitutions.
Flavor Profile & Texture
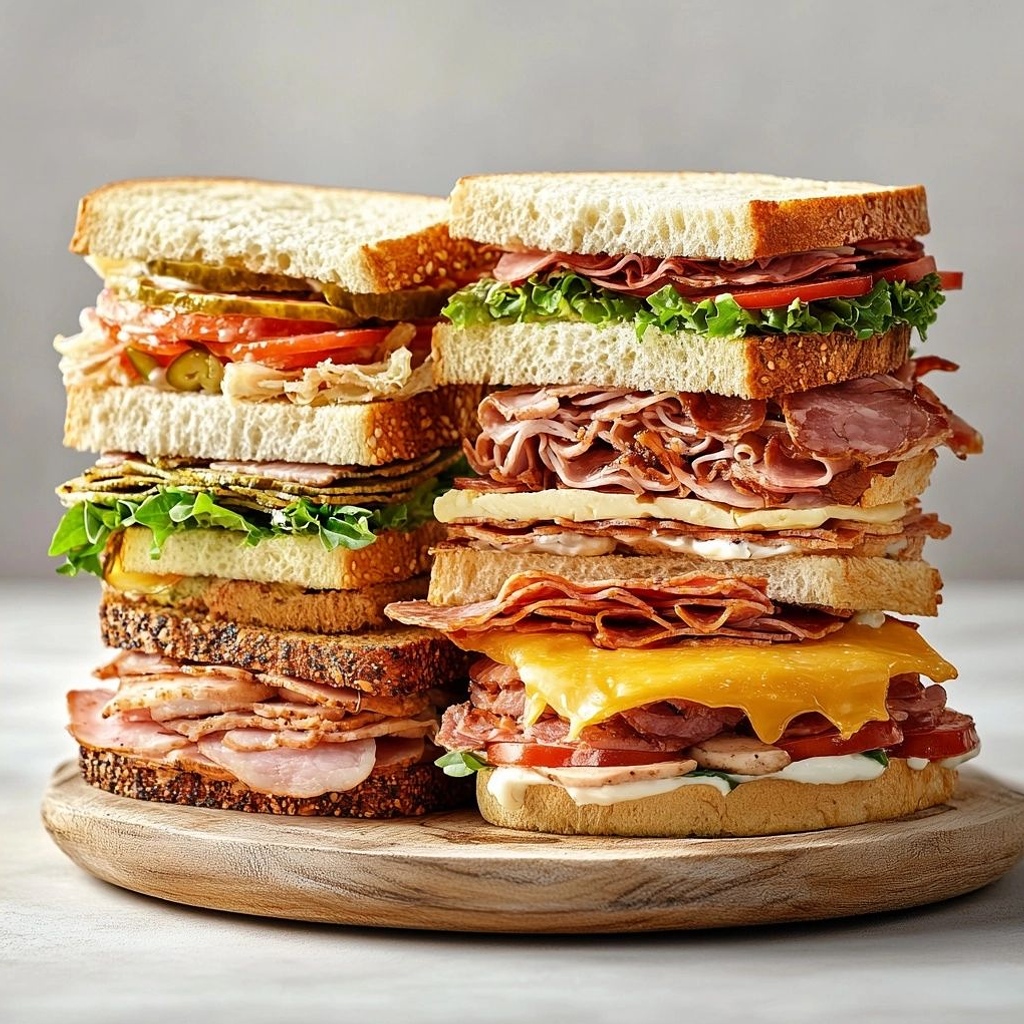
Each sandwich type brings a distinct flavor profile and texture signature, yet they all share a core principle: balance. The Italian grinder leans into savory, peppery, and tangy elements—salty cured meats, sharp cheeses, briny pickled vegetables, and a kiss of olive oil or vinaigrette to unify the layers. The result is a robust, hearty bite with a satisfying chew and a lingering savory finish. The club sandwich revels in contrast: crisp toast, velvety mayo, juicy poultry, smoky bacon, and lush tomato slices that bring brightness and moisture. When melted cheese meets warm bread, the entire ensemble becomes irresistibly cohesive, with a sly crunch on the exterior and a soft, pillow-like interior. The tuna melt pairs canned tuna with creamy cheese and a toasty crust, delivering midweek nostalgia and a comforting, almost nacho-like melt that’s equally at home on a plate or in a wrap. Grilled cheese, in its most elevated form, is cheese-forward but not heavy—high-quality bread toasted to a crackly shell that gives way to a molten, gooey center. A Reuben offers a more complex tang—savory corned beef, tangy sauerkraut, Swiss cheese, and a rye bread crust that crackles with each bite. The BLT shines with simplicity: crispy bacon, ripe tomato, crisp lettuce, and a smear of mayo that acts as both moisture and a binding agent, delivering a bright, salty-sweet, and summery bite.
Beyond these core flavors, the textures are the real heroes. A well-toasted bread adds a durable crunch, resisting sogginess while still absorbing some of the flavorful juices. Melty cheese binds ingredients in a creamy, luxurious embrace. Pickles, kraut, or pepperoncini introduce acidity and crunch, cutting through richness and elevating each bite. Fresh vegetables—crisp lettuce, juicy tomatoes, tangy onions—bring freshness and contrast. The interplay of hot and cold, soft and crusty, savory and tangy, makes these sandwiches dynamic and endlessly satisfying.
Occasions & Pairings
These sandwiches shine across a spectrum of occasions. For weeknights, they’re ideal for quick dinners when you want something comforting yet substantial. They’re perfect for weekend brunch buffets, potlucks, and casual gatherings where guests can customize their fillings. Pack a few on a picnic—breads sturdy enough to hold up, fillings hearty enough to satisfy, and condiments in separate containers to avoid sogginess. For holidays or special occasions, elevate your bread choices, switch in premium cheeses, and add a few artisanal touches, such as house-made pickles, smoked meats, or a tangy remoulade that complements the filling.
Pairing ideas to enhance these sandwiches:
– Sides: kettle chips, pickles, a bright cucumber salad, or a warm bowl of soup on the side.
– Drinks: a crisp lager or a dry sparkling wine can balance the richness; a citrusy iced tea or a cold brew coffee works beautifully with grilled or toasted variants.
– Desserts: something light and simple, like citrusy sorbet or a small almond biscotti, cleanses the palate after a savory binge.
– Dips and condiments: a zingy mustard, garlic aioli, or a tomatillo salsa can add a bright counterpoint to heavier fillings.
– Bread pairings: choose rustic rye for Reuben, sourdough for a robust grinder, and a soft brioche or white sandwich bread for a more indulgent grilled cheese experience.
Tips, Variations & Substitutions
- Make-ahead ideas: Assemble sandwiches, wrap them tightly, and refrigerate for up to a day before cooking or serving. If you plan to toast later, keep spreads light to avoid soggy bread.
- Dietary adaptations:
- Vegan: Use plant-based meats or marinated tofu/tempeh, a vegan cheese substitute, and egg-free mayo alternatives. Choose a sturdy bread that holds up to moisture.
- Gluten-free: Opt for gluten-free bread or a crisp, toasted corn tortilla alternative for a grinder-style bite.
- Low-carb: Build fillings on lettuce wraps or cloud bread, focusing on proteins, cheeses, and crisp veggies for crunch.
- Regional twists:
- Southwest-inspired: chipotle mayo, avocado, pepper jack, grilled chicken, and a tomato slice on toasted whole-grain bread.
- Mediterranean: tuna or chicken with olives, cucumber ribbons, feta, and a drizzle of lemon-oregano vinaigrette on a hearty pita or flatbread.
- Cheese techniques: For maximum melt, use a combination of cheeses (e.g., a sharp cheddar with a meltier mozzarella or Gruyère) and a slightly lower heat to avoid burning edges while ensuring interior melt.
- Bread choices: Sturdy breads like sourdough, rye, or ciabatta hold up better to juicy fillings. For a lighter bite, use a soft white bread and brush with a little butter before toasting.
- Texture boosters: Add a layer of crunchy lettuce or pickles to maintain a crisp bite even after toasting; consider a thin layer of mayo or mustard to keep moisture from seeping into the bread too quickly.
Storage & Make-Ahead Ideas
Storing sandwiches properly preserves texture and flavor. If you have leftovers, wrap them tightly in parchment or wax paper and refrigerate for up to 24 hours. For sandwiches that taste better warm, consider toasting or broiling them just before serving, then rejoining with fillings that hold up to heat. If you’re making a batch for a party or picnic, assemble components separately—bread slices, proteins, cheeses, and toppings—then let guests build their own sandwiches. This approach preserves bread integrity, avoids sogginess, and adds an element of interactive fun to your event.
Tips for make-ahead success:
– Keep condiments separate until serving to prevent bread from becoming soggy.
– If you’re preparing a club-style sandwich, toast bread lightly in advance and store in a sealed container; reassemble with fresh greens just before serving.
– For tuna melts or Reubens, consider applying the cheese near the end of toasting to ensure an even melt without over-crisping the bread.
Fun Facts & Trivia (Optional)
Did you know that the classic Reuben is believed by some to have been created in the United States in the 1920s or 1930s, with claims rooted in various cities such as Omaha and New York? The combination of corned beef, sauerkraut, Swiss cheese, and Russian dressing over rye bread is iconic, and debates about its origin continue to fascinate sandwich lovers. The Italian grinder, sometimes called a hoagie in certain regions, can trace its lineage to Italian immigrant communities bringing cured meats, olives, and oil-packed flavors to American delis. The club sandwich, with its triple-deck structure and precise layering, emerged from the bustling mid-20th-century American diners and hotels as a sandwich of convenience and elegance, designed to feed many in a single, portable package. A grilled cheese is perhaps the simplest yet most enduring comfort—a reminder that the beauty of bread and cheese can shine even without elaborate techniques. Tuna melts, on the other hand, exemplify the 20th-century thrift-and-comfort approach, turning pantry staples into a warm, satisfying meal that pairs surprisingly well with simple sides like tomato soup. Each of these sandwiches has its own cultural resonance, a story about how everyday ingredients become something special when crafted with care, balance, and a dash of culinary memory.
Conclusion / The Everyday Magic of Sandwiches
At their best, sandwiches are more than a quick bite. They are edible storytelling—each layer a character, each spread a mood, and each crust a moment of texture that lingers. The best sandwich recipes you’ll crave—Italian grinder, club, tuna melt, grilled cheese, Reuben, BLT, and beyond—are not merely recipes on a page. They are invitations: to gather people around a table, to experiment with flavors you love, and to celebrate how everyday ingredients can be transformed into something memorable. The beauty of these sandwiches lies in their adaptability and their ability to transform a common pantry into a canvas for creativity. So, take a loaf of bread, a handful of flavorful fillings, and a little imagination, and embark on a sandwich journey that can brighten any morning, cap a busy afternoon, or close a long day with simple, soulful satisfaction. Each bite is a small celebration of nourishment, nostalgia, and the joy of sharing food that tastes like home—even when you’re miles away from it. And as you explore these variations, you’ll likely discover your own secret tweaks and personal favorites—your go-to ratio of crunch to melt, your preferred spread, and your favorite agora of toppings—that will make these sandwiches uniquely yours each time you make them.
Ingredients
- Italian Grinder
- Club Sandwich
- Tuna Sandwich
- Grilled Cheese
- Reuben
- BLT
- Optional Add-ins & Tips
– Italian sandwich rolls (crusty Italian rolls or long sub rolls)
→ The foundation of the grinder. Choose rolls that are sturdy enough to hold multiple fillings without becoming soggy. Slice horizontally, leaving one side hinged for easy stuffing and to keep fillings compact.
– Genoa salami (thinly sliced)
→ Adds a robust, briny salinity and classic flavor to the grinder. Arrange in a single layer to distribute saltiness evenly; do not overpack to avoid overpowering other ingredients.
– Mortadella (thinly sliced)
→ Contributes a silky texture and subtle sweetness. Layer evenly for a balanced mouthfeel and to temper the sharper salami notes.
– Ham (thinly sliced)
→ Provides additional protein and mild savory flavor. Use deli-style ham sliced thin for even distribution and flexibility when assembling the sandwich.
– Provolone or provolone piccante (sliced)
→ Melts smoothly and adds a creamy, slightly tangy note. Prefer sliced cheese for easy layering and uniform melt.
– Giardiniera or pepperoncini (drained, chopped)
→ Bright, tangy crunch to cut through the richness. Chop finely so bits spread through the sandwich without soaking the bread.
– Thinly sliced tomatoes
→ Provide juiciness and acidity to balance meatiness. Salt lightly and let them rest a minute to draw out moisture before assembling.
– Lettuce leaves (romaine or iceberg)
→ Adds crispness and freshness. Pat dry to prevent soggy bread; use whole leaves or large shards for easy biting.
– Red onion (very thinly sliced)
→ Contributes sharp bite and aroma. Soak briefly in cold water if you want milder onion flavor and crunch without excessive bite.
– Olive oil (extra virgin)
→ Creates a glossy, fruity richness that binds fillings. Brush lightly over bread or drizzle inside after toasting for sheen without sogginess.
– Red wine vinegar or balsamic glaze
→ Adds brightness and a touch of acidity to brighten the rich meats. Use sparingly to avoid oversaturation.
– Dried oregano or Italian seasoning
→ Classic herbal note that ties flavors together. Sprinkle lightly to avoid overpowering the meat and cheese.
– Salt and black pepper
→ Essential seasoning to bring out flavors. Season components as you layer; taste and adjust gradually, since cured meats are already salty.
– White or whole wheat sandwich bread (four slices)
→ The traditional canvas for a club. Lightly toast or grill the bread for extra structure and a nutty flavor, which helps hold up against moist fillings.
– Turkey breast (sliced)
→ Lean protein that keeps the club balanced. Layer evenly and avoid overfilling to maintain stack integrity and bite size.
– cooked bacon (crispy)
→ Adds smoky, crunchy texture and fat to carry flavors. Drain on paper towels to remove excess fat and prevent a soggy sandwich.
– ham (sliced)
→ Additional savory depth and moisture. Use thin slices that stack well between bread layers without tearing.
– Cheddar or Swiss cheese (sliced)
→ Melt-friendly, provides creamy or nutty notes. If you’re toasting, choose a cheese that melts smoothly without separating.
– Lettuce (iceberg or romaine)
→ Adds crispness and freshness, acting as a barrier to moisture from tomatoes and mayo. Pat dry to avoid sogginess.
– Tomato (sliced)
→ Juicy sweetness that brightens the savory layers. Sprinkle a pinch of salt to draw out flavor; blot extra moisture to prevent soggy bread.
– Mayonnaise (optional, spread on bread)
→ Adds moisture and binds layers. Use a light hand to avoid overwhelming the meat flavors; you can mix mayo with a touch of Dijon for tang.
– Salt and black pepper
→ Simple seasoning to elevate ingredients. Season tomatoes lightly to help flavor penetrate the sandwich rather than pooling on the bread.
– Canned tuna (in water or olive oil, drained)
→ Protein foundation of the sandwich. If using flaky canned tuna, flake it with a fork and remove excess liquid to prevent sogginess. Oil-packed tuna offers richer flavor; water-packed is lighter.
– Mayonnaise (or Greek yogurt for lighter version)
→ Binds the tuna and adds creaminess. For a lighter option, substitute part of the mayo with yogurt and adjust tang with a squeeze of lemon.
– Celery (finely diced)
→ Crunch and fresh vegetal note; helps lighten the texture and add a crisp bite that contrasts with soft tuna.
– Onion (finely minced)
→ Adds a sharp, savory punch. For milder flavor, rinse minced onion and pat dry, or soak briefly in cold water and drain.
– Pickles or dill relish (finely chopped)
→ Brings tang and brightness. Chop finely to distribute evenly and prevent large pickle shards in each bite.
– Lemon juice or a splash of pickle juice
→ Brightens the tuna and cuts through richness. Use a small amount at a time; you can always add more, but you can’t remove it.
– Lettuce (romaine or green leaf)
→ Adds crunch and a fresh base. Rinse and dry thoroughly to avoid soggy bread from moisture transfer.
– Salt and black pepper
→ Season to taste. Tuna can be salty depending on brand, so start with a light touch and adjust after mixing.
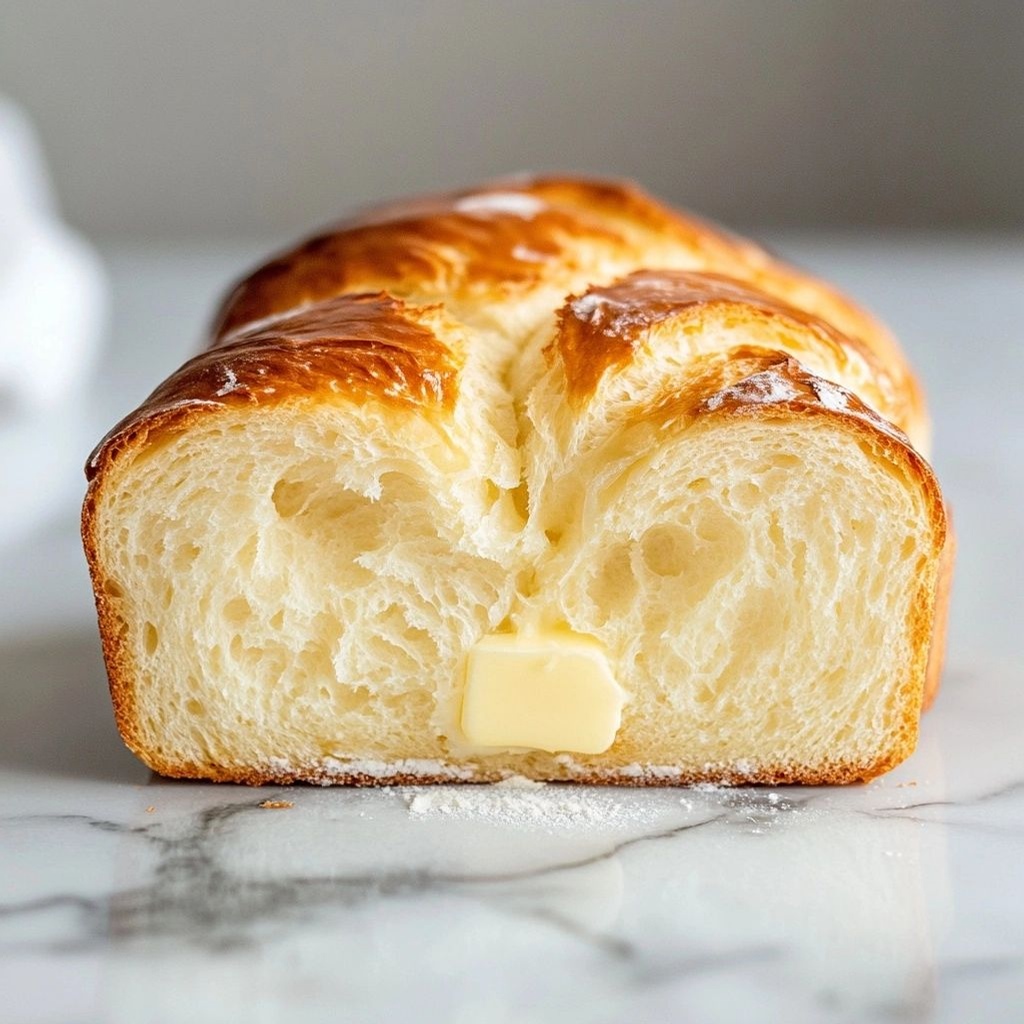
– Bread (sliced)
→ The sandwich’s structure. Choose a sturdy bread that toasts well and yields a golden crust; sourdough or brioche provide depth and sweetness respectively.
– Cheese slices (cheddar, American, or a melt-friendly mix)
→ Primary flavor and melt. Use slices that cover the bread edge to edge for a gooey, even melt; combining cheeses can enhance flavor complexity.
– Butter (for spreading and grilling)
→ Enables crisp, golden browning and rich toasty aroma. Always spread evenly on the outside to prevent sticking and to promote even browning.
– Rye bread (sliced)
→ The quintessential sandwich base with a distinct flavor that pairs with savory fillings. Toast lightly to strengthen structure; keep bread firm to hold sauerkraut and fillings.
– Corned beef (thinly sliced)
→ Rich, beefy core of the sandwich. Layer in a way that the meat remains tender and evenly distributed without clumping.
– Sauerkraut (drained)
→ Provides acidity, crunch, and a characteristic tang. Squeeze out excess moisture to prevent sogginess; drain well but retain some brine for flavor.
– Swiss cheese (sliced)
→ Melts well with rye, adding nutty creaminess that pairs with the tang of kraut and beef.
– Russian or Thousand Island dressing
→ Creamy, tangy spread that unifies flavors. If making at home, whisk mayo, ketchup, relish, and a touch of vinegar for a quick version.
– Butter (for grilling)
→ Creates a crisp, flavorful crust. Spread on outside of sandwich before grilling to ensure even browning and moisture sealing.
– Bread (toasted)
→ Crunchy foundation that supports juicy fillings. Lightly toast to resist sogginess from tomato and mayo; use your preferred bread type for texture variation.
– Bacon (crispy)
→ Provides smoky, salty richness and crunch. Cook to a crisp texture and drain well on paper towels to remove excess fat before layering.
– Lettuce (iceberg or romaine)
→ Adds crunch and freshness. Use fully dried leaves to prevent moisture from soaking into the bread and mashing the sandwich texture.
– Tomato (sliced)
→ Juicy sweetness that balances saltiness. Salt lightly to enhance tomato flavor; blot excess moisture to maintain bread integrity.
– Mayonnaise
→ Creamy binding that moisten and flavor the sandwich. A thin layer helps prevent the bread from drying out while adding cohesion to the layers.
– Avocado slices (optional)
→ Adds creamy richness and healthy fats. Mash lightly or slice to layer with other ingredients, ensuring it doesn’t overpower the classic flavors of each sandwich.
– Pickles or pickled vegetables (optional)
→ Bright acidity and crunch that elevate sandwiches. Slice thinly so they distribute evenly and don’t create large pockets of brine.
– Extra-virgin olive oil or flavored mayo (optional)
→ A finishing drizzle or spread to enrich mouthfeel. Use sparingly to prevent sogginess; pair with herbs for a gourmet touch.
Instructions
- Preheat the oven to 375°F (190°C) and line a sheet pan with parchment for toasting the bread portions used in multiple sandwiches, ensuring an even, dry heat that crisps without burning.
→ This prepares a stable, toasted surface that resists sogginess from moist fillings and creates a cohesive bite. - Slice Italian grinder rolls horizontally, leaving one side hinged, then lightly hollow the interior to create space for fillings without overflowing; this structure keeps fillings compact and prevents squeeze-out.
→ A sturdy, well-formed base is essential for even slicing and handling after assembly. - Pat the thinly sliced Genoa salami, Mortadella, and Ham to remove any excess moisture, then arrange in a single even layer on the bottom half of each roll to distribute salt evenly and avoid clumping.
→ Uniform layering ensures balanced flavor across every bite and prevents overpowering saltiness from concentrated pockets. - Distribute Provolone slices evenly over the meats, aligning to cover the entire surface; this promotes a uniform melt and creamy texture when the sandwich is heated.
→ An even cheese layer yields a cohesive, gooey bite rather than melted patches. - Drain and finely chop giardiniera or pepperoncini, then sprinkle bits across the meats; aim for small pieces that disperse throughout rather than large clumps that overwhelm a single bite.
→ The brightness and crunch cut richness while integrating flavors across the sandwich. - Slice tomatoes thinly, salt lightly, and let them rest on a rack or plate for a minute to draw out excess moisture; pat dry before adding to maintain bread integrity.
→ Moisture management prevents soggy bread and helps preserve sandwich structure during eating. - Lay lettuce leaves in a single layer on the bottom half; pat dry thoroughly to prevent moisture transfer that can degrade texture.
→ Crisp greens act as a moisture barrier and contribute crunchy contrast. - In a small bowl, whisk olive oil with a touch of red wine vinegar and a pinch of dried oregano; brush lightly on the interior of the top half of the rolls or drizzle inside after assembly for sheen without sogginess.
→ The fat and acidity brighten flavors and help emulsify the fillings for a glossy finish. - Season the assembled layers with a light grind of black pepper and a small pinch of salt, tasting as you go since cured meats are already seasoned; adjust to achieve a harmonious balance.
→ Final seasoning should enhance flavors without tipping into oversalted territory. - Close the grinder sandwiches and place them on the prepared sheet pan; toast in the oven until the cheese fully melts and the bread is golden and crisp, about 8 to 10 minutes, rotating halfway for even browning.
→ Even toasting ensures a uniform crust and prevents soft, mushy interiors from uneven heating. - For the Club Sandwich, layer four slices of bread on a clean surface and lightly toast each slice to build structure while preserving tenderness; this toasting locks in bite and prevents soggy layering.
→ The toasted bread acts as a solid scaffold for moist fillings and stacks cleanly. - Spread a thin layer of mayonnaise on one side of each toasted slice or mix mayo with a touch of Dijon for tang, then assemble in order: turkey breast, crispy bacon, ham, and a cheese slice between the middle bread pieces.
→ Layering in this sequence ensures the meats stay in place, while cheese melts into the warm bacon and turkey for cohesion. - Place lettuce and tomato slices on the top layer, lightly seasoning tomatoes to enhance flavor without making the sandwich soggy; cap with the final toasted bread with mayo side down.
→ The tomato juice should be contained by the lettuce barrier to maintain texture across the stack. - Slice the completed club diagonally into two halves and secure with toothpicks if needed; toast briefly in a hot pan for 1–2 minutes to meld flavors and lightly brown the exterior.
→ A short warm finish helps melt cheese slightly and enhances aroma and mouthfeel. - For the Tuna Sandwich, drain canned tuna well and flake with a fork; transfer to a bowl and mix in mayonnaise (or Greek yogurt for a lighter version) until just moistened, aiming for a creamy but not soupy consistency.
→ Proper moisture balance guarantees creamy texture without oozing or sogginess when assembled. - Add finely diced celery and minced onion to the tuna, along with chopped pickles or dill relish; drizzle in lemon juice or pickle juice a teaspoon at a time, tasting after each addition to avoid overpowering brightness.
→ Crisp vegetal notes and acidity lift the tuna while keeping flavors clean and well integrated. - Fold in chopped lettuce and season with a light pinch of salt and pepper; spread the tuna mixture on the bottom slice of bread and top with a second slice, finish with optional avocado slices if desired.
→ Lettuce adds crunch and a moisture barrier; avocado adds richness but should be used judiciously to avoid sogginess. - For a Classic Grilled Cheese, select sturdy bread and layer cheese slices edge to edge; spread butter evenly on the outer faces of the bread to promote a crisp, caramelized crust.
→ Even buttering ensures uniform browning and prevents sticking to the pan while building deep, toasty flavor. - Heat a nonstick skillet over medium-low and place the assembled sandwich in; press gently with a spatula to maximize contact with the pan and encourage uniform melt; cook until the bottom is golden and the cheese begins to ooze, about 3–4 minutes.
→ Gentle heat yields a smooth melt without scorching and creates a satisfying crust. - Flip the sandwich, press again, and cook until the second side is deeply browned and the cheese is completely melted, about 2–3 more minutes; remove from heat and rest 1 minute before slicing to allow the cheese to set.
→ Resting helps prevent the cheese from sliding out and offers a cohesive bite when cut. - For the Reuben, toast rye bread lightly to strengthen its structure and resist sogginess from kraut and beef; this also enhances rye’s aroma.
→ Toasting yields a firmer base that holds sauerkraut and fillings without collapsing. - Layer thinly sliced corned beef on the bottom slice, followed by well-drained sauerkraut and Swiss cheese; spread Russian or Thousand Island dressing on the interior of the top slice.
→ Proper layering ensures tang, creaminess, and melt integration across bites while kraut provides acidity to balance beef. - Butter the exterior of the bread and grill in a hot skillet or panini press until the bread is deeply browned and the cheese is fully melted; press gently to unify layers and prevent shifting.
→ A crisp crust seals in moisture, while even heat yields a smooth, melted center. - For the BLT, toast the bread until lightly golden for a sturdy frame that resists sogginess; pat bacon slices dry on paper towels to remove surface fat.
→ Crunch and dryness from the bacon maximize texture contrast and prevent a soggy foundation. - Assemble in order: crisp bacon, lettuce, sliced tomato, and a thin layer of mayonnaise; season tomato lightly with salt to heighten flavor without drawing out excessive moisture.
→ The mayo acts as a lubricant and flavor carrier, while salt on tomato enhances brightness and overall balance. - Cut the sandwich diagonally and serve immediately for the best texture and color contrast between the crunchy bread, chimney of bacon, and juicy tomato.
→ Immediate serving preserves the integrity of textures and flavors, avoiding limpness. - Optional Add-ins & Tips: If using avocado slices, layer them sparingly to avoid overpowering the core flavors of each sandwich; for pickles or pickled vegetables, distribute evenly so no single bite is overly briny.
→ Balanced additions enhance mouthfeel without obscuring the primary ingredients. - When finishing with extra-virgin olive oil or flavored mayo, drizzle or spread sparingly on the exterior or interior as a finishing touch to enrich mouthfeel while maintaining structure; avoid excessive amounts to prevent sogginess.
→ A light finish elevates richness and complexity without compromising crust or texture.
Notes
These best sandwich recipes are assembled with classic techniques and balanced flavors that stay intact from bite to bite. Choose sturdy breads that can hold multiple fillings without collapsing, and lightly toast or grill to create a reliable barrier against moisture while adding depth. Layer lean proteins with melty cheeses to ensure cohesion, and distribute vegetables and pickled elements evenly to deliver brightness in every mouthful. For the Italian Grinder, press the layers gently so the bread remains intact; for the Club, toast the bread for extra structure; for the Tuna, drain excess liquid and fold in crunchy celery for contrast; for the Grilled Cheese, cover the bread edge to edge with cheese for a gooey center; for the Reuben, pat the sauerkraut dry and toast the rye until fragrant and crisp; and for the BLT, pat the lettuce dry to prevent sogginess. Use a light touch with condiments— mayo or dressings should bind but not overwhelm— and consider finishing with a drizzle of olive oil or a smear of flavored mayo to elevate richness without making the bread soggy. To scale or customize, feel free to add avocado for creaminess, extra pickles for tang, or a touch of Dijon for a subtle heat. When reheating, heat gently in a skillet or panini press to re-melt cheese and re-crisp the exterior, while keeping fillings juicy inside. Always season components as you assemble, mindful that cured meats can be salty, and aim for a harmonious blend where no single element overpowers the others. Finally, prepare components in advance and layer just before serving to preserve texture and bite, and consider gluten-free bread options or dairy substitutes if you’re cooking for dietary needs.
Tips
General assembly and technique tips
- Plan for balance: start with a baseline of bread that can support multiple fillings without becoming soggy. If a sandwich tends to leak moisture, consider toasting or pre-toasting the bread to create a barrier against moisture transfer.
- Texture contrast: aim to include at least one crunchy element (lettuce, giardiniera, celery, pickles) and one creamy element (mayonnaise, cheese) in each sandwich to keep bites interesting.
- Moisture management: pat dry tomatoes and pickles when needed; drain sauerkraut and giardiniera well. For tuna and Reuben, drain excess liquid or brine to prevent soggy bread.
- Cheese technique: choose melts that suit the bread and heat method. For toasted or grilled sandwiches, place cheeses that melt smoothly and evenly to avoid separation.
- Even layering: distribute primary fillings in a single, even layer rather than piling in the center. This helps every bite deliver consistent flavor.
- Toasting guidance: light-to-medium toasting helps build structure without drying out delicate ingredients like lettuce or tomato. If you plan to grill, brush bread with a small amount of oil or butter for a crisp crust.
- Season thoughtfully: cured meats are already salty, so season components lightly and taste as you build. A pinch of salt on tomatoes or a drizzle of acidic dressing can brighten the whole sandwich without overpowering.
- Storage and freshness: assemble just before serving for the best texture. If prepping ahead, keep components separate (bread toasted, meats sliced, veggies washed and dried) and assemble shortly before eating.
Italian Grinder tips
- Toast or lightly grill the bread halves before layering to enhance sturdiness and prevent sogginess from meats and giardiniera.
- Spread a thin layer of olive oil on the cut surfaces of bread for shine and moisture control, then add a light brush of red wine vinegar or balsamic glaze on the filling layer for brightness.
- Chop giardiniera finely so every bite has a tangy crunch without creating soggy pockets.
Club Sandwich tips
- Toast the bread lightly to create a dry surface that grips mayo and fillings. Use three stacked slices and secure with a light press or toothpicks to maintain the three-layer structure when cut.
- To keep layers intact, apply mayo sparingly to each interior surface and place lettuce as a moisture barrier between wet components (tomato) and bread.
- Slice diagonally and serve immediately for clean portions and a classic club appearance.
Tuna Sandwich tips
- Flavor balance: use a combination of mayo and a splash of acid (lemon juice or pickle juice) to wake up tuna without making it mayo-forward.
- Texture control: for chunkier tuna, fold in diced celery and pickles gently; for smoother texture, mash slightly and fold; both work well depending on preference.
- Try a light touch of Dijon or Dijon-mayo blend to add subtle heat without dominating the tuna.
Grilled Cheese tips
- Use a sturdy bread and a high-fat cheese blend to achieve an ultra-melty interior. If using plain cheddar, consider mixing with a cheese that melts smoothly (like American or fontina).
- Butter the outside generously, then cook on low-to-medium heat to allow a thorough melt without scorching the crust.
Reuben tips
- Rinse and drain kraut thoroughly; pat dry to minimize moisture transfer. A light squeeze removes excess brine while preserving tang.
- Warm corned beef slightly before layering to ensure even distribution and a tender bite once grilled.
- Toast rye lightly to develop flavor and help hold the gooey dressing and kraut together.
BLT tips
- Cook bacon to crispness and drain well to prevent grease from softening the bread. A light blot with paper towels helps keep the sandwich crisp.
- Fully dry lettuce leaves to avoid extra moisture seeping into the bread. Consider shaving or tearing into sizes that fit the bread shape.
- Use a modest amount of mayo to bind and moisten the sandwich without overpowering tomato brightness.
Optional Add-ins & Tips (general)
- Avocado slices: layer in thin slices or a gentle mash to avoid overpowering other flavors; season with a touch of salt and lemon to prevent browning.
- Extra-virgin olive oil or flavored mayo: use sparingly as a finishing drizzle or spread to enhance mouthfeel; pair with herbs like oregano or basil for a gourmet touch.
- Pickles or pickled vegetables: slice thinly for even distribution and to avoid large pockets of brine that can oversaturate bread.
FAQ
What is the best bread choice for an Italian grinder?
Crusty Italian rolls or a sturdy hoagie roll works best. The exterior stays crisp while the interior soaks up flavorful oil and deli juices without falling apart.
How do I achieve a perfect grilled cheese?
Use equal parts butter and a high-fat cheese like cheddar or Gruyère. Cook slowly on medium-low heat until the bread is golden and the cheese is melted; cover briefly to help melt the center.
Can I make these sandwiches ahead for a party?
Yes. Assemble and refrigerate ungrilled sandwiches up to a day ahead. Grill just before serving, or toast lightly to warm through. For tuna or BLT, keep components cold and assemble fresh.
What’s a simple tuna salad filling?
Drain canned tuna, mix with mayonnaise, a squeeze of lemon, celery or dill pickle, salt, and pepper. Add a touch of Dijon for depth. Keep it moist but not runny.
How can I build a classic Reuben?
Use thinly sliced corned beef, sauerkraut, Swiss cheese, and Russian or Thousand Island dressing on rye. Grill on buttered pan until the cheese is melty and the bread is toasted.
What’s a great BLT variation?
Try adding avocado or a fried egg for extra richness. Use crispy bacon, ripe tomatoes, and arugula on toasted sourdough with mayo or a light spread of avocado mayo.
How can I spice up an Italian grinder?
Layer capicola, salami, mortadella, provolone, peppers, and an herby oil-vinegar dressing. Toast the sandwich until the cheese begins to melt and the bread is crunchy.
What are some veggie-friendly options?
Grill portobello or zucchini slices with mushrooms, add roasted peppers, fresh mozzarella, pesto, and a drizzle of balsamic glaze on ciabatta or focaccia.
How do I prevent soggy sandwiches?
Toast the bread lightly, pat toppings dry, and sauce components separately (or layer wet ingredients between drier ones). Consider toasting greens or using a barrier like cheese or avocado.
Can I make these sandwiches without dairy?
Yes. Use dairy-free butter or olive oil for grilling, and substitute cheese with plant-based melts or avocado for creaminess. Use dairy-free dressings or mayo as needed.