Introduction / Hook
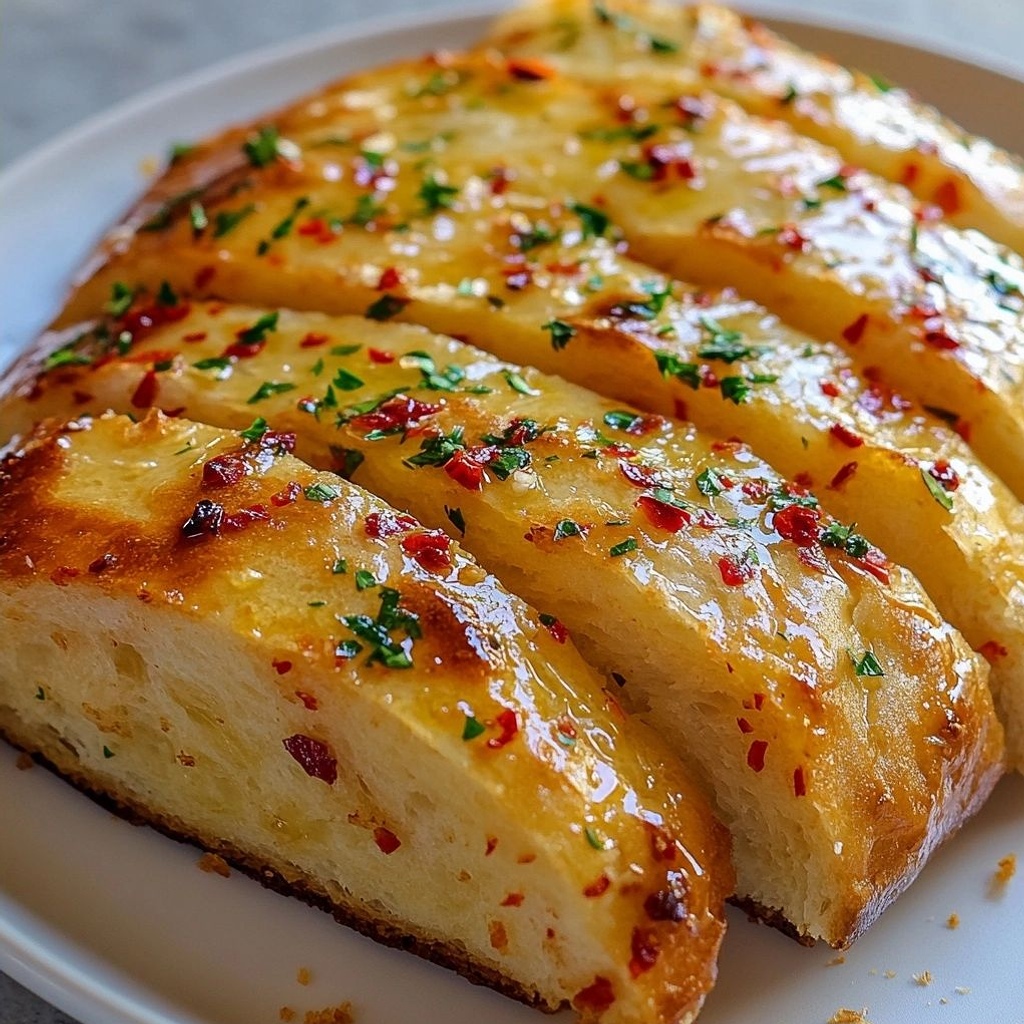
Imagine tearing into a crusty, golden loaf that crackles with heat, a shower of chili warmth flooding your senses as melted pockets of peppery goodness spill into your mouth. This isn’t just bread; it’s a celebration of paprika and heat, a party-ready snack that transforms any gathering into a lively, appetite-stoked affair. Chilli Bread is the kind of bite-sized luxury you picture at a bustling tasting table or a casual game night: a fragrant, smoky crumb with a mischievous kick, inviting you to reach for another slice before you even finish the first. The aroma alone—charred edges, toasted seeds, a whisper of garlic and herbs—promises comfort and a little adventure in every bite. Welcome to a bread recipe that’s as versatile as it is irresistible, a crowd-pleaser that disappears fast and leaves a lingering, spicy memory.
The Story Behind the Dish
Chilli Bread traces its roots to the heart of bake-and-share culture, where warmth is found not just in the oven but in the shared experience of passing a loaf and trading stories with friends and family. The concept is simple: a sturdy, slightly enriched loaf spiked with chili—an homage to street foods and markets where heat and aroma mingle with the scent of freshly rising dough. In many regions, bread becomes a canvas for bold flavors, and chili—whether in the form of dried flakes, fresh chilies, or a smoky pepper blend—acts as the storytelling spice. The idea behind chili bread as a party starter is pragmatic: you bake once, you slice generously, and you watch plates come back for seconds, thirds, and extra napkins to mop up the lingering heat. Some cooks favor a rustic loaf with irregular holes that cradle chili oil; others opt for a softer crumb that soaks up a little olive oil and a dusting of sea salt. Over the years, chili bread has traveled through kitchens, adapting to local tastes. In coastal towns, you might find a hint of lemon zest or a brush of garlic butter to brighten the heat; in Mediterranean households, herbs like oregano and thyme drift across the surface, turning a simple slice into a taste of sunshine. The dish embodies conviviality: it’s the kind of snack that invites sharing, conversation, and playful dipping—perfect for a party starter where a buzz of conversation is as important as the heat itself.
Why You’ll Love This Recipe
- Fast to prepare and very forgiving: mix, proof, bake, and you’re ready to serve in under an hour.
- Versatile heat: you can dial up or down the chili to suit your crowd, from mild warmth to blazing fire.
- Textural contrast: a satisfyingly crisp crust gives way to a tender, fluffy interior that carries spices beautifully.
- Perfect as a party starter: slices disappear quickly, and it pairs with dips, cheeses, soups, and salads alike.
- Make-ahead friendly: you can bake a batch in advance and rewarm with minimal effort, ideal for entertaining.
- Crowd-pleasing aroma: the scent of toasted seeds, garlic, and chili wafts through the room, drawing guests to the table.
- All-around comforting yet exciting: it satisfies craving for something hearty while delivering a lively kick.
Flavor Profile & Texture
The flavor of chilli bread is a masterclass in balance. The crust carries a delicate char that hints at smoky undertones, while the interior remains soft, moist, and elegantly chewy. The chili introduces a measured heat—enough to wake the palate without overpowering the bread’s own sweetness. Garlic, herbs, and a touch of olive oil blend with the dough to create a savory, almost garlicky perfume that expands with every bite. Depending on the chili you use, you might detect a citrusy brightness, a peppery bite, or a slow, warming heat that lingers on the tongue. The seeds scattered atop, whether sesame, fennel, or poppy, add a pop of crunch and a tiny nutty note that contrasts with the tenderness inside. The overall experience is comforting and robust: a rustic loaf that feels homemade and lovingly seasoned, capable of transforming a simple snack into a memorable mini-feast.
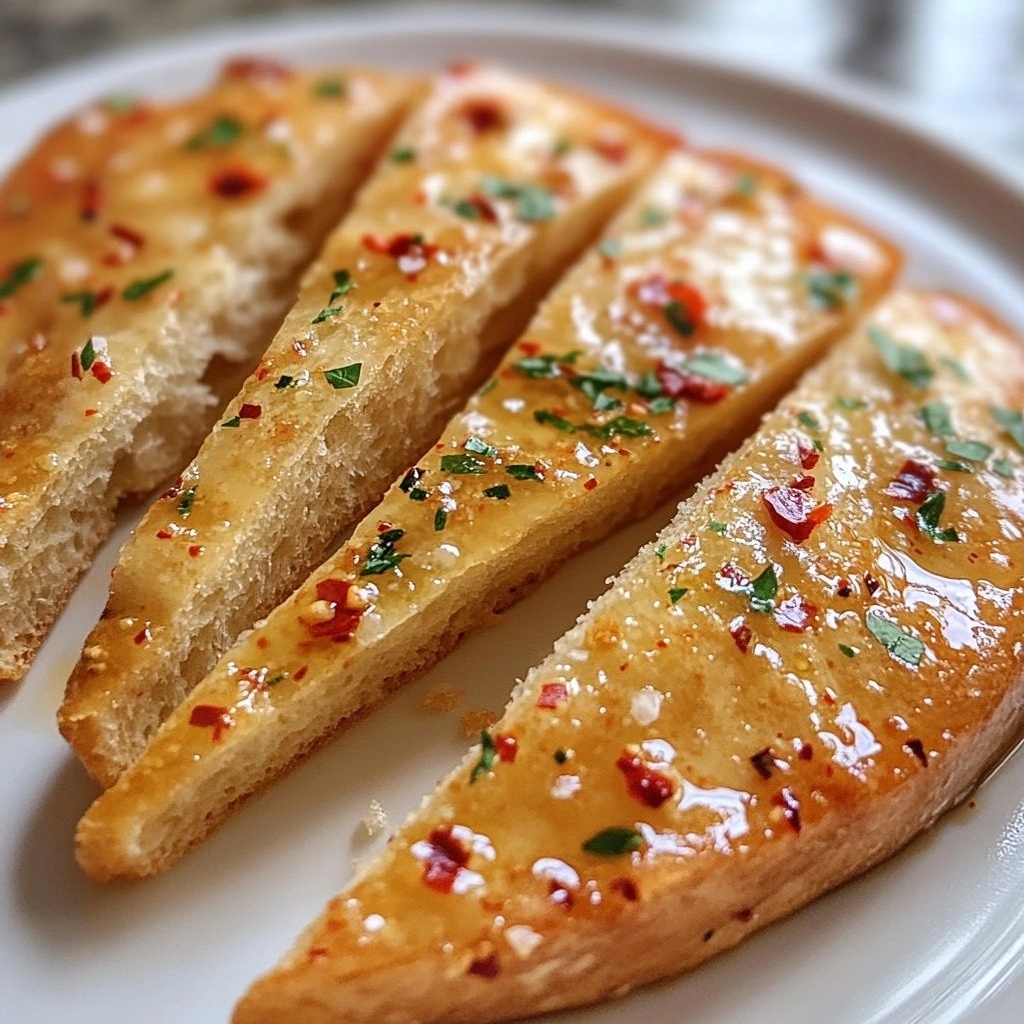
Texture-wise, you’ll notice a crisp exterior that gives way to a soft, honeyed crumb. If you opt for a denser loaf, you’ll feel a more substantial bite with each slice; if you prefer airier bread, a light and fluffy crumb will enhance the chili’s brightness without dulling the heat. The chili’s presence is a consistent thread—there when you bite, present in the aroma, and lingering after you swallow. The finish is peppery and warm, occasionally carrying a hint of sweetness from caramelized edges or a touch of honey used in some versions to balance the saltiness of the dough. This bread is all about texture contrasts—crisp edge, tender center, and a gentle spice that invites you back for more, layer by layer.
Occasions & Pairings
This chilli bread is at home across a spectrum of occasions. It shines as a party starter at casual gatherings, a warm appetizer during holiday meals, or a comforting bite during a weeknight soup night. It also makes for a brilliant accompaniment to a cheese board, where its heat pairs with creamy cheeses, tangy blues, and sharp cheddars, while the bread itself soaks up the olives, fig jam, or honey drizzle on the board. For drinks, pair it with a bright white such as Sauvignon Blanc or a chilled rosé to balance the spice, or offer a robust red for a bolder dining experience. It’s equally at home as a snacking bread for movie nights or as a cheerful addition to a potluck table, where a loaf can stand up to a variety of dips, from whipped feta and roasted pepper hummus to olive oil infused with chili and herbs. If you’re hosting a game night or a casual party, cut the loaf into bite-sized slabs so guests can grab and go, with a little squeeze of lemon or a herbaceous drizzle to brighten each slice. The bread’s warmth can act as a social icebreaker, a comforting nod to shared food memories and the joy of tasting something with a bit of spark.
When planning a menu around chili bread, think in terms of the spread: a simple olive oil dip with cracked black pepper, a tangy yogurt-herb sauce, or a garlicky aioli can elevate the experience. It also pairs beautifully with tomato-based soups, creamy garlic soups, or even a light cucumber and dill yogurt dip on a warm afternoon. For a more indulgent pairing, consider a platter of cured meats, marinated olives, pickles, and fresh bread sticks to create a vibrant, savory spread that invites people to graze and converse.
Tips, Variations & Substitutions
- Heat levels: start with 1 teaspoon of chili flakes or a mild chili powder, then adjust to taste. For a milder loaf, use sweet paprika with a touch of cayenne.
- Chili varieties: experiment with fresh minced chiles for brightness, dried chili flakes for consistent heat, or a chili paste for a deeper, rounded warmth.
- Herbal infusions: add dried thyme, rosemary, or oregano to the dough for an aromatic punch that complements chili perfectly.
- Cheese option: fold grated sharp cheddar, manchego, or parmesan into the dough for a richer, cheese-forward version that melts into gooey pockets as it bakes.
- Oil and moisture: use good-quality extra-virgin olive oil to enrich the crumb and enhance the bread’s aroma; a small amount of butter can bring a luxurious, glossy finish.
- Gluten-free variation: swap with a gluten-free all-purpose flour blend and add a touch of xanthan gum if your blend requires it; consider adding a bit more oil to maintain moisture.
- Vegan option: replace dairy components with plant-based milk and a neutral oil; use nutritional yeast for a cheesy note if desired and ensure the leavening agents are vegan.
- Herbal twists: lemon zest or orange zest can brighten the bread, especially when paired with chili for a lively contrast.
- Country loaf variant: shape as a round boule for a rustic crust, scored to create a dramatic rise and a cracker-thin crust edge when baked hot.
- Make-ahead shortcut: bake the loaf a day ahead, cool completely, wrap tightly, and refrigerate; reheat gently in a warm oven to refresh the crust before serving.
Storage & Make-Ahead Ideas
Chilli bread stores well when kept in the right conditions. After baking and cooling completely, wrap slices tightly in parchment and then in foil to preserve moisture and prevent the crust from becoming too hard. You can freeze individual slices for quick snacks later; reheat directly from the freezer in a 350°F (175°C) oven for about 8–12 minutes until warmed through and the crust regains its crispness. To keep fresh for a couple of days, store the whole loaf or sliced portions in an airtight container or a cloth bread bag at room temperature away from direct sunlight. If you want to serve it as a party starter with dips, consider placing slices on a warm bread board and keeping warm over a low-wattage lamp or a small warming tray. For best flavor, rewarm just before guests arrive—this preserves the crust’s snap and intensifies the inviting aromas that drew people to the table in the first place.
Make-ahead strategies include preparing the dough and letting it proof in the fridge overnight for a slow, overnight fermentation that deepens flavor. The next day, shape, bake, and finish with a final brush of olive oil and a sprinkle of chili flakes for an extra pop. If you’re pressed for time, you can prepare a flavored oil or butter ahead of time, mix with chili and garlic, and brush it over the loaf just before baking to achieve a glossy, spicy finish with a glossy, bakery-quality crust.
Fun Facts & Trivia (Optional)
Throughout various cultures, chili and bread have played complementary roles in celebratory meals. In some regions, chili-infused bread is served as a symbol of warmth and hospitality, with neighbors exchanging slices as tokens of goodwill. The practice harks back to techniques of flavor layering—crackling crusts, aromatic fillings, and the social ritual of breaking bread together. The use of chili in bread has long been a way to preserve heat and add personality to a simple staple, a reminder that everyday food can carry tradition and character in equal measure. If you listen closely while a loaf bakes, you may notice it whispering of summer markets, smoky ovens, and the shared joy of a well-timed bite among friends. And for those who love culinary trivia, chili has a storied history across continents—from the peppers of Central and South America to the peppers of Asia—each culture adding its own spin to what a ‘spicy loaf’ can be.
Another delightful bit of trivia: many bakers use chili oil or chili flakes to finish breads with a punch of color and heat, a visual cue that hints at the flavor journey to come. The combination of warmth, scent, and texture in chilli bread often triggers nostalgia—reminding us of family gatherings, street-food markets, and the thrill of discovering a new, boldly flavored treat at a casual party. These small touches—flaky salt on top, a brush of herb butter, a dusting of seeds—are what elevate a humble loaf into an event, a moment of culinary drama that still feels homely and welcoming.
As you prepare this chilli bread, remember that the magic lies not only in the ingredients but in the way the aroma fills the room and the way people gather around a platter, reaching for the next slice. It’s a simple dish with a big personality—a modern nod to timeless bread traditions, remixed for contemporary tastes and party atmospheres. The more you explore its variations, the more you’ll discover personal touches that reflect your own kitchen, your guests, and the memories you want to make with every bite.
Ingredients
-
– Chilli Bread Base
– 3 cups all-purpose flour
→ The main structure of the bread. Flour provides the gluten network that traps gas produced by the yeast, giving the loaf chew and rise. If you are gluten-free, substitute with 3 cups gluten-free bread flour or a 1:1 gluten-free flour blend plus 1 tablespoon xanthan gum per cup. Hydration may vary; add water gradually to form a soft, cohesive dough.
– 1 cup warm water (around 110°F/45°C)
→ Warm water activates the yeast without killing it. If your kitchen is cooler, you may need a touch more water; if it’s very warm, use a tad less to prevent over-proofing. Aim for a smooth, elastic dough after kneading.
– 2 teaspoons active dry yeast
→ Yeast is the leavening agent that makes the bread rise and become fluffy inside. Use fresh, active yeast and proof it in a small portion of the warm water with a pinch of sugar until foamy to confirm it’s alive before mixing into the dough.
– 1 teaspoon sugar
→ Feeds the yeast to start fermentation and helps browning of the crust. You can substitute with 1 teaspoon honey or maple syrup for deeper flavor; organic sugar will provide a cleaner sweetness that doesn’t muddy the chili flavors.
– 1 teaspoon salt
→ Builds flavor and tightens the dough by strengthening gluten strands. Salt also controls yeast activity, so add it with the flour to ensure even distribution. If using salted butter or cheese later, adjust measurement accordingly.
– 2 tablespoons olive oil
→ Adds richness, tenderness, and a softer crumb. Oil coats flour proteins, limiting gluten development slightly for a more pliable dough and helps with moisture retention during baking. Use extra-virgin olive oil for best aroma.
– Chilli Flavoring
– 2-3 fresh green chilies (e.g., jalapeños) finely chopped
→ Provides fresh, bright heat and crisp texture in every bite. Remove seeds if you want milder heat. If you prefer smoky heat, substitute with roasted poblano or ancho chilies. Chop finely to distribute evenly through the dough.
– 1-2 cloves garlic, minced
→ Garlic infuses the bread with savory depth. For a milder flavor, grate and press the paste into the dough early on. Fresh garlic provides aroma that bakes into the crust.
– 1 teaspoon red chili flakes
→ Adds quick, concentrated heat and a peppery kick. Adjust to taste; more flakes mean more heat and a speckled red appearance in the crust. Mix into the dough or sprinkle on during shaping for bursts of spice.
– 1 tablespoon chili paste or chili powder (adjust to preferred heat)
→ Intensifies chili flavor throughout the loaf. If using chili paste, choose a version without added sugars for a cleaner chili bite; chili powder is milder and easier to measure for consistent heat.
– 1 tablespoon chopped fresh cilantro or parsley (optional)
→ Fresh herbs offer a bright contrast to the heat and give a hint of color and aroma. Chop finely and fold into the dough just before shaping for maximum flavor diffusion.
– Toppings & Finish
– 1 cup shredded mozzarella or cheddar cheese (optional)
→ Adds melty, gooey richness on top or inside the loaf. Choose a cheese that melts well; sprinkle over the shaped dough before final proof to create a cheesy crust or fold into the dough for stuffed bread. If you are dairy-free, use a vegan mozzarella substitute.
– 1 tablespoon grated Parmesan (optional)
→ Creates a savory, crisp crust with a toasty nutty note. Best when sprinkled on just before baking for a delicate crunch and golden edges.
– 1 tablespoon sesame seeds or nigella seeds (optional)
→ Adds a subtle toasty aroma and a light crunch on the crust. Toast seeds briefly in a dry skillet before using to heighten flavor. They stick nicely to the surface when brushed with a bit of oil or water before proofing.
– 1–2 teaspoons olive oil for brushing
→ Keeps the crust moist and encourages even browning and a glossy finish. Brush lightly after shaping and just before baking or during the final 5 minutes of proofing to help the toppings adhere and the crust brown evenly.
– Optional Add-ins
– 1/2 cup corn kernels (frozen or fresh)
→ Adds pops of sweetness and texture that contrast with the spicy bread. If using frozen corn, thaw and pat dry to prevent excess moisture. Fold into the dough or sprinkle on top before baking for visual interest.
– 1/4 cup chopped olives (optional)
→ Provides a briny, savory bite that echoes many chili bread profiles. Pit and chop olives finely so they distribute evenly; pat them dry to avoid adding extra moisture to the dough, which could affect rise.
– 1/4 cup chopped cilantro or chives (optional)
→ Bright herbaceous note that complements chili flavors. Fold into the dough during final mixing or sprinkle over the top after shaping for a fresh finish. Use generously if you love herbal aroma.
Instructions
- Preheat your oven to 350°F (175°C) and line a 9×5-inch loaf pan with parchment paper or grease it well.
→ Preheating ensures the oven is at the correct temperature when the dough enters, promoting even rise and a proper crust. Greasing or lining prevents sticking and makes removal clean after baking. - Proof the 2 teaspoons active dry yeast in 1/2 cup warm water (about 110°F/45°C) with the 1 teaspoon sugar for 5–10 minutes until foamy.
→ This confirms the yeast is alive and active; a foamy bloom indicates good leavening power before mixing into the dough. - Whisk together 3 cups all-purpose flour and 1 teaspoon salt in a large bowl to distribute salt evenly and develop initial gluten structure.
→ Uniform salt distribution regulates yeast activity and lays the groundwork for consistent dough texture by preventing clumps of salt from touching yeast directly. - Stir in 2 tablespoons olive oil to the flour mixture to coat the flour proteins and begin tenderizing the crumb.
→ Oil creates a softer, more pliable dough and helps retain moisture during baking, contributing to a tender interior. - Combine the foamy yeast mixture with 1 cup warm water and pour into the flour–oil mixture, mixing with a wooden spoon until a shaggy dough forms.
→ The warm liquid activates the remaining gluten and yeast evenly; a shaggy dough indicates you haven’t overworked the flour yet. - Turn the dough onto a lightly floured surface and knead for 8–10 minutes until it becomes smooth, elastic, and slightly tacky; add a tablespoon or two of water if it’s too dry, or a little flour if overly sticky.
→ Proper kneading develops the gluten network for structure and gas retention; a windowpane test (stretch a small piece until translucent without tearing) confirms readiness. - Shape the dough into a ball, place it in a lightly oiled bowl, cover with a damp towel or plastic wrap, and proof in a warm spot for 60–75 minutes until doubled in size.
→ The first rise builds flavor, improves crumb structure, and creates the necessary air pockets for a soft, airy loaf. - Meanwhile, prepare the chili flavoring by finely chopping 2–3 fresh green chilies, mincing 1–2 garlic cloves, and whisking in 1 teaspoon red chili flakes with 1 tablespoon chili paste or chili powder to form a cohesive chili paste.
→ Finely chopped chilies distribute heat evenly; minced garlic blends into the dough for savory depth; chili paste or powder ensures consistent heat throughout the loaf. - Gently fold the chili mixture and 1 tablespoon chopped fresh cilantro or parsley into the risen dough just until evenly incorporated, taking care not to overwork and deflate the dough.
→ Folding distributes the heat and aromatics without pushing out all the built-up gas; use a gentle folding motion to preserve precious air pockets. - Punch down the dough to release large gas pockets, turn it onto a floured surface, and shape it into a tight log or loaf; if using toppings, sprinkle 1 cup shredded mozzarella or cheddar and 1 tablespoon grated Parmesan on the surface, then fold partially to embed.
→ Punching rebonds the dough to a workable level and reshapes for even interior texture; layering cheese creates a cheesy crust and melts into the crumb during baking. - Place the shaped dough into the prepared loaf pan, cover loosely, and proof for a second rise of 25–35 minutes until the dough crests slightly above the rim of the pan.
→ The second rise enlarges the loaf for a lighter crumb and helps achieve a tall, well-risen bread with a golden crust. - Brush the top lightly with 1–2 teaspoons olive oil and sprinkle optional toppings (1 tablespoon sesame or nigella seeds, extra parmesan, or herbs) to aid adherence and create a flavorful crust.
→ Oil promotes browning and a glossy crust; seeds and cheese add aroma, texture, and visual appeal, while ensuring they stick during baking. - Bake in the preheated oven for 28–34 minutes, rotating the pan halfway if needed, until the crust is golden brown and a digital thermometer inserted into the center reads 190°F (88°C).
→ A golden crust signals proper Maillard reaction and moisture evaporation; the internal temperature confirms complete cooking without being dry. - Remove the loaf from the oven, transfer to a wire rack, and let cool for at least 20–30 minutes before slicing to finish the gelatinization process and set the crumb.
→ Resting prevents the interior from collapsing and ensures clean, even slices; slicing too soon can make the bread gummy and crumbly. - Slice the cooled bread and serve as a spicy snack or appetizer, optionally with extra chili oil or a light herb butter to enhance the chili-forward profile.
→ Restoring moisture with a finishing spread heightens flavor perception and provides a pleasant, contemporary party bite with a bright finish.
Notes
These chili bread is a vibrant, savory loaf designed to be a party-ready starter or snack. It blends a soft, chewy crumb with bright chili heat and optional cheesy topping for a decadent crust. You can customize the heat level by adjusting the fresh chilies, chili flakes, or chili paste, and you can fold in add-ins like corn, olives, or herbs for extra texture and flavor. For a lighter version, omit the cheese or use a dairy-free cheese substitute. If you want a stronger garlicky note, increase the minced garlic or add a touch of garlic powder to the dough. Always proof the yeast in warm water with a pinch of sugar to ensure a lively rise, and monitor hydration since different flours absorb liquid differently. If you’re gluten-sensitive, substitute the flour with a labeled gluten-free bread flour blend and add an extra tablespoon of xanthan gum per cup of flour for structure. Fresh cilantro or parsley adds a bright finish that pairs perfectly with the chili.
Tips for perfect results:
– Temperature and proofing: Keep the water around 110°F/45°C for active dry yeast and proof until foamy before mixing. If your kitchen is cooler, allow extra time for the dough to rise; in a warm environment, you may need a touch less water to avoid over-proofing.
– Dough handling: Knead until smooth and elastic, then cover and let rise until approximately doubled. If you’re adding shredded cheese or toppings, incorporate them gently to avoid deflating the dough.
– Flavor layering: Finely chop fresh chilies to distribute heat evenly. For deeper chili flavor, mix chili paste or chili powder into the dough and scatter the chili flakes for bursts of heat in the crust.
– Toppings: Brushing with olive oil before baking helps toppings adhere and promotes a glossy crust. Toast sesame or nigella seeds briefly to heighten aroma before applying to the dough.
– Serving ideas: Slice warm and serve with a yogurt-dill dip, sour cream, or an herby chimichurri. It also makes a fantastic accompanyment to soups or salads at a party spread.
– Storing and freezing: Once cooled, store in an airtight container for up to 3 days. This bread freezes well; slice before freezing so you can reheat individual portions as needed. Reheat gently to prevent drying out.
– Gluten-free note: If using gluten-free flour, consider adding a tablespoon of xanthan gum per cup of flour and adjust hydration gradually to achieve a soft, cohesive dough that still holds together during shaping.
Enjoy experimenting with these mix-ins and toppings to tailor the chili bread to your taste and occasion.

Tips
Tips for Perfect Chilli Bread
- Hydration and dough feel: Start with the 3 cups of flour and 1 cup warm water as written, but be prepared to adjust. If the dough is sticky after mixing, add a teaspoon of flour at a time. If it feels dry, add a tablespoon of water and knead until smooth.
- Proofing strategy: Proof the dough in a warm, draft-free spot until it doubles in size. If your kitchen is cool, place the dough in a turned-off oven with the light on or near a warm bowl of water to maintain steady warmth.
- Yeast health check: If the dough doesn’t rise, confirm your yeast is active by proofing 2 teaspoons in warm water with a pinch of sugar until foamy before proceeding.
- Flavor layering: For stronger chili flavor, sauté the minced garlic and chopped chilies in a teaspoon of olive oil for 1–2 minutes before adding to the dough to release oils and aroma.
- Even heat distribution: When shaping, roll the dough evenly to a uniform thickness to ensure consistent crumb and crust color across the loaf.
- Spice control: If you’re sensitive to heat, start with 1 green chili and 1 teaspoon chili flakes, then taste the dough after mixing and adjust with an additional pinch of chili flakes in the dough or as a top sprinkle before baking.
- Cheese tips: If using mozzarella or cheddar, reserve some to sprinkle on top just before baking for a molten crust. For a crisp crust, brush the top with olive oil and sprinkle Parmesan toward the end of the bake.
- Seed topping: Toast sesame or nigella seeds briefly in a dry skillet to boost aroma before sprinkling on the dough or pressing lightly into the surface with a brush of water or oil to help them adhere.
- Optional add-ins: Fold corn kernels, olives, or herbs gently into the dough on the last mix. Pat dry any add-ins that release moisture to avoid a sticky dough.
- Serving suggestions: Let the loaf cool 10–15 minutes before slicing to keep the crumb intact. Serve with a yogurt-based dip, mellow mayo, or a zesty herb oil to balance the heat.
- Storage: Wrap cooled bread tightly and store at room temperature for up to 2 days or freeze slices for longer. Reheat briefly in a hot oven or toaster to restore crust crispness.
FAQ
Chilli Bread Recipe – FAQ
What is chili bread?
Chili bread is a warm, savory bread loaf or loaf slices infused with chopped chilies, garlic, and herbs for a spicy, flavorful snack or party starter.
What ingredients are typically used?
Common ingredients include bread dough or baguette slices, chopped fresh chilies or chili flakes, garlic, butter or olive oil, herbs (like parsley or oregano), salt, and optional cheese for topping.
Can I use different types of bread?
Yes. Sturdy breads like baguette, ciabatta, or focaccia work well. For a softer texture, sandwich bread can be used in a panini-style chili toast.
How spicy is this recipe?
The heat level depends on the type and amount of chilies you use. Start with milder chilies or fewer seeds, then adjust to taste. For a milder version, use red pepper flakes; for extra heat, add fresh jalapeños or Thai chilies.
Is this dish baked or pan-fried?
Chili bread is typically baked in the oven until the bread is crispy and the topping is golden. You can also toast slices in a skillet for a quick version.
What toppings pair well with chili bread?
Grated cheese (cheddar, mozzarella), chopped herbs, a squeeze of lemon or lime, a dollop of sour cream, or a drizzle of herb-infused oil all complement the spiciness nicely.
How do I prevent the bread from drying out?
Brush the bread with melted butter or olive oil before baking, don’t overbake, and consider sealing in moisture with a light foil cover for the first part of baking if using a loaf.
Can I make chili bread in advance?
Yes. Assemble and bake, then store cooled bread in an airtight container for up to 2 days. Reheat in the oven for 5–10 minutes to restore crispiness. Bread toppings like herbs should be added just before serving to maintain freshness.
What dipping sauces go well with chili bread?
Options include garlic yogurt dip, marinara, ranch, spicy aioli, or a simple olive oil with balsamic vinegar dip. Choose based on your flavor preference and heat level.
Any tips for a party-friendly version?
Slice the bread into bite-sized crostini, top with chili butter and a sprinkle of cheese, then bake briefly to serve as easy-to-handle starters. You can also set up a chili bread bar with different toppings for guests to customize.