Author

Ocean Nightleaf

Browsing

Introduction – A Warm Embrace of Cinnamon and Apple

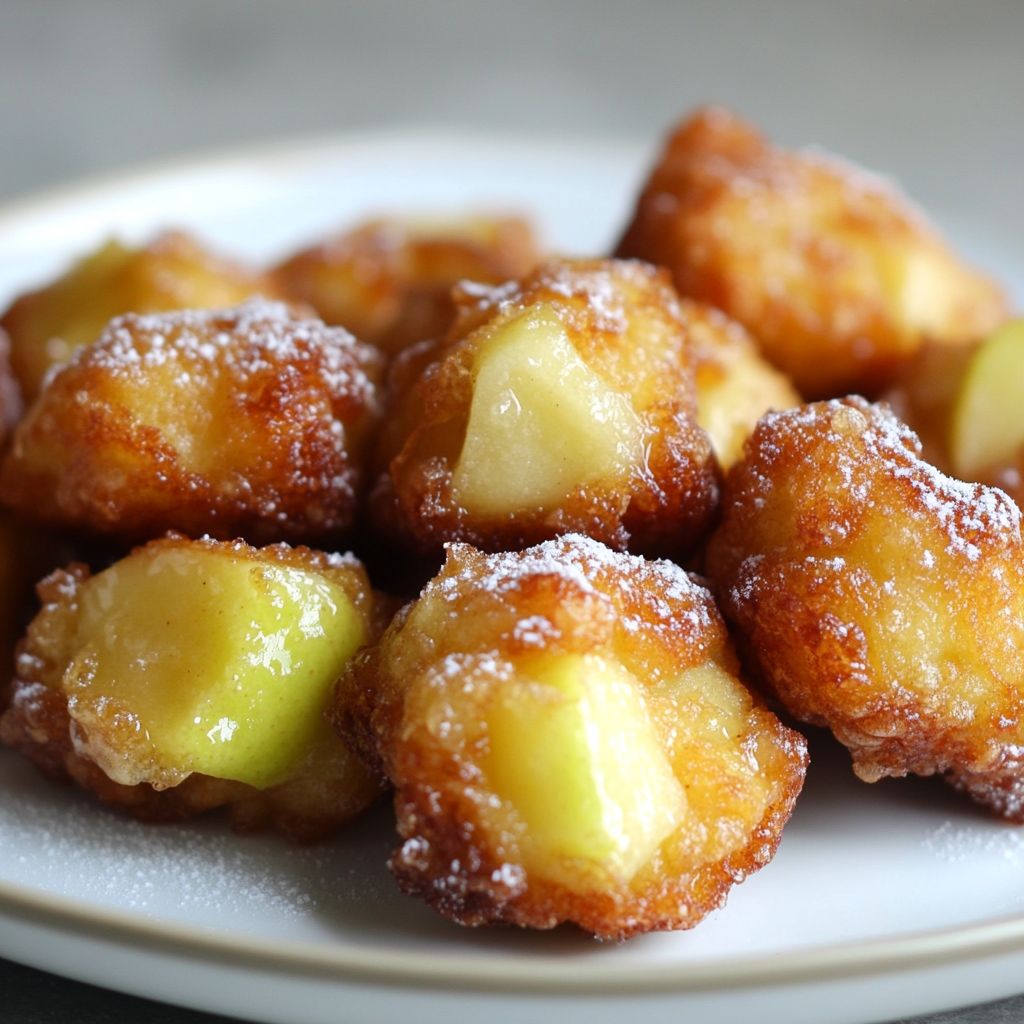
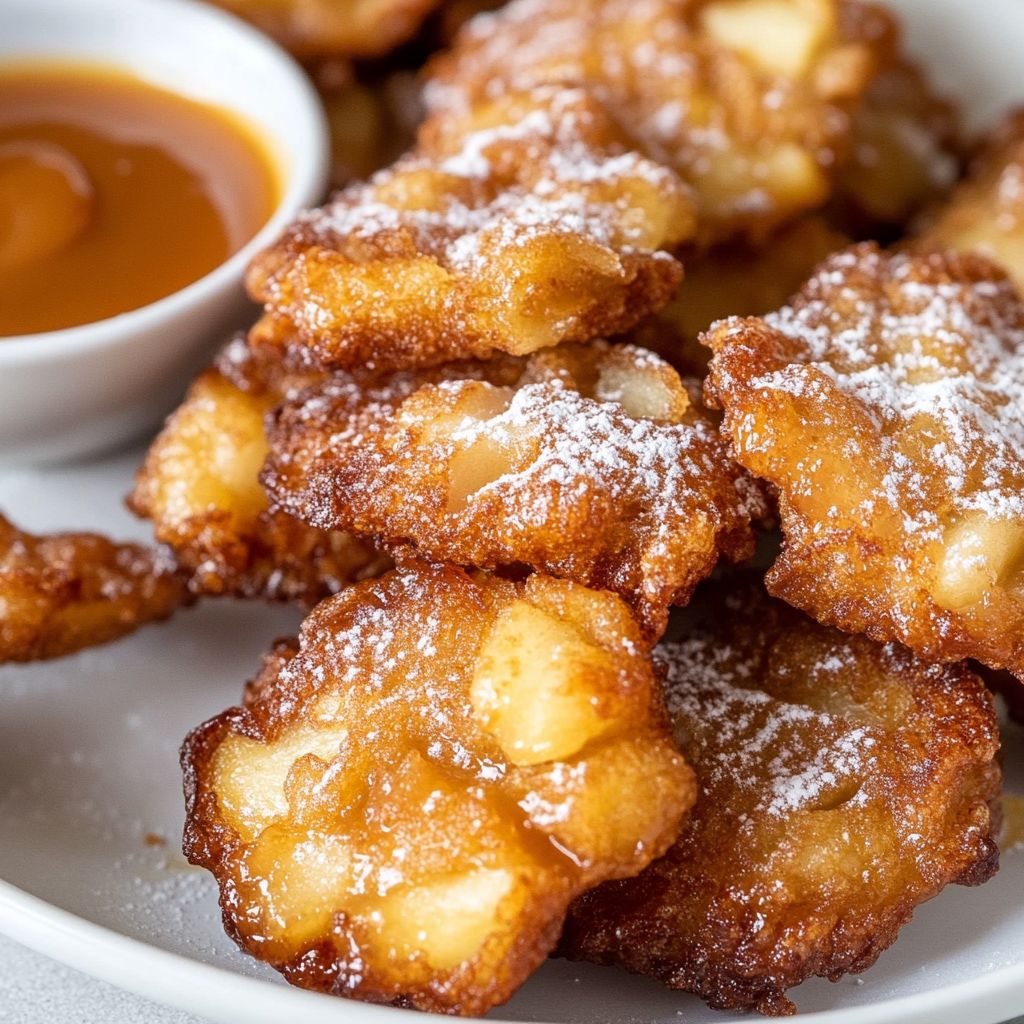
Imagine biting into a warm, tender fritter, the comforting fragrance of cinnamon and freshly baked apples enveloping your senses. Each morsel bursts with a perfect balance of sweetness and spice, offering a nostalgic embrace reminiscent of cozy autumn days. Let the flavors carry you to an orchard suffused with the crisp aura of fallen leaves. This is the experience of a Baked Apple Fritter — a creation that melds tradition with the simplicity of modern baking, and it’s waiting to be your next delicious adventure in the kitchen.

The Story Behind the Dish – From Orchards to Your Oven

Baked Apple Fritters have a storied past, tracing their roots to the European ancestors of modern doughnut-style confections. Fritters themselves are romance-infused dough pastries, rich with history as rural treats crafted to celebrate harvests. Particularly popular in regions abundant with orchards, these apple-laden delights were initially deep-fried, serving as joyful indulgences when apples were gathered in the brisk months of fall.

Transitioning from a traditional deep-fried method to baking goes beyond just a change in cooking technique; it represents a culinary evolution. Baking the fritters allows the elemental flavors of fresh apples and aromatic spices to shine while offering a healthier alternative to the deeply rooted classic. Transporting an age-old tradition to our contemporary lifestyles, Baked Apple Fritters symbolize the blending of past and present, bringing the taste of homemade goodness directly to your oven rack.

Why You’ll Love This Recipe

  • Effortless Baking: This recipe foregoes the mess and complexity of deep frying, making it perfect for novice bakers and easy weekend baking sessions.
  • Healthier Choice: Remember indulging doesn’t have to mean overindulging. Baked Apple Fritters are lighter on calories, reducing guilt without sacrificing taste.
  • Seasonal Delight: Maximizing the flavors of in-season apples adds freshness and vibrancy that is unbeatable, taking advantage of nature’s bounty.
  • Family-Friendly: An excellent dish to get kids involved, from mixing batter to the joy of watching fritters rise, it’s a fun and educational kitchen activity.
  • Can Be Made Ahead: Prepare your dough in advance, allowing you to enjoy a warm, chewy treat at the drop of a hat when guests arrive unexpectedly.

Flavor Profile & Texture – Layers of Comfort

The flavor profile of a Baked Apple Fritter is a symphony of contrasts harmoniously existing within each bite. You encounter the tartness of the apple juxtaposing with the underlying sweetness of the batter. Cinnamon, nutmeg, and allspice dance around your palate, offering layers of warmth and zest that are evocative of a seasonal celebration. Baking helps maintain the apple’s moisture, ensuring a tender crumb that is delightfully soft yet firm enough to support the fruit’s juiciness without becoming soggy.

The texture is an integral part of this indulgence — perfectly chewy at the center, with a slightly crisp edge formed by the baking process, which mimics the apples’ natural caramelization. This contrast within each fritter makes every bite a unique experience, teetering between the delicate crunch and pillow-like softness, leaving you craving more.

Occasions & Pairings

Baked Apple Fritters are versatile enough to match any occasion. They can turn an ordinary breakfast into an extraordinary one, providing a hearty, sweet companion to a cup of robust coffee or tea. Picture a leisurely Sunday brunch, where their aroma welcomes your guests with open arms, complementing other brunch favorites like scrambled eggs and bacon.

For an elegant dessert option, consider pairing them with a scoop of vanilla ice cream or a dollop of freshly whipped cream. The warmth of the fritters contrasts beautifully with the cold creaminess, creating a dish that’s both comforting and sophisticated. During the holiday season, serve them alongside mulled cider or a spiced wine, enhancing their seasonal flavors and bringing an additional dimension of festivity to your gathering.

Tips, Variations & Substitutions

One of the joys of Baked Apple Fritters is the ability to adapt and customize them to fit your personal culinary style. Here are some ideas to make them your own:

Creative Twists

  • Add-Ins: Experiment by adding cranberries, raisins, or even shredded carrots for a more textured experience.
  • Glaze It: Drizzle a simple glaze made from powdered sugar and milk over the warm fritters for an extra hint of sweetness.
  • Swirl In Some Spice: Incorporate ginger or cardamom for a different spice element that elevates the traditional cinnamon-coating.

Dietary Alternatives

  • Vegan Option: Substitute dairy with plant-based milk and butter alternatives, and use flaxseed meal in place of eggs.
  • Gluten-Free: Gluten-free flour blends are widely available and work well without altering the texture significantly.

Regional Variations

Explore flavors from different cultures by opting for regional apple varieties — Granny Smith for a tart punch, or Honeycrisp for sweetness. Incorporate spices from Indian to Middle Eastern origins for a deeper taste profile. You can even blend in nuts like pecans or almonds for a nutty, earthy twist that echoes southern influences.

Storage & Make-Ahead Ideas

Preserving the freshness of Baked Apple Fritters is easy, with solutions that extend their shelf life while retaining flavor and texture.

  • Refrigeration: Keep them in an airtight container and store them in the refrigerator for up to three days. Enjoy them at room temperature or lightly warm them in the oven before serving.
  • Freezing: Once cooled, freeze individually on a baking sheet before transferring them to a freezer-safe bag. They can last up to three months, and simply pop them in the oven to heat up when ready to eat.
  • Make-Ahead: Prepare your dough ahead and refrigerate. On the day of serving, just mold them into shape and bake fresh. This technique ensures they’re ready whenever the craving calls.

Fun Facts & Trivia

Did you know that an apple fritter was once part of Abraham Lincoln’s favorite meal, marking it as not just a treat for today’s sophisticated palates but one revered through the annals of time? Apple fritters also find sainthood with the celebration of ‘Johnny Appleseed Day’ in remembrance of the man responsible for spreading apple orchards across America.

In conclusion, Baked Apple Fritters are more than just an inviting pastry. They encapsulate the heartwarming charm of home cooking with an easy approach that allows everyone to be a baker. This recipe respects its origins while embracing new-age baking, making it as intriguing in its history as it is delightful in its taste. Once you savor these fritters, you may find yourself welcoming them as an enduring part of your culinary repertoire.

Ingredients

  • Dough Base
    • 2 cups all-purpose flour
      → The main structure of the fritters, all-purpose flour provides the necessary gluten to create a light and airy dough. It should be measured precisely to ensure the right texture; too much can make the fritters dense. Sifting the flour before measuring can help aerate it for an even lighter result.
    • 1 tablespoon baking powder
      → This leavening agent is crucial for giving the fritters their lightness and fluffiness. Ensure it’s fresh for maximum potency; old baking powder can lead to dense fritters. Simply mix it evenly with the flour to distribute it throughout the dough.
    • 1/2 teaspoon salt
      → Salt enhances the overall flavor of the fritters by balancing the sweetness of the apples and sugar. It should be mixed into the dry ingredients to ensure even distribution throughout the dough.
    • 1/4 cup granulated sugar
      → This sweetener provides the necessary sweetness for the dough. Granulated sugar helps to create a tender texture; for a deeper flavor, consider substituting brown sugar. It should be mixed with the dry ingredients to evenly sweeten the fritters.
    • 2 large eggs
      → Eggs serve as a binding agent, helping to hold the fritters together while also adding richness. They should be at room temperature for easier mixing. Beating them lightly before adding them to the mixture can ensure they incorporate smoothly.
    • 3/4 cup milk
      → Milk adds moisture to the dough, ensuring the fritters remain soft and tender. Use whole milk for a richer flavor, or a non-dairy alternative if preferred. Make sure it’s at room temperature so it mixes seamlessly with the eggs.
    • 1 teaspoon vanilla extract
      → Pure vanilla extract elevates the flavor of the fritters, giving them warmth and a hint of sweetness. Always opt for pure vanilla over imitation for the best, most authentic flavor. Add it to the wet ingredients before combining with the dry.
  • Apple Filling
    • 2 cups apples (peeled, cored, and diced)
      → Fresh apples provide natural sweetness and moisture, and their texture adds a delicious bite to the fritters. Choose tart apples like Granny Smith for a balanced flavor or sweeter apples such as Fuji for a milder taste. Dice them into small, uniform pieces to ensure even distribution throughout the dough.
    • 1/2 teaspoon ground cinnamon
      → This spice adds warmth and enhances the apple flavor. It should be evenly mixed into the diced apples before incorporating them into the dough to ensure that every bite has a touch of cinnamon warmth.
    • 1 tablespoon lemon juice
      → Lemon juice keeps the diced apples from browning and adds a bright acidity that balances the sweetness. It should be mixed with the apples immediately after dicing to preserve their fresh flavor and color.
  • Frying & Coating
    • Vegetable oil (for frying)
      → Choose a neutral oil with a high smoke point, such as canola or peanut oil, to fry the fritters. Heat the oil to the appropriate temperature (around 350°F or 175°C) before frying; too cool oil will result in greasy fritters, while too hot can burn them.
    • 1/2 cup powdered sugar (for dusting)
      → This sugar adds a sweet finishing touch to the fritters. Sprinkle it generously over the warm fritters immediately after removing them from the oil for it to adhere properly. For a fun variation, mix in a little cinnamon for a chai-inspired flavor.

Instructions

  • Start by preparing the dough base. In a large mixing bowl, combine 2 cups of all-purpose flour, 1 tablespoon of baking powder, 1/2 teaspoon of salt, and 1/4 cup of granulated sugar.

    → This is the foundation of your fritters. Mixing these dry ingredients ensures they are evenly distributed, which helps the fritters rise uniformly during frying.
  • In a separate bowl, whisk together 2 large eggs, 3/4 cup of milk, and 1 teaspoon of vanilla extract until well combined.

    → Whisking the wet ingredients thoroughly incorporates air, enhancing the fluffiness of your fritters. Using room temperature ingredients aids in achieving a smooth mixture.
  • Gradually add the wet mixture into the dry ingredients, stirring gently with a spatula until just combined. Do not over-mix; a few lumps are okay.

    → Over-mixing can lead to tough fritters due to gluten development. Stirring until just combined ensures a light and tender texture.
  • Prepare your apple filling by peeling, coring, and dicing the apples into small, even pieces. Then, toss the diced apples with 1 tablespoon of lemon juice and 1/2 teaspoon of ground cinnamon.

    → Dicing the apples uniformly promotes even distribution throughout the fritters. The lemon juice prevents browning, while the cinnamon enhances flavor.
  • Carefully fold the diced apples into the fritter batter using a spatula until evenly incorporated.

    → Folding gently preserves the airiness of the batter while ensuring that the apple pieces are well distributed, giving every fritter a delicious apple bite.
  • In a deep, heavy-bottomed pot or a frying pan, heat vegetable oil to 350°F (175°C). You can use a cooking thermometer for accuracy.

    → Maintaining the oil temperature is crucial; too cool, and the fritters will absorb excess oil; too hot, and they may burn. It’s best to use an oil with a high smoke point, like canola or peanut oil.
  • Using a large spoon or ice cream scoop, carefully drop spoonfuls of the batter into the hot oil, being cautious not to overcrowd the pot.

    → Frying in batches allows the fritters to cook evenly and rise properly. Overcrowding lowers the oil temperature, which can lead to greasy fritters.
  • Fry the fritters for 2-3 minutes on each side or until they are golden brown and float to the surface. Use a slotted spoon to turn them as needed.

    → Monitor their color carefully; golden brown indicates they are properly cooked. Floating fritters signify they are cooking correctly and will help ensure a light texture.
  • Once cooked, remove the fritters from the oil and place them on a plate lined with paper towels to absorb excess oil.

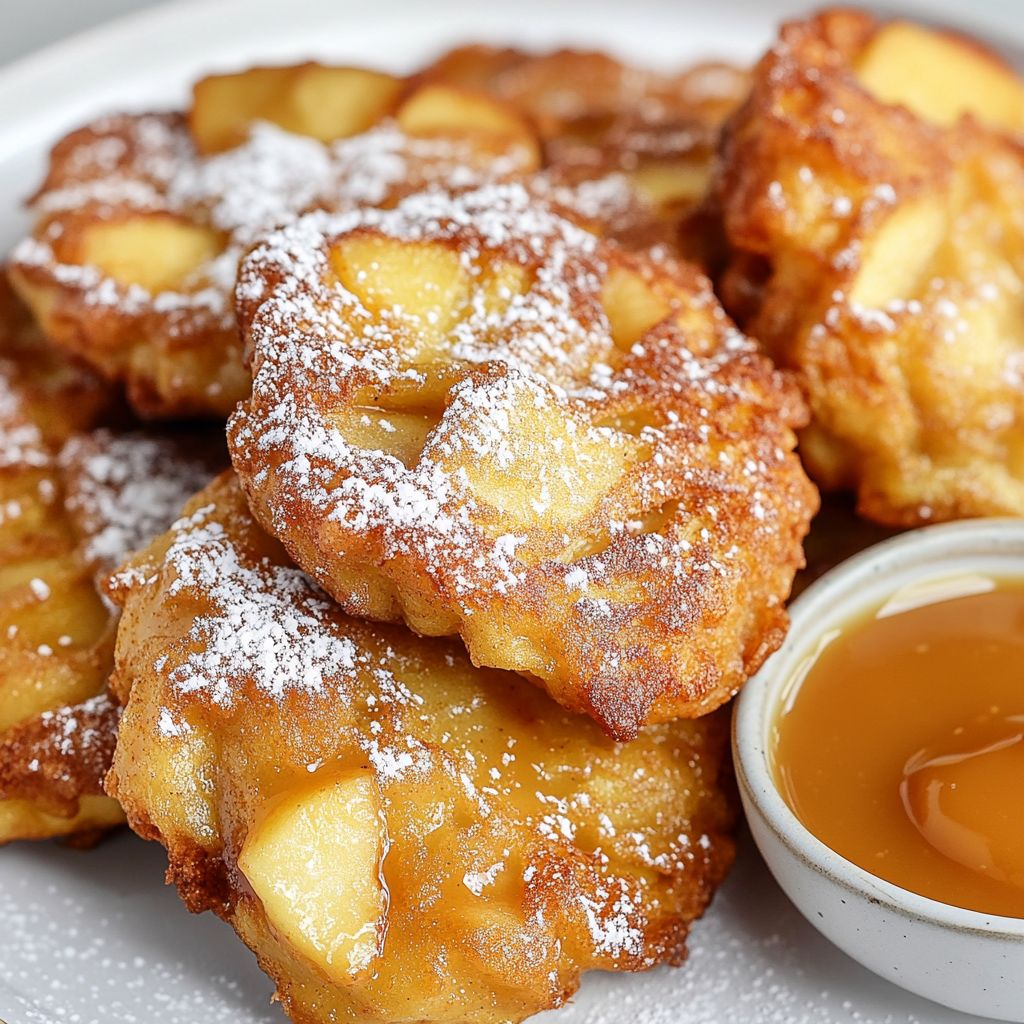
    → Draining excess oil helps maintain the fritters’ lightness and prevents them from becoming soggy.
  • While the fritters are still warm, generously dust them with powdered sugar, optionally mixing in a little cinnamon for added flavor.

    → Sprinkling powdered sugar while hot ensures it adheres well to the fritters, creating a deliciously sweet finish that enhances their appeal.
  • Serve the apple fritters warm and enjoy their delightful texture and flavor!

    → Warm fritters are best as the flavors are at their peak and the textures are perfectly soft and fluffy, offering a delightful bite.

Notes

These baked apple fritters are a delightful treat that brings together the comforting flavors of spiced apples and dough, perfect for breakfast or as a sweet snack. The dough is light and fluffy, while the apple filling offers a sweet burst in every bite. You can use any variety of apples based on your preference and availability, but combining tart and sweet apples can deliver a more nuanced flavor profile. For an added twist, consider incorporating nuts or raisins into the apple filling.

When frying, ensure your oil is at the right temperature to achieve golden-brown fritters without absorbing excess oil, keeping them light and crispy. If you’re looking for a healthier alternative, you can bake the fritters in the oven at a high temperature for a enjoyably light version, just remember to adjust the cooking time accordingly.

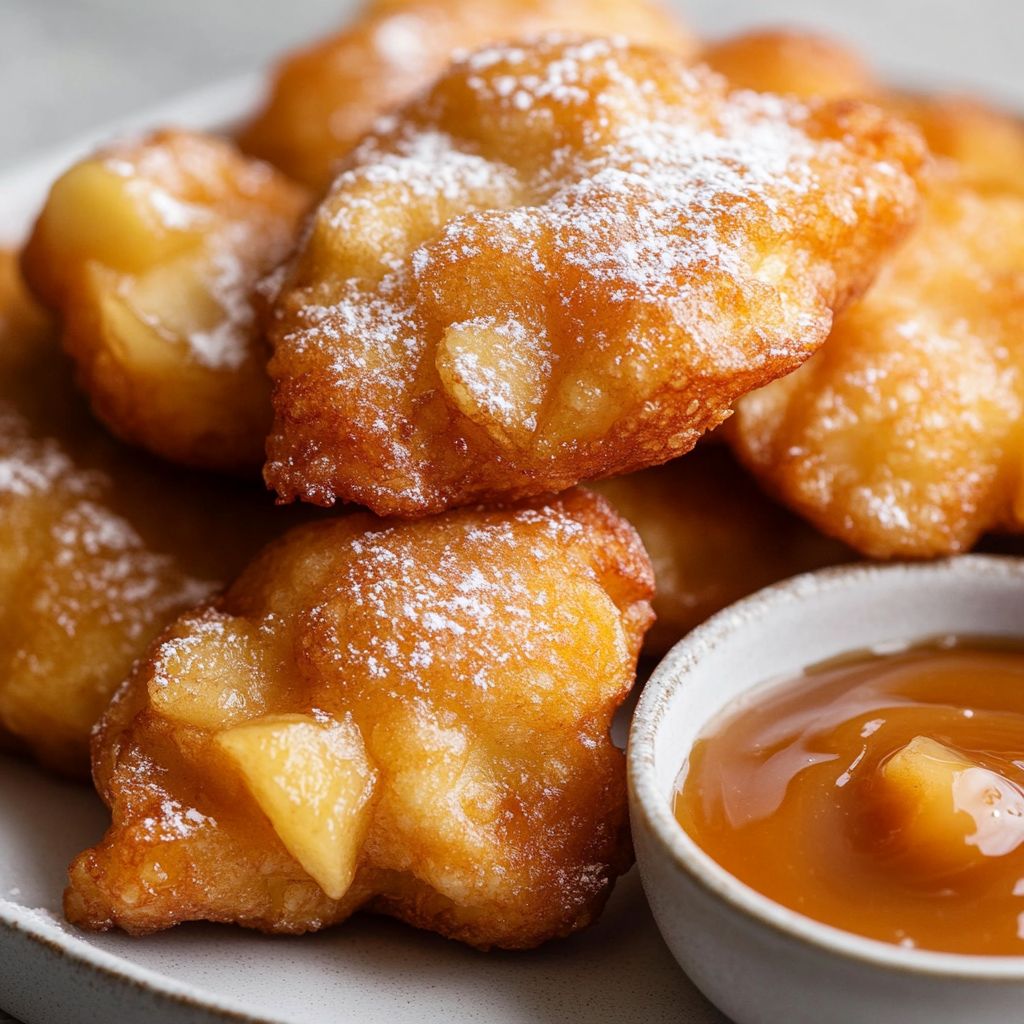
The fritters are best enjoyed fresh from the fryer, dusted with powdered sugar. For an extra indulgent treat, pair them with a side of caramel sauce or a dollop of whipped cream. These fritters also make a wonderful dessert option or can be served at brunch gatherings. Leftovers can be stored in an airtight container for a couple of days, but they’re so delicious they might not last that long!

Tips

Cooking Tips for Baked Apple Fritters

  • Prepare your workspace: Before you begin, ensure your kitchen is clean and you have all your ingredients measured and ready to go. This will help streamline the process and prevent any last-minute scrambling for items.
  • Choose the right apples: Select apples that are firm and slightly tart, like Granny Smith or Honeycrisp, for the best balance of flavor. Avoid soft or mealy apples, as they will not hold up well during the cooking process.
  • Mix ingredients carefully: When combining your wet and dry ingredients, mix them gently until just combined. Overmixing can lead to tough fritters. A few lumps are perfectly fine.
  • Let the dough rest: Allow the dough to rest for about 10 minutes after mixing. This resting period helps the flour hydrate and the baking powder activate, resulting in fluffier fritters.
  • Testing oil temperature: To check if your oil is hot enough, drop a small amount of batter into the oil. If it sizzles and rises to the top quickly, the oil is ready. If it browns too fast, lower the heat, and if it doesn’t sizzle, increase the heat slightly.
  • Use a thermometer: For best results, use a candy or deep-fry thermometer to monitor the oil temperature throughout frying. Maintaining the right heat will yield crispy, golden-brown fritters.
  • Don’t overcrowd the pan: Fry fritters in small batches to avoid lowering the oil temperature, which can lead to greasy fritters. Ensure there’s enough space around each fritter for proper frying.
  • Drain properly: Use a slotted spoon to remove the fritters from the oil, letting excess oil drip off. Then place them on a paper towel-lined plate to absorb more grease, keeping them crispy.
  • Serve warm: Baked apple fritters are best enjoyed warm. Dust them with powdered sugar just before serving for an extra touch of sweetness.
  • Storing leftovers: If you have any leftovers, store them in an airtight container at room temperature for up to two days. To reheat, place them in a 350°F (175°C) oven for about 5-10 minutes to restore their crispiness.

FAQ

What are baked apple fritters?

Baked apple fritters are a delicious dessert made with fresh apples, cinnamon, and dough that is baked until golden instead of being deep-fried, making them a healthier option.

How do I prepare the apples for the fritters?

Start by peeling, coring, and dicing the apples into small pieces. You can also toss them with lemon juice to prevent browning.

Can I use any type of apple for this recipe?

Yes, you can use a variety of apples! Granny Smith, Honeycrisp, or Fuji apples work well due to their balance of sweetness and tartness.

How can I make the fritters healthier?

You can make the fritters healthier by using whole wheat flour, reducing the sugar, and using unsweetened applesauce instead of oil or butter.

Can I add other spices to the fritters?

Absolutely! You can enhance the flavor by adding nutmeg, ginger, or cardamom to the batter along with the cinnamon.

What is the best way to store leftover fritters?

Store leftover fritters in an airtight container in the refrigerator for up to 3 days. You can reheat them in the oven to restore their texture.

Can I freeze baked apple fritters?

Yes, you can freeze baked apple fritters. Place them in a single layer on a baking sheet to freeze individually, then transfer them to a freezer bag for up to 2 months.

What can I serve with baked apple fritters?

Baked apple fritters can be served with a drizzle of caramel sauce, a dusting of powdered sugar, or a scoop of vanilla ice cream for extra indulgence.

Introduction

Picture this: a crisp autumn morning, the air lightly kissed by the chill of fall, with a golden sunrise peeking through leaves tinged with shades of orange, red, and gold. What could make this scenic morning more perfect than the aroma of freshly fried treats wafting through your kitchen, warming you from the inside out with every bite? Welcome to the delightful world of Apple Fritter Bites—a divine fusion of warm, cinnamon-kissed apples and a delicate, fluffy pastry that’s perfect for starting your day on a sweet note or indulging as a comforting snack.

Apple Fritter Bites bring a little piece of this heavenly experience into your home, making it easy to create a treat that’s as comforting as a hug and as delicious as it is inviting. Picture biting into a tender, buttery exterior that gives way to a soft, sweet apple core fragrant with the essence of cinnamon and a hint of nutmeg, conjuring memories of fall festivals and family gatherings.

The Story Behind the Dish

Apple Fritters have a rich and storied past, an enduring testament to the delights that result when simple ingredients are blended with loving care and culinary creativity. Originating as a medieval dish, fritters began as savory items before evolving into the sweet variations we enjoy today. They played a significant role in European peasant cuisine, where they were made with leftover batter and the year’s fresh bounty, turning the mundane into a celebration of seasonal produce. The apple, a fruit synonymous with American fall traditions, made the perfect companion, marrying sweetness and slight tartness in a way few ingredients can match.

Today, these indulgences are enjoyed globally, often found at street fairs, in bakeries, and on breakfast menus alike. The transformation from full-sized fritters to visual and edible delights like Apple Fritter Bites speaks to our constant evolution of culinary arts and the creativity that’s inspired by our favorite classic flavors.

Why You’ll Love This Recipe

  • Quick and Easy: While some fritter recipes may seem intimidating, Apple Fritter Bites are wonderfully approachable, making it possible for enthusiasts of all skill levels to indulge in homemade goodness.
  • Family-Friendly: The perfect size for little hands, these bites are great for children, and they make a beautiful addition to family breakfasts or brunches.
  • Seasonal and Versatile: These bites capture the essence of fall but are charming and delicious year-round. You can take them from casual gatherings to celebratory events with ease.
  • Comforting Aromas: Nothing compares to the scent of apples and cinnamon; it’s a mood-lifter that evokes comfort and joy.

Flavor Profile & Texture

Apple Fritter Bites are a symphony of flavors and textures. The outside is slightly crisp, forming a beautiful golden crust while the inside remains fluffy and soft. The sugar used in the batter caramelizes beautifully during frying, creating a slightly sweet exterior that’s balanced beautifully by the apples. A generous amount of cinnamon brings warmth, while nutmeg introduces a subtle, earthy undertone that pairs perfectly with the tart-sweet juxtaposition of apples. The apples themselves cook until tender yet retain a satisfying bit of bite, providing a refreshing contrast in texture with every morsel. This, paired with the sweet finish of powdered sugar or glaze, creates a balance so heavenly you’ll find yourself reaching for “just one more” (again and again).

Occasions & Pairings

Though particularly perfect during the autumn months, these bites are versatile enough to be enjoyed year-round. Here are some occasions and pairings to consider:

  • Breakfast Treat: Serve alongside strong, hot coffee or a spiced chai tea to make any morning feel special.
  • Dessert Delight: Accompany with a scoop of vanilla bean ice cream or a dollop of whipped cream for a decadent dessert.
  • Party Favorite: Present at brunches, holiday parties, or as a sweet addition to a potluck for instant crowd-pleasing. These bites can serve as both a standalone treat or part of a delicious dessert platter.

Tips, Variations & Substitutions

  • Fruit Substitutions: If you’d like to shake things up, consider using pears, peaches, or even berries as an apple alternative for a switch in flavor.
  • Dietary Options: For those needing a gluten-free option, substitute the all-purpose flour with a gluten-free blend. To make it vegan-friendly, use a plant-based milk and egg substitute.
  • Add Those Extras: Try including a sprinkle of chopped nuts for added crunch, or drizzle with caramel sauce for an extra indulgent touch.

Storage & Make-Ahead Ideas

Apple Fritter Bites are best enjoyed fresh, but if you find yourself with leftovers, they can be stored at room temperature in an airtight container for a day or two. For longer storage, refrigerate them and gently reheat in an oven to regain some of that fresh-from-the-fryer warmth. When making ahead, prepare the batter and diced apples separately, then combine and fry just before serving to maintain optimal freshness.

Fun Facts & Trivia

Did you know that fritters have their own day of recognition? National Apple Fritter Day falls on June 2nd annually in the United States—an excellent excuse to enjoy these bites to your heart’s delight! Furthermore, fritters are so beloved in American culture that one town—Ludington, Michigan—holds an annual ‘Apple Fest’ celebrating all things apple, of which fritters are a crowd favorite, keeping this age-old pastry firmly rooted in our hearts (and bellies).

Delving into the world of Apple Fritter Bites is more than just a culinary adventure; it’s a celebration of tradition, flavor, and the warmth that sharing a delicious treat can bring. With each bite, you’re not just enjoying a dessert but partaking in a piece of history crafted by countless generations of cooks who refined this simple delight into something spectacular. So go ahead, savor each delectable mouthful, and let the inviting aroma transport you to an idyllic orchard filled with the laughter of family and friends.

Ingredients

  • Fritter Batter
    → This forms the base of the apple fritter bites, providing a fluffy, tender inside. The batter should be mixed until just combined to ensure the fritters are light and airy, avoiding overmixing which can make them dense.
    • 1 cup all-purpose flour
      → All-purpose flour is the main structure-building component of the batter. It provides the necessary gluten for elasticity and helps the fritters hold their shape. Be careful not to overmeasure; spoon flour into the measuring cup and level it off with a knife for accuracy.
    • 1/2 cup granulated sugar
      → Sugar sweetens the batter and aids in browning the fritters during frying, giving them a golden color. It can also help to enhance the overall flavor. Use fine granulated sugar to ensure it dissolves quickly into the batter.
    • 1 teaspoon baking powder
      → Baking powder is a leavening agent that adds volume and lightness to the fritters. Ensure that it is fresh for the best rise. Sifting it into the dry ingredients can help distribute it evenly.
    • 1/2 teaspoon ground cinnamon
      → Cinnamon adds a warm, cozy flavor to the fritters, complementing the sweetness of the apples. Use fresh cinnamon for the best flavor potency. If desired, feel free to adjust the amount according to your taste preference.
    • 1/4 teaspoon salt
      → Salt enhances the overall flavor of the fritters, balancing the sweetness. A small amount is sufficient, as too much can overpower the batter. Use fine table salt for even distribution.
    • 1/2 cup whole milk
      → Milk adds moisture to the batter, creating a rich texture. Use whole milk for a greater creaminess; if using a lower-fat option, you may need to adjust the flour slightly to achieve the right consistency.
    • 1 large egg
      → The egg acts as a binder in the batter, holding all the ingredients together, and adds richness and moisture. Make sure it is at room temperature to blend easily into the batter.
  • Apples
    → Fresh apples are the star ingredient of the fritters, adding natural sweetness and a juicy texture. Use a variety known for cooking, such as Granny Smith or Honeycrisp, and ensure they are diced into small, even pieces for consistent cooking.
    • 2 medium apples (peeled, cored, and diced)
      → Peeling and coring the apples ensures a smoother texture in the fritters. Dice them into small pieces (about 1/4 inch) to ensure they cook evenly within the batter and integrate well without overwhelming it.
  • Frying Ingredients
    → These ingredients are essential for getting a perfect outer crisp to the fritters when frying. Make sure to follow temperature guidelines to prevent sogginess.
    • Vegetable oil (for frying)
      → Vegetable oil has a high smoke point, making it ideal for frying. Use enough to submerge the fritters partially (about 2-3 inches in depth) in a deep pot. Heat the oil to around 350°F (175°C) to achieve a perfect golden exterior while cooking the interior thoroughly.
  • Glaze
    → The glaze adds a sweet, sticky finish to the fritters, enhancing their flavor and making them more appealing visually. Mix well to ensure a uniform consistency for easy drizzling.
    • 1 cup powdered sugar
      → Powdered sugar is used to create a glaze that coats the fritters with a sweet finish. Sifting the sugar beforehand can help eliminate lumps for a smoother glaze.
    • 2-3 tablespoons milk
      → The milk thins the powdered sugar to create a drizzleable glaze. Adjust the amount of milk based on your desired consistency; start with less and add more as needed.
    • 1/2 teaspoon vanilla extract (optional)
      → Vanilla extract adds a lovely depth of flavor to the glaze, enhancing the overall sweetness. Use pure vanilla extract for the best results, as imitation vanilla can have a harsher taste.

Instructions

  • Gather all your ingredients and equipment before starting the recipe.

    → This step ensures that you have everything you need within reach, making the cooking process smoother and more efficient, preventing interruptions while cooking.
  • In a large mixing bowl, whisk together the flour, sugar, baking powder, cinnamon, and salt until evenly combined.

    → This helps to distribute the leavening agent and spices uniformly, ensuring every bite of the fritters is flavorful. Use a whisk instead of a spoon for better aeration of the dry ingredients.
  • In a separate bowl, combine the milk and egg. Beat them together until well blended.

    → This step ensures that the egg integrates smoothly into the batter, creating a uniform texture. Make sure the egg is at room temperature so it incorporates easily without lumps.
  • Gradually add the wet mixture to the dry ingredients, stirring gently with a spatula or wooden spoon until just combined.

    → Mixing just until combined prevents overmixing, which could lead to denser fritters. It’s okay if there are a few small lumps; this is preferred for a light texture.
  • Carefully fold in the diced apples, ensuring they are evenly distributed throughout the batter.

    → Folding helps maintain the airiness of the batter while incorporating the apples, which provide flavor and moisture. Use a gentle motion to avoid deflating the batter.
  • Prepare your frying setup by filling a heavy-bottomed pot with vegetable oil to a depth of about 2-3 inches.

    → Using a heavy-bottomed pot helps maintain an even temperature while frying. Ensure the oil is deep enough to allow the fritters to float for even cooking.
  • Heat the oil over medium heat until it reaches 350°F (175°C) using a candy or deep-fry thermometer.

    → Maintaining the correct frying temperature is crucial for achieving a crispy exterior without burning. If the oil is too cool, the fritters will absorb oil and become greasy; too hot, and they will burn on the outside while remaining uncooked inside.
  • Once the oil is ready, drop tablespoonfuls of the fritter batter into the hot oil, being careful not to overcrowd the pot.

    → Overcrowding lowers the oil temperature, affecting frying quality. Fry in batches of 3-4 fritters, allowing space for them to expand and ensuring even cooking.
  • Fry the fritters for about 2-3 minutes on each side or until they turn golden brown, using a slotted spoon to turn them.

    → Constantly checking and turning ensures even browning. Frying in batches allows for proper temperature maintenance and results in a better texture.
  • Once golden brown, remove the fritters from the oil and place them on a paper towel-lined plate to drain excess oil.

    → This step prevents the fritters from becoming soggy and maintains their crispiness. Allow them to cool slightly before glazing.
  • While the fritters are cooling, prepare the glaze by sifting the powdered sugar into a mixing bowl.

    → Sifting eliminates lumps, resulting in a smoother glaze texture. It also helps the sugar dissolve more evenly when mixed with the liquid.
  • Add 2 tablespoons of milk and the vanilla extract (if using) to the powdered sugar, and whisk until you achieve a smooth consistency.

    → Adjusting the milk quantity helps you control the thickness of the glaze. Start with less and add more to reach your desired drizzle quality.
  • Drizzle the glaze over the warm fritters using a spoon or a piping bag for a more controlled application.

    → Drizzling the glaze while the fritters are still warm allows the sugar to slightly melt into the fritters, enhancing the overall flavor and appearance.
  • Serve the apple fritter bites warm for the best taste and texture.

    → Serving them while warm enhances the flavors and provides the most enjoyable eating experience. The glaze will also have a delightful sticky texture when warm.

Notes

These Apple Fritter Bites are a delightful treat, perfect for breakfast or as a sweet snack. The fritter batter is light and fluffy, crucial for achieving the right texture, so be careful not to overmix it. Fresh apples contribute a juicy sweetness, making each bite irresistible. When frying, make sure the oil is at the right temperature to achieve a crisp exterior without sogginess inside.

For the glaze, ensure the powdered sugar is sifted to prevent lumps and make for a smooth drizzle. You can customize your fritters by adding spices or incorporating different types of apples to vary the flavor profile. They can be enjoyed warm, but they’re also delicious at room temperature. For an extra touch, consider adding a sprinkle of cinnamon or a dash of nutmeg to the glaze for enhanced flavor.

These fritter bites are best served fresh, but they can be stored in an airtight container at room temperature for a couple of days. If you have leftovers, they can be reheated in an oven or microwave. Enjoy your homemade treats drizzled with glaze for a sweet finishing touch!

Tips

Tips for Preparing Apple Fritter Bites

  • Mixing the Batter: When preparing the fritter batter, mix the ingredients until just combined. Overmixing can lead to dense fritters. Use a rubber spatula to gently fold in the dry ingredients with the wet ones.
  • Selecting Apples: Choose tart apples like Granny Smith or sweet ones like Honeycrisp for a balanced flavor. Using a mix can provide complexity to the taste. Scale the sweetness by adjusting the sugar based on your apple choice.
  • Dicing Apples: Cut the apples into small, uniform pieces (around 1/4 inch) to ensure they evenly distribute and cook through within the batter. This also helps maintain a pleasant texture in every bite.
  • Frying Temperature: Use a kitchen thermometer to monitor the oil temperature. If the oil is too hot, the fritters will brown quickly but remain uncooked inside; if too low, they will absorb excess oil and become greasy. Aim for a steady temperature around 350°F (175°C).
  • Fry in Batches: Avoid overcrowding the pot while frying. Frying in smaller batches allows the oil temperature to remain consistent and ensures even cooking and browning.
  • Draining Excess Oil: Once fried, place the fritters on a wire rack set over a baking sheet or on paper towels to drain excess oil. This will help maintain their crispiness.
  • Preparing the Glaze: To achieve a smooth glaze, sift the powdered sugar before mixing it with milk. Be gradual when adding milk to reach your desired consistency, aiming for a pourable glaze.
  • Flavor Enhancement: Adding vanilla extract to your glaze not only deepens the flavor but can also create a more aromatic experience. Consider adding a pinch of cinnamon into the glaze for an extra flavor twist that pairs beautifully with the fritters.
  • Serving Suggestions: Serve the fritter bites warm for the best taste and enjoyable texture. They pair wonderfully with a scoop of vanilla ice cream or a dollop of whipped cream for an indulgent treat.

FAQ

What are Apple Fritter Bites?

Apple Fritter Bites are small, deep-fried pastries made with apple chunks, often flavored with cinnamon and sugar. They are similar to traditional apple fritters but in bite-sized portions, making them perfect for snacking or sharing.

What ingredients do I need to make Apple Fritter Bites?

You will need apples, all-purpose flour, sugar, cinnamon, baking powder, eggs, milk, and oil for frying. Optional ingredients include vanilla extract and powdered sugar for dusting.

Can I use any type of apple for this recipe?

Yes, you can use any type of apple, but varieties like Granny Smith and Honeycrisp are popular for their balance of sweetness and tartness, which enhances the flavor of the fritters.

How do I ensure my Apple Fritter Bites turn out crispy?

To achieve crispy fritters, ensure your oil is at the right temperature (around 350°F or 175°C) before frying. Avoid overcrowding the pan, and allow enough space between each fritter for even cooking.

Can I bake Apple Fritter Bites instead of frying them?

Yes, you can bake them as a healthier alternative. Preheat your oven to 375°F (190°C), place the fritters on a baking sheet lined with parchment paper, and bake for about 15-20 minutes or until golden brown.

How should I store leftover Apple Fritter Bites?

Store any leftover Apple Fritter Bites in an airtight container at room temperature for up to two days. For longer storage, you can refrigerate them, but they may lose some crispiness.

Can I freeze Apple Fritter Bites?

Yes, you can freeze Apple Fritter Bites. Allow them to cool completely, then place them in a freezer-safe container or bag. They can be stored in the freezer for up to three months. Thaw in the refrigerator and reheat in the oven for best results.

What can I serve with Apple Fritter Bites?

Apple Fritter Bites are delicious on their own, but you can serve them with a drizzle of caramel sauce, a dusting of powdered sugar, or a scoop of vanilla ice cream for a delightful dessert experience.

Introduction: A Symphony of Comfort and Flavor

Imagine wrapping your hands around a steaming bowl, and inhaling the comforting, slightly sweet aroma that rises to greet you. This isn’t just any dish — it’s a luxurious bowl of Butternut Squash Soup. Velvety smooth and bursting with flavors that dance between earthy sweetness and hinting spice, this soup is an indulgence that’s both heartwarming and utterly satisfying. Perfect for brisk autumn days or cozy holiday dinners, Butternut Squash Soup stands as a testament to the magic that simple ingredients can create. Its rich, creamy texture and vibrant golden hue make it a feast for both the palate and the eyes. With each spoonful, you’ll be transported to a place of warmth and contentment, making this dish not just a meal but a sensory experience worth every moment. Dive into the lusciousness of this culinary masterpiece, and allow its flavors to envelop you in a sense of pure indulgence.

The Story Behind the Dish

Butternut Squash Soup has graced tables across various cultures and kitchens, each adding its own unique twist. This dish hails from the broader family of squash soups, which have been a staple in many traditional cuisines, particularly in North America, where squash has been cultivated for thousands of years. The Native Americans were among the first to utilize this versatile root vegetable, savoring its nutrition-packed offerings in soups and stews long before it became a modern comfort food.

In the 20th century, as culinary arts evolved, chefs around the world began to refine traditional squash soups into the creamy, aromatic versions we cherish today. Butternut squash, in particular, became a favorite for its natural sweetness and nutty undertones, which lend themselves perfectly to soups. This modern take on an ancient classic has become a beloved staple in households worldwide, cherished not just for its flavor but also for its warm, nourishing qualities.

Why You’ll Love This Recipe

  • Nutrient-Rich: Packed with vitamins and minerals, this soup is as wholesome as it is delicious.
  • Whole Family Favorite: Its gentle sweetness and creamy texture make it a hit with both kids and adults.
  • Perfect for Meal Prep: Whether you’re making a quick weekday dinner or preparing meals for the week, this soup fits seamlessly into your cooking schedule.
  • No-Fuss Ingredients: Easily accessible, everyday ingredients that require minimal effort to transform into something extraordinary.

Flavor Profile & Texture

The flavor profile of Butternut Squash Soup is a balanced symphony of sweet, savory, and creamy. At its core, the natural sweetness of the butternut squash sets the stage, enhanced by aromatic spices like nutmeg and cinnamon to bring warmth and complexity. The savory notes often come from a subtle sauté of onions or garlic, providing depth and a roundness that ties the flavors together. Creaminess is achieved through pureed squash, often complemented by rich chicken stock or coconut milk for added luxury. This results in a smooth and velvety texture that glides effortlessly across the palate.

Occasions & Pairings

This harmonious dish finds its place at virtually any occasion, from intimate dinners to grand holiday feasts. It’s an ideal starter for Thanksgiving, taking advantage of the fall harvest, or a comforting choice for a dinner party on a chilly night. Pair it with a crisp, buttery Chardonnay or a robust Merlot for a sophisticated dining experience. On the table, Butternut Squash Soup pairs beautifully with crusty breads or soft, herbed rolls. For a fuller meal, consider serving it alongside a fresh green salad or roasted chicken dish.

Tips, Variations & Substitutions

One of the charms of Butternut Squash Soup is its adaptability. Here are some creative ways to put your own spin on this classic:

  • Vegan Option: Replace chicken stock with vegetable broth, and substitute cream with coconut milk for a completely plant-based delight without sacrificing creaminess.
  • Add a Kick: Introduce a hint of heat with a touch of cayenne pepper or a sprinkle of chili flakes for those who crave a spicier dish.
  • Herbal Infusion: Include fresh herbs like sage or rosemary to the cooking process for an aromatic elevation.
  • Nutty Excellence: Garnish with toasted pumpkin seeds or pecans for a delightful crunch and a nutty flavor contrast.

Storage & Make-Ahead Ideas

One of the beauties of this Butternut Squash Soup is its ability to taste even better as leftovers, with flavors deepening as they meld. Store in an airtight container in the refrigerator for up to five days. For longer preservation, it freezes exceptionally well — simply pour into a freezer-safe container, allowing space at the top for expansion, and store for up to three months. Reheat gently on the stove or microwave, stirring occasionally to ensure even warming. For those ahead of the game type of cooks, this soup is a perfect make-ahead dish; prepare the entire batch, refrigerate or freeze, and reheat when needed, offering a delicious, home-cooked meal with minimal effort.

Fun Facts & Trivia

Did you know that the butternut squash, botanically a fruit, descends from the squash family native to the Americas? These fruits (yes, fruits!) were once revered as a symbol of goodness and prosperity by the Incas. Another surprising tidbit: butternut squash is extremely low in calories yet packed with content, providing abundant Vitamin A, C, E, potassium, and fiber — a nutrition powerhouse clothed in an orange coat. The squash’s shape even inspired some early kitchen inventions; its remarkable similarity to a violin led pioneering chefs to slice it creatively, not just for taste but for aesthetic presentation, a method still retained in fine dining standards today.

Harness the comfort and elegance of Butternut Squash Soup, whether serving for a touch of nostalgia in a cozy setting or an expression of refined, modern culinary art. It embodies both a longstanding tradition and an invitation to innovate, promising not just nourishment for the body, but joy and connection to the culinary world.

Ingredients

  • Butternut Squash
    → The star ingredient of this soup, butternut squash provides a rich, sweet flavor and smooth texture when pureed. Choose squash that is firm and heavy for its size, with a beige skin and a well-developed stem. Peel and cube it into even pieces to ensure they cook uniformly and blend easily into a velvety soup.
  • 1 medium onion (chopped)
    → Onion adds depth and savory flavor to the soup. Chop it finely to ensure even cooking and distribution in the mix. Use a yellow onion for a sweet and mellow taste, which will caramelize nicely when sautéed, enhancing the overall flavor profile of the soup.
  • 2 cloves garlic (minced)
    → Garlic adds a fragrant, robust flavor to the soup, complementing the sweetness of the squash. Mince it finely to release its aromatic oils, aiding in distributing the garlic flavor throughout the soup. Ensure not to overcook it, as burnt garlic can impart a bitter taste.
  • 2 tablespoons olive oil
    → Olive oil is used for sautéing the onions and garlic, helping to build the foundation of flavor in the soup. Use extra virgin olive oil for a fresher, fruitier taste. Heat it gently over medium heat before adding the onions to avoid burning, which can lead to bitterness.
  • 4 cups vegetable broth
    → Vegetable broth serves as the cooking liquid that will blend the flavors together. Opt for a low-sodium variety to control the saltiness of the soup. Heating the broth prior to adding it to the pot can speed up the cooking process and help the flavors meld together more swiftly.
  • 1 teaspoon ground ginger
    → Ground ginger enhances the soup with a warm, spicy note that pairs beautifully with the sweetness of the squash. Measure it accurately and add it mid-cooking to release its flavors, but be cautious with the quantity as it can easily overpower the other ingredients.
  • 1/2 teaspoon ground cinnamon
    → Cinnamon provides an additional layer of warmth and complexity to the soup. Use a fresh spice to ensure maximum flavor, and add it towards the end of cooking for the best aroma. Be sure not to add too much, as a little goes a long way.
  • Salt and pepper to taste
    → Salt and black pepper are essential for balancing and enhancing the flavors of the soup. Start with a small amount and taste as you go, adjusting as necessary. Freshly cracked black pepper will provide a superior flavor compared to pre-ground options.
  • 1/2 cup coconut milk (optional)
    → Coconut milk can be added for creaminess and a subtle, tropical sweetness that complements the soup. Use full-fat coconut milk for the richest flavor and smoothest texture. Stir it in after pureeing the soup and heat gently to incorporate without boiling, preserving its creamy consistency.
  • Fresh herbs for garnish (optional)
    → Fresh herbs like cilantro or parsley add a burst of color and a fresh taste to the finished soup. Chop them finely and sprinkle them on top just before serving to provide a vibrant contrast to the soup’s warm tones. Consider adding a drizzle of olive oil for extra flavor and appeal.

Instructions

  • Begin by preparing the butternut squash.

    → Carefully use a sharp vegetable peeler to remove the tough outer skin of the squash. Cut the squash in half lengthwise using a sturdy knife, scooping out the seeds with a spoon. Then, slice the squash into even cubes, about 1-inch in size, which will help them cook uniformly and blender smoothly into the soup.
  • Chop the onion into fine pieces.

    → Place the onion on a cutting board and, with a sharp knife, cut off both ends. Slice the onion in half from root to stem. Peel off the skin and lay it flat. Make multiple horizontal cuts, followed by vertical cuts, then slice down to create finely chopped pieces. This technique ensures that the onion cooks evenly and integrates well into the soup.
  • Mince the garlic cloves.

    → Smash each clove with the flat side of your knife to loosen the skin, then peel it off. Finely chop the garlic by slicing it into thin slivers, gathering the slices, and then chopping across them repeatedly for a finer mince. This technique releases the garlic’s essential oils, enhancing its flavor, which will permeate the soup.
  • Heat the olive oil in a large pot over medium heat.

    → Pour 2 tablespoons of extra virgin olive oil into the pot, allowing it to warm for about a minute. This helps release its flavors without burning. To check if it’s hot enough, you can dip a piece of onion in; it should sizzle gently when the oil is ready.
  • Add the chopped onion to the pot and sauté.

    → Once the oil is hot, add the chopped onion. Stir frequently for about 5-7 minutes until the onion becomes translucent and slightly caramelized. This process develops the onion’s natural sugars, enhancing the soup’s depth of flavor.
  • Stir in the minced garlic and cook briefly.

    → Add the minced garlic to the pot and cook for 1-2 minutes, stirring constantly. Garlic cooks quickly and can burn, so watch closely until it becomes fragrant. This step builds an aromatic base for your soup.
  • Add the cubed butternut squash to the pot.

    → Gently stir in the squash cubes and mix with the onions and garlic. This encourages the squash to soak up the flavors from the sautéed ingredients. Cook for about 3-4 minutes, allowing the squash to soften slightly, preparing it for the broth.
  • Pour in the vegetable broth.

    → Add 4 cups of low-sodium vegetable broth to the pot, ensuring the squash is fully submerged. If you prefer a smoother soup, you can add a bit more broth. Bring the mixture to a gentle boil, which will help everything cook evenly.
  • Season with ground ginger and ground cinnamon.

    → Carefully measure and add 1 teaspoon of ground ginger and 1/2 teaspoon of ground cinnamon into the pot. Stir to evenly distribute the spices. This flavor layering enhances the soup, creating a warm and inviting taste.
  • Reduce the heat and simmer.

    → Lower the heat to a gentle simmer, cover the pot partially, and let the soup cook for about 20-25 minutes or until the squash is tender when pierced with a fork. This step allows the flavors to deepen and meld together beautifully.
  • Test the squash for doneness.

    → After 25 minutes, use a fork to check if the squash pieces are soft enough to easily break apart. This ensures the soup will blend smoothly and provides the desired texture.
  • Carefully blend the soup until smooth.

    → Using an immersion blender, blend the soup directly in the pot until it reaches a velvety consistency. If you don’t have an immersion blender, carefully transfer the soup in batches to a countertop blender. Blend until smooth, ensuring to vent the lid to allow steam to escape and prevent splashes.
  • Return the blended soup to the pot and stir in the coconut milk (if using).

    → Add 1/2 cup of full-fat coconut milk to the velvety soup, stirring gently to combine. This will enrich the soup and provide an indulgent creaminess. Heat through on low while stirring, being careful not to boil the soup, as high heat can affect the coconut milk’s texture.
  • Season with salt and pepper to taste.

    → Start by adding a small pinch of salt and a few cracks of black pepper, stirring well. Taste the soup and adjust the seasoning as necessary, remembering that this balance is crucial in enhancing the overall flavor.
  • Serve the soup and garnish as desired.

    → Ladle the hot soup into bowls, and if desired, top with chopped fresh herbs like cilantro or parsley for color and added freshness. A drizzle of olive oil can also enhance visual appeal and flavor, making your dish inviting and delicious.

Notes

Butternut squash soup is a comforting dish that is both nutritious and delicious. The natural sweetness of butternut squash combined with the savory notes from onion and garlic creates a harmonious blend of flavors. When preparing this soup, following some key tips can enhance its overall quality.

Start by selecting a firm and heavy butternut squash, as this ensures the best flavor and texture. Once you’ve peeled and cubed the squash, it’s important to keep the pieces uniform in size to guarantee even cooking. Sauté the onions until they’re soft and translucent, allowing them to caramelize slightly for additional sweetness.

When adding garlic, remember to mince it finely and introduce it to the pot after the onions have begun to soften. This helps to create a rich aromatic base. Be careful not to overcook the garlic to avoid bitterness; a couple of minutes is usually sufficient.

Using high-quality extra virgin olive oil will build a robust flavor as you sauté the vegetables. When adding the vegetable broth, consider heating it prior to use. This step not only speeds up the cooking time but also helps to meld the flavors of the soup more quickly.

Incorporating ground ginger and cinnamon is key to bringing warmth and complexity to the soup. Adding these spices at the right time is crucial; ginger during cooking and cinnamon towards the end will help preserve their aromatic properties without overwhelming other flavors.

As you approach the finishing touches, adjust the seasoning with salt and freshly cracked black pepper. Be sure to taste as you go to achieve the desired flavor balance. If you’re looking for a creamier texture, stir in full-fat coconut milk after pureeing the soup, as this adds richness without overpowering the original flavors.

Finally, garnishing the soup with fresh herbs not only adds a lovely color contrast but also a fresh note that brightens the flavors. A drizzle of olive oil just before serving can enhance both the flavor and presentation. Enjoy your delicious and nutritious butternut squash soup!

Tips

Cooking Tips for Butternut Squash Soup

  • Choosing Butternut Squash: Look for squash that feels heavy and has smooth, unblemished skin. The more mature the squash, the sweeter and richer the flavor will be. Don’t forget to cut it into uniform pieces for even cooking.
  • Sautéing Aromatics: Start by heating the olive oil before adding chopped onions. This allows the onions to absorb the oil’s flavor, helping them to caramelize perfectly. Stir frequently to prevent sticking or burning.
  • Perfect Garlic Timing: Mince the garlic just before adding it to the pot; this will ensure that it retains its fresh flavor. Cook it until fragrant, which usually takes about 30 seconds, ensuring it doesn’t brown too much.
  • Broth Temperature: Warming up the vegetable broth on a separate stove or microwave before adding it to the pot can speed up the cooking time, allowing the flavors to meld quicker.
  • Balancing Spices: When adding ground ginger and cinnamon, consider starting with half the amount suggested, then tasting the soup to adjust to your preference. This helps ensure that the flavors remain balanced.
  • Salt and Pepper to Taste: Season gradually! It’s easier to add salt and pepper than to remove it. Starting with a pinch and tasting frequently ensures you can achieve the desired flavor profile.
  • Perfect Creaminess: If using coconut milk, stir it in after the soup has been pureed for a smooth consistency. Avoid boiling it after adding, as high heat can separate the creaminess.
  • Garnishing: For a vibrant finishing touch, use fresh herbs right before serving. They not only enhance the flavor but also brighten the appearance of your soup, making it visually appealing.
  • Storage: This soup stores well in the refrigerator for up to a week. To maintain freshness, store in an airtight container and reheat gently on the stove or in the microwave, adding a splash of broth if it thickens too much.

FAQ

What ingredients are needed to make Butternut Squash Soup?

You will need butternut squash, onions, garlic, vegetable or chicken broth, olive oil, salt, pepper, and optional spices like nutmeg or cinnamon.

How long does it take to prepare Butternut Squash Soup?

The preparation time is approximately 10-15 minutes and cooking time is about 30-40 minutes, depending on your method.

Can I make Butternut Squash Soup vegan?

Yes! Simply use vegetable broth instead of chicken broth and ensure any added cream or toppings are plant-based.

What are some ways to customize my Butternut Squash Soup?

You can add ingredients like apple for sweetness, ginger for spice, or coconut milk for a creamy texture. Top with seeds or herbs for extra flavor.

How should I store leftover Butternut Squash Soup?

Store leftovers in an airtight container in the refrigerator for up to 4-5 days. You can also freeze it for up to 3 months.

What is the best way to serve Butternut Squash Soup?

Serve it warm, garnished with a drizzle of olive oil, a sprinkle of fresh herbs, or a dollop of sour cream or yogurt.

Can I blend the soup to make it creamy?

Yes, blending the soup will give it a smooth and creamy texture. You can use an immersion blender or a countertop blender for this.

Is Butternut Squash Soup healthy?

Yes, butternut squash soup is generally low in calories and high in vitamins A and C, fiber, and antioxidants, making it a healthy choice.

Introduction: A Delectable Morning Delight

Imagine waking up to the serene sound of birds chirping outside your window and the sun’s first light gently rising over the horizon. There is nothing quite like starting your day with a breakfast that feels like a warm embrace — one that transports you, even just in thought, to a cozy French café. Enter the Croissant Breakfast Sandwich: a symphony of flavors and textures that promises to make your mornings spectacular. With a golden, flaky croissant at its heart, this sandwich brings indulgence and simplicity together in perfect harmony. Its buttery aroma alone is enough to make your mouth water, inviting you to take that first, irresistible bite.

The Story Behind the Dish

The croissant, a quintessential component of this breakfast sandwich, is steeped in a rich history that contributes to its allure. While this buttery pastry is synonymous with France, its origins are, interestingly, entwined with Austrian culinary traditions. The croissant’s ancestry can be traced back to the Austrian kipferl, a crescent-shaped bread enjoyed as early as the 13th century. In the 17th century, this delightful pastry made its way to France, evolving into the airy, laminated version that we adore today.

Coupling this iconic pastry with popular breakfast elements, such as eggs, cheese, and perhaps a slice of ham or bacon, elevates the simple sandwich to an experience of luxurious taste. This combination reflects the blend of culinary influences, drawing from sophisticated French techniques and classic American breakfast staples. It’s a partnership that speaks to global culinary exchanges and the boundless creativity present in modern kitchens.

Why You’ll Love This Recipe

  • Quick and Easy: This sandwich can be assembled in under 20 minutes, making it an ideal choice for busy mornings.
  • Versatile and Customizable: Whether you prefer a vegetarian option or are a sausage aficionado, the croissant breakfast sandwich can be tailored to suit your likes and dietary needs.
  • Rich and Satisfying: The combination of a crusty croissant, soft scrambled eggs, and melted cheese ensures a satisfying meal that keeps you full and energized well into the afternoon.
  • Perfect for Entertaining: These sandwiches are a hit for brunch gatherings, offering something a little more upscale yet familiar.

Flavor Profile & Texture

The delightful contrast of textures and flavors in a Croissant Breakfast Sandwich is what makes it so special. Imagine biting into a perfectly flaky croissant, with its layers gently shattering against your lips. That initial crunch gives way to a tender, buttery interior that melts in your mouth. As you continue your culinary journey, your taste buds are met with the soft, luscious texture of creamy, scrambled eggs, intermingling with melted cheese that offers a luxurious depth of flavor.

Should you opt to add crispy bacon or a delicate slice of ham, the savory saltiness highlights the natural sweetness of the croissant while adding a satisfying crunch or a salty kick. If you prefer a fresher take, consider adding crisp greens or avocado slices for a layer of freshness and a creamy contrast. With each bite, you discover a new wave of flavors, each complementing the other to create a truly unforgettable breakfast experience.

Occasions & Pairings

These sandwiches are perfect for a multitude of occasions. Whether it’s a leisurely Sunday brunch with friends, a morning family gathering, or a simple weekday meal that adds a touch of elegance to your routine, Croissant Breakfast Sandwiches are a versatile choice. Pair them with freshly brewed coffee or a glass of orange juice to enhance the breakfast experience. For a more lavish spread, serve alongside a fruit salad or a refreshing smoothie, completing the meal with a touch of natural sweetness.

Tips, Variations & Substitutions

Creative Variations

One of the beauties of the croissant breakfast sandwich is its adaptability. Here are some creative twists:

  • Vegetarian Delight: Opt for roasted vegetables such as bell peppers and mushrooms in place of meat.
  • Spicy Kick: Add a splash of hot sauce, jalapeños, or pepper jack cheese for a fiery flavor.
  • Sweet and Savory: Drizzle a bit of honey or maple syrup over bacon to create a sweet-salty fusion.
  • Herb Infusion: Mix fresh herbs like chives or basil into your scrambled eggs for an aromatic touch.

Dietary Alternatives

  • Gluten-Free: Use a gluten-free croissant option available at many specialty stores.
  • Dairy-Free: Opt for plant-based cheeses and spreads for those who are lactose intolerant.

Storage & Make-Ahead Ideas

If you anticipate busy mornings, these sandwiches can be partially prepared in advance to save time.

  • Pre-Cooked Ingredients: Prepare your bacon or protein choices the night before, storing them in the refrigerator until assembly.
  • Storing Leftovers: If you have leftover sandwiches, wrap them tightly and store in the refrigerator for up to 48 hours.
  • Reheating: Keep the croissants crispy by reheating them in an oven at a low temperature, ensuring you avoid mushy results in the microwave.
  • Freezing: These sandwiches can be frozen. Wrap them individually, and reheat straight from frozen, extending oven time as needed.

Fun Facts & Trivia

Did you know that there is a somewhat romantically embroidered tale about the croissant’s shape being inspired by the crescent on the Turkish flag? This story is set back in the 17th century, following the Austrian victory at the siege of Vienna. Bakers in Vienna are said to have created the kipferl in the shape of the crescent from the Ottoman flag to symbolize the victory over the besieging forces. True or legend, it’s a fascinating behind-the-scenes tidbit that adds to the intrigue of this iconic pastry.

The croissant breakfast sandwich beautifully marries the elegance of French patisserie with hearty breakfast classics, delivering a culinary masterpiece that delights on every level. Whether it’s part of a leisurely brunch or a fanciful midweek indulgence, this sandwich is bound to make every breakfast an extraordinary event.

Ingredients

  • Croissant Base
    • 4 large butter croissants
      → Croissants should be fresh and flaky, providing a rich, buttery flavor that serves as the perfect vehicle for the filling. Choose high-quality croissants for the best texture and taste. If homemade, allow them to cool slightly before slicing to prevent them from becoming soggy.
  • Egg Mixture
    • 6 large eggs
      → Eggs are the star ingredient in this sandwich, providing protein, richness, and a creamy texture. Crack the eggs into a bowl and whisk them with a pinch of salt and pepper until well combined. For fluffier eggs, consider adding a splash of milk or cream before cooking.
    • 1/4 cup milk or cream
      → This adds creaminess and richness to the scrambled eggs, making them more indulgent. Use whole milk or heavy cream for the best flavor and texture. Whisk it together with the eggs until fully combined.
  • Cheese
    • 1 cup shredded cheese (cheddar, Swiss, or your choice)
      → Cheese adds a savory, melty component that enhances the sandwich’s flavor profile. Choose a cheese that melts well; shredded cheese allows for even distribution throughout the eggs. For the best results, use freshly shredded cheese instead of pre-packaged.
  • Veggies (Optional)
    • 1/2 cup diced bell peppers
      → Bell peppers add a sweet, crunchy texture and a pop of color. Dice them into small, even pieces to ensure they cook evenly. Sauté the peppers lightly in a pan before adding them to the egg mixture for enhanced flavor.
    • 1/2 cup chopped spinach
      → Spinach contributes nutritional value and a vibrant green color. Use fresh spinach, and chop it roughly. Sauté briefly with the eggs to wilt it down; this helps to preserve the flavor and nutrients.
  • Condiments (Optional)
    • 2 tablespoons mayonnaise
      → Mayonnaise adds creaminess and tang to the sandwich. You can use regular or flavored mayonnaise, or even a herb-infused version for extra flavor. Spread it on the inside of the croissant for added moisture and taste.
    • Hot sauce or mustard (to taste)
      → These condiments add a kick to the sandwich. Use your preferred hot sauce or a zesty mustard to balance the richness of the croissants and eggs. Start with a small amount and adjust according to your taste.
  • Garnishes (Optional)
    • Fresh herbs (such as chives or parsley)
      → Fresh herbs provide a burst of flavor and a fragrant touch to the sandwich. Chop them finely and sprinkle on top of the assembled sandwich for a fresh finish. Make sure to use herbs that complement the overall flavor of your sandwich.

Instructions

  • Preheat your oven to 350°F (175°C) and place a baking sheet in the oven.

    → Preheating ensures that the croissants get warmed through evenly and helps maintain their flaky texture, making them more enjoyable when prepared with the fillings.
  • Slice each butter croissant in half horizontally using a serrated knife.

    → A serrated knife helps to cut through the flaky layers without squishing the croissant. Take your time to ensure a clean cut, maintaining the integrity of the flaky layers for a better sandwich structure.
  • In a large mixing bowl, crack 6 large eggs and whisk them together with a pinch of salt and freshly cracked pepper until fully blended.

    → Whisking incorporates air into the eggs, which helps achieve a light and fluffy texture once cooked. The salt enhances the egg’s natural flavor, so make sure it is evenly distributed.
  • Add 1/4 cup of milk or cream to the egg mixture and whisk until combined.

    → The milk or cream adds richness and creates a creamier texture in the scrambled eggs; this enhances the overall flavor and mouthfeel of your sandwich.
  • Heat a non-stick skillet over medium heat and add a small amount of butter or oil to the pan.

    → Heating the skillet properly ensures even cooking of the eggs. A little fat will prevent sticking and add flavor; make sure to coat the bottom of the pan evenly.
  • Pour the egg mixture into the skillet and let it sit undisturbed for a few moments to allow the bottom to set.

    → Letting the eggs sit helps form a base, which makes it easier to fold and cook them evenly. This initial setting stage is crucial for achieving a soft, custardy texture.
  • Using a spatula, gently stir the eggs, pushing the set edges toward the center, allowing the uncooked eggs to flow to the edges.

    → This technique prevents the eggs from overcooking and ensures soft curds form. Stir carefully to avoid breaking the eggs into too small pieces.
  • When the eggs are nearly set but still slightly runny, fold in the shredded cheese and any desired vegetables like diced bell peppers or chopped spinach.

    → Adding the cheese now allows it to melt into the warm eggs, creating a deliciously creamy consistency. Vegetables add moisture and flavor, and folding them in at this stage ensures they are evenly distributed and warmed through without losing their texture.
  • Remove the skillet from heat and allow the residual heat to finish cooking the eggs.

    → Carryover cooking will continue to gently cook the eggs to the perfect doneness without becoming dry or rubbery. Aim for a creamy consistency that appears slightly undercooked, as it will firm up with the residual heat.
  • If using, spread 1 tablespoon of mayonnaise on the inside of each croissant half.

    → Mayonnaise adds moisture and flavor, balancing the richness of the eggs and croissant. Spreading it evenly helps each bite be flavorful and creamy.
  • Fill each bottom half of the croissant with a generous portion of the scrambled egg and cheese mixture.

    → Being generous ensures that every bite of the sandwich is satisfying and fulfilling. Aim to mound the filling slightly to account for the top half of the croissant.
  • Optionally, drizzle your hot sauce or mustard over the scrambled egg filling before placing the croissant tops back on.

    → This adds a spicy or tangy note that contrasts beautifully with the rich flavors of the eggs and croissants; adjust the amount to suit your taste for heat.
  • Place the assembled croissant sandwiches on the preheated baking sheet and bake in the oven for 5-7 minutes until warmed through and slightly crispy.

    → Baking not only warms the sandwiches but also gives a light crispness to the croissants, enhancing textural contrast. Keep an eye on them to prevent browning too much.
  • Remove the croissant breakfast sandwiches from the oven and allow them to cool slightly for a minute before garnishing with freshly chopped herbs if desired.

    → Allowing them to cool slightly prevents burns when biting into the sandwich. Fresh herbs brighten the flavor and add visual appeal, making your dish look appealing.
  • Serve the croissant breakfast sandwiches immediately and enjoy!

    → Serving them warm preserves the integrity of the filling, making for a delightful breakfast experience. Pair with a fresh fruit salad or a side of crispy bacon for a complete meal.

Notes

These croissant breakfast sandwiches are an indulgent and satisfying way to start your day. The flaky, buttery croissants serve as the perfect base for the creamy scrambled eggs and your choice of cheese. For the best results, ensure you use fresh croissants and high-quality cheese that melts easily. You can customize the filling to suit your taste by adding sautéed vegetables like bell peppers and spinach, which not only enhance flavor but also boost nutritional value.

If you prefer a bit of tang, consider spreading a layer of mayonnaise inside the croissant, and feel free to add a touch of hot sauce or mustard for some heat. Fresh herbs such as chives or parsley can elevate the sandwich with a burst of flavor and visual appeal. These breakfast sandwiches are best enjoyed immediately but can also be wrapped and stored in the refrigerator for a quick breakfast option throughout the week. Just reheat them in the oven or microwave before serving. Enjoy your delicious creation!

Tips

Cooking Tips for Croissant Breakfast Sandwiches

  • Choosing the Right Croissants: Always aim for the freshest croissants available. If you’re buying from a bakery, consider going during peak hours when they are likely to be freshly baked. If purchasing from a grocery store, look for croissants with a golden brown color and flaky texture.
  • Preparing the Egg Mixture: When whisking the eggs, try to incorporate air into the mixture for fluffier results. A manual whisk or an electric mixer on low speed can achieve this. For additional creaminess, consider beating in a tablespoon of cream cheese along with the milk.
  • Cooking the Eggs: Use a non-stick skillet or a well-seasoned cast iron pan to avoid sticking. Cook the eggs over medium-low heat and stir gently to achieve a soft, fluffy texture. Avoid overcooking, as they will continue to cook while you assemble the sandwich.
  • Adding Cheese: For the best melting effect, add the shredded cheese to the eggs just before they are fully cooked and continue to stir until the cheese is melted. If using multiple types of cheese, experiment with different combinations for unique flavors.
  • Prepping Veggies: Sautéing the vegetables not only builds flavor but also reduces moisture, preventing the sandwich from becoming soggy. Cook the bell peppers and spinach until just tender; this should take only a few minutes. Drain any excess moisture before mixing them into the egg mixture.
  • Enhancing Flavor with Condiments: Experiment with condiments before spreading them on the croissants. Mixing mayonnaise with a hint of lemon juice or garlic can elevate the taste. Remember to adjust the quantity of hot sauce based on your spice tolerance, and always taste as you go!
  • Presentation: When assembling your sandwich, consider layering the ingredients in a way that each bite has a combination of textures and flavors. Place the egg mixture on the flat side of the croissant, don’t be afraid to let it overflow slightly!
  • Fresh Garnishes: Scatter the chopped fresh herbs over the completed sandwich just before serving to add not only color but also a fresh, aromatic element. Consider pairing with a light salad to complement the richness of the sandwich.

FAQ

What ingredients do I need to make Croissant Breakfast Sandwiches?

You will need croissants, eggs, cheese (such as cheddar or Swiss), cooked bacon or sausage, and any additional toppings like spinach, avocado, or tomato.

Can I make Croissant Breakfast Sandwiches ahead of time?

Yes, you can prepare the ingredients ahead of time. Cook the eggs and meat, and store them in the refrigerator. Assemble the sandwiches in the morning for a quick breakfast.

How do I cook the eggs for the sandwich?

You can scramble, fry, or poach the eggs depending on your preference. For a classic touch, try making scrambled eggs and add a bit of cream for richness.

Can I use store-bought croissants?

Absolutely! Store-bought croissants will save you time and can still taste delicious. Just warm them up slightly before assembling your sandwich.

What can I substitute for bacon or sausage in this recipe?

For a vegetarian option, you can use sautéed mushrooms or a veggie sausage. Avocado or roasted vegetables can also add flavor and texture.

How can I make the sandwich more nutritious?

You can add leafy greens like spinach or kale, use whole grain croissants, or include sliced tomatoes and avocado to enhance nutrition.

What kind of cheese works best for Croissant Breakfast Sandwiches?

Cheddar, Swiss, and Gruyère are great choices. You can also experiment with goat cheese or feta for a different flavor.

How do I heat the sandwich after assembling it?

You can heat the sandwich in a skillet over medium heat, in an oven at about 350°F (175°C) for a few minutes, or in a microwave for a quick option.

Introduction: The Allure of the Spinach and Feta Croissant

Imagine biting into a flaky, buttery croissant that crumbles delicately at your touch, unveiling a savory filling of wilted spinach creamed together with tangy feta cheese. The contrast of crisp pastry and creamy filling creates a delightful texture that dances on your palate. This Spinach and Feta Croissant is not just any pastry—it’s a journey of flavors and aromas that transport you to a quaint European café. Whether enjoyed as a breakfast indulgence or a satisfying snack, its harmonious blend of ingredients makes each bite a memorable culinary experience. Embark on this gastronomic adventure and rediscover the simple joys of a perfectly crafted croissant.

The Story Behind the Dish: A Culinary Crossroad

The Spinach and Feta Croissant is a beautiful fusion of French and Mediterranean culinary traditions. The croissant, with its French origins, is a symbol of baking sophistication. Its history dates back to the early 19th century and has become synonymous with elegance and craft. On the other hand, the Mediterranean flavors of spinach and feta bring memories of vibrant Greek landscapes and blue seas.

Originally, the combination of spinach and feta cheese is a staple in Greek cuisine, often found in the popular pie known as Spanakopita. By marrying these two beloved elements—French pastry craftsmanship and Greek filling traditions—we create something entirely new yet warmly familiar. This culinary crossroad represents the globalization of food, where best-loved regional dishes come together to create a universally beloved snack.

Why You’ll Love This Recipe

  • Delectable Flavor Fusion: Enjoy the marriage of buttery French croissant pastry with rich Mediterranean fillings.
  • Perfect Anytime Treat: Whether served for breakfast, brunch, or as a party appetizer, these croissants are versatile and sure to satisfy.
  • Wholesome Ingredients: With fresh spinach and high-quality feta cheese, this recipe brings healthy greens and proteins into the delicious package.
  • Simple Yet Sophisticated: Easy enough for novice bakers yet impressive for entertaining guests.
  • Vegetarian Delight: A crowd-pleaser that caters to vegetarian preferences without compromising on flavor.

Flavor Profile & Texture: A Symphony of Delights

The Spinach and Feta Croissant is a masterclass in texture and flavor. The croissant itself offers a light, flaky crust that shatters pleasingly with each bite, revealing a soft, layered interior. Within this decadent shell lies a filling that is both hearty and creamy. The spinach provides an earthy, slightly sweet backdrop that perfectly complements the brininess of the feta cheese.

The feta cheese stands out, offering its tangy, salty notes which cut through the richness of the pastry, providing a balanced taste that is both nuanced and satisfying. The moisture from the filling keeps the interior luscious and prevents the croissant from becoming dry. Each mouthful is an orchestrated balance of contrast—richness and acidity, flakiness and creaminess.

Occasions & Pairings: When and How to Serve

This croissant is quite the chameleon of dishes, suitable for myriad occasions. Serve it as a luxurious start to a weekday morning or as a lavish treat at brunch gatherings. It makes an excellent partner to a cup of rich, aromatic coffee or a glass of freshly squeezed orange juice, enhancing its flavors with each accompanying sip.

On more casual occasions, pair it with a crisp green salad laced with cucumbers, tomatoes, and olives for a Mediterranian twist. As for beverages, consider matching it with a light Chardonnay or an effervescent champagne to complement its buttery nature.

Tips, Variations & Substitutions: Personalizing Your Croissant

  • Customizable Fillings: Add sun-dried tomatoes, black olives, or even sautéed mushrooms for an additional burst of flavor.
  • Making Vegan-Friendly: Use vegan butter for the pastry and replace feta with plant-based alternatives to suit vegan diets.
  • Gluten-Free Option: Substitute traditional croissant dough with a gluten-free pastry dough. Store-bought options can expedite this process.
  • Spice It Up: Introduce some heat by adding red pepper flakes or finely chopped jalapeños into the filling.

Storage & Make-Ahead Ideas: Savvy Preparations

The beauty of the Spinach and Feta Croissant lies not only in its immediate pleasure but in its adaptability for make-ahead preparations. You can construct the croissants up to the baking stage and freeze them for up to a month; when you need them, bake them fresh, straight from the freezer.

Store leftover croissants in an airtight container at room temperature for up to two days. To reheat, simply pop them in an oven at 350°F (175°C) for a few minutes until they regain their crispy exterior.

For reheating, consider using the oven instead of the microwave, which could alter the crisp texture of the croissant. Should you wish to simplify a busy morning, you can prepare the filling a day in advance, allowing for swift assembly.

Fun Facts & Trivia: Delving Deeper into Culinary Lore

Did you know that the croissant didn’t originate in France? Its roots lie in Vienna, Austria, from where it traveled to France and evolved into the buttery delight we cherish today. The crescent shape is symbolic, named after the shape of the Islamic crescent moon—crafted to celebrate victory by Christian Europe over the occupation forces in the Battle of Vienna.

Meanwhile, feta cheese has a history that stretches back over 8,000 years and is often considered one of the oldest cheeses in the world. Originating in Greece, it holds a venerable place in Mediterranean cuisine.

These facts enhance the understanding of our Spinach and Feta Croissant, celebrating not just its delightful taste, but also its rich historical roots.

Ingredients

  • Croissant Dough
    • 4 cups all-purpose flour
      → All-purpose flour provides the structure needed for the croissant dough. It creates a gluten network that allows the croissant to rise and become flaky. For best results, measure using the spoon-and-level method to avoid compacting the flour.
    • 1 teaspoon salt
      → Salt enhances flavor and strengthens the gluten structure in the dough. It also controls yeast fermentation, helping to regulate the rising of the dough for optimal lift and texture. Be sure to mix it evenly with the flour before incorporating other ingredients.
    • 1 tablespoon granulated sugar
      → Sugar provides a touch of sweetness and helps in browning the croissant during baking. It also contributes to yeast activation, which is essential for fermentation. Use white granulated sugar for this purpose to achieve the best results.
    • 1 cup unsalted butter (cold)
      → Cold unsalted butter is essential for achieving the flaky layers of the croissant. It should be cut into small cubes and incorporated into the dough using a technique called lamination, where layers of dough and butter are folded together. Using unsalted butter allows you to control the saltiness of your pastry.
    • 1 cup whole milk (warm)
      → Warm whole milk activates the yeast and helps to hydrate the flour. Make sure it is warm, not hot, to avoid killing the yeast. The creaminess of whole milk also adds richness to the dough, resulting in a more indulgent croissant.
    • 2 teaspoons active dry yeast
      → Active dry yeast is the leavening agent that allows the dough to rise. It should be sprinkled over the warm milk to activate before mixing it into the dough. Make sure to check the expiration date for best results, as expired yeast may not rise properly.
  • Filling
    • 2 cups fresh spinach (chopped)
      → Fresh spinach adds a vibrant color and nutritional value to the filling. It should be rinsed, and any tough stems removed before chopping it coarsely. Sautéing the spinach for a few minutes until wilted will enhance its flavor and reduce moisture content before mixing.
    • 1 cup crumbled feta cheese
      → Feta cheese contributes a salty, tangy flavor that complements the earthiness of spinach. Use quality feta for better taste and texture. Crumble it into small pieces to ensure even distribution throughout the filling.
    • 1/4 teaspoon black pepper
      → Black pepper serves to enhance the flavors of the spinach and feta. Use freshly ground black pepper for the best flavor. Adjust the amount according to your taste preference, being careful not to overpower the other ingredients.
    • 1/4 teaspoon nutmeg (optional)
      → Nutmeg adds a warm, aromatic flavor that pairs beautifully with spinach and cheese. Use freshly grated nutmeg if available, as it has a more potent flavor compared to pre-ground. Add sparingly, as it can easily overpower the dish.
    • 1 tablespoon olive oil (for sautéing)
      → Olive oil is used for sautéing the spinach, adding richness and flavor to the filling. Choose a high-quality extra virgin olive oil for the best taste. Heat it in a pan over medium heat before adding the spinach to wilt it down.

Instructions

  • Prepare your croissant dough by combining flour, salt, and sugar in a large mixing bowl.

    → This step establishes the base for your croissant dough. Use a whisk or a fork to mix these dry ingredients thoroughly before adding any liquid. This helps ensure the salt and sugar are evenly distributed, leading to a consistent dough.
  • Add the active dry yeast to the warm milk in a separate bowl and let it sit for 5-10 minutes until it becomes frothy.

    → Activating the yeast is crucial for proper fermentation. The frothy appearance indicates the yeast is alive and ready to create carbon dioxide, which will result in a light and airy croissant. Ensure the milk is warm to the touch (around 100°F or 37°C) but not boiling.
  • Combine the frothy yeast mixture with the dry ingredients and mix until a dough begins to form.

    → Gentle mixing at this stage helps incorporate the liquid into the flour without overworking the gluten. You can use a spatula or your hands for this, continuing until there are no dry pockets remaining.
  • Incorporate the cold, cubed unsalted butter into the dough by cutting it in with a pastry cutter or your fingers, aiming for a rough texture with pea-sized pieces of butter remaining.

    → This lamination process creates layers in the croissant, essential for achieving the flaky texture. Be careful not to overmix, as you still want chunks of butter that will melt during baking, creating steam and lift.
  • Knead the dough gently on a floured surface for about 5 minutes until smooth, then form it into a ball and place it in a greased bowl.

    → Kneading strengthens the dough’s gluten structure, making it elastic. After kneading, ensure the dough is smooth and elastic before covering it with plastic wrap to allow for proper rising.
  • Cover the bowl with a damp cloth and let it rise in a warm place until it doubles in size, about 1-2 hours.

    → This step allows the yeast to ferment and produce gas, causing the dough to expand. A warm, draft-free area, like an oven turned off but slightly warmed, is ideal for this process.
  • While the dough rises, sauté the chopped spinach in olive oil over medium heat for 2-3 minutes until wilted and all moisture has evaporated.

    → Sautéing the spinach concentrates its flavor and fat content, making it a savory filling. Ensure it’s not watery by cooking it until all moisture evaporates, as excess moisture can lead to soggy croissants.
  • Once cooled, combine the sautéed spinach with crumbled feta, black pepper, and nutmeg (if using) in a mixing bowl.

    → Mixing the filling thoroughly ensures even distribution of flavors. This balance of spinach and feta creates the characteristic taste profile of the croissant. Adjust seasoning to your preference.
  • Roll out the risen dough on a lightly floured surface into a large rectangle, about 1/4 inch thick.

    → A uniform thickness ensures even baking, allowing all layers to achieve the desired flakiness. Use a rolling pin and apply even pressure while rolling out to avoid tearing the dough.
  • Cut the dough into triangles by slicing the rectangle into long strips and then diagonally across, creating the triangle shapes for the croissants.

    → Cutting triangles provides the shape needed to roll up the croissants properly. Ensure your triangles are roughly equal in size for uniform baking.
  • Place a spoonful of the spinach-feta filling at the base of each triangle and roll tightly towards the point, forming a crescent shape.

    → Rolling from the base towards the top triangle tip ensures a tight croissant that maintains its shape. Avoid overstuffing to prevent spillage during baking.
  • Arrange the rolled croissants on a baking sheet lined with parchment paper, allowing space between each for expansion during baking.

    → Proper spacing is crucial as croissants rise significantly in the oven and require room to spread out. Ensure that they don’t touch to maintain a good texture.
  • Cover the croissants with a cloth and let them rise again for 30-45 minutes until slightly puffed.

    → This secondary rising creates more air pockets and enhances the croissant’s flakiness. Be patient; this step is essential for achieving the right texture.
  • Preheat your oven to 375°F (190°C) during the last 10 minutes of the second rise.

    → Preheating ensures that the croissants start baking in a consistently hot environment, which is necessary for proper puffing and browning.
  • Before baking, brush the tops of the croissants with a beaten egg for a glossy finish.

    → An egg wash enhances the color and shine of the croissants, giving them an appealing appearance. Use a pastry brush for an even application.
  • Bake the croissants in the preheated oven for 15-20 minutes or until golden brown and flaky.

    → Baking at the right temperature allows the butter to melt and create steam, which is essential for the flakiness of the croissant. Keep an eye on the croissants in the last few minutes of baking for a perfect golden hue.
  • Remove the croissants from the oven and allow them to cool on a wire rack for a few minutes before serving.

    → Cooling on a wire rack prevents condensation from forming beneath the croissants, which can make them soggy. Enjoy the croissants warm or at room temperature for the best flavor!

Notes

These Spinach and Feta Croissants are a delicious combination of flaky pastry and savory filling, ideal for breakfast or a snack. Start with a well-prepared croissant dough by ensuring all your ingredients are at the right temperature—cold butter and warm milk are key for that perfect flaky texture. After mixing the dough, remember to laminate it properly for multiple layers that create the signature flakiness of croissants.

For the filling, sautéing the spinach in olive oil not only enhances its flavor but also reduces moisture, which is crucial to prevent sogginess in the croissants. Crumbling the feta cheese ensures that it distributes evenly throughout, adding a creamy texture that pairs wonderfully with the spinach. You can customize the filling by adding herbs or spices according to your preference, but be mindful of balancing flavors; a pinch of nutmeg can add warmth to the dish without overwhelming it.

Once baked, these croissants are at their best when served warm. They can also be made ahead and stored in the freezer, making them a convenient option for busy mornings. Reheat them in the oven for a few minutes to restore that fresh-baked quality. Enjoy with a side salad for a light lunch or on their own for a delightful snack.

Tips

Tips for Preparing Spinach and Feta Croissant

  • Measuring Ingredients: Accurate measurement of ingredients, especially flour and butter, is crucial for the success of your croissant. Use a kitchen scale for precise measurements if possible.
  • Laminating the Dough: When incorporating cold butter into your croissant dough, make sure to keep everything cold. If the butter begins to soften, return the dough to the refrigerator for a while to prevent it from blending into the dough instead of creating layers.
  • Resting the Dough: After mixing the dough, allow it to rest in the refrigerator for at least 2 hours or overnight. This helps to relax the gluten, making it easier to roll out and shape the croissants.
  • Sautéing Spinach: To avoid excess moisture in your filling, sauté the chopped spinach just until wilted and then let it cool before mixing it with feta. This prevents soggy pastries.
  • Flavoring Wisely: Adjust the seasonings to your personal taste but remember that feta cheese is already salty. Start with small amounts of salt or pepper and add to taste.
  • Shaping Croissants: When rolling out the dough, make sure to create a triangle shape. This will help in achieving the classic croissant shape as you roll it from base to tip.
  • Baking Temperature: Preheat your oven properly before placing the croissants inside. A hot oven (around 400°F or 200°C) will help them puff up quickly and develop that signature flaky outer layer.
  • Egg Wash: For a golden, shiny finish, brush the croissants with a beaten egg before baking. You can add a splash of milk to the egg for a richer color.
  • Cooling: Allow the baked croissants to cool on a wire rack to prevent them from becoming soggy. Enjoy them warm or at room temperature!

FAQ

What ingredients do I need to make spinach and feta croissants?

You will need puff pastry, fresh spinach, feta cheese, garlic, onion, salt, pepper, and an egg for egg wash.

Can I use frozen spinach instead of fresh?

Yes, you can use frozen spinach. Make sure to thaw and drain it well to remove excess moisture.

How do I prevent the croissants from becoming soggy?

Make sure to drain any excess liquid from the spinach mixture, and avoid overfilling the croissants.

Can I add other ingredients to the filling?

Yes! You can add ingredients like cream cheese, onions, or herbs like dill or parsley to enhance the flavor.

How long do I bake the spinach and feta croissants?

Bake them in a preheated oven at 400°F (200°C) for about 20-25 minutes or until they are golden brown.

How can I store leftover croissants?

Store them in an airtight container in the refrigerator for up to 3 days. You can also freeze them for longer storage.

Can I make the filling in advance?

Yes, you can prepare the filling ahead of time and store it in the refrigerator for up to 24 hours before using it.

What can I serve with spinach and feta croissants?

They pair well with a simple salad or a bowl of soup for a complete meal.

Introduction to Cheesy Broccoli Bites

Prepare to embark on a flavor-filled journey with our mouthwatering Cheesy Broccoli Bites. These delectable morsels bring together the earthy goodness of fresh broccoli and the rich, velvety allure of cheese, creating an irresistible combination that promises to please even the pickiest eaters. Imagine the satisfying crunch of a golden, baked exterior giving way to a burst of cheesy, broccoli-studded perfection inside. With each bite, the aromatic scents of melted cheese and roasted broccoli dance through your senses, beckoning you to indulge in one more taste. Whether you’re a seasoned cook looking for a new favorite snack or an adventurous eater eager to explore new culinary delights, these Cheesy Broccoli Bites offer a unique experience that is both comforting and delightfully surprising.

The Story Behind Cheesy Broccoli Bites

The pairing of broccoli and cheese is a beloved culinary tradition that dates back decades, if not centuries. This classic duo likely gained traction as a result of the undeniable health benefits of broccoli, combined with the comforting charm of cheese. Broccoli, with its robust texture and slightly bitter undertone, provides the perfect canvas for the creamy richness of melted cheese. Over the years, this combination has been reinvented and reimagined in numerous ways—from hearty casseroles to elegant soufflés. With Cheesy Broccoli Bites, we continue this legacy, offering a bite-sized version that captures the essence of comfort food while catering to modern, on-the-go lifestyles. Inspired by the need for quick, nutritious snacks that don’t compromise on flavor, this dish is a testament to the versatility and timelessness of broccoli and cheese.

Why You’ll Love Cheesy Broccoli Bites

  • These bites are a breeze to make, perfect for busy weeknights or impromptu gatherings.
  • They’re a nutritious snack option, offering the wholesome benefits of broccoli disguised in a cheesy delight.
  • Kid-approved! The cheesy exterior wraps the broccoli in a cloak of irresistible flavor, making it a hit with even reluctant veggie eaters.
  • Perfectly portable – ideal for lunch boxes, picnics, or road trips.
  • Bursting with flavor – these bites ensure every mouthful is a delightful explosion of textures and tastes.

Flavor Profile & Texture

Cheesy Broccoli Bites masterfully blend two elemental qualities: the savory, oozy goodness of cheese and the fresh, crisp vibrancy of broccoli. When baked to perfection, the exterior turns a beautiful shade of golden brown, offering a satisfying crunch with each bite. Meanwhile, inside, the broccoli remains tender, bathing in molten cheese that coats your taste buds with its sumptuous, creamy embrace. The flavor profile is multifaceted, starting with a savory punch from the cheese that melts into the slightly nutty undertone of roasted broccoli. Hints of garlic and a sprinkle of seasoning enhance this blend, elevating a simple snack into a sophisticated treat for the palate.

Occasions & Pairings

Cheesy Broccoli Bites are incredibly versatile, making them ideal for numerous occasions. Consider serving them as an appetizer at a holiday gathering, where they are sure to spark conversation and please guests of all ages. They’re equally suitable for a casual weeknight dinner, offering a delicious side dish that accompanies grilled meats or roasted poultry beautifully. For a fun twist, pair them with a tangy marinara sauce for dipping, or serve alongside a creamy ranch dressing for an additional layer of flavor. Wash these bites down with a crisp, cold white wine, such as a Sauvignon Blanc, to bring out their cheesy nuances. And don’t forget the kids; a glass of fresh-pressed apple juice can provide a delightful contrast, accentuating the savory notes with its natural sweetness.

Tips, Variations & Substitutions

Cheesy Broccoli Bites are not only delicious but also ripe for customization. Here are some ideas to make this recipe your own:

  • Cheesy Variations: While cheddar is a classic choice, feel free to experiment with other cheeses like mozzarella for extra gooeyness or Parmesan for a sophisticated twist.
  • Dietary Adjustments: For a lighter option, consider using a reduced-fat cheese. Those on a vegan diet can opt for dairy-free cheese alternatives and egg substitutes.
  • Spicy Twist: Add a pinch of cayenne pepper or chili flakes for a spicy kick that complements the overall flavor.
  • Herbaceous Infusion: Mix in fresh herbs such as parsley, basil, or chives for an aromatic touch.
  • Extra Veggies: Incorporate finely diced red peppers or caramelized onions for added sweetness and variety.

Storage & Make-Ahead Ideas

One of the best features of Cheesy Broccoli Bites is their convenience, both in the moment and for future meals. To store leftovers, place them in an airtight container and refrigerate for up to three days. To reheat, pop them in the oven or toaster oven until warmed through, which will help retain their outer crunch. If you wish to prepare a batch in advance, you can freeze the unbaked bites on a lined baking sheet until solid and then transfer them to a freezer bag for up to two months. When ready to bake, place them directly in a preheated oven and simply add a couple of extra minutes to the cooking time. This flexibility ensures that you always have a delicious, homemade snack ready whenever the craving strikes.

Fun Facts & Trivia

Did you know that broccoli was first cultivated in Europe over 2,000 years ago? It didn’t become popular in the United States until Italian immigrants brought it over in the 1920s. Now it’s a staple in many households across the country. Furthermore, cheese, in its myriad forms, has been a cherished food across cultures since its believed accidental discovery over 4,000 years ago. Combining these two time-tested ingredients into our modern Cheesy Broccoli Bites pays homage to a rich culinary history and highlights the evolution of our food landscape, demonstrating how classic ingredients can find new life in contemporary kitchens.

Ingredients

  • Cheesy Mixture
    → This mixture is essential as it combines flavor and moisture, creating a cohesive bite. The cheese adds richness, while the other components help bind the broccoli together. Ensure that all ingredients are well combined for an even distribution of flavors.
    • 1 cup shredded cheddar cheese
      → Cheddar cheese is the star of this recipe, providing a sharp, tangy flavor that enhances the overall taste. Use freshly shredded cheese instead of pre-packaged varieties for the best meltability and flavor. Ensure the cheese is at room temperature for easier mixing with the other ingredients.
    • 1/2 cup grated Parmesan cheese
      → Parmesan cheese adds a savory depth to the bites with its nutty flavor. It also helps with browning and creates a delicious crust on the outside when baked. For best results, use freshly grated Parmesan for optimal melt and flavor.
    • 2 large eggs
      → Eggs act as a binding agent, helping to hold the mixture together and giving it structure. Ensure the eggs are at room temperature before mixing, as this allows for better incorporation into the cheesy mixture, resulting in a fluffier texture.
    • 1/4 cup plain breadcrumbs
      → Breadcrumbs absorb moisture and help bind the ingredients together while adding a slight crunch. Choose plain breadcrumbs to avoid adding extra flavors. Lightly toast them before mixing in for added texture and flavor enhancement.
  • Broccoli Base
    → The broccoli provides the primary vegetable component, contributing both nutrition and texture to the bites. Proper preparation is key to ensuring the broccoli remains vibrant and tender yet not mushy.
    • 2 cups fresh broccoli florets (chopped finely)
      → Fresh broccoli gives the bites their signature crunch and vibrant color. When chopping, aim for small, uniform pieces to ensure even cooking and distribution in the bites. Blanching the broccoli briefly in boiling water before chopping can enhance its vibrant color and make it tender without losing its crunch.
  • Seasoning and Flavoring
    → These additions elevate the taste profile, ensuring each bite is well-seasoned and delicious. Proper seasoning is crucial to enhance the flavors of the cheese and broccoli.
    • 1 teaspoon garlic powder
      → Garlic powder infuses the bites with a savory aroma and flavor, complementing the cheese and broccoli well. Avoid fresh garlic, as it can overpower the other ingredients. Use a high-quality garlic powder for the best flavor.
    • 1 teaspoon onion powder
      → Onion powder adds depth and a subtle sweetness to the bites without being overpowering. Like garlic powder, it allows for a smoother texture compared to fresh onions. Ensure it’s evenly distributed throughout the mixture for balanced flavor.
    • Salt and pepper to taste
      → Salt enhances all the flavors while pepper adds a hint of heat. Use kosher salt for a cleaner flavor. Start with a pinch of each and adjust according to your personal preference for seasoning.
  • Optional Coating
    → Adding a coating before baking can provide a delightful crispness and added flavor to the bites. It’s not necessary, but it enhances texture and appearance.
    • 1/2 cup panko breadcrumbs (optional)
      → Panko breadcrumbs create an extra crunchy topping for the bites when baked. Coat the tops lightly with panko before placing them in the oven for an appealing golden finish. For best results, lightly toast them in olive oil before mixing, to enhance their crunchiness.

Instructions

  • Preheat your oven to 375°F (190°C) and prepare a baking sheet by lining it with parchment paper.

    → Pre-heating the oven ensures that the Cheesy Broccoli Bites cook evenly and helps them rise properly. Lining the baking sheet simplifies cleanup and prevents sticking.
  • Finely chop the broccoli florets until you have about 2 cups.

    → Aim for uniform pieces to ensure even cooking. You can blanch the broccoli first by placing it in boiling water for 1-2 minutes, then immediately transferring it to an ice bath to lock in the bright green color and crispness before chopping.
  • In a large mixing bowl, combine the 1 cup of shredded cheddar cheese and 1/2 cup of grated Parmesan cheese.

    → Mixing the cheeses together ensures that their flavors meld and evenly distribute throughout the bites. Make sure to use freshly shredded and grated cheeses for best texture and flavor.
  • Crack the 2 large eggs into the mixing bowl with the cheese mixture.

    → Ensure the eggs are at room temperature for better incorporation. Beat the eggs lightly with a fork or whisk before adding them to the cheese to facilitate an even blend.
  • Add 1/4 cup of plain breadcrumbs to the cheese and egg mixture.

    → The breadcrumbs are critical for binding the ingredients together while also providing structure. Toasting the breadcrumbs lightly in a skillet until golden can enhance their flavor.
  • Stir in the finely chopped broccoli to the cheese mixture.

    → Use a spatula to fold in the broccoli gently, ensuring that all pieces are evenly coated with the cheesy mixture without over-mixing, which could lead to a dense texture.
  • Add 1 teaspoon of garlic powder, 1 teaspoon of onion powder, and season with salt and pepper to taste.

    → This step is crucial for enhancing flavor. Start with a small pinch of salt and pepper, and adjust as needed after mixing to find your preferred seasoning level.
  • If using, lightly coat the tops of each prepared bite with 1/2 cup of panko breadcrumbs before baking.

    → This optional step adds an extra crunch and visual appeal. Make sure the panko is evenly distributed over the tops of the bites for uniform browning.
  • Scoop the mixture onto the prepared baking sheet, forming small mounds or patties.

    → Use a cookie scoop or spoon to ensure uniformity in size, which helps with even cooking. Leave a bit of space between each mound to allow air circulation while they bake.
  • Bake in the preheated oven for 15-20 minutes, or until the bites are golden brown and the edges are crispy.

    → Keep an eye on the bites during the last few minutes. The cheese should be bubbling, and the panko should achieve a lovely golden hue for optimal texture.
  • Remove from the oven and allow to cool on the baking sheet for a few minutes before transferring them to a wire rack.

    → Cooling them slightly helps the bites firm up and makes them easier to handle without breaking apart. This also enhances their flavor as the cheese and seasonings settle.
  • Serve warm, enjoying them as a snack or appetizer.

    → These bites are best enjoyed fresh, but they can also be stored in an airtight container in the fridge for a few days and reheated in the oven for a crisp finish.

Notes

These cheesy broccoli bites are a delicious and nutritious snack or appetizer that the whole family will love. The combination of cheddar and Parmesan cheeses creates a rich flavor profile, while the fresh broccoli adds a vibrant punch of color and texture. Here are some tips to ensure your broccoli bites turn out perfectly:

  • Choosing the Right Broccoli: Opt for fresh, bright green broccoli florets that are firm to the touch. Avoid any that show signs of yellowing or wilting. If you prefer, you can also use frozen broccoli, but ensure it is thoroughly thawed and drained before use.
  • Optimal Cheese Selection: For this recipe, using freshly shredded cheddar and grated Parmesan is key. Pre-packaged cheeses often contain anti-caking agents that prevent them from melting as well. Consider mixing in other cheeses like mozzarella for additional meltiness!
  • Mixing Techniques: When combining your cheesy mixture, gently fold the ingredients to avoid overmixing. This helps keep the texture light and fluffy, which is desirable for these bites. Make sure everything is evenly incorporated for the best flavor in every bite.
  • Blanching the Broccoli: Briefly blanching the chopped broccoli in boiling water for 1-2 minutes before adding it to the mixture can help maintain its bright green color and crispness. After blanching, immediately transfer the broccoli to an ice bath to stop the cooking process.
  • Coating for Extra Crunch: For an additional layer of texture, consider using panko breadcrumbs as a topping. Lightly toast them in olive oil before sprinkling over the mixture. This step is optional but will enhance the overall experience!
  • Baking Notes: Bake the bites until they’re golden brown and firm to the touch. Cooking times may vary depending on your oven, so keep an eye on them in the last few minutes. If you find they are browning too quickly, cover them lightly with aluminum foil.
  • Storage Tips: These cheesy broccoli bites can be made ahead of time and stored in the refrigerator for up to 3 days. They also freeze well. To freeze, arrange the uncooked bites on a baking sheet and freeze until solid, then transfer to a freezer-safe container. Bake directly from the freezer, adding a few extra minutes to the baking time.
  • Serving Suggestions: Serve these bites warm with your favorite dipping sauces, such as marinara, ranch, or a garlic aioli. They make perfect finger food for parties, or a wholesome snack for kids after school!

Tips

  • Preparation is Key: Before you begin mixing your ingredients, ensure all components are prepared and measured. This will make the assembly process smoother and help you focus on the balance of flavors.
  • Chopping Broccoli: When chopping the broccoli, try to achieve uniform sizes to ensure even cooking. Larger florets may not cook through completely while smaller ones could become overly soft.
  • Blanching for Bright Color: If you choose to blanch the broccoli, make sure to shock it in an ice bath immediately after boiling to stop the cooking process. This keeps the broccoli vibrant green and adds a slight tenderness without losing crunch.
  • Egg Temperature: Remember to bring your eggs to room temperature before mixing. This helps them incorporate smoothly into the mixture, resulting in a fluffier texture in the finished bites.
  • Cheese Selection: Opt for high-quality cheddar and Parmesan cheeses and shred them yourself. This ensures better meltability and flavor compared to pre-grated varieties.
  • Breadcrumbs Texture: If using plain breadcrumbs, lightly toasting them before mixing can elevate their flavor and add a nice texture to the bites. This step will help achieve a better crunch.
  • Seasoning Adjustments: Taste your mixture before forming the bites. You may want to adjust the garlic powder or onion powder based on your personal preference for a customized flavor profile.
  • Panko Coating for Crunch: If using panko breadcrumbs for an optional coating, remember that less is more; a thin layer will provide crunch without overpowering the cheesy broccoli flavor.
  • Baking Note: Be mindful not to overcrowd the baking sheet. Spacing the bites will promote even cooking and help them get crispy on all sides.
  • Storage Suggestions: If you have leftovers, store them in an airtight container in the refrigerator. Reheat in the oven to maintain their crispness rather than using a microwave, which can make them soggy.

FAQ

What are Cheesy Broccoli Bites?

Cheesy Broccoli Bites are delicious bite-sized snacks made from finely chopped broccoli mixed with cheese, breadcrumbs, and various seasonings, then baked or fried until golden and crispy.

Are Cheesy Broccoli Bites healthy?

Yes, Cheesy Broccoli Bites can be a healthy snack option as they incorporate broccoli, which is high in vitamins and minerals. However, their healthiness also depends on the amount of cheese and breadcrumbs used.

Can I make Cheesy Broccoli Bites gluten-free?

Absolutely! Simply substitute the regular breadcrumbs with gluten-free breadcrumbs or crushed gluten-free crackers to make a gluten-free version of Cheesy Broccoli Bites.

How can I store leftover Cheesy Broccoli Bites?

Leftover Cheesy Broccoli Bites can be stored in an airtight container in the refrigerator for up to 3 days. For longer storage, they can be frozen and reheated in the oven when needed.

What can I serve with Cheesy Broccoli Bites?

Cheesy Broccoli Bites pair well with a variety of dips such as ranch dressing, marinara sauce, or garlic aioli. They also make a great side dish for soups and salads.

Can I air fry Cheesy Broccoli Bites?

Yes, you can air fry Cheesy Broccoli Bites! Preheat your air fryer and cook them for about 10-12 minutes at 375°F (190°C) until they are crispy and golden brown.

What cheese is best for Cheesy Broccoli Bites?

Cheddar cheese is a popular option for Cheesy Broccoli Bites due to its sharp flavor and excellent melting properties. Other good choices include mozzarella, Monterey Jack, or a blend of different cheeses.

Can I add other vegetables to the recipe?

Yes, you can definitely add other vegetables such as carrots, cauliflower, or bell peppers to the Cheesy Broccoli Bites for added flavor and nutrition. Just make sure to chop them finely!

Introduction: A Burst of Flavor in Every Bite

Immerse yourself in the vibrant world of flavors with our delightful Mini Veggie Quesadillas. Picture this: a crispy and golden exterior encasing a melty, savory filling that bursts with the fresh taste of garden vegetables. These tiny treasures are not just a feast for the taste buds but a visual and aromatic delight that will transport you straight to the heart of Mexican cuisine. Effortlessly combining texture, taste, and tradition, Mini Veggie Quesadillas are the perfect small bites for transforming any gathering into a festive affair.

The Story Behind the Dish: A Tribute to Mexican Tradition

Quesadillas, a beloved staple in Mexican households, trace their origins back to the 16th century following the Spanish introduction of dairy products to the region. Originally a simple tortilla filled with cheese, the quesadilla has evolved over the centuries, now embracing a myriad of fillings that reflect the rich and diverse palette of Mexican cuisine. Our Mini Veggie Quesadillas pay homage to this culinary tradition, celebrating Mexico’s agricultural bounty with a colorful array of seasonal vegetables. Each bite tells a story of cultural fusion, where every ingredient adds its unique chapter to the narrative of Mexican heritage.

Why You’ll Love This Recipe

  • Quick & Easy: Perfect for weeknight dinners or spontaneous gatherings, these quesadillas come together in minutes.
  • Healthy & Nutritious: Packed with seasonal vegetables, they are a delicious way to help you meet your daily veggie intake.
  • Family-Friendly: Adaptable to suit everyone’s taste, making it ideal for both children and adults alike.
  • Customizable: Offers countless opportunities for personal adaptations and variations.
  • Vegetarian Delight: Satisfying yet meat-free, making it a suitable choice for vegetarians without compromising on flavor.

Flavor Profile & Texture: A Symphony of Senses

Mini Veggie Quesadillas offer a tantalizing flavor journey. The heart of this dish lies in its fillings – an ensemble of vibrant vegetables sautéed until they release an aromatic harmony of flavors. Imagine crisp bell peppers mingling with the mild sweetness of corn, all brought together by the warming embrace of melted cheese. The tortilla, toasted to perfection, provides a satisfyingly crunchy contrast to the gooey interiors, ensuring that every bite delivers a dynamic balance of textures that is sure to delight your taste buds.

Occasions & Pairings: Celebrate Any Time, Anywhere

These quesadillas are nothing if not versatile, making them suitable for an array of occasions. Serve them as enticing appetizers at a party or as a quick snack on a lazy afternoon. They also shine as a delightful breakfast option along with a side of fresh salsa. Pair these with a refreshing margarita for an authentic Mexican dining experience, or perhaps with a tangy ceviche to enhance the flavor profile of a Mexican-themed lunch. For dessert, consider a rich chocolate flan or churros to round out your meal with a sweet finish.

Tips, Variations & Substitutions: Make It Your Own

Get creative with your Mini Veggie Quesadillas to match your preferences or dietary requirements. For a spicier kick, add jalapeños to the filling or pour a hot salsa over the finished quesadillas. Looking for a vegan version? Swap out the cheese for a plant-based alternative and ensure that the tortillas do not contain any animal products. For additional protein, consider adding black beans or tempeh. Regional variations can be explored by incorporating local vegetables and seasonings to give this timeless dish a personal signature.

Storage & Make-Ahead Ideas: Convenience at Its Best

Mini Veggie Quesadillas are as convenient as they are delicious. If you find yourself with leftovers, simply store them in an airtight container in the refrigerator where they can last up to three days. Reheating is a breeze: just place them in a preheated oven for about 10 minutes to maximize their crispy texture. For those who like being ahead of schedule, the filling can be made a day in advance. Alternatively, assemble the quesadillas and freeze them; they can go from freezer to table in no time with a quick bake.

Fun Facts & Trivia: Did You Know?

Quesadillas are so beloved in Mexico that there’s even a debate surrounding the necessity of cheese in one. In Mexico City and a few other regions, a quesadilla is defined by the tortilla and the filling – cheese is optional! The word “quesadilla” comes from the Spanish word for cheese, “queso,” but in modern times, fillings can range from mushrooms and squash blossoms to potatoes and chorizo, proving that versatility and creativity go hand in hand in the world of quesadillas.

In conclusion, Mini Veggie Quesadillas hold a special place not only in Mexican culinary tradition but also in the hearts of food lovers worldwide. They embody the perfect blend of nostalgia and innovation, offering a dish that is as enjoyable to make as it is to eat. Whether you’re creating a cultural experience or simply looking for a quick, satisfying meal, these little quesadillas promise joy in every bite.

Ingredients

  • Flour Tortillas
    → Flour tortillas serve as the base for the quesadillas, holding all the delicious fillings together. Opt for small tortillas, typically around 6 inches in diameter, for mini versions that are perfect for snacks or appetizers. Fresh tortillas will provide the best texture and flavor; if using pre-packaged, ensure they are soft and pliable for easier folding and grilling.
  • 1 cup shredded cheese (cheddar or Monterey Jack)
    → Cheese adds richness and a gooey texture, acting as the glue that binds the fillings inside the tortillas. Shred your cheese from a block rather than using pre-shredded to avoid anti-caking agents that can affect melting. Use a mix of cheddar for sharpness and Monterey Jack for creaminess for a balanced flavor.
  • 1/2 cup bell peppers (chopped)
    → Bell peppers provide a sweet crunch and vibrant color to the quesadillas. Use a mix of red, yellow, and green for a variety of flavors and visual appeal. Chop them into small, uniform pieces to ensure even cooking, and consider sautéing them briefly before adding to the quesadilla for enhanced sweetness and reduced moisture.
  • 1/2 cup mushrooms (sliced)
    → Mushrooms add umami flavor and a meaty texture while keeping the quesadillas moist. Choose button or cremini mushrooms for their mild taste. Slice them thinly for quicker cooking, and sauté them until they are browned and any excess moisture has evaporated, preventing sogginess in the final quesadilla.
  • 1/2 cup spinach (packed)
    → Spinach adds a nutritious boost and vibrant green color to the filling. Use fresh spinach, as it wilts beautifully during cooking. Pack the leaves tightly when measuring to ensure you get enough; cook them just until wilted to retain their bright color and nutrients before adding to your quesadilla.
  • 1/4 cup red onion (finely chopped)
    → Red onion contributes a sharp bite and subtle sweetness to the quesadilla. Finely chop the onion to ensure it cooks down quickly and doesn’t overwhelm the other flavors. For a milder taste, you can soak the chopped onion in cold water for a few minutes before adding it to the filling, which helps to mellow its sharpness.
  • Spices (cumin and chili powder)
    → A blend of spices like cumin and chili powder elevates the flavor profile, adding warmth and depth to the quesadilla filling. Use about 1/2 teaspoon of each, adjusting to taste. Toasting the spices in a dry pan for a minute before adding them to the mixture enhances their flavors and aroma, making the dish more aromatic and flavorful.
  • Cooking oil (olive oil or vegetable oil)
    → Oil is necessary for cooking the quesadillas, providing the needed fat for crispy edges and helping to prevent sticking. Use a light oil like olive oil for flavor or vegetable oil for a neutral taste. Heat the oil in the pan before adding the quesadillas to ensure they brown nicely.

Instructions

  • Gather all ingredients and kitchen tools required for preparation.

    → This includes flour tortillas, cheese, bell peppers, mushrooms, spinach, red onion, spices, cooking oil, a cutting board, knife, sauté pan, and a spatula. Having everything at hand streamlines the cooking process and ensures you don’t miss any vital steps or elements.
  • Prepare the vegetables by washing and chopping them.

    → Rinse the bell peppers and spinach under cold water to remove any dirt. Cut the bell peppers into small, even pieces to ensure they cook uniformly. For mushrooms, slice thinly to encourage browning and moisture release. Chop red onion finely to distribute the flavor evenly in the mixture. This initial prep not only saves time but also helps maintain flavor and texture throughout cooking.
  • Sauté the bell peppers, mushrooms, and red onion in a non-stick sauté pan.

    → Heat about 1 tablespoon of cooking oil over medium heat in the pan. Once hot, add the chopped vegetables. Stir frequently for about 4-5 minutes or until softened and slightly browned, which enhances their sweetness and reduces moisture content. This step adds depth and flavor to the filling, ensuring you have a delicious and textured quesadilla.
  • Add the spinach to the sautéed vegetables and cook until just wilted.

    → Mix in 1/2 cup of packed fresh spinach, stirring until it wilts down, which takes about 2 minutes. This quick cooking preserves the vibrant color and nutrients of the spinach, ensuring that your filling remains healthy and visually appealing.
  • Season the mixture with spices and mix well.

    → After the spinach has wilted, sprinkle in 1/2 teaspoon each of cumin and chili powder, stirring to combine thoroughly. This not only adds depth of flavor but also balances the sweetness of the vegetables with a bit of warmth and spice. Make sure everything is uniformly coated to ensure every bite is flavorful.
  • Remove the vegetables from the heat and set the mixture aside to cool slightly.

    → This prevents the filling from becoming too hot, making it easier to handle when assembling the quesadillas. Allowing it to cool also helps the flavors meld together, improving the overall taste of your dish.
  • Preheat a clean sauté pan or griddle over medium heat and add a small amount of oil.

    → Use about 1/2 tablespoon of oil for frying the quesadillas. Ensure the pan is hot enough that a drop of water sizzles when added; this indicates it is ready for cooking. A properly heated pan will achieve crispy edges while keeping the filling warm.
  • Assemble the mini quesadillas by placing the vegetable mixture on half of each tortilla and topping with cheese.

    → Take a flour tortilla, and on one half, place a spoonful of the vegetable mixture followed by a generous sprinkle of shredded cheese. Folding the tortilla over helps encapsulate the filling and creates a neat package that cooks evenly. Be sure not to overfill to avoid spillage during cooking.
  • Carefully place the assembled quesadilla in the preheated pan.

    → Gently lay the folded quesadilla into the pan, ensuring it sizzles as it makes contact. This initial cooking creates a crispy texture on the outside while melting the cheese inside. Cook for about 3-4 minutes, checking occasionally to prevent burning.
  • Flip the quesadilla once golden brown on the first side.

    → Use a spatula to carefully turn the quesadilla over, ensuring that it stays folded. Cook for an additional 2-3 minutes on the other side until the cheese is fully melted and the tortilla is crispy. Flipping halfway through ensures an even browning on both sides.
  • Remove the quesadilla from the pan and cut it into wedges.

    → Once cooked, transfer the quesadilla to a cutting board and allow it to cool for a minute before slicing it into quarters with a sharp knife. Cutting while warm helps the cheese maintain its gooey texture and makes for easier eating. Serve immediately to enjoy the maximum flavor and crispy texture.
  • Repeat the assembly and cooking process with the remaining tortillas and filling.

    → Continue to fill and cook the remaining quesadillas, remembering to add more oil to the pan as needed to prevent sticking. Keep the finished ones warm in a low oven (200°F or 93°C) while you complete the batch to ensure they stay crispy and ready to serve.
  • Serve the mini veggie quesadillas hot with your choice of dipping sauces.

    → Arrange the quesadilla wedges on a platter and consider serving them with sour cream, guacamole, or salsa for an added layer of flavor. Dipping sauces not only complement the dish but also enhance the overall eating experience.

Notes

  • These mini veggie quesadillas are not only quick to prepare but also versatile, allowing you to experiment with different vegetables and spices. Feel free to substitute any of the veggies for others you prefer or have on hand, such as zucchini or corn, to keep things interesting. Adding black beans or cooked chicken can also enhance the protein content.
  • When assembling your quesadillas, be careful not to overfill them, as this can make them difficult to seal and may lead to spillage during cooking. Aim for a balanced amount of cheese and veggies on each tortilla.
  • For a golden, crispy exterior, ensure your pan is adequately heated before adding the quesadillas, and use medium heat throughout cooking. You may need to cook them in batches to ensure they brown evenly without overcrowding the pan.
  • Serve these quesadillas with your choice of dipping sauces, such as salsa, guacamole, or sour cream, to elevate the flavor experience. Adding fresh herbs like cilantro can also provide a refreshing burst of flavor.
  • If you’re preparing these for a gathering, consider making a larger batch and keeping them warm in the oven at a low temperature until ready to serve. They are best enjoyed fresh but can be stored in an airtight container in the refrigerator for a few days; simply reheat in a skillet or microwave.

Tips

  • Preparation of Ingredients: Before you start assembling the quesadillas, ensure all ingredients are prepped and within reach. Chop vegetables uniformly to facilitate even cooking, and have your cheese shredded and ready. This will streamline the cooking process and help you assemble quickly.
  • Layering Tips: When filling your quesadillas, avoid overstuffing them. A handful of each filling should suffice to ensure the tortillas can be folded and sealed properly. Distribute the cheese evenly across the tortilla, as it will melt and help “glue” everything together.
  • Heating the Tortillas: Preheat your tortillas in a dry skillet for about 10-15 seconds on each side before adding the fillings. This step makes them more pliable and enhances their flavor by warming them, making for easier folding and grilling.
  • Cooking Technique: When cooking the quesadillas, use medium heat to allow the cheese to melt thoroughly without burning the tortillas. Cooking them too fast may result in crispy outsides but unmelted cheese, whereas lower heat will yield a soggier texture.
  • Flipping the Quesadilla: When it’s time to flip, use a wide spatula to support the entire quesadilla. This prevents any fillings from spilling out and ensures even cooking on both sides. Cook until golden brown, typically 2-3 minutes per side.
  • Serving Suggestions: Serve your mini quesadillas with an array of dips like salsa, guacamole, or sour cream for extra flavor. You can also garnish with fresh cilantro or a squeeze of lime juice for added freshness.
  • Storage Tips: If you have leftovers, store them in an airtight container in the refrigerator. When reheating, use a skillet instead of a microwave to keep them crispy. Heat over medium until warmed through.
  • Customization Options: Feel free to get creative with your fillings! Add legumes like black beans for extra protein, or substitute other vegetables such as zucchini or corn. Adjust the spices based on your flavor preference—try adding smoked paprika for a smoky twist.

FAQ

What ingredients do I need to make Mini Veggie Quesadillas?

To make Mini Veggie Quesadillas, you will need tortillas, cheese, bell peppers, onions, mushrooms, corn, spinach, and spices such as cumin and chili powder. You can also add other veggies as per your preference.

How do I prepare the filling for Mini Veggie Quesadillas?

Start by sautéing your chopped vegetables in a little oil until they are tender. Add spices and seasonings to taste. Mix in the cheese and cook until melted before assembling the quesadillas.

Can I use gluten-free tortillas for Mini Veggie Quesadillas?

Yes, you can definitely use gluten-free tortillas as a substitute for regular ones to make Mini Veggie Quesadillas suitable for those with gluten allergies.

How long does it take to cook Mini Veggie Quesadillas?

The cooking time for Mini Veggie Quesadillas is approximately 10-15 minutes. This includes both preparing the filling and cooking the quesadillas in a pan until golden brown and crispy.

Can I make Mini Veggie Quesadillas ahead of time?

Yes, you can prepare the filling and assemble the quesadillas ahead of time. Store them in the refrigerator for up to a day. Just cook them fresh when ready to serve for the best texture.

What can I serve with Mini Veggie Quesadillas?

Mini Veggie Quesadillas pair well with salsa, guacamole, sour cream, or a fresh salad for a complete meal.

Are Mini Veggie Quesadillas suitable for kids?

Yes, Mini Veggie Quesadillas are a great option for kids! They can be made with a variety of vegetables and can be adjusted to suit their tastes.

Can I freeze Mini Veggie Quesadillas?

Yes, Mini Veggie Quesadillas freeze well. Allow them to cool completely, then wrap them tightly and store in the freezer for up to 2 months. Reheat in the oven or toaster for best results.

Introduction: The Irresistible Allure of Sweet Chili Chicken Meatballs

Prepare to delight your taste buds with an explosion of flavors in every bite of these Sweet Chili Chicken Meatballs. Imagine tender chicken meatballs, perfectly seasoned and glazed with a luscious blend of sweet and spicy chili sauce. These delectable morsels offer an unparalleled dining experience that strikes a perfect balance between sweet notes and a subtle heat, wrapping your senses in a culinary embrace that is both comforting and exhilarating. Whether it’s the enticing aroma that captivates your attention or the symphony of flavors dancing on your palate, this dish assures an unforgettable culinary adventure that turns every meal into a celebration.

The Story Behind the Dish

The art of making meatballs dates back to ancient Roman times, where ingredients were minced and rolled into small balls to stretch available resources while creating hearty meals. Through centuries, the concept of meatballs has been embraced and adapted across cultures worldwide, evolving into a myriad of delicious varieties. These Sweet Chili Chicken Meatballs might not have ancient origins, but they draw inspiration from the rich culinary traditions of Asia. The sweet chili sauce, often used in Asian cuisine, provides a modern twist to the traditional meatball, integrating global culinary influences into a harmonious fusion of flavors.

Sweet chili sauce has its roots in Thailand, where the balance of sweet and spicy is a quintessential aspect of Thai cooking. The sauce, typically made from red chilies, rice vinegar, and sugar, has gained popularity across the globe for its versatility and taste. By turning this beloved condiment into a glaze for chicken meatballs, this dish honors both culinary heritage and contemporary tastes, making it a unique addition to any cook’s repertoire.

Why You’ll Love This Recipe

  • Easy to Make: With simple ingredients and straightforward preparation, these meatballs are perfect for cooks of all skill levels.
  • Family-Friendly: The balanced flavors appeal to both adults and children, making it a hit at family dinners.
  • Versatile: Serve them as an appetizer, main course, or part of a party spread.
  • Healthy Ingredients: Lean chicken makes this dish a healthier choice compared to beef or pork alternatives.
  • Perfect for Meal Prep: Make them ahead of time and enjoy throughout the week without compromising freshness.

Flavor Profile & Texture

The first bite into these Sweet Chili Chicken Meatballs introduces you to a multi-layered flavor experience. The initial sweetness becomes an inviting precursor to the subtle heat of chili that follows, creating a pleasant lingering spice that intrigues the palate. The meatballs themselves are crafted with minced chicken, resulting in a light yet satisfying texture that practically melts in your mouth. Complemented by the glossy, sticky glaze of sweet chili sauce, each bite offers a perfect harmony of taste and texture that beckons you to reach for another one.

Occasions & Pairings

Whether you’re hosting a casual dinner party or looking to spice up your weeknight meals, these Sweet Chili Chicken Meatballs are wonderfully adaptable to various occasions. They’re an ideal choice for holiday gatherings, potlucks, or as crowd-pleasing appetizers for game night.

  • Serve with Rice: Pair them with jasmine or basmati rice for a complete meal.
  • Salad Companion: Complement them with a fresh Asian slaw to add a crisp element to your meal.
  • Appetizer: Serve with toothpicks as a delicious party finger food.
  • Beverage Pairing: Enjoy with a chilled glass of Riesling or a light beer to balance the heat.

Tips, Variations & Substitutions

These meatballs are not only delicious but also highly customizable:

  • Spiciness Level: Adjust the heat by increasing or decreasing the amount of chili sauce or adding your choice of fresh chilies.
  • Dietary Adjustments: Try using ground turkey for a leaner option or a plant-based mince for a vegan twist.
  • Gluten-Free Option: Use gluten-free breadcrumbs if you are avoiding gluten.
  • Flavor Variation: Infuse with additional herbs such as cilantro or coriander for extra aroma and taste.

Storage & Make-Ahead Ideas

Planning ahead is seamless with these make-ahead and storage tips:

  • Refrigeration: Store the cooked meatballs in an airtight container in the refrigerator for up to 4 days.
  • Freezing: Freeze uncooked meatballs on a baking sheet, then transfer them to a freezer bag. Thaw and cook when needed, lasting about 2 months in the freezer.
  • Reheating: Reheat the meatballs in the oven or a skillet over low heat until warmed through, ensuring they maintain their moisture and flavor.
  • Make-Ahead: Prepare the meatballs up to the glazing step, refrigerate, and finish cooking with the sauce just before serving to retain the fresh, vibrant glaze.

Fun Facts & Trivia

Did you know that the concept of pairing a sweet element with spicy dishes isn’t just a modern culinary trend? Historically, this combination has been cherished for its ability to enhance flavors and create well-balanced dishes. Sweet and spicy foods stimulate different taste receptors on the tongue, creating a dynamic sensory experience that has been enjoyed by cultures worldwide for centuries.

In some Asian cultures, sweetness symbolizes happiness and sweetness in life, while spice invites warmth and excitement. The combination in this recipe not only pleases the palate but also connects with deeper culinary traditions that celebrate life’s contrasts.

Embark on your culinary journey with these Sweet Chili Chicken Meatballs and discover how the fusion of flavors, history, and modern convenience creates a dish that’s more than just a meal — it’s an experience. Explore the wonderful interplay of tastes and bring a little bit of joyful flavor to your dining table with every delicious bite.

Ingredients

  • Chicken Meatball Base
    • 1 pound ground chicken
      → Ground chicken serves as the primary protein source, offering a lighter alternative to beef or pork. It should be fresh and of good quality for the best flavor and texture. Keep it cold until you’re ready to mix it with the other ingredients to help maintain its firmness.
    • 1/2 cup breadcrumbs
      → Breadcrumbs act as a binder, helping to hold the meatballs together and providing a pleasant texture. Use panko for a lighter, airier texture or regular breadcrumbs if you prefer a denser meatball. Mix them in with the chicken while they are dry to ensure even distribution.
    • 1/4 cup finely chopped green onions
      → Green onions add a fresh, mild onion flavor and vibrant color to the meatballs. Slice them finely to ensure they blend well without large chunks. Both the white and green parts can be used, but avoid any wilted or bruised portions for the best results.
    • 2 cloves garlic (minced)
      → Fresh garlic provides a robust flavor and aroma, enhancing the overall taste of the meatballs. Mince the garlic finely to distribute its flavor evenly throughout the mixture. If you want a milder flavor, you can sauté the minced garlic in a bit of olive oil before adding it.
    • 1 large egg
      → The egg acts as a binder, helping to hold the meatballs together while also adding moisture. Use a fresh egg and beat it lightly before mixing it into the meatball mixture. Ensure all ingredients are well combined to create a uniform mixture.
    • 1 teaspoon salt
      → Salt enhances the flavors of all ingredients and is essential for a well-seasoned meatball. Use kosher salt for a more subtle salting effect, and adjust to your taste preference if necessary.
    • 1/2 teaspoon black pepper
      → Black pepper adds a slight warmth and depth to the flavor profile of the meatballs. Use freshly ground pepper for the best flavor and adjust the quantity to suit your spice tolerance.
  • Sweet Chili Sauce
    • 1/2 cup sweet chili sauce
      → Sweet chili sauce provides a deliciously sweet and mildly spicy glaze that complements the chicken meatballs perfectly. Choose a quality brand or homemade version for the best flavor. Brush it onto the meatballs before baking for a lovely caramelization.
    • 1 tablespoon soy sauce
      → Soy sauce adds umami depth and saltiness, enhancing the overall flavor of the dish. Use low-sodium soy sauce to control the salt level if desired. Mix it into the sweet chili sauce for a well-rounded flavor.
    • 1 teaspoon rice vinegar
      → Rice vinegar adds a touch of acidity to balance the sweetness of the sauce. Look for unseasoned rice vinegar to avoid additional flavors that may alter the sauce’s profile. A little goes a long way in brightening the overall taste.
  • Toppings
    • Sesame seeds (for garnish)
      → Sesame seeds provide a nutty flavor and crunchy texture that complements the tenderness of the chicken meatballs. Toast them lightly in a dry skillet for a richer flavor before sprinkling them over the finished dish for an extra burst of nuttiness.
    • Chopped cilantro (for garnish)
      → Fresh cilantro adds a bright, herbaceous note that brings freshness to the dish. Remove any tough stems and only use the leaves for garnish. Rinse and dry the cilantro before chopping for a clean, vibrant garnish.

Instructions

  • Preheat your oven to 400°F (200°C) and line a baking sheet with parchment paper.

    → Preheating ensures the meatballs cook evenly from the start. The parchment paper will help prevent sticking and make cleanup easier, allowing the meatballs to brown without burning.
  • In a large mixing bowl, combine 1 pound of ground chicken, 1/2 cup of breadcrumbs, 1/4 cup of finely chopped green onions, and 2 cloves of minced garlic.

    → Mixing the ingredients together in a separate bowl allows you to thoroughly incorporate each item into the chicken. The mixture should feel cohesive but not overly wet or dry.
  • Add 1 large beaten egg, 1 teaspoon of salt, and 1/2 teaspoon of black pepper to the chicken mixture.

    → The egg acts as a binder, which is crucial for the meatballs’ structure. Beating it beforehand ensures it mixes more easily into the meat, distributing moisture and binding elements evenly across the mixture.
  • Use your hands or a spoon to mix the ingredients until just combined; do not overmix.

    → Overmixing can lead to tough meatballs; you want to combine ingredients while keeping a light texture. The mixture should hold together when formed into a ball without being too compact.
  • With your hands, shape the mixture into bite-sized meatballs, about 1 to 1.5 inches in diameter, and place them on the prepared baking sheet.

    → A uniform size ensures even cooking, which helps prevent some meatballs from being undercooked while others are overcooked. Use a scoop or your fingers for consistent sizing.
  • In a small bowl, mix 1/2 cup of sweet chili sauce, 1 tablespoon of soy sauce, and 1 teaspoon of rice vinegar until well blended.

    → This mixture will become the glaze that infuses the meatballs with flavor. Combining the sauces in a bowl makes it easy to brush onto the meatballs.
  • Brush the sweet chili glaze generously over each meatball, ensuring an even coating.

    → Coating the meatballs before baking allows the sugars in the sauce to caramelize in the oven, enhancing flavor and creating a beautiful glaze. Use a brush or the back of a spoon for this task.
  • Bake the meatballs in the preheated oven for 20-25 minutes or until they reach an internal temperature of 165°F (74°C).

    → This cooking time allows the meatballs to cook through while also developing a golden-brown exterior. Use a meat thermometer for accuracy to ensure food safety.
  • While the meatballs are baking, toast a handful of sesame seeds in a dry skillet over medium heat until golden brown and fragrant, about 2-3 minutes.

    → Toasting enhances the flavor and adds crunch; keep an eye on them, as they can burn quickly. Stir them often to ensure they toast evenly.
  • Remove the meatballs from the oven and let them cool slightly before plating.

    → Allowing them to cool for a few minutes before serving helps maintain their shape and allows the glaze to set slightly.
  • Garnish the meatballs with toasted sesame seeds and chopped cilantro just before serving.

    → Garnishing not only enhances the visual appeal but also adds textural contrast and fresh flavor, balancing the sweetness of the sauce.
  • Serve the sweet chili chicken meatballs warm and enjoy them as an appetizer, main dish, or served over rice or noodles.

    → The warmth helps bring out the flavors of the glaze and the aromatic ingredients, making for a delightful eating experience.

Notes

These Sweet Chili Chicken Meatballs are a deliciously light and flavorful dish that combines succulent ground chicken with a sweet and spicy glaze. The meatballs are easy to prepare and can be served as an appetizer or a main dish. You can customize your meatballs by adding herbs or spices that suit your taste. Make sure to keep your ground chicken cold until you are ready to mix the ingredients, ensuring the right texture. When baking, keep an eye on them to avoid overcooking, as they can dry out quickly. For added flair, consider serving these meatballs on a bed of rice or with toothpicks as the perfect party snack. Leftovers can be stored in the refrigerator for a couple of days or frozen for longer storage. Reheat gently to maintain their moisture without losing the flavor. Enjoy garnished with toasted sesame seeds and fresh cilantro for that extra pop of taste and presentation.

Tips

Cooking Tips for Sweet Chili Chicken Meatballs

  • Choosing Ground Chicken: Select high-quality ground chicken that is fresh and firm. The fat content should ideally be around 10-15% for best results; more fat can lead to greasy meatballs, and less can make them dry.
  • Breadcrumbs for Binding: If you’re looking for a gluten-free option, consider using ground oats or gluten-free breadcrumbs as a substitute for traditional breadcrumbs. This will still help bind the meatballs without the gluten.
  • Chopping Green Onions: When chopping, aim for uniform pieces to ensure even distribution throughout the meatball mixture. Using kitchen scissors can be an efficient way to chop the green onions quickly.
  • Garlic Preparation: For enhanced flavor, you can crush the garlic cloves with your knife before mincing them, as this will release more oils and aroma.
  • Making Uniform Meatballs: Use a cookie scoop or ice cream scoop for making meatballs of equal size. This ensures even cooking and a beautiful presentation.
  • Egg Incorporation: When adding the egg, make sure to combine it with the other wet ingredients first for better mixing, ensuring the egg is distributed evenly throughout the meatball mixture.
  • Cooking Method: For a healthier approach, you can bake the meatballs on a wire rack set over a baking sheet, allowing excess fat to drip away during cooking.
  • Sweet Chili Sauce Application: For a more intense flavor, consider marinating the formed meatballs in the sweet chili sauce for at least 30 minutes before cooking. This adds depth to the flavor profile.
  • Toasting Sesame Seeds: Watch the sesame seeds closely while toasting, as they can burn easily. Stir them frequently and remove them from heat as soon as they turn golden brown to achieve that perfect nutty flavor.
  • Cilantro Handling: To enhance the flavor of cilantro, gently bruise the leaves before using. This releases essential oils and intensifies the herb’s aroma.

FAQ

What ingredients are needed to make Sweet Chili Chicken Meatballs?

The main ingredients include ground chicken, breadcrumbs, sweet chili sauce, garlic, ginger, eggs, and green onions. Additional ingredients like soy sauce, sesame oil, and various spices may also be used for extra flavor.

How long does it take to prepare and cook Sweet Chili Chicken Meatballs?

Preparation time is typically around 15-20 minutes, and cooking time ranges from 20-25 minutes, depending on the cooking method and size of the meatballs.

Can I use turkey instead of chicken for this recipe?

Yes, ground turkey can be used as a substitute for ground chicken. The flavor may be slightly different, but the overall dish will still be delicious.

Are Sweet Chili Chicken Meatballs gluten-free?

The recipe can be made gluten-free by using gluten-free breadcrumbs and ensuring that the sweet chili sauce is gluten-free. Always check labels for gluten-containing ingredients.

What is the best way to cook Sweet Chili Chicken Meatballs?

Sweet Chili Chicken Meatballs can be baked, pan-fried, or even grilled. Baking is a healthier option, while frying gives a crispier texture.

Can I make the meatballs in advance and freeze them?

Yes, you can prepare the meatballs in advance, form them, and freeze them uncooked. To cook, simply bake or fry them from frozen, adding a few extra minutes to the cooking time.

What can I serve with Sweet Chili Chicken Meatballs?

These meatballs pair well with rice, noodles, or a fresh salad. You can also serve them as an appetizer with dipping sauce on the side.

How can I adjust the spiciness of the dish?

You can adjust the spiciness by using less sweet chili sauce or choosing a milder variety. Adding additional sugar can also help balance out the heat if desired.

Introduction: A Bite-Sized Delight

Imagine the glorious combination of the chewy goodness of pizza and the tender, melt-in-your-mouth texture of an eggplant. Welcome to the world of Mini Eggplant Pizzettes — a gastronomic masterpiece that will redefine your notion of pizzas forever. These petite wonders are not just a treat to your taste buds but an experience that encapsulates the joy of cooking and the art of flavor blending. Picture a golden brown, slightly crisp yet tender eggplant slice, topped with luscious layers of savory tomato sauce, mildly melted cheese, and a sprinkling of fresh herbs. As you take a bite, you are greeted with a burst of flavors that dance harmoniously, leaving you in a delightful state of culinary bliss. Making them is as much fun as eating them, and they are sure to please everyone, from the pickiest eaters to the most discerning foodies.

The Story Behind the Dish

The creation of Mini Eggplant Pizzettes is deeply rooted in the marriage of culinary tradition and modern convenience. Originating from the heartland of traditional Italian cuisine, the inspiration for these diminutive delights is the classic eggplant parmesan combined with the universally adored pizza. While both dishes have been revered on their own, merging them was akin to creating a new legend. The idea was to maintain the heritage of Italian cooking, emphasizing freshness and the love for vibrant yet simple flavors, while reimagining the dish for a modern palette looking for a quick and fun eating experience.

Eggplant, or aubergine as it is known in certain parts of the world, has its history woven through several cultures, making it not only versatile but rich in historical significance. Since ancient times, it has been a staple in Middle Eastern, Mediterranean, and Asian cuisines. Known for its adaptability, the eggplant was brought to Italy by the Arabs during the Middle Ages, where it was initially met with suspicion but over time became a cherished ingredient in Italian gastronomy.

Why You’ll Love This Recipe

  • Healthy Alternative: Swapping traditional dough for eggplant makes this a lighter, healthier option that is gluten-free and packed with nutrients.
  • Quick & Easy: With minimal ingredients and straightforward steps, these pizzettes are perfect for a speedy yet impressive meal.
  • Customizable: A base for your creativity—add your favorite toppings or experiment with different cheeses and herbs.
  • Family-Friendly: A hit with kids and adults alike, making it an excellent choice for family dinners or casual gatherings.

Flavor Profile & Texture

Picture yourself savoring a mini pizza where each bite delivers the robustness of the Mediterranean countryside. The Mini Eggplant Pizzettes invite you to indulge in a medley of flavors: the subtle earthiness of the eggplant, slightly caramelized on the edges for a hint of sweetness, the tangy and rich tomato sauce balancing the creamy, slightly salty cheese, and the aromatic charm of basil leaves lending freshness to every morsel. That’s further accentuated by a delicate drizzle of high-quality olive oil that adds a silky richness.

The texture is equally captivating; the eggplant provides a gratifying base, soft yet firm enough to support the toppings. Each pizzette offers a delightful contrast, with creamy cheese melding into the cushioned eggplant while the top layer remains invitingly elastic.

Occasions & Pairings

Mini Eggplant Pizzettes are incredibly versatile and cater to a vast array of occasions:

  • Party Appetizers: Their miniature size and visually appealing presentation make them ideal for parties or social gatherings.
  • Weeknight Dinners: Preparing a quick, satisfying bite without the fuss is made easy with these pizzettes.
  • Brunch Treats: Serve them at brunch for something different that won’t overwhelm the palate early in the day.

When it comes to pairing, consider complementing these pizzettes with a crisp white wine or a light red. For non-alcoholic options, a sparkling water with a twist of lemon works wonders. As for sides, a bright, leafy salad or a platter of roasted veggies would be perfect companions.

Tips, Variations & Substitutions

The charm of Mini Eggplant Pizzettes rests in their ability to be tailored to suit individual preferences:

  • Cheese Choice: While mozzarella is the traditional favorite, feel free to experiment with feta, goat cheese, or a sprinkle of parmesan for an added flavor punch.
  • Vegan Twist: Opt for vegan cheese and ensure the sauce is plant-based to cater to vegan diets.
  • Herbal Touch: Add oregano, thyme, or rosemary for additional aromatic depth.
  • Spicy Kick: For those who like it hot, a dash of crushed red pepper flakes works miracles.

Moreover, using a mix of colored cherry tomatoes instead of sauce can transform the dish into a visual and gustatory delight.

Storage & Make-Ahead Ideas

The beauty of Mini Eggplant Pizzettes also lies in their flexibility regarding meal prep and storage:

  • Prepare your eggplant slices and sauce in advance, storing them separately in airtight containers in the refrigerator for up to two days.
  • Assemble and bake the pizzettes just before serving for optimal freshness and texture.
  • Leftover pizzettes can be stored in the fridge for up to 3 days. Reheat them in the oven to maintain their texture and taste.

If you plan on making them in large batches, consider freezing the cooked eggplant discs and thawing them before assembling with fresh toppings.

Fun Facts & Trivia

Did you know that eggplants were once considered to be a type of egg? Its name originated from European cultivars that were yellow or white, resembling goose or chicken eggs. Furthermore, in several cultures, eggplant is symbolically associated with prosperity and fertility, often served during celebratory feasts and new beginnings.

In summary, this delightful recipe is a testament to how the traditional and modern culinary worlds can unite to create something innovative and delicious. Not only are Mini Eggplant Pizzettes a joy to eat, but they also bring an aspect of fun and novelty to any meal or gathering. Enjoy the process, savor each bite, and share the joy with family and friends!

Ingredients

  • Mini Eggplant Base
    • 2 medium eggplants
      → Choose firm, fresh eggplants that are smooth and glossy without any soft spots. Eggplants serve as the base for the pizzettes, providing a hearty and nutritious alternative to traditional pizza crust. Slice them into 1/2 inch rounds for the best size and texture, ensuring they cook evenly in the oven.
    • 1/4 cup olive oil
      → Olive oil is essential for brushing on the eggplant slices, helping them to cook evenly while adding rich flavor and moisture. Use high-quality extra virgin olive oil for better taste. Brush or drizzle it generously on both sides of the eggplant to prevent them from becoming too dry during baking.
  • Toppings
    • 1 cup marinara sauce
      → Select your favorite marinara sauce or make your own for more control over flavor and ingredients. The sauce adds moisture and a delicious tomato base, which complements the eggplant well. You can either spread it evenly over the eggplant rounds or dollop it in the center, allowing it to spread as it bakes.
    • 1 cup shredded mozzarella cheese
      → Mozzarella cheese is famous for its excellent melting quality and mild flavor, making it perfect for these pizzettes. Use fresh mozzarella for a best melt and taste, shredding it just before use to maximize freshness. Spread it generously over the sauce for a gooey, cheesy bite.
    • 1/2 teaspoon Italian seasoning
      → A blend of dried herbs like oregano, basil, and thyme adds a wonderful aroma and depth of flavor to the pizzettes. Sprinkle it evenly over the cheese for an enhanced taste experience. You can also adjust the amount according to your preference for a more or less herbaceous flavor.
    • Salt and pepper to taste
      → Seasoning with salt and pepper enhances the overall flavors of the dish. Sprinkle salt over the eggplant slices before baking to draw out excess moisture and season them well, and add cracked black pepper for a touch of heat. Taste your marinara and cheese, and adjust as necessary.
  • Garnish (Optional)
    • Fresh basil leaves (for garnish)
      → Fresh basil adds a bright, aromatic finish to the pizzettes. Choose vibrant, green leaves without browning. Tear them to release extra flavor and place atop the newly baked pizzettes just before serving for an appealing look and a hint of freshness.

Instructions

  • Preheat your oven to 400°F (200°C) and arrange your oven rack to the middle position.

    → Preheating the oven is crucial as it ensures even cooking from the moment the pizzettes go in. Adjusting the rack position allows optimal heat circulation and prevents burning the tops without cooking the bottoms.
  • Prepare the eggplants by slicing them into 1/2 inch rounds.

    → Use a sharp knife for clean cuts, and ensure your slices are uniform in thickness to guarantee even cooking. Firmly hold the eggplant on a cutting board and slice downwards in a straight motion, taking care to remove any green stem tops that may be present.
  • Brush both sides of each eggplant round with olive oil.

    → Generously applying olive oil prevents the eggplants from drying out and enhances their flavor. You can use a basting brush to apply oil easily and uniformly, making sure to coat edges and surface without drowning them, as too much oil can lead to soggy bases.
  • Sprinkle salt on both sides of the eggplant rounds and let them sit for 15 minutes.

    → This step helps draw out excess moisture, which prevents the eggplants from becoming soggy when baked. You will notice some moisture pooling; this is normal and beneficial. After 15 minutes, pat them dry with a paper towel to remove excess moisture and salt.
  • Line a baking sheet with parchment paper and arrange the eggplant slices in a single layer.

    → Parchment paper makes for easy cleanup and prevents the eggplant from sticking. Place the eggplant rounds evenly spaced on the sheet to allow for proper air circulation, which will help them cook evenly and become slightly crispy.
  • Bake the eggplant rounds in the preheated oven for 10 minutes.

    → Baking them first helps to develop a slight tenderness and starts the cooking process while you prepare the toppings. Keep an eye on them to avoid overbaking; they should be slightly tender but not fully cooked, as they will bake again with toppings.
  • Remove the eggplants from the oven and spoon a teaspoon of marinara sauce onto each round.

    → Using the back of the spoon, spread the sauce evenly but keep it centered on the round to avoid overflow. This step creates a flavorful base for your toppings while adding moisture during the second round of baking, ensuring a deliciously savory pizzette.
  • Sprinkle shredded mozzarella cheese generously over the marinara sauce on each eggplant round.

    → The cheese should cover the sauce adequately but not pile too high, as it will melt and expand. Freshly shredded cheese melts better than pre-shredded versions, yielding a creamier texture and superior flavor.
  • Sprinkle Italian seasoning over the cheese on each pizzette.

    → Evenly distributing the seasoning enhances the flavor profile, adding warmth and depth. Feel free to adjust the amount to cater to your personal taste, adding more if you love herbs!
  • Return the baking sheet to the oven and bake the pizzettes for an additional 10-12 minutes, or until the cheese is melted and bubbly.

    → Keep an eye on them to prevent burning; the cheese should be golden and have a slightly crisp texture. This step ensures the eggplant is fully cooked through while allowing the flavors to meld beautifully.
  • Once out of the oven, let the pizzettes cool for a few minutes before garnishing with torn fresh basil leaves if desired.

    → Letting them cool slightly helps the cheese set, making them easier to handle. Tearing the basil releases aromatic oils, enhancing the overall flavor and providing a fresh color contrast that makes for an appealing presentation.
  • Serve the mini eggplant pizzettes warm as an appetizer or a light meal.

    → Enjoy the contrast of flavors and textures: the crispy crust of the eggplant, the rich sauce, and melting cheese. These pizzettes can be served on their own or paired with a salad for a complete meal.

Notes

These Mini Eggplant Pizzettes offer a delightful twist on traditional pizza by using eggplant slices as a base, making them a low-carb and gluten-free option. Eggplants provide a rich, savory flavor, and when baked, they become tender and slightly crispy. Ensure your eggplants are fresh and firm for the best results. The combination of marinara sauce and gooey mozzarella cheese creates a mouthwatering topping, and the Italian seasoning adds an aromatic touch that enhances the overall flavor profile.

For customization, feel free to explore different toppings or additional vegetables to suit your taste. You can add sliced bell peppers, olives, or even pepperoni for a heartier pizzette. Remember to adjust the salt and pepper according to your preferences, and feel free to experiment with other herbs if you have favorites. These pizzettes not only make for a fantastic appetizer but also work well as a snack or a light meal.

For serving, consider garnishing with fresh basil for a burst of color and flavor. These pizzettes are best enjoyed warm, right after baking, but they can also be stored in the fridge for later. Simply reheat them in the oven to bring back their crispy texture. Serve with a side salad or enjoy them on their own for a satisfying dish that’s both nutritious and delicious.

Tips

Cooking Tips for Mini Eggplant Pizzettes

  • Selecting Eggplants: Always choose eggplants that are firm and have smooth, shiny skin. This ensures a better flavor and texture. Avoid any samples that show signs of bruising or soft spots, as these can indicate overripeness.
  • Preparation of Eggplants: When slicing the eggplants into rounds, aim for uniformity. Slices that are about 1/2 inch thick will provide consistency in cooking time, ensuring that they are all tender by the time the pizzettes are done.
  • Olive Oil Application: For optimal flavor, use a brush or your hands to apply the olive oil thoroughly. This will help to create a nice texture and prevent the eggplant from drying out during baking.
  • Marinara Sauce Tips: If you’re making your own marinara, consider adding garlic, a pinch of red pepper flakes, or a splash of red wine to elevate the flavor. If using store-bought sauce, taste it first and consider adding herbs or spices if you want to tweak it further to your preference.
  • Melting Cheese: For the best melt and stretch, opt for fresh mozzarella. If you can’t find it, regular shredded mozzarella will still work, but consider mixing in a bit of parmesan for added flavor depth.
  • Herb Adjustment: Italian seasoning can vary in strength, so it’s wise to start with less and taste as you go. Fresh herbs can also be used in place of dried ones if available, providing a more intense aroma and flavor.
  • Seasoning Tips: Don’t forget to season your eggplant before baking! This step will enhance the natural flavors and prepare the eggplant to better absorb the marinara sauce and cheese flavors.
  • Adding Basil: For finishing, use fresh basil right before serving to maintain its vibrant green color and fresh flavor. You can also lightly chop the leaves, which can make for an attractive garnish and distribute the flavor more evenly across the pizzettes.

FAQ

What are Mini Eggplant Pizzettes?

Mini Eggplant Pizzettes are bite-sized appetizers made from slices of eggplant that are topped with pizza sauce, cheese, and various toppings, then baked until tender and delicious.

How do I prepare the eggplant for the pizzettes?

To prepare the eggplant, slice it into rounds about ¼ inch thick, sprinkle with salt, and let it sit for about 30 minutes to draw out excess moisture and bitterness. Rinse and pat dry before using.

Can I use other vegetables instead of eggplant?

Yes, you can substitute eggplant with other vegetables like zucchini, mushrooms, or bell peppers. Just ensure they are cut to a similar thickness for even cooking.

What toppings can I use for Mini Eggplant Pizzettes?

You can use a variety of toppings such as marinara sauce, mozzarella cheese, pepperoni, olives, bell peppers, mushrooms, or fresh herbs like basil and oregano.

How long do I bake the Mini Eggplant Pizzettes?

Bake the Mini Eggplant Pizzettes at 400°F (200°C) for about 15-20 minutes, or until the eggplant is tender and the cheese is bubbly and golden.

Are Mini Eggplant Pizzettes gluten-free?

Yes, Mini Eggplant Pizzettes can be gluten-free, provided you use gluten-free pizza sauce and cheese. Double-check all ingredients to ensure they’re certified gluten-free.

Can I make Mini Eggplant Pizzettes ahead of time?

Yes, you can prepare the eggplant, add the toppings, and assemble the pizzettes ahead of time. Store them in the refrigerator and bake them just before serving.

What is the best way to serve Mini Eggplant Pizzettes?

Serve Mini Eggplant Pizzettes warm as an appetizer or snack. They pair well with marinara sauce for dipping, fresh herbs as garnish, or a side salad for a complete meal.

Introduction: A Burst of Flavor in Every Bite

Welcome to a culinary delight that combines simplicity with elegance – the Lemon Herb Ricotta Crostini. Imagine biting into a crispy slice of baguette, perfectly toasted to a golden brown. As you take that first crunchy bite, your taste buds are met with the creamy smoothness of freshly whipped ricotta cheese, elevated by the bright, zesty notes of lemon zest and the fragrant aroma of fresh herbs. This dish is more than just a starter; it sets the stage for memorable gatherings and cozy dinners alike, offering a delightful balance of flavors and textures that will have your guests raving and your family asking for more.

The Story Behind the Dish

The humble crostini finds its roots in Italian cuisine, where it has been cherished for centuries as an appetizer that showcases the art of using simple, high-quality ingredients to create something truly special. The word “crostini” translates to “little crusts,” and in Italy, these savory bites are traditionally served as a precursor to a meal, often paired with wine. This Lemon Herb Ricotta version draws inspiration from Italy’s emphasis on fresh, seasonal ingredients, elevating the classic to new heights with the addition of lemon zest and aromatic herbs.

Ricotta cheese, at the heart of our crostini, has a rich history in Italian cuisine. It’s known for its light, delicate texture and creamy consistency, making it an ideal canvas for various flavors. The addition of lemon brings in a Mediterranean twist, while herbs like basil, thyme, or rosemary infuse the dish with earthy undertones, reminiscent of Italian countryside gardens.

Why You’ll Love This Recipe

  • Quick and Easy: This recipe is perfect for those who want an elegant appetizer without spending hours in the kitchen. With minimal prep and cook time, it’s a quick fix for unexpected guests.
  • Versatile and Customizable: Whether you’re a staunch vegetarian or a flavor enthusiast, this crostini can be customized to suit your taste preferences. Add more lemon for zestiness or extra herbs for a stronger aroma.
  • Aesthetically Pleasing: Not only is it delicious, but these crostini also make for a stunning addition to your table, perfect for Instagram-worthy pictures that will make your friends envious.
  • Kid-Friendly: The creamy ricotta and the mild tang of lemon make it palatable for children, ensuring a hit with even the pickiest eaters.

Flavor Profile & Texture

The flavor journey of Lemon Herb Ricotta Crostini is a symphony for the senses. The initial crunch from the toasted bread quickly gives way to the creamy, smooth texture of whipped ricotta. The cheese itself is mildly sweet and nutty, and when combined with a sprinkle of lemon zest, it gains a refreshing, tangy brightness that cuts through the creaminess.

The herbs provide a robust background, adding depth with each bite. Basil offers a sweet, peppery essence, while thyme presents a subtle, minty undertone. The resulting blend is both harmonious and multi-dimensional, ensuring that every bite is as satisfying as the last.

Occasions & Pairings

When to Serve

This crostini is incredibly versatile and can be enjoyed on various occasions. Serve it as an appetizer for a dinner party to impress your guests with its elegance, or bring it out as a refreshing snack during a summer picnic. It’s also an ideal accompaniment to a brunch spread, pairing beautifully with mimosas and fresh fruit.

Perfect Pairings

  • Wines: Pair with a crisp, chilled Prosecco or a light Sauvignon Blanc to complement the citrus and herb notes.
  • Salads: Serve alongside a simple arugula and cherry tomato salad drizzled with olive oil.
  • Soups: Try with a warm bowl of tomato basil soup for a comforting yet sophisticated meal.

Tips, Variations & Substitutions

One of the beautiful aspects of this dish is its adaptability. Here are some ideas to make it your own:

  • Add a Protein Boost: Top with prosciutto for a savory twist, or a poached egg for a more substantial meal.
  • Experiment with Cheese: Substitute the ricotta with goat cheese for a tangier flavor or mascarpone for a richer texture.
  • Herb Variations: Play with different herbs like dill or chives to find your perfect blend.
  • Dietary Adjustments: Make it vegan by using a plant-based ricotta and egg-free baguette.

Storage & Make-Ahead Ideas

If you find yourself with leftovers, don’t worry; these crostini are just as delightful the next day. Store the toasted baguette separately from the ricotta mixture to keep it from becoming soggy.

  • Refrigeration: Keep the ricotta mixture in an airtight container for up to 3 days in the fridge.
  • Freezing: While it’s not recommended to freeze the assembled crostini, the ricotta mixture can be frozen for up to one month. Thaw and whip it again to restore its creamy texture before serving.
  • Make-Ahead Strategy: Prepare the ricotta blend a day in advance and store it in the fridge. Toast the bread just before serving and assemble quickly.

Fun Facts & Trivia

Did you know that ricotta cheese is technically not a cheese? It’s a byproduct of the cheese-making process, specifically derived from the whey that’s left behind. This makes it a low-fat option compared to many other cheeses, aligning with Italian culinary principles of using every part of the ingredient without wastage.

The tradition of crostini, along with its cousin the bruschetta, is believed to date back to ancient Roman times when olive growers would bring their olives to a local press and taste the freshly pressed oil with a piece of bread.

Whether you’re invoking the rustic charm of the Italian countryside or introducing your taste buds to sophisticated flavors, Lemon Herb Ricotta Crostini promises a delectable experience, bite after bite.

Ingredients

  • Bread Base
    • 1 French baguette (sliced)
      → The baguette serves as the foundation for the crostini, providing a crunchy texture that contrasts beautifully with the creamy topping. Choose a fresh baguette for optimal flavor and crispness. Slice it diagonally for larger pieces, ensuring that the slices are not too thick so that they toast evenly.
    • 2 tablespoons olive oil
      → Olive oil adds moisture to the bread and helps achieve a golden, crisp texture while toasting. For the best flavor, use a high-quality extra virgin olive oil. Brush it liberally on both sides of the baguette slices before toasting, and consider adding a pinch of salt and pepper for extra flavor.
  • Ricotta Mixture
    • 1 cup ricotta cheese
      → Ricotta cheese is the creamy base of the crostini, providing richness and a slight sweetness. Use fresh, whole-milk ricotta for the best texture and flavor. Make sure to stir it well to achieve a smooth consistency before spreading it on the toasted bread.
    • 2 tablespoons lemon juice
      → Fresh lemon juice brings brightness and acidity to balance the richness of the ricotta. Squeeze the juice just before using to ensure its freshness and potency. For a more intense lemon flavor, consider using the zest as well.
    • 1 tablespoon lemon zest
      → Lemon zest intensifies the lemon flavor without adding extra moisture, enhancing the overall brightness of the dish. Use a microplane to finely grate the zest, being careful to only capture the yellow part of the peel and avoid the bitter white pith.
    • 2 tablespoons fresh herbs (such as basil, chives, or tarragon)
      → Fresh herbs add complexity and freshness to the ricotta mixture. Chop them finely to release their essential oils and distribute their flavor evenly throughout the cheese. Choose herbs that complement lemon, and feel free to mix them for a lively flavor profile.
    • Salt and pepper to taste
      → Salt enhances the flavors of the dish, while freshly cracked pepper adds a hint of heat. Season the ricotta mixture gradually, tasting as you go to find the perfect balance. Be cautious with the salt, as the bread base may also have saltiness.
  • Toppings
    • Extra lemon zest for garnish
      → A sprinkle of extra lemon zest on top of the assembled crostini adds visual appeal and a burst of citrus aroma. This garnish should be applied just before serving to maintain its fresh brightness and prevent it from drying out.
    • Additional fresh herbs for garnish
      → A few extra finely chopped herbs can be sprinkled over the crostini for added color and flavor. This not only enhances the presentation but also emphasizes the herbaceous elements of the dish.

Instructions

  • Preheat your oven to 400°F (200°C) and prepare a baking sheet by lining it with parchment paper.

    → Preheating the oven allows the crostini to toast evenly and achieve that desired crispy texture. Lining the baking sheet with parchment paper ensures easy cleanup and prevents the bread from sticking.
  • Slice the French baguette diagonally into ½-inch thick pieces.

    → Diagonal slices provide a larger surface area which is ideal for spreading the ricotta mixture. Aim for even thickness to ensure all slices toast uniformly, preventing some from becoming overly toasted while others remain soft.
  • Brush both sides of each sliced baguette piece with olive oil.

    → Brushing olive oil on both sides creates a barrier that promotes even browning and crispness when toasting. Use a pastry brush for an even application, and consider sprinkling a small pinch of salt and pepper on top to enhance flavor.
  • Arrange the baguette slices in a single layer on the prepared baking sheet.

    → Arranging the slices in a single layer ensures that each piece receives direct heat for even toasting. Overcrowding the pan can lead to steaming instead of toasting, which affects the final texture.
  • Bake the bread slices in the preheated oven for 10-12 minutes, flipping them halfway through.

    → Baking the slices until they are golden brown and crisp on both sides develops a rich flavor and a satisfying crunch. Flipping them halfway ensures that both sides toast equally and prevents burning.
  • While the bread is toasting, prepare the ricotta mixture by placing 1 cup of ricotta cheese in a mixing bowl.

    → Using fresh, whole-milk ricotta will provide a creamy texture. Ensure that the ricotta is at room temperature for easier mixing, as cold cheese can be difficult to blend smoothly.
  • Add 2 tablespoons of fresh lemon juice to the ricotta cheese.

    → Adding lemon juice brightens the flavor of the ricotta and helps balance the richness. Use freshly squeezed lemon juice for optimal zing, and mix thoroughly after adding to fully incorporate.
  • Grate 1 tablespoon of lemon zest using a microplane and mix it into the ricotta.

    → Grating the zest finely ensures that its oils and flavor are evenly distributed into the ricotta. Be careful to only zest the yellow part of the lemon to avoid the bitter pith, which can detract from the dish.
  • Finely chop 2 tablespoons of fresh herbs of your choice and fold them into the ricotta mixture.

    → Using fresh herbs such as basil, chives, or tarragon enhances the overall freshness of the dish. Finely chop the herbs to maximize flavor release, then gently fold them into the ricotta to combine without deflating it.
  • Season the ricotta mixture with salt and pepper to taste, adjusting as necessary.

    → Seasoning is crucial for enhancing the flavors of the ricotta. Start with a small pinch of salt and a turn of freshly cracked pepper, then taste and adjust accordingly; be mindful that the bread may add some saltiness as well.
  • Once the crostini are toasted, remove them from the oven and allow them to cool slightly on a wire rack.

    → Cooling on a wire rack prevents steaming from occurring on the bottom of the toasted bread, which could make it soggy. Allow them to cool just enough to handle comfortably.
  • Spoon a generous amount of the ricotta mixture onto each toasted baguette slice.

    → A generous topping ensures that every bite is flavorful and satisfying. Use the back of the spoon to spread the ricotta evenly, allowing it to mound slightly for a rustic presentation.
  • Sprinkle extra lemon zest and finely chopped fresh herbs over the assembled crostini for garnish.

    → Adding lemon zest and herbs at this stage enhances the visual appeal and adds a fresh aroma. This not only makes the dish look inviting but also boosts the overall flavor right before serving.
  • Serve the lemon herb ricotta crostini immediately while still slightly warm.

    → Serving the crostini warm provides a delightful contrast to the creaminess of the ricotta. Enjoying them immediately also allows guests to experience the full flavor and texture before the crostini become soft.

Notes

These Lemon Herb Ricotta Crostini are a delightful and refreshing appetizer or snack, perfect for any gathering. The combination of creamy ricotta and bright lemon flavor, paired with the crunch of toasted baguette, creates a satisfying contrast. For best results, ensure that your baguette is fresh, as this will enhance both texture and flavor. When toasting the bread, consider keeping a close eye on it to achieve that perfect golden brown without burning.

Feel free to experiment with the herbs in the ricotta mixture; basil, chives, or tarragon each bring their unique flavor and aroma that pairs wonderfully with the dish. For added depth, consider adding toppings like sliced cherry tomatoes or a drizzle of balsamic glaze, which can further enhance the overall presentation and taste.

These crostini can be served immediately after assembling or set out as a make-your-own station with all components presented separately. If preparing in advance, it’s best to toast the baguette and store them in an airtight container until you are ready to spread the ricotta mixture and garnish just before serving. This approach ensures that the bread remains crisp and the flavors are fresh. Enjoy pairing these with a chilled white wine or light cocktail for an elevated experience.

Always remember to taste as you go, adjusting the seasoning of the ricotta to suit your preference and the specific freshness of your ingredients. This dish is not only visually appealing but also allows for a balance of flavors that can cater to a variety of palates.

Tips

Tips for Preparing Lemon Herb Ricotta Crostini

  • Choosing the Right Bread: Select a baguette that is fresh and crusty. If you can’t find a French baguette, ciabatta or sourdough can be great alternatives. Ensure that the bread slices are uniform in thickness to promote even toasting.
  • Perfectly Toasting the Bread: Preheat your oven to 400°F (200°C) for optimal crisping. Arrange the baguette slices on a baking sheet and brush each side generously with olive oil. Toast them for about 5-7 minutes or until golden brown, flipping halfway through for an even texture.
  • Making the Ricotta Mixture: For a smoother texture, strain the ricotta through a fine mesh sieve before mixing. This helps remove excess moisture and results in a better spread. Combine lemon juice, zest, and herbs in a bowl with the ricotta, mixing gently to preserve its creamy texture.
  • Flavor Balancing: Adjust the acidity and saltiness in the ricotta mixture gradually. Add lemon juice and zest first, then taste before adding salt and pepper. This allows you to achieve the desired zing without overwhelming the dish.
  • Herb Variations: While basil, chives, and tarragon are excellent choices, consider experimenting with other herbs like dill or parsley for unique flavor profiles. Keep in mind the balance of flavors with the lemon to ensure a harmonious dish.
  • Assembly and Presentation: Spread the ricotta mixture generously on the toasted baguette slices just before serving to prevent the bread from becoming soggy. Use the back of a spoon to create a little swirl for a rustic appearance.
  • Serving Suggestions: Pair with a crisp white wine like Sauvignon Blanc or a refreshing sparkling water infused with citrus to complement the flavors. Consider serving alongside a light salad or vegetable crudités for a complete appetizer spread.

FAQ

What ingredients do I need for Lemon Herb Ricotta Crostini?

You will need fresh ricotta cheese, a mixture of herbs (such as basil, parsley, or chives), lemon juice and zest, olive oil, salt, pepper, and baguette or your choice of bread for the crostini.

How do I prepare the crostini?

To prepare the crostini, slice the baguette into 1/2-inch slices, brush them lightly with olive oil, and bake at 400°F (200°C) for about 8-10 minutes until they are golden and crispy.

Can I use store-bought ricotta cheese?

Yes, you can use store-bought ricotta cheese for convenience, but for the best taste, consider using fresh ricotta if available.

What herbs can I use in this recipe?

You can use any fresh herbs you like! Common choices include basil, parsley, chives, and dill. Feel free to mix and match according to your preference.

How long can I store leftovers?

The prepared crostini is best eaten fresh. However, if you have leftover ricotta spread, it can be stored in an airtight container in the fridge for up to 3 days.

Can I make this recipe ahead of time?

Yes, you can prepare the ricotta mixture ahead of time and store it in the refrigerator. However, it’s best to toast the crostini just before serving for the best texture.

What can I serve with Lemon Herb Ricotta Crostini?

This appetizer pairs well with a variety of toppings, such as sliced tomatoes, roasted peppers, or cured meats, and it is excellent alongside a fresh salad or as part of a charcuterie board.

Is this recipe suitable for gluten-free diets?

To make this recipe gluten-free, simply use gluten-free bread or crackers for the crostini. The ricotta and herb mixture is naturally gluten-free.