Author

Ocean Nightleaf

Browsing

Introduction: The Allure of Soft Baked Chocolate Cookies

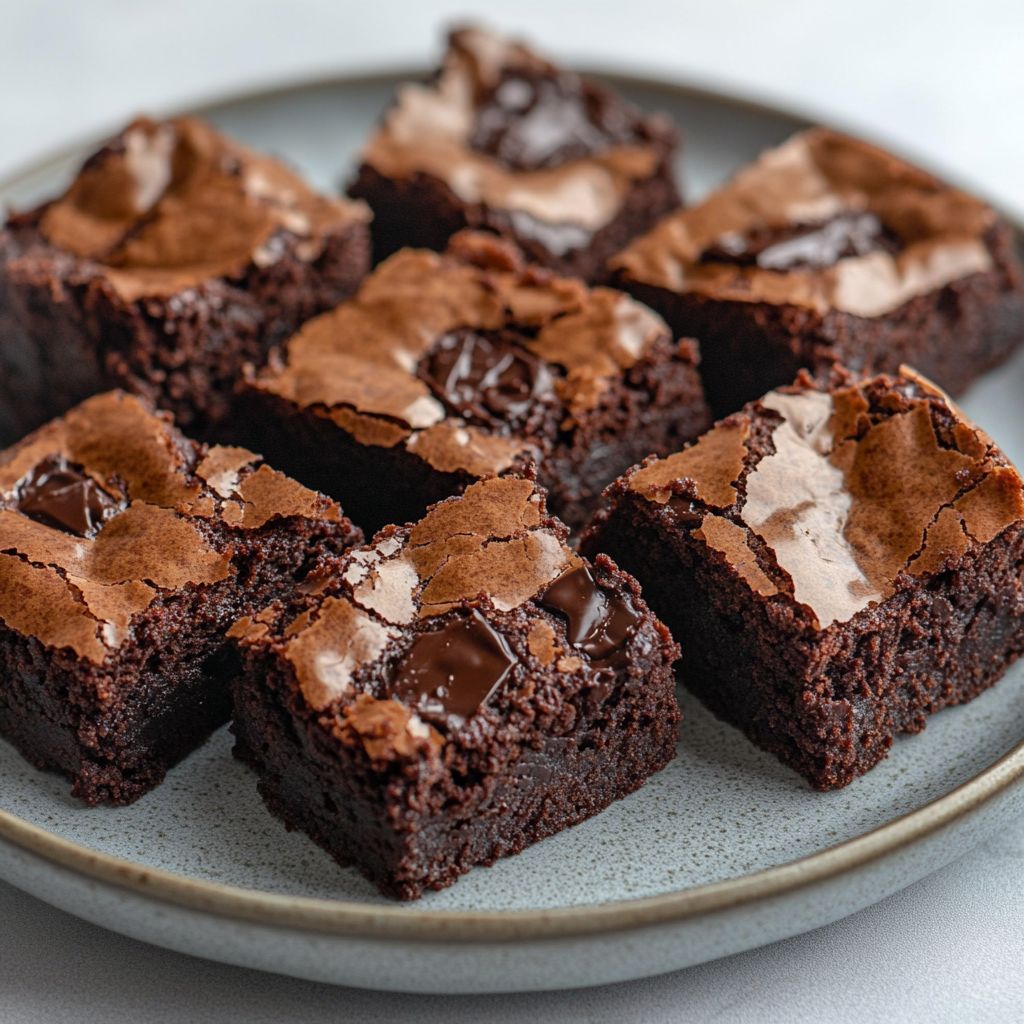
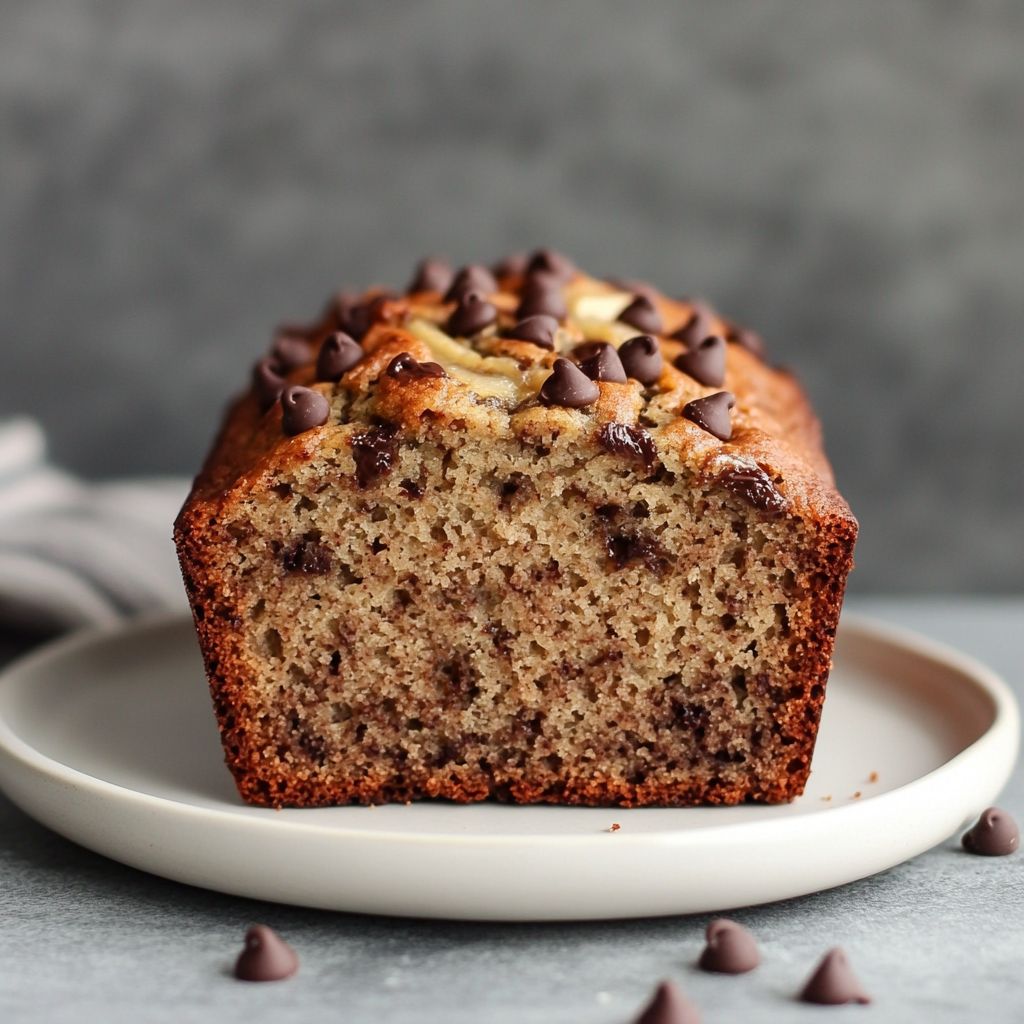
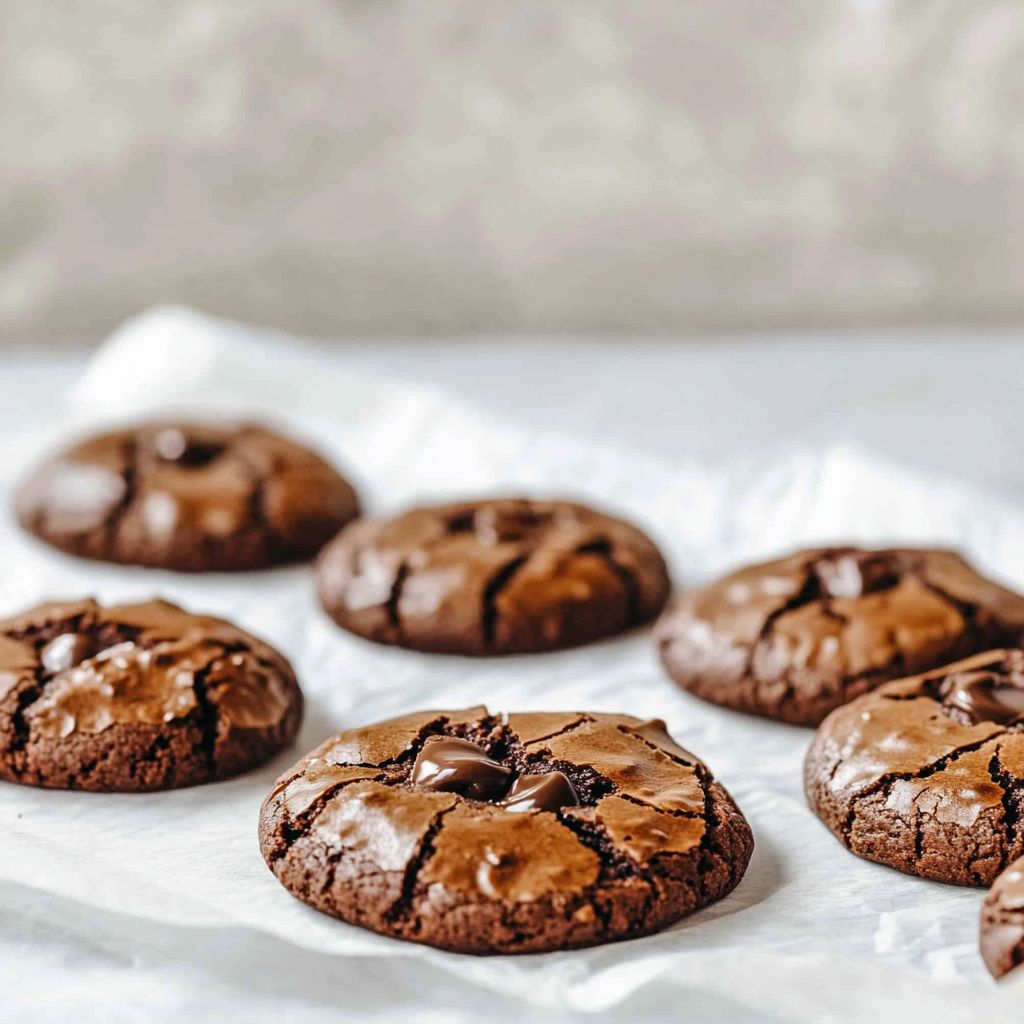
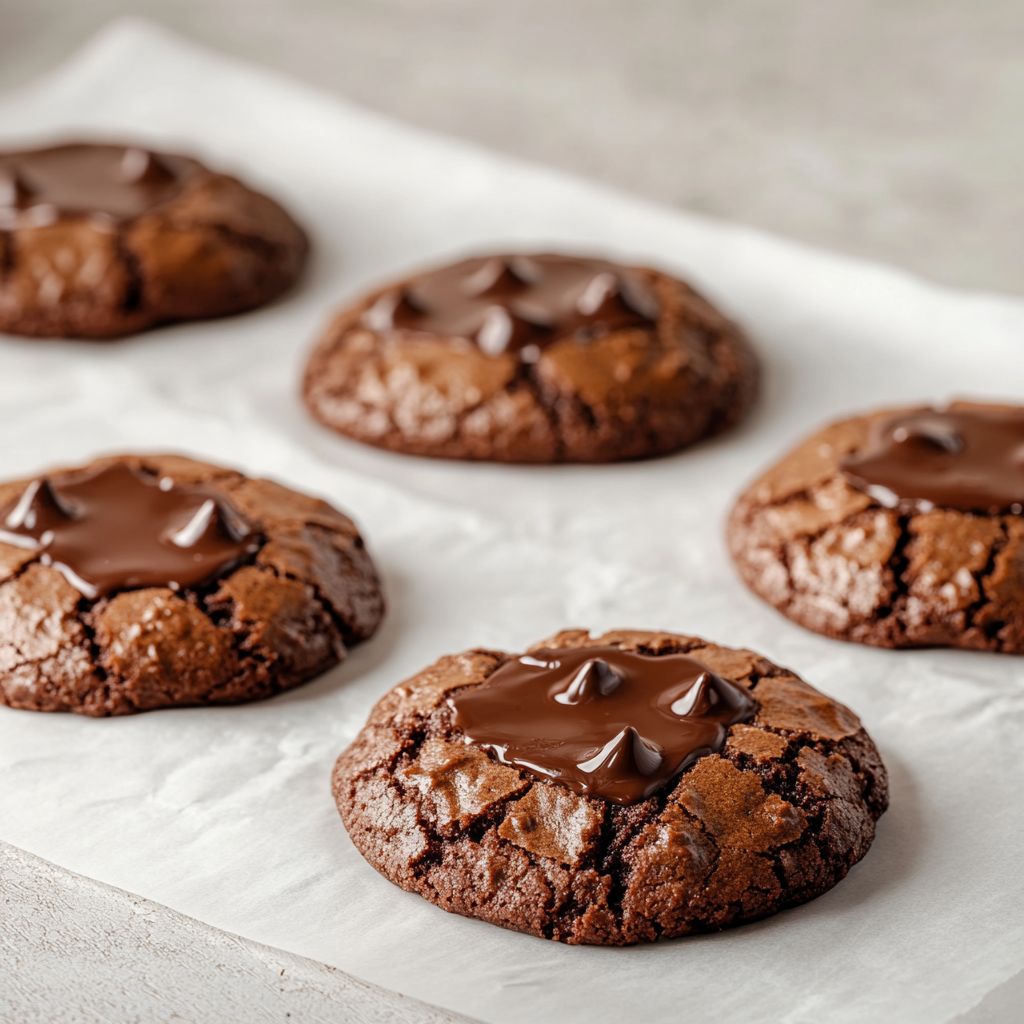
Imagine biting into a warm, fresh-out-of-the-oven chocolate cookie, its soft texture yielding with the slightest resistance to reveal glistening pockets of molten chocolate. The aroma alone is like an embrace, filling the kitchen with the comforting perfume of cocoa and vanilla. Soft Baked Chocolate Cookies bring a sensory delight that transcends simple indulgence — they are a nostalgic retreat, reminiscent of childhood days and cozy, lazy afternoons. This recipe promises not only to satisfy your chocolate cravings but also to create moments worth cherishing.

The Story Behind the Dish

The journey of the humble chocolate cookie began in the United States during the 1930s when Ruth Wakefield accidentally invented what is now a global sensation. At her Toll House Inn in Massachusetts, she stumbled upon this culinary marvel by adding broken pieces of semi-sweet chocolate to her cookie dough, unaware that they would retain their shape after baking. This serendipitous discovery led to the creation of the original chocolate chip cookie, forever changing the dessert landscape.

Over the decades, bakers and home cooks have put their own twist on this classic, experimenting with thickness, texture, and add-ins to suit personal preferences. The Soft Baked Chocolate Cookie is a variation that emerged to meet the desire for a chewier, softer bite—perfect for those who appreciate a texture that closely mimics that of cookie dough with the satisfying warmth of a baked treat.

Why You’ll Love This Recipe

  • Quick and Easy: These cookies are simple to make, requiring just a few basic ingredients you likely already have in your pantry.
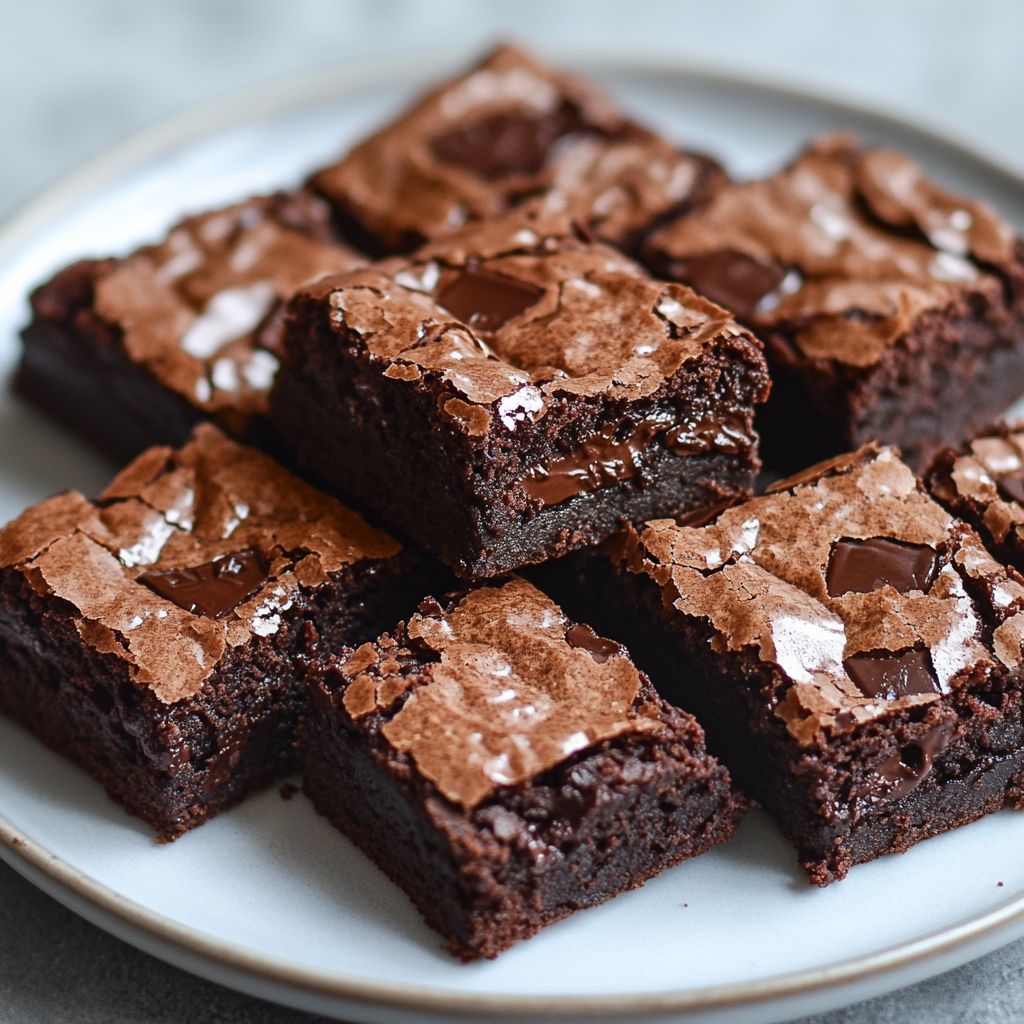
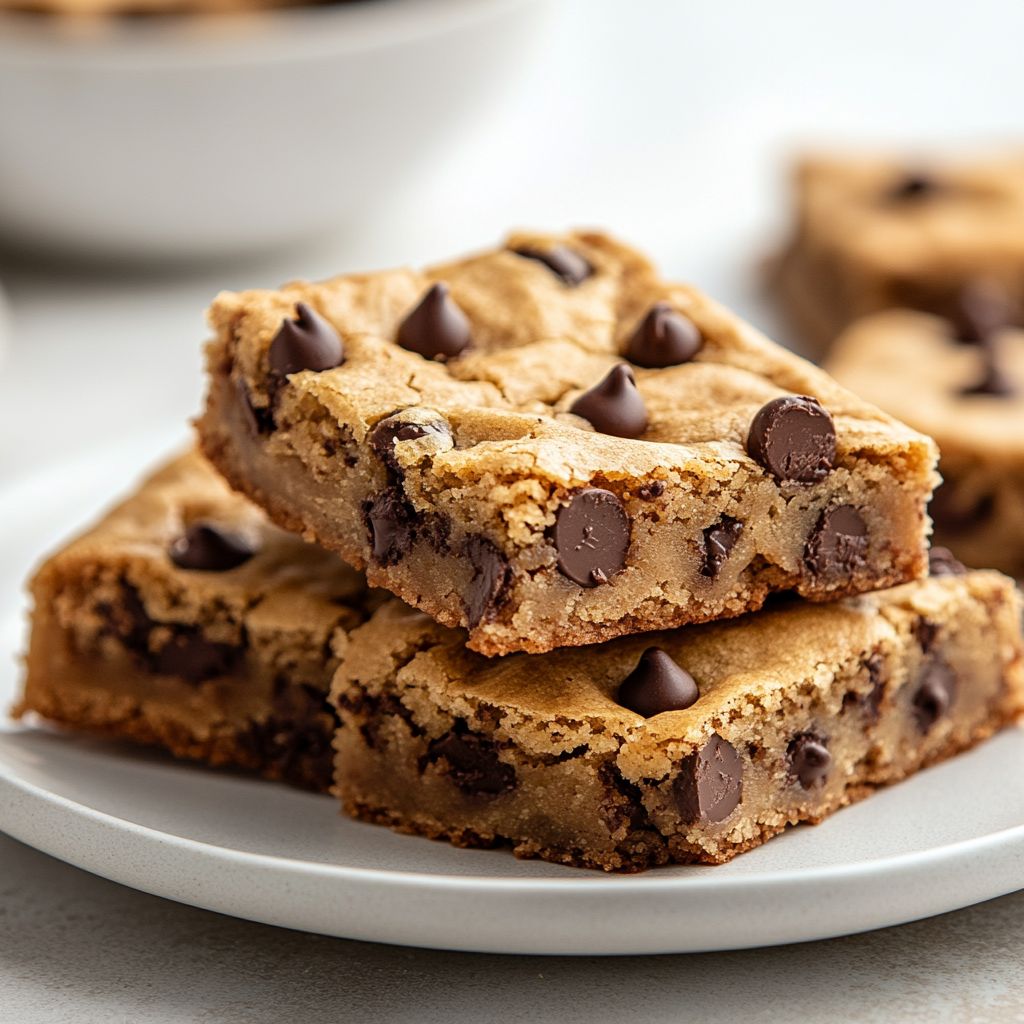
  • Chewy Inside, Slightly Crisp Outside: The perfect combination of textures makes each bite irresistible.
  • Versatile: You can adapt the recipe with nuts, dried fruits, or different chocolates to suit various tastes.
  • Kid-Friendly: A fun activity for children to join in, from mixing the dough to scooping it onto the baking sheet.
  • Comfort Food at Its Best: Perfect for any comforting gathering, whether you need a pick-me-up on a dreary day or a celebratory treat for a special occasion.

Flavor Profile & Texture

The beauty of a Soft Baked Chocolate Cookie lies in its uncomplicated yet profoundly satisfying flavor profile. The dominant taste is, of course, chocolate — intense and rich, offering a deep, almost bittersweet pleasure. To balance this is the cookie’s sweetness, a soft and comforting note that enhances rather than overwhelms the cocoa flavors. Subtle hints of vanilla and a pinch of salt act as undercurrents, adding complexity and depth to each bite.

The texture is equally captivating. These cookies boast a melt-in-your-mouth softness, with a slight chewiness that lingers. The edges, slightly firmer and crispier, provide a contrast that heightens the overall sensory experience, making each mouthful a journey of taste and texture.

Occasions & Pairings

Soft Baked Chocolate Cookies are wonderfully versatile, making them suitable for a myriad of occasions. They are a beloved choice for holiday baking, bringing warmth and nostalgia to any festive table. Equally, they are perfect for casual gatherings, afternoon snack times, or as a delightful finish to a family dinner.

Pair these cookies with a tall glass of cold milk for the traditionalist, or venture into pairing them with a robust cup of coffee or a creamy hot chocolate for extra decadence. For an adult twist, serve them alongside a small glass of tawny port or a rich, full-bodied red wine, which complements the chocolate beautifully.

Tips, Variations & Substitutions

Customize your cookies to suit different dietary requirements or flavor preferences. Here are some suggestions:

  • Gluten-Free: Substitute regular flour with a 1:1 gluten-free baking blend to maintain the same soft texture.
  • Vegan: Use a flax egg in place of a regular egg and substitute butter with a vegan margarine or coconut oil.
  • Extra Indulgent: Enhance the richness by folding in chunks of dark or milk chocolate along with semi-sweet chips.
  • Nutty Variations: Add chopped walnuts or pecans for a crunchy contrast in texture.
  • Spice It Up: For an unexpected twist, incorporate a teaspoon of cinnamon or a dash of cayenne pepper to the batter.

Storage & Make-Ahead Ideas

These cookies are just as delightful when enjoyed fresh as they are when savored a day or two after baking. To keep them soft and chewy, store them in an airtight container at room temperature for up to a week. For longer storage, you can freeze the cookie dough balls on a baking sheet until solid, then transfer them to a freezer-safe bag. This way, you can bake a fresh batch whenever the craving strikes — simply add a few extra minutes to the baking time.

If you’re hosting a party or preparing for a busy week, consider making the dough ahead of time. It can be refrigerated for up to three days, allowing you to pop them in the oven moments before serving for a truly indulgent, fresh-baked experience.

Fun Facts & Trivia

Did you know the chocolate chip cookie became the official state cookie of Massachusetts in 1997? This recognition underscores its status as a beloved American treat. Furthermore, cookie lovers across the globe celebrate National Chocolate Chip Cookie Day on August 4th, a testament to its universal appeal.

In conclusion, Soft Baked Chocolate Cookies are more than just a dessert; they are a tradition, a celebration, and a versatile canvas for culinary expression. Whether you’re baking them to savor solo or to share with friends, each cookie invites comfort, joy, and connection in every soft, chocolatey bite.

Ingredients

  • Cookie Base
    • 1 cup unsalted butter (softened)
      → Softened butter is crucial as it aids in creating a creamy texture when beaten with sugars. Ensure the butter is at room temperature for optimal incorporation, allowing the cookies to achieve a soft, tender crumb. For best results, leave it out for about an hour before starting the recipe.
    • 1 cup granulated sugar
      → Granulated sugar not only sweetens the cookies but also contributes to their chewy texture by creating a crisp outer layer when baked. Make sure to measure it accurately to balance the sweetness and texture properly.
    • 1 cup packed brown sugar
      → The molasses content in brown sugar adds moisture and a rich caramel flavor, enhancing the overall taste of the cookies. Use light or dark brown sugar depending on your preference, but ensure it’s packed tightly in the measuring cup for correct measurement.
    • 2 large eggs
      → Eggs act as binders, helping to hold all the ingredients together. It’s vital to use large eggs at room temperature to ensure they emulsify properly with the butter and sugars, resulting in a smooth and consistent batter.
    • 1 teaspoon pure vanilla extract
      → Pure vanilla extract enhances the flavor profile of the cookies and adds depth. Avoid imitation vanilla; it lacks the complexity of pure extract. Add it with the wet ingredients for even distribution throughout the dough.
    • 2 cups all-purpose flour
      → All-purpose flour provides structure to the cookies. For soft cookies, ensure you measure it correctly by scooping and leveling off instead of packing it in. Too much flour can lead to dry cookies, so consider using the spoon and sweep method for accuracy.
    • 1/2 cup unsweetened cocoa powder
      → Cocoa powder gives the cookies their rich chocolate flavor and dark color. Choose a high-quality cocoa powder for better taste. Sift it before adding to the flour to prevent clumps and ensure an even distribution in the dough.
    • 1 teaspoon baking soda
      → Baking soda is a leavening agent that helps the cookies rise and become soft. Make sure it’s fresh for best results, and mix it thoroughly into the dry ingredients to prevent uneven rising during baking.
    • 1/2 teaspoon salt
      → Salt enhances the flavors and balances the sweetness of the cookies. It’s best to use fine sea salt to ensure even distribution throughout the dough. It’s an essential ingredient for elevating the overall taste.
  • Mix-Ins
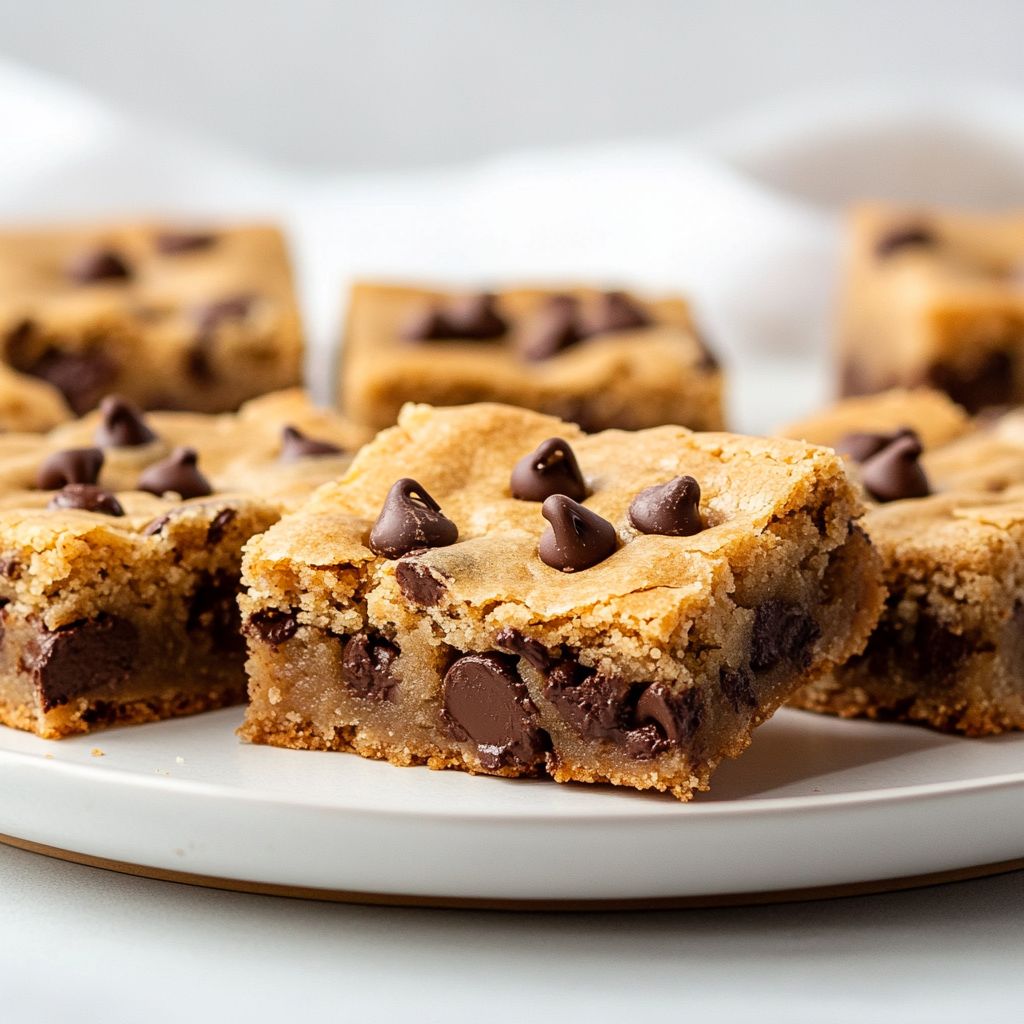
    • 1 cup chocolate chips (semi-sweet or dark)
      → Chocolate chips are the star ingredient, offering gooey pockets of chocolate in every bite. For a richer flavor, opt for dark chocolate chips. You can also reserve a handful to sprinkle on top before baking for an appealing presentation.
    • 1/2 cup chopped nuts (optional)
      → Chopped nuts like walnuts or pecans can add a delightful crunch and nutty flavor to your cookies. Toast them lightly before chopping to enhance their flavor. Be sure to chop them evenly to distribute them throughout the dough.

Instructions

  • Gather all your ingredients and weigh them accurately before starting the preparation.

    → This ensures you have everything you need at hand, minimizing the risk of missing components during the mixing process and ensuring consistent results.
  • Preheat your oven to 350°F (175°C) and line a baking sheet with parchment paper.

    → Preheating the oven allows the cookies to bake evenly, and using parchment paper prevents sticking, making for easier cleanup and preventing the cookies from becoming too dark on the bottom.
  • In a large mixing bowl, cream the softened butter with granulated sugar and brown sugar using an electric mixer on medium speed until the mixture is light and fluffy, about 3-5 minutes.

    → Creaming incorporates air into the butter and sugars, creating a light texture in the cookies. Ensure there are no lumps of butter remaining, as these can create uneven baking.
  • Add the two large eggs, one at a time, mixing on low speed until fully integrated, then mix in the teaspoon of pure vanilla extract.

    → Adding eggs one at a time allows for better emulsification, leading to a smoother and more cohesive batter. Mixing in the vanilla at this stage evenly distributes its flavor throughout the dough.
  • In a separate bowl, sift together the 2 cups of all-purpose flour, 1/2 cup of unsweetened cocoa powder, 1 teaspoon of baking soda, and 1/2 teaspoon of salt.

    → Sifting helps break up any clumps in the cocoa powder and flour, ensuring a smooth, even cookie dough without pockets of dry ingredients. Additionally, it aerates the flour for a lighter texture.
  • Gradually add the dry mixture to the wet mixture, mixing on low speed until just combined and no dry flour remains visible.

    → Avoid overmixing at this stage to prevent developing gluten, which can lead to tough cookies. Stop mixing as soon as you don’t see any flour; a few lumps are okay.
  • Fold in the 1 cup of chocolate chips and, if using, 1/2 cup of chopped nuts, using a spatula or wooden spoon to incorporate them evenly throughout the dough.

    → Folding gently helps maintain the airy structure of the dough while ensuring the chocolate chips and nuts are evenly distributed, leading to delightful bursts of flavor in each cookie.
  • Using a cookie scoop or tablespoon, portion the dough onto the prepared baking sheet, spacing them about 2 inches apart to allow for spreading.

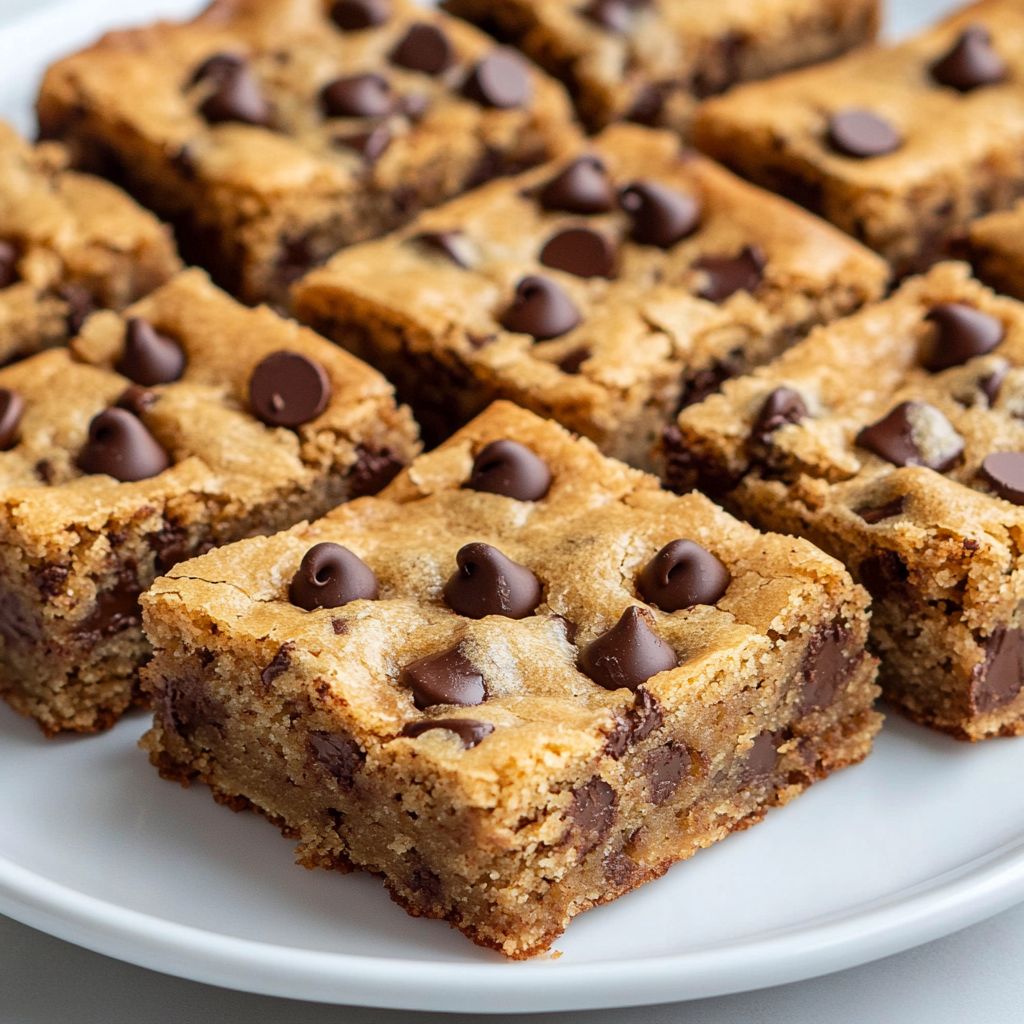
    → This ensures even baking and prevents the cookies from merging into one another. If you desire larger cookies, adjust the portion size accordingly, but remember to increase baking time slightly.
  • Sprinkle any reserved chocolate chips on top of the cookie dough before baking for a visually appealing presentation.

    → This step not only enhances the look of the cookies but also ensures that there are plenty of chocolate morsels visible on top, inviting and tempting to anyone who sees them.
  • Bake the cookies in the preheated oven for 10-12 minutes, or until the edges are set and the tops look slightly puffed and soft.

    → The cookies will continue to cook as they cool on the baking sheet, so it’s important to underbake slightly for that soft, chewy texture desired. A toothpick inserted into the center should have a few moist crumbs attached but not be wet with batter.
  • Remove the baking sheet from the oven and let the cookies cool on the sheet for 5 minutes before transferring them to a wire rack to cool completely.

    → Cooling initially on the baking sheet allows them to set and makes handling them easier without breaking. Transferring to a wire rack allows air to circulate around the cookies, preventing them from becoming soggy.
  • Store the cooled cookies in an airtight container at room temperature for up to a week, or freeze them for longer storage.

    → Keeping them in an airtight container prevents them from drying out and maintains their optimal texture. Freezing allows you to enjoy freshly baked cookies at a later date; simply thaw them at room temperature or reheat in the microwave for a few seconds.

Notes

These soft baked chocolate cookies are a delightful treat that can be enjoyed any time of the day. The combination of granulated and brown sugars gives these cookies a balanced sweetness and a chewy texture that is incredibly satisfying. Using softened butter is key to achieving a creamy and tender dough that bakes beautifully. Make sure to allow your eggs to reach room temperature as well; this helps with the emulsification process, ensuring a uniform batter.

The richness of cocoa powder is what truly defines these cookies, providing an intense chocolate flavor. Be mindful of how you measure your flour; too much can lead to a dry cookie. Mixing your dry ingredients thoroughly helps to ensure a consistent texture throughout the batch. For those who crave extra chocolate, the addition of semi-sweet or dark chocolate chips creates gooey pockets that complement the cookie perfectly.

For added texture and flavor, consider mixing in chopped nuts, which not only enhance the crunch but also provide a wonderful contrast to the softness of the cookie. If you like, reserve some chocolate chips to add on top before baking for an appealing finish.

These cookies can be stored in an airtight container for several days, although they may not last long due to their deliciousness! For longer storage, you can freeze the baked cookies. Enjoy them warm from the oven with a glass of milk for a classic pairing or as a sweet snack any time of the day.

Tips

  • Temperature and Storage Tips
    • Preheat your oven: Always preheat your oven to ensure even baking. Set it to the temperature specified in the recipe before placing your cookie dough in, which helps achieve that perfect rise and soft texture.
    • Chill the dough: For thicker cookies, consider chilling the dough for at least 30 minutes before baking. This helps the cookies maintain their shape and prevents them from spreading too much in the oven.
    • Cooling the cookies: Allow the cookies to cool on the baking sheet for a few minutes before transferring them to a wire rack. This prevents them from breaking and allows them to firm up slightly, enhancing their texture.
    • Storage: Store leftover cookies in an airtight container at room temperature for up to a week. For longer storage, you can freeze the cookies or the unbaked dough for up to three months. Just make sure to wrap them tightly to avoid freezer burn.
  • Baking Techniques
    • Baking in batches: If you’re baking multiple trays of cookies, rotate them halfway through baking. This ensures that every cookie gets equal heat exposure, leading to a consistent bake.
    • Use parchment paper: Line your baking sheets with parchment paper or silicone mats. This helps prevent sticking and makes cleanup a breeze, while also promoting even baking.
    • Test for doneness: Cookies will continue to firm up as they cool. Look for the edges to be set and the centers to look slightly underbaked before taking them out of the oven for that perfect soft texture.
  • Customization Ideas
    • Flavor variations: Experiment with different types of extracts, such as almond or peppermint, to change up the flavor profile of your cookies. Just a few drops can make a big difference!
    • Different mix-ins: Get creative with your mix-ins! Consider adding toffee bits, dried fruit, or white chocolate for a unique twist on the classic chocolate cookie.

FAQ

What ingredients are needed to make soft baked chocolate cookies?

To make soft baked chocolate cookies, you will need all-purpose flour, cocoa powder, baking soda, salt, unsalted butter, granulated sugar, brown sugar, vanilla extract, eggs, and chocolate chips.

How do I ensure my chocolate cookies remain soft after baking?

To keep your cookies soft, be careful not to overbake them. Remove them from the oven when the edges are set but the centers look slightly underbaked. They will continue to cook on the baking sheet as they cool.

Can I substitute the all-purpose flour with gluten-free flour?

Yes, you can use a gluten-free all-purpose flour blend as a substitute for regular all-purpose flour. Make sure it contains xanthan gum or add it separately for the best texture.

What type of chocolate chips should I use for the cookies?

You can use semi-sweet chocolate chips for a classic flavor, but feel free to experiment with dark chocolate, milk chocolate, or even white chocolate chips according to your preference.

How long should I chill the cookie dough before baking?

Chilling the cookie dough for at least 30 minutes helps to enhance the flavors and prevents the cookies from spreading too much during baking.

How can I store leftover cookies to maintain their softness?

Store the cookies in an airtight container at room temperature. To retain their softness, you can also add a slice of bread to the container, as it helps to keep the cookies moist.

Can I freeze the cookie dough for later use?

Yes, you can freeze the cookie dough! Scoop the dough into balls, place them on a baking sheet to freeze, then transfer to a freezer bag once solid. They can be baked directly from frozen—just add a couple of extra minutes to the baking time.

How do I know when the cookies are done baking?

Your cookies are done when the edges are firm and the center looks slightly glossy. They should still look a little underbaked, as they’ll continue to set while cooling.

Introduction to Pure Indulgence: Baked Chocolate Croissants

Imagine the enchanting aroma of melted chocolate mingling with the enticing scent of freshly baked buttery pastry, wafting through your kitchen. That’s the irresistible allure of Baked Chocolate Croissants, a concoction that combines the soul-soothing richness of dark chocolate with the unparalleled flakiness of golden-brown croissant pastry. These delectable treats promise to transport you straight to a Parisian boulangerie, where culinary art meets the heavenly realm of chocolate bliss. Whether you’re a seasoned baker or a passionate novice, the joy of crafting and savoring these homemade delights is an experience like no other. Get ready to indulge your senses, satisfy your cravings, and create something truly memorable with these exquisite Baked Chocolate Croissants.

The Story Behind the Dish

The birth of chocolate croissants, or “pains au chocolat” as they’re affectionately known in France, can be traced back to the 19th century. This classic pastry has deep roots in the rich tapestry of French culinary arts, known for its elegant simplicity and decadent tastes. The croissant itself, with its layered buttery profile, became a breakfast staple across Europe as the art of baking perfected it over centuries. When dark chocolate found its luxurious way into their hearts, a beloved pastry was born, combining the simplicity of baking with the indulgence of fine chocolate. The Baked Chocolate Croissant has since become synonymous with leisurely mornings and cherished family gatherings.

Incorporating chocolate into the croissant was more than just a stroke of genius—it was an evolution of European confectionery traditions that embraced the abundance of cocoa brought in from the New World. Today, this classic remains a symbol of chic, yet it warmly invites innovate spins and personal tweaks, ensuring its place in the modern culinary playbook.

Why You’ll Love This Recipe

  • Effortlessly Elegant: Despite their sophisticated appearance, Baked Chocolate Croissants require minimal ingredients yet deliver maximum satisfaction.
  • Family-Friendly Fun: This recipe is perfect for a weekend baking project with loved ones. Involve the family, and make baking an engaging and rewarding experience.
  • Versatile Delight: Enjoy them for breakfast, as a snack, or as a delightful dessert.
  • Customizable Creations: Though originally featuring dark chocolate, feel free to experiment with a variety of fillings—create a different twist every time you bake.

Flavor Profile & Texture

Baked Chocolate Croissants are a testament to the magical union of diverse yet complementary flavors and textures. The pastry itself is tender yet flaky, with a delicate exterior that gives way to layers of buttery bliss. Inside, the rich, molten chocolate provides a satisfying, indulgent contrast, lending an irresistible depth that matches perfectly with the lightness of the pastry. The contrast between the slightly crispy crust and the tender interior, combined with the creamy chocolate core, creates a sensory experience that’s as joyful to discover as it is to savor.

Occasions & Pairings

Baked Chocolate Croissants make a fabulous addition to any occasion, transforming ordinary moments into treasured memories:

  • Breakfast or Brunch: Start the day with a touch of luxury, pairing your croissants with a steaming cup of coffee or tea.
  • Celebrations & Gatherings: Make your brunches or tea parties feel extra special with these perfectly baked indulgences.
  • Dessert Course: Serve as a sophisticated dessert, perhaps with a dollop of whipped cream or a scoop of vanilla ice cream.

Tips, Variations & Substitutions

The classic nature of Baked Chocolate Croissants offers the perfect canvas for innovation and personalization. Here are a few ideas to consider:

  • Flavor Variations: Swap the dark chocolate with milk or white chocolate for a milder sweetness. Consider adding a hint of orange zest or a sprinkle of sea salt to enhance the chocolate’s depth.
  • Dietary Alternatives: Use gluten-free pastry dough or dairy-free chocolate to tailor the recipe to dietary needs without compromising on taste.
  • Regional Twists: Incorporate fruit preserves like raspberry or apricot for a fruity twist, or explore nut butters such as almond or hazelnut spread.

Storage & Make-Ahead Ideas

Baked Chocolate Croissants are just as delightful when enjoyed fresh from the oven or saved for later. Here’s how to make the most of leftover pastries:

  • Storing: Keep them in an airtight container at room temperature for up to two days or refrigerate them for longer shelf life.
  • Reheating: For a freshly baked experience, reheat the croissants in an oven preheated to 180°C (350°F) for about 5-10 minutes.
  • Freezing: Prepare the croissants and freeze them unbaked; simply bake from frozen with an additional few minutes in the oven.

With these storage tips, you’ll have delightful Baked Chocolate Croissants ready whenever the craving strikes, making any morning a special occasion.

Fun Facts & Trivia

Did you know that the croissant’s shape is steeped in history? Legend has it that its crescent shape was inspired by the Turkish flags, celebrating the defeat of the Ottoman Empire at the Siege of Vienna in 1683. True or not, the croissant’s iconic shape is timeless and instantly recognizable worldwide.

Another interesting tidbit: the worldwide proliferation of croissants is credited partly to the initiatives of Austrian baker August Zang, who introduced French-style bakeries to Paris in the 1800s. His Viennese bakery offered rich, buttery pastries that quickly became popular, setting the stage for the development of the beautifully layered pastries we enjoy today.

Finally, did you know that in France, regulations govern the specific proportions of ingredients and methods used to make ‘true’ croissants, ensuring consistency in quality and taste? This dedication to authenticity is just another reason why biting into a Baked Chocolate Croissant is a guaranteed irresistible pleasure.

In closing, Baked Chocolate Croissants are more than just a sweet treat; they are a fusion of cultures and history, wrapped up in layers of buttery pastry and luxurious chocolate. Let this recipe be your passport to creating comfort, indulgence, and a taste of French culinary craftsmanship right in your own kitchen.

Ingredients

  • Croissant Dough
    • 4 cups all-purpose flour
      → All-purpose flour provides the structure for the croissant. It should be measured precisely for the best texture. Consider using a kitchen scale for accuracy, and be mindful not to pack the flour into the measuring cup.
    • 1 teaspoon salt
      → Salt enhances the flavor of the dough and strengthens the gluten structure. It can be added directly to the flour before the other ingredients to ensure even distribution. Use fine sea salt for the best results.
    • 1/4 cup granulated sugar
      → Sugar adds sweetness and helps to create a rich flavor in the dough. It can be adjusted based on personal preference and provides a slight fermentation benefit during the dough’s rise.
    • 2 1/4 teaspoons instant yeast
      → Instant yeast acts as the leavening agent that helps the dough rise and develop a light texture. Be sure to verify the yeast is fresh for optimal results. It can be mixed directly with the dry ingredients.
    • 1 cup whole milk (warm)
      → Warm milk activates the yeast and helps with the dough’s fermentation. Make sure the milk is not too hot to avoid killing the yeast; it should be lukewarm, around 100°F (38°C).
    • 1/4 cup unsalted butter (melted)
      → Butter adds richness and flavor to the dough. It should be melted and allowed to cool slightly before being added to the mixture. This will prevent the heat from affecting the yeast.
  • Butter Layer
    • 1 cup unsalted butter (cold)
      → This butter will be rolled into the dough to create flaky layers in the croissant. It should be very cold and firm for optimal lamination. Cut it into cubes and shape it into a rectangle to make this process easier.
  • Chocolate Filling
    • 1 cup dark chocolate chips (or chopped chocolate)
      → Dark chocolate provides a rich, indulgent filling for the croissants, adding to the dessert’s sweetness and flavor. Choose high-quality chocolate with at least 60% cocoa solids for the best taste. Allow it to come to room temperature before using.
    • 1 tablespoon cocoa powder
      → Cocoa powder enhances the chocolate flavor and adds depth to the filling. Ensure it is sifted before mixing to avoid clumping. It can also help to balance the sweetness of the chocolate chips.
  • Egg Wash
    • 1 large egg
      → An egg wash provides a beautiful glossy finish to the croissants when baked. Whisk it lightly before brushing to ensure even coverage. You can also mix in a tablespoon of water or milk for a less intense sheen.

Instructions

  • In a large mixing bowl, combine 4 cups of all-purpose flour, 1 teaspoon of salt, and 1/4 cup of granulated sugar.

    → This combination forms the base of your croissant dough. Make sure to whisk the dry ingredients together thoroughly to ensure an even distribution of salt and sugar, which are essential for flavor and fermentation.
  • Add 2 1/4 teaspoons of instant yeast to the dry mixture.

    → Instant yeast does not require proofing, making it easy to mix directly into the dry ingredients. Ensure the yeast is fresh, as expired yeast can lead to poor rising and texture.
  • Warm 1 cup of whole milk to about 100°F (38°C) and pour it into the flour mixture.

    → Properly warming the milk is crucial because it activates the yeast, aiding in the fermentation process. Use a thermometer to check the temperature, ensuring it is not too hot, which can kill the yeast.
  • Add 1/4 cup of melted unsalted butter to the milk and flour mixture.

    → The butter adds flavor and richness while also improving the dough’s texture. Allow the melted butter to cool slightly before adding it to prevent scalding the yeast.
  • Mix the ingredients together with a wooden spoon or your hands until a shaggy dough forms.

    → The goal is to combine everything until no dry flour remains visible. Avoid over-mixing at this stage to keep the dough tender, as gluten develops when mixed too much.
  • Knead the dough on a lightly floured surface for about 10 minutes until it becomes smooth and elastic.

    → Kneading develops gluten, which gives the croissants their structure and chewiness. If the dough is too sticky, sprinkle a little more flour while kneading, but avoid adding too much to keep the dough tender.
  • Shape the dough into a ball and place it in a lightly greased bowl, covering it with a damp cloth. Let it rise in a warm place until doubled in size, about 1 to 2 hours.

    → This first rise is essential for developing flavor. Keeping the dough covered prevents it from drying out. You can create a warm environment by placing the bowl in an turned-off oven with the light on.
  • While the dough is rising, prepare the butter layer by cutting 1 cup of cold unsalted butter into cubes.

    → Using cold butter is crucial as it will be rolled into the dough to create flaky layers. Ensure the butter remains firm, as softened butter will lead to a greasy dough.
  • Shape the cold butter into a rectangle (about 6×8 inches) using a rolling pin between two sheets of parchment paper.

    → This rectangle needs to fit well in the dough for folding. The parchment paper helps prevent sticking and makes it easier to roll out the butter evenly.
  • Once the dough has doubled, turn it out onto a lightly floured surface and roll it into a large rectangle about 12×20 inches.

    → Use even pressure and roll from the center outward to maintain an even thickness. Make sure the corners are sharp and the edges are straight to ensure uniform folding.
  • Place the prepared cold butter rectangle in the center of the rolled-out dough and fold the dough over the butter, sealing the edges to encase the butter completely.

    → This process ensures that the butter is trapped within the dough, which is essential for creating the flaky layers characteristic of croissants.
  • Gently roll out the dough into a long rectangle about 12×24 inches.

    → Use light pressure to avoid squeezing the butter out. Keep flour available to dust the surface as needed to prevent sticking.
  • Fold the dough into thirds (like a letter) and wrap it in plastic wrap. Chill in the refrigerator for 30 minutes.

    → Chilling allows the butter to firm up and makes the dough easier to roll out for subsequent turns. It’s also important for developing the layers.
  • Repeat the rolling and folding process two more times, chilling between each turn, for a total of three turns.

    → Each turn increases the layers of butter and dough, which is what gives the croissants their flakiness and structure. Ensure that the dough remains cool during this process.
  • For the chocolate filling, in a bowl, mix 1 cup of dark chocolate chips with 1 tablespoon of sifted cocoa powder.

    → Sifting the cocoa powder avoids clumps and ensures that it integrates smoothly with the chocolate. This mix flavors the filling, giving it a rich chocolate taste.
  • Roll out the finished dough into a large rectangle about 1/4 inch thick. Cut the dough into triangles (about 4 inches wide at the base and 8 inches tall).

    → Sharp cuts are essential for clean edges; this helps in rolling the croissants without them losing shape. Make sure each triangle is uniform for even baking.
  • Place a tablespoon of the chocolate filling at the base of each triangle and roll them up from the base towards the point.

    → Tightly rolling the croissant ensures that the chocolate filling stays inside during baking while helping the croissant achieve its signature crescent shape.
  • Place the rolled croissants on a baking sheet lined with parchment paper, spacing them about 2 inches apart.

    → This spacing allows for expansion while baking without the croissants touching. Keeping them on parchment prevents sticking and simplifies clean-up.
  • Whisk 1 large egg in a small bowl to create the egg wash, then brush it lightly over each croissant.

    → An egg wash gives the croissants a beautiful golden-brown color and delicious glossy finish. Be gentle to avoid deflating the dough.
  • Cover the baking sheet loosely with plastic wrap and let the croissants rise again in a warm area until puffy, about 1 hour.

    → This second rise allows for further development of flavor and ensures the croissants are light and airy. Avoid drafts, as they may affect the rising process.
  • Preheat your oven to 375°F (190°C) while the croissants are rising.

    → An adequately preheated oven is crucial for achieving the right texture and color. Ensure your oven is hot before placing the croissants inside.
  • Bake the croissants in the preheated oven for 15-20 minutes or until they are golden brown and puffed.

    → Keep an eye on them as baking times can vary. They should have a beautiful, deep golden color, indicating they are perfectly baked and flaky.
  • Remove the croissants from the oven and allow them to cool on a wire rack for about 10 minutes.

    → Cooling on a wire rack prevents moisture from collecting underneath, which can make the bottoms soggy. This final step is vital for leaving the croissants crisp.
  • Serve the baked chocolate croissants warm or at room temperature, enjoying their flaky layers and rich chocolate filling.

    → Allowing them to cool slightly enhances the flavor profile, making every bite satisfying and indulgent. Enjoy with coffee, tea, or as a sweet treat on their own.

Notes

These baked chocolate croissants are a delightful treat that combines flaky, buttery pastry with rich chocolate filling. The dough is made from scratch, allowing you to truly appreciate the flavors and textures of freshly baked croissants. For the best results, ensure all ingredients are at the proper temperature, especially the cold butter for lamination, which is crucial for creating those signature layers. You can experiment with different types of chocolate for a customized flavor—a mix of dark and milk chocolate can provide a unique taste profile. Once baked, serve these croissants warm for the ultimate indulgence; they pair wonderfully with a cup of coffee or tea. If you have leftovers, they can be stored in an airtight container for a couple of days, or you can freeze them for longer storage. Reheat them in the oven for a few minutes to restore their flaky texture before serving.

Tips

Tips for Making Baked Chocolate Croissants

  • Preparing the Dough: When mixing the dough, ensure you do not over-knead it; this can lead to tough croissants. Knead until just combined and smooth.
  • Creating Layers: Lamination is key to flaky croissants. After placing the cold butter between the layers of dough, use a rolling pin to gently roll it out, keeping the butter cold throughout the process. If the butter becomes too soft, refrigerate the dough for a few minutes before continuing.
  • Shaping the Croissants: For a more uniform shape, roll the dough into a rectangle and cut out triangles. Make sure to stretch the triangle slightly while rolling it into a croissant shape to create more layering and a better rise.
  • Proofing: Allow the shaped croissants to rest until doubled in size, usually 1-2 hours. Keep them in a warm, draft-free area. This step is critical as it helps develop flavor and ensure a light texture.
  • Baking: Preheat your oven to the correct temperature and ensure it is fully heated before baking. This ensures the croissants puff up nicely. Consider using a baking stone for the best results, as it helps with even heat distribution.
  • Storage: If you have leftover croissants, store them in an airtight container at room temperature for a day or two, or freeze them for longer storage. Reheat in the oven to bring back their crispiness.
  • Experimentation: Feel free to experiment with the filling! Try adding nuts, fruits, or different types of chocolate to personalize your croissants to your taste.

FAQ

What ingredients are needed to make baked chocolate croissants?

You will need puff pastry, chocolate (dark, milk, or semi-sweet), butter, sugar, egg (for egg wash), and optional powdered sugar for dusting.

Can I use store-bought puff pastry?

Yes, store-bought puff pastry is perfect for making chocolate croissants as it saves time and effort without sacrificing taste.

How long does it take to bake chocolate croissants?

Typically, it takes about 15-20 minutes to bake chocolate croissants at 400°F (200°C) until they are golden brown and puffed.

Can I fill the croissants with other types of chocolate?

Absolutely! You can use different types of chocolate such as Nutella, white chocolate, or even flavored chocolate for a unique twist.

How can I make sure my croissants are flaky?

To achieve a flaky texture, ensure that your puff pastry is kept cold and handle it minimally to retain the layers of butter and dough.

Can I freeze baked chocolate croissants?

Yes, baked chocolate croissants can be frozen. Make sure to cool them completely, wrap them tightly, and store in an airtight container before freezing.

What is the best way to reheat frozen croissants?

The best way to reheat frozen croissants is to let them thaw in the fridge overnight and then heat them in a preheated oven at 350°F (175°C) for about 10-15 minutes.

How can I enhance the flavor of my chocolate croissants?

You can enhance the flavor by adding a pinch of sea salt, a sprinkle of cinnamon, or incorporating a flavored chocolate, such as orange or raspberry.

Introduction

Indulge in the delightful, swirling realms of our Chocolate Swirl Muffins, an exploration in decadence that’s both visually captivating and utterly irresistible. Imagine the rich aroma of chocolate mingling effortlessly with the warm embrace of freshly baked muffins; this ensemble beckons with the promise of velvety cacao and buttery goodness. What makes these muffins special is the delicate marriage of flavors and textures—each bite is a tapestry of soft, fluffy cake interlaced with ribbons of rich, dark chocolate. Whether you’re a baking connoisseur or an enthusiastic beginner, this recipe is your gateway to baking nirvana, combining simplicity with a touch of elegance.

The Story Behind the Dish

The allure of the chocolate swirl muffin lies in its humble yet intricate design, tracing its roots back to the artful bundt cakes of the 19th century when bakers first started experimenting with marbled pastries. These muffins, standing as a testament to years of culinary evolution, embody the ethos of versatility. While muffins themselves have a storied history spanning centuries and continents, the act of swirling chocolate into a baked good is a nod to the greater art of creating a visually stunning yet tastefully subtle treat.

Originating as a play on the traditional marble cake popular in Germany and other parts of Europe, the idea of incorporating swirls of different flavors into bread forms began to weave its way into breakfast spreads and afternoon teas across the world. The modernization of this practice led to the creation of the chocolate swirl muffin—a portable, individually portioned delicacy that has found its way into cafés, home kitchens, and gourmet dining alike.

Why You’ll Love This Recipe

  • Quick and Easy: Perfect for busy mornings or last-minute gatherings, these muffins come together in no time with minimal effort.
  • Decadent Taste: Rich in chocolate but balanced enough to enjoy regularly, making every occasion special.
  • Family-Friendly: Loved by both kids and adults, a universal pleaser at breakfast or as an afternoon snack.
  • Versatile: Be it a warm breakfast item, a fancy brunch centerpiece, or a comforting dessert, these muffins adapt to meet your needs.
  • Visually Stunning: The swirled pattern adds a decorative touch without the need for complex decoration skills.

Flavor Profile & Texture

The Chocolate Swirl Muffins are a masterclass in the harmonious blend of flavor and texture, designed to appease even the most discerning palate. Upon your first bite, you are greeted by the initial subtle sweetness and gentle vanilla notes of the muffin base, followed closely by the irresistible pop of chocolate swirls. The chocolate infusion is bold, yet never overpowering, providing a deep, rich cocoa undertone that complements rather than competes with the delicate sweetness.

Texturally, these muffins are a delightful combination of airy and moist. The muffin base is fluffy, offering a slight resistance that gives way to a tender crumb enveloped by the silken, luscious veins of melted chocolate. Each bite promises a unique experience as the swirls create pockets of gooey chocolate goodness amidst the softness of the muffin, offering a sensory journey of tastes and textures.

Occasions & Pairings

Our Chocolate Swirl Muffins shine at any time of the day, making them the perfect choice for a variety of occasions. Start your morning with these muffins paired with a rich, aromatic cup of coffee, or enjoy them during a leisurely brunch accented with a medley of fresh fruits and a dollop of creamy yogurt. These muffins also make a sophisticated addition to an afternoon tea spread, served alongside an assortment of freshly brewed teas.

For a more indulgent experience, transform the muffins into a dessert by pairing them with a scoop of vanilla ice cream or whipped cream. They even hold their own as a late-night snack, perfectly paired with a glass of cold milk or a cozy mug of hot cocoa.

Tips, Variations & Substitutions

While the traditional recipe for Chocolate Swirl Muffins is impeccable on its own, there are countless ways to tailor them to your dietary needs or flavor preferences:

  • Variation: Add a handful of chopped nuts such as walnuts or pecans for additional crunch and flavor contrast.
  • Dietary Alternatives: Swap the classic butter for coconut oil and use almond milk for a lactose-free version. Consider using a gluten-free flour blend to accommodate dietary restrictions.
  • Creative Twists: Introduce a hint of spice by adding a teaspoon of cinnamon or espresso powder to enhance the chocolate flavor.
  • Flavor Boost: Stir in a splash of orange or almond extract to create a subtle yet fragrant aroma that pairs beautifully with chocolate.

Storage & Make-Ahead Ideas

To keep your Chocolate Swirl Muffins at their best, store them at room temperature in an airtight container for up to three days. For extended freshness, refrigerate them, though be sure to let the muffins come back to room temperature or give them a short warm-up in the oven or microwave to restore their softness before serving.

These muffins are also freezer-friendly. After baking, allow them to cool completely, then wrap each muffin individually in plastic wrap before placing them in a resealable freezer bag. Store for up to three months; simply thaw overnight on the counter or heat in the microwave for a quick defrost.

If making ahead, prepare the batter the evening before and refrigerate it overnight. When ready, simply swirl in the chocolate just before baking to ensure a fresh baked experience without the morning hassle.

Fun Facts & Trivia

Did you know that the swirling technique, prominently featured in these muffins, isn’t just for aesthetics? It’s believed the psychological impact of seeing a beautiful swirl pattern increases the anticipation and enjoyment of the eating experience, showcasing just how intertwined our senses are. Furthermore, the chocolate swirl technique has been utilized in many global cuisines as a symbol of art meeting culinary, and has been a canvas for creative expression in baking competitions worldwide. Whether for their taste or their artistry, Chocolate Swirl Muffins continue to captivate both casual bakers and connoisseurs alike.

Ingredients

  • Muffin Base
    • 2 cups all-purpose flour
      → All-purpose flour provides the structure needed for the muffins. It ensures a nice rise and a tender crumb. For the best result, measure the flour using the spoon-and-level method to avoid packing it too tightly in the measuring cup.
    • 1 cup granulated sugar
      → Sugar sweetens the muffins and contributes to the browning process during baking, creating a lovely golden crust. It’s important to use granulated sugar for a simple and straightforward sweetness. Adjust the amount based on your desired level of sweetness.
    • 1/2 cup unsweetened cocoa powder
      → Cocoa powder is essential for providing the rich chocolate flavor in the muffins. Make sure to use unsweetened cocoa powder to maintain the balance of sweetness. Sift it before adding to eliminate any lumps and ensure even distribution.
    • 1 tablespoon baking powder
      → Baking powder acts as the leavening agent, helping the muffins rise and become fluffy. Ensure it’s fresh to maximize its effectiveness; a quick test is to add some to warm water – it should fizz up immediately if it’s active.
    • 1/2 teaspoon salt
      → Salt enhances the flavor of the muffins and balances the sweetness. It also strengthens the gluten structure in the flour, contributing to a better texture. Use fine sea salt for even distribution throughout the batter.
    • 1/2 cup whole milk (or non-dairy alternative)
      → Milk adds moisture to the muffins, helping to create a soft and tender texture. If using non-dairy milk, choose a plain, unsweetened variety. Bring the milk to room temperature before mixing for a smoother batter.
    • 1/2 cup vegetable oil
      → Vegetable oil provides moisture and helps keep the muffins soft. It produces a tender crumb without adding any pronounced flavor. For a healthier option, you can substitute with unsweetened applesauce or melted coconut oil.
    • 2 large eggs
      → Eggs are crucial for binding the ingredients and providing structure. They also add moisture and richness. Use room temperature eggs for better incorporation into the batter. If vegan, you can replace them with flax eggs (1 tablespoon flaxseed meal + 2.5 tablespoons water per egg, let sit until gelatinous).
    • 1 teaspoon pure vanilla extract
      → Vanilla extract enhances the overall flavor of the muffins, adding warmth and depth. Always choose pure vanilla extract over synthetic alternatives for the best flavor profile. Add it to the wet ingredients for even mixing.
  • Chocolate Swirl Mixture
    • 1/2 cup chocolate chips (semi-sweet or dark)
      → Chocolate chips provide delicious pockets of melted chocolate throughout the muffins, enhancing the chocolate flavor and adding a delightful texture. Choose high-quality chocolate for the best results, and let them cool slightly after melting before swirling into the batter.
    • 1 tablespoon vegetable oil (for chocolate)
      → Adding a bit of oil when melting the chocolate chips helps to achieve a smoother consistency for swirling. This prevents the chocolate from seizing up and allows for easier incorporation into the muffin batter.
  • Optional Toppings
    • 1/4 cup powdered sugar (for dusting)
      → Powdered sugar can be sprinkled on top of the muffins for a decorative touch and a hint of sweetness. Use a fine mesh sieve to dust it evenly over the tops after the muffins have cooled completely for an attractive finish.

Instructions

  • Preheat your oven to 350°F (175°C) and line a 12-cup muffin tin with paper liners or grease it well.

    → This ensures the muffins do not stick to the tin and makes them easier to remove after baking. Greasing can be done with cooking spray or butter, ensuring all surfaces are covered for easy release.
  • In a large mixing bowl, whisk together the 2 cups of all-purpose flour, 1 cup of granulated sugar, 1/2 cup of unsweetened cocoa powder, 1 tablespoon of baking powder, and 1/2 teaspoon of salt until fully combined.

    → Whisking incorporates air into the dry ingredients, helping to create a lighter muffin. Make sure there are no clumps of cocoa powder and everything is evenly mixed by taking your time with this step.
  • In a separate bowl, combine the 1/2 cup of whole milk, 1/2 cup of vegetable oil, 2 large eggs, and 1 teaspoon of pure vanilla extract. Whisk these wet ingredients together until they are well blended and frothy.

    → Mixing the wet ingredients ensures even distribution of moisture and flavor throughout the batter. Using room temperature ingredients helps them blend more easily, creating a smoother batter.
  • Create a well in the center of the dry ingredients and pour in the wet ingredients. Gently fold the mixture together with a spatula or wooden spoon until just combined; do not overmix.

    → Folding helps maintain the muffin’s light texture by gently combining the ingredients without deflating the batter. It’s okay if there are a few lumps; overmixing can lead to dense muffins.
  • In a small microwave-safe bowl, combine the 1/2 cup of chocolate chips and 1 tablespoon of vegetable oil. Microwave in 15-second increments, stirring after each, until the chocolate is completely melted and smooth.

    → Melting the chocolate with a bit of oil prevents it from hardening and allows for a smoother swirl in the muffin batter. Be careful not to overheat the chocolate, as it can seize if cooked too long.
  • Take about one-third of the muffin batter and transfer it to a separate bowl. Stir the melted chocolate mixture into this portion until well combined.

    → This chocolate batter will be used for swirling. By separating it, you ensure that the chocolate flavor is concentrated and can effectively create the desired swirls in the muffins.
  • Using a spoon or cookie scoop, evenly distribute the plain muffin batter into each muffin cup, filling them about halfway.

    → Filling halfway allows room for the muffins to rise without overflowing. Ensure your portions are uniform for even baking and consistent muffin size.
  • Drop spoonfuls of the chocolate batter on top of the plain batter in each muffin cup. Using a toothpick or a skewer, gently swirl the chocolate into the plain batter to create a marbled effect.

    → Swirling creates visual appeal and ensures pockets of chocolate flavor throughout the muffin. Take care not to overmix; you want distinct swirls rather than a uniform color.
  • Bake the muffins in the preheated oven for 18-20 minutes, or until a toothpick inserted in the center comes out clean or with a few moist crumbs, but no wet batter.

    → Baking times can vary, so start checking at 18 minutes. The toothpick test is key to knowing when your muffins are done – they continue to cook slightly after being removed from the oven.
  • Once baked, remove the muffins from the oven and allow them to cool in the tin for about 5 minutes. Then transfer them to a wire rack to cool completely.

    → Cooling in the muffin tin helps them firm up slightly, making them easier to handle. Transferring to a wire rack allows air to circulate around the muffins, preventing them from getting soggy on the bottom.
  • If desired, dust the cooled muffins with powdered sugar using a fine mesh sieve before serving.

    → Dusting with powdered sugar adds a lovely visual touch and a hint of sweetness. The fine mesh sieve ensures an even and delicate coating over the tops of your muffins.

Notes

These Chocolate Swirl Muffins are a delightful treat, combining rich chocolate flavor with a tender crumb. The muffin base is easy to prepare, and the chocolate swirl adds an indulgent finish. To ensure the best texture, be careful not to overmix the batter; gentle folding is key to keeping the muffins light and fluffy. If you prefer a more intense chocolate flavor, feel free to add extra chocolate chips or even double the cocoa powder. These muffins are best enjoyed fresh but can be stored in an airtight container for up to 3 days or frozen for longer storage. When ready to serve, consider dusting with powdered sugar for an elegant touch or serving with a side of whipped cream for a decadent dessert option. Enjoy your baking!

Tips

Tips for Making Chocolate Swirl Muffins

  • Preheat Your Oven: Make sure to preheat your oven to 350°F (175°C) well ahead of time. This ensures that the muffins start baking at the right temperature, resulting in a perfect rise.
  • Prepare Your Muffin Pan: Grease your muffin pan or use paper liners to make removing the muffins easier. If using non-stick spray, ensure every corner of the pan is coated to prevent sticking.
  • Mix Dry Ingredients Separately: When preparing the dry ingredients, mix your flour, cocoa powder, baking powder, sugar, and salt in a separate bowl before combining with the wet ingredients. This helps to evenly distribute the leavening agent and cocoa powder, preventing lumps.
  • Don’t Overmix: When combining wet and dry ingredients, mix until just combined. Overmixing can lead to dense and tough muffins. A few lumps are okay!
  • Use Room Temperature Ingredients: Ensure your eggs and milk are at room temperature before mixing. This helps to create a smoother batter and allows for better emulsification.
  • Swirl for Visual Appeal: When adding the chocolate swirl mixture to the muffin batter, use a toothpick or knife to gently swirl it in. This creates a beautiful marbled effect without overmixing the batter.
  • Check for Doneness: To check if your muffins are done, insert a toothpick in the center of a muffin. If it comes out clean or with a few crumbs, they’re ready. Be careful not to overbake, as this can dry them out.
  • Cool Before Serving: Allow the muffins to cool in the pan for about 5 minutes before transferring them to a wire rack. This prevents them from becoming soggy on the bottom.
  • Store Properly: To keep your muffins fresh, store them in an airtight container at room temperature for up to 3 days or refrigerate for up to a week. You can also freeze them for up to 3 months; just let them cool completely before wrapping them tightly.
  • Dusting Tips: If you decide to use powdered sugar as a topping, sprinkle it just before serving as it may become absorbed into the muffins if added too early.

FAQ

What ingredients do I need to make Chocolate Swirl Muffins?

You will need flour, sugar, cocoa powder, baking powder, baking soda, salt, eggs, milk, vegetable oil, vanilla extract, and chocolate chips.

How long does it take to prepare Chocolate Swirl Muffins?

Preparation time is approximately 15 minutes, while baking time is around 20-25 minutes.

Can I use whole wheat flour instead of all-purpose flour?

Yes, you can substitute whole wheat flour for all-purpose flour. However, the texture may be denser.

How should I store leftover Chocolate Swirl Muffins?

Store them in an airtight container at room temperature for up to 3 days or in the refrigerator for a week. You can also freeze them for up to 3 months.

Can I add other ingredients to the muffins?

Absolutely! You can add nuts, dried fruit, or even a layer of peanut butter for added flavor.

How do I know when the muffins are fully baked?

Insert a toothpick into the center of a muffin; if it comes out clean or with only a few crumbs, the muffins are done.

Are Chocolate Swirl Muffins suitable for a vegan diet?

No, the traditional recipe includes eggs and milk. However, you can use vegan substitutes like flax eggs and plant-based milk to make them vegan-friendly.

Can I make mini Chocolate Swirl Muffins?

Yes! Adjust the baking time to about 12-15 minutes for mini muffins, keeping an eye on them to prevent overbaking.

Introduction

Imagine a dessert that embodies the very essence of indulgence, a creation that melds the airy lightness of a cloud with the rich, decadent depth of the finest cocoa. This is none other than the Baked Chocolate Soufflé. Every bite brings a luxurious experience, where the crisp, delicate crust unveils a warm, molten center, enveloping your senses in a symphony of chocolate bliss. Perfect for any occasion that demands a touch of elegance, this soufflé promises not only to tantalize your taste buds but to mesmerize your soul with its unparalleled allure.

The Story Behind the Dish

The origins of the soufflé are as rich and fascinating as the dish itself. Dating back to the early 18th century in France, the term “soufflé” stems from the French word “souffler,” meaning “to blow” or “to puff.” It was first mentioned in Vincent La Chapelle’s “Le Cuisinier Moderne,” and by the 19th century, soufflés had become a staple dessert in French haute cuisine. The Baked Chocolate Soufflé we know today has evolved over the years, adding modern simplicity to classical elegance. Always associated with culinary mastery, it has taken its place as an emblem of sophisticated dining, adored by culinary aficionados and home cooks alike. The chocolate variant, in particular, has garnered adoration worldwide for its intoxicating mix of comfort and extravagance.

Why You’ll Love This Recipe

  • Impressive yet Simple: While soufflés are notorious for their complexity, this baked chocolate version is surprisingly straightforward, making it accessible for novice and seasoned bakers alike.
  • Versatile Luxury: Suitable for both intimate dinners and grand celebrations, this dessert can adapt to nearly any dining scenario with its timeless charm.
  • Layers of Flavor: The combination of deep, dark chocolate and the subtle hint of vanilla or liqueur creates a multidimensional taste experience.
  • Customizable: Gluten-free, low-sugar, and even dairy-free options make this recipe adaptable to various dietary preferences without sacrificing flavor.
  • Showstopper Presentation: Few desserts elicit gasps of awe as a perfectly risen soufflé does when brought to the table.

Flavor Profile & Texture

The Baked Chocolate Soufflé offers an intriguing dichotomy in its flavor and texture profile. Upon breaking through its delicate exterior, you are greeted with a flood of deep, rich chocolate that dances around the palate. The soufflé should be a marriage of light and delicate, with just the right amount of sweetness balanced by the bitterness of dark chocolate. A perfect soufflé has a mildly crisp crust that gives way to a luscious, molten middle, offering warmth that spreads with each spoonful. The subtle addition of vanilla or a splash of coffee liqueur can enhance the chocolate, creating a symphony of flavors that will leave guests craving more.

Occasions & Pairings

This luxurious dessert is befitting for a variety of occasions, from cozy romantic dinners to elegant holiday feasts. Imagine the delight of serving it at a celebration, where its dramatic poof can make even the simplest gathering feel like an event. Pair it with:

  • Fruit Compote: A tart raspberry or cherry compote adds a refreshing tartness that perfectly offsets the rich soufflé.
  • Creamy Side: A dollop of freshly whipped cream or a scoop of vanilla ice cream adds another layer of indulgence.
  • Beverage Pairings: Wines like a rich Port or a sophisticated espresso complement the dessert beautifully.

Tips, Variations & Substitutions

The Baked Chocolate Soufflé is incredibly adaptable. Here are some ideas to make this classic recipe your own:

  • Dietary Alternatives: Substitute almond or oat milk to make it dairy-free. For a gluten-free option, ensure that all your baking components are certified gluten-free.
  • Flavor Variations: Add a dash of orange zest or chili powder for an exciting twist. A sprinkle of sea salt can also enhance the chocolate’s richness.
  • Infused Whipped Cream: Infuse your whipped cream with a hint of mint or lavender for a fresh take on the traditional toppers.

Storage & Make-Ahead Ideas

Soufflés are best enjoyed immediately to savor their full, airy potential. However, you can prepare the batter ahead of time and keep it refrigerated for up to a few hours before baking. This allows for stress-free, last-minute assembly when guests arrive. While soufflés don’t store well once baked, you can freeze the unbaked batter in ramekins, allowing it to thaw and rise to perfection during baking.

Fun Facts & Trivia

Did you know that the soufflé’s rise largely depends on the airiness of its batter, which is achieved by whipping the egg whites to perfect peaks? This culinary technique exemplifies the fascinating world of food science, showcasing how the simplest ingredients can transform into a masterpiece with the right technique. The myth that opening the oven door will collapse a soufflé arises from the sensitivity entailed in this creation — proving once again that great culinary feats often marry precision with a little bit of magic.

Let the Baked Chocolate Soufflé captivate you with its charm, one spoonful at a time. A dessert that marries tradition with innovation, indulgence with accessibility, and simplicity with elegance — it’s a celebration of chocolate in one of its finest forms.

Ingredients

  • Soufflé Mixture
    • 4 ounces dark chocolate (at least 70% cocoa)
      → The star of the soufflé, dark chocolate adds rich flavor and decadence to the dish. It should be finely chopped or broken into small pieces to ensure it melts smoothly when combined with the other ingredients. Opt for high-quality chocolate for the best flavor and texture.
    • 2 tablespoons unsalted butter (plus extra for greasing)
      → Butter enriches the chocolate flavor and helps create a tender soufflé. Use unsalted butter so you can control the overall saltiness of the dessert. Make sure to butter the ramekins generously before adding the soufflé mixture to prevent sticking.
    • 3 large eggs (separated)
      → Eggs are essential for providing structure and lift to the soufflé. The egg whites will be whipped to incorporate air, allowing the soufflé to rise beautifully. Ensure the egg whites are free of yolks and at room temperature for optimal volume when whisked.
    • 1/4 cup granulated sugar (plus extra for dusting)
      → Sugar sweetens the soufflé and aids in the stabilization of the egg whites when whipped. Reserve some sugar for dusting the ramekins to enhance presentation and encourage a nice caramelization as the soufflé bakes. The more finely granulated the sugar, the better it will dissolve.
    • 1 teaspoon pure vanilla extract
      → Vanilla adds depth and warmth to the flavor profile of the soufflé, balancing out the richness of the chocolate. Use pure vanilla extract for a more authentic and robust flavor; avoid artificial versions for the best results.
    • Pinch of salt
      → Salt enhances the flavors of the chocolate and helps to balance the overall sweetness of the dish. A small pinch will do; be careful not to overdo it, as the goal is to complement, not overpower, the chocolate.
  • Optional Garnish
    • Powdered sugar (for dusting)
      → Dusting the finished soufflé with powdered sugar provides a beautiful contrast and adds a touch of sweetness. Use a fine sieve to sprinkle it evenly over the top just before serving to maintain its light appearance and prevent the sugar from dissolving into the warm soufflé.
    • Fresh raspberries or strawberries (for serving)
      → Fresh berries add a burst of tartness that perfectly contrasts the rich chocolate. They should be rinsed and patted dry gently before use. For a more elevated presentation, you can serve them on the side or arrange them on top of the soufflé for an elegant touch.

Instructions

  • Preheat your oven to 375°F (190°C) and adjust the oven rack to the lower third position.

    → Preheating the oven ensures that your soufflé starts baking at the right temperature, which is crucial for achieving that perfect rise and fluffy texture. Placing it in the lower third helps even out the heat distribution, allowing the soufflé to bake uniformly.
  • Generously butter four 6-ounce ramekins using soft, unsalted butter.

    → Buttering the ramekins creates a non-stick surface, allowing the soufflés to rise properly without sticking to the sides. Make sure to coat the insides completely, including the tops, where the soufflé will rise, to ensure an even lift.
  • Dust the inside of the ramekins with granulated sugar, shaking out any excess.

    → This step not only helps prevent sticking but also creates a slight caramelization at the edges of the soufflés, enhancing both flavor and appearance. Make sure to tap out the extra sugar to avoid any clumping.
  • Melt the dark chocolate and butter together in a heatproof bowl set over a pot of simmering water (double boiler method).

    → This gentle melting method prevents the chocolate from burning, allowing it to stay smooth and glossy. Stir occasionally until fully melted and combined, then remove from heat and let it cool slightly.
  • In a separate large mixing bowl, separate the egg whites from the yolks, placing the yolks in one bowl and the whites in another.

    → Ensuring no yolk gets into the whites is crucial; even a tiny amount of fat can hinder the whipping process. Room temperature eggs whip better, so let them sit for about 20-30 minutes prior to separating.
  • Whisk the egg yolks into the melted chocolate mixture along with the vanilla extract and a pinch of salt until smooth.

    → This integrates the yolks, adds depth from the vanilla, and balances flavors with a touch of salt. Make sure the chocolate mixture is only slightly warm so it doesn’t cook the yolks.
  • In a clean mixing bowl, use an electric mixer to whip the egg whites on medium speed until frothy.

    → Starting at medium speed allows air to gradually incorporate. This is the first step to achieving a voluminous meringue, which is critical for the soufflé’s lift.
  • Gradually add the 1/4 cup of granulated sugar to the frothy egg whites, continuing to whip until stiff peaks form.

    → Adding sugar gradually helps stabilize the egg whites and increase their volume. When the mixture can hold stiff peaks, it is ready. This step is crucial for achieving that airy texture in your soufflé.
  • Gently fold one-third of the whipped egg whites into the chocolate mixture using a rubber spatula.

    → This initial folding lightens the chocolate base, making it easier to incorporate the rest of the egg whites without deflating them. Be gentle but thorough; the goal is to incorporate air without losing volume.
  • Add the remaining egg whites to the chocolate mixture in two additions, folding carefully until no white streaks remain.

    → This step is vital for maintaining the aeration from the egg whites. Use a gentle lifting and folding motion to combine, ensuring you do not deflate the mixture, which is what gives the soufflé its rise.
  • Spoon the soufflé mixture into the prepared ramekins, filling them just below the rim.

    → Avoid overfilling to prevent overflow during baking. Filling them appropriately allows room for the soufflé to rise elegantly. Smooth the tops with a spatula for an even surface.
  • Bake in the preheated oven for 12-15 minutes or until the soufflés have risen and the tops look set but the centers are still slightly soft.

    → The goal is a puffy, slightly wobbly center that indicates a light and airy texture. Baking times may vary based on your oven, so keep an eye on them towards the end and avoid opening the oven door too frequently, which can cause sinking.
  • Once baked, remove the soufflés from the oven and let them cool for 1-2 minutes before serving.

    → This resting period allows the soufflés to stabilize slightly, making them easier to serve. They are best enjoyed immediately after baking to appreciate their lightness and texture.
  • Optional: Dust with powdered sugar and garnish with fresh raspberries or strawberries just before serving.

    → The powdered sugar provides a lovely visual appeal and additional sweetness. Fresh berries add a delightful contrast in flavor and enhance presentation. Use a fine sieve for even dusting, and be gentle when placing the berries to avoid breaking them.

Notes

These baked chocolate soufflés are a luxurious dessert that showcases the deep, rich flavors of high-quality dark chocolate. The soufflé’s airy texture is achieved by folding whipped egg whites into a chocolate mixture, creating a delightful contrast between the outer layer and the molten center. Ensure you prepare your ramekins with butter and a dusting of sugar ahead of time to prevent sticking and provide a nice caramelized finish as they bake. Serve immediately for the best rise and texture, as soufflés are known for deflating quickly after being removed from the oven.

For an exquisite touch, consider sprinkling powdered sugar over the soufflé just before serving to enhance its visual appeal and add a hint of sweetness. Fresh berries, such as raspberries or strawberries, make a lovely accompaniment, offering a tart balance to the richness of the chocolate. Always remember to serve these soufflés warm, as this is when they are at their most impressive and enjoyable, with a soft and gooey center that melts in your mouth.

When selecting your dark chocolate, pick a brand that you enjoy eating on its own, as the flavor will be prominent in the final dish. If you’re feeling adventurous, you can experiment with flavored chocolate or even add a splash of liqueur to the batter for a unique twist. Just be cautious with flavors that may overshadow the chocolate’s essence.

Finally, soufflés are a fantastic way to impress your guests or a loved one and can be made gluten-free by ensuring that your chocolate and vanilla extract are free from gluten. Celebrate every bite of these rich delights knowing they not only taste great but are crafted with care and quality ingredients.

Tips

Tips for Making a Perfect Baked Chocolate Soufflé

  • Choose the Right Chocolate: The quality of the chocolate plays a critical role in your soufflé’s flavor. Opt for dark chocolate with a cocoa content of 70% or higher. Finely chop or break it into small pieces to ensure it melts evenly and integrates well with the other ingredients.
  • Prepare Your Ramekins: Before you start mixing your ingredients, generously grease your ramekins with unsalted butter and dust them lightly with granulated sugar. This will help create a non-stick surface, allowing your soufflés to rise beautifully and release easily after baking.
  • Room Temperature Ingredients: Make sure your eggs are at room temperature before starting. This helps the egg whites whip up more effectively, leading to a lighter and airier soufflé. For best results, take the eggs out of the fridge about 30 minutes before you plan to use them.
  • Whip Egg Whites Properly: When whipping your egg whites, use a clean, dry bowl and utensils to avoid any grease that may impede their ability to whip up. Beat the egg whites until soft peaks form and then gradually add the granulated sugar to stabilize them. The mixture should be glossy and hold stiff peaks.
  • Folding Technique: When combining the whipped egg whites with the chocolate mixture, use a gentle folding motion. This helps retain the air you’ve incorporated into the egg whites, which is essential for a soufflé that rises elegantly.
  • Watch the Baking Time: Soufflés need precise timing. Keep an eye on them in the oven; they should be puffed and slightly set in the center. Remove them from the oven promptly to avoid them deflating too much.
  • Serving Suggestions: Dust your soufflé with powdered sugar just before serving for a chic presentation. Pairing it with fresh raspberries or strawberries not only adds visual appeal but also provides a refreshing contrast to the rich chocolate flavor.
  • Enjoy Immediately: Soufflés are best enjoyed fresh out of the oven while they retain their airy texture. Serve them immediately for the best experience, as they will start to deflate as they cool.

FAQ

What is a chocolate soufflé?

A chocolate soufflé is a classic French dessert that is light, airy, and made with a rich chocolate base combined with whipped egg whites. It can be served as a sweet treat or as part of a dinner party dessert course.

How do I properly prepare ramekins for a soufflé?

To prepare ramekins, make sure to butter them generously along the bottom and sides, then dust them with sugar or cocoa powder. This helps the soufflé rise evenly and prevents sticking.

Can I make the soufflé ahead of time?

It’s best to bake the soufflé just before serving, as it can deflate quickly once it cools. However, you can prepare the base mixture ahead of time and refrigerate it. Just whip the egg whites and fold them in right before baking.

What type of chocolate is best for a soufflé?

Use high-quality dark chocolate (70% cocoa or higher) for a rich flavor and a smooth texture. You can also experiment with milk or white chocolate, but note that this will change the flavor profile.

Can I make a gluten-free chocolate soufflé?

Yes, a chocolate soufflé is naturally gluten-free as it does not contain any flour. Just ensure that all other ingredients used (like chocolate and any toppings) are also gluten-free.

What is the best way to serve a chocolate soufflé?

Serve the soufflé warm, immediately after it comes out of the oven, ideally with a dusting of powdered sugar or a scoop of vanilla ice cream on top for a delightful contrast.

Why did my soufflé collapse?

Soufflés can collapse if they are not baked long enough, if the oven temperature is too low, or if the egg whites are over-whipped, leading to loss of volume. It’s crucial to carefully monitor the baking time and temperature.

What can I do with leftover chocolate soufflé?

If you have leftovers, they can be refrigerated for a day or two. You can reheat them in the oven at a low temperature, but be aware that they may not rise as they did fresh out of the oven.

Introduction: The Ultimate Indulgence

Welcome to the world of pure, unadulterated chocolate decadence with our irresistible Double Chocolate Brownies. Imagine sinking your teeth into a rich, gooey center that exudes the deep, dark allure of chocolate, with pockets of molten chocolate chips adding bursts of extra flavor and texture to every bite. As you savor the first morsel, your senses will be enveloped by an irresistible aroma of cocoa, with its hints of sweet vanilla whispering promises of pure bliss.

These brownies are no ordinary treat. They are a testament to the power of chocolate, crafted to satisfy the most intense chocolate cravings while offering a comforting embrace for your taste buds. Whether you are a chocolate aficionado or simply someone with a sweet tooth, these brownies will leave you mesmerized, making them a must-try for anyone seeking a heavenly indulgence.

The Story Behind the Dish: A Rich History

The history of the brownie is as rich as the dessert itself, with origins tracing back to the United States in the late 19th century. Browns were first documented in the Sears Roebuck catalog in the early 1900s. However, the exact origin story of the brownie is shrouded in kitchen lore. Some tales suggest it was a happy accident when a busy cook forgot to add baking powder to her chocolate cake, resulting in a dense, yet delectable creation that has been loved by generations ever since.

Our Double Chocolate Brownies are a modern rendition of this beloved classic, designed to elevate the original by enhancing the chocolate experience with the addition of luscious chocolate chips. This innovation caters to modern palates that appreciate a bold, multifaceted chocolate flavor, while still adhering to the traditional essence of a brownie – soft, dense, and entirely satisfying.

Why You’ll Love This Recipe

  • Decadent and Satisfying: These brownies are the perfect treat for chocoholics, with their double dose of chocolate in the form of cocoa powder and chocolate chips.
  • Simple to Prepare: No need for complicated techniques or equipment—just straightforward baking that yields impressive results.
  • Universal Appeal: A crowd-pleaser that’s perfect for family gatherings, parties, or solo indulgence.
  • Adaptable: Easy to customize for various dietary preferences or creative twists.

Flavor Profile & Texture

Experience an explosion of chocolatey goodness from the first bite, as each brownie boasts a robust, bittersweet chocolate flavor that dances gracefully across your palate. The cocoa provides a deep foundation of slightly smoky, earthy notes, while the chocolate chips add sweet bursts of intensity throughout the experience.

Texture is key to the indulgence offered by these brownies. Expect a dense, fudgy center that gives way to a chewy exterior, a perfect balance crafted for those indulgent moments when you crave something substantial yet luxurious. The surprising crunch from the chocolate chips enhances the textural contrast, offering a delightful variation with every mouthful.

Occasions & Pairings

The versatility of Double Chocolate Brownies makes them suitable for a variety of occasions:

  • Holiday Gatherings: Serve warm with a dollop of whipped cream for a festive dessert.
  • Casual Parties: Stack them on a plate as a finger-friendly treat that disappears quickly.
  • Weeknight Indulgences: Perfect as a post-dinner delight or paired with a scoop of creamy vanilla ice cream for an extra-special treat.

For drink pairings, consider complementing the rich chocolate with a full-bodied red wine, like a Cabernet Sauvignon, or a robust port. Coffee aficionados might opt for a freshly brewed espresso or a creamy cappuccino to amplify the flavors.

Tips, Variations & Substitutions

While our Double Chocolate Brownies are stunning on their own, part of their appeal is the ease with which you can adapt them:

  • Dietary Alternatives: For a gluten-free version, simply swap the all-purpose flour for a gluten-free blend, while ensuring the chocolate chips used are also gluten-free.
  • Vegan Adjustments: Replace eggs with flaxseed eggs (1 tablespoon ground flaxseed + 3 tablespoons water per egg) and use dairy-free chocolate chips and a vegan butter substitute.
  • Add a Twist: Enhance the cocoa depth by adding a teaspoon of instant coffee granules, or add a pinch of cayenne pepper for a subtle kick.
  • Mix-ins: Experiment with added textures by folding in nuts, such as walnuts or pecans, or swirl in a bit of creamy peanut butter for an exciting contrast.

Storage & Make-Ahead Ideas

Proper storage ensures these brownies can be savored at their best for several days. Here’s how:

  • Room Temperature: Store in an airtight container at room temperature for up to four days. If stacking, place a piece of parchment paper between layers to prevent sticking.
  • Refrigeration: If you prefer a firmer texture, keep them in the refrigerator, well covered, for up to a week.
  • Freezing: For longer storage, these brownies freeze beautifully. Wrap individual pieces in plastic wrap, followed by aluminum foil or a zip-lock bag, ensuring that they are well sealed to prevent freezer burn. They can be frozen for up to two months. To enjoy, simply thaw at room temperature or warm them in a low oven for a freshly baked experience.

Make-ahead tips involve preparing the batter and refrigerating it for up to two days before baking, allowing you to serve freshly baked brownies with minimal effort.

Fun Facts & Trivia

Did you know that January 22nd is National Brownie Day in the United States? It’s celebrated by baking and enjoying a batch of delicious brownies in all their forms—fudgy, cakey, or somewhere in between. This national holiday is a testament to the brownie’s beloved status among desserts.

Interestingly, brownies have inspired numerous pop culture references and creative spin-offs, proving their enduring appeal. From brownie sundaes served in classic diners to gourmet reinterpretations in upscale restaurants, the humble brownie continues to evolve while never straying far from its roots as a simple yet sophisticated treat.

In conclusion, Double Chocolate Brownies are more than a dessert; they are a celebration of chocolate in its most decadent form. Whether you’re baking for others or treating yourself, these brownies promise to deliver a rich, comforting experience that’s sheer indulgence with every bite. So gather your ingredients, preheat your oven, and prepare to transform a few simple components into something extraordinary—an unforgettable chocolate delight meant to be shared and cherished.

Ingredients

  • Brownie Base
    • 1 cup unsalted butter (melted)
      → Unsalted butter provides richness and moisture to the brownies, resulting in a fudgy texture. Melting the butter allows it to incorporate easily into the batter. For the best flavor, use high-quality butter, as it directly impacts the taste of the brownies.
    • 2 cups granulated sugar
      → Sugar is essential for sweetness and helps achieve the delicate balance of flavor in brownies. It also contributes to the chewy texture. For moister brownies, consider using a mix of granulated and brown sugar, as brown sugar contains molasses, which adds moisture.
    • 4 large eggs
      → Eggs are crucial for binding the ingredients together and providing structure. They also add richness. Make sure the eggs are at room temperature for better emulsification with the melted butter and sugar. This can be achieved by taking them out of the fridge about 30 minutes prior to use.
    • 1 teaspoon pure vanilla extract
      → Pure vanilla extract enhances the overall flavor profile of the brownies, making them more aromatic and delicious. Choose high-quality vanilla extract for the best taste, and avoid imitation vanilla, which lacks depth and complexity.
    • 1 cup all-purpose flour
      → Flour is the main structure builder in brownies. It helps achieve that perfect chewy texture by providing gluten. When measuring, use the spoon-and-level method to avoid overpacking the flour, which can lead to dense brownies. If you prefer gluten-free, substitute with a 1:1 gluten-free flour blend.
    • 1/2 cup unsweetened cocoa powder
      → Cocoa powder gives the brownies their rich chocolate flavor and dark color. Use high-quality unsweetened cocoa powder for the best results. Sift the cocoa powder before adding it to the batter to prevent clumping and ensure an even distribution throughout the mixture.
    • 1/2 teaspoon baking powder
      → Baking powder acts as a leavening agent, helping the brownies rise slightly and become less dense. Ensure it is fresh for maximum effectiveness. Sifting the baking powder with the flour will ensure even distribution in the batter.
    • 1/4 teaspoon salt
      → A small amount of salt enhances the sweetness and balances the flavors. It helps to bring out the chocolate flavor more prominently. Use fine salt for even integration into the batter, ensuring that there are no overpowering salty bites.
    • 1 cup semi-sweet chocolate chips
      → Chocolate chips provide burst of melted chocolate in every bite, adding decadence and richness. Choose high-quality chocolate chips for optimal flavor. To get a variety of textures, consider using a mix of chips and chopped chocolate, or even dark chocolate for a richer flavor.
  • Optional Add-ins
    • 1/2 cup chopped nuts (walnuts or pecans)
      → Nuts add a delightful crunch and nutty flavor to the brownies. Chop them into small, evenly sized pieces to ensure they are dispersed throughout the batter. Lightly toast the nuts in a dry skillet for a few minutes to enhance their flavor before adding them.
    • 1/4 cup caramel sauce (drizzled on top)
      → Caramel sauce adds a sweet, gooey element that pairs wonderfully with chocolate. Drizzle it over the brownies after they have cooled slightly for a beautiful presentation. For homemade caramel, be sure to use a reliable recipe to achieve the perfect consistency.

Instructions

  • Preheat your oven to 350°F (175°C) and line a 9×13 inch baking pan with parchment paper, leaving some overhang on the sides.

    → Preheating the oven ensures even cooking from the start. Lining the pan with parchment not only prevents sticking but also makes it easier to lift the brownies out once they are cooled, allowing for clean cuts and presentation.
  • Melt 1 cup of unsalted butter in a medium saucepan over low heat or in a microwave-safe bowl in the microwave.

    → Melting the butter gives the brownies their fudgy texture and a smooth consistency when mixed with the sugar. Be careful not to overheat the butter; it should be melted but not boiling. If using the microwave, heat in short increments, stirring in between until just melted.
  • Add 2 cups of granulated sugar to the melted butter and stir with a whisk until combined and smooth.

    → Combining sugar with warm butter helps dissolve the sugar more effectively, leading to a smooth batter. This is important for achieving the desired chewy texture in your brownies. Mix until the mixture looks glossy and well integrated.
  • Incorporate 4 large eggs, one at a time, mixing well after each addition.

    → Adding eggs individually ensures they are fully emulsified into the mixture, which is critical for structure and richness. Use a whisk or a spatula to mix until the eggs are fully combined and the batter looks thick and uniform.
  • Stir in 1 teaspoon of pure vanilla extract until well combined.

    → Vanilla enhances the flavor of the brownies, making them aromatic and delicious. Make sure to mix it in thoroughly so the flavor is evenly distributed throughout the batter.
  • In a separate large bowl, whisk together 1 cup of all-purpose flour, 1/2 cup of unsweetened cocoa powder, 1/2 teaspoon of baking powder, and 1/4 teaspoon of salt.

    → This step ensures that the dry ingredients are evenly mixed. Whisking helps to aerate the flour and cocoa, preventing lumps which could lead to uneven texture in the final baked brownies. Sifting the cocoa powder will also minimize clumping.
  • Gradually add the dry ingredients to the wet ingredients, folding gently with a spatula until just combined.

    → Overmixing can lead to tough brownies. The goal is to combine everything until there are no dry streaks left; however, it’s perfectly fine if there are a few small lumps. This will keep your brownies soft and tender.
  • Gently fold in 1 cup of semi-sweet chocolate chips until evenly distributed throughout the batter.

    → Folding helps maintain the airiness of the batter while incorporating the chocolate chips. This ensures that each bite of brownie is rich and chocolatey. Avoid vigorous stirring which can deflate the batter.
  • If desired, add 1/2 cup of chopped nuts, mixing them into the batter using the folding technique.

    → Chopped nuts provide a delightful crunch and additional flavor. Ensuring the nuts are evenly distributed allows for a consistent texture in your brownies, but make sure they are not too large to avoid uneven baking.
  • Pour the brownie batter into the prepared baking pan and spread it evenly using an offset spatula.

    → Spreading the batter evenly minimizes uneven baking and allows for uniform doneness, ensuring that each brownie cooks evenly. Carefully smooth the surface to prevent any peaks or valleys.
  • Bake in the preheated oven for 25-30 minutes, or until a toothpick inserted into the center comes out with a few moist crumbs.

    → The bake time can vary based on your oven and the exact dimensions of the pan used. Testing with a toothpick helps determine doneness; if the toothpick comes out clean, the brownies may be overdone, leading to a drier texture.
  • Remove the brownies from the oven and let them cool in the pan for 10-15 minutes.

    → Allowing the brownies to cool slightly helps them set up properly. It’s important not to try to cut them too soon, as they will be too soft and may crumble apart.
  • Carefully lift the brownies out of the pan using the parchment overhang and transfer them to a wire rack to cool completely.

    → Transferring them to a wire rack prevents condensation, which can make the brownies soggy. Cooling completely is crucial for achieving clean cuts and enhancing the flavors as they meld.
  • Once cooled, cut the brownies into squares or rectangles using a sharp knife.

    → A sharp knife ensures crisp edges and well-defined squares. For even cleaner cuts, you can wipe the knife between cuts to remove any excess brownie residue. Aim for equal-sized pieces for attractive presentation.
  • If desired, drizzle 1/4 cup of caramel sauce over the cooled brownies for added sweetness and visual appeal.

    → The caramel sauce adds a rich and gooey dimension that pairs wonderfully with chocolate. To drizzle effectively, you can place the caramel sauce in a small squeeze bottle or a spoon for control, ensuring it adorns each brownie beautifully.

Notes

These decadent double chocolate brownies are a chocolate lover’s dream. The rich combination of melted butter, sugar, and cocoa powder creates a fudgy base that is hard to resist. Make sure to mix in the chocolate chips thoroughly for pockets of melted chocolate throughout the brownies, and consider customizing with optional add-ins like nuts or caramel for an enhanced experience.

For best results, ensure all ingredients are at room temperature before starting, especially the eggs. This helps create a smooth, well-blended batter. When measuring flour, use the spoon-and-level method to avoid dense brownies which can occur from overpacking the flour. Remember to sift your cocoa powder and baking powder for an even texture, and check the freshness of your baking powder to maximize the rise.

Once baked, allow the brownies to cool in the pan before cutting into squares. This helps them set and makes for cleaner edges. For an extra indulgent treat, serve warm with a scoop of vanilla ice cream or a drizzle of whipped cream. These brownies will keep in an airtight container for up to a week, though they are likely to be devoured much sooner!

Tips

Cooking Tips for Double Chocolate Brownies

  • Butter Melting: Always melt the butter gently, either in a microwave or stovetop, to avoid burning. Let it cool slightly before mixing with the sugar to prevent cooking the eggs when added later.
  • Mixing Method: When combining the sugar, eggs, and melted butter, whisk vigorously to incorporate air, which contributes to a light texture. However, be careful not to overmix once the dry ingredients are added, as this can lead to tough brownies.
  • Egg Temperature: For best results, ensure the eggs are at room temperature. If in a hurry, place cold eggs in a bowl of warm water for about 10 minutes to achieve the desired temperature.
  • Quality Ingredients: Use high-quality cocoa powder and chocolate chips, as they significantly affect the flavor of the brownies. If you can, opt for Dutch-processed cocoa powder for a smoother and deeper chocolate taste.
  • Flour Measurement: To accurately measure the flour, spoon it into the measuring cup and level it off with a knife instead of scooping it directly from the bag. This prevents compacting and results in a lighter brownie texture.
  • Baking Dish: Use a metal baking pan for evenly baked brownies. If you prefer softer edges, line the pan with parchment paper, allowing for easy removal and cleaning.
  • Baking Time: Oven temperatures can vary, so start checking the brownies for doneness a few minutes before the recommended baking time. A toothpick should come out with a few moist crumbs, not completely clean, for the perfect fudgy texture.
  • Cooling Time: Allow the brownies to cool in the pan before cutting. This helps them set up and makes it easier to achieve clean cuts. Use a sharp knife for slicing, and wipe it clean between cuts to keep edges neat.
  • Storage: To keep brownies fresh, store them in an airtight container at room temperature for up to 3 days. For longer storage, refrigerate or freeze, ensuring they are well-wrapped to prevent dryness.

FAQ

What are double chocolate brownies?

Double chocolate brownies are a rich, fudgy dessert made with chocolate in both the batter and additional chocolate chunks or chips. They are known for their intense chocolate flavor and moist texture.

How do I make double chocolate brownies from scratch?

To make double chocolate brownies from scratch, mix together melted butter, sugar, eggs, and vanilla extract, then fold in flour, cocoa powder, and chocolate chips until combined. Bake in a preheated oven until set.

Can I use cocoa powder instead of melted chocolate?

Yes, you can use cocoa powder instead of melted chocolate. However, the texture and intensity of the chocolate flavor may be slightly different.

How long do double chocolate brownies take to bake?

Double chocolate brownies typically take about 20-25 minutes to bake at 350°F (175°C), but it’s essential to check for doneness by inserting a toothpick; it should come out with a few moist crumbs.

Can I add nuts to double chocolate brownies?

Absolutely! You can add nuts such as walnuts, pecans, or almonds to your double chocolate brownie batter for added texture and flavor.

How should I store double chocolate brownies?

Store double chocolate brownies in an airtight container at room temperature for up to 3 days, or in the refrigerator for up to a week. They can also be frozen for longer storage.

Can I make double chocolate brownies gluten-free?

Yes, you can substitute all-purpose flour with a gluten-free flour blend or almond flour to make gluten-free double chocolate brownies.

What are some variations for double chocolate brownies?

Some delicious variations include adding mint extract for mint chocolate brownies, peanut butter swirls, or even chili powder for a spicy kick. You can also top them with frosting or a sprinkle of sea salt for added flavor.

Introduction

There’s something undeniably enchanting about the aroma of freshly baked bread wafting through the kitchen, and when that bread is infused with the sweet scent of ripe bananas and rich chocolate chips, it becomes nothing short of magical. Enter Chocolate Chip Banana Bread, a timeless classic that marries the comforting familiarity of banana bread with the indulgent allure of chocolate. This delectable treat is more than just a dessert — it’s an experience, evoking feelings of warmth, nostalgia, and the simple joys of home-baked goodness.

The beauty of this recipe lies in its perfect balance: it’s rich yet light, sweet yet not overwhelming, and indulgent yet undeniably wholesome. Whether you’re a seasoned baker or a kitchen novice, this chocolate chip banana bread is a surefire way to impress your friends, family, or just yourself! Join us as we explore the enchanting world of this delightful dish, uncovering its story, flavors, and irresistible charm.

The Story Behind the Dish

Chocolate chip banana bread, as we know it today, is the result of a culinary journey steeped in history and innovation. The origins of banana bread can be traced back to the 1930s, during the Great Depression. As resourcefulness became a necessity, home bakers found new and creative ways to use overripe bananas, which were once discarded. The result was a delightful, sweet bread that quickly became a household staple.

Flash forward to the modern era, and the simple banana bread has seen countless variations, with the addition of chocolate chips being one of the most popular. Introduced in the mid-20th century by ingenious bakers looking for a way to elevate their creations, chocolate chips added a luxurious and decadent touch, creating a marriage of flavors that’s hard to resist. The result is a beloved treat that has stood the test of time, cherished by generations for its rich taste and comforting appeal.

Why You’ll Love This Recipe

  • Easy to Make: With straightforward steps and simple ingredients, this recipe is perfect for both beginner and experienced bakers.
  • Wholesome Indulgence: Made with real bananas and quality chocolate, it’s a sweet treat that you can feel good about.
  • Versatile: Enjoy it as a breakfast treat, an afternoon snack, or a delightful dessert.
  • Family Favorite: Its universal appeal makes it a hit with kids and adults alike.
  • Freezes Well: Make a batch and freeze for those days when you need a quick and satisfying snack.

Flavor Profile & Texture

This chocolate chip banana bread is a sensory delight, harmoniously blending the natural sweetness of ripe bananas with the rich, melty goodness of semi-sweet chocolate chips. The bananas lend an unparalleled moistness to the bread, ensuring each bite is soft, tender, and full of flavor. Meanwhile, the chocolate chips offer delightful little pockets of luxury, providing a perfect balance of sweetness and texture.

Beyond the dominant flavors of banana and chocolate lies a subtle complexity, with hints of vanilla and perhaps a whisper of cinnamon, adding warmth and depth to the overall profile. The texture is a triumph, achieving that elusive balance between moistness and structure, ensuring every slice holds together beautifully while melting in your mouth.

Occasions & Pairings

Chocolate chip banana bread is a versatile staple that can be enjoyed on virtually any occasion. Whether you’re serving it at a leisurely brunch, packing it up for a picnic, or enjoying it as a cozy after-dinner treat, it never fails to deliver. It’s an ideal companion to a variety of beverages:

  • Morning Coffee: Start your day with a slice of this bread and a robust cup of coffee for a satisfyingly sweet pick-me-up.
  • Afternoon Tea: Pair it with a lightly brewed tea to mellow the sweetness and enhance the banana and chocolate flavors.
  • Dessert Wine: For a sophisticated twist, enjoy it with a sip of dessert wine, highlighting the bread’s subtle complexities.

Tips, Variations & Substitutions

Chocolate chip banana bread is incredibly adaptable, and there are countless ways to make it your own:

  • Add Nuts: Incorporate walnuts or pecans for extra crunch and a nutty depth.
  • Dairy-Free: Use dairy-free chocolate chips and swap butter with coconut oil or a plant-based alternative.
  • Gluten-Free: Substitute regular flour with a quality gluten-free blend to meet dietary needs without sacrificing flavor.
  • Spices: Experiment with spices like cinnamon, nutmeg, or cardamom for a new flavor twist.
  • Swirl In Nutella: For a decadent treat, swirl in some Nutella before baking for added richness and flavor.

Storage & Make-Ahead Ideas

Chocolate chip banana bread is as convenient as it is delicious. Here’s how you can enjoy it at its best:

  • Room Temperature: Store in an airtight container at room temperature for up to four days.
  • Freezing: Wrap individual slices in plastic wrap, then place in a freezer-safe bag. Freeze for up to three months. Simply thaw at room temperature when ready to enjoy.
  • Reheating: Refresh slices by warming them in the oven or toaster for a few minutes to enjoy that freshly-baked quality.
  • Make Ahead: Prepare the batter in advance and refrigerate overnight. Bake fresh the next day for best results.

Fun Facts & Trivia

Did you know that bananas are technically berries? This makes banana bread a wonderful “berry bread,” if you will. Interestingly, the United States celebrates National Banana Bread Day on February 23, providing the perfect excuse to whip up a batch of this scrumptious bread.

Moreover, chocolate chip banana bread aligns with the growing trend of “rescued produce,” which champions using ingredients that might otherwise go to waste. In kitchens worldwide, overripe bananas find new life in the form of this beloved bread, making it a delicious and environmentally conscious choice.

In conclusion, chocolate chip banana bread is more than just a recipe; it’s a celebration of flavor, history, and innovation. Each bite tells a story of comfort and indulgence, making it a staple that you’ll return to time and time again. Whether you enjoy it alone or share the joy with others, this delightful creation is sure to become a cherished favorite in your culinary repertoire.

Ingredients

    Banana Bread Base

  • 3 ripe bananas (mashed)
    → Use very ripe bananas with plenty of brown spots to ensure maximum sweetness and moisture. The natural sugars in ripe bananas not only provide sweetness but also act as a binder, keeping the banana bread moist and flavorful. Mash them well to avoid any large chunks that might disrupt the texture of the bread.
  • 1/3 cup melted coconut oil (or unsalted butter)
    → Coconut oil or butter adds richness and moisture to the bread. If using coconut oil, let it cool slightly before adding to the mixture to prevent cooking the eggs. Unsalted butter can also be used for a more traditional flavor. Both should be thoroughly melted but not smoking to ensure easy incorporation into the batter.
  • 1/2 cup granulated sugar
    → Granulated sugar provides sweetness and helps with the browning of the crust. You can adjust the amount of sugar based on your preference, but be careful not to reduce it too much, as this will affect the overall taste and texture. For a deeper flavor, consider using brown sugar instead.
  • 2 large eggs (room temperature)
    → Eggs add structure and moisture to the banana bread. Room temperature eggs mix more easily into the batter, creating a smoother consistency. Ensure they are fully incorporated to avoid any separation during baking, which could lead to uneven texture.
  • 1 teaspoon pure vanilla extract
    → Pure vanilla extract adds a rich, aromatic flavor that complements the bananas and chocolate chips. Avoid imitation vanilla if possible, as it lacks the depth of flavor provided by pure vanilla. Measure accurately to ensure a balanced flavor.
  • 1 teaspoon baking soda
    → Baking soda acts as a leavening agent, helping the banana bread rise and achieve a light texture. Make sure to use fresh baking soda, as old or expired baking soda may not provide the same level of leavening. Combine it with the dry ingredients thoroughly to ensure even rising.
  • 1/2 teaspoon salt
    → Salt enhances the flavor of the banana bread and balances the sweetness. It’s essential for bringing out the flavors of the other ingredients. Use fine salt for even distribution, and it’s best to combine it with the dry ingredients before mixing it into the batter.
  • 1 1/2 cups all-purpose flour (or gluten-free flour blend)
    → All-purpose flour provides structure and binds the ingredients together. If you prefer a gluten-free option, opt for a gluten-free flour blend that contains xanthan gum to mimic the elasticity of traditional flour. Sift the flour before measuring to remove any lumps and ensure an even texture.
  • Chocolate Chips

  • 1 cup semi-sweet or dark chocolate chips
    → Chocolate chips add richness and sweetness to the bread. Use good quality chocolate chips for the best flavor. You can also mix in milk chocolate for a sweeter taste or dark chocolate for a richer one. For a fun twist, consider adding white chocolate chips or chunks for a contrasting flavor and texture.

Instructions

  • Preheat your oven to 350°F (175°C) and line a 9×5-inch loaf pan with parchment paper or grease it thoroughly.

    → Preheating ensures that the banana bread bakes evenly from the start. Lining the pan with parchment paper or greasing it prevents sticking, allowing for easy removal of the bread once baked. This also helps achieve a nice crust on the outside.
  • In a large mixing bowl, mash the 3 ripe bananas until smooth using a fork or a potato masher.

    → Ensure that the bananas are very ripe, as their high sugar content contributes to the sweetness and moisture of the bread. Mash them thoroughly to create a smooth base without large chunks, which could affect the texture of the final product.
  • Add 1/3 cup of melted coconut oil or unsalted butter to the bowl with the mashed bananas and mix thoroughly.

    → The oil or melted butter adds a rich flavor and moisture to the bread. If using coconut oil, let it cool to room temperature before combining to avoid cooking the other ingredients. Stir until well blended, ensuring the fat is evenly distributed throughout the banana mixture.
  • Incorporate 1/2 cup of granulated sugar into the banana and oil mixture, stirring until fully combined.

    → Sugar not only sweetens the bread but also contributes to its texture. Mixing it in thoroughly will ensure even sweetness throughout the loaf. This step also helps to create a uniform wet mixture before adding the dry ingredients.
  • Crack in 2 large eggs, ensuring they are at room temperature, and add 1 teaspoon of pure vanilla extract. Stir until the mixture is smooth and homogenous.

    → Room temperature eggs combine more easily into the batter, leading to a smoother texture. The vanilla extract enhances the overall flavor profile, making the bread aromatic and delicious. Ensure that no egg whites are left separate to avoid lumps in the batter.
  • In a separate bowl, whisk together 1 teaspoon of baking soda, 1/2 teaspoon of salt, and 1 1/2 cups of all-purpose flour until well combined.

    → Combining dry ingredients in a separate bowl ensures even distribution of the baking soda and salt, which are critical for proper leavening and flavor. Sifting the flour before measuring can help avoid clumps and ensure accurate that the correct amount is used.
  • Gradually add the dry flour mixture to the wet banana mixture, folding gently with a spatula until just combined.

    → Be careful not to overmix, as this can lead to tough banana bread. Gently folding preserves the air bubbles needed for a light texture. Stop mixing when no dry flour is visible; a few lumps are perfectly okay.
  • Fold in 1 cup of semi-sweet or dark chocolate chips into the batter until evenly distributed.

    → Adding chocolate chips enhances the flavor and adds a delightful texture contrast. Mixing them in gently ensures they are evenly spread throughout the batter without breaking them into smaller pieces.
  • Pour the banana bread batter into the prepared loaf pan, smoothing the top with the spatula for an even surface.

    → Smoothing the top helps the bread rise evenly and creates a nice appearance after baking. Make sure the batter reaches the corners of the pan for uniform baking.
  • Bake in the preheated oven for 60 to 65 minutes, or until a toothpick inserted into the center comes out clean or with a few moist crumbs.

    → Baking for the correct amount of time is key to achieving a fully cooked loaf. Start checking around the 60-minute mark to avoid overbaking, which can lead to dryness. Remember that the bread will continue to cook slightly after being removed from the oven.
  • Remove the banana bread from the oven and let it cool in the pan for 10-15 minutes, then transfer it to a wire rack to cool completely.

    → Allowing the bread to cool in the pan helps set its shape, while transferring it to a wire rack prevents sogginess by allowing air to circulate around the loaf. Cooling completely before slicing will give you cleaner, more attractive slices.
  • Slice and serve the chocolate chip banana bread once cooled, enjoying it fresh or toasted with a touch of butter if preferred.

    → Slicing the bread at room temperature ensures that it holds its shape without crumbling. Toasting can enhance the flavor and provide a delightful contrast to the soft interior, making each bite a tasty experience.

Notes

  • Preheat your oven to 350°F (175°C). This ensures that your banana bread bakes evenly and rises properly. It’s best to use an oven thermometer to confirm the accurate temperature.
  • Prepare a loaf pan by greasing it with coconut oil or butter, or line it with parchment paper for easy removal later. Using parchment paper can also help prevent sticking.
  • In a large mixing bowl, mash the ripe bananas thoroughly with a fork or potato masher until they resemble a smooth puree. This will ensure even distribution throughout the batter.
  • In the same bowl, whisk in the melted coconut oil (or butter), granulated sugar, room temperature eggs, and pure vanilla extract. Mix until the ingredients are fully combined and smooth.
  • In a separate bowl, combine the baking soda, salt, and all-purpose flour (or gluten-free flour blend). Stir these dry ingredients together to ensure they are well mixed before adding to the wet ingredients.
  • Gradually fold the dry ingredients into the wet mixture using a spatula. Be careful not to overmix; stop as soon as you see no more flour. This helps maintain a tender texture.
  • Gently fold in the chocolate chips, reserving a handful to sprinkle on top if desired. This will create a delicious chocolate layer on the surface of the bread once baked.
  • Pour the batter into the prepared loaf pan, smoothing out the top. Tap the pan lightly on the counter to remove any air bubbles.
  • Bake in the preheated oven for 55-65 minutes or until a toothpick inserted into the center comes out clean or with a few moist crumbs. The baking time may vary based on your oven and pan size.
  • Once baked, allow the banana bread to cool in the pan for about 10 minutes before transferring it to a wire rack to cool completely. This will help prevent sogginess at the bottom.
  • Store any leftover banana bread in an airtight container at room temperature for up to 3 days, or refrigerate for up to a week. For longer storage, slice and freeze individual pieces, allowing you to enjoy a quick treat later.
  • Consider serving your chocolate chip banana bread warm or toasted, with a spread of nut butter or a dollop of yogurt for added richness. Enjoy with a cup of coffee or tea for a cozy snack!

Tips

Cooking Tips for Chocolate Chip Banana Bread

  • Banana Selection: The key to delicious banana bread is using overripe bananas. Look for bananas that are soft, with plenty of brown spots. They should be easy to mash and provide maximum sweetness.
  • Mashing Bananas: Ensure that the bananas are mashed thoroughly. Using a fork or a potato masher works best to create a smooth consistency, as large chunks of banana can create uneven texture in the final bread.
  • Coconut Oil Temperature: If you’re using coconut oil, allow it to cool until it’s warm but not hot before pouring it into the banana mixture. This prevents the eggs from cooking prematurely and helps to maintain the integrity of the batter.
  • Room Temperature Ingredients: For the best texture, let your eggs and any dairy product sit out for about 30 minutes before mixing. This will help them blend more easily with the other ingredients, resulting in a well-combined batter.
  • Sweetness Adjustments: When measuring sugar, always do so accurately. If you prefer a less sweet bread, consider reducing the sugar slightly—but keep in mind this may affect the moisture and texture of the finished product.
  • Baking Soda Freshness: Check the expiration date on your baking soda before use. An effective leavening agent is crucial for a light and fluffy loaf. You can test it by adding a couple of drops of vinegar; if it bubbles, it’s good to go!
  • Mixing Technique: When combining the wet and dry ingredients, mix until just combined. Overmixing can lead to dense banana bread, as it develops the gluten in the flour. A few lumps in the batter are perfectly fine.
  • Chocolate Chip Variety: For a more complex flavor profile, experiment with different types of chocolate chips. Semi-sweet, dark, or even a mixture can enhance the taste. Consider folding in some nuts for added texture if desired.
  • Cooling: After baking, let the banana bread cool in the pan for about 10-15 minutes before transferring it to a wire rack. This will prevent it from becoming soggy and allow it to set properly.
  • Storage Tips: Store any leftovers in an airtight container at room temperature for up to 3 days, or refrigerate for longer freshness. You can also freeze slices wrapped in plastic wrap and aluminum foil for up to 3 months—perfect for on-the-go snacks!

FAQ

What ingredients do I need to make Chocolate Chip Banana Bread?

To make Chocolate Chip Banana Bread, you will need ripe bananas, all-purpose flour, sugar, butter, eggs, baking soda, vanilla extract, salt, and chocolate chips.

How ripe should the bananas be?

The bananas should be very ripe, preferably with dark spots and a soft texture. Overripe bananas provide the best flavor and sweetness for the bread.

Can I use frozen bananas for this recipe?

Yes, you can use frozen bananas. Make sure to thaw them completely and drain any excess liquid before mashing and using them in the recipe.

Can I substitute whole wheat flour for all-purpose flour?

Yes, you can substitute part or all of the all-purpose flour with whole wheat flour. The texture will be denser, but it will add more nutrition to your bread.

How long should I bake the bread?

The chocolate chip banana bread should be baked at 350°F (175°C) for about 60-70 minutes, or until a toothpick inserted into the center comes out clean.

Can I add nuts to the Chocolate Chip Banana Bread?

Absolutely! You can add chopped walnuts or pecans for extra texture and flavor. Just mix them in along with the chocolate chips.

How should I store the leftover banana bread?

Store leftover banana bread in an airtight container at room temperature for up to 3 days, or refrigerate it for longer freshness. You can also freeze it for up to 3 months.

Can I make this recipe vegan?

Yes! You can make vegan chocolate chip banana bread by substituting the eggs with flax eggs or applesauce and using dairy-free butter and chocolate chips.

Introduction: A Sweet Adventure Awaits

Imagine biting into a warm chocolate chip cookie that’s fresh from the oven — the divine blend of crispy edges and a chewy center, with gooey chocolate in every bite. Now, picture that same indulgent experience only amplified, in the form of a Chocolate Chip Cookie Bar. These bars are a spectacular transformation of the classic cookie, offering a symphony of flavors and textures that captivate the senses from the first bite. They are wonderfully dense yet soft, with each square promising a perfect balance of sweet chocolate and buttery dough. If you’re ready for a journey of taste that is both comforting and exhilarating, then Chocolate Chip Cookie Bars are exactly what you need.

The Story Behind the Dish

Chocolate chip cookies have been a staple in the dessert world since their serendipitous creation in the 1930s by Ruth Wakefield of the Toll House Inn. The original version was an accidental marvel, borne of a simple substitution in ingredients. Over time, this classic treat has evolved into numerous variations, each bringing its own charm to the table. The Chocolate Chip Cookie Bar is one such delightful evolution, taking inspiration from the universal love of the traditional cookie and adding a twist in presentation and texture.

This variation likely emerged from the desire for a quicker, less labor-intensive way to enjoy the beloved chocolate chip cookie. Instead of placing individual dollops of dough onto a baking sheet, the dough is spread uniformly in a pan, baked to perfection, and then cut into bars. This approach not only saves time but also enriches the flavor, as the dough bakes more evenly and the chocolate is distributed across more surface area. These cookie bars have since become a beloved treat in many households, perfect for everything from casual gatherings to midnight snacks.

Why You’ll Love This Recipe

  • Effortlessly Simple: Prepare your cookie dough, spread it in a pan, and let your oven do the rest.
  • Celebrated Flavor: Enjoy the classic taste you love, enhanced with a new texture.
  • Great for Groups: Perfect for potlucks, parties, or cozy family nights.
  • Customizable: Adapt the recipe to suit your dietary needs or culinary creativity.
  • Satisfying Texture: Delight in the combination of a soft center with slightly crispy edges.

Flavor Profile & Texture

The Chocolate Chip Cookie Bar captures the quintessence of its cookie counterpart; each bite is a harmonious blend of brown sugar, butter, and vanilla. The chocolate chips are not merely an accent but a full-fledged partner in flavor, melting just enough to integrate subtly yet unsurely with the dough. As you bite into one, you’ll notice the bar’s soft and chewy heart, which is beautifully offset by the slightly crisp, golden-brown edge.

The bar’s texture is a noteworthy aspect — while cookies can sometimes be uniform in their chewiness, the bars offer a layered experience. The top is slightly firm, giving way to a dense, luxuriously soft interior that results in a mouthfeel that will have you reaching for another piece.

Occasions & Pairings

These bars are versatile treats that can elevate any occasion, be it a casual family gathering or a sophisticated evening soirée. Here are some ideas for when and how to enjoy them:

  • Everyday Treat: Perfect for an after-school snack or a lunchbox surprise.
  • Festive Celebrations: Add them to dessert tables at holidays or special events as a crowd-pleaser.
  • Pairings: Pair with a cold glass of milk, steaming cup of coffee, or a dollop of vanilla ice cream for an extra layer of indulgence.

Tips, Variations & Substitutions

Customize Your Cookie Bars

One of the best features of this recipe is its adaptability. Here are some creative ways to make it your own:

  • Add Some Nuts: Fold in chopped walnuts or pecans for an additional crunch and depth of flavor.
  • Try Different Chocolates: Swap the classic semi-sweet chips for dark, milk, or white chocolate to suit your taste.
  • Experiment with Flavors: Introduce a hint of sea salt or a sprinkle of cinnamon for a surprising twist.

Dietary Alternatives

  • Gluten-Free: Use a gluten-free flour blend suitable for baking.
  • Vegan Version: Replace butter with coconut oil or vegan butter, and use a flax egg as a binder.

Storage & Make-Ahead Ideas

Chocolate Chip Cookie Bars are not only delicious but also convenient when it comes to storage and make-ahead options:

  • Keep Fresh: Store in an airtight container at room temperature for up to a week.
  • Freeze for Later: Wrap in plastic wrap and aluminum foil for freezing. They will last up to three months. Thaw at room temperature before serving.
  • Make Ahead: Prepare the dough in advance and refrigerate it for up to three days before baking. This chilling time can also enhance the flavor by allowing it to fully develop.

Fun Facts & Trivia

The concept of cookie bars is thought to have gained popularity during war times when resources were scarce, and efficient baking was a necessity. This efficient method of preparing dessert was quickly embraced and has stood the test of time, much to our taste buds’ delight!

Chocolate chip cookie bars offer more than just convenience and flavor; they provide a connection to a simpler time, where resourcefulness was as essential as taste. Each bite is not only a taste of decadence but a nod to the past, a perfect blend of history and culinary artistry.

So next time you find yourself craving something sweet, why not dive into the world of Chocolate Chip Cookie Bars? It’s a culinary adventure you won’t soon forget!

Ingredients

  • Cookie Base
    • 2 1/4 cups all-purpose flour
      → All-purpose flour is the main structure builder for the cookie bars. It provides the necessary gluten, which helps the bars hold their shape and gives them a chewy texture. To ensure accurate measurement, spoon the flour into your measuring cup and level it off without packing it down.
    • 1 teaspoon baking soda
      → Baking soda acts as a leavening agent in the cookie bars, promoting rise and creating a light, airy texture. It should be mixed well with the dry ingredients to ensure even distribution, and always check the expiration date for optimal effectiveness.
    • 1/2 teaspoon salt
      → Salt is essential for enhancing the flavors of the cookie bars, balancing the sweetness of the sugar and chocolate. By incorporating it into the dry ingredients, you ensure an even distribution throughout the batter for enhanced flavor in every bite.
    • 3/4 cup unsalted butter (softened)
      → Softened unsalted butter provides richness and moisture to the cookie bars, helping to create a tender crumb. Be sure to leave it out at room temperature for about an hour before baking, or soften it in the microwave for 10-second intervals until just pliable, but not melted.
    • 1 cup packed brown sugar
      → Brown sugar contributes moisture, chewiness, and a rich, caramel-like flavor to the bars, thanks to its molasses content. Always pack it firmly into the measuring cup to ensure you get the right amount, which will help the bars stay soft and chewy.
    • 1/2 cup granulated sugar
      → Granulated sugar aids in creating a balance between sweetness and texture, promoting a slight crispness on the edges of the cookie bars. Combine it thoroughly with the brown sugar and butter to ensure proper incorporation and aeration for a fluffy base.
    • 2 large eggs (room temperature)
      → Eggs act as binders in the recipe, helping to combine the ingredients while also providing richness. Ensure they are at room temperature before mixing, as this helps achieve a smoother batter and improves the overall consistency of the finished product.
    • 2 teaspoons pure vanilla extract
      → Pure vanilla extract enhances the overall flavor profile of the cookie bars, adding a sweet and aromatic note. For the best results, use high-quality pure vanilla extract rather than imitation vanilla, which can lack depth and richness.
    • 1 1/2 cups semisweet chocolate chips
      → Chocolate chips provide bursts of gooey chocolate throughout the cookie bars, making them irresistible. Choose high-quality semisweet chocolate chips for a balanced sweetness, and add them to the batter gently to keep them intact for optimal melty goodness.
  • Optional Add-ins
    • 1/2 cup chopped nuts (optional)
      → Chopped nuts, such as walnuts or pecans, add crunch and a complementary flavor texture to the soft cookie bars. Toast them lightly before chopping to enhance their flavor. Use even pieces for uniform distribution.
    • 1/2 cup shredded coconut (optional)
      → Shredded coconut contributes a chewy texture and subtle sweetness, beautifully complementing the chocolate. Use unsweetened coconut for a more balanced flavor, and consider toasting it lightly for a richer, nuttier taste.

Instructions

  • Preheat your oven to 350°F (175°C) and line a 9×13 inch baking pan with parchment paper, leaving some overhang on the sides.

    → Preheating the oven ensures that your cookie bars bake evenly from the start. Lining the pan with parchment paper allows for easy removal of the bars once they are baked, preventing any sticking.
  • In a medium mixing bowl, whisk together 2 1/4 cups all-purpose flour, 1 teaspoon baking soda, and 1/2 teaspoon salt.

    → This step combines the dry ingredients, ensuring the baking soda and salt are evenly distributed throughout the flour. Whisking helps aerate the flour, preventing clumps, which is crucial for achieving a uniform texture in the baked bars.
  • In a large mixing bowl, cream together 3/4 cup softened unsalted butter, 1 cup packed brown sugar, and 1/2 cup granulated sugar using a hand mixer or stand mixer on medium speed until the mixture is light and fluffy.

    → Creaming the butter and sugars properly incorporates air into the mixture, which is essential for a light and fluffy cookie bar. Scrape down the sides of the bowl occasionally to ensure all ingredients are well mixed and nothing is left unmixed at the bottom.
  • Add 2 large room temperature eggs, one at a time, mixing well after each addition. Then add 2 teaspoons of pure vanilla extract and continue to blend until well incorporated.

    → Mixing the eggs in one at a time allows for thorough emulsification, which provides stability to the batter. Room temperature eggs mix more smoothly with the butter and sugar, ensuring a creamy texture. The vanilla extract enhances the flavor, so mix until it’s fully integrated.
  • Gradually add the flour mixture to the wet ingredients, mixing on low speed until just combined but still slightly streaky.

    → This technique helps to prevent overmixing, which could lead to tough cookie bars. Mixing until just combined ensures the structure remains tender by not overdeveloping the gluten in the flour.
  • Gently fold in 1 1/2 cups semisweet chocolate chips (and any optional add-ins like 1/2 cup chopped nuts or 1/2 cup shredded coconut, if using) using a spatula or wooden spoon until evenly distributed throughout the batter.

    → Folding keeps the batter light and fluffy while ensuring the chocolate chips and any add-ins are evenly spread throughout. Be careful not to overmix, as this could deflate the batter.
  • Pour the batter into the prepared baking pan and spread it evenly into the corners using a spatula.

    → Spreading the batter evenly helps ensure uniform baking, which will lead to consistent texture and doneness throughout the cookie bars. A spatula helps create a smooth surface.
  • Bake in the preheated oven for 25-30 minutes, or until the edges are golden brown and a toothpick inserted into the center comes out with a few moist crumbs.

    → Checking the doneness with a toothpick ensures you don’t overbake the bars, which could make them dry. The bars continue to cook slightly as they cool, so pulling them out when they are still slightly underdone allows for the ideal fudgy texture.
  • Remove the baking pan from the oven and allow the cookie bars to cool in the pan for about 15 minutes before lifting them out using the parchment overhang.

    → Allowing the bars to cool in the pan helps set their structure. Using the parchment to lift them out prevents breaking and makes it easier to cut them into squares. Cooling fully on a wire rack is recommended for best results.
  • Once fully cool, cut into squares or bars using a sharp knife.

    → A sharp knife ensures clean cuts without tearing the cookie bars. For even squares, you can score the bars with your knife in a grid pattern before cutting all the way through.
  • Serve and enjoy your delicious chocolate chip cookie bars, optionally drizzling melted chocolate on top for added decoration.

    → Adding a drizzle of melted chocolate can enhance visual appeal and intensify the chocolate flavor, making your bars even more irresistible.

Notes

These chocolate chip cookie bars are the perfect mix of chewy and gooey, making them an irresistible treat for any occasion. The combination of brown sugar and granulated sugar creates a nice balance of texture and sweetness, ensuring the bars are soft in the middle with a slight crispness on the edges. For best results, make sure to use room temperature eggs and softened butter, as this will help to create a perfectly smooth batter.

Feel free to customize your cookie bars further by adding in your favorite nuts or shredded coconut. Toasting nuts beforehand will enhance their flavor, while unsweetened shredded coconut can add a lovely chewiness without adding extra sweetness. If you’re feeling adventurous, you could also experiment with other types of chocolate chips, like dark or white chocolate, to cater to your taste.

These bars are also great for meal prepping; they can be stored in an airtight container for up to a week or frozen for longer storage. Just cut them into squares, and you have a delightful snack or dessert ready to go! Serve these cookie bars as-is, or for an indulgent treat, enjoy them warm with a scoop of ice cream or a drizzle of your favorite sauce.

Remember to allow the bars to cool completely before slicing to ensure clean cuts and prevent them from falling apart. Use a sharp knife for the best results. Enjoy your baking!

Tips

  • Measuring Ingredients: Always use spoons and cups specifically designed for dry or liquid measurements to ensure accuracy. For flour, spoon it into the measuring cup and level it off with a knife for the best results.
  • Mixing the Batter: Mix the wet ingredients together on low speed to avoid overmixing, which can lead to tougher cookie bars. Once the flour is added, mix just until you no longer see dry flour to maintain a tender texture.
  • Egg Temperature: For best results, use eggs that have been at room temperature. If you forget to take them out ahead of time, you can place them in a bowl of warm water for about 10 minutes to quickly warm them.
  • Chilling the Dough: If you find that the dough is too sticky, consider chilling it in the refrigerator for 30 minutes before spreading it into your pan. This can help with shaping and reduce spreading while baking.
  • Baking Pan Liners: Line your baking pan with parchment paper, allowing some to hang over the edges. This makes it easier to lift the cookie bars out and cut them evenly once they are cooled.
  • Baking Time: Keep a close eye on your cookie bars as they bake. The edges should look set and lightly golden while the center may still look slightly underbaked. They will continue to firm up as they cool.
  • Cooling the Bars: Allow the cookie bars to cool completely in the pan before cutting. Using a sharp knife or a pizza cutter can help create clean cuts without disturbing the bars too much.
  • Storing Leftovers: Store any leftover cookie bars in an airtight container at room temperature for up to a week. For longer storage, you can freeze them by wrapping individual bars in plastic wrap and then placing them in a freezer bag.
  • Customization: Feel free to experiment with add-ins such as toffee bits, peanut butter chips, or different types of nuts to create variations of the classic chocolate chip cookie bars!

FAQ

What ingredients do I need to make chocolate chip cookie bars?

To make chocolate chip cookie bars, you will need the following ingredients: all-purpose flour, baking soda, salt, unsalted butter, granulated sugar, brown sugar, vanilla extract, eggs, and chocolate chips.

Can I use a different type of chocolate in the recipe?

Yes, you can use different types of chocolate chips such as dark chocolate, milk chocolate, or white chocolate. You can also mix different types for added flavor.

How long do I need to bake the cookie bars?

The baking time for chocolate chip cookie bars typically ranges from 25 to 30 minutes. It’s best to check for a golden-brown color around the edges and a slight softness in the center.

Should I chill the dough before baking?

Chilling the dough is optional, but it can help improve the flavor and texture of the cookie bars. If you have time, consider chilling for at least 30 minutes before baking.

Can I add nuts or other ingredients to the bars?

Yes, you can add chopped nuts, such as walnuts or pecans, or even other mix-ins like dried fruit or oats to customize your chocolate chip cookie bars.

How should I store leftover cookie bars?

Store leftover chocolate chip cookie bars in an airtight container at room temperature for up to one week. You can also freeze them for longer storage; just make sure to wrap them well.

Can I double the recipe to make more cookie bars?

Yes, you can double the recipe. Just ensure you use a larger baking dish and adjust the baking time as needed, checking for doneness as you near the original baking time.

How can I tell when the cookie bars are fully baked?

The cookie bars are done when the edges are golden brown and a toothpick inserted into the center comes out with a few moist crumbs. They may look slightly underbaked in the center, but they will continue to cook as they cool.

Introduction to Baked Chocolate Cheesecake

Imagine sinking your fork into a slice of rich, indulgent chocolate cheesecake, perfectly baked to creamy perfection. This isn’t just any cheesecake — it’s a baked chocolate masterpiece that brings a new level of luxury to the classic dessert. As your fork glides through, you hear the light crunch of the buttery crust meeting the velvety chocolate filling, enhancing the joy of this decadent treat. With each bite, your senses are enveloped by the deep, rich flavors of chocolate mingling harmoniously with the tangy cream cheese. It’s a dessert that’s not only intrinsically satisfying but is also a showstopper, promising to elevate any occasion to something truly special.

The Story Behind the Dish

The chocolate cheesecake, a beloved dessert across the world, draws its roots from ancient Greece where the earliest forms of cheese-based treats were offered to athletes during the first Olympic games in 776 B.C. However, the delightful transformation into cheesecake as we know it began in 19th century New York, with the creamy blend of fresh cheese and sugar topped typically with vibrant berries or chocolate. The baked chocolate cheesecake is a modern twist that brings together the classic tang of cream cheese with the lush richness of chocolate, resulting in a dessert that feels both nostalgic and innovative.

This combination is no mere culinary accident; it’s a thoughtful melding of ingredients that heralds from both European and American culinary traditions. With the global popularity of chocolate, recipes have evolved and spread, embedding themselves in the hearts of dessert lovers from various cultures, each bringing their variation to the table. Yet, no matter where you enjoy it, a slice of baked chocolate cheesecake remains an indulgent reminder of the universal love for chocolate and creamy desserts.

Why You’ll Love This Recipe

  • Decadence Redefined: With every mouthful, savor the unique richness that only a well-balanced chocolate cheesecake can deliver. It’s a dessert that combines the best elements of chocolate and cheesecake, reimagining each in the most delectable form.
  • Simple Elegance: Although it offers a complex symphony of flavors, the recipe remains accessible to home bakers of all skill levels, promising spectacular results every time.
  • Versatile Delight: Whether served at a lavish dinner party or a cozy family gathering, this cheesecake is sure to be the centerpiece of the table and a conversation starter.
  • Mood Booster: Chocolate is renowned for its mood-enhancing properties, so imagine that uplift coupled with the satisfaction of a homemade dessert.

Flavor Profile & Texture

The baked chocolate cheesecake is a dessert lover’s dream. At its core, the flavor profile is a marriage of bittersweet luxury and creamy delight. The deep cocoa notes contrast the mild tang from the cream cheese, creating a balanced sweetness that is neither overpowering nor dull. This harmony makes each bite more irresistible than the last. Picture the texture: a subtly crisp, buttery crust holds a luscious filling that is both dense and silky, topped with a smooth, glossy ganache that envelopes the senses in pure chocolate nirvana.

Occasions & Pairings

This indulgent baked chocolate cheesecake is perfect for virtually any occasion that calls for a touch of elegance and comfort. Celebrate a friend’s birthday, serve it as the grand finale at a dinner party, or simply luxuriate in a slice during a quiet night in.

When it comes to pairing, consider offering a dollop of whipped cream or a scoop of vanilla ice cream alongside your cheesecake. To drink, a rich cup of espresso or a glass of port wine can deepen the flavor experience. Fruit-forward wines or dessert cocktails can also complement or cut through the cheesecake’s richness, refreshing the palate with new sensations.

Tips, Variations & Substitutions

This versatile recipe provides numerous opportunities for customization:

  • Add a Fruity Twist: Top with fresh raspberries or strawberries to introduce a slightly tart element that contrasts beautifully with the rich chocolate.
  • Make it Gluten-Free: Substitute the crust with gluten-free cookie crumbs or a base of nut flours for those who avoid gluten.
  • Dietary Alterations: Use vegan cream cheese and an egg replacer for a plant-based version that doesn’t compromise on flavor or texture.
  • Region-specific Flavors: Infuse spices like cayenne or cinnamon into the ganache to give it a Mexican chocolate flair, or incorporate Irish cream into the filling for a boozy twist.

Storage & Make-Ahead Ideas

One of the beauties of baked chocolate cheesecake is its ability to stay fresh and delicious over several days with proper storage. Keep it in an airtight container in the refrigerator, where it can last for up to a week. For longer preservation, wrap individual slices in plastic wrap and store them in a freezer-safe bag for up to three months; just be sure to let them thaw in the refrigerator before serving.

You can prepare the cheesecake a day or two in advance before a big event, allowing you to focus on other preparations while knowing you have an exceptional dessert ready and waiting.

Fun Facts & Trivia

Did you know that National Cheesecake Day is celebrated annually on July 30th in the United States? It’s the perfect excuse to whip up a baked chocolate cheesecake and share it with friends and family, or to indulge in a slice just for you!

Moreover, ancient cheesecakes made with different layers and textures can be found in various parts of the world, from the Italians’ ricotta-based versions to the Japanese cotton-soft cheesecakes. Each region illustrates its cultural adaptations through this dessert, embracing ingredients that capture their culinary essence.

Indeed, the baked chocolate cheesecake is more than a dessert; it’s an epitome of gastronomic art across ages and continents, a deliciously unifying experience found in its smooth, chocolatey depths.

Ingredients

  • Cream Cheese
    → Cream cheese is the primary ingredient providing the rich and creamy texture characteristic of cheesecake. Use full-fat cream cheese for the best flavor and smooth consistency. Ensure it is at room temperature to avoid lumps during mixing, leading to a perfectly smooth batter.
  • Granulated Sugar
    → Sugar sweetens the cheesecake and balances the flavors. It also contributes to the texture by helping to create a pleasing mouthfeel. For even incorporation, measure accurately and mix thoroughly with the cream cheese until completely blended.
  • Cocoa Powder
    → Unsweetened cocoa powder adds the signature chocolate flavor to the cheesecake. Sift it before adding to avoid lumps and ensure it blends evenly throughout the batter. Use high-quality cocoa powder for the richest flavor and color.
  • Eggs
    → Eggs act as a binding agent, providing structure and stability to the cheesecake. They should be at room temperature to ensure even mixing and to help the cheesecake rise slightly during baking without cracking. Be careful not to overbeat, as this can incorporate air and create a dense texture.
  • Sour Cream
    → Sour cream adds creaminess and a tangy flavor that balances the sweetness of the sugar. It also helps to keep the cheesecake moist. Use full-fat sour cream for the best results, and mix it gently with the other ingredients to avoid excess air pockets.
  • Vanilla Extract
    → Pure vanilla extract enhances the overall flavor profile and adds depth to the cheesecake. Use high-quality pure vanilla extract rather than imitation for the best taste. Add it towards the end of mixing to ensure its aromatic qualities remain intact.
  • Chocolate Crust
    → A chocolate crust typically made from crushed chocolate cookies mixed with melted butter provides a flavorful foundation for the cheesecake. Use a food processor to finely crush the cookies to ensure even distribution. Press the mixture firmly into the bottom of the pan to create a sturdy base.
  • Melted Dark Chocolate
    → Melted dark chocolate provides an intense chocolate flavor and richness to the cheesecake. Choose high-quality dark chocolate with at least 60% cocoa content for depth. Allow the chocolate to cool slightly before incorporating it into the cream cheese mixture to prevent curdling.

Instructions

  • Prepare your workspace by gathering all the ingredients and tools needed for the cheesecake.

    → This includes measuring cups, spoons, mixing bowls, a food processor, a springform pan, and a rubber spatula. Having everything ready minimizes interruptions and mistakes during the preparation process.
  • Preheat your oven to 325°F (163°C) and prepare a 9-inch springform pan.

    → Preheating ensures the cheesecake bakes evenly and at the right temperature, preventing it from cooking too slowly or unevenly. Grease the sides of the pan with butter or cooking spray to ensure easy removal.
  • Make the chocolate crust by finely crushing chocolate cookies in a food processor.

    → Choose chocolate cookies like Oreos or any similar brand. Process until you achieve a sand-like consistency, ensuring there are no large chunks. This step is crucial for an even crust that holds together.
  • Combine the crushed chocolate cookies with melted butter and mix well.

    → The melted butter acts as a binder to hold the crust together. Use a fork or your hands to combine thoroughly, ensuring that all crumbs are moistened. This creates a compact crust that will hold its shape once baked.
  • Press the crust mixture firmly into the bottom of the springform pan.

    → Use the bottom of a measuring cup or a flat object to create an even layer, pressing down to compact the crust. This firmness prevents the crust from crumbling when serving the cheesecake.
  • Bake the crust in the preheated oven for 10 minutes, then remove and allow to cool.

    → Baking the crust helps to set it, preventing it from becoming soggy once the cheesecake filling is added. Cooling it afterward makes sure it doesn’t melt the cream cheese mixture when layered.
  • In a large mixing bowl, beat the room temperature cream cheese with granulated sugar until smooth.

    → Use an electric mixer on medium speed for about 2-3 minutes. Start slowly to avoid splattering. This step is essential for achieving a silky texture, ensuring that the sugar is fully dissolved.
  • Sift the cocoa powder into the cream cheese mixture and blend until combined.

    → Sifting removes any lumps and ensures even distribution throughout the batter. Mix on low speed to prevent cocoa powder from flying out of the bowl.
  • Add the eggs one at a time to the mixture, mixing gently after each addition.

    → This technique allows each egg to incorporate fully before adding the next, creating a smoother batter while reducing the risk of overmixing, which can lead to cracks in the cheesecake.
  • Stir in the sour cream and vanilla extract, mixing until just combined.

    → Gently folding in these ingredients minimizes air bubbles in the batter. The sour cream adds moisture and a slight tang, enhancing the overall flavor profile.
  • Melt the dark chocolate in a microwave or a double boiler until completely smooth.

    → If using a microwave, heat in 20-second intervals, stirring in between to prevent burning. Allow it to cool slightly before adding to the batter to avoid curdling the cream cheese.
  • Pour the melted dark chocolate into the cheesecake mixture and gently fold to combine.

    → Use a spatula to incorporate the chocolate evenly without deflating the batter. This step adds rich flavor and color to the cheesecake.
  • Carefully pour the cheesecake filling over the cooled crust in the springform pan.

    → Pouring gently helps avoid disturbing the crust while ensuring an even layer of filling. Spread the top lightly with a spatula for a uniform surface.
  • Bake the cheesecake in the preheated oven for 55-65 minutes, or until the edges are set but the center is slightly jiggly.

    → The residual heat will continue to cook the center after removing it from the oven. This prevents cracking by ensuring the cheesecake isn’t overcooked.
  • Turn off the oven and let the cheesecake cool inside with the door ajar for 1 hour.

    → This gradual cooling process helps prevent sudden temperature changes that can cause cracks. Leaving the door slightly open allows steam to escape, further stabilizing the texture.
  • Remove the cheesecake from the oven and let it cool to room temperature.

    → Allowing it to cool completely before refrigerating is important for achieving the right texture. Cover it with plastic wrap once it reaches room temperature to prevent drying out.
  • Refrigerate the cheesecake for at least 4 hours, or overnight if possible, for the best flavor and set consistency.

    → Chilling allows the flavors to meld beautifully and helps the cheesecake firm up, making it easier to slice. A well-chilled cheesecake also has a more satisfying texture.
  • When ready to serve, carefully unclip the springform pan and slice the cheesecake.

    → Use a sharp knife dipped in hot water for clean slices, wiping the blade between cuts. This technique ensures beautiful presentation and prevents the cheesecake from sticking to the knife.
  • Serve chilled, optionally garnishing with whipped cream or chocolate shavings for an added touch.

    → The garnish not only enhances the visual appeal but also adds extra flavor, offering a delightful contrast to the rich chocolate cheesecake.

Notes

These baked chocolate cheesecakes are a decadent dessert that combines a rich chocolate flavor with a smooth, creamy texture. To ensure that your cheesecake turns out perfectly, it’s crucial to use room temperature cream cheese to avoid lumps and achieve a silky batter. When combining the sugar with the cream cheese, mix thoroughly to ensure it is fully incorporated, as this will enhance the overall texture of the cheesecake.

Using high-quality unsweetened cocoa powder is essential for achieving a deep chocolate flavor. Sifting the cocoa powder before adding it to the mixture will help eliminate any lumps and ensure an even distribution throughout the batter. Remember that the eggs are important for providing structure, so they should also be at room temperature for optimal mixing.

Incorporating full-fat sour cream adds a delightful tanginess to the sweetness and ensures your cheesecake remains moist and creamy. Be gentle when mixing the sour cream to prevent incorporating too much air, which can lead to a dense texture.

For added depth of flavor, opt for pure vanilla extract instead of imitation vanilla, and add it towards the end of mixing. When preparing the chocolate crust, crush the cookies finely using a food processor to create an even texture, and be sure to press the mixture firmly into the pan for a stable base.

Lastly, melted dark chocolate enriches the cheesecake with a robust chocolate essence. Be cautious to let it cool slightly before mixing it in, as hot chocolate can curdle the cream cheese. Once baked, allow the cheesecake to cool gradually in the oven to prevent cracking, and chill in the refrigerator for a few hours or overnight for the best texture and flavor.

Tips

Cooking Tips for Baked Chocolate Cheesecake

  • Preparation is Key: Before starting, make sure to gather all your ingredients and tools. This will help streamline the process and avoid any last-minute rush.
  • Soften the Cream Cheese: Ensure your cream cheese is fully softened to room temperature. You can speed up this process by cutting it into smaller pieces or microwaving it for a few seconds, but avoid melting it.
  • Mixing Technique: When mixing the cream cheese and sugar, use a hand mixer or stand mixer on low speed to avoid adding too much air, which can lead to cracking during baking. Scrape down the sides of the bowl frequently to incorporate all ingredients evenly.
  • Sifting Cocoa Powder: Always sift the cocoa powder before adding it to the mixture. This helps avoid clumps that can create an uneven texture in your cheesecake.
  • Egg Temperature: For best results, ensure your eggs are at room temperature, as this creates a smoother batter and better incorporation of ingredients.
  • Creating a Perfect Crust: After pressing the chocolate crust mixture into the pan, consider baking it for about 10 minutes at 350°F (175°C) to set it slightly before adding the cheesecake filling. This helps maintain its structure and prevents it from becoming soggy.
  • Watch for Overbaking: The cheesecake is done when the edges are set, but the center has a slight jiggle. Overbaking can lead to cracks. To prevent cracking, you can also turn off the oven and leave the cheesecake inside with the door slightly ajar for 1 hour to cool gradually.
  • Chill Time: Be patient! Allow the cheesecake to cool completely at room temperature before transferring it to the fridge. Chilling for at least 4 hours, preferably overnight, helps the flavors meld and enhances the creamy texture.
  • Serving Suggestions: For an added touch, top your cheesecake with whipped cream, chocolate shavings, or fresh berries just before serving to enhance presentation and flavor.

FAQ

What ingredients are needed for Baked Chocolate Cheesecake?

The main ingredients include cream cheese, sugar, eggs, chocolate, vanilla extract, and a graham cracker crust.

How long does it take to bake a Chocolate Cheesecake?

The baking time is typically around 50-60 minutes, followed by cooling time to set properly.

Can I use a different type of chocolate?

Yes, you can use dark, milk, or even white chocolate, depending on your preferred taste and sweetness level.

Is it necessary to refrigerate the cheesecake after baking?

Yes, it’s important to refrigerate it for at least 4 hours or overnight to allow it to set correctly and enhance the flavors.

How can I tell when the cheesecake is done?

The cheesecake should be set around the edges but still slightly jiggly in the center. It will continue to firm up as it cools.

Can I make this cheesecake in advance?

Absolutely! Baked chocolate cheesecake can be made a day or two in advance and stored in the refrigerator until you are ready to serve it.

What toppings pair well with Baked Chocolate Cheesecake?

Whipped cream, chocolate ganache, fresh berries, or a dusting of cocoa powder are all great toppings to complement the cheesecake.

Is it possible to make a gluten-free version?

Yes, you can use gluten-free graham crackers or a nut-based crust to create a gluten-free Baked Chocolate Cheesecake.

Introduction / Hook

Imagine biting into a warm, freshly baked chocolate donut, its rich cocoa aroma enticing your senses while a light dusting of sugar melts on your lips. Each bite is a perfect symphony of moist chocolatey goodness intertwined with a slight crunch from its baked crust. Baked chocolate donuts are the epitome of indulgence without the guilt, offering a healthier alternative to their deep-fried counterparts while still delivering a full-bodied taste that screams decadence. Whether you’re a chocolate enthusiast or just seeking a sweet escape, these donuts will transport you to indulgent bliss with just one bite.

The Story Behind the Dish

The journey of the donut is a fascinating tale that weaves through various cultures and centuries. While the classic fried donut can trace its roots back to early Dutch settlers in North America, who initially made ‘olykoeks’ or ‘oily cakes,’ the baked donut is a more modern twist, embodying contemporary health-conscious trends. Over time, with increasing awareness of healthier lifestyles, bakers began experimenting with baking instead of frying, preserving the essence of the donut but eliminating some of the guilt of indulgence. Chocolate, a universally adored flavor, found its place in this evolution, and thus the baked chocolate donut emerged—a harmonious blend of tradition and innovation.

Why You’ll Love This Recipe

  • Healthier Indulgence: Being baked rather than fried means these donuts are lighter, reducing added fats without compromising on that irresistible chocolate flavor.
  • Quick and Easy: From mixing the batter to enjoying the final product, this recipe streamlines the donut-making process, perfect for busy mornings or a last-minute treat.
  • Versatile Treat: Suitable for breakfast, dessert, or a sweet snack, they can be adapted to any time of day or occasion.
  • Family-Friendly: A fun activity to involve the little ones. Kids will love dipping and decorating these chocolate delights.
  • Rich and Moist: Despite being baked, these donuts maintain an impeccable level of moisture with a soft, cake-like crumb that melts in your mouth.

Flavor Profile & Texture

The baked chocolate donut is a wonderful tapestry of flavors and textures. It’s characterized by its deep, intensive chocolate flavor that is both comforting and invigorating. The cocoa used in the batter provides a rich, bittersweet note, perfectly balanced with the sugar’s sweetness for an elevating experience with each bite. Texturally, you’ll enjoy a moist, tender crumb that rivals even the finest cakes, all encased beneath a slightly crisp shell that’s developed naturally in the oven. The light sugar coating or optional glaze adds a hint of sweetness and texture contrast, making every mouthful a balanced journey of flavors.

Occasions & Pairings

Baked chocolate donuts are versatile and can easily adapt to various occasions. They make an excellent addition to a weekend brunch spread, served alongside fresh fruit and a pot of freshly brewed coffee. Consider them for your dessert table at gatherings—they’re an assured crowd-pleaser and can be jazzed up with toppings like sprinkles, nuts, or even a drizzle of white chocolate. For a truly decadent experience, pair them with a scoop of vanilla ice cream or a glass of cold milk. Holidays, birthdays, or a simple afternoon tea party are made even more special with the inclusion of these delightful treats.

Tips, Variations & Substitutions

This recipe offers an array of possibilities for customization. You can easily adapt it to suit various dietary needs or flavor preferences:

  • Chocolate Lovers’ Twist: Add chocolate chips to the batter for extra bursts of chocolate.
  • Gluten-Free Option: Substitute the all-purpose flour with a gluten-free flour blend. Ensure the flour is suitable for baking, which typically includes xanthan gum for elasticity.
  • Vegan Adaptation: Replace the butter with coconut oil, and use flaxseed mixed with water as an egg substitute. Opt for plant-based milk in the batter.
  • Spicy Kick: Include a pinch of cayenne pepper or cinnamon in the batter for a warm, spicy twist.
  • Nutritional Boost: Incorporate a handful of oats or nuts into the batter for added texture and nutrition.

Storage & Make-Ahead Ideas

Baked chocolate donuts are a make-ahead marvel. They can easily be stored in an airtight container at room temperature for up to two days, retaining their freshness and flavor. For longer storage, consider freezing them; after cooling completely, wrap each donut individually in plastic wrap or foil, then place them in a freezer bag. When ready to enjoy, simply thaw at room temperature. Reheating can be done in a preheated oven or toaster for a few minutes to revive their warmth and soft texture. This flexibility makes them perfect for preparation ahead of busy weeks or upcoming gatherings, ensuring you always have a delicious treat on hand.

Fun Facts & Trivia (Optional)

Did you know that donuts, in various forms, can be found across the globe? From the Berliner in Germany to the Italian Zeppole and the Spanish Churro, each culture has its interpretation, celebrated in its unique way. The term ‘donut’ itself came into popular use in the 20th century, an abbreviated form of ‘doughnut,’ which rose conveniently alongside America’s love for confections.

The baked chocolate donut today pays homage to this rich historical backdrop while embracing a healthier direction. It’s not only a treat for your taste buds but also a delightful addition to the ongoing story of global cuisine, showing that sometimes the path to healthier living doesn’t mean compromising on taste or tradition.

Ingredients

  • Donut Batter
    • 1 cup all-purpose flour
      → This flour forms the main structure of the baked donuts. For a lighter texture, it’s important to spoon the flour into the measuring cup rather than scooping it directly. This prevents the flour from becoming packed, which could result in dense donuts.
    • 1/2 cup unsweetened cocoa powder
      → Cocoa powder adds rich chocolate flavor and color to the donuts. Ensure to sift it before mixing to remove any lumps and achieve a smooth batter. Using high-quality cocoa powder will enhance the chocolate taste.
    • 3/4 cup granulated sugar
      → Sugar sweetens the donuts and helps to create a tender crumb. Use fine granulated sugar for better incorporation into the batter. It’s essential to mix it well with other dry ingredients to ensure even sweetness throughout.
    • 1 teaspoon baking powder
      → This leavening agent helps the donuts rise and become fluffy. Make sure the baking powder is fresh for maximum effectiveness. It should be combined with the dry ingredients to ensure even distribution in the batter.
    • 1/2 teaspoon baking soda
      → Baking soda works synergistically with acidic ingredients in the recipe (like vinegar or yogurt) to aid in leavening. Ensure it is also fresh and mix it well with the other dry ingredients.
    • 1/4 teaspoon salt
      → Salt enhances the flavors in the donuts and balances the sweetness. Use fine salt for even distribution throughout the batter. This small amount is crucial for bringing out the chocolate flavor without making the donuts taste salty.
    • 1/2 cup buttermilk (or milk with vinegar)
      → Buttermilk adds moisture and a slight tanginess, contributing to the overall flavor and texture of the donuts. If you don’t have buttermilk, you can create a substitute by adding 1/2 tablespoon of vinegar to regular milk and letting it sit for 5 minutes.
    • 1 large egg (room temperature)
      → Eggs provide moisture and richness while helping to bind the ingredients together. For best results, ensure the egg is at room temperature to allow for better emulsion into the batter.
    • 2 tablespoons vegetable oil
      → Oil adds moisture and tenderness to the donuts. Choose a neutral oil so it doesn’t interfere with the chocolate flavor. Mixing it in with the wet ingredients helps to create a smoother batter.
    • 1 teaspoon pure vanilla extract
      → Vanilla adds depth and enhances the overall flavor of the donuts. Always opt for pure vanilla extract over imitation for the best flavor profile. Adding it to the wet ingredients will help integrate its flavor evenly.
  • Chocolate Glaze
    • 1 cup powdered sugar
      → Powdered sugar is the base for the glaze, providing sweetness and a smooth texture. Sift it before use to prevent lumps in the glaze for a creamy finish.
    • 2 tablespoons cocoa powder
      → Adding cocoa powder to the glaze enhances the chocolate flavor and gives it a rich, dark color. Ensure it is sifted before mixing to avoid clumping in the glaze.
    • 2 tablespoons milk (or cream)
      → Milk or cream is essential for achieving the desired consistency of the glaze. Adjust the quantity depending on how thick or thin you prefer your glaze, but start with 2 tablespoons and add more if necessary.
    • 1 teaspoon pure vanilla extract
      → A touch of vanilla in the glaze amplifies the chocolate flavor and adds a hint of sweetness and warmth to the finish. As with the batter, using pure vanilla extract is recommended for the best results.

Instructions

  • Preheat your oven to 350°F (175°C) and grease a donut pan well.

    → Preheating the oven ensures that the donuts rise properly and bake evenly. Greasing the donut pan will prevent the donuts from sticking and make it easier to release them once baked.
  • In a large mixing bowl, sift together 1 cup of all-purpose flour, 1/2 cup of unsweetened cocoa powder, 3/4 cup of granulated sugar, 1 teaspoon of baking powder, 1/2 teaspoon of baking soda, and 1/4 teaspoon of salt.

    → Sifting helps to aerate the dry ingredients and remove any lumps, leading to a lighter batter. The combination of these dry ingredients is essential for the structure, flavor, and leavening of your donuts.
  • In a separate bowl, combine 1/2 cup of buttermilk (or create a buttermilk substitute with milk and 1/2 tablespoon of vinegar), 1 large egg (at room temperature), 2 tablespoons of vegetable oil, and 1 teaspoon of pure vanilla extract.

    → Mixing the wet ingredients separately allows for better integration into the dry mixture. Using room-temperature egg helps create a smoother batter and ensures better emulsification of the ingredients.
  • Pour the wet ingredients into the bowl with the dry ingredients.

    → This step brings all the components together. Use a spatula or wooden spoon and gently fold the ingredients together until just combined. Be careful not to overmix, as this can develop gluten and make the donuts dense.
  • Transfer the batter into a piping bag or a zip-top bag with a corner snipped off for easy filling.

    → This technique helps to neatly fill the donut mold without making a mess. It also allows for better portioning, ensuring that each donut is uniform in size.
  • Fill each cavity of the donut pan about halfway full with the batter.

    → Filling halfway allows room for the donuts to rise while baking. If you fill them too full, the batter will overflow, resulting in misshapen donuts.
  • Bake in the preheated oven for 10-12 minutes, or until a toothpick inserted into the center of a donut comes out clean.

    → The exact baking time may vary based on your oven, so keep an eye on the donuts. Toothpick testing is key to determine doneness; when it comes out clean, the donuts are properly baked and ready.
  • Remove the donuts from the oven and allow them to cool in the pan for about 5 minutes before transferring them to a wire rack to cool completely.

    → Cooling in the pan helps them firm up slightly before you transfer them, preventing breakage. The wire rack allows for even cooling, which is vital for the texture of the donuts.
  • While the donuts cool, prepare the chocolate glaze by sifting together 1 cup of powdered sugar and 2 tablespoons of cocoa powder in a bowl.

    → Sifting ensures a smooth glaze without lumps, which is important for achieving the desired glossy finish. Make sure to blend these two to fully incorporate their flavors.
  • Add 2 tablespoons of milk (or cream) and 1 teaspoon of pure vanilla extract to the powdered sugar mixture.

    → Combining these wet ingredients gives your glaze the necessary consistency to both coat and drip elegantly from the donuts. Start with the minimum amount of liquid and adjust as needed.
  • Whisk the mixture until smooth and glossy, adjusting with more milk if necessary to reach your desired glaze thickness.

    → The whisking process incorporates air into the glaze, making it lighter, while adjusting the thickness ensures it adheres well to the donuts without sliding off. A thicker glaze will sit on top, while a thinner one will create a drip effect.
  • Once the donuts are completely cooled, dip the tops into the chocolate glaze, allowing any excess to drip off.

    → Dipping creates an even coating and gives a beautiful finish. Letting the excess glaze drip off ensures that the glaze isn’t too thick, which may impact the texture.
  • Place the glazed donuts back on the wire rack for a few minutes to allow the glaze to set.

    → Allowing the glaze to set gives it a shiny, firm finish and prevents it from being disturbed or smudged while you prepare to serve or store them.
  • Optionally, sprinkle additional cocoa powder or chocolate shavings on top of the glaze while it’s still wet for decoration.

    → This decorative touch adds an extra layer of flavor and visual appeal to your donuts, making them even more enticing.
  • Serve your baked chocolate donuts immediately or store them in an airtight container at room temperature for up to three days.

    → Storing in an airtight container will keep them fresh and prevent them from becoming stale. However, for the best texture and flavor, they are best enjoyed fresh from the oven.

Notes

These baked chocolate donuts are a delightful treat, perfect for breakfast or as a snack throughout the day. The use of all-purpose flour and cocoa powder creates a rich chocolate flavor and tender texture, making them irresistible. For the best results, measure your flour carefully to avoid dense donuts, and don’t skip sifting the cocoa powder to ensure a smooth batter.

Adding buttermilk contributes moisture and a slight tang, which balances the sweetness from the sugar. If you’re out of buttermilk, a simple substitute can be made with regular milk and vinegar. Remember to let your egg come to room temperature before incorporating it into the batter, as this helps create a better texture.

The chocolate glaze takes these donuts to the next level, adding a glossy finish and extra sweetness. Be sure to sift the powdered sugar and cocoa powder together to prevent lumps for a creamy, decadent glaze. You can adjust the thickness of the glaze by varying the amount of milk or cream, depending on your preference.

Feel free to customize your baked donuts by adding chocolate chips or nuts into the batter for extra texture. These donuts are best enjoyed fresh but can also be stored in an airtight container for a few days or frozen for later consumption. They make for a fantastic pairing with a cup of coffee or a glass of milk, making them an ideal choice for any time of day.

Tips

Tips for Making Baked Chocolate Donuts

  • Measuring Ingredients: When measuring flour, use a spoon to fluff it up before scooping it into the measuring cup, then level it off with a straight edge. This helps avoid packing the flour, ensuring light and fluffy donuts.
  • Sifting Dry Ingredients: Sifting the cocoa powder and powdered sugar not only removes lumps but also aerates the ingredients, leading to a smoother batter and glaze. Don’t skip this step for the best texture!
  • Mixing Technique: When combining the dry and wet ingredients, mix until just combined. Over-mixing can lead to dense donuts. A few lumps are perfectly fine!
  • Room Temperature Ingredients: Always aim to use room temperature eggs and buttermilk. This helps in achieving a better emulsion and results in a smoother batter, contributing to the overall texture of the donuts.
  • Elevating Flavor: For a richer chocolate flavor, consider adding a splash of coffee to the batter. It enhances the chocolate taste without adding a coffee flavor to the donuts.
  • Donut Pan Preparation: Ensure to grease your donut pan thoroughly or use a non-stick spray to prevent sticking. If possible, use a silicone donut pan for easy removal.
  • Baking Time: Keep a close eye on the donuts as they bake. They typically take about 10-12 minutes, but oven temperatures can vary. Look for a springy surface and a toothpick inserted into the center should come out clean.
  • Glaze Consistency: When making the chocolate glaze, start with the recommended amount of milk or cream. If the glaze is too thick, gradually add more liquid until you reach your desired consistency.
  • Cooling Time: Allow the donuts to cool in the pan for a few minutes before transferring them to a wire rack. This helps set their shape and prevents sogginess from heat trapped in the pan.
  • Customization: Feel free to customize your toppings! Consider adding sprinkles, chopped nuts, or shredded coconut on top of the glaze for an extra layer of flavor and texture.
  • Storage: Store leftover donuts in an airtight container at room temperature for up to 2 days. If you want to keep them longer, consider refrigerating them, though this may affect their texture.

FAQ

1. What ingredients do I need to make baked chocolate donuts?

To make baked chocolate donuts, you will typically need all-purpose flour, cocoa powder, sugar, baking powder, baking soda, salt, eggs, milk, vegetable oil, and vanilla extract.

2. Can I use whole wheat flour instead of all-purpose flour?

Yes, you can substitute whole wheat flour for all-purpose flour, but the texture may be denser. Consider using a blend of both for a lighter donut.

3. How do I store baked chocolate donuts?

Baked chocolate donuts can be stored in an airtight container at room temperature for up to 2 days, or in the refrigerator for about a week. You can also freeze them for longer storage.

4. Can I make the donut batter ahead of time?

It’s best to bake the donuts shortly after making the batter for optimal freshness. If you must prepare it ahead of time, store it in the refrigerator, but be aware that baking time may vary.

5. What can I use as a glaze for the donuts?

You can use a simple glaze made from powdered sugar and milk, or try a chocolate glaze made from melted chocolate and butter. Adding sprinkles or chopped nuts can enhance the presentation.

6. Are baked chocolate donuts healthier than fried donuts?

Yes, baked chocolate donuts are generally considered healthier than fried ones, as they typically have less fat and fewer calories due to the absence of frying oil.

7. Can I add chocolate chips to the batter?

Absolutely! Adding chocolate chips to the batter can add extra flavor and texture. Just fold them in gently before pouring the batter into the donut pan.

8. How long do I need to bake the donuts?

Baked chocolate donuts usually take about 10-12 minutes to bake in a preheated oven at 350°F (175°C). Check for doneness by inserting a toothpick; it should come out clean.

Introduction / Hook

Imagine a dessert that marries the richness of a chocolate cake with the indulgent allure of molten chocolate flowing like lava from its center. That’s the magic of the Fudgy Chocolate Lava Cake. Each bite is a symphony of textures: the soft, spongy cake yielding effortlessly to reveal a molten core that flows like liquid gold, rich and decadent. This luxurious dessert promises an experience that captivates both the senses and the spirit, inviting you to savor every delightful moment. Whether for a special occasion or just a self-indulgent treat, this cake is the ultimate indulgence for chocolate lovers everywhere.

The Story Behind the Dish

The Chocolate Lava Cake, often dubbed the “molten chocolate cake,” made its revered entry into the culinary spotlight not too long ago. First crafted and perfected in the world-renowned kitchens of France, this dessert rose to popularity in the 1980s. Its creation is often attributed to French chef Michel Bras, whose quest for a unique dessert led him to innovate this iconic dish. Fudgy Chocolate Lava Cake embodies the perfect blend of classic French baking techniques with a touch of modern flair.

Interestingly, its popularity soared in the United States thanks to celebrated chef Jean-Georges Vongerichten. The blend of soft exterior with a liquid center puzzled many a pastry chef but enchanted every palate it touched. Its widespread acclaim replaced the long, ingredient-heavy desserts that dominated menus, proving that simplicity and elegance are often the ultimate sophistication.

Why You’ll Love This Recipe

  • Quick and Easy: This dessert can be whipped together in just about the same time it takes to watch your favorite TV show episode.
  • Restaurant-Quality: Bring the luxe experience of fine dining to your kitchen with this indulgent cake.
  • Show-Stopping Dessert: Perfect for impressing guests, this dessert’s presentation is as impressive as its flavor.
  • Customizable Sweetness: Adjust the chocolate type and amount of sugar to suit your personal taste preference.
  • Family-Friendly Fun: An engaging recipe that invites fun interactions and eager taste tests from little helpers.

Flavor Profile & Texture

The beauty of the Fudgy Chocolate Lava Cake lies in its complexity of flavors and textures. The outer cake is rich with chocolate and subtly sweet, offering a slight sponginess that complements the indulgently gooey center. The molten core is a luxurious, velvety surprise, bursting with an intensified chocolate essence that coating the tongue in pure bliss. Together, these textures create a multi-dimensional experience—one moment you’re tasting fine chocolate cake, and the next flows into a soothing dessert sauce.

This mesmerizing balance between soft cake and runny center is the hallmark of an exquisite lava cake. Choose from a variety of high-quality chocolates, whether semisweet, bittersweet, or milk, and enjoy the dance of sweet and bitter on your palate.

Occasions & Pairings

The elegance and allure of the Fudgy Chocolate Lava Cake make it a perfect dessert for special occasions. Impress your Valentine with this masterpiece or serve it as the grand finale to your festive family gatherings. Birthdays, anniversaries, or any celebratory dinner benefit from the addition of this dazzling dessert.

For the ultimate experience, pair this cake with a scoop of vanilla ice cream. The cold and creamy counterpart enhances the warmth of the chocolate, creating a divine contrast. Alternatively, a dollop of freshly whipped cream or a sprinkle of berries can add a refreshing edge to balance the cake’s richness. For beverage pairings, consider a velvety port or a rich espresso.

Tips, Variations & Substitutions

While the classic Fudgy Chocolate Lava Cake is a delight, there are numerous ways to personalize the recipe:

  • Flavor Infusions: Add a splash of espresso or a dash of your favorite liqueur for a grown-up twist to your lava cake.
  • Dietary Alternatives: Opt for gluten-free flour or almond flour for a gluten-sensitive friendly version. For lower calorie content, consider using dark chocolate with high cacao content.
  • Regional Twists: Experiment with a sprinkle of sea salt or chili to create a tantalizing sweet-spicy contrast.
  • Chocolate Choices: Explore different chocolate types, from silky milk chocolate to robust dark chocolate, each providing a unique flavor tone.

Storage & Make-Ahead Ideas

The method of eating a Chocolate Lava Cake fresh out of the oven guarantees a molten center, but should you have leftovers, they can be stored with care. Wrap each cake individually in cling film to maintain moisture, then refrigerate for up to two days. Reheat gently in the oven at low heat to avoid drying out or compromising the molten core. Alternatively, the batter can be prepared and refrigerated for a day ahead. When ready to bake, bring to room temperature and follow the baking steps to ensure a perfectly flowing center.

For those who love planning, freeze individual portions of baked cakes and reheat them at a low setting for dessert on demand. Being able to excite guests with a seemingly fresh lava cake without the hassle of preparation makes entertaining a breeze.

Fun Facts & Trivia

Embrace these curious titbits as you enjoy your delicious dessert:

  • The molten center technically isn’t molten at all. Instead, it’s an undercooked batter that results from intentionally short baking times, allowing the center to remain runny.
  • Although associated predominantly with France and the U.S., variations of chocolate lava cakes have been discovered worldwide, each incorporating unique local flavors and spices.
  • The popularity of lava cakes coincided with the rise of television cooking programs, becoming a hallmark of culinary shows that demonstrated the lusciousness of a sophisticated dessert with simplicity.

Ingredients

  • 1/2 cup unsalted butter
    → Unsalted butter adds richness and moisture to the lava cake, creating a fudgy texture that’s both decadent and indulgent. When using butter in baking, it’s best to melt it gently—either in the microwave or over a double boiler—so it incorporates smoothly into the batter without cooling it too much.
  • 1 cup dark chocolate (at least 60% cocoa)
    → High-quality dark chocolate is essential for achieving the deep, rich flavor associated with fudgy lava cake. Chop the chocolate into small pieces to ensure it melts uniformly with the butter. Choose a chocolate that you enjoy eating on its own for the best flavor in the finished cake.
  • 2 large eggs
    → Eggs provide structure and stability to the cake, helping it rise while contributing to a moist texture. Make sure to bring them to room temperature before using to ensure they mix well with the other ingredients, allowing for a smoother batter.
  • 2 large egg yolks
    → Additional egg yolks contribute to a richer flavor and creamier texture, enhancing the cake’s molten center. Use fresh eggs and separate them carefully, ensuring that not even a drop of egg white gets into the yolks, as this can affect the emulsion.
  • 1/4 cup granulated sugar
    → Sugar sweetens the cake while also helping to create a tender crumb. When measuring, it’s important to scoop and level the sugar rather than packing it in, as this will give you a more accurate measure for your recipe.
  • 2 tablespoons all-purpose flour
    → Flour provides the necessary structure to the cake but in a minimal amount; this allows for a delightfully gooey center. Sift the flour before measuring to remove any lumps and incorporate air, which helps with even distribution throughout the batter.
  • 1 teaspoon vanilla extract
    → Pure vanilla extract enhances the overall flavor of the cake. Opt for pure vanilla rather than imitation for a more complex and aromatic profile. Add it at the mixing stage to ensure it disperses evenly in the batter.

  • Powdered sugar (for dusting)
    → Powdered sugar adds a touch of sweetness and a visually appealing finish to the lava cake. Dust it over the cakes just before serving to prevent it from dissolving into the warm chocolate, ensuring it looks beautiful on the plate.
  • Vanilla ice cream or whipped cream (for serving)
    → A scoop of vanilla ice cream or a dollop of whipped cream adds a cool, creamy contrast to the warm, gooey lava cake. Serve immediately after baking while the center is still molten for the best experience. Using high-quality ice cream can elevate the dessert further.

Instructions

  • Preheat your oven to 425°F (220°C) and prepare four ramekins by greasing them with butter and dusting them with cocoa powder.

    → This high temperature is crucial for creating the gooey center while ensuring the outside cooks through. Greasing and dusting the ramekins will prevent the lava cakes from sticking, allowing for easy removal after baking.
  • Melt the unsalted butter and dark chocolate together using a double boiler or a microwave.

    → Use a double boiler by placing a heatproof bowl over simmering water, stirring occasionally until melted, or microwave in 20-second intervals, stirring in between. This gentle heating prevents the chocolate from seizing. The mixture should be smooth and slightly warm when completed.
  • Remove the melted butter and chocolate mixture from the heat and allow it to cool slightly.

    → Cooling the mixture prevents cooking the eggs when they are added, ensuring the batter remains smooth without scrambling any of the ingredients.
  • In a mixing bowl, whisk together the large eggs and egg yolks until well combined and slightly frothy.

    → Whisking introduces air into the eggs, giving the lava cake a light and airy texture. This should take about 1-2 minutes. Ensure the mixture is homogeneous for even baking.
  • Gradually mix in the granulated sugar into the egg mixture until it is fully dissolved and slightly thickened.

    → This step is crucial as dissolving the sugar creates a smoother batter and helps with aeration. You can use a whisk or an electric mixer on low speed for this process.
  • Add the melted chocolate and butter mixture to the egg and sugar mixture, and mix until smooth.

    → Incorporating the chocolate slowly ensures an even distribution of flavors throughout the batter, creating a rich and decadent taste in every bite. Avoid overmixing to maintain the air bubbles created in the eggs.
  • Sift the all-purpose flour over the batter and gently fold it in until just combined.

    → Folding involves using a spatula to lift the batter from the bottom and over the top, ensuring you do not deflate the air bubbles. This keeps the lava cake light while still allowing the flour to achieve structure.
  • Stir in the vanilla extract to the batter until fully incorporated.

    → The vanilla enhances the overall flavor profile of the cake, making it more aromatic. Make sure it’s evenly mixed for consistent flavor throughout the cake.
  • Divide the batter evenly among the prepared ramekins, filling each about 3/4 full.

    → Filling them to this level allows space for the cakes to rise without overflowing, ensuring a perfect dome shape. Use a spatula to scrape the bowl clean for maximum yield.
  • Bake the lava cakes in the preheated oven for 12-14 minutes or until the edges are firm, but the center remains soft.

    → Baking times can vary based on your oven, so start checking at 12 minutes. The ideal cake should have a set edge but jiggle slightly when gently shaken, indicating a molten center.
  • Remove the lava cakes from the oven and let them cool for 1 minute before inverting onto serving plates.

    → Allowing them to rest for a minute helps to slightly firm up the edges, making them easier to unmold. Gently tapping the ramekin on the plate can help release any stubborn spots.
  • Dust the tops with powdered sugar and serve immediately with vanilla ice cream or whipped cream, if desired.

    → The powdered sugar adds a touch of elegance and sweetness, while the cold ice cream or whipped cream contrasts beautifully with the warm molten chocolate, creating a delightful experience.

Notes

This fudgy chocolate lava cake is an indulgent dessert, perfect for chocolate lovers. The key to achieving the classic molten center is careful timing; make sure to keep an eye on the baking time to avoid overcooking the cake. Serve it warm for the most decadent experience, allowing the rich chocolate to flow out with each slice. You can experiment with flavor by adding a pinch of sea salt or a splash of espresso powder to enhance the chocolate flavor. This dessert pairs perfectly with a scoop of vanilla ice cream or a dollop of whipped cream, providing a delightful contrast in temperatures and textures. For an impressive presentation, dust the finished cakes with powdered sugar just before serving, and consider adding fresh berries for a pop of color and freshness. Be sure to use high-quality ingredients, especially chocolate, to elevate the dessert’s overall flavor.

Tips

Cooking Tips for Fudgy Chocolate Lava Cake

  • Prep Your Ingredients: Before you start, gather all your ingredients and measure them out. This will help you bake more efficiently and ensures you don’t forget any key components during the process.
  • Use Quality Chocolate: Always choose high-quality dark chocolate for the best flavor. The cocoa percentage in the chocolate can significantly affect the richness of your lava cake, so aim for a chocolate that you love.
  • Room Temperature Eggs: Remember to allow your eggs to come to room temperature before using them. This helps them blend more seamlessly into the mixture and improves the overall texture of your cake.
  • Gently Melt Butter: Melt the butter slowly to avoid separating or burning it. This preserves its emulsifying properties, which are crucial for achieving the right texture in your batter.
  • Don’t Overmix: When combining your wet and dry ingredients, mix until just combined. Overmixing can result in a denser cake rather than a light, fudgy texture.
  • Prepare Your Molds: Ensure your ramekins or muffin tins are well-greased. You can also dust them with cocoa powder instead of flour to prevent sticking and add an extra hint of chocolate flavor.
  • Baking Time: Keep a close eye on your lava cakes in the oven. They’re done when the edges look set but the center still jiggles slightly. This ensures the molten center you’re looking for!
  • Let Them Rest: Allow the cakes to rest for a minute or two after removing them from the oven before serving. This allows them to firm up slightly, which makes it easier to plate without breaking.
  • Serving Suggestions: Serve your lava cakes immediately with a spoonful of vanilla ice cream or whipped cream for a delightful contrast of temperatures. You can also drizzle some chocolate sauce on top for extra indulgence.
  • Storage Tips: If you have leftovers, store them in an airtight container in the fridge. Reheat gently in the microwave just before serving to regain that delicious gooey center.

FAQ

What are the main ingredients in Fudgy Chocolate Lava Cake?

The main ingredients include dark chocolate, butter, eggs, sugar, flour, and vanilla extract.

How long does it take to make Chocolate Lava Cake?

Preparation time is typically 15 minutes, and baking time is around 12-15 minutes, making the total time approximately 30 minutes.

Can I make Fudgy Chocolate Lava Cake ahead of time?

Yes, you can prepare the batter ahead of time and refrigerate it. Just pour it into the ramekins and bake when you’re ready to serve.

What should I serve with Chocolate Lava Cake?

It’s delicious served with vanilla ice cream, whipped cream, or fresh berries.

How do I know when the Chocolate Lava Cake is done baking?

The edges should be set but the center will still be slightly jiggly. The tops should look dry and not shiny.

Can I use milk chocolate instead of dark chocolate?

Yes, you can use milk chocolate, but the lava cake may be sweeter and less rich in flavor.

Is there a gluten-free version of Chocolate Lava Cake?

Absolutely! You can substitute regular flour with a gluten-free flour blend to make the cake gluten-free.

Can I add flavors or toppings to my lava cake?

Yes! You can add flavors like espresso, orange zest, or almond extract to the batter. For toppings, consider raspberries or a dusting of powdered sugar.