Introduction / Hook
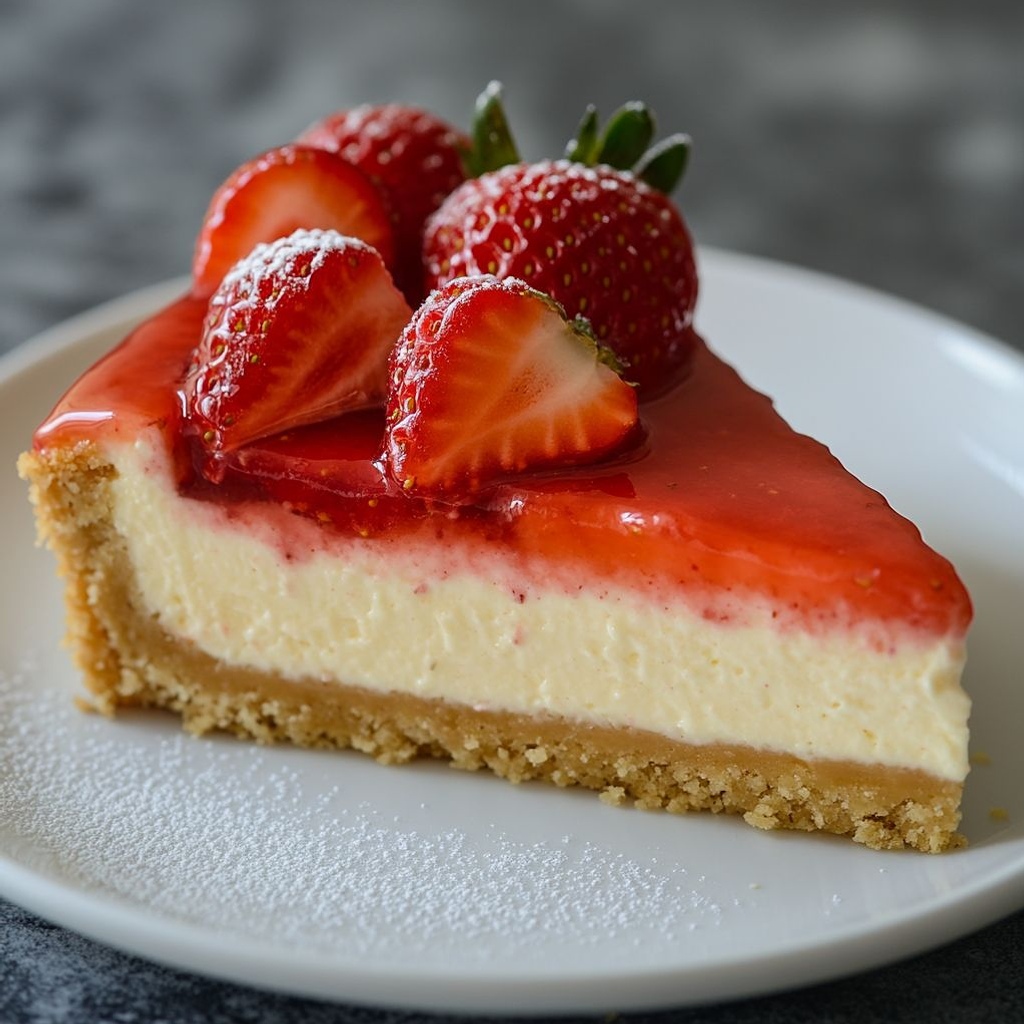
Step into a kitchen that smells of sunshine and sweet memories. Cheesecake dump alle fragole is more than dessert—it’s a warm invitation to slow down, scoop generously, and savor the moment with friends and family. Picture a glossy ribbon of strawberry brightness resting atop a creamy, dreamy cheesecake layer, all cradled by a tender, crumbly crust that crinkles softly when you press a fork through it. The aroma of vanilla and lemon zest lingers in the air, mingling with the fruit’s orchard-fresh scent as you carve the first slice. This recipe distills comfort into a single, crowd-pleasing dish that delivers the elegance of a classic cheesecake with the no-fuss charm of a dump cake. It’s the kind of dessert you bring to a potluck, a Sunday family dinner, or a birthday celebration when you want to impress without overworking the kitchen. The strawberry topping is both bright and lush, a payoff that feels lavish yet approachable, making every bite a little celebration of summer and togetherness.
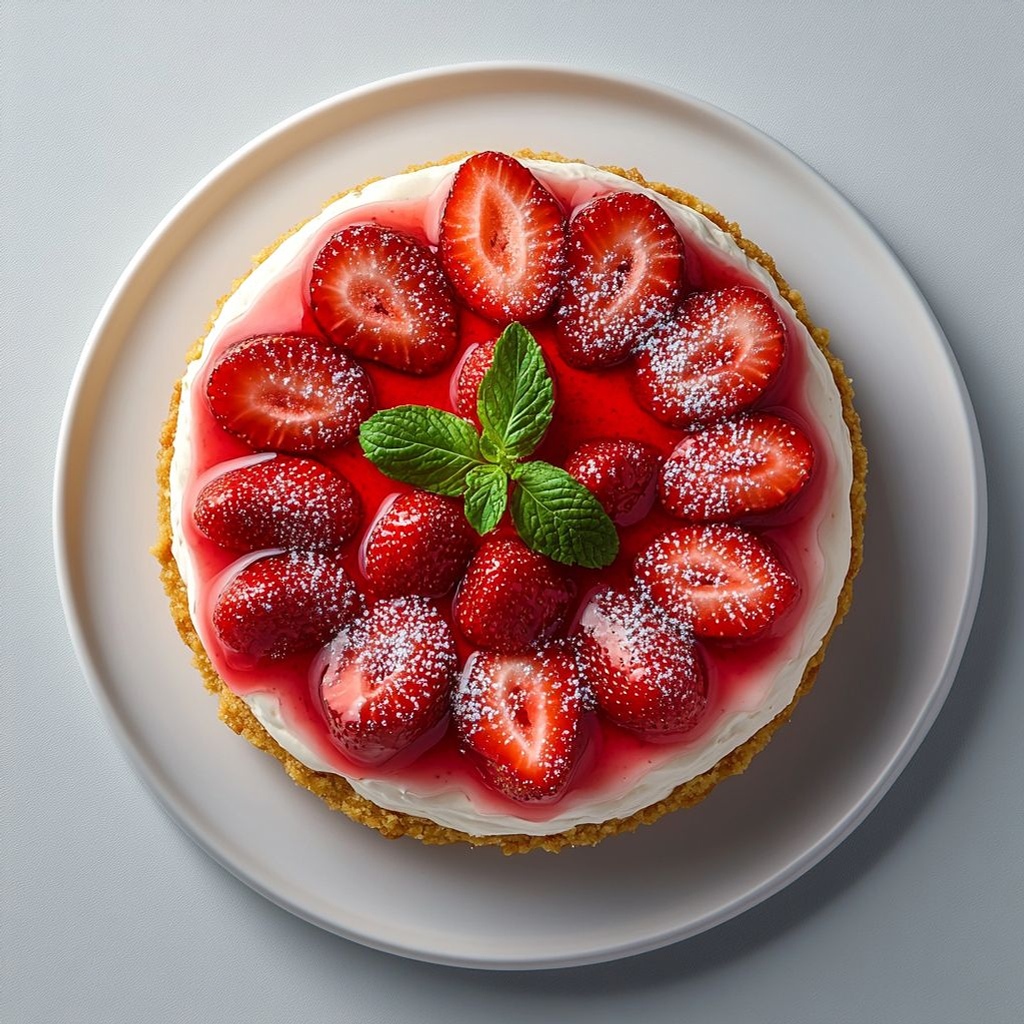
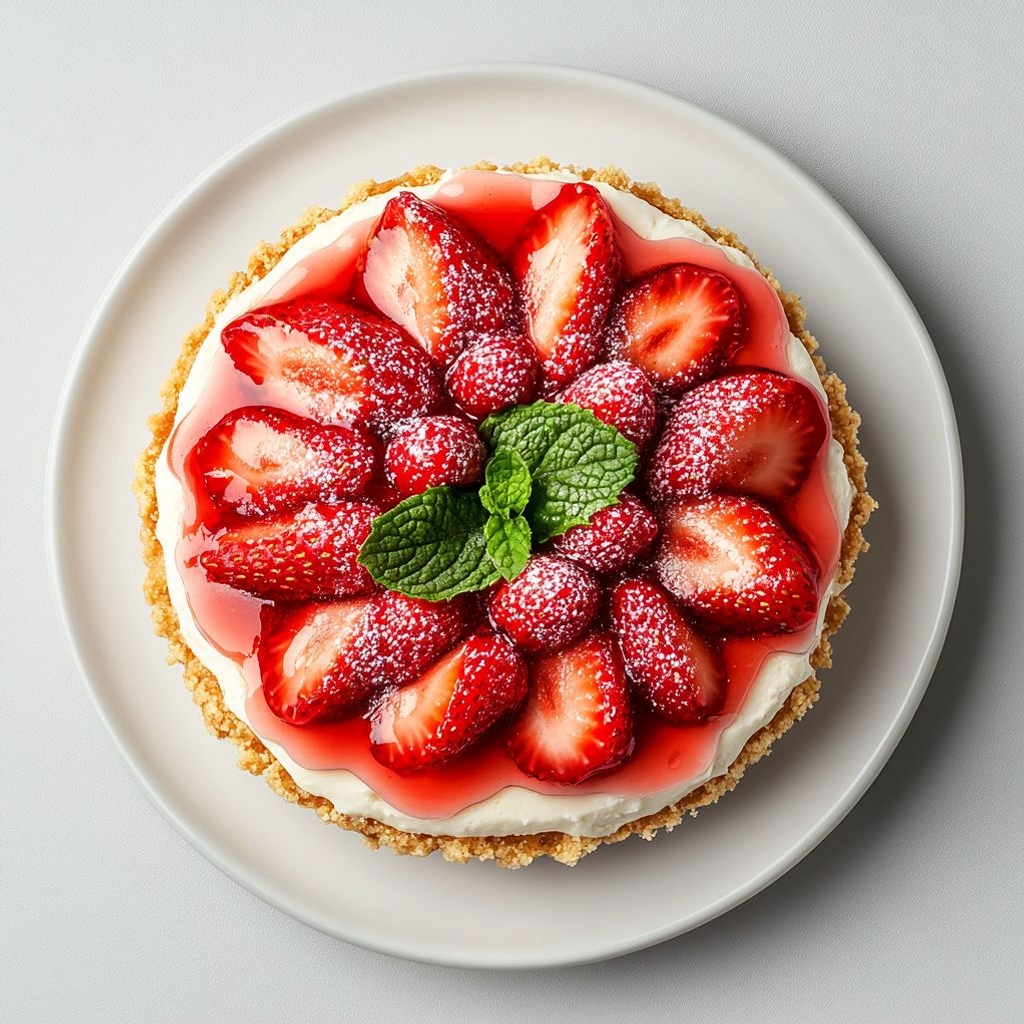
Cheesecake dump alle fragole invites you to imagine a table scattering wafts of berry syrup, sheer creaminess, and a crust that yields just enough to remind you of its presence without stealing the spotlight. There’s something almost cinematic about the way the colors unfold: pale ivory cheesecake giving way to a ruby pool of strawberry goodness, all contrasting against a pale, crumbly edge. It’s soft, it’s tangy, it’s lightly sweet, and it has that magical balance that makes you reach for a second slice before you even know you’ve finished the first. Beyond its beauty, what makes this dessert truly special is its sense of hospitality—the sense that you’re inviting people to pause, breathe, and share something a little bit magical in a single, spoonful moment.
The Story Behind the Dish
Dump cakes have a reputation for being the do-it-once-and-done solutions that home cooks reach for when time is tight but the craving for something soulful remains. The term “dump” evokes the idea of ingredients being layered, dumped, and baked with minimal fuss, a practical approach that became a beloved staple in American kitchens during busy decades. Cheesecake, on the other hand, carries a long legacy of refined indulgence—silky fillings, delicate crusts, and a balance of tang and sweetness that has delighted generations. This recipe marries these two impulses: the effortless, forgiving charm of a dump cake with the lush decadence of a classic cheesecake, all wrapped in the bright fruitiness of strawberries. The result is a dessert that feels special enough for celebrations yet accessible enough for a weeknight treat, a culinary bridge between tradition and convenience.
In Italian households, strawberries, or fragole, have their own timeless appeal. They appear in desserts that celebrate the brightness of fruit in the height of summer and in comforting, family-friendly sweets that bring people together. Cheesecake dump alle fragole embodies that spirit—it’s a dish that respects tradition while embracing modern kitchen realities. It’s the kind of dessert you might imagine being shared at a sunlit veranda, with a pot of espresso steaming nearby and a chorus of delighted voices as each slice disappears. The name itself tells a story: a cheesecakey silhouette softened with the vivid, ruby-toned charm of fragole, a playful nod to both elegance and ease. It’s a dish that feels as at home on a rustic table as it does on a festive dessert cart, because it speaks to a universal desire: dessert that tastes like celebration, without requiring you to toil for hours in the kitchen.
Why You’ll Love This Recipe
- Effortless indulgence: A straightforward assembly that delivers big-on-flavor without demanding hours of precision.
- Versatility: Works with regular or gluten-free crust options, and can be adapted to dairy-free or vegan preferences with simple substitutions.
- Perfect balance: The creamy cheesecake layer contrasts beautifully with a bright, fruity strawberry topping, creating a harmonious taste profile that’s neither too rich nor too tart.
- Make-ahead magic: This dessert gains depth and flavor when prepared ahead of time, making it ideal for gatherings where you need to reduce last-minute kitchen chaos.
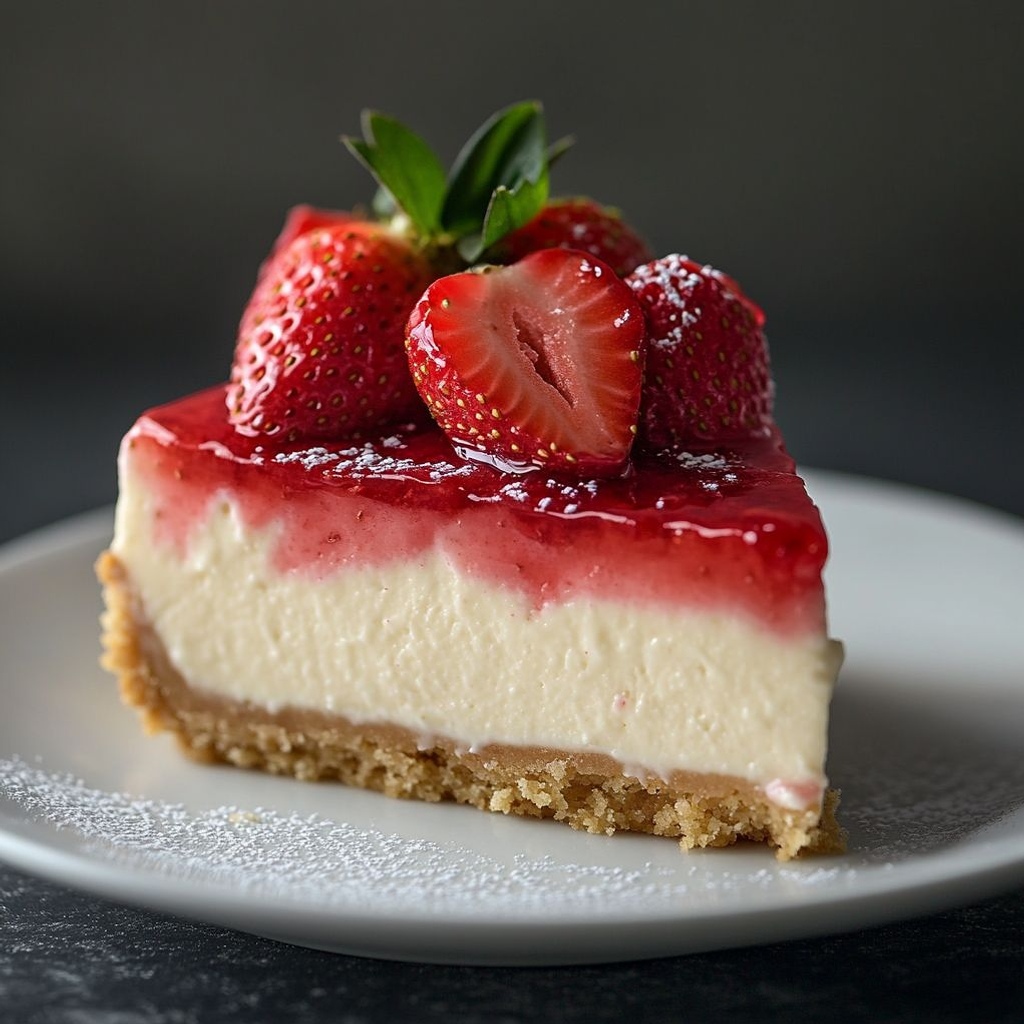
- Visual appeal: The glossy strawberry layer against a pale, velvety cheesecake surface makes for a striking, restaurant-caliber presentation.
- Family-friendly appeal: Sweet, comforting, and not overly fancy—it’s the kind of dessert kids and adults alike will eagerly request again and again.
- One-pan convenience: Most of the work happens in one pan or dish, which means easier cleanup and more time for savoring the moment with your guests.
Flavor Profile & Texture
What makes cheesecakes truly sing is the texture dance between components, and this version performs a delicious duet. The crust—whether you lean on a buttery biscuit base or a nutty, crumbly alternative—offers a gentle crunch that gives way to the ultra-smooth, airy cheesecake layer. The cheesecake itself is a silk-smooth filling with a whisper of tang from the dairy or plant-based cream cheese, enriched by a touch of vanilla, a kiss of citrus zest, and a hint of sweetness that never overpowers the palate. It holds a luscious, almost cloud-like quality that melts on the tongue, leaving behind a clean, creamy finish.
Then comes the strawberry topping—vivid, glossy, and fragrant. Strawberries burst with fresh brightness, which is amplified by a delicate syrup that seems to cling softly to every berry. The result is a luscious contrast: the fruit’s natural acidity cutting through the confection’s sweetness, while a hint of lemon or orange zest lifts the entire ensemble, making the flavors feel light rather than cloying. There are several textural notes to savor: the initial bite into the crust, the creamy midsection, and the juicy, saucy strawberry layer that lingers on the tongue. The overall experience is reminiscent of a summer harvest, where fruit and dairy come together to create something that feels celebratory and comforting all at once.
For those who love a little extra theatre, you can imagine a cool, pale center meeting a warm, glossy strawberry top—an invitation to explore the contrasts: cold, creamy, and smooth against bright, fruity, slightly tart. The aroma alone—vanilla, citrus zest, and fragrant strawberries—is enough to trigger happy memories and dreams of gatherings with loved ones. This dessert is a sensory package: the visuals invite admiration, the aroma invites anticipation, and the taste delivers a satisfying, well-rounded finish that makes every forkful a small, edible hug.
Occasions & Pairings
Cheesecake dump alle fragole shines in a variety of settings, and its versatility is one of its strongest charms. It’s ideally suited for:
- Summer picnic or garden party: the strawberry topping feels bright and seasonally appropriate, especially when strawberries are at their peak.
- Holiday gatherings and family dinners: it’s impressive enough to serve as a centerpiece dessert, yet simple enough to assemble without alarming the host.
- Birthdays and anniversaries: a classic treat with a playful name, perfect for toasting with a flute of prosecco or a glass of dessert wine.
- Weeknight dessert with a “wow” factor: you can pull this off after a simple dinner and still feel like a culinary hero.
Pairing ideas to elevate the experience:
- Drinks: Prosecco, Moscato d’Asti, a light sparkling rosé, or a sweet Italian liqueur that complements berries.
- Accompaniments: a dollop of lightly whipped cream or a scoop of vanilla bean ice cream can add a new layer of richness. A few fresh mint leaves can provide a refreshing contrast.
- Side desserts: a short, citrusy sorbet can refresh the palate between bites, especially on hot days.
- Meh alternative: if you’re serving a heartier Italian meal, balancing with a crisp salad or a small plate of biscotti can be a delightful way to end the feast.
Tips, Variations & Substitutions
- Crust options: Traditional crumb crusts (graham crackers, digestive biscuits, or almond cookies) work beautifully. For a gluten-free version, use gluten-free biscuits or a nut-and-dare crust (finely ground almonds or hazelnuts mixed with a touch of butter) to maintain a satisfying crunch.
- Cheesecake base variations: If you want a lighter texture, use a mixture of cream cheese and greek yogurt or ricotta. For a richer, denser feel, lean into full-fat cream cheese and a splash of heavy cream.
- Vegan/dairy-free adaptation: Use plant-based cream cheese, coconut cream, or soaked cashews blended with a touch of lemon juice and a neutral oil. Replace dairy butter in the crust with a solid plant-based alternative. The strawberry topping can be prepared with a sugar-free or naturally sweetened syrup to suit dietary needs.
- Fruit variations: While fragole take center stage, other berries like raspberries, blueberries, or a mixed berry blend work beautifully. For a citrus twist, add a thin layer of lemon curd between the cheesecake and the fruit topping, or fold a small amount of zest into the filling for brightness.
- Flavor boosters: A teaspoon of vanilla extract is classic, but you can experiment with almond extract, lemon zest, or a hint of orange blossom water to create a subtle, aromatic difference. A light swirl of fruity jam into the cheesecake layer just before setting can introduce an elegant marble effect.
- Texture tweaks: If you prefer a more pronounced crust, press the crust firmly and bake briefly to develop a toasty aroma. For a softer edge, reduce baking time or allow the dish to rest longer before slicing to let the layers set fully.
- Make-ahead tips: This dessert benefits from chilling. Prepare the base and filling in advance, then top with the strawberry sauce the day you plan to serve. This allows the flavors to meld and the topping to retain its glossy sheen.
- Make it portable: If you’re taking this to a potluck, consider using a disposable, shallow serving dish that keeps the top level and easy to portion. A tall, straight-edged side knife helps maintain clean slices for transport.
Storage & Make-Ahead Ideas
The nature of cheesecake means it loves a little rest. After it’s assembled and set, you can cover and store it in the refrigerator. Here are practical guidelines to keep it at its best:
- Refrigeration: Store covered or in an airtight container for up to 3–4 days. The flavors deepen with time, and the texture remains pleasantly creamy.
- Make-ahead: You can prepare the crust, the cheesecake filling, and the topping separately up to 24 hours in advance. Assemble and chill close to serving time to preserve the topping’s vibrancy and glossiness.
- Freezing: Individual slices can be frozen for longer storage. Wrap each slice tightly in plastic wrap and seal in an airtight container. Thaw in the refrigerator before serving; the texture remains velvety, though the shell may soften slightly after freezing.
- Reheating and serving: If the topping has cooled and become a touch firm, a brief gentle warming or allowing it to come to room temperature can restore a glossy, luscious appearance.
Fun Facts & Trivia (Optional)
Here are a few delightful tidbits to add a little extra flavor to your conversation as you plate this dessert:
- The idea of “dump cakes” emerged as a practical, no-fuss approach to dessert-making, popular in mid-to-late 20th-century kitchens where time and equipment were at a premium. The name playfully captures the effortless layering of ingredients into a single dish before baking.
- Strawberries have long been celebrated as a symbol of sweetness, summer, and affection in many cultures. Their bright color and fragrant aroma make them a go-to pairing for creamy dairy desserts, elevating both the scent and the taste with a natural fruitiness.
- Cheesecake itself has ancient roots, but the modern smooth, rich American cheesecake owes much to the availability of cream cheese in the 19th and early 20th centuries. This dessert tradition grew to include quicker, more forgiving forms, like the modern strawberry-top cheesecake variations you enjoy today.
- Flavor layering is a culinary concept that transcends cultures. The balance between tangy, creamy, and fruity notes mirrors how many traditional desserts segment flavors to create a multi-dimensional tasting experience in a single bite.
Closing Thoughts
Cheesecake dump alle fragole is not just a recipe; it’s an invitation to gather, to share, and to celebrate the simple pleasures of good food and good company. It embodies the spirit of hospitality—an indulgent treat that doesn’t demand perfection but rewards with warmth, memories, and a little bit of magic in every spoonful. Whether you’re feeding a busy weeknight crowd or treating guests to something special, this dessert offers a harmonious blend of elegance and ease. Embrace the charm of fragole, let the cheesecake’s luxurious creaminess linger on your palate, and savor the moment as the last slice disappears. In the end, it’s about more than dessert—it’s about the joy of coming together to enjoy something truly comforting and quintessentially satisfying.
Ingredients
- Crust
- 1 1/2 cups graham cracker crumbs (or gluten-free graham cracker crumbs), finely crushed
→ The crust forms the flavorful, slightly crunchy base that supports the creamy cheesecake. Finely crushing the crackers ensures an even, compact crust that bakes or sets uniformly. If you need a gluten-free version, use certified gluten-free crackers and crush to a fine, sand-like texture for best binding with the melted butter. - 2 tablespoons granulated sugar
→ A touch of sugar in the crust enhances the cookie flavor and helps balance the tang of the cheese. Evenly mix with the crumbs so the sweetness is distributed and not concentrated in one bite. - 4 tablespoons unsalted butter, melted
→ The melted butter binds the crust, giving it structure and a rich, shortbread-like mouthfeel. Let the butter cool slightly before mixing with the crumbs so the crust doesn’t become too greasy or oil-separated. Press into the pan firmly for an even, cohesive crust.
- 1 1/2 cups graham cracker crumbs (or gluten-free graham cracker crumbs), finely crushed
- Filling
- 24 oz (680 g) cream cheese, softened
→ The creamy backbone of the cheesecake. Softened cream cheese blends smoothly, preventing a lumpy batter and ensuring a silken filling. Use full-fat cream cheese for the best richness and stable texture after baking or chilling. - 3/4 cup granulated sugar
→ Sweetness that offsets the tang of the cream cheese. Adjust to taste depending on how sweet your strawberries are and whether you prefer a lighter or richer filling. Beat thoroughly with the cream cheese for a smooth, airy consistency. - 1 teaspoon pure vanilla extract
→ Vanilla depth enhances the overall flavor, rounding the tanginess of the cheese. If possible, use Madagascar or Tahitian vanilla for a more aromatic profile. You can also use vanilla paste for a stronger vanilla presence. - 1/4 cup sour cream
→ Adds tang and moisture, helping to yield a creamier, silkier filling. If you want a lighter texture, you can substitute with full-fat Greek yogurt or omit, but note the filling may be a touch stiffer. - 3 large eggs, at room temperature
→ Eggs provide structure and help the filling set firmly as it bakes. Add one at a time on low speed to avoid incorporating too much air, which can cause cracks. Room-temperature eggs blend more smoothly with the cream cheese for a uniform batter. - 1 tablespoon lemon juice
→ Brightens the flavor of the filling and complements the strawberry topping. Fresh lemon juice is preferred for vibrant acidity; use promptly to avoid dull flavors. - 1 teaspoon lemon zest (optional)
→ Adds a fragrant citrus aroma that enhances the cheesecake profile without overpowering the cheese. Zest is optional; if used, zest before juicing the lemon to capture maximum oils and fragrance.
- 24 oz (680 g) cream cheese, softened
- Strawberry Topping / Sauce
- 2 cups fresh strawberries, hulled and sliced
→ The strawberry topping provides bright, juicy contrast to the creamy cheese. Hull and slice evenly to ensure uniform cooking and sauce consistency; if berries are very sweet, you can reduce the sugar in the sauce. - 2 to 3 tablespoons granulated sugar
→ Sugar macerates the berries, drawing out juices and creating a glossy, flavorful topping. Start with 2 tablespoons and adjust to taste depending on berry sweetness and how thick you want the sauce. - 1 tablespoon lemon juice
→ Adds acidity to counterbalance sweetness and preserves the bright color and flavor of the strawberries. Use freshly squeezed lemon juice for best brightness. - 1 teaspoon cornstarch dissolved in 1 teaspoon water (optional)
→ If you simmer the berries to form a sauce, this slurry thickens quickly for a smooth, glossy finish. Skip if you prefer a chunky, rustic sauce or want to keep it loose to pool over the slice.
- 2 cups fresh strawberries, hulled and sliced
- Optional Add-ins
- 1/2 cup white chocolate chips (optional)
→ Adds creamy sweetness and a subtle vanilla-milk flavor that pairs beautifully with strawberry. Fold in after beating the filling or sprinkle on top before baking for pockets of melt-in chocolate in every bite. - 1/2 cup crushed graham cracker crumbs (optional)
→ Extra crusty texture or a crumbly topping element if you love more crunch. Sprinkle over the surface before chilling or baking to create a marbled, textured finish. - Fresh mint leaves for garnish (optional)
→ A fresh, aromatic touch that complements the strawberry and cheese without overpowering them. Gently tear or finely chop mint and scatter around the edge of slices for a pop of color and fragrance. - 1/4 cup strawberry jam for swirls (optional)
→ Concentrated strawberry flavor and a pretty marbled effect if swirled into the filling after it’s spread in the pan. Dollop in and swirl with a skewer or spoon for an even distribution without sinking to the bottom.
- 1/2 cup white chocolate chips (optional)
Instructions
- Preheat your oven to 325°F (165°C) and prepare a 9-inch springform pan by lightly greasing the bottom and sides and lining the bottom with parchment to prevent sticking.
→ A properly prepared pan ensures clean release of the cheesecake slices and protects the crust from tearing during unmolding. - Place graham cracker crumbs in a medium bowl with 2 tablespoons granulated sugar and whisk to distribute evenly.
→ Even distribution of sugar with the crumbs gives the crust a balanced sweetness in every bite and prevents uneven flavor pockets. - Melt 4 tablespoons unsalted butter until just melted and smooth, then remove from heat.
→ Melting the butter completely ensures uniform binding with the crumbs and a cohesive crust when you mix it in. - Pour the melted butter over the crumb mixture and stir with a fork or rubber spatula until every crumb is evenly moistened.
→ Adequate moisture is essential for the crust to hold together when pressed and baked, avoiding crumbly seams. - Press the crumb mixture firmly into the bottom of the prepared pan and slightly up the sides to form a compact crust using the flat bottom of a measuring cup or a small glass.
→ A compact crust resists crumbling and bakes evenly, creating a solid base for the creamy filling. - Bake the crust in the preheated oven for 8 to 10 minutes until lightly golden and set, then remove and let it cool completely on a rack before filling.
→ Pre-baking creates a crisp base that stays firm as the soft filling bakes, preventing a soggy bottom. - In a large mixer or with a hand mixer, beat 24 oz (680 g) cream cheese at medium speed until smooth and free of lumps, about 2 to 3 minutes.
→ Softened cream cheese blends smoothly, forming a silkier filling and reducing the risk of graininess in the finished cheesecake. - Add 3/4 cup granulated sugar and continue to beat on medium speed until light and fluffy, about 3 to 4 minutes.
→ Thorough aeration lightens the filling and helps it set evenly without cracks when baked. - Beat in 1 teaspoon pure vanilla extract and 1/4 cup sour cream until just combined.
→ Vanilla adds depth and the sour cream contributes moisture and tang for a balanced flavor and ultra-silky texture. - With the mixer on low, add 3 large eggs one at a time, letting each incorporate fully before adding the next, and scrape the bowl halfway through.
→ Adding eggs one by one prevents large air pockets, which can cause cracks, and ensures a smooth, cohesive batter. - Beat in 1 tablespoon lemon juice and, if desired, 1 teaspoon lemon zest until combined.
→ The lemon enhances brightness and cuts the richness of the cheese without overpowering the flavor. - Pour the filling onto the cooled crust and smooth the top with a spatula to create an even surface for a clean slice.
→ An even top prevents uneven browning and ensures a uniform presentation when served. - Wrap the outside of the pan with two layers of heavy-duty foil and set the pan in a larger baking dish; pour hot water into the outer dish until it comes halfway up the sides of the springform to create a water bath.
→ The water bath stabilizes the filling, controlling moisture release and minimizing cracks during baking. - Bake the cheesecake in the water bath at 325°F (165°C) until the center slightly jiggles and the edges are set, about 55 to 65 minutes.
→ The gentle jiggle indicates doneness; overbaking dries the center, while underbaking leaves it too soft. - Turn off the oven and crack the door ajar; let the cheesecake rest in the oven for 1 hour to gradually cool and minimize cracking.
→ Slow cooling reduces thermal shock and helps preserve a smooth, crack-free surface. - Carefully remove the foil and bake dish from the oven, then transfer the cheesecake to a rack to cool to room temperature before refrigerating for at least 4 hours or overnight.
→ Chilling firms the filling and ensures clean slicing; overnight resting deepens flavor and texture. - Prepare the strawberry topping by combining 2 cups sliced fresh strawberries, 2 to 3 tablespoons granulated sugar, and 1 tablespoon lemon juice in a saucepan; cook over medium heat until the mixture becomes syrupy and the berries release juices.
→ Macerating the berries with sugar draws out juices and creates a bright, glossy topping that complements the rich cheesecake. - If you want a thicker sauce, whisk 1 teaspoon cornstarch dissolved in 1 teaspoon water into the simmering strawberry mixture and cook until glossy and slightly thickened; refrigerate to cool before serving.
→ The slurry quickly thickens the sauce for a more defined swirl and coating on the slice. - Optionally fold in 1/2 cup white chocolate chips into the filling after the sour cream stage or sprinkle them on top before baking to create pockets of melted sweetness in every bite.
→ White chocolate adds creamy richness that pairs beautifully with strawberry without overpowering the cheese. - Optionally sprinkle 1/2 cup crushed graham cracker crumbs over the surface of the filling before chilling to introduce extra crunch and a rustic texture.
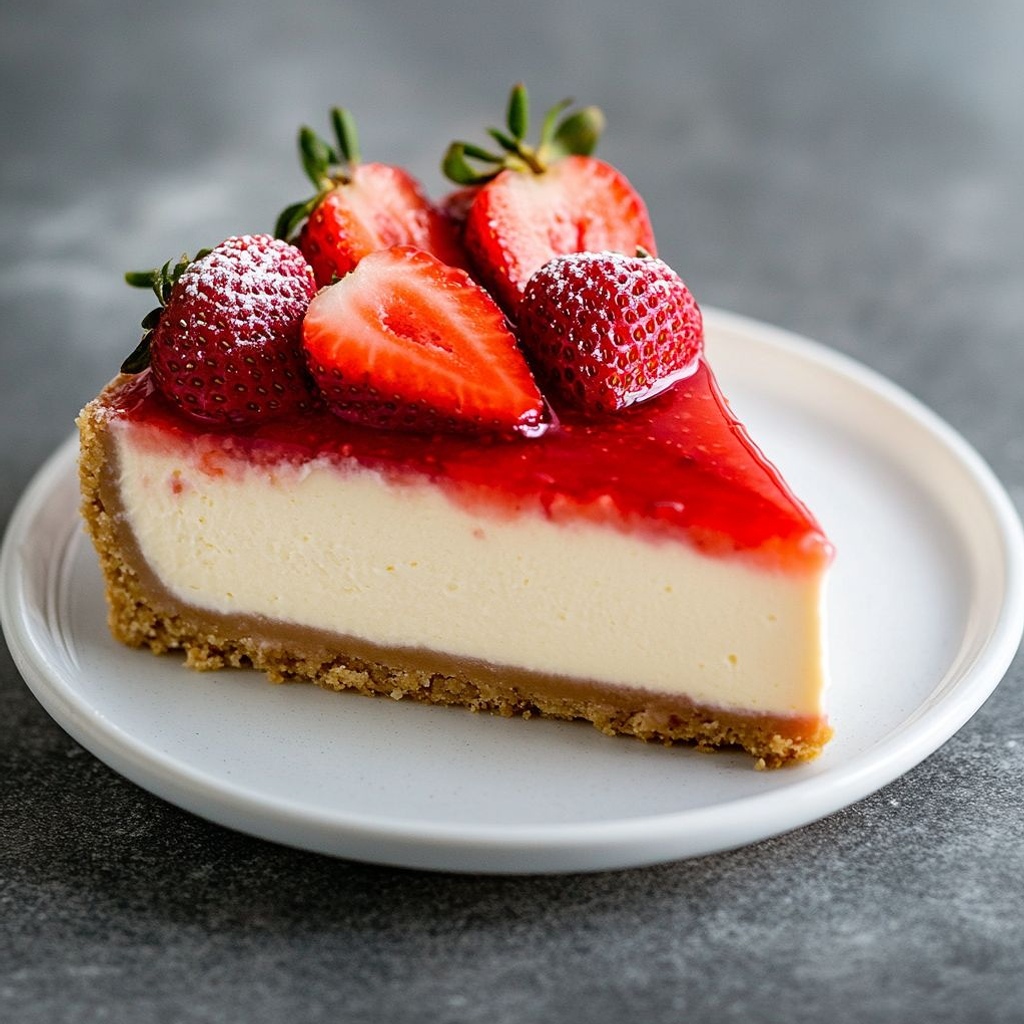
→ The extra crumb layer provides contrast to the smooth filling and echoes the crust flavor. - Just before serving, garnish with fresh mint leaves if desired and spoon a portion of the strawberry topping over each slice for a vibrant color and aroma.
→ Mint adds a fresh aroma that complements the strawberry and cheese; ensure leaves are gently torn or finely chopped for even distribution. - Slice the cheesecake while chilled, wipe the knife between cuts for clean edges, and serve with additional strawberry topping on the side if preferred.
→ Cold slices hold their shape well and present neatly on the plate, showcasing the glossy filling and bright topping.
Notes
These strawberry cheesecake dump alle fragole are rich, creamy, and crowned with a vibrant strawberry topping. For best results, make sure the cream cheese is softened to room temperature and beat with sugar until smooth and fluffy, then add eggs one by one on low speed to keep the batter silky and crack-free. If you need a gluten-free crust, crush certified gluten-free graham crackers finely and mix with sugar and melted butter, pressing the crust firmly into the pan. A brief pre-bake helps set the crust and prevents sogginess; allow it to cool before filling. In the filling, blend in sour cream and a touch of lemon juice to brighten, while lemon zest is optional for a citrusy aroma. Pour over the crust and bake in a water bath for even heating; avoid overmixing after adding the eggs to minimize cracks. For the strawberry topping, macerate sliced berries with sugar and lemon juice, simmer briefly until saucy, and thicken with a light cornstarch slurry if you want a glossy glaze. Chill the assembled cheesecake for several hours or overnight to achieve clean slices and full flavor development. Optional add-ins include white chocolate chips folded into the filling or a swirl of strawberry jam after spreading the filling. Serve chilled with extra fresh berries and a dollop of whipped cream if desired. Always check that gluten-free crust components are certified gluten-free if you have gluten intolerance.
Tips
Consigli pratici per ottenere una Cheesecake dump alle fragole perfetta
Base (Crust)
- Assicurati che i cracker siano finemente triturati: una base ben compatta si ottiene con briciole uniformi, senza pezzi grandi che creano zone morbide.
- Se usi cracker senza glutine, verifica che siano certificati e tritali in una consistenza sabbiosa per una buona adesione con il burro fuso.
- Aggiungi lo zucchero in modo uniforme ai cracker: distribuisce la dolcezza in ogni morso evitando sapori troppo marcati in un solo punto.
- Lascia raffreddare leggermente il burro fuso prima di mescolarlo ai cracker; così la base resta lucida e non si separa dall’impasto.
- Per una base più croccante, inforna la crust a 175°C (350°F) per 8–10 minuti, poi lascia raffreddare completamente prima di riempire. Per una base no-bake, premi bene le briciole nello stampo e lascia rassodare in frigorifero almeno 1 ora.
- Usa carta forno sul fondo e sui bordi se vuoi facilitare la rimozione della cheesecake una volta pronta.
Filling (Crema)
- Lascia il formaggio cremoso a temperatura ambiente finché è morbido, in modo che si amalgami in modo omogeneo senza grumi.
- Batti il formaggio con lo zucchero a velocità media fino a ottenere una crema liscia e soffice; evita di incorporare aria in eccesso per prevenire crepe in superficie.
- Aggiungi la vaniglia e la panna acida (sour cream) per dare morbidezza e profondità al sapore; se vuoi una crema meno “acida”, puoi usare yogurt greco intero al posto di parte della sour cream.
- Aggiungi gli uova uno alla volta a velocità bassa/o per mantenere la miscela liscia; evita di incorporare troppa aria che potrebbe causare rigonfiamenti in cottura.
- Il succo di limone intensifica la freschezza; se preferisci un sapore più delicato, riduci la quantità o ometti la scorza di limone (la scorza è opzionale ma aggiunge aroma).
- Se usi la scorza di limone, grattugiala prima di spremere il succo per catturare al massimo gli oli essenziali.
- Per una consistenza liscia e set, puoi combinare la crema di formaggio con la sour cream a spatola, poi aggiungere gli altri aromi con movimenti leggeri dal basso verso l’alto.
- Se decidi di infornarla, evita di aprire il forno spesso; una cottura lenta a bassa temperatura riduce il rischio di crepe e di rigonfiamenti indesiderati.
Strawberry Topping / Sauce (Topping alle fragole)
- Taglia le fragole in pezzi di dimensione uniforme per una cottura omogenea; così otterrai una salsa lucida e consistente.
- Macera le fragole con lo zucchero per 10–15 minuti prima di scaldarle: rilascia i succhi naturali e migliora la profondità del sapore.
- Aggiungi il succo di limone per bilanciare la dolcezza e mantenere un colore brillante, evitando che diventi opaco durante la cottura.
- Se vuoi una salsa lucida e leggermente spessa, sciogli la maizena in acqua fredda e aggiungila al composto bollente; cuoci 1–2 minuti finché si addensa. In alternativa, lascia una salsa più liquida se preferisci che coli sulle fette.
- Lascia raffreddare la salsa prima di versarla sulle fette: una salsa calda può sciogliere la crema e alterare la consistenza.
Opzioni extra e personalizzazioni
- Cuoche a gusto con gocce di cioccolato bianco: incorpora 1/2 tazza di gocce di cioccolato bianco dopo aver montato la crema, oppure aggiungile sulla superficie prima di raggruppare la torta per creare piccoli cavità di cioccolato che si sciolgono nel taglio.
- Per una texture extra croccante, aggiungi 1/2 tazza di granella di graham cracker all’impasto della base o cospargi un po’ sulla superficie prima di raffreddare.
- Decorazione con foglioline di menta fresca per un tocco di colore e freschezza; aggiungile al momento del servizio per mantenere l’aroma.
- Per un effetto marmorizzato, inserisci 1 cucchiaio di marmellata di fragole a cucchiaiate sull’impasto già steso e fai dei vortici con uno/stuzzicadenti prima di infornare o rassodare.
Preparazione anticipata e conservazione
- La cheesecake si mantiene bene in frigorifero, coperta, per 3–4 giorni. Per 5-6 giorni, è consigliabile congelare singole fette avvolte bene in pellicola e poi trasferite in contenitore ermetico; lascia scongelare in frigorifero prima di servire.
- Se preferisci, puoi preparare solo la base e la crema in anticipo e assemblare il topping al momento di servire per una consistenza più fresca.
- Per un effetto party, la cheesecake può essere tagliata in fette e congelata singolarmente; quando serve, lascia scongelare in frigorifero mantenendo intatta la crema.
FAQ
Domanda 1: Che cosa è Cheesecake dump alle fragole?
È una cheesecake fredda, senza forno, composta da una base di biscotti, una crema al formaggio dolcificata e panna montata, e un topping di fragole (o una salsa di fragole). Si lascia rassodare in frigorifero prima di servire.
Domanda 2: Quali ingredienti servono?
Base: 200 g di biscotti secchi (digestivi o simili), 75 g di burro fuso. Ripieno: 600 g di formaggio cremoso tipo Philadelphia, 100 g di zucchero a velo, 1 cucchiaino di estratto di vaniglia, 200 ml di panna fresca da montare. Topping: 300 g di fragole fresche tagliate a pezzi, 2 cucchiai di zucchero (opzionale), succo di limone a piacere.
Domanda 3: Che stampo è consigliato e quanto tempo va in frigorifero?
Uno stampo a cerniera di circa 22 cm è ideale per facilitare la sformatura. Dopo aver assemblato, lascia rassodare in frigorifero almeno 4 ore, meglio tutta la notte per una crema ben ferma.
Domanda 4: È possibile prepararlo senza forno?
Sì. Si tratta di un dolce no-bake. La base viene preparata con biscotti e burro, la crema si ottiene miscelando formaggio e panna montata, senza necessità di cottura.
Domanda 5: Che tipo di formaggio usare e posso sostituirlo?
Usa formaggio cremoso spalmabile (tipo Philadelphia) e, se vuoi una crema più ricca, puoi aggiungere un po’ di mascarpone. Evita formaggi molto acquosi. Se vuoi una versione leggera, puoi dimezzare la quantità di formaggio e aumentare la panna montata.
Domanda 6: Fragole fresche o surgelate?
Preferisci fragole fresche per un sapore vivace e una consistenza perfetta. Se usi fragole surgelate, scongelale bene e asciugale accuratamente prima di usarle per evitare troppa umidità nella crema.
Domanda 7: Posso prepararlo in anticipo?
Sì. Puoi prepararlo qualche giorno prima e conservarlo in frigorifero, coperto. Se vuoi, puoi anche congelarlo già tagliato in porzioni, avvolto bene e poi scongelarlo in frigorifero prima di servirlo.
Domanda 8: Come si prepara e si monta la crema?
Step-by-step: 1) Mescola il formaggio cremoso con lo zucchero a velo e la vaniglia fino a ottenere una crema liscia. 2) Monta la panna separatamente. 3) Incorpora delicatamente la panna montata al composto di formaggio. 4) Versa la crema sulla base di biscotti e livella. 5) Copri con le fragole a pezzi o con una salsa di fragole preparata a parte. Riponi in frigorifero.
Domanda 9: Quali varianti posso sperimentare?
Varianti comuni includono: scorza e succo di limone o lime per una nota agrumata, gocce di cioccolato bianco o cacao nella crema, una base al cacao al posto dei biscotti, o uno strato di purea di fragole tra base e crema. Per una versione senza lattosio, usa formaggio cremoso senza lattosio e panna vegetale montata.
Domanda 10: Come conservare e servire al meglio?
Conserva in frigorifero, coperto, fino a 3-4 giorni. Per servire al meglio, toglilo dal frigorifero 10-15 minuti prima e taglialo con un coltello caldo o bagnato per fette più nette. Se hai optato per la salsa di fragole, aggiungila poco prima di servire per evitare che ammorbi la crema.
Domanda 11: Errori comuni e come evitarli?
Errore comune: crema troppo liquida. Soluzione: assicurati di montare bene la panna e di incorporarla delicatamente. Errore: base troppo secca o friabile. Soluzione: premi bene i biscotti mescolandoli con burro fuso e fai rassodare in frigorifero prima di aggiungere la crema. Errore: fragole troppo zuccherate o troppo mature. Soluzione: regola lo zucchero del topping secondo il gusto personale e non esagerare.